alz-il.net
  • Home
  • Blog
  • YouTube
  • TikTok
  • Instagram
RSS

THE LOVELY CRAZY

February 15, 2020 by maximios • Blog

I have been on a good long kick here with eating oats at night for my after dinner snack. Just about every night after cleaning up the dinner dishes, sweeping the floors, going for a nice after dinner walk with the mr, I come home, put the hot water on, grab my oats, my peanut flour, and sometimes a banana. As soon as the water boils I mash up some banana (if using), add in some oats, pour in some boiling water, and let them sit. I also pour a huge jar of tea then plop my butt down at the counter to do any brain tasks that need doing like checking the email, left over billing things, maybe check the old phone for the first time in hours%u2026 After about 5 minutes of that, I stop brain tasks because I just can%u2019t, grab oats, and dump in a few big ass tablespoons of peanut flour and cinnamon and give it a good stir. Voila, snack time. A delicious, nutritious, tummy filling and easy dish that is full of all sorts of things that my body needs. I grab a spoon, my tea, and open my book. For sure one of my favorite times of day.

Now lets talk about peanut flour. I have been eating peanut flour for a few years now. Not to confuse with powered peanut butter which is basically peanut flour but usually with added sugar and salt. Peanut flour is just peanuts, with the oil pressed out and then ground up into a super fine flour. And not a flour is the typical sense. Like you can%u2019t make bread with it, but you could add it to bread. You can also use it to thicken things like soups or sauces up. Or add it to smoothies, make a cake frosting with it , or just mix it with a little water and eat it with a spoon. It is delicious and amazing and full of protein without all the added fat and high calorie content. I started to add it to foods because of the protein but now I just eat it all the time because I freaking love the stuff. (Another favorite way to eat it is cut up carrot sticks tossed in the flour%u2026 SO GOOD!) Anyway, truth be told, it is not the most widely available stuff. I have only seen it in a few store over the years, so I have been buying it online. But recently someone told me that Trader Joes is selling it now (I haven%u2019t checked yet) so I figured now is a good time to share the greatness of the flour and how you might want to use it.

Anyway, these oats here are my favorite way to eat oats. Warm and creamy, but not cooked and gruel like. They are like a cross between stove top oats and overnight oats except they take all of 5 minutes to make and you don%u2019t need to dirty a pot. Then mixed with banana for extra sweetness and flavor, the peanut flour for all the peanut butter taste and protein. These oats are unstoppable.%u00a0 Delicious and nutritious for breakfast, lunch, snack time, or dessert, these oats are all win win. Add another win just because. Win, Win, WIN!

Now to the oats!

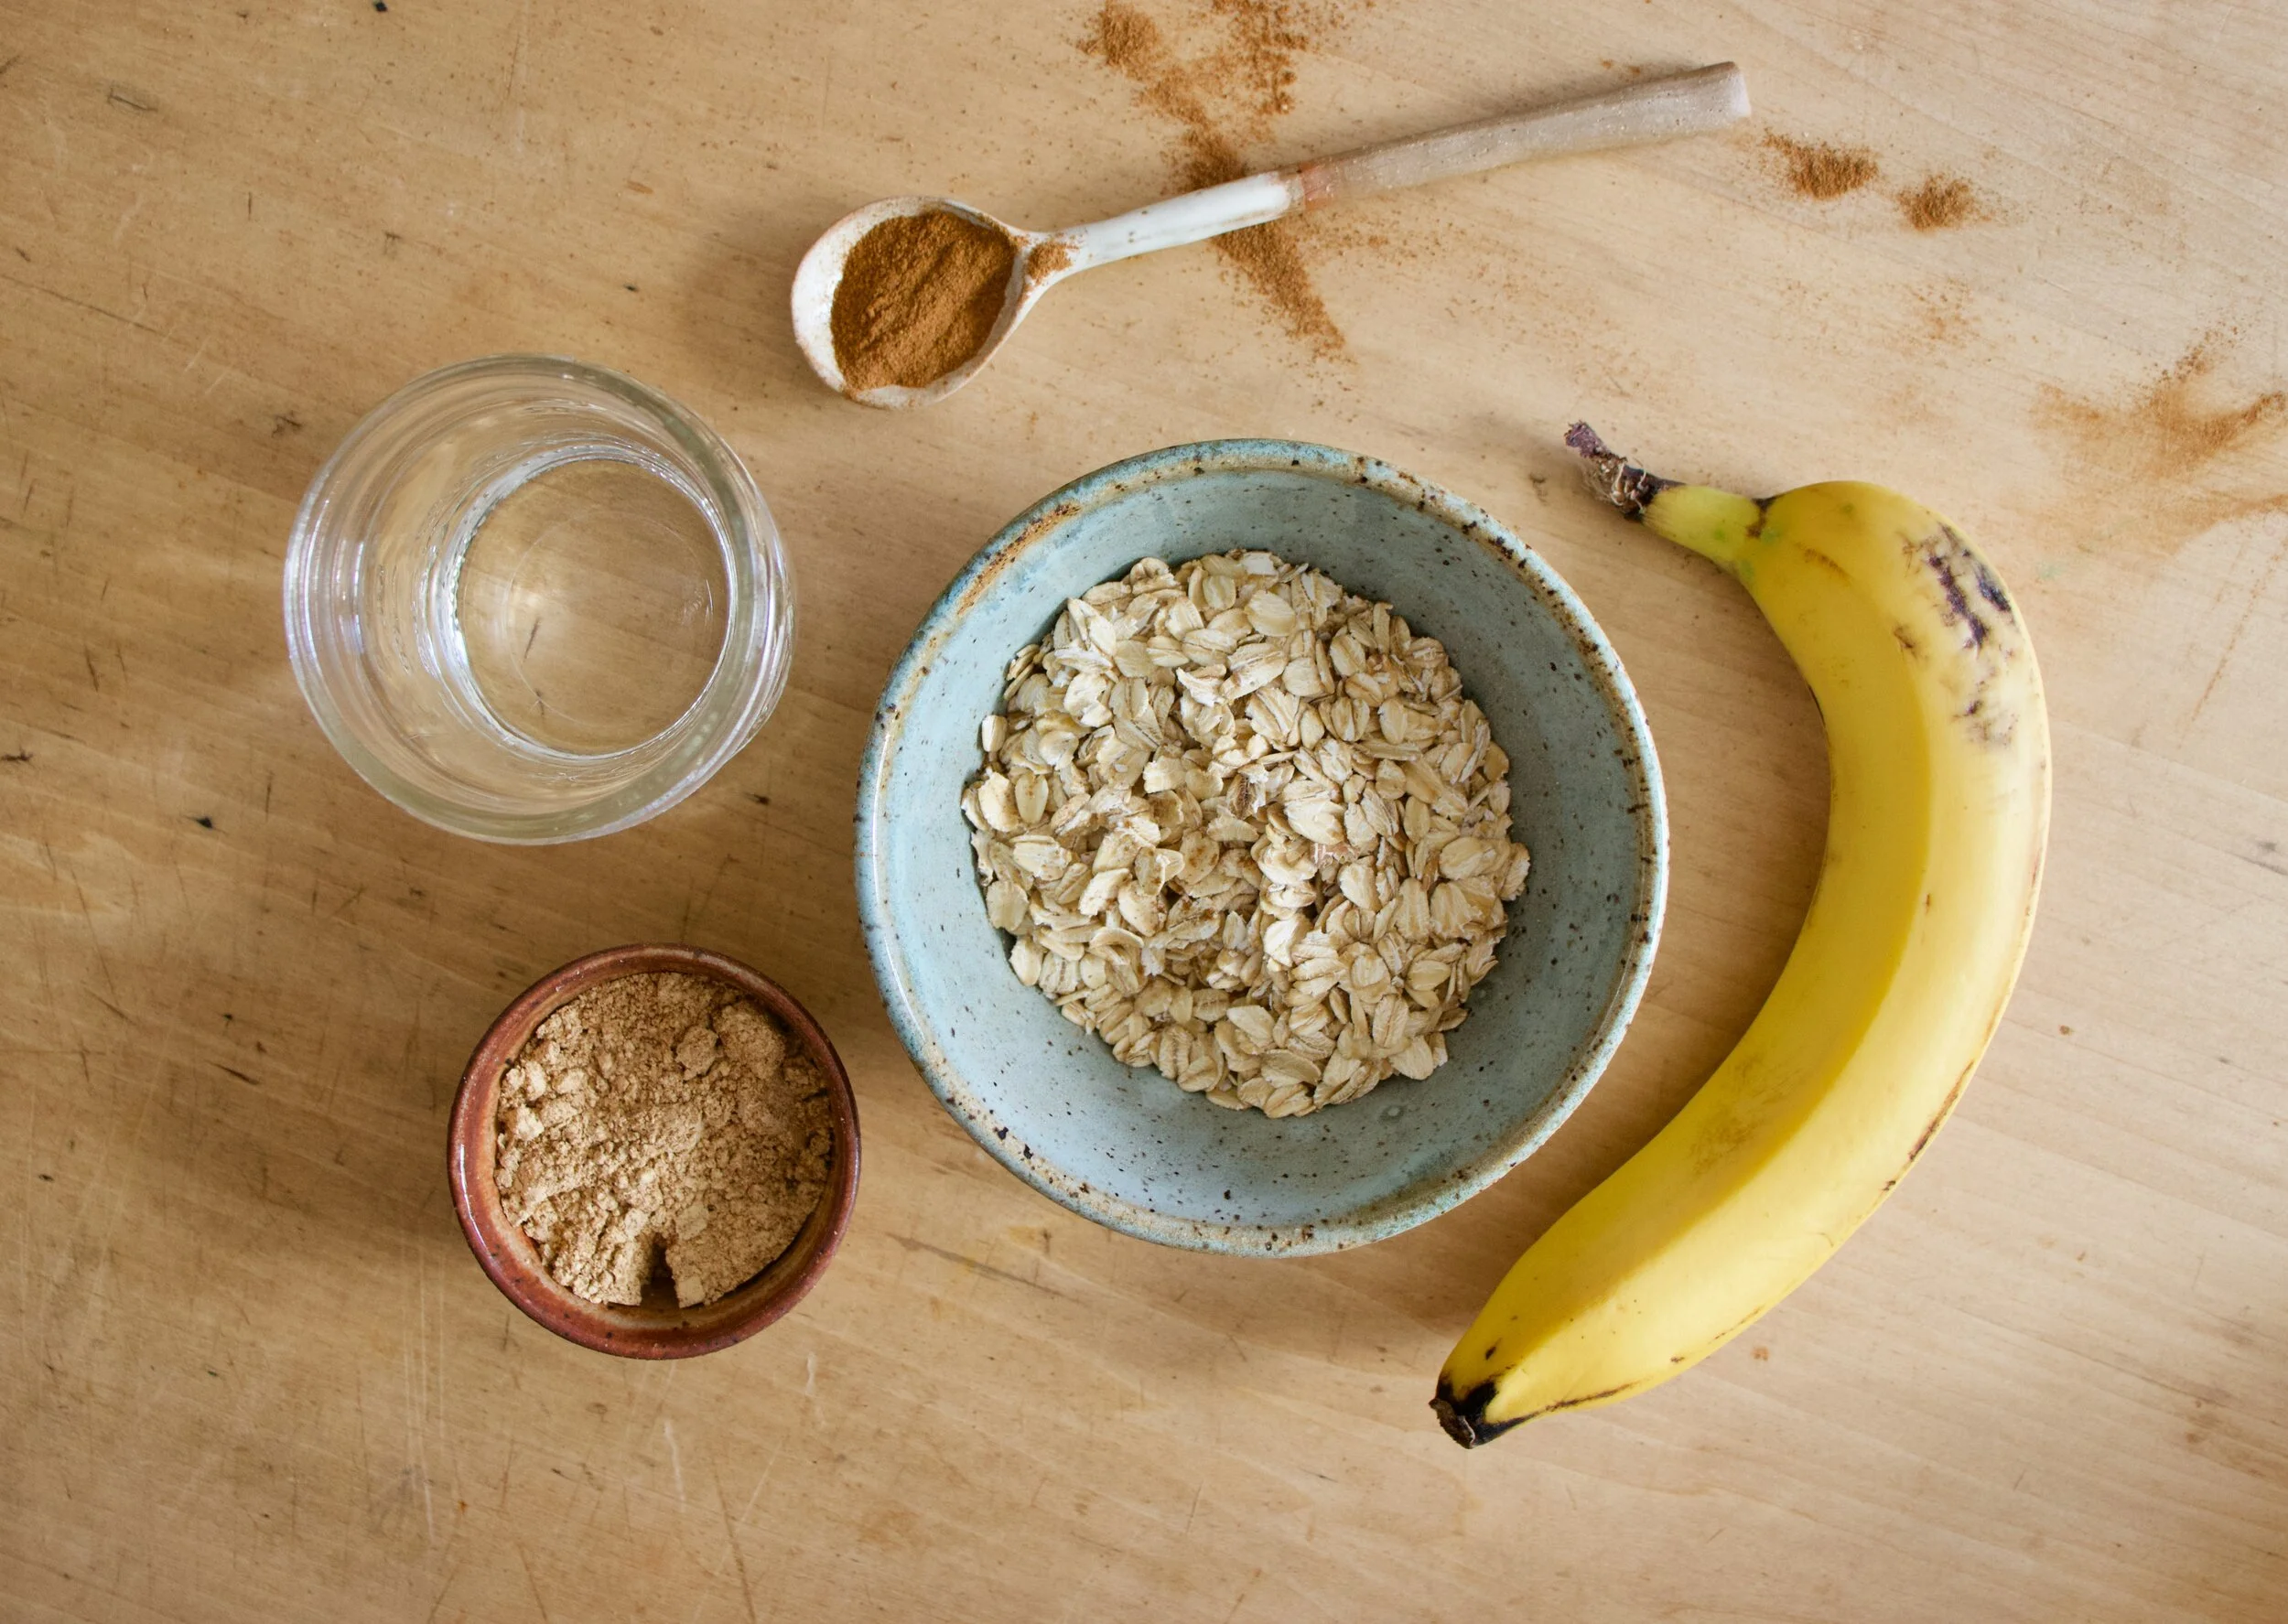
The stuff. Old fashion oats, a small banana, peanut flour, cinnamon, and boiling hot water.

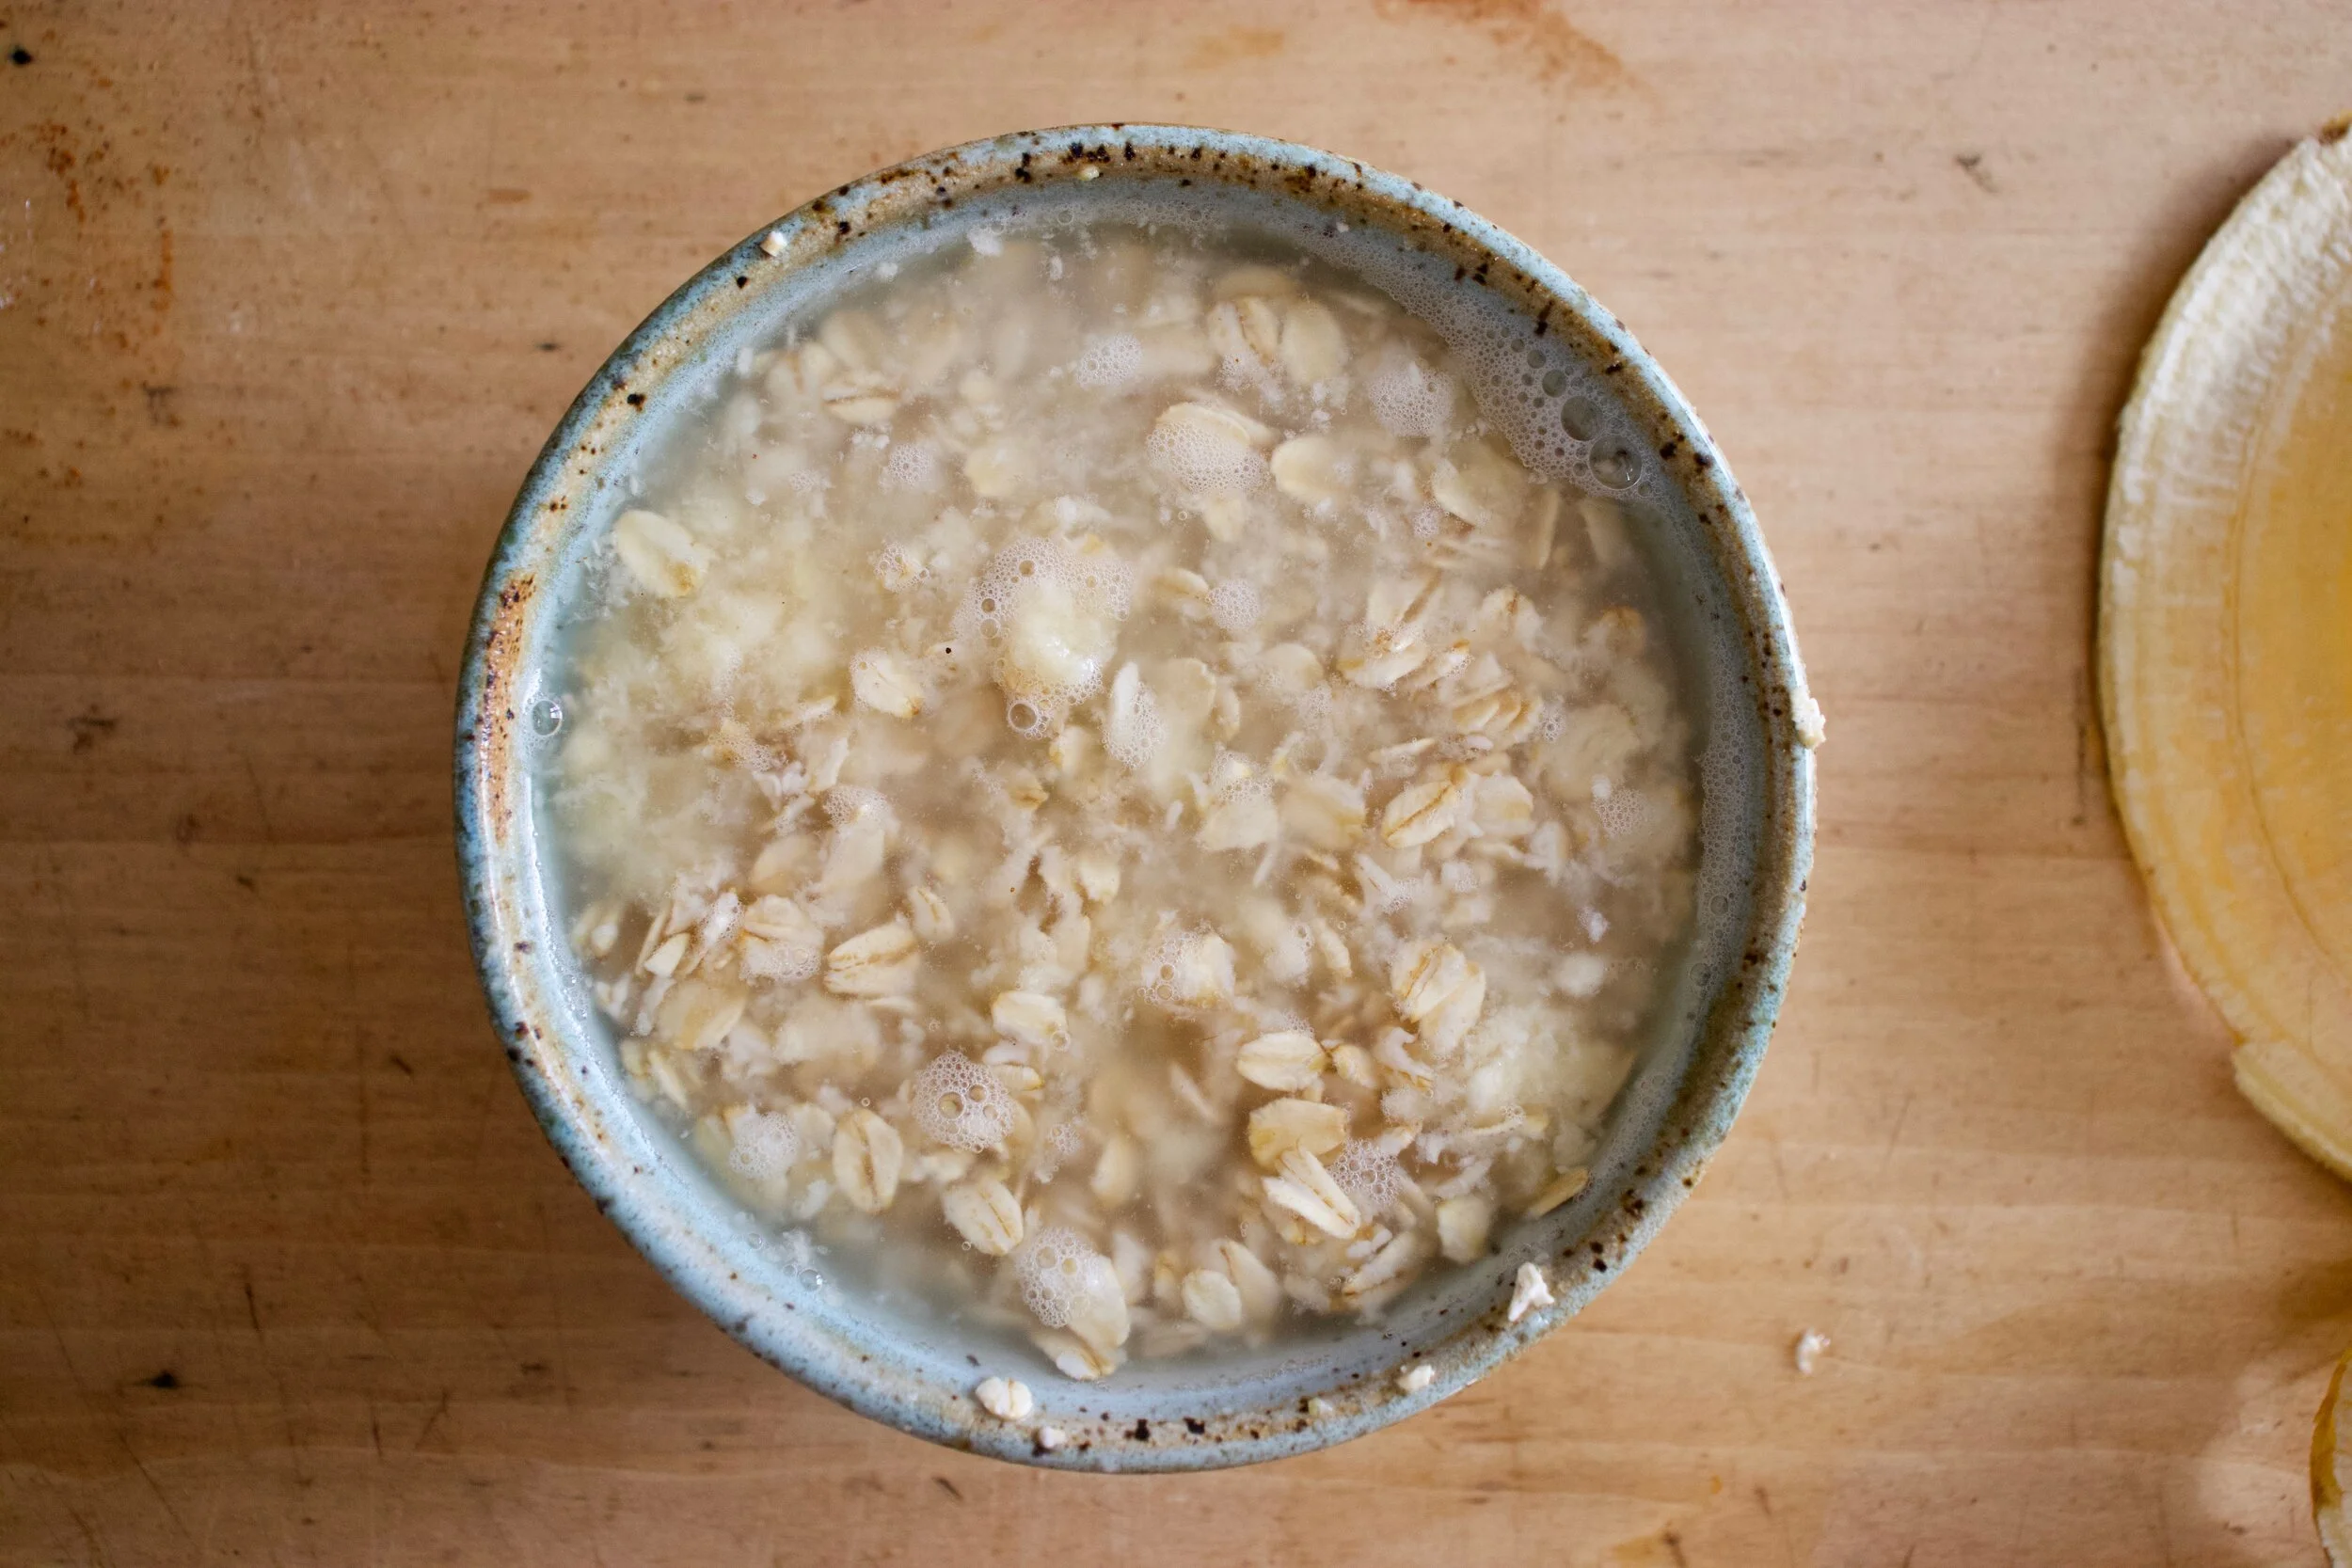
Mash up the banana until smoothish then add in half the hot water and mix. Dump in the oats and mix those too.

Top with the rest of the boiling water and let sit for about 5 minutes.

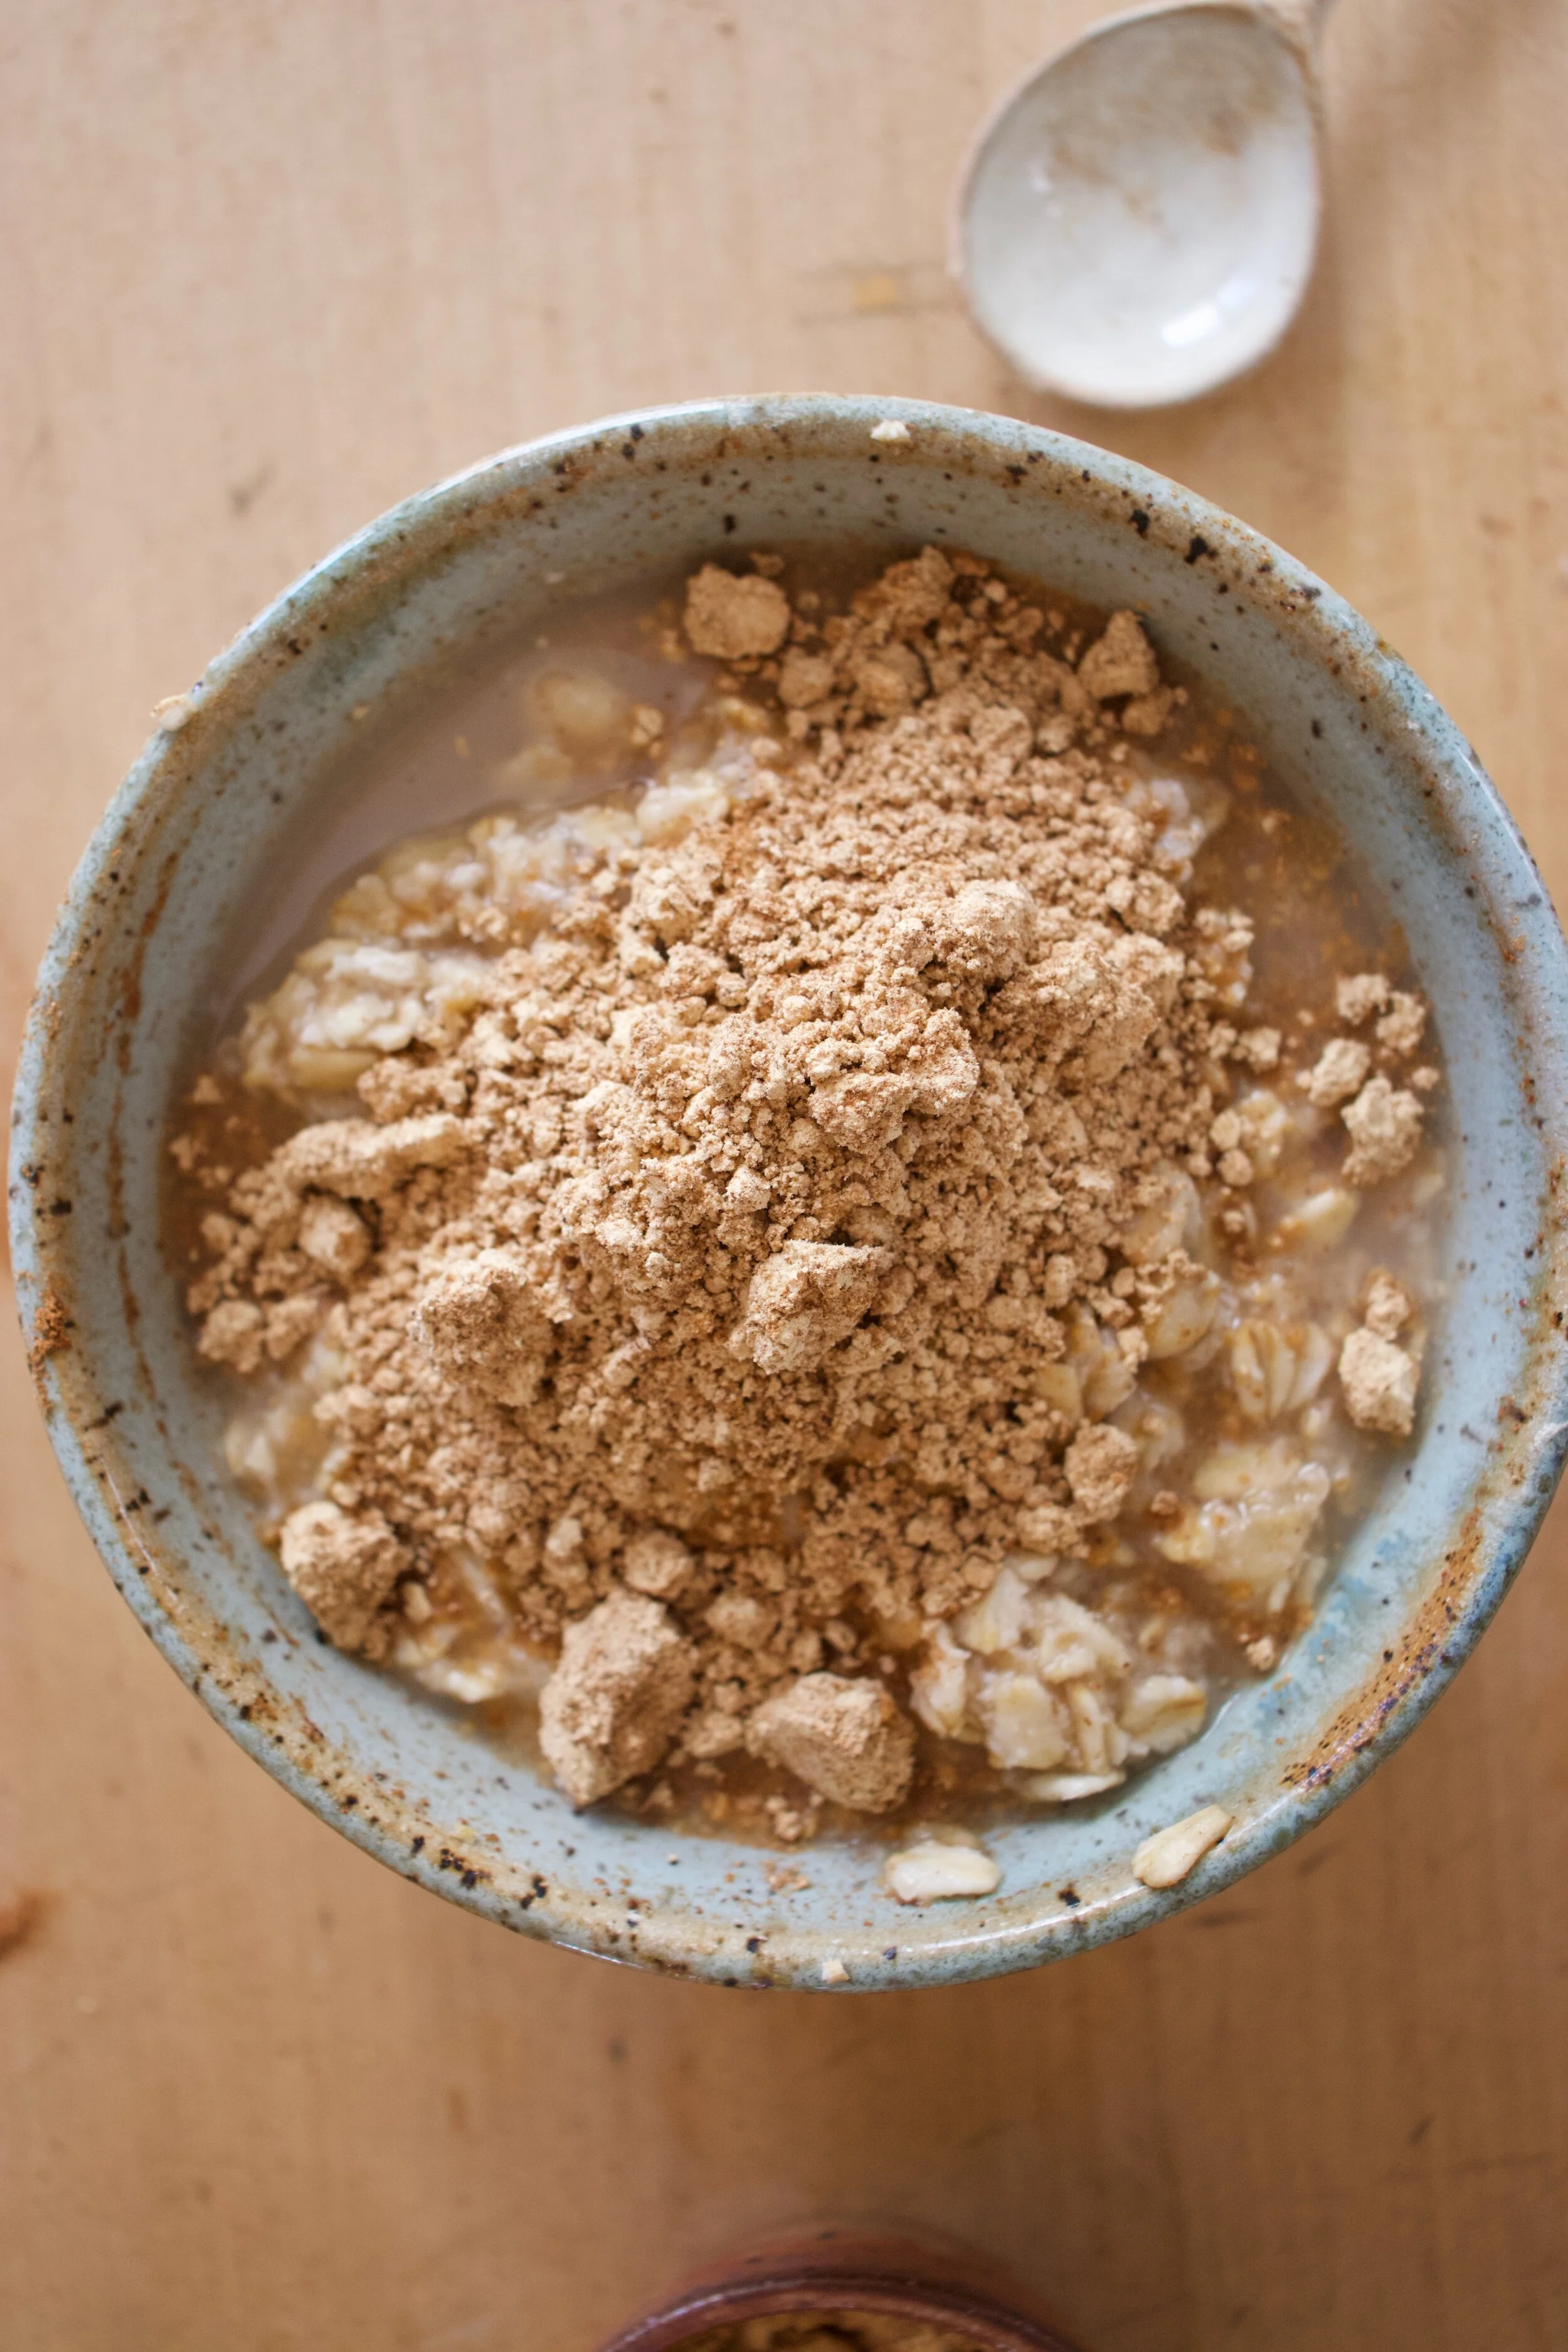
After the oats absorbed the hot banana water, dump on the cinnamon and the peanut butter flour and mix in.

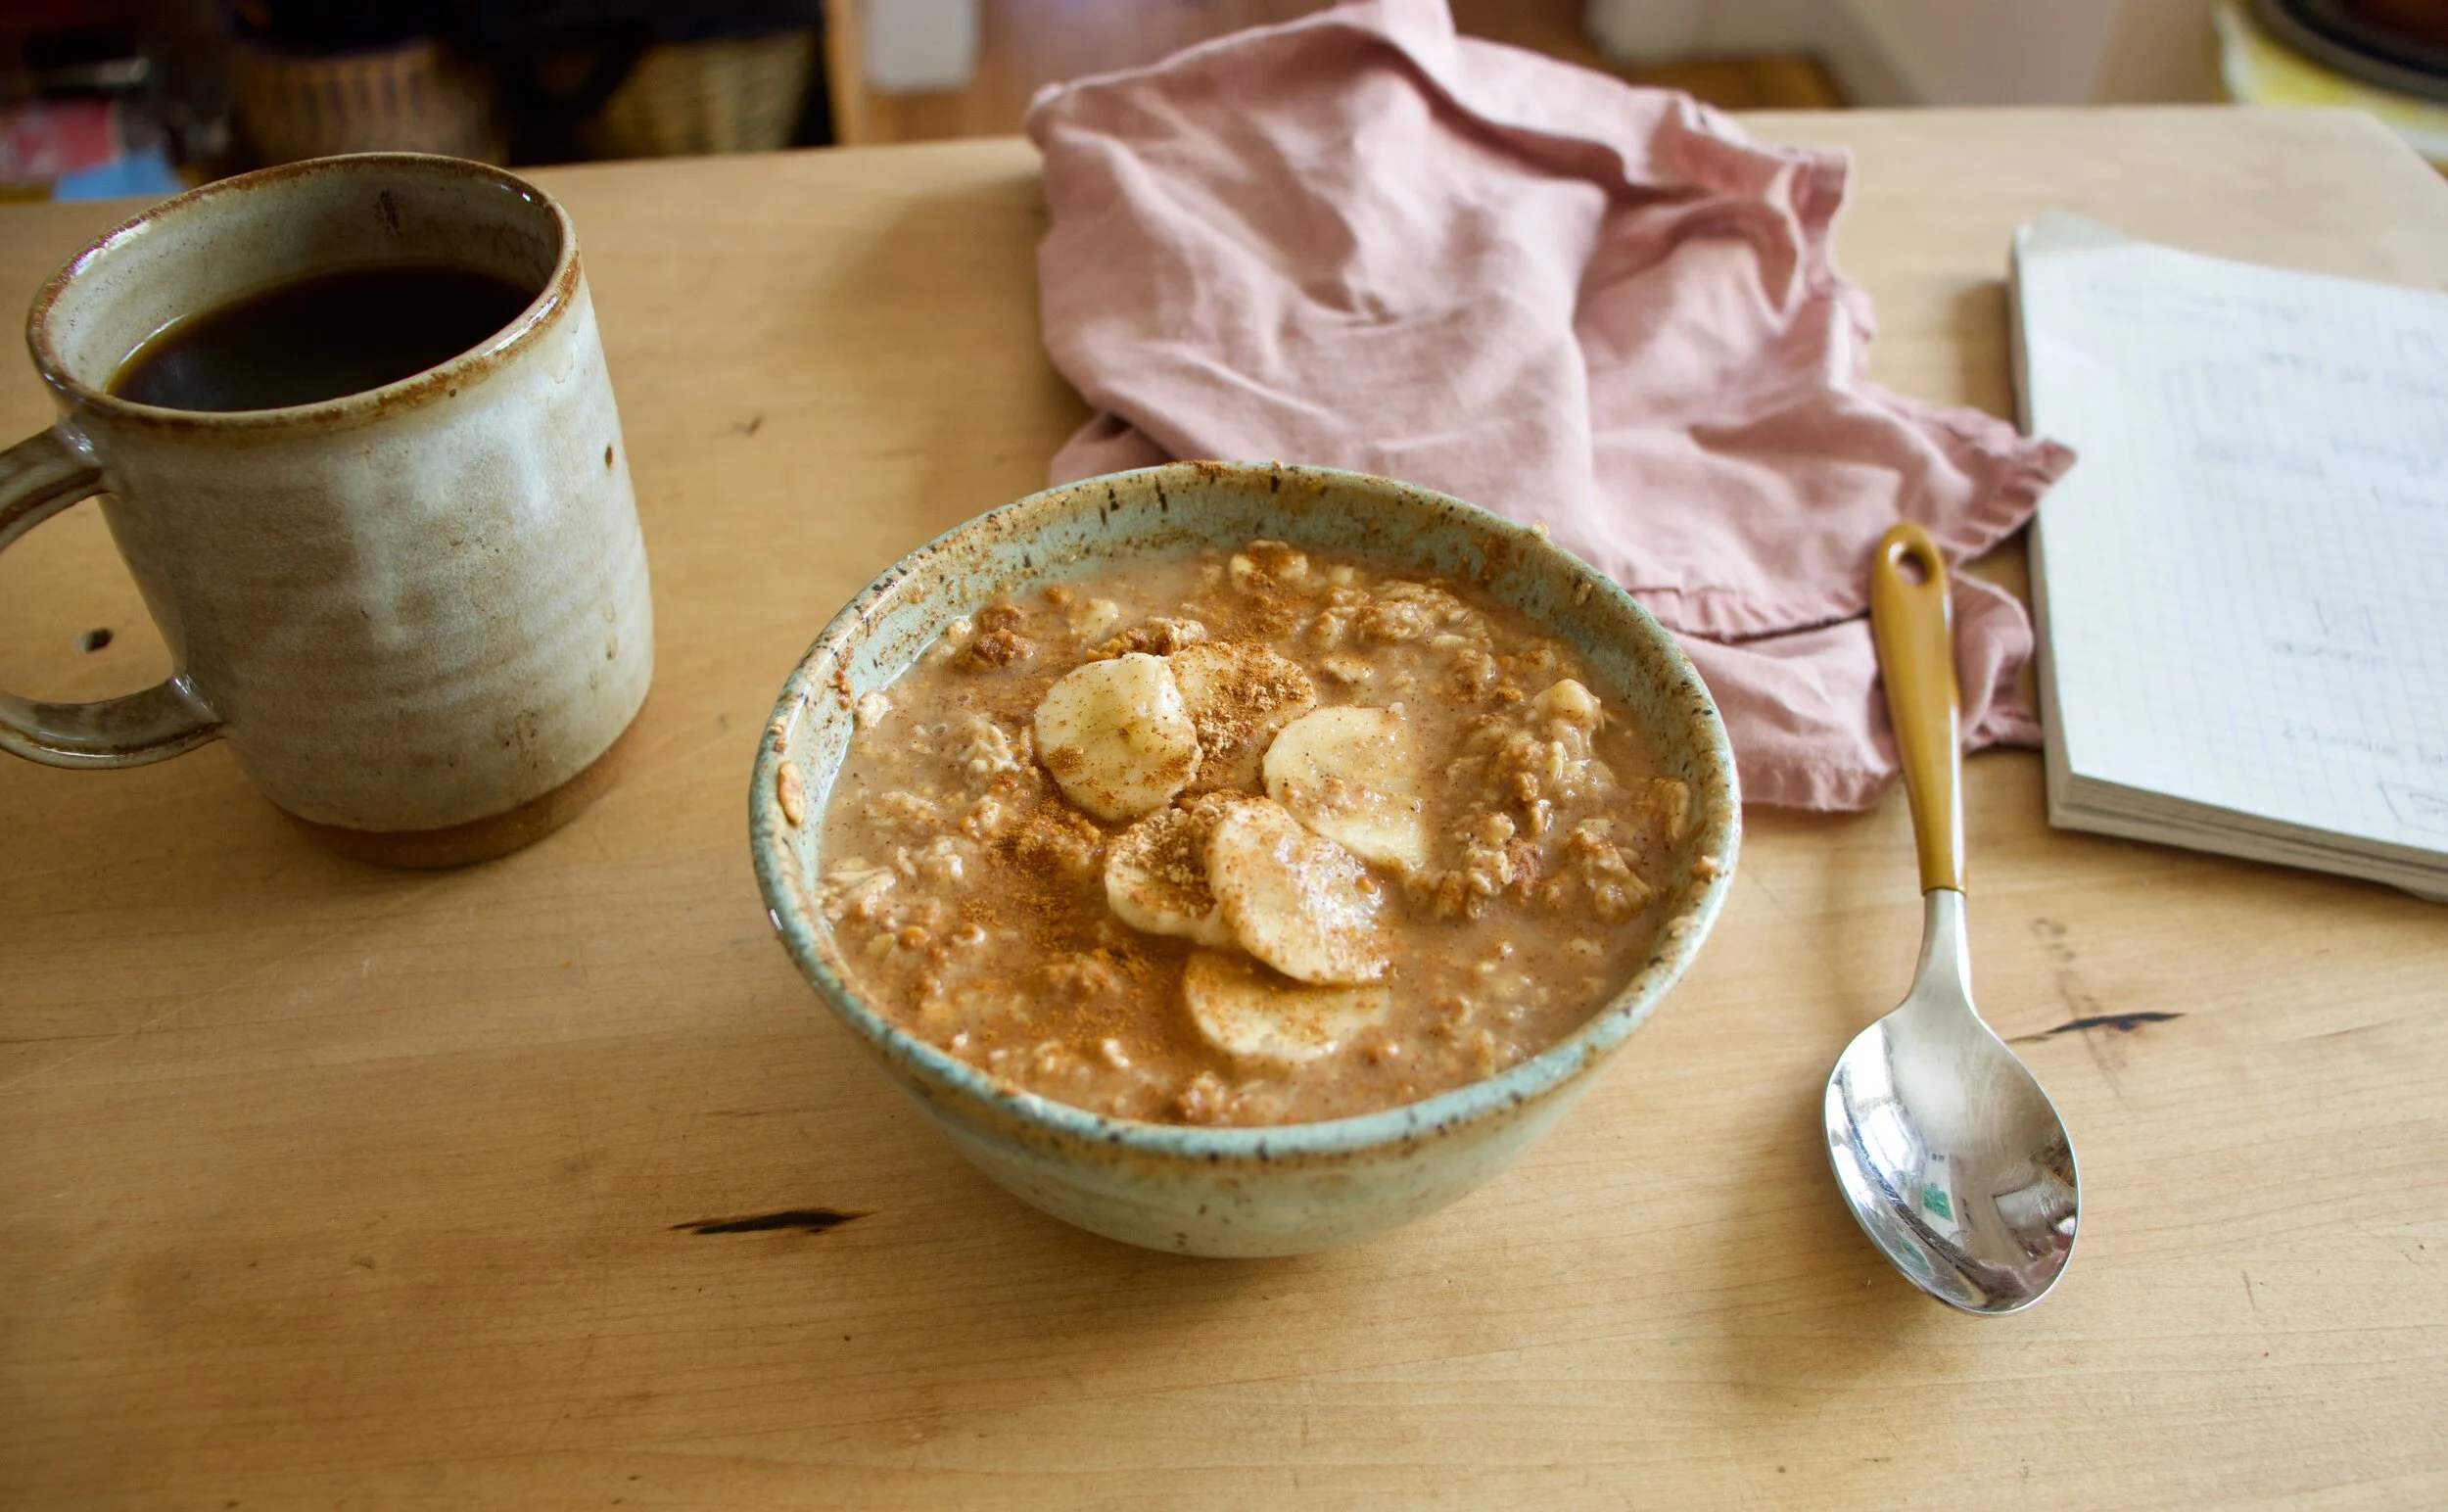
Grab yourself a spoon friend.

Eat.

-C

Makes 1 serving. Can be halved for smaller portion

  • 1 small banana

  • 1/2 cup old fashion oats

  • 2 (or more if you want) tablespoons peanut flour

  • 1 teaspoon cinnamon (optional)

  • 1 cup boiling water

Place peeled banana in a bowl and mash with a fork unit smooth. Add in half the boiling water and mix.. Dump in oats and mix until incorporated then add in the rest of the hot water. Let sit for 5 minutes until oats absorb all the water. Stir in peanut flour and cinnamon. Eat.

I have been on a severe citrus kick lately. Oranges, limes, lemons, kumquats. I want it all and have been eating it all. A lot of it all. Espeically the oranges which are just so good right now. We have been going through bags of them faster then ever and I am not mad about it.

Which then brings us to chili. Chili is one of the things that I make on a very regular bases. It%u2019s beans, veggies, tomatoes, and a ton of spices. Easy as can be, most people like it, and I never get sick of it. I mean, how could you get sick of it, it is so good! Anyway. Chili, its great but have you ever added orange to it? Oh man is it amazing. Bright and acidic and sweet. The whole pot of chili just radiates more goodness, more intensity, more, moreness. (I know that doesn%u2019t make sense but you get it.) It%u2019s a whole new level of chili and I don%u2019t if there will ever be a time when I don%u2019t add orange to my chili again. Well at least during citrus season.

But enough about all that, what you really want is to just start making this orange black bean chili so you can eat it. I hear you, so I%u2019ll let you at it.

To the chili!

The stuff. Oranges, black beans, crushed tomatoes, an onion, a couple carrots, a pepper, and jalape%u00f1os. Also lots of cumin, chili powder, ground ginger, garlic powder, and salt and pepper.

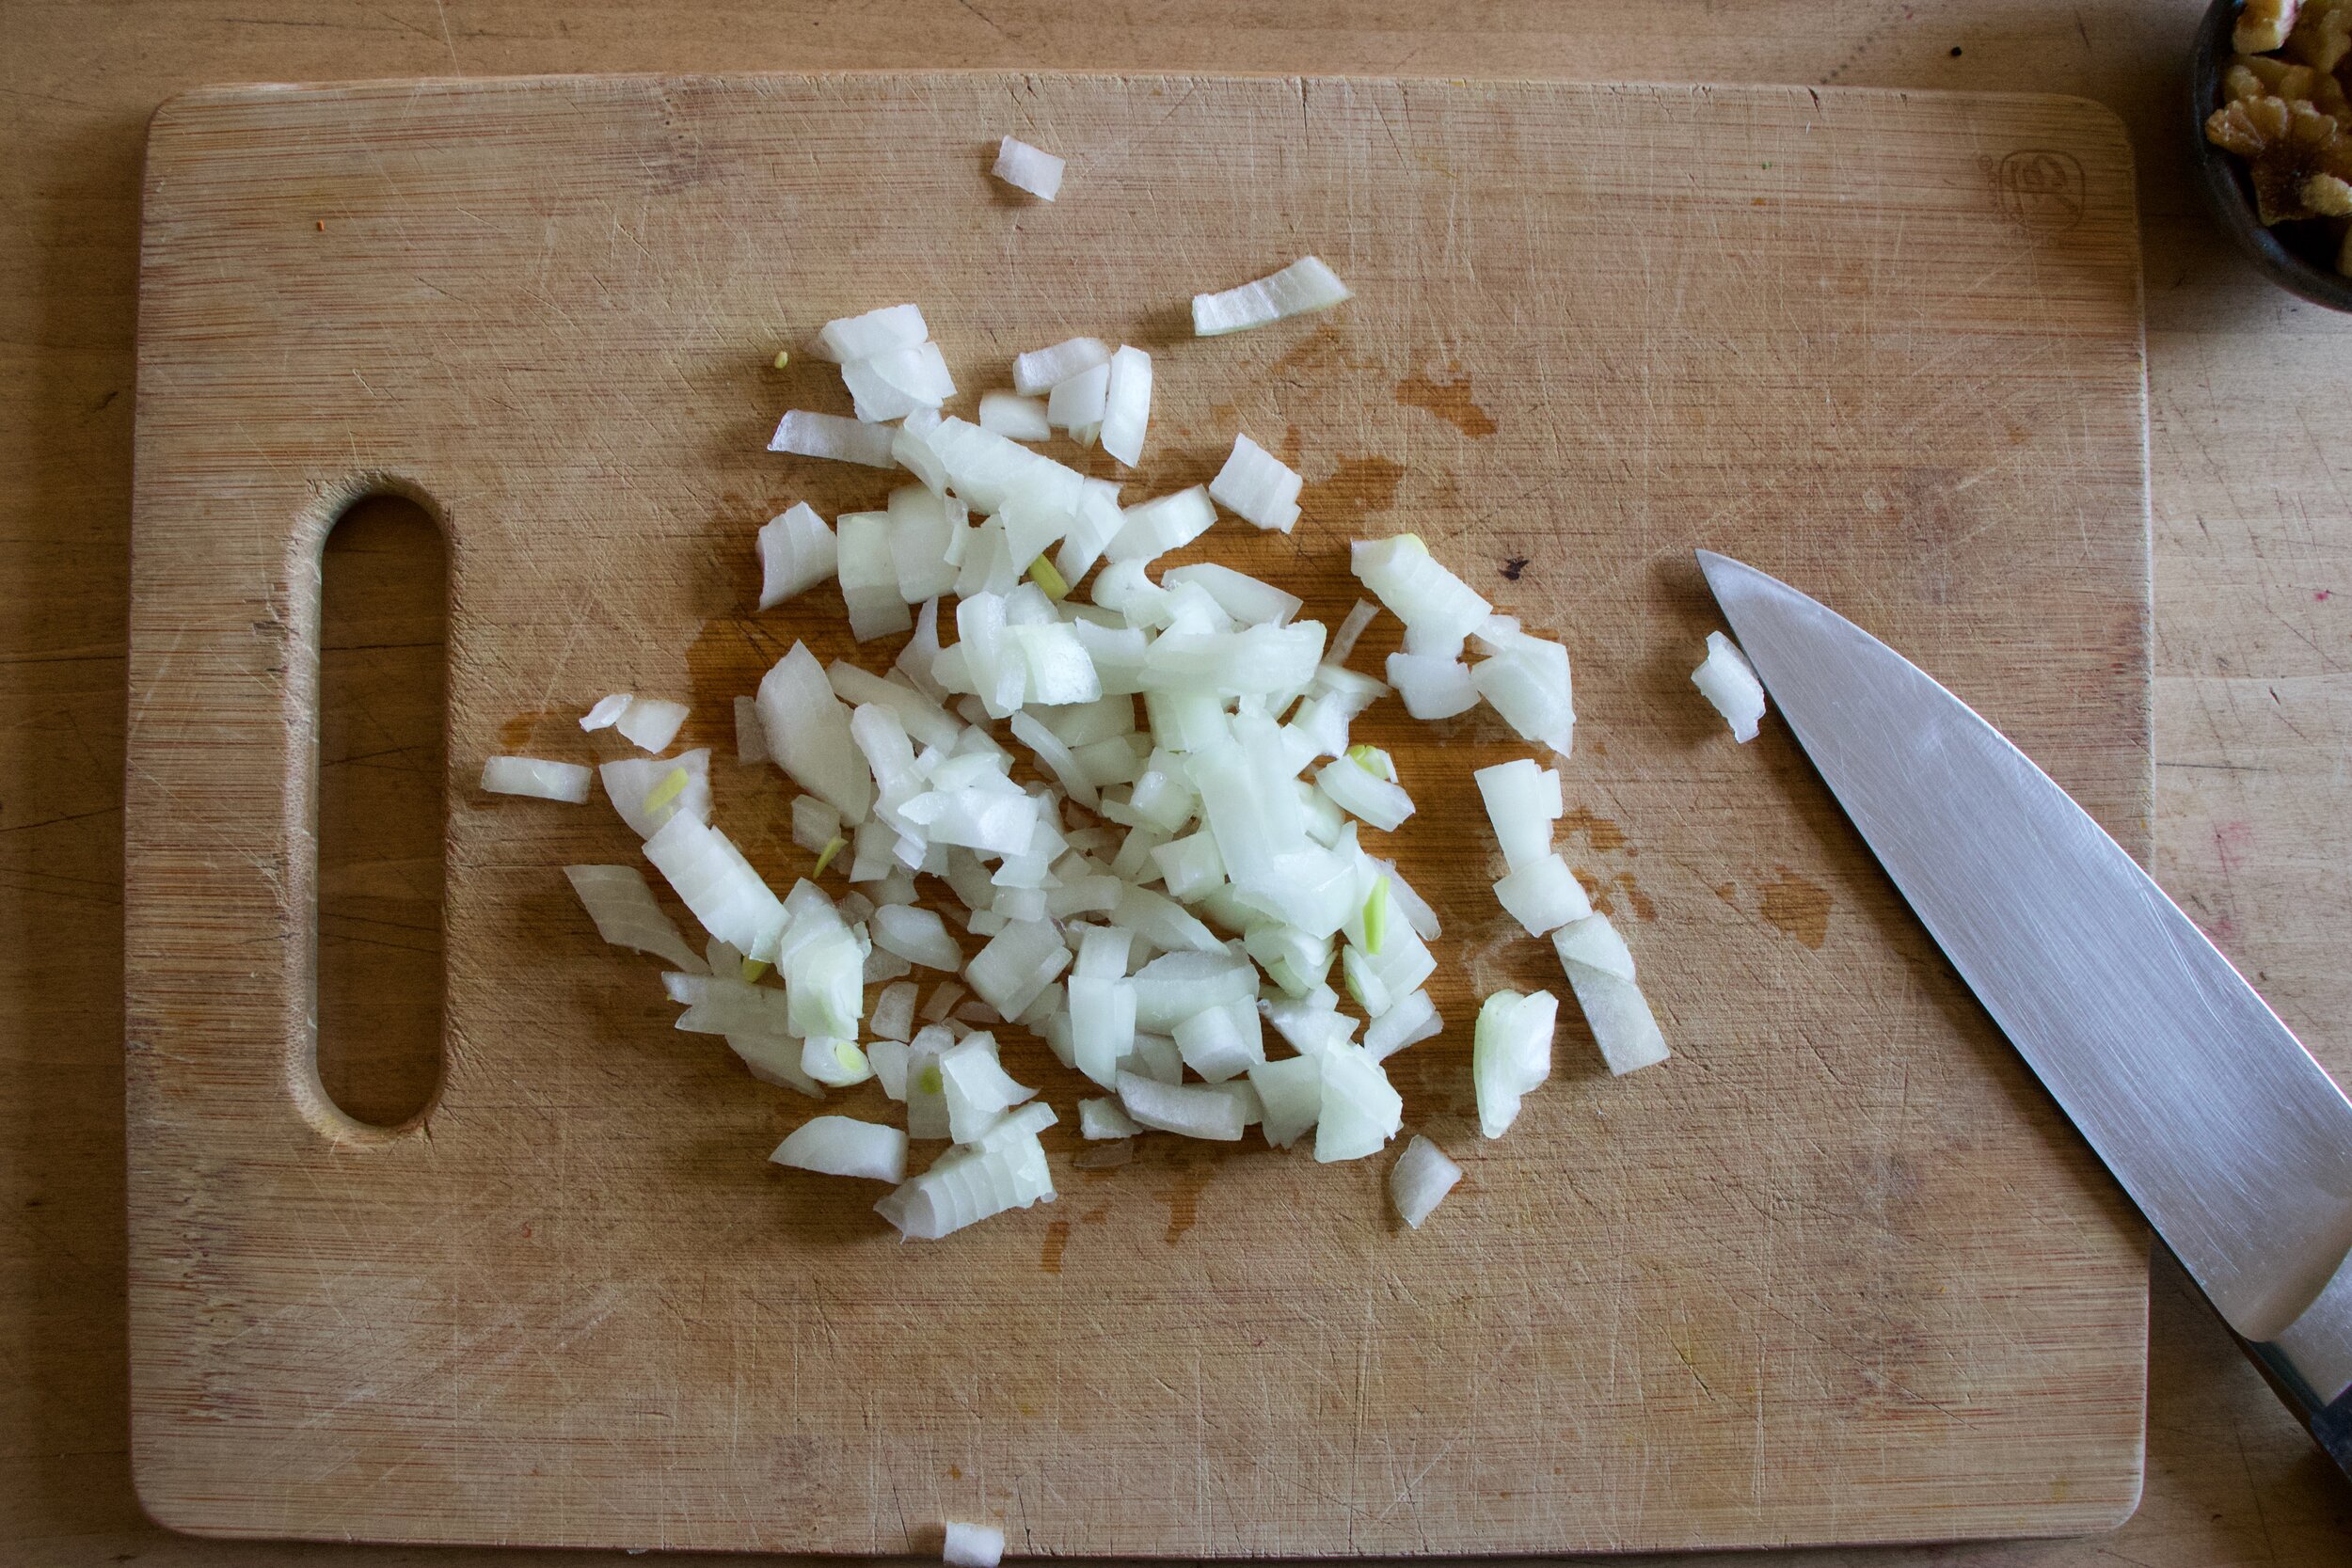
Small dice up the pepper, onion, carrots, and jalape%u00f1os. Don%u2019t want it super spicy, don%u2019t add the jalape%u00f1os.
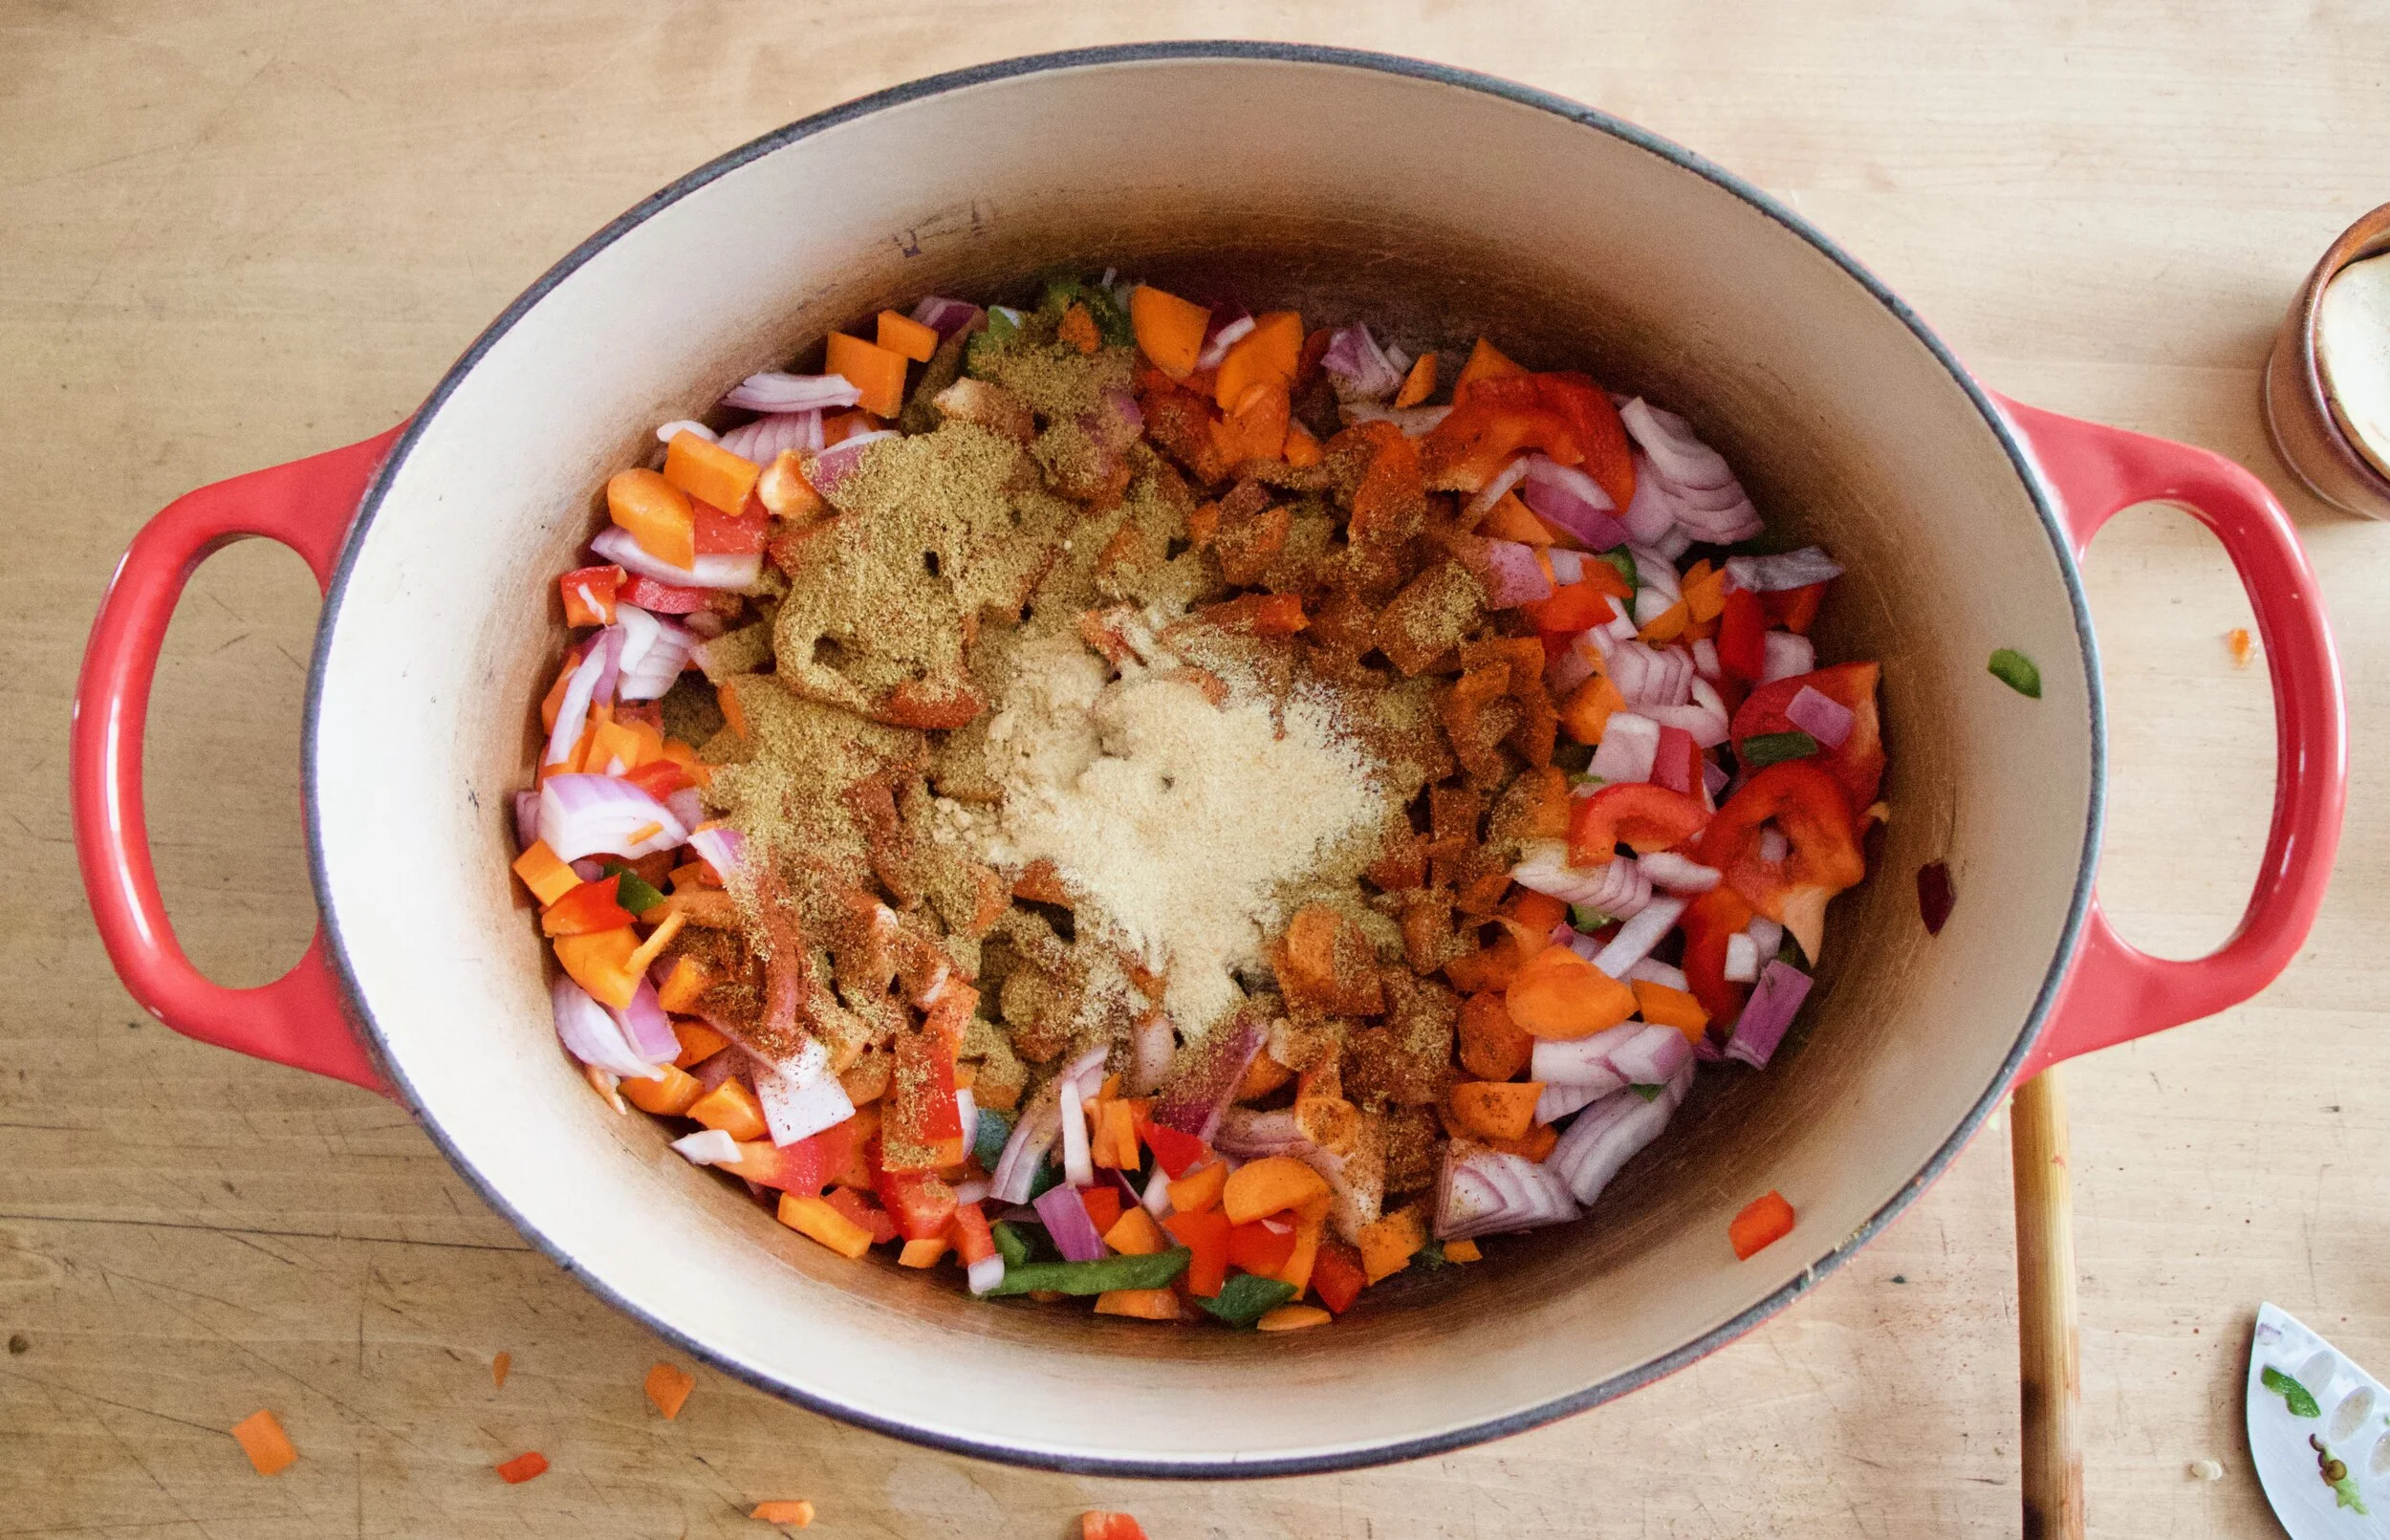
All that stuff gets tossed into a big pot along with all the spices, some salt and pepper, and a little water too. Place on stove to start cooking down the veggies.
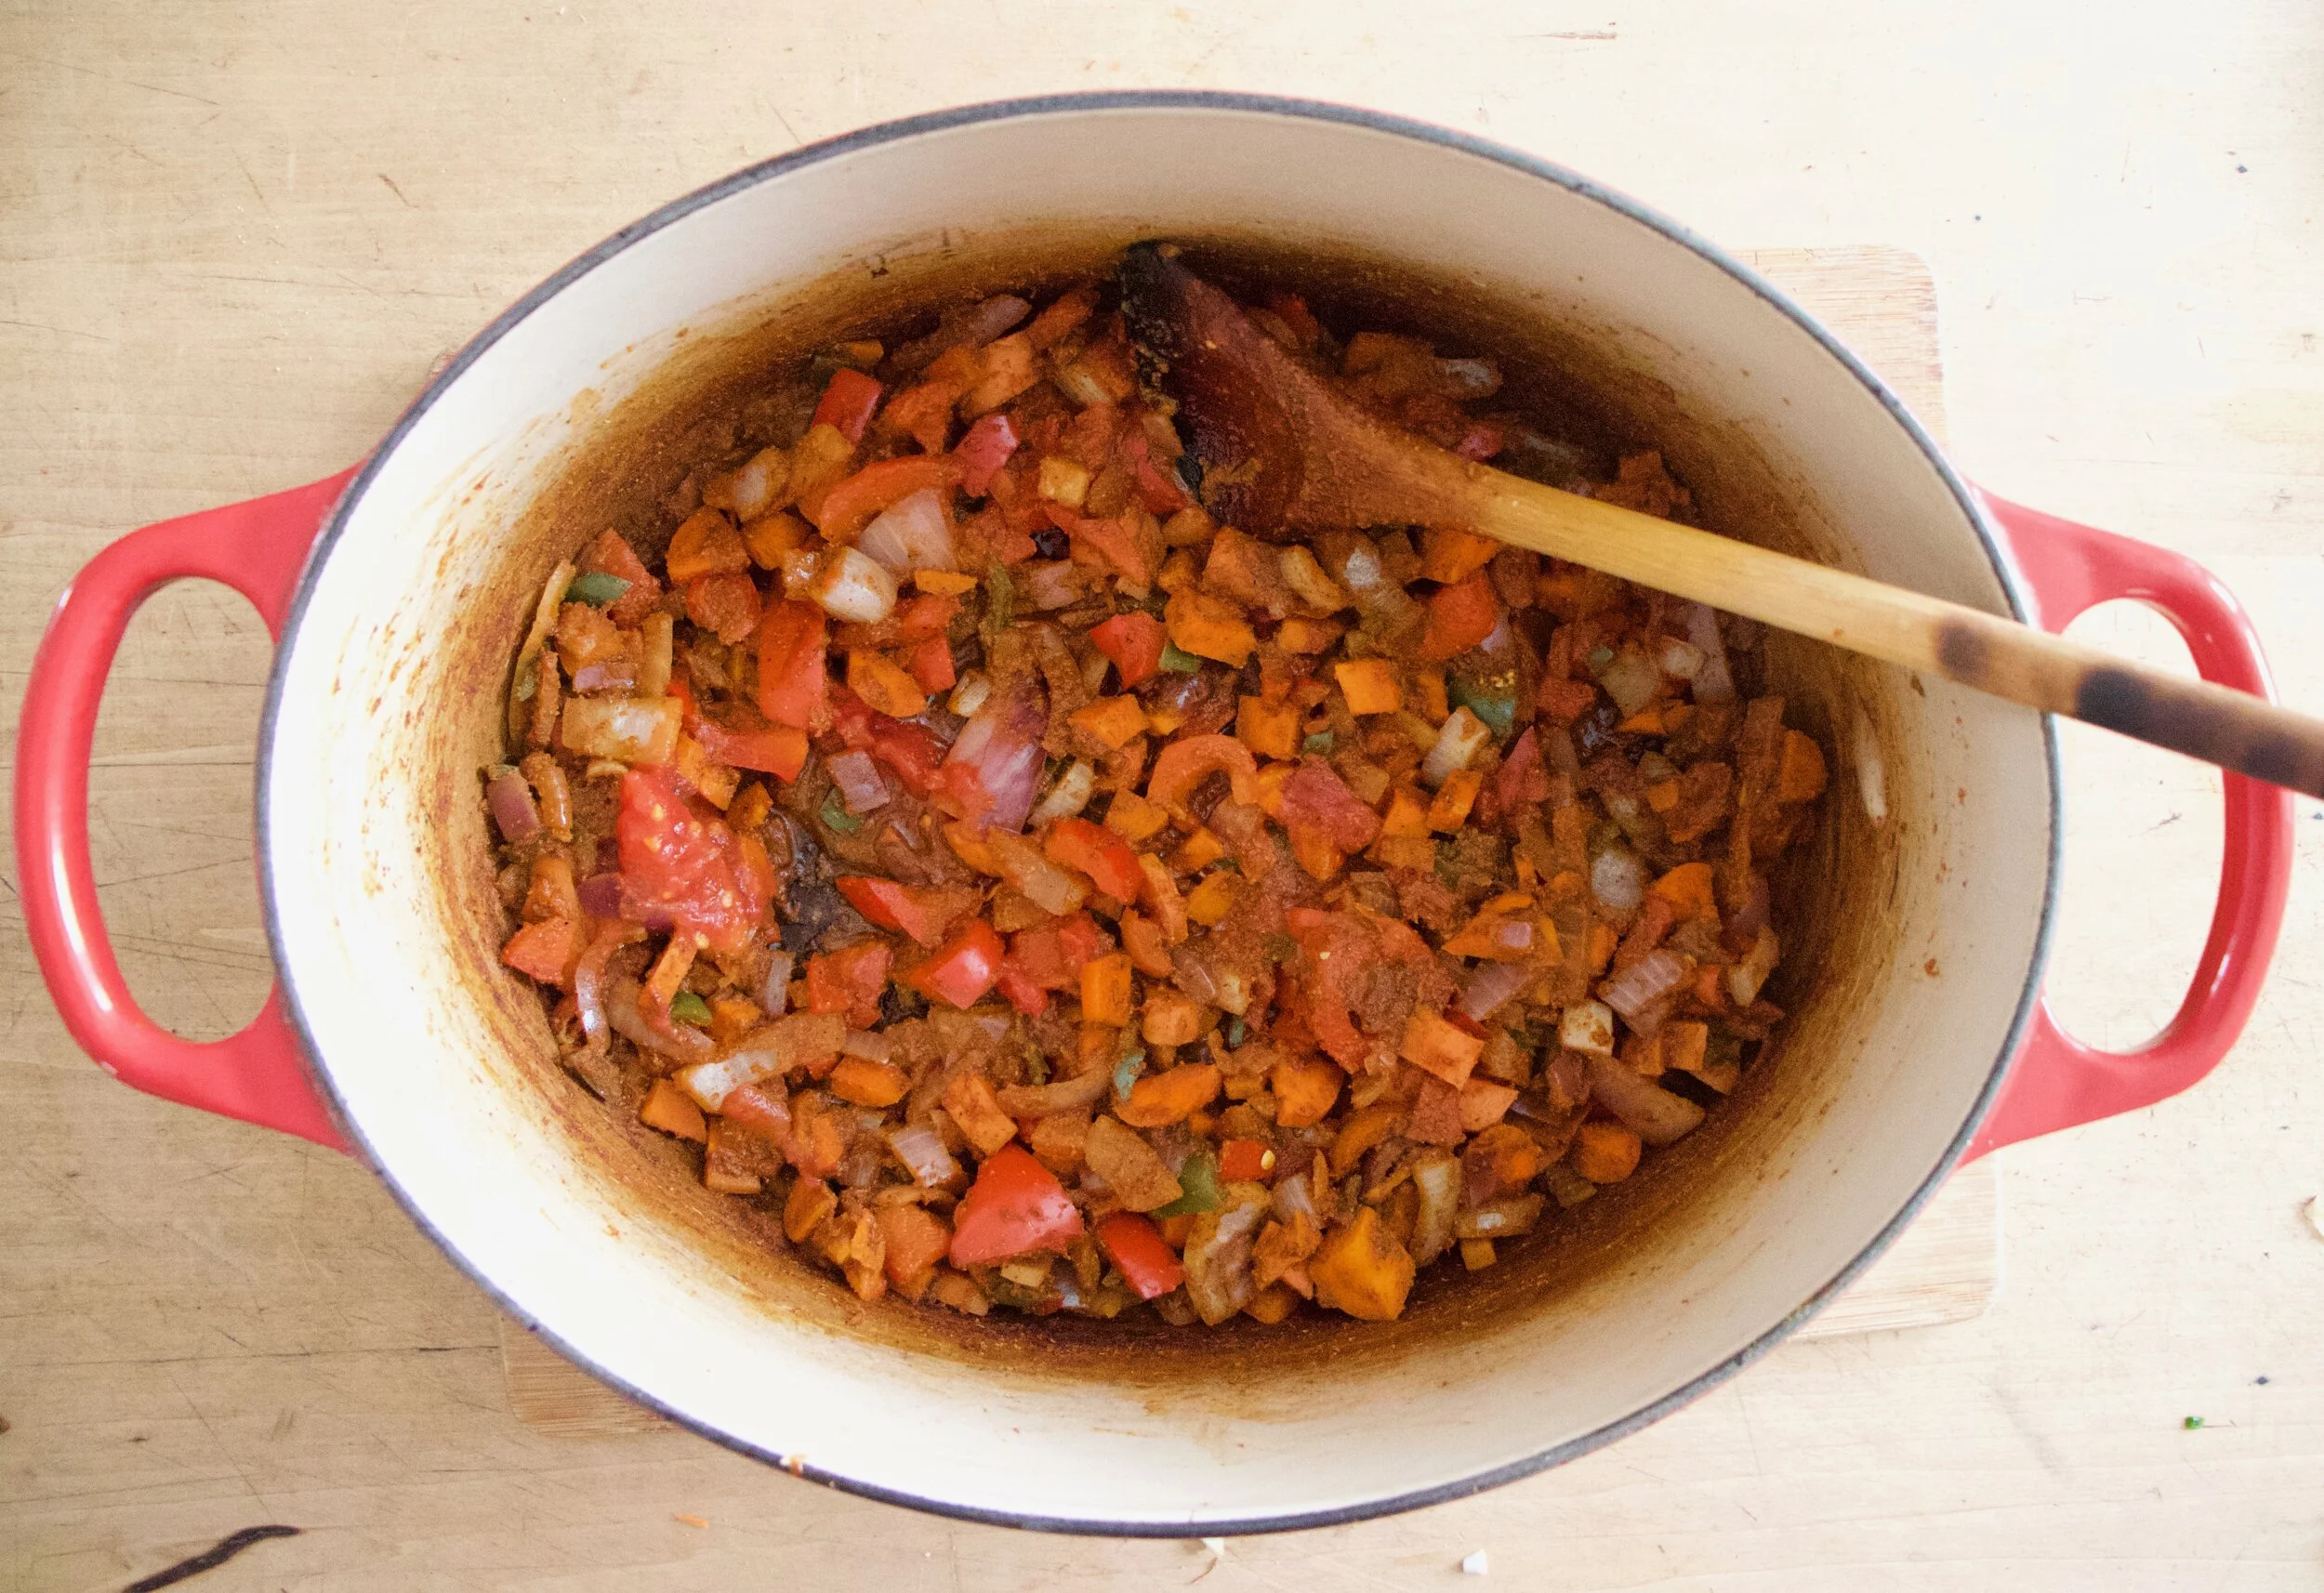
Slightly tender and smells amazing.
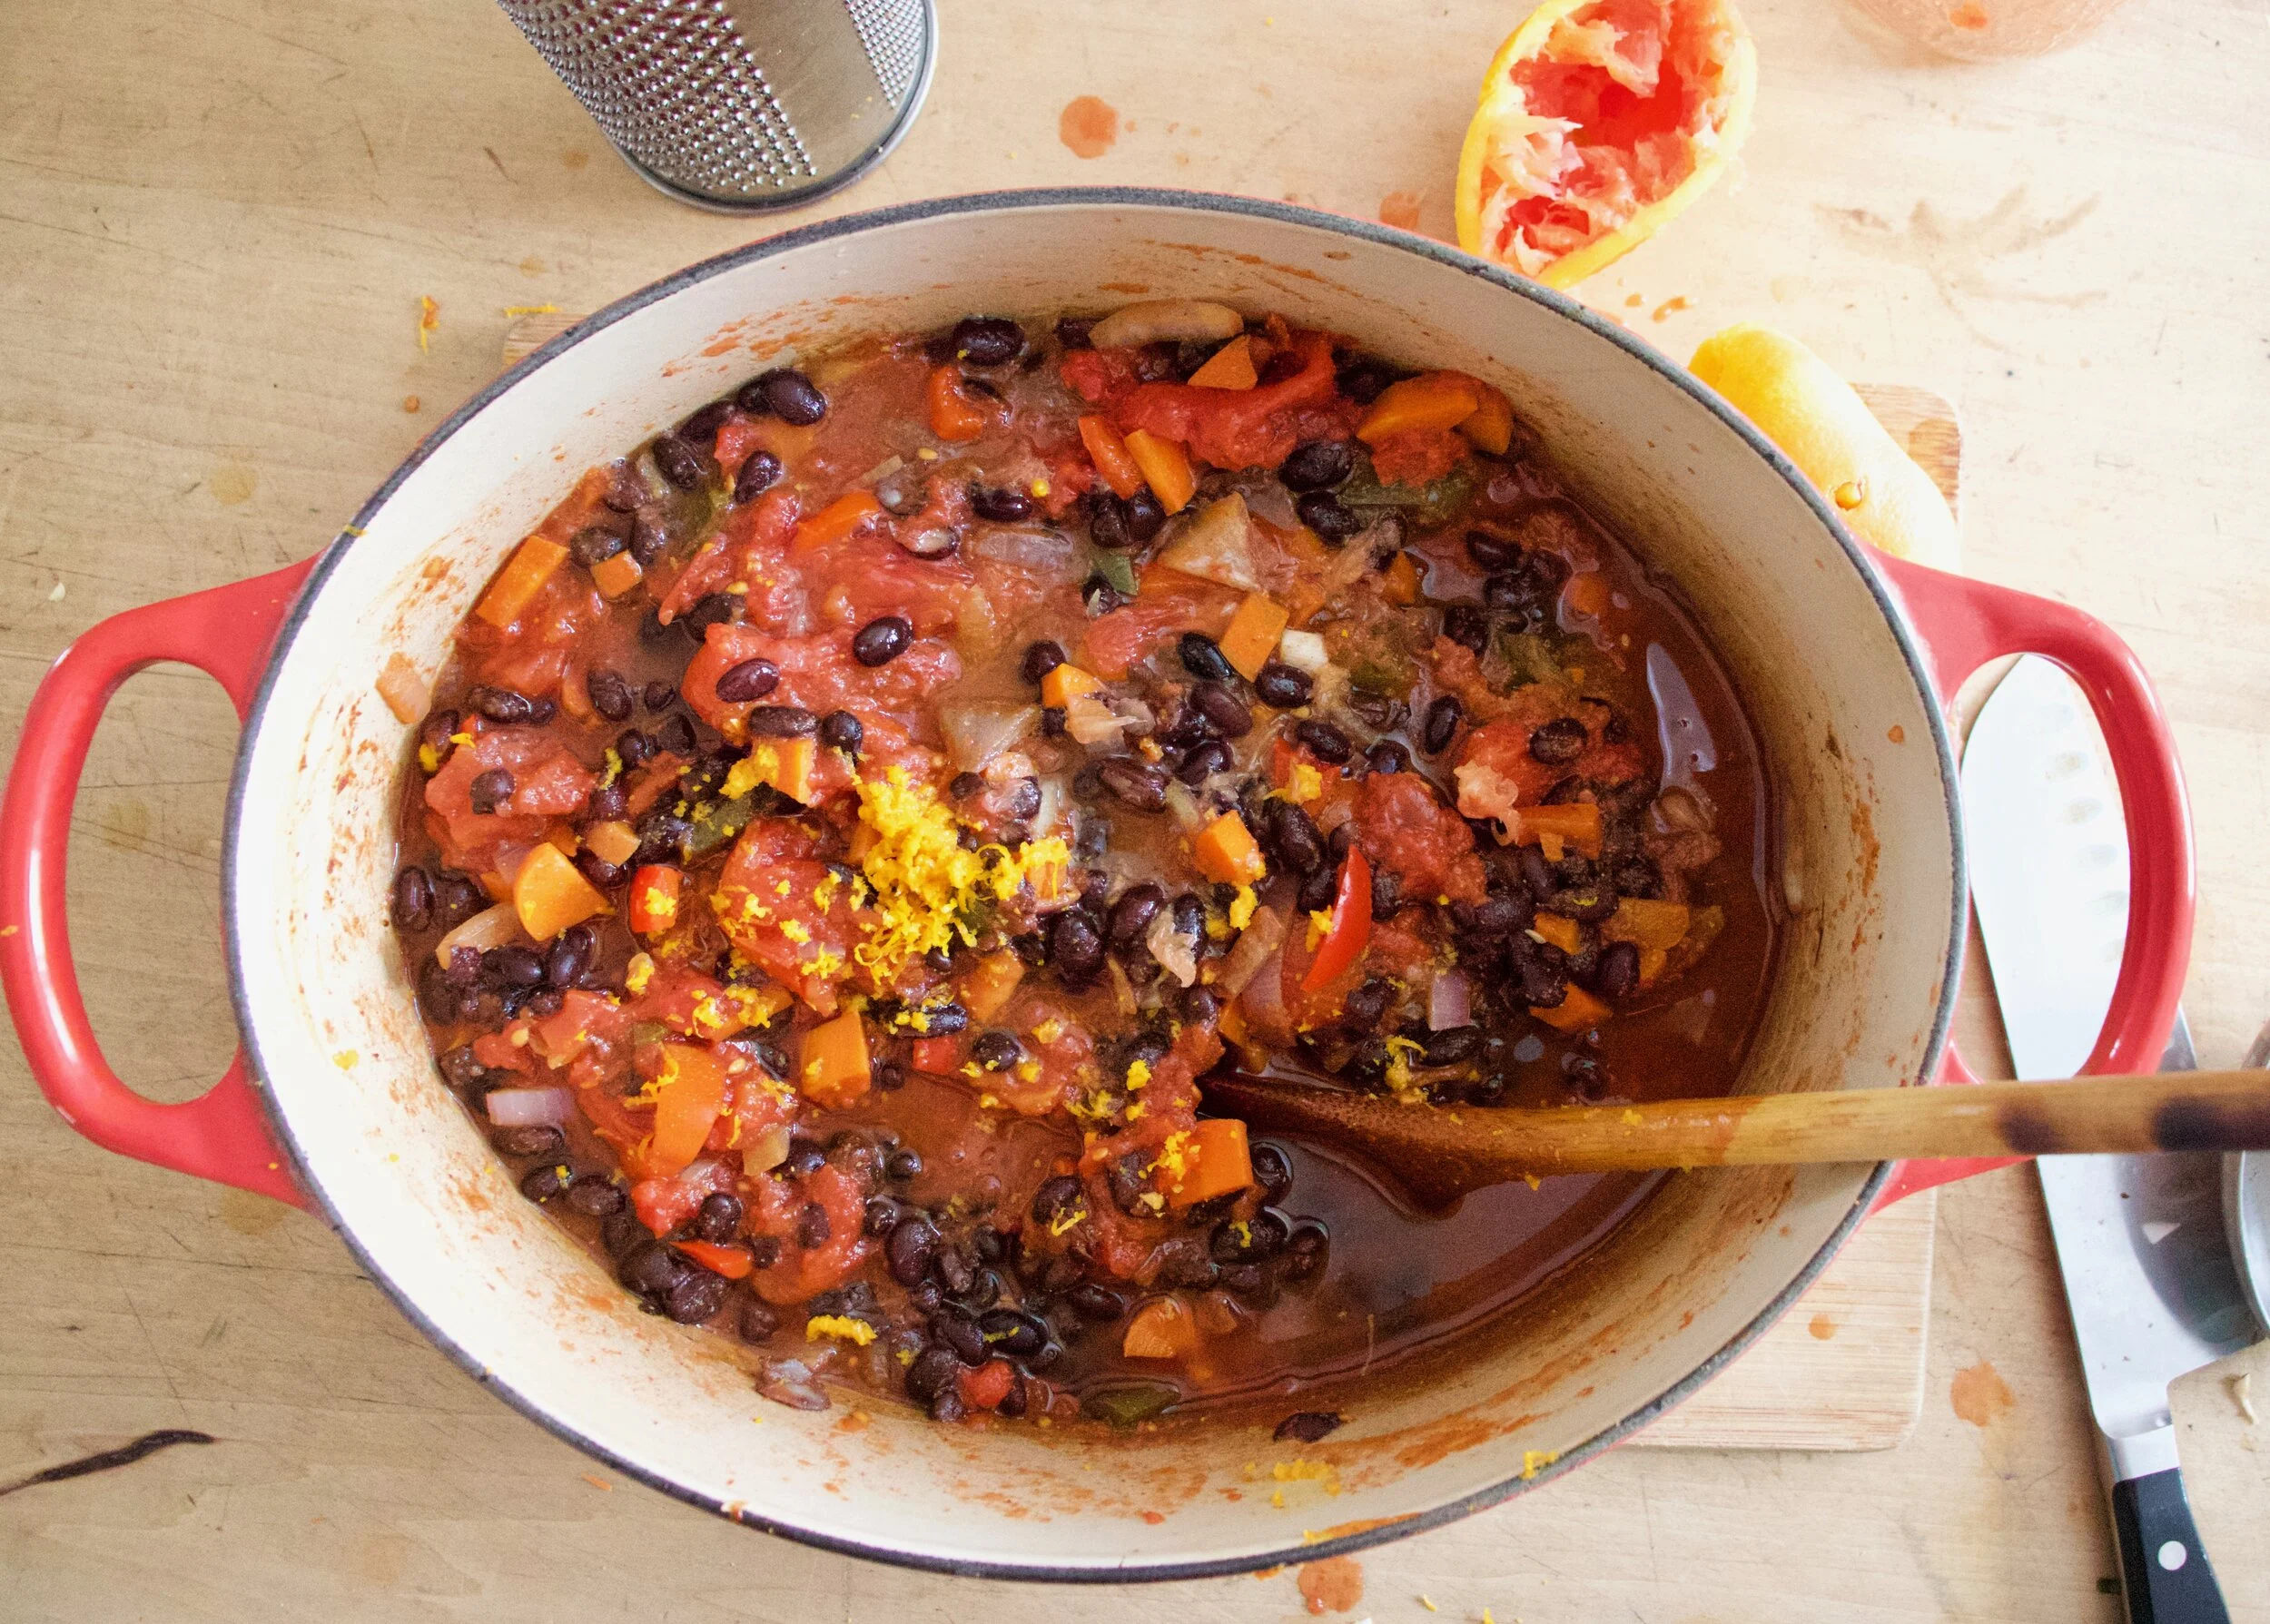
Now add in the beans, the tomatoes, and the zest and juice of an orange. Mix it all up, set it back on stove and keep on cooking,
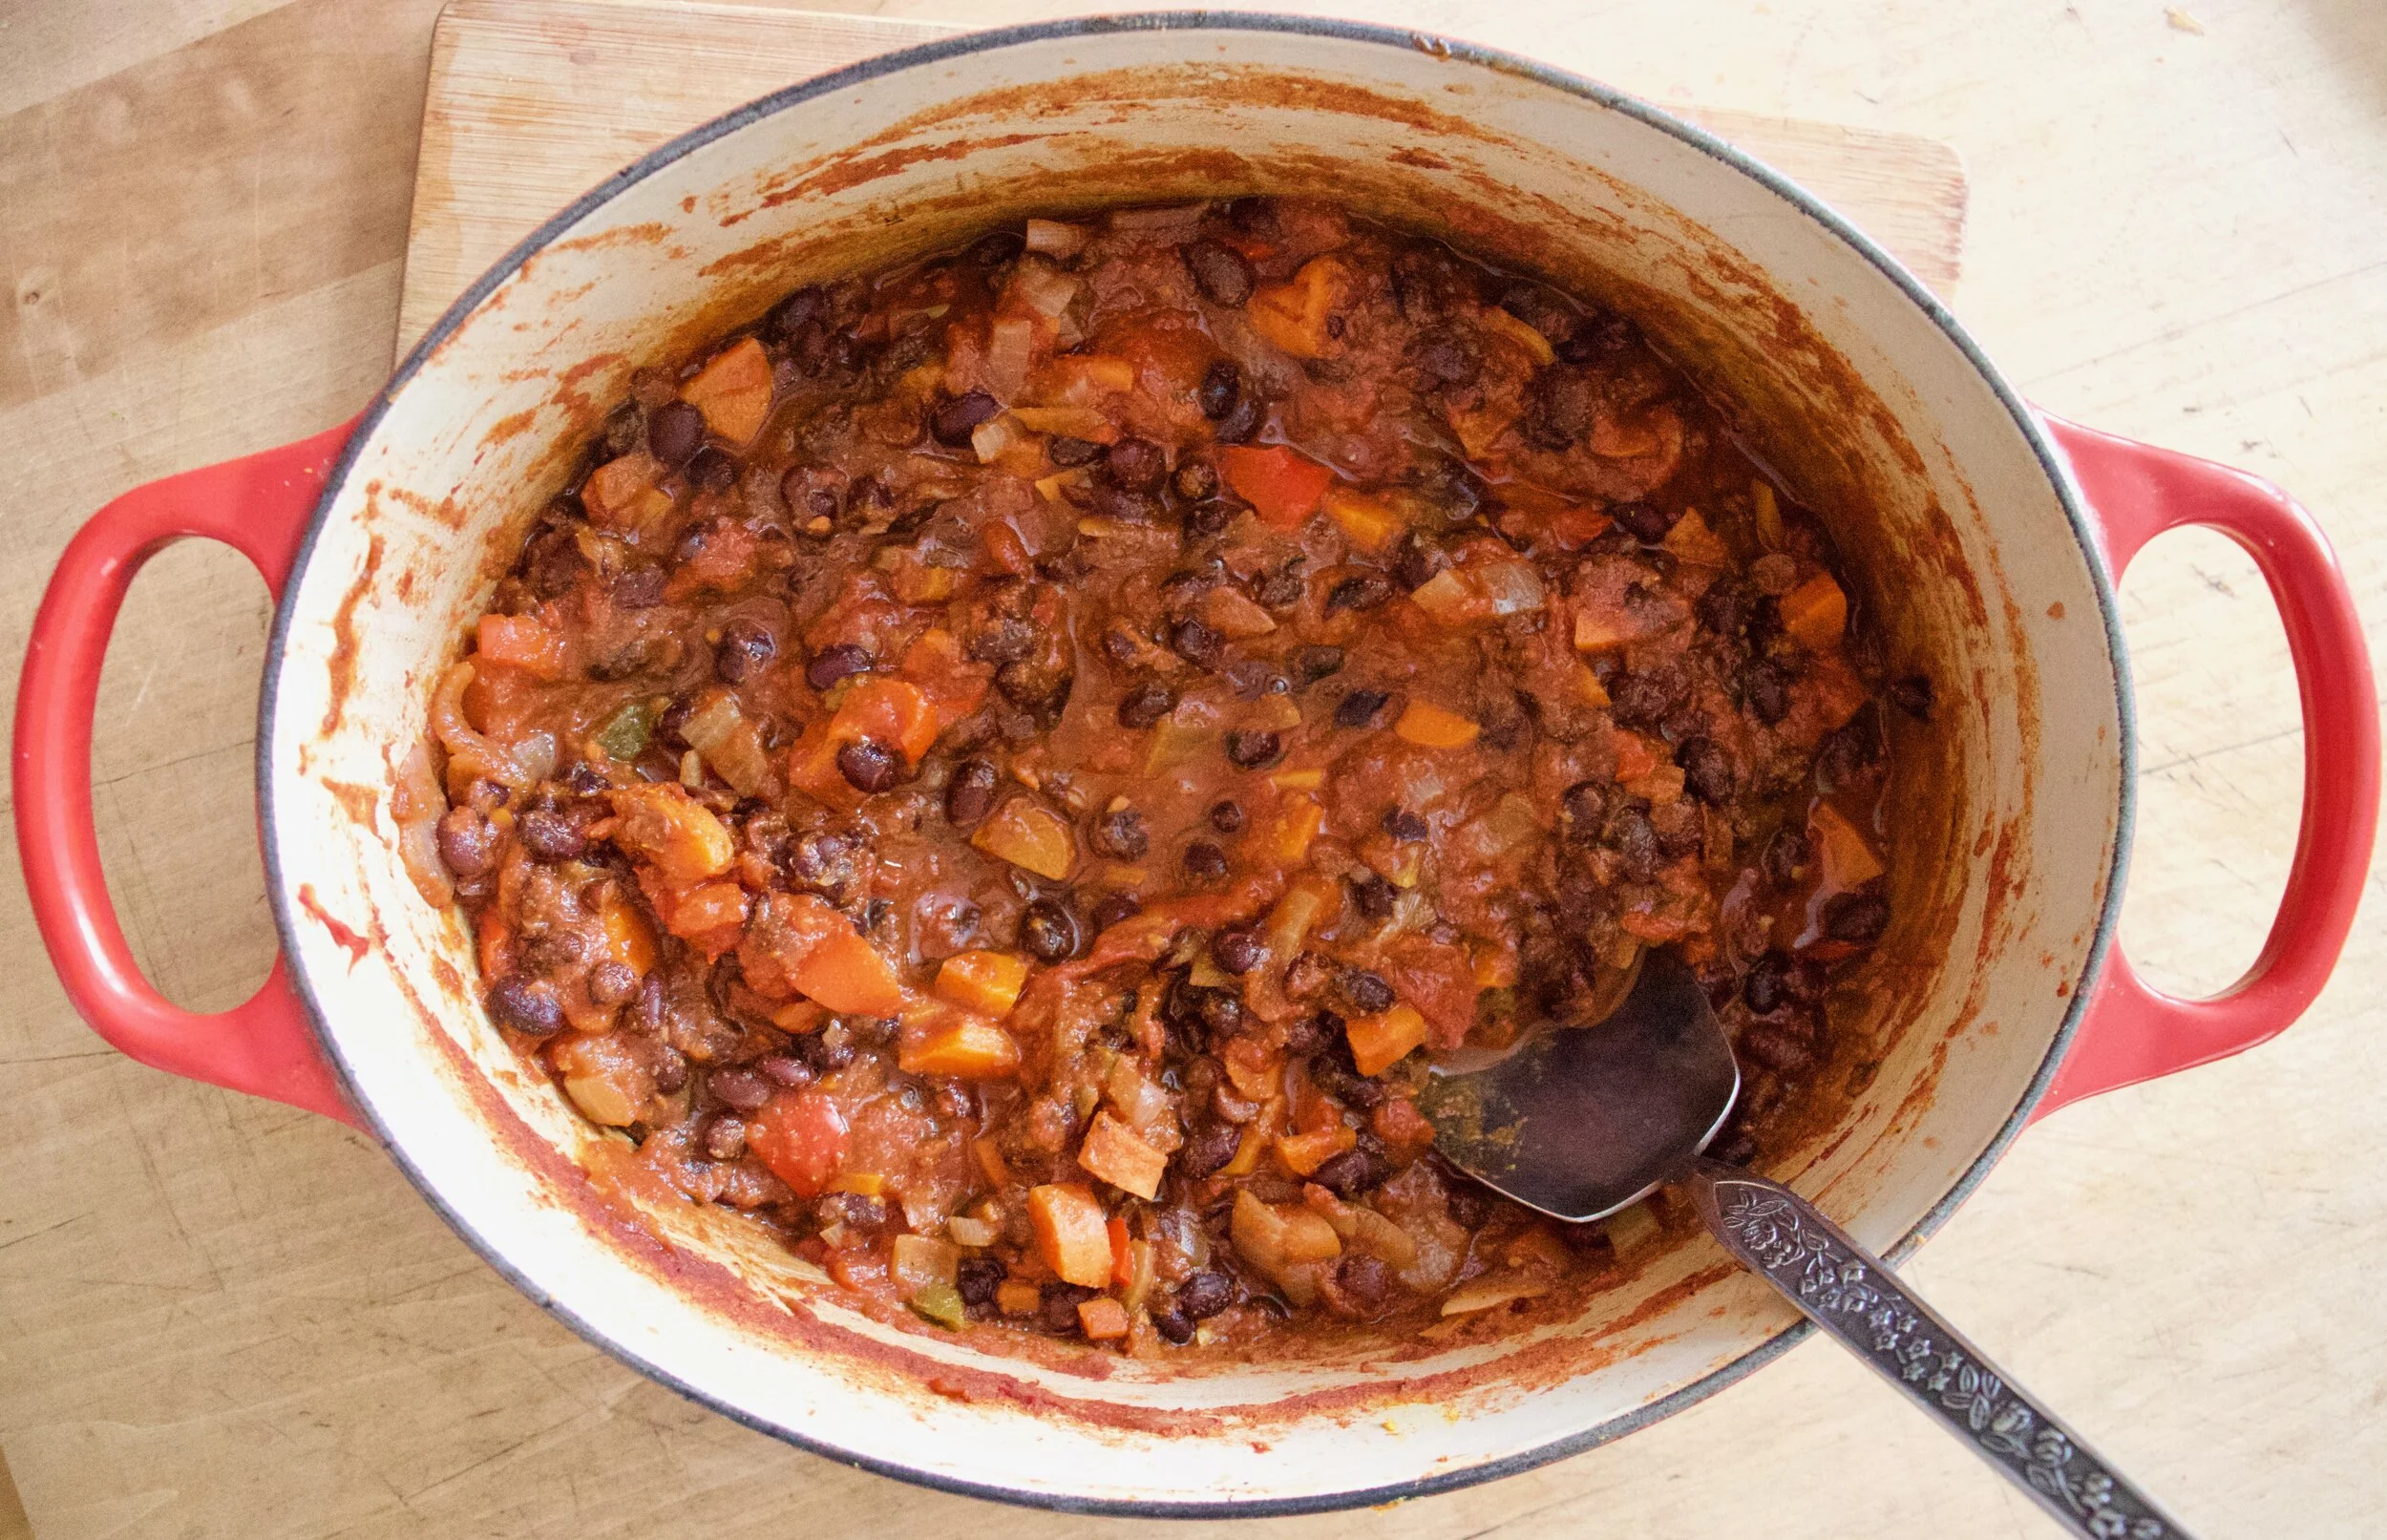
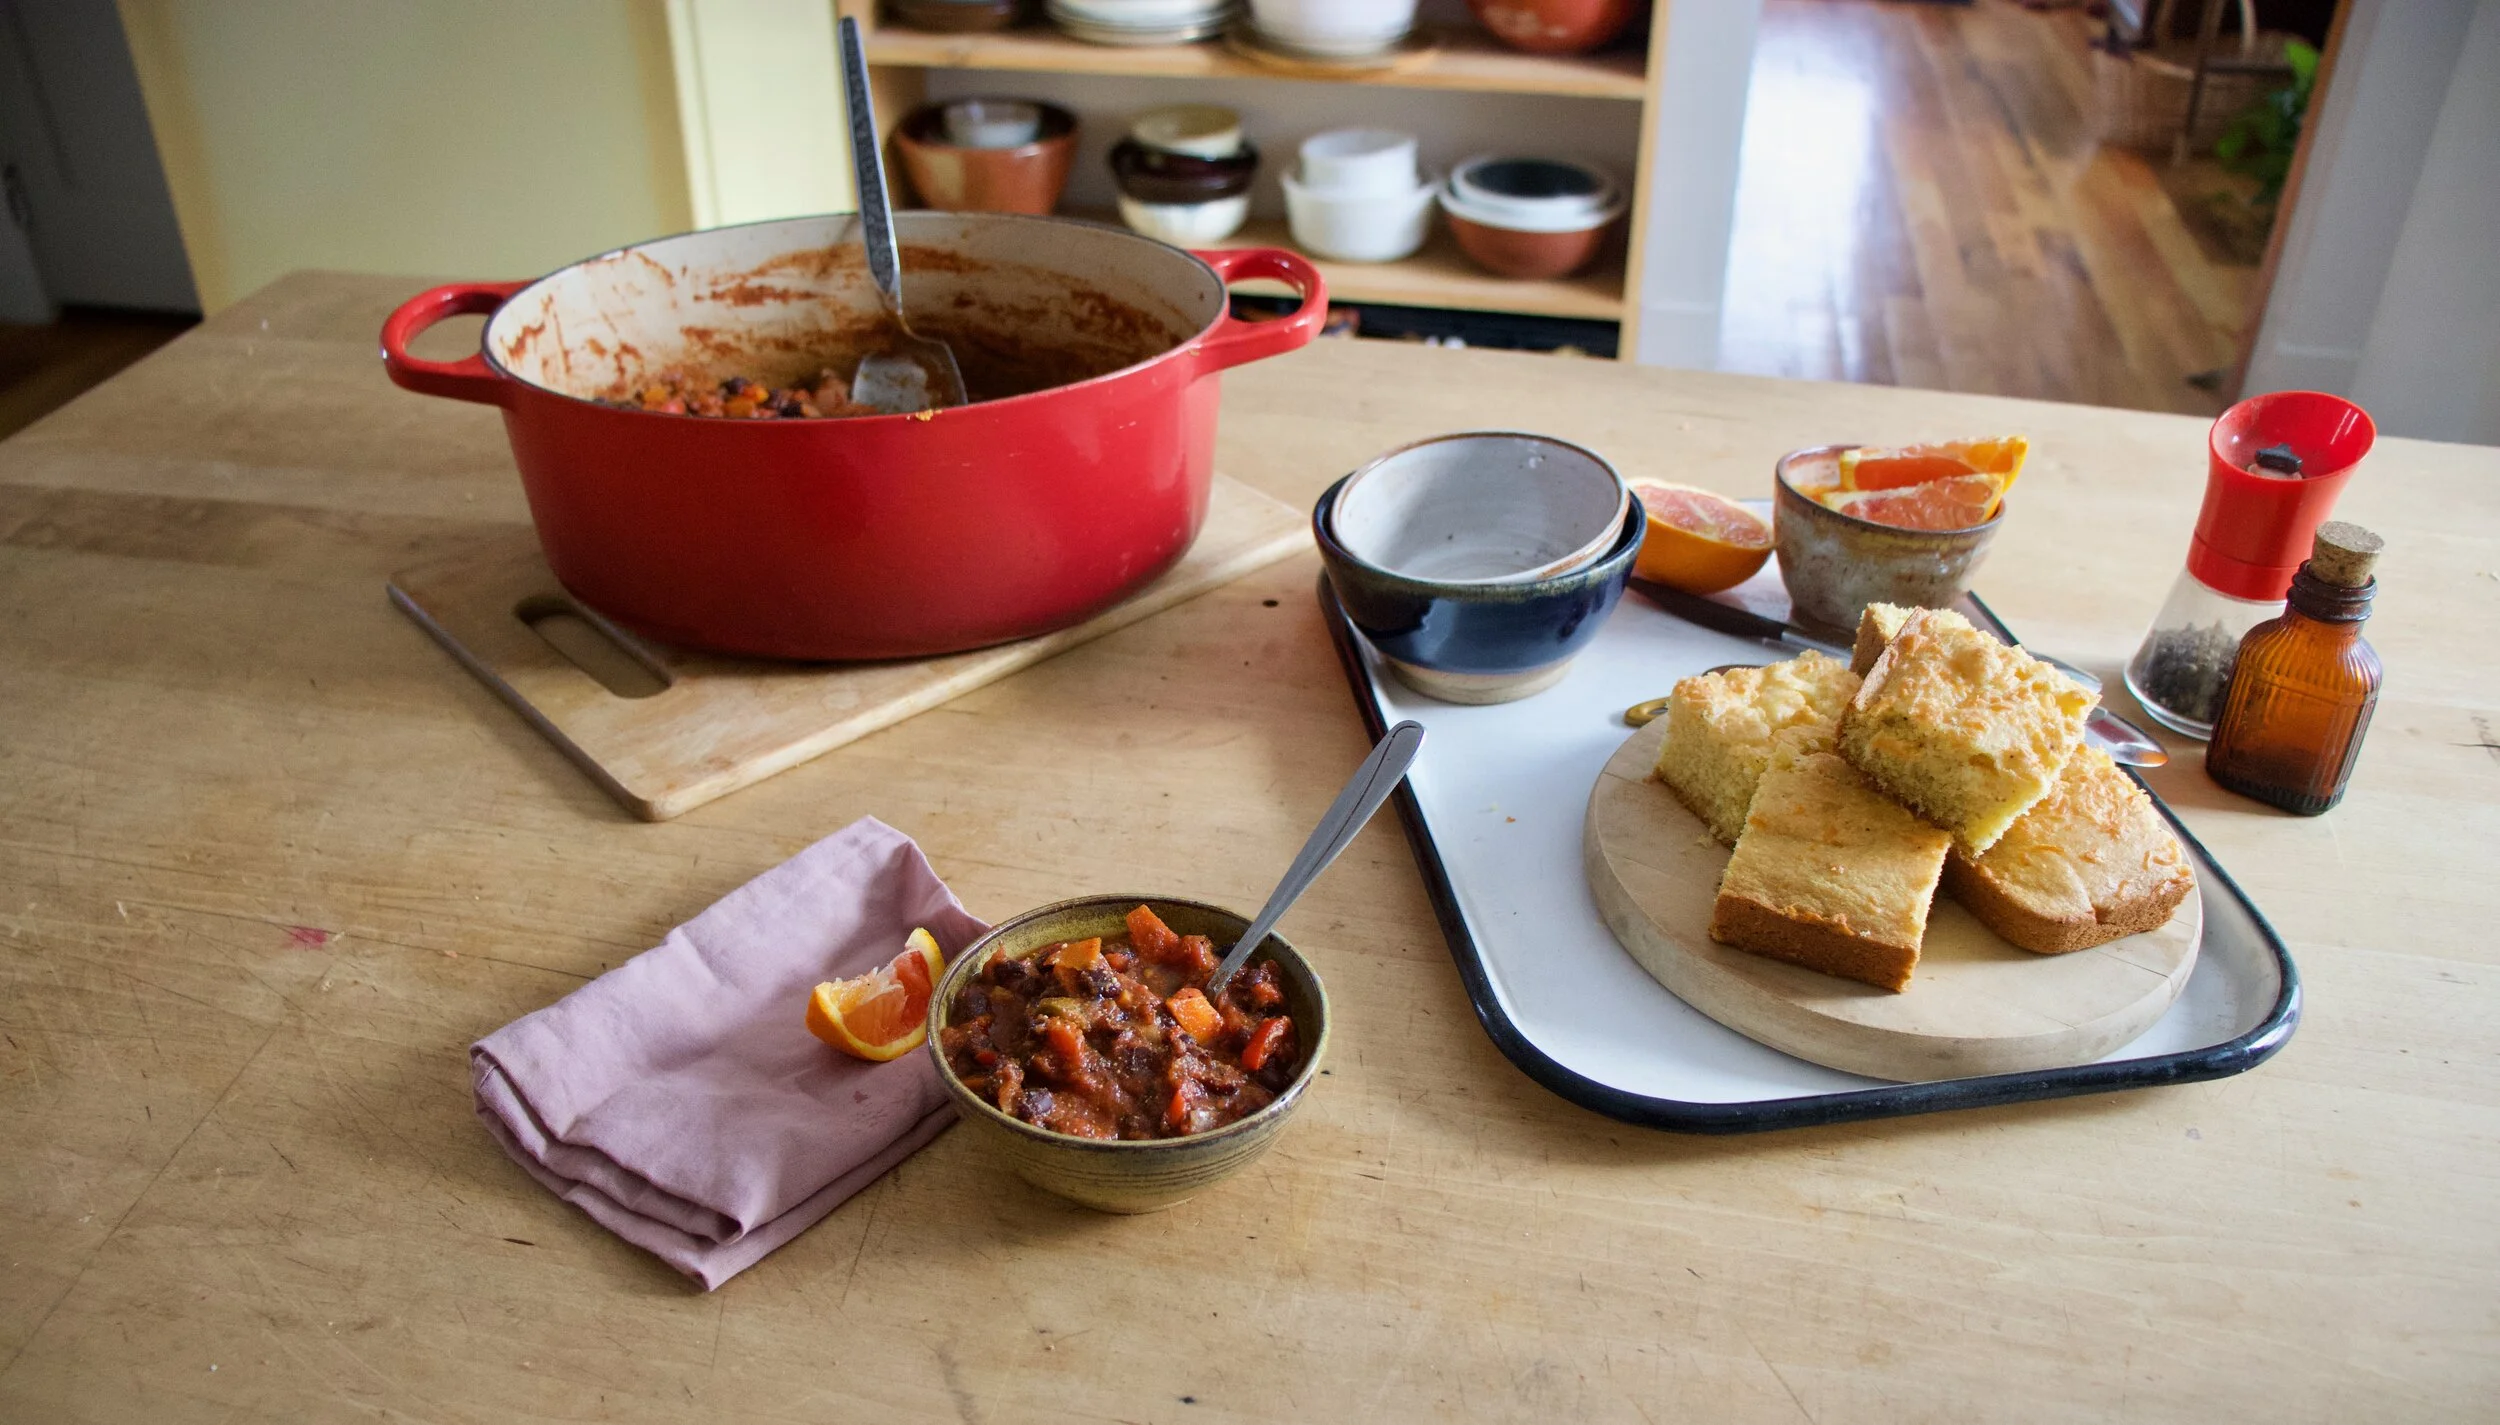
Now eat your chili, with extra orange slices to squeeze all over it of course. And maybe you want to serve it with some corn bread? That is entirely up to you, but who would be made about it?

-C

Serves 4-6 people

  • 1 pound cooked black beans drained (about 5 cups or 3 cans)

  • 5 cups crushed tomatoes (or 2 28oz cans)

  • 2 oranges (navel or cara cara work)

  • 2 carrots

  • 1 large onion

  • 1 bell pepper

  • 2 jalapenos (optional)

  • 2 heaping tablespoons cumin

  • 2 tablespoon chili powder

  • 2 teaspoons garlic powder

  • 2 teaspoons ground ginger

  • salt and pepper

Start by chopping up the veggies. Small dice the carrot, the onion and the pepper. If using jalape%u00f1o, dice that into small little bits too. And remove seeds for less heat or leave them if you like it. Once that is all cut up, dump it all into a large heavy bottom pot along with the cumin, chili powder, garlic and ginger powder, and about a teaspoon or so each of salt and pepper. Add about 1/2 cup water, mix it all up, and place the pot on stove on medium heat and start to cook the veggies and spices until they begin to smell fragrant and are ever so slightly tender, which should take 5-10 minutes.

Now add in the beans, the tomatoes, and the zest and juice of one orange. Mix together and keep cooking on medium heat, partially lidded, for about 45 minutes to an hour, stirring once in a while, until the chili has thicken and tastes good to you.

Once done, season to taste with more salt and pepper and either stir the juice of the second orange into the whole pot or serve with slices of orange to squeeze on top.

Eat. Store any left overs in fridge. Tastes delicious cold too.

I eat so much hummus. Everyday, all day. Homemade, store bought. If there is hummus, I will be consuming it. But the thing is, I usually don%u2019t eat more then a little at a time. (A little being like 1/2 a cup). And sure, sometimes that is just fine and enough, but other times, what I really want to do is garb a spoon and a bag of carrots and eat it all. And then I do.

But there is that little voice in the back of my head telling me that if someone where to catch me eating mounds of hummus, they would liken my eating behavior to that of someone eating a jar of mustard (Not going to lie, it happens sometimes) or of a bottle of ketchup (but I don%u2019t eat ketchup) and that have a problem and shouldn%u2019t being eating it like that. Because hummus, for some reason, has been put into the condiment category. It%u2019s treated like a dip or a spread and that is fine and dandy to eat it as such, but hummus is so much more. It can, and should be treated more like a main component to a dish. So let us step outside of that box and eat it how we really want to eat it.

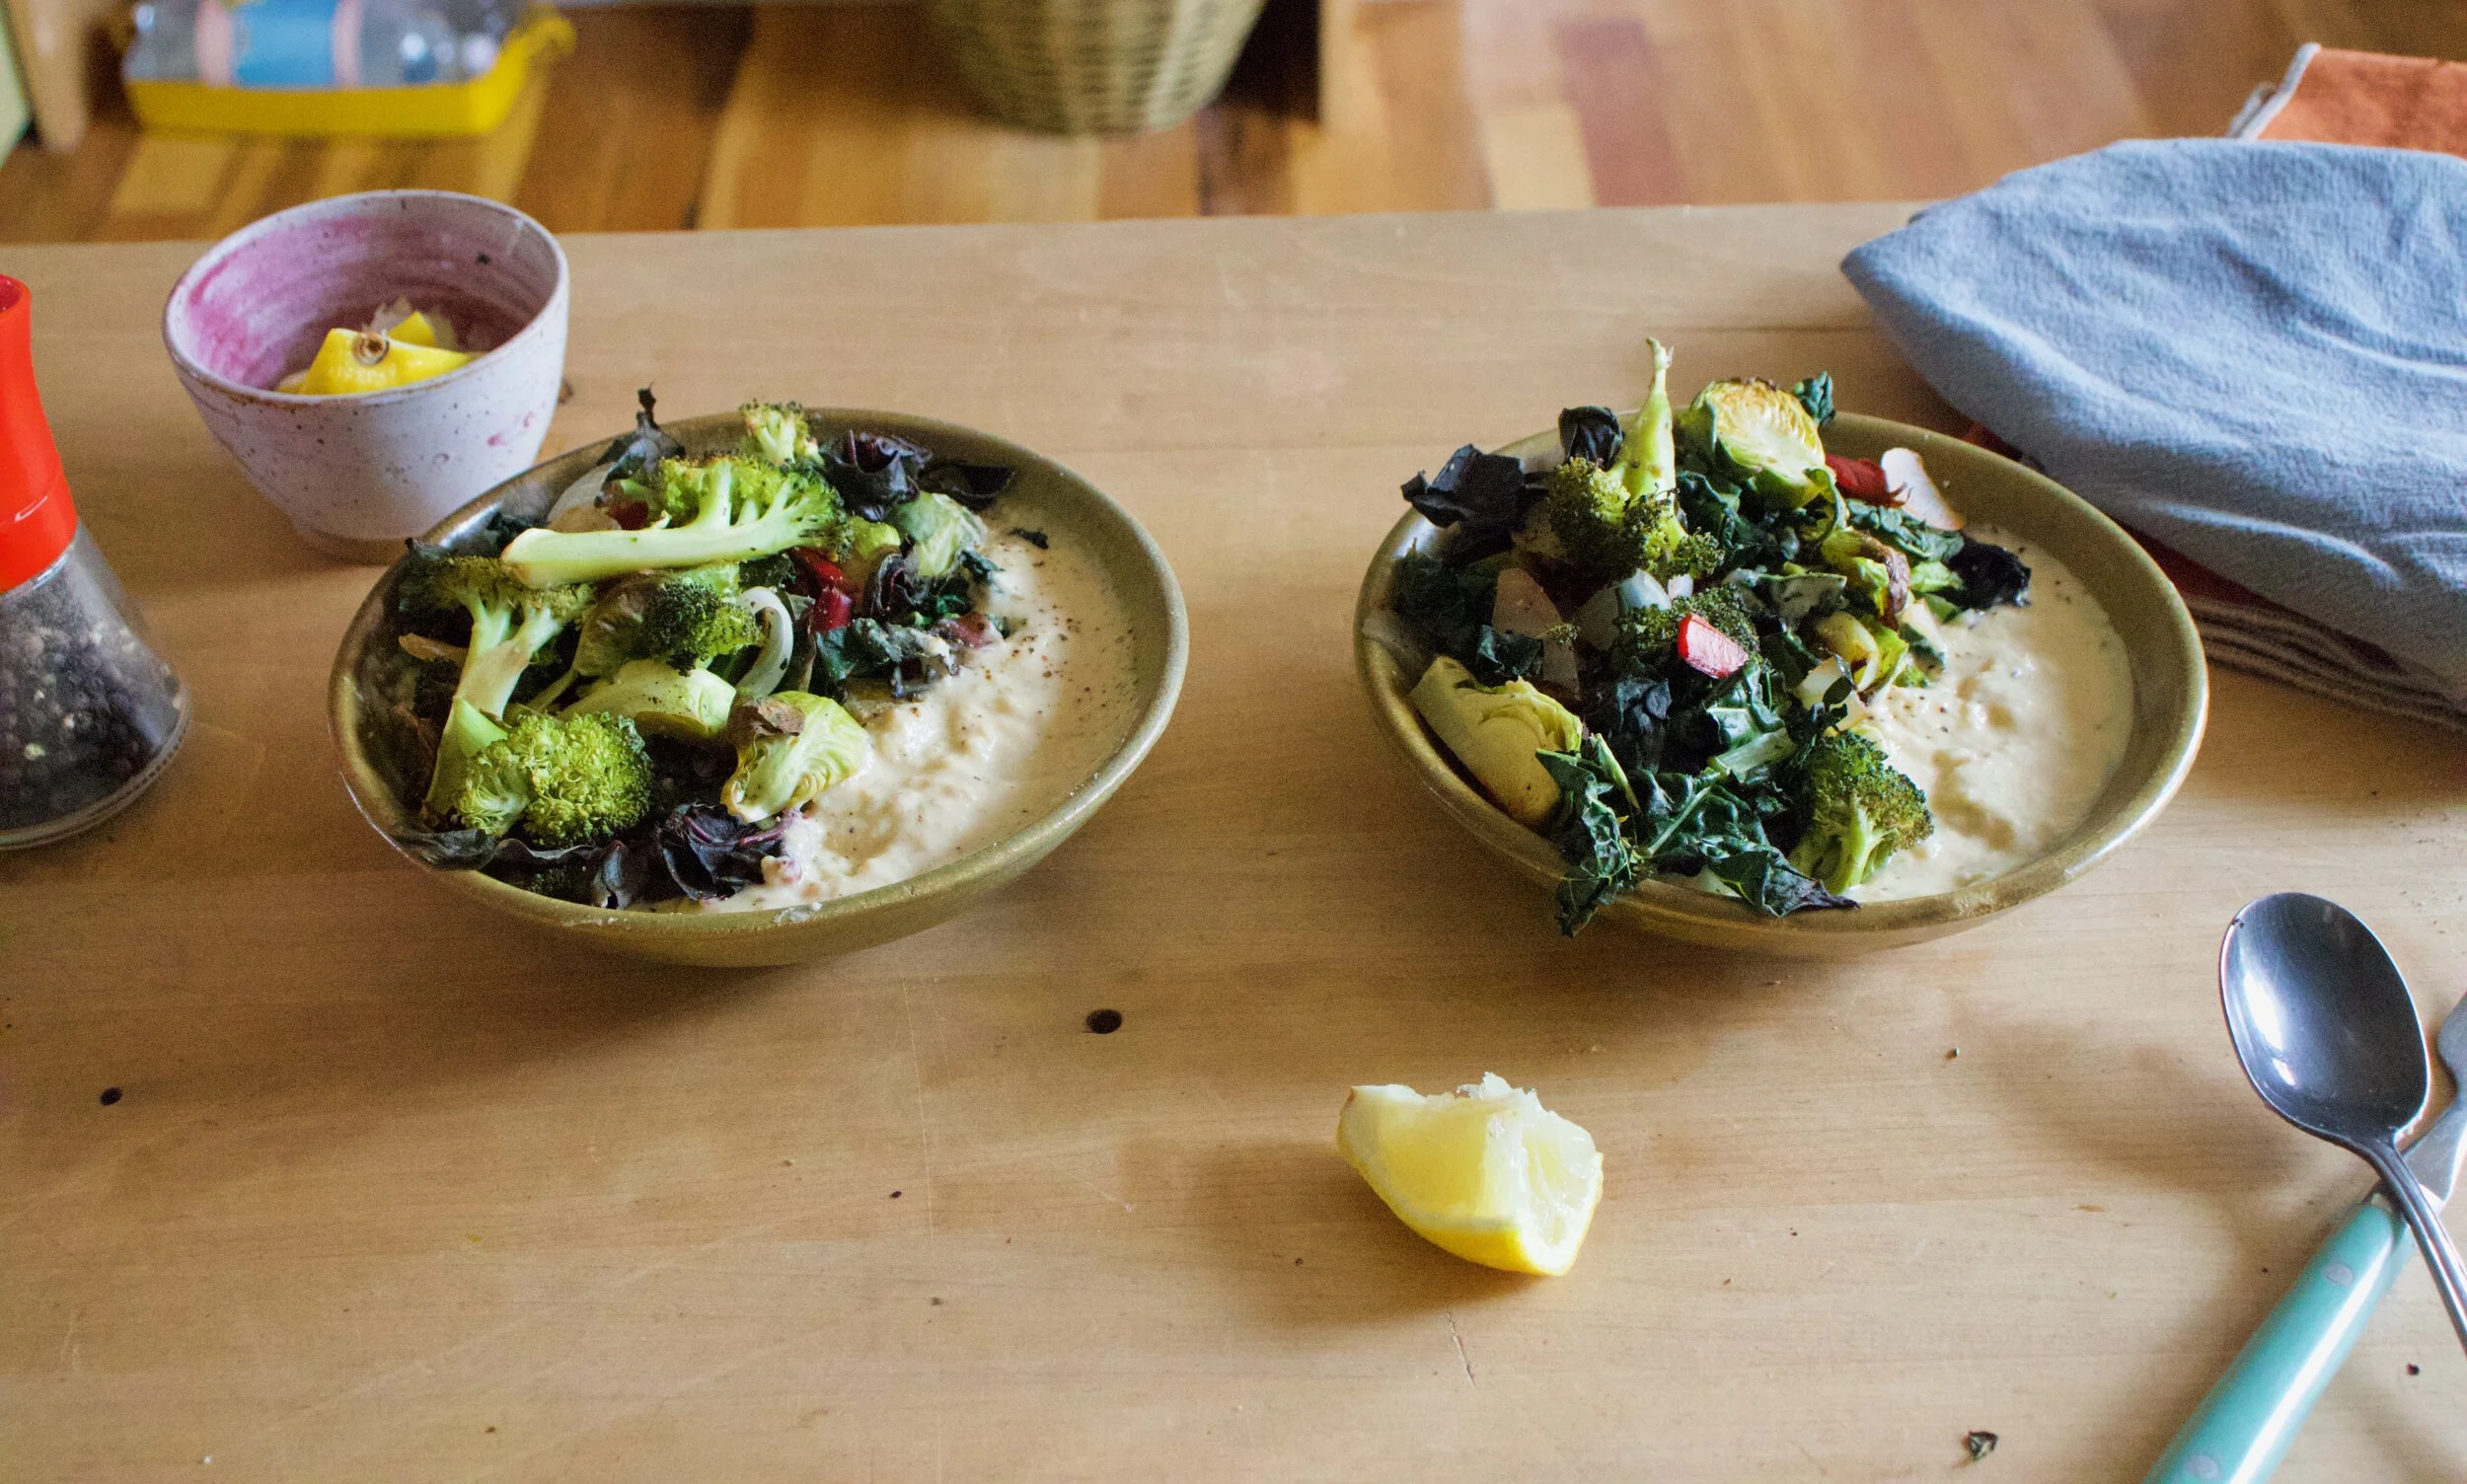
Hummus by the bowlful. I know right! It just makes so much sense to me. And now to you too. We need to stop stopping ourselves from just a scoop or two because really, that is just not enough. Nope, this is for real. A bowl, full of hummus, topped with roasted veggies because that is just more deliciousness. And we get to eat it all.

Life can be pretty great sometime, you know. HA

Now to the bowl of hummus!

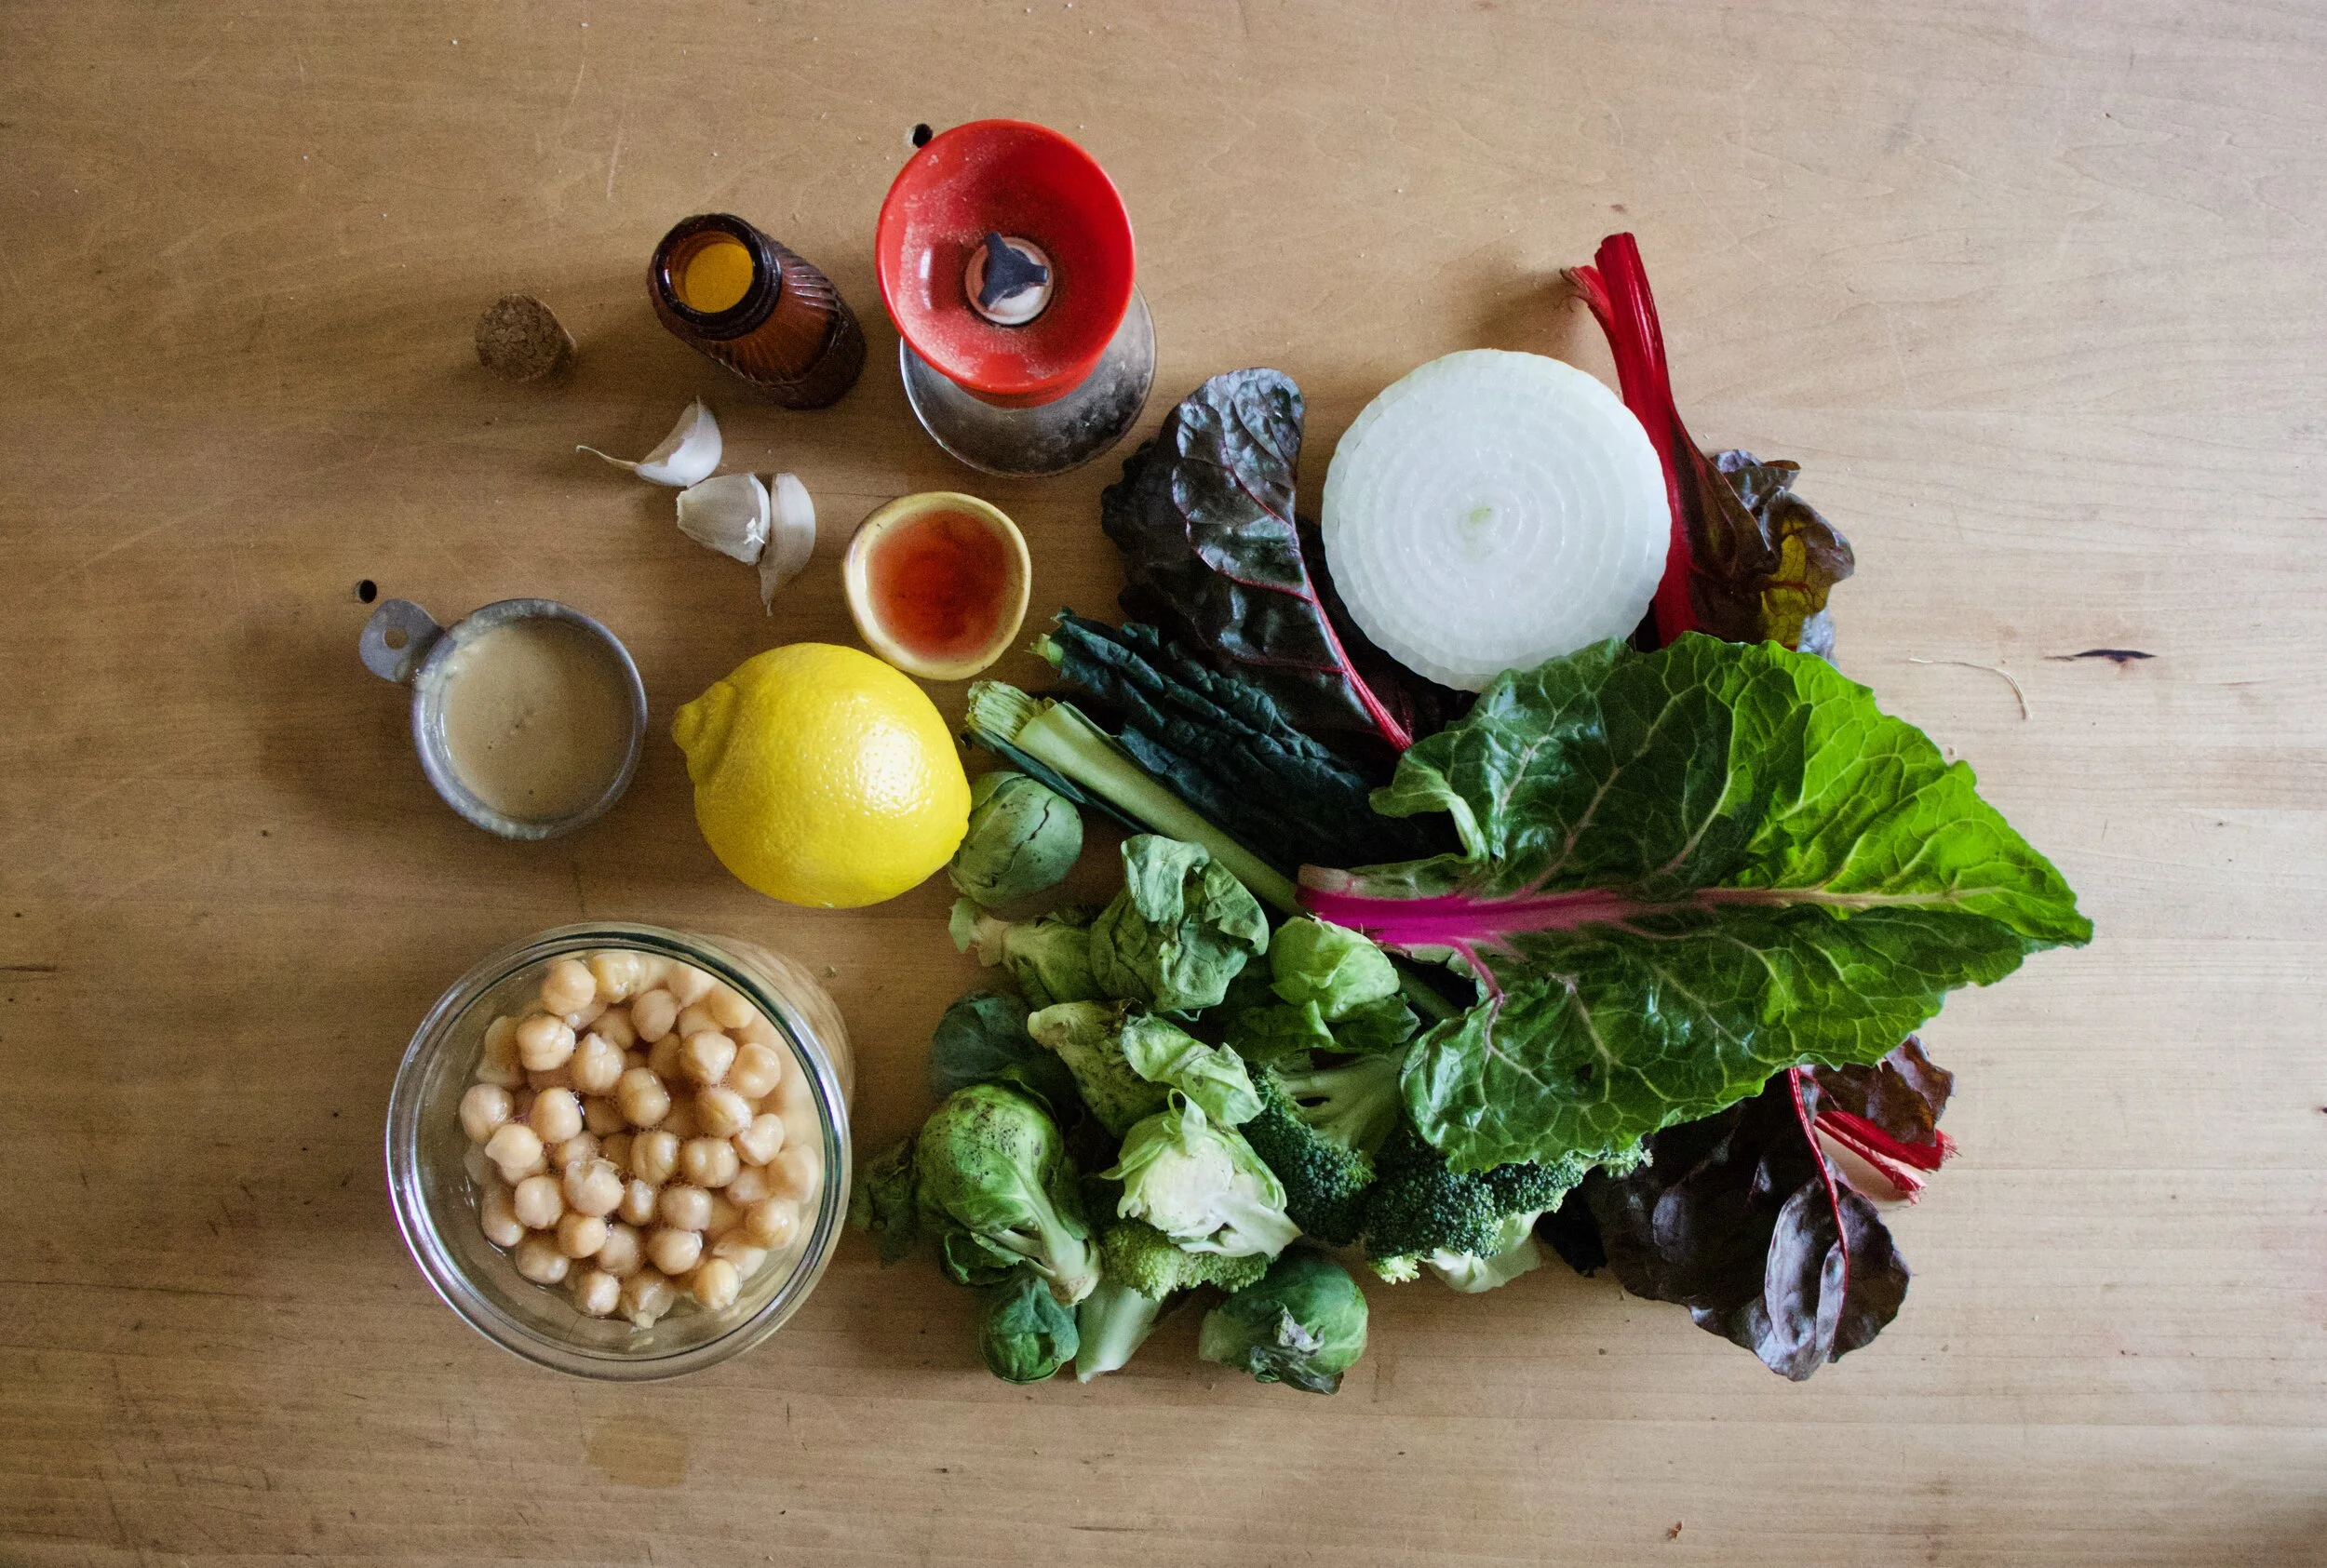
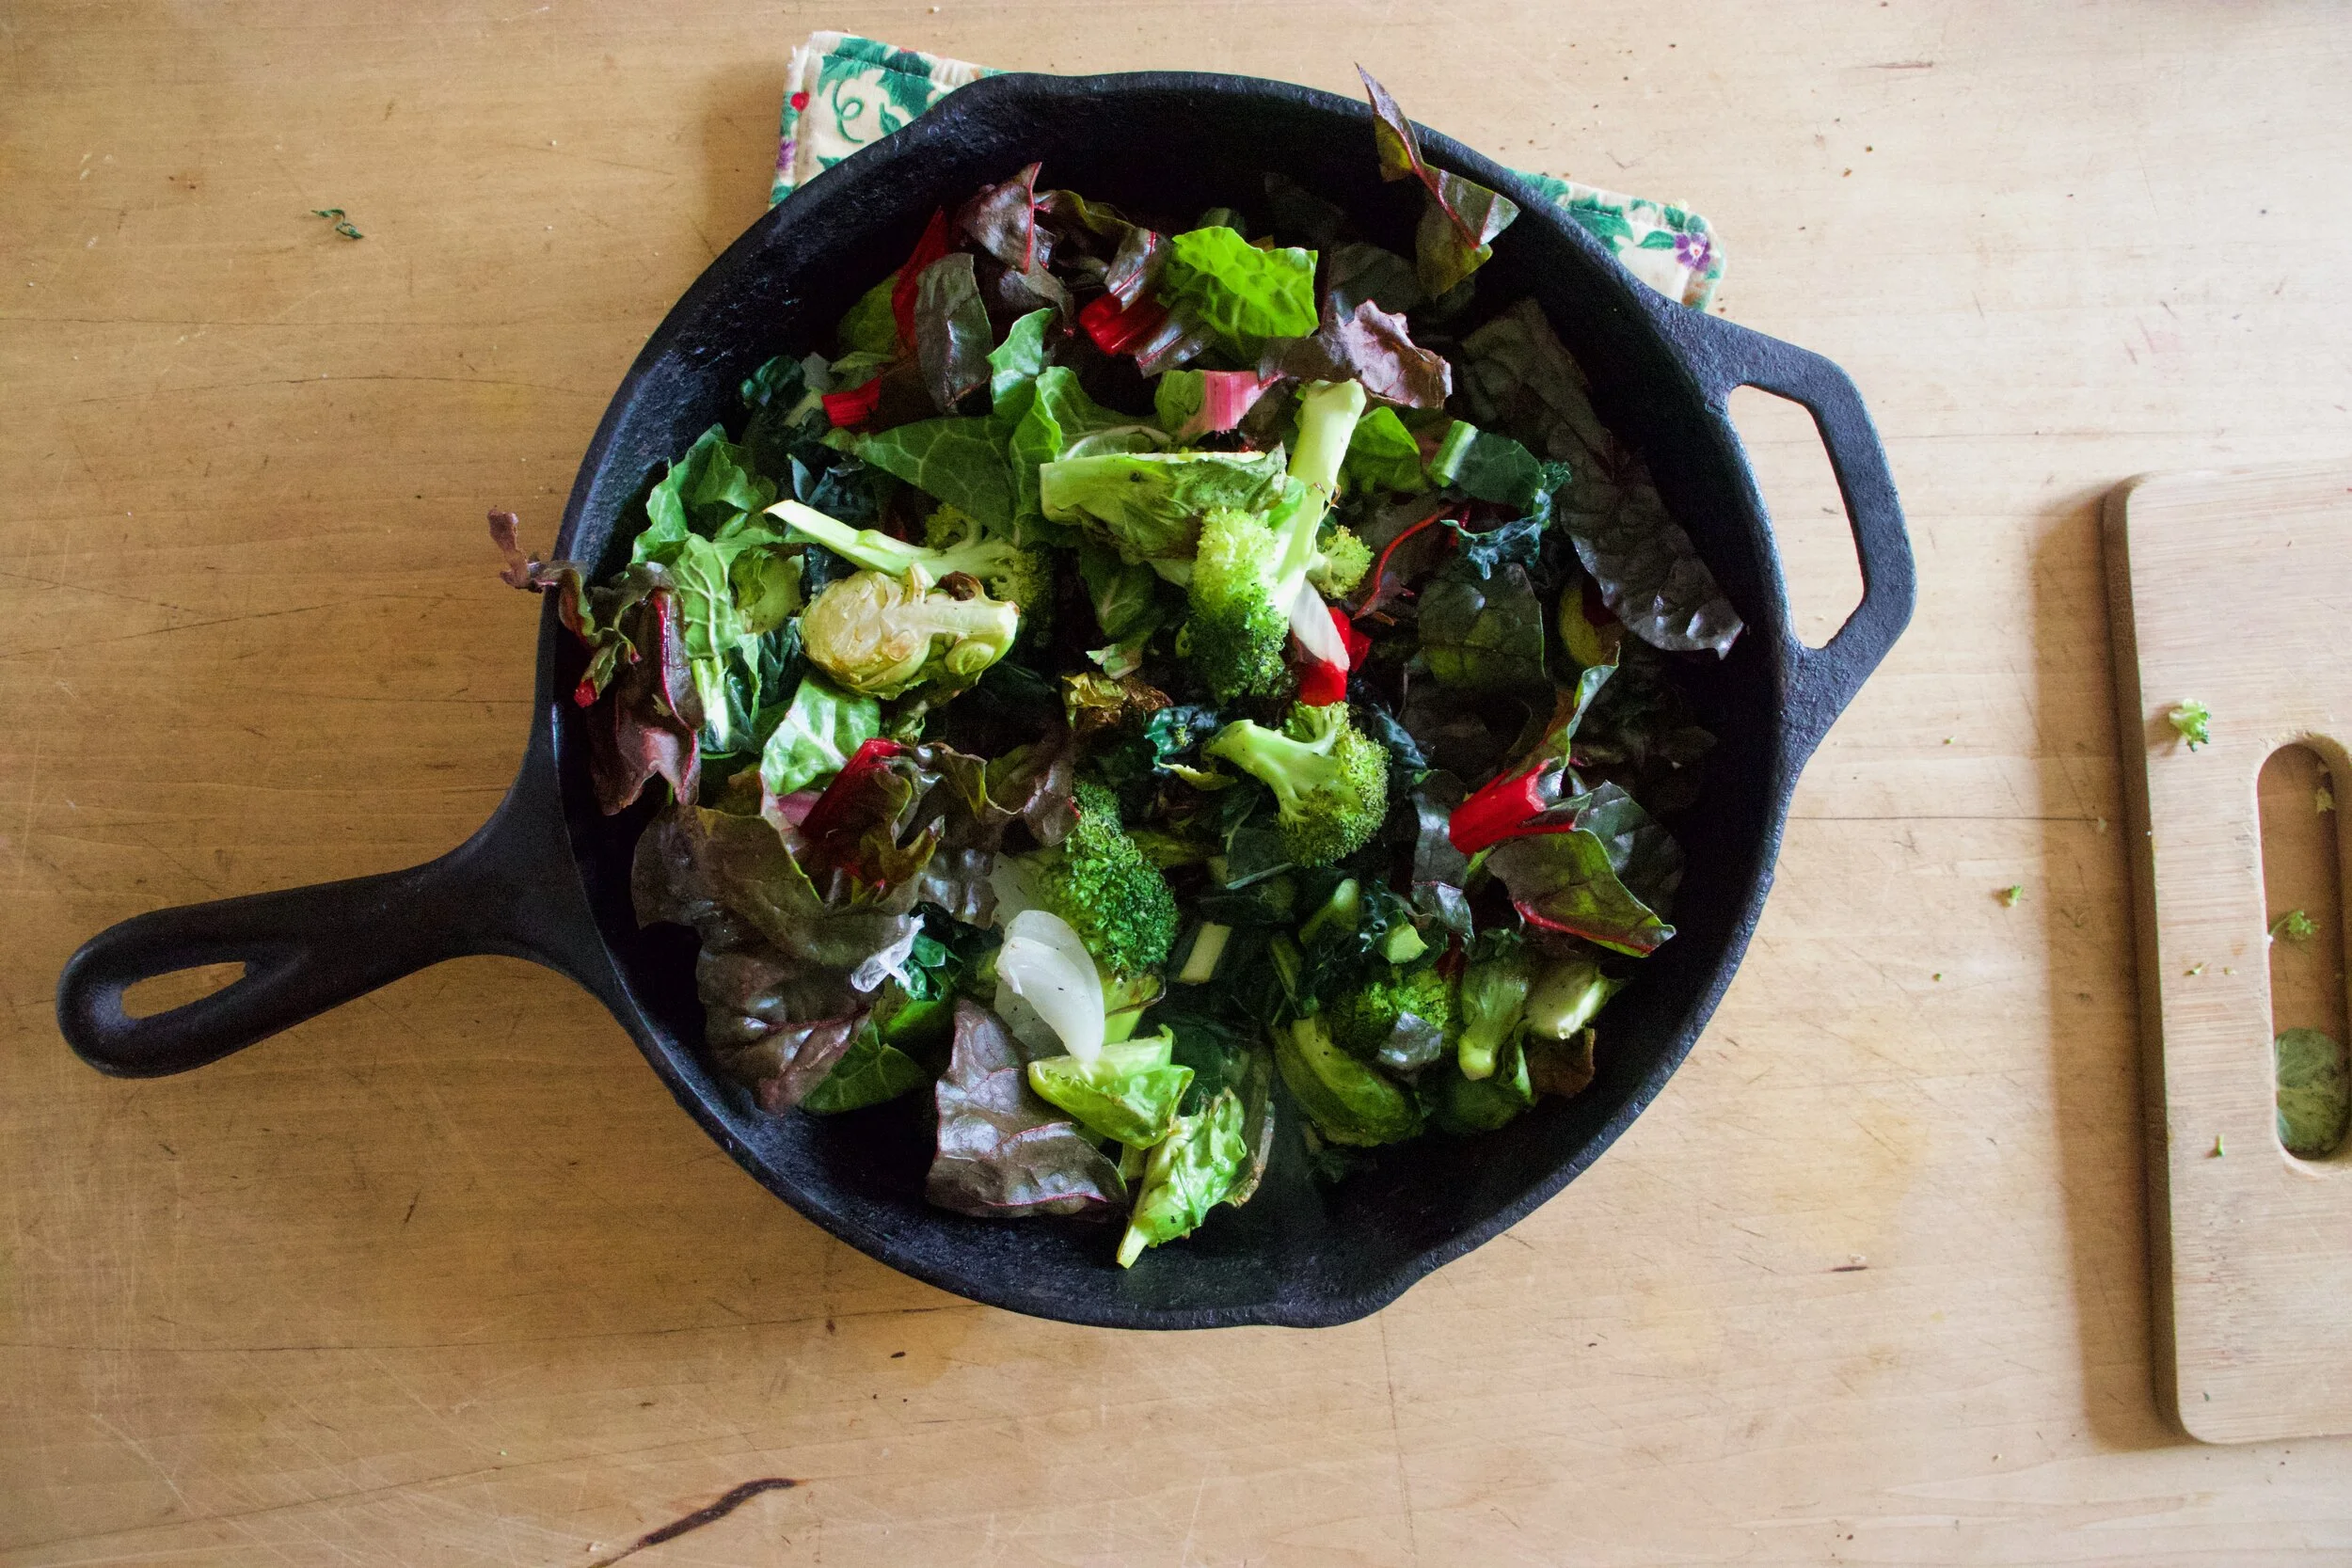
The stuff. We got chickpeas, tahini, a lemon, red wine vinegar, garlic, salt and pepper. And Veggies. Brussel Sprouts, broccoli, onion, Swiss chard, and kale.

Chop up the broccoli, the onion and half or quarter the Brussel sprouts. And separately, chop up the kale and chard.

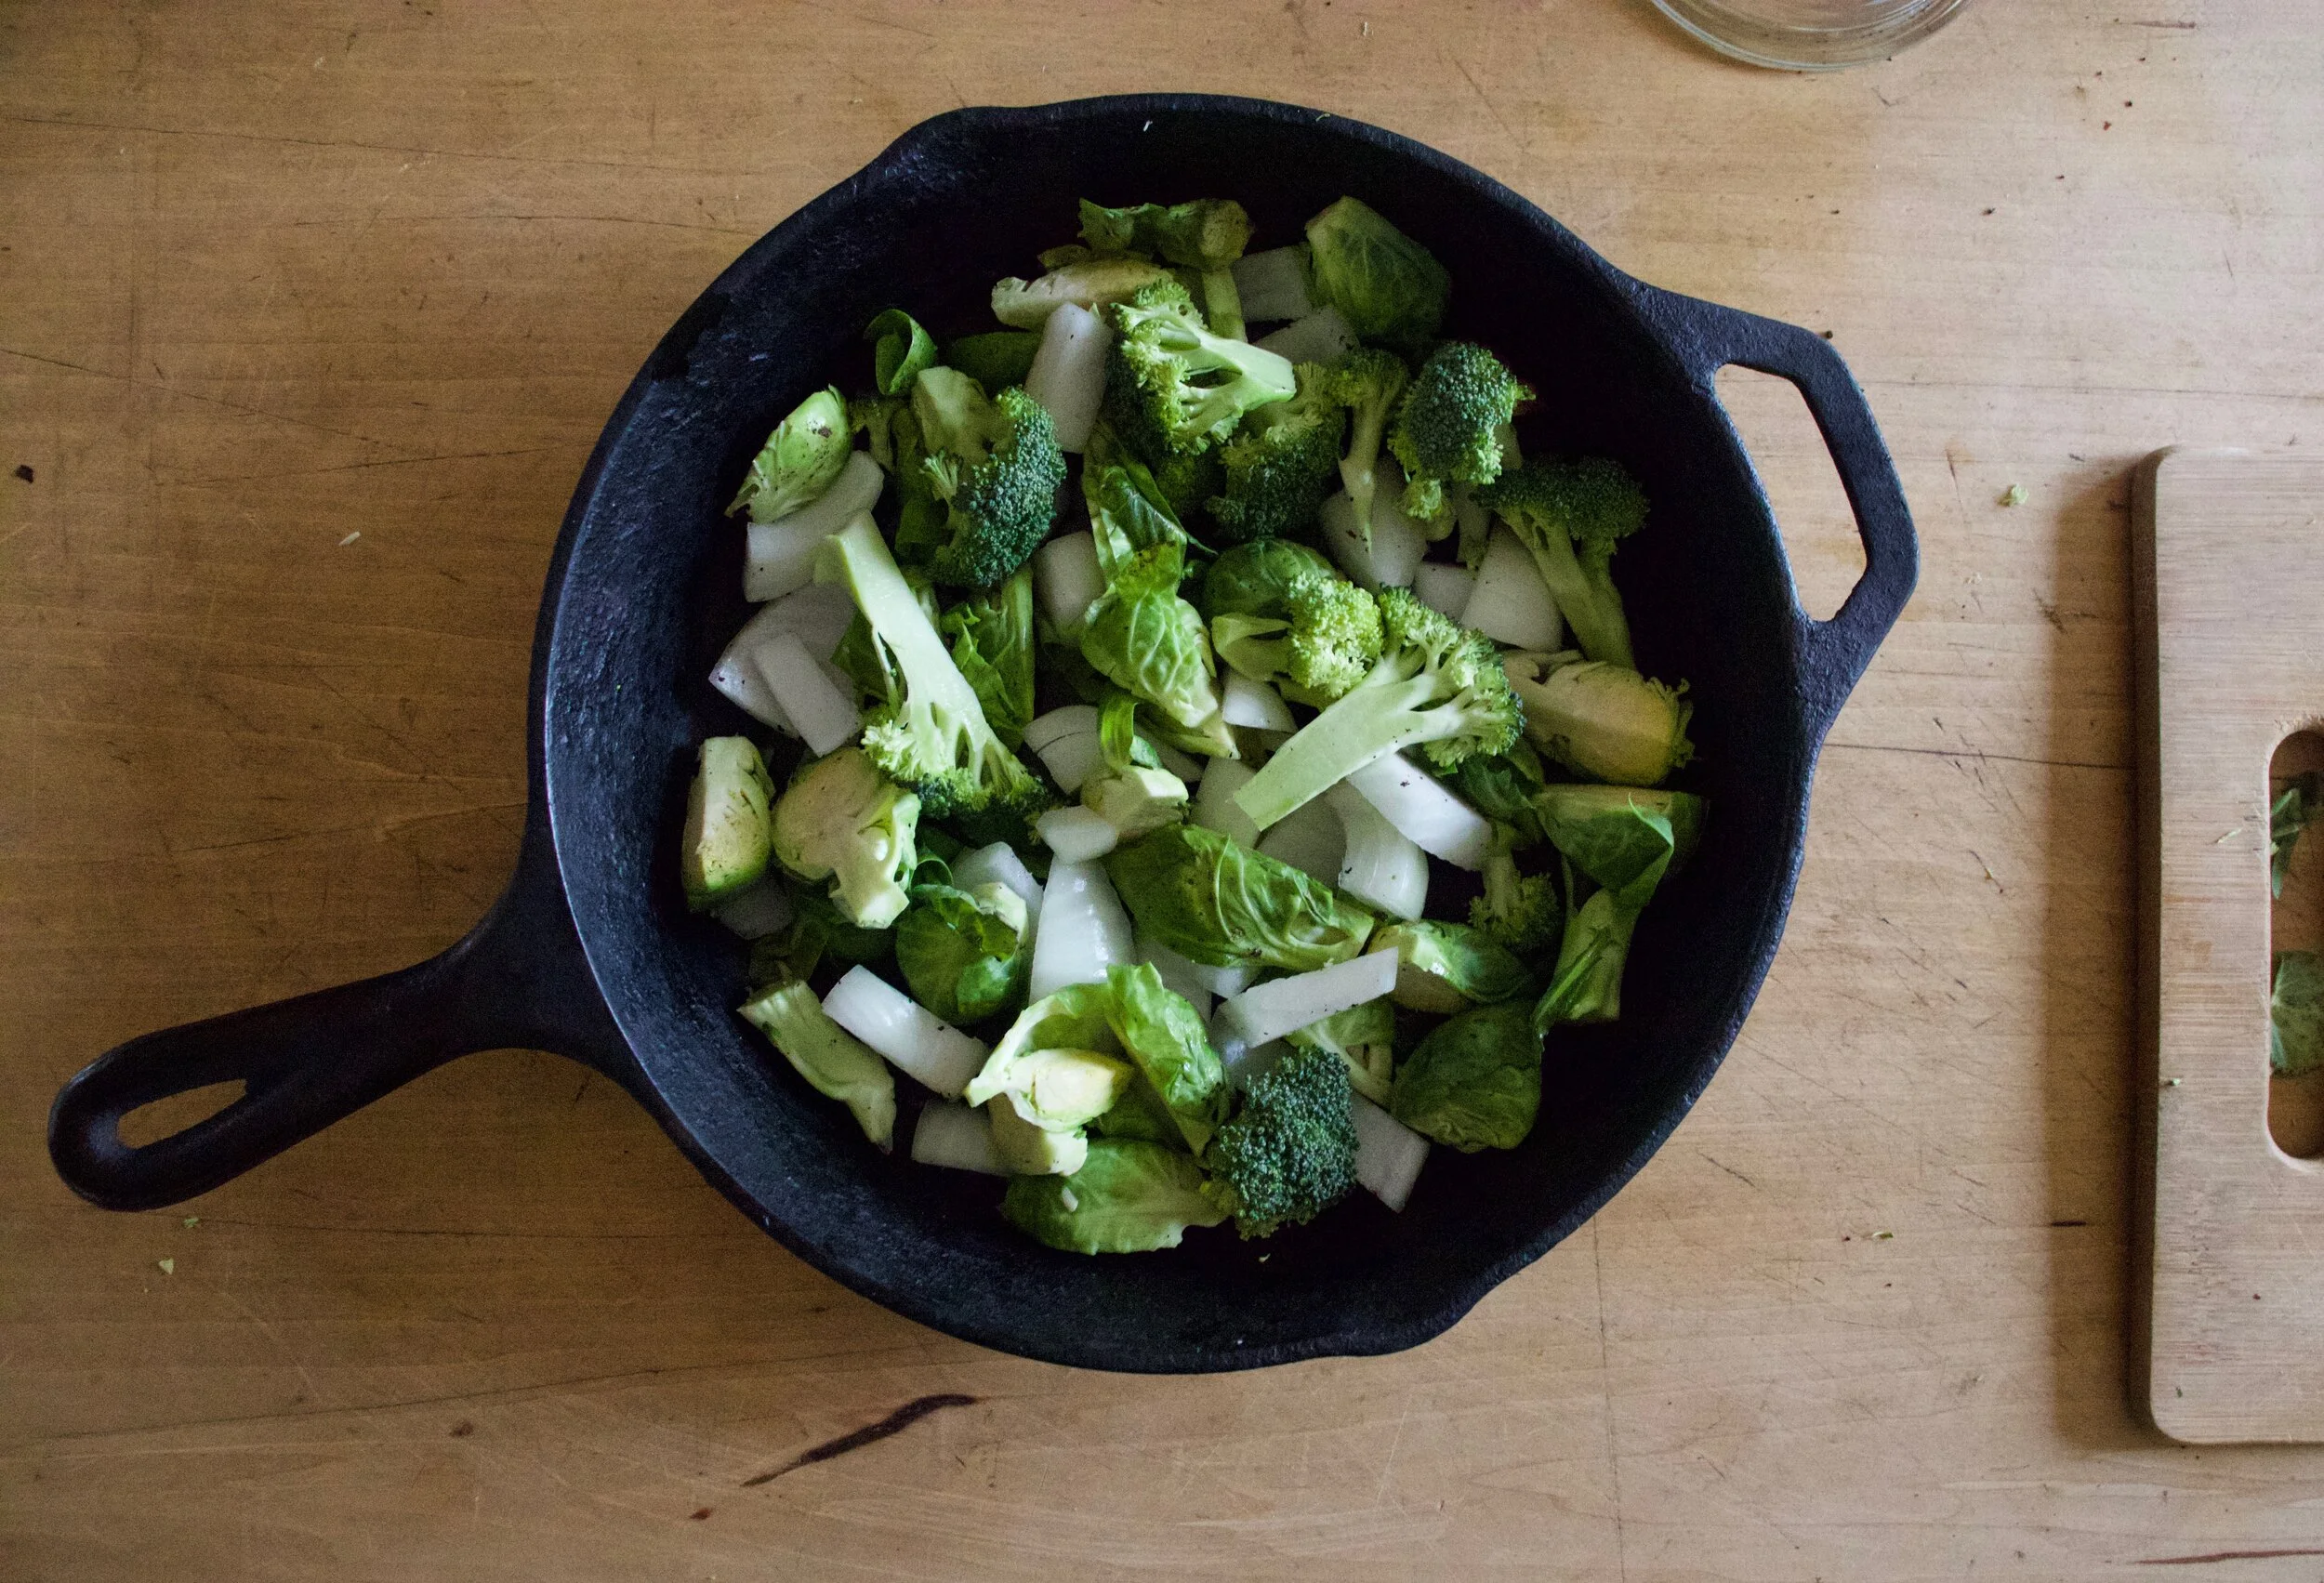
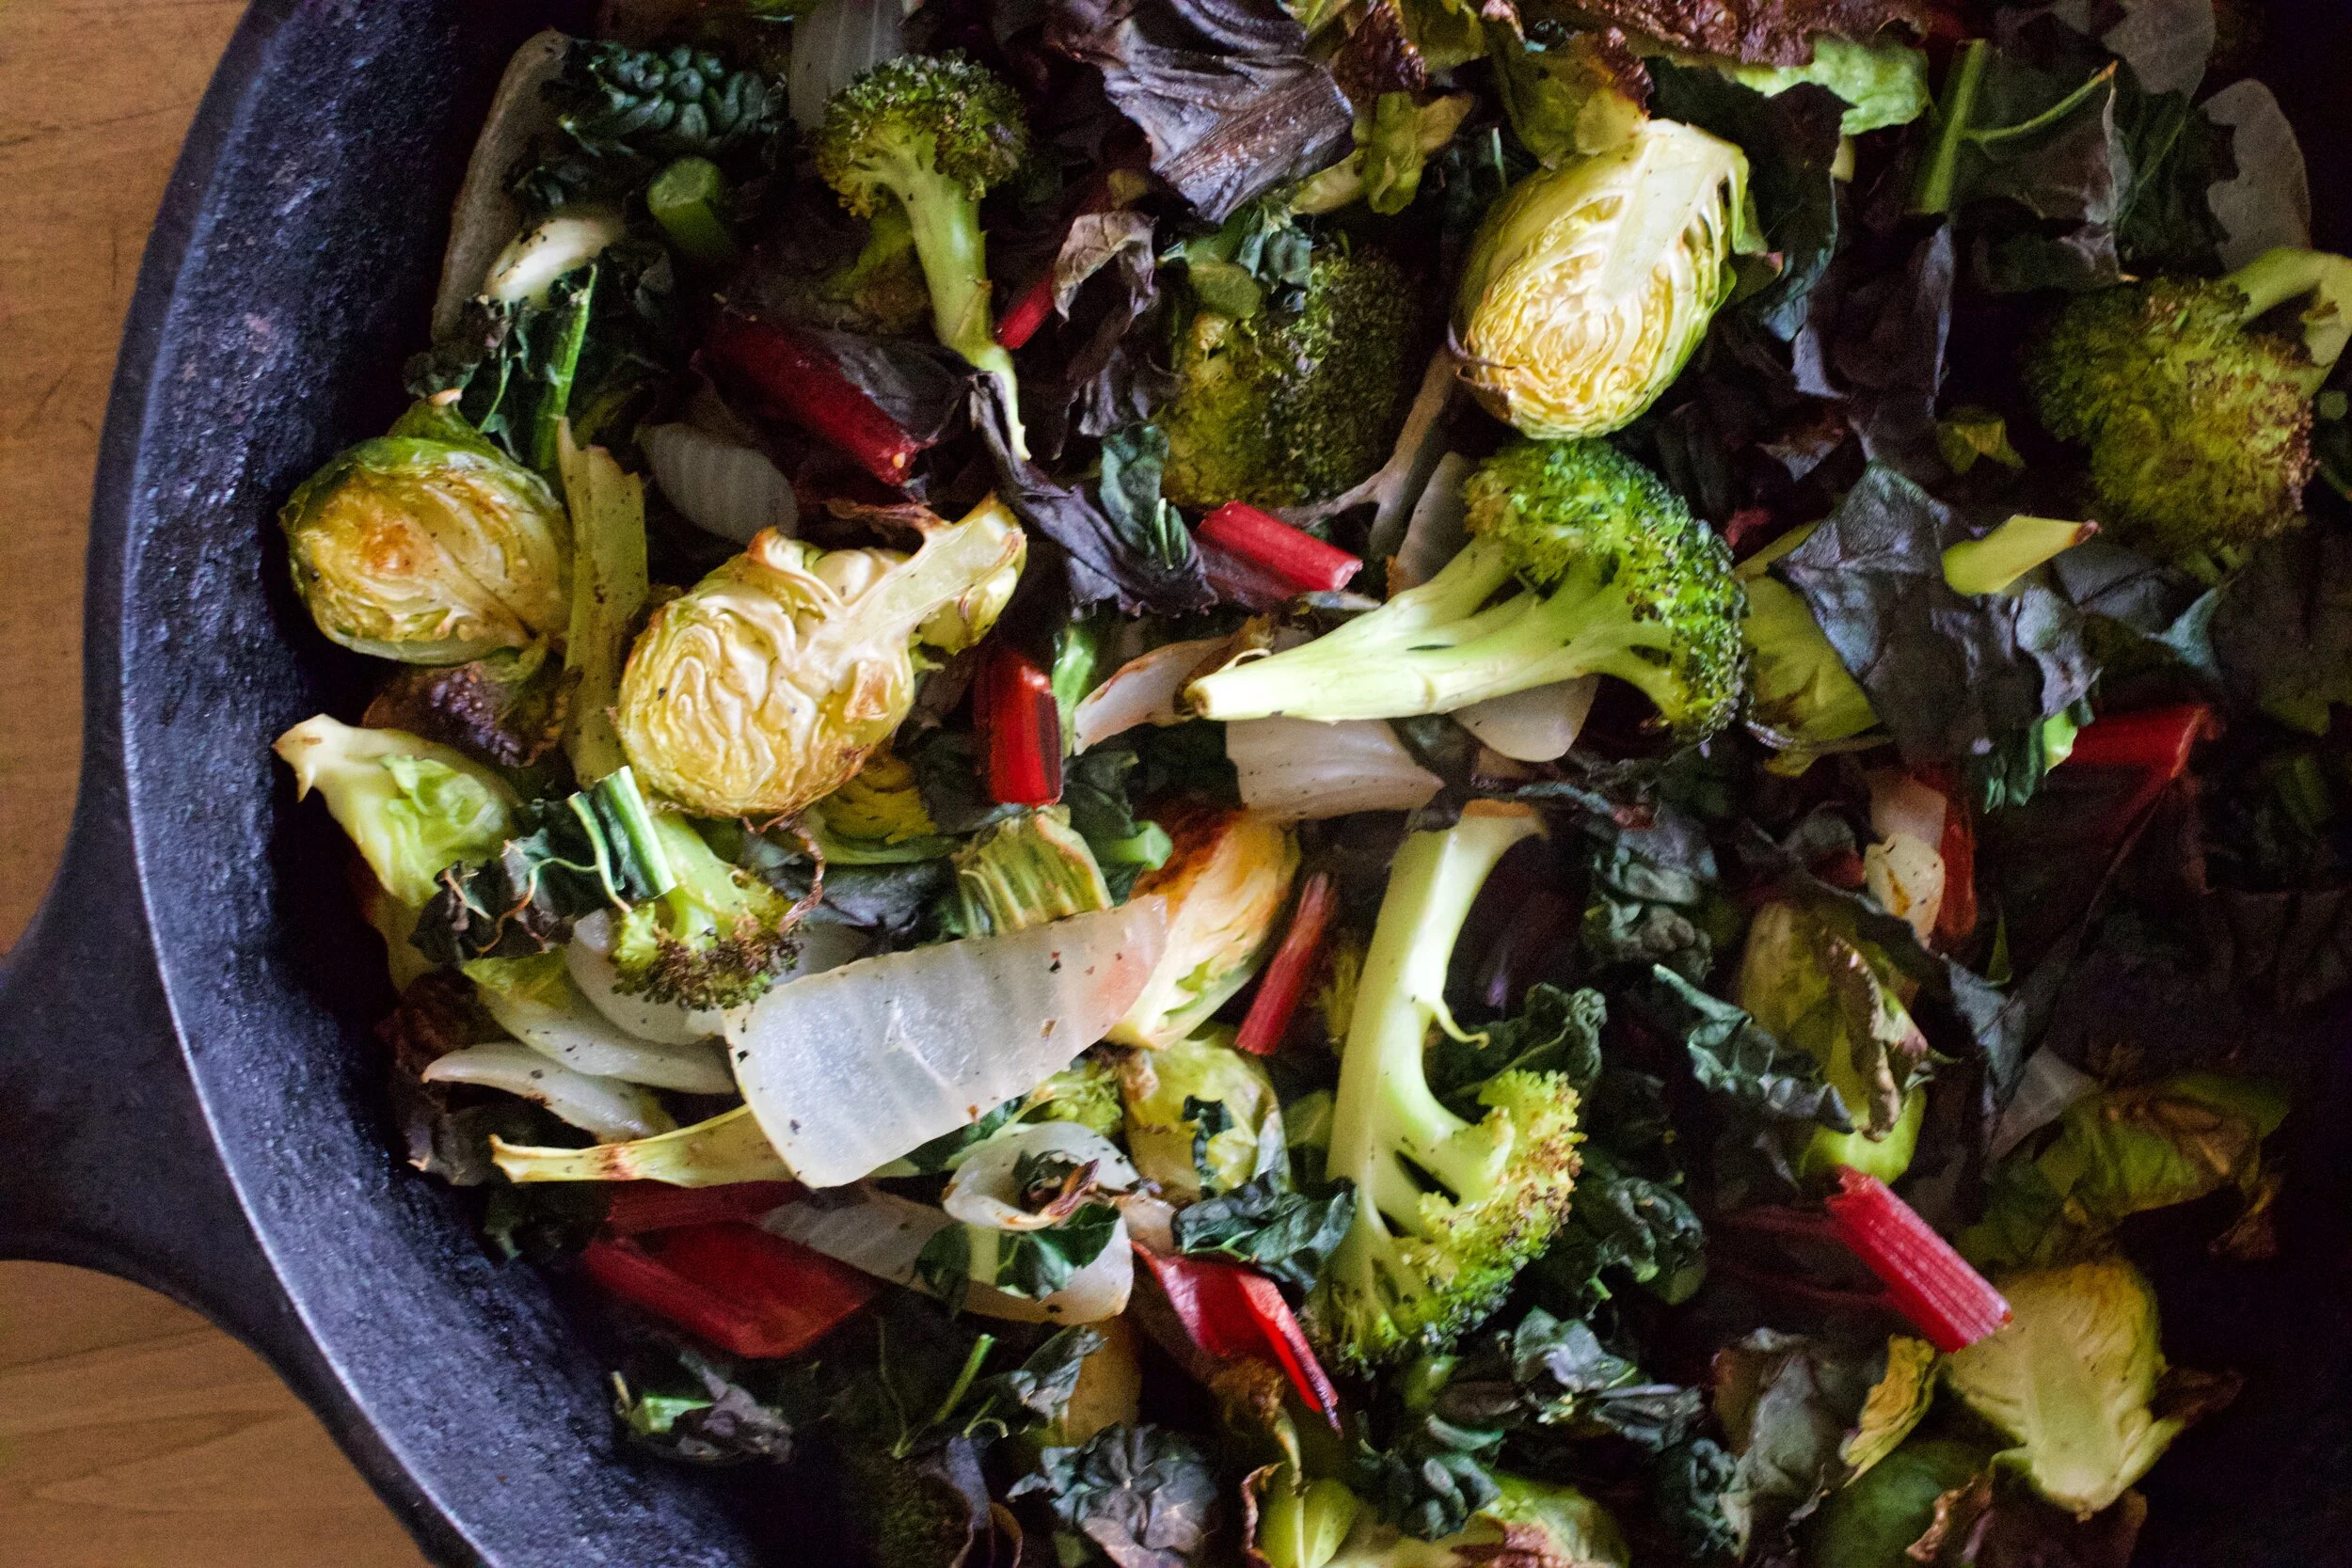
Toss the chopped Brussels, broccoli and onion into a baking sheet or oven safe skillet and season with salt and pepper. IF you want to toss in a little oil, go for it. Then pop the veggies into a hot oven to roast away.

Once the veggies are just about done to your liking, grab the chopped kale and chard and off to the veggies. Toss and roast for a few more minutes.

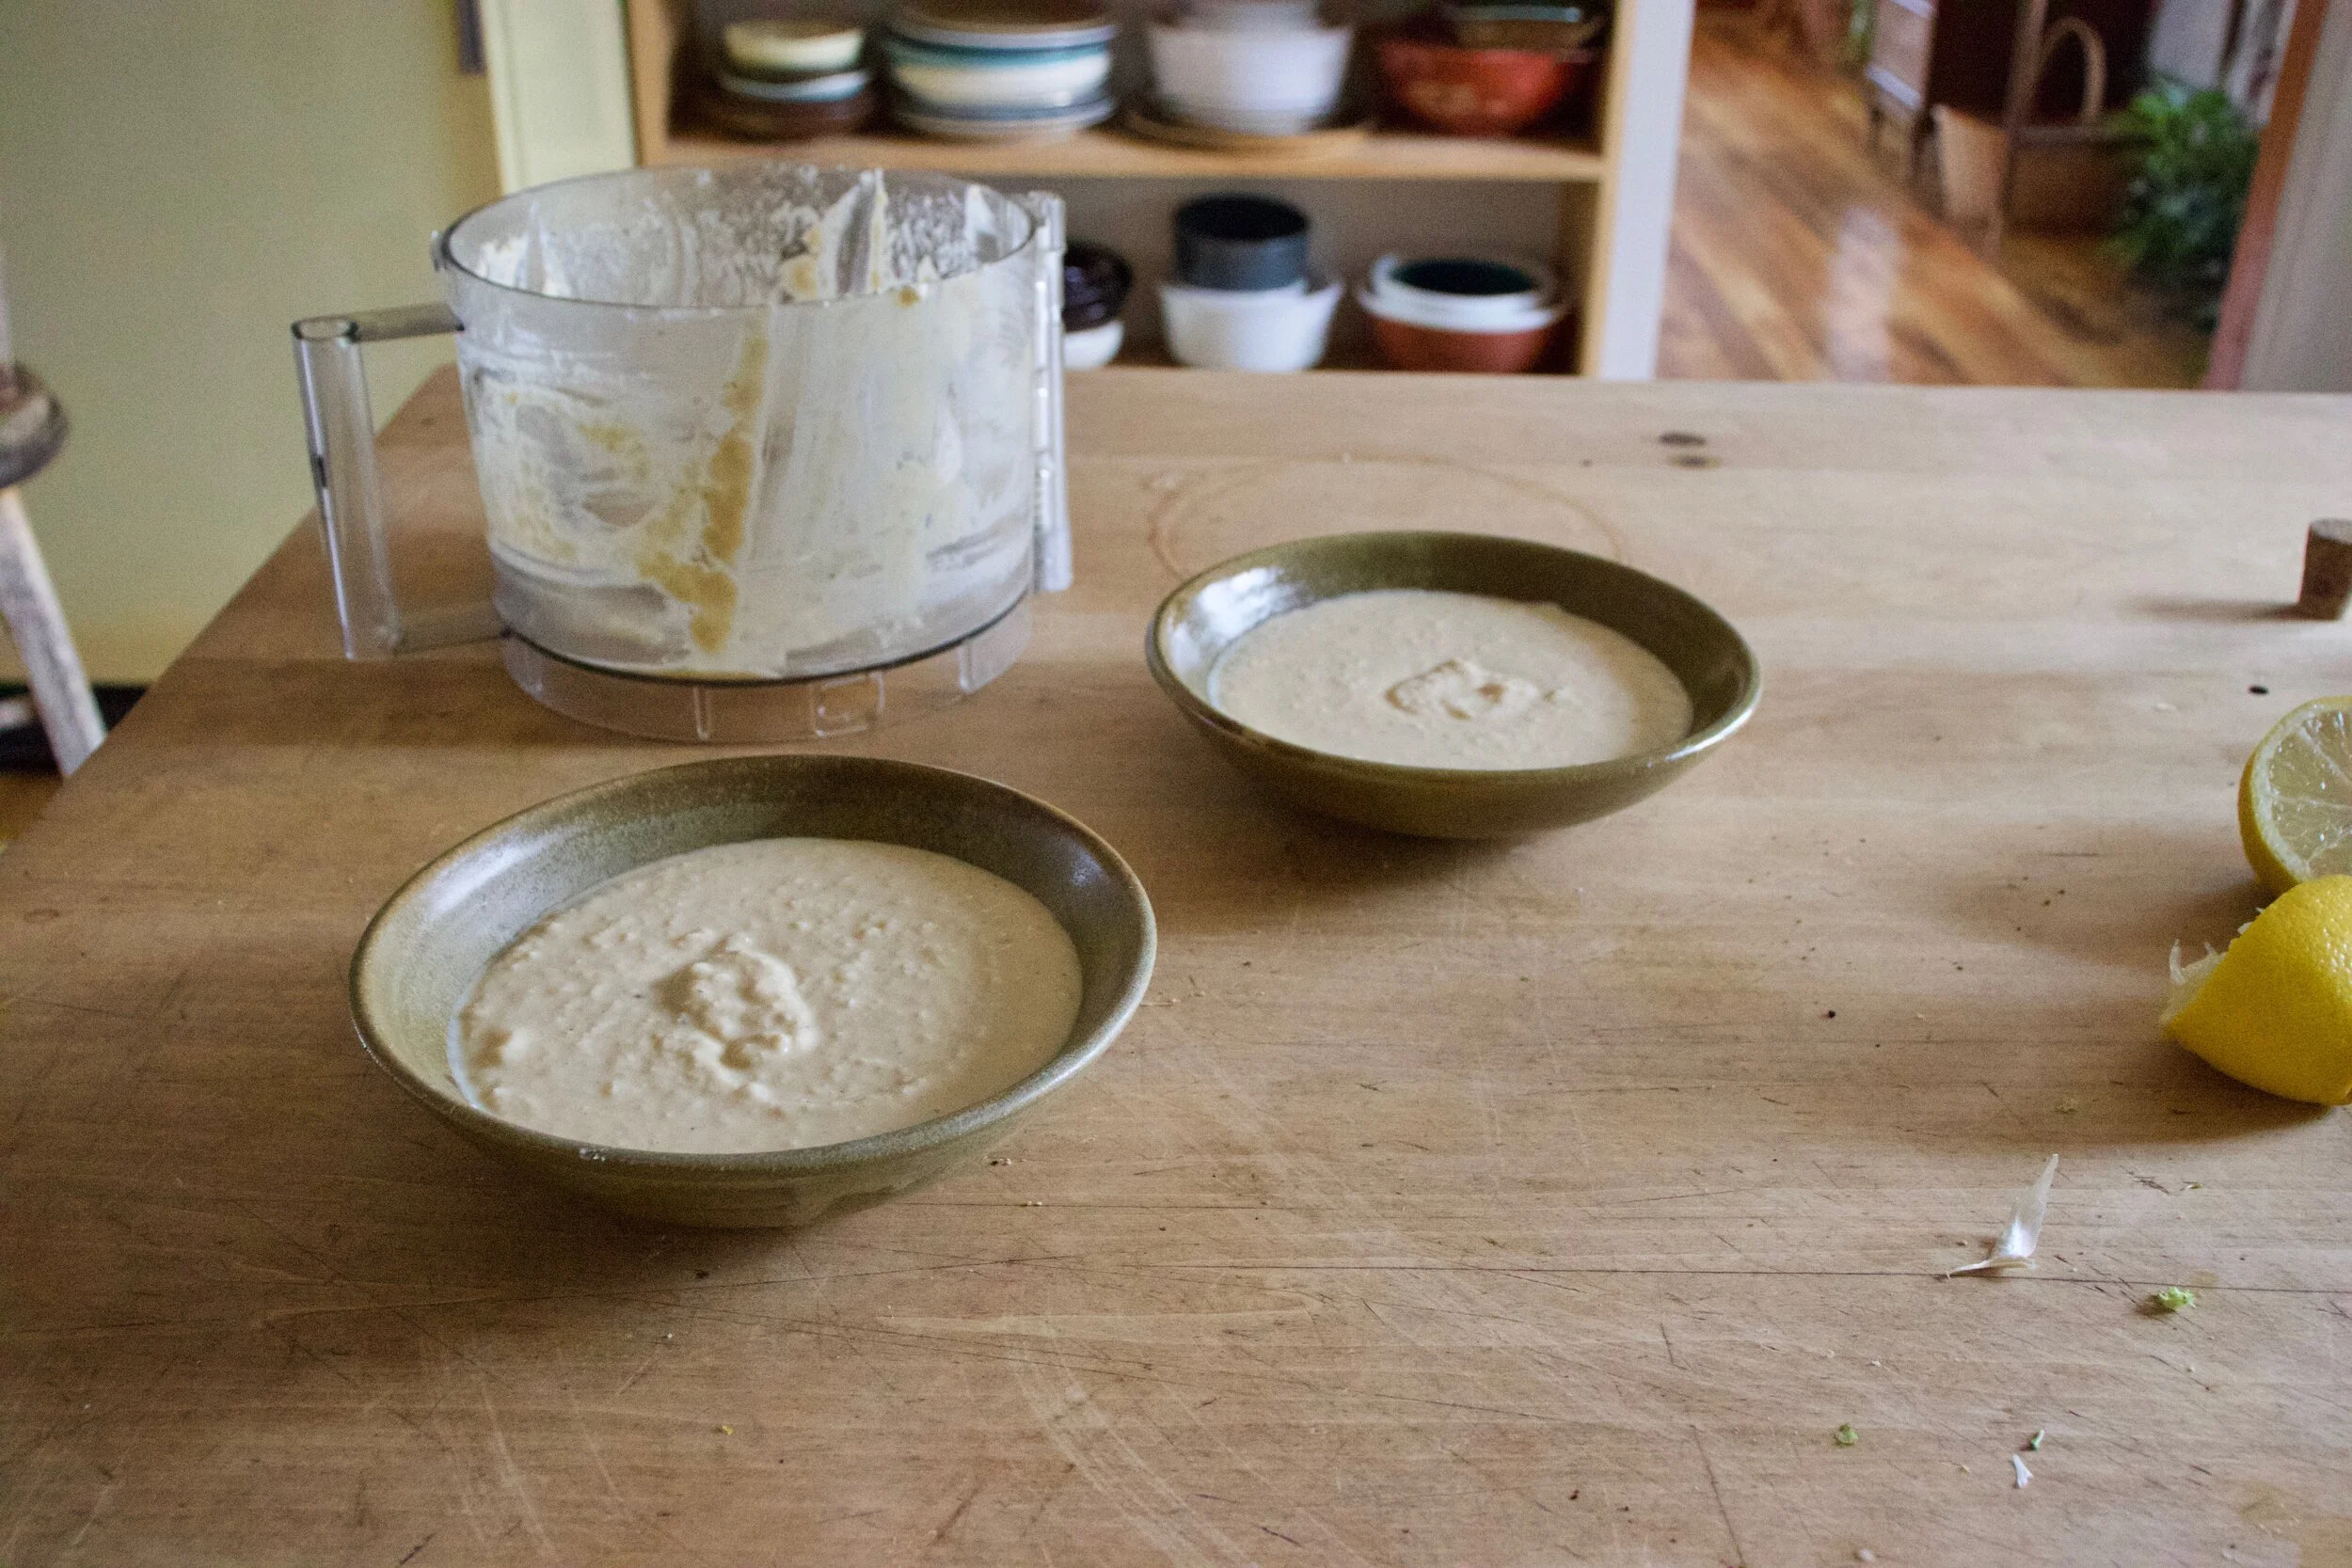
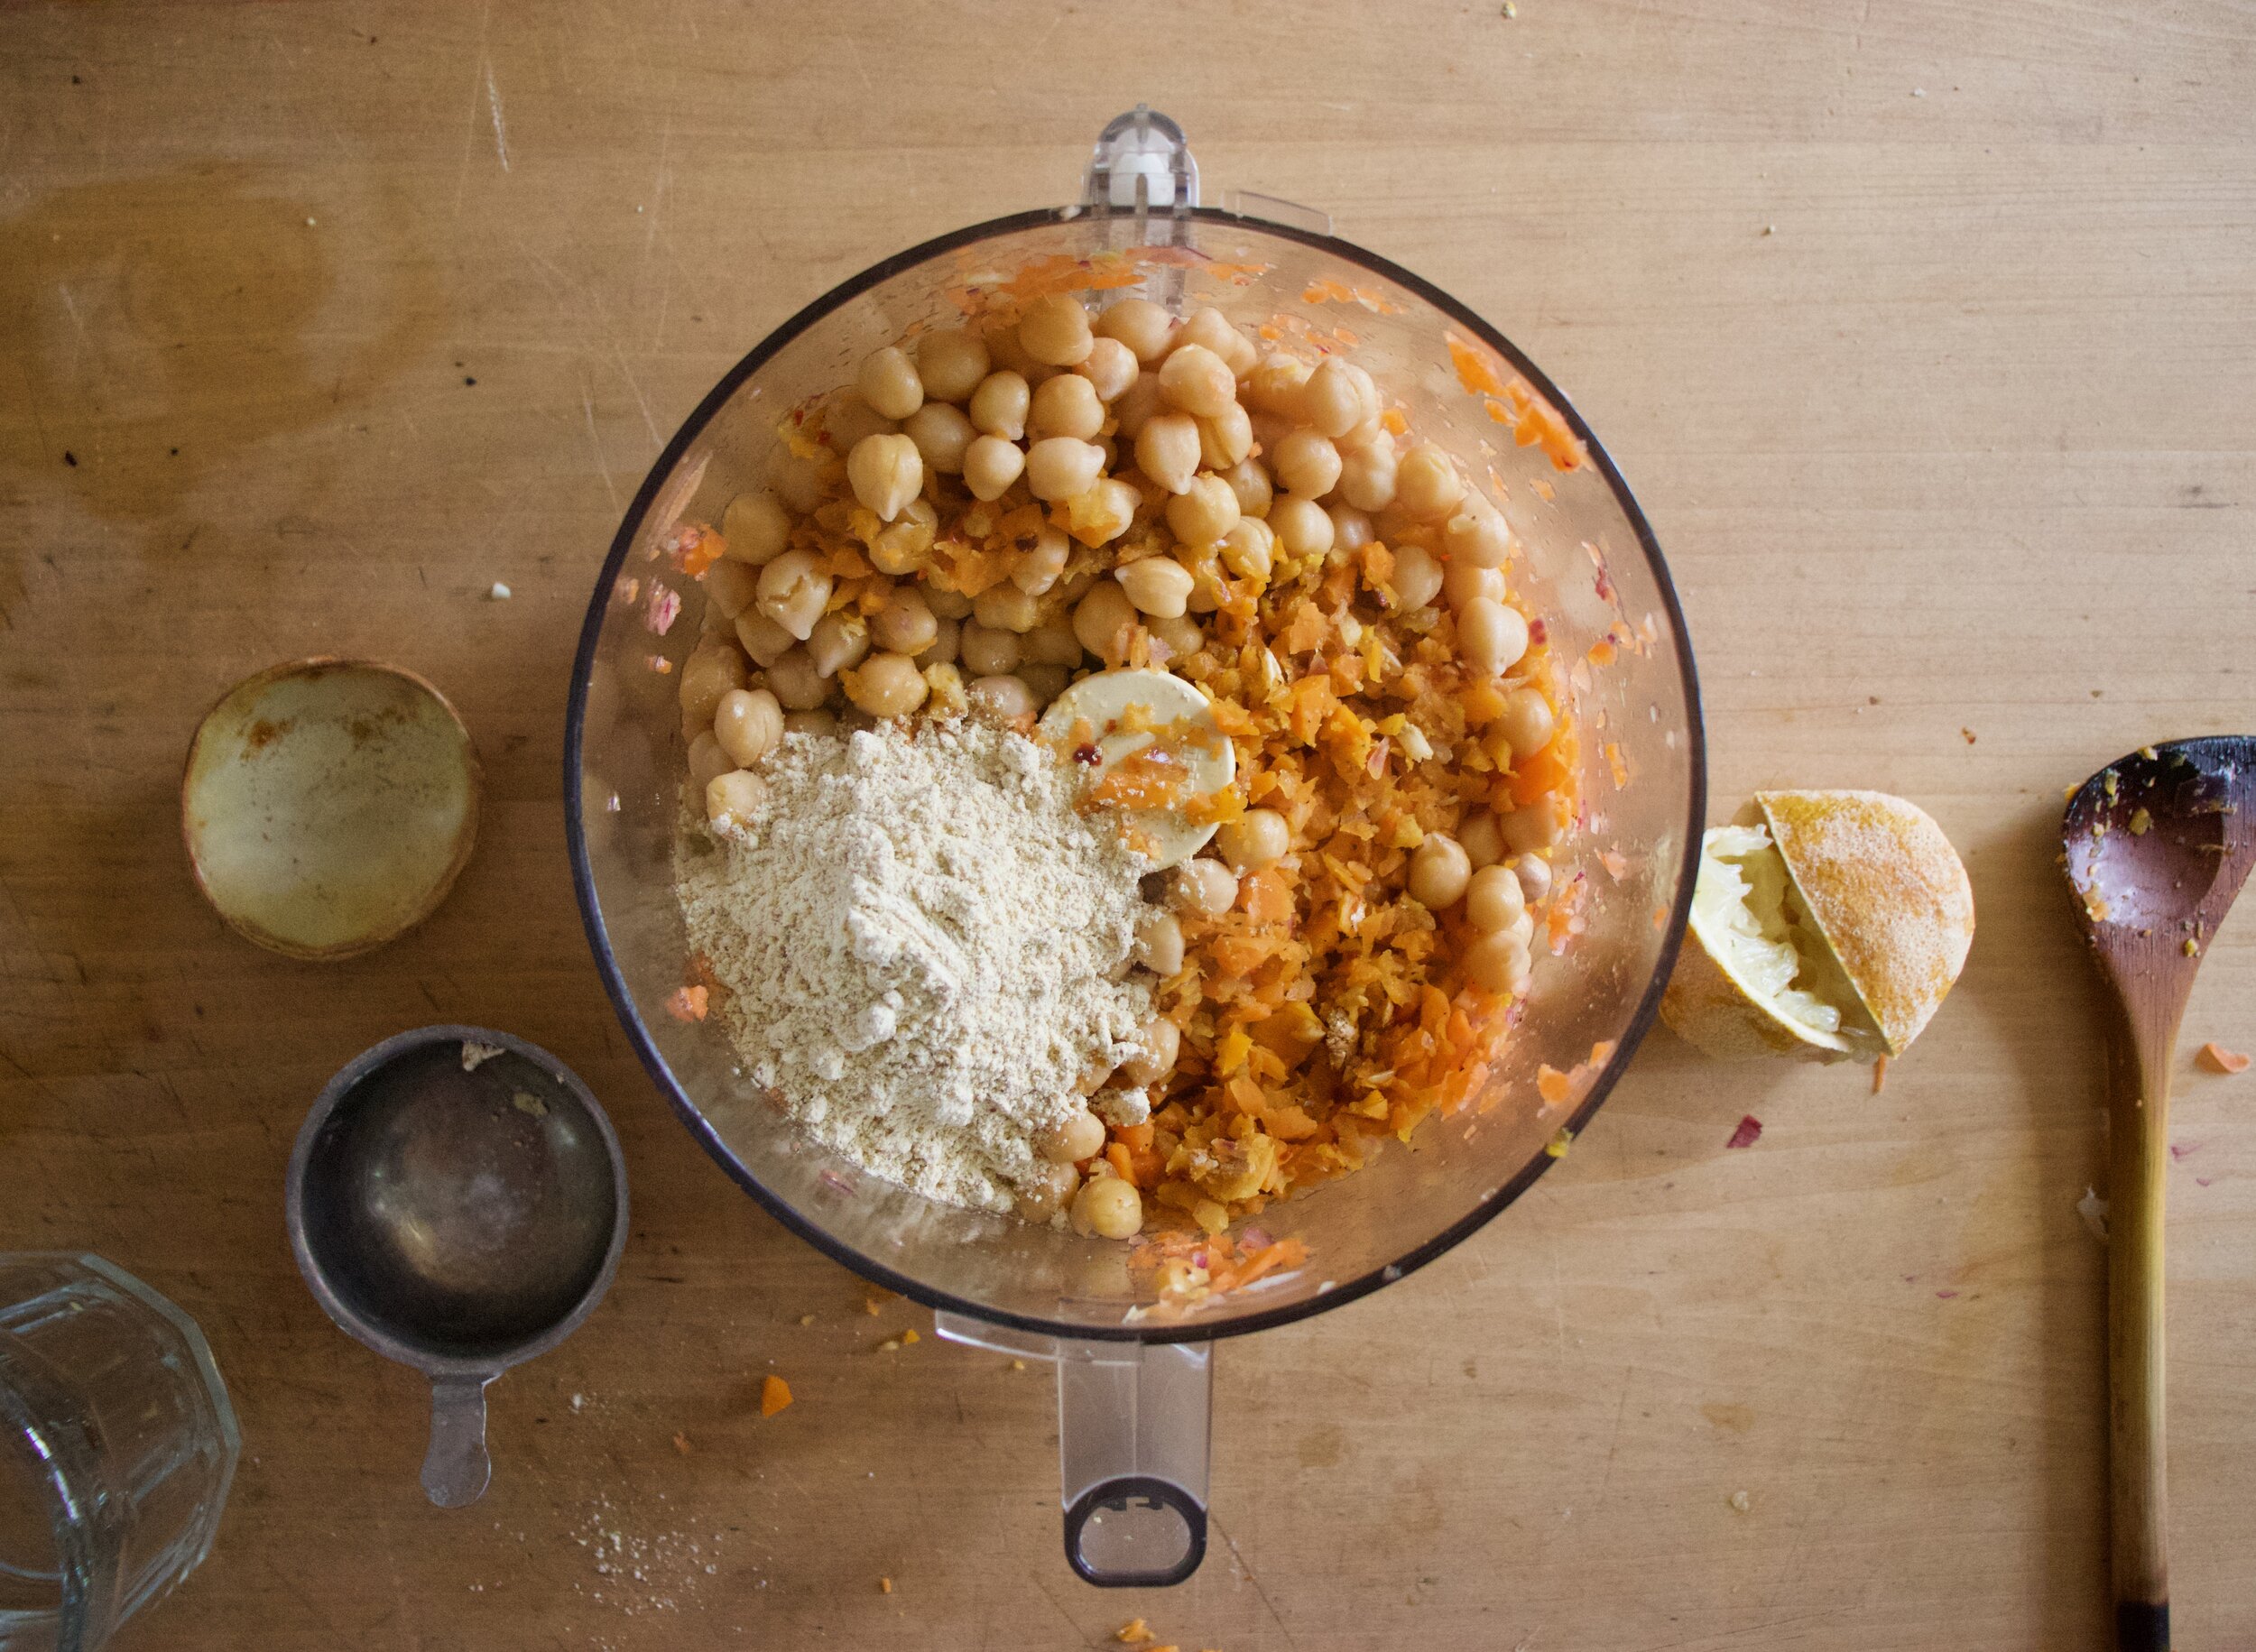
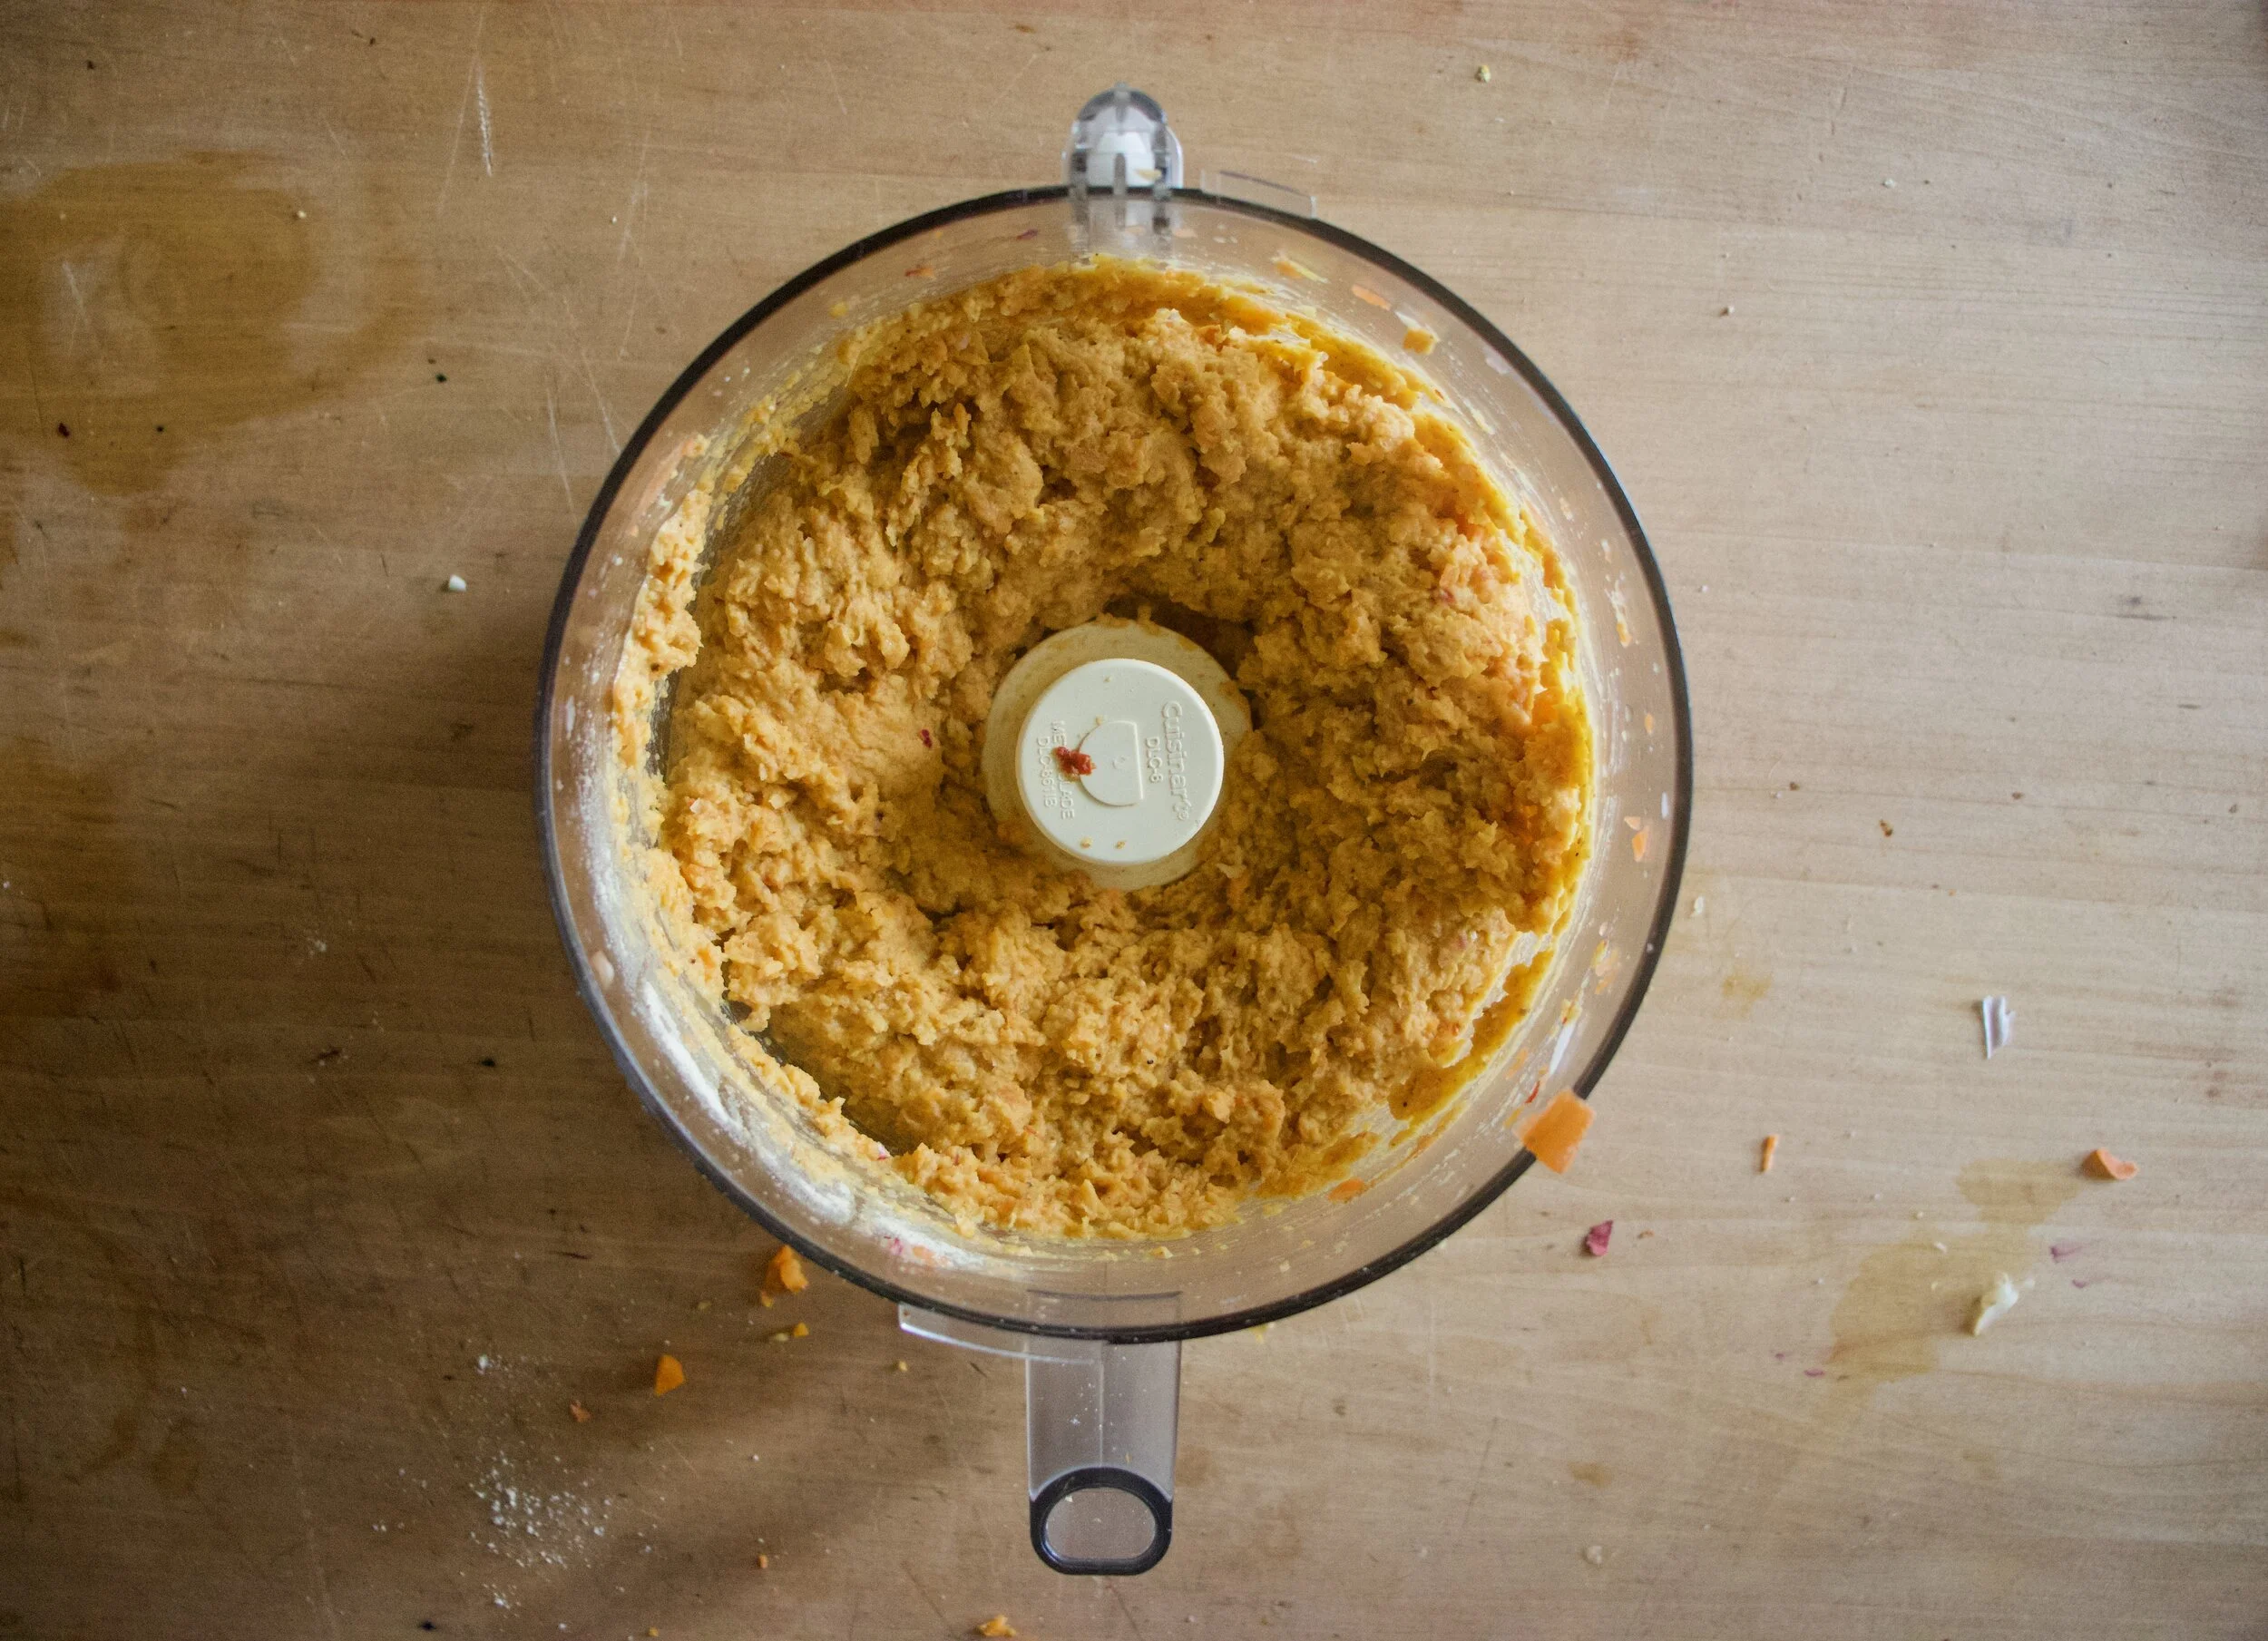
Hummus. Chickpeas with liquid, garlic, tahini, juice of lemon, and blend. Creamy smooth and delicious.

Dump that hummus into bowls.

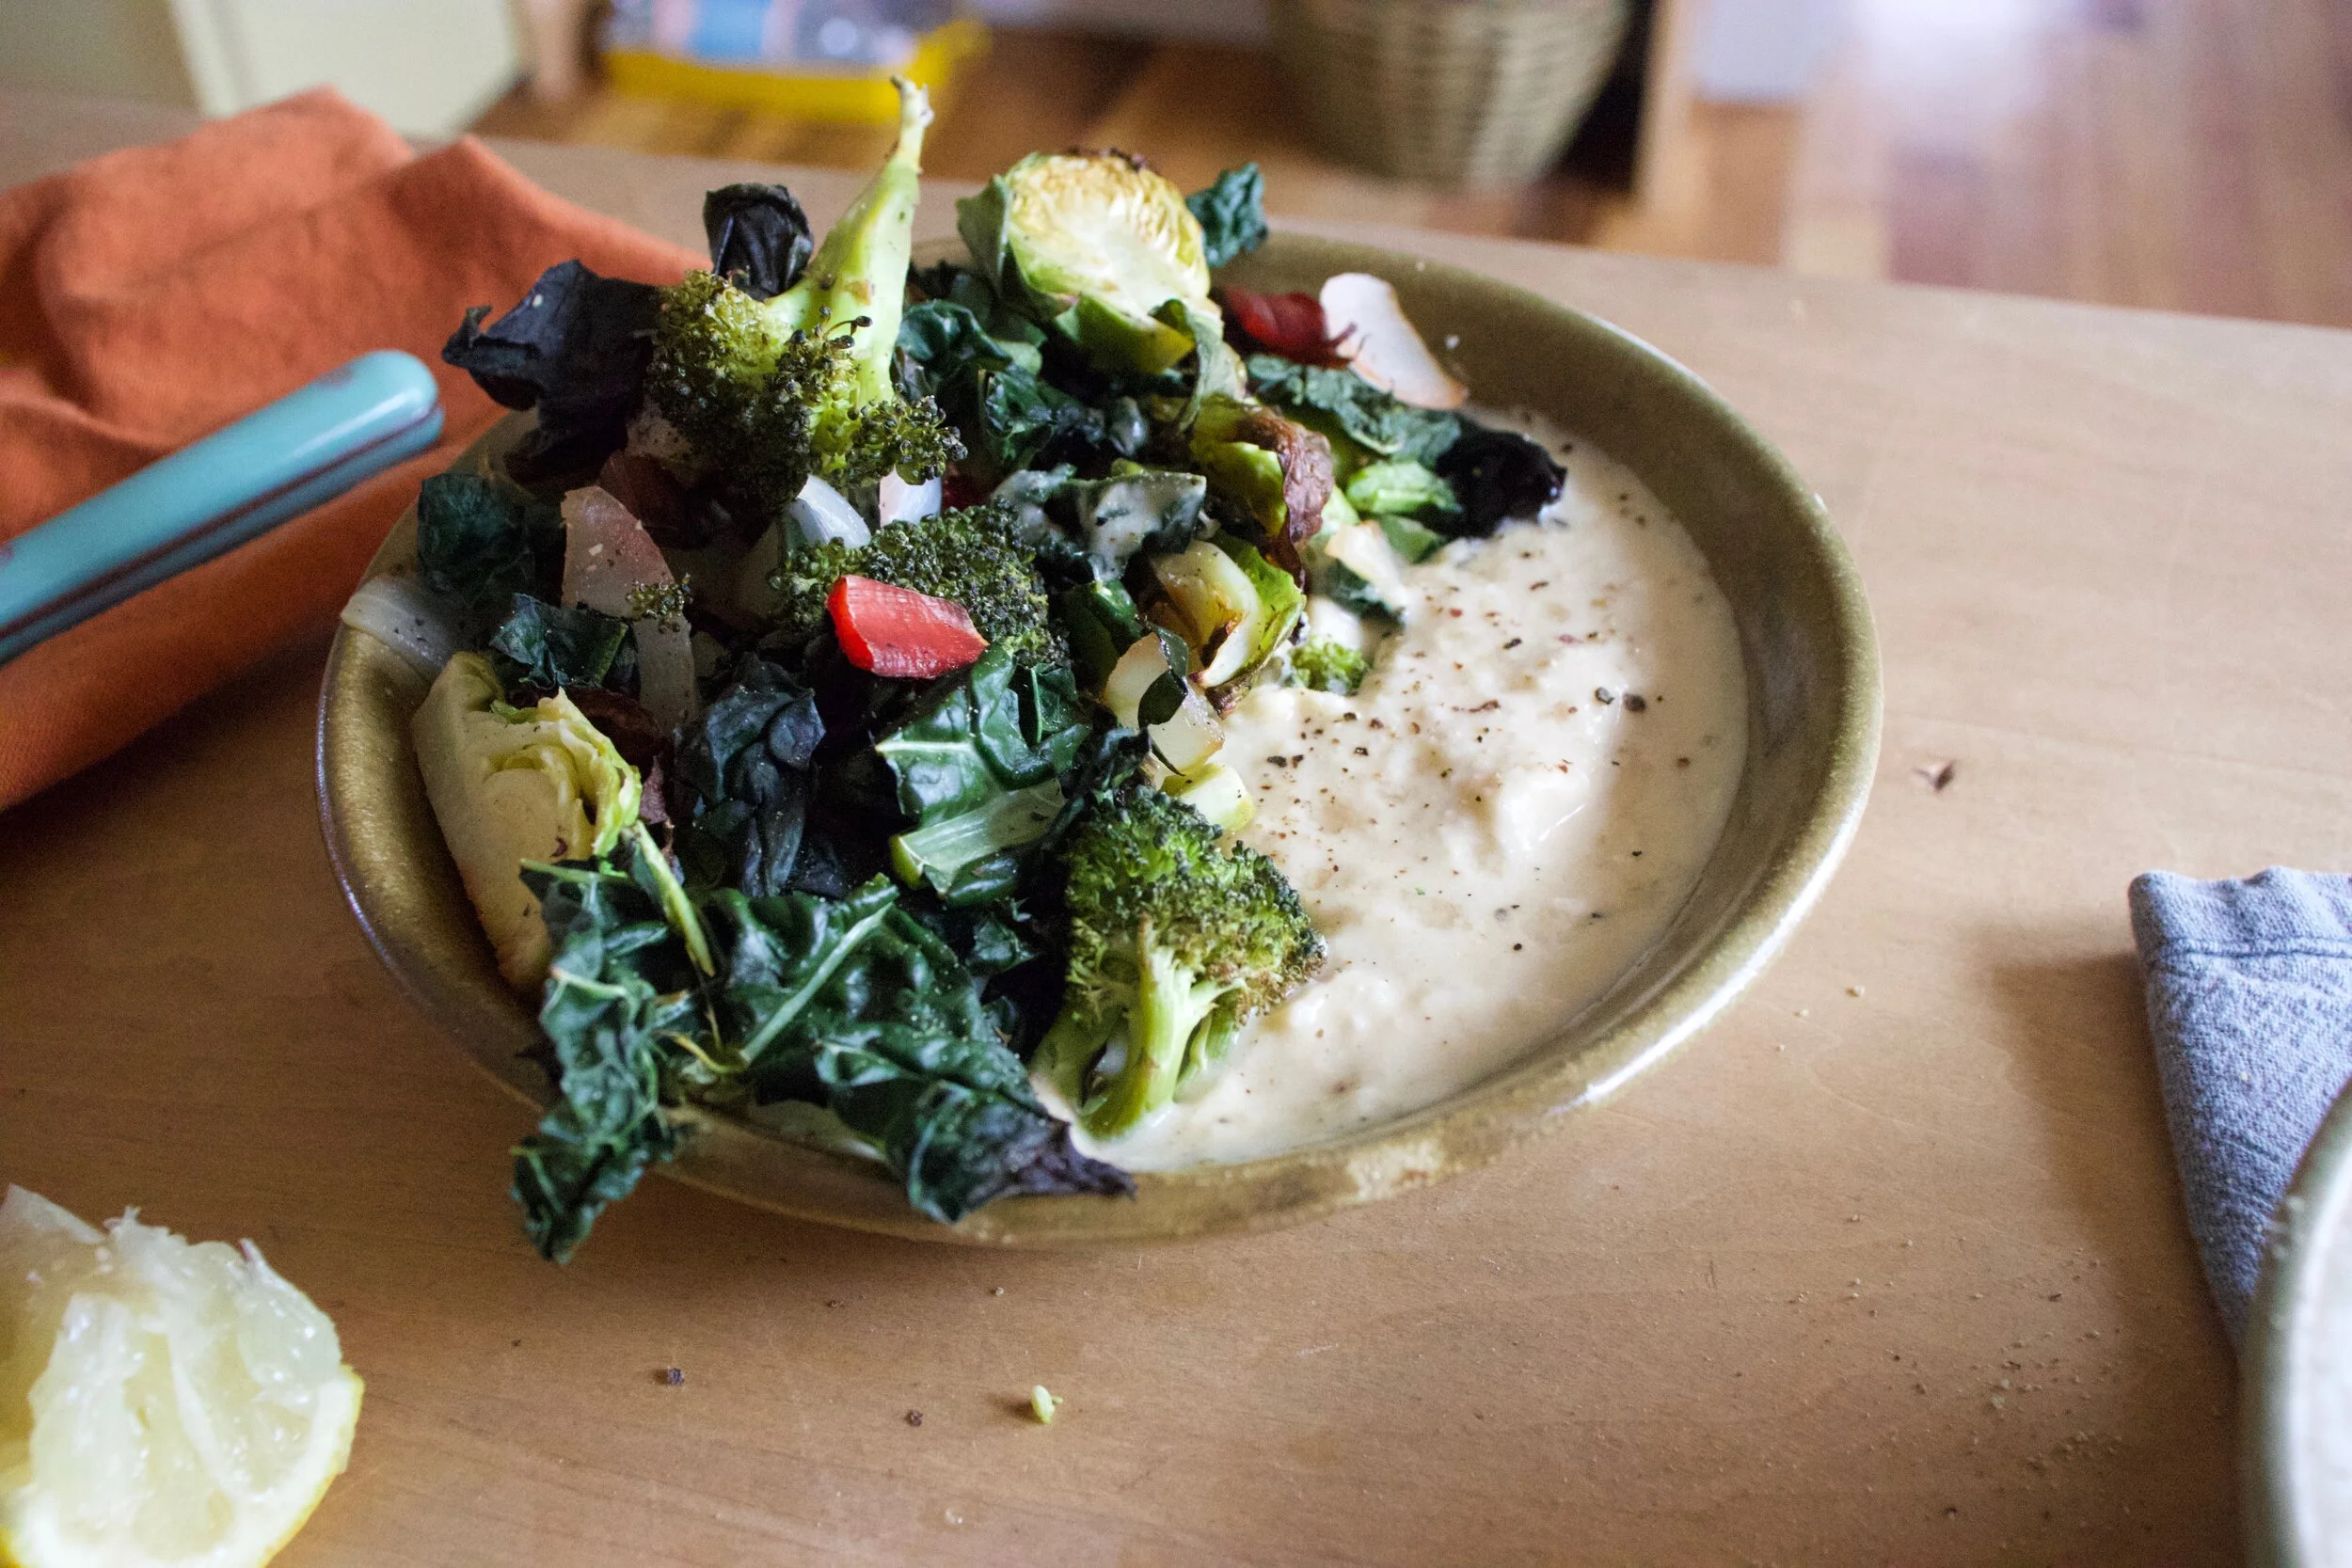
And top with roasted veggies.

Would you look at that. Now all you need to to is dig in. Serve with extra lemon and black pepper. Grab your utensil of choice and eat.

-C

makes 2 servings if eating as a meal

  • 3 cups cooked chickpeas in liquid

  • A lemon

  • 1 tablespoon red wine vinegar

  • 2-3 cloves garlic

  • 1/4 cup tahini

  • salt and pepper

  • 10 or so Brussel sprouts

  • A small head of broccoli

  • A small onion

  • 5-6 kale and or Swiss chard leaves

Note. Use whatever veggies you want. Fresh or already prepared. All and any leftovers would be great.

Preheat oven to 450.

Cut Brussel sprouts in half, chop the onion into small pieces, and cut up the broccoli and toss onto a baking sheet or an oven safe skillet. Sprinkle with a little salt and pepper and stick into the oven to roast for about 20 ish minutes or until nice and roasted. Feel free to toss the veggies in a little oil if you want. Chop up the kale and chard into smaller pieces. Once veggies are just a few minutes from being cooked to you liking, remove from oven, and toss in the greens. Cook for another 5 or so minutes until those are nice and wilted. Remove veggies from oven.

While veggies are roasting, make hummus. Place chick peas with liquid, the juice of the lemon, vinegar, garlic, and tahini into a food processor. Blend until smooth and creamy. Taste and season with salt and pepper to your liking. Dump into a bowls.

And when you have hummus make and veggies roasted, its time to compile. Dump the hummus into 2 bowls. Dump half of the roasted veggies into each bowl.. Squeeze more lemon juice onto both then grab a fork.

Eat. And yes, lick bowl clean. No shame.

I love me some falafel. I love me some peppers. So I guess it is natural that I would want to stuff falafel inside of peppers and eat them all to my face right? I think so.

As we all already know, most of what I cook is depicted by whatever I get at farm share. And the past few weeks we have been getting a lot of peppers. I have been happily eating one or two a day, just as they are, but I figured it was time that I did something else with them. Now what is the first thing that comes to mind with peppers? Stuffed peppers of course. And there you have it, falafel stuffed peppers.

So I am not going to lie and say the mr ate them and swooned. He is not the biggest fan of peppers (I am starting to realize that he doesn%u2019t have all the right taste buds in his mouth. So sad for him.) so he dumped the falafel out of the pepper and ate it with most of the pickled onions, the tahini, and rice. That he really liked. Lucky me, I wanted his pepper anyway because roasted peppers are freaking fantastic amazing and whatever him. Me, as a pepper and falafel lover, I found these stuffed peppers to be everything that I wanted and needed and then some. Eaten pretty much right away warm, with pickled onion and covered in all the tahini, it was a very very satisfying meal. But also a left over stuffed pepper that was stuck in the fridge, eaten cold standing in front of said fridge, right before bed. That was something great as well. I might have even gone in for a second one%u2026%u2026

Anyway, a pepper stuffed with falafel is a good idea if you want food, like peppers, like falafel, and are cool. Just saying.

To the falafel stuffed peppers!

The stuff. A few sweet peppers, some cooked chickpeas, chickpea flour, an onion, a bunch of fresh cilantro and parsley, a few cloves of garlic, red wine vinegar, a little water, tahini, cumin, chili pepper flakes, and salt and pepper.

First, take the onion and cut in half. Take one half and cut into very thin slices, place in a bowl, sprinkle with a pinch of salt and toss with the vinegar and a few tablespoons of water. Set that bowl aside. The other half of onion just cut into a few smaller chunks.

To make falafel. Add the chunks of onion and garlic to food processor and pules a few times to start chopping it up. Add in the cilantro and parsley, the chickpeas and chickpea flour, the cumin and chili pepper flakes, and a good few pinches of salt and lots of pepper. Pulse until completely combined but still a bit chunky. OR pulse until smooth if you would rather it like that. It%u2019s up to you.

Grab peppers and cut each in half. Remove the ribs ad the seeds.

Take falafel mix and stuff it into peppers.

Place peppers onto a baking sheet and into the oven they go.

In the meantime while the peppers are cooking, toss the onions around in the brine a few times. Then right before you take the peppers from the oven, drain the brine from the onions into a jar with the tahini and mix until smooth. Add a splash of water to the mix if you need to loosen it up a bit more to make the consistency of the tahini drizzle-able.

And out they come when all roasted and crispy and my oh my, so good!

Now you eat. Garb a bowl, maybe a grain of some sort if you like (I made the mr rice), plop a pepper down, add some pickled onions and drizzle that tahini all over.

Eat.

-C

Makes 6 half peppers stuffed

  • 3 medium sized sweet peppers

  • 2 cups cooked and drained chickpeas (or one can)

  • 1 large onion

  • 1 bunch (about 1/2 cup packed) cilantro

  • 1 bunch (about 1/2 cup packed parley

  • 2-3 cloves garlic

  • 2 teaspoons cumin

  • 1 teaspoon chili peper flakes

  • 1/3 cup chickpea flour or oat flour if you don%u2019t have chickpea

  • salt and pepper

  • 1/4 cup tahini

  • a few tablespoons water

  • 3 tablespoon red wine vinegar

Preheat oven to 425

Grab the onion and cut in half. Take one half and cut into very thin slices and place in a bowl. Spinkle with a pinch of salt and dump in the vinegar along with about 2 tablespoon water. Toss around until all the onion is coated and set aside.

Take remaining half onion and cut into big chunks. Toss into a food processor along with the garlic and pulse a few times until the onion is chopped up. Add in the cilantro, parsley, chickpeas, chickpea flour, cumin, chili pepper flakes, and a good pinch of salt and lots of pepper. Pulse the hole shebang until the mixture is combined, the herbs are incropeted, but there is a little chunk left. Or you could make it smooth if you wanted too. It%u2019s up to you.

Grab the peppers and cut them in half. Remove the ribs and seeds then take the falafel mixture and evenly distribute it between the peppers halves.

Place stuffed peppers on a baking sheet, falafel side up, and place into oven to bake for about 45 minutes. You want the falafel mix to have a chance to cook inside and out and to get nice and golden brown and crispy on top.

Right before the peppers are done, grab the onions and the tahini. Toss the onions one last time in the briny mix it%u2019s been sitting in, then drain that brine into the tahini. Mix around until smooth. The tahini should be at the consistency to drizzle so if it is still to thick, add in a splash of hot water to loosen it up.

Once peppers are cooked, remove fro oven. Place on a plate with or without some grain, toss on some pickled onion and drizzle tahini all over.

Eat.

Store left over peppers in a the fridge. To eat, just reheat or eat cold. I really enjoyed eating one cold.

Spit peas are one of my go to%u2019s when camping. Besides taking up no room at all to pack, they are also super easy to make. Plus they only take about an hour to cook, which is the perfect amount of time to prepare the rest of the food for a meal and sit and chill out before eating. Not to mention that they are damn freaking tasty, especially after a day frolicking through woods and paddling on water. I mean, who doesn%u2019t like split peas? (If you say you don%u2019t, you probably should try again because I bet you would like these)

Constnaly thinking of our next hiking, kayaking, and camping adventure has got me with split peas on the mind. Especially now that the nights are getting a little cooler. Knowing that I am gonna have a hearty, protein pack and filling meal after a day of activity is just the greatest.

And collard greens. A green that gets overlooked a lot. No super popular, well, not around these parts, which is crazy because they are SO good! They have a more pronounced flavor (in a good way) then most greens. More pungent and earthy, and slitghy salty, if that makes sense. And hold up better then any green when cooked making them perfect to toss into pots with things like spit peas . Plus they travel well. I can bring a bunch camping with me and not worry that if I leave them out for to long they will turn into slimy green mush. If it is really hot, sure they might wilt up a bit, but stick the stems in a little water, they will last all day fine. And that is all you need them to do.

So yeah, this dish is perfect for camping, but also perfect for not camping and just making at home too. Again, super easy, fast and is just a great tasting dish.

Split peas and collard greens. Topped off with mustardy cabbage slaw. Can%u2019t wait to make this again this weekend!

To the spit pas and collard greens!

The stuff. A bunch of collard greens, some split peas, an onion, a couple carrots, some cabbage, stone ground mustard, spices which include garlic, ginger, dill, thyme, and ground mustard. And salt and pepper. And you are gonna need water too.

Start by removing the stems from the leaves of the collards. Then small dice up the carrots, the onion and the stems. Grab the collard leaves, roll them up together, then slice then into thin ribbons.

All that stuff you just cut up now gets tossed into big pot, along with all the spices.

Add in the dried peas and water. Lots and lots of water. Bring pot to boil, then reduce heat to low and loosely cover pot. Cook foe 45-50 minutes or so.

While the peas and greens are cooking, shred up some cabbage.

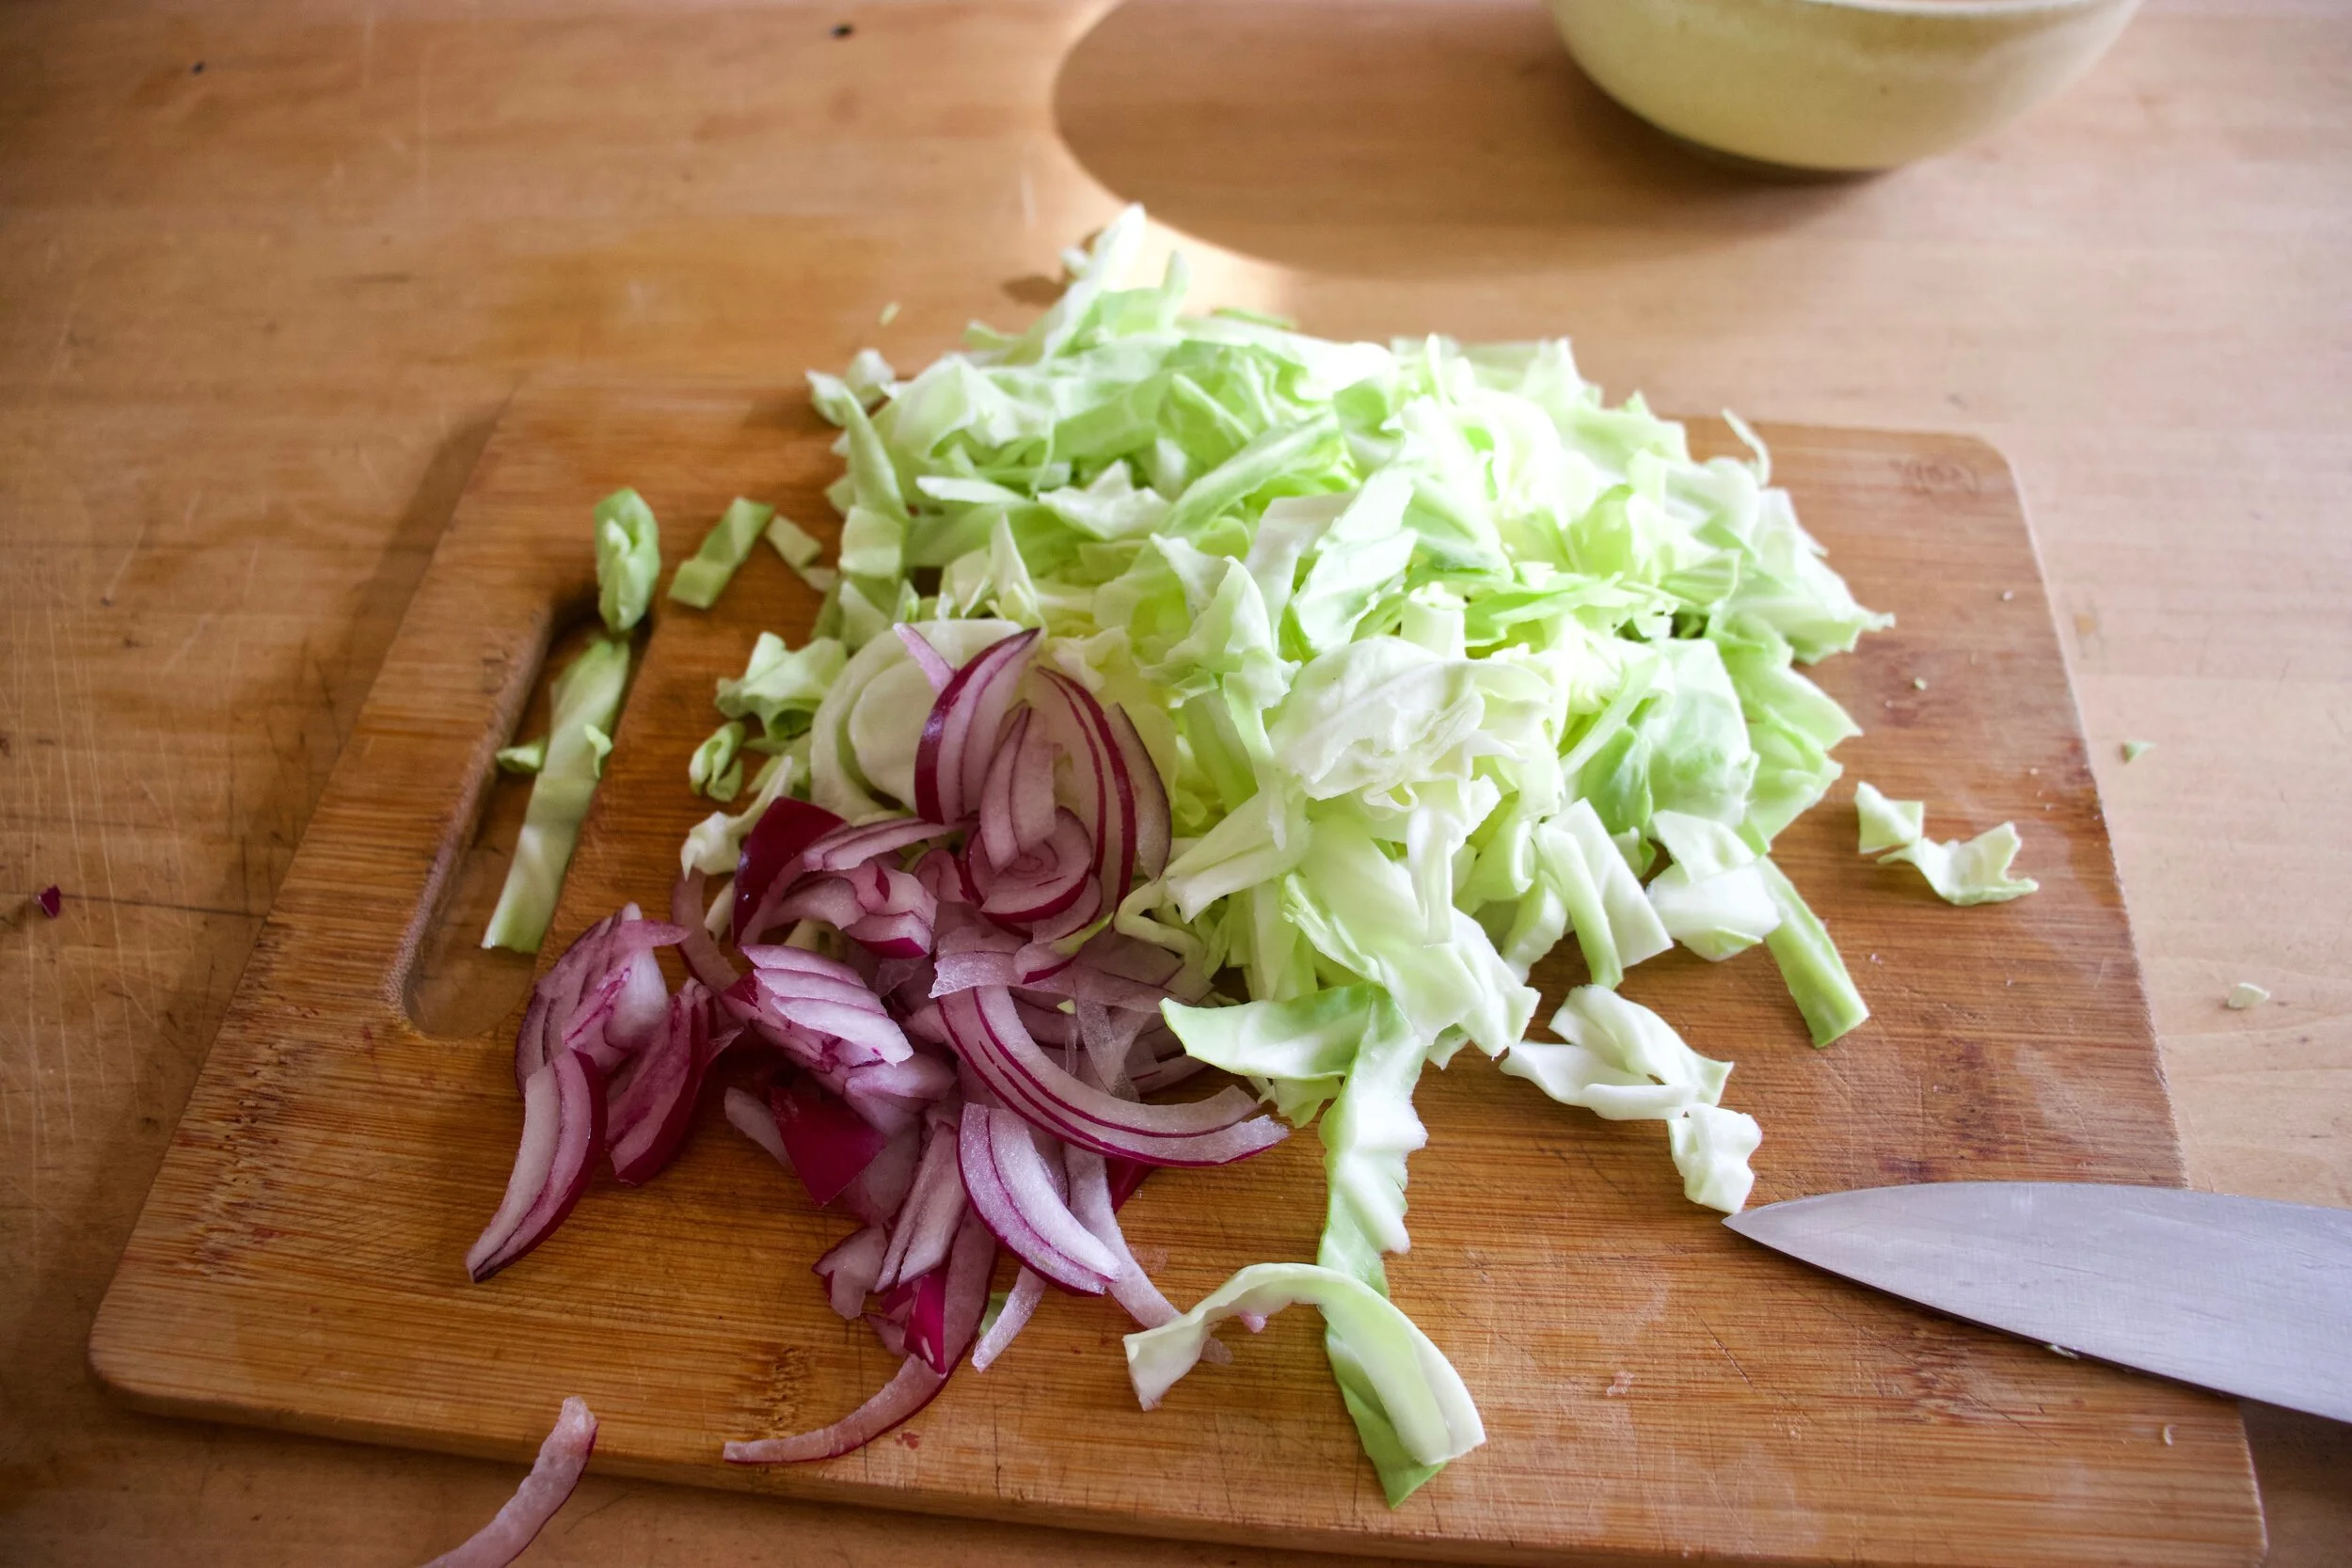
Add a good dollop or two of some good stone ground or Dijon mustard and mix.

Cooked until the split peas are tender and starting to fall apart. Taste and season with salt and pepper.

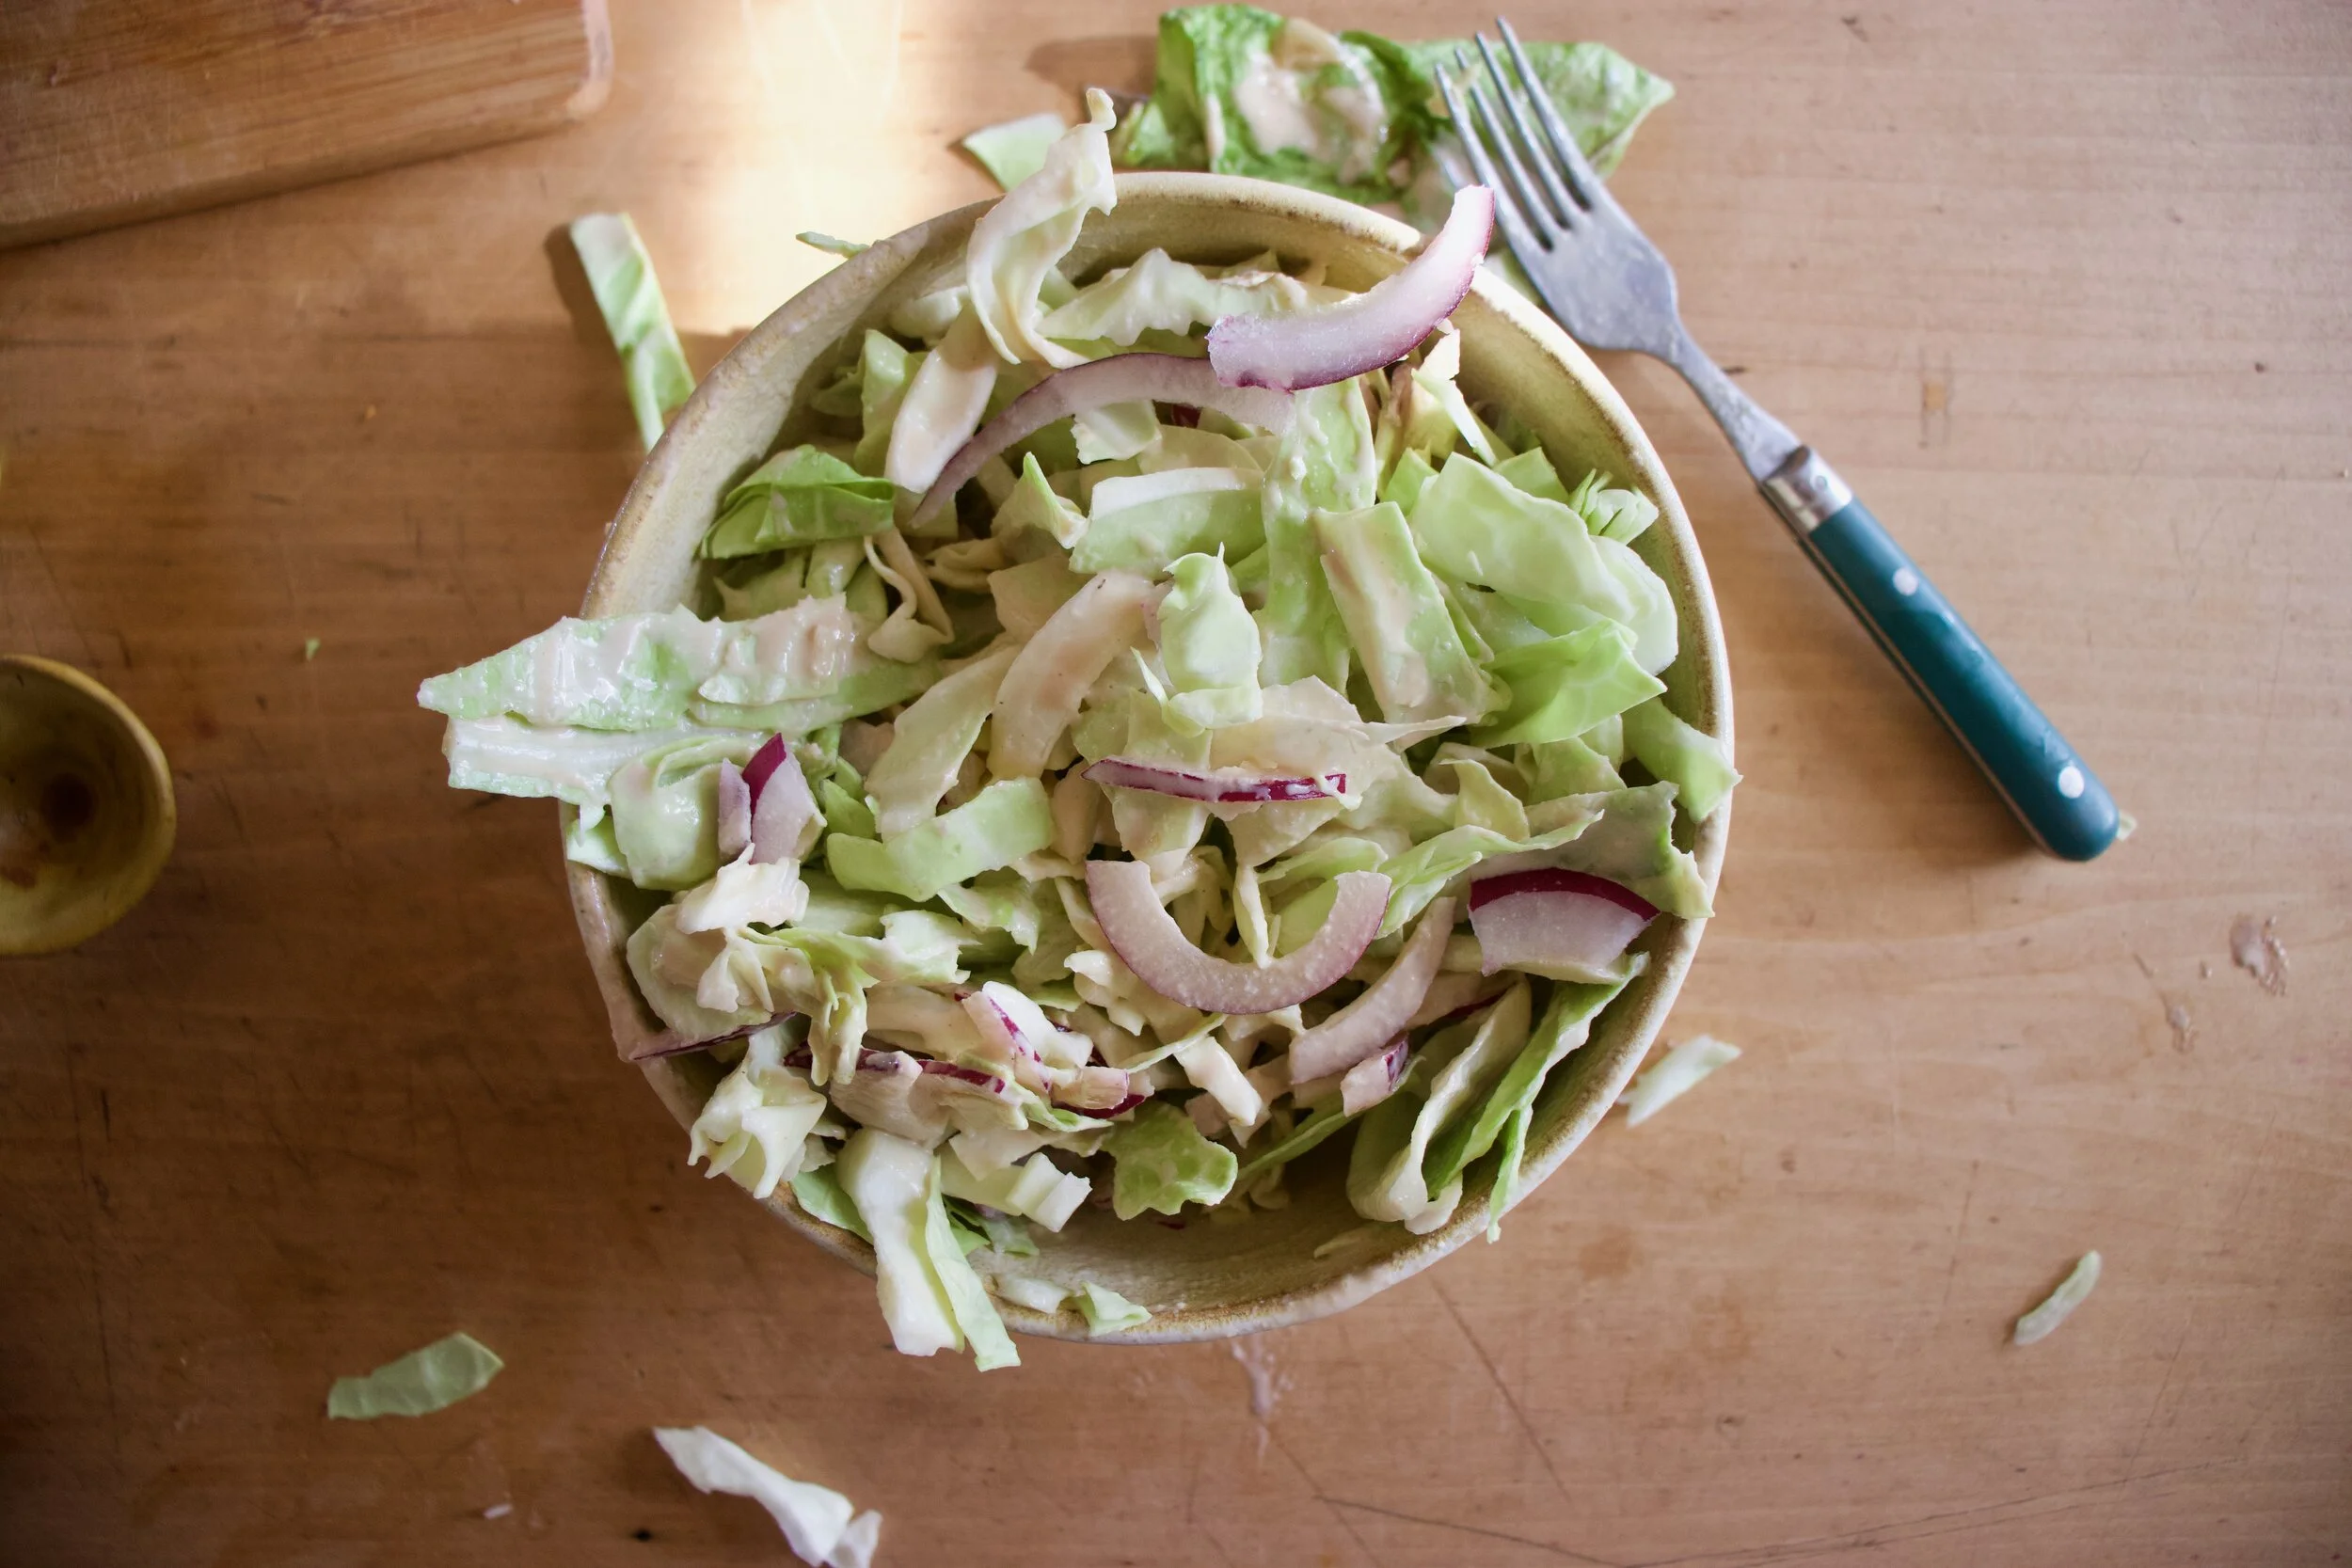
And then you eat. A big bowl full of the slpit peas and greens, topped with some mustardy cabbage slaw.

This is good food. Really freaking good.

-C

serves 4-6 folks

  • 2 cups dried split peas

  • 8-9 cups water

  • 1 large onion

  • 2 carrots

  • 1 bunch collard greens (about 6-7large leaves)

  • 1 teaspoon garlic powder

  • 1 teaspoon ginger powder

  • 1 tablespoon dill

  • 1 tablespoon thyme

  • 1 teaspoon ground mustard

  • salt and pepper

  • 2-3 tabespppms Dijon or stone ground mustard

  • 1/2 head of cabbage (red and or green)

Start by removing the stems from the collards. Grab the carrots and onion and dice them up small, along with the stems. Then take the leaves of the greens and stack and roll them up together. Slice the roll into thin ribbons. Place all of it, carrots onions stems, and greens, into large pot, along with all the spices, (don%u2019t add any salt until the end) and stick o the stove. Add in the split peas and 8 cups of water. Bring pot to a boil, then reduce to low and place a loose lid on pot. Let cook for 45 minutes to an hour, or until the spit peas are tender and just about to fall apart. If you think you might need to add more water to cook the peas through, then add another cup.

Once cooked, season with salt pepper to taste.

For the cabbage slaw,which you can make right after your start the peas, just shred up cabbage and mix it together with the mustard and set aside.

And once the split peas and collard greens are all cooked, scoop into bowls, top with some of the cabbage slaw, and eat to your face.

We have officially kicked off our summer camping adventures. And with camping comes all the greatness of all the things, including camping food.

Recently a friend asked me what it is that we do for camp food. So I told her. Camp food is basically aways the same and consists of a big pot of spiced warm lentils or split peas (both cook really fast and have lots of protein), a shredded summer squash in the summer, or pumpkin in the colder months, maybe fresh tomatoes or a bunch of kale to chop and mix in, and a side of cut up carrots, cucumbers, green beens or whatever else I have.. Then I’ll bring a hunk of bread for the mr to eat and me, usually a small head of cabbage to squirt mustard on and crunch into. (Always have the mustard on hand.) And I bring apples to snack on too, but that usually it. (Sometime I%u2019ll back a desert for the mr. If I am feeling nice.)

She was a little taken aback. Said when she (and basically everyone in the world, which I disagreed with) goes camping it is bags of chips, cookies, meat, and everything and anything that she (they) wanted. Basically that camp food was junk food and that she though we were weirdos. But cool weirdos so you know.

So our camp food%u2026 not like many others. But honestly it is everything that I want to eat and I love it so whatever whatever. As for the mr, he is happy with the food and when he is not, he brings along something else, but that rarely happens because my lentils be so good. HA!

But she got me thinking that I should have a few more snack options beside cut up carrots and apples. So that is why I made crackers. These chickpea chili lime, freaking amazing crackers. Because crackers are a very appropriate snack food, and these crackers in particular are even greater because they are made with the goodness of chickpea flour which is packed full of protein and is well received after a day of hiking or other fun outdoor camping activities. And how can you go wrong with chili lime? Well i%u2019ll tell you, you really can%u2019t

So the plan was to make a batch, eat a few, save the rest for this camping weekend. But guess what? I have to make another batch. They didn%u2019t make it. We ate them all. (not sorry) At least I know we will be liking our new camping snack addition well and right.

So if you like crackers, camping or elsewhere, you should really gives these a go. They will not disappoint.

Now to the crackers!

The stuff. Chickpea flour, chili powder, a lime, a little baking powder, olive oil, salt and pepper, and water.

Combine the flour, zest of the lime, half the chili powder and half the salt, and the baking powder and some pepper in a bowl. Mix until completely combined then add in the oil, water and the juice of the lime.

Mix until dough forms. It might feel a little sticky, if that is the case, just mix other tablespoon of chickpea flour.

Knead dough on a well chickpea floured surface for a good minute until the dough is a even consistency then let it sit for a few minutes to rest. Once rested, cut dough into 2-3 pieces because working smaller is easier.

Roll out your first piece of dough about 1/8 inch thick. (Again, make sure to really flour your work surface and rolling pin.) Mix salt and chili powder together and sprinkle on top. Cut out your crackers (squares are nice but triangles would be nice too) then poke each cracker with a fork.

Crackers on a baking sheet before baking and after baking looking all crackery and delicious. And yeah, they shrink a bit.

And lastly, cool the crackers on a cooling rack. They will crisp up a even more. Then it%u2019s all you.

Ready to eat whenever you make the move. You can pack them away for later or place these delicious crackers in a very pretty bowl and eat them away. Or both.

A cracker win!

-C

make 75 crackers

  • 1 1/2 cups chick pea flour plus about 1/3 more for dusting and rolling

  • 1/2 teaspoon baking powder

  • 1 tablespoon olive oil

  • 1/3 cup room temp water

  • 1 teaspoon chili powder split in half

  • 1 lime

  • 1 teaspoon salt split in half

  • 1/2 teaspoon fresh crackers pepper

Preheat oven to 350.

In a bowl combine the chick pea flour, baking soda, pepper, 1/2 teaspoon chili powder, and half a 1/2 teaspoon salt. Mix until evenly incorporated. Add in oil, the juice of the lime, and and water and mix until a dough forms. Dump dough onto counter and knead until completely uniform in texture. Add more flour if the dough is really sticky. Set dough aside for a few minutes to rest.

To make the crackers, really dust the counter with chickpea flour. Cut the dough into 2-3 pieces and roll1 piece out at a time to about an1/8 inch thin. Again, really flour the surface and rolling pin or else the dough will stick Once rolled, combine the remaining chili powder and salt and sprinkle the top with it. And then cut the crackers. Take a knife of bench scrapper or pizza cattier and cut the dough into inch long strips vertically, then diagonally. Poke each cracker with a fork then gently place them onto a baking sheet. Repeat with remaining dough.

Bake crackers for 15-20 minutes or until a nice deep golden brown. Remove from oven and let cool on a wire rack.

And then eat.

Store uneaten crackers in an airtight container for about a week.

I am obsessed. For real. That might seem like a strong statement for a feeling about a food, but right now, it is truth. I spend more time then I want to admit thinking and drooling over Socca, which is, to those who do not know, the most basic chickpea flour pancake-y bread thing. Chickpea flour, water and salt. Cooked fast under the broiler in a screaming hot skillet. That is it. And it is amazing. Depending on how you make it, it can be creamy and soft or more cracker like with some crisp crunch to it. Either way, it is just so freaking good. Of course, what I am dreaming about regarding it is not just plan basic socca (which I have made 3 times in the past 3 days) but different flavored soccas (I have experimented with lot of seasoning, and they are all A+) with all sorts of different topping and using it in all sorts of different ways. But for now, I wanted to keep basic so we all know how good simplicity is. We will go from here.

There is no stopping me. There is no stopping the socca.

Now to my new favorite food, the socca.

Chickpea flour, salt and water. That is it. Mix it all up.

Batter all smooth and now in need of a rest. Half an hour or up to a day of rest is good.

Now to cook the socca. You need to use something oven safe like cast iron. The trick here is to preheat the skillet while you are preheating the oven. Crank oven to 450 with the skillet in oven and once the oven reaches temp, turn oven over to a high broil. Let the skillet get really hot for another minute or two then remove skillet from oven (carefully!!!) and give it a splash of oil. Don%u2019t preheat the skillet with oil in it or else it will start to smoke and get gross.

Now that you got a nice hot and oiled skillet, grab the rested batter and pour half of it in. Tilt skillet around to coat bottom then stick skillet back into oven under broiler and cook for 4-8minutes. ( It depends on your broilers strength and your preference for blisters)

Out from the broiler. Cooked and slightly blistered. I went easy on this one. The next one got a few more blisters.

2 soccas, one a little thicker then the other. One a little more blistered then the other. Both in my belly.

So many Soccas to come.

So. many. Soccas.

-C

makes two 10 inch soccas

  • 1 cup chickpea flour

  • 1 cup room temperature water

  • 1/2 teaspoon salt

  • olive oil for pan

Mix chickpea flour, salt and water together into a bowl until smooth. Let mixture rest for at least half an hour or up to a day.

When ready to make the socca, preheat oven to 450 with a 10 inch oven safe skillet (I used cast iron but any oven safe dish would work) in oven.

Once oven reaches temp, turn oven over to broil and place skillet under it for a minute to really heat the skillet. Carefully, with oven mitts, remove hot skillet from oven and brush or pour a smidge of oil into the hot skillet to coat bottom. Pour in half the batter and tilt around until bottom is coated then place skillet back into oven under broiler and cook for 4 -8 minutes or until the socca starts to blister. (it kind of depends on your broiler so keep a close eye on it) Remove from oven and slip socca onto cutting board. Sprinkle with salt and pepper. Drizzle with olive oil if you like. Then all you do is cut and eat.

Left over socca can be stored in fridge and reheated in oven or toaster.

Note. IF you want a slightly thicker socca, use a 8 inch skillet. For a thiner, more cracker like socca, pour in 1/3 of the batter at a time (you will end up with 3 instead of 2)

Spring is here for reals, I think. No, it is here, it has just been a bit raw and maybe a bit more rainy then it really needs to be, but whatever, it is spring and it is good. Things are greener by the day, the temperatures although not exactly warm are still inhabitable and without cause for winter jackets (although I have still been rocking the mittens) and spring veggies are popping up all over. Things are looking good.

So last week I made a pie crust with the intention to make a veggie pot pie and stuck it into the freezer. When the time came to make said pot pie, I forgot to take it out of the freezer so the crust was not meant to be for pot pie (it will probably end up as a rhubarb pie%u2026we shall see). Without pie crust, I wasn%u2019t exactly feeling like I should make a pot pie, but a tart, well yeah, sure. A crispy and chewy crackery crusted thing with almond ricotta a spring veggies because that is where the mind went and what the mr agreed sounded good. (When I make up recipes I just start taking about ingredient and preparations and wait til the mr says %u201cYea, that loud good. I%u2019ll eat that %u201c He usually will say it right away and for anything. Very easy to please or he just doesn%u2019t care%u2026hum? )

And so the tart was made and the tart was eaten in all entirety for dinner by the mr alone. Usually when he eats all of something it means it was one of the really good things. Or he is really really hungry. But he said it was a really good thing. I trust him because I agreed. I got in a few spoonfuls of the almond ricotta mixture and it is really freaking good if I do say so myself (I could eat bowls of almond ricotta all day long).

Anyway, heres to spring and all things that are green and good.

To the tart.

The stuff. Flours (white and white whole wheat), baking powder, and a little salt in the bowl. Water and olive oil, blanched almonds, a lemon, a clove of garlic, asparagus, peas, frozen and thawed spinach, a small red onion, and salt and pepper.

Start with making the crust. Mix the dry together then add in the oil and water to form a dough. Knead dough a minutes until the dough is uniform and place back in bowl and cover. Dough needs a few alone minutes to rest. I can relate to that.

While dough is resting, make the almond ricotta. Almonds, garlic, the juice of the lemon, and a bit of water go into blender. Add in a pinch of salt and pepper too.

Blend until creamy and smooth.

Dump in the spinach and blend, just until combined.

Scoop ricotta into a bowl and mix in the peas. And sure give it another taste but try not to eat it all.

Grab the onion and slice it all nice and thin.

And after the resting time, grab dough and roll it out. Try for a rectangular shape or as rectangular as you can get it, but nice and thin. Thiner is better.

Place rolled out dough onto a baking sheet and poke the bottom with lots of little hole. Take ricotta mixture and spread evenly all over crust, leaving a 1 1/2 border all the way around.

Then top with the asparagus and more onions.

Fold over the edges of the crust, sprinkle with a pinch of salt and pepper, and into the oven it goes to bake.

And then it is baked. And ready to eat (after a few minutes of cooling).

Nothing left but to cut it up and eat it.

Spring. Green. Food.

Things are good.

-C

Makes a 8×12(ish) tart

  • For the Crust

  • 1/2 cup all purpose flour

  • 1/2 cup white whole wheat (can sub for all purpose)

  • 3 tablespoon oil

  • 1/3 cup room temp water

  • 1/4 teaspoon baking powder

  • 1/2 teaspoon salt

  • For the Almond Ricotta and Veggies

  • 1/2 cup blanched almonds

  • 1/4- 1/3 cup warm water

  • 1 lemon

  • 1 clove garlic

  • 1/2 teaspoon salt and pepper or more to taste

  • 1/4 cup frozen and thawed spinach squeezed of liquid

  • 9-10 spears of Asparagus

  • 1/4 cup peas (fresh or frozen and thawed)

  • 1 /2 red onion

First make the crust. Whisk together the flours, salt, and baking soda. Add in the oil and water and mix until a dough forms. Form dough into a ball and knead for minute or two on counter then place dough back into the bowl and cover. The dough needs to rest for 10-15 minutes.

While dough is resting, make the almond ricotta. Place almonds, garlic, and juice of lemon into a blender. Start blending and add in the lesser amount of water, adding a little more until the stuff all starts to blend. Blend on high for a minute or two until the mixture is nice and creamy. Season with salt and pepper, blend a second to mix then add in the squeezed out spinach. Blend until mix together then dump or scoop the mixture into a bowl and mix in the peas. Then thinly slice up the onion.

Preheat the oven to 450

After doughs little rest, lightly flour a counter and roll it out, thin as you can, in a rectangular shape. Try for at least 12in x 16in. The rectangle doesn%u2019t need to be perfect. Rough is good.

Place the rolled out crust onto a baking. Take a fork and dock the surface (poke holes into it to prevent air bubbles). Take the ricotta and pea mixture and spread evenly on crust, leaving about a 1 1/2 inch border all the way around. Add a layer of sliced red onion and then take asparagus (trim off woody ends) and either lay on whole or break in half and lay on. Add more onions on top. Fold the border of the crust over the top. Sprinkle the whole thing with pepper and place into the hot oven.

Bake for 22-25 minutes or until the crust becomes a nice golden brown. Remove and let cool a few minutes

And then cut up and eat. Right away or at room temperature. Or some now and some later. All up you you.

Store left over in fridge in air tight container for up to a few days. the crust will not be crispy but more chewy. Can stick it back in oven for a few minutes to crisp it up.

THE LOVELY CRAZY

February 15, 2020 by maximios • Blog

I have been on a severe citrus kick lately. Oranges, limes, lemons, kumquats. I want it all and have been eating it all. A lot of it all. Espeically the oranges which are just so good right now. We have been going through bags of them faster then ever and I am not mad about it.

Which then brings us to chili. Chili is one of the things that I make on a very regular bases. It%u2019s beans, veggies, tomatoes, and a ton of spices. Easy as can be, most people like it, and I never get sick of it. I mean, how could you get sick of it, it is so good! Anyway. Chili, its great but have you ever added orange to it? Oh man is it amazing. Bright and acidic and sweet. The whole pot of chili just radiates more goodness, more intensity, more, moreness. (I know that doesn%u2019t make sense but you get it.) It%u2019s a whole new level of chili and I don%u2019t if there will ever be a time when I don%u2019t add orange to my chili again. Well at least during citrus season.

But enough about all that, what you really want is to just start making this orange black bean chili so you can eat it. I hear you, so I%u2019ll let you at it.

To the chili!

The stuff. Oranges, black beans, crushed tomatoes, an onion, a couple carrots, a pepper, and jalape%u00f1os. Also lots of cumin, chili powder, ground ginger, garlic powder, and salt and pepper.

Small dice up the pepper, onion, carrots, and jalape%u00f1os. Don%u2019t want it super spicy, don%u2019t add the jalape%u00f1os.

All that stuff gets tossed into a big pot along with all the spices, some salt and pepper, and a little water too. Place on stove to start cooking down the veggies.

Slightly tender and smells amazing.

Now add in the beans, the tomatoes, and the zest and juice of an orange. Mix it all up, set it back on stove and keep on cooking,

Now eat your chili, with extra orange slices to squeeze all over it of course. And maybe you want to serve it with some corn bread? That is entirely up to you, but who would be made about it?

-C

Serves 4-6 people

  • 1 pound cooked black beans drained (about 5 cups or 3 cans)

  • 5 cups crushed tomatoes (or 2 28oz cans)

  • 2 oranges (navel or cara cara work)

  • 2 carrots

  • 1 large onion

  • 1 bell pepper

  • 2 jalapenos (optional)

  • 2 heaping tablespoons cumin

  • 2 tablespoon chili powder

  • 2 teaspoons garlic powder

  • 2 teaspoons ground ginger

  • salt and pepper

Start by chopping up the veggies. Small dice the carrot, the onion and the pepper. If using jalape%u00f1o, dice that into small little bits too. And remove seeds for less heat or leave them if you like it. Once that is all cut up, dump it all into a large heavy bottom pot along with the cumin, chili powder, garlic and ginger powder, and about a teaspoon or so each of salt and pepper. Add about 1/2 cup water, mix it all up, and place the pot on stove on medium heat and start to cook the veggies and spices until they begin to smell fragrant and are ever so slightly tender, which should take 5-10 minutes.

Now add in the beans, the tomatoes, and the zest and juice of one orange. Mix together and keep cooking on medium heat, partially lidded, for about 45 minutes to an hour, stirring once in a while, until the chili has thicken and tastes good to you.

Once done, season to taste with more salt and pepper and either stir the juice of the second orange into the whole pot or serve with slices of orange to squeeze on top.

Eat. Store any left overs in fridge. Tastes delicious cold too.

Mid week, I was doing a little pantry cleaning/ inventorying of what I had and needed when I came upon not one, not two, or even three. No, six. SIX, jars of jam. And there are 2 that are already opened in the fridge. I don%u2019t know why, but knowing that there was that much jam in the house made me a little uneasy. Six unopened jars is about 3 jars past my comfort zone. Sure there are so many things you can do with a jar of jam (jelly, preserves, and marmalade included) and now that I am thinking about it, is one of the reasons why I bought a few jars a while back. Then there was Christmas and I think we got at least two jars as gifts so it%u2019s not all my fault, but still, that is just too many jars of jam. Right there I needed to get rid of at least one jar. So muffins. Jam muffins, with poppyseed crust because it%u2019s pretty and nobody ever complains about poppy seeds, or at least they don%u2019t until after they eat them and have poppy seeds stuck in their teeth all day. But that is just our mouths way of saving a little for later, am I right? HA

Anyway, a quick and simple muffin recipe for all of you people out there that might have a jar or two too many of jam in the fridge or pantry%u00a0(I used apricot but any flavor(s) would work) and could use yourself a tasty little muffin situation. I mean who doesn%u2019t want a tasty muffin?

To the muffins.
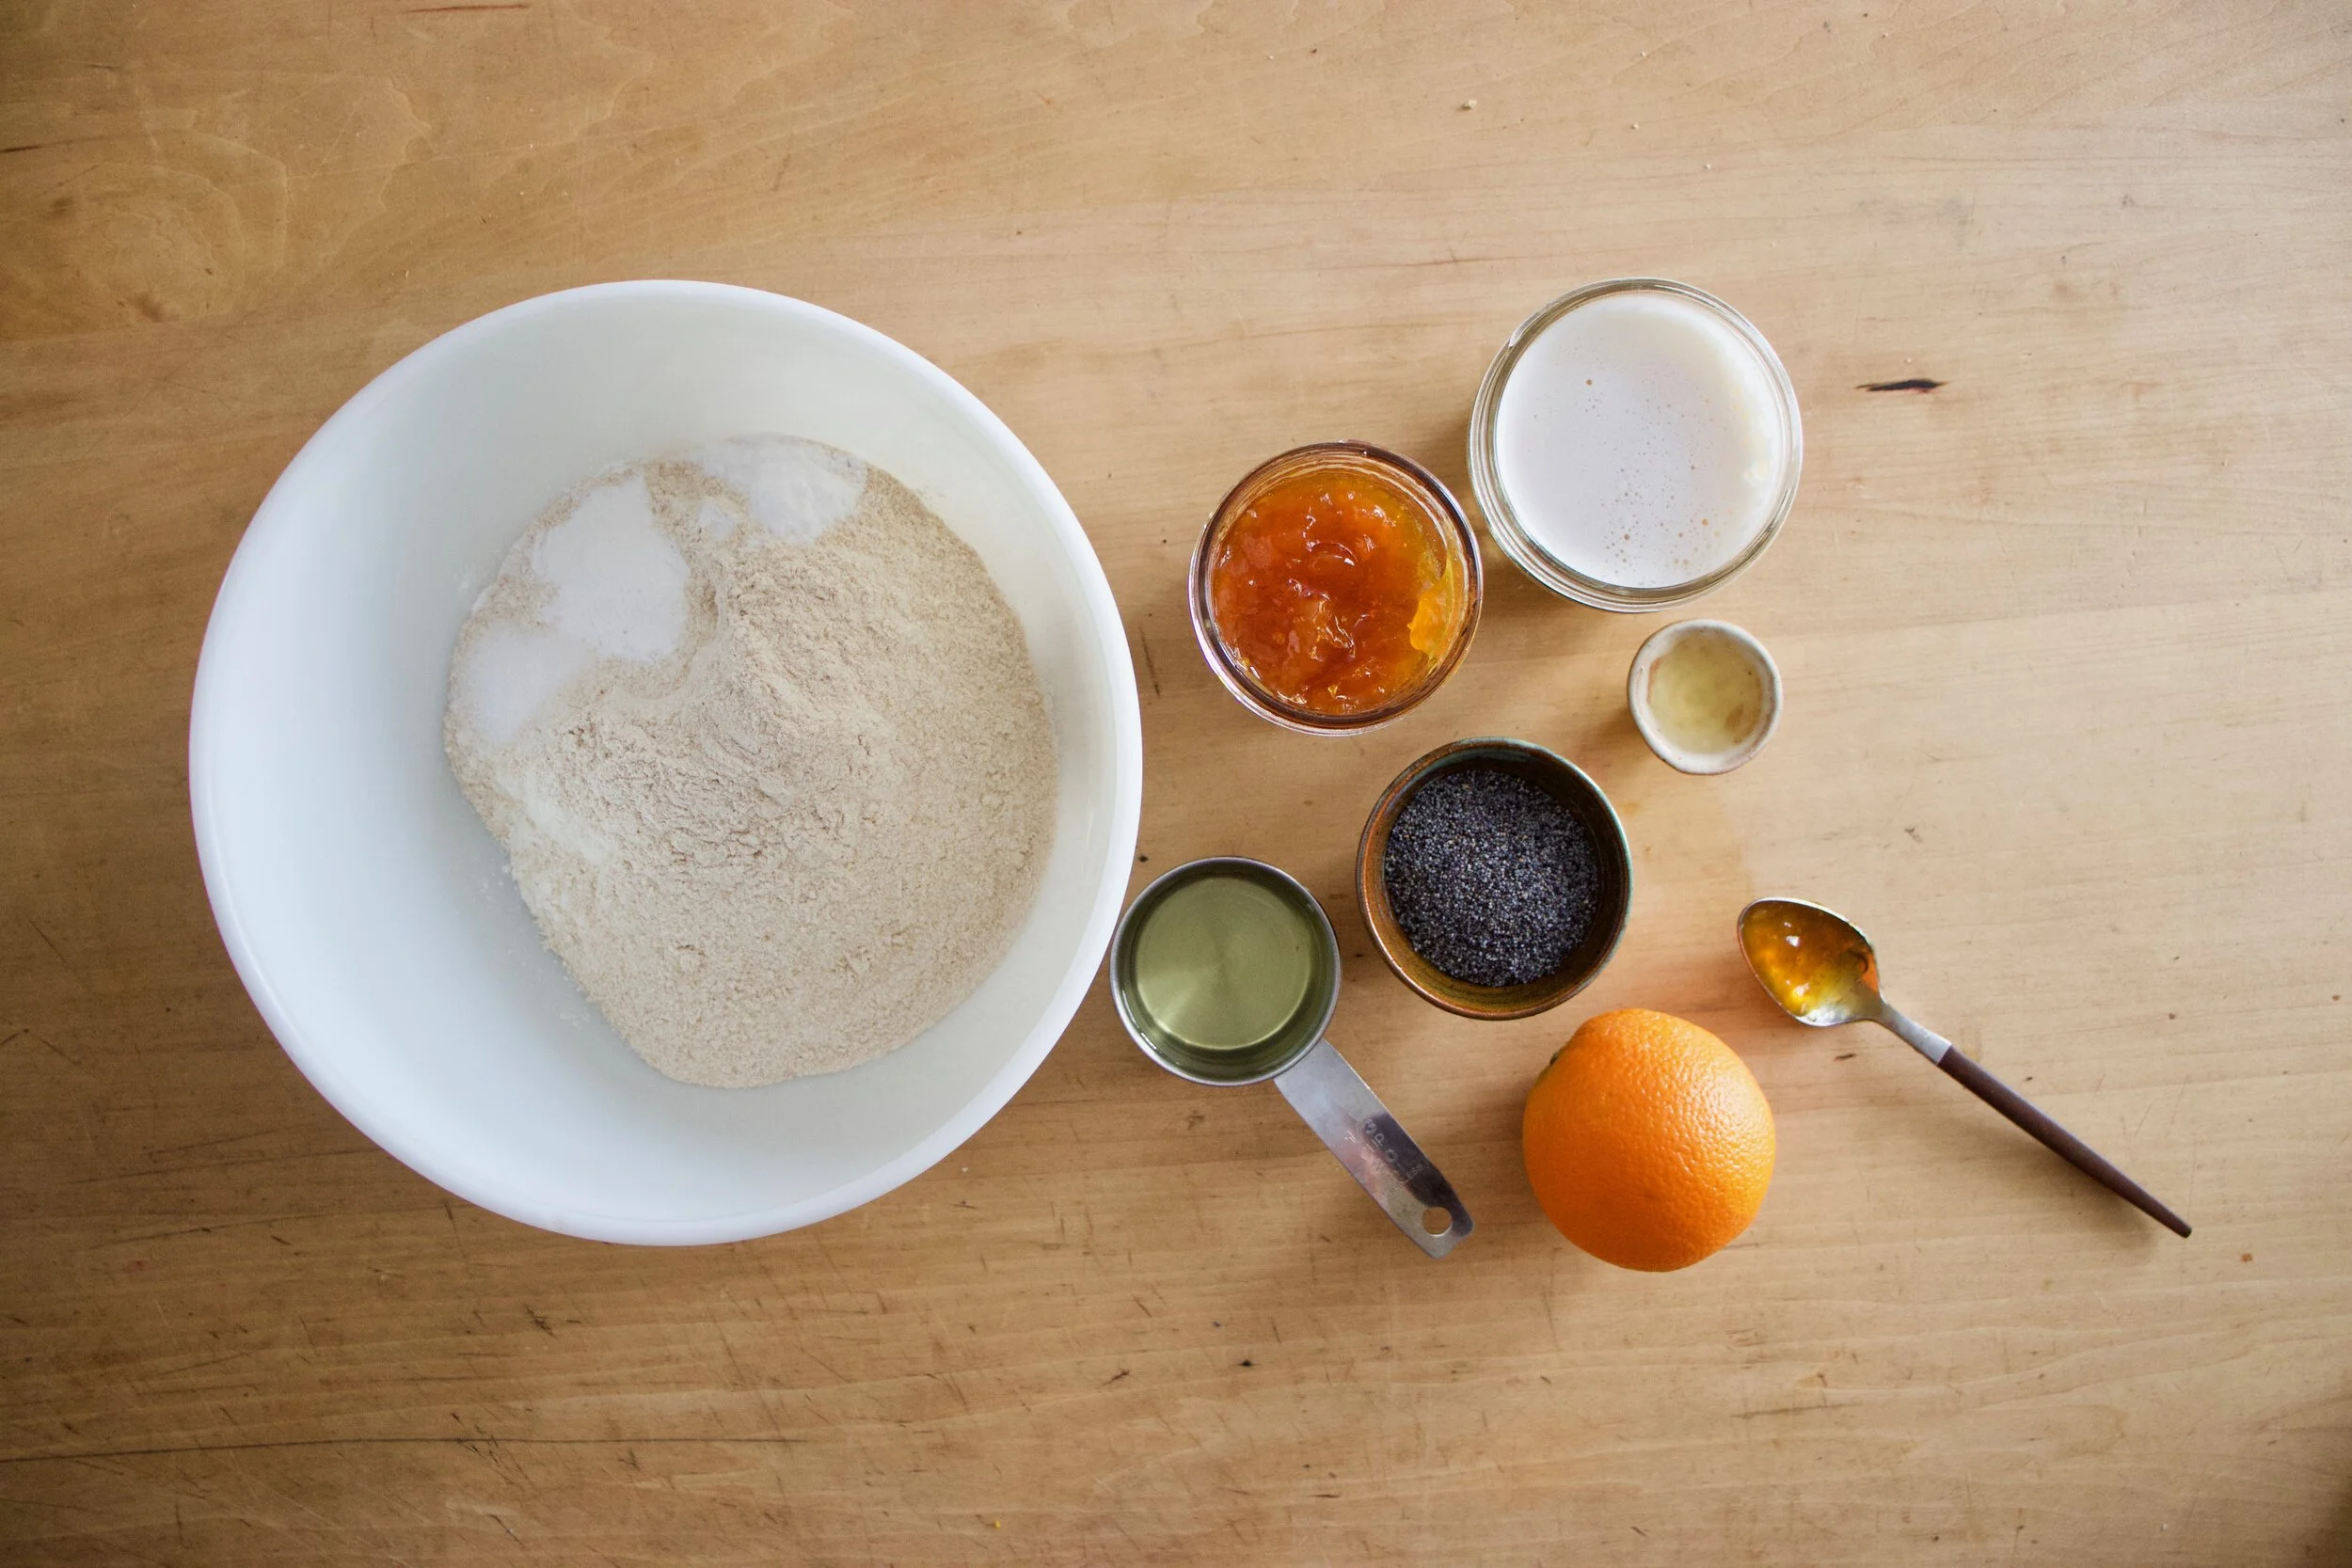
The stuff. In the bowl is white and white whole wheat flour, baking powder and soda, and salt. Also have apricot jam, oil, almond milk, apple cider vinegar, and orange, and some poppy seeds.
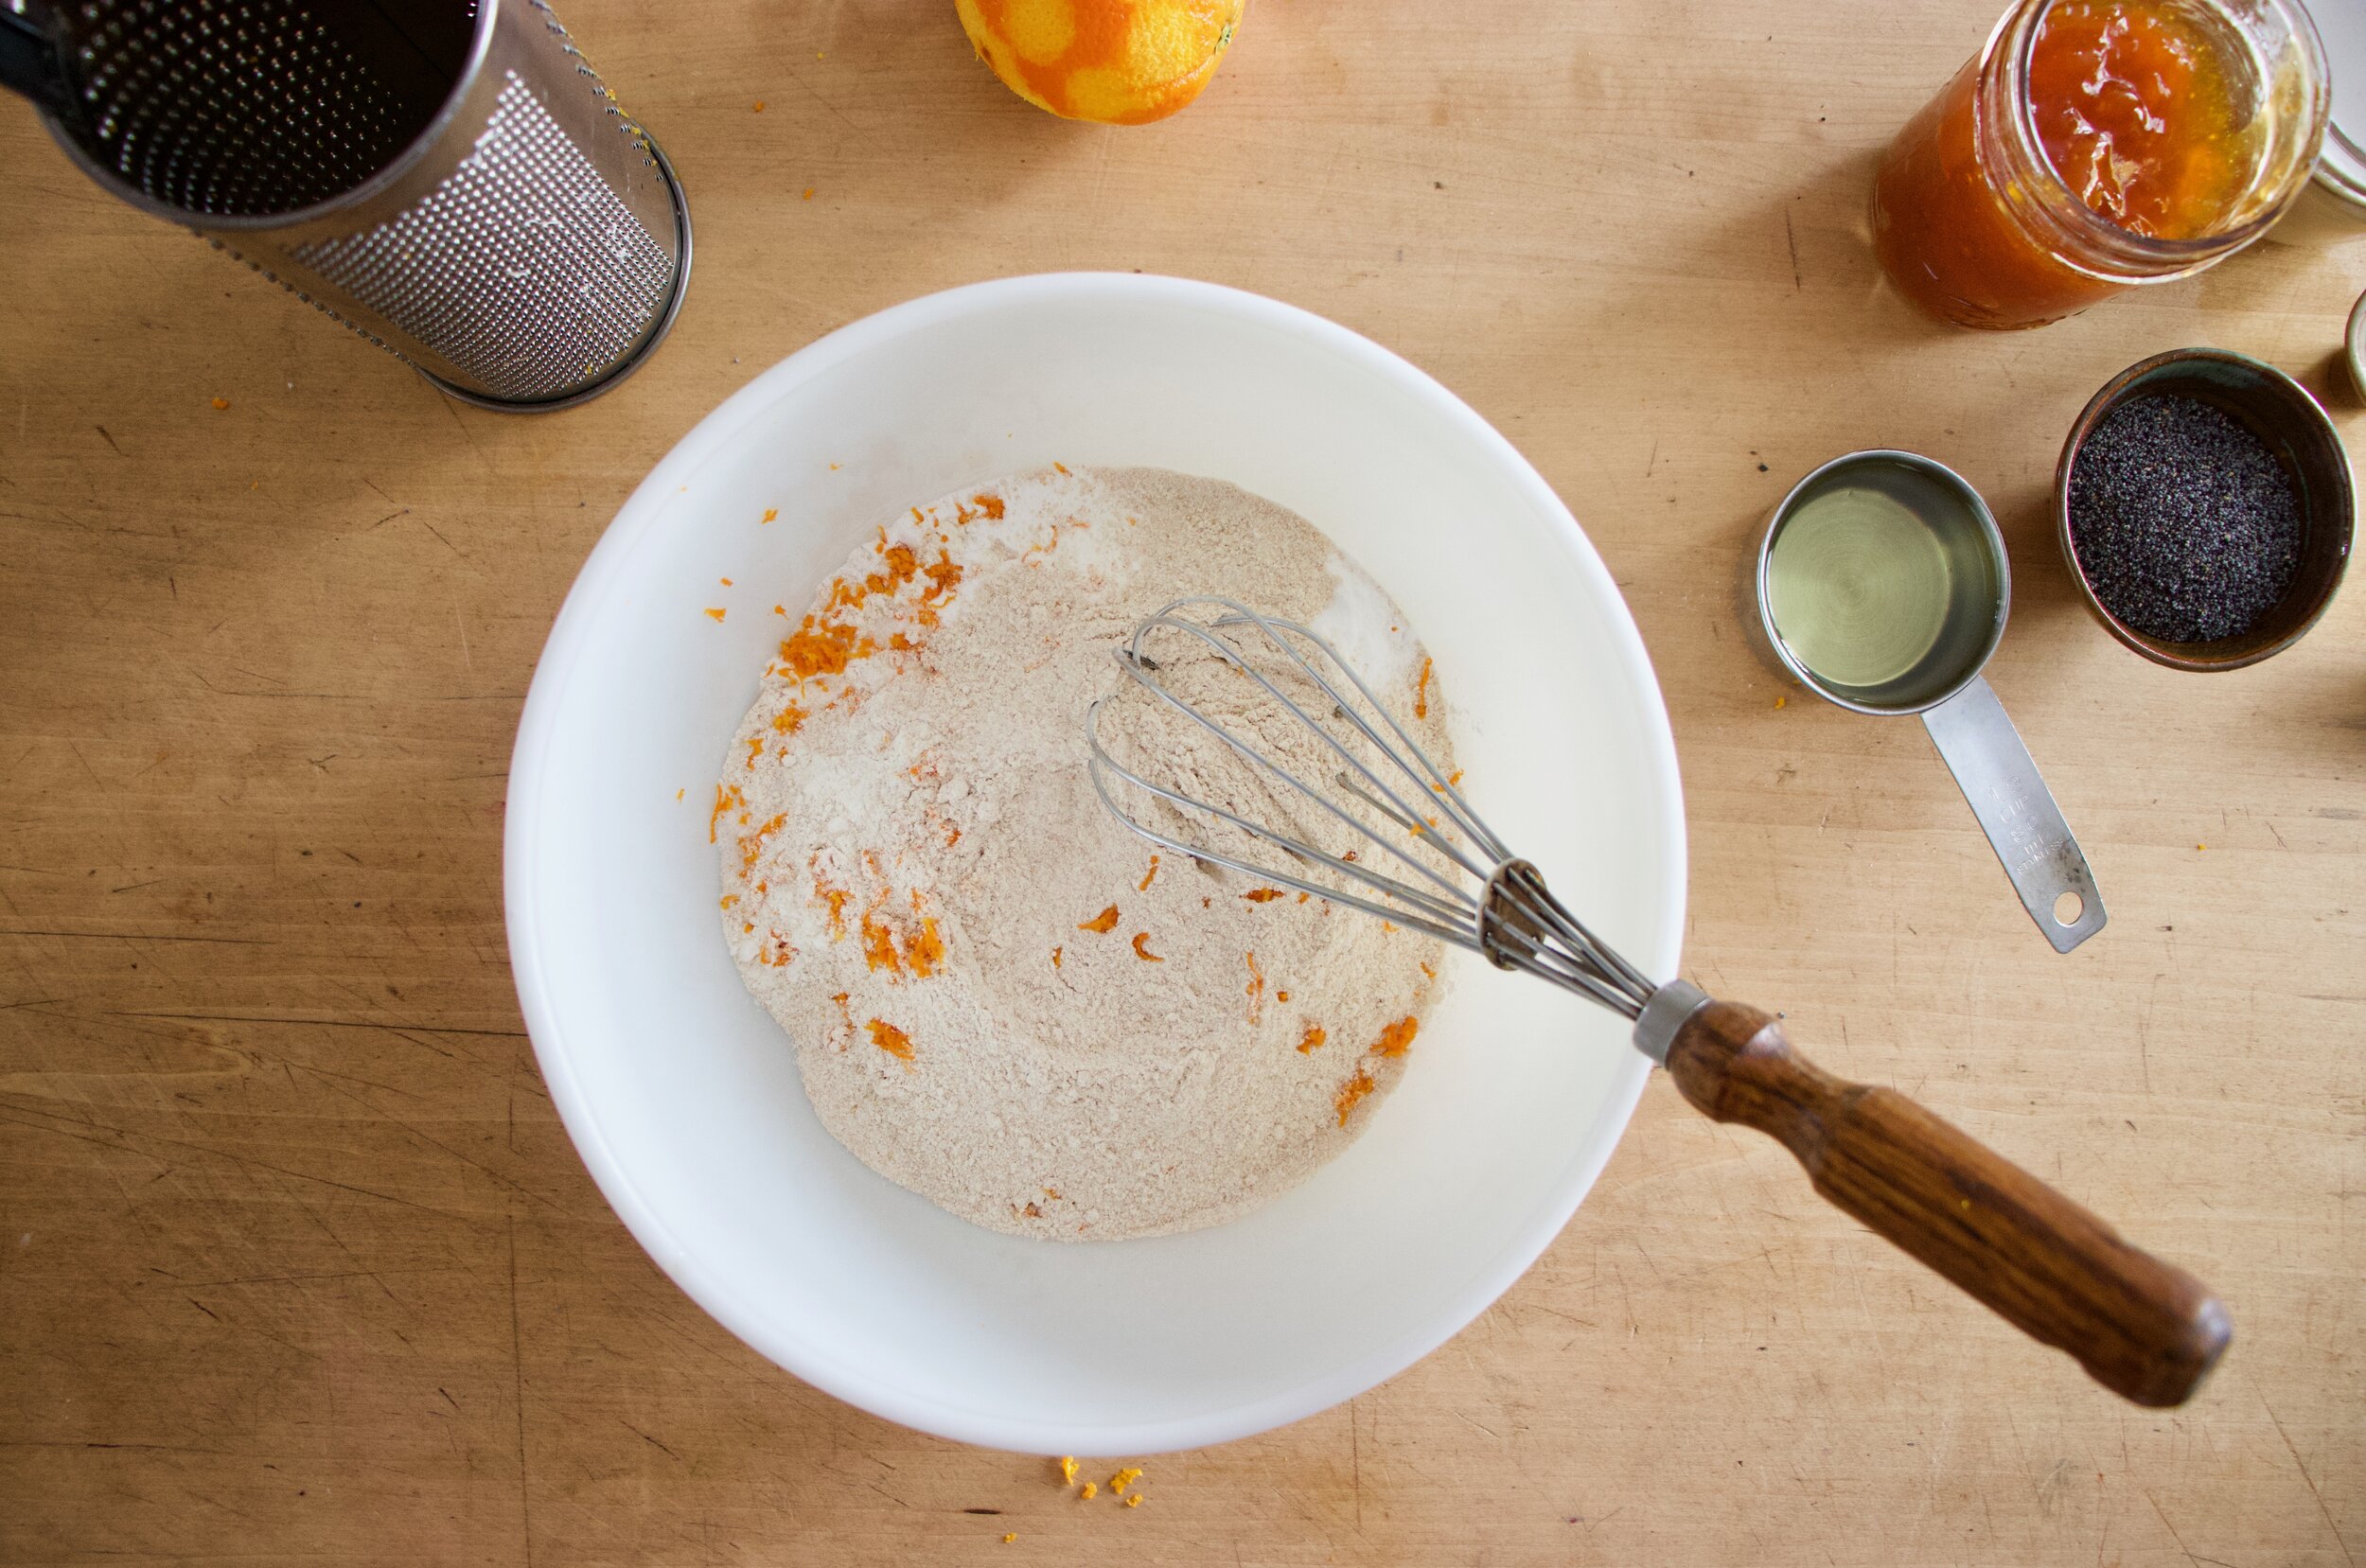
Grab a zester and zest the orange into the bowl with all the dry stuff. Whisk to combine.
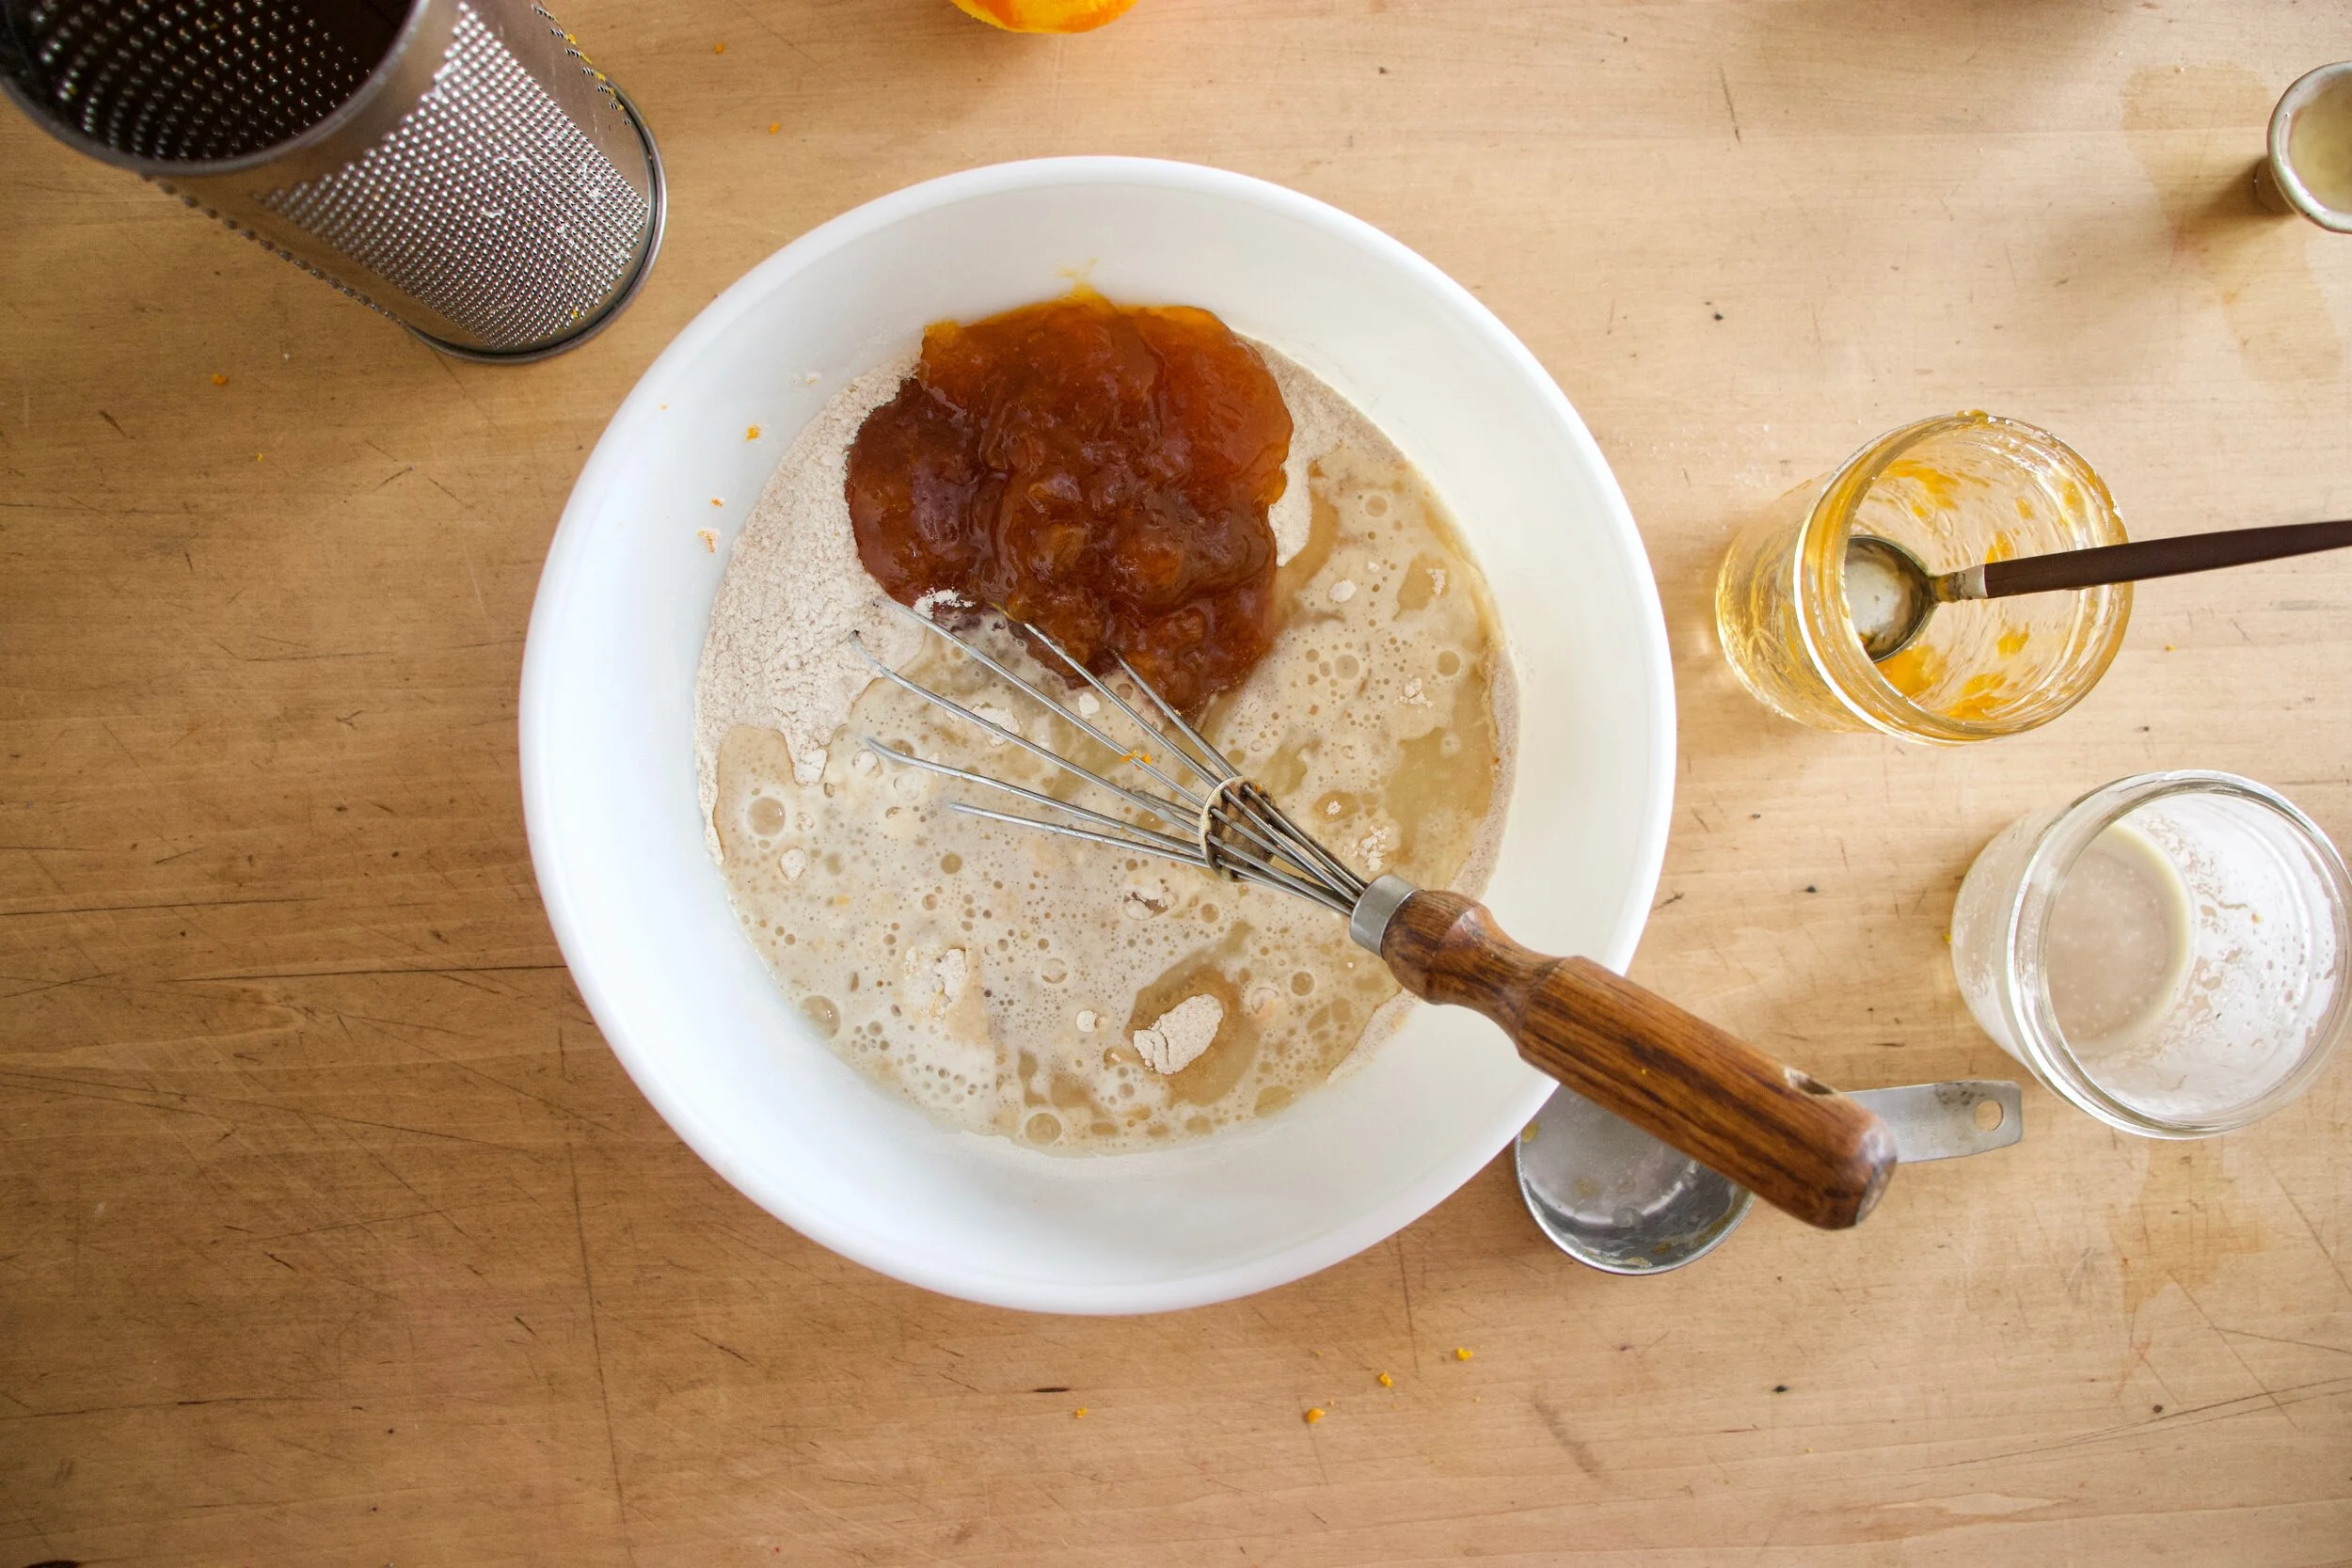
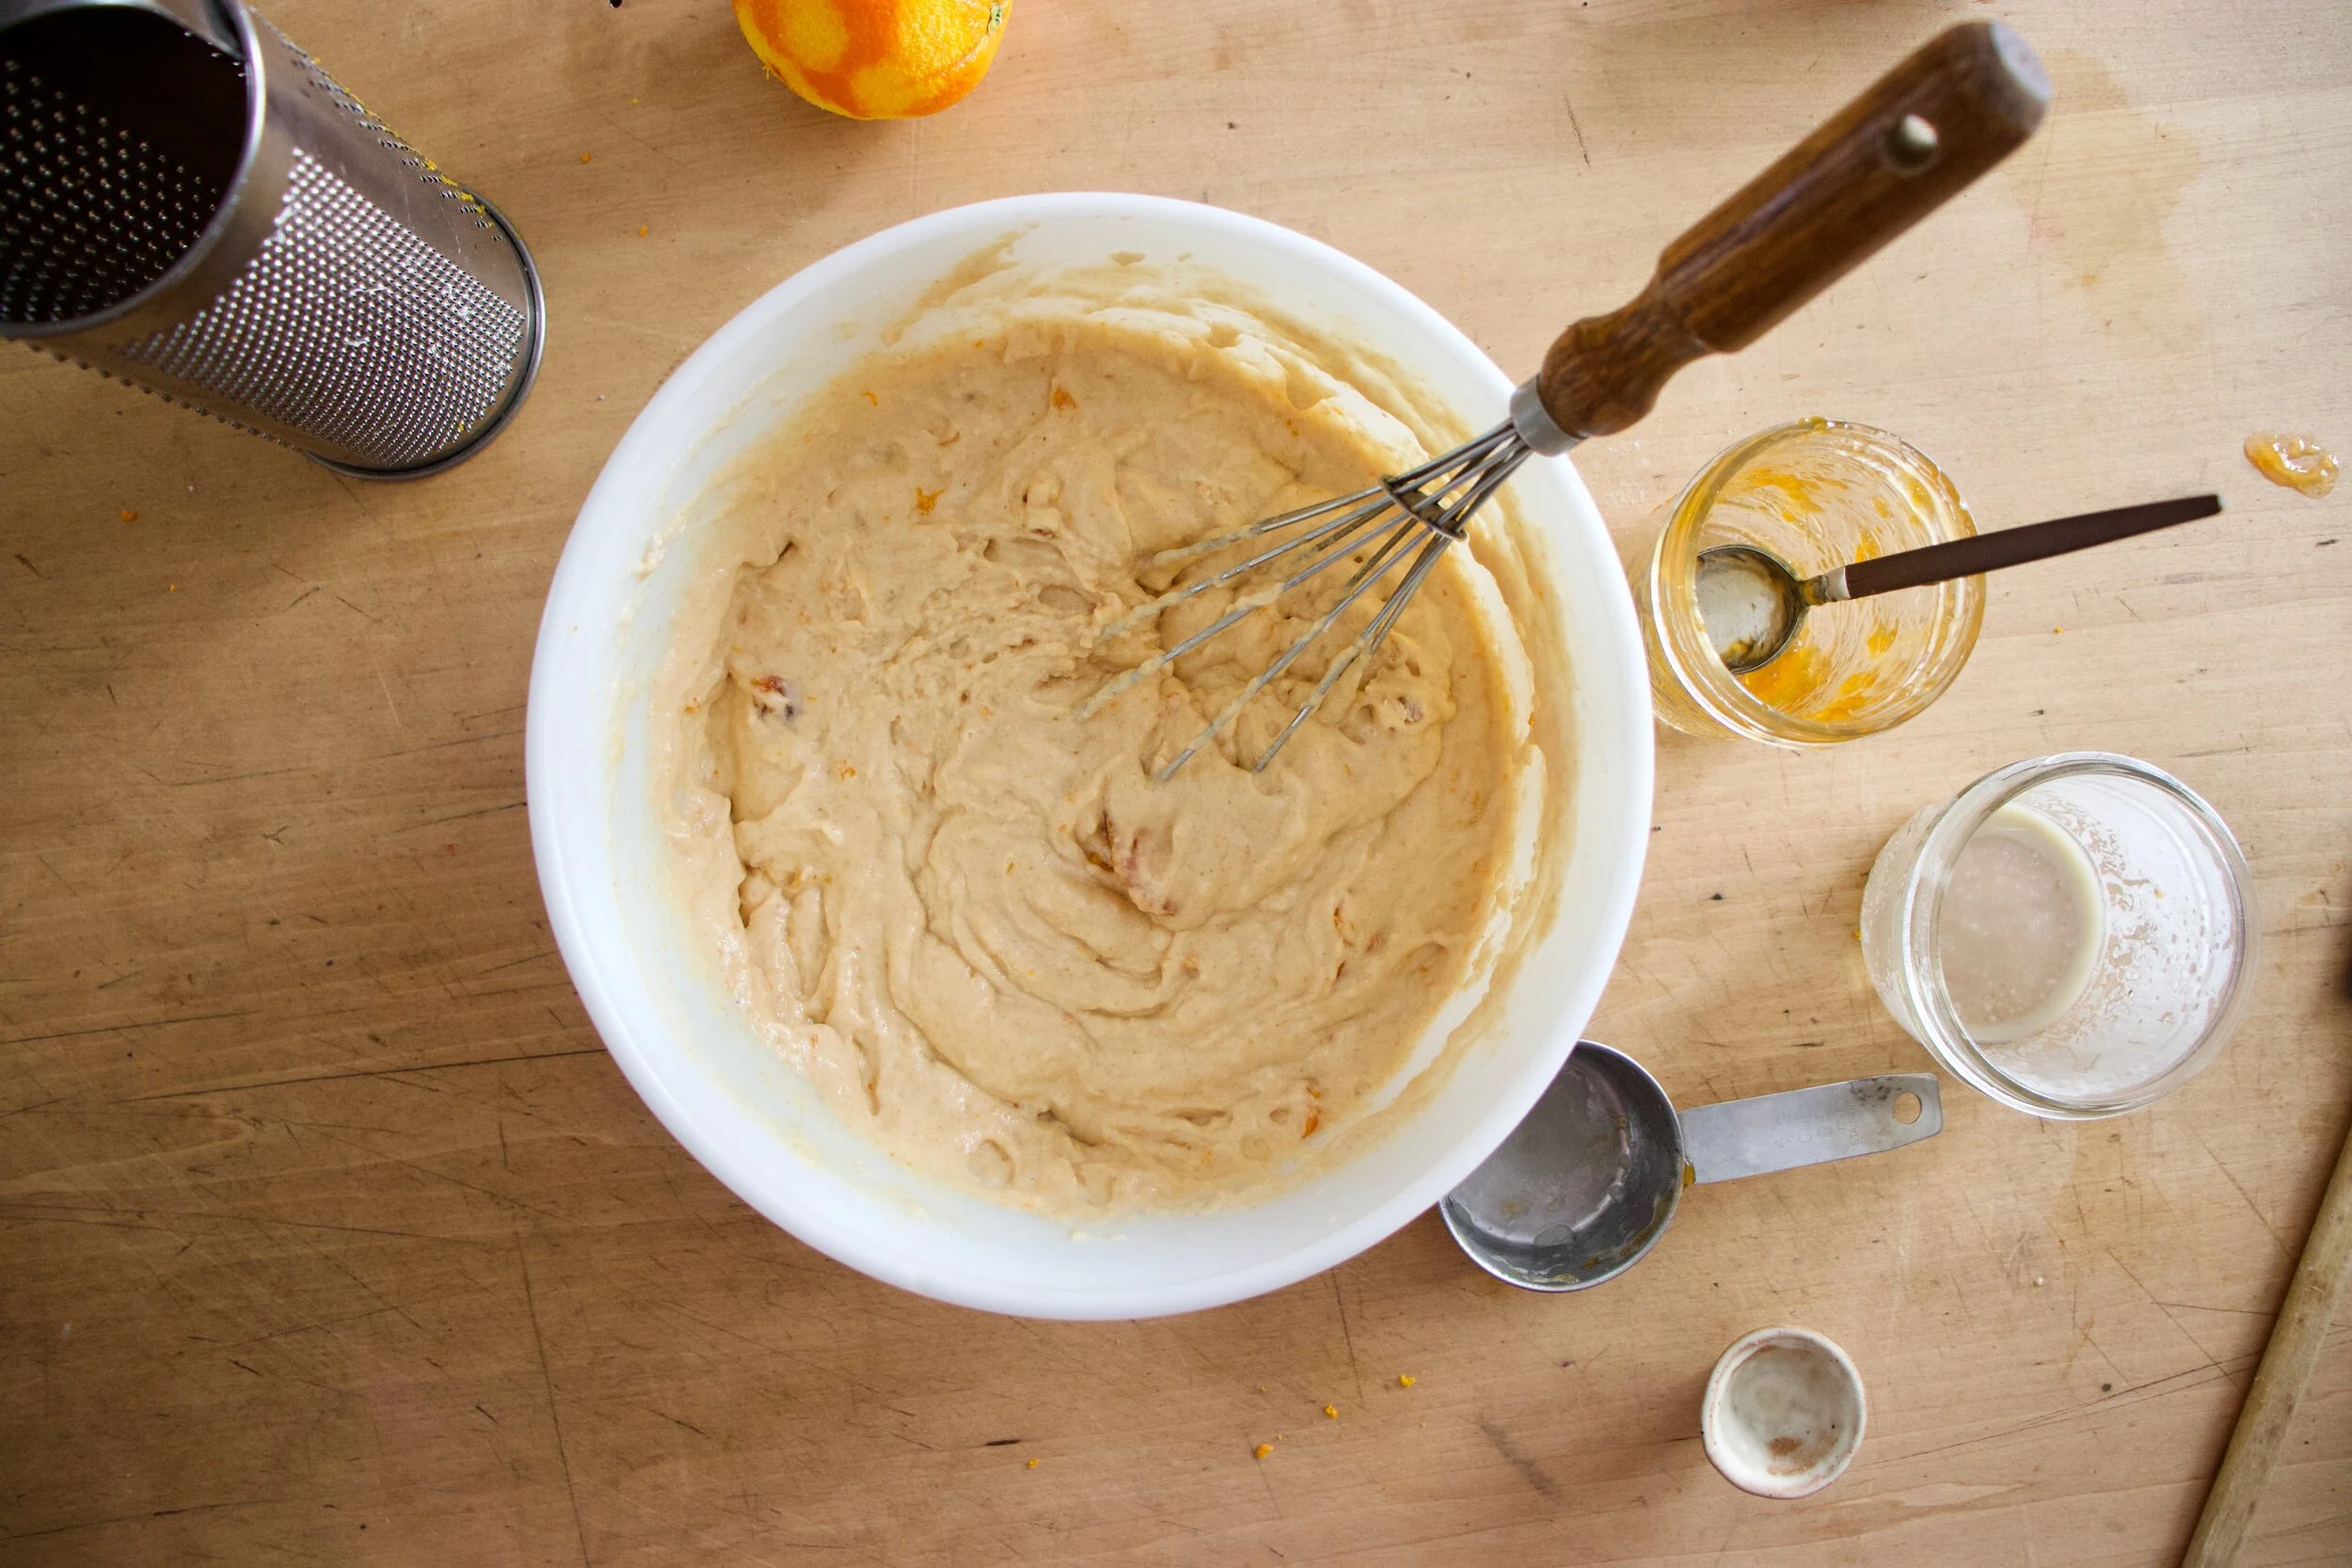
Jam, oil, milk, and vinegar. All on top of dry. Whisk that up until just combined. No over mixing. You will get tough (not in a good way) muffins.
Scoop into well greased muffins tins then cover the tops with poppy seeds.
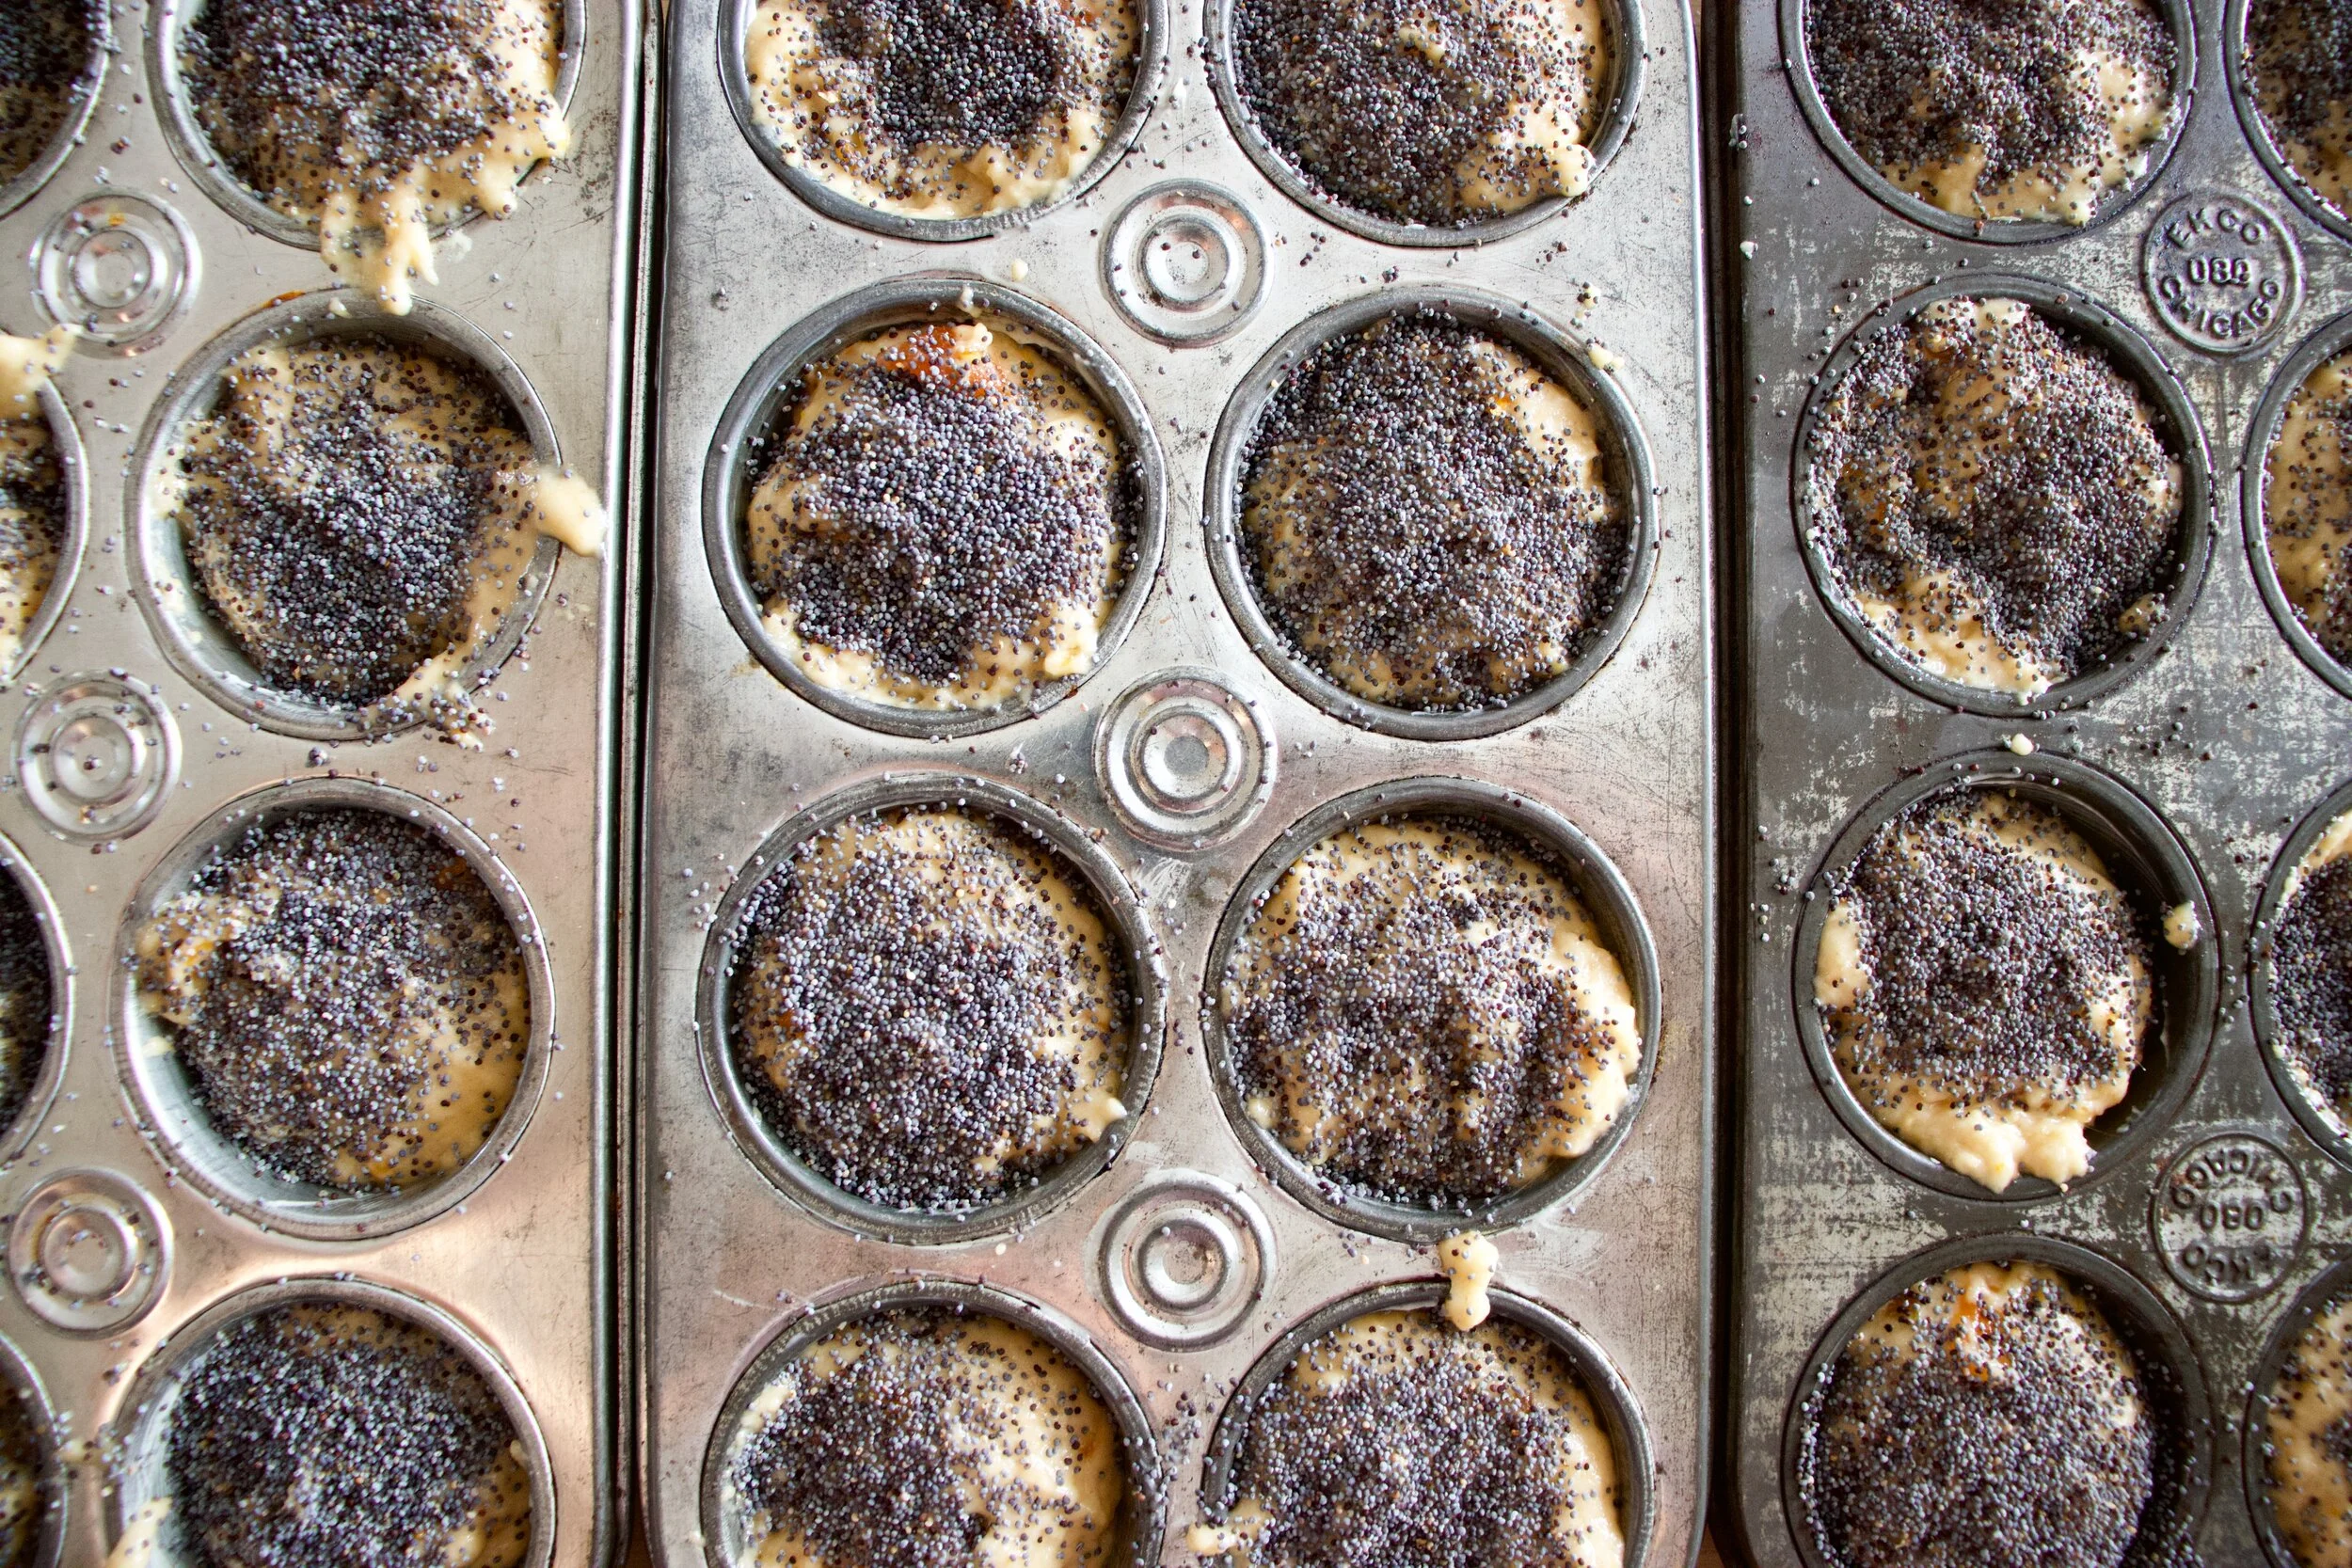
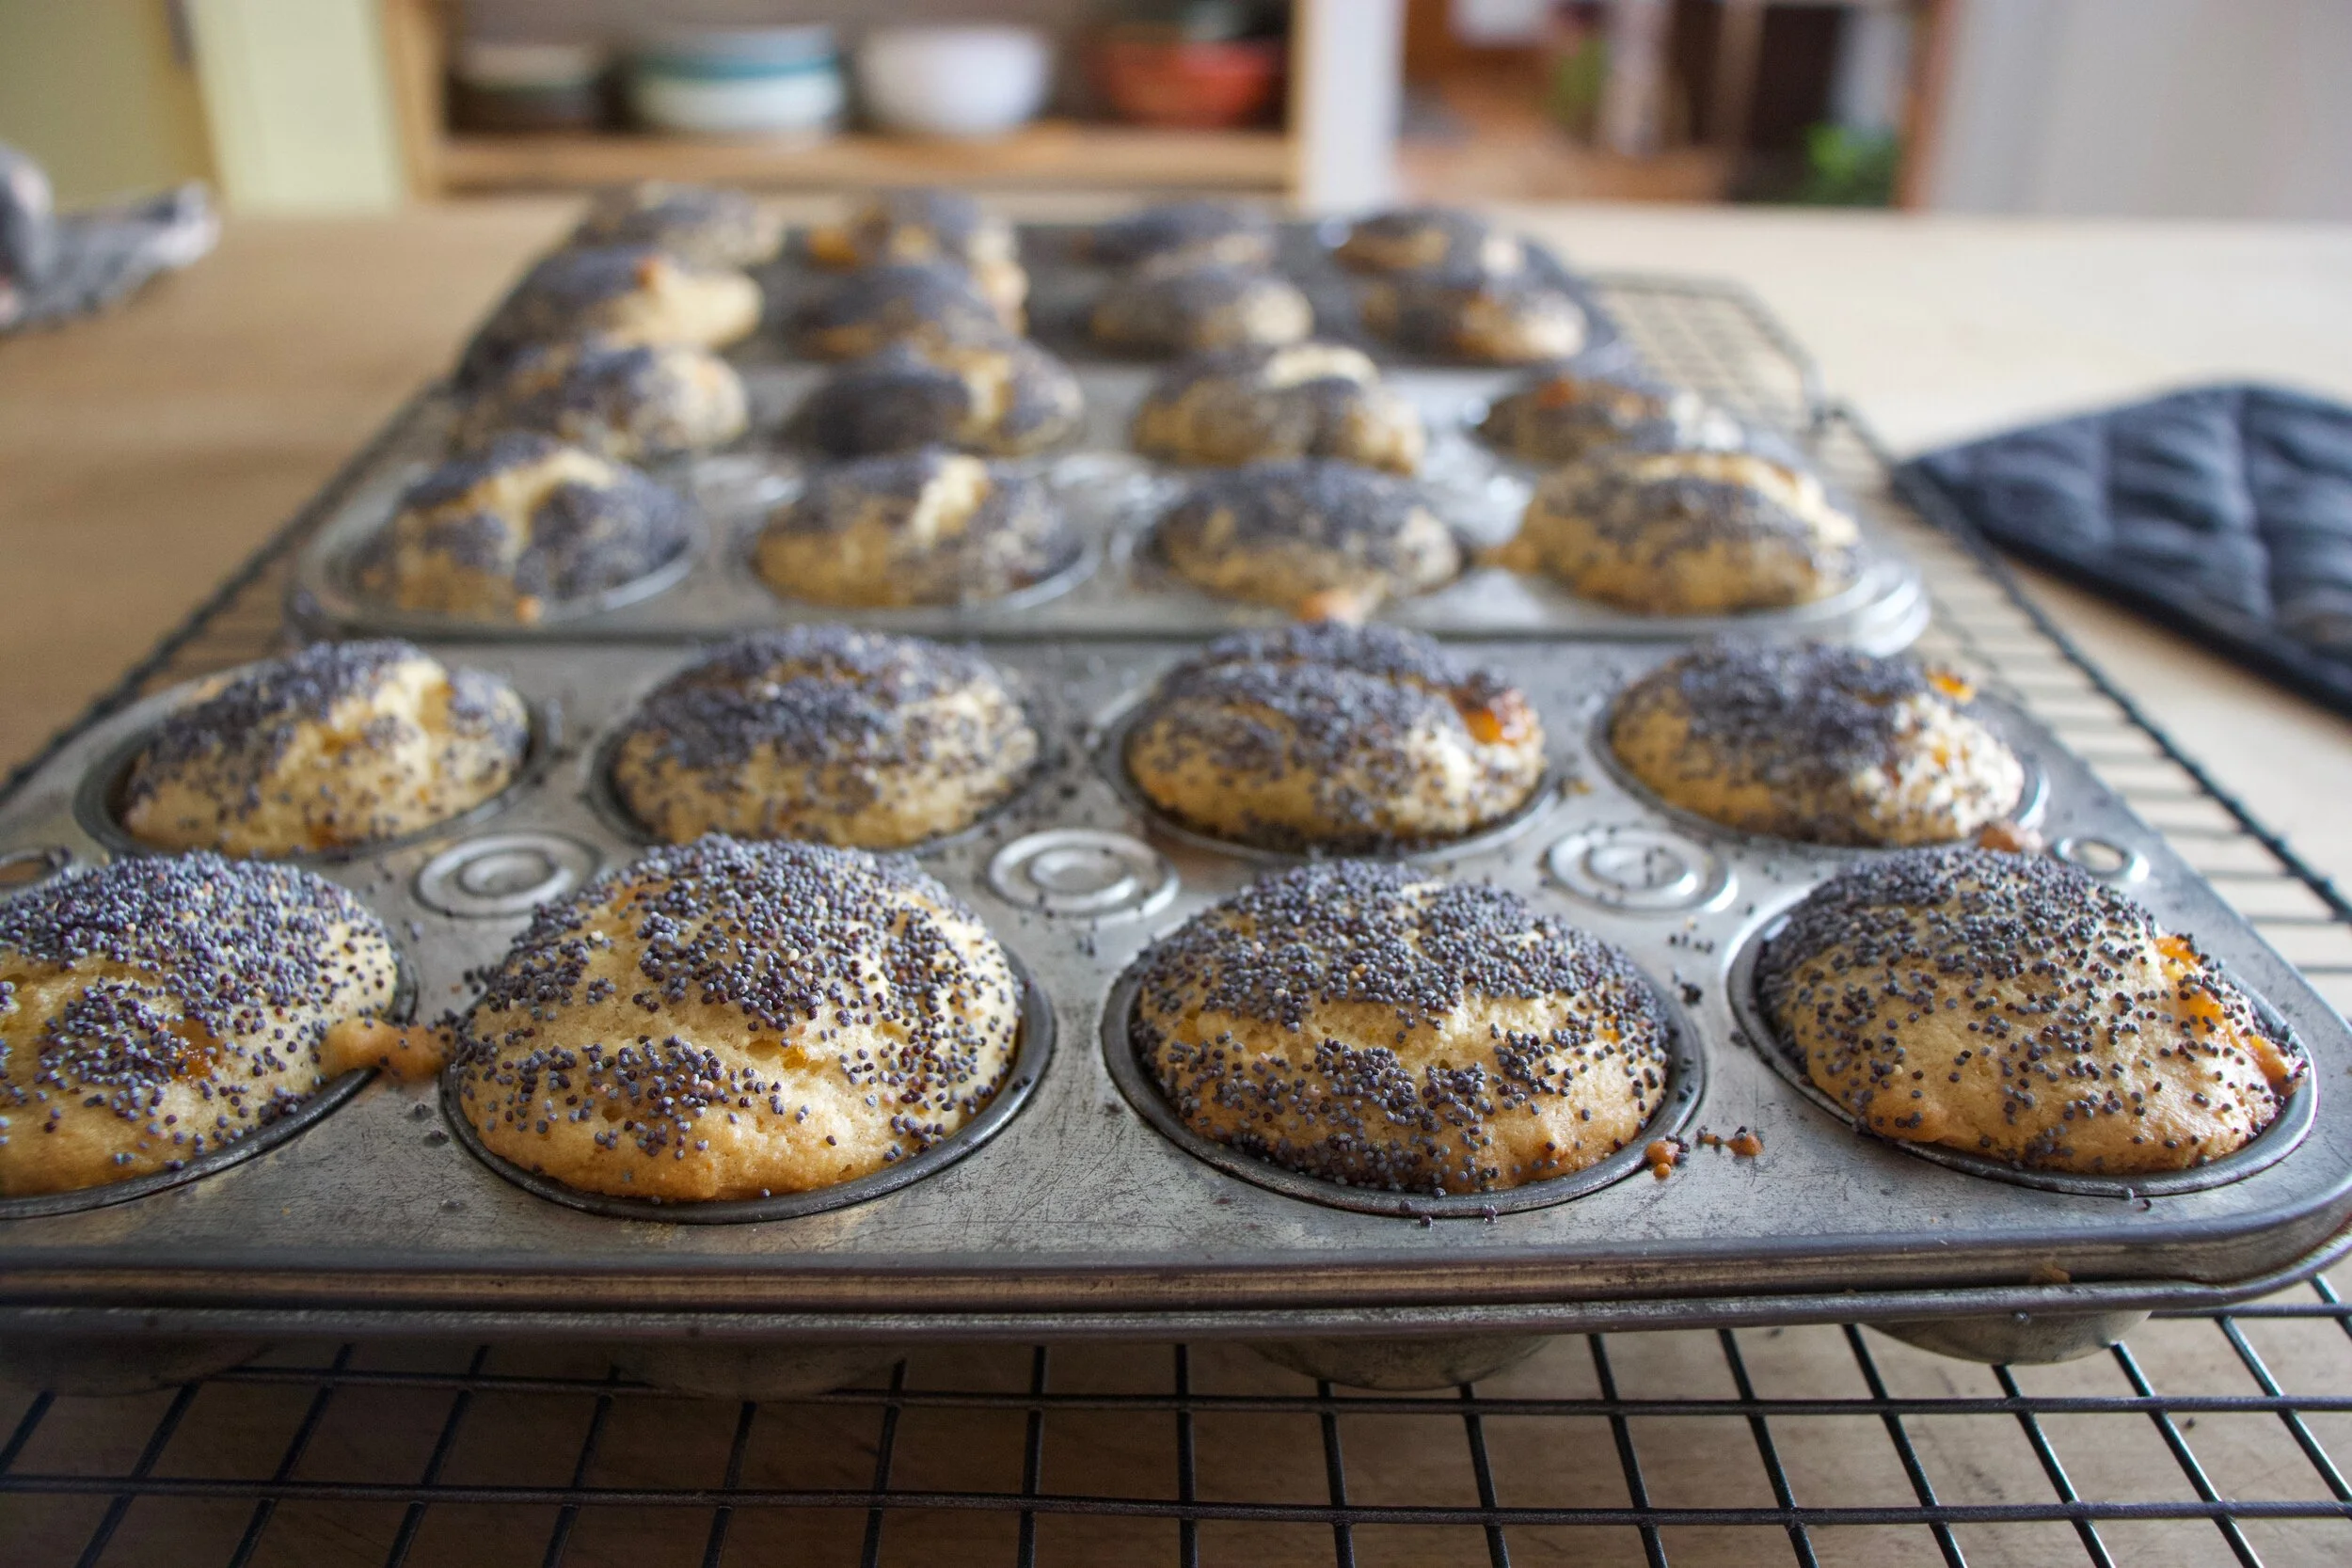
And out of the oven, looking all pretty like.
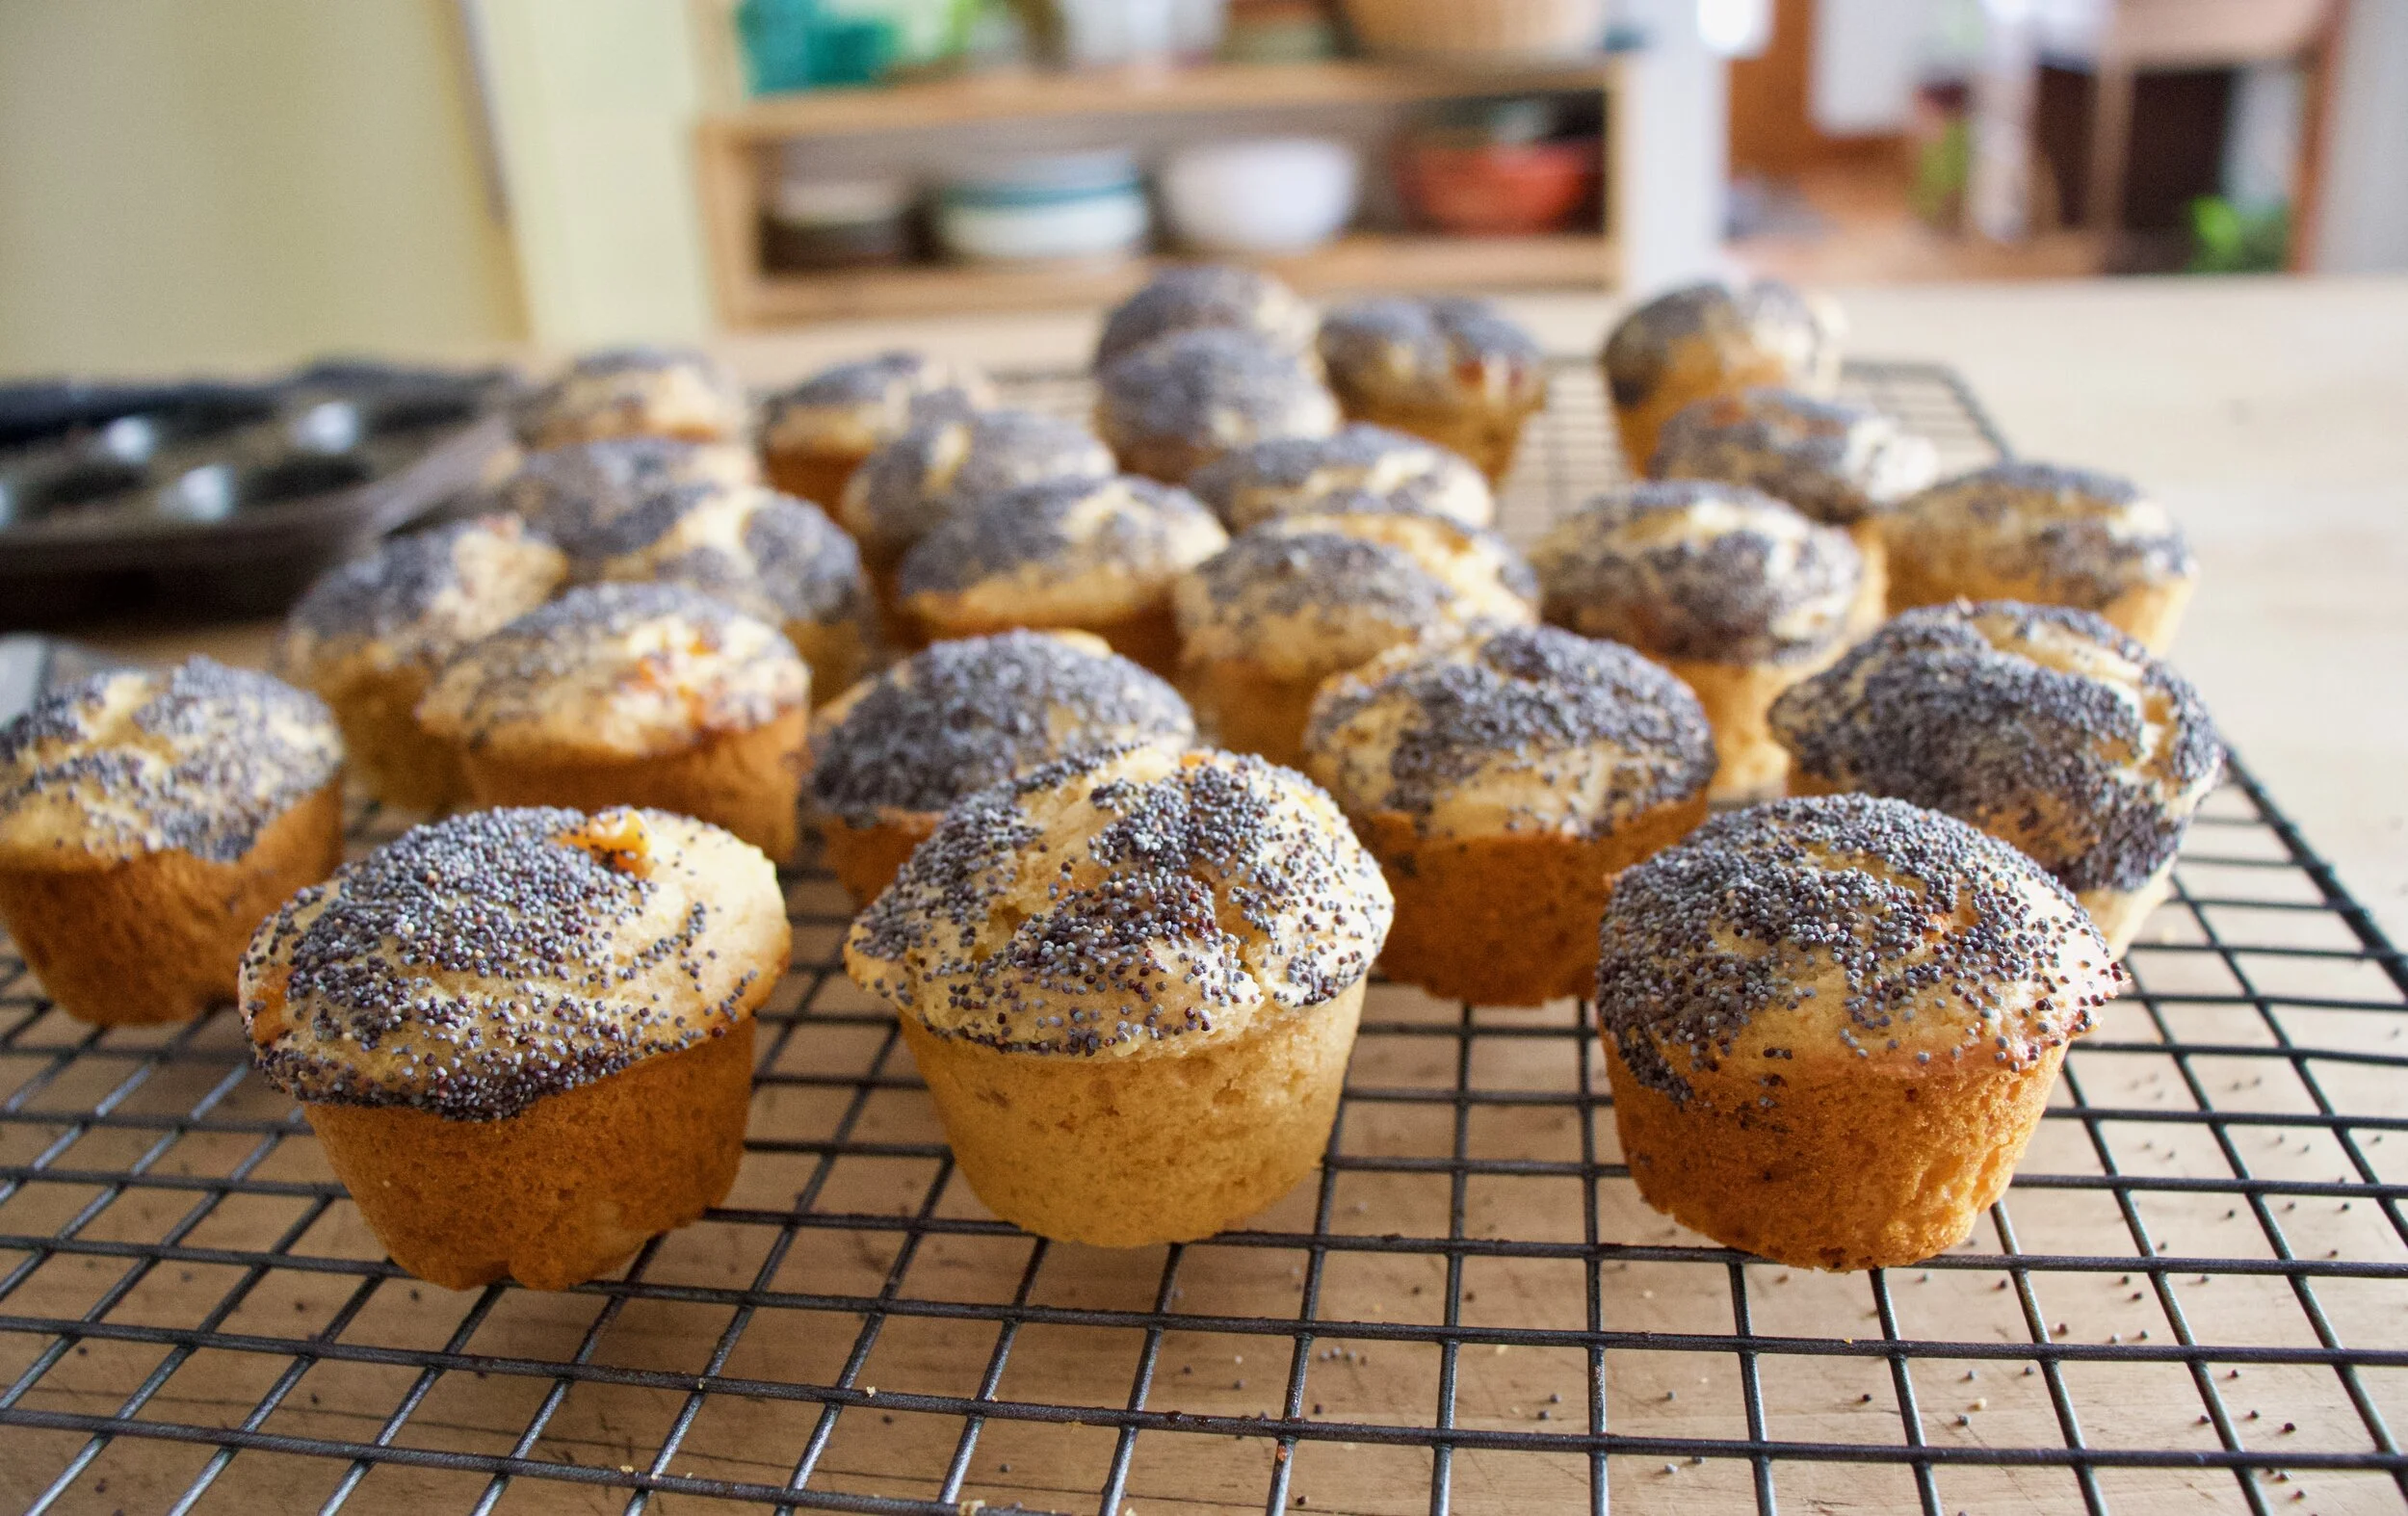
Pop those muffins out of the tins and cool on a wire rack for a bit. And by all means, don%u2019t wait until they are completely cool.

Now eat you a warm muffin and if they are mini, grab a few. You can%u2019t just eat one mini muffin, that is just crazy.

-C

Make 12 normal size muffins or 24 mini muffins

  • 1 cup all purpose flour

  • 1 1/4 cups white whole wheat flour

  • 2 teaspoon baking powder

  • 1/2 teaspoon baking soda

  • 1/2 teaspoon salt

  • 1 cup plant milk

  • 1/3 cup neutral oil

  • 1 tablespoon apple cider vinegar

  • zest of an orange

  • 1 heaping cup apricot jam or preserves (can sub in any flavor you like)

  • 1/3 cup poppy seeds

Preheat oven to 350

In a large bowl whisk together the flours, salt, baking powder and soda, and the zest of the orange. Add in the oil, milk, jam, and vinegar and whisk until just incorporated. Scoop batter into well grease muffin pans (12 regular or 24 mini) then cover the tops with poppy seeds. Pop into hot oven and bake until risen and a tester comes out clean when one is poked. For mini muffins, check after 13 minutes, for normal muffins, after 16 minutes.

Once baked, remove from oven and pop out of pans when cool enough to handle. Place on a wire rack to cool completely or just start eating them warm.

Store left over muffins in an airtight container for 3-4 days at room temperature. They also freeze well.

What%u2019s up with dinner rolls? Do people eat them all year round, like on a Tuesday in the middle of March or maybe a nice blue sky sunny day in July? Is that a weird question? But seriously, think about it. Dinner rolls, at least in my world of people, are pretty much only eaten in and around Thanksgiving and Christmas. Huh. Kind of strange seeing that dinner rolls are bread which everyone eats all the time and are basically made specifically for dinner (although can and should be eaten for breakfast and lunch as well) which most people eat. Every. Single. Day. Well, whatever the reason, it%u2019s weird. So yes, I am making these here dinner rolls now at the traditional holiday time but I think as of now, I am going to start making them all the time. It%u2019s going to be my new thing. Fourth of July dinner rolls. Yup.

And so yes, we need dinner rolls right now for the holiday food feasts and these dinner rolls are the perfect accompaniment to any and all dinners. They are nice and fluffy and all dinner roll like, just as any good roll should be, but also slightly more nutty and soft and healthy because oats and wheat flour and homemade which is always the best.

And if you are like, hell yes I am a dinner roll person and hell no I am sticking to store bought cause that is that and how it%u2019s done, well hey, no judgment here. I made these for my people for our family Thanksgiving, (which is happening today at my house. There are going be so many people) and I know that everyone will love and be happy to eat them, but I too also bought some of those super white, take and bake ones that I know if I don%u2019t have on the table next to these gorgeous and amazing rolls, that I will probably get punched in the face. So we will have both. And then at dinner I can bask in the glory of all the comments about how much better my rolls are then the store bought ones. (Secretly why I am having both. Fishing for compliments. HAHA!)

Now to those soft and fluffy dinner rolls!
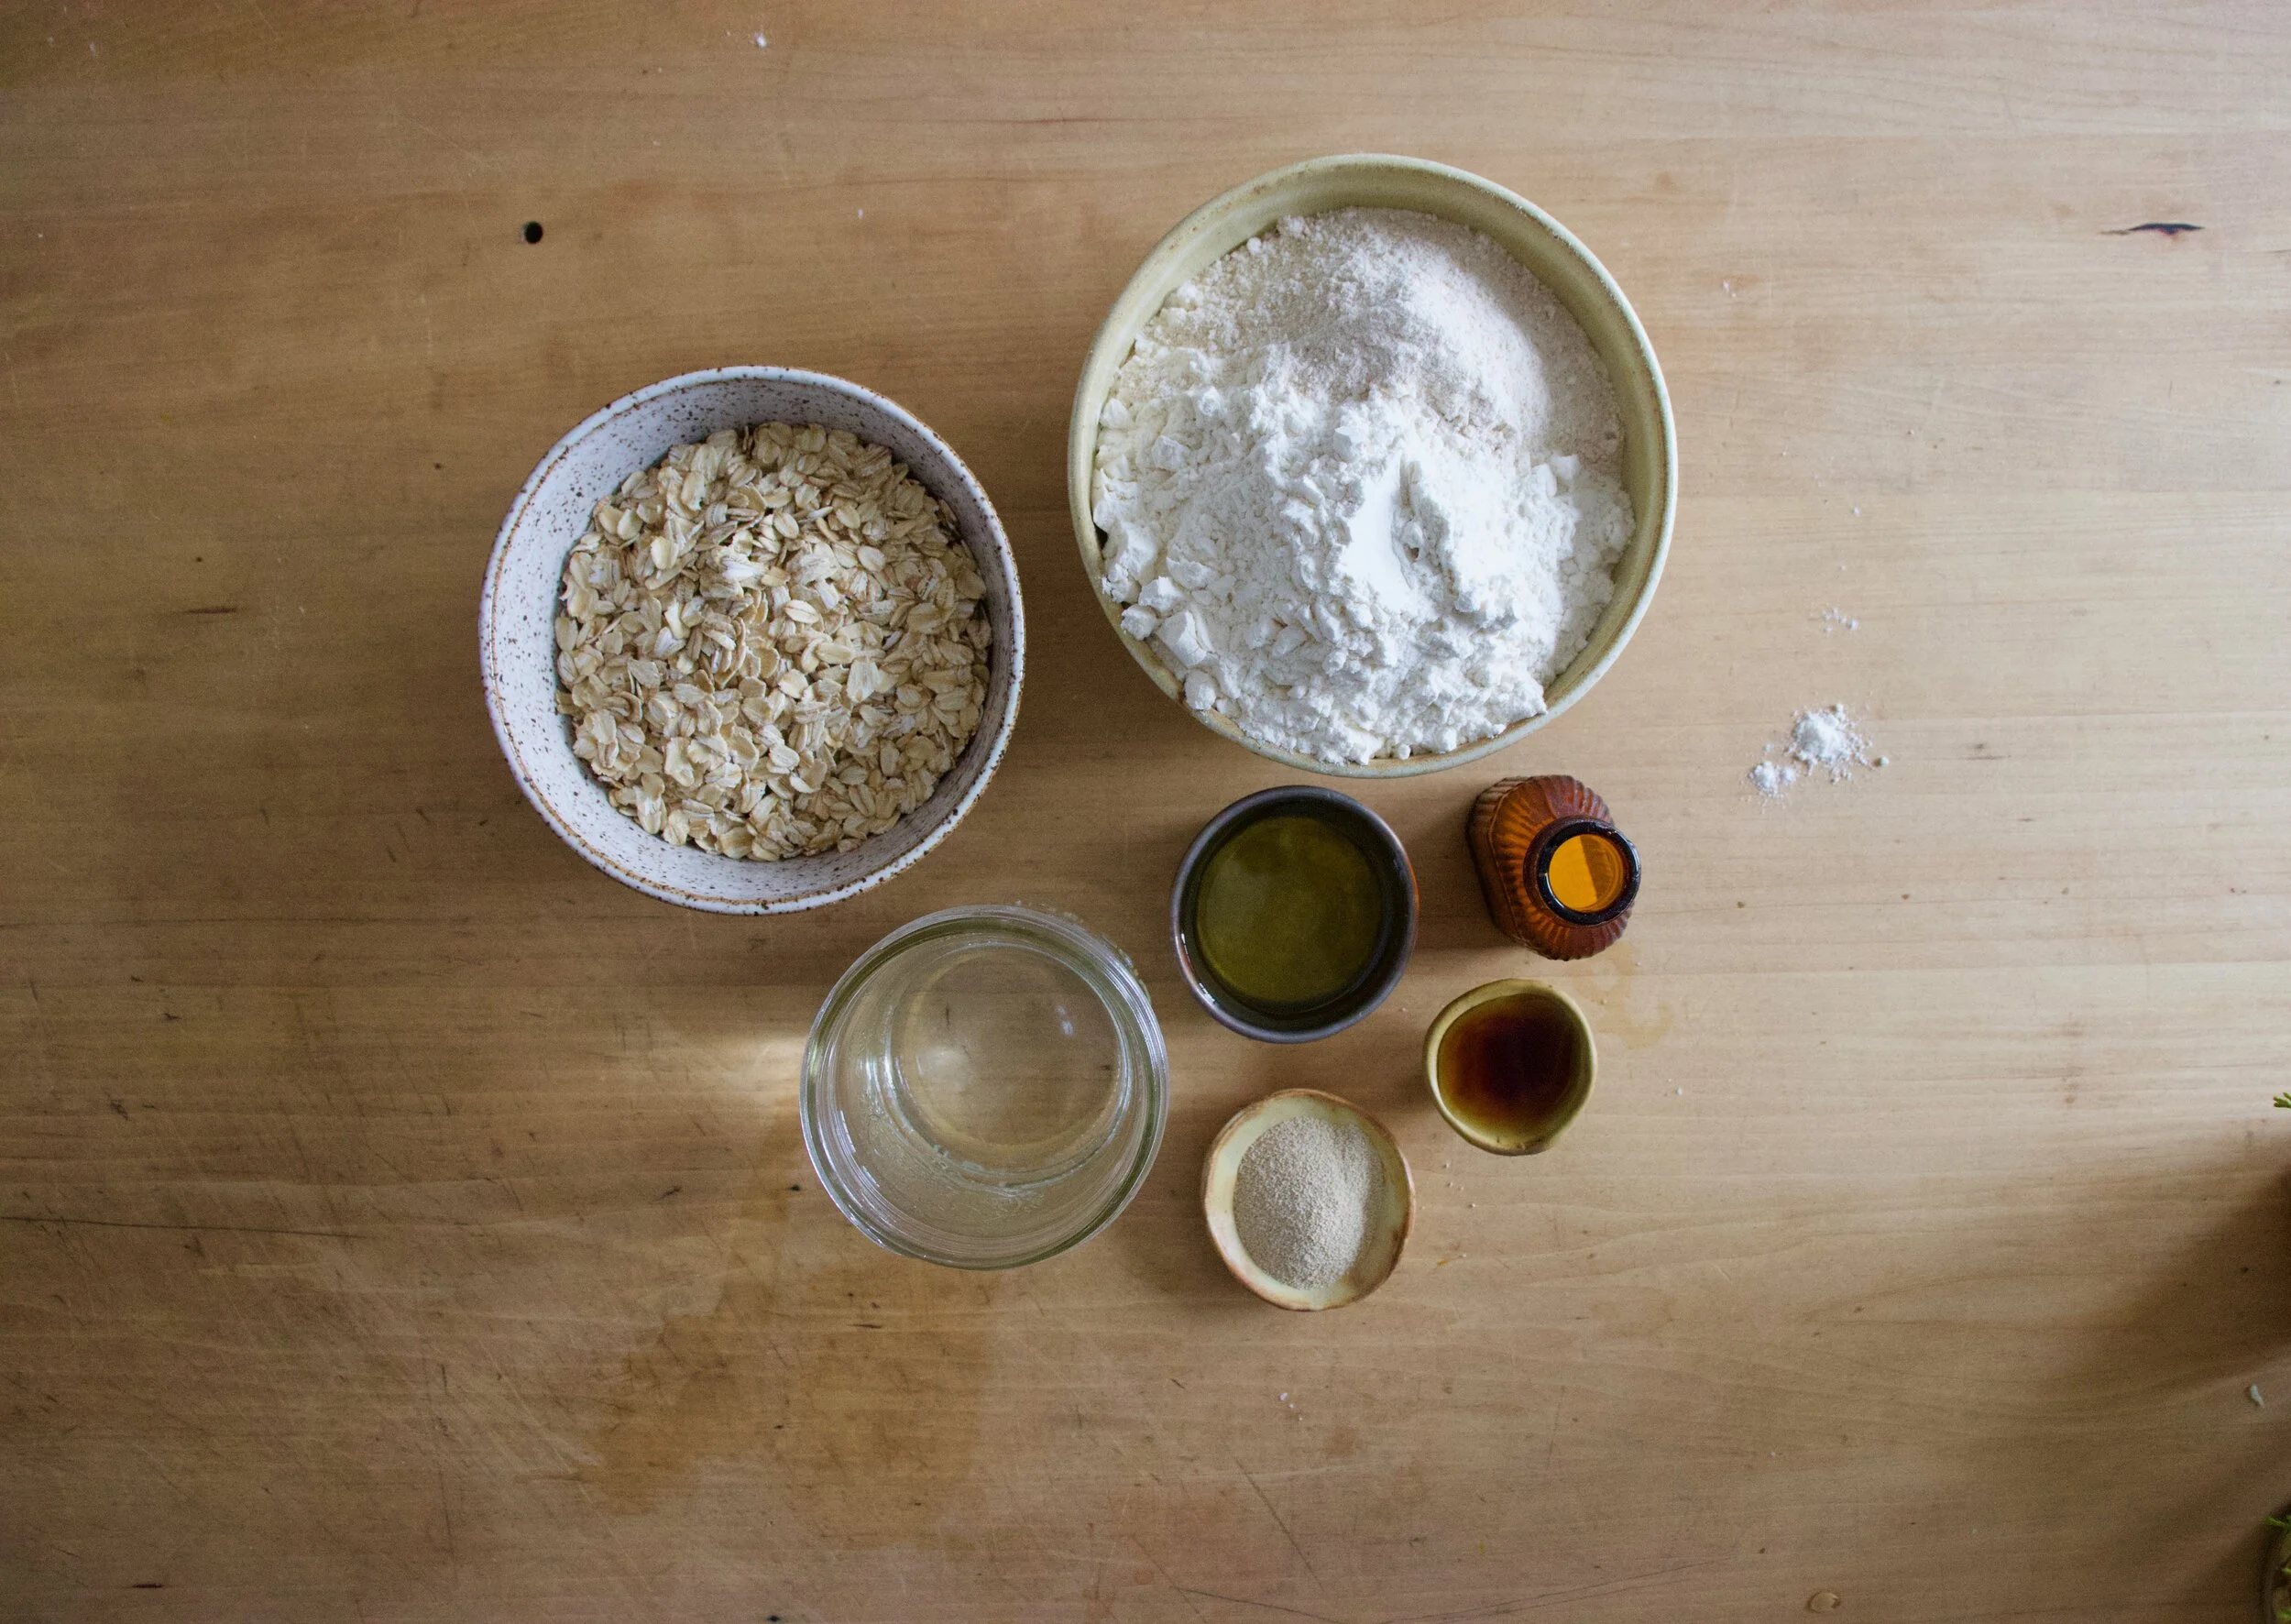
The stuff. Old fashion oats, all purpose and white whole wheat flour, yeast, oil, water (hot and room temperature), maple syrup, and salt.
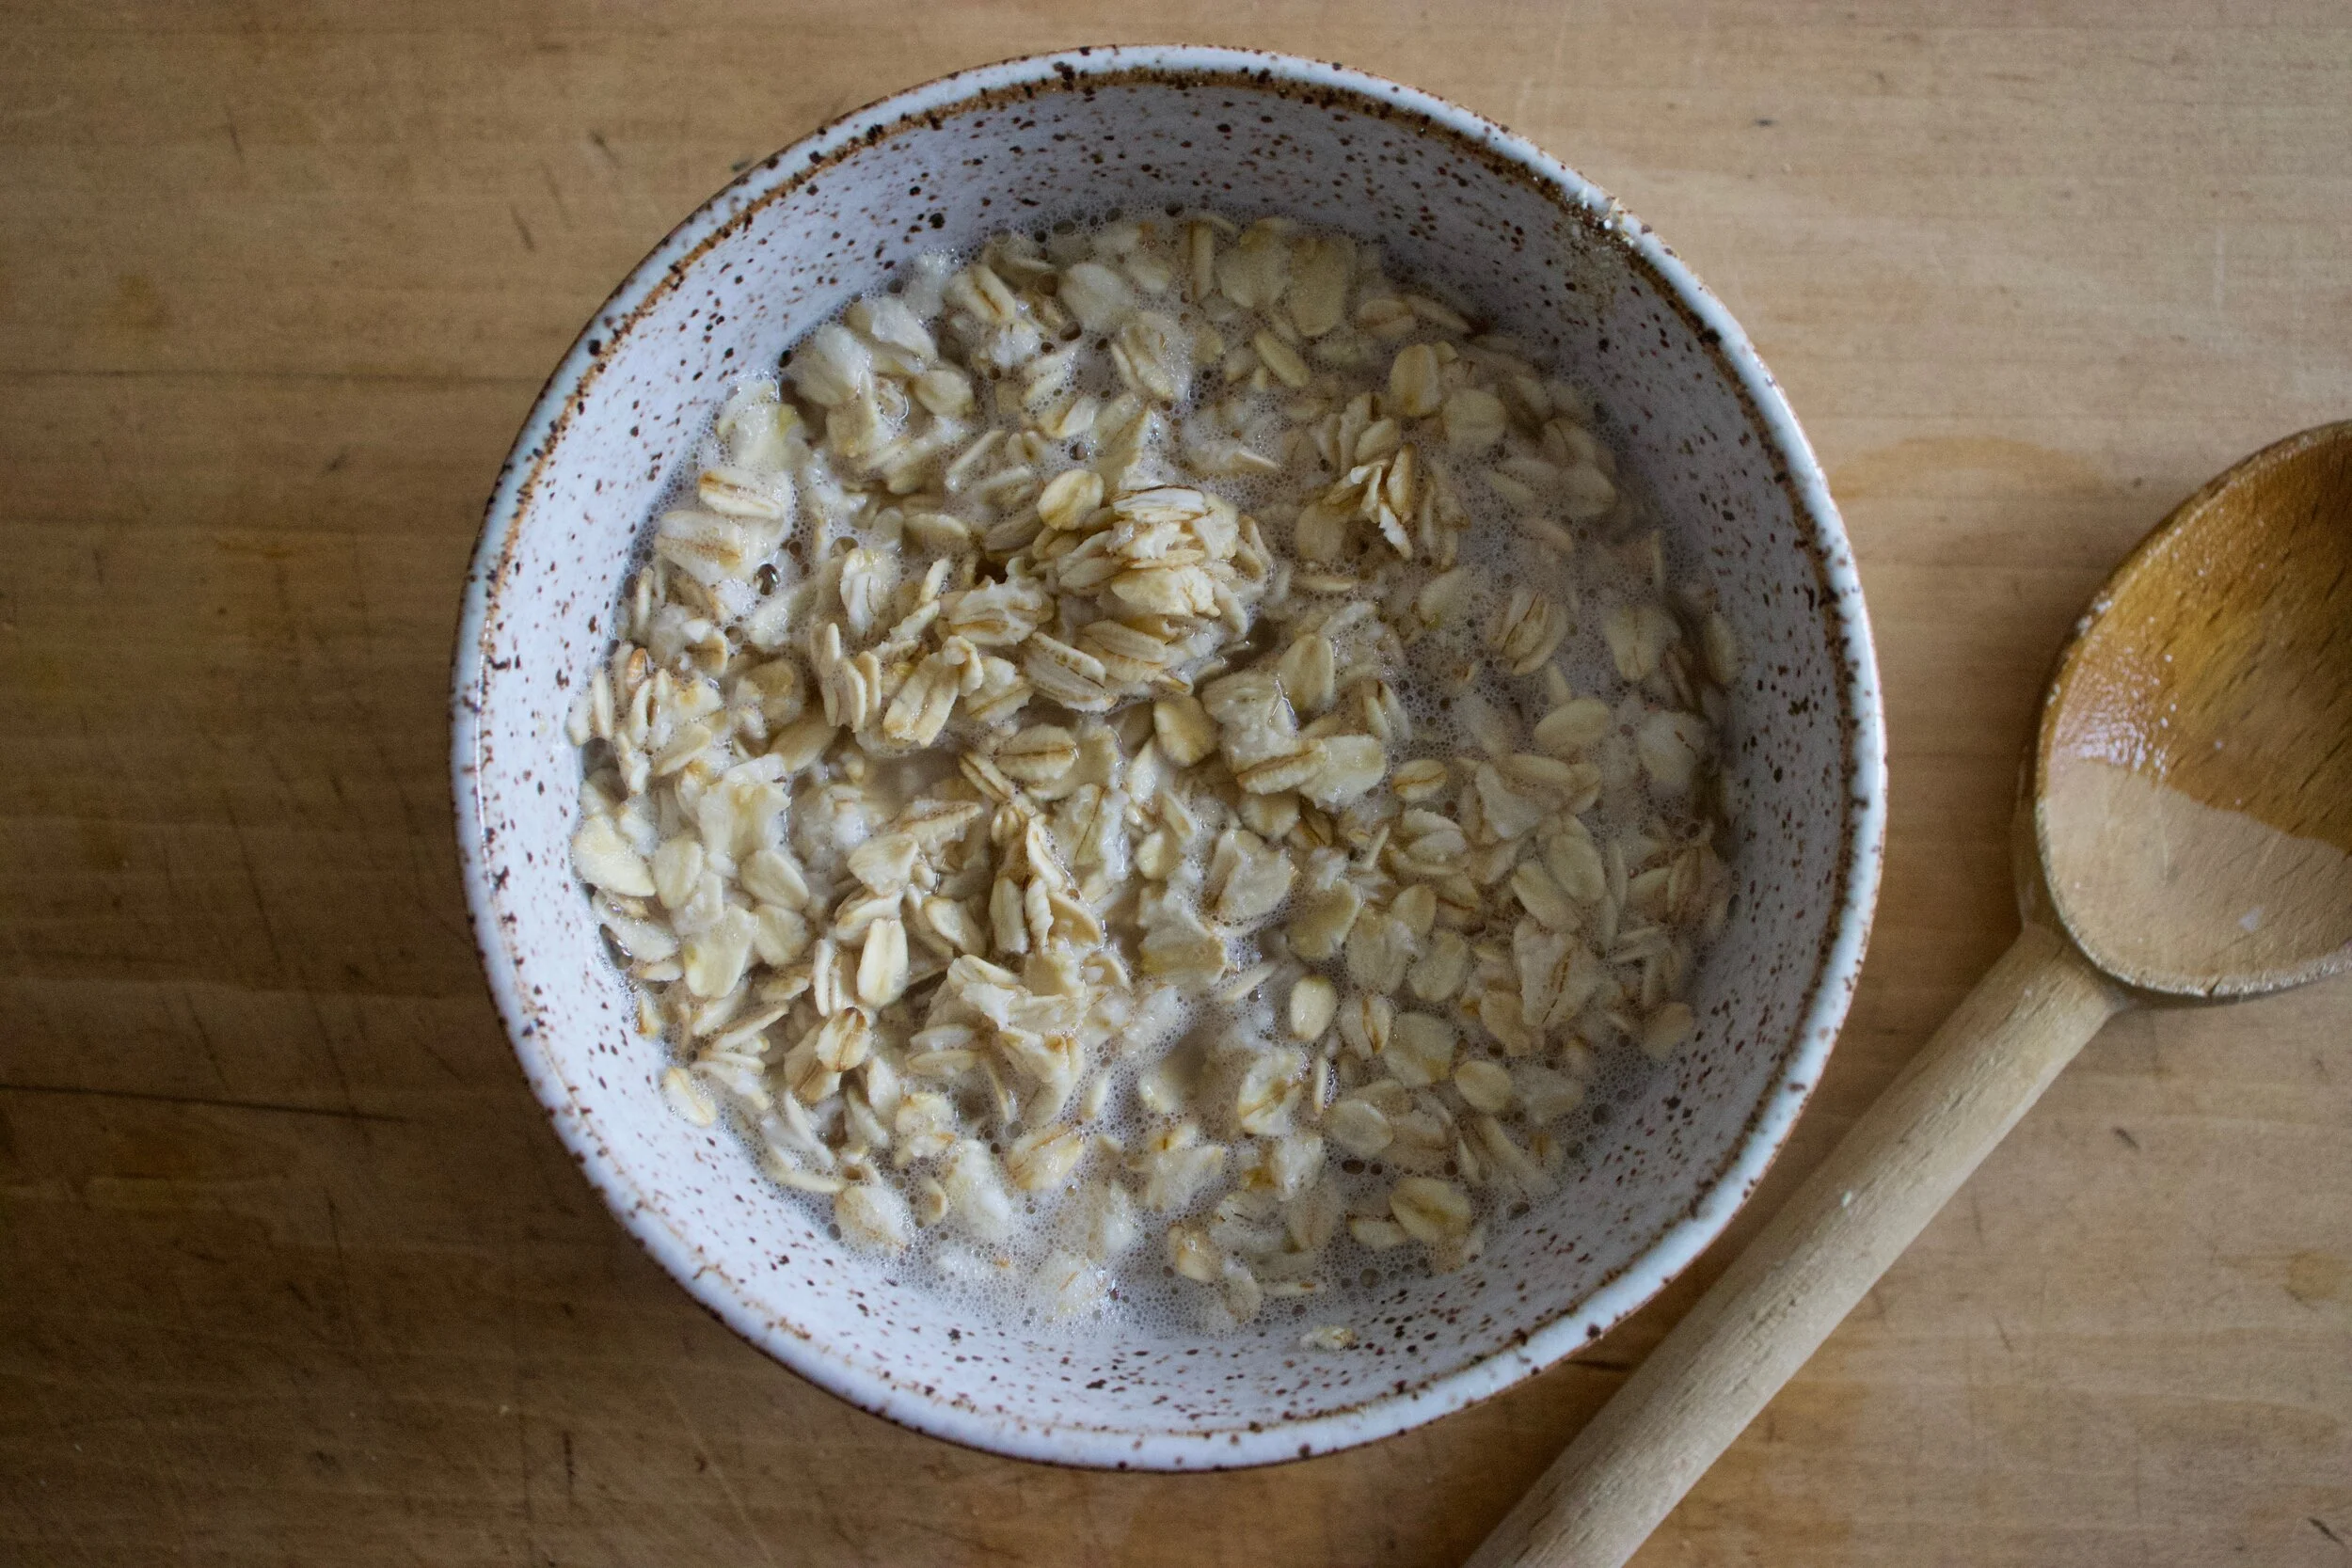
First, take the boiling water and pour it over the oats. Mix them and let them soak and cool for 10 or so minutes.

While oats are soaking, add the room temp water to a big bowl with the yeast. Once the oats are soft and cooled off a bit, add them to the yeast mixture along with the oil, and maple. Mix together. The add the flours and mix until combined.
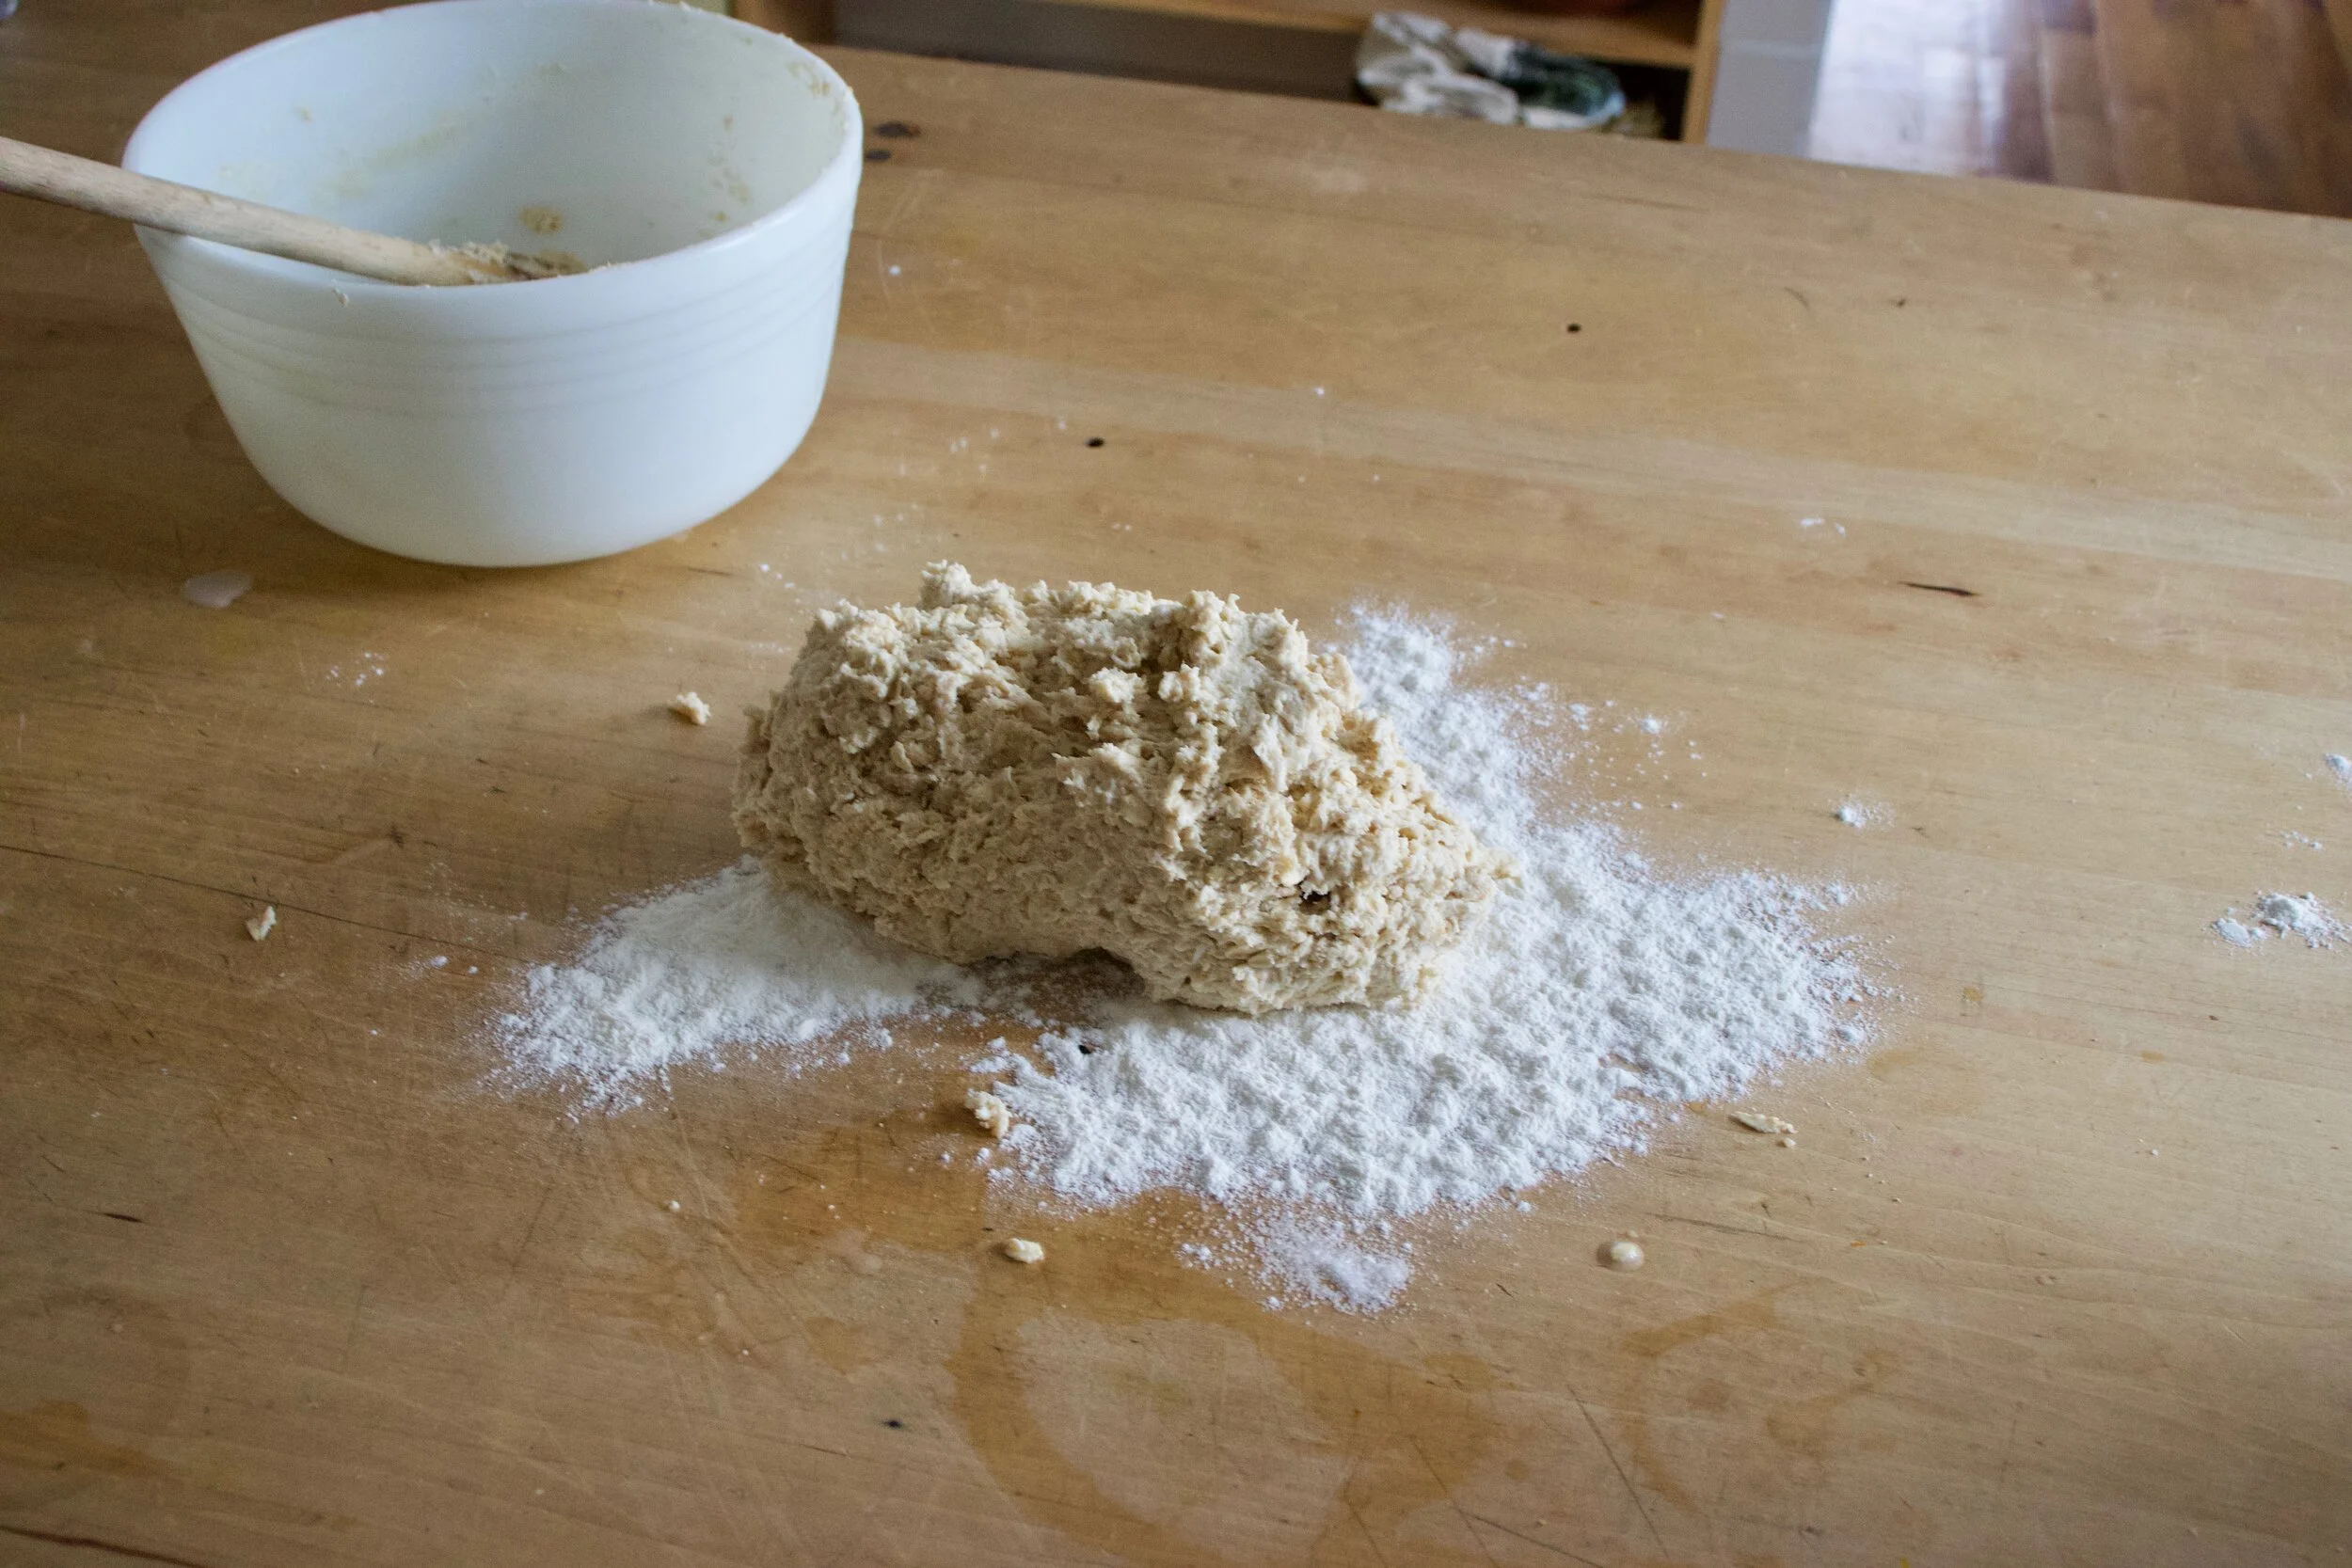
Dump dough onto a floured surface and knead for about 3-5 minutes, adding a little more four as needed to keep from being to sticky, but don%u2019t over flour. The dough is and should be a little tacky.
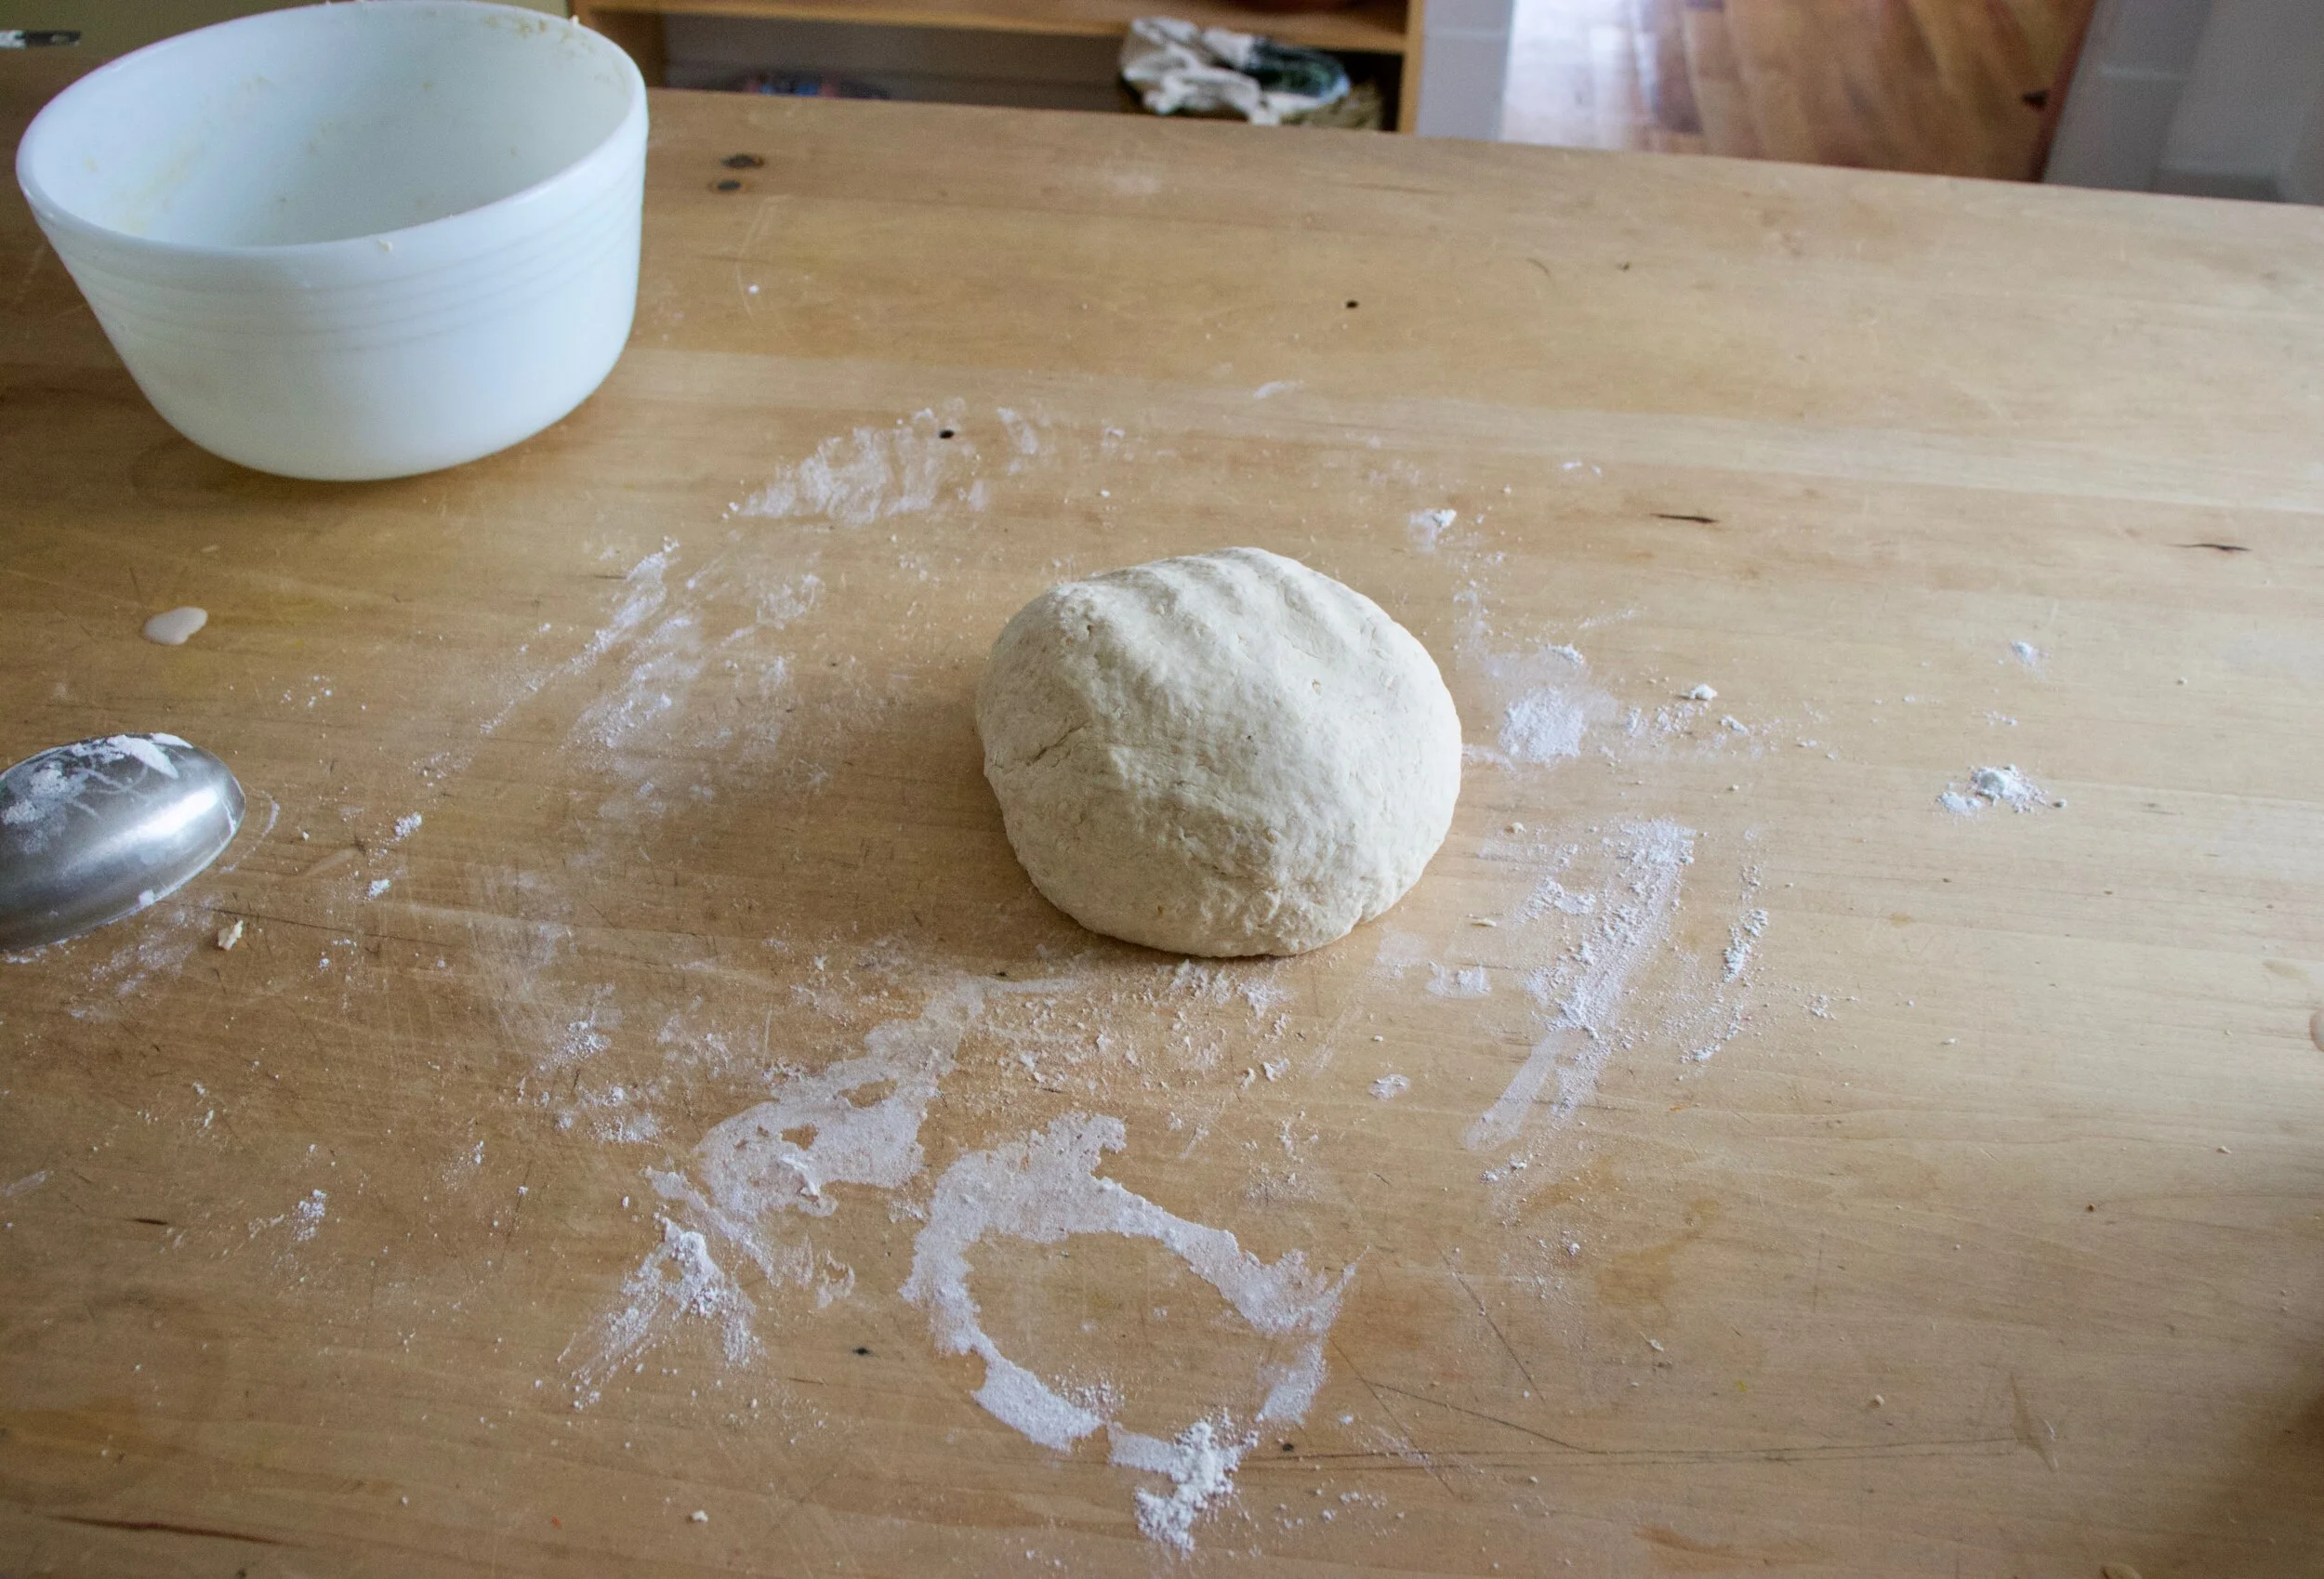
Soft and supple. Kneaded and ready.

Place the dough back into the bowl and cover with a damp towel. Leave alone and let rise for about an hour or until it doubles in size.
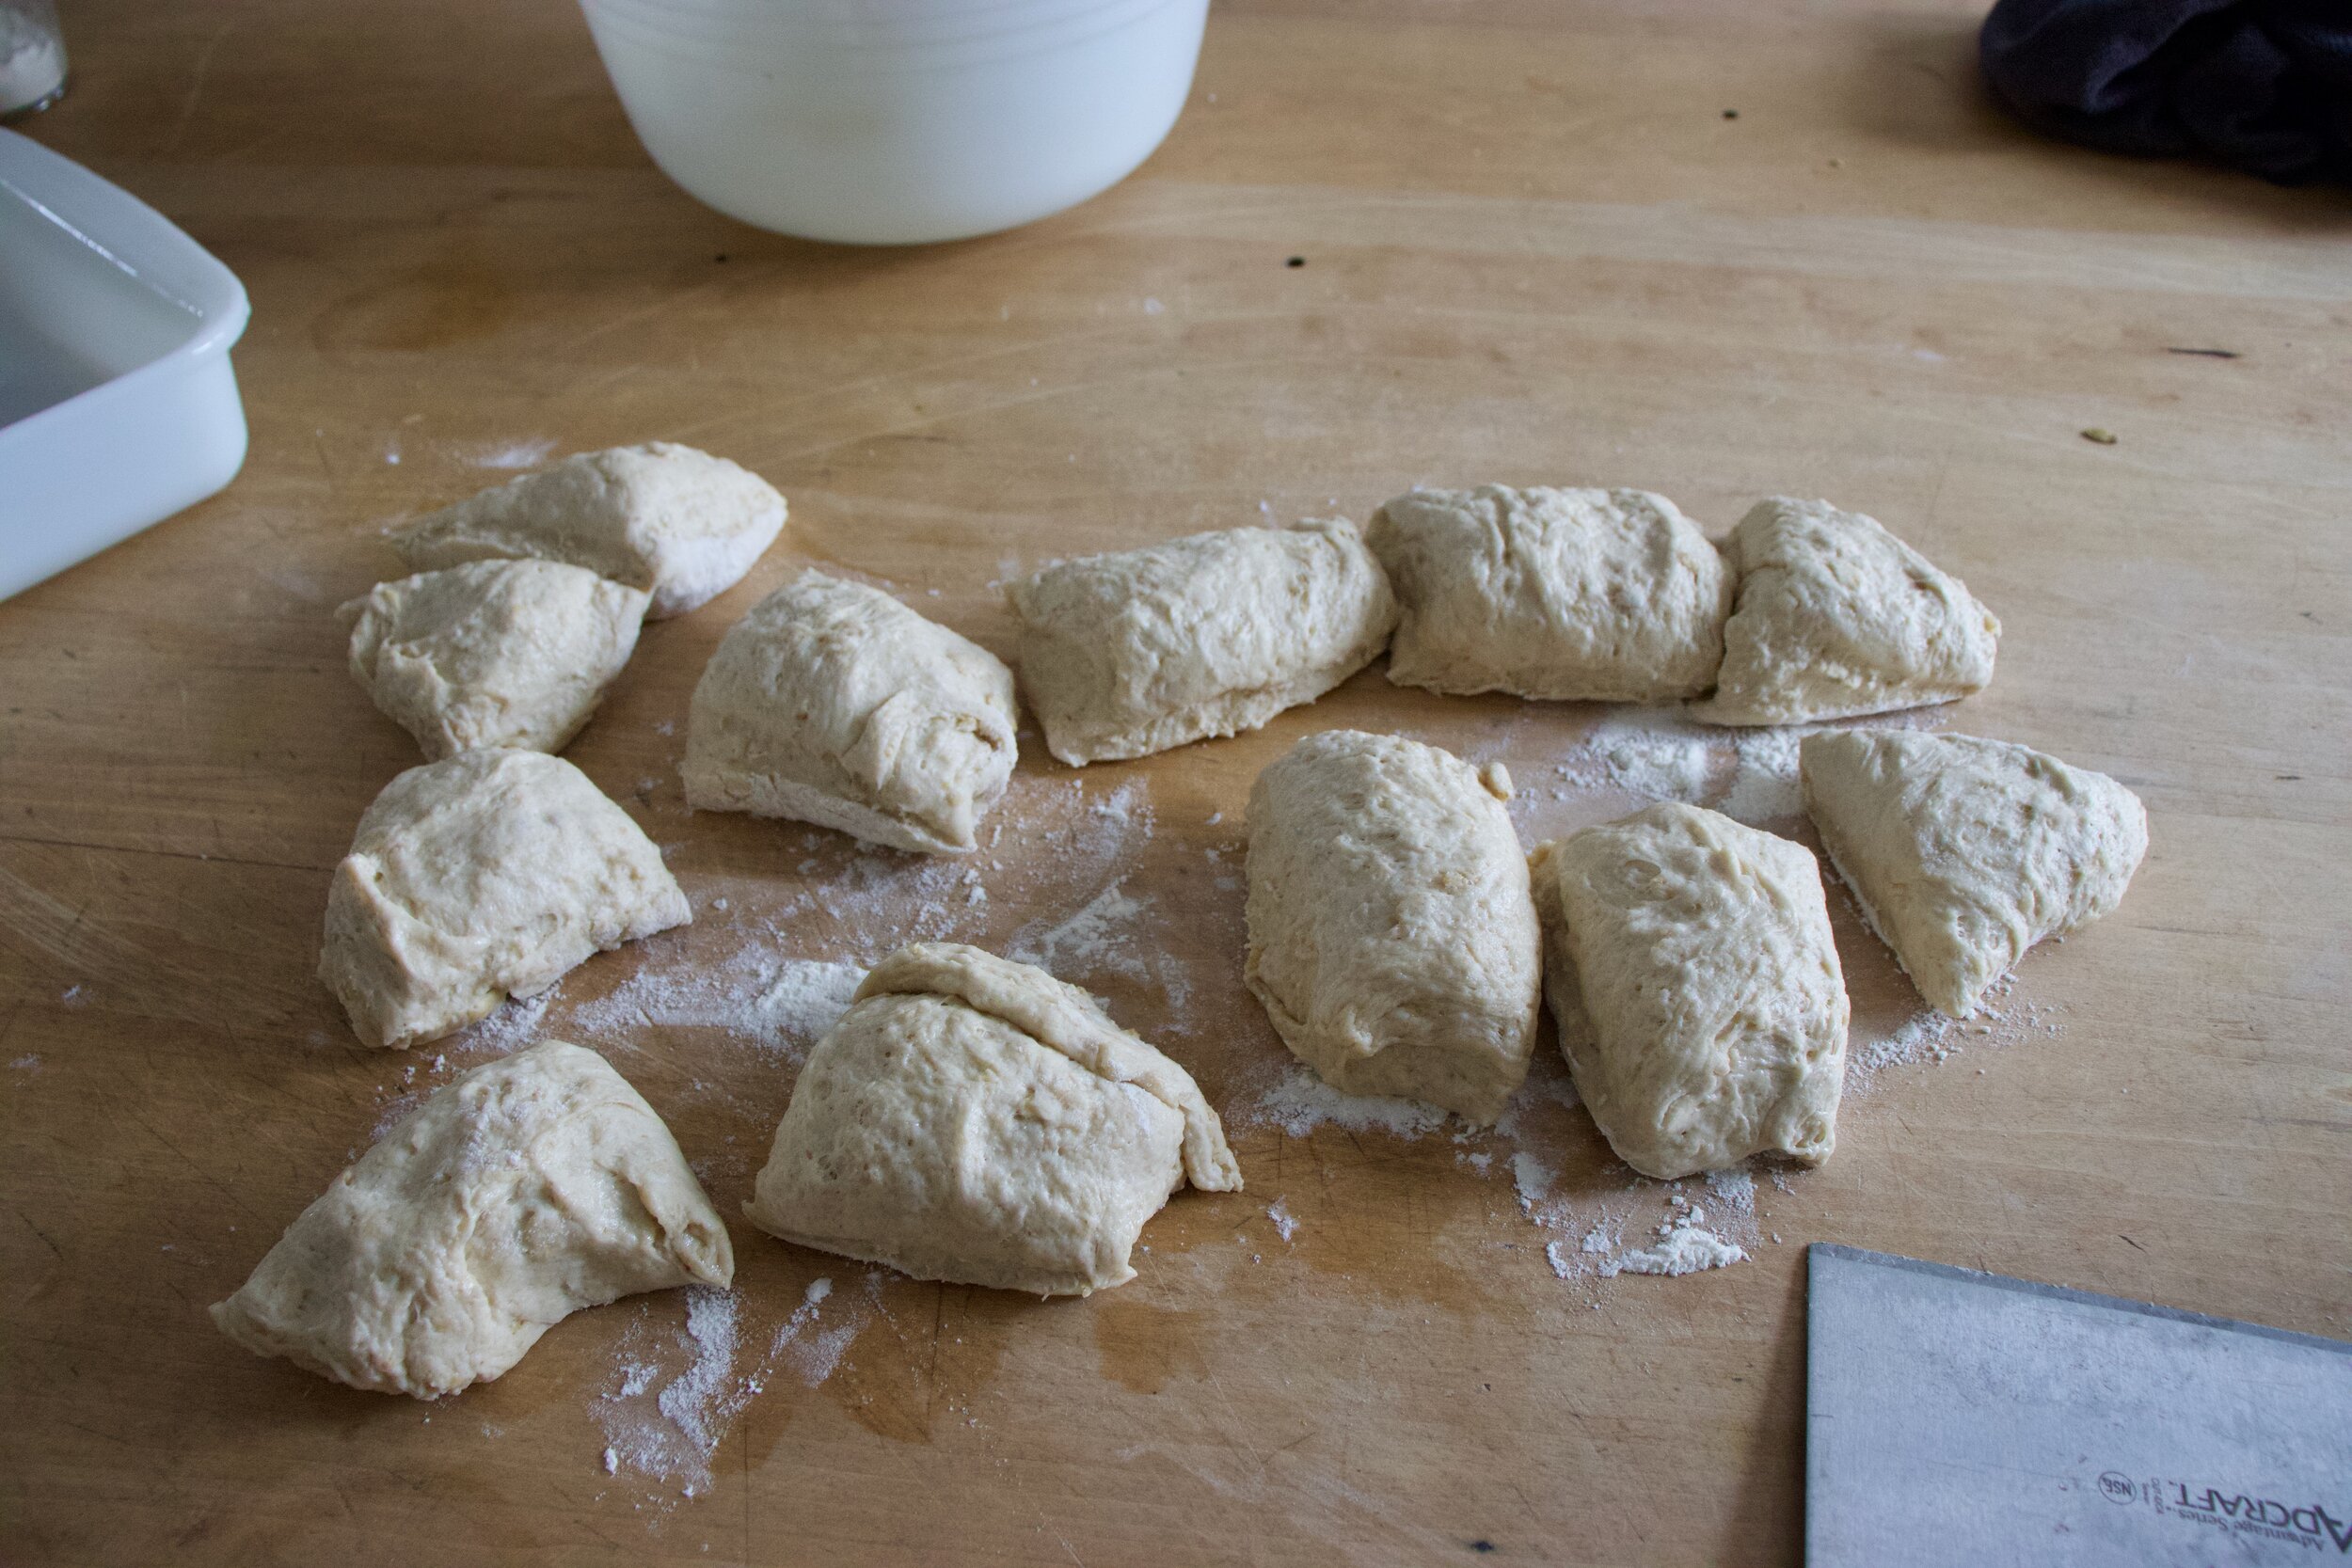
Once the dough doubles, dump out onto a lightly floured surface and cut into 12-16 equal sized pieces .

Roll each roll into a roll shape and place them in a lightly greased baking dish. Cover for another 15-20 minutes to let rest and rise a little more.
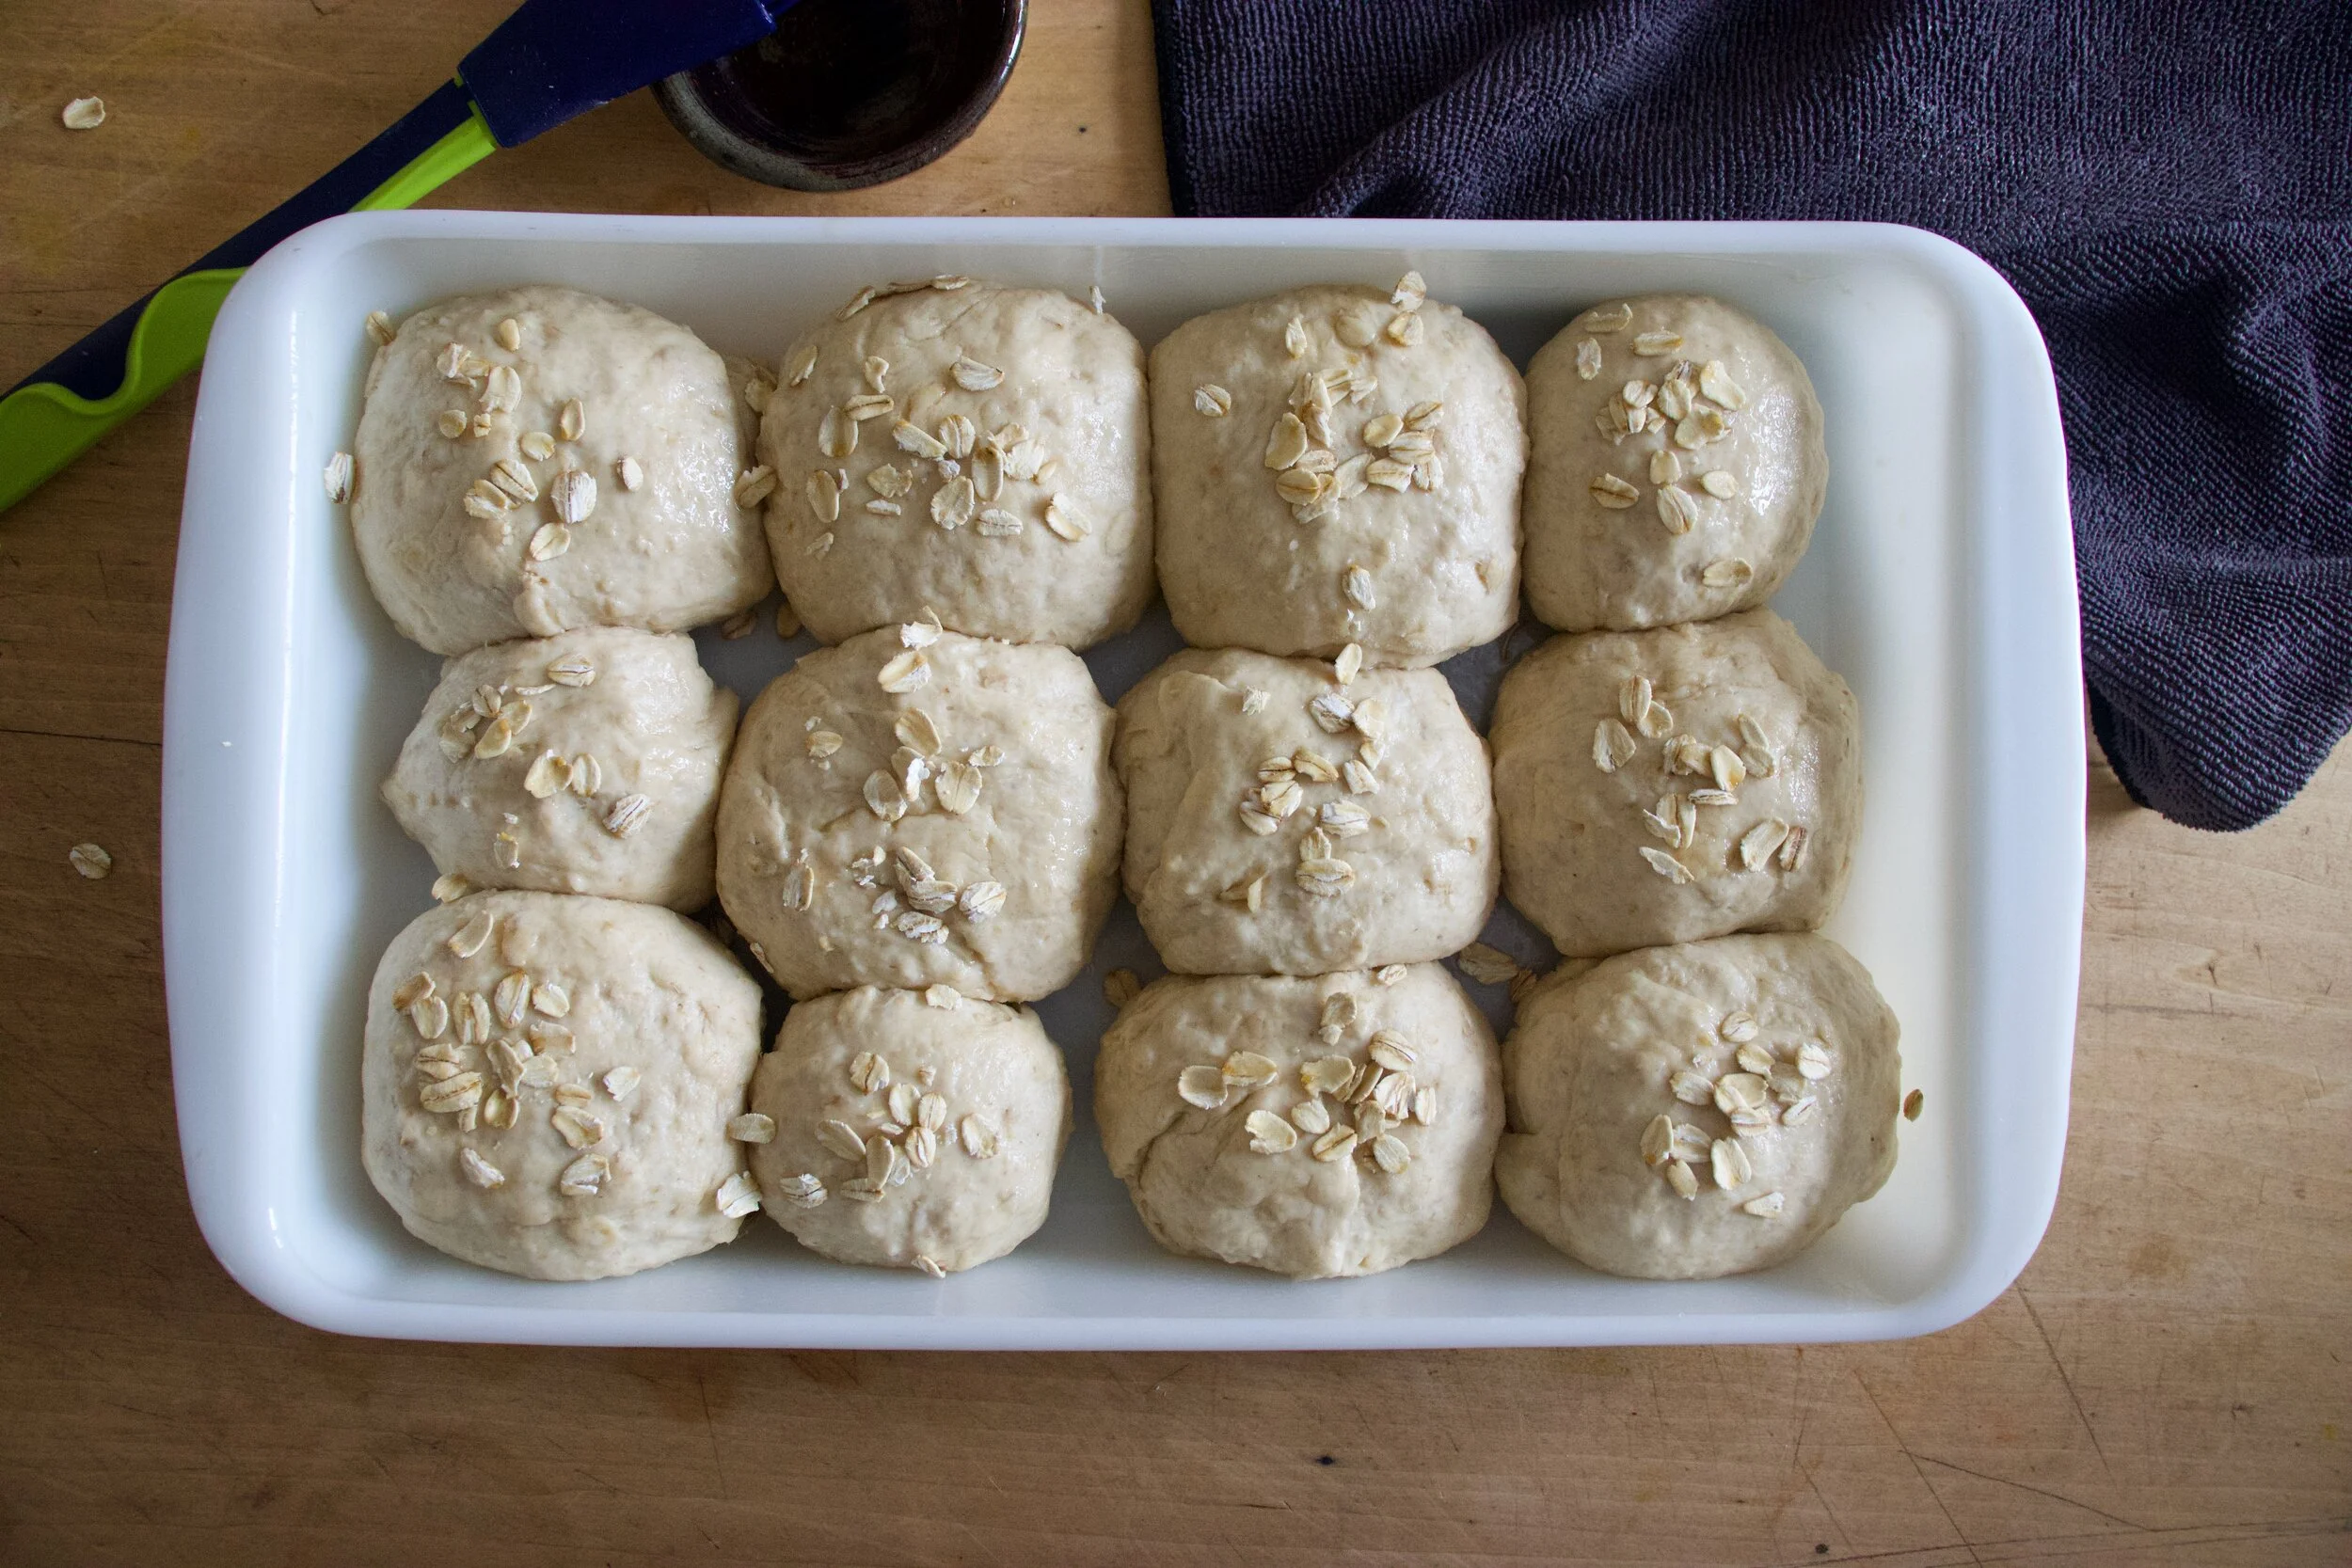
Rolls risen again, just a little plumper. And now right before you place them in the oven, brush tops with a maple/water mixture and sprinkle with a few oats. To look pretty. And into the oven they go, 30ish minutes, until nice and golden brown.

Baked to golden dinner roll perfection.

And there you have it. Soft and fluffy dinner rolls. Warm out of the oven, looking and smelling like all the good things that you want and need.

And can, and should, be made now and all year round.

-C

makes 12-16 rolls

  • 1 1/2 cups old fashion oats

  • 2 cups all purpose flour plus more for kneading

  • 1 1/2 cups white whole wheat flour

  • 2 cups boiling water

  • 1 cup room tempature water plus 2 tablespoons for brushing tops

  • 2 teaspoons salt

  • 2 tablespoons maple or honey

  • 2 teaspoons yeast

  • 1/4 cup neutral oil

In a bowl, mix oats with boil water and let sit and soak for about 10 minutes. In the meantime, in a large bowl, mix the room temp water with the yeast and 1 tablespoon of maple and mix. Once oats have soaked and cooled to a point that they are not super hot, but still just warm, mix them in with the yeast mixture. Add the salt and oil and mix then and both the white and white wheat flour. Mix until combined. The dough is going to be sticky, but that how is should be. Dump the dough onto a lightly floured surface and knead for 3-5 minutes, adding a little flour as needed to keep from sticking too much, until dough is nice and uniformed in texture. Place dough back into big bowl (after you clean it out and lily oil it) and cover with a damp towel. Place somewhere warm for about an hour until it doubles in size.

Once dough has doubled, dump out onto a lightly floured surface and with a knife of dough cutter, cut into 12- 16 equal sized pieces. Roll each piece into a ball, pinching any ends together and place them into a 9×13 inch baking pan. Once all pieces are in, over and let rest for another 15 minutes.

While dough is resting again, preheat oven to 350.

After the dough has rested, and right before you place them in the oven, mix 1tablespoon of maple with about 2 tablespoons warm water and brush the tops of the rolls. Sprinkle with a handful of oats and then place them into the oven to bake. 30-35 minutes, until they are a nice golden brown.

Once baked remove from oven and let cool to a reasonable temperature and serve.

These can certainly be made a few days ahead of time of eating. Just remove baked rolls from pan and let cool completely then place the into an airtight bag. To reheat, just place on a baking sheet and stick in a hot oven until warm.

Have I told you how amazing my farmshare is? I am sure I have, but if I haven%u2019t lately, well let me just tell you, it is. All summer long we (the members) get to pick a bunch of fresh herbs every week. Basil, scallions, dill, parsely, and cilantro. Planted every few weeks to keep us in the herbs all summer long. And every few weeks there is a herb free for all. Pick unlimited amounts of whatever herb is plentiful. Last week it was unlimited parsley. Yeah there was unlimited basil and that was nice too, but the parsley, the underrated, overlooked herb. That was what I wanted and I picked the shit out of it.

Parsley. No I is not just a green sprig that garnishes your plate at a restaurant. It is a great spicy, fresh, clean tasting herb that plays so well with everything. I really think parsley can, and should, make it%u2019s way into almost any dish. It adds a touch more brightness to any spice blend. And there is just something about munching on some fresh parsley, it just works for me. Parsley is good friends. No. Parsley is great.

So now we match said parsley with another bright herb, mint, and blend it up into a pesto. Magic on the tongue. And a no brainer for pesto is pasta, although this pesto would make a great spread or smothered on grilled veggies or scooped into soup.

A summery pesto pasta salad dish situation. Perfect for all the times that you are hungry and need food.

To the pesto pasta salad!

The stuff. Parsley. mint, a few scallions, toasted almonds, garlic, a lemon, nutritional yeast, salt and pepper, and olive oil. Also pasta, a cucumber, and a big handful of cherry tomatoes.

First for pesto. Start by pulsing the almonds in a food processor until they become a nice crumb. Remove about 1/4 cup and set aside.
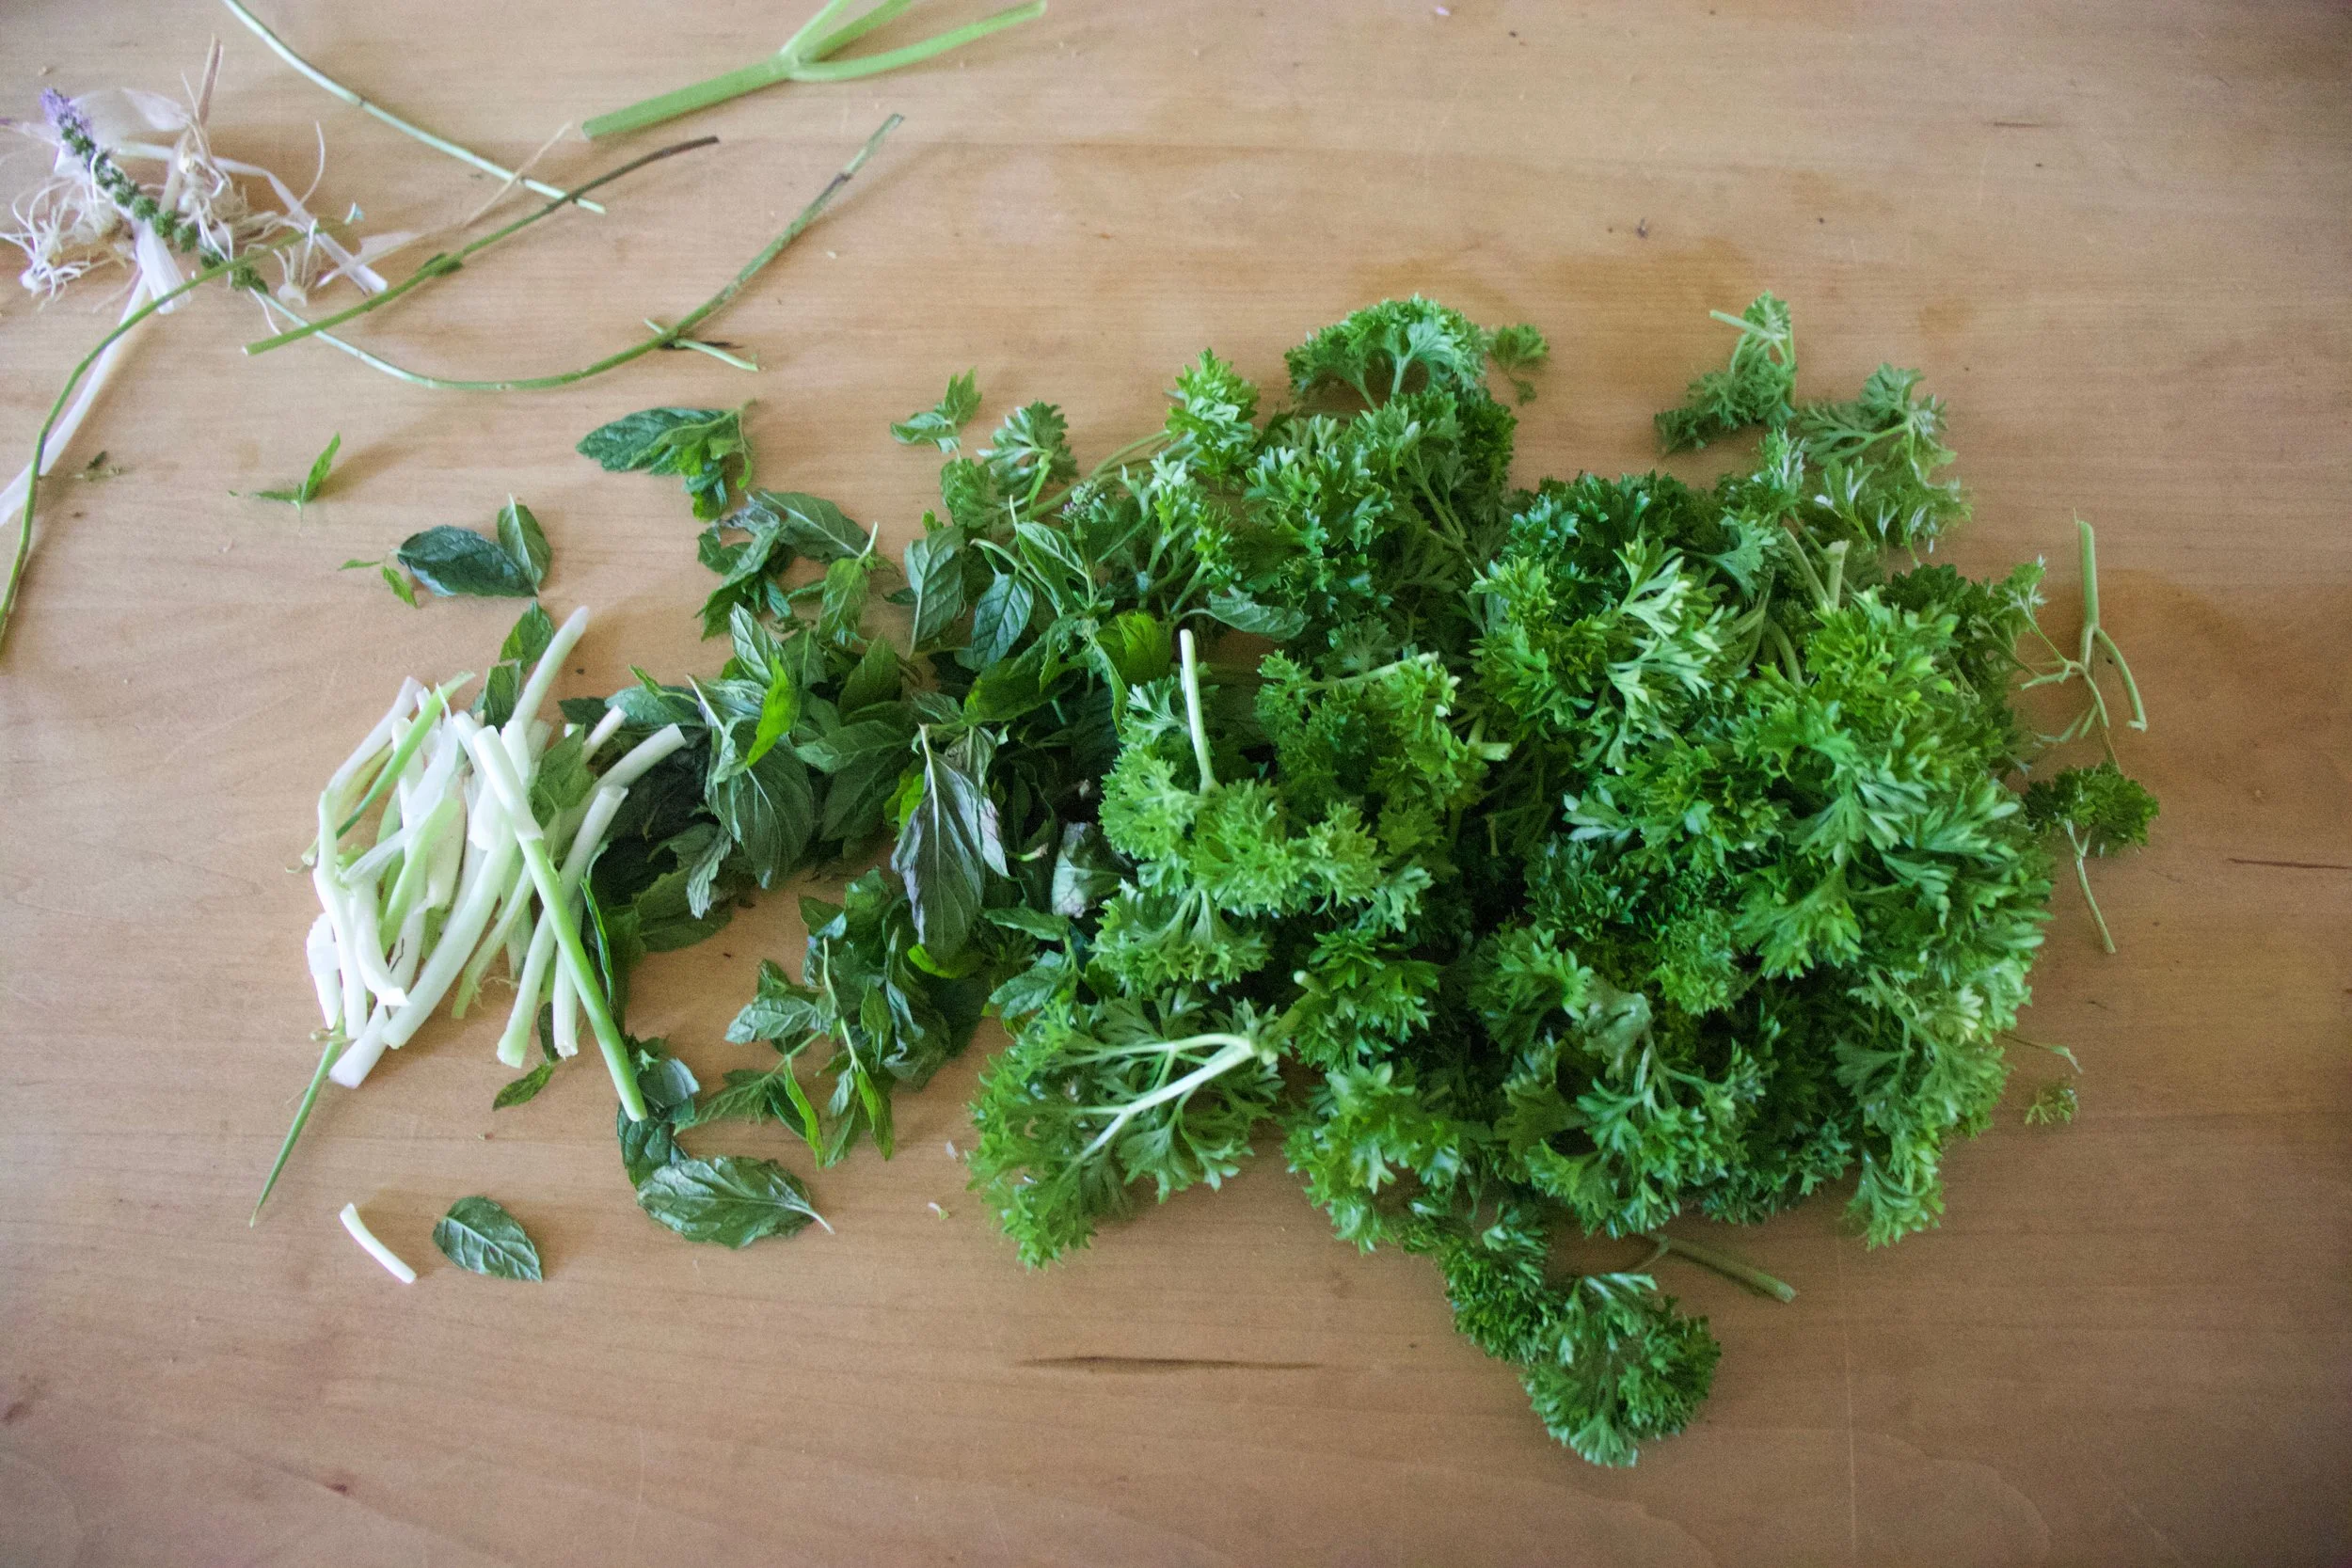
Grab the herbs and scallions and remove any really wooden stems (keep the more tender ones) and rip the herbs into smaller pieces.
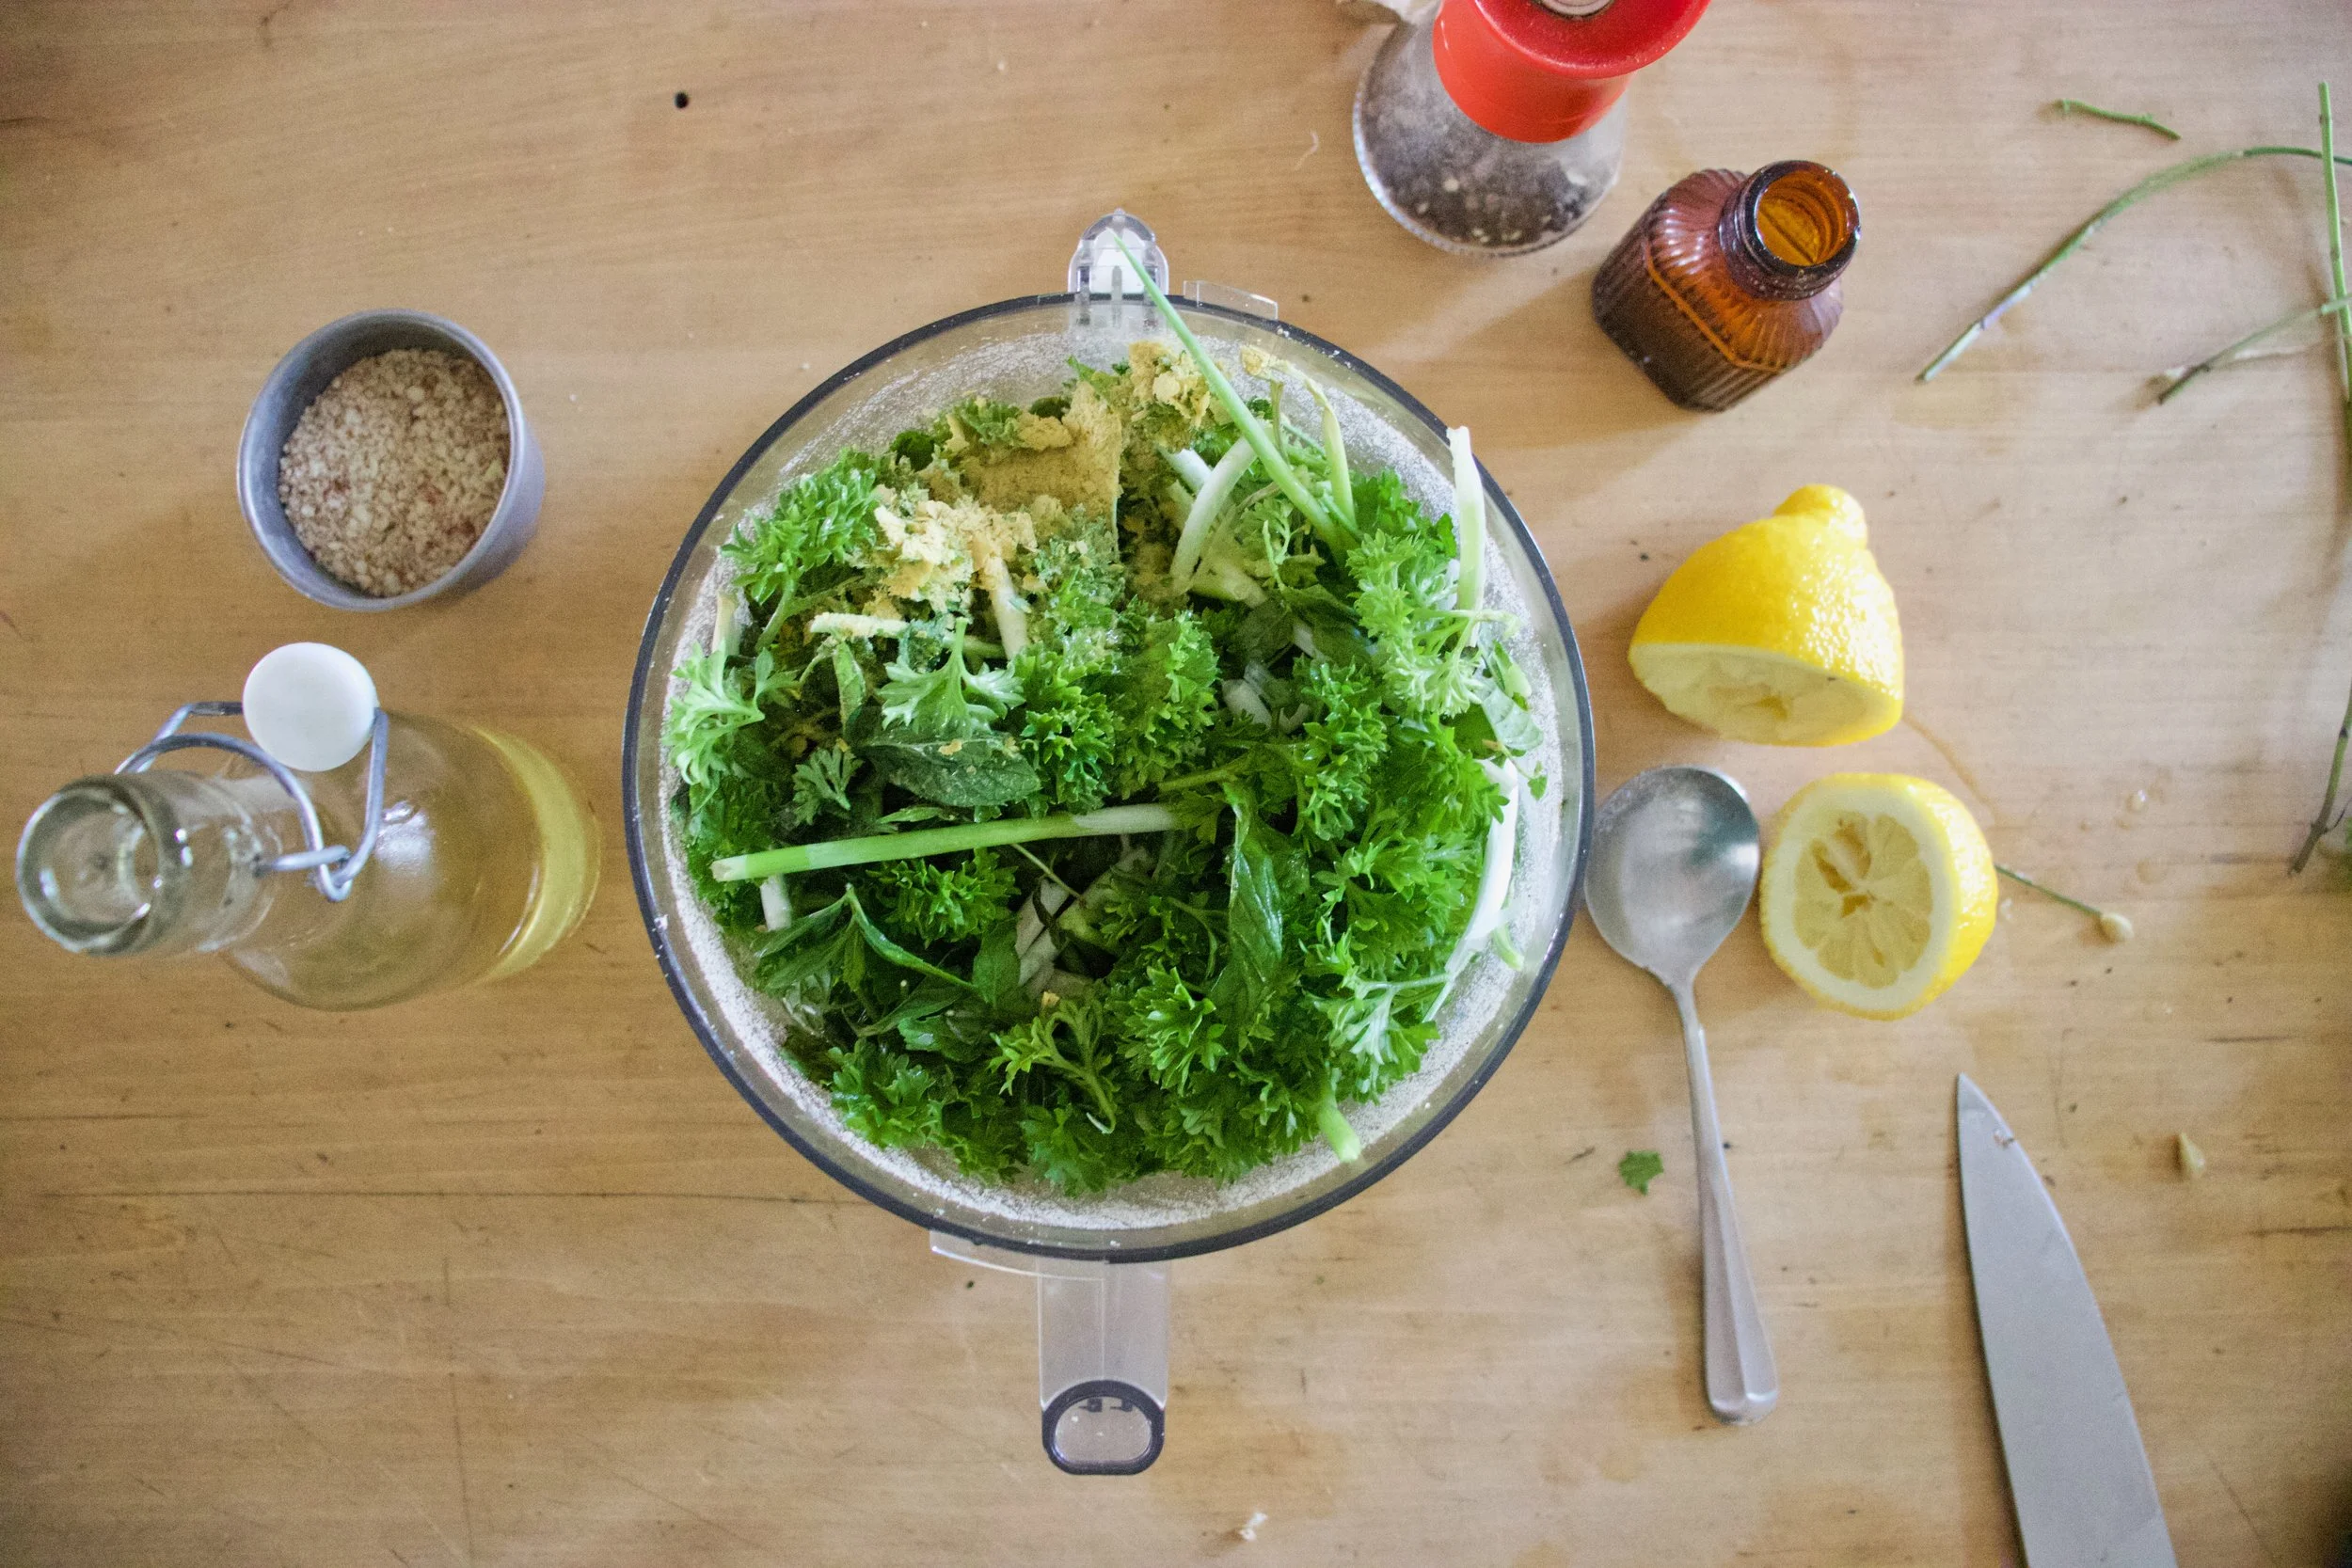
All the parsley, mint, and scallions now go into food processor with almonds, along with the garlic, nutritional yeast, the juice of the lemon, and a pinch of salt and some crack pepper. Pulse the food processor and stream in the olive oil until everything comes together. You might need to stop and scrape the sides a few times.
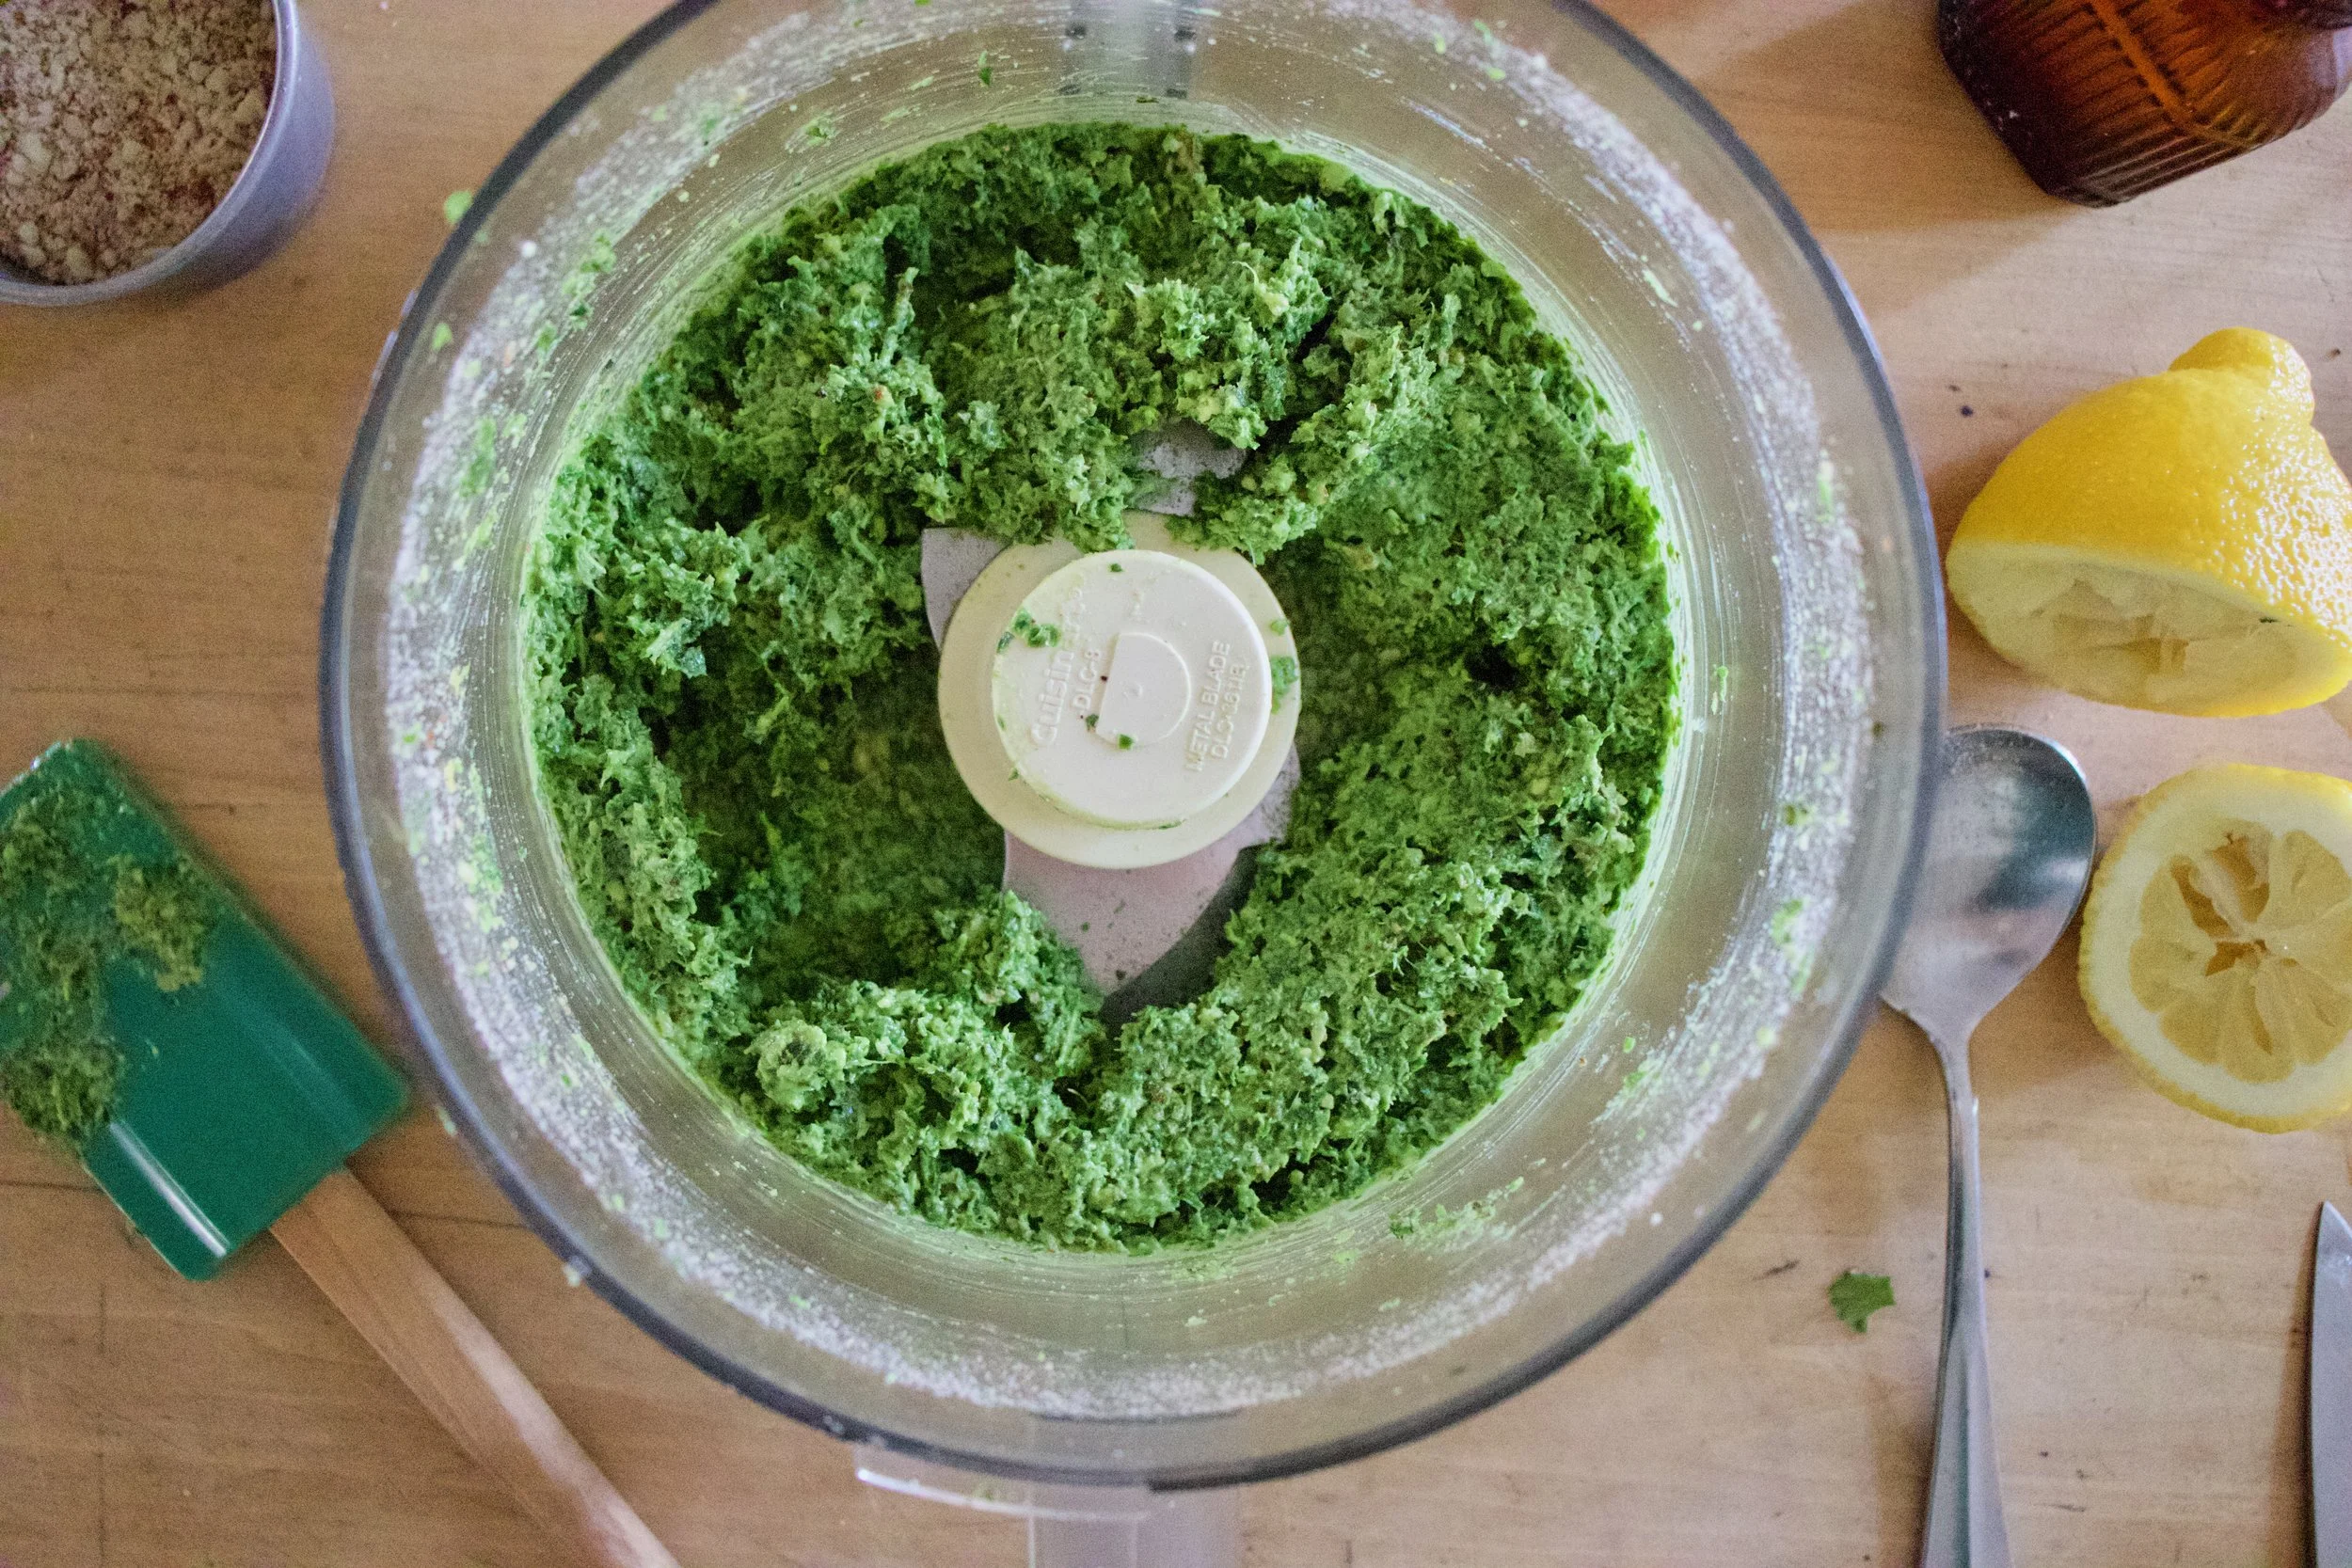
Now you need pasta. Cook it to the directions on the package you got it from. Cook it all the way through then when you strain it, rinse it with a little cool water.

Chop up the cucumber into small chunks and half or quarter the cherry tomatoes.

And to put it all together. Pasta goes in a bowl. Add in the pesto. If the pesto seems a little on the thick side and not easily mixes, add in a little warm water to thin it out a bit.

Add the cucumber and tomatoes.

Mix some more, sprinkle on lots of the crumbled almonds you set aside, maybe a few more springs of parsley and a few more leaves of mint for good measure and call it done.

Be ready to eat cause this salad is ready to be eaten.

-C

Makes a pound of pasta

  • 2 cups packed parsley (Curly or flat. I used curly)

  • 1 cup packed mint

  • a few scallions if you have them

  • 3/4 cup roasted almonds

  • 3 cloves garlic

  • a lemon

  • 1/4 cup nutritional yeast

  • 1/2- 3/4 cup olive oil

  • salt and pepper

  • 1 pound bow tie pasta

  • Big handful cherry tomatoes

  • a tender skinned cucumber

Note. This recipe makes a big batch of pesto and big pasta salad. You can totally make the all the pesto and only use half and only boil half of the pasta. Just stored left over pesto in a jar in the fridge for about week or so or stick it in the freezer for a few months. And you can use it for all sorts of great things like sandwiches, salads, as a dip%u2026 whatever you want.

To make the pesto. Place almonds in food processor and pulse until crumbly then remove about a 1/4 cup and set aside. Add in the garlic and pulse a few times. Then grab the parsley, mint, and scallions. Remove any tough stems and rip the herbs into smaller pieces. Add them to food processor along with the nutritional yeast, the juice of the lemon, and a good pinch or two of salt and lots of pepper. Pulse while slowly adding in the olive oil. Stop, scrap sides, then pulse until smooth. Taste and add more salt if needed.

Half or quarter cherry tomatoes and cut cucumber into small chunks

Cook the pasta. Big pot of boil water with a pinch pf salt. Cook until fully cooked, then drain. Give it a quick rinse of cool water. Dump the pasta into a big bowl.

To make the pasta salad. Scoop pesto into bowl with the pasta and mix it until all the pasta is evenly coated. If pesto is really thick, just add a little warm water to thin it out. Add in the cut up tomatoes and cucumber, mix, then top with the reserves ground up almonds and a handful more of chopped fresh mint and parsley.

Eat.

Left overs should be stored in fridge for a a few days. Left over pesto a week or so and or in the freezer for a few months.

Peaches are here. YAY!!! Peaches are for sure one of those fleeting fruits, one that once in season, you need to eat as many fresh as you can because once they are out of season, they are not good. Not good at all. And me being me, I see peaches, I buy a shit load, and now I have a fridge drawer full. Not complaining in the slightest, but peaches cannot sit around all summer waiting to be eaten. So if you are going to buy a shit load, know what you are going to do with them all.

My peaches, well they haven%u2019t had to wait long. I have been eating at least a peach a day and%u2026 I made these bars with a few. Sharing my peaches, thats what I do. HA.

These almond peach shortbread bars. Fantastic A+ on all fronts. Easy to make, not a whole heck of a lot of ingredients, make the house smell amazing, and really kick off the peach, summer vibe thing that goes on around here.

‘%u201cMillions of peaches, peaches for me. Millions of Peaches, peaches for free%u201d %ud83c%udfb6 (Peaches by The Presidents of the United States of America. If you have%u2019t head the song, look it up. I don%u2019t think I can even look at a peach without hearing the song in my head.)

Now to the peach almond shortbread bars!
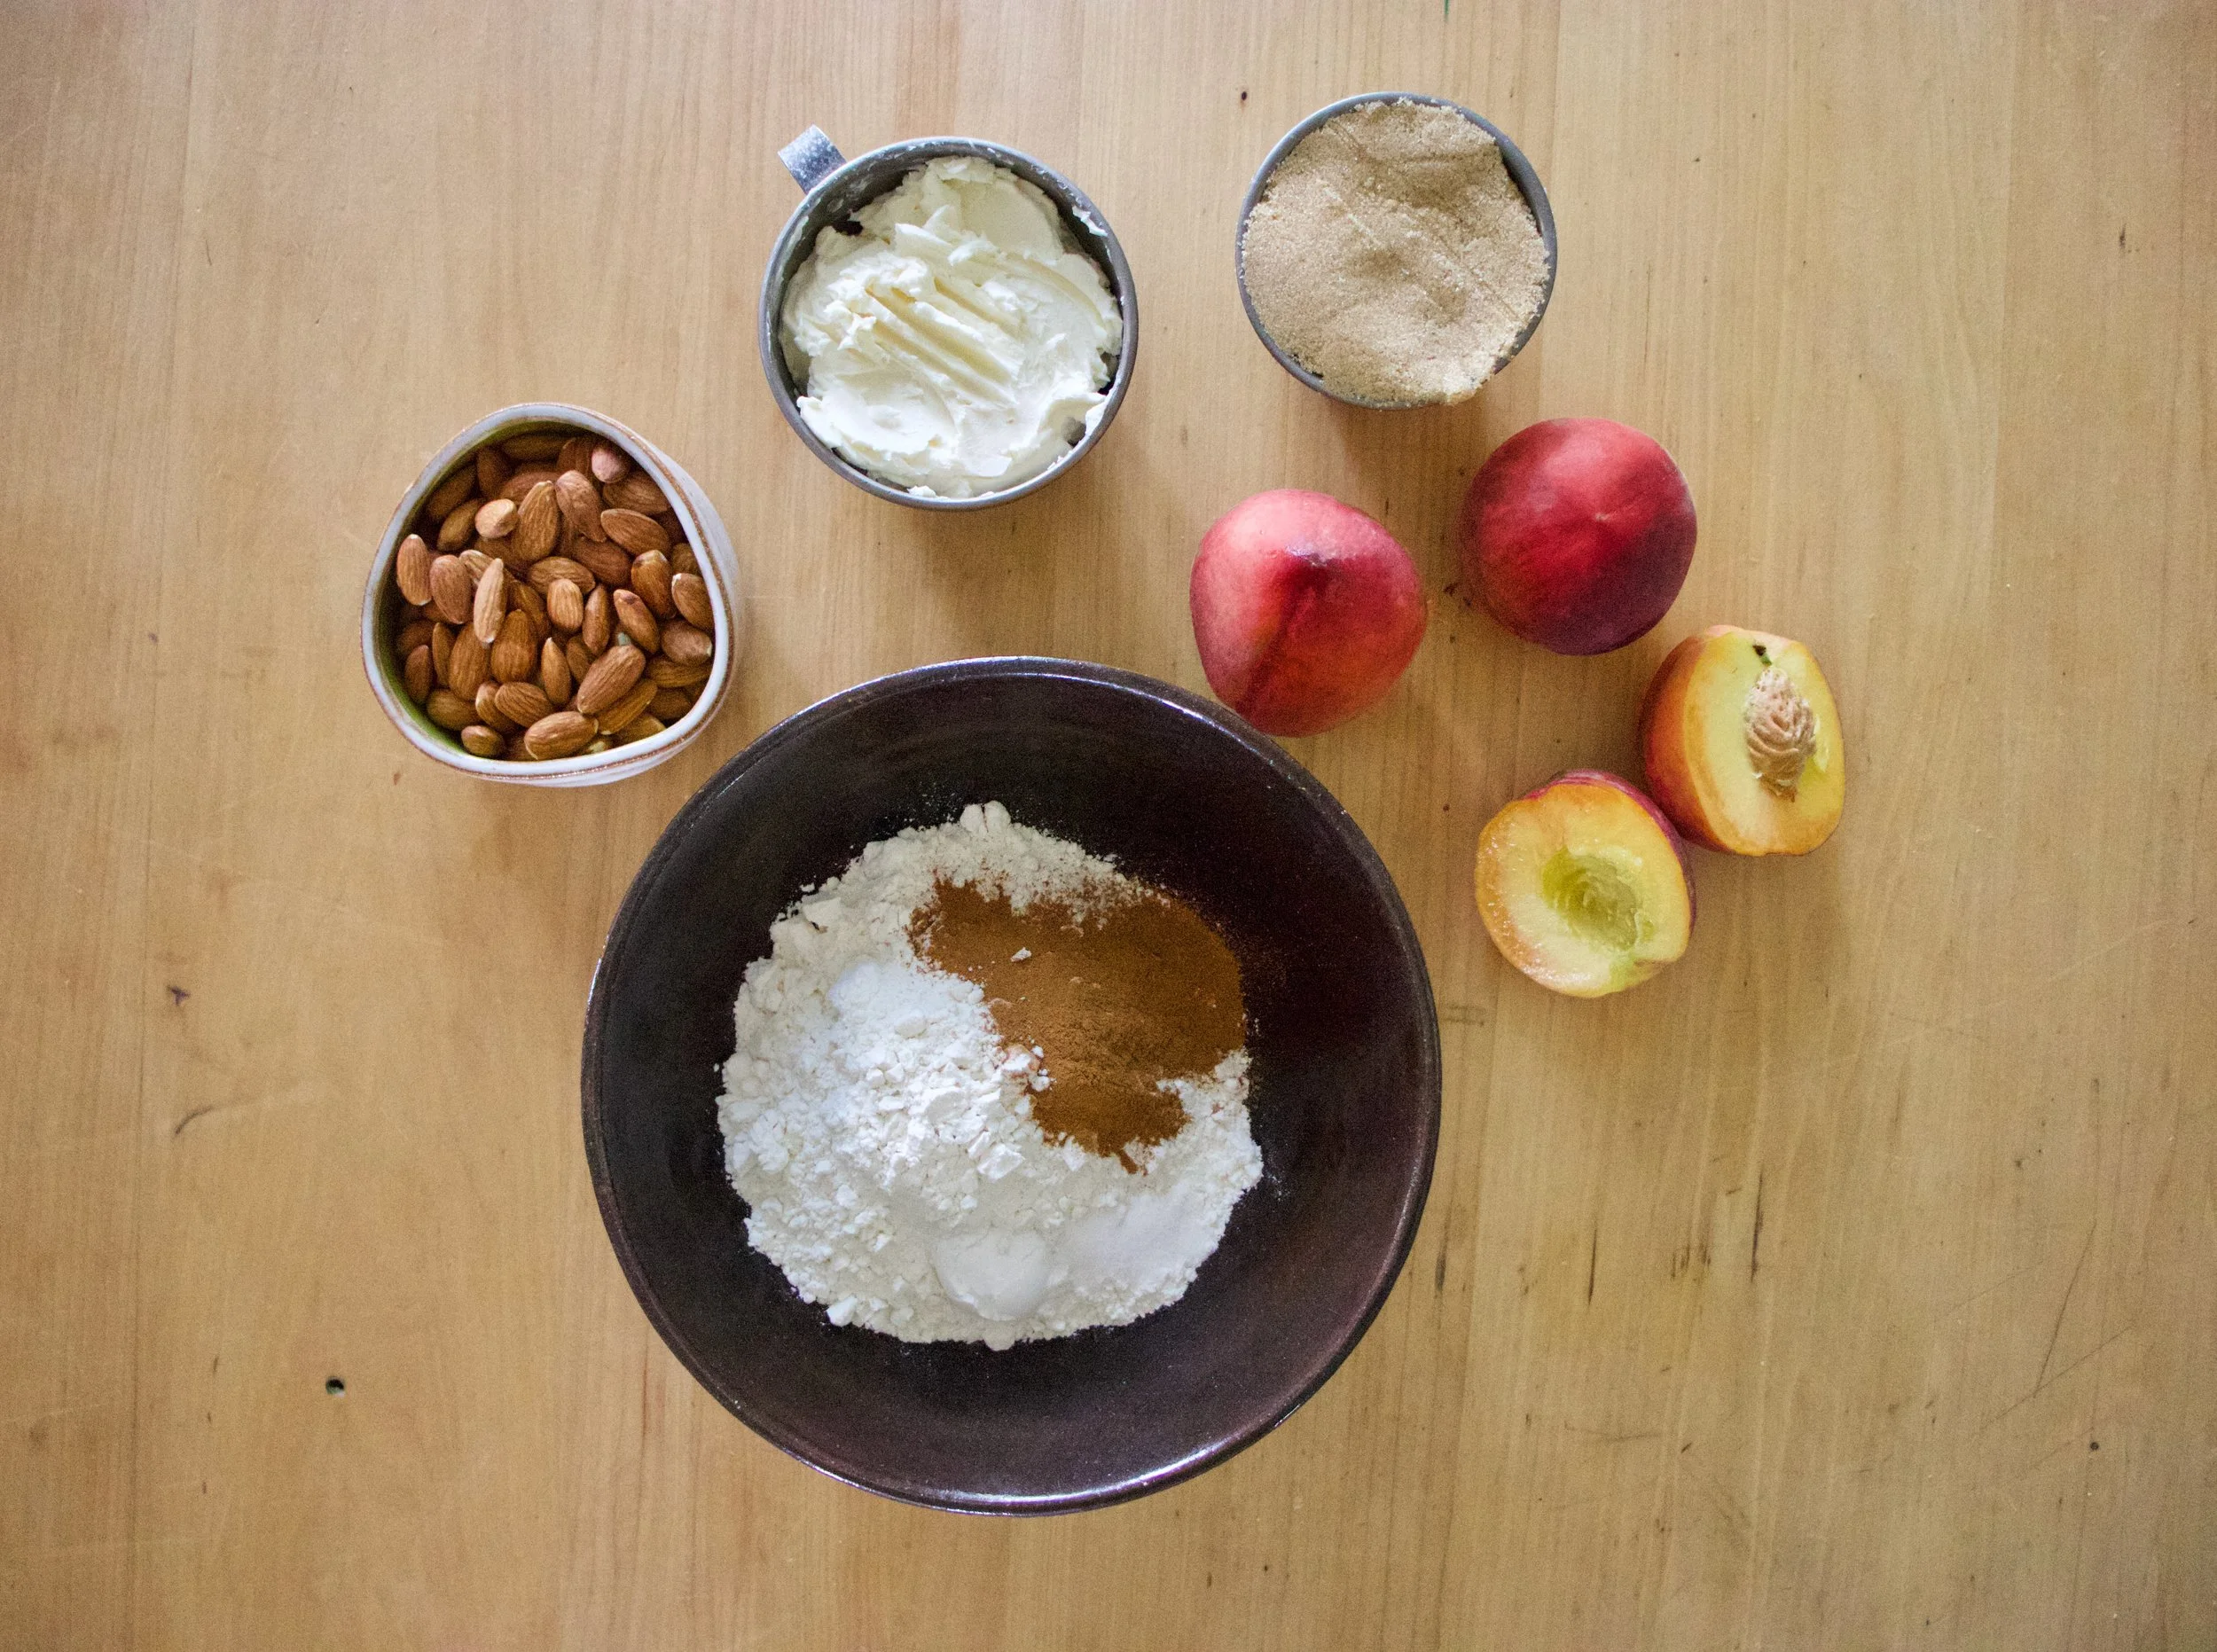
The stuff. Peaches, almonds, vegan butter, brown sugar, flour, cinnamon, salt, and baking powder.

Easy peasy. Almonds go in to food processor first. Blend and pulse for a minute or two until they turn into a medium fine almond meal. (Don%u2019t over blend or you will end up with almond butter.) When almonds are ground, add in the flour, baking powder, salt, cinnamon, and sugar. Pulse until combined. Then add in the butter in chunks and pulse until dough just starts to come together.

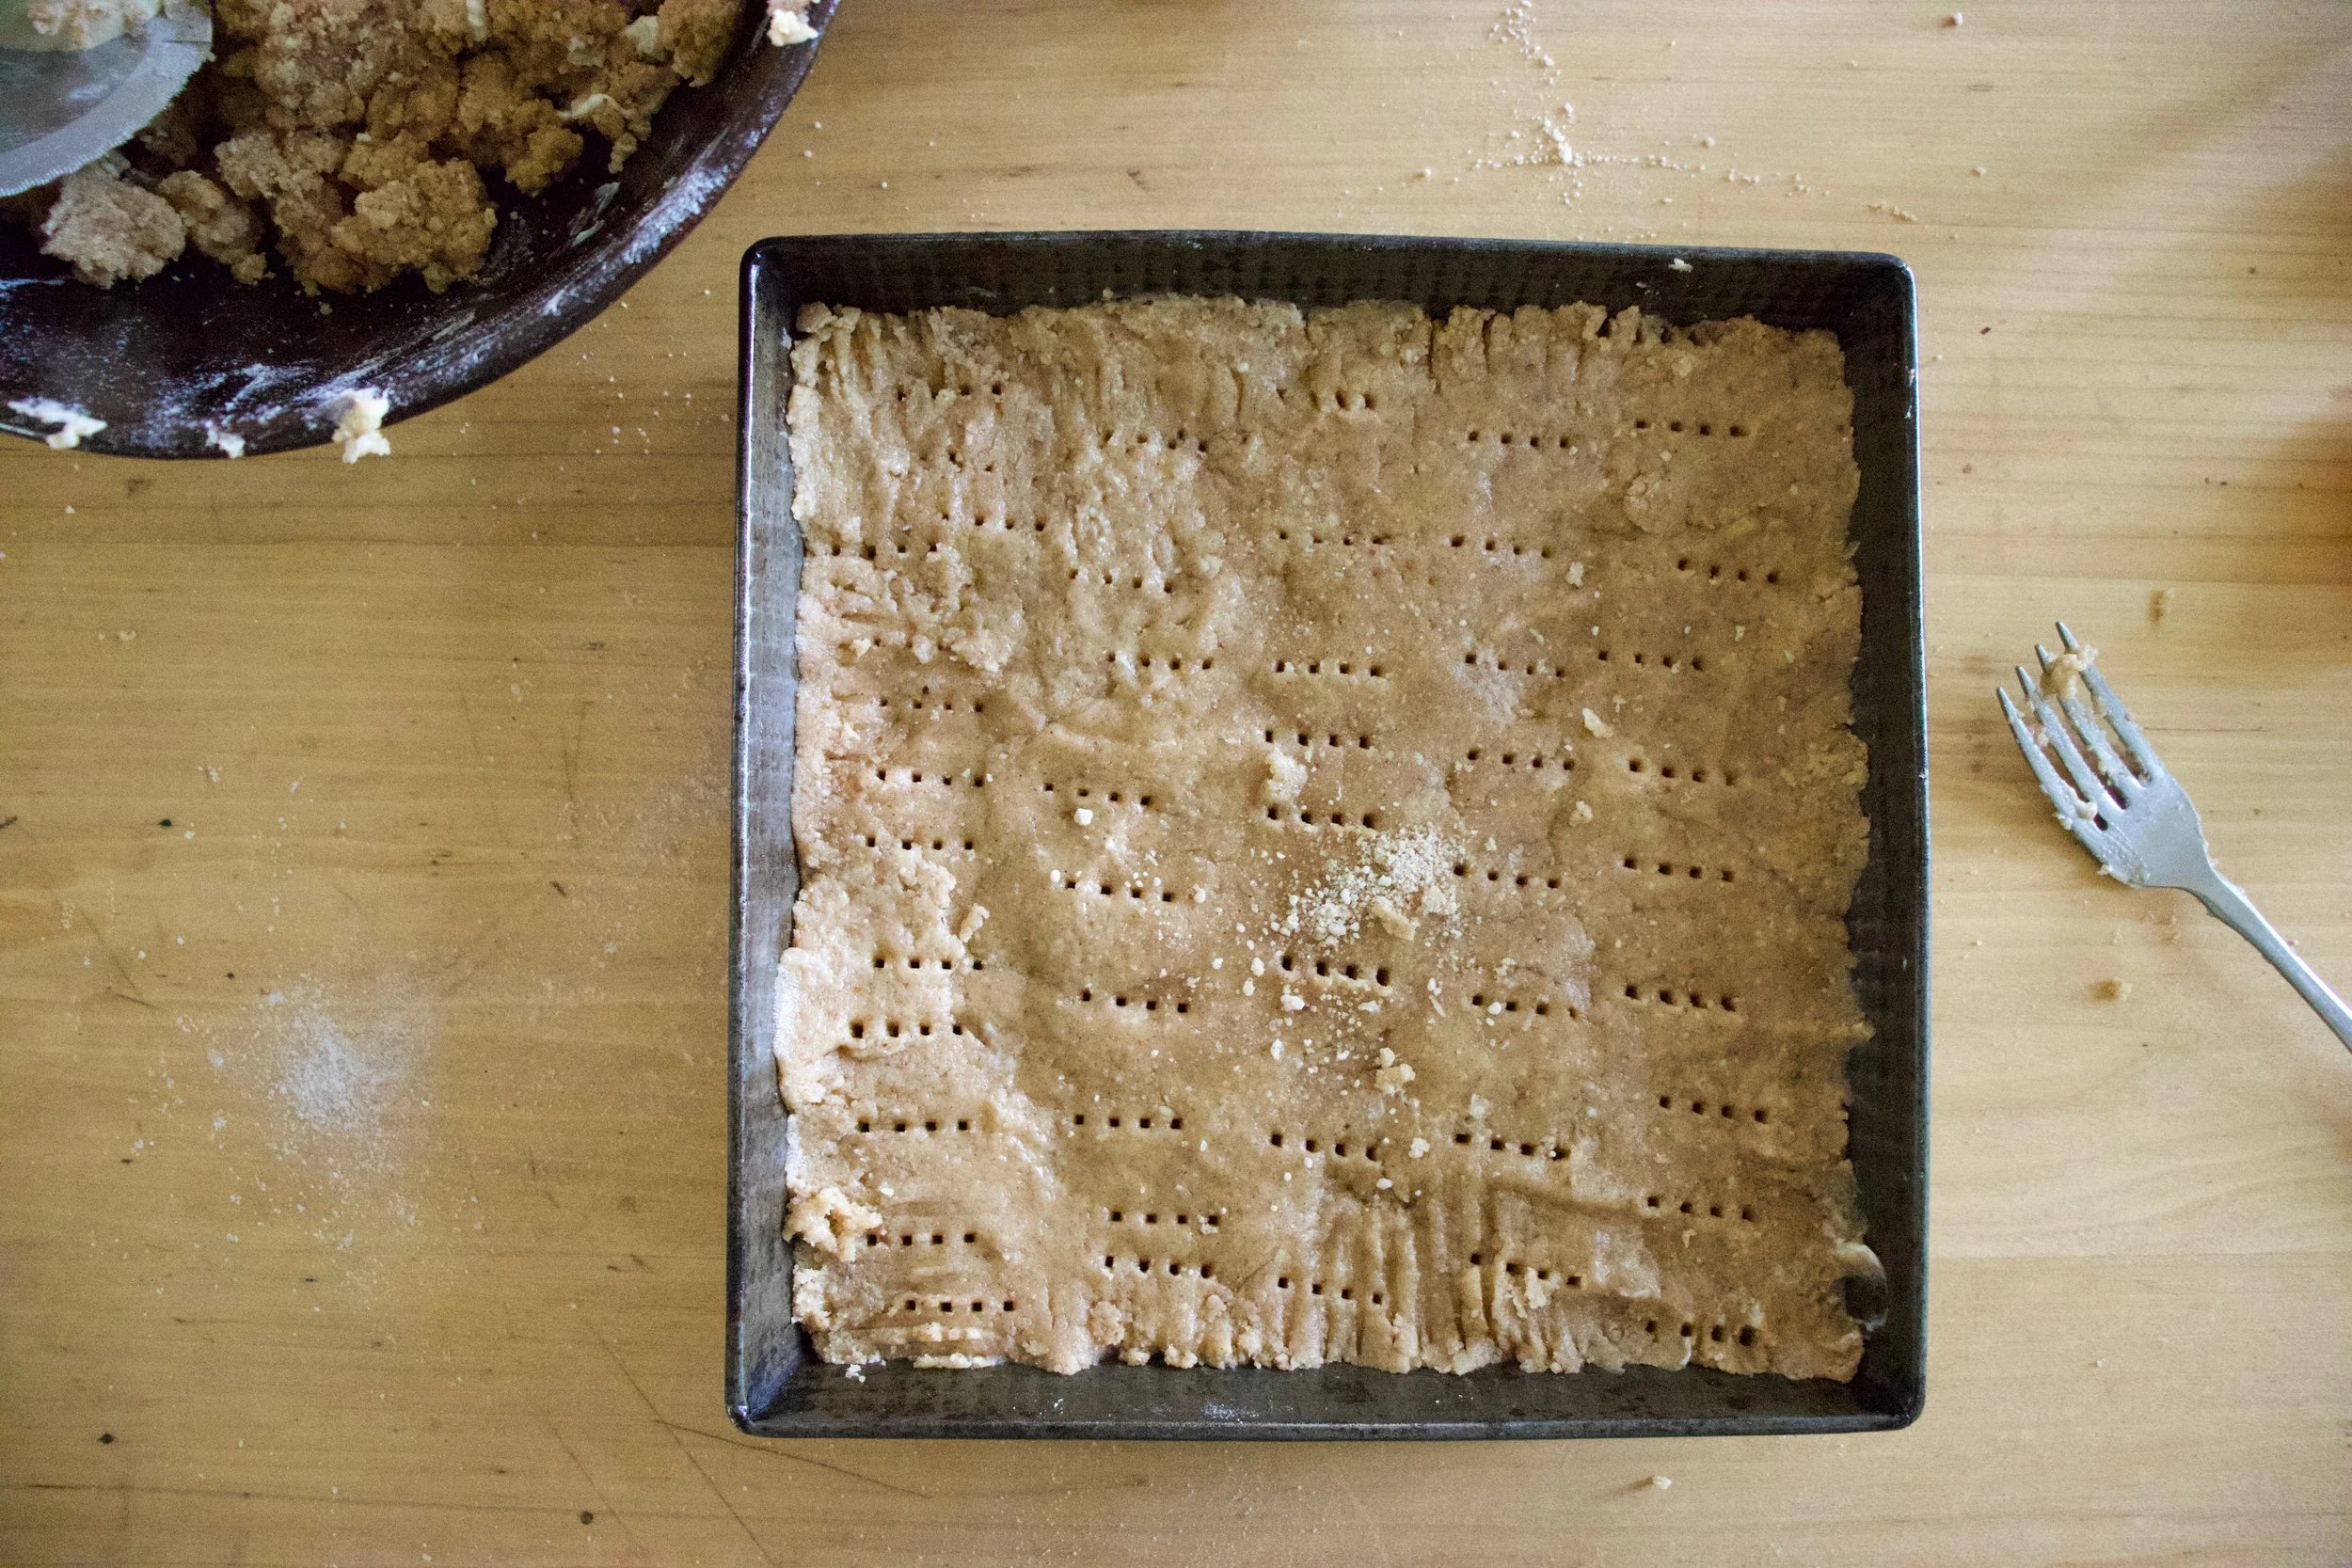
Half the dough goes into a 9×9 baking pan. Smooshed evenly all over the bottom poke it with a fork. Then it just needs to go into the oven to bake. 15-18 minutes or so, just until it starts to brown a bit.
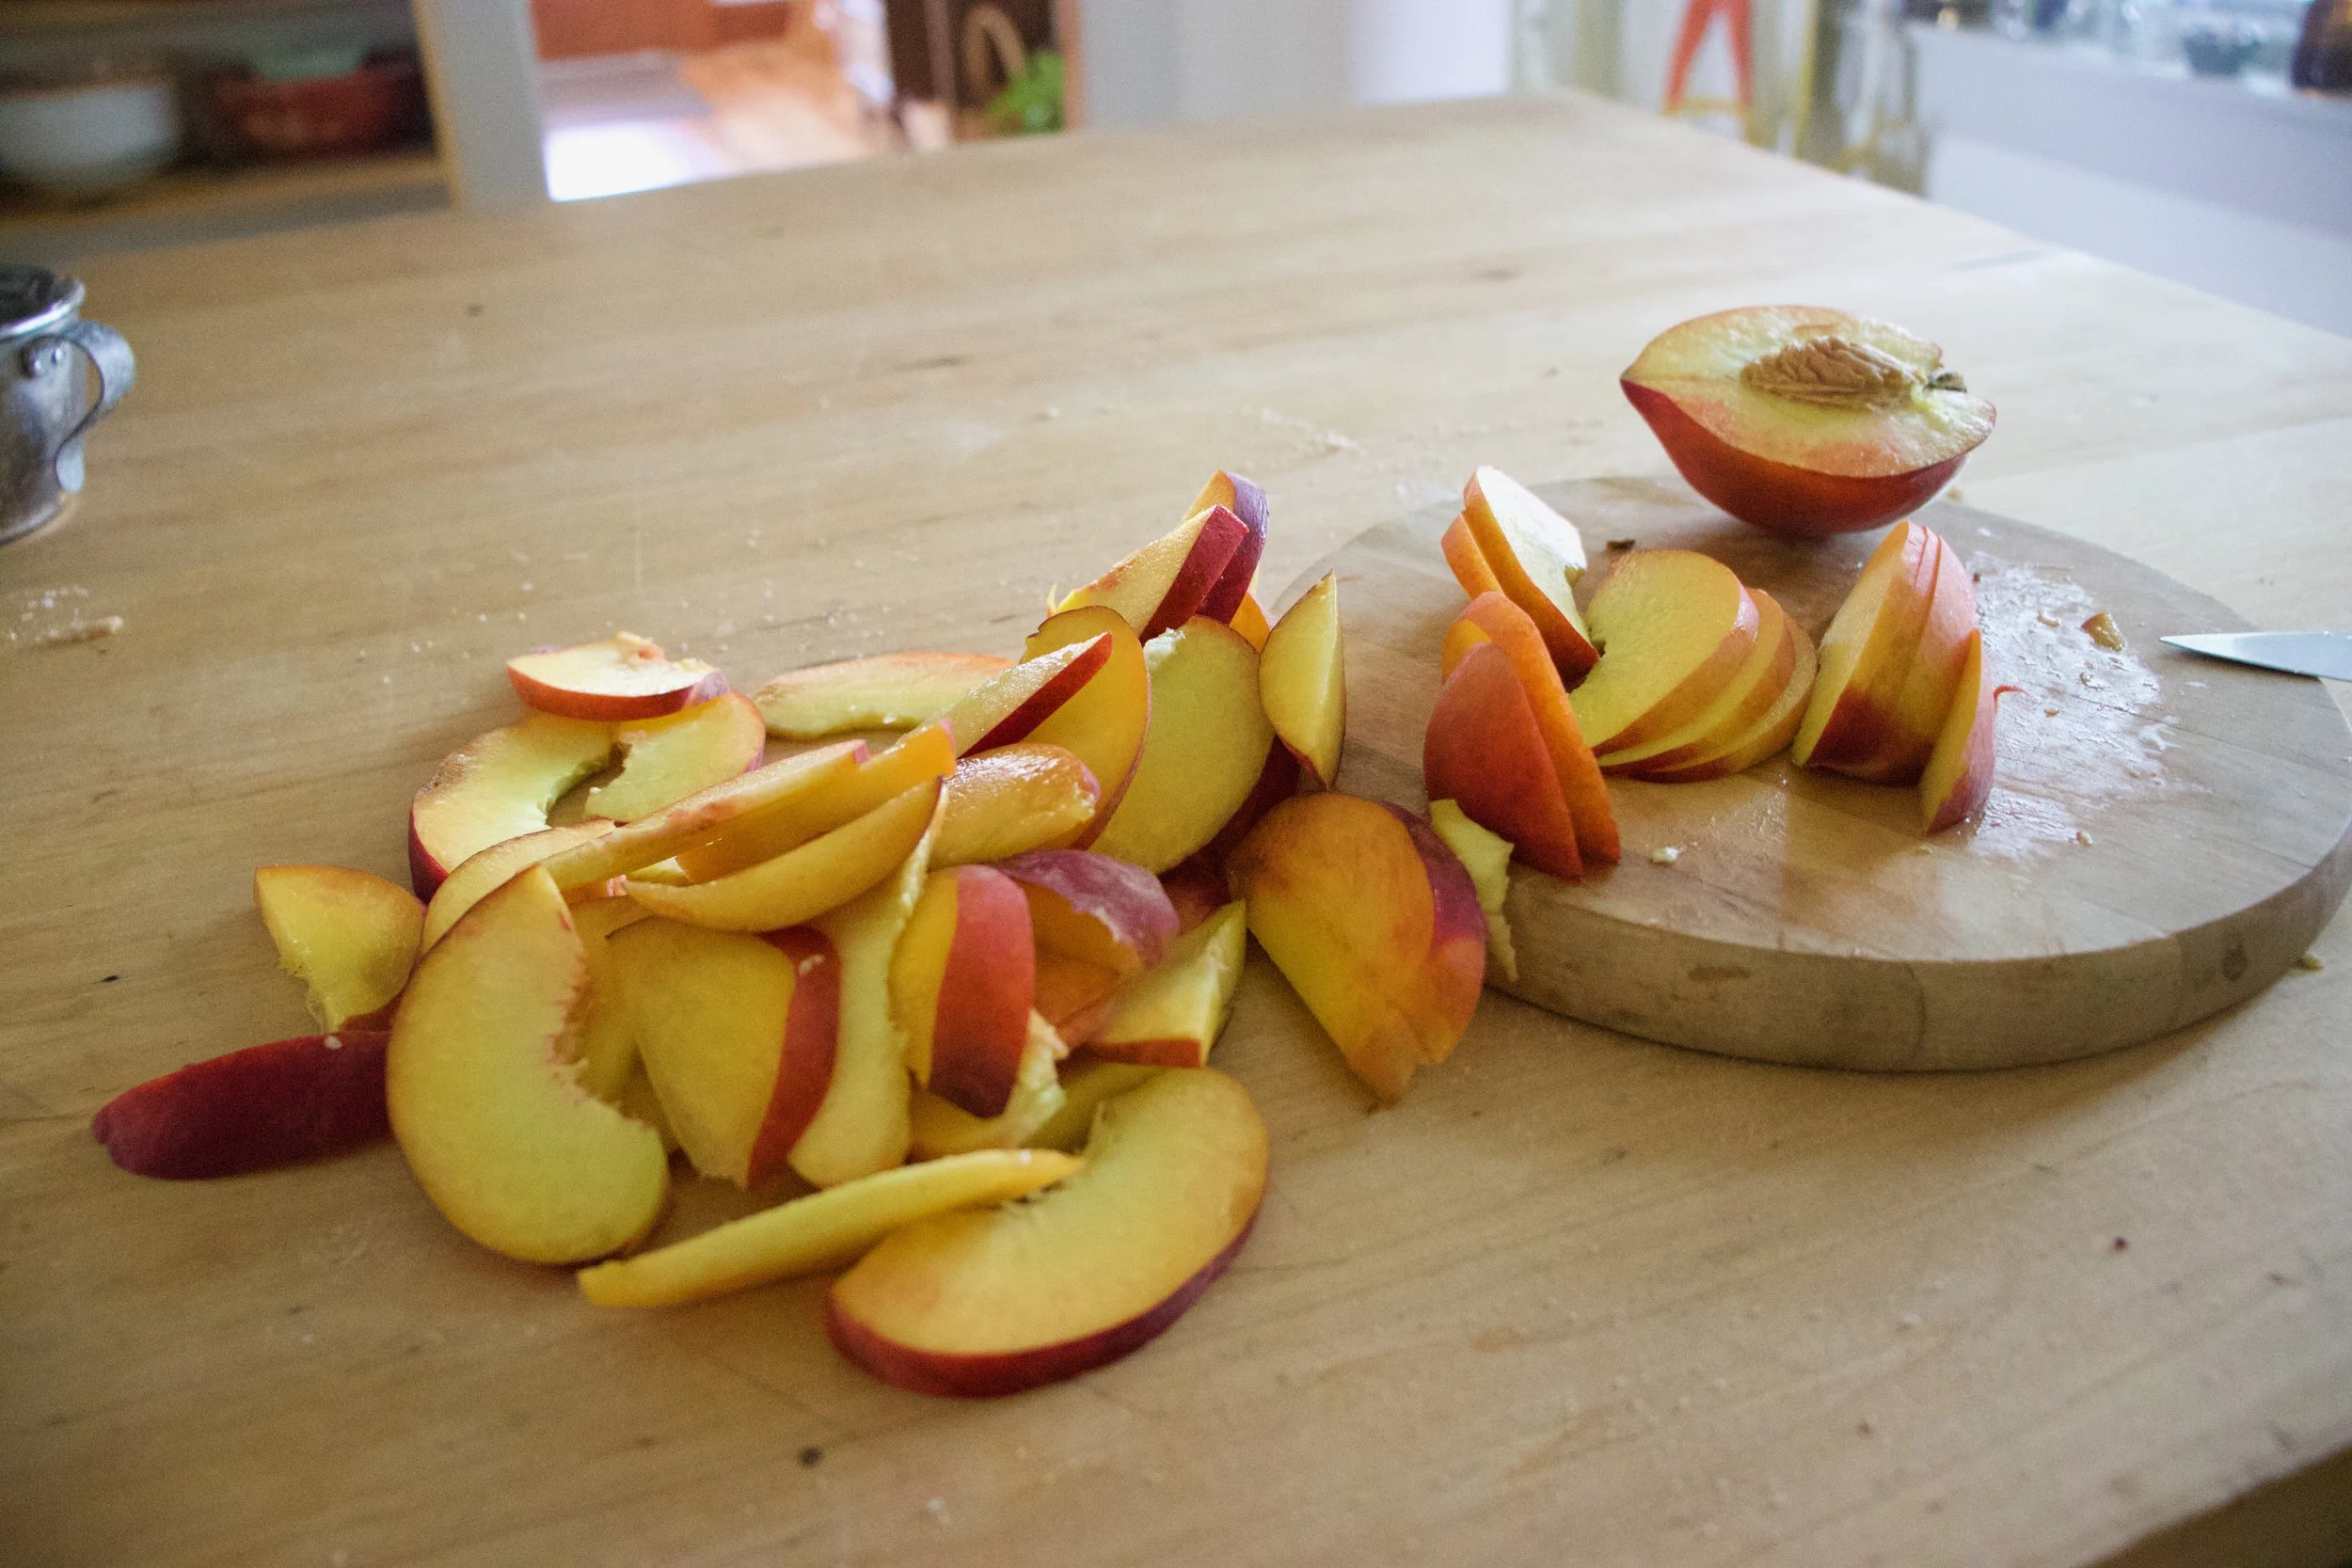
Peaches need to be cut so cut them up. !/2 inch thick slices, after the pits be removed of course.

Blinded baked bottom. Looks good yeah? Let it cool for a few minutes and then it gets peaches. Three rows, all over lapping and nestled together.

The top gets the remaining half of dough and is now it%u2019s ready for the oven. Another 40-ish minutes or so to really seal the deal.

Taken from the oven when golden brown, cooled, cut up, and placed on a pretty plate because pretty is nice.
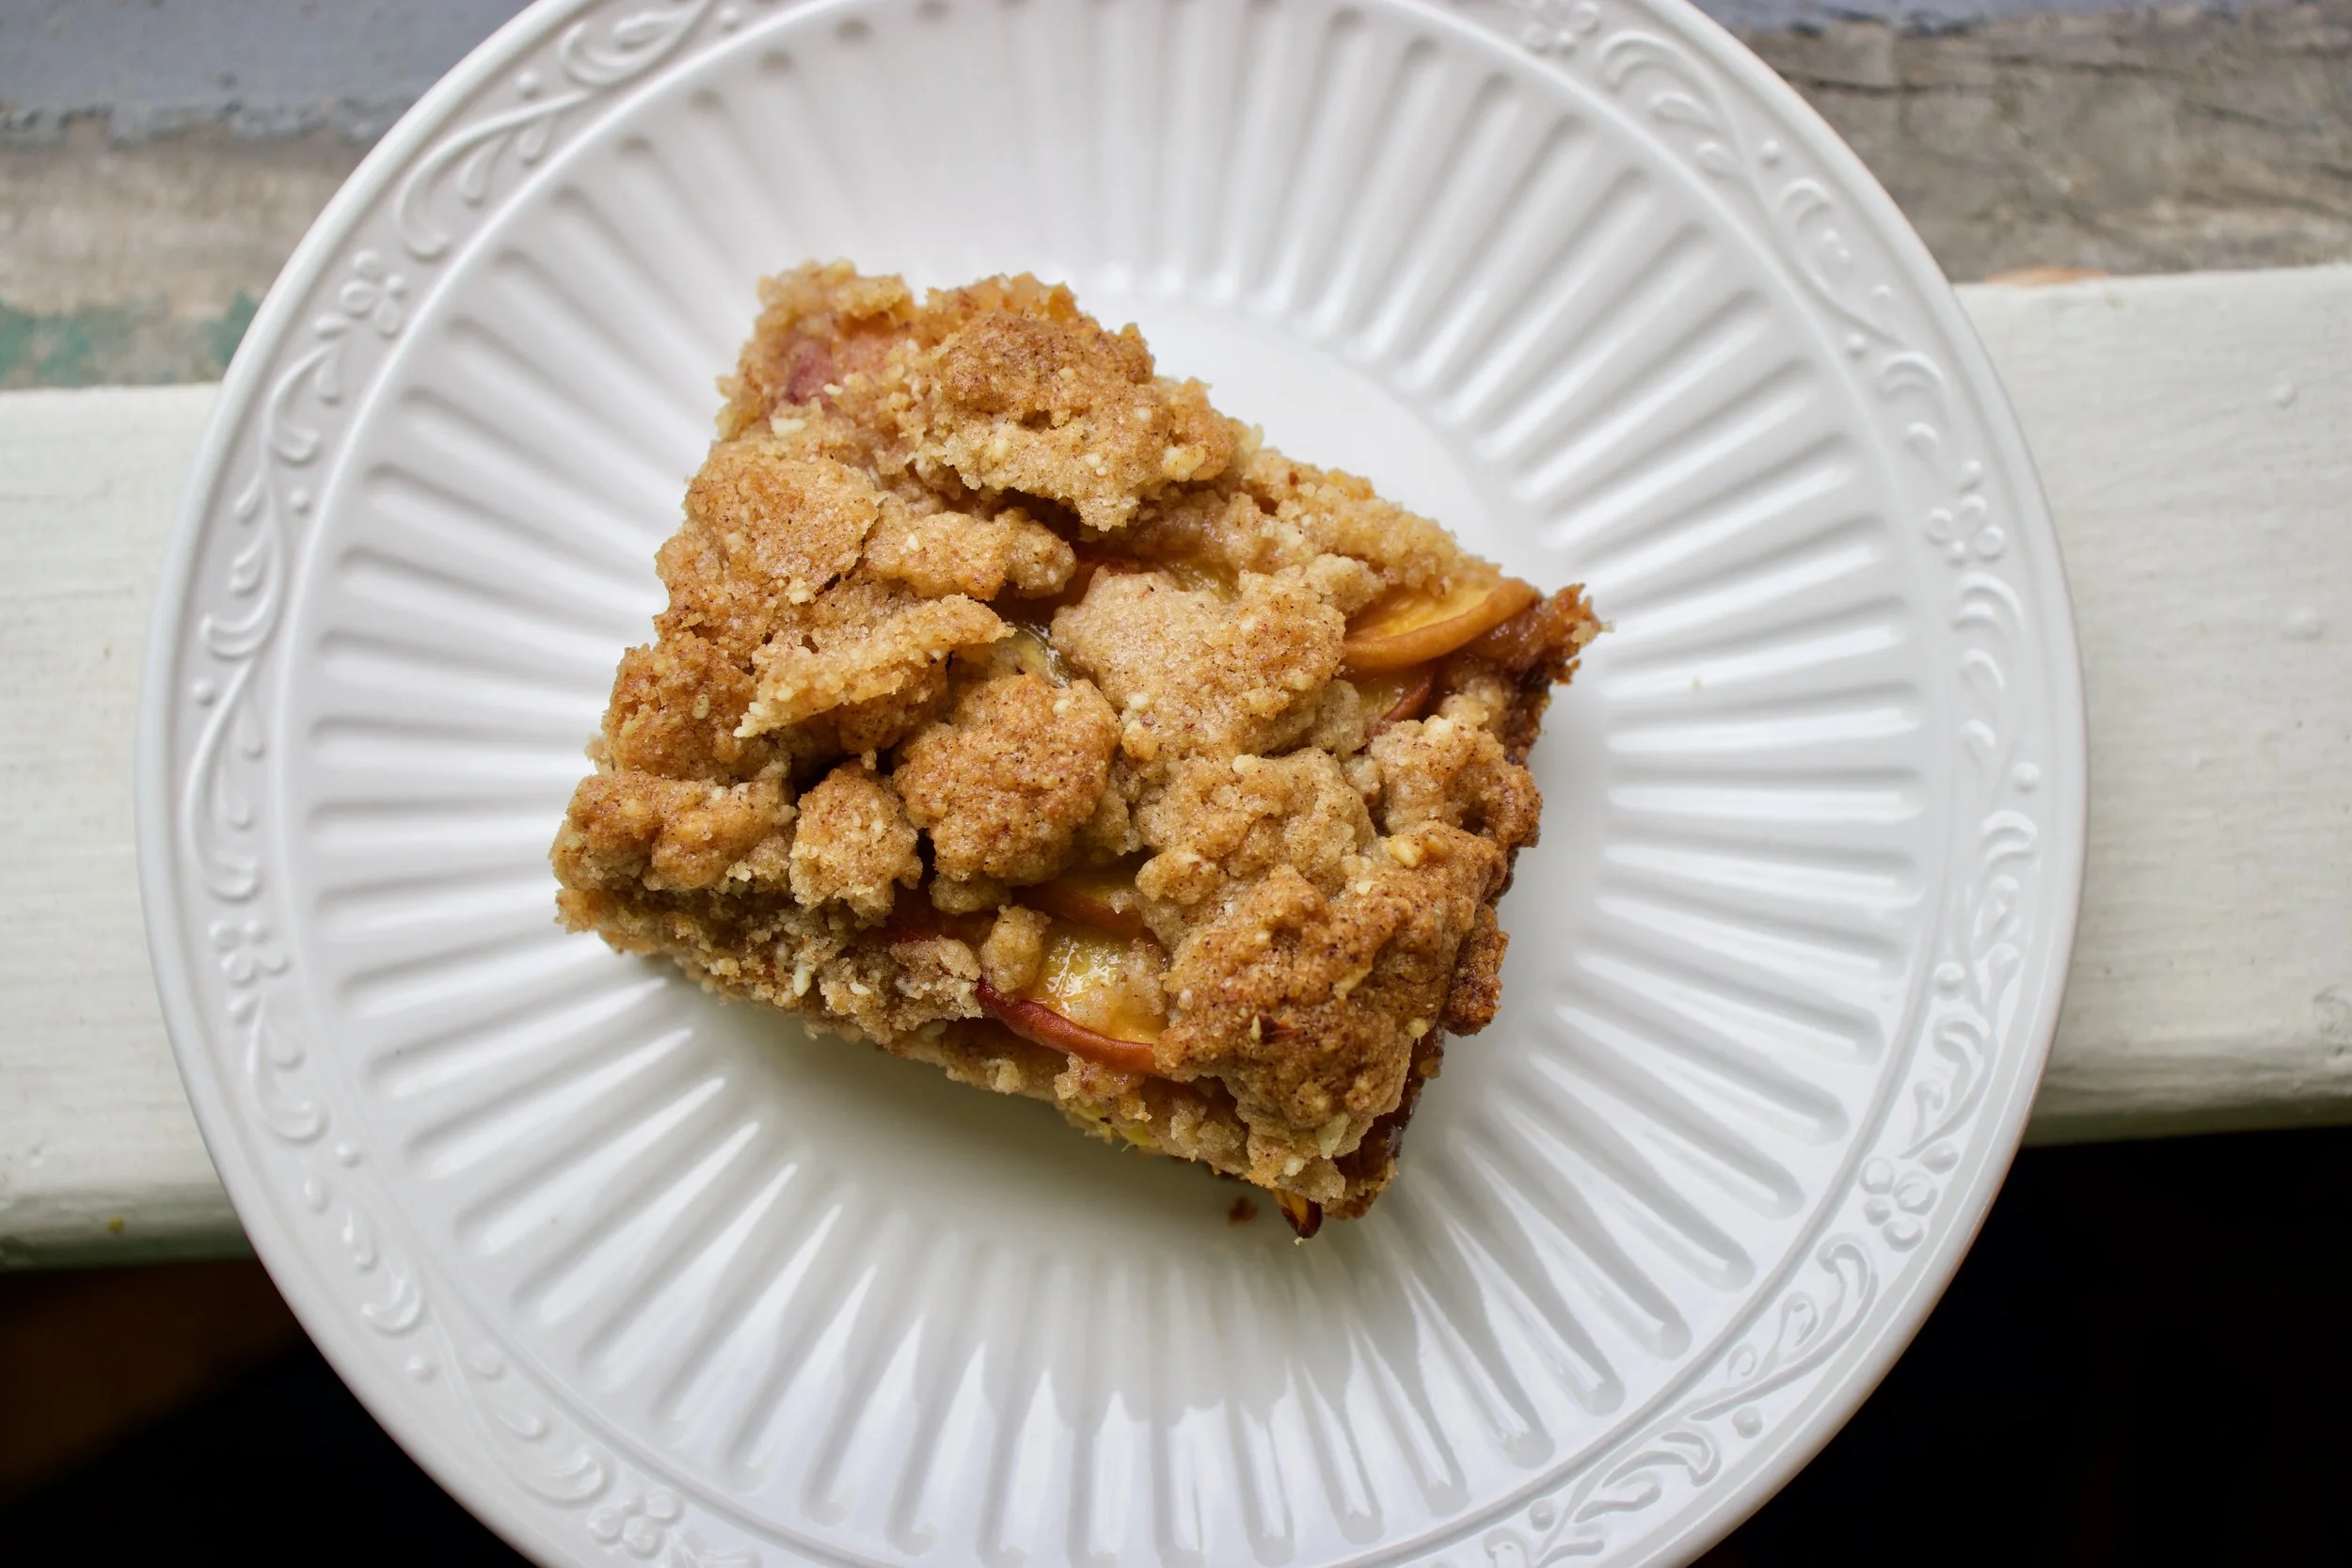
I am pretty sure you figured out what to do next%u2026. EAT IT!

-C

makes a 9×9 pan which can be cut Into the sizes of your choice

  • 1 cup vegan butter

  • 1 cup packed brown sugar

  • 2 cup cup all purpose flour

  • 1 cups raw almonds

  • 1 teaspoon baking powder

  • 1 teaspoon salt

  • 3 large firm peaches

  • 1 heaping teaspoon cinnamon

Preheat oven 350

Place almonds into a food processor and pulse and blend until a fine meal has formed. It should take only a minute or two and stop half way and scrape the edges and sides do the almonds don%u2019t start to form a paste. Add in the flour, salt, baking powder, cinnamon,and sugar and pulse until combined. Add in the vegan butter in a few chunks and pulse until the mixture turns into a crumbly dough. Stop pulsing and dump mixture into big bowl.

Take half of the mixture and place into a 9×9 baking pan. Evenly distribute and press the dough into the bottom. Take a fork and poke the dough all over then place the pan in the oven. Bake for 15-17 minutes or until the dough just starts to lighly brown. Remove from oven.

While the bottom crust is cooling off for a few minutes, slice peaches into 1/2 inch slices. Obviously make sure to remove pit.

Now take your half baked crust and layer peaches evenly on top. It is easies to start at the top, make three rows across and then layer the peaches down (like in the picture above). Once peaches are layered, grab the remaining half of dough and evenly distribute on top. Place back into oven and bake for another 40-45 minutes or until the crumble on top is a nice deep golden brown.

Remove from oven, let coo completely (or as completely as you can) cut into pieces, and then you eat it.

Left over pieces should be placed in an airtight container in the fridge for up to 5 days. They freeze well individually wrapped too.

blind back for about 15 minutes of until the crust is starting to brown around the edges

bake for another 30 minutes

Let%u2019s talk about how soup is the perfect food. It can be light and fresh, hearty and deep, chunky or smooth. You can eat it with a spoon, or somtime a fork if warranted, or just drink it from a mug. It%u2019s usually a one pot meal, a small pot for one, a big pot for many. Make a pot of soup and eat some now and save some for later. It freezes amazingly well. Got a few extra sad carrots and wilted greens? Toss them into a pot with whatever you have on hand, maybe those veggies scraps and you got yourself a meal. Want something more filling, just add in some grains. Feeling sick, warm soup will make it all better. Feeling fresh and springy, well soup is there for you too. Seriously soup, you can do anything. If I could, I would marry you. %u2665%ufe0f

This soup is one of this velvety smooth, light but rich, delicious beyond delicious soups. A fresh spring time soup. Not to hearty or heavily spiced. Super rich and creamy and flavorful. Bright ass green which makes it amazing in itself, but then with a nice tangy sumac tahini swirl on top, well it is just about the most perfect soup. I made to share, which I did, (and everyone licked their bowls clean) but then hoarded the little bit left over and ate it cold for a late afternoon snack. That is another thing about soup, you can eat is cold and it is still amazing.

Tasty and delicious, and nutritious. This soup does it all.

To the soup!

The stuff. Peas, chopped broccoli, and chopped cauliflower which are all frozen and slightly thawed. You can totally use fresh here too, but I just so happen to have it frozen so you might as well save the fresh stuff for fresh eating. Also have a big yellow onion, a few cloves garlic, some tahini, a lemon, sumac, and salt and pepper. You need water which I did not picture here.

A pot, some water and a roughly chopped onion and the garlic start off this soup. Bring the pot to a boil, then turn to medium and let the onion and garlic cook until very tender. I have been making a lot of soups starting with this step lately. Boiling the onion and garlic until tender and fragrant really make for a super flavorful and clean soup base. Or soup in itself.

Now add in the broccoli and cauliflower to the pot and cook until tender.

Mid soup cooking time is a good time to make the sumac tahini sauce for the swirl. Basics here, just mix the tahini, the sumac, a pinch of salt and pepper, the juice of the lemon and a tablespoon of warm water together until smooth.

Last but not least, the peas. Add them in and they just need a few minutes to cook through.
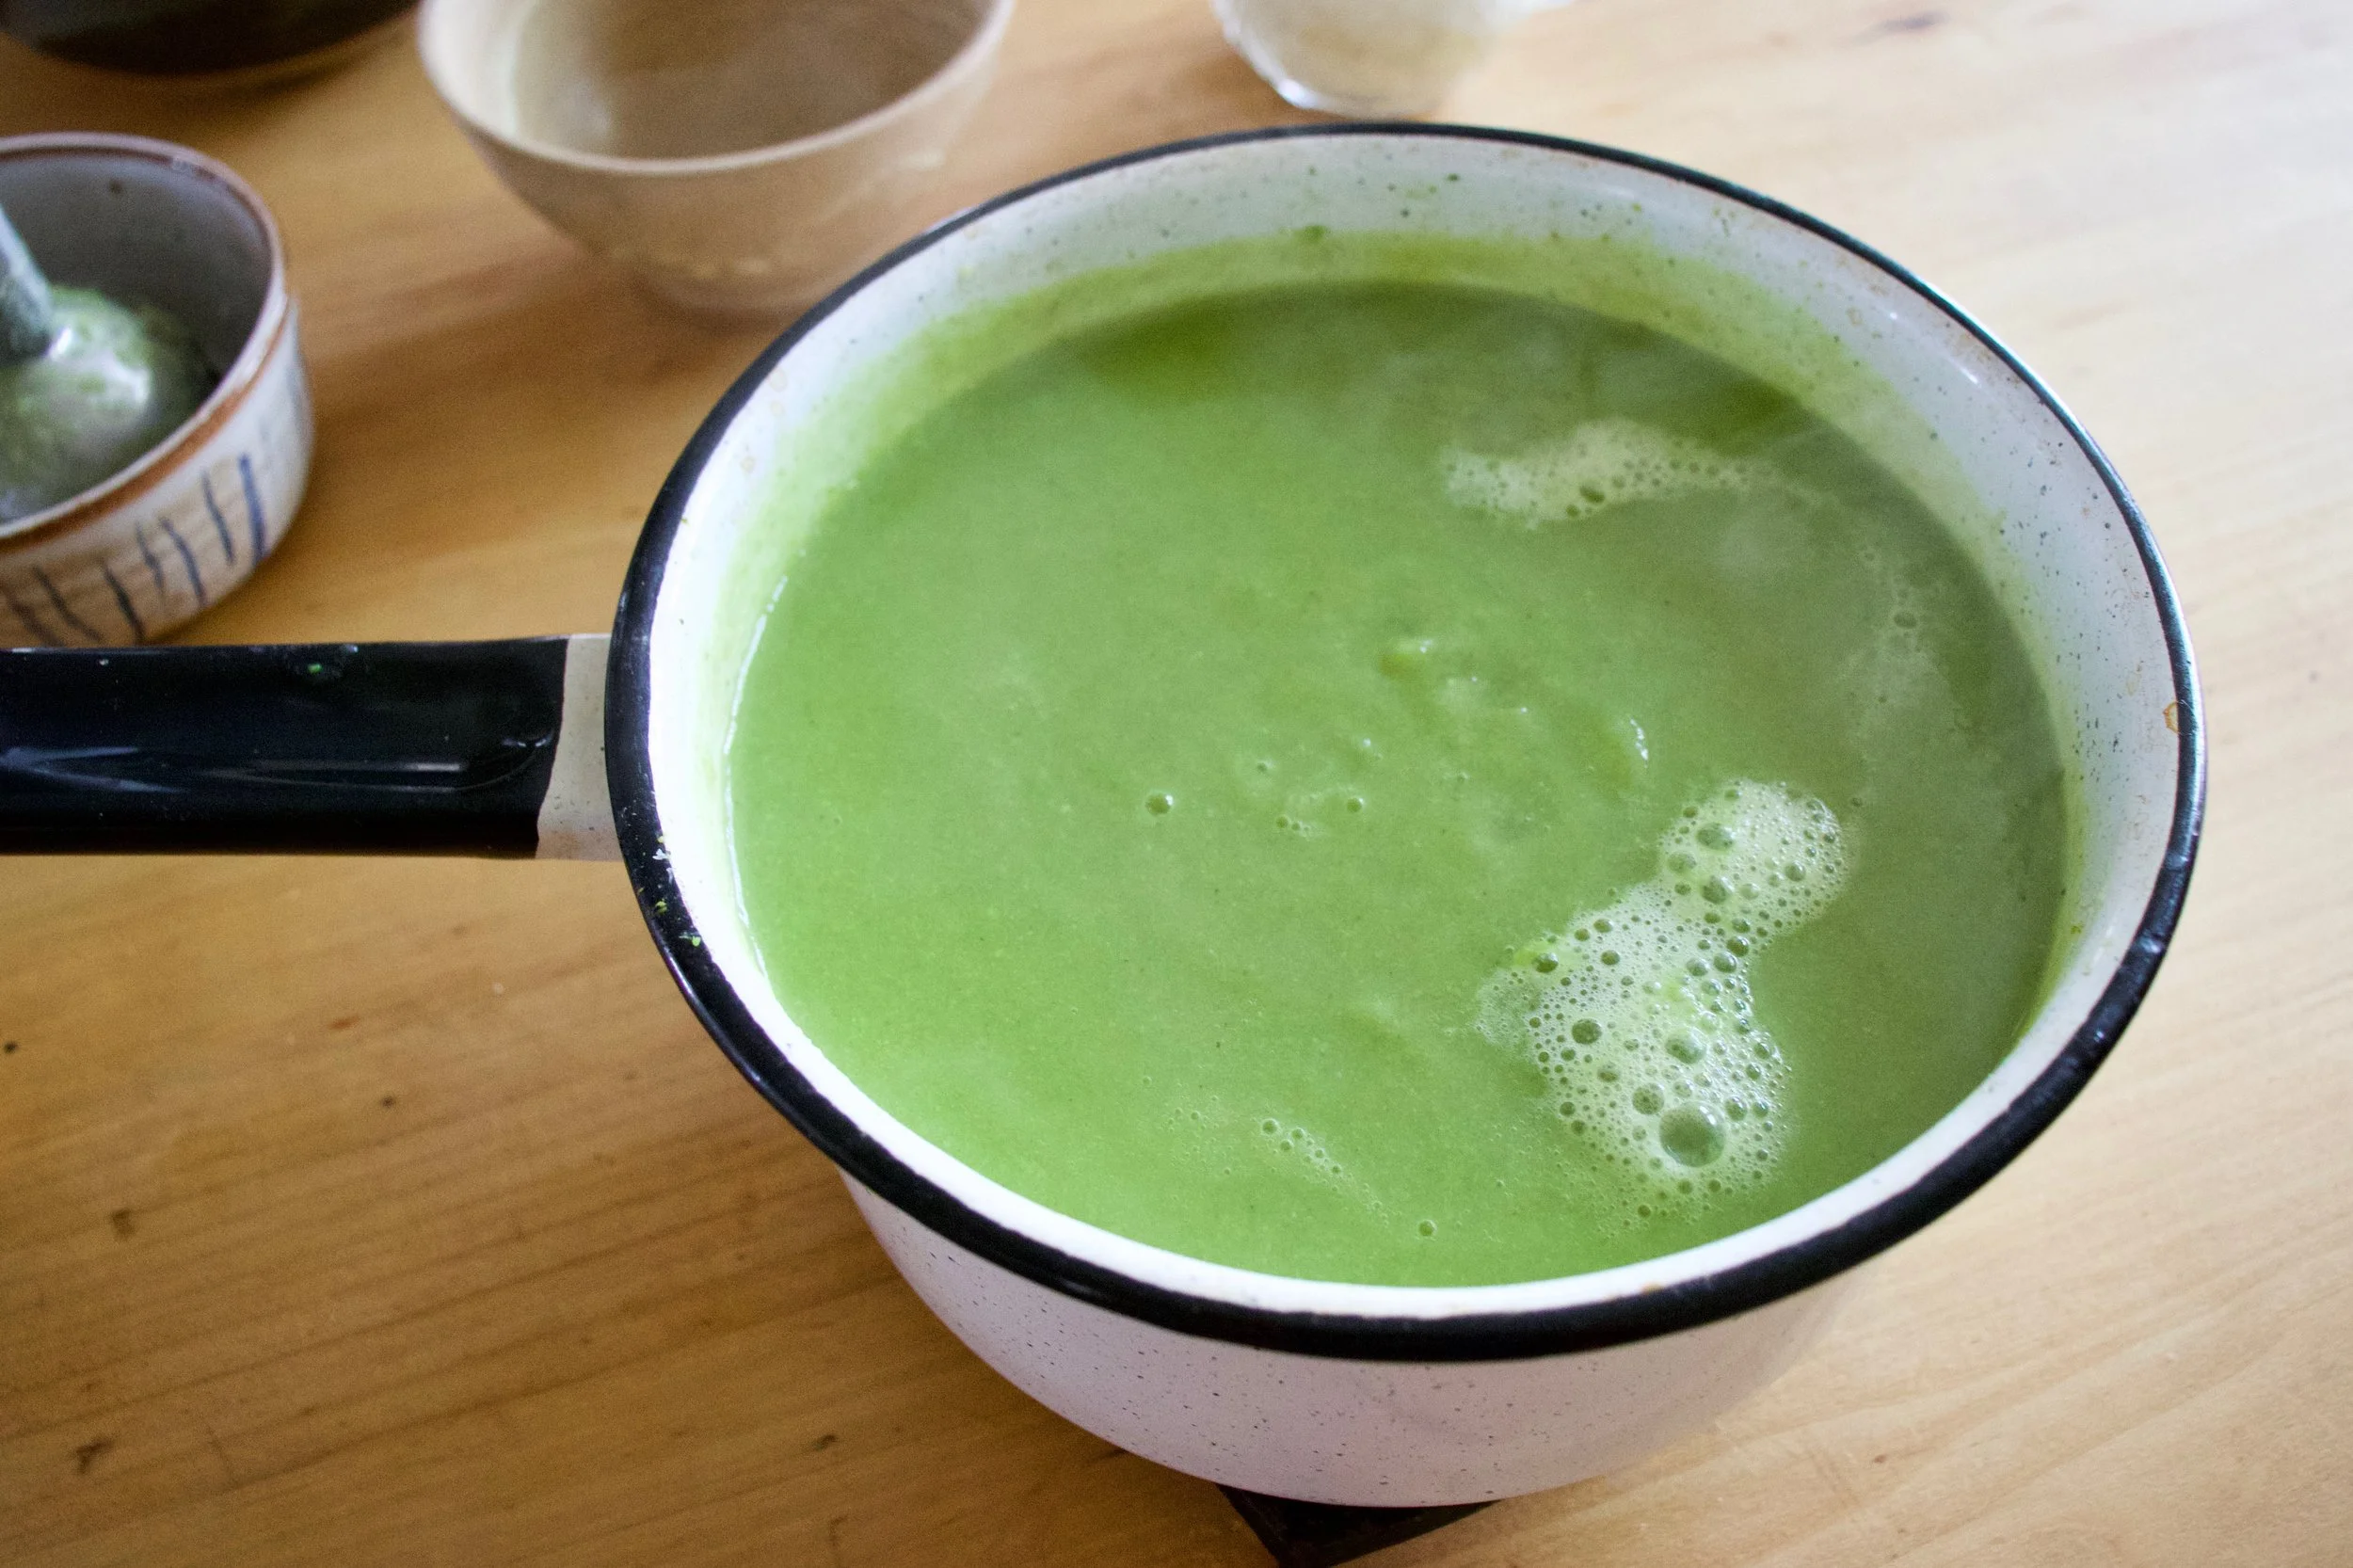
And then it all gets blended to become this green creamy goodness.
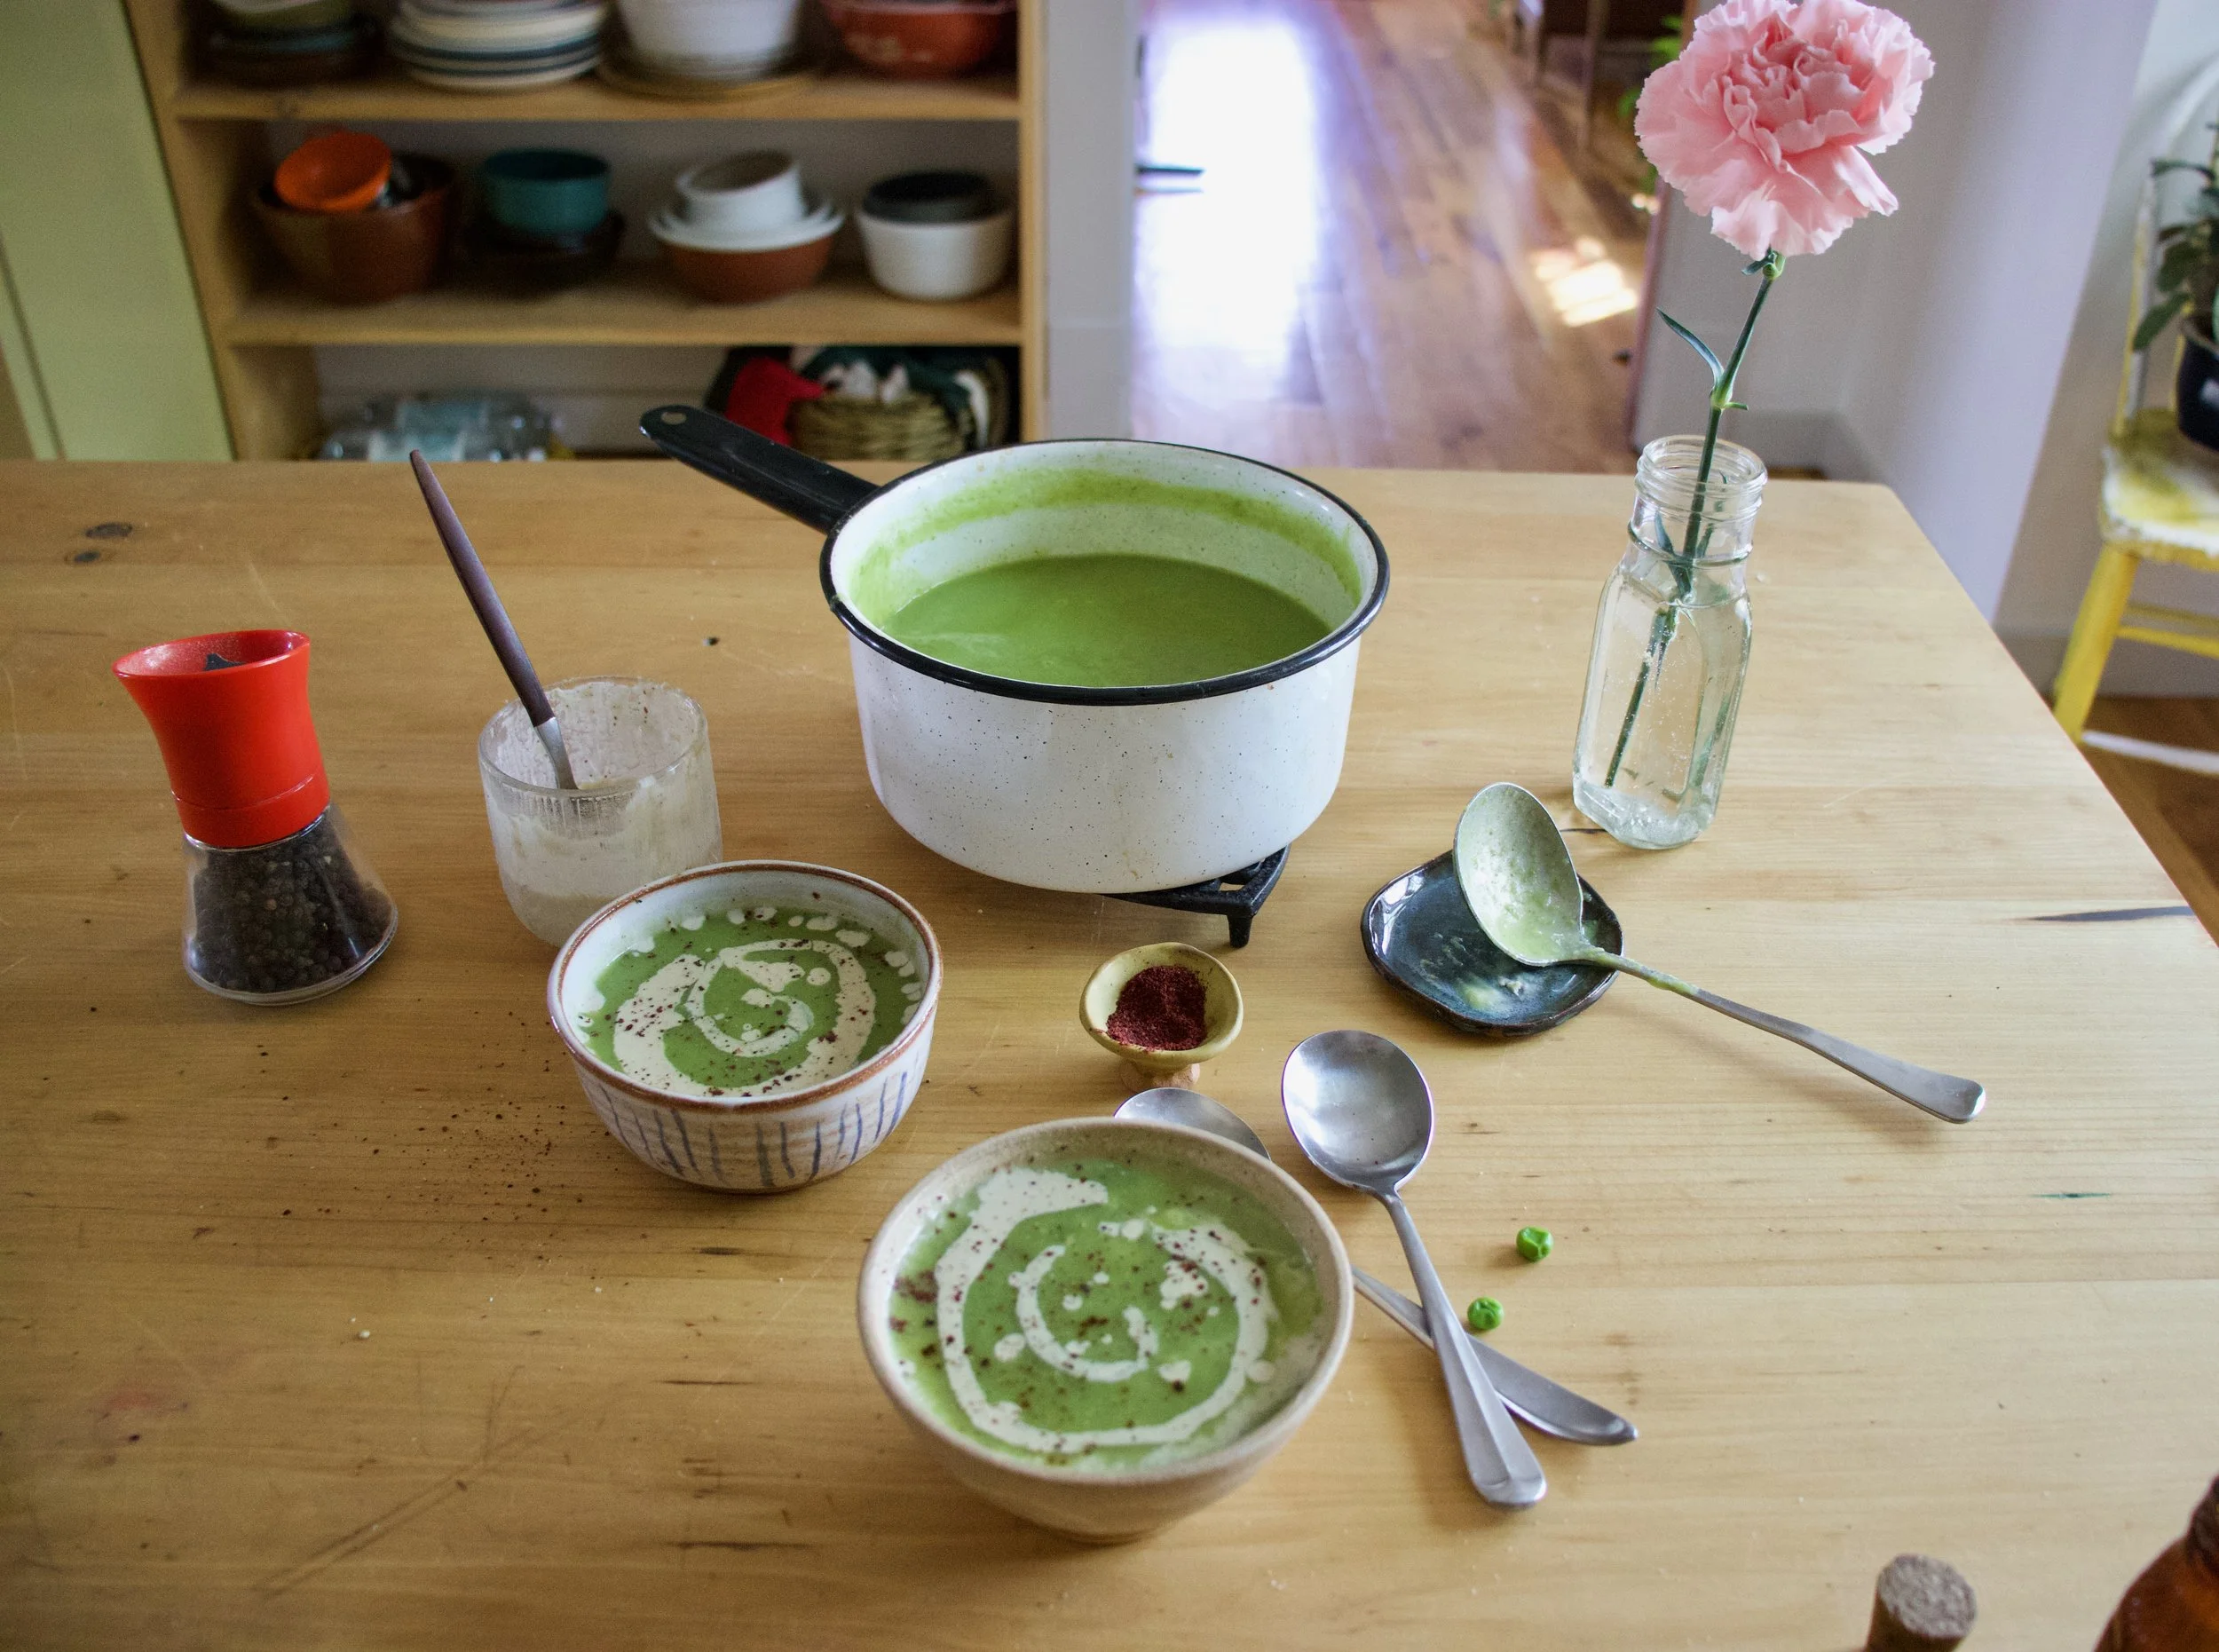
Ladle into bowls, grab the sumac tahini sauce and swirl it on in. A tablespoon or so is good. And don%u2019t forget a little more pepper and another pinch of sumac for good measure.
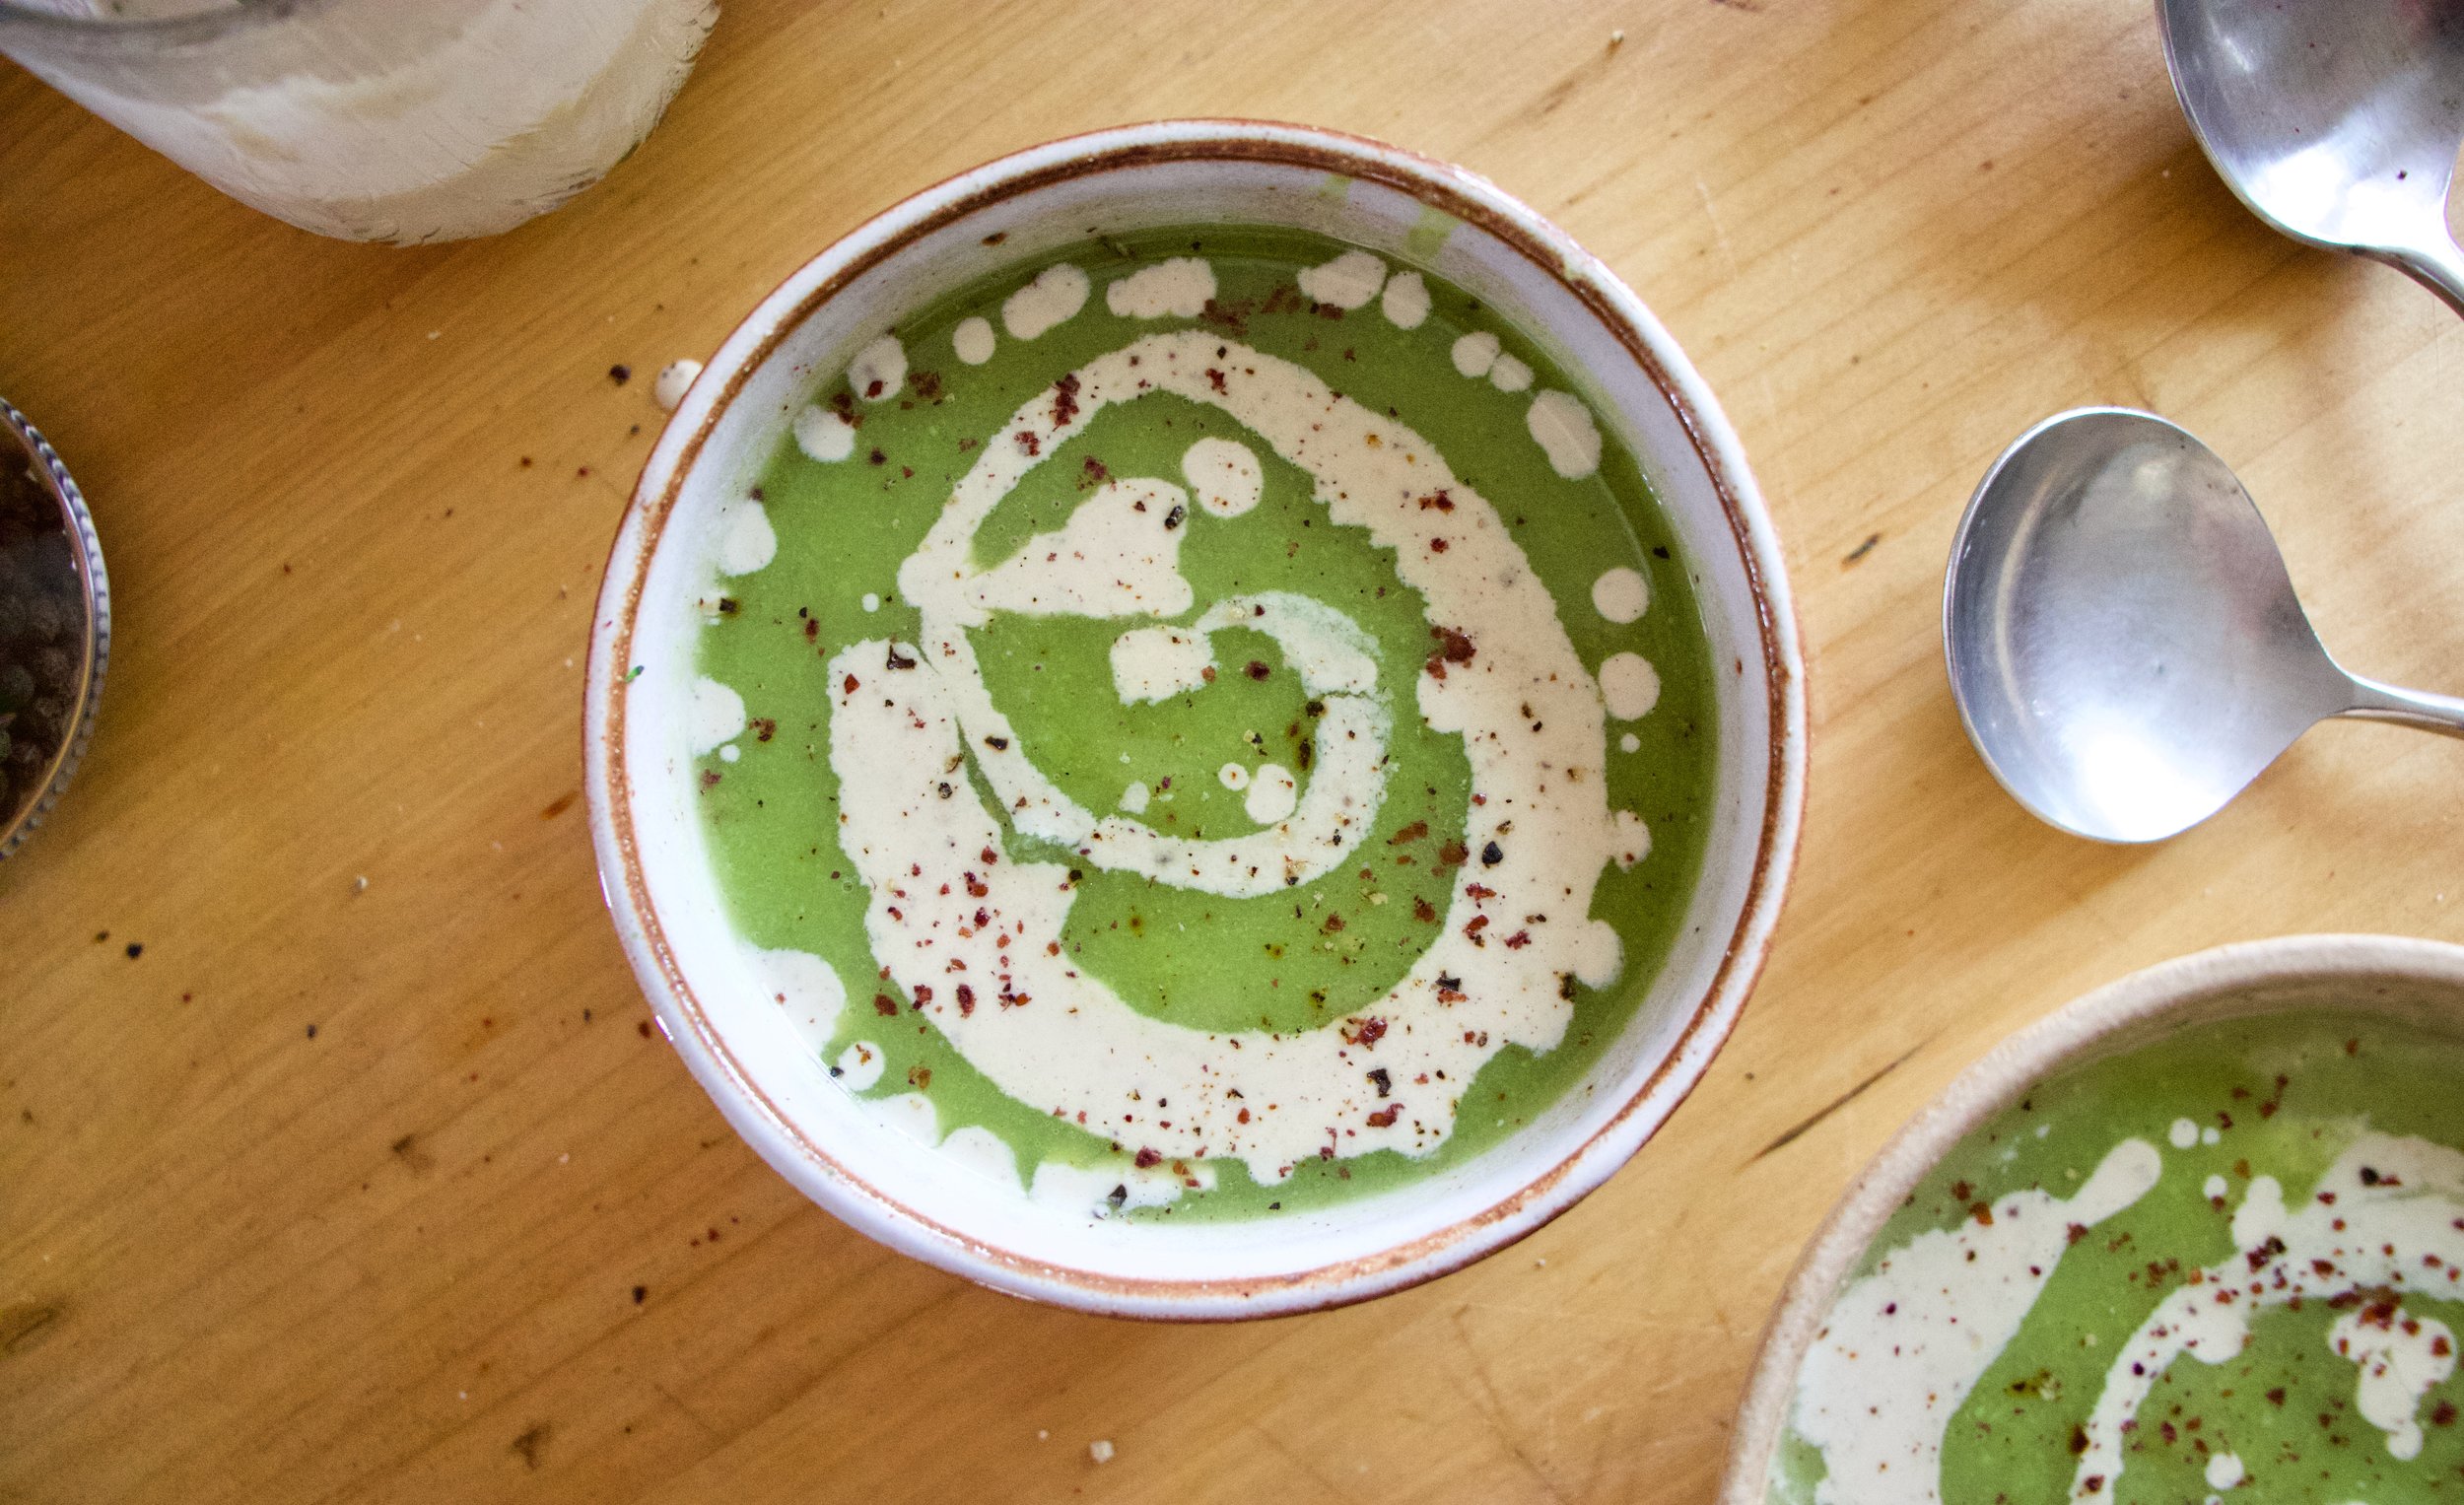
Just appreciate for a moment. That is one good looking bowl of soup. And it taste even better then it looks.

-C

Makes about 4 serving

  • 1 1/2 cups fresh or frozen peas

  • 1 1/2 cup chopped fresh or frozen cauliflower

  • 1 1/2 cup chopped fresh or frozen broccoli

  • 1 large onion

  • 3-4 cloves garlic

  • 4-5 cups water

  • Salt and pepper

  • 1 teaspoon sumac

  • 2 tablespoons tahini

  • 2-4 tablespoons warm water

Start by removing the papery skin from the onion and chop into a few big chunks. Remove the skin from garlic too. Place into pot with 4 cups water. Turn heat on high and bring to a boil then turn heat to medium and let onion are garlic cook until tender which should take about 15-20 minutes

Once the onion is cooked, add in the broccoli and cauliflower. Turn heat back to high and bring to a boil again then turn back down to medium heat. Keep cooking until tender (another 15 minutes or so) then add in the peas. Keep on heat until peas are cooked through then remove the pot from heat and either transfer to a blender or use a immusrian blender to blend the soup until smooth. Add a little more water if needed to get to the right consistency to blend right. Or if you want a thinner soup.

For the tahini sumac swirl just mix the tahini and sumac together along with the juice of the lemon, two tablespoon warm water and a pinch of salt. Mix together until smooth. If the mixture is to thick, add another tablespoon of water.

To serve. Ladle or pour soup into bowls and drizzle and swirl the tahini sumac on top. Sprinkle with pepper and a pinch more sumac and you are good to go.

Spring is here for reals, I think. No, it is here, it has just been a bit raw and maybe a bit more rainy then it really needs to be, but whatever, it is spring and it is good. Things are greener by the day, the temperatures although not exactly warm are still inhabitable and without cause for winter jackets (although I have still been rocking the mittens) and spring veggies are popping up all over. Things are looking good.

So last week I made a pie crust with the intention to make a veggie pot pie and stuck it into the freezer. When the time came to make said pot pie, I forgot to take it out of the freezer so the crust was not meant to be for pot pie (it will probably end up as a rhubarb pie%u2026we shall see). Without pie crust, I wasn%u2019t exactly feeling like I should make a pot pie, but a tart, well yeah, sure. A crispy and chewy crackery crusted thing with almond ricotta a spring veggies because that is where the mind went and what the mr agreed sounded good. (When I make up recipes I just start taking about ingredient and preparations and wait til the mr says %u201cYea, that loud good. I%u2019ll eat that %u201c He usually will say it right away and for anything. Very easy to please or he just doesn%u2019t care%u2026hum? )

And so the tart was made and the tart was eaten in all entirety for dinner by the mr alone. Usually when he eats all of something it means it was one of the really good things. Or he is really really hungry. But he said it was a really good thing. I trust him because I agreed. I got in a few spoonfuls of the almond ricotta mixture and it is really freaking good if I do say so myself (I could eat bowls of almond ricotta all day long).

Anyway, heres to spring and all things that are green and good.

To the tart.

The stuff. Flours (white and white whole wheat), baking powder, and a little salt in the bowl. Water and olive oil, blanched almonds, a lemon, a clove of garlic, asparagus, peas, frozen and thawed spinach, a small red onion, and salt and pepper.

Start with making the crust. Mix the dry together then add in the oil and water to form a dough. Knead dough a minutes until the dough is uniform and place back in bowl and cover. Dough needs a few alone minutes to rest. I can relate to that.

While dough is resting, make the almond ricotta. Almonds, garlic, the juice of the lemon, and a bit of water go into blender. Add in a pinch of salt and pepper too.

Blend until creamy and smooth.
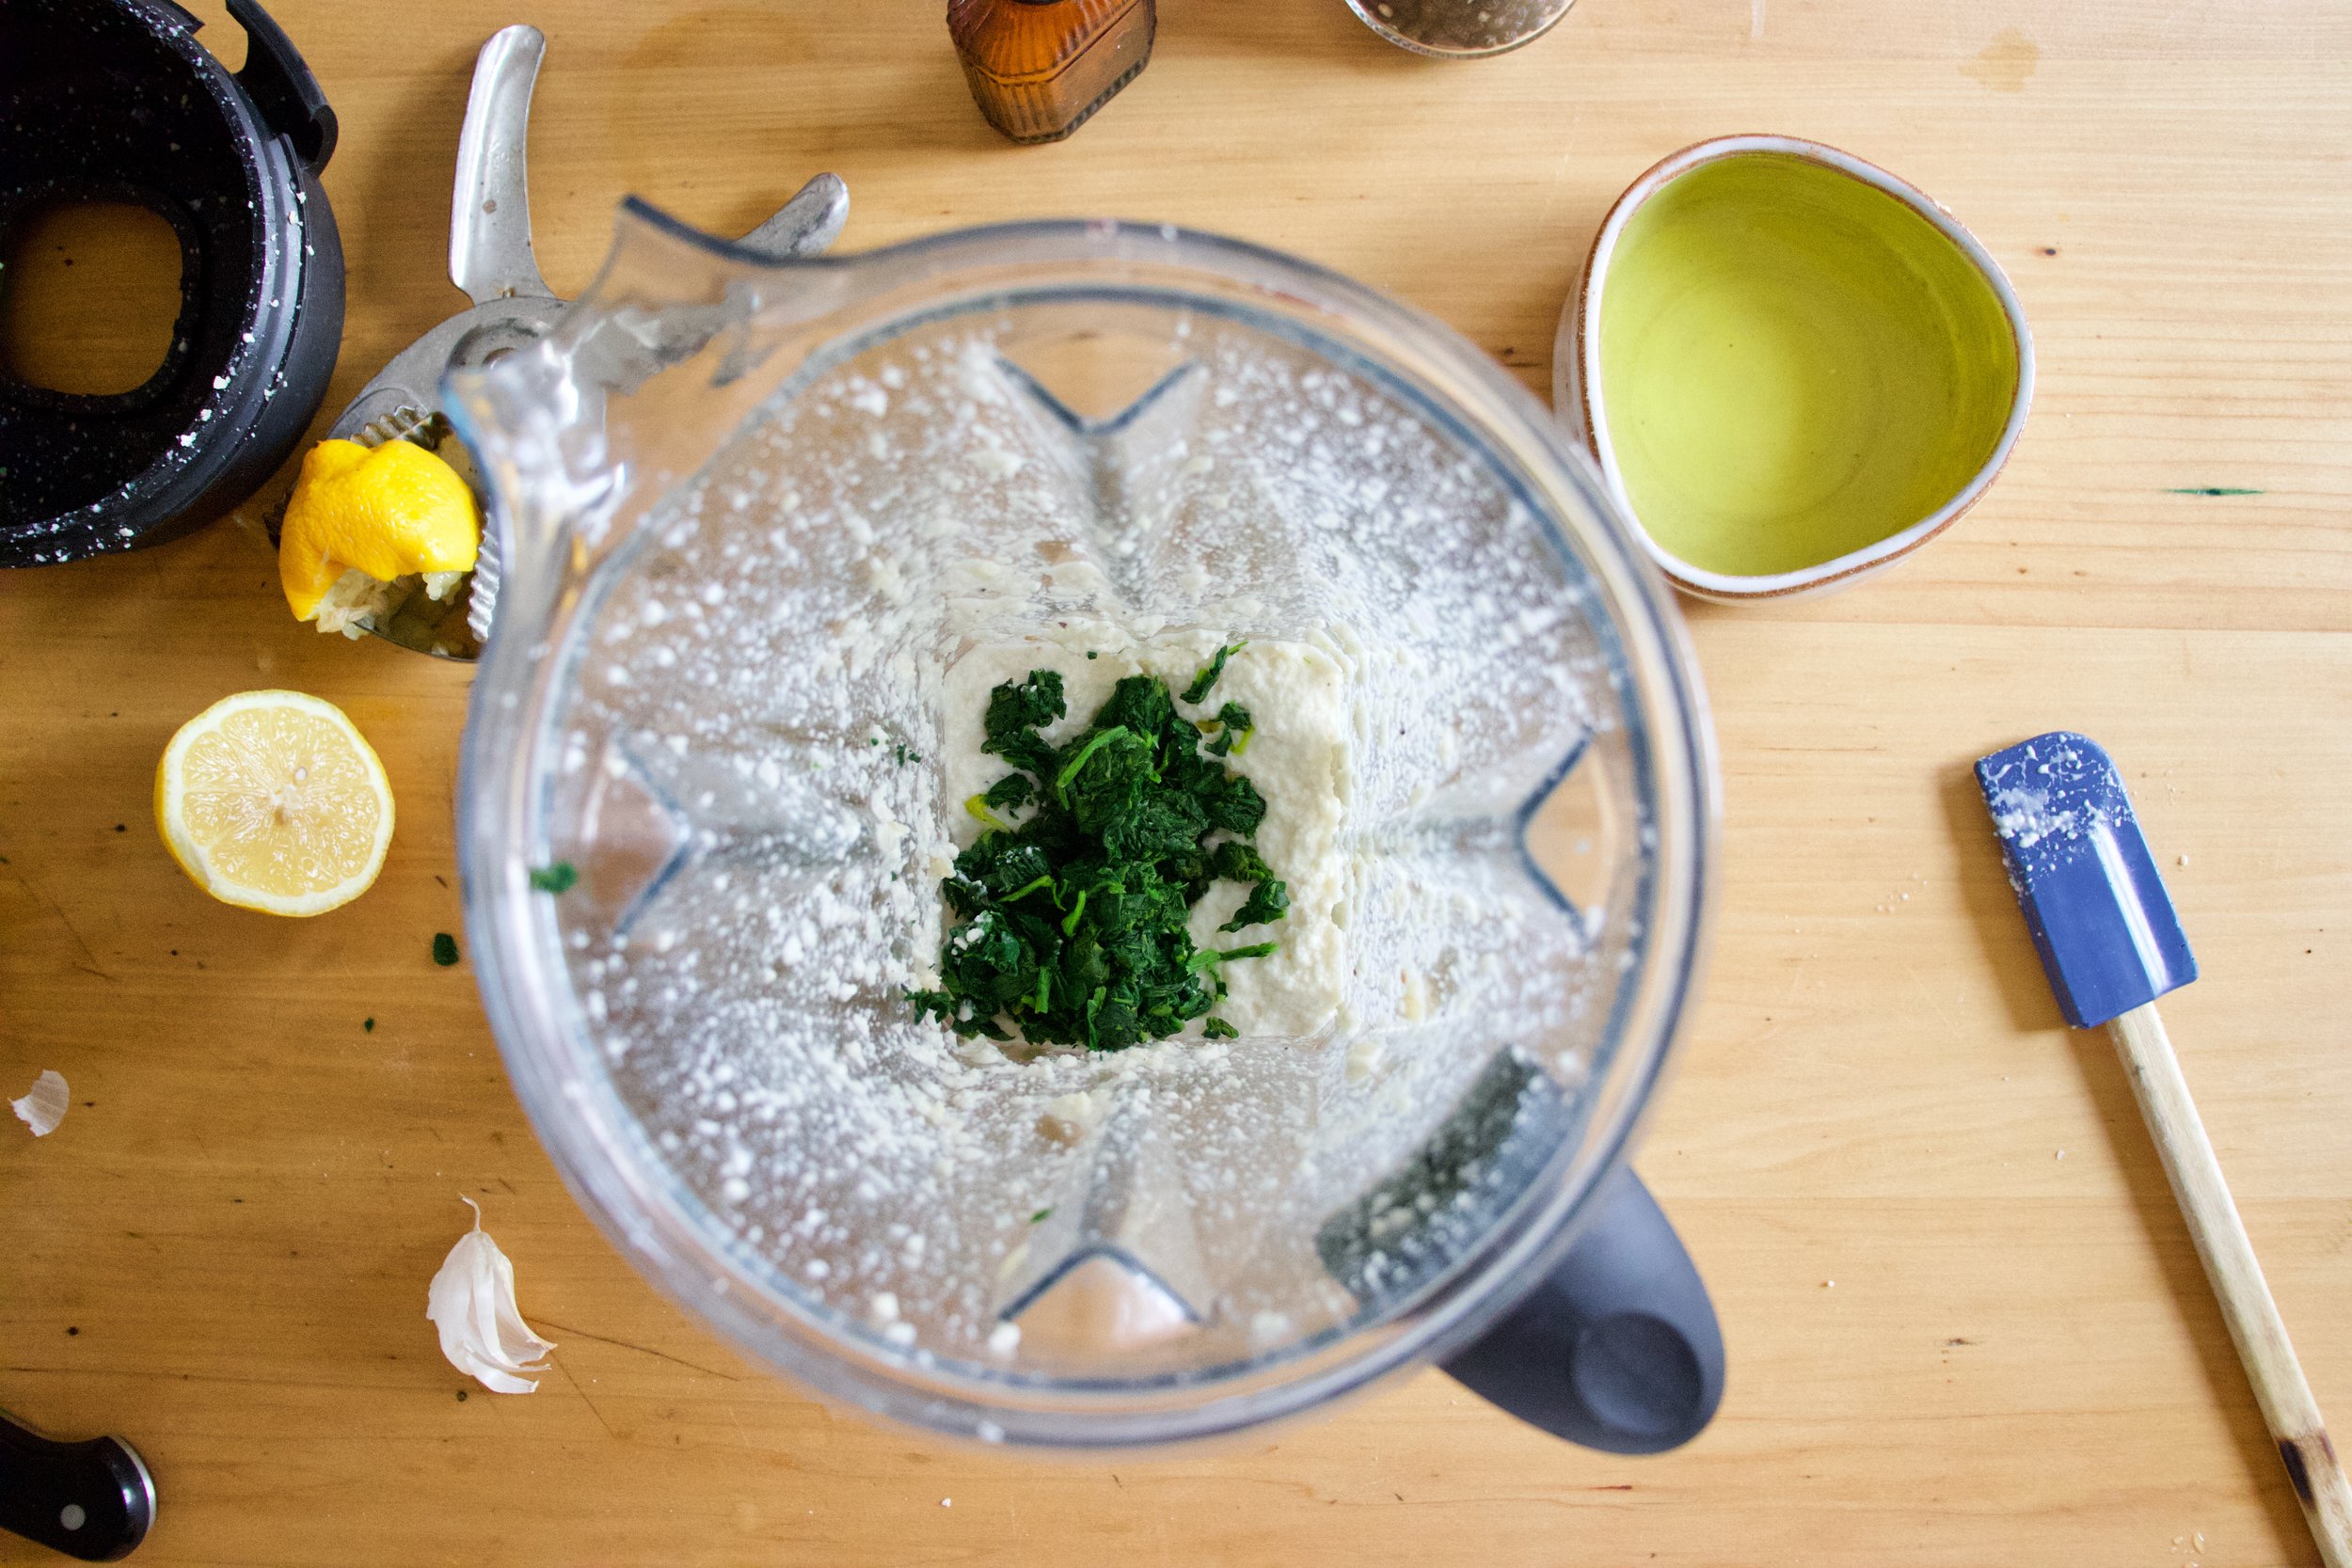
Dump in the spinach and blend, just until combined.
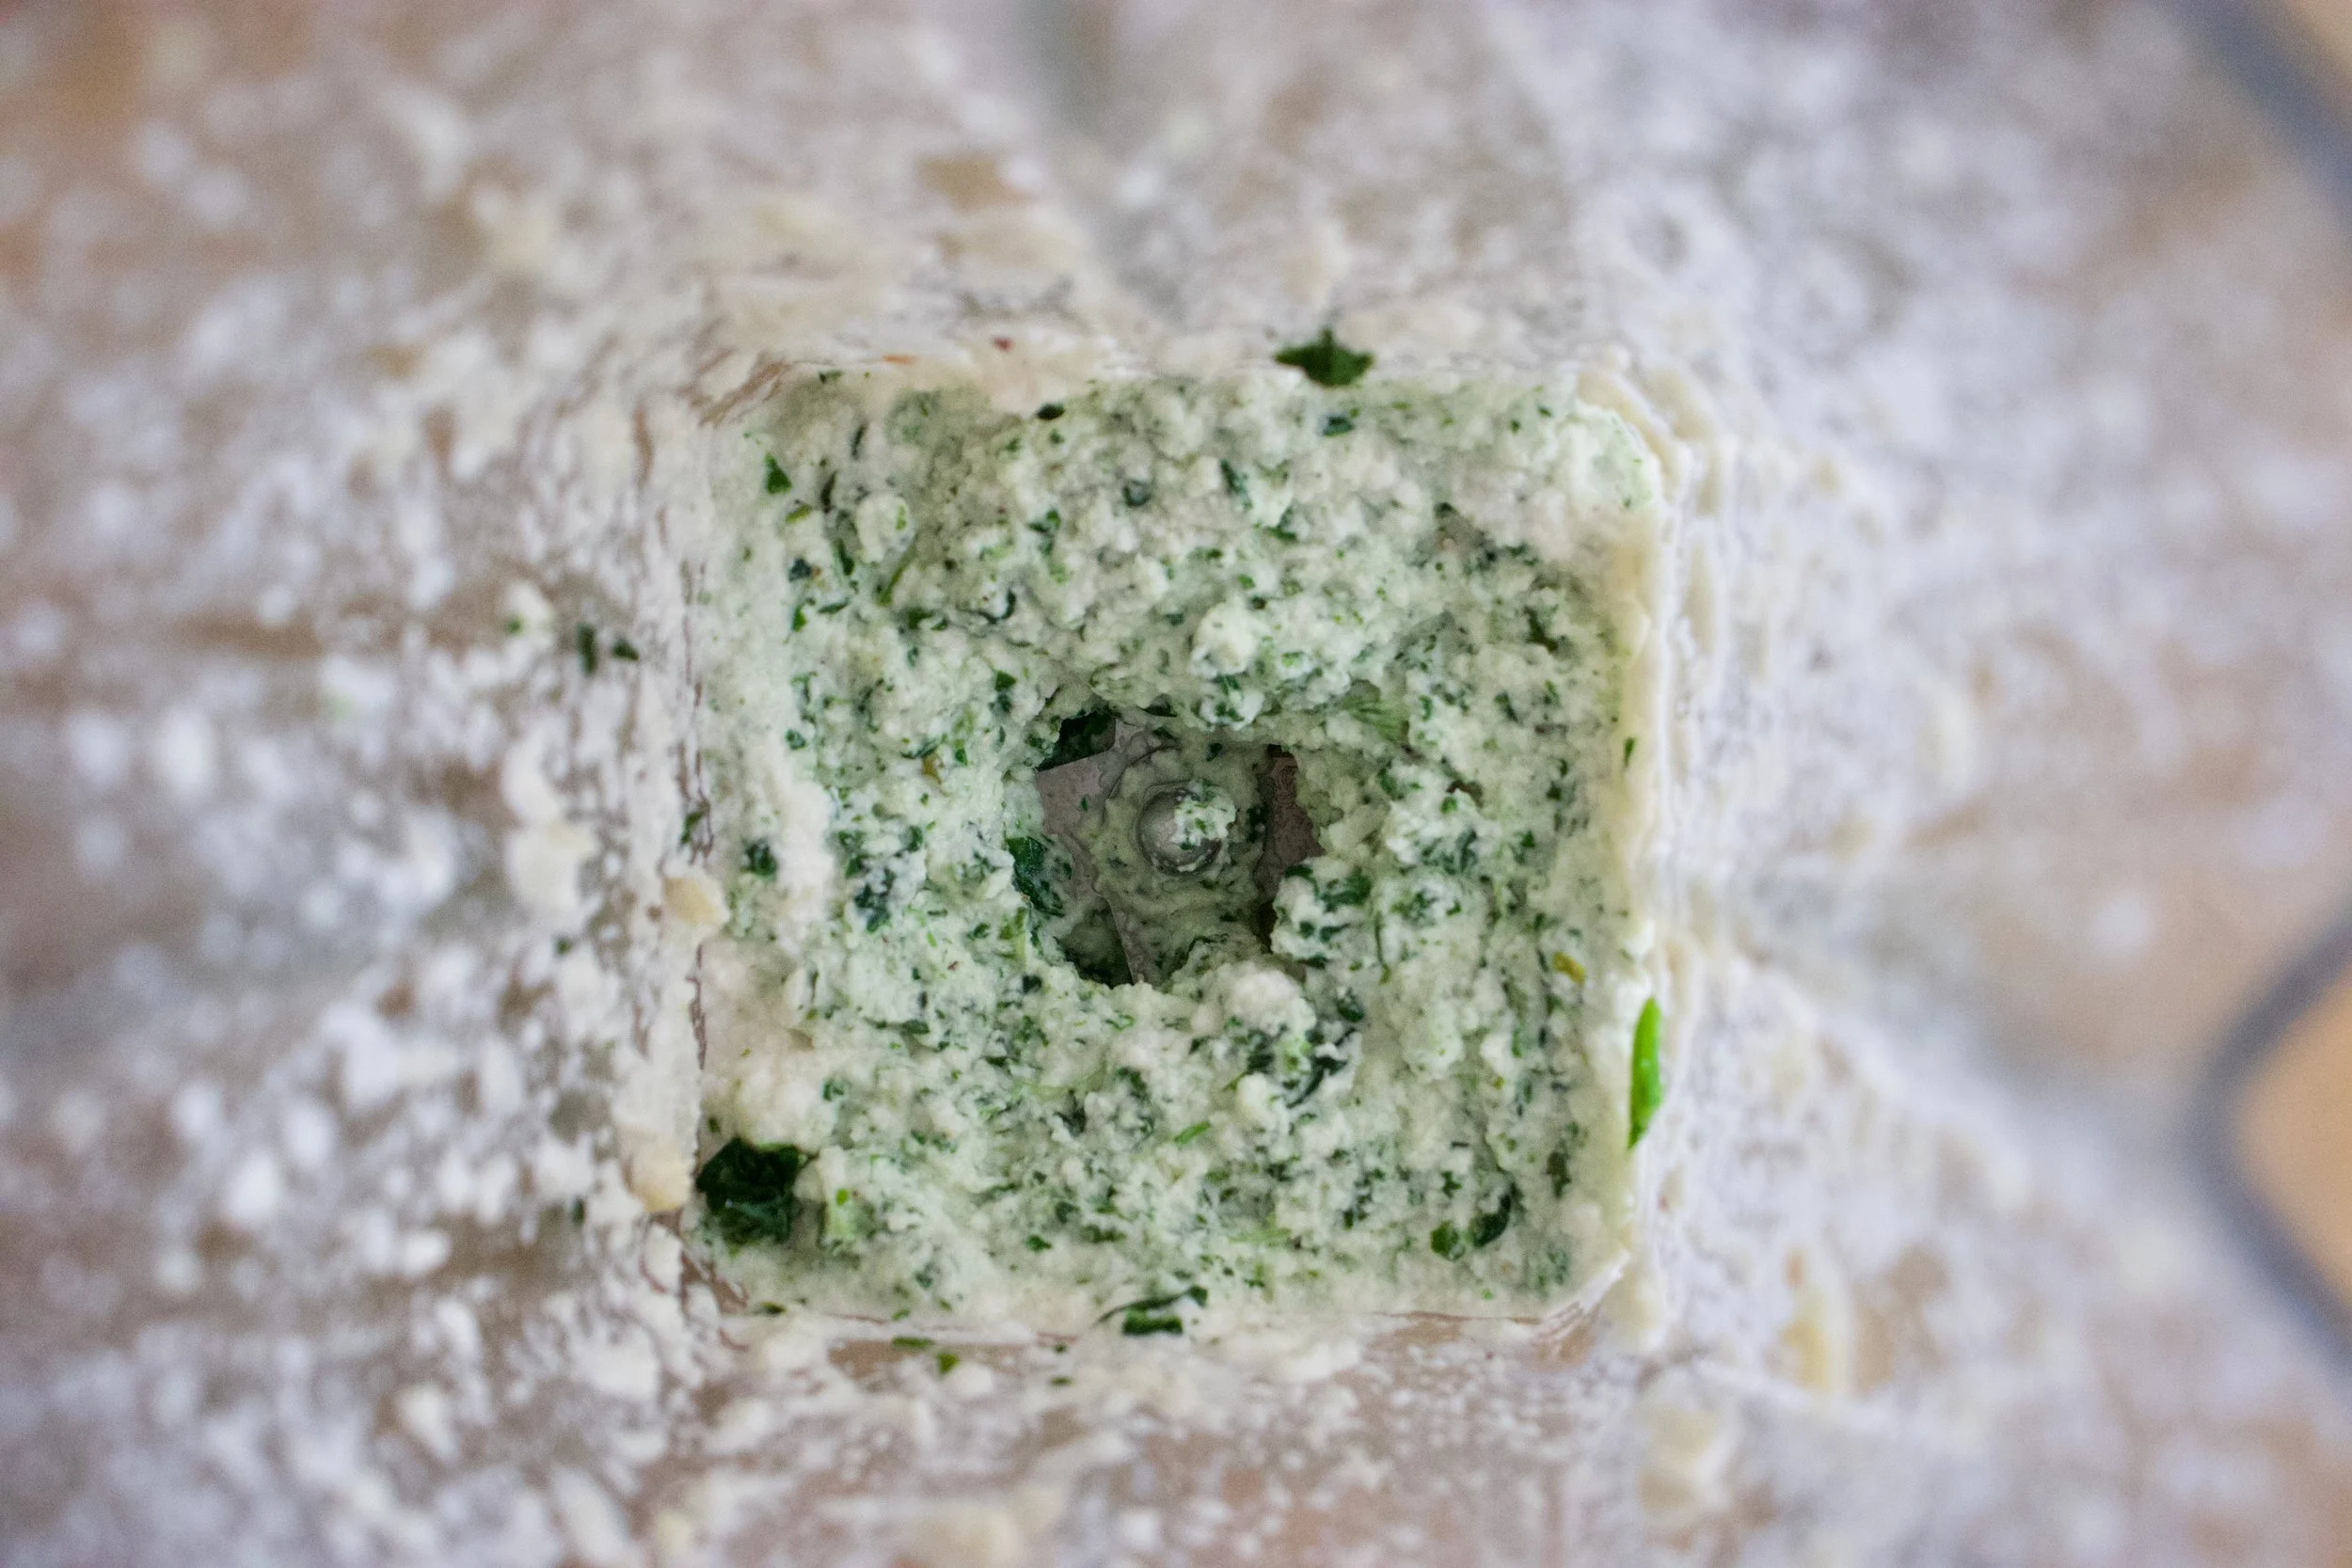
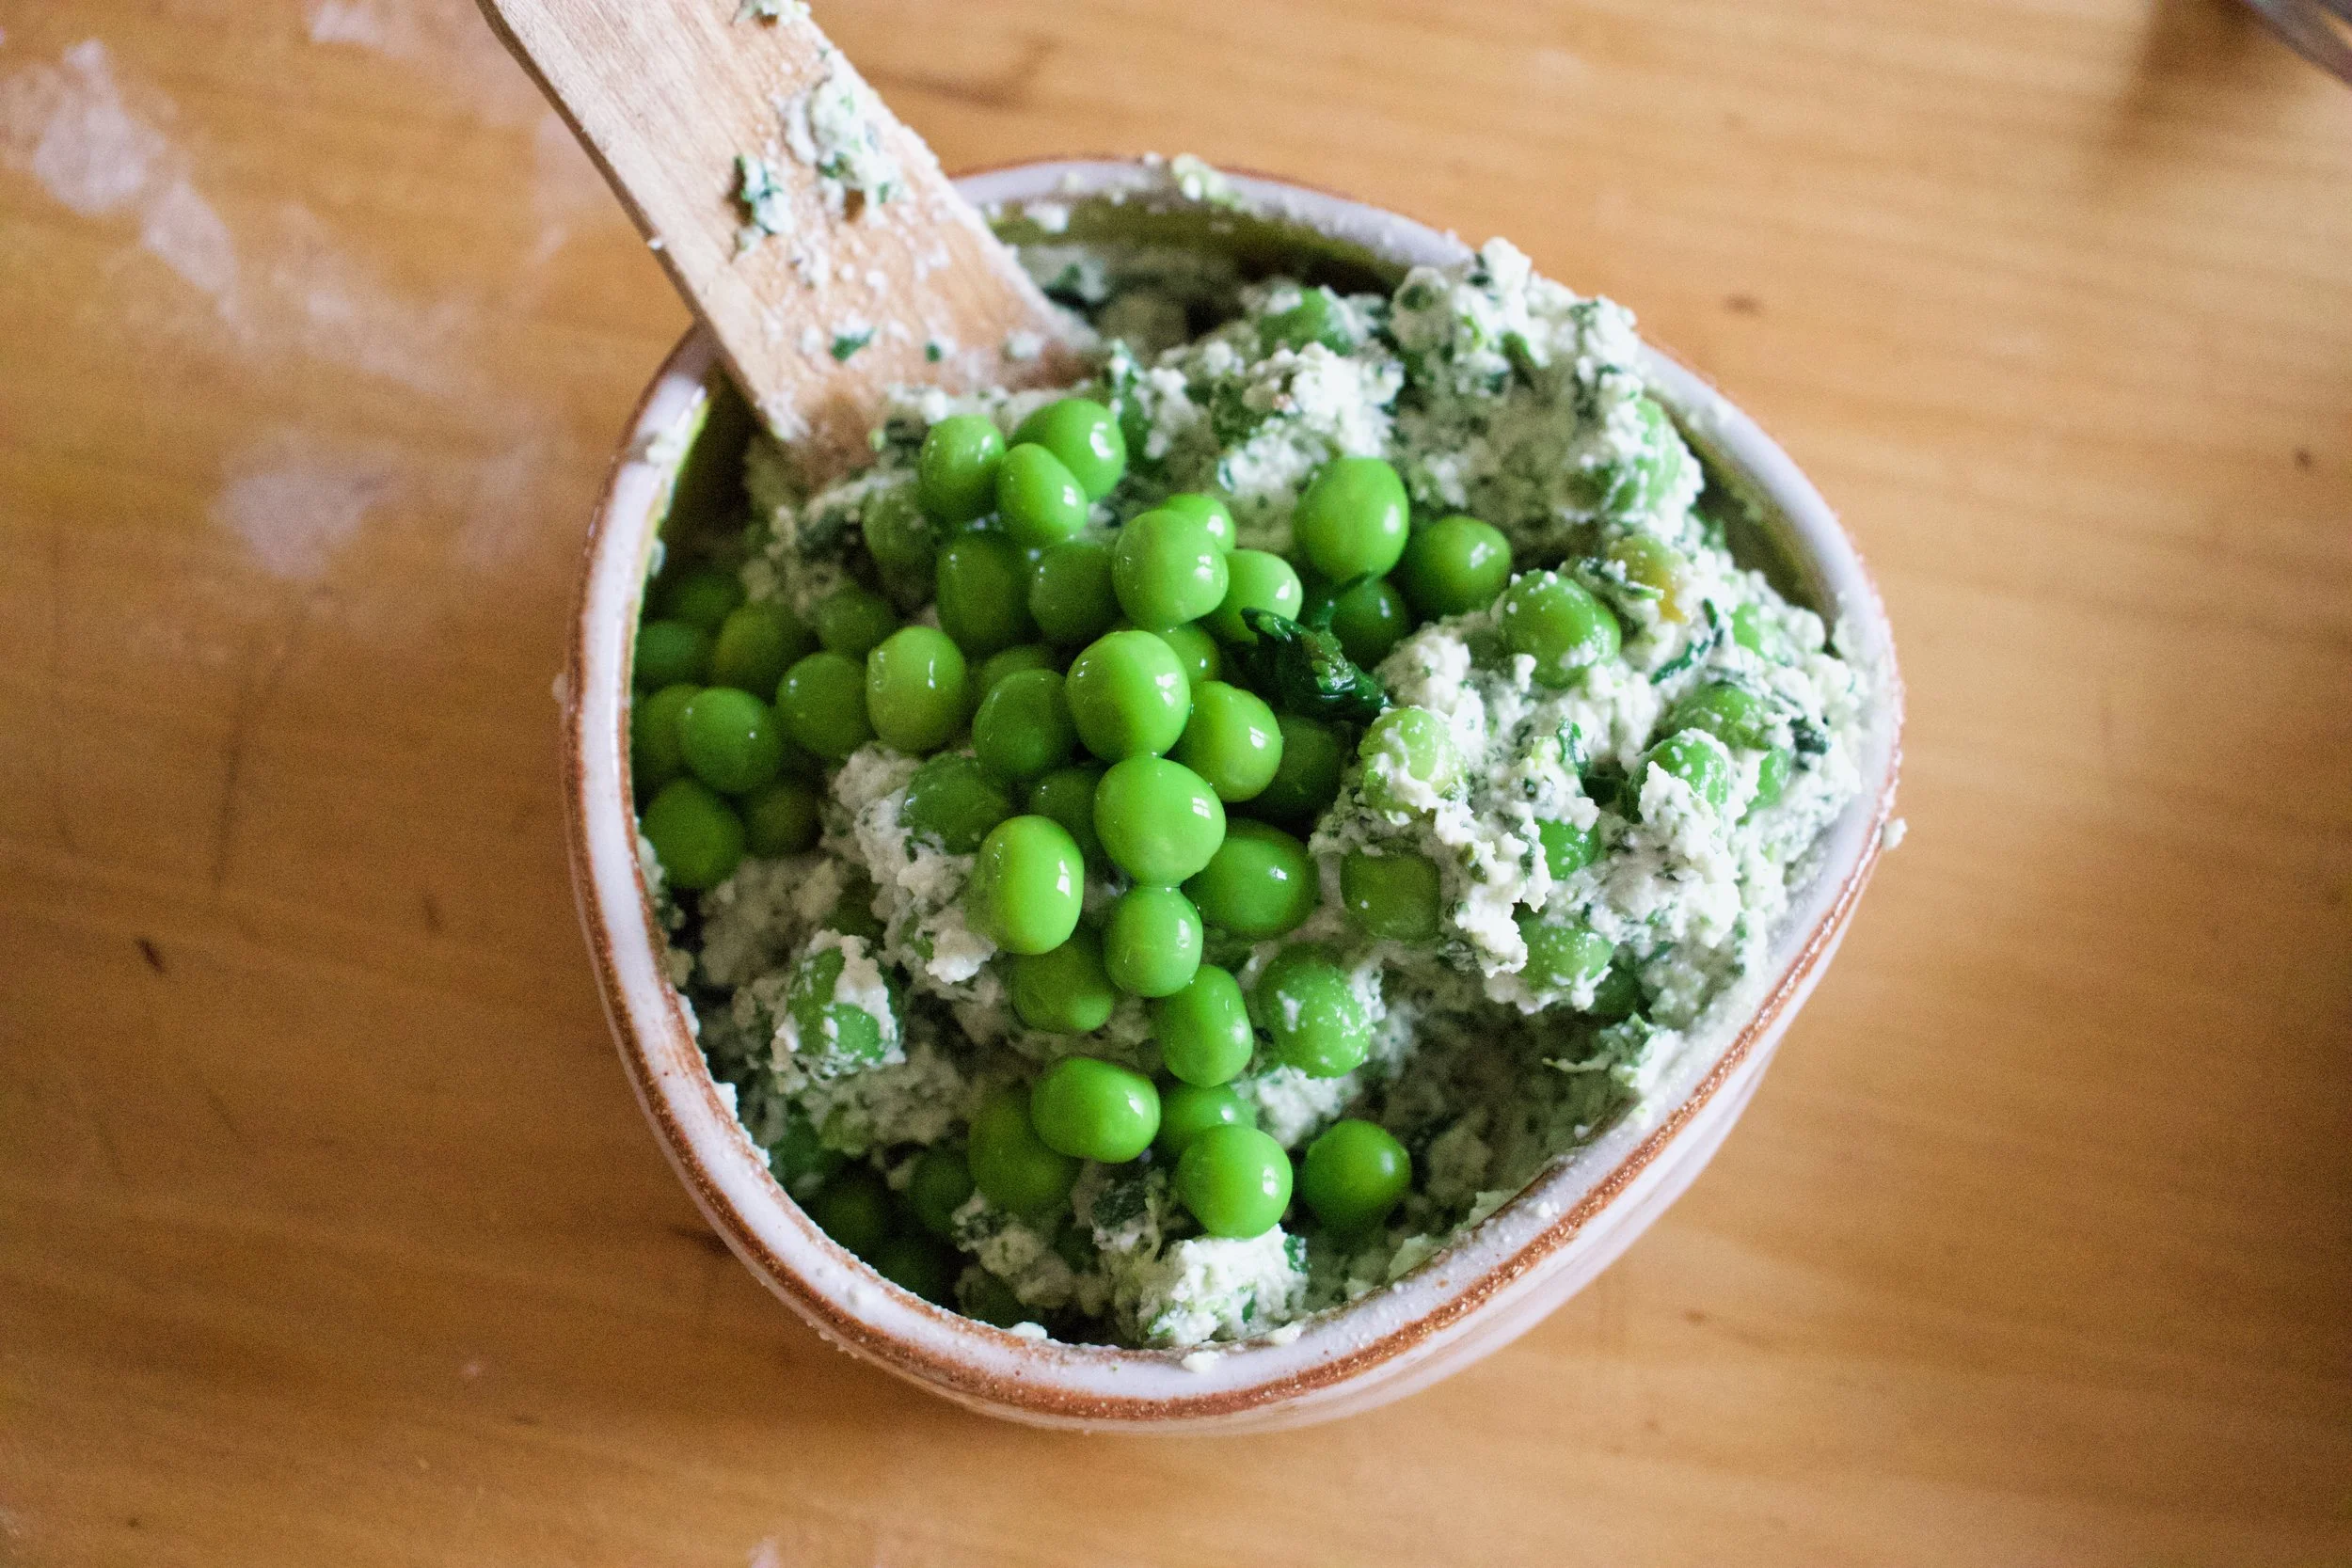
Scoop ricotta into a bowl and mix in the peas. And sure give it another taste but try not to eat it all.
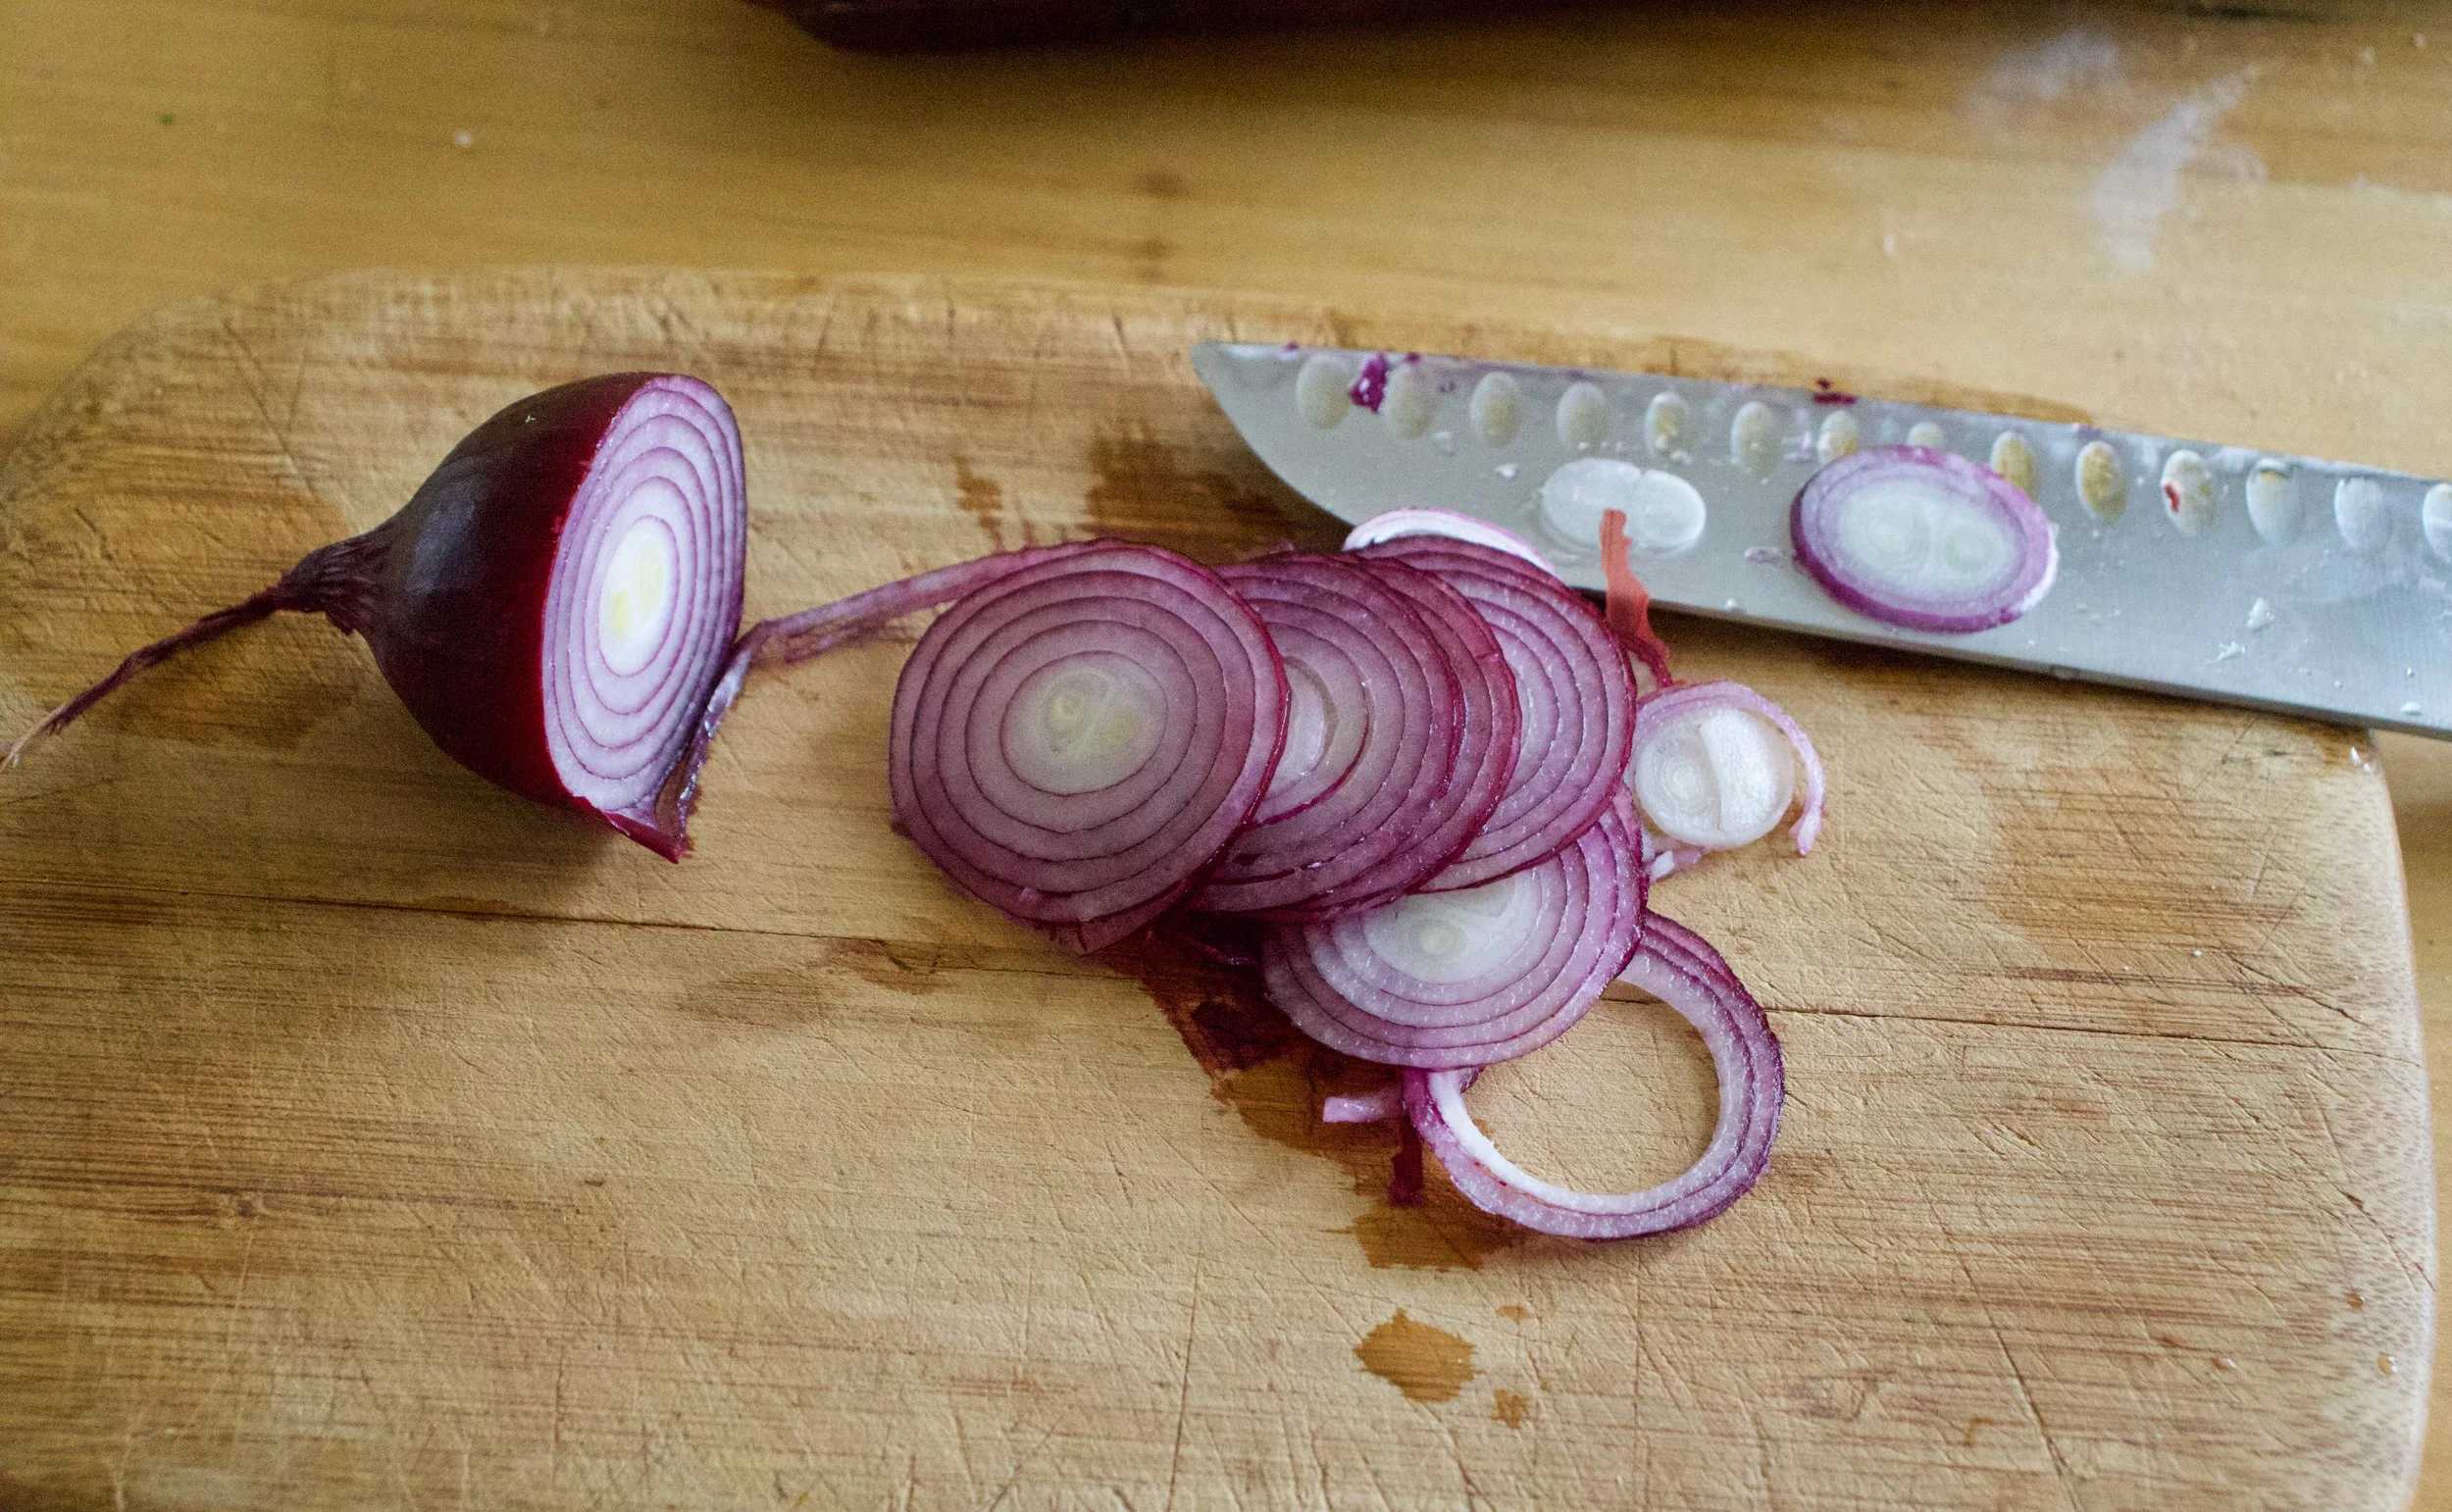
Grab the onion and slice it all nice and thin.

And after the resting time, grab dough and roll it out. Try for a rectangular shape or as rectangular as you can get it, but nice and thin. Thiner is better.

Place rolled out dough onto a baking sheet and poke the bottom with lots of little hole. Take ricotta mixture and spread evenly all over crust, leaving a 1 1/2 border all the way around.

Then top with the asparagus and more onions.
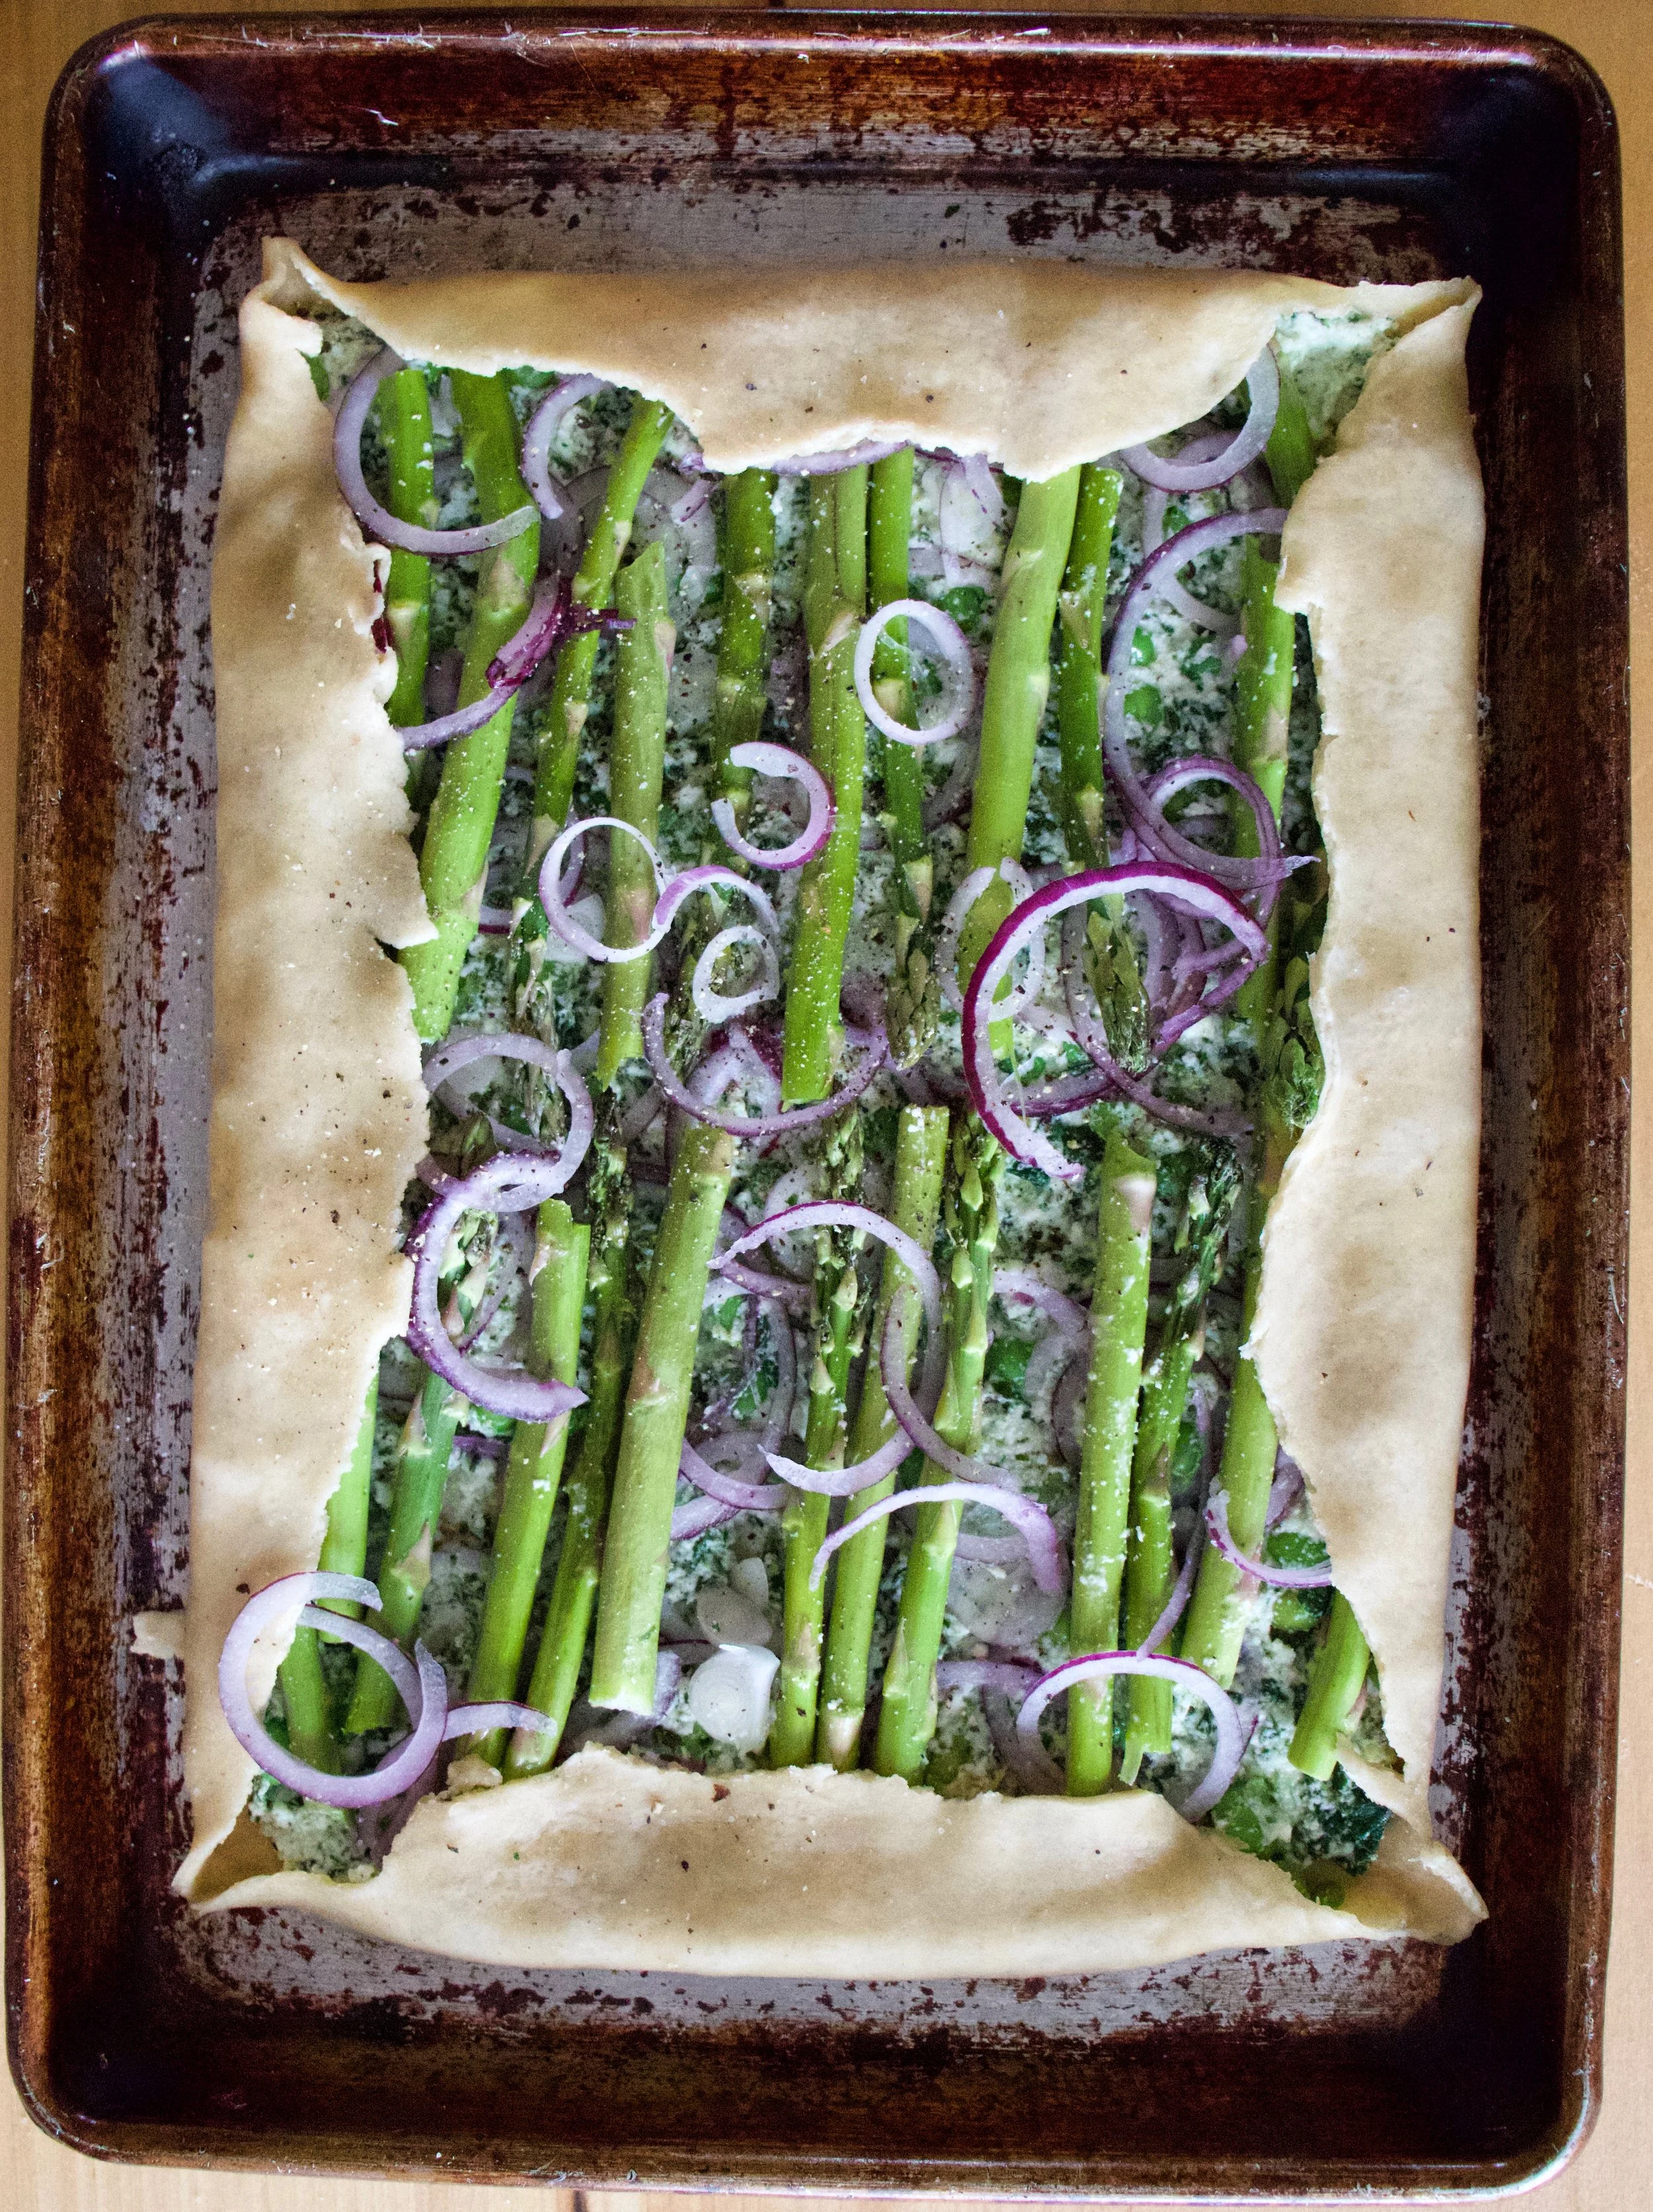
Fold over the edges of the crust, sprinkle with a pinch of salt and pepper, and into the oven it goes to bake.
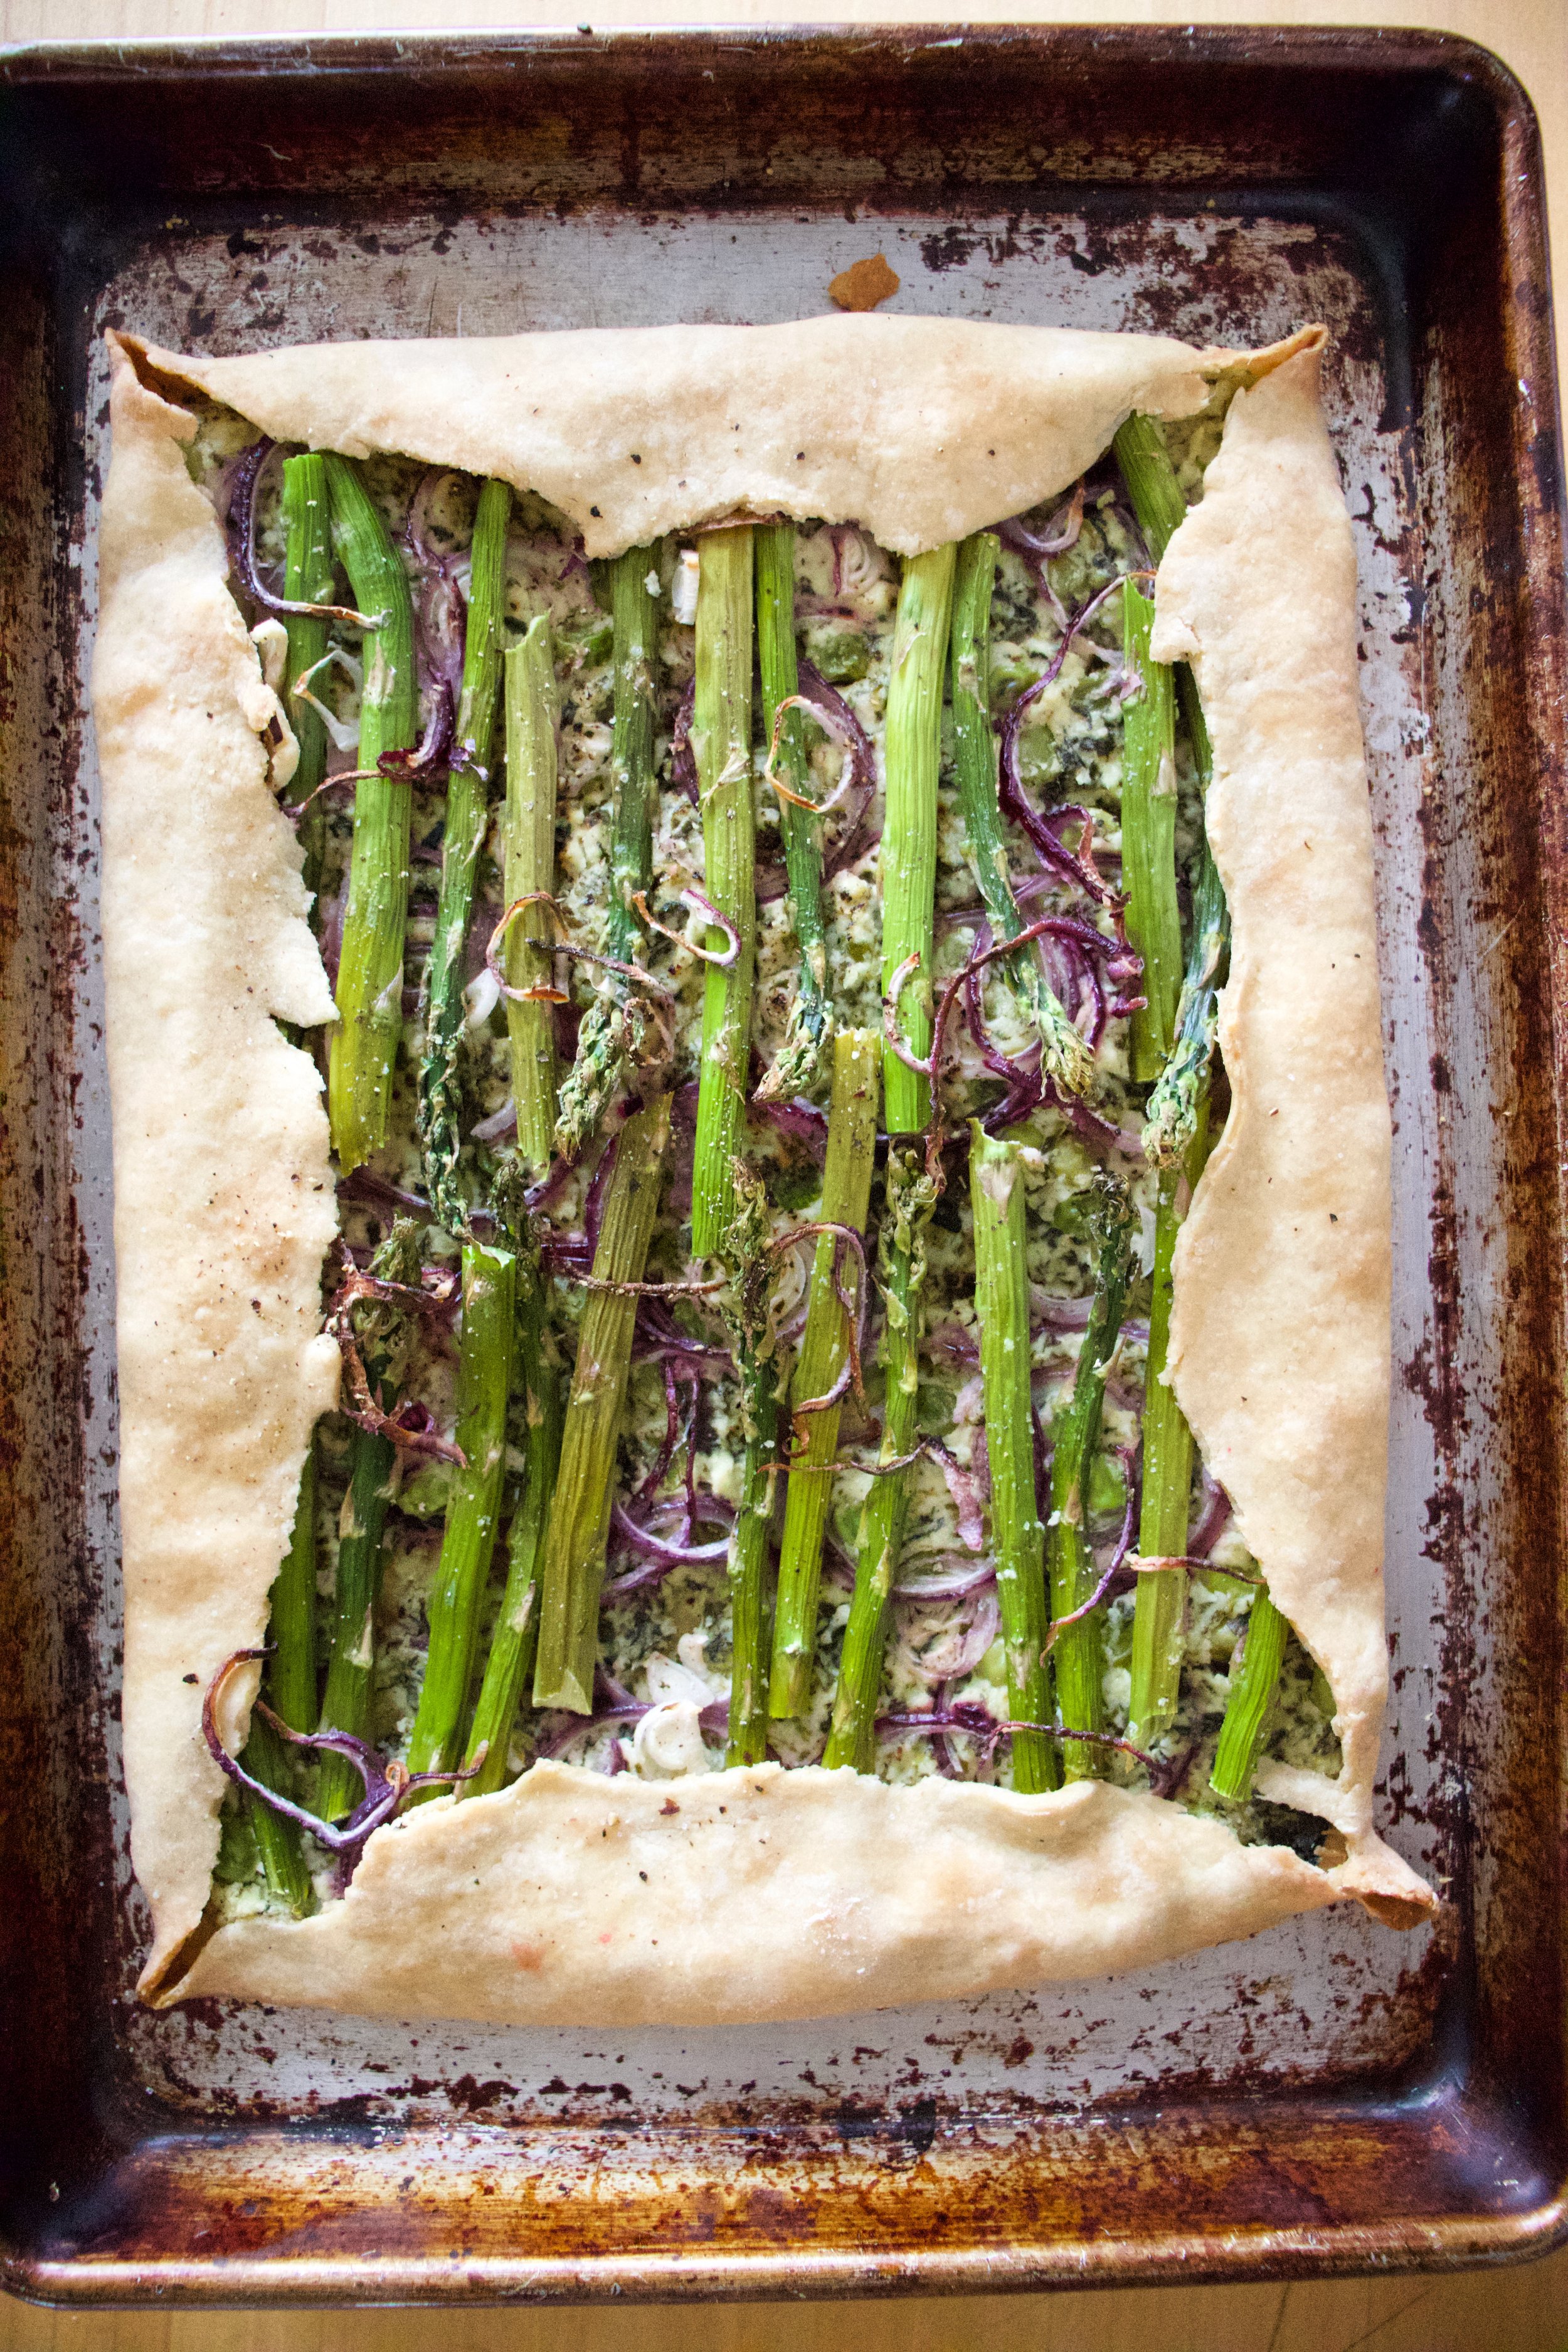
And then it is baked. And ready to eat (after a few minutes of cooling).
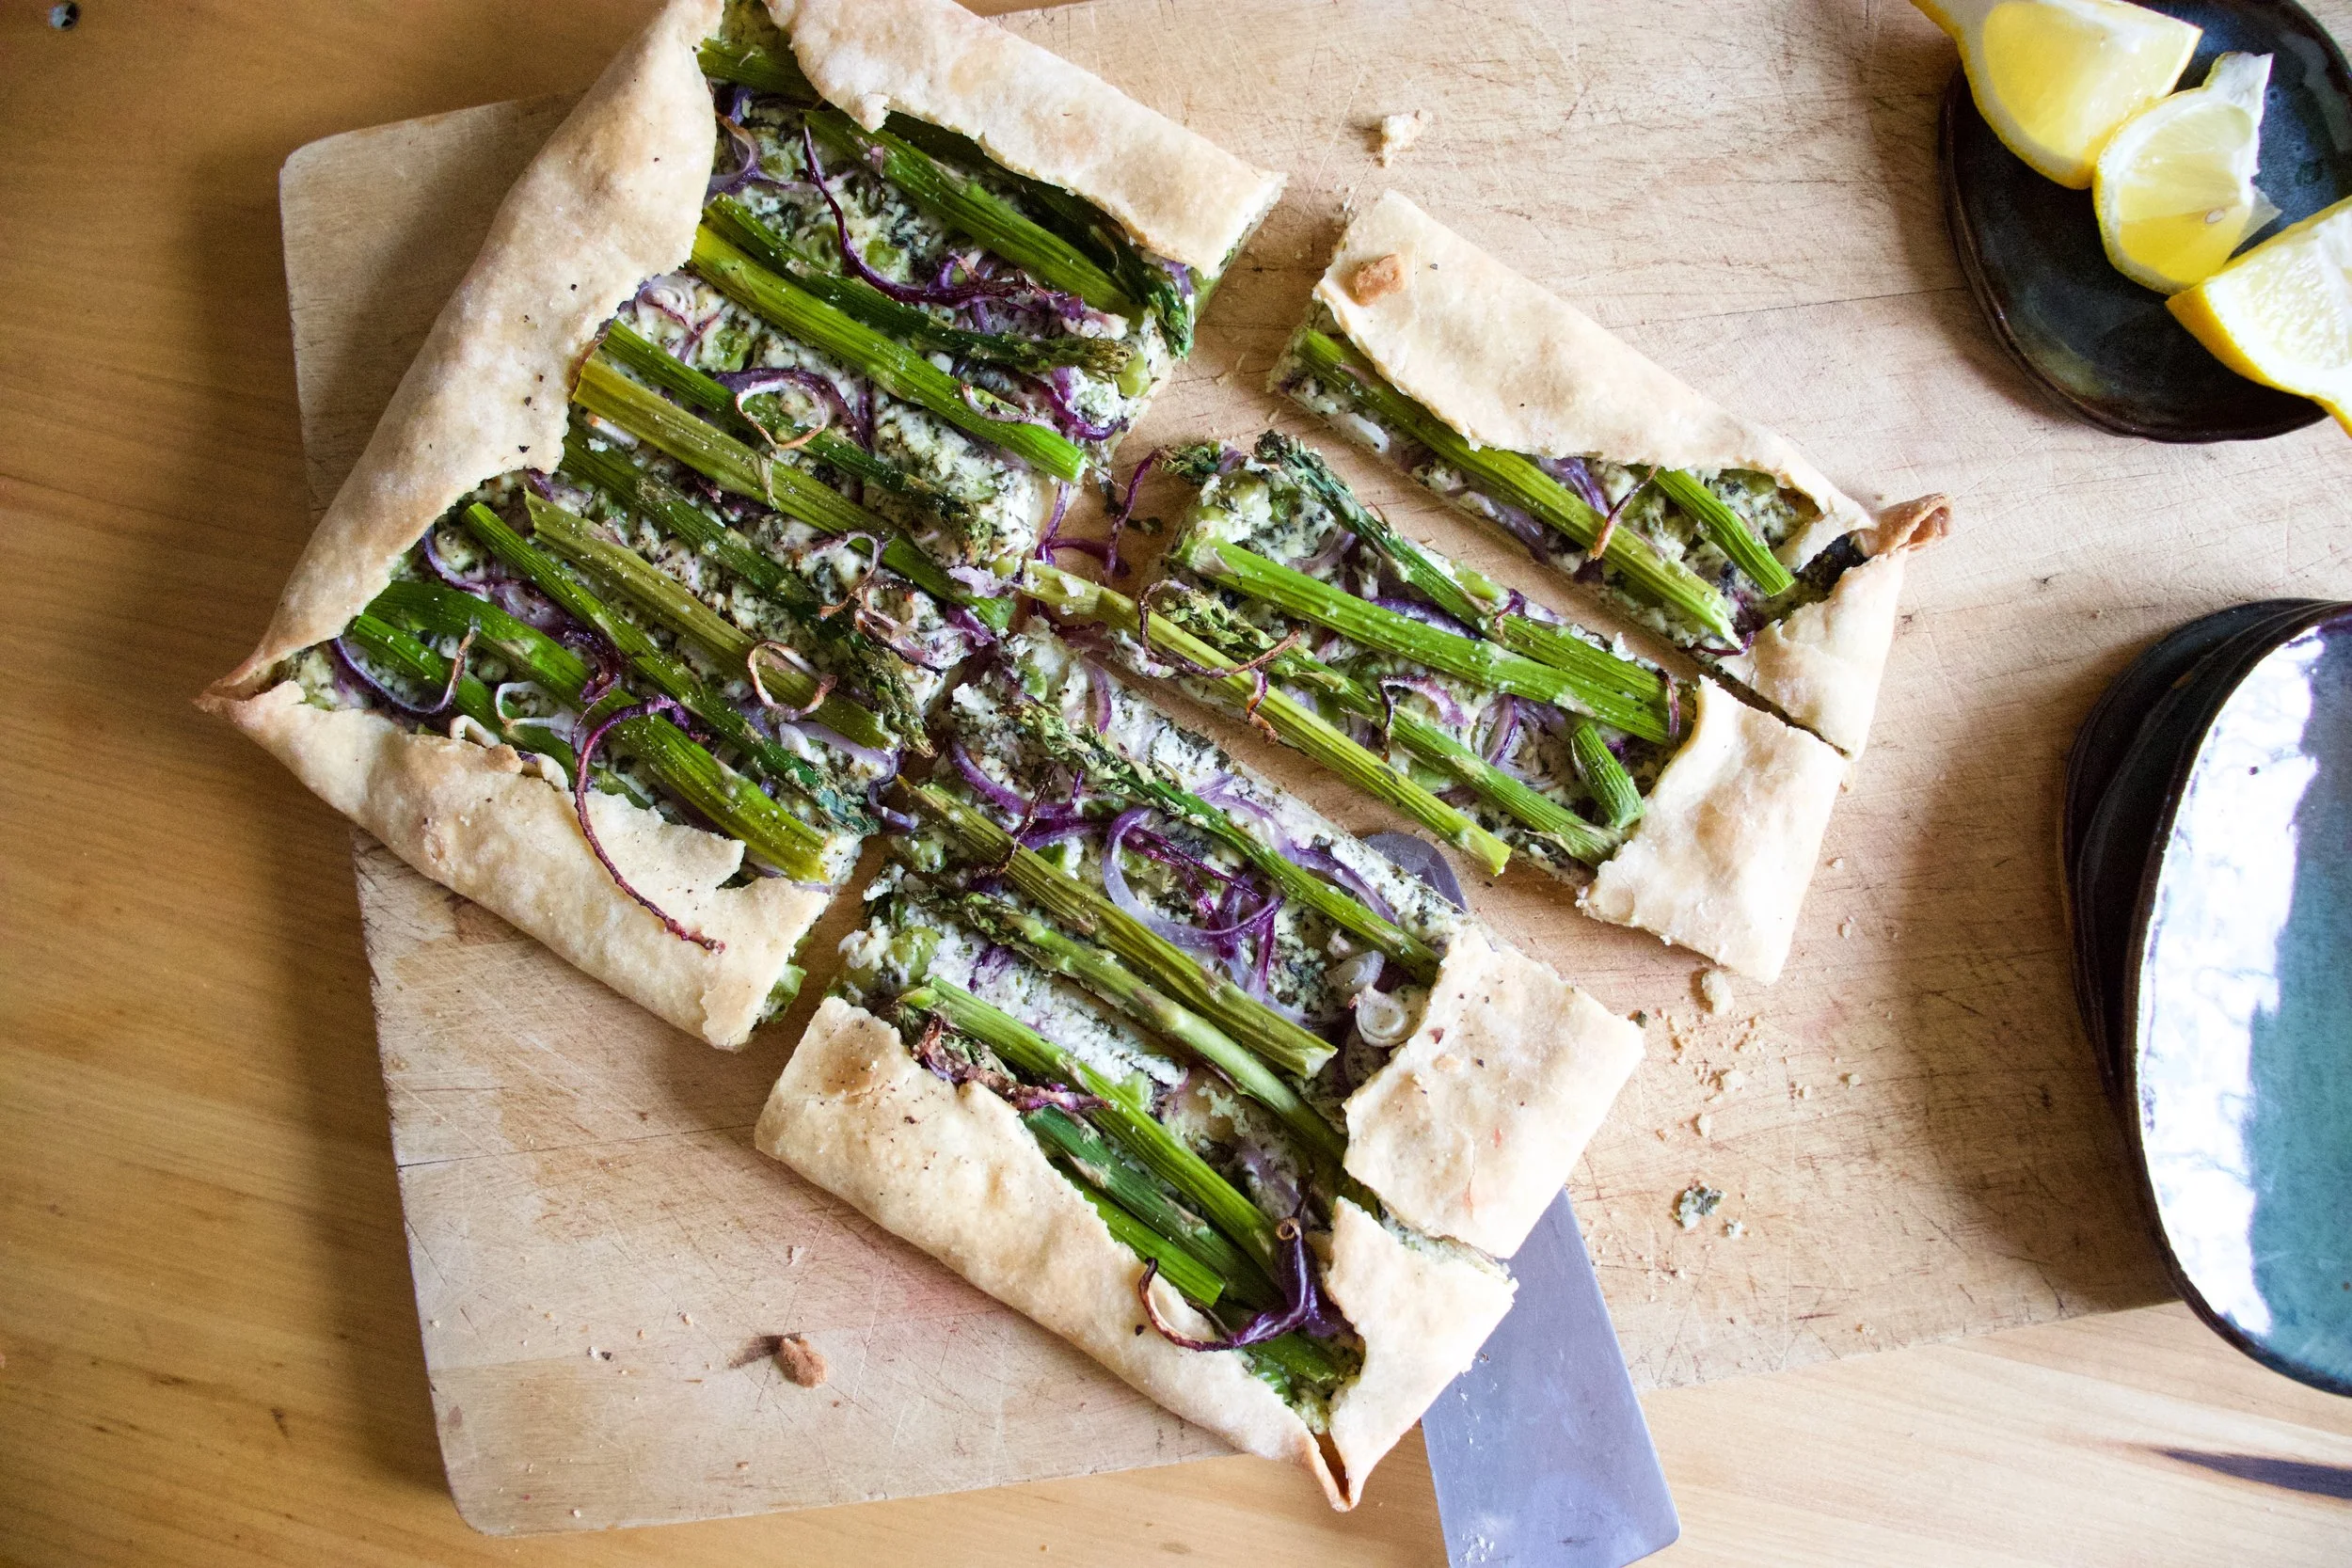
Nothing left but to cut it up and eat it.

Spring. Green. Food.

Things are good.

-C

Makes a 8×12(ish) tart

  • For the Crust

  • 1/2 cup all purpose flour

  • 1/2 cup white whole wheat (can sub for all purpose)

  • 3 tablespoon oil

  • 1/3 cup room temp water

  • 1/4 teaspoon baking powder

  • 1/2 teaspoon salt

  • For the Almond Ricotta and Veggies

  • 1/2 cup blanched almonds

  • 1/4- 1/3 cup warm water

  • 1 lemon

  • 1 clove garlic

  • 1/2 teaspoon salt and pepper or more to taste

  • 1/4 cup frozen and thawed spinach squeezed of liquid

  • 9-10 spears of Asparagus

  • 1/4 cup peas (fresh or frozen and thawed)

  • 1 /2 red onion

First make the crust. Whisk together the flours, salt, and baking soda. Add in the oil and water and mix until a dough forms. Form dough into a ball and knead for minute or two on counter then place dough back into the bowl and cover. The dough needs to rest for 10-15 minutes.

While dough is resting, make the almond ricotta. Place almonds, garlic, and juice of lemon into a blender. Start blending and add in the lesser amount of water, adding a little more until the stuff all starts to blend. Blend on high for a minute or two until the mixture is nice and creamy. Season with salt and pepper, blend a second to mix then add in the squeezed out spinach. Blend until mix together then dump or scoop the mixture into a bowl and mix in the peas. Then thinly slice up the onion.

Preheat the oven to 450

After doughs little rest, lightly flour a counter and roll it out, thin as you can, in a rectangular shape. Try for at least 12in x 16in. The rectangle doesn%u2019t need to be perfect. Rough is good.

Place the rolled out crust onto a baking. Take a fork and dock the surface (poke holes into it to prevent air bubbles). Take the ricotta and pea mixture and spread evenly on crust, leaving about a 1 1/2 inch border all the way around. Add a layer of sliced red onion and then take asparagus (trim off woody ends) and either lay on whole or break in half and lay on. Add more onions on top. Fold the border of the crust over the top. Sprinkle the whole thing with pepper and place into the hot oven.

Bake for 22-25 minutes or until the crust becomes a nice golden brown. Remove and let cool a few minutes

And then cut up and eat. Right away or at room temperature. Or some now and some later. All up you you.

Store left over in fridge in air tight container for up to a few days. the crust will not be crispy but more chewy. Can stick it back in oven for a few minutes to crisp it up.

I have very strong feelings for heart shaped baked goods. I think that everything, all year round, should be heart shaped. How lovely would that be? It would be ever so lovely, or I would think so anyway. And yes, ok, I was thinking about Valentines Day when I made these cupcakes but don%u2019t let that be the only reason you make a cupcake, cake, or any other baked good into the shape of a heart or pink for that matter.. Hearts are just so sweet and cute and dare I say cuddly? (Can you cuddle baked goods? Let me know if you have and do. We should talk about that). And pink is just a fantastic color, especially when it is the color of the flavor. Purple-y pink equals a taste like berry so all just makes sense.

Anyways. Cupcakes. Made with nutty almond meal to taste all nutty, frosted with blackberry and clementine frosting which is a pairing that all party and non party people will love. A down right deeelightful combination that will, no matter your circumstance in life, make you smile. Because lets get this clear, these cupcakes might look all lovey dovey and Valentines Day-e and are very much a perfect Valentines Day treat, but also can be an everyday, run of the milll, straight up any day, all day cupcakes. Valentines Day does not own the heart or pink.

These cupcakes are for you to love and you don%u2019t need to worry if they love you back. That would be weird.

Slightly off topic thought. How awesome would it be if someone made a cute little teddy bear that when you squeezed it it would scream %u201cWHAT THE HELL! GET OFF ME!%u201d Hahahaha. That would be amazing.

To the cupcakes!

The stuff. Flour, almond meal, baking soda, baking powder, salt, sugar, soy milk, oil, vanilla extract, and apple cider vinegar. Also some blackberry jam, powdered sugar, some vegan butter, and a clementine.

In a big bowl, whisk together the granulated sugar, flour, almond meal, salt, baking powder, and baking soda.

Add in the oil, vanilla, milk, and apple cider vinegar. Mix until fully incorporated.

And that is some mixed batter.
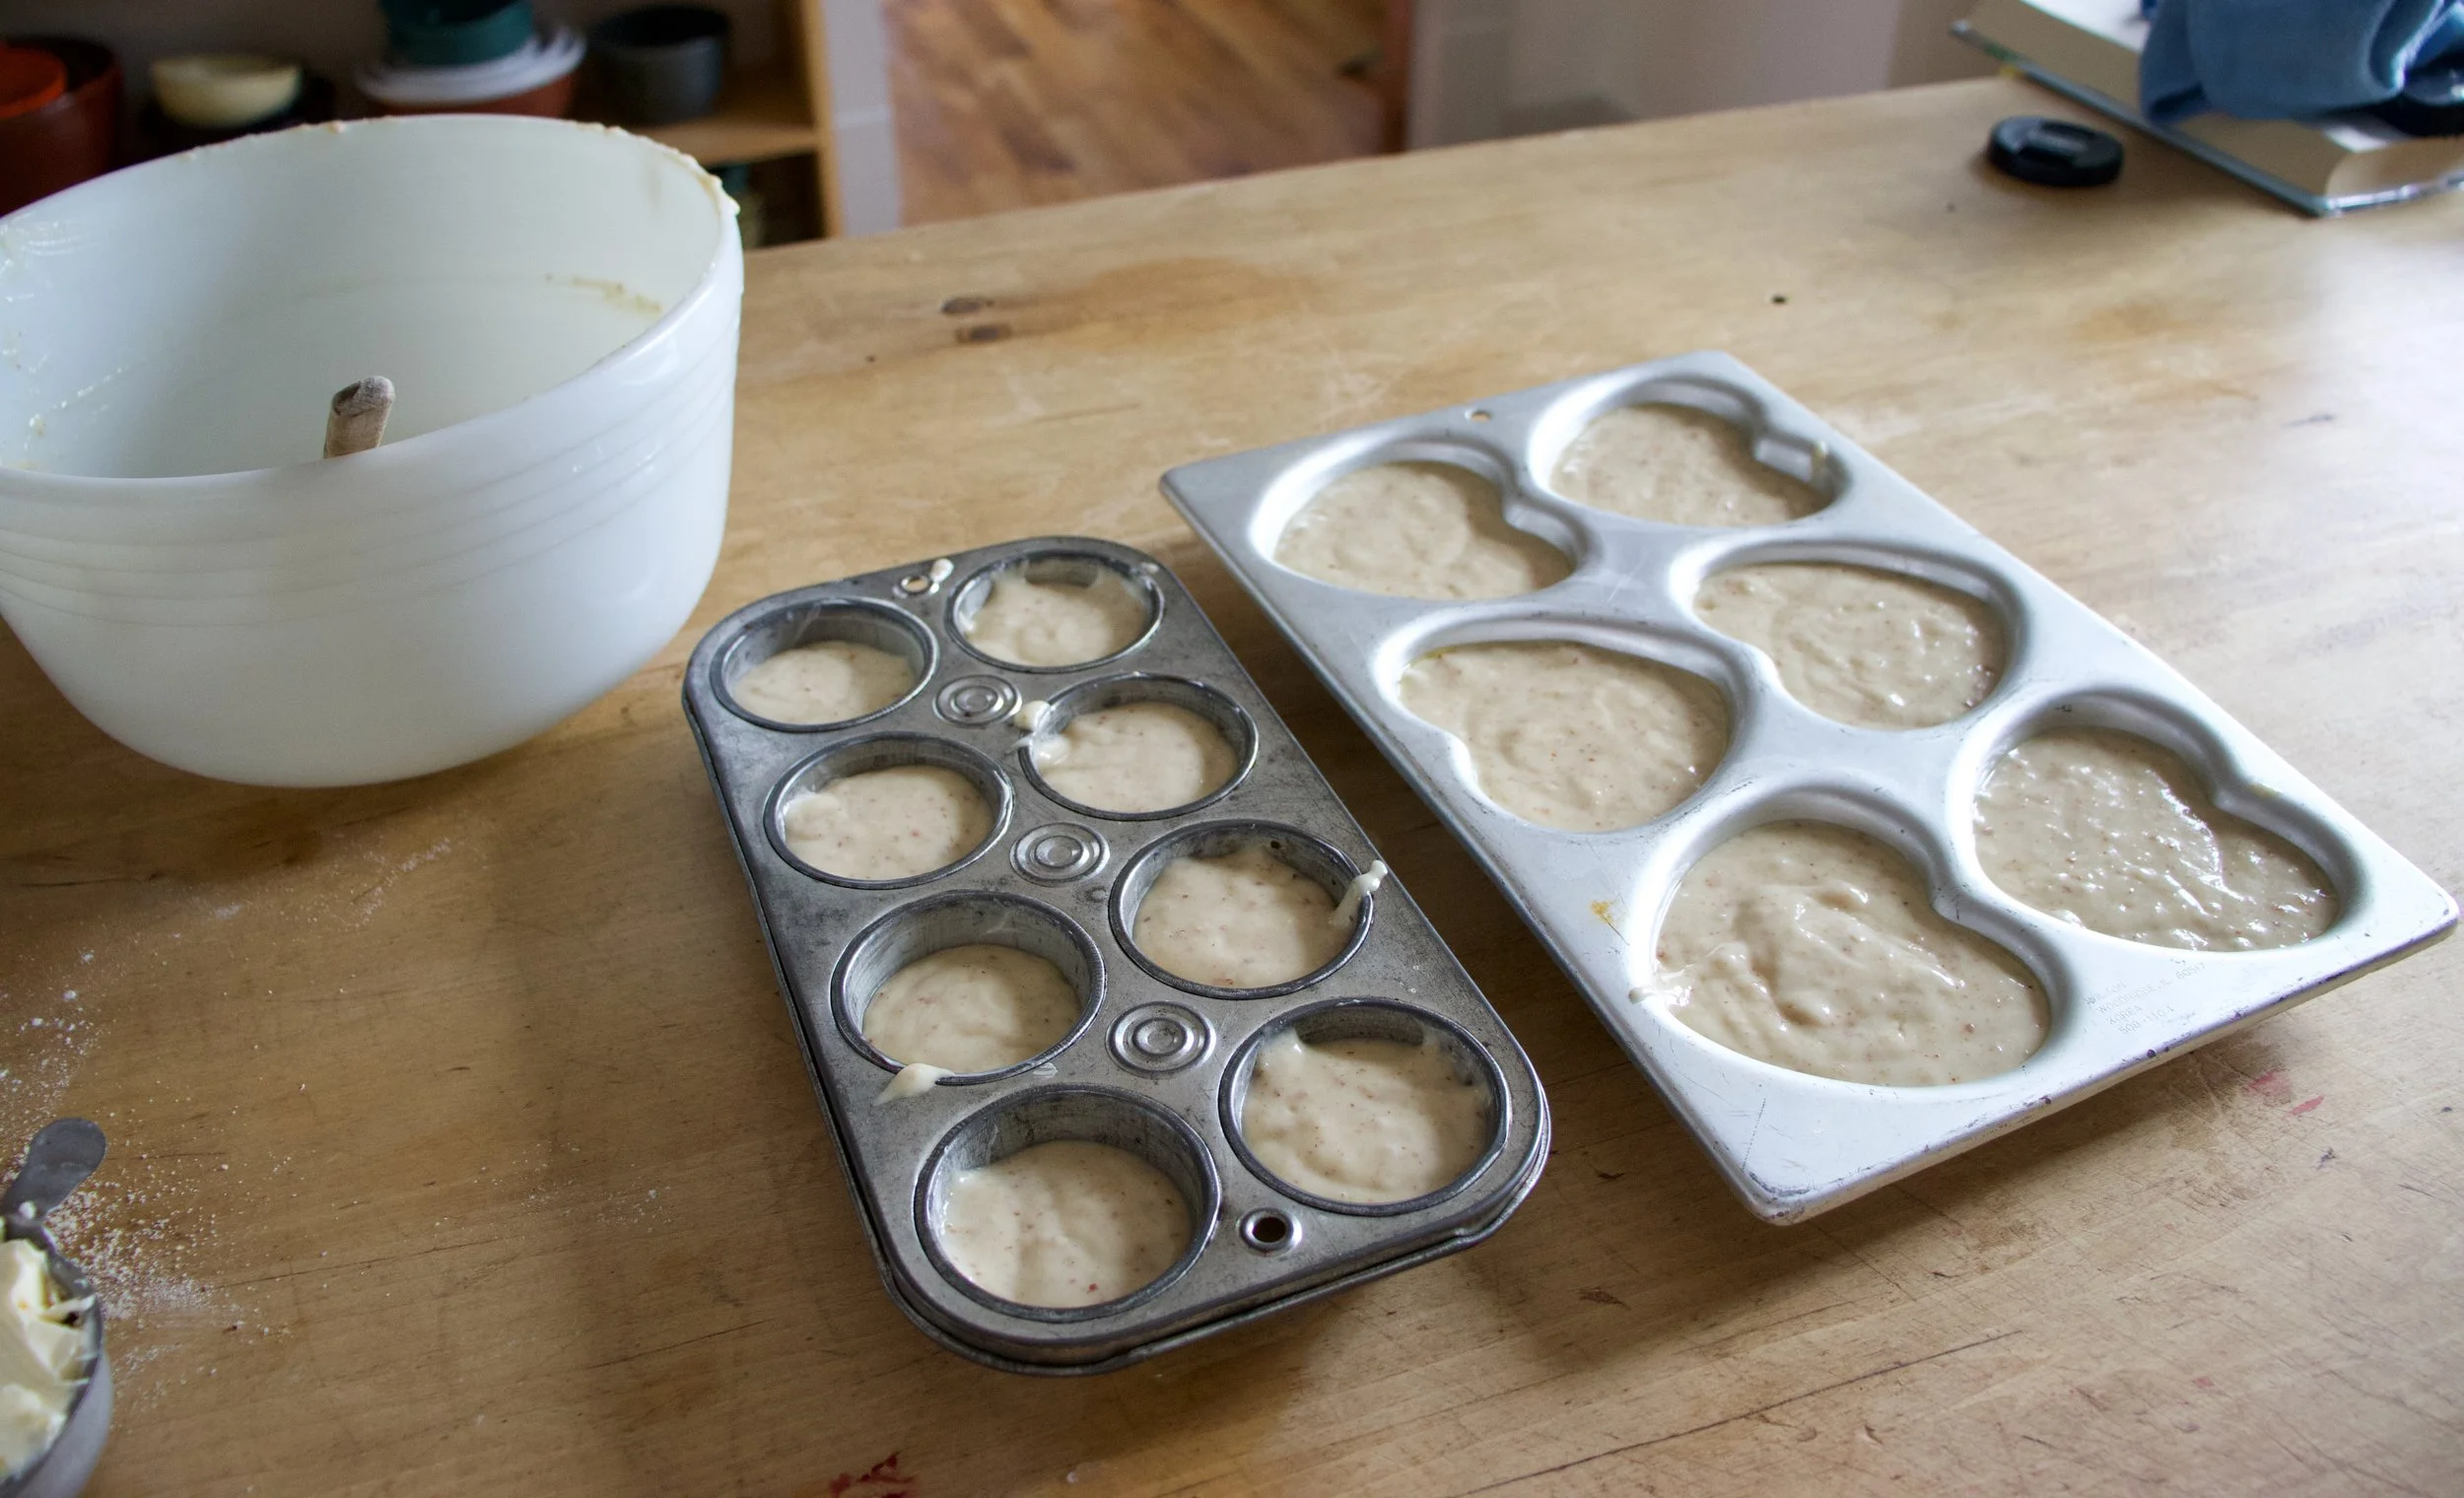
Scoop the batter into well greased muffin tins. I used to different shapes and sizes because I wanted too. You can do the same, just be aware different sizes will cook at different times.

And into the hot oven they go.

Baked, popped out of the tins, and cooling to cool.

Frosting time. Butter, clementine zest, and jam mixed together makes for the prettiest color.

Add in the powdered sugar and juice of the clementine and beat with a beater.
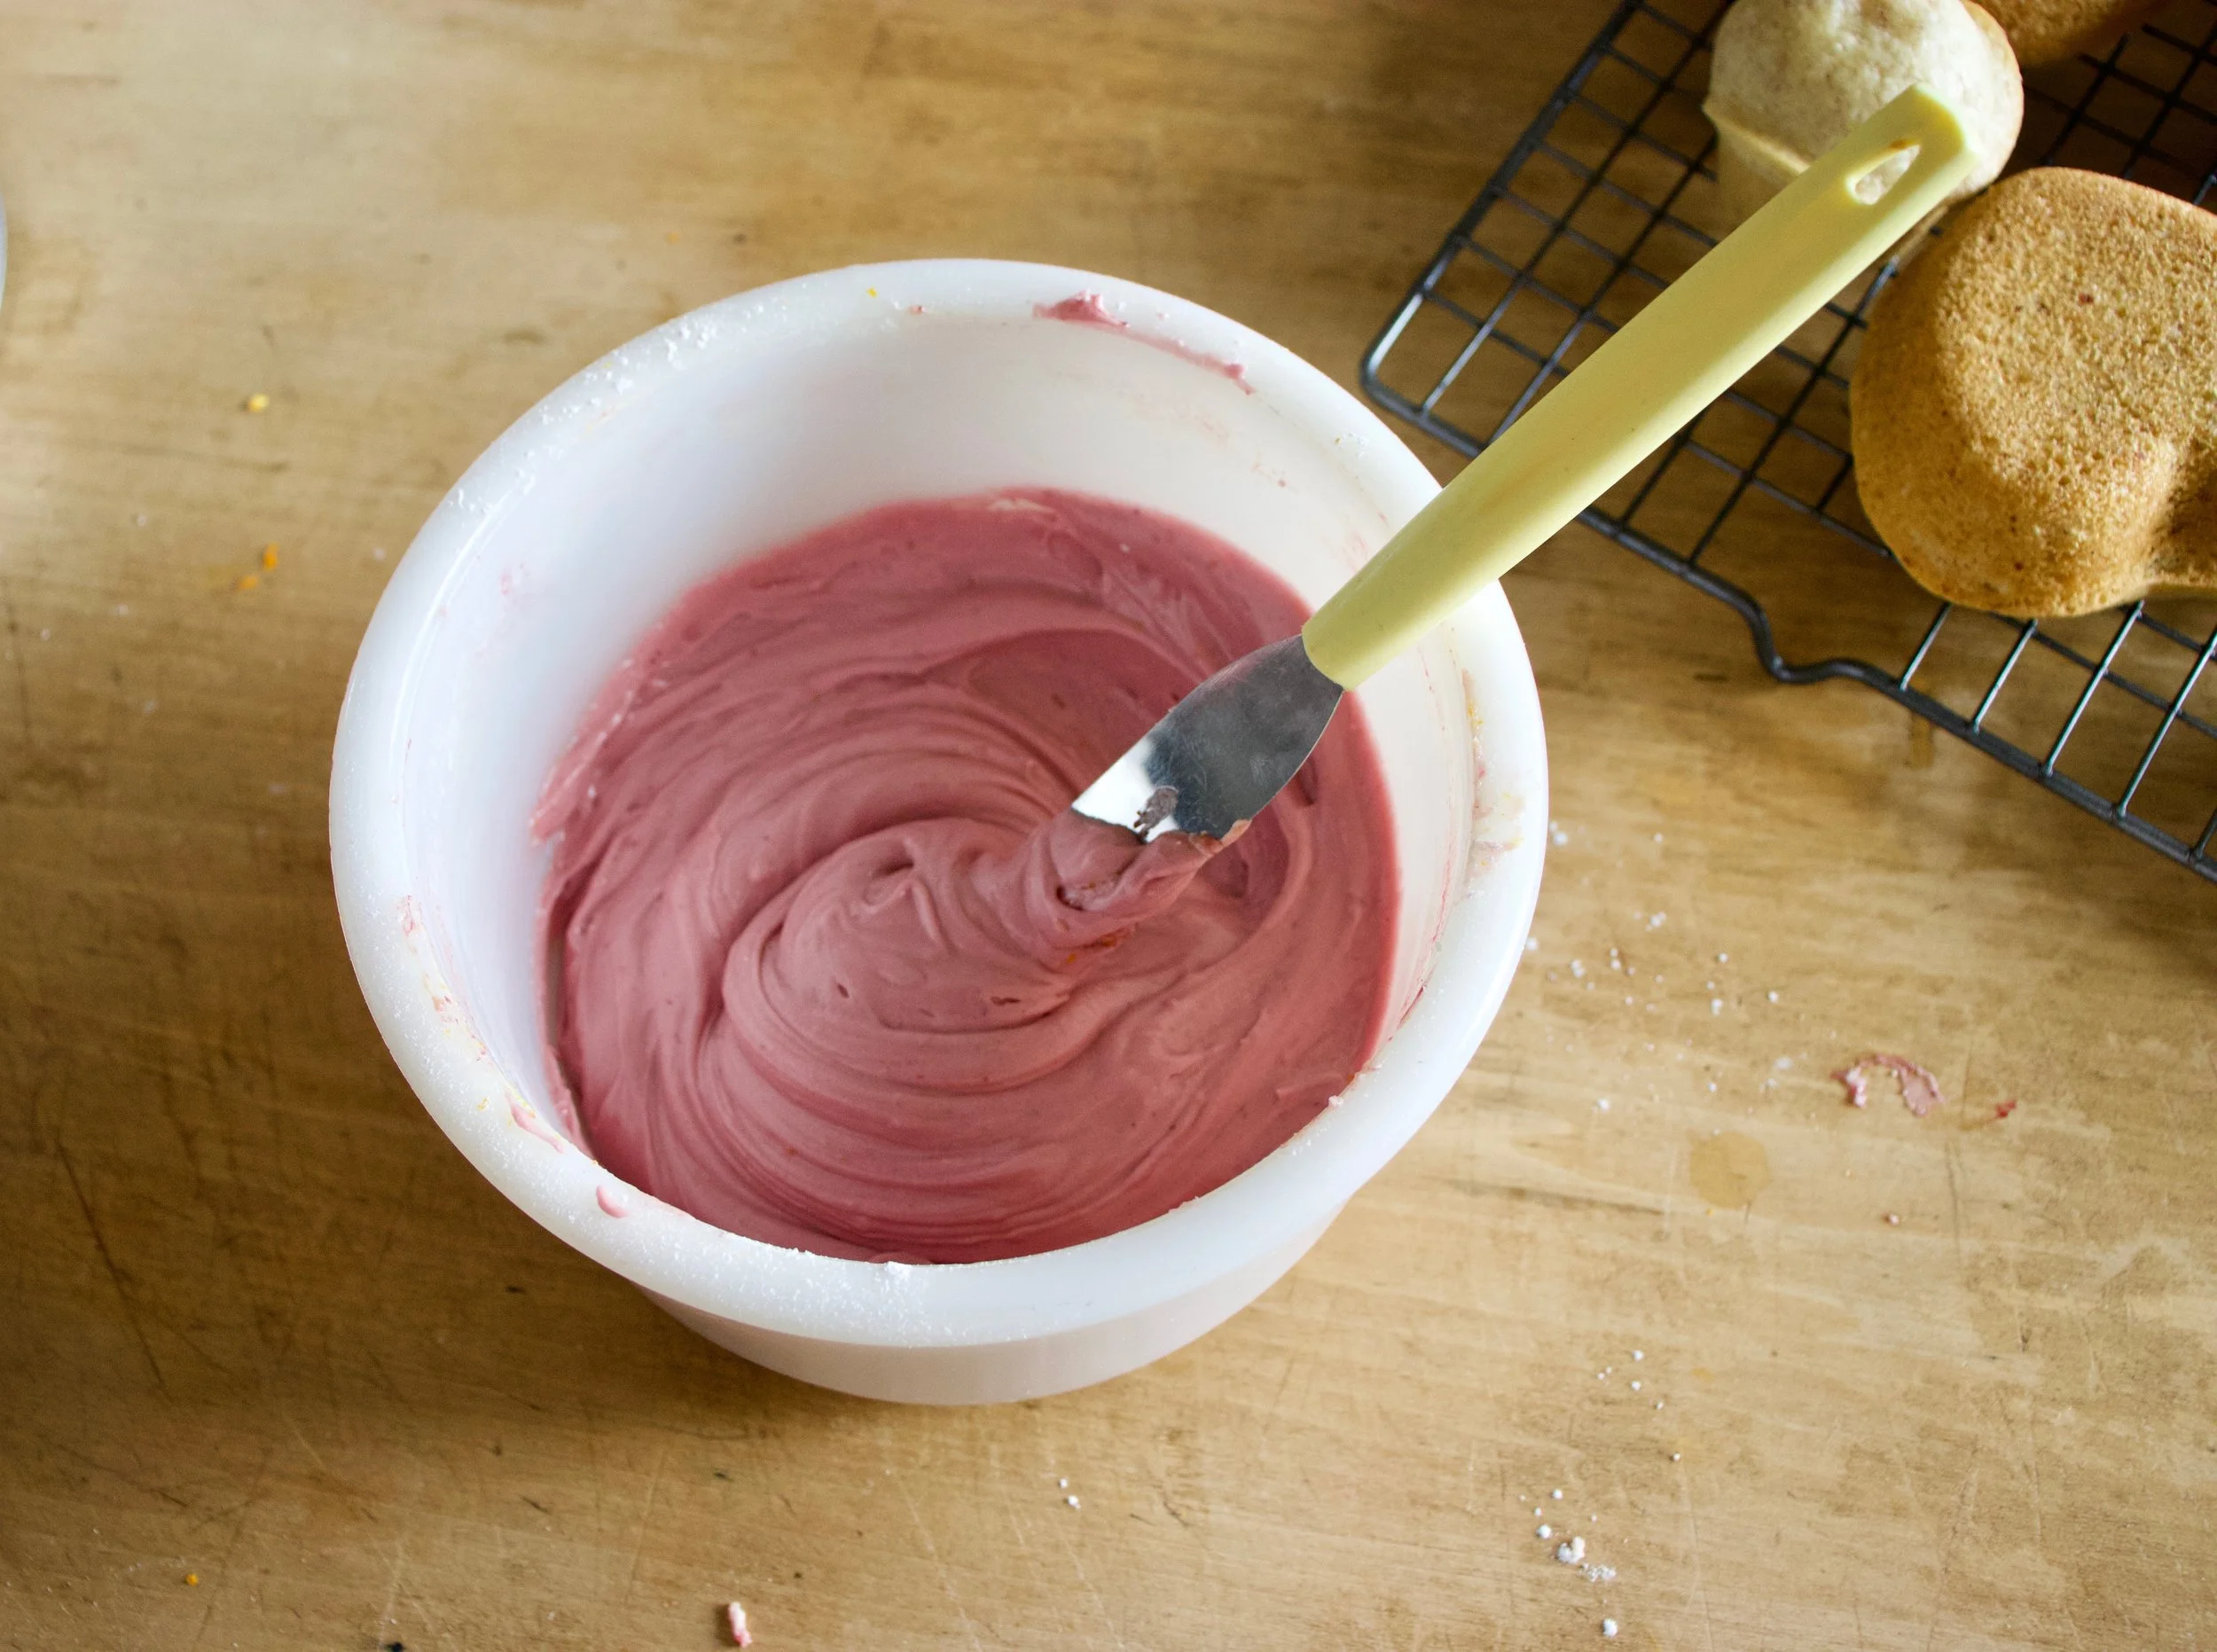
Pretty pink frosting. All natural.

And now that the cupcakes are cooled (you must wait until they are completely cooled) get them frosted.

And of course, adding sprinkles will only make them that much better.

And now you got the cupcakes which makes it cupcake time.

Look at that smile. Thats a smile just for cupcakes, not at all because I told him too.

Happy happy.

-C

Makes 12-16 cupcakes (depending on size)

  • 1 1/2 cups all purpose flour

  • 1/2 cup almond meal

  • 1/3 cup neutral oil

  • 1 1/4 cup almond milk

  • 3/4 cup white sugar

  • 1 teaspoon baking soda

  • 1 teaspoon baking powder

  • 1 tablespoon apple cider vinegar

  • 1/2 teaspoon salt

  • 1 teaspoon vanilla or almond extract

  • For the frosting

  • 3 tablespoons blackberry jam or preserves with or without seeds

  • 2- 2 1/2 cups powdered sugar

  • 4 tablespoon vegan butter

  • 1 clementine (zest and some juice)

Preheat oven to 350.

In a large bowl whisk together the flours, salt, baking soda and powder and sugar until fully combines. In a separate bowl mix together the oil, milk, vinegar, and vanilla. Pour into the dry and mix, by hand, until full incorporated. Scoop batter into well greased muffin tins (heart or other shape up to you) and place into oven for 13-18 minutes (shorter time for smaller cupcakes, longer for larger sized) or until lightly browned and a tester stuck into a cake comes out clean. Pull from oven when done and pop from tin. Place on a wire rack to cool.

While cakes are cooling, make frosting. Beat together the butter, zest of the clementine, and jam. Add in the sugar and the juice and beat until fully incorporated. If the consistency is to thin, add a little more sugar, to thick, more clementine juice or if out of juice, a splash of milk.

Once cupcakes are full cooled, frost, add sprinkle if you would like, and then the only thing left to do is eat them.

Eat cupcakes, store left overs in an air tight container in the fridge for up to a week.
THE LOVELY CRAZY

February 15, 2020 by maximios • Blog

I have been on a good long kick here with eating oats at night for my after dinner snack. Just about every night after cleaning up the dinner dishes, sweeping the floors, going for a nice after dinner walk with the mr, I come home, put the hot water on, grab my oats, my peanut flour, and sometimes a banana. As soon as the water boils I mash up some banana (if using), add in some oats, pour in some boiling water, and let them sit. I also pour a huge jar of tea then plop my butt down at the counter to do any brain tasks that need doing like checking the email, left over billing things, maybe check the old phone for the first time in hours%u2026 After about 5 minutes of that, I stop brain tasks because I just can%u2019t, grab oats, and dump in a few big ass tablespoons of peanut flour and cinnamon and give it a good stir. Voila, snack time. A delicious, nutritious, tummy filling and easy dish that is full of all sorts of things that my body needs. I grab a spoon, my tea, and open my book. For sure one of my favorite times of day.

Now lets talk about peanut flour. I have been eating peanut flour for a few years now. Not to confuse with powered peanut butter which is basically peanut flour but usually with added sugar and salt. Peanut flour is just peanuts, with the oil pressed out and then ground up into a super fine flour. And not a flour is the typical sense. Like you can%u2019t make bread with it, but you could add it to bread. You can also use it to thicken things like soups or sauces up. Or add it to smoothies, make a cake frosting with it , or just mix it with a little water and eat it with a spoon. It is delicious and amazing and full of protein without all the added fat and high calorie content. I started to add it to foods because of the protein but now I just eat it all the time because I freaking love the stuff. (Another favorite way to eat it is cut up carrot sticks tossed in the flour%u2026 SO GOOD!) Anyway, truth be told, it is not the most widely available stuff. I have only seen it in a few store over the years, so I have been buying it online. But recently someone told me that Trader Joes is selling it now (I haven%u2019t checked yet) so I figured now is a good time to share the greatness of the flour and how you might want to use it.

Anyway, these oats here are my favorite way to eat oats. Warm and creamy, but not cooked and gruel like. They are like a cross between stove top oats and overnight oats except they take all of 5 minutes to make and you don%u2019t need to dirty a pot. Then mixed with banana for extra sweetness and flavor, the peanut flour for all the peanut butter taste and protein. These oats are unstoppable.%u00a0 Delicious and nutritious for breakfast, lunch, snack time, or dessert, these oats are all win win. Add another win just because. Win, Win, WIN!

Now to the oats!

The stuff. Old fashion oats, a small banana, peanut flour, cinnamon, and boiling hot water.

Mash up the banana until smoothish then add in half the hot water and mix. Dump in the oats and mix those too.

Top with the rest of the boiling water and let sit for about 5 minutes.

After the oats absorbed the hot banana water, dump on the cinnamon and the peanut butter flour and mix in.

Grab yourself a spoon friend.

Eat.

-C

Makes 1 serving. Can be halved for smaller portion

  • 1 small banana

  • 1/2 cup old fashion oats

  • 2 (or more if you want) tablespoons peanut flour

  • 1 teaspoon cinnamon (optional)

  • 1 cup boiling water

Place peeled banana in a bowl and mash with a fork unit smooth. Add in half the boiling water and mix.. Dump in oats and mix until incorporated then add in the rest of the hot water. Let sit for 5 minutes until oats absorb all the water. Stir in peanut flour and cinnamon. Eat.

Mid week, I was doing a little pantry cleaning/ inventorying of what I had and needed when I came upon not one, not two, or even three. No, six. SIX, jars of jam. And there are 2 that are already opened in the fridge. I don%u2019t know why, but knowing that there was that much jam in the house made me a little uneasy. Six unopened jars is about 3 jars past my comfort zone. Sure there are so many things you can do with a jar of jam (jelly, preserves, and marmalade included) and now that I am thinking about it, is one of the reasons why I bought a few jars a while back. Then there was Christmas and I think we got at least two jars as gifts so it%u2019s not all my fault, but still, that is just too many jars of jam. Right there I needed to get rid of at least one jar. So muffins. Jam muffins, with poppyseed crust because it%u2019s pretty and nobody ever complains about poppy seeds, or at least they don%u2019t until after they eat them and have poppy seeds stuck in their teeth all day. But that is just our mouths way of saving a little for later, am I right? HA

Anyway, a quick and simple muffin recipe for all of you people out there that might have a jar or two too many of jam in the fridge or pantry%u00a0(I used apricot but any flavor(s) would work) and could use yourself a tasty little muffin situation. I mean who doesn%u2019t want a tasty muffin?

To the muffins.

The stuff. In the bowl is white and white whole wheat flour, baking powder and soda, and salt. Also have apricot jam, oil, almond milk, apple cider vinegar, and orange, and some poppy seeds.

Grab a zester and zest the orange into the bowl with all the dry stuff. Whisk to combine.

Jam, oil, milk, and vinegar. All on top of dry. Whisk that up until just combined. No over mixing. You will get tough (not in a good way) muffins.

Scoop into well greased muffins tins then cover the tops with poppy seeds.

And out of the oven, looking all pretty like.

Pop those muffins out of the tins and cool on a wire rack for a bit. And by all means, don%u2019t wait until they are completely cool.

Now eat you a warm muffin and if they are mini, grab a few. You can%u2019t just eat one mini muffin, that is just crazy.

-C

Make 12 normal size muffins or 24 mini muffins

  • 1 cup all purpose flour

  • 1 1/4 cups white whole wheat flour

  • 2 teaspoon baking powder

  • 1/2 teaspoon baking soda

  • 1/2 teaspoon salt

  • 1 cup plant milk

  • 1/3 cup neutral oil

  • 1 tablespoon apple cider vinegar

  • zest of an orange

  • 1 heaping cup apricot jam or preserves (can sub in any flavor you like)

  • 1/3 cup poppy seeds

Preheat oven to 350

In a large bowl whisk together the flours, salt, baking powder and soda, and the zest of the orange. Add in the oil, milk, jam, and vinegar and whisk until just incorporated. Scoop batter into well grease muffin pans (12 regular or 24 mini) then cover the tops with poppy seeds. Pop into hot oven and bake until risen and a tester comes out clean when one is poked. For mini muffins, check after 13 minutes, for normal muffins, after 16 minutes.

Once baked, remove from oven and pop out of pans when cool enough to handle. Place on a wire rack to cool completely or just start eating them warm.

Store left over muffins in an airtight container for 3-4 days at room temperature. They also freeze well.

What do you think about at 5 o%u2019clock in the morning? Wait, are you awake at 5? Well I am and yes, I know that most people are not and think I am crazy for waking up so early, but it is and I do and whatever. Anyway, it%u2019s 5 o’clock and I am at the gym (yes, I wake up at 5 AND go to the gym) and me and my gym friend start talking about food (as usual) and what we were going to do with our Brussels sprouts that we got from the farm (I got her to join my CSA!). That is what I am usual thinking at 5. Food, and how to prepare it. And as the sprout conversation commerced, this is what materialized in my head. Crisp, crunchy fresh Brussels spouts, shredded up and tossed in a warm tangy cranberry sauce. My mouth was salivating and as usual, I left the gym hungry.

So I came home, drank all my coffee and then proceeded to make the sprout dish for lunch and let me tell you, this sprout slaw is amazing. Tangy and crunchy and all Brussels sprouty. It has a hardy salad feel without being heavy. It is a slaw that really get me, you know. (I actually don%u2019t know.)

Anyway, you should really get on the eating this Brussels sprouts slaw (or any Brussels sprouts dish) train now, before they go out of season and you end up buying kind of not great sprouts from the market that don%u2019t taste as good. Bad Brussels sprouts suck.

To the cranberry Brussels sprout slaw.

The stuff. Fresh Brussels sprouts, cranberries (fresh or frozen), some onion, balsamic vinegar, a little maple, dried cranberries and toasted walnuts, and salt and pepper.

Start with onion. Grab it and dice it nice and small.

Dump the onion into a skillet with a little pinch of salt and a splash of water and cook for a few minutes, just unit they are not raw anymore. Then add in the cranberries and 1/2 cup water. Cook on a low heat until the cranberries all pop and the sauce starts to thicken.

While cranberries are cooking, shred up the sprouts. Thin as you can get them.

Cranberries are now a thick and chunky sauce and oh so delicious. Add in the vinegar and maple here and give it a good stir and a taste test too. If it is too tart for your liking, add more maple. Think you might need a bit more vinegar, well splash it on it.

Now toss those shredded spouts it.

Stir it around. Season with salt and pepper and there it is.

Scoop into a bowl. Top with dried cranberries and walnuts and grab a fork.

This is good.

-C

serves 3-4 as a side or one person who wants to eat it all to themselves

  • 1 1/2 cups fresh or frozen cranberries

  • 1/2 a pound Brussels sprouts ( around 3 1/2- 4 cups shredded)

  • 1 small or 1/2 a large onion

  • 3 tablespoons balsamic vinegar

  • 1 tablespoon maple syrup (or more to taste)

  • salt and pepper

  • 1/2 -3/4 cup water

  • small handful dried cranberries (optional)

  • smal handfuls toasted walnuts (optional)

Start with dicing the onion up into small pieces. Place in a skillet with a small pinch of salt and a good splash of water and place on medium heat. Cook for a few minutes or until the water has evaporated and the onions are not raw. Add in the cranberries and 1/2 cup water. Keep on low heat and cook until the cranberries pop and start to thicken. If the cranberries are not cooked all the way and the water has evaporated out, just add another 1/2 cup.

While cranberries are cooking, shredded the Brussels sprouts, as thin as you can. A mandolin is great for this but a knife works too.

Once the cranberries have cooked down to a saucey consistency add in the vinegar and maple and stir around. Remove from heat and carefully taste the sauce. If you think it needs more maple or vinegar, add in another tablespoon until it tastes good to you. Dump in the shredded sprouts and mix. Season with salt and pepper to taste.

And then it%u2019s done. You can dump it all into a bowl and sprinkle the dried cranberries and walnuts on top, or leave it in the skillet and do the same. Me,I scooped half into a bowl for pictures sake and ate the rest right out of the skillet. I then licked the skillet clean with my finger. Then ate the bowl full. SO good.

I don%u2019t think I can ever eat potatoes any other way ever again.

It started with me, doing my weekly pantry cleaning, you know, when I wipe down ever surface, count all the beans and lentils in the jars to make sure I am not running low, and inspect every squash for soft spots. I was just going about my thing when I looked over at my waffle iron. Poor, sad, underused. And it hit me. When was the last time I waffled anything? I remember how excited I was when I found it a few years back at a thrift store. Such a cutie little iron. When I brought it home, I used it a bunch of times for maybe a week or two. And then it was put away and I think I have busted it out like 3 times in the past 2 years. So not cool.

I also noticed I had a shit load of potatoes left from thanksgiving.

And there I had it, a reason to use the waffle iron and a way to use up the potatoes. And now, now I am a potato on the waffle iron addict, which is weird because I am not a overly potatoy person in general. But now with this new waffled hash brown thing, well I might just be eating potatoes all day, every day. (At least until I get sick of them or I run out of potatoes.) They come out soft and fluffy inside, super crispy in ever little nook and cranny, outside. Evenly, perfectly cooked. It%u2019s hard to explain, but they are just, ugh, so good, especially dipped in mustard for a fantastic hash brown snack. (Yes mustard, no not ketchup. Let me do me, you do you.) Or smothered in refried black beans topped with salsa and avocado (that was the dinner version). These hash browns. Just make some and you will see.

And no matter what happens with my hash brown phase, I will be damned if I ever let the waffle iron go so long without use. It deserves better then that.

To the best hash browns EVER!

The stuff. Potatoes, salt and pepper, and a little oil.

Shred potatoes. Simple, easy.

Place the shredded potatoes into a clean dish towel (avoid paper towels because paper towels are the devil) and squeeze as much of the liquid out as you can.

Dump the squeezed out shredded taters back into the bowl and sprinkle with salt and pepper and mix it around.

Oil your hot iron and pile on the potatoes. Then close it and press it down. It%u2019s a bit dependent on your iron how long they will need to cook fully, mine took about 9 minutes on high. But maybe just stand close by and check yours after 7ish minutes but expect maybe 10 or so.

Deep golden brown and crispy all over.

I mean, really look. Every surface browned and crispy. It is freaking perfection!

And then like any good waffled food, you plate it, and eat it. Me, with horseradish mustard and a big stupid smile.

Thank you waffle iron. You done good.

-C

makes 2-3 servings

  • 2-3 small to medium sized starchy potatoes (Russet or Yukon Gold)

  • couple teaspoons olive oil

  • teaspoon each of salt and pepper

Preheat your waffle iron to high

Shred potatoes on a box grater. Once shredded, gather in a clean kitchen towel and squeeze as much of the liquid as you can from the potatoes. Place potatoes back into bowl and add in about a teaspoon of each salt and pepper and mix around.

Open iron and brush with oil. Place shredded potatoes on the iron, kind of pack together, and close. If it locks, lock it shut, if it doesn%u2019t push it down. And let cook, for about 10 minutes, checking after 7ish (you iron might have more power the mine does). Once the potatoes are a deep golden crispy brown, remove from iron.

Then eat. Any way you want. Plain, with mustard or ketchup. Next to some scramble something or another. Piled high with some black beans and salsa. Whatever. Just eat them and be happy for the waffle iron.

I eat so much hummus. Everyday, all day. Homemade, store bought. If there is hummus, I will be consuming it. But the thing is, I usually don%u2019t eat more then a little at a time. (A little being like 1/2 a cup). And sure, sometimes that is just fine and enough, but other times, what I really want to do is garb a spoon and a bag of carrots and eat it all. And then I do.

But there is that little voice in the back of my head telling me that if someone where to catch me eating mounds of hummus, they would liken my eating behavior to that of someone eating a jar of mustard (Not going to lie, it happens sometimes) or of a bottle of ketchup (but I don%u2019t eat ketchup) and that have a problem and shouldn%u2019t being eating it like that. Because hummus, for some reason, has been put into the condiment category. It%u2019s treated like a dip or a spread and that is fine and dandy to eat it as such, but hummus is so much more. It can, and should be treated more like a main component to a dish. So let us step outside of that box and eat it how we really want to eat it.

Hummus by the bowlful. I know right! It just makes so much sense to me. And now to you too. We need to stop stopping ourselves from just a scoop or two because really, that is just not enough. Nope, this is for real. A bowl, full of hummus, topped with roasted veggies because that is just more deliciousness. And we get to eat it all.

Life can be pretty great sometime, you know. HA

Now to the bowl of hummus!

The stuff. We got chickpeas, tahini, a lemon, red wine vinegar, garlic, salt and pepper. And Veggies. Brussel Sprouts, broccoli, onion, Swiss chard, and kale.

Chop up the broccoli, the onion and half or quarter the Brussel sprouts. And separately, chop up the kale and chard.

Toss the chopped Brussels, broccoli and onion into a baking sheet or oven safe skillet and season with salt and pepper. IF you want to toss in a little oil, go for it. Then pop the veggies into a hot oven to roast away.

Once the veggies are just about done to your liking, grab the chopped kale and chard and off to the veggies. Toss and roast for a few more minutes.

Hummus. Chickpeas with liquid, garlic, tahini, juice of lemon, and blend. Creamy smooth and delicious.

Dump that hummus into bowls.

And top with roasted veggies.

Would you look at that. Now all you need to to is dig in. Serve with extra lemon and black pepper. Grab your utensil of choice and eat.

-C

makes 2 servings if eating as a meal

  • 3 cups cooked chickpeas in liquid

  • A lemon

  • 1 tablespoon red wine vinegar

  • 2-3 cloves garlic

  • 1/4 cup tahini

  • salt and pepper

  • 10 or so Brussel sprouts

  • A small head of broccoli

  • A small onion

  • 5-6 kale and or Swiss chard leaves

Note. Use whatever veggies you want. Fresh or already prepared. All and any leftovers would be great.

Preheat oven to 450.

Cut Brussel sprouts in half, chop the onion into small pieces, and cut up the broccoli and toss onto a baking sheet or an oven safe skillet. Sprinkle with a little salt and pepper and stick into the oven to roast for about 20 ish minutes or until nice and roasted. Feel free to toss the veggies in a little oil if you want. Chop up the kale and chard into smaller pieces. Once veggies are just a few minutes from being cooked to you liking, remove from oven, and toss in the greens. Cook for another 5 or so minutes until those are nice and wilted. Remove veggies from oven.

While veggies are roasting, make hummus. Place chick peas with liquid, the juice of the lemon, vinegar, garlic, and tahini into a food processor. Blend until smooth and creamy. Taste and season with salt and pepper to your liking. Dump into a bowls.

And when you have hummus make and veggies roasted, its time to compile. Dump the hummus into 2 bowls. Dump half of the roasted veggies into each bowl.. Squeeze more lemon juice onto both then grab a fork.

Eat. And yes, lick bowl clean. No shame.

Every now and then I make something for me. All for me. This is one of those dishes that was not destined to be shared with anyone. That I had no one else in mind to eat besides me. No worring about what anyone else with think. Just a simple little dish that I was craving and wanting.

So I made it and man, was it so freaking satisfying. Cooking for oneself is very much a gratifying experience.

Celeriac, or also know as celery root. Have you ever had it? If not, well duder, you need to. It is in my top 3 favorite vegetables and that is saying a lot. So anyway, celeriac, has a slight celery taste, but also kind of earthy and nutty. It pairs well with anything that a potato might, but also is amazing on it%u2019s own. Roasted, steamed, raw. Just really fantastic. And it is in season so get on it and go find yourself some.

And lentils. In my top 3 favorite foods. Made them crispy because pureed celeriac and crispy lentils just sounded right and I love me crispy things. Again, I was making this dish fo me so crispy was happening.

Together, the creamy, delicious pureed celeriac covered with a bunch of spiced, crispy lentil%u2026.Amazing. Eating it, I couldn%u2019t have been happier. I did myself one good with this one.

I might even have to make it to share someday.

Now to the celeriac and lentils!

The stuff. A bulb of celeriac, some cooked lentils, salt and pepper, chili powder, garlic powder. mustard powder, and oil. (oil is optional)

The celeriac. Ok, so most people peel it. I actually get weird looks from people when I tell them I don’t , but let me do me, you know. So anyway. Peel it if you want, or not, just cut it up into chunks.

Place cut up celeriac into a pot and cover with water. Place on stove on medium heat and cook until fork tender.

Lentils meet spices and get mix all together. Add a pinch of salt and lots of cracked pepper too.

Spread now spiced lentils onto a baking sheet, pop into oven, and bake until crispy. Easy peasy.

And to puree the celeriac. Strain any extra water into a cup. Season with a pinch of salt and pepper and grab the hand blender (or regular blender) and blend it, adding back in some of the strained water as needed, to get to a consistency that you like. Me, I liked it pretty smooth, but also with a little chunk. Heck, you could leave it really chunky or go all out completely smooth. Up to you. Also if you want a creamier texture, add in a teaspoon or so of the olive oil. That is a taste preference. I didn’t add oil this time, but I have before. It%u2019s good both ways.

And there you have it. Add the celeriac puree to a bowl, top with crispy lentils, and garnish with something green if you want.

Then eat it.

Not going to lie. After this picture was taken, I busted out the spicy mustard and covered everything with it. And it was amazing.

-C

serves 1 as a meal, or a few as a side dish

  • 1 1/2 cups cooked green lentils

  • 1 large celeriac bulb (soft ball sized)

  • 1 teaspoon chili power

  • 1/2 teaspoon ground mustard powder

  • 1/2 teaspoon garlic powder

  • salt and pepper

  • olive oil (optional)

Grab celeriac and peel if you want, or just give it a really good wash. Cut into chunks and place into pot. Add enough water to just cover the celeriac and place on medium heat on the stove. Cook until fork tender.

In the mean time, mix all the spices and a good pinch of salt and lots of pepper together with the lentils. Dump them and spread them out onto a lightly oiled baking sheet. Place in oven and turn to 400 degrees (you can start cooking the lentils while the oven is preheating). Bake for about 20 minutes or until lentils are crispy.

Once the celeriac is tender, strain water into a cup and either with a hand blender or a regular blender, blend until smooth, adding in some of the poured off water as needed. You can puree as smoothly as you like or leave a few chunks.. Also, you might want to add in a teaspoon or so of olive oil for a slightly richer and creamier taste. Season to taste with salt and pepper.

Ehen the lentils are done, take them from oven. Place large amount (or all) of the celeriac puree to a bowl, cover with some (or all) of the crispy lentils and that is that. Eat away.

Serving suggestion%u2026. Mustard. Any kind. So good.

When your sister drops off 50 lbs of beets, on top of the 50 lbs that you have to harvest that are growing in your garden, what do you do?

Well chips of course.

Yeah, chips. That%u2019s right. When I got home from camping on Monday and there was a humongous pile of beets sitting next to my front door, I am not going to lie, I was a little shocked. I mean there wasn’t just a few little ones. These beets were freaking huge, like the size of my arm, and so many. But pretty much right after my initial shock I knew what needed to be done. First, eat a few roasted, second, roast extra to freeze for later, and lastly, make a few bunches of chips.

Have you ever had beet chip? They are amazing. Crispy, crunchy, tasty as all heck. If you like beets, even in the slightest, you will love these. If you hate beets, well maybe don%u2019t? Either way, beet chips are the best chip. Wha’t%u2019s not to love? Pink, and chippy. Sweet, and salty. And then you add the fact that making beets into chips is a good way to get your veggies in and that you can eat a whole bowl full and feel zero guilt because you are just eating beets. Plus making beets into chips is a good way to use up any extra beets you might have laying around or that have been dropped off at your front door.

These chips, once they are made, will not last long. So when you do make them, know you will probably be making them again soon there after. Me, I have still have to harvest all my garden beets so beet chips are happening again soon. Real soon (like this afternoon!)

To the beets!

The stuff. Beets (these are Formanova beets but any variety works) salt and pepper ,and oil.

Ok so you need to cut these bad boys reallllllly thin. Like 1/15th a inch. So, what I am saying is, use a mandolin. If you don%u2019t have one, a knife will do, but you are going to have a hard time getting them as thin as you need to and all of them consistent so baking is going to be a little more tricky so maybe you should just go borrow or invest in a mandolin.

Grab baking sheets, oil, and salt and pepper. You can either dump the oil directly onto the pile of sliced beets and really toss to make sure each one has been coasted or do what I did which was I drizzled oil into my hands and rubbed each sliced beet between my oiled hands before placing on the sheet.

After you get them on there, single layered with no overlapping, sprinkle tops with a pinch of salt and pepper.

On the way into the oven.

After the oven. Baked for about 18 minutes. You really have to watch after the first 13 or so minutes to make sure you catch them at the perfect time. Crispy, but not burnt.

A side by side shot. Crazy shrinking will happen!

Oh man, so delicious. And so pretty!.

Let the chips cool before eating, you know, so you don%u2019t burn your tongue. Plus they crisp up a wee bit more.

Once cooled, pile them into bowl, and then eat them. And eat them all. They are only beets after all. And you won%u2019t be able to stop yourself anyway. Ha

-C

Makes enough for an evening of chip eating for 1-2 people

  • 2 Large beets (think softball sized)

  • a tablespoon or two of oil (I used grape seed but really any would work)

  • salt and pepper

Note. Making these without cutting with a mandolin will be a pain in the ass. It can be done, but if you have a mandolin, use it.

Preheat oven to 350

With a mandolin, slice the beets about 1/15 inch thick. (No need to peel the beets unless you want to.) Once beets are all sliced, either drizzle them all with a tablespoon or so of oil and toss until all are coated. OR what I did and found worked really well was drizzled oil into my hands and rubbed each beet between my oiled hands as I was placing them on the baking sheets. Either way.

Now place oiled beets, single layered, without overlapping, on baking sheets. Sprinkle with a pinch of salt and pepper and place into oven. Bake for about 13 minutes without worrying then start to check every minute or so until the beets are a deep golden brown and crispy ,which will be between 15-20 minutes. Also, even though you cut them all the exact same thickness, some might crisp up faster so you should remove done chips as they happen. Once they are done, place on a rack to cool. And then do another batch. And not, they do crisp up a tiny bit more as they cool.

Once chips are cool and crisp, eat.

Store uneaten (how did you not eat them all?) chips in an air tight container. If you notice that they turned a bit chew, just place them back into oven while preheating oven to 300 then turn oven off and let sit in there for a few minutes.

There are a million things you can, and should, do with tomatoes. Salsa is one of those things. Especially with the super fresh and ripe summertime tomatoes that may or may not be overflowing every empty surface of your kitchen (my current predicament). And peaches. Now is the time friends to eat your peaches. In season and oh so tasty. Do it now before it%u2019s too late and those oh so deliciously ripe and sweet peaches are gone and all that is left are mealy, gross, supermarket fakes. Only eat in season peaches. That is a life lesson everyone should know.

This salsa is perfect. Super fresh, sweet and slightly spicy, with a hint of tangy goodness and just, you, really freaking perfect. A salsa that hits all the right notes with out being overly anything and underly nothing if you know what I mean. All the tastes of summertime. A darn good salsa. Darn good.

This salsa also makes me a winner at the game I am playing with myself called %u201cGet the mr to eat tomatoes and like it”%u201c. The game started when he told me he was sick of tomatoes and he didn’t want to eat anymore. I made the salsa (which also made me a winner in the other game I play called %u201cGet the mr to eat fruit in his savory dishes%u201d, because he also tells me how much he hates fruit in savory), he tried the salsa, raved about the salsa, and then went and ate the rest of the salsa with his rice and beans. .

I win again! Haha

Anyway, super fast, super fresh, super super. A great way to use up a any of your shit load of tomatoes you might have laying around and to get in a few more of those summertime peaches before they are gone again for the year.

Now to the salsa.

The stuff. Cherry tomatoes, peaches, an onion, a jalape%u00f1o, a lime, a bunch of cilantro, salt and pepper, and a little vinegar.

Start by cutting up the tomatoes into quarters. Do this carefully or else you will have tomatoes rolling around everywhere. Place chopped tomatoes into a bowl.

Then dice up those peaches into small little pieces and toss into bowl with tomatoes.

Onion gets diced up too and placed into bowl.

Jalapeno, seeds removed, diced up nice and small. Get it into the bowl.

And cilantro. Give it a rough chop and into the bowl it goes.

A sprinkle of salt, lots of pepper (to taste of course), the juice of the lime, and a splash of vinegar. Mix it all up and there you have it.

Into a jar (or you can just keep it in the bowl if you want), and it%u2019s ready for eating. Chips, tacos, to top a salad%u2026 This salsa does it all. Heck, just eat it with a spoon. There is absolutely nothing wrong with that.

-C

Makes about 32 oz of the good stuff

  • 1 overflowing pint cherry tomatoes (red, yellow, sun gold or a mix of any)

  • 2 ripe but firm peaches

  • 1 bunch cilantro

  • 1-2 jalape%u00f1os (depending on how hot you want it)

  • 1 small red or white onion

  • a lime

  • salt and pepper

  • splash red or white wine vinegar

Grab the tomatoes and carefully, so they don%u2019t roll away, cut each one into quarters. Place in a big bowl. Cut peaches in half, remove pit, and dice the flesh into very small little piece and toss into bowl. Now onion, dice that into small little pieces, along with the jalape%u00f1o and toss into bowl. Cilantro gets a rough chop then into the bowl it goes. Now sprinkle in a little salt and lots of black pepper. Add the juice of the lime and a splash of the vinegar and toss it all around. Let sit for a few minutes, taste, then season with more salt and pepper if needed. Can add more vinegar for more acid if needed too.

This salsa only gets better with a little age so you can definitely make it a day or two ahead of time.

Store in a bowl to serve or a jar for longer storage. Use within a 4-5 days of making it.

THE LOVELY CRAZY

February 15, 2020 by maximios • Blog

Let us talk about how winter squash is like one of the best foods ever. Seriously. Hardy, creamy, rich, and full of the nutty, sweet flavors of all the good things. How anyone says they don%u2019t like winter squash is beyond me. I sometimes even feel like I put myself in danger of exploding when I am around enough cooked squash. I can eat and eat it until it%u2019s gone, which is fine if it%u2019s a serving or two, but when you roast up a 10 pound butternut, well, that is when the danger is real. I am getting better at holding back, but man, sometimes I just can’t (or don%u2019t want to?) help myself. ( You might also wonder why I cook 10 pounds of squash at a time. It%u2019s because I will eat it all in a few days and I might as well cook a bunch at once, for efficiency sake.)

Now the delicata squah. If you haven%u2019t had it before, stop what you are doing and go get one. You need to try it because it is amazing. Sweet, nutty, creamy. So good! And another good thing is that they are not giant, so you can buy one and eat the whole thing and not worry about overeating until you can%u2019t move, unless that is the goal. In that case, just buy a bunch. HA.

Anyway, it%u2019s getting to that time of year where salad is still great, it is just great warm. And with winter squash. Don%u2019t you agree? So we cook up the squash, grab the kale and make one heck of a salad to eat all to your face. Because that is what will happen. You will make it , taste it, and not want to share it. It is too good to share. (Yes salads can be too good to share, so if you are planning on feeding others, plan accordingly)

To the salad!

The stuff. Kale, a delicata squash, red onion, some balsamic vinegar, a touch of maple, spicy brown mustard, a handful of toasted seeds, and salt and pepper.

Start with the squash. Cut it in half and scoop seeds from booth sides (these seeds are great roasted). After deseeded, cut both pieces into 1/4-1/2 inch thick rounds. And NO!!!!, do not peel the skin.

Grab the onion and cut into 1/4 inch rounds too.

Place the squash on a very lightly oiled baking sheet so the pieces are not overlapping each other. Then toss on the onion which is fine if it overlaps. Sprinkle with a pinch of salt and lots of cracked pepper and pop into a hot oven.

In the meantime, mix the dressing situation together. Mustard, maple, and balsamic in a jar, mix and done.

Chop the kale too. Into mouth sized pieces.

Once squash is cooked all nice and tender, remove pan from oven. Take all the kale and toss on top then take the dressing and drizzle it all over the kale. Pop the pan back into the oven for a minutes or two, just until the kale starts to ever so slightly wilt.

Pull the pan back out and give it a good toss.

Dump it all into a big bowl, toss in the toasted seeds, and call it. Now grab a fork and start eating.

-C

Can be a main dish for 1 or a side for a few

  • 1 delicata squash

  • 1 bunch of kale (around 3/4 pound)

  • 1 smallish red onion

  • 3 tablespoons balsamic vinegar

  • 1 -2 teaspoons maple syrup (more for a slightly sweeter, maple-y flavor)

  • 2 tablespoons brown or dijon mustard

  • 1/4 cup toasted seeds of choice (I used pumpkin and sunflower)

Preheat oven to 400

Cut delicata squash in half and scoop out all the seeds (you can save seeds to toast up later if you want), then slice the squash into 1/4 – 1/2 inch thick rounds. Grab onion and cut into thin slices. Take onion and squash and place them onto a very lightly oiled baking sheet and sprinkle with salt and pepper. Don%u2019t let the squash overlap, but it is fine for the onion to overlap the squash and itself. Pop the pan into the oven and bake until the squash starts to brown and is fork tender, which should take about 10-15 minutes.

In the meantime, chop kale into small mouth sized pieces and set aside. And mix the balsamic, mustard, and maple together to create the dressing.

Once the squash and onions are cooked, toss the kale onto the pan and drizzle the whole thing with the balsamic mixture. Toss it all around and pop pan back into oven for another minute or two, just to let kale get a touch wilted.

Remove pan from oven, dump everything from pan onto a plate, and toss in the toasted seeds.

Grab a fork. Eat.

Do you ever wake up first thing in the morning with a craving, a maybe somewhat strange food craving? Lately I have been waking up and within an hour of being up, I start to think about olives. My mouth starts to water and it%u2019s like I can almost taste the salty, briny, fattiness in my mouth, which in itself is kind of weird, but for me is really really weird because up until very recently I completely hated olives. Now, well now I just want to eat them all. And first thing in the morning.

I don%u2019t pretend to understand such things. My brain is going to do what it%u2019s going do. Tell me I like olives, well all right then.

Another thing I am desperately craving is freshy fresh greens which makes complete since because I always crave greens. I am still pretty deep in root veggies and cooked things because winter and Vermont and all, but all I really really really want to eat are buckets of greens. Any kind will do, but the sweet tender baby ones%u2026. So good.

And so I combined my two cravings, greens and olives and hit those craving like POW! BAM! POOF? A salad so simple yet so amazing and mouth watering. I outdid myself here.

To the bestest, most amazingly perfect salad yet!

The stuff. A big ol%u2019 bowl of greens. Black pitted olives, half an avocado, a lemon, toasted almonds, a chunk of red onion, a couple cloves garlic, and pepper.

Almond crumbs. Exactly what it sounds like. Place almonds into a clean food prosessor and pulse until they are crumbs.

Dump the almonds into a bowl. Don%u2019t bother cleaning it out, you are about to use it again. Olives, avocado, garlic, and all the juice of the lemon now get a go in the food processor. Pulsed together into a creamy, kinda of chunky but mostly smooth, mixture of amazing. Add a few tablespoons of cold water if the mixture seems really thick, but other then that, you be done.

Very thinly slice up red onion and slice up a few extra olives.

All here, all ready to go. Just got to toss it together now.

Greens, some slices olives and onion tossed all together in a good amount of the olive avocado goodness then topped with a hardy helping of almond crumbs. Fresh pepper to finish it off.

I was barely able to stop myself from eating it all before snapping a few pictures.

All of my cravings come true%u2026

It%u2019s salad time!

-C

Makes enough dressing and crumbs to feed 2-4 people

  • 1/2 of a ripe avocado

  • 1 cup pitted black olives

  • 1 lemon

  • 2-3 tablespoons cold water

  • 1-2 cloves garlic

  • 1/4 cup toasted almonds

  • 2-4 large handfuls of fresh greens (I used a mixture of baby spinach, baby chard, and baby kale. Spring mix or even chopped leaf lettuce would be grand as well)

  • about 1/2 a small red onion

  • pepper to taste

Place almonds in food processor and pulse until they are crumbly. Not to fine, a few big chunks are good.. Remove and set aside

Roughly chop the garlic and place in the food processor (no need to clean it out after the almonds). Add in the avocado and most of the olives (leave few behind to slice up). Add in the juice of the lemon. Pulse until mixture is combined but with little specks of olive left.or completely smooth if you wanted too. Scoop out into a container. You want it to be slightly loos so it will mix well with the greens. If the mixture seems really thick, add in a a few tablespoons of cold water to thin out.

Grab the onion and remaining olives and thinly slice.

Now to assemble salad. Place a handful of clean greens into a bowl. Toss a some onions and extra sliced olives into greens. Add as little or as much olive avocado dressing as desired then sprinkle as much or as little of the almond crumbs all over that. Top with freshly find pepper

Then eat it.

We need fresh, we need green, we need color.

We need salad. %u00a0

The other night I made Megan’s birthday dinner which consisted of pizza and salad. The pizza was pizza and everyone loved it and ate it, but what surprised me was how everyone was really into the salad. A big ass bowl or fresh greens with onions and I think carrots and cabbage and some cranberries I pulled form the freezer and candies almonds. Simple and not fussy, and everyone was just so happy to eat it. I felt like a salad genus and now I am full on into making fun awesome spring salads. (I have to keep reminding myself that yes, it is indeed spring.%u00a0So what we got snow yesterday, it will melt, right????%u00a0)%u00a0

So I bring to you a a bowl of fresh crispy spring greens with crunch and bite and creaminess and flavor. A salad that will bring you joy and satisfaction and maybe even anticipation for your next salad adventure.%u00a0Not to mention a salad that looks so dang pretty.%u00a0

Get into the green. You will be as happy as a rabbit in a garden.%u00a0

The stuff. Greens, red onion, an avocado, almonds, blueberries, and a lemon. Also need some maple syrup, olive oil, red wine vinegar, and salt and pepper.%u00a0

A couple teaspoons of maple %u00a0go in with the almonds. Really toss make sure they are all coated.

Place the almonds into a hot skillet cook for about 5-7 minutes or until the maple has become sticky and the almonds no longer raw.%u00a0

When they are done,%u00a0dump them onto a piece of parchment to cool. Don worry if they clung a little, you can break them apart once they are hard.%u00a0

Easy ass dressing. Blueberries. juice from the lemon, olive oil, vinegar, a tiny splash of maple, and a good pinch or pepper.%u00a0

Blended then done. Taste and season with salt if needed.%u00a0

Avocado gets cut into small chunks and the onion get s thinly sliced.

It’s all ready, so now make a salad

Makes 2-3 %u00a0salads%u00a0

  • 1/4 pound greens ( I used spring mix but mesclun mix or spinach is good too)%u00a0
  • 1/2 %u00a0red onion
  • 1 avocado

For the Almonds%u00a0

  • 1/3 cup raw halved or slivered almonds
  • 2 teaspoons maple syrup%u00a0

For the Blueberry lemon Vinaigrette%u00a0

  • 1/3 cup blueberries (I used %u00a0frozen)
  • 1 lemon
  • 1 Tablespoon olive oil
  • 2 Tablespoon red wine vinegar
  • 1/2 teaspoon maple syrup
  • pinch or salt
  • pinch or pepper

To make the %u00a0candied almonds, preheat a skillet to on medium heat on top of the stove.%u00a0Place almonds into a small bowl and drizzle with maple syrup. Stir to coat. When the pan is hot, dump the maple covered almond into it and spread them out. Cook for a 3 minutes, then give a stir and cook for a 3 or so more minutes or until the maple has evaporated and the almonds are starting to brown. Dump the almonds directly onto a piece of parchment paper to cool and hardened. Do worry if they stick together a bit, you can break them apart after.%u00a0

To make the vinaigrette,%u00a0place the berries into a jar (if using stick blender) or blender with the juice of the lemon, olive oil, vinegar, maple, and a pinch of pepper Blend until smooth. Taste then add a very small pinch of salt or more to taste.%u00a0

For salad. Thinly slice the onion and dice the avocado. Place greens into bowl(s) and toss with onions and avocado. Top with %u00a0candied almonds and drizzle all over with the vinaigrette. Grab a fork and eat.

Any left over dressing will last in fridge for about a week and left over almonds will be good for.a few weeks in a airtight container.%u00a0%u00a0%u00a0

I picked up out last winter farm share this week which makes me sad just thinking about it. Where am I going to get my food?%u00a0 Luckily it’s only like 3 weeks until the summer share starts so I think I will survive.

At the last pick up we got the usual roots, cabbage,and greens, but we got a bunch of spring greens. 3 lbs of them and I was just all smiles and glee. I legitimately get super excited when there is a large quantity of fresh spring greens in my fridge. Greens make me happy. And of course I share my green wealth with the mr. (I am so nice) He is not thae biggest fan of just handfuls of greens to the mouth for dinner so I figured a nice dressing to dress up those greens and any other veggies was something I could do. And I just so happen to have bought a giant bag of walnuts and walnuts go great with everything so yeah. And it’s really freaking good.

The stuff. Walnuts, oil(I used avocado but walnut or olive oil would be great) a lemon, a little honey, and salt and pepper. Also probably going to need a little water.

Stuff goes into blender and gets blended until creamy. This dressing starts off really thick and can be left thick or a little bit of water can be added to thin it out. Up to you.

Poured into a jar and that’s that.

Creamy walnut dressing.

Not just a salad dressing. You can eat it with anything and everything. I was dipping carrots and apple slices in it and the mr was dipping his pizza in it cause that’s how we roll.

-C

Makes about 1 1/2 cups

  • 1 cup toasted walnuts
  • 1/4 cup of oil. (I used avocado but olive or walnut would be good)
  • 1 lemon
  • %u00a0Teaspoon or two of salt and pepper
  • 1 teaspoon honey or agave
  • Water

Place walnuts, juice of lemon, honey or agave, and a pinch of salt and pepper into a blender or food processor. pulse to break up nuts then turn on and stream in oil. Blend until smooth, adding a few tablespoons of water to thin out as needed. This is a thick dressing so you can add as much water as you like to thin it out, just do it slowly. When blended, taste and season with more salt and pepper if needed. . Pour into a jar.%u00a0 Stick in the fridge when not in use. Will last a couple of weeks if you don’t eat it all.

THE LOVELY CRAZY

February 15, 2020 by maximios • Blog

Mid week, I was doing a little pantry cleaning/ inventorying of what I had and needed when I came upon not one, not two, or even three. No, six. SIX, jars of jam. And there are 2 that are already opened in the fridge. I don%u2019t know why, but knowing that there was that much jam in the house made me a little uneasy. Six unopened jars is about 3 jars past my comfort zone. Sure there are so many things you can do with a jar of jam (jelly, preserves, and marmalade included) and now that I am thinking about it, is one of the reasons why I bought a few jars a while back. Then there was Christmas and I think we got at least two jars as gifts so it%u2019s not all my fault, but still, that is just too many jars of jam. Right there I needed to get rid of at least one jar. So muffins. Jam muffins, with poppyseed crust because it%u2019s pretty and nobody ever complains about poppy seeds, or at least they don%u2019t until after they eat them and have poppy seeds stuck in their teeth all day. But that is just our mouths way of saving a little for later, am I right? HA

Anyway, a quick and simple muffin recipe for all of you people out there that might have a jar or two too many of jam in the fridge or pantry%u00a0(I used apricot but any flavor(s) would work) and could use yourself a tasty little muffin situation. I mean who doesn%u2019t want a tasty muffin?

To the muffins.

The stuff. In the bowl is white and white whole wheat flour, baking powder and soda, and salt. Also have apricot jam, oil, almond milk, apple cider vinegar, and orange, and some poppy seeds.

Grab a zester and zest the orange into the bowl with all the dry stuff. Whisk to combine.

Jam, oil, milk, and vinegar. All on top of dry. Whisk that up until just combined. No over mixing. You will get tough (not in a good way) muffins.

Scoop into well greased muffins tins then cover the tops with poppy seeds.

And out of the oven, looking all pretty like.

Pop those muffins out of the tins and cool on a wire rack for a bit. And by all means, don%u2019t wait until they are completely cool.

Now eat you a warm muffin and if they are mini, grab a few. You can%u2019t just eat one mini muffin, that is just crazy.

-C

Make 12 normal size muffins or 24 mini muffins

  • 1 cup all purpose flour

  • 1 1/4 cups white whole wheat flour

  • 2 teaspoon baking powder

  • 1/2 teaspoon baking soda

  • 1/2 teaspoon salt

  • 1 cup plant milk

  • 1/3 cup neutral oil

  • 1 tablespoon apple cider vinegar

  • zest of an orange

  • 1 heaping cup apricot jam or preserves (can sub in any flavor you like)

  • 1/3 cup poppy seeds

Preheat oven to 350

In a large bowl whisk together the flours, salt, baking powder and soda, and the zest of the orange. Add in the oil, milk, jam, and vinegar and whisk until just incorporated. Scoop batter into well grease muffin pans (12 regular or 24 mini) then cover the tops with poppy seeds. Pop into hot oven and bake until risen and a tester comes out clean when one is poked. For mini muffins, check after 13 minutes, for normal muffins, after 16 minutes.

Once baked, remove from oven and pop out of pans when cool enough to handle. Place on a wire rack to cool completely or just start eating them warm.

Store left over muffins in an airtight container for 3-4 days at room temperature. They also freeze well.

It%u2019s not too late to get in a little end of the year baking. It is actually the perfect time to bake. All the holiday hub bub is still going on so there is usually still people all around still willing and able to eat your offerings (if you were so inclined to share), the days just feel more slow and of need of warmth and lovely smells. Plus we need something to do while while waiting for New Years, because we are just all sitting around waiting for that ball to drop, right? HAHAHA. No.

Anyway, I have been wanting to make some version of a boiled clementine cake for a while now. I love that fact the the whole clementine goes into the cake, that there is no peeling or zesting or juicing. It is just boil the clems for a little while to get the bitterness out and you are good to go. And it doesn%u2019t hurt that right now is citrus season so I have a humngo bowl of clementines, plus a shit load of other oranges and other citrus to go through so the thought of tossing a good few clementines into a cake, well it was just what needed to be done.

And the family is coming over to eat and trash my house so I needed another dessert besides the half eaten ice cream cake left in the freezer from Camereon%u2019s birthday/Christmas. So I baked that they will eat. And there we go. Win win.

Now to the clementine cake.

The stuff. Flour, baking powder and soda, salt, sugar, oil, cinnamon, vinegar, clementines, and powdered sugar.

First you need to boil the clementines. Big pot, fill with water, place clems inside, bring to a boil, then simmer for 2 hours. Seems like a long time but just do it while you are making and drinking coffee or doing laundry or whatever. You don%u2019t need to keep an eye on them, other then to check that the water hasn%u2019t evaporated, and it smells so nice.

After the 2 hours are up, remove clementines from water and let cool enough to handle. Cut in half. If there are giant seeds, remove them.

Place the clementines into blender and blend until silky smooth.

Now the other stuff. Flour, sugar, salt, baking powder and soda, and cinnamon. All into big bowl.

Whisk together until incorporated then add in the clementine puree, the oil, and the vinegar. Whisk together until it becomes a uniform batter.

Scoop batter into a very well greased bundt cake pan and bake, 50-60 minutes, until tester comes out clean.

The big revel%u2026. And it went perfect! Now time to let this sucker cool a bit on a wire rack.

While the cake is cooling, make a simple glaze. Just powdered sugar and fresh (not boiled) clementine juice. Mixed unit glaze consistency.

Once the cake is pretty much cooled, pour on the glaze.

And now it is cake time.

-C

Makes one bundt cake

  • 2 1/4 cups all pupose flour

  • 1 cup white sugar

  • 1/2 teaspoon salt

  • 1 teaspoon baking powder

  • 1 teaspoon baking soda

  • 1 tablespoon vinegar

  • 1/2 cup any neutral oil

  • 1 teaspoon cinnamon

  • 6 clementines (you need 2 cups pureed)

    For the glaze

  • 1 cup powdered sugar

  • 1 clementine

To start, place 6 clementines into large pot and fill with water. Place on stove and bring water to a rapid boil then reduce heat and continue to simmer clementines for about 2 hours.

Once clementines are cooked, cut in half and check and discard any large seeds. Place the clementines into a blended and blend until smooth. Should have about 2 cups puree. If you are short on volume, add water to make up the difference.

Preheat oven to 350

Grab a large bowl. Dump the flour, baking powder and soda, salt, cinnamon, and sugar and whisk together until completely incorporated. Now add in the clementine puree along with the oil and the vinegar. Mix until completely incorporated. Scoop batter into a well greased burnt pan (at least 10 cup capacity) then place into oven on middle rack and bake for 50-60 minutes until a tester (or a fork) stuck in to the deepest part of the cake comes out clean.

Once baked, remove cake from oven and allow to cool for a few minutes in pan, then flip the cake out of pan, gently of course, and hope you greased it well enough for it to just pop out. Once removed from pan, allow to cool on a wire rack.

While cake is cooling, make the glaze. Powered sugar into a bowl along with the juice of a clementine. Mix together. If the glaze is to thick, add more juice (or water), to thin, a little more powdered sugar until you reach your desired consistency (pourable but not runny is good) and once cake is cooled, pour glaze all over.

And then eat cake.

What%u2019s up with dinner rolls? Do people eat them all year round, like on a Tuesday in the middle of March or maybe a nice blue sky sunny day in July? Is that a weird question? But seriously, think about it. Dinner rolls, at least in my world of people, are pretty much only eaten in and around Thanksgiving and Christmas. Huh. Kind of strange seeing that dinner rolls are bread which everyone eats all the time and are basically made specifically for dinner (although can and should be eaten for breakfast and lunch as well) which most people eat. Every. Single. Day. Well, whatever the reason, it%u2019s weird. So yes, I am making these here dinner rolls now at the traditional holiday time but I think as of now, I am going to start making them all the time. It%u2019s going to be my new thing. Fourth of July dinner rolls. Yup.

And so yes, we need dinner rolls right now for the holiday food feasts and these dinner rolls are the perfect accompaniment to any and all dinners. They are nice and fluffy and all dinner roll like, just as any good roll should be, but also slightly more nutty and soft and healthy because oats and wheat flour and homemade which is always the best.

And if you are like, hell yes I am a dinner roll person and hell no I am sticking to store bought cause that is that and how it%u2019s done, well hey, no judgment here. I made these for my people for our family Thanksgiving, (which is happening today at my house. There are going be so many people) and I know that everyone will love and be happy to eat them, but I too also bought some of those super white, take and bake ones that I know if I don%u2019t have on the table next to these gorgeous and amazing rolls, that I will probably get punched in the face. So we will have both. And then at dinner I can bask in the glory of all the comments about how much better my rolls are then the store bought ones. (Secretly why I am having both. Fishing for compliments. HAHA!)

Now to those soft and fluffy dinner rolls!

The stuff. Old fashion oats, all purpose and white whole wheat flour, yeast, oil, water (hot and room temperature), maple syrup, and salt.

First, take the boiling water and pour it over the oats. Mix them and let them soak and cool for 10 or so minutes.

While oats are soaking, add the room temp water to a big bowl with the yeast. Once the oats are soft and cooled off a bit, add them to the yeast mixture along with the oil, and maple. Mix together. The add the flours and mix until combined.

Dump dough onto a floured surface and knead for about 3-5 minutes, adding a little more four as needed to keep from being to sticky, but don%u2019t over flour. The dough is and should be a little tacky.

Soft and supple. Kneaded and ready.

Place the dough back into the bowl and cover with a damp towel. Leave alone and let rise for about an hour or until it doubles in size.

Once the dough doubles, dump out onto a lightly floured surface and cut into 12-16 equal sized pieces .

Roll each roll into a roll shape and place them in a lightly greased baking dish. Cover for another 15-20 minutes to let rest and rise a little more.

Rolls risen again, just a little plumper. And now right before you place them in the oven, brush tops with a maple/water mixture and sprinkle with a few oats. To look pretty. And into the oven they go, 30ish minutes, until nice and golden brown.

Baked to golden dinner roll perfection.

And there you have it. Soft and fluffy dinner rolls. Warm out of the oven, looking and smelling like all the good things that you want and need.

And can, and should, be made now and all year round.

-C

makes 12-16 rolls

  • 1 1/2 cups old fashion oats

  • 2 cups all purpose flour plus more for kneading

  • 1 1/2 cups white whole wheat flour

  • 2 cups boiling water

  • 1 cup room tempature water plus 2 tablespoons for brushing tops

  • 2 teaspoons salt

  • 2 tablespoons maple or honey

  • 2 teaspoons yeast

  • 1/4 cup neutral oil

In a bowl, mix oats with boil water and let sit and soak for about 10 minutes. In the meantime, in a large bowl, mix the room temp water with the yeast and 1 tablespoon of maple and mix. Once oats have soaked and cooled to a point that they are not super hot, but still just warm, mix them in with the yeast mixture. Add the salt and oil and mix then and both the white and white wheat flour. Mix until combined. The dough is going to be sticky, but that how is should be. Dump the dough onto a lightly floured surface and knead for 3-5 minutes, adding a little flour as needed to keep from sticking too much, until dough is nice and uniformed in texture. Place dough back into big bowl (after you clean it out and lily oil it) and cover with a damp towel. Place somewhere warm for about an hour until it doubles in size.

Once dough has doubled, dump out onto a lightly floured surface and with a knife of dough cutter, cut into 12- 16 equal sized pieces. Roll each piece into a ball, pinching any ends together and place them into a 9×13 inch baking pan. Once all pieces are in, over and let rest for another 15 minutes.

While dough is resting again, preheat oven to 350.

After the dough has rested, and right before you place them in the oven, mix 1tablespoon of maple with about 2 tablespoons warm water and brush the tops of the rolls. Sprinkle with a handful of oats and then place them into the oven to bake. 30-35 minutes, until they are a nice golden brown.

Once baked remove from oven and let cool to a reasonable temperature and serve.

These can certainly be made a few days ahead of time of eating. Just remove baked rolls from pan and let cool completely then place the into an airtight bag. To reheat, just place on a baking sheet and stick in a hot oven until warm.

If you are a falafel fan, as I am, then this one is for you. Carrot ginger falafel. Oh yes. Warm and spicy and carroty and all the things that are good, packed into a chickpea ball of mouth sized proportions. When I thought of it it sounded good, When I made it and ate it, it was everything and more I could have asked for in a freaking fantastic falafel. As for the tahini cabbage slaw, I might just be making it in my house every dang day. Super easy, super tasty, goes with the falafel like whoa but is just as good eaten on it%u2019s own. Eaten together the pair make every inch of mouth space happy. A happy mouth space, what more can you ask for?

To the falafel!

The stuff. Cooked chickpeas, carrots, a piece of fresh ginger, tahini, soy sauce, cabbage, an onion, a few cloves of garlic, red wine vinegar, some cumin and red pepper flakes, a lemon, chickpea flour, salt and pepper, and oil.

Start off by chopping the carrots into small pieces. Then cut half of the onion into small pieces. Rough chop the garlic and the ginger as well. No need to peel ginger unless you really want to.

Place it all into food processor and pulse until a small crumble.

Carrot onion garlic ginger mixture.

Dump mixture into a skillet with a splash of water. Add in the cumin, chili flakes, and a good pinch of salt and pepper and cook on the stove for 5-8 minutes until the crumble softens and becomes fragrant.

Dump carrot ginger mixture back into food processor along with the chickpeas, chickpea flour, and the juice of the lemon. Puree until smooth.

Carrot ginger falafel mixture. Now stick it in the fridge. For a little while to a day, just to let it set up a bit.

And in the mean time you can make the slaw. Shred cabbage and cut up onion all nice and thin.

Dump tahini, soy, vinegar, and a few tablespoons warm water into bowl and mix until creamy and good.

Toss in that cabbage and onion. Now you have tahini cabbage slaw.

Now to cook falafel. Grab the batter, scoop into balls then smoosh into disks. Place in a light oiled skillet and brown each side a nice golden brown.

After browning, place on a baking sheet. Once all the falafel has been browned, place the baking sheet into the oven to finish up cooking. 20 minutes or so and you got yourself falafel.

Then eat it. Falafel topped with tahini cabbage slaw. That is how it%u2019s done, with or without wraps or pitas or whatever your want. Just as it is. Falafel, cabbage slaw, into mouth.

Good things friend.

-C

serves 3-4 people or makes 14-16 falafel balls

  • For the falafel

  • 2 cups cooked chickpeas drained

  • 3-4 carrots (around 2 cups diced)

  • 1/2 of a red onion

  • 2 inches fresh ginger

  • 2-3 cloves garlic

  • 1 teaspoon cumin

  • 1/2 teaspoon chili flakes

  • 1/3 cup chickpea flour (can sub in oat flour if needed)

  • juice of a small lemon

  • salt and pepper

  • For Tahini Cabbage Slaw

  • 1/2 head red or green cabbage (about 3 cups shredded)

  • 1/2 of a red onion

  • 3 tablespoon tahini

  • 1 tablespoon soy or liquid aminos

  • 2 tablespoon red wine vinegar

  • a few tablespoons warm water

Grab carrots and red onion. Chop carrots into small chunks and cut onion in half. Cut one half into chunks. Place in food processor. Take the ginger and cut into small chunks (you don%u2019t need to peel it) and peel and slice garlic and cut into small pieces. Add that to the food processor. Pulse the mixture into a very small crumble then dump the mixture into a skillet with a splash of water. Add in the cumin, chili flakes, and a good pinch of salt and lots of pepper, and place on medium heat and cook for 5-8 minutes until soft and fragrant. Once cooked, scoop back into food processor along with the chickpeas, chickpea flour, and the juice of the lemon. Turn on and and puree until smooth, stopping when needed to scrap down the side. Then either dump mixture into a bowl or leave in the container you processed it in and place in fridge for 1/2 hour to a day.

When ready to cook, preheat oven to 400.

After letting the dough sit for a bit, remove from fridge. Grab skillet and lightly oil it and place on medium heat. Take a cookie scoop or just a spoon and scoop balls of falafel into your hand and roll them around so they are packed together. Smoosh then balls a little into disks and place into hot skillet. Let cook until bottom is golden brown then gently flip and cook the other side until browned. Place cooked falafel on a baking sheet. Once you have browned all the falafel, place into oven to bake for about 20 minutes or until the falafel has firmed up to your liking.

To make the tahini cabbage slaw. Shred cabbage and cut the remaining half of red onion into thin pieces. Place tahini, soy, vinegar, and 2 tablespoons warm water into a big bowl. Mix together until light and creamy. If the mixture seems to thick, add another tablespoon of warm water. When happy with consistency, add in the cabbage and onion and toss around until everything is coated.

Now when the slaw is made, the falafel is cooked, you eat it. Serve with warm pita or wraps or a bed of greens or nothing. Just slaw on top of falafel. And FYI, this whole shebang can be eaten hot or cold or anywhere in between.

When I was a kid, every once in a while my mom would buy those Entenmann%u2019s marbled loaf cakes, (she still might) and I loved them. Chocolate and vanilla swirled into every slice. Super moist and rich with the soft, fluffy top. I would cut a big slice, toast it, then smother it in peanut butter.

Now when I see these cakes, well honesty, I think they kind of look sad. A cake such as a marbled cake, should not be squashed into a box, stacked away on some display case. No cake should have to deal with that. Cakes should be made then oohed and awed at from the comforts of home, only boxed if 100% necessary like in the case of bringing to a friend or giving as a present. Basically, what I am saying is don%u2019t buy pre-made cakes friends, make the cake at home yourself. The cake will like you better for it.

Anyway, I just was thinking about those cakes and my childhood in general and it made me want to make a quick cake all marbled because of the nostalgia and also, I mean, marbled cakes are pretty pretty and why the heck not. And because it is pumpkin season I had to go with pumpkin and chocolate instead of vanilla and chocolate because we all know it was the right thing to do.

Pumpkin spices, rich chocolate. Two flavors in one bite. Who could complain? I don%u2019t think my 10 year old self would have. I think she would have eaten the whole damn loaf (toasted with peanut butter of course).

Nw to the chocolate and pumpkin loaf cake..

The stuff. Flour, baking soda, baking powder, salt, pumpkin puree, brown sugar, white sugar, oil, almond milk, cocoa powder, pumpkin pie spices, coffee, and apple cider vinegar.

Quick and easy. Oil and sugars get a good mix in a big bowl then in goes the pumpkin puree. Mix that in with the milk and apple cider vinegar. Ina separate bowl, mix the flour baking soda and powder and salt. Mix the dry into the wet.

Split the mix in half (eye ball it) and add the spice mix to one bowl and the cocoa and coffee to the other. Mix them until the new ingredients are incorporated. You will then have a chocolate batter and pumpkin spice batter.

Grease a loaf pan then layer dollops of each of the batters into the pan until both batters are gone.

Before the oven and after of the oven.

Place cooked loaf on a wire rack to cool. Really. It needs it. Just wait a least 15 minutes, you can do it.

And then you cut into the load, marvel at the marble, and then eat it.

Two flavors, one mouth.

-C

makes 1 loaf

  • 2 cups all purpose flour

  • 1/3 cup cocoa powder

  • 1 1/2 cups pumpkin puree

  • 1/2 cup white sugar

  • 1/3 cup brown sugar

  • 1/3 cup neutral flavored oil

  • 1 tablespoon apple cider vinegar

  • 1/4 cup plant milk

  • 2 tablespoon coffee (or water if you don%u2019t have coffee)

  • 1 teaspoon baking soda

  • 1 1/2 teaspoon baking powder

  • 1/2 teaspoon salt

  • 1 heaping tablespoon pumpkin pie spice or 2 teaspoon cinnamon 1/4 teaspoon each ginger, nutmeg, allspice, and clove

Preheat oven to 350

In a large bowl, mix together the white and brown sugar with the oil until combined and there are no chunks of sugar. Add in the pumpkin puree and the milk and vinegar and mix until incorporated. In a separate bowl, mix together the flour, baking powder, baking soda, and salt. Add the dry mixture to the wet and gently mix until just combined. Scoop half of the batter (eye ball it) into other bowl. Add the pumpkin pie spices to one bowl and fold it into batter until incorporated. Add the cocoa and coffee to the other batter and fold it in until incorporated.

Interchange scooping the batters into greased loaf pan. One, then the other, to create the marbled effect, until both batters are gone. Place pan into oven and bake for 55-60 minutes or until a tester comes out clean.

Remove pan from oven and pop bread out and place on a wire rack to cool.

Cut a slices, eat, be happy.

Store bread in airtight container for 3-4 days at room temperature or just slice it up and freeze pieces.

As of right now, these are by far the best cookies I have ever made. Look at them. They are SO CUTE!. Worth all the effort, seeing that I do not own a ghost cookie cutter (although I think my version of ghosts are pretty fantastic) and had to hand cut out each cookie with a knife and a ghost cutout I made a few weeks back. They make me happy just looking at them. That right there is saying something. And I don%u2019t know about you and where you are, but it is getting pretty freaking cold out and I refuse to turn the heat on for a few more weeks so I do what I need to do to stay warm. If that means turning on the oven to bake cookies, then so be it. I have a feeling I am going to be making a few more batches of cookies before the months over. HA! (For reals though.)

These cookies are more or less a traditional sugar cookie with a chocolate ganache type filling, both with a hint of coconut flavor from the use of coconut oil. Something about the whole combination; the cookie, the coconutieness, and the chocolate that really had everyone (I gave them out a Barbs birthday party) praise my amazingness. I guess they are pretty freaking delicious.

Cute and delicious. Best kind of cookie!

And quick note. Yes these are ghosts but think of all the fun shaped sandwich cookies you could make. I am thinking moose shaped cookies next or maybe Christmas trees%u2026 Oh the possibilities!

Now, to the cookies!

The stuff. White sugar, coconut oil, flour, baking powder, salt, vanilla, almond milk, cocoa powder, and powdered sugar. For cookies and filling.

To make cookie dough. Beat toghetet the coconut oil with sugar and vanilla until smooth and fluffy. Add in all the dry ingredients and the almond milk and mix until a dough forms.

Wrap dough in plastic and squish tight. Place in fridge for an hour or up to a day.

After dough has had time in the fridge, grab it and roll it out on a lightly floured surface to about 1/4 inch thick.

Cut out cookie shapes. If you want to cut out eyes or a few different shapes, remember each cookie needs a top and bottom so even numbers folks.

Place cut out cookies on a baking sheet then into the oven they go.

Bakes and ghostly! Place them on a wire rack to cool and keep baking the rest of the cookies.

While cookies are cooling, make chocolate filling. Super soft, almost melted coconut oil goes in a bowl with vanilla and gets beaten together. Add in the cocoa powder, powdered sugar and pinch of salt and kept beating slowly anding in a bit of milk until the whole shebang comes together into chocolate filling awesomeness.

Once the cookies are completely cooled, fill them. The filling might have tightened up a bit so if it is not spreadable, pop into microwave for like 8 seconds to get it to move. Scoop or smear equal amounts of filling onto the bottoms of the cookies and top them off with their tops.

Done, and ready to eat.

Ghosts cookies for all your ghost fueled festivities.

-C

makes at least 16 sandwich cookies

For the cookies

  • 2 1/4 cups all purpose flour

  • 3/4 cup white sugar

  • 1 teaspoon baking powder

  • 1/2 teaspoon salt

  • 1 teaspoon vanilla extact

  • 2/3 cup soft coconut oil

  • 5 tablespoons plant milk (I used almond)

For the filling

  • 1 1/2- 2 cups powdered sugar

  • 1/3 cup cocoa powder

  • 4 tablespoons melted coconut oil

  • 1/2 teaspoon vanilla extract

  • 2-3 tablespoons plant milk

  • 1/8 teaspoon salt

Preheat oven to 350

In a bowl beat together the white sugar with the coconut oil and vanilla extract. Add in the flour, baking powder, and salt and start to mix with a spoon or fork, adding in the milk as you go. Keep mixing until completely incorporated and turns to a ball of dough. Gather together into a ball and wrap in plastic. Pat flat and place into fridge for an hour or up to a day.

To cut out cookies. Roll fridgerated dough out on a floured surface to about 1/2 inch thick. Cut out shapes, making sure to have a top and bottom for each cookie. Gather left over dough into a ball and repeat until all the dough is used.

Place cookies on a baking sheet and bake for 13-15 minutes or until they are just starting to lightly brown around the edges. Remove from oven and place on a wire rack to cook.

For chocolate filling. Beat together the melted coconut oil with vanilla. Add in the lesser amount of powdered sugar, salt, and cocoa powder. Beat on low, adding in 2 tablespoons plant milk. Beat until mixture comes together into a thick but spreadable consistency. If it seems too thick, add more milk, too thin, a little more powdered sugar.

Cookie assembly. 2 cookies at a time. A top and bottom. Spread about a tablespoon of chocolate filling to bottom cookies and pop the top on.

Eat cookies. Store what is not eaten in a airtight container for up to a week, but these ghosts will definitely not last that long.

Every now and then I make something for me. All for me. This is one of those dishes that was not destined to be shared with anyone. That I had no one else in mind to eat besides me. No worring about what anyone else with think. Just a simple little dish that I was craving and wanting.

So I made it and man, was it so freaking satisfying. Cooking for oneself is very much a gratifying experience.

Celeriac, or also know as celery root. Have you ever had it? If not, well duder, you need to. It is in my top 3 favorite vegetables and that is saying a lot. So anyway, celeriac, has a slight celery taste, but also kind of earthy and nutty. It pairs well with anything that a potato might, but also is amazing on it%u2019s own. Roasted, steamed, raw. Just really fantastic. And it is in season so get on it and go find yourself some.

And lentils. In my top 3 favorite foods. Made them crispy because pureed celeriac and crispy lentils just sounded right and I love me crispy things. Again, I was making this dish fo me so crispy was happening.

Together, the creamy, delicious pureed celeriac covered with a bunch of spiced, crispy lentil%u2026.Amazing. Eating it, I couldn%u2019t have been happier. I did myself one good with this one.

I might even have to make it to share someday.

Now to the celeriac and lentils!

The stuff. A bulb of celeriac, some cooked lentils, salt and pepper, chili powder, garlic powder. mustard powder, and oil. (oil is optional)

The celeriac. Ok, so most people peel it. I actually get weird looks from people when I tell them I don’t , but let me do me, you know. So anyway. Peel it if you want, or not, just cut it up into chunks.

Place cut up celeriac into a pot and cover with water. Place on stove on medium heat and cook until fork tender.

Lentils meet spices and get mix all together. Add a pinch of salt and lots of cracked pepper too.

Spread now spiced lentils onto a baking sheet, pop into oven, and bake until crispy. Easy peasy.

And to puree the celeriac. Strain any extra water into a cup. Season with a pinch of salt and pepper and grab the hand blender (or regular blender) and blend it, adding back in some of the strained water as needed, to get to a consistency that you like. Me, I liked it pretty smooth, but also with a little chunk. Heck, you could leave it really chunky or go all out completely smooth. Up to you. Also if you want a creamier texture, add in a teaspoon or so of the olive oil. That is a taste preference. I didn’t add oil this time, but I have before. It%u2019s good both ways.

And there you have it. Add the celeriac puree to a bowl, top with crispy lentils, and garnish with something green if you want.

Then eat it.

Not going to lie. After this picture was taken, I busted out the spicy mustard and covered everything with it. And it was amazing.

-C

serves 1 as a meal, or a few as a side dish

  • 1 1/2 cups cooked green lentils

  • 1 large celeriac bulb (soft ball sized)

  • 1 teaspoon chili power

  • 1/2 teaspoon ground mustard powder

  • 1/2 teaspoon garlic powder

  • salt and pepper

  • olive oil (optional)

Grab celeriac and peel if you want, or just give it a really good wash. Cut into chunks and place into pot. Add enough water to just cover the celeriac and place on medium heat on the stove. Cook until fork tender.

In the mean time, mix all the spices and a good pinch of salt and lots of pepper together with the lentils. Dump them and spread them out onto a lightly oiled baking sheet. Place in oven and turn to 400 degrees (you can start cooking the lentils while the oven is preheating). Bake for about 20 minutes or until lentils are crispy.

Once the celeriac is tender, strain water into a cup and either with a hand blender or a regular blender, blend until smooth, adding in some of the poured off water as needed. You can puree as smoothly as you like or leave a few chunks.. Also, you might want to add in a teaspoon or so of olive oil for a slightly richer and creamier taste. Season to taste with salt and pepper.

Ehen the lentils are done, take them from oven. Place large amount (or all) of the celeriac puree to a bowl, cover with some (or all) of the crispy lentils and that is that. Eat away.

Serving suggestion%u2026. Mustard. Any kind. So good.

Soup. No joke (although people make jokes about me), is eaten in my house, at lunch and sometime even at dinner. Every. Single. Day. There is just no going wrong with a big pot or veggies, spices, sometimes beans, sometime not. I make it in big batches, in small batches. Sometimes it%u2019s more a bisque, or a chili or a stew, or just a really really spicy broth. Whatever I have in the fridge or freezer, the stuff that might not be great eaten fresh, sad spinach%u2026. It all turns in soup.

Does that make me some kind of weird soup freak? Maybe, but I am ok with that. And to those who see me walking down the street and yell silly things about me having to get home to eat my soup (it happens more then you know) well, you know you are just jealous and secretly wish you were eating soup with my too. So %ud83d%ude1d.

Are you a soup person too? I mean, who isn%u2019t, especially right now that is is fall time and it%u2019s getting chilly and darker out and all we want to do is hibernate. Definitely a soup time if there was ever a specific time for soup. And this soup, made even more hardy and comforting with the addition on dumplings. I actually made it specifically for the mr because, well just because I love him and thought he would enjoy it. And well, he loved it because dumplings of course. Light and slightly chewy, soup thickening dumplings with hot and comforting soup. A perfect end to a day of him working outside in the cold.

So soup. Make it. Dumplings. Add those too. You will be a winner with food, and in life.

To the soup and dumplings!

The stuff. A few stalks of Swiss chard, a couple carrots and a few potatoes. An onion, dried navy beans, some cherry tomatoes. Then there is flour, with salt and baking powder, a little oil, plant based milk, and salt and pepper.

Veggie chopping time. Dice the potatoes, the onion, the carrots, and the stalks of the chard into small mouth sized pieces. Cut the cherry tomatoes in half and the chard leaves into small ribbons. Set the tomatoes and greens aside.

Dump the carrots, onion, chard stalks, and potatoes into a very large pot, add all the spices, a good pinch of salt, lots of black pepper, and a few splashed of water. Cook on medium high heat for 5-7 minutes to just kind of sweat the veggies a bit.

Add in beans and water. Bring pot to a boil then reduce heat to medium and let cook for about an hour. Just give it a stir once in a while.

After an hour check the beans. If they seem close to being done (almost squish in between fingers), then add in the tomatoes, the chard greens, and a few more cup of water. Keep on heat and start the dumpling batter.

Dumpling batter. Mix together the dry ingredients then add in the wet. Mix until combined.

Soup. All nice and looking just about done. The vegges are soft and tender, the beans are cooked. Check and season for salt now then get ready to drop dumplings.

Drop the dumplings. Tablespoons of batter go right into the soup. Thencook, with a lid slightly covering pot, for about 15 minutes.

Look at that. Soup with soft, fluffy, dumpling ready for consumption.

Now all you have to do it serve it up and eat it up.

Soup all day. Every day. Dumplings too!

-C

makes 4-6 servings

  • For the soup

  • 1/2 cup dried small white beans

  • 1 large onion

  • 2 carrots

  • 2 small red potatoes

  • 3 Swiss chard leaves and stalks

  • handful of cherry tomatoes (about a cup or so)

  • 1 teaspoon garlic powder

  • 1 teaspoon dill

  • 1 teaspoon thyme

  • 1 teaspoon ginger

  • 1 teaspoon marjoram

  • 1 teaspoon ground mustard

  • 1/2 teaspoon sage

  • 1/2 red pepper flakes

  • 12 cups water

  • salt and pepper to taste

  • For dumplings

  • 1 cup all purpose flour

  • 1 tablespoons oil

  • 1 teaspoon baking powder

  • 1/2 teaspoon salt

  • 1 teaspoon black pepper

  • 1/2 cup warm water or plant based milk

Couple quick notes. I use water but if you really want, use veggie stalk. I find stalk overpowers soup and makes it taste salty, even when it is low sodium. Plus water is there and free but again, use stalk if you want. Also, you can use just about any veggie that you like so if you want to replace chard with celery and spinach or throw some red peppers into the soup, go for it.

Start by small dicing the potatoes, the onion, the carrots, and the stalks of the chard. Dump it all into a large pot, along with all the spices and a good pinch of salt and pepper, and place on the stove on medium high heat with about 1/2 cup water and cook for a few minutes. Cut the cherry tomatoes in half and cut the chard leaves into small ribbons. Set aside.

Once the veggies and spices have had a few minutes on the stove, add in the dried beans and 10 cups of water. Bring the pot to a boil then reduce to a medium heat. Cook for about an hour, giving it a stir once in a while. After an hour, check beans for doneness but removing one or two and pinching between fingers. . They should be close to done by now. If they are still really heard, cook for another 20 minutes, if almost cooked through, toss in the tomatoes, the chard greens and the other 2 cups of water. Keep cooking.

In the meantime, make dumpling dough. Mix the dry together then add in the oil and milk. Mix until just combined. Set aside.

Once the soup is done (the veggies are all soft and tender, the beans are cooked through which should take a total of 1 1/2 hours), it%u2019s time to dumpling. Turn the soup up to a medium high heat and carefully drop tablespoons of the dumpling batter right into the soup. The batter will float. Once all the dumplings are in, half cover the pot and let the dumpling cook for 15 minutes or until the dumplings are big, light. and fluffy.

Remove pot from heat and serve and eat right away. Big bowls, Big spoons. Pinch more of salt if needed. Lots of pepper.

THE LOVELY CRAZY

January 29, 2020 by maximios • Blog

Besides begin a coffee addict, I am also a super big tea drinker. At least 1, if not like 3 cups a day. And when I say cups, I mean a 32oz ball jar of steaming hot water with a tea bag of some sort in it. And sure, I will use the same bag twice or leave in an old bag and add a new bag. Or with loose leaf, I%u2019ll end up just eventually swallowing it all. What can I tell ya. That%u2019s my truth. %ud83e%udd37%ud83c%udffb%u200d%u2640%ufe0f

Anyway, tea. I have a shit ton. Bags and loose leaf, but sometimes what I would call “conventional tea flavors%u201d do not sing my fancy. That is when I will dig around in my spice jars and pull stuff out to make or add to a tea.

Fenugreek. A seed. A great tasting seed. I usually use it in my chilis and curry dishes, but lately, I have also been brewing it up with (and without) fresh ginger to drink because it is fantastic. Ginger of course is spicy and earthy, but fenugreek, while also being really earthy, also has a sweetness to it and tastes kind of like real maple syrup. Now doesn%u2019t that sound great? That%u2019s because it is great.

So if you are feeling a little something different and tasty and maybe just so happened to have some fenugreek in the old spice cabinet, give this tea a try. A perfect for and cosy drink for cold winter afternoon.

To the tea!

The stuff. Water, fenugreek, fresh ginger, and an orange.

Dump water into a pot and add in fenugreek seeds. Place on the stove and bring to a boil, then turn the heat to low and simmer.

Cut up the fresh ginger into small chunks and take a few ribbons of peel from the orange.

After the fenugreek has had a 5 minute head start in the water, add in the ginger and orange and keep simmering for another 5 to 10 minutes. (longer time for stronger tea)

Strain the tea into cups, squeeze in a little fresh orange juice, and go curl up o the couch.

It%u2019s tea time.

-C

makes 2 cups of tea

  • 2 teaspoons fenugreek seeds

  • 1 inch chunk of fresh ginger

  • an orange (optional)

  • 4 cups water

Place water and fenugreek seeds in a pot and place on stove. Bring to a boil then turn heat down to simmer for about 5 minutes. Cut up ginger into small chunks and peel a few ribbons of orange zest and place into pot. Continue to simmer for another 5-10 minutes (longer for stronger tea). When you are ready to drink, strain into cups, squeeze in a little fresh orange juice, and drink.

Just the other day I was at the gym talking to someone when all of a sudden, she coughed into my face, like full fledge hacking. This and then she continued to tell me that she has been sick for like weeks and blah blah blah. After that all I was thinking was, Oh Fuck, she just gave me her ick%u2026.GET AWAY FAST!!!!

So it%u2019s that time of year. Everyone all sick and shit. And that means getting my stash of stuff made, my feel better, don%u2019t get sick stuff. The tonics and elixirs and hocus pocus things that I use all year long, but mostly during the winter months when everyone starts getting sick.

One of the things I make is fire cider. First off, let me tell you I am no doctor, just in case you thought I might be. But I l am a strong believer in food as medicine. So the fire cider is a heath tonic of sorts, made with all sorts of yummy and highly potent things like fresh grated horseradish, hot peppers, garlic, and so forth. All things that are good for your health in many ways, but also taste really good. And let me tell you, if you are into the healing powers or not, a swing of this infused cider tonic will surely open up your sinus cavity like whoa.

And now before you get super excited about going and making yourself this fantastic health tonic/salad dressing/drink mixer, and thinking it will be ready and done as soon as you do a little grating, well hold up. You can throw it together super fast, but it does take a good 4-6 weeks of chilling and infusing before you really want to get into it. But don%u2019t let that stop you, it is 100% worth all the waiting. And wouldn%u2019t you know, the holidays are about 4-6 weeks away and I was just thinking after I made a batch for myself how I should make another big batch and give away in little jars for Christmas this year. Now there is a good idea. (Might not be a doctor, but I sure am a smarty pants%u2026HAHAHA)

Now to the Fire cider!

Garlic, onion and hot peppers, chopped into bits. Place it all into a clean 32oz jar.

Grated horseradish, turmeric, and ginger. Into jar it goes. And watch out, freshly grated horseradish can be a little intense.

Sliced lemon. Into said jar along with thyme, oregano, and peppercorns.

Packed and filled with raw apple cider vinegar.

Now a lid and some time in a cool dark place and you got yourself some liquid gold.

Remember, I am not a doctor so yeah, but this cider helps me feel better when I need it to and I think you will find it will help you too. And it tastes freaking awesome on food so theres that!

-C

makes 16-20 oz

  • 1/3 cup fresh grated horseradish

  • 1/4 cup fresh grated ginger root

  • 1/4 cup fresh grated tumeric

  • 1 chopped onion

  • 3-5 heads of garlic chopped

  • 2%u20144 hot peppers (depending on the type you use and the heat level you want) chopped

  • 1 lemon sliced

  • 1 teaspoon peppercorns

  • 1 teaspoon oregano

  • 1 teaspoon thyme

  • Raw apple Cider Vinegar

  • Honey or maple syrup (optional)

Note. Feel free to change the amounts of all of the ingredients. Want to use less horseradish, then do so. No hot peppers, then don%u2019t add them. Leave out the oregano and thyme and add dill or rosemary. You can be creative with your own flavors.

Now to make fire cider.

Place all ingredients besides vinegar into a 32 oz jar. Pack down with a wooden spoon then fill jar with apple cider vinegar.(Make sure all the stuff is submerged in the vinegar.) Place a lid on jar. If using a metal lid, line top with wax paper first or just use a plastic lid if you have one. Place jar in a cool dark place for 4-6 weeks, giving it a shake every day.

After at least 4 weeks, remove lid of the jar, strain the liquid from the solids through a fine mesh strainer or cheesecloth, squeezing out as much as the liquid as you can. You can discard the solids or make something tasty with them (saut%u00e9ed with potatoes?). Then taste the liquid. Add sweetener if you want, maybe a few tablespoons to start and go from there.

And thats it. Store the cider a lidded jar in a cool dark place. Or in the fridge if you want it cold.

To use, just take a swig when feeling crappy, stuffy, cold, or just want a tasty little pick me up. Or use as condiment on food, like in a salad or wherever.

Enjoy!

For the longest time now, I have been drinking a little turmeric with a little lemon first thing in the morning. It started as a medicinal drink, but quickly became a tasty habit. I have some stupid weird circulation condition called raynaud’s where changes in temp turn my fingers and toes into icicles. And for me, the worst time of the year for this condition is the spring (but spring is still my favorite). All the up and down of temperature and the wet cold damp weather is my trigger, not to forget to mention that those temp swings can get a girl sick. (I can’t get sick!!)

So way back when I started to drink for my health and the feeling in my fingers. Turmeric, ginger, and cinnamon , all super warming spices that help greatly with blood circulation, not to mention a whole bunch of other good things. (I could tell you and go on and on, but you can just look it up yourself) Ever since I started drinking and eating lots of these spices, my raynauds has gotten soooo sooo soooo much better. I still get cold finger and toes, but no where as severe and the way less often.

Now a few weeks ago the mr started making himself an afternoon turmeric tea. He read something on the internet about how it’s the best anti-inflammatory and good for achy joints. (Sure dude, listen to the internet and not me) Being a big guy doing construction and such, he gets really achy joints and there is only so much arnica and frozen peas a guy can do. So now he drinks this and I think he is starting to notice a difference. (less time with the frozen peas) And since he is making himself tea every afternoon, I started to make a spicy tea for myself in the afternoons too. I figured that a little extra goodness to ward off the chills and any larking illness is only a plus. It’s our after lunch treat that tastes good, is warm and soothing and is doing the body all sorts of good.

Spicy turmeric tea. You will get addicted and feel like awesomeness.

The stuff. Ground turmeric, ground ginger, saigon cinnamon and hot water. Additional yums with a little lemon and some honey if you like it sweet or have a scratchy throat.

Spices into a drinking vessel (I like a big jar)

And in goes the hot water. Give it a good stir and a squeeze of lemon (and sweeten if your gonna)

And watch it swirl. A drink that keeps this girl happy and healthy.

Something great to look forward.

-C

  • 1 tablespoon ground turmeric
  • 1 teaspoon ground saigon cinnamon (can use regular, but it’s not as spicy sweet)
  • 1/2 teaspoon ground ginger
  • 1 1/2- 2 cups hot water (not quite boiling)
  • honey to taste (I only use if my throat is sore)
  • lemon juice (optional)

Note… My measurements are just guidelines. You might like a little less turmeric or more ginger so make this drink any way that tastes best for you.

Grab yourself a big mug or jar, add in the spices and hot water, honey if you want it and a squeeze of lemon juice if using. Stir with a spoon and drink. Keep spoon handy to give it a good stir every now and then

I had me a little over the weekend and we had so much fun. We had a dance party, sang Christmas songs, made paper trees, and made cookies. It was a much more of a fun day then I had planned ans expected. (Christmas themed fun day.. uh, yeah!)

But the thing was I wasn’t planning on making cookies. Wait scratch that, I was planning on cookies on Friday and asked her mom what kind of cookie we should make.%u00a0 And by Saturday, I had decided that I had way to much crap to do and didn’t have time to make cookies. The little was going to spend the day with me doing errands and maybe a little work stuff.%u00a0 But that morning, when dropped off at 730 am, the first thing she said to me was “we are making gingerbread cookies today” in the most tiny little sleepy voice.%u00a0 Not a “are we gong to?”, she was saying it as a fact. (her mother must have told her) So yeah, after that, I had to make the cookies. (I am not a monster) And because I now had to make cookies, I just said screw it to everything else I was going to do. I figured I might as well just roll with it and dance to jingle bell rock all day long.

About the cookies. These gingerbread cookies are everything I think a gingerbread should be. Sweet and spicy, dense and crisp, (but not hard) There is a slight snap, but not a tooth breaking snap and as you eat it, the middle of the cookie gets a little softer. They are the best paired with coffee or tea. Words that I have heard describe these cookies are; “fantastic” Oh my God” and “Fucking Amazing”. So I am pretty sure that these are a winning cookie.

And sure, we could have made gingerbread people, but really, why make little weird shaped people when you can make a squirrel and a mouse. (step outside of the gingerbread box and make all kinds of shapes!) And although I love me a good neon colored sprinkle situation, I really got into using more natural looking things to decorate. But again, the shape and decor of your cookie is all up to you.%u00a0

Note.. Awesome cookie cutters came from IKEA.

The stuff. We have flour, baking soda and powder,and some salt. For the spices we are using ginger (or course) cinnamon, and cracked pepper (for a little extra kick). Also have a bowl with brown sugar, molasses, oil, a splash of vanilla and two chia seed “eggs”.

Whisk (or sift) together the flour with all the spices, the baking soda and powder and the salt.

And mix together the oil, chia eggs and vanilla with the molasses and brown sugar.

Look at that cutie… doing all the work.

Mix the dry into the wet like so.

Mix as much as you can with a wooden spoon and when you the spoon stops working, use your hands and form the dough into a large disk.%u00a0 Wrap it in wax paper (or plastic) and stick it in the fridge for a little while to rest ans evenly distribute all the moisture.

When you are ready for cookies, remove the dough from the fridge ans let it warm up for a few minutes. then take it and roll it out to about 1/2 inch.%u00a0 And pretty sure you know how to use a cookie cutter so cut some cookies.

A baking sheet of pre -baked creatures going into the oven.

After about 8-10 minutes, the cookies are a little poofy, a little more golden brown, and a lot of super good smelling lovely.

Now if you want, decorate your cookies! (you don’t HAVE to, but you should)
%u00a0I used white chocolate chips, tiny chocolate chips, dried cranberries and chopped almonds. And for the glaze, just powdered sugar and lemon juice. But use whatever you want.

And my favorite, the porcupine ! (I totally made this one)

-Happy Tuesday!

-C

Makes about 2 dozen (depending in your cookie cutter sizes)

  • 2 1/2 cups all purpose flour
  • 2 heaping teaspoons ground ginger
  • 1 heaping teaspoon cinnamon
  • 1/2 teaspoon salt
  • 1 teaspoon fresh cracked pepper (optional)
  • 1/2 teaspoon baking soda
  • 1/2 teaspoon baking powder
  • 2 chia or flax eggs (2 tablespoons ground chia or flax seeds with 6 tablespoons warm water)
  • 1/2 cup brown sugar
  • 1/2 cup molasses
  • 1/2 cup neutral flavored oil (like veggie or canola)
  • splash of vanilla extract
  • Things to decorate with like chopped almonds, raisins, frosting, chocolate chips.. whatever you want

Grab yourself a big bowl and add in the sugar, molasses, oil, vanilla, and the chia eggs. Mix until combined. In a separate bowl, whisk together the flour with the all the spices, baking soda and powder, and the salt.%u00a0 Dump dry into wet and mix with a wooden spoon until a dough form. When yu can no longer mix with spoon, use your hands and knead the dough into a large disk.%u00a0 Wrap in wax paper or plastic, ans stick in the fridge for at least and hour, or up to 3 days.

When you are ready to make the cookies, remove dough from fridge and let it sit and warm up a little bit so it;s not so stiff and much easier to roll out.

Preheat oven to 350

Working in one big batch or cutting dough half, roll the dough until it’s about 1/2 inch thick. Take your cookie cutters of your preferred shape and cut as many out as you can. Place cookies onto a baking sheet and bake between 8-11 minutes or until the cookies have slightly rising and the cookies are just starting to brown. .

Note… Using a cookie cutter with small intricate pieces, the edges might get a little crisper then the middle faster. So just keep your eye out for those.

Remove from sheet and place on a cooling rack.

And decorate, using whatever you want and as much as you want.

My contribution to last nights dinner at my sisters…. Freshy fresh veggies spring rolls.I had about 30 minutes between work and getting over to my sisters house to throw something together so it needed to be something fast, easy, and something I could make without going to the store. She was making the main course (some teriyaki situation and rice) so I was doing up the veggies.

I had just bought a package of spring roll wrappers%u2026. Bingo! The perfect and logical choice. I grab the wrappers, a variety of veggies and after spending 12 of my 30 minutes trying to scrub the oil based paint off of my face and hands, I still managed to completely prepare, construct, and take pictures of these lovely tasty spring rolls. and get over to my sisters in time for dinner.

Impressed? %u00a0

Damn right!

The stuff. Carrot, beet, asparagus, red cabbage, and kohlrabi, which all (except asparagus, which I just cut into thirds) got cut into matchstick sized pieces with my mandoiln. Then there are the rice spring roll wrappers that we need to make the veggies into rolls. Also a bit of red wine vinegar to drizzle onto the veggies for a little extra zing. And lastly, soy, fresh ginger, and a couple cloves of garlic for a spicy salty dipping sauce.Start by having everything set out and ready to assemble.%u00a0Fill a large shallow dish or baking sheet with really warm water. Working with one at a time,place a rice wrapper into water and let sit for about 10 seconds or until the paper starts to soften. Remove from water and place on a damp surface (just splash a little water on the counter) Take a little bit of everything and and place on the lower middle part of the paper. Fold in the sides first, then tuck and roll the wrapper as tightly as you can without ripping the wrapper.

Repeat until you have used up all you veggies.For the dipping sauce. Finely grate ginger and garlic and add to soy sauce. Stir%u2026 and it’s done.Freshy, pretty and fantastically delicious. And for real, took about 8 minutes to make. (I even had enough time to wash the dishes before we left!)

I am so awesome!

Hump Day Pow!!!!!

-C

Fresh Veggies Spring Rolls%u00a0

Makes 8-10 but can easily be increased or decreased to desired amount%u00a0

  • 8-1o rice spring roll papers
  • Splash of Red wine or rice vinegar
  • 1/4 cup soy or tamari sauce
  • 2 cloves of garlic
  • teaspoon %u00a0freshly grated ginger
  • 1 medium carrot
  • 1 medium beet
  • 1/4 head of purple cabbage
  • 10 thin fresh asparagus
  • 1 small kohlrabi

Note%u2026 I used the veggies that I had in the fridge at the moment. If you have a bunch of veggies but not these particular ones, use what you have. Pretty much all veggies taste good inside a spring roll!

Gather your veggies and prep by either using a mandolin, a grater, or some sick knife skills, and julienne, shred, or slice you veggies into thin match sticks. Once all the veggies are prepared, sprinkle a little vinegar over the top.

For the rolls…Grab a large shallow vessel %u00a0(a rimmed baking sheet works great) and add in warm water. Working %u00a0one at a time, place the wrapper into the water for about 10 seconds or until the wrapper starts to soften. Remove and spread onto a clean, damp work surface. Gather a bit of each veggie that you are adding and place towards the bottom %u00a0middle of the wrapper. Now fold the sides in over the pile of veggies. Then with the side closest to you, tuck and roll wrapper away from you, trying to keep it tight, but not to tight that it rips.. (Hopefully that makes since.) Place finished rolls onto a damp surface to keep from sticking and if not serving right away, drape with %u00a0a damp towel or paper towel to keep from drying out.

For the soy ginger dipping sauce. Add grated ginger, %u00a0minced garlic, and soy into a bowl and mix together. %u00a0Serve with spring rolls.%u00a0

Eat one, two, or a plateful. It’s nice to share but not a necessity.

There is a joke about Vermonters, that all we talk about is the weather. Well, it’s kind of true. But to our defense, we get a lot of weather, and it’s always changing and intense and both lovely and crazy and all over. So yeah, we talk. A lot, about the weather. And on that topic, I am trying so hard not to complain, but%u00a0honestly, I am getting a little sick, both physically and mentally from all of these %u00a0super, to freaking cold temperatures. Yesterday the high was 0 ( which was at like 2 in the morning) %u00a0and factor in the windchill, the temp stayed at like 25 below. It f**king sucks. I can’t %u00a0stay outside for too long or else I will probably die. The dog %u00a0is having a hard time making it around the block before he gets ice paws, and the mister, well he even started wearing gloves (he wears a sweater all winter and never gets cold%u2026..he is officially cold)

%u00a0And not only is the cold keeping us all indoors, but its making us all borderline sick. We both have been fighting something for the past few week. The headaches, stuffy nose, chest congestions. The puppy is getting super dry skin and gave himself a hot spot. BLAh!! Ok, enough! No more complaining
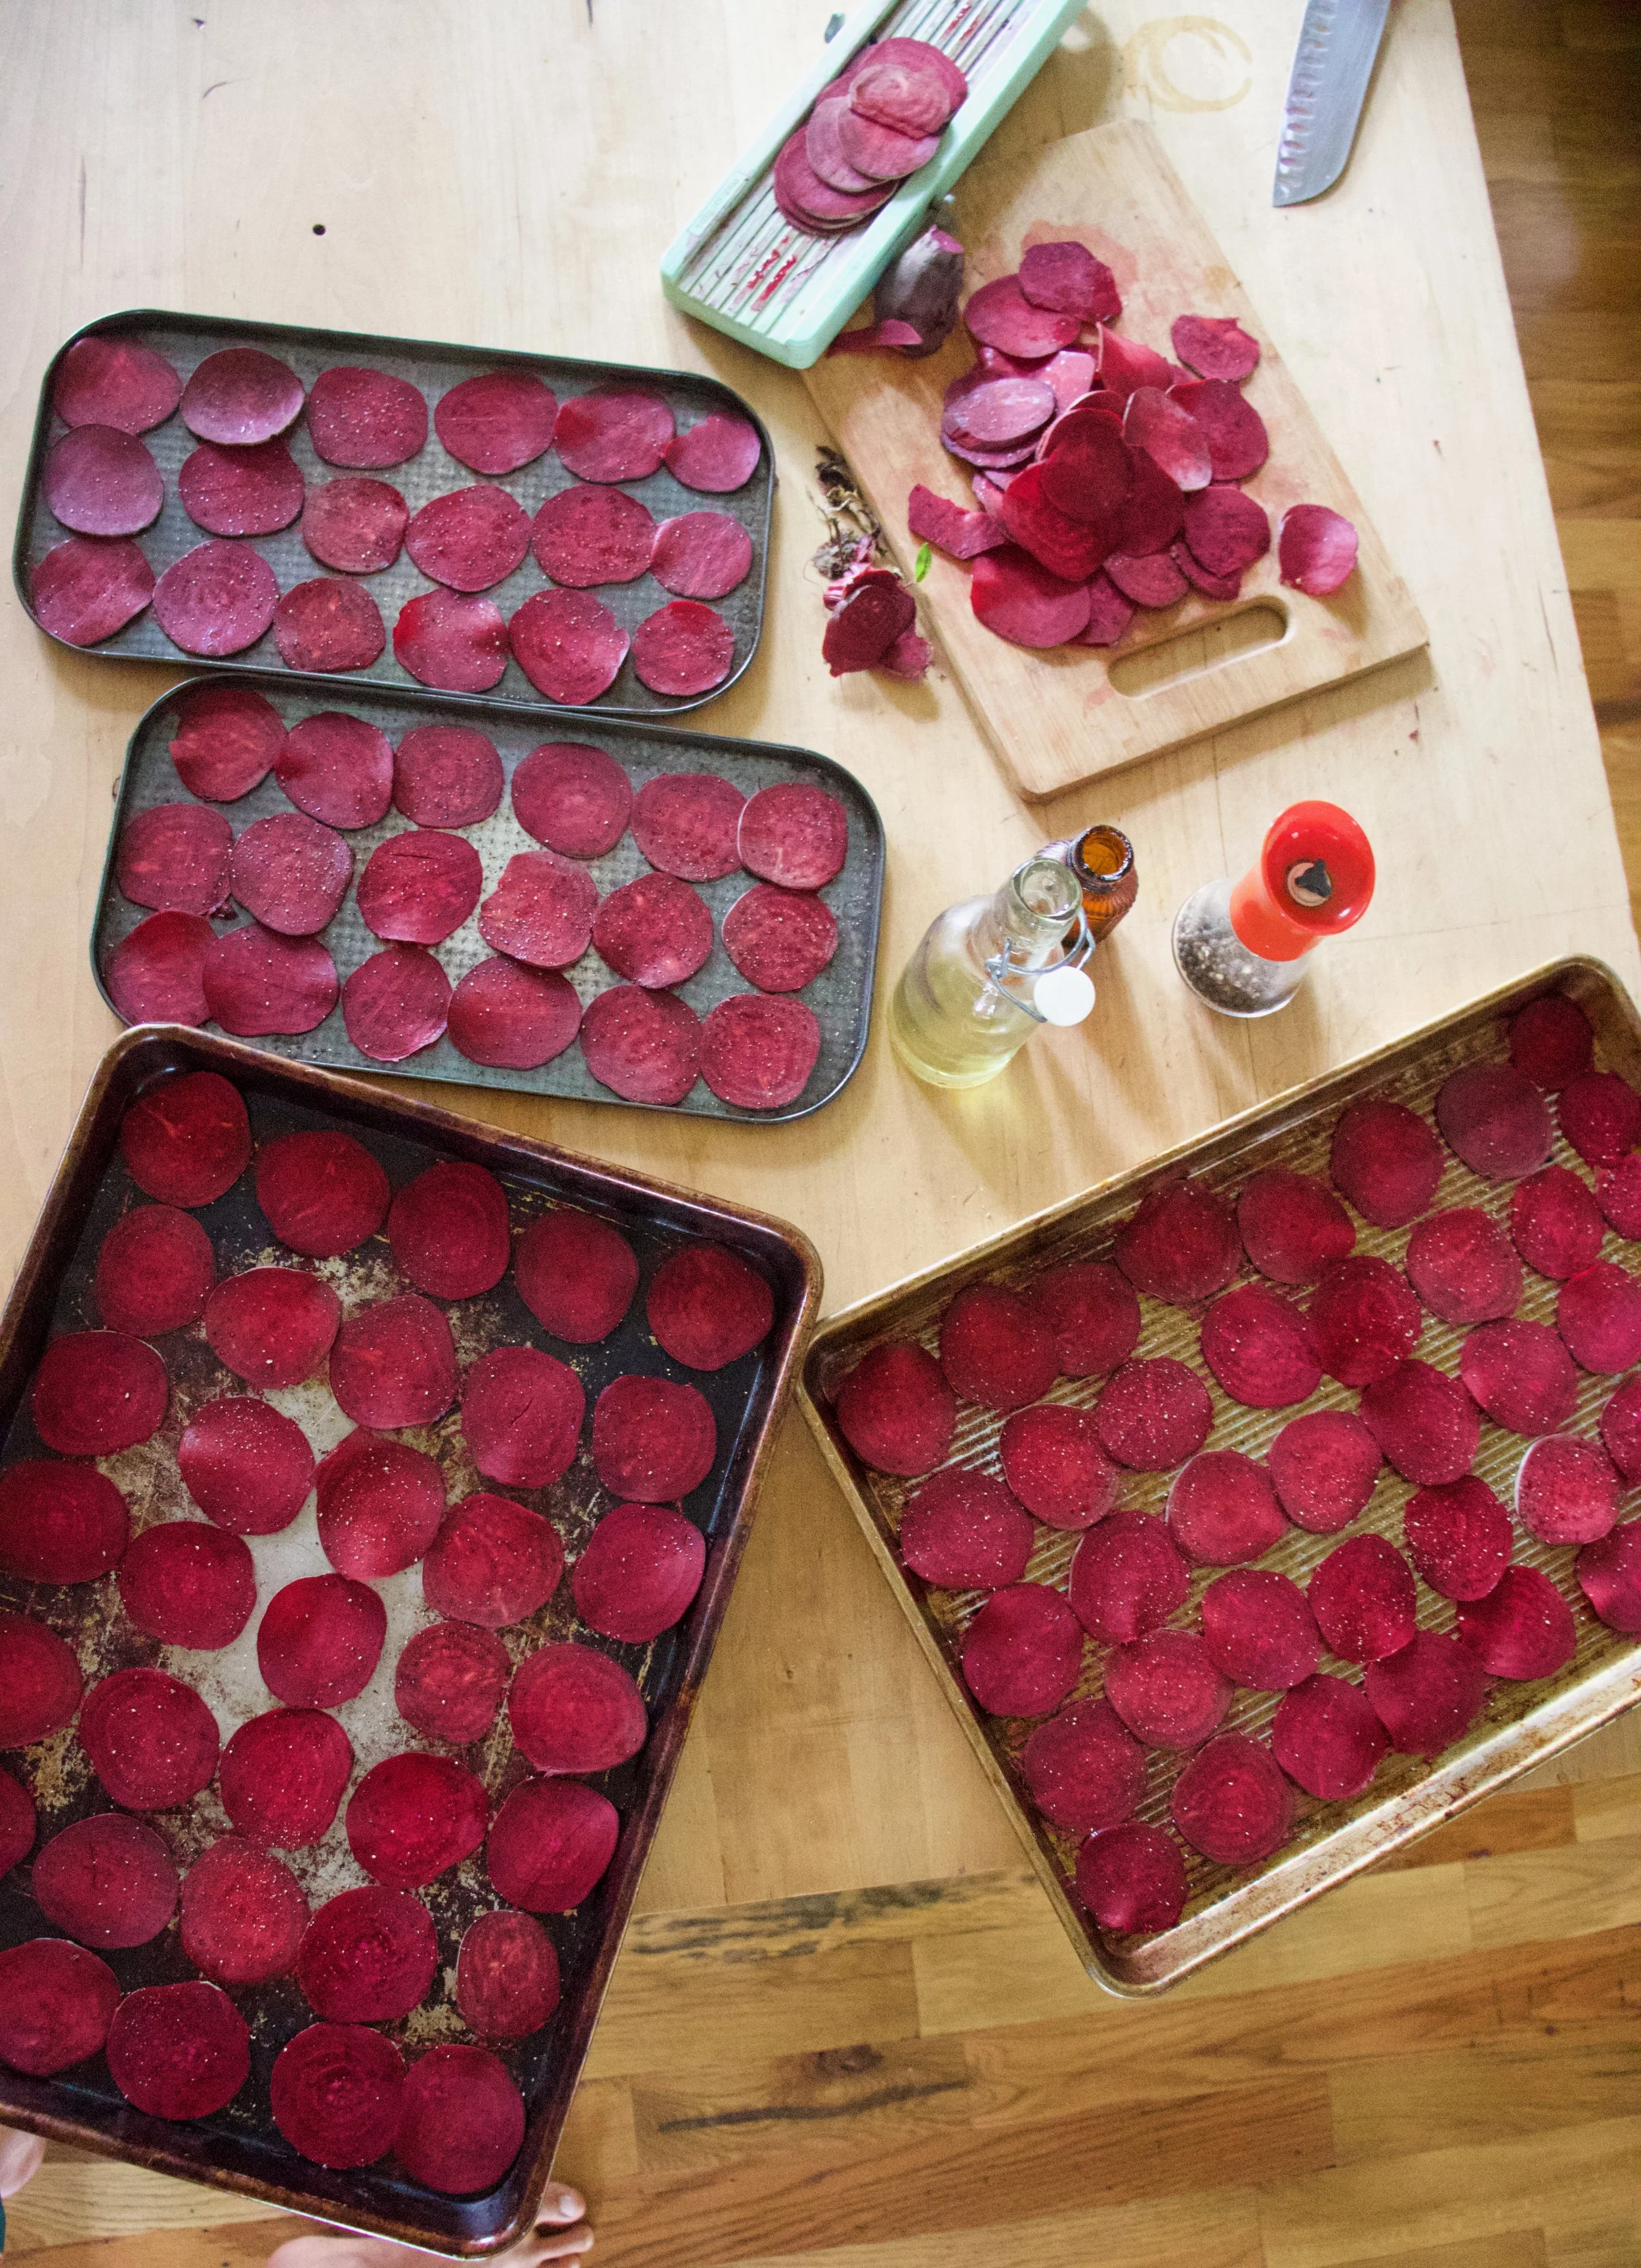
Because %u00a0I do really love the winter and all the pretty snow!!!!

But we are feeling kind of sick so to make us feel oh so much better, a fantastic, super tasty, healing, good for me, good for you, soup. Turmeric ginger carrot%u2026 oh man. Made with lots of ginger, turmeric and garlic and finished with a drizzle of raw honey. This soup is exactly what we need. All ingredients scream.. FEEL GOOD, BE WARM AND COZY! Almost everything in it has antibacterial and anti inflammatory properties. The veggies are hearty and heathy and just eating soup helps to keep hydrated. And the best part..it tastes so freaking amazing.%u00a0

So whether %u00a0you are feeling a little mah, or just a little hungry.%u2026this soup is where it’s at!

Lots of chopped up carrots, a small onion, a little bit of cauliflower I had left over and a small beet. If you don’t have the cauliflower and or a beet, just use %u00a0ares pepper or another 2 carrots.. no biggy.%u00a0

Then we have the fresh ginger ( you can use powdered) turmeric and garlic. %u00a0All the good healthy spicy and yummy stuff.%u00a0

I accidentally spilled the turmeric on the counter..but it kind of looks like I might have done it on purpose%u2026 yeah, let’s go with that. %u00a0Chop the garlic and he ginger into %u00a0 %u00a0chunksAnd toss into the pot to warm and activate. Just a little toasty toast.%u00a0

And the veggies are roasted and tender and smell so good. %u00a0It took a lot of will power to not eat the whole pan right there.

I added the roasted veggies and 3 cups water straight into my pot %u00a0with the spices because I used an emulsion blender. If you are using normal blender, add the veggies, the toasted spices and the water to the blender and blend until smooth. Then transfer to a pot.

Pretty much all blended together%u2026.(I left a few big chunks in there to snack on while I was waiting to eat serve%u2026I was really hungry) and let to simmer for a little longer…

And now ladle into a bowl and get ready for a fantastic finish%u2026 drizzle a spoonful of raw honey into soup%u2026%u2026.so so good. You could add the honey before serving, but heating it kills all the good antibacterial stuff so that’s why we wait.%u00a0Then %u00a0I sprinkle some chopped kale and chives. (do it if you want, but not necessary)

Now enjoy. Let the warmth wash over you and feel all those good spices helping to fight the good fight to keep you well and all the yummy to satisfy your hunger.

And lets hope for some warm (above 0!!) weather!

-C

Turmeric Ginger%u00a0Carrot Soup

Ingredients

  • 5 large carrots
  • 1 small onion
  • 1 small beet*
  • quarter head cabbage ( or a cup of frozen)*
  • 2-3 teaspoons %u00a0turmeric%u00a0
  • 2-3 tablespoons fresh %u00a0ginger (1/2 teaspoon if using powdered)
  • 4-6 cloves garlic
  • salt pepper
  • raw honey (omit if vegan)

* If you don’t have or want to use beet and or the cauliflower, you can use a red pepper, a small sweet potato, or just use a few more carrots.%u00a0

Chop all veggies into similar sized chunks and toss into a lightly oiled pan or on a baking sheet and sprinkle with salt. %u00a0Stick in oven at 425 for about 30 minutes or until all veggies are fork tender.%u00a0

In a large soup pot or dutch oven, toss chopped garlic, ginger and the turmeric and place on medium heat for a few minutes to activate the spices. Add the roasted veggies and 3 cups water to pot (if using emulsion blender) and blend until smooth. If using a blender, add the toasted spices, roasted veggie and 3 cups water and blend until smooth then transfer to a large pot or dutch oven. Add salt and pepper to taste. Turn heat down to%u00a0%u00a0simmer and let cook for an addition 10 minutes.%u00a0

When ready to serve, ladle soup into bowl and drizzle a spoonful of raw honey into soup. Garnish with fresh chopped kale, chives, cabbage or whatever you want. (or nothing is good too)

%u00a0 %u00a0 I have been meaning do a post on seltzer and syrups for a while now and this one is perfect%u2026 Everyone around me has been getting sick and I am trying my hardest to not get anything.%u00a0

Citrus and ginger%u2026. Two of my favorite things, combined into one super refreshing, light and crisp, thirst quenching drink. Tasty and packed full of vitamin C from the citrus and blood warming, tummy healing ginger. Its kind of%u00a0a feel better elixir, a good for you drink, a sparkler pop. %u00a0A drink everyone can get into %u00a0 %u00a0 %u00a0 (the mister even liked it), And it has no added sugars or nasty coloring, it can’t get much better.

Feeling Happy, feeling crappy, or just plain feeling, this drink is a good for it all.

%u00a0

I made the ginger date simple syrup ahead of time.. All I did what chop 2 1/2 tablespoons fresh ginger and %u00a0about 3 tablespoons pitted dates and added to a pot with a cup of water. Simmered the stuff until the dates were mostly dissolved, about 15 minutes, took off the %u00a0heat and pureed it. I let it steep for another 5 minutes and strained%u2026.no biggy. %u00a0 This is a milder sweet simple syrup. If you like sweeter add more dates or even add a bit of honey%u2026 Do what tastes the best to you.

Juice the lime and blood orange%u2026..so much pretty!

I ended up with about 12 tablespoons of juice from a the lime and the orange.. If you need or want to, juice an additional orange and lime.%u00a0

Add 2-3 tablespoons of the fresh juice per 12oz glass and add about 2-3 tablespoons of the ginger date syrup%u2026(adjust amounts to you taste) Top off with cold plain seltzer water and maybe an ice-cube or two. ( I would have if I had thought to make ice)

So lovely%u2026. so nice.%u00a0I really got into these flavors. This drink has the ability to make you feel warm and cozy while being cold and fresh. It makes me happy.

Double thumbs up here!

Stay un-sick!

-C

Blood Orange Ginger Lime Sparkler Pop

Ingredients

  • 2 1/2 tablespoons fresh chopped ginger
  • 3 tablespoons chopped dates (more if you want sweeter)
  • 1 cup water
  • 1 lime
  • 1 blood orange
  • Plain Seltzer water
  • Ice (optional)

For the ginger date syrup

In a small pot on low heat, add chopped dates and ginger to a cup of water. Simmer until dates %u00a0have mostly dissolved, about 15 minutes. remove from heat and puree with either %u00a0a blender to a hand emulsifier. Let steep for another 5 minutes and strain, reserving the pulp (add it to soup or salad dressing). Let completely cool.

To assemble drink, juice blood orange, and lime. Add about 3 tablespoons of the ginger syrup and 2-3 tablespoons of the citrus juice per 12 0z cup. Top with plain seltzer water, give it a light swirl with a spoon or straw and add ice cube if you want. Now have at it!

Another cold and blustery week%u2026 but it’s the middle of January in Vermont so its to be expected.( I just wish I could walk outside for more than 5 minutes without my nose ruining and having the snot freeze to my face) Yup, cold and busy. My Dad has come back to Vermont for a long visit (he moved to Michigan a few years ago%u2026 jerk) %u00a0So while he is here I have been trying to put in as much %u00a0time as possible with him %u00a0all the while trying to do 8 million other things, %u00a0 I figured I owe him a little bit of my time (and lots of food) for helping to raise me%u2026I am such a good daughter. (2 thumbs pointed at me with a big smirk..)%u00a0

%u00a0Let me take you through a few little happy highlights of my week.%u00a0

The father and I went for a little hike with the pup on one of the milder temperature days%u2026 I drove to the trail, locked the car doors and off we went. After getting cold enough where I couldn’t feel my hands-feet-face%u2026 we made our way back to the car. And I reached for the keys%u2026and shuffled around in my pockets%u2026.and felt around in all my pockets again%u2026. and again. Finally, I had to admit it, I dropped the keys. I got a little panicky (I was so cold and the car key is like 300 bucks to replace) but we did the only thing we could do. I stuff everything back in my pockets and off we went in search of the key. We got lucky, my dad found the key only a few minutes into the trail!!! Hooray! A happy hike with a happy ending.

Me and this little made some donuts, but screw the donuts(sweet potato with chocolate frosting).. look at the overalls! I decided a long time ago that when I have kids, they will be wearing nothing but overalls. Osh Gosh FOREVER!%u00a0

%u00a0FARM SHARE PICK UP!!! I was starting to go through veggie withdrawals.

%u00a0Shadow hearts for Valentines Day! I love Valentines Day..%u2026 or maybe I just love hearts and pink. Either way, I am getting ready for some V-day recipes! This one is a definite go%u2026.

%u00a0And beet dyed coconut sprinkles%u2026I mean, talk about happy.%u00a0

%u00a0A late Christmas gift from Nicks mom. Every year she gives us s few of her hand thrown pieces%u2026.. love!!

%u00a0And I gave the mister a haircut!!! He has been asking me for about 2 months now to cut it, but %u00a0for some reason we just haven’t gotten around to it. %u00a0So finally this week it happened, and I can see his lovely face again!

How can you not be happy when your piece of ginger looks like a little man. (right after I took this picture I cut his legs off)

Flowers from our garden last summer%u2026.. Sunflowers are my favorite (these are teddy bear sunflowers)%u2026. I love looking back at old picture, especially ones from opposite seasons, like flowers in winter or pictures of snow in summer. There like little glimpses of whats to come. I can not say it enough, I am so lucky to live in VT..we have excellent seasons so there is always something to look forward too!

So yeah, a few little happy happys%u2026..

Hope you all have some happy happys too!%u00a0

-C

THE LOVELY CRAZY

January 28, 2020 by maximios • Blog

Besides begin a coffee addict, I am also a super big tea drinker. At least 1, if not like 3 cups a day. And when I say cups, I mean a 32oz ball jar of steaming hot water with a tea bag of some sort in it. And sure, I will use the same bag twice or leave in an old bag and add a new bag. Or with loose leaf, I%u2019ll end up just eventually swallowing it all. What can I tell ya. That%u2019s my truth. %ud83e%udd37%ud83c%udffb%u200d%u2640%ufe0f

Anyway, tea. I have a shit ton. Bags and loose leaf, but sometimes what I would call “conventional tea flavors%u201d do not sing my fancy. That is when I will dig around in my spice jars and pull stuff out to make or add to a tea.

Fenugreek. A seed. A great tasting seed. I usually use it in my chilis and curry dishes, but lately, I have also been brewing it up with (and without) fresh ginger to drink because it is fantastic. Ginger of course is spicy and earthy, but fenugreek, while also being really earthy, also has a sweetness to it and tastes kind of like real maple syrup. Now doesn%u2019t that sound great? That%u2019s because it is great.
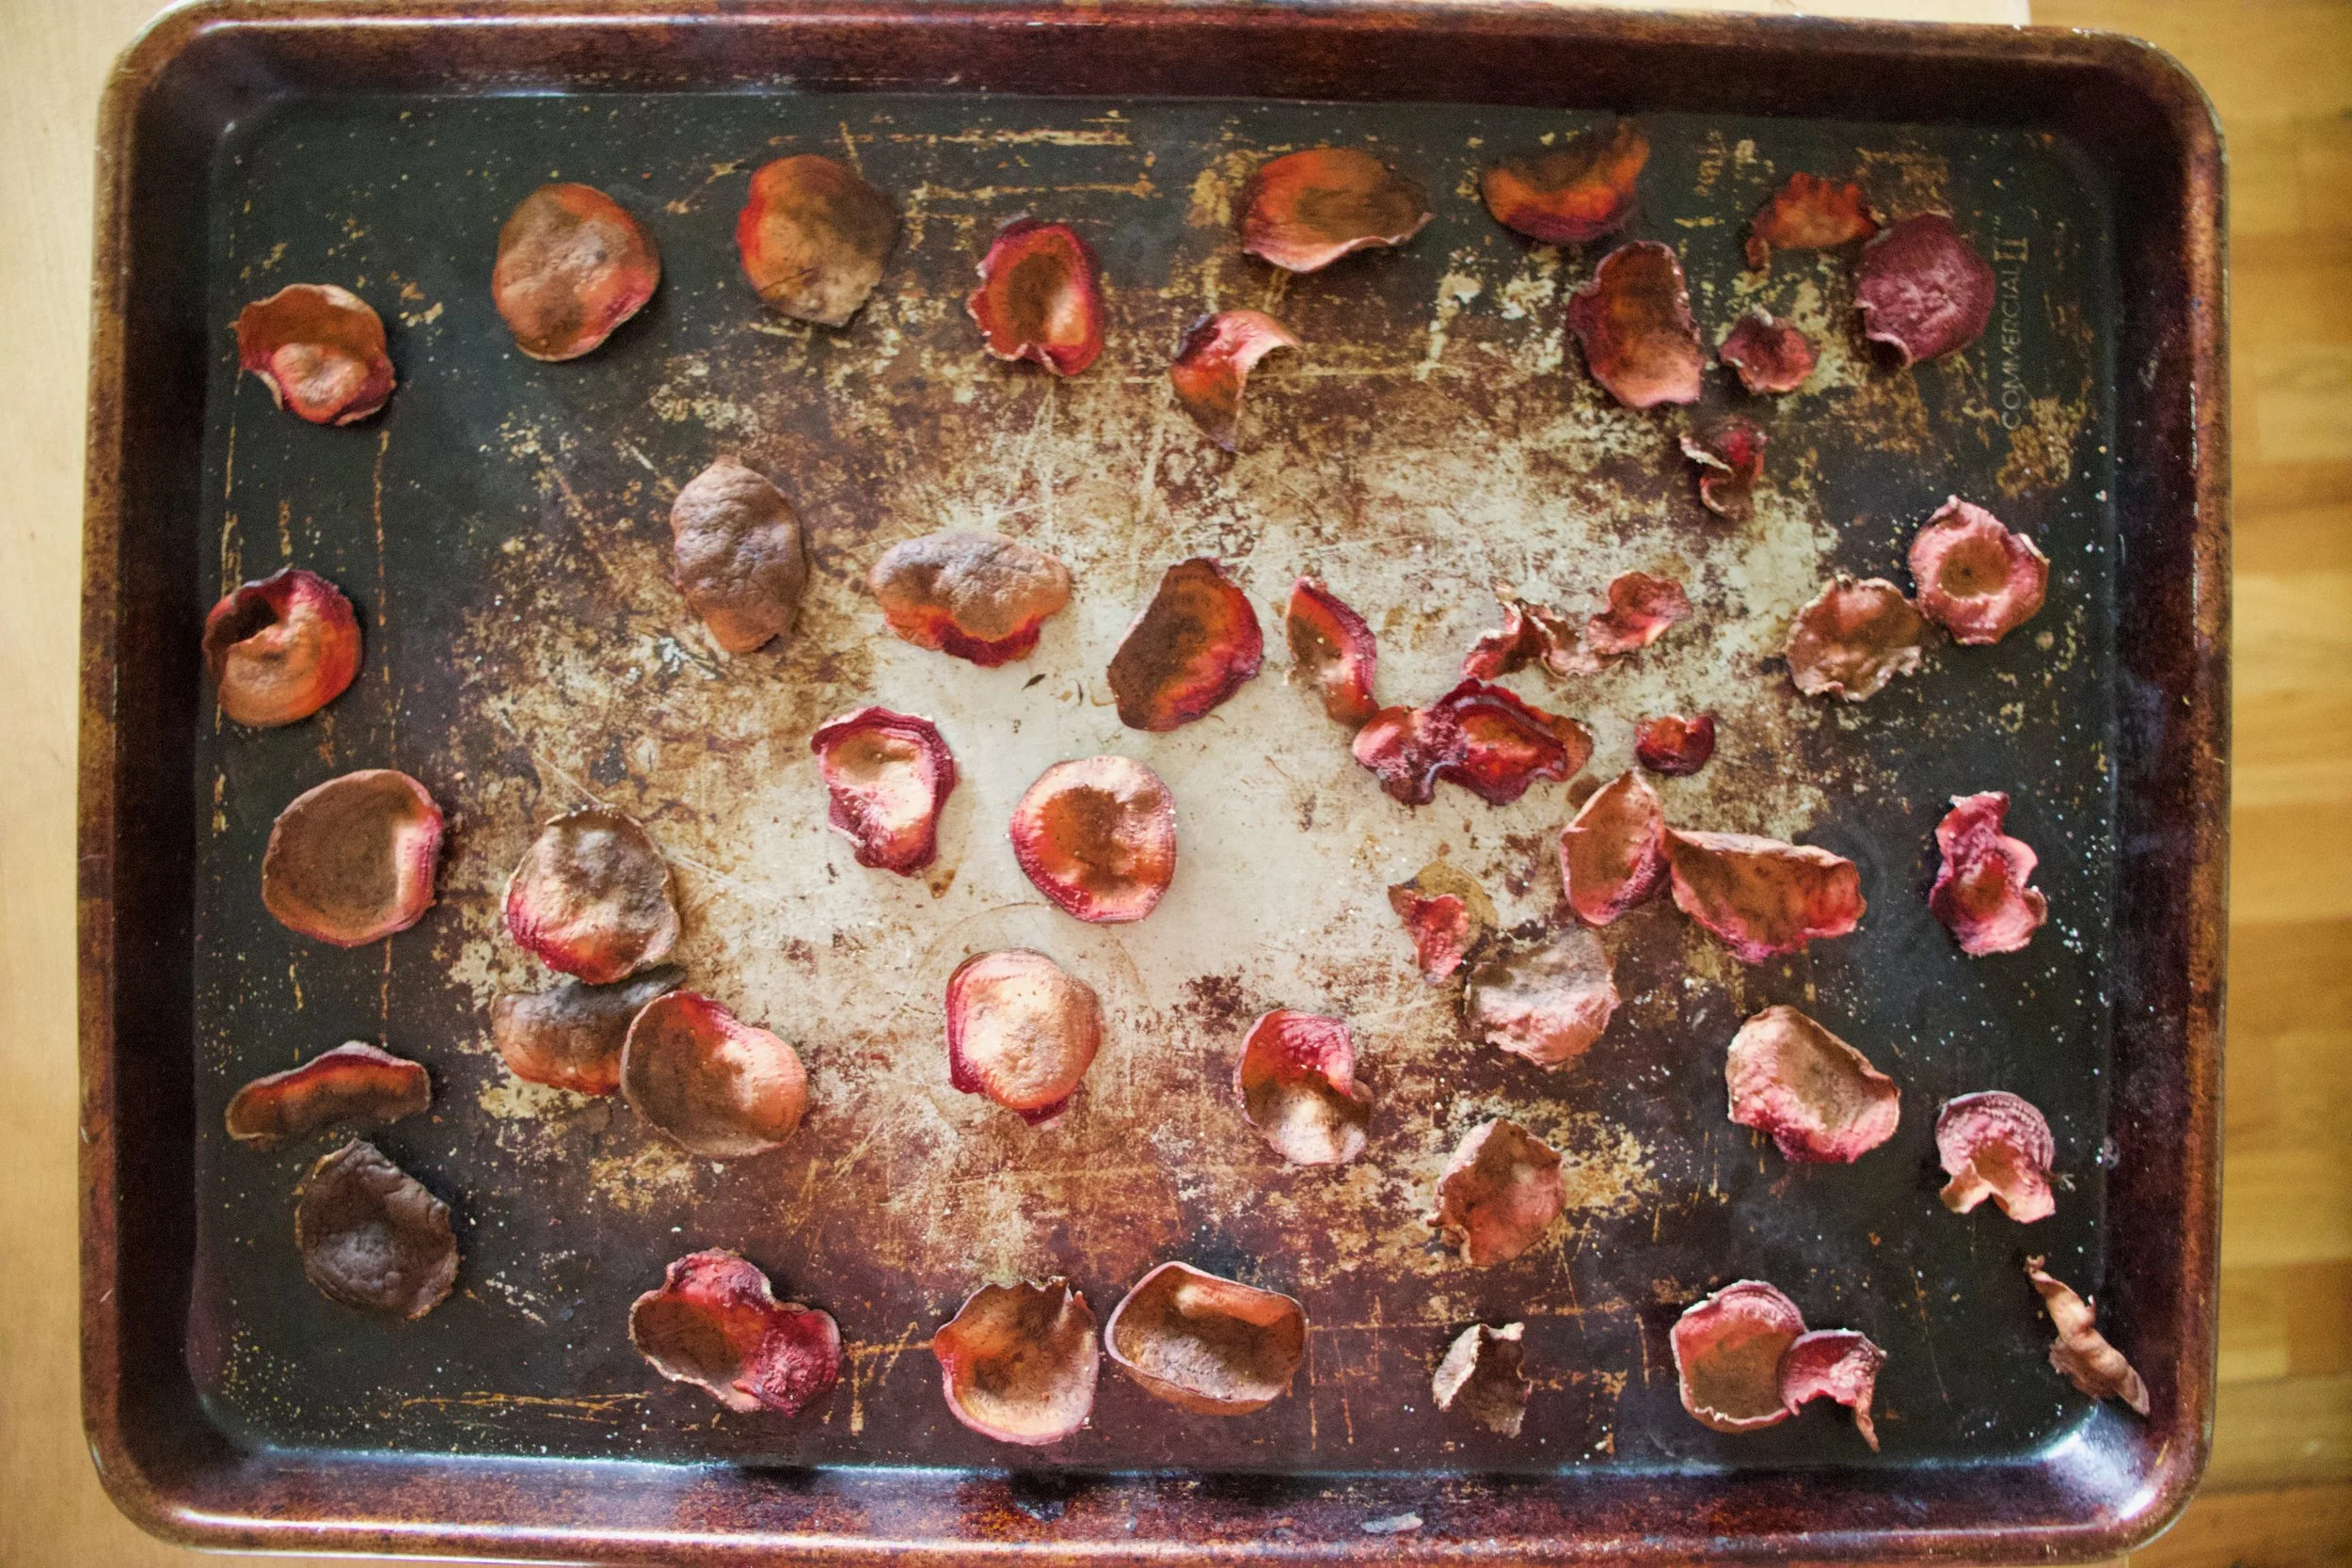
So if you are feeling a little something different and tasty and maybe just so happened to have some fenugreek in the old spice cabinet, give this tea a try. A perfect for and cosy drink for cold winter afternoon.

To the tea!

The stuff. Water, fenugreek, fresh ginger, and an orange.

Dump water into a pot and add in fenugreek seeds. Place on the stove and bring to a boil, then turn the heat to low and simmer.

Cut up the fresh ginger into small chunks and take a few ribbons of peel from the orange.

After the fenugreek has had a 5 minute head start in the water, add in the ginger and orange and keep simmering for another 5 to 10 minutes. (longer time for stronger tea)

Strain the tea into cups, squeeze in a little fresh orange juice, and go curl up o the couch.

It%u2019s tea time.

-C

makes 2 cups of tea

  • 2 teaspoons fenugreek seeds

  • 1 inch chunk of fresh ginger

  • an orange (optional)

  • 4 cups water

Place water and fenugreek seeds in a pot and place on stove. Bring to a boil then turn heat down to simmer for about 5 minutes. Cut up ginger into small chunks and peel a few ribbons of orange zest and place into pot. Continue to simmer for another 5-10 minutes (longer for stronger tea). When you are ready to drink, strain into cups, squeeze in a little fresh orange juice, and drink.
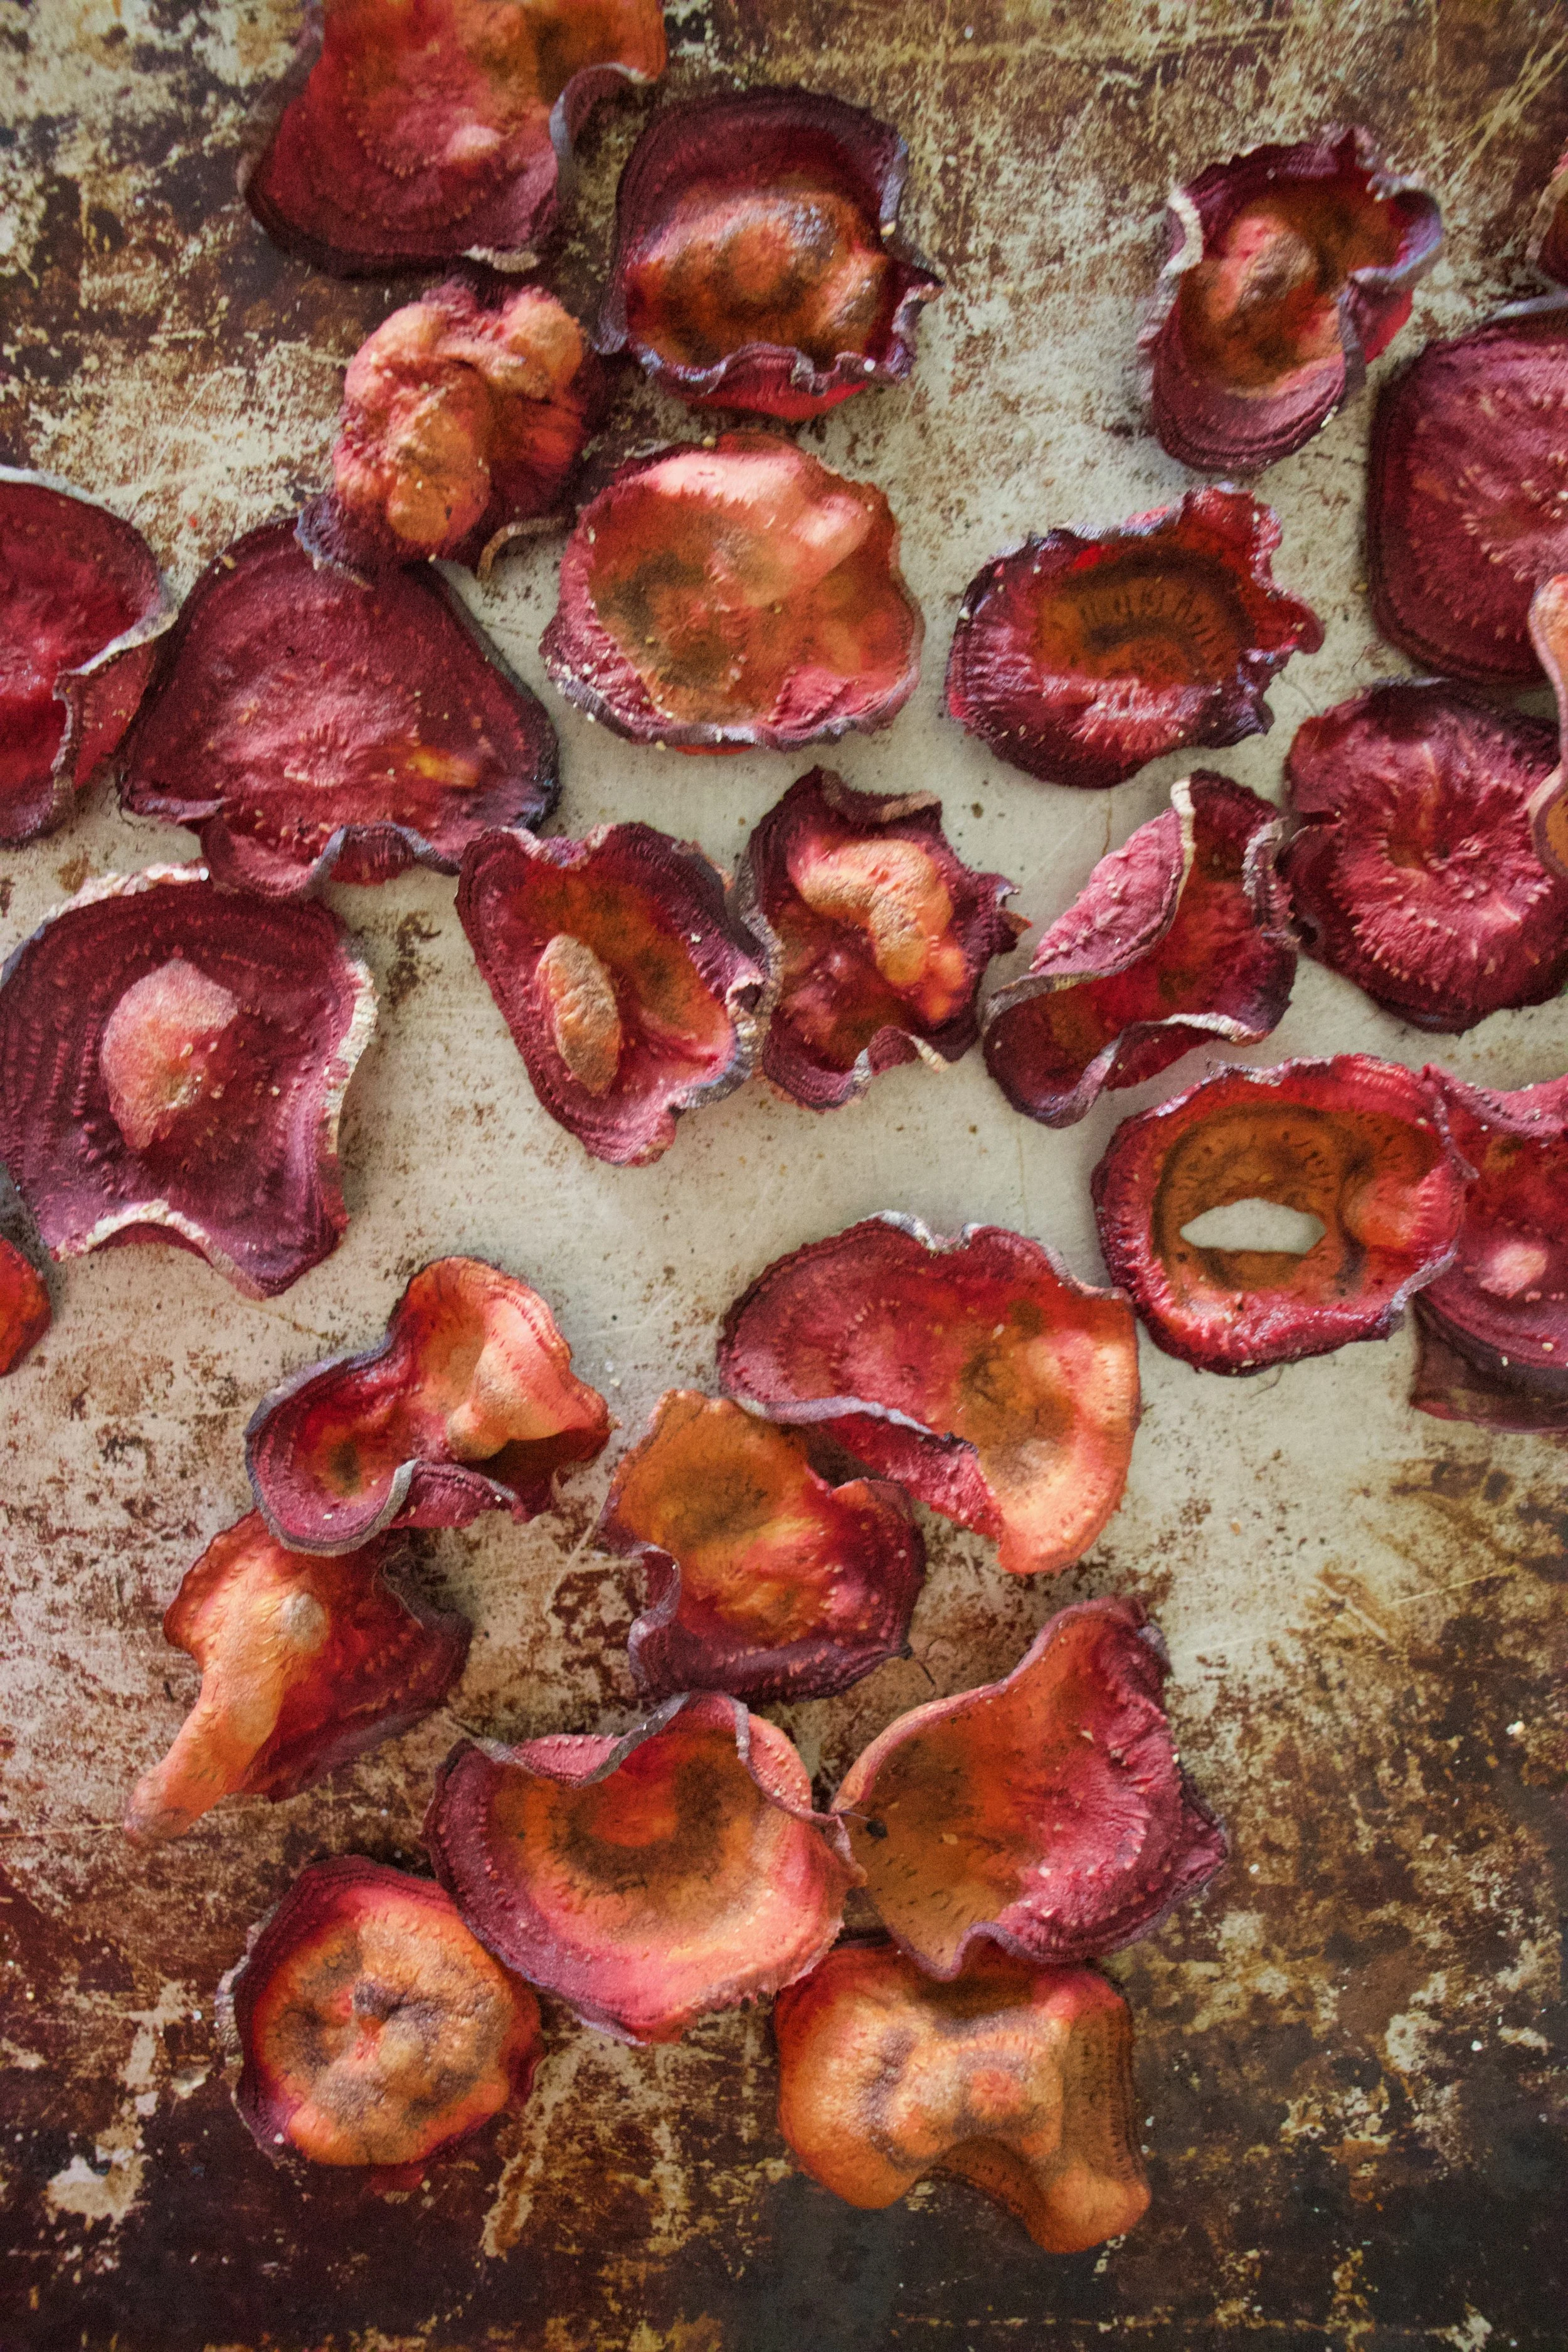
Just the other day I was at the gym talking to someone when all of a sudden, she coughed into my face, like full fledge hacking. This and then she continued to tell me that she has been sick for like weeks and blah blah blah. After that all I was thinking was, Oh Fuck, she just gave me her ick%u2026.GET AWAY FAST!!!!
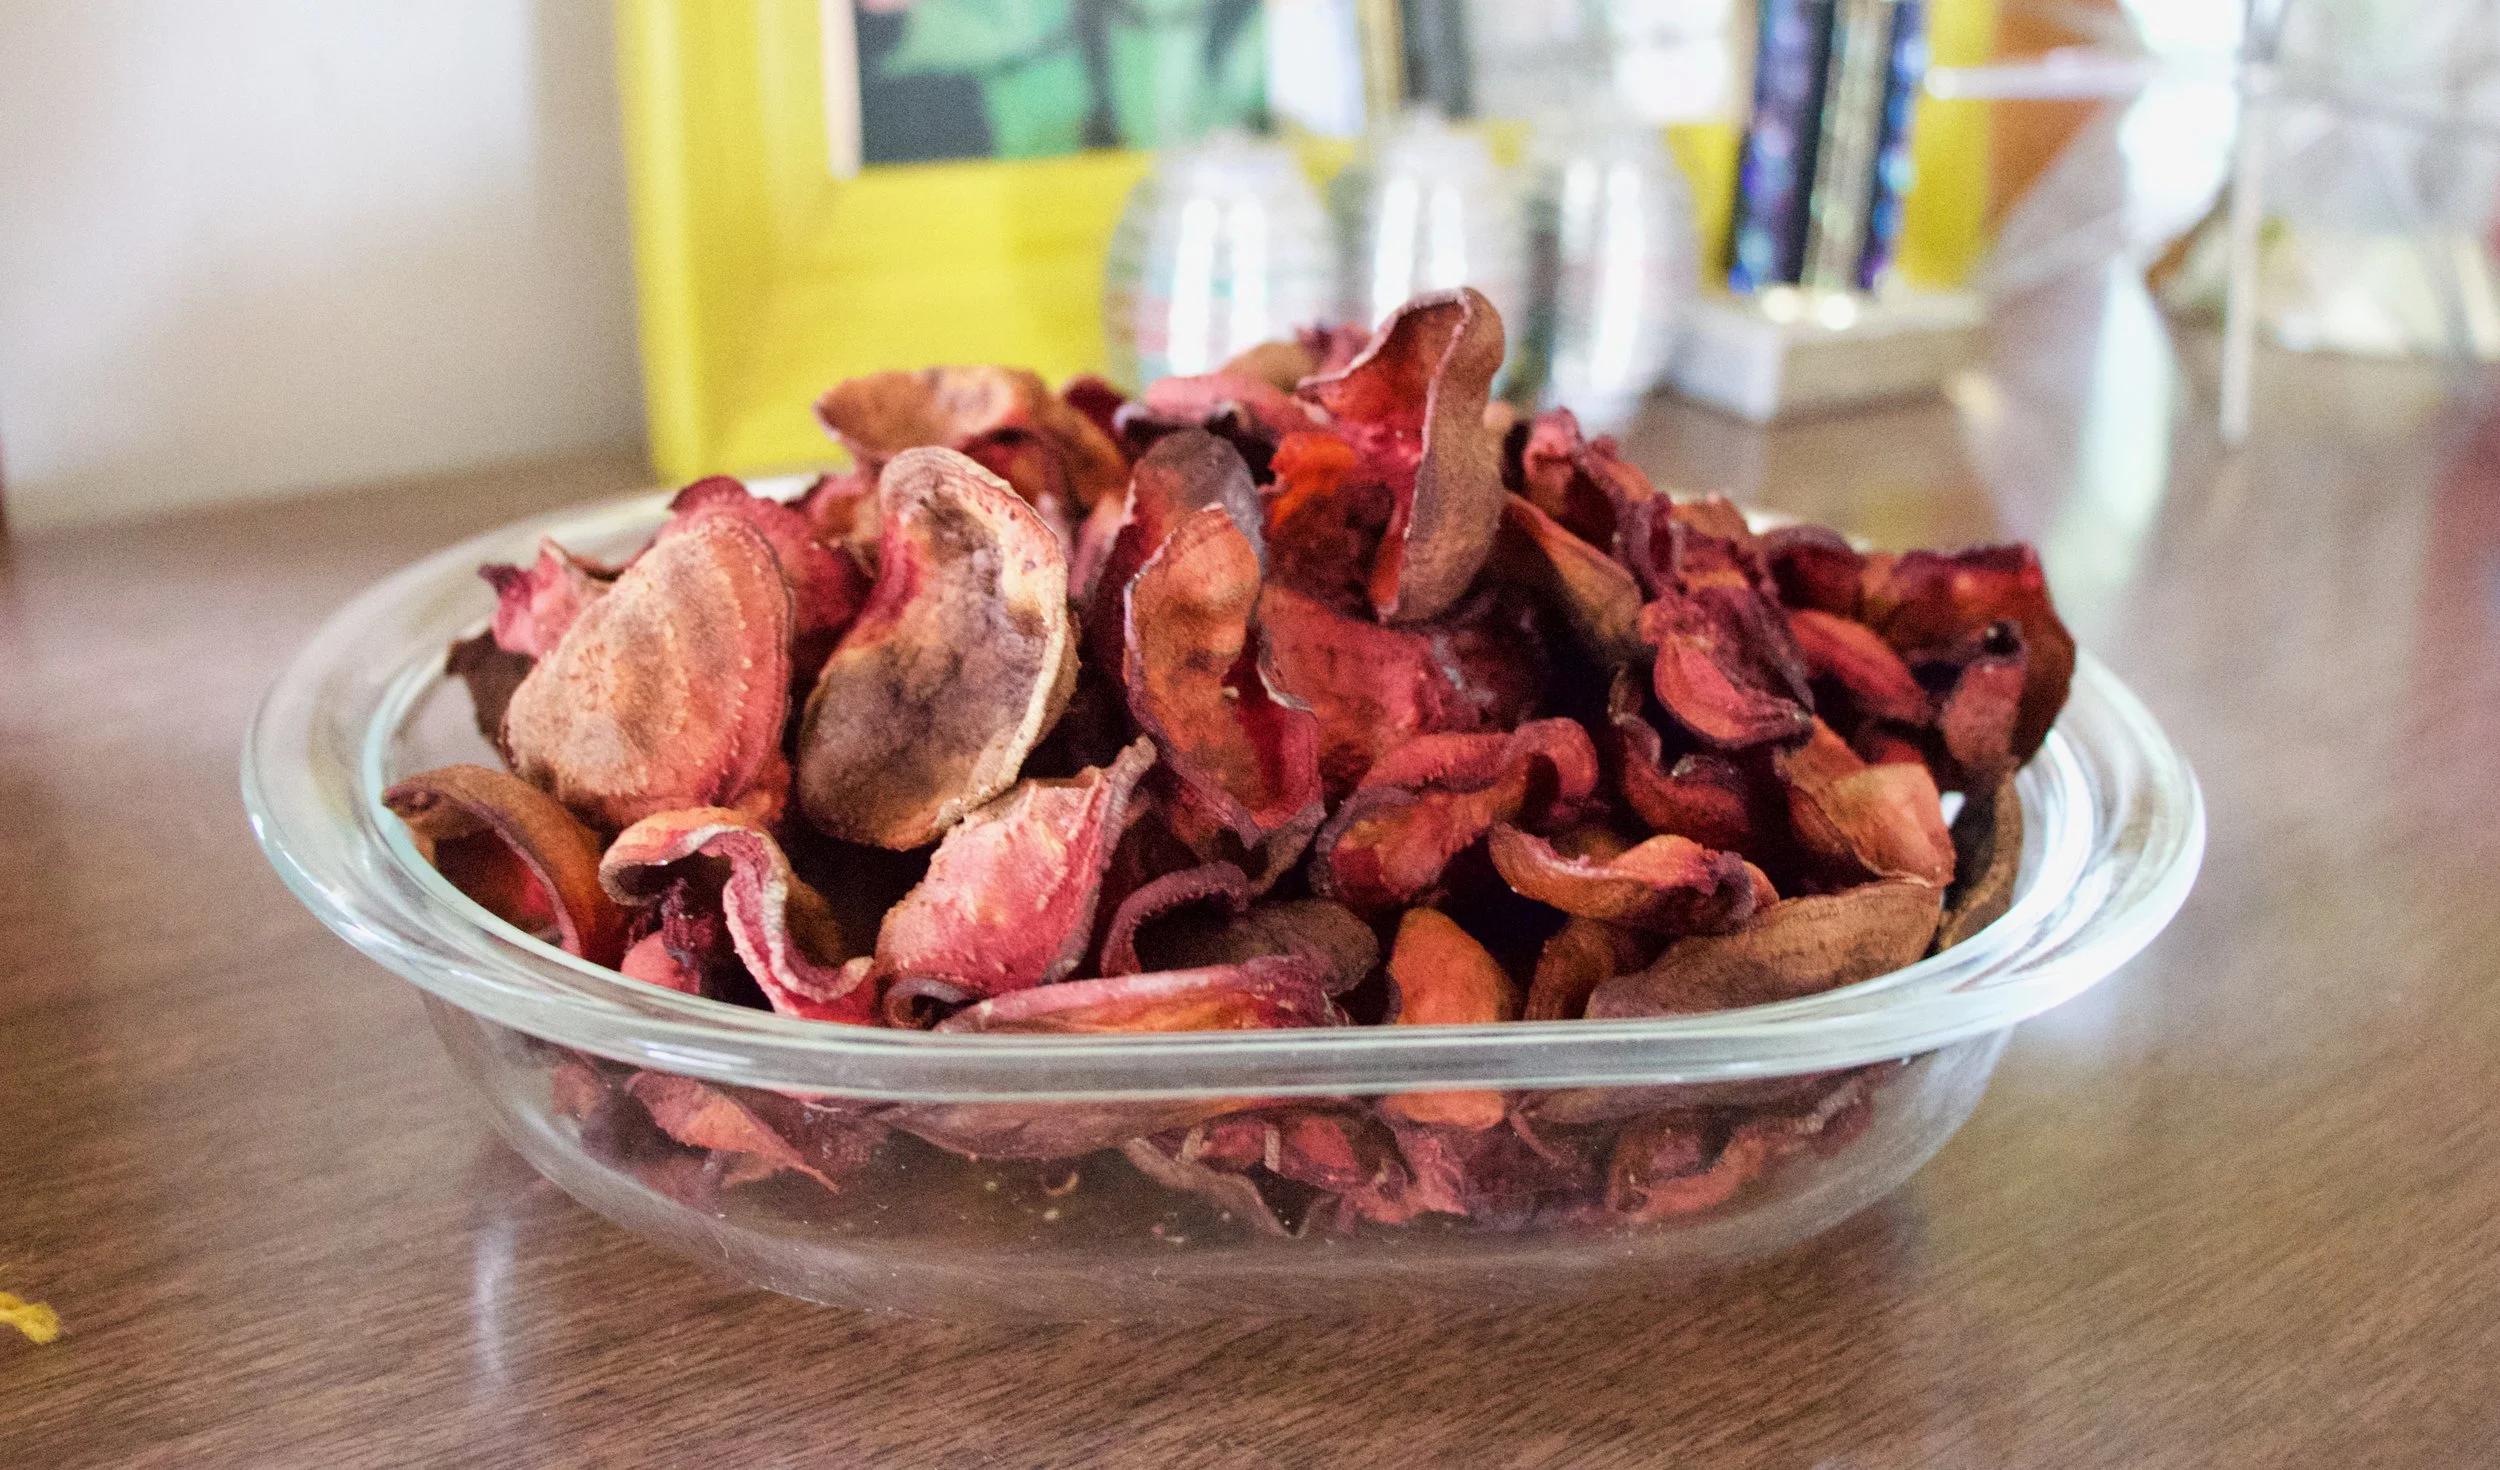
So it%u2019s that time of year. Everyone all sick and shit. And that means getting my stash of stuff made, my feel better, don%u2019t get sick stuff. The tonics and elixirs and hocus pocus things that I use all year long, but mostly during the winter months when everyone starts getting sick.

One of the things I make is fire cider. First off, let me tell you I am no doctor, just in case you thought I might be. But I l am a strong believer in food as medicine. So the fire cider is a heath tonic of sorts, made with all sorts of yummy and highly potent things like fresh grated horseradish, hot peppers, garlic, and so forth. All things that are good for your health in many ways, but also taste really good. And let me tell you, if you are into the healing powers or not, a swing of this infused cider tonic will surely open up your sinus cavity like whoa.

And now before you get super excited about going and making yourself this fantastic health tonic/salad dressing/drink mixer, and thinking it will be ready and done as soon as you do a little grating, well hold up. You can throw it together super fast, but it does take a good 4-6 weeks of chilling and infusing before you really want to get into it. But don%u2019t let that stop you, it is 100% worth all the waiting. And wouldn%u2019t you know, the holidays are about 4-6 weeks away and I was just thinking after I made a batch for myself how I should make another big batch and give away in little jars for Christmas this year. Now there is a good idea. (Might not be a doctor, but I sure am a smarty pants%u2026HAHAHA)

Now to the Fire cider!

Garlic, onion and hot peppers, chopped into bits. Place it all into a clean 32oz jar.

Grated horseradish, turmeric, and ginger. Into jar it goes. And watch out, freshly grated horseradish can be a little intense.

Sliced lemon. Into said jar along with thyme, oregano, and peppercorns.

Packed and filled with raw apple cider vinegar.

Now a lid and some time in a cool dark place and you got yourself some liquid gold.

Remember, I am not a doctor so yeah, but this cider helps me feel better when I need it to and I think you will find it will help you too. And it tastes freaking awesome on food so theres that!

-C

makes 16-20 oz

  • 1/3 cup fresh grated horseradish

  • 1/4 cup fresh grated ginger root

  • 1/4 cup fresh grated tumeric

  • 1 chopped onion

  • 3-5 heads of garlic chopped

  • 2%u20144 hot peppers (depending on the type you use and the heat level you want) chopped

  • 1 lemon sliced

  • 1 teaspoon peppercorns

  • 1 teaspoon oregano

  • 1 teaspoon thyme

  • Raw apple Cider Vinegar

  • Honey or maple syrup (optional)

Note. Feel free to change the amounts of all of the ingredients. Want to use less horseradish, then do so. No hot peppers, then don%u2019t add them. Leave out the oregano and thyme and add dill or rosemary. You can be creative with your own flavors.

Now to make fire cider.

Place all ingredients besides vinegar into a 32 oz jar. Pack down with a wooden spoon then fill jar with apple cider vinegar.(Make sure all the stuff is submerged in the vinegar.) Place a lid on jar. If using a metal lid, line top with wax paper first or just use a plastic lid if you have one. Place jar in a cool dark place for 4-6 weeks, giving it a shake every day.

After at least 4 weeks, remove lid of the jar, strain the liquid from the solids through a fine mesh strainer or cheesecloth, squeezing out as much as the liquid as you can. You can discard the solids or make something tasty with them (saut%u00e9ed with potatoes?). Then taste the liquid. Add sweetener if you want, maybe a few tablespoons to start and go from there.

And thats it. Store the cider a lidded jar in a cool dark place. Or in the fridge if you want it cold.

To use, just take a swig when feeling crappy, stuffy, cold, or just want a tasty little pick me up. Or use as condiment on food, like in a salad or wherever.

Enjoy!

Have you heard of switchel? A lot of people haven’t so don’t feel bad if you don’t know what the hell I am talking about (like my computer. It keeps auto correcting switchel to switched). So switchel. It’s basically a drink made from water and apple cider vinegar. But wait, don’t grimace and click away, it’s also has fresh ginger, lime, and maple syrup mixed in and is really really really freaking refreshing and tasty and just really good. I guess it was even used back I the day as a sort of sports drink, like Gatorade because it has all sorts of electrolytes and anti-inflammatory properties from the ginger.%u00a0%u00a0Plus apple cider vinegar has got all sorted or health benefits,%u00a0so it’s a tasty treat with benefits. Who doesn’t love the benefits?%u00a0

You can drink the switchel %u00a0straight up hot or cold, add it to seltzer for a bubbly soda like drink or even %u00a0mix some cocktails with it. I enjoy a nice cold glass when I am feeling thirsty but what I usually do it fill up half a %u00a0jar with boiling water, then fill the rest of the jar up with the cold switchel. It’s a nice tangy, spicy,%u00a0refreshing and warming drink that I look forward to every day. I even got the littles to try it.%u00a0%u00a0One thought it to be nasty (can’t win them all), but the other one really liked it too, so you know it’s not just me that thinks it good.%u00a0

The stuff. Apple cider vinegar (the good stuff that is raw and has the mother), fresh ginger, limes, maple syrup, and water.%u00a0

Fresh ginger is the best. Give it a little peel with a spoon, just to maximize gingerness exposure then chop into small pieces.%u00a0

Ginger and water goes into big pot. Bring it to a boil then turn down to a high simmer for 10-15 minutes to really get the ginger infused into that water.%u00a0

After it’s cooled a bit, strain the now ginger water into a pitcher or a big jar.

Add in the vinegar, the juice of the limes and a bit maple syrup. Start off with a little maple, you can alway add more later if needed.%u00a0

After the switchel has some time in the fridge to cool (at least 2 hours, but I like it best when it’s sat overnight) grab a glass ,some ice cubes, and a slice of lime. It’s go time.%u00a0

A drink to you my friends

-C

Makes bout 6%u00a0 cups%u00a0

  • 1/2 cup raw apple cider vinegar (with the mother. Braggs is a popular option)%u00a0
  • 5-6 inch piece of fresh ginger%u00a0
  • 2 limes
  • 5 1/2 cups water
  • 1-4 tablespoons maple syrup%u00a0

With a spoon, gently peel ginger . Not perfectly, just get some of the skin off. Chop it into small pieces and place it into a large pot with the water. Bring to a boil then let simmer for 10-15 minutes. Strain ginger water int a large pitcher or jar.

Add in the apple cider vieager, the juice of the limes, and a tablespoon or two of maple syrup. Give it a good stir then place in the fridge until cold (about two hours but overnight is best)%u00a0

When it’s cold, give it a good stir again, taste, and if it needs more maple, add it in. And then it’s ready.

You can drink it on ice, maybe add some seltzer to it, or mix it into some fancy cocktail. It can also be reheated for a nice spicy warming treat.%u00a0

For the longest time now, I have been drinking a little turmeric with a little lemon first thing in the morning. It started as a medicinal drink, but quickly became a tasty habit. I have some stupid weird circulation condition called raynaud’s where changes in temp turn my fingers and toes into icicles. And for me, the worst time of the year for this condition is the spring (but spring is still my favorite). All the up and down of temperature and the wet cold damp weather is my trigger, not to forget to mention that those temp swings can get a girl sick. (I can’t get sick!!)

So way back when I started to drink for my health and the feeling in my fingers. Turmeric, ginger, and cinnamon , all super warming spices that help greatly with blood circulation, not to mention a whole bunch of other good things. (I could tell you and go on and on, but you can just look it up yourself) Ever since I started drinking and eating lots of these spices, my raynauds has gotten soooo sooo soooo much better. I still get cold finger and toes, but no where as severe and the way less often.

Now a few weeks ago the mr started making himself an afternoon turmeric tea. He read something on the internet about how it’s the best anti-inflammatory and good for achy joints. (Sure dude, listen to the internet and not me) Being a big guy doing construction and such, he gets really achy joints and there is only so much arnica and frozen peas a guy can do. So now he drinks this and I think he is starting to notice a difference. (less time with the frozen peas) And since he is making himself tea every afternoon, I started to make a spicy tea for myself in the afternoons too. I figured that a little extra goodness to ward off the chills and any larking illness is only a plus. It’s our after lunch treat that tastes good, is warm and soothing and is doing the body all sorts of good.

Spicy turmeric tea. You will get addicted and feel like awesomeness.

The stuff. Ground turmeric, ground ginger, saigon cinnamon and hot water. Additional yums with a little lemon and some honey if you like it sweet or have a scratchy throat.

Spices into a drinking vessel (I like a big jar)

And in goes the hot water. Give it a good stir and a squeeze of lemon (and sweeten if your gonna)

And watch it swirl. A drink that keeps this girl happy and healthy.

Something great to look forward.

-C

  • 1 tablespoon ground turmeric
  • 1 teaspoon ground saigon cinnamon (can use regular, but it’s not as spicy sweet)
  • 1/2 teaspoon ground ginger
  • 1 1/2- 2 cups hot water (not quite boiling)
  • honey to taste (I only use if my throat is sore)
  • lemon juice (optional)

Note… My measurements are just guidelines. You might like a little less turmeric or more ginger so make this drink any way that tastes best for you.

Grab yourself a big mug or jar, add in the spices and hot water, honey if you want it and a squeeze of lemon juice if using. Stir with a spoon and drink. Keep spoon handy to give it a good stir every now and then

THE LOVELY CRAZY

January 28, 2020 by maximios • Blog

Mid week, I was doing a little pantry cleaning/ inventorying of what I had and needed when I came upon not one, not two, or even three. No, six. SIX, jars of jam. And there are 2 that are already opened in the fridge. I don%u2019t know why, but knowing that there was that much jam in the house made me a little uneasy. Six unopened jars is about 3 jars past my comfort zone. Sure there are so many things you can do with a jar of jam (jelly, preserves, and marmalade included) and now that I am thinking about it, is one of the reasons why I bought a few jars a while back. Then there was Christmas and I think we got at least two jars as gifts so it%u2019s not all my fault, but still, that is just too many jars of jam. Right there I needed to get rid of at least one jar. So muffins. Jam muffins, with poppyseed crust because it%u2019s pretty and nobody ever complains about poppy seeds, or at least they don%u2019t until after they eat them and have poppy seeds stuck in their teeth all day. But that is just our mouths way of saving a little for later, am I right? HA

Anyway, a quick and simple muffin recipe for all of you people out there that might have a jar or two too many of jam in the fridge or pantry%u00a0(I used apricot but any flavor(s) would work) and could use yourself a tasty little muffin situation. I mean who doesn%u2019t want a tasty muffin?

To the muffins.

The stuff. In the bowl is white and white whole wheat flour, baking powder and soda, and salt. Also have apricot jam, oil, almond milk, apple cider vinegar, and orange, and some poppy seeds.

Grab a zester and zest the orange into the bowl with all the dry stuff. Whisk to combine.

Jam, oil, milk, and vinegar. All on top of dry. Whisk that up until just combined. No over mixing. You will get tough (not in a good way) muffins.

Scoop into well greased muffins tins then cover the tops with poppy seeds.

And out of the oven, looking all pretty like.

Pop those muffins out of the tins and cool on a wire rack for a bit. And by all means, don%u2019t wait until they are completely cool.

Now eat you a warm muffin and if they are mini, grab a few. You can%u2019t just eat one mini muffin, that is just crazy.

-C

Make 12 normal size muffins or 24 mini muffins

  • 1 cup all purpose flour

  • 1 1/4 cups white whole wheat flour

  • 2 teaspoon baking powder

  • 1/2 teaspoon baking soda

  • 1/2 teaspoon salt

  • 1 cup plant milk

  • 1/3 cup neutral oil

  • 1 tablespoon apple cider vinegar

  • zest of an orange

  • 1 heaping cup apricot jam or preserves (can sub in any flavor you like)

  • 1/3 cup poppy seeds

Preheat oven to 350

In a large bowl whisk together the flours, salt, baking powder and soda, and the zest of the orange. Add in the oil, milk, jam, and vinegar and whisk until just incorporated. Scoop batter into well grease muffin pans (12 regular or 24 mini) then cover the tops with poppy seeds. Pop into hot oven and bake until risen and a tester comes out clean when one is poked. For mini muffins, check after 13 minutes, for normal muffins, after 16 minutes.

Once baked, remove from oven and pop out of pans when cool enough to handle. Place on a wire rack to cool completely or just start eating them warm.

Store left over muffins in an airtight container for 3-4 days at room temperature. They also freeze well.

THE LOVELY CRAZY

January 28, 2020 by maximios • Blog

It%u2019s been 14 days since my last farm share pick up with 7 more days to go. (The farmers take a long break at the end of the year, which they all deserve but makes me sad. Or more like hungry.) It is a pretty long stretch for me to have to go without getting me some farm fresh goods. I have been making due, rationing out my roots (the greens were gone within days) and supplementing with lots and lots of frozen zucchini, Swiss chard, and broccoli, so it hasn%u2019t been bad. But now I am worried because with al the supplementing, the chest freezer is looking a little more on the empty side then I would like. And it%u2019s only January. I guess that is what happens when you eat your weight in vegetables everyday. %ud83e%udd37%u200d%u2640%ufe0f

Anyway, I am pretty much out of roots. The turnips were the last of what I had left besides the lone beet that I found stuffed in with the apples. And because they were the last roots and knowing I am not going to have any roots until next week, I wanted to do something a little special with them. That is why I hassledbacked them, which basically means I sliced them up without cutting completely through so they are cut but still stuck together. Does that make since? If not, just look at the pictures.

These turnips, oh these turnips. First off, roasted turnips are amazingly delicious and if you have never roasted one, well you need to get on it and do so. Secondly, the turnips I used are gIlfeather, which if you did not already know, are the Vermont state vegetable. But don%u2019t worry, if you can%u2019t find the gilfeather, regular old purple top turnips work and taste just as fantastic because all roasted turnips are so fantatic. When roasted I might describe them as the cooler, hipper, cousin of the baked potato. Add the avocado cream and seeds, which are the cooler friends of the cooler cousin, and you got yourself a cool dude party! Or basically just a way tastier baked potato situation with fixing.

Now don%u2019t you want a tasty cool hassledback turnip? And yes, I keep wanting to call them David hasselbacks turnips too. Because they are so cool. Am I right? Haha!

To the turnips!

The stuff. Turnip. Either a couple smaller ones or a giant one, up to you. Also need an avocado, a little red wine vinegar and water, salt and pepper, garlic powder, olive oil, and some toasted seeds (if you want).

If using a giant turnip, cut in half. If using small ones, you can cut those in half too or leave them whole. Up to you.

Now to hasselback. Using two guides that are the same thickness (chopsticks or chip clips.. whatever you have lying around that you don%u2019t mind nicking with a knife) slice into the turnip about ever 1/4 inch, right down to the guide, but not all the way through.

Lightly oil a skillet or baking sheet and also rub a little oil all over the turnips and lay them hasselbacked side up. Sprinkle with salt, pepper, and a pinch of garlic powder. Then into a hot ass oven they go.

While the turnips are roasting , make up the avocado cream. Basic, just scoop avocado into bowl (if you have a stick blender) or blender, add in a pinch of salt, the water and vinegar, and blend until smooth.

And back to the turnips. Baked for a little longer then an hour and flipped once, now they are all roasted and crispy and all sorts of ready.

A freshly roasted hasseldbacked turnip smothered in avocado cream and sprinkle with toasted seeds.. Good things here friends. Good things.

-C

serves 2-4

  • 1 large or 2 small turnips

  • salt and pepper

  • olive oil

  • pinch or garlic powder

  • an avocado

  • 1 tablespoon red wine vinegar

  • 1 tablespoon water

  • handful of toasted mixed seeds (I used pumpkin and sunflower seeds)

Preheat oven to 450

Grab turnip(s) and wash thoughtful. If you buy the turnip from the store and it has a wax coating, peel the outer skin, otherwise, you don%u2019t have to. Now to haseslback. Cut the large turnip in half or if using to small ones, you can just leave it whole. Take two, either chopsticks or something that is about 1/4 – 1/2 inch thick, and place on either side of turnip to use as a cutting guid. Slice the turnip about ever 1/4 inch , right down to the guide, but not all the way through. After cutting, place on a lightly oiled skillet or baking sheet and drizzle a little oil in our hand and rub all over. Sprinkle with salt, pepper, and a pinch or garlic powder. Place the turnips in hot oven. Roasts for about an hour, or until the slices of the turnip start to brown and come apart. Also, if you want a little more crispy edge, half way through, drizzle on a little more oil. You can also flip (which I did) the turnip cut side down to finish roasting.

While turnips are roasting, make avocado puree. Scoop avocado into bowl or blender. Add in the water, vinegar, and a pinch or salt. Blend in blender or with stick blender until smooth. If to thick, drizzle in a little more water until desired consistency.

Once cooked and all crispy like, remove turnips from oven, place on a plate and slather on the avocado cream. Sprinkle on toasted seeds and eat to your face hole.

THE LOVELY CRAZY

January 28, 2020 by maximios • Blog

It%u2019s been 14 days since my last farm share pick up with 7 more days to go. (The farmers take a long break at the end of the year, which they all deserve but makes me sad. Or more like hungry.) It is a pretty long stretch for me to have to go without getting me some farm fresh goods. I have been making due, rationing out my roots (the greens were gone within days) and supplementing with lots and lots of frozen zucchini, Swiss chard, and broccoli, so it hasn%u2019t been bad. But now I am worried because with al the supplementing, the chest freezer is looking a little more on the empty side then I would like. And it%u2019s only January. I guess that is what happens when you eat your weight in vegetables everyday. %ud83e%udd37%u200d%u2640%ufe0f

Anyway, I am pretty much out of roots. The turnips were the last of what I had left besides the lone beet that I found stuffed in with the apples. And because they were the last roots and knowing I am not going to have any roots until next week, I wanted to do something a little special with them. That is why I hassledbacked them, which basically means I sliced them up without cutting completely through so they are cut but still stuck together. Does that make since? If not, just look at the pictures.

These turnips, oh these turnips. First off, roasted turnips are amazingly delicious and if you have never roasted one, well you need to get on it and do so. Secondly, the turnips I used are gIlfeather, which if you did not already know, are the Vermont state vegetable. But don%u2019t worry, if you can%u2019t find the gilfeather, regular old purple top turnips work and taste just as fantastic because all roasted turnips are so fantatic. When roasted I might describe them as the cooler, hipper, cousin of the baked potato. Add the avocado cream and seeds, which are the cooler friends of the cooler cousin, and you got yourself a cool dude party! Or basically just a way tastier baked potato situation with fixing.

Now don%u2019t you want a tasty cool hassledback turnip? And yes, I keep wanting to call them David hasselbacks turnips too. Because they are so cool. Am I right? Haha!

To the turnips!

The stuff. Turnip. Either a couple smaller ones or a giant one, up to you. Also need an avocado, a little red wine vinegar and water, salt and pepper, garlic powder, olive oil, and some toasted seeds (if you want).

If using a giant turnip, cut in half. If using small ones, you can cut those in half too or leave them whole. Up to you.

Now to hasselback. Using two guides that are the same thickness (chopsticks or chip clips.. whatever you have lying around that you don%u2019t mind nicking with a knife) slice into the turnip about ever 1/4 inch, right down to the guide, but not all the way through.

Lightly oil a skillet or baking sheet and also rub a little oil all over the turnips and lay them hasselbacked side up. Sprinkle with salt, pepper, and a pinch of garlic powder. Then into a hot ass oven they go.

While the turnips are roasting , make up the avocado cream. Basic, just scoop avocado into bowl (if you have a stick blender) or blender, add in a pinch of salt, the water and vinegar, and blend until smooth.

And back to the turnips. Baked for a little longer then an hour and flipped once, now they are all roasted and crispy and all sorts of ready.

A freshly roasted hasseldbacked turnip smothered in avocado cream and sprinkle with toasted seeds.. Good things here friends. Good things.

-C

serves 2-4

  • 1 large or 2 small turnips

  • salt and pepper

  • olive oil

  • pinch or garlic powder

  • an avocado

  • 1 tablespoon red wine vinegar

  • 1 tablespoon water

  • handful of toasted mixed seeds (I used pumpkin and sunflower seeds)

Preheat oven to 450

Grab turnip(s) and wash thoughtful. If you buy the turnip from the store and it has a wax coating, peel the outer skin, otherwise, you don%u2019t have to. Now to haseslback. Cut the large turnip in half or if using to small ones, you can just leave it whole. Take two, either chopsticks or something that is about 1/4 – 1/2 inch thick, and place on either side of turnip to use as a cutting guid. Slice the turnip about ever 1/4 inch , right down to the guide, but not all the way through. After cutting, place on a lightly oiled skillet or baking sheet and drizzle a little oil in our hand and rub all over. Sprinkle with salt, pepper, and a pinch or garlic powder. Place the turnips in hot oven. Roasts for about an hour, or until the slices of the turnip start to brown and come apart. Also, if you want a little more crispy edge, half way through, drizzle on a little more oil. You can also flip (which I did) the turnip cut side down to finish roasting.

While turnips are roasting, make avocado puree. Scoop avocado into bowl or blender. Add in the water, vinegar, and a pinch or salt. Blend in blender or with stick blender until smooth. If to thick, drizzle in a little more water until desired consistency.

Once cooked and all crispy like, remove turnips from oven, place on a plate and slather on the avocado cream. Sprinkle on toasted seeds and eat to your face hole.

«‹ 19 20 21 22›»

Recent Posts

  • 1xBet APK 2026 — un fichier, une source étape par étape
  • Support en français — canaux et horaires
  • Cresus Casino : catalogue de jeux, moyens de paiement et fonctionnement en France
  • 1xBet Mobile: Why the File Matters More Than the Button
  • 1xBet APK : comprendre avant l’installation

A nemzetközi sportfogadó oldalak jellemzően magasabb szorzókkal dolgoznak, mint a hazai piac szereplői.

Denne guide til casino uden rofus i 2026 – spil uden dansk licens forklarer regler, muligheder og risici ved udenlandske platforme.

Et casino med hurtige udbetalinger kan forbedre spiloplevelsen ved at sikre hurtig adgang til dine gevinster.

Vores guide til spillesider uden om rofus hjælper dig med at navigere blandt internationale casinoer.

We ranked the top online casino Malaysia platforms on withdrawal times, not on marketing claims.

Registration takes a few minutes, and this sg online casino guide walks through verification and the first deposit step by step.

A hazai fórumokon rengeteg tippet találhatsz arról, hogyan működik a casino befizetés nélküli bónusz aktiválása promóciós kódokkal.

Flere spillere vælger en velkomstbonus uden indbetaling for at prøve casinoet gratis.

@lonelyplanet
STUDIO ESCAPE Creative Getaways Quiet stays and bright worktables for a weekend reset. See Places
MAKER ROUTE World Nomads Travel-ready planning and practical coverage for makers. Read Tips