I have been on a severe citrus kick lately. Oranges, limes, lemons, kumquats. I want it all and have been eating it all. A lot of it all. Espeically the oranges which are just so good right now. We have been going through bags of them faster then ever and I am not mad about it.
Which then brings us to chili. Chili is one of the things that I make on a very regular bases. It%u2019s beans, veggies, tomatoes, and a ton of spices. Easy as can be, most people like it, and I never get sick of it. I mean, how could you get sick of it, it is so good! Anyway. Chili, its great but have you ever added orange to it? Oh man is it amazing. Bright and acidic and sweet. The whole pot of chili just radiates more goodness, more intensity, more, moreness. (I know that doesn%u2019t make sense but you get it.) It%u2019s a whole new level of chili and I don%u2019t if there will ever be a time when I don%u2019t add orange to my chili again. Well at least during citrus season.
But enough about all that, what you really want is to just start making this orange black bean chili so you can eat it. I hear you, so I%u2019ll let you at it.
To the chili!
The stuff. Oranges, black beans, crushed tomatoes, an onion, a couple carrots, a pepper, and jalape%u00f1os. Also lots of cumin, chili powder, ground ginger, garlic powder, and salt and pepper.
Small dice up the pepper, onion, carrots, and jalape%u00f1os. Don%u2019t want it super spicy, don%u2019t add the jalape%u00f1os.
All that stuff gets tossed into a big pot along with all the spices, some salt and pepper, and a little water too. Place on stove to start cooking down the veggies.
Slightly tender and smells amazing.
Now add in the beans, the tomatoes, and the zest and juice of an orange. Mix it all up, set it back on stove and keep on cooking,
Now eat your chili, with extra orange slices to squeeze all over it of course. And maybe you want to serve it with some corn bread? That is entirely up to you, but who would be made about it?
-C
Serves 4-6 people
1 pound cooked black beans drained (about 5 cups or 3 cans)
5 cups crushed tomatoes (or 2 28oz cans)
2 oranges (navel or cara cara work)
2 carrots
1 large onion
1 bell pepper
2 jalapenos (optional)
2 heaping tablespoons cumin
2 tablespoon chili powder
2 teaspoons garlic powder
2 teaspoons ground ginger
salt and pepper
Start by chopping up the veggies. Small dice the carrot, the onion and the pepper. If using jalape%u00f1o, dice that into small little bits too. And remove seeds for less heat or leave them if you like it. Once that is all cut up, dump it all into a large heavy bottom pot along with the cumin, chili powder, garlic and ginger powder, and about a teaspoon or so each of salt and pepper. Add about 1/2 cup water, mix it all up, and place the pot on stove on medium heat and start to cook the veggies and spices until they begin to smell fragrant and are ever so slightly tender, which should take 5-10 minutes.
Now add in the beans, the tomatoes, and the zest and juice of one orange. Mix together and keep cooking on medium heat, partially lidded, for about 45 minutes to an hour, stirring once in a while, until the chili has thicken and tastes good to you.
Once done, season to taste with more salt and pepper and either stir the juice of the second orange into the whole pot or serve with slices of orange to squeeze on top.
Eat. Store any left overs in fridge. Tastes delicious cold too.
Potatoes in tomatoes. It just has a nice ring to it. And to tell the truth, that is the only reason I made this dish, because it sounds good.
Ok, not really the only reason, but it was the start, that and I have been sitting on some potatoes for a little while and it was time for them to be eaten. Enter in the tomatoes. I figures cooking the potatoes in tomatoes is alike to a ketchup and french fry situation. Not completely the same, but you get the idea. Add in chickpeas for good measure and onion because I wanted to and that is that. Nothing fussy, one pot, easy, hearty, and good.
Also not hurting anyone that these potatoes take a little while to bake. I could have made this dish in a way that made them cook faster (like parboil the potatoes) but I wanted the heat from the oven. It has been pretty freaking dang cold out so I liked having the heat, it adds another dimension to the term comfort food (as in me being comfortable hanging out next a hot oven).
Anyway, nothing too fancy, just all around tasty dish. It is just what you need to bake and eat on any given cold winter day. And it sounds nice too. Just say it aloud. Potatoes in Tomatoes. Right? Now you see, it had to be done.
To the potatoes in tomatoes!
The stuff. Potatoes, crushed tomatoes, cooked chick peas, an onion, a few cloves garlic, Italian seasoning, salt and pepper and a bit of olive oil.
Start by chopping the onion and mincing the garlic.
Get it all into a cast iron pan or oven safe skillet with a little olive oil. Add the spices and give it some heat on the stove top while you cut potatoes.
Now cut those potatoes nice and thin. A mandolin works wonders but a knife will do just as well, just try to keep the thickness all the same.
Potatoes are cut and onion mixture has sweated a bit so now you add in the chick peas (with liquid) and half the crushed tomatoes. Stir it all up.
Layer on potatoes, drizzle with a tiny bit of olive oil and give them some salt and pepper love.
Dump the rest of the tomatoes on top then add in water, enough that all the potatoes are completely submerged.
Now into the oven they go.
Doesn%u2019t that just look all fantastic? I mean really really , A+ good, no? If you are feeling extra crispy, you could even stick the skillet under the broiler for a few minutes right before you pull it out.
And that is that. Potatoes in tomatoes with chick peas and onions. A simple but very satisfying dish to keep your cold belly full of warm goodness.
Be well.
-C
About a pound or so of white or red potatoes
3 cups (or a 28oz can) crushed tomatoes
2 cups (or a 16 oz can) cooked chickpeas in liquid
1 large onion
2-3 close garlic
2 tablespoons Italian seasoning
2-3 cups water
olive oil
salt and pepper
Preheat oven to 400
Grab onion and dice into small pieces. Mince the garlic. Grab a medium sized oven safe skillet and toss the onion and garlic in with a tablespoon or so of olive oil and the seasoning. Place on medium heat and cook for a few minutes until the the onion is slightly cooked and fragrant. Remove from heat. Mix in the chick peas with liquid and half of the crushed tomatoes.
Rinse potatoes and slice into 1/4 inch thick rounds. Place tomatoes into the skillet, layering any way you want. Drizzle the top with like a teaspoon olive oil then sprinkle the tomatoes with salt and pepper. Spread the rest of the crushed tomatoes over the potatoes then pour the water in. If the potatoes are not completely submerged in water, add more until they are. Cover the skillet with a lid or tin foil.
Place skillet in oven and bake 40ish minutes then remove lid or foil and bake for another 25-30 minutes or until potatoes are fork tender and slightly crispy on the edges. Depending on the type of patotoes you use,(like a really firm and waxy yellow potato) you might need to add more water to the skillet and cook for longer. If that is the case, just pour more water over until the potatoes are submerged again and keep baking until cooked.
For extra crispy, when potatoes are done, place skillet under broiler for a few minutes until crisp to your liking.
Pull from oven, let cool a minutes or two then dig in.
I can%u2019t remember the last time I have gone a day without eating lentils. Seriously, even when we travel I buy or bring along a bag of lentils. Or when we are camping, its basically all we eat. So it is safe to say that I know my way around a lentil or two. They are probably my favorite food (I say that about all my favorites)
Other then lentils being amazing delicious, the are so versatile. I am sure I say it all the time, but there is nothing you cannot make with lentils, sweet or savory. And nutritional as all heck. So much iron and a super amount of protein. Lentils are basically the perfect food in tiny little coin shaped form. Take it from this vegan lady here. Lentils help keep me alive. HA.
But enough about how many lentils I eat, what we need to address is this chili. It doesn%u2019t matter if you are a lentil feen or not, you will very much enjoy yourself a big bowl of this hearty, slightly spicy, warming goodness. Especially now, when it%u2019s cold outside and the days are short and you just want to eat something filling and healthy and that is not left over holiday cookies. And big bonus, this is a chili that you could come home to start at 5 and basically have it ready to eat by 6. That is just one bit of the magic of lentils, they so cook so fast.
And it%u2019s chili and chili is the best so you really should just get it made. It%u2019s what you need, I can tell.
To all the lentil goodness!
The stuff. Green lentils, crushed tomatoes, a cubanelle pepper, an onion, a couple carrots, and some cauliflower. Also a few cloves or garlic, cumin, chili powder, ground ginger, a red jalape%u00f1o, and salt and pepper.
Get started by small choping the carrot, onion, and pepper. Mince up the garlic too.
Grab that jalape%u00f1o and remove steam (and seeds if you want heat) and dice into very very small piece.
Into a big old pot it all goes, along with the cauliflower and all the spices. Add a splash of water and a sprinkle of salt and pepper and stick it on the stove for a few minutes to warm up the veggies and spices.
Looking good.. So good I wanted to eat it all, but don%u2019t, it%u2019s for the chili.
Now add all the tomatoes and water and place back on stove on high heat until it starts to boil, then reduce heat to a medium and cook until lentils are tender.
Well look at that, chili.
And why not top with a little avocado while you are at it. It is a very good addition, to the spiciness.
Very little amount of works for such great rewards. Probably going to be your new favorite chili recipe just so you know.
Lentil chili. Grab a bowl, kick up your feet, and dig on it.
-C
makes a lot of chili, like 10-12 servings
1 pound green lentils
1 large onion
5-6 cloves or garlic
1 cubanelle pepper (or any green or sweet pepper)
2 large carrots
3 cups chopped cauliflower (fresh or frozen)
6 cups (two 28 oz cans) crushed tomatoes
2 hefty tablespoons cumin
1 hefty tablespoon chili powder
1 teaspoon ground ginger
1 jalape%u00f1o pepper
6-8 cups water
salt and pepper
diced avocado for serving (optional)
Remove steam and seeds from cubanelle pepper and small dice it along with the carrots and onion then place int all nto a large heavy bottom pot. Mince the garlic add into pot. Remove steam and seeds from jalape%u00f1o pepper and finely dice it and add to pot. Last but not least, add the spices to the mix. Add a splash of water and place on high heat and cook the veggies and spices until for 5 or so minutes, just to give them a little heads start and to activate the spices.
Once the veggies have had a few minutes of heat, dump in the dried lentils, the tomatoes, and 6 cups of water. Stir around and keep on high heat until it starts to boil then turn down to medium and continue to cook, stirring once in a while, until the lentils are tender and the chili has thickened, which should take about 35-40 minutes. If at any time you the lentils are not submerged in liquid but are not cooke through, add more water. And once the lentils are cooked you can thicken bu continuing to cooke does or thin it out by adding more water. Taste soup and season with salt and pepper as you see fit.
To serves, ladle into bowls and tope with diced avocado.
Left overs are fantastic hot or cold and will last in the fridge for about a week. Or if you want, you can freeze a few servings.
I made baked beans last week for a side to dinner with the mr and Barb. They ate them all. I didn%u2019t get more then a spoonful. I was sad for me, but also was like %u201cShit, if I had known you guys were bean fiends, I would be making baked beans like all the time.%u201d
And maybe not all the time, but I made them again this week. And again, they ate a lot, but I got me some this time, and I will probably make them again next week too because they will be perfect for Thanksgiving. See, homemade baked beans are a thing of beauty. Sure you can buy them in a can and be just fine, but these baked beans, well these are waaaayyyy way better. These baked beans are soft (not canned bean soft) and tomatoey and a little spicy with a tang. Not sickly sweet, (not sugar added) and not too salty.. They are just about perfect. You can eat them on their own, toss them into salads or wraps, stick on some toast, serve as as side, or just eat them cold straight from a jar from the fridge right before bed. (your loved one will thank you for that). Plus they are baked in the oven and I love me a good warm oven on a cold day. And the obvious, but all the protein and all around goodness. A great dish to serve if ever you need to feed people like me who don%u2019t eat meat. It%u2019s a win win win win.
Baked beans in all their glory. No cans in sight.
The stuff. White beans that were soaked overnight, strained then added back to a pot with 6 cups of water. Also have crushed tomatoes. an onion, a few cloves of garlic, chili powder, mustard powder, apple cider vinegar, and some salt and pepper.
First step is to start boiling you beans. But while that is happening, mince garlic and chop the onion into really small pieces.
Toss the onion and garlic in a pan and cook on medium low until soften and fragrant.
Cooked beans. All you need to do to cook them is place the pot with soaked beans and water on high, bring to a boil, then turn heat to a medium. Let beans cook until tender. It should take about an hour and a half.
Beans are cooked and the garlic and onion are soften so now all you do is combine everything together. Don%u2019t drain the beans, just toss in the tomatoes, the vinegar, the spices, and a few pinches of pepper and a pinch of salt. Stir in all together,
Looks like soup right? This is right before you stick it into the oven.
Now look at that, oven baked beans. The best part%u2026 The crispy sides. ALL MINE!
Not much left to do but eat them. Straight up with a hunk of bread. That is a good way to start anyway.
Enjoy your beans!
-C
Makes a big pot of beans
1 pound (2 cups) white beans soaked in water for at least 8 hours (I used great northern but navy would be good too)
6 cups water or veggie stock
3 cups (or a 28 oz can) crushed tomatoes
1 onion
3 cloves garlic
1 1/2 tablespoons chili pepper
1 tablespoon mustard powder
1/3 cup apple cider vinegar
salt and pepper
Strain soaked beans and place them into large oven safe dutch oven almond with the water and stick on the stove. Bring the beans to a boil then reduce heat to medium and cook util the beans are tender. Should take about 1 1/2 hours.
Sometime while the beans are cooking, mince garlic and chop the onion into very small pieces. Place in a skillet and cook on medium until the onion and garlic are soften and fragrant. Remove from heat and set aside until beans are cooked
Preheat oven to 425
One beans are tender, dump in the cooked garlic and onion, the tomatoes, the spices, the vinegar, and a good pinch of salt and pepper. Stir it all together and place into the oven. Bake for about 2 hours, staring about ever 30 minutes, until the bean sauce is nice and thick. If at any point you think they have gotten to dry, just add more water. Pull the beans out of oven once you are happy with the sauce consistency. Taste and season with more salt and pepper if needed.
And then eat them. As a meal, as a side, or as a snack. Beans are good anytime.
Any leftovers should be stored in the fridge. Beans can be reheated very easily on the stove top. Just place the pot back on stove, stir in a little water and cook til hot.
Beans are also fantastic eaten cold from the fridge.
What are you doing this weekend? It is suppose to be cold and rainy (if not snowy) and crappy and just not a good weekend to be hanging outside, which makes it the perfect weekend to spend some time inside, SPRING CLEANING! Haha. Doesn’t cleaning get you excited? No, well,%u00a0sorry for you. Me, I like to clean, and I really like to tackle jobs that really really need to be tackled, like cleaning out the fridge. And a crappy weather spring weekend is probably the best time to do it.%u00a0
The refrigerator. My pride and joy of the kitchen. It’s an old harvest gold Fridgaire from like 1970. This is the fridge I spent almost a year hunting down and finally finding on craigslist from a man who was cleaning out his dead mothers house. The fridge that I almost gave up on when I couldn’t find it and almost bought a big stainless steal thing instead.mBut last minute, I found it, like it was %u00a0meant to be. And this fridge has a story all of it’s own. It was a prize won by on of the ladies daughters from a cereal company contest.%u00a0The family kept it for all these years and took such good care or it because of that.%u00a0A well cared for and loved fridge.%u00a0It is a good one with faux wood trim and metal shelving. It keeps my food cold and frozen %u00a0(sometimes frozen when it shouldn’t be. The back top shelve %u00a0in the fridge has a few cold spots the might freeze whatever is there. My solution to that is to not stick things in the cold spots.) and is just as pretty as can be. Some people question it, don’t understand why I didn’t just buy a matching fridge to my stainless steal stove, but you know what, if you don’t like it, well I really don’t care. It makes me happy and I love it.
And to what goes on on the inside. To know me is to know what is inside of my refrigerator. It is always packed. There is and always will %u00a0be carrots, beets, lemon, cabbage, turmeric, greens, greens, and more greens in there. There will always be some hummus of some kind, mustard, bread dough, tofu,%u00a0and lots and lots of any and every veggies you can think of. Plus a bunch of %u00a0jars and container, which I have a bad habit of not placing lids on all the time, full of lentils and beans, rice, and quinoa. %u00a0There is usually a %u00a0baked sweet potato or some squash and more likely the not, tomatoes and plant milk. In the freezer, well that’s getting pretty empty now, but after harvest in the fall, it is packed to the brim with bags of frozen veggies. Now it has a few bags of veggies, frozen bananas and berries,flours, and nuts. But the fridge,%u00a0The fridge is always full. And it an get a little messy….
And now I it’s time to clean it out.%u00a0
I spot clean and straighten it out often. Usually before I pick up farm share I go through it and tidy up, make more space, and pull stuff out that needs to be eaten first. But that is just the surface cleaning. Stuff gets sticky, stuff gets stuck, and especially with veggies, stuff gets dirty.%u00a0%u00a0Spot cleaning has a place but it’s not cutting it anymore. It’s spring and it’s time for a full fledge deep clean.%u00a0
Now I know most people have their own methods for cleaning but here are a few tips and techniques that I have to tackle the beast.
-Prepare. You don’t want to just go at it without a plan and supplies. Get out your cleaning supplies. Grab a recycling can and a compost bucket, and have a big lean surface ready to place stuff on. The vacuum or a broom should be handy too.%u00a0
–Cleaning solutions. It is a fridge so you don’t want to be cleaning it with a bunch of chemicals. What I use is a vinegar solution. 50/50 white vinegar and water and a squirt of dish soup. It cleans, degreases, disinfects, and won’t kill you.%u00a0
–An empty sink or bathtub to wash all the drawers and shelving off.%u00a0
–A few clean containers. Just have them on hand,%u00a0with lids, to place stray things roaming around in there.%u00a0
–Clean from%u00a0%u00a0top to bottom. This avoids crap falling into something you already cleaned.
–Labels. Any containers that are not clear might benefit from a label. And if you tend to leave things in the fridge for a long time, a label for the date of opening is also a good idea.%u00a0
–Inventory. Knowing what is in the fridge is very important, this prevents food waste.
–Too many condiments. I don’t know how many times I have looked in peoples fridges and seen 5 different bottles of ketchup or Italian dressings open. Consolidate. %u00a0And if you don’t like it or don’t use it, get rid of it.
–Wipe it all down. Not just the fridge itself, but all the stuff going back into it. So many times I have stuck the soy sauce in the door and had it leaked all over.%u00a0
–Know your fridge and place accordingly. Most people don’t have super old fridges, but even the new ones have some quirks. Know if there are cold spots or dead zones or places that things get stuck and place food accordingly. Also think about where you are placing food. It don’t make sense to but the milk way in the back if you use it all the time.
–Under and behind. Don’t forget to clean under the fridge and behind the fridge. It will be dusty, maybe a little gross, but it must be done.
–Music. A good playlist is always going to make you better are cleaning.
As for the Use it Up Soup, do just that.%u00a0This is the perfect time to use up what you got. I know that I have way more veggies then the average person, but don’t let that stop you. You could even pull stuff out and fill in missing ingredients form the store if you want. And be creative, %u00a0pickled hot peppers, all the frozen veggies, any wilted greens. Even almost empty bottles of mustard. If you think it sounds good in soup,%u00a0use it up. Add some canned tomatoes and a handful of spice, you are gonna end up with something tasty.
. A clean fridge and soup, how can it get any better?%u00a0
The before. Veggies all over. Jars and containers stacked, with and without lids. A stray half of banana, and empty water bottle, and a half eaten salad in a bowl just having out. %u00a0The shelves are kind of gross. The veggie drawers are nasty, and I think almost everything is wet because I dumped over a container of tofu the other day and all the tofu water leaked all over…… This deep clean was a long time coming.
I always have so many bags and containers of veggies and beans in the fridge.
The stuff in the door too. This is actually a lot of crap. The last dinner party we had someone brought over salad dressings. The mr and I don’t use salad dressing,%u00a0but I guess it’s not so bad to have them here. The littles like them and I know that they will be eaten.
And the stuff that is going to be soup. I found a wrinkly parsnip, some celery, carrots, a few cooked potatoes, some cooked butternut squash and a half a kale and carrot salad. The jar of almost gone lentils, and jar of tomatoes.%u00a0Some ginger and turmeric root which is always is the fridge. A rutabaga, some cabbage, an onion,%u00a0and I also grabbed some frozen green beans and the rest of the frozen rhubarb ( resh rhubarb is on it’s way)%u00a0
I chopped it all up, tossed it into a big pot. Added some spices and %u00a0water and stuck it on the stove to cook away while I got to the cleaning.%u00a0
After. Clean fridge wand clean food. All organized and pretty.
The freezer before. It looks a little crazy but there really isn’t that much in there.%u00a0
After. I pulled it all out, wiped it down, and put it all back, organized, and wth lids (again, my bad habit of no lids)%u00a0
And all the while I was cleaning, the soup was cooking.
Clean refrigerator. Makes this lady happy here.%u00a0
And the reward for all of your cleaning. A big bowl of soup.
-C
Pineapples have been on sale all week long. I think it’s because Easter and I guess people need pineapples for Easter for some reason. Does Pineapple have anything to do with bunnies or Jesus? I think not. Pretty sure it has something to do with cake or ham or some shit, but I honestly don’t care because I just like the fact that I can buy a few (like 3)%u00a0pineapples without breaking the bank.%u00a0(I think I am going to buy 3 more for the dehydrator) Plus it is always good to have a pineapple or 3 on the counter at home. You never know when you are going to need one.%u00a0So lets give a shout out to the Easter bunny and %u00a0Jesus. Thanks for the cheap pineapples.%u00a0%u00a0HA!
So now you are have those pineapples, you are going want to eat them. And maybe you don’t want to eat them with cake or ham or some shit. You are going to want to eat it the best way…In a stir fry.%u00a0
This is by far one of my favorite stir fry combinations. Pineapple does amazing things when cooked a bit, especially with soy, broccoli,%u00a0and tofu. This dish definitely let’s pineapple reach it’s full pineapple potential. It is so good that tI think I might even prefer my pineapple cooked along with savory stuff. It is just so right and seriously so freaking good. The mr even get excited for it and he is not the excitable kind of guy.%u00a0Plus it’s fast (especially if you have already cut up your pineapple) and easy because stir fry and that’s what stir fries are. Fast and easy, just like……….(insert your favorite fast and easy person and then chuckle)
And don’t try to use canned pineapple because no.%u00a0%u00a0Just get the fresh one,even if it’s not on sale.%u00a0It’s a must.%u00a0
The stuff. A pineapple (you are only going to need 1/3 of this, but you can never have too much fresh pineapple on hand), a big head of broccoli, a little cabbage, and some firm tofu. %u00a0Also need some soy, a few cloves of garlic, a little fresh ginger, a bit of oil, and pepper.%u00a0
Dice up the tofu into cubes and place on a clean dish towel to absorb some moisture.%u00a0
Grab the fresh pineapple. Cut it up the way you do, but the easiest way %u00a0for me is to cut in half the cut that half into fourths then cut the skin away. You are going to have a lot of extra pineapple so snack as you need too. I always eat like half of what I am cutting up and end up with pineapple gut. SO maybe watch yourself.%u00a0%u00a0
Pour some soy into a cup and mince the garlic and ginger.%u00a0
Garlic, ginger, soy. Looking good.
Cut up about 2ish (or more if you want) pineapple into small mouth sized pieces. Break Broccoli head into small florets and shredded the cabbage.%u00a0
Tofu into a lightly oiled hot skillet with a splash of soy, cooked until a nice crisp brown on all sides.%u00a0%u00a0Once it is cooked, remove from pan and set aside.
It’s the broccolis turn. Add in the florets and a splash of water to start cooking down for a few minutes, it need the head start.%u00a0
Once the broccoli turns bright green and is slightly less raw, add in the pineapple and cook until the broccoli is slightly tender and the pineapple starts to caramalize which will take about 5-7 minutes.%u00a0
Add the tofu back in along with the shredded cabbage and dump the soy ginger garlic mixture all over.. Keep cooking and stirring around until everything is hot and the liquid has mostly been absorbed.%u00a0
That’s some stir fry ladies and gentlemen.%u00a0
You might want some rice to accompany your stir fry so think about it and have it ready. Other then that, it’s food to face time.%u00a0
Enjoy the best stir fry ever.%u00a0
Bye.
-C
serves 2
1/3 of a fresh pineapple (about 2 cups cubed)
1/2 %u00a0block firm tofu
a large head of broccoli (about 2 1/2-3 cups of florets)
1/4 head of red or green cabbage (about a cup shredded)
2-3 cloves garlic
3 tablespoons soy or tamari
1 tablespoon freshly grated ginger
pepper
Cooked rice to serve with (Optional)
Cube tofu into 1 inch pieces and either place on a dry towel to absorb the moisture or place the tofu into the microwave and heat for 2 minutes. When you take it out of the microwave there will be a lot of liquid…pour it off and pat the tofu dry.%u00a0
Cube fresh pineapple into similar sized pieces and break broccoli into small florets. Shred cabbage.%u00a0
Mince garlic and add to a bowl or jar with the grated ginger and soy sauce.%u00a0
Place a large skillet on the stove an medium heat. Drizzle in a little olive oil. Once oil is hot, place the tofu in with a splash of soy, cooking until all sides are a nice dark browned. Remove the tofu from pan and add the in the broccoli. Add a splash of water and cook for 5 minutes. Then add in the pineapple and cook for another 5-7 minutes or until the pineapple starts to caramelize and the broccoli os no longer raw.%u00a0%u00a0Add the tofu back in along with the shredded cabbage and pour the soy garlic ginger mixture all over. Sprinkle with pepper to taste.%u00a0Cook for another 5 minutes or until the liquid has cooked down.%u00a0
Serve with rice or quinoa and extra soy if needed.
Whether you are stuck at home because you have the flu or because you do not want to leave the house for fear of turning into a human popsicle, or maybe even you just don’t want to because this is the first weekend that you have no plans, no obligations, no parties, well then you are in good company.%u00a0
Unfortunately for me, I have to leave the house.%u00a0I have obligations, I am getting over the flu, and I am pretty sure I am going to turn into a popsicle because when -8 is the high for the day, well, it’s bound to happen.%u00a0
But lucky for me I already made the soup, in my fitful sicky, but able to think about and eat food again state. Yes I had the flu, or better yet, the stomach flu. And the stomach flu and food do not mix. Even the thought of food would send me reeling and it was just no good. I seriously thought I would never be able to think or better yet, eat food again without turning straight to the bucket.%u00a0But I will stop there because you don’t need to hear about my misery. Anyway, the death spiral subsided and food was no longer the enemy. I actually wanted (kinda of) to eat again. So food it was to be.
Because it was my first day back to food, I really wanted to take it super easy. (Before I made this soup I actually boiled a carrot until it was mush and ate that just to test my tummy)%u00a0%u00a0Nothing heavy, obviously hot and warming, not to spicy. %u00a0Just soothing and nourishing. And I didn’t really want think about it and worry about it and spend much time in the kitchen. Sure I could have bought a can of soup but actually no, canned soup is not for me. And I know the mr would have thrown something together for me but I was determined to be a slightly productive human and do something with my day even if it was minimal.%u00a0%u00a0I had to make the soup, I had to do it.%u00a0
This soup was exactly what I needed and could not have been any easier to make.%u00a0Chop up some shit, toss it into a pot, and walk away (or nap on the couch) for a little while. It can be done on the stove, in a slow cooker, or if you have a Instapot and want to do that, I should say go for it. And I am not saying this because I was starving, but %u00a0this was one dang fantastic tasting soup. Right in every way. It’s going on my semi permanent soup rotation for the next few months.%u00a0%u00a0%u00a0%u00a0
No bad after 48 hours of dying and no food. (stupid flu)
The stuff. Carrots, celery, a small rutabaga, and and onion. A red potato, a parsnip, some green been, garlic, canned tomatoes, navy beans, %u00a0thyme, rosemary, a bay leaf, and salt and pepper.
Note here that all this stuff was already in my house. Say you do not have a rutabaga or a parsnip, it’s totally fine. You can add%u00a0
Here is the hardest part. Chop it all up into little pieces. All of it all mixed together, just get it chopped.
And toss it all into a big pot with he green beans,%u00a0a handful of dried beans,%u00a0and the spices.
Add in the can of tomatoes
Then fill the pot with water.
Now stick the pot on the stove and bring to a boil then reduce heat to a little lower the medium and loosely cover with a lid.%u00a0
A couple hours later, once the beans are cooked and the veggies are tender, you got yourself a big ol’%u00a0pot of some fantastic home made, easy as can be, vegetable soup.%u00a0
Chunky, hearty, and easy as can be. And the best part is that I have left overs and we all know that left over soup is the best soup.%u00a0
Stay warm, don’t turn into a popsicle.
-C
Makes a big pot of soup
2 carrots
3 stalks of elery
1 onion
1 small rutabage
1 red onion
1 parsnip
2 cups frozen green beans%u00a0
1/2 cup navy beans
3-4 cloves garlic
1 28oz can %u00a0(no salt added)%u00a0crushed tomatoes
1 teaspoon roasemary
1 teaspoon thyme
1 bay leave
salt and pepper
water
Note. You might not want rutabaga in this or you might want to add some cauliflour or peppers, so go for it. It’s a pretty adaptable soup so use what you got and like.%u00a0
Grab all you raw veggies, give them a quick wash, then chop them all up into bite sized pieces. Mince up the garlic.%u00a0Dump it all into a large heavy bottom pot. Add in the frozen green beans, the dried beans, the spices and the can of tomatoes. Add a pinch of salt and pepper and %u00a0enough water to cover the everything 3-4 inches.%u00a0
Place pot on stove, bring to a boil, then reduce heart to medium low and loosely cover wit a lid. Cook, giving it a stir once in a while, %u00a0for a least 1.5 hours ( can cook all day on long on simmer if you like)%u00a0%u00a0or until the beans are coooked through and the veggies have soften.%u00a0Add more water if needed.
Serve when you are ready to eat. Refrigerate leftovers.
Casseroles are a winter staple. So versatile, easy to make, can feed a few or feed a crowd, and best part is you can stick one into the oven and and kind of forget about it for a while. On a cold day having the oven on is always welcome, and timing with these things, well you can keep it in the oven for a little while longer then it needs because the worst thing that will happen is that it will get a little more crispy, and that is only an added bonus because the crispy bits are the best.%u00a0%u00a0And what I really love about casseroles is left overs. If you are smart you make it bigger then needed so you have some left over to either eat the next day or freeze for a meal later. Leftover casseroles are the best.%u00a0
This casserole is a nice, hearty,%u00a0stick toy your bone with our feeling heavy and gross casserole. Coconut milk and butternut squash give a creaminess, chickpeas for protein and goodness, kale because, and hazelnuts for a nice yummy crunch. All the flavors pair well together and also pair well with many different types of seasonings. I was going to go curry, then I was thinking rosemary, but ended up keeping it simple without any spices which was really nice because the flavors were all rich and clean. But really, you could go a bunch of different ways with this because its a casserole and thats what casserole do.%u00a0
The stuff. You will need a can of chickpeas, a can of coconut milk (I used light coconut), some kale, an onion, and a butternut squash (you will only need about 3 -ish cups cubed so your squash doesn’t need to be as big as mine was). Also need some garlic, raw hazelnuts, olive oil, coconut flour, and salt and pepper%u00a0
Start by chopping the onion into small pieces and mincing the garlic. Add to a big pot with a little olive oil and get it on a medium heat to start to cook it all down.%u00a0
While the onions and garlic are cooking,%u00a0%u00a0cube the squash. You probably only need the neck, so cut the bottom off (save for later) and peel the skin (also save for later , for soup or stock). Cut the peeled squash into mouth sized cubes.%u00a0
And by the time you are done with the squash, the onion and garlic have had enough time cooking. Add in the can of coconut milk and the coconut flour. Stir in the flour and bring the pot to a boil, then turn heat down to medium again and let cook for a few minutes until it starts to thicken a bit.
Remove from heat and add in the squash, the chickpeas, and salt and pepper. Mix it all around.
Pour directly into the casserole dish filled with kale and give that all a good mix around.
Level it all out and top with the chopped hazelnuts. %u00a0Now into the oven it goes.%u00a0
And hour or so later, you have yourself a casserole ready for for your face.
Grab a bowl and dig on in.
-C
P.S. We realized as we are eating that a really goof vinegary hot sauce or lime juice are perfect addition to this dish. So do that.%u00a0
serves 3-5
1 can light coconut milk
1 can chick peas drained%u00a0
3 ish cups cubed butternut squash
1/2 bundle of kale (like 5 big handfuls chopped up)
1/2 cup chopped raw hazelnuts
1 onion
2 tablespoons coconut flour ( can sub regular flour)
4-5 cloves garlic
olive oil
salt and pepper%u00a0
Either vinegary hot sauce or a lime wedges (optional for serving)
preheat oven to 375
Start by chopping the onion into small pieces and mincing the garlic. Add to a large pot with a tablespoon of olive oil and place on a medium heat to start cooking.%u00a0
While the onions are going, peel and dice your squash. The easiest way to do this is to cut the neck off and then peel that. (save the peels and the base for soup) Dice the peeled squash into mouth sized cubes and set aside.
Once the onions are lightly cooked, whisk in the canned coconut milk and the coconut flour. Bring mixture to a boil then return to a medium heat. Cook for about 5 minutes or until the milk starts to thicken a bit. Add in the squash, the chick peas, and a teaspoon of salt and pepper. Mix together. Add in the chopped up kale and mix that it then dump it all into 3 quart casserole dish. Level it out and top with the chopped hazelnuts. Place the casserole into the oven and bake for 1 hour ( or a little longer for the crispier crunchy parts.%u00a0
Once you remove from oven, let sit for 5-10 minutes to set up and then call it ready.%u00a0
Serve with hot sauce and or lime wedges.
Any left over is great for a meal %u00a0within then next few days or frozen for a meal down the road%u00a0
Mid week, I was doing a little pantry cleaning/ inventorying of what I had and needed when I came upon not one, not two, or even three. No, six. SIX, jars of jam. And there are 2 that are already opened in the fridge. I don%u2019t know why, but knowing that there was that much jam in the house made me a little uneasy. Six unopened jars is about 3 jars past my comfort zone. Sure there are so many things you can do with a jar of jam (jelly, preserves, and marmalade included) and now that I am thinking about it, is one of the reasons why I bought a few jars a while back. Then there was Christmas and I think we got at least two jars as gifts so it%u2019s not all my fault, but still, that is just too many jars of jam. Right there I needed to get rid of at least one jar. So muffins. Jam muffins, with poppyseed crust because it%u2019s pretty and nobody ever complains about poppy seeds, or at least they don%u2019t until after they eat them and have poppy seeds stuck in their teeth all day. But that is just our mouths way of saving a little for later, am I right? HA
Anyway, a quick and simple muffin recipe for all of you people out there that might have a jar or two too many of jam in the fridge or pantry%u00a0(I used apricot but any flavor(s) would work) and could use yourself a tasty little muffin situation. I mean who doesn%u2019t want a tasty muffin?
To the muffins.
The stuff. In the bowl is white and white whole wheat flour, baking powder and soda, and salt. Also have apricot jam, oil, almond milk, apple cider vinegar, and orange, and some poppy seeds.
Grab a zester and zest the orange into the bowl with all the dry stuff. Whisk to combine.
Jam, oil, milk, and vinegar. All on top of dry. Whisk that up until just combined. No over mixing. You will get tough (not in a good way) muffins.
Scoop into well greased muffins tins then cover the tops with poppy seeds.
And out of the oven, looking all pretty like.
Pop those muffins out of the tins and cool on a wire rack for a bit. And by all means, don%u2019t wait until they are completely cool.
Now eat you a warm muffin and if they are mini, grab a few. You can%u2019t just eat one mini muffin, that is just crazy.
-C
Make 12 normal size muffins or 24 mini muffins
1 cup all purpose flour
1 1/4 cups white whole wheat flour
2 teaspoon baking powder
1/2 teaspoon baking soda
1/2 teaspoon salt
1 cup plant milk
1/3 cup neutral oil
1 tablespoon apple cider vinegar
zest of an orange
1 heaping cup apricot jam or preserves (can sub in any flavor you like)
1/3 cup poppy seeds
Preheat oven to 350
In a large bowl whisk together the flours, salt, baking powder and soda, and the zest of the orange. Add in the oil, milk, jam, and vinegar and whisk until just incorporated. Scoop batter into well grease muffin pans (12 regular or 24 mini) then cover the tops with poppy seeds. Pop into hot oven and bake until risen and a tester comes out clean when one is poked. For mini muffins, check after 13 minutes, for normal muffins, after 16 minutes.
Once baked, remove from oven and pop out of pans when cool enough to handle. Place on a wire rack to cool completely or just start eating them warm.
Store left over muffins in an airtight container for 3-4 days at room temperature. They also freeze well.
I have been meaning to make this jam for a while now. I’ll buy a bunch of jalape%u00f1os, then slowly, before I get to cooking them down,%u00a0end up eating them%u00a0all. But not today,%u00a0and the rewards are great, Fresh jalape%u00f1o jam. So much potential for the greatest of things%u00a0(I am thinking mango jalape%u00f1o sorbet%u2026 no, I am making jalape%u00f1o mango sorbet) And if you, like me are a jalape%u00f1o fan, this is going to make your life amazing. You will find yourself jamming up everything, or maybe just eating it with a spoon.
Whatever you want to do with it,%u00a0just make it.%u00a0
Honey and jalape%u00f1os.. All you need, well a little salt and water too, but that’s it.
What you need to do is remove the stems,, most of the ribs and half of the seeds removed. (You could remove all or none of the seeds depending on you heat preference)%u00a0Chop the peppers%u00a0into small chunks, toss into a pot,%u00a0sprinkle with a bit of salt, add in a splash of water. Place%u00a0the pot on medium heat. Top it with a lid, and give the peppers a good stir%u00a0every few minutes. While the peppers are cooking, you want to make sure the bottom isn’t sticking and buringin. If that starts to happen, just turn the heat down a bit and add%u00a0in a little splash more of water.
After about 20 minutes, the peppers are fully cooked and falling apart. The liquid is cooked down and the peppers are starting to caramelize on the bottom of the pan. When that happened, remove the pot from heat.
Now you can either blend the peppers, mash the peppers with a fork, or leave it chunky. Thats a choice Ill leave to you. ( I like to blend, but keep some%u00a0chunks)
And drizzle in a bit o honey. As little or as much as you like.
And scoop into a jar.%u00a0Eat the jam on anything you want. (I found myself eating it with a spoon)
Keep it Real!
-C
Makes about 1 1/2 cups of jam
10 large jalape%u00f1o peppers
a pinch of salt
About 1 tablespoon of honey, but add more if you like (And if you want to keep it vegan, use agave or sugar)
Wash, remove ribs and most seeds (the more seeds you leave the hotter it will be)%u00a0and dice jalapenos into small chunks. Place in a pot with a few%u00a0splashes of water and a sprinkle of%u00a0salt. Turn on medium heat and cover, stirring every few minutes. If the peppers seem%u00a0to be sticking %u00a0o the pot and burning, turn heat down and add another splash of water.%u00a0After about 20 minutes, the peppers should be really%u00a0tender and%u00a0falling apart. The liquid should be completely cooked out and the peppers will start to caramelized at the bottom of the pot. When that starts to happen, remove from heat. %u00a0Now%u00a0either mash with a fork, blend with a hand blender, or leave superr chunky. Drizzle in honey (or sweetener)%u00a0and stir.%u00a0
Eat right away or stick in a jar and store in the fridge for up to a week (It won’t last that long)
Besides begin a coffee addict, I am also a super big tea drinker. At least 1, if not like 3 cups a day. And when I say cups, I mean a 32oz ball jar of steaming hot water with a tea bag of some sort in it. And sure, I will use the same bag twice or leave in an old bag and add a new bag. Or with loose leaf, I%u2019ll end up just eventually swallowing it all. What can I tell ya. That%u2019s my truth. %ud83e%udd37%ud83c%udffb%u200d%u2640%ufe0f
Anyway, tea. I have a shit ton. Bags and loose leaf, but sometimes what I would call “conventional tea flavors%u201d do not sing my fancy. That is when I will dig around in my spice jars and pull stuff out to make or add to a tea.
Fenugreek. A seed. A great tasting seed. I usually use it in my chilis and curry dishes, but lately, I have also been brewing it up with (and without) fresh ginger to drink because it is fantastic. Ginger of course is spicy and earthy, but fenugreek, while also being really earthy, also has a sweetness to it and tastes kind of like real maple syrup. Now doesn%u2019t that sound great? That%u2019s because it is great.
So if you are feeling a little something different and tasty and maybe just so happened to have some fenugreek in the old spice cabinet, give this tea a try. A perfect for and cosy drink for cold winter afternoon.
To the tea!
The stuff. Water, fenugreek, fresh ginger, and an orange.
Dump water into a pot and add in fenugreek seeds. Place on the stove and bring to a boil, then turn the heat to low and simmer.
Cut up the fresh ginger into small chunks and take a few ribbons of peel from the orange.
After the fenugreek has had a 5 minute head start in the water, add in the ginger and orange and keep simmering for another 5 to 10 minutes. (longer time for stronger tea)
Strain the tea into cups, squeeze in a little fresh orange juice, and go curl up o the couch.
It%u2019s tea time.
-C
makes 2 cups of tea
2 teaspoons fenugreek seeds
1 inch chunk of fresh ginger
an orange (optional)
4 cups water
Place water and fenugreek seeds in a pot and place on stove. Bring to a boil then turn heat down to simmer for about 5 minutes. Cut up ginger into small chunks and peel a few ribbons of orange zest and place into pot. Continue to simmer for another 5-10 minutes (longer for stronger tea). When you are ready to drink, strain into cups, squeeze in a little fresh orange juice, and drink.
I talk a lot about how much coffee I drink (and yes, I do drink a lot of coffee) but honestly, I drink just as much if not more tea. Almost always herbal, sometimes a bag, sometimes loose leaf. In the cold months I probably drink 5 cups a day (well actually I drink it out of big ball jars and drink 2-3 of those big jars a day) So yeah, I drink a lot of tea too.
This tea blend is one of my favorites. Licorice is delicious. Sweet and spicy, not to mention fantastic for any respiratory ailments you might be having (licorice root is one of my go to%u2019s for medicinal purposes) Adding all the other spices just brings even more amazing spicy goodness that will make your house smell amazing and make you face smile a smile. A perfect tea to place on the stove to sip on all day, warm your insides and hands (best cure for cold hands is a hot mug) and most likely put you in a cheery festive mood because we are in the thick of all the holidays and sweet and spicy mulled hot drinks will do that to a person.
Take a few minutes, make some tea, and take care of yourself. It will be good. Trust.
To the tea!!
The stuff. Cut and sifted licorice root, whole or hulled cardamon pods (use one or the other), whole cloves, a couple cinnamon stick, some fresh ginger, and and orange.
Not much needs to be done, just slice the ginger into a few thin pieces (you don%u2019t even need to peel it) and peel the good parts of the orange off (avoid the white pith) then add it to a pot with the spices and that%u2019s pretty much it.
Pot full of spices. It%u2019s gonna be good.
And we can%u2019t forget to add in the water cause tea needs water. Bring the pot to a nice boil on the stove for a few minutes then pull it off the heat.
Set hot tea to steep for like 10 or so minutes.
Strain steeped tea into mugs.
Pssss.. You can re-steep all the tea bits if you want. I have resteeped mine like 3 times!
Add a festive common stick and slice of orange to (squeeze the juice into the tea.
Now take in all the cozy sweet feels, sip, and enjoy.
-C
Makes 3 large cups (plus more if you want to re-steep spices)
2 teaspoons cut and sifted Licorice root
1/2 teaspoon whole cloves
4-5 whole cardamon pods or 1 teaspoon hulled cardamon
about an inch and a half of fresh ginger
An orange
1-2 whole cinnamon sticks
36-40 oz of water
Peel or zest the orange (not the white part,) and slice the ginger into a few thin pieces. Place into a big pot along with all the spices and the water. Place pot on stove and bring to a boil for 2-3 minutes then turn heat off and let tea steep for 10 minutes.
After steeping, strain into cups. Slice orange into segments and serve tea with a squeeze of fresh orange juice. IF you feel fancy, a cinnamon stick too. Feel free to sweeten tea to taste, but I think you will find that it is sweet enough.
Drin kind enjoy.
Note. After you strain the tea, place the spices back into the pot. Add more water. boil and steep again. These spices can be used for a few rounds of tea
I am channeling all my summer time feels here in hopes for warmer weather. As of yesterday there was still a pile of snow outside of my house and I am still leaving every morning in a hat, mittens, and a winter jacket.
I want t-shirts and shorts, I want sandals, and I want to set my winter jacket on fire (not really, but kinda).
This cold weather has crept back into my soul and I needed something to remind me that there will be warmer days to come and I will soon be bitching about how hot I am and blah blah blah.. you know how it goes.
So I make lemonade. This lemonade as inspired by my favorite tea as of late, raspberry zinger. It’s a nice and tangy tart and really tasty. I make great big jar of it at night and add a little squeeze or two of lemon to it for that little extra zing. I figured if it tastes good hot, it will taste great cold, which in fact, it does. It taste really freaking good. And it just occurred to me that there is probably a little subliminal inspiration from Beyonce in wanting lemonade, so thanks for the B.
Anyway, it’s suppose to me nice and seasonably warm this weekend. Maybe bust out your lemonade game and try a batch of this one.
The stuff. Lemons, a raspberry zinger tea bag, honey (or any sweetener you like to use) water and ice.
Bring some of that water to aalmost boil and pour it over the tea bag (make sure you stick the bag into a jar or pitcher)
While the tea is steeping, juice the lemons. And a personal preference, you can strain out the pulp or not. I use the strainer to catch the seeds but then stick the pulp back in cause I like pulp. All up to you.
While the tea is steeping and still hot, add in any sweetener that you want to use. ( I used a little honey) Stir until that sweetness is all dissolved.
And after the tea has had a good steep, dump the brewed tea into the pitcher with the lemon juice then add in the really cold water. Stir it all around.
Add acouple thin slices of lemon to make it all fancy anda few big chunks of ice to make it super cold
Refreshing, crispy, tangy with a touch of sweet….Perfect for all those warm summer days to come (hopefully)
Have a great weekend people.
-C
Makes 5 cups
1 raspberry zinger tea bag( I used Celestial Seasonings)
3/4 cup fresh lemon juice (3-5 lemons, depending on size)
Anywhere between no to 1/2 cup of sweeter (can use sugar, honey or maple, I like a touch of honey)
4 cups water (2 hot, 2 cold)
ice
Place tea bag in 2 cups of hot water (can be done directly in a pitcher) Add in the sweetener while its still hot and mix until completely dissolved. Let steep for about 10 minutes.
Remove tea bag and add in the lemon juice, 2 more cups of cold water and mix, Top with ice and garnish with a few more lemon slices if your feeling fanciful.
Serve in a glass full of ice with a wedge of lemon and a smile on you face.
For the longest time now, I have been drinking a little turmeric with a little lemon first thing in the morning. It started as a medicinal drink, but quickly became a tasty habit. I have some stupid weird circulation condition called raynaud’s where changes in temp turn my fingers and toes into icicles. And for me, the worst time of the year for this condition is the spring (but spring is still my favorite). All the up and down of temperature and the wet cold damp weather is my trigger, not to forget to mention that those temp swings can get a girl sick. (I can’t get sick!!)
So way back when I started to drink for my health and the feeling in my fingers. Turmeric, ginger, and cinnamon , all super warming spices that help greatly with blood circulation, not to mention a whole bunch of other good things. (I could tell you and go on and on, but you can just look it up yourself) Ever since I started drinking and eating lots of these spices, my raynauds has gotten soooo sooo soooo much better. I still get cold finger and toes, but no where as severe and the way less often.
Now a few weeks ago the mr started making himself an afternoon turmeric tea. He read something on the internet about how it’s the best anti-inflammatory and good for achy joints. (Sure dude, listen to the internet and not me) Being a big guy doing construction and such, he gets really achy joints and there is only so much arnica and frozen peas a guy can do. So now he drinks this and I think he is starting to notice a difference. (less time with the frozen peas) And since he is making himself tea every afternoon, I started to make a spicy tea for myself in the afternoons too. I figured that a little extra goodness to ward off the chills and any larking illness is only a plus. It’s our after lunch treat that tastes good, is warm and soothing and is doing the body all sorts of good.
Spicy turmeric tea. You will get addicted and feel like awesomeness.
The stuff. Ground turmeric, ground ginger, saigon cinnamon and hot water. Additional yums with a little lemon and some honey if you like it sweet or have a scratchy throat.
Spices into a drinking vessel (I like a big jar)
And in goes the hot water. Give it a good stir and a squeeze of lemon (and sweeten if your gonna)
And watch it swirl. A drink that keeps this girl happy and healthy.
Something great to look forward.
-C
1 tablespoon ground turmeric
1 teaspoon ground saigon cinnamon (can use regular, but it’s not as spicy sweet)
1/2 teaspoon ground ginger
1 1/2- 2 cups hot water (not quite boiling)
honey to taste (I only use if my throat is sore)
lemon juice (optional)
Note… My measurements are just guidelines. You might like a little less turmeric or more ginger so make this drink any way that tastes best for you.
Grab yourself a big mug or jar, add in the spices and hot water, honey if you want it and a squeeze of lemon juice if using. Stir with a spoon and drink. Keep spoon handy to give it a good stir every now and then
My flowers are coming up, I have packed away my winter jacket, and I haven’t worn anything but sandals for the past week. Plus yesterday I made the first batch of sun tea and saw my first hot air balloon of the season (which lead to a heated discussion with the mister about how hot air balloons take flight. We were both kinda right, but me more than him)So yeah, %u00a0it’s for real%u2026 Winter is gone and spring has sprung, or more like spring sprung then bounced cause now it’s basically summer weather. Not complaining, but I hope we get a least a few more weeks of pleasant, not hot and humid weather.%u00a0
Anyway. Sun tea, one of my favorite summer time drinks. Made by infusing regular old teas with water by using the almighty power of sun.
Why do we want to make iced tea this way instead of just using boiling water? Well you can still do that, but sun tea makes a more mellow, lovely, and I find, more sweeter tea. It brings out more complex flavors that you don’t get with the boiling water method. %u00a0And it’s nice to know that it took zero effort on my part to make the drink (not that boiling water takes that much effort, but still)
It can be made with any variety %u00a0of teas, infused with other fresh herbs, dried spices, or even chunks of fruit. You can also make the teas and add flavors after the infusing is over. Have fun and play with flavor combos.
A few of my%u00a0favorite sun tea%u00a0combinations
Any mellow black tea like orange pekoe or english breakfast with a few springs of mint
Chamomile and mint%u00a0
Green with a fruity tea, like blueberry or pomegranate
Lemon Zinger with a few springs of Rosemary
These are just a few of the endless possible flavors. And you don’t have to get fancy with it either, you can totally use plain old lipton tea bags (I still do that too)
Now harness the sunshine and feel awesome and fancy by making some tea!
Woo Hoo Wednesday!
-C
SUN TEA
%u00a0What you’ll need
Tea- Either bags or loose leaf
Water- Preferably Filtered
A glass jar with a lid
Sunshine
I %u00a0use a ratio of 1 tea bag or 1 tablespoon loose leaf tea per 2 cups of water. And I usually make my teas in half gallon ball jars so I use 4-5 teabags or tablespoons of tea. (makes just enough tea for 4-6 tall glasses, depending on you glass size) %u00a0If it’s a mint tea, I usually use a little less because I find that mint teas can become to strong and bitter so I %u00a0use 3 teas bags or tablespoons of loose.
Directions
Place tea loose or bags into jar. Fill with water, leaving about an inch for tea expansion, place lid on tight, and stick in the sun for anywhere between 3-5 hours %u00a0(depending on how strong you like your tea). When tea is infused to your liking, remove teabags or strain the loose tea and stick into the fridge to chill. Serve as is %u00a0in a drinking vessel with a few ice cubes and add sweetener if that’s what you do.
Drink within a day or two, then rinse jar and make a new batch!
Oh, it definitely was a long week. Did a lot of holiday stuff, watched a lot of littles( got peed on) got sick and lost my voice for a couple of days.(that was fun). All sorts of good stuff. But for real, I had a great week. Here are some bits. Persimmons.,,,,,,,,,,,. Do I need to say more?
This new tea%u2026 I wasn’t sure I was going to like it but oh do I. It’s so freaking good, I have been drinking it every day. I must stock up before its gone!
Everything about getting our Christmas tree makes me happy. Every year, the mister, the dog, and I drive down to the rangers station,, get our tree tag , and hike into the Green Mountain National Forest to hunt for and cut down our Christmas tree. The tree is the thing for me. I don’t want presents, no shopping, take the food, just the tree and I will be happy. %u00a0Its our most fantastical tradition. We make is a whole day event. A nice drive, lunch, listening to Christmas music, lots of hot coffee, a long hike in the most beautiful place in the world. The perfect day.%u00a0Look at how happy this guy is. Its hunting season and we forgot his bright colors so we improvised. Yellow trash bag ribbons. His new nickname is now Trash dog. It fits him.
Watching this little. She is an amazing human being and I love love love her.. I think she might be mine. She really likes soup..
My elf candle holders I got from CB2. I wanted them so bad for years and finally the last year they sold them I bought myself these guys. I heart them
Oh you like my new milk crate show bench? Its awesome,, one of the best uses of scrap wood and milk crate that I have ever done(Yes there has been other scape wood milk crate projects) Well you are in luck..I will show you how to made it.. watch for it next week!
I love old strainers. I kind of have a thing for them. This big guy is now in my collection. Bonus, green AND purple kale%u2026.
Hanging out with my sister. I haven’t seen her for what seems like the past 4 months(she is in nursing school). This was her last day of classes %u00a0so we cleaned her house, folded laundry while listening to music and I made her dinner.We wrapped up the night by mass texting our other sisters inappropriate pictures of the elf on the shelf. It got pretty crazy. %u00a0It was such a great night. I love my sisters.
Hope you found some bits of happy this week, if not, your not doing it right.
Mid week, I was doing a little pantry cleaning/ inventorying of what I had and needed when I came upon not one, not two, or even three. No, six. SIX, jars of jam. And there are 2 that are already opened in the fridge. I don%u2019t know why, but knowing that there was that much jam in the house made me a little uneasy. Six unopened jars is about 3 jars past my comfort zone. Sure there are so many things you can do with a jar of jam (jelly, preserves, and marmalade included) and now that I am thinking about it, is one of the reasons why I bought a few jars a while back. Then there was Christmas and I think we got at least two jars as gifts so it%u2019s not all my fault, but still, that is just too many jars of jam. Right there I needed to get rid of at least one jar. So muffins. Jam muffins, with poppyseed crust because it%u2019s pretty and nobody ever complains about poppy seeds, or at least they don%u2019t until after they eat them and have poppy seeds stuck in their teeth all day. But that is just our mouths way of saving a little for later, am I right? HA
Anyway, a quick and simple muffin recipe for all of you people out there that might have a jar or two too many of jam in the fridge or pantry%u00a0(I used apricot but any flavor(s) would work) and could use yourself a tasty little muffin situation. I mean who doesn%u2019t want a tasty muffin?
To the muffins.
The stuff. In the bowl is white and white whole wheat flour, baking powder and soda, and salt. Also have apricot jam, oil, almond milk, apple cider vinegar, and orange, and some poppy seeds.
Grab a zester and zest the orange into the bowl with all the dry stuff. Whisk to combine.
Jam, oil, milk, and vinegar. All on top of dry. Whisk that up until just combined. No over mixing. You will get tough (not in a good way) muffins.
Scoop into well greased muffins tins then cover the tops with poppy seeds.
And out of the oven, looking all pretty like.
Pop those muffins out of the tins and cool on a wire rack for a bit. And by all means, don%u2019t wait until they are completely cool.
Now eat you a warm muffin and if they are mini, grab a few. You can%u2019t just eat one mini muffin, that is just crazy.
-C
Make 12 normal size muffins or 24 mini muffins
1 cup all purpose flour
1 1/4 cups white whole wheat flour
2 teaspoon baking powder
1/2 teaspoon baking soda
1/2 teaspoon salt
1 cup plant milk
1/3 cup neutral oil
1 tablespoon apple cider vinegar
zest of an orange
1 heaping cup apricot jam or preserves (can sub in any flavor you like)
1/3 cup poppy seeds
Preheat oven to 350
In a large bowl whisk together the flours, salt, baking powder and soda, and the zest of the orange. Add in the oil, milk, jam, and vinegar and whisk until just incorporated. Scoop batter into well grease muffin pans (12 regular or 24 mini) then cover the tops with poppy seeds. Pop into hot oven and bake until risen and a tester comes out clean when one is poked. For mini muffins, check after 13 minutes, for normal muffins, after 16 minutes.
Once baked, remove from oven and pop out of pans when cool enough to handle. Place on a wire rack to cool completely or just start eating them warm.
Store left over muffins in an airtight container for 3-4 days at room temperature. They also freeze well.
Welp, we had a few days of winter. But all that nice pretty snow, well it%u2019s basically all gone again due to all the freaking RAIN. Honestly, what the real fuck. I am starting to think that we won%u2019t have any real winter this year and I am made as hell about it. And no I don%u2019t want to hear it, that you like the warmer days and all that. It is winter, in Vermont, so it it suppose to be snowy and cold. GRRRRRRRRR. (Rant over)
The week came and went with the usual and such. The mr and I went snow shoeing one afternoon, built new shelves on the wall in the living room, and started talking about a time we need to talk about tax stuff. Blah. I also turned a year older, spent a good amount of time working on my pottery that will be up for sale soon (heart mugs are looking good!), picked up farm share, worked at the studio, and did this and that and what have you.
Then the past few days have been kind of crap with me having some sort of head thing. My head feels like an overinflated ballon that is full of jelly and is wrapped in rubber bands. Not exactly sick but not exactly not sick either. And me being me, and as the mr pointed out, when I feel under the weather I tend to feel guilty and push myself to do stuff which is the exact opposite of what I tell everyone else to do when they feel like crap. Not really the best approach to getting better. So I think I really need to work on being ok with feeling like shit and doing nothing and not trying to clean out the basement. HA
Today the mr and I have a good amount of chores to do so that is the plan for the day. I still, as of now, am feeling like real shit so I am going take it easy while running around. And at least with chores comes coffee and no matter how crappy I feel, I won%u2019t complain about coffee.
Links into the world wide web.
-When I am tired for no reason it is most definitely stressed induced. What Kind of Tired Are You?
-I feraking love this. Use %u2018Roadside Wildflowers at Full Speed%u2019 to Identify Plants Without Leaving Your Car
Before You Buy a Persimmon, Remember This. I have yet to buy one this year. Maybe today I will seek one out
–THE SUBVERSIVE JOY OF COLD-WATER SWIMMING. I think if I swam, I would be really into this.
-A long read about worms and why they are not as great as people think they are. Cancel Earthworms.
–What Percentage of the Human Brain Is Used? I don%u2019t know about your brain, but I am pretty sure I use a lot more then 10%%u00a0If I had to guess, probably around 70%. 80% on a good day. Ha
-Super into this house. Look Inside: This Bright Red %u201870s Ski House Is on the Market %u00a0
-Winter actiivnites and all the places to camp this time of year. Vermont State Parks Winter Activities.
-Whwnever I hear about anything that ws said by anyone from %u201cGOOP%u201d, I instantly think %u201cbullshit%u201d especially when it comes to anything vagina related. ‘The Goop Lab’ Is Just ‘Jackass’ for Girls
–Secondhand screen time may be just as dangerous as secondhand smoking. No shit. I see it all the time.
It%u2019s been 14 days since my last farm share pick up with 7 more days to go. (The farmers take a long break at the end of the year, which they all deserve but makes me sad. Or more like hungry.) It is a pretty long stretch for me to have to go without getting me some farm fresh goods. I have been making due, rationing out my roots (the greens were gone within days) and supplementing with lots and lots of frozen zucchini, Swiss chard, and broccoli, so it hasn%u2019t been bad. But now I am worried because with al the supplementing, the chest freezer is looking a little more on the empty side then I would like. And it%u2019s only January. I guess that is what happens when you eat your weight in vegetables everyday. %ud83e%udd37%u200d%u2640%ufe0f
Anyway, I am pretty much out of roots. The turnips were the last of what I had left besides the lone beet that I found stuffed in with the apples. And because they were the last roots and knowing I am not going to have any roots until next week, I wanted to do something a little special with them. That is why I hassledbacked them, which basically means I sliced them up without cutting completely through so they are cut but still stuck together. Does that make since? If not, just look at the pictures.
These turnips, oh these turnips. First off, roasted turnips are amazingly delicious and if you have never roasted one, well you need to get on it and do so. Secondly, the turnips I used are gIlfeather, which if you did not already know, are the Vermont state vegetable. But don%u2019t worry, if you can%u2019t find the gilfeather, regular old purple top turnips work and taste just as fantastic because all roasted turnips are so fantatic. When roasted I might describe them as the cooler, hipper, cousin of the baked potato. Add the avocado cream and seeds, which are the cooler friends of the cooler cousin, and you got yourself a cool dude party! Or basically just a way tastier baked potato situation with fixing.
Now don%u2019t you want a tasty cool hassledback turnip? And yes, I keep wanting to call them David hasselbacks turnips too. Because they are so cool. Am I right? Haha!
To the turnips!
The stuff. Turnip. Either a couple smaller ones or a giant one, up to you. Also need an avocado, a little red wine vinegar and water, salt and pepper, garlic powder, olive oil, and some toasted seeds (if you want).
If using a giant turnip, cut in half. If using small ones, you can cut those in half too or leave them whole. Up to you.
Now to hasselback. Using two guides that are the same thickness (chopsticks or chip clips.. whatever you have lying around that you don%u2019t mind nicking with a knife) slice into the turnip about ever 1/4 inch, right down to the guide, but not all the way through.
Lightly oil a skillet or baking sheet and also rub a little oil all over the turnips and lay them hasselbacked side up. Sprinkle with salt, pepper, and a pinch of garlic powder. Then into a hot ass oven they go.
While the turnips are roasting , make up the avocado cream. Basic, just scoop avocado into bowl (if you have a stick blender) or blender, add in a pinch of salt, the water and vinegar, and blend until smooth.
And back to the turnips. Baked for a little longer then an hour and flipped once, now they are all roasted and crispy and all sorts of ready.
A freshly roasted hasseldbacked turnip smothered in avocado cream and sprinkle with toasted seeds.. Good things here friends. Good things.
-C
serves 2-4
1 large or 2 small turnips
salt and pepper
olive oil
pinch or garlic powder
an avocado
1 tablespoon red wine vinegar
1 tablespoon water
handful of toasted mixed seeds (I used pumpkin and sunflower seeds)
Preheat oven to 450
Grab turnip(s) and wash thoughtful. If you buy the turnip from the store and it has a wax coating, peel the outer skin, otherwise, you don%u2019t have to. Now to haseslback. Cut the large turnip in half or if using to small ones, you can just leave it whole. Take two, either chopsticks or something that is about 1/4 – 1/2 inch thick, and place on either side of turnip to use as a cutting guid. Slice the turnip about ever 1/4 inch , right down to the guide, but not all the way through. After cutting, place on a lightly oiled skillet or baking sheet and drizzle a little oil in our hand and rub all over. Sprinkle with salt, pepper, and a pinch or garlic powder. Place the turnips in hot oven. Roasts for about an hour, or until the slices of the turnip start to brown and come apart. Also, if you want a little more crispy edge, half way through, drizzle on a little more oil. You can also flip (which I did) the turnip cut side down to finish roasting.
While turnips are roasting, make avocado puree. Scoop avocado into bowl or blender. Add in the water, vinegar, and a pinch or salt. Blend in blender or with stick blender until smooth. If to thick, drizzle in a little more water until desired consistency.
Once cooked and all crispy like, remove turnips from oven, place on a plate and slather on the avocado cream. Sprinkle on toasted seeds and eat to your face hole.
Do you ever wake up first thing in the morning with a craving, a maybe somewhat strange food craving? Lately I have been waking up and within an hour of being up, I start to think about olives. My mouth starts to water and it%u2019s like I can almost taste the salty, briny, fattiness in my mouth, which in itself is kind of weird, but for me is really really weird because up until very recently I completely hated olives. Now, well now I just want to eat them all. And first thing in the morning.
I don%u2019t pretend to understand such things. My brain is going to do what it%u2019s going do. Tell me I like olives, well all right then.
Another thing I am desperately craving is freshy fresh greens which makes complete since because I always crave greens. I am still pretty deep in root veggies and cooked things because winter and Vermont and all, but all I really really really want to eat are buckets of greens. Any kind will do, but the sweet tender baby ones%u2026. So good.
And so I combined my two cravings, greens and olives and hit those craving like POW! BAM! POOF? A salad so simple yet so amazing and mouth watering. I outdid myself here.
To the bestest, most amazingly perfect salad yet!
The stuff. A big ol%u2019 bowl of greens. Black pitted olives, half an avocado, a lemon, toasted almonds, a chunk of red onion, a couple cloves garlic, and pepper.
Almond crumbs. Exactly what it sounds like. Place almonds into a clean food prosessor and pulse until they are crumbs.
Dump the almonds into a bowl. Don%u2019t bother cleaning it out, you are about to use it again. Olives, avocado, garlic, and all the juice of the lemon now get a go in the food processor. Pulsed together into a creamy, kinda of chunky but mostly smooth, mixture of amazing. Add a few tablespoons of cold water if the mixture seems really thick, but other then that, you be done.
Very thinly slice up red onion and slice up a few extra olives.
All here, all ready to go. Just got to toss it together now.
Greens, some slices olives and onion tossed all together in a good amount of the olive avocado goodness then topped with a hardy helping of almond crumbs. Fresh pepper to finish it off.
I was barely able to stop myself from eating it all before snapping a few pictures.
All of my cravings come true%u2026
It%u2019s salad time!
-C
Makes enough dressing and crumbs to feed 2-4 people
1/2 of a ripe avocado
1 cup pitted black olives
1 lemon
2-3 tablespoons cold water
1-2 cloves garlic
1/4 cup toasted almonds
2-4 large handfuls of fresh greens (I used a mixture of baby spinach, baby chard, and baby kale. Spring mix or even chopped leaf lettuce would be grand as well)
about 1/2 a small red onion
pepper to taste
Place almonds in food processor and pulse until they are crumbly. Not to fine, a few big chunks are good.. Remove and set aside
Roughly chop the garlic and place in the food processor (no need to clean it out after the almonds). Add in the avocado and most of the olives (leave few behind to slice up). Add in the juice of the lemon. Pulse until mixture is combined but with little specks of olive left.or completely smooth if you wanted too. Scoop out into a container. You want it to be slightly loos so it will mix well with the greens. If the mixture seems really thick, add in a a few tablespoons of cold water to thin out.
Grab the onion and remaining olives and thinly slice.
Now to assemble salad. Place a handful of clean greens into a bowl. Toss a some onions and extra sliced olives into greens. Add as little or as much olive avocado dressing as desired then sprinkle as much or as little of the almond crumbs all over that. Top with freshly find pepper
Then eat it.
We need fresh, we need green, we need color.
We need salad. %u00a0
The other night I made Megan’s birthday dinner which consisted of pizza and salad. The pizza was pizza and everyone loved it and ate it, but what surprised me was how everyone was really into the salad. A big ass bowl or fresh greens with onions and I think carrots and cabbage and some cranberries I pulled form the freezer and candies almonds. Simple and not fussy, and everyone was just so happy to eat it. I felt like a salad genus and now I am full on into making fun awesome spring salads. (I have to keep reminding myself that yes, it is indeed spring.%u00a0So what we got snow yesterday, it will melt, right????%u00a0)%u00a0
So I bring to you a a bowl of fresh crispy spring greens with crunch and bite and creaminess and flavor. A salad that will bring you joy and satisfaction and maybe even anticipation for your next salad adventure.%u00a0Not to mention a salad that looks so dang pretty.%u00a0
Get into the green. You will be as happy as a rabbit in a garden.%u00a0
The stuff. Greens, red onion, an avocado, almonds, blueberries, and a lemon. Also need some maple syrup, olive oil, red wine vinegar, and salt and pepper.%u00a0
A couple teaspoons of maple %u00a0go in with the almonds. Really toss make sure they are all coated.
Place the almonds into a hot skillet cook for about 5-7 minutes or until the maple has become sticky and the almonds no longer raw.%u00a0
When they are done,%u00a0dump them onto a piece of parchment to cool. Don worry if they clung a little, you can break them apart once they are hard.%u00a0
Easy ass dressing. Blueberries. juice from the lemon, olive oil, vinegar, a tiny splash of maple, and a good pinch or pepper.%u00a0
Blended then done. Taste and season with salt if needed.%u00a0
Avocado gets cut into small chunks and the onion get s thinly sliced.
It’s all ready, so now make a salad
Makes 2-3 %u00a0salads%u00a0
1/4 pound greens ( I used spring mix but mesclun mix or spinach is good too)%u00a0
1/2 %u00a0red onion
1 avocado
For the Almonds%u00a0
1/3 cup raw halved or slivered almonds
2 teaspoons maple syrup%u00a0
For the Blueberry lemon Vinaigrette%u00a0
1/3 cup blueberries (I used %u00a0frozen)
1 lemon
1 Tablespoon olive oil
2 Tablespoon red wine vinegar
1/2 teaspoon maple syrup
pinch or salt
pinch or pepper
To make the %u00a0candied almonds, preheat a skillet to on medium heat on top of the stove.%u00a0Place almonds into a small bowl and drizzle with maple syrup. Stir to coat. When the pan is hot, dump the maple covered almond into it and spread them out. Cook for a 3 minutes, then give a stir and cook for a 3 or so more minutes or until the maple has evaporated and the almonds are starting to brown. Dump the almonds directly onto a piece of parchment paper to cool and hardened. Do worry if they stick together a bit, you can break them apart after.%u00a0
To make the vinaigrette,%u00a0place the berries into a jar (if using stick blender) or blender with the juice of the lemon, olive oil, vinegar, maple, and a pinch of pepper Blend until smooth. Taste then add a very small pinch of salt or more to taste.%u00a0
For salad. Thinly slice the onion and dice the avocado. Place greens into bowl(s) and toss with onions and avocado. Top with %u00a0candied almonds and drizzle all over with the vinaigrette. Grab a fork and eat.
Any left over dressing will last in fridge for about a week and left over almonds will be good for.a few weeks in a airtight container.%u00a0%u00a0%u00a0
I was cleaning out the fridge and found that I had a good few really ripe avocados that were in need of eating ASAP. (I bought like 8 at once… super sale!) My first thought was I wish I could freeze these and save them for later. Then I thought well why the heck don’t I freeze them. So that’s what I did. I pureed them up, added a little lemon juice and stuck a jar of tangy green creamy goodness into the freezer and all throughout the week found myself standing in front of the fridge with a spoon scraping at the jar of avocado. It was so good. I even added a little fruit to it toward the end. Avocado and fruit = oh hell yes.
And now that is is officially spring we should be eating popsicles (right?!). I figured you guys are cool enough that I would share my new found love of frozen avocados and you would be down with it.
I know, some might think that plain old frozen avocado doesn’t sound amazing, but when you add a little sweetness and swirl it around with super sweet and creamy mango. Trust me, it’s freaking amazing. The flavors go perfectly together, and the texture, it’s almost like ice cream… SO GOOD! Anyway, I know that it might not be the perfect spring weather as of today, but the beauty of these is that you make them, freeze them and leave them until the perfect moment. Say a good long day of raking up all the cat poop that the neighbors cat has left in all your spring flower beds, or picking up all the recycling that has blow into the bushes all winter long. Maybe a day of cleaning out the closet or dusting the ceilings. Make these popsicles now and treat yourself to one after doing some kind of crappy spring chores, its what you need to do.. Or better yet, bribe a little with a popsicle to do your spring cleaning….. Yeah, I might just do that.
Or just make them and eat them… no spring chores required.
The stuff. A nice ripe mango and a nice ripe avocado. A bit of lemon juice (from half a lemon),%u00a0 a little maple syrup, and a some water.
Scoop the avocado into a jar and cut up the mango ans stick into a jar…..
Splash a little water into each jar and blend them up. (I used my hand blender. but use the blending device of your choice) Add the maple syrup to the avocado.. as much as you need, and if your mango is not super sweet, you can add a little to that too.
Scoop the avocado puree into the mango and gently swirl it around
Now pour/scoop the mixture into your popsicle molds. And because mine was thick enough, I was able to stick the wood sticks without them sinking.
Noe get them quick into the freezer
A good few hours (I didn’t even check until the next day but I bet 4-5 hours in a good freezer will do) the popsicles are nowposicles!!!!!
Pop them out of the mold (a few minutes on the counter and or a quick rinse under warm water) and do what needs to be done.
So creamy sweet and refreshing… This is a happy spring popsicle for sure.
Have a great day!
-C
Makes four 4oz popsicles
1 ripe avocado
1 ripe mango
1/2 a lemon or lime
1-2 tablespoons maple syrup (or any sweetener of you liking)
about 1/2 cup of water
Note.sIF your mango is not super sweet you might want to add a little maple syrup to thatto that as well. And depending on the actual size of your mango and avocado, you might find yourself with a little extra fruit puree…. so maybe an extra popsicle can be made or you can just eat it now.
Scoop avocado into a jar and cut and dice mango and place in a separate jar. Add maple to the avocado (and the mango if you want) and about 1/4 cup of water to each.%u00a0 With a hand blender, blend each until smooth ( or use a regular blender) Once both are blended, dump one into the other and gently swirl around. Pour mixture into popsicle molds, add the sticks and stick into the freeze. Keep freezing until frozen which should take at least 4-5 hours.
And once frozen, pop out of molds (run mold under warm water or just leave on counter for a few minutes) and eat them like it hot!
Sitting at the airport in Copenhagen %u2026%u2026
What What!!! %u00a0Thats right people. Our travel adventure has begun!
And you guys, I made it alive, my very first (%u00a0and second) plane ride ever! And oh boy was it a dozy.
The flight from boston to Iceland was just about as scary as I could have imagined. The plane felt like it was jolting back and forth the entire time. So much turblance. I pretty much couldn%u2019t lift my head off of the mr%u2019s shoulder the entire flight or else I was going to barf. And sleep. Not a chance. I was to busy wondering how long we would make it in the sub artic waters if the plane went down. I was thinking a similar situation to Kate and Leo in the Titanic, although I would never let Nick go. (gag. I did a little too.)%u00a0
So now we are sitting and hanging at the airport waiting for eight, yes EIGHT HOURS for our next flight into Ireland. Yeah, we are a little bored and sure, we could lock up our bags and venture out into the city, but honestly, we are beat ass tired. We kind of planed on hanging here anyway so we could spend a little time recouping from the time difference (sleeping like bum style)%u00a0and checking out the place so when we do come back next week for our stay we will know what to do. And really, just sitting here watching all the cool people with there funky luggage and hockey sticks??.. It%u2019s a good bit of fun. I just wish I packed me one of those donut pillows.
Anyway enough about our travel adventures for now cause I know what you really want to know about is this salad.
This is one of those salads that leaves your mouth puckering and wanting more. Sweet, acitic, spicy.. it hits it all.%u00a0I really wish I had me some of this salad right now. I made it this past weekend and as I am sitting here writing this, all I can think about it how I wish I packed it to bring we me.%u00a0I actually might done that but I was worried that any fantastic food I brought with me to the airport was going to get confiscated. So all I have left to eat, until we get to Ireland and a grocery store, is a can beans.%u00a0%u00a0Oh well. Next time.%u00a0But you, you can go make this salad right now and eat it and be happy. I’ll just have to wait until I get back to make it again.
The stuff. A persimmon (I used half), a small jalapeno (red or green) half and avocado and some red onion.%u00a0 Then you need some greenage in the form of kale or whatever greens you want and a lime, some red wine vinegar, and a bit of salt.%u00a0
Slice the persimmon and the onion nice and thin and into mouth sized pieces. Cut the avocado into chucks and de-seed and slice the jalapeno into thin little pieces
Stick it all into a bowl and cover with the juice of the lime, a splash splash of vinegar , and a pinch of salt.
%u00a0Toss around and let chill for a bit (the longer the better)
Chop up the kale into piece that will fit into your mouth
And then dump the stuff right into the greens
Agh, I want some salad%u2026.Jjust one more plane ride.
Have a swell day my friends!%u00a0
-C
serves 1-2
%u00bd of a ripe persimmon
%u00bd of an avocado
1 small jalape%u00f1o (red or green)
%u00bd of a red onion
%u00bd a bunch of kale
1 lime
a few splashes of red wine vinegar
salt and pepper to taste
Note.. You as much or as little the stuff as you like.
De-seed the jalape%u00f1o and thinly slice it, along with the persimmon and onion and place into a bowl. Cut the avocado into small chunks and into the bowl that goes too. Add in the juice of the lime and about 2 splashes of vinegar along with a pinch of salt. Toss around ad let sit on the counter for at least 5 minutes, but the long the better. And chop up your greens. When your marinating stuff tastes good enough to eat, toss into the greens. Sprinkle with pepper and grab a fork.
Eat. Yum.
I have been meaning to share the magic of crispy waffle iron tofu for a while, but somehow kind of forgot. Yesterday when talking to my (not quite) mother in law she mentioned the bean waffles I made a while ago and suddenly I had a very real need to go home and bust out the waffle iron and make some tofu. And some of you may be thinking that this sounds weird, but its not. Waffle irons are not just for waffles, you can cook just about anything in them. I compare then to a George Foreman grill (remember those) or even a griddler. . Works the same way, just makes everything waffles shaped.
As for the rest of this open face toast situation, it just makes so much sense.%u00a0 Crispy cumin lime tofu, avocado, mashed up squash…. A heap of things that are so freaking good.%u00a0 I actually made the sandwich for the mr and was a little bit worried he was not going to like it, but worry I need not. He got down with it too. You could even ditch the bread and eat waffled tofu slathered in the squash and tofu alone, or maybe swap out bread for greens (that’s what I did) Whatever you do, it will be good and your tofu will be so nice and crispy (without having to deep fry) that you may never cook tofu anther way again.
The stuff. Tofu, some roasted squash (any squash or sweet potato works), and half an avocado. Going to need a lime, some cumin and a pinch of chili powder, salt and pepper and little olive oil. And some type of bread that is good for toasting.
The cumin and chili powder go into a bowl with lime juice, a little oil ans a pinch of salt ans pepper. Give it a good whisk and set aside.
And now tend to the tofu. You want to get as much water removed from the tofu as you can.%u00a0 I do this by pressing the sliced pieces between a clean tea towel a bunch of times until the tofu is as dry I can get it without falling apart.
While you are doing this, preheat your waffle iron.
Once the tofu is a dried as you can get it, dredge each piece of tofu, front and back, through the cumin lime mixture.
And place it on your preheated, lightly oiled waffle iron.
Close iron and let the tofu iron itself cripsy.
And in about 7-10 minutes, you got yourself some super fantastic crispy, oh so tasty tofu.
Now to put it all together.%u00a0 Bread is toasted and topped with mashed up squash.
Next goes the tofu then top that with the avocado. Finish with a squeeze of lime and a pinch of salt.
And sriracha if you like it..
Not deep fried, but super crispy tofu! And squash! and avocado! and toast!
It’s amazing.
-C
Make 2 pieces of toast
For the tofu
1/2 a block of extra firm tofu cut about an inch thick slices
Juice of half a lime
1 heaping teaspoon cumin
pinch of chili powder
salt and pepper
3 teaspoons oil plus more to brush onto iron
And for the rest of the sandwich
a piece 4-5 inch piece of baguette or 2 slices of thick bread (use gluten free bread if you want)
About a 1/3 cup of cooked or roasted squash or sweet potato
sriracha (if you are into it)
1/2 an avocado
the other half of lime
In a shallow bowl, mix together the juice of 1/2 the lime,the cumin and chill powder, a pinch of salt and pepper and 3 teaspoons of oil. Set aside
Preheat waffle iron to either the on setting or if it has variable setting, high.
Take your tofu and remove as much of the liquid as you can by pressing it between two clean kitchen towels. When you get as much of the liquid out as you can, take the tofu and place into the cumin mixture and coat both sides.%u00a0 Ready the iron by brushing each side with a little more oil just to make sure it doesn’t stick and place the tofu on the iron, close it up, and let it do it’s thing for about 8-10 minutes. (check after 6-7 to see whats what and if is as crispy crunchy as you like, remove. If you think it could use another minute or two, well close it back up and keep ironing it.
And when the tofu is done, it’s time tot make compile it all together.
Toast you bread you are going to use. Once toasted mash a good amount of squash onto toast. Place tofu on top of that and thinly sliced avocado on top of that. Finish with a sprinkle of salt, a squeeze of lime juice and if you are feeling a bit more spicy, a few drizzle drops of sriracha.
Eat right away. Do not share…they can make their own.
Besides begin a coffee addict, I am also a super big tea drinker. At least 1, if not like 3 cups a day. And when I say cups, I mean a 32oz ball jar of steaming hot water with a tea bag of some sort in it. And sure, I will use the same bag twice or leave in an old bag and add a new bag. Or with loose leaf, I%u2019ll end up just eventually swallowing it all. What can I tell ya. That%u2019s my truth. %ud83e%udd37%ud83c%udffb%u200d%u2640%ufe0f
Anyway, tea. I have a shit ton. Bags and loose leaf, but sometimes what I would call “conventional tea flavors%u201d do not sing my fancy. That is when I will dig around in my spice jars and pull stuff out to make or add to a tea.
Fenugreek. A seed. A great tasting seed. I usually use it in my chilis and curry dishes, but lately, I have also been brewing it up with (and without) fresh ginger to drink because it is fantastic. Ginger of course is spicy and earthy, but fenugreek, while also being really earthy, also has a sweetness to it and tastes kind of like real maple syrup. Now doesn%u2019t that sound great? That%u2019s because it is great.
So if you are feeling a little something different and tasty and maybe just so happened to have some fenugreek in the old spice cabinet, give this tea a try. A perfect for and cosy drink for cold winter afternoon.
To the tea!
The stuff. Water, fenugreek, fresh ginger, and an orange.
Dump water into a pot and add in fenugreek seeds. Place on the stove and bring to a boil, then turn the heat to low and simmer.
Cut up the fresh ginger into small chunks and take a few ribbons of peel from the orange.
After the fenugreek has had a 5 minute head start in the water, add in the ginger and orange and keep simmering for another 5 to 10 minutes. (longer time for stronger tea)
Strain the tea into cups, squeeze in a little fresh orange juice, and go curl up o the couch.
It%u2019s tea time.
-C
makes 2 cups of tea
2 teaspoons fenugreek seeds
1 inch chunk of fresh ginger
an orange (optional)
4 cups water
Place water and fenugreek seeds in a pot and place on stove. Bring to a boil then turn heat down to simmer for about 5 minutes. Cut up ginger into small chunks and peel a few ribbons of orange zest and place into pot. Continue to simmer for another 5-10 minutes (longer for stronger tea). When you are ready to drink, strain into cups, squeeze in a little fresh orange juice, and drink.
It%u2019s hot out and we are thirsty. Water is good, water is great, but sometimes a little somethin%u2019 somethin%u2019 is called for, for you know, being that we need to deal with it being so freaking hot out. and sticky and gross. (BLAH. This past week we have had some temperatures it had make me crankers.)
Anyway, what is more refreshing then cucumber? Not much. And so we blend up cucumber, add some mint and lime juice and stick it into a glass with ice and bubbles. What can be more refreshing then that? Plus look at how pretty it is. Bright ass green. A true summertime drink.
To the Spritzer!
The stuff. A thin skinned cucumber, a lime, a spring of mint, club soda, and if you want, a little simple syrup.
Chunk up the cucumber and into the blender it goes with the juice of the lime and a couple mint leaves.
Grab a couple glasses, add in some ice, and fill each glass half way with the cucumber juice. (mix in liquid sweetener in now if you want it.)
Top off with club soda, a mint leaf and a few slices of cucumber and you are golden cool and fancy free.
Stay cool%u2026..as a cucumber.. HAHA!
Makes 2 or 3 drinks
1 cucumber (thin skinned and 6-8 inches long)
a lime
a few mint leaves
club soda or plain seltzer
1-2 teaspoons liquid sweetener (optional)
Take cucumber and place into blender along with the juice of the lime and a couple mint leaves. Blend until smooth. Grab a couple glass, fill each with ice, then fill each glasses half way with cucumber mixture. Add in any liquid sweetener if using and stir. (I recommend trying without sweetness, that is that way I like it, and then add sweetener if you need it.) Top glasses off with club soda. Garnish with sliced cucumber, lime wedges, and or mint leaves if you want.
Drink away.
It%u2019s a smoothie. And no, we have never really been smoothie people in this house, but what can I say, sometimes smoothies happen, especially when you have about 20 ripe bananas in the fruit bowl with no room in the freezer and no need for 7 loafs of banana bread.
So I smoothied. And I like it (a lot).
This is a smoothie of simplicity. Nothing fancy. Simplest of simple. Straight to the point. And all sorts of good.
You might think, does this simple smoothie you speak of taste very good? Yes, yes indeed it does. It is all sorts of fantastic. Basically if you like creamy, nutty, oaty, bananery things, you will like this. And it%u2019s a perfect breakfast, snack, dessert, or just wanting a little treat like thing that is not garbage food. A smoothie of all smoothies with the most basic ingredients. And takes about 15 seconds to whip up. Can%u2019t complain about that.
To the smoothie goodness!
The stuff. A ripe banana, some old fashion rolled oats, a pinch of salt, water, and a smidge of maple syrup if you want it.
Everything goes into blender.
And blended until smooth. Hence the word smoothie.
Pour it into a cup (or if you are feeling primal, drink it straight from the blender%u2026 it%u2019s totally cool)
And done.
A banana oat smoothie.
Let the good time roll!
-C
makes 1 smoothie
1 very ripe banana
1/3 cup raw old fashion oats
1 1/2 cups water
pinch of salt
a tablespoon or two of any sweetener you like (optional)
a pinch of cinnamon (optional)
Place everything into a blender and blend until smooth. Pour into a cup, sprinkle with cinnamon if you wish, and drink right away.
It’s melon season!%u00a0The past few farm shares have included at least 2,, if not 4, watermelons and cantaloupes… Can you imagine. eating 4 watermelons a week? That’s a tall order, even for someone like me who could probably eat a whole watermelon in one sitting, it’s just doing it 4 times a week might be a problem. %u00a0It’s a whole lot of melon and not enough stomach, you know what I mean?%u00a0
So what do I do with so much melon? Well first off, whenever anyone comes over I try to get them to %u00a0eat as much of it as they can, which helps a great deal. Secondly, I cut it up and freeze some. But here is the thing, I love eating chunks of frozen cantaloupe, but frozen watermelon,%u00a0never been my favorite so I usually just pass on sticking in the freezer, until now.
There is something magical that happens when you stick the frozen watermelon and cantaloupe together into a blender and making it into a slushy. It’s like eating a ray of sunshine or maybe even a rainbow, just really satisfying and juicy, and sweet but not overly sweet, and just really freaking good. Especially with all the stupid hot and humid weather we have had lately, these slushies have really been hitting the spot. %u00a0Even the mr who says he dislikes watermelon was all into these melon slushies. (he likes things that he says he doesn’t like all the time. I am pretty sure he is taste confused) Like %u00a0he was really into them. Usually I have to prompt him to tell me how something tastes, but not the slushy, he told me right away how good it was. I was like, I know dude, I just drank 2 of them myself. And I could have drank 2 more but I was trying to not get tot far ahead of myself. Moderation is key, plus I didn’t;t have any more of the melons frozen. Time to restock the freezer.%u00a0
Go make yourself a slushy, it’s juicy deliciousness will make you happy.%u00a0
The stuff. Watermelon and cantaloupe. There should be a lime in there too but it must have rolled away….%u00a0
Chop some of each of the melon up, remove the rinds, and place on a big baking sheet and stick into the freezer until frozen. You can do as little as 2 cups %u00a0of each or as much as a whole melon, it’s up to you. (I suggest freezing extra)
Frozen melon. And now you can slushy.
Equal parts watermelon and cantaloupe go into blender, along with the juice of half (or more to taste)%u00a0a lime and you are probably going to need to add about 1/2 a cup of water, to help the blender blend it all together. %u00a0And that’s it. You blend until it’s all slushy.
Pour into cups, garnish with a lime and/or little chunks of melon and you are good as golden.%u00a0
From now on, or until summer is over and I run out of melon, I will be keeping the freezer stocked, especially because I know that the next few weeks are suppose to be stupid hot again.%u00a0
Waterloupe slushies. Summertime goodness.%u00a0
-C
about 2 cups %u00a0of a watermelon
about 2 cups of a cantaloupe%u00a0
1 lime
1/2- 1 cup water%u00a0
Note. The amounts above are for two%u00a0 2 cup slushies. You can, and should,%u00a0freeze a crap load more melon for future slushies. %u00a0Also, no one would fault you for maybe adding a little nip of some clear alcohol to this slushy situation to make it more of an adult drink……
Cut up a watermelon and a cantalopjue. Eat some and reserve at least 2 cups of each. Remove the rinds from the melons and cut into cubes. Place melon on a baking sheet and stick into the freezer until frozen.%u00a0
Once frozen,%u00a0place equal parts frozen watermelon and cantaloupe into the blender with the juice of a lime. Turn blender on. Slowly add in water until the blender can handle blending the frozen fruit. Blend until smooth. Pour into cups, garnish if you want with more melon and lime, then get to drinking.%u00a0
Have you heard of switchel? A lot of people haven’t so don’t feel bad if you don’t know what the hell I am talking about (like my computer. It keeps auto correcting switchel to switched). So switchel. It’s basically a drink made from water and apple cider vinegar. But wait, don’t grimace and click away, it’s also has fresh ginger, lime, and maple syrup mixed in and is really really really freaking refreshing and tasty and just really good. I guess it was even used back I the day as a sort of sports drink, like Gatorade because it has all sorts of electrolytes and anti-inflammatory properties from the ginger.%u00a0%u00a0Plus apple cider vinegar has got all sorted or health benefits,%u00a0so it’s a tasty treat with benefits. Who doesn’t love the benefits?%u00a0
You can drink the switchel %u00a0straight up hot or cold, add it to seltzer for a bubbly soda like drink or even %u00a0mix some cocktails with it. I enjoy a nice cold glass when I am feeling thirsty but what I usually do it fill up half a %u00a0jar with boiling water, then fill the rest of the jar up with the cold switchel. It’s a nice tangy, spicy,%u00a0refreshing and warming drink that I look forward to every day. I even got the littles to try it.%u00a0%u00a0One thought it to be nasty (can’t win them all), but the other one really liked it too, so you know it’s not just me that thinks it good.%u00a0
The stuff. Apple cider vinegar (the good stuff that is raw and has the mother), fresh ginger, limes, maple syrup, and water.%u00a0
Fresh ginger is the best. Give it a little peel with a spoon, just to maximize gingerness exposure then chop into small pieces.%u00a0
Ginger and water goes into big pot. Bring it to a boil then turn down to a high simmer for 10-15 minutes to really get the ginger infused into that water.%u00a0
After it’s cooled a bit, strain the now ginger water into a pitcher or a big jar.
Add in the vinegar, the juice of the limes and a bit maple syrup. Start off with a little maple, you can alway add more later if needed.%u00a0
After the switchel has some time in the fridge to cool (at least 2 hours, but I like it best when it’s sat overnight) grab a glass ,some ice cubes, and a slice of lime. It’s go time.%u00a0
A drink to you my friends
-C
Makes bout 6%u00a0 cups%u00a0
1/2 cup raw apple cider vinegar (with the mother. Braggs is a popular option)%u00a0
5-6 inch piece of fresh ginger%u00a0
2 limes
5 1/2 cups water
1-4 tablespoons maple syrup%u00a0
With a spoon, gently peel ginger . Not perfectly, just get some of the skin off. Chop it into small pieces and place it into a large pot with the water. Bring to a boil then let simmer for 10-15 minutes. Strain ginger water int a large pitcher or jar.
Add in the apple cider vieager, the juice of the limes, and a tablespoon or two of maple syrup. Give it a good stir then place in the fridge until cold (about two hours but overnight is best)%u00a0
When it’s cold, give it a good stir again, taste, and if it needs more maple, add it in. And then it’s ready.
You can drink it on ice, maybe add some seltzer to it, or mix it into some fancy cocktail. It can also be reheated for a nice spicy warming treat.%u00a0
I love watermelon, I mean, who doesn’t, but i don’t often buy them for myself for one main reason. They are so freaking big and once you cut open a melon, the rest of what is not eaten needs to be refrigerated which would be fine but I have a very tiny fridge and sticking a watermelon in there takes up about half the space. And sure, I could maybe eat a whole melon all to may face in one sitting, but then I would explode. And yes, I know you can buy smaller wedges of melon at the store, but I refuse. Those wedges just seem gross and expensive and wrong to me.%u00a0 When I buy watermelon I take my chances and buy the whole thing and just eat the crap out of it until I make room for other food in the fridge.
It has been so hot out (too hot) and I really just needed a watermelon, so I bought a watermelon (the biggest one I could find because of course). I waited for a day until the fridge was near empty and cut the beast up. Half went into the fridge right away (I had just eaten the last of the greens to make room) and the other half, well only a 1/4 was eaten. I could have kept going and eaten the rest or I figured I would just make a nice tea drink with the rest. And that what I did and that’s this drink I show you here. Smooth, bright, and earthy iced green tea with fresh sweet watermelon, it’s all summertime up in you mouth. And pureeing up watermelon into a liquid definitely takes up way less space in the fridge. I am a genius.
The stuff. Some watermelon, a few green tea bags, a lime( or a lemon), a spring or two of mint, and some water.
Start off with making the tea. Hot water to tea bags, steep for 5 or so minutes then remove bags. Stick tea in fridge to cool.
Now for the watermelon. Remove the rind from the fruit , and cut it up into chunks. Toss in a few mint leaves and…..
So you have cooled tea, pureed watermelon and the juice of a lime.
Pour it all together and mix it all up.
And there you have it. Fresh watermelon green ice tea, ready for your drinking.
All you need now are glasses full of ice and little wedges of melon.
All the summertime, all the watermelon.
Hope you are all staying cool.
-C
make 6 1/2 cups
4 green tea bags
4 cups water
1/4 of a watermelon (about 2 1/2 cups liquid watermelon)
1 lime (lemon works too)
a few sprigs of mint (optional)
Bring water to an almost boil (I let my tea pot whistle, turn it off and sit for a minute or two) and pour hot water over tea bags. Let steep for about 5 minutes, then remove bags and refrigerate tea until cold.
When the tea has cooled, take you melon, remove the rind, and puree the fruit along with the mint, with a blending device of you choice. Squeeze in the juice of the lime and give it all a good stir.
Pour tea over ice, garnish with a sprig of mint and a slice of watermelon if you want some fancy.
I am channeling all my summer time feels here in hopes for warmer weather. As of yesterday there was still a pile of snow outside of my house and I am still leaving every morning in a hat, mittens, and a winter jacket.
I want t-shirts and shorts, I want sandals, and I want to set my winter jacket on fire (not really, but kinda).
This cold weather has crept back into my soul and I needed something to remind me that there will be warmer days to come and I will soon be bitching about how hot I am and blah blah blah.. you know how it goes.
So I make lemonade. This lemonade as inspired by my favorite tea as of late, raspberry zinger. It’s a nice and tangy tart and really tasty. I make great big jar of it at night and add a little squeeze or two of lemon to it for that little extra zing. I figured if it tastes good hot, it will taste great cold, which in fact, it does. It taste really freaking good. And it just occurred to me that there is probably a little subliminal inspiration from Beyonce in wanting lemonade, so thanks for the B.
Anyway, it’s suppose to me nice and seasonably warm this weekend. Maybe bust out your lemonade game and try a batch of this one.
The stuff. Lemons, a raspberry zinger tea bag, honey (or any sweetener you like to use) water and ice.
Bring some of that water to aalmost boil and pour it over the tea bag (make sure you stick the bag into a jar or pitcher)
While the tea is steeping, juice the lemons. And a personal preference, you can strain out the pulp or not. I use the strainer to catch the seeds but then stick the pulp back in cause I like pulp. All up to you.
While the tea is steeping and still hot, add in any sweetener that you want to use. ( I used a little honey) Stir until that sweetness is all dissolved.
And after the tea has had a good steep, dump the brewed tea into the pitcher with the lemon juice then add in the really cold water. Stir it all around.
Add acouple thin slices of lemon to make it all fancy anda few big chunks of ice to make it super cold
Refreshing, crispy, tangy with a touch of sweet….Perfect for all those warm summer days to come (hopefully)
Have a great weekend people.
-C
Makes 5 cups
1 raspberry zinger tea bag( I used Celestial Seasonings)
3/4 cup fresh lemon juice (3-5 lemons, depending on size)
Anywhere between no to 1/2 cup of sweeter (can use sugar, honey or maple, I like a touch of honey)
4 cups water (2 hot, 2 cold)
ice
Place tea bag in 2 cups of hot water (can be done directly in a pitcher) Add in the sweetener while its still hot and mix until completely dissolved. Let steep for about 10 minutes.
Remove tea bag and add in the lemon juice, 2 more cups of cold water and mix, Top with ice and garnish with a few more lemon slices if your feeling fanciful.
Serve in a glass full of ice with a wedge of lemon and a smile on you face.
For the longest time now, I have been drinking a little turmeric with a little lemon first thing in the morning. It started as a medicinal drink, but quickly became a tasty habit. I have some stupid weird circulation condition called raynaud’s where changes in temp turn my fingers and toes into icicles. And for me, the worst time of the year for this condition is the spring (but spring is still my favorite). All the up and down of temperature and the wet cold damp weather is my trigger, not to forget to mention that those temp swings can get a girl sick. (I can’t get sick!!)
So way back when I started to drink for my health and the feeling in my fingers. Turmeric, ginger, and cinnamon , all super warming spices that help greatly with blood circulation, not to mention a whole bunch of other good things. (I could tell you and go on and on, but you can just look it up yourself) Ever since I started drinking and eating lots of these spices, my raynauds has gotten soooo sooo soooo much better. I still get cold finger and toes, but no where as severe and the way less often.
Now a few weeks ago the mr started making himself an afternoon turmeric tea. He read something on the internet about how it’s the best anti-inflammatory and good for achy joints. (Sure dude, listen to the internet and not me) Being a big guy doing construction and such, he gets really achy joints and there is only so much arnica and frozen peas a guy can do. So now he drinks this and I think he is starting to notice a difference. (less time with the frozen peas) And since he is making himself tea every afternoon, I started to make a spicy tea for myself in the afternoons too. I figured that a little extra goodness to ward off the chills and any larking illness is only a plus. It’s our after lunch treat that tastes good, is warm and soothing and is doing the body all sorts of good.
Spicy turmeric tea. You will get addicted and feel like awesomeness.
The stuff. Ground turmeric, ground ginger, saigon cinnamon and hot water. Additional yums with a little lemon and some honey if you like it sweet or have a scratchy throat.
Spices into a drinking vessel (I like a big jar)
And in goes the hot water. Give it a good stir and a squeeze of lemon (and sweeten if your gonna)
And watch it swirl. A drink that keeps this girl happy and healthy.
Something great to look forward.
-C
1 tablespoon ground turmeric
1 teaspoon ground saigon cinnamon (can use regular, but it’s not as spicy sweet)
1/2 teaspoon ground ginger
1 1/2- 2 cups hot water (not quite boiling)
honey to taste (I only use if my throat is sore)
lemon juice (optional)
Note… My measurements are just guidelines. You might like a little less turmeric or more ginger so make this drink any way that tastes best for you.
Grab yourself a big mug or jar, add in the spices and hot water, honey if you want it and a squeeze of lemon juice if using. Stir with a spoon and drink. Keep spoon handy to give it a good stir every now and then
It%u2019s been 14 days since my last farm share pick up with 7 more days to go. (The farmers take a long break at the end of the year, which they all deserve but makes me sad. Or more like hungry.) It is a pretty long stretch for me to have to go without getting me some farm fresh goods. I have been making due, rationing out my roots (the greens were gone within days) and supplementing with lots and lots of frozen zucchini, Swiss chard, and broccoli, so it hasn%u2019t been bad. But now I am worried because with al the supplementing, the chest freezer is looking a little more on the empty side then I would like. And it%u2019s only January. I guess that is what happens when you eat your weight in vegetables everyday. %ud83e%udd37%u200d%u2640%ufe0f
Anyway, I am pretty much out of roots. The turnips were the last of what I had left besides the lone beet that I found stuffed in with the apples. And because they were the last roots and knowing I am not going to have any roots until next week, I wanted to do something a little special with them. That is why I hassledbacked them, which basically means I sliced them up without cutting completely through so they are cut but still stuck together. Does that make since? If not, just look at the pictures.
These turnips, oh these turnips. First off, roasted turnips are amazingly delicious and if you have never roasted one, well you need to get on it and do so. Secondly, the turnips I used are gIlfeather, which if you did not already know, are the Vermont state vegetable. But don%u2019t worry, if you can%u2019t find the gilfeather, regular old purple top turnips work and taste just as fantastic because all roasted turnips are so fantatic. When roasted I might describe them as the cooler, hipper, cousin of the baked potato. Add the avocado cream and seeds, which are the cooler friends of the cooler cousin, and you got yourself a cool dude party! Or basically just a way tastier baked potato situation with fixing.
Now don%u2019t you want a tasty cool hassledback turnip? And yes, I keep wanting to call them David hasselbacks turnips too. Because they are so cool. Am I right? Haha!
To the turnips!
The stuff. Turnip. Either a couple smaller ones or a giant one, up to you. Also need an avocado, a little red wine vinegar and water, salt and pepper, garlic powder, olive oil, and some toasted seeds (if you want).
If using a giant turnip, cut in half. If using small ones, you can cut those in half too or leave them whole. Up to you.
Now to hasselback. Using two guides that are the same thickness (chopsticks or chip clips.. whatever you have lying around that you don%u2019t mind nicking with a knife) slice into the turnip about ever 1/4 inch, right down to the guide, but not all the way through.
Lightly oil a skillet or baking sheet and also rub a little oil all over the turnips and lay them hasselbacked side up. Sprinkle with salt, pepper, and a pinch of garlic powder. Then into a hot ass oven they go.
While the turnips are roasting , make up the avocado cream. Basic, just scoop avocado into bowl (if you have a stick blender) or blender, add in a pinch of salt, the water and vinegar, and blend until smooth.
And back to the turnips. Baked for a little longer then an hour and flipped once, now they are all roasted and crispy and all sorts of ready.
A freshly roasted hasseldbacked turnip smothered in avocado cream and sprinkle with toasted seeds.. Good things here friends. Good things.
-C
serves 2-4
1 large or 2 small turnips
salt and pepper
olive oil
pinch or garlic powder
an avocado
1 tablespoon red wine vinegar
1 tablespoon water
handful of toasted mixed seeds (I used pumpkin and sunflower seeds)
Preheat oven to 450
Grab turnip(s) and wash thoughtful. If you buy the turnip from the store and it has a wax coating, peel the outer skin, otherwise, you don%u2019t have to. Now to haseslback. Cut the large turnip in half or if using to small ones, you can just leave it whole. Take two, either chopsticks or something that is about 1/4 – 1/2 inch thick, and place on either side of turnip to use as a cutting guid. Slice the turnip about ever 1/4 inch , right down to the guide, but not all the way through. After cutting, place on a lightly oiled skillet or baking sheet and drizzle a little oil in our hand and rub all over. Sprinkle with salt, pepper, and a pinch or garlic powder. Place the turnips in hot oven. Roasts for about an hour, or until the slices of the turnip start to brown and come apart. Also, if you want a little more crispy edge, half way through, drizzle on a little more oil. You can also flip (which I did) the turnip cut side down to finish roasting.
While turnips are roasting, make avocado puree. Scoop avocado into bowl or blender. Add in the water, vinegar, and a pinch or salt. Blend in blender or with stick blender until smooth. If to thick, drizzle in a little more water until desired consistency.
Once cooked and all crispy like, remove turnips from oven, place on a plate and slather on the avocado cream. Sprinkle on toasted seeds and eat to your face hole.

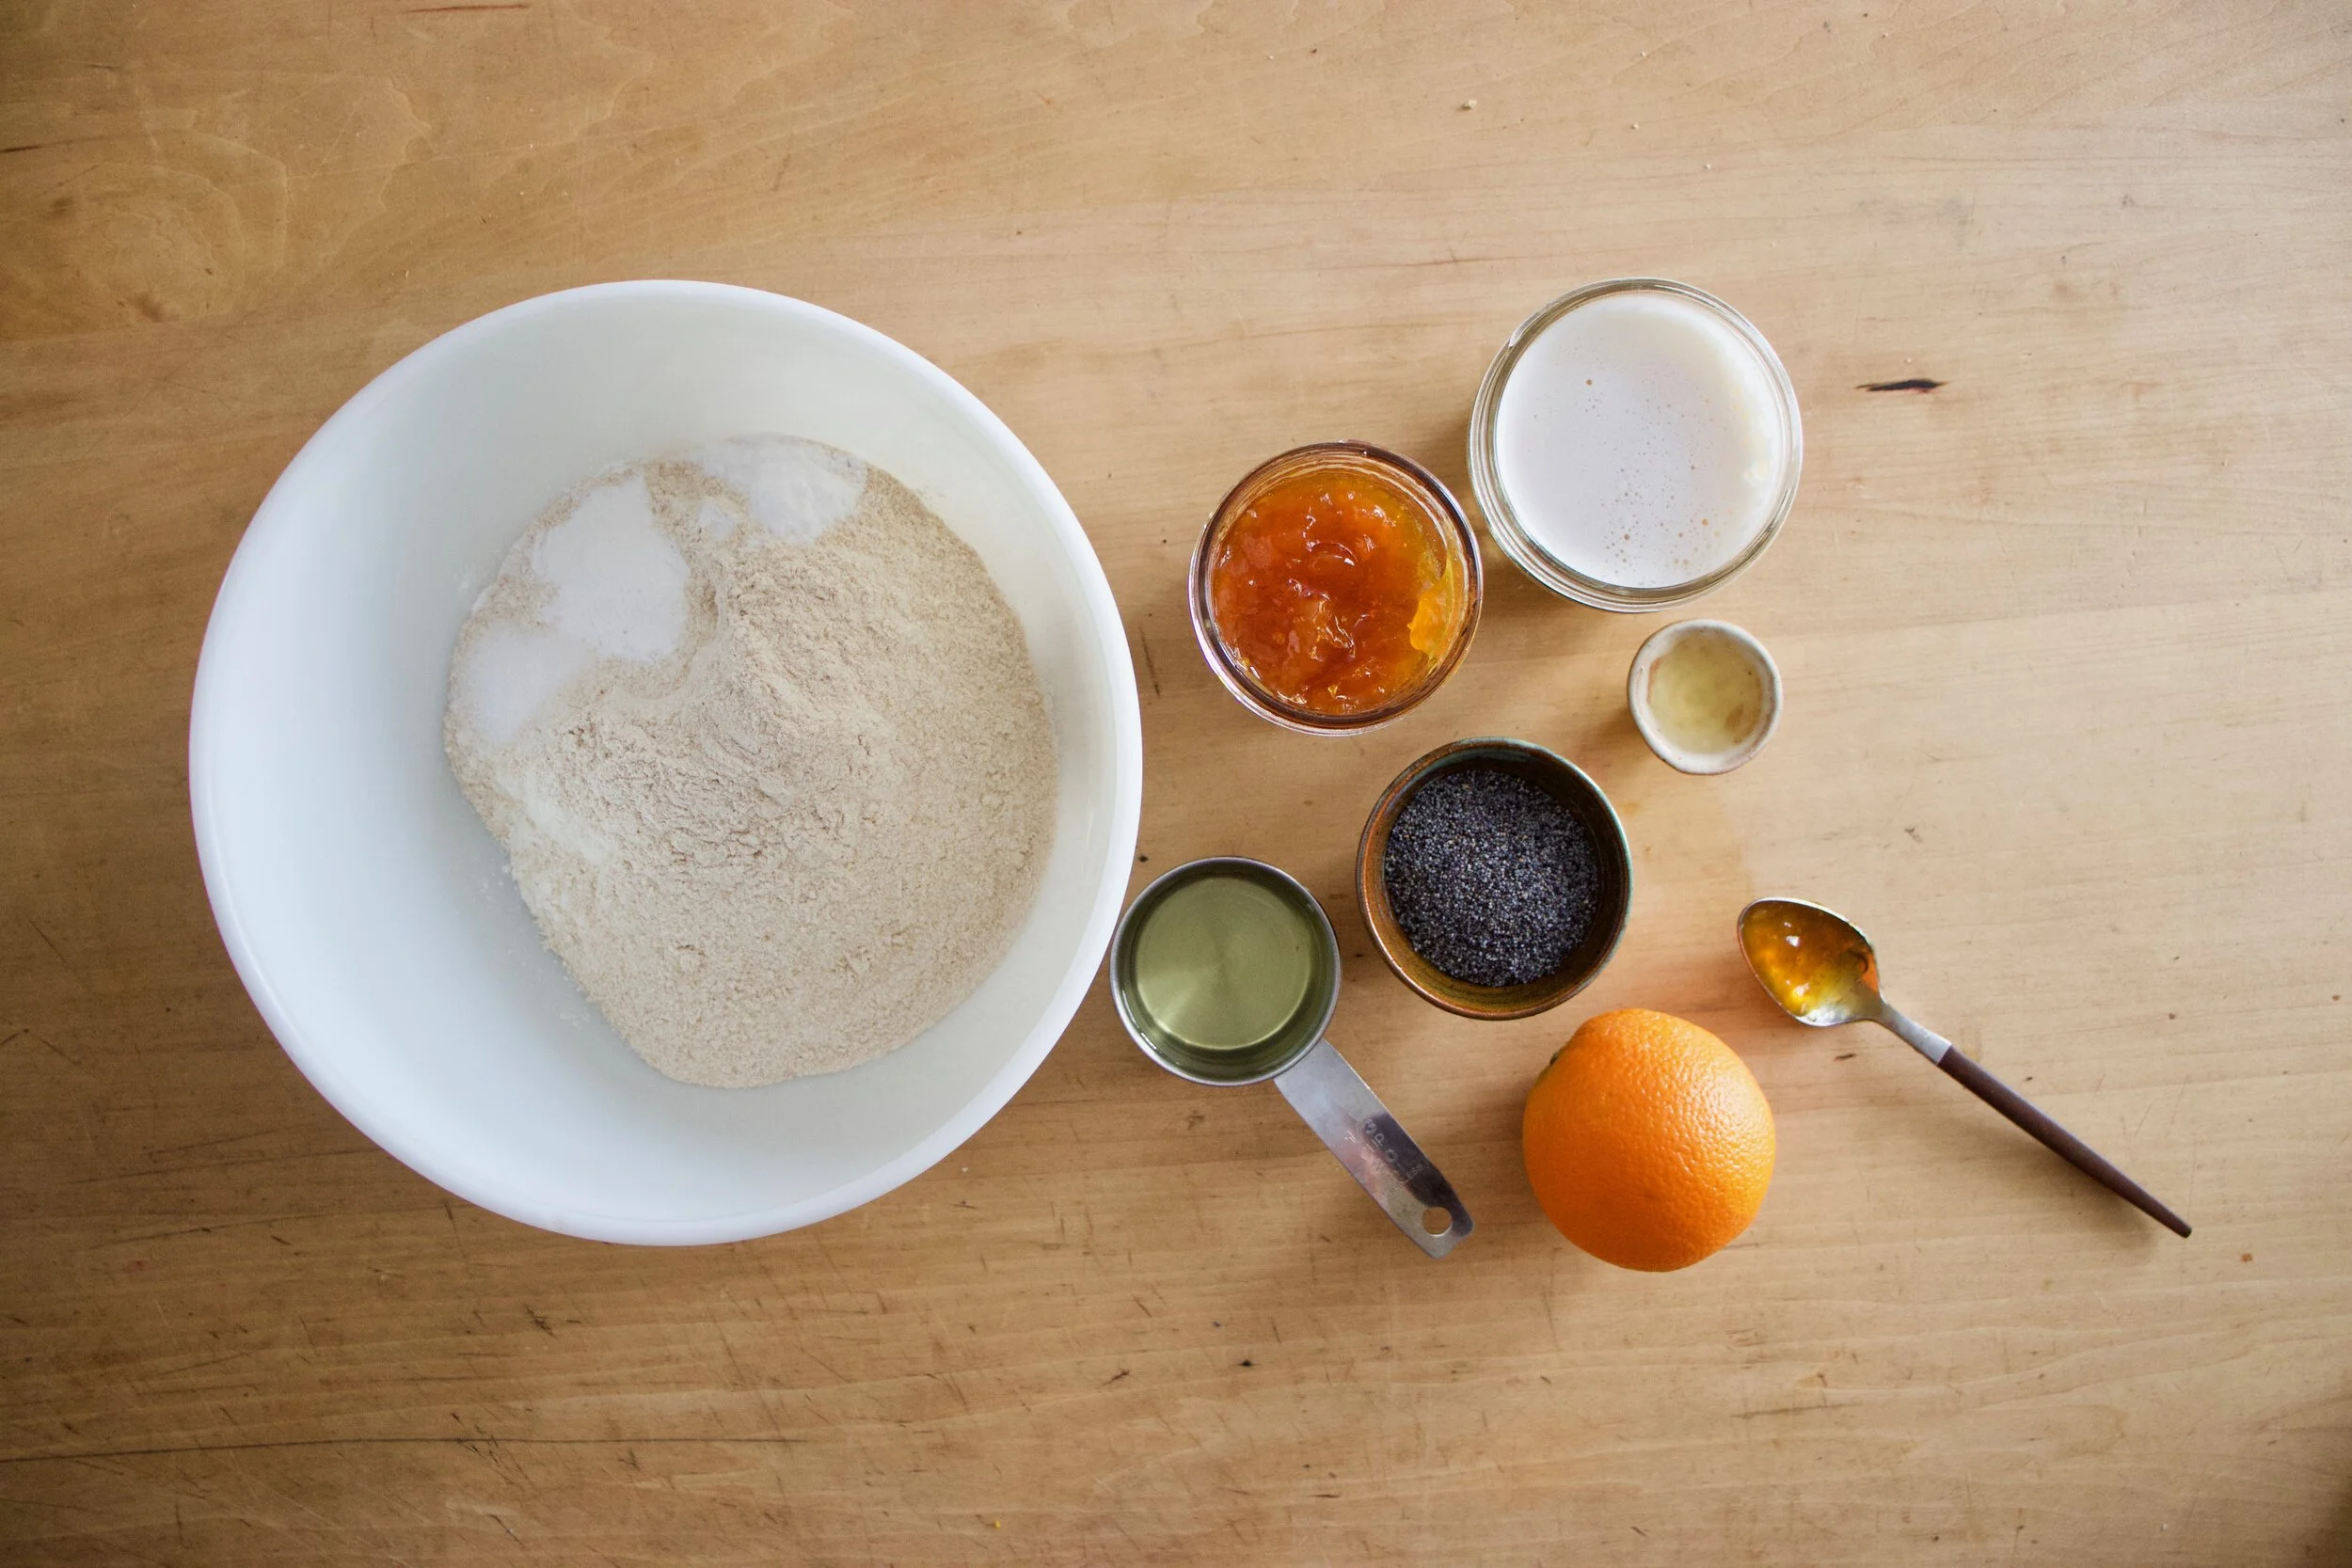


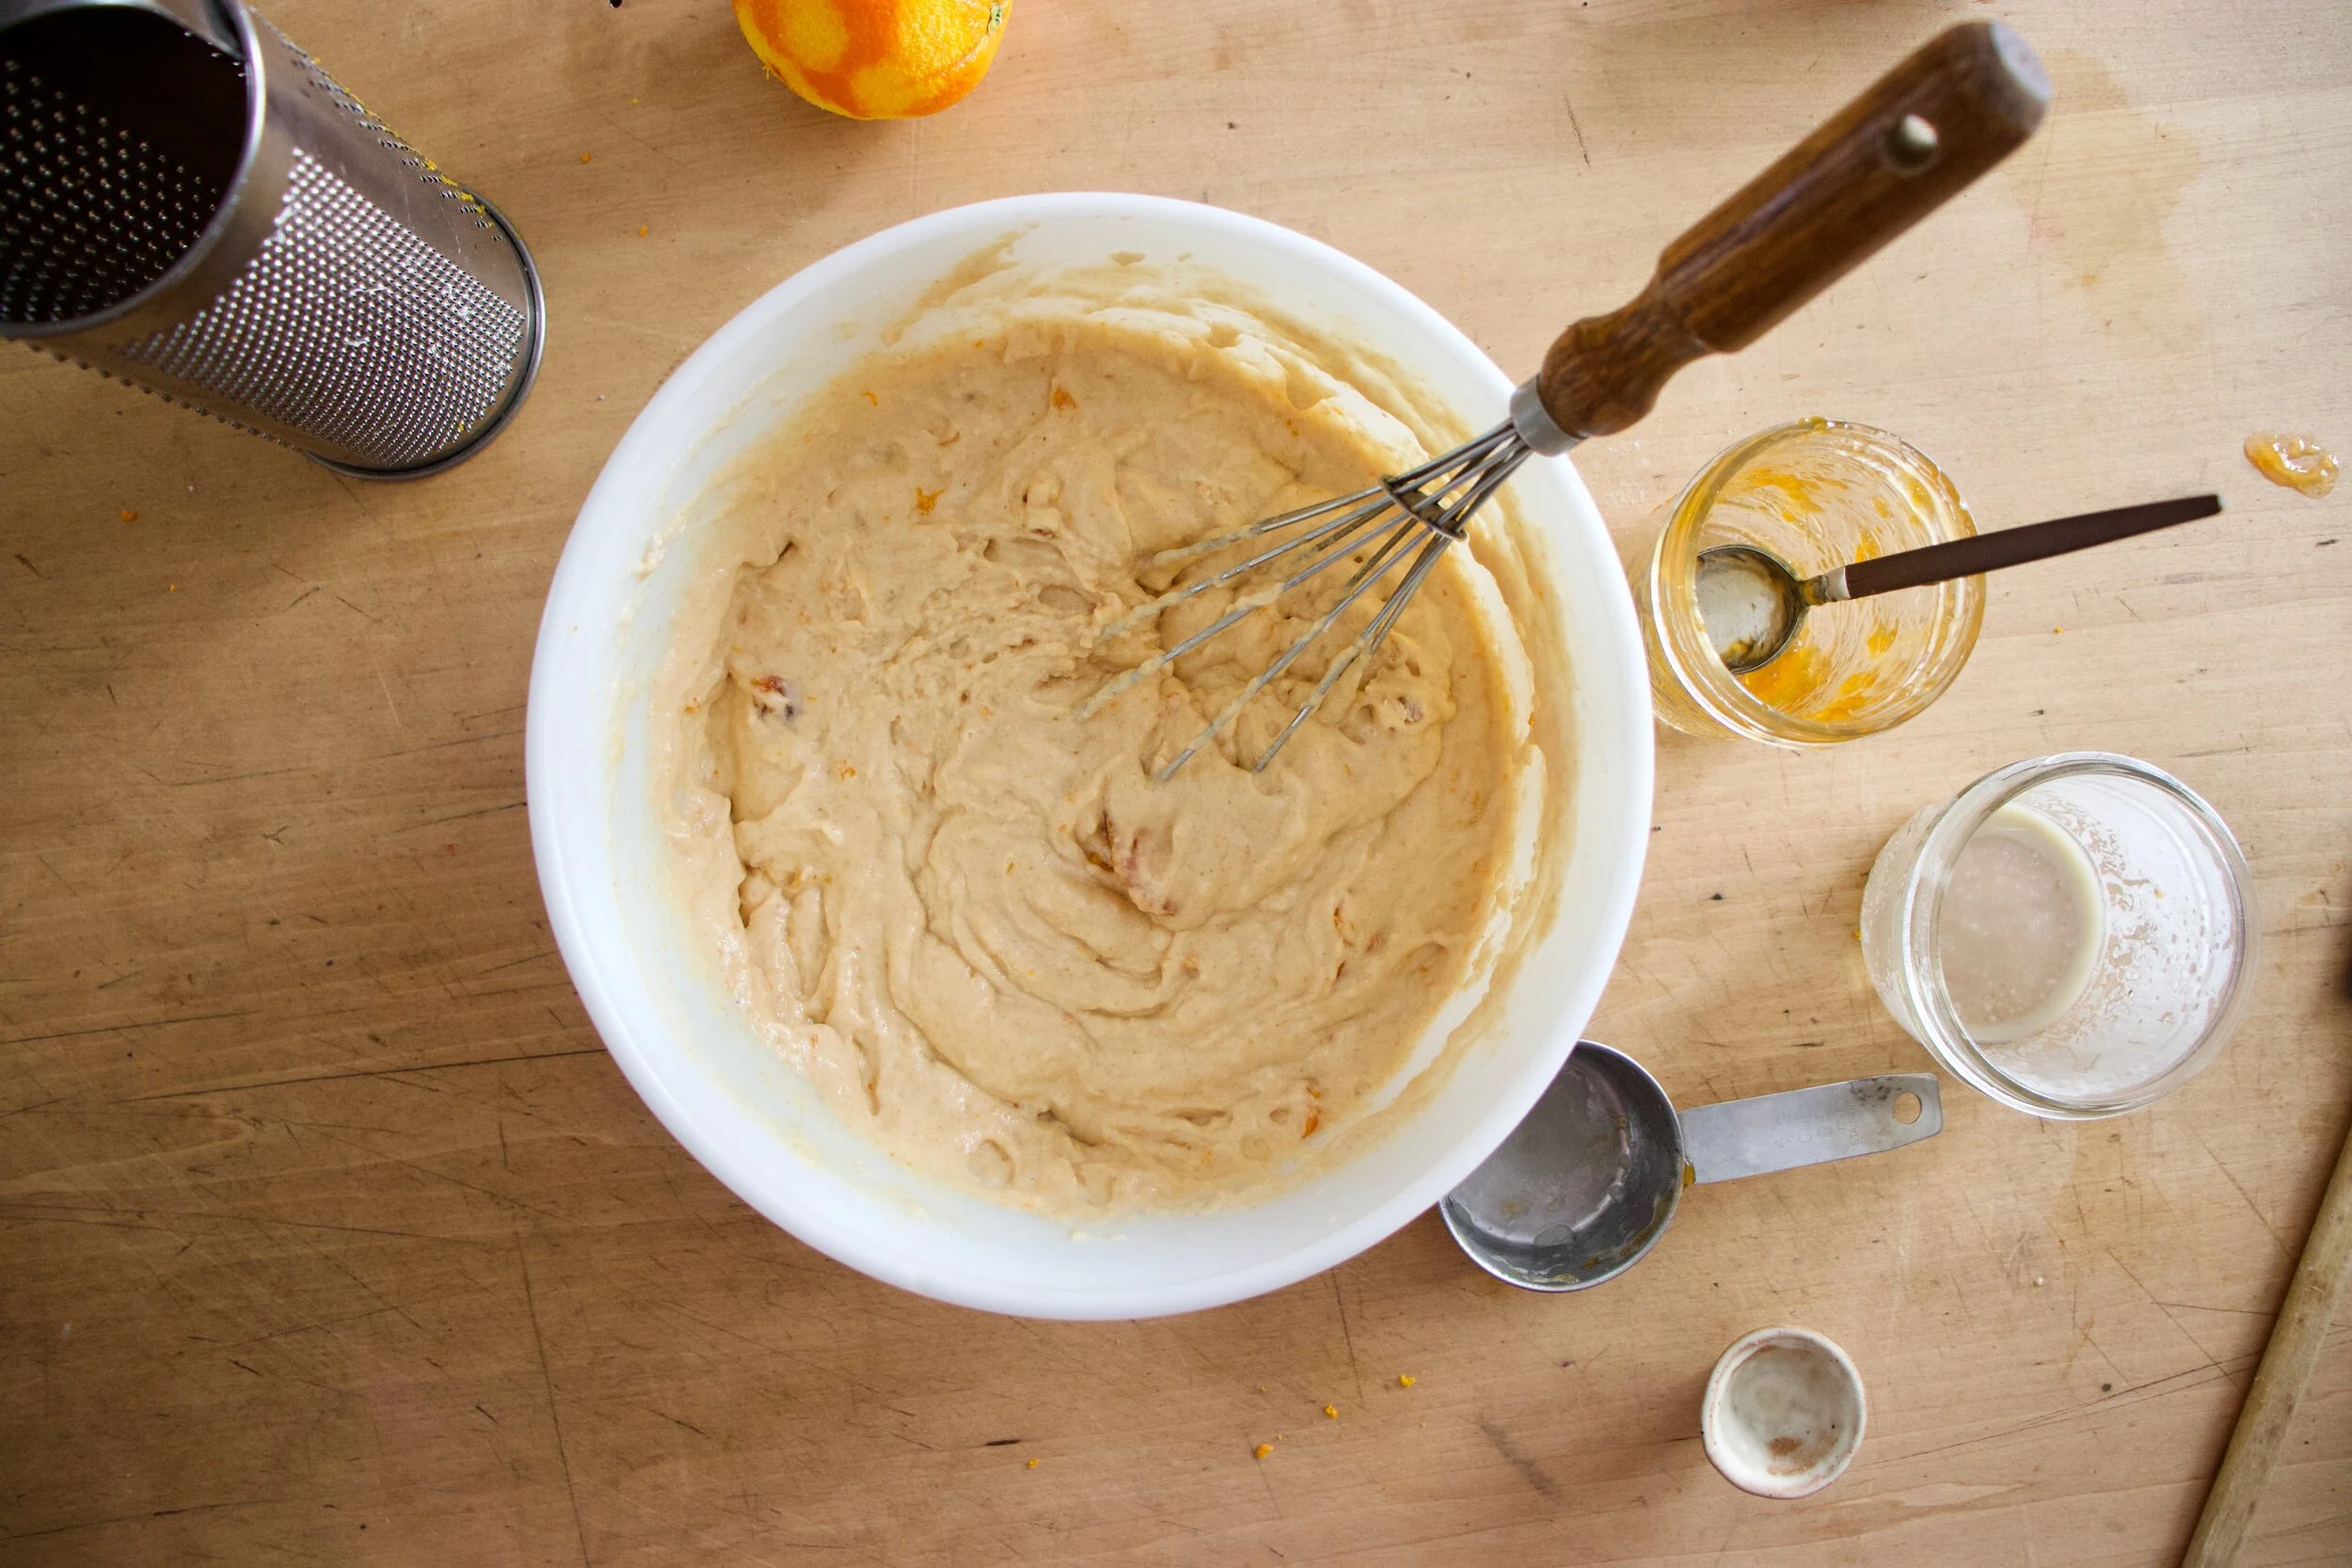
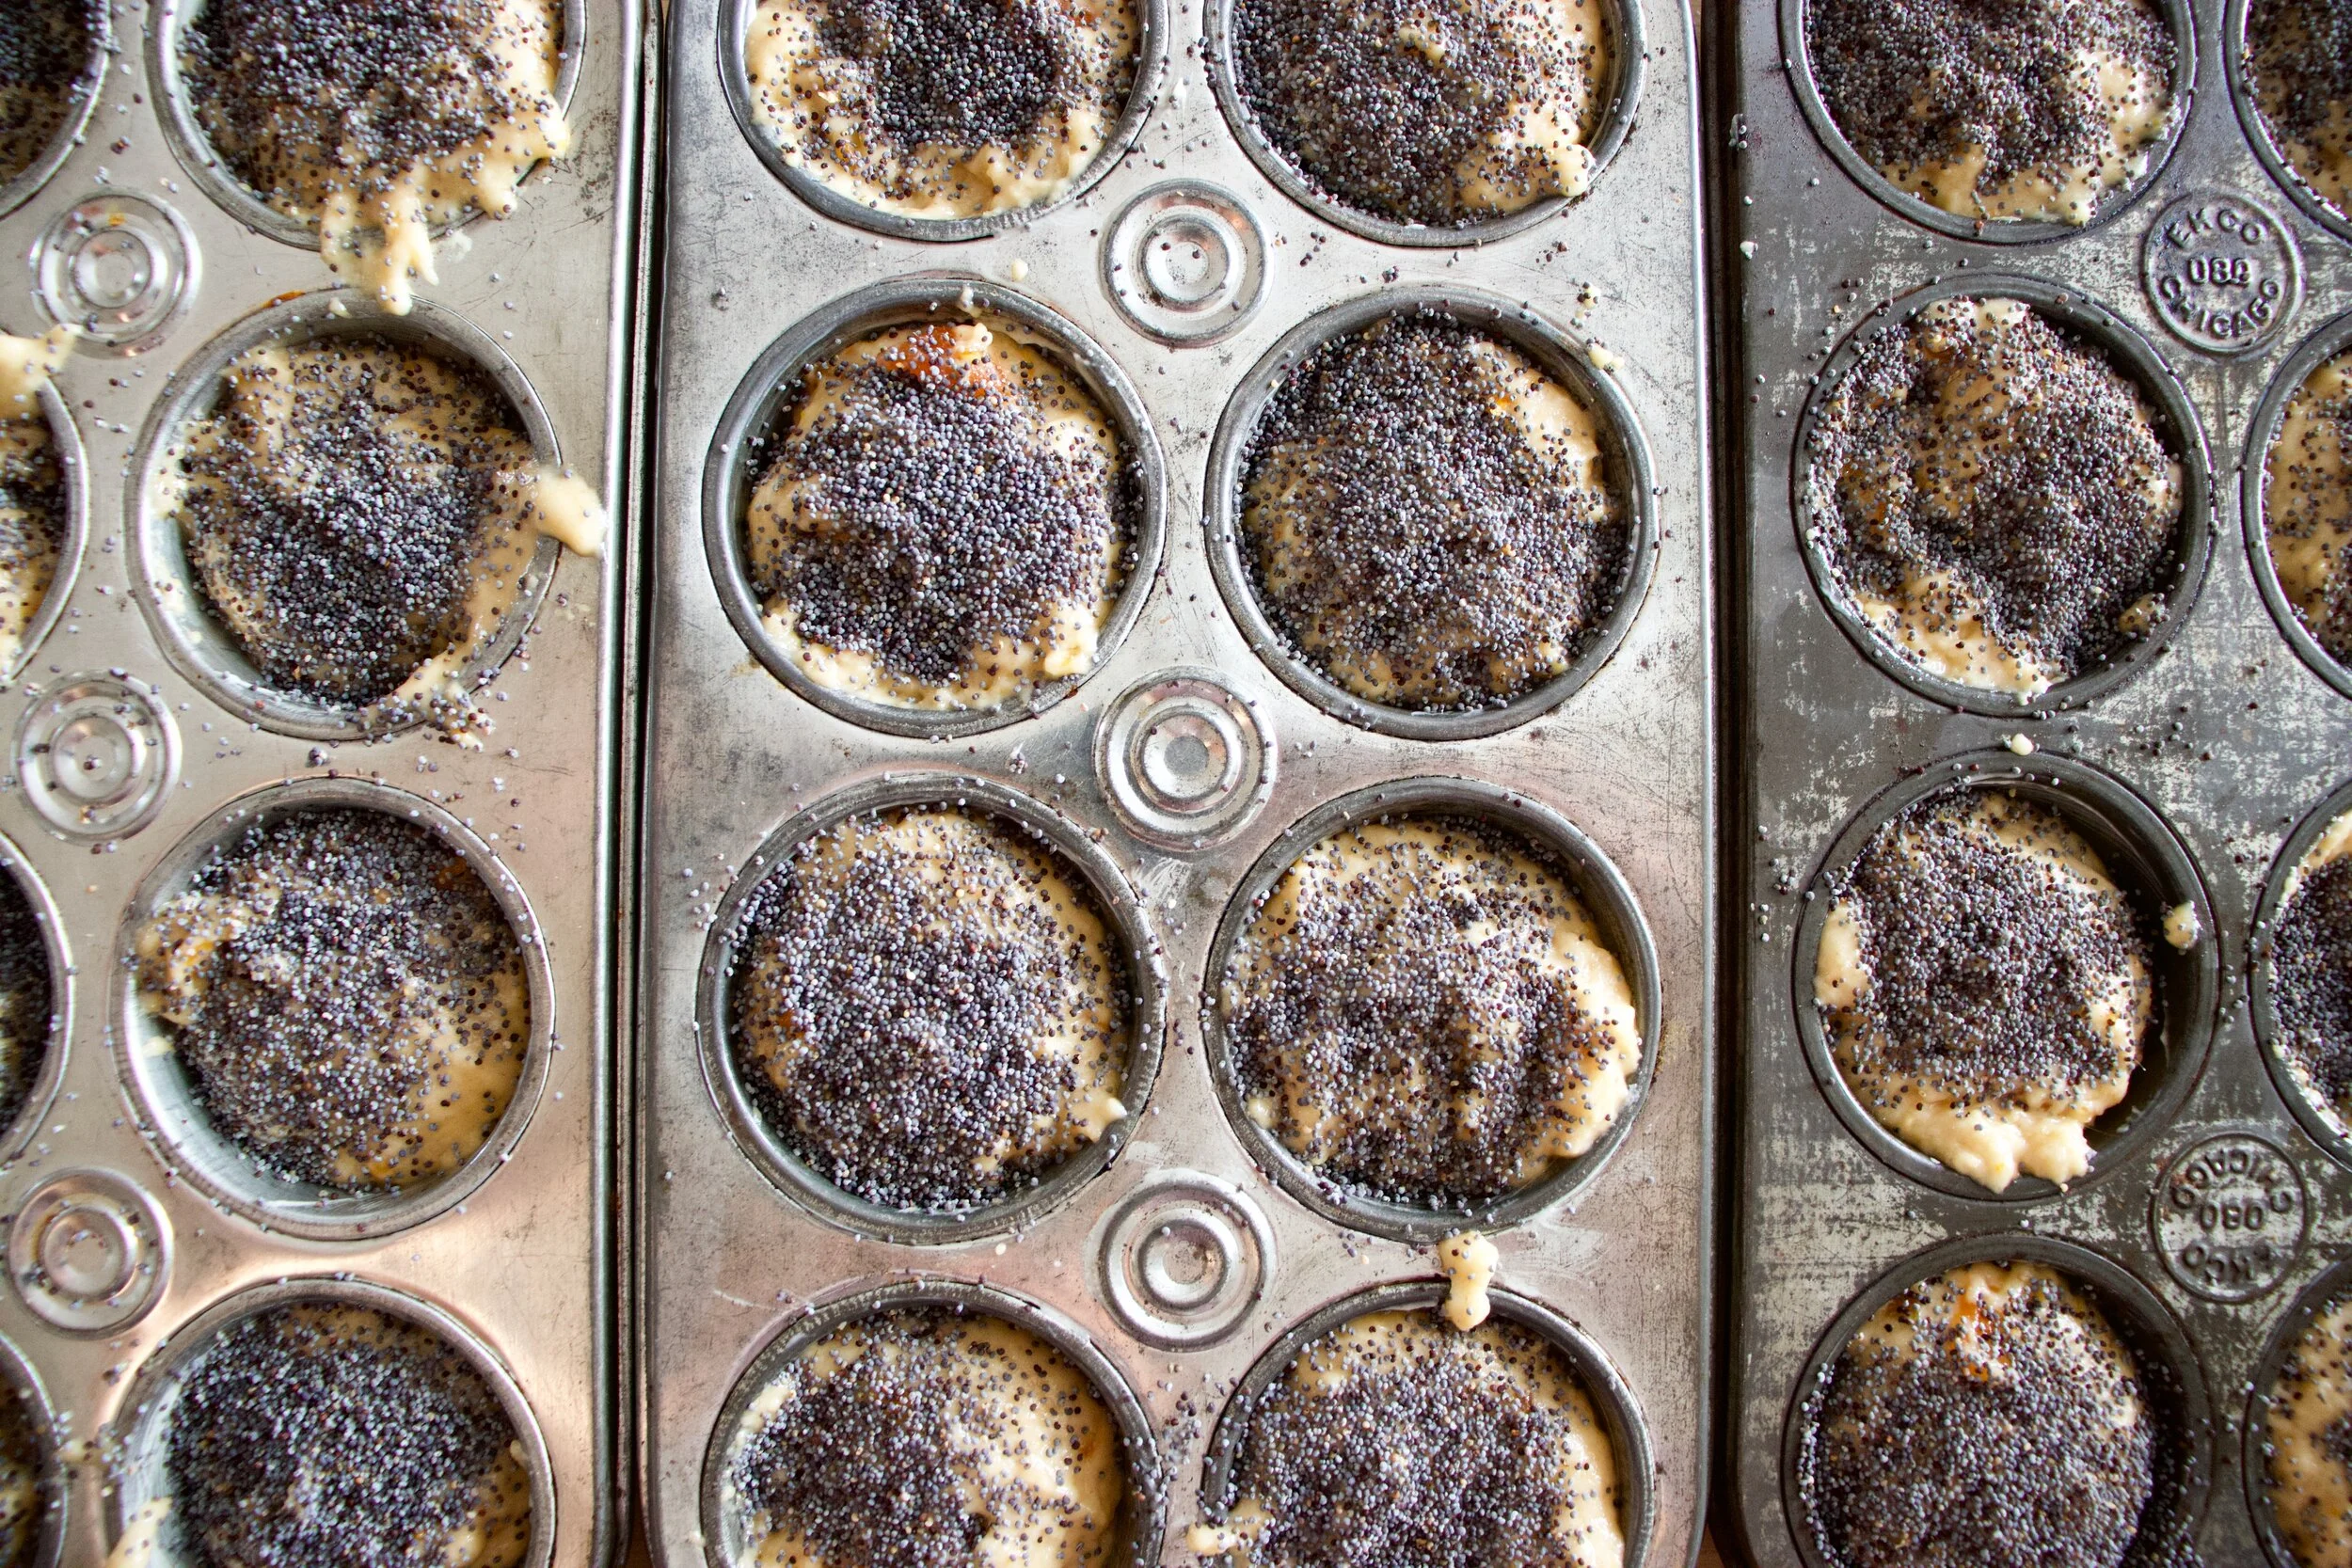
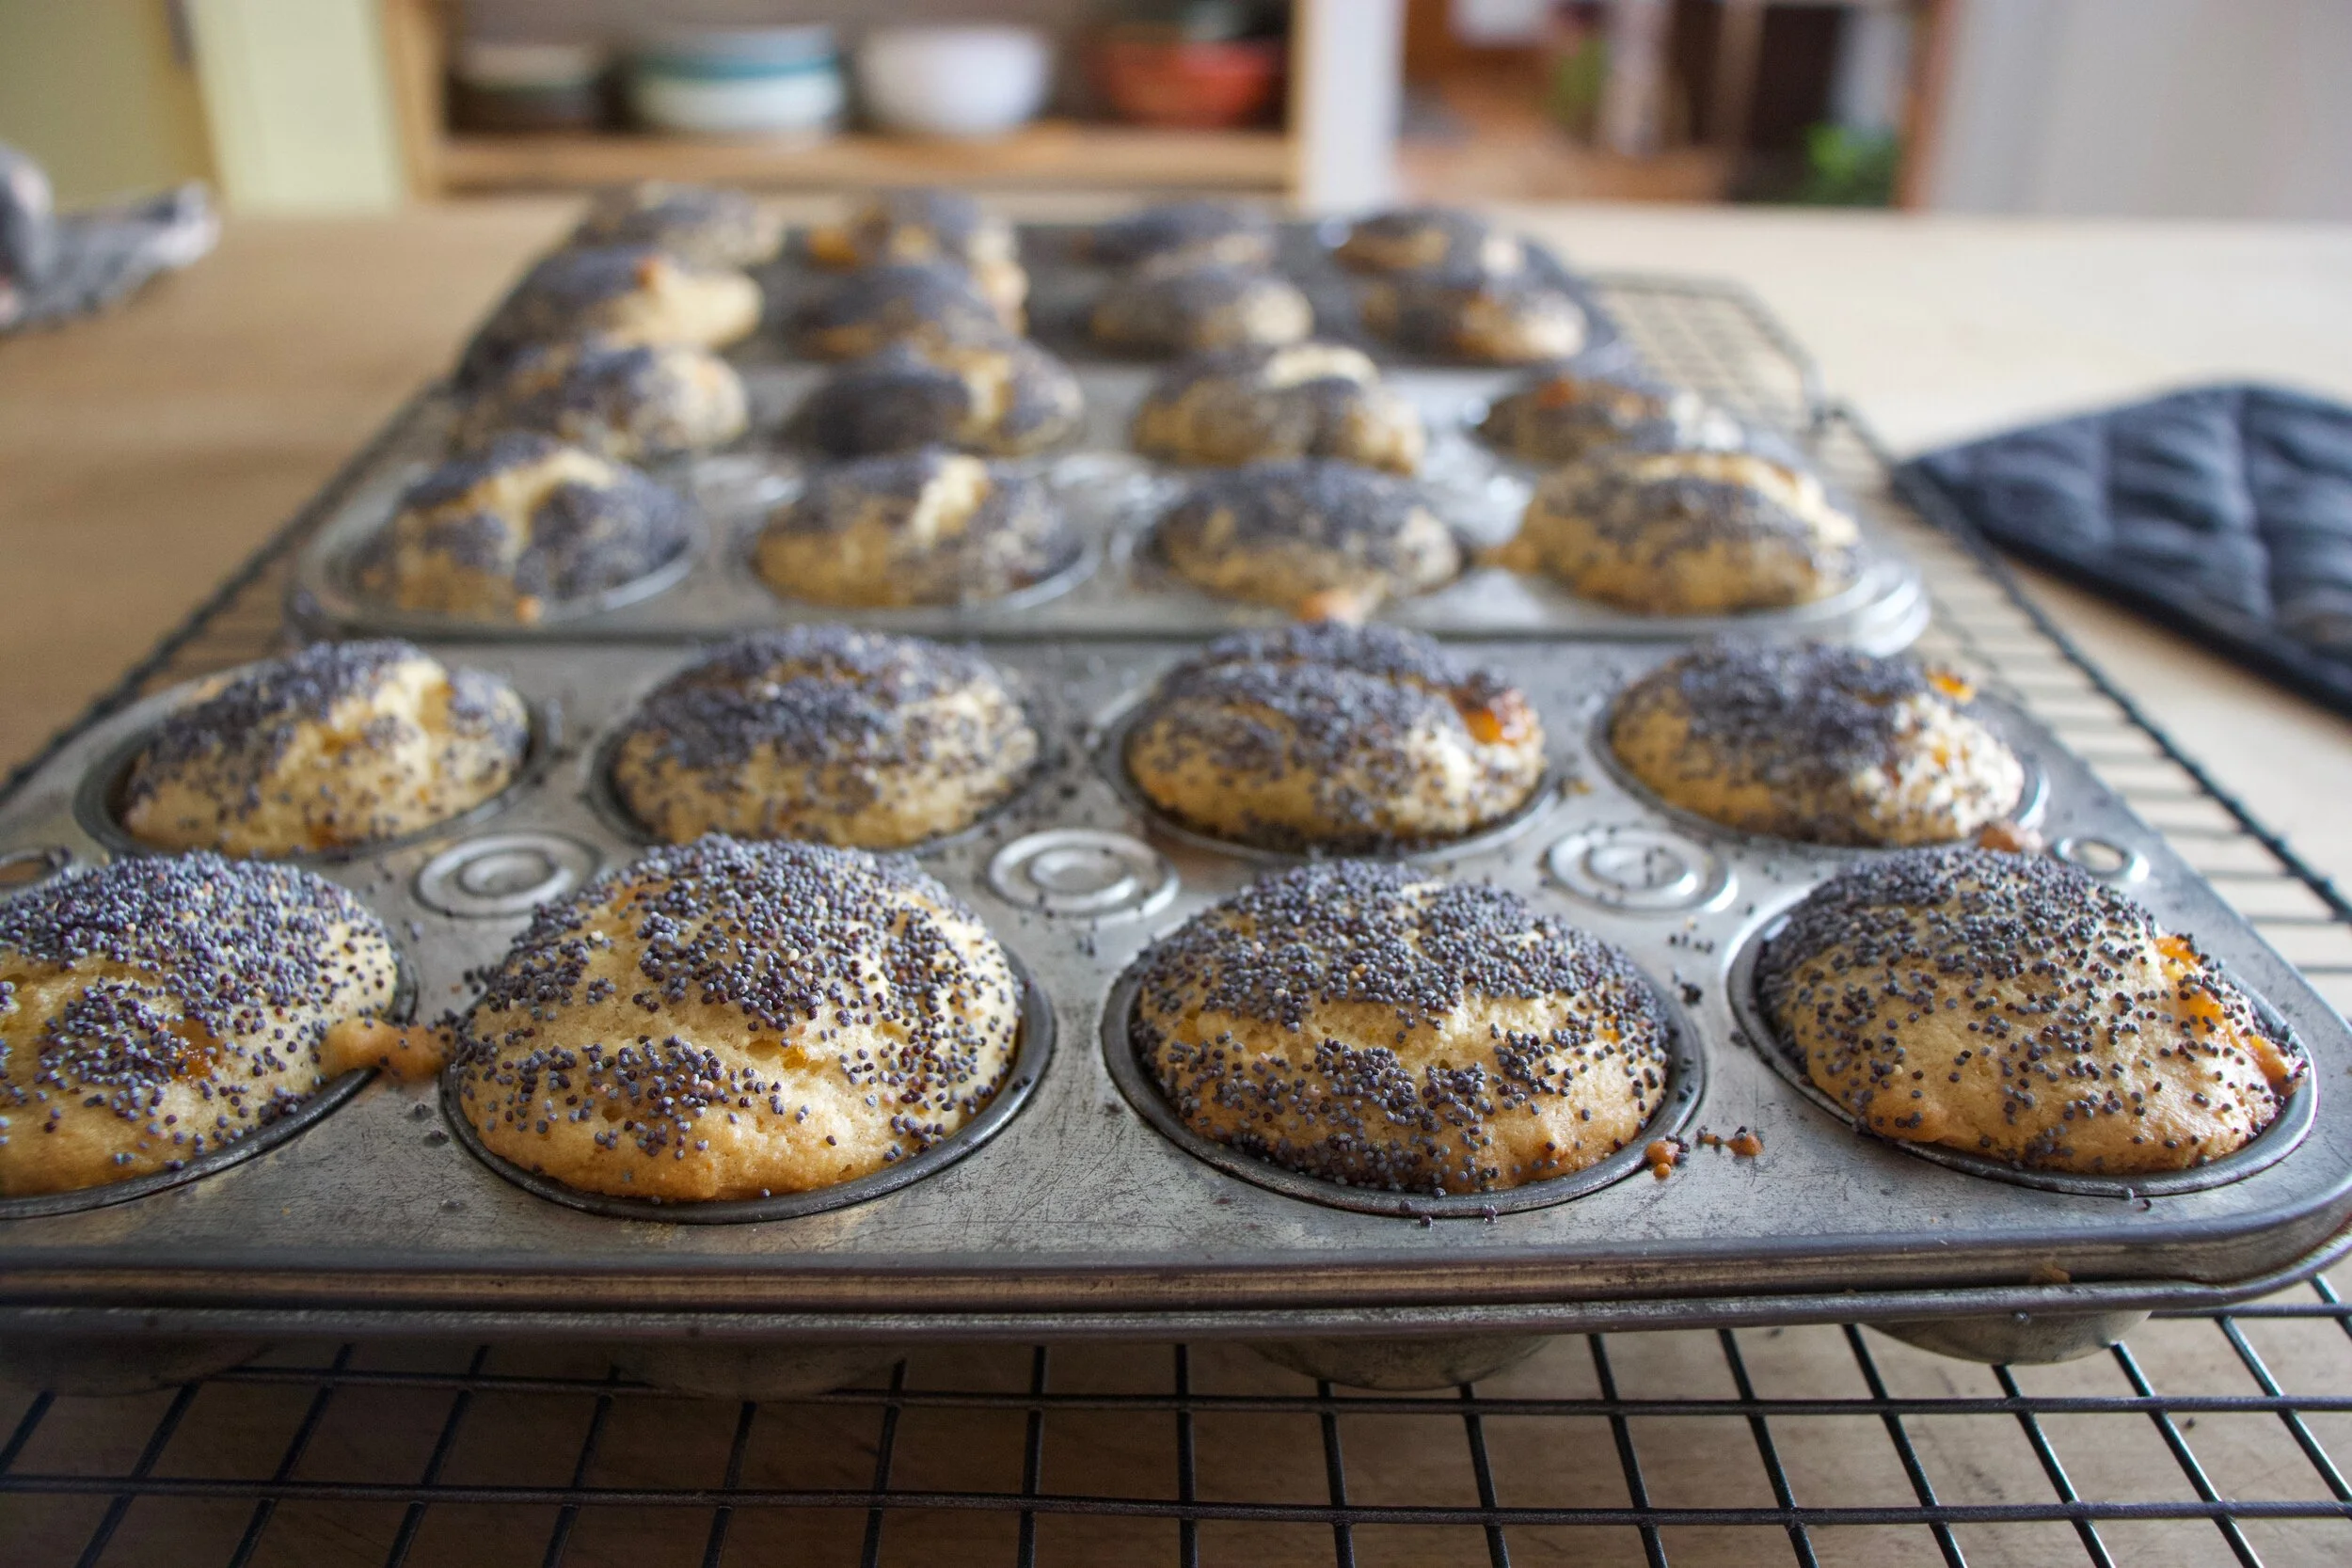


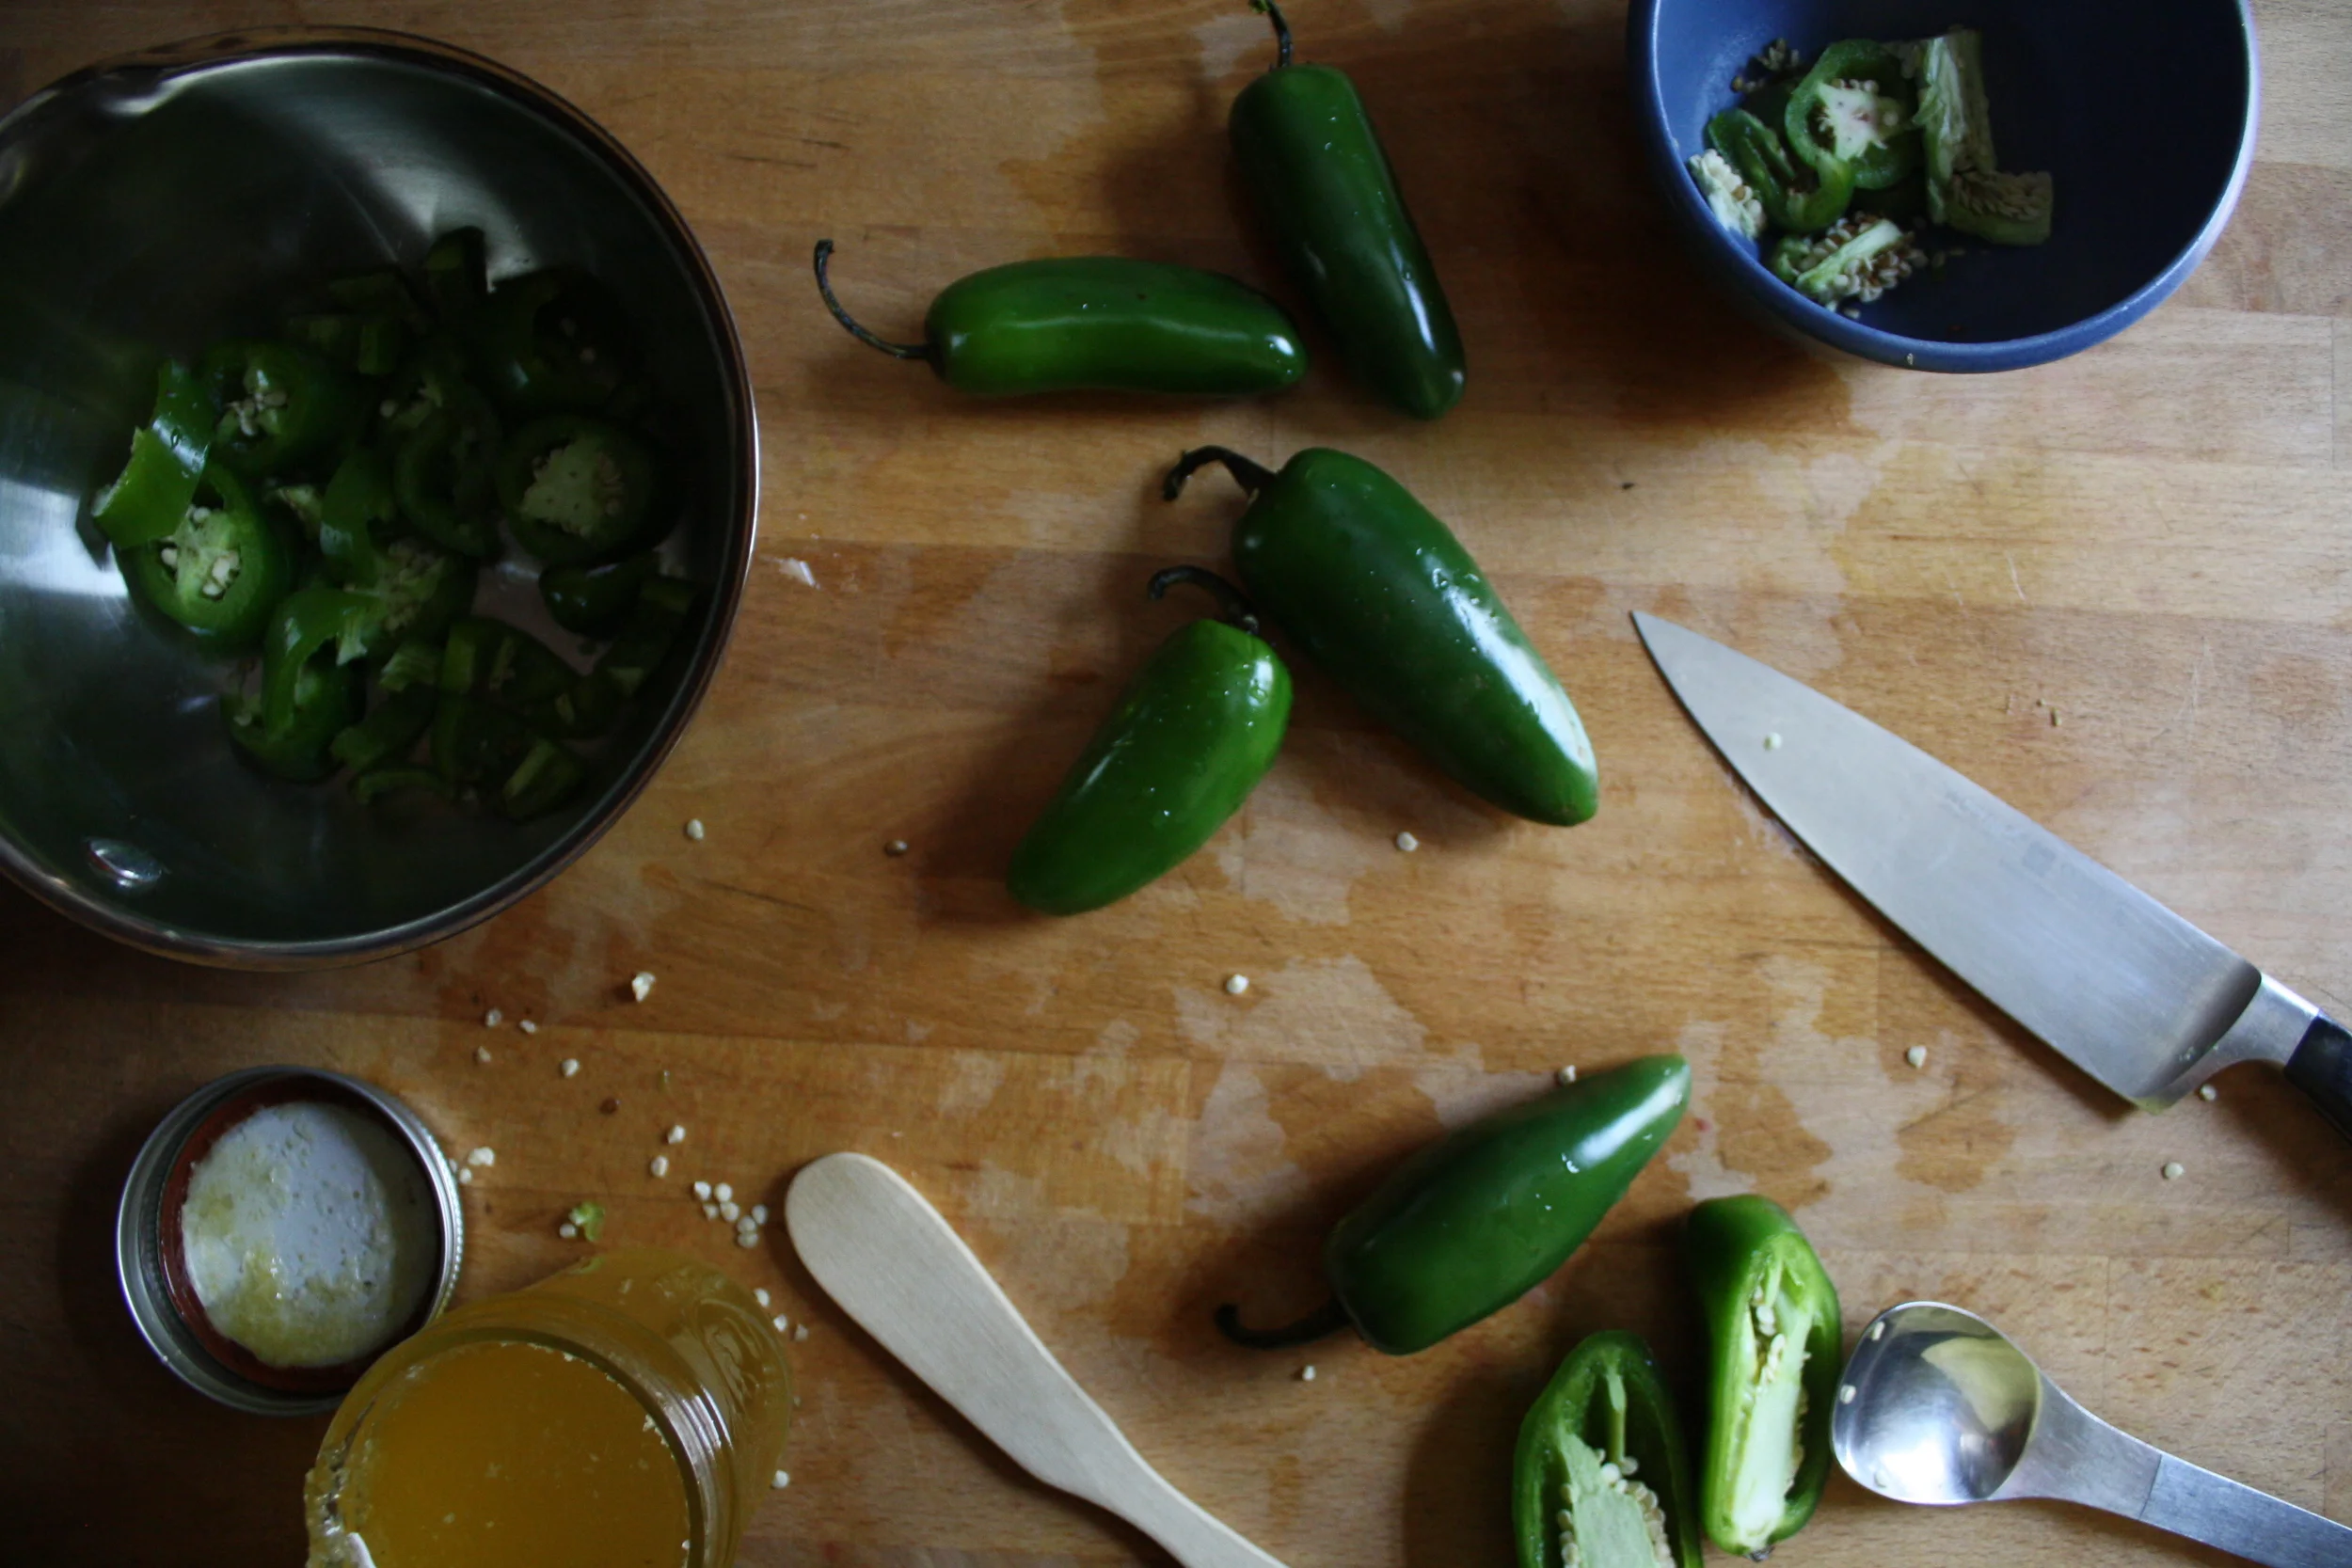
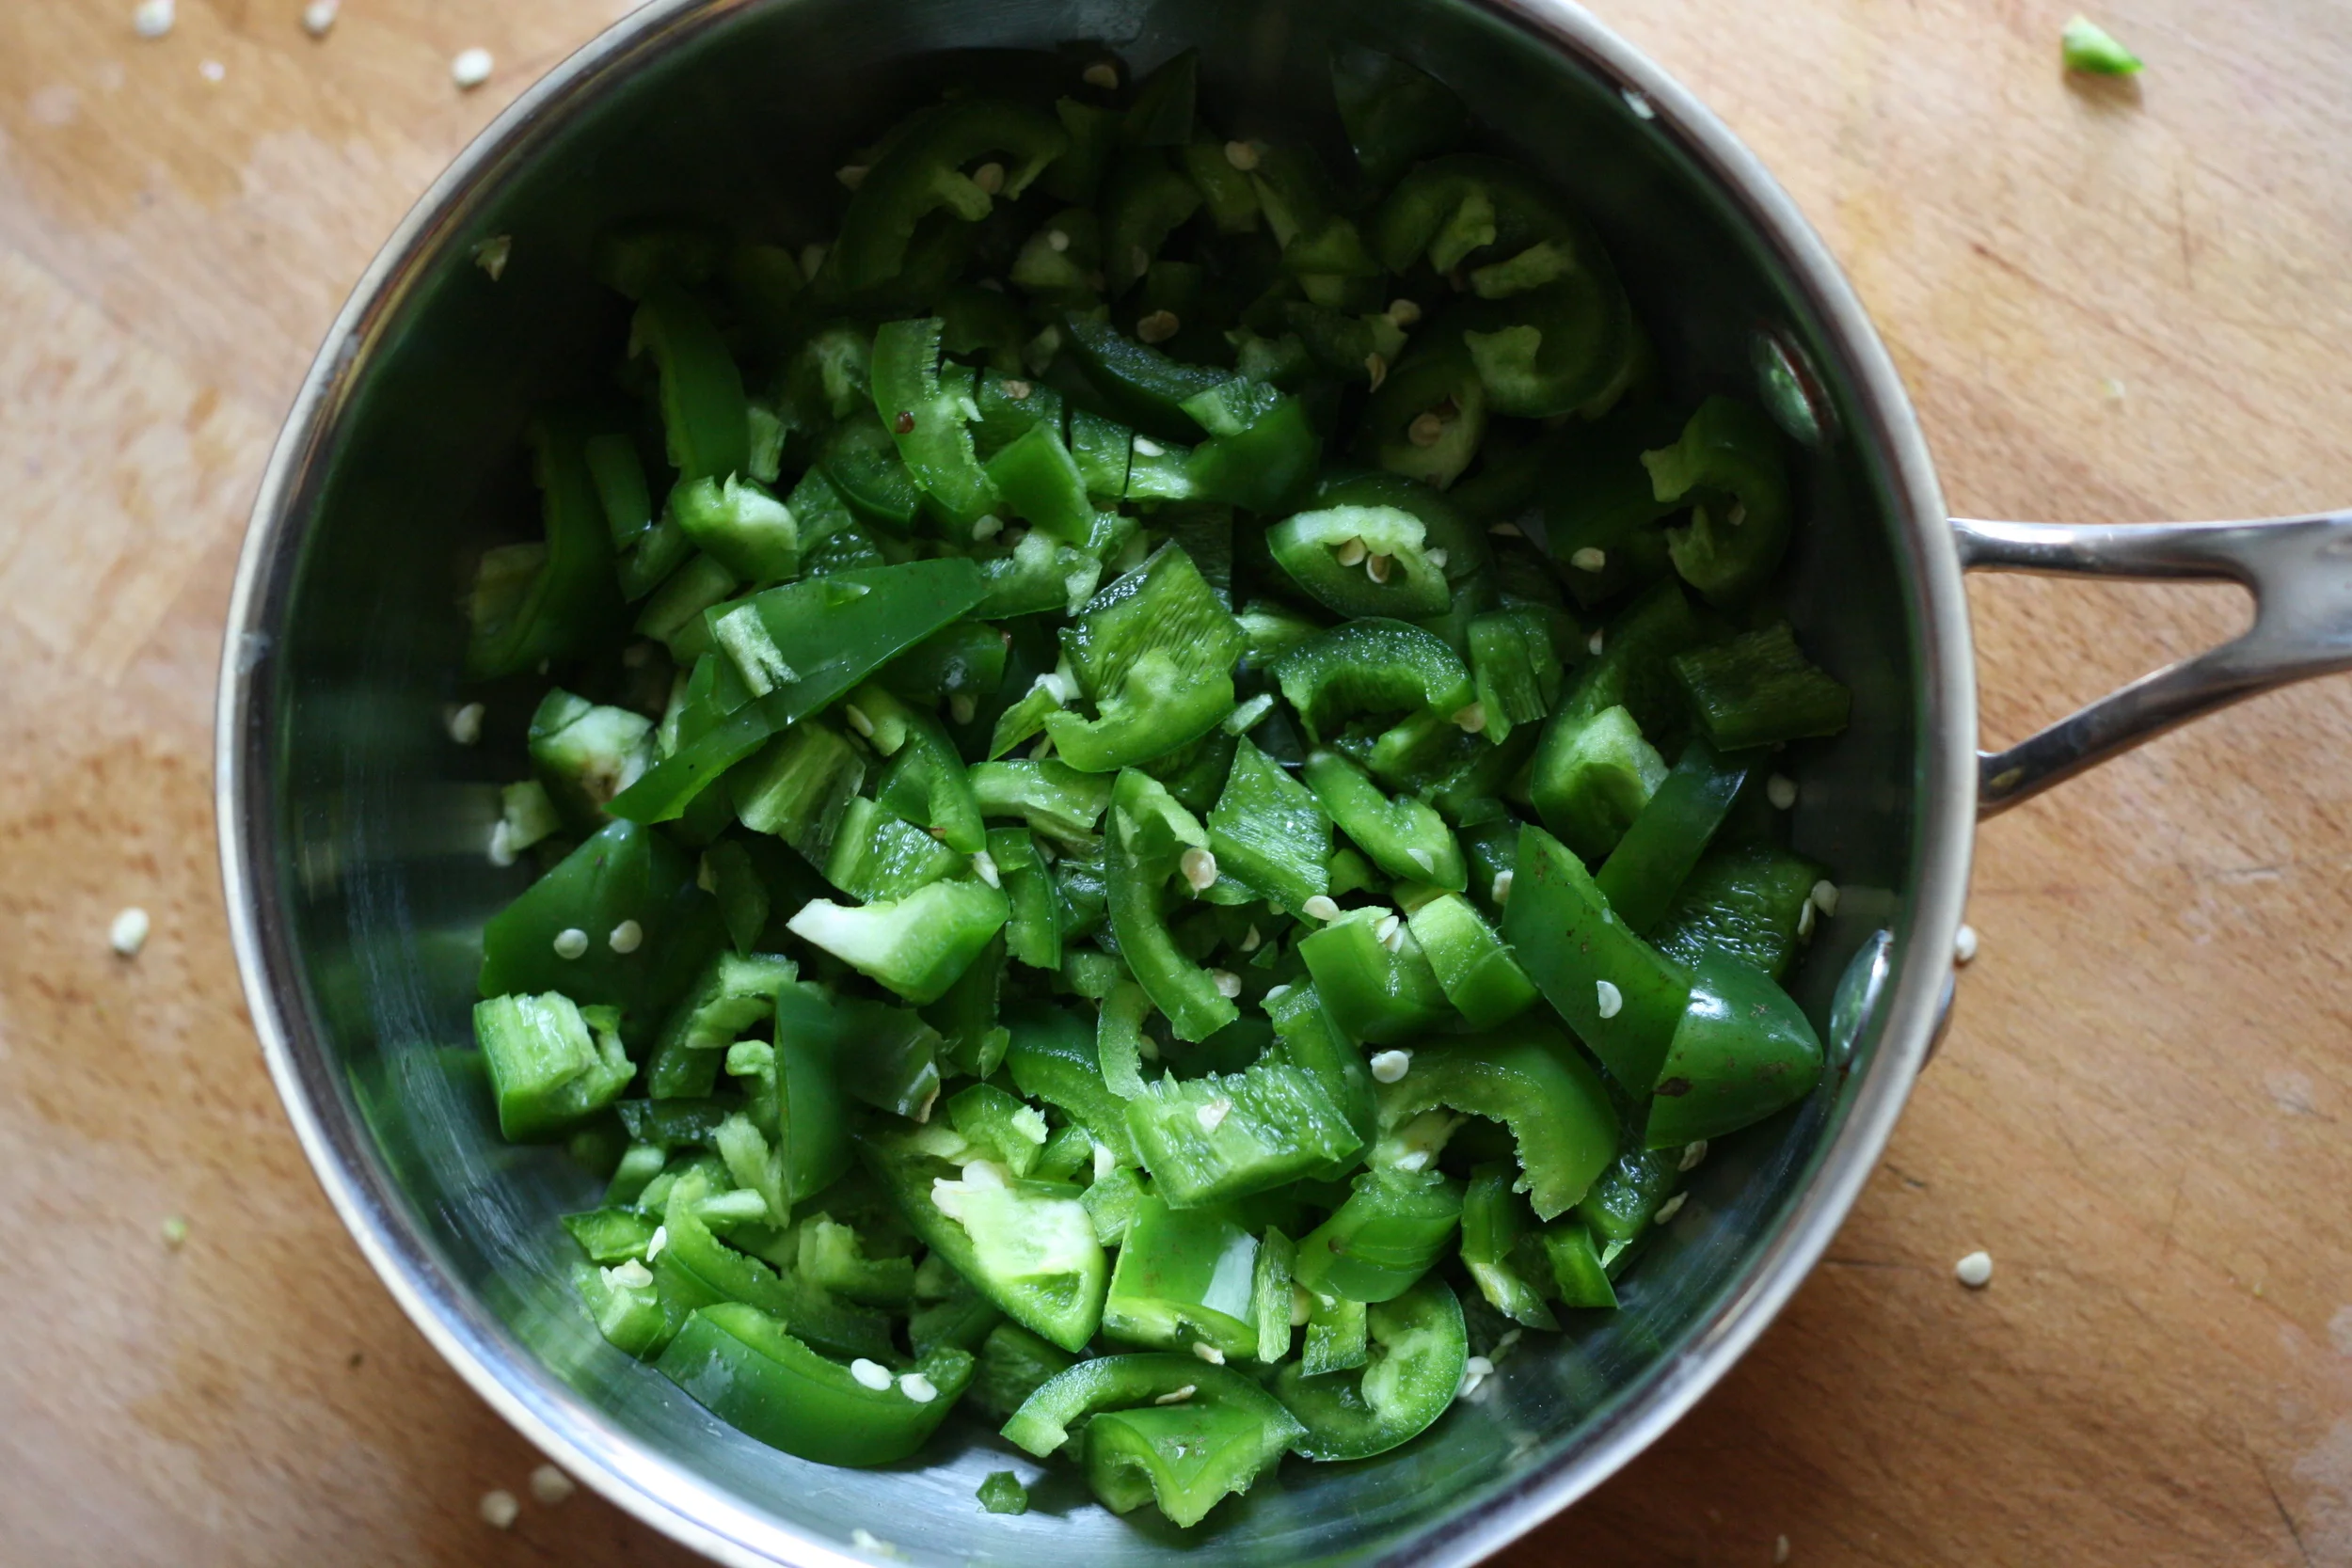
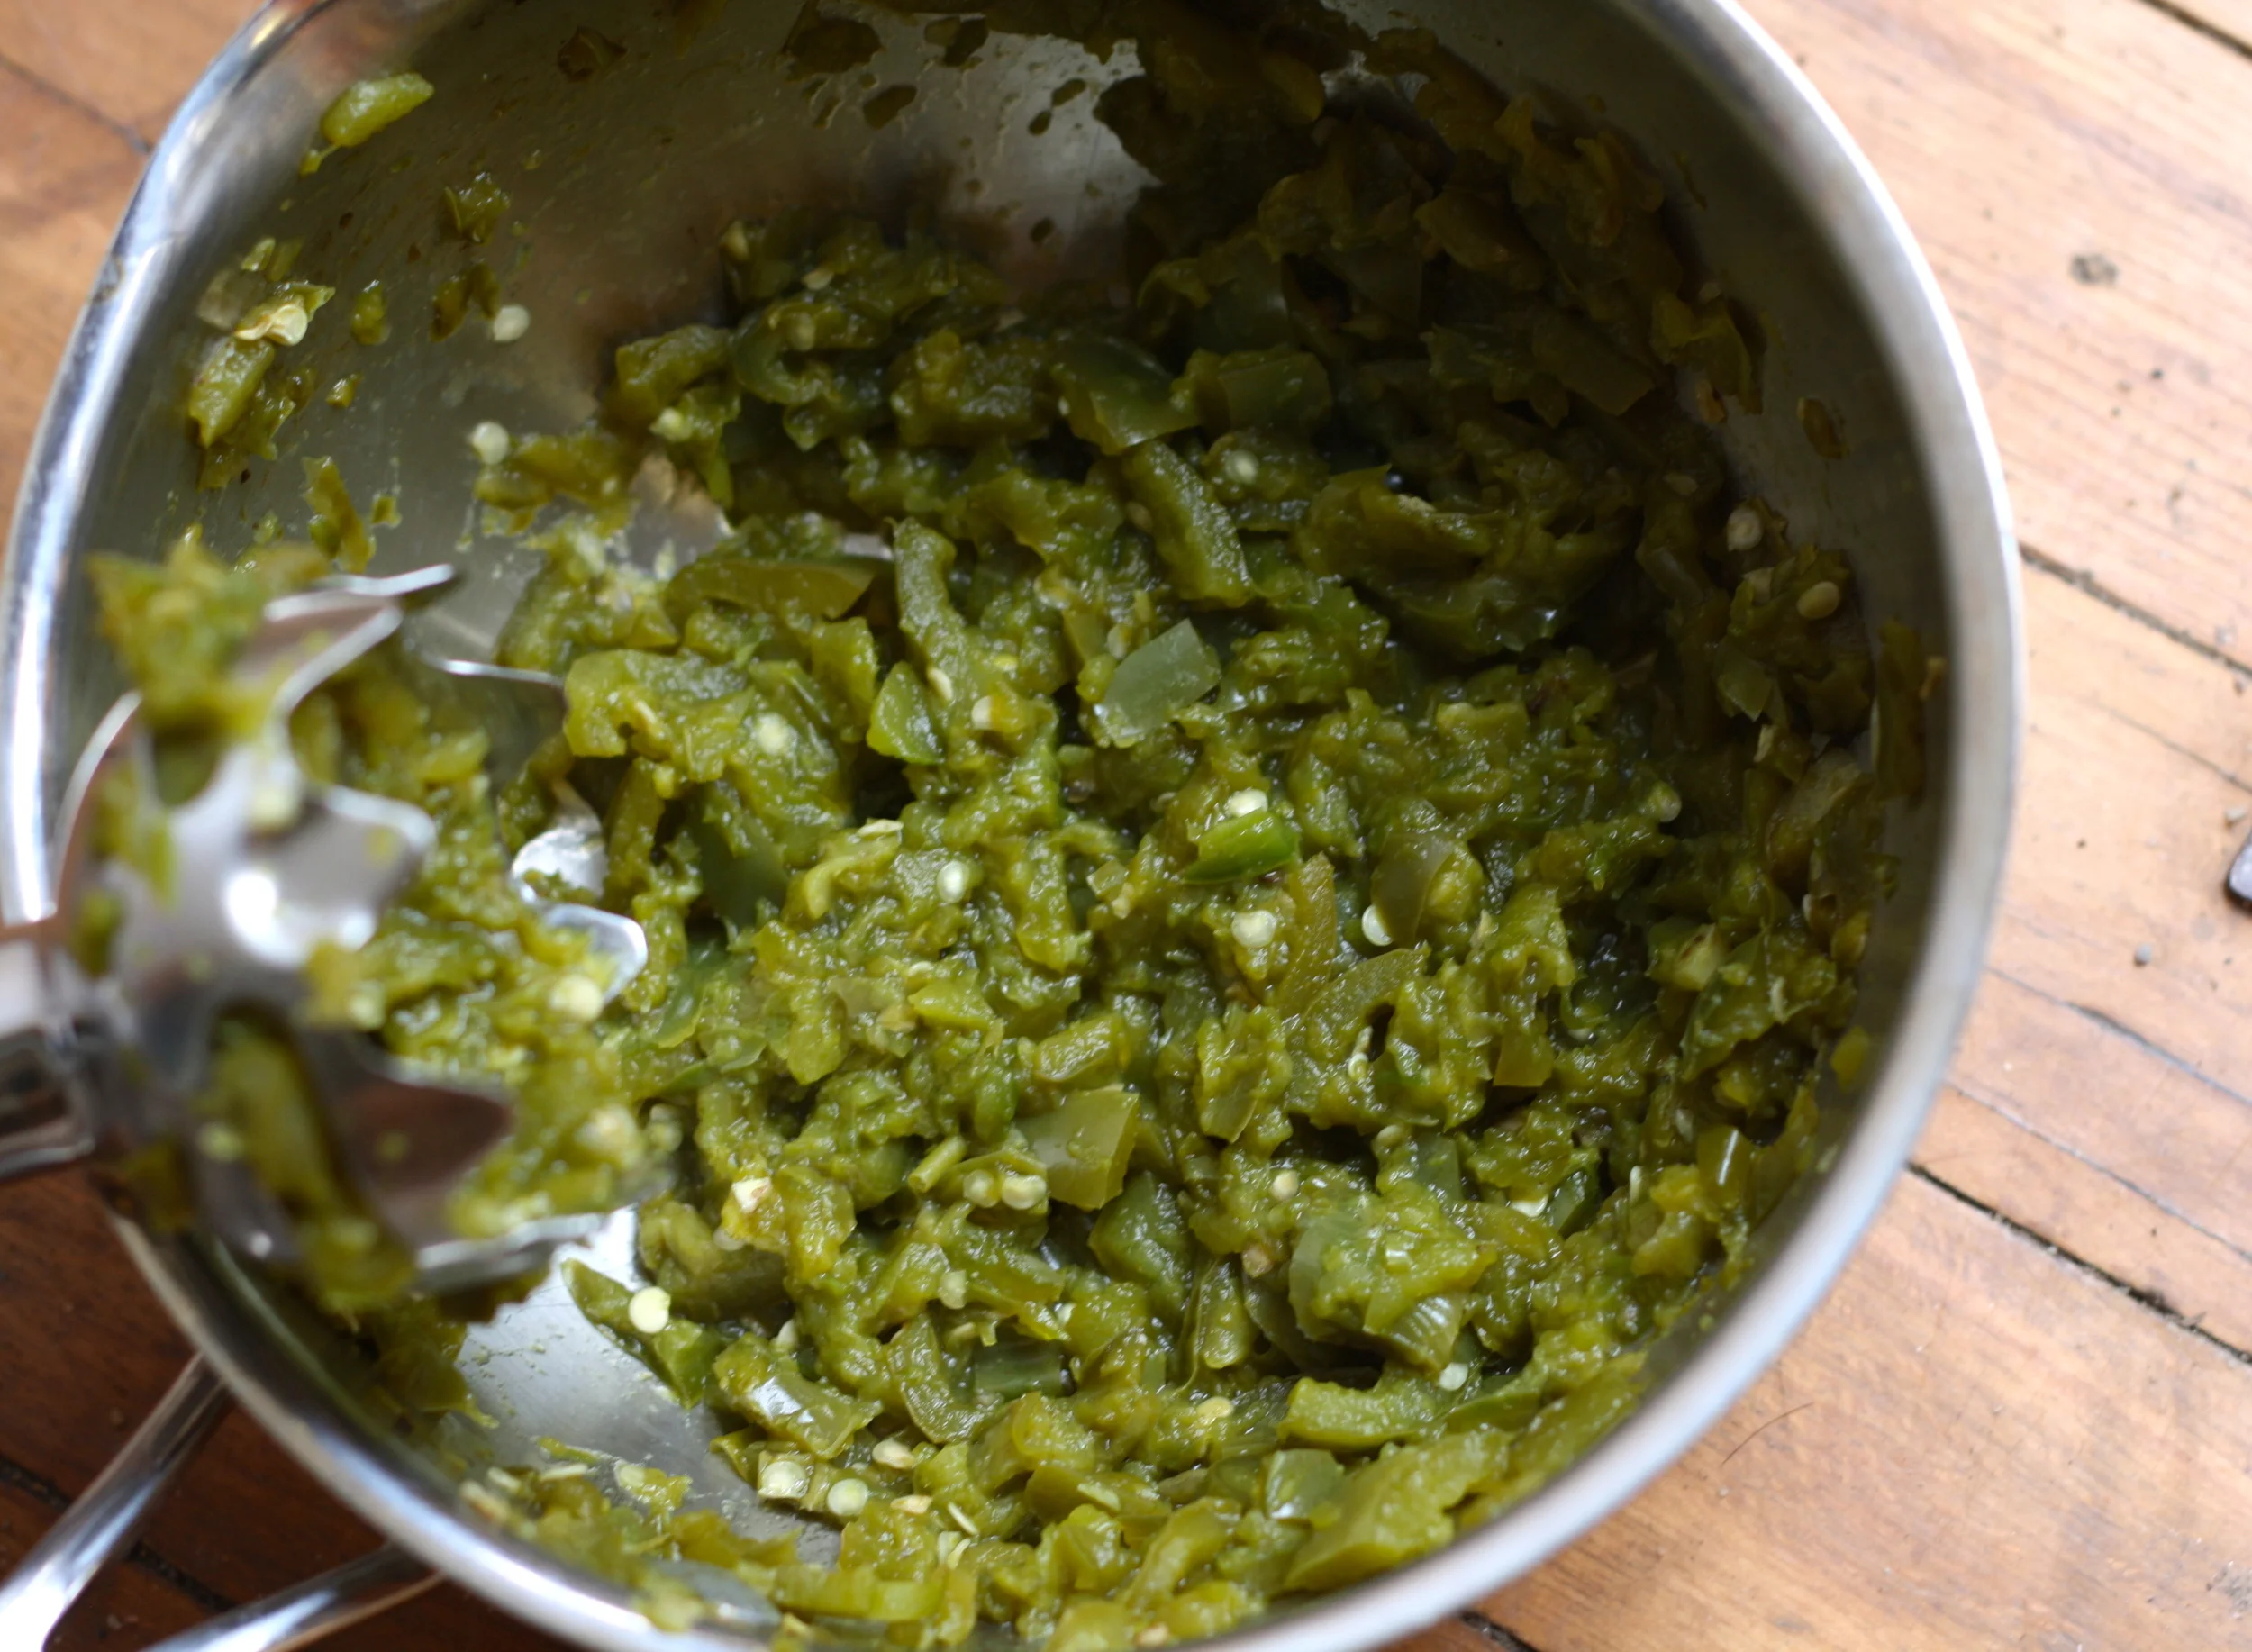


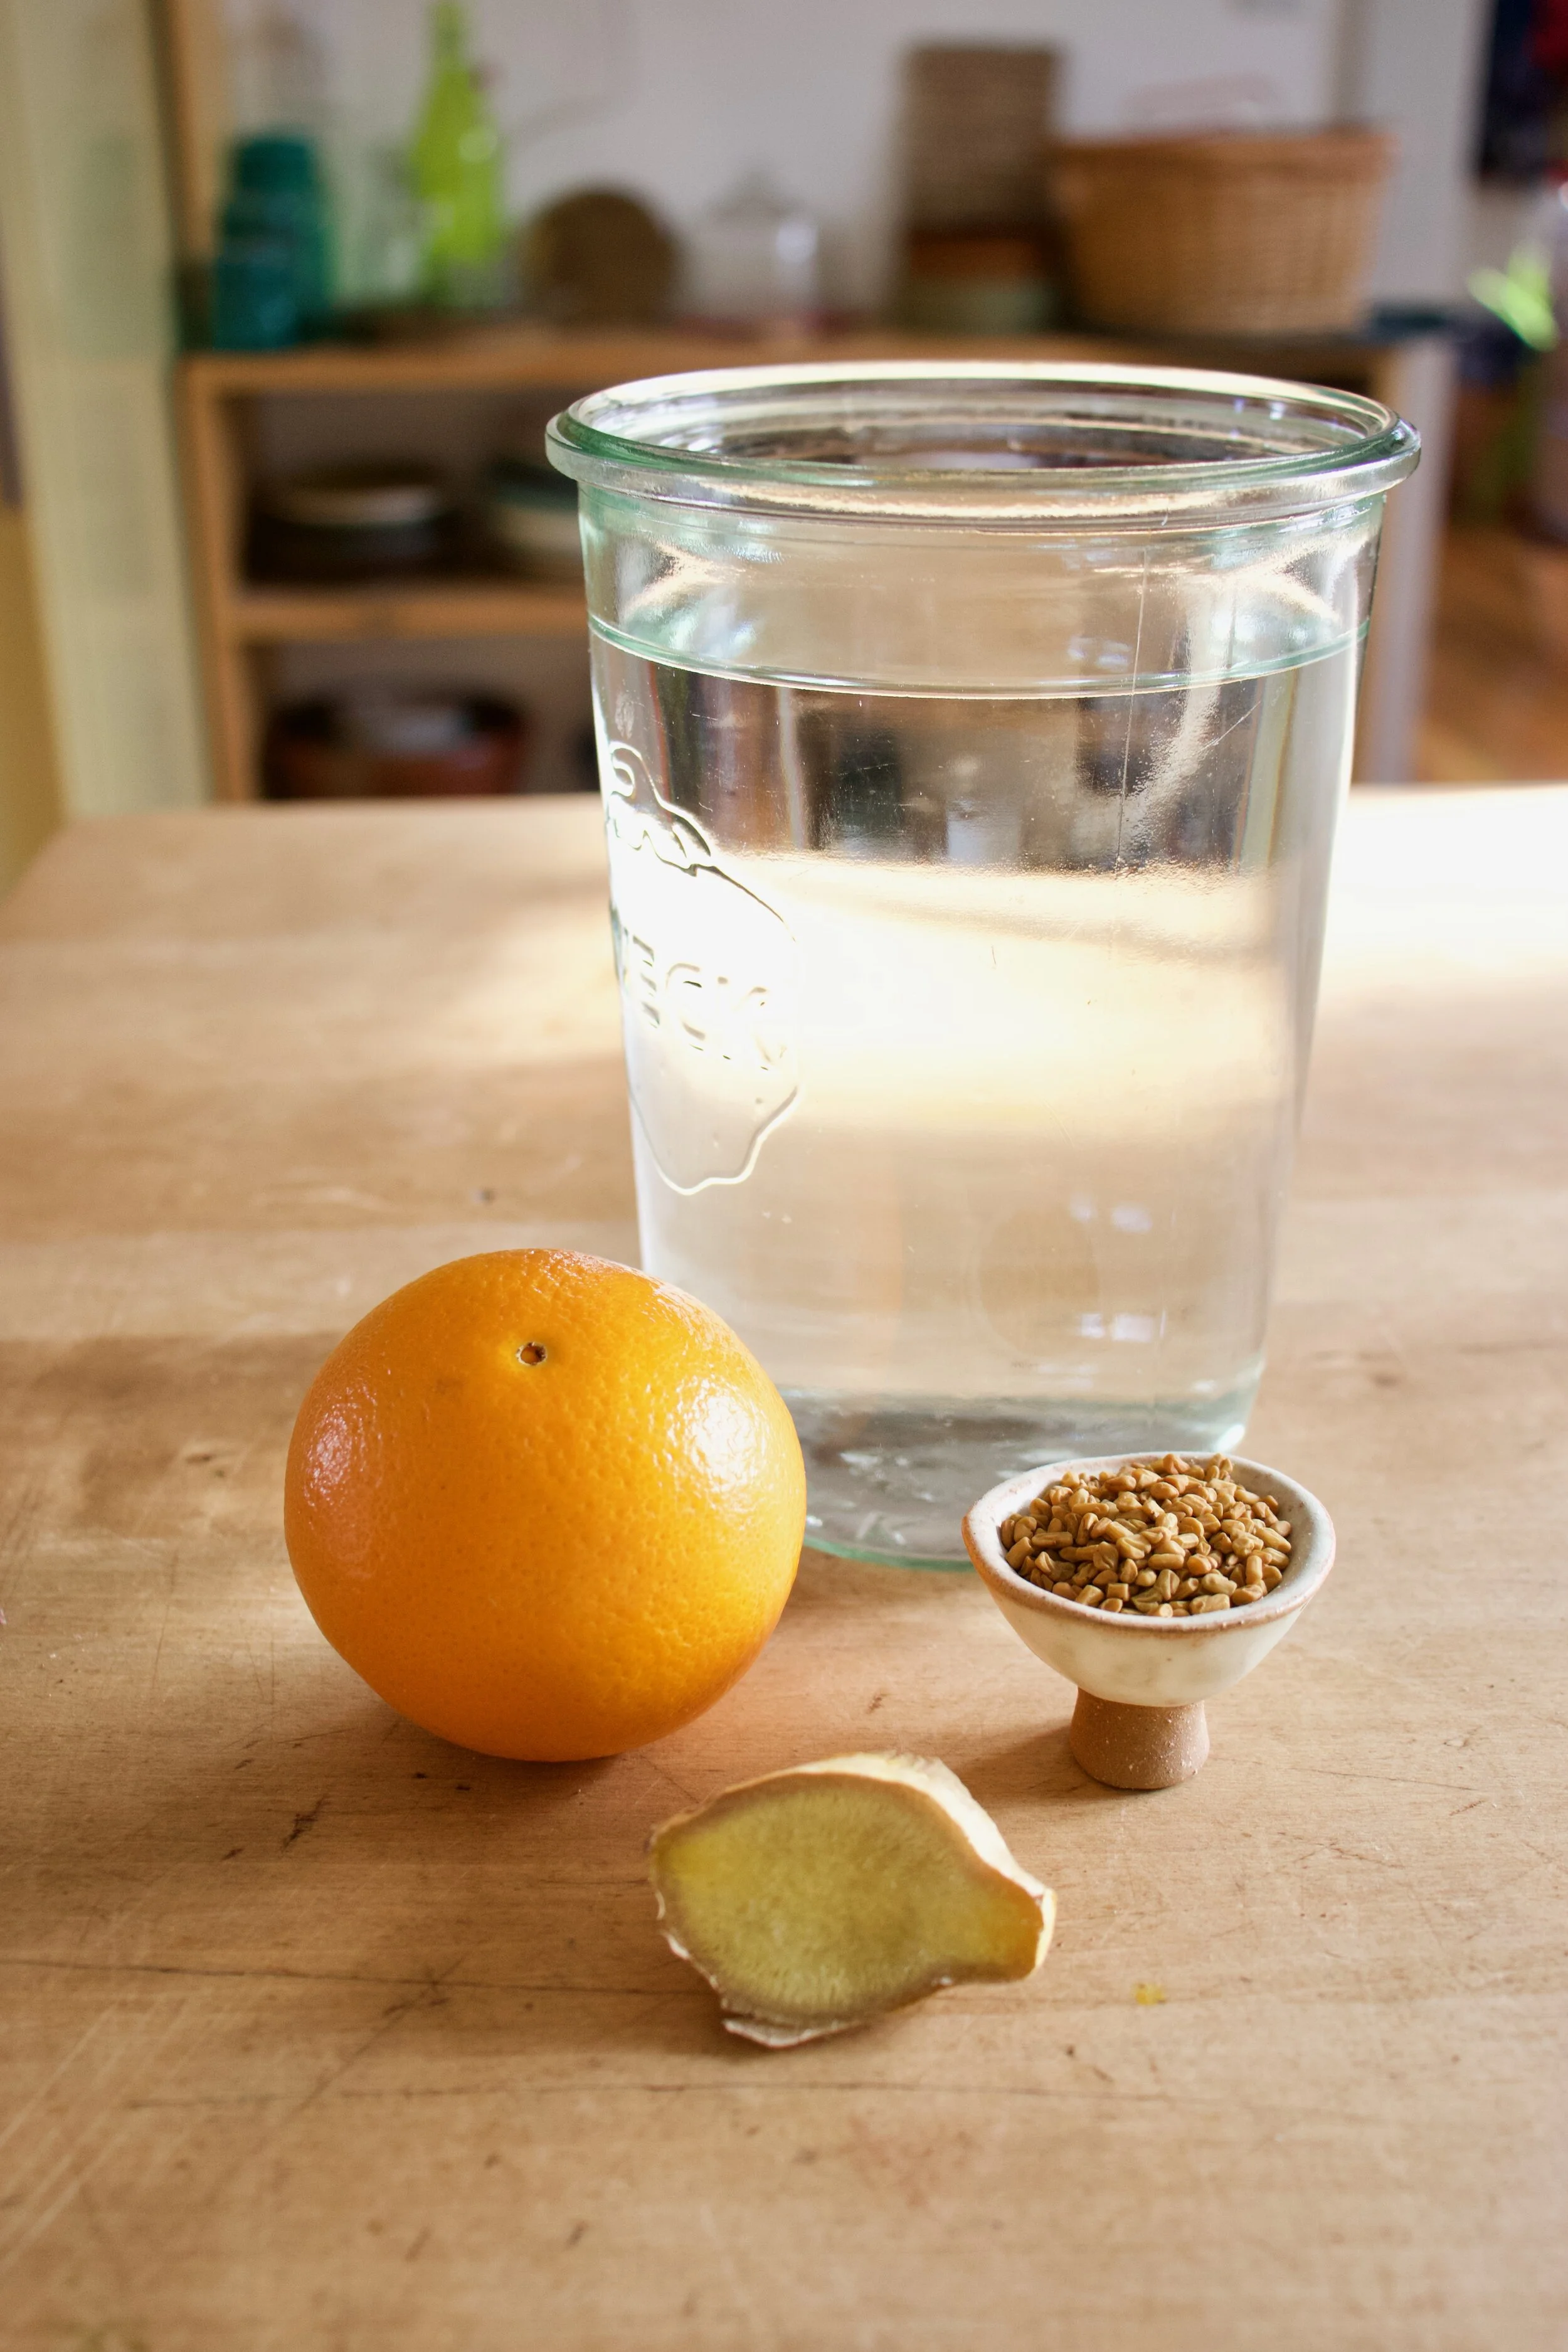
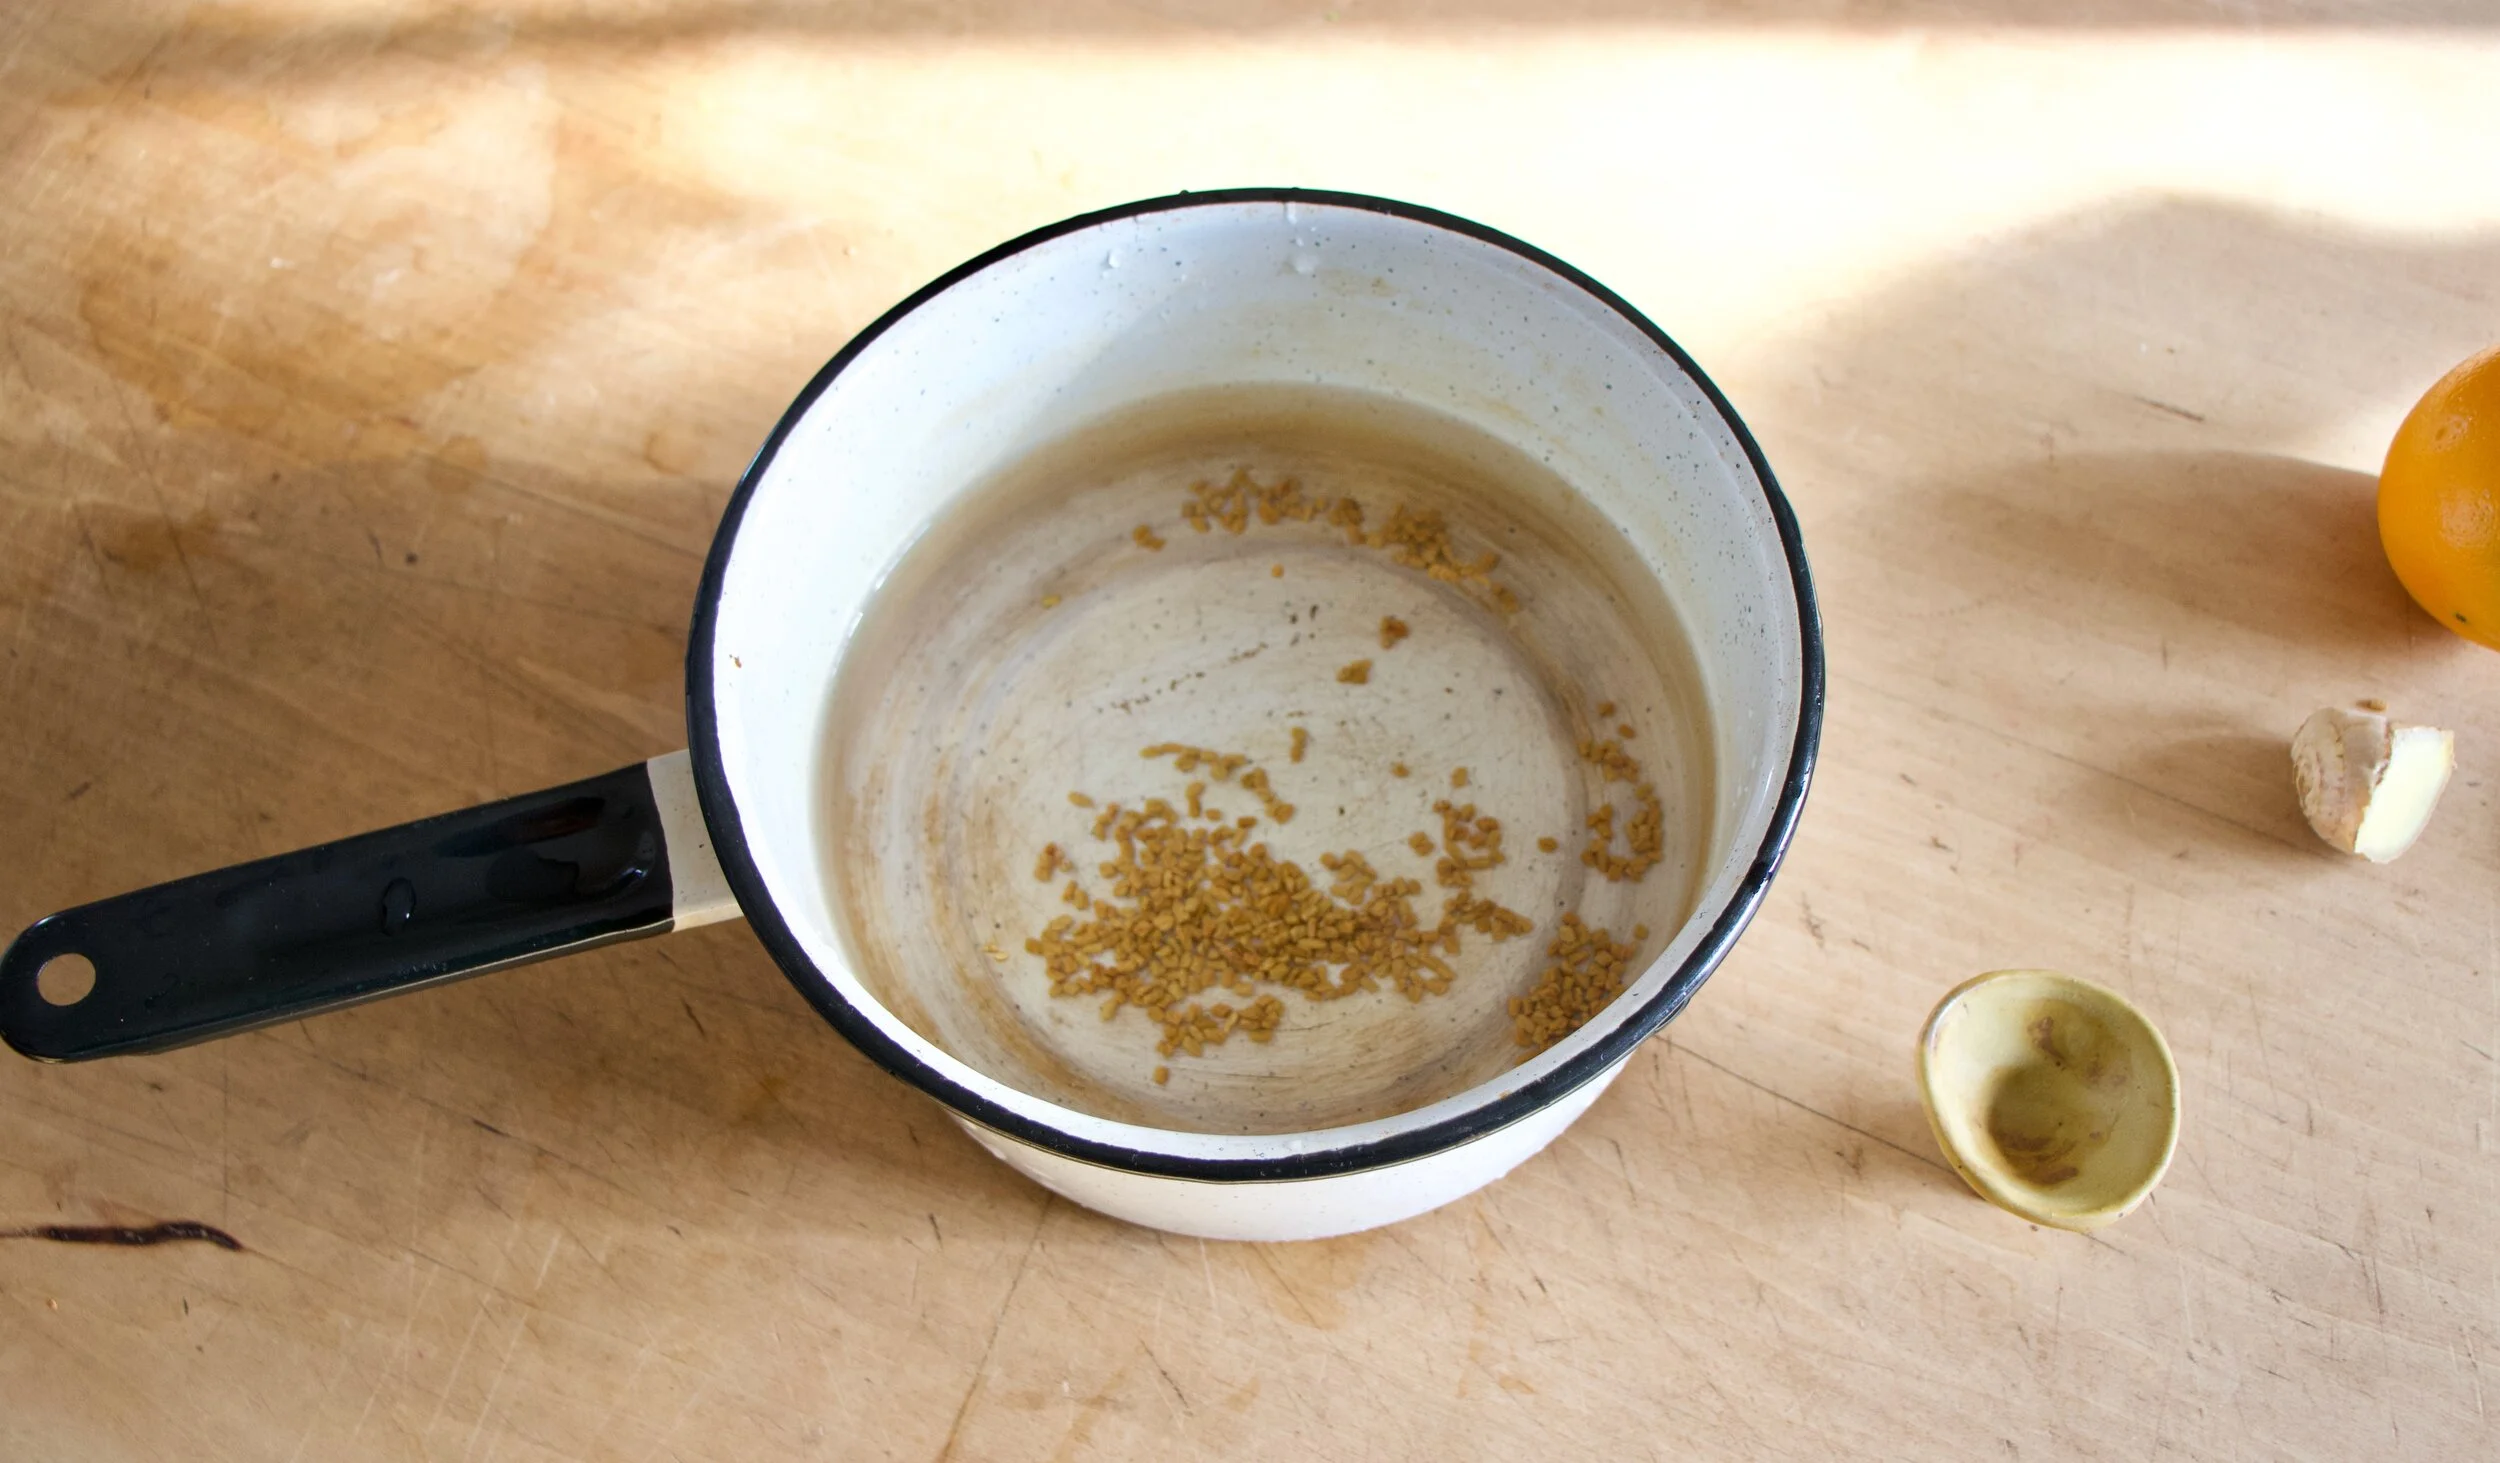


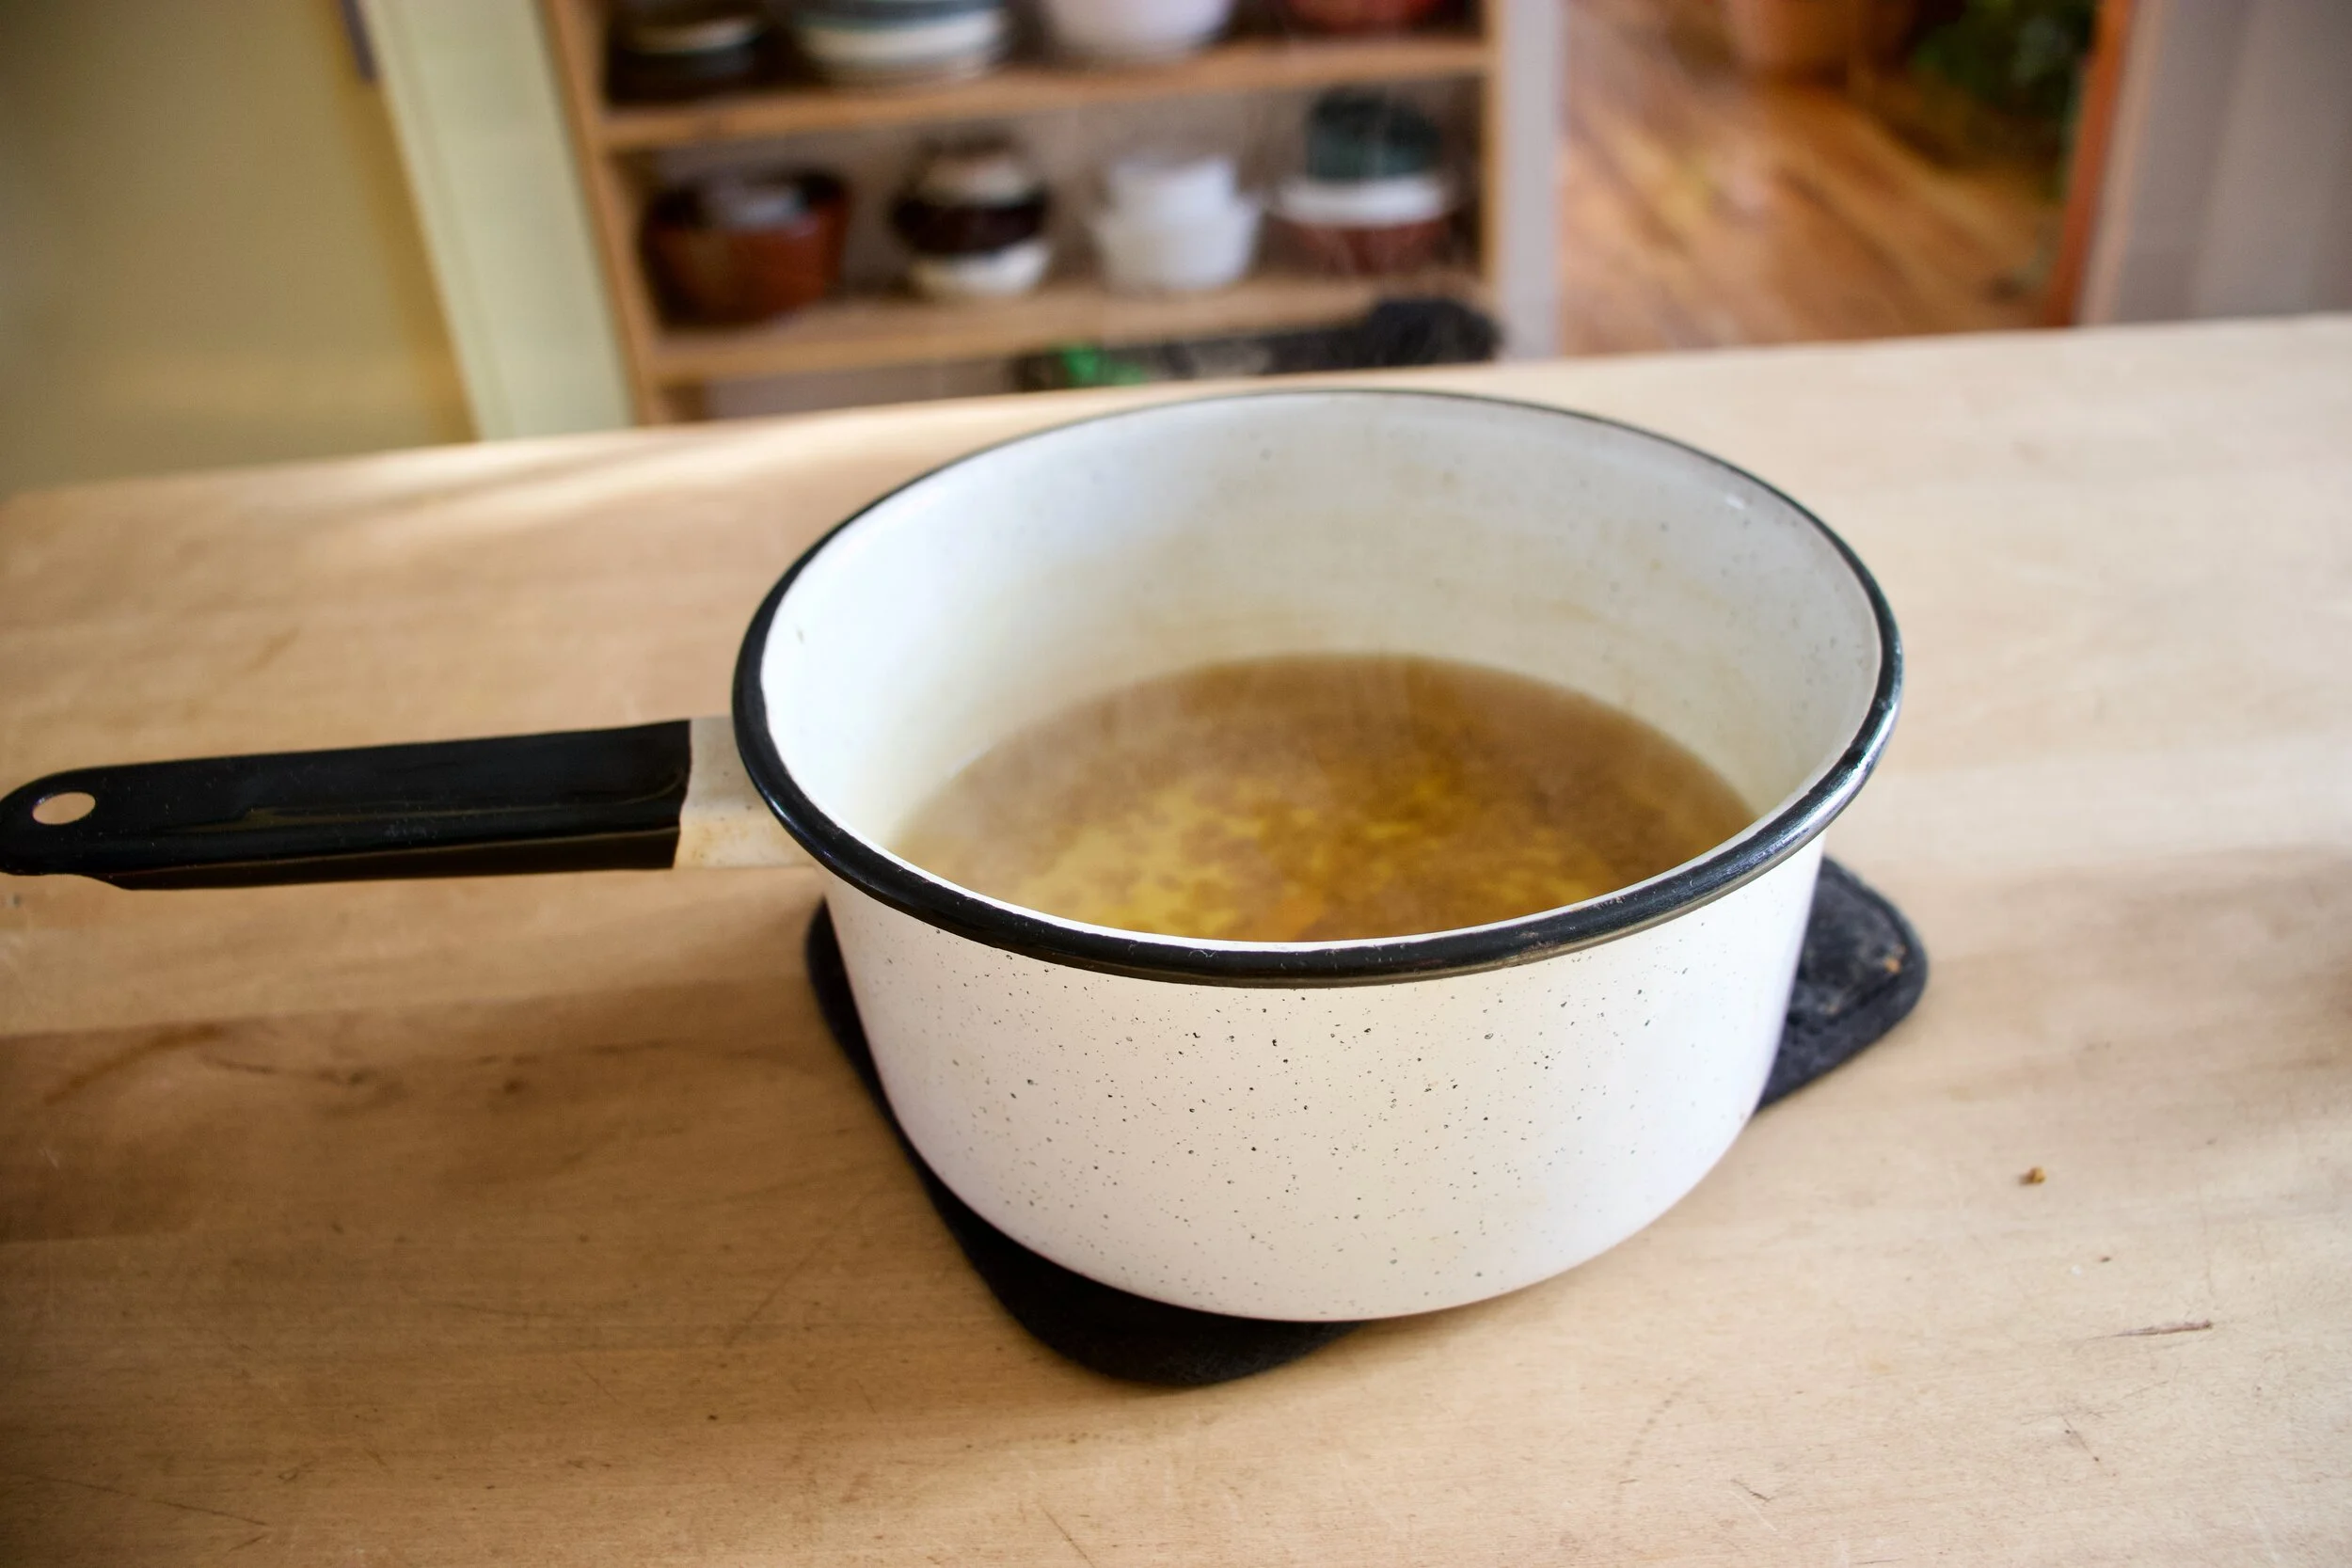
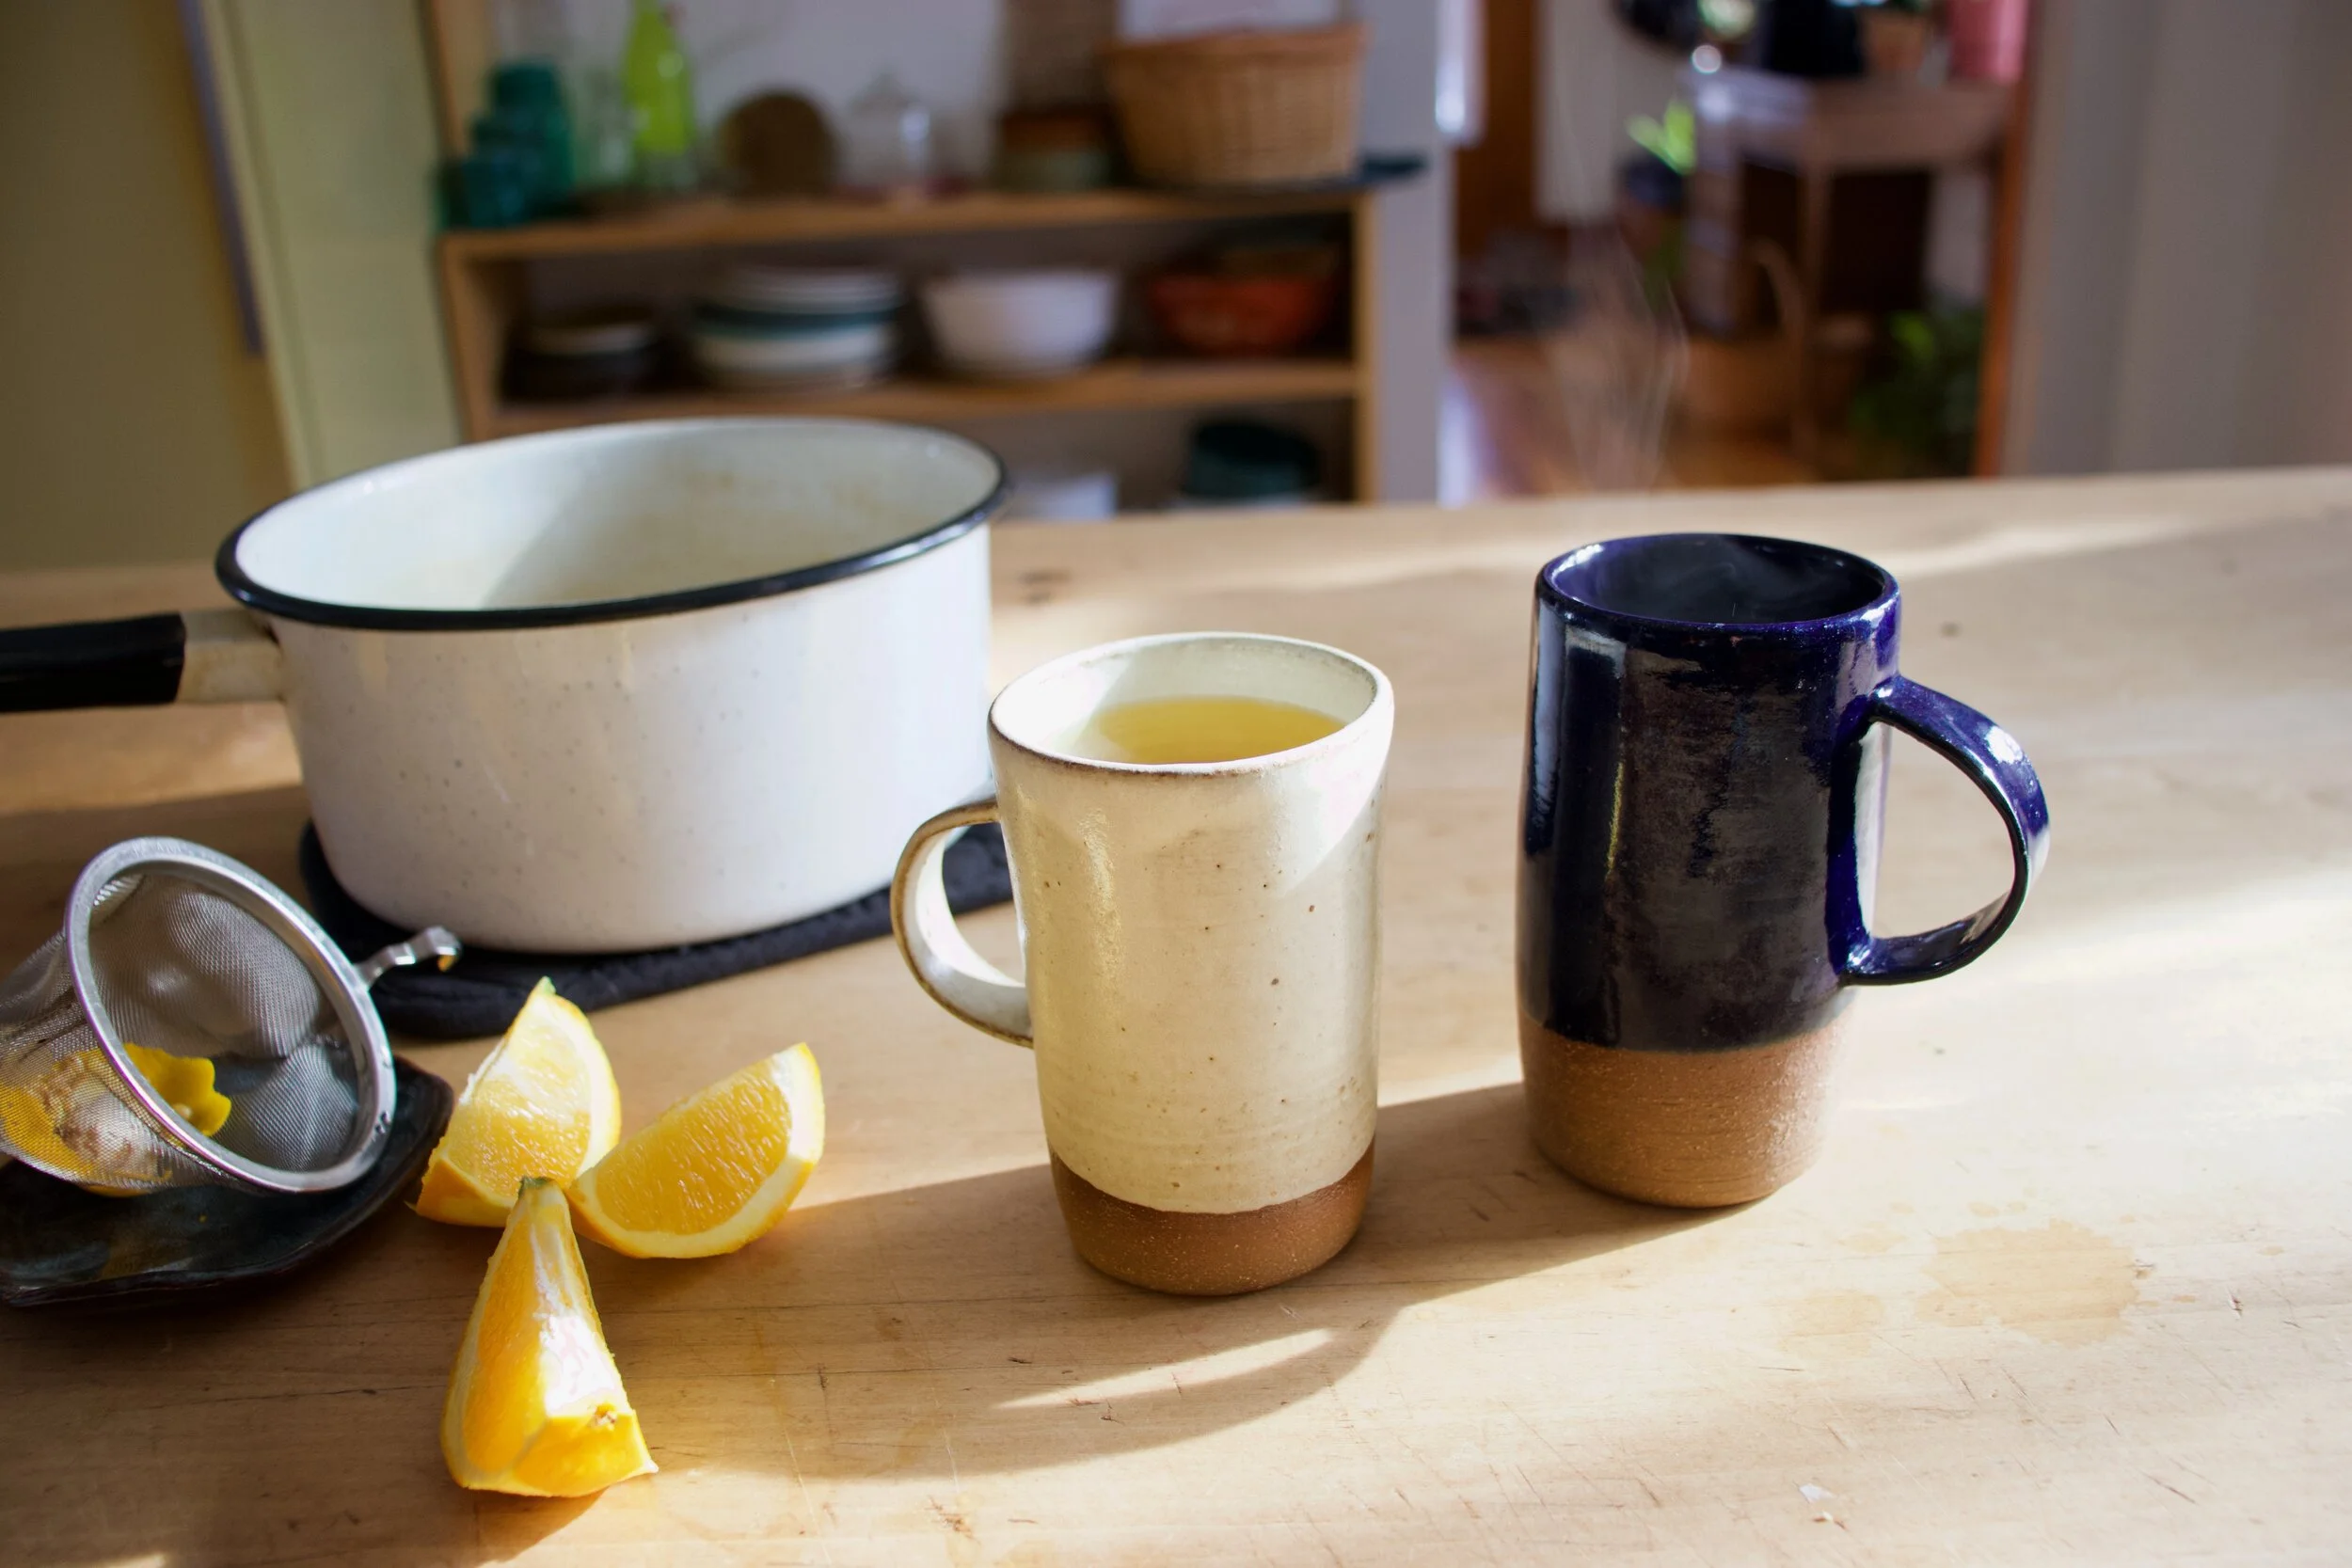


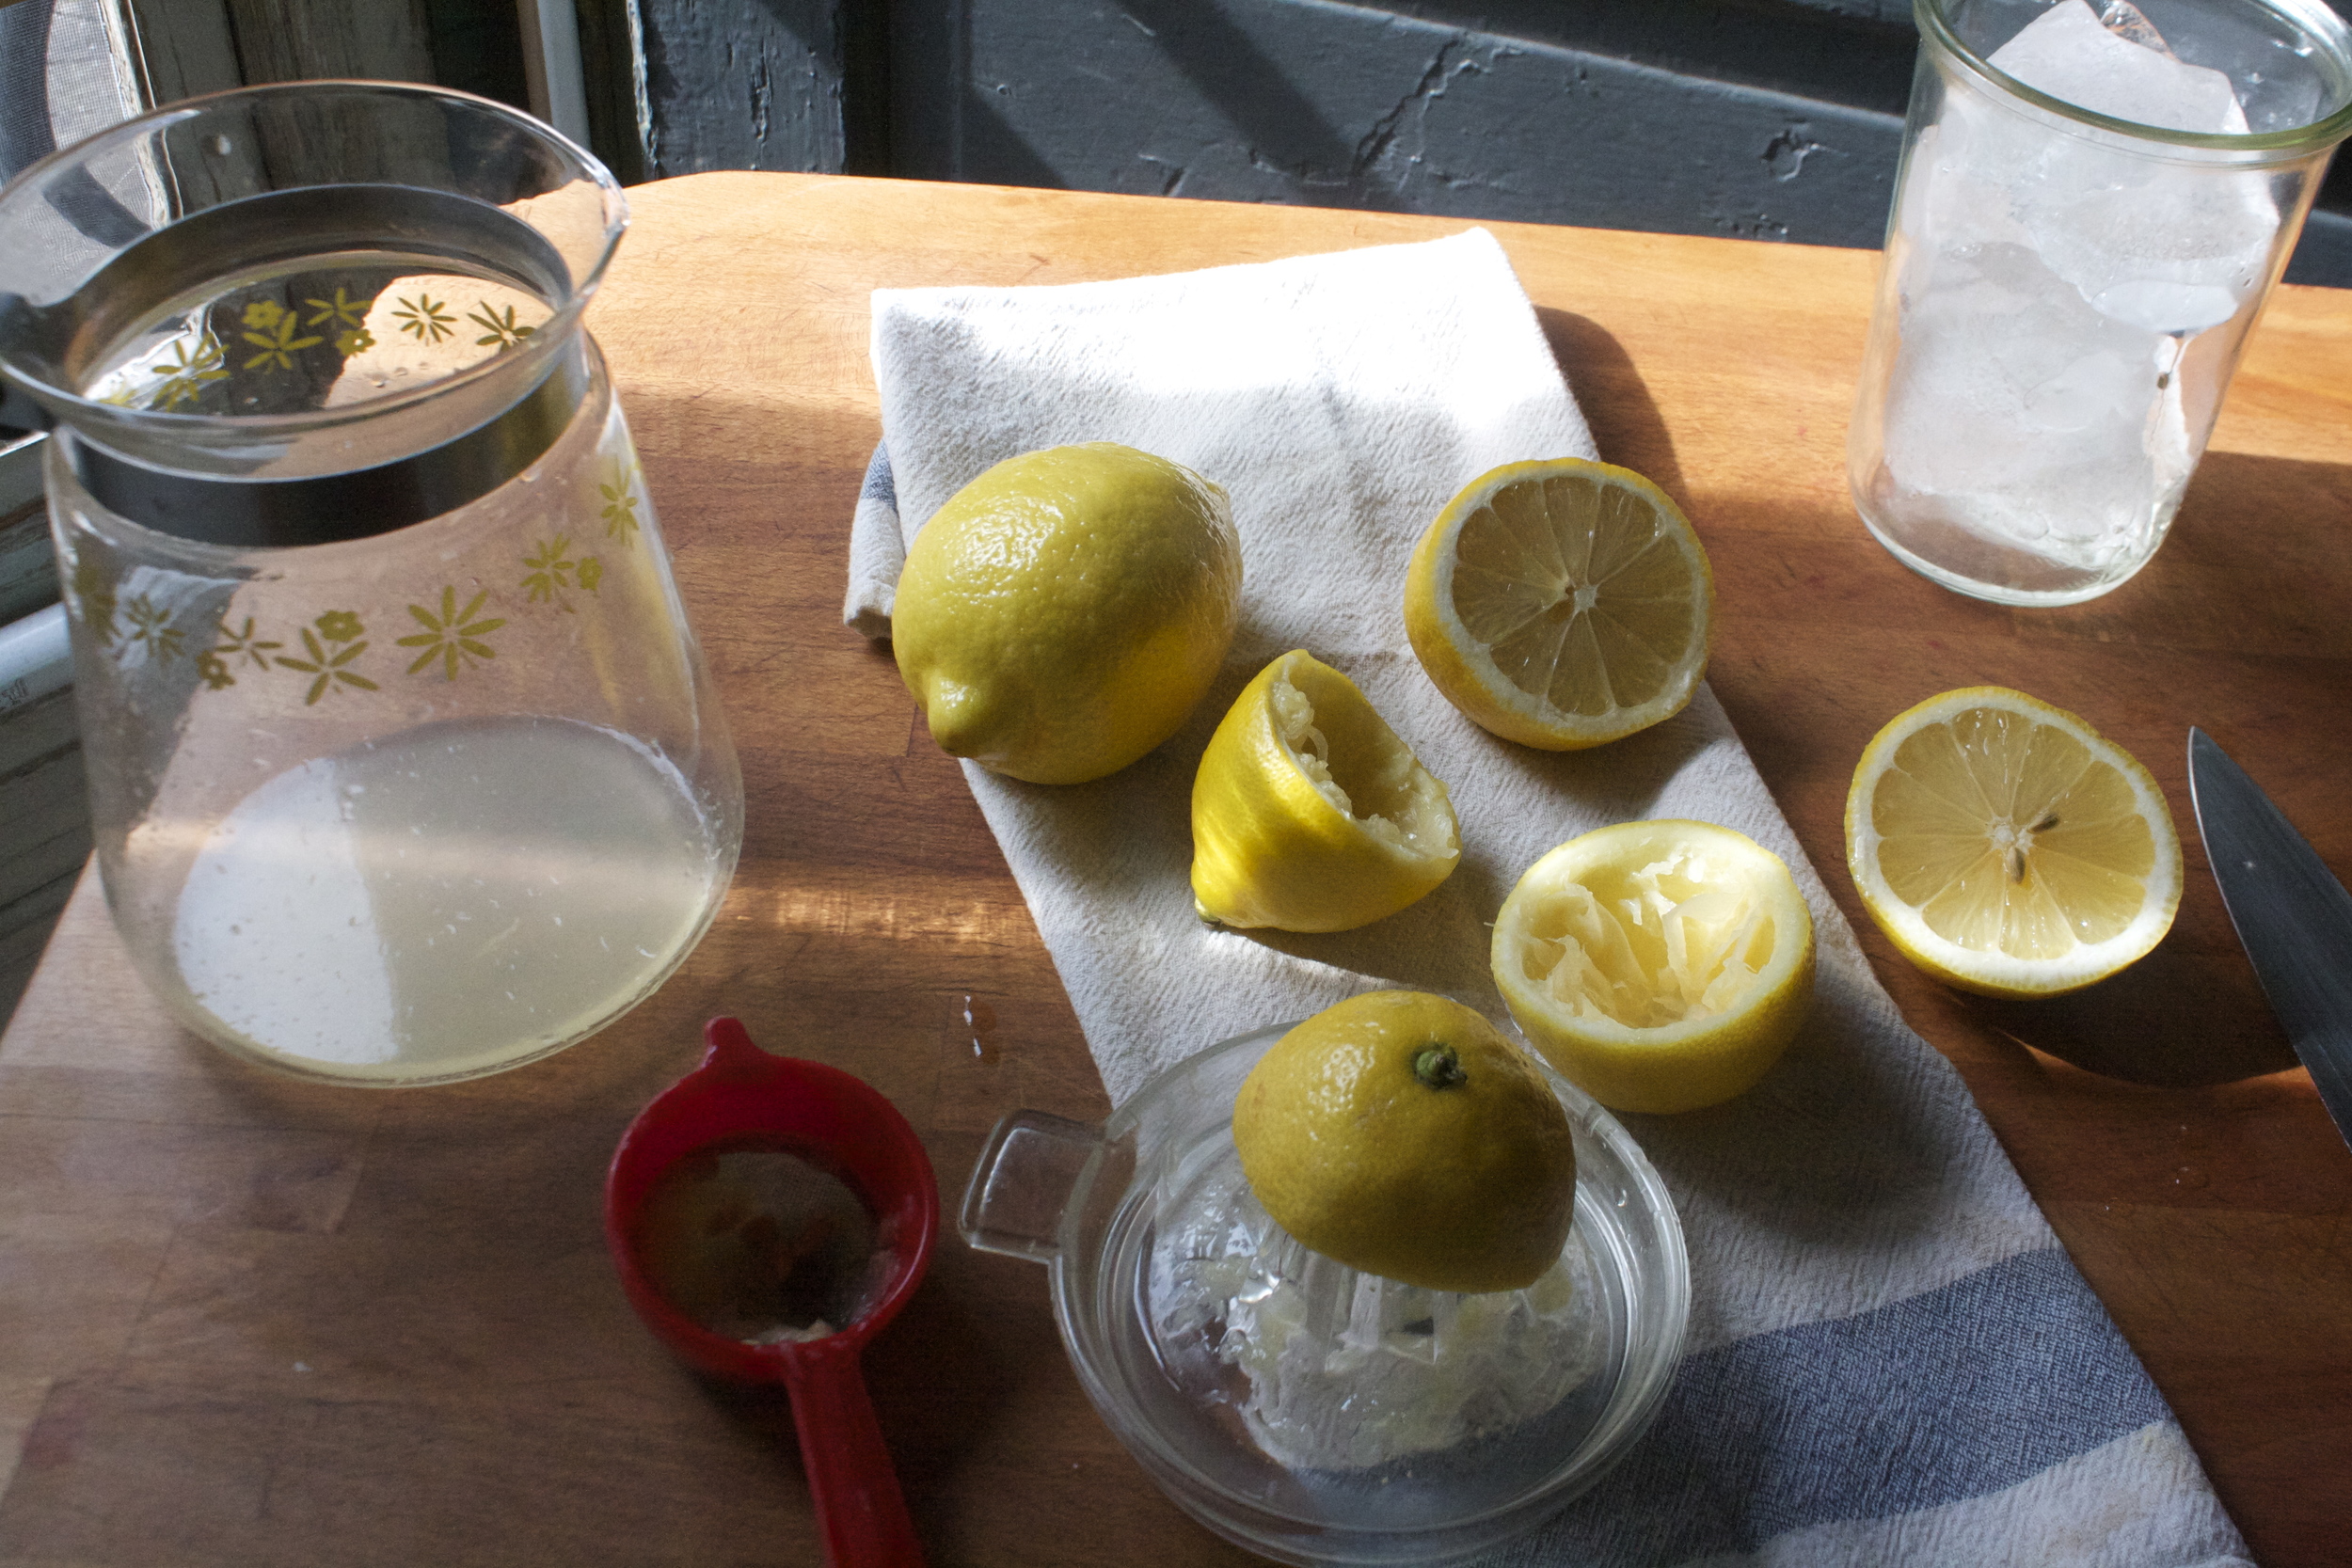

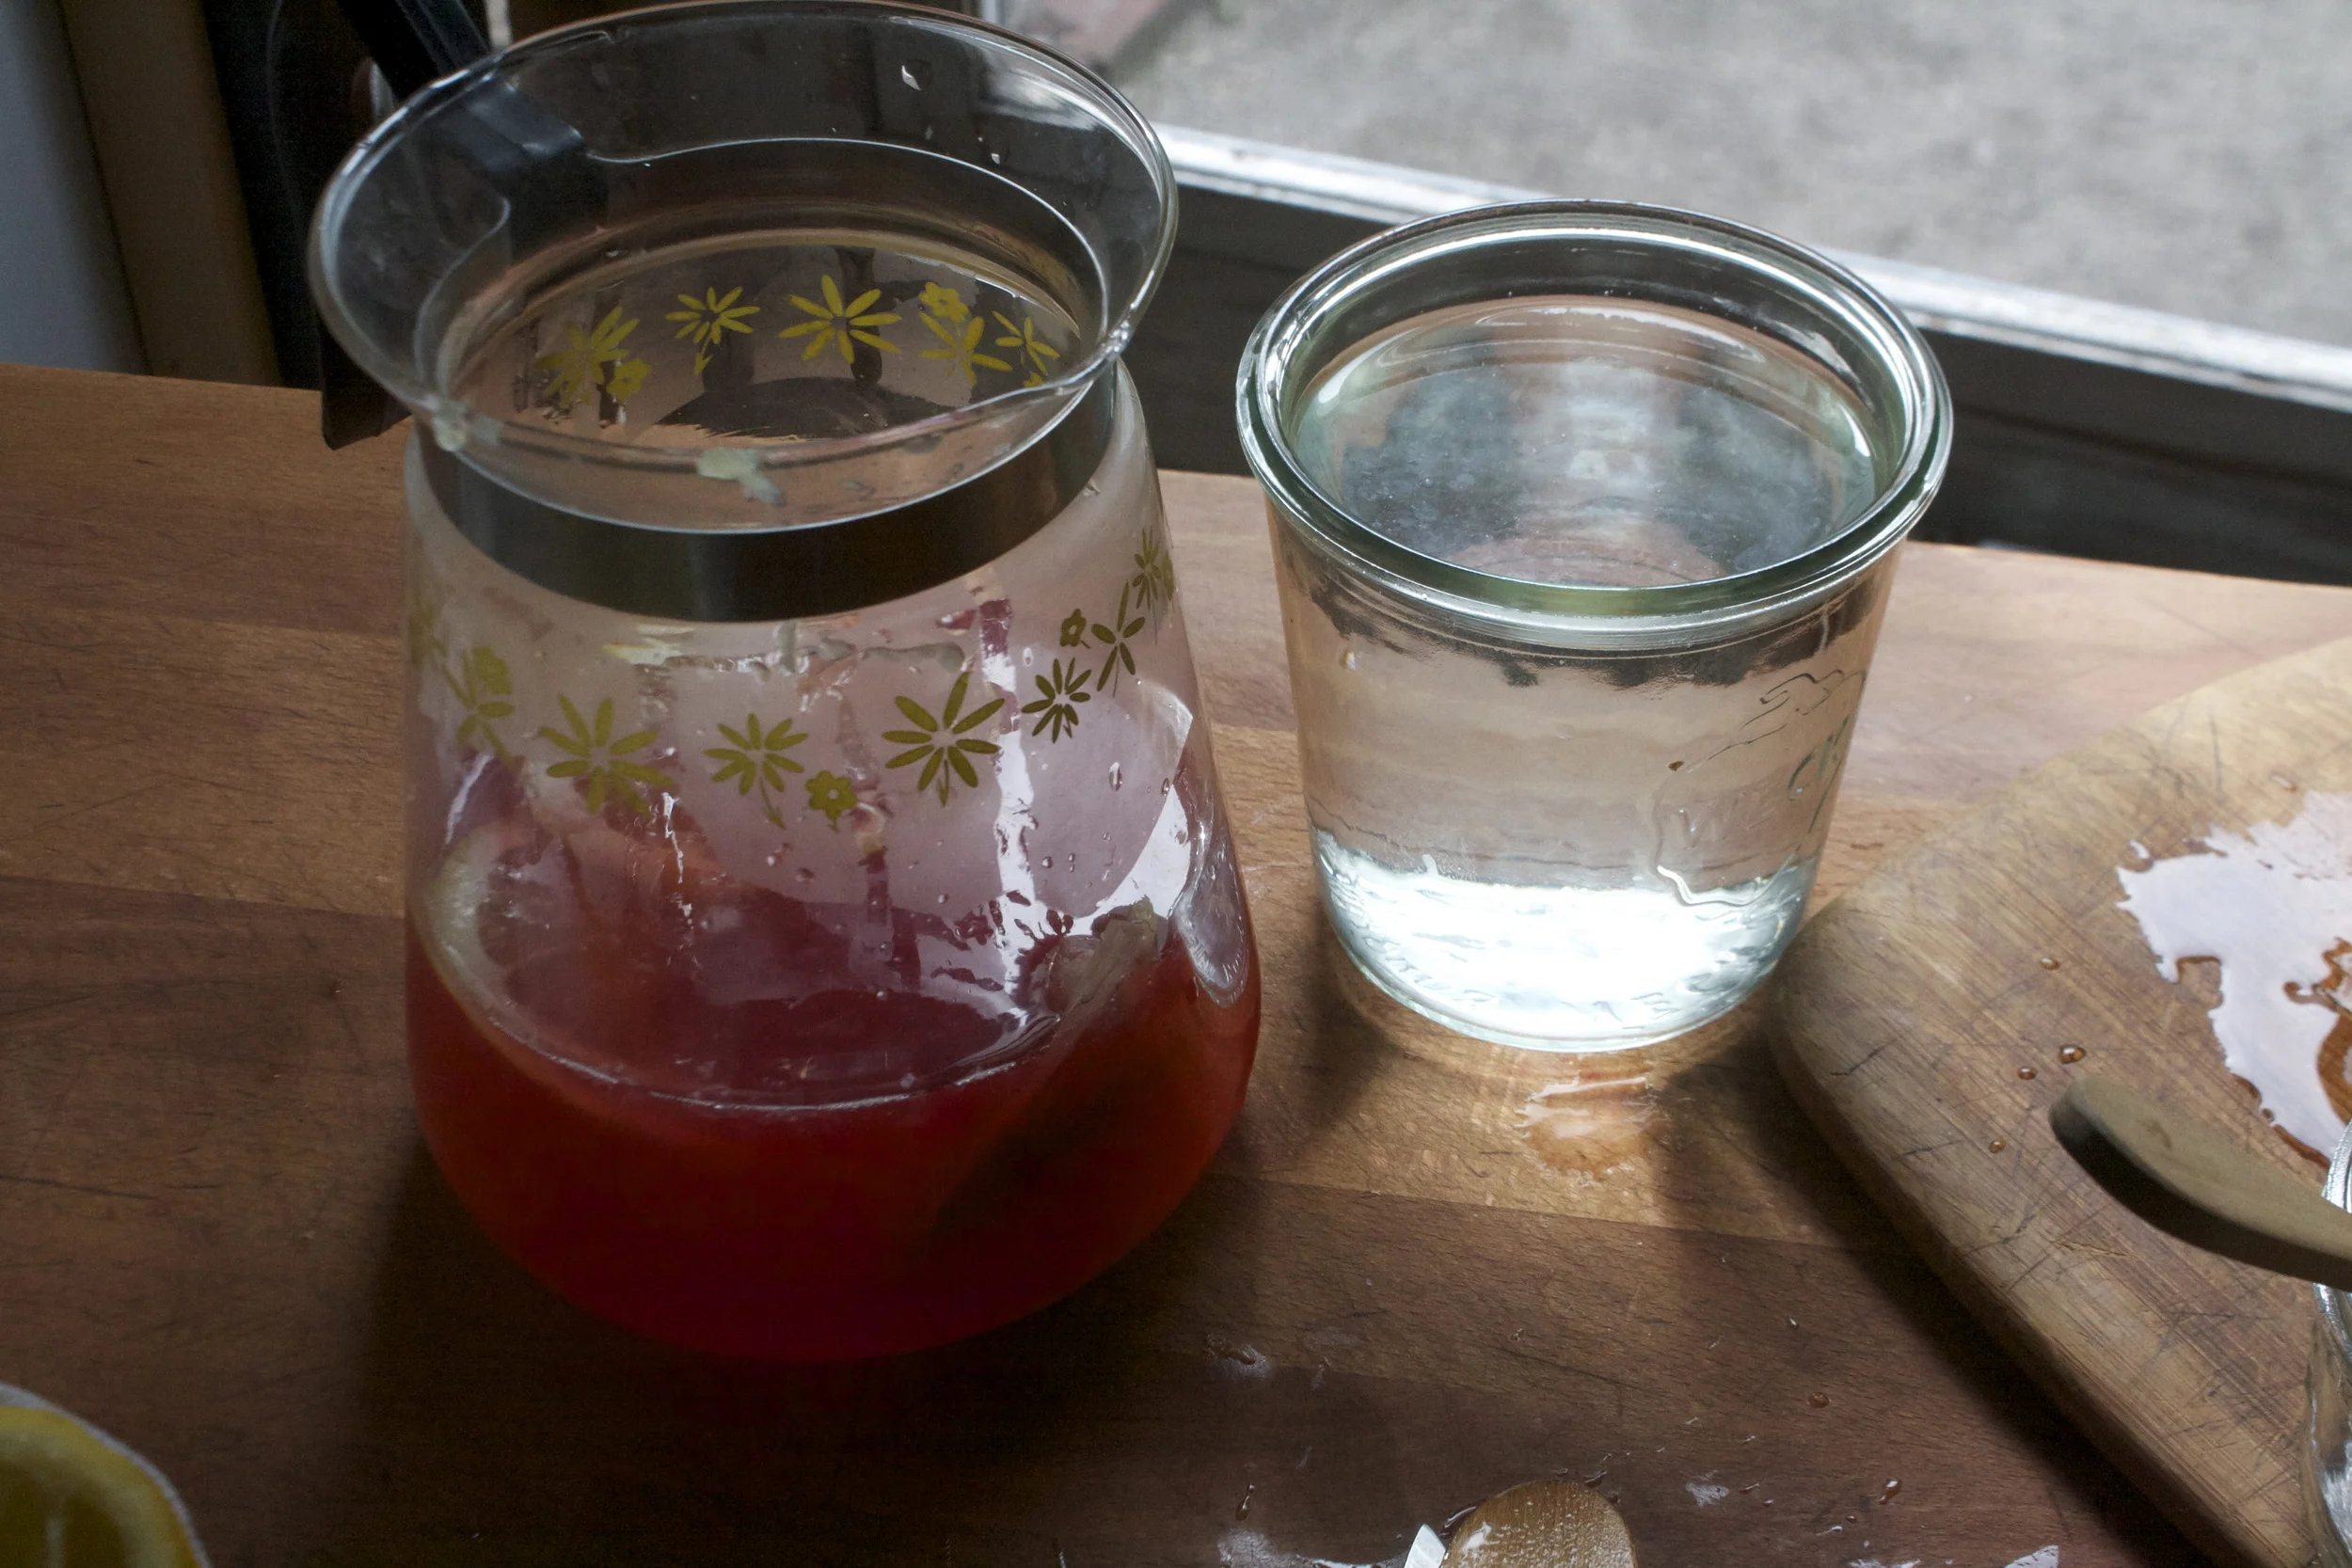


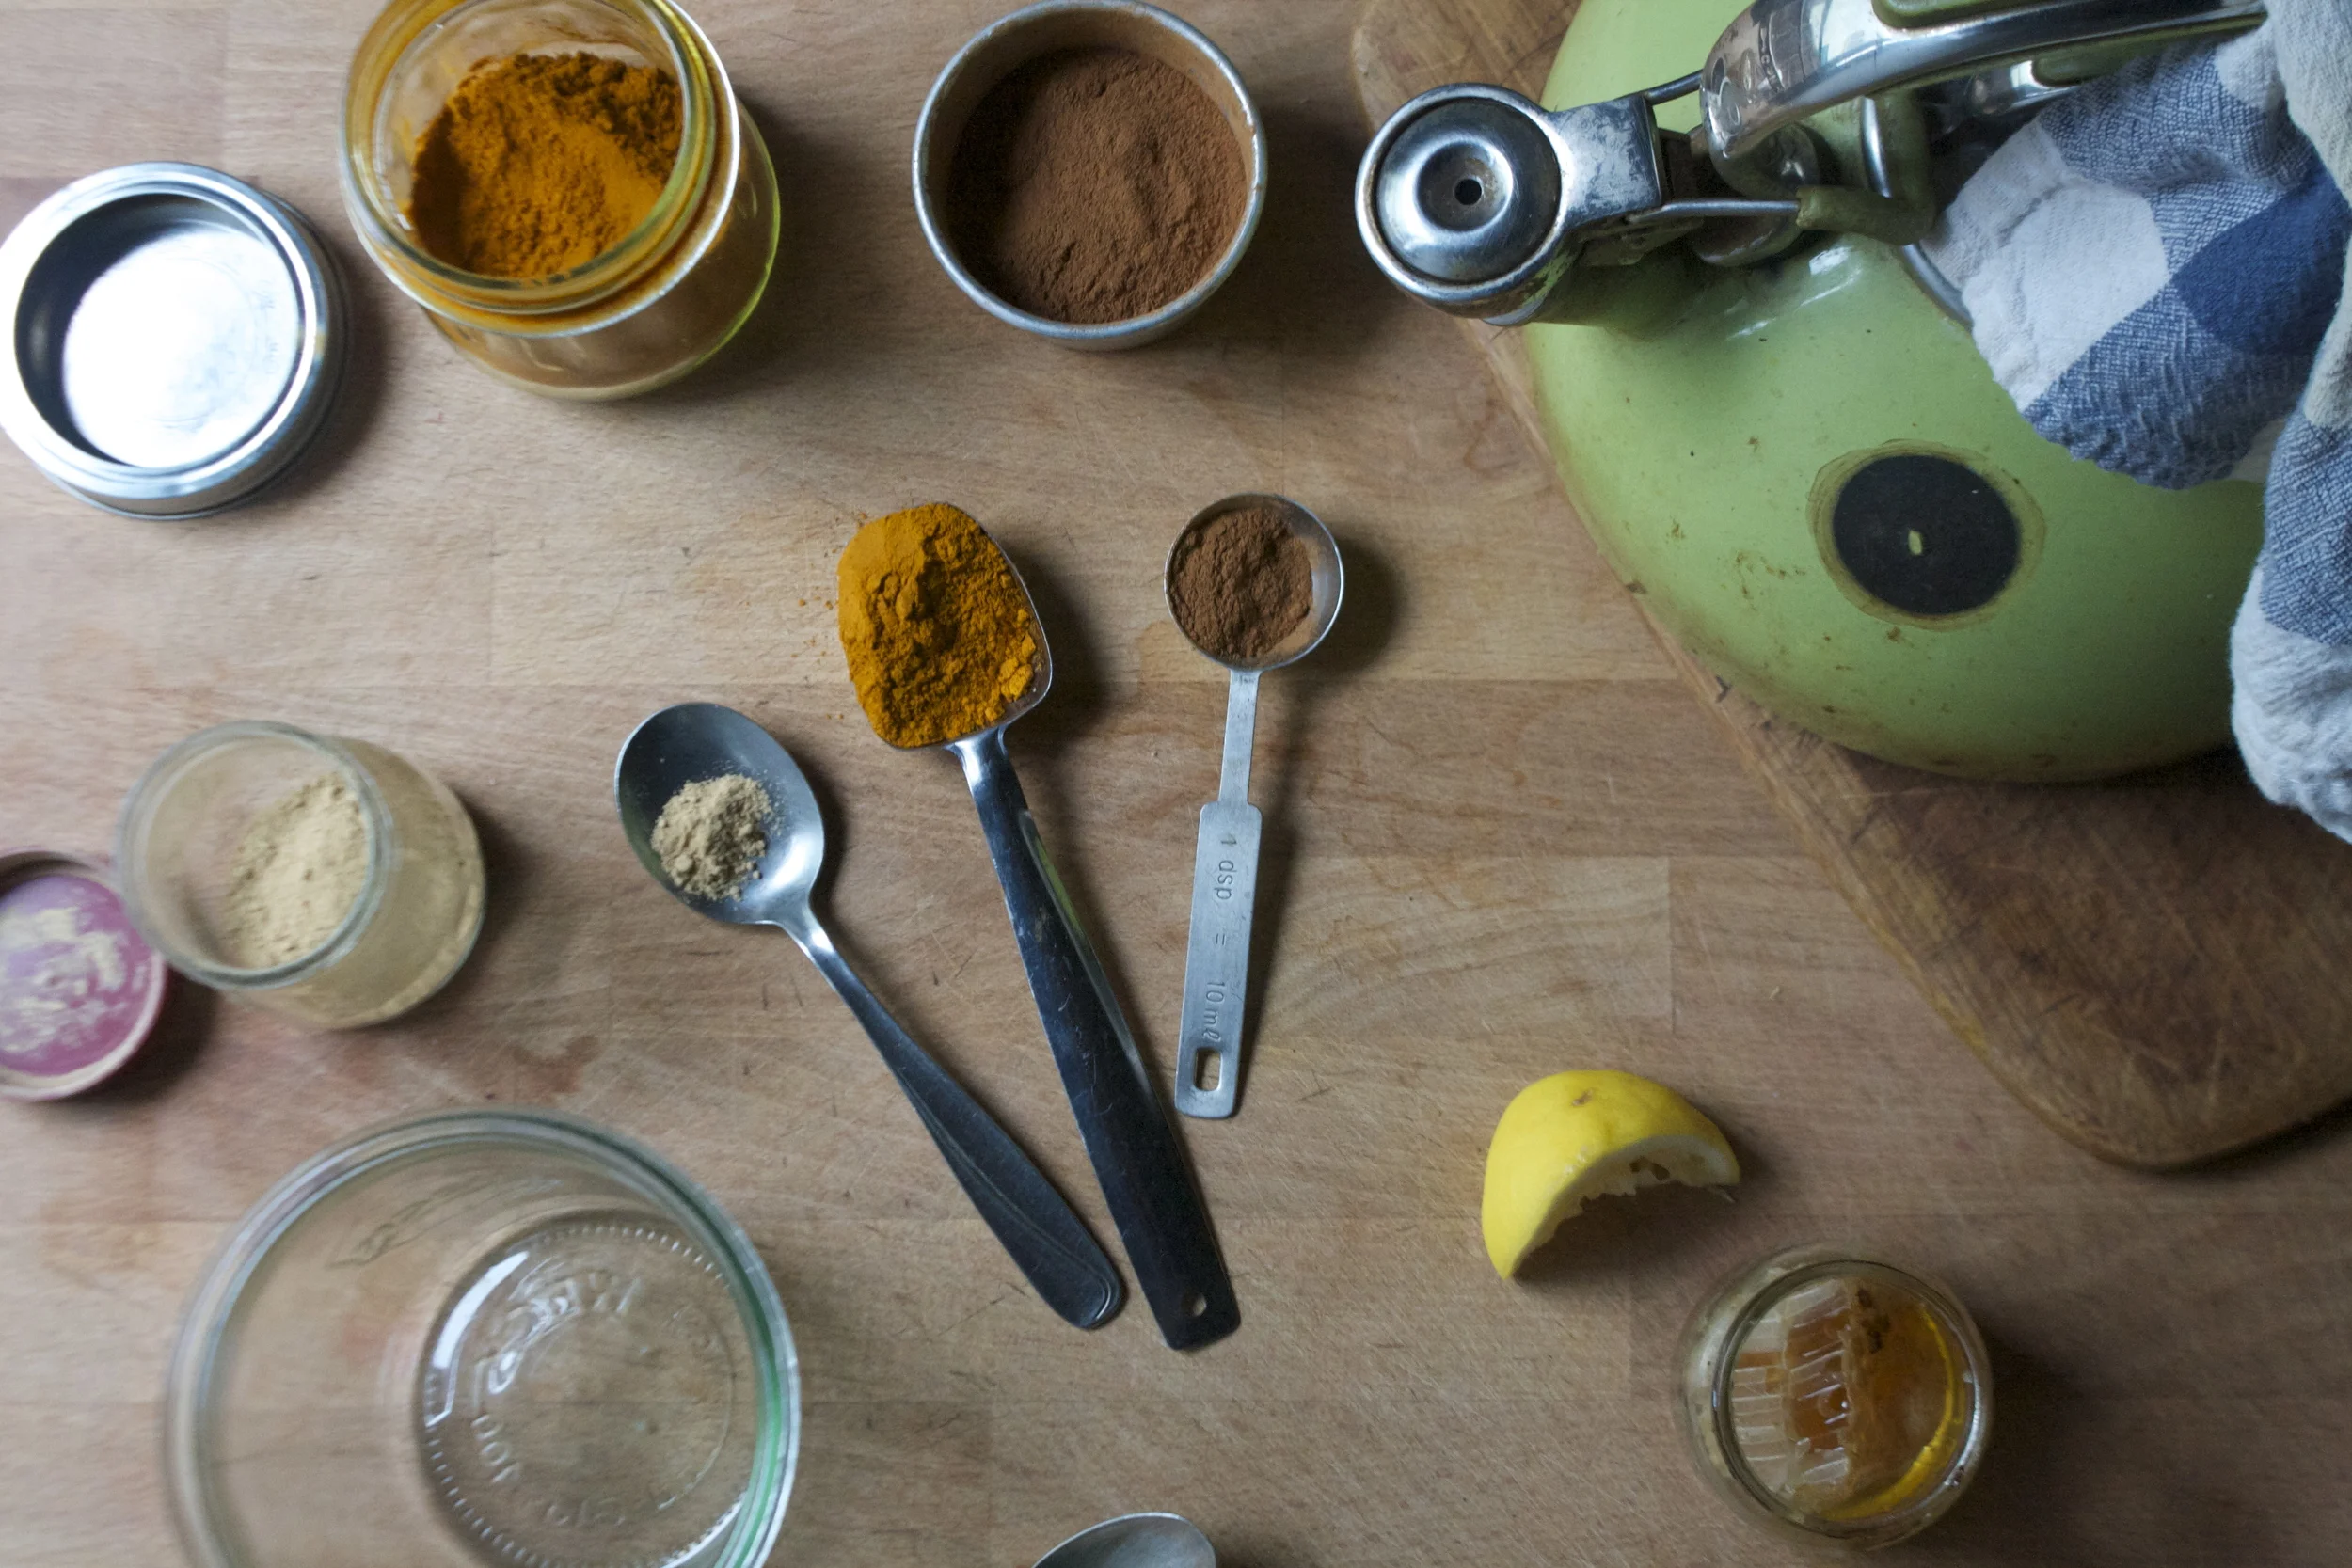

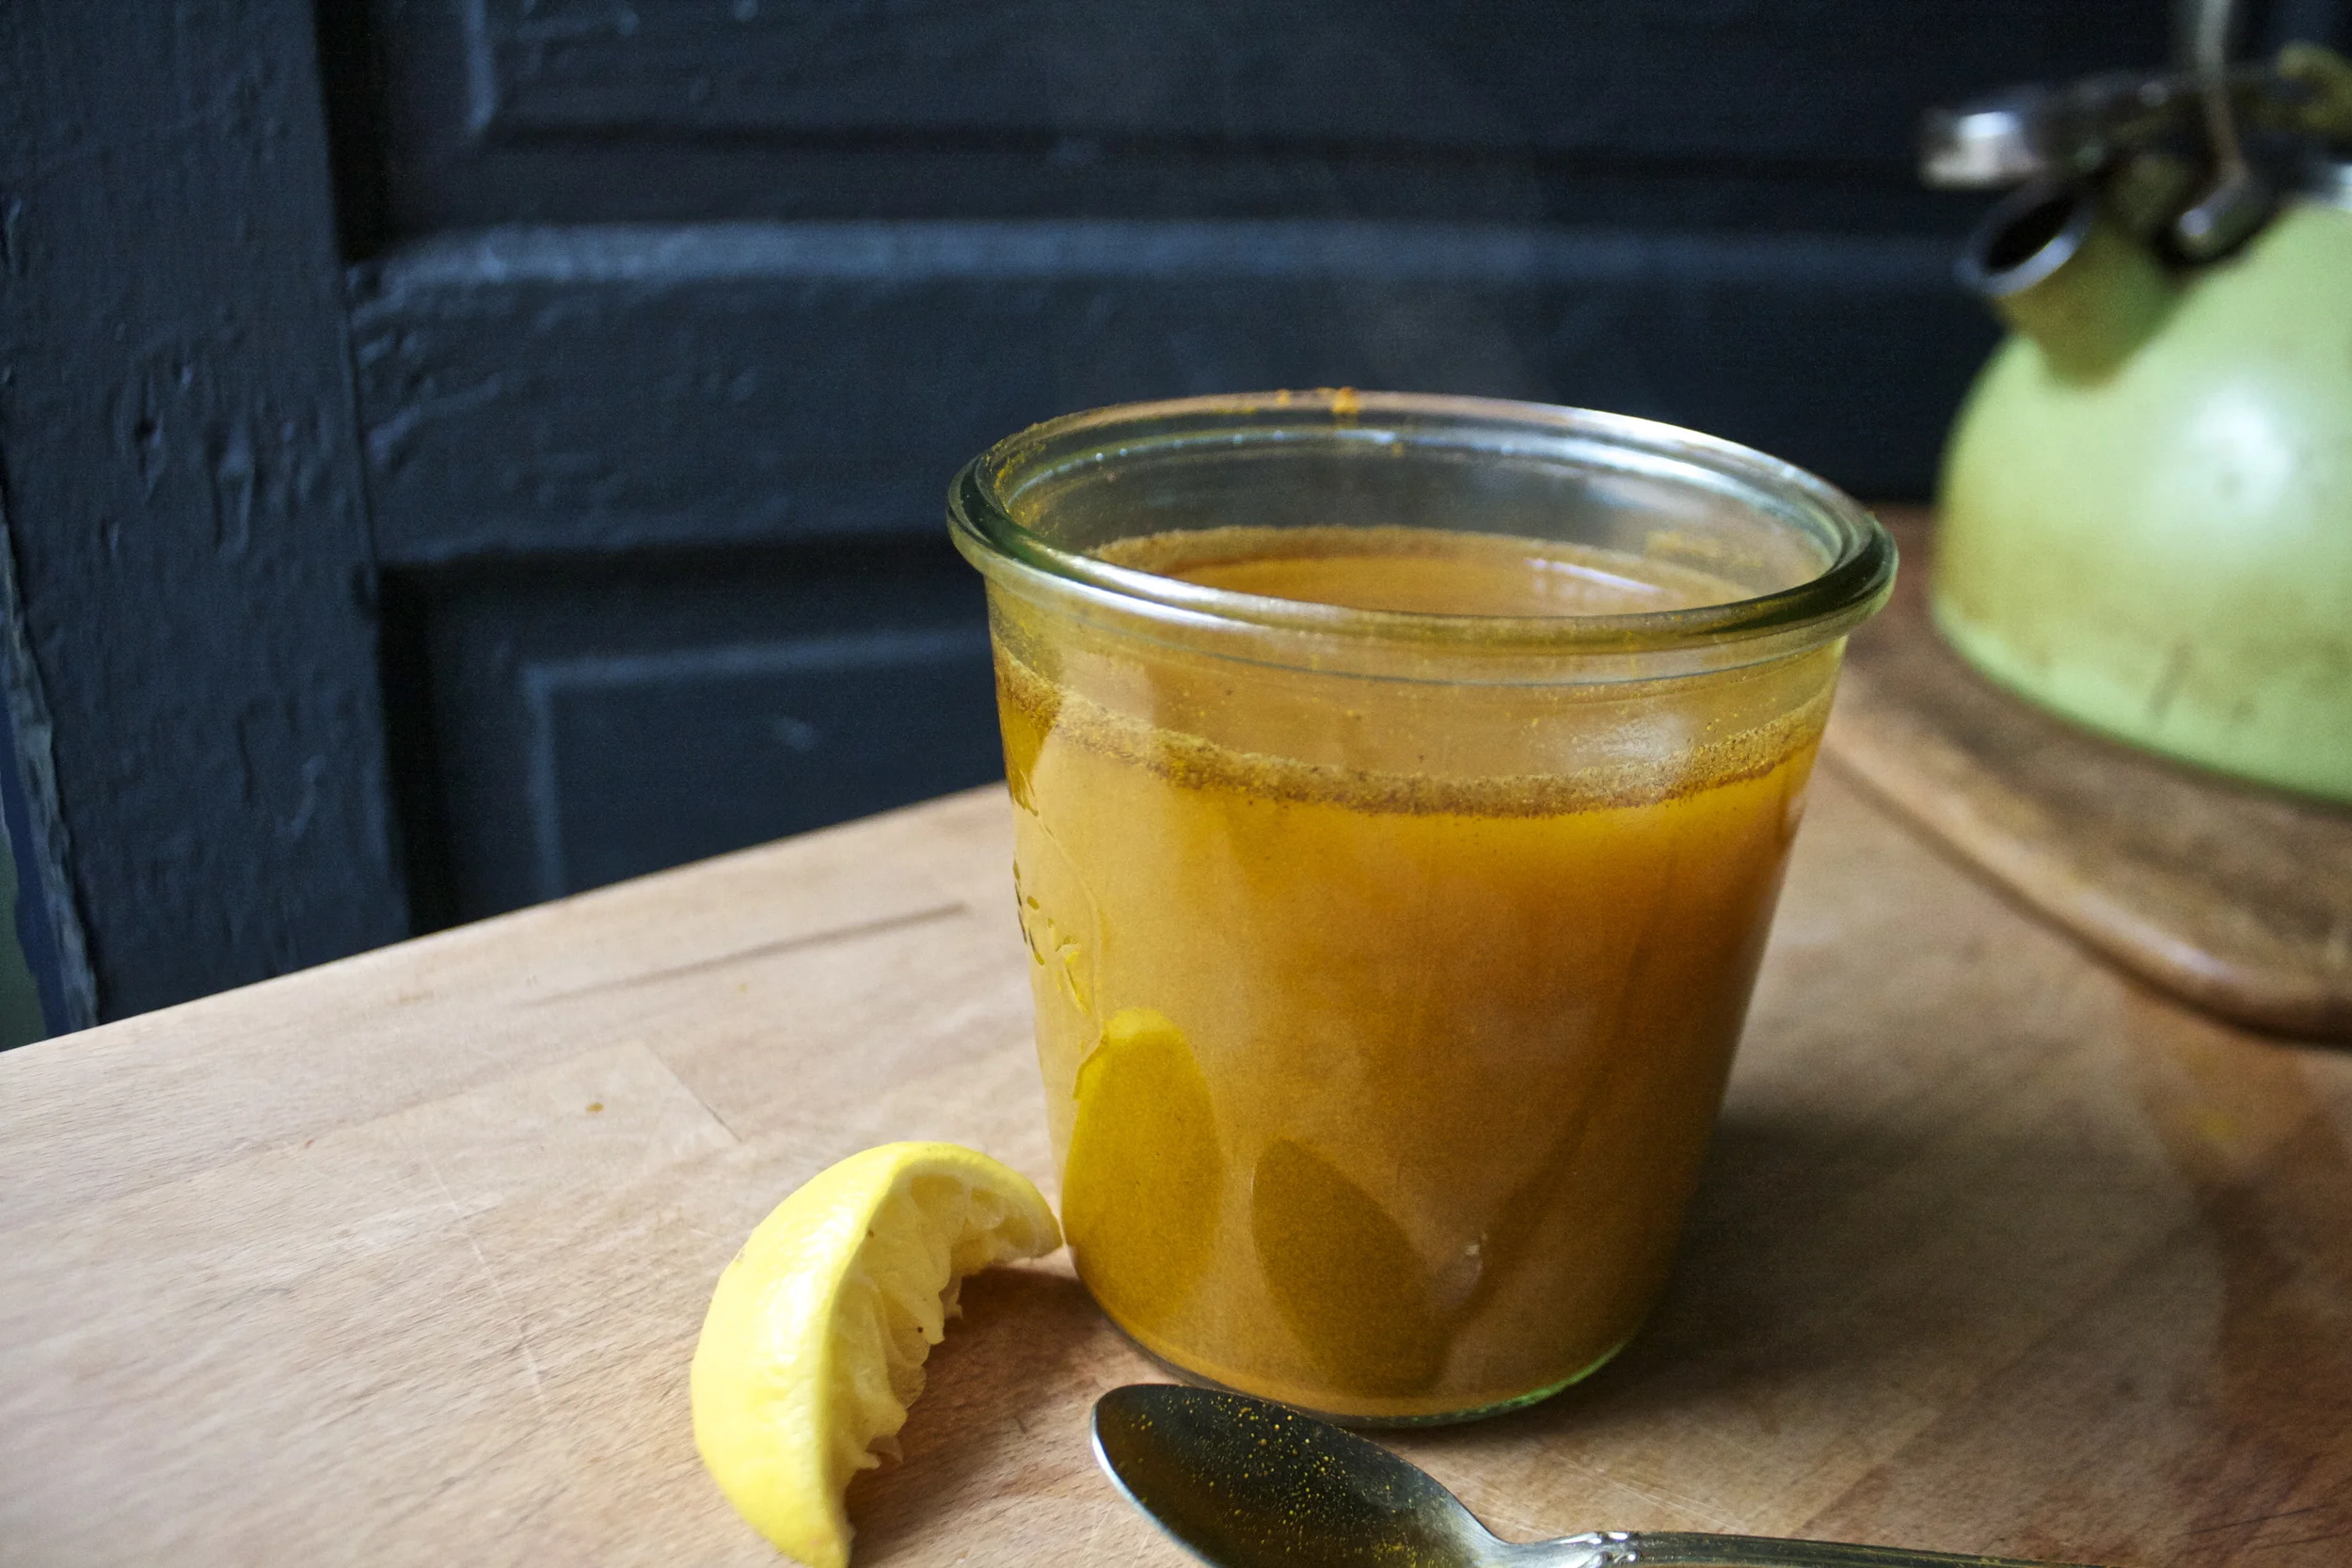
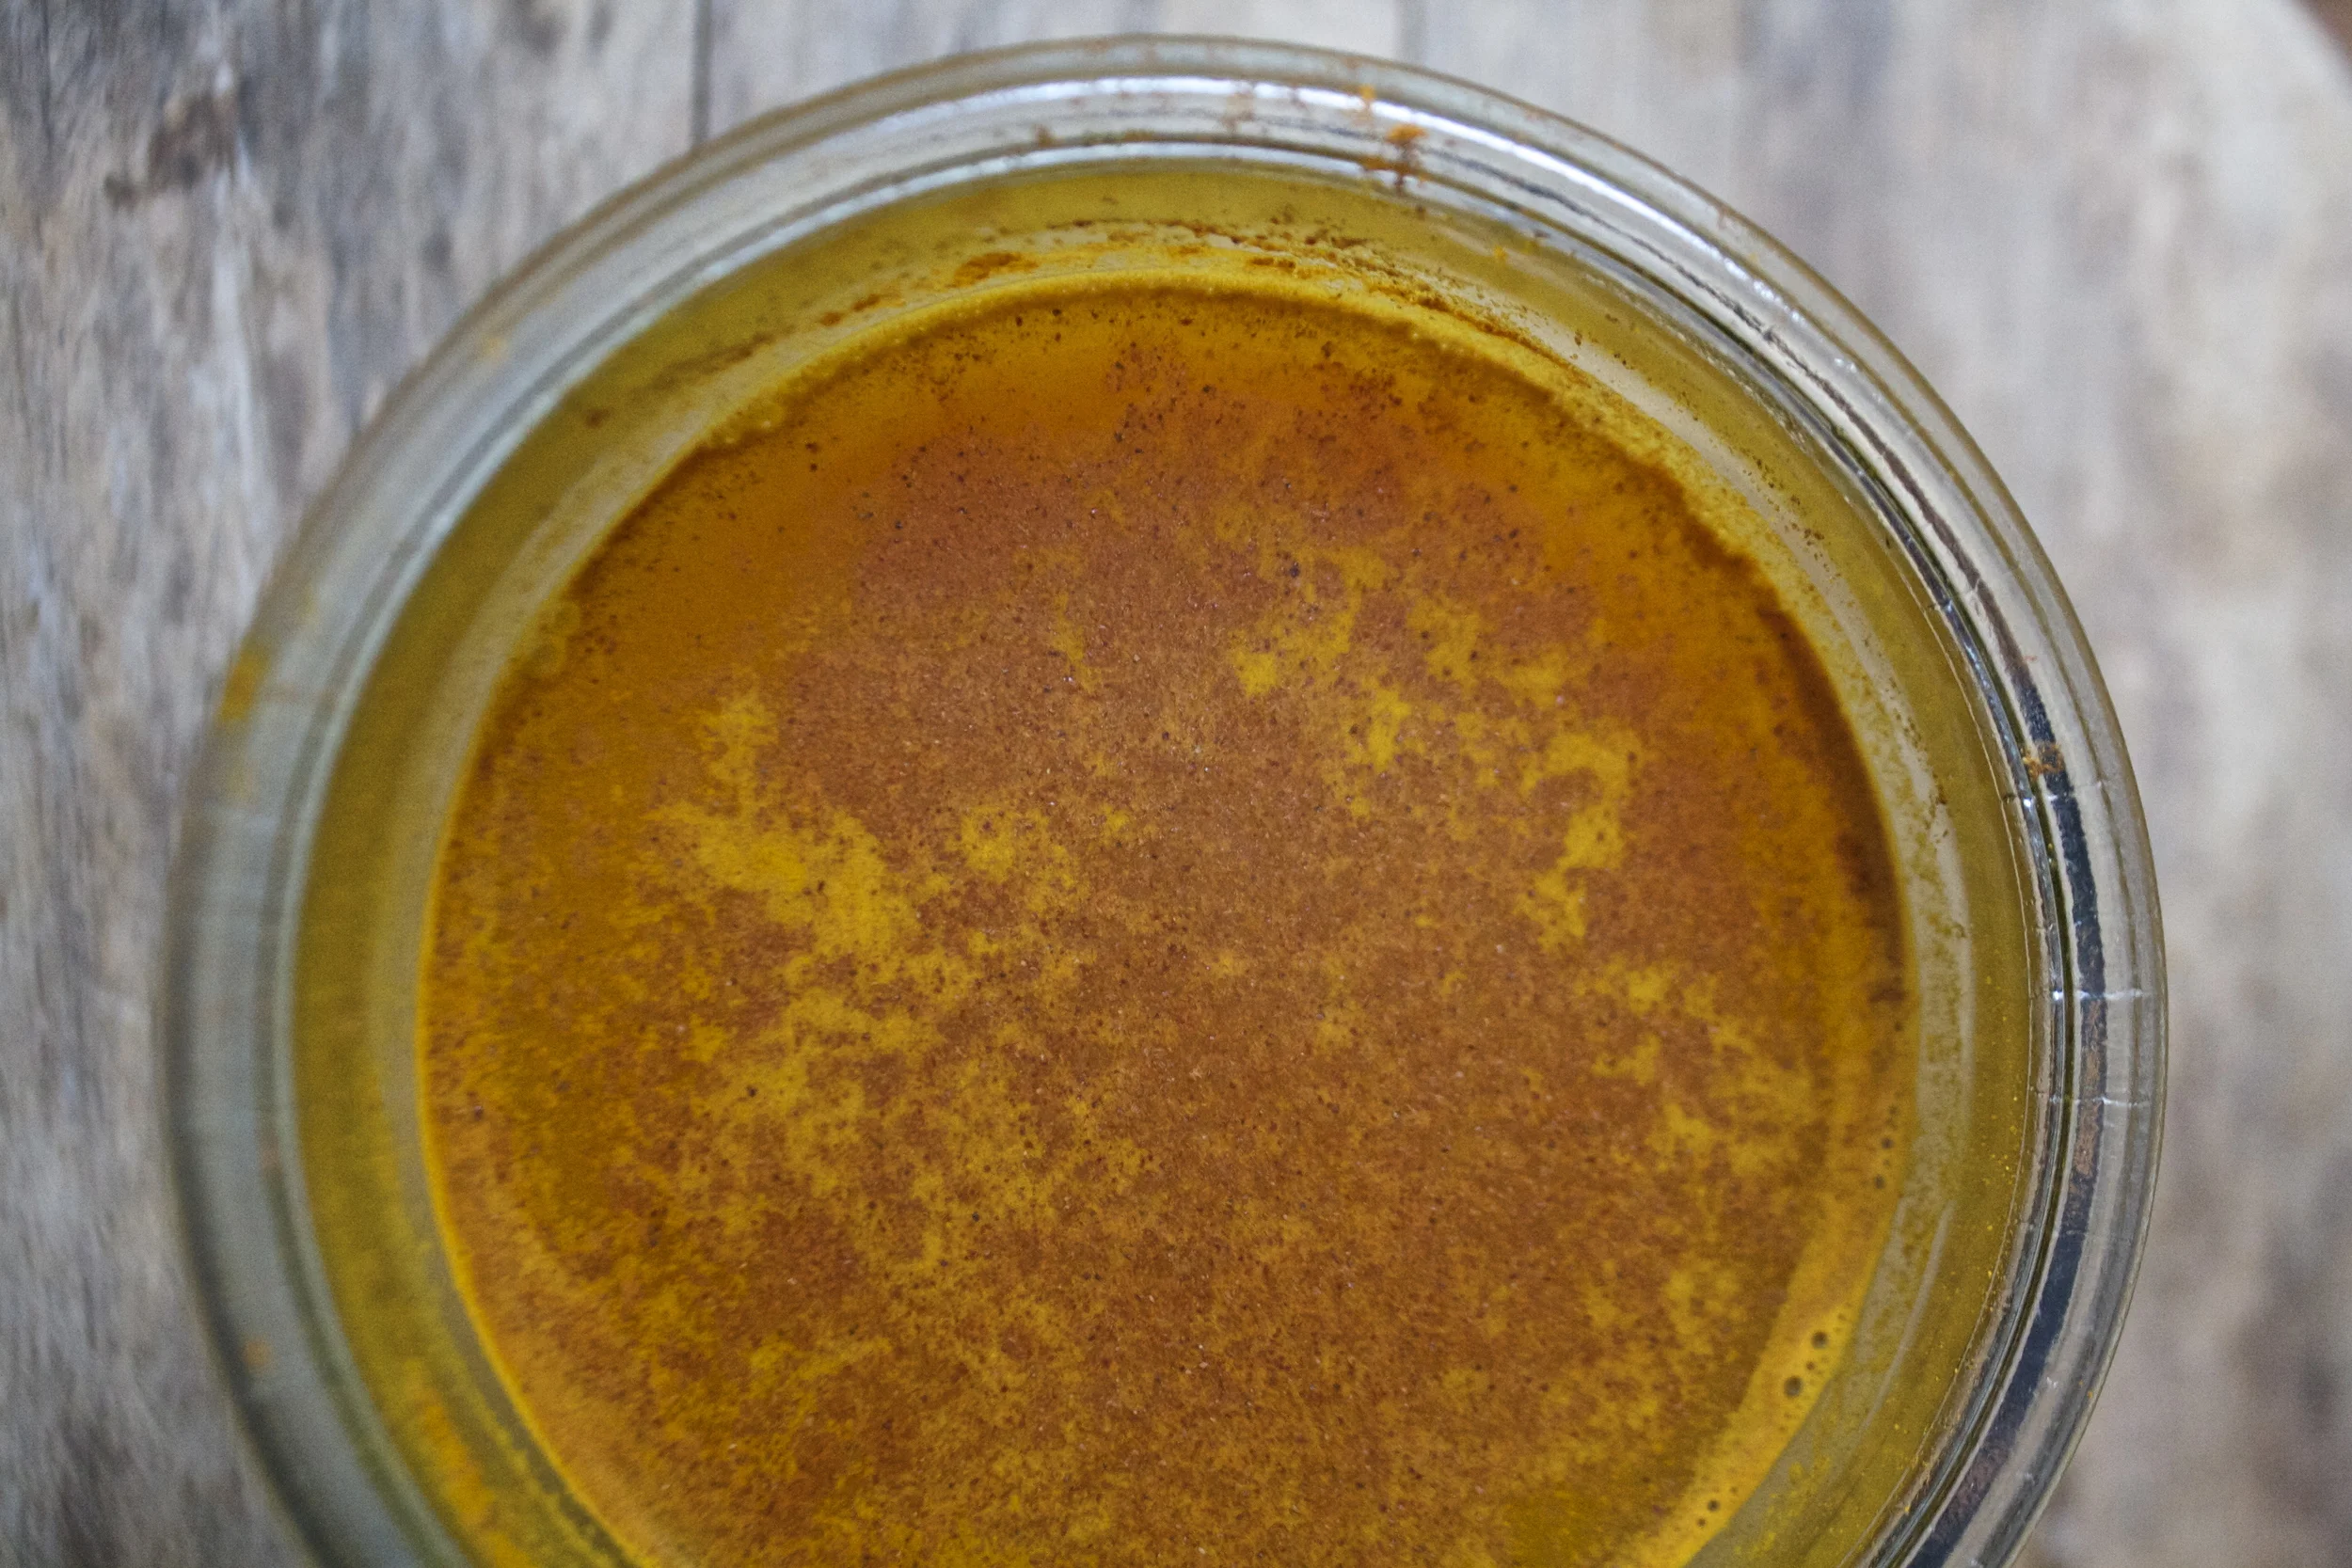


 Persimmons.,,,,,,,,,,,. Do I need to say more?
 This new tea%u2026 I wasn’t sure I was going to like it but oh do I. It’s so freaking good, I have been drinking it every day. I must stock up before its gone!
 Look at how happy this guy is. Its hunting season and we forgot his bright colors so we improvised. Yellow trash bag ribbons. His new nickname is now Trash dog. It fits him.
 Watching this little. She is an amazing human being and I love love love her.. I think she might be mine. She really likes soup..
 My elf candle holders I got from CB2. I wanted them so bad for years and finally the last year they sold them I bought myself these guys. I heart them
 Oh you like my new milk crate show bench? Its awesome,, one of the best uses of scrap wood and milk crate that I have ever done(Yes there has been other scape wood milk crate projects) Well you are in luck..I will show you how to made it.. watch for it next week!
 I love old strainers. I kind of have a thing for them. This big guy is now in my collection. Bonus, green AND purple kale%u2026.
 Hanging out with my sister. I haven’t seen her for what seems like the past 4 months(she is in nursing school). This was her last day of classes %u00a0so we cleaned her house, folded laundry while listening to music and I made her dinner.We wrapped up the night by mass texting our other sisters inappropriate pictures of the elf on the shelf. It got pretty crazy. %u00a0It was such a great night. I love my sisters.


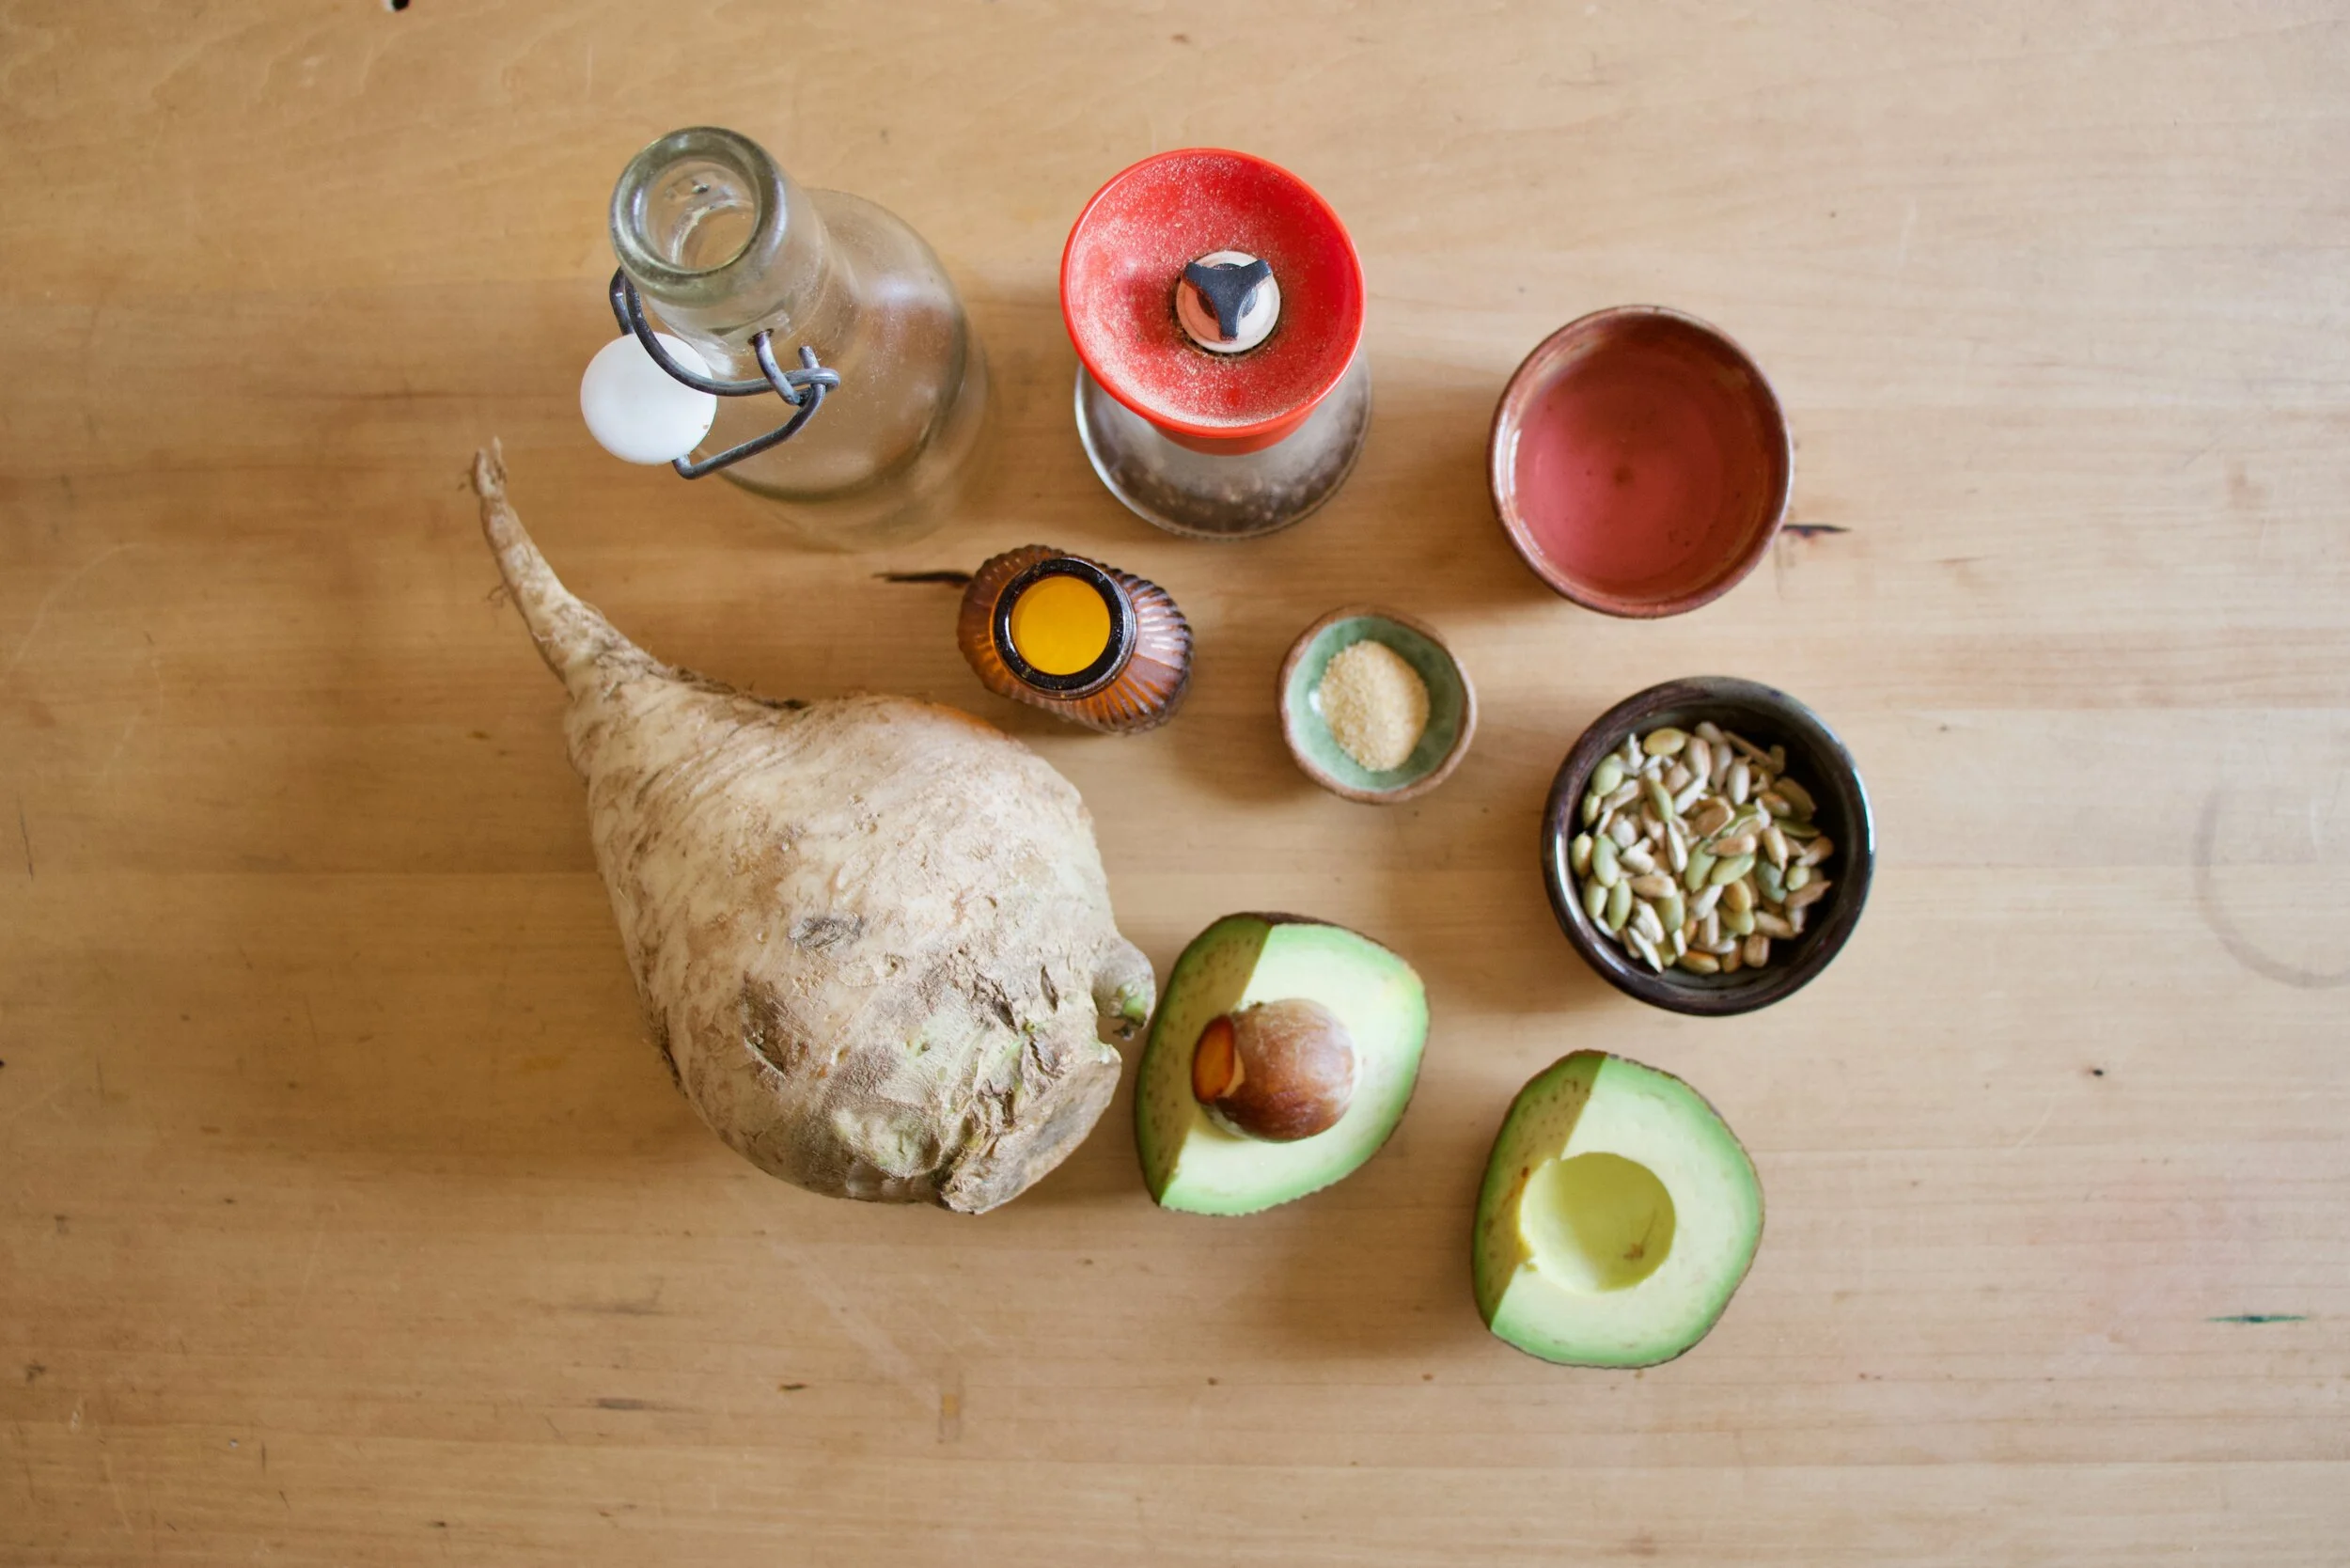
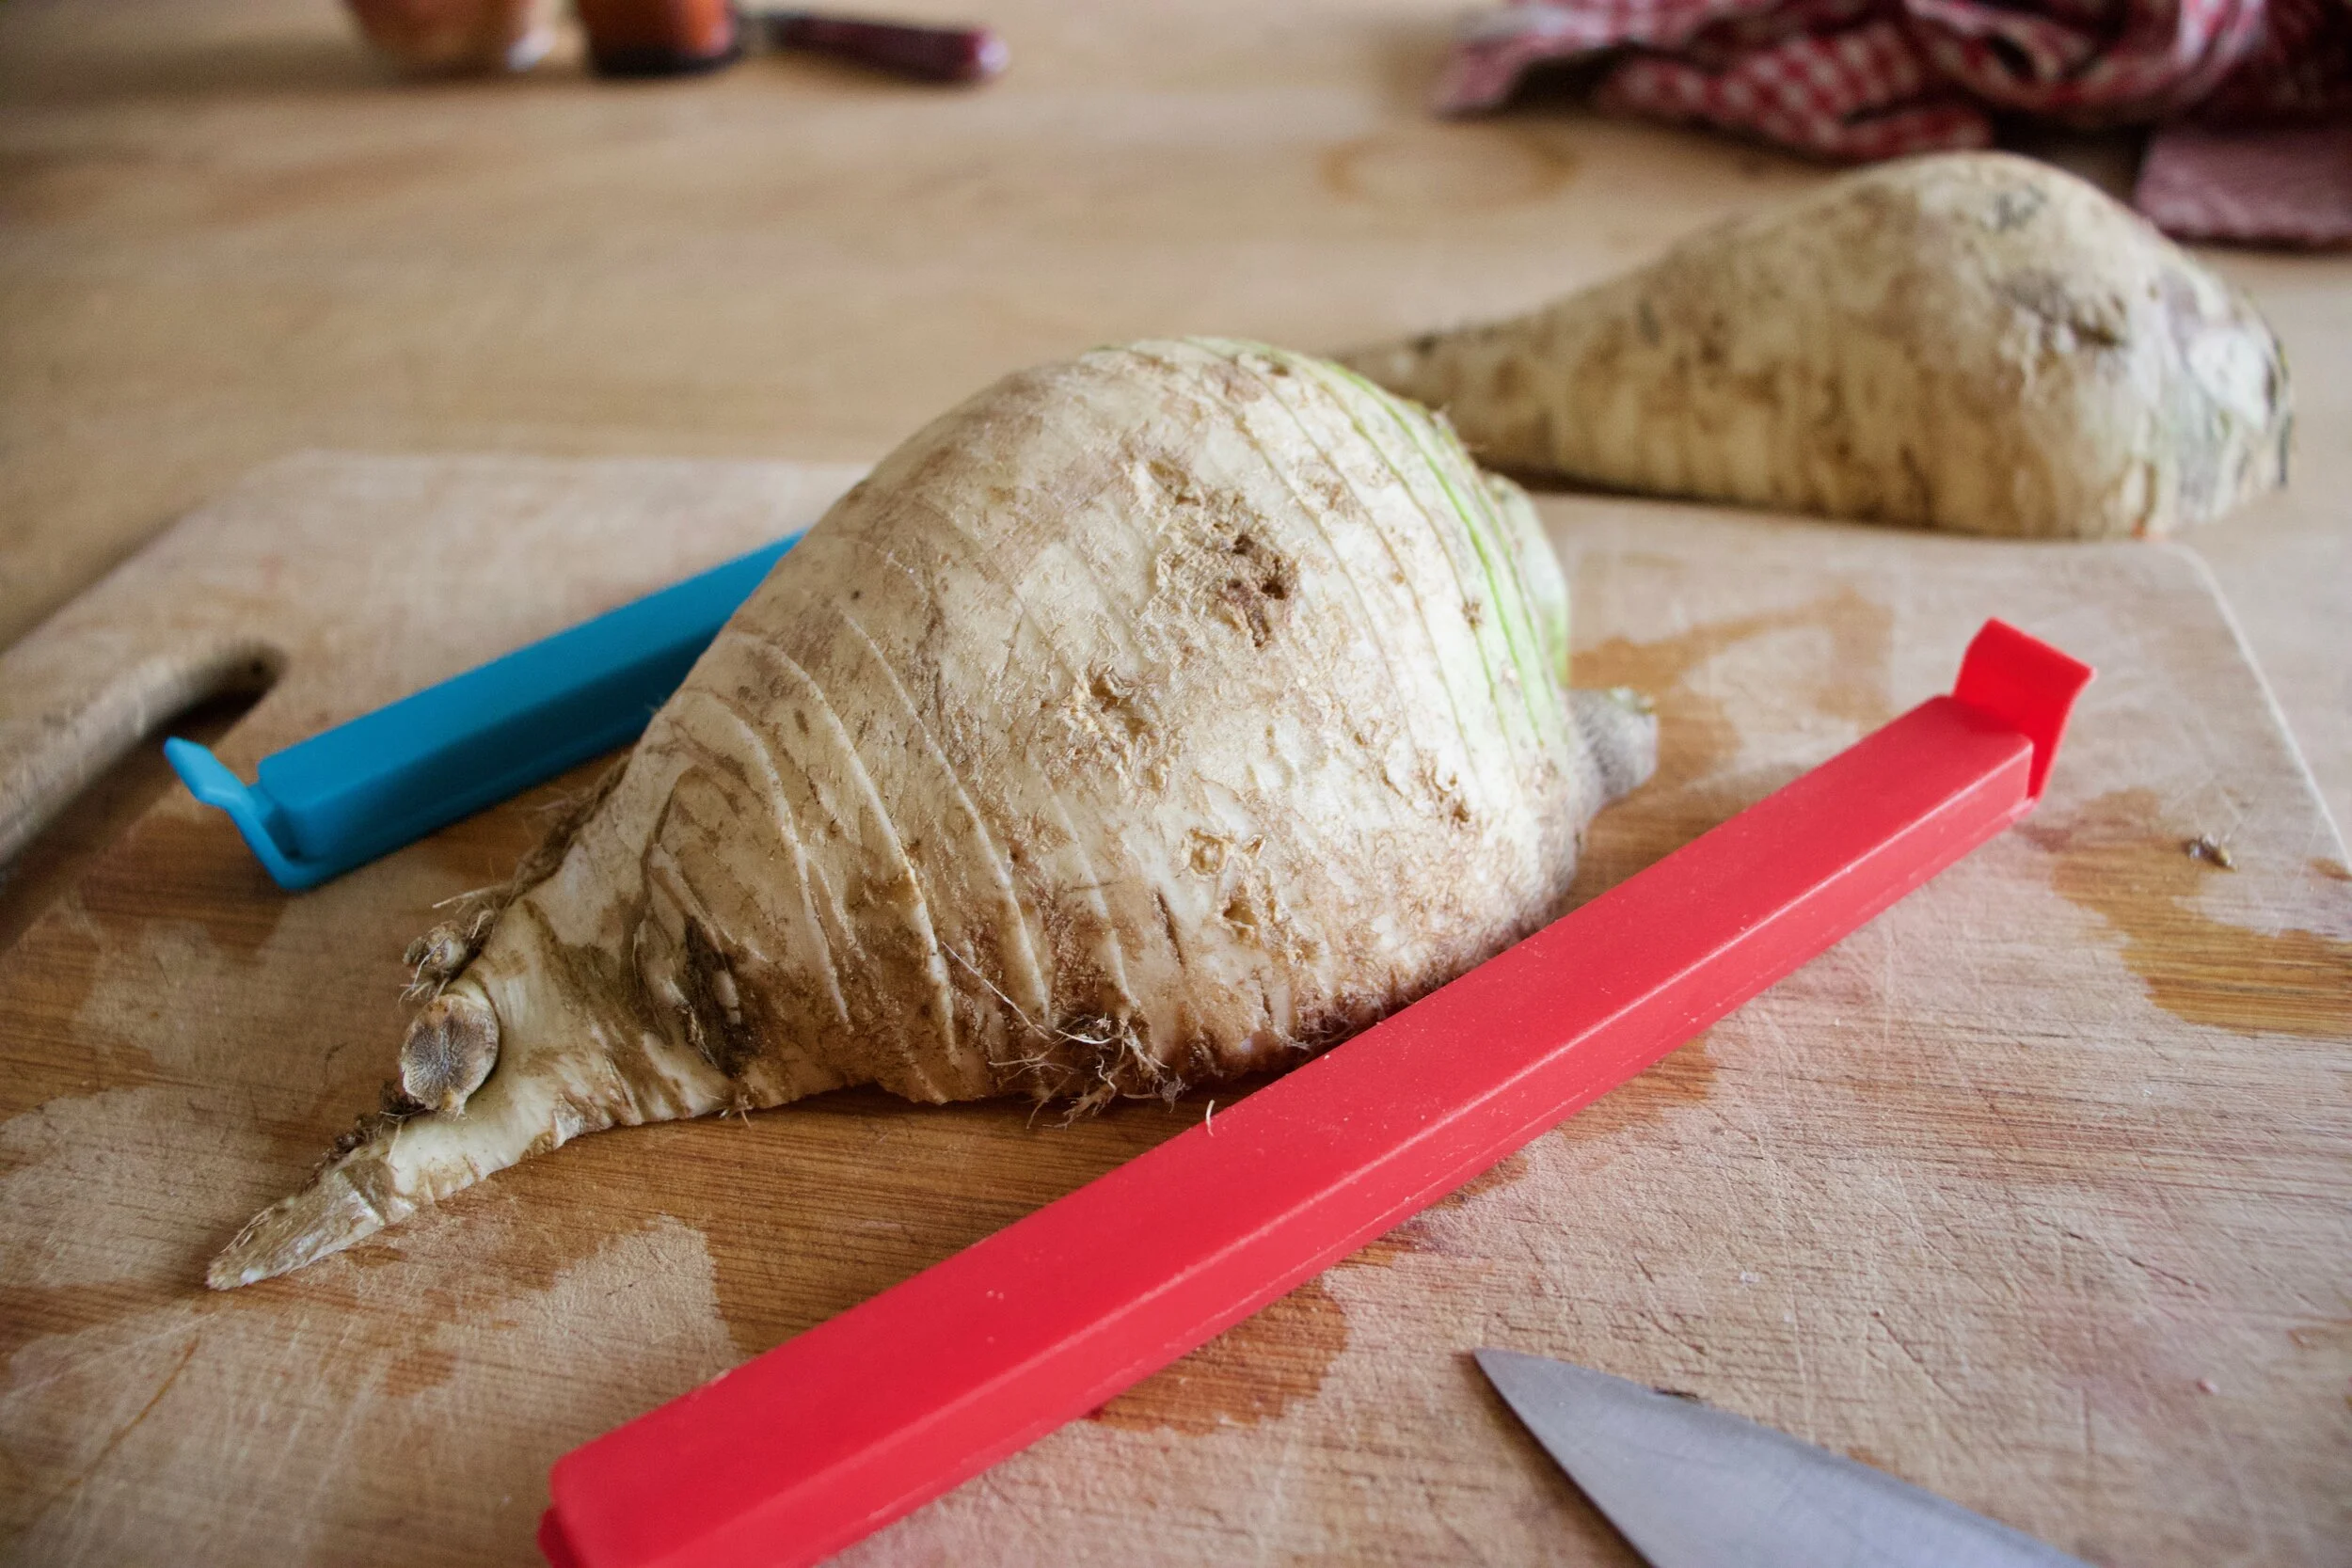
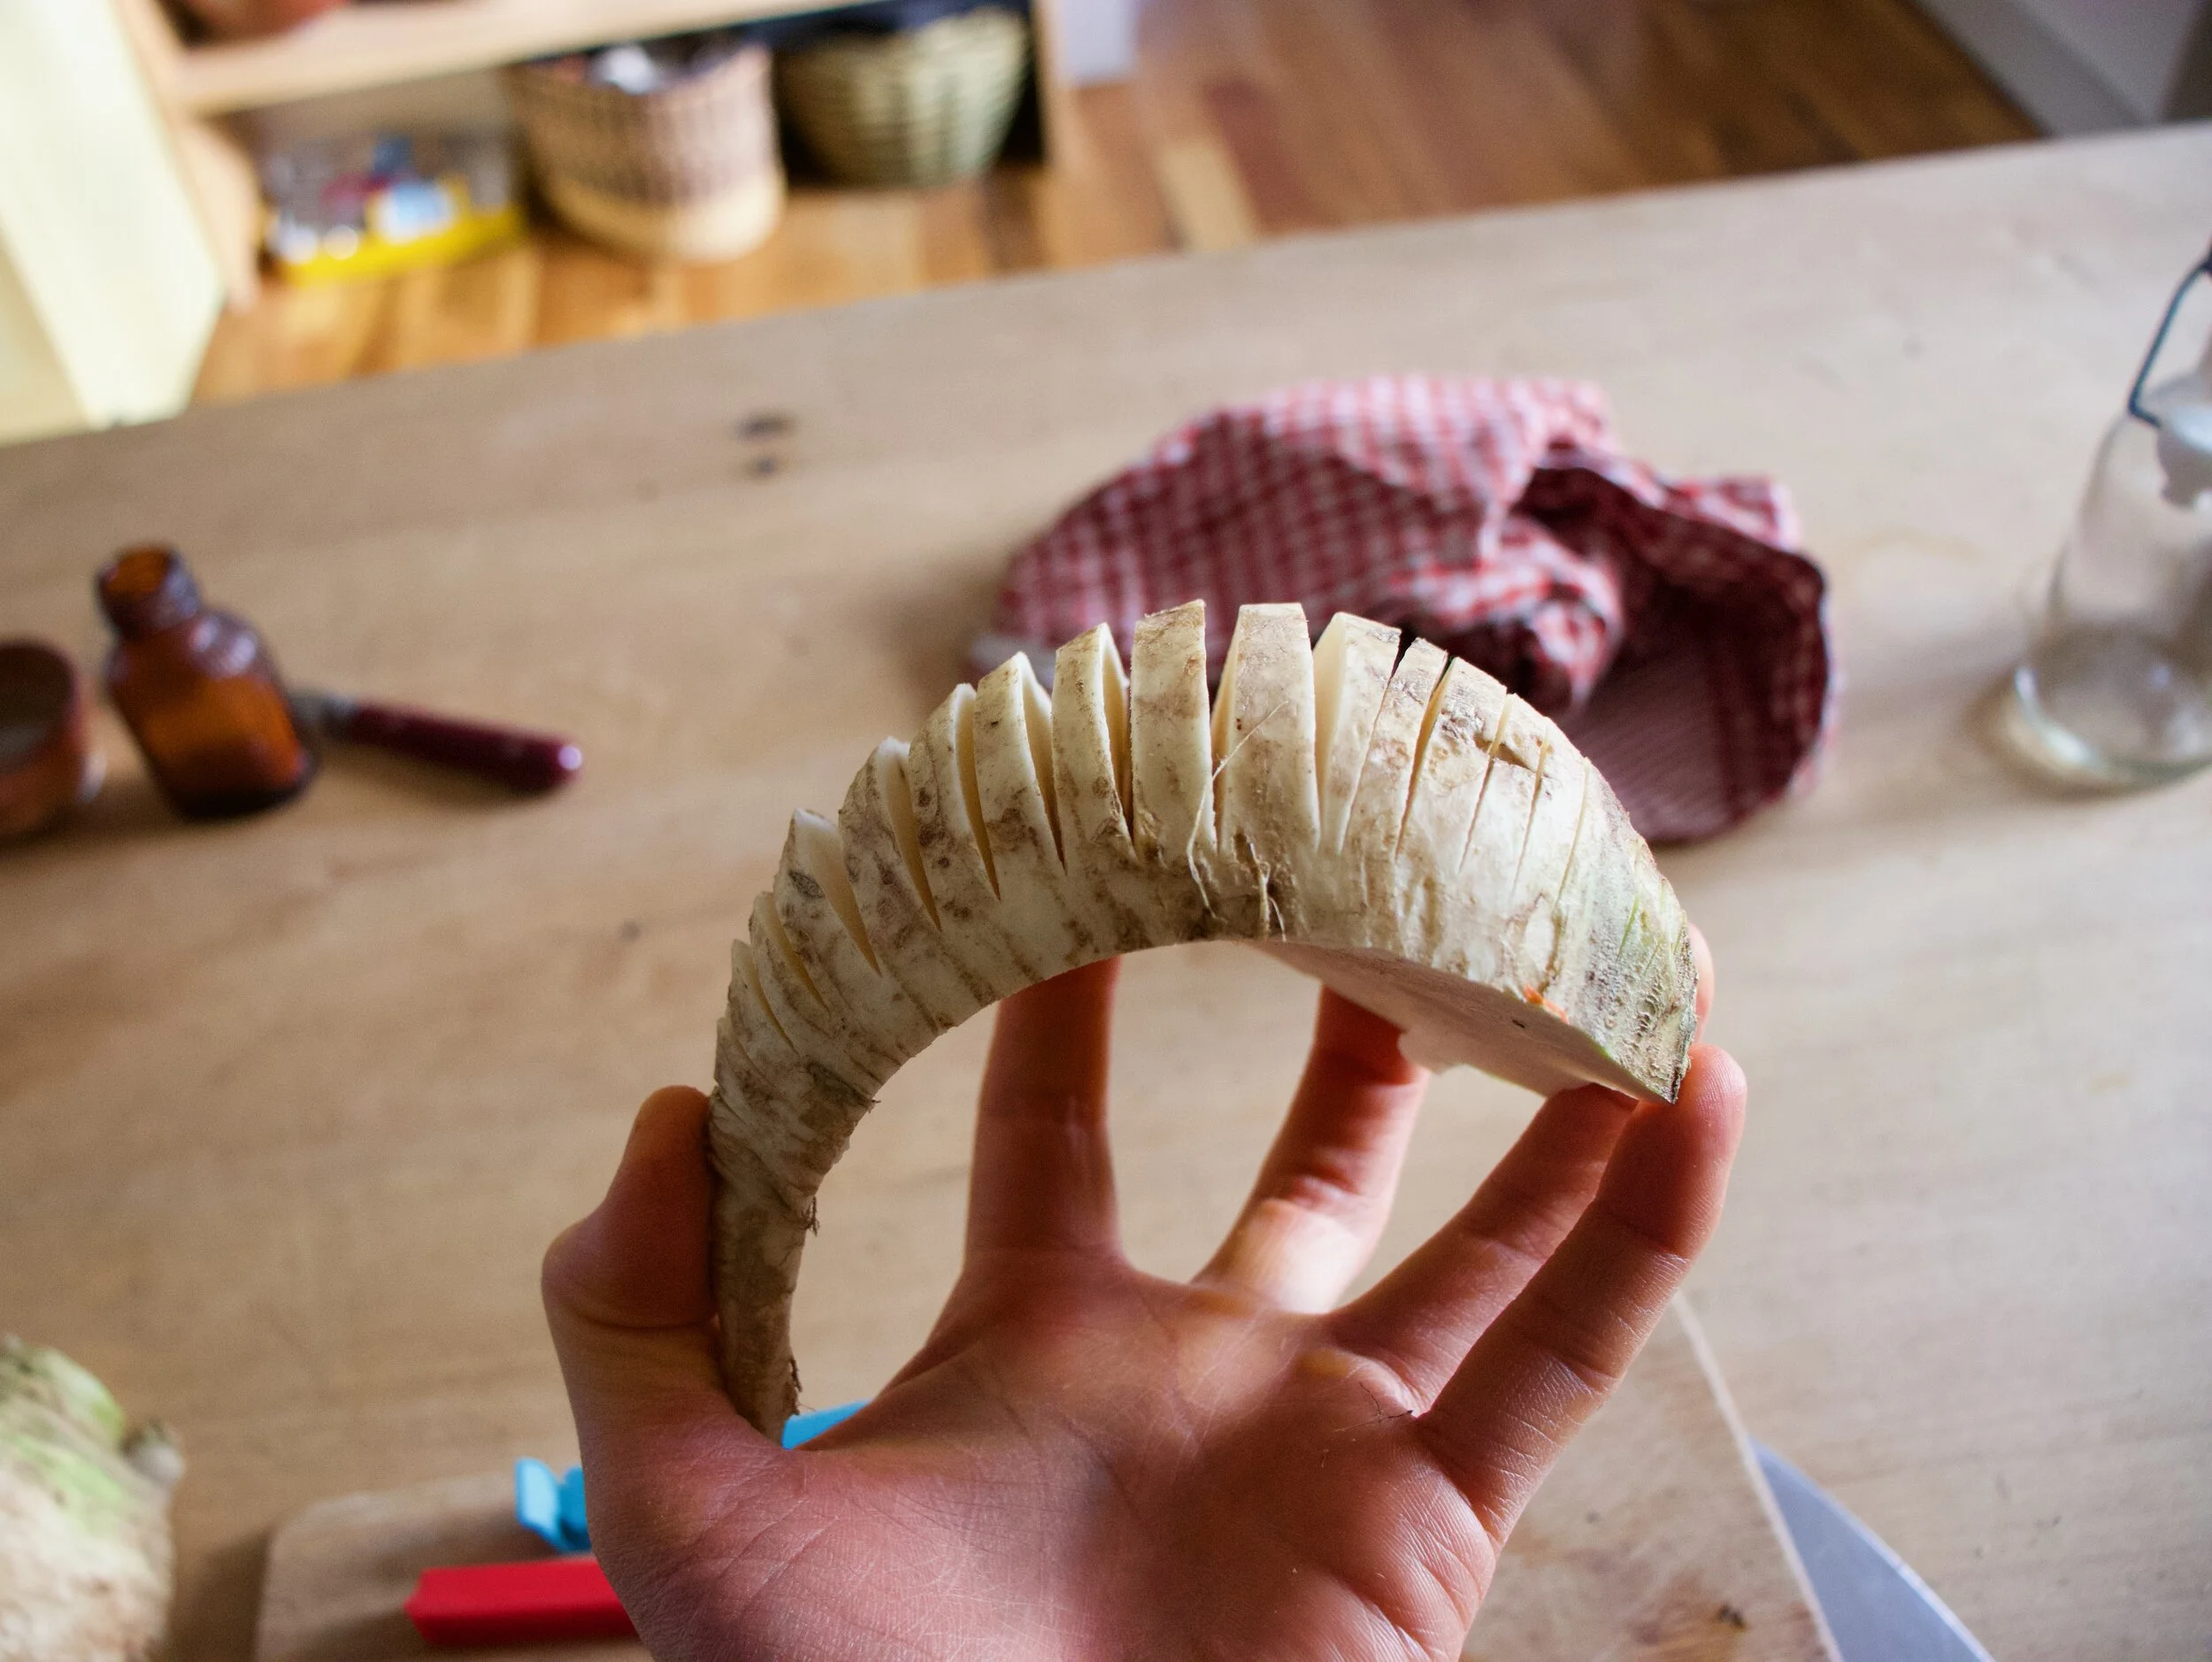
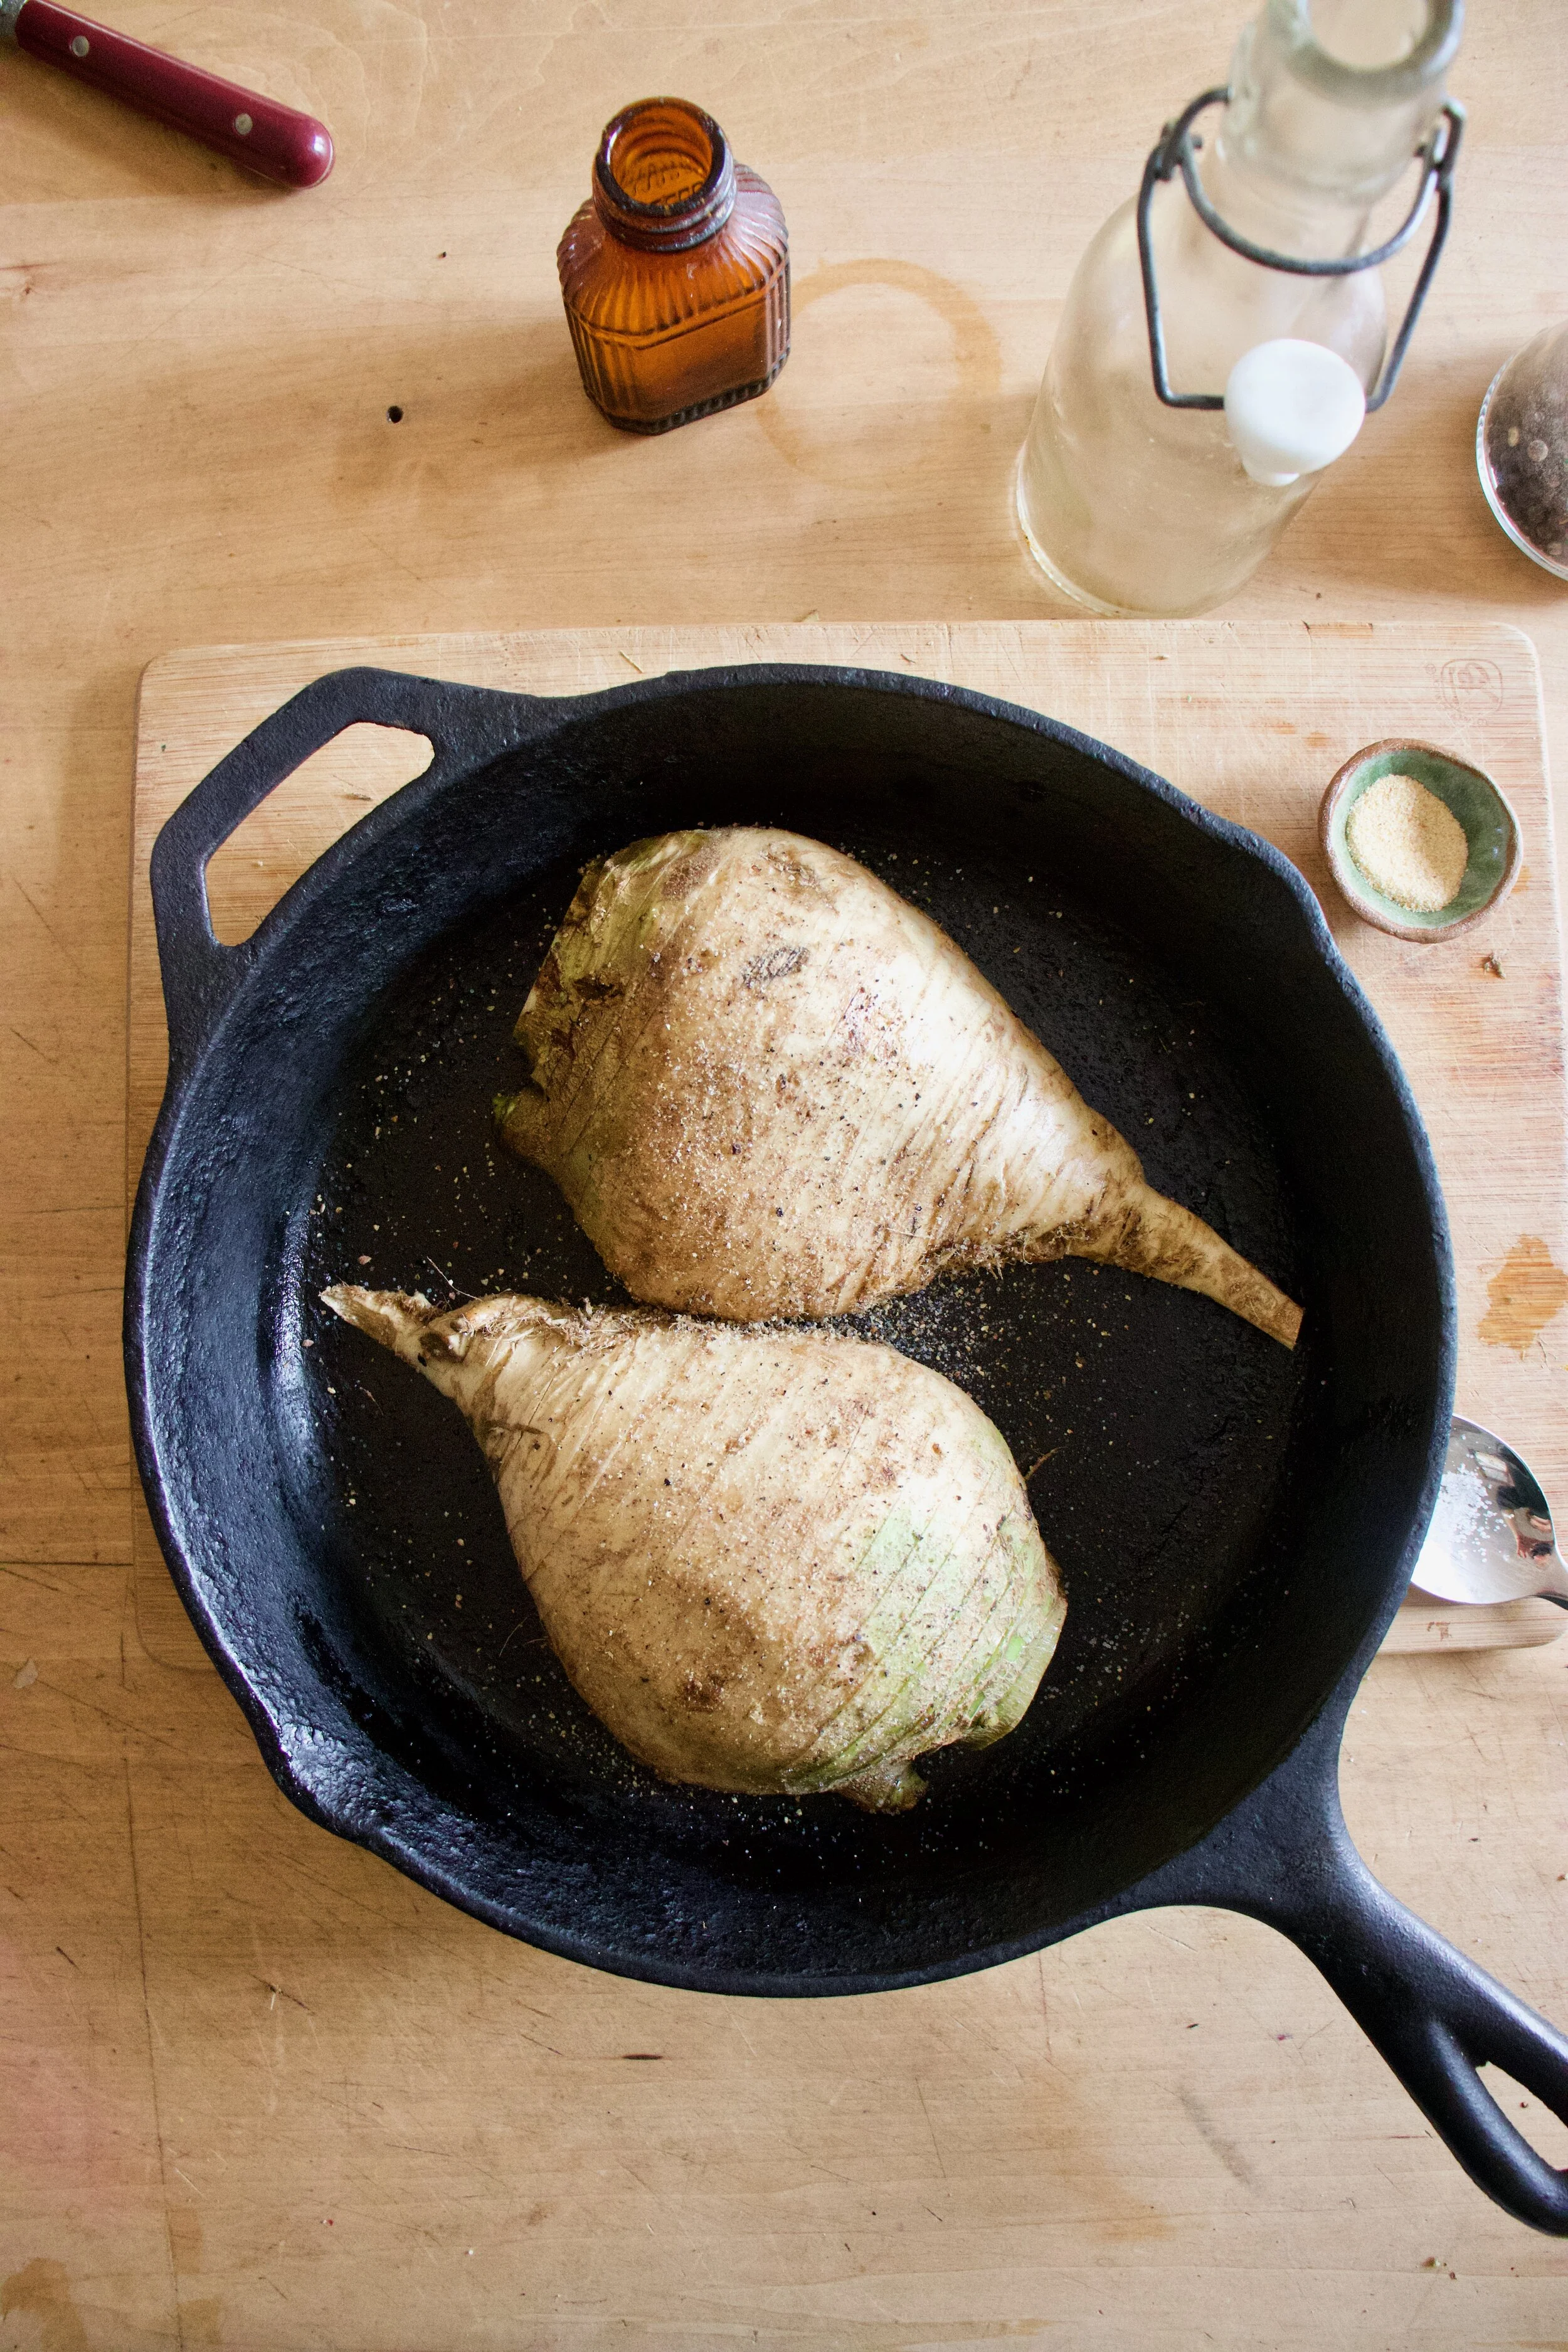
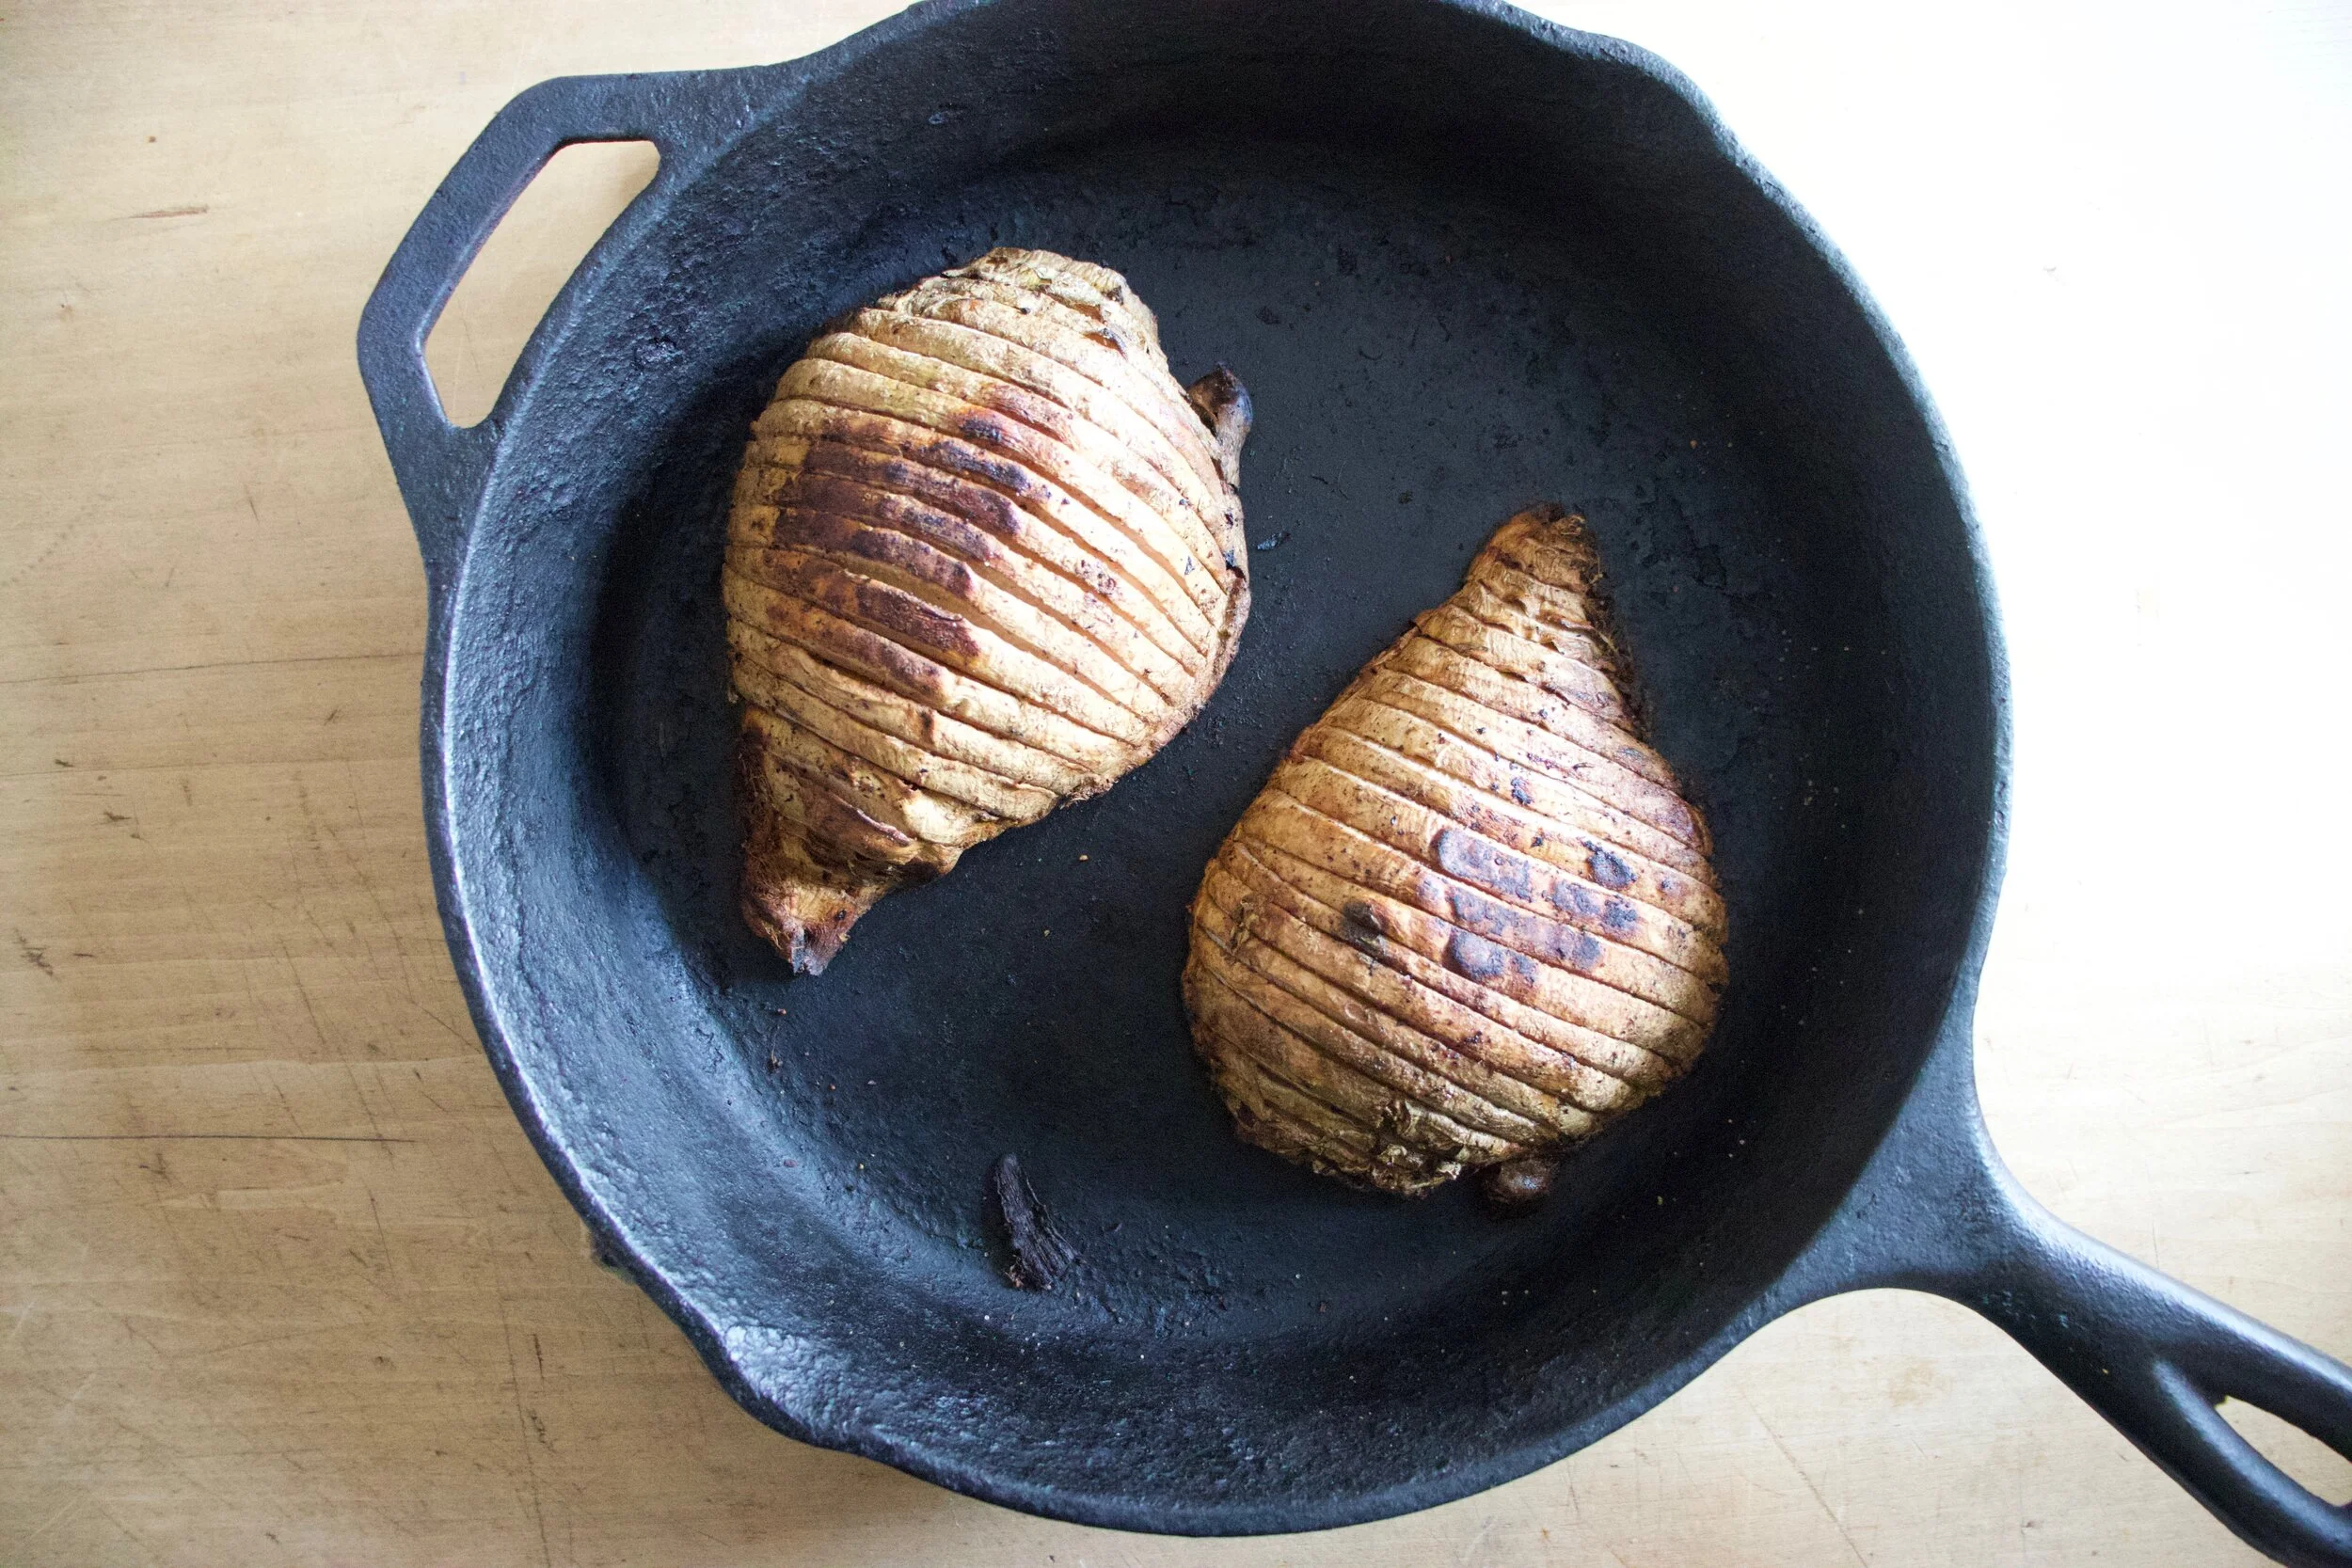
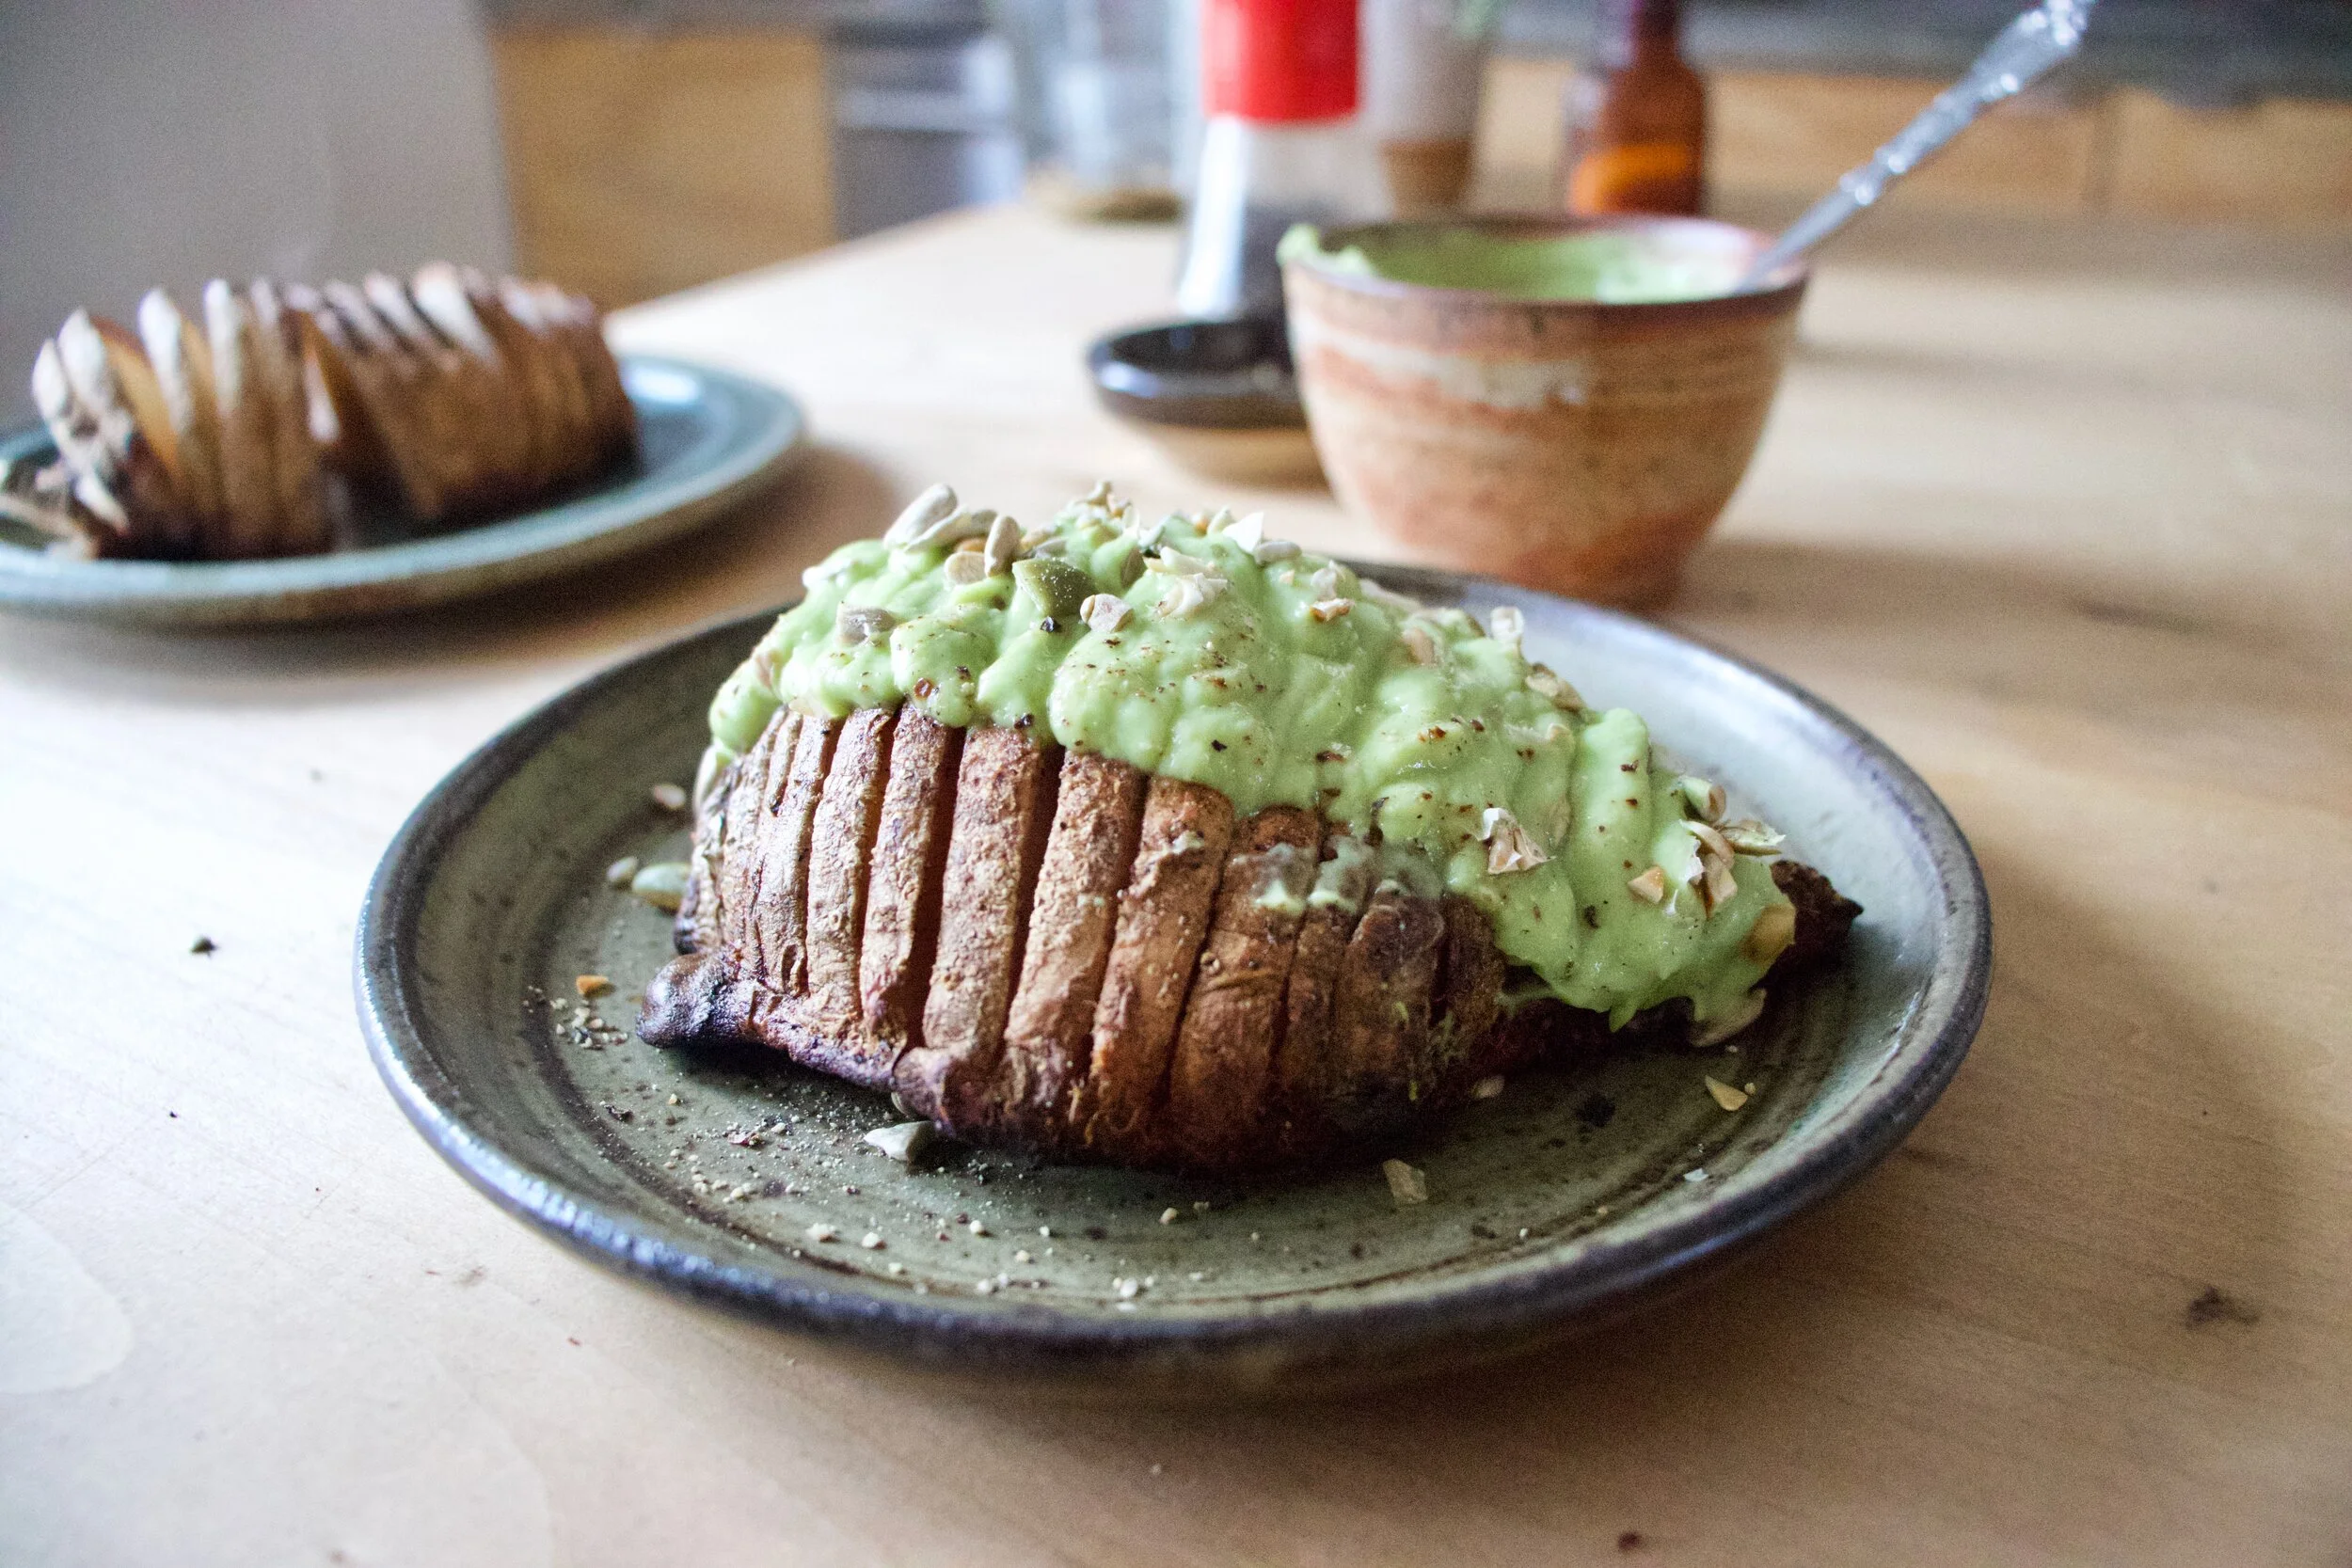

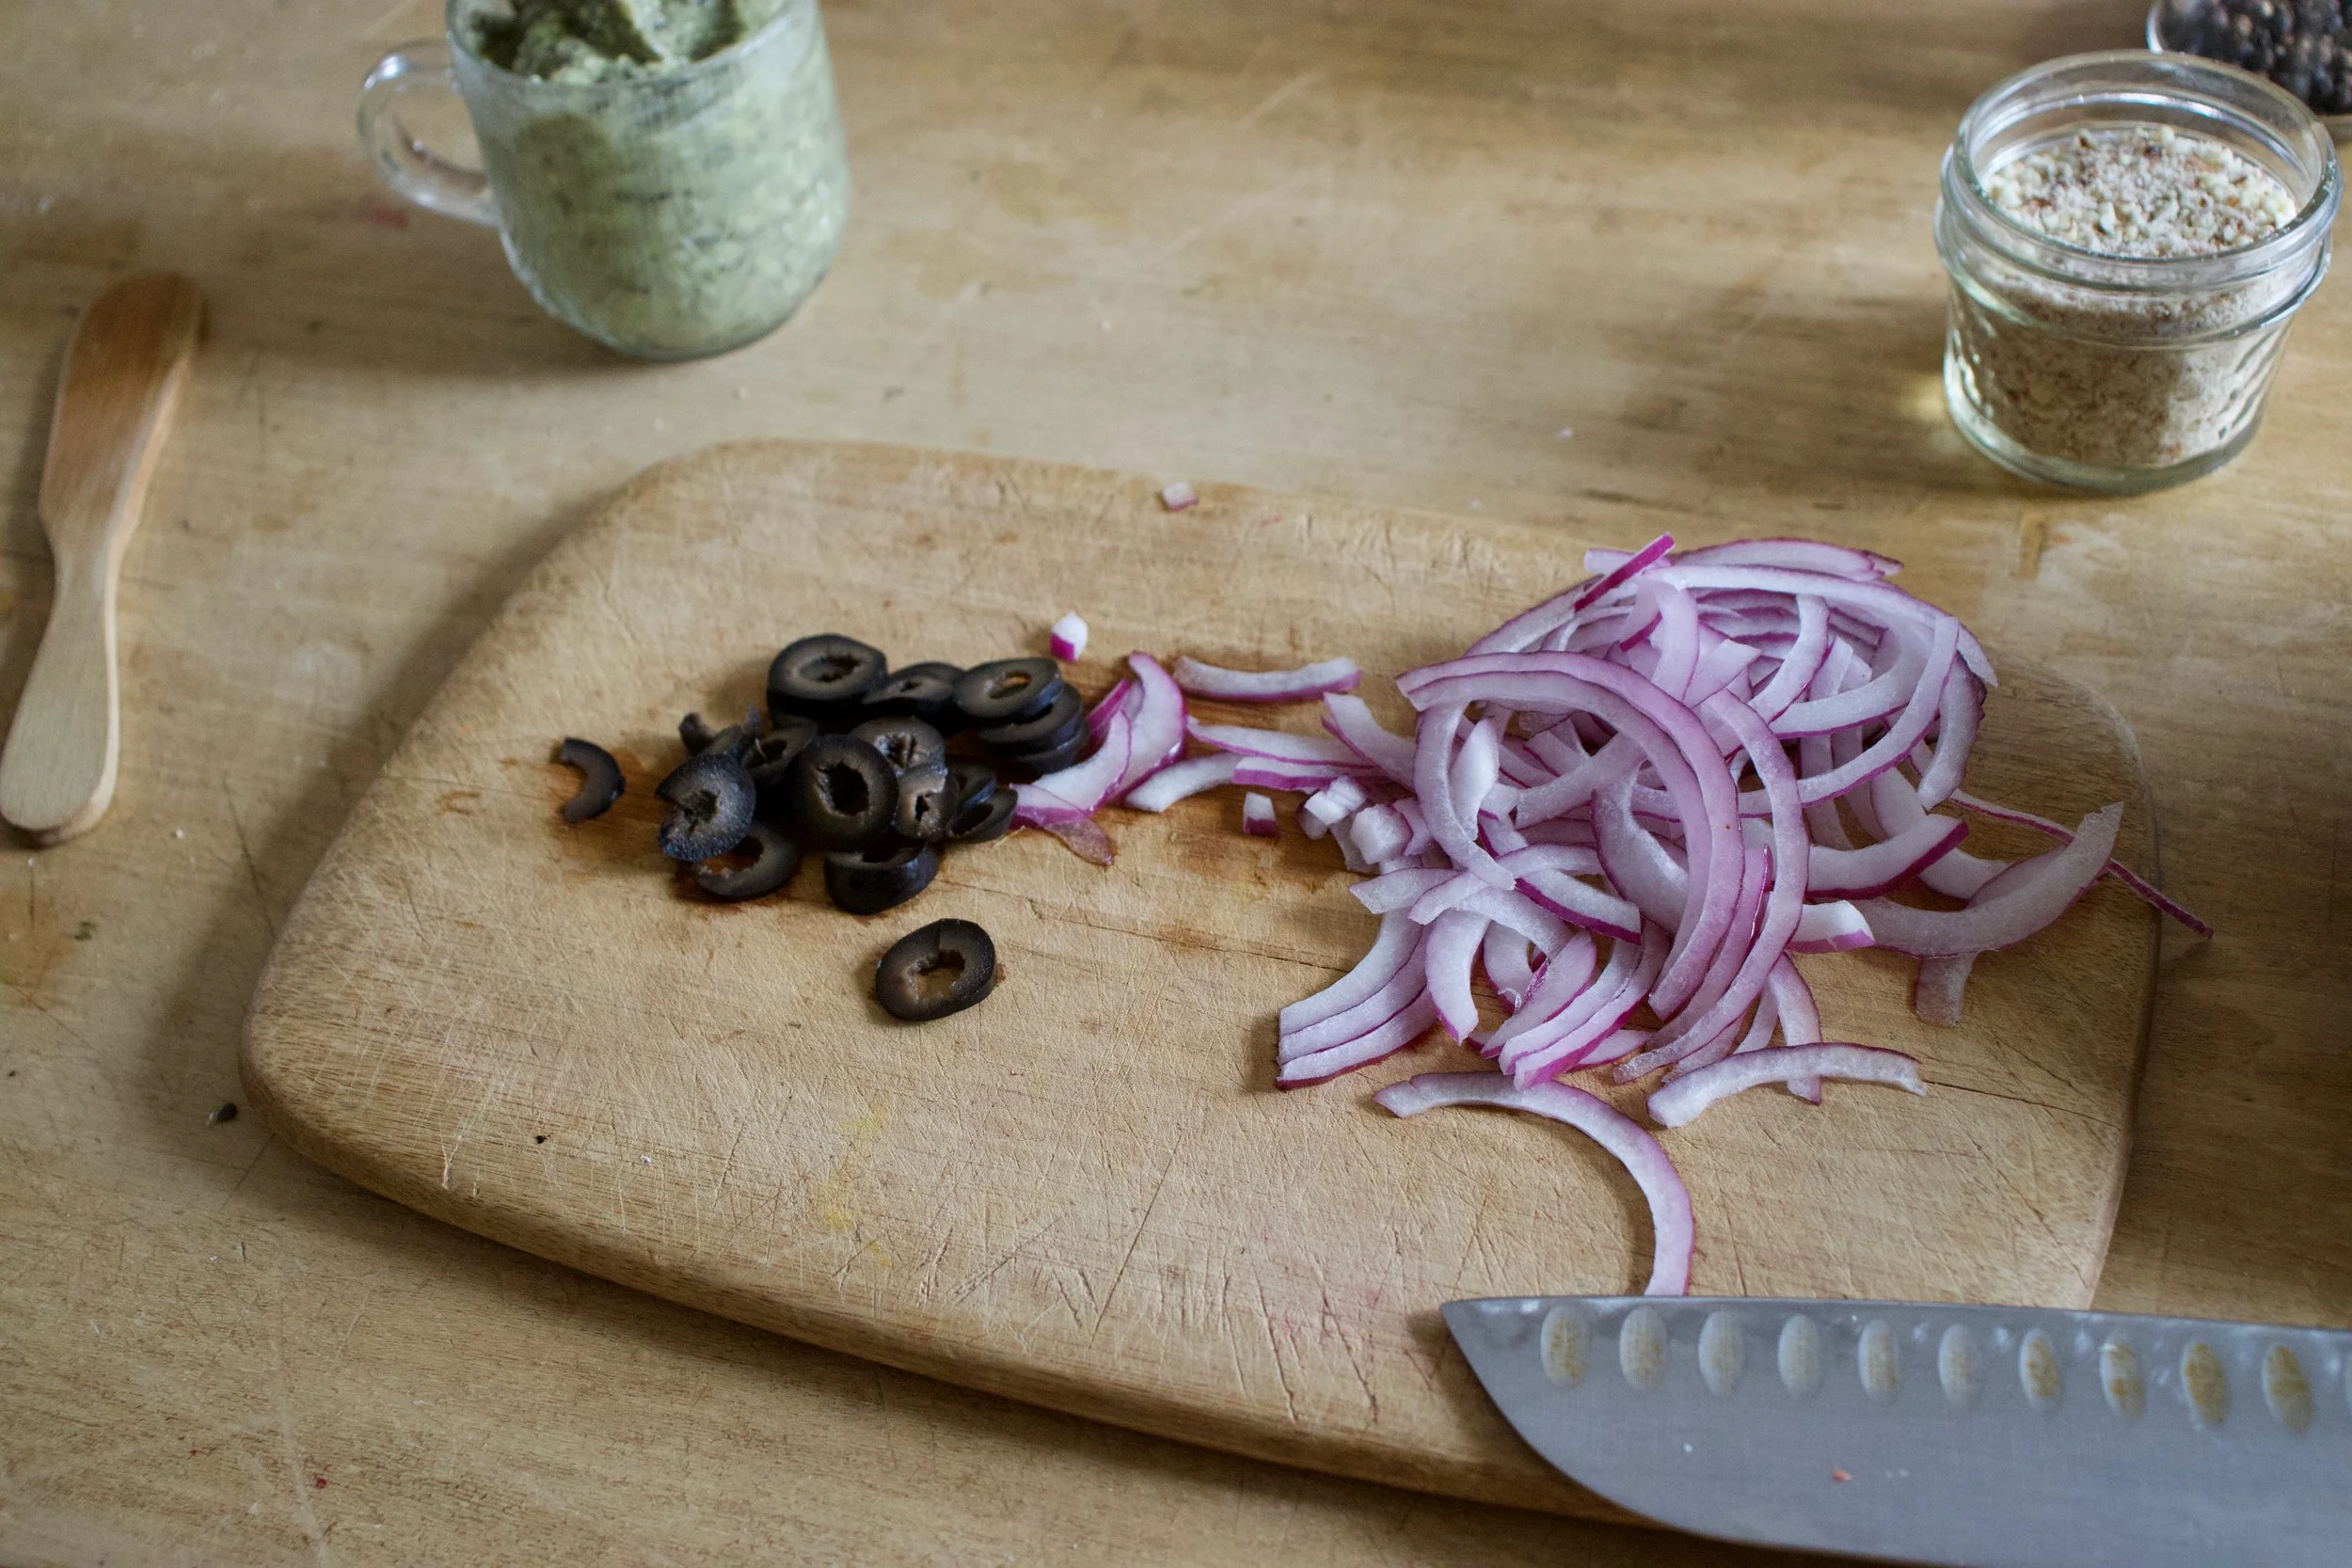


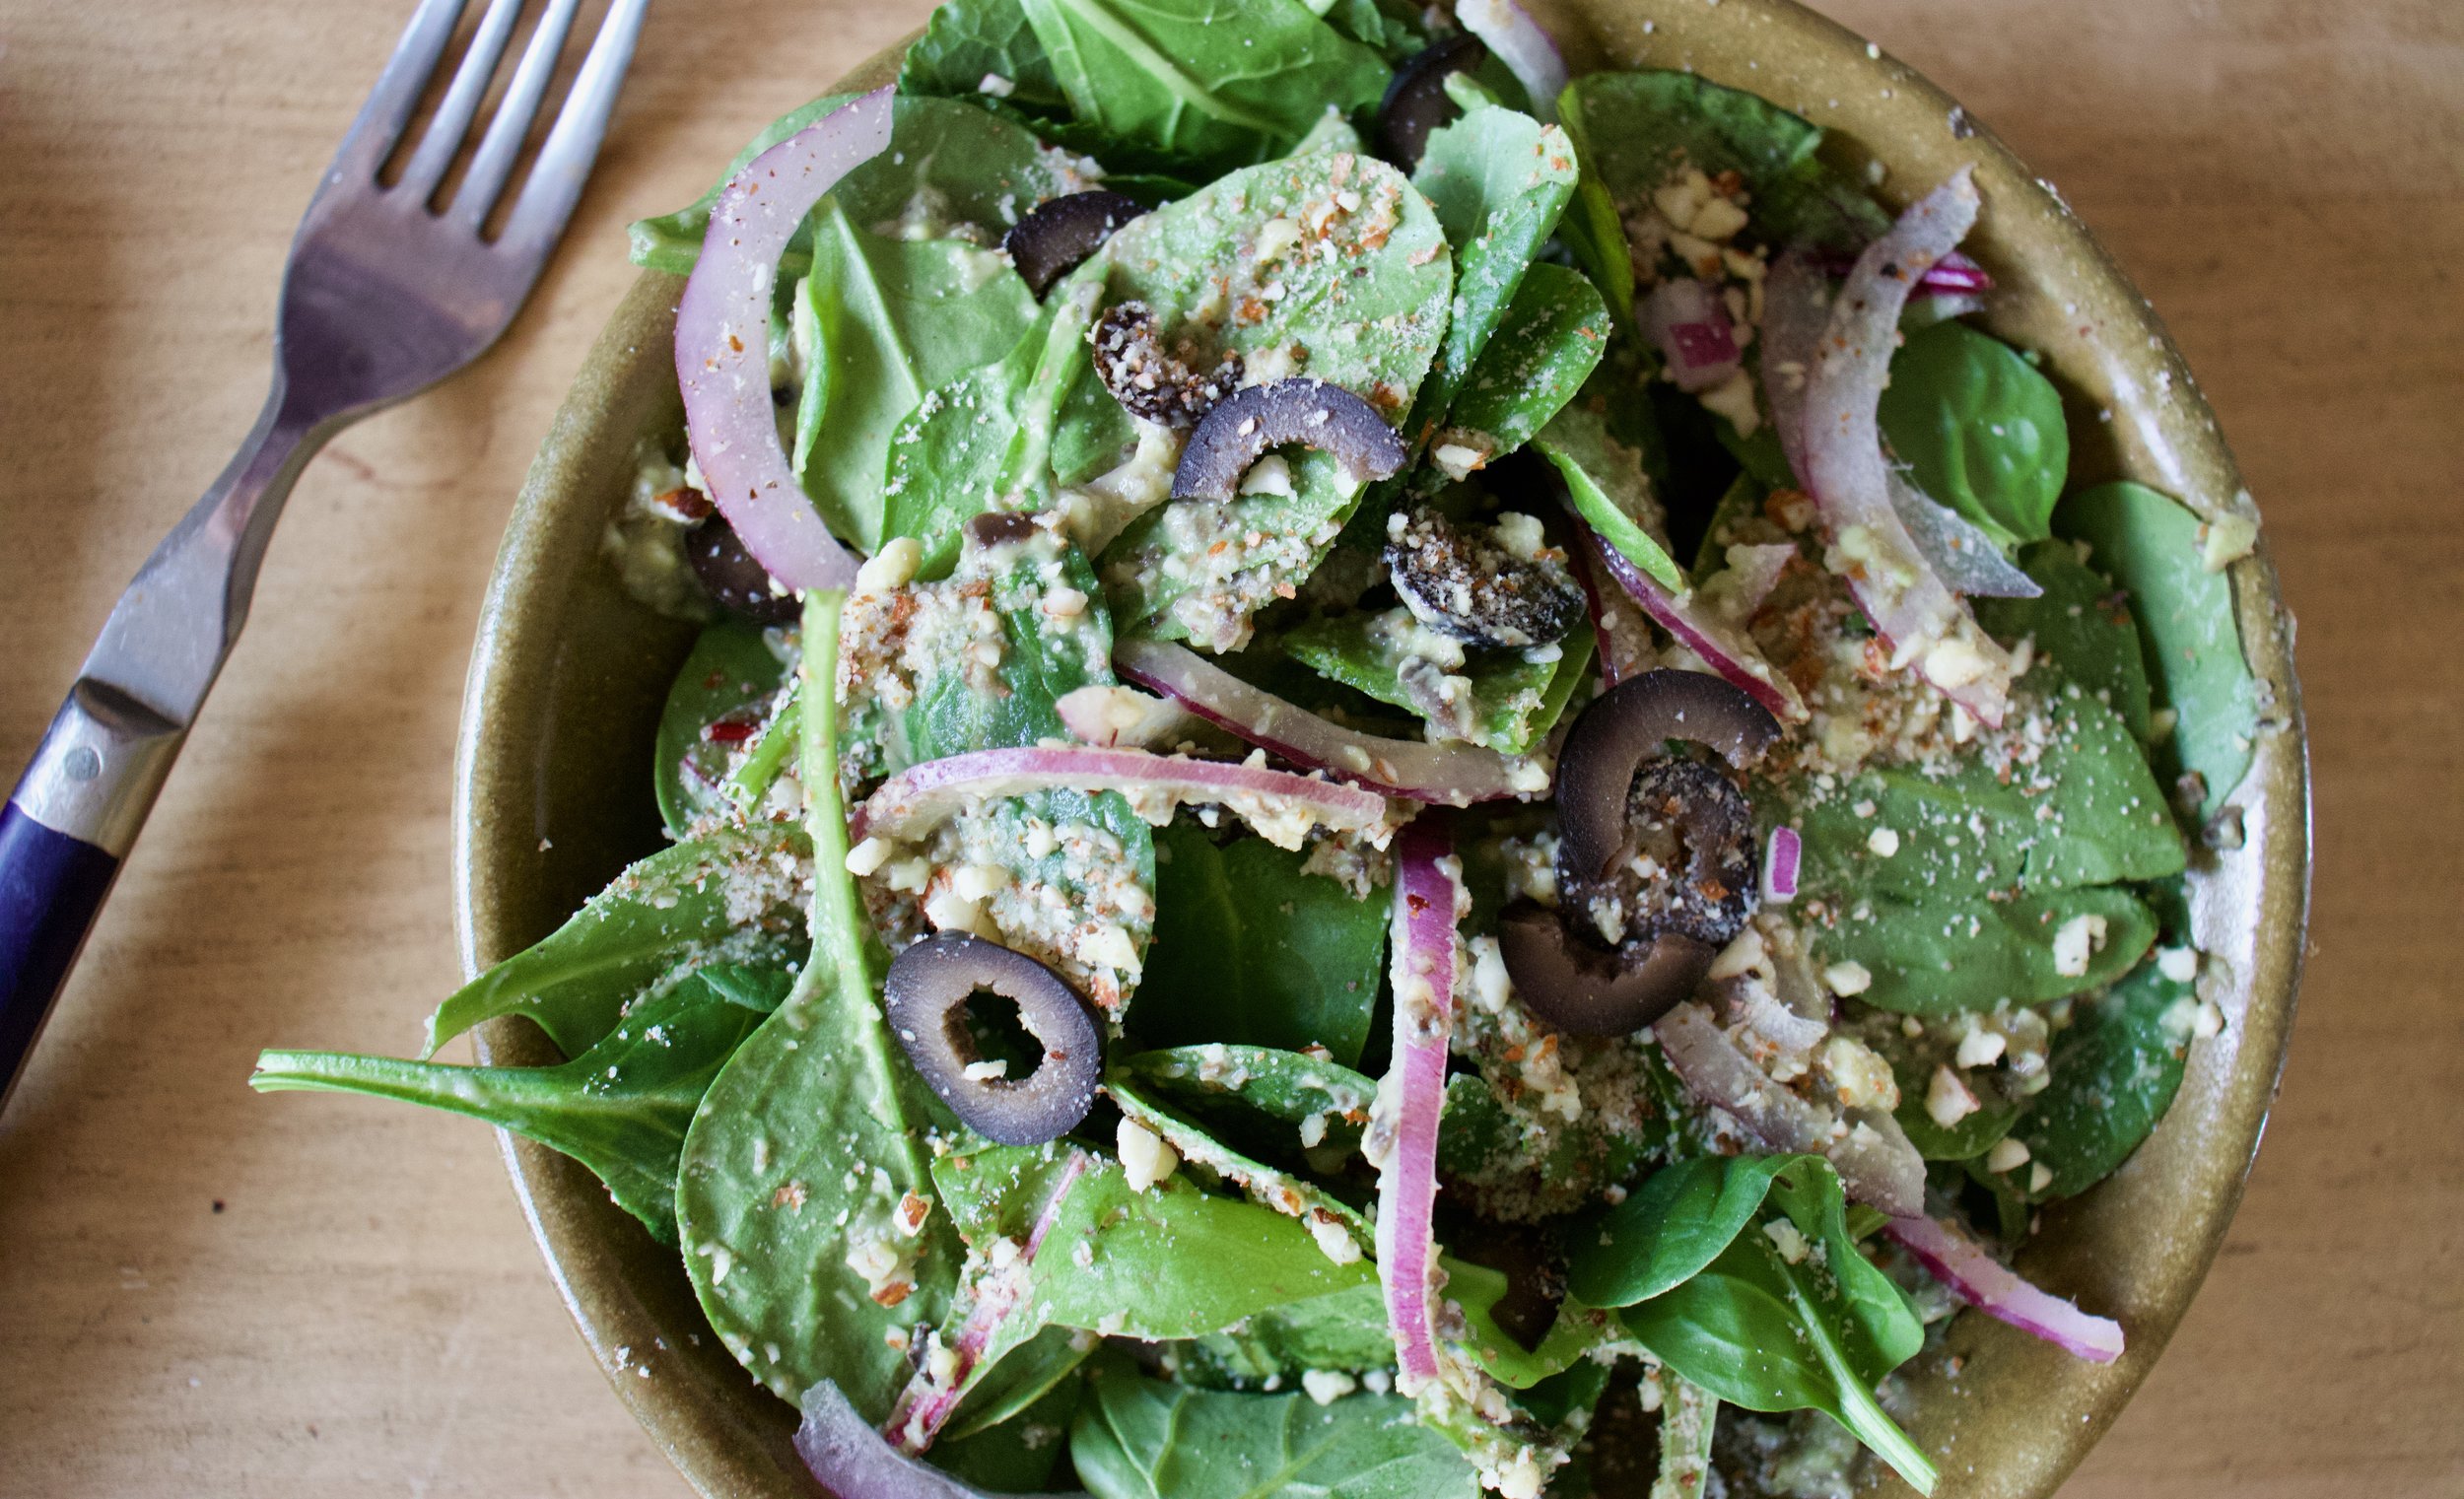


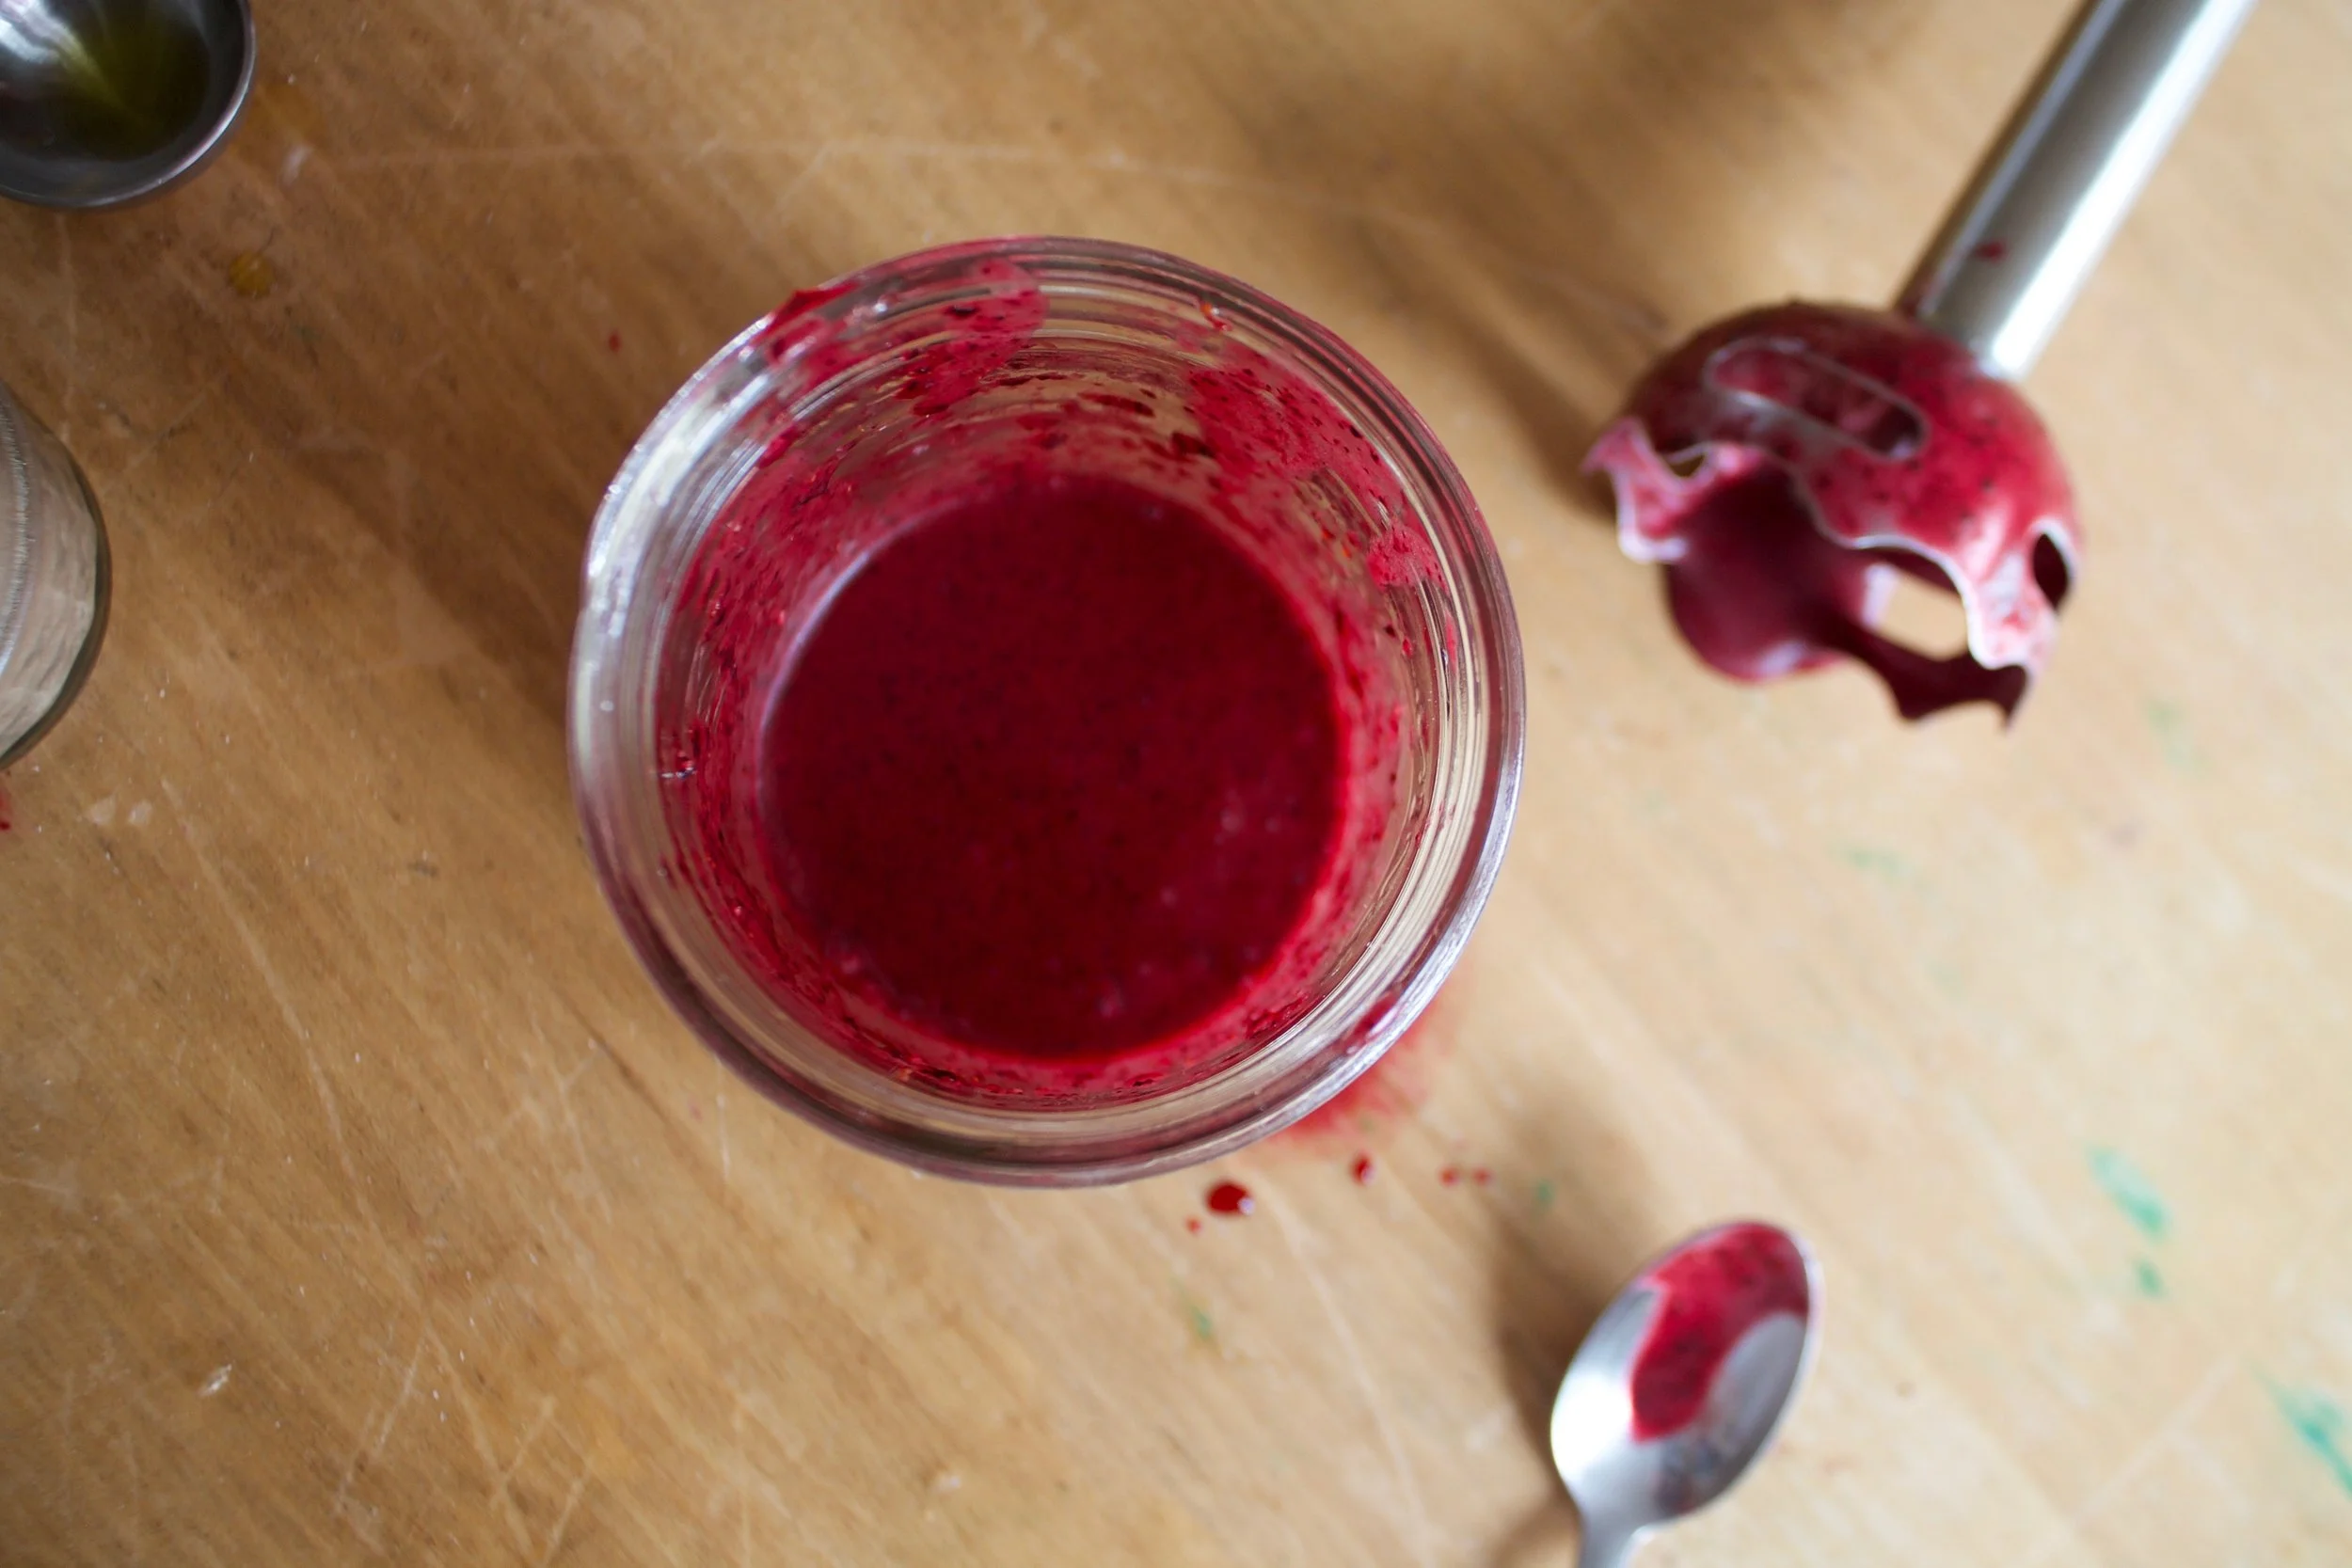

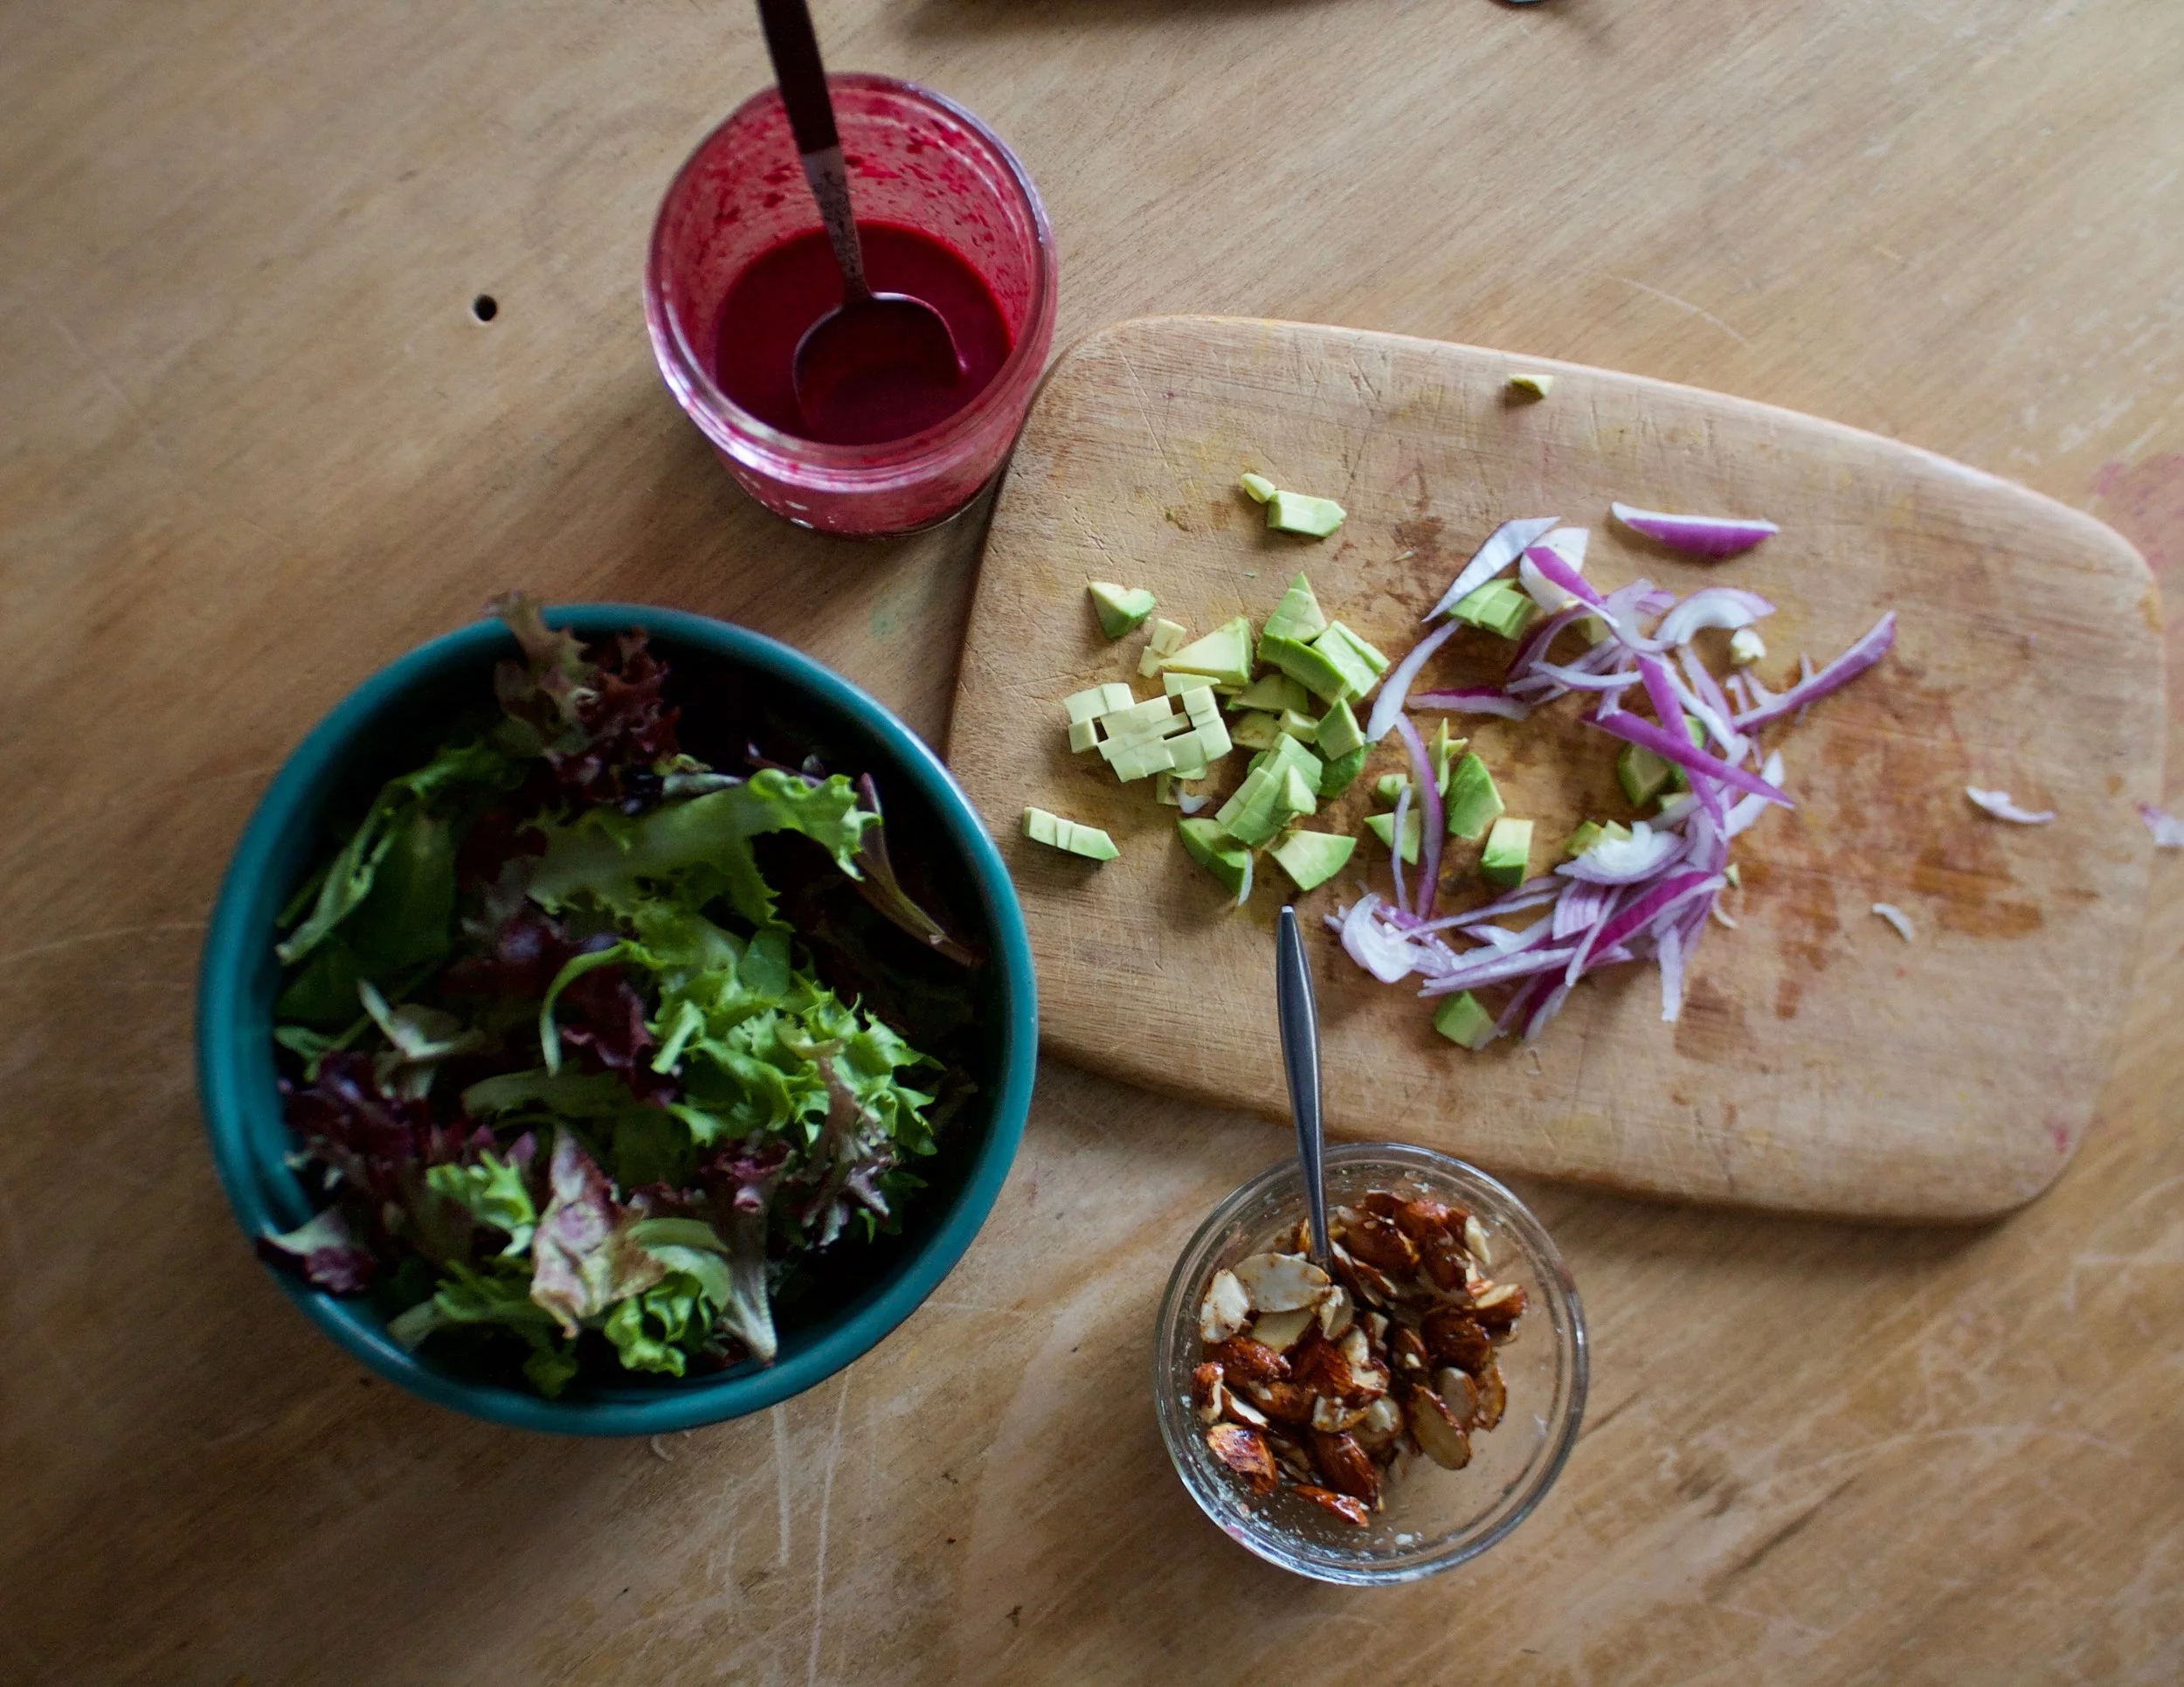


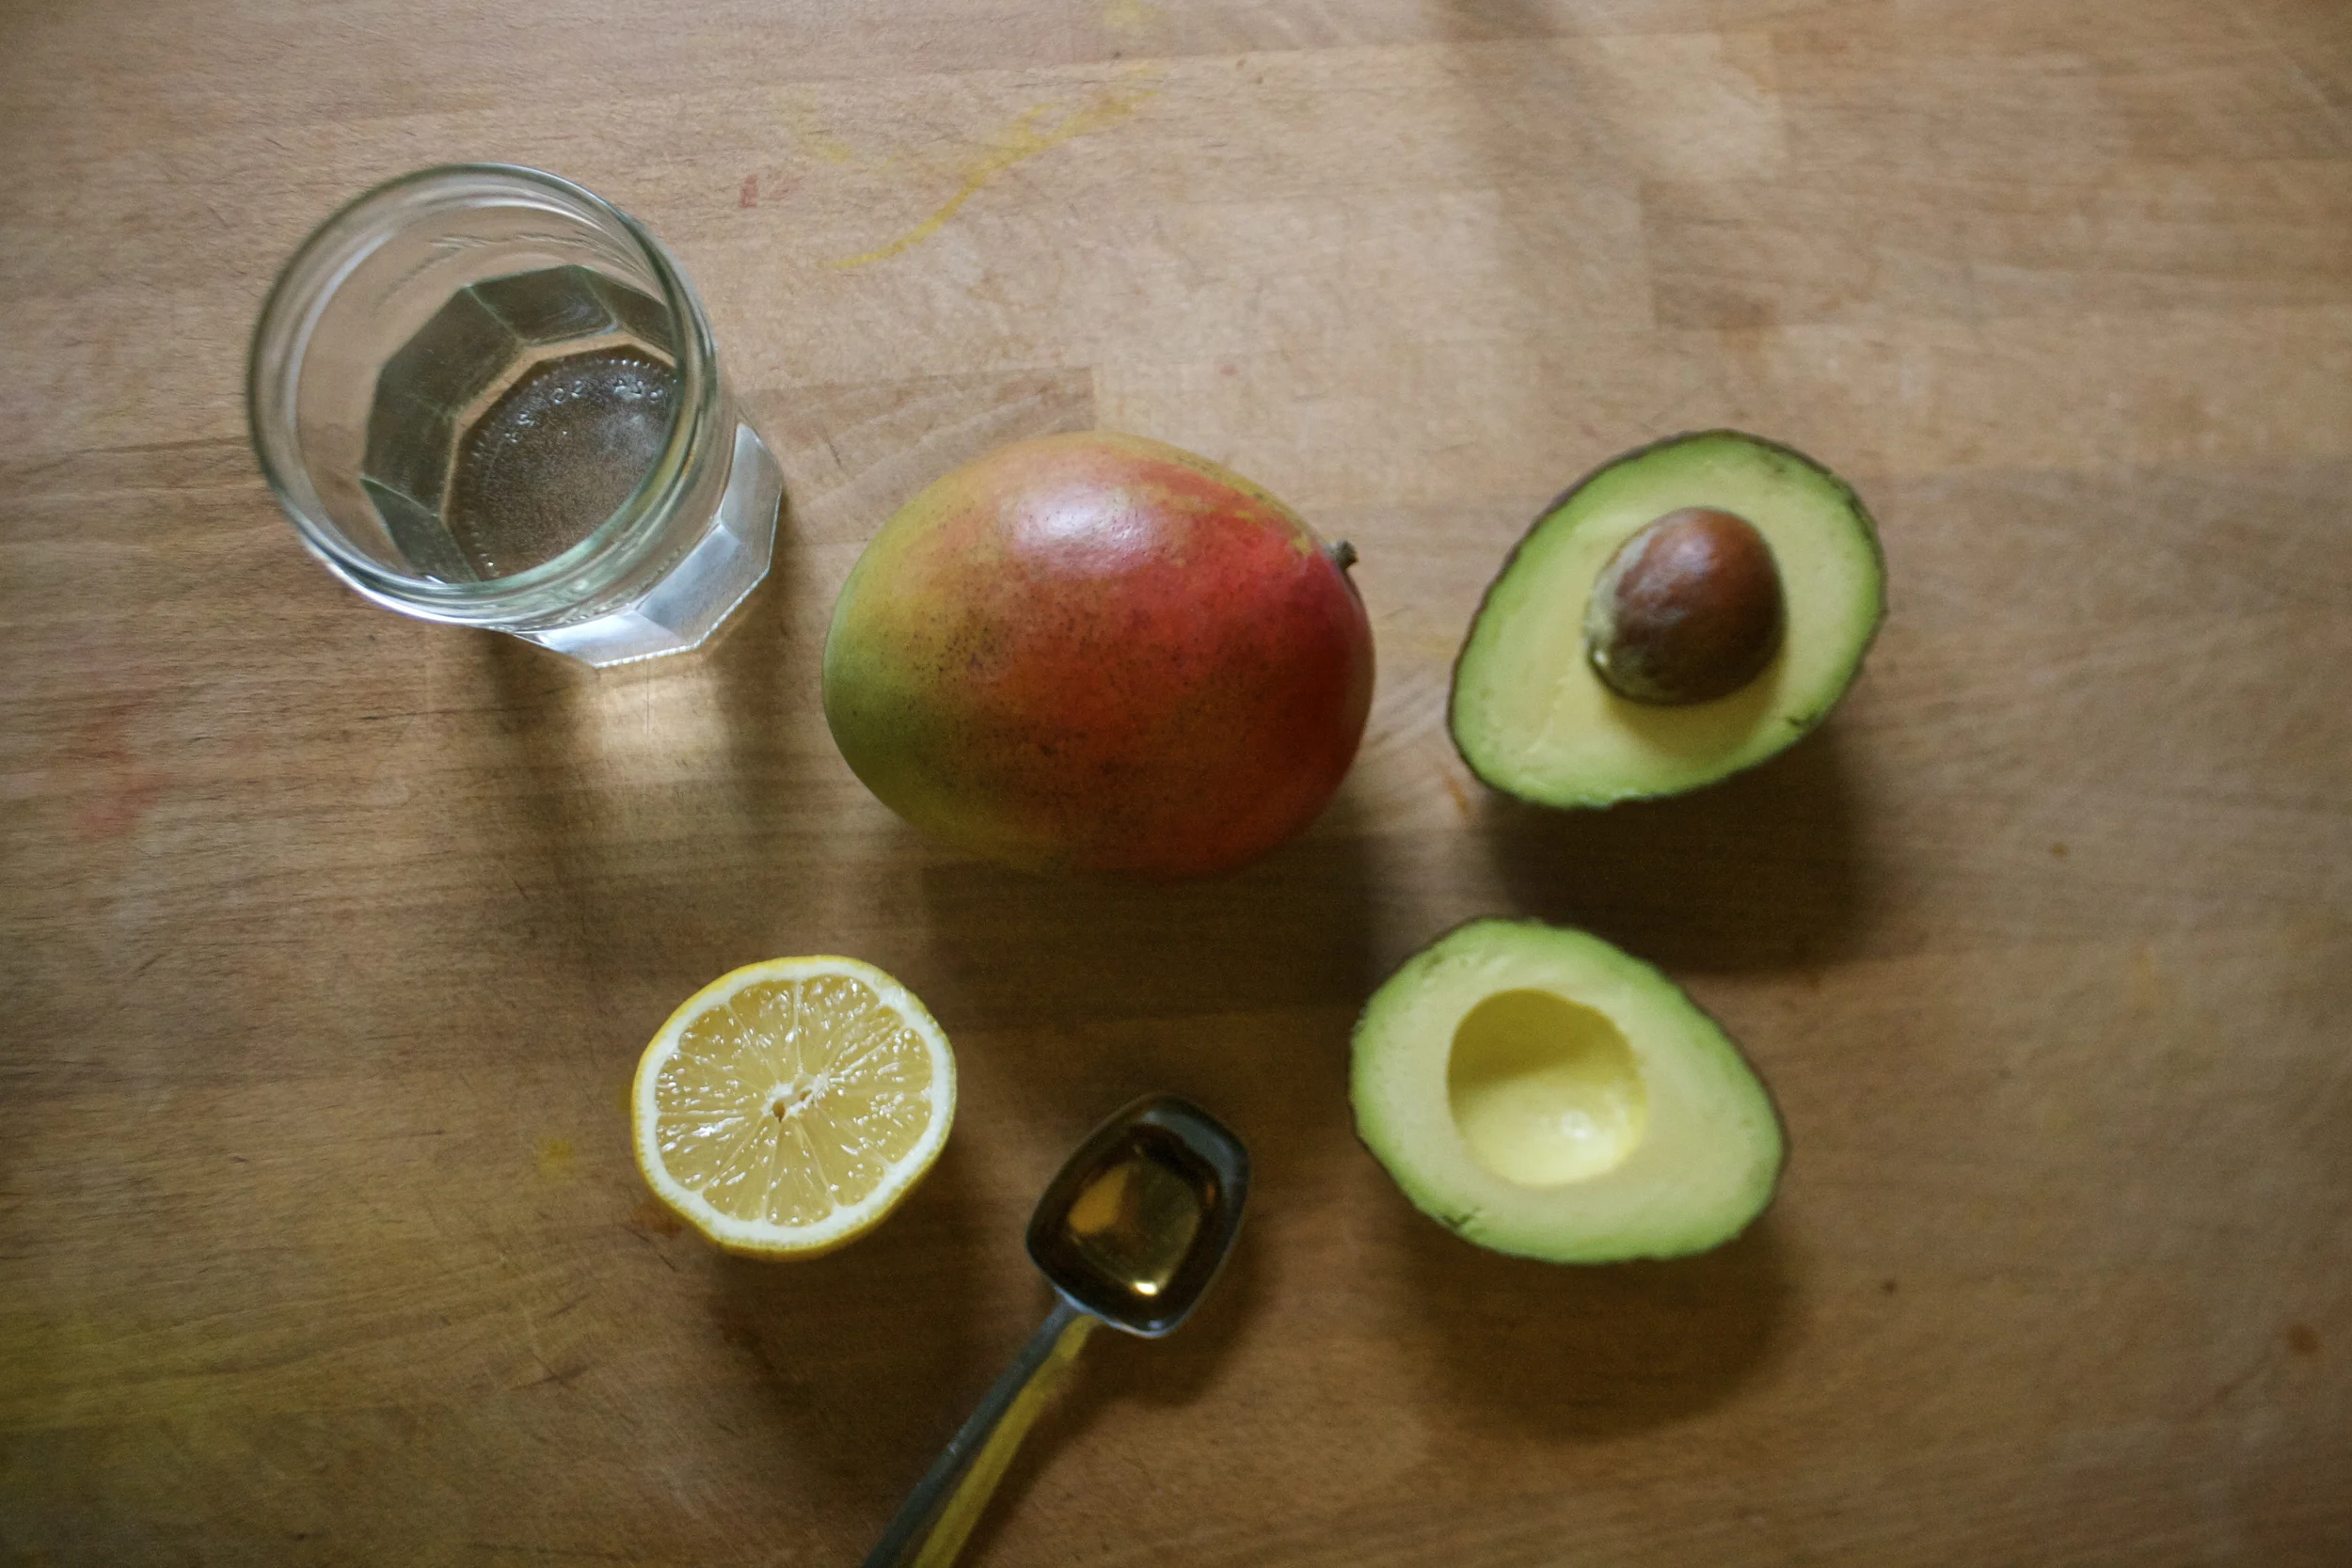
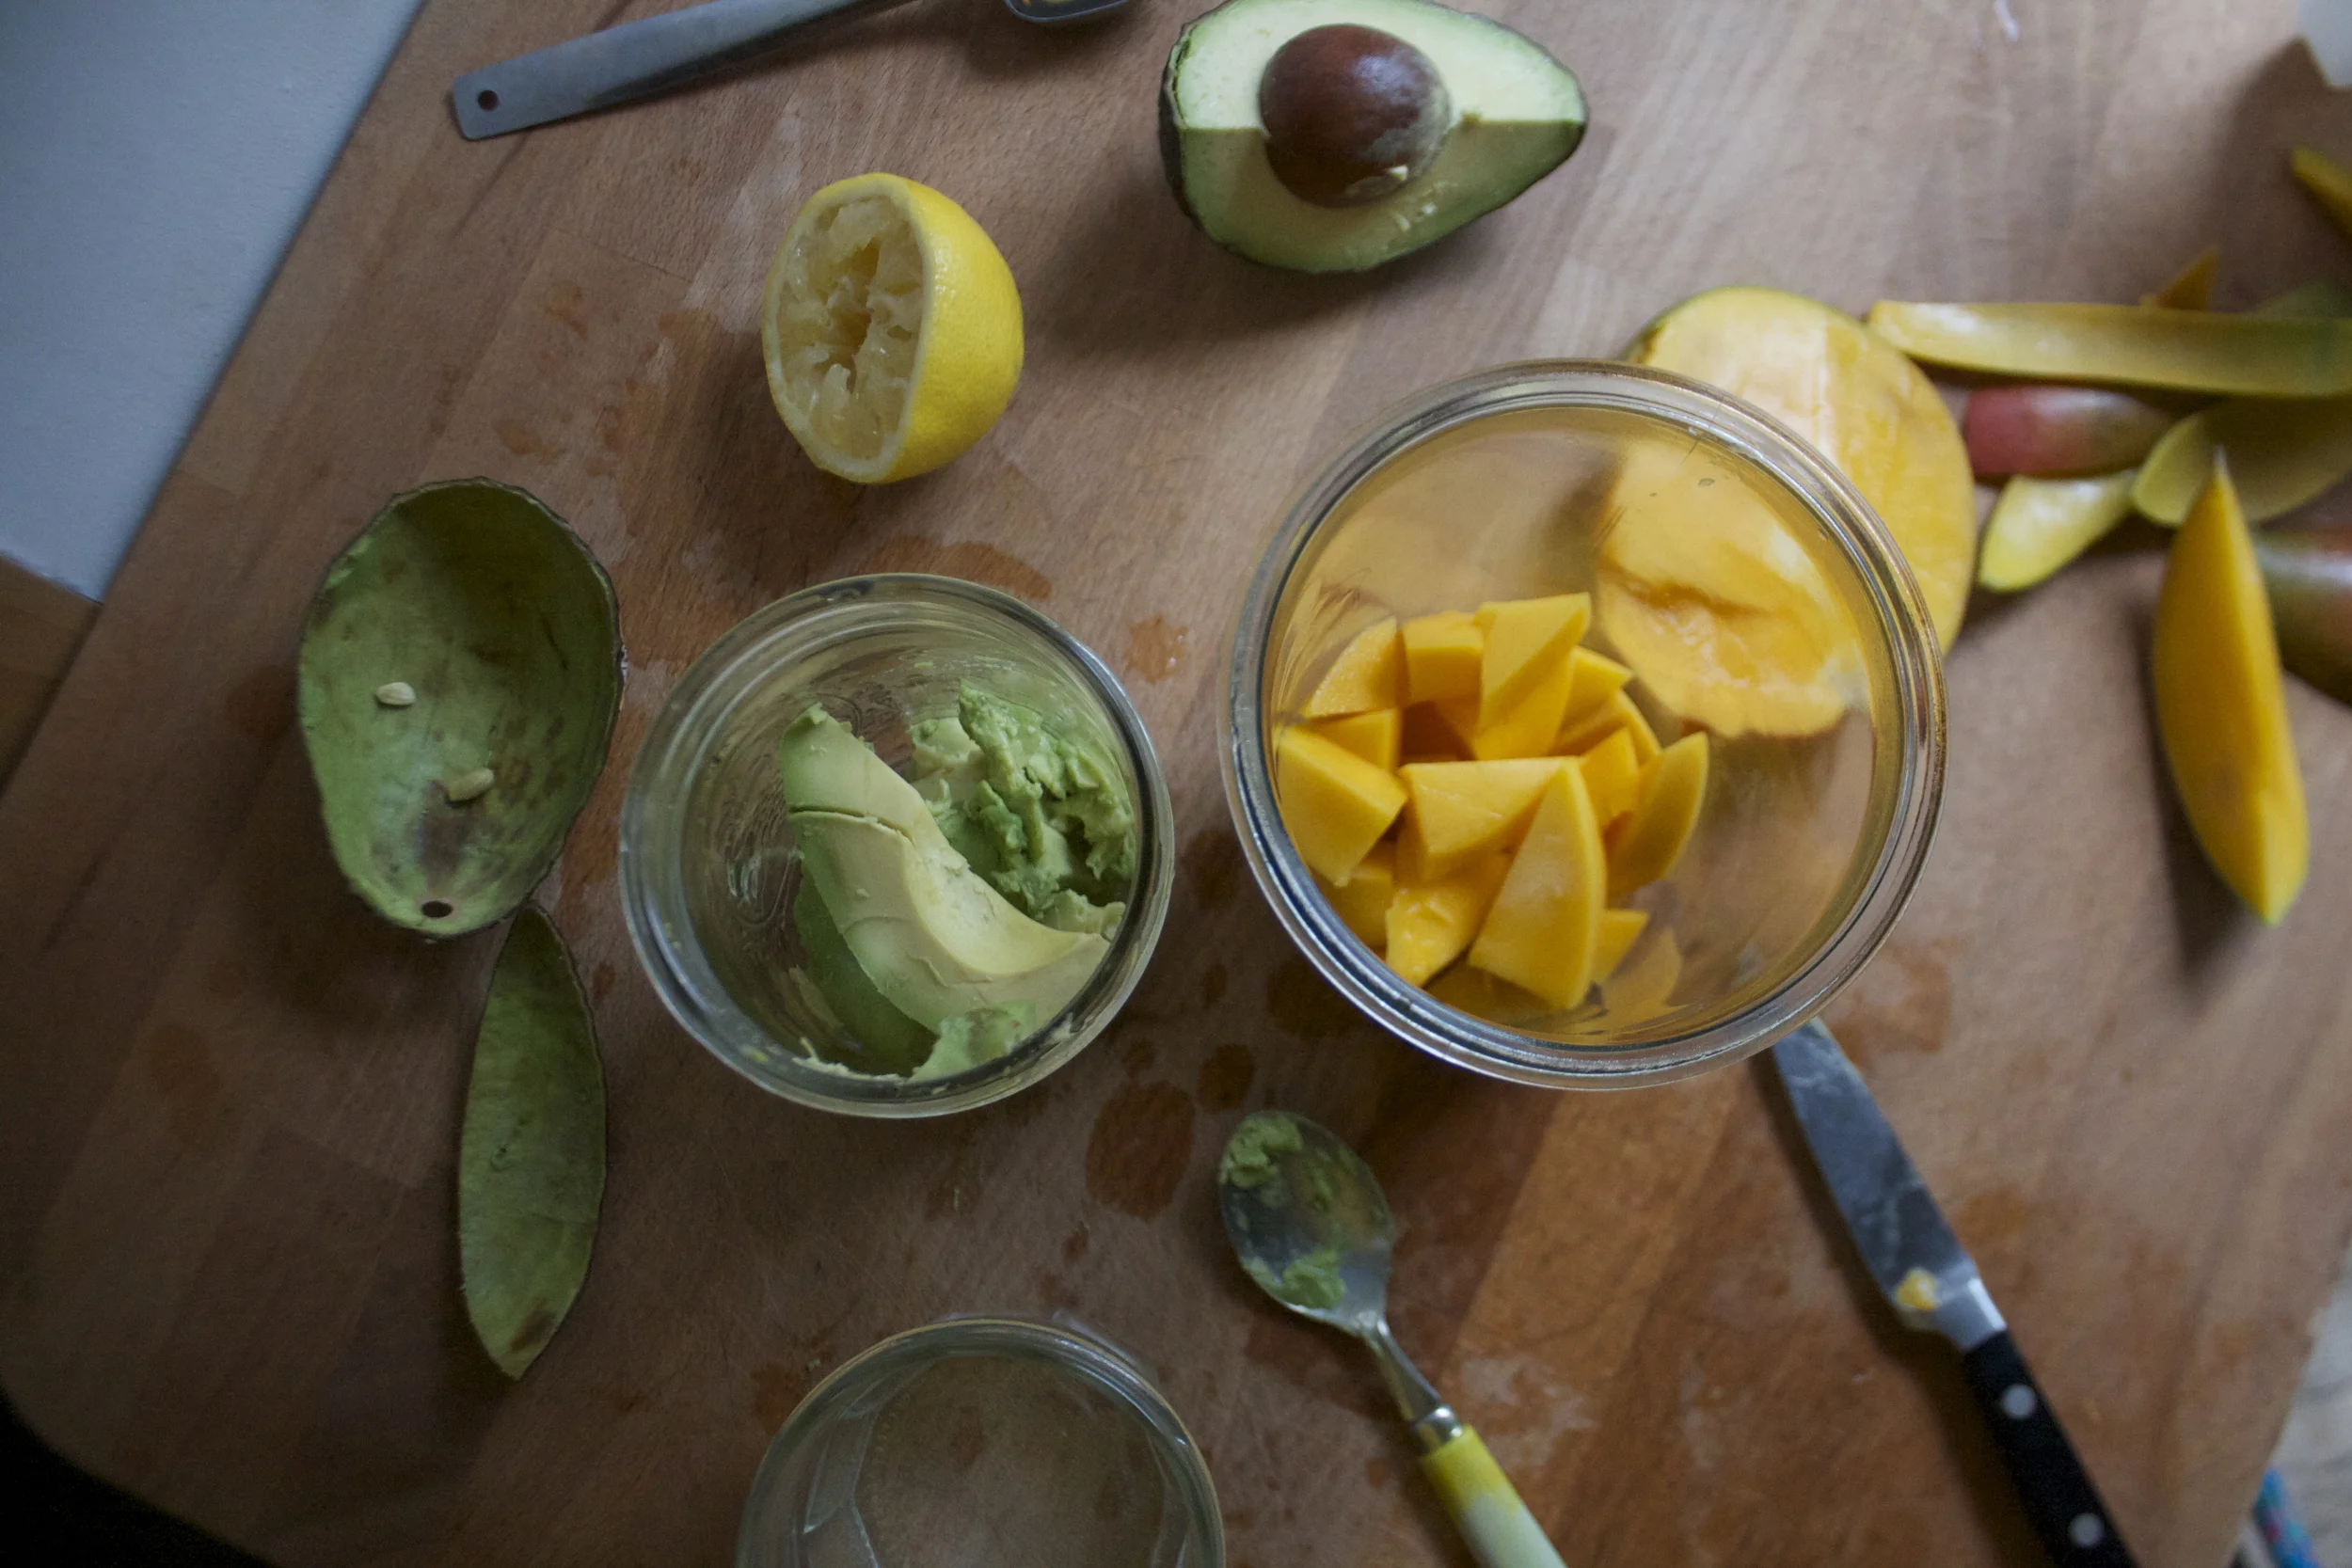
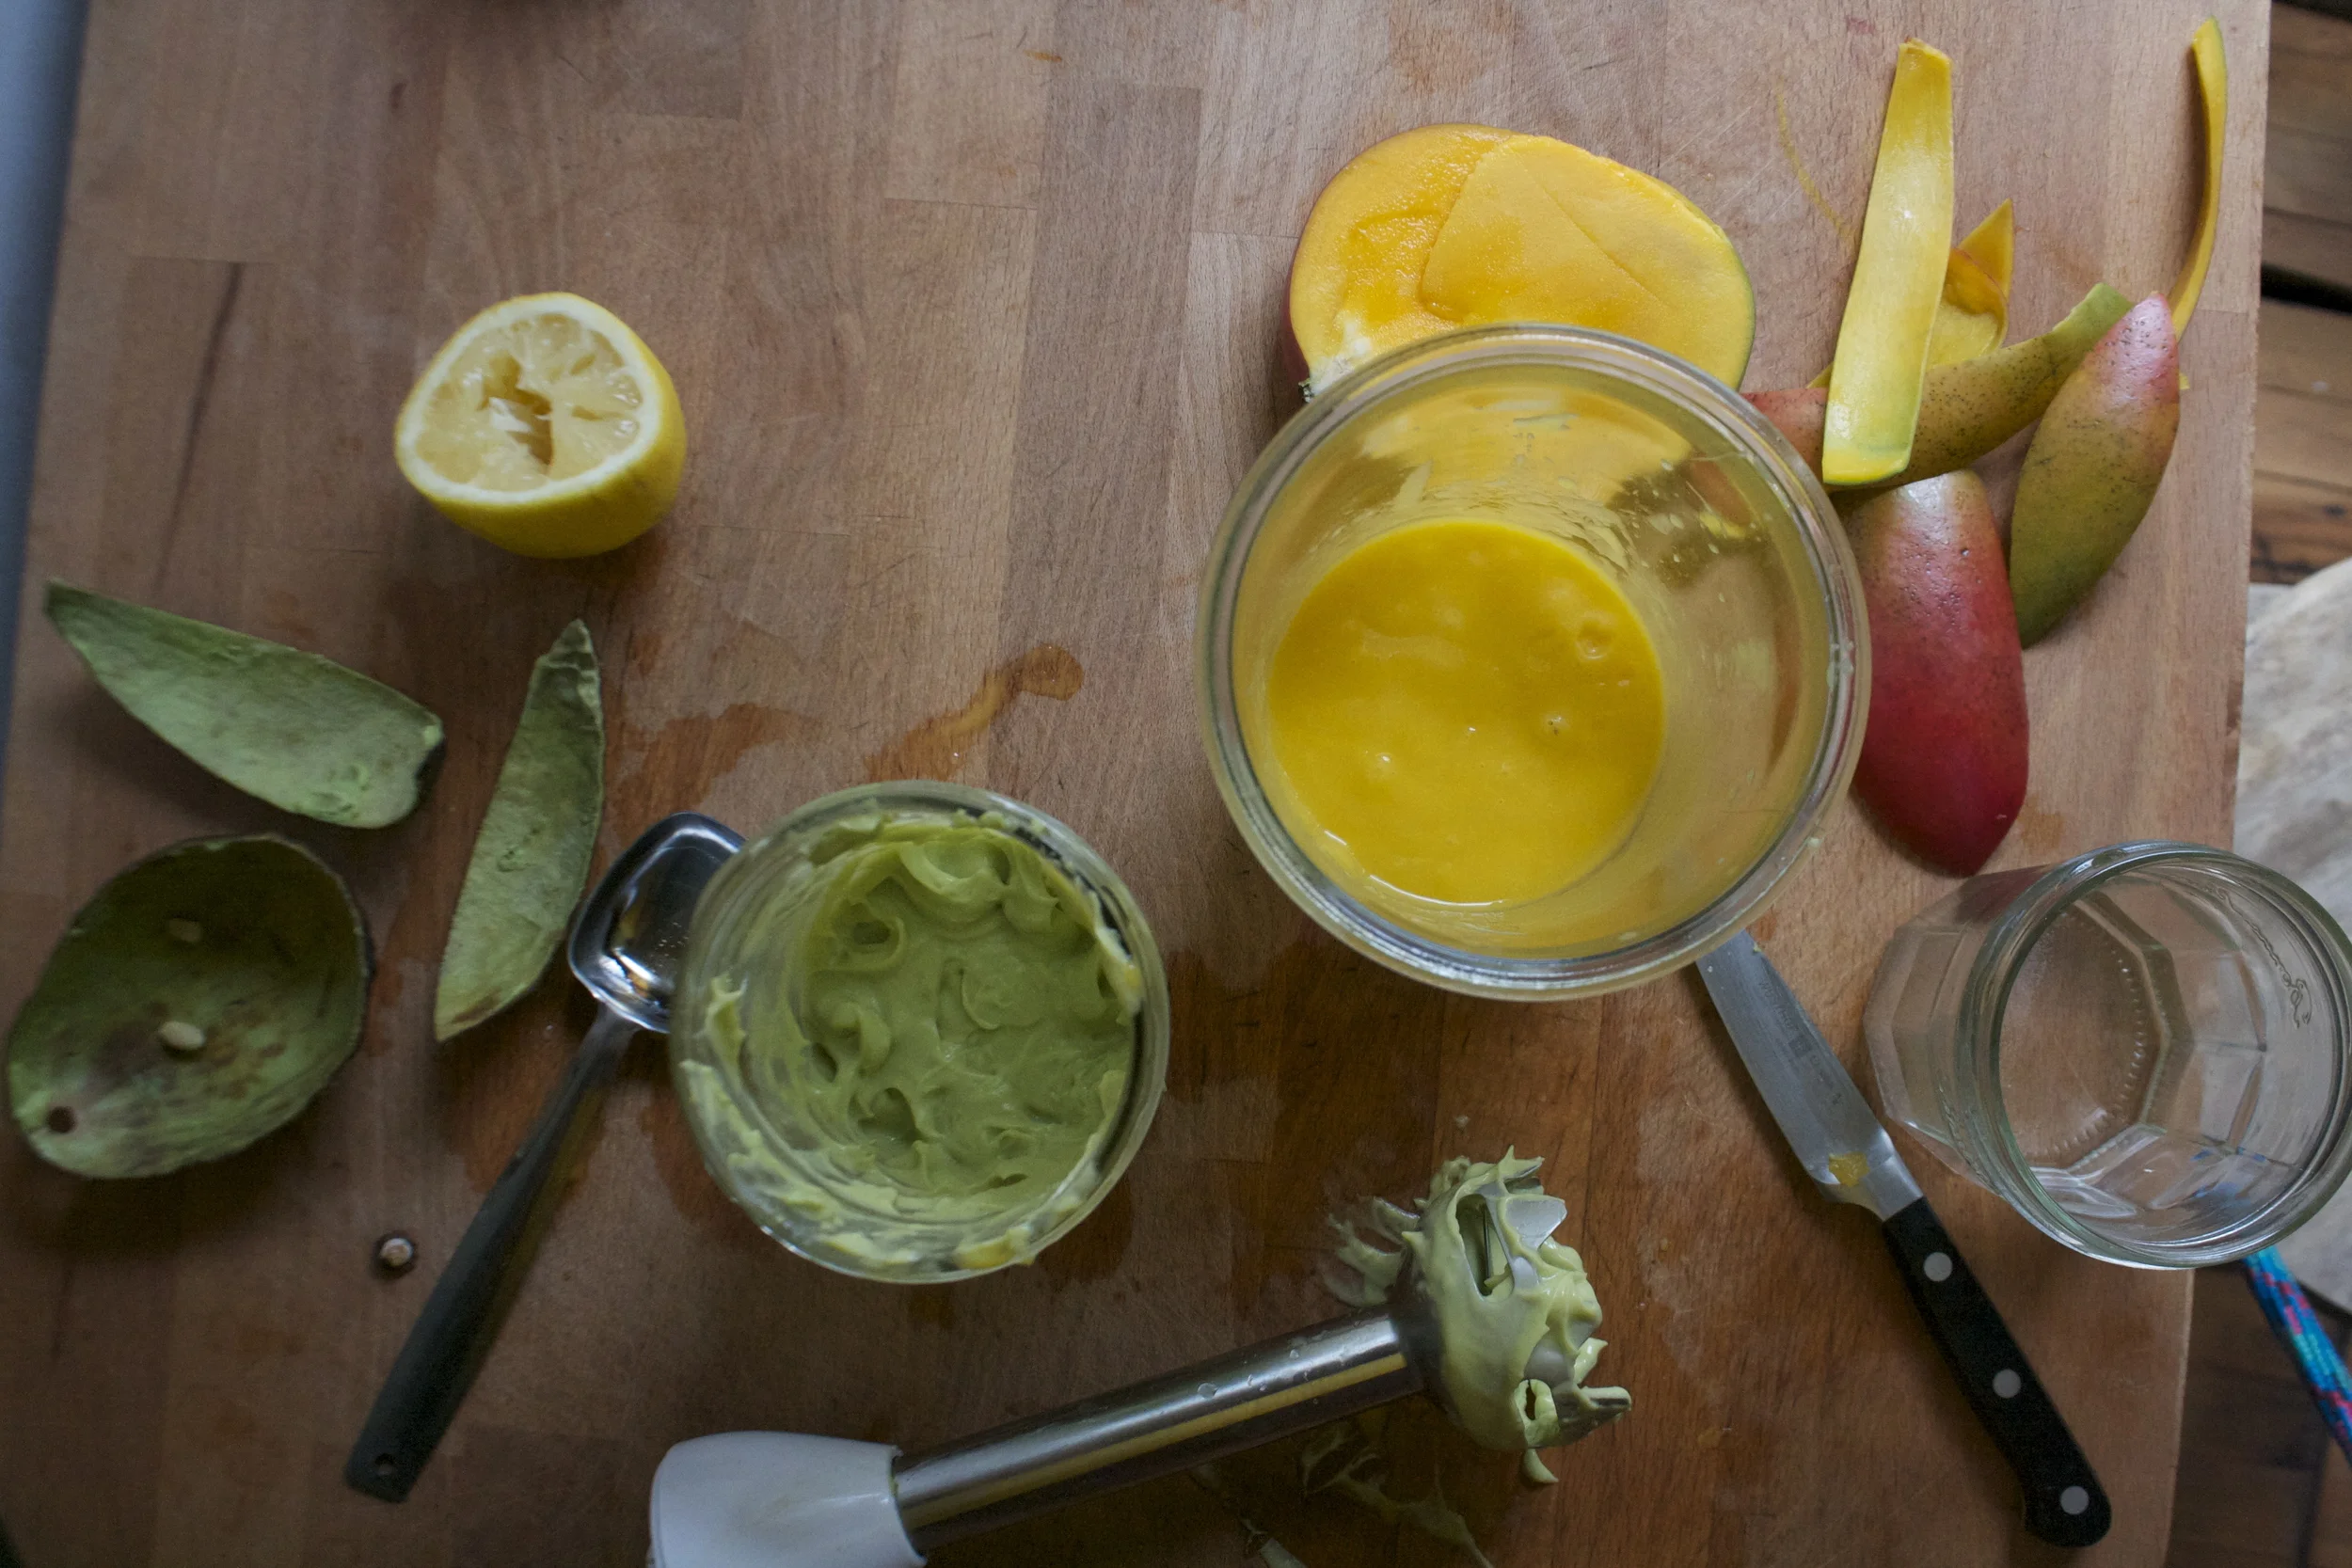

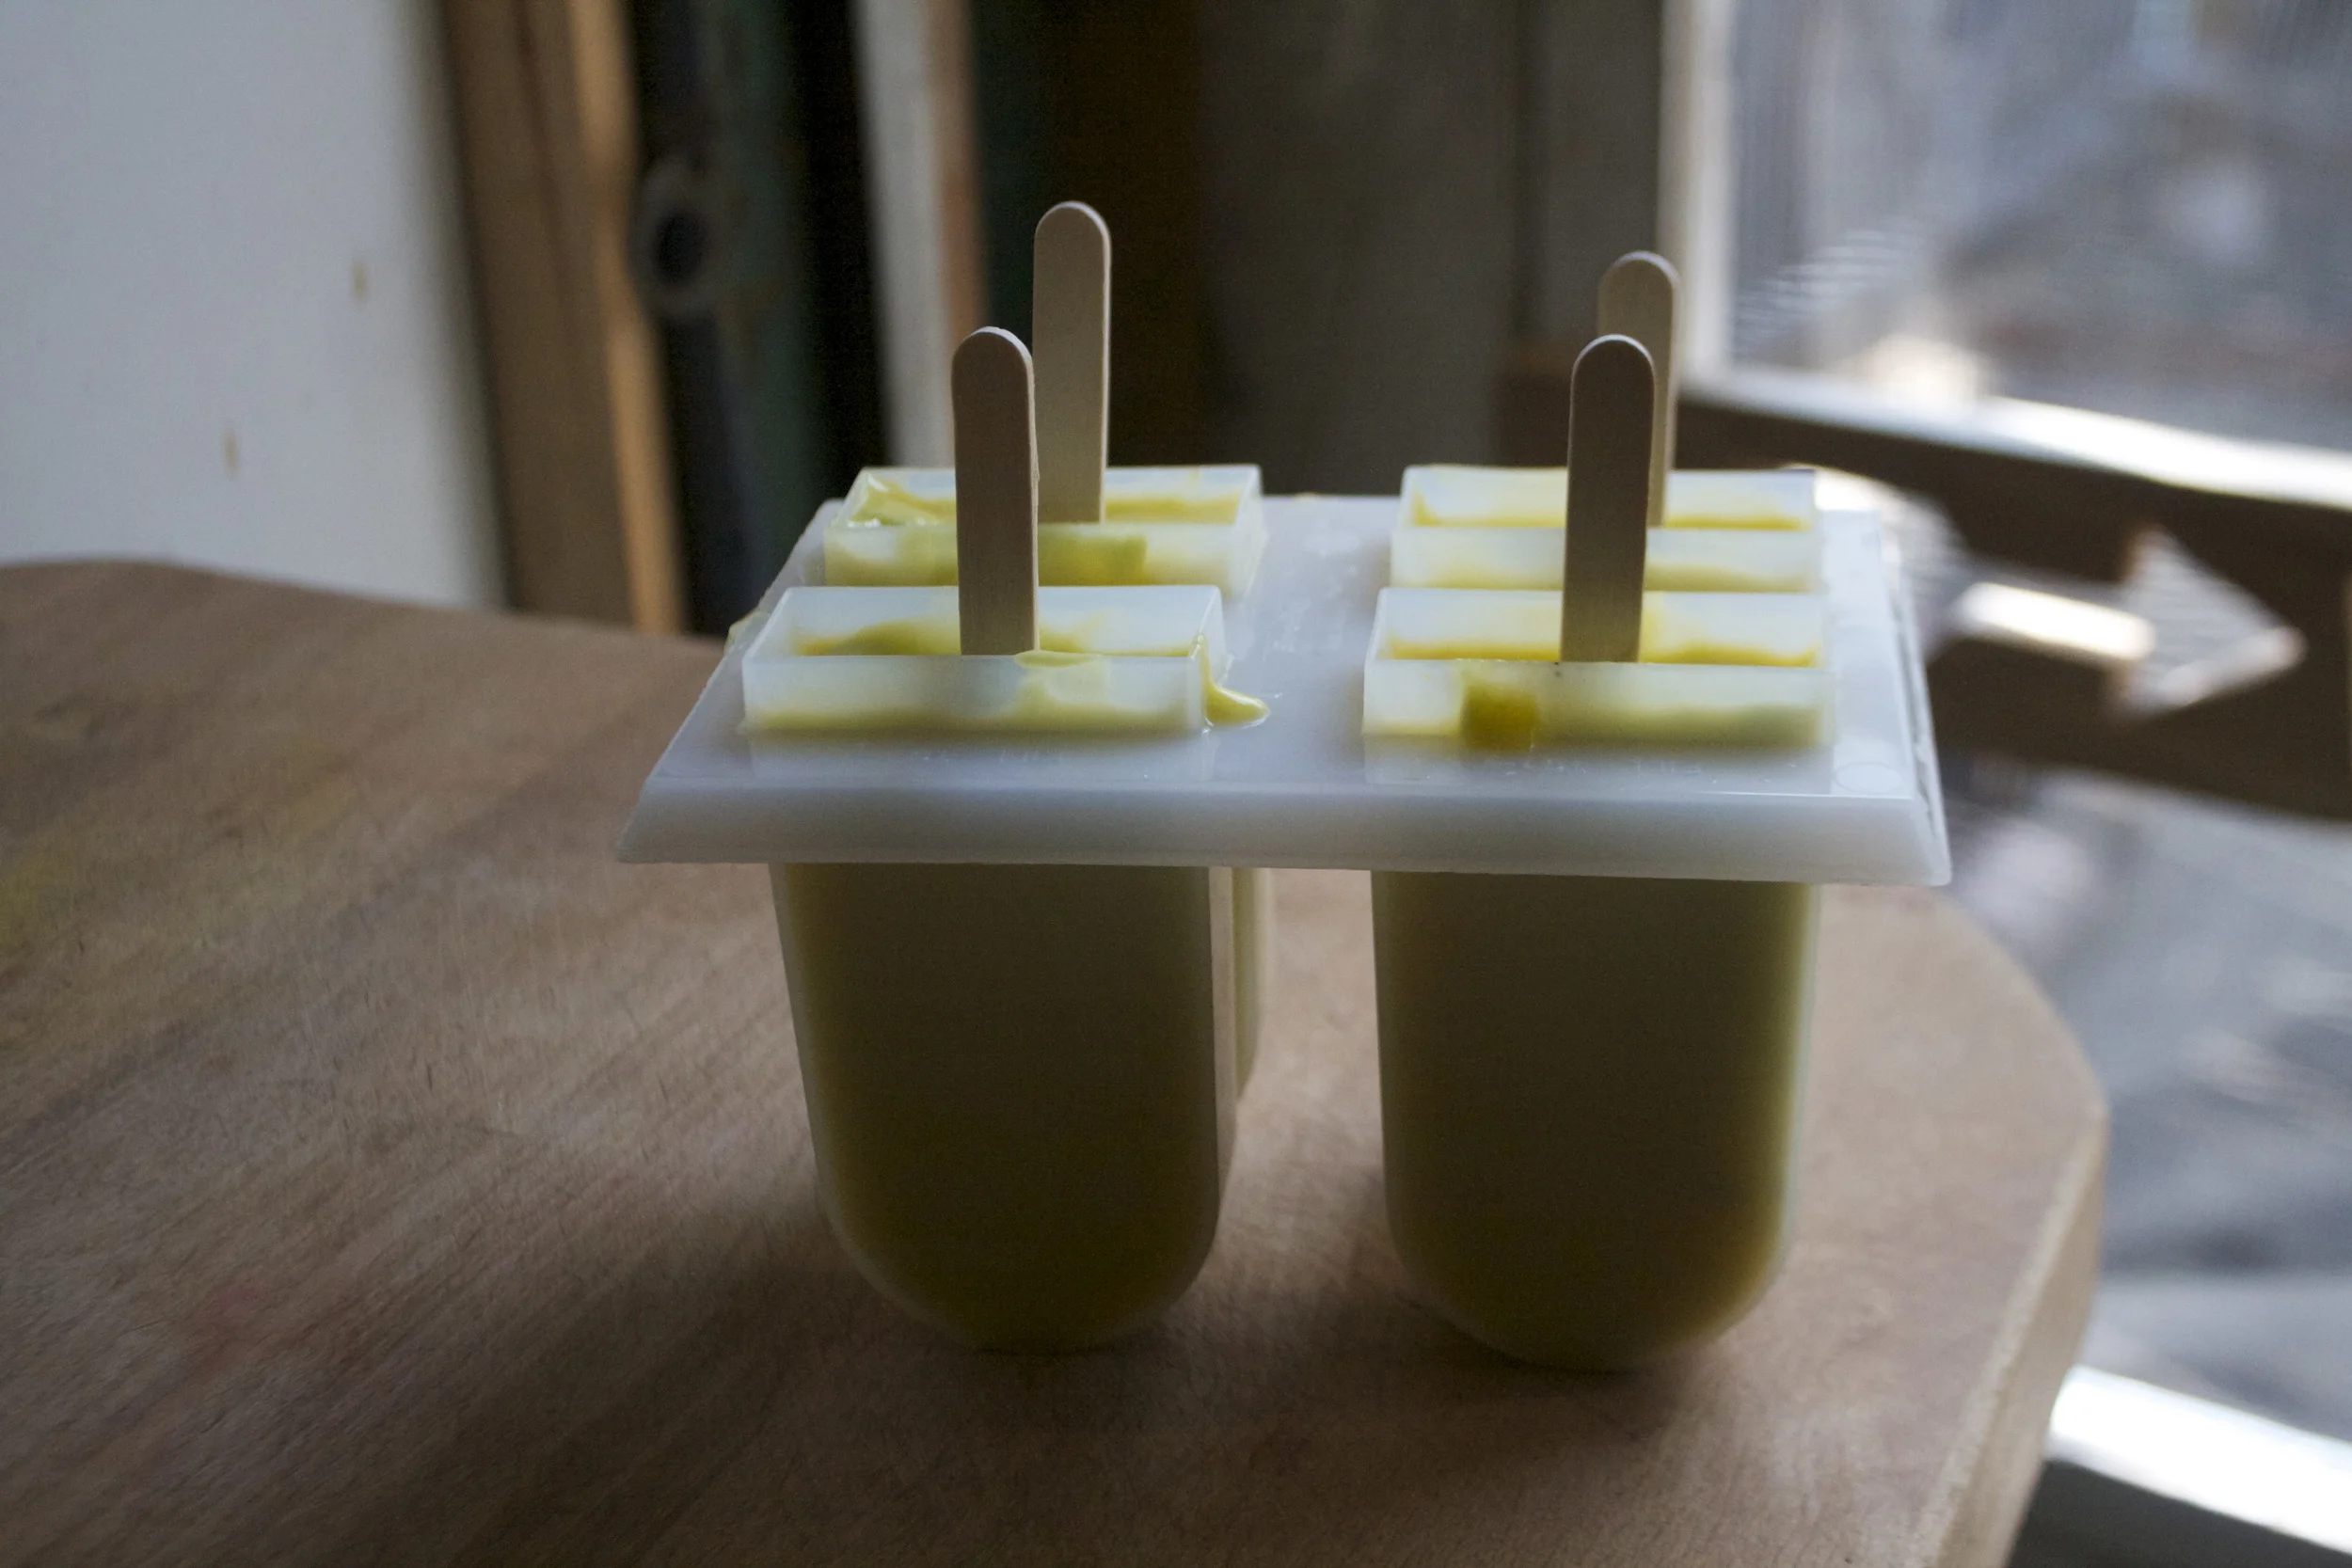
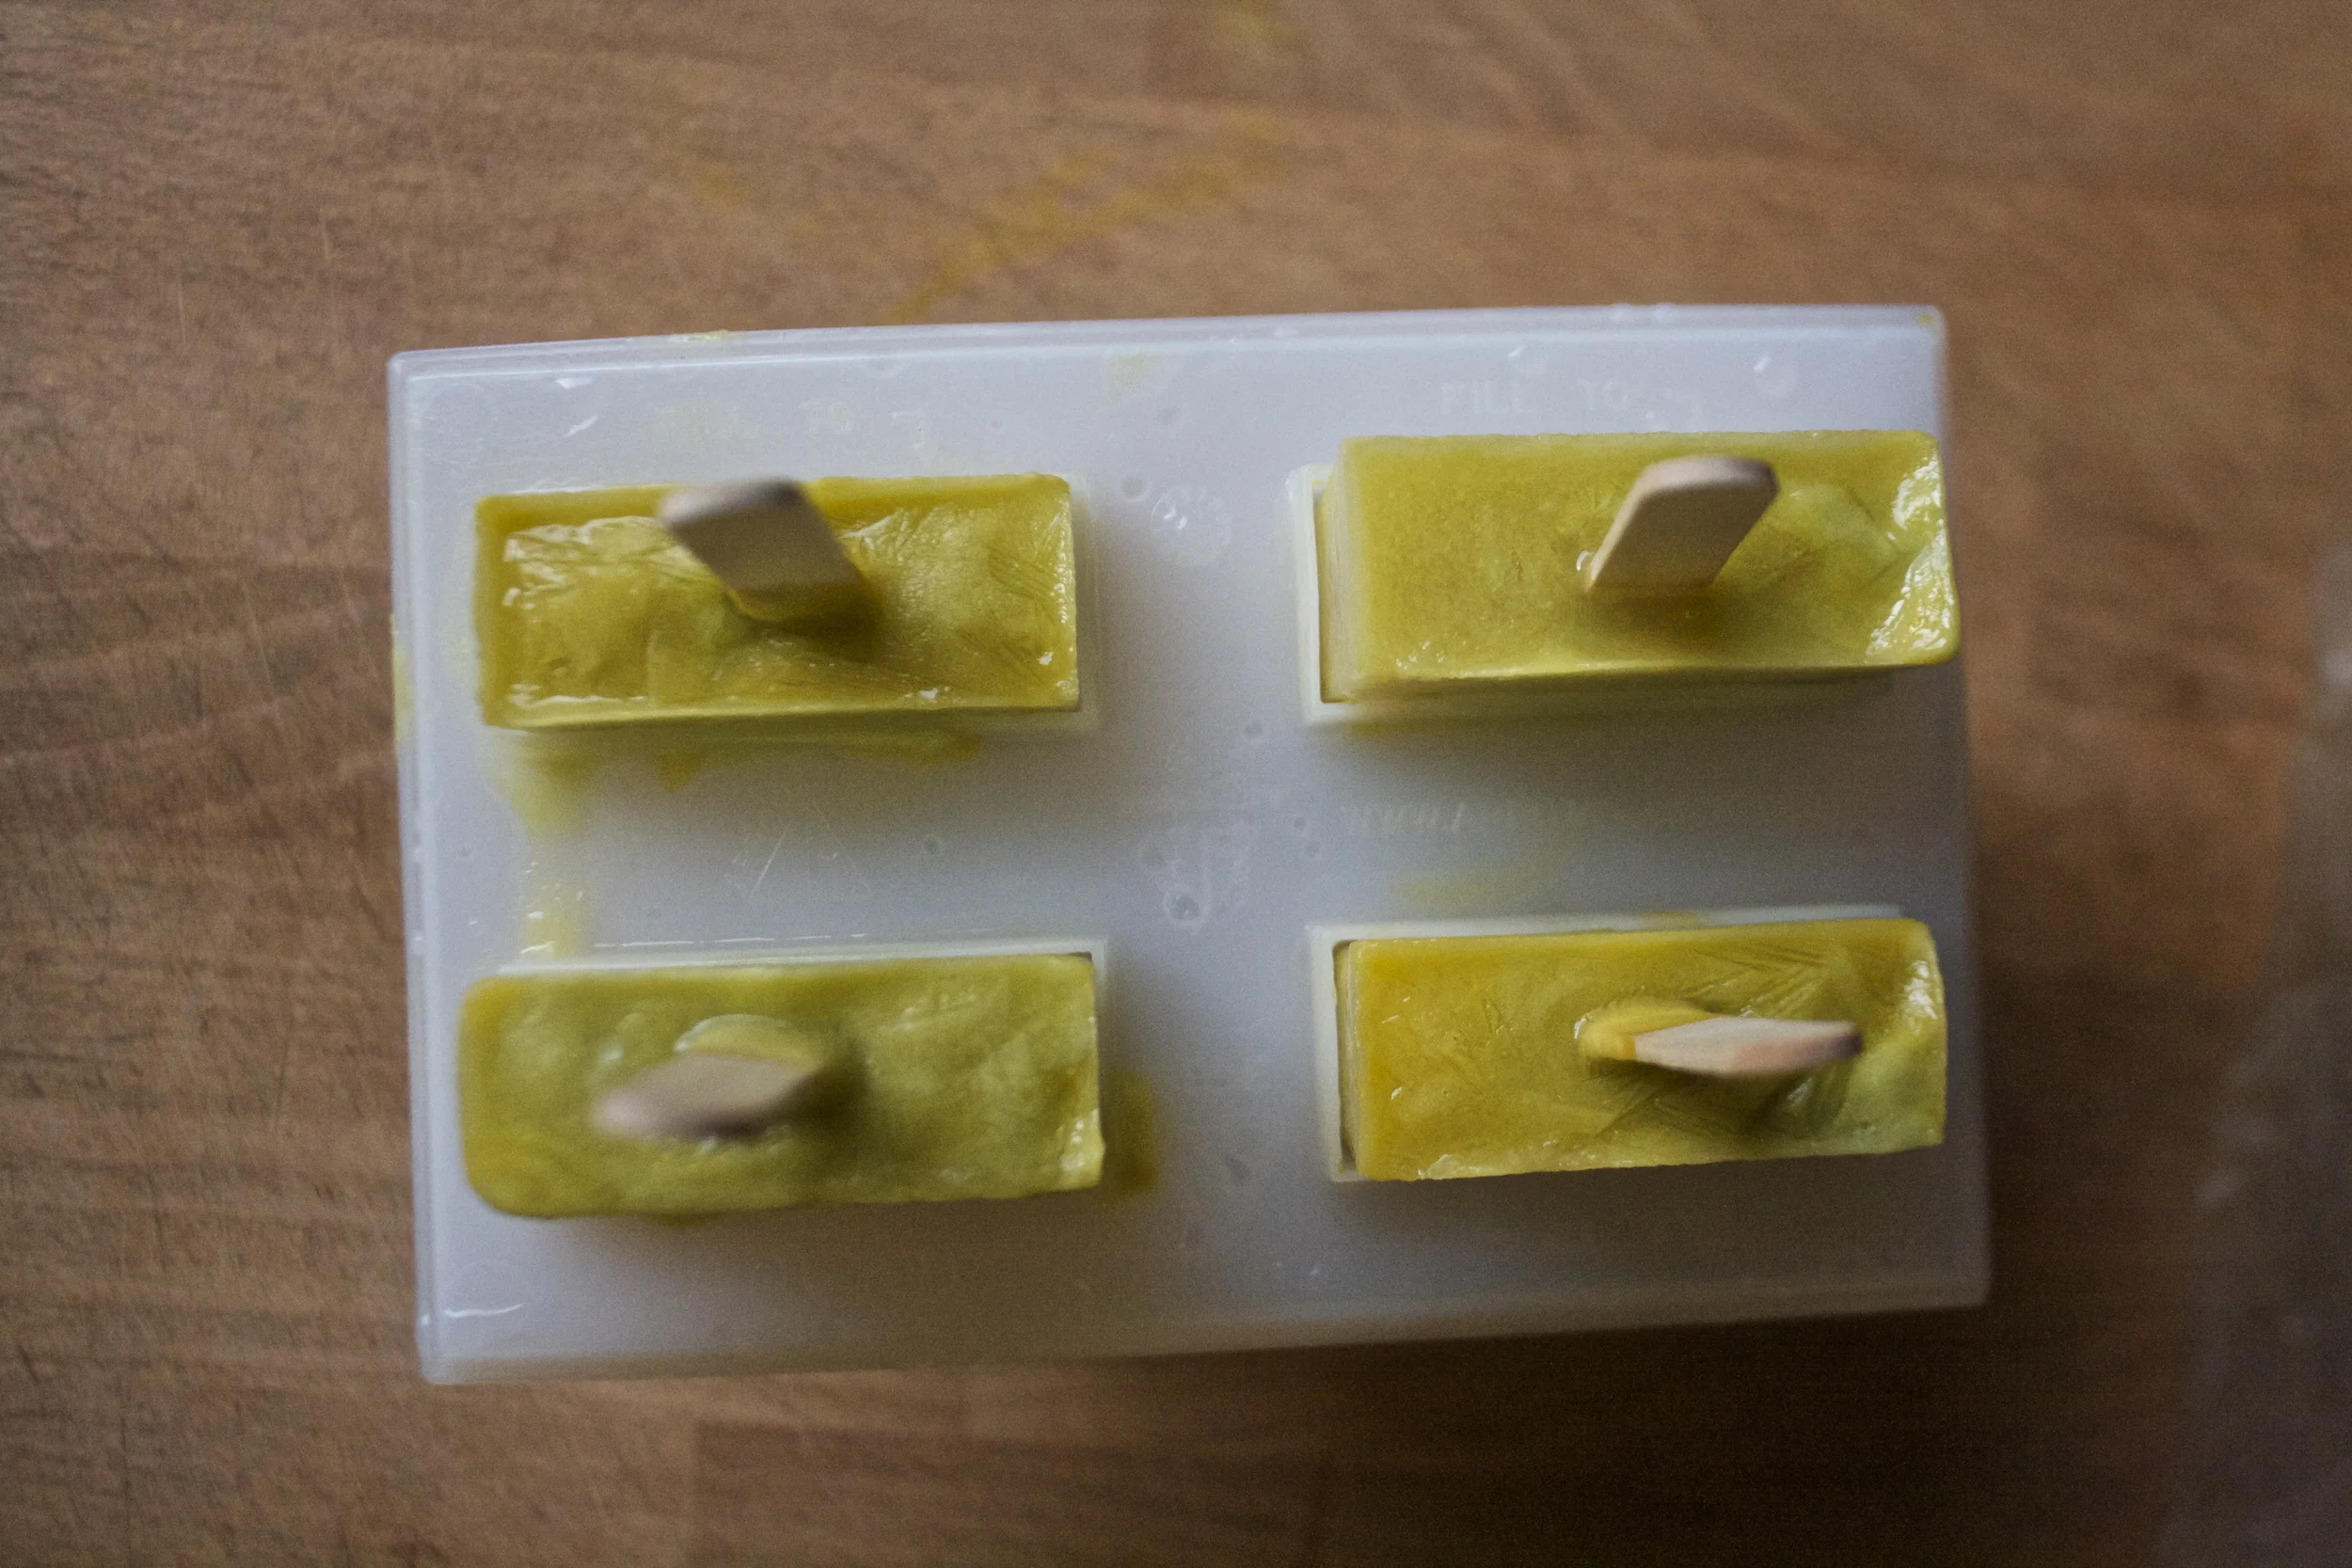

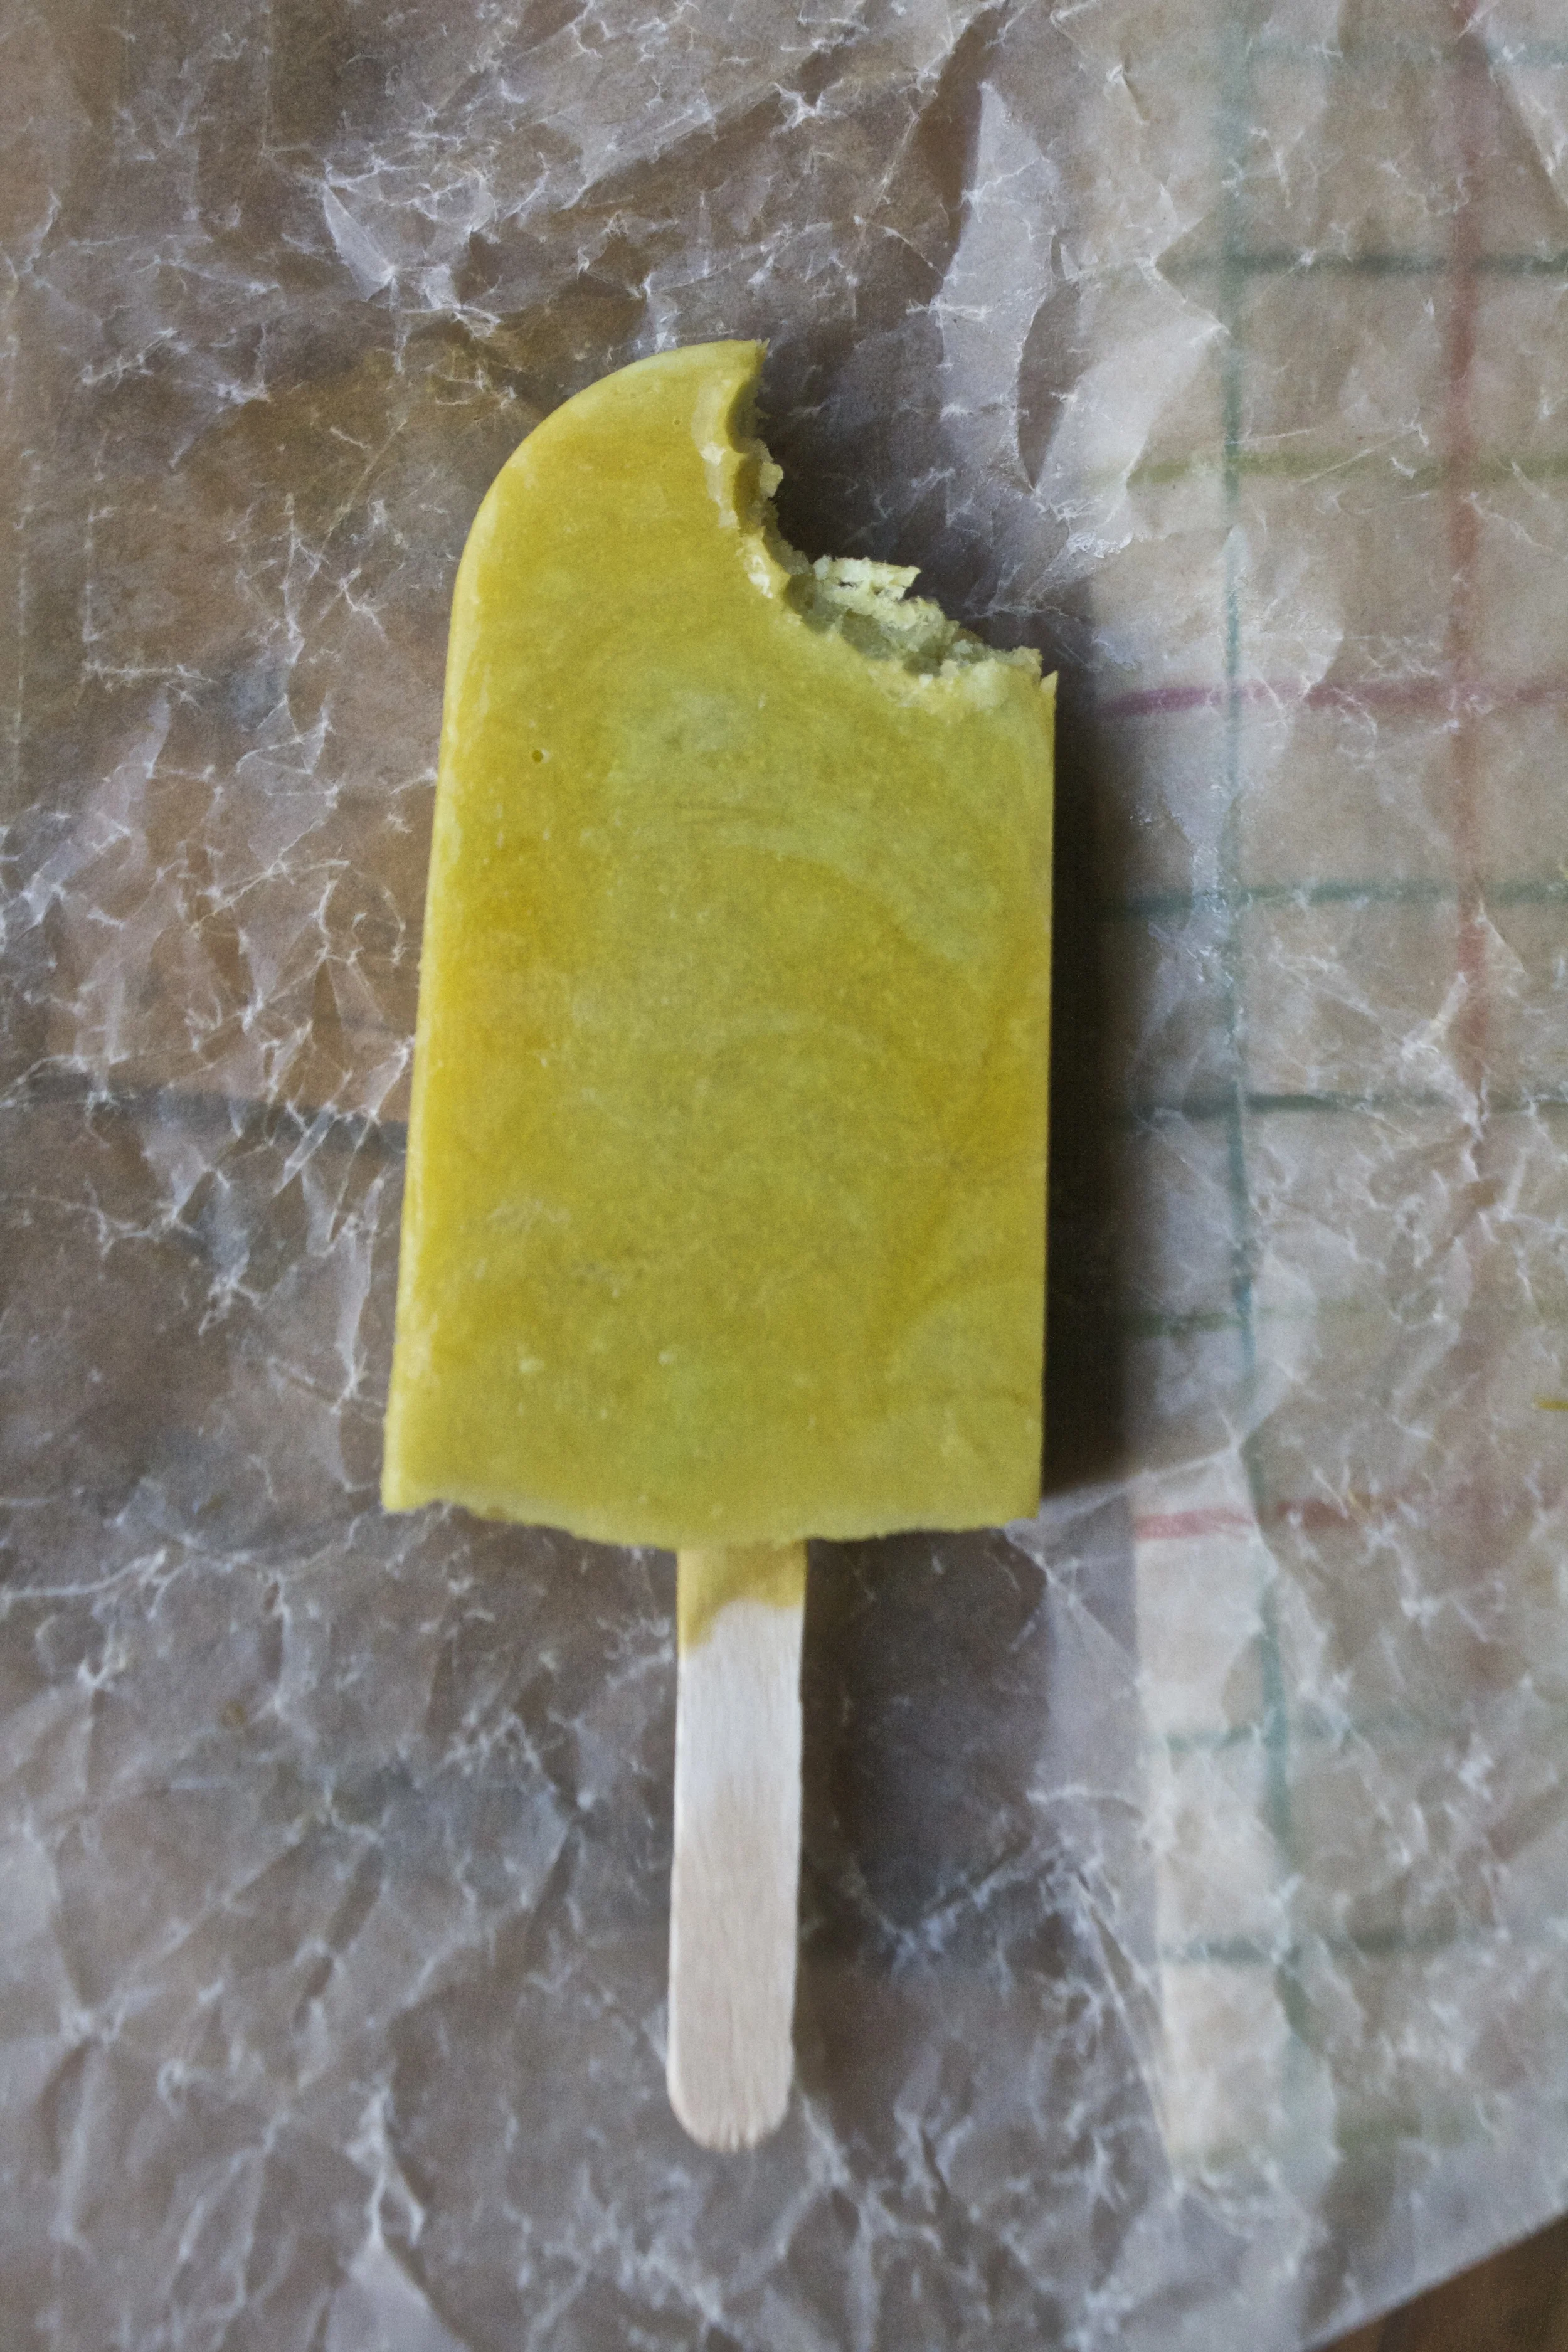


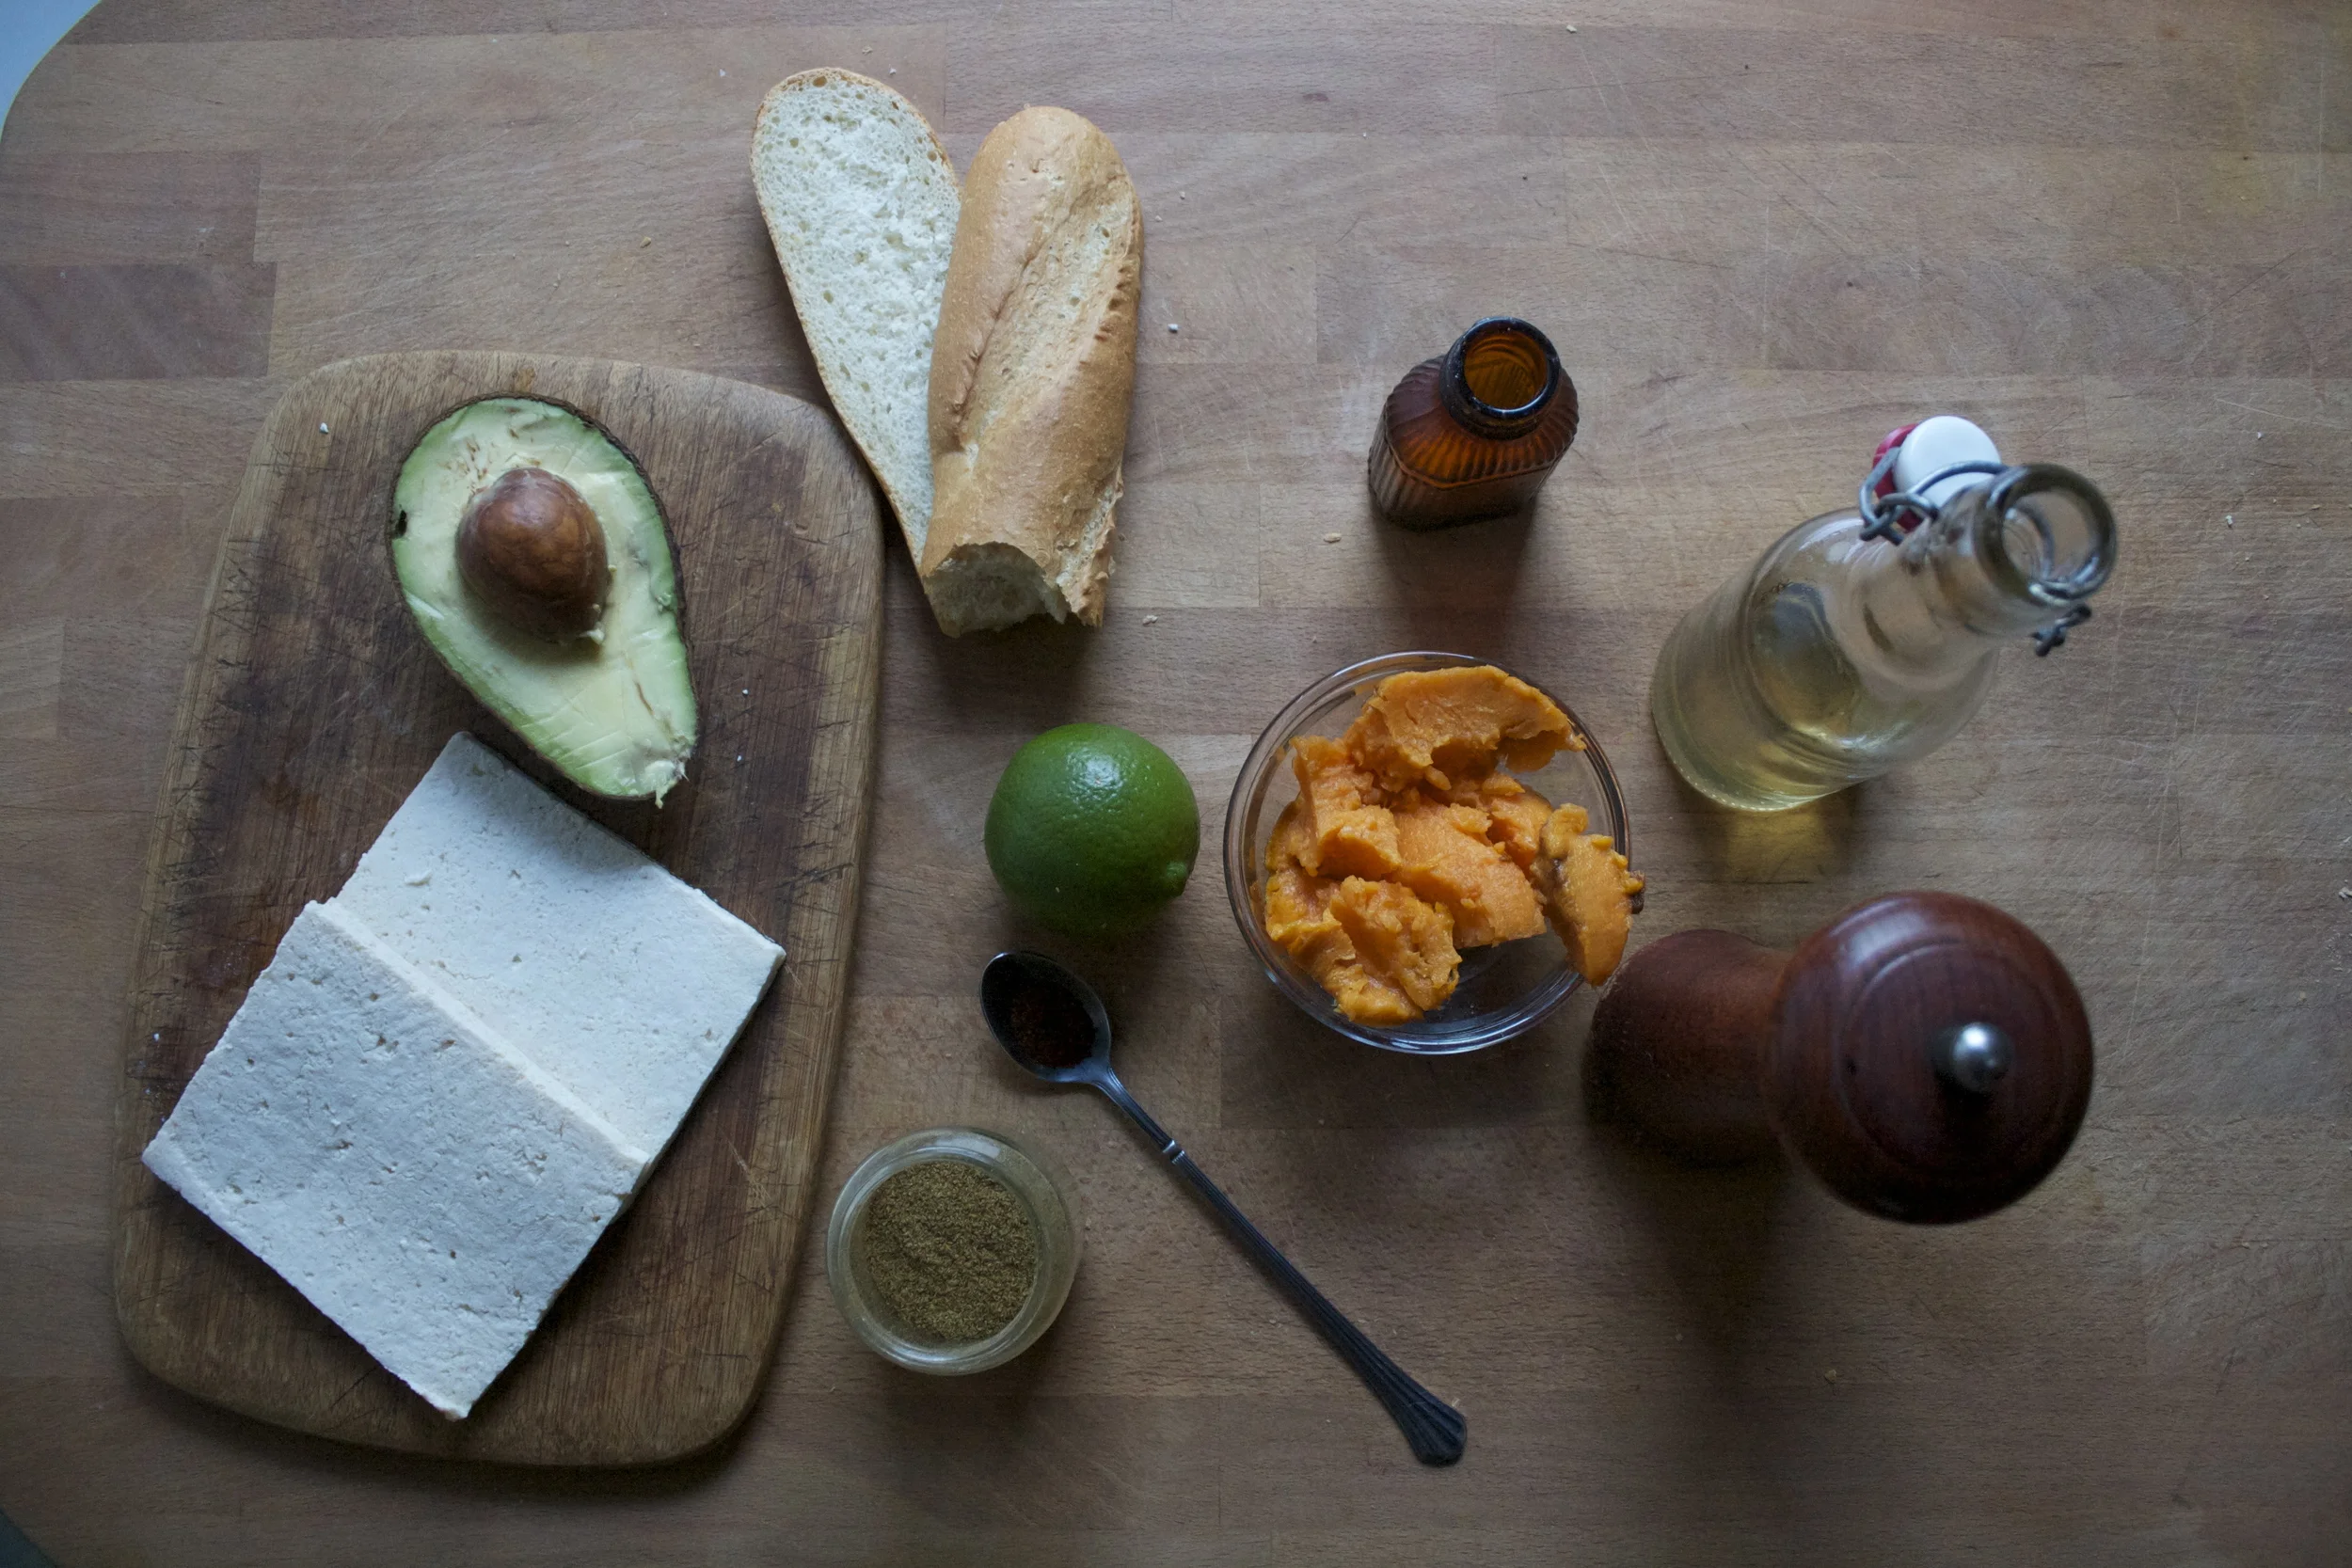

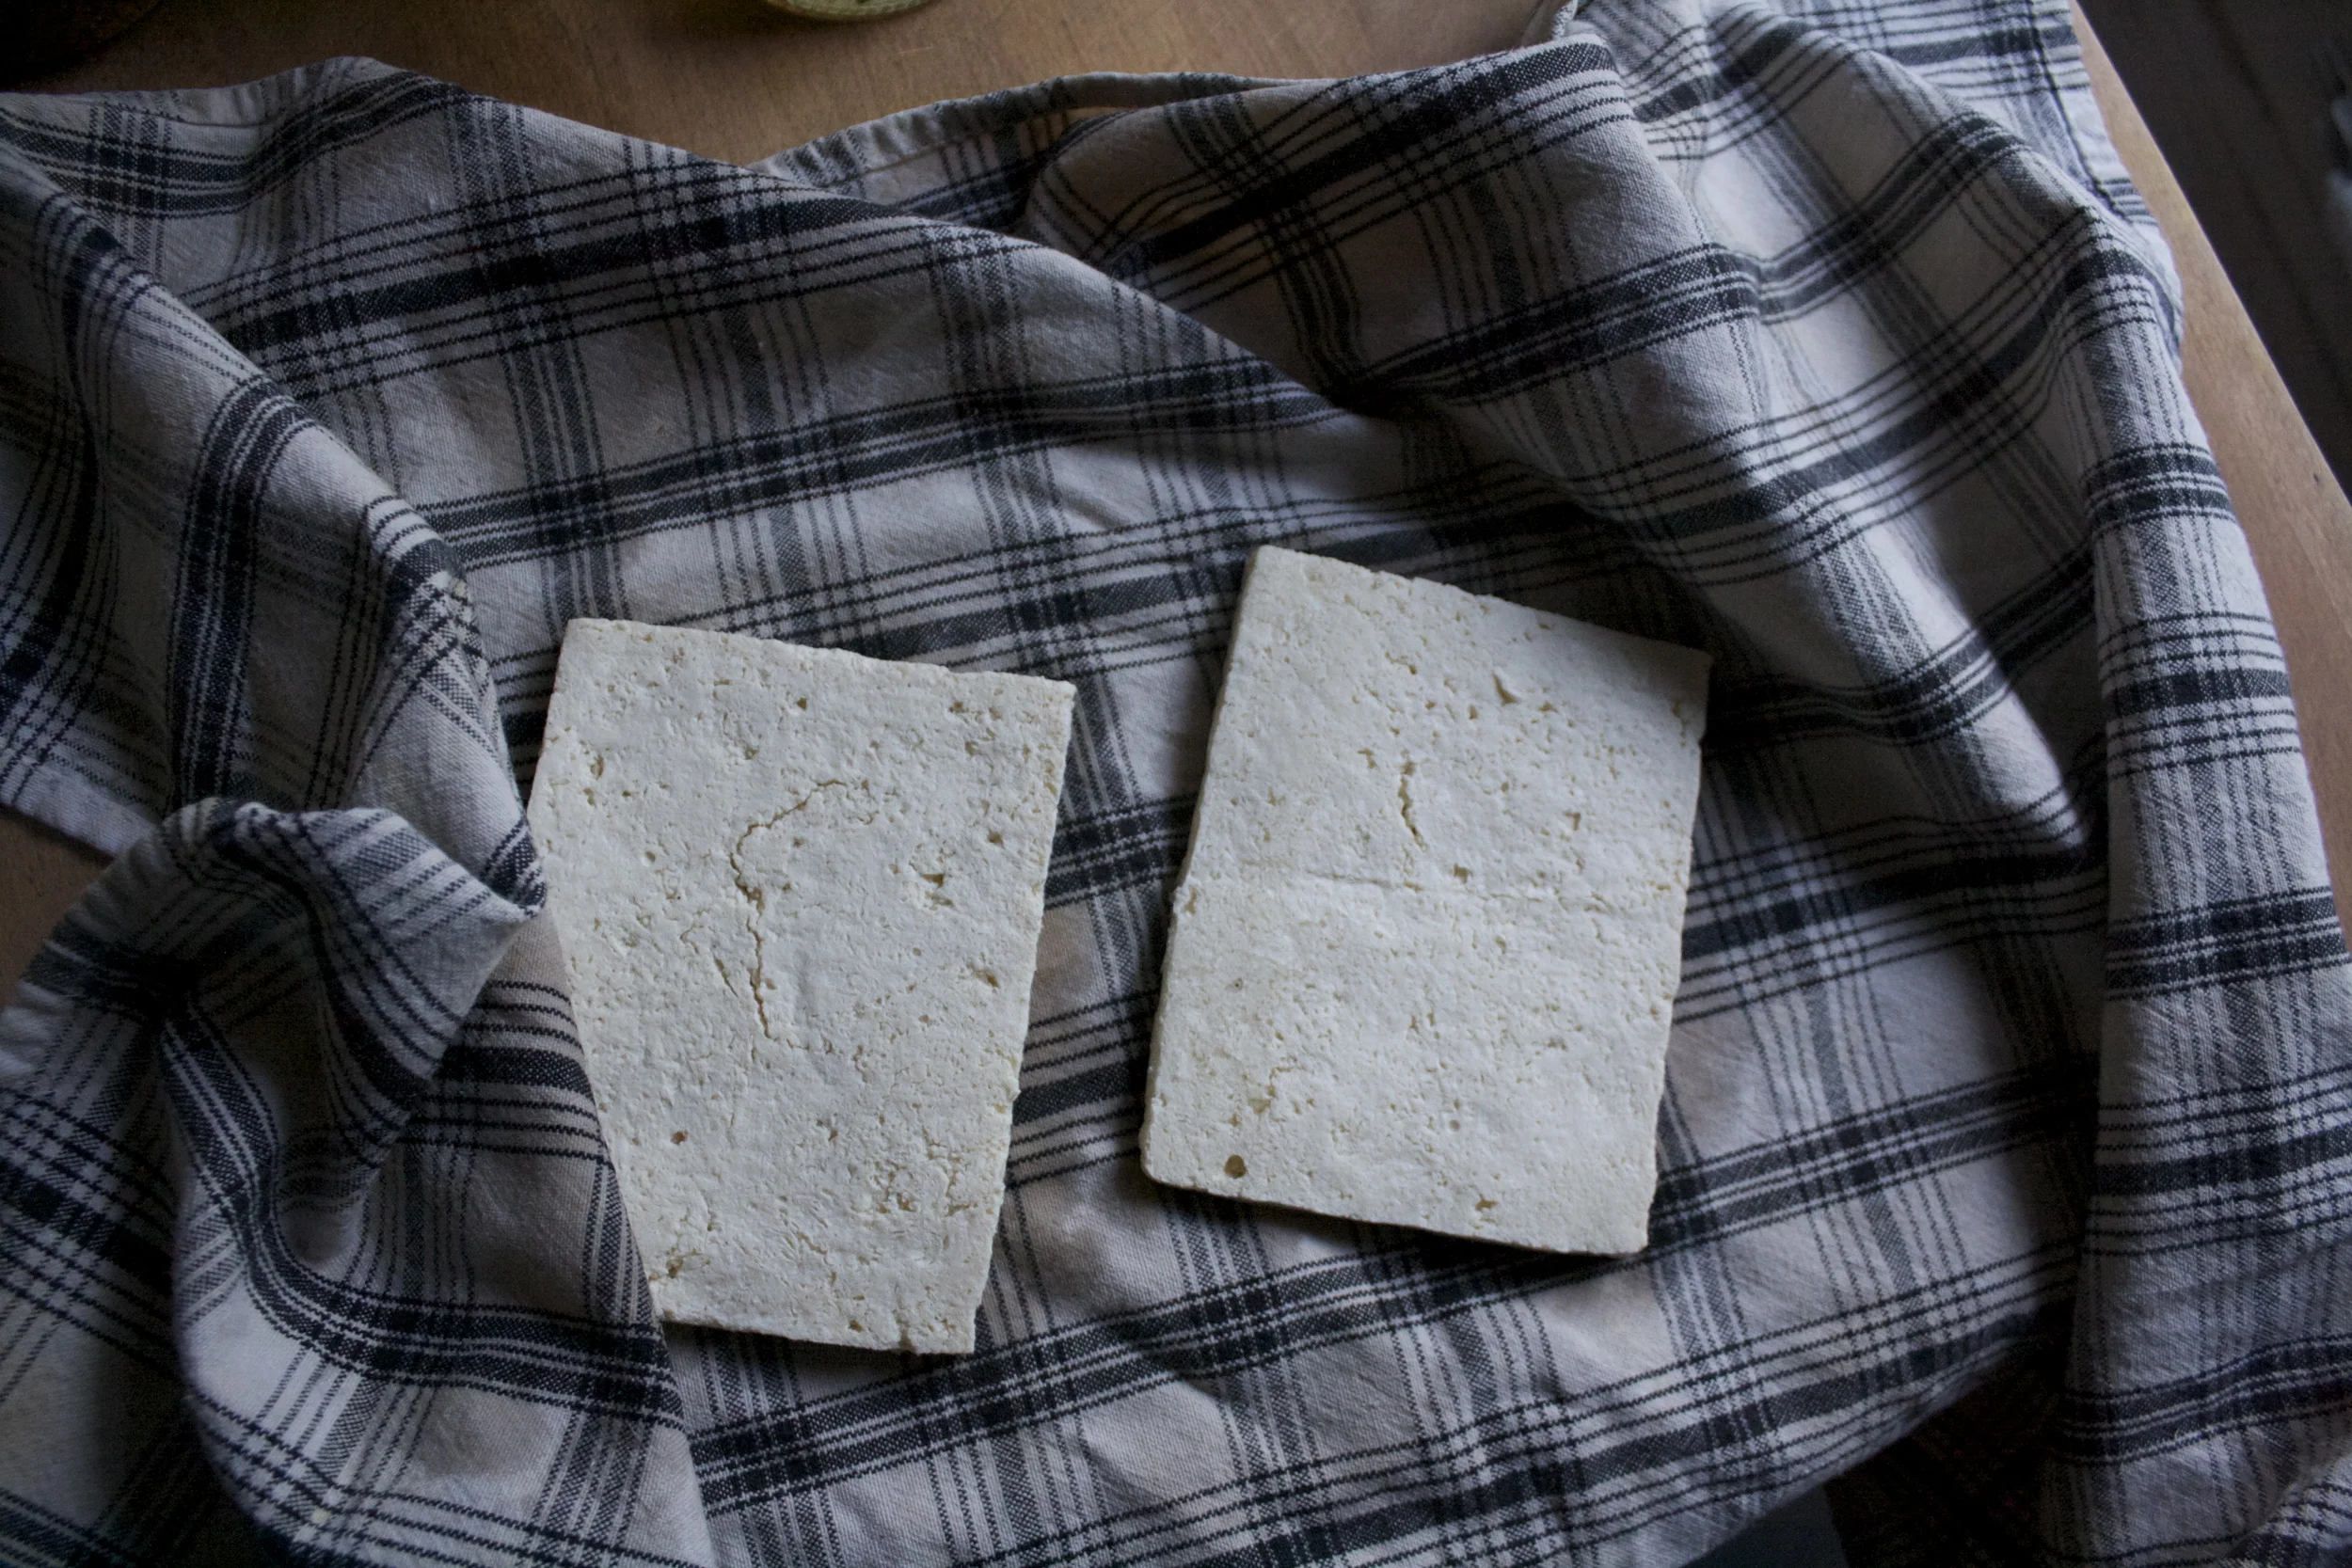

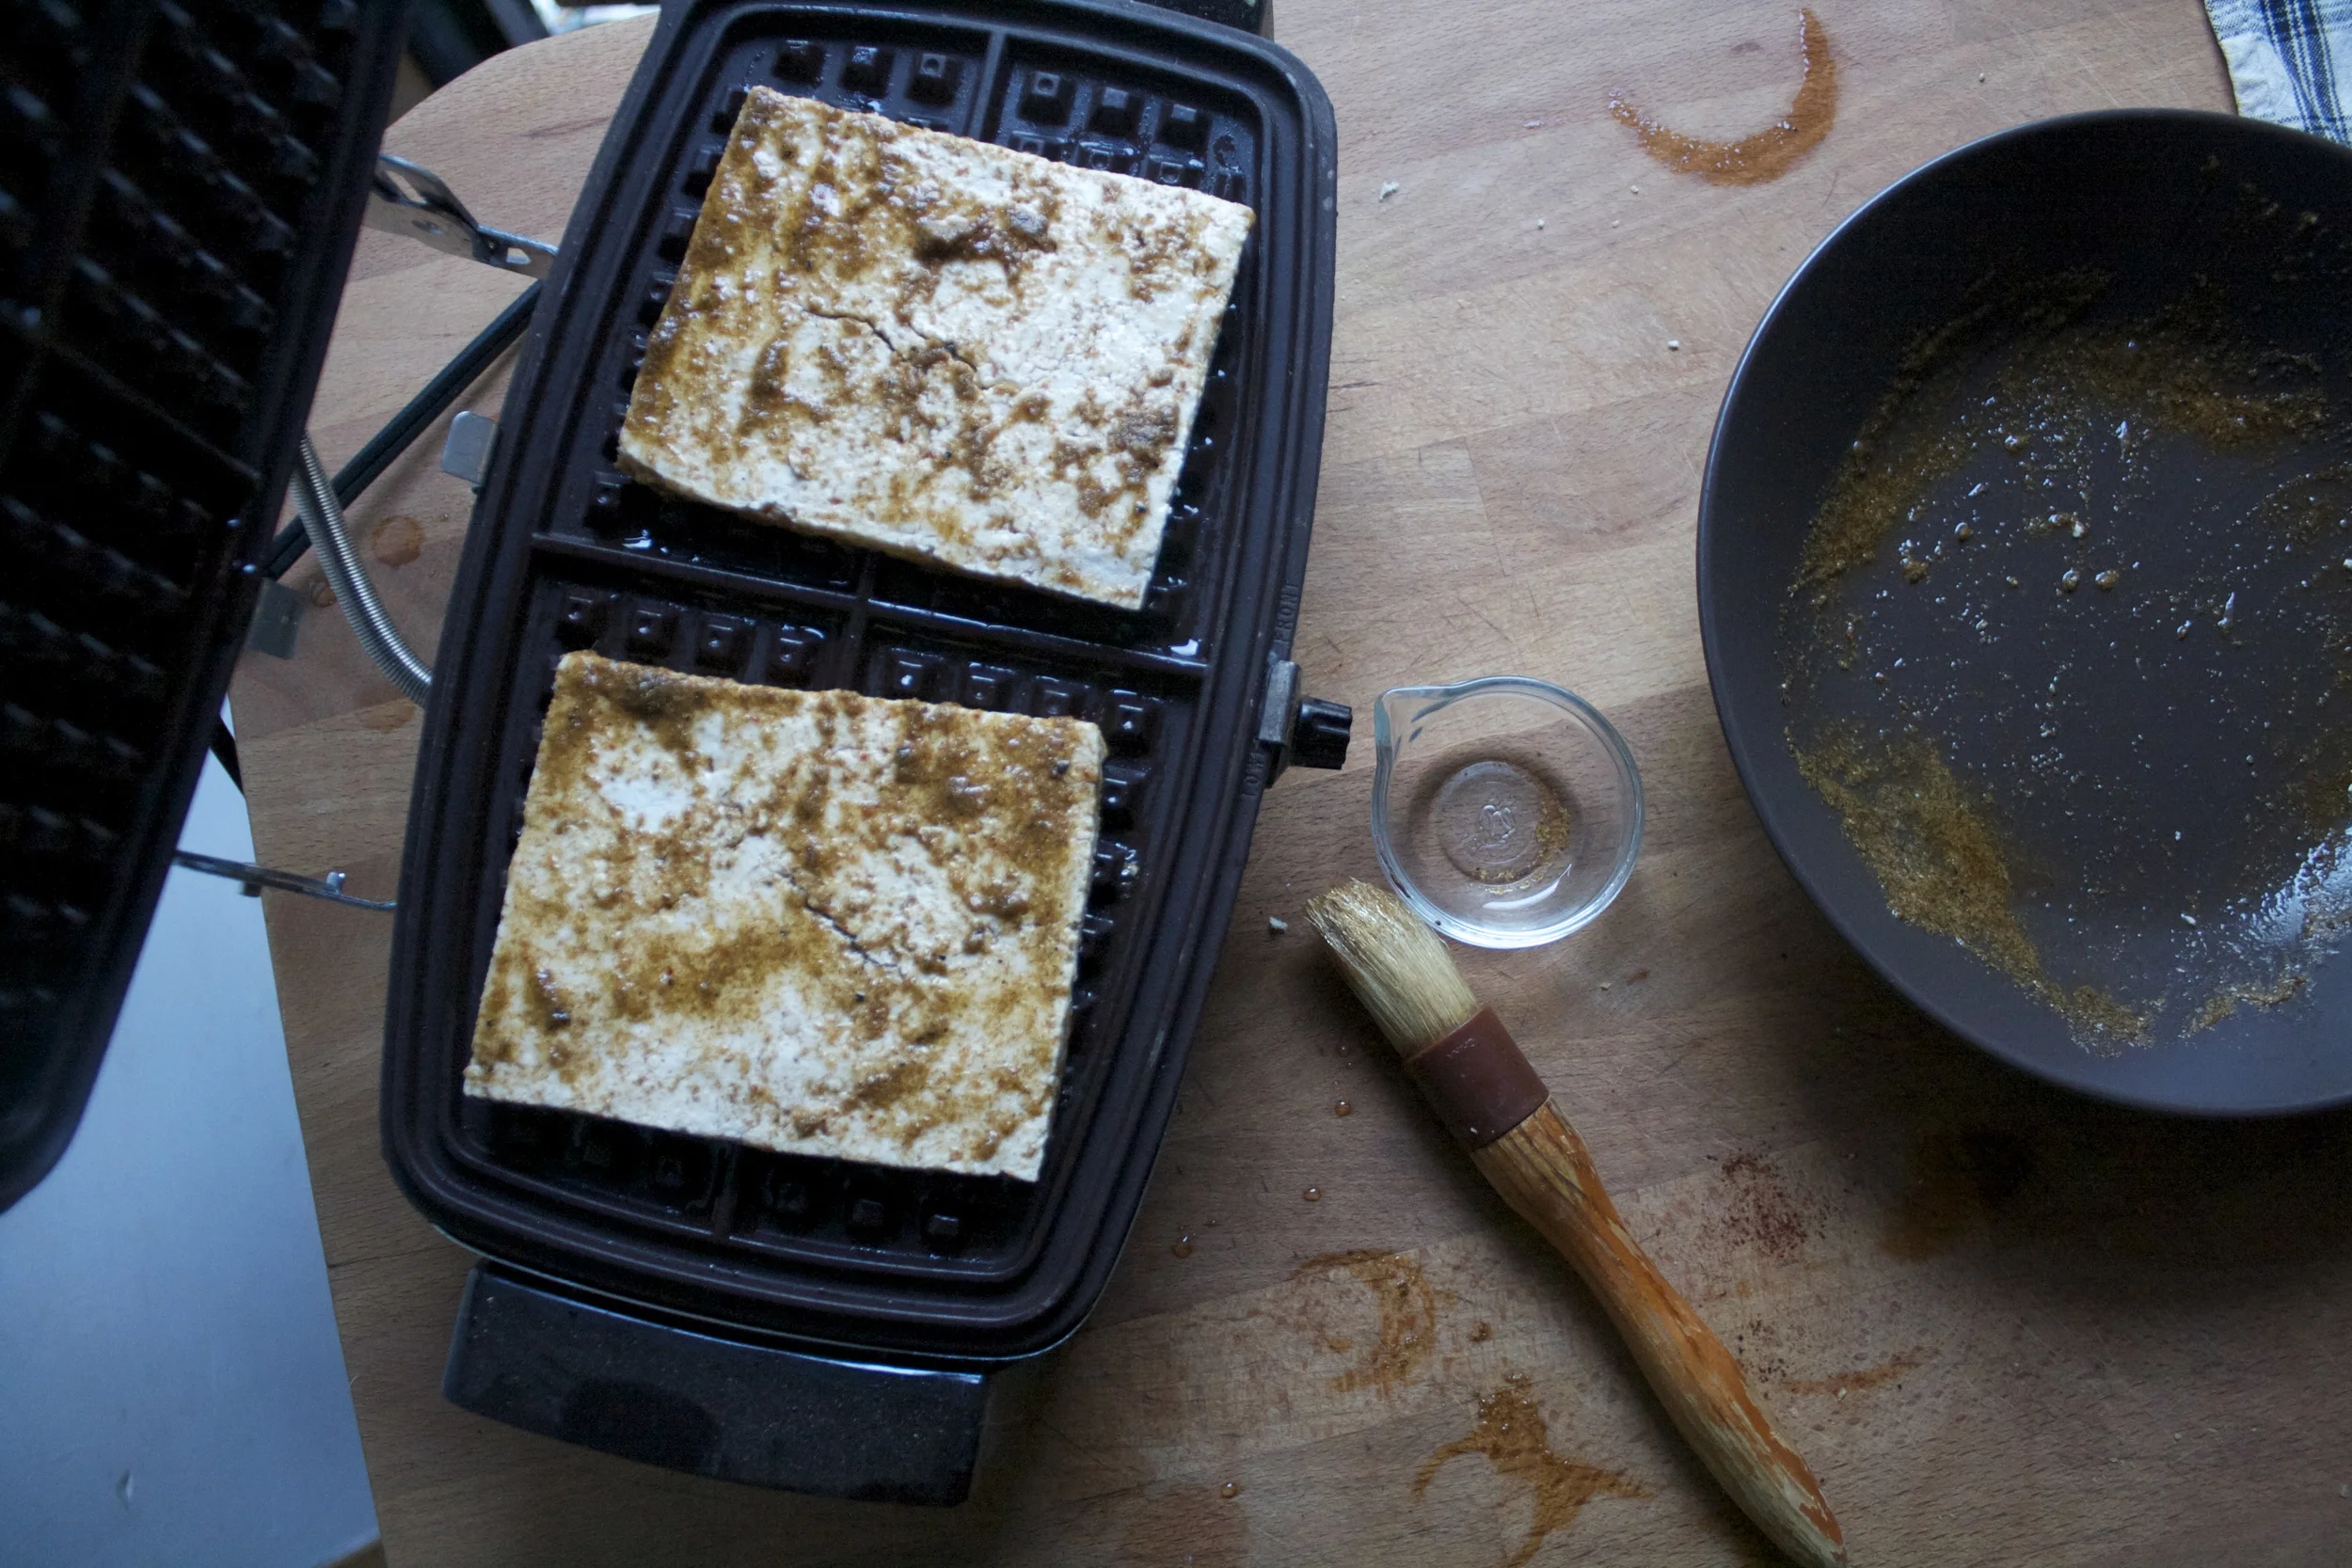


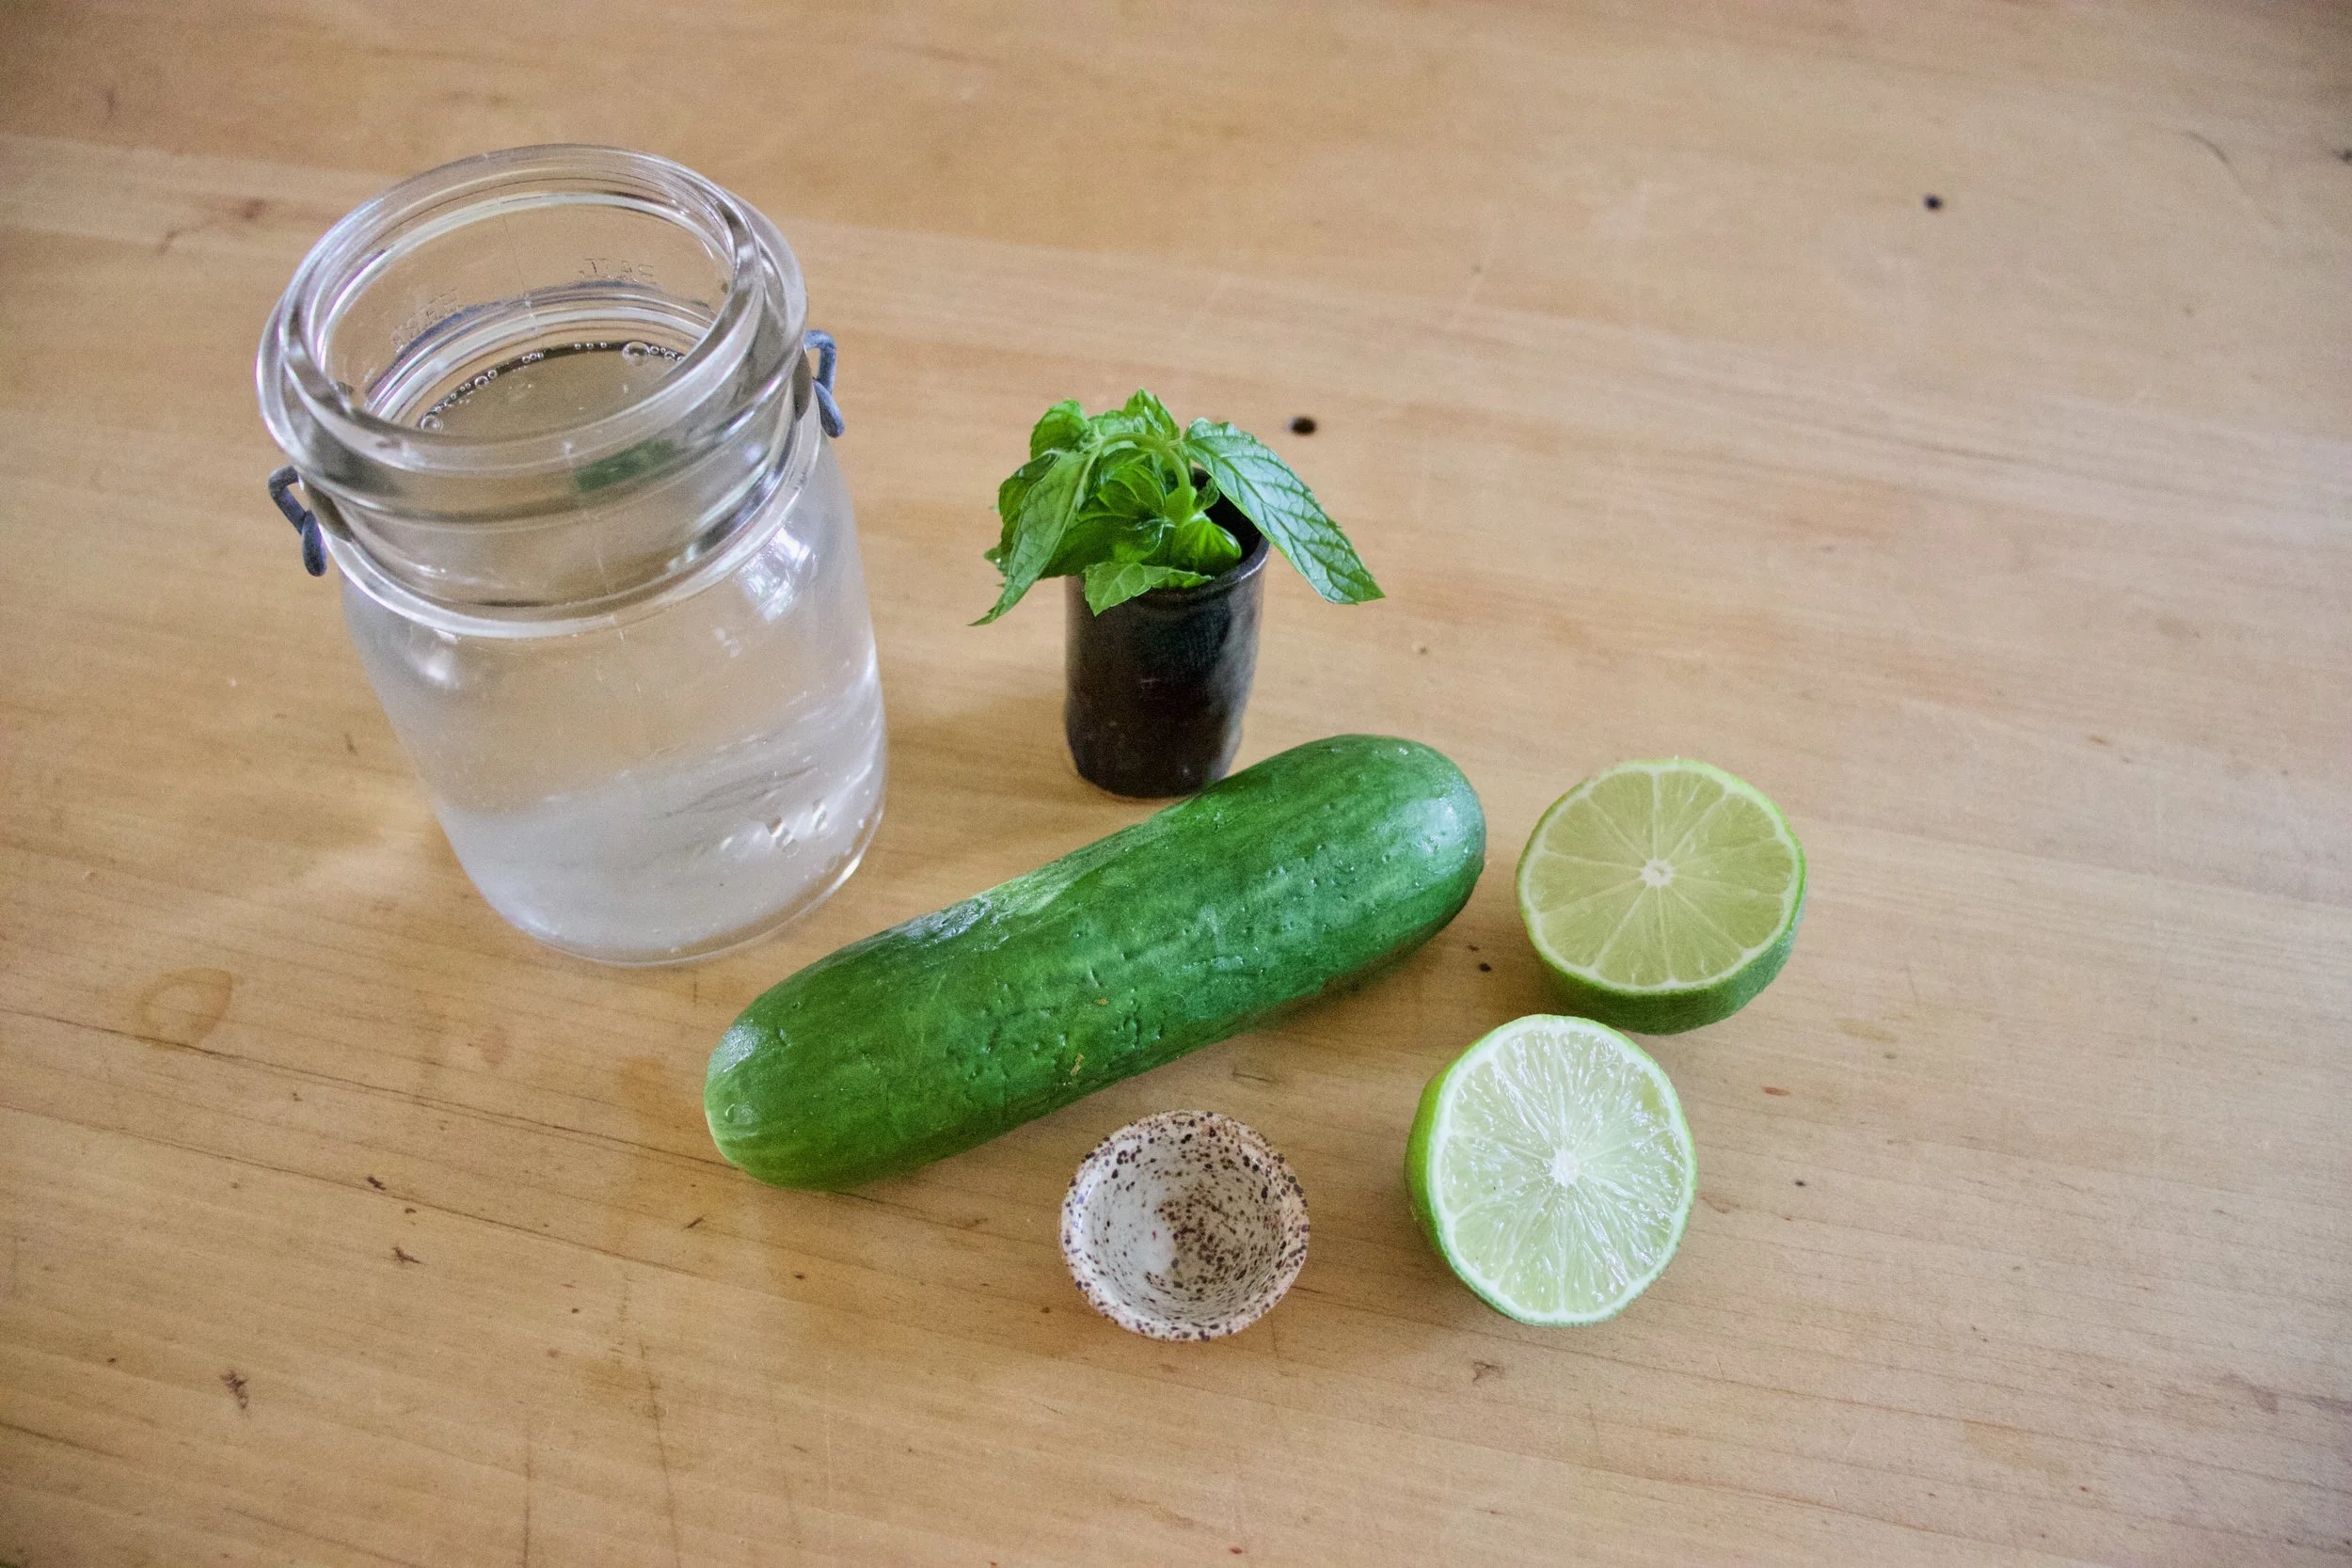
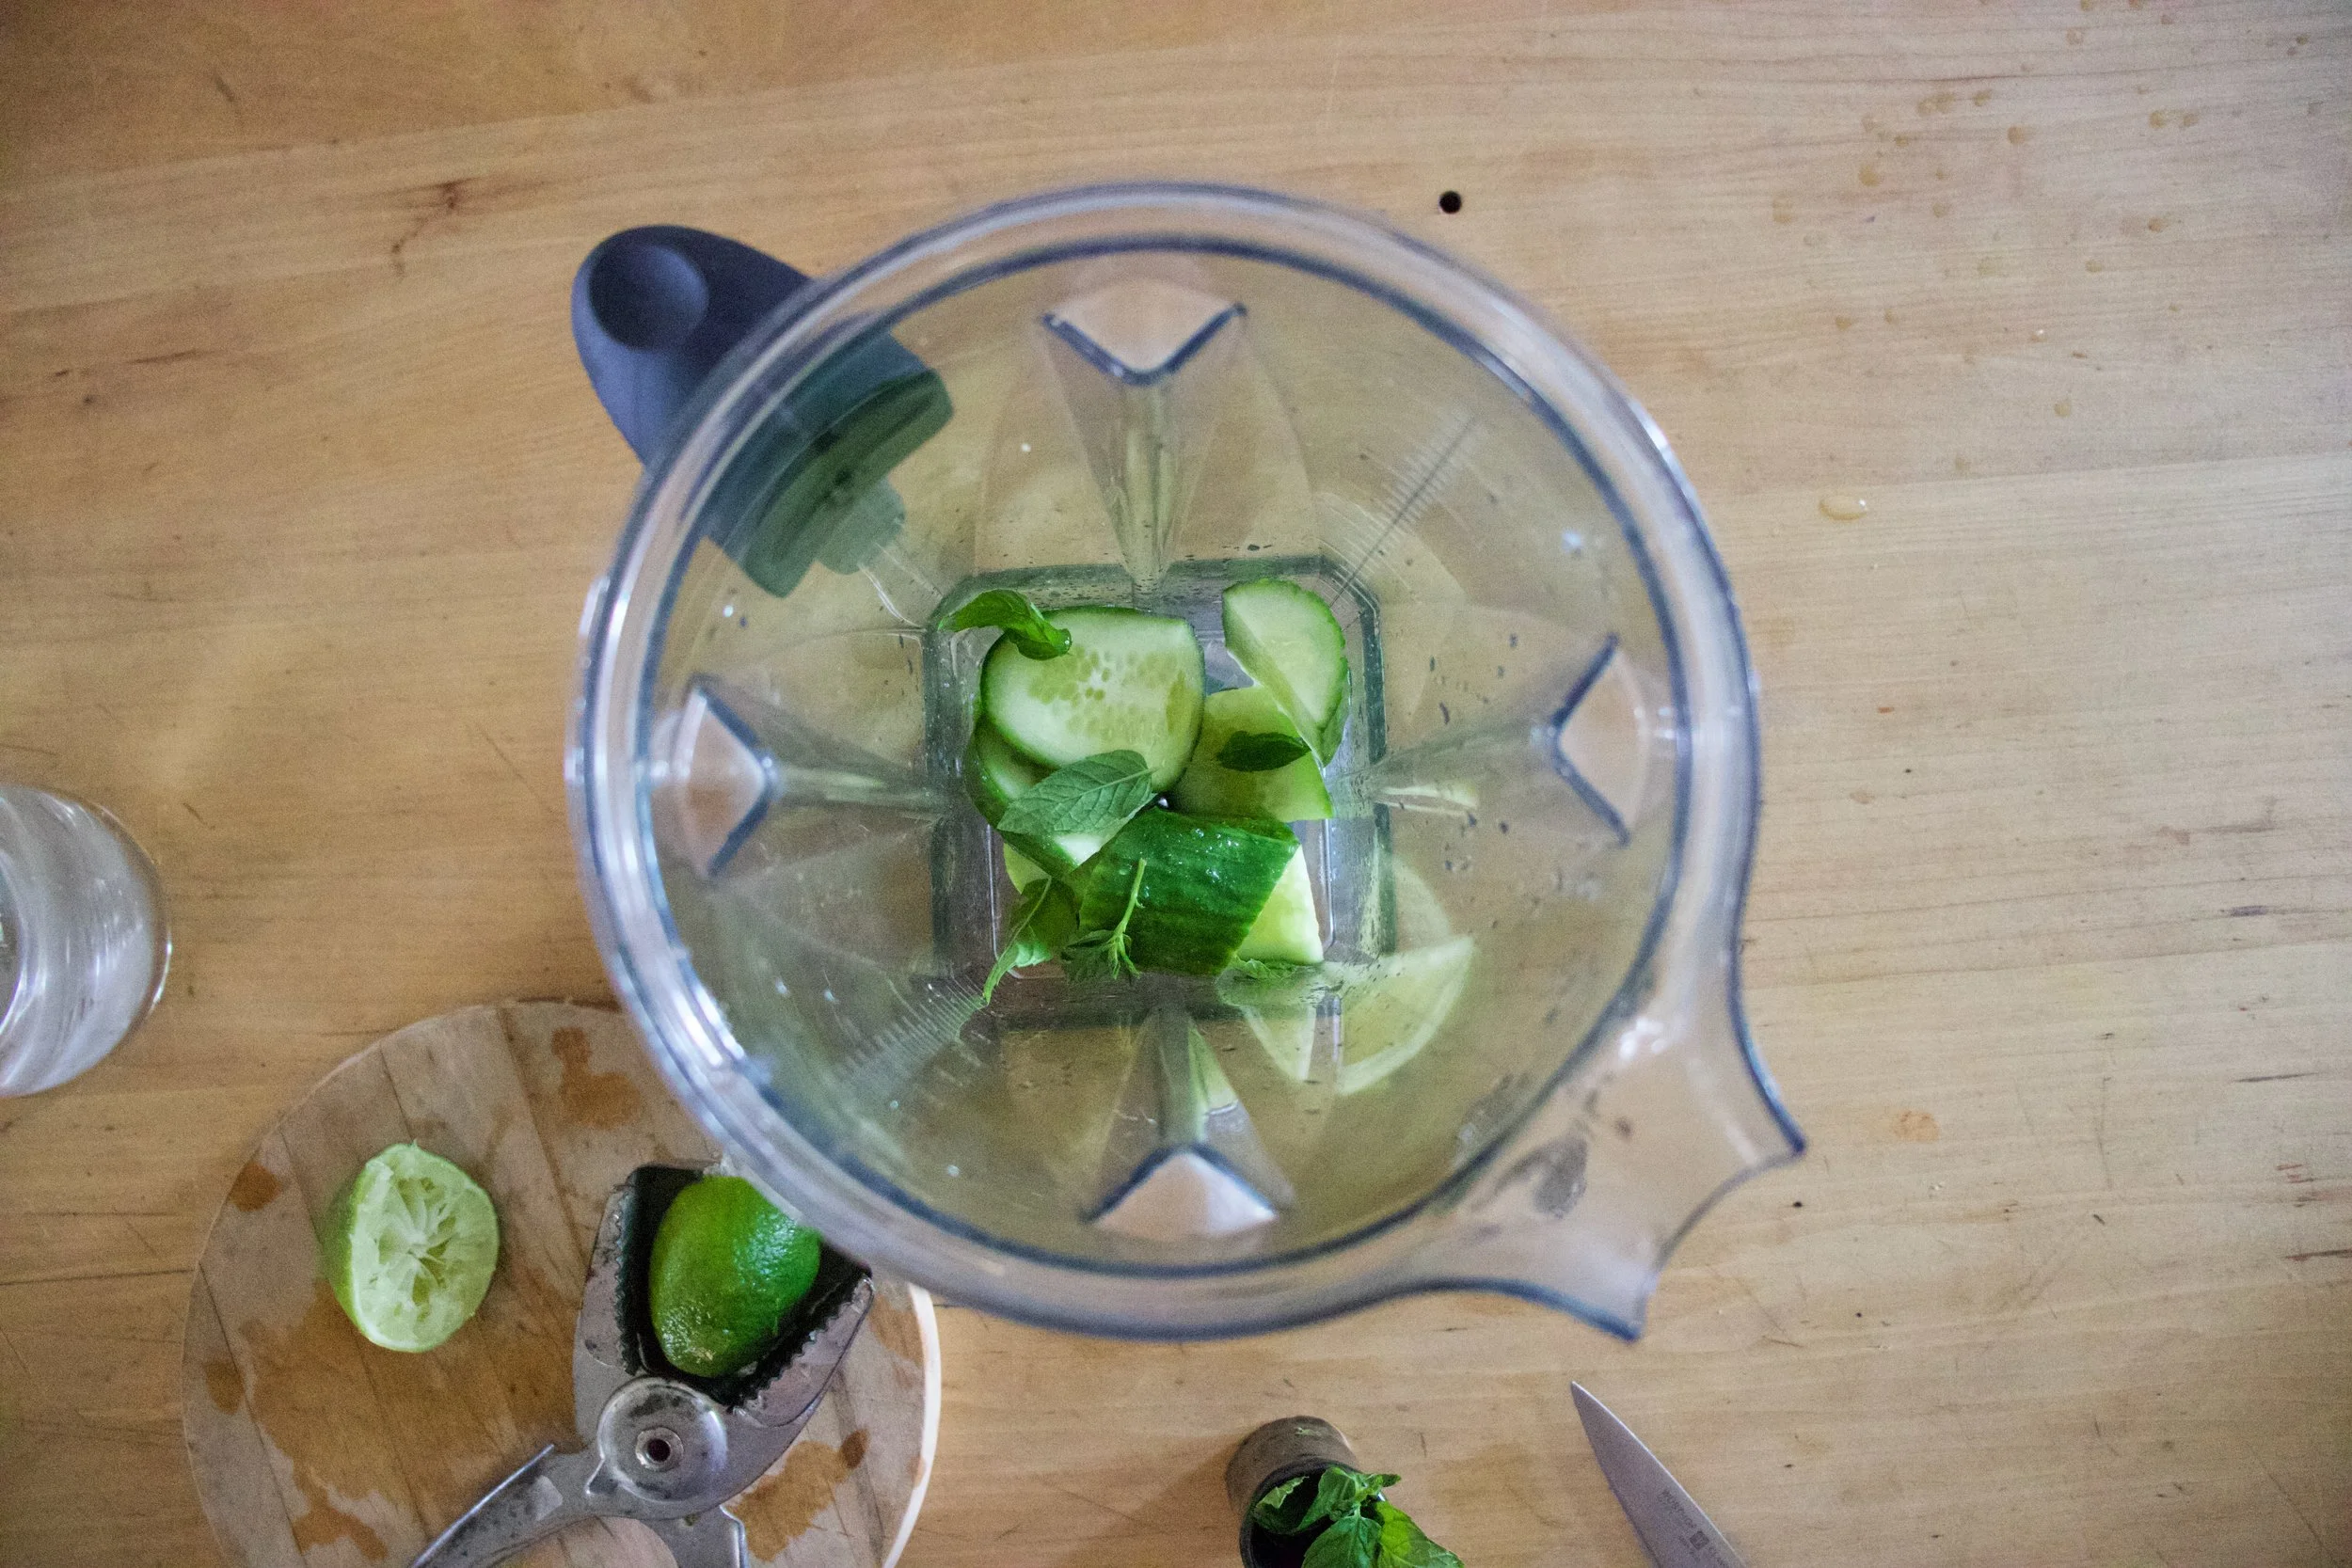


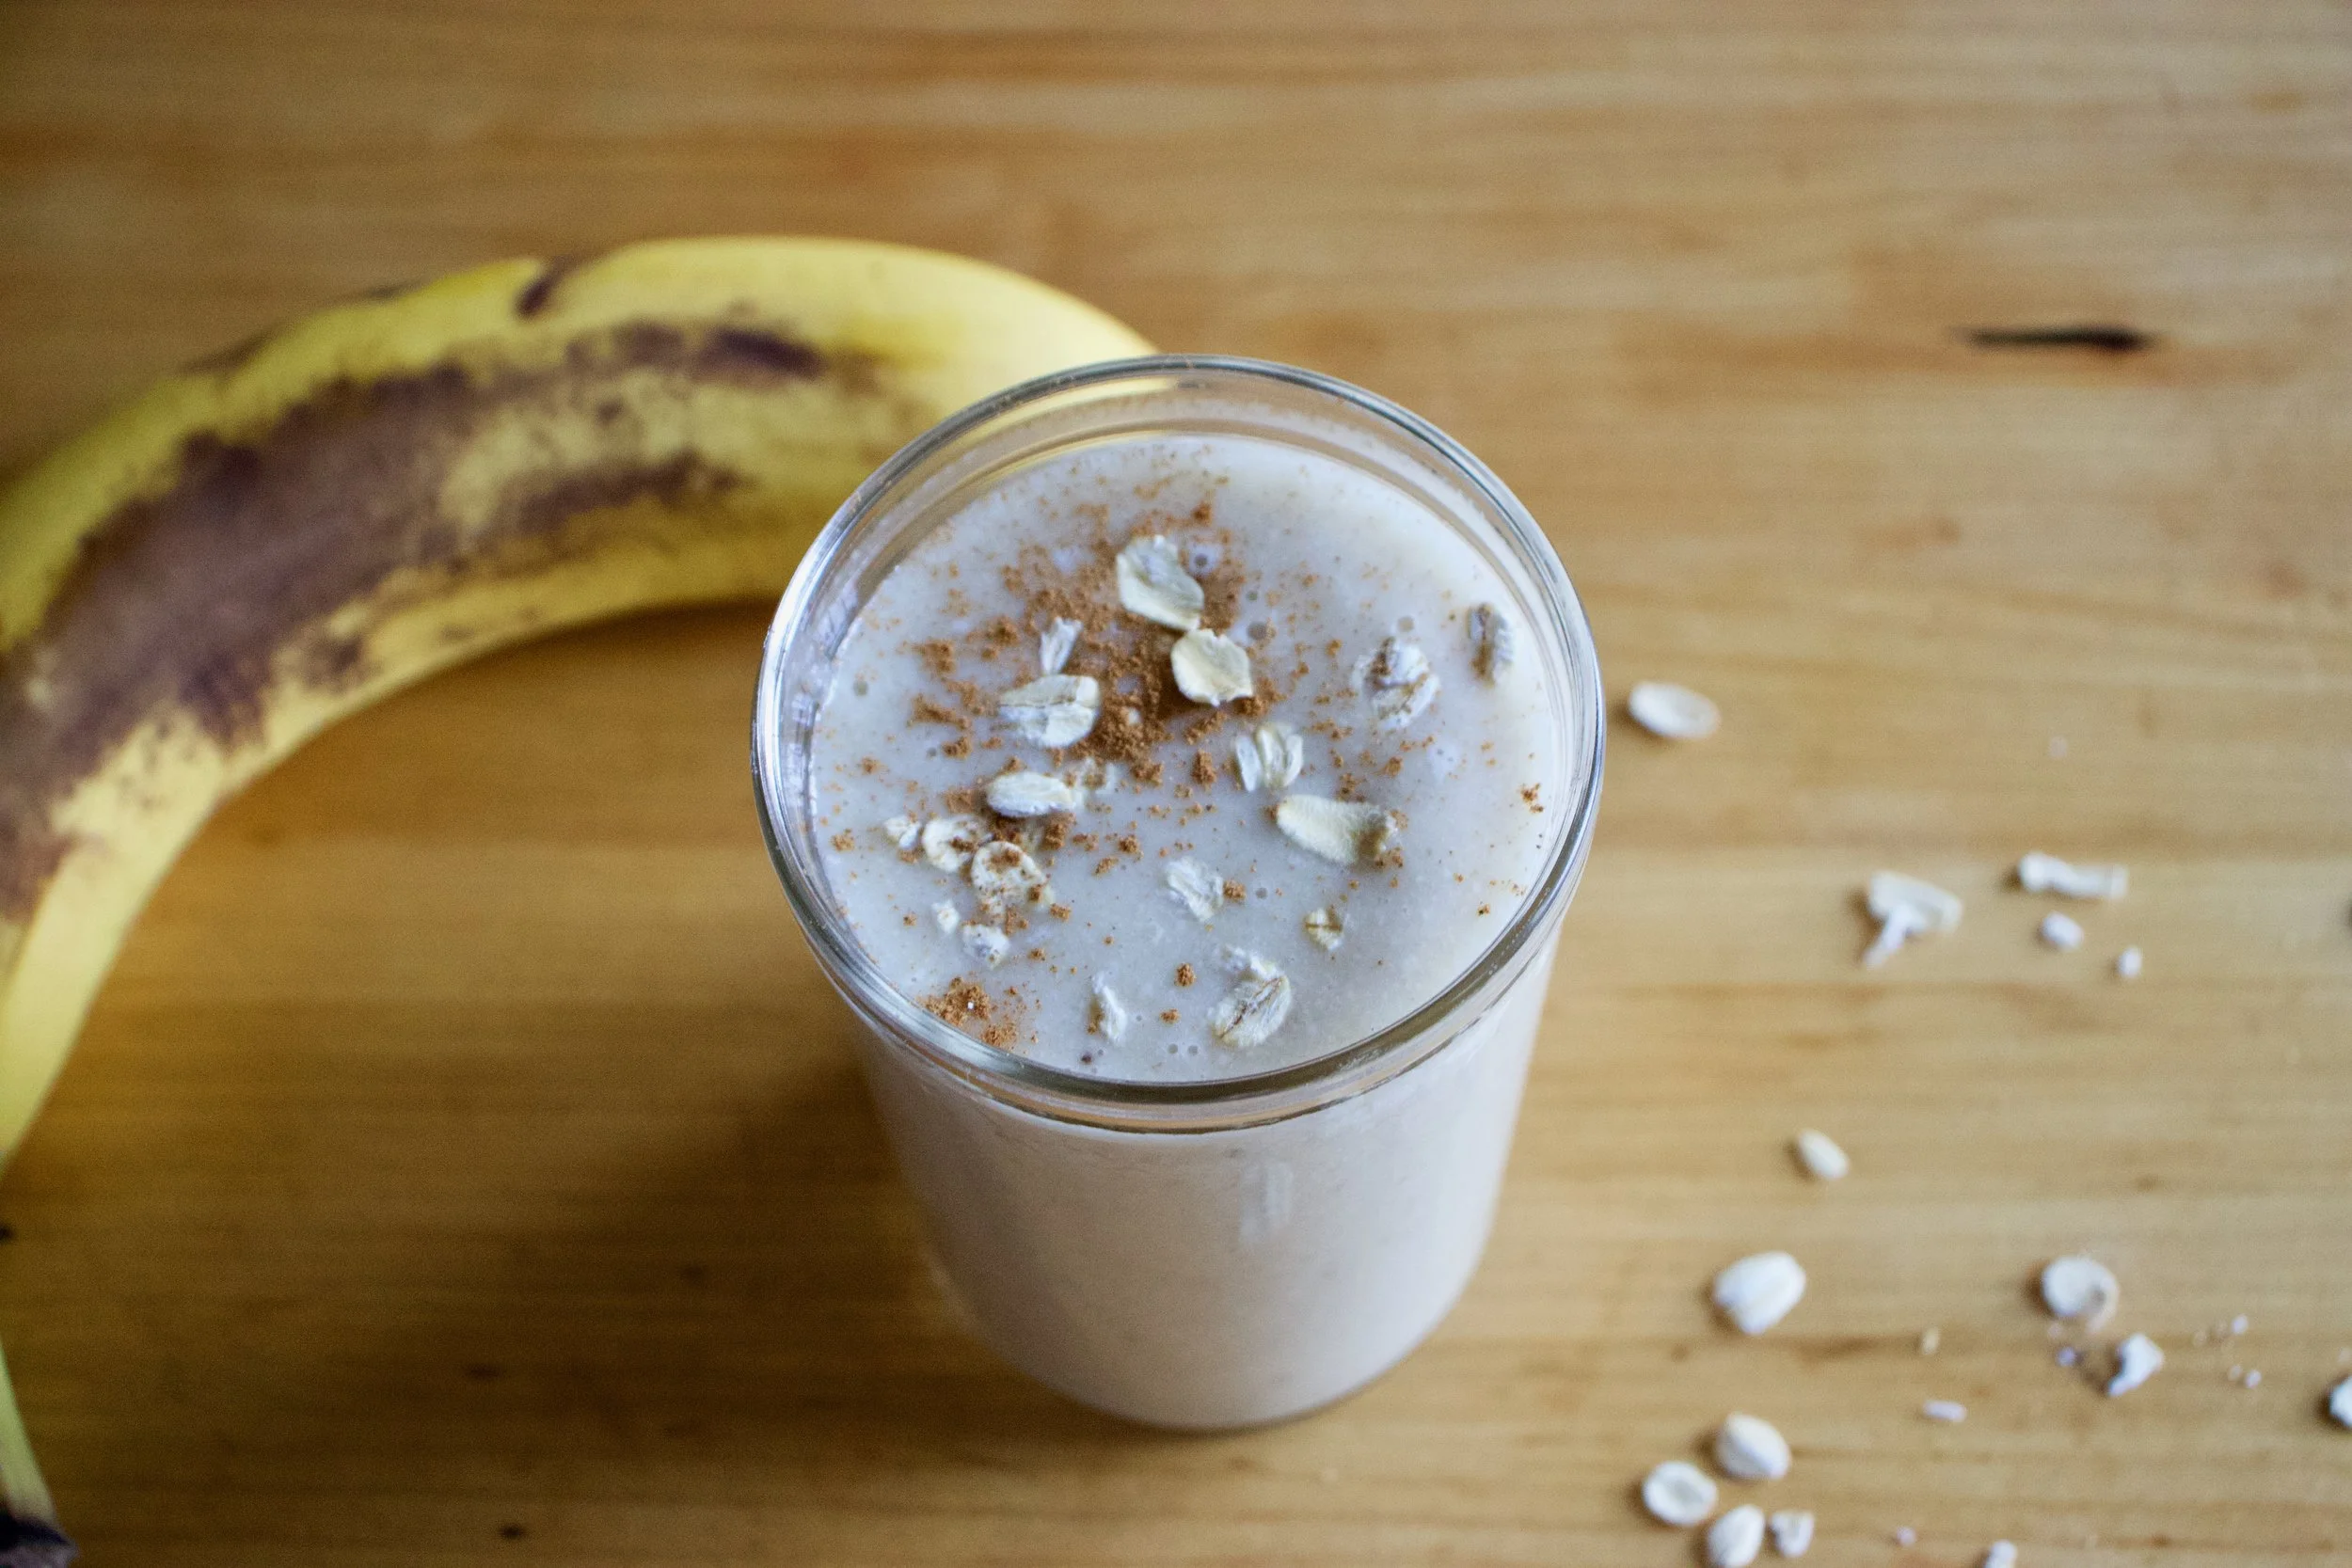

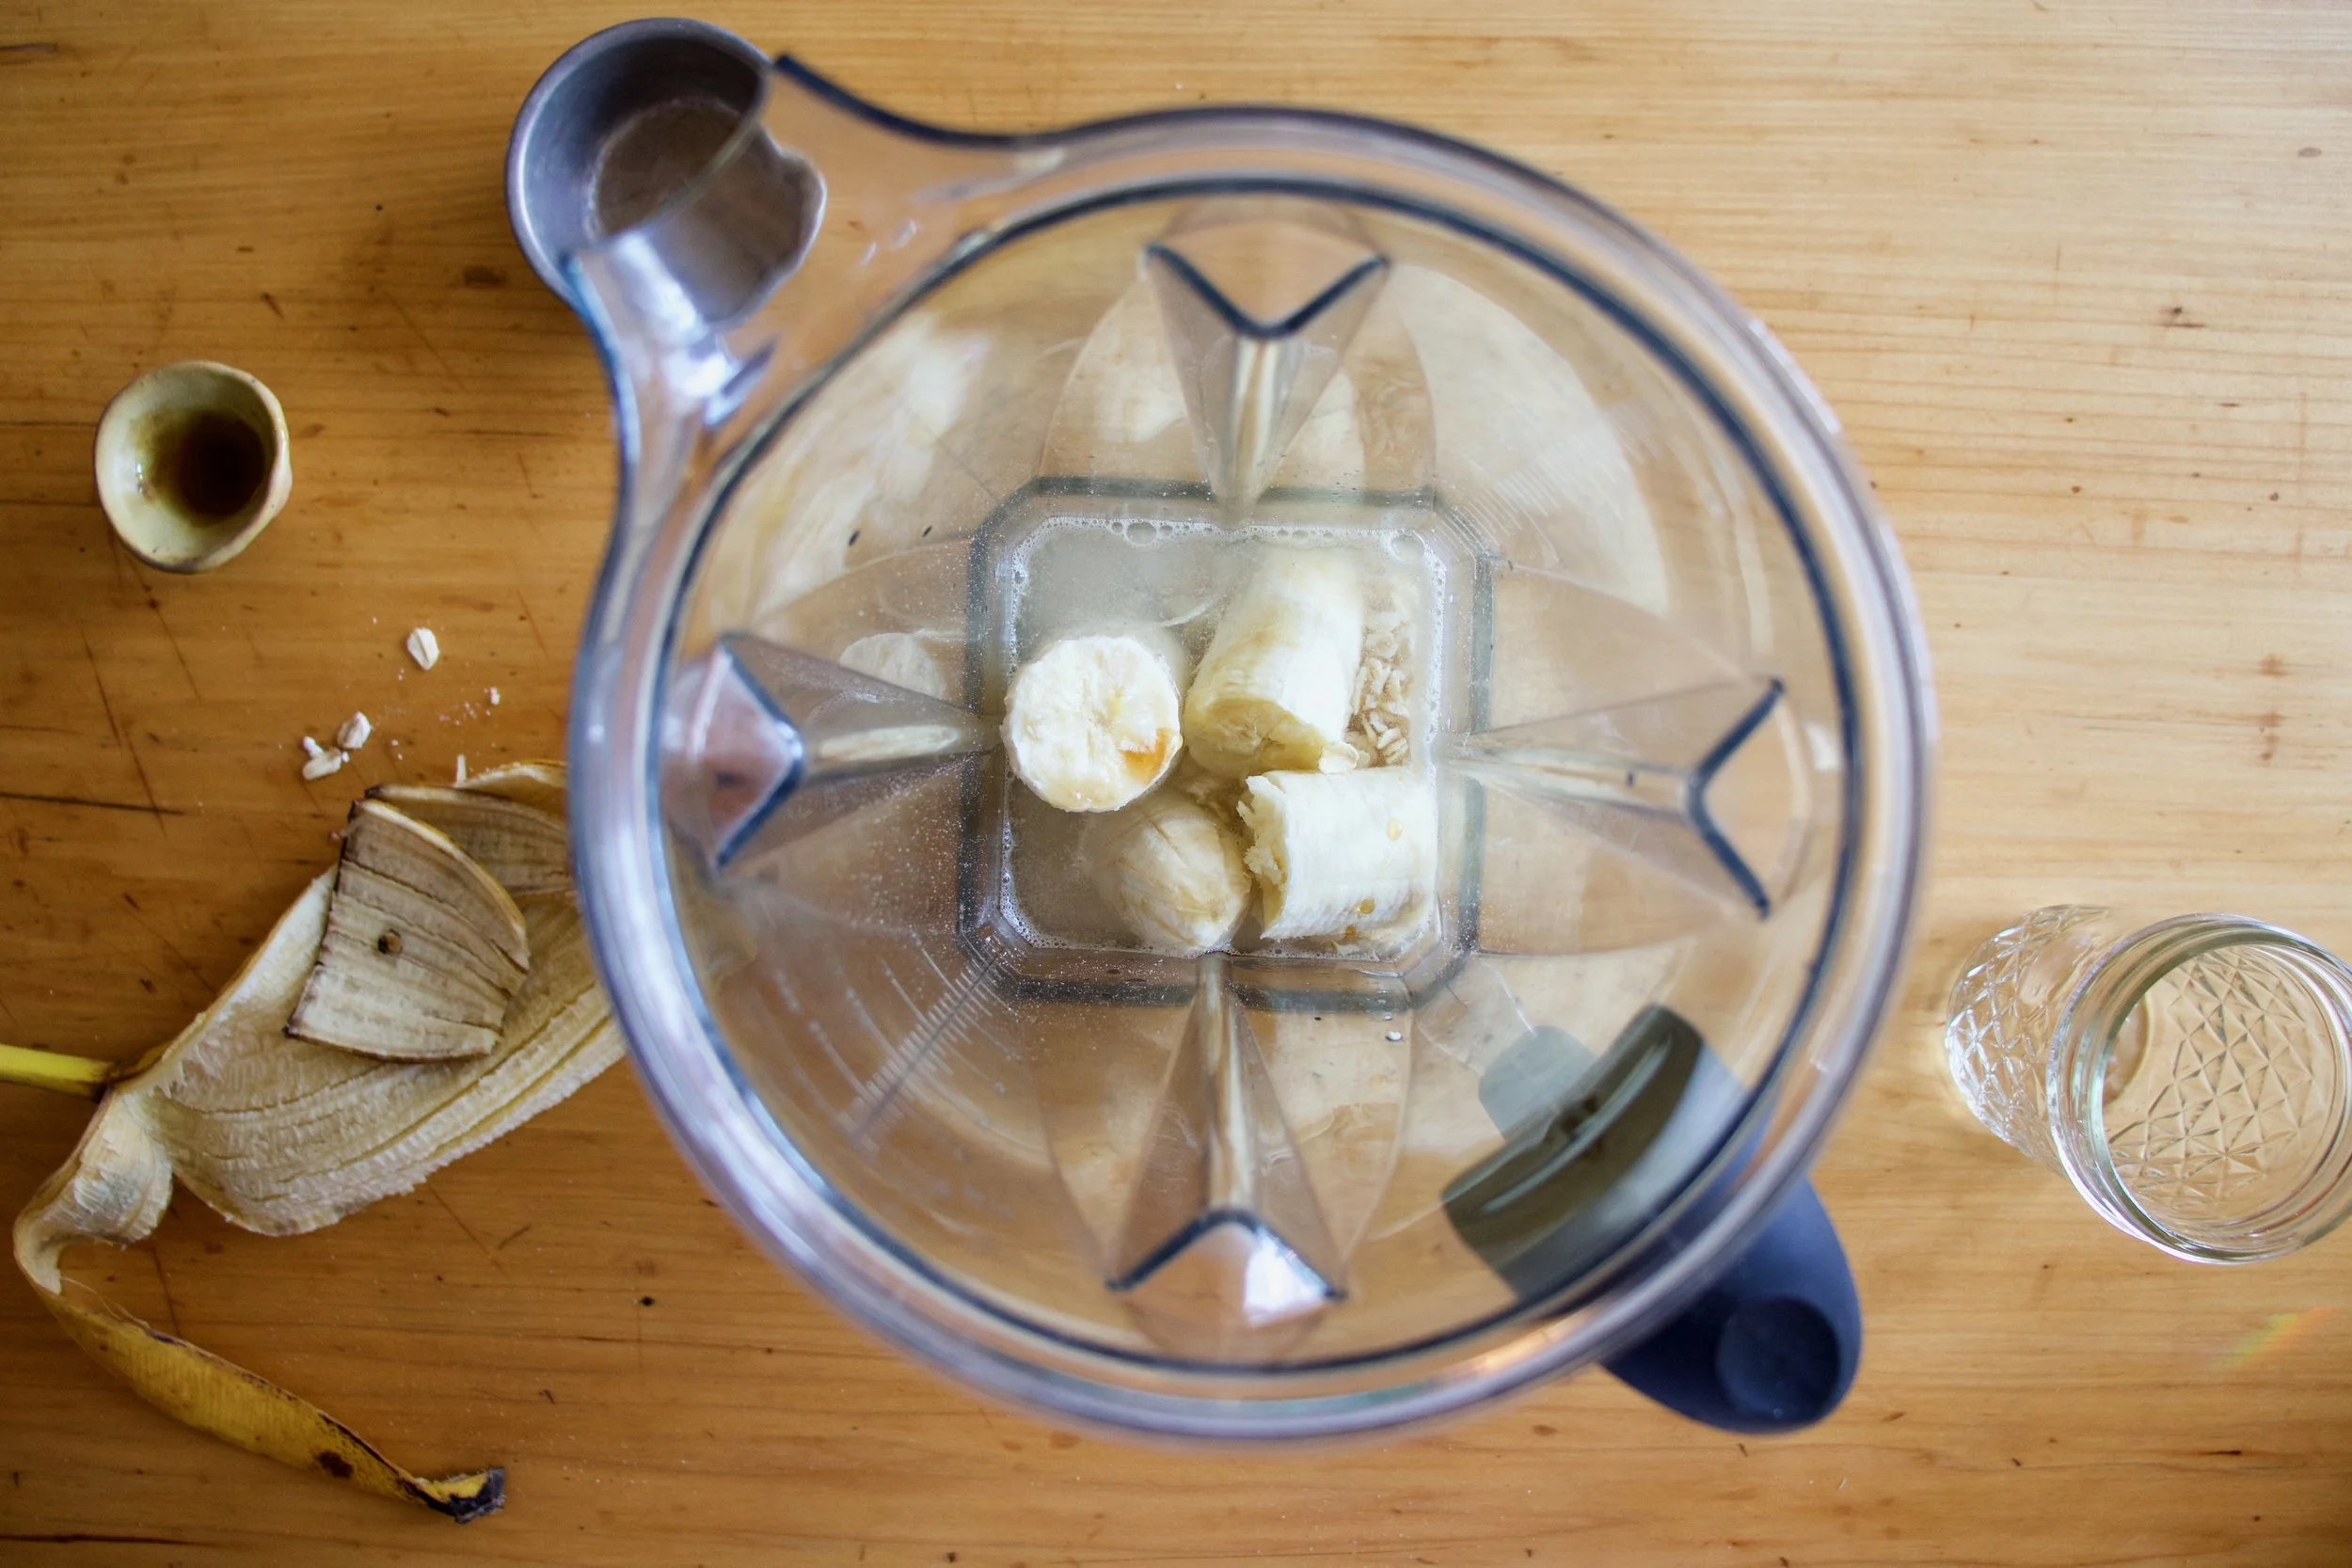

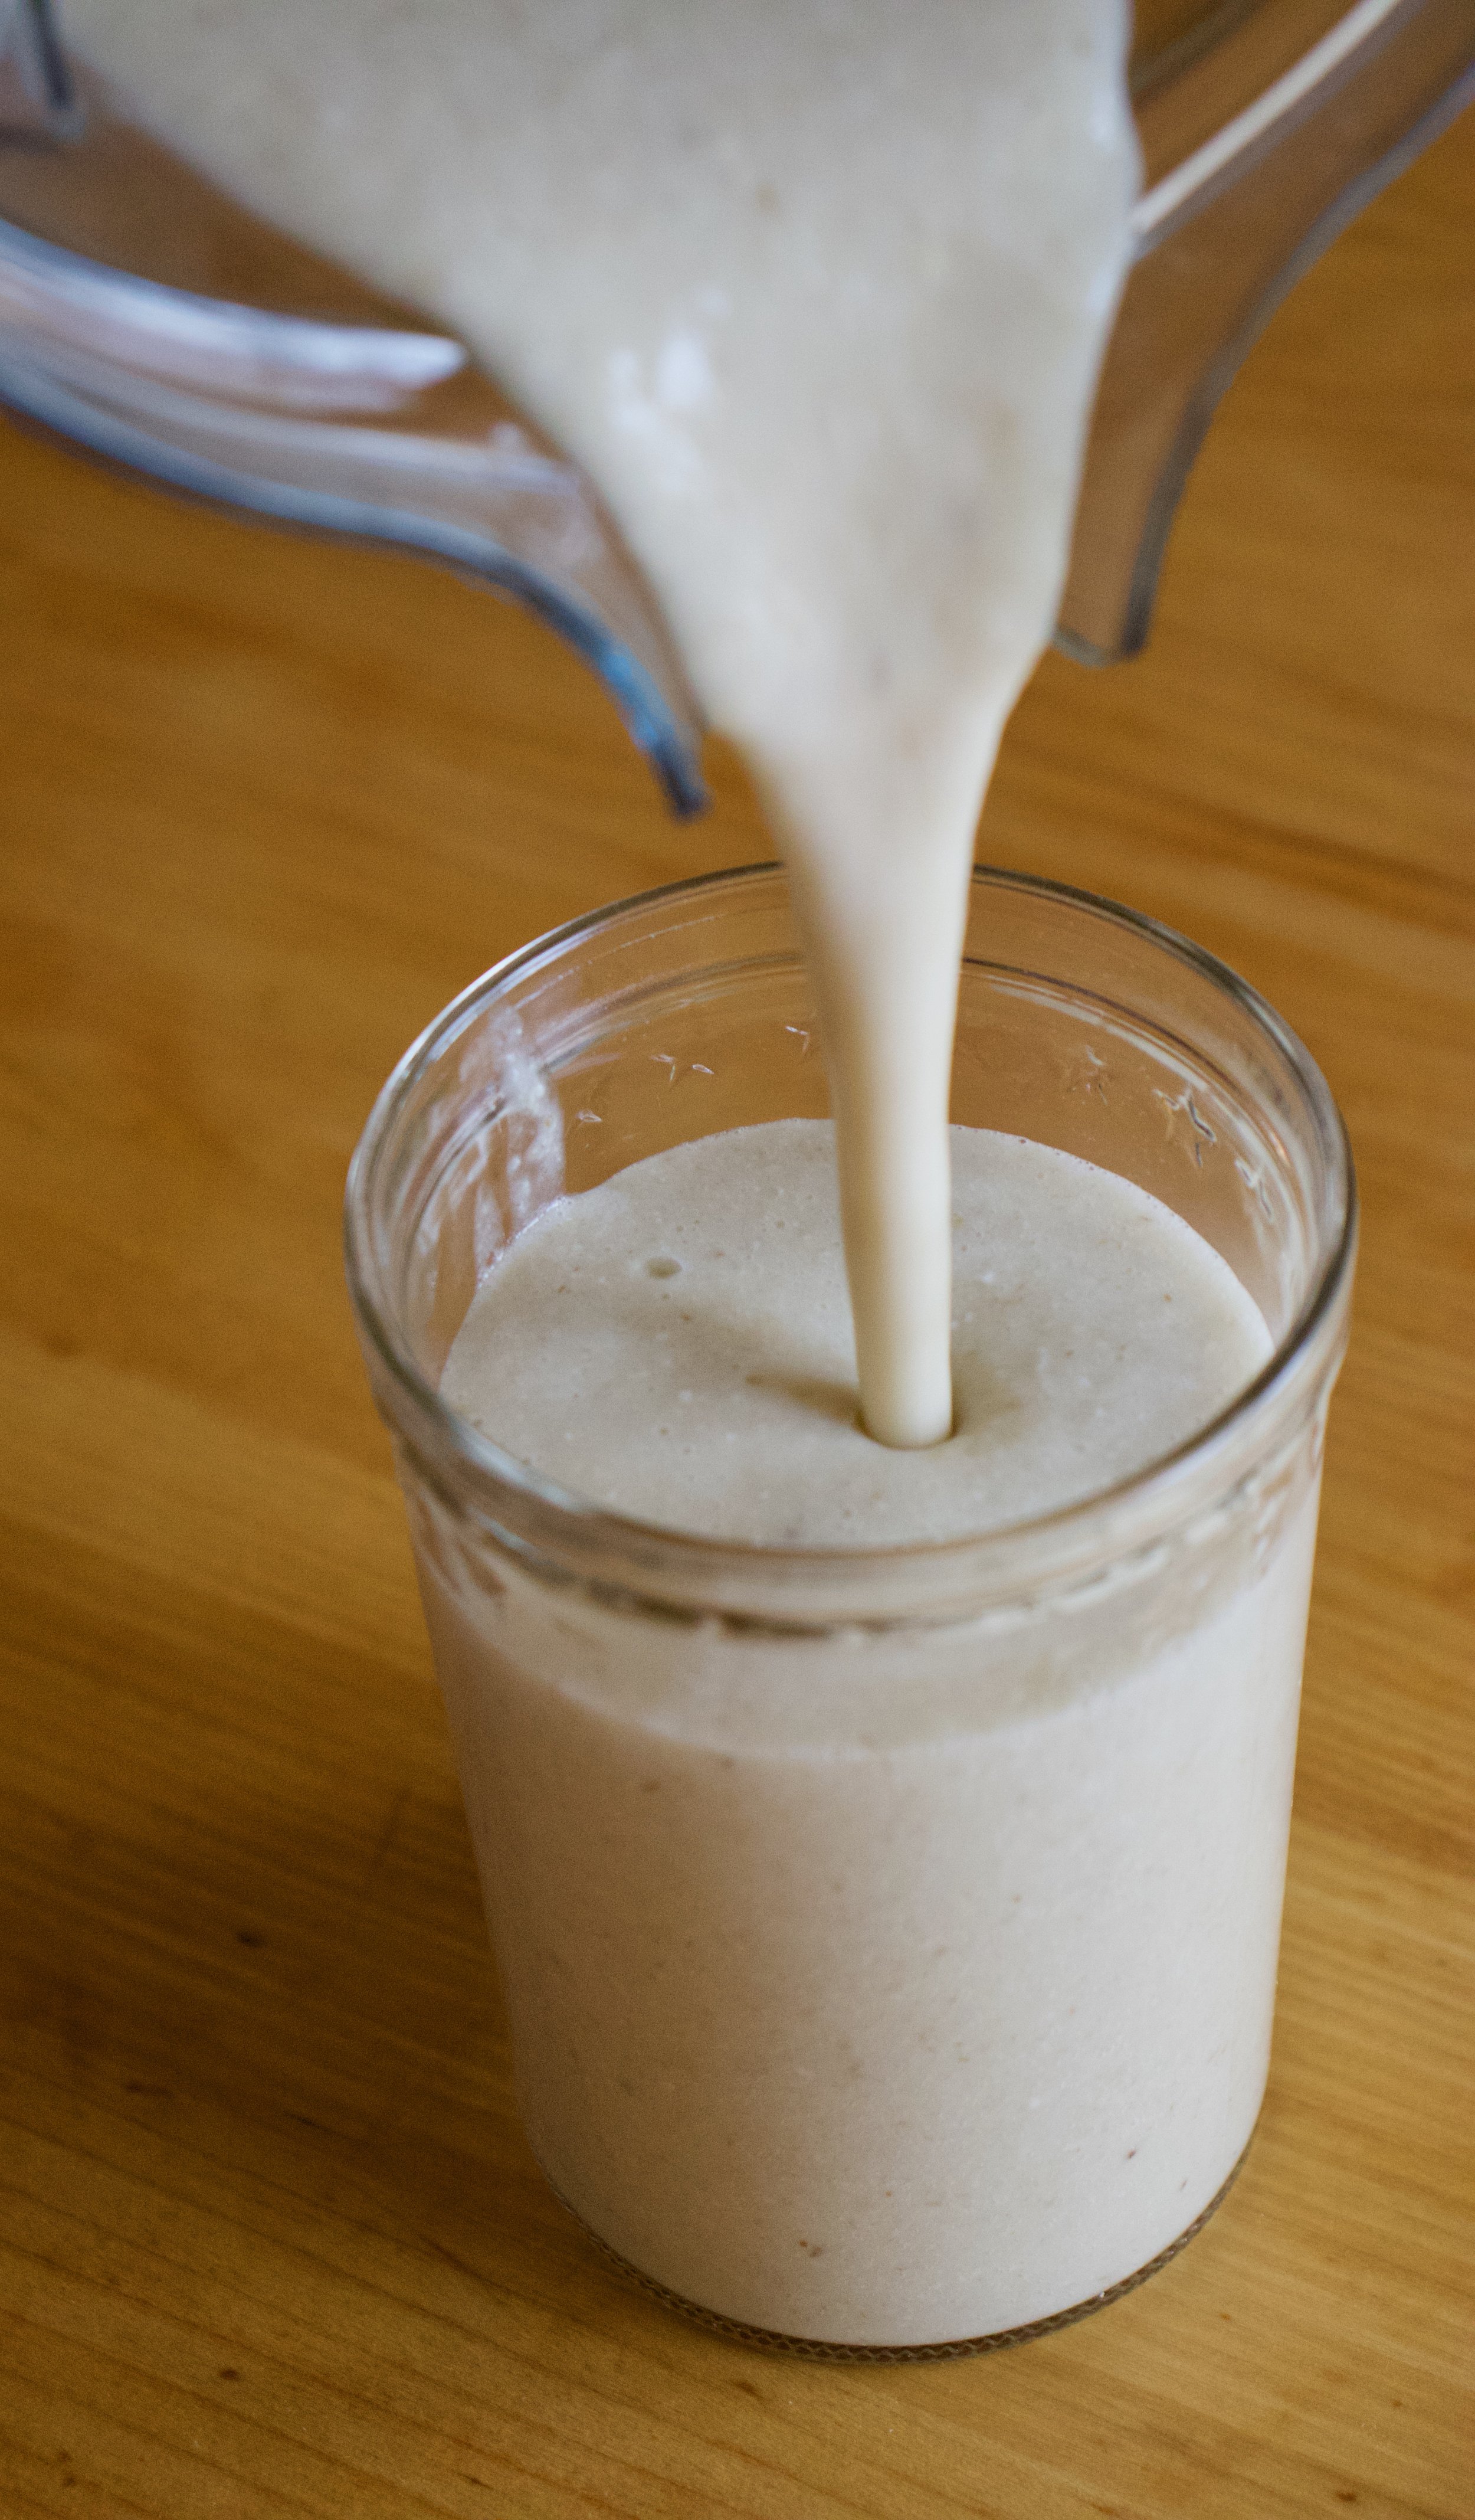


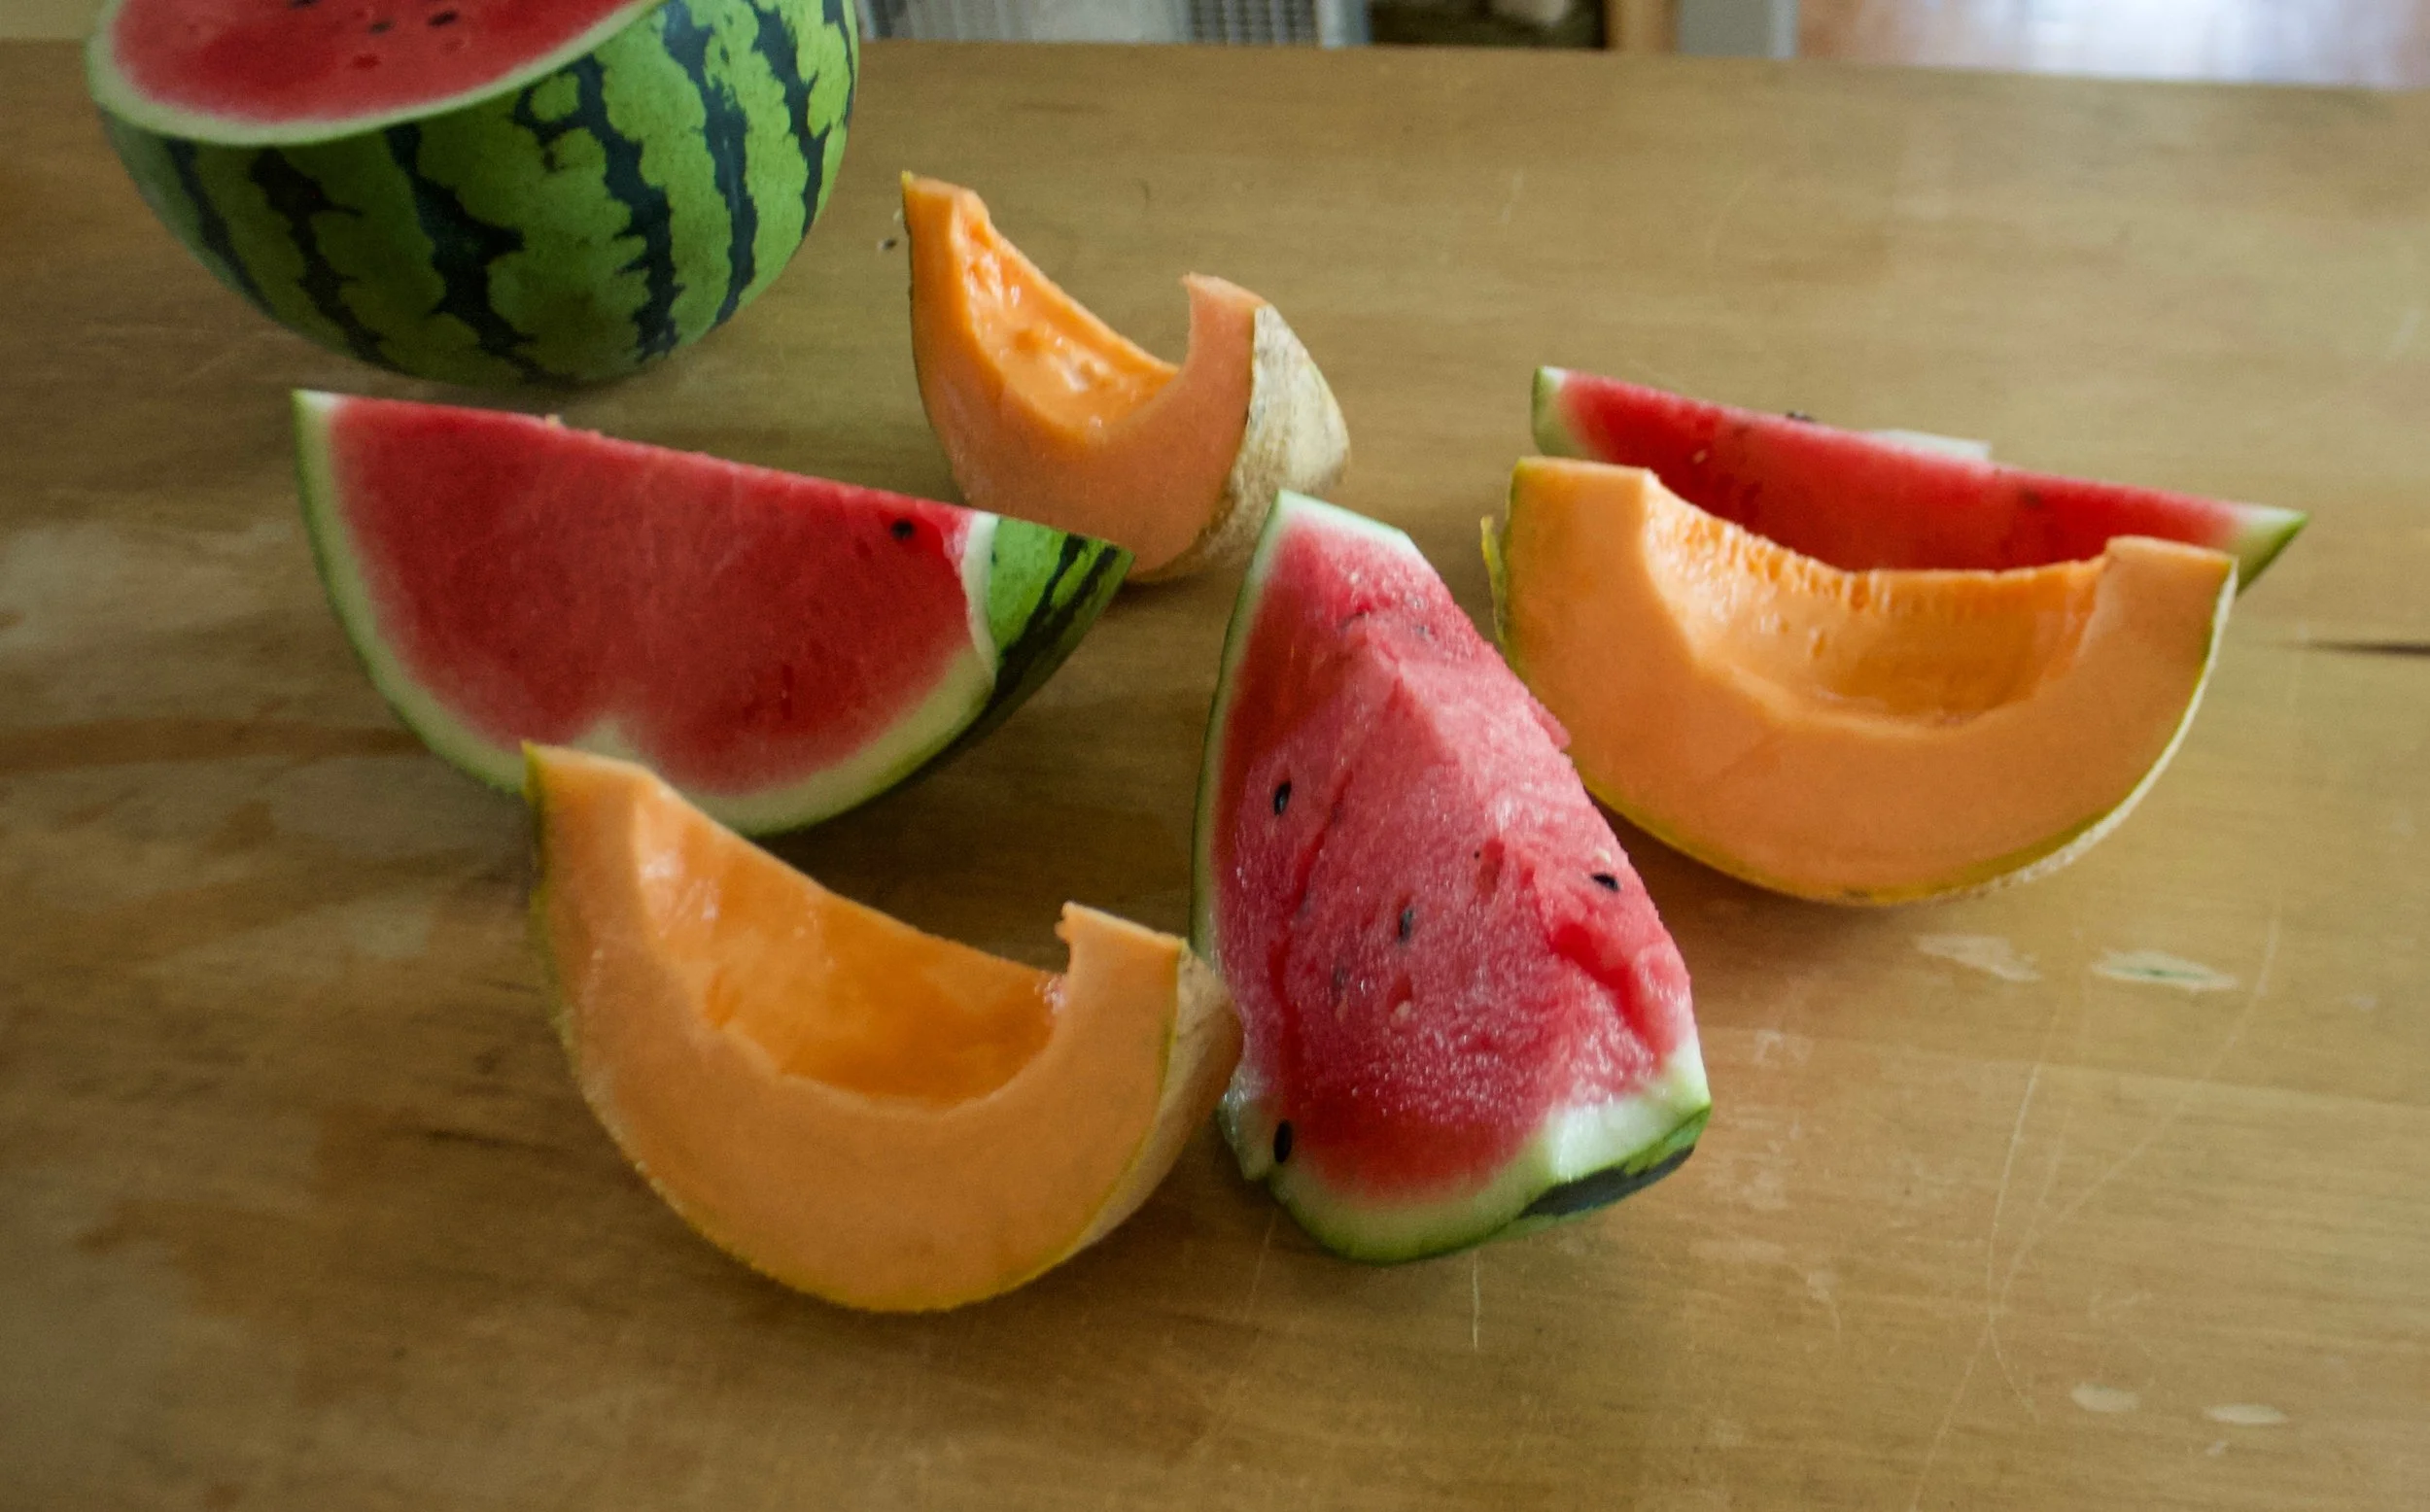

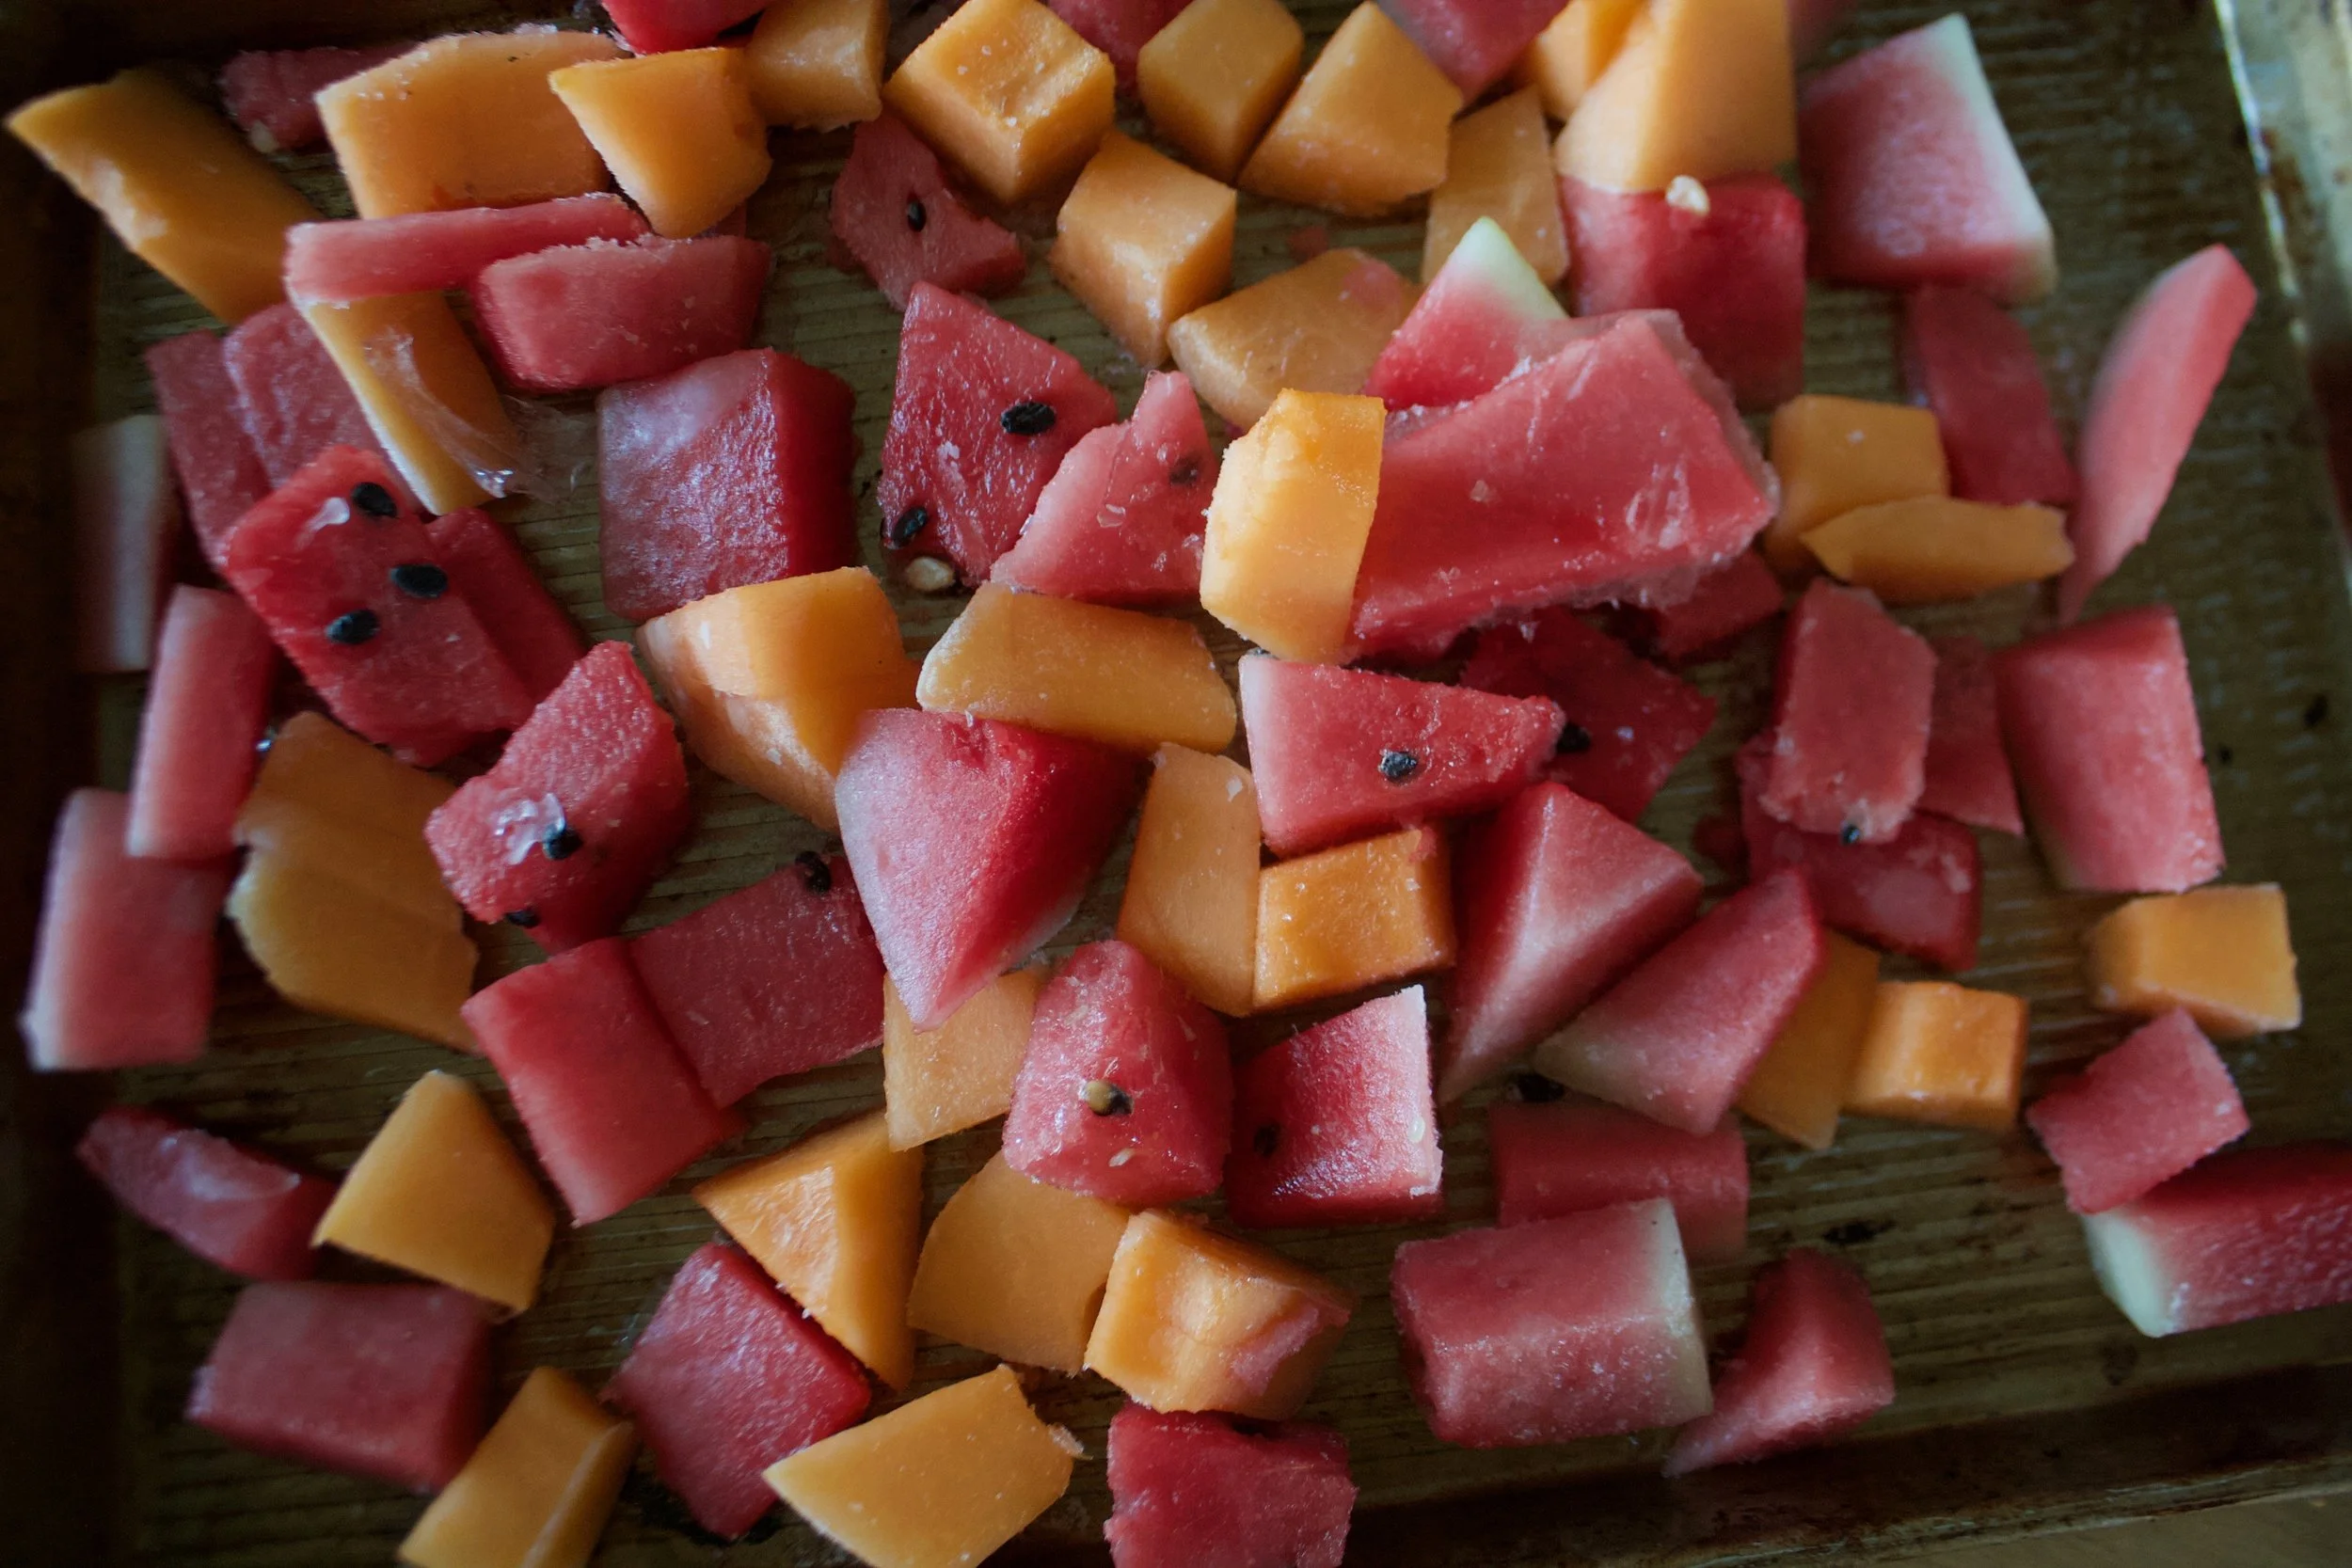

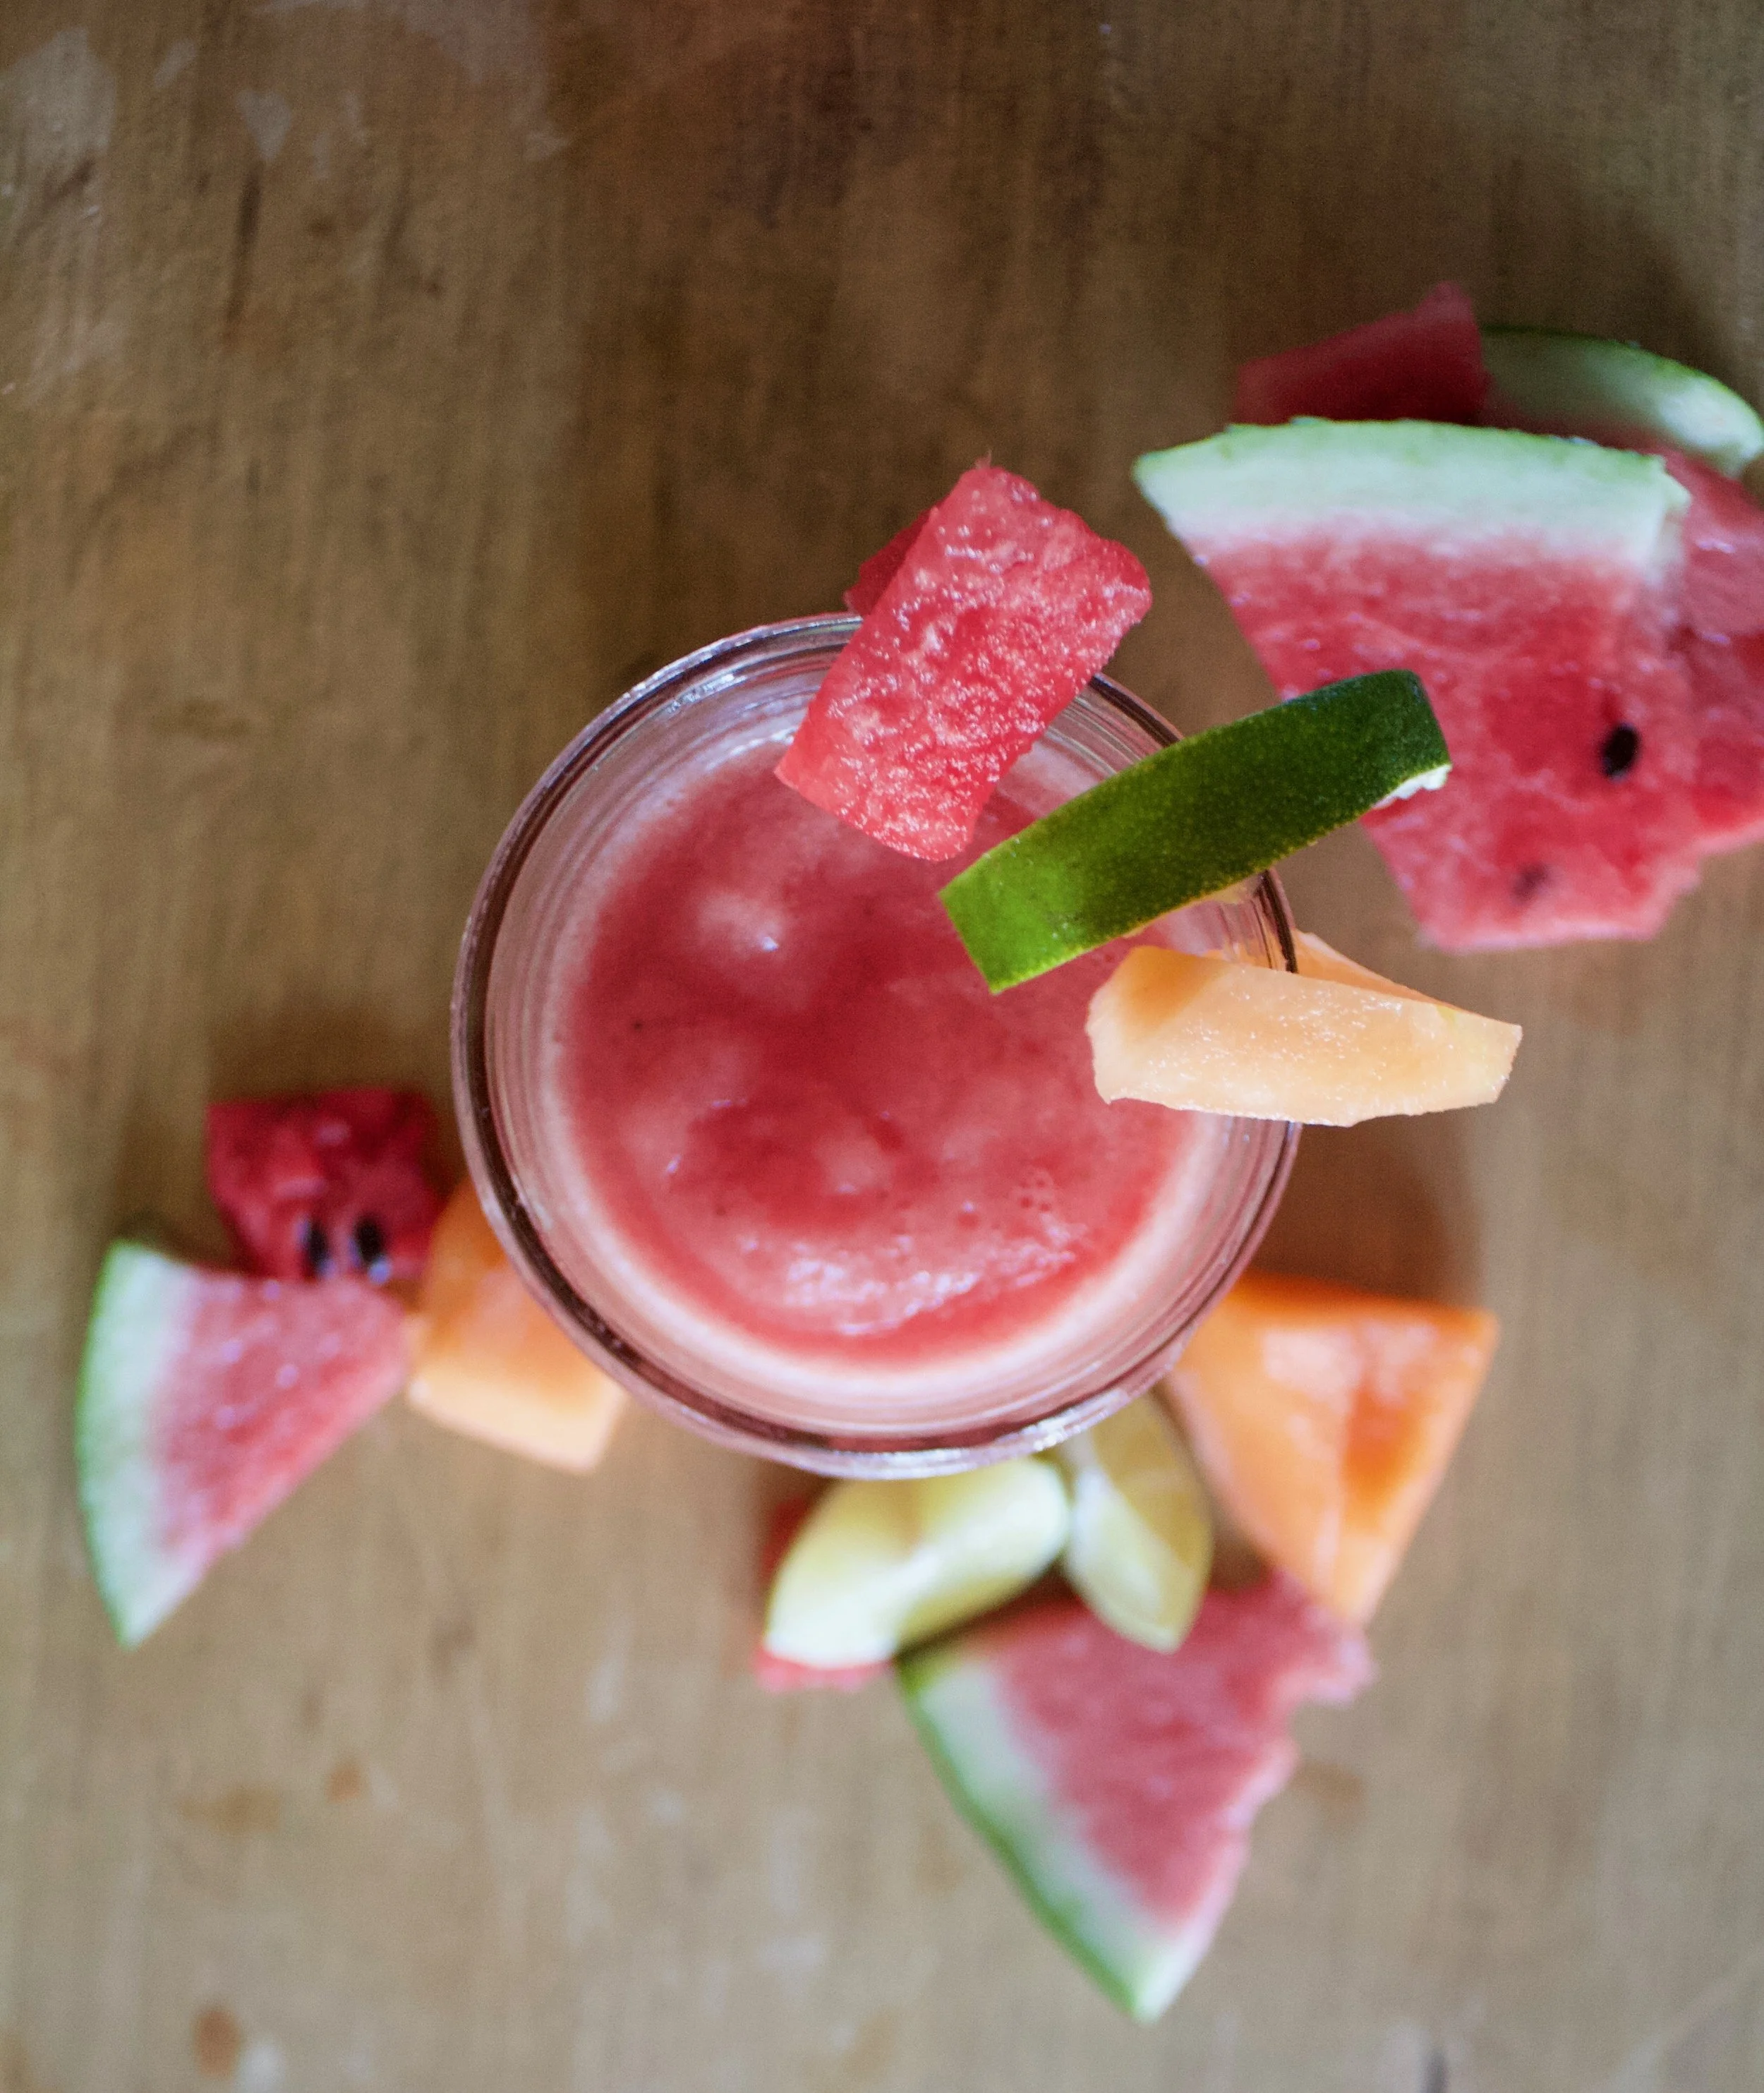

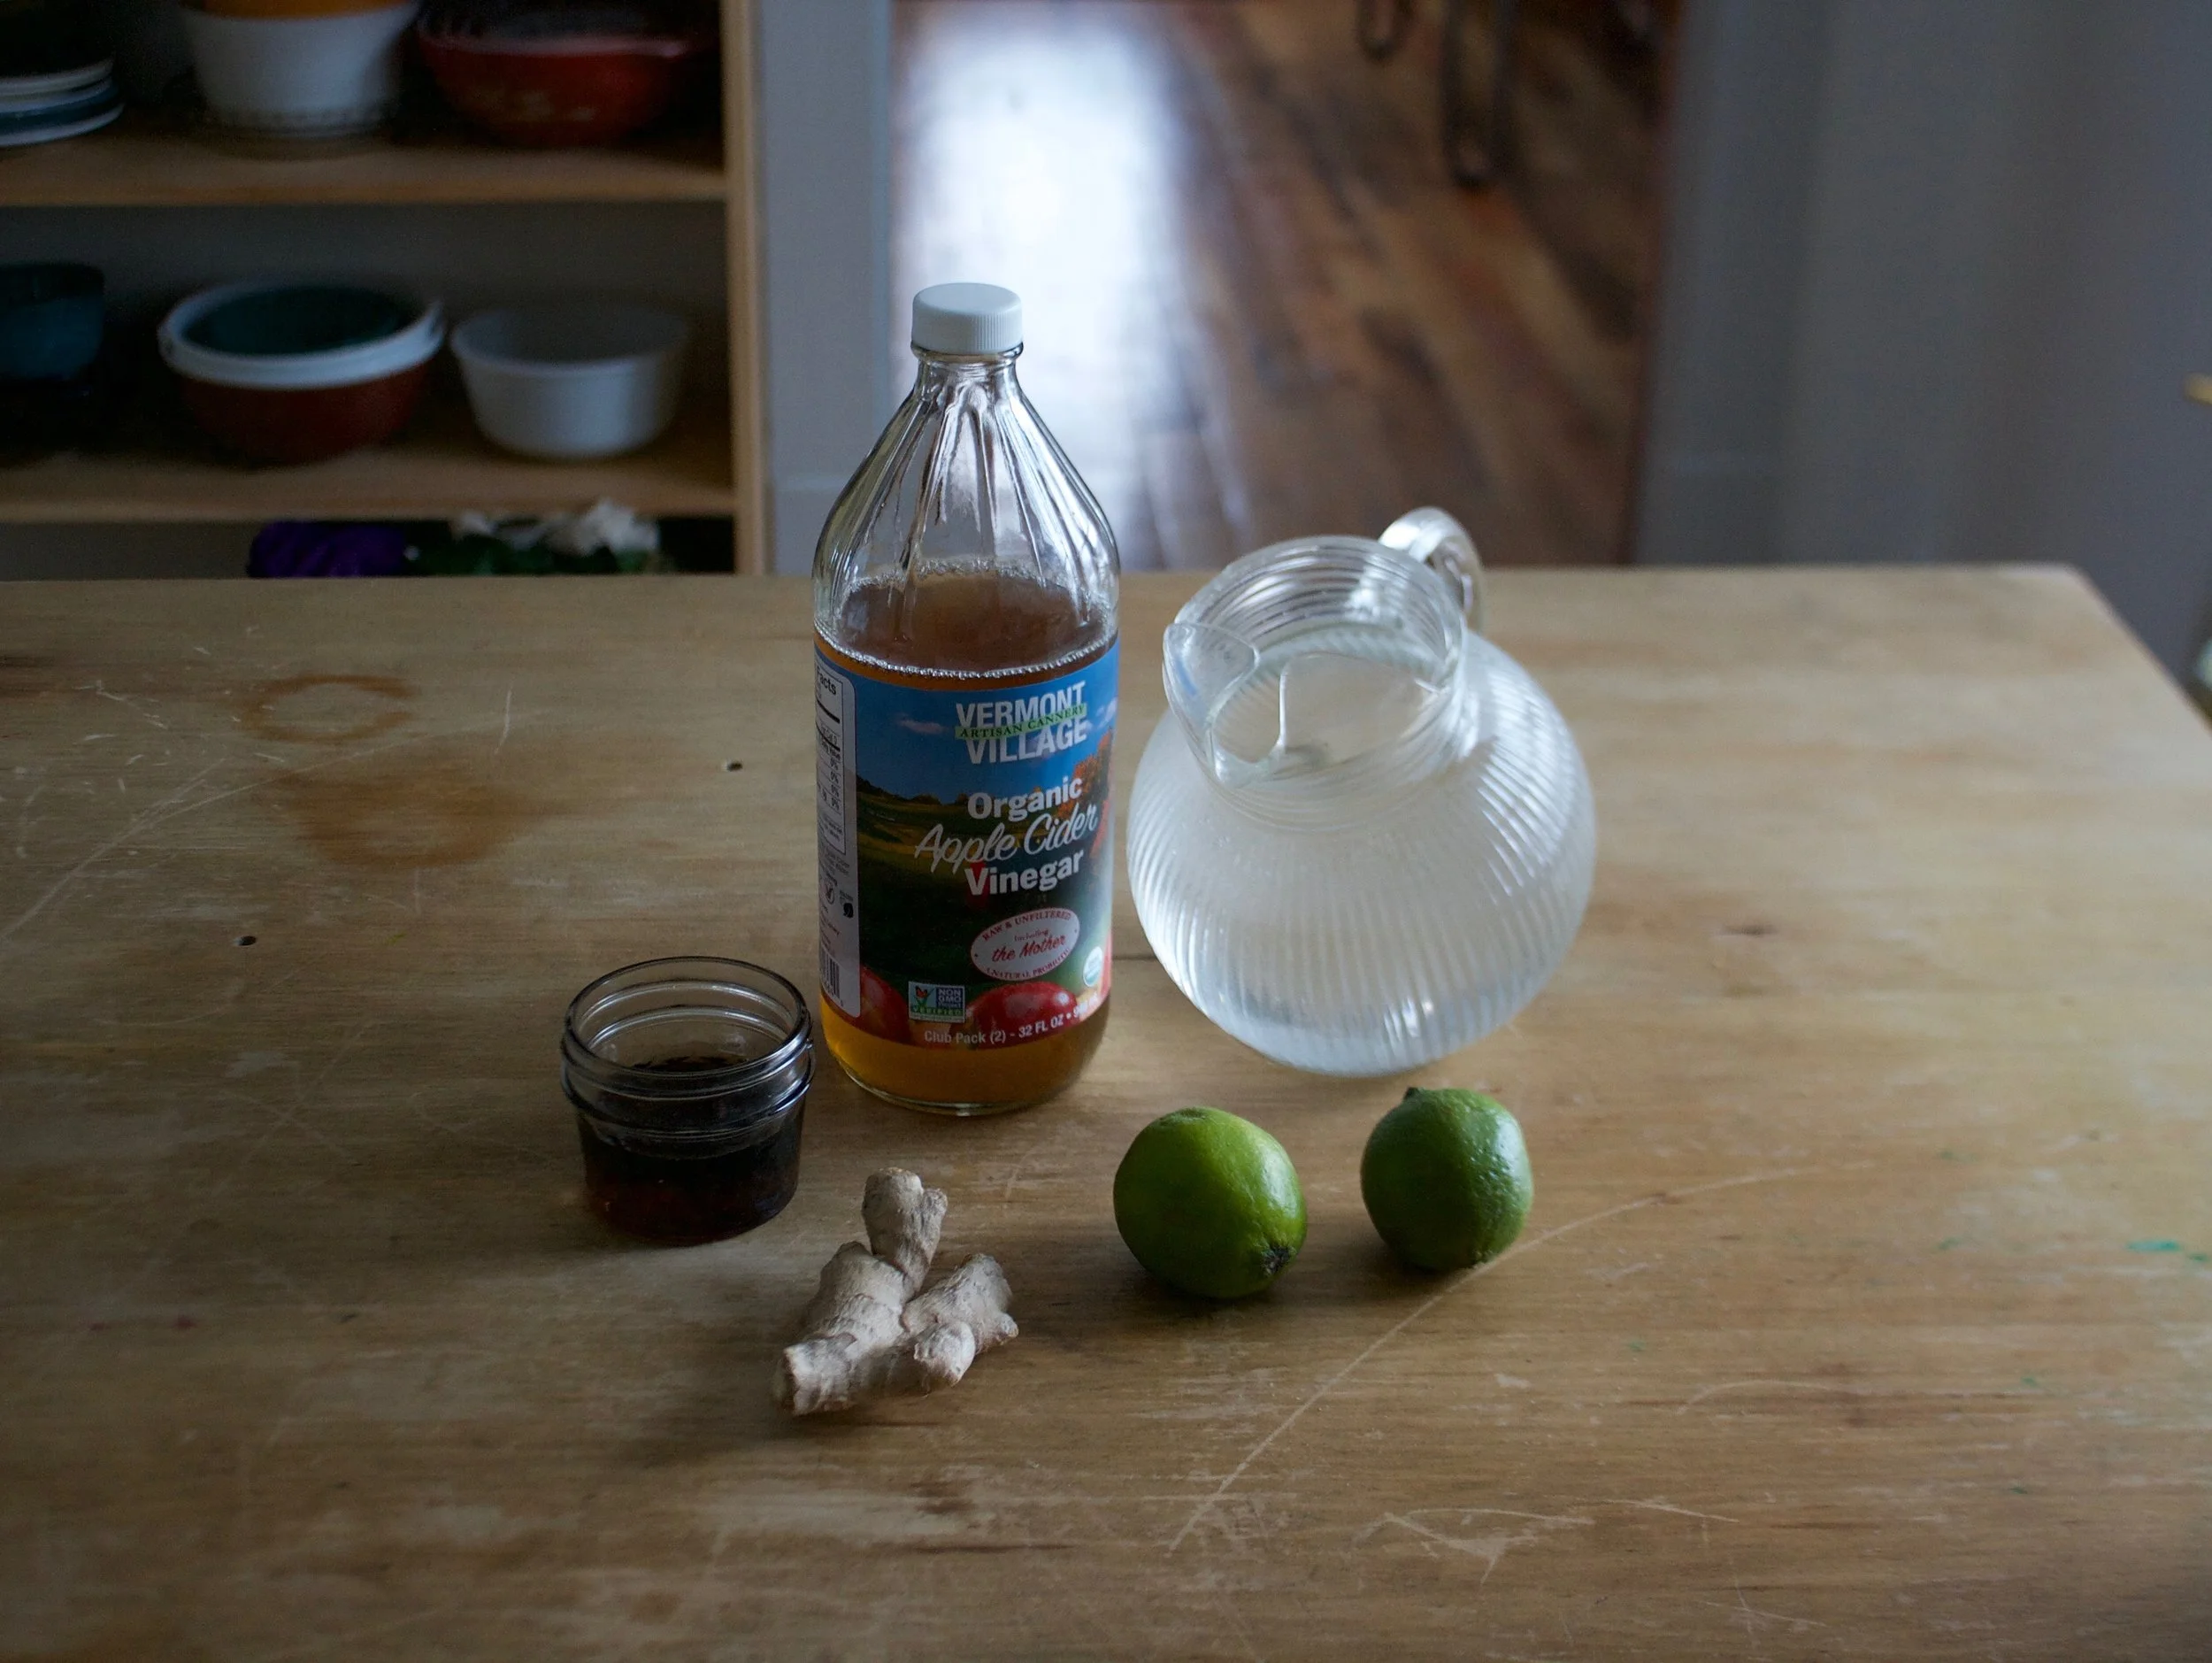
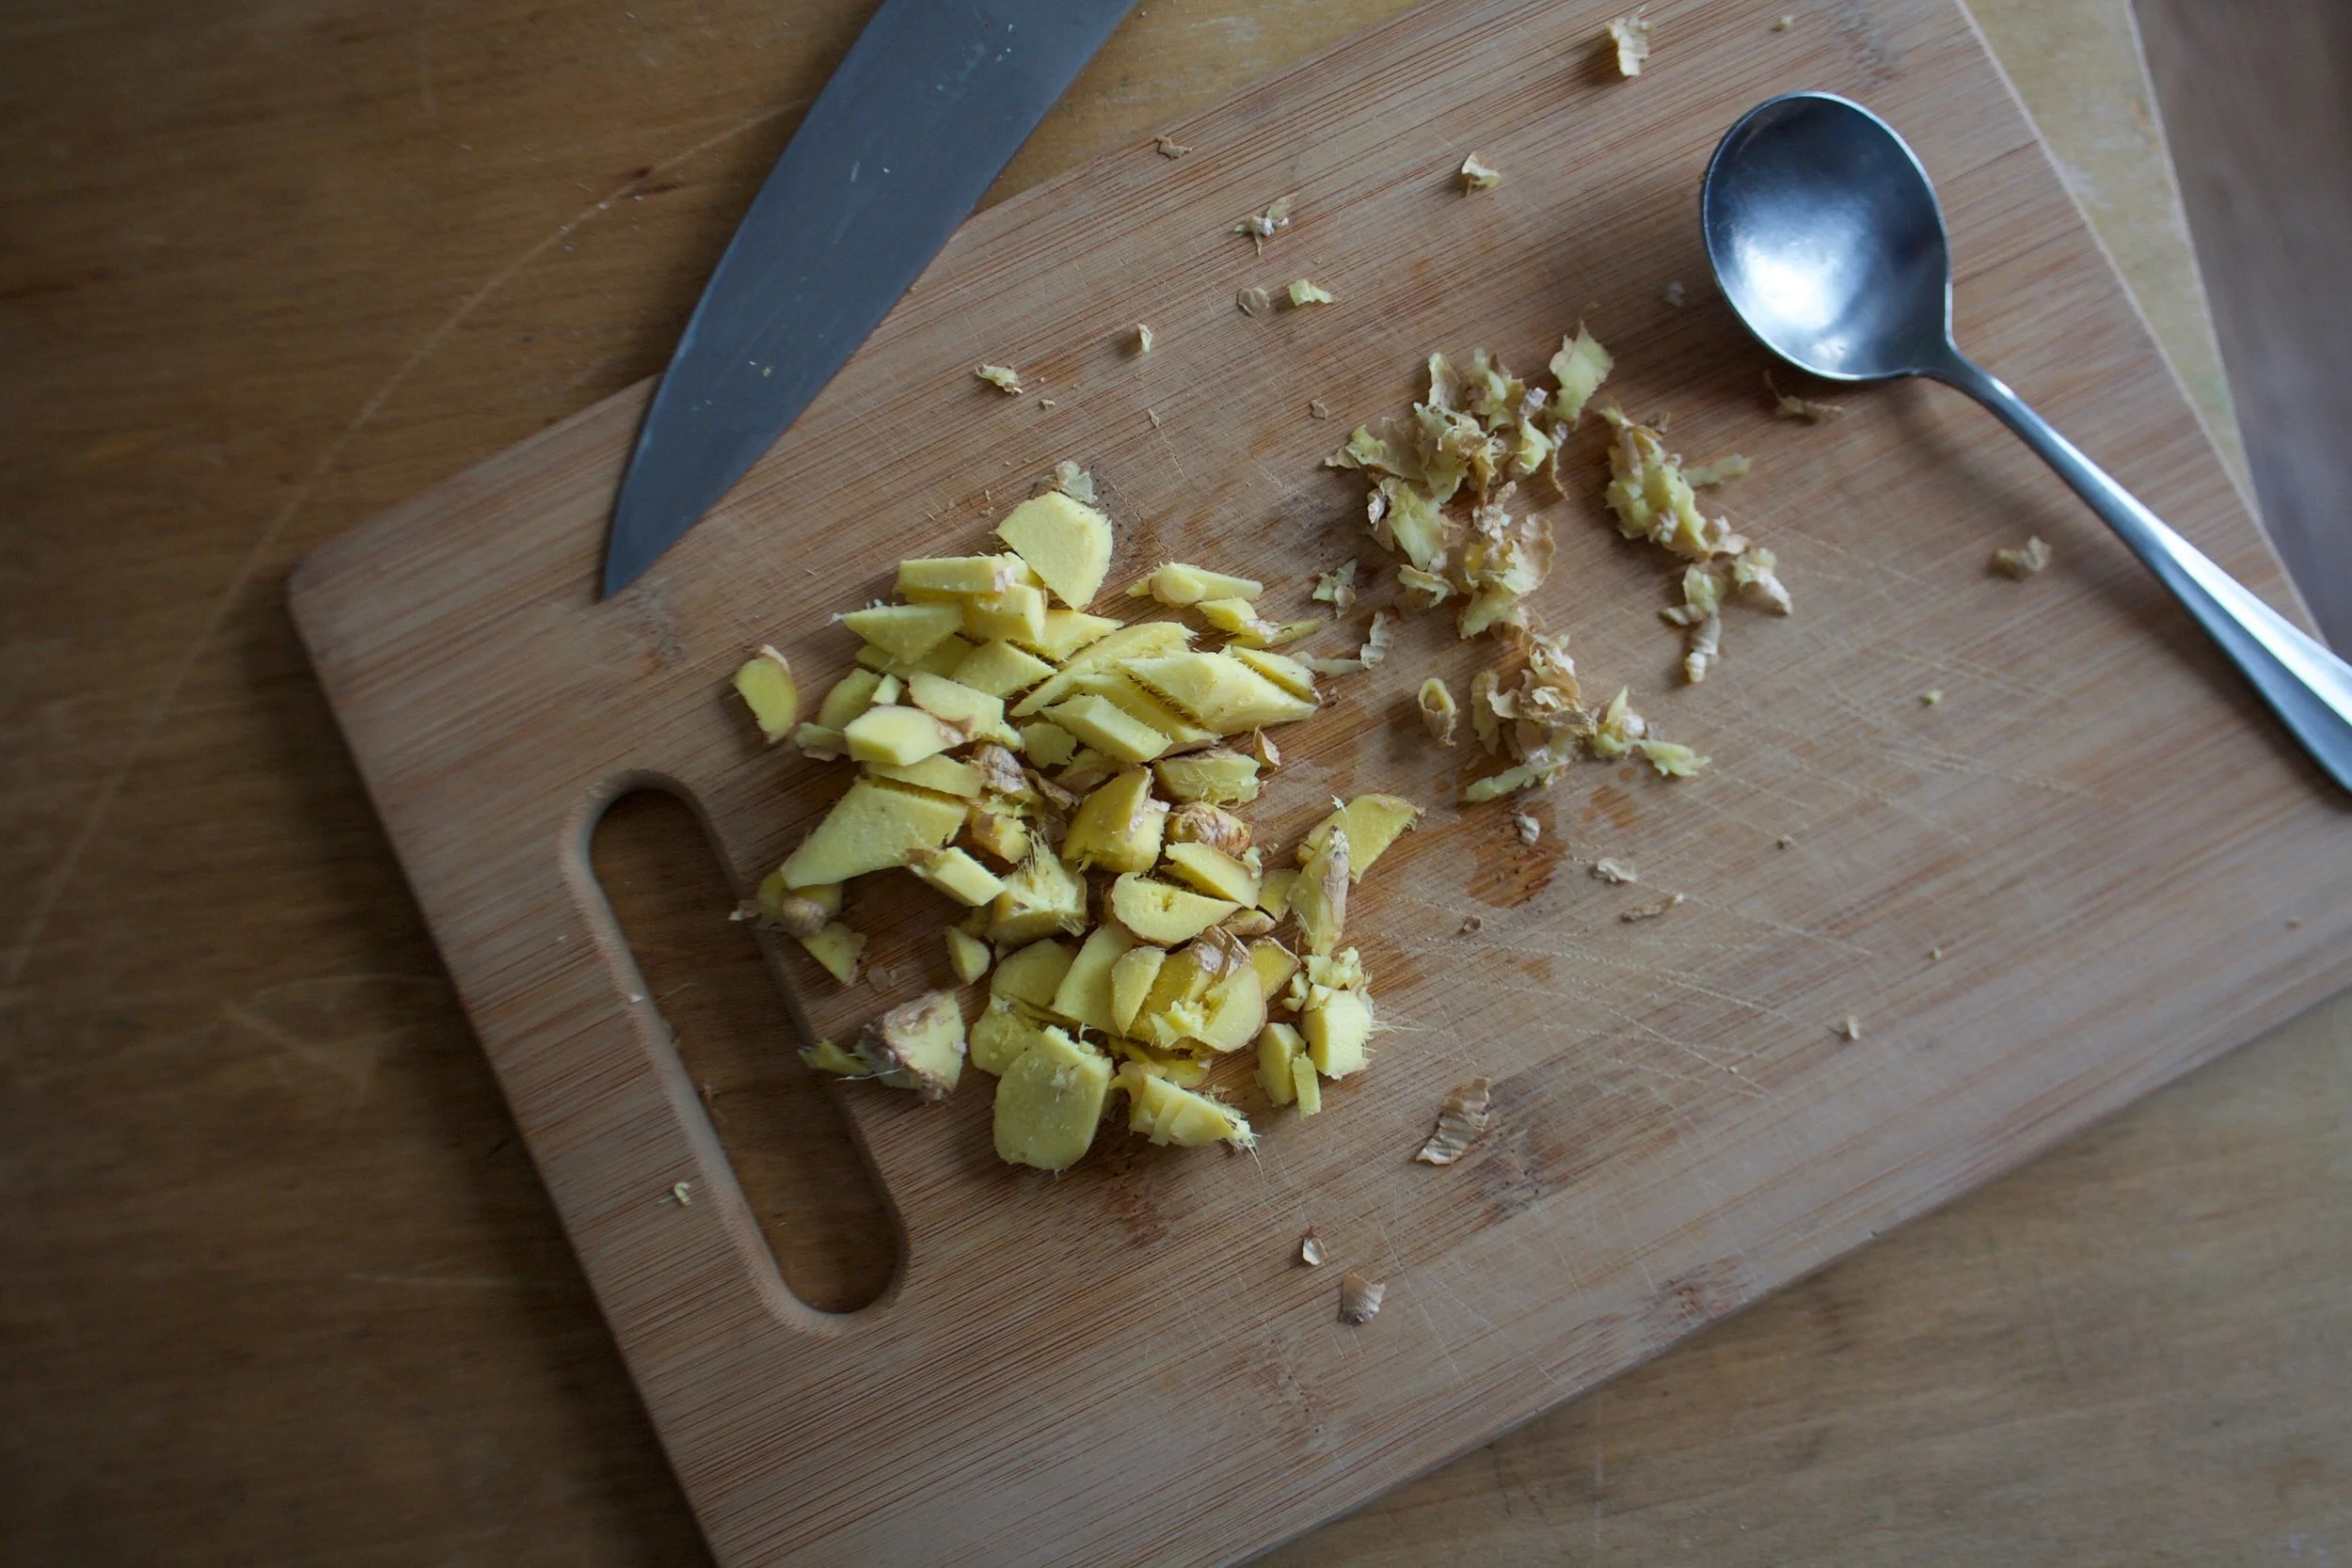


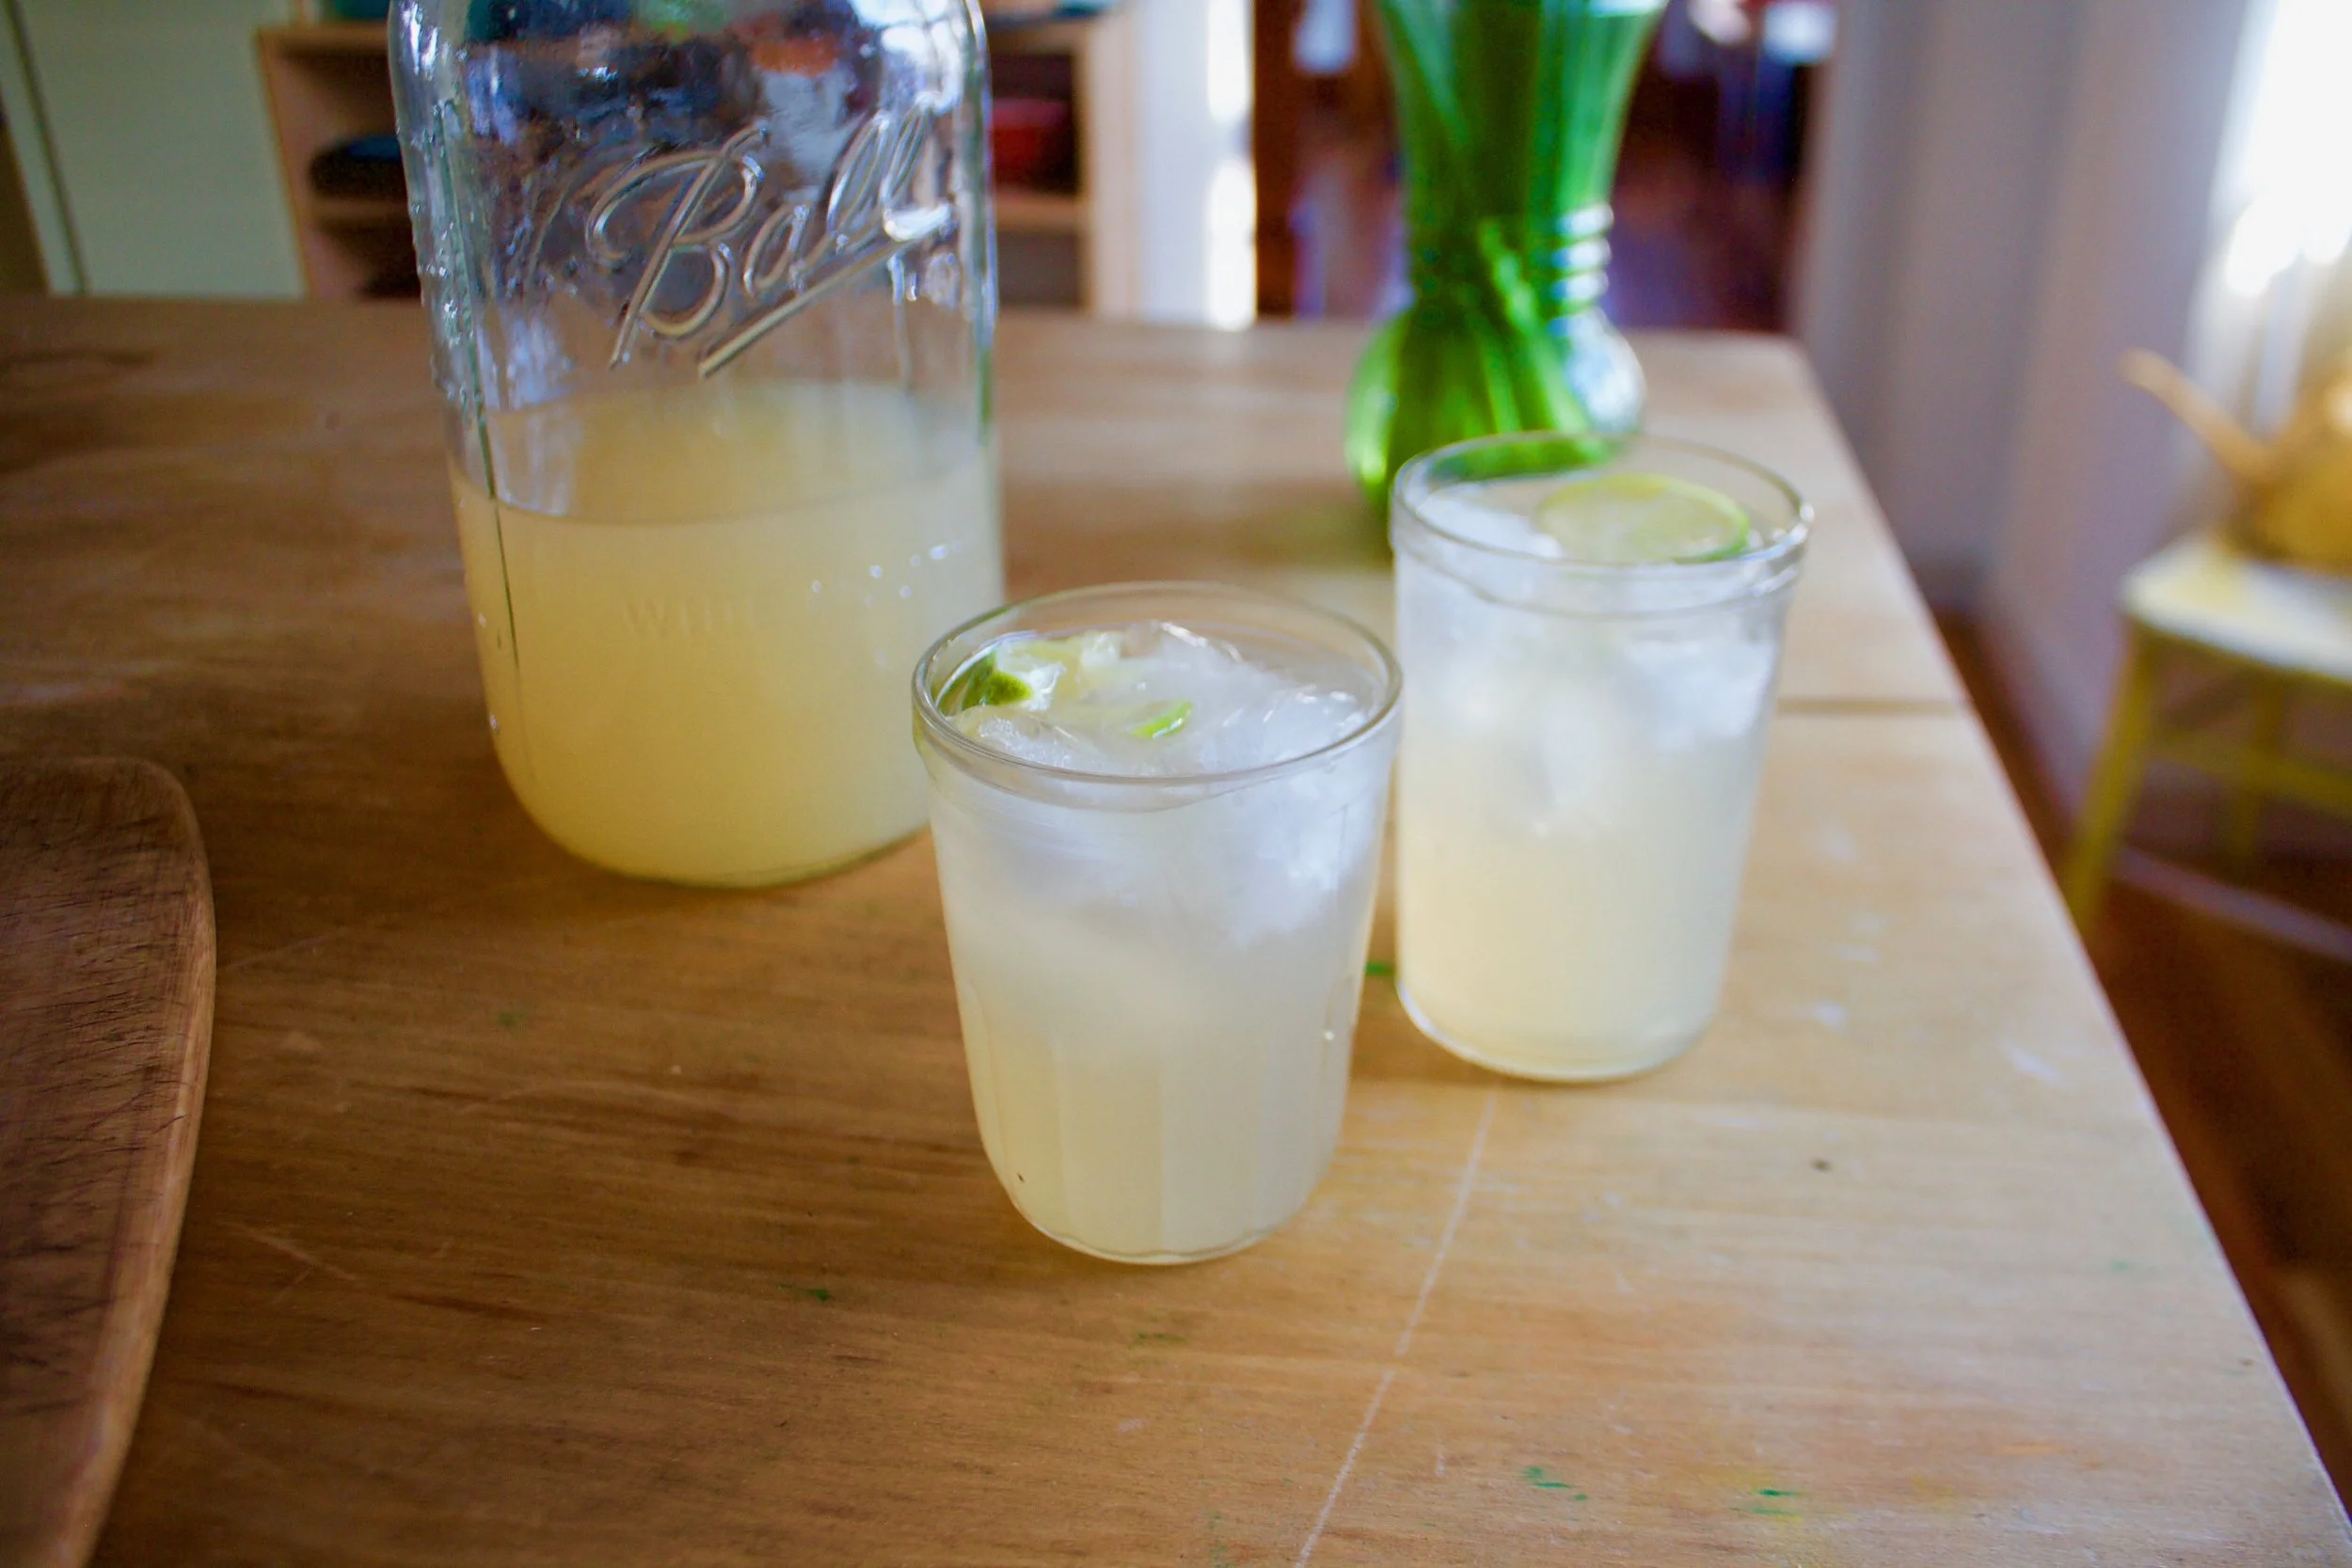
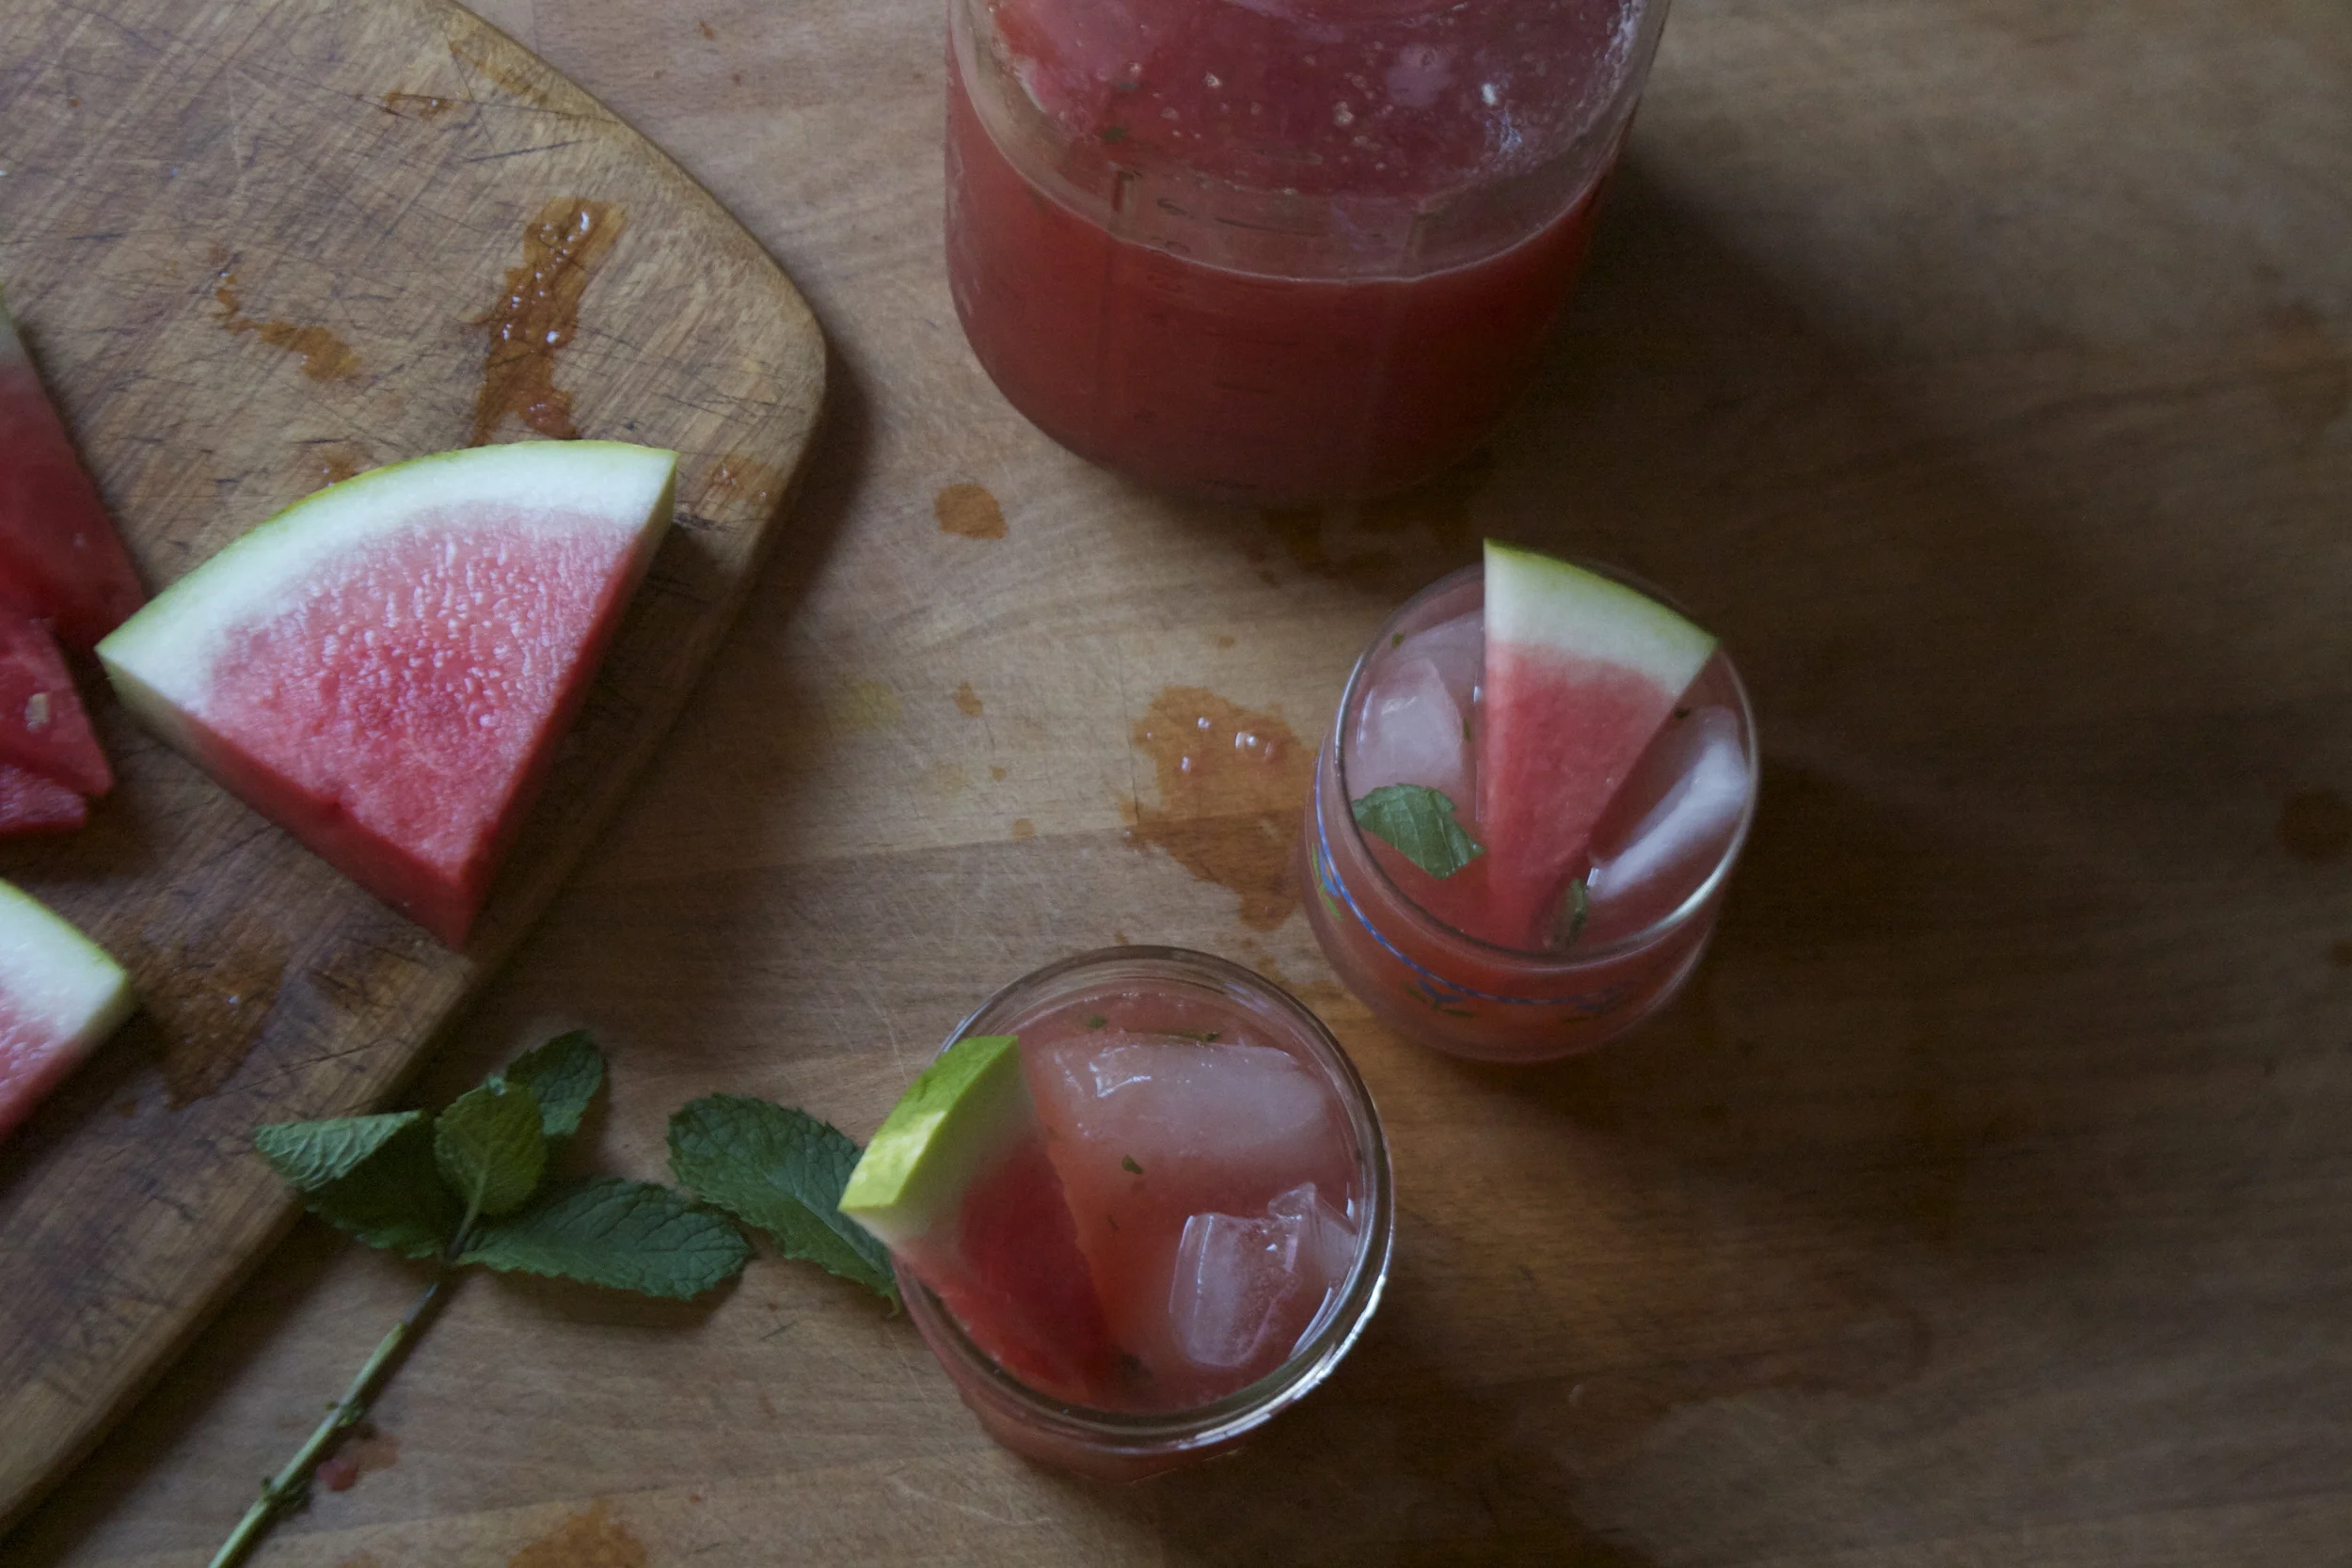
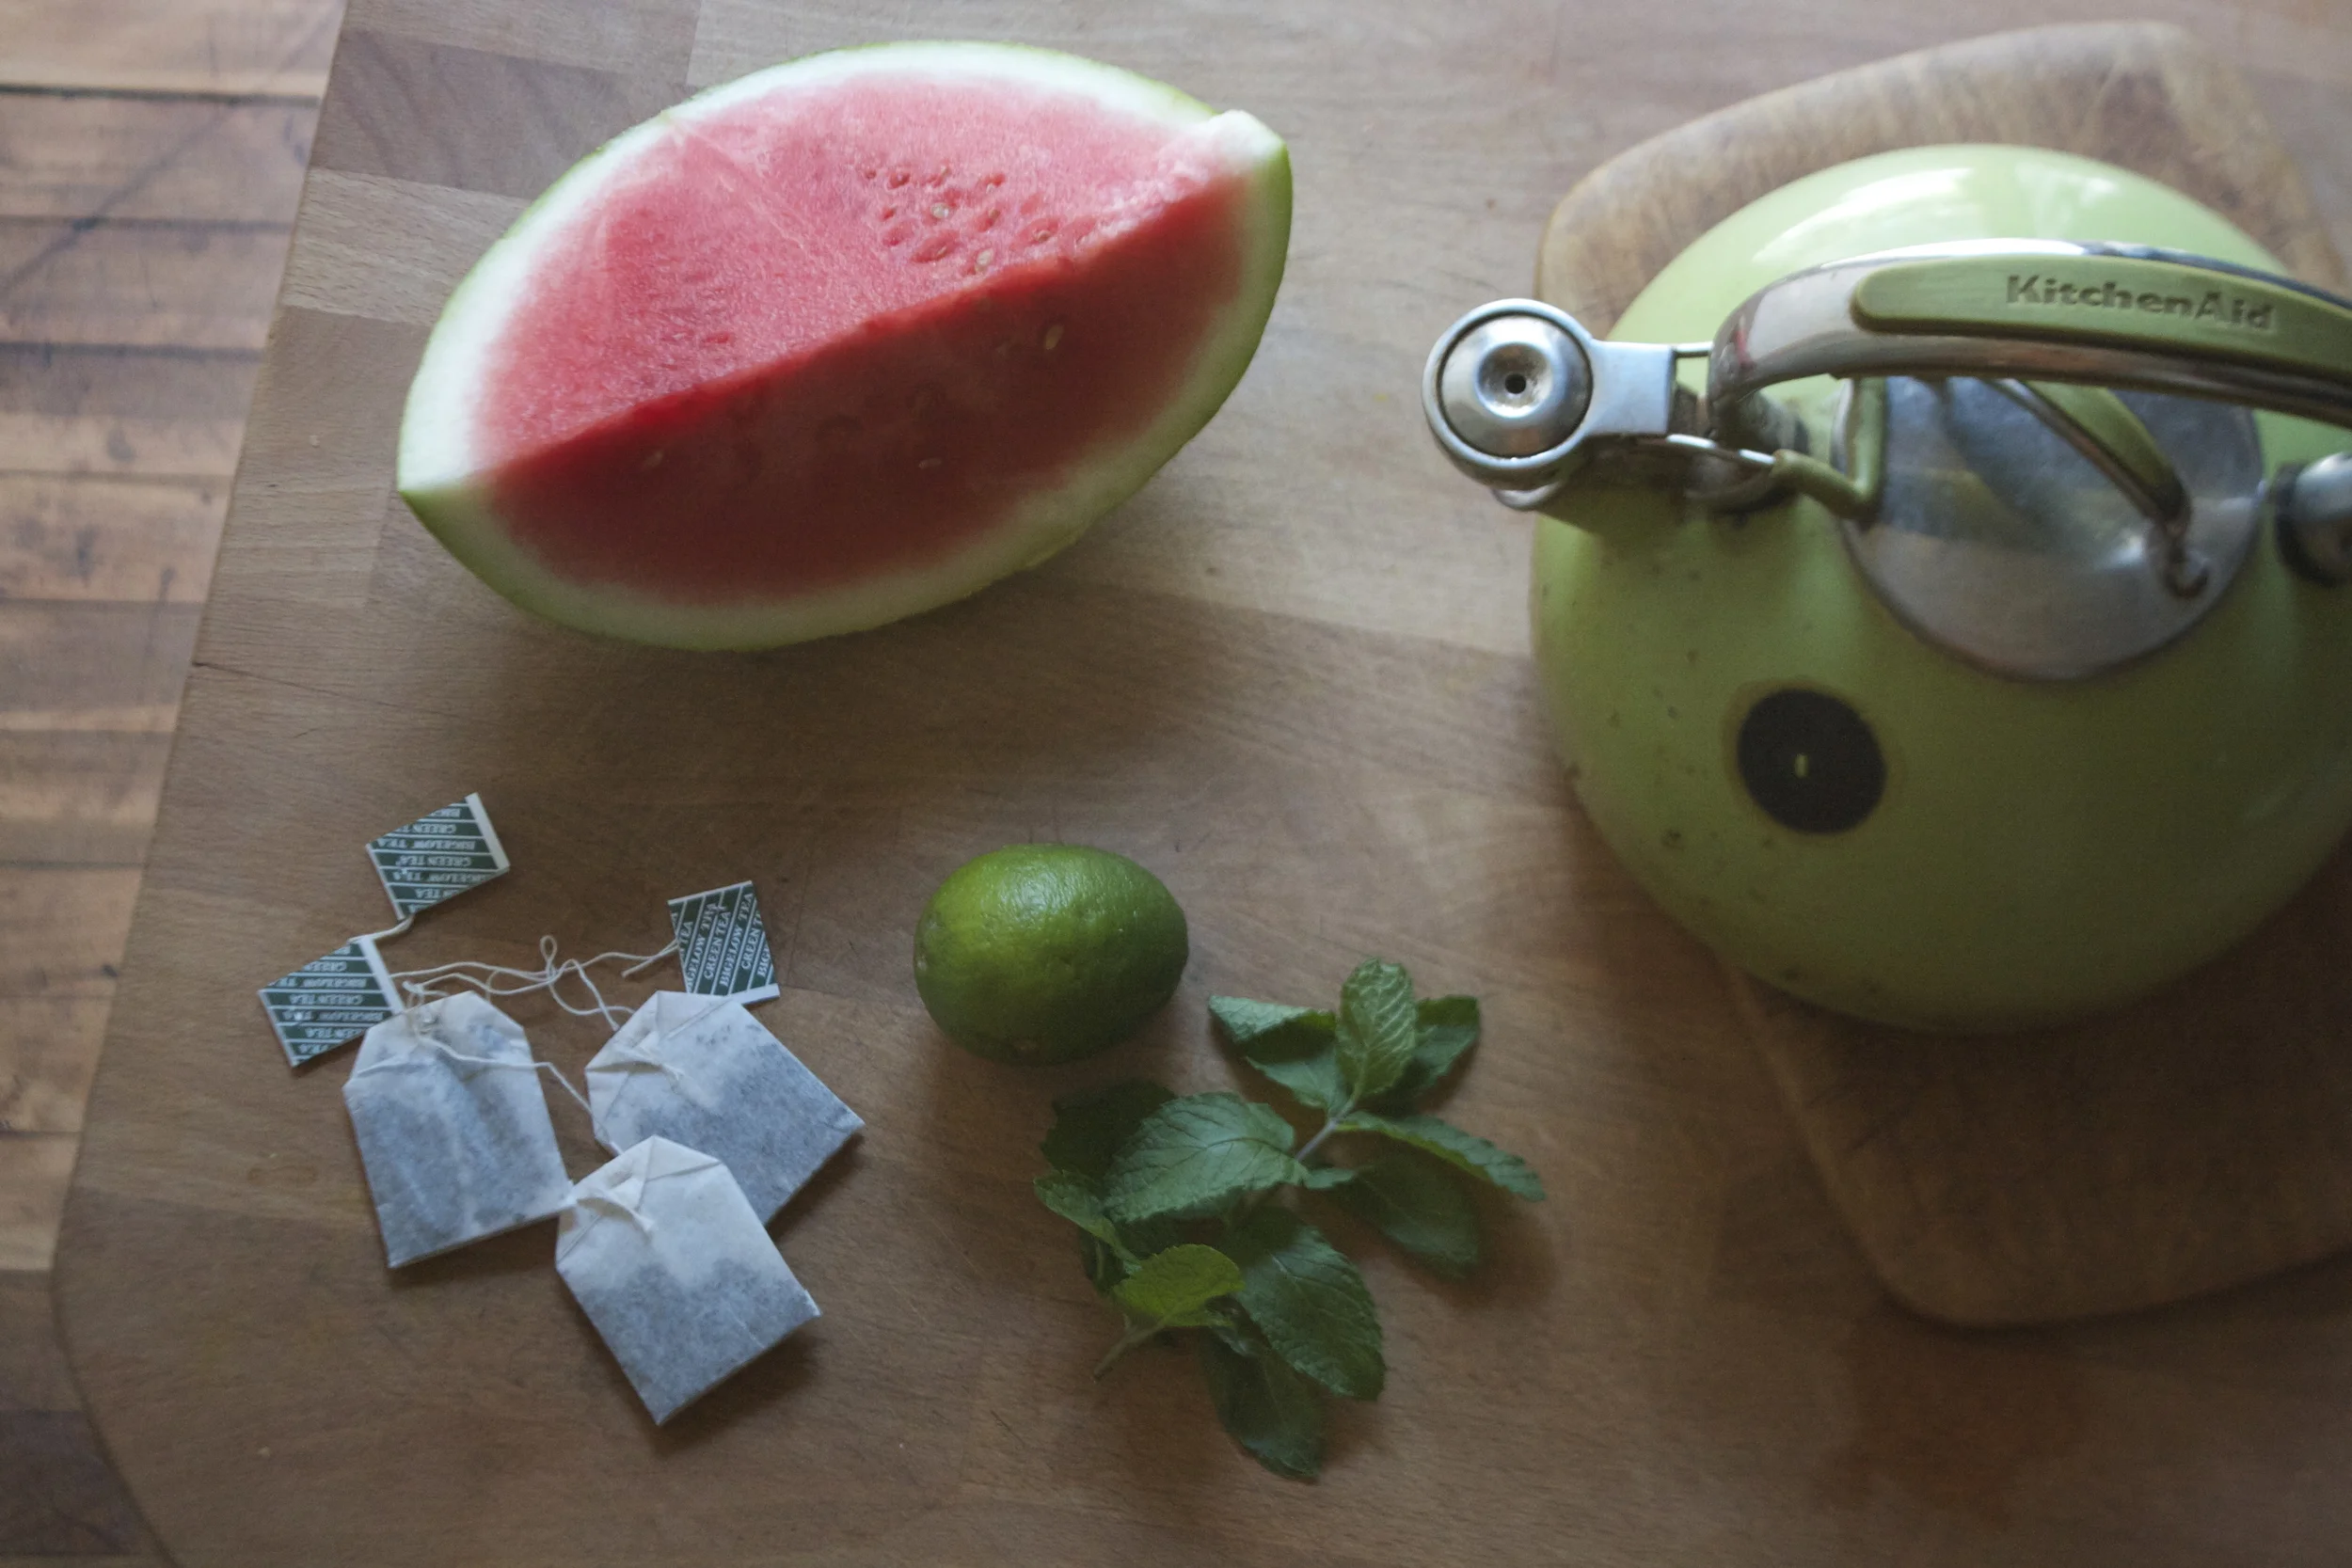
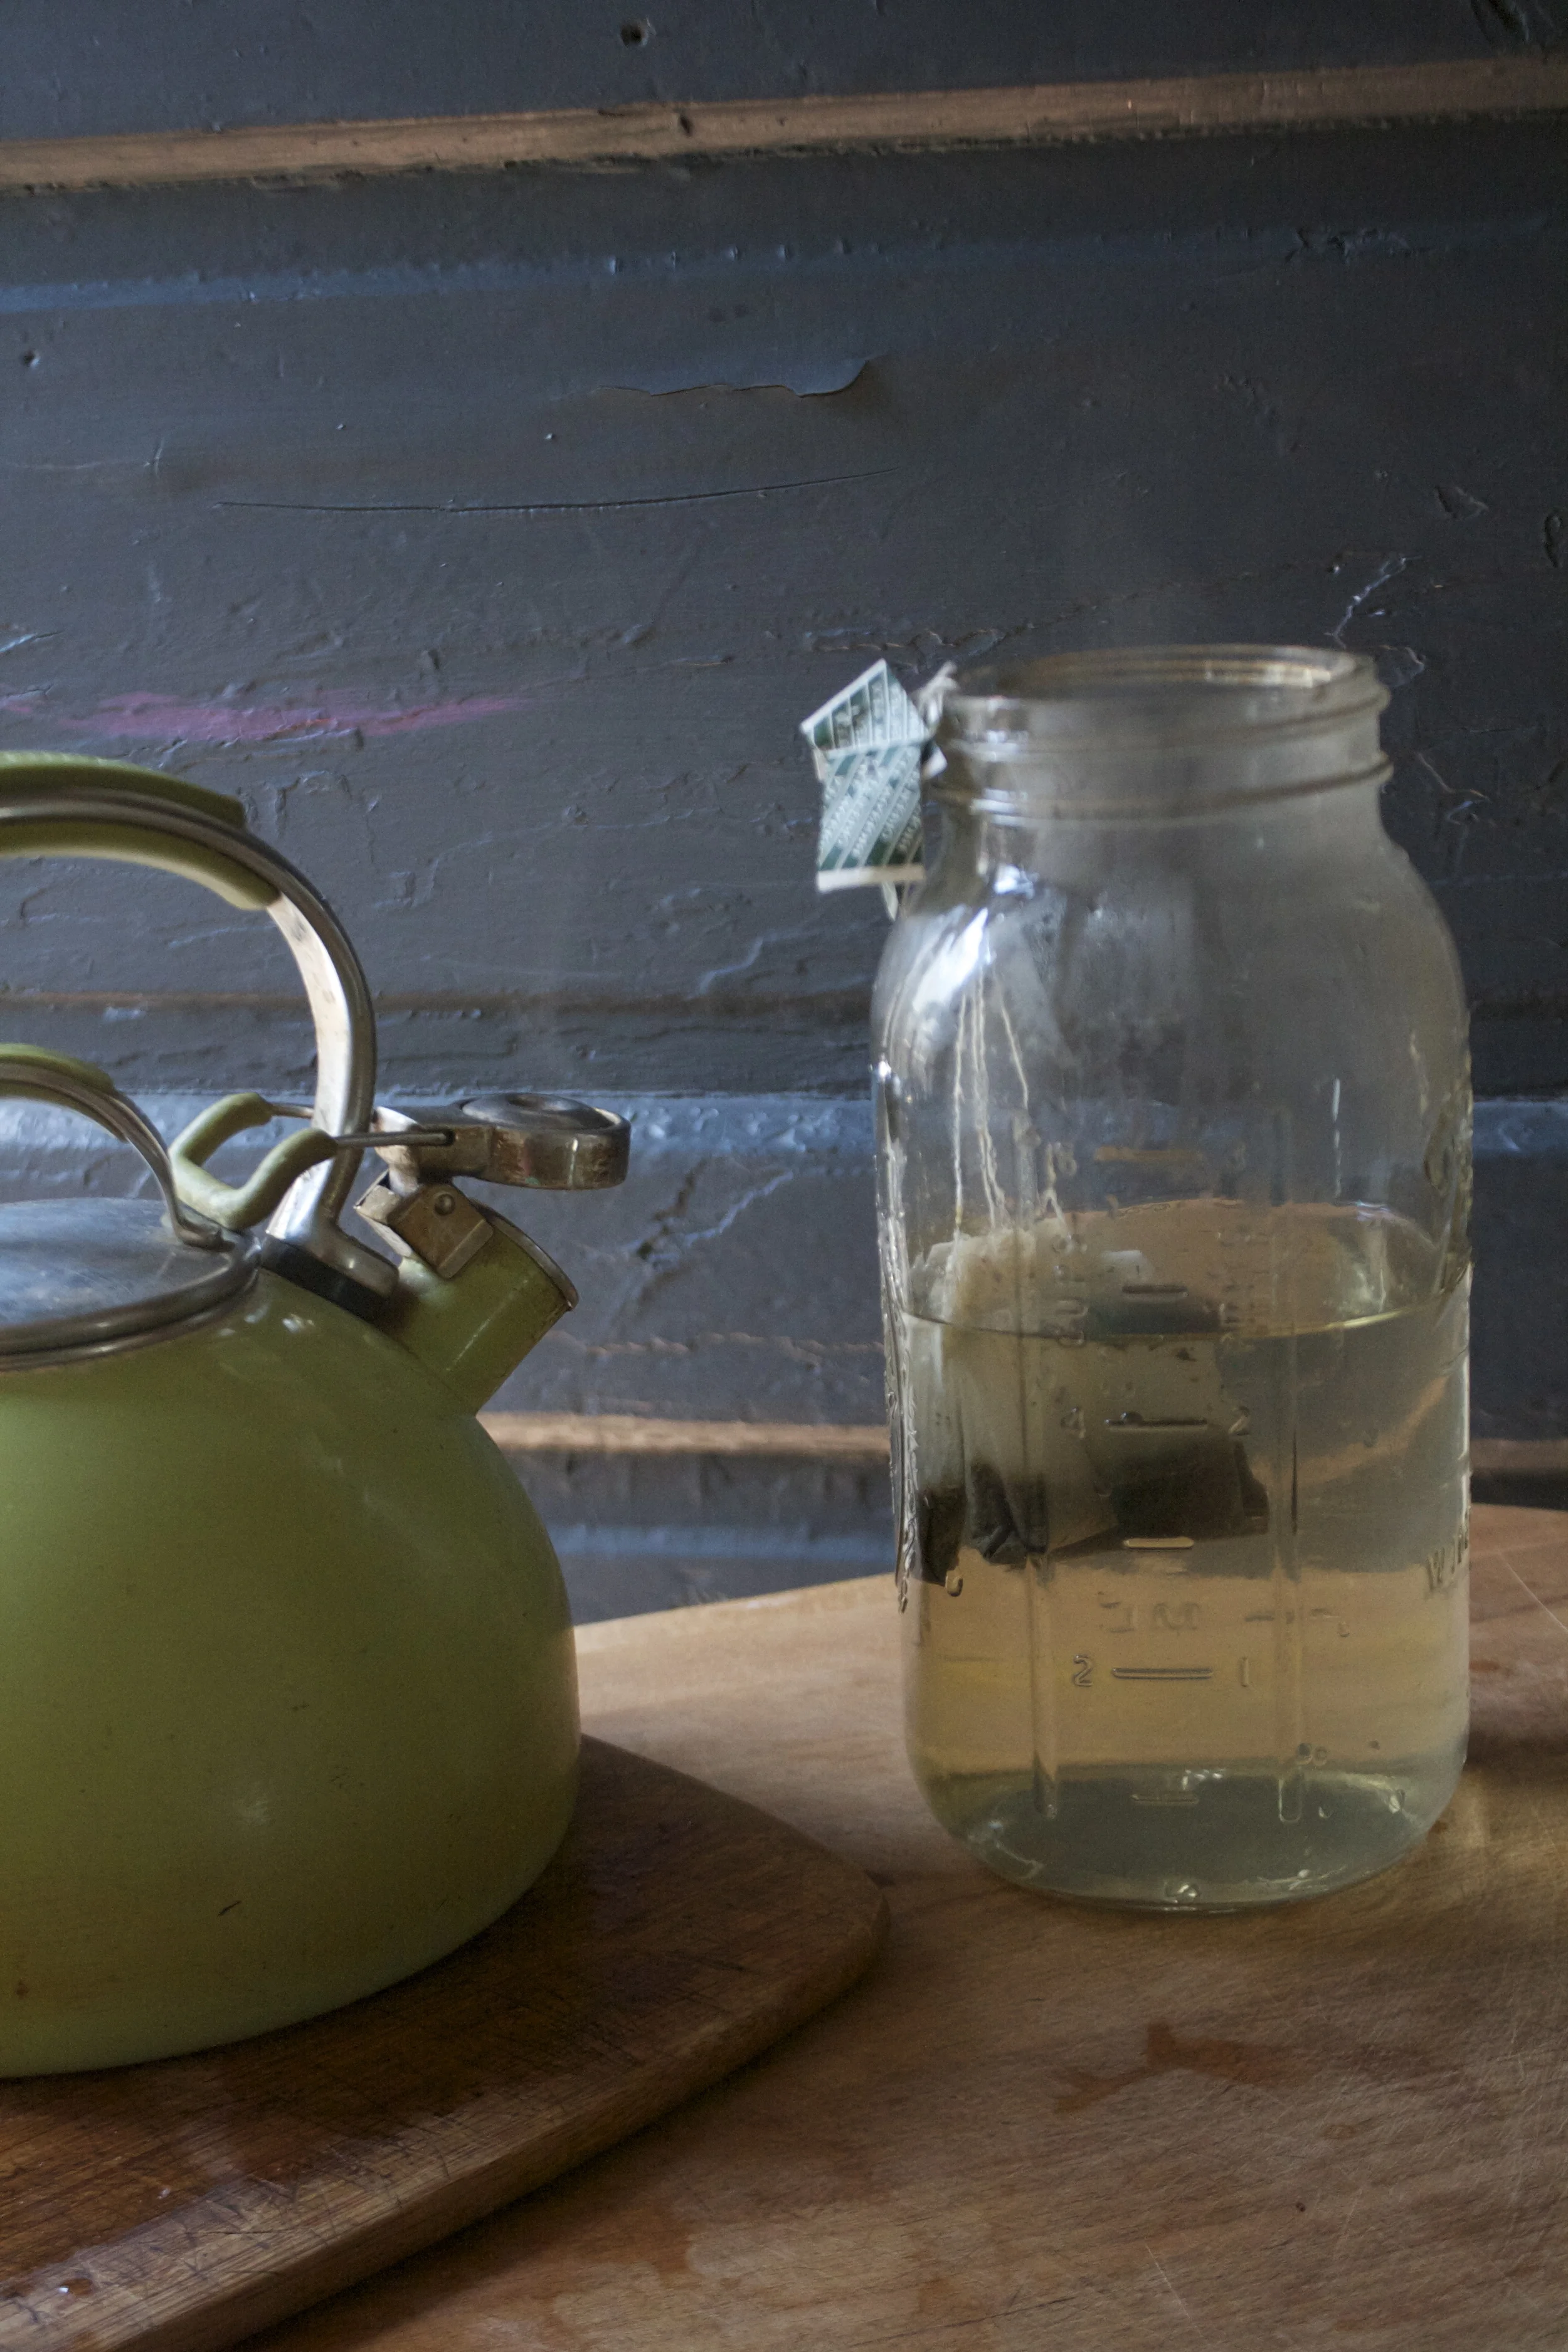
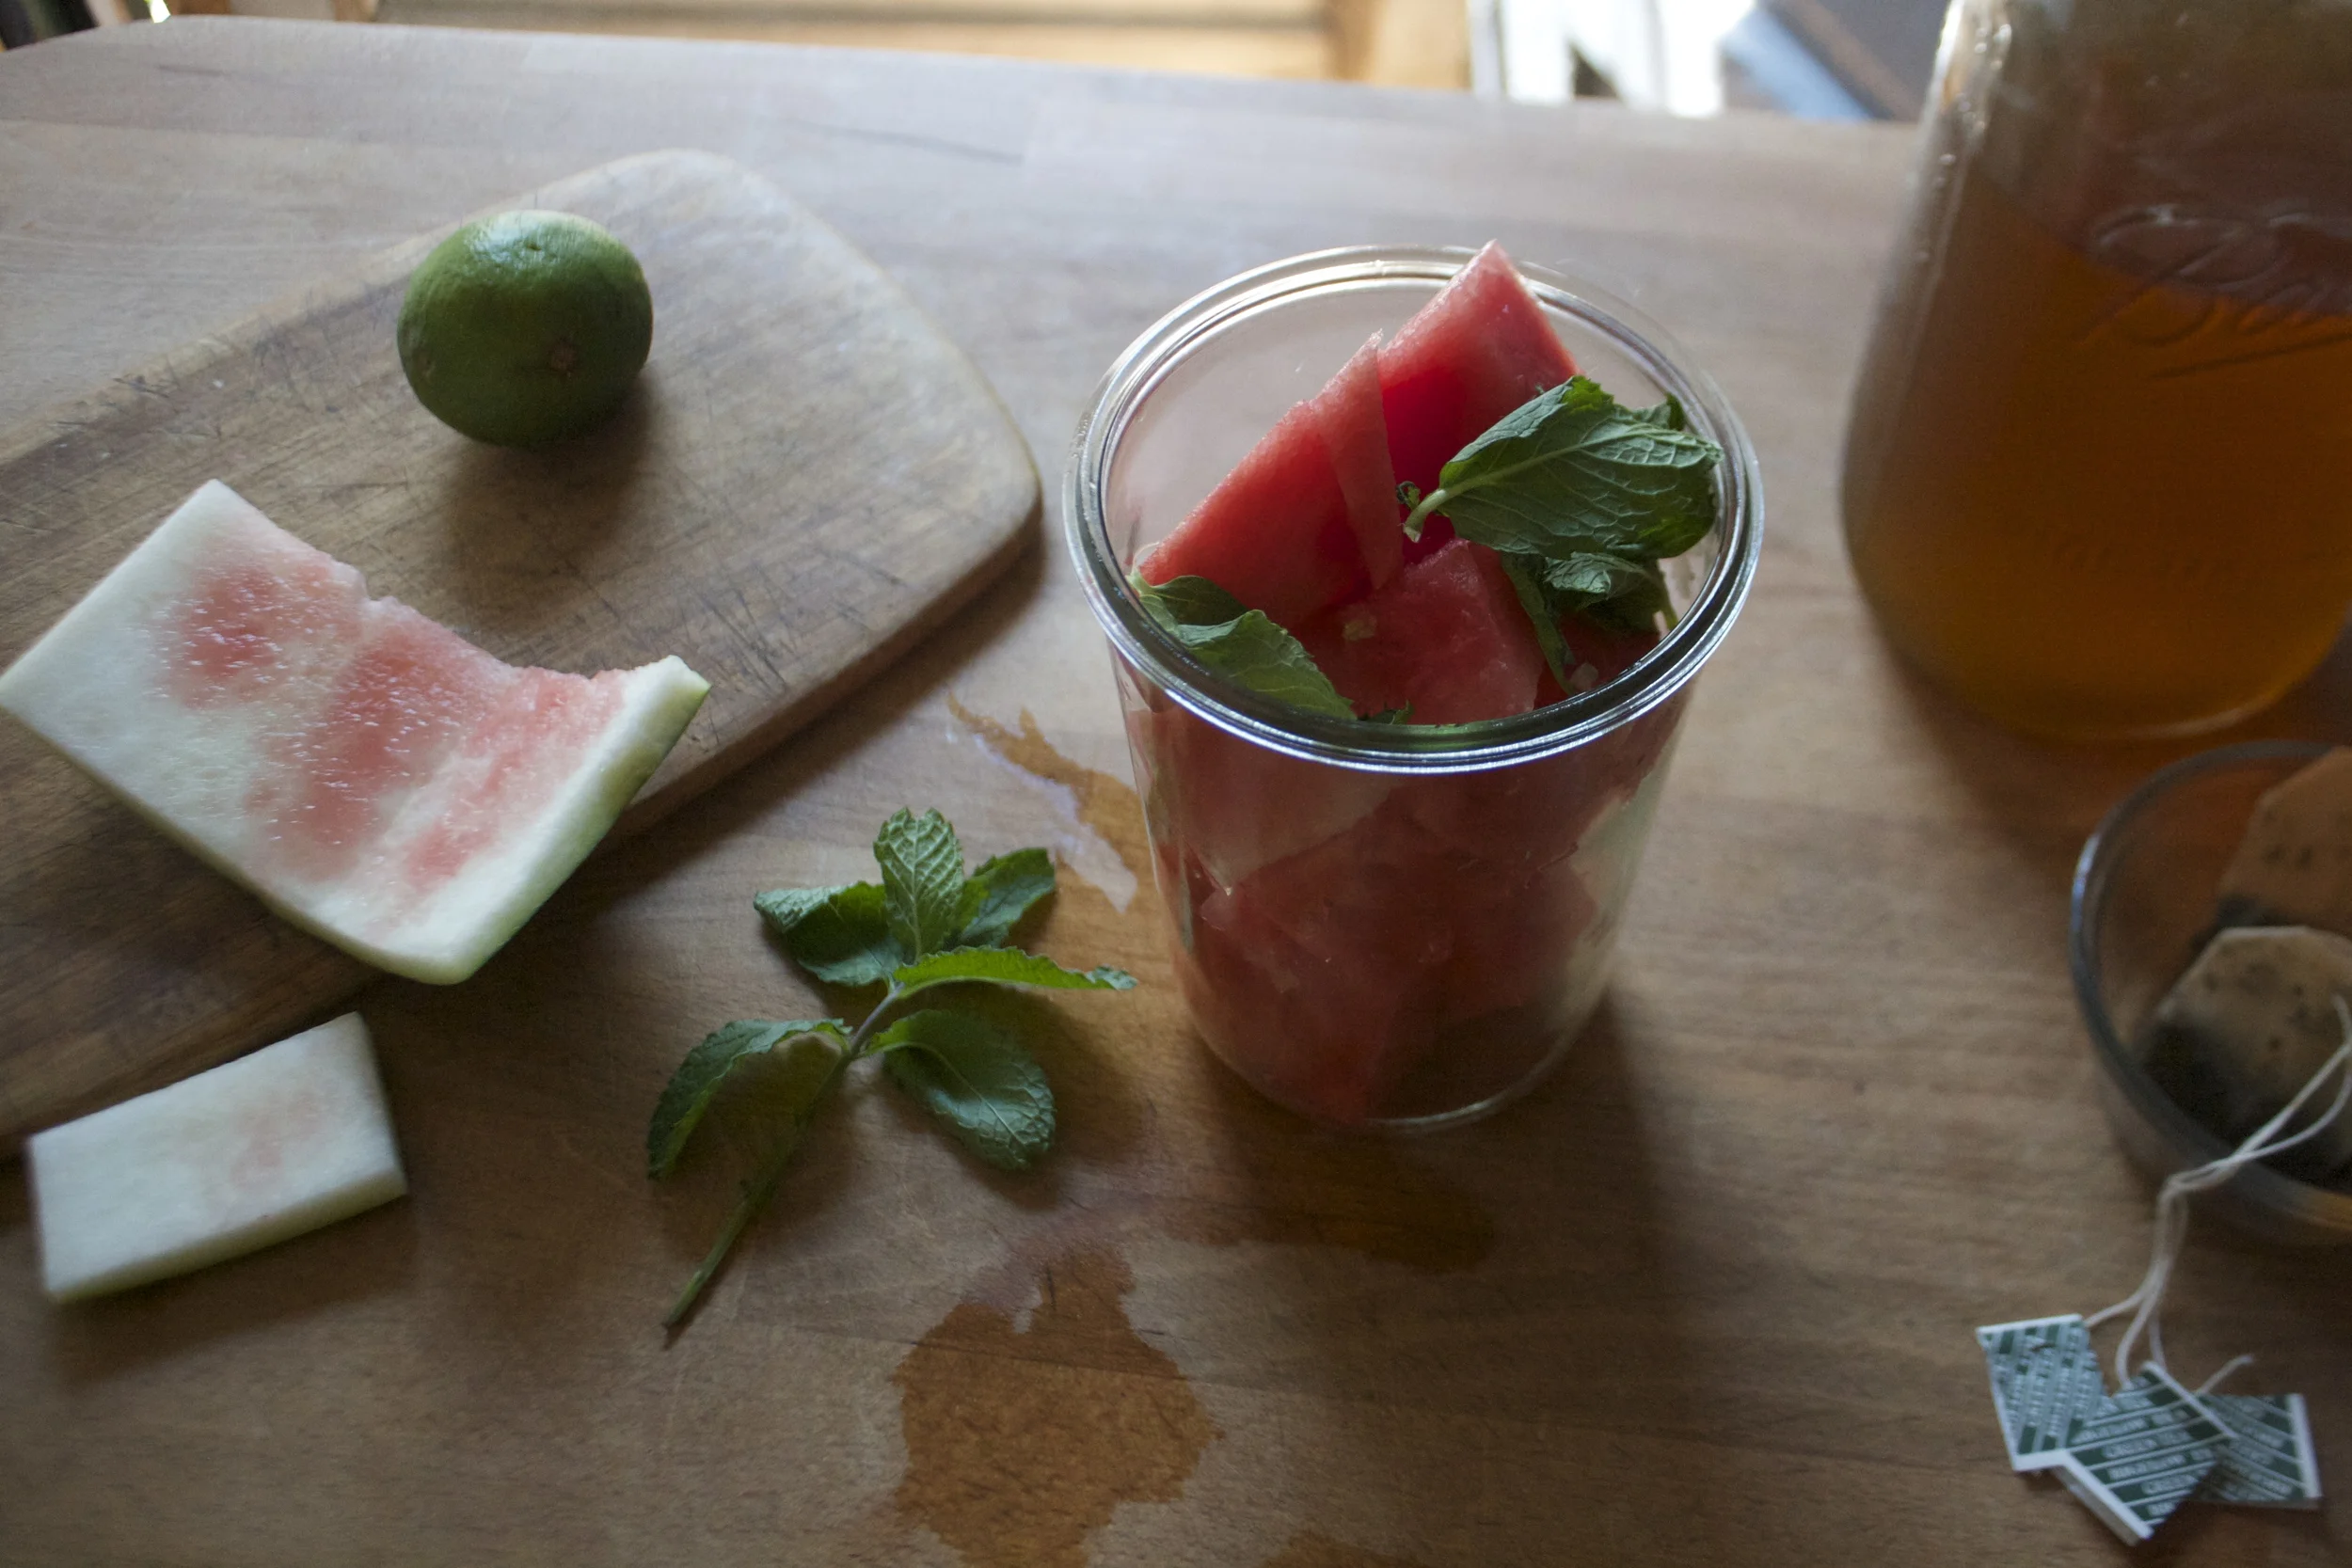
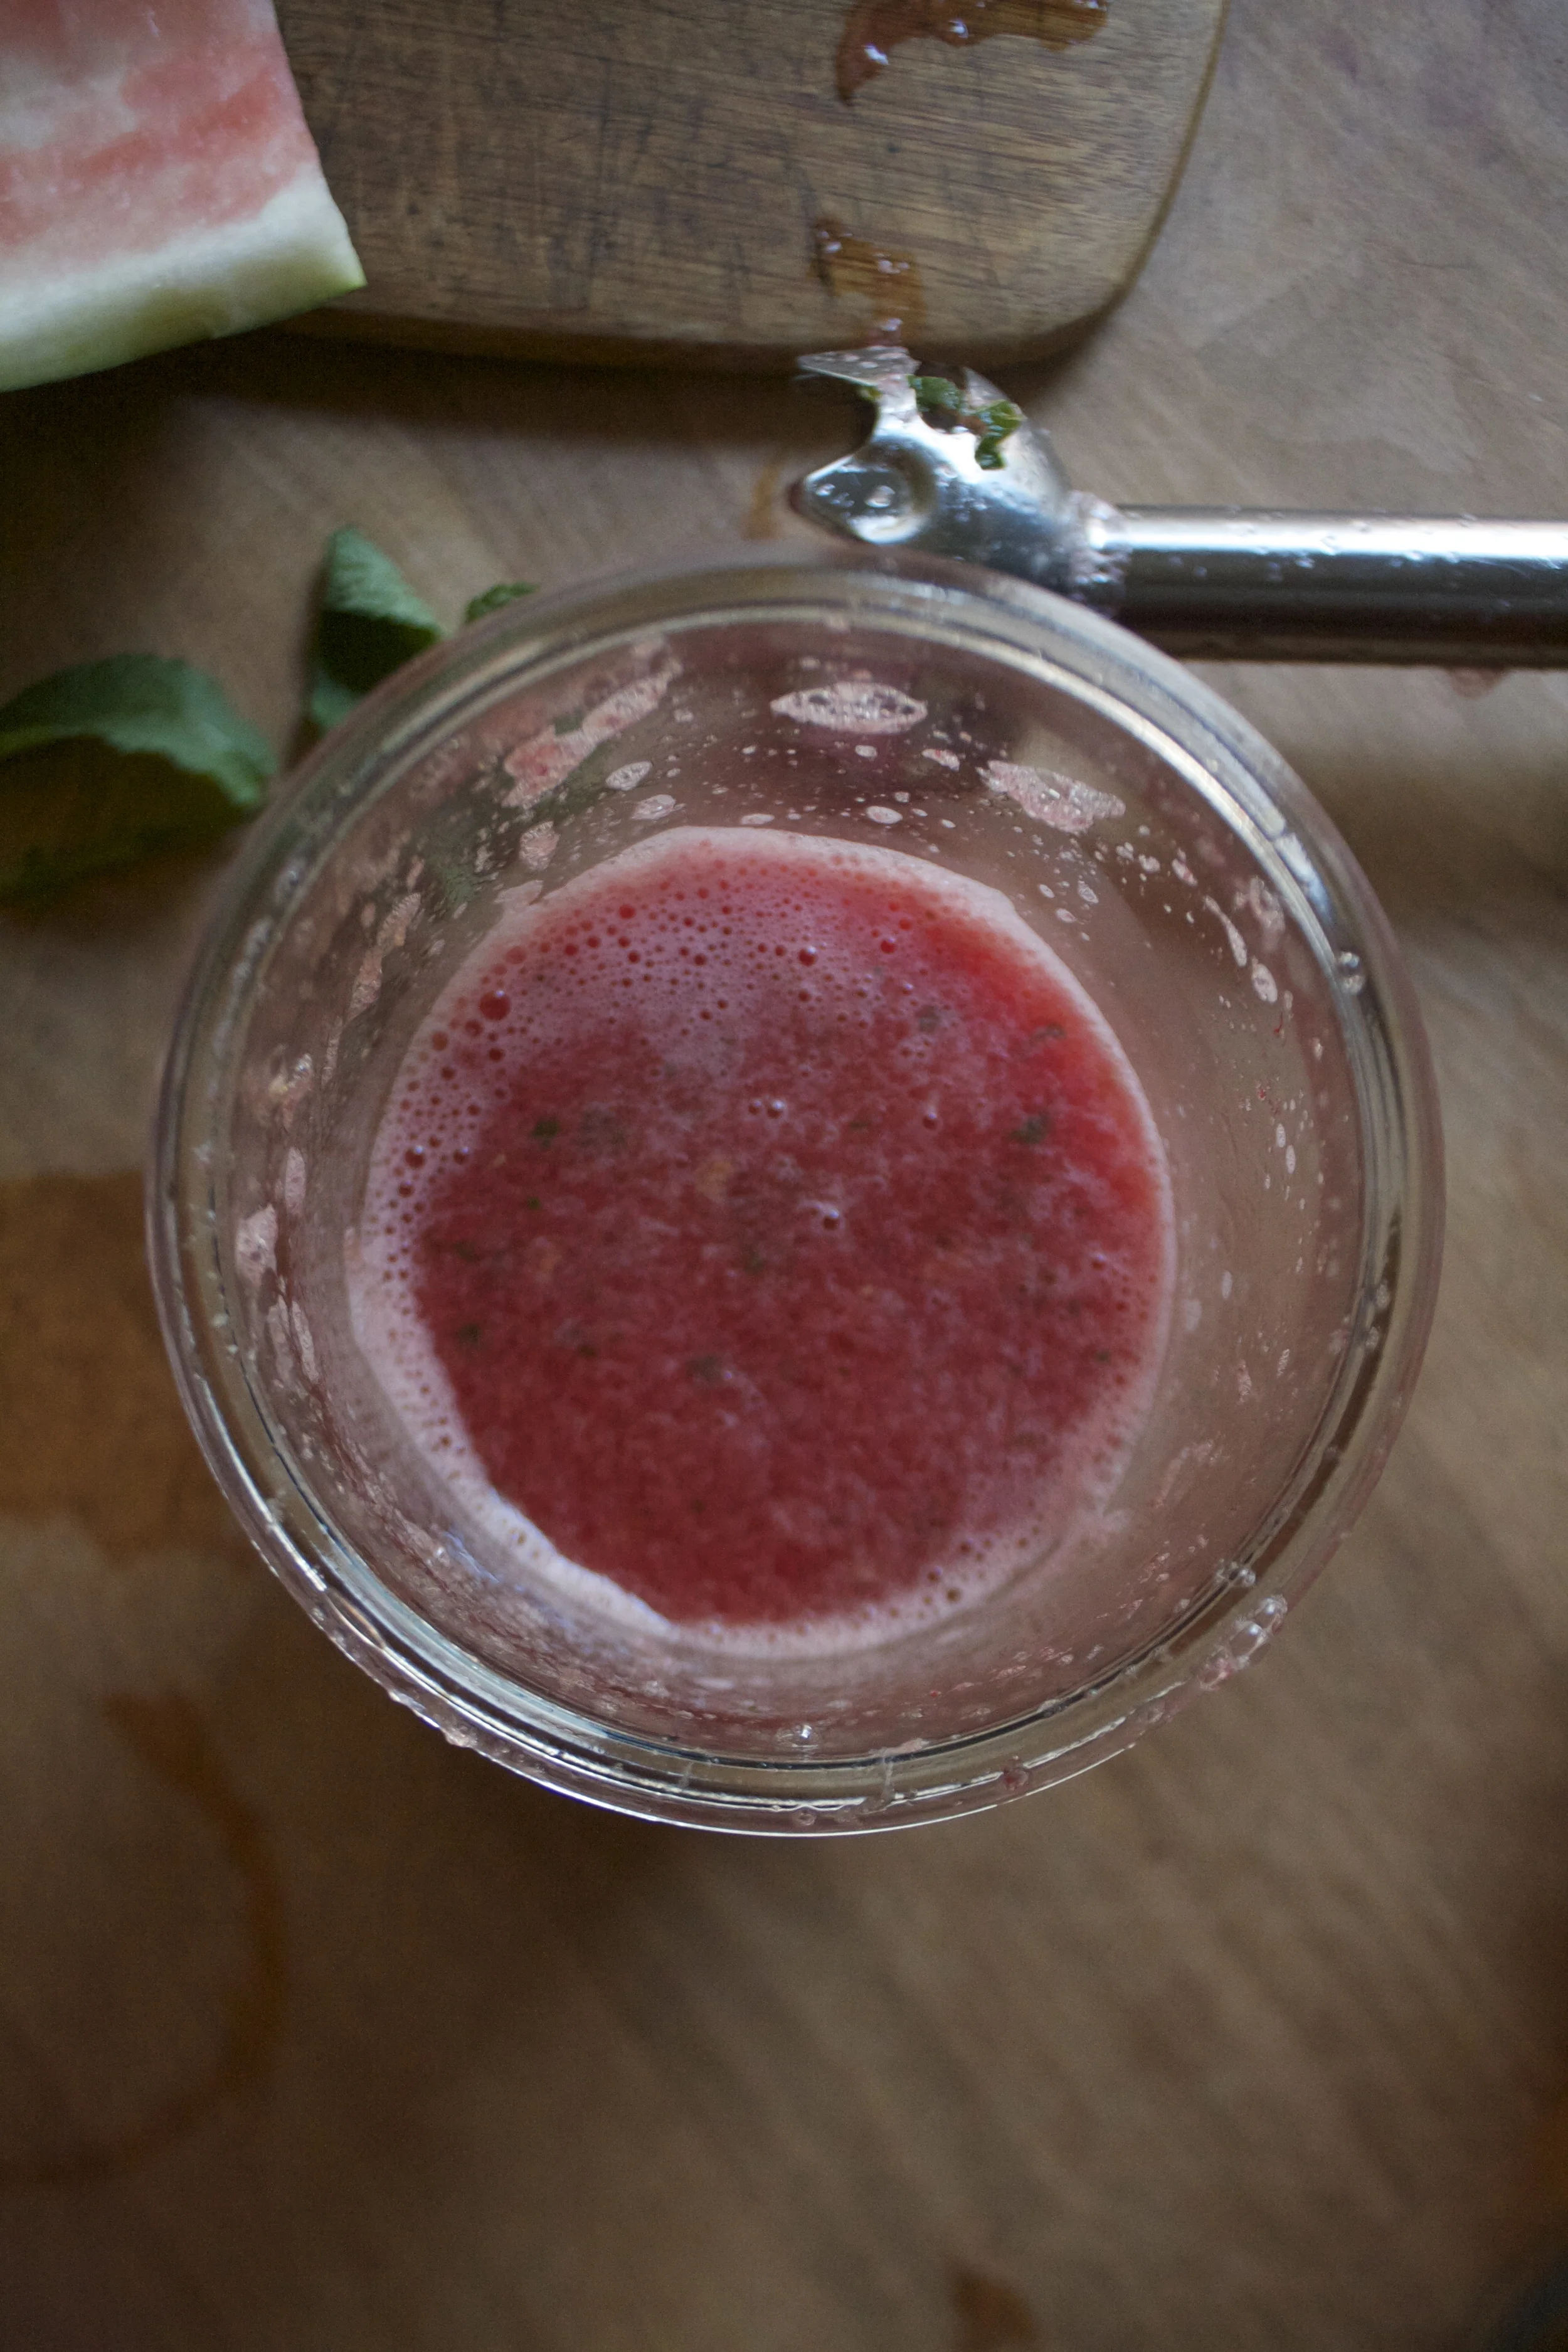

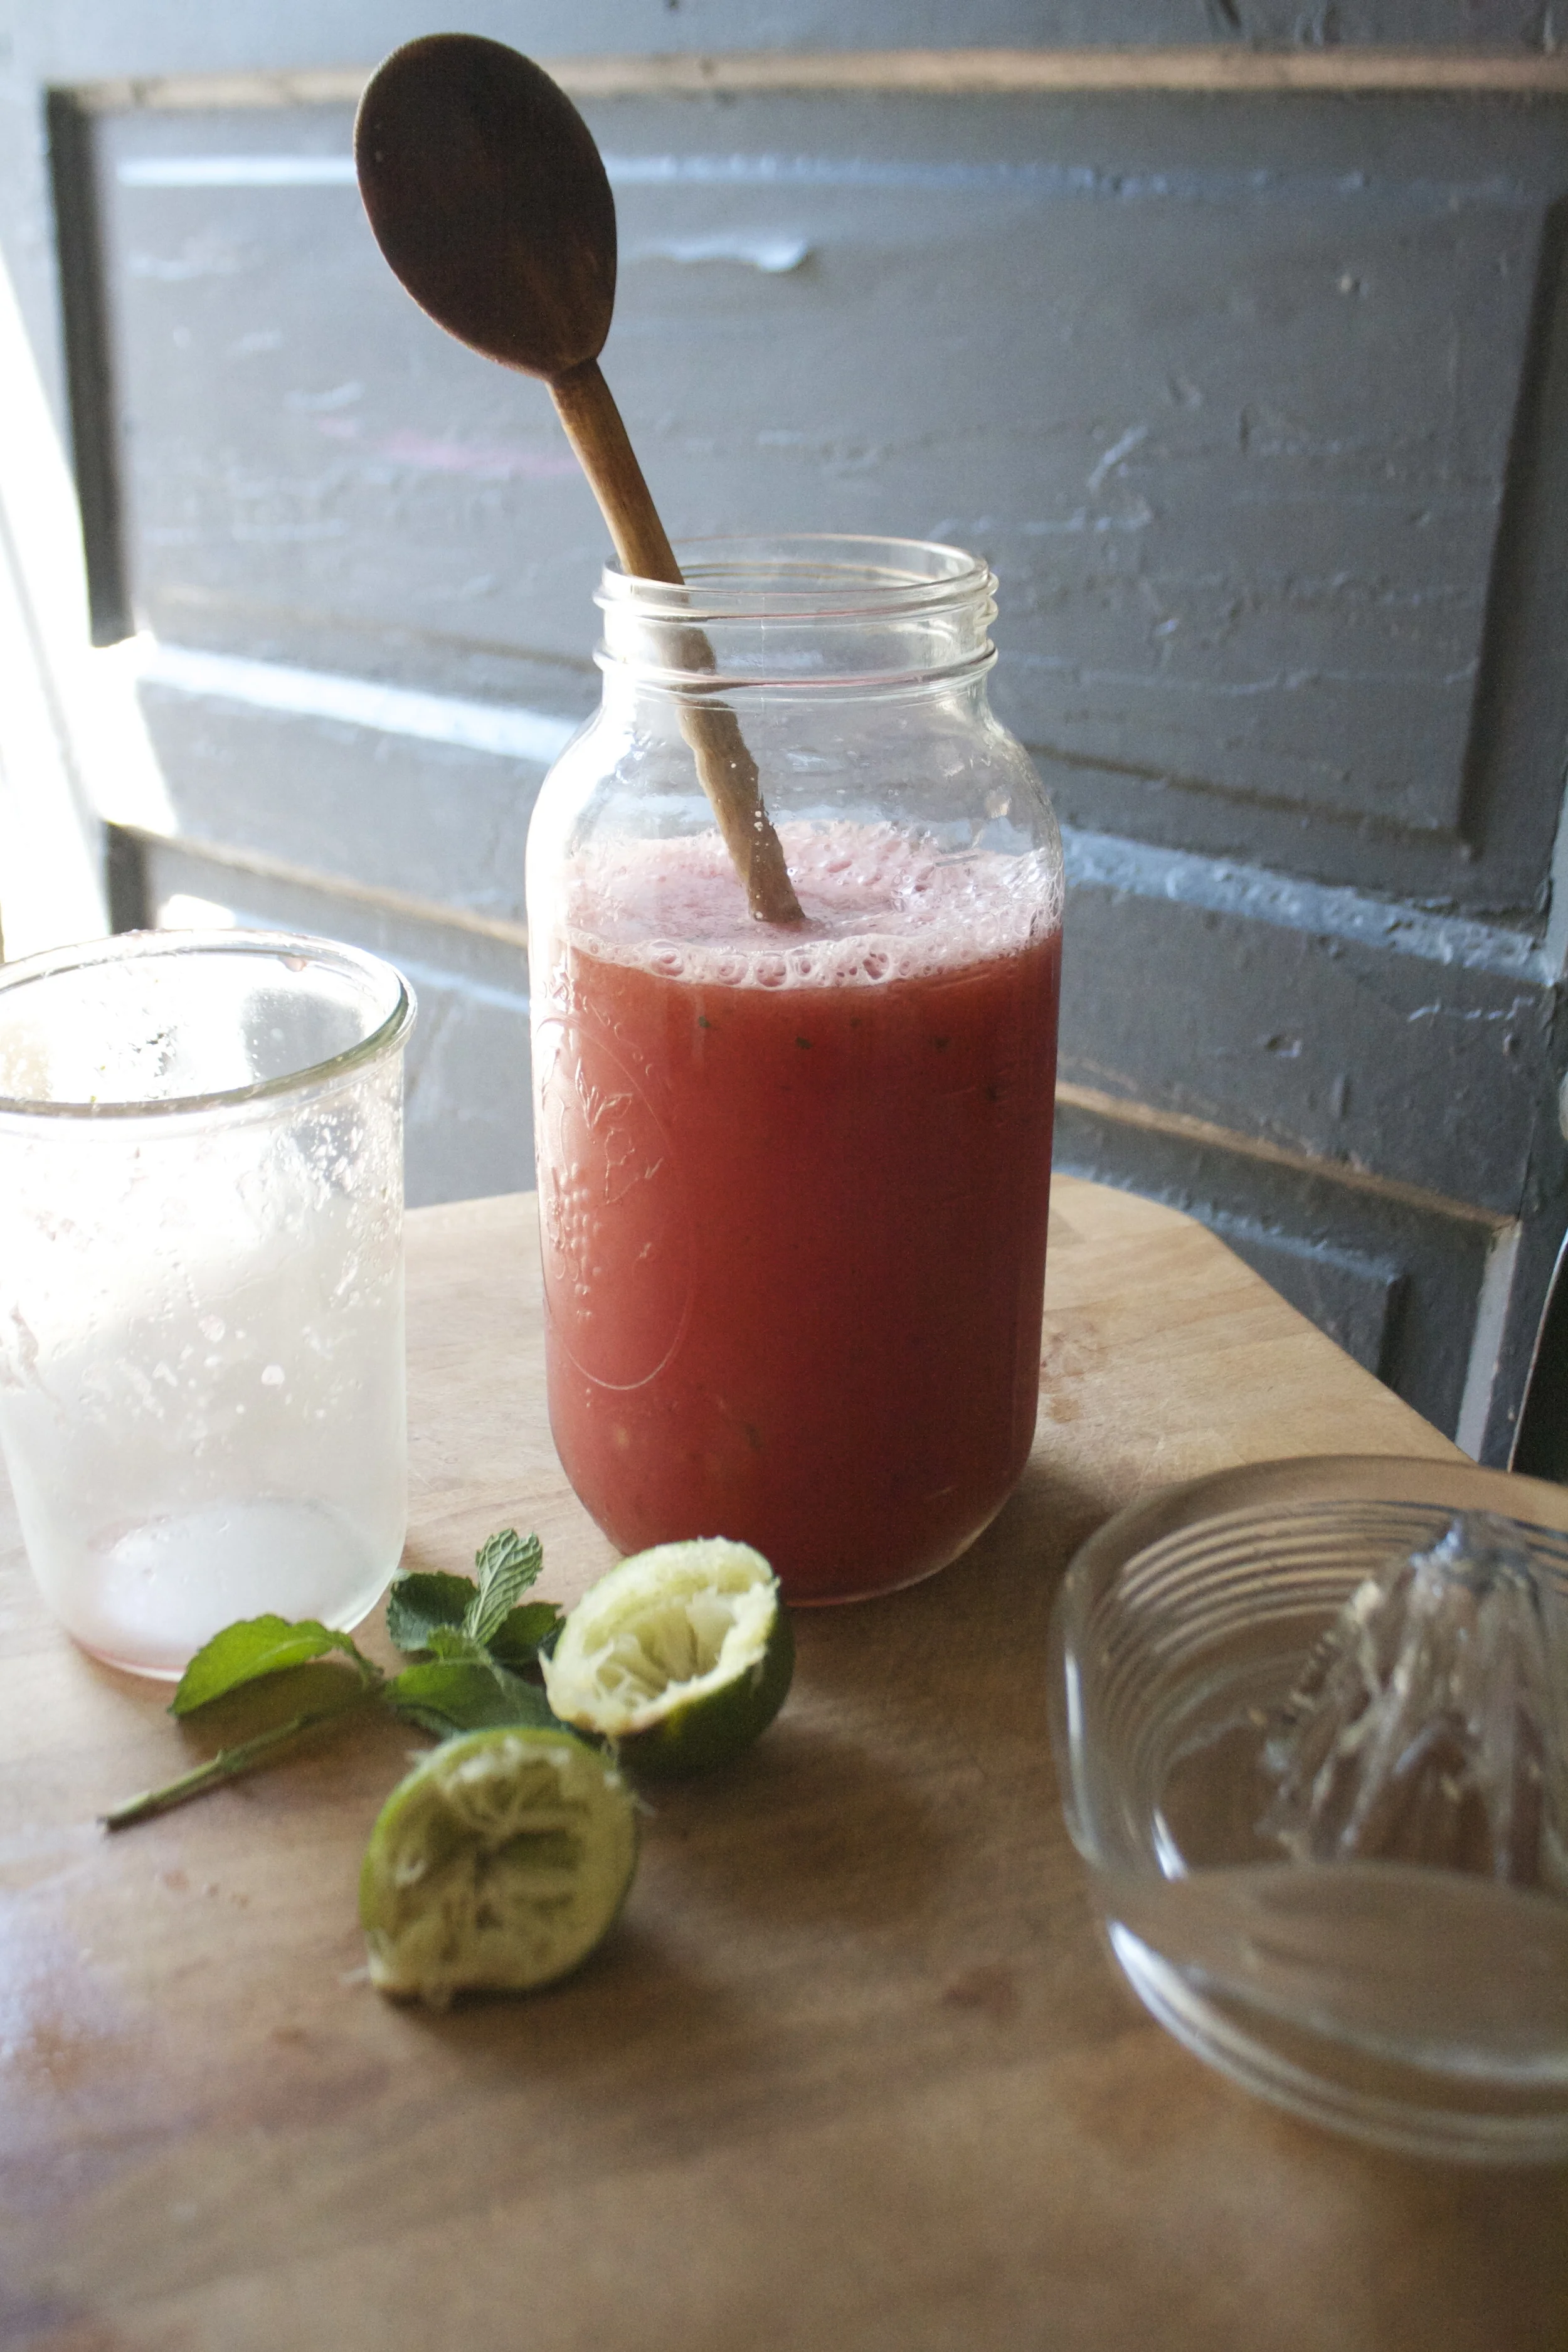
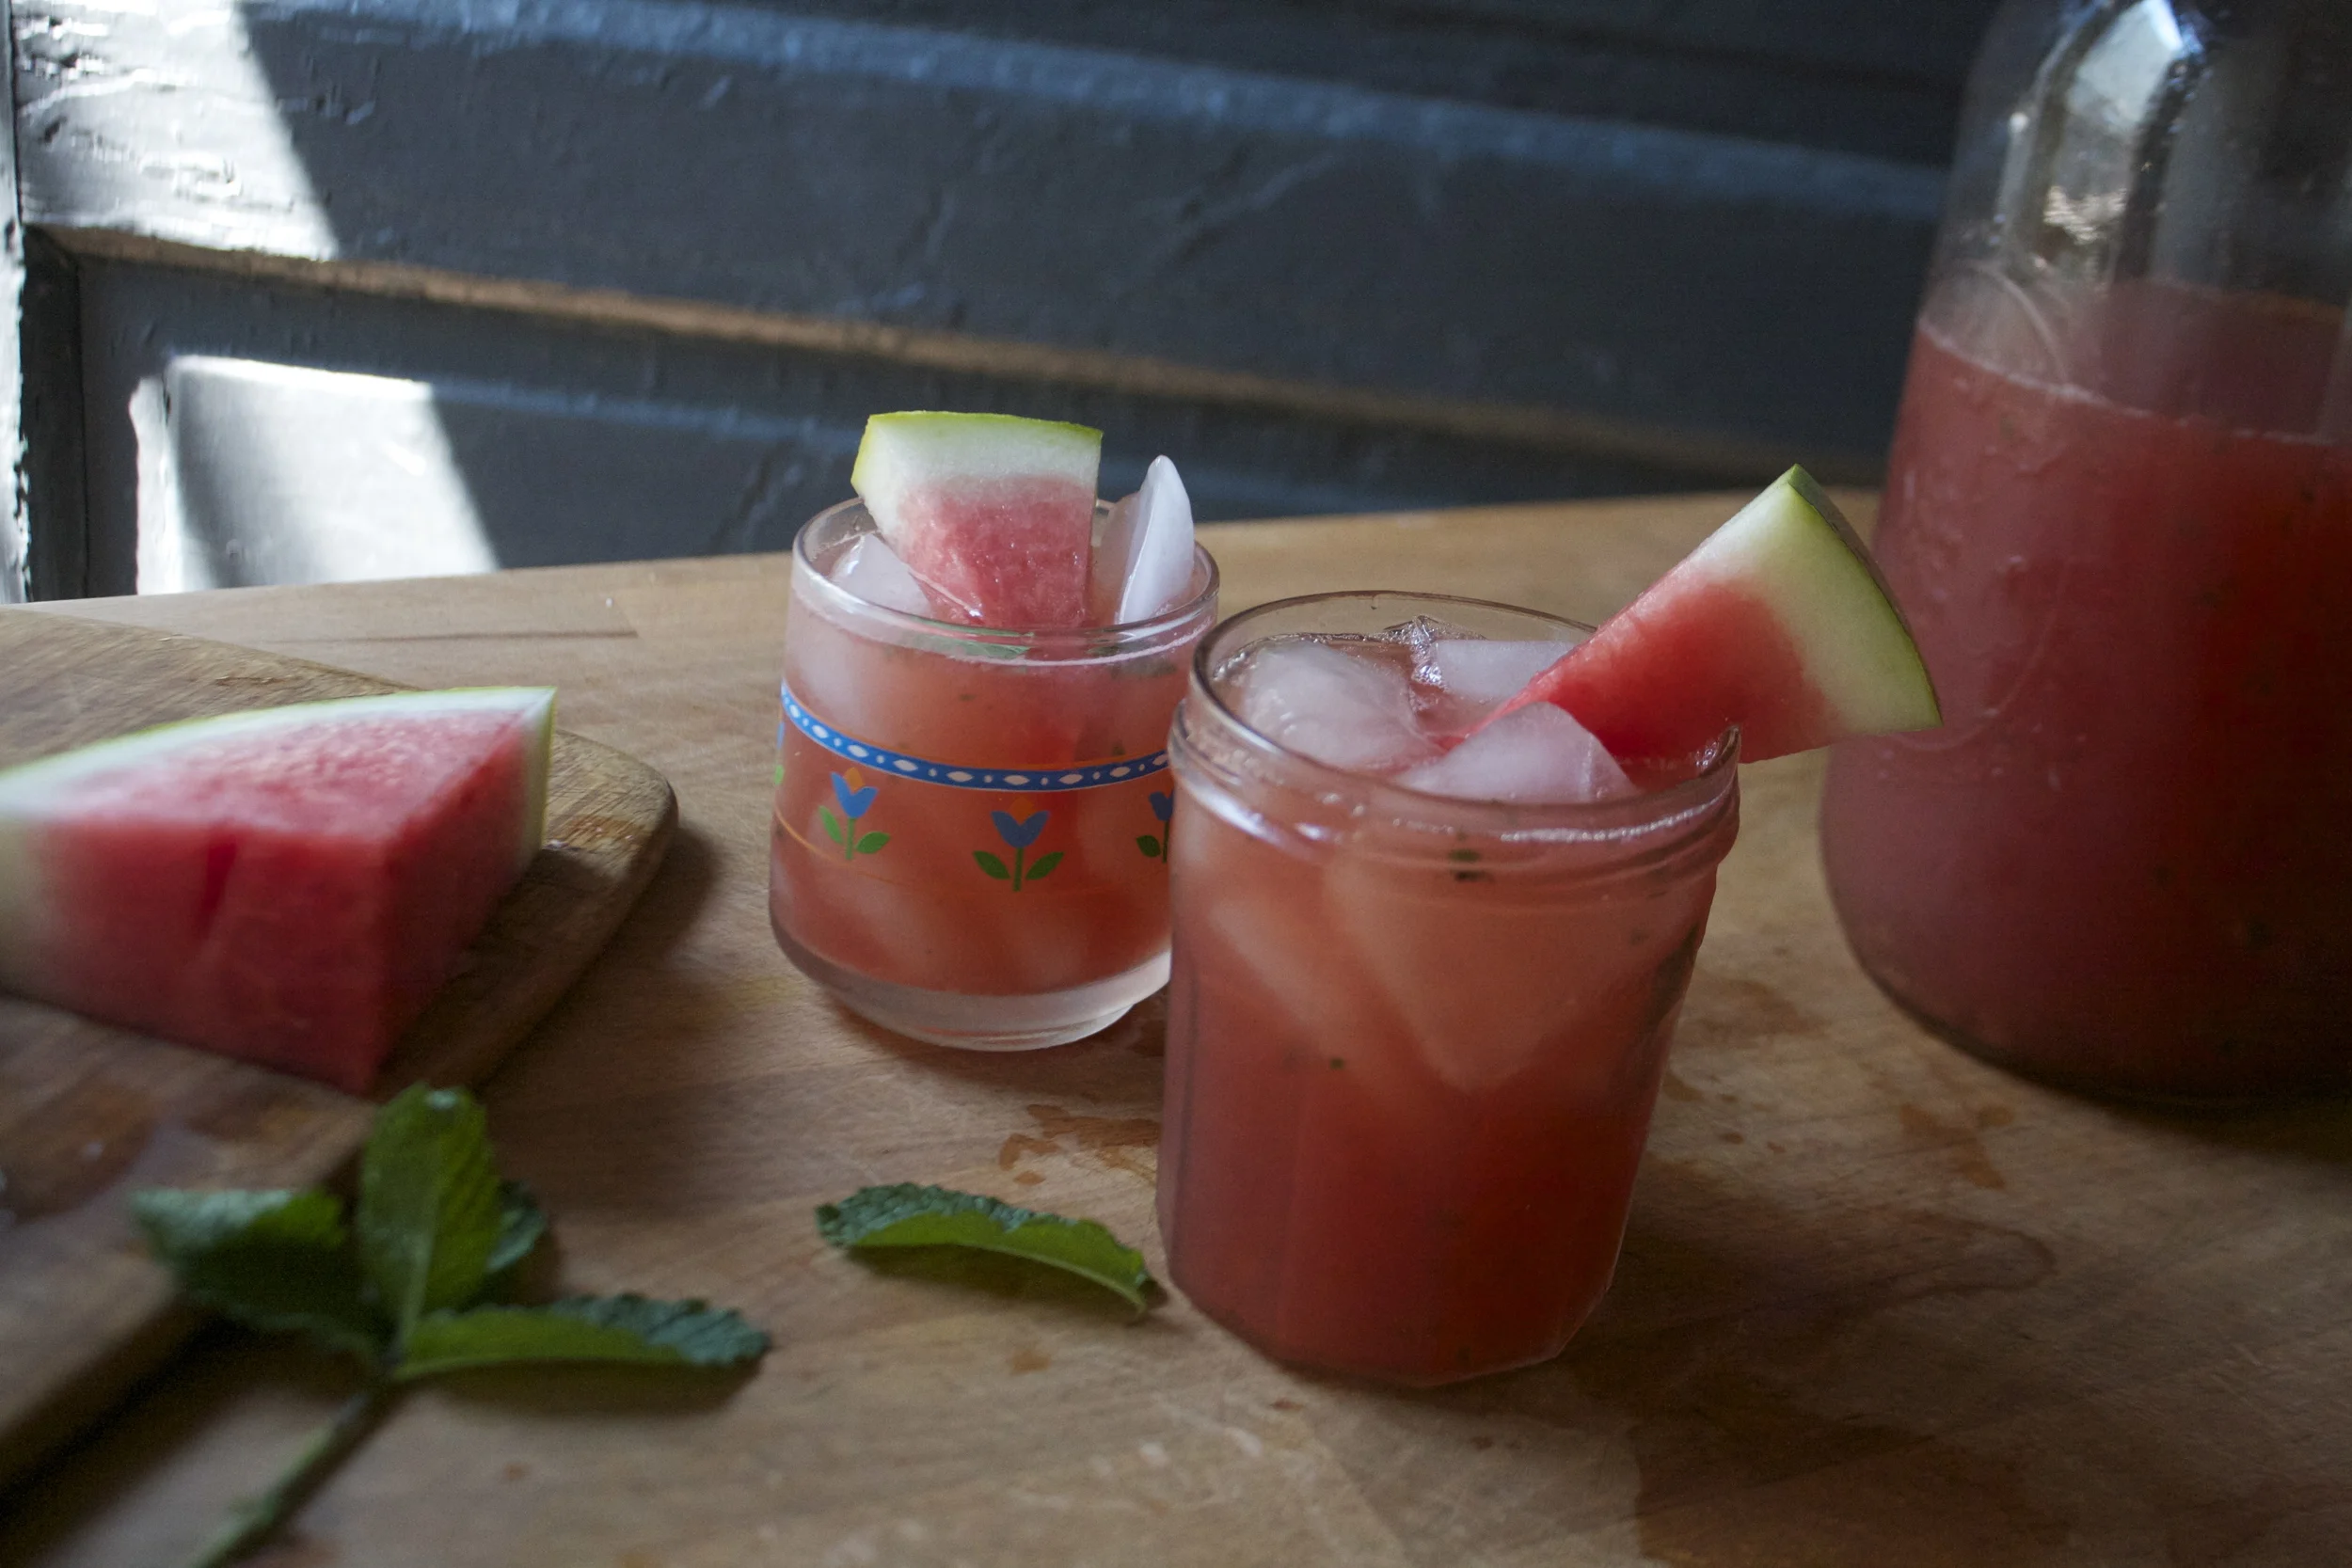

THE LOVELY CRAZY
January 28, 2020 by maximios • Blog
I have been on a severe citrus kick lately. Oranges, limes, lemons, kumquats. I want it all and have been eating it all. A lot of it all. Espeically the oranges which are just so good right now. We have been going through bags of them faster then ever and I am not mad about it.
Which then brings us to chili. Chili is one of the things that I make on a very regular bases. It%u2019s beans, veggies, tomatoes, and a ton of spices. Easy as can be, most people like it, and I never get sick of it. I mean, how could you get sick of it, it is so good! Anyway. Chili, its great but have you ever added orange to it? Oh man is it amazing. Bright and acidic and sweet. The whole pot of chili just radiates more goodness, more intensity, more, moreness. (I know that doesn%u2019t make sense but you get it.) It%u2019s a whole new level of chili and I don%u2019t if there will ever be a time when I don%u2019t add orange to my chili again. Well at least during citrus season.
But enough about all that, what you really want is to just start making this orange black bean chili so you can eat it. I hear you, so I%u2019ll let you at it.
To the chili!
The stuff. Oranges, black beans, crushed tomatoes, an onion, a couple carrots, a pepper, and jalape%u00f1os. Also lots of cumin, chili powder, ground ginger, garlic powder, and salt and pepper.
Small dice up the pepper, onion, carrots, and jalape%u00f1os. Don%u2019t want it super spicy, don%u2019t add the jalape%u00f1os.
All that stuff gets tossed into a big pot along with all the spices, some salt and pepper, and a little water too. Place on stove to start cooking down the veggies.
Slightly tender and smells amazing.
Now add in the beans, the tomatoes, and the zest and juice of an orange. Mix it all up, set it back on stove and keep on cooking,
Now eat your chili, with extra orange slices to squeeze all over it of course. And maybe you want to serve it with some corn bread? That is entirely up to you, but who would be made about it?
-C
Serves 4-6 people
1 pound cooked black beans drained (about 5 cups or 3 cans)
5 cups crushed tomatoes (or 2 28oz cans)
2 oranges (navel or cara cara work)
2 carrots
1 large onion
1 bell pepper
2 jalapenos (optional)
2 heaping tablespoons cumin
2 tablespoon chili powder
2 teaspoons garlic powder
2 teaspoons ground ginger
salt and pepper
Start by chopping up the veggies. Small dice the carrot, the onion and the pepper. If using jalape%u00f1o, dice that into small little bits too. And remove seeds for less heat or leave them if you like it. Once that is all cut up, dump it all into a large heavy bottom pot along with the cumin, chili powder, garlic and ginger powder, and about a teaspoon or so each of salt and pepper. Add about 1/2 cup water, mix it all up, and place the pot on stove on medium heat and start to cook the veggies and spices until they begin to smell fragrant and are ever so slightly tender, which should take 5-10 minutes.
Now add in the beans, the tomatoes, and the zest and juice of one orange. Mix together and keep cooking on medium heat, partially lidded, for about 45 minutes to an hour, stirring once in a while, until the chili has thicken and tastes good to you.
Once done, season to taste with more salt and pepper and either stir the juice of the second orange into the whole pot or serve with slices of orange to squeeze on top.
Eat. Store any left overs in fridge. Tastes delicious cold too.
Potatoes in tomatoes. It just has a nice ring to it. And to tell the truth, that is the only reason I made this dish, because it sounds good.
Ok, not really the only reason, but it was the start, that and I have been sitting on some potatoes for a little while and it was time for them to be eaten. Enter in the tomatoes. I figures cooking the potatoes in tomatoes is alike to a ketchup and french fry situation. Not completely the same, but you get the idea. Add in chickpeas for good measure and onion because I wanted to and that is that. Nothing fussy, one pot, easy, hearty, and good.
Also not hurting anyone that these potatoes take a little while to bake. I could have made this dish in a way that made them cook faster (like parboil the potatoes) but I wanted the heat from the oven. It has been pretty freaking dang cold out so I liked having the heat, it adds another dimension to the term comfort food (as in me being comfortable hanging out next a hot oven).
Anyway, nothing too fancy, just all around tasty dish. It is just what you need to bake and eat on any given cold winter day. And it sounds nice too. Just say it aloud. Potatoes in Tomatoes. Right? Now you see, it had to be done.
To the potatoes in tomatoes!
The stuff. Potatoes, crushed tomatoes, cooked chick peas, an onion, a few cloves garlic, Italian seasoning, salt and pepper and a bit of olive oil.
Start by chopping the onion and mincing the garlic.
Get it all into a cast iron pan or oven safe skillet with a little olive oil. Add the spices and give it some heat on the stove top while you cut potatoes.
Now cut those potatoes nice and thin. A mandolin works wonders but a knife will do just as well, just try to keep the thickness all the same.
Potatoes are cut and onion mixture has sweated a bit so now you add in the chick peas (with liquid) and half the crushed tomatoes. Stir it all up.
Layer on potatoes, drizzle with a tiny bit of olive oil and give them some salt and pepper love.
Dump the rest of the tomatoes on top then add in water, enough that all the potatoes are completely submerged.
Now into the oven they go.
Doesn%u2019t that just look all fantastic? I mean really really , A+ good, no? If you are feeling extra crispy, you could even stick the skillet under the broiler for a few minutes right before you pull it out.
And that is that. Potatoes in tomatoes with chick peas and onions. A simple but very satisfying dish to keep your cold belly full of warm goodness.
Be well.
-C
About a pound or so of white or red potatoes
3 cups (or a 28oz can) crushed tomatoes
2 cups (or a 16 oz can) cooked chickpeas in liquid
1 large onion
2-3 close garlic
2 tablespoons Italian seasoning
2-3 cups water
olive oil
salt and pepper
Preheat oven to 400
Grab onion and dice into small pieces. Mince the garlic. Grab a medium sized oven safe skillet and toss the onion and garlic in with a tablespoon or so of olive oil and the seasoning. Place on medium heat and cook for a few minutes until the the onion is slightly cooked and fragrant. Remove from heat. Mix in the chick peas with liquid and half of the crushed tomatoes.
Rinse potatoes and slice into 1/4 inch thick rounds. Place tomatoes into the skillet, layering any way you want. Drizzle the top with like a teaspoon olive oil then sprinkle the tomatoes with salt and pepper. Spread the rest of the crushed tomatoes over the potatoes then pour the water in. If the potatoes are not completely submerged in water, add more until they are. Cover the skillet with a lid or tin foil.
Place skillet in oven and bake 40ish minutes then remove lid or foil and bake for another 25-30 minutes or until potatoes are fork tender and slightly crispy on the edges. Depending on the type of patotoes you use,(like a really firm and waxy yellow potato) you might need to add more water to the skillet and cook for longer. If that is the case, just pour more water over until the potatoes are submerged again and keep baking until cooked.
For extra crispy, when potatoes are done, place skillet under broiler for a few minutes until crisp to your liking.
Pull from oven, let cool a minutes or two then dig in.
I can%u2019t remember the last time I have gone a day without eating lentils. Seriously, even when we travel I buy or bring along a bag of lentils. Or when we are camping, its basically all we eat. So it is safe to say that I know my way around a lentil or two. They are probably my favorite food (I say that about all my favorites)
Other then lentils being amazing delicious, the are so versatile. I am sure I say it all the time, but there is nothing you cannot make with lentils, sweet or savory. And nutritional as all heck. So much iron and a super amount of protein. Lentils are basically the perfect food in tiny little coin shaped form. Take it from this vegan lady here. Lentils help keep me alive. HA.
But enough about how many lentils I eat, what we need to address is this chili. It doesn%u2019t matter if you are a lentil feen or not, you will very much enjoy yourself a big bowl of this hearty, slightly spicy, warming goodness. Especially now, when it%u2019s cold outside and the days are short and you just want to eat something filling and healthy and that is not left over holiday cookies. And big bonus, this is a chili that you could come home to start at 5 and basically have it ready to eat by 6. That is just one bit of the magic of lentils, they so cook so fast.
And it%u2019s chili and chili is the best so you really should just get it made. It%u2019s what you need, I can tell.
To all the lentil goodness!
The stuff. Green lentils, crushed tomatoes, a cubanelle pepper, an onion, a couple carrots, and some cauliflower. Also a few cloves or garlic, cumin, chili powder, ground ginger, a red jalape%u00f1o, and salt and pepper.
Get started by small choping the carrot, onion, and pepper. Mince up the garlic too.
Grab that jalape%u00f1o and remove steam (and seeds if you want heat) and dice into very very small piece.
Into a big old pot it all goes, along with the cauliflower and all the spices. Add a splash of water and a sprinkle of salt and pepper and stick it on the stove for a few minutes to warm up the veggies and spices.
Looking good.. So good I wanted to eat it all, but don%u2019t, it%u2019s for the chili.
Now add all the tomatoes and water and place back on stove on high heat until it starts to boil, then reduce heat to a medium and cook until lentils are tender.
Well look at that, chili.
And why not top with a little avocado while you are at it. It is a very good addition, to the spiciness.
Very little amount of works for such great rewards. Probably going to be your new favorite chili recipe just so you know.
Lentil chili. Grab a bowl, kick up your feet, and dig on it.
-C
makes a lot of chili, like 10-12 servings
1 pound green lentils
1 large onion
5-6 cloves or garlic
1 cubanelle pepper (or any green or sweet pepper)
2 large carrots
3 cups chopped cauliflower (fresh or frozen)
6 cups (two 28 oz cans) crushed tomatoes
2 hefty tablespoons cumin
1 hefty tablespoon chili powder
1 teaspoon ground ginger
1 jalape%u00f1o pepper
6-8 cups water
salt and pepper
diced avocado for serving (optional)
Remove steam and seeds from cubanelle pepper and small dice it along with the carrots and onion then place int all nto a large heavy bottom pot. Mince the garlic add into pot. Remove steam and seeds from jalape%u00f1o pepper and finely dice it and add to pot. Last but not least, add the spices to the mix. Add a splash of water and place on high heat and cook the veggies and spices until for 5 or so minutes, just to give them a little heads start and to activate the spices.
Once the veggies have had a few minutes of heat, dump in the dried lentils, the tomatoes, and 6 cups of water. Stir around and keep on high heat until it starts to boil then turn down to medium and continue to cook, stirring once in a while, until the lentils are tender and the chili has thickened, which should take about 35-40 minutes. If at any time you the lentils are not submerged in liquid but are not cooke through, add more water. And once the lentils are cooked you can thicken bu continuing to cooke does or thin it out by adding more water. Taste soup and season with salt and pepper as you see fit.
To serves, ladle into bowls and tope with diced avocado.
Left overs are fantastic hot or cold and will last in the fridge for about a week. Or if you want, you can freeze a few servings.
I made baked beans last week for a side to dinner with the mr and Barb. They ate them all. I didn%u2019t get more then a spoonful. I was sad for me, but also was like %u201cShit, if I had known you guys were bean fiends, I would be making baked beans like all the time.%u201d
And maybe not all the time, but I made them again this week. And again, they ate a lot, but I got me some this time, and I will probably make them again next week too because they will be perfect for Thanksgiving. See, homemade baked beans are a thing of beauty. Sure you can buy them in a can and be just fine, but these baked beans, well these are waaaayyyy way better. These baked beans are soft (not canned bean soft) and tomatoey and a little spicy with a tang. Not sickly sweet, (not sugar added) and not too salty.. They are just about perfect. You can eat them on their own, toss them into salads or wraps, stick on some toast, serve as as side, or just eat them cold straight from a jar from the fridge right before bed. (your loved one will thank you for that). Plus they are baked in the oven and I love me a good warm oven on a cold day. And the obvious, but all the protein and all around goodness. A great dish to serve if ever you need to feed people like me who don%u2019t eat meat. It%u2019s a win win win win.
Baked beans in all their glory. No cans in sight.
The stuff. White beans that were soaked overnight, strained then added back to a pot with 6 cups of water. Also have crushed tomatoes. an onion, a few cloves of garlic, chili powder, mustard powder, apple cider vinegar, and some salt and pepper.
First step is to start boiling you beans. But while that is happening, mince garlic and chop the onion into really small pieces.
Toss the onion and garlic in a pan and cook on medium low until soften and fragrant.
Cooked beans. All you need to do to cook them is place the pot with soaked beans and water on high, bring to a boil, then turn heat to a medium. Let beans cook until tender. It should take about an hour and a half.
Beans are cooked and the garlic and onion are soften so now all you do is combine everything together. Don%u2019t drain the beans, just toss in the tomatoes, the vinegar, the spices, and a few pinches of pepper and a pinch of salt. Stir in all together,
Looks like soup right? This is right before you stick it into the oven.
Now look at that, oven baked beans. The best part%u2026 The crispy sides. ALL MINE!
Not much left to do but eat them. Straight up with a hunk of bread. That is a good way to start anyway.
Enjoy your beans!
-C
Makes a big pot of beans
1 pound (2 cups) white beans soaked in water for at least 8 hours (I used great northern but navy would be good too)
6 cups water or veggie stock
3 cups (or a 28 oz can) crushed tomatoes
1 onion
3 cloves garlic
1 1/2 tablespoons chili pepper
1 tablespoon mustard powder
1/3 cup apple cider vinegar
salt and pepper
Strain soaked beans and place them into large oven safe dutch oven almond with the water and stick on the stove. Bring the beans to a boil then reduce heat to medium and cook util the beans are tender. Should take about 1 1/2 hours.
Sometime while the beans are cooking, mince garlic and chop the onion into very small pieces. Place in a skillet and cook on medium until the onion and garlic are soften and fragrant. Remove from heat and set aside until beans are cooked
Preheat oven to 425
One beans are tender, dump in the cooked garlic and onion, the tomatoes, the spices, the vinegar, and a good pinch of salt and pepper. Stir it all together and place into the oven. Bake for about 2 hours, staring about ever 30 minutes, until the bean sauce is nice and thick. If at any point you think they have gotten to dry, just add more water. Pull the beans out of oven once you are happy with the sauce consistency. Taste and season with more salt and pepper if needed.
And then eat them. As a meal, as a side, or as a snack. Beans are good anytime.
Any leftovers should be stored in the fridge. Beans can be reheated very easily on the stove top. Just place the pot back on stove, stir in a little water and cook til hot.
Beans are also fantastic eaten cold from the fridge.
What are you doing this weekend? It is suppose to be cold and rainy (if not snowy) and crappy and just not a good weekend to be hanging outside, which makes it the perfect weekend to spend some time inside, SPRING CLEANING! Haha. Doesn’t cleaning get you excited? No, well,%u00a0sorry for you. Me, I like to clean, and I really like to tackle jobs that really really need to be tackled, like cleaning out the fridge. And a crappy weather spring weekend is probably the best time to do it.%u00a0
The refrigerator. My pride and joy of the kitchen. It’s an old harvest gold Fridgaire from like 1970. This is the fridge I spent almost a year hunting down and finally finding on craigslist from a man who was cleaning out his dead mothers house. The fridge that I almost gave up on when I couldn’t find it and almost bought a big stainless steal thing instead.mBut last minute, I found it, like it was %u00a0meant to be. And this fridge has a story all of it’s own. It was a prize won by on of the ladies daughters from a cereal company contest.%u00a0The family kept it for all these years and took such good care or it because of that.%u00a0A well cared for and loved fridge.%u00a0It is a good one with faux wood trim and metal shelving. It keeps my food cold and frozen %u00a0(sometimes frozen when it shouldn’t be. The back top shelve %u00a0in the fridge has a few cold spots the might freeze whatever is there. My solution to that is to not stick things in the cold spots.) and is just as pretty as can be. Some people question it, don’t understand why I didn’t just buy a matching fridge to my stainless steal stove, but you know what, if you don’t like it, well I really don’t care. It makes me happy and I love it.
And to what goes on on the inside. To know me is to know what is inside of my refrigerator. It is always packed. There is and always will %u00a0be carrots, beets, lemon, cabbage, turmeric, greens, greens, and more greens in there. There will always be some hummus of some kind, mustard, bread dough, tofu,%u00a0and lots and lots of any and every veggies you can think of. Plus a bunch of %u00a0jars and container, which I have a bad habit of not placing lids on all the time, full of lentils and beans, rice, and quinoa. %u00a0There is usually a %u00a0baked sweet potato or some squash and more likely the not, tomatoes and plant milk. In the freezer, well that’s getting pretty empty now, but after harvest in the fall, it is packed to the brim with bags of frozen veggies. Now it has a few bags of veggies, frozen bananas and berries,flours, and nuts. But the fridge,%u00a0The fridge is always full. And it an get a little messy….
And now I it’s time to clean it out.%u00a0
I spot clean and straighten it out often. Usually before I pick up farm share I go through it and tidy up, make more space, and pull stuff out that needs to be eaten first. But that is just the surface cleaning. Stuff gets sticky, stuff gets stuck, and especially with veggies, stuff gets dirty.%u00a0%u00a0Spot cleaning has a place but it’s not cutting it anymore. It’s spring and it’s time for a full fledge deep clean.%u00a0
Now I know most people have their own methods for cleaning but here are a few tips and techniques that I have to tackle the beast.
-Prepare. You don’t want to just go at it without a plan and supplies. Get out your cleaning supplies. Grab a recycling can and a compost bucket, and have a big lean surface ready to place stuff on. The vacuum or a broom should be handy too.%u00a0
–Cleaning solutions. It is a fridge so you don’t want to be cleaning it with a bunch of chemicals. What I use is a vinegar solution. 50/50 white vinegar and water and a squirt of dish soup. It cleans, degreases, disinfects, and won’t kill you.%u00a0
–An empty sink or bathtub to wash all the drawers and shelving off.%u00a0
–A few clean containers. Just have them on hand,%u00a0with lids, to place stray things roaming around in there.%u00a0
–Clean from%u00a0%u00a0top to bottom. This avoids crap falling into something you already cleaned.
–Labels. Any containers that are not clear might benefit from a label. And if you tend to leave things in the fridge for a long time, a label for the date of opening is also a good idea.%u00a0
–Inventory. Knowing what is in the fridge is very important, this prevents food waste.
–Too many condiments. I don’t know how many times I have looked in peoples fridges and seen 5 different bottles of ketchup or Italian dressings open. Consolidate. %u00a0And if you don’t like it or don’t use it, get rid of it.
–Wipe it all down. Not just the fridge itself, but all the stuff going back into it. So many times I have stuck the soy sauce in the door and had it leaked all over.%u00a0
–Know your fridge and place accordingly. Most people don’t have super old fridges, but even the new ones have some quirks. Know if there are cold spots or dead zones or places that things get stuck and place food accordingly. Also think about where you are placing food. It don’t make sense to but the milk way in the back if you use it all the time.
–Under and behind. Don’t forget to clean under the fridge and behind the fridge. It will be dusty, maybe a little gross, but it must be done.
–Music. A good playlist is always going to make you better are cleaning.
As for the Use it Up Soup, do just that.%u00a0This is the perfect time to use up what you got. I know that I have way more veggies then the average person, but don’t let that stop you. You could even pull stuff out and fill in missing ingredients form the store if you want. And be creative, %u00a0pickled hot peppers, all the frozen veggies, any wilted greens. Even almost empty bottles of mustard. If you think it sounds good in soup,%u00a0use it up. Add some canned tomatoes and a handful of spice, you are gonna end up with something tasty.
. A clean fridge and soup, how can it get any better?%u00a0
The before. Veggies all over. Jars and containers stacked, with and without lids. A stray half of banana, and empty water bottle, and a half eaten salad in a bowl just having out. %u00a0The shelves are kind of gross. The veggie drawers are nasty, and I think almost everything is wet because I dumped over a container of tofu the other day and all the tofu water leaked all over…… This deep clean was a long time coming.
I always have so many bags and containers of veggies and beans in the fridge.
The stuff in the door too. This is actually a lot of crap. The last dinner party we had someone brought over salad dressings. The mr and I don’t use salad dressing,%u00a0but I guess it’s not so bad to have them here. The littles like them and I know that they will be eaten.
And the stuff that is going to be soup. I found a wrinkly parsnip, some celery, carrots, a few cooked potatoes, some cooked butternut squash and a half a kale and carrot salad. The jar of almost gone lentils, and jar of tomatoes.%u00a0Some ginger and turmeric root which is always is the fridge. A rutabaga, some cabbage, an onion,%u00a0and I also grabbed some frozen green beans and the rest of the frozen rhubarb ( resh rhubarb is on it’s way)%u00a0
I chopped it all up, tossed it into a big pot. Added some spices and %u00a0water and stuck it on the stove to cook away while I got to the cleaning.%u00a0
After. Clean fridge wand clean food. All organized and pretty.
The freezer before. It looks a little crazy but there really isn’t that much in there.%u00a0
After. I pulled it all out, wiped it down, and put it all back, organized, and wth lids (again, my bad habit of no lids)%u00a0
And all the while I was cleaning, the soup was cooking.
Clean refrigerator. Makes this lady happy here.%u00a0
And the reward for all of your cleaning. A big bowl of soup.
-C
Pineapples have been on sale all week long. I think it’s because Easter and I guess people need pineapples for Easter for some reason. Does Pineapple have anything to do with bunnies or Jesus? I think not. Pretty sure it has something to do with cake or ham or some shit, but I honestly don’t care because I just like the fact that I can buy a few (like 3)%u00a0pineapples without breaking the bank.%u00a0(I think I am going to buy 3 more for the dehydrator) Plus it is always good to have a pineapple or 3 on the counter at home. You never know when you are going to need one.%u00a0So lets give a shout out to the Easter bunny and %u00a0Jesus. Thanks for the cheap pineapples.%u00a0%u00a0HA!
So now you are have those pineapples, you are going want to eat them. And maybe you don’t want to eat them with cake or ham or some shit. You are going to want to eat it the best way…In a stir fry.%u00a0
This is by far one of my favorite stir fry combinations. Pineapple does amazing things when cooked a bit, especially with soy, broccoli,%u00a0and tofu. This dish definitely let’s pineapple reach it’s full pineapple potential. It is so good that tI think I might even prefer my pineapple cooked along with savory stuff. It is just so right and seriously so freaking good. The mr even get excited for it and he is not the excitable kind of guy.%u00a0Plus it’s fast (especially if you have already cut up your pineapple) and easy because stir fry and that’s what stir fries are. Fast and easy, just like……….(insert your favorite fast and easy person and then chuckle)
And don’t try to use canned pineapple because no.%u00a0%u00a0Just get the fresh one,even if it’s not on sale.%u00a0It’s a must.%u00a0
The stuff. A pineapple (you are only going to need 1/3 of this, but you can never have too much fresh pineapple on hand), a big head of broccoli, a little cabbage, and some firm tofu. %u00a0Also need some soy, a few cloves of garlic, a little fresh ginger, a bit of oil, and pepper.%u00a0
Dice up the tofu into cubes and place on a clean dish towel to absorb some moisture.%u00a0
Grab the fresh pineapple. Cut it up the way you do, but the easiest way %u00a0for me is to cut in half the cut that half into fourths then cut the skin away. You are going to have a lot of extra pineapple so snack as you need too. I always eat like half of what I am cutting up and end up with pineapple gut. SO maybe watch yourself.%u00a0%u00a0
Pour some soy into a cup and mince the garlic and ginger.%u00a0
Garlic, ginger, soy. Looking good.
Cut up about 2ish (or more if you want) pineapple into small mouth sized pieces. Break Broccoli head into small florets and shredded the cabbage.%u00a0
Tofu into a lightly oiled hot skillet with a splash of soy, cooked until a nice crisp brown on all sides.%u00a0%u00a0Once it is cooked, remove from pan and set aside.
It’s the broccolis turn. Add in the florets and a splash of water to start cooking down for a few minutes, it need the head start.%u00a0
Once the broccoli turns bright green and is slightly less raw, add in the pineapple and cook until the broccoli is slightly tender and the pineapple starts to caramalize which will take about 5-7 minutes.%u00a0
Add the tofu back in along with the shredded cabbage and dump the soy ginger garlic mixture all over.. Keep cooking and stirring around until everything is hot and the liquid has mostly been absorbed.%u00a0
That’s some stir fry ladies and gentlemen.%u00a0
You might want some rice to accompany your stir fry so think about it and have it ready. Other then that, it’s food to face time.%u00a0
Enjoy the best stir fry ever.%u00a0
Bye.
-C
serves 2
Cube tofu into 1 inch pieces and either place on a dry towel to absorb the moisture or place the tofu into the microwave and heat for 2 minutes. When you take it out of the microwave there will be a lot of liquid…pour it off and pat the tofu dry.%u00a0
Cube fresh pineapple into similar sized pieces and break broccoli into small florets. Shred cabbage.%u00a0
Mince garlic and add to a bowl or jar with the grated ginger and soy sauce.%u00a0
Place a large skillet on the stove an medium heat. Drizzle in a little olive oil. Once oil is hot, place the tofu in with a splash of soy, cooking until all sides are a nice dark browned. Remove the tofu from pan and add the in the broccoli. Add a splash of water and cook for 5 minutes. Then add in the pineapple and cook for another 5-7 minutes or until the pineapple starts to caramelize and the broccoli os no longer raw.%u00a0%u00a0Add the tofu back in along with the shredded cabbage and pour the soy garlic ginger mixture all over. Sprinkle with pepper to taste.%u00a0Cook for another 5 minutes or until the liquid has cooked down.%u00a0
Serve with rice or quinoa and extra soy if needed.
Whether you are stuck at home because you have the flu or because you do not want to leave the house for fear of turning into a human popsicle, or maybe even you just don’t want to because this is the first weekend that you have no plans, no obligations, no parties, well then you are in good company.%u00a0
Unfortunately for me, I have to leave the house.%u00a0I have obligations, I am getting over the flu, and I am pretty sure I am going to turn into a popsicle because when -8 is the high for the day, well, it’s bound to happen.%u00a0
But lucky for me I already made the soup, in my fitful sicky, but able to think about and eat food again state. Yes I had the flu, or better yet, the stomach flu. And the stomach flu and food do not mix. Even the thought of food would send me reeling and it was just no good. I seriously thought I would never be able to think or better yet, eat food again without turning straight to the bucket.%u00a0But I will stop there because you don’t need to hear about my misery. Anyway, the death spiral subsided and food was no longer the enemy. I actually wanted (kinda of) to eat again. So food it was to be.
Because it was my first day back to food, I really wanted to take it super easy. (Before I made this soup I actually boiled a carrot until it was mush and ate that just to test my tummy)%u00a0%u00a0Nothing heavy, obviously hot and warming, not to spicy. %u00a0Just soothing and nourishing. And I didn’t really want think about it and worry about it and spend much time in the kitchen. Sure I could have bought a can of soup but actually no, canned soup is not for me. And I know the mr would have thrown something together for me but I was determined to be a slightly productive human and do something with my day even if it was minimal.%u00a0%u00a0I had to make the soup, I had to do it.%u00a0
This soup was exactly what I needed and could not have been any easier to make.%u00a0Chop up some shit, toss it into a pot, and walk away (or nap on the couch) for a little while. It can be done on the stove, in a slow cooker, or if you have a Instapot and want to do that, I should say go for it. And I am not saying this because I was starving, but %u00a0this was one dang fantastic tasting soup. Right in every way. It’s going on my semi permanent soup rotation for the next few months.%u00a0%u00a0%u00a0%u00a0
No bad after 48 hours of dying and no food. (stupid flu)
The stuff. Carrots, celery, a small rutabaga, and and onion. A red potato, a parsnip, some green been, garlic, canned tomatoes, navy beans, %u00a0thyme, rosemary, a bay leaf, and salt and pepper.
Note here that all this stuff was already in my house. Say you do not have a rutabaga or a parsnip, it’s totally fine. You can add%u00a0
Here is the hardest part. Chop it all up into little pieces. All of it all mixed together, just get it chopped.
And toss it all into a big pot with he green beans,%u00a0a handful of dried beans,%u00a0and the spices.
Add in the can of tomatoes
Then fill the pot with water.
Now stick the pot on the stove and bring to a boil then reduce heat to a little lower the medium and loosely cover with a lid.%u00a0
A couple hours later, once the beans are cooked and the veggies are tender, you got yourself a big ol’%u00a0pot of some fantastic home made, easy as can be, vegetable soup.%u00a0
Chunky, hearty, and easy as can be. And the best part is that I have left overs and we all know that left over soup is the best soup.%u00a0
Stay warm, don’t turn into a popsicle.
-C
Makes a big pot of soup
Note. You might not want rutabaga in this or you might want to add some cauliflour or peppers, so go for it. It’s a pretty adaptable soup so use what you got and like.%u00a0
Grab all you raw veggies, give them a quick wash, then chop them all up into bite sized pieces. Mince up the garlic.%u00a0Dump it all into a large heavy bottom pot. Add in the frozen green beans, the dried beans, the spices and the can of tomatoes. Add a pinch of salt and pepper and %u00a0enough water to cover the everything 3-4 inches.%u00a0
Place pot on stove, bring to a boil, then reduce heart to medium low and loosely cover wit a lid. Cook, giving it a stir once in a while, %u00a0for a least 1.5 hours ( can cook all day on long on simmer if you like)%u00a0%u00a0or until the beans are coooked through and the veggies have soften.%u00a0Add more water if needed.
Serve when you are ready to eat. Refrigerate leftovers.
Casseroles are a winter staple. So versatile, easy to make, can feed a few or feed a crowd, and best part is you can stick one into the oven and and kind of forget about it for a while. On a cold day having the oven on is always welcome, and timing with these things, well you can keep it in the oven for a little while longer then it needs because the worst thing that will happen is that it will get a little more crispy, and that is only an added bonus because the crispy bits are the best.%u00a0%u00a0And what I really love about casseroles is left overs. If you are smart you make it bigger then needed so you have some left over to either eat the next day or freeze for a meal later. Leftover casseroles are the best.%u00a0
This casserole is a nice, hearty,%u00a0stick toy your bone with our feeling heavy and gross casserole. Coconut milk and butternut squash give a creaminess, chickpeas for protein and goodness, kale because, and hazelnuts for a nice yummy crunch. All the flavors pair well together and also pair well with many different types of seasonings. I was going to go curry, then I was thinking rosemary, but ended up keeping it simple without any spices which was really nice because the flavors were all rich and clean. But really, you could go a bunch of different ways with this because its a casserole and thats what casserole do.%u00a0
The stuff. You will need a can of chickpeas, a can of coconut milk (I used light coconut), some kale, an onion, and a butternut squash (you will only need about 3 -ish cups cubed so your squash doesn’t need to be as big as mine was). Also need some garlic, raw hazelnuts, olive oil, coconut flour, and salt and pepper%u00a0
Start by chopping the onion into small pieces and mincing the garlic. Add to a big pot with a little olive oil and get it on a medium heat to start to cook it all down.%u00a0
While the onions and garlic are cooking,%u00a0%u00a0cube the squash. You probably only need the neck, so cut the bottom off (save for later) and peel the skin (also save for later , for soup or stock). Cut the peeled squash into mouth sized cubes.%u00a0
And by the time you are done with the squash, the onion and garlic have had enough time cooking. Add in the can of coconut milk and the coconut flour. Stir in the flour and bring the pot to a boil, then turn heat down to medium again and let cook for a few minutes until it starts to thicken a bit.
Remove from heat and add in the squash, the chickpeas, and salt and pepper. Mix it all around.
Pour directly into the casserole dish filled with kale and give that all a good mix around.
Level it all out and top with the chopped hazelnuts. %u00a0Now into the oven it goes.%u00a0
And hour or so later, you have yourself a casserole ready for for your face.
Grab a bowl and dig on in.
-C
P.S. We realized as we are eating that a really goof vinegary hot sauce or lime juice are perfect addition to this dish. So do that.%u00a0
serves 3-5
preheat oven to 375
Start by chopping the onion into small pieces and mincing the garlic. Add to a large pot with a tablespoon of olive oil and place on a medium heat to start cooking.%u00a0
While the onions are going, peel and dice your squash. The easiest way to do this is to cut the neck off and then peel that. (save the peels and the base for soup) Dice the peeled squash into mouth sized cubes and set aside.
Once the onions are lightly cooked, whisk in the canned coconut milk and the coconut flour. Bring mixture to a boil then return to a medium heat. Cook for about 5 minutes or until the milk starts to thicken a bit. Add in the squash, the chick peas, and a teaspoon of salt and pepper. Mix together. Add in the chopped up kale and mix that it then dump it all into 3 quart casserole dish. Level it out and top with the chopped hazelnuts. Place the casserole into the oven and bake for 1 hour ( or a little longer for the crispier crunchy parts.%u00a0
Once you remove from oven, let sit for 5-10 minutes to set up and then call it ready.%u00a0
Serve with hot sauce and or lime wedges.
Any left over is great for a meal %u00a0within then next few days or frozen for a meal down the road%u00a0