
THE LOVELY CRAZY
 What is better for a bake sale then Oreo cookies? Oreo cookies made from scratch!.
So when my sister called and asked me to make something for my nephews bake sale to raise money for his basketball team, I couldn’t say no. (or I didn’t want to say no cause any good excuse to bake right!) Plus I had just found this awesome recipe on one of my favorite blogs, my name is yeh, for home made Oreos that I have been super excited to try, so it kind of worked out. But before I committed to the Oreo, I wanted to just double check with my nephew and see what he might want me to make because it was his bake sale.
This is the conversation we had. And yes, it was through text.
Me- “Hey bud, what do you want me to make for your bake sale? Cupcakes, cookies, donuts, or brownies”
Jack- ” Yea!”
Me- “Yea what?”
Jack- “Make that.”
Me- “Make what?….Hello!! What do you want me to make? Should I make Oreos?”
Jack- I WANT OREOS!”
Ok.. So it took a little while, but we got there. And after the the basketball game and the super successful bake sale..
ME-“Did you see the Oreos?”
Jack- “What do you mean?”
Me- “The Oreos I made for the bake sale…the ones you wanted me to make”
Jack- “There was a bake sale? I want Oreos”
Yup, that’s the attention span of my 13 year old nephew. Little shit head. But for real, I had so much fun making these cookies and I am definitely going to be making them again. Plus they were a super hit at the sale.
I am the best aunt! (and sister!)
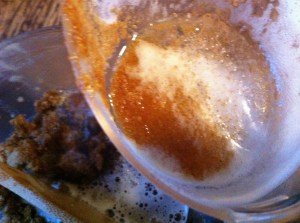
 Cookie Time! Whats going on here is brown sugar and butter have be beaten together until nice and fluffy Then a good big splash of vanilla and another 2 big splashes of coffee are added to that.(I sacrificed my last few sips of my coffee for these cookies) The dry stuff, flour, salt and cocoa powder, are whisked together, waiting to be added to the wet.
  Mix the dry ingredients into the wet and mix. I ended up just using my hand and kind of squish mixing everything together until in tuned into a nice lovely uniformed dough. Form the dough into 2 balls and give each a few kneads to get any air bubbles out. Place dough back into bowl and stick in the fridge to sit for 10-15 minutes( it makes the dough a little easier to work with)
 Once the dough has had a little time to rest and cool, remove from fridge, one ball at a time. Place on a lightly cocoa or powdered sugar dusted surface and roll out the dough. Grab any size circle (or other shape) cookie cutter and get to shaping the cookies. Notice the tin can in the bowl? I could’t find my biscuit cutters anywhere but the can was the perfect size, and it worked really well. Keep a little bowl of either powered sugar of cocoa to dip the cutter in in between making the cookies. It really helps the dough from sticking and breaking.
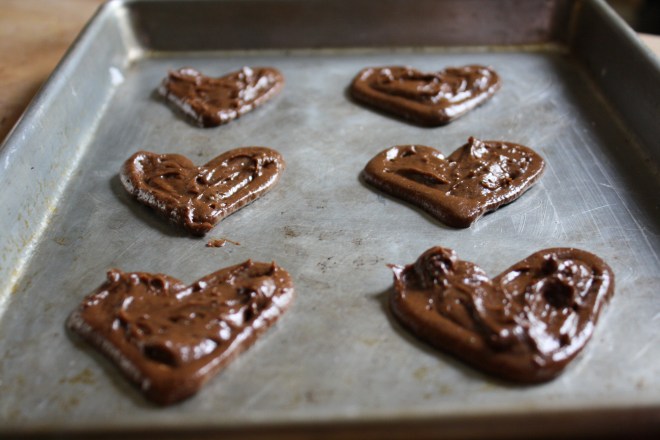
When you have cut out your cookies, use a spatial and place them on a baking sheet. You can try to transfer with you hands, but you end up messing up the shape and most of them will break anyway.
Stick the cookies in the oven for about 15 minutes a batch and continute to roll and cut out the cookies until you have no dough left.
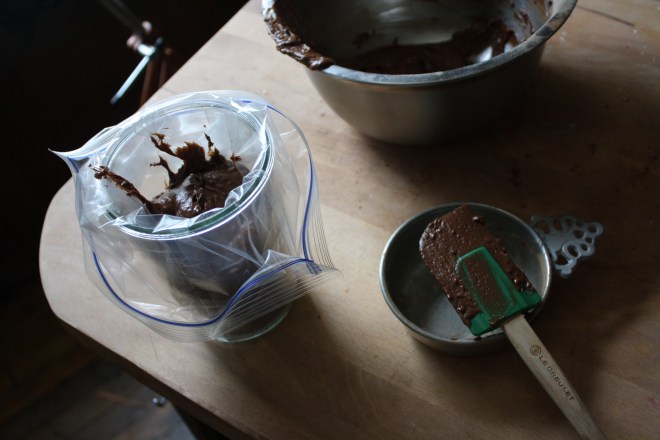
 While the cookies are getting their cool on, make the cream filling. All you need is a stick of butter, about 4 cups of powdered sugar, some vanilla and a few splashes of heavy cream. Beat that all up until nice and creamy thick and spoon it into a pastry bag (I used a big old ziplock bag) to be piped on the cookies.
  Filling the cookies is for sure the best part. Separate the cookies into pairs and pipe a big blob of filling onto one of the two cookies. Take the names cookie and place on top, giving it a little smooth to the disperse the cream. Keep doing that until the cookies are all filled.

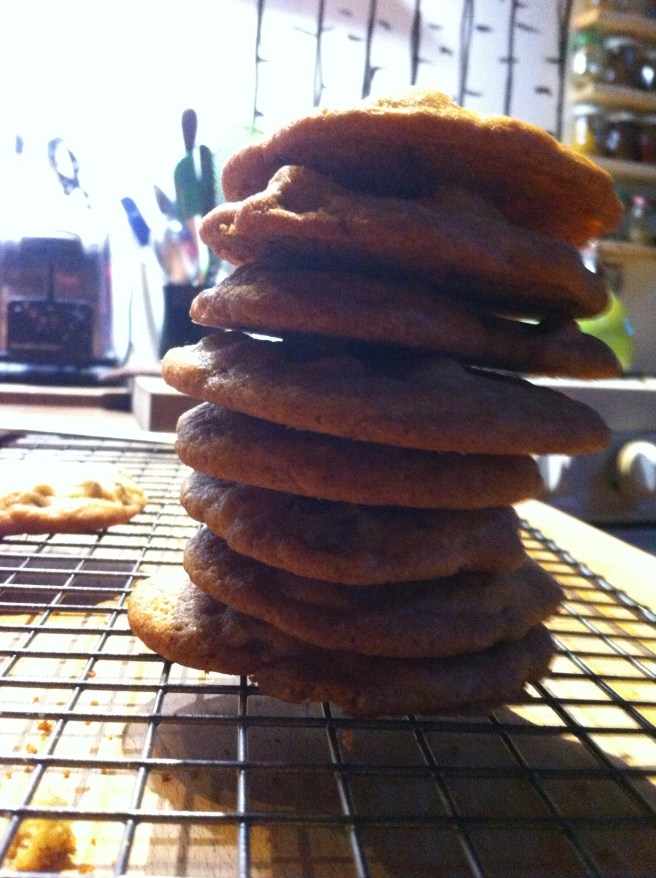
Stacks of cookies… Sold to the highest bidder! I was told that they sold out within the first half hour at $1.50 a pop….Should have charged $5…. for a good cause right?
And yes, even though he was being a space head and didn’t even care that I just made him like 50 bucks for his team, I still saved the kid one.He just had to give me either a hug or 5 bucks for it.
I got a hug. (I really wanted the 5 dollars)
-C
From Scratch Oreo Cookies
Adapted by Molly Yeh from My Name is Yeh!
The cookie (makes about 18 3 inch Oreos)
- 2 cups all purpose flour
- 1 cup cocoa powder
- 3/4 cup brown sugar
- 1 cup or 2 sticks soften butter (use earth balance for vegan)
- 1 teaspoon salt
- 1 teaspoon vanilla extract
- 2 tablespoons brewed coffee
The filling
- 1 stick soft butter (us earth balance for vegan)
- 2 tablespoons heavy or whipping cream (use a nut or soy milk for vegan)
- 4 cups powdered sugar
- 2 teaspoons vanilla extract
Cookies- In a large bowl cream together sugar and butter until light and fluffy. Add in vanilla and coffee and mix together. In another bowl, whisk together the flour, salt and cocoa powder. Add dry to wet and mix together unit a uniform dough forms. Dump out onto a lightly cocoa or powdered sugared surface and knead dough a few times. Split ball into two balls, place in bowl, and stick in the fridge for 15 or so minutes.
Preheat oven t0 325 degrees
When dough is chilled, remove one ball at a time, and roll dough out on a cocoa or powdered sugar dusted counter until its about 1/4 inch thick. With a round (any shape would work) cookie cutter, cut out as many cookies as you can. In between sits, dip cutter in a sugar and cocoa to keep the cookie from sticking. Transfer cut out cookies onto a baking sheet with a spatula. Take scraps, roll into a ball, and roll out again. Keep doing that until you can’t cut out any more. (You can either bake a weird shape cookie or just eat the dough)
Bake cookies for about 15 minutes or until the cookie has risen a bit and the tops have lost their glossiness and look cooked. Remove from oven and let cookies dry on a wire rack.
Make the filling
Filling- Beat together butter, sugar, vanilla, and cream until completely mixed and is at your optimal consistency. Add a drizzle more cream if you want to thin out or add more sugar for a thicker cream.
Stick the filling into a piping bag or ziplock bag an snip the end. With cookies in pairs, pipe a big dollop of filling onto one of the two cookies. Place the naked cookie onto the filled cookie and give a smooth to distribute the filling.
lick your fingers and eat a cookie.
If selling at a bake sale, charge $3 a cookie…. If it’s for a good cause.
 I am so happy its Friday, but like whoa, this week has flown by so fast. I think I need to make a pie to slow things down a bit.. What Kind of pie am I making? We will get to that, but first we must make a killer pie crust, one to hold of the goodness to come.
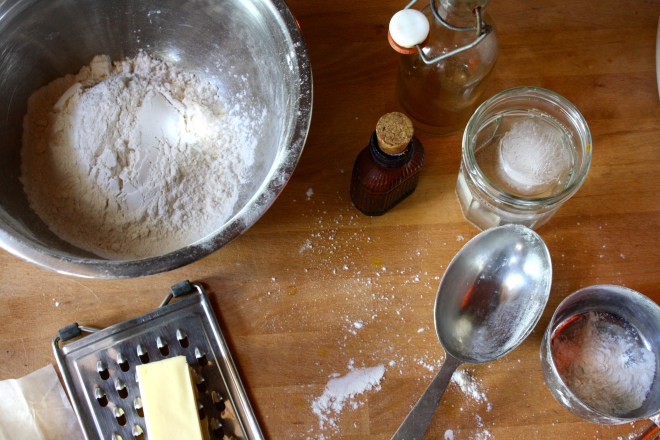 Crusty Stuff. Flour, a stick of frozen butter (or a stick of frozen Earth Balance, which I have used and it turns out much the same) a bit of sugar, some salt, ice water, and apple cider vinegar*.
Whats with the vinegar you ask? Well first off, don’t worry about tasting it, you won’t. Secondly, I add it because it helps keep gluten from forming in the flour, which in turns makes the pie crust more flakey and less doughy. If the though of vinegar really bothers you, you can use lemon juice or even leave it out. 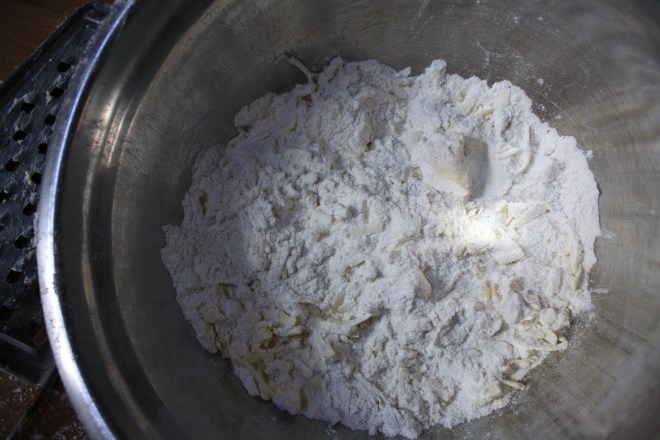
The flour, salt, ans sugar are mixed together into a bowl. Then with a box grater or hand grater with big hole, grate the frozen butter directly into the flour, stopping every few tablespoons to toss around in the flour. (DO this or you will end up with a big pile of shredded butter that is starting to melt back together) Also, hold the butter with the wrapper to keep from warming the butter with your hand.
Once the whole stick is shredded, take a fork and just toss the chunks around a bit more just to evenly distribute. Now add in vinegar and water. Toss with fork until the mixture starts to come together. If you think that dough seems way to dry, add in one more tablespoon of ice water.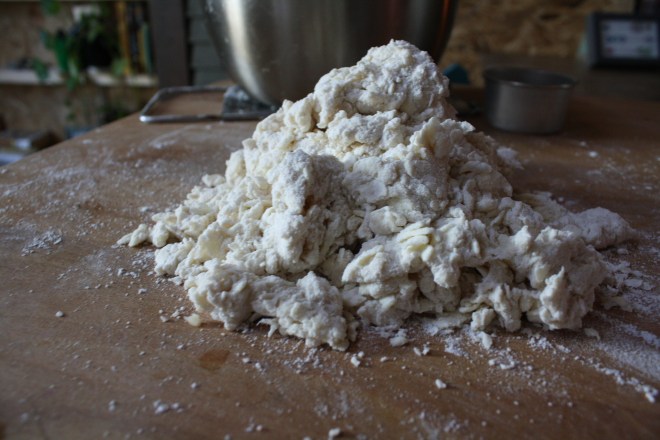 Dump the dough onto a lightly flour surface and kind of squish, smoosh dough into a pile. The dough is all clumpy and weird looking, Well thats what it is support to look like, so your good.
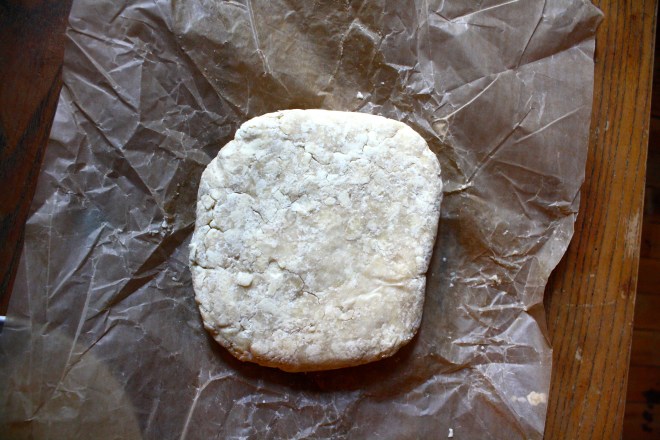
 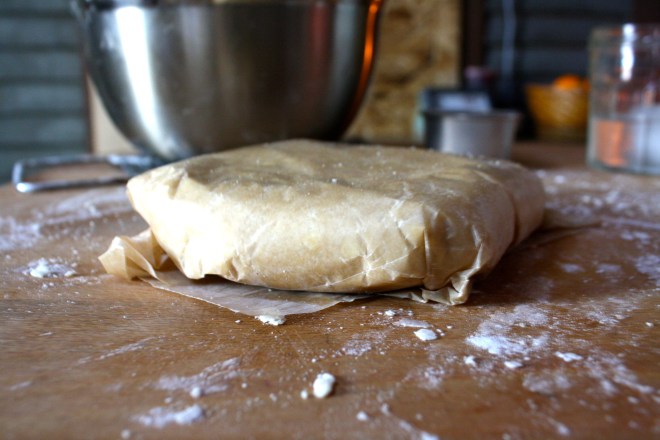 Once the dough is gathered into a ball, place onto a piece of wax paper and wrap. Now is the most satisfying part..Smoosh the wrapped dough into a disk but applying pressure. Aaahh, kind of looked like pie crust. Now Stick it in the fridge for a least a hour (Don’t skip this or your crust will be blah)
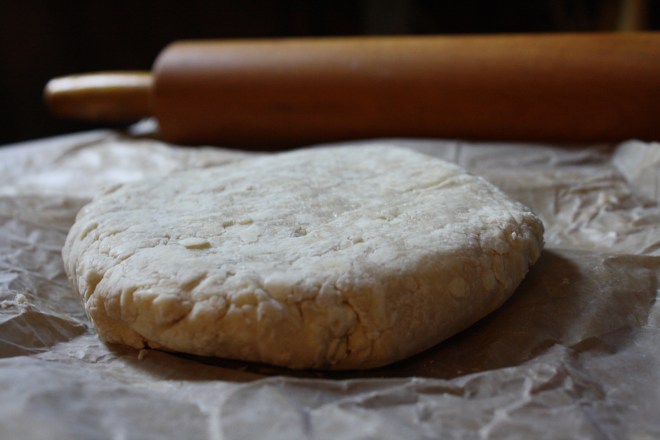
Out of the fridge and awaiting a roll and a filling.
Weekend plans for a pie are set!
Have lots of good times!
-C
Pie Crust
Notes… You can for sure make this pie crust vegan by replacing the butter for a stick of Earth Balance. Also, this is the stuff for a single pie crust but I usually habra bit left over to make a few little cutouts for the top of the pie or pie scrap cookies.
To make this a double pie crust, just double everything up.
- 1 1/4 cups all-purpose flour
- 1 tablespoons granulated sugar
- 1/2 teaspoon salt
- 1/2 cup unsalted butter (or Earth Balace), cold or frozen
- 1/4 cup ice water
- 1 tablespoon apple cider vinegar
In a large bow, whisk together the flour, salt, and sugar. Place grater in bowl and with the biggest grate hole, grate the frozen or cold butter directly into the flour mixture, stopping ever few tablespoons to toss around in the flour so you don’t end up with a big pile of grated butter. With a fork, toss around a bit until the butter is evenly disrupted in the flour being careful NOT to work the butter into the flour. Add in the vinegar and water and mix as little as possible with a fork until the mixture starts to come together. The mixture will seem kind of dry and almost like it is falling apart, but thats what you want. If dough is really too dry, add in another tablespoon of ice water. Dump mixture onto a lightly floured surface and squish together to form a ball, handling as little as possible. Place on a piece of wax paper and wrap. Give it a good squish to flatten out a bit and place back into fridgerater for a least one hour, if not longer.
And then you have crust
Crust can be frozen.. just wrap in plastic wrap and place into a freezer bag.

 TGIF!!!! For reals, because Monday-Thurday were monster days. And now that its friday, I can dig a hole and hide in it until it’s at least 30 degrees with some sunshine. (I might never get to come out.)
A few things I will bring in my hole:
- food (lots of food and coffee, lots of coffee)
- a soft blanket and pillow
- a few books, preferably with pictures, on farming and gardening (think spring!)
- the entire series of the Fresh Prince of Bel-air and a device to watch it on
- toothpaste (I can use my finger to brush my teeth)
But before I leave for my hole in the ground, I made these little cake bites to get my people through the weekend. Sweet little lemony bites of rich dense cake dipped into bittersweet chocolate. (I am just so nice) They have all the pleasure or cake without the need of a fork and are much easier to give away then a big slice of cake. Plus, they are fun to make. My little sister helped and did most of the chocolate dipping. Then she and another little used their mouths to clean up the chocolate mess. It was an afternoon of chocolate all over the kitchen fun day.
So make some bites to have and to share. Or if you, like me, are digging a hole to hide in, make a batch of bites to bring with you. That’s the beauty of cake covered in a harden chocolate shell, they travel really well. Simple lemon cake stuff. Flour, baking powder and salt whisked together, Sugar and soft butter in a bowl. An egg, some vanilla, milk, and of course, the lemon.
To make the batter, cream the soften butter with the sugar until light and fluffy. Zest lemon(1 big or 2 small) into bowl with the juice of the lemon(s), the vanilla and the egg. Beat until combined. Now beat in the dry and then the milk. Keep beating for another minute until all mixed. Batter should be light and fluffy.
Batter goes into a greased and floured 9×13 baking sheet and stuck into a 375 degree oven for about 30 minutes (You can use a 9×9 baking pan. Just bake fir another 10 minutes and you will end up with thicker bites). Remove from oven and let cool for a few minutes and flip to remove cake from baking sheet. Cut cake into small pieces (I cut 4×6 to get 24 bites) and place bake into sheet and into freezer (I stuck mine outside, it was -2 degrees ) for at least 2 hours.
 Frozen bites ready for the chocolate coating… Bittersweet chocolate chips and a little bit of coconut oil. Melted together all nice and shiny smooth.
 Now dip and slather those bites in the melted chocolate.
Oh what a lovely sister I have.. Look at her dunk….. like a boss! Fully coated and placed on a rack for the chocolate to harden. I ended up sticking the rack in the freezer for 10 minutes…They harder really fast in there.
And now you have some it, bites of cake covered in chocolate. 1 bite, 2 bites…5 bites. Eat however many you want because its Friday and because there small little bites and just because you can.
Now if you need me, I’ll be in my hole.
-C
Chocolate Lemon Cake Bite
- 1 1/2 cups all purpose flour
- 1 teaspoon baking powder
- 1 teaspoons salt
- 1 cup white sugar
- 1/2 cup (1 stick) soft butter
- 1 egg
- 1 teaspoon vanilla
- 1 cup milk
- 1 large or 2 small lemons
- 2 cups bittersweet chocolate chips
- 2 tablespoons coconut oil
Add butter and sugar to a large bowl and beat on medium unit light and fluffy. Ass in vanilla egg, the zest of the lemon and the juice of the lemon. Beat to incorporate. Now beat in the dry and lastly the milk.
Grease and flour either a 9×9 pan or a 9×13 baking sheet. dump batter in and smooth out. Stick in oven and bake for about 3o minutes or until a toothpick stuck into the middle comes out clean. Remove and let cool for a few minutes on a wire rack. Flip cake to remove from pan. Cut cake into bit sized pieces, 4×6 is a good size, and place back on baking sheet and stick into freezer for at least 2 hours.
When cake bites are as good as frozen, get the chocolate ready. Take the chocolate and the coconut oil and either melt in a double boiler or the microwave. Mix until smooth and make sure to full incorporate the oil. Now remove the cake bites from the freezer and dip each bite into chocolate, trying to full coat all sides. Stick onto a wire rack or a parchment lined pan to harden. They can be stuck back into the freezer to harden faster.
Once chocolate has harden, your good to go!
 So the mister wants to know…”Why would anyone ever buy those crappy english muffins from the store when they could be eating these?”
Good question…And we will all answer….”Never again! Because I now make the sickest E.M.s around.!”(E.M.s is the cool short way to say english muffins and now that you are going to make your own….man, your so cool!)
These E.M.s are perfect. Easy to make, not overly fussy, and you end up with a super yummy, extremely versatile, individually portion super sweet little disk of bread. And the best part is..nooks and crannies! I think that is why I decided to make these E.M.s, so Nick and I can talk the about nooks and crannies…(Sometimes we need light conversation)
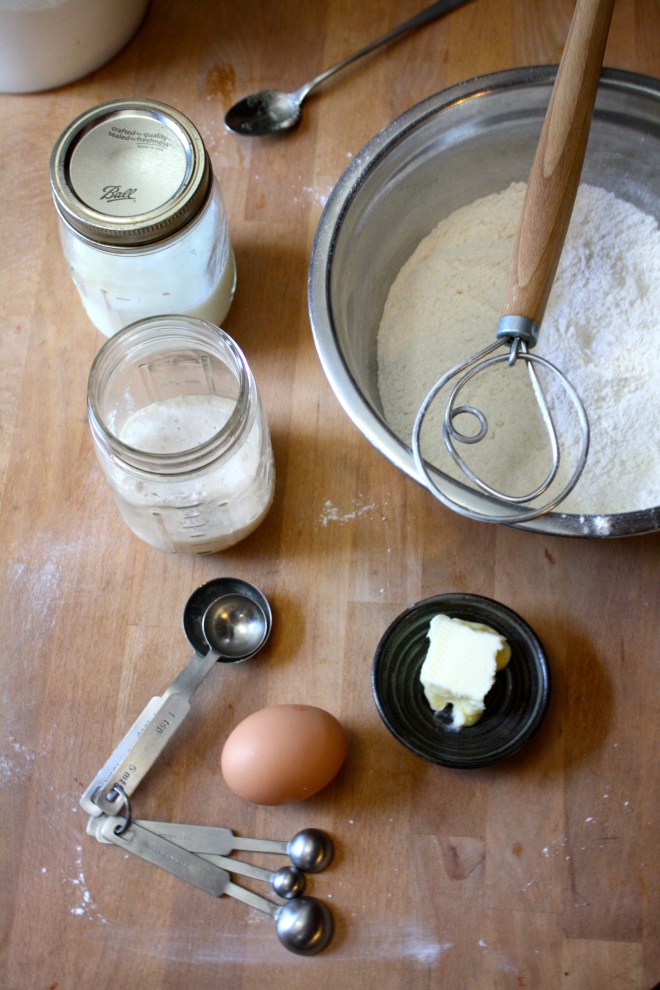
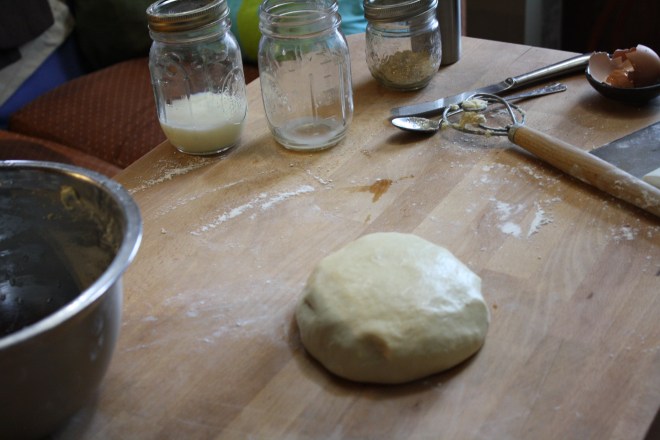
We start with flour and salt whisked together in a bowl. The honey, yeast and warm water are getting on proofing in a jar. An egg waiting to be cracked, some milk, and 2 tablespoons of butter. All this good stuff equals…nooks and crannies!
Oh you like my nifty dough whisk….me too, I use it all the time. Maybe I should have a dough whisk give away ……maybe…..
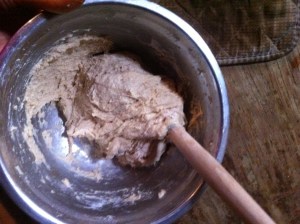
 Everything all mixed together, dumped onto a floured surface and kneaded for 10 minutes by hand…..If you have a stand mixer, you can use it if you want, but you are missing out on the fun of doing it by hand….
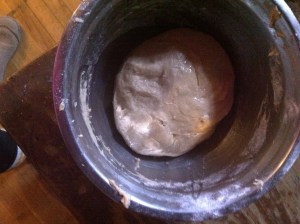
When the dough has been sufficiently kneaded, gather dough into a nice ball, coat with a little oil and place back into bowl. Cover with a towel and stick in a warm place to rise for about an hour or until it has doubled in size.
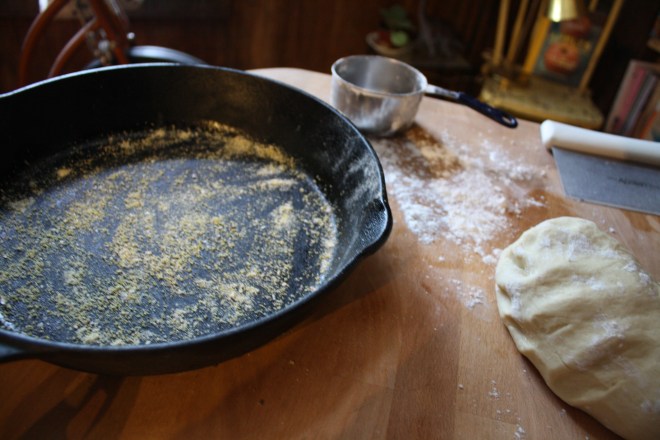 When dough has doubled, punch down and plop out onto floured surface. Dust the bottom of a griddle or in my case, two cast iron pans, with corn meal. Divide dough into 8-10 equal balls and smash into 2 inch thick disks.
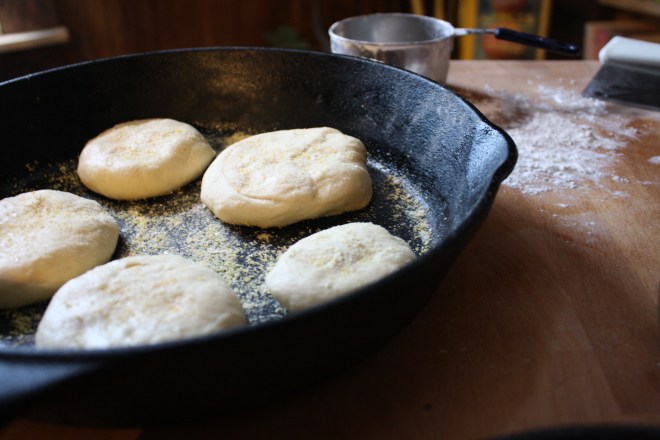 Place on griddle or pans and sprinkle more corn meal on top of each E.M. Cover and let rise for another 15 minute.
 Now the E.M.s have rested, turn the griddle (or pans) on to low heat. Once your griddle (or pans) gets hot, continue to cook that side for another 7-10 minutes, or until golden brown. Flip and cook other side for 10-12 minutes or until golden brown. Once browned, check for doneness with a thermometer. The inside should reach 200 degrees.( if you don’t have a thermometer, fork split one open and check…. you are going to eat it anyway) If the outside cooked faster then the inside, no worries, just pop them into the oven at 350 for 8-10 minutes. I had to pop mine into the oven for to cook completely.

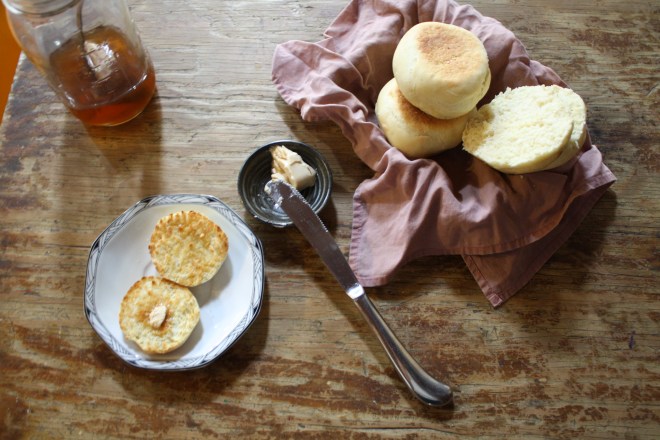
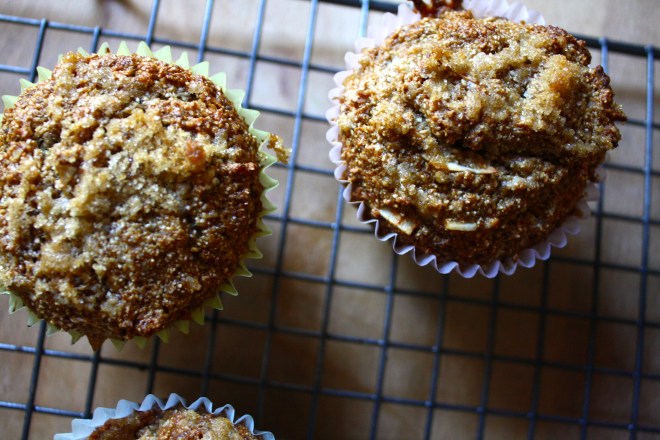
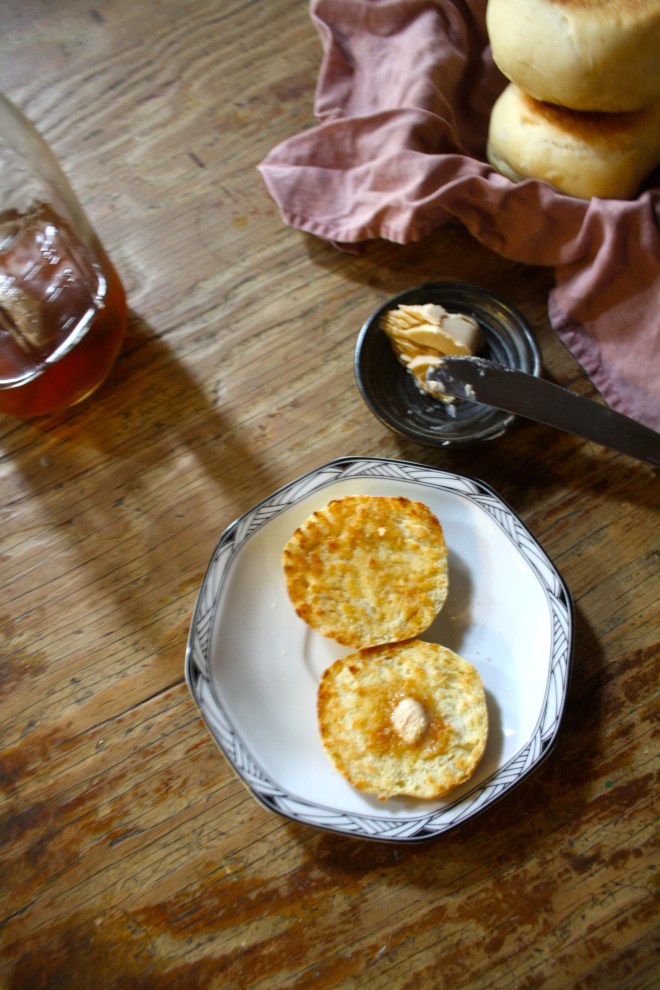 Remove form griddle, let cool a bit, and ……Fresh, fluffy fat, fantastic….Everything and more that a real english muffin should be. Split open with a fork and……. the nooks and crannies! So spot on. Serve with anything your heart desires…I served these with whipped honey butter…. and eat the only kind of E.M. you will ever again eat. Grocery store english muffins be damned!
Enjoy and Happy Tuesday!
-C
English Muffins
Ingredients
- 2 1/2 cups unbleached all-purpose flour
- 2 teaspoons honey
- 1 teaspoon salt
- 2 tablespoon butter at room temperature
- 1 1/4 teaspoons active dry yeast
- 1/4 cup warm water
- 3/4 cup milk
- 1 egg
- cornmeal for pan
Combine warm water, honey and yeast in a bowl to active..about 5-10 minutes or until yeast is foamy.
In a separate bowl, whisk together flour and salt. Mix in butter(I use my fingers) When yeast mixture is done proofing, whisk together mixture with the egg and milk. Add wet to dry and mix until just incorporated Dump out onto floured surface and knead dough for 8 minutes, adding a bit of flour whenever dough starts to get too sticky. Roll into a ball, coat with oil and place back into bowl and cover with a towel. Let rise for 60 minutes or until sought has doubled in size.
Once the first rise is done, deflate dough and divide into 8 equal pieces(10 for a slightly smaller muffin). Smoosh each ball into a flat disk, about 2 inches thick) and place on a cold cornmeal dusted cast iron griddle. (I used 2 cast iron pans) Sprinkle tops of muffins with more corn meal and let dough rest for another 15 minted. Turn burners on low heat. Let griddle get hot and continue to cook the muffins for another 10 minutes or until golden brown. Flip and cook opposite side until gold brown and remove from griddle. To make sure the muffins are cooked completely, stick an instant read thermometer into the center…it should read 200 degrees. (if you don’t have a thermometer, split one open… the tester E.M.) If the E.M.s are not completely cook, just stick in the oven on 350 for 5-10 minutes or until cooked throughout.
Remove and let cool. To serve, split open with a fork and give a light toast. Spread with butter, jam, peanuts butter, anything you want…maybe make E.M pizzas!
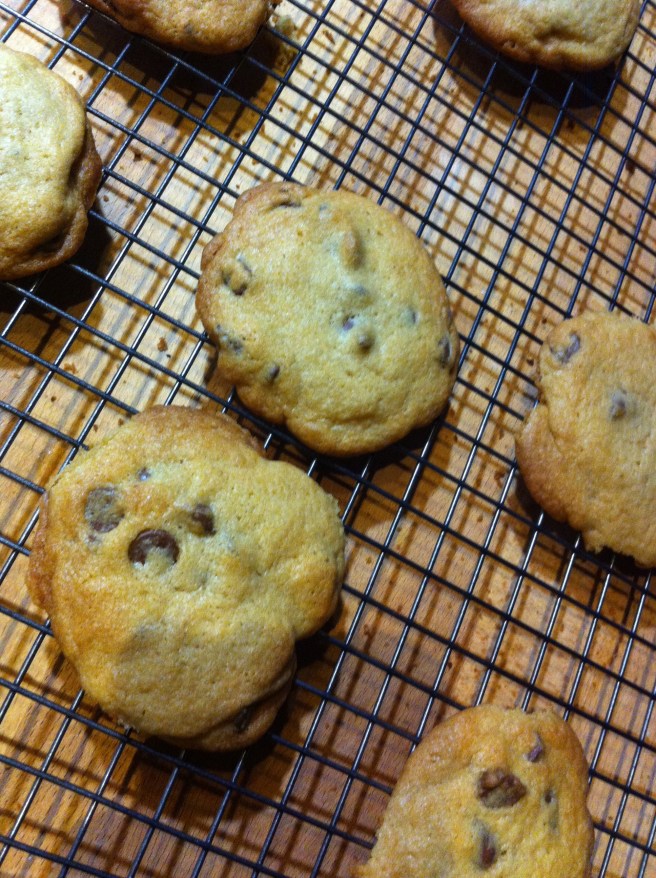
 Those are some for real chocolate chip cookies…….for real.
This is probably one of the first recipes that I ever really knew by heart. Some recipes I can bring up in my head, but if I haven’t used it in a while, I usually have to check to make sure I got it right… Not these… Chocolate chip cookie are forever imprinted in my brain.
Chocolate chip may seem like a simple cookie, but trust me, its more complex then one may think. There are so many little factors that really affect the over all cookie: The baking temperature, the exact perfect time to pull the cookies out of the oven. Weather the butter is hand mixed or beaten, softened or melted. The color of the baking sheet and how long you leave the cookie on the sheet before placing on the coloring rack…….This cookie is as much about method as it is about ingredients. ….But don’t let that scare you..you got this. Just don’t think that these are a mindless act of baking. You have to be committed, keeping on the oven the whole time these cookies are baking………….. It’s so worth it.
Full disclosure here…I have been making these cookies the same way for so long so I am not exactly sure, but this might actually be the same recipe as toll house. I haven’t looked….Either way…I have tried out other chocolate chip recipes and this one has always come out on top.
 As usual, I forgot an ingredient in the line up…the chocolate chips, oh and the pinch of salt.. But rest assure, even though not pictured, there are indeed chocolate chips in these cookies!


Pre heat the oven to 375.
Room temperature butter creamed with both the white and brown sugar. Before you add the butter to the sugar, smash any of the big chunks of brown sugar. The key to my recipe is not melting butter or using an electric beater, it’s all hand mixin, no electric mixing(you could use a kitchen aid, but I don’t have one so I think you should use a wooden spoon too), plus it’s a good arm work out. Mix mix mix. I find smearing on the side of the bowl helps too. Mix/smear until both sugar and butter is a unified color and consistency, Once that happens, add the two room temperature eggs, the vanilla and mix a little more,
 When everything is mixed, add the dry ingredients and mix that until fully incorpaerterd….
Take a minute here and sniff……I love the smell of cookie dough, it’s a happy smell. Now for the chocolate chips. I use only 1 1/2 cups of chocolate chips… You want just enough in each cookie, but don’t want to overwhelm it with too much chocolate. The cookie is as much of the star as the chocolate.
  See how may cookie sheet is nice and silver and clean? For a long time I used a very dirty and dark baking sheet. I would make cookies and they always seem to come out slightly burnt. Got myself a new baking sheet and……perfect cookies. If your baking sheet is dark, I would recommend using parchment paper.
Your ready to scoop and bake….my suggestion. Make 2-4 cookies for your first batch, or what I call the tester batch. I swear, there is some law of the universe that says the first batch always is overcooked. I have excepted that and learned to only make a couple for the first batch Scoop mounds of your preferable size(I do a spoonful) and place on sheet with each mound having good amount of spreading space. Place in preheated oven..
Now here is the really important part!!!!Baking time is essential to how your cookie turns out. If you want a more soft and chewy cookie, bake for about 7-9 minutes or until the cookies are just barely turning brown…just barely. They might seem a little undercooked, but the cookies will cook a bit more once pulled from the oven Trust…I know what I am talking about. .Let them cool for about a minute on sheet before transferring them to rack. If you like more crunchy milk dipping cookie..bake for 9-11 minutes or until they are golden brown.
 Lovely right…
Now you have gone and done it…Made fantastic cookies!!! Maybe you are going to share? No pressure, but it is the holiday season. For real, you can’t go wrong with a chocolate chip cookie, every loves it. and then will in turn love you too.
Get people to like you with Cookies!!!! hahahaha… but you know its true!
Perfect Chocolate Chip Cookie
- 2 1/4 cups all-purpose flour
- 1 teaspoon baking soda
- 1 teaspoon salt
- 3/4 cup brown sugar
- 3/4 white sugar
- 1 cup (two sticks) unsalted butter at room temperature
- 2 eggs
- teaspoon vanilla
- 1 1/2 cups chocolate chips
Preheat oven to 375.
In a bowl, whisk together flour, salt and baking soda
In a large bowl with a wooden spoon, cream together the brown and white sugar with the room temperature butter. Add eggs and vanilla and stir. Now add the dry ingredients and….. then the chocolate chips.
On a light-colored baking sheet to a parchment line sheet, use a spoon and drop a constant size mound of dough, leaving room for expansion. Place in oven for 7-9 minus until cookie is barely turning brown. Remove and let sit on sheet for another minute before transferring to cooling rack. Keep doing this until all of you dough is gone…
COOKIES!!!!
 I don’t know what got into my head today, but I was hell bent on making blondes. I was already committed to make cupcakes with the help of a little little, but, not going to lie, the cake was coming from a box. It wasn’t going to satisfy my baking itch. You see, it’s the misters birthday this week and tonight was the family B-day dinner. My family consists of a whole lot of people, and half of them are 13 and under. So instead of busting my butt baking an amazing 4 tiered strawberry chocolate cream cheese cake for kids who won’t even try it(that was last week, the cake came out fantastic and everyone but the birthday girl ate it. But maybe a 2 year old doesn’t need to like strawberry cake) I decided that I was going boxed and low and behold, they loved Hey, sometimes you gots to make the people happy. But I really wanted to do something else, something a little more special, something for the more mature pallet……..banana brown butter blondes…..Oh yea, I did and I did.
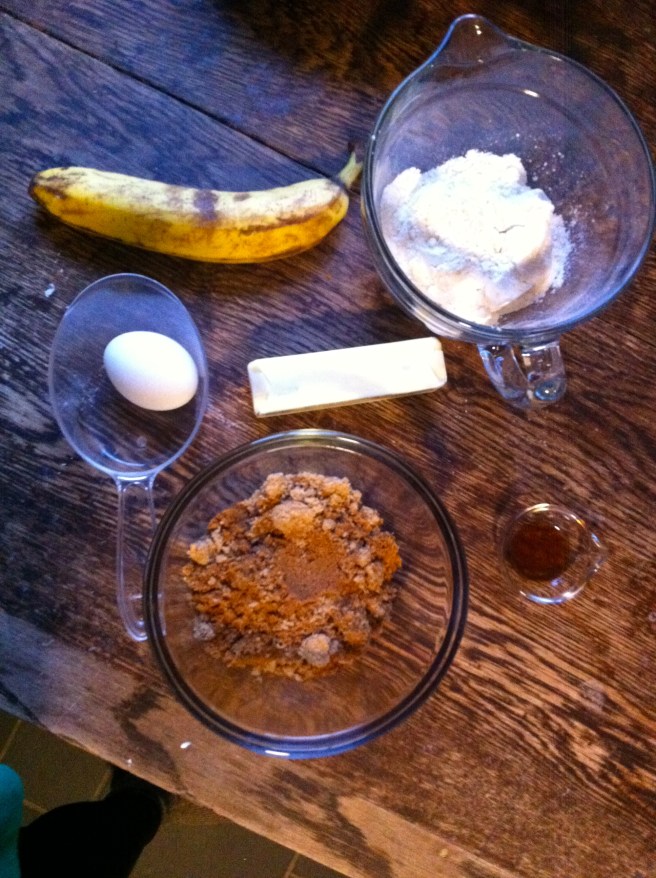 Not a heck of a lot of ingredients. Flour, sugar, banana, butter, egg and vanilla. I always forget something in my ingredient line up pics. Today it was the cinnamon, but thats ok, its optional anyway.

 Start with browning the butter… lots of lovely little bits. Smells super nutty.. You want to do it first so it can cool a little before using.
 Cooled butter mixed with the brown sugar.(I might have jumped the gun a bit and hit was still slightly warm) Make sure when you add the butter you add all the little flavor bits. Mix or beat it up. then add the vanilla and egg.
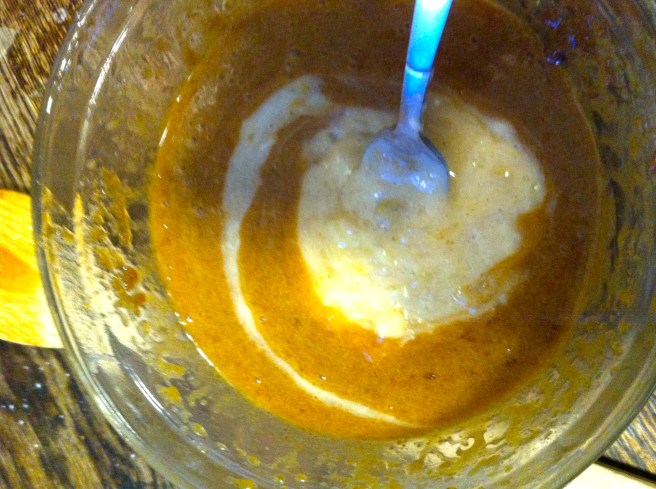 Now mash up and mix in the nanaers. Swirl it in, just like that. Now is a good time to add a little cinnamon… but don’t add it if your don’t want too.
 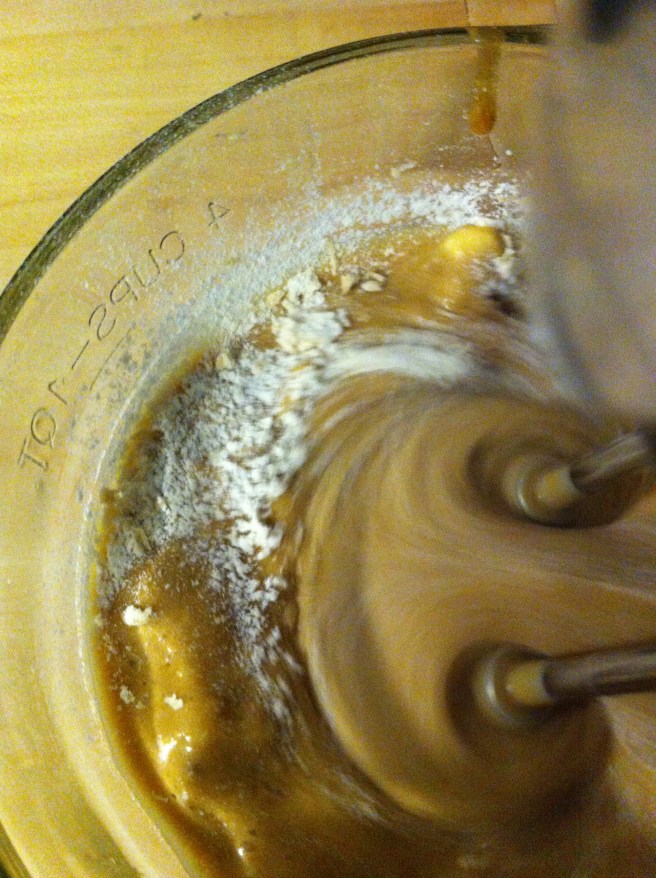 I don’t know how I ended up using like five different mixing instruments for this little batch of brownies, but I did, and I definitely trashed the kitchen. First off, I was at my sisters and I don’t know where she puts all of stuff.(She doesn’t either) Secondly, I was also making cupcakes and garlic bread, pasta, and salad at the same time…so maybe that all made me a little more messy than usual…..Whatever. its ok, I cleaned it up. Anyway, above you see me using an electrical beater to mix in flour. I used the beater for the cupcakes and then started used it in the brownies..It was fine, I used low speed for just a sec but I would recommend to just stir in the flour..Try not to overwork the batter.
 Ready for the pan…..Its a bit thick, which is good. Your going to have to scoop it more than pout it. Make sure to spread it evenly in pan and not just plop it in and stick it into the oven.
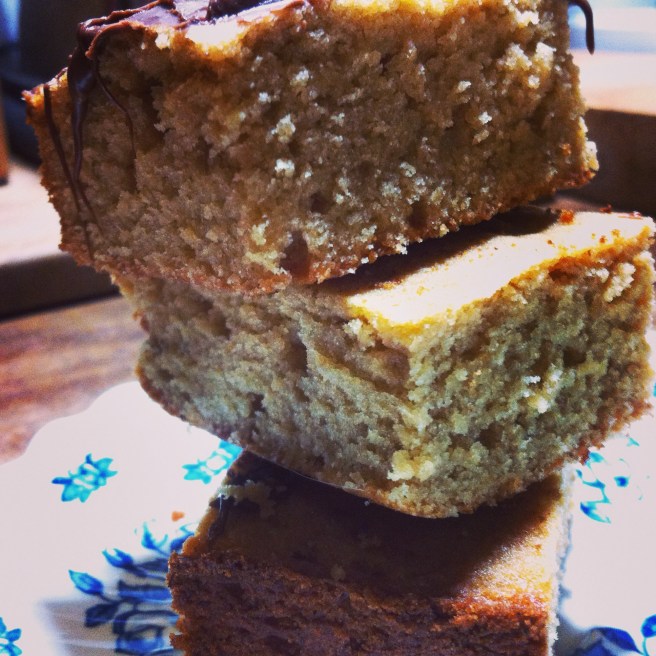
 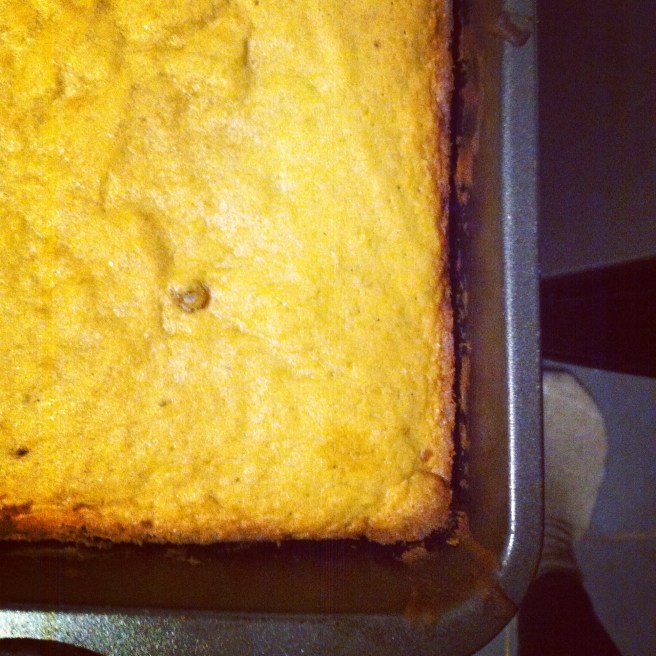 Aaaahhh, so darn pretty.
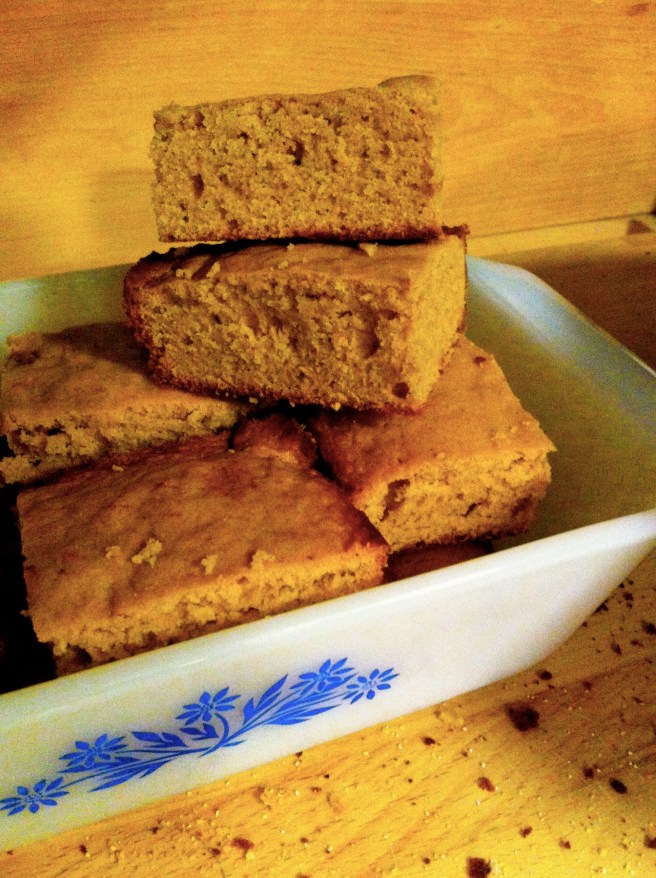 And cut into little squares..I love the casserole dish in this picture.… my sister might not ever get it back.
 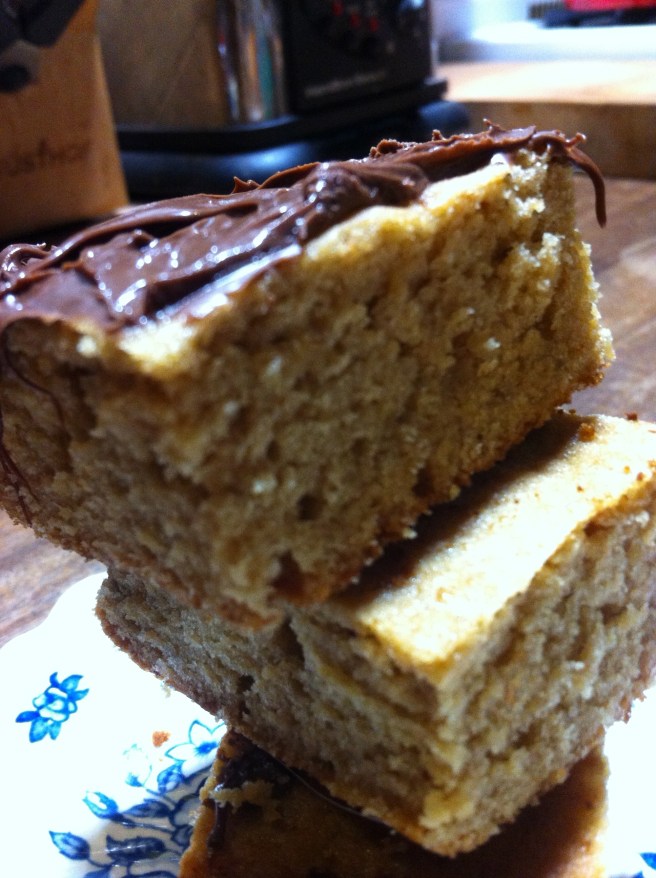 To add a little something something, I went and added a small smear of Nutella on half the batch……I think it was a good idea.
Banana Brown Butter Blondies
- 1/2 cup (1 stick)unsalted butter
- 1 cup brown sugar
- 1 cup all purpose flour
- 1 egg
- 1 teaspoon vanilla
- 1 teaspoon cinnamon(optional)
- 1 medium mashed banana
Preheat oven to 350
Place butter in a small pot or pan over medium heat. Stir frequently until the butter is completely melted and starting to foam. It will start to smell nutty and turn brown within a few minutes…when its a medium brown, take of heat and let cool.( I stick my in the freezer in a shallow pan to help cool faster.)
Once butter has cooled a bit, cream together with the brown sugar. In a small bowl, mash banana. Add egg, vanilla and banana. mix together, then mix in flour until just incorporated. Scoop batter into a grease 8×8 pan and spread evenly. Place in oven for about 20 minutes or until golden brown..It should be cooked all the way through but still a little gooey, moist and brownie like
Let cool and remove from pan….cut and do what you need to do! For a little more decadence..add a drizzle of chocolate or a bit of peanut butter. or do what I did, a smear of Nutella…and serve with the recommendation of a cold glass of milk.
I know your all curious about the cupcake so I’ll show you…I actually made cupcake and a two layered 4 inch cake for the birthday boy. I know, I know…. and the bright pink frosting. It’s actually pretty amazing. That kind of color doesn’t excises in nature.
HAPPY ALMOST BIRTHDAY LOVE!!!!!!!!!!
 HORRAY, its Saturday!!! I don’t care that I have a bunch of laundry and house work to do, bills to pay, a mangy dog to groom… I get to do it all at home with the music blasting,(maybe some holiday tunes) a lot of coffee, in my comfy sweats and the oven on. Weekends are always a mixed bag of crazy for me but I can usually count on being at home for a chunk of the morning or afternoons and that’s when I jump at the chance to make me some yeasted bread. Give me a couple of hours, my list of chores and watch me go.. I can mix and knead,, set aside to rise and hit up cleaning that toilet. Go back and knead, divided and rise again, then go fold all the laundry. Stick the bread in the oven and watch out, I am mopping the floors. I am nothing if not a fantastic multitasked, much like these rolls. You can serve them as a side for dinner , use them as a sandwich roll, or eat them as the star with a dab of butter and a drizzle of honey. The possibilities are endless. This particular recipe is fantastic for may reasons…. Its pretty simple, not to many ingredients and is made with whole wheat flour. If you don’t want 16 rolls, you can make the dough, bake half and freeze the rest. You could even bake into loaves of bread instead.Yeah, sounds good right? Go ahead, you know you want to. Just do it!
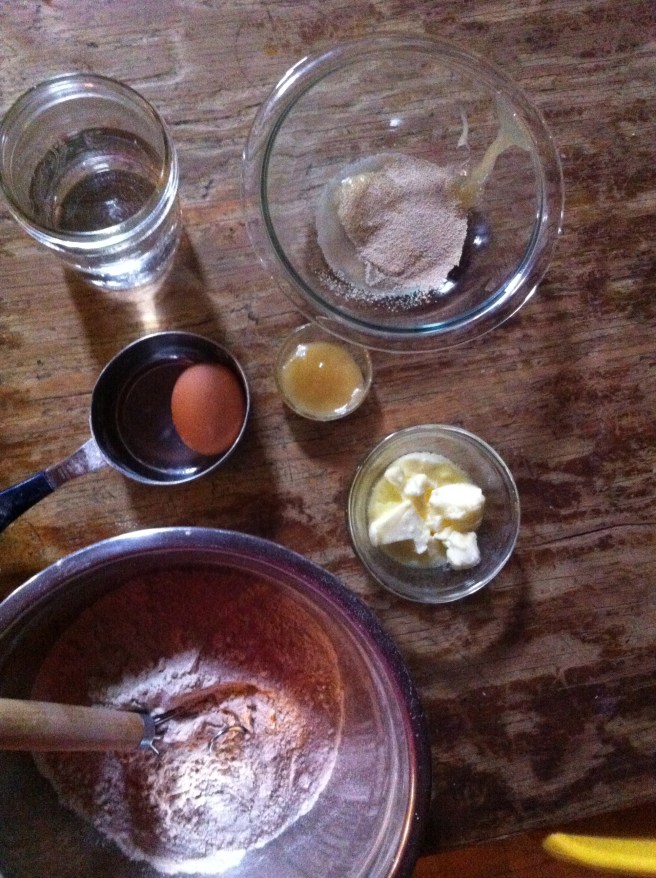 I always gather the ingredients.. I have learned over the years that if I have all my stuff out and measured in front of me, I will almost never forget something and that I make less of a mess. It also helps that I find it pretty. So, flours and salt are whisked together. The yeast and honey in a bowl waiting to be proofed. The butter in need of more melting and an egg.. Pretty.
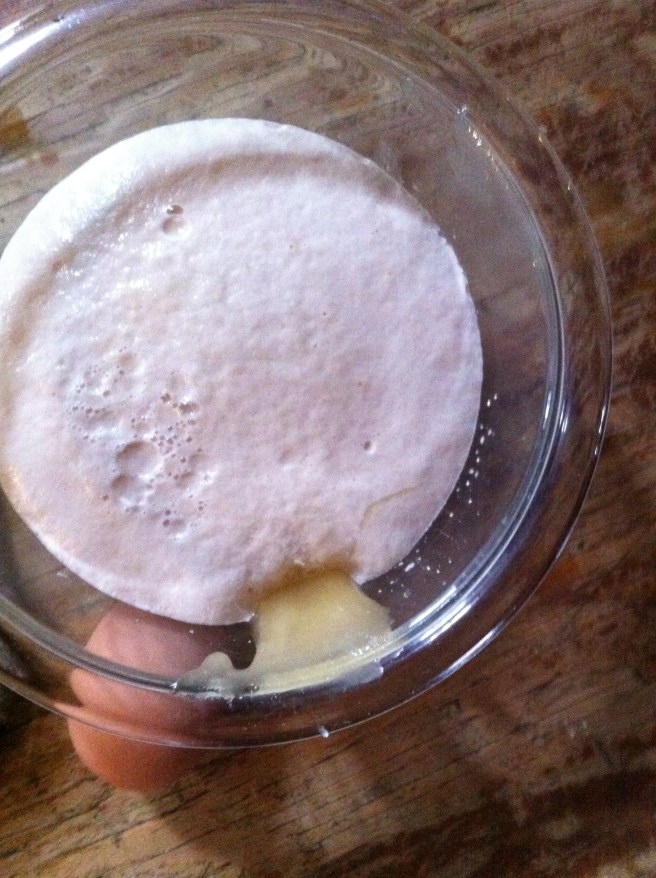 Honey and yeast mixed with a cup of warm water. BE CAREFUL with the temperature of the water.. If its to hot, the yeast will kill the yeast and you will have to start over again, but I trust you won’t do that.
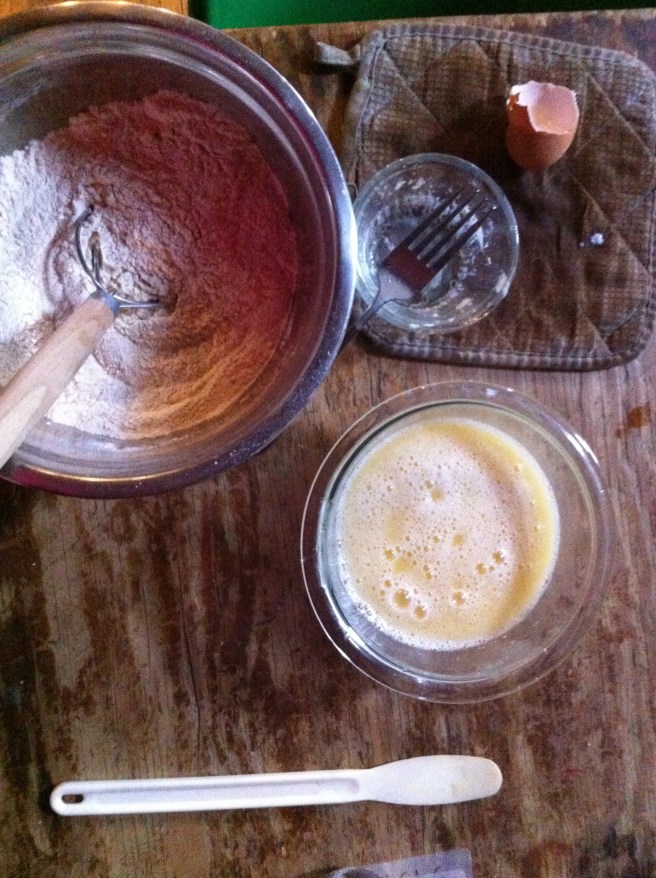 Now that the yeast is active, mix in melted butter and egg. (Make sure the butter is not hot, warm is ok) Add wet ingredients to the dry and mix.
I have a super awesome dough mixer , it helps to mix and not completely stick like it does to a wooden spoon. Dont have one? Use a wooden spoon, it works the same with a little more stickiness..You have a stand mixer? Well fancy you. No I am not jealous,(maybe a little). I like using my hands when making bread, but you? Go ahead, use your mixer, its cool with me. So mix you dough, you want the dough wet and sticky but still able to roll into a ball. If you need to, add a pinch more of flour, just enough to help form a ball. When ball is formed, drizzle oil and rub all over and place in bowl with a damp towel. Let sit somplace warm to rise for about an 45 minutes or unit dough has doubled in size. A good warm spot..Try the top of the fridge, thats my rising spot.
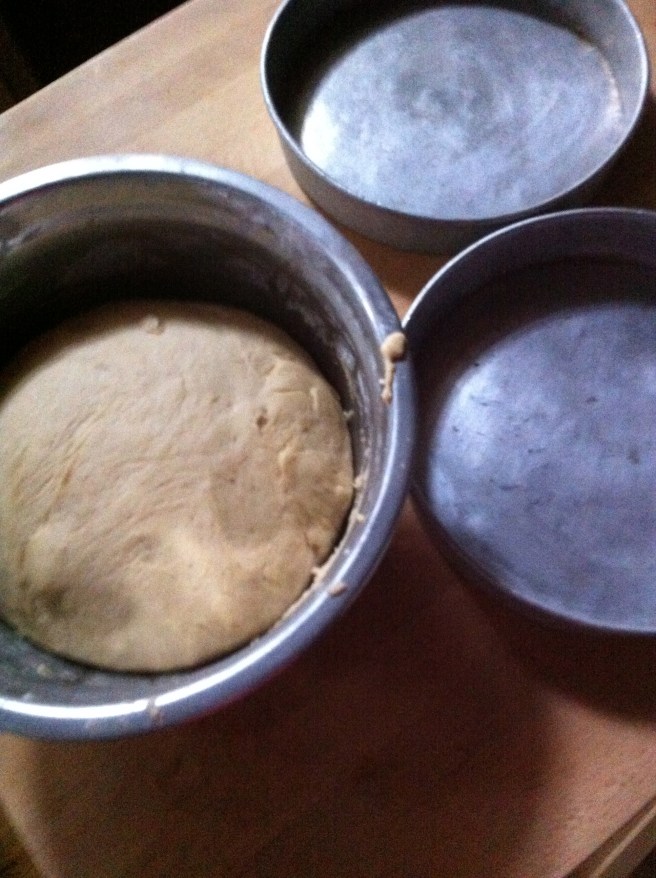
Once it has doubled, roll out onto a nicely floured surface and..my favorite part, punch it down and knead for a few minutes…. This dough doesn’t need a lot of kneading, just enough to reform ball and get some air out. Now divide and place into well buttered pans. I used two 9 inch cake pans, but a 13 X 9 pan or baking dish would work or loaf pans if you want loaves. Just make sure to really butter the pans.
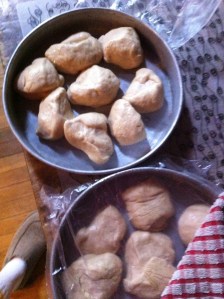
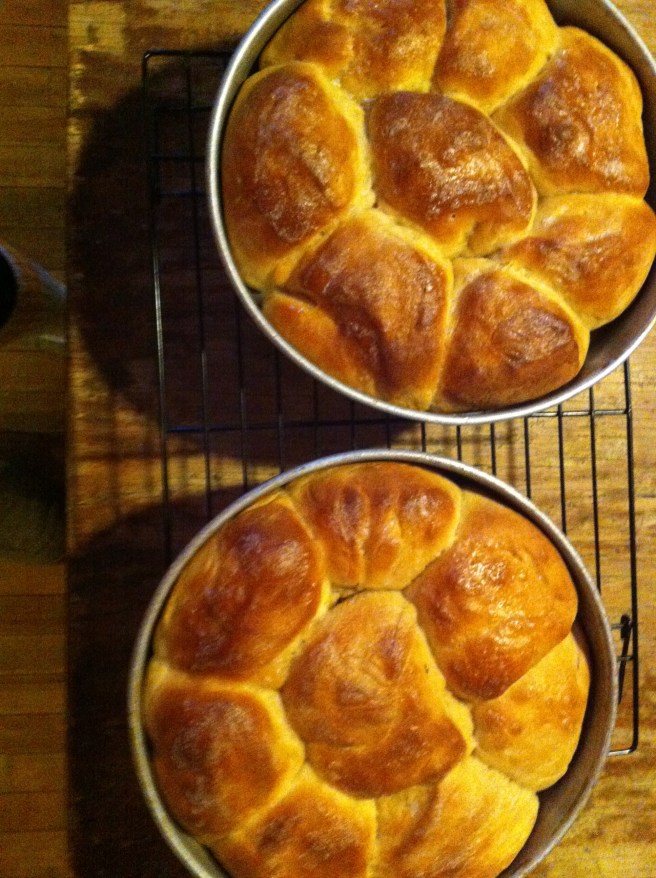
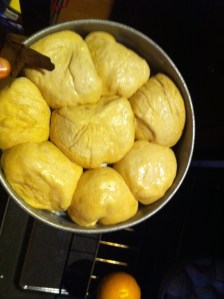 Little ball of dough turned into big balls of dough. (Yeast is so cool!).Into the oven they go. Right before I baked them I gave the tops a little milk wash, just for color. Do it if you want, you could even do an egg wash, but it’s really not necessary. Oh boy… Fresh from the oven…Take a bit of butter and melt over the top….
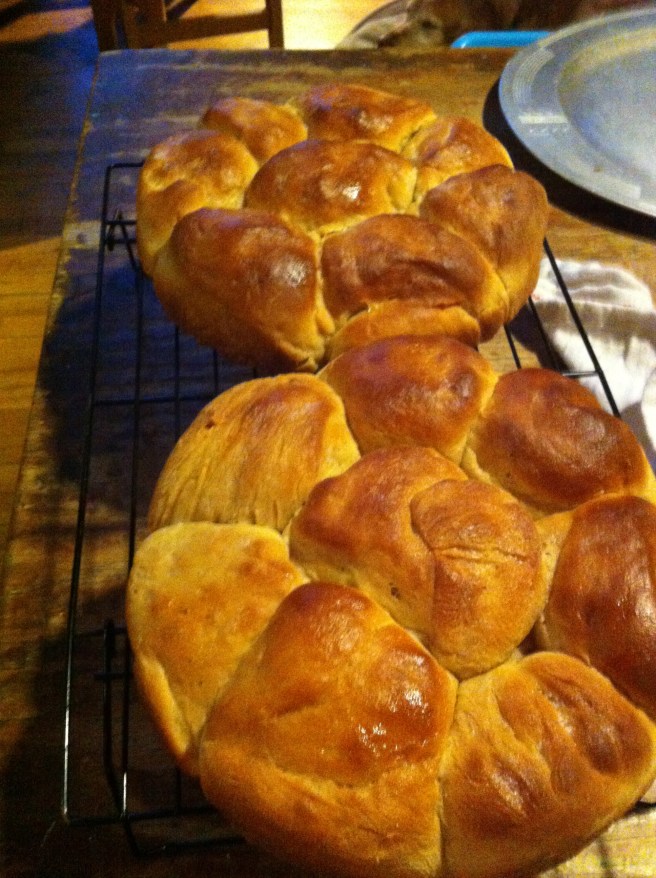 So lovely! Who wouldn’t want to just tear these beauties apart?
Now eat.. Eat with jam, eat with cheese, eat with peanut butter or with a bit of honey. Or, eat as is…..Just eat it and enjoy you labor of love and the satisfaction that you just made those delicious rolls that you are eating.
Honey Wheat Pull-apart Rolls.
Ingredients
- 1 cup all-purpose flour
- 1 3/4 white whole wheat flour
- 2 tablespoons honey
- 4 tablespoons melted butter
- teaspoon salt
- 2 1/4 teaspoon yeast
- 1 egg
- 1 cup warm water
- 2 tablespoons butter(to rub over baked rolls)
Makes 16 good-sized rolls
In a large bowl whisk together both flours and salt.
In a smaller bowl add warm water, yeast and honey. Stir and let sit for 5 – 10 minutes or until the yeast has grown and is foamy. Meanwhile, melt butter and let sit for 5 minutes. When the yeast has proofed, whisk together with butter and egg. Add to dry ingredients.
With a dough spoon , wooden spoon, stand mixer or your fist, mix (or knead) until the dough comes together and begins to form into a ball. You want the dough to be wet and sticky but add a pinch or two of flour if its to wet and not forming a ball.
Coat dough with a little oil and place back into large bowl. Cover with a towel and place in a warm place(The top of the fridge is great) Let rise for 45 minutes or until the dough has doubled in size.
When dough has doubled, dump dough onto a well floured surface, flour up you hand and punch down the dough and knead for a few minutes. Divided dough 16 even balls. Now is a good time to preheat oven to 400 degrees.
Place in greased pans ( 8 in each) and cove with plastic and let rise for another 20-30 minutes or until dough has doubled and filling out the pans. When the second rise is done, place in oven and bake for 25 minutes or until a nice light brown. If you want a darker crust, right before baking, lightly brush the tops of rolls with butter. As soon as the rolls are removed from the oven take the remaining 2 tablespoons of butter( one tablespoon for each pan) and melt over top of rolls
Note..If you want to freeze any rolls, place in a pan after fist rise and stick in freezer until frozen Transfer to a airtight bag. When you want to use, simply pop out of freezer and let sit for about and hour. Bake as directed above.


 There is a joke about Vermonters, that all we talk about is the weather. Well, it’s kind of true. But to our defense, we get a lot of weather, and it’s always changing and intense and both lovely and crazy and all over. So yeah, we talk. A lot, about the weather. And on that topic, I am trying so hard not to complain, but honestly, I am getting a little sick, both physically and mentally from all of these super, to freaking cold temperatures. Yesterday the high was 0 ( which was at like 2 in the morning) and factor in the windchill, the temp stayed at like 25 below. It f**king sucks. I can’t stay outside for too long or else I will probably die. The dog is having a hard time making it around the block before he gets ice paws, and the mister, well he even started wearing gloves (he wears a sweater all winter and never gets cold…..he is officially cold)
 I accidentally spilled the turmeric on the counter..but it kind of looks like I might have done it on purpose… yeah, let’s go with that. Chop the garlic and he ginger into chunks
 And toss into the pot to warm and activate. Just a little toasty toast.
  And the veggies are roasted and tender and smell so good. It took a lot of will power to not eat the whole pan right there.
 I added the roasted veggies and 3 cups water straight into my pot with the spices because I used an emulsion blender. If you are using normal blender, add the veggies, the toasted spices and the water to the blender and blend until smooth. Then transfer to a pot.
 Pretty much all blended together….(I left a few big chunks in there to snack on while I was waiting to eat serve…I was really hungry) and let to simmer for a little longer…
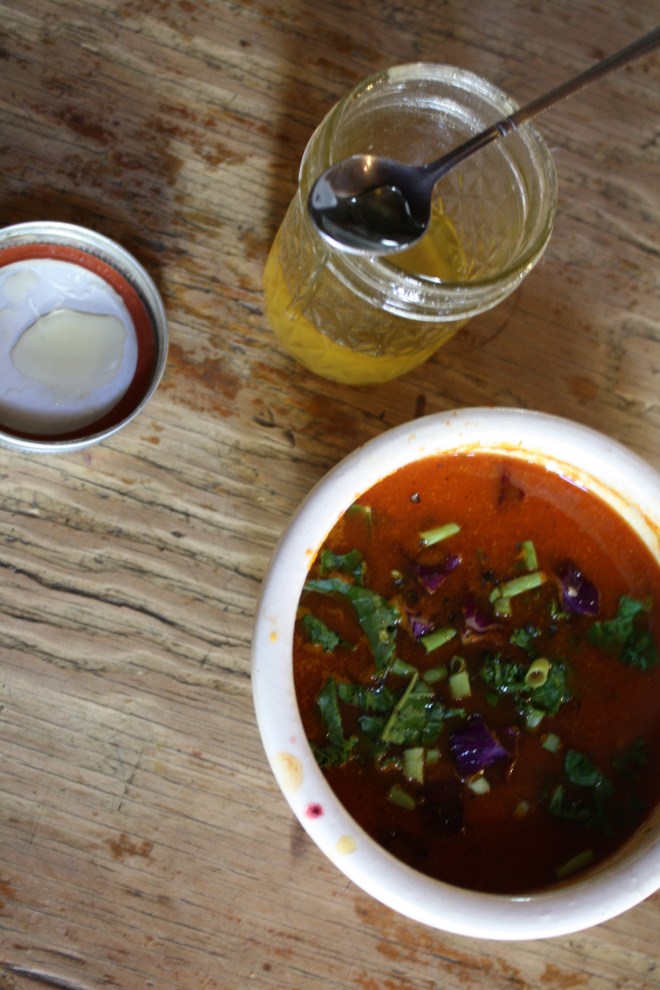
 It hasn’t stopped snowing, the temperature is dropping fast (it’s getting to the point the dog doesn’t even want to be outside) and the mister is busy hand shoveling three long driveways. So I figured that in between all the laundry folding, plant watering , and all around sitting on my butt that I am doing INSIDE, that I would be so super nice and crank the stove up and make my love some cookies. I love making cookies, especially when I have chores to do. I think part of it is that cookies are baked in batches which breaks up the chores and gives a sort of rhythm to things. Plus everything is nice when the house smells like cookies. I was going to make chocolate chocolate chocolate cookies, but realized that I didn’t have cocoa powder, so I went with fresh cranberries (I just scored a pound of organic cranberries for 89 cents!) coconut flakes and chocolate chips. Plus I wanted to make them oatmeal because the mister likes oatmeal and oatmeal makes the cookies a little more hardy. (We need hardy when the temperature dips below zero) The verdict….. chewy, soft, slightly sweet oatmeal, bittersweet chocolate, nutty floral coconut, and the zing and pop of the fresh cranberries. He told me to hide them… hide so he will stop eating them….. because they be amazing!
 The base of this cookie….We are using regular old fashion oats and flour. Salt, baking soda and baking powder. Vanilla, chia seeds in hot water, coconut oil white and brown sugar…. You know, all the cookie stuff. Then all the goodness.. Chocolate chips, coconut flakes, and fresh cranberries. Goodness. Oh yeah, and they are vegan…if that matters to you.
  Warm the coconut oil and mix with the white and brown sugars. Then add the chia seeds soaked in hot water. Stir until nice and silky smooth.
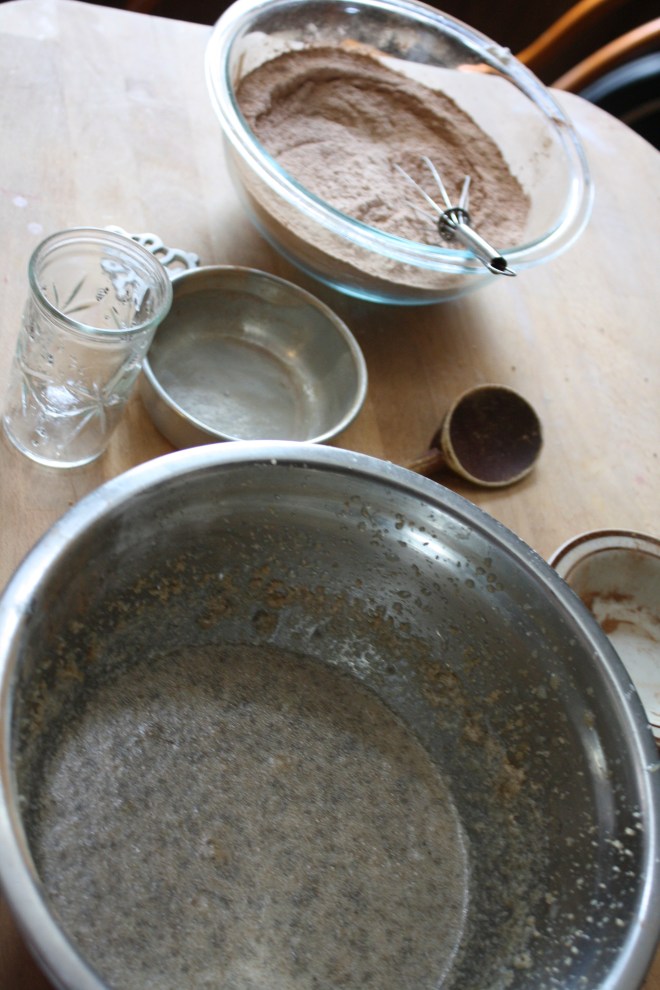
  In goes some more stuff. I just dumped all the dry right on in that bowl and mixed it up nice and nice.
  Chopped the fresh cranberries into chunks… One at a time…… Just kidding, I actually laid a cutting board on top of the cranberries, applied a little pressure and sliced through the cranberries.. Does that make sense? I hope so, because its is much easier and faster and the cranberries don’t all roll away.
  The chopped cranberries, coconut flakes and the chocolate chips go in to be mix all up.
  I used my hands to form the balls and gave each mound a little smoosh, but not completely flat. Then into a preheated 375 degree oven for about 13-15 minutes or until a nice golden brown.
 A cup of hot coffee and a plate of warm cookies… I am the nicest, right! (After his nice cookie rest I proceeded to do a little nagging, so the day evened out) So today is probably a great day for everyone to make cookies. It’s freezing out, its saturday and well, just cause. You might even be looking for a great recipe to make for that big party your going to. You should make these cookies. Have a Fantastic Weekend!!! -C
 All I want to do is make everything into hearts and turn everything pink…Is that a problem?
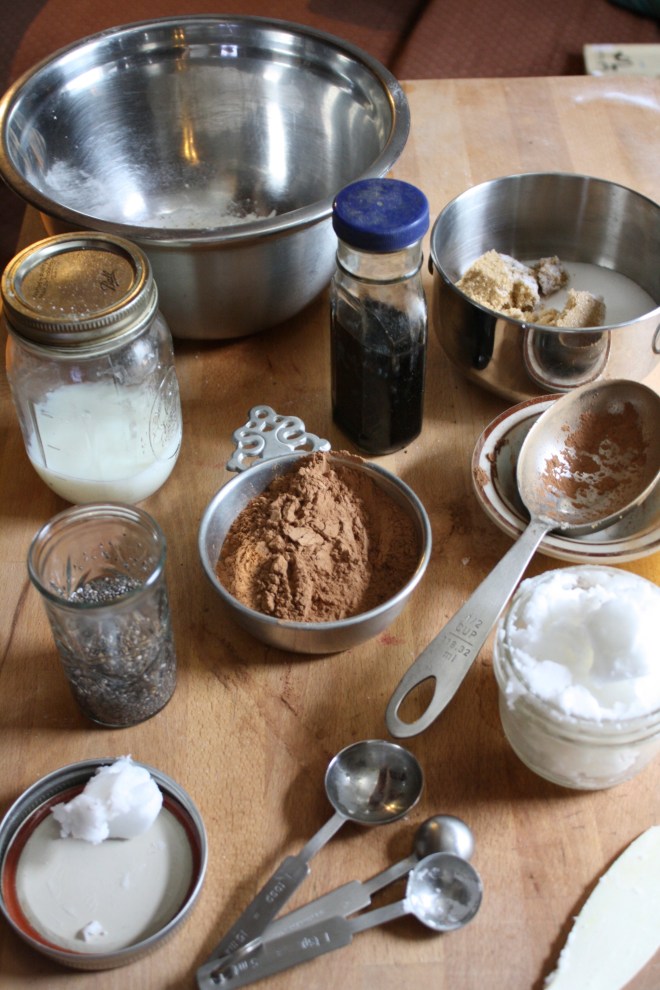
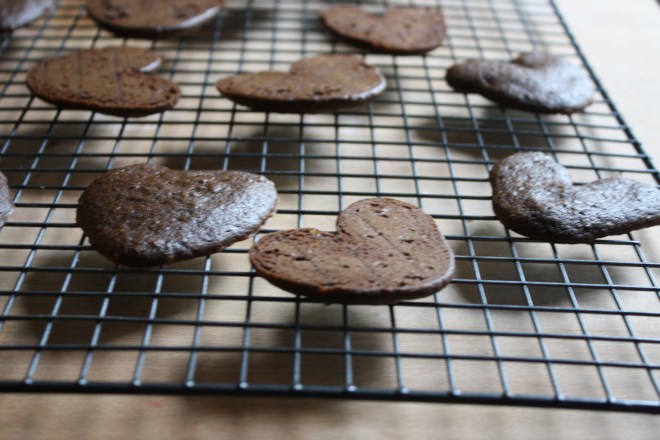 So lovely. Shadow hearts while the whoopie hearts cool.
 Whoopies all paired up
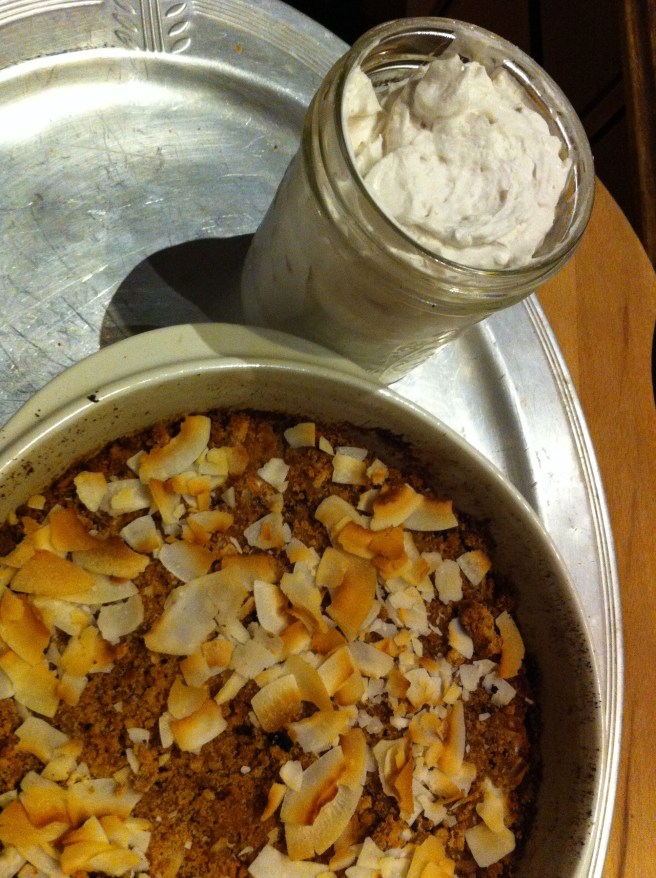
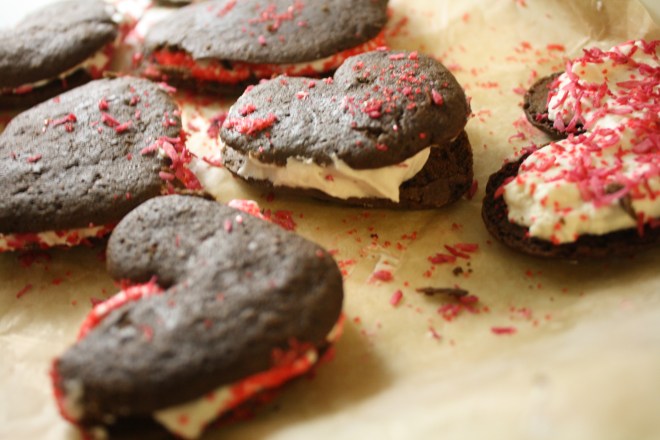 Stuffed with a generous dollop of whipped coconut cream ( a cold can of coconut cream whipped with a splash of vanilla and a tad bit of sweetener) and sprinkled with my home-made beet dyed coconut sprinkles…..
 I need a good snack.. Something healthy, hardy, fast, and of course, something tasty.
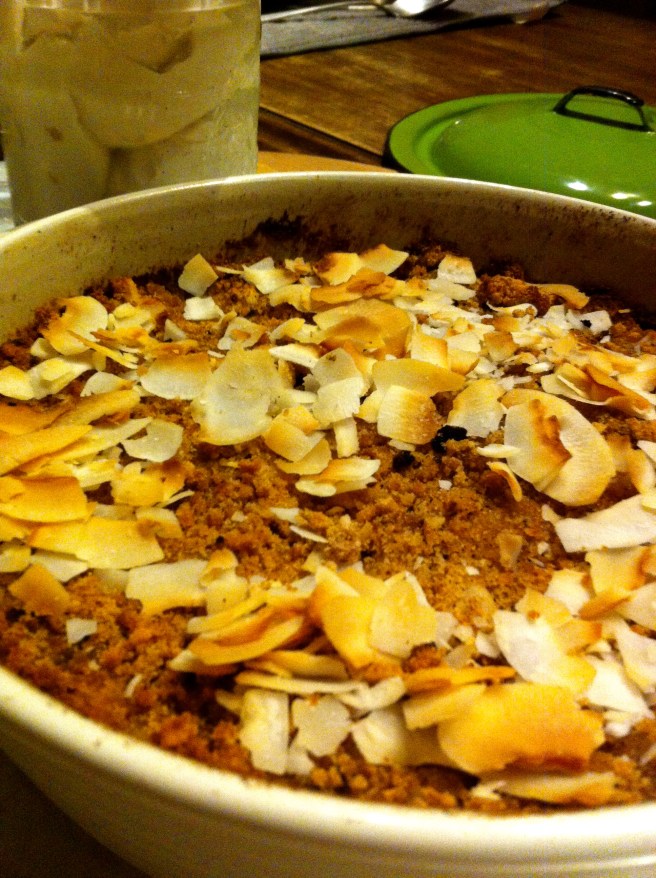
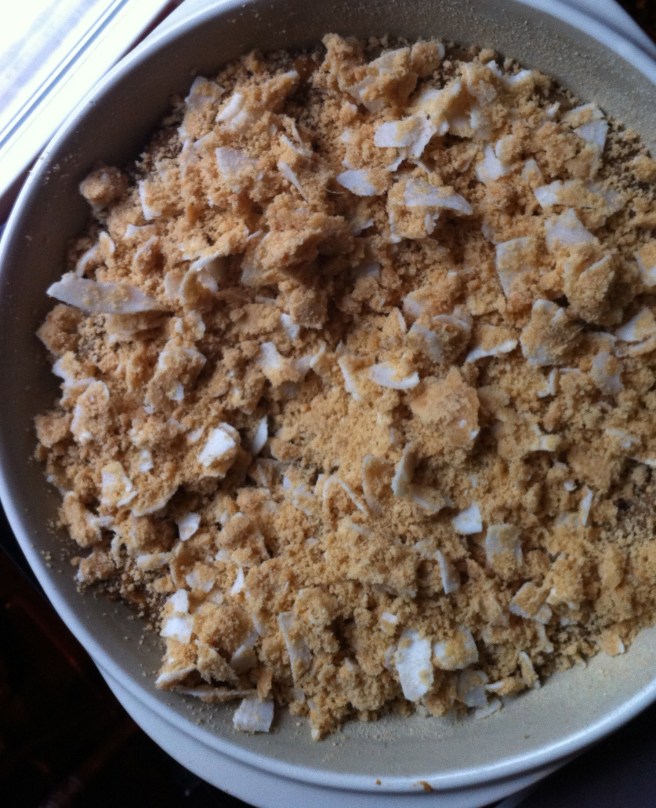 Yes Please. Thank you very much. Sweet Potato custard (I don’t know what else to call it) topped with coconut. My taste buds have found themselves in heaven. I have found myself sticking my butt out of the fridge with spoon in hand. Hey there, like what you see?
 Custard ingredients. A whole lot of not much. Sweet potatoes are the star here. A few dates, chia seeds, and a bit of cinnamon spice. That’s it. Oh yes, this desert is 100% way acceptable for breakfast and comes with absolutely 0% quilt. Its magic.
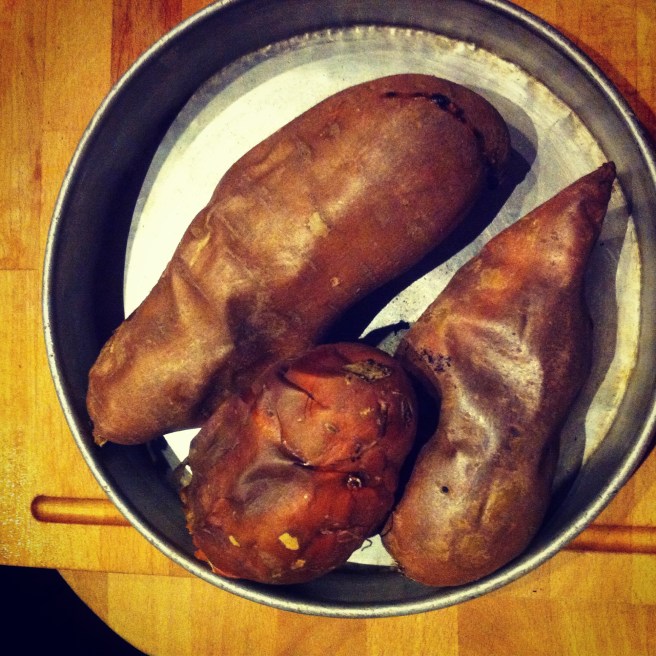 If you have left over sweet potato, this is your chance to use them up, but if not, 3 sweet potatoes, stuck in the oven at 400 degrees for about 45 minutes or until they are fork tender.
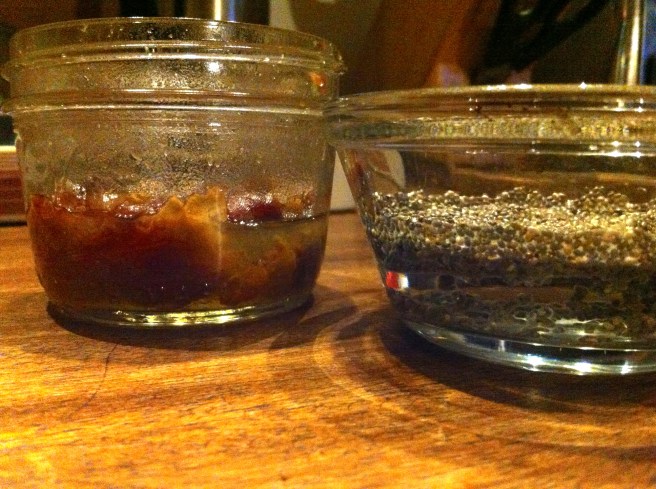 While the potatoes are baking, chia seeds go into water to soak.. I remember the first time I used chia seeds and they turned into gel, I thought something was very wrong. They are suppose to turn gloppy, so if your concerned, don’t be. Now take your dates..MAKE SURE TO REMOVE PIT!!!..and stick in some warm water, just enough to cover. If you are familiar with dates and use them often, you might already have date paste on hand…just use that. otherwise. we are going to turn these dates into a paste by simply letting them sit in a bit of water to soften and then pureeing.. It’s a really simple process that you can do every time you use date paste in a recipe, but my suggestion is to make a big batch and save the rest. It will turn into a new thing for you. You will want to eat it by the spoon full and then some. It’s that good..
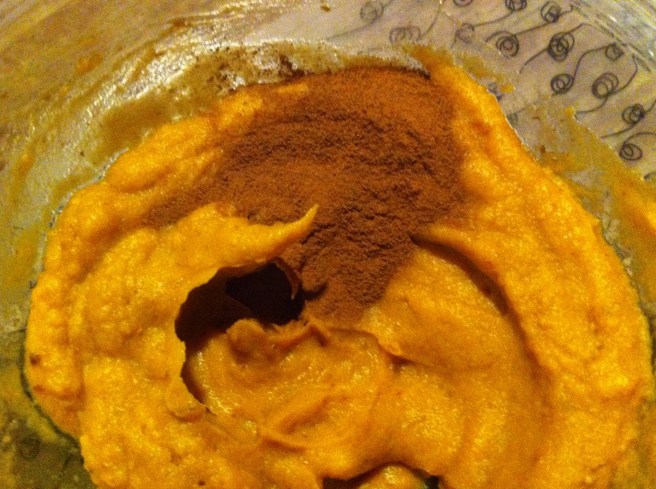 The potatoes are done and cooling… now is a good time to puree dates. The consistency doesn’t have to be silky smooth, but it doesn’t hurt to get close. Once the potatoes are cool enough to handle, remove skin( eat the skin) and stick into either a large bowl if you’re using a handle blender or emulsifier, or into the food processor. Puree those sweet roots of deliciousness, adding a splash of water or two if they need help whipping up. Add the chia seeds, the date paste, and spices….mix and POW!!. Go ahead, you must eat a bite….or two. Satisfied for now? Stick it into the fridge. Refrigerating for a bit to even over night makes the custard set up a smidge better, but you really don’t need to refrigerate. To be honest,, you don’t need to bake this either, just eat it like pudding(which is what I have been doing too) But you really want to bake it. Just stick the bowl in the fridge.
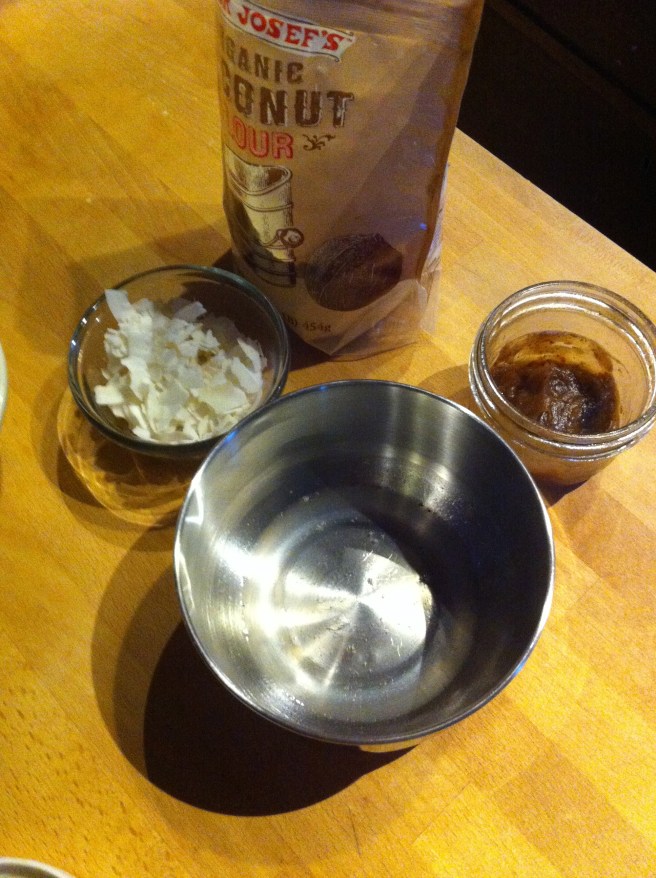 Now to make this custard even more awesome, we are going to add a little coconut topping. Here we have coconut flour, unsweetened coconut flakes, a little scoop of the custard filling and a little coconut oil
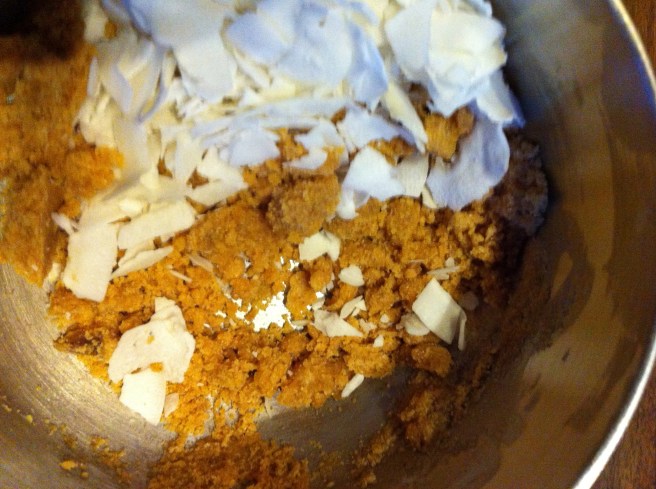

 I was informed yesterday that if I was going to make tortilla chips, that I better make some sweet ass dips to go with them. I kind of agree… tortilla chips need dip… or better yet, two dips. Queso and guacamole. It’s what needed to be done, and so I did it.

 Perfect…
 To think that both of these dips took about 10 minutes total to make. (I had pre baked the cauliflower and sweet potato) And for real, I would spend much more time if I had too because both of these dips are so freaking good, I definitely will be making these on the regular.
 When something goes on sale at the grocery store, I tend to buy it. Being that it is Valentines Day this week, all the stores are having specials on all sorts of sexy things… and strawberries are one of them. Now I am not a huge fan of buying produce that is terribly out of season, but I can’t help myself…a good deal is a good deal and the strawberries were a super good deal. I was just going to make some sweet ass strawberry jam or maybe a lovely strawberry cake with them (and I probably still will), but these strawberries are actually super juicy and full of flavor, and it’s always nice to eat some full flavor freshy strawberries… especially soaked in balsamic vinegar. And yeah, I think that this salad is pretty sexy, so it makes for a perfect Valentines day dish.
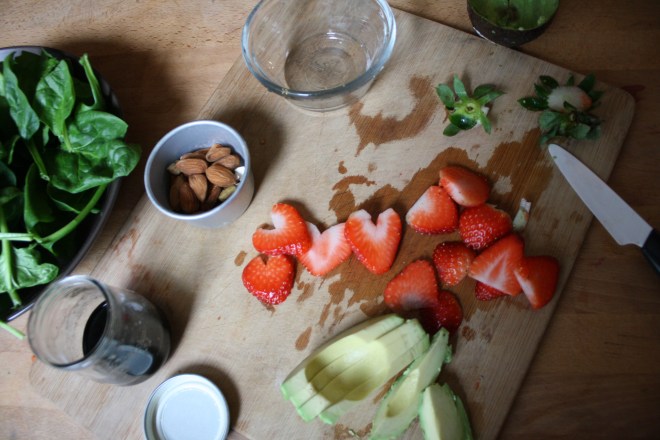 A handful of ingredients and 5 minutes will get you to a fantastic salad experience.
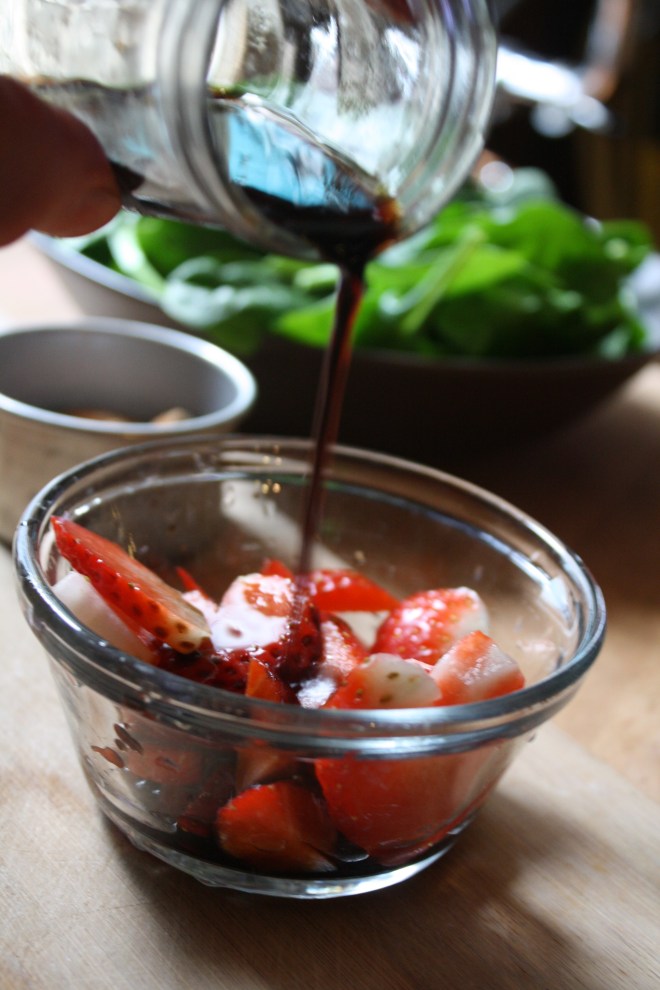 Pour the vinegar on the strawberries and let sit for at least 5 minutes. (the longer the strawberries can sit with the vinegar, the better)
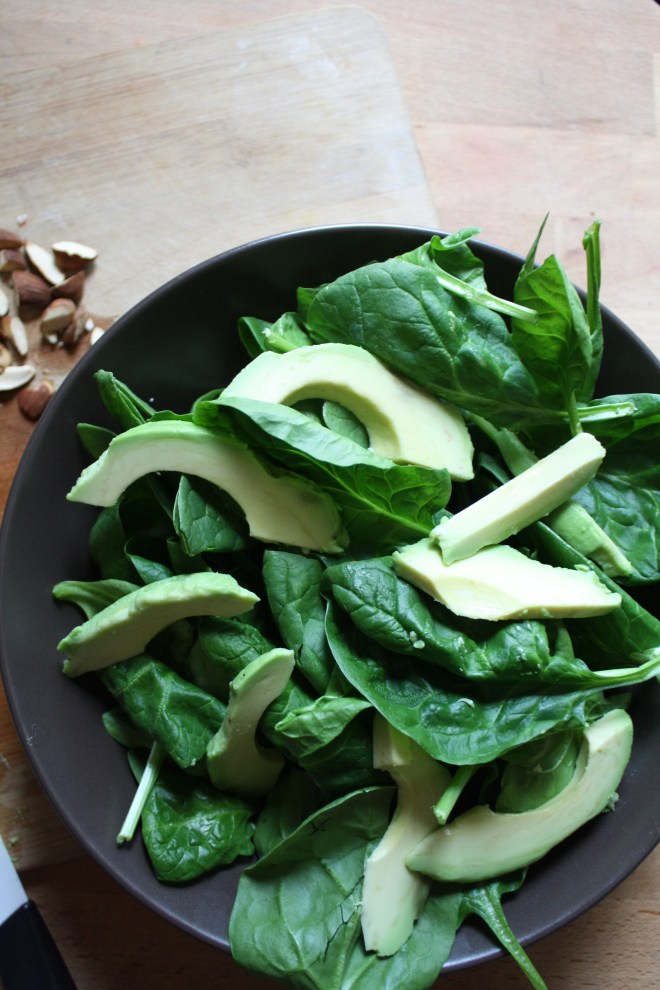
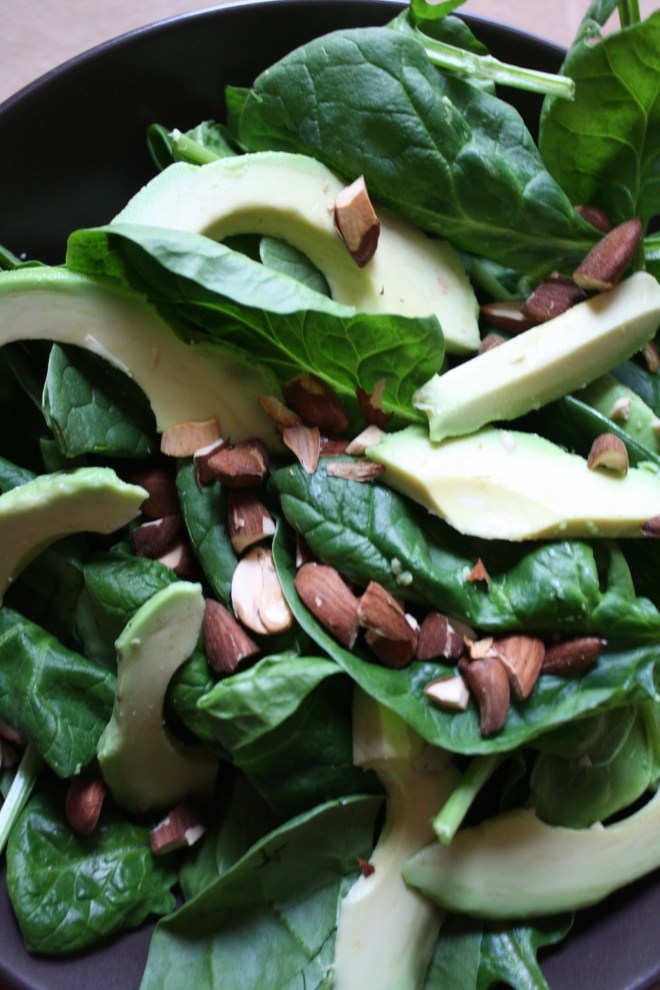 Pile it on.. thinly slice avocado.. rough chopped toasted almonds… It’s pretty much as easy as it can get.
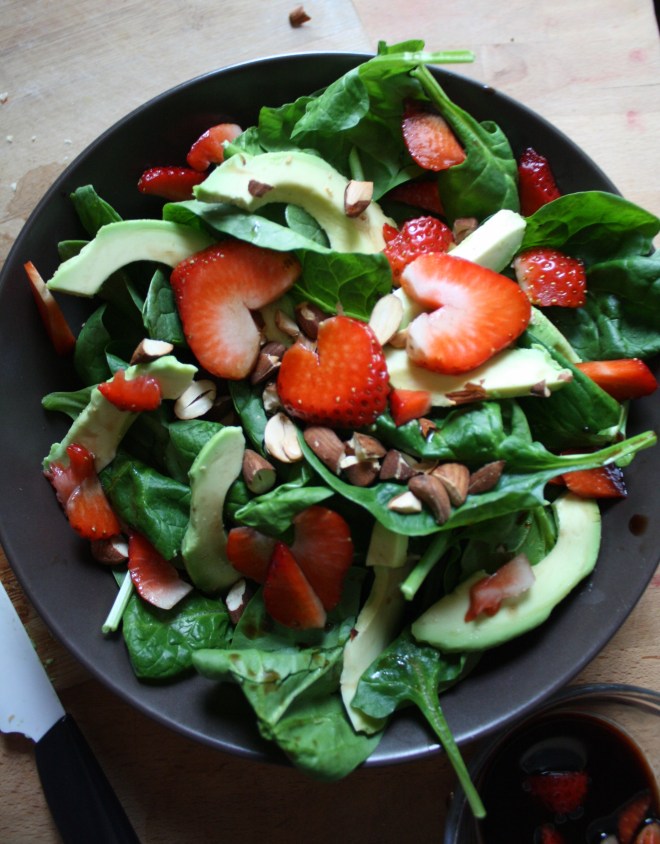 And last but not least, toss on the balsamic soaked strawberries and drizzle the remaining vinegar. (if you made hearts, place on top to make pretty) Sprinkle with a pitch of salt and pepper and pow! Fancy, sexy, delicious salad.
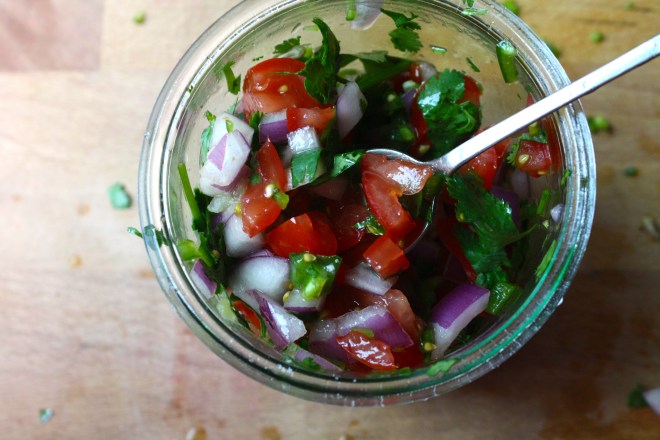 Happy Cinco de Mayo! And what better day to share my version of my oh so fantastic pico de gallo, or as I call it, super freshy salsa.
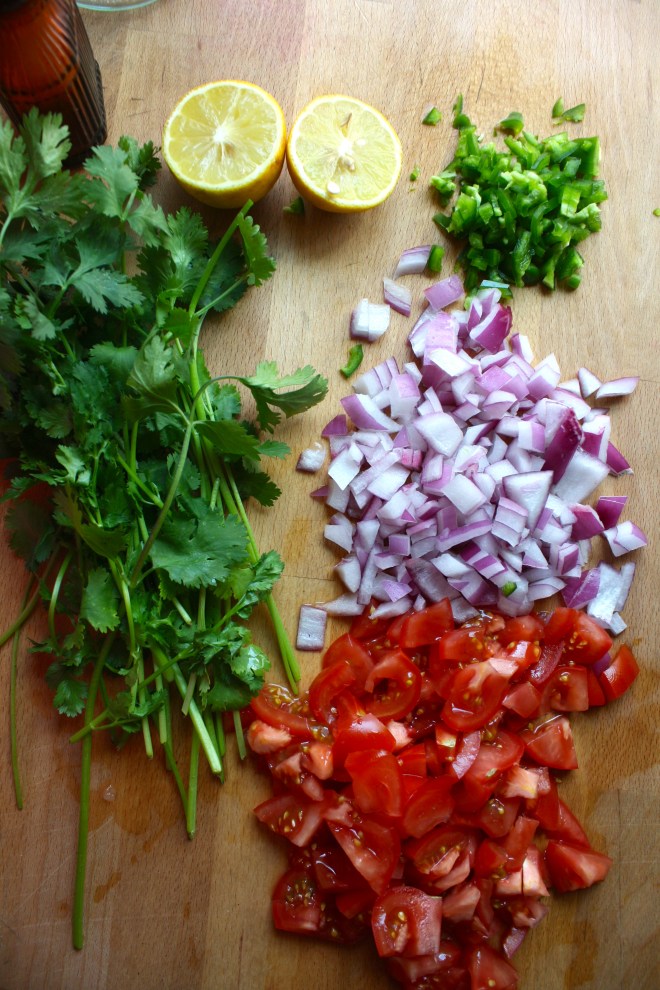 The stuff. Chopped Roma tomatoes, chopped red onion, a diced jalapeño, lemon, a bunch of cilantro, and salt.
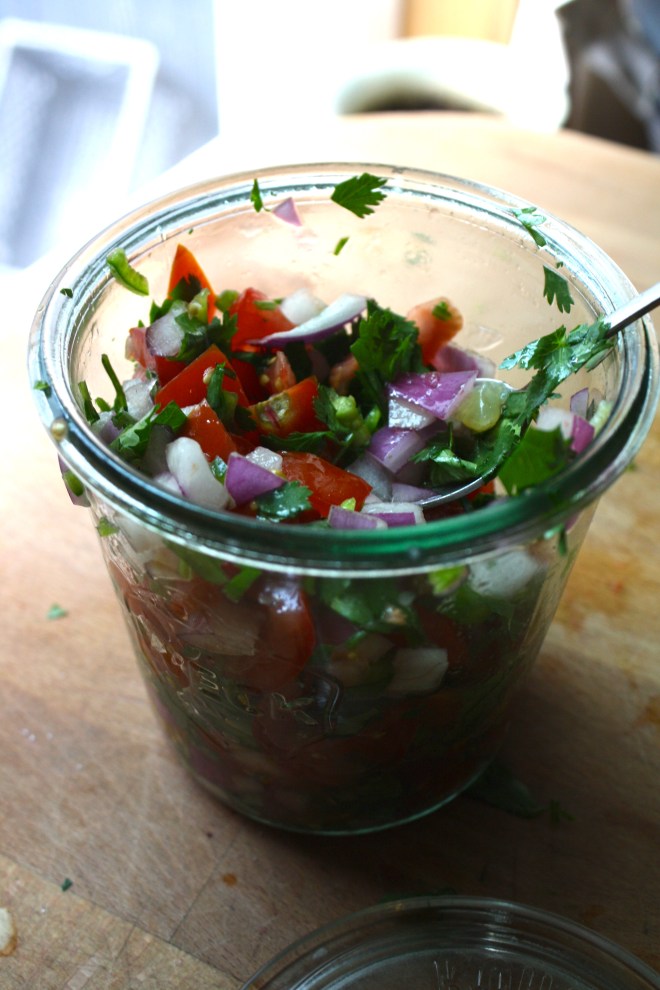 And thats it. Now eat… with something or without.


 And that’s how I know that this is a winner.
  As an awesome aunt, when I have any of my nieces or nephews, I feel the need to make something special for dinner, something that the kiddos might not get very often, but also keep it on he healthy side. I have 2 littles for the night which gives me the perfect opportunity for a trash food recipe. You know trash food, things like boxed mac and cheese, beefaroni in a can, or, in this case, sloppy joes.
 The stuff… We start with onion and green pepper, chopped into pieces. Black beans, bulgur, can crushed tomatoes. Chili powder, garlic powder, a bit o apple cider vinegar (which I forgot to picture) ,and some salt and pepper. Oh and cheese if you want… Plus a bun of some sort is necessary.
 Toss the chopped onion and peppers into a deep skillet or pot with a drizzle of oil. Cook on medium heat until tender and toss in the spices. Give a stir. Add in the beans, bulgur, and tomato, a splash of vinegar. Stir it all up, cover, and let simmer for about 15 minutes, or until the bulgur has absorbed the liquid and is nice and tender.
 And Then dump a good heaping pile right onto a bun. Add some cheese, or not..and eat with wild abandonment, making sure to get as much on your face as you get in you mouth.
 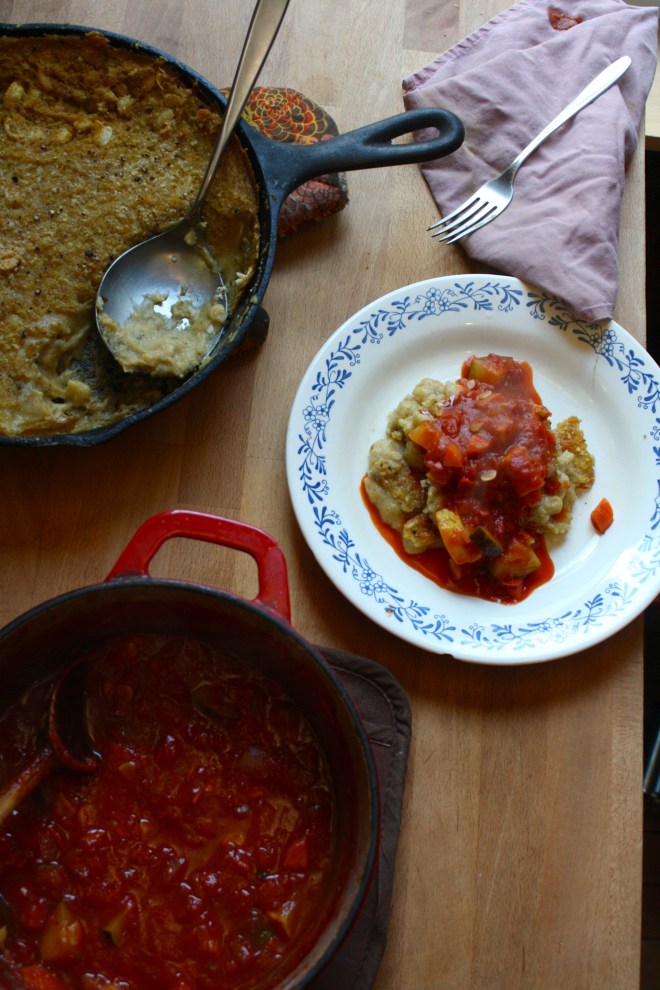 Is it really for real April? Where has all the time gone and where the hell is the warm weather? It’s not funny anymore. I am officially OVER winter! Ok, so now that I got that off my chest…..
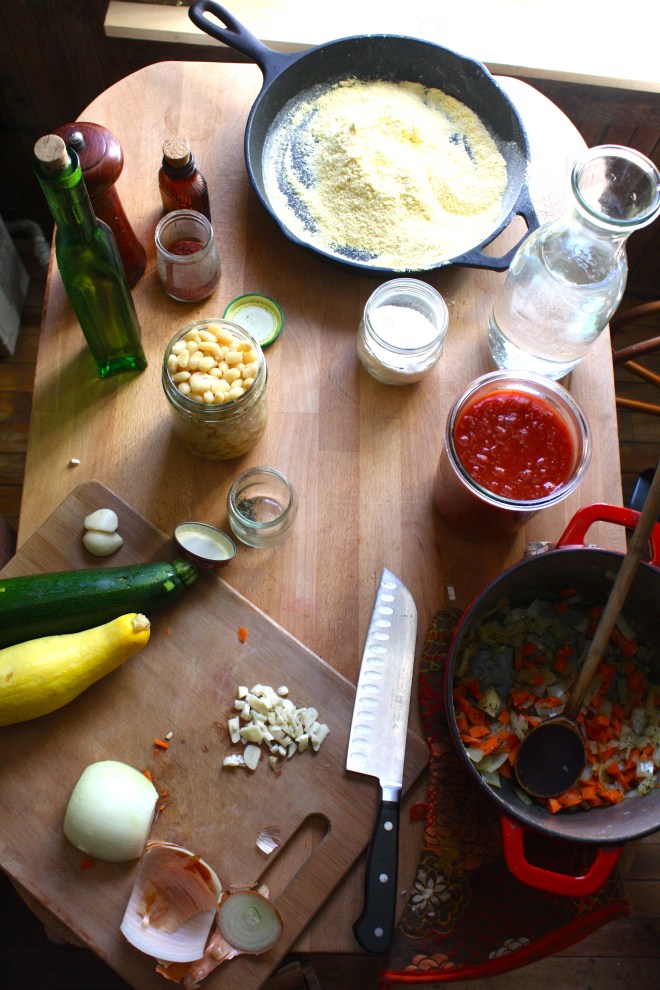 The Stuff. Cornmeal, water, navy beans and parmesan for the polenta. Crushed tomatoes, garlic, dried basil, onion, carrot, zucchini, and summer squash for the sauce. Salt, pepper, and olive oil all around.
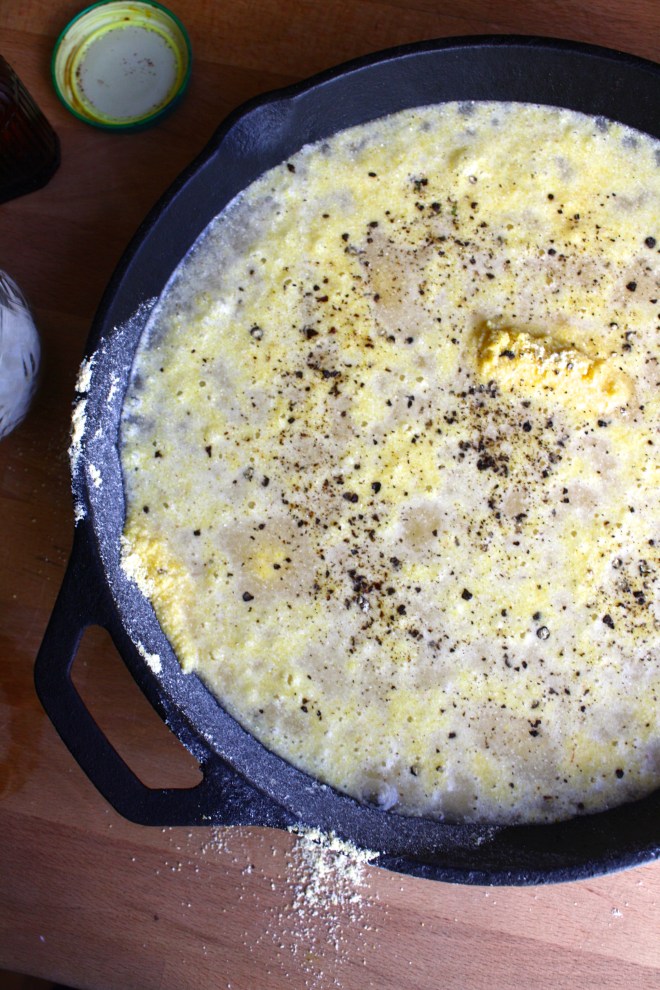 Cornmeal and water go into a cast iron skillet (or any oven safe dish) with a pinch of salt and pepper. Give it a little mix and stick it into the oven at 400 degrees .
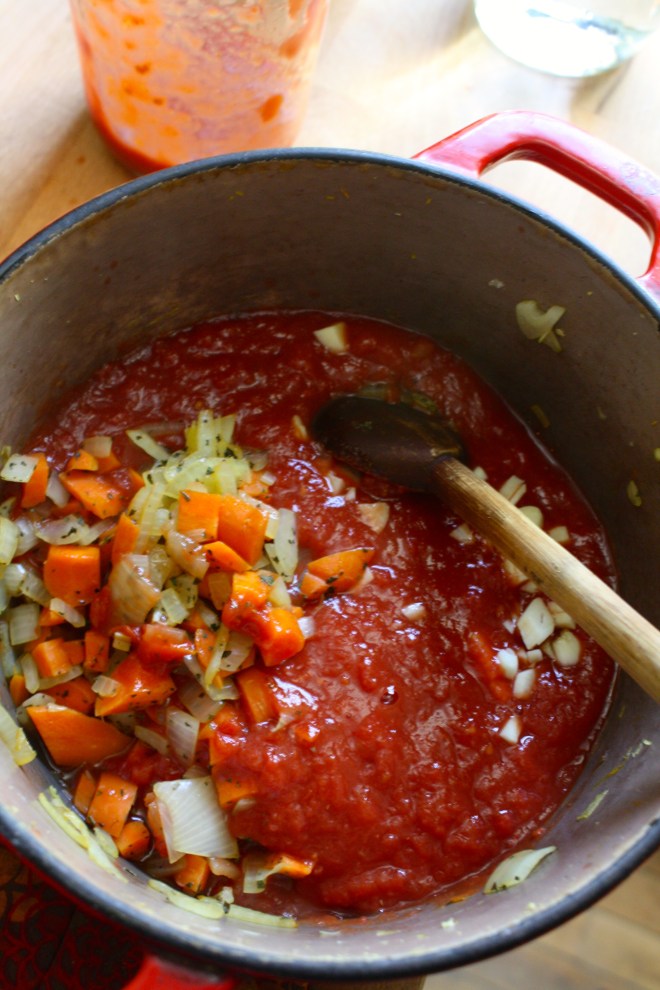 Once the polenta is in the oven, make the sauce. Chop up all the veggies and stick into a dutch oven or sauce pot with a pinch of salt, the basil and a good drizzle of olive oil. Stick on medium heat and let veggies cook down a bit. When the veggies are tender, add in minced garlic, crushed tomatoes and another drizzle or oil. Turn burner to lowest setting and simmer (giving it a stir every now and then) for about 45 minutes or until the polenta is done.
 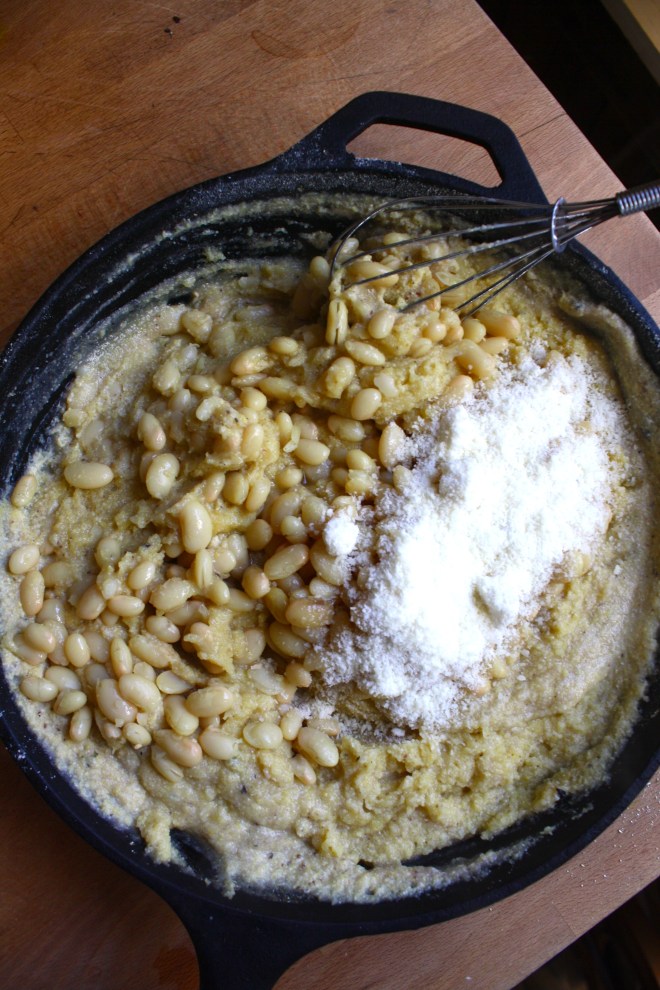 After about 30 minutes when the water had pretty much all cooked down, take the polenta out of the oven and stir in the beans, the parmesan, a tablespoon or two of olive oil and salt and pepper. Smooth top out and sprinkle with more pepper, parmesan and drizzle with a bit more oil. Stick back into oven for another 1/2 or until polenta has formed a crust and no longer giggles when you wiggle the pan.
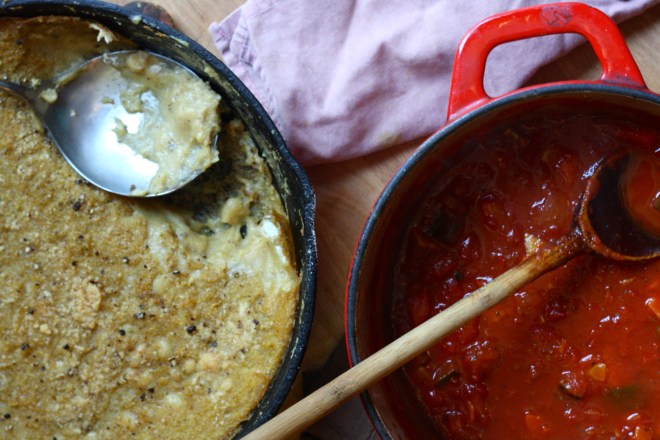 Pull polntna from the oven and let sit for at least 1o minutes.
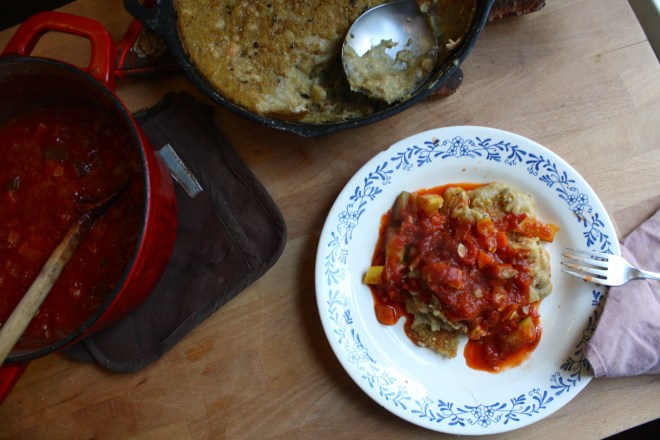
 You ever have one of those days where its 9 am and your ready to call it a day? . Yesterday was one of those day for me. Its spring vacation around here (more like an arctic vacation) and I had volunteered my day to babysitting/ hanging out with 2 of my nephews, ages 11 and 13. (I know, I am the greatest sister). I had all of these great ideas and plans of things to do, but when it came down to it, they wanted to do nothing but play video games and not really listen to anything I said. I basically had to drag them outside to go for a walk we me and that’s all I could get them to do My great little nephews, I love them so much, but yesterday they had their minds set on being little monsters.
 What we have going here…… Chopped up onion, celery, and carrot in a pot. Stick that pot on the stove for a few minutes on medium heat to start the cooking process. While that happening get the other stuff ready. A big can of diced tomatoes, hot sauce, worcestershire sauce*, prepared horseradish*, celery salt, garlic powder, salt and pepper And last but not least a good squirt of yellow mustard. Now add it all to the pot and bring to a boil. Turn down to low and stick a lid on it.
 After about 20 minutes the veggies should be soft and the flavors should all have melded together. Taste soup as it is cooking and add any more spice that you want.
 I stopped when I got to a smooth consistency with the littlest bit of texture.
 And there it is…served with a stock of celery and a wedge of lemon (I forgot to add them to the pictures!) A bloody Mary to take the edge off any drag of a cold weather day. And best part.. left over soup is great served chilled with a shot of vodka to loosen this Mary up!
 Before we get to the fries, I just want to mention that yesterday was one of those fantastic winter days that reminds me why I love living in Vermont. Pretty white snow everywhere, the sun was out, and 20 degrees without a gust of wind. The trash dog an I were even able to go for a little hike. It was so nice and soooo sooo needed! Anyways, the other day as me, my sister and the mister where putting together one more piece of Ikea furniture, (I am the master at Ikea assembling!) a little runs into the room and presents the mister with a Dominos pizza. Yup, a whole pizza just for him. Why you might ask? Well I guess my sister was delivered the wrong pizza and the place didn’t want it back and she didn’t want it, so she gave it to him.
 The carrots and the parsnips are all sliced up into big matchsticks and ready to be baked to crispy browned perfection. I added the oil to the pan to toss the fries in and then sprinkled with a fair amount of salt and pepper. If you don’t have and or want to use a cast iron pan, a baking sheet works just the same.
 Oh saucy sauce stuff. Tomato puree, sriracha, and yellow mustard. Add a little bit of honey to lighten it up (can use brown sugar if keeping it vegan), a splash of apple cider vinegar and a couple minced cloves of garlic. Topped off with the smokey delightful spice of cumin. I cold eat this on everything…and I kind of did.
  Fries are done, Sauce is ready. Served in super cute tea cups.(from now on I want to serve everything in tea cups.) A perfect side dish, snack, or even a light meal. It lead the mister to ask the question…What pizza?
  WOO WHOA!! MARDI GRAS! I wish I was down in New Orleans today celebrating… and soaking up some warmth and sunshine, catching beads, maybe even taking my shirt off(?!!?)
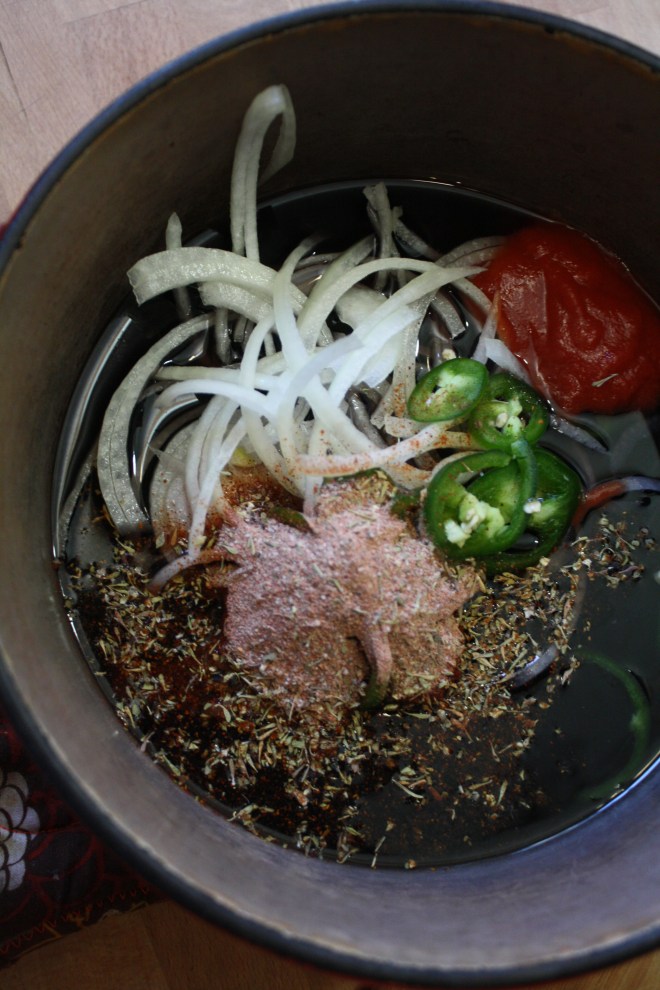
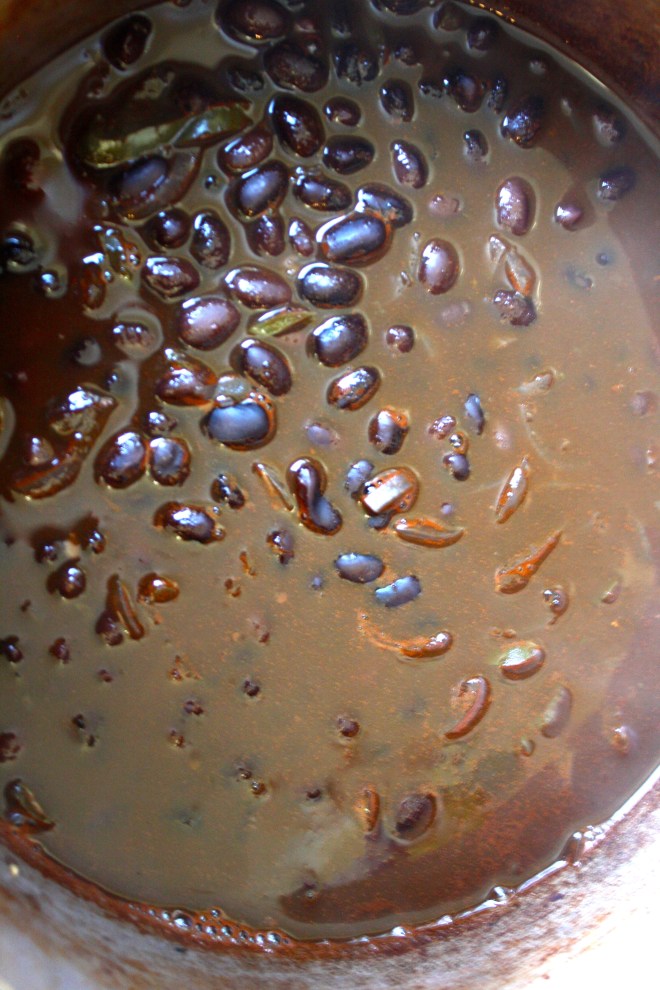 Beans are in a pot filled with water unit beans are completely sumerged. Add in the onion, jalapeño, tomato paste and cajun seasoning. Bring to a boil then cover with a lid and simmer for about 45 minutes….. After about a half hour, start up the rice. Water in pot with rice, bring to a boil, cover and simmer for 15-20 minutes.
  The rice is done and fluffed with at fork. The beans are cooked with just the tiniest bit of bite, bathing in a thick spicy tomatoey sauce. The chunks of onion and jalapeño have broken down and are hiding in every bite…. Oh so good!
 Bringing a little spice and nice to this crazy cold winter day or any fun festivities you may have planned.
 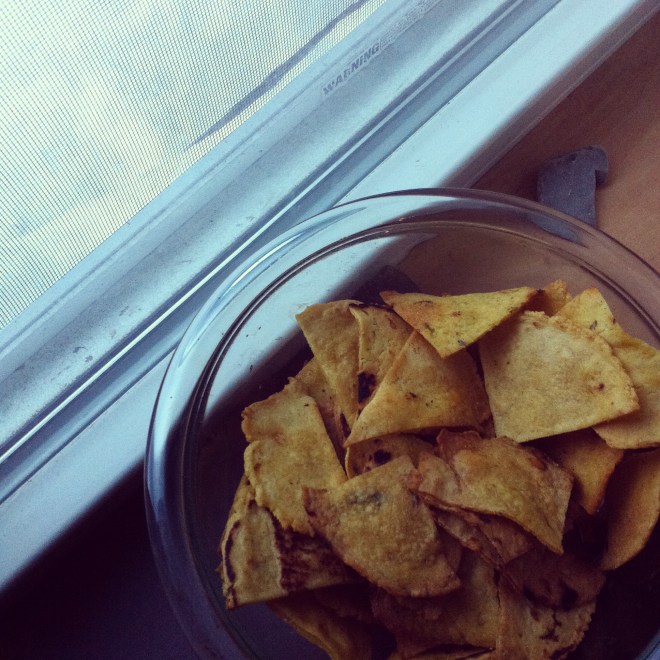 How awesome will you be when you bring the most freaking amazing tortilla chips to the party this weekend? You will be like..”what, it ain’t no thang.. I am just good like that” Yes, yes you are.
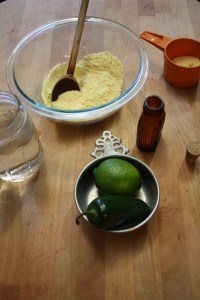
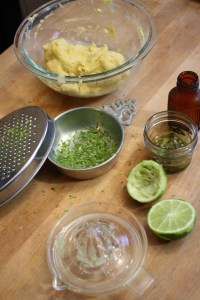
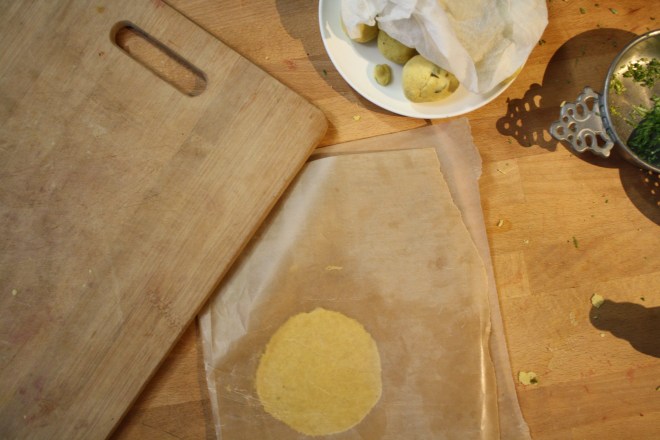 Knead dough a few times just to make sure it’s completely uniformed and divide into 12-14 equal pieces. Place balls on a plate and cover with a wet paper towl to keep from drying out.
 My cast iron skillet is big enough to cook 2 -3 at a time, but doing one at a time is cool too. Preheat the skillet to medium heat. Cook each tortilla for about 2-3 minutes ( or until starting to brown) on each side.
 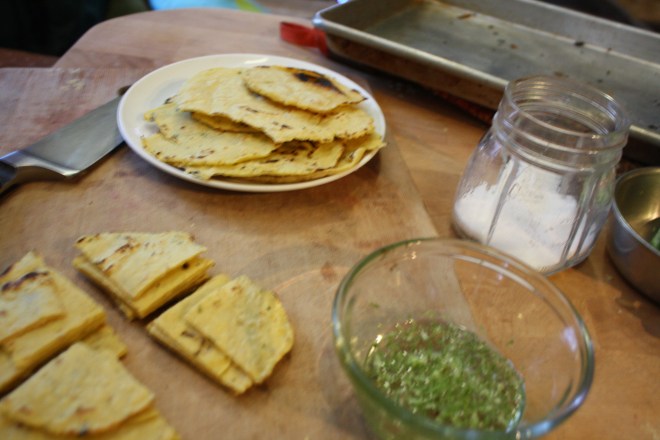 Half way there to chips!!!
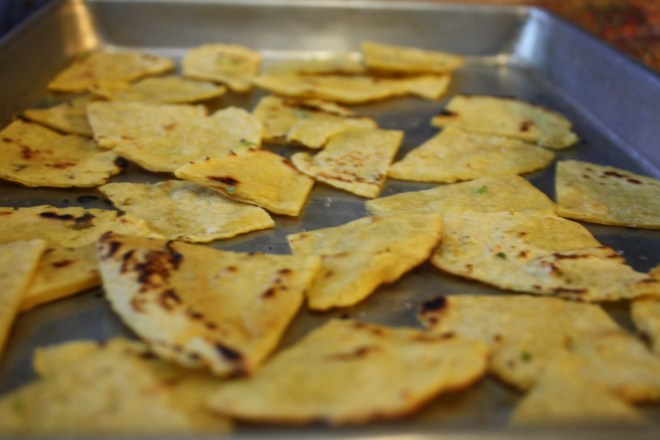 Placed all nice and cozy on a baking sheet. trying not to overlap. Into a 400 degree oven for about 20 minutes to complete the chip making process.. After about 15 minutes, check for doneness. When nice a crispy, remove from oven, squeeze lime juice all over and sprinkle with salt. I then stuck them back in the oven for a few more minutes just to dry the lime..
 After cooling down, take those chips and stick them in a bowl.
THE LOVELY CRAZY
September 19, 2015 by maximios • Blog
As I sit here writing this, mind you typing is not a terribly labor intestive activity, I am drip drip dripping sweat… It’s just not right.
And today will be as hot as shit fuck. But its support to get so much better tomorrow. So that’s it, not more complaining. Everything is all good.
Now lets talk about this salad. This is such a fresh, clean, and full flavor salad made of just a few simple ingredients, the star being the fennel. Almost licorice-y and sweet, yet still has a crisp earthiness, it pairs so well with onion and kale and dressed with just lemon juice. Simple, easy, and very much satisfying. Kind of the perfect salad to make when you don’t want to make anything because the world is a sauna and nothing hurts you soul more then to think of turning on the oven.(full disclosure. Stove burn does go on for a few minutes.. but only a few)
Maybe you have never had fennel or think you don’t like it, Well if you haven’t had it, you must, and if you think you don’t like it, you should try it again. Up until recently, I kind of discarded fennel as a mah veggie. I didn’t hate it, but I never really cared for it, and I definitely did not seek it out. But this past year, for some odd reason (I blame/thank old age) I have really gotten into the yummy bulb. I have even gone out of my way to find it. And last week I was much excited when I went to farm share pick up and found that there was crate of fennel. Woo HOO!
Sweet fennel+hot weather and no desire to move = Fennel onion carrot salad
The stuff. A bulb of fennel (this was a big one so I use half of it),a medium onion , a big carrot, a bunch of kale, salt, pepper, a little olive oil and a lemon (I ended up using 2 smallish lemons)
Take you fennel and either with a mandolin or a knife, thinly slice the bulb. Do the same with the onion.
Toss the sliced fennel and onion into a lightly oiled skillet and sprinkle with a dash of salt. Place on medium low heat and cook jjust until the veggies are soften and starting to brown.
Chop the kale into pieces small enough to fit into your mouth and julienne or shred the carrot.
Compile the stuff. Juice the lemon. Kale into a bowl, dump most tot the lemon juice on that and sprinkle with salt and mix around (I used my hands). Dump the sautéed fennel onion onto of that and top with the carrot and the rest of the juice.
TA DA! Now that’s some pretty.
And toss it all around. I like to add a few thinly slices of raw fennel and lots of fresh cracked pepper.
Share with a friend. Or not. (a not for me)
Happy hump de dump day. Stay cool friends!
-C
Makes a big salad for one, or a few smaller sized side salads.
With either a mandolin or using a knife, slice up the fennel and onion super thin. Toss into a lightly oiled skillet, sprinkle with salt, and stick on the stove on medium low heat. Stir and let cook down for 5-8 minutes or until the fennel and onion have soften and are starting to brown.
While thats cooking, chop up the kale into small pieces and julienne or shred the carrot.
Place kale into bowl, juice the lemon and drizzle most of the juice all over the kale and give it a good mix. Dump on the cooked fennel onion and top with the carrots and a the rest of the lemon juice.. Sprinkle with salt and pepper to taste and give it a good toss. Top with a few fresh shaving of fennel.
Share with a friend, or eat it all to your self.
And now the cucumbers are growing shit crazy.
Every time I open the fridge, at least one (if not a few) come falling out from all the places that I have managed to squeeze them in. (the egg tray in the door is not a safe place for cucumbers) This is a slight problem, but a problem that I kind of like having.
This past weekend I had planned on doing a bunch of pickling and canning. Like a whole day of music blasting, dancing around the kitchen in a cute little apron with wooden spoon in hand, (pretending its a microphone) canning all sorts of fruits and veggies that a piling up in massive amounts for the winter months.
That didn’t happen, and I still have a million cucumbers and not a whole heck of a lot of time this week to inact my canning day day dream.
My simple solution. Cut um up, stick in a bowl with a some fresh dill, a lithe vinegar and leave them on the counter….. And watch as they disappear. It’s crazy. I find if you leave a bowl of cut up anything on the counter, anyone that walks by will stop and eat a few pieces (if not the whole bowl) It’s a scientific fact (no not really, but maybe)
As for my blissful canning day. It will be happening soon. But until then, this is the way to go with those all those cucks. (this works fantastic will zucchinis too!)
The stuff. Cucumbers, onion, fresh dill, salt, pepper, and red wine vinegar.
Slice up the cucumber and onion and toss into a bowl. Spinkle with salt, pepper, and lots of fresh chopped up dill. Splash in the vinegar and toss it all around.
Let it sit on the counter for at least 2 minutes, but the longer they sit, the more pickley they taste.
And eat. Leave on the counter until they are all gone..which won’t take too long.
Enjoy the Tuesday!
-C
Slice cucumber and onion into thin slices. and stick in a big bowl. Sprinkle with salt. pepper, chopped up dill. Pour on a few glugs of vinegar. Toss around, taste and adjust seasoning if needed and let sit on the counter for a few minute… or as long as you want*.
Eat all day long or until they are gone.
IF there are still cucumbers left over after 2 hours and you are worried about leaving food out all day (I don’t worry, but that’s me), stick in the fridge until you ar ready to eat them.
Guess what guys ….I got myself a sick vintage waffle/ griddle iron. I couldn’t be more thrilled!!! I found this thing at the local recycled goods store the other day, along with a very beautiful old white pyrex mixing bowl. It was one of my best thrift store scores! (Checking out the inventory and the condition of all the old things that day, I would say an old lady had just died and all her perfectly keep, mint condition kitchen stuff had just been donated. But it’s cool, cause I get the feeling that she was at least 90, with a big loving family, and was happy until the day she died. And I am sure she would be pleased that I have taken over the waffle maker. Thanks old lady!)
And now I am pretty sure that everything I make for the next week will be cooked on said waffle/griddle. I am serious, I already have a list of things to try and cook on it; cookies, biscuits, granola bars, potatoes, fruit, some type of pasta situations…. the list of possibilities is endless and I bet that at least 1/2 of these things will be totally awesome and amazing.
But first thing first. I need to make dinner.
So waffles for dinner!!
Note. These waffles are completely 100% fantastic for any meal you want to make them for. They consist of nothing more then beans, a shit ton of veggies, and just a bit of cornmeal. But don’t let that fool you because they are super packed full of so much flavor, have a really soft tender inside, with a nice crispy outside and are so super pretty. They are wonderful! The stuff. First, we got a big old pile of shredded up veggies which include; carrot, beet, sweet potato, onion, parsnip, celeriac, and a little bit of kale. A we got a bowl of rinsed and strained white beans, a little bit of cornmeal and salt, pepper, and garlic powder.
The makings of something amazing!Before you do anything. get your waffle iron out and preheat it.
While thats going on, take you beans, add 3/4 cup water and puree until smooth with whatever blending device want to like to use. (I used my hand blender…less to clean)Now collect all the shredded veggies and dump into a big bowl with the bean puree, the spices and the cornmeal. Mix until combined. The batter should be thick, but not dry. If its seems to wet, add more corn meal, or too dry, add a little more water.
Note how my batter turned a magical pink… I love beets, they make everything pretty! And check out that bowl!When your waffle iron is preheated, oil it if needed (if your not sure, add a little oil just to really make sure your waffles don’t stick) and take appropriate size spoonfuls of the batter and stick on iron. Close it and wait…..My iron has a little light that turns on when the waffles are done cooking, so I waited patiently (ok iI did open it a few time) until light tuned on and removed the perfectly cooked waffles.
Did I mention how awesome my new/old vintage iron is?
SO AWESOME!!
I made a little gaucamole and gave the mister and little bowl of plain Greek yogurt with lemon juice, but feel free to top, drizzle, or dump whatever you want onto these beauties…
Happy waffle Wednesday!!!
-C
Veggie Bean Wonder Waffles
Makes 8-10 waffles (in my iron) feeds 2-3 peeps
Note on veggies… I used what I had in the fridge and shredded, it came to about 3 cups. If you don’t have these specific veggies or only want to use a few.. go for it. Just make sure to have 3 cups of whatever veggies you use.
Take you beans and blend them up with whatever device you would like to use. Once creamy, add to a bowl with the rest of the ingredients. Stir until combined.
Once the waffle iron is preheated, oil it( if needed) and place the recommended amount of batter right on it there. Close and cook until golden brown and waffly.
Serve on a plate with topping of your choice, A few suggestions.. Guacamole, salsa, hummus, mustard, greek yogurt… anything that tastes good to you.
Eat as breakfast, lunch or dinner…
Fork into face
You ever make dish, completely on the fly, just to use something up (I have a lot of ripe tomatoes) with no real expectation, just because… Then have it be one of the best freaking things that you have ever made? This salad is one of those things.. maybe not the best thing I have ever made, but definitely the best salad I have ever made…. this week.
A salad compiled of all things amazing, taking just a few minutes to make and is the perfect balance of uber fresh with baby spinach, raw kale, and crunchy quick pickled onions. Then adding a touch of warmth with the sweet and juicy seared tomatoes and big chunks of creamy avocado.
I mean, for reals. ……Best Salad Ever !!!! (this week)
Now let’s do this.
The Stuff. A big bowl of baby spinach and chopped up kale, a few sliced up roma tomatoes, some super thinly sliced red onion, half an avocado, red wine vinegar and salt and pepper. Before you do anything, place the sliced onions into bowl, sprinkle with a pinch of salt and add a few glugs of the red wine vinegar. You want the onions to sit in the vinegar for at least 5 minutes on the counter cause the longer they sit the more crispy pickly they get. (after eating onions like this, you will never want to eat them any other way) Lightly oil a skillet and preheat to a medium heat. Once the skillet is hot, sprinkle the tomato slices with salt and pepper and place tomatoes right on in, snugly, but not overlapping. Let cook for about 3-4 minutes, or until the bottoms start to brown. Flip and cook other side for another few minutes.Once the tomatoes are seared on both sides, remove them gently from skillet and toss them on top of the bowl of greens.
Take the pickled onions and toss those right on top, with any of the residual vinegar, add dice and scoop the half of avocado and toss that on in as well.And now eat the best salad ever (this week).
Make the day good!
-C
Skillet Seared Tomato and Quick Pickled Onion Salad
Serves 2 as a side, 1 for a hungry eater
Thinly slice red onion and place in a bowl. Add vinegar into a and sprinkle with salt. Let sit on counter for at least 5 minutes, if not longer,
Slice tomatoes into 1/2 inch thick rounds and sprinkle with a pitch or salt and pepper. Lightly oil a skillet and preheat it on medium heat. Once the skillet is preheated, stick the tomatoes on it (watch out for splattering tomato juice) Cook first side for about 3 minutes or until the bottom has browned, then flip and do the same for other side.
One tomatoes are seared, place directly onto the greens. Now dump the pickled onions and residual vinegar on top. And dice up avocado and add that on top too.
Now eat your salad, fork or fingers…
And I know, ba-daaaamn. So good.
I have been strategic about the roots and veggies that I have chosen to bring home the past few weeks.(My farm lets you pick what you want) I know what I can buy at the store, things like carrots and potatoes, so I have been passing those up, but the roots like beets and celeriac… I have been bringing home baskets of those and hoarding them in the fridge and basement in preparation for the laps in farm fresh food and knowing that if I want to by these at the store it s going to coast me a million dollars a pound. (a for real million dollars)
Yup, lots of roots around here, especially celeriac root which is fantastic. I am kind of obsessed with celeriac, with its fibrous, knobby exterior, soft but almost meaty texture inside, and a flavor that is close to celery but so much better. I don’t know why it has taken me so long to do a posting featuring this amazing root vegetable (I eat it almost every day)
So here, an amazingly tasty, hearty but not heavy, celeriac recipe. Perfect for spring and the change into summer…. Mustard roasted celeriac with an fanatic split peas gravy that will have you licking you bowl clean.
*Note. I don’t peel my celeriac root. I really enjoy the fibrous exterior but realize that some don’t(The mister does not like it) so peel it if you want.
While the gravy is cooking, take the celeriac rounds and brush each side with yellow mustard, sprinkle with pepper, and place on a baking sheet. Stick into the oven to roast for about 25 minutes, flipping the rounds after about 10 minutes.
Serve with the fanciest knife and fork you can find. Extra yellow mustard and sriracha sauce are great condiments to have close by.
Happy Tuesday!
-C
Mustard Roasted Celeriac with Split Pea Gravy
Preheat oven to 400 degrees
Small dice the carrot, parsnip and onion and throw into a large pot. Spinkle with salt and pepper, add in the thyme and bay leaf and add a splash of water. Stick on stove on medium heat and stir. Let cook until the veggies become soft and fragrant. Now add in the split peas and 2 cups of water. Bring to a boil then cover and turn heat down to medium low. Let cook until the split peas become tender (about 25 minutes) string on occasion and adding more water if the peas are not completely summered while cooking.
Once the peas are tender, let cool for a few minutes, remove bay leaf, and either dump into a blender or blend with an immersion blender until nice and creamy. If gravy seems to thick, add in more water.
Scrub or peel celeriac roots and slice them into 1/2 inch think rounds. Place on a baking sheet and brush mustard on both sides and spindle with pepper. Stick into oven for about 10 minutes, flip, then back into the oven for another 15 or so minutes, or unit the celeriac is tender.
When the celeriac is done remove from oven and stick a few rounds on a bed of spinach (or not, or any kind of grain or green you like) Top with a hearty helping of the gravy and toss on some chopped up tomatoes.
Eat with at knife and fork like a fancy person.
Yesterday I spent the entire day (ok maybe not the entire day), but a the better part of the afternoon defrosting my freezer. Sure, I do the occasional chip chop here and there, just enough from around the freezer door so it will close, but ever few months I notice that everything in the fridge is not staying cold and that the freezer is not freezing stuff. Thats when I know its for real time to defrost. So a few days ago when I noticed my bananas were turing to liquid in the freezer, I knew it what I had to do….Completely empty the fridge and melt/hack away the 2-4 inches of ice build up that accumulated. It is such a freaking pain in the ass.So on this defrosting day, I took all the stuff from the freezer, stuck it in a cooler, and the rest of the stuff, which is basically all veggies, I just tossed on the table. As I am hacking away with a metal spatual, a wooden spoon, and a constant rotation of pots of boiling water, I was thinking about dinner. I figured I might as well just eat up as much of the veggies as I could, you know, so I didn’t have to put them back in the fridge. And also, I was getting pretty annoyed because this particular defrosting session was taking way longer the anticipated, which made making dinner seem like another pain in the ass. I figured I might as well just eat everything that is already out on the table, which pretty much narrowed down the “whats for dinner” conversations because it was already all over the place. And so dinner was a humongo salad for me, and for the mister, I made him a monster of a veggie sandwich. (my salad was exactly the same stuff as the sandwich, minus the bagel) Easy, fast, super duper yummy, pretty and piled so high with tons of veggies that the fridge is pretty much empty now.
Look at the is beast. I don’t call it a monster sandwich for nothing.
The stuff included in this monster veggie sandwich..
Romaine lettuce, tomato, avocado for there is not real sandwich without them. Thinly sliced radishes, cucumber,a and onion for nice crispy crunch. Shredded beets, carrots, and purple cabbage to give more crunch and a bit of sweetness. Then of course there needs to be something pickled, so I used banana peppers cause they are the SHIT!! And lastly some hummus for a nice creamy finish (plus a bit of protein) and yellow mustard because mustard on everything is just right. Heres to a mountain if goodness that is no longer in the fridge! Served with a another mountain of roasted parsnips and carrots (more stuff from the fridge) and a tall glass of iced tea.
Lucky that today is farm share pick up cause the fridge is pretty much on empty.
Yea it’s Thursday!!!!
-C
A Monster Veggie Sandwich
Note. This is just a guide.. Feel free to use whatever veggies you fancy.
To assemble. Ready your bread.. Toast if you want, and stick it on a plate
On either side, smear the hummus and the mustard.
Pick a side, start to stack by evenly disrupting veggies on top of veggies. Place the second piece of bread on top and giving a little smooth to keep it together.
And go at it. Cut in half or don’t. Have a napkin or a long sleeve ready to wipe your face.
I love me some freshy salsa, It makes me oh so happy.
I make this stuff all the time, especially during the warmer months and tomato season. I usually make a batch right before a meal, just enough to eat right away, but sometimes I ‘ll make a big batched of it, thinking I’ll save some for the next day. It never makes it past the second day in the fridge because it’s just one of those things that when you see it, you want to eat it. Weird but true. And it’s totally ok to do so cause it’s basically eating a big bowl of healthy goodness, so eat on!
It takes no time to prepare, tastes super refreshing, goes on everything, and it’s just so freaking tasty. You can eat it with tacos and chips (the mister) or like me, I like to add it to everything; salads, popcorn, or directly in my mouth.
Make one batch, make 4, it doesn’t matter cause you will eat it all, and need to make more.
Stick all the chopped stuff into a jar and add in the juice of the lemon. Roughly chop the cilantro and add that on in with a sprinkle of salt.
Mix it up…. And thats it. Now eat… with something or without.
A spoon out of the jar is one of my favorite ways to go at it.
Happy Cinco de Mayo, Happy Tuesday!
-C
Pico de Gallo… Freshy Salsa
Chop tomatoes and onion and toss into a bowl or jar. Cut seeds from jalapeño(s) and dice up into little bitty pieces and add that to the tomato and onion. Roughly chop the cilantro and toss that in as well with the juice of the lemon or lime. Sprinkle with salt. Stir, let sit for a minutes, taste and then add more salt if needed.
Eat right away or make ahead and store in the fridge until ready to use.
Goes great with corn chips, tacos, toss onto salads or eat as is standing in front of the fridge. If someone is judging you, they are stupid.
Sloppy yes, trashy, not so much. These are made with beans and bulgur. No meat.
And I figured it is nice enough out that I can make the kiddos some messy food and then just bring them out back and hose them off… I mean, why not right?
If you are a bun toaster… toast while waiting. If not, just get the buns ready And Then dump a good heaping pile right onto a bun. Add some cheese, or not..and eat with wild abandonment, making sure to get as much on your face as you get in you mouth.
Fantastic Friday!! Live it up.
-C
Black Bean and Bulgur Sloppy Joes
Dice the onion and the pepper and toss with a drizzle of olive oil into a large skillet. Sauté on medium heat until veggies become tender. Add in the spices, stir in and let cook for a minutes, then add in the beans, the tomato,water and the bugler. Cover skillet and let simmer until bugler becomes soft.
When the slop is ready, either toasted or not, scoop a generous portions onto buns. If so inclined, add some cheese.
Eat with hands… Sloppy is good.