The other day the mister and I started reminiscing about some of our earliest memories of what our parents fed us or what they used to eat when we were growing up. One of the dishes that we both remember eating was the classic creamed beef on toast, or as my mom use to call it, shit on a shingle. Yup, shit on a shingle. (who ever started calling creamed meat on toast is a freaking genius) I think that as a kid, I liked the dish just for the mer fact that I could say the word shit and get away with it. I think my mom liked it for few reasons; she could make a big butt load of it really fast, for a crap load of kids, on the super cheap. And I think that she just really like it.
Shit on a shingle is one of those foods that I like to call “trash food”, you know stuff like beefaroni or pork and beans. Stuff that we all loved as little kids but might think twice about feeding to anyone now. ( I’ll still feed nick a can of beefaroni.. he likes it) As a throwback to our earliest food memories, (also a lack of food in the house and wanted to make something fast, easy, and cheap.. thanks mom!) I made the mister my rendition of the classic. Creamy Lentils and Mushrooms on toast. Not quite as trashy as creamed beef (lentils, mushrooms and onions are not trashy) but you get the same reminiscing feeling. I guess I could call it something like “stuff on a shingle” or lumps on a shingle”, but what kid (or adult) would want to eat that. Let’s just stick with shit, it makes it more awesome to eat it.
The shit….. A few mushrooms, a bit of onion, cooked lentils, flour, milk, oil, salt and pepper, and garlic powder. And the shingles.. 2 pieces of thick white country bread. Slice the mushrooms and the onion and toss into a skillet with a drizzle of oil. Cook on medium heat until browned and fragrant..Remove from pan.In the empty pan still on medium heat, add in the olive oil and the flour. Whisky constantly, slowly add in the milk. Keep whisking until sauce thickens. Remove from heat. Add in salt, pepper, and garlic powder.Add the mushrooms and the lentils into the sauce and give it a good mix. Oh, and don’t forget to toast up the bread. Now dump that shit all over those shingles! Oh the memories.
If you need to, make it classy by serving it with a cloth napkin and a nice fork and knife. But eat it however you need to. (As kids we like dirty hands and no fork, preferably with a big tall glass of overly sweetened red flavored kool-aid)
Enjoy this fantastic Spring weekend!
-C
Shit on s Shingle (Creamy Lentils and Mushrooms on Toast)
One serving
1 cup cooked lentils
2- 3 mushrooms
1/2 small onion
1 cup milk (cow, nut, plant… whatever you want)
1 tablespoon olive oil
1 tablespoon flour
1 teaspoon garlic powder
salt and pepper
2 pieces of nice thick but soft white sandwich bread
Slice the mushroom and onion and toss into a pan or skillet with a drizzle of oil. Cook on medium heat until brown and fragrant than dump onto a plate. In same skillet, add the oil and the flour and mix with a whisk while slowly adding in the milk. Keep whisking until sauce starts to thicken. Turn heat to simmer and add in the cooked lentils and the sautéd mushrooms and onions. Push down the bread in the toaster.. and when it pops up, dump the shill over it.
Happy St Patricks Day!!!! As a kid, St Patricks day always meant green milk, green eggs, and those nasty gold foil covered chocolate coins. (you know, from the pot of gold) Not to mention all the leprechaun hunting and pinching. In my family, if you were unlucky enough to forget to wear green, you ended up as a walking target. It all started out nice an innocent, a pinch here or there, but by the end of the day, someone would end up pinching a little to hard or maybe just one too many times and the game would go from pinches to punches.
Ahh, memories.
Now as an adult (kinda adult) St Patricks is celebrated a little differently. The little ones in the family still get their green milk (which they are told is leprechaun pee) and those nasty gold coins, but I think the pinching has stopped.( a great tradition lost) I myself don’t have any littles at home so no little leprechaun games or gross dyed food for me. Nope, in my house we celebrate with a few beers and a more traditional irish dish, Colcannon. Mashed up potatoes with cabbage and kale… I mean, can it get much better? It can when you use red potatoes and red cabbage. Not only is it so tasty tasty, but it is so pretty pretty. No need for green milk or nasty candy.
But I still make sure to wear green and you might find me doling out a pinch or two.
The stuff…. Super pretty red potatoes, red cabbage, shallots, kale, salt and pepper, and olive oil.
Note. If you do not have or want to use red potatoes, russet or white will work, it just won’t be as pretty.
Dice up the pretty potatoes and stick them into a pot and fill up with water and add in a good tablespoon of salt. Stick on high heat and bring to a boil, then turn the heat down to medium and cook those taters until super fork tender. (bring them to the edge of falling apart)
While the potatoes are boiling, chop up the cabbage, shallots, and the kale and stick into a big skillet with a good drizzle of olive oil. Sauté on medium heat until soft and tender.
Once the potatoes are super tender, drain the water and dump them into the pan with the sautéed veggies. With a potato masher or a fork, mash up the potatoes and mix in the veggies, adding a drizzle or more of olive oil as you go. (Start with a drizzle and work your way up until it tastes good to you) Salt and pepper to taste.
The most pretty pan of smashed up potatoes that I have ever seen. Eat as a side dish or even a light main dish. Fork is a good utensil to use, but I found that my fingers worked just as well.
Have a great happy day full of green, potatoes, and pinches. Maybe even a leprechaun or two!
-C
Red Potato Colcannon
5-10 Red potatoes Red Potatoes depending on the size (about 3 1/2 – 4 chops chopped)
1 Cup Chopped Red or Green Cabbage
1 Cup Chopped Kale
1-2 Shallots
Olive Oil
Salt and Pepper
Rinse and dice potatoes and place into big pot. Cover potatoes with water and add about a tablespoon of salt. Place on high high heat and bring to a boil. Turn heat to medium low and let potatoes cook until super fork tender. While potatoes are boiling, chop up cabbage, shallots and kale and sauté in a large cast iron skillet (or any skillet) with a good drizzle of olive oil. Once the potatoes are done, drain water and add potatoes to the skillet with the sautéed veggies. With a potato masher or fork, mash the potatoes and mix with the veggies, adding a drizzle or two (depending on your taste) of olive oil as you go. Salt and pepper to taste.
Serve from skillet or dump into a fancy dish with a big spoon.
Eat as a main dish or as a side….Good hot, warm and cold.
HOORAY FOR SPRING!!!!!!!
Yesterday The mister and I went for a walk, a long walk. I was wearing a sweater, a light jacket and I left the mittens and hat at home. There was sunshine, huge puddles and mud. Birds were chirping. It was amazing.
After our nice long walk, we got home and I needed to start dinner. It was a little later than I usually so I wanted fast and easy I usually always have pesto in my fridge (I had to make some, but it only takes 5 minutes) because when it’s in there, I can whip up a big awesome meal in the time it takes to boil some pasta or quinoa or smear on toast or toss with potatoes. It really can be used on everything and can be made out of just about anything. Kale and walnuts are just one of so many fantastic combos. And frozen ravioli is always in the freezer too. I used just plain cheese, but use whatever kind you like.
Together, pesto and ravioli, well that’s a quick, easy, and tasty meal, perfect for a spring evening, And yea, there will be left over pesto from this recipe… just stick it in the fridge or freezer….you will be glad you have it.
Pesto stuff. Kale, walnuts, parmesan cheese(nutritional yeast to keep it vegan), garlic, lemon, olive oil, and salt and pepper.
A few little pre steps before the blending.. Toast the walnuts. Just toss onto a dry skillet and stick on medium heat for about 5 minutes or until they start to become née and fragrant. Remove from skillet and add in a bit of water. Add in chopped or ripped kale and cover to let the kale tenderize, but only for about 2 minutes. (you want the kale to still be crispy and fresh tasting) Drain water and add kale, garlic, toasted walnuts, cheese and the juice of the lemon into a food processor. Turn on and slowly add in olive oil until you get to a nice paste, adding more oil to get to your desired consistency. Oh and don’t forget to salt and pepper to taste!
Straight up frozen ravioli goes onto an oiled baking sheet.(make sure that non are overlapping) Place into an oven at 400 degrees for about 15-18 minutes, flipping after 10. If you want to add mushroom and a few more walnuts, just toss them onto the ravioli when you are flipping over the ravioli.
When the ravioli is nice and brown and crispy, remove from oven and dump the ravioli and the mushrooms into a bowl. Add a big old scoop of the freshly made pesto and toss around.
Look at this… fresh, crunchy, light and happy. Kinda like a spring day.
I am the best lady, making the mister a pretty yummy dinner.
Have a great Tuesday!
-C
Kale Pesto and Baked Ravioli
4-5 cups chopped Kale
1/2 cup Parmesan Cheese ( Nutritional Yeast to make it vegan)
1/2 cup Walnuts
1/4-1/2 cup Olive Oil
4-5 Cloves Garlic
1 Lemon
Salt and Pepper
1 bag of frozen ravioli(use vegan or gluten-free if you want)
3-4 mushrooms
Note..There will be plenty of left over pesto… Just fridge or freeze it
Place walnuts in a skillet and toast on medium heat for about 3-5 minutes or until the nuts become fragrant. In the same skillet, add enough water to cover bottom and add in all the kale. Place a lid on it and let kale wilt on medium heat for about a minutes or 2, Take off heat. Add walnuts. garlic, cheese, salt and pepper, and juice of lemon to a food processor. Blend. Now add in the kale and blend, slowly adding olive oil until a thick paste forms. You can add as much oil as you want to make it as thick or thin as you like.
Preheat oven to 400
Place frozen ravioli on an oiled baking sheet, making sure none are overlapping. Place into oven for about 15-18 minutes, removing after 8 minutes to flip. When you take the ravioli out to flip, slice up the mushrooms and grab a few more walnuts and toss onto baking sheet with the ravioli. When the ravioli’s are nicely browned and toasty, remove (mushrooms and walnuts too) and place into bowl. Add a big scoop of pesto and toss to mix.
Serve and eat.. fork is optional.
Note..Add a thin layer to the top of any left over pesto to keep it fresh and from turning black
One of the best things about winter is that I can have something in the oven at any time and not worry about how hot the house is going to get. I get to spend my free time (or my in between free minutes) baking up all the thing that I would not dare bake in the summer. (lots of bread and cakes) Yeah, I might complain a little about how cold it is outside (to my defense, -20 is kind of a bitch) but then I think of the super hot humid days that come during the summer and cringe. At least when its cold out I am able to get warm, (que oven) but when its super hot and humid, I just turn into something that border lines a wet towel and the rabbit animal… Not so pleasant. I much prefer cooler weather. So no big surprise….I made bread.. or focaccia to be exact. And now you should too because first off, you want to eat it, and secondly, you can probably whip this up faster then it would take to get all of you winter warmies on and leave the house. Don’t leave, just turn the oven on. The stuff, which isn’t a whole lot… Flour and salt. A mixture of honey, water, and yeast. And olive oil. Its pretty much my pizza dough recipe, tweaked with the addition of oil, less flour and no kneading. Mix together the wet and dry…I used my nifty dough whisk, but a wooden spoon or even your hand works. Mix mix mix. The dough should be really slack and sticky. And guess what.. no need to knead! Just make sure the dough is uniformly incorporated…hehe.. uniformly incorporated… sounds weird. Drizzle the dough (don’t worry about making it into a ball, a blob is good) with a little oil and place in a nice warm place topped with a towel to rise for about an hour or until dough has doubled in size. Once is has fully risen, drizzle 2 tablespoons oil in two 9 inch cake pans. Divide dough in half, and kind of smoosh dough into pans. Cover and let rise for another 20 minutes or so. When dough has finished its second rise, drizzle each with another tablespoon of oil and with your fingers, fill out the pan and indent the dough, kind of like playing a piano or tickling a puppy(?)….Then layer your toppings (if you want any) Start with any herbs, then the veggies. Then last, any cheese you got. I used thyme, cracked black pepper, tomato, onion, topped with parmesan cheese. And the other one is just plain old salt. Pulled from the oven when nice and golden brown..set on a wire rack to cool for a few minute and removed from the pans. The mister was practically salivating waiting for a slice… and he was so not disappointed. Crispy outside with soft airy insides… Everything a perfect focaccia should be. The one with the toppings was the favorite for the first night, but for a peanut butter and cheese panini for lunch the next day…plain is the way to go.. My suggestion, do what I did, jazz one up and leave one plain. And then make more if you need too because the forecast call for another week of below zero!!! Oh the things that I’ll get to make! (me being positive) Stay warm! -C
Focaccia with out without stuff
3 cups all-purpose flour
1 tablespoon salt plus 2 teaspoons for topping (can use more or less if you want)
2 teaspoons active yeast (or one package)
1 1/2 cups warm water
1 tablespoon honey (or sugar if vegan)
6 tablespoons olive oil
Optional toppings
Fresh cracked pepper
Thyme or any other spices
Thinly sliced tomato
Thinly sliced onion
Parmesan Cheese
Anything you want!
In a bowl or jar, mix honey (or sugar), yeast and warm water together and let sit for about 5 minutes or until yeast is activated and starts to foam In a large bowl, whisk together flour and 1 tablespoon of salt. With either a wooden spoon, dough whisk, or if you have one, a stand mixer with a dough hook, mix the yeast mixture with the flour. The dough is going to be really sticky so mixing might get a little gloppy, but keep at it until everything is full incorporated.. for about 3-5 minutes and don’t be afraid to use your hand… you can wash it off. Once mixed drizzle with oil and cover with a towel. Let rise for about an hour or until dough has dubbed in size. When dough has double, coat two 8 or 9 inch cake pans each with 2 tablespoons olive oil. Dump dough onto floured surface and cut in half. Take each half a place in pan. cover and let rise again for another 20ish minutes. preheat over to 400 degrees After second rise, lightly take your fingers and push down dough, making little indents all over the surface. Drizzle each with another tablespoon of olive oil and sprinkle each with a teaspoon of salt. If using spices or any other toppings, nows the time to layer them on. And do any cheese last! Place in oven and bake for about 30 minutes or until the tops are golden brown. When done, place on a wire rack and let cool a bit before removing from pans. Done!! To store, place in a paper bag.. best eaten within a few days!
Yesterday I spent the entire day (ok maybe not the entire day), but a the better part of the afternoon defrosting my freezer. Sure, I do the occasional chip chop here and there, just enough from around the freezer door so it will close, but ever few months I notice that everything in the fridge is not staying cold and that the freezer is not freezing stuff. Thats when I know its for real time to defrost. So a few days ago when I noticed my bananas were turing to liquid in the freezer, I knew it what I had to do….Completely empty the fridge and melt/hack away the 2-4 inches of ice build up that accumulated. It is such a freaking pain in the ass.So on this defrosting day, I took all the stuff from the freezer, stuck it in a cooler, and the rest of the stuff, which is basically all veggies, I just tossed on the table. As I am hacking away with a metal spatual, a wooden spoon, and a constant rotation of pots of boiling water, I was thinking about dinner. I figured I might as well just eat up as much of the veggies as I could, you know, so I didn’t have to put them back in the fridge. And also, I was getting pretty annoyed because this particular defrosting session was taking way longer the anticipated, which made making dinner seem like another pain in the ass. I figured I might as well just eat everything that is already out on the table, which pretty much narrowed down the “whats for dinner” conversations because it was already all over the place. And so dinner was a humongo salad for me, and for the mister, I made him a monster of a veggie sandwich. (my salad was exactly the same stuff as the sandwich, minus the bagel) Easy, fast, super duper yummy, pretty and piled so high with tons of veggies that the fridge is pretty much empty now.
Look at the is beast. I don’t call it a monster sandwich for nothing.
The stuff included in this monster veggie sandwich..
Romaine lettuce, tomato, avocado for there is not real sandwich without them. Thinly sliced radishes, cucumber,a and onion for nice crispy crunch. Shredded beets, carrots, and purple cabbage to give more crunch and a bit of sweetness. Then of course there needs to be something pickled, so I used banana peppers cause they are the SHIT!! And lastly some hummus for a nice creamy finish (plus a bit of protein) and yellow mustard because mustard on everything is just right. Heres to a mountain if goodness that is no longer in the fridge! Served with a another mountain of roasted parsnips and carrots (more stuff from the fridge) and a tall glass of iced tea.
Lucky that today is farm share pick up cause the fridge is pretty much on empty.
Yea it’s Thursday!!!!
-C
A Monster Veggie Sandwich
Note. This is just a guide.. Feel free to use whatever veggies you fancy.
Either a bagel, 2 slices of bread, or a big chunk of baguette (use a gluten free bread if you want or need too)
Hummus- Homemade or store bought
Mustard
Something pickled like pickles, banana peppers , jalapeños or all three
Lettuce, spinach or some kind of leafy green
Tomato
Avocado
Onion
Radishes
Cucumber
Shredded Carrots
Shredded Beets
Shredded Cabbage
To assemble. Ready your bread.. Toast if you want, and stick it on a plate
On either side, smear the hummus and the mustard.
Pick a side, start to stack by evenly disrupting veggies on top of veggies. Place the second piece of bread on top and giving a little smooth to keep it together.
And go at it. Cut in half or don’t. Have a napkin or a long sleeve ready to wipe your face.
I figured now is a good time to get this recipe out there before we get to far into spring and summer recipes because there is going to be a lot of banana ice cream filled recipe coming and I figured its a good idea to have the basic banana ice cream recipe ready for people to refer too. And because I made so much fantastic naner ice cream, I also made a cookies and cream naner ice cream for my sisters and the mister.
Comments that I got from my sisters and the mister when I made them this ice cream
-Sister one.”I give this my sister seal of approval.. It’s so good. The first dessert you have made that I liked! (not including all the other desserts that you have made that I liked)”
-Sister two- “Wow.. it looks like ice cream and feels like ice cream and tastes like ice cream.. You should make me this ice cream!” (I was confused too because I was pretty sure I just made her some)
-The mister- “I am so excited for my new fly fishing pole!”
Ok, so the naner ice cream isn’t new to the mister and he IS very much excited for his new fly fish pole. So excited that he forgot to tell me how amazing that I am and to thank me for making him a big bowl of yumminess. (It’s ok, I forgive him)
And yes, this is probably one of the easiest, most delicious, healthy and amazing frozen dessert that you will ever eat. You will probably find yourself buying mass amounts of bananas and stocking the freezer until things just start falling out. (which is also ok because it’s only bananas and you can’t have too many frozen bananas)
The stuff you need for this ice cream…. Nice and ripe bananas, peeled and then frozen* That’s it.
To make it, place frozen bananas into food processor and hit the on button. Process the crap out of the namers until nice and silky smooth.
*Note, the smaller the frozen chunks are , the faster and maybe a little easier for the blender to blend the naners into ice cream. So if you think of it, chop bananas into pieces before freezing or even after.
After all blended and smooth, either eat right away or scoop ice cream into a freezer safe container and stick in freezer. That’s the banana ice cream… And it is amazing and so so so so so addictive. I make a batch, think I am only going to eat a scoop, then find myself eating half of what I have made, but it’s ok cause it’s only bananas.
Now for the cookies and cream banana ice cream..One batch of banana ice cream, either freshly made, still in food processor or made ahead and placed in a food processor and given a good pulse to smooth it up.
Add cookies in, crushing a bit beforehand and pulse till combined. Now you have cookies and cream naner ice cream…. and everybody is happy.
Scoop into a cup, a bowl, a freezer safe container, or directly into your mouth. Be careful…. You can still get brain freeze from eating naner ice cream too fast!
Keep it real hump day drum bum!
-C
Basic Banana Ice Cream
Makes one batch. Good for 3-4 servings
4-5 ripe bananas peeled and frozen
Peel bananas and stick in a freezer bag or container and freeze. When bananas are completely frozen, break into pieces and stick into a food processor or blender and puree until silky smooth.
Eat right away or scoop into a freezer safe container for later.
Cookies and Cream Banana Ice Cream
1 batch banana ice cream
5-10 (depending on your cookie need) cream filled cookies like oreos or Trader Joe’s Joe Joe’s (These are gluten free)
In a food processor, blend banana ice cream with cookies.
Eat right away, with a utensil of choice in a container of choice.
Bowl licking is acceptable.
Chomp Chomp Chomp… The sound I make as I eat this freaking fantastic crunchy granola. You know it’s good when the person sitting next to you is annoyed by the sound of you face while eating. I eat a lot of crunchy stuff. And I am pretty sure I annoy the mister a lot.
Oh well, he will live, and he eats his fair share of annoying stuff too so we can just call it even.
So granola. I love it. I make a batch every few weeks or so, and I usually make it just for me. (I almost never make things just for me) I like to keep it simple but flavorful. A tad sweet, but not really, and crunchy, without the oily fried taste. I also like a variety of sizes, some big clusters and some small pieces.
This granola fits the bill perfectly. Made with 5 ingredients, no oil, and the perfect sweetness level. It’s one of my favorite flavors yet. And I know I said I made it just for me, but the mister really liked it too. (I can’t help sharing)
The simplest of stuff. 1 smashed banana, a cup of pureed butternut squash, Vietnamese cinnamon*, honey, and old fashion oats. (and a dash of salt, not shown)
*Note. I only ever use Vietnamese cinnamon because once I start using it, regular old cinnamon just won’t cut it anymore. It is a bit sweeter and a lot more spicy. If you don’t have it or don’t want to use it, use regular cinnamon and add in 1/2 a teaspoon of all spice.Toss the cinnamon and salt with the oats. Mix together the banana, squash and the sweetener and combine with the oats until full incorporated.
Another note. Because I made this granola for me and no body else, I actually omitted the honey (I think that banana abs squash make it sweet enough) But if I was making this for lets say, the mister, or a friend, I would use add a bit. The sweetness level and sweetener of choice is up to you, but 2-3 teaspoons of honey or maple syrup is usually sweet enough for people.
Dump the mixture on a parchment lined baking sheet and give it a little pat, you know, to settle all the bit and pieces together, all cozy and evenly spread out. Now stick into a preheated oven and after about 20 minutes, take out of oven and give the granola a toss, breaking apart any super big chunks or overly wet pieces. Put back into oven for another 20 minutes. (I like my granola super crispy crunchy so I cook it a little longer, like 30 more minutes)And when you are happy with the crunchiness of you granola, remove from oven and let cool, trying not to eat all of it while it sit’s on the counter looking all pretty and smelling like happiness.
Grab a bowl, stick the rest into a jar with a lid, hide it from others, and chomp chomp chomp away!
-C
Banana Butternut Granola
3 cups old fashion oats (use gluten free oats if needed)
1 ripe banana, mashed
1 cup butternut squash puree (can use canned)
2 tablespoons Vietnamese cinnamon (or 2 tablespoons regular cinnamon and 1/2 teaspoon of allspice)
1-3 tablespoon honey or sweetener of choice (use greater amount for sweeter)
dash of salt
Preheat oven to 375
In a large bowl, mix together oats, cinnamon and salt. Mix the mashed banana, squash, and sweetener of choice together and combine with the oats. If the mixture seems really dry, add in a very small splash of water to loosen just enough to mix.
Dump mixture onto a parchment lined baking sheet and evenly disperse the mixture. Give it a kind of smoosh to compact the oats and to make sure all its all the same thickness on the pan.
Stick into oven for 20 minutes. Remove and give granola a little toss, maybe breaking apart any really big chunks (unless you like really big chunks) and put back into oven for another 20 minutes. (30 for a crunchier granola) Remove from oven and let cool on baking sheet before storing in an air tight container. If you find that it is not as crunchy as you would like or is a few days old and lost some of its crunchiness, just stick it back into the oven for a few minutes to re crunch.
Eat as is, as a cold cereal, dip in peanut butter, add to popcorn or whatever way you want to eat it. No utensil required.
The other day the mister and I started reminiscing about some of our earliest memories of what our parents fed us or what they used to eat when we were growing up. One of the dishes that we both remember eating was the classic creamed beef on toast, or as my mom use to call it, shit on a shingle. Yup, shit on a shingle. (who ever started calling creamed meat on toast is a freaking genius) I think that as a kid, I liked the dish just for the mer fact that I could say the word shit and get away with it. I think my mom liked it for few reasons; she could make a big butt load of it really fast, for a crap load of kids, on the super cheap. And I think that she just really like it.
Shit on a shingle is one of those foods that I like to call “trash food”, you know stuff like beefaroni or pork and beans. Stuff that we all loved as little kids but might think twice about feeding to anyone now. ( I’ll still feed nick a can of beefaroni.. he likes it) As a throwback to our earliest food memories, (also a lack of food in the house and wanted to make something fast, easy, and cheap.. thanks mom!) I made the mister my rendition of the classic. Creamy Lentils and Mushrooms on toast. Not quite as trashy as creamed beef (lentils, mushrooms and onions are not trashy) but you get the same reminiscing feeling. I guess I could call it something like “stuff on a shingle” or lumps on a shingle”, but what kid (or adult) would want to eat that. Let’s just stick with shit, it makes it more awesome to eat it.
The shit….. A few mushrooms, a bit of onion, cooked lentils, flour, milk, oil, salt and pepper, and garlic powder. And the shingles.. 2 pieces of thick white country bread. Slice the mushrooms and the onion and toss into a skillet with a drizzle of oil. Cook on medium heat until browned and fragrant..Remove from pan.In the empty pan still on medium heat, add in the olive oil and the flour. Whisky constantly, slowly add in the milk. Keep whisking until sauce thickens. Remove from heat. Add in salt, pepper, and garlic powder.Add the mushrooms and the lentils into the sauce and give it a good mix. Oh, and don’t forget to toast up the bread. Now dump that shit all over those shingles! Oh the memories.
If you need to, make it classy by serving it with a cloth napkin and a nice fork and knife. But eat it however you need to. (As kids we like dirty hands and no fork, preferably with a big tall glass of overly sweetened red flavored kool-aid)
Enjoy this fantastic Spring weekend!
-C
Shit on s Shingle (Creamy Lentils and Mushrooms on Toast)
One serving
1 cup cooked lentils
2- 3 mushrooms
1/2 small onion
1 cup milk (cow, nut, plant… whatever you want)
1 tablespoon olive oil
1 tablespoon flour
1 teaspoon garlic powder
salt and pepper
2 pieces of nice thick but soft white sandwich bread
Slice the mushroom and onion and toss into a pan or skillet with a drizzle of oil. Cook on medium heat until brown and fragrant than dump onto a plate. In same skillet, add the oil and the flour and mix with a whisk while slowly adding in the milk. Keep whisking until sauce starts to thicken. Turn heat to simmer and add in the cooked lentils and the sautéd mushrooms and onions. Push down the bread in the toaster.. and when it pops up, dump the shill over it.
Last week pineapples were on sale everywhere……So I bought 5. Don’t judge
And I bet I am not the only one that got overly excited at $1.50 pineapple and bough themselves a few. We will just call ourselves opportunists. Now we have plenty of pineapples and don’t have to pay the $4 a piece prices. (Justification)
But if you don’t have a pineapple laying around, you must go get one. (Maybe if your lucky, there might still be some sales going on) because you must make this salad. I am on a mission to make everyone I know eat it because, for lake of a better way to say it…….It will rock your world.
Dill and pineapple are a serious match made in heaven. Pineapple, with its sweet, tangy, citrusness and dill with it’s super fresh earthiness. Mixed together with a few other helpers to create a fresh, clean, chunky, tangy, over the top, flavor. I could stop right there, but toss in a handful of lentils, some creamy avocado and a bed of kale…It’s like the best spring time, celebration on you tongue, happiness in you tummy, kind of salad.
A salad that will make you smile. (and maybe buy 5 pineapples)
Stuff for the goodness. We got the kale, some avocado because all salads should have avocado and some cooked lentils because, well, all salads should have lentils (or beans or nuts.. so you could totally something else) Then a few sprigs of fresh dill, a clove of garlic, red wine vinegar, salt and a bowl of chunked up pineapple. The pineapple, dill, garlic, red wine vinegar, a splash of water and a pinch of salt get blended in a blender or whatever blending device you use. Go as smooth or chunky as you like, I recommend going smooth, but leaving a little chunk, like half blended.
The prep is done, now compile. Kale in bowl, top with lentils,. Toss on avocado chunks, and, last but not least, the blended pineapple dill mixture.So good……So so good.
Happy Friday!!
-C
So Good Pineapple Dill Kale Salad
Serves Two
3 cups washed and chopped Kale
1/2 a avocado, diced
1 cup fresh pineapple chunks
1-2 springs fresh dill
1 tablespoon Red Wine Vinegar
Salt
1/2 cup cooked lentils (or any bean or nut will do)
Note. No fresh dill? You can use dried, just sub in 1 teaspoon for the fresh and after blending with the pineapple, let sit a little longer to really let the flavors meld together.
Place pineapple, dill, pinch of salt, vinegar and garlic into a blender or whatever you own that blends and blend stuff together, leaving it a little chunky. Let sit for 5-10 minutes.
Kale goes into a bowl and add the lentils and diced avocado. Pour the blended pineapple on. Toss around.
Now eat.
First day of Spring!! Well kind of I guess. I think it actually starts at like 6:20 tonight, when the temperature is going to dip back done to 10.(Spring my ass) I don’t know about you people out there but here in Vermont, we are really hanging on to winter. I have to keep telling myself…” It will be warmer soon and you’ll be looking forward to this weather in a few months.. so stop bitching!” I give myself good pep talks.
Anyway, last week at the farm share pick up, there was a nice little surprise. We got a few pounds of some sweet locally grown and milled whole wheat flour. There was a little sign with the information about the wheat and where it came from, but in my haste of gathering all of my other veggies, I failed to take notes and forgot the name of the farm that it came from. But I do know that my farm traded some celeriac for the wheat. I was really excited because I am really into the idea of using locally grown grains and I don’t know, it just made me really happy, especially because it was a trade. Food framing and local sharing is stuff that makes me happy.
I wanted to make something to kind of showcase the hearty, nutty flavor of the wheat and I also wanted to make something that my mister would eat for breakfast. Well what better way to do that then with muffins! Banana coconut whole wheat (that just happen to be vegan) Hearty, fruity, and smells like the word lovely and the color yellow. A few to eat and a few to share. Hanging at home, running away or getting ready for a day of spring cleaning….This is a great weekend to make muffins!
The stuff… Light, nutty local whole wheat flour, ripe oh ripe bananas and coconut flakes are the stars in this muffin… But we need the other stuff too. Brown sugar, vanilla, coconut oil and a chia egg. Baking powder, baking soda, and last but not least, salt.
Yup, that sounds about right The salt, baking soda, and baking powder are whisked together. The banana and all the rest of the stuff are mixed up… Then mix the wet mixture into the dry. Stir until combined and then add in the coconut flakes,Scoop mixture into 12 lined muffin cups… A scoop like mine works very nicely. Don’t have one, well I recommend you get yourself one. Until then, use a spoon. Something I always do when baking any muffin is sprinkle the tops of each muffin with a bit of sugar or brown sugar. It melts and caramelizes and adds a sweet little crunch to the tops.
Now stick the muffins into the oven. Remove from oven when they look like this, nice and golden brown. Also good idea to check with a tester stuck into the middle. When it comes out clean, they are done.12 happy little muffins cooling on a rack, waiting to be eaten with you mouth.
Doesn’t the sight of pretty food make you happy, like sing a song happy? Muffins, whoa yah!! Friday yah yah!! Spring…What, Yah!! Yah…Yah Yah!!!
Terrible I know, but at least you were spared hearing my actual voice.
Have a great weekend. Do lots of springy stuff!
-C
2 Cups Whole Wheat Flour
4 Ripe bananas
1 Teaspoon Baking Soda
1/2 Teaspoon Baking Powder
1 teaspoon Salt
1 teaspoon Vanilla Extract
3/4 Cup Brown Sugar
1/3 cup melted Coconut Oil
1 Tablespoon Chia Seeds + 3 Tablespoons warm water
1/2 Cup Unsweetened Coconut Flakes
Preheat oven to 350
In a small bowl, mix 3 tablespoons warm water to the chia seeds and let sit for at least 5 minutes (10 is better) In a large bowl, peel and mash the bananas until they turn into a kind of chunky soupy puree. Add in brown sugar, chia seed mixture, vanilla extract, and the melted coconut oil (make sure it’s melted or it won’t incorporate into the mixture) Mix together. In another bowl, whisk together the flour, baking soda, baking powder and salt. Mix the wet mixture with the dry until combined then mix in the coconut flakes.
Line a 12 cup muffin tin and fill each cup about 3/4 the way up with batter. Sprinkle each muffin with brown sugar and place in oven on center rack. Bake for 25-30 minutes or until the tops 0f the muffins are golden brown and a tester inserted into the middle comes out clean.
Remove muffins from tin and let cool.
Serve as is or maybe with a smudge of coconut butter, or anything you want really.
No need for fork, just use you mouth.
There is irish soda bread in your future. I can see it. A nice hardy hunk slathered in butter and honey, crumbs all over the place. So all you have to do know is make it.
I remember reading somewhere (I wish I could remember where) that irish soda bread is just four ingredients, flour, sea salt, baking soda and buttermilk and adding anything else would make it a cake. So when I decided to make irish soda bread, thats all I used. ( I made it with some wheat flour) What you end up with is a highly dense, super fragrant, soft, chewy bread with a crunchy crust. Definitely not a cake.
Note….You can for sure add in a bit of sweetener or even little fat to make it richer and softer, but then it wouldn’t be bread (or so that’s what I read) There are tons of other recipes out there that have other stuff in them. This is just a really simple basic recipe.
White whole wheat flour and all purpose flour mixed together. Salt baking soda and buttermilk. That’s it.All the dry whisked together and in goes the buttermilk. Mix together until dough starts to form then dump onto a floured surface. Handling dough as little as possible, knead into ball.
Place on a baking sheet and dust with flour. Take a sharp knife and cut an X through the top about 1/2 inch deep.
Stick in into the oven for 50 ish minutes, or unit la tester stuck into the middle comes out clean and there is kind of a hollow thunk when tapped on.
And now you have a very pretty, dense hunk of irish soda bread.
Cut and serve with butter and honey (thats how the mister likes it) or whatever you want to eat it with.
-C
Irish Soda Bread
1 cup all purpose flour
1 cup white whole wheat flour (or you can use all purpose)
1 teaspoon baking soda
1 teaspoon salt
1 cup buttermilk (or your choice if milk plus a tablespoon lemon juice)
Preheat oven to 375
In a large bowl, whisk together flours, baking soda and salt. Mix in buttermilk until the dough starts to come together. If the dough seems to dry, add another splash or two of milk. Dump out dough onto a floured surface and shape into a ball. transfer onto a baking sheet, dust with flour and cut a x about 1/2 inch into the top. Stick into oven for 50 minutes until a toothpick comes out clean and the bread makes a hollow sound when tapped.
Let cool enough to handle.
Cut into and serve with a smear of whatever you want
Best eaten within a day or two
TGIF!!!! For reals, because Monday-Thurday were monster days. And now that its friday, I can dig a hole and hide in it until it’s at least 30 degrees with some sunshine. (I might never get to come out.)
A few things I will bring in my hole:
food (lots of food and coffee, lots of coffee)
a soft blanket and pillow
a few books, preferably with pictures, on farming and gardening (think spring!)
the entire series of the Fresh Prince of Bel-air and a device to watch it on
toothpaste (I can use my finger to brush my teeth)
But before I leave for my hole in the ground, I made these little cake bites to get my people through the weekend. Sweet little lemony bites of rich dense cake dipped into bittersweet chocolate. (I am just so nice) They have all the pleasure or cake without the need of a fork and are much easier to give away then a big slice of cake. Plus, they are fun to make. My little sister helped and did most of the chocolate dipping. Then she and another little used their mouths to clean up the chocolate mess. It was an afternoon of chocolate all over the kitchen fun day.
So make some bites to have and to share. Or if you, like me, are digging a hole to hide in, make a batch of bites to bring with you. That’s the beauty of cake covered in a harden chocolate shell, they travel really well.Simple lemon cake stuff. Flour, baking powder and salt whisked together, Sugar and soft butter in a bowl. An egg, some vanilla, milk, and of course, the lemon.
To make the batter, cream the soften butter with the sugar until light and fluffy. Zest lemon(1 big or 2 small) into bowl with the juice of the lemon(s), the vanilla and the egg. Beat until combined. Now beat in the dry and then the milk. Keep beating for another minute until all mixed. Batter should be light and fluffy.
Batter goes into a greased and floured 9×13 baking sheet and stuck into a 375 degree oven for about 30 minutes (You can use a 9×9 baking pan. Just bake fir another 10 minutes and you will end up with thicker bites). Remove from oven and let cool for a few minutes and flip to remove cake from baking sheet. Cut cake into small pieces (I cut 4×6 to get 24 bites) and place bake into sheet and into freezer (I stuck mine outside, it was -2 degrees ) for at least 2 hours.
Frozen bites ready for the chocolate coating… Bittersweet chocolate chips and a little bit of coconut oil. Melted together all nice and shiny smooth.Now dip and slather those bites in the melted chocolate.
Oh what a lovely sister I have.. Look at her dunk….. like a boss!Fully coated and placed on a rack for the chocolate to harden. I ended up sticking the rack in the freezer for 10 minutes…They harder really fast in there.
And now you have some it, bites of cake covered in chocolate. 1 bite, 2 bites…5 bites. Eat however many you want because its Friday and because there small little bites and just because you can.
Now if you need me, I’ll be in my hole.
-C
Chocolate Lemon Cake Bite
1 1/2 cups all purpose flour
1 teaspoon baking powder
1 teaspoons salt
1 cup white sugar
1/2 cup (1 stick) soft butter
1 egg
1 teaspoon vanilla
1 cup milk
1 large or 2 small lemons
2 cups bittersweet chocolate chips
2 tablespoons coconut oil
Add butter and sugar to a large bowl and beat on medium unit light and fluffy. Ass in vanilla egg, the zest of the lemon and the juice of the lemon. Beat to incorporate. Now beat in the dry and lastly the milk.
Grease and flour either a 9×9 pan or a 9×13 baking sheet. dump batter in and smooth out. Stick in oven and bake for about 3o minutes or until a toothpick stuck into the middle comes out clean. Remove and let cool for a few minutes on a wire rack. Flip cake to remove from pan. Cut cake into bit sized pieces, 4×6 is a good size, and place back on baking sheet and stick into freezer for at least 2 hours.
When cake bites are as good as frozen, get the chocolate ready. Take the chocolate and the coconut oil and either melt in a double boiler or the microwave. Mix until smooth and make sure to full incorporate the oil. Now remove the cake bites from the freezer and dip each bite into chocolate, trying to full coat all sides. Stick onto a wire rack or a parchment lined pan to harden. They can be stuck back into the freezer to harden faster.
The other day the mister and I started reminiscing about some of our earliest memories of what our parents fed us or what they used to eat when we were growing up. One of the dishes that we both remember eating was the classic creamed beef on toast, or as my mom use to call it, shit on a shingle. Yup, shit on a shingle. (who ever started calling creamed meat on toast is a freaking genius) I think that as a kid, I liked the dish just for the mer fact that I could say the word shit and get away with it. I think my mom liked it for few reasons; she could make a big butt load of it really fast, for a crap load of kids, on the super cheap. And I think that she just really like it.
Shit on a shingle is one of those foods that I like to call “trash food”, you know stuff like beefaroni or pork and beans. Stuff that we all loved as little kids but might think twice about feeding to anyone now. ( I’ll still feed nick a can of beefaroni.. he likes it) As a throwback to our earliest food memories, (also a lack of food in the house and wanted to make something fast, easy, and cheap.. thanks mom!) I made the mister my rendition of the classic. Creamy Lentils and Mushrooms on toast. Not quite as trashy as creamed beef (lentils, mushrooms and onions are not trashy) but you get the same reminiscing feeling. I guess I could call it something like “stuff on a shingle” or lumps on a shingle”, but what kid (or adult) would want to eat that. Let’s just stick with shit, it makes it more awesome to eat it.
The shit….. A few mushrooms, a bit of onion, cooked lentils, flour, milk, oil, salt and pepper, and garlic powder. And the shingles.. 2 pieces of thick white country bread. Slice the mushrooms and the onion and toss into a skillet with a drizzle of oil. Cook on medium heat until browned and fragrant..Remove from pan.In the empty pan still on medium heat, add in the olive oil and the flour. Whisky constantly, slowly add in the milk. Keep whisking until sauce thickens. Remove from heat. Add in salt, pepper, and garlic powder.Add the mushrooms and the lentils into the sauce and give it a good mix. Oh, and don’t forget to toast up the bread. Now dump that shit all over those shingles! Oh the memories.
If you need to, make it classy by serving it with a cloth napkin and a nice fork and knife. But eat it however you need to. (As kids we like dirty hands and no fork, preferably with a big tall glass of overly sweetened red flavored kool-aid)
Enjoy this fantastic Spring weekend!
-C
Shit on s Shingle (Creamy Lentils and Mushrooms on Toast)
One serving
1 cup cooked lentils
2- 3 mushrooms
1/2 small onion
1 cup milk (cow, nut, plant… whatever you want)
1 tablespoon olive oil
1 tablespoon flour
1 teaspoon garlic powder
salt and pepper
2 pieces of nice thick but soft white sandwich bread
Slice the mushroom and onion and toss into a pan or skillet with a drizzle of oil. Cook on medium heat until brown and fragrant than dump onto a plate. In same skillet, add the oil and the flour and mix with a whisk while slowly adding in the milk. Keep whisking until sauce starts to thicken. Turn heat to simmer and add in the cooked lentils and the sautéd mushrooms and onions. Push down the bread in the toaster.. and when it pops up, dump the shill over it.
What do you think about at 5 o%u2019clock in the morning? Wait, are you awake at 5? Well I am and yes, I know that most people are not and think I am crazy for waking up so early, but it is and I do and whatever. Anyway, it%u2019s 5 o’clock and I am at the gym (yes, I wake up at 5 AND go to the gym) and me and my gym friend start talking about food (as usual) and what we were going to do with our Brussels sprouts that we got from the farm (I got her to join my CSA!). That is what I am usual thinking at 5. Food, and how to prepare it. And as the sprout conversation commerced, this is what materialized in my head. Crisp, crunchy fresh Brussels spouts, shredded up and tossed in a warm tangy cranberry sauce. My mouth was salivating and as usual, I left the gym hungry.
So I came home, drank all my coffee and then proceeded to make the sprout dish for lunch and let me tell you, this sprout slaw is amazing. Tangy and crunchy and all Brussels sprouty. It has a hardy salad feel without being heavy. It is a slaw that really get me, you know. (I actually don%u2019t know.)
Anyway, you should really get on the eating this Brussels sprouts slaw (or any Brussels sprouts dish) train now, before they go out of season and you end up buying kind of not great sprouts from the market that don%u2019t taste as good. Bad Brussels sprouts suck.
To the cranberry Brussels sprout slaw.
The stuff. Fresh Brussels sprouts, cranberries (fresh or frozen), some onion, balsamic vinegar, a little maple, dried cranberries and toasted walnuts, and salt and pepper.
Start with onion. Grab it and dice it nice and small.
Dump the onion into a skillet with a little pinch of salt and a splash of water and cook for a few minutes, just unit they are not raw anymore. Then add in the cranberries and 1/2 cup water. Cook on a low heat until the cranberries all pop and the sauce starts to thicken.
While cranberries are cooking, shred up the sprouts. Thin as you can get them.
Cranberries are now a thick and chunky sauce and oh so delicious. Add in the vinegar and maple here and give it a good stir and a taste test too. If it is too tart for your liking, add more maple. Think you might need a bit more vinegar, well splash it on it.
Now toss those shredded spouts it.
Stir it around. Season with salt and pepper and there it is.
Scoop into a bowl. Top with dried cranberries and walnuts and grab a fork.
This is good.
-C
serves 3-4 as a side or one person who wants to eat it all to themselves
1 1/2 cups fresh or frozen cranberries
1/2 a pound Brussels sprouts ( around 3 1/2- 4 cups shredded)
1 small or 1/2 a large onion
3 tablespoons balsamic vinegar
1 tablespoon maple syrup (or more to taste)
salt and pepper
1/2 -3/4 cup water
small handful dried cranberries (optional)
smal handfuls toasted walnuts (optional)
Start with dicing the onion up into small pieces. Place in a skillet with a small pinch of salt and a good splash of water and place on medium heat. Cook for a few minutes or until the water has evaporated and the onions are not raw. Add in the cranberries and 1/2 cup water. Keep on low heat and cook until the cranberries pop and start to thicken. If the cranberries are not cooked all the way and the water has evaporated out, just add another 1/2 cup.
While cranberries are cooking, shredded the Brussels sprouts, as thin as you can. A mandolin is great for this but a knife works too.
Once the cranberries have cooked down to a saucey consistency add in the vinegar and maple and stir around. Remove from heat and carefully taste the sauce. If you think it needs more maple or vinegar, add in another tablespoon until it tastes good to you. Dump in the shredded sprouts and mix. Season with salt and pepper to taste.
And then it%u2019s done. You can dump it all into a bowl and sprinkle the dried cranberries and walnuts on top, or leave it in the skillet and do the same. Me,I scooped half into a bowl for pictures sake and ate the rest right out of the skillet. I then licked the skillet clean with my finger. Then ate the bowl full. SO good.
It is spring yes? I know it is officially spring but around here it has been more or less still winter which is to be expected but is, at this point, no longer welcomed. I, as well as everyone else I talk to, are over it. Enough snow. enough of the hats and jackets. Just enough.
But the bright side of the chilly, cold weather is that we can and still want to turn the oven on and cook things. And because I turned the heat off a little prematurely, I am cold so I really want the oven on.
One skillet, a little chop action, a stir, some good time in the oven and there you go, food for your belly. Not a ton of dishes to do, steps to fallow, thoughts to think (other then eating thoughts). A good old, hearty, simple to toss together, spicy, delicious skillet of goodness. Prepare it fast, pop into warm oven, sit in kitchen drawing up plans for the spring veggie garden, and then eat yourself warm. What more can we ask for?
We can ask for spring weather because seriously. But other then that.
To the goodness of cajun lentils and rice!
The stuff. Lentils, brown rice, cajun seasoning, some crushed tomatoes, an onion, a carrot, a few cloves garlic, some cauliflower, water, oil, and salt and pepper.
First off, mince garlic and chop up the cauliflower, carrot, and onion into small pieces.
Toss it all into a good sized oven safe skillet with a splash of oil. Mix in the cajun seasoning too and stick o nth stove on medium heat for a few minutes.
Cook until fragrant and slightly tender. Taste it, it is good.
Dump in the lentils and rice. Then dump I the tomatoes and the water. Give it all a mix.
And after. All done. Now dinner.
Grab some green thing to chop and toss on for some color.
Now grab some bowls, a few forks, and get to eating.
-C
Serves 4-6
3/4 cup uncooked brown or white rice
3/4 cup dried green lentils
2 cups crushed tomatoes (preferably not salted)
2 1/4 cups water
3 tablespoons cajun seasoning (see note)
1 large carrot
1/4 head of cauliflower (about 2 cups chopped)
1 large yellow onion
2-3 cloves garlic
1 tablespoon olive oil
salt and pepper
Note. Store bought cajun seasoning usually contains salt and pepper so when seasoning, be aware of the amount of salt (if any) you choose to use.
Preheat oven to 350
Start by chopping the carrot, onion, and cauliflower into small pieces. Mince the garlic and toss it all into the skillet with the olive oil. Stir in the cajun seasoning and sprinkle in salt and pepper if it needs it. Place skillet on medium high heat and cook veggies until fragrant and slightly tender which should take about 5 minutes then remove from heat. Dump in the lentils, rice, water and tomatoes. Stir until mixed then either place a lid or foil over the top. Place into preheated oven for about an hour, removing the lid or foil after 40ish minutes and giving it a stir when you do. The bake is done when the rice and lentils are fully cooked, but if you are into a crispy top and crunchy sides, by all means, cook a little longer.
Remove from oven when fully cooked and you are happy with crispness. Let cool for a few minutes, toss on some chopped green something or another if you want, and serve it up.
Left overs store great in the fridge for a few day and freeze well too.
Whenever I think of pot pies, I think of those little frozen, boxed pot pies that you get in the freezer section of the grocery store. Those frozen disks filled with all sorts of nasty shit made many appearances in my childhood. Hungry after school?%u00a0Go home,grab pot pie from the freezer, give it a few stabs with a fork and toss it into the oven..%u00a0
Well one day I did exactly that. Came home from school, grabbed a pot pie out of the freezer,%u00a0grabbed %u00a0a sharp knife (wait a knife?) and stabbed the pie. One hole. Stabbed it again. Two holes. One more time for good measure. three holes, and. knife goes through pie and into my hand. I can remember it like it was yesterday. I was so shocked that I just stood there for a few minutes just staring at the whole situation.%u00a0Imagine that, a little girl holding a knife with a frozen pot pie stuck on it covered in blood, screaming. Ugh.
Needless to say, after that, I never touched one of those frozen pot pies again.
But this is not one of those nasty frozen pot pies. This is a one pot,(skillet) full of warm and hearty goodness. Seasoned tender veggies and beans covered in a creamy polenta crust that has no need for any sort of stabbing. %u00a0%u00a0And bonus.. only one pot to clean up! And it’s all cool and autumn-y out so we don’t want to die when to oven is on!!!%u00a0
Pot Pie WInner!
The stuff. Onion, zucchini. potato, carrot, tomato, canaille beans, corn meal, boiling water, Italian seasoning, salt and pepper, and a little olive oil. %u00a0
So If you are missing, or not wanting to use any of the above veggies, don’t. Just sub in more of another or ad something different. Same with the bean. If you had chick peas or navy beans%u2026 its’ all going to taste good.%u00a0
Chop up all the veggies, except the tomato and toss into a oiled skillet. Sprinkle with salt and pepper and the italian seasoing and stick on medium heat. We want to give the veggies a little cooking head start, but the majority of the cooking will happen in the oven. With that said, turn your oven on.%u00a0
Once the veggies have become slightly tender,%u00a0add in the beans and the tomatoes.%u00a0%u00a0Keep cooking for a little while longer, just to soften up the tomatoes.
While thats going on, get the polenta ready. Add a little salt to the cornmeal and grab yourself a whisk. Slowly poor boiling water over cornmeal while constantly mixing with whisk to prevent big lumps. (it’s ok if there rare a few small lumps)
Dump the polenta onto veggies
And smooth over the top. Sprinkle with lots of pepper and stick it into hot oven to bake.
Some time later(about 45 minute) the polenta is all cooked and crispy, the veggies underneath %u00a0are all %u00a0creamy and soft, and the whole thing is ready for consumption.
Grab you bowls, grab you forks%u2026%u00a0Big scoops right into bowl
And happy eating it is.
-C
serve 3-4
1 carrot
1 small onion
2 stalks celery
1 medium red potato
2 tomatoes
1 small zucchini
1 cup canaille beans
3 tablesoons italinan spice blend*
3/4 cup corn meal
3 cups boiling water
salt and pepper
olive oil %u00a0
*I make my own italian spice blend, which consists of basil, oregano, thyme, marjoram,,%u00a0rosemary,%u00a0and garlic powder. I think most blends are the same, minus the garlic so make your own use a pre blended mixture, just look to see there is garlic in it. If not, add a teaspoon or two of garlic powder to the veggies.
Preheat oven to 425.
Oil a large (I used a 12 inch) cast iron skillet or such oven. Chop up all the veggies, except the tomatoes, into smallish, mouth sized chunks and toss into skillet. Add in seasoning and a good few pinches of salt and pepper. Place on medium heat and cook for about 8 minutes, or until the veggies start to release there juices and are slightly tender.%u00a0%u00a0Now chop up the tomatoes and toss those into the pot along with the beans, in with the veggies. Cook for another 5 %u00a0minutes or until all the veggies are slightly tender.%u00a0
In a large jar or bowl, whisk together a pitch or two of salt and pepper to the cornmeal. While continuously whacking, pour the boiling water over the cornmeal. Pour/ spread cornmeal mixture over veggies, then smooth it out to form the crust. Season with salt and lots of pepper and place into oven. Bake for 45-50 minutes or until the polenta is cooked and has turned a nice golden brown. Remove from oven, let cool for a few minute, then serve.
Some folks might enjoy some type of cheese so if you want to,%u00a0%u00a0give it to them.
The other day the mister and I started reminiscing about some of our earliest memories of what our parents fed us or what they used to eat when we were growing up. One of the dishes that we both remember eating was the classic creamed beef on toast, or as my mom use to call it, shit on a shingle. %u00a0 Yup, shit on a shingle. (who ever started calling creamed meat on toast is a freaking genius)%u00a0I think that as a kid, I liked %u00a0the dish just for the mer fact that I could say the word shit and get away with it. %u00a0I think my mom liked it for few reasons; she could make a big butt load of it really fast, for a crap load of kids, on the super cheap. And I think that she just really like it. %u00a0
Shit on a shingle is one of those foods that I like to call “trash food”, you know stuff like beefaroni or pork and beans. Stuff that we all loved as little kids but might think twice about feeding to anyone now. ( I’ll still feed nick a can of beefaroni.. he likes it)%u00a0As a throwback to our earliest food memories, (also a lack of food in the house and wanted to make something fast, easy, and cheap.. thanks mom!) I made the mister my rendition of the classic. Creamy Lentils and Mushrooms on toast. Not quite as trashy as creamed beef (lentils, mushrooms and onions are not trashy) but you get the same reminiscing feeling. I guess I could call it something like “stuff on a shingle” or lumps on a shingle”, but what kid (or adult) %u00a0would want to eat that. Let’s just stick with shit, it makes it more awesome to eat it.
The shit%u2026.. A few mushrooms, a bit of onion, cooked lentils, flour, milk, oil, salt and pepper, and garlic powder. And the shingles.. 2 pieces of thick white country bread.%u00a0Slice the mushrooms and the onion and toss into a skillet with a drizzle of oil. Cook on medium heat until browned and fragrant..Remove from pan.In the empty pan still on medium heat, add in the olive oil and the flour. Whisky constantly, slowly add in the milk. Keep whisking until sauce thickens. Remove from heat. Add in %u00a0salt, pepper, and garlic powder.Add the mushrooms and the lentils into the sauce and give it a good mix. Oh, and don’t forget to %u00a0toast up the bread. Now dump that shit all over those shingles! Oh the memories.
If you need to, make it classy by serving it with a cloth napkin and a nice fork and knife. But eat it however you need to. (As kids we like dirty hands and no fork, preferably with a big tall glass of overly sweetened red flavored kool-aid)
Enjoy this fantastic Spring weekend!
-C
%u00a0Shit on s Shingle (Creamy Lentils and Mushrooms on Toast)
One serving
1 cup cooked lentils
2- 3 mushrooms
1/2 small onion
1 cup milk (cow, nut, plant%u2026 whatever you want)
1 tablespoon olive oil
1 tablespoon flour
1 teaspoon garlic powder
salt and pepper
2 pieces of nice thick but soft white sandwich bread
Slice the mushroom and onion and toss into a pan or skillet with a drizzle of oil. Cook on medium heat until brown and fragrant than dump onto a plate. In same skillet, add the oil and the flour and mix with a whisk while slowly adding in the milk. Keep whisking until sauce starts to thicken. Turn heat to simmer and add in the cooked lentils and the saut%u00e9d mushrooms and onions. Push down the bread in the toaster.. and when it pops up, dump the shill over it.
%u00a0I’ll let you know now, I am a make and eat soup all year long person. I can think of few things better then sitting outside, basking in the sun, hopefully with a light wind, a book in hand, enjoying a nice big cup of some good homemade soup. (Doesn’t that sound so freaking lovely?) This soup right here is perfect for just that. Parsnips are the best, kind of like a big white sweet, yet starchy carrots. And cooked together with a little bit of light and lemony thyme, rich earthy turmeric and a couple more chopped veggie%u2026.. you got yourself a%u00a0nice thick and fragrant bowl of happiness that fills you up without weighing you down. It’s food you can eat that fills you up, leaves you feeling cozy, yet still wanting to hop on a bike or lace up the running shoes. %u00a0Hearty without the feeling of all the heaviness.
A perfect soup for spring! (or summer, winter, or fall)
The stuff. Parsnips, carrots, onion and garlic. Thyme and turmeric, salt and pepper. the tinniest bit of oil and water (water not shown)Chop all the veggies and the garlic, drizzle a dutch oven or a pot with oil, toss in the veggies. Add the turmeric, the thyme, and 1/2 cup of water.%u00a0Sweet sweating the veggies. Turn pot on medium and cook until the water completely cooks out. When the veggies start to brown and stick to the pot, deglaze with water. Give a good stir and keep cooking. Repeat the deglazing process until the veggies are super soft and ready to blend. (I did this 4 times.. it only took 10 minutes)Add enough water to cover the cooked veggies.%u00a0And now blend the heck out of it.. Go as smooth or chunky as you want. I blended as smooth as I could get with this crappy immersion blender. (Blender on loan until I finally decide on, and buy a new one)And there you have it. Scoop into bowls, add lots of cracked black pepper, and go to town. I made enough to save a bowl for later%u2026 %u00a0it didn’t last for later.%u00a0
Soup so good.%u00a0
-C
Parsnip Thyme and Turmeric Soup%u00a0
4 large parsnips
2 carrots
1 whole onion
3-4 cloves garlic
2 teaspoons thyme
2 teaspoons turmeric%u00a0
salt and pepper
olive oil
water
Dice up the parsnips, carrots, garlic and onion and place into a large dutch oven or pot. Drizzle with a bit of olive oil, %u00a0sprinkle on the spices, salt and pepper and add about 1/2 cup of water. Turn heat on medium and start cooking down the veggies. Once the water evaporates and the veggies start to caramelize, deglaze pot with about a 1/2 cup of water. Give pot a stir, and continue to cook until water evaporates. %u00a0Repeat this 2-3 more times until the veggies are super soft and fragrant.%u00a0
When the %u00a0veggies are ready, add enough water to the pot to submerge the veggies. Bust out the immersion blender or dump into a blending device and blend until smooth (or the consistency that you want) Have a cup of water ready to thin out if needed. When blended, taste for salt and pepper, add more if you want, and cook on low heat until you are ready to serve.
Garnish with a lot of good cracked pepper
Eat from a vessel, use a spoon
The bounty of spring is upon us. Asparagus is everywhere and I have been embracing it.. smelly pee and all.%u00a0 And along with all my spring veggies and smells, %u00a0I have grabbing for more springy spices. I go through seasonal spice kicks, like cinnamon and ginger in the fall, curries and chills in the winter. And for spring, I am big on sumac. If you haven’t heard of it or tasted it, it kind of taste like a tangy salty lemon..without actually having any salt. And its a really pretty, a bright red, almost purple color. I use it on a lot of things, especially veggies and bean dishes, sometimes as a lemon replacer, but mostly to add another level of tangy flavor.%u00a0It’s fantastic, really great for all those springy time dishes. Nice and bright!
%u00a0This dish is perfect made and eaten right away, but it’s one of those dishes that tastes even better the day after. Also it’s good and safe to serve room temperature. (think lunch box or a picnic!) And did I mention healthy? Protein packed quinoa and the lean green asparagus, I mean come on. You won’t feel an ounce of guilt for eating a hugmongo bowl of this stuff because you should, so it’s totally ok.
Eat away!%u00a0
The stuff of the stuff. Quinoa and asparagus for the base. Sumac, lemon, garlic, onion, salt and pepper and a little splash of oil for the dressing.%u00a0
Note. Sumac is not always the easiest spice to find. I know that its available online (what isn’t) and that some health food store or herbal apothecaries carry it, but i have ye tot see it at a conventional supermarket. And once you find it, buy a good amount cause you will also fall in love with it and use it on everything.%u00a0
%u00a0 %u00a0 %u00a0Start by making the dressing. You want to have it sit for at least 10 minutes. It will be perfect by the time the quinoa is done. Mince the garlic, dice the onion and juice the lemon. Stick it all into a jar with the sumac, a pinch of salt and pepper and about a teaspoons worth of olive oil. Stick a lid on the jar and shake shake shake. and let it sit.
Now you should make the quinoa.. Water and quinoa go into pot, high heat until boiling, %u00a0topped with a lid and set to simmer for about 15 minutes.%u00a0
When the quinoa is simmering, cook up the asparagus. Add a drizzle of oil, to a pan and a few splashes of water. Place trimmed and chopped asparagus to pan and sprinkle with salt. Cook on medium heat for about 8 minutes, or until cooked but still has a nice crunch to it. Take off heat and add the dressing to pan. %u00a0Let it sit and marinate for a few minutes.When the quinoa is tender, fluff with a fork and add to the skillet with the asparagus and dressing. Toss around to make sure all the quinoa gets dressed. Take a taste.. does it need a little salt and pepper? Add a pinch if it does.Pile into a bowl, add a bit of cracked pepper.. and eat.
Or%u2026 Idea! Make this dish and pack it into a jar. Maybe grab a baguette and some hummus os some other %u00a0tasty foods and take yourself and a friend out for a picnic.%u00a0
So much good .
Keep it real yo
-C
Quinoa and Asparagus with Sumac Dressing
serves 3-4 %u00a0as a side dish or 2 as a main meal.%u00a0
1 cup quinoa
2 cups water
8-10 asparagus%u00a0
olive oil
For the Dressing
1 tablespoon sumac
1/2 small red onion
2-3 cloves garlic
Juice of 1 jumbo lemon or 2 small lemons
2 teaspoons olive oil
salt and pepper
Start but making the dressing. Mince the garlic and finely dice the onion. Place in a %u00a0jar with the sumac, the juice of the lemon, a pinch of salt and pepper, and a little splash of oil. Top the jar and shake the crap out of it for a minute. Let sit and meld. (This dressing can be made ahead of time and is fantastic on all sorts of everything)
In a large pot, add water, quinoa and a spindle of salt. Bring to a boil, cover , and reduce heat to simmer. Let cook for about 15 minutes or until water has completely absorbed. %u00a0When the quinoa gets going, trim the woody parts of the asparagus and chop the remain asparagus into inch long pieces. Toss into a lightly oiled skillet with a few splashes of water, sprinkle with salt and put on medium heat for about 8 minutes, or until asparagus is cooked, but still crispy. Take off heat and add the sumac dressing. Once the quinoa is done, fluff it with a fork and toss it with the sumac dressed asparagus. Scoop into a bowl, add some cracked pepper. Bring food to face and eat.%u00a0
Any leftover? This dish is fantastic serves cold or at room temperature.
Is it really for real April? Where has all the time gone and where the hell is the warm weather? It’s not funny anymore. I%u00a0am officially OVER winter!%u00a0 Ok, so now that I got that off my chest%u2026..
Last night the misters Dad came over for a long awaited dinner accompanied by talk of life goals and what her referred to as “narratives” or the story of our lives. Some deep shit to be talking about at dinner, especially with zero alcohol to be had.
Me, being so super awesome, was all up in taking charge in making the food. Except that %u00a0last night I didn’t have a bunch of time and honestly, much energy to be doing anything. %u00a0And sure, I could have just made a pot of spaghetti, but that just felt like cheeping out. So Polenta it was. And because I just made a hug pot of navy bean, those were going into the polenta too.
Beany polenta baked in the oven with a tomato sauce cooked on the stove. About 5 minutes of hands on time and an hour to cook it all. It’s the perfect meal to make when you have guests coming over. Fast prep, into the oven and on the stove, and then you have an hour to clean and make yourself presentable. See, I am a thinker. (I ended up skipping the making myself presentable part%u2026 I stayed in my gym clothes.. no need to impress family right?) Then after about and hour you end up with a hearty healthy pretty meal, all from scratch, that seems like you spent the afternoon cooking.%u00a0When in fact you spent the past hour vacuuming and watching Gilmore Girls.%u00a0
The Stuff. Cornmeal, water, navy beans and parmesan for the polenta. Crushed tomatoes, garlic, dried basil, onion, carrot, zucchini, and summer squash for the sauce. Salt, pepper, and olive oil all around.
Cornmeal and water go into a cast iron skillet (or any oven safe dish) with a pinch of salt and pepper. Give it a little mix and stick it into the oven at 400 degrees .
Once the polenta is in%u00a0the oven, make the sauce. Chop up all the veggies and stick into a dutch oven or sauce pot with a pinch of salt, the basil and a good drizzle of olive oil. Stick on medium heat and let veggies cook down a bit. %u00a0When the veggies are tender, add in minced garlic, crushed tomatoes and another drizzle or oil. %u00a0Turn burner to lowest setting and simmer (giving it a stir every now and then) for about 45 minutes or until the polenta is done.%u00a0After about 30 minutes when the water had pretty much all cooked down, take the polenta out of the oven and stir in the beans, the parmesan, a tablespoon or two of olive oil and salt and pepper. Smooth top out and sprinkle with more pepper, parmesan and drizzle with a bit more oil. Stick back into oven for another 1/2 or until polenta %u00a0has formed a crust and no longer giggles when you wiggle the pan.
Pull polntna from the oven and let sit for at least 1o minutes.
Two big spoons and a pile of plates. Have the people serve themselves!
Have a Happy Day!%u00a0
-C
Baked Navy Bean Polenta with Chunky Tomato Sauce
Serves 4 hungry people
For the Polenta
1 1/2 Cups Course Ground Corn Meal
4 Cups Water
3 Cups Prepared Navy Beans (Or just use to cans)
1/2 Cup Parmesan Cheese or Vegan Parmesan (Optional)
3 Tablespoons Olive Oil
Salt and Pepper
For the Sauce
One 28oz Can of Crushed Tomatoes
1 large Carrot
1 Small Onion
4 (or more ) Cloves Garlic
1 teaspoon Dried Basil
1 Small Zucchini
1 Small Summer Squash
Olive Oil
Salt and Pepper
Preheat oven to 400
In a large skillet, mix together the cornmeal and the water and add a good pinch of salt and pepper. Place into oven for about 30 minutes or until the polenta starts to congeal at the edge of the skillet nd most of the waster has cooked down.
Remove skillet from oven and with a whisk or wooden spoon, mix in the beans, the parmesan (if using) and 2-3 tablespoons of olive oil. Smooth out mixture, sprinkle with salt, pepper, parmesan and drizzle with olive oil. Stick back into oven for another 30 minutes or so. %u00a0Polenta is done when it no longer wiggles when you giggle the skillet.
For the sauce
Small dice the carrot and the onion and stick into a medium dutch oven oor sauce pan with a drizzle of olive oil. Place on medium heat and cook until the veggies are tender. Add in tomato, minced up garlic and basil. stir and let simmer on stove top for about 45 minutes. When you place the polenta back into the oven for the second bake, dice up zucchini and squash and add to sauce. Stir and keep on simmer until ready to serve.
Once the polenta has completely cooked, remove from oven and let sit for at least 5 minutes%u202610 is better to solidify.
Spoon big piles of polenta on a plate or in a bowl, top with a big heap of tomato sauce. Sprinkle with a little more parm %u00a0and maybe another dash of pepper .
Eat%u2026..Spoon or fork is recommeded.
Happy Food!
Last night I had my sister and her kiddos come over for dinner. Nothing fancy, nothing to complicated, %u00a0just something %u00a0fast and something that I knew the littles would eat. %u00a0Spaghetti and meatballs, except replace meatballs were bean balls So they came, we played, did a little drawing and had a bit of first grad gossip. Then came %u00a0dinner time %u00a0when I was told by one little that she was not going to eat.. She had pasta for lunch. Well I made her sit anyway and she mainly just ate carrots (I was ok with that) Then the other little was all into his pasta and bean balls, 1 down, 3 more to go, when the mister let slip that the meatballs were not really meat. He ate around the remaining balls, said he didn’t want them anymore. And my sister, well she doesn’t eat anything that is not pizza.
Good thing a neighbor stopped by while we were eating. He had a few of the balls and told me that they were amazing. I needed someone to tell me that. %u00a0
So yeah, the littles were not overly enthused with the ball, but the Mister the Neighbor, and I thought that they were awesome and delicious. Maybe next time I will make sure that %u00a0pasta was not lunch and tell Nick to keep his mouth shut and stop talking about balls at the dinner table.
I feel like I don’t need to tell you how to boil pasta or heat up the sauce, so I left that portion of the recipe out. I have faith that you are capable in doing that part without my instruction.
The bean ball stuff. Chickpeas (soaked and cooked or canned), sweet potato, carrot, onion, and some chick pea flour. Dried garlic, basil and oregano. Salt and pepper and a little bit of olive oil.%u00a0Small chop all the veggies and toss them and the dry spices into a skillet with a drizzle or two of olive oil. Stick on medium %u00a0heat and add about 1/4 cup of water to pan. Top with %u00a0slid and let veggies cook down until soft and fragrant.
Add the cooked veggies to a food processor or blender with %u00a0the rinsed and drained chickpeas. The mixture gets pulsed until combined, %u00a0keeping a little bit of chunkiness. %u00a0Now go warhead and taste %u00a0the mixture. Add another pinch or two of salt , pepper or any of the spices that you think it need. %u00a0Dump the mixture into a bowl and mix in the chickpea flour than stink the mixture into the fridge for a least a 1/2 hour. Cooling to off is really important to forming the balls. If you don’t, it’s much harder to keep mixture from falling apart and sticking to your hands.
After the mixture has had time to cool and set, start rolling the mixture into balls roughly the size of ping pong balls. In a shallow bowl, add a few tablespoons of the chickpea flour with a pinch of salt, pepper and garlic powder. Take each ball and roll in flour and place each ball on a well oiled baking sheet. When the balls are all rolled, stick into the oven and bake away for about 30-40 minutes, flipping balls after about 20. %u00a0After you flip the balls, get the pasta ready so its finished about the same time the balls are done.You pasta and sauce is cooked and the balls are all crispy and oh so nice.
Serve balls over pasta with sauce and eat with a fork.
Your day is now complete.. balls and all.
Happy Weekend!
-C
Spaghetti and Bean Balls
makes about 20 balls
4 Cups (or 2 cans) Cooked, Rinsed and Drained ChickPeas
1 Small Sweet Potato
1 Small Onion
1 Carrot
1/4 Cup Chickpea Flour plus extra to roll balls in
1 Heaping Teaspoon Basil
1 Heaping Teaspoon Oregano
1 Heaping Teaspoon Garlic Powder
Olive or Vegetable Oil
Salt and Pepper
Your choice of Spaghetti (Use Vegan and or Gluten Free if needed) %u00a0Prepared as package recommends
Marinara or Pasta Sauce of your choice
Preheat Oven to 425 degrees
Small dice the carrot, onion and sweet potato and toss into a skillet on medium high heat with a splash of oil. Add in the dry spices and add in about a quarter cup of water. stir and cover the skillet with a lid and let the veggies cook down until the water has evaporated and the veggies are tender.%u00a0
Add rinsed and drained chickpeas to a food processor with the cooked veggie mixture. Pulse together until the mixture is combined and slightly smooth, but still with a little bit of texture left.Place bean mixture in a bowl %u00a0and mix in the 1/4 cup of chickpea flour. and stick in the fridge for a least a 1/2 hour to cool. (Mixture can be made a day ahead if you want)
Once the mixture has time to cool and set up , remove from fridge and with a light head, roll mixture into ping-pong sized balls. In a separate shallow dish add a bit of chickpea flour with a pinch of salt and pepper. Roll each ball in the flour mixture and place balls on a well oiled baking sheet. Once balls ae made, stick into the oven and bake for about 30-40 minutes, flipping after about 20 minutes. The balls are done when the outsides are once and golden brown and crispy. After about 30 minutes, get to cooking your pasta and mariana sauce.
Once the pasta and sauce is done, plate it and toss on some of those awesome bean balls!
Bean balls also make fantastic bean ball sandwiches or bean balls on a toothpick.%u00a0
Salad season is here. Green salads, fruit salads, potato salads, and grain salads. All the salads and we are not mad about it.
This is a good grain salad using millet, which I am sightly surprised to hear that a lot of people have never had. Millet is kind of like quinoa, but not. I cooks fluffy and looks kind of the same, and is gluten free like quinoa. I think the biggest difference is that millet is slightly softer and tastes a bit more nutty. It also is really good at absorbing liquid flavors.
But who are we to compare. The main thing is that it is nutritious and delicious so we will eat it.
Back to the salad. This is one of those grain salads that is good cooked and served warm but only gets better with a little age (like an hour or a day) in the fridge. Served hot or cold or room tempature, and is hearty enough to be meal like but is also a fantastic addition as a side to any of you meal plans. Like maybe a BBQ? Whatever the occasion, or non occasion, this is just a really good grain salad situation and I think you will be pleased, smiling all smiles while eating it.
To the millet salad.
The stuff. Millet, a couple handful of greens, a few mushrooms, an onion, dijon mustard, a little maple syrup, red wine vinegar, a lemon, a couple cloves or garlic, some toasted sunflower seeds, and salt and pepper.
Start by giving the millet a little toast, just enough to really up the nutty flavor and make it that much more yummy. It only takes a few minutes in a skillet on medium heat. Not an entirely necessary step, but you should do it.
Toasted millet goes into pot with water. Bring pot to a boil and then turn to the lowest simmer and cover.
While millet is cooking, get to the mushrooms and onions. Chop the onion thin and small and the mushrooms thin and small as well. Place them into the skillet with a drizzle of oil and place on medium heat. Mix around every now and then and cook until the mushrooms and onions are soft and a nice golden brown.
And make the vinaigrette. Minced garlic, mustard, vinegar, the juice of the lemon, and maple syrup get put into one place.
Mixed and now all is one.
Millet. Cooked and fluffed and ready to go.
Cooked mushrooms and onions go into the pot, along with the greens, the sunflower seed, and the vinaigrette. This step can be right away or you can wait a little while for things to cool as to not wilt the greens. Up tp you.
Mixed with love and hunger.
Even if you are making it ahead of time, just do yourself a favor. Grab a bowl, grab a fork, and get down on it.
-C
Seves 4-6
3/4 cup uncooked millet
2 cups water
1 sweet onion
3-4 big button mushrooms
Large handful or two of bitter greens like arugula, spinach or a mixture.
2 tablespoon brown or dijon mustard
2 tablespoon red wine vinegar
1 teaspoon maple syrup
2 cloves garlic
salt and pepper
handful toasted sunflower seeds
To start, toast millet. Dump the uncooked millet into a pan and place on a medium heat tt for about 5 minutes or until you start hearing the millet crackle.This gives the millet a slightly more nutty flavor but you can skip this step if you don%u2019t care.
Dump millet and water into medium pot. Place on high heat until water starts to boil then tun heat down to simmer and over. After about 15 or 20 minutes, when most of the water is gone, turn pot completely off. Let sit, covered for another 10ish minutes then take a fork and fluff it.
While the millet is cooking, cook the veggies. Grab the onion and slice it up into thin pieces. Clean off the mushrooms and chop them into small thin pieces too. Place the chopped stuff into the skillet with a drizzle of olive oil and a pinch of salt and place on a medium heat. Stir occasionally and cook for about 15 minutes or until the onion and mushroom are a nice dark, golden brown.
And make the mustard vinaigrette. Mince garlic and place into a jar or bowl with the vinegar, the mustard, the maple, and the juice of the lemon. Mix and set aside.
Once the millet is cooked, the mushrooms and onions are cooked, and the vinaigrette is made, all you have left to do is mix everything together. You can do this while things are slightly warm which will wilt the greens a bit, o let them cool so the greens stay fresh. Up to you. (I like the greens fresh)
Finally, dump cooked mushrooms and onions into pot with cooked millet. Add in the greens and sunflower seeds and drizzle the vinegertte all over. Toss around until fully mixed. Sprinkle with lots of fresh cracked pepper.
Then eat. Or place in a container to bring to the BBQ.
The other day the mister and I started reminiscing about some of our earliest memories of what our parents fed us or what they used to eat when we were growing up. One of the dishes that we both remember eating was the classic creamed beef on toast, or as my mom use to call it, shit on a shingle. %u00a0 Yup, shit on a shingle. (who ever started calling creamed meat on toast is a freaking genius)%u00a0I think that as a kid, I liked %u00a0the dish just for the mer fact that I could say the word shit and get away with it. %u00a0I think my mom liked it for few reasons; she could make a big butt load of it really fast, for a crap load of kids, on the super cheap. And I think that she just really like it. %u00a0
Shit on a shingle is one of those foods that I like to call “trash food”, you know stuff like beefaroni or pork and beans. Stuff that we all loved as little kids but might think twice about feeding to anyone now. ( I’ll still feed nick a can of beefaroni.. he likes it)%u00a0As a throwback to our earliest food memories, (also a lack of food in the house and wanted to make something fast, easy, and cheap.. thanks mom!) I made the mister my rendition of the classic. Creamy Lentils and Mushrooms on toast. Not quite as trashy as creamed beef (lentils, mushrooms and onions are not trashy) but you get the same reminiscing feeling. I guess I could call it something like “stuff on a shingle” or lumps on a shingle”, but what kid (or adult) %u00a0would want to eat that. Let’s just stick with shit, it makes it more awesome to eat it.
The shit%u2026.. A few mushrooms, a bit of onion, cooked lentils, flour, milk, oil, salt and pepper, and garlic powder. And the shingles.. 2 pieces of thick white country bread.%u00a0Slice the mushrooms and the onion and toss into a skillet with a drizzle of oil. Cook on medium heat until browned and fragrant..Remove from pan.In the empty pan still on medium heat, add in the olive oil and the flour. Whisky constantly, slowly add in the milk. Keep whisking until sauce thickens. Remove from heat. Add in %u00a0salt, pepper, and garlic powder.Add the mushrooms and the lentils into the sauce and give it a good mix. Oh, and don’t forget to %u00a0toast up the bread. Now dump that shit all over those shingles! Oh the memories.
If you need to, make it classy by serving it with a cloth napkin and a nice fork and knife. But eat it however you need to. (As kids we like dirty hands and no fork, preferably with a big tall glass of overly sweetened red flavored kool-aid)
Enjoy this fantastic Spring weekend!
-C
%u00a0Shit on s Shingle (Creamy Lentils and Mushrooms on Toast)
One serving
1 cup cooked lentils
2- 3 mushrooms
1/2 small onion
1 cup milk (cow, nut, plant%u2026 whatever you want)
1 tablespoon olive oil
1 tablespoon flour
1 teaspoon garlic powder
salt and pepper
2 pieces of nice thick but soft white sandwich bread
Slice the mushroom and onion and toss into a pan or skillet with a drizzle of oil. Cook on medium heat until brown and fragrant than dump onto a plate. In same skillet, add the oil and the flour and mix with a whisk while slowly adding in the milk. Keep whisking until sauce starts to thicken. Turn heat to simmer and add in the cooked lentils and the saut%u00e9d mushrooms and onions. Push down the bread in the toaster.. and when it pops up, dump the shill over it.
Wowzers.. What was I thinking! I know, the same thing you are%u2026YES YES YES!!! Gluten free what now.. My lovely sister is on that ban wagon. She has been having”issues” lately(so many, it’s hard to pin point) and says she is feeling better without the gluten. Me being the lovely person that I am want to feed my poor sister, make her happy with food. %u00a0I HAD to prepare that lady a dinner and it had to be pizza cause I know how much she likes her pizza. So I brain storm. What would be a good gluten-free pizza crust? I could do the obvious and %u00a0get gluten-free flour, but to be honest, that’s some expensive stuff and I really didn’t feel like going to the store. I wanted to work with what I had in the house%u2026.and ah ha, there it is, %u00a0cornmeal.. With a little bit of water I can turn that into some polenta and a super gluten-free pizza crust.
So in walks polenta(if polenta could walk) What goes good with polenta? Caramelized onions, mushrooms and yes, my last delicate squash.(I am too nice) A nice base of marinara sauce and a bit of parmesan cheese mixed into the crust and sprinkled on top%u2026..a complete work of genius that I was proud to serve to the gluten free lady.
Note. I have to make this clear, just because this pizza is gluten-free doesn’t mean that a person that is not gluten-free cannot eat this. Anyone and Everyone should eat this pizza.
%u00a0There really isn’t a whole lot of ingredients to this pizza%u2026 Cornmeal for the polenta. Marinara sauce%u2026.I used jarred marinara because it was a little easier and we don’t always need to make things from scratch%u2026Lots of onions(2 finely sliced), handful of %u00a0sliced mushrooms, thinly sliced squash and parmesan cheese. Most of the prep takes place at the same time, but that’s good, we can multi task, just have everything pre chopped and ready to go. First thing first, start the polenta
There are so many different ratios and directions on how to prepare polenta, so if you feel like your way is better, I trust you. What I did for this crust was 1 cup cornmeal to about 2 1/4 cups water. The main thing is the finished product. You want a pasty paste that is spreadable but not overly watery.
Bring the water to a boil and constantly whisk while gradually pouring in the cornmeal. After a minute to two, it should be pretty well incorporated and there shouldn’t be to many lumps. Turn the heat down to simmer and stir a lot %u00a0until the polenta starts to pull away for the sides of the pot. Really scrap the bottom of the pot so it doesn’t burn. Once its done, add in a 1/4 cup of parmesan( if you want to keep it vegan, just don’t add it) and salt and pepper.
%u00a0 %u00a0%u00a0 %u00a0 %u00a0 %u00a0%u00a0On a well oiled baking sheet or pizza sheet..spread the polenta into the shape of your desire. I went with a somewhat circular shape, but now that I think of it, I wish I had been more creative, like maybe a triangle or even the shape of a bus%u2026.Yeah, a bus shaped pizza would have been cool.
This crust needs to be pre baked so stick it in the oven.It should take about 20ish minutes.
%u00a0%u00a0 %u00a0 %u00a0 %u00a0 %u00a0 %u00a0You can do this pre crust or at the same time, but roast your sliced squash. Place single layers squash on an oiled pan, salt and pepper, then into the oven. It should take 10 minutes on each side.
%u00a0 %u00a0 %u00a0
You got the crust in, the squash in, now we need to caramelize the onions. You may be thinking that 2 onions is a lot, and it kind of is, but you want a lot. A tiny bit of oil into a skillet and all the onions. medium low heat with a lid, string on occasion. When the onions start to caramelize, add the mushrooms and cook until onions are nice and soft and the mushrooms are no longer raw. %u00a0By the time you done with this task%u2026everything should be ready%u2026.time to assemble!
%u00a0 %u00a0%u00a0
First marinara%u2026then the roasted squash.
%u00a0%u00a0 %u00a0 %u00a0I Sprinkle a layer of parmesan cheese and pile on those onions and mushrooms,. Sprinkle with a little more cheese. %u00a0( use vegan cheese or no cheese if you want it vegan) Back into the %u00a0oven for another 15 minutes to give everything some time to crisp and melt. %u00a0Remove from oven and appreciate%u2026That is one good looking pizza. I took %u00a0a long spatial and run under the crust just to make sure if wasn’t stuck. I also found that if you let it %u00a0cool for a few minutes before serving, the polenta gets a little stiffer and easier to handle, but not necessary.
Its time to eat! %u00a0 And I know that it was a success. This is my gauge for how good it was%u2026I stopped by the next day to drop a xmas tree stand off to her(again, look at how nice I am) and she was eating lunch%u2026the left over pizza. That might not seem like anything to you but to me%u2026 She doesn’t eat leftovers. Sure, she will stick them in the fridge, but that’s where they stay until she tosses into the garbage. The pizza was leftover good%u2026.That is good!
Polenta Delicata Caramelized Onions and Mushroom Pizza
Ingredients
1 cup polenta (Cornmeal)
1 tablespoon olive oil, plus more for the pan
2 %u00a01/4 cup water
1/2 cup grated Parmesan(omit if making vegan)
%u00a01/2 of Marinara sauce
1 small delicata squash
2 medium onions
8-10 mushrooms
2 gloves garlic
Directions
Pre heat oven to 425
In a medium saucepan, bring 2%u00bc cups water to a boil. Whisking constantly, slowly add the cornmeal while constantly whisking. Once full incorporated, turn to low and stir for a few minutes until the polenta starts to thicken and pull away from the sides. Stir in 1/4 cup of parmesan (if using). Salt and pepper to taste. Genously oil a pizza sheet to a cookie sheet and spread the polenta mixture %u00a0about a 1/2 thick. Place into oven and bake for 20-25 minutes or until crust is a nice golden brown.
While the crust is cooking, place thinly sliced squash on an oiled baking sheet and sprinkle with salt and pepper. Place in oven at the same time as crust, flipping squash after 10 minutes. Cook until fork tender, about 20 minutes.
While the crust and squash is baking, caramelize the onions. In a large skillet with a bit of oil. toss in onions and a little salt. %u00a0Cook on medium low heat with a %u00a0lid, giving them a good stir every now and then. Once onions are nicely cooked down, toss in the mushrooms. Continue to cook unit mushrooms are no longer raw.
Remove crust %u00a0and squash from oven and let cool for a minute. Now just pile stuff on. Spread %u00a0marinara sauce evenly around crust. Add squash and top with cheese. Dump the onions and mushroom on top and sprinkle with a bit more cheese.(Again, use vegan or no cheese to keep it vegan) Place back into oven for another 20 minutes.
Remove and let cool for a few minutes%u2026%u2026%u2026..and then eat eat eat!!!
A good side dish for this pizza%u2026a nice light arugula salad. Hey, you could even just toss some greens right on top of this pie, that would be fantastic too!
The other day the mister and I started reminiscing about some of our earliest memories of what our parents fed us or what they used to eat when we were growing up. One of the dishes that we both remember eating was the classic creamed beef on toast, or as my mom use to call it, shit on a shingle. Yup, shit on a shingle. (who ever started calling creamed meat on toast is a freaking genius) I think that as a kid, I liked the dish just for the mer fact that I could say the word shit and get away with it. I think my mom liked it for few reasons; she could make a big butt load of it really fast, for a crap load of kids, on the super cheap. And I think that she just really like it.
Shit on a shingle is one of those foods that I like to call “trash food”, you know stuff like beefaroni or pork and beans. Stuff that we all loved as little kids but might think twice about feeding to anyone now. ( I’ll still feed nick a can of beefaroni.. he likes it) As a throwback to our earliest food memories, (also a lack of food in the house and wanted to make something fast, easy, and cheap.. thanks mom!) I made the mister my rendition of the classic. Creamy Lentils and Mushrooms on toast. Not quite as trashy as creamed beef (lentils, mushrooms and onions are not trashy) but you get the same reminiscing feeling. I guess I could call it something like “stuff on a shingle” or lumps on a shingle”, but what kid (or adult) would want to eat that. Let’s just stick with shit, it makes it more awesome to eat it.
The shit….. A few mushrooms, a bit of onion, cooked lentils, flour, milk, oil, salt and pepper, and garlic powder. And the shingles.. 2 pieces of thick white country bread. Slice the mushrooms and the onion and toss into a skillet with a drizzle of oil. Cook on medium heat until browned and fragrant..Remove from pan.In the empty pan still on medium heat, add in the olive oil and the flour. Whisky constantly, slowly add in the milk. Keep whisking until sauce thickens. Remove from heat. Add in salt, pepper, and garlic powder.Add the mushrooms and the lentils into the sauce and give it a good mix. Oh, and don’t forget to toast up the bread. Now dump that shit all over those shingles! Oh the memories.
If you need to, make it classy by serving it with a cloth napkin and a nice fork and knife. But eat it however you need to. (As kids we like dirty hands and no fork, preferably with a big tall glass of overly sweetened red flavored kool-aid)
Enjoy this fantastic Spring weekend!
-C
Shit on s Shingle (Creamy Lentils and Mushrooms on Toast)
One serving
1 cup cooked lentils
2- 3 mushrooms
1/2 small onion
1 cup milk (cow, nut, plant… whatever you want)
1 tablespoon olive oil
1 tablespoon flour
1 teaspoon garlic powder
salt and pepper
2 pieces of nice thick but soft white sandwich bread
Slice the mushroom and onion and toss into a pan or skillet with a drizzle of oil. Cook on medium heat until brown and fragrant than dump onto a plate. In same skillet, add the oil and the flour and mix with a whisk while slowly adding in the milk. Keep whisking until sauce starts to thicken. Turn heat to simmer and add in the cooked lentils and the sautéd mushrooms and onions. Push down the bread in the toaster.. and when it pops up, dump the shill over it.
I have been meaning to share the magic of crispy waffle iron tofu for a while, but somehow kind of forgot. Yesterday when talking to my (not quite) mother in law she mentioned the bean waffles I made a while ago and suddenly I had a very real need to go home and bust out the waffle iron and make some tofu. And some of you may be thinking that this sounds weird, but its not. Waffle irons are not just for waffles, you can cook just about anything in them. I compare then to a George Foreman grill (remember those) or even a griddler. . Works the same way, just makes everything waffles shaped.
As for the rest of this open face toast situation, it just makes so much sense.%u00a0 Crispy cumin lime tofu, avocado, mashed up squash…. A heap of things that are so freaking good.%u00a0 I actually made the sandwich for the mr and was a little bit worried he was not going to like it, but worry I need not. He got down with it too. You could even ditch the bread and eat waffled tofu slathered in the squash and tofu alone, or maybe swap out bread for greens (that’s what I did) Whatever you do, it will be good and your tofu will be so nice and crispy (without having to deep fry) that you may never cook tofu anther way again.
The stuff. Tofu, some roasted squash (any squash or sweet potato works), and half an avocado. Going to need a lime, some cumin and a pinch of chili powder, salt and pepper and little olive oil. And some type of bread that is good for toasting.
The cumin and chili powder go into a bowl with lime juice, a little oil ans a pinch of salt ans pepper. Give it a good whisk and set aside.
And now tend to the tofu. You want to get as much water removed from the tofu as you can.%u00a0 I do this by pressing the sliced pieces between a clean tea towel a bunch of times until the tofu is as dry I can get it without falling apart.
While you are doing this, preheat your waffle iron.
Once the tofu is a dried as you can get it, dredge each piece of tofu, front and back, through the cumin lime mixture.
And place it on your preheated, lightly oiled waffle iron.
Close iron and let the tofu iron itself cripsy.
And in about 7-10 minutes, you got yourself some super fantastic crispy, oh so tasty tofu.
Now to put it all together.%u00a0 Bread is toasted and topped with mashed up squash.
Next goes the tofu then top that with the avocado. Finish with a squeeze of lime and a pinch of salt.
And sriracha if you like it..
Not deep fried, but super crispy tofu! And squash! and avocado! and toast!
It’s amazing.
-C
Make 2 pieces of toast
For the tofu
1/2 a block of extra firm tofu cut about an inch thick slices
Juice of half a lime
1 heaping teaspoon cumin
pinch of chili powder
salt and pepper
3 teaspoons oil plus more to brush onto iron
And for the rest of the sandwich
a piece 4-5 inch piece of baguette or 2 slices of thick bread (use gluten free bread if you want)
About a 1/3 cup of cooked or roasted squash or sweet potato
sriracha (if you are into it)
1/2 an avocado
the other half of lime
In a shallow bowl, mix together the juice of 1/2 the lime,the cumin and chill powder, a pinch of salt and pepper and 3 teaspoons of oil. Set aside
Preheat waffle iron to either the on setting or if it has variable setting, high.
Take your tofu and remove as much of the liquid as you can by pressing it between two clean kitchen towels. When you get as much of the liquid out as you can, take the tofu and place into the cumin mixture and coat both sides.%u00a0 Ready the iron by brushing each side with a little more oil just to make sure it doesn’t stick and place the tofu on the iron, close it up, and let it do it’s thing for about 8-10 minutes. (check after 6-7 to see whats what and if is as crispy crunchy as you like, remove. If you think it could use another minute or two, well close it back up and keep ironing it.
And when the tofu is done, it’s time tot make compile it all together.
Toast you bread you are going to use. Once toasted mash a good amount of squash onto toast. Place tofu on top of that and thinly sliced avocado on top of that. Finish with a sprinkle of salt, a squeeze of lime juice and if you are feeling a bit more spicy, a few drizzle drops of sriracha.
Eat right away. Do not share…they can make their own.
The other day the mister and I started reminiscing about some of our earliest memories of what our parents fed us or what they used to eat when we were growing up. One of the dishes that we both remember eating was the classic creamed beef on toast, or as my mom use to call it, shit on a shingle. %u00a0 Yup, shit on a shingle. (who ever started calling creamed meat on toast is a freaking genius)%u00a0I think that as a kid, I liked %u00a0the dish just for the mer fact that I could say the word shit and get away with it. %u00a0I think my mom liked it for few reasons; she could make a big butt load of it really fast, for a crap load of kids, on the super cheap. And I think that she just really like it. %u00a0
Shit on a shingle is one of those foods that I like to call “trash food”, you know stuff like beefaroni or pork and beans. Stuff that we all loved as little kids but might think twice about feeding to anyone now. ( I’ll still feed nick a can of beefaroni.. he likes it)%u00a0As a throwback to our earliest food memories, (also a lack of food in the house and wanted to make something fast, easy, and cheap.. thanks mom!) I made the mister my rendition of the classic. Creamy Lentils and Mushrooms on toast. Not quite as trashy as creamed beef (lentils, mushrooms and onions are not trashy) but you get the same reminiscing feeling. I guess I could call it something like “stuff on a shingle” or lumps on a shingle”, but what kid (or adult) %u00a0would want to eat that. Let’s just stick with shit, it makes it more awesome to eat it.
The shit%u2026.. A few mushrooms, a bit of onion, cooked lentils, flour, milk, oil, salt and pepper, and garlic powder. And the shingles.. 2 pieces of thick white country bread.%u00a0Slice the mushrooms and the onion and toss into a skillet with a drizzle of oil. Cook on medium heat until browned and fragrant..Remove from pan.In the empty pan still on medium heat, add in the olive oil and the flour. Whisky constantly, slowly add in the milk. Keep whisking until sauce thickens. Remove from heat. Add in %u00a0salt, pepper, and garlic powder.Add the mushrooms and the lentils into the sauce and give it a good mix. Oh, and don’t forget to %u00a0toast up the bread. Now dump that shit all over those shingles! Oh the memories.
If you need to, make it classy by serving it with a cloth napkin and a nice fork and knife. But eat it however you need to. (As kids we like dirty hands and no fork, preferably with a big tall glass of overly sweetened red flavored kool-aid)
Enjoy this fantastic Spring weekend!
-C
%u00a0Shit on s Shingle (Creamy Lentils and Mushrooms on Toast)
One serving
1 cup cooked lentils
2- 3 mushrooms
1/2 small onion
1 cup milk (cow, nut, plant%u2026 whatever you want)
1 tablespoon olive oil
1 tablespoon flour
1 teaspoon garlic powder
salt and pepper
2 pieces of nice thick but soft white sandwich bread
Slice the mushroom and onion and toss into a pan or skillet with a drizzle of oil. Cook on medium heat until brown and fragrant than dump onto a plate. In same skillet, add the oil and the flour and mix with a whisk while slowly adding in the milk. Keep whisking until sauce starts to thicken. Turn heat to simmer and add in the cooked lentils and the saut%u00e9d mushrooms and onions. Push down the bread in the toaster.. and when it pops up, dump the shill over it.
%u00a0Some days making an effort is just too much. The upcoming holidays are taking up most of my brain capacity. I need the day to decompress and I don’t want to worry making any meals. Not to mention I am running low on food in the house, my winter farm share doesn’t start until next week (HORRAY!!) and I really don’t want to go to the grocery store. I have avocado, I have tomato, I have bread. Smoosh avocado on toast, top with a few slices of tomato, and give it a sprinkle of salt. Wa La..There you have it. Easy and delicious and is suitable for breakfast, lunch and dinner. Don’t like avocado? Well today, that’s not my problem. I am sure you can find %u00a0jar of peanut butter. Note: Peanut butter anything is also suitable for any meal replacement. Thursday Thursday!!
These are definitely my favorite shaped cutout cookies I have ever made. I mean seriously, carrot shaped carrot cookies, what could possibly ever be better? Nothing, and that%u2019s truth for you.
Not only are they carrot shaped, they are also carrot flavored. Yup, Carrot shaped, carrot flavored, awesomeness. A little cinnamon added to the cookie for little extra boost of flavor and an orange glaze because it works and orange is good and fresh and springing. All good stuff.
You might be thinking, huh, carrot puree in a cookie, well that doesn%u2019t sound right. But it is, it is right. And you know how I know that these cookies are awesome? Well I packed them up, (2 dozen of them) and took them over to the littles house for an after school treat. When I got there, the two older ones had friends over. I asked them if they wanted a carrot which earned me that look that said %u201care you serious%u201d but them showed them the cookies. Of course the wanted a carrot so I gave them each one. They ate their cookies then proceeded to beat the shit out of the mr. Then they asked for another cookies and beat the shit out of the mr some more. This when on and on for about a 1/2 hour until all the cookies were gone and the mr was crouched in the corner with a broom trying to defend himself against 4 rulely kids who where slashing at him with light sabers and spraying him in he face with kitchen cleaner. It%u2019s because they wanted more cookies. (and yes, the littles are getting crazy). So yeah, the cookies are good. Ass kicking good.
Anyway, a cookie with some goodness mix into it, shaped into a great shape, that will make everyone smile and happy. You could make them by yourself, make them with your friends, make them with some kids, with some old people. They are the perfect cookie to leave out for the easter bunny(do you leave carrots out for the easter bunny?) or to serve up at any easter party, spring party, or any garden party you might be attending. This cookie is pretty much perfect for any and every occasion that required a cookie. Or a carrot because carrots are always welcome.
To the carrots! I mean, the cookies!
The stuff. Flour, baking soda, salt, sugar, vegan butter, carrot puree, cinnamon, an orange, some powdered sugar, and food coloring.
Into a big bowl the sugar, vegan butter, and carrot puree go.
Beat for a minute or two until completely incorporated.
Add in all the rest of the dry stuff and mix by hand until it turns to dough.
This is the dough it turned into.
Gather the dough and wrap it or place in a plastic bag and stick it Into the fridge for a few hours or overnight. The dough NEEDS to chill.
After you let the dough be, remove from fridge, liberally dust counter, and roll out dough about 1/4 inch thick.
And then it%u2019s time to cut the cookies out. I unfortunately do not have a cookie cutter so I improvised and make 2 carrot cutouts from paper and hand cut each cookie. That worked but took forever so I got crafty and used a fat Christmas tree cookie cutter then just did a little trim and pinch to make it into a cookie. (I am a genius for that). Any way works, and you can also do other shapes too, the cookies don%u2019t change taste in different shapes. (but that would be so cool if they did)
Carefully place cut out cookies onto a baking sheet, giving them a little space because they do spread a tiny bit.
And into the oven to bake they go.
Out in 10 minutes looking all carrot like.
Carrots waiting to cool so they can be glazed.
The glaze. Pretty straight forward. Just zest orange into powdered sugar and juice the orange into the sugar and mix.
Divide glaze and dye one orange and one green
And glaze away. I recommend doing it over a rack and baking sheet to minimize mess because they do drip a bit.
Now just you look at that, carrot shaped carrot sugar cookies .What a sight!
And of course, carrots come in bunches. HA
Enjoy some carrots!
-C
makes about 2 and a half dozen (depending on size)
2 1/4 cups all purpose flour plus more for dusting
1 teaspoon baking soda
1/2 teaspoon salt
1 teaspoon cinnamon
1/2 cup vegan butter
3/4 cup granulated sugar
1/2 cup carrot puree ( see note about how to make puree)
For the glaze
2 to 3 cups powdered sugar
on orange
orange and green food coloring
Note. To make carrot puree, steam a couple carrots until completely soft them blend until smooth.
Place sugar, vegan butter, and carrot puree into a big bowl. Beat with a beater until light and fluffy. Add in the flour, baking soda, salt, and cinnamon and mix by hand until completely incorporated and mixture tunes into dough. Gather dough into a disk and wrap in plastic or place in a plastic bag and refrigerate for at least 2 hours or up to overnight.
Once dough has chilled enough and you are ready to go, preheat the oven to 350.
Place dough on a flour dusted counter and roll out about 1/4 inch thick. Cut out the cookies with a cutter or by hand and place on a baking sheet. Bake cookies for 10-11 minutes or until just starting to turn slightly brown around the edges. Remove from oven and place on a wire rack to cool.
Once cookies are all baked and cooling, make the glaze. Place powered sugar into a big bowl, zest in the orange then add in the juice od half the orange. Mix completely and check consistency. You want it to be slightly running but not liquid, but also not to stiff. Add more juice or more sugar to get it right. Once it is the right consistency, separate into 2 bowls. Dye one green and one orange. Now glaze you cookies. A knife or small spatula works best and yes, the glaze drips a little so do it over a baking sheet, but after about 10 minutes the glaze hardens.
And then you have carrot cookies and all is good. Now go eat a carrot cookie!
Store uneaten cookies in an airtight container for up to 5 days. They can be frozen too.
Hey hey hey! Happy Valentines Day! Hope you have a loved one to share the day with (romantically or not)
How has your week been? We are getting right back into the swing of thingsand it has been a little too easy. It’s almost (almost) like we didn’t leave. The best thing I can think to do now is to start planning our next big adventure (pretty sure we are going cross county at then end of this summer) But before that we have the house to do. This week we have spent a good amount of time with drawings, measurements, looking at materials, and just trying to figure out what we want and or can do. (we can’t afford solid gold bath fixtures.. wonk wonk…) And the apartments. I think everyone and their mom wants to rent one of our apartments. So many showings.%u00a0 The mr has been so good and running around showing places like 5 times a day, in the cold no less, but so far so good. We have a few new tenantslined up and ready to go.%u00a0 Things are getting done around here!
But other then that. just thinking a bit much about spring. I am getting the feels for all sorts of dirty activities (planting things you dirty birds) and am thinking we should probably get seeds and get some plants going soon here. This lady is needing some kale!
Anyway. V day. Off to a great start. I am awake and inside and not outside so that’s awesome. I realized how cold it is out when last night after the pup came inside from his5 minute walk, I tried to take his leash off and my fingers froze to the metal clip. Yeah, its that f*cking cold. So no outside today(it’s suppose to be worse then yesterday)%u00a0 Nope, just going to make a gallon of coffee, open the door and let the puppy go pee. Then I will close said door, sit on the couch, and continue my morning reading. This will be the way of the day. Coffee, reading, letting the pup go pee. Simple and satisfying. Oh and the mr and I are going to watch a movie later and eat lots of food.. The excitement is overflowing here!
How about you? Got any big plans? Don’t worry if you don’t, your big plans today should involve being happy and staying warm, but if you do. Go you! Have fun, and remember to keep your clothes on until you get inside!
Here is some internet I weeded through for you to look at.
–The Dark Origins Of Valentine’s Day. Not all pink and fluffy teddy bears.
-Is there a difference between hot cocoa and hot chocolate… yes, and its kind of obvious.
-Having a major crush on these tiles for the new bathroom. what do you think?
-Color is more then just color.The Psychology of Color
-This reminds me of Iceland.. the whole country is geothermal. Citrus In The Snow: Geothermal Greenhouses Grow Local Produce In Winter
-Because you should know. How to make strawberry mice. (really cute!)
-I have forever slept with my feet stinking out. Sleep Hack: Keep Your Feet Outside Your Covers
-On food. Fat Isn’t Bad, Stupid is Bad
-I love this house and all the decor.
-And because whenyour young and you think it would be fun, You Can Now Study Tacos at the University of Kentucky. I know I would have.
And a few pics from the past week
Happy Sunday and keep it real!
-C
Yesteray the mr and I took a couple littles( and one not so little) to the farm for a tracker ride and pumpkin picking! It was fantastic. The sun was out, but it was still fall chilly. The pumpkins were amazing and we were the first one there so we had an the first pick of the lot! But before we went to the pumpkin patch, we went to the raspberry patch for some breakfast raspberries %u00a0and the littles stumbled upon a super friendly, lovey black cat. Needless to say, they picked no raspberries and just ended up playing with the cat.%u00a0%u00a0I asked one of the farmers if they knew the cat and she told us it’s kind of the farms cat and her name is%u2026wait for it%u2026. Super Friendly.. Best name ever.
This week also included a birthday party, a solar eclipse (did you see it?) a little drive to check our some tree colors (wasn’t much at the time, but this week will be good) and some more apple picking (I can’t stop!). We also took one of the last trips to the garden to harvest some greens and got crushed. I have been babying a bed of rainbow chard all summer and was so excited to do one big-ass harvest. But when we got there, all the leaves have been eaten off. A Fuckface deer ate my chard! I was so mad and am still a little pissy about it, but what can I do? And really, If I was a deer , tI would have muched the shit out of that chard too.
Also, it seems that everyday I am digging/riffling through the basement for just one more long sleeve shirt, pair of wool socks,%u00a0or a warmer pair of mittens. I have’t pulled out the jacket yet, but I think that it’s going to happen soon. I mean, wearing 2 long sleeve shirts and 2 sweaters is getting kind of annoying when I leave the house to walk the dog, So yeah, might do that today.
But this weather%u2026 SO GOOD right! Blankets, sweaters, tea and coffee, knitting and reading. If I could live in a fall state for my entire life. Oh man that would be great.%u00a0
Anyways, enough about me, how about you? Are you enjoying the weather where you are? Are you getting out and doing all the fall things that one does? Are you at least getting in some r and r toady? I hope so. cause we all deserve it!%u00a0
Here, the Internet stuff from the week if you feel so inclined.
-Someone get me a ticket! Harry Potters Christmas Dinner in the Great Hall%u2026. I must go!
–I have a thing for clouds.%u00a0What’s at the edge of aCloud?%u00a0
-This house%u00a0is so amazing
-And love this place too.
-Pretty trees dripping light.%u00a0
-I am trying to get the mr to go with me.. but I am going. (heights are a bitch)%u00a0%u00a0Wild Walk. A walk through the %u00a0Treetops.%u00a0
-Are you a sweet of sour person? Me, I think I am sour.%u00a0Power Of Sour: How Tart Is Reclaiming Turf From Sweet
-Clone your dog?%u00a0%u00a0I think I’m gonna pass on that.%u00a0
-A myth about Refreezing food.%u00a0%u00a0Good, cause I a freezer, refreezesr of food.%u00a0
And some picture from all the fun..%u00a0
The past few weeks, whenever the mr and I have a free couple of hours, we have been hitting the countryside, in such of the best rivers (for me to play in and for him to fly fish)%u00a0
We have been to many, but this one is my new favorite. There is shade to sit in, sun to bath in,%u00a0and hiking trails to hike. There are little wading pools, deep spots that are great for fishing, and lost and lots of the most amazing rock formations. And bonus,%u00a0the was not a mere person in site, only a few cute little frogs.
%u00a0No matter that I think I broke the bottom of my foot walking barefoot in the water and jumping hard onto a rock, or that the mr came back with a touch of poison ivy (poison something). We still both love it and are looking forward to our next trip back with shoes and long sleeves!
You got any plans this weekend? If not, I am recommending that you hit a river. Bring a book, bring a picnic, and bring a little bucket for your river treasures. Soak up the last bits of the summer, take a break from the crazy, and just go. Trust, you will be happy you did.
Hey there people! How’s it going? Good right.. cause it’s SUNDAY!
Ok, so I know that some people don’t like sundays, but me, it’s my day. The one day of the week that I try to do as little crap as possible and relax, It also means the house is spotless, the fridge is stocked, (so so so stocked..a farm share and garden explosion!)%u00a0and the sheets have been changed on the bed%u2026. I LOVE clean sheets! %u00a0
This past week was for sure one of those dragging, nagging, just want it to be over type of weeks. Why? I am not exactly sure. We have %u00a0had us some good time;%u00a0a back to school dinner, banana ice cream cake, garden time and a few playground trips. But I think I am just feeling the pull towards fall and am just clicking the days away until %u00a0we have the crisp cold days full of apple,%u00a0pumpkins, cozy sweaters, and colorful leaves.%u00a0Call me crazy, but I can’t wait for the warm weather to GO AWAY!
Anyway, %u00a0today I am going to relax a bit. Maybe I’ll finish my book, restart my knitting (I have knitted about 3 hats and keep pulling them apart because I don’t end up liking them.. I have pattern commitment issues) or do a little more painting. (on canvas, not walls). %u00a0I hope to take the mr and the pup for a little hike and of course, drink a much coffee as my heart can handle.%u00a0
How about you? Got any plans for the day?%u00a0
Note about picture above%u2026. Saw the stuffed bear on a walk with the pup.. He went BATSHIT when he saw it. I don’t know how I even managed to take a picture cause he was barking like an ass at the thing%u2026. Thats my dog.
Here is internet stuff from the week
-No more squares on Instagram. I am not going to lie, haven’t noticed%u00a0
-Uh, no shit.%u00a0Turns Out Sarcastic People Really Are%u00a0Better at Everything%u00a0
-Can You Use That In A Sentence? Dictionary Adds New Words%u2026Awesomsauce!
-Plants all around!!!%u00a0
–%u00a0This house%u00a0and this house
-Why isn’t this happening everywhere?%u00a0Streamlined Berlin Grocery Store Creates No Packaging Waste
–If only I had a library.. These are tops!%u00a0
-The Complete Guide to Gluten Free Baking.%u00a0Thanks King Arthur Flour!
-Human Face Coffee Lids.. hahaha%u00a0
-Indiana Brewery Is Now Making a Beer for Dogs.%u00a0I know my pup would like one.
And a few pictures from the week (All taken with my I phone 4.. I kept forgetting my camera)
Can you believe it%u2026%u00a0August already.%u00a0What the what?
%u00a0I was in the great big Coscto store this week and saw Halloween costumes and I am pretty sure there was some Christmas shit too. (I wasn’t %u00a0about to look to closely and fall down that rabbit hole)%u00a0I mean, jeeze, It’s%u00a0still summer and I%u00a0like to think that I live a little more in the somewhat present moment. %u00a0I have a hard time figuring out what I am going to be doing in 2 weeks, let alone 2 months from now. %u00a0But man, seeing that stuff really sent me into a time whirl%u2026 It’s just flying by so fast.%u00a0
Anyway,%u00a0August. One of my favorite months of the year. The farm shares are gigantic (I got corn and watermelons at the last pick up!)%u00a0and the garden is bursting with so many goodies.%u00a0The days are still really warm, but the nights are starting to cool off, The wild flowers are in abundance all over. Plus%u00a0my Dad always comes%u00a0back to Vermont in August for a long visit (he;s here now!), which means lots%u00a0of family stuff, a Stem family reunion, lots of%u00a0hiking, and of course lots of%u00a0food eating. And it’s getting close to back to school time. The littles are all getting equally%u00a0exctited/depressed about the going back. I am kind of excited for them to go back too!%u00a0
My goal for August.. try to check off some more of my summer bucket%u00a0list and also try to%u00a0buy some plane tickets to a far away land.( I hear that%u00a0tickets prices this month are at the lowest%u00a0they have been in years!)%u00a0At the same time%u00a0I want to%u00a0try%u00a0not to worry to much about doing a bunch of stuff.. %u00a0just try to enjoy what’s left of the summer. No pressure!
So what about you? Got any end of summer plans?%u00a0
I’ll leave you with some good internet stuff from the week.
-I know I have said this before, but this is the house I am meant to live in.
-Cocoon in a tree!?!!%u2026but where do you pee?
–Get it here%u2026IKEA 2016 CATALOG!
-I love a good tub.%u00a0The World’s Most Beautiful Bathtubs
–Whoa.%u00a0How Birds See Our World%u00a0
-This wood is so pretty.%u00a0
–Different types of summer squash
-I am a plant whore so this makes%u00a0me happy.%u00a0A Plethora of Plants in Every Room
-Oh to be one of these littles…%u00a0The Kids of Burning Man
Can you believe it? We are already getting toward the end of June. This is just crazy to me. I feel like I should have gotten more summer stuff done already.%u00a0Aaaaaaaaah! Pulling my hair out! Whatever, it’s all cool. I’ll get there (where?%u00a0%u00a0not exactly sure) but I think%u00a0this week was a good start. We did a%u00a0little road trip to Montreal, a few good bike rides, hung out%u00a0with some littles that are officially on summer%u00a0vacation (again. AAAAAHHHHH),%u00a0a drive to the country to collect wildflowers%u2026. I mean, I did a good amount of awesome stuff this week. %u00a0I also did a fair amount of not so much fun crap, but we don’t%u00a0need to go there. All this summer talk got me thinking.. What do I want to do this summer? So I made a list
SUMMER BUCKET LIST
Hike Camels Hump (and some other mountains)
Start knitting a sweater so it will be ready for%u00a0fall
Fly a kite
A kayaking Day Trip
At least one%u00a0EPIC bike ride
repot all my house plants
spend a n entire day in bed (or at least at home)
Make popsicles at least once a week
Fly somewhere
go swimming in a river
Clean out the barn
A few good camping trips (can combine with #1,2,3,4,6, and 9)
Road Trip!!! (another one)
Shave my legs and get a hair cut
Every kind of berry picking
I could add a few more, but this is a good start. %u00a0Do you have a summer bucket list? If so, something you got that I am missing? I am open to suggestions,
Anyway, here is what this%u00a0week in internet had for me…
%u00a0- %u00a0I am in love and inspired by this.%u00a0STUDIO TOUR: KIKI SLAUGHTER
-%u00a0A Gallery of Beautifully Eclectic Living Rooms%u00a0
–Yes, Coffee Can Actually Improve The Power Of Your Power Naps
-Nick and I were just listening to this TED talk. Very interesting.%u00a0Shifting Time%u00a0%u00a0
%u00a0-%u00a0I love %u00a0a good%u00a0%u00a0Horseshoe.
-This hotel room, I could live in.%u00a0%u00a0AN APARTMENT-LIKE HOTEL ROOM FOR THE TRAVELING PROFESSIONAL%u00a0
-Your Inner-Child Will Love This Playground Decor%u00a0I think I want the side.%u00a0 %u00a0
And some pictures from%u00a0the week.
The gardens looking good, no?
Sticks and farting noises make the best of times.
Weekly CSA%u2026..so AMAZING!!!
I rode the mr’s%u00a0%u00a0bike for a few days after my tire%u00a0popped. I liked having a basket, I felt like the wicked witch of the west.
For a little while now, we have been telling this lady (my little sis) we would take her to the big city up north. She had never been, (which is crazy%u00a0cause we live so close) and wanted to just explore and take some pictures.%u00a0So last week when she finally finished school for the summer, the mr, this lady, and I made the trip.
%u00a0I guess the best way to start a little road trip%u00a0is with a bowl or egg noodle covered in the smelliest%u00a0teriyaki sauce ever ( it was 9 in the morning). Gross as hell, but i give her credit for creativity. This lady has a fantastic (and pretty freaking dirty) mind.%u00a0
And really, what’s a trip to Montreal without stopping at%u00a0Ikea. It’s like a house%u00a0ware themed playground.%u00a0So much tomfoolery!%u00a0
The mr. wants to know, “is%u00a0it really frozen yogurt, cause it’s too good to be yogurt?”%u00a0The lady%u00a0just wants an Ikea closer so she can eat ice cream and hot dogs all day, everyday.%u00a0
The balls we plastic and full of water%u2026.and after wondering aloud if the balls ever dropped, this one fell onto my head.
Once in the city, we parked and set out on foot. The goal for the day was to walk, see some cool shit, and get a good cup of coffee. All of which we did. So after a few hours, tired, hot and sun burnt (we forgot the sunscreen), we dragged ass back to the car and drove home.
Until next time. (maybe we’ll take her to a strip club)

 The other day the mister and I started reminiscing about some of our earliest memories of what our parents fed us or what they used to eat when we were growing up. One of the dishes that we both remember eating was the classic creamed beef on toast, or as my mom use to call it, shit on a shingle. Yup, shit on a shingle. (who ever started calling creamed meat on toast is a freaking genius) I think that as a kid, I liked the dish just for the mer fact that I could say the word shit and get away with it. I think my mom liked it for few reasons; she could make a big butt load of it really fast, for a crap load of kids, on the super cheap. And I think that she just really like it.
  The shit….. A few mushrooms, a bit of onion, cooked lentils, flour, milk, oil, salt and pepper, and garlic powder. And the shingles.. 2 pieces of thick white country bread.
  Slice the mushrooms and the onion and toss into a skillet with a drizzle of oil. Cook on medium heat until browned and fragrant..Remove from pan.
 In the empty pan still on medium heat, add in the olive oil and the flour. Whisky constantly, slowly add in the milk. Keep whisking until sauce thickens. Remove from heat. Add in salt, pepper, and garlic powder.
 Add the mushrooms and the lentils into the sauce and give it a good mix. Oh, and don’t forget to toast up the bread.
  Now dump that shit all over those shingles! Oh the memories.
 Happy St Patricks Day!!!! As a kid, St Patricks day always meant green milk, green eggs, and those nasty gold foil covered chocolate coins. (you know, from the pot of gold) Not to mention all the leprechaun hunting and pinching. In my family, if you were unlucky enough to forget to wear green, you ended up as a walking target. It all started out nice an innocent, a pinch here or there, but by the end of the day, someone would end up pinching a little to hard or maybe just one too many times and the game would go from pinches to punches.
  The stuff…. Super pretty red potatoes, red cabbage, shallots, kale, salt and pepper, and olive oil.
 Dice up the pretty potatoes and stick them into a pot and fill up with water and add in a good tablespoon of salt. Stick on high heat and bring to a boil, then turn the heat down to medium and cook those taters until super fork tender. (bring them to the edge of falling apart)
 Once the potatoes are super tender, drain the water and dump them into the pan with the sautéed veggies. With a potato masher or a fork, mash up the potatoes and mix in the veggies, adding a drizzle or more of olive oil as you go. (Start with a drizzle and work your way up until it tastes good to you) Salt and pepper to taste.
  The most pretty pan of smashed up potatoes that I have ever seen. Eat as a side dish or even a light main dish. Fork is a good utensil to use, but I found that my fingers worked just as well.
 HOORAY FOR SPRING!!!!!!!
 Pesto stuff. Kale, walnuts, parmesan cheese(nutritional yeast to keep it vegan), garlic, lemon, olive oil, and salt and pepper.
 Straight up frozen ravioli goes onto an oiled baking sheet.(make sure that non are overlapping) Place into an oven at 400 degrees for about 15-18 minutes, flipping after 10. If you want to add mushroom and a few more walnuts, just toss them onto the ravioli when you are flipping over the ravioli.
  Look at this… fresh, crunchy, light and happy. Kinda like a spring day.
 One of the best things about winter is that I can have something in the oven at any time and not worry about how hot the house is going to get. I get to spend my free time (or my in between free minutes) baking up all the thing that I would not dare bake in the summer. (lots of bread and cakes) Yeah, I might complain a little about how cold it is outside (to my defense, -20 is kind of a bitch) but then I think of the super hot humid days that come during the summer and cringe. At least when its cold out I am able to get warm, (que oven) but when its super hot and humid, I just turn into something that border lines a wet towel and the rabbit animal… Not so pleasant. I much prefer cooler weather. So no big surprise….I made bread.. or focaccia to be exact. And now you should too because first off, you want to eat it, and secondly, you can probably whip this up faster then it would take to get all of you winter warmies on and leave the house. Don’t leave, just turn the oven on.
  The stuff, which isn’t a whole lot… Flour and salt. A mixture of honey, water, and yeast. And olive oil. Its pretty much my pizza dough recipe, tweaked with the addition of oil, less flour and no kneading.
  Mix together the wet and dry…I used my nifty dough whisk, but a wooden spoon or even your hand works. Mix mix mix. The dough should be really slack and sticky. And guess what.. no need to knead! Just make sure the dough is uniformly incorporated…hehe.. uniformly incorporated… sounds weird.
 Drizzle the dough (don’t worry about making it into a ball, a blob is good) with a little oil and place in a nice warm place topped with a towel to rise for about an hour or until dough has doubled in size. Once is has fully risen, drizzle 2 tablespoons oil in two 9 inch cake pans. Divide dough in half, and kind of smoosh dough into pans. Cover and let rise for another 20 minutes or so.
  When dough has finished its second rise, drizzle each with another tablespoon of oil and with your fingers, fill out the pan and indent the dough, kind of like playing a piano or tickling a puppy(?)….Then layer your toppings (if you want any) Start with any herbs, then the veggies. Then last, any cheese you got. I used thyme, cracked black pepper, tomato, onion, topped with parmesan cheese. And the other one is just plain old salt.
  Pulled from the oven when nice and golden brown..set on a wire rack to cool for a few minute and removed from the pans.
  The mister was practically salivating waiting for a slice… and he was so not disappointed. Crispy outside with soft airy insides… Everything a perfect focaccia should be. The one with the toppings was the favorite for the first night, but for a peanut butter and cheese panini for lunch the next day…plain is the way to go.. My suggestion, do what I did, jazz one up and leave one plain. And then make more if you need too because the forecast call for another week of below zero!!! Oh the things that I’ll get to make! (me being positive) Stay warm! -C


 I figured now is a good time to get this recipe out there before we get to far into spring and summer recipes because there is going to be a lot of banana ice cream filled recipe coming and I figured its a good idea to have the basic banana ice cream recipe ready for people to refer too. And because I made so much fantastic naner ice cream, I also made a cookies and cream naner ice cream for my sisters and the mister.
 The stuff you need for this ice cream…. Nice and ripe bananas, peeled and then frozen* That’s it.
 After all blended and smooth, either eat right away or scoop ice cream into a freezer safe container and stick in freezer. That’s the banana ice cream… And it is amazing and so so so so so addictive. I make a batch, think I am only going to eat a scoop, then find myself eating half of what I have made, but it’s ok cause it’s only bananas.
  One batch of banana ice cream, either freshly made, still in food processor or made ahead and placed in a food processor and given a good pulse to smooth it up.
 Now you have cookies and cream naner ice cream…. and everybody is happy.
 Chomp Chomp Chomp… The sound I make as I eat this freaking fantastic crunchy granola. You know it’s good when the person sitting next to you is annoyed by the sound of you face while eating. I eat a lot of crunchy stuff. And I am pretty sure I annoy the mister a lot.
  The simplest of stuff. 1 smashed banana, a cup of pureed butternut squash, Vietnamese cinnamon*, honey, and old fashion oats. (and a dash of salt, not shown)
 Toss the cinnamon and salt with the oats. Mix together the banana, squash and the sweetener and combine with the oats until full incorporated.
  Dump the mixture on a parchment lined baking sheet and give it a little pat, you know, to settle all the bit and pieces together, all cozy and evenly spread out. Now stick into a preheated oven and after about 20 minutes, take out of oven and give the granola a toss, breaking apart any super big chunks or overly wet pieces. Put back into oven for another 20 minutes. (I like my granola super crispy crunchy so I cook it a little longer, like 30 more minutes)
 And when you are happy with the crunchiness of you granola, remove from oven and let cool, trying not to eat all of it while it sit’s on the counter looking all pretty and smelling like happiness.
  Last week pineapples were on sale everywhere……So I bought 5. Don’t judge
  Stuff for the goodness. We got the kale, some avocado because all salads should have avocado and some cooked lentils because, well, all salads should have lentils (or beans or nuts.. so you could totally something else) Then a few sprigs of fresh dill, a clove of garlic, red wine vinegar, salt and a bowl of chunked up pineapple.
  The pineapple, dill, garlic, red wine vinegar, a splash of water and a pinch of salt get blended in a blender or whatever blending device you use. Go as smooth or chunky as you like, I recommend going smooth, but leaving a little chunk, like half blended.
 So good……So so good.


 There is irish soda bread in your future. I can see it. A nice hardy hunk slathered in butter and honey, crumbs all over the place. So all you have to do know is make it.
  White whole wheat flour and all purpose flour mixed together. Salt baking soda and buttermilk. That’s it.
 All the dry whisked together and in goes the buttermilk. Mix together until dough starts to form then dump onto a floured surface. Handling dough as little as possible, knead into ball.
 Place on a baking sheet and dust with flour. Take a sharp knife and cut an X through the top about 1/2 inch deep.

 TGIF!!!! For reals, because Monday-Thurday were monster days. And now that its friday, I can dig a hole and hide in it until it’s at least 30 degrees with some sunshine. (I might never get to come out.)
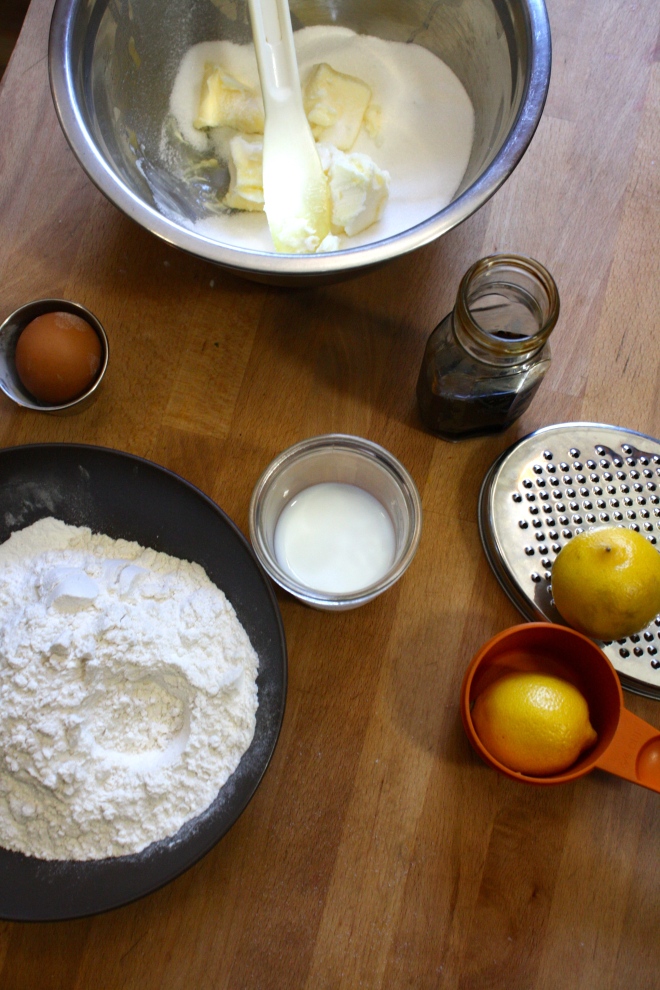 Simple lemon cake stuff. Flour, baking powder and salt whisked together, Sugar and soft butter in a bowl. An egg, some vanilla, milk, and of course, the lemon.
  Frozen bites ready for the chocolate coating… Bittersweet chocolate chips and a little bit of coconut oil. Melted together all nice and shiny smooth.
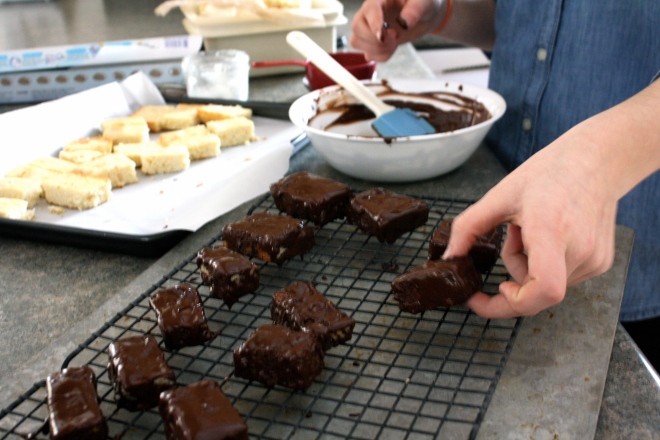 Now dip and slather those bites in the melted chocolate.
  Fully coated and placed on a rack for the chocolate to harden. I ended up sticking the rack in the freezer for 10 minutes…They harder really fast in there.

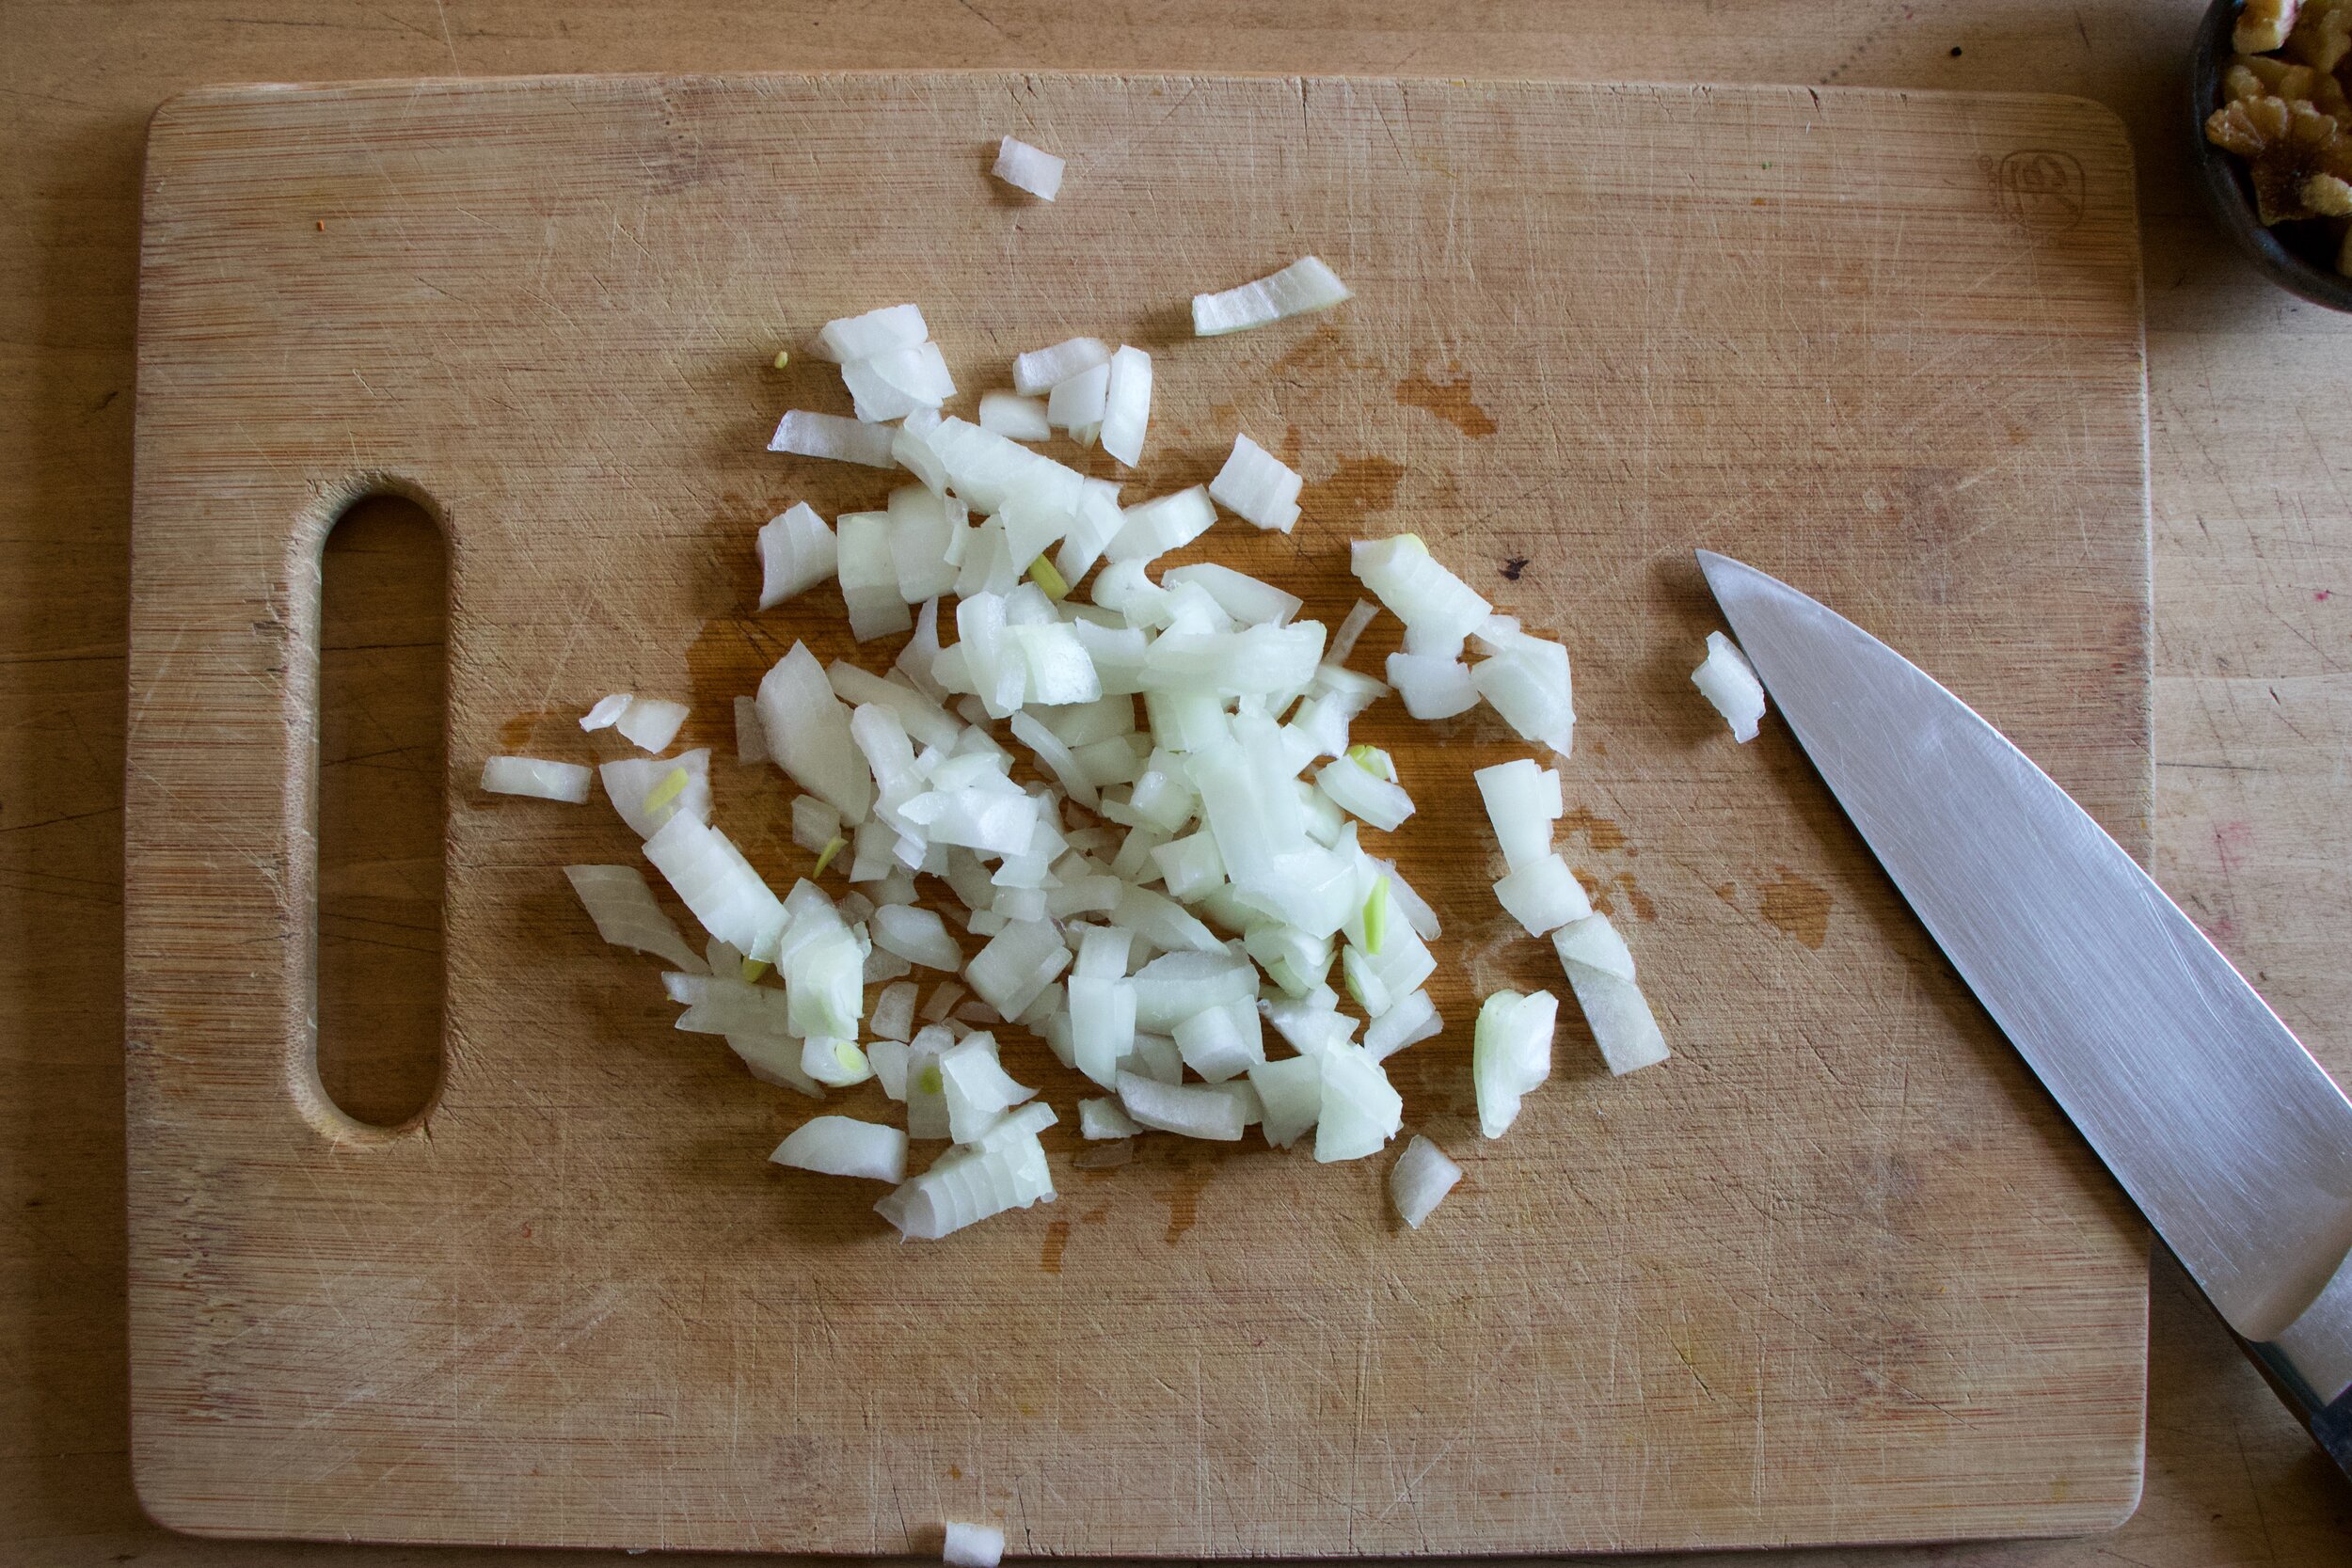
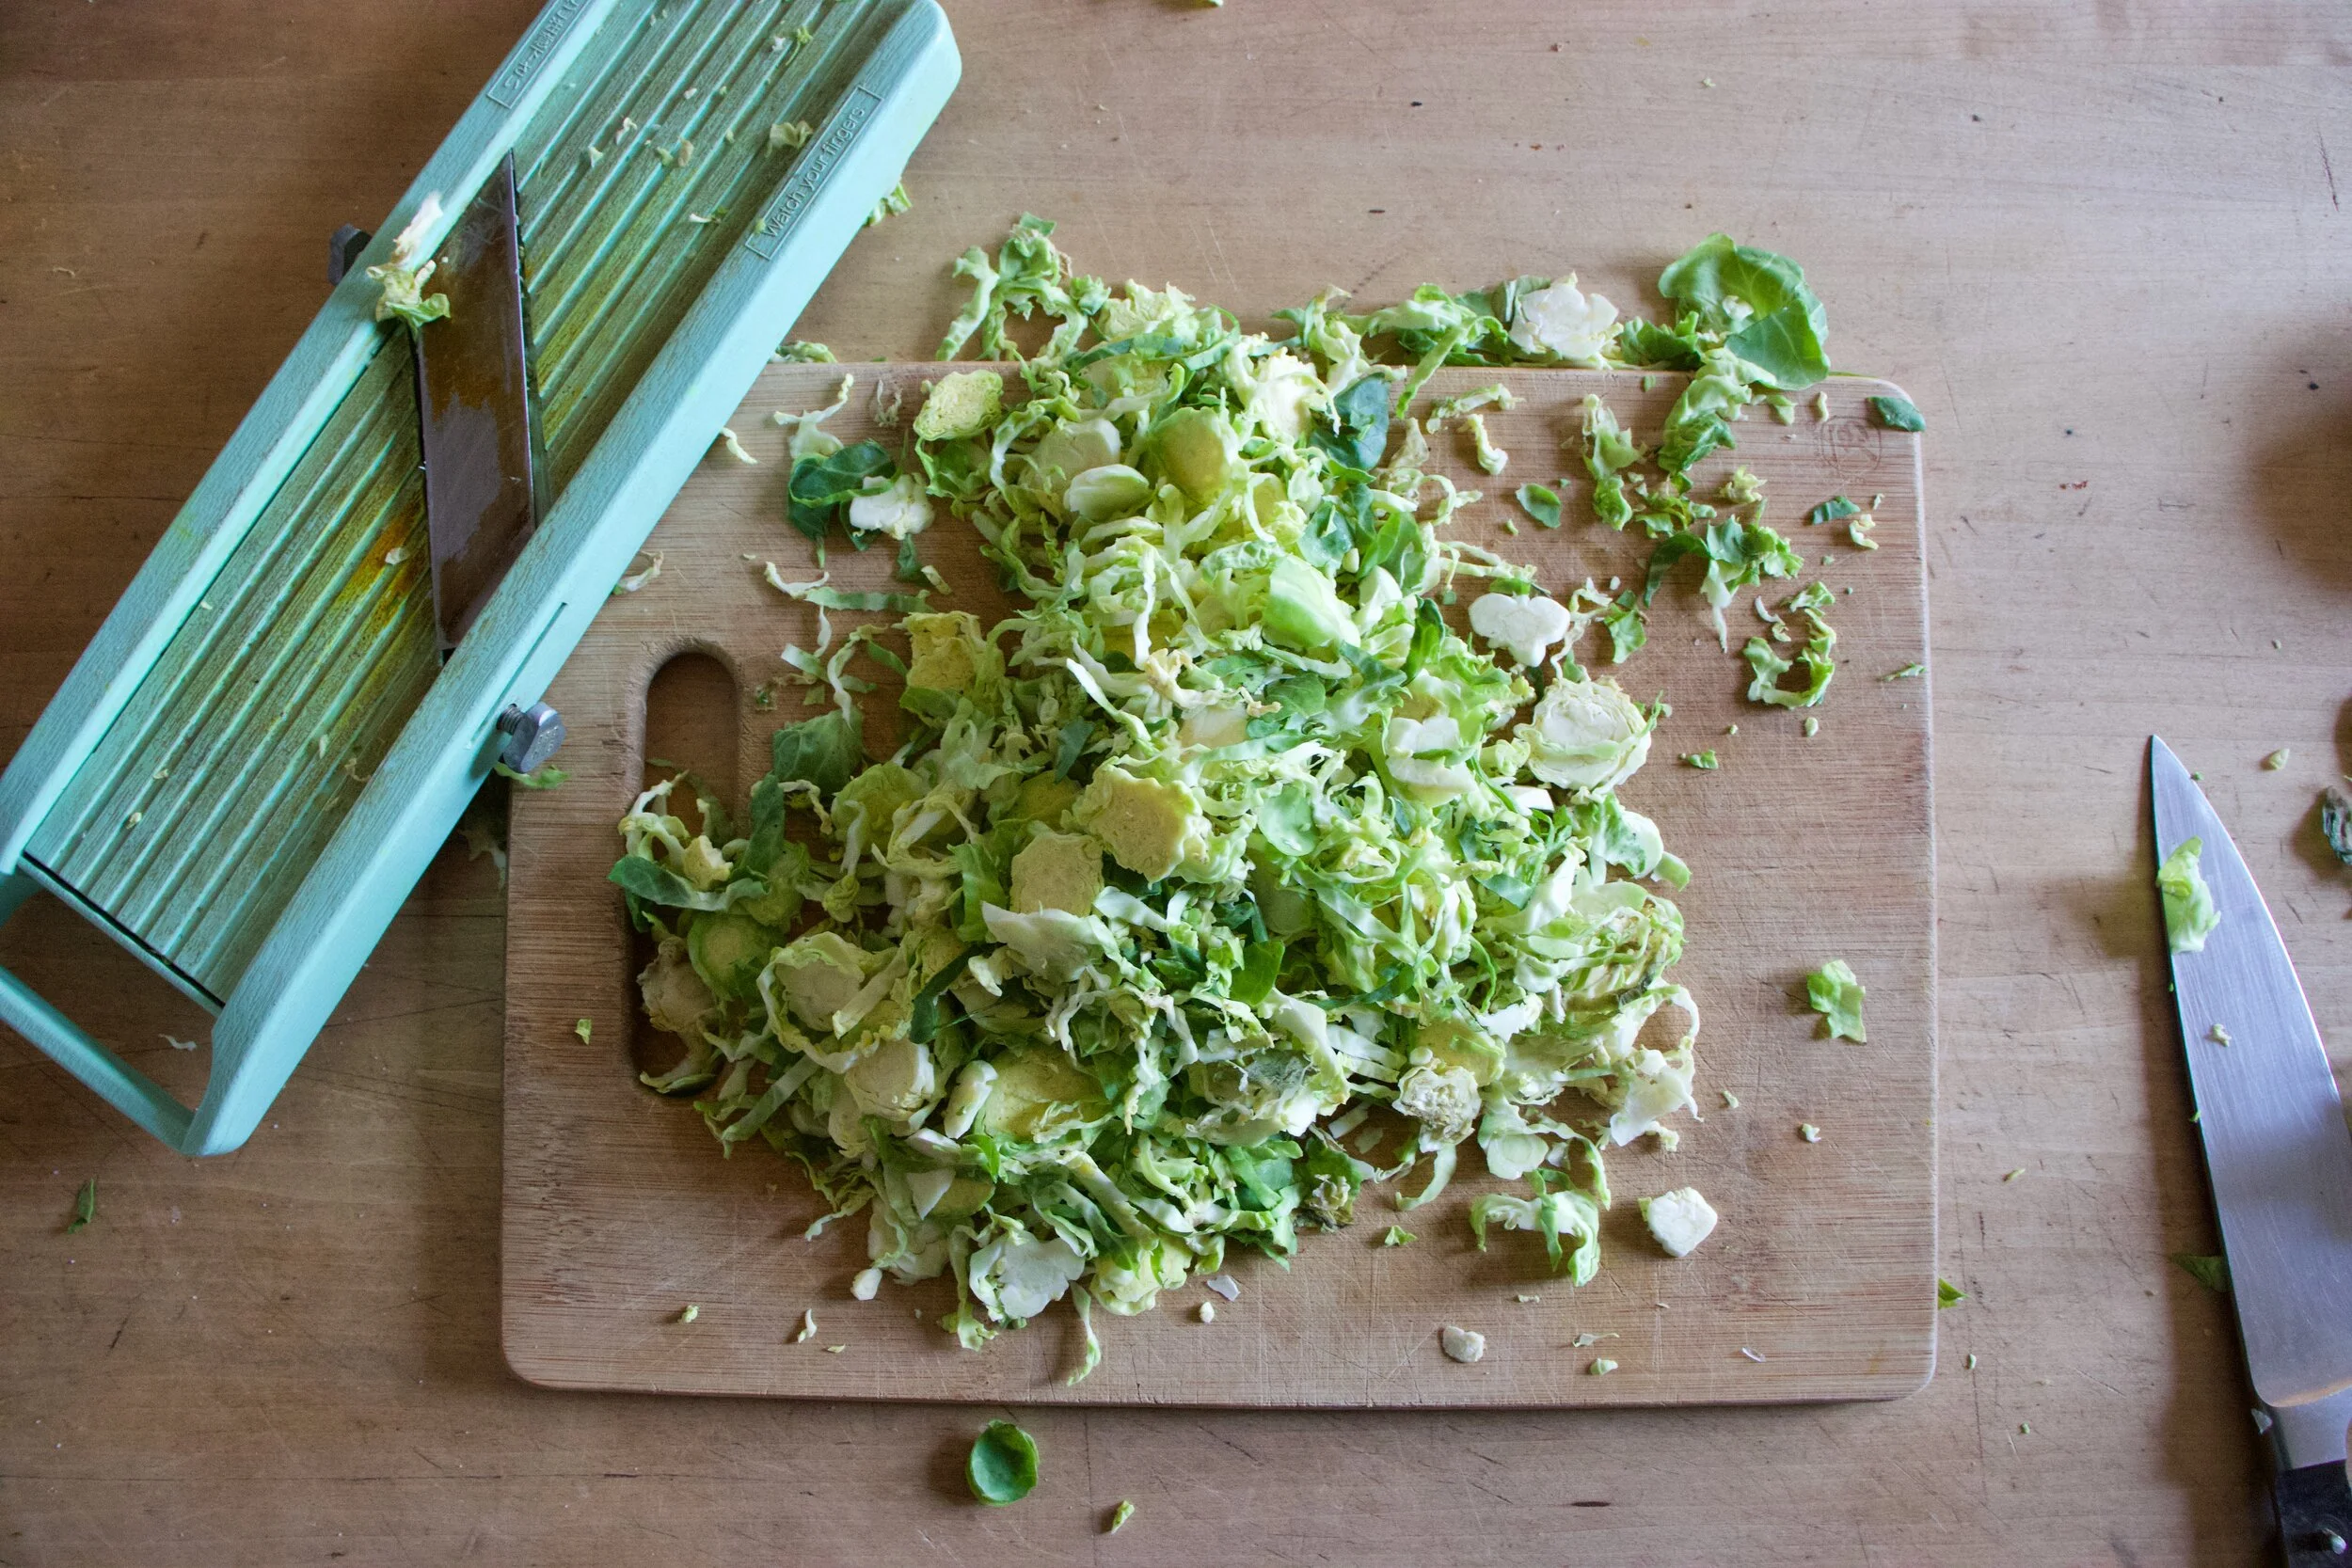
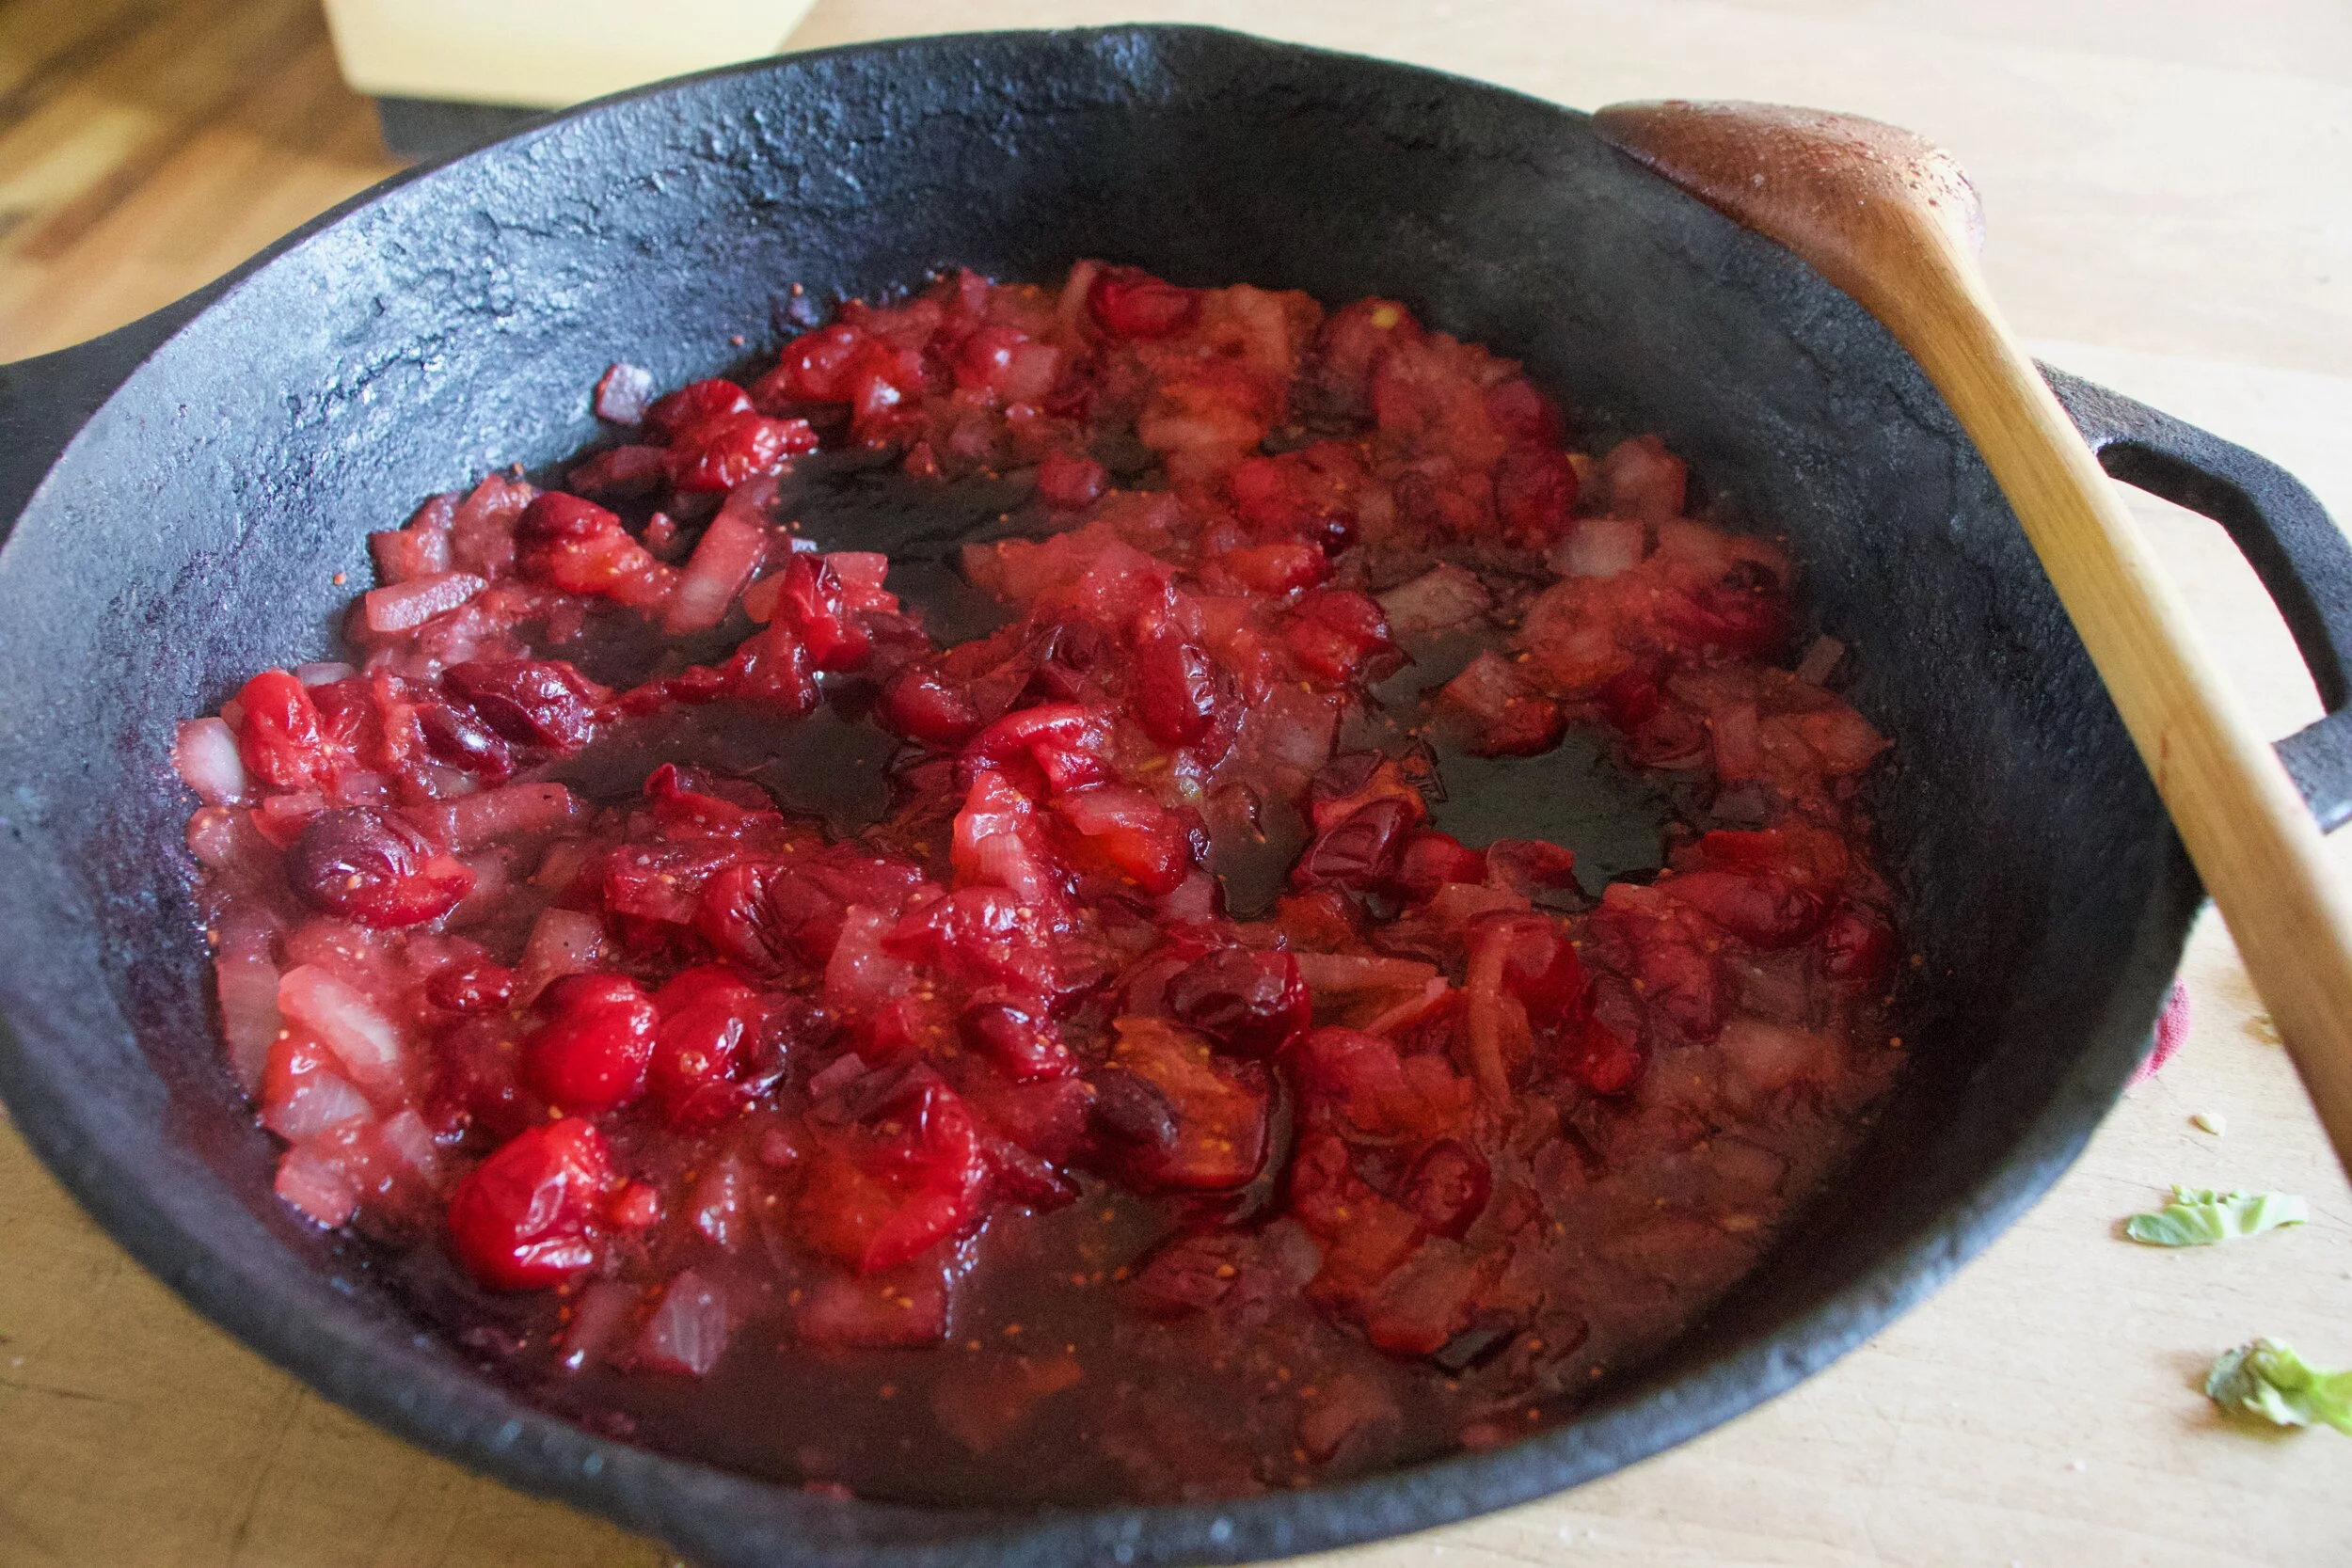
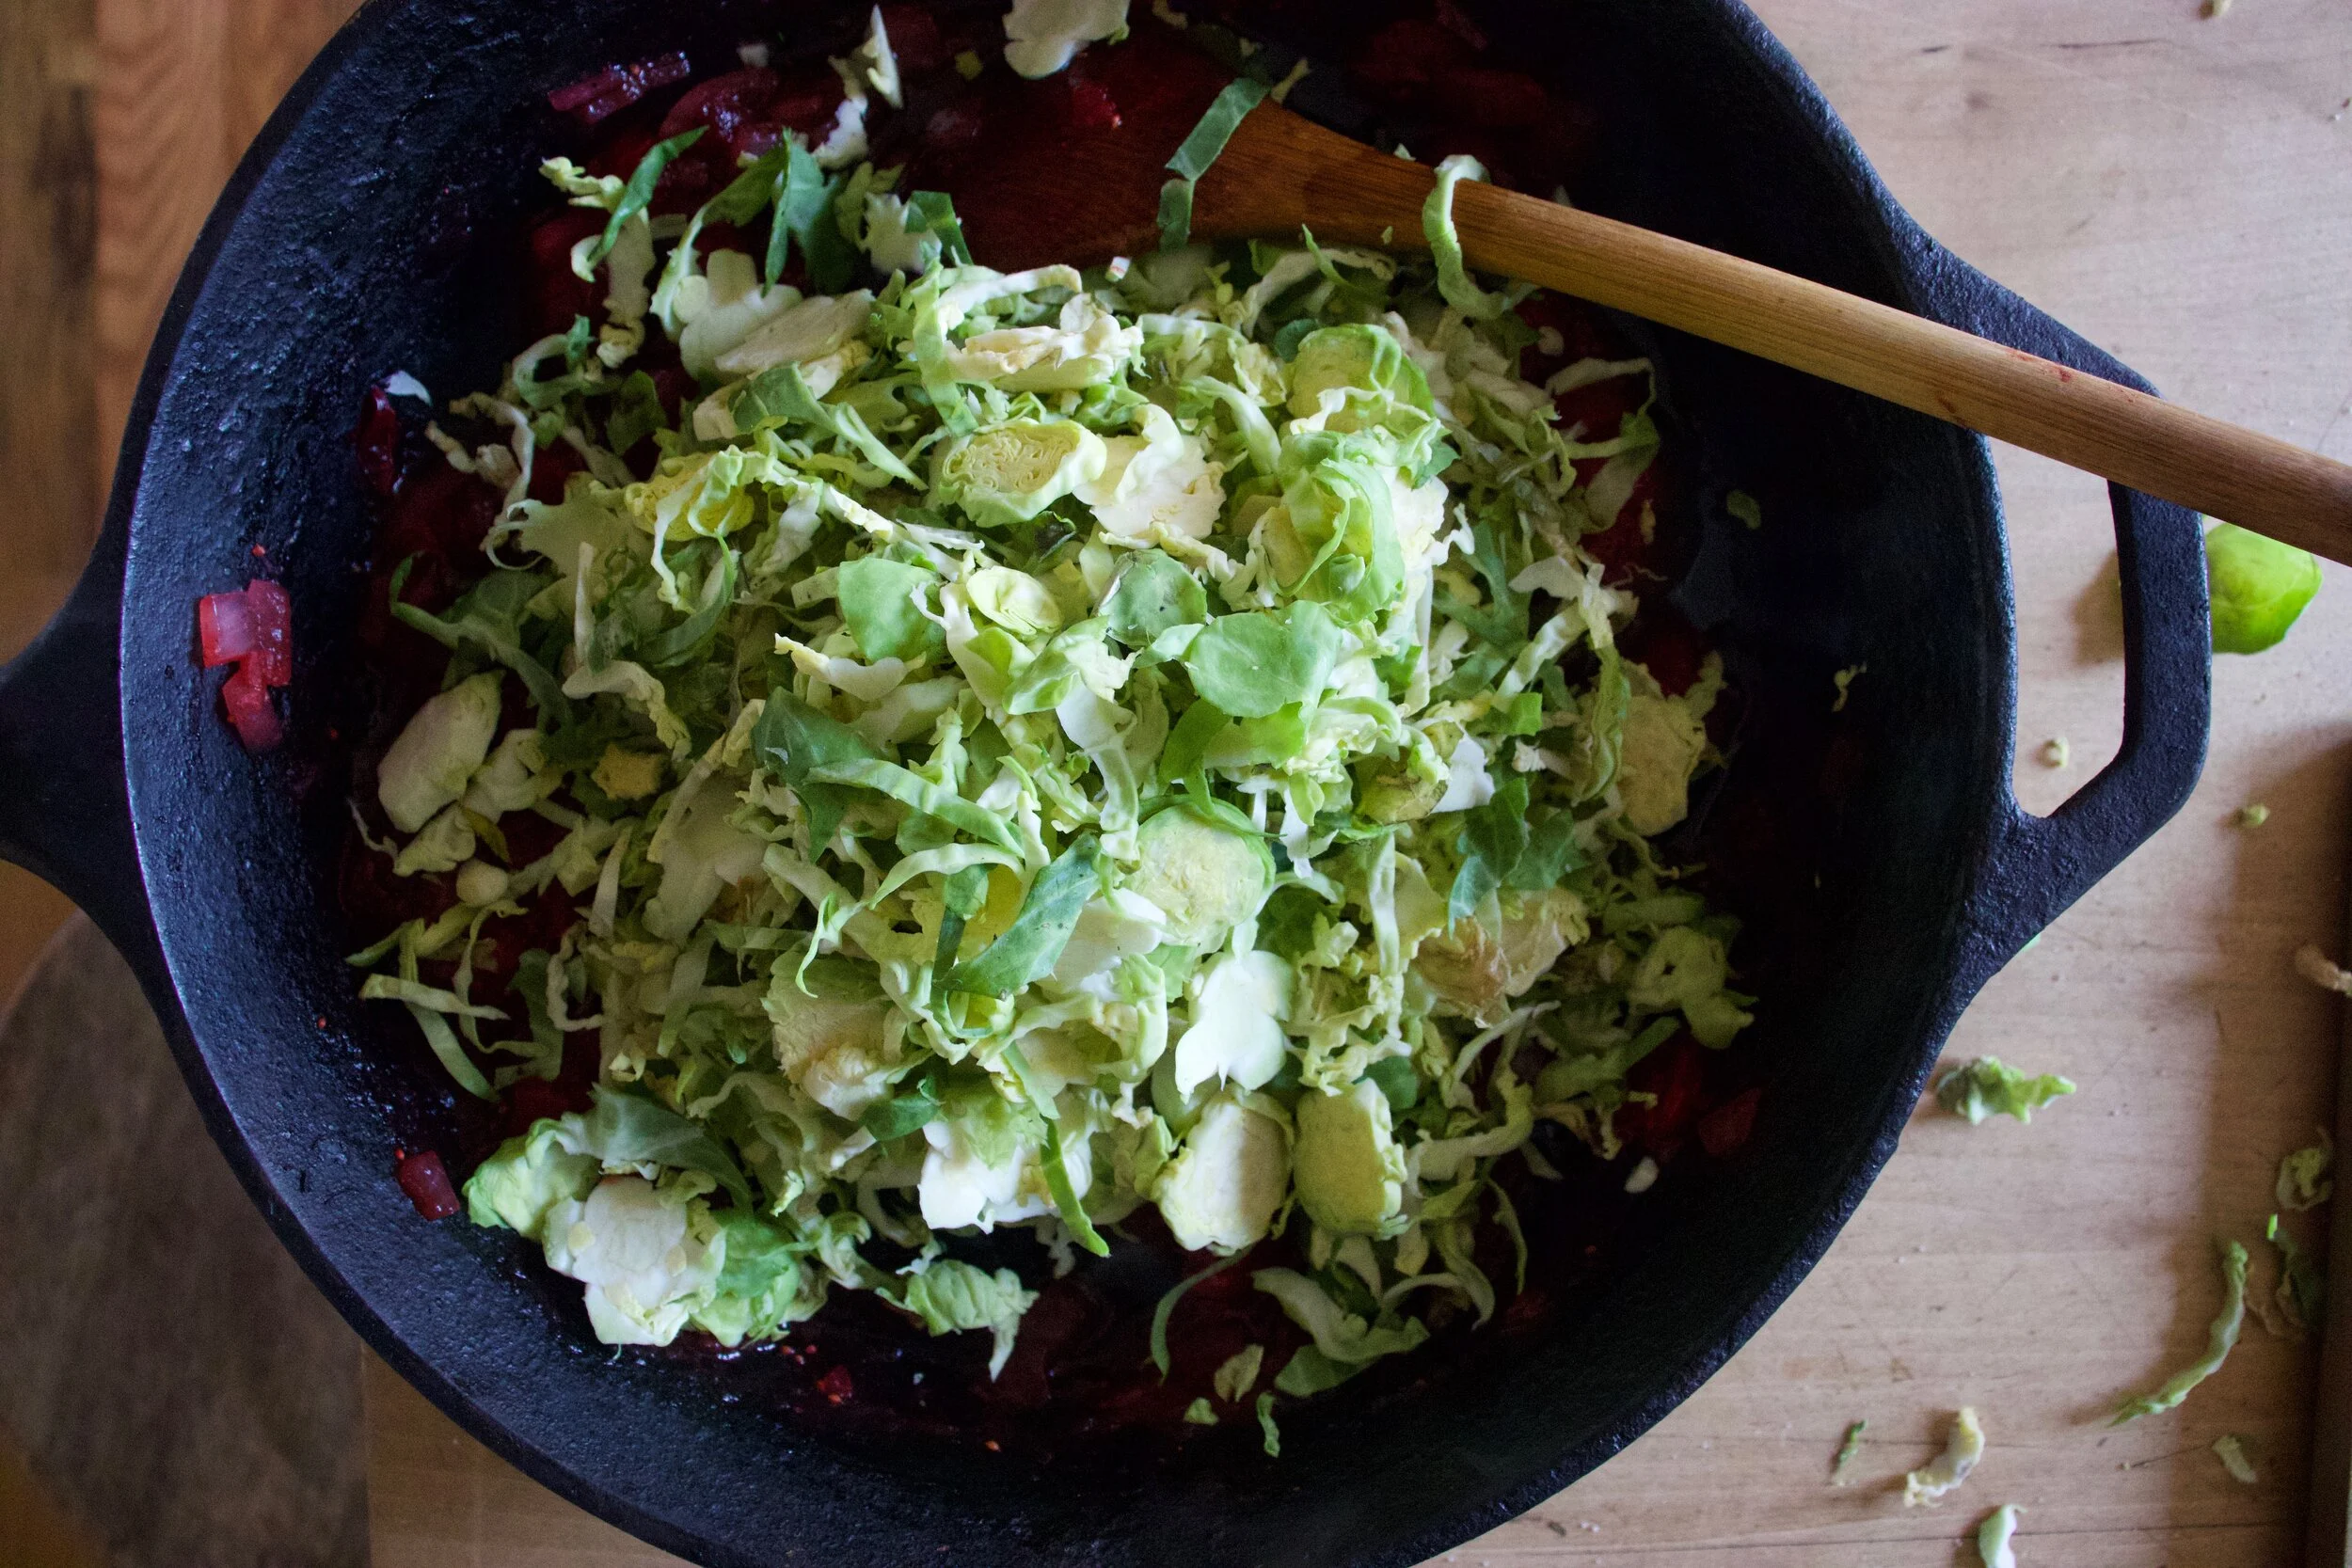
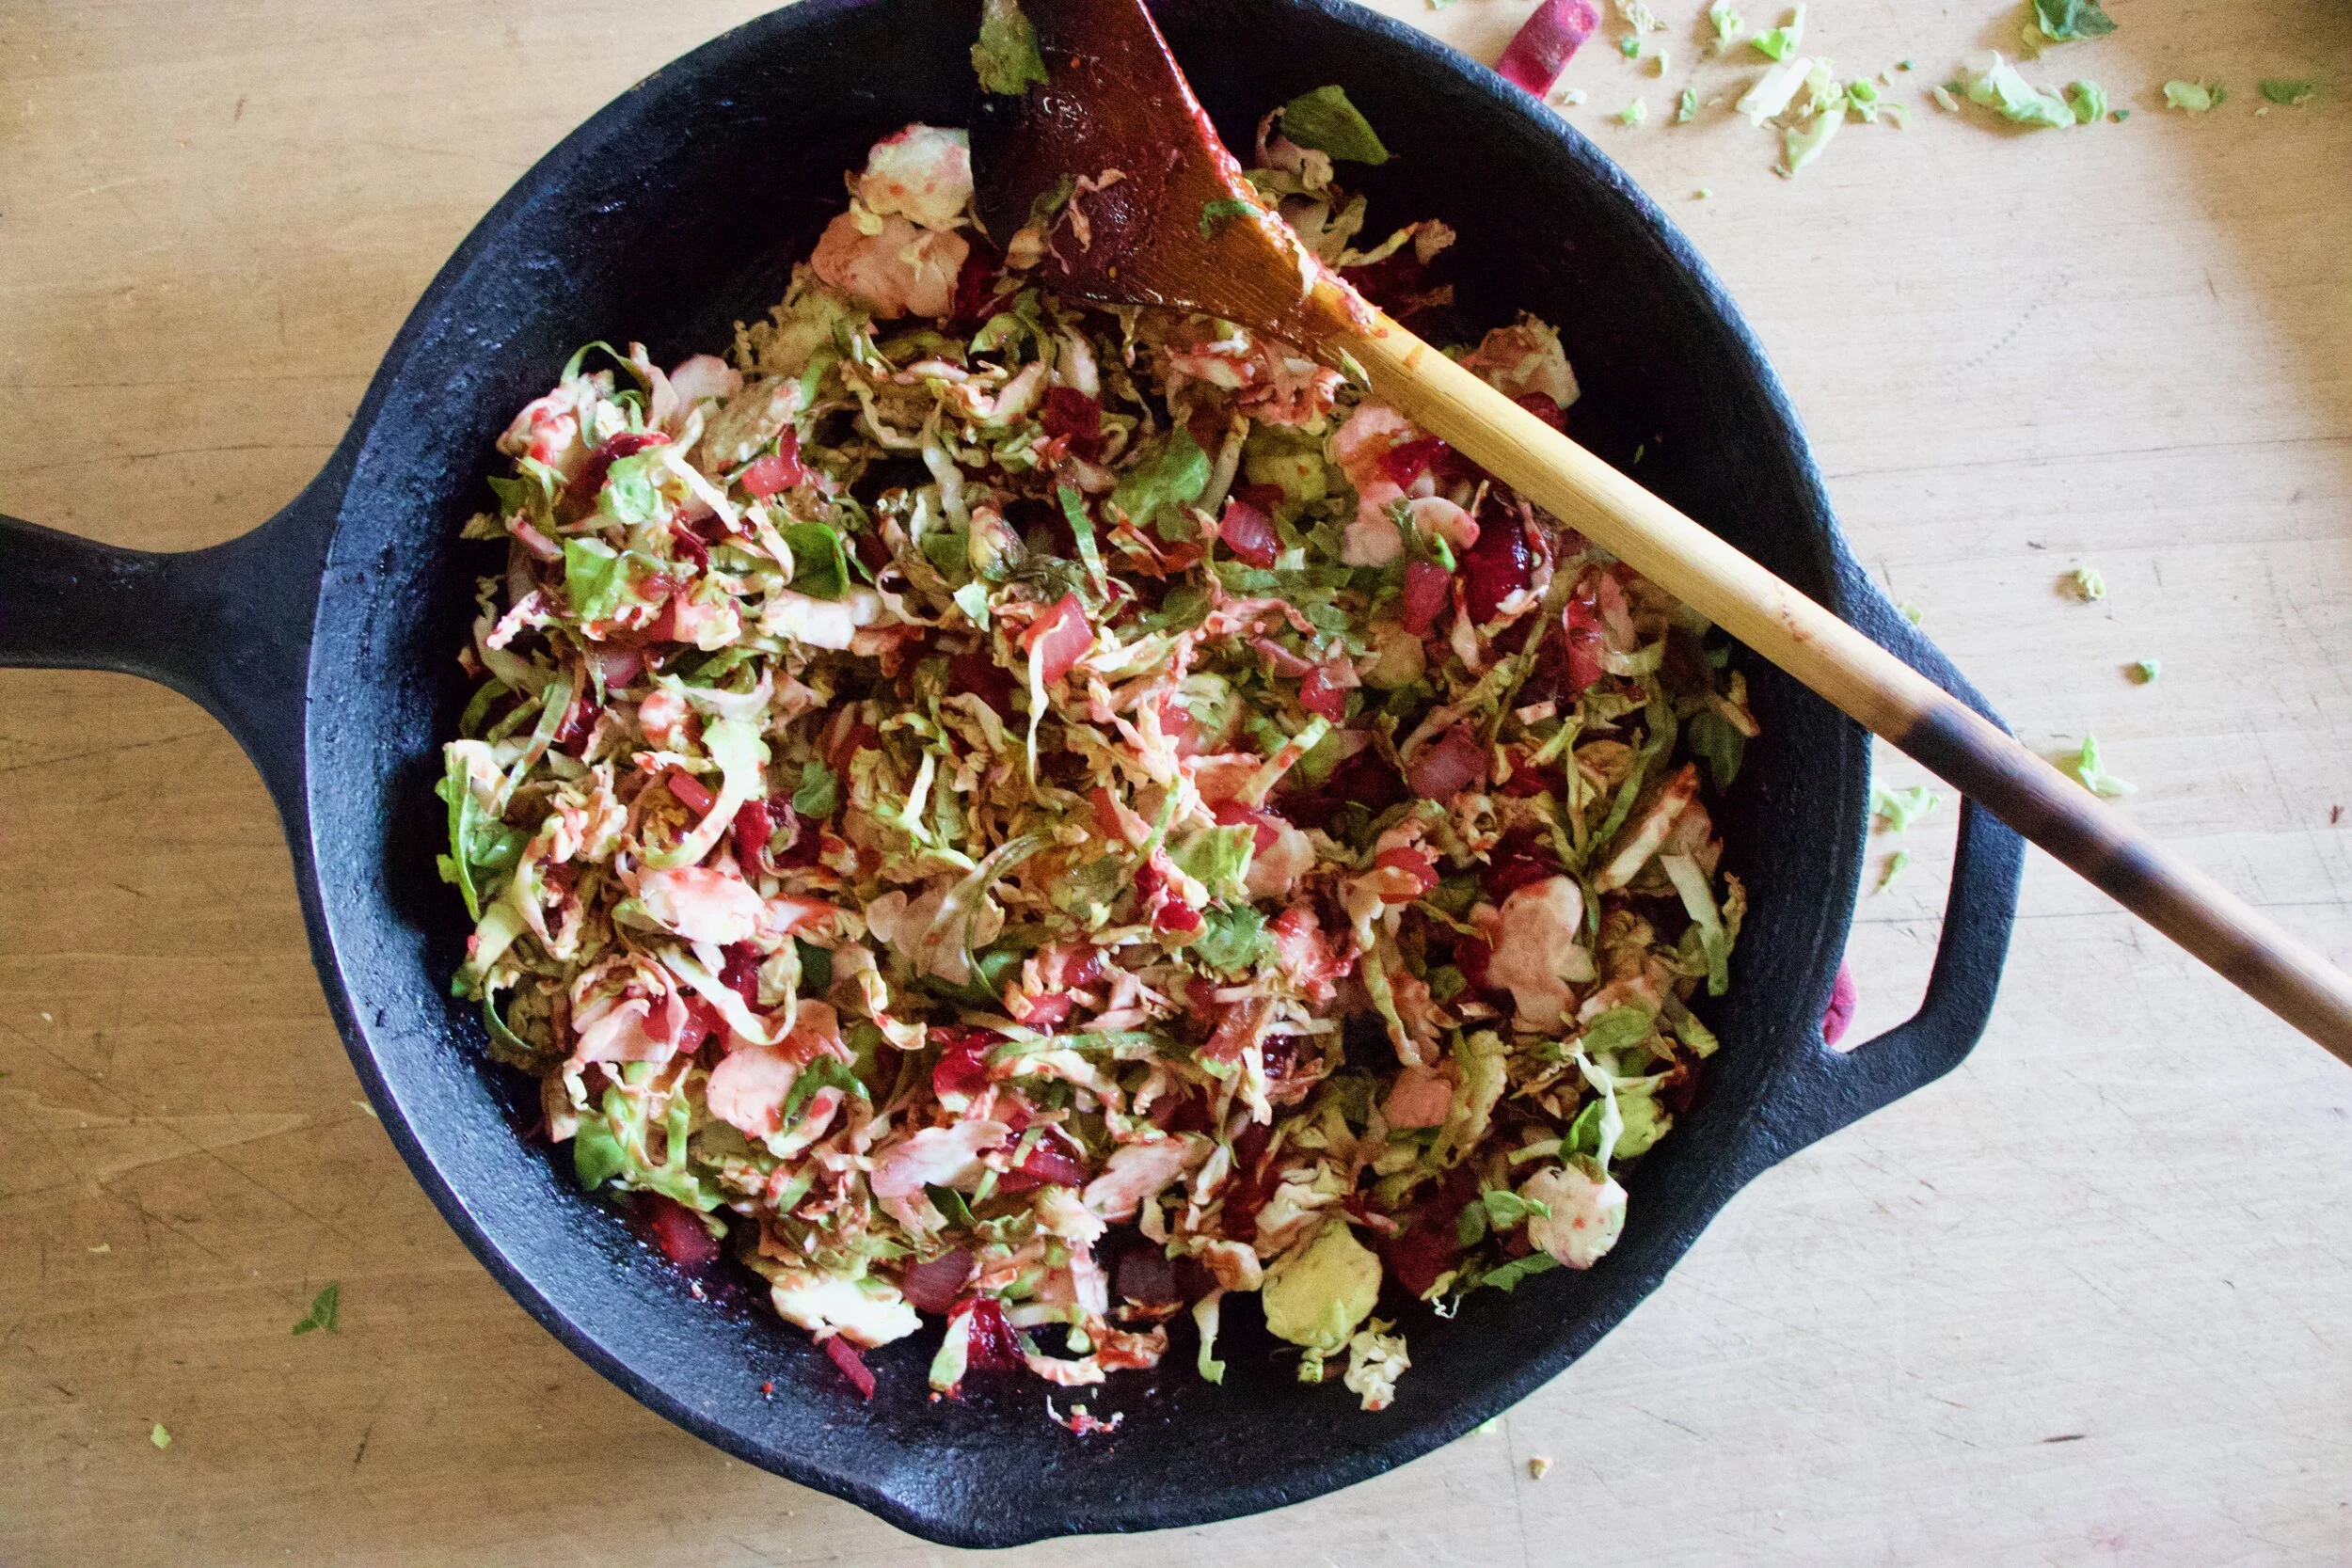

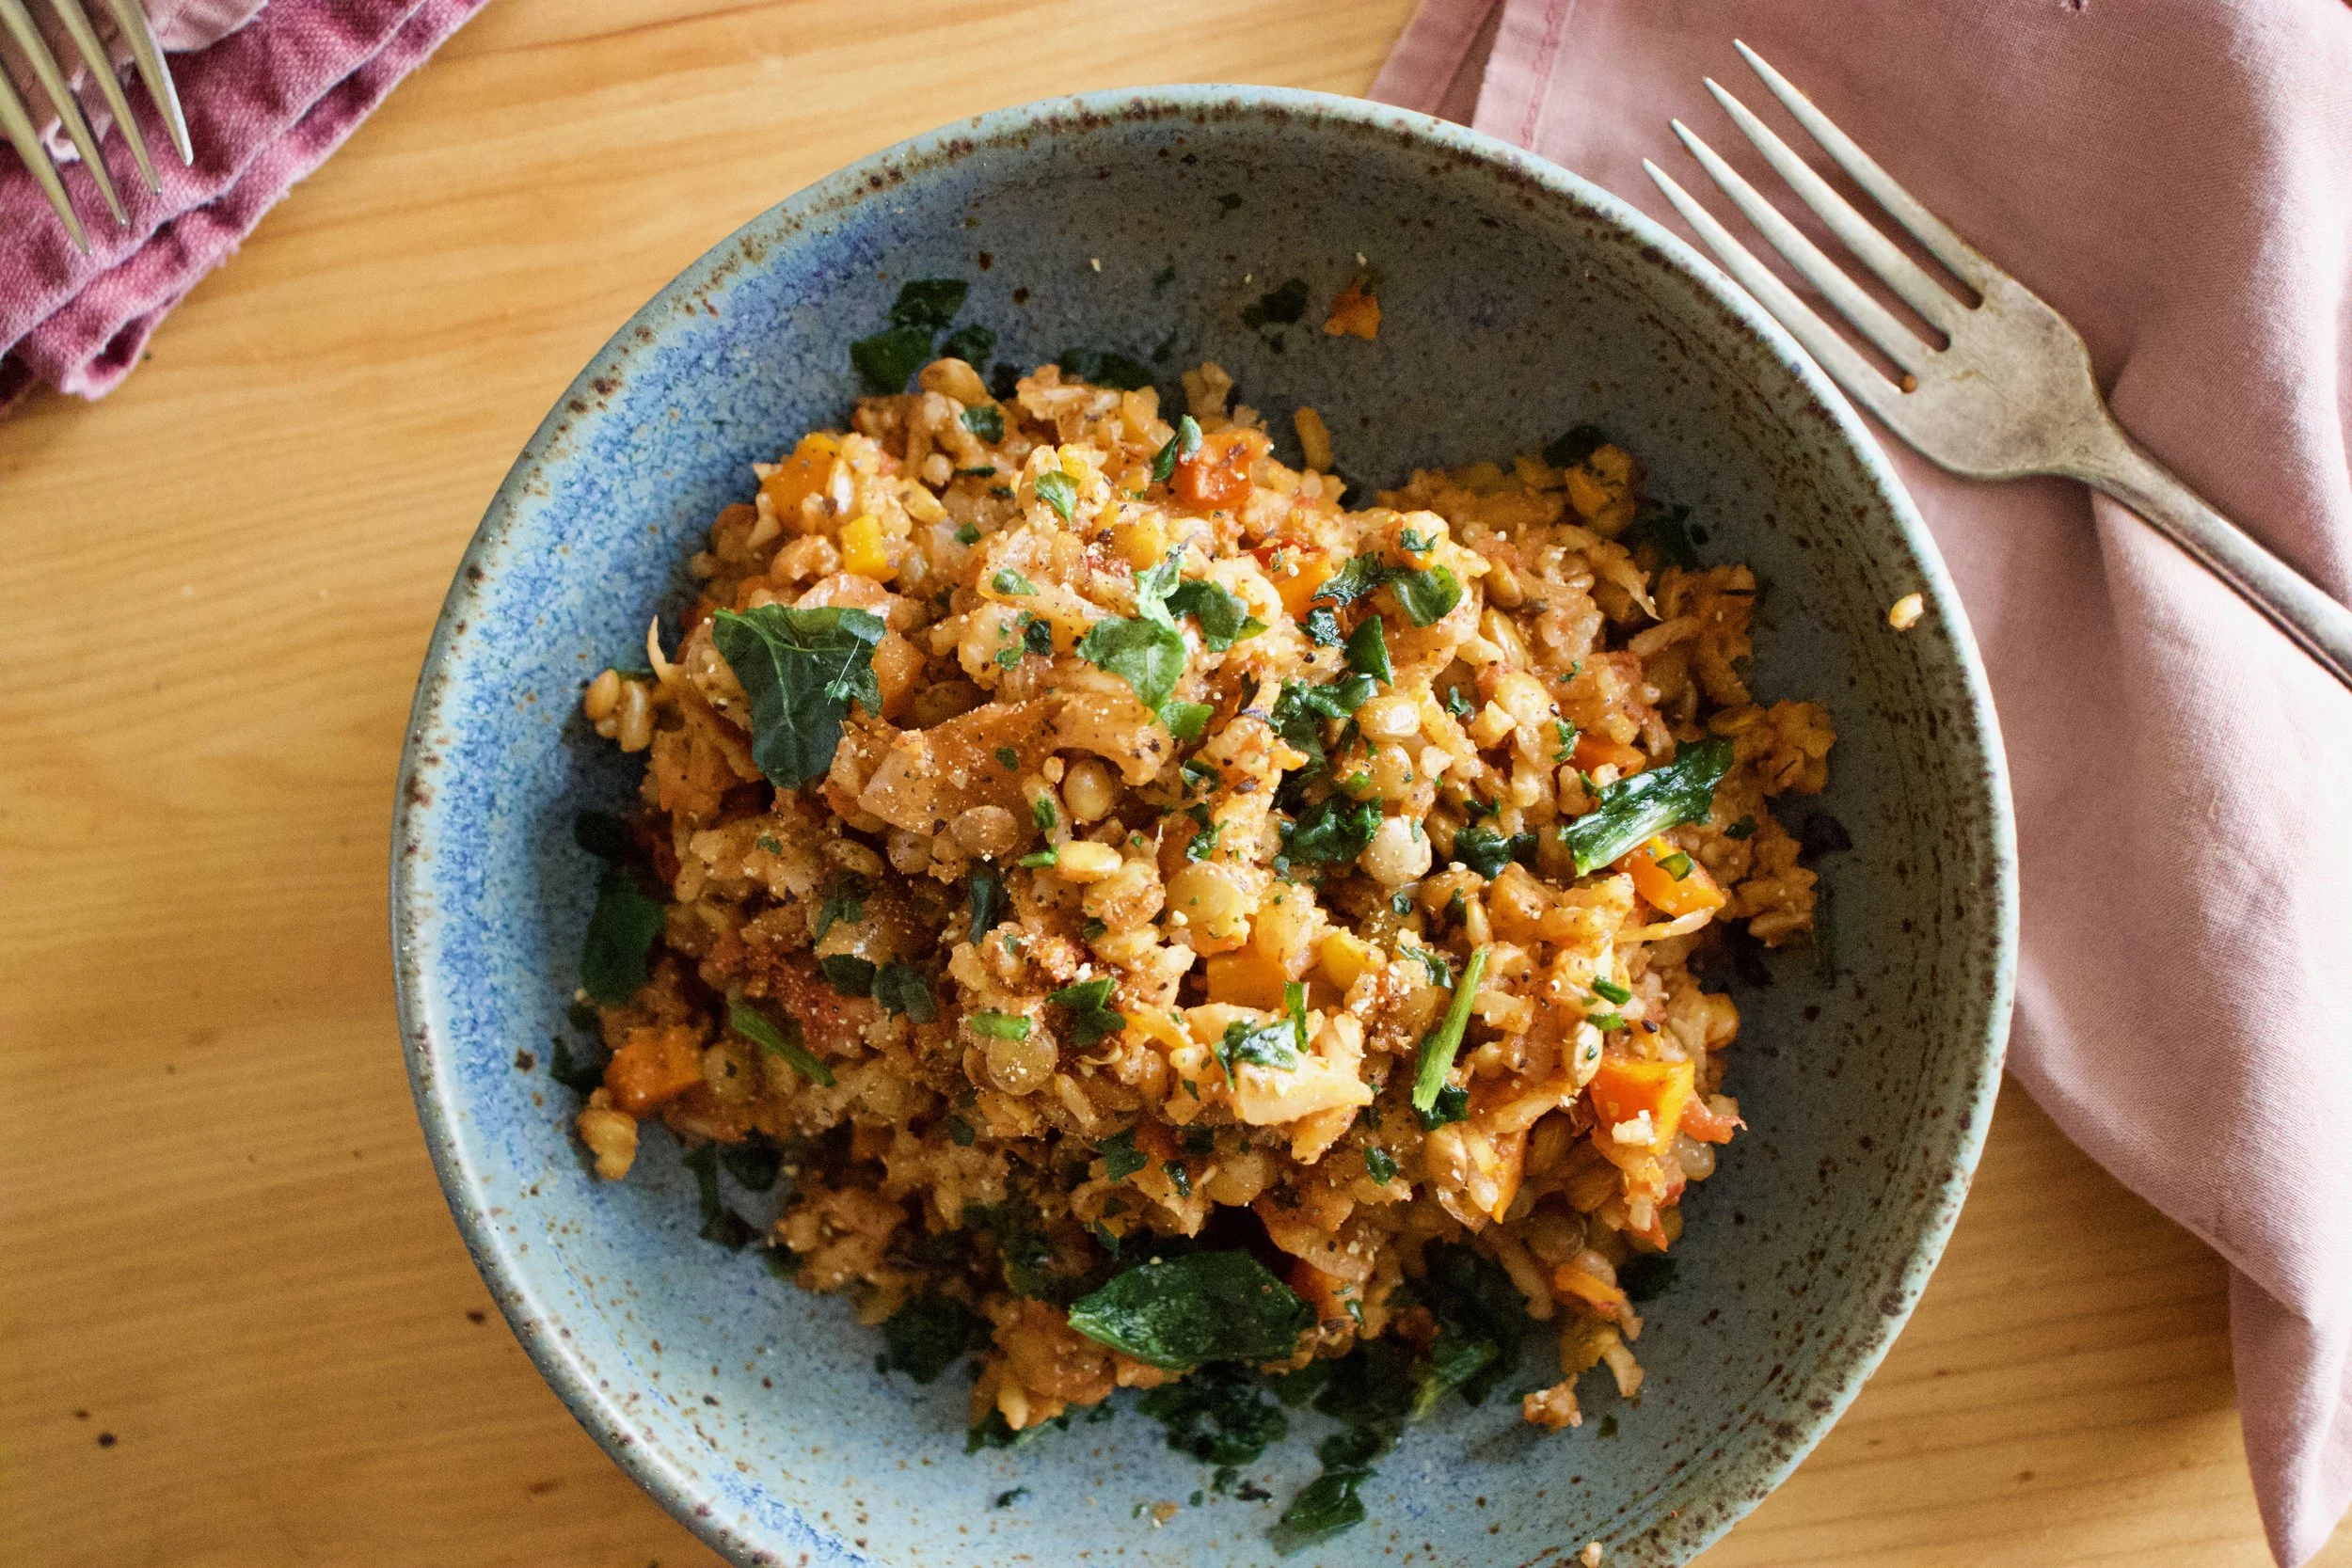


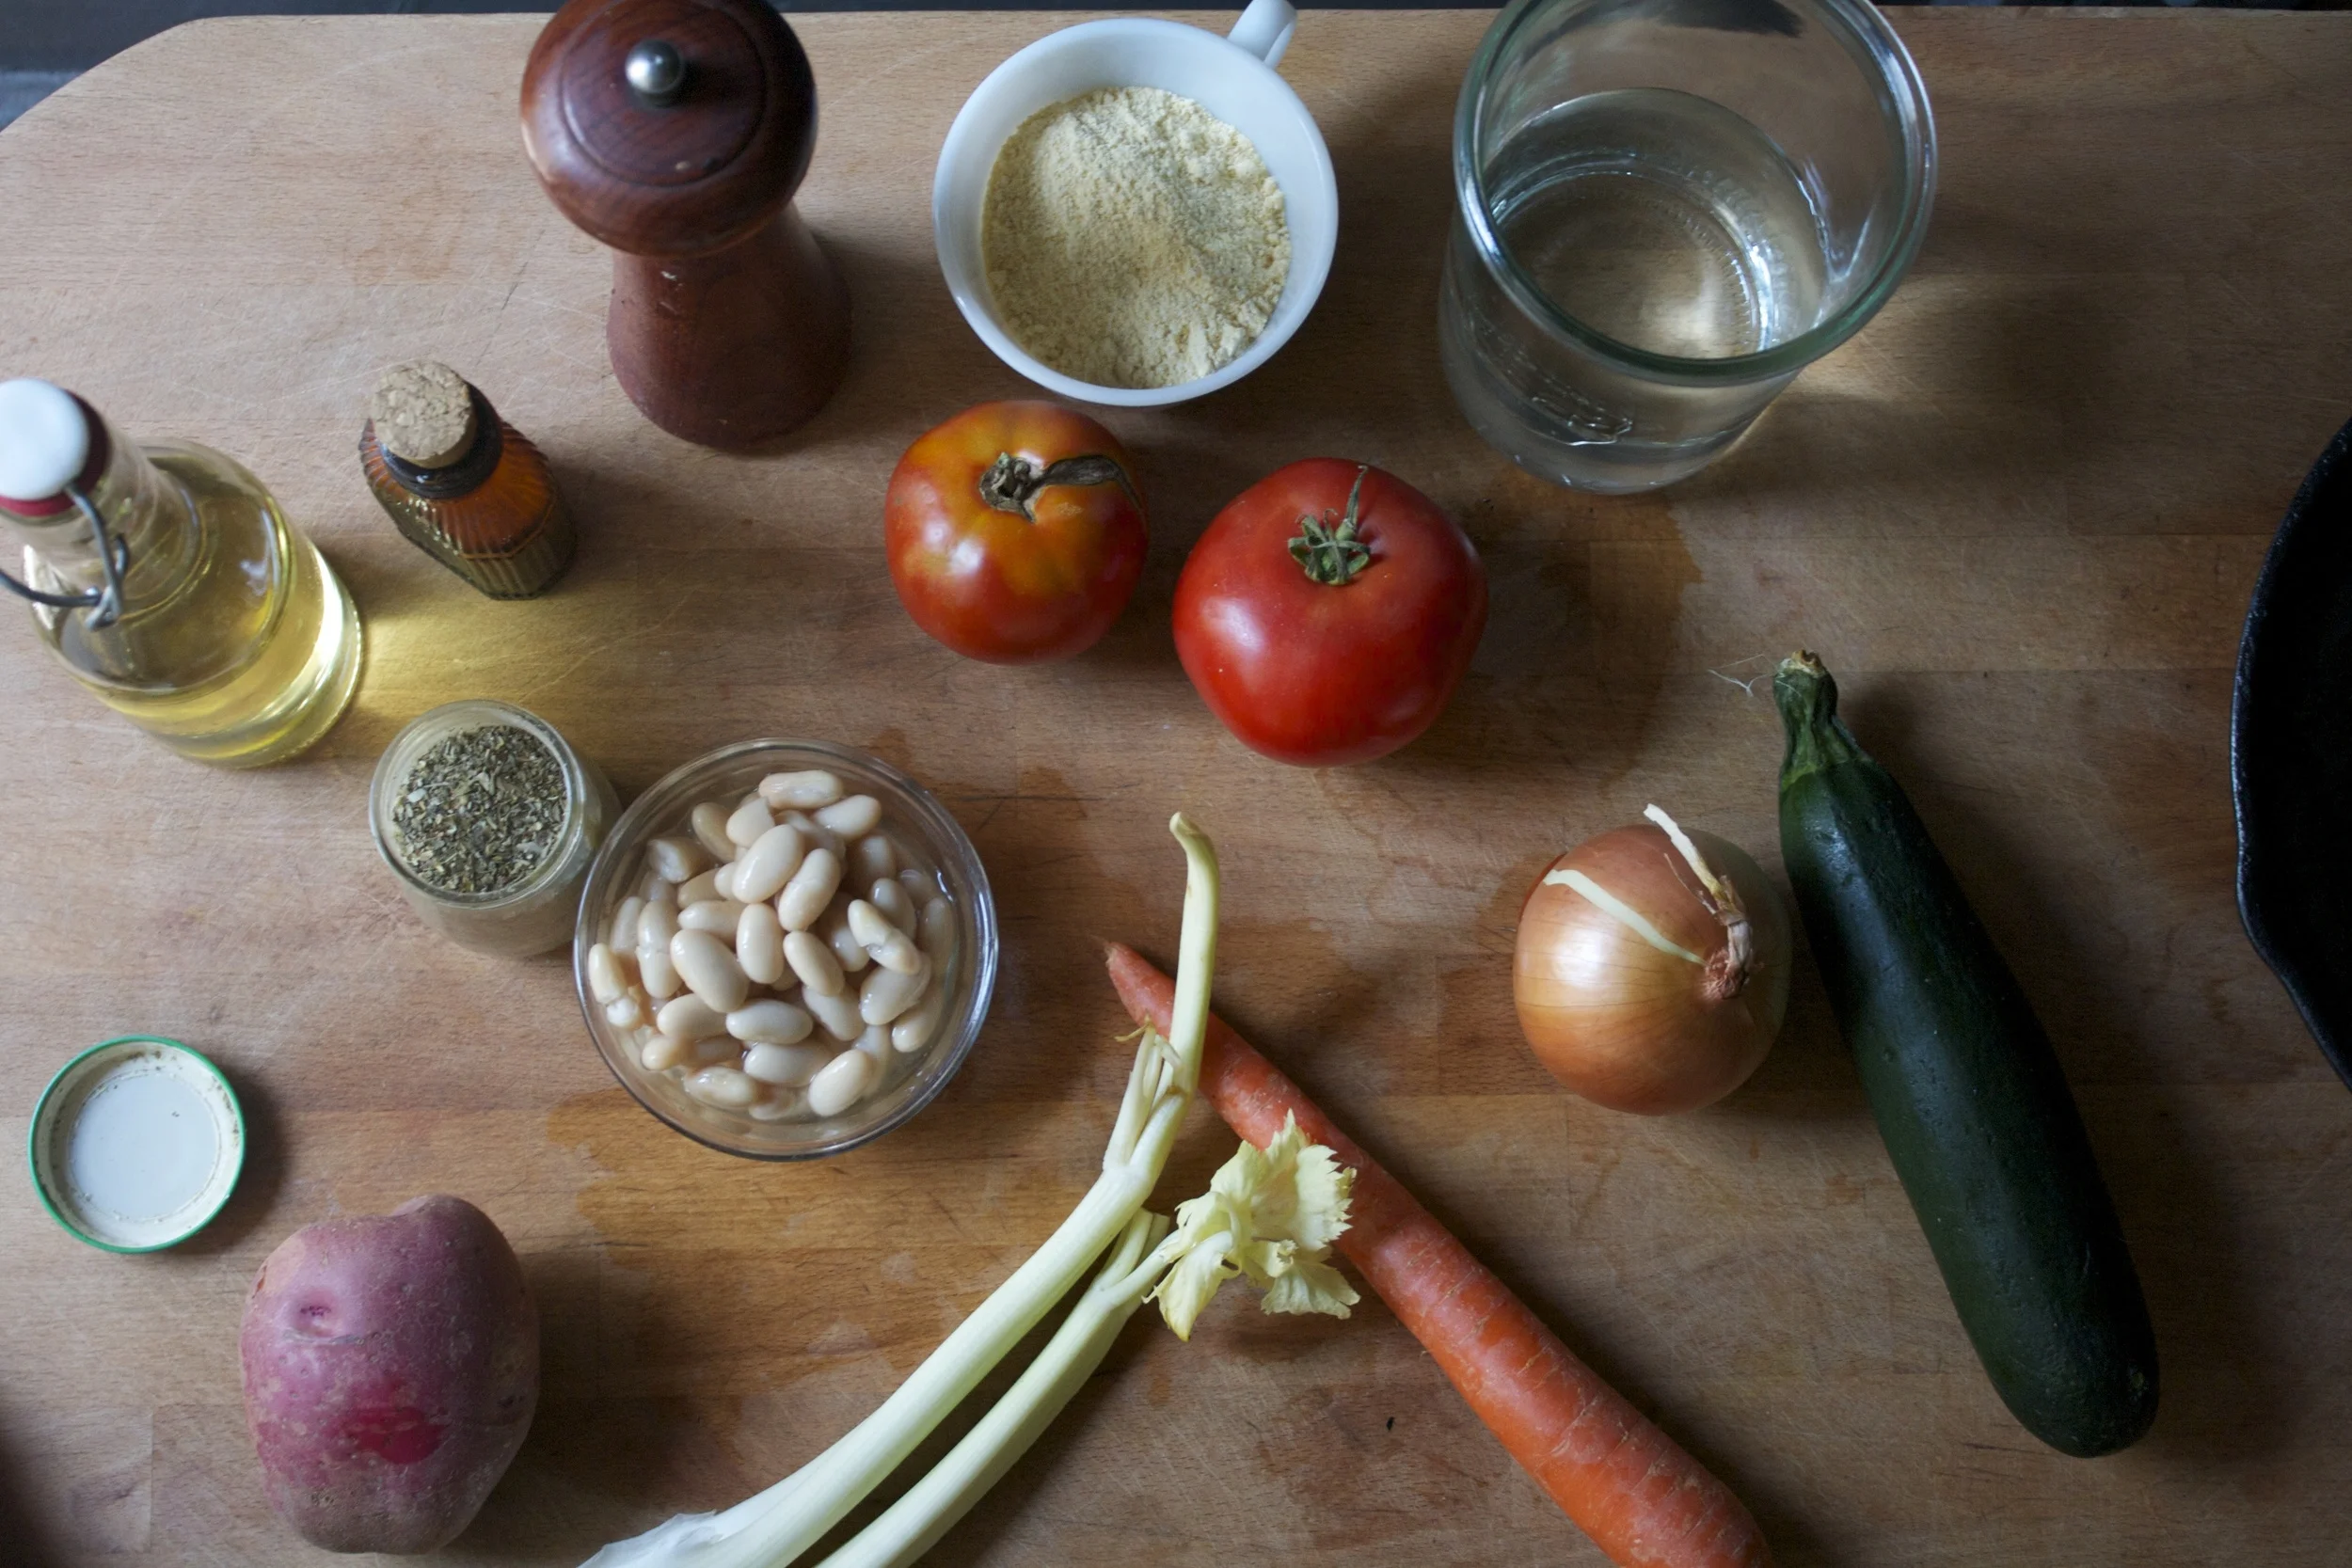


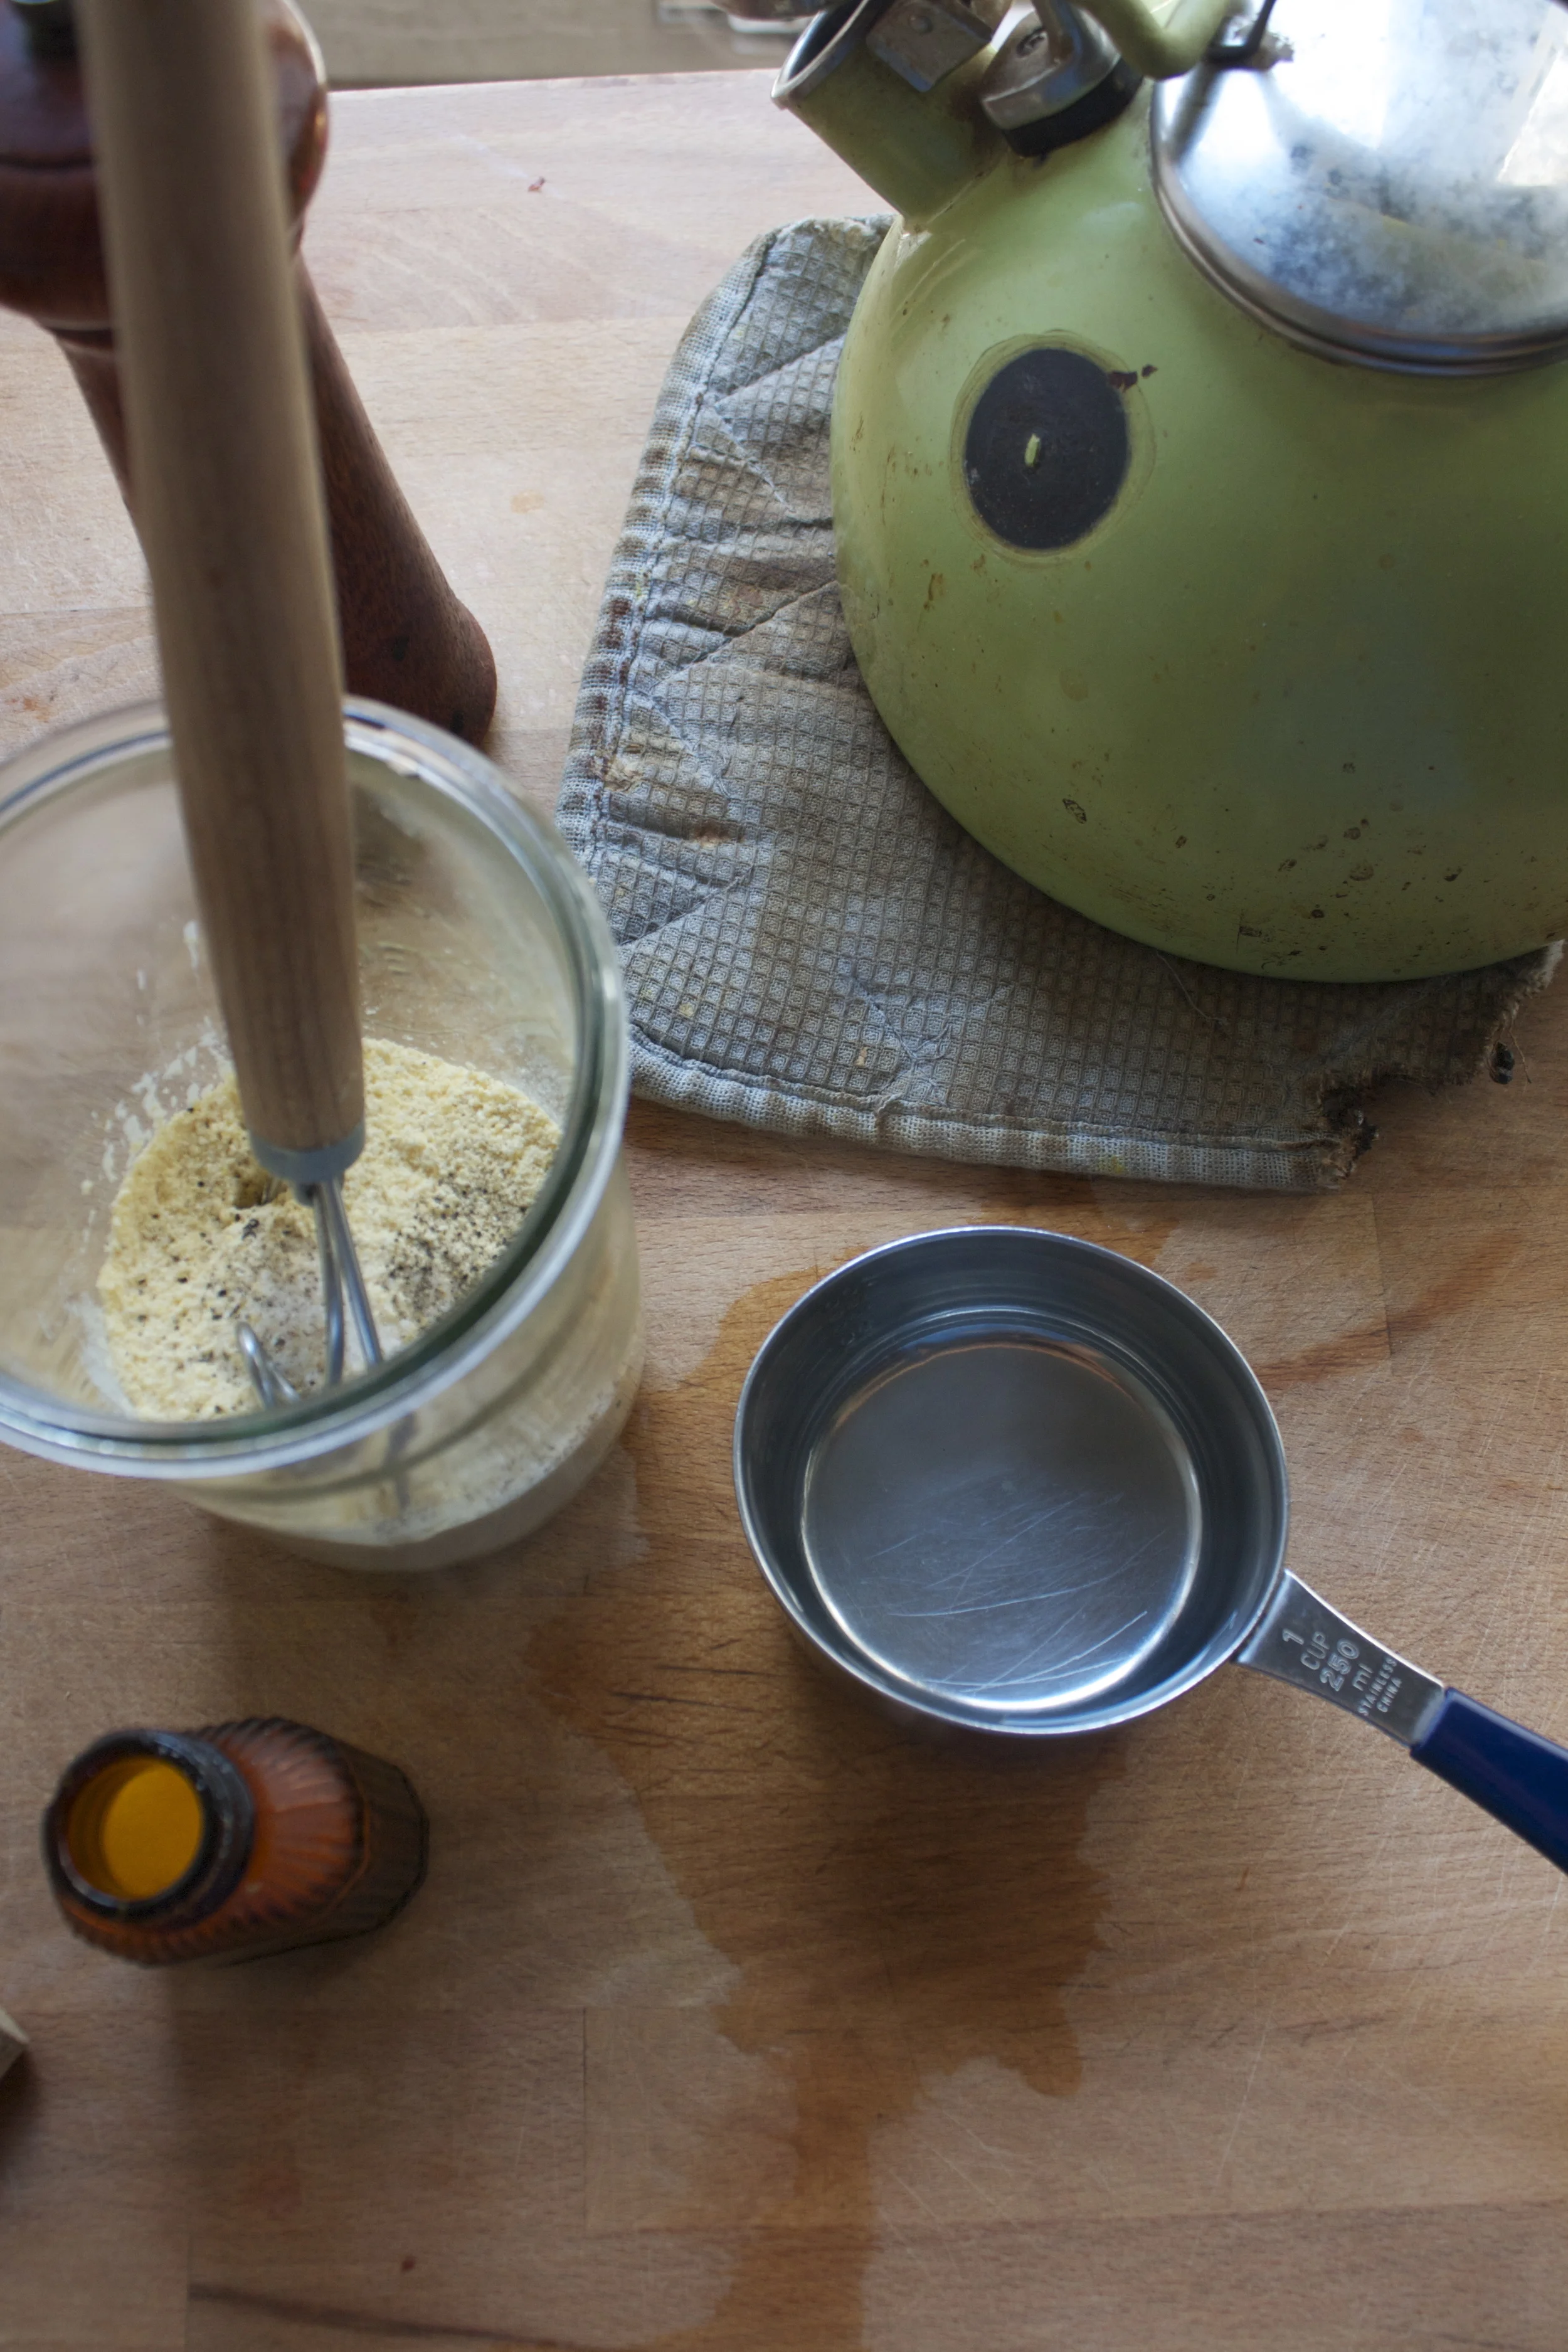
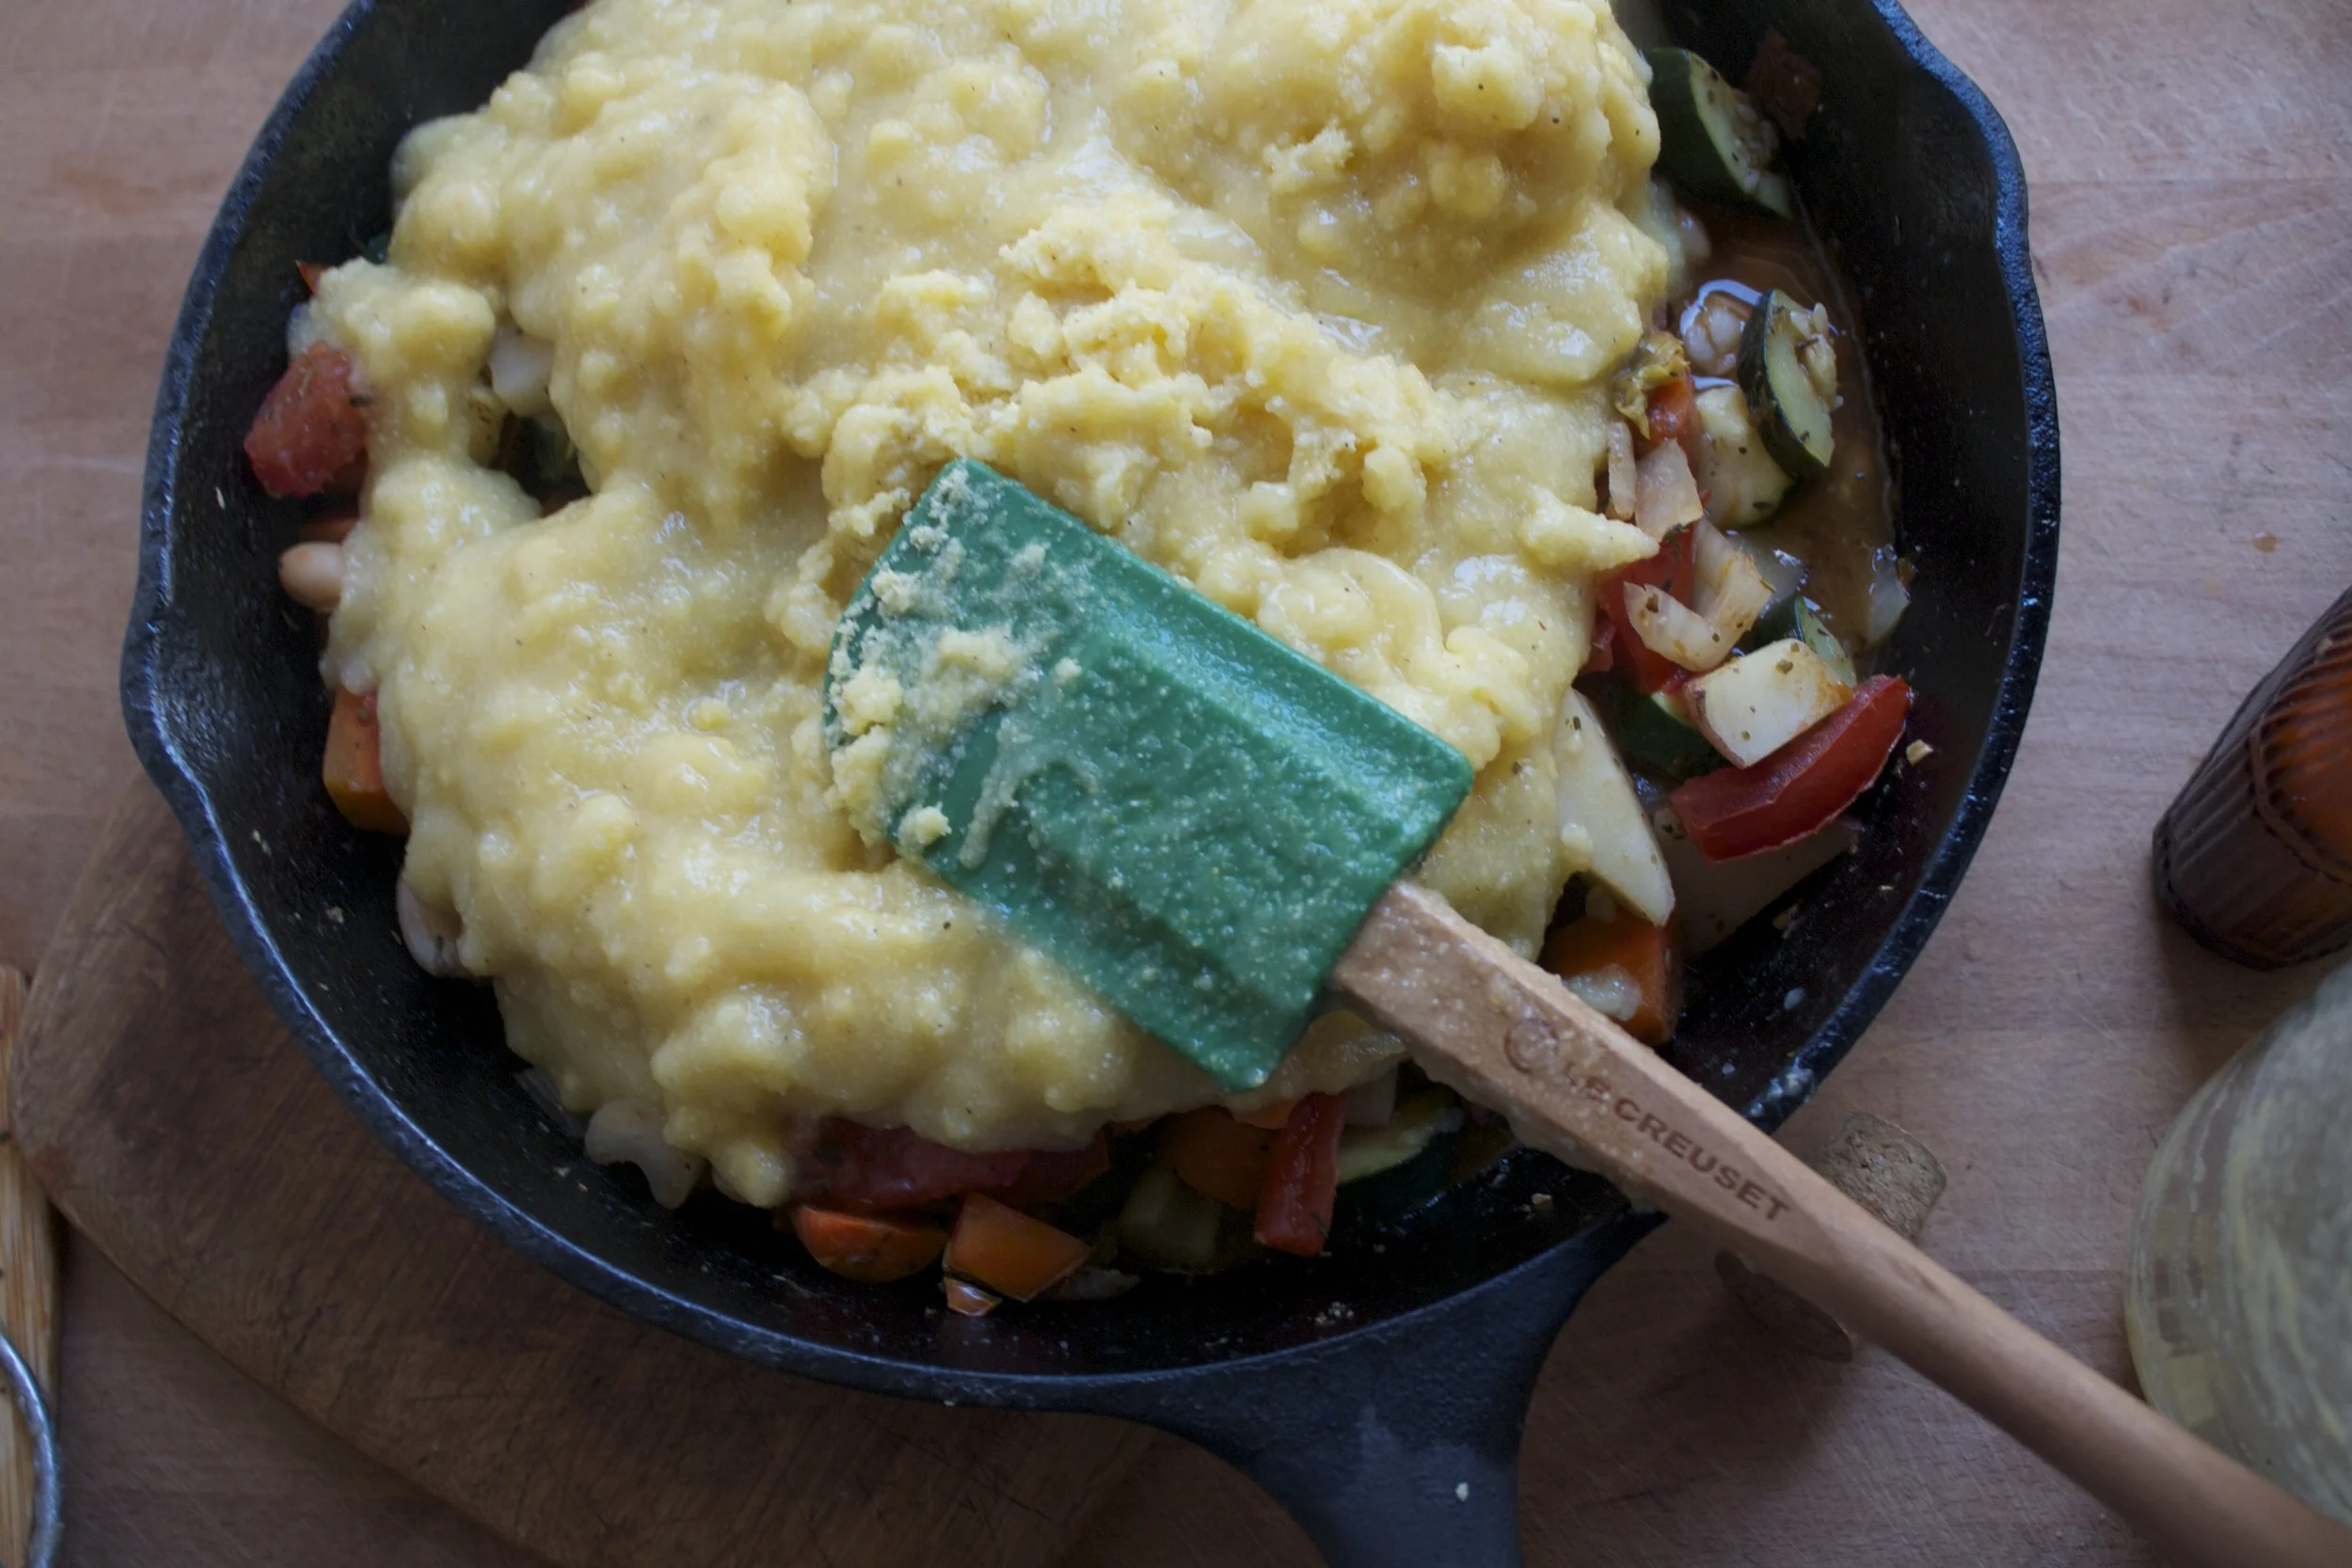
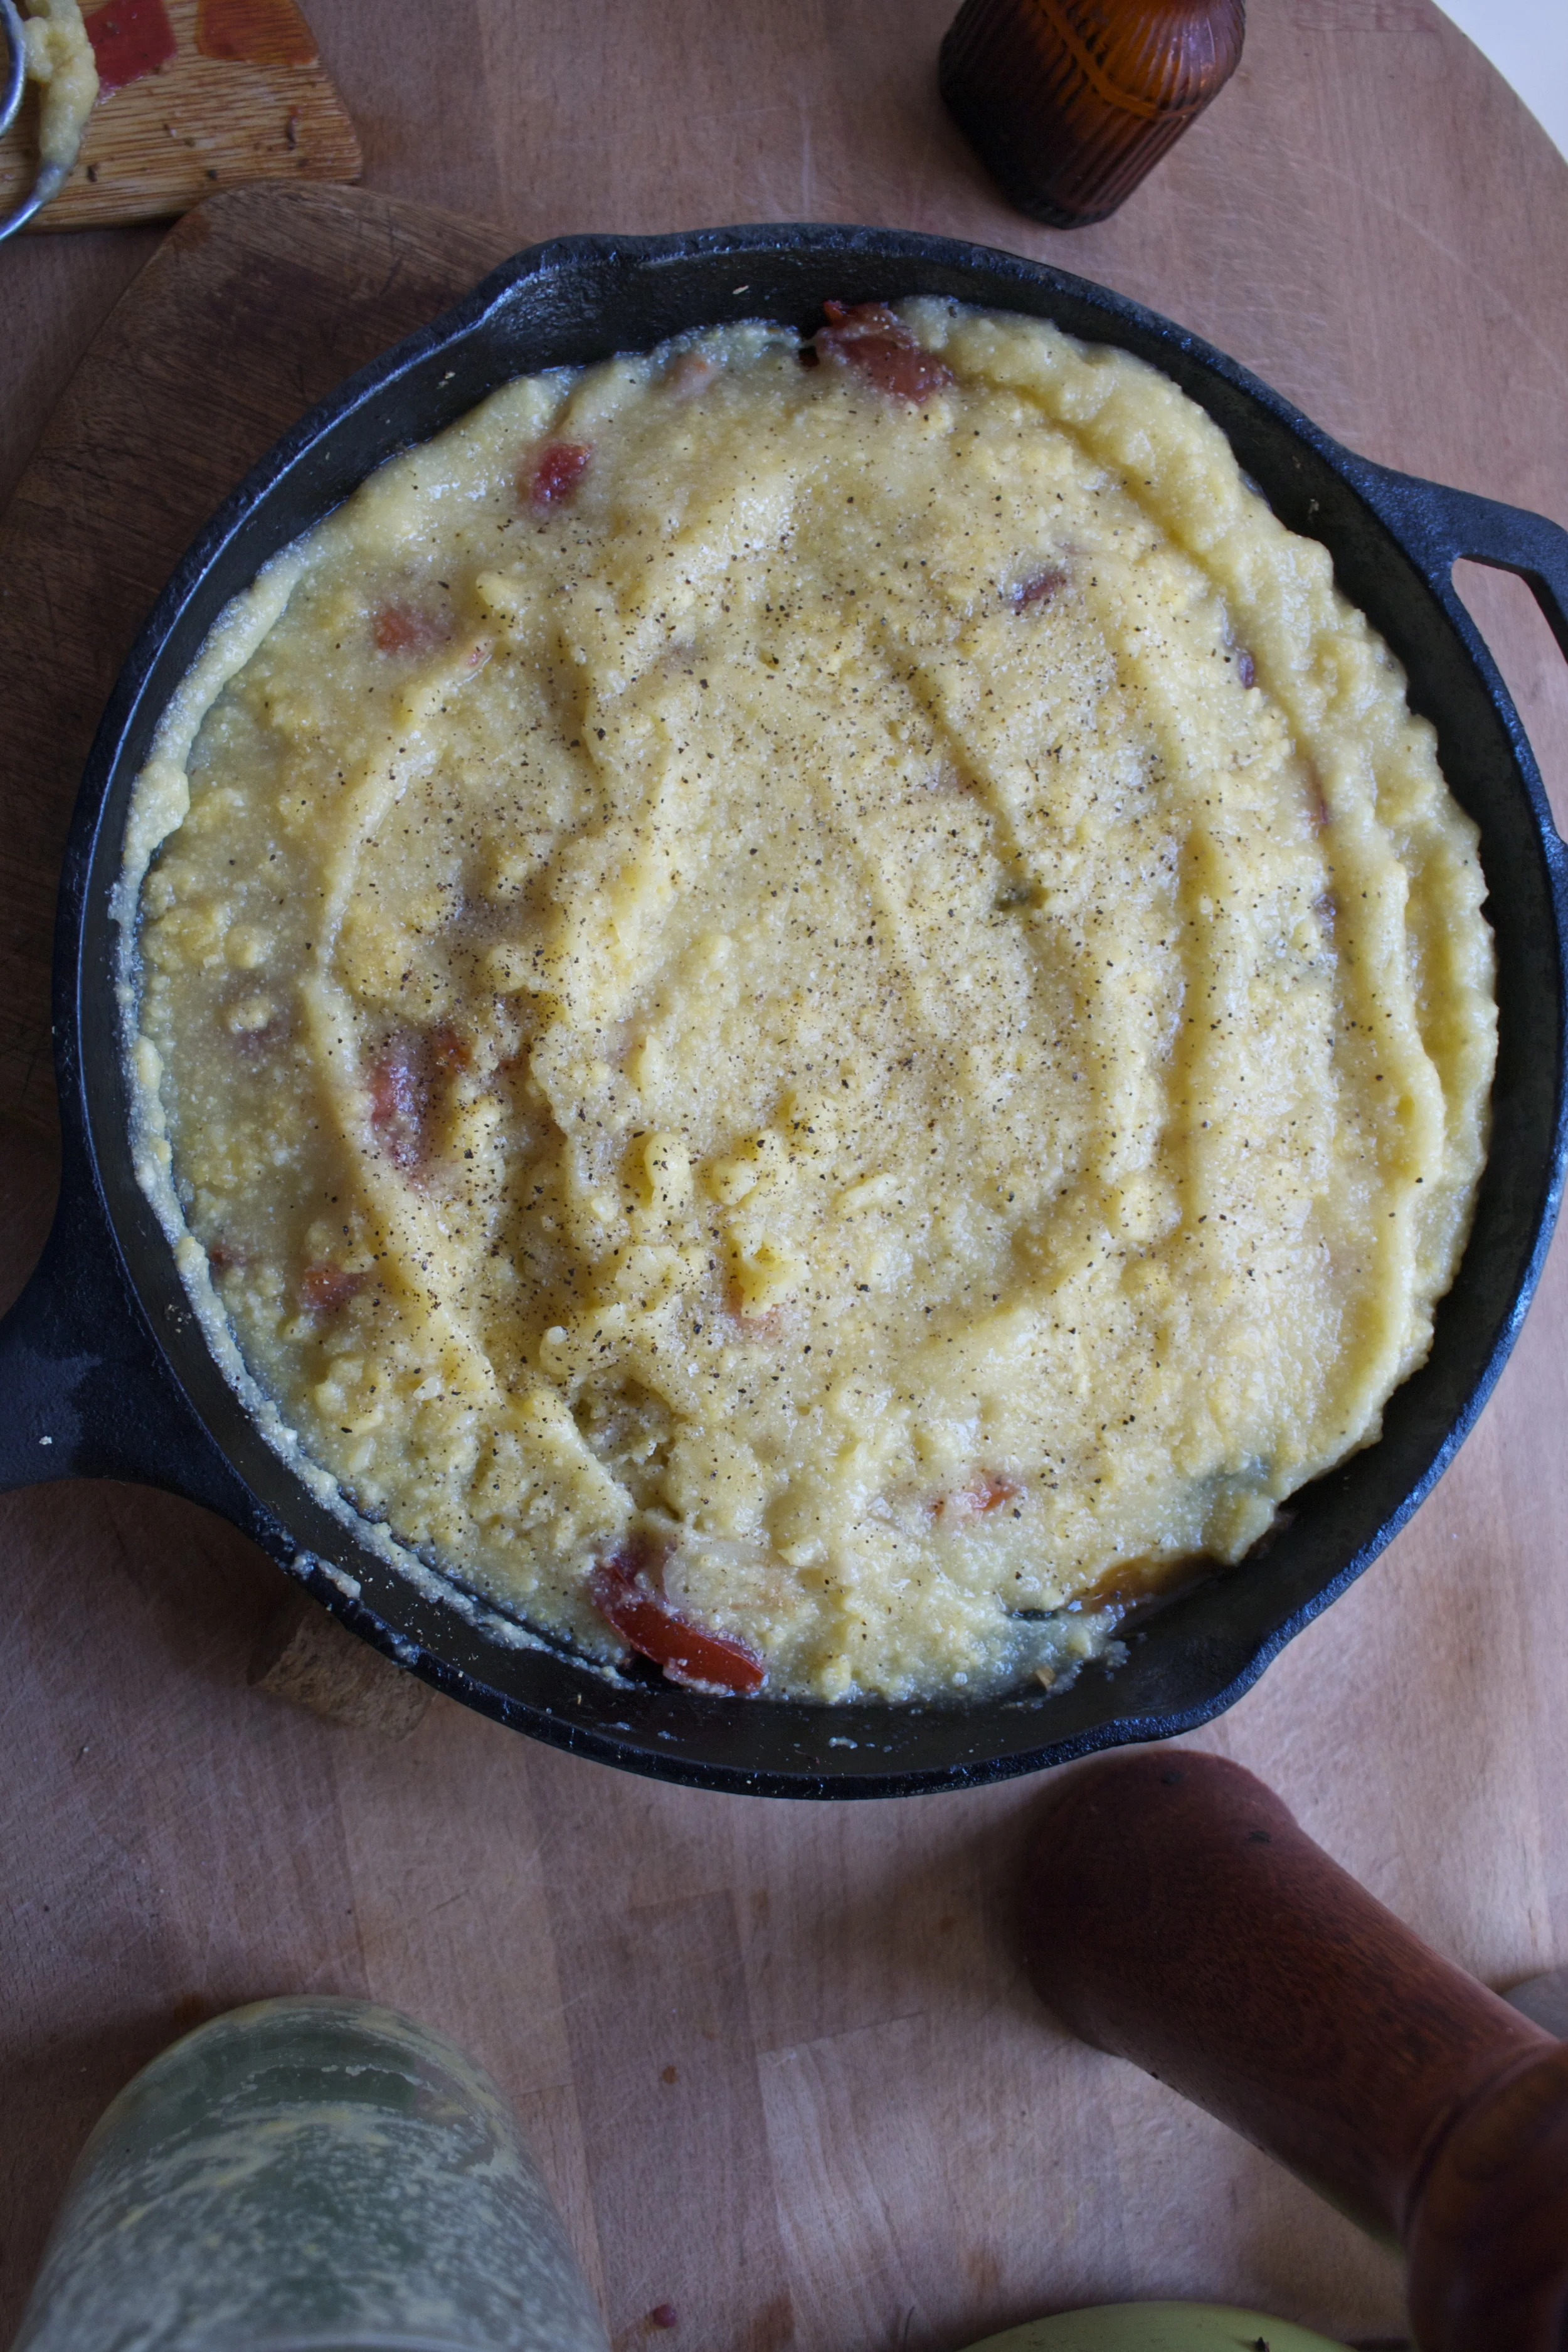
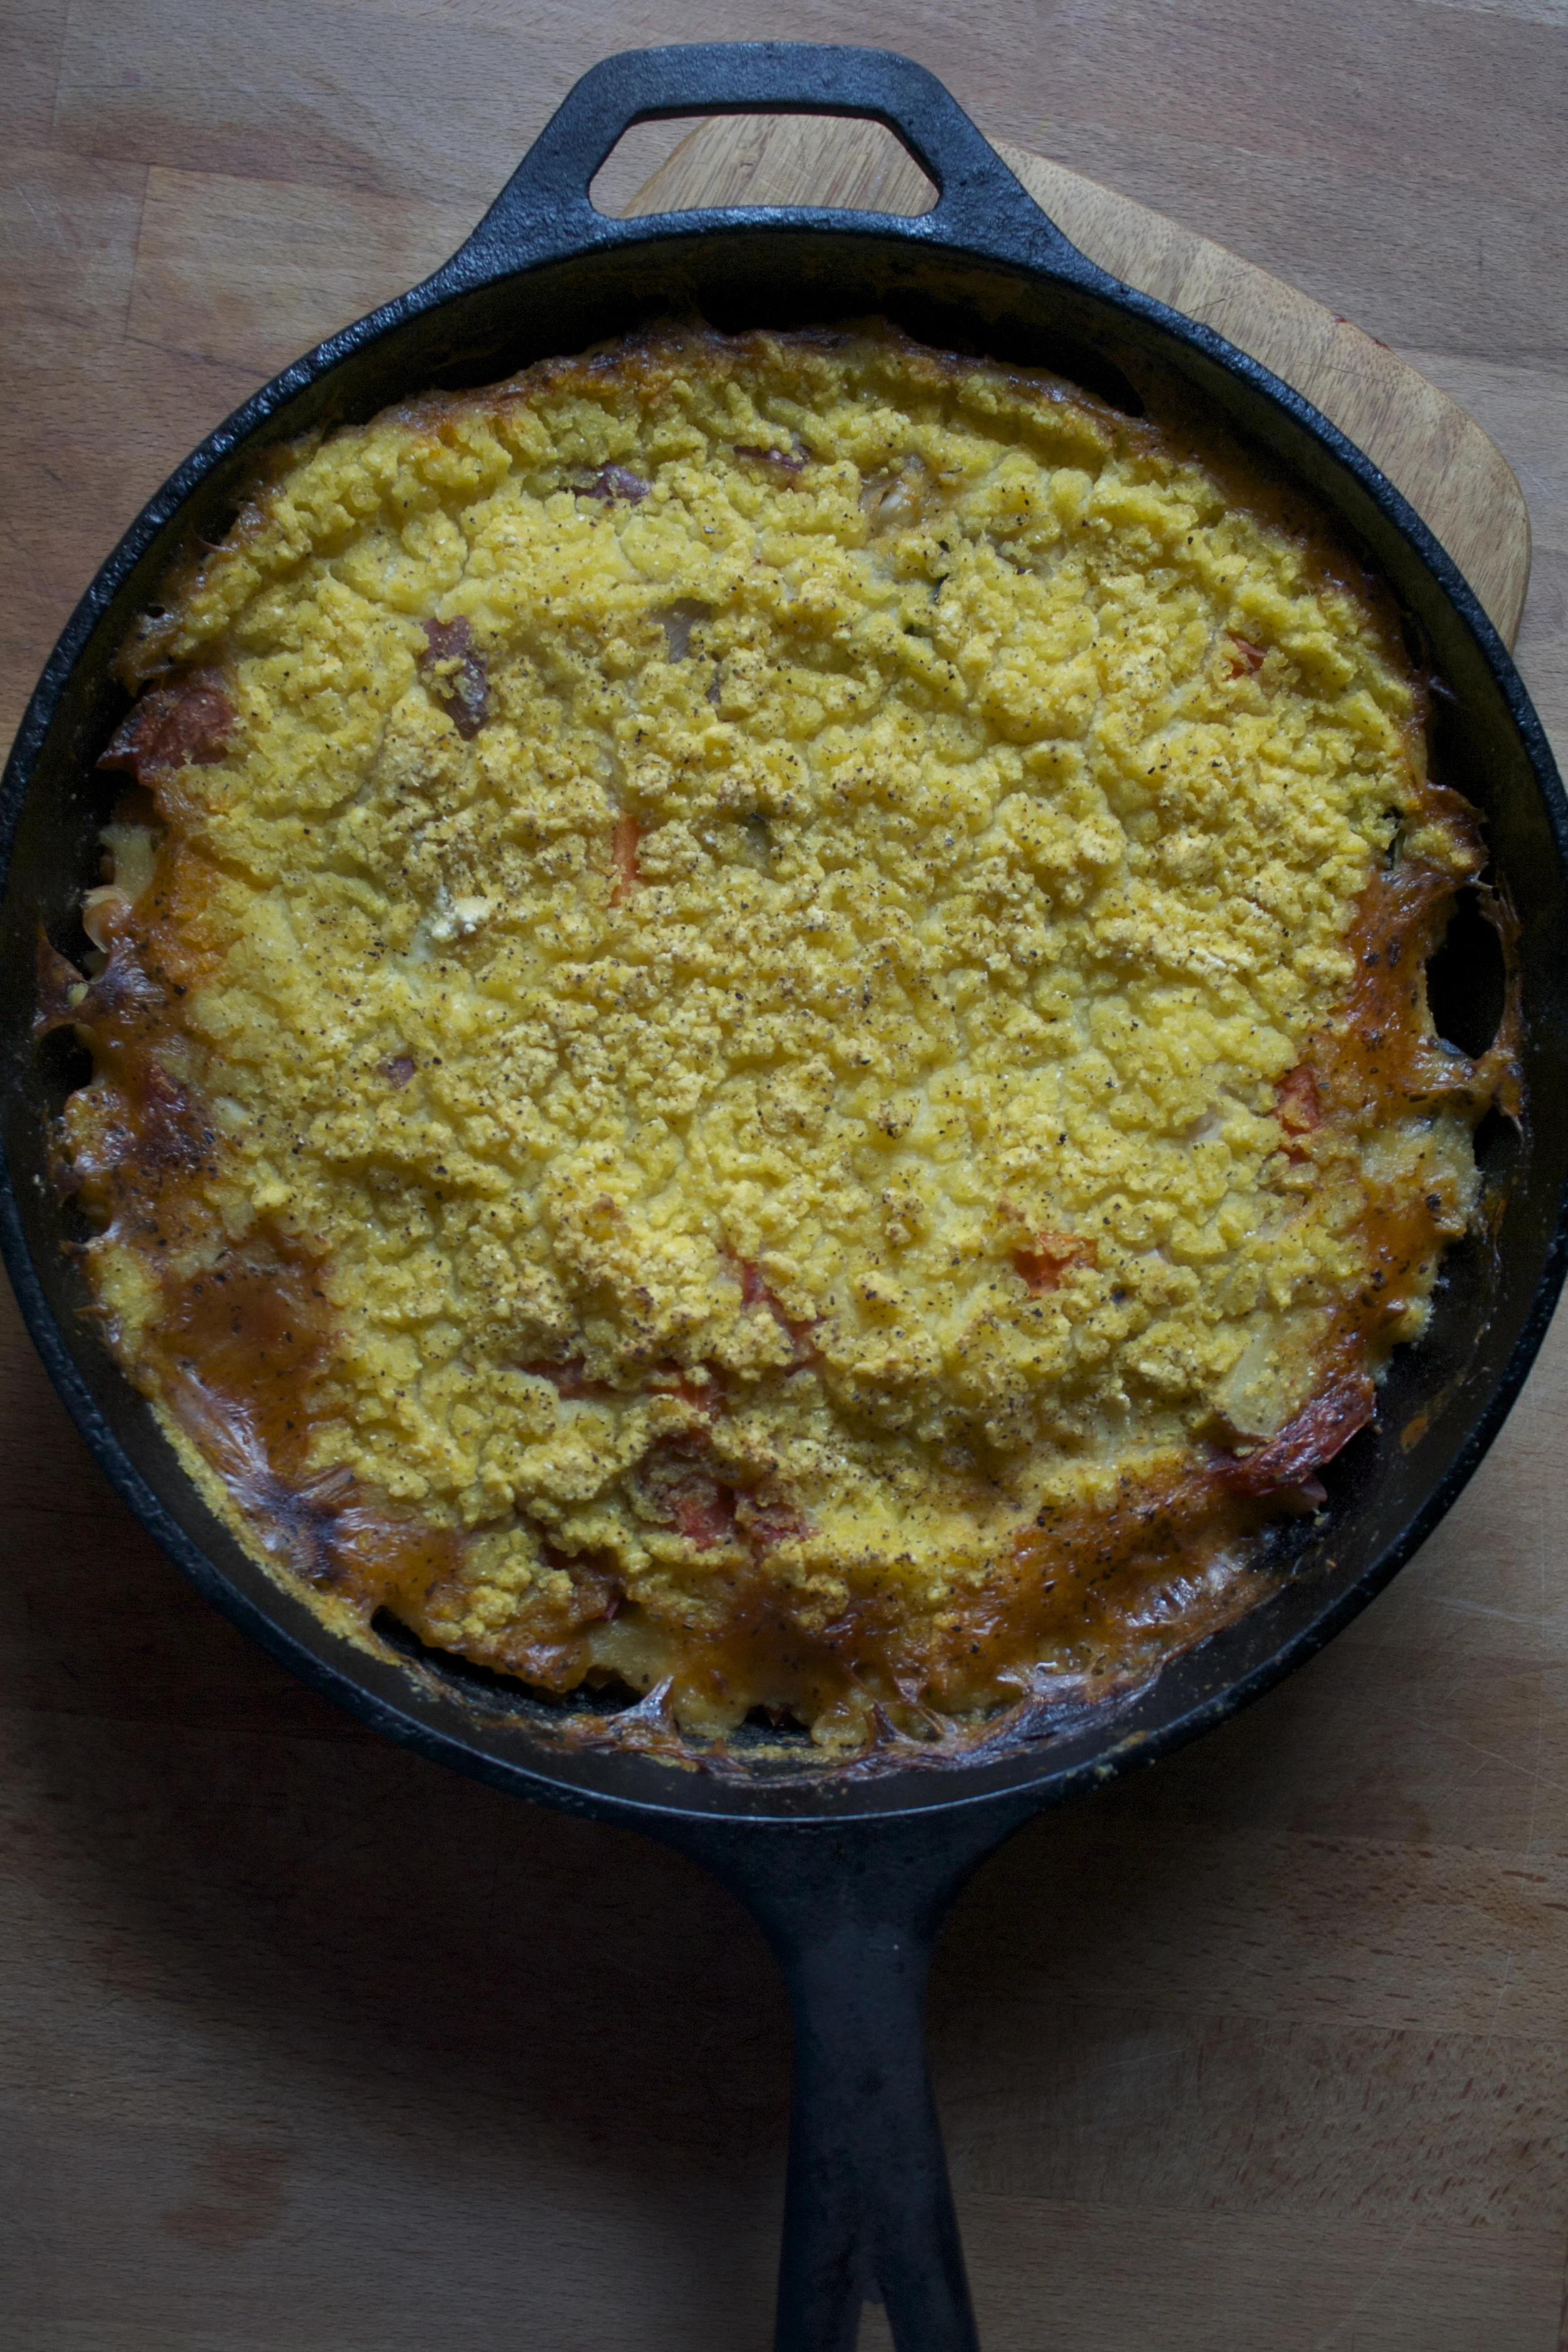
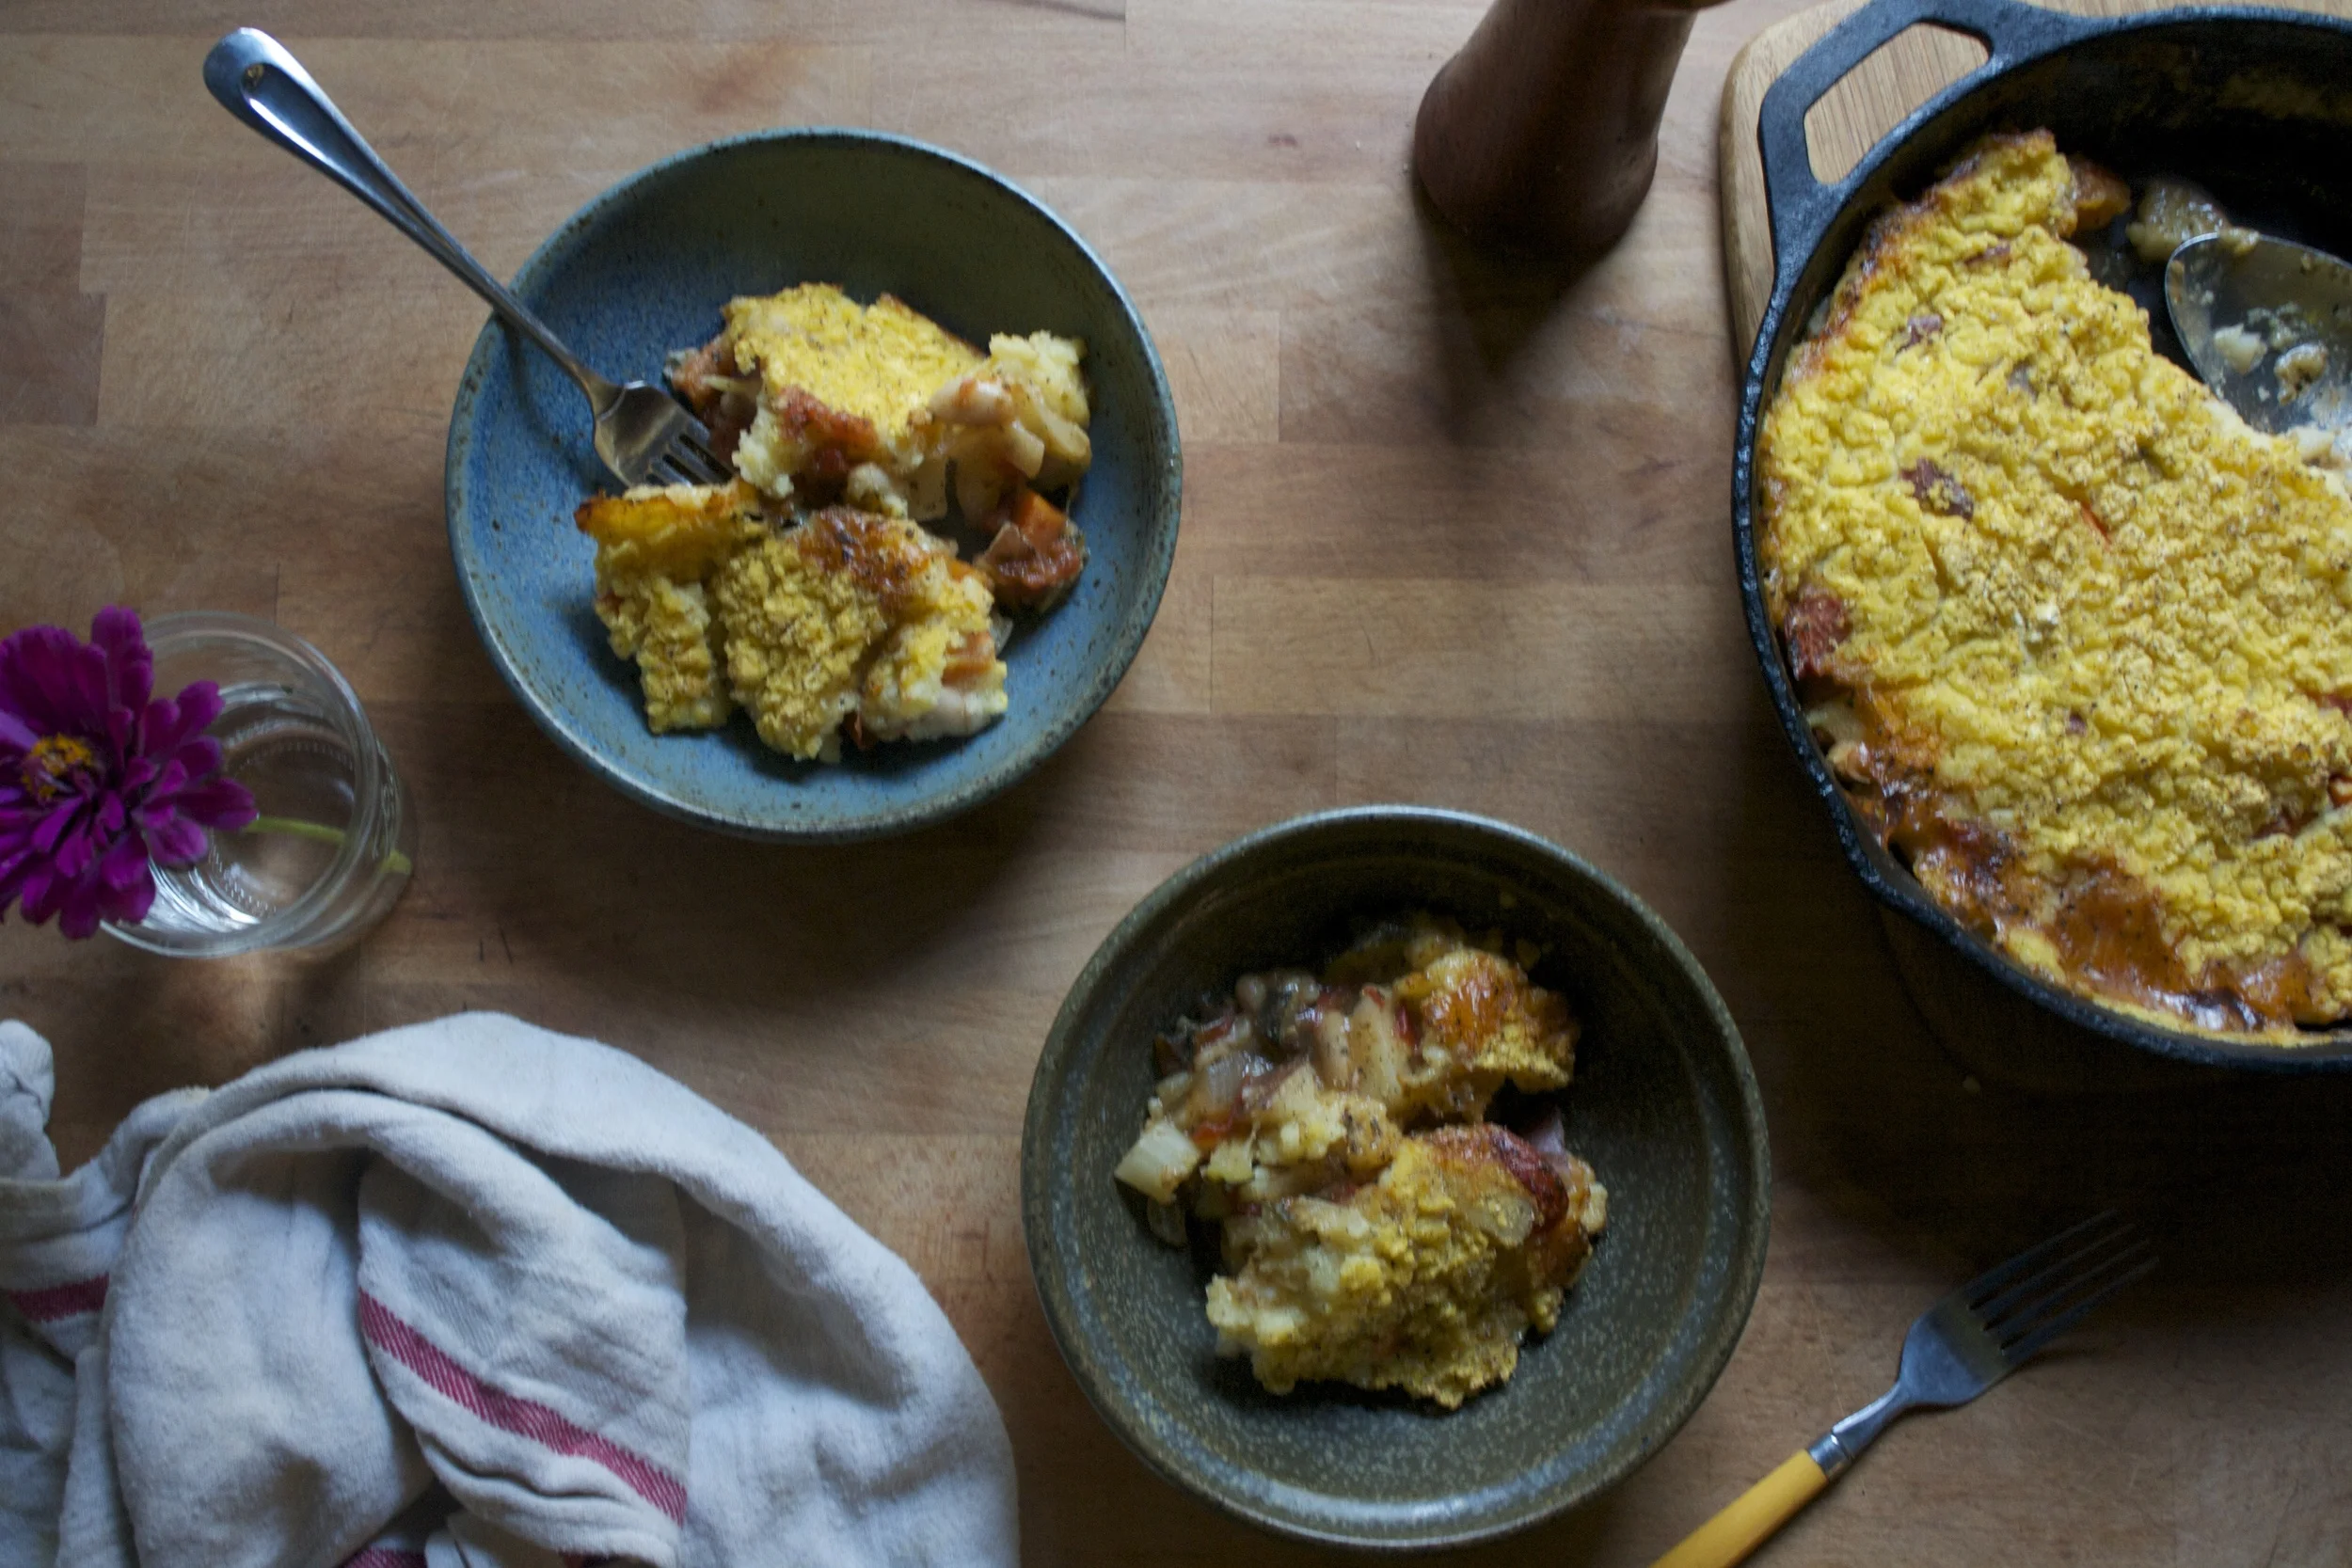
 %u00a0I’ll let you know now, I am a make and eat soup all year long person. I can think of few things better then sitting outside, basking in the sun, hopefully with a light wind, a book in hand, enjoying a nice big cup of some good homemade soup. (Doesn’t that sound so freaking lovely?) This soup right here is perfect for just that. Parsnips are the best, kind of like a big white sweet, yet starchy carrots. And cooked together with a little bit of light and lemony thyme, rich earthy turmeric and a couple more chopped veggie%u2026.. you got yourself a%u00a0nice thick and fragrant bowl of happiness that fills you up without weighing you down. It’s food you can eat that fills you up, leaves you feeling cozy, yet still wanting to hop on a bike or lace up the running shoes. %u00a0Hearty without the feeling of all the heaviness.
 The stuff. Parsnips, carrots, onion and garlic. Thyme and turmeric, salt and pepper. the tinniest bit of oil and water (water not shown)
 Chop all the veggies and the garlic, drizzle a dutch oven or a pot with oil, toss in the veggies. Add the turmeric, the thyme, and 1/2 cup of water.%u00a0
 Sweet sweating the veggies. Turn pot on medium and cook until the water completely cooks out. When the veggies start to brown and stick to the pot, deglaze with water. Give a good stir and keep cooking. Repeat the deglazing process until the veggies are super soft and ready to blend. (I did this 4 times.. it only took 10 minutes)
 Add enough water to cover the cooked veggies.%u00a0
 And now blend the heck out of it.. Go as smooth or chunky as you want. I blended as smooth as I could get with this crappy immersion blender. (Blender on loan until I finally decide on, and buy a new one)
 And there you have it. Scoop into bowls, add lots of cracked black pepper, and go to town. I made enough to save a bowl for later%u2026 %u00a0it didn’t last for later.%u00a0
 The bounty of spring is upon us. Asparagus is everywhere and I have been embracing it.. smelly pee and all.%u00a0 And along with all my spring veggies and smells, %u00a0I have grabbing for more springy spices. I go through seasonal spice kicks, like cinnamon and ginger in the fall, curries and chills in the winter. And for spring, I am big on sumac. If you haven’t heard of it or tasted it, it kind of taste like a tangy salty lemon..without actually having any salt. And its a really pretty, a bright red, almost purple color. I use it on a lot of things, especially veggies and bean dishes, sometimes as a lemon replacer, but mostly to add another level of tangy flavor.%u00a0It’s fantastic, really great for all those springy time dishes. Nice and bright!
 The stuff of the stuff. Quinoa and asparagus for the base. Sumac, lemon, garlic, onion, salt and pepper and a little splash of oil for the dressing.%u00a0
 %u00a0 %u00a0 %u00a0
 Start by making the dressing. You want to have it sit for at least 10 minutes. It will be perfect by the time the quinoa is done. Mince the garlic, dice the onion and juice the lemon. Stick it all into a jar with the sumac, a pinch of salt and pepper and about a teaspoons worth of olive oil. Stick a lid on the jar and shake shake shake. and let it sit.
 When the quinoa is simmering, cook up the asparagus. Add a drizzle of oil, to a pan and a few splashes of water. Place trimmed and chopped asparagus to pan and sprinkle with salt. Cook on medium heat for about 8 minutes, or until cooked but still has a nice crunch to it. Take off heat and add the dressing to pan. %u00a0Let it sit and marinate for a few minutes.
 When the quinoa is tender, fluff with a fork and add to the skillet with the asparagus and dressing. Toss around to make sure all the quinoa gets dressed. Take a taste.. does it need a little salt and pepper? Add a pinch if it does.
 Pile into a bowl, add a bit of cracked pepper.. and eat.
 Is it really for real April? Where has all the time gone and where the hell is the warm weather? It’s not funny anymore. I%u00a0am officially OVER winter!%u00a0 Ok, so now that I got that off my chest%u2026..
 The Stuff. Cornmeal, water, navy beans and parmesan for the polenta. Crushed tomatoes, garlic, dried basil, onion, carrot, zucchini, and summer squash for the sauce. Salt, pepper, and olive oil all around.
 Cornmeal and water go into a cast iron skillet (or any oven safe dish) with a pinch of salt and pepper. Give it a little mix and stick it into the oven at 400 degrees .
 Once the polenta is in%u00a0the oven, make the sauce. Chop up all the veggies and stick into a dutch oven or sauce pot with a pinch of salt, the basil and a good drizzle of olive oil. Stick on medium heat and let veggies cook down a bit. %u00a0When the veggies are tender, add in minced garlic, crushed tomatoes and another drizzle or oil. %u00a0Turn burner to lowest setting and simmer (giving it a stir every now and then) for about 45 minutes or until the polenta is done.%u00a0
 After about 30 minutes when the water had pretty much all cooked down, take the polenta out of the oven and stir in the beans, the parmesan, a tablespoon or two of olive oil and salt and pepper. Smooth top out and sprinkle with more pepper, parmesan and drizzle with a bit more oil. Stick back into oven for another 1/2 or until polenta %u00a0has formed a crust and no longer giggles when you wiggle the pan.
 Pull polntna from the oven and let sit for at least 1o minutes.
 Last night I had my sister and her kiddos come over for dinner. Nothing fancy, nothing to complicated, %u00a0just something %u00a0fast and something that I knew the littles would eat. %u00a0Spaghetti and meatballs, except replace meatballs were bean balls So they came, we played, did a little drawing and had a bit of first grad gossip. Then came %u00a0dinner time %u00a0when I was told by one little that she was not going to eat.. She had pasta for lunch. Well I made her sit anyway and she mainly just ate carrots (I was ok with that) Then the other little was all into his pasta and bean balls, 1 down, 3 more to go, when the mister let slip that the meatballs were not really meat. He ate around the remaining balls, said he didn’t want them anymore. And my sister, well she doesn’t eat anything that is not pizza.
 I feel like I don’t need to tell you how to boil pasta or heat up the sauce, so I left that portion of the recipe out. I have faith that you are capable in doing that part without my instruction.
 Small chop all the veggies and toss them and the dry spices into a skillet with a drizzle or two of olive oil. Stick on medium %u00a0heat and add about 1/4 cup of water to pan. Top with %u00a0slid and let veggies cook down until soft and fragrant.
 Add the cooked veggies to a food processor or blender with %u00a0the rinsed and drained chickpeas.
  The mixture gets pulsed until combined, %u00a0keeping a little bit of chunkiness. %u00a0Now go warhead and taste %u00a0the mixture. Add another pinch or two of salt , pepper or any of the spices that you think it need. %u00a0Dump the mixture into a bowl and mix in the chickpea flour than stink the mixture into the fridge for a least a 1/2 hour. Cooling to off is really important to forming the balls. If you don’t, it’s much harder to keep mixture from falling apart and sticking to your hands.
 After the mixture has had time to cool and set, start rolling the mixture into balls roughly the size of ping pong balls. In a shallow bowl, add a few tablespoons of the chickpea flour with a pinch of salt, pepper and garlic powder. Take each ball and roll in flour and place each ball on a well oiled baking sheet. When the balls are all rolled, stick into the oven and bake away for about 30-40 minutes, flipping balls after about 20. %u00a0After you flip the balls, get the pasta ready so its finished about the same time the balls are done.
 You pasta and sauce is cooked and the balls are all crispy and oh so nice.


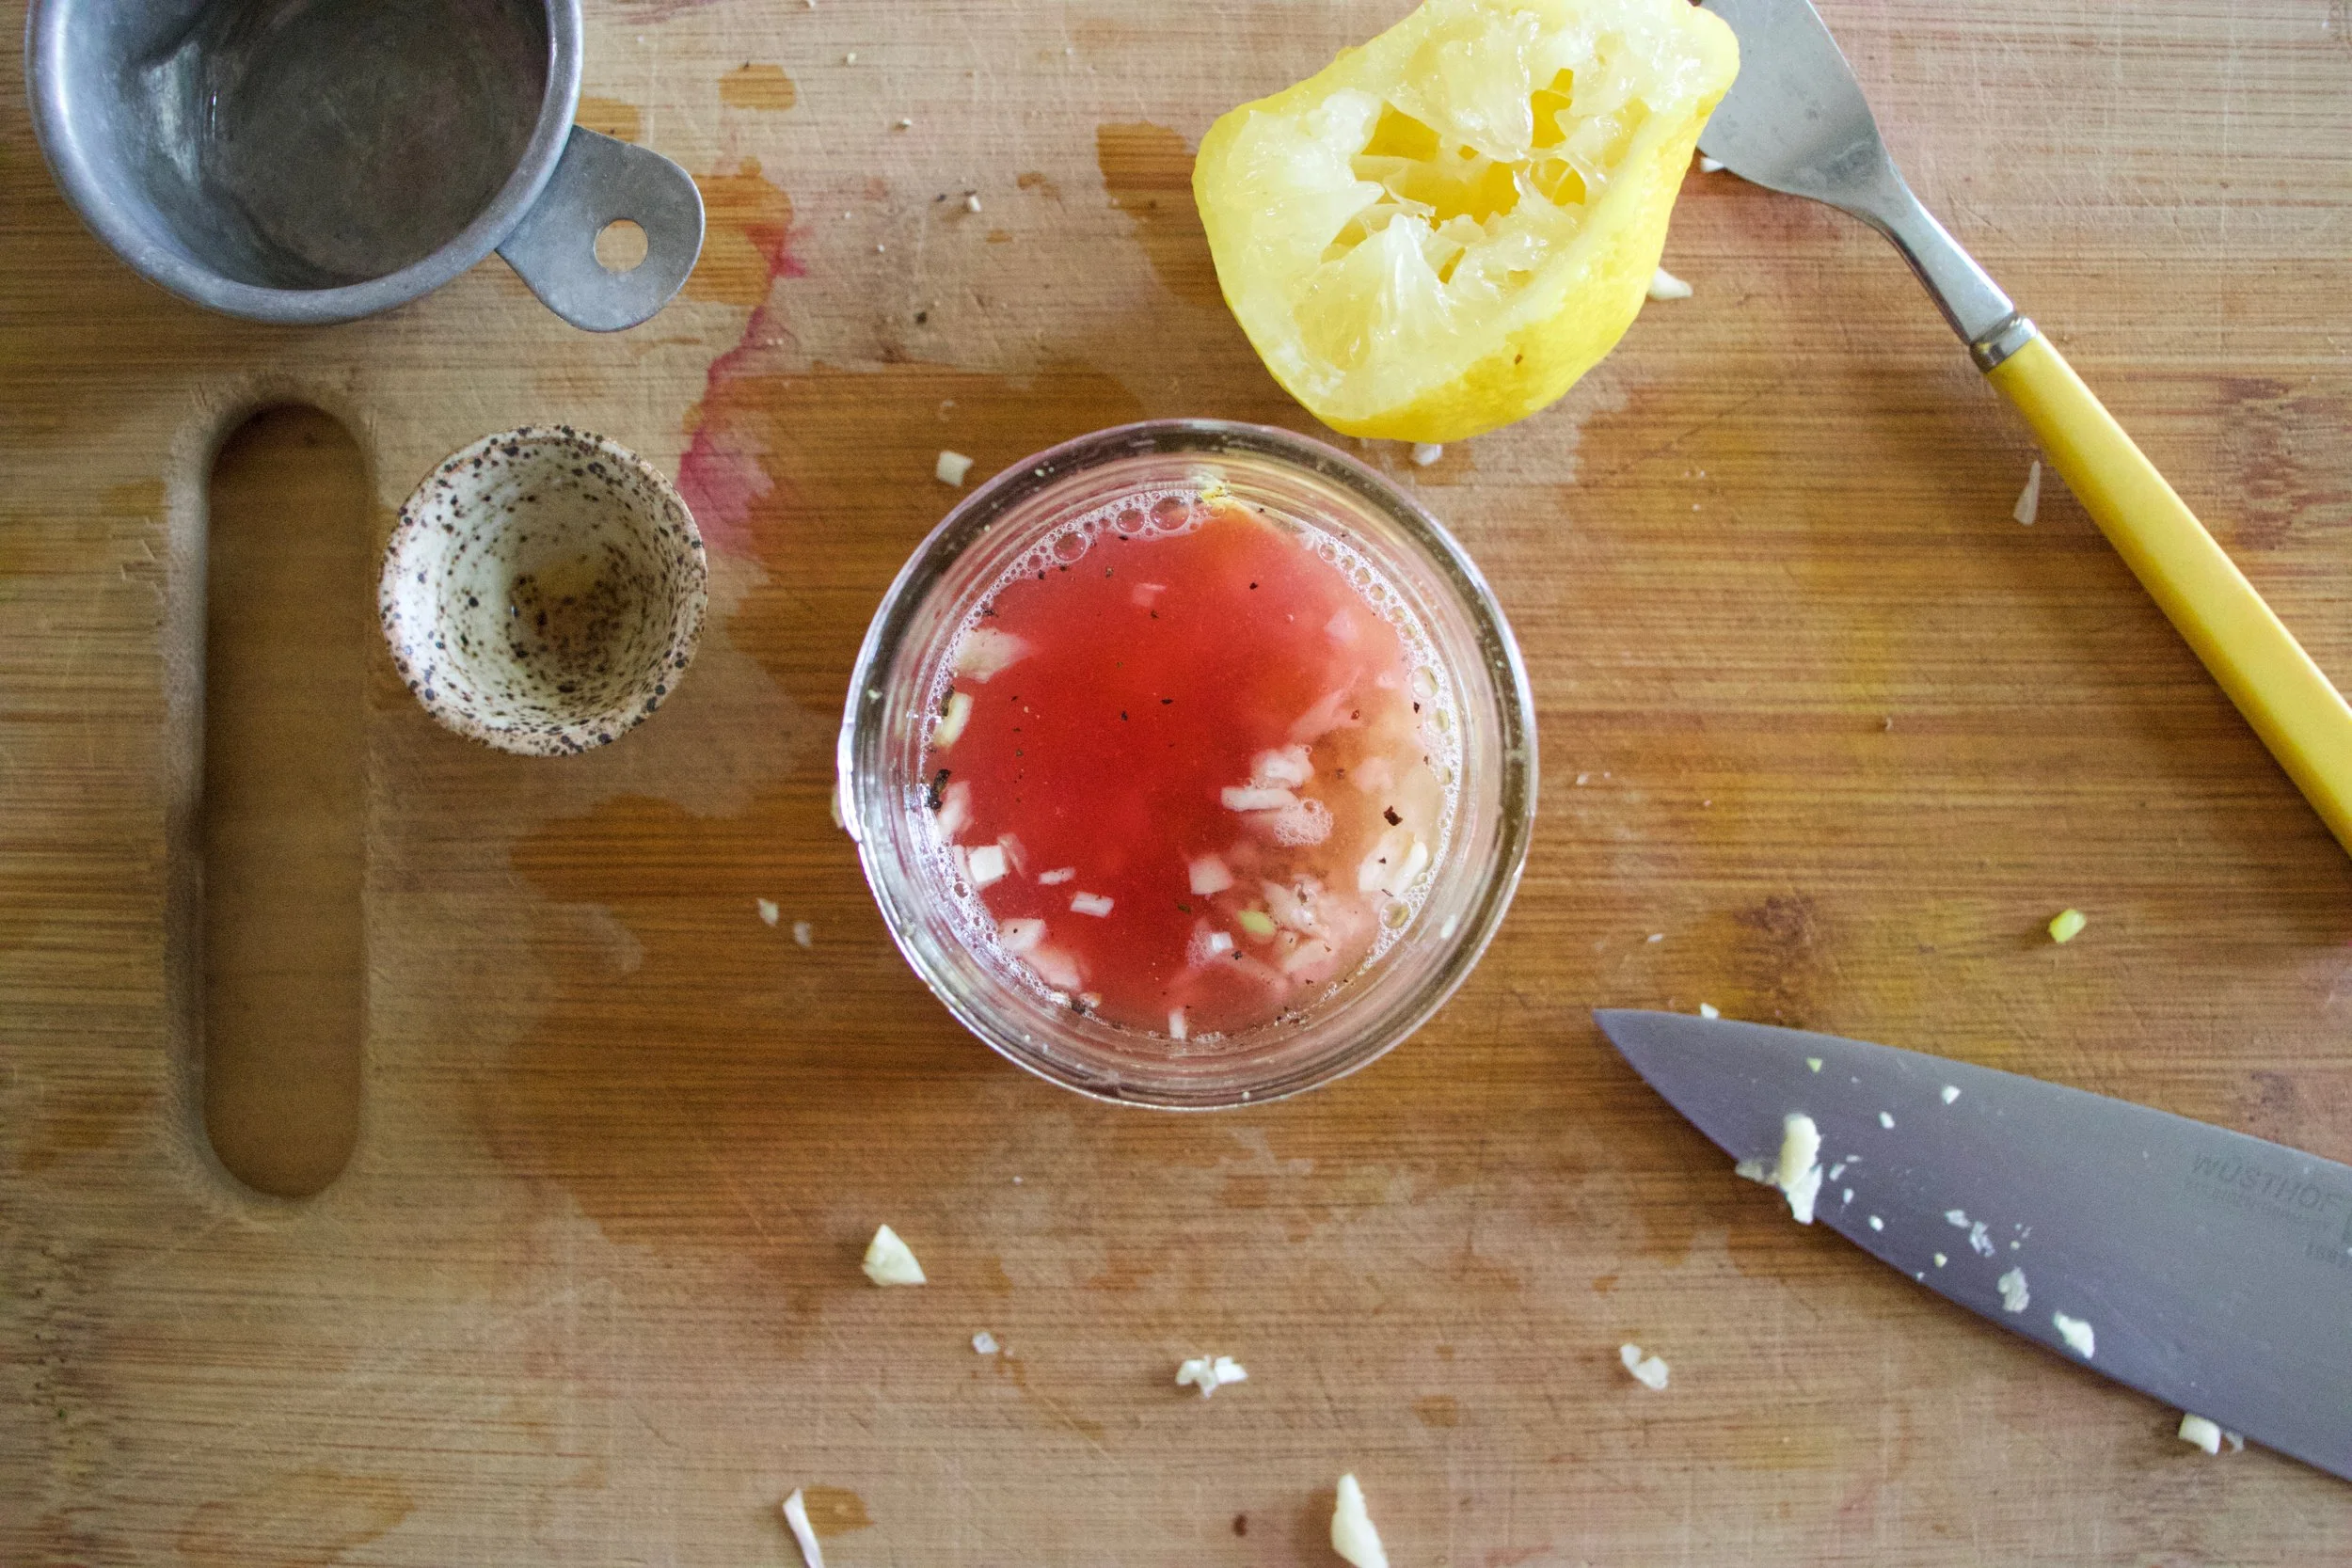


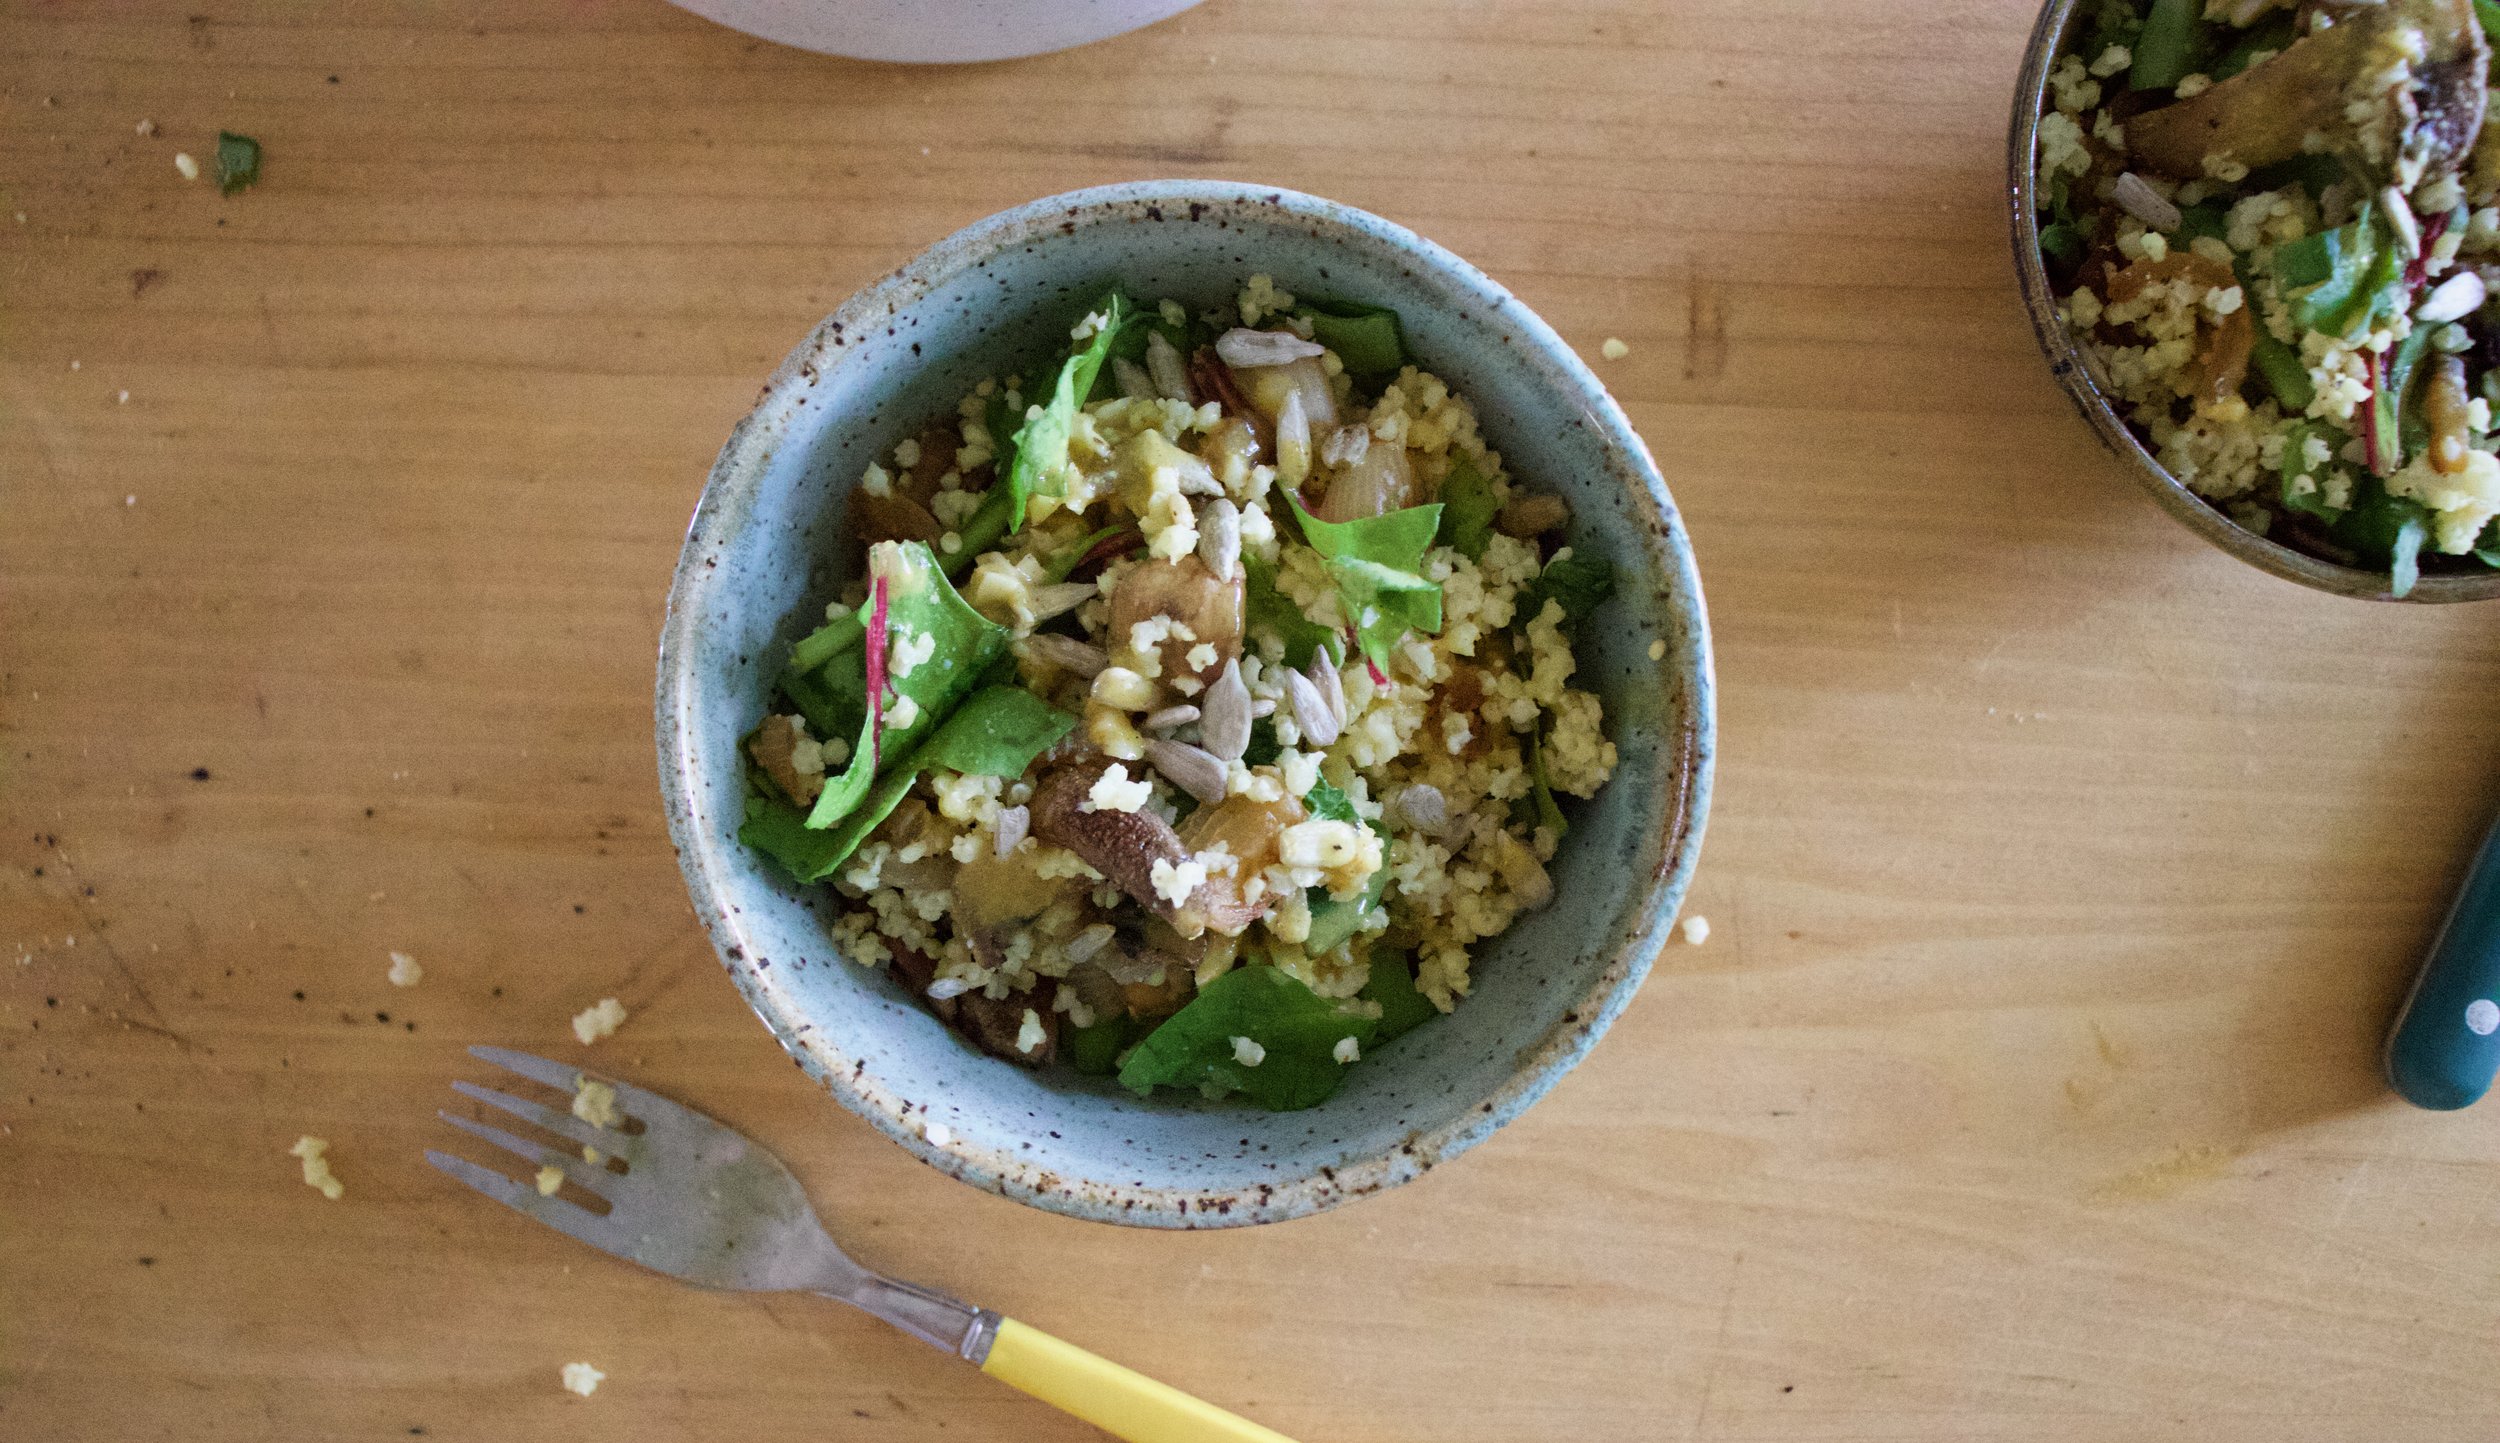
 Wowzers.. What was I thinking! I know, the same thing you are%u2026YES YES YES!!! Gluten free what now.. My lovely sister is on that ban wagon. She has been having”issues” lately(so many, it’s hard to pin point) and says she is feeling better without the gluten. Me being the lovely person that I am want to feed my poor sister, make her happy with food. %u00a0I HAD to prepare that lady a dinner and it had to be pizza cause I know how much she likes her pizza. So I brain storm. What would be a good gluten-free pizza crust? I could do the obvious and %u00a0get gluten-free flour, but to be honest, that’s some expensive stuff and I really didn’t feel like going to the store. I wanted to work with what I had in the house%u2026.and ah ha, there it is, %u00a0cornmeal.. With a little bit of water I can turn that into some polenta and a super gluten-free pizza crust.
 %u00a0There really isn’t a whole lot of ingredients to this pizza%u2026 Cornmeal for the polenta. Marinara sauce%u2026.I used jarred marinara because it was a little easier and we don’t always need to make things from scratch%u2026Lots of onions(2 finely sliced), handful of %u00a0sliced mushrooms, thinly sliced squash and parmesan cheese. Most of the prep takes place at the same time, but that’s good, we can multi task, just have everything pre chopped and ready to go. First thing first, start the polenta

 %u00a0 %u00a0
 %u00a0 %u00a0 %u00a0 %u00a0%u00a0On a well oiled baking sheet or pizza sheet..spread the polenta into the shape of your desire. I went with a somewhat circular shape, but now that I think of it, I wish I had been more creative, like maybe a triangle or even the shape of a bus%u2026.Yeah, a bus shaped pizza would have been cool.
 %u00a0
 %u00a0 %u00a0 %u00a0 %u00a0 %u00a0 %u00a0You can do this pre crust or at the same time, but roast your sliced squash. Place single layers squash on an oiled pan, salt and pepper, then into the oven. It should take 10 minutes on each side.
 %u00a0 %u00a0 %u00a0
 %u00a0 %u00a0%u00a0
 %u00a0
 %u00a0 %u00a0 %u00a0I Sprinkle a layer of parmesan cheese and pile on those onions and mushrooms,. Sprinkle with a little more cheese. %u00a0( use vegan cheese or no cheese if you want it vegan) Back into the %u00a0oven for another 15 minutes to give everything some time to crisp and melt. %u00a0
 Remove from oven and appreciate%u2026That is one good looking pizza. I took %u00a0a long spatial and run under the crust just to make sure if wasn’t stuck. I also found that if you let it %u00a0cool for a few minutes before serving, the polenta gets a little stiffer and easier to handle, but not necessary.
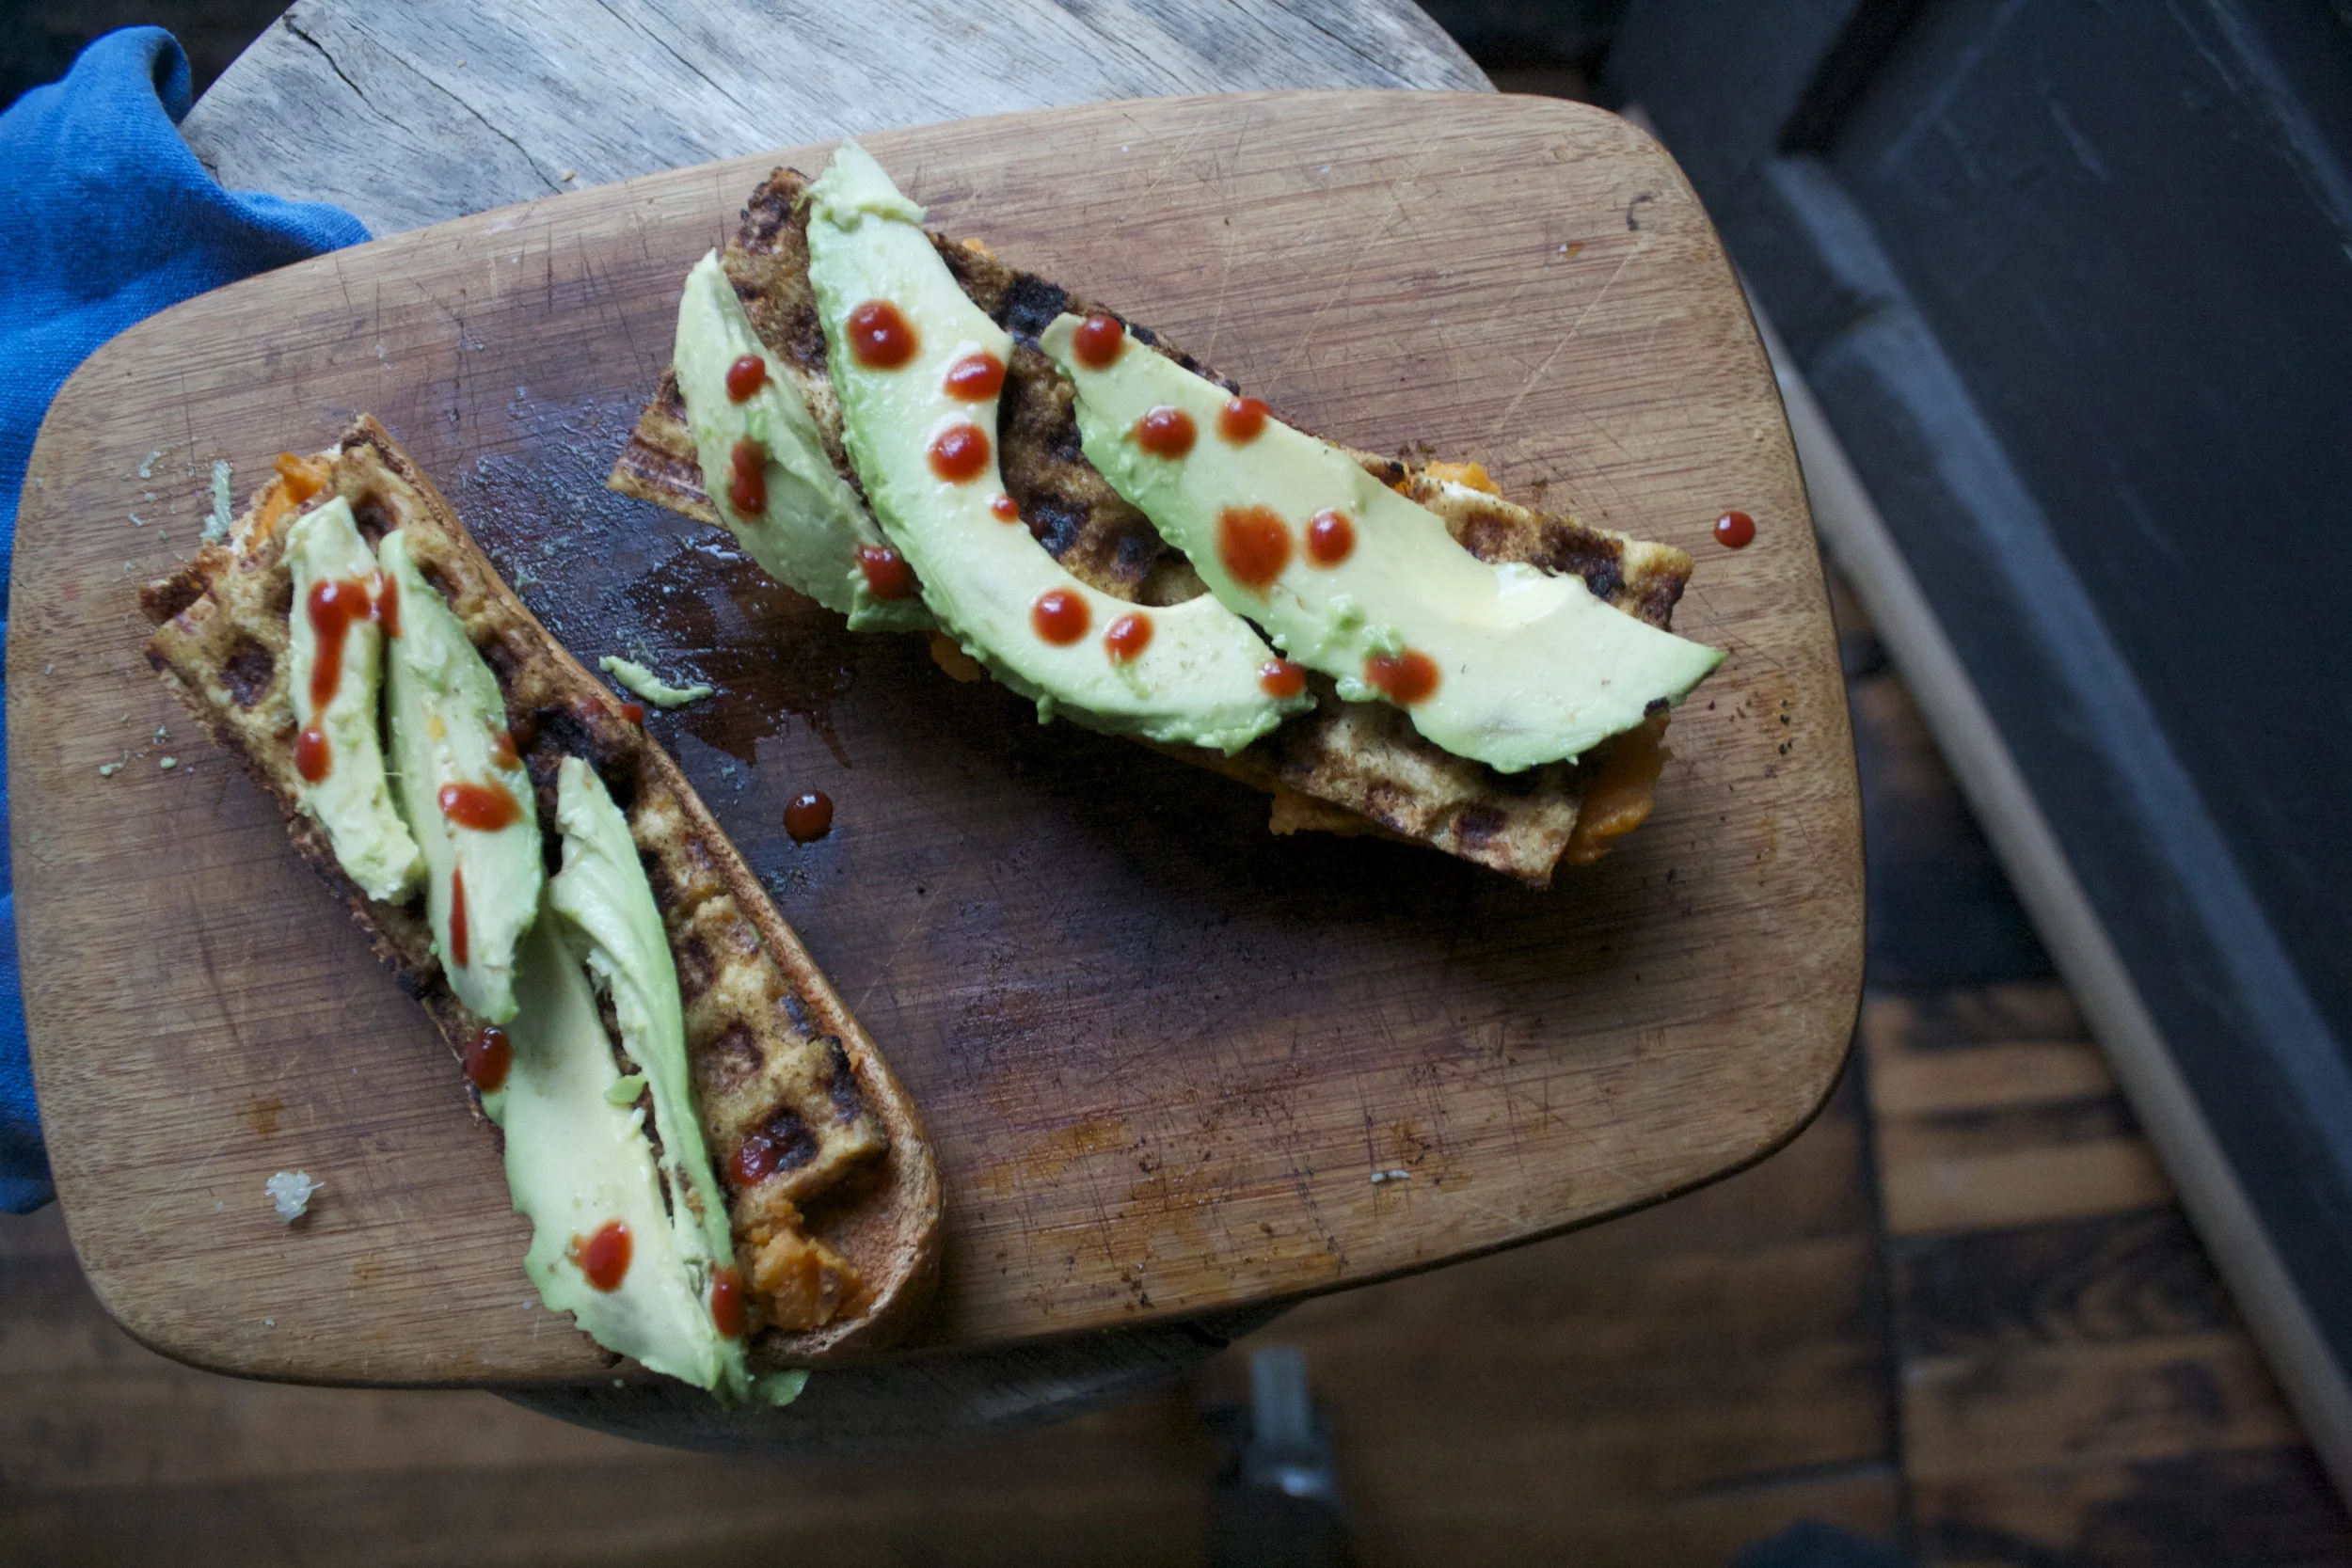
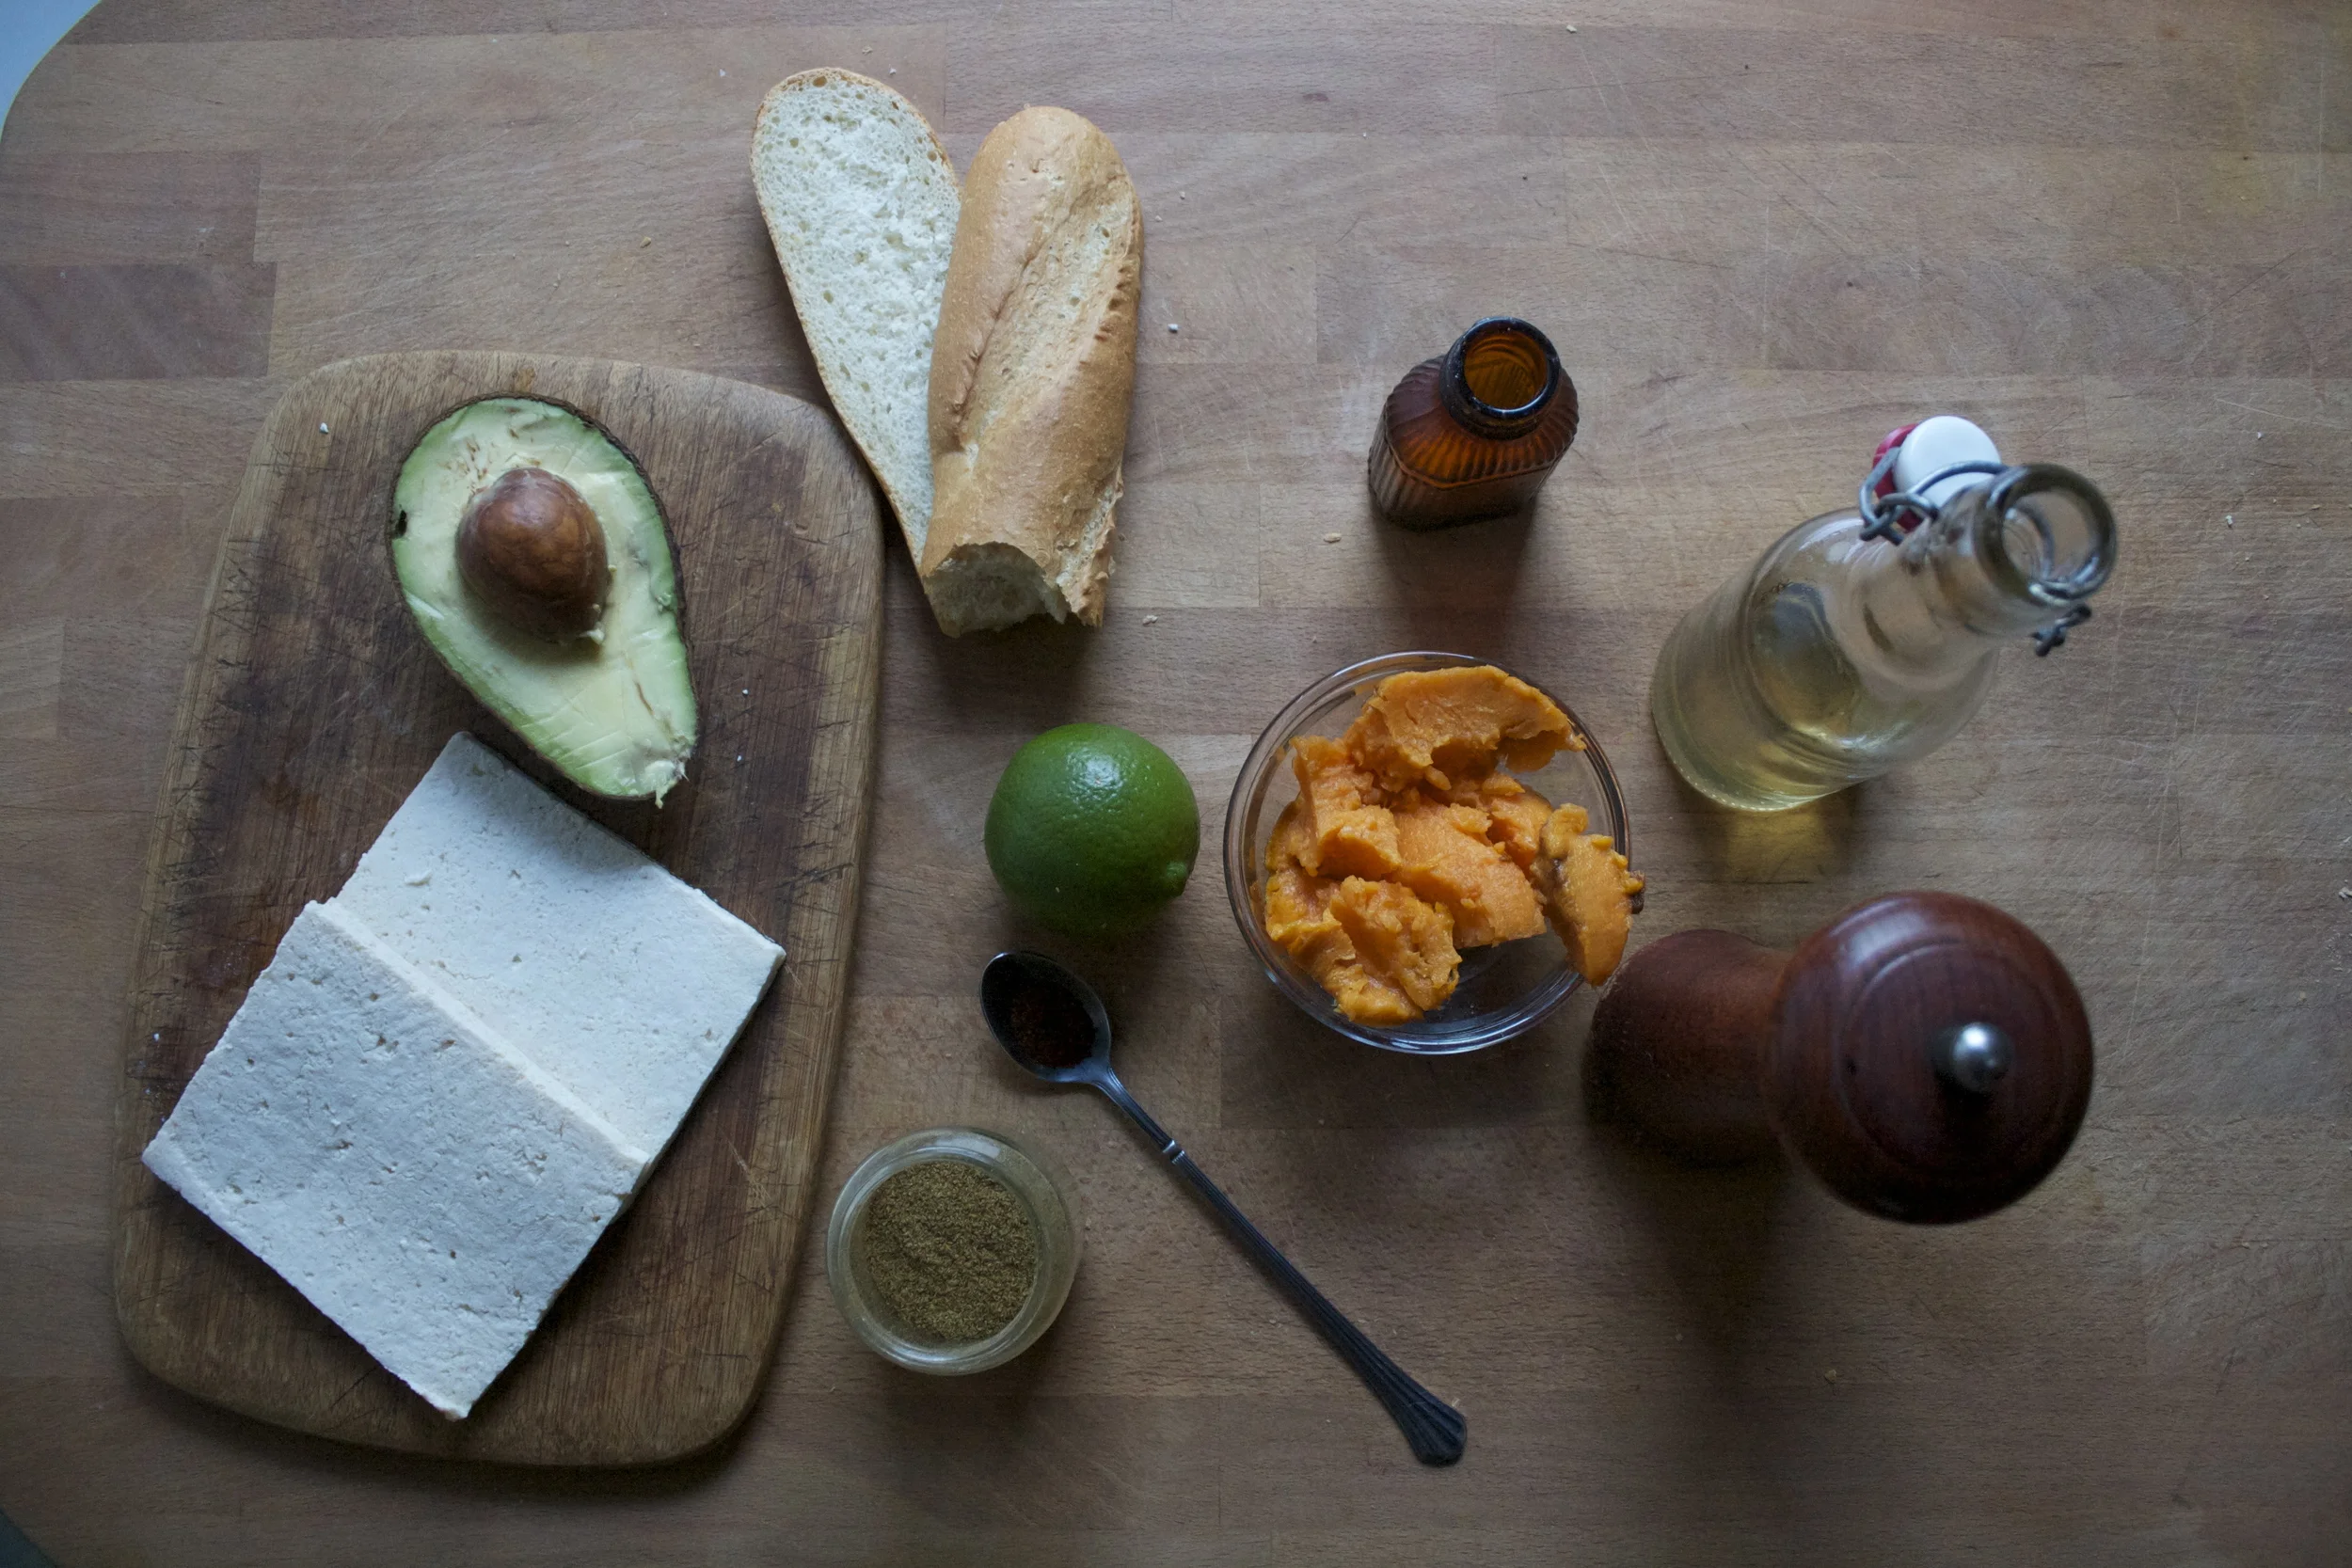

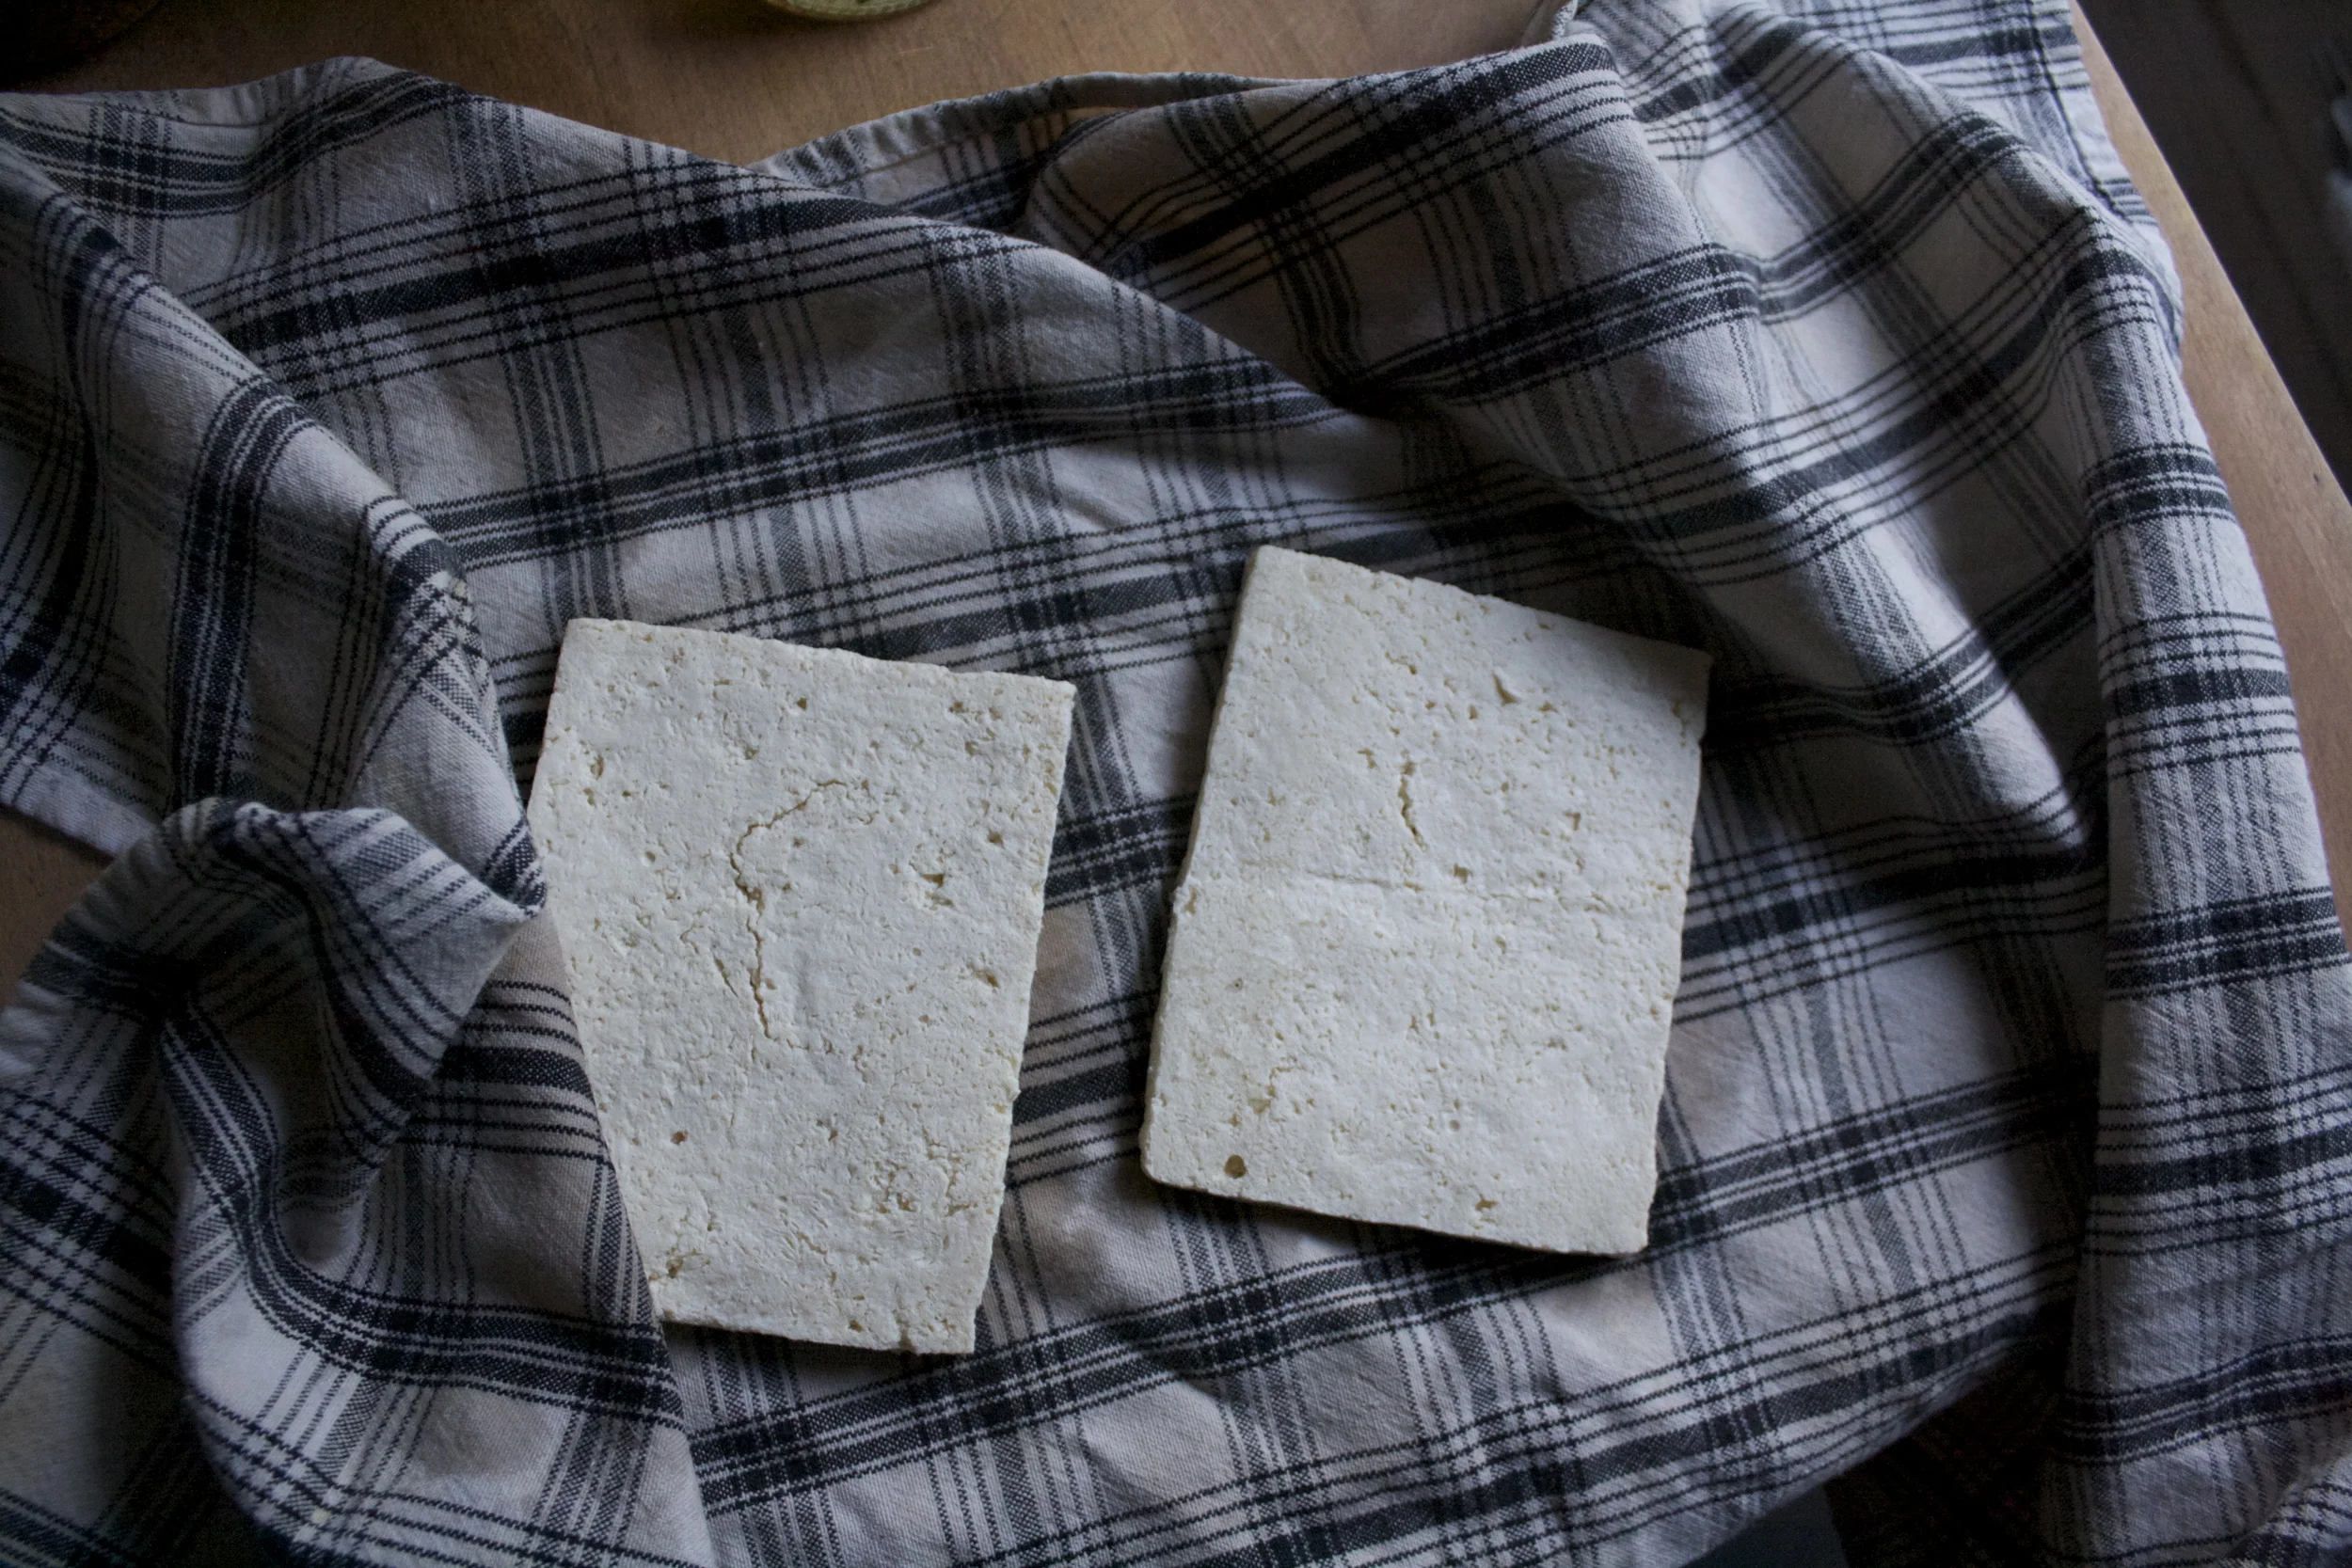
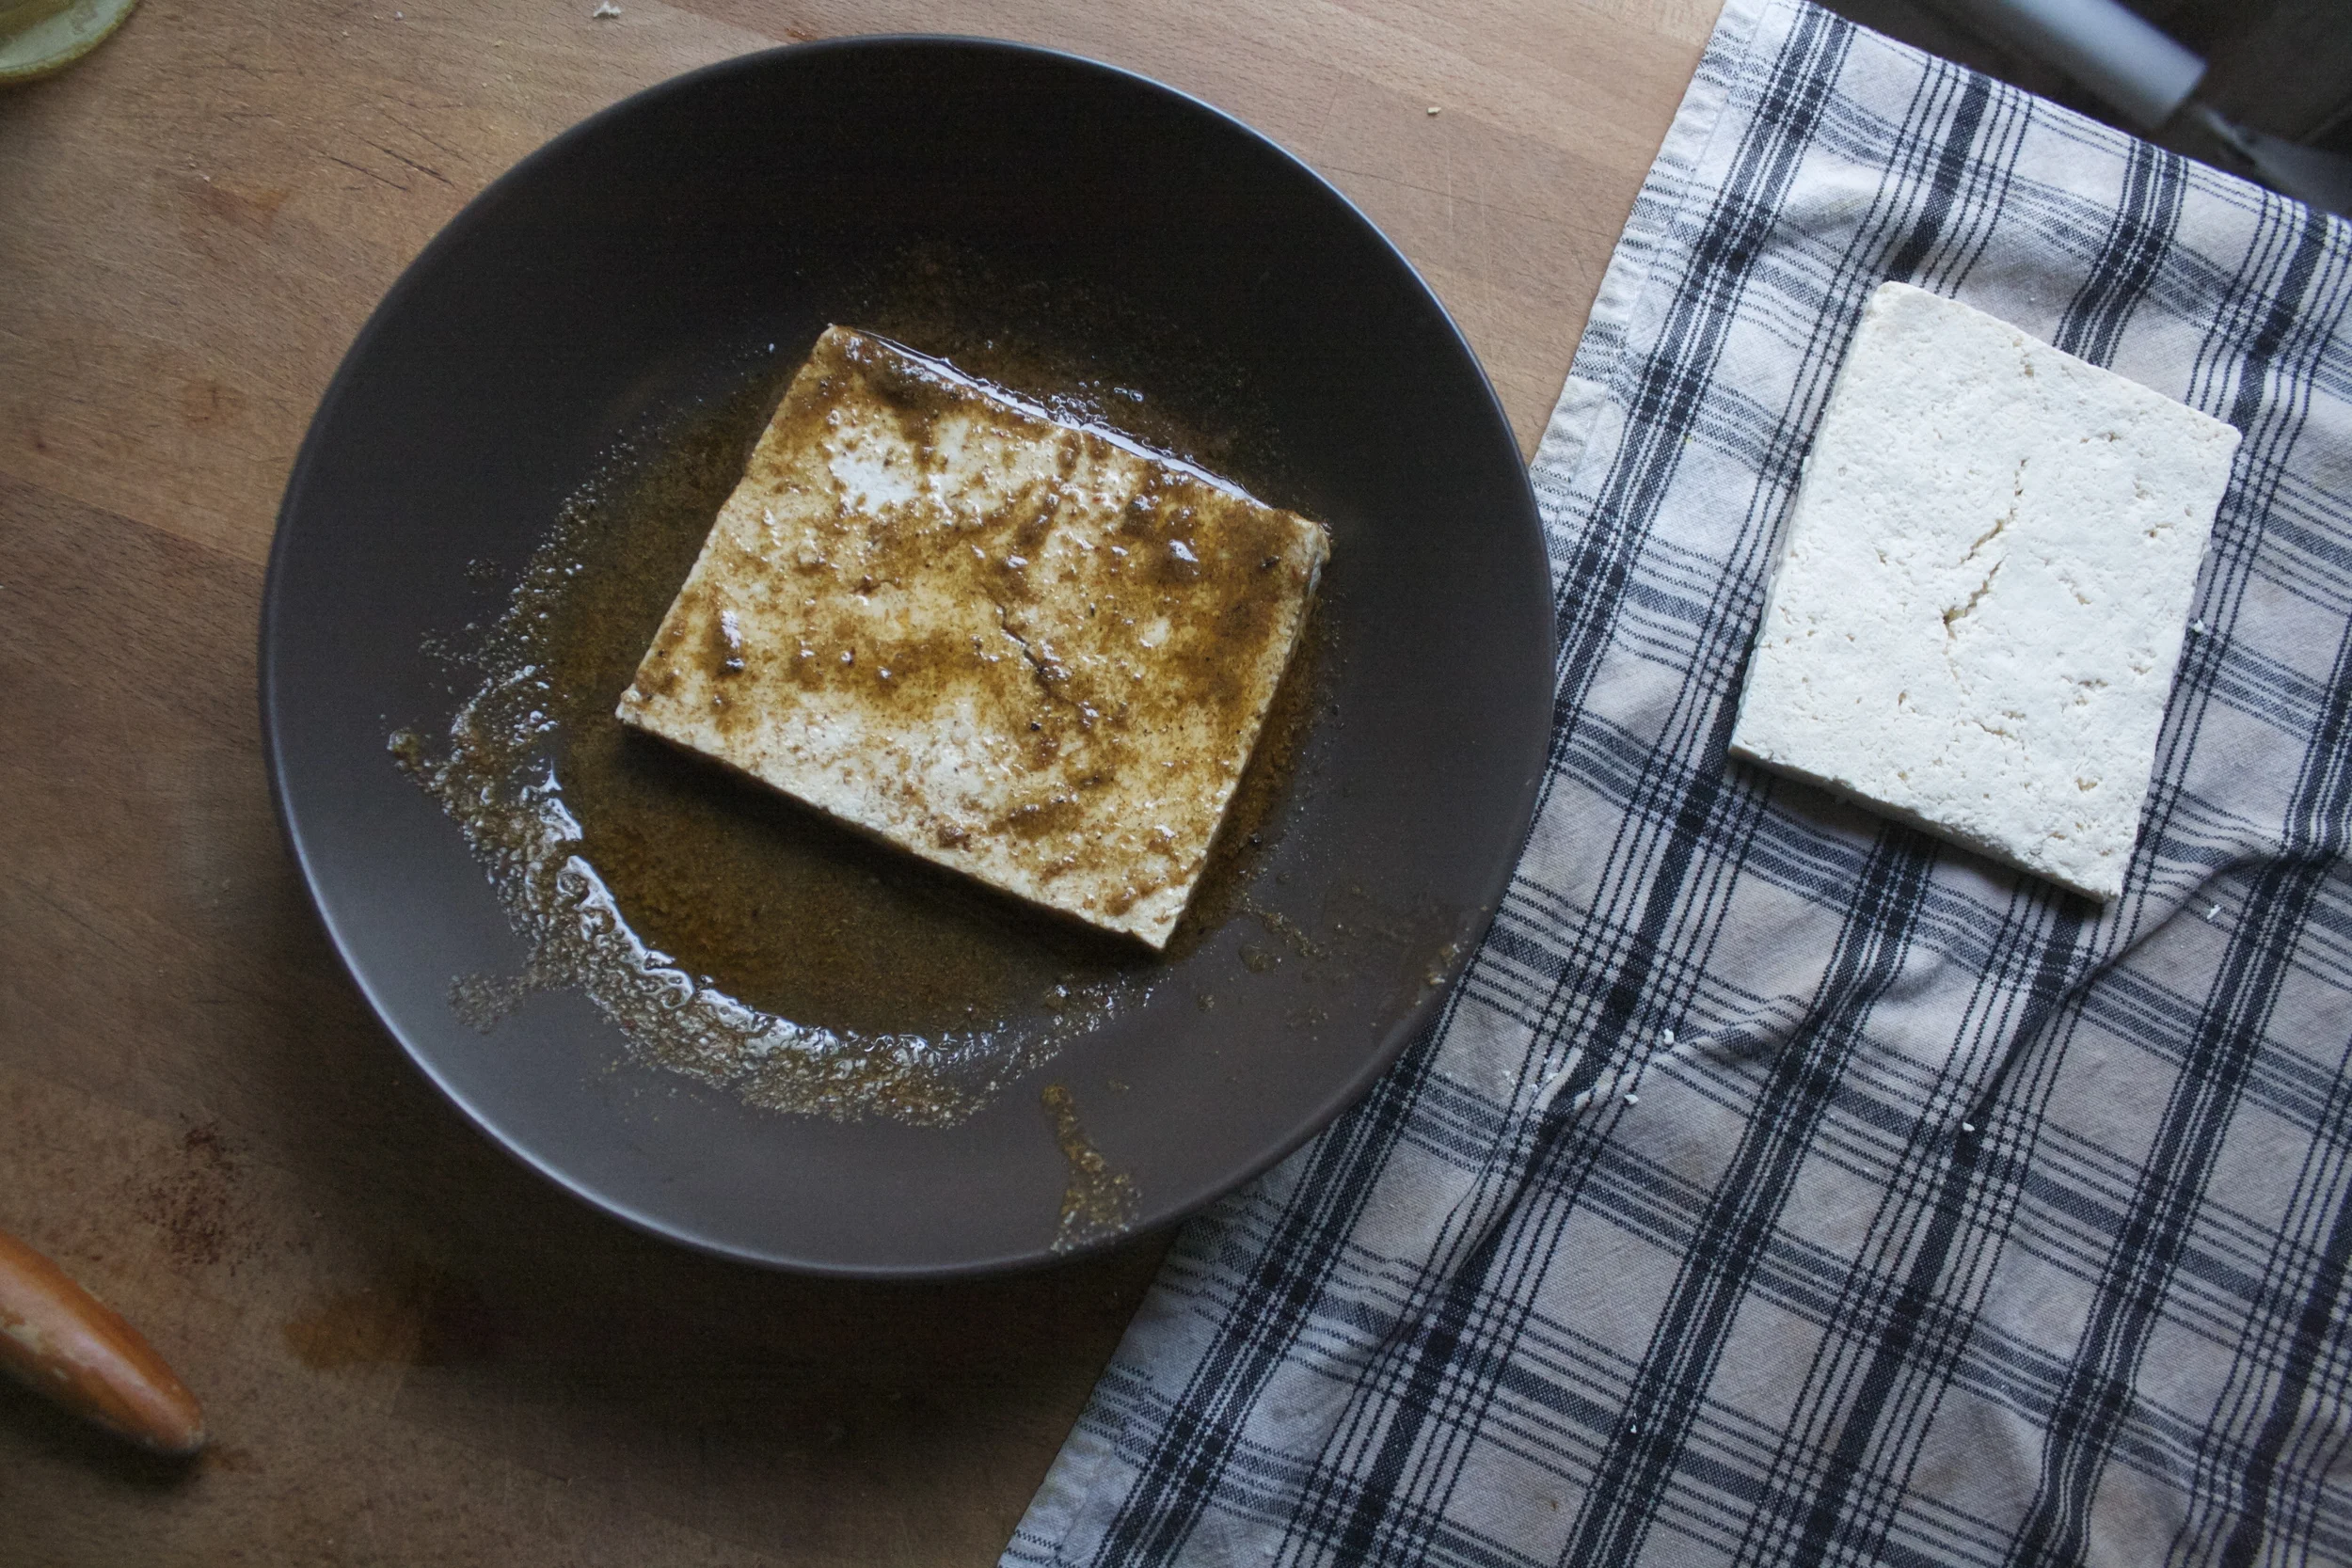
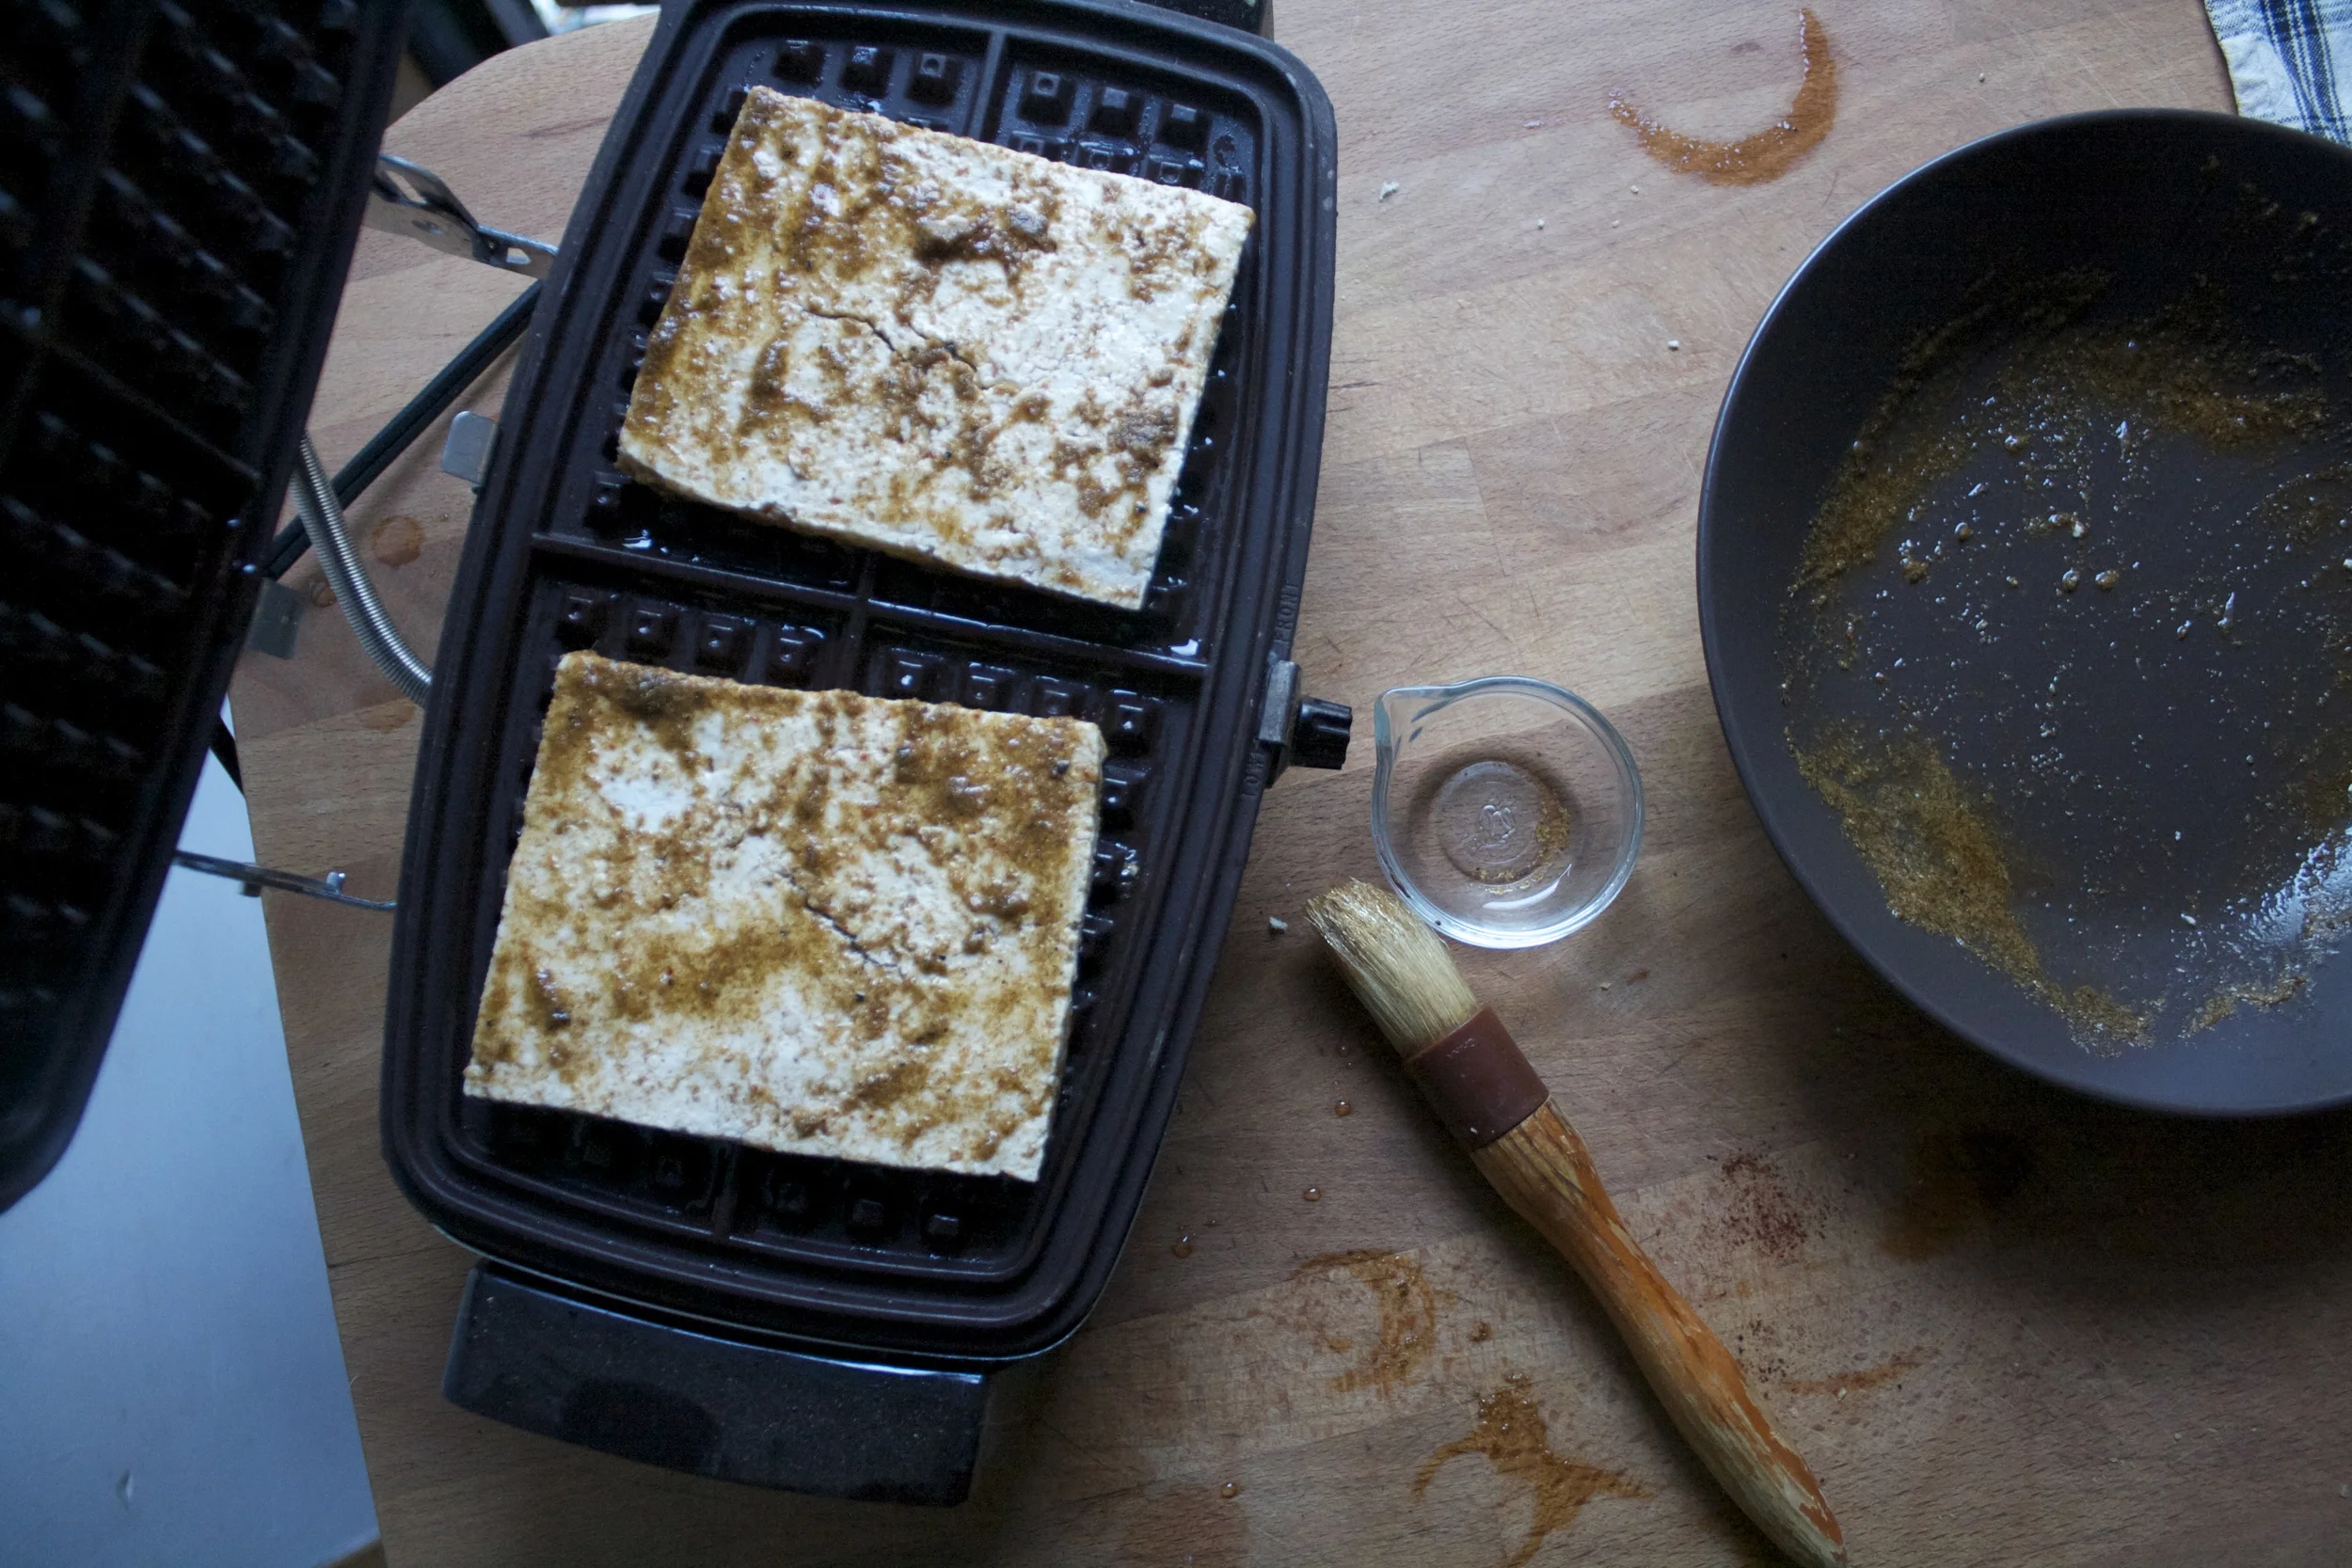
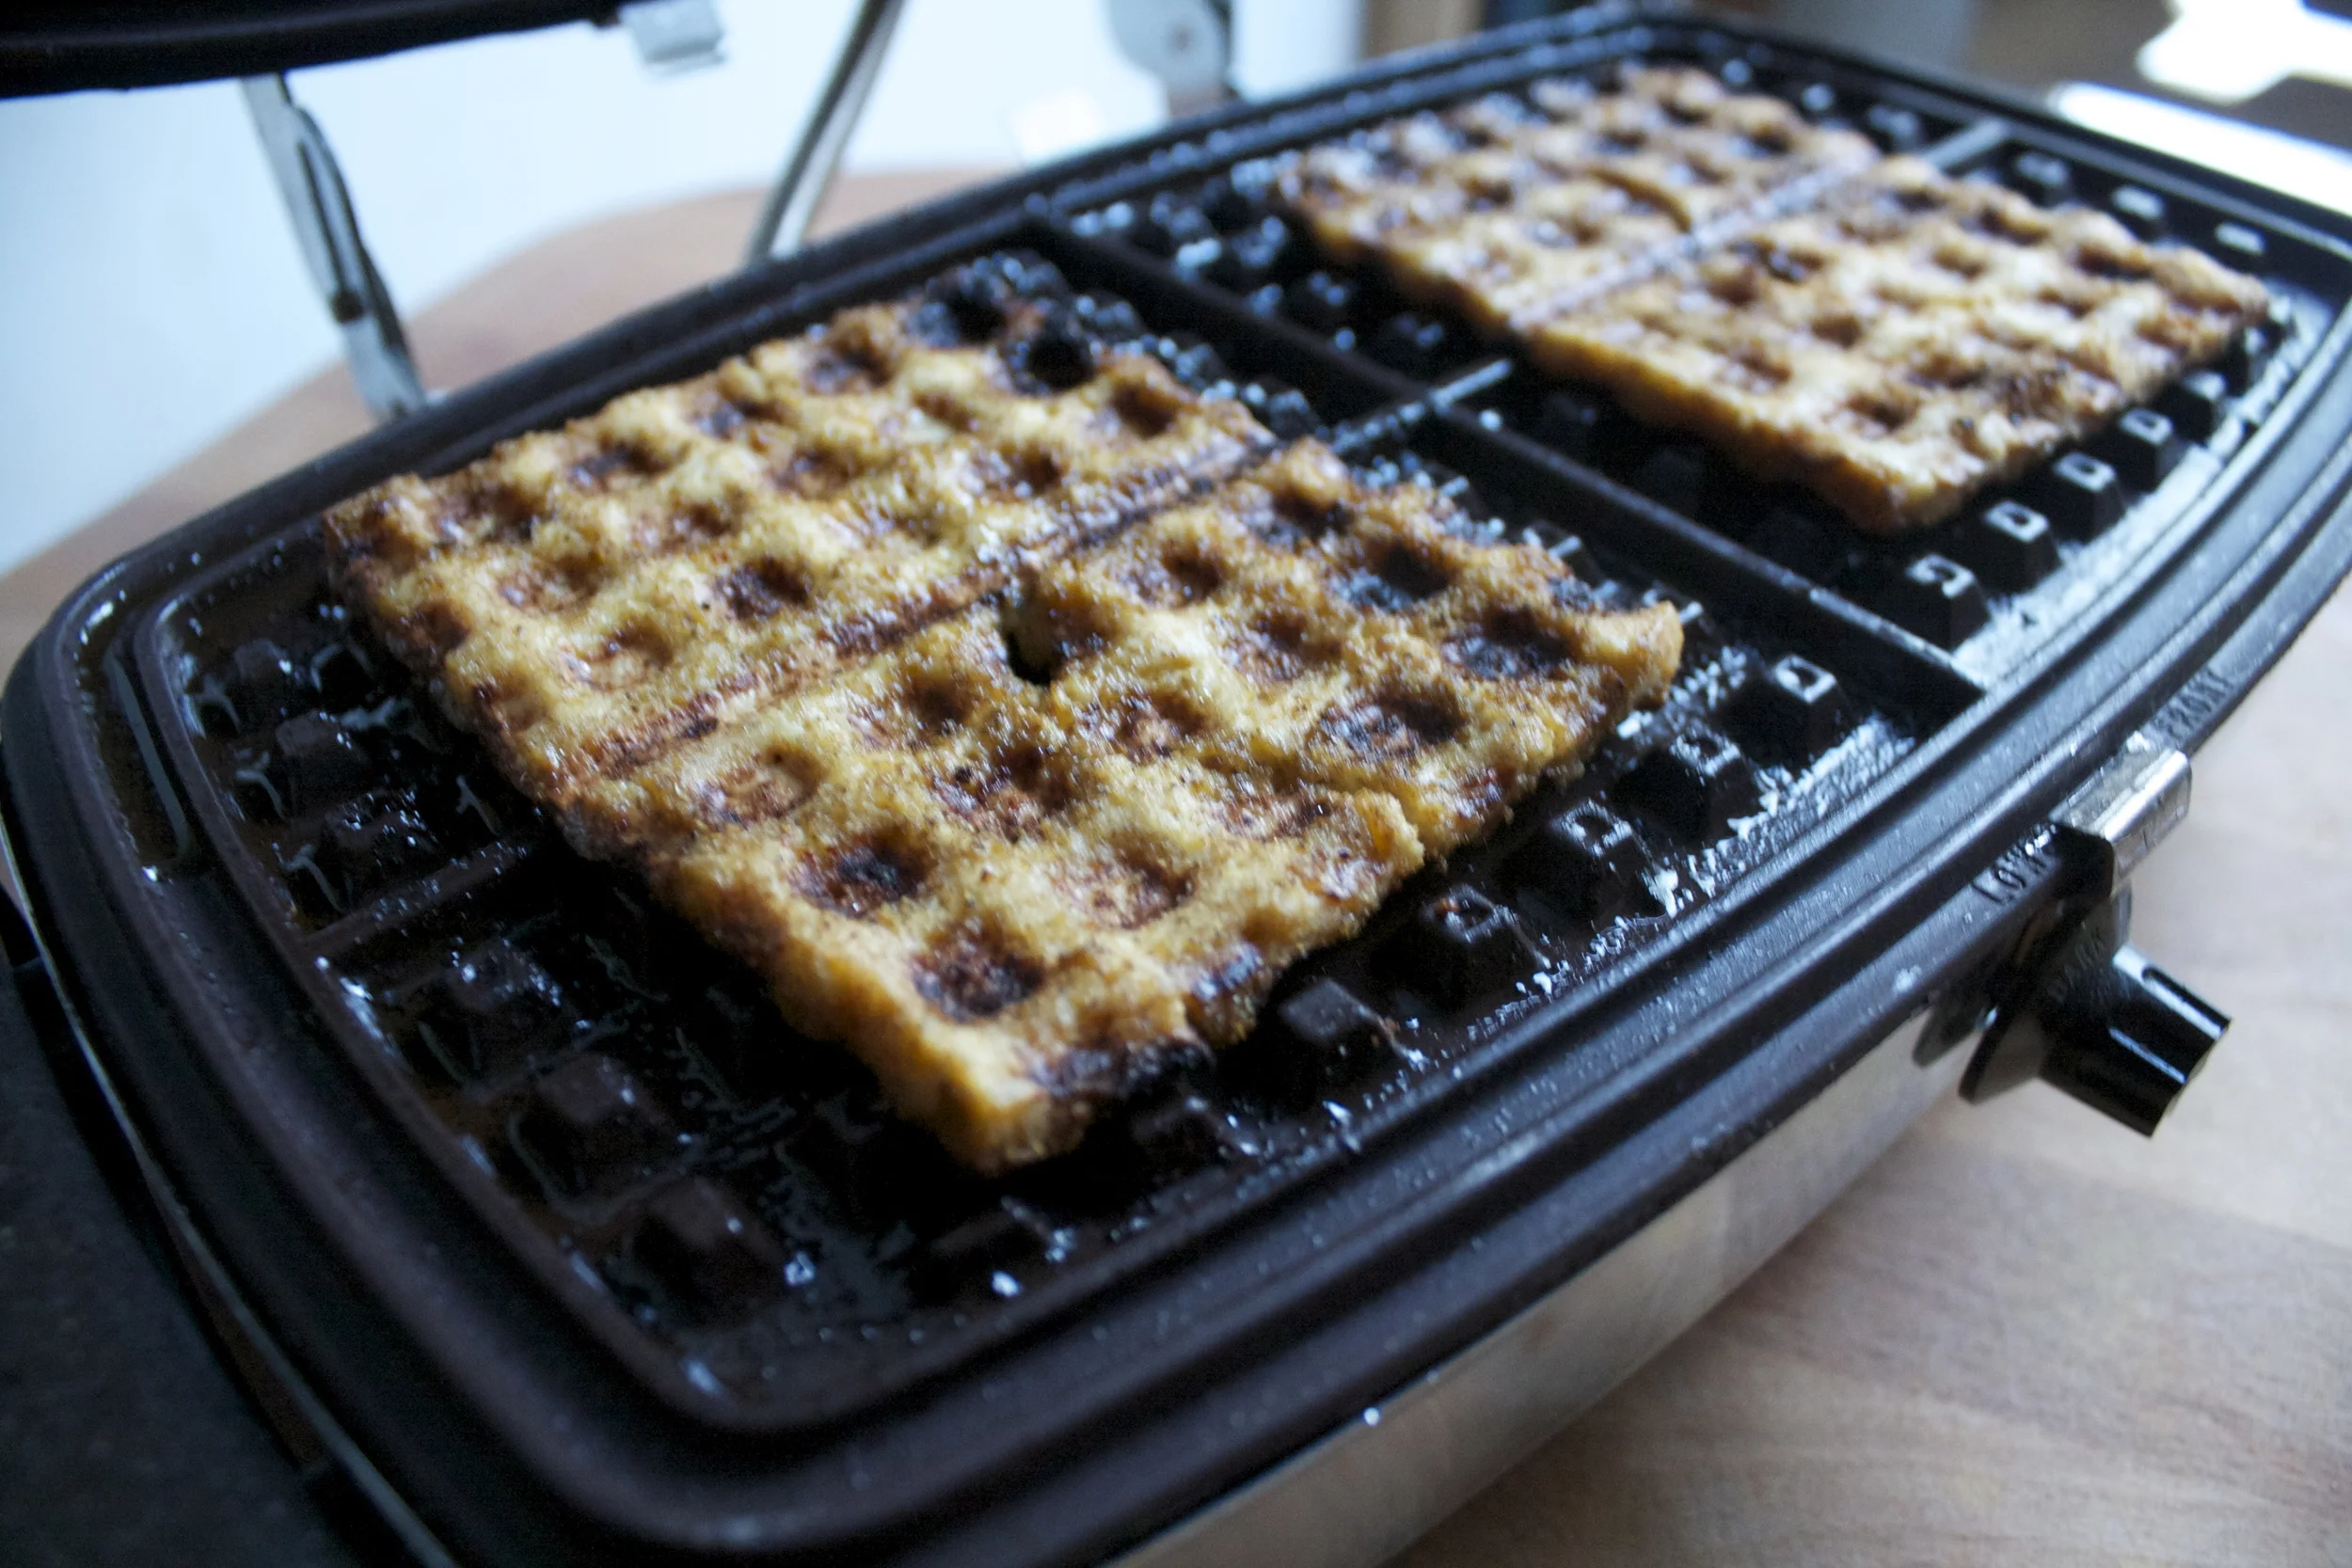

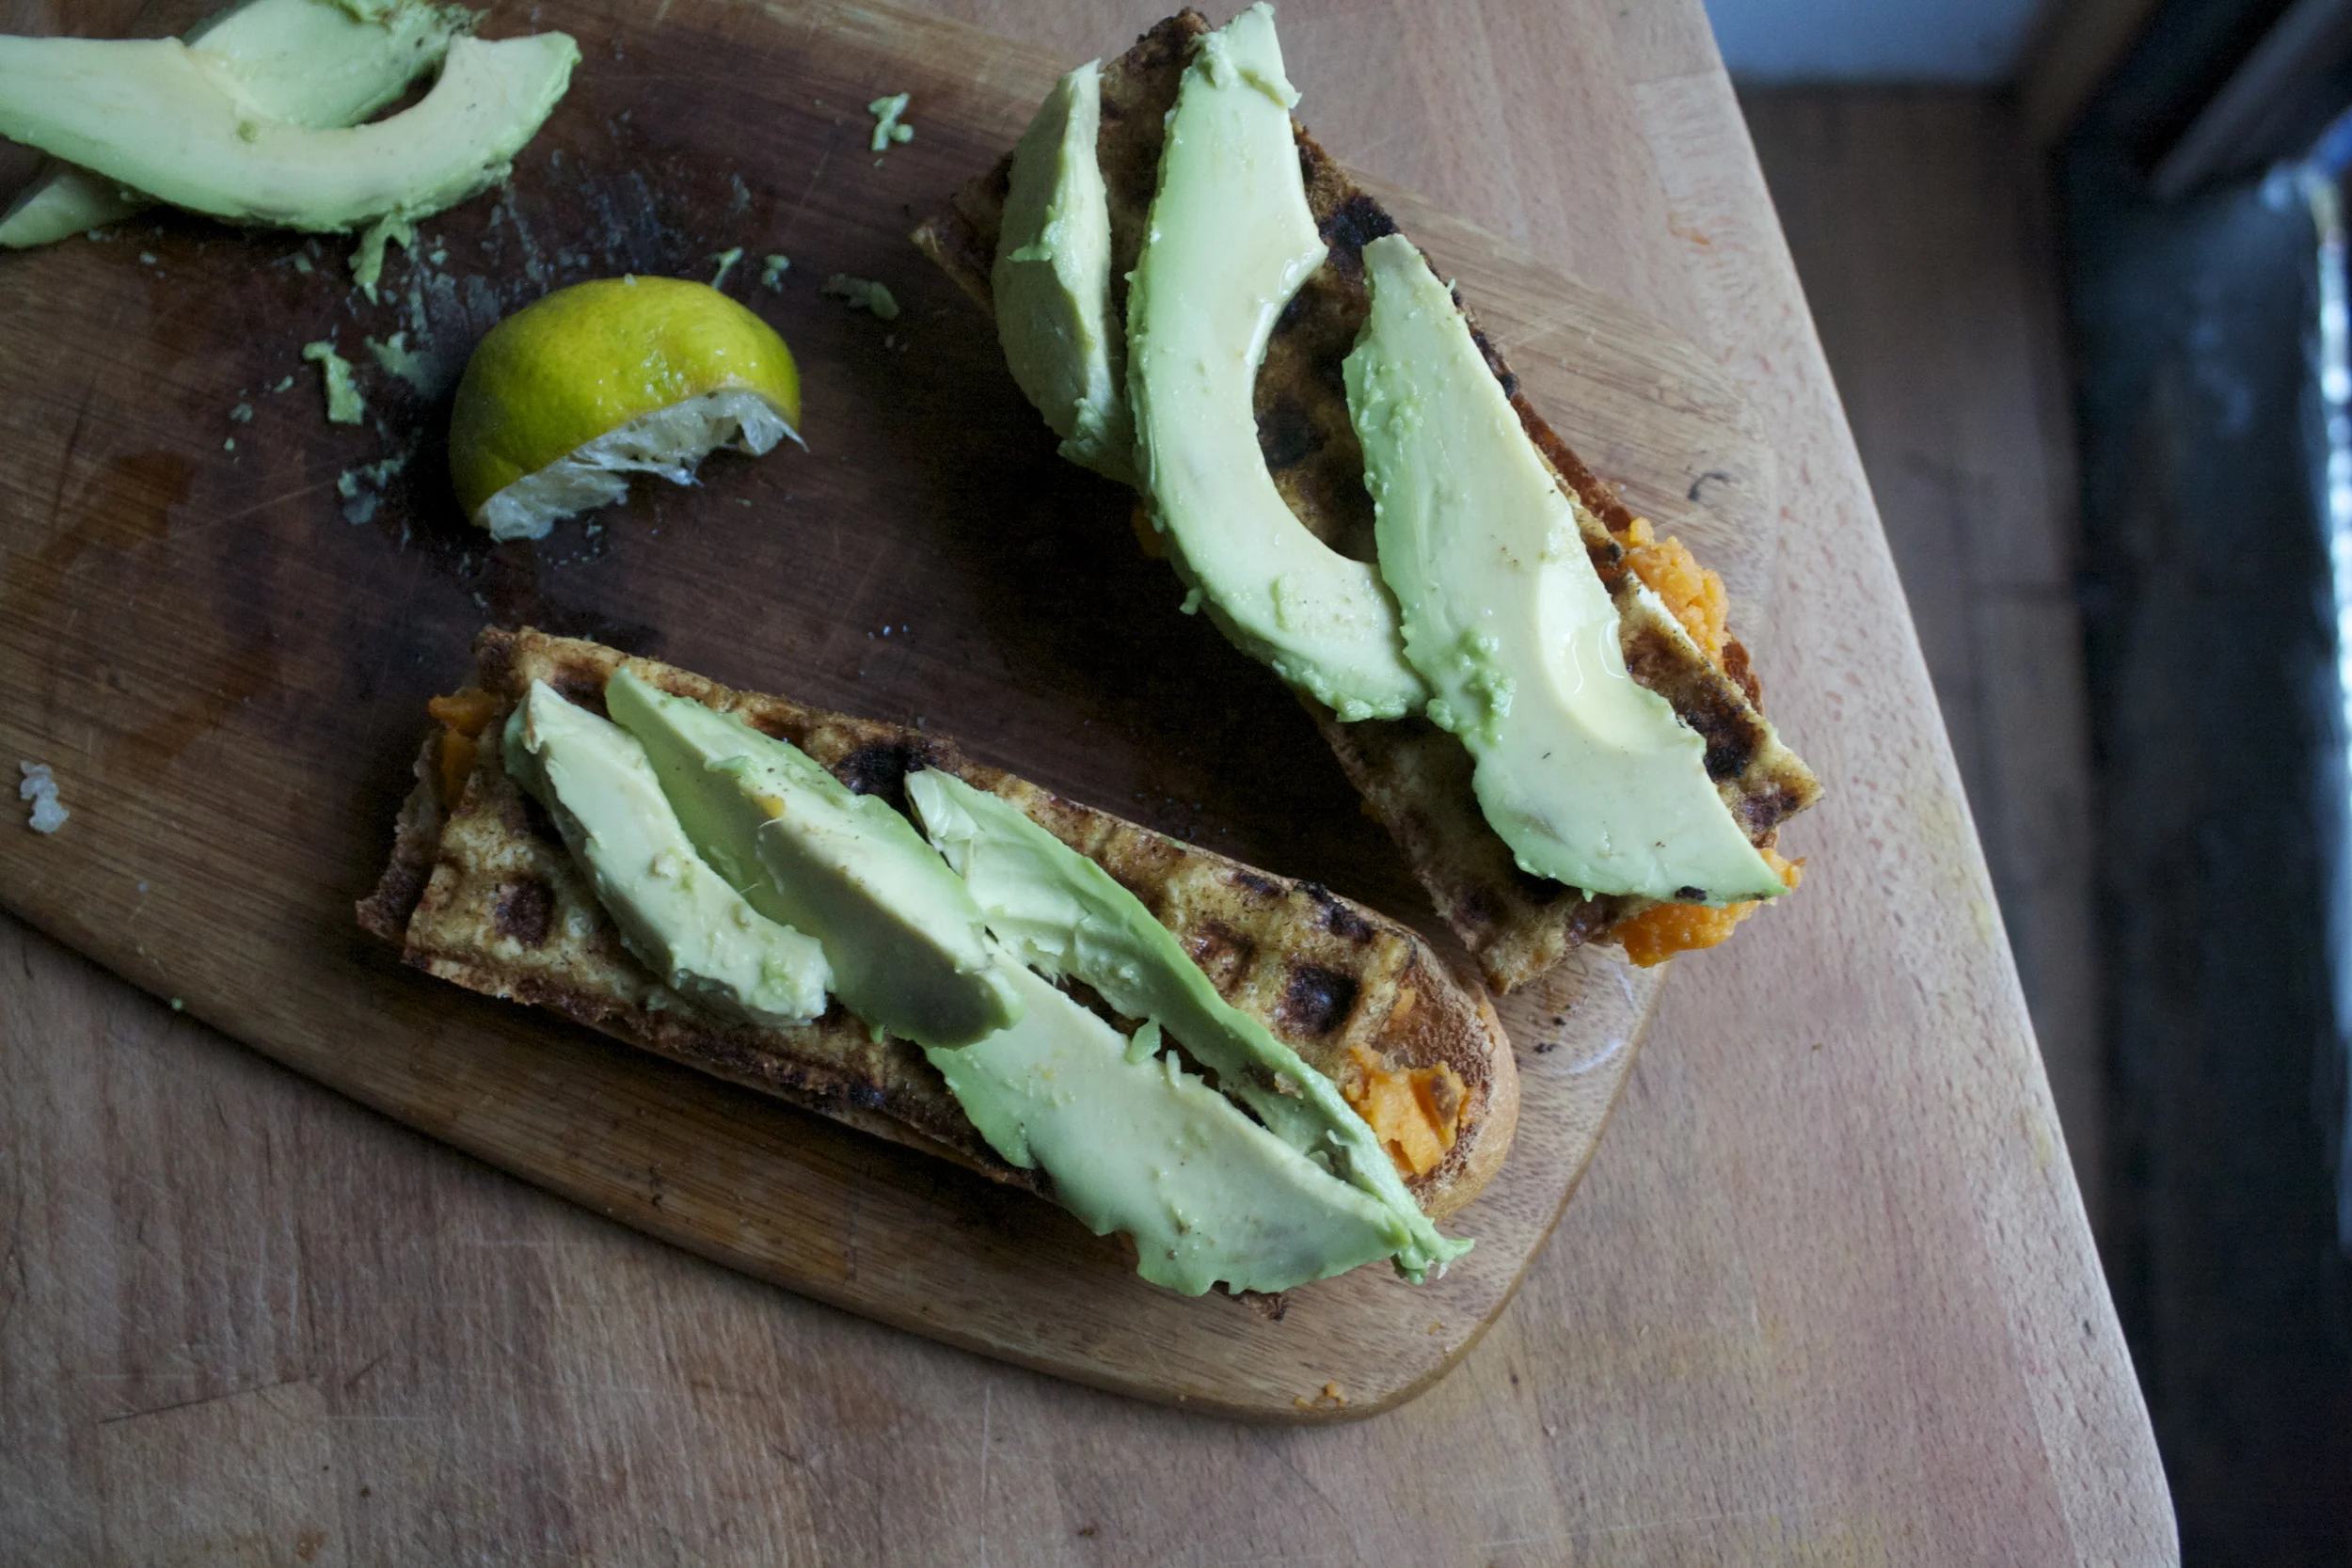
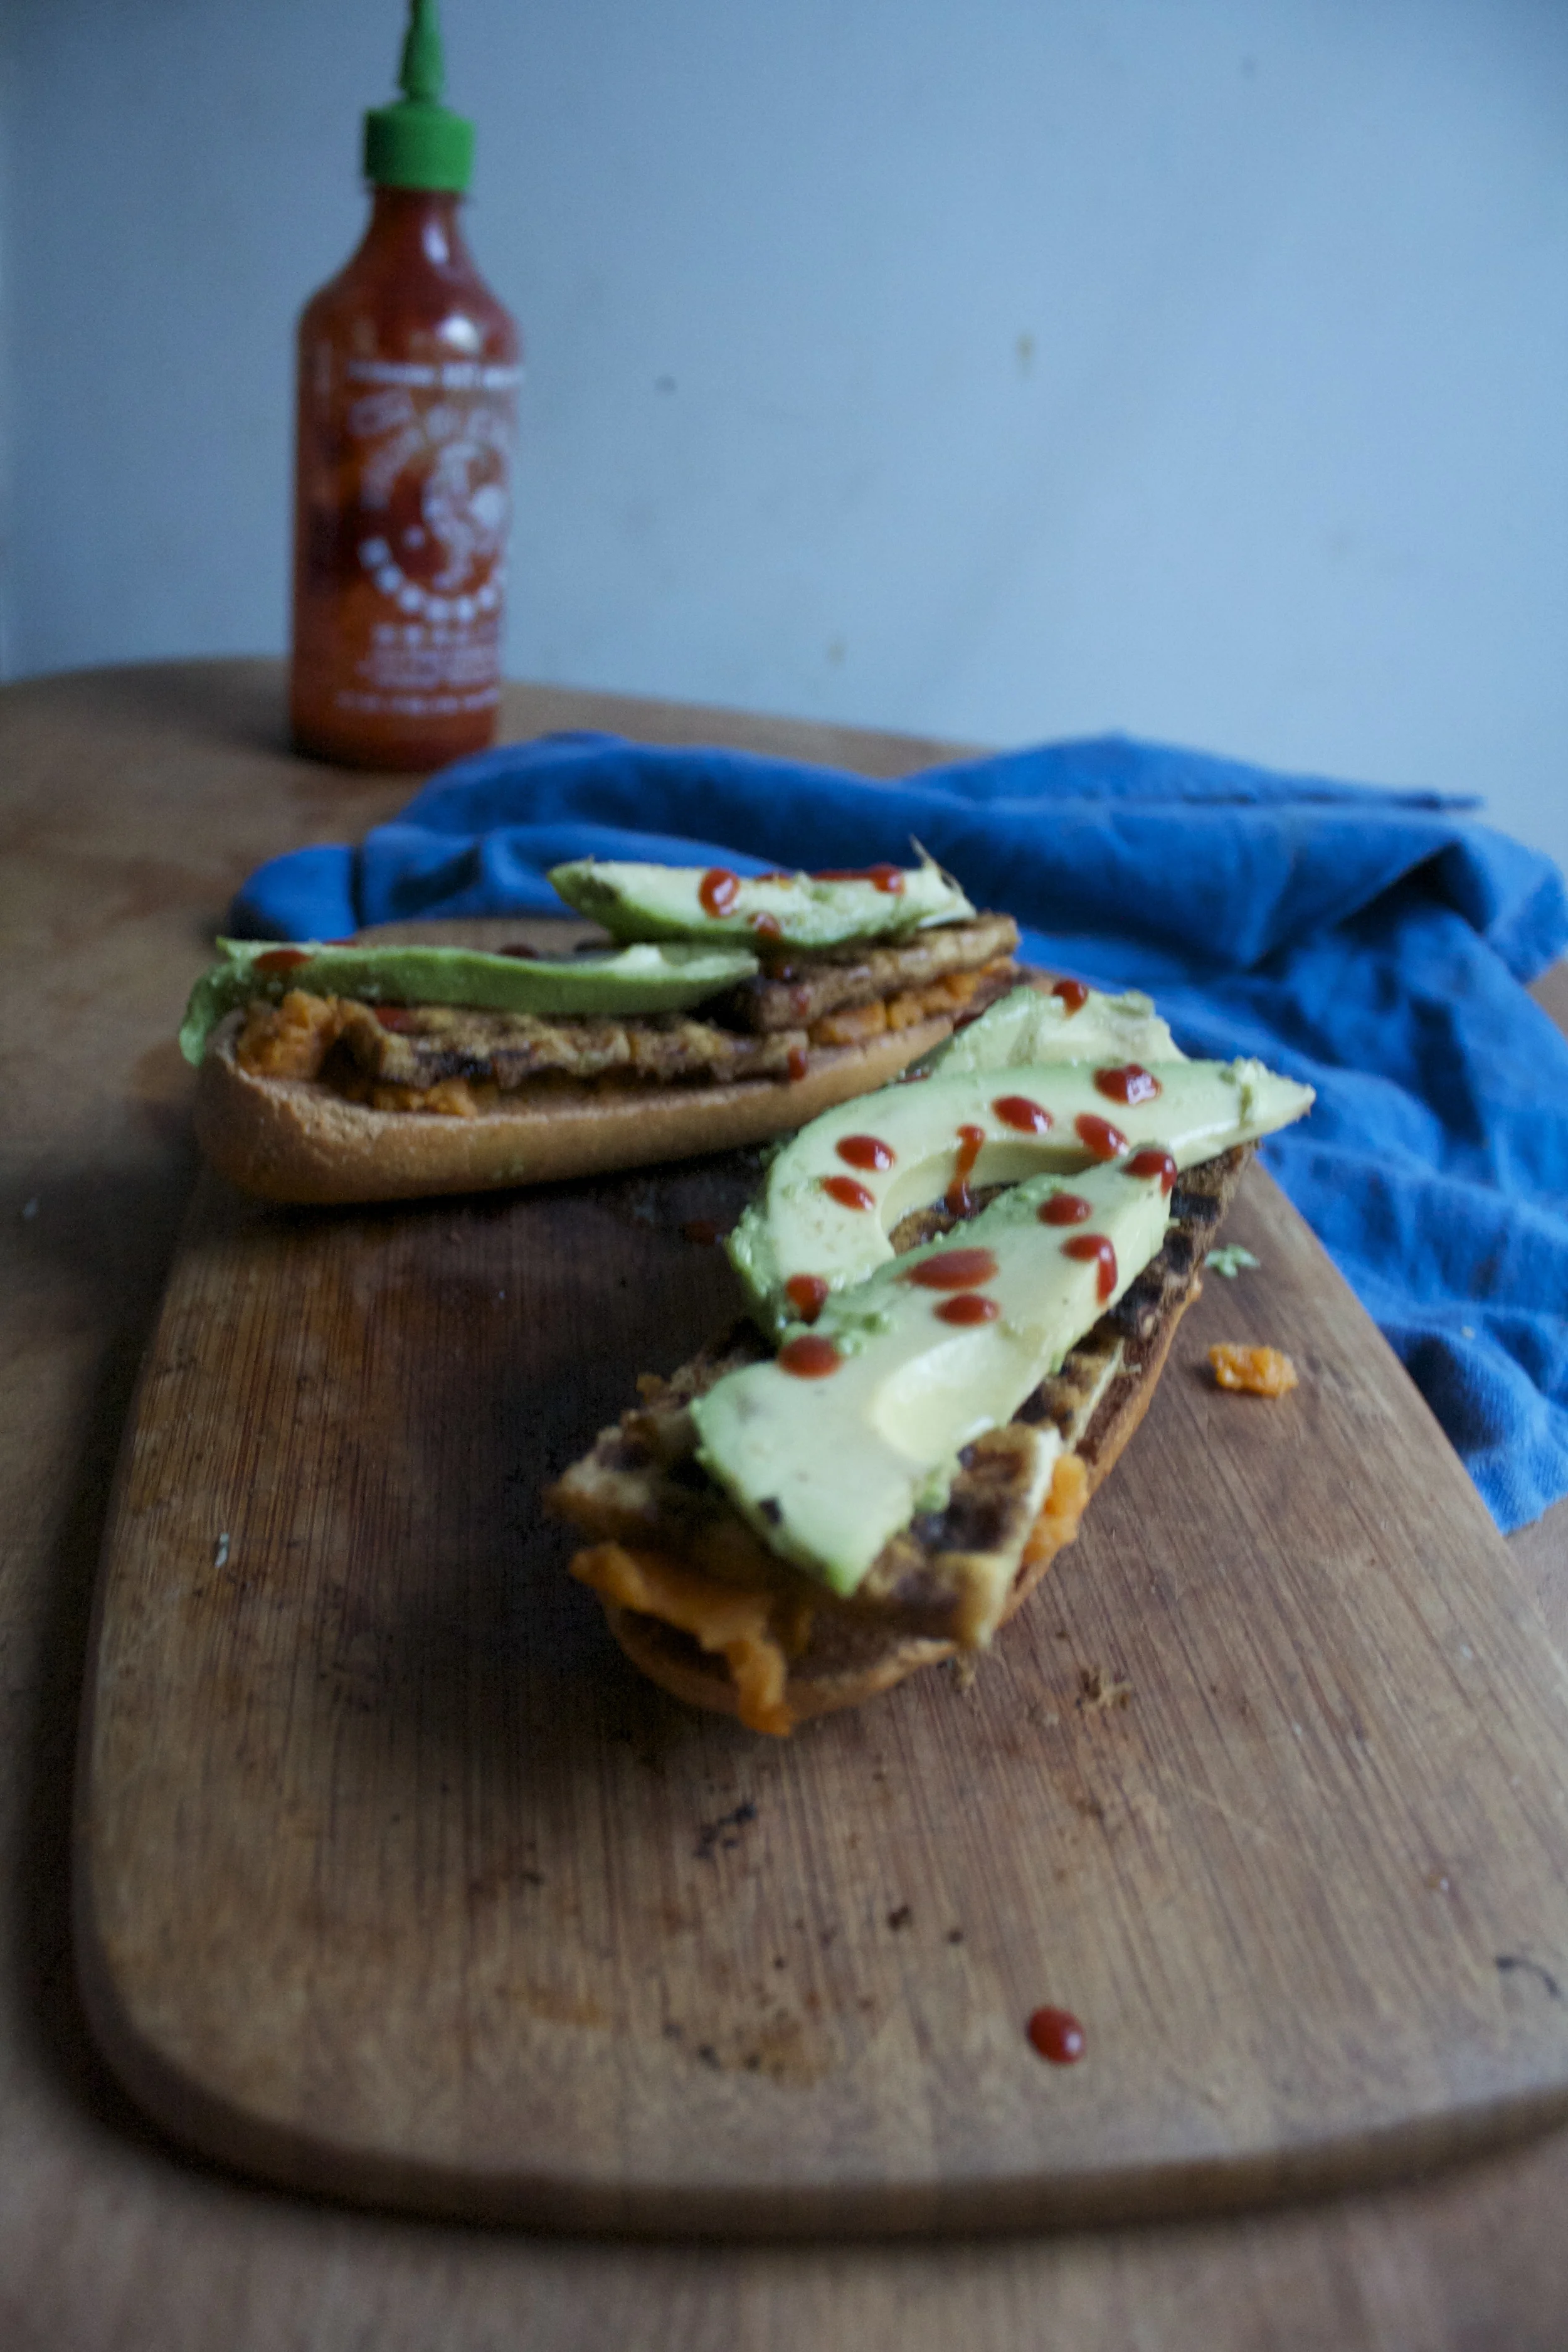
 %u00a0Some days making an effort is just too much. The upcoming holidays are taking up most of my brain capacity. I need the day to decompress and I don’t want to worry making any meals. Not to mention I am running low on food in the house, my winter farm share doesn’t start until next week (HORRAY!!) and I really don’t want to go to the grocery store. I have avocado, I have tomato, I have bread. Smoosh avocado on toast, top with a few slices of tomato, and give it a sprinkle of salt. Wa La..There you have it. Easy and delicious and is suitable for breakfast, lunch and dinner. Don’t like avocado? Well today, that’s not my problem. I am sure you can find %u00a0jar of peanut butter. Note: Peanut butter anything is also suitable for any meal replacement. Thursday Thursday!!
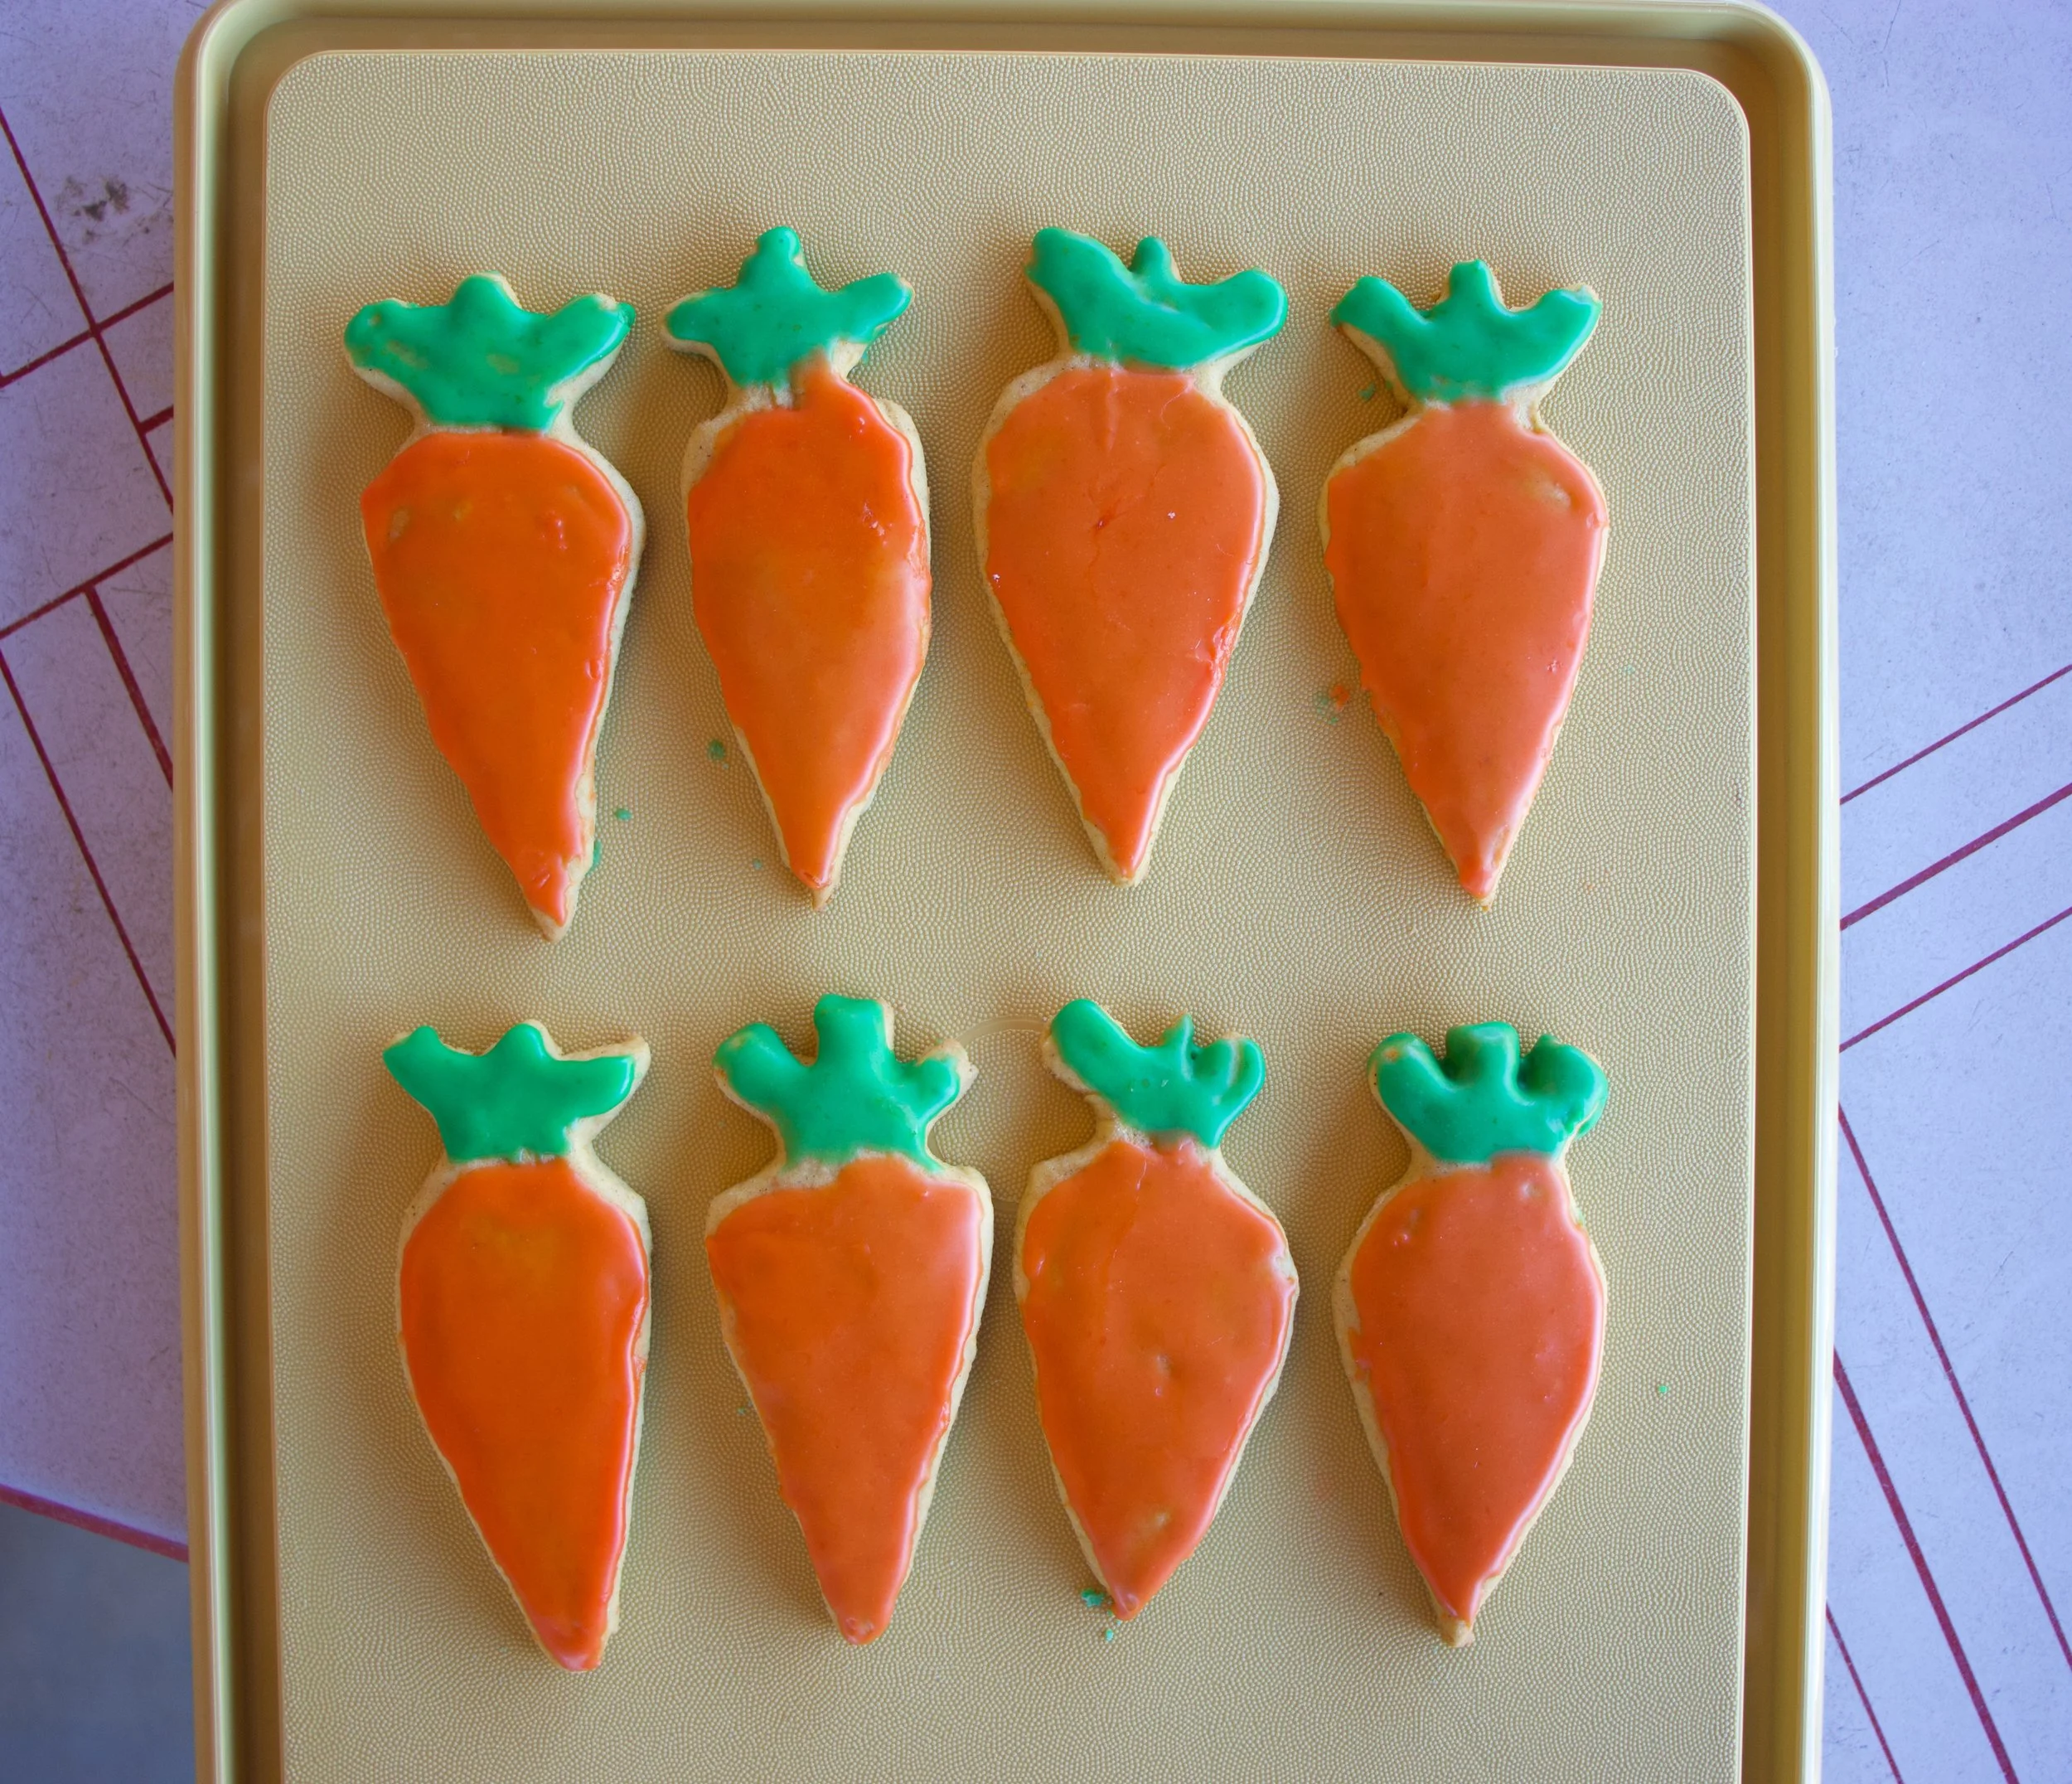
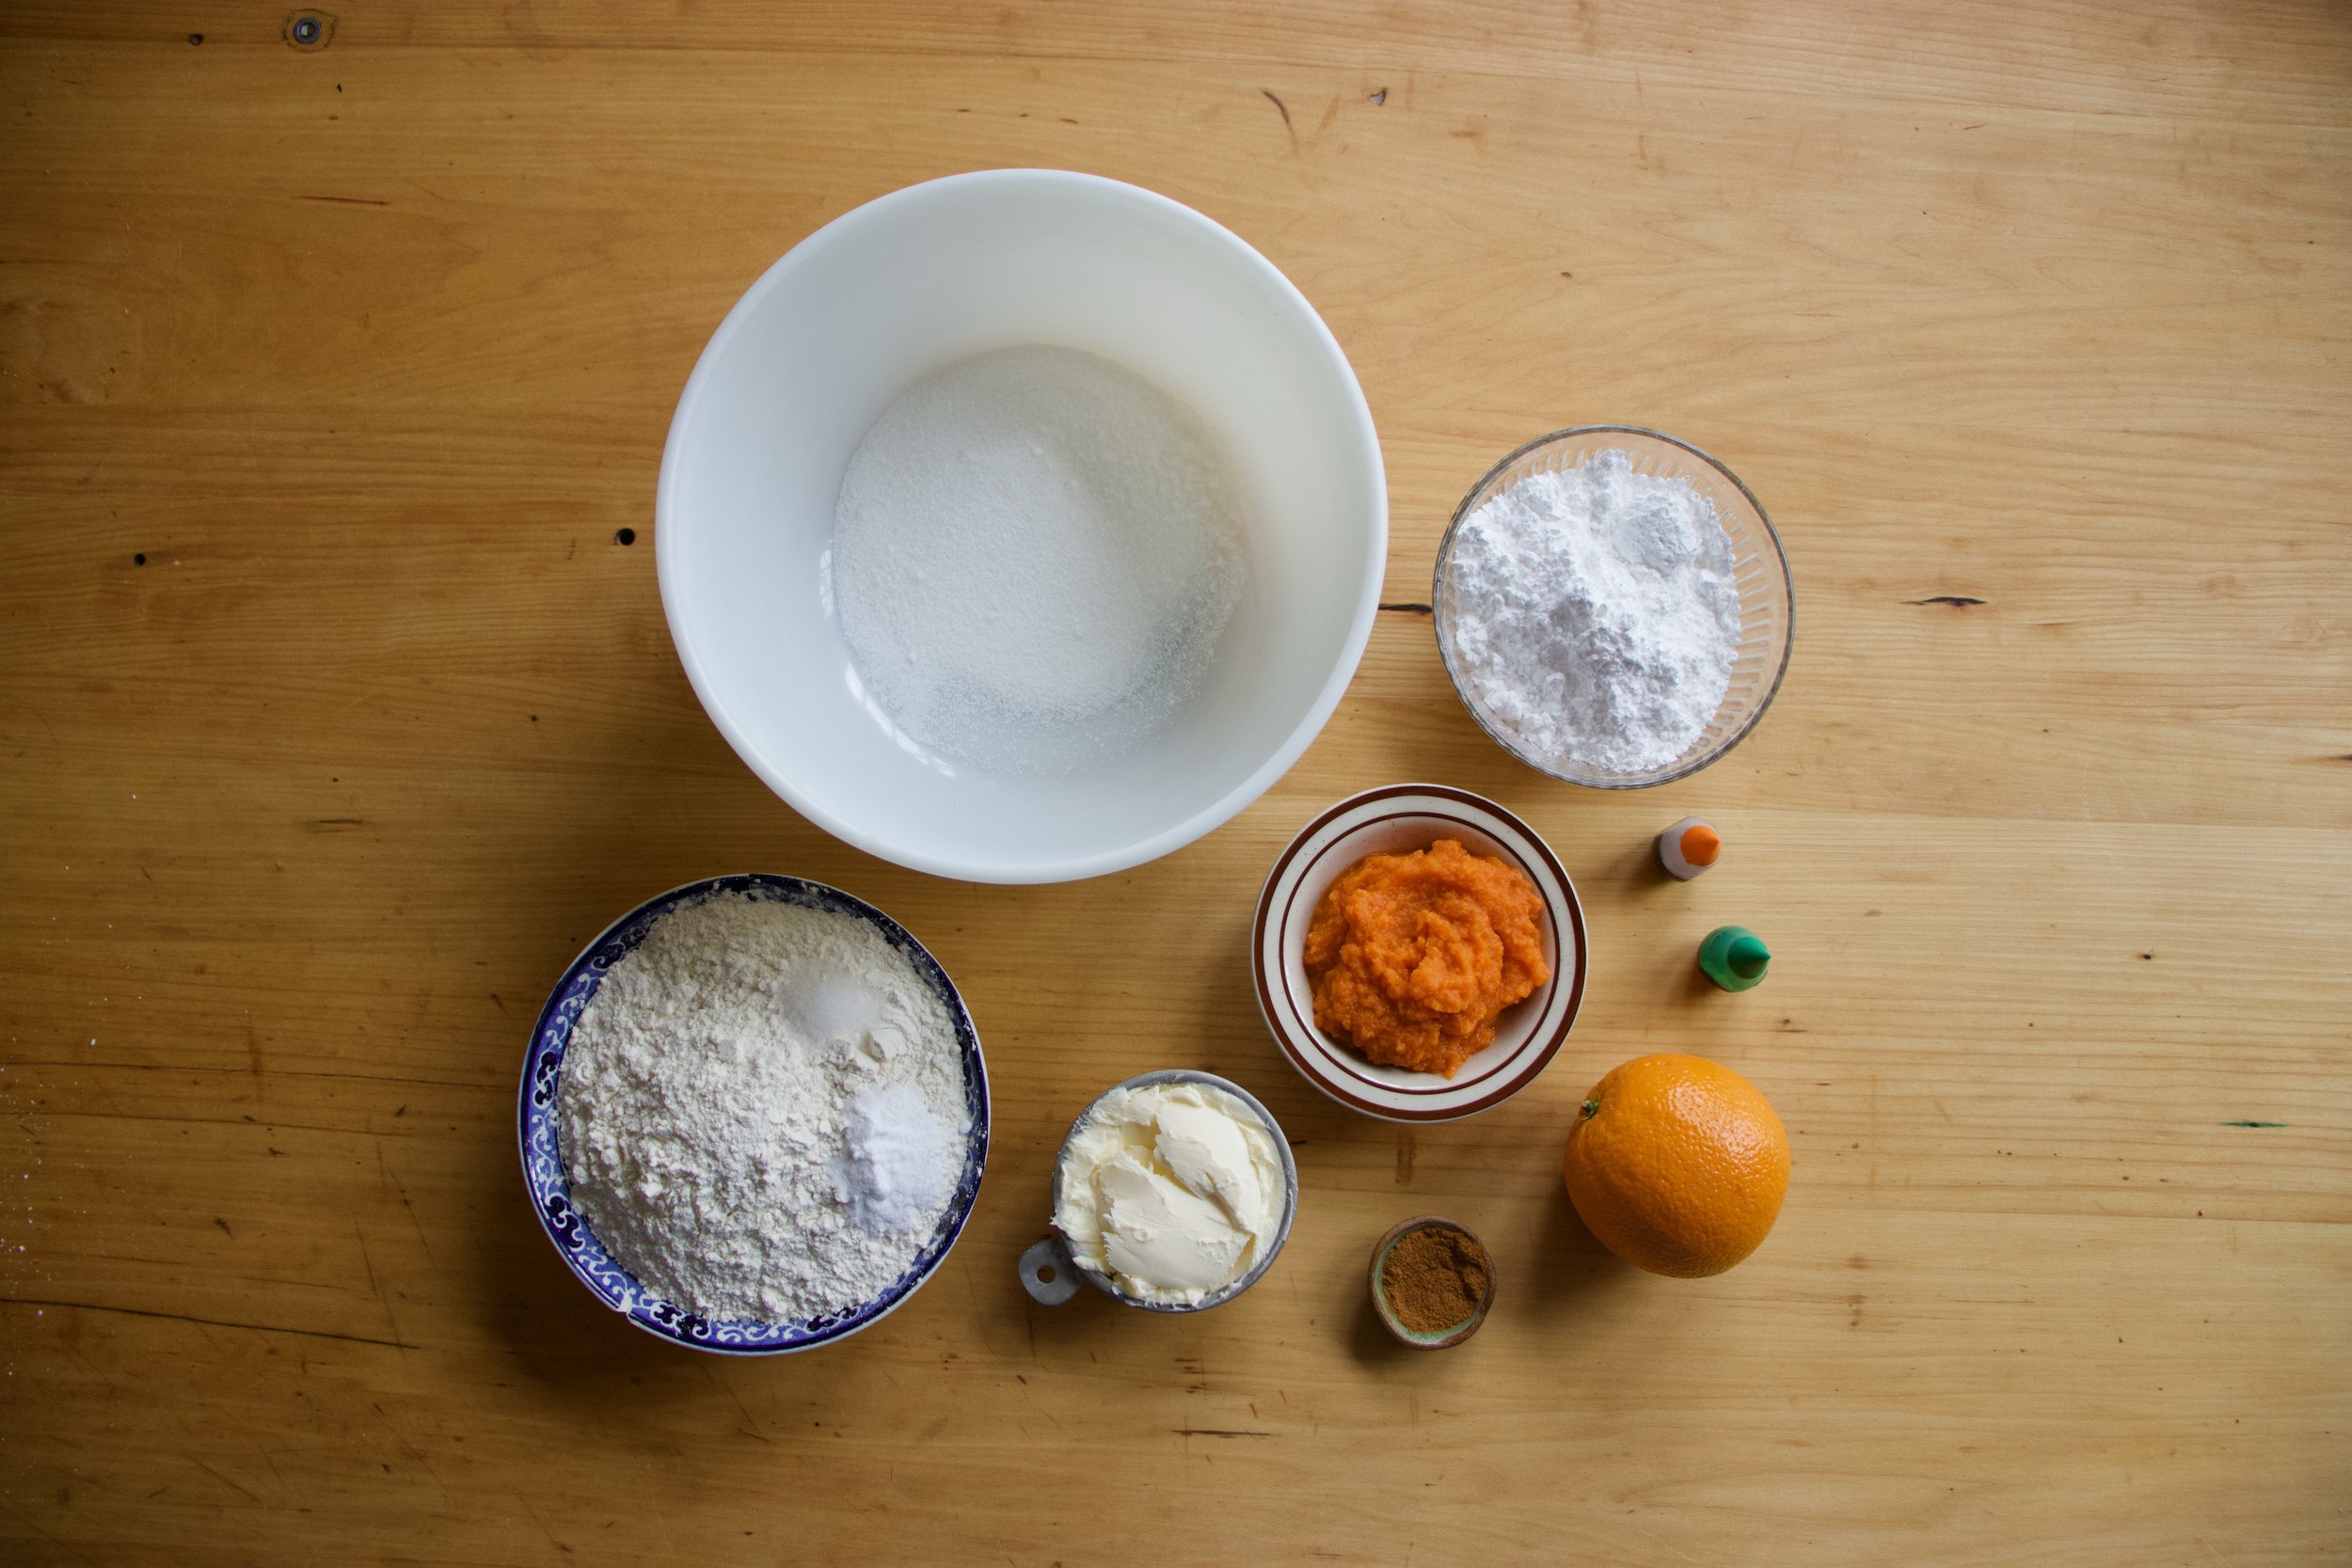

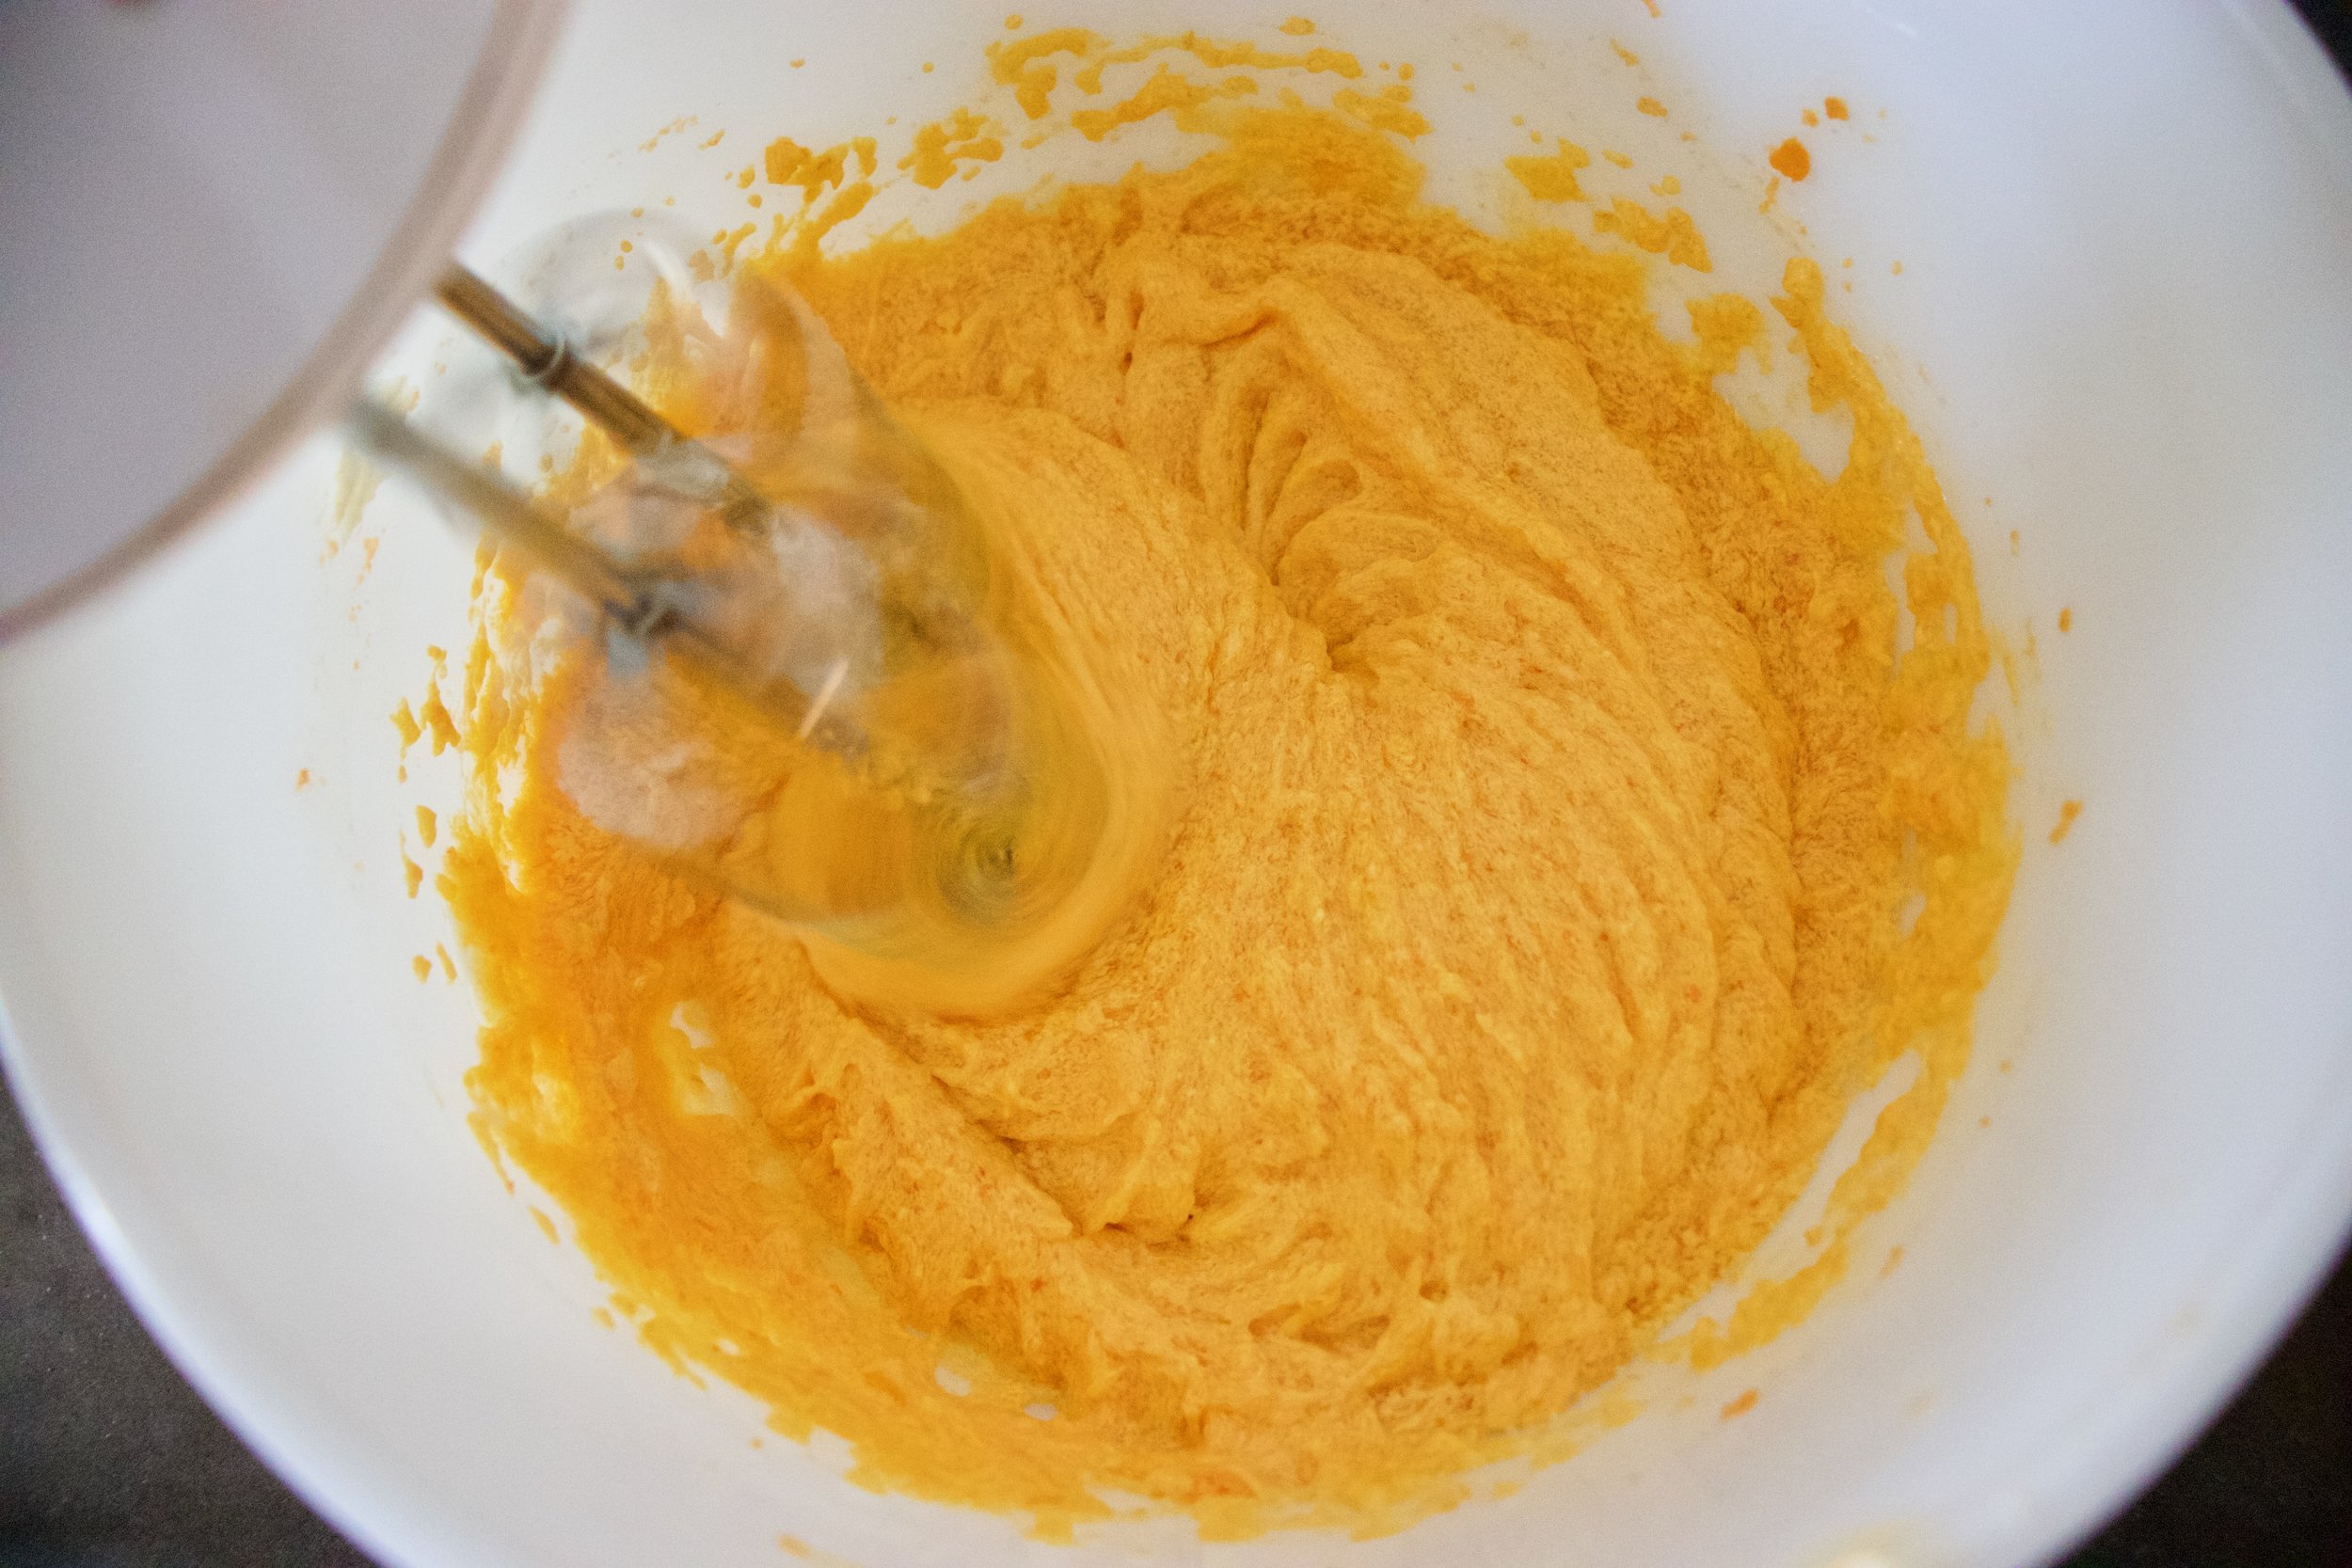


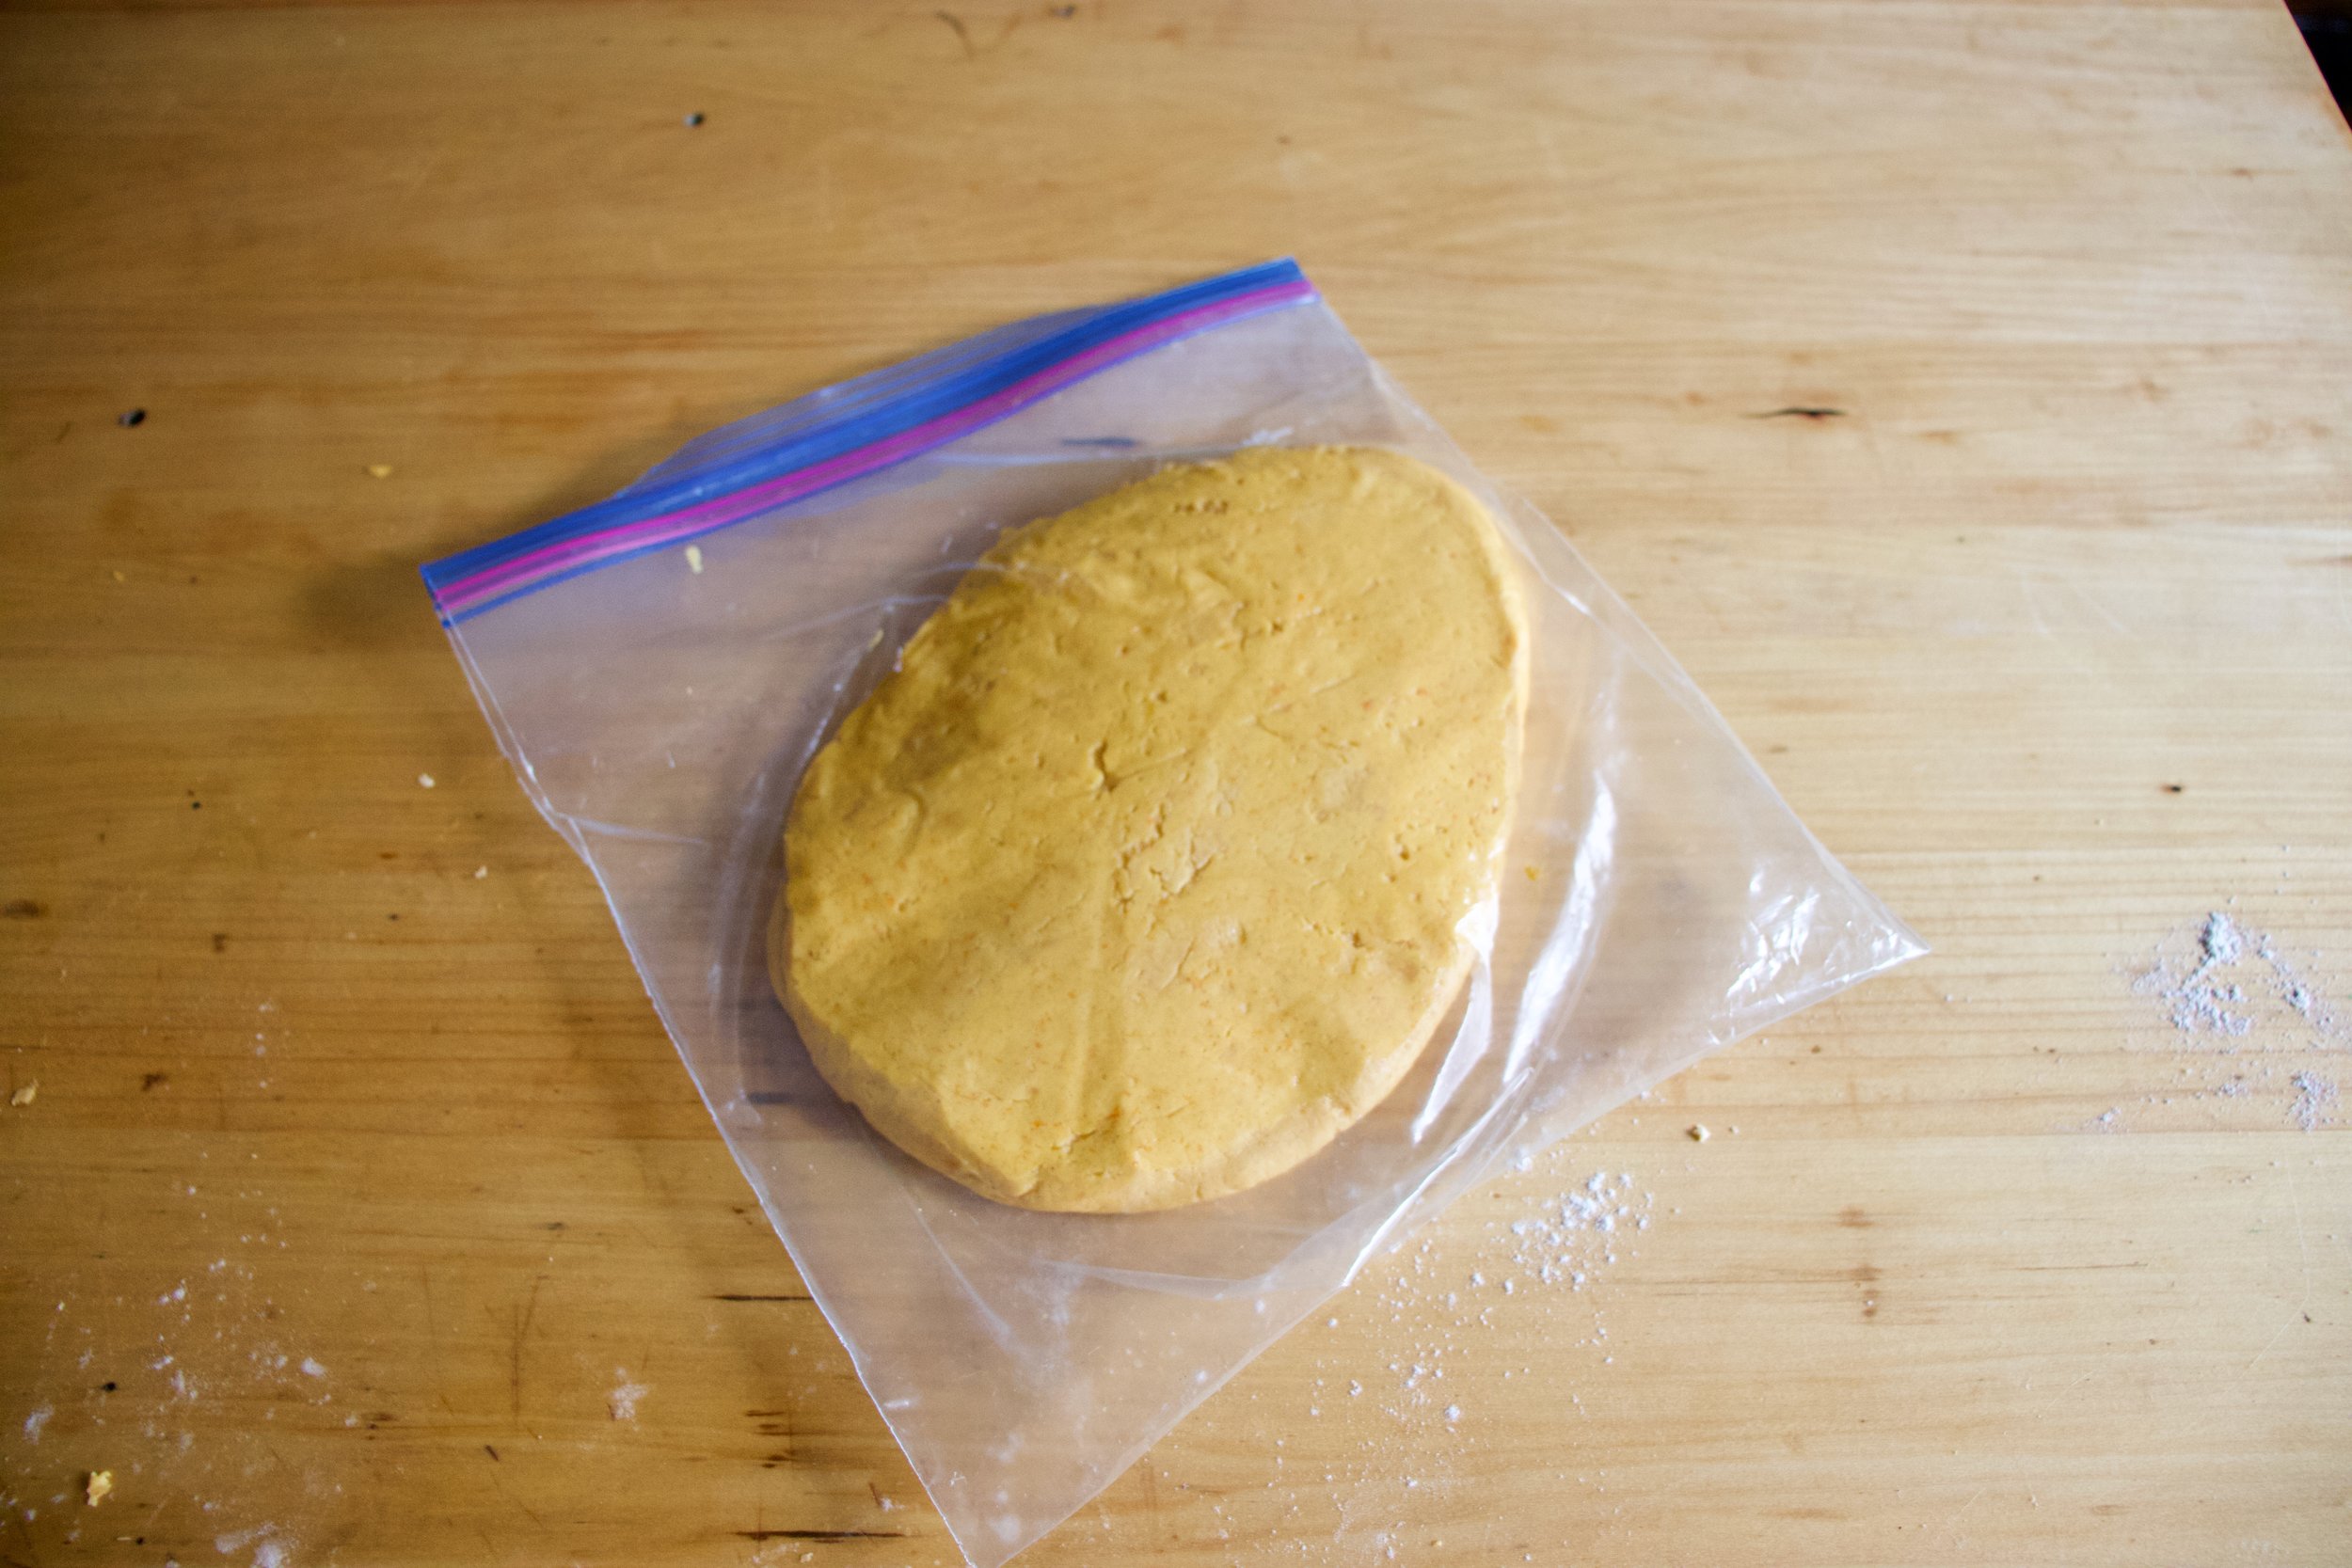

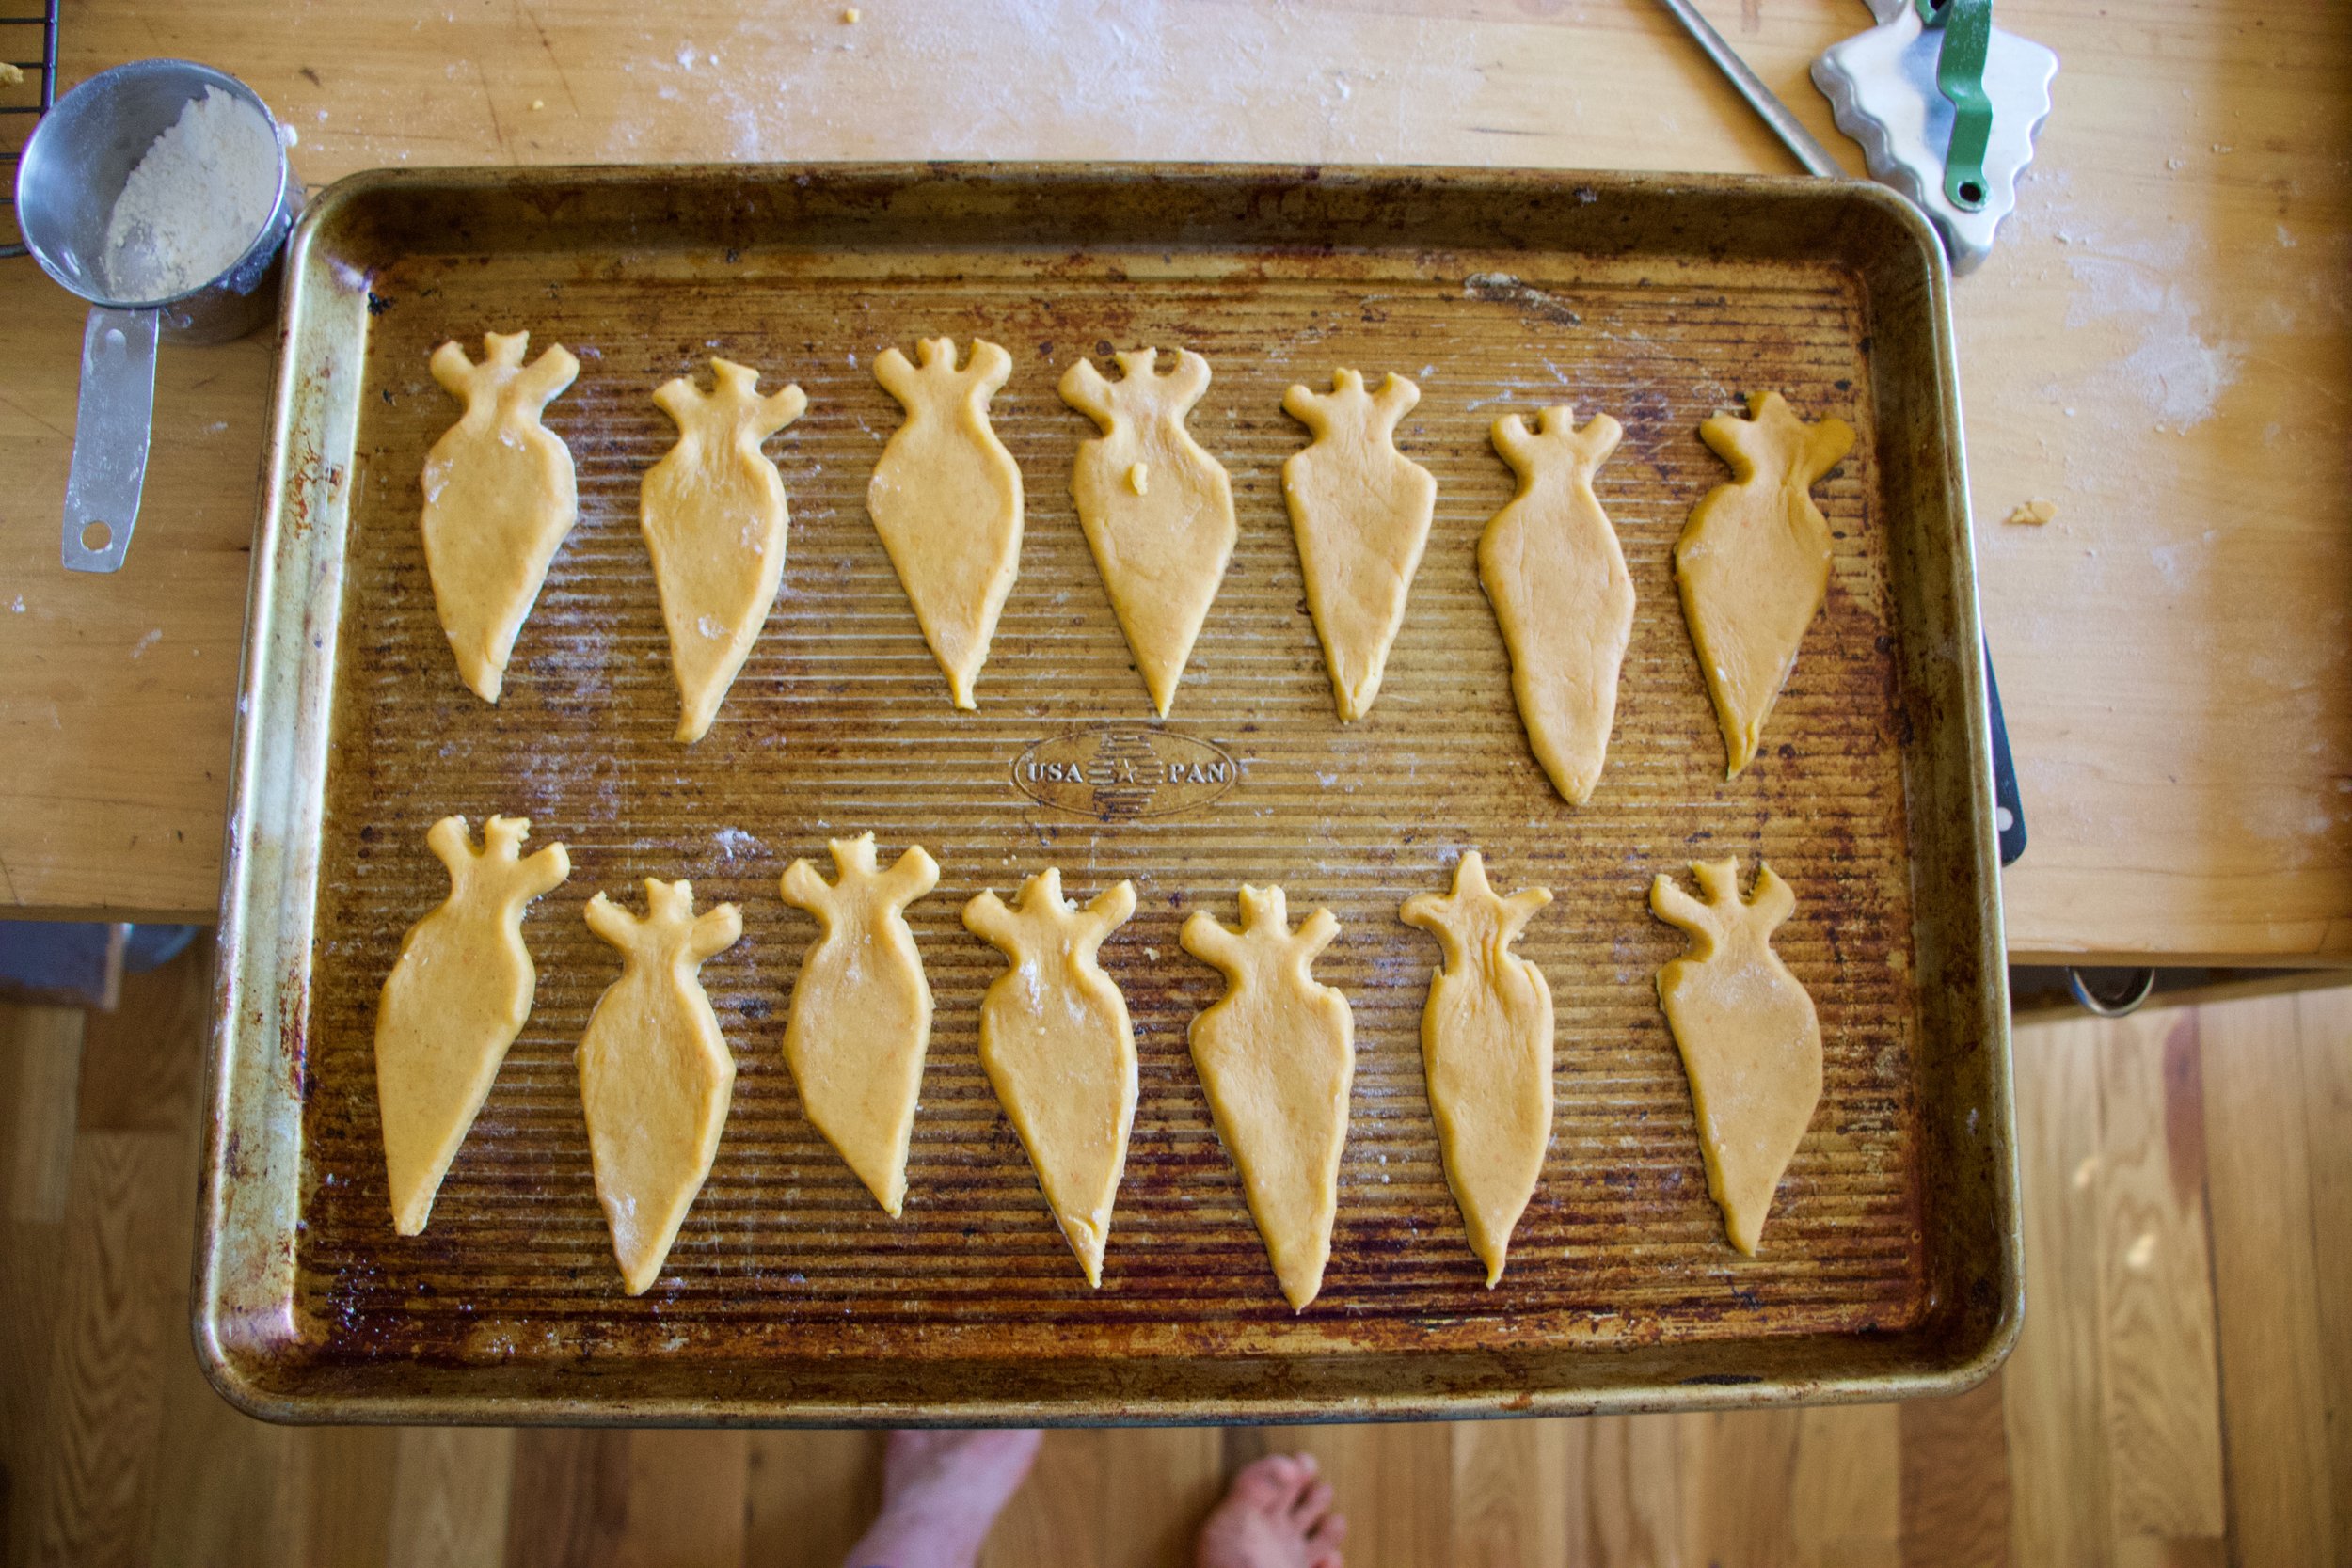
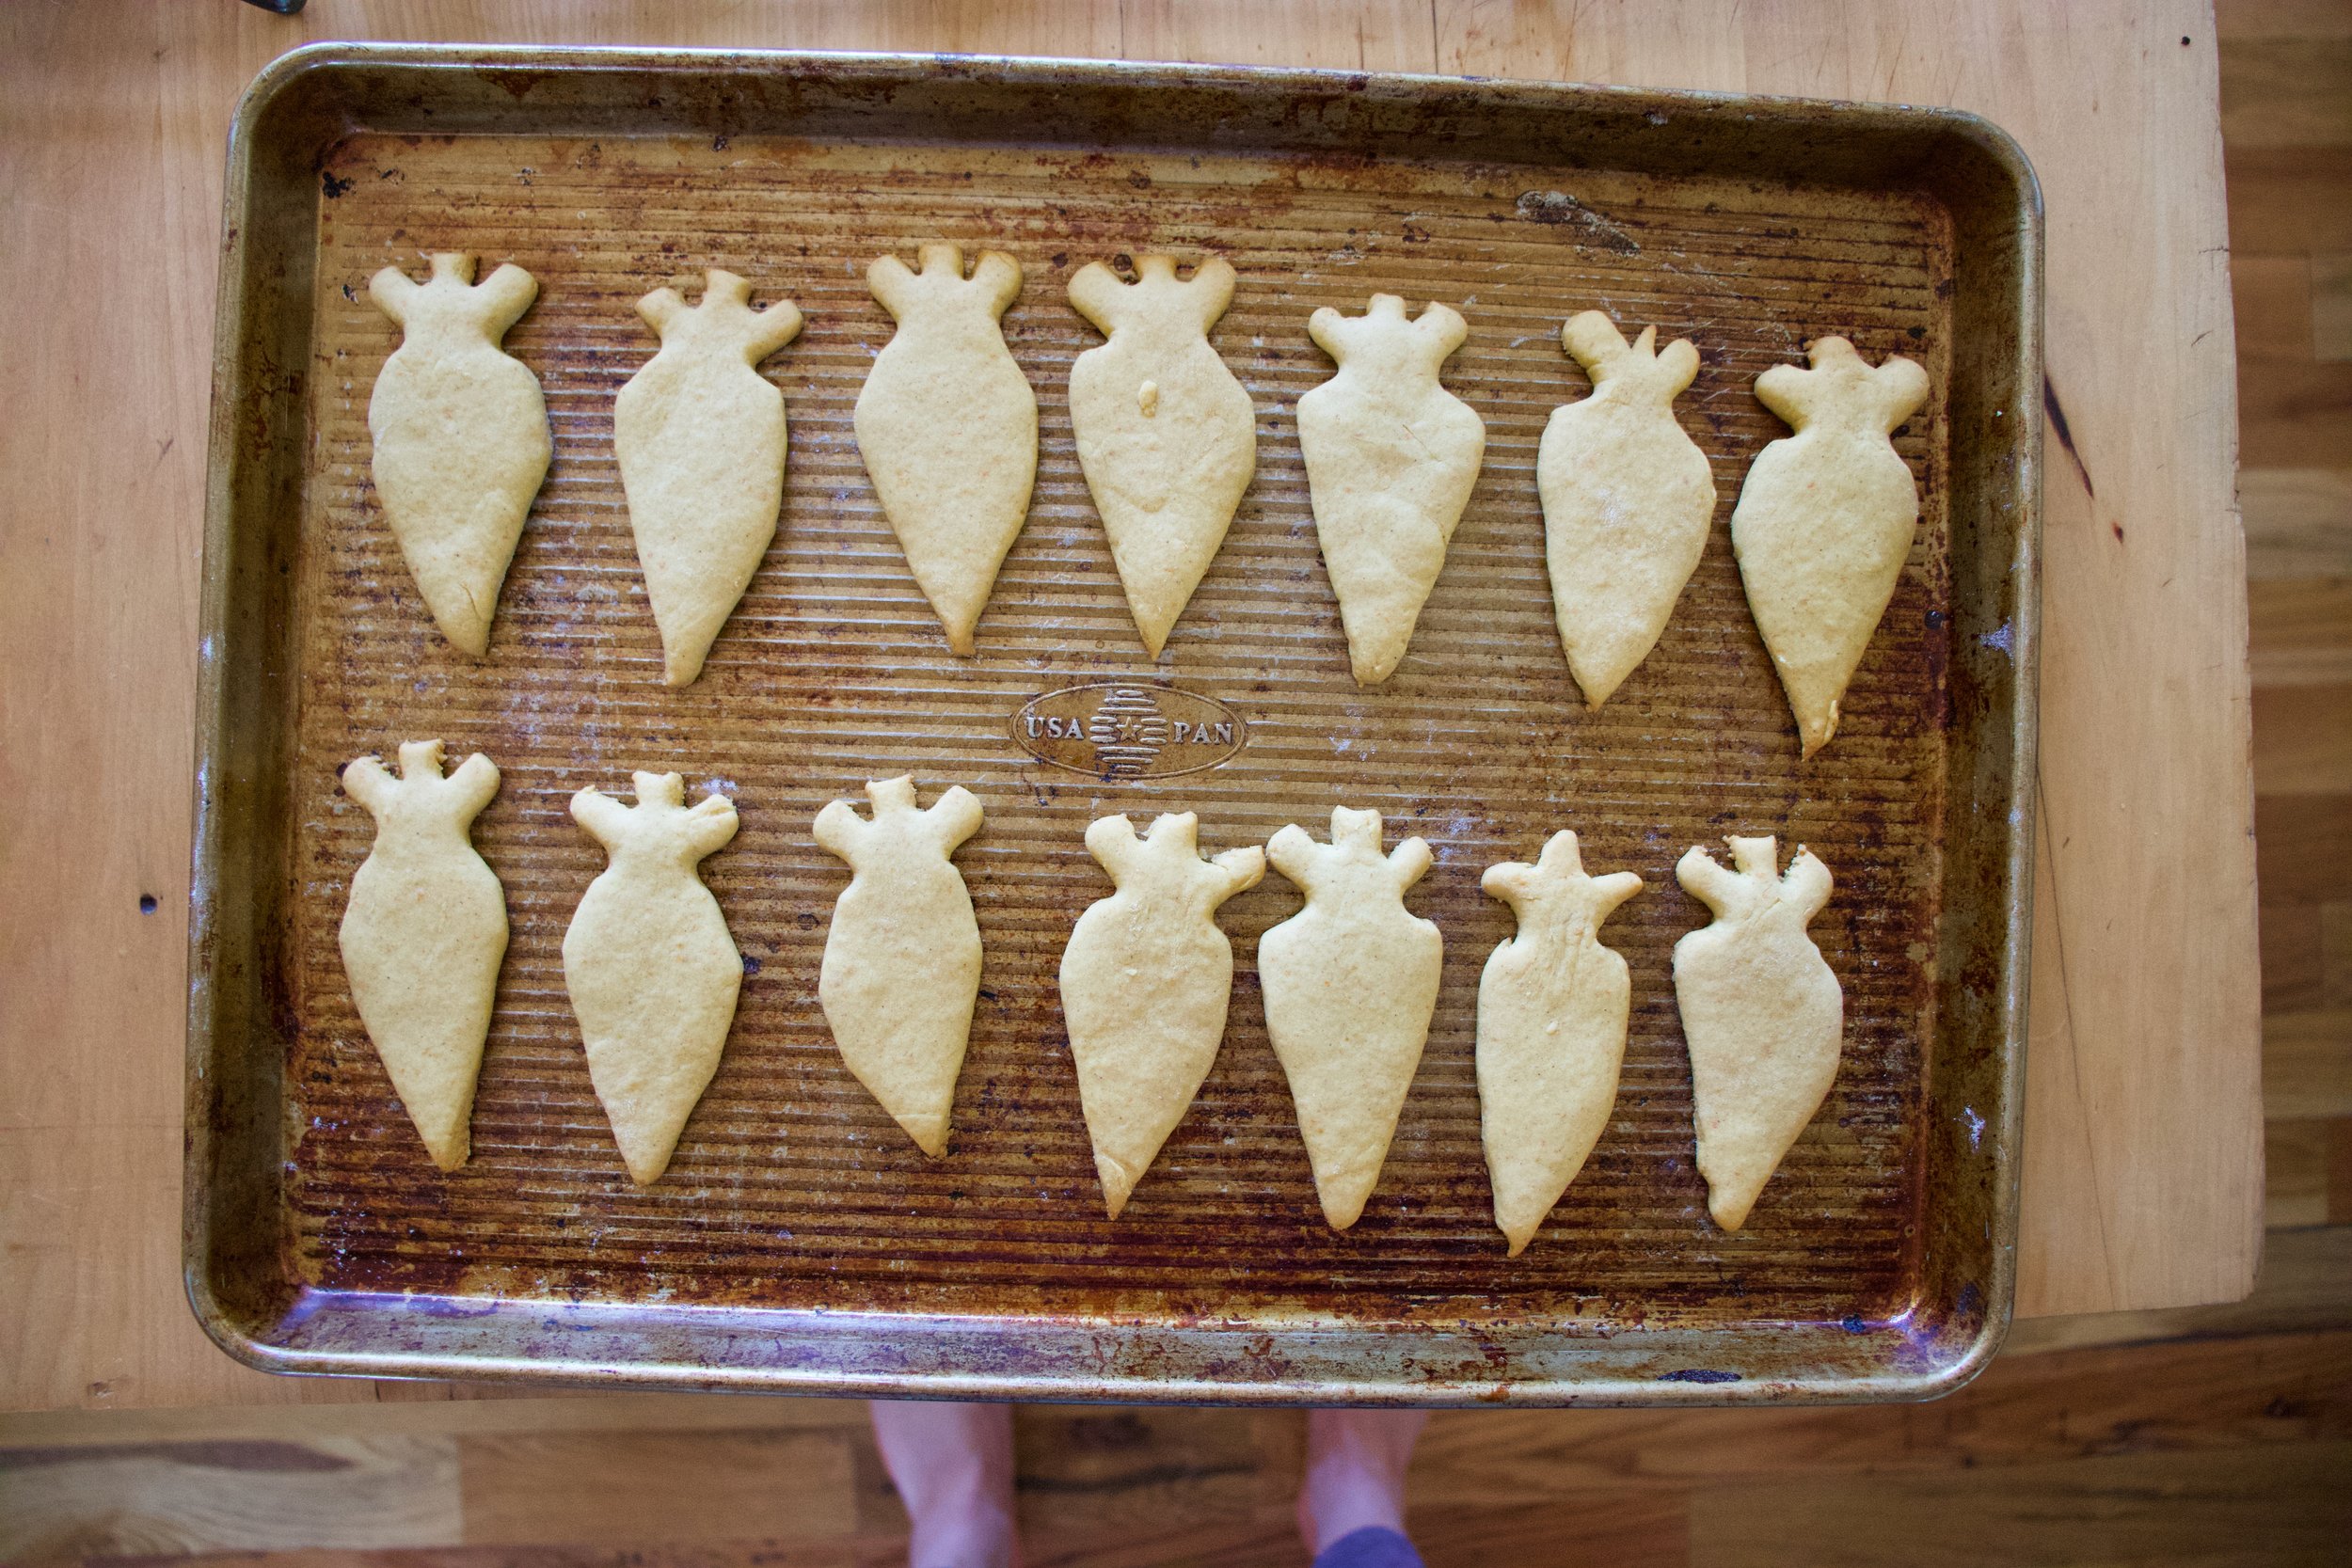
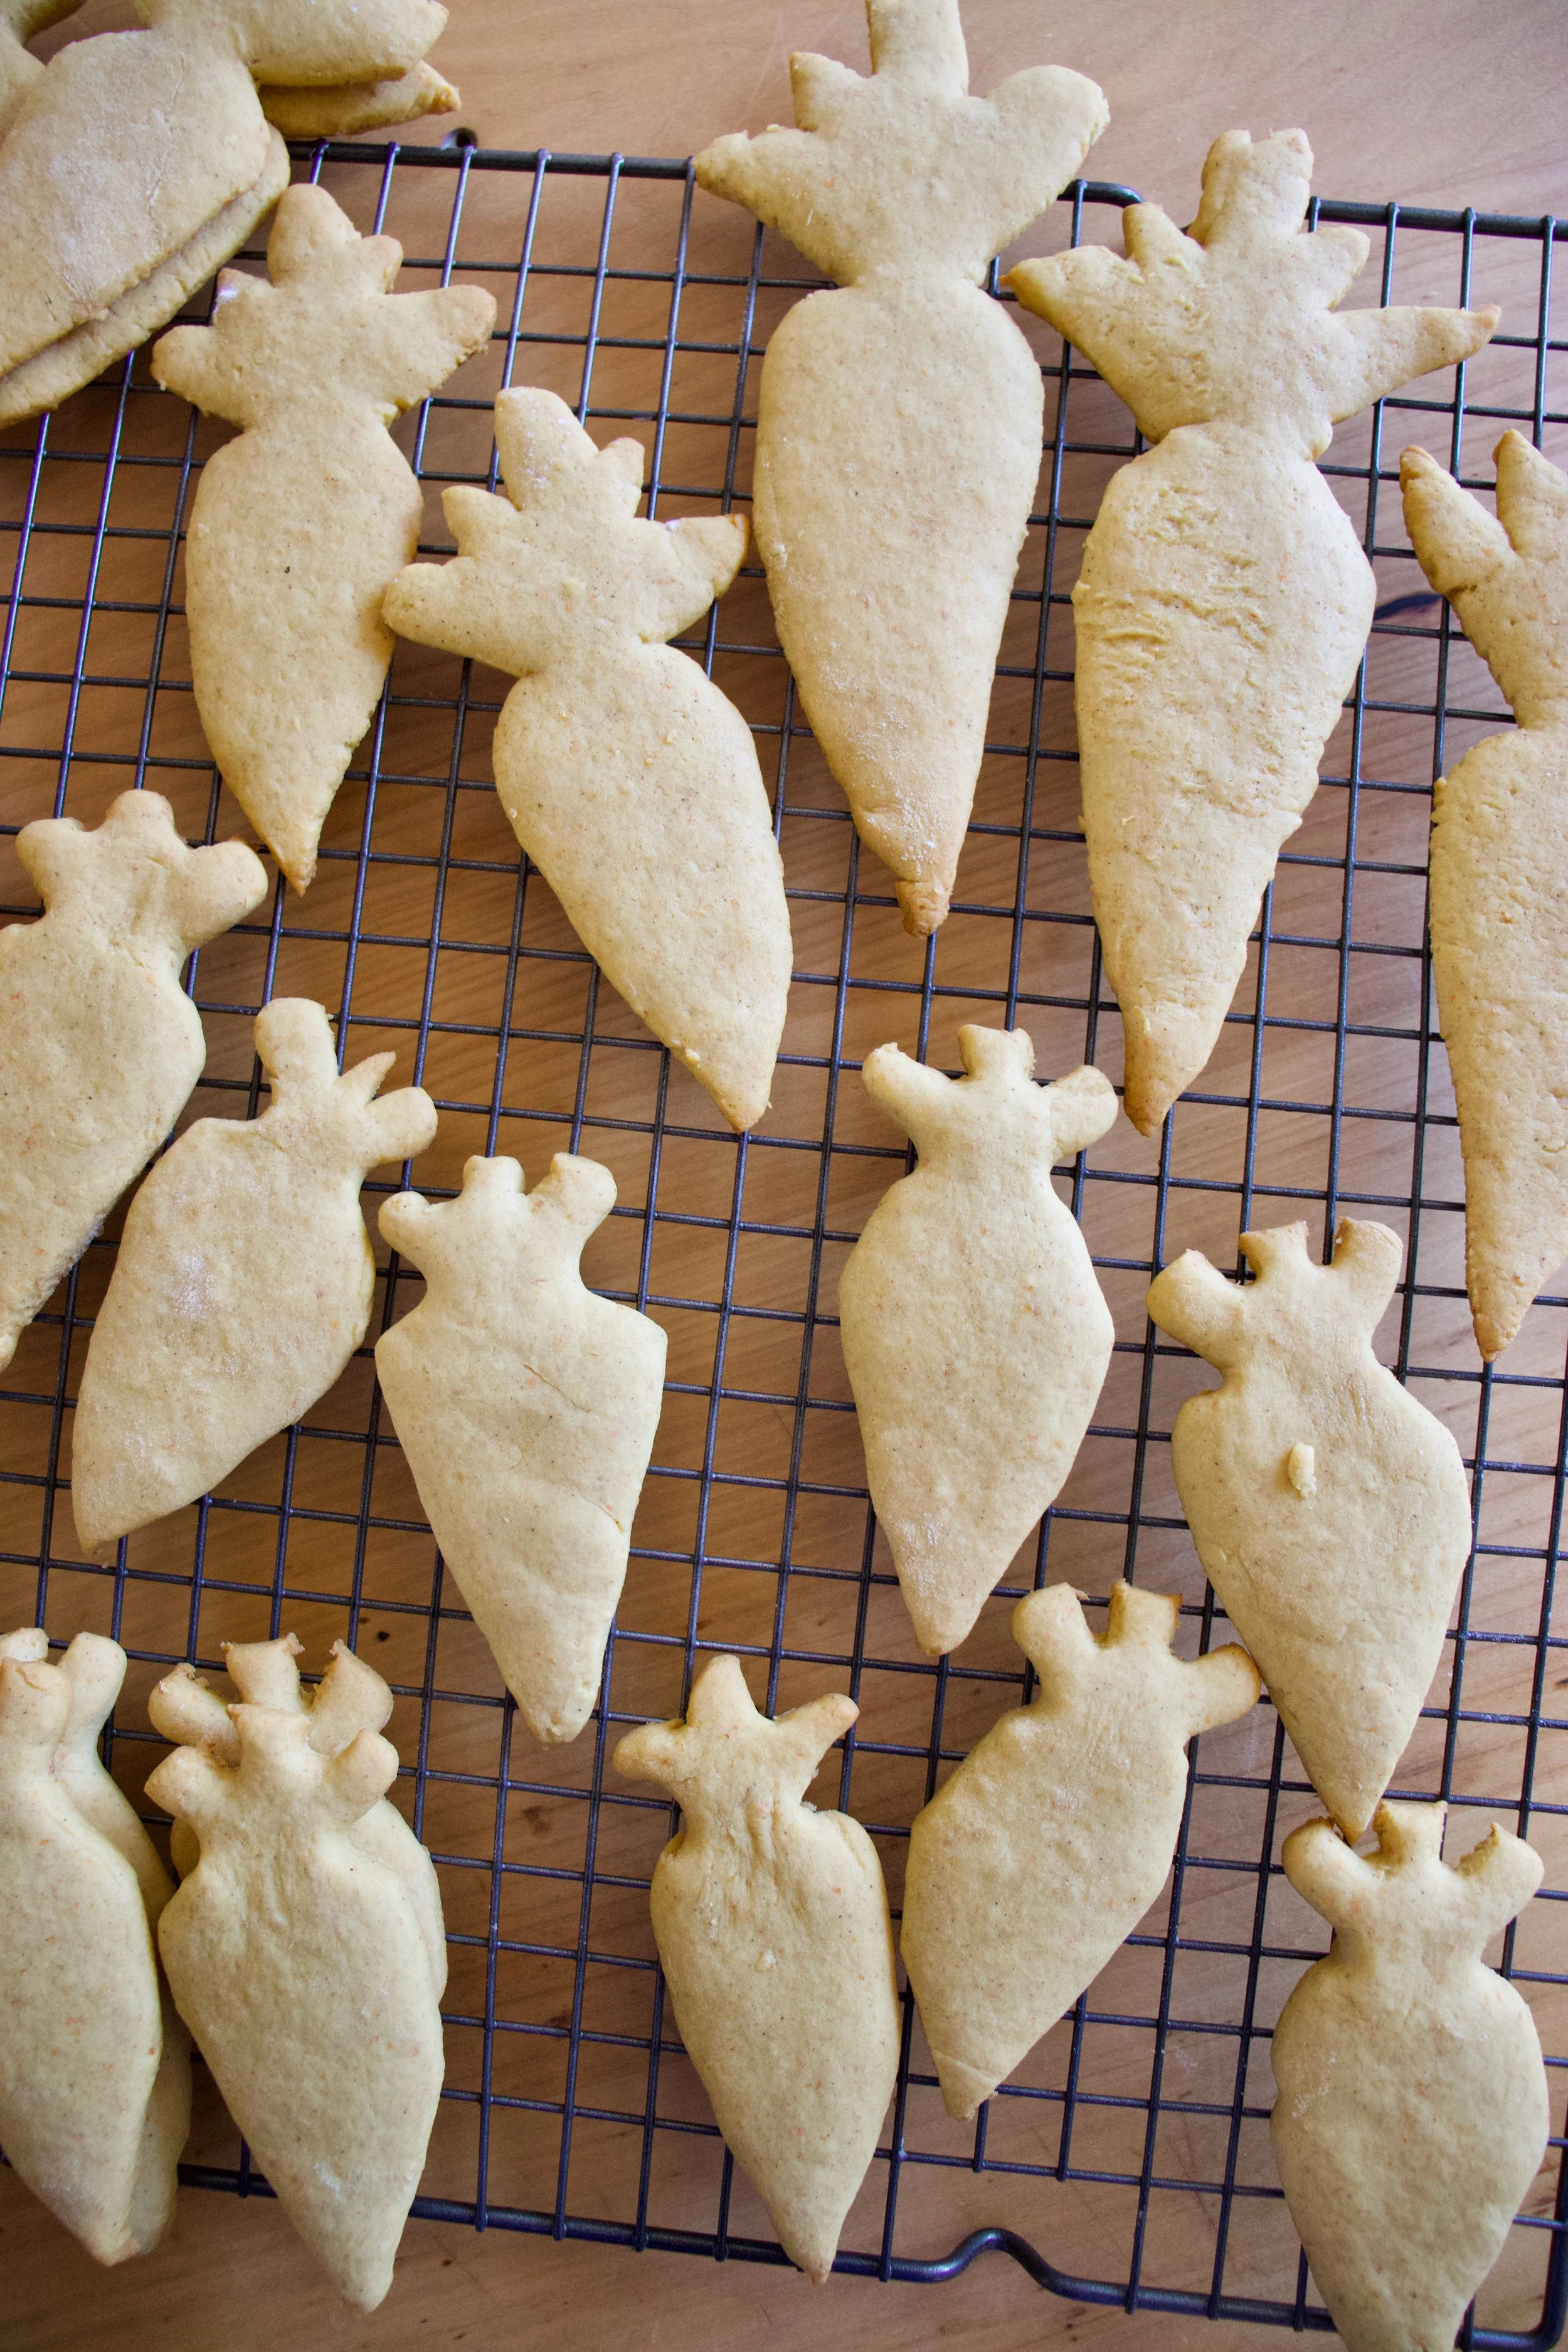
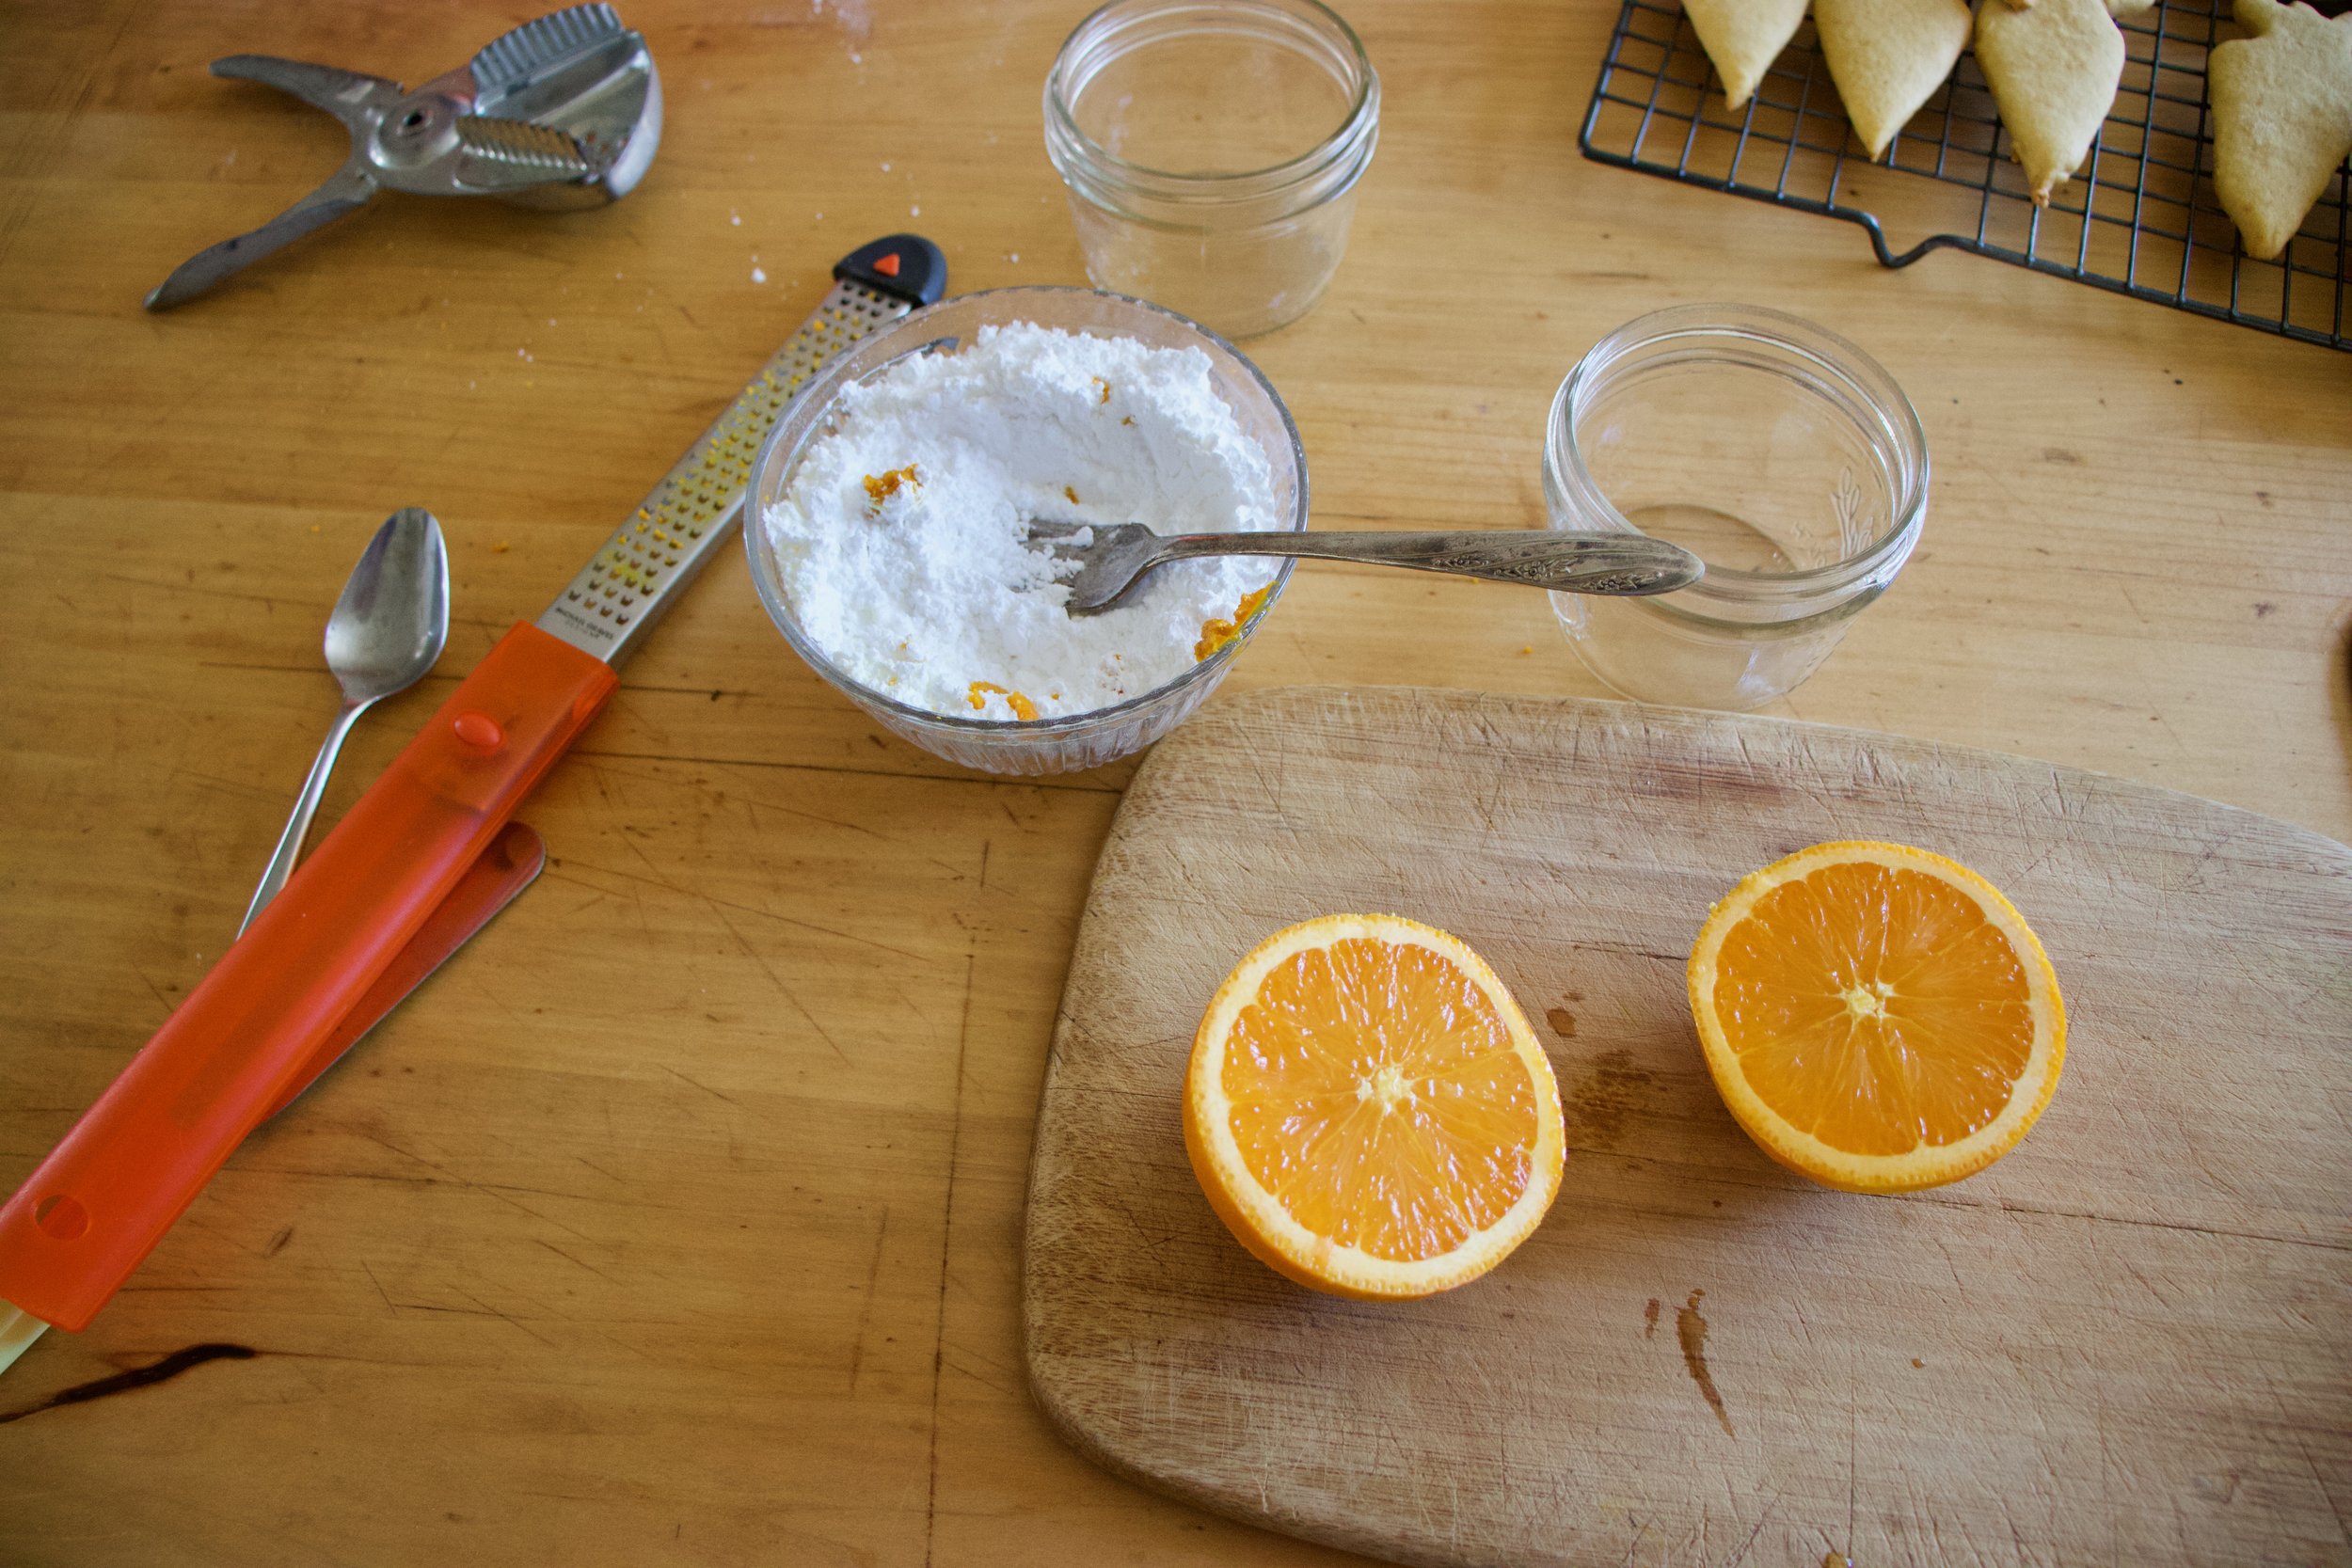
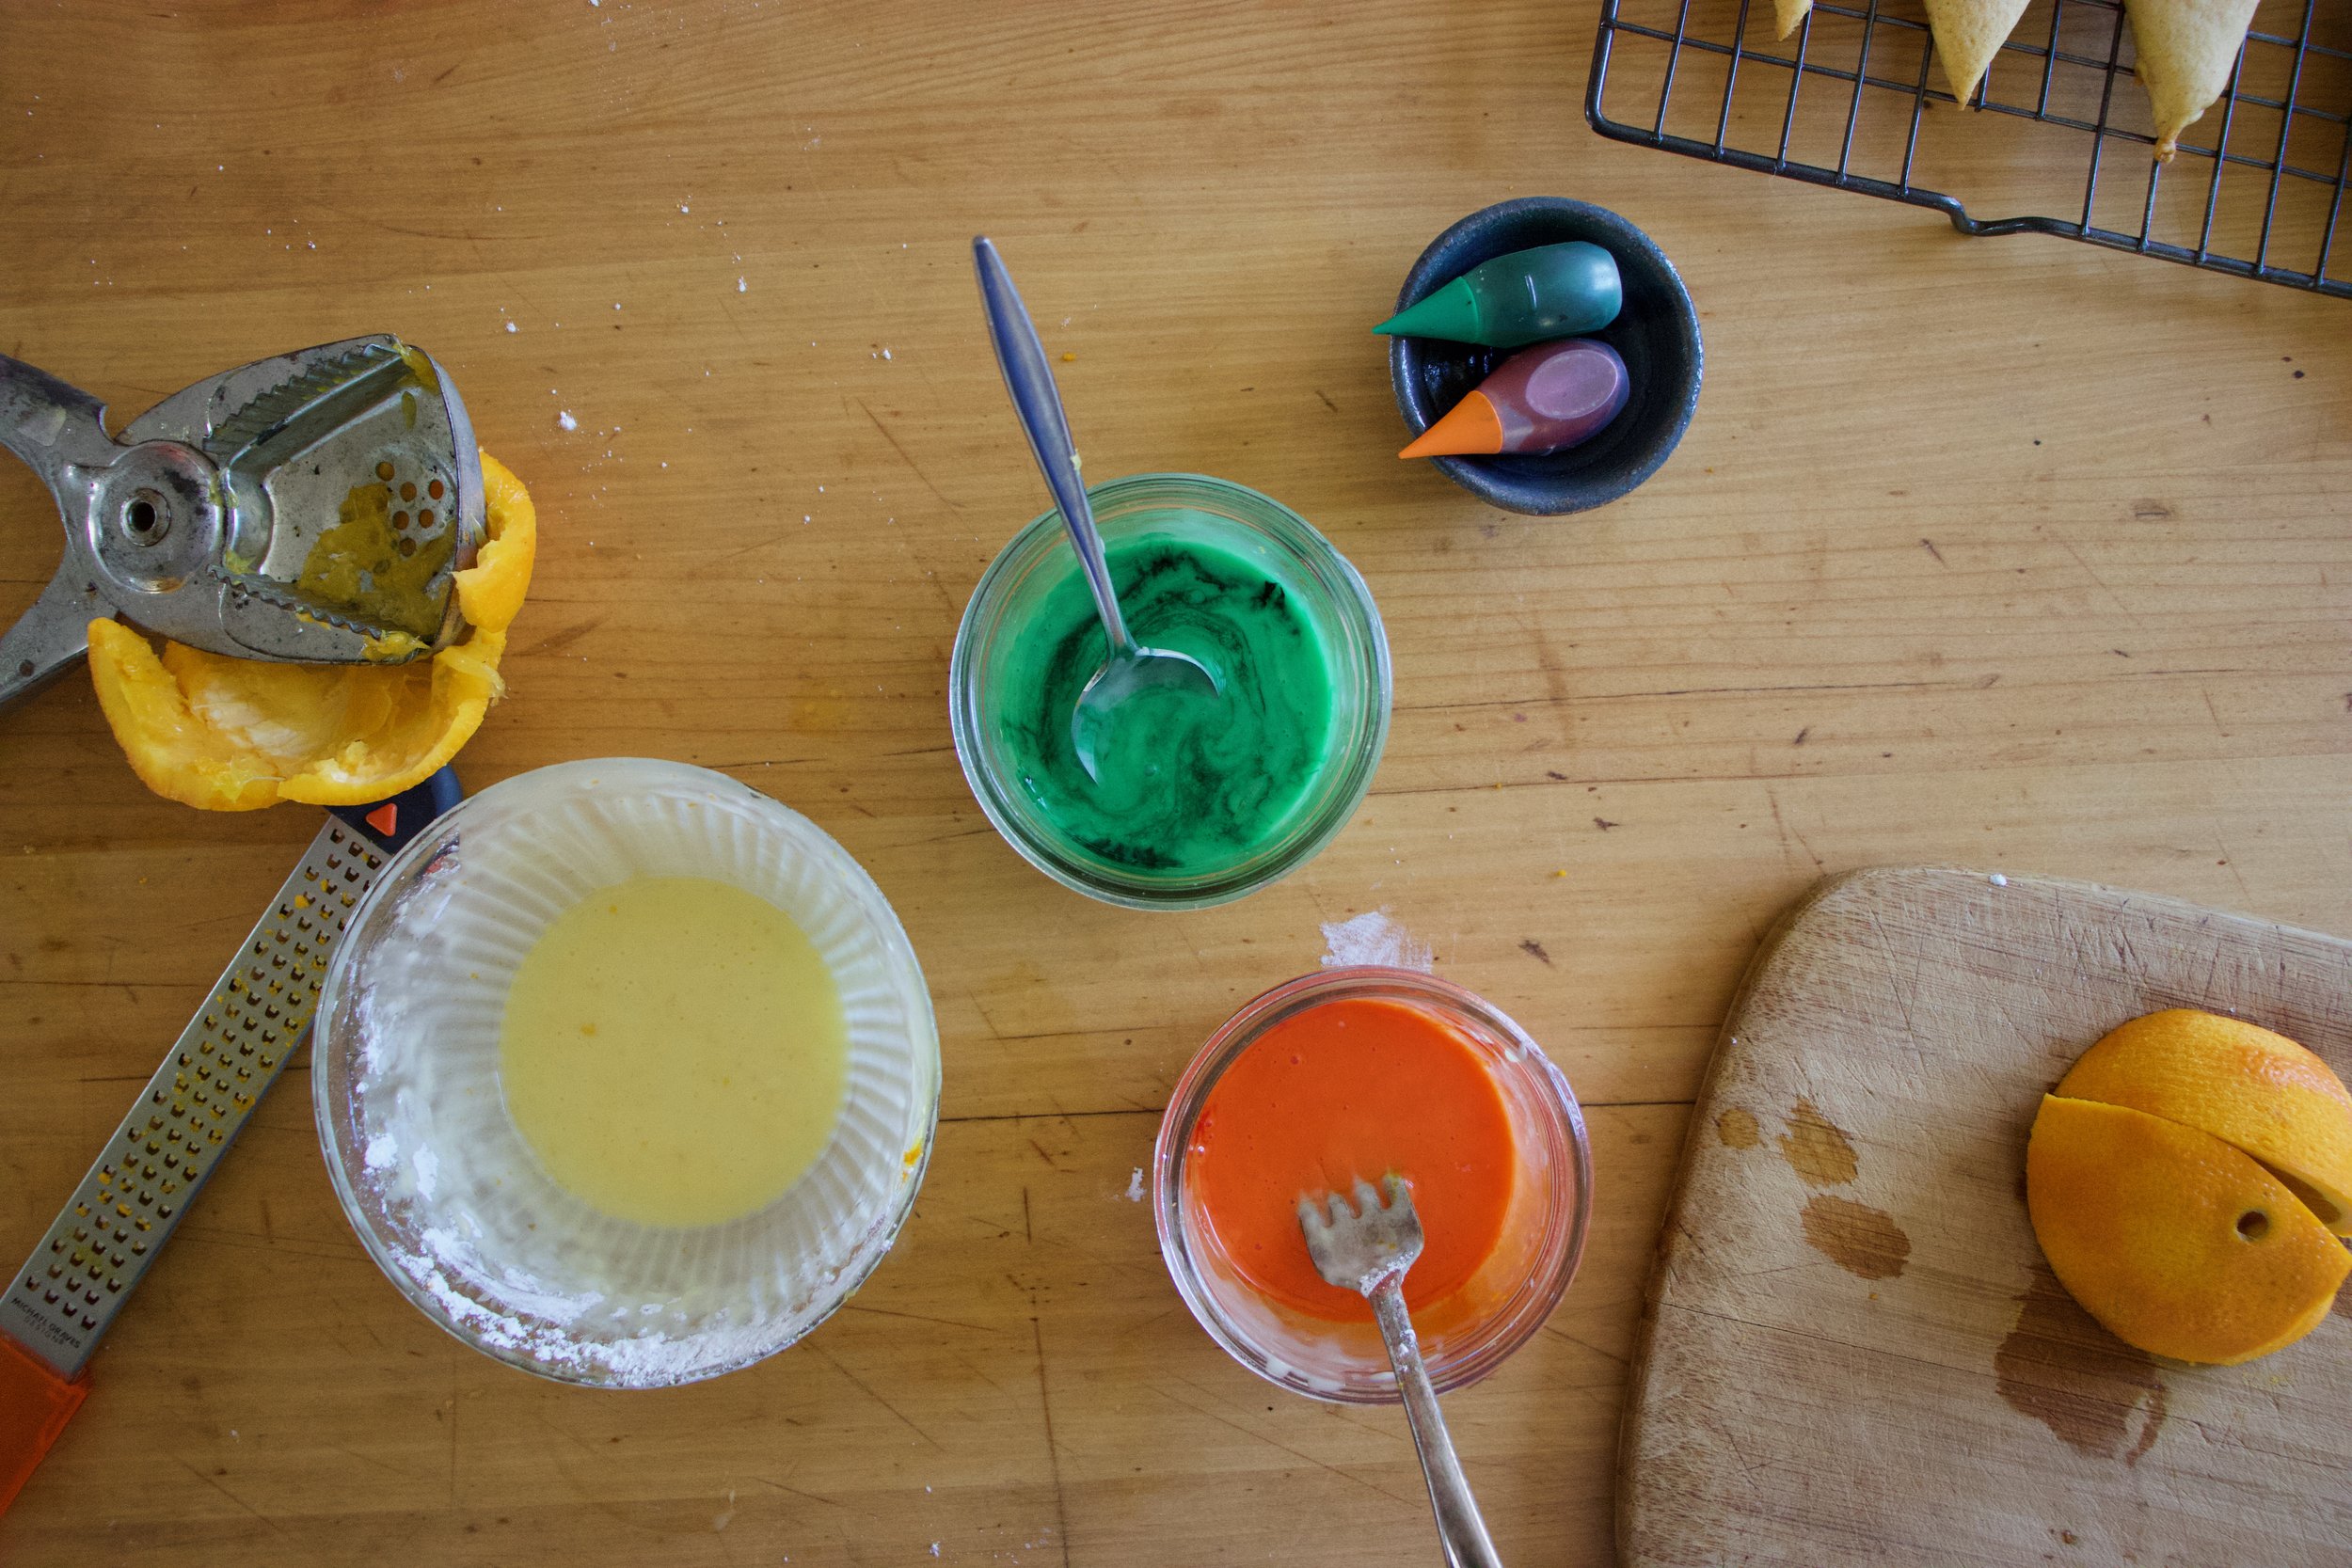


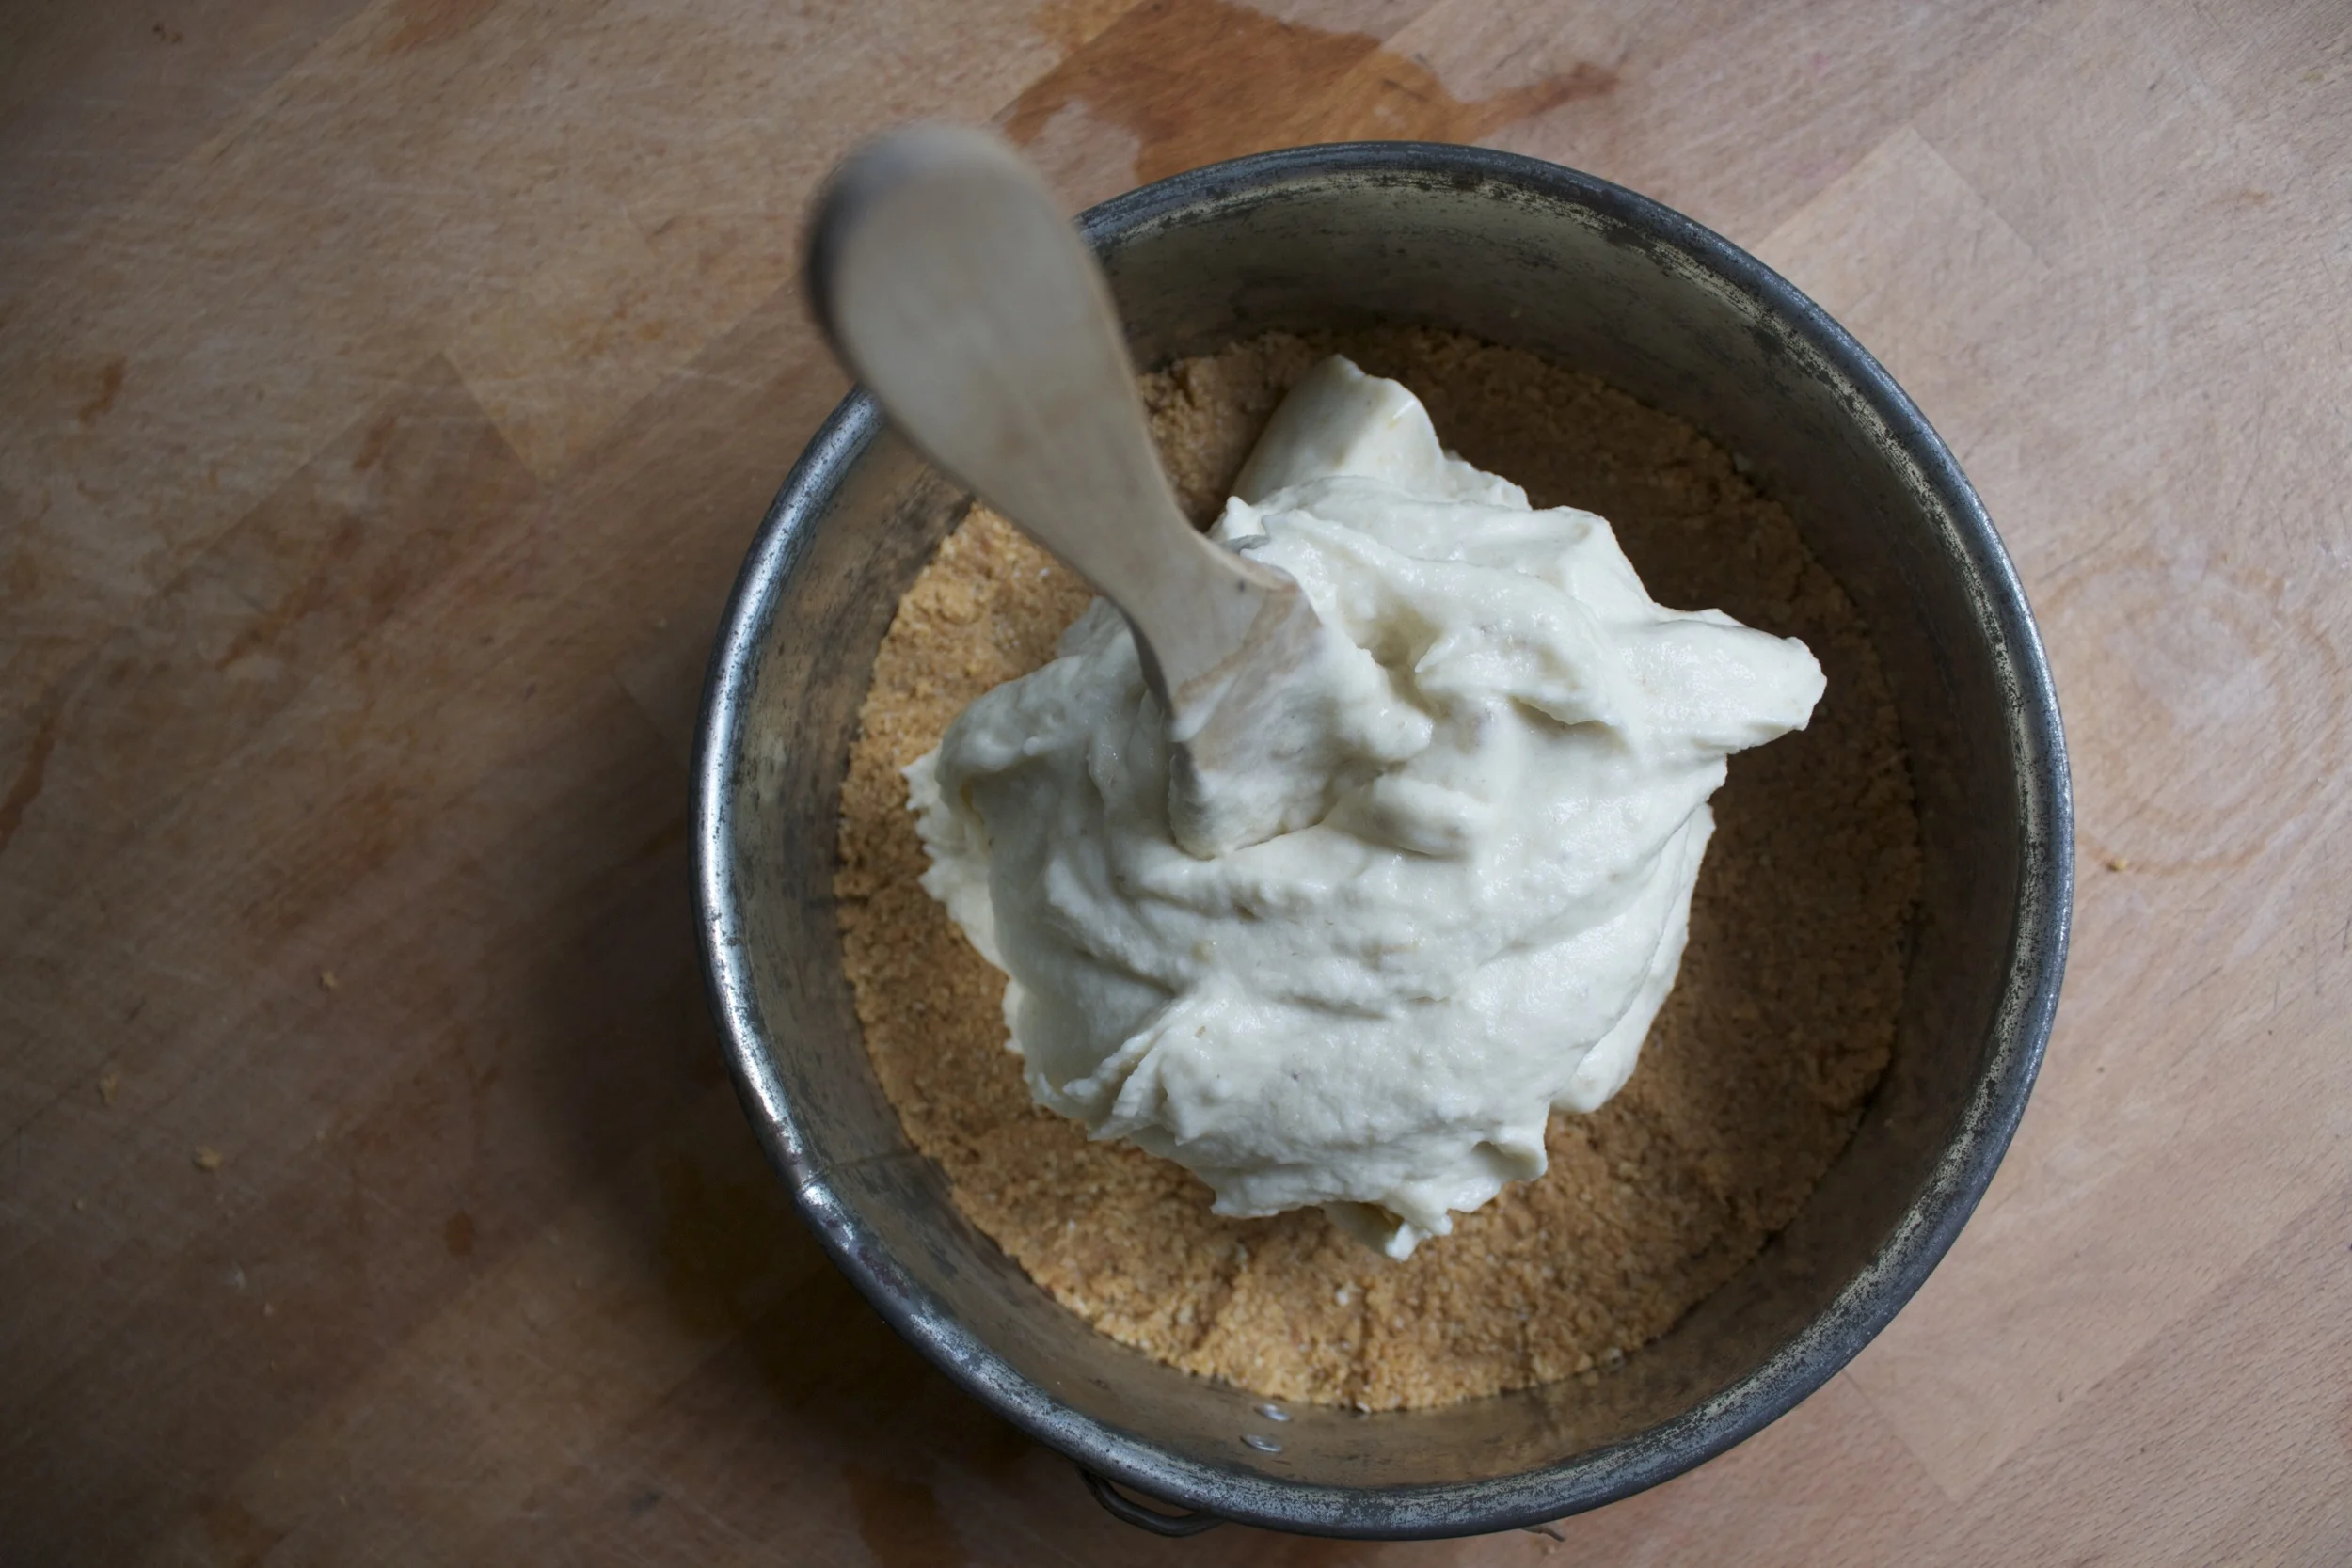

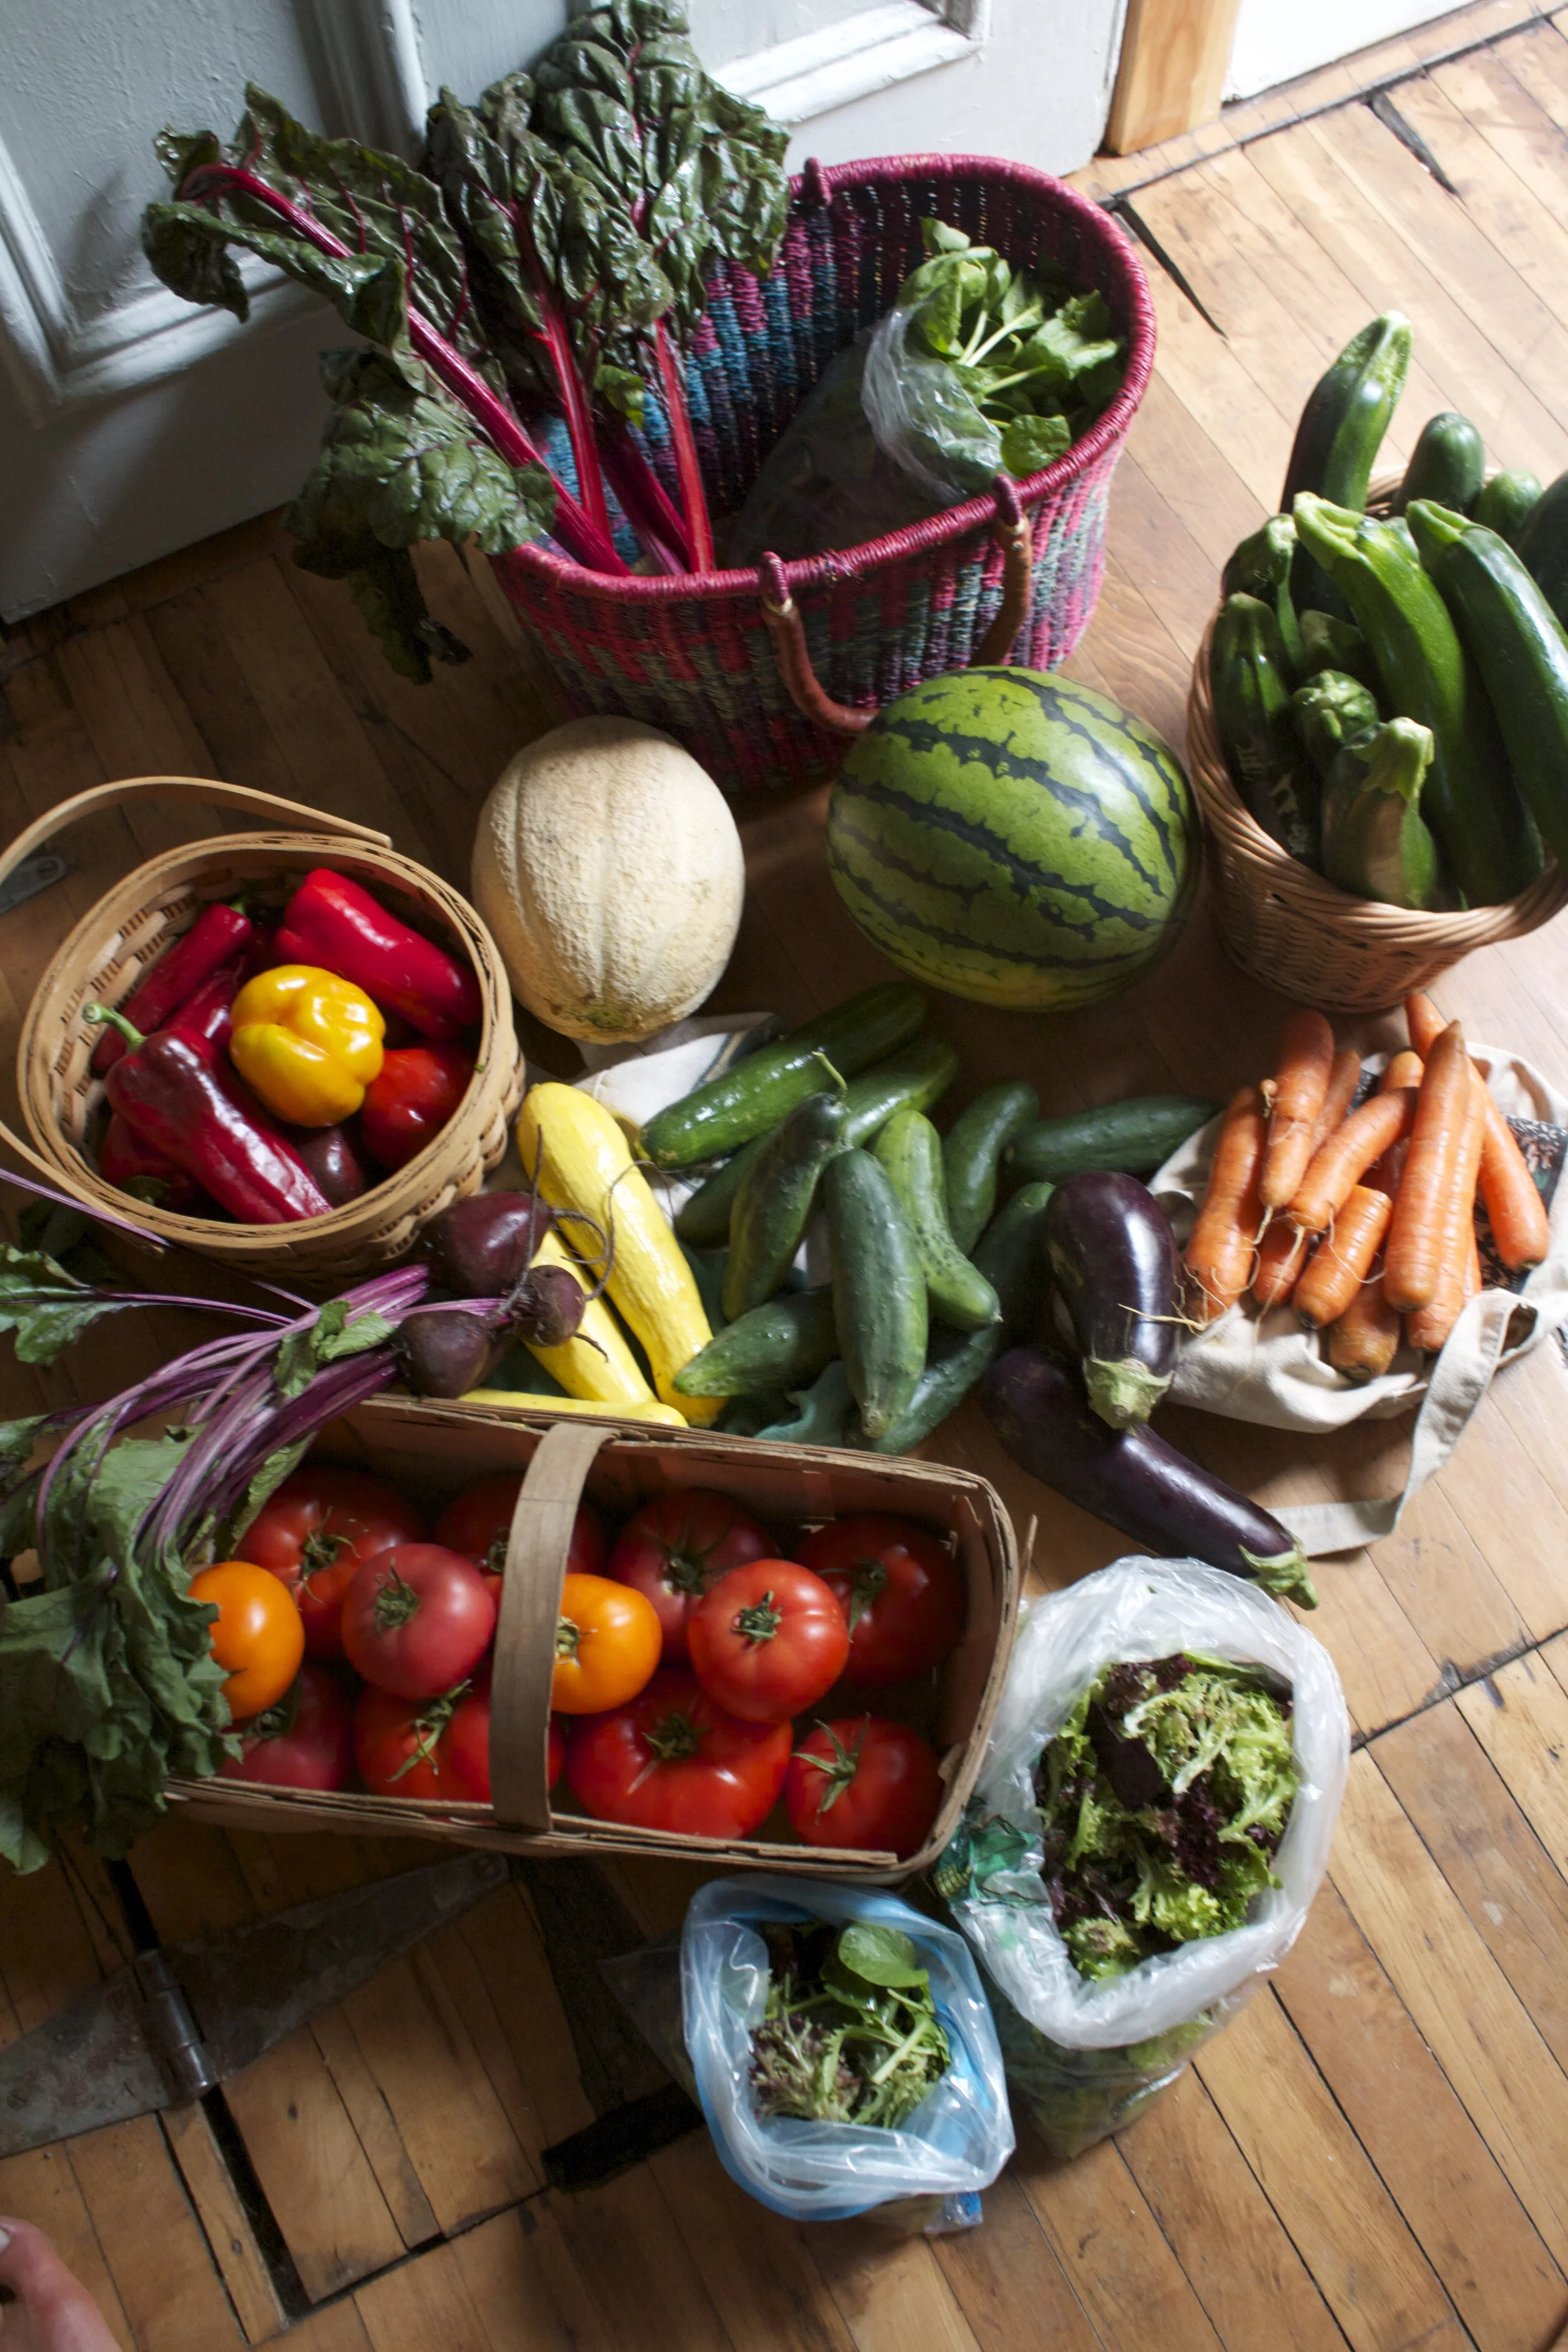


THE LOVELY CRAZY
January 10, 2020 by maximios • Blog
Shit on a shingle is one of those foods that I like to call “trash food”, you know stuff like beefaroni or pork and beans. Stuff that we all loved as little kids but might think twice about feeding to anyone now. ( I’ll still feed nick a can of beefaroni.. he likes it) As a throwback to our earliest food memories, (also a lack of food in the house and wanted to make something fast, easy, and cheap.. thanks mom!) I made the mister my rendition of the classic. Creamy Lentils and Mushrooms on toast. Not quite as trashy as creamed beef (lentils, mushrooms and onions are not trashy) but you get the same reminiscing feeling. I guess I could call it something like “stuff on a shingle” or lumps on a shingle”, but what kid (or adult) would want to eat that. Let’s just stick with shit, it makes it more awesome to eat it.
If you need to, make it classy by serving it with a cloth napkin and a nice fork and knife. But eat it however you need to. (As kids we like dirty hands and no fork, preferably with a big tall glass of overly sweetened red flavored kool-aid)
Enjoy this fantastic Spring weekend!
-C
Shit on s Shingle (Creamy Lentils and Mushrooms on Toast)
One serving
Slice the mushroom and onion and toss into a pan or skillet with a drizzle of oil. Cook on medium heat until brown and fragrant than dump onto a plate. In same skillet, add the oil and the flour and mix with a whisk while slowly adding in the milk. Keep whisking until sauce starts to thicken. Turn heat to simmer and add in the cooked lentils and the sautéd mushrooms and onions. Push down the bread in the toaster.. and when it pops up, dump the shill over it.