
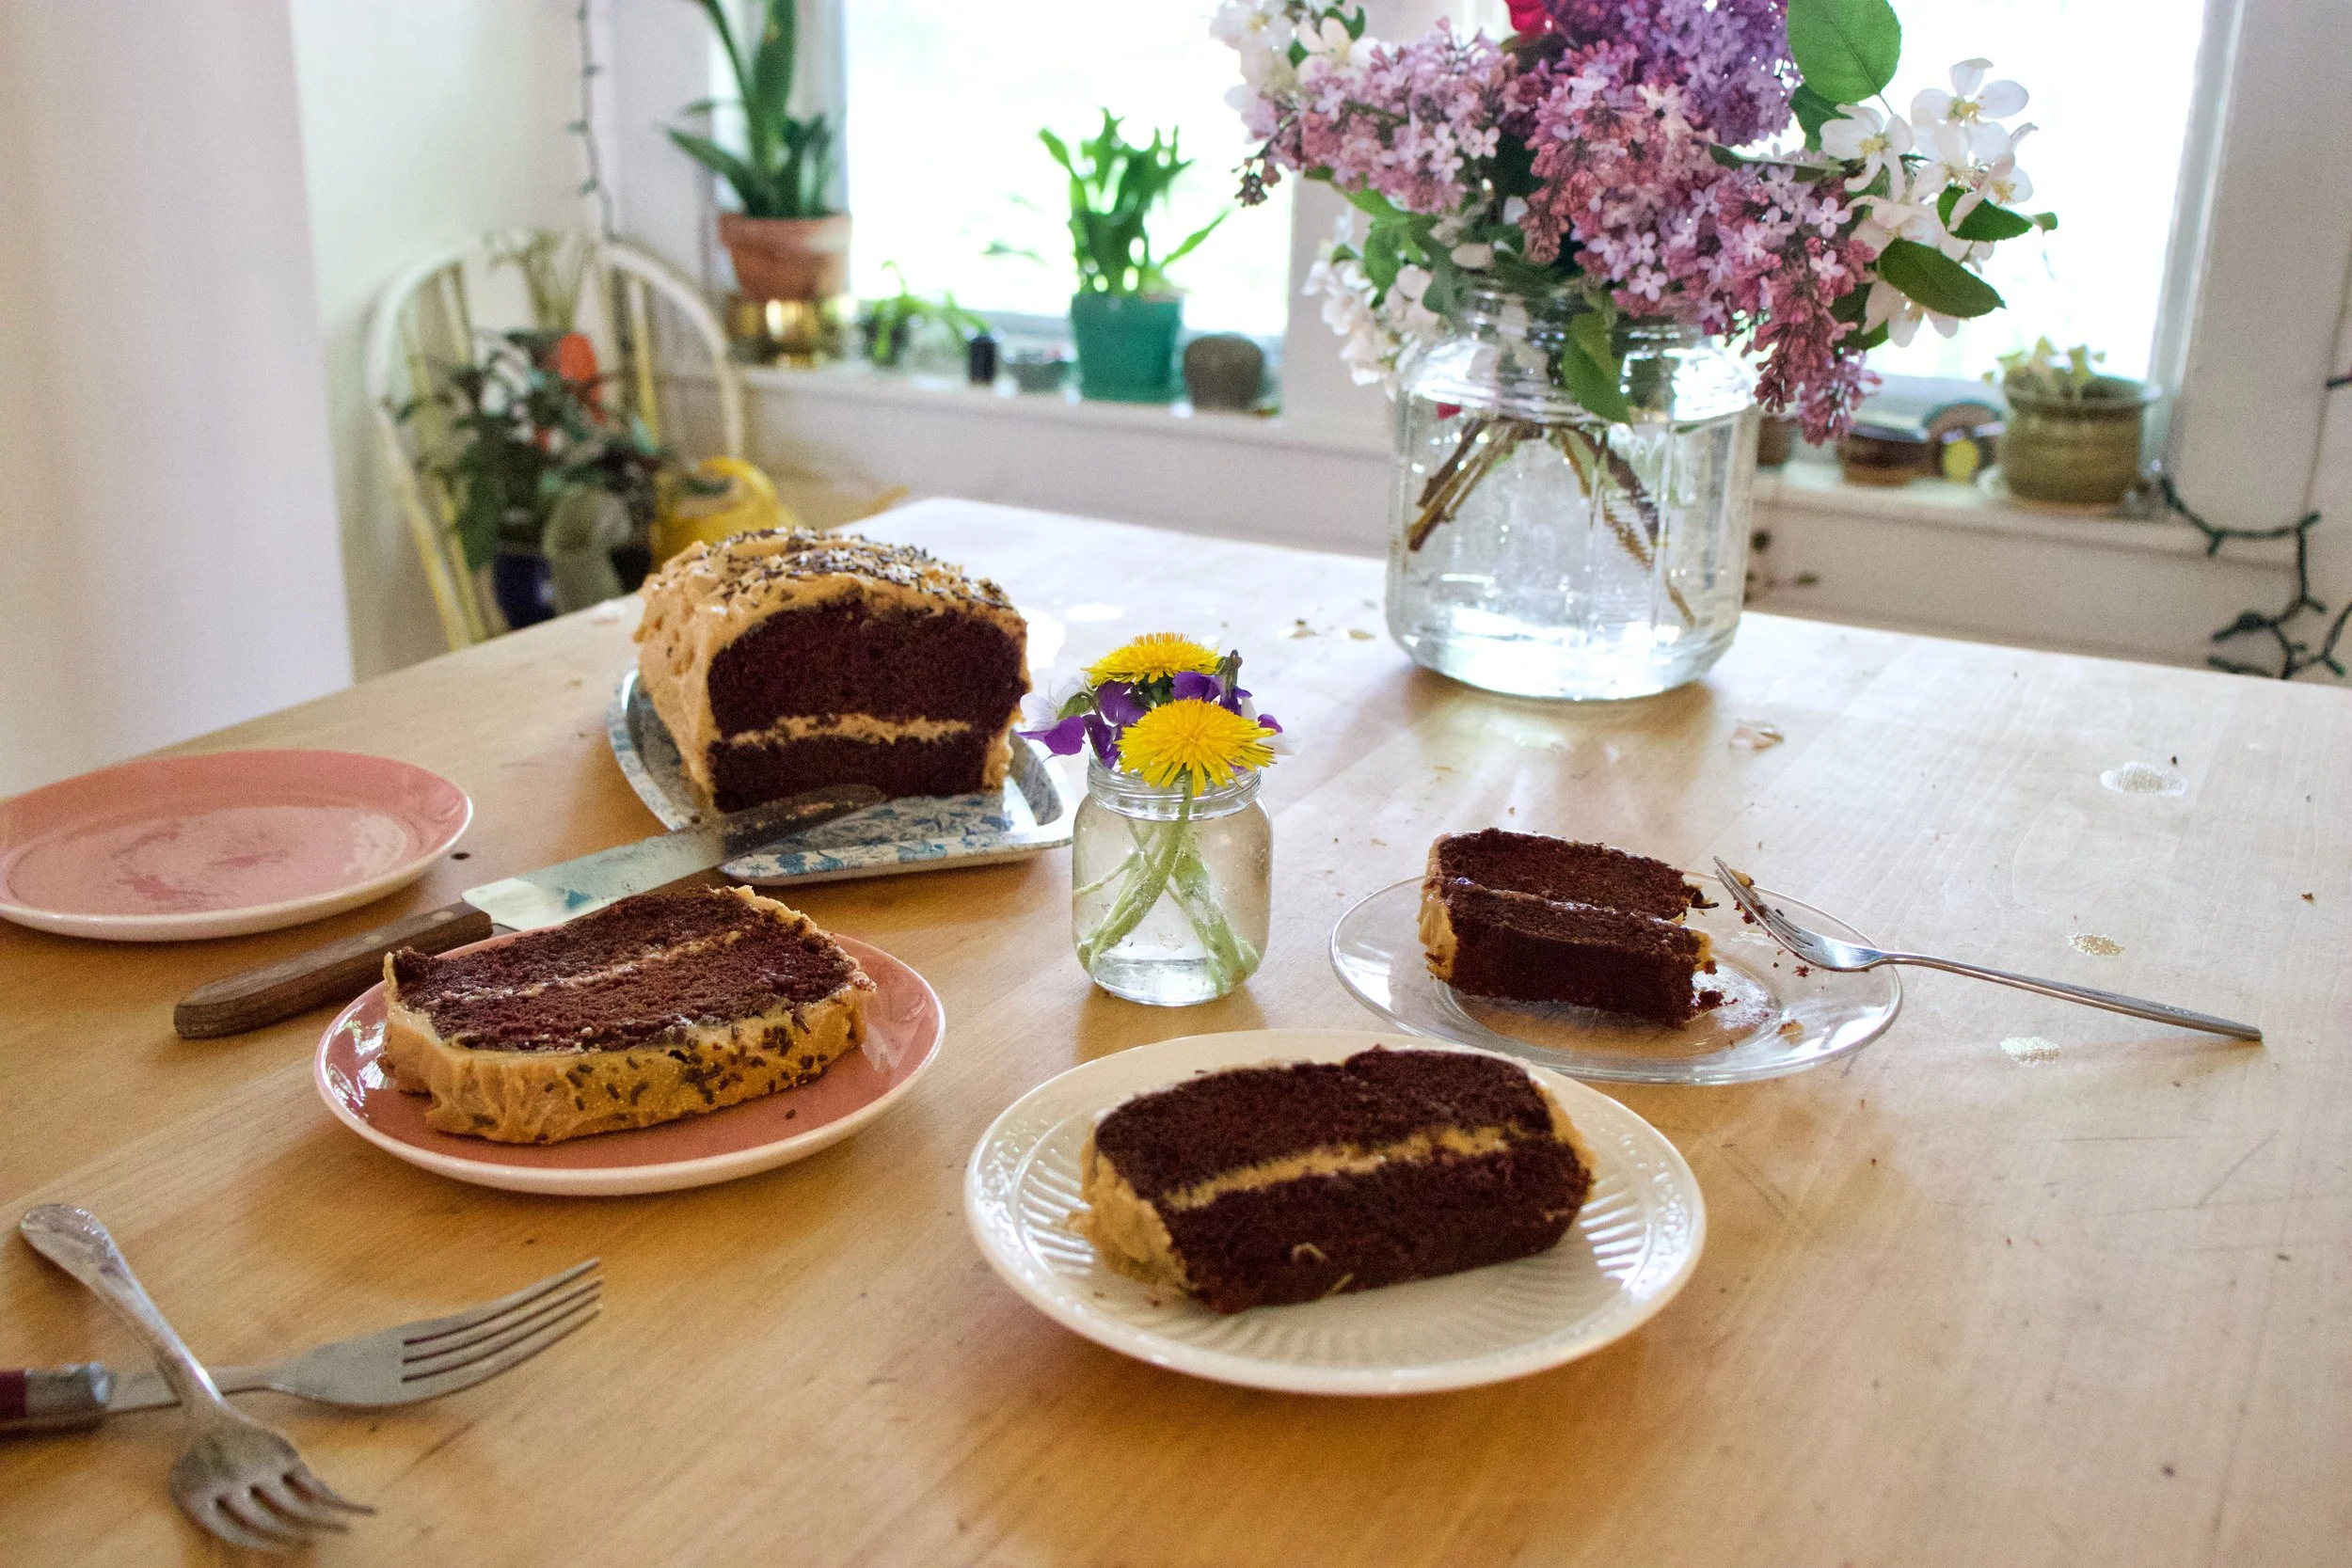
THE LOVELY CRAZY
It is exactly that time of year. Apples galore, cool days in need of a little extra warm, meaning a warm oven is welcome, if not needed. It%u2019s the best time of year, or at least one of them.
And so I bake bread. Sometimes just a roll, and sometime a loaf, almost everyday. I love bread baking because, well just because. Plus it%u2019s what people want to eat and will always eat because I guess bread=love. Makes sense to me.
This bread was made from a small dip in the 2 gallons of applesauce I made the night before. (We had sooooo many apples). The mr isn%u2019t the biggest fan of applesauce, says he would rather eat a fresh apple. I kind of get it, but dude, warm, chunky, slightly cinnamon-y applesauce%u2026 I mean, that is happiness right there. Right? Anyway, I am trying not to eat all the applesauce to my face by myself at once (it has been a challenge) and plus I needed to make the mr some bread, so I figured what the hell. I%u2019ll just use applesauce as my liquid in the bread. And so I did and that is that and now that mr really like applesacue (when it is baked into bread)
This bread is a basic sandwich type bread. The apple taste is there but not overwhelming so it can be used for sandwiches of all kinds, toast, just eating with a smear od something, or not. Just a overall good loaf of bread with a little extra from the apple. And braided because I was feeling classy. It%u2019s amazing what at little braiding of bread dough can do for your self esteem. Made me feel like I was the coolest person in the world. Haha!
Now to the bread.

The stuff. A few apples, regular all purpose and white whole wheat flour, salt, applesauce, maple syrup, yeast, and warm water.
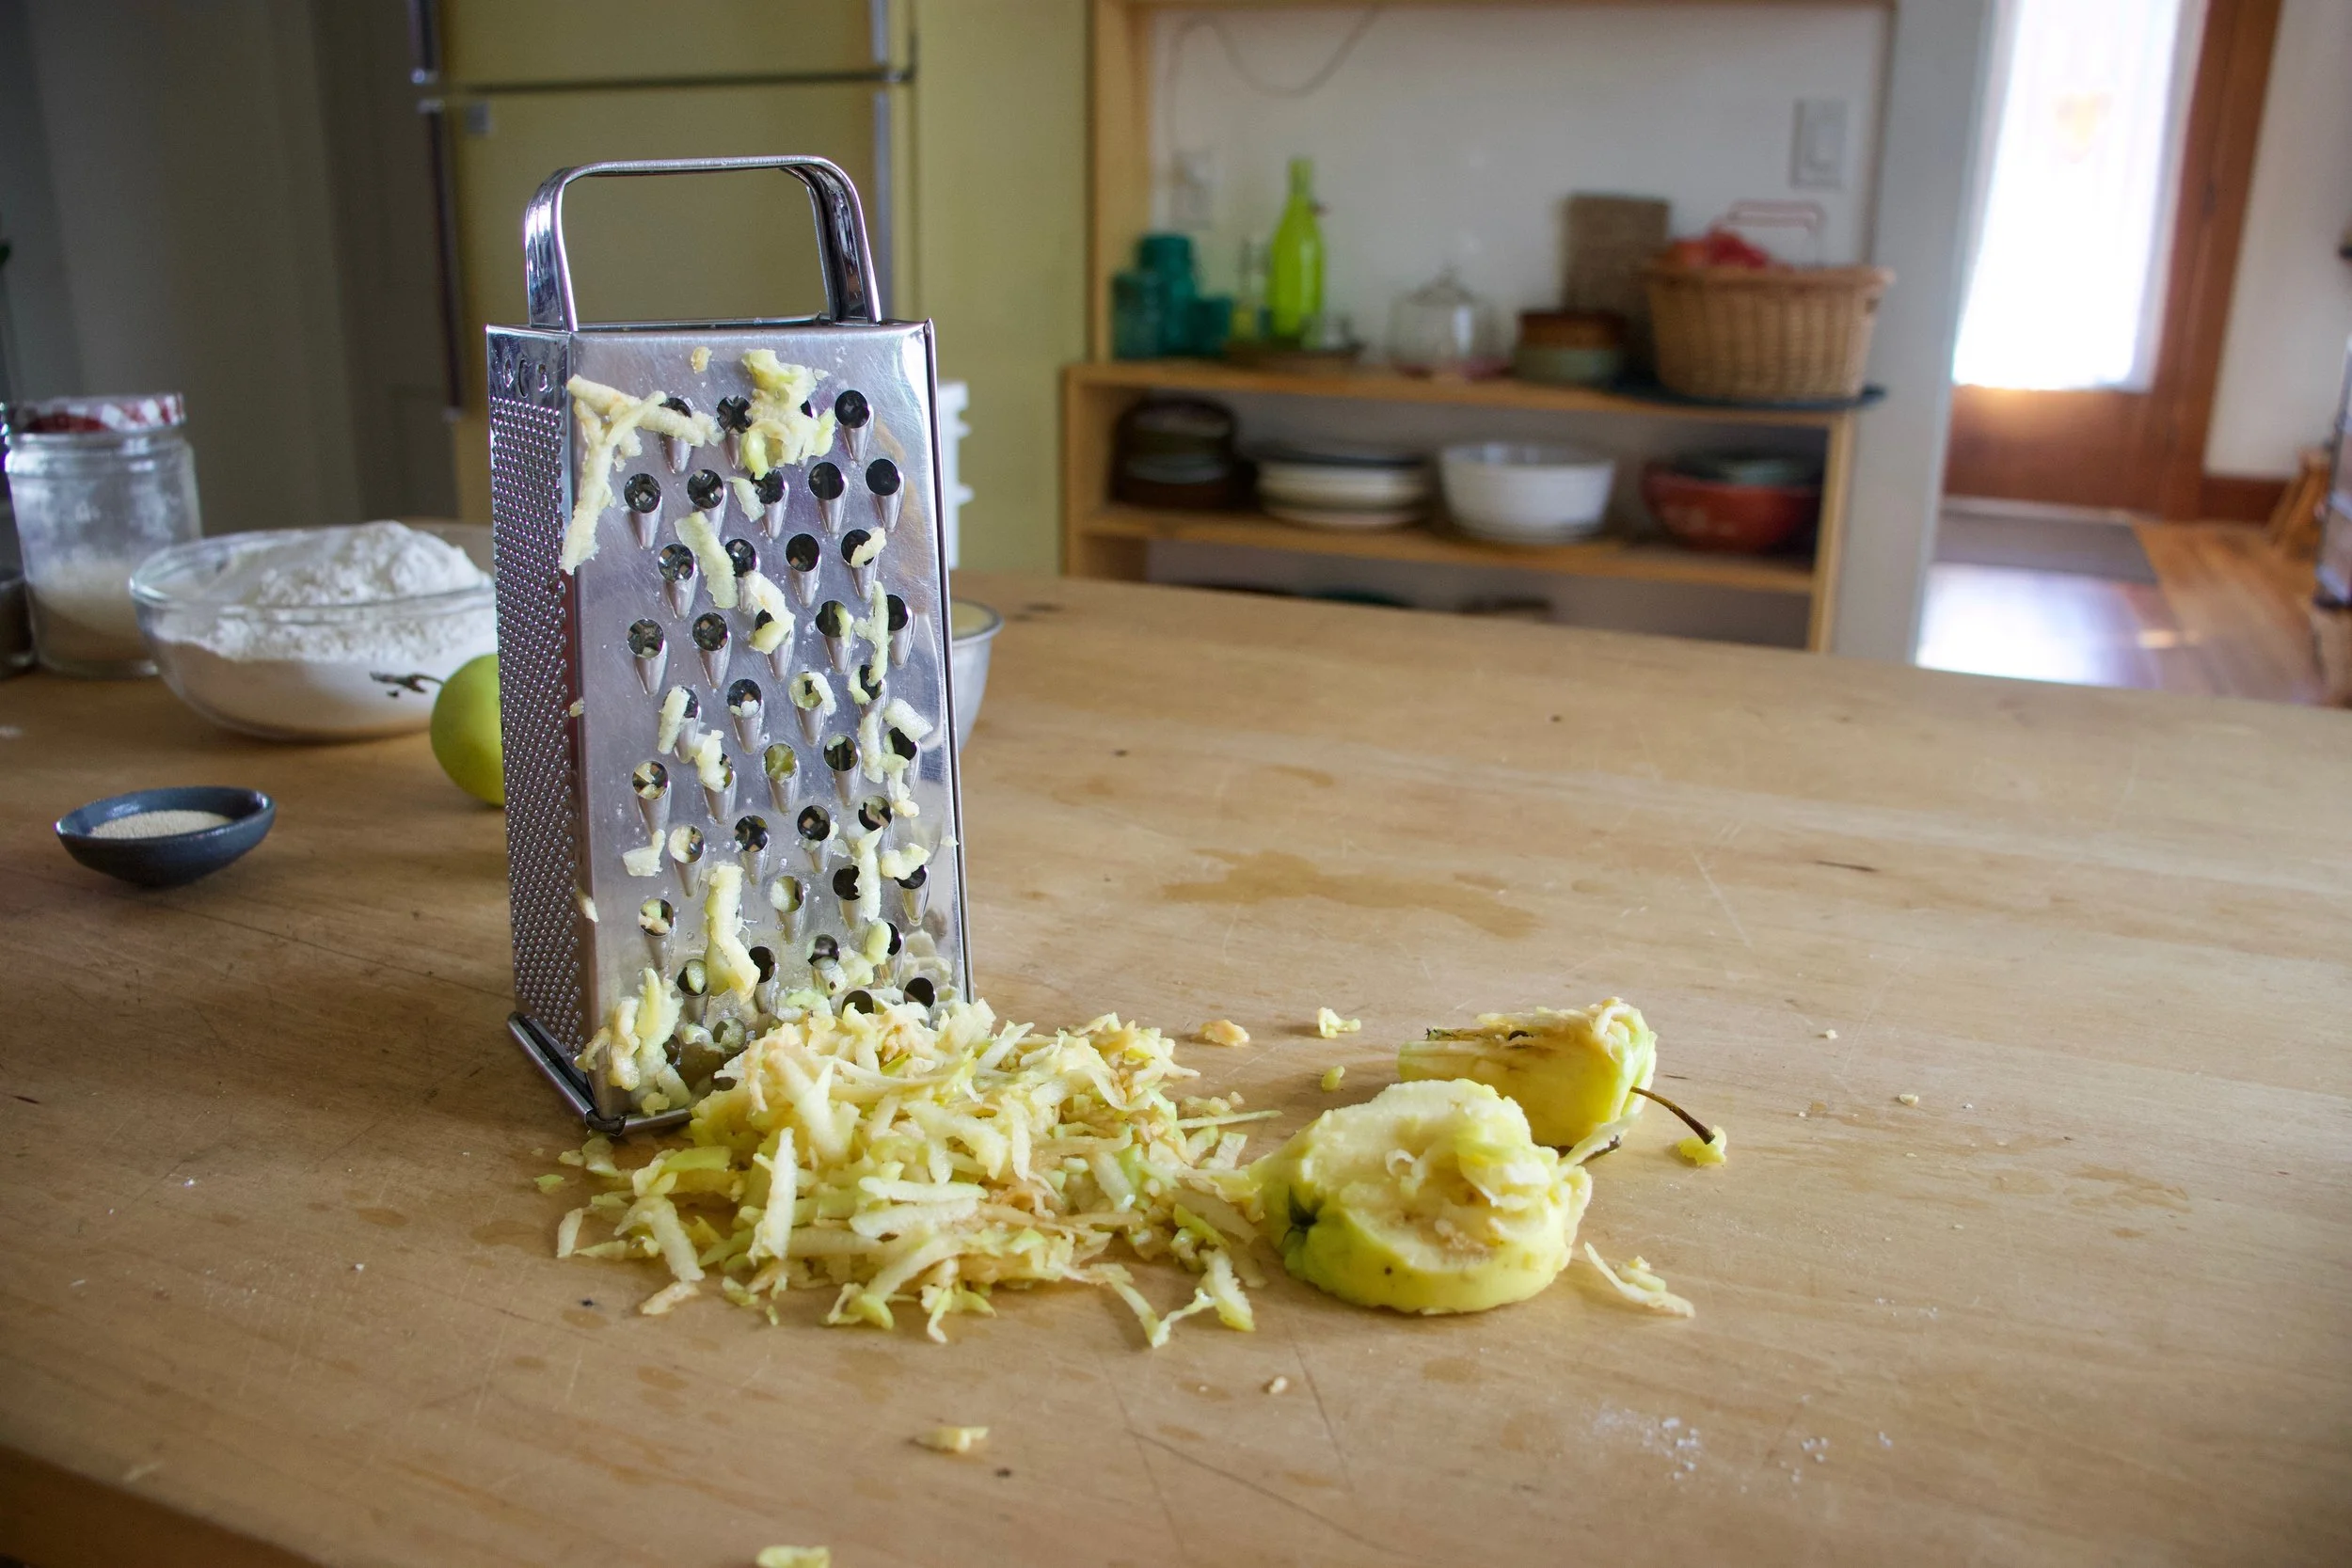
Applesauce, shredded apple, maple, yeast, and a little water get mix up and let to sit for a few minutes to activate yeast. Then the salt gets mixed in, along with all the flour. Stir until dough forms. Dough should be slightly sticky, ut not wet. IF wet, add a handful more flour. To dry, add more water.
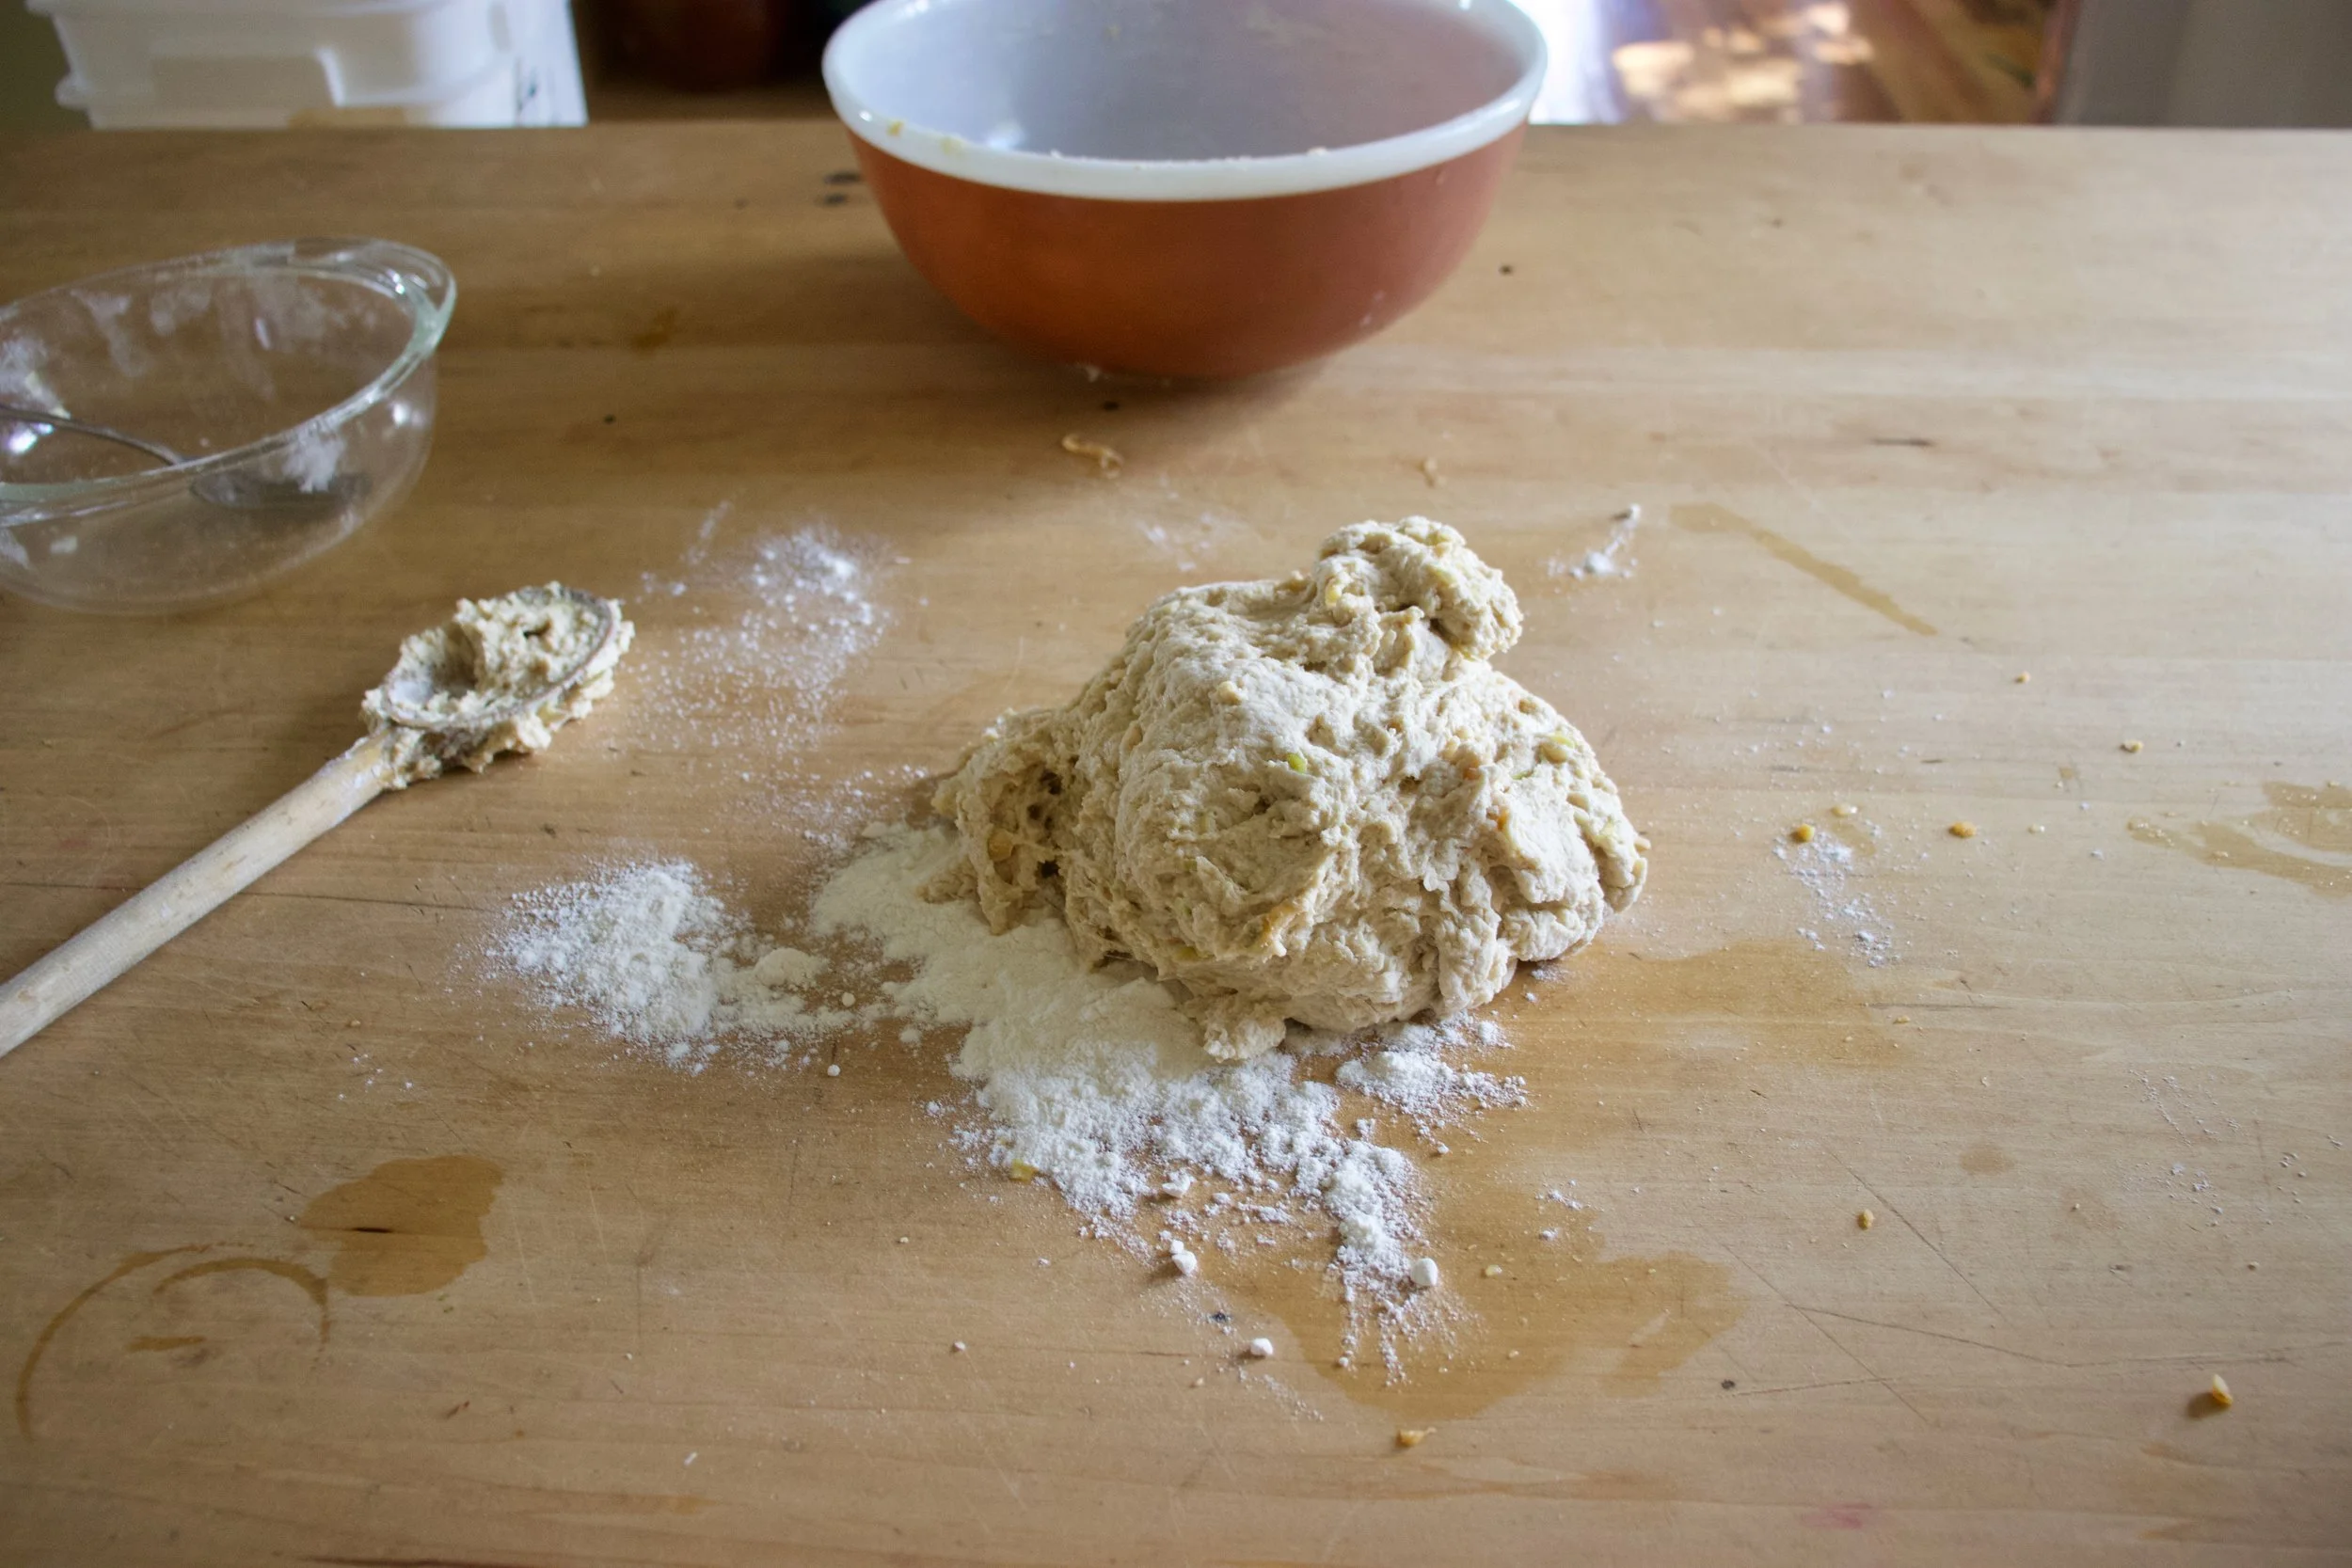
Dump the dough onto a floured surface, cover your hands in flour, and knead dough for about 5 or so minutes, adding more flour as needed to keep dough from sticking, until the dough is a nice and cohesive texture.
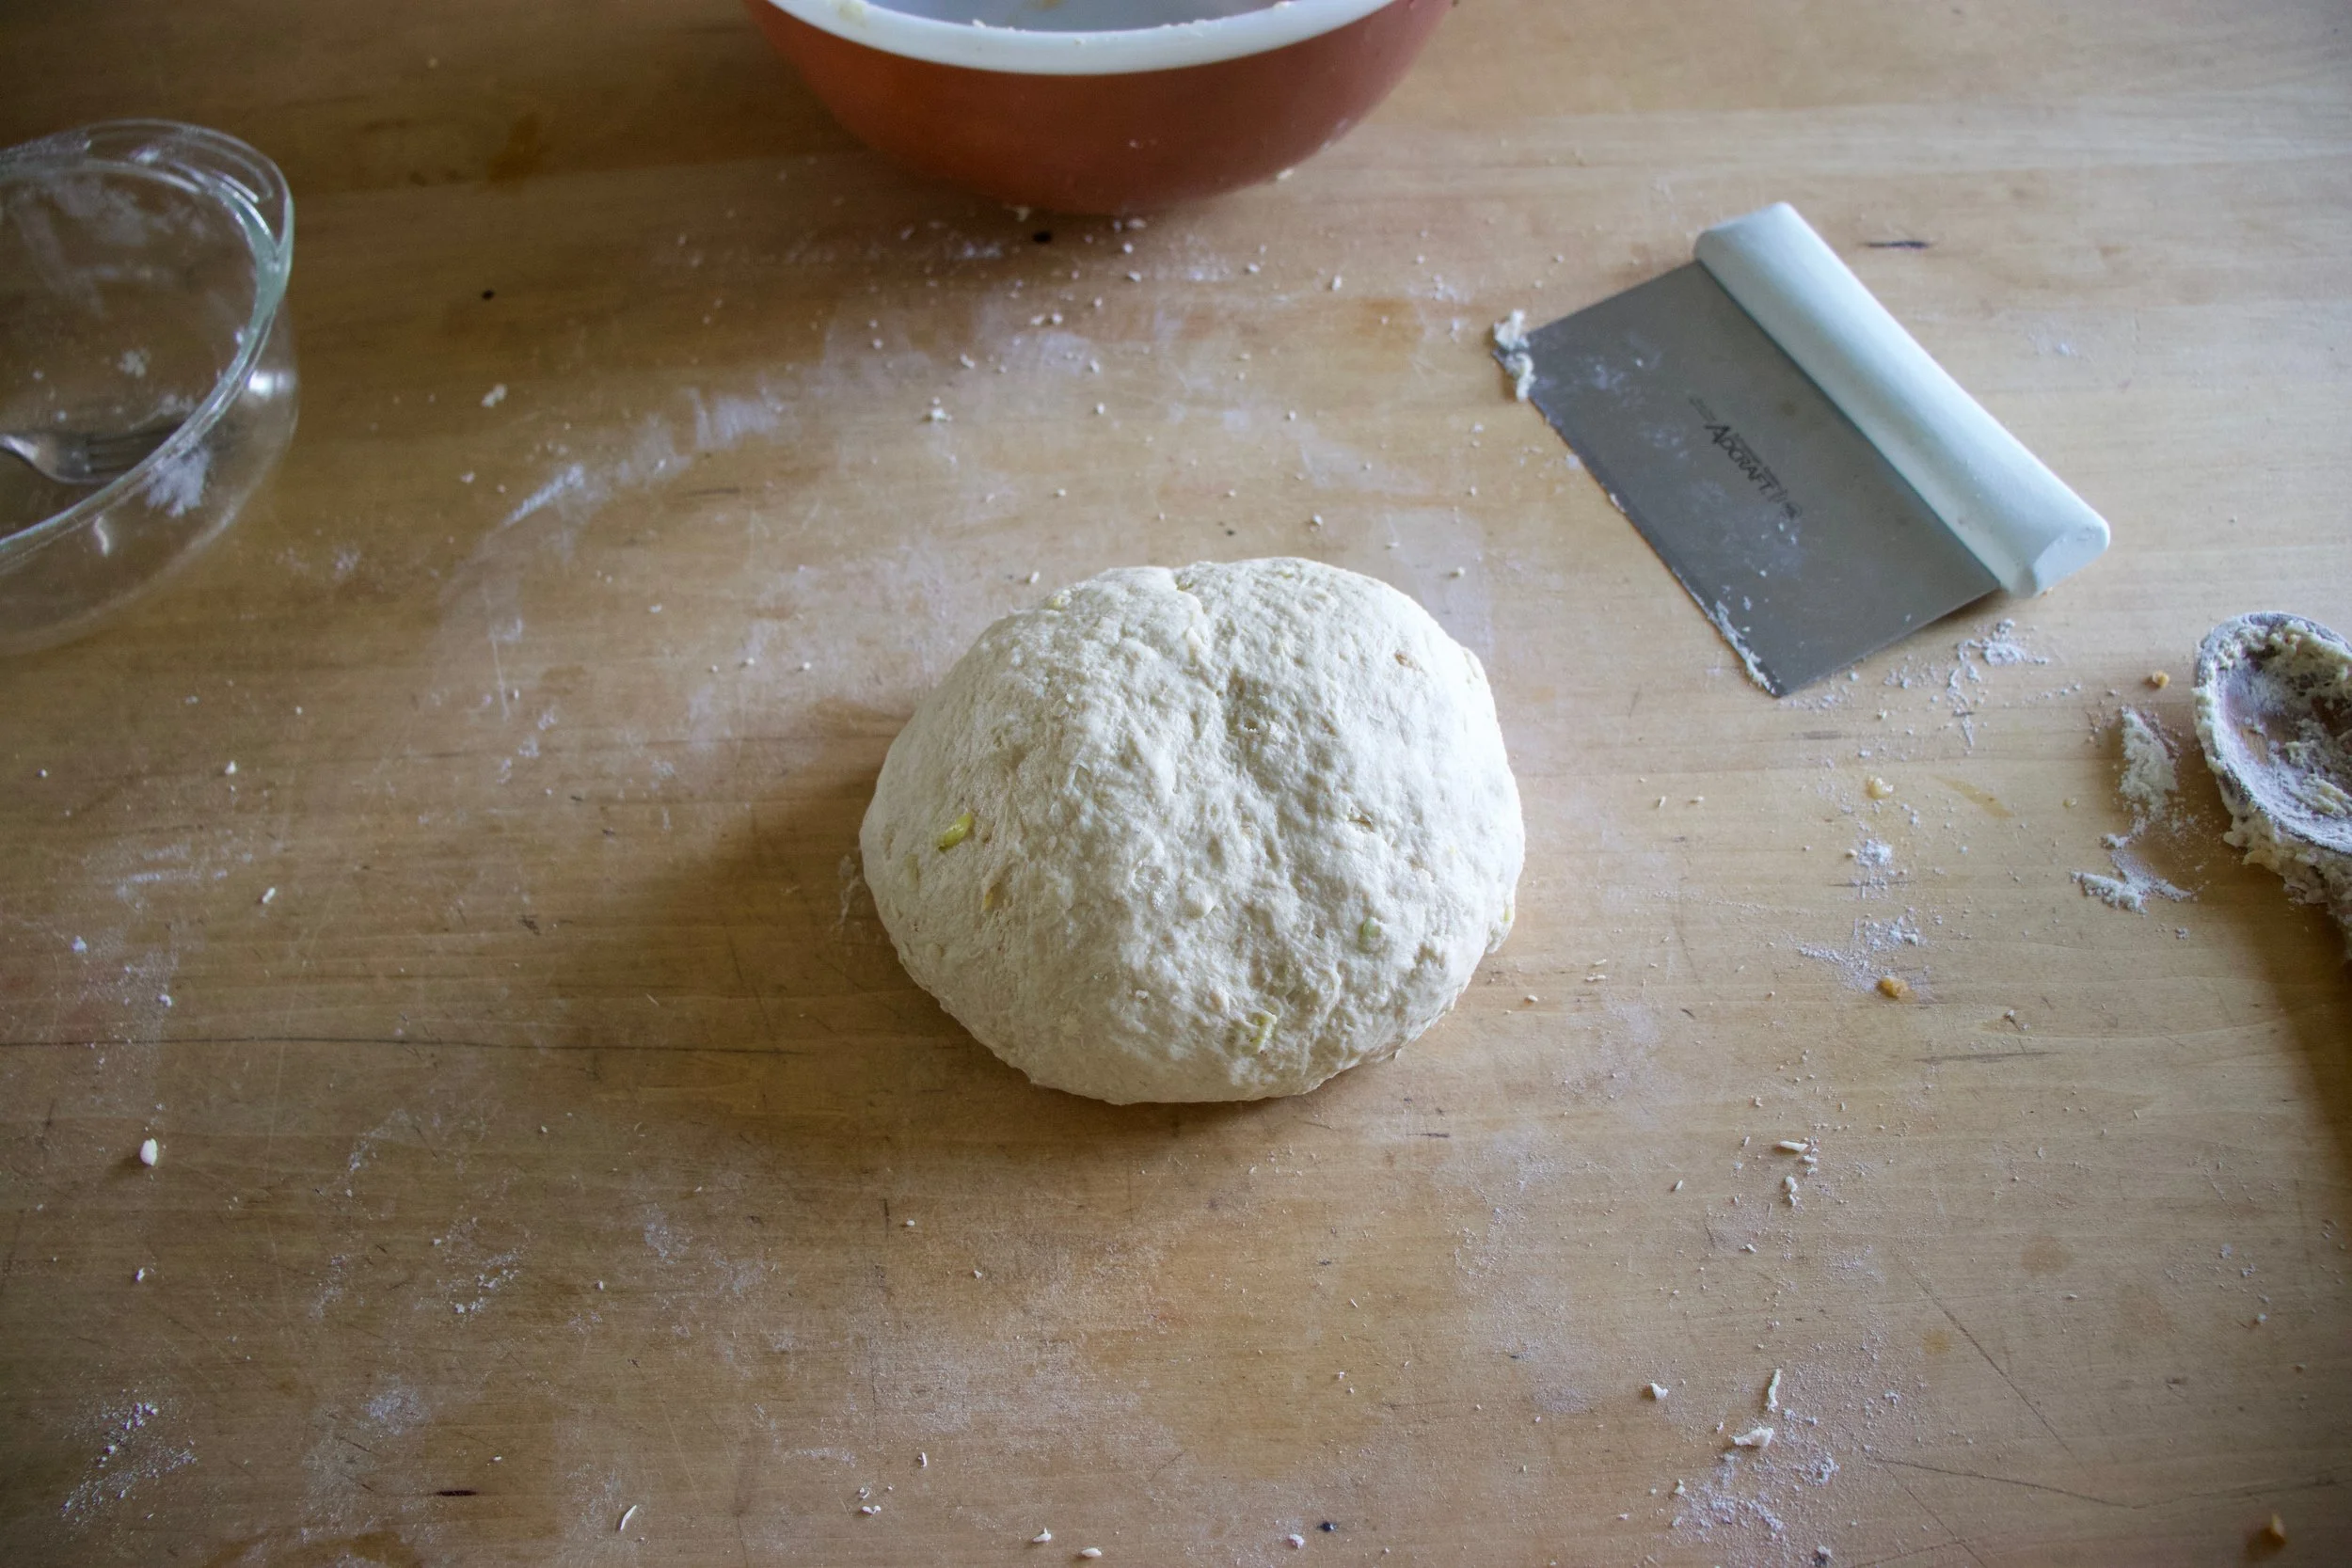
Nice looking dough. Now roll dough into a ball.
Place dough in a clean wet or oiled bowl and cover with a damp cloth for one to one and a half hours or until dough doubles in size.
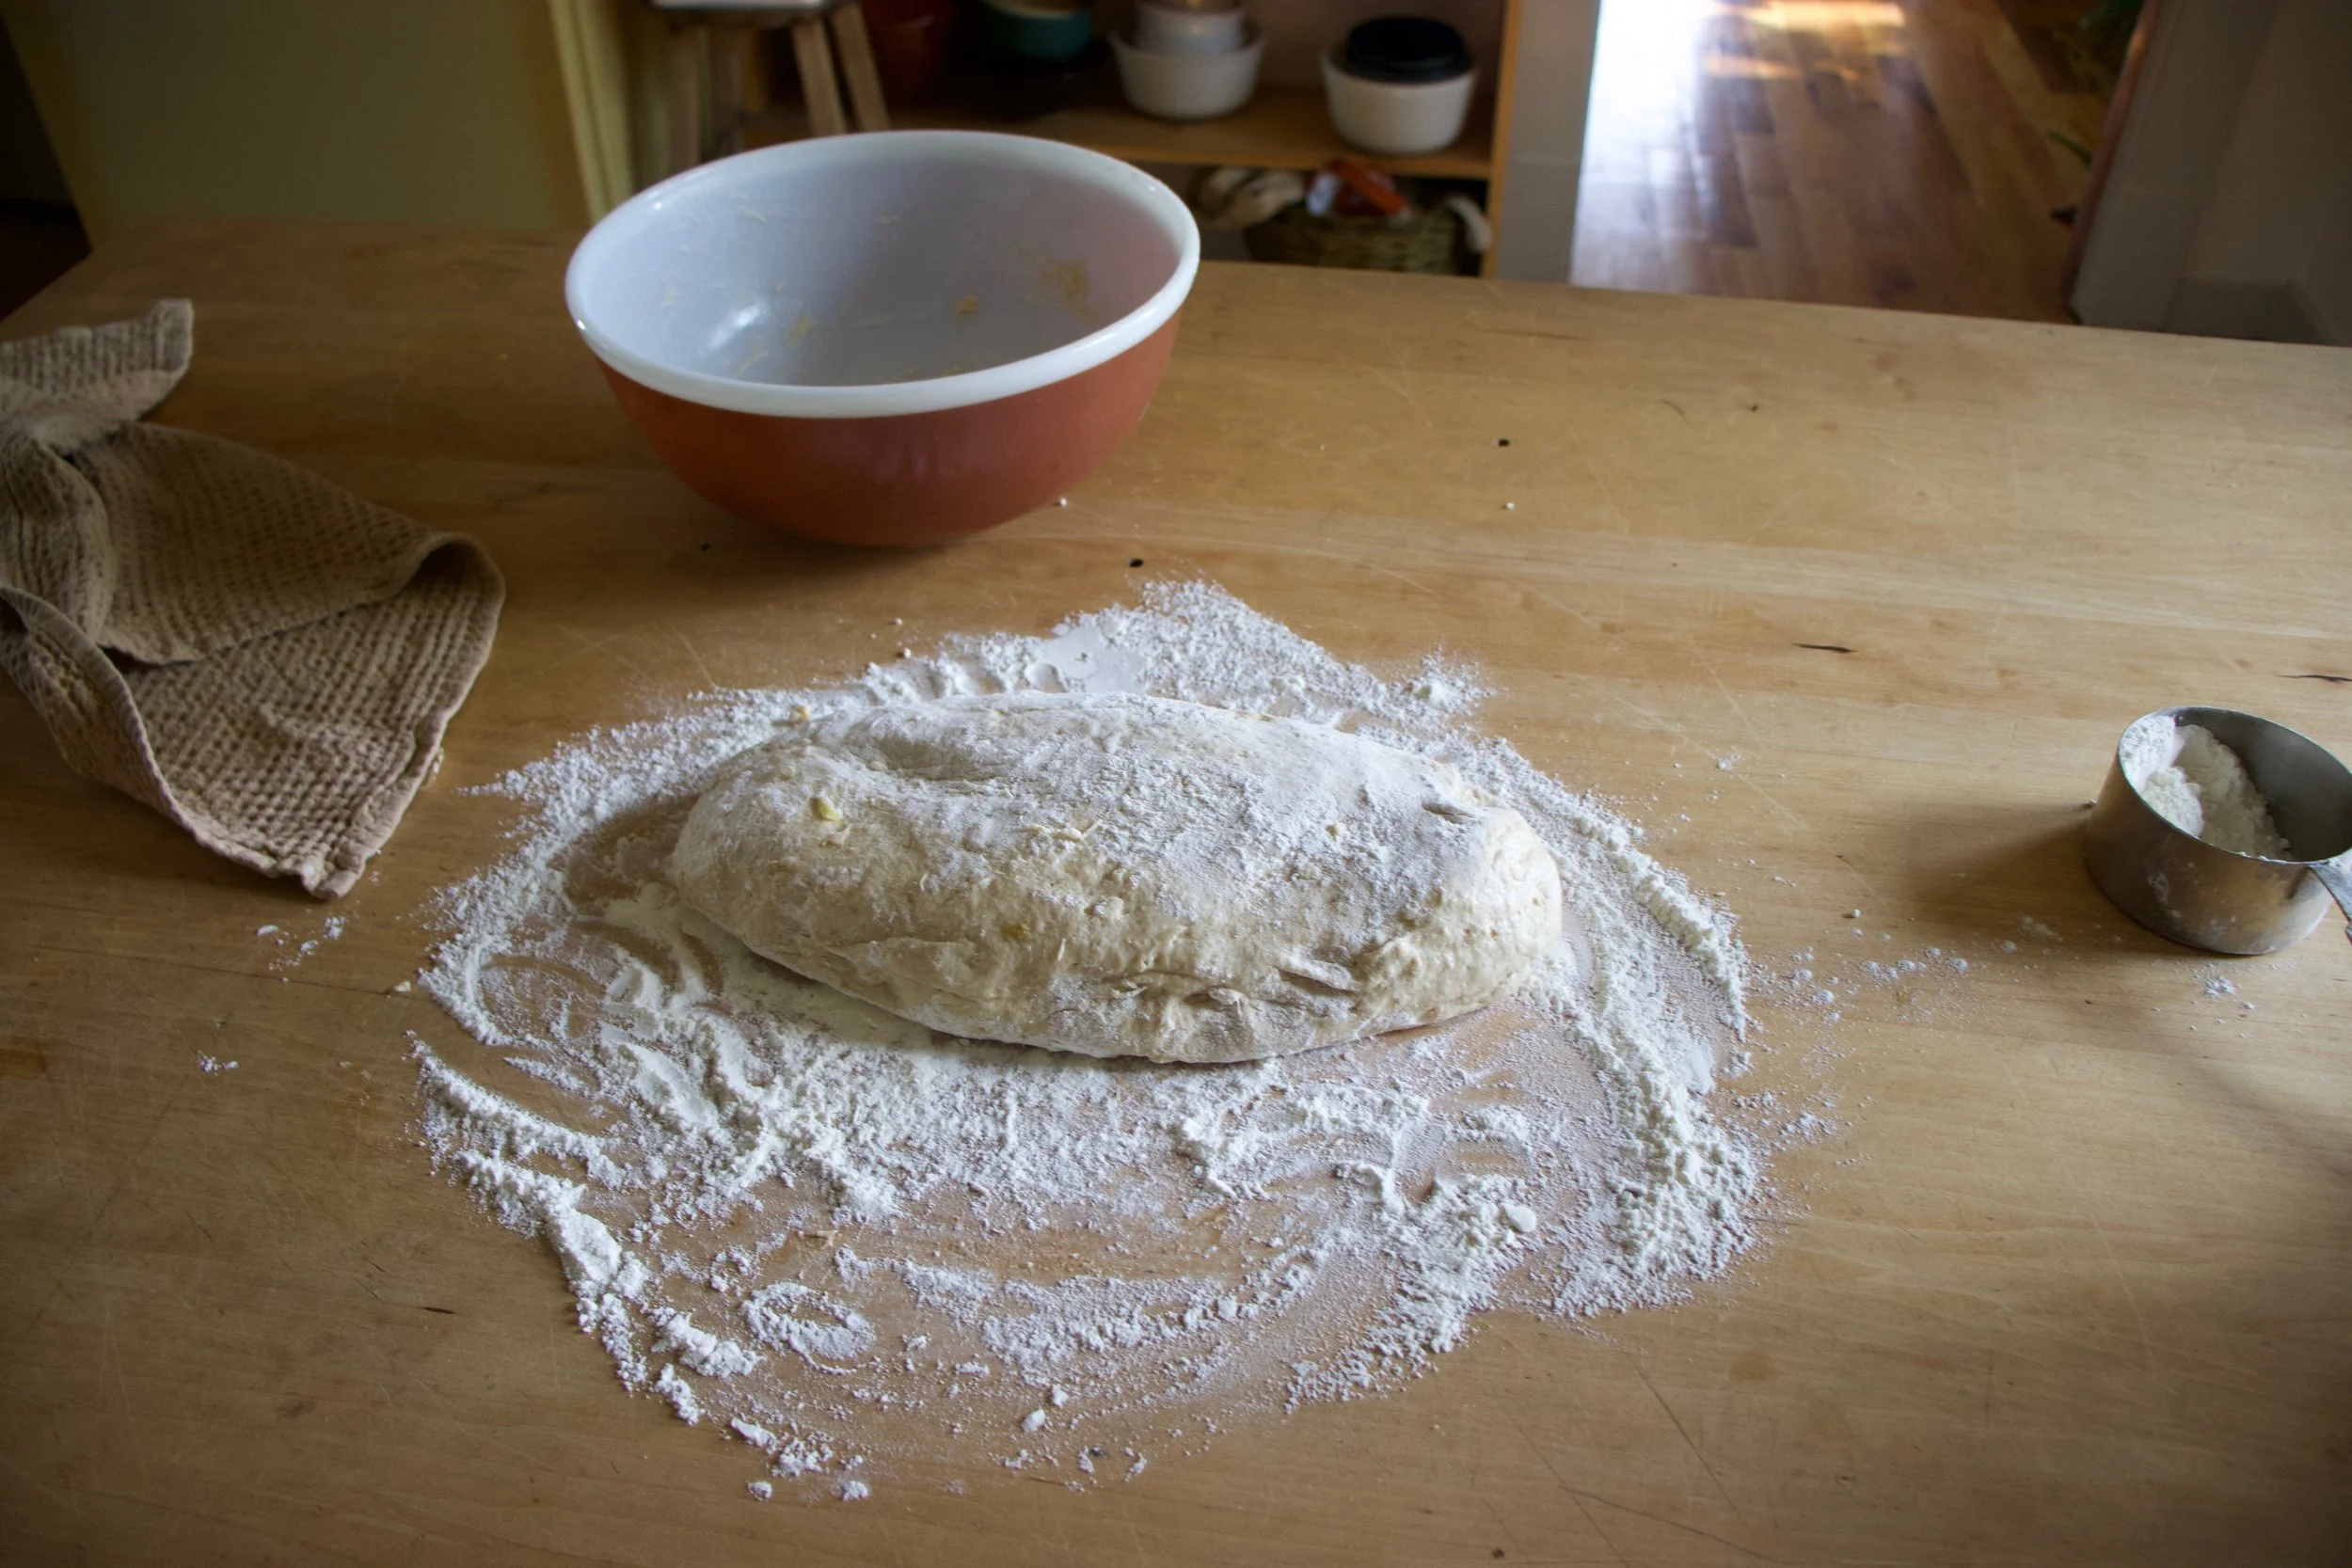
Dump dough onto floured surface.

Cut dough into 3 equal pieces and roll out into long longs.
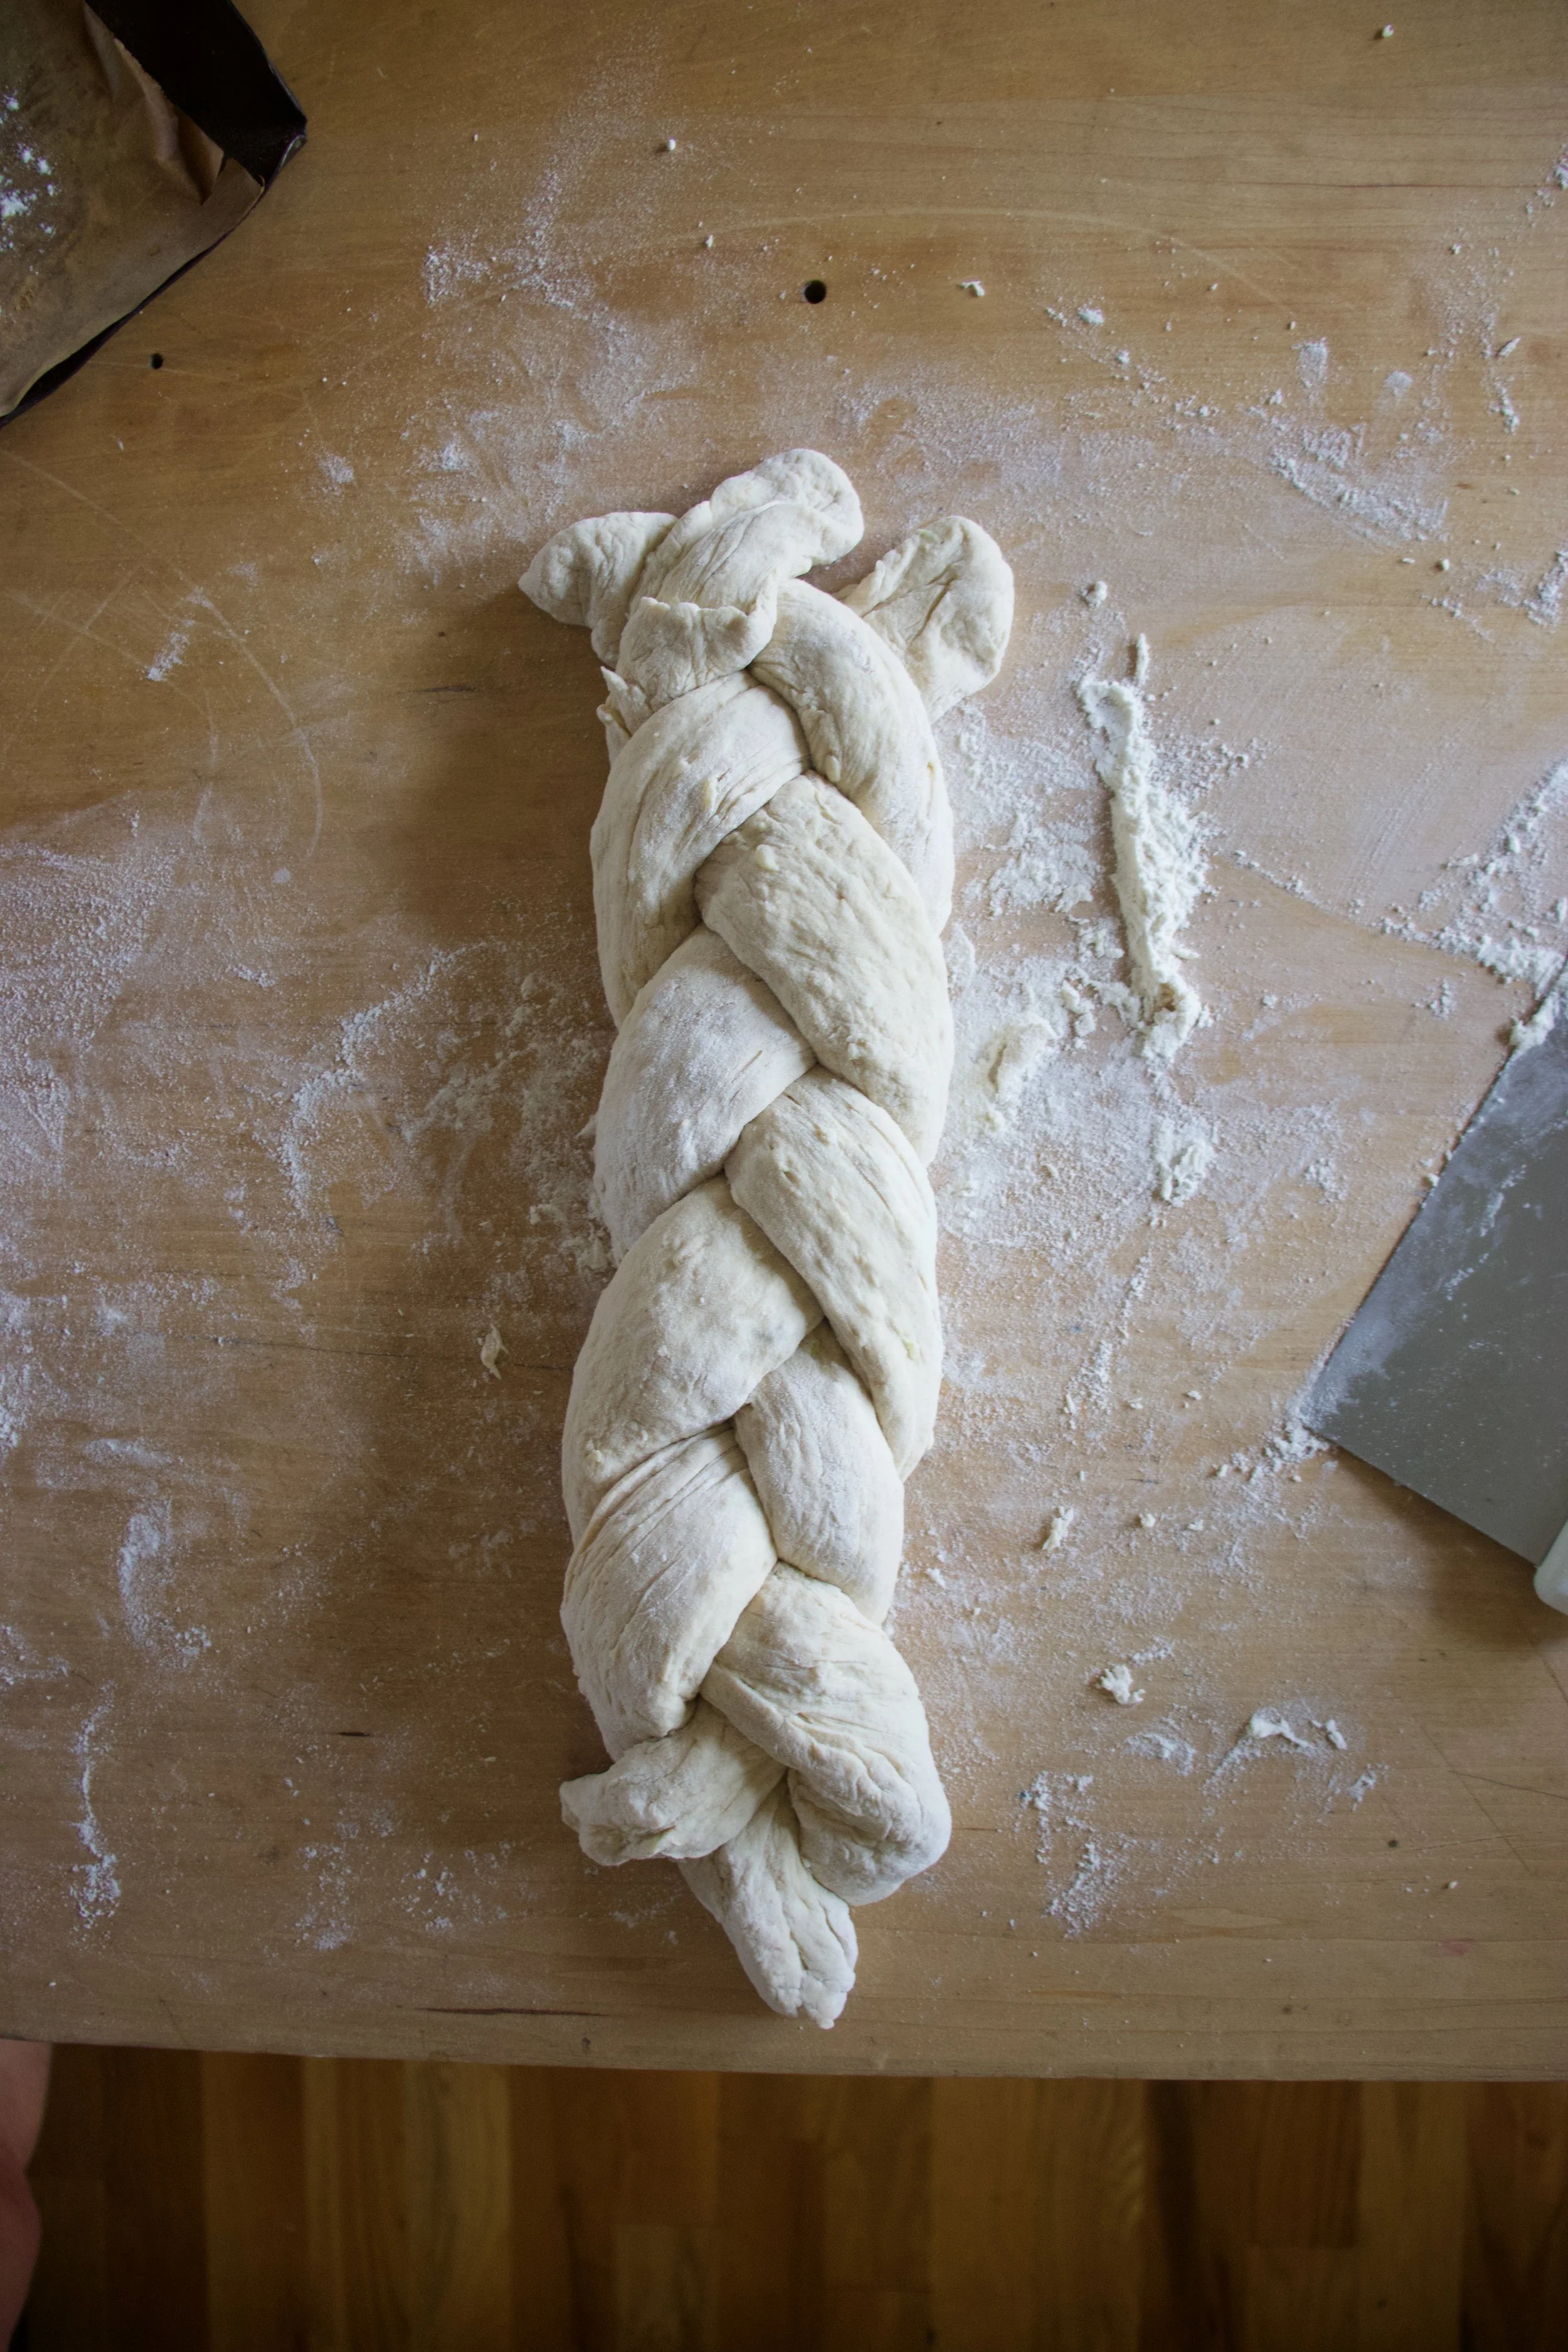
Braid logs together. You can stop here bake it this way or%u2026

After placing it on a parchment lined baking sheet, tuck the ends of the braids underneath each other and make it like this. Either way. And once you have the dough on the baking sheet, brush a little water or plant milk on top and let dough rest for 15 minutes of so while the oven preheats.
Before oven and after oven. Classy, right?
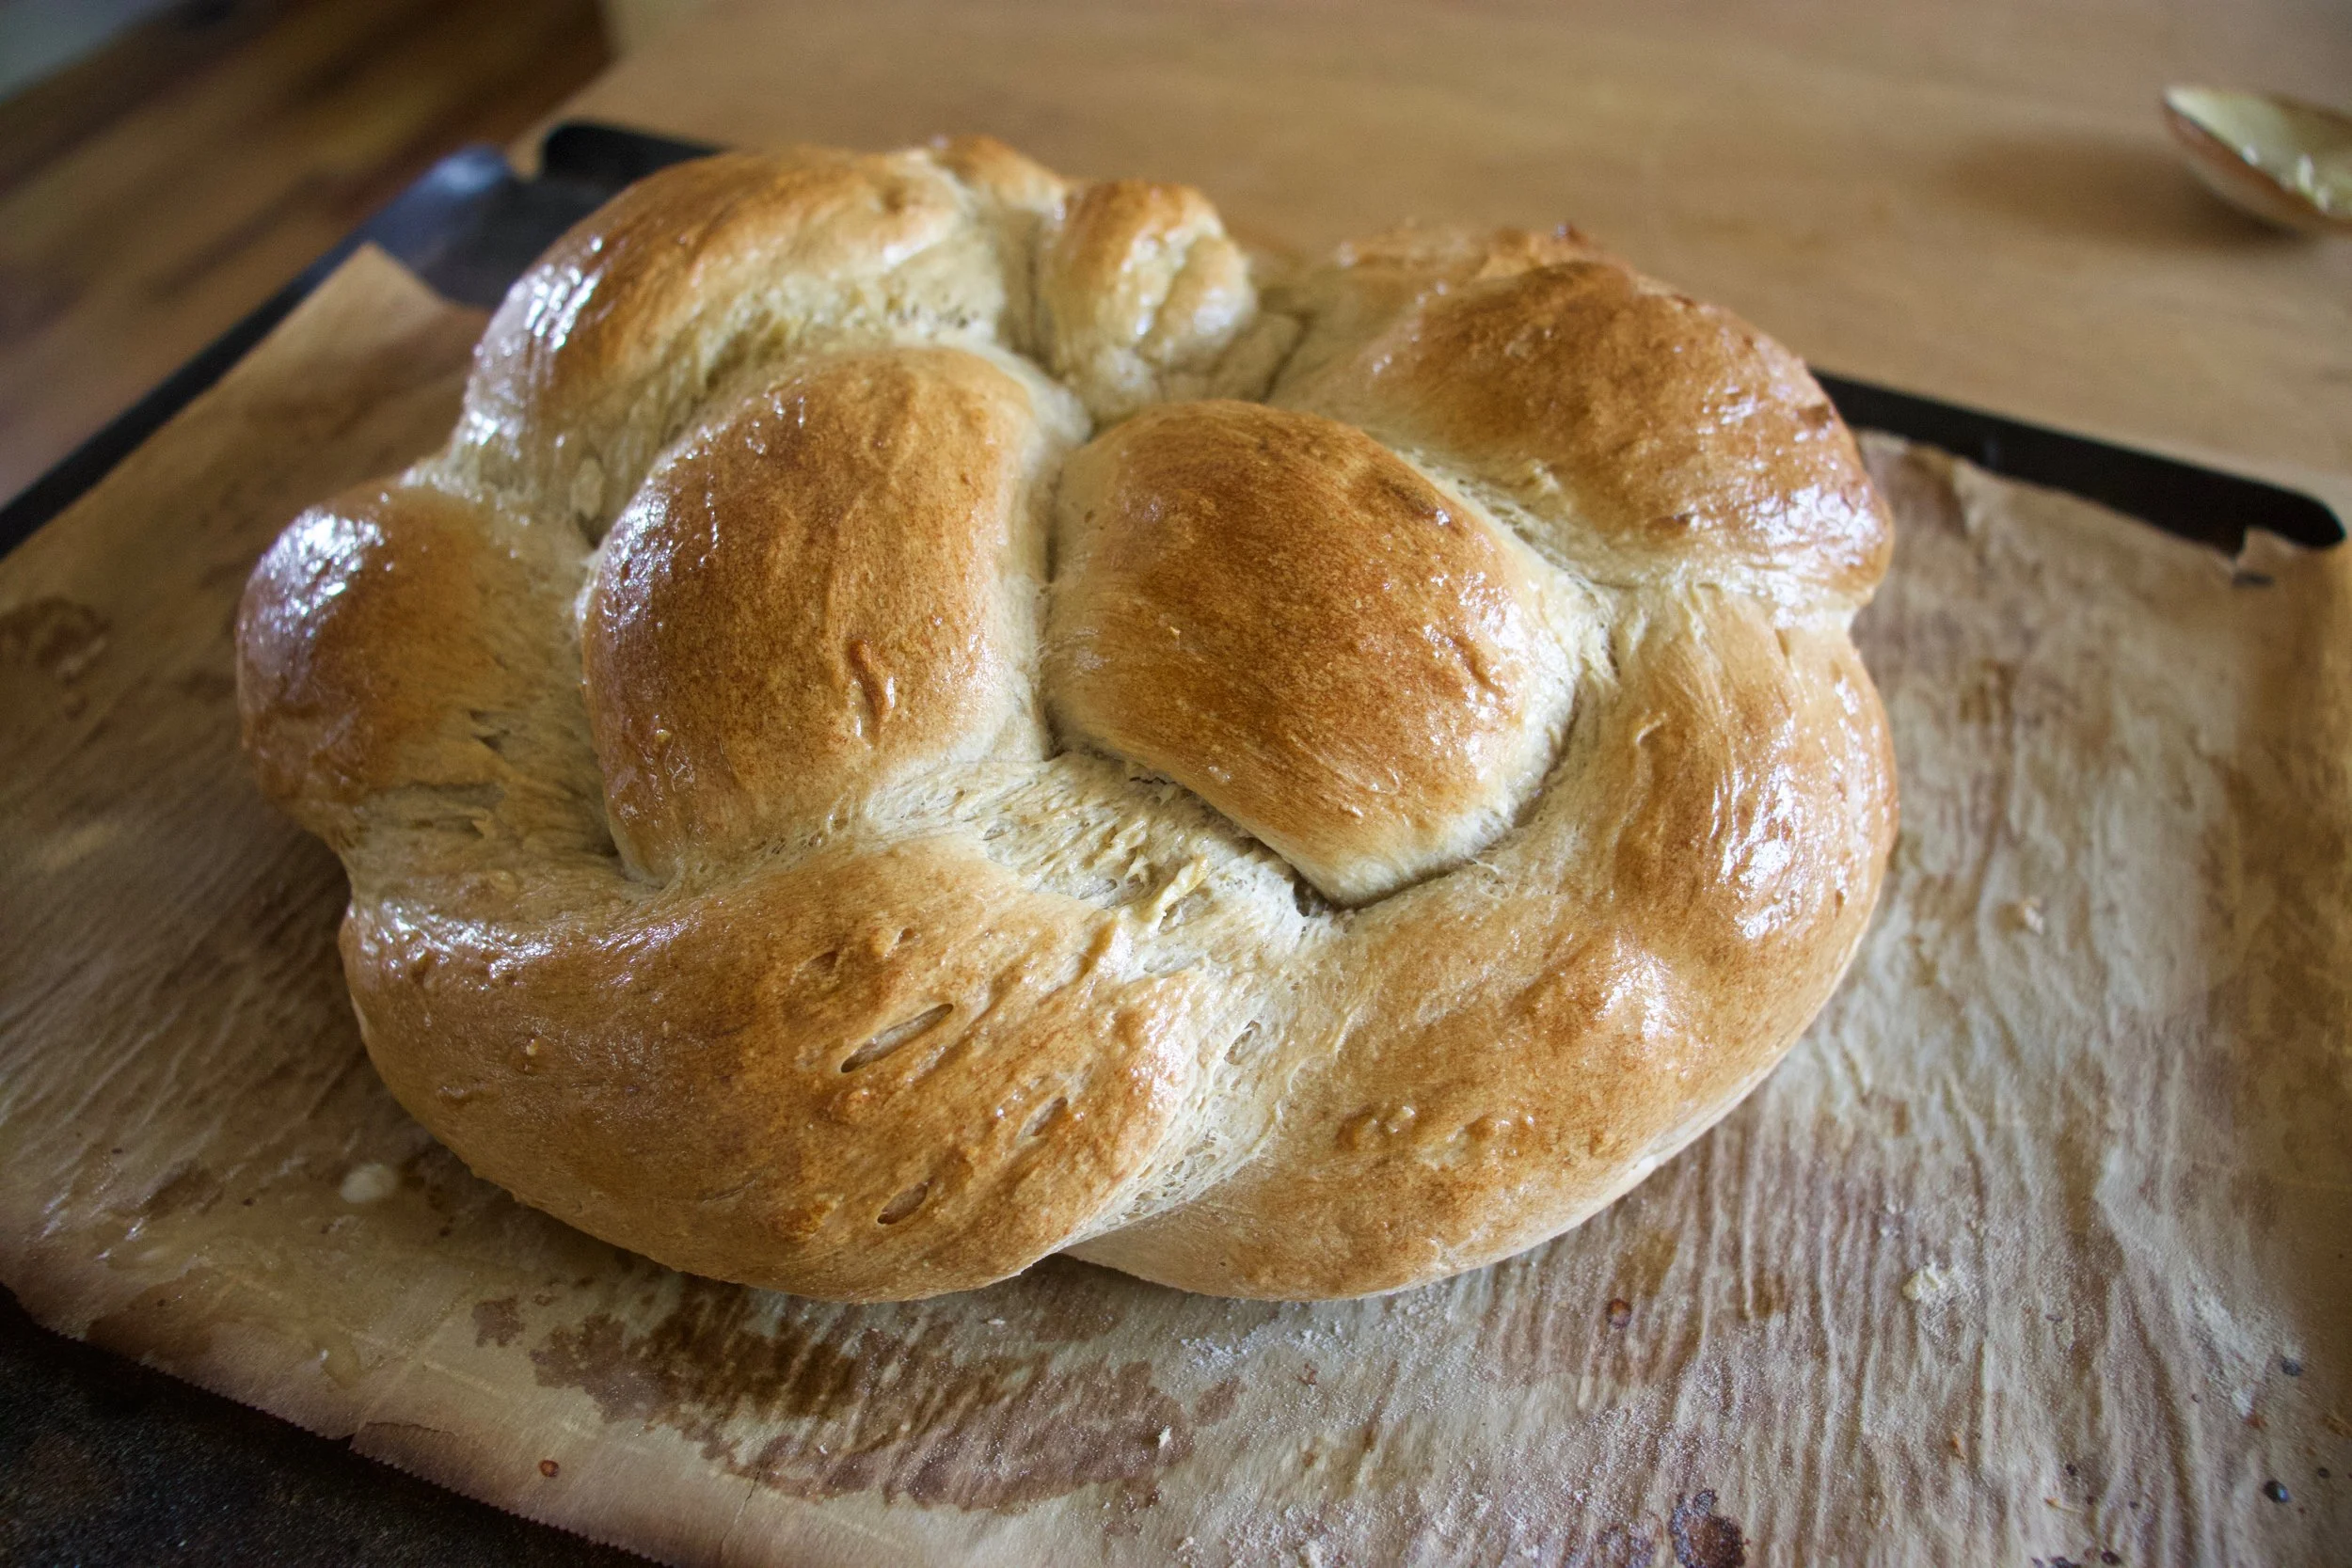
Then for shin and soft crust, rub warm loaf with some plant butter.

And for the hard part. Let it cool before slicing it. Ok sure, a little warm is fine, but wait at least 20 minutes (an hour would be best) and then eat you some bread.
Eat you some bread. That%u2019s a t-shirt right there.
Happy Fall friends!
-C
makes pretty one loaf
-
2 cups all purpose flour
-
1 1/2 cups white whole wheat flour plus more for kneading
-
1 cup unsweetened room temperature applesauce
-
1 large or 2 small apples ( about 2/3 cup shredded apple)
-
1/4- 1/2 cup warm water
-
1 tablespoon maple syrup or honey
-
2 teaspoons active yeast
-
1 teaspoon salt
-
1 tablespoon or so plant milk or water
-
1 tablespoon plant based butter (optional for rubbing on finished bread)
Grab the apples and shred them until you have 2/3 cup shredded apple. In a large bowl, mix together the applesauce, shredded apples, yeast, 1/4 cup warm water, and sweetener.and let yeast activate for a few minutes. Add in salt, the all purpose flour and the 1 1/2 cups white wheat flour. Stir together until dough forms. The dough should be a little bit sticky so if the dough seems to dry, add in 1/4 cup more warm water. If it seems really wet, add in a handful more flour.
Dump dough out onto a well floured surface and knead for about 5 minutes adding a little bit of flour to the counter as needed to prevent it from sticking. Once dough is cohesive in texture, roll into a ball and place into a clean wet or oiled bowl. Cover with a damp towel and allow the dough to double in size. Should take between an hour and an hour and a half.
Once dough doubles in size preheat oven to 400
Dump risen dough back onto a well flour counter. Cut the dough into 3 equal sizes and roll each piece into long logs about 20 inches or so long. Place each roll next to each other and braid. Grab a baking sheet and line with a piece of parchment paper. Sprinkle with a bit of flour and place braided dough onto sheet, either as a braid or if you want, like I did, wrap the braid around itself into a rounded braid situation. Tuck ends into each other and under the loaf. Brush the top gently with a little plant milk or water and let rest for about another 15 minutes or so.
After the rest, place dough into preheated oven. Bake for 35-45 minutes (Less if left long braid, more if wrapped braid) or until the top is a deep golden brown and when tapped on the bottom, it sounds hollow. Also can use an insta read thermometer and check temperature. You want it to reach 190 degrees.
Once bread is baked, remove from oven. If you want the top to stay a little crispy, don%u2019t do anything but let it cool. For a softer, shinny crust, rub the top while it is still warm with some plant based butter.
Let bread cool completely before cutting.
Then eat it like you would eat bread. Any and every way.
Store cooled loaf in a airtight bag on counter for 2-3 days but if not eating that fast, slice and place into freezer. That way you can pull out individual pieces and toast as you want.


Sunday was the first, and probably the biggest Thanksgivings we are going to this week. It was my family, which consists of my mom, 8 siblings (plus a few spouses) and 9 little%u2019s. A small little house bursting at the seems with a bunch of shit heads. There was a pumpkin pie food fight, secret Santa%u2019s name picking that had to be redone 3 times (because we cant count) and much to much time devoted to sister selfies.%u00a0 It was a blast.
%u00a0And my mom always requests everyone to bring something to diner so I of course wanted to contribute a pie.%u00a0One pie, something that would appeal to as many of those crazies with dietary restrictions as possible, that was a not gross, but still not full of crap, and that people would want to eat. So I went with an apple and acorn squash pie that happen to be vegan, gluten free, and a little on the less sweet side. (Look at me trying to be all nice an accommodating)
%u00a0But guess what. My mom, well she bought 5 other freaking pies from the farm stand to supplement my pie. And yeah, when the time came for dessert my pie got a few nibbles, and I was told that it was fantastic, but they all went for the super sugary, full on butter and fat, custard pies%u2026 Dietary restrictions thrown aside. And I am ok with that because my pie got divided up between a few of the ladies and they ended up easting it for breakfast. So my pie turned out to be the day after thanksgiving breakfast pie. And that might even be better then being the night of pie cause everyone knows that left over pie eaten for breakfast is the best kind of pie!
So if you are looking for a good pie that is great the day of Thanksgiving and be good for breakfast the next day, this is the pie for you.

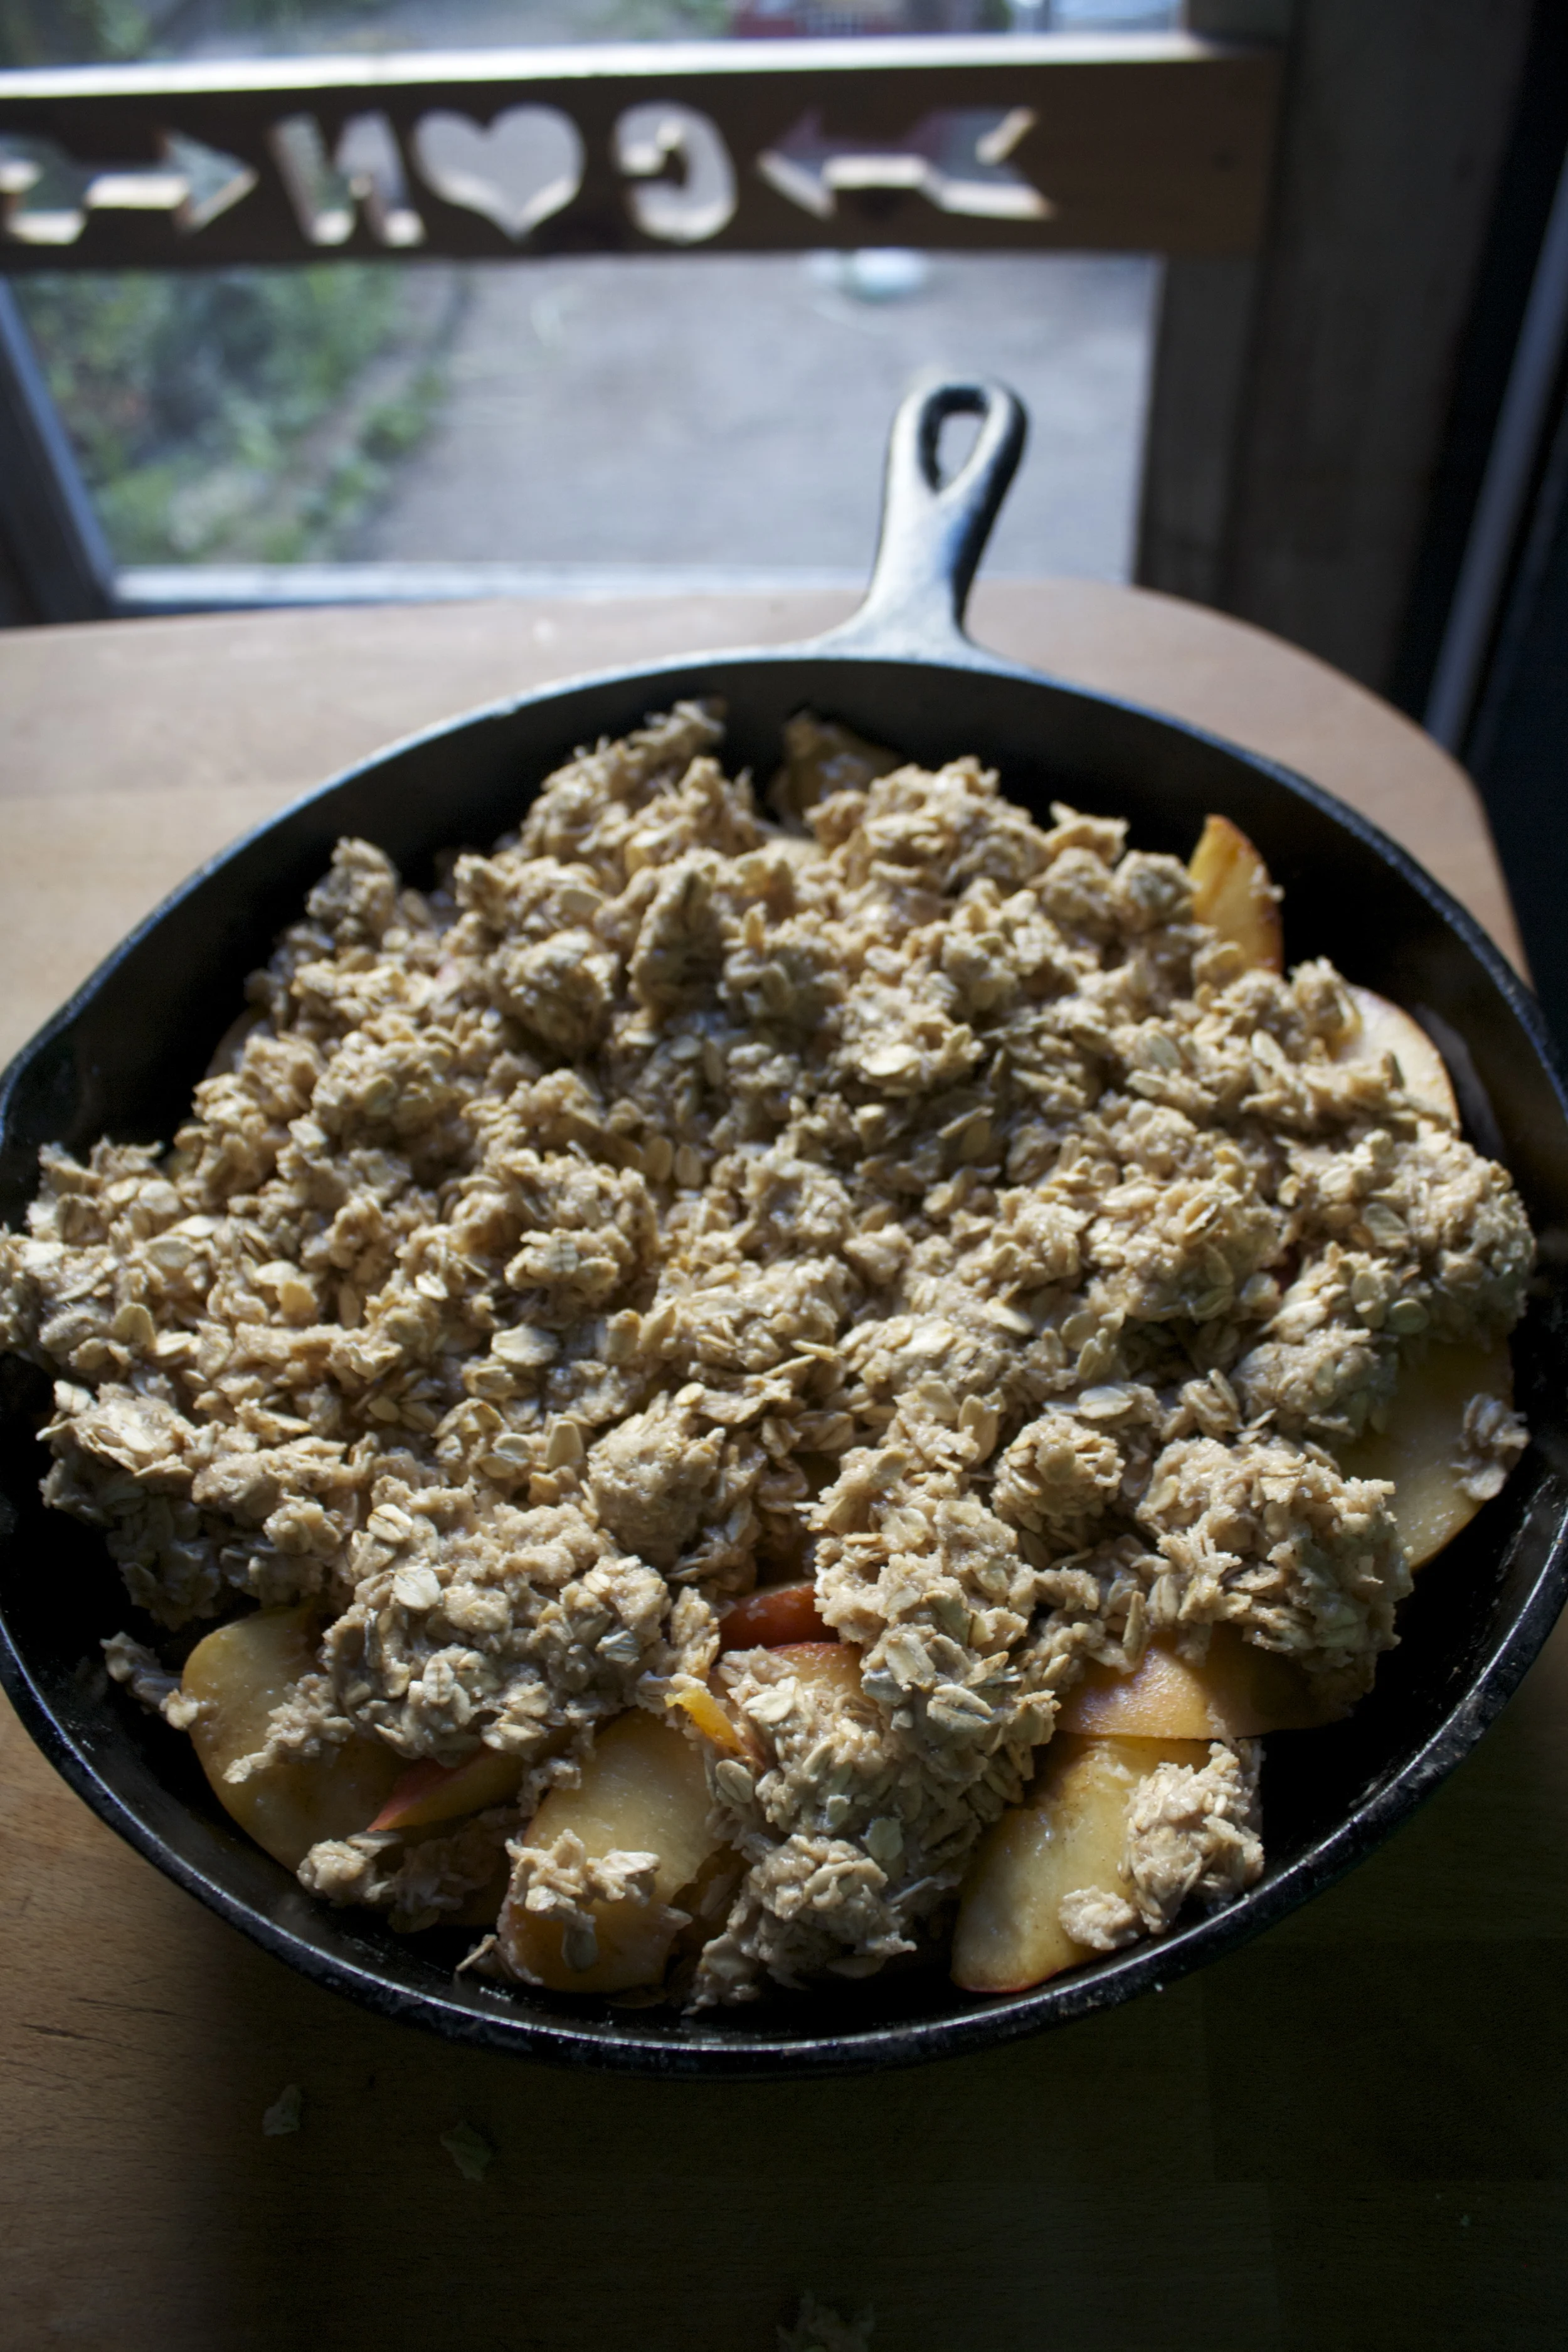
The stuff. Apples, an acorn squash (only going to need half), some old fashion oats, earth balance, brown sugar and a lemon. Also need a little bit of cinnamon, ginger, and salt. oh, and a bit of water.
Oats, earth balance, some sugar, a pinch of salt and a bit of cinnamon all go into a food processor to blend.%u00a0While its blending, add in a tablespoon or two of water to help all the stuff come together. %u00a0Once it starts to pull away from the sides, turn off and call it ready.%u00a0

remove about 1/2 a cup of the crumb and set aside for topping and dump the rest into a pie plate. Press into the dish until it looks like a pie crust.
Stick into the oven to pre bake.%u00a0
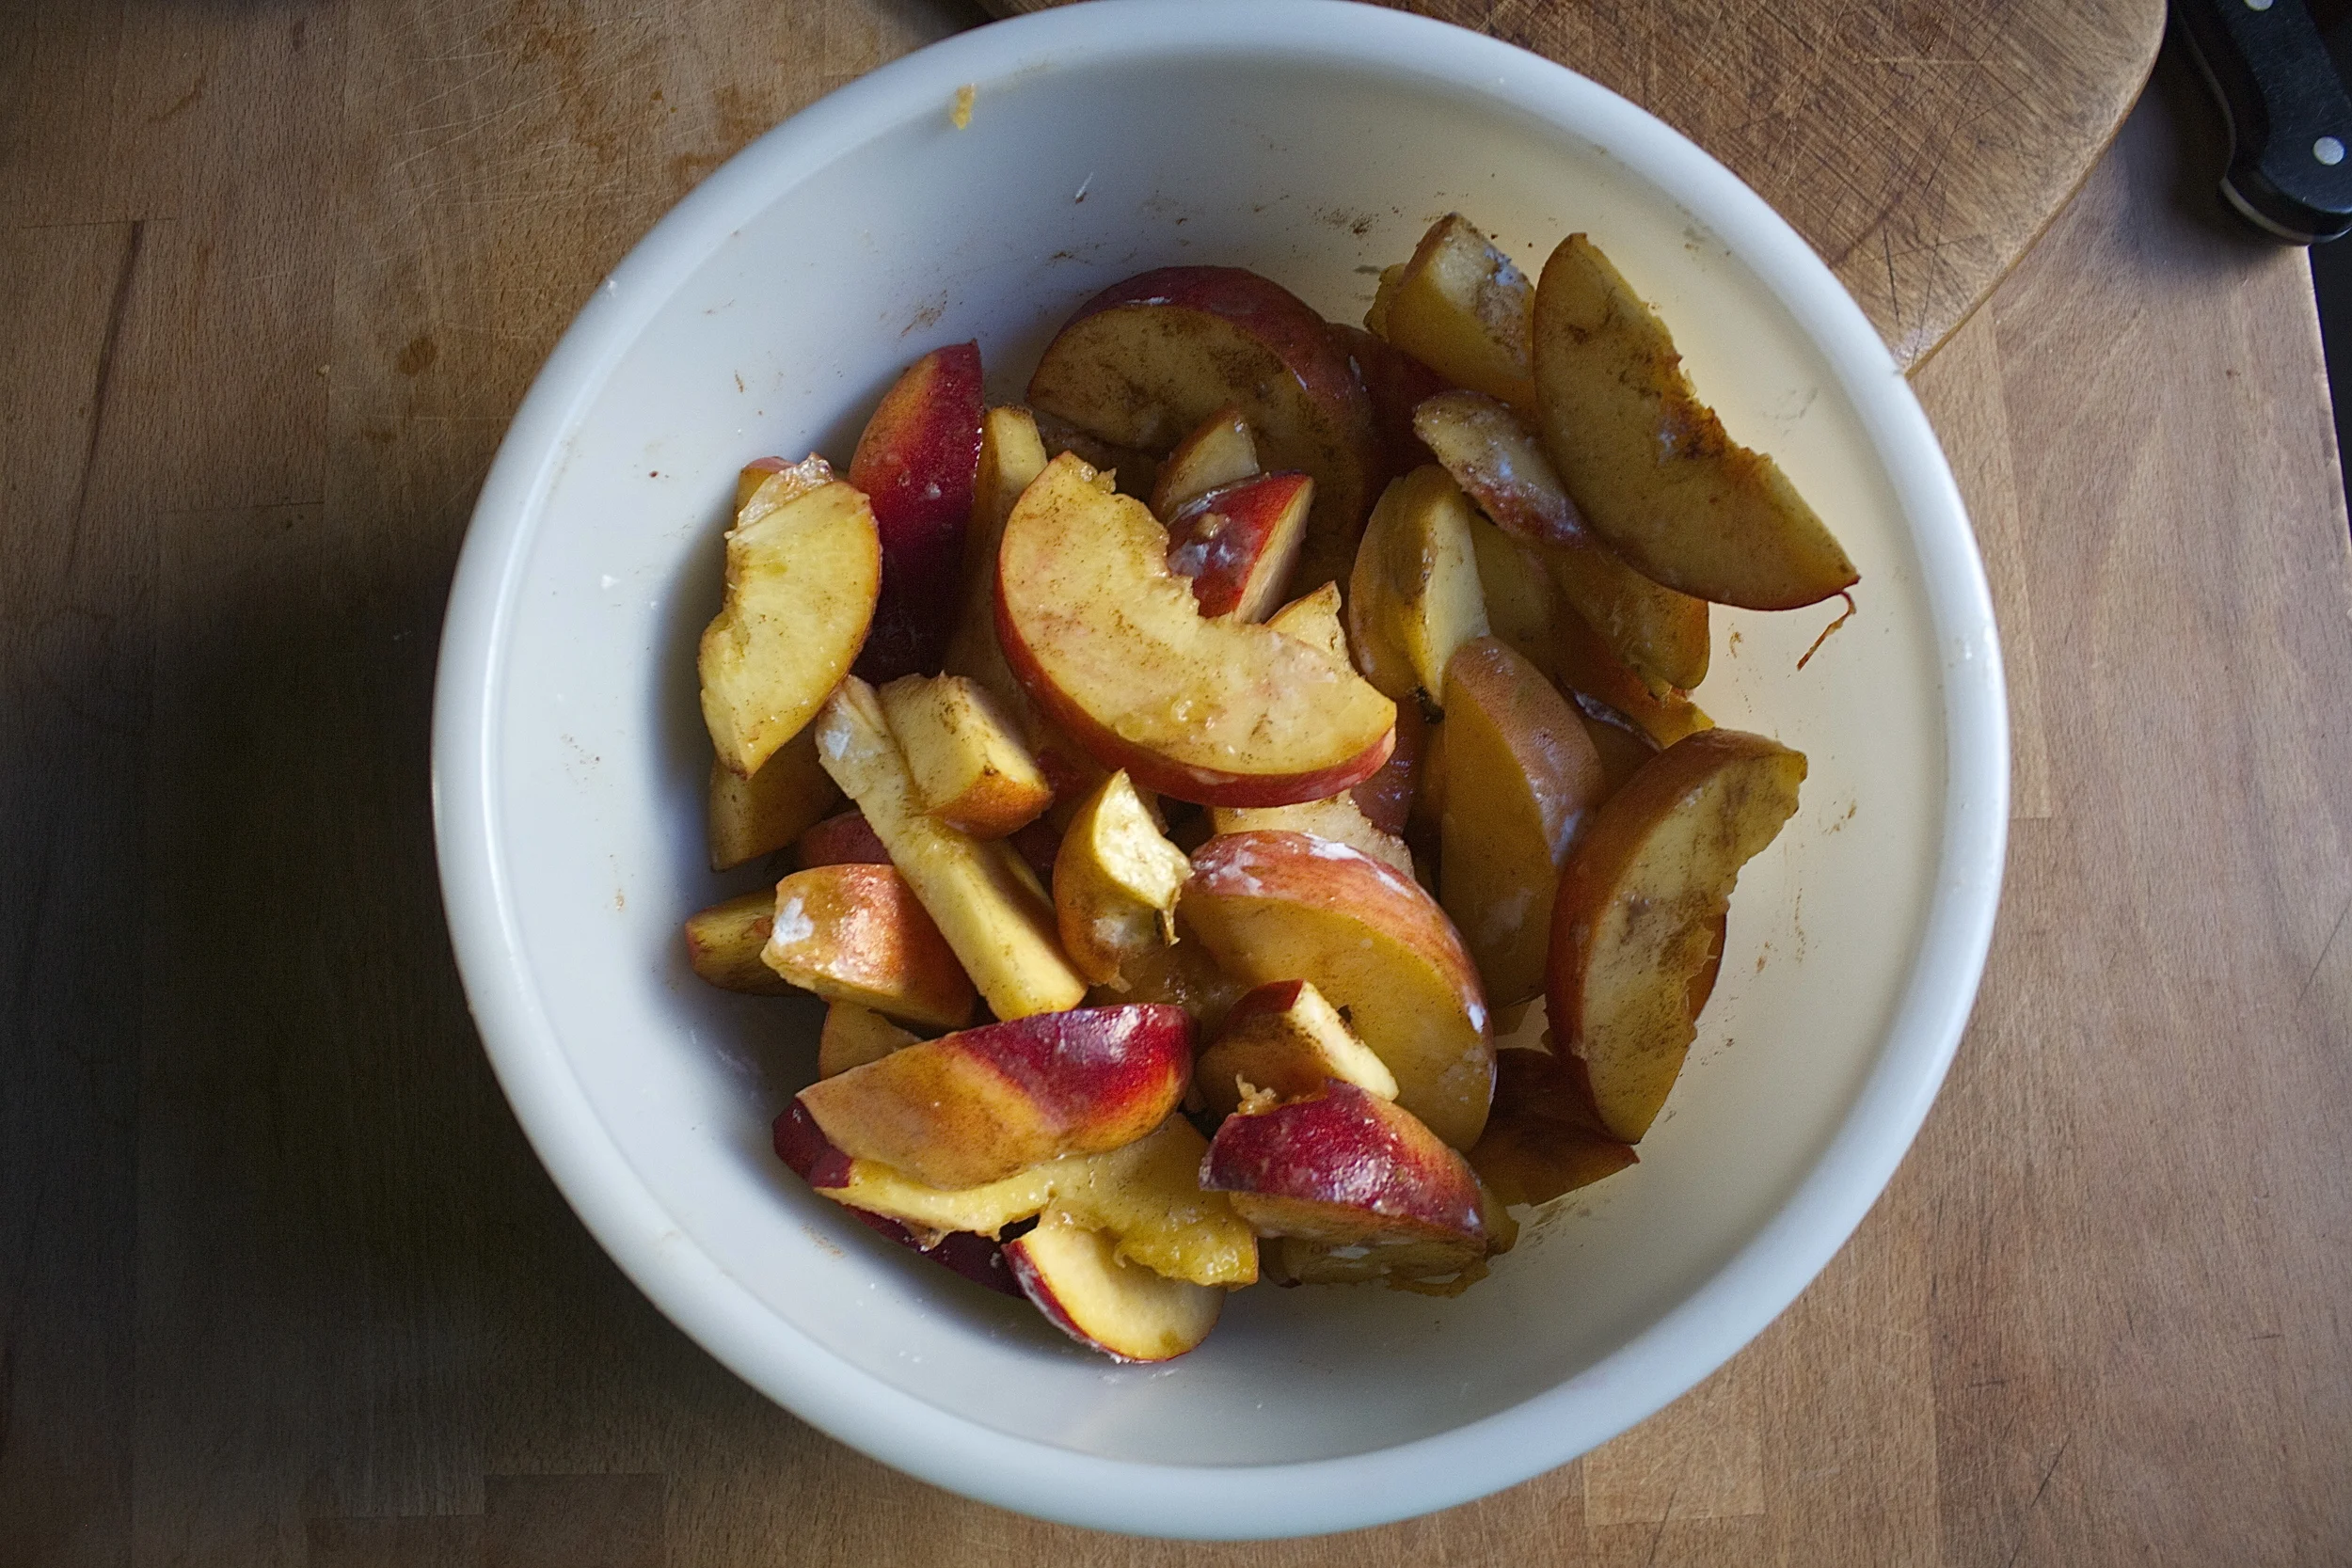
The crust is in the oven and the apples and the squash are not going to cut themselves up so you are going to have to do it. And personal preference here, peel the stuff or don’t (I wouldn’t usually but I know the people eating %u00a0the pie and they are peeled people) So remove all seed and stems and slice both the apple and squash intto 1/2 inch slices. Cut the squash into pieces that are similar to the apple,%u00a0

Earth balance into the skillet first then topped with all the chopped stuff, the spices and some sugar and stick it on the stove to cook down. You want to get the pan hot with a medium high heat then turn it down to a low heat, stirring and them placing a lid on the stuff until the squash and apples are slightly tender (not falling apart)%u00a0and the sugar has caramelized.
And note.. If you notice that the sugar is caralized before the squash and apples are tender, just add in a splash of water and mix around to prevent the sugar from burning.

Filling all ready to go, just add in the juice of the lemon here.

The left over crust crumble, some more earth balance, cinnamon, oats and sugar get mix together to make a little crumble to sprinkle on top.%u00a0
And now all there is left to do is to put it all togehert. Filling goes into pre-baked crust.

And gets topped with the crumble.%u00a0
Into the oven it goes (give it about 45-50 minutes to bake)

And pulled out when the top is all golden brown and smelling pretty.

Left to cool for a few minutes, then sliced into thinck pieces and shared all around!
Now thats a pie that’s meant for breakfast!
-C
Apple Acorn Squash Pie with an Oat Crust%u00a0
Makes 1 pie
The Crust%u00a0
- 3 cups %u00a0old fashion oats
- 2 tablesppon brown sugar
- 4 tabelsoons earth balance
- 1 teaspoon cinnamon
- 1-2 tablespoons water
Filling
- 1/2 %u00a0acorn squash (about 3 cups chopped)
- 4-5 %u00a0apples (any kind will do)
- 1 tablespoon cinnamon
- 1/2 teaspoon ginger
- 1 lemon
- 4 tablespoons earth balance
- 6 tablespoons brown sugar
Crumb topping
- 1/2 crumb that is set aside
- 1/2 cup old fashion oats
- 2 tablespoon earth balance
- 1 teaspoon cinnamon
- 3-5 tablespoon brown sugar (more if you like it sweeter)
Start by making the crust. This crust is going to be prebaked so preheat the oven to 375.
Stick the oats, some super soft or even melted earth balance, brown sugar, a pinch of salt and cinnamon, and a splash of water into a food processer and pulse until a fine crumbly crumb is made. Remove about 1/2 %u00a0cup of the crumb and dump the rest into a pie plate. Press into the dish evenly and once you are happy with the looks of the crust, stick it into the oven. Bake for about 20 minutes or until the crust is just starting to brown.
While crust is prebaking, peel (if you want),%u00a0core and slice apples into %u00bd inch pieces. Now grab the squash while you are at it and cut it in half, remove seeds, peel (if you want) and slice into %u00bd inch pieces (make them about the same size as the apple pieces.) Get yourself a big skillet and add in the earth balance, all the chopped up apples and squash, the spices and the sugar and stick on the stove one medium high heat. When the skillet is nice and hot, the butter all melted and the sugar is starting to melt, turn heat down to medium low, stick a lid on the pan, and cook for a few more minutes (like 7 minutes) until the squash and apples are slightly fork tender , but not falling apart. If the sugar starts to caramelizes before the stuff is tender, add in a splash or two of water to stop the sugar from burning.%u00a0Remove from heat, add in the juice of the lemon,%u00a0and set aside.
%u00a0And for the crumble. Just add all the crumble ingredients together and mix around (I used my fingers).
So crust is pre-baked, filling is precooked, and crumble is ready. So now all you need to do is put it together.
Dump the filling into the crust and then top with the crumble. Stick the pie into the oven and bake for about 45-50 minutes or until the filling is fork tender and the crumble on top is nice and golden brown.
Remove from oven and let cool for at least 5 minutes (15 minutes is even better), and serve it on up!
A simple little artsy craft project to get down with%u2026 apple printing. ALmost the same as potato print, except smells better and your apple comes with an interior fun shape to print with. And you have to use apple this time of year cause its apple season and there are apples everywhere!
I usually do things like this with a little or two, but at the time, I had no littles in my possession, so I went it did it all by my lonesome.%u00a0(which was actually a lot of fun)%u00a0I made myself big cup of hot coffee, put on some tunes, and zoned out and did a bunch of prints. It was a great little afternoon project that anyone, little or not so much, can do. And the best part about printing is%u2026 you can’t screw it up
And I know that this is going to be a cold dreary weekend%u2026 so this might just be the perfect indoor project to do!%u00a0

Things you are going to need..
- apple(s).. And the apple that I use are fallen apples.. so I don’t feel bad about using them.
- paper
- a knife (or something sharp enough to cut the apple)
- paint ( I used cheap-o acrylic paint, but any paint would work)
- paint-brush
- Cup of water (to rinse brush)
- rag (to wipe hands)
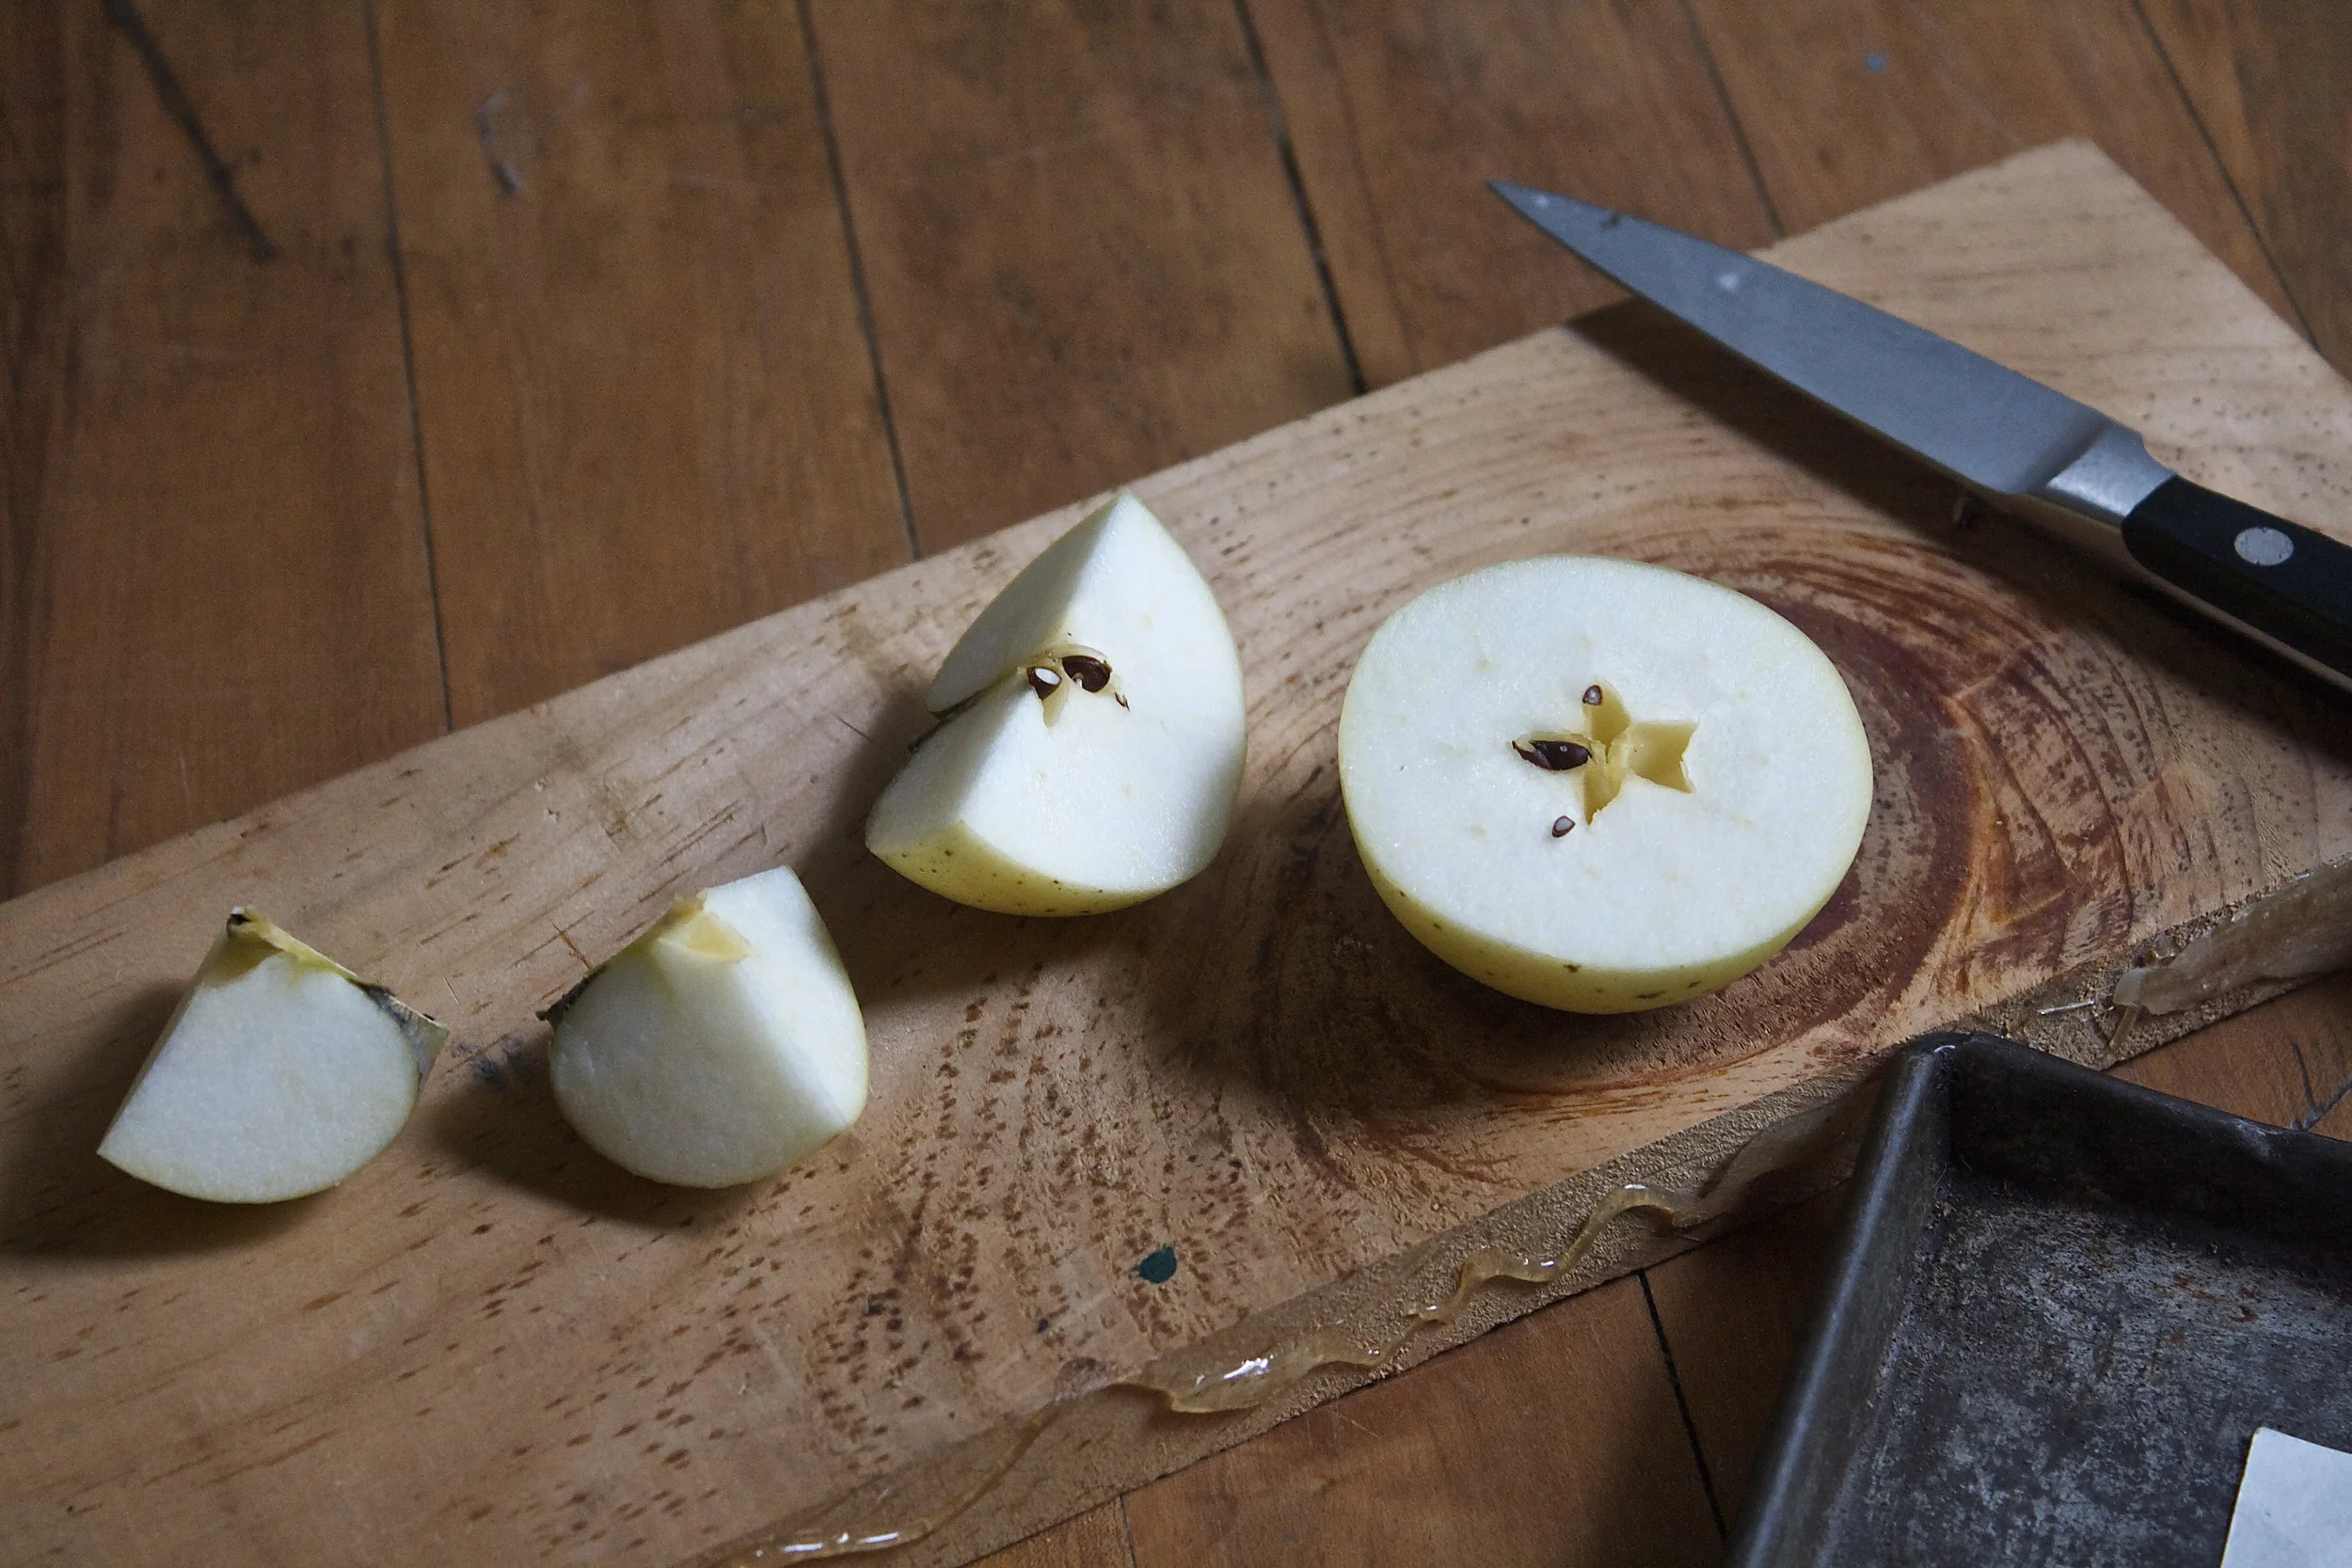
Start by slicing your apple. If you cut in in half, you get the cool star shape in the middle, or just chop it into cool shaped pieces.%u00a0
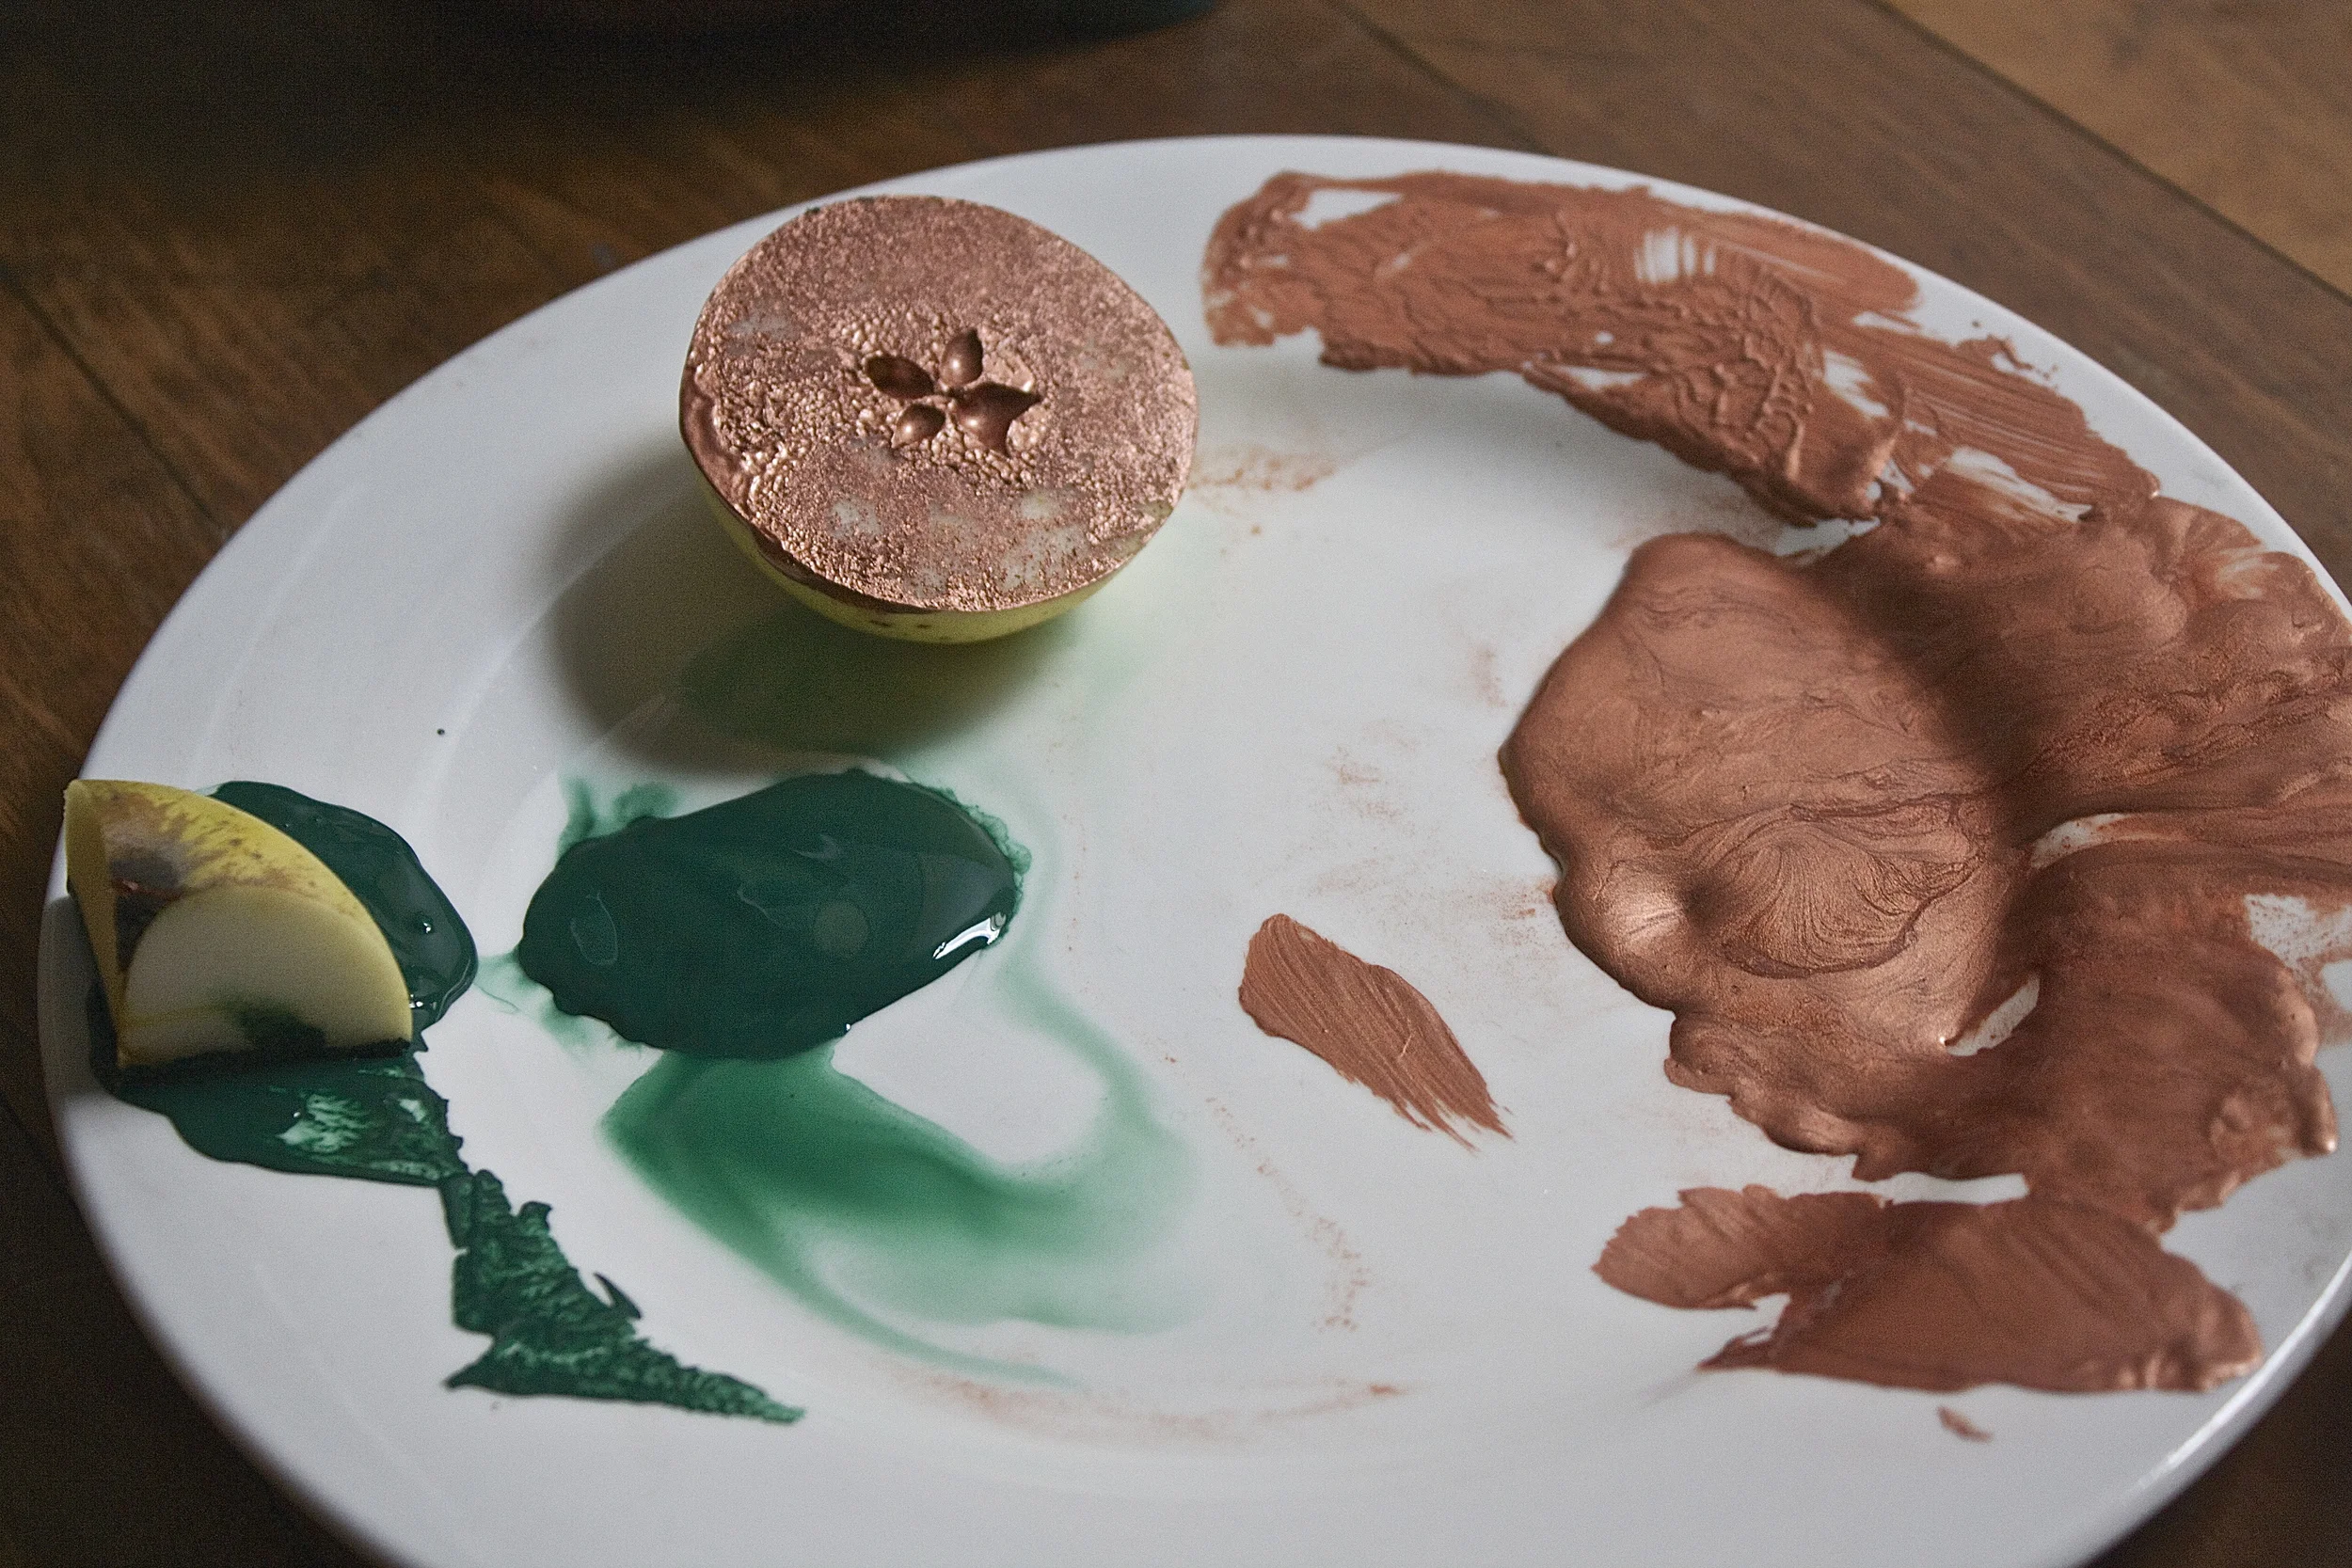
Apply paint to the apple. I found that if I dipped the apple, then remove to much excess paint with a paint brush to work the best for me.. My suggestion is to play around with what works best for you.
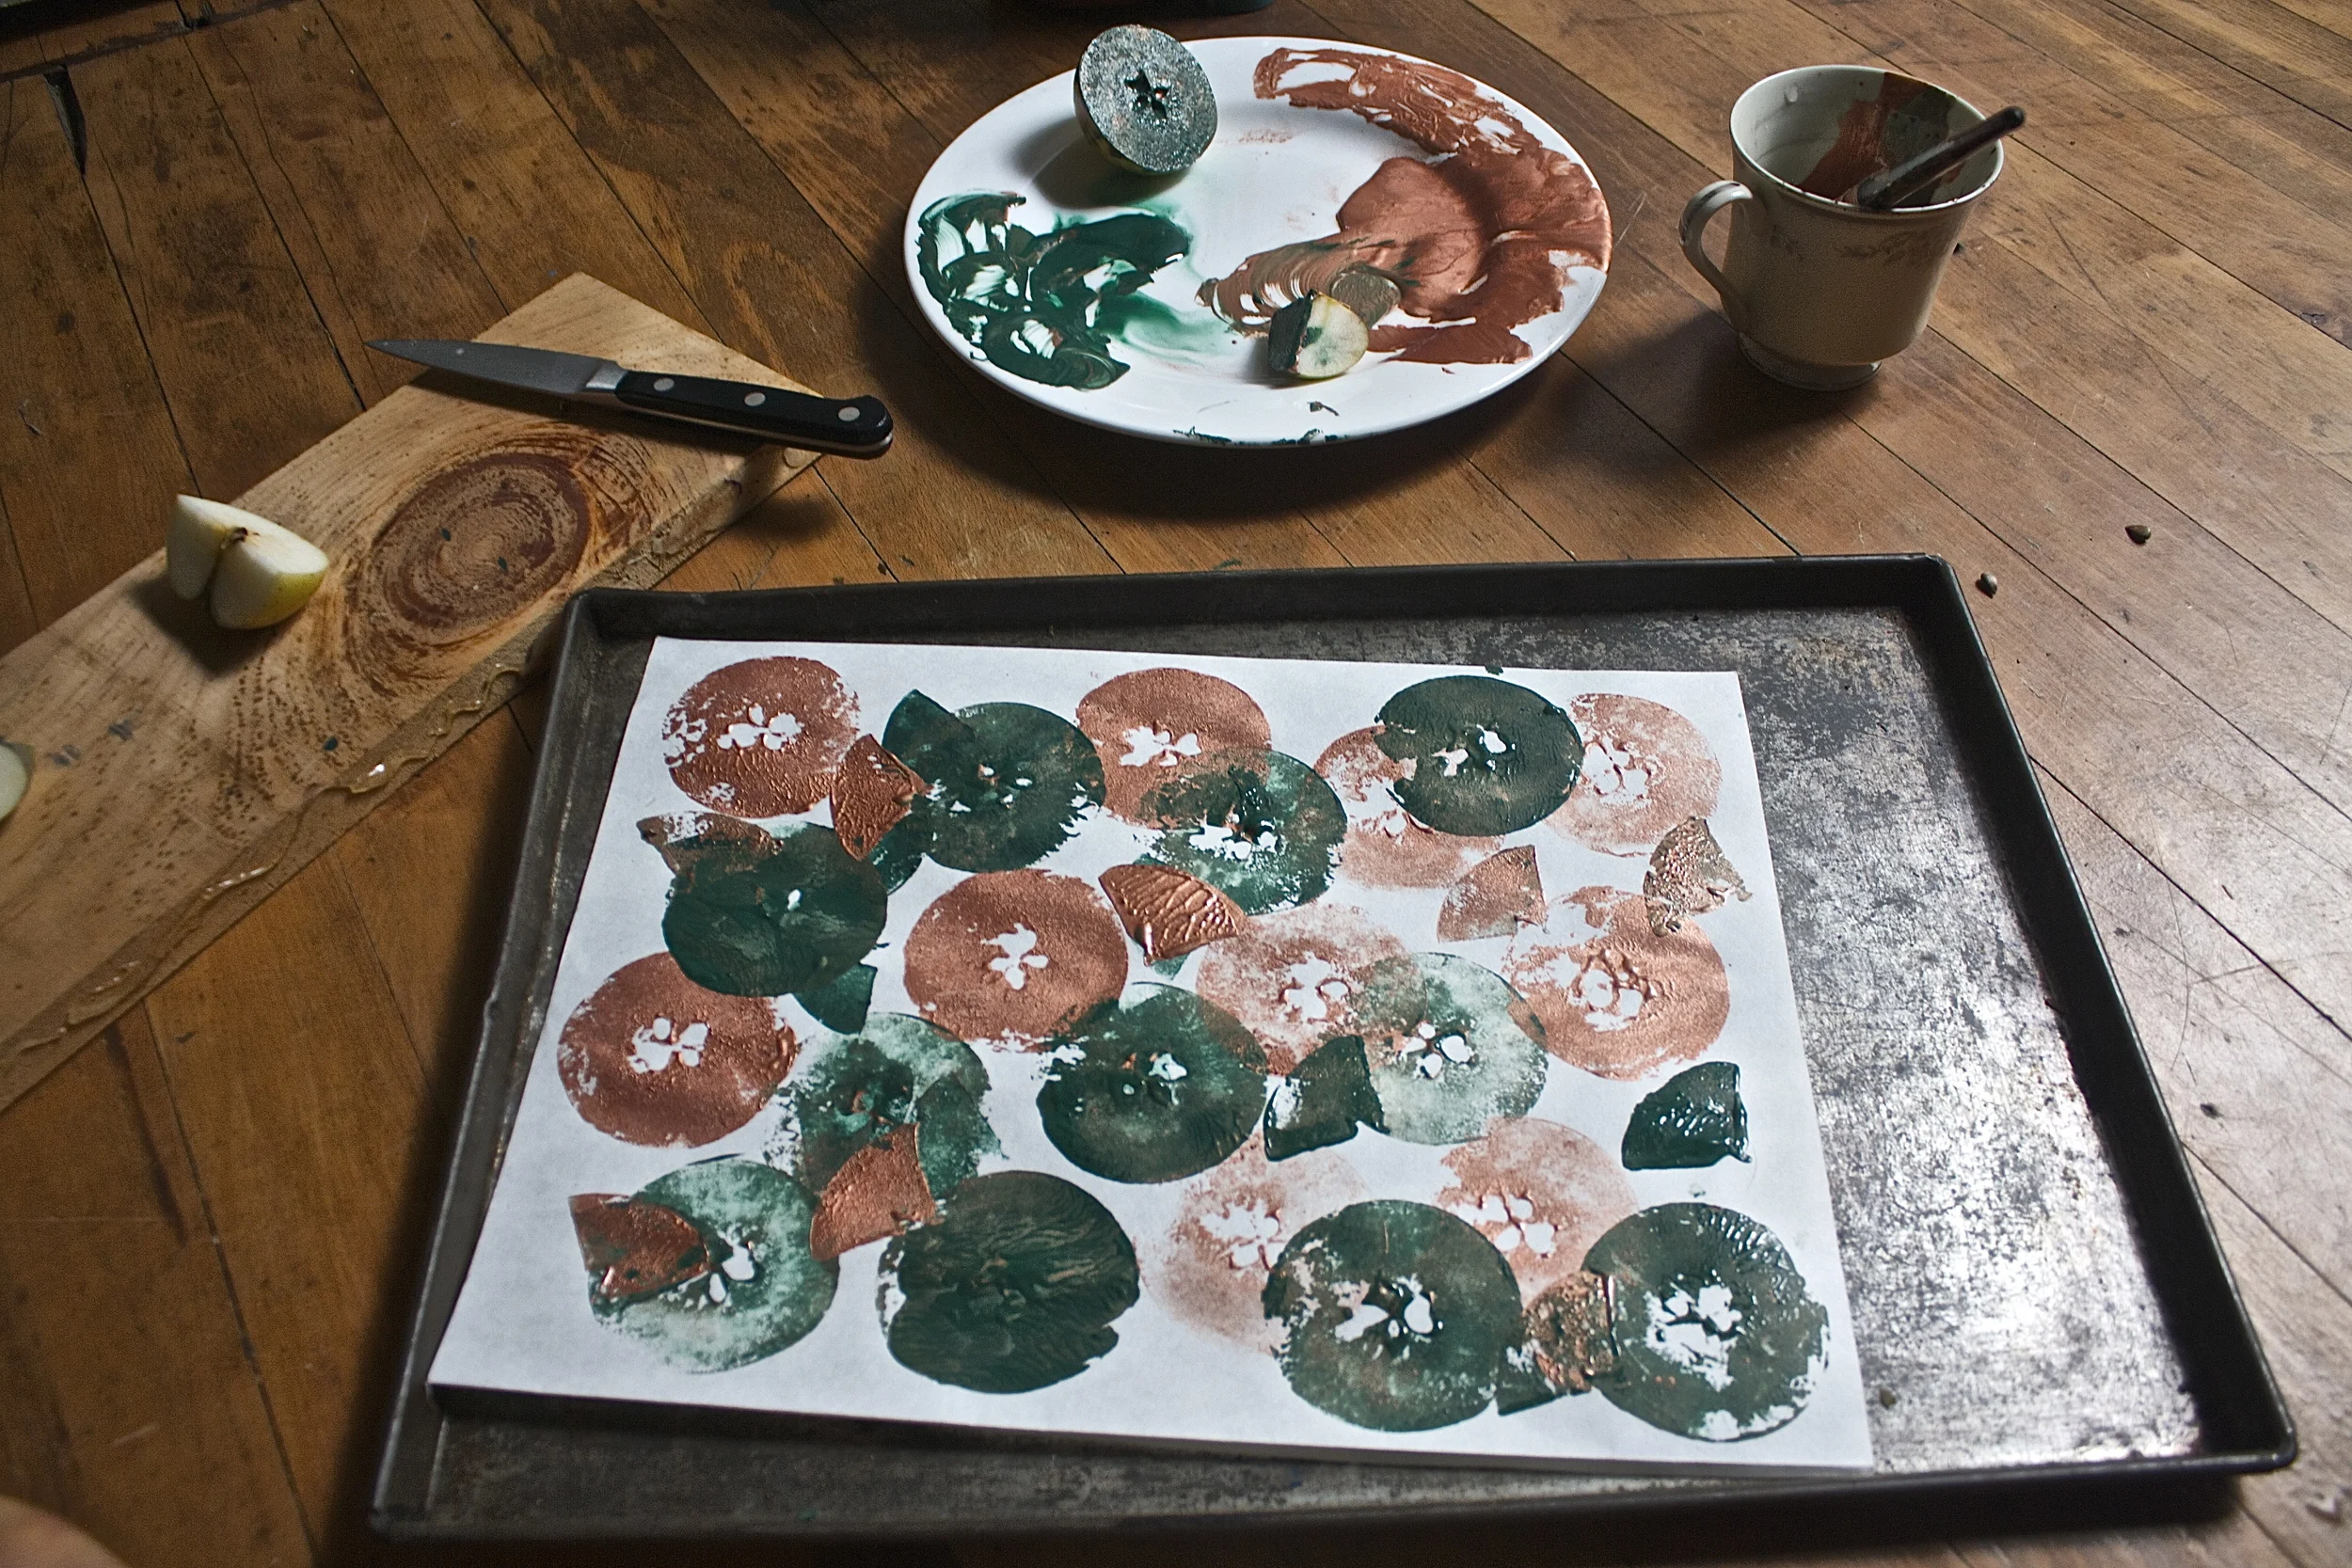
Apple goes paint side down on paper%u2026 and that’s how it goes. Now repeat, either with the same shape, or use a new one. OR change up the color.. it’s all how you want to do it.%u00a0
If%u00a0
. I got a little excited with my fist print turned out a little chaotic(note print above)%u00a0but then I rained myself in.%u00a0
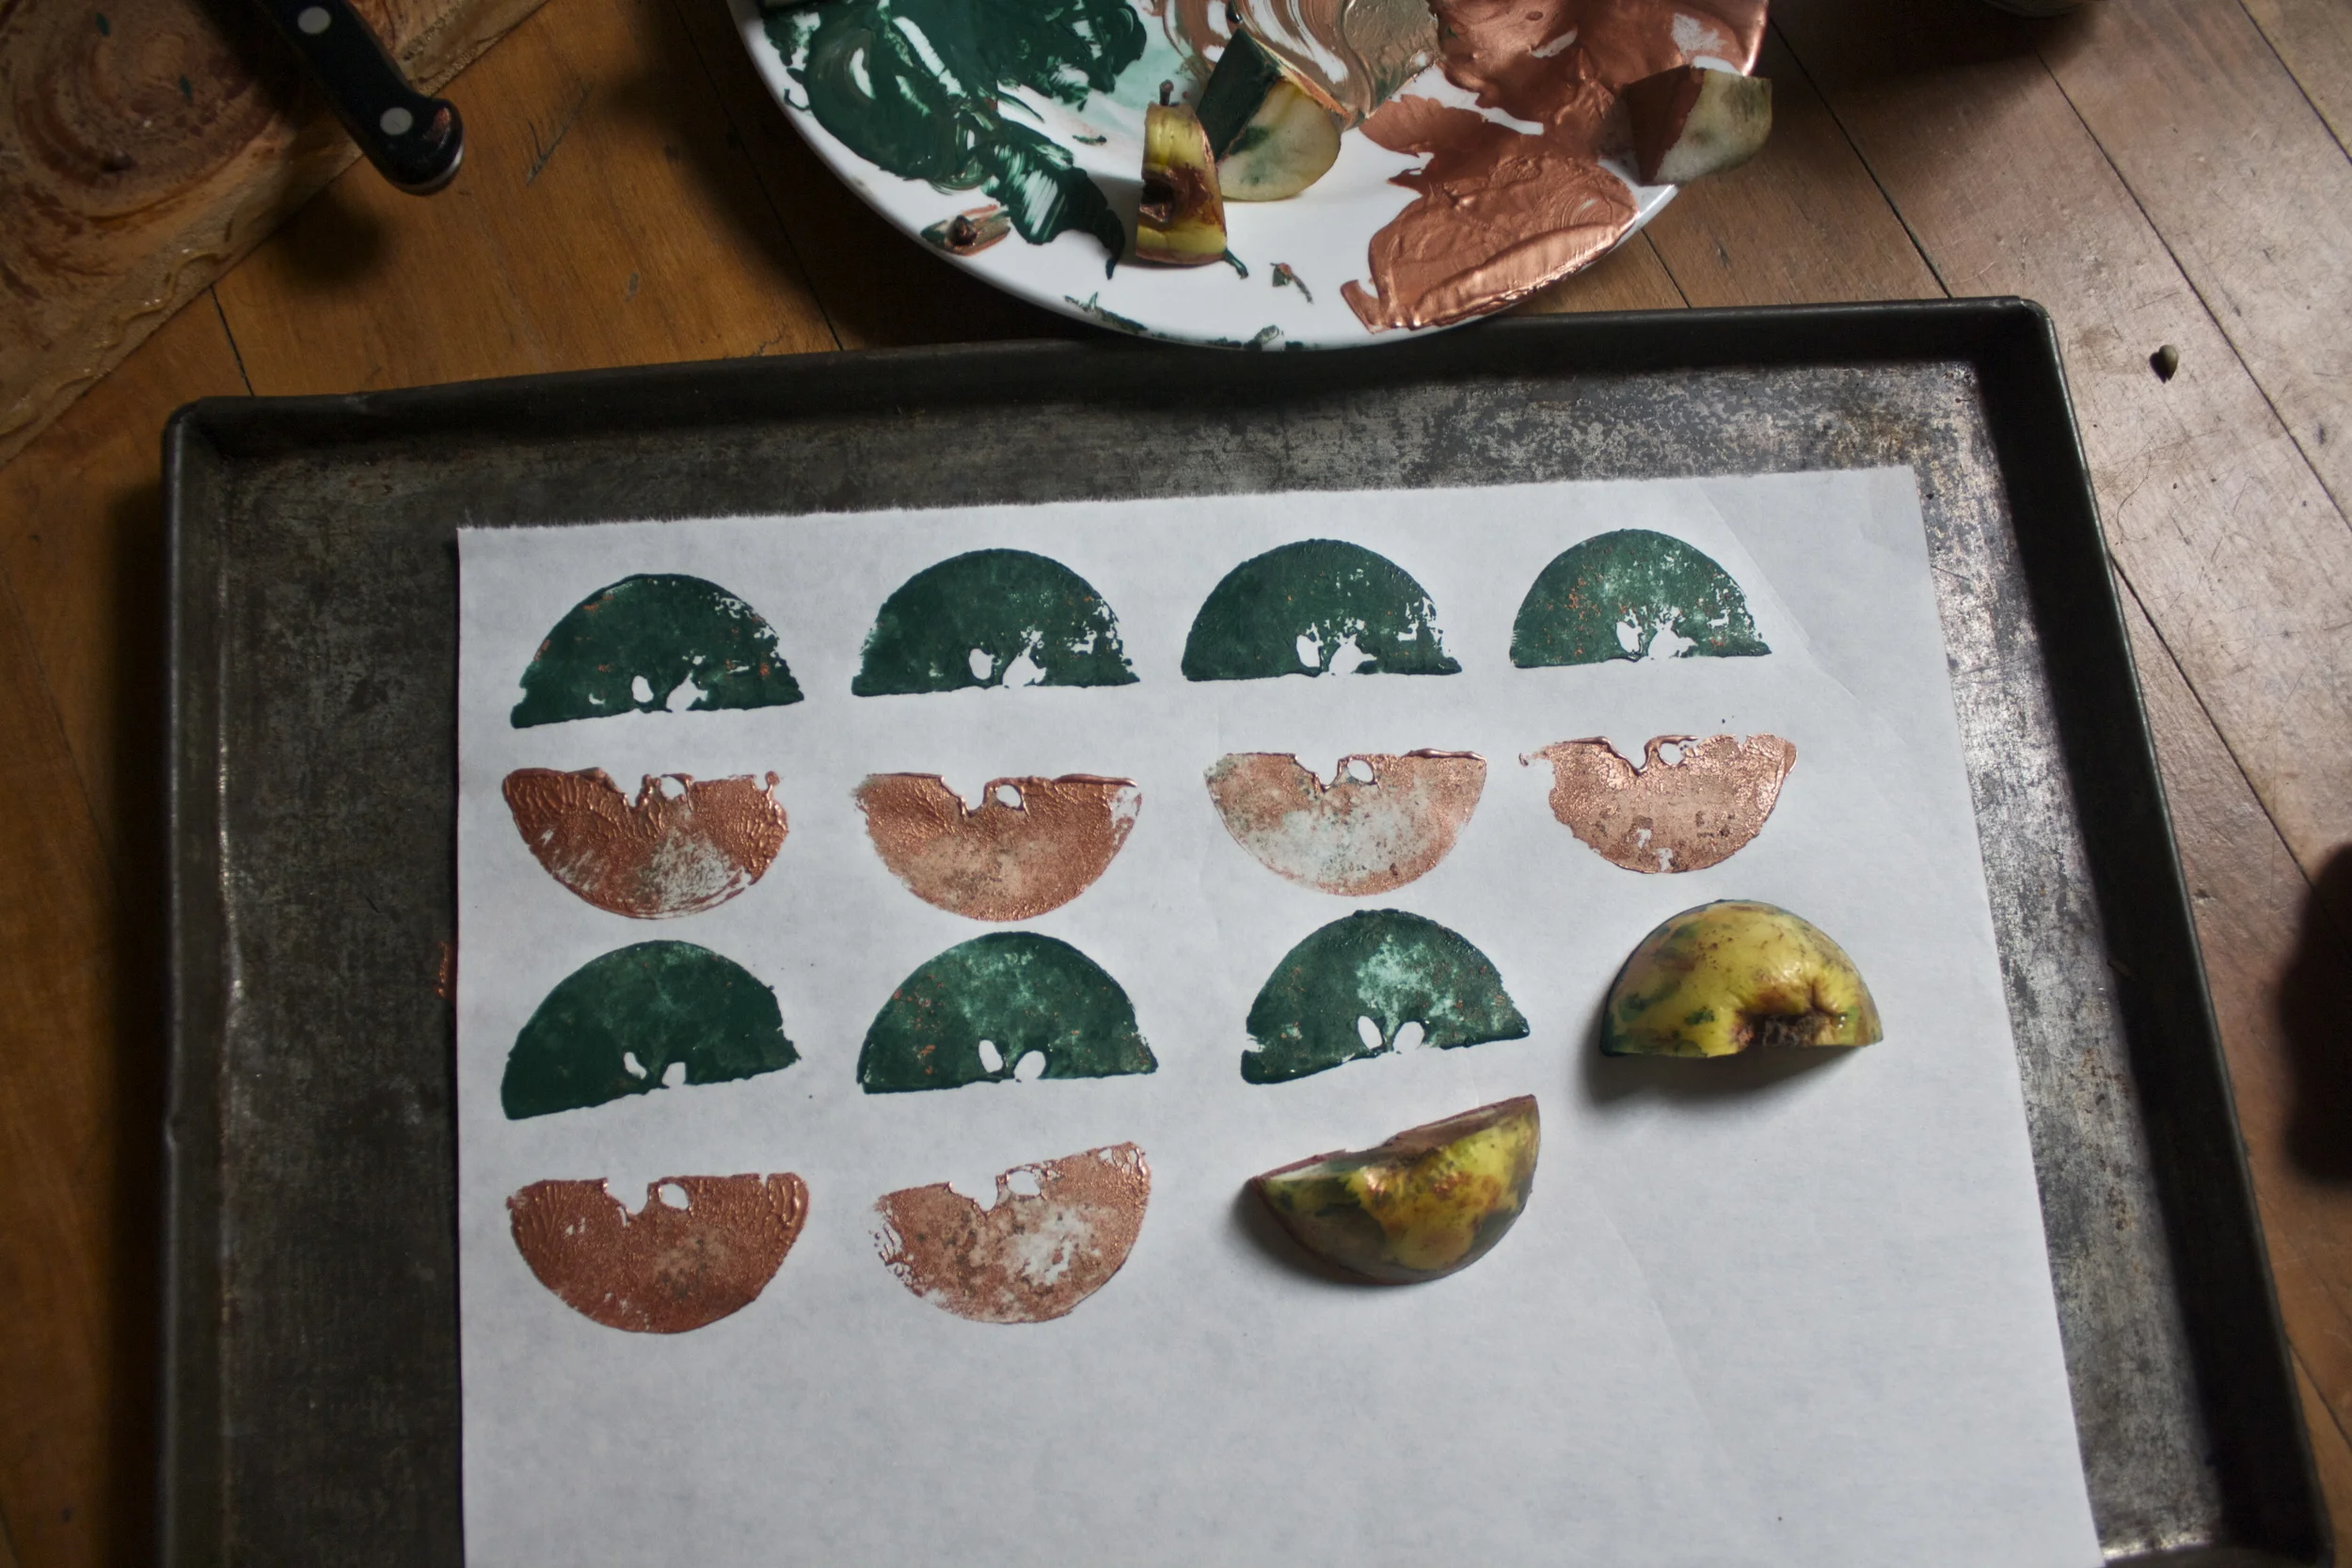
And did a few more simpler designs. %u00a0%u00a0
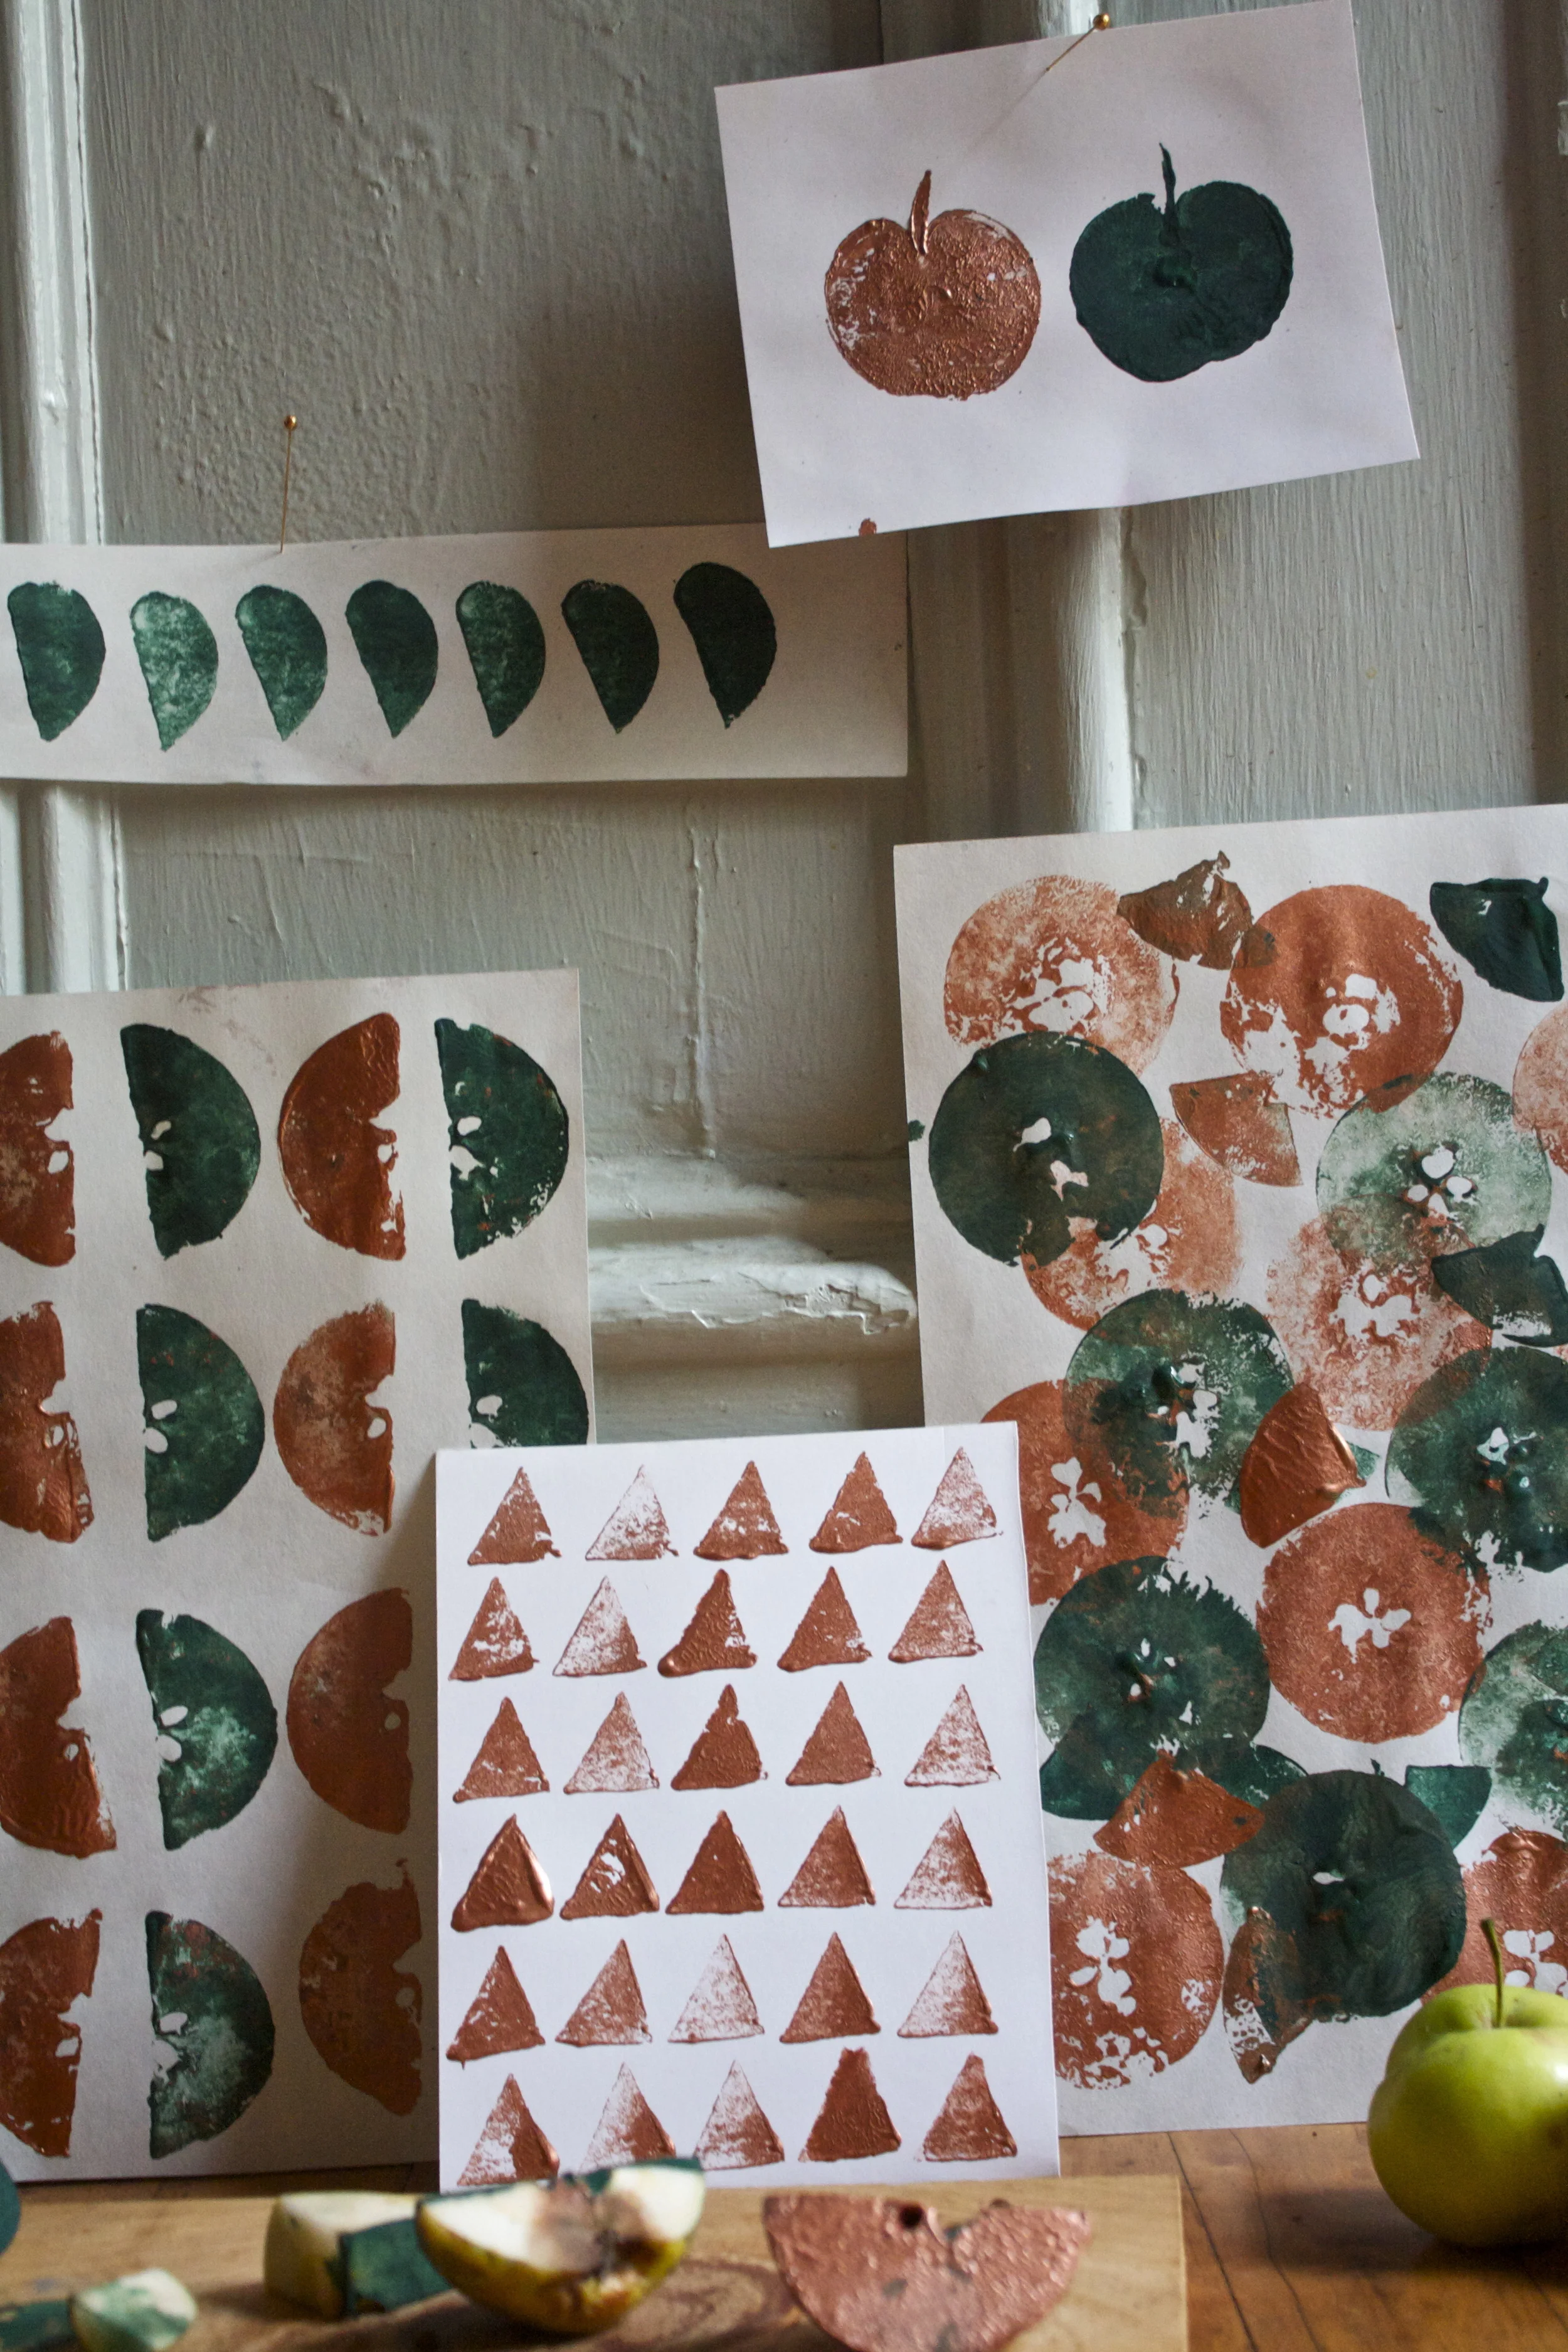
But do it anyway you want cause it’s going to look cool no matter what.
Have fun!
-C

Fall is all up in here!. The air is so nice and crisp and the leaves are changing to the prettiest colors.%u00a0I gots my pumpkins, an abundance of apples and squashes (our table is forverver overflowing with some type of squash) and am wearing all of my favorite sweaters.%u00a0
I am a happy lady here!
And this happy lady just wants to sit on her butt and knit.
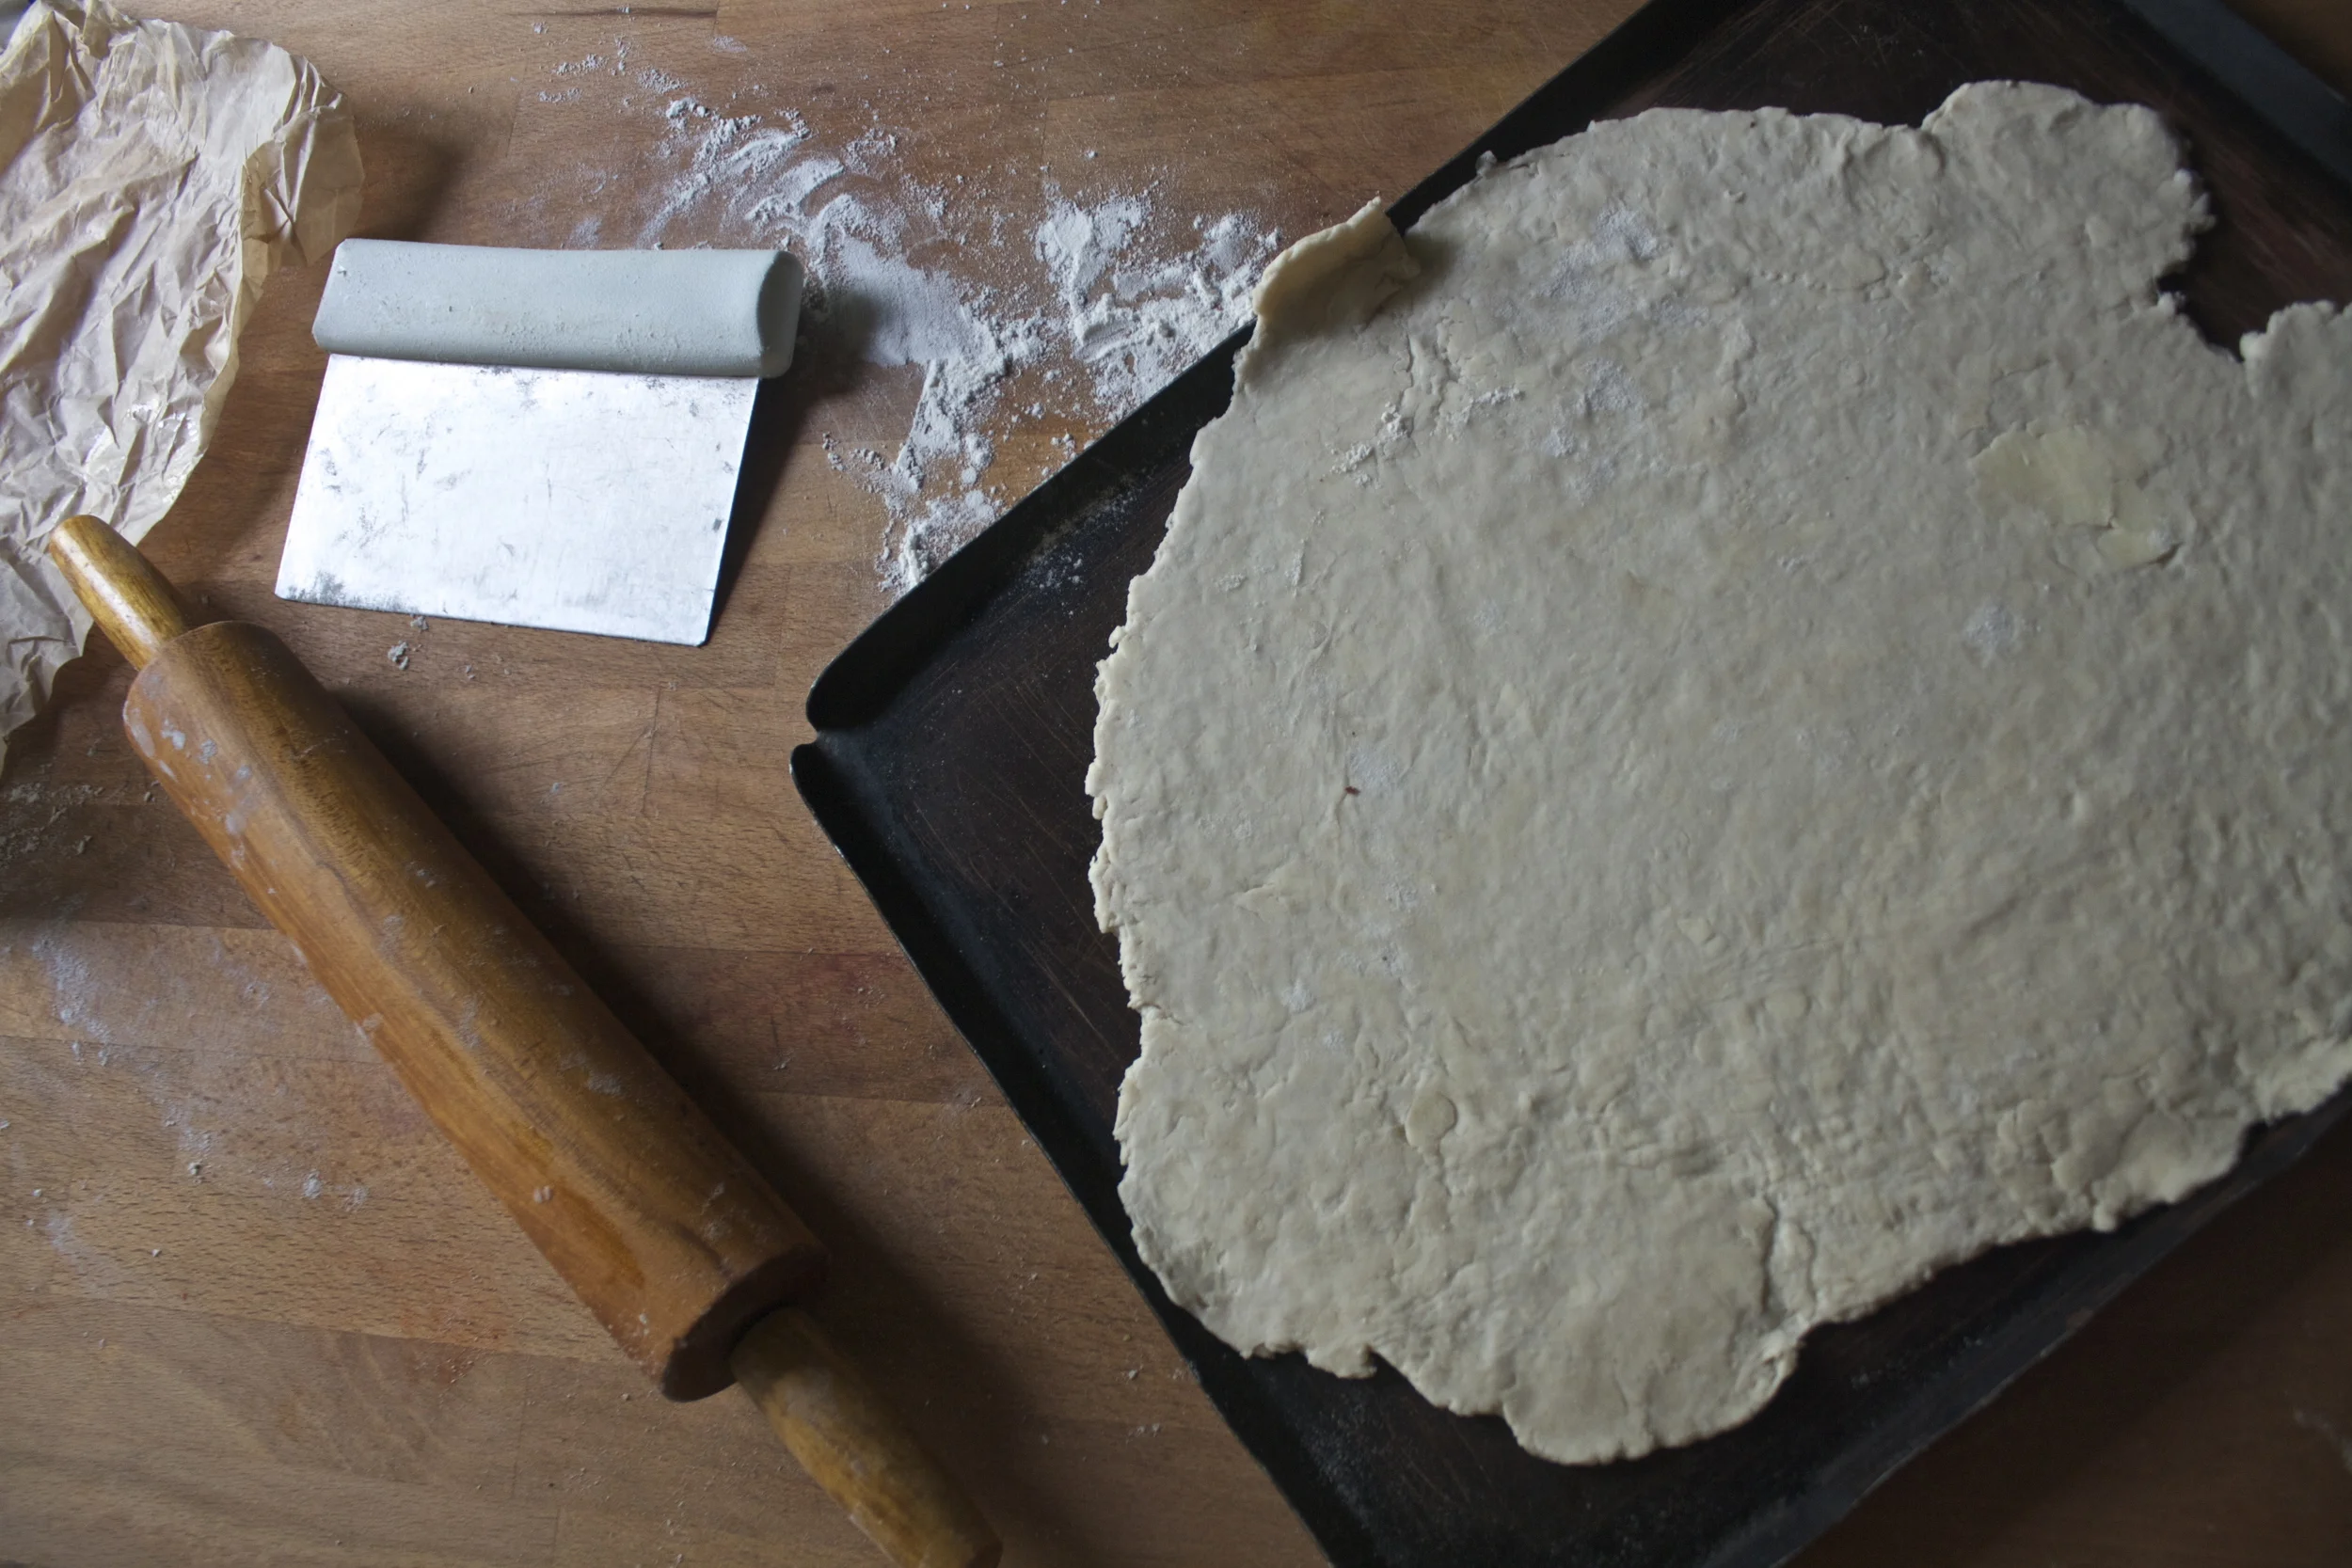
But first, dinner. And my thought are. “What to do that doesn’t include doing much of anything (especially dishes) and maybe even has the oven on for a little extra warmth?” See here, I am a thinker. I knew I %u00a0had a single pie dough in the freezer (you should always have a pie dough in the freezer), a table full of the loveliest produce. So this happened. And the mr ate it, and he was all like “Whoa”.%u00a0 And I was like,”yeah dude, I know.”
A Ssuper fall galette.. and I still had time for my knitting and my butt.%u00a0
Like Whoa!
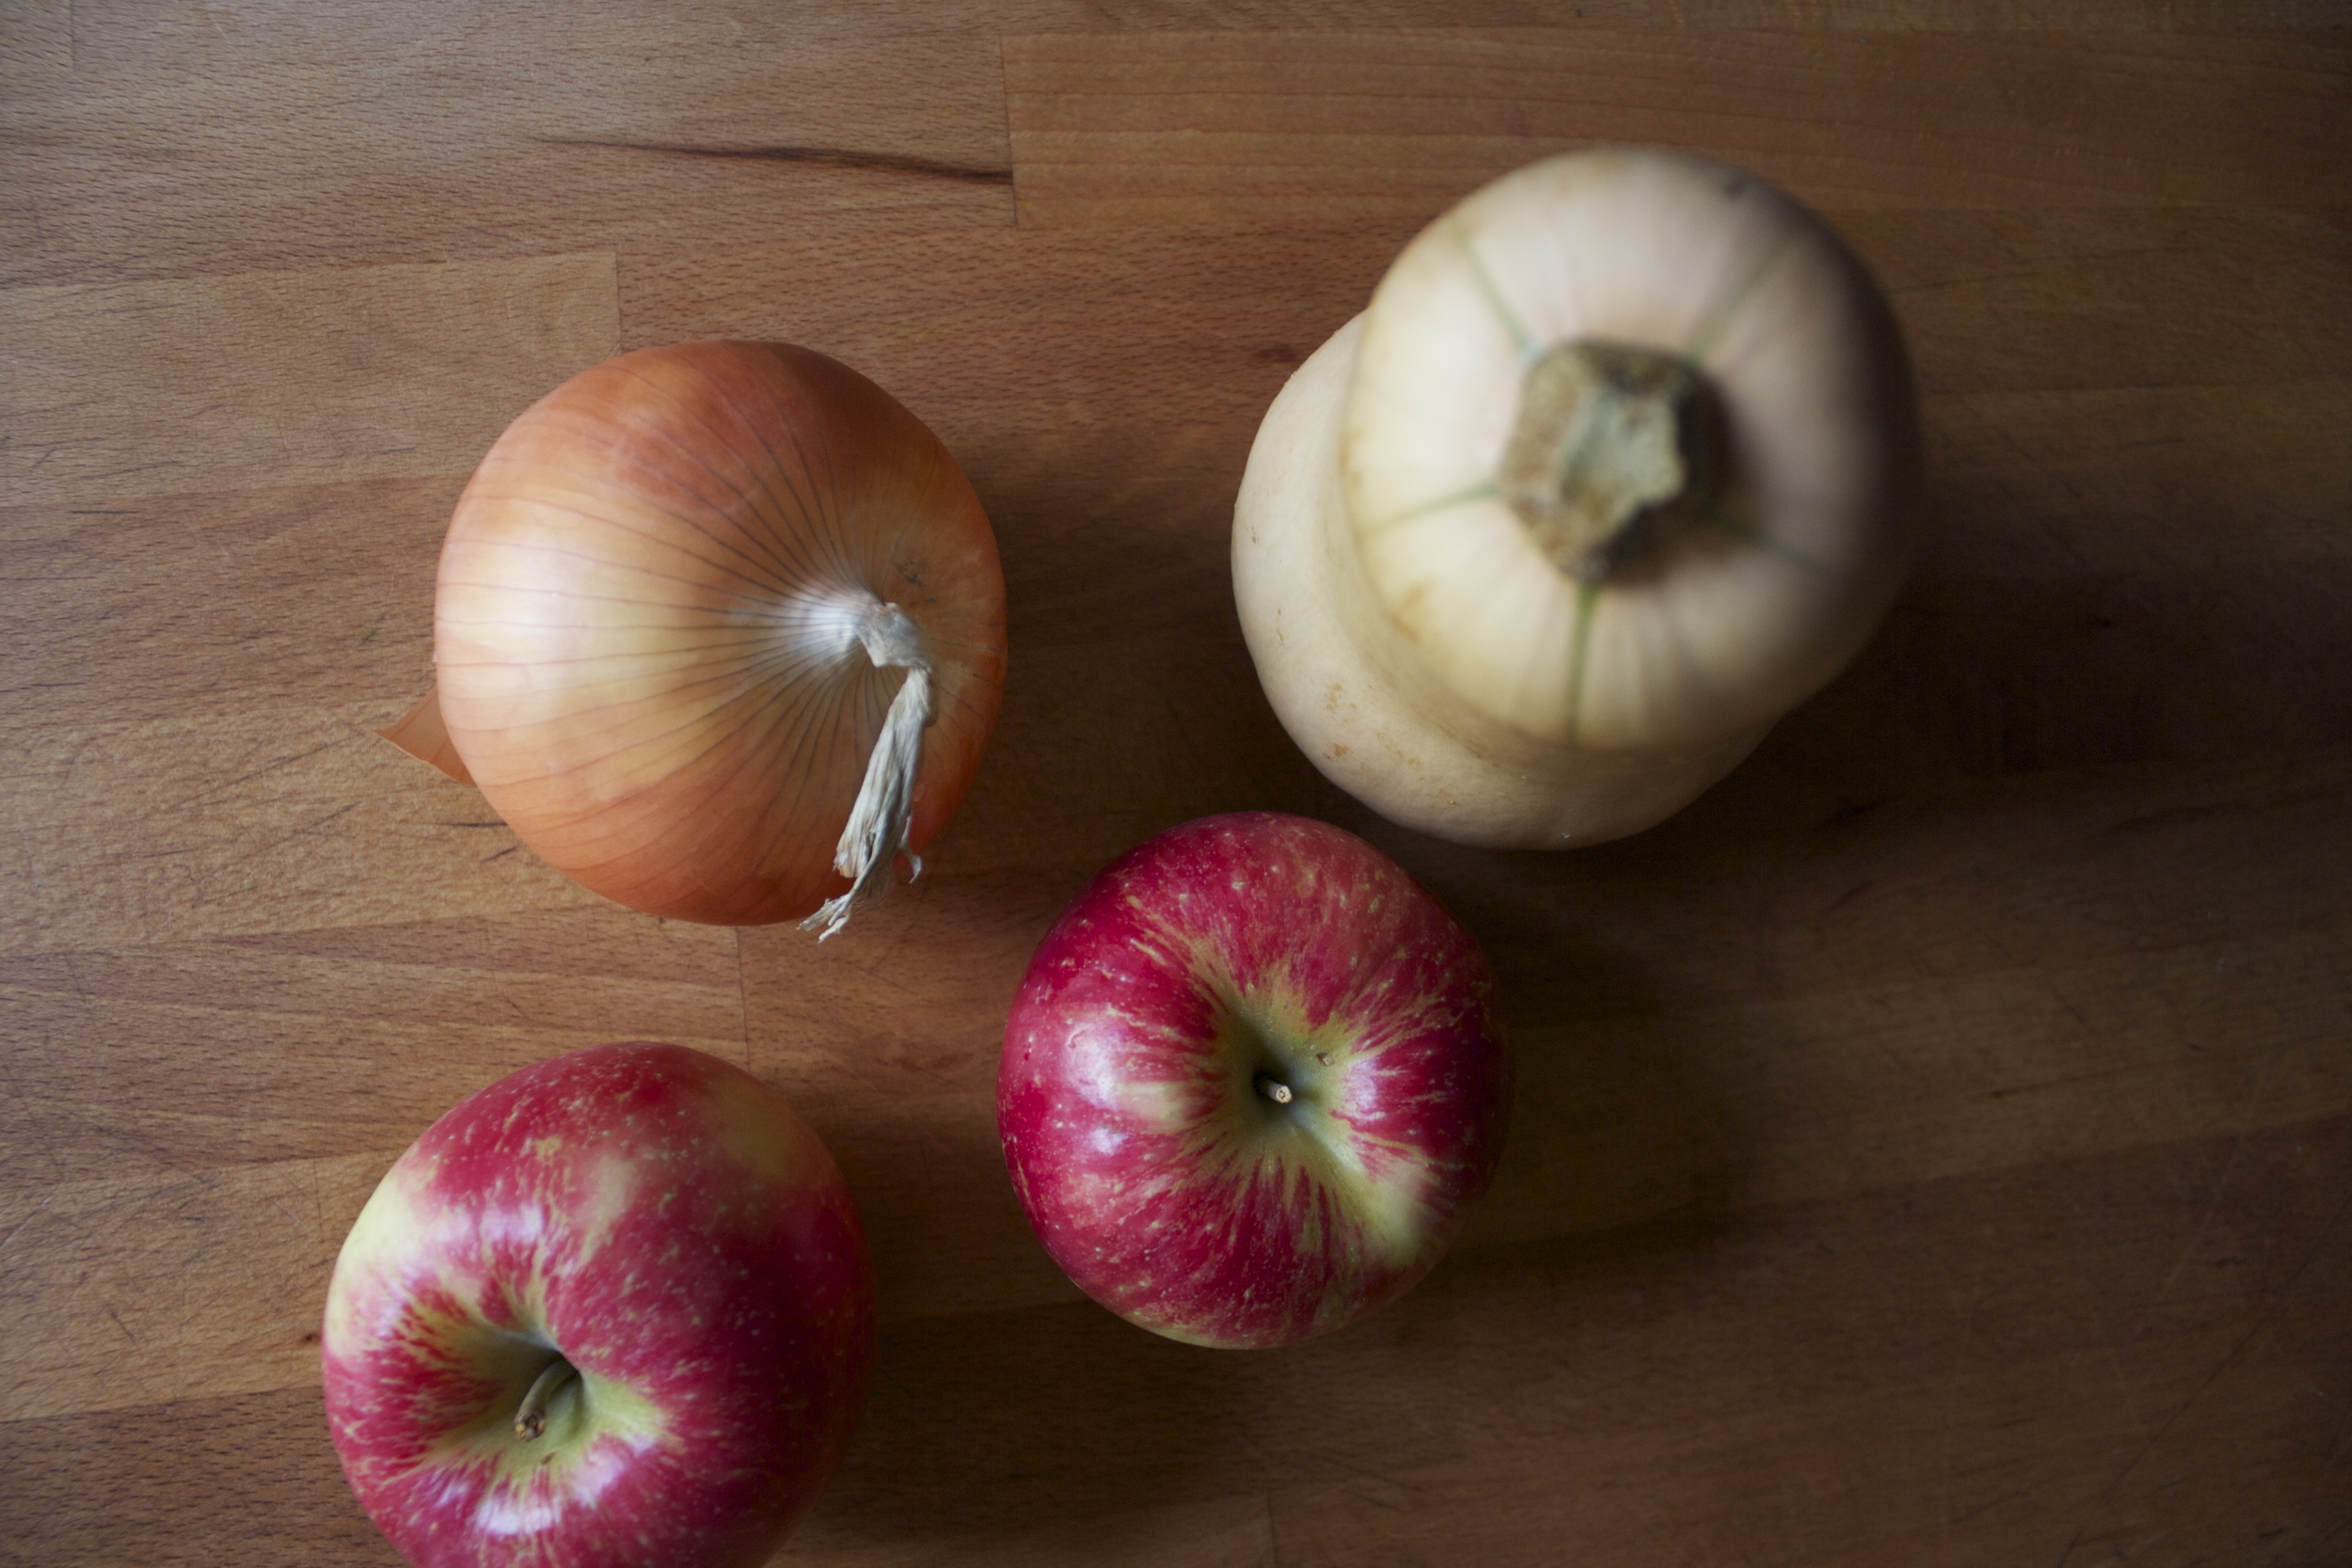
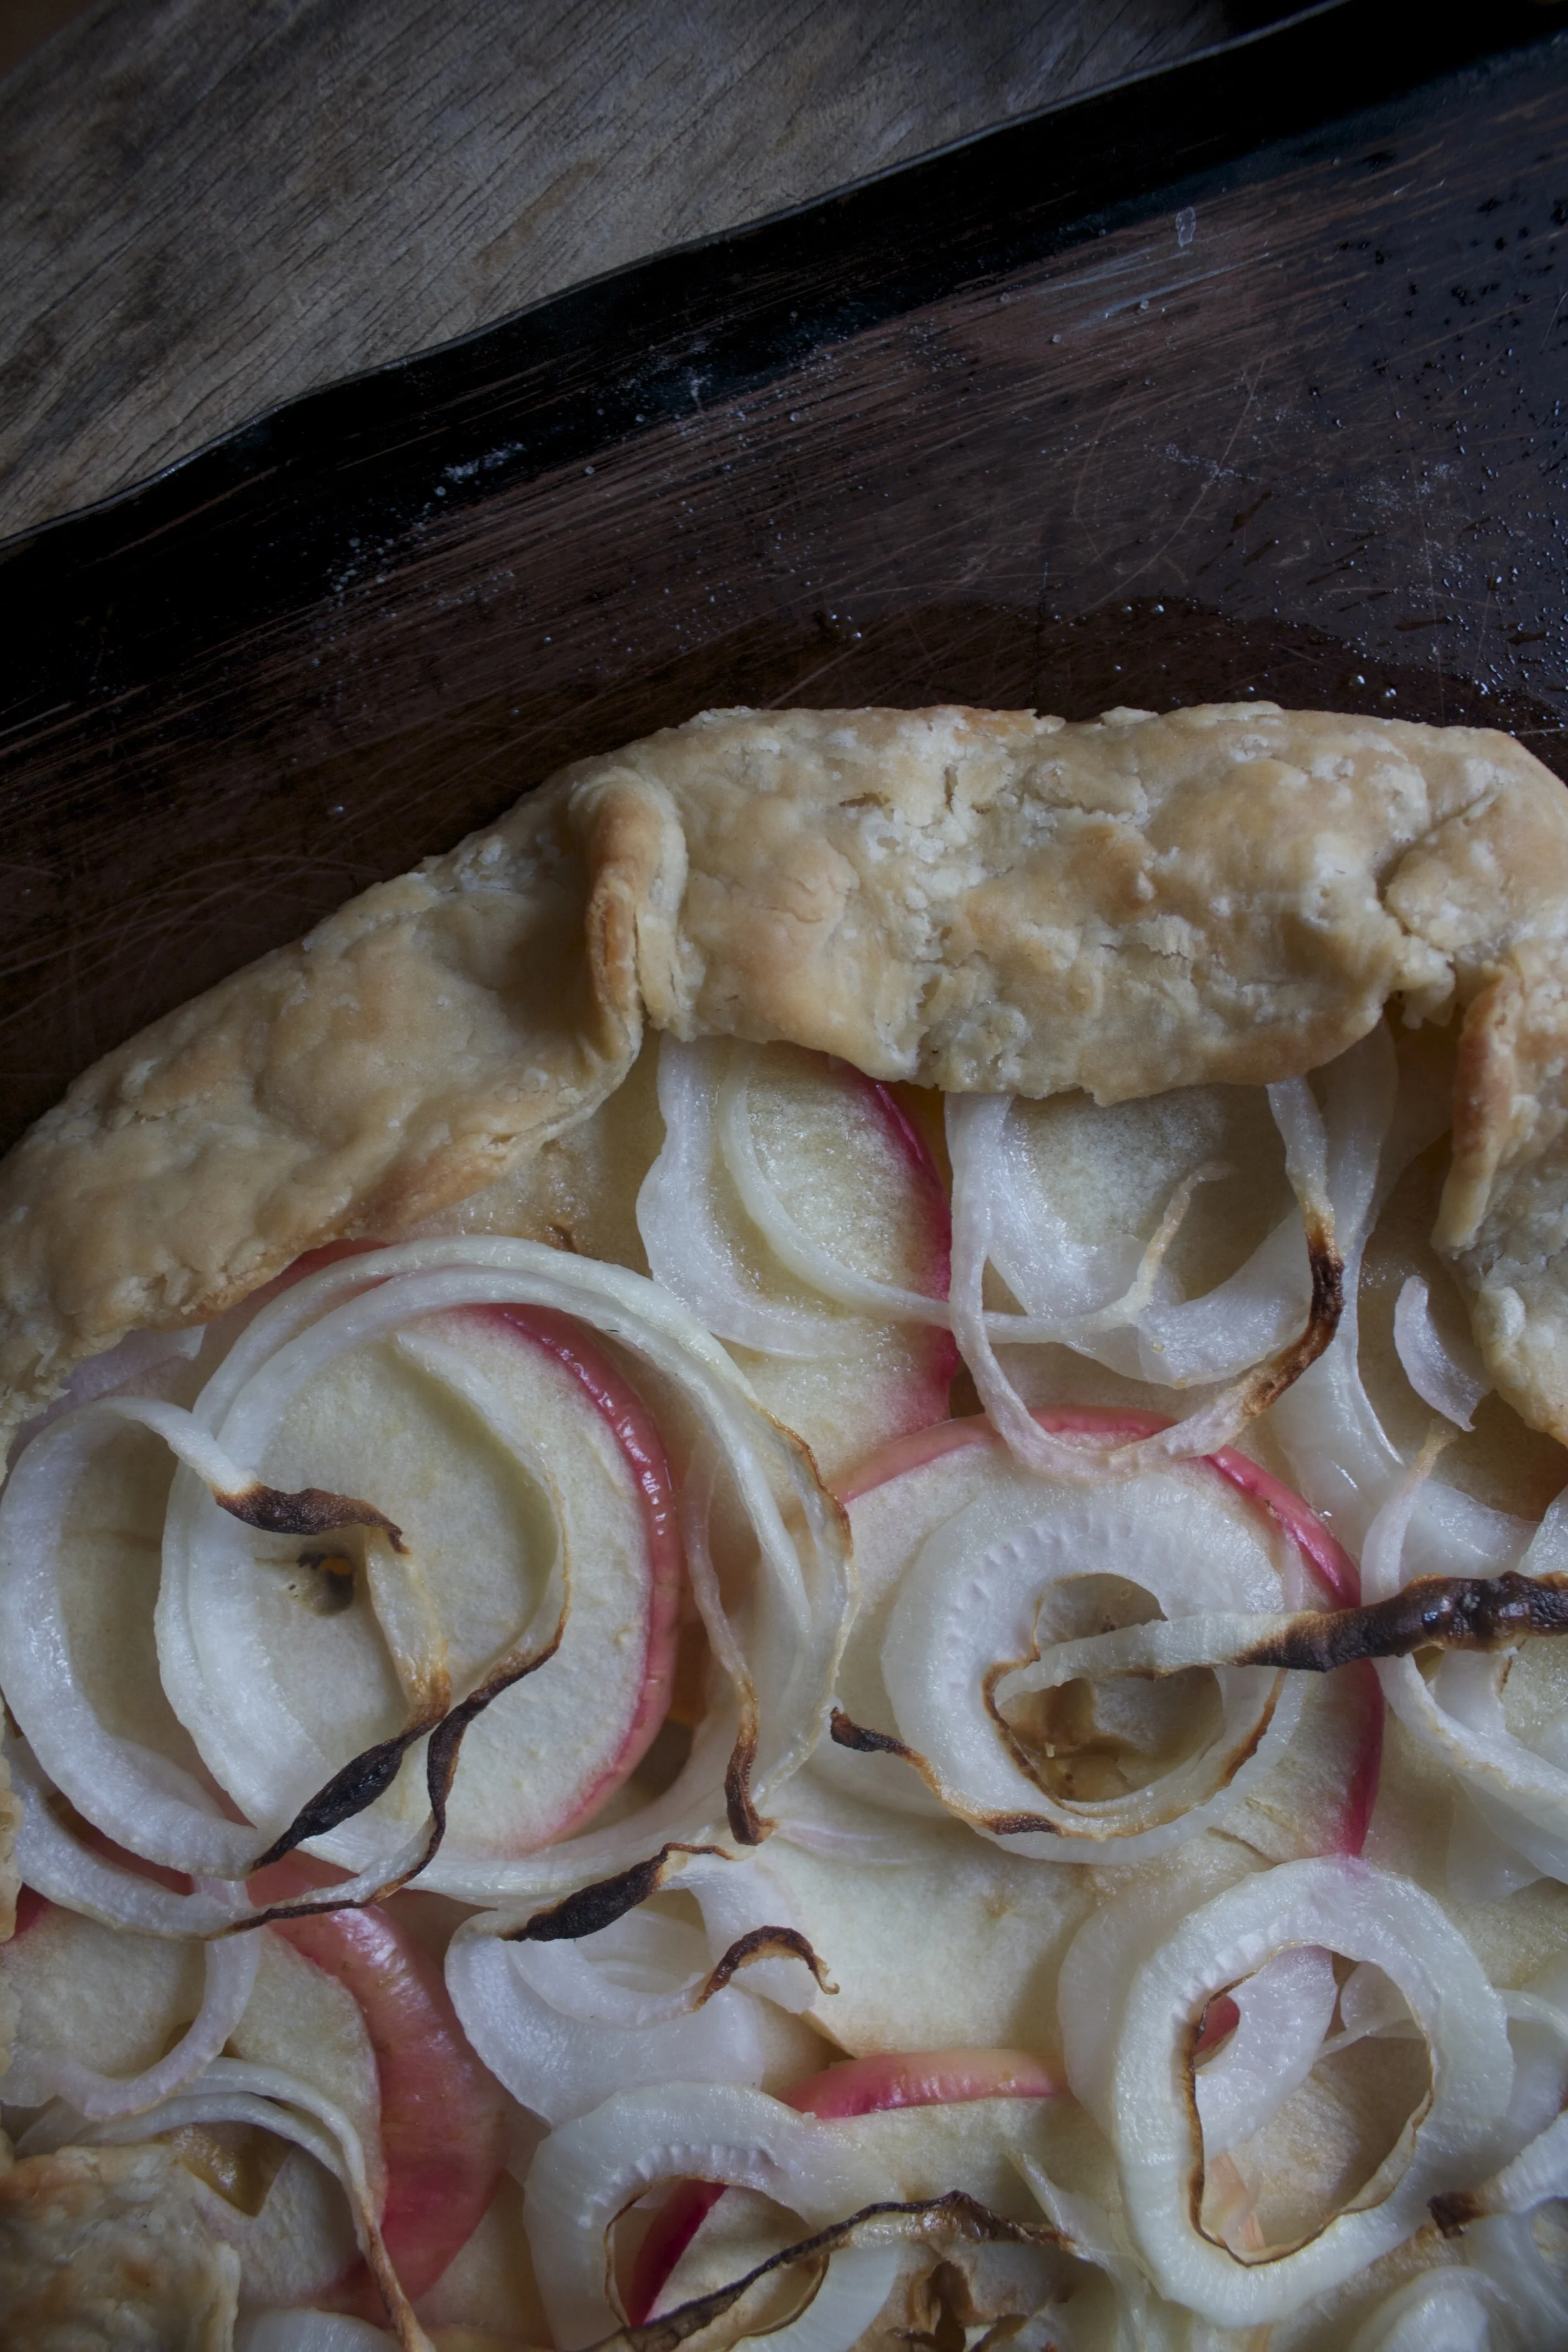
The stuff. A single crust pie dough, a butternut squash, an onion, and a honey crisp apple.(there are 2 shown, but I only needed on1)%u00a0%u00a0Also going to need a tiny bit if olive oil and a pinch of salt
Preheat oven to 375.
Roll your chilled dough out %u00a0on a lightly floured surface and place onto a large baking sheet. Stick it in the fridge to rest for a few minutes.
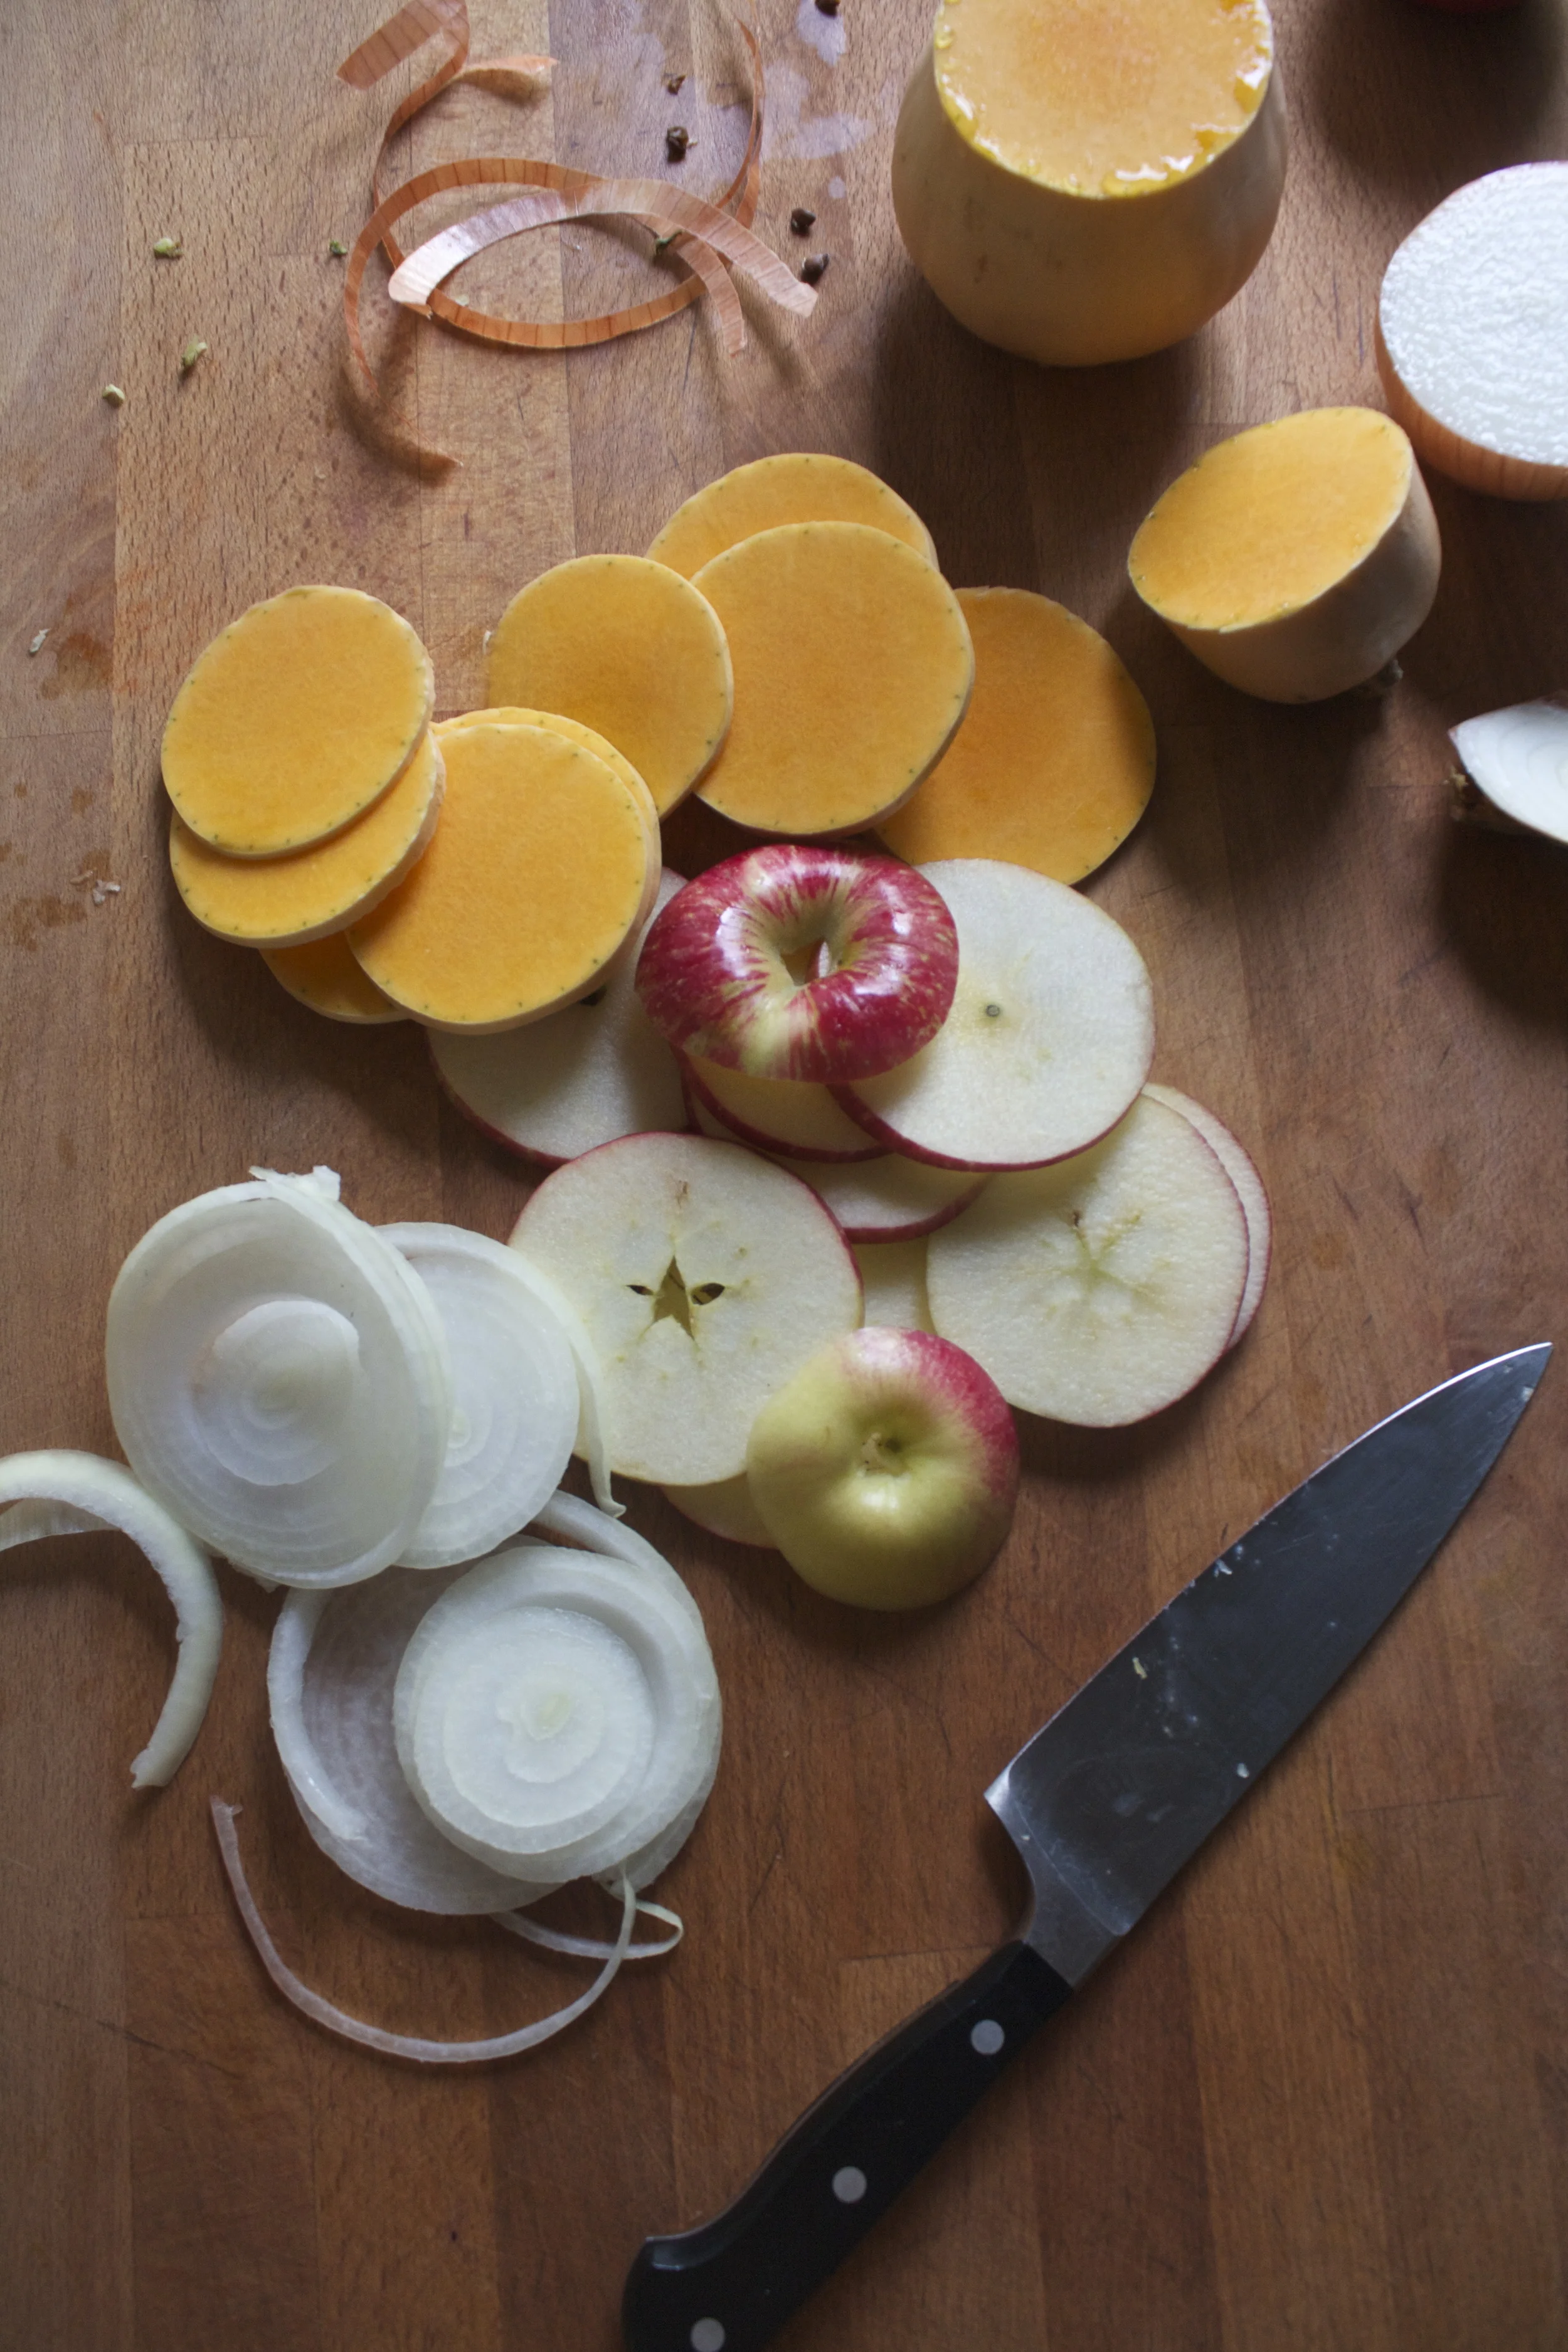
And slice them up into 1/4 inch-ish thick srounds.
Time to compile%u2026 A layer of overlapping squash. (Make sure to leave inch-ish boarder)%u00a0%u00a0Then a layer of the apples, and lastly the onion, which I think looks so pretty as ringlets, but you could keep in rounds if you wanted.%u00a0
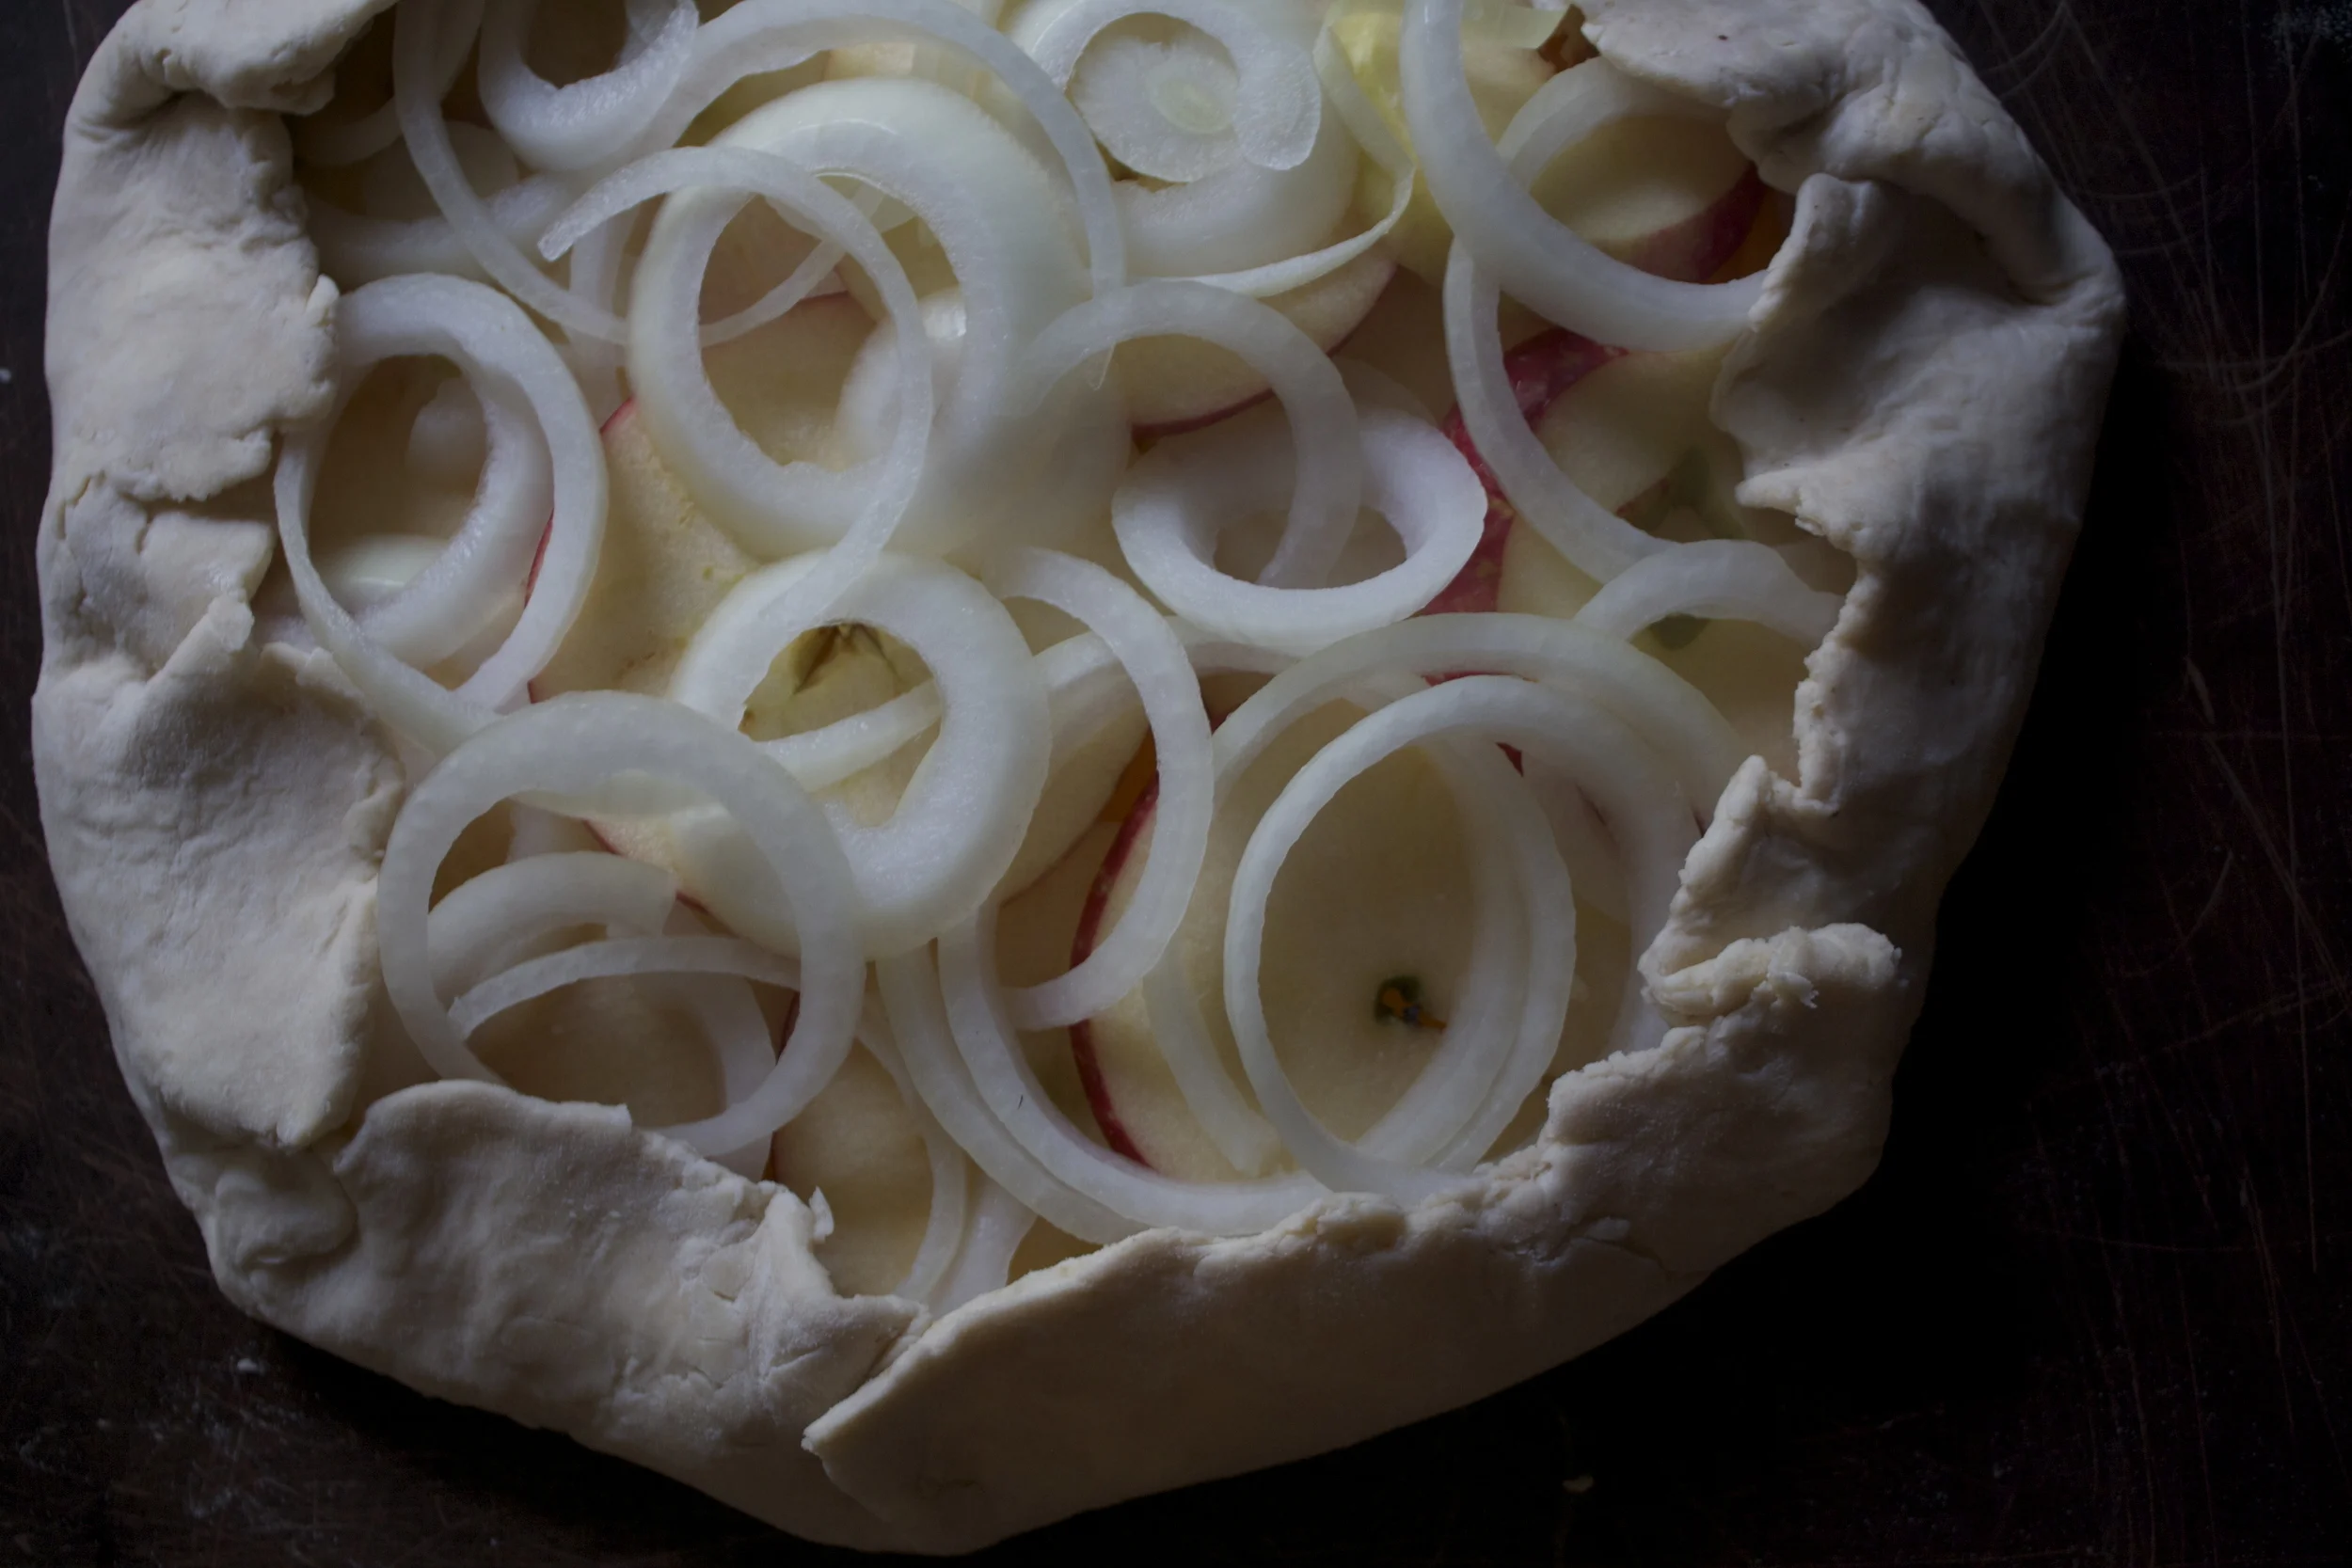
Fold the sides and pinching dough to keep it secure. Drizzle the top, and the crust, with a tiny bit of olive oil and sprinkle with a picnh of salt.
Now into the oven it goes!
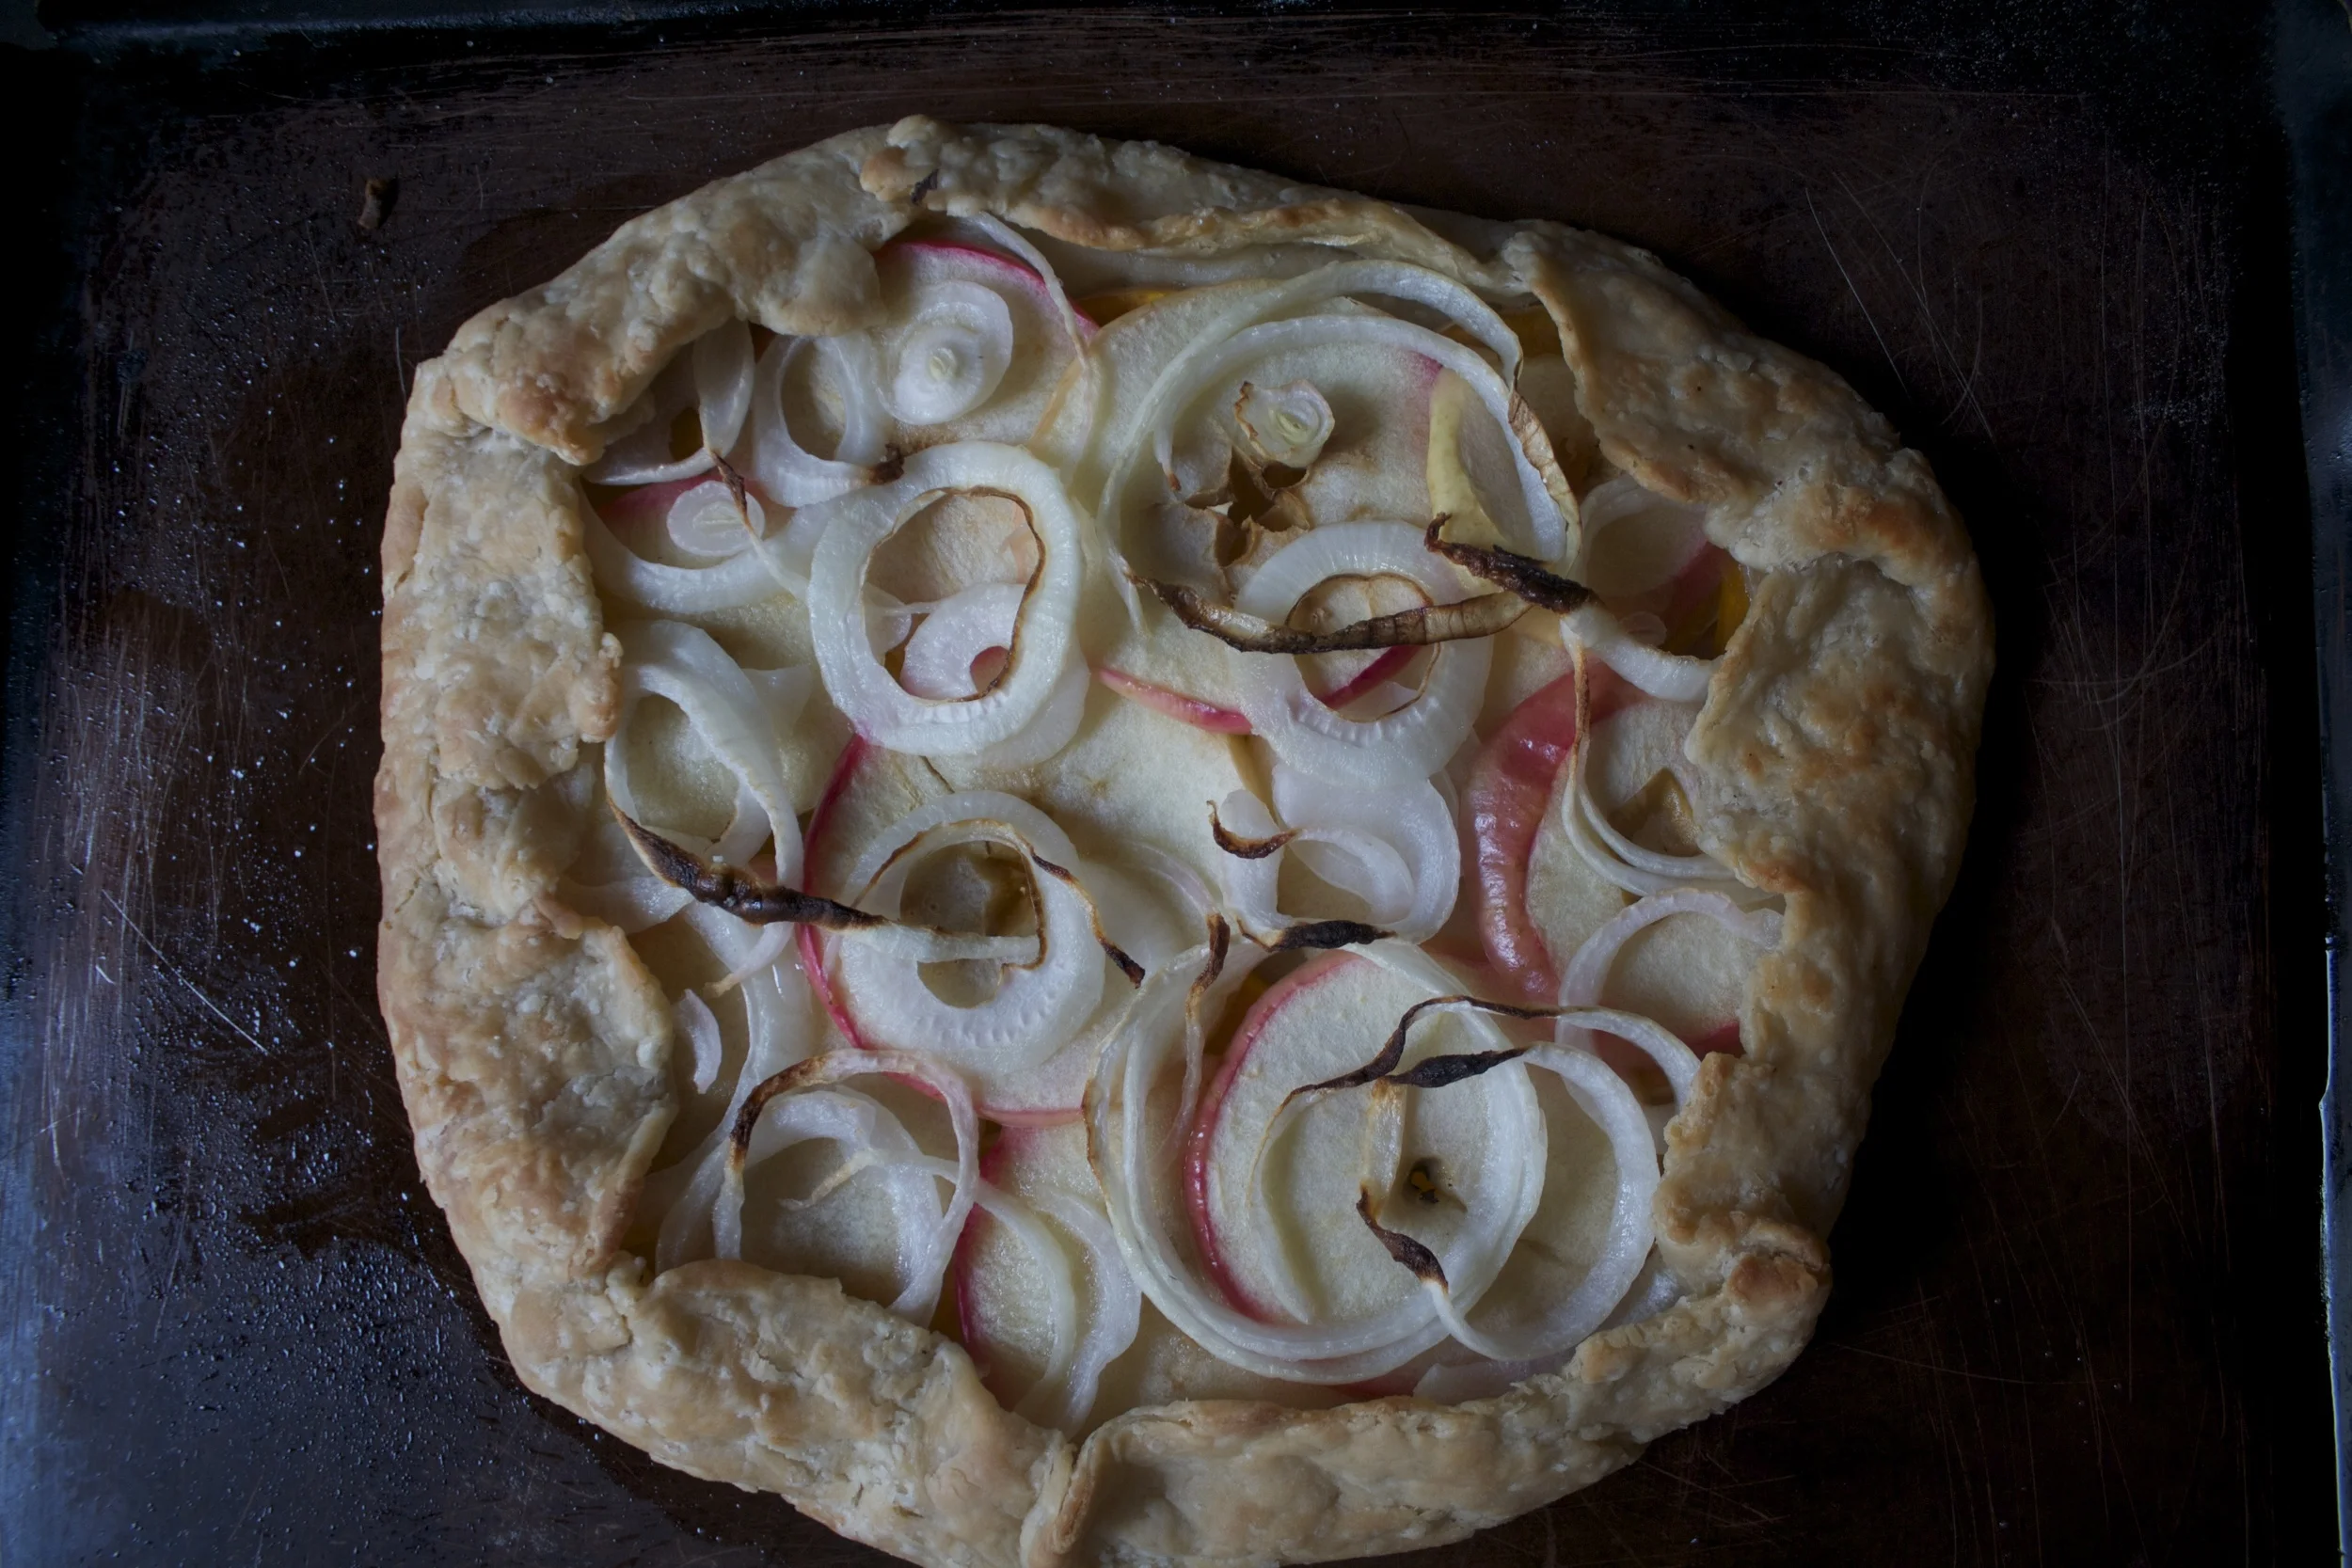
And %u00a0after about 45 minutes when the dust is perfectly golden and the stuff inside is nice and tender. Remove (turn off the oven) and let cool
And there you have it.. A ode to fall in flavors and colors..
Have a great day%u2026 Eat lots of fall food!
-C
- 1 single pie dough (recipe here)
- 1 small butternut squash
- 1 medium sweet onion
- 1 large honey crisp apple
- olive oil
- salt
Preheat oven to 375.
Roll out chilled pie dough %u00a0on a lightly floured surface to about a 12-14 inch round (ish) and place on a large baking sheet and stick in the fridge.
Grab the squash and cut the neck off the bottom.%u00a0Save the bottom for later (maybe soup?)%u00a0and slice up the neck into 1/4 inch thick rounds. %u00a0Now take the onion and apple and slice those into 1/4 inch thick rounds too. (the seeds and the stem will just fall our.. but if they don’t, just poke them out with a knife)
Grab the dough from fridge and start to layer. First a layer of squash, leaving around an 1.5 inch boarder. You want the pieces to overlap,but don’t double layer. Next the apples go on top of the squash, again overlapping. Finally the onion. I liked the look of the individual ringlets%u2026 but you can do thick rounds if you want.%u00a0Fold over the sides of the dough, pinching it in wherever it needs to be pinch until all the stuff is snug. Drizzle with a tiny bit of olive oil %u00a0and rub a little oil on the outside crust as well. Sprinkle with a pinch of salt and stick into oven.
Bake for about 45 minutes or until crust is a nice light golden brown and the stuff inside is tender.
Remove, let cool for a few minutes and eat your heart out.

I am a firm believe in the healing power of food. Whenever anyone (that I like) gets some sort of medical percedure, I like to bring them something home cooked, weather it be dinner or a baked good,%u00a0%u00a0you know, so they don’t have to worry about starving to death. ( no one I have ever visited was ever starving)%u00a0Food helps you heal and food makes you happy so bringing a healing person some food only makes sense to me.%u00a0So when the mr’s aunt recently had part of her knee drilled out, cleaned out and stuffed with human cadaver bone marrow (%u00a0pretty cool))%u00a0%u00a0I baked her,%u00a0her husband, and her kiddos some muffins.
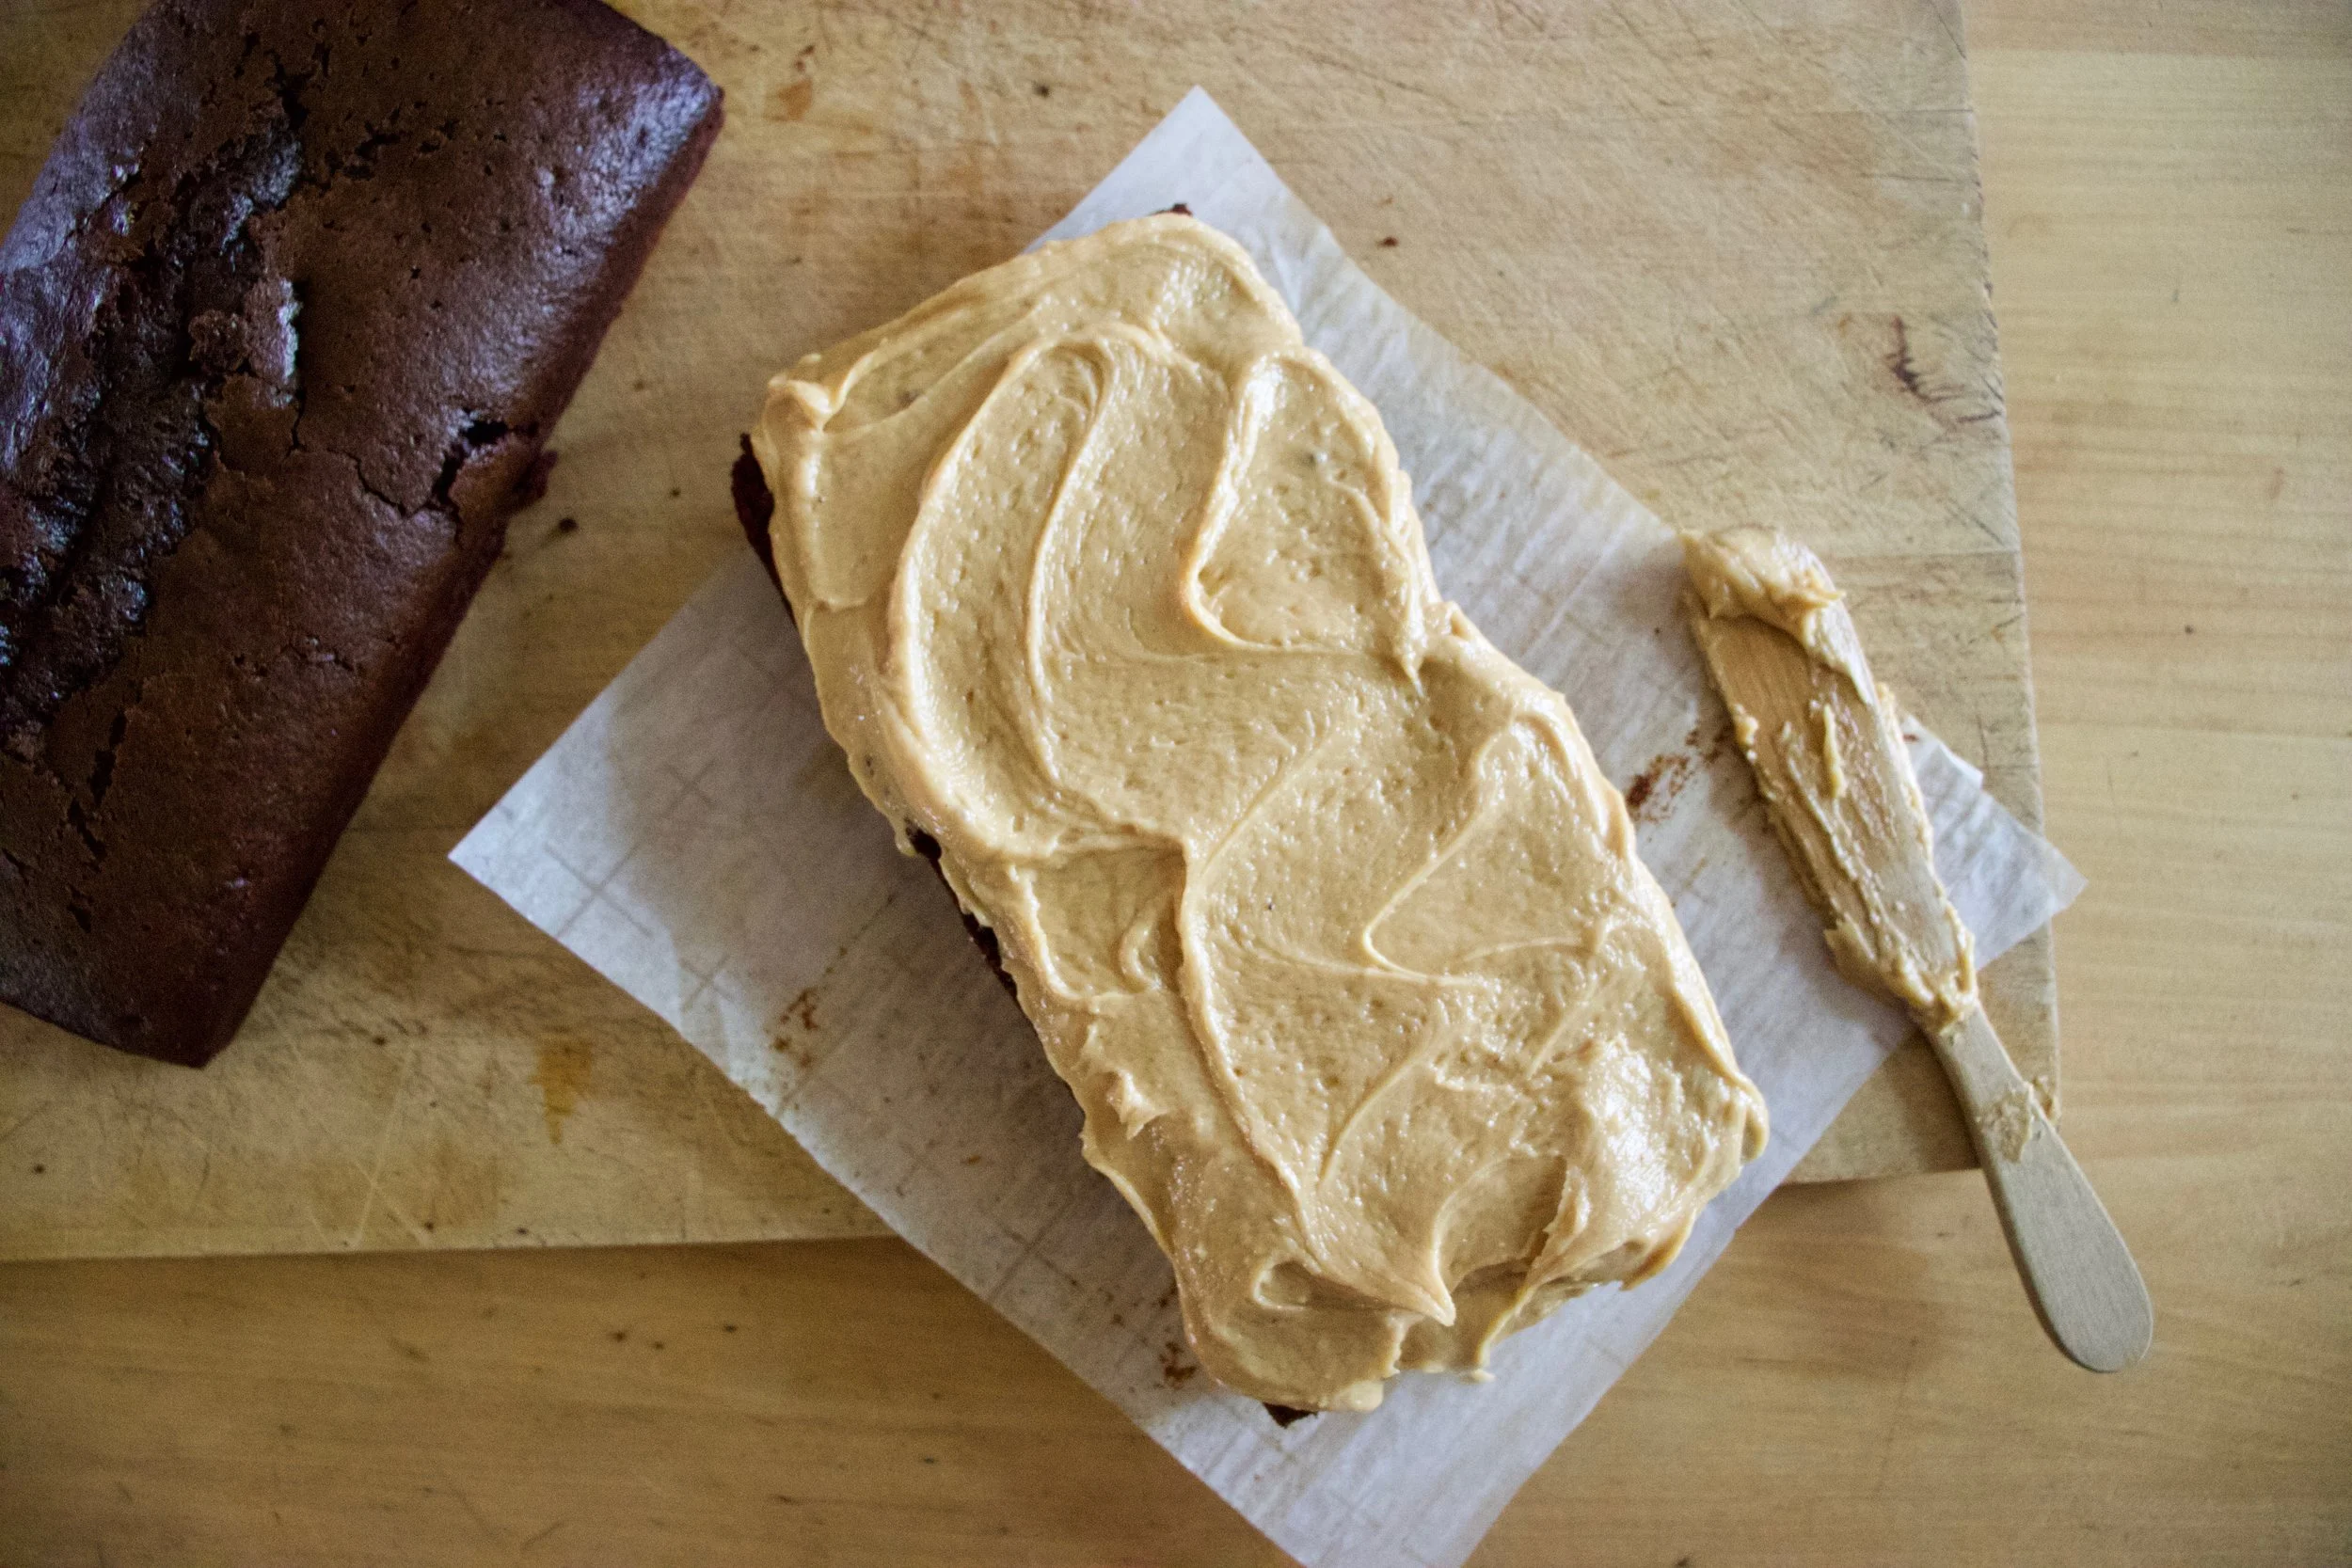
Why muffins? Well I was thinking soup or a casserole, but the mr suggests I do a baked good instead. I was going to go with a cake, but then that can get kind of annoying and troublesome with a couple of kids. Cupcakes are to cheesy and don’t send the right message of get well, (cupcakes say, run around.. sugar high!), a pie would have been nice, but I am not sure if the kids like pie. Then there are muffins.. muffins are perfect. Not terribly packed full of sugars and crap. A little more hearty, can be eaten as a snack, a dessert, or a quick breakfast, and keep for a good while. %u00a0I made them apple cause I gots a shit ton of apple and peanut butter cause protein is good and it just makes sense.%u00a0
Apple+peanut butter are BFF’s and really, what human doesn’t like peanut butter?%u00a0
So his aunt and family got the muffins, and the mr only got 1. I think he was really disappointed that I didn’t save him another one or make more. %u00a0
Oh well. I guess I can make them again, if he is lucky.%u00a0
And I feel like I should say get we’ll soon Sarrh, but this last is a badass and is already doing great,so I will just say,%u00a0Hi Sarah, looking good!
Now to the muffins!

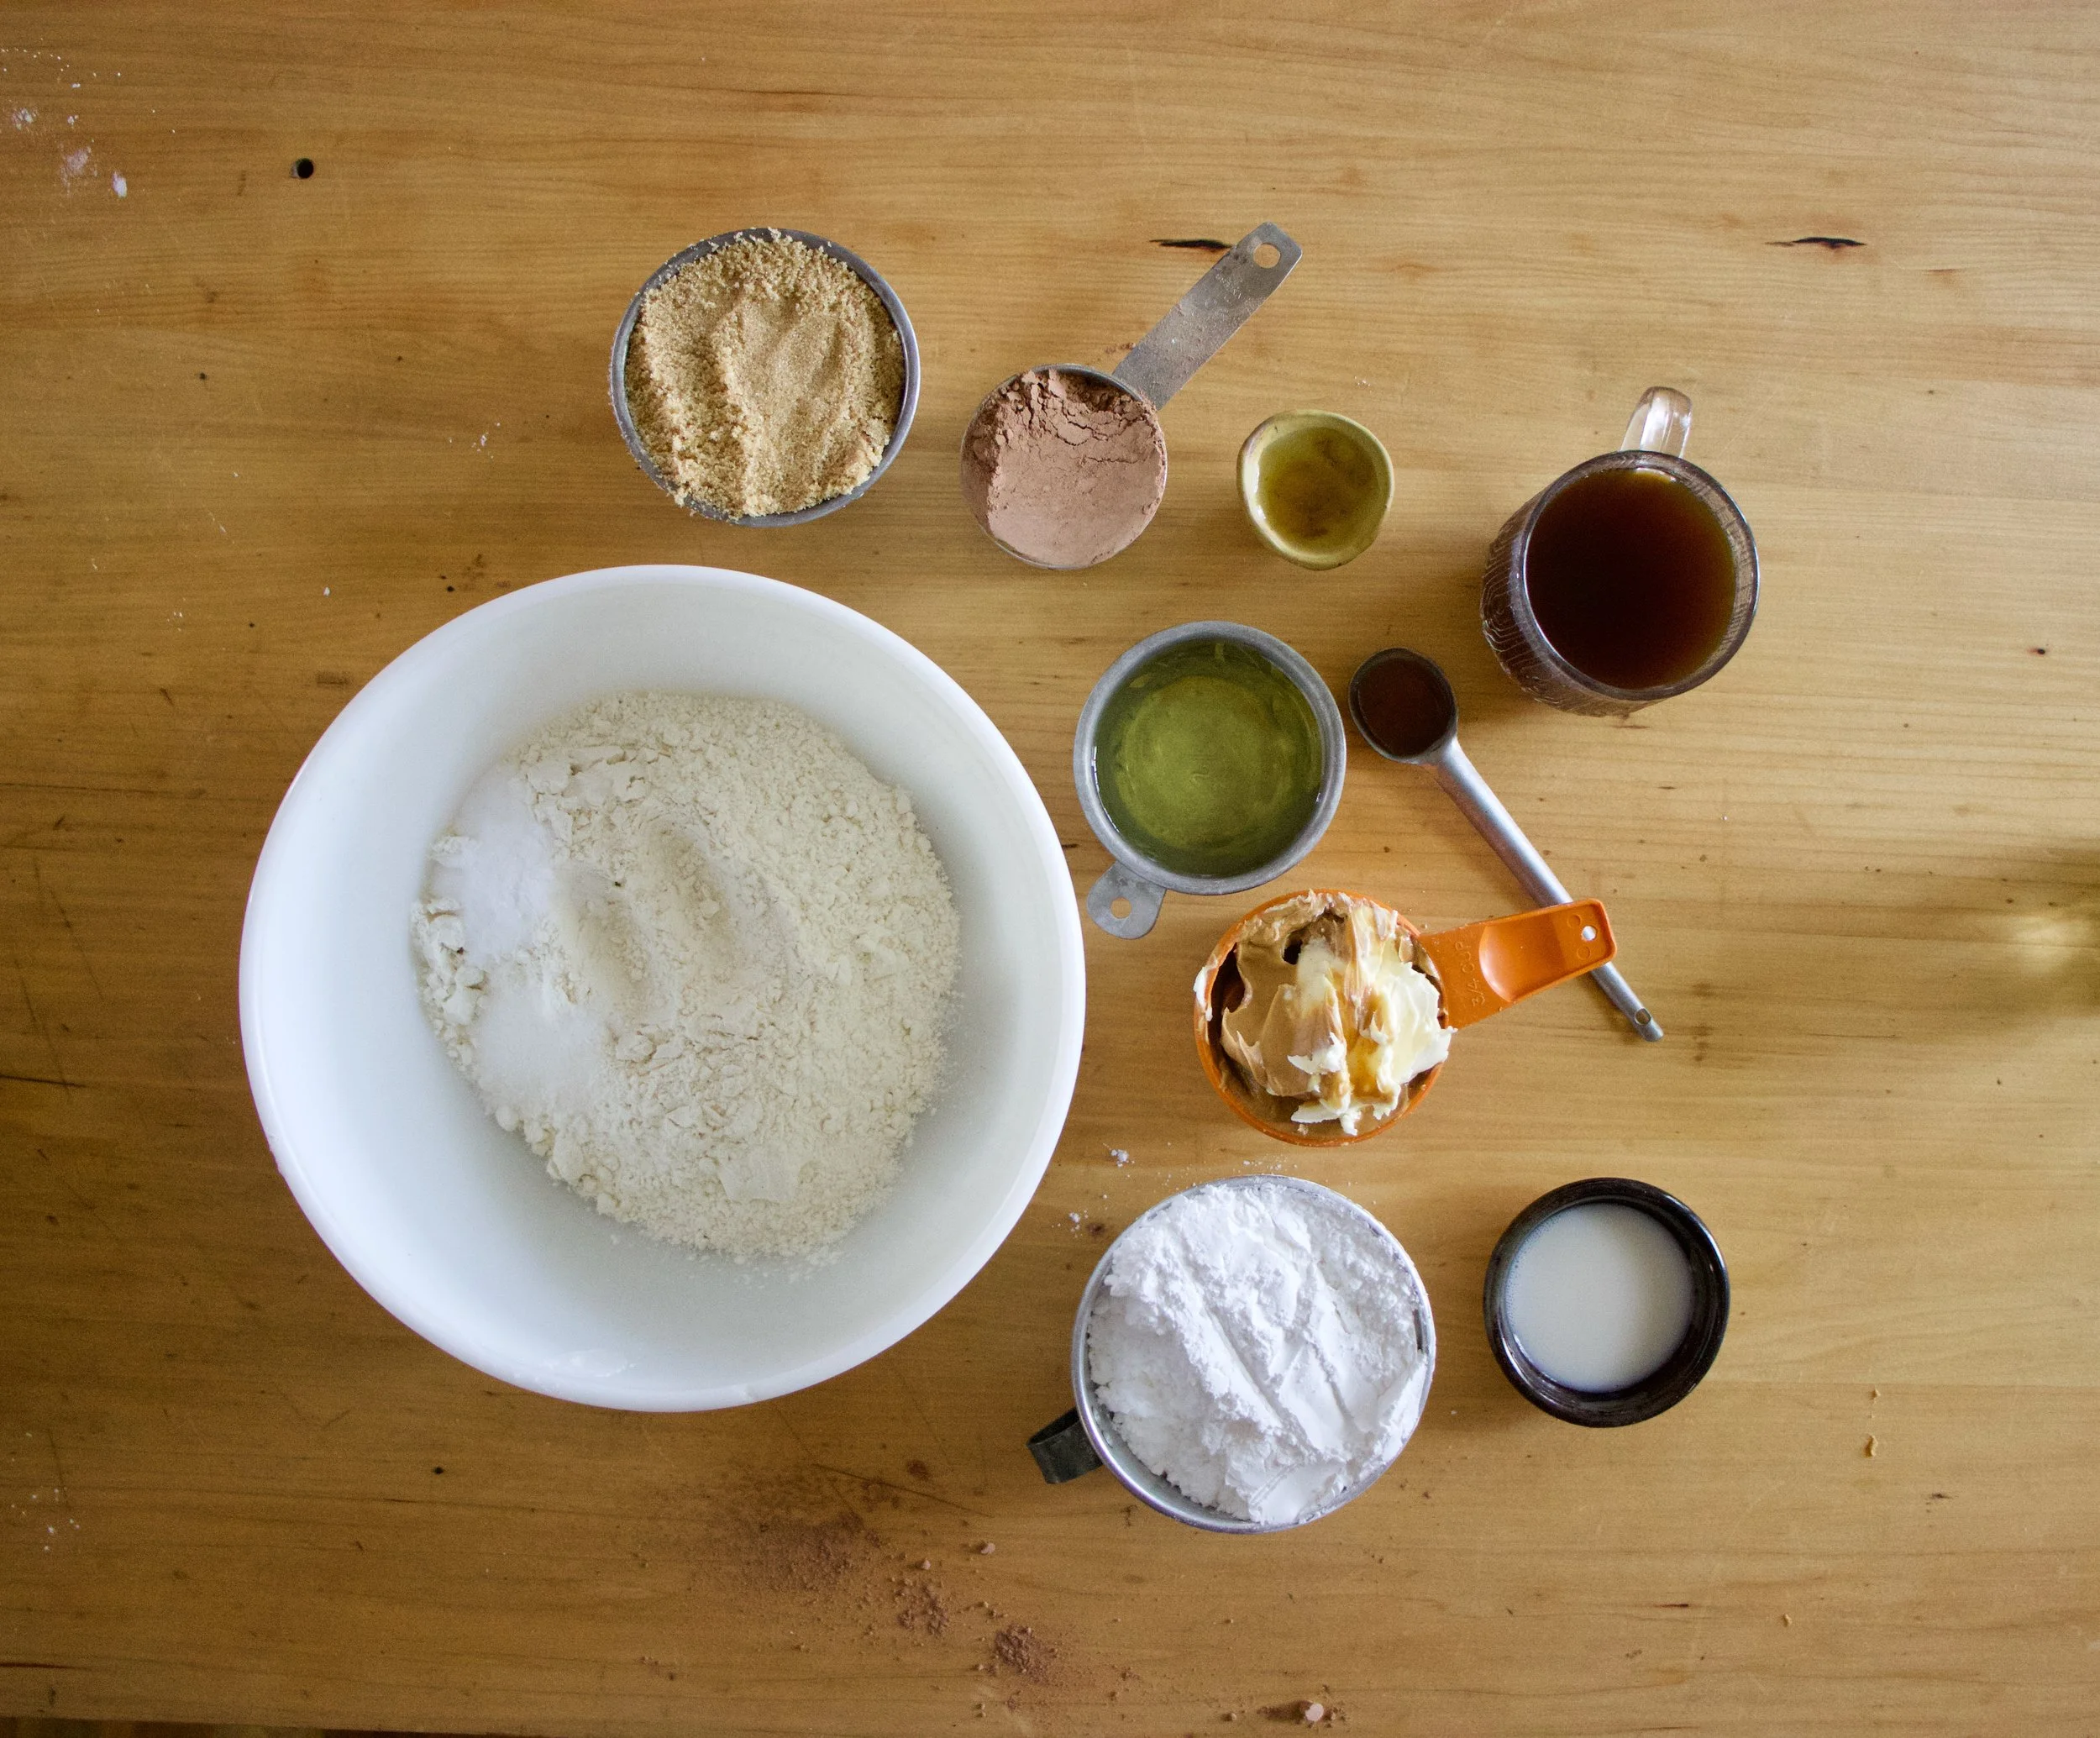
The stuff. Dry ingredients are flour, baking packing soda cinnamon and salt. Then we have applesauce, breon sugar, oil, vanilla extract and vinegar.%u00a0For the streusel…. peanut butter, brown sugar, flour, salt and earth balance. (you could use butter if you want)
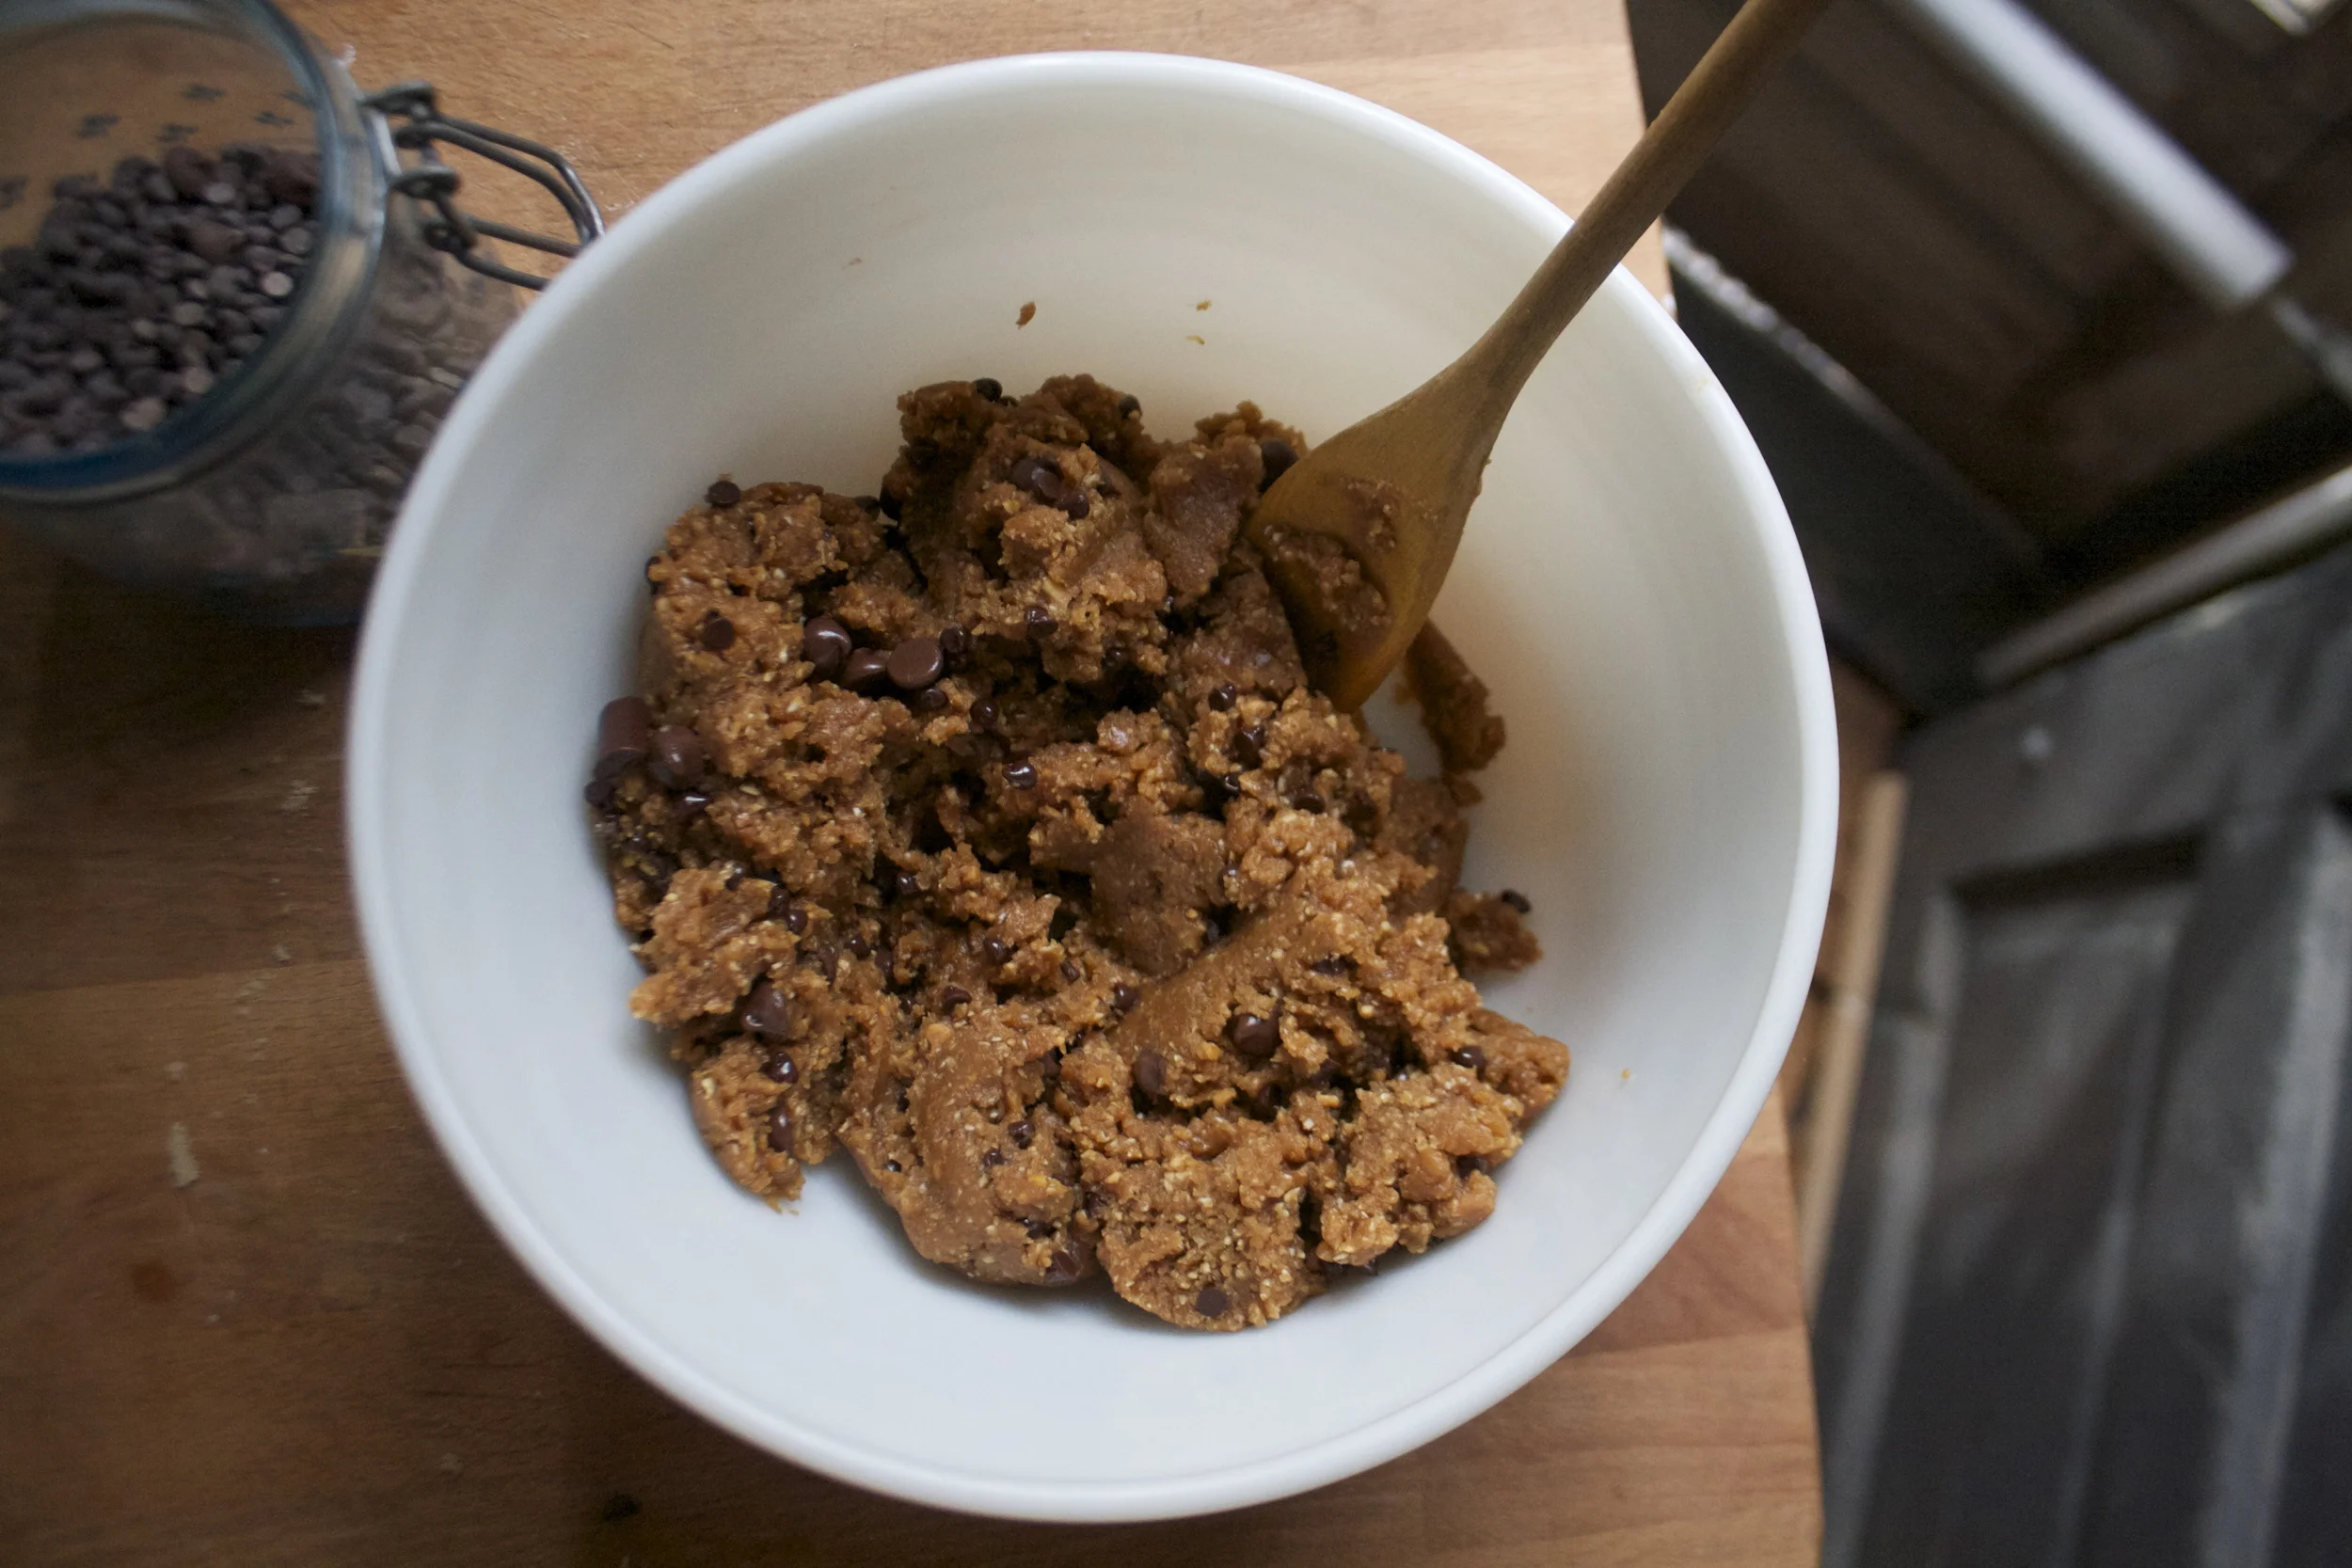
The streusel stuff goes into a bowl and gets mixed until it turns into a crumbly, soft dough and set aside.
Whisk together the flour, baking soda, cinnamon and salt in one bowl, then in another bowl, mix together he applesauce, oil, vanilla, %u00a0sugar and lastly, the vinegar.%u00a0

Fold the wet into the dry, mixing just enough until incorporated. And remember%u2026.DON”T OVERMIX!

Now scoop batter into muffin pans. Use liners, or not%u2026 I usually don’t but figured that lined muffins travel and keep a little better%u2026 plus I just found a bunch when I was cleaning out a kitchen drawer.

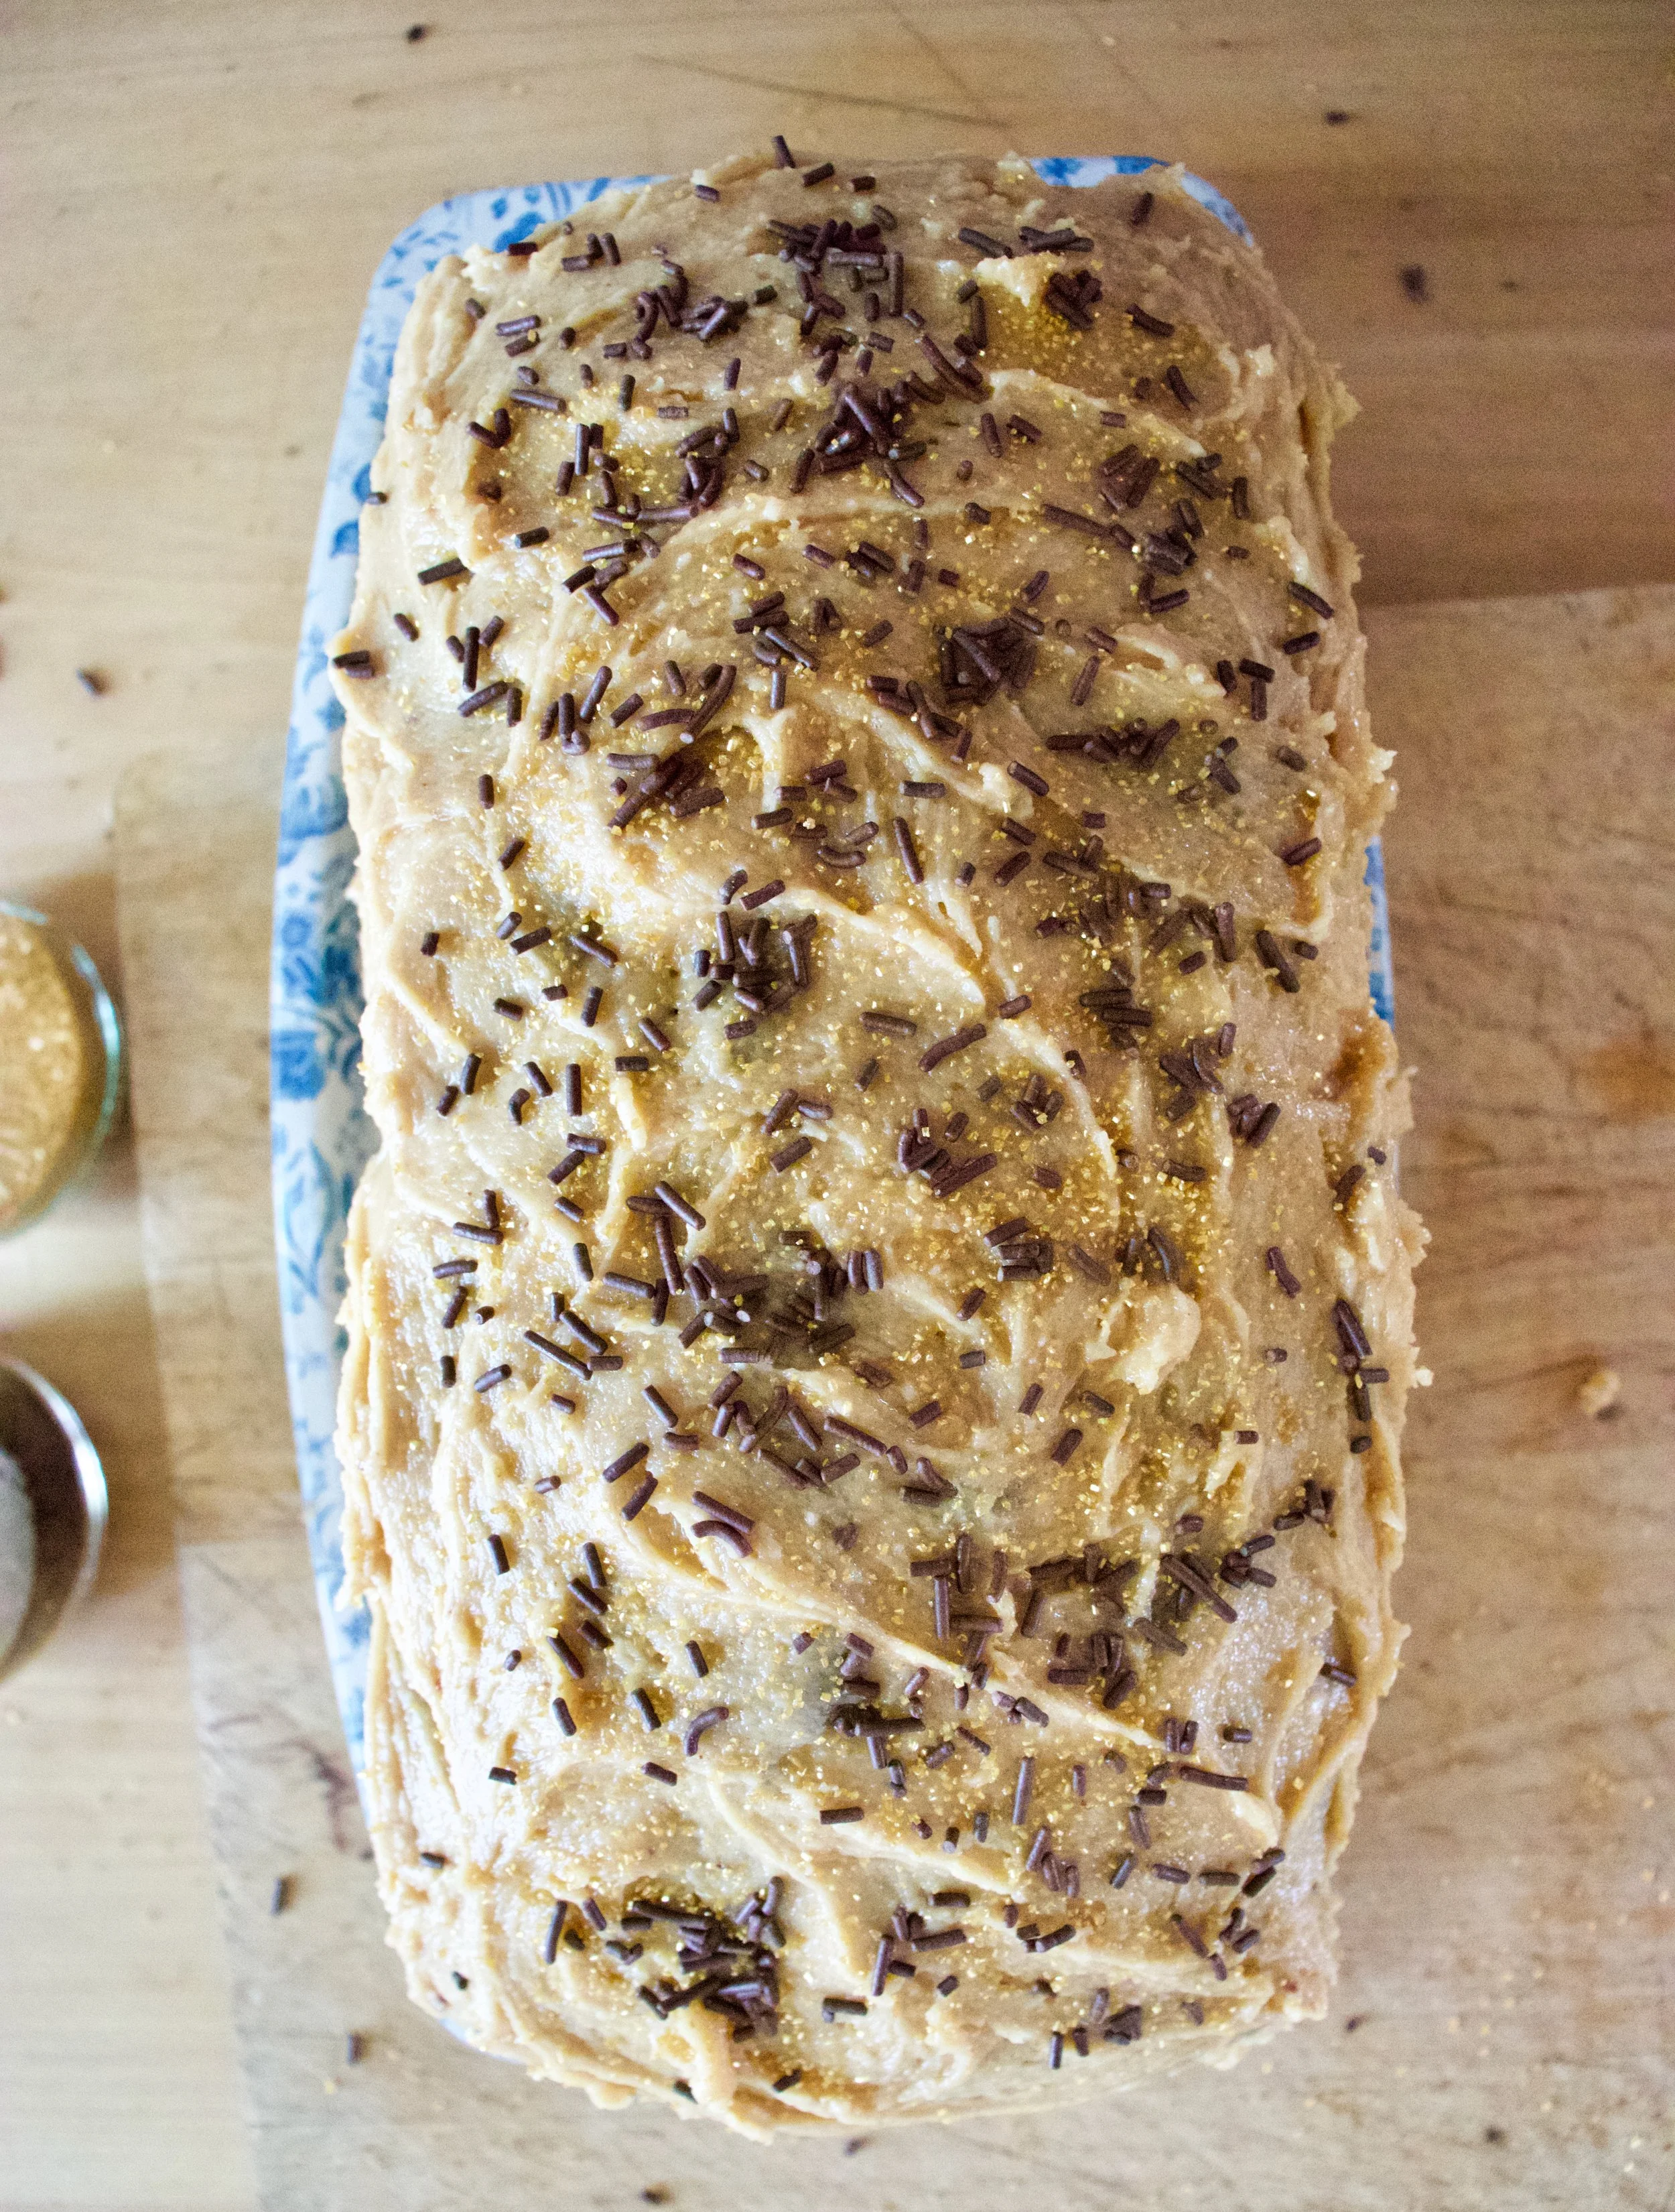
Streusel top those muffins!

A view from the side%u2026 Use it all, don’t be shy, the crumble is there to be eaten%u2026 Oh, and lesson learned by me.%u00a0Next time I make these I will give the streusel a little pat into each muffin, to really secure it to the tops.%u00a0So yeah, you should do that.
Now into the ove they go!

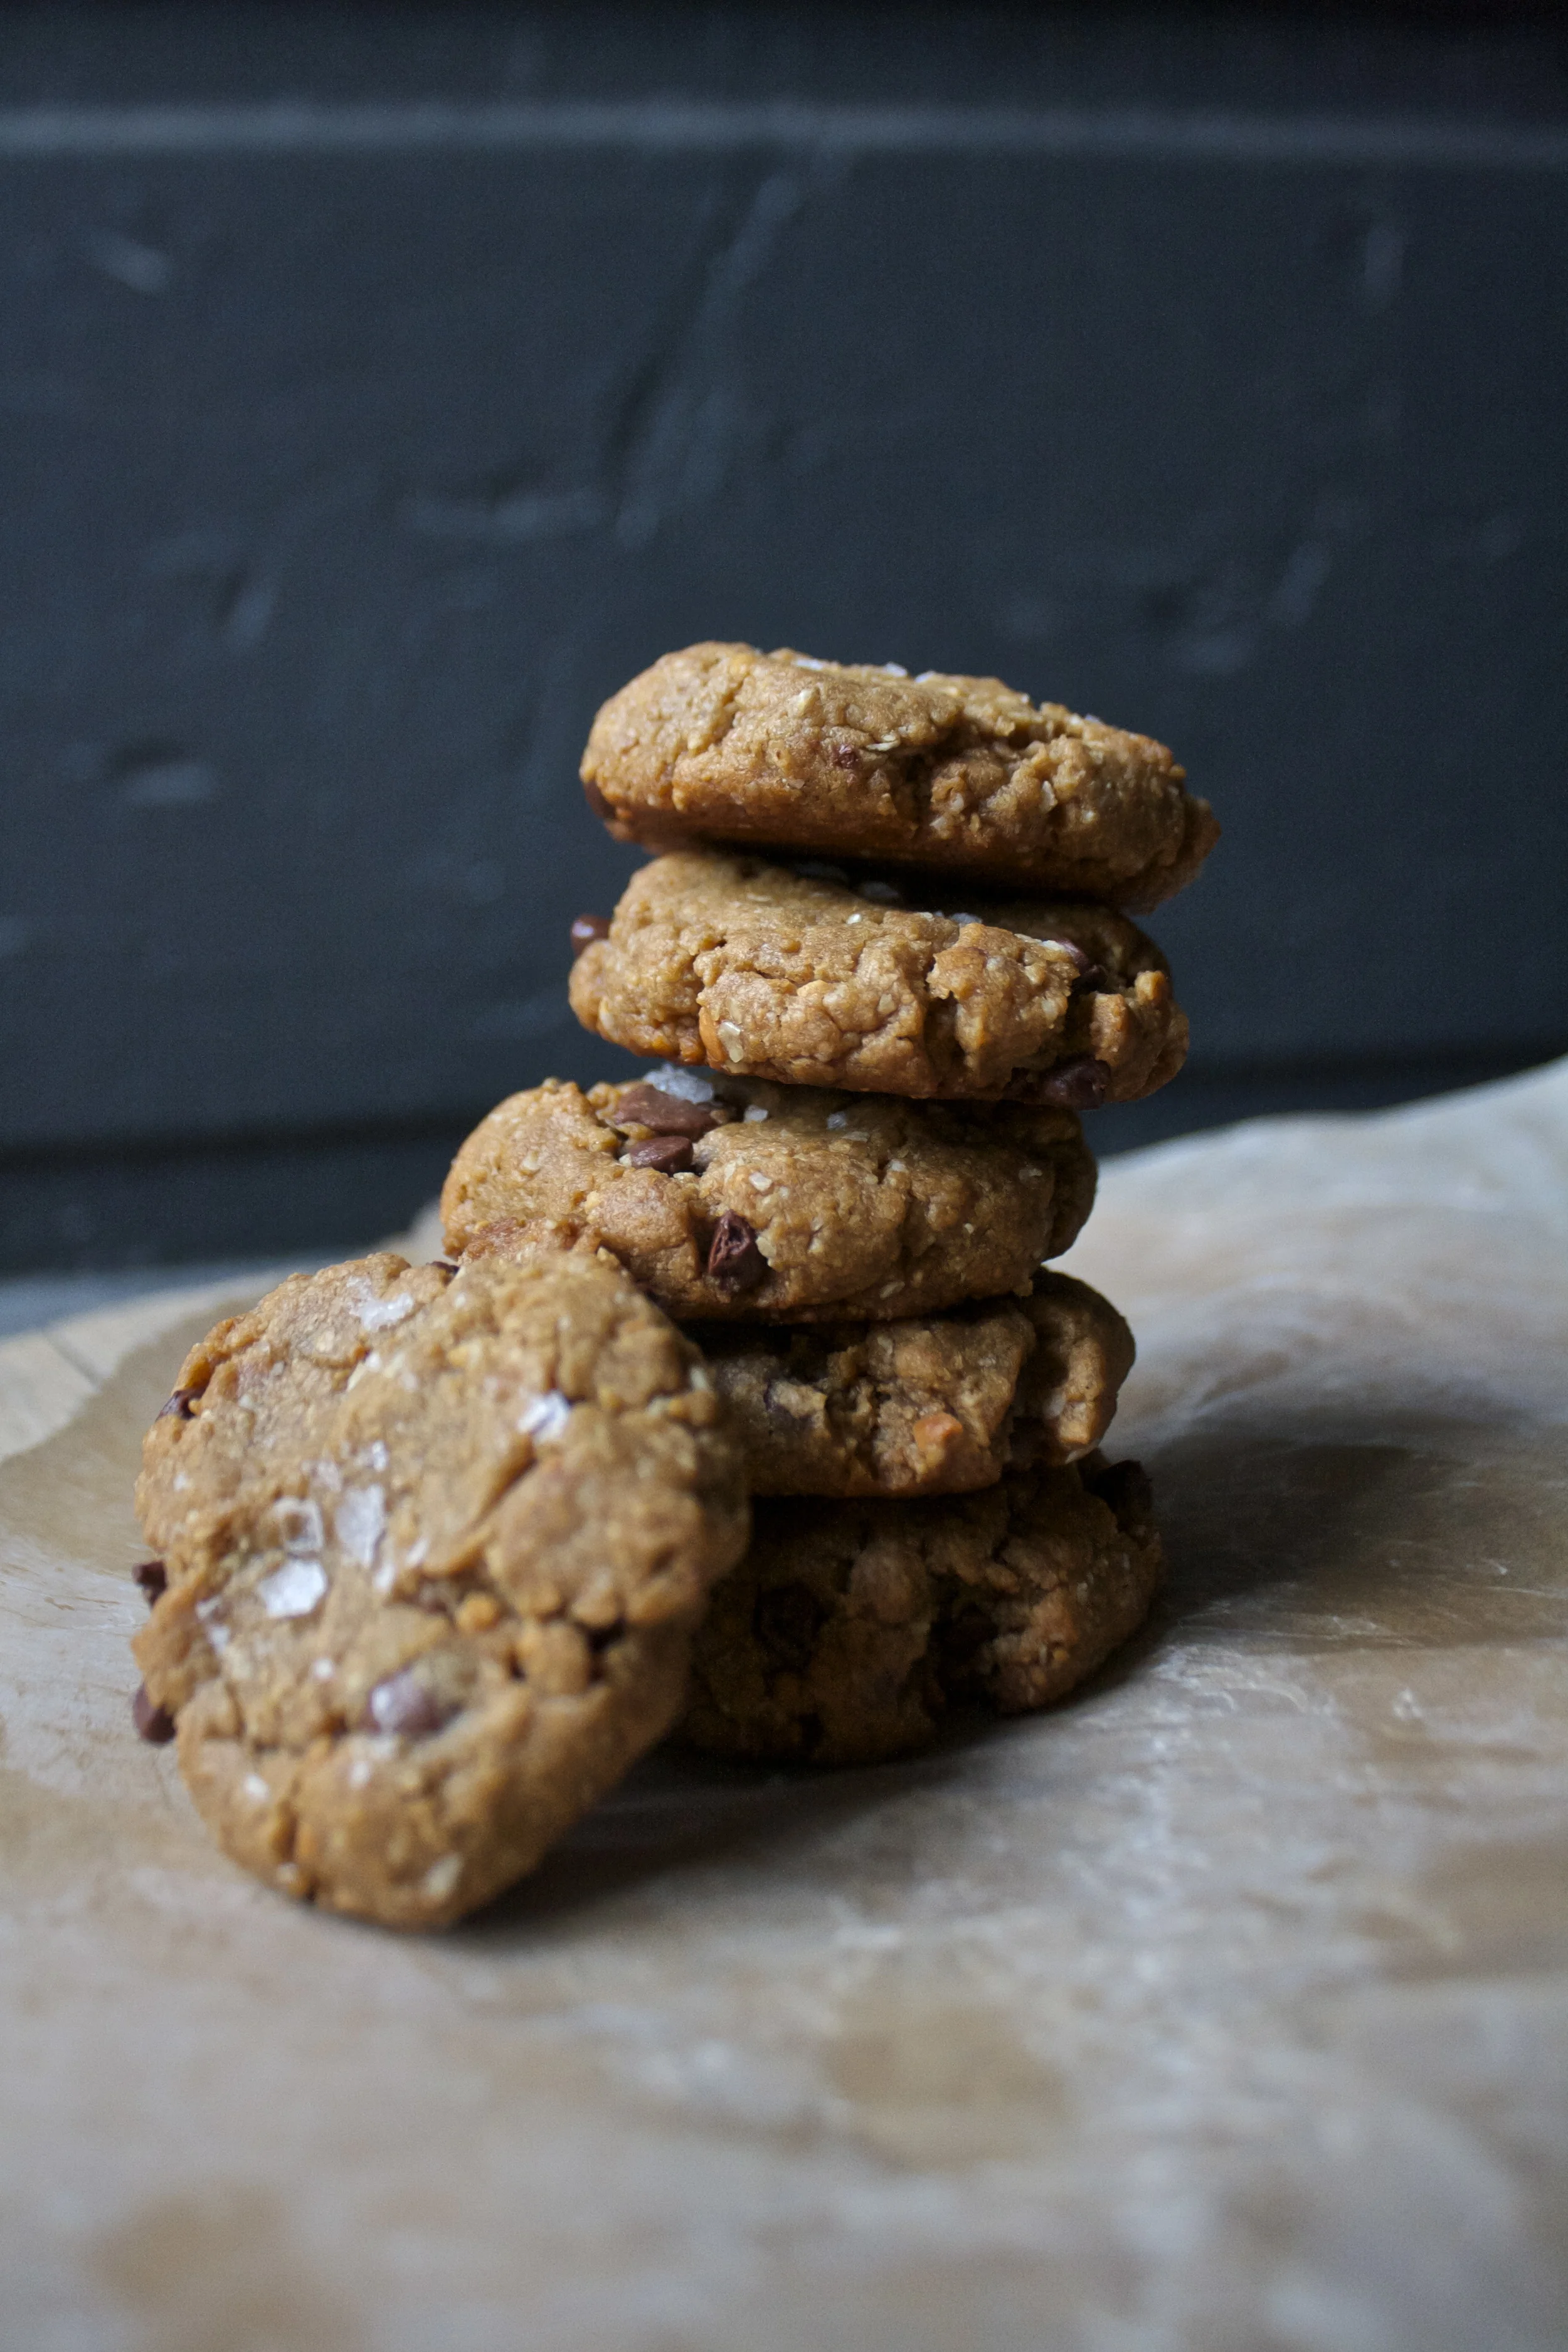
Pull out to cool when the streusel is browned, the muffins are poofed, and a tester poked comes out clean.

The smell alone will make your mouth water and you tummy growl.%u00a0
A muffin win!
Happy Friday!%u00a0%u00a0Do lots of fun fall stuff this weekend!
-C
Makes 12 muffins
%u00a0Muffin Stuff
- 2 1/4 cups all-purpose flour
- 2 teaspoons baking soda
- 1 teaspoon salt
- 1 teaspoons ground cinnamon
- 2 cups applesauce*%u00a0(recipe here)
- 2/3 cups brown sugar
- 1/2 cup oil
- 2 tablespoons apple-cider vinegar
- 1 teaspoon pure vanilla extract
Peanut Butter Streusel Stuff
- 1/2 cup flour
- 1/3 cup peanut butter
- 3 tablespoon %u00a0brown sugar
- 2 tablespoons %u00a0earth balance
* IF you are using homemade applesauce (you should!) A little chunky is good. Just make sure that there are no huge chunks. Also, if you applesauce is really thick, just add a bit of water to think it would. It doesn’t have to be pourable, but it should have a bit of water content to it.%u00a0
Turn oven on to 350 and either grease or line a 12 hole muffin pan
In a bowl, combine all of the streusel stuff unit it becomes a kind of crumbly dough and set aside.
In a large bowl, whisk together the flour, baking soda, salt, and cinnamon. In a separate bowl, mix together the applesauce,, brown sugar, oil, vanilla,, and vinegar. Pour the wet into the dry and fold in until %u00a0just fully incorporated, br careful to not over mix the batter.
Scoop equal amounts of batter into you muffin tin. Grab the streusel l topping and evenly distipute that all over the muffins, giving the topping a soft pat to make sure it stays put while baking.%u00a0
Place muffins in oven and bake for about 30 ish minutes, or unlit the streusel is browning, the muffins are poofy and a test comes out clean.
Remove from oven, pop muffins from tin, and let cool on a rack.
Serve as soon as you want. A glass of milk (plan, nut or cow) or a big old cup of joe goes really well with this muffin situation.%u00a0


THE LOVELY CRAZY
October 15, 2019 by maximios • Blog
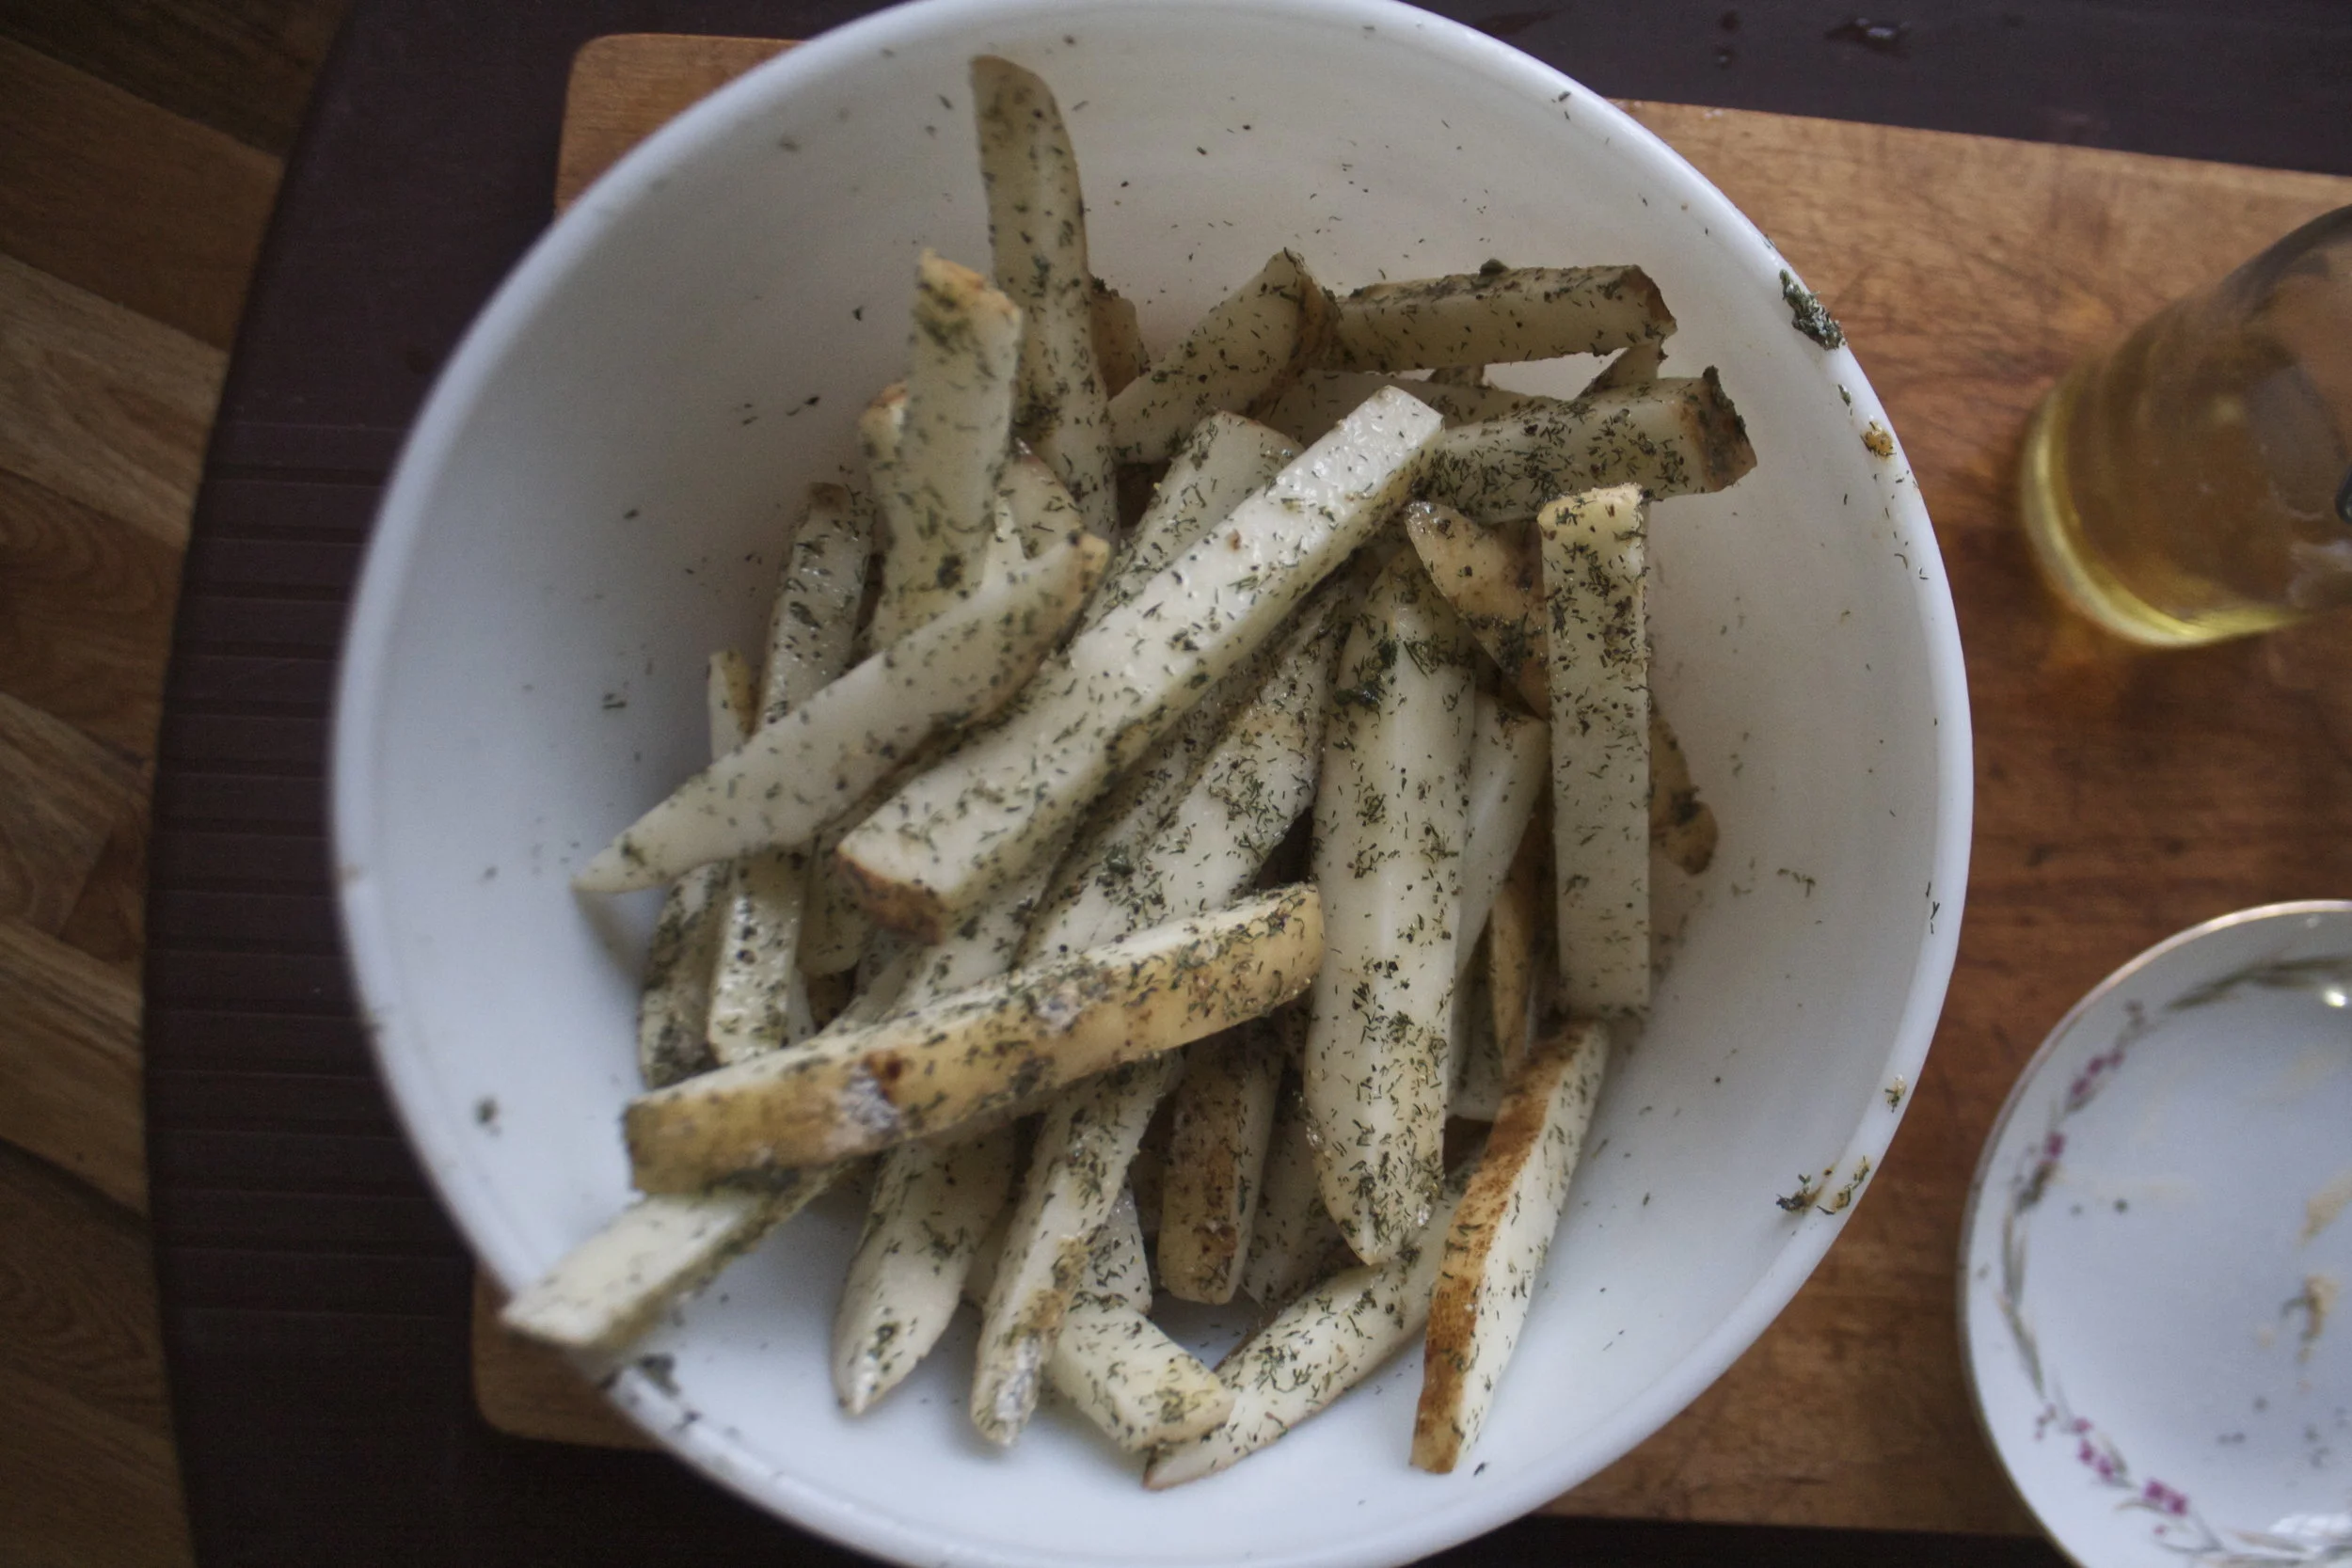
I am spicing up my snack time these day, going an extra step and actually preparing a little something rather then just eating a pound of carrots. Yes yes, a pound of carrots is a great snack, but there are so many other fantastic veggies awaiting my belly and I can only accommodate %u00a0so much at once. So today the carrots had to wait, it’s time for the parsnips.%u00a0
After I made this and was eating it with all smiles and glee, I had the mr take a taste to see what he thought. What I learned is that If you do not like parsnips then you will not like this dish. But if you are awesome and do like parsnips, well then you will like this. But I guess if you like parsnips but don’t like cranberries then you might actually not like this either.
So what I guess I am saying is if you like parsnips and cranberries, you will freaking love this. And this, these cranberry roasted parsnips, are great as a snack or as %u00a0a fantastic accompaniment to any meal that you will be serving anytime soon. It’s quick and easy and delivers in all sorts of good ways, if you like cranberries and parsnips.%u00a0
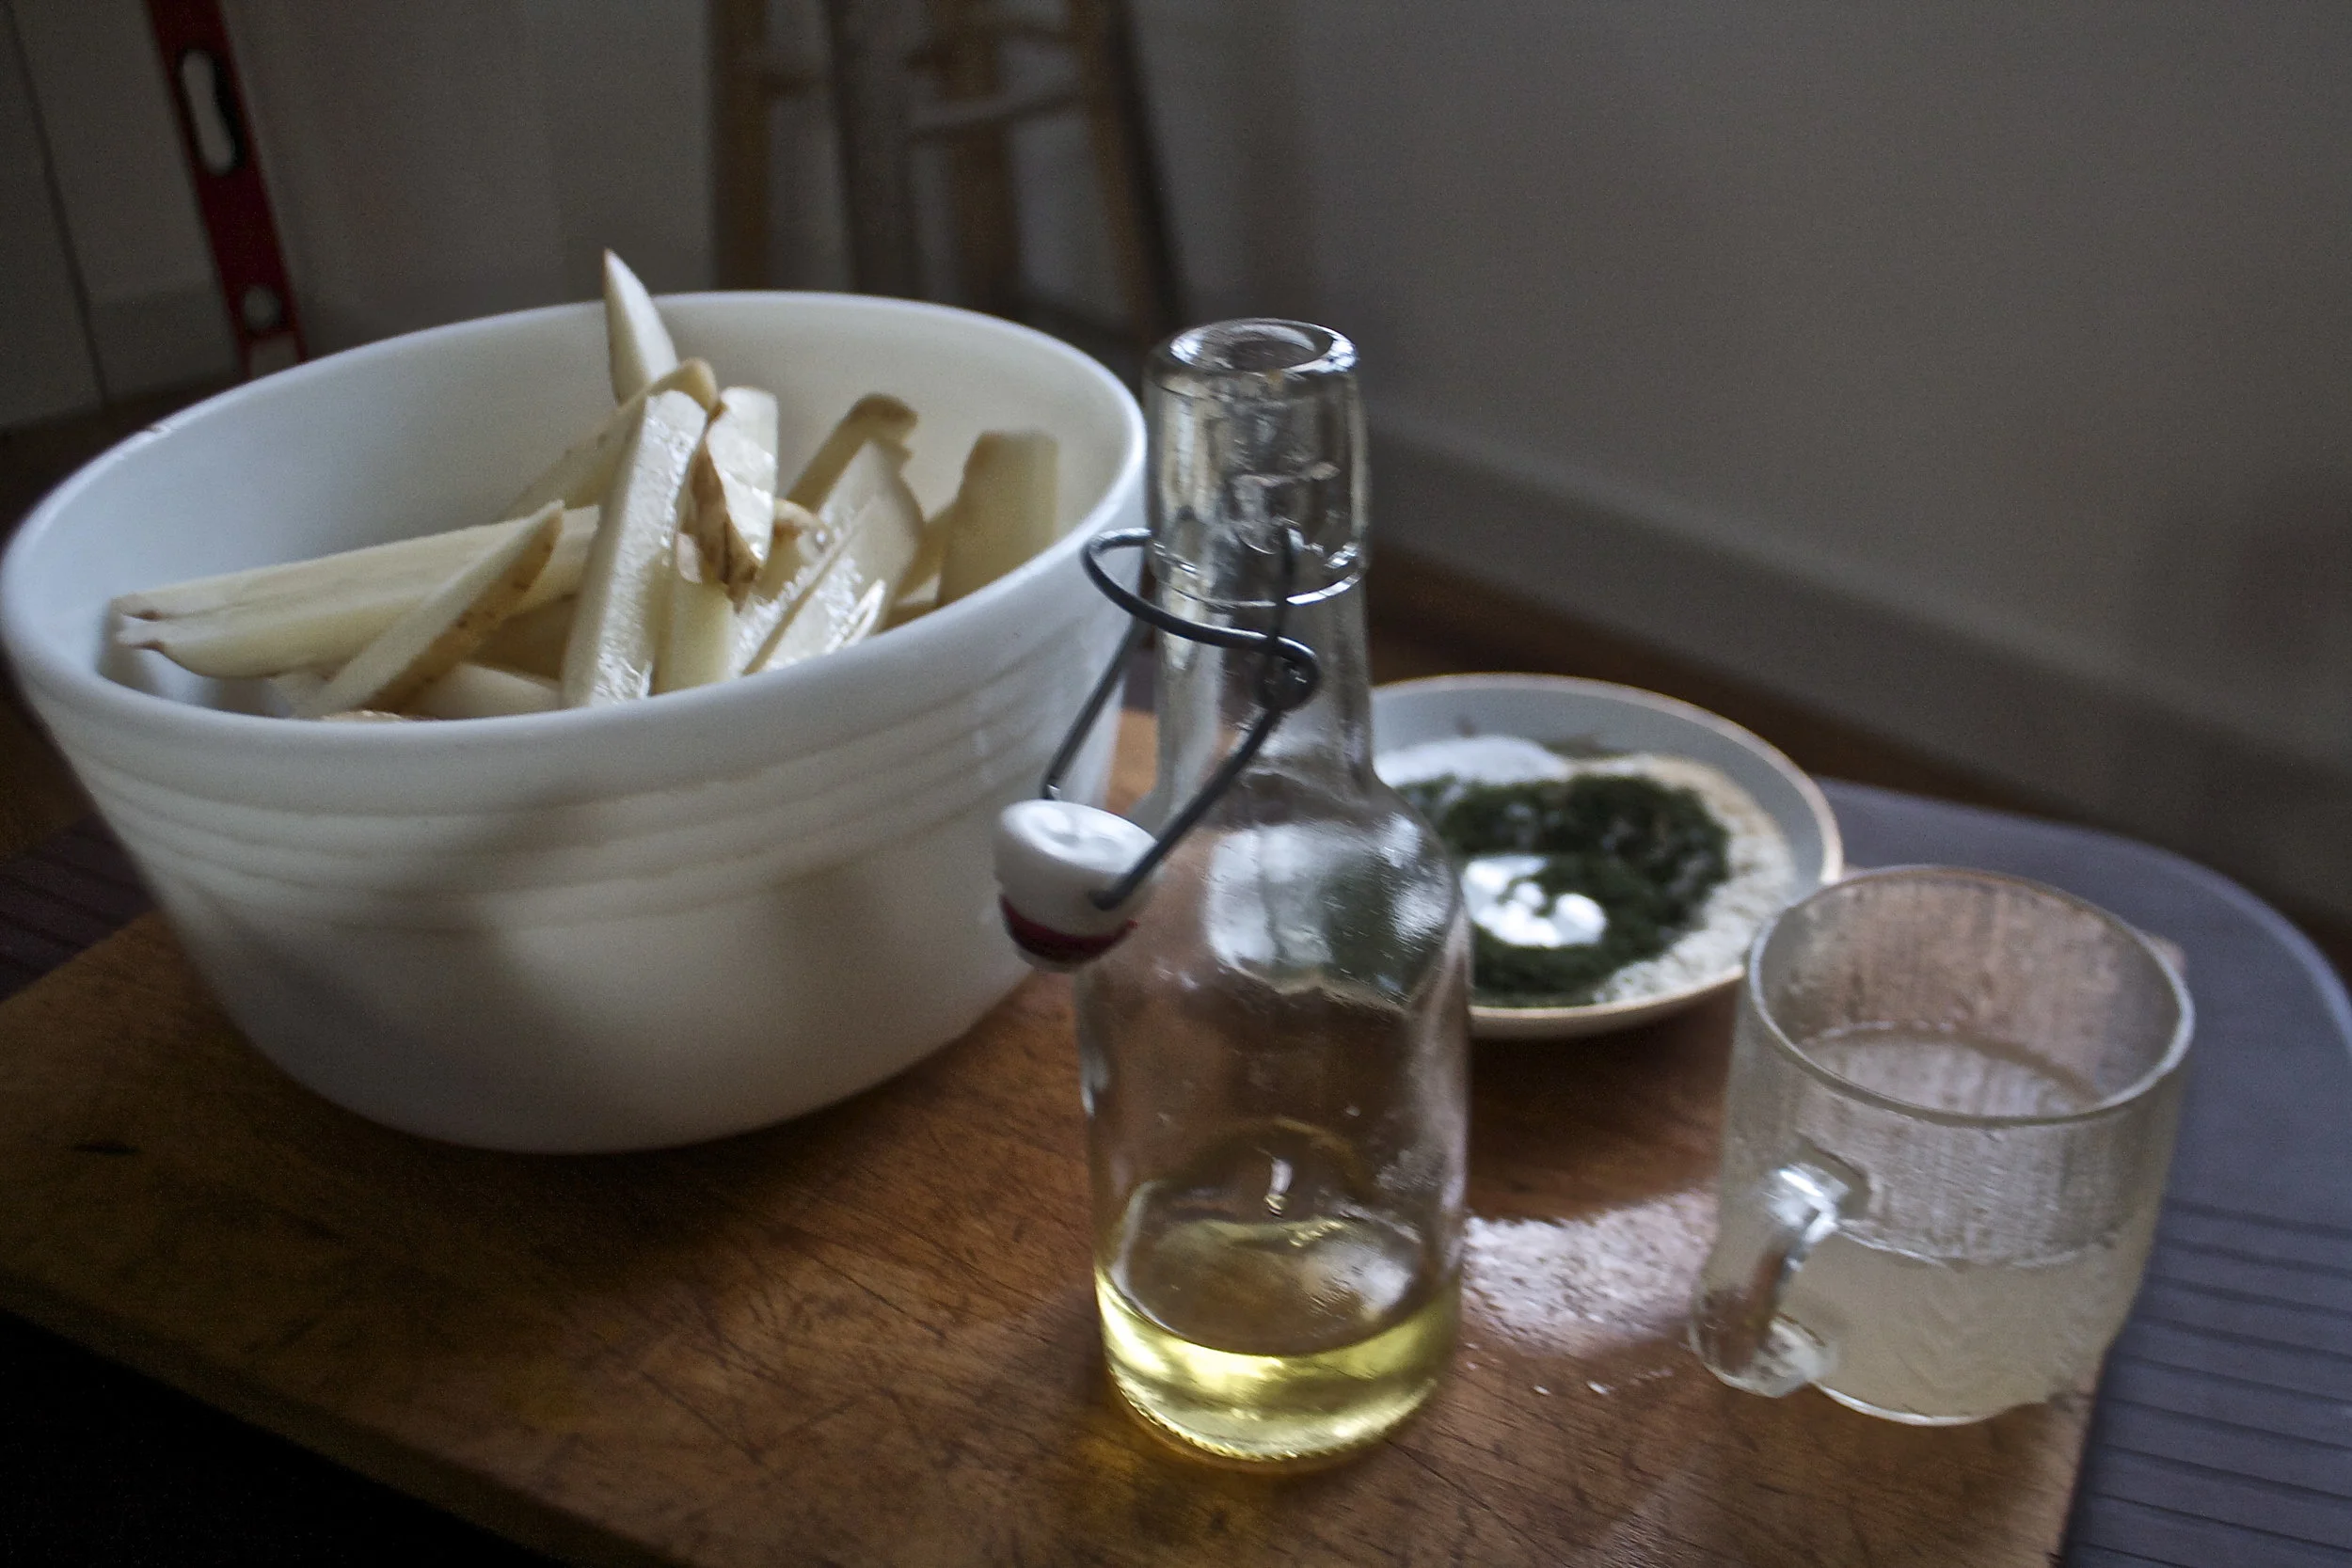
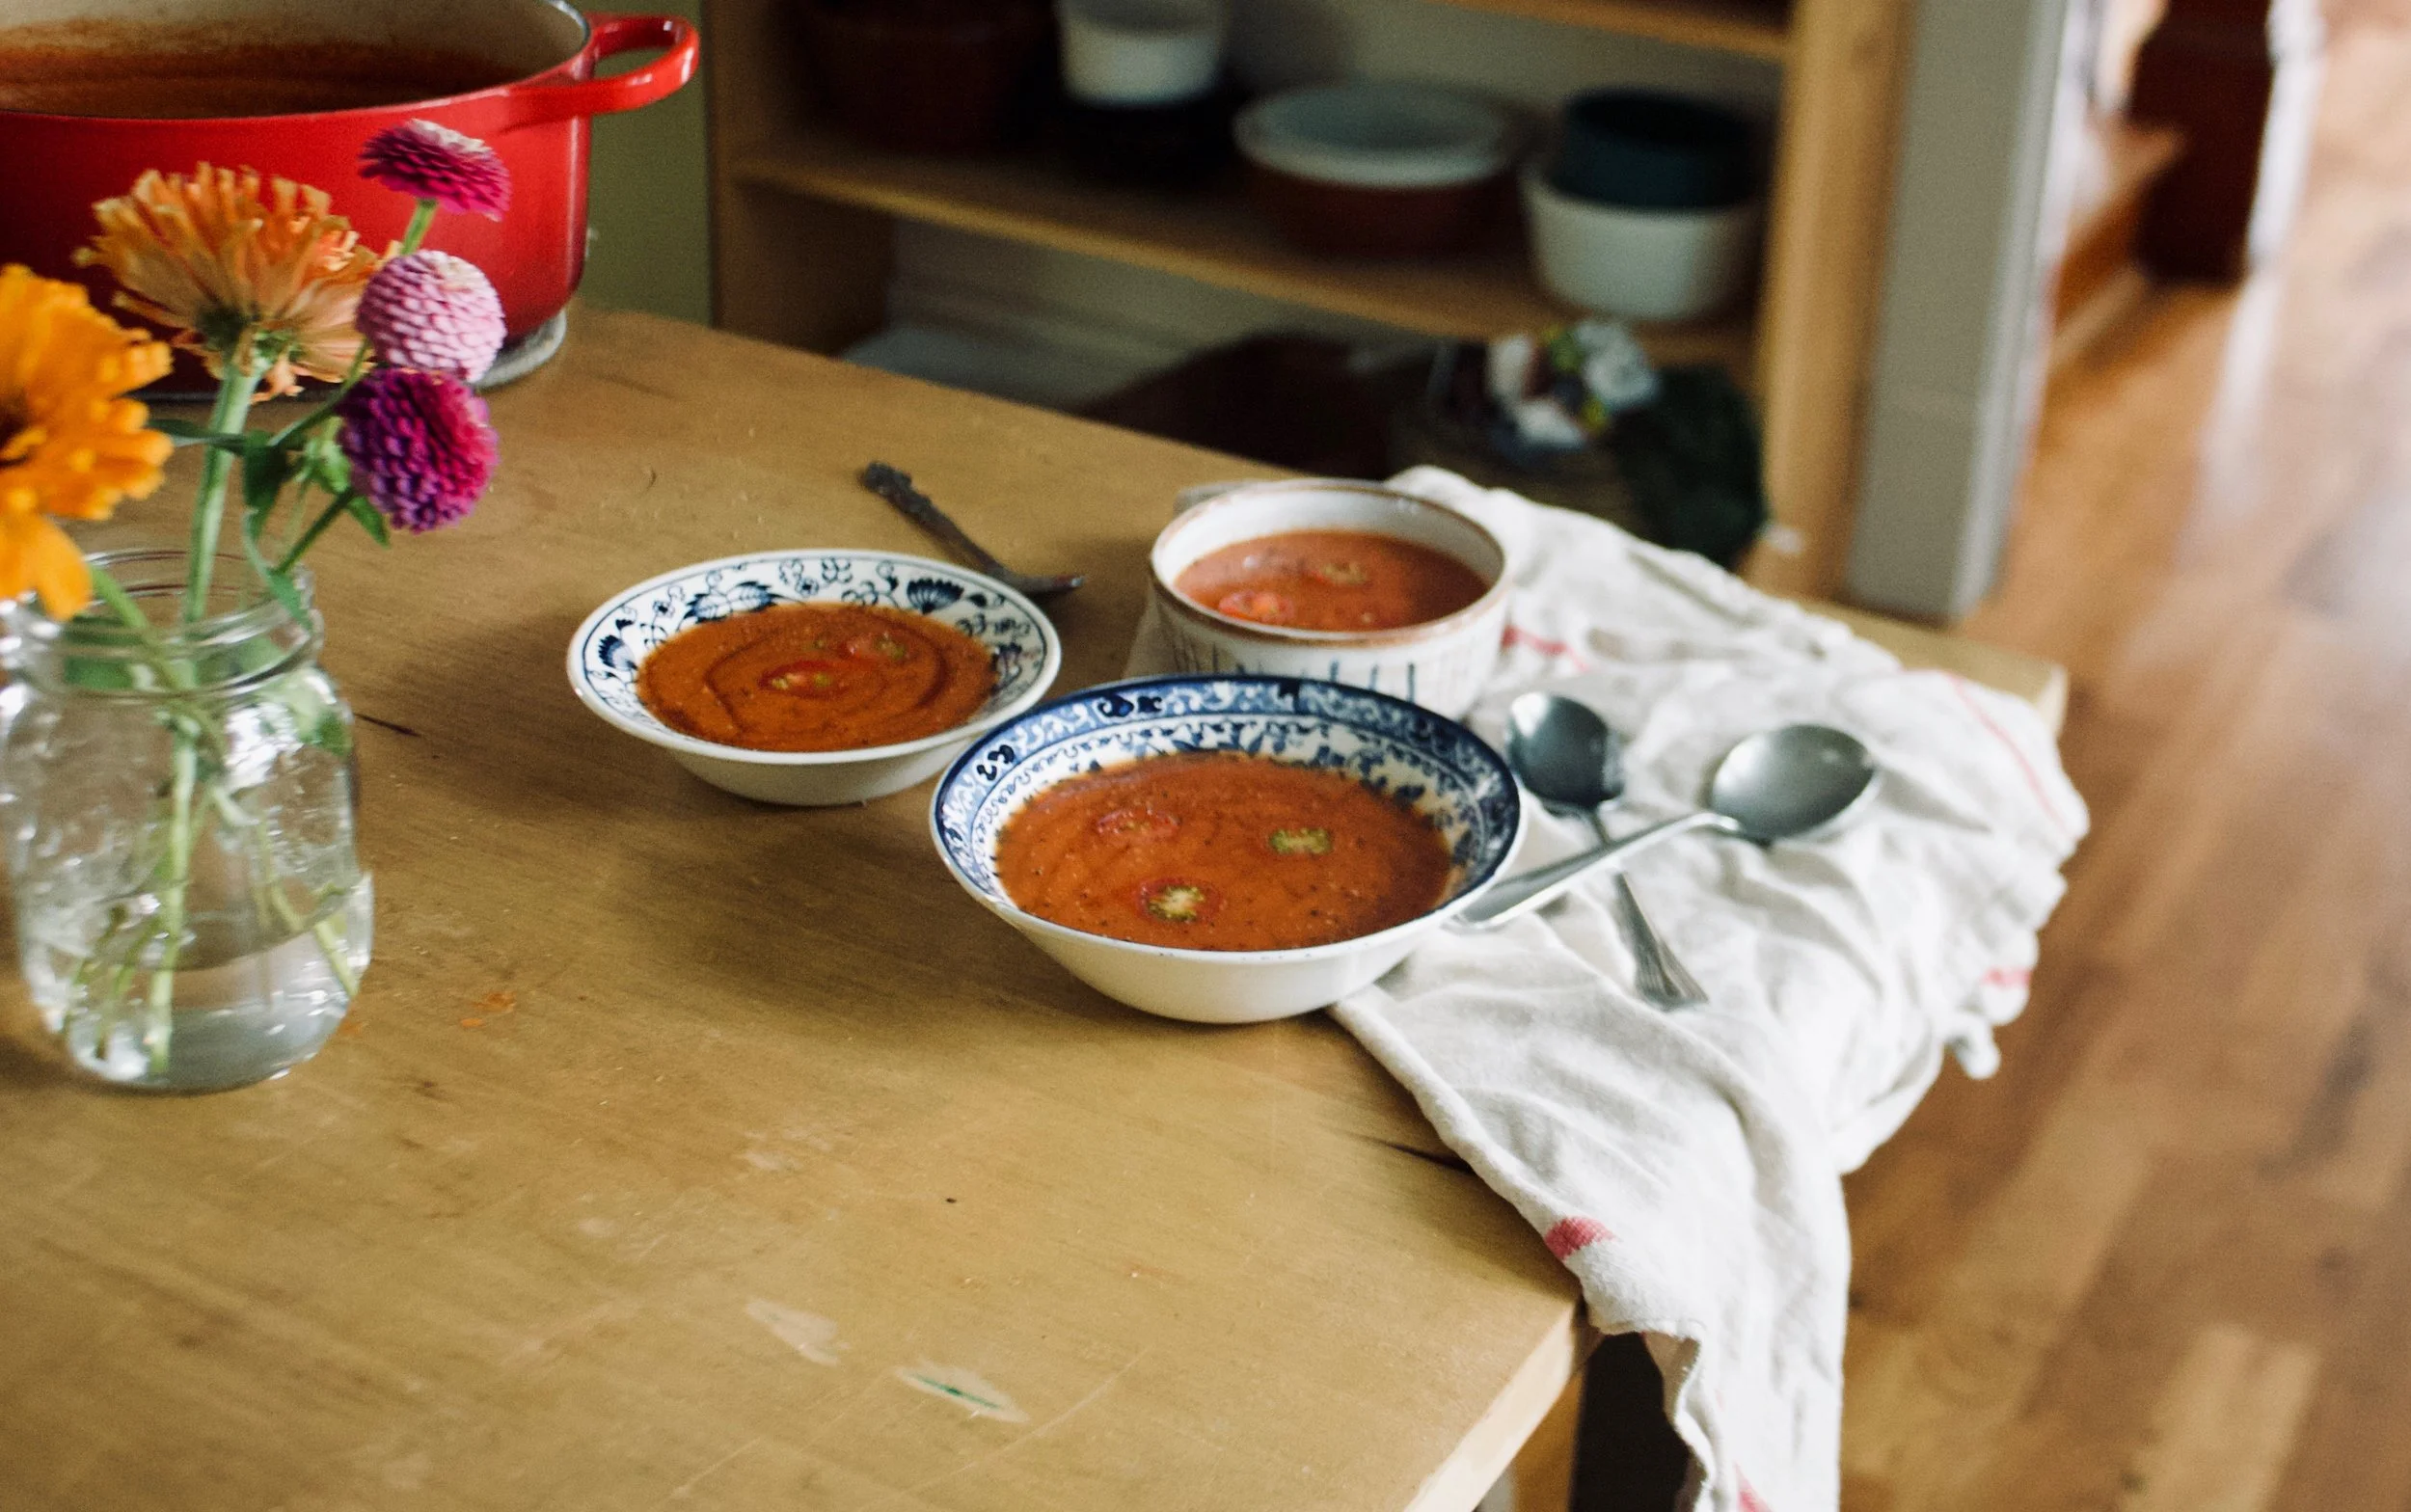
The stuff. Parsnip. fresh (or frozen) cranberries, a little maple syrup, olive oil, and salt and pepper.%u00a0
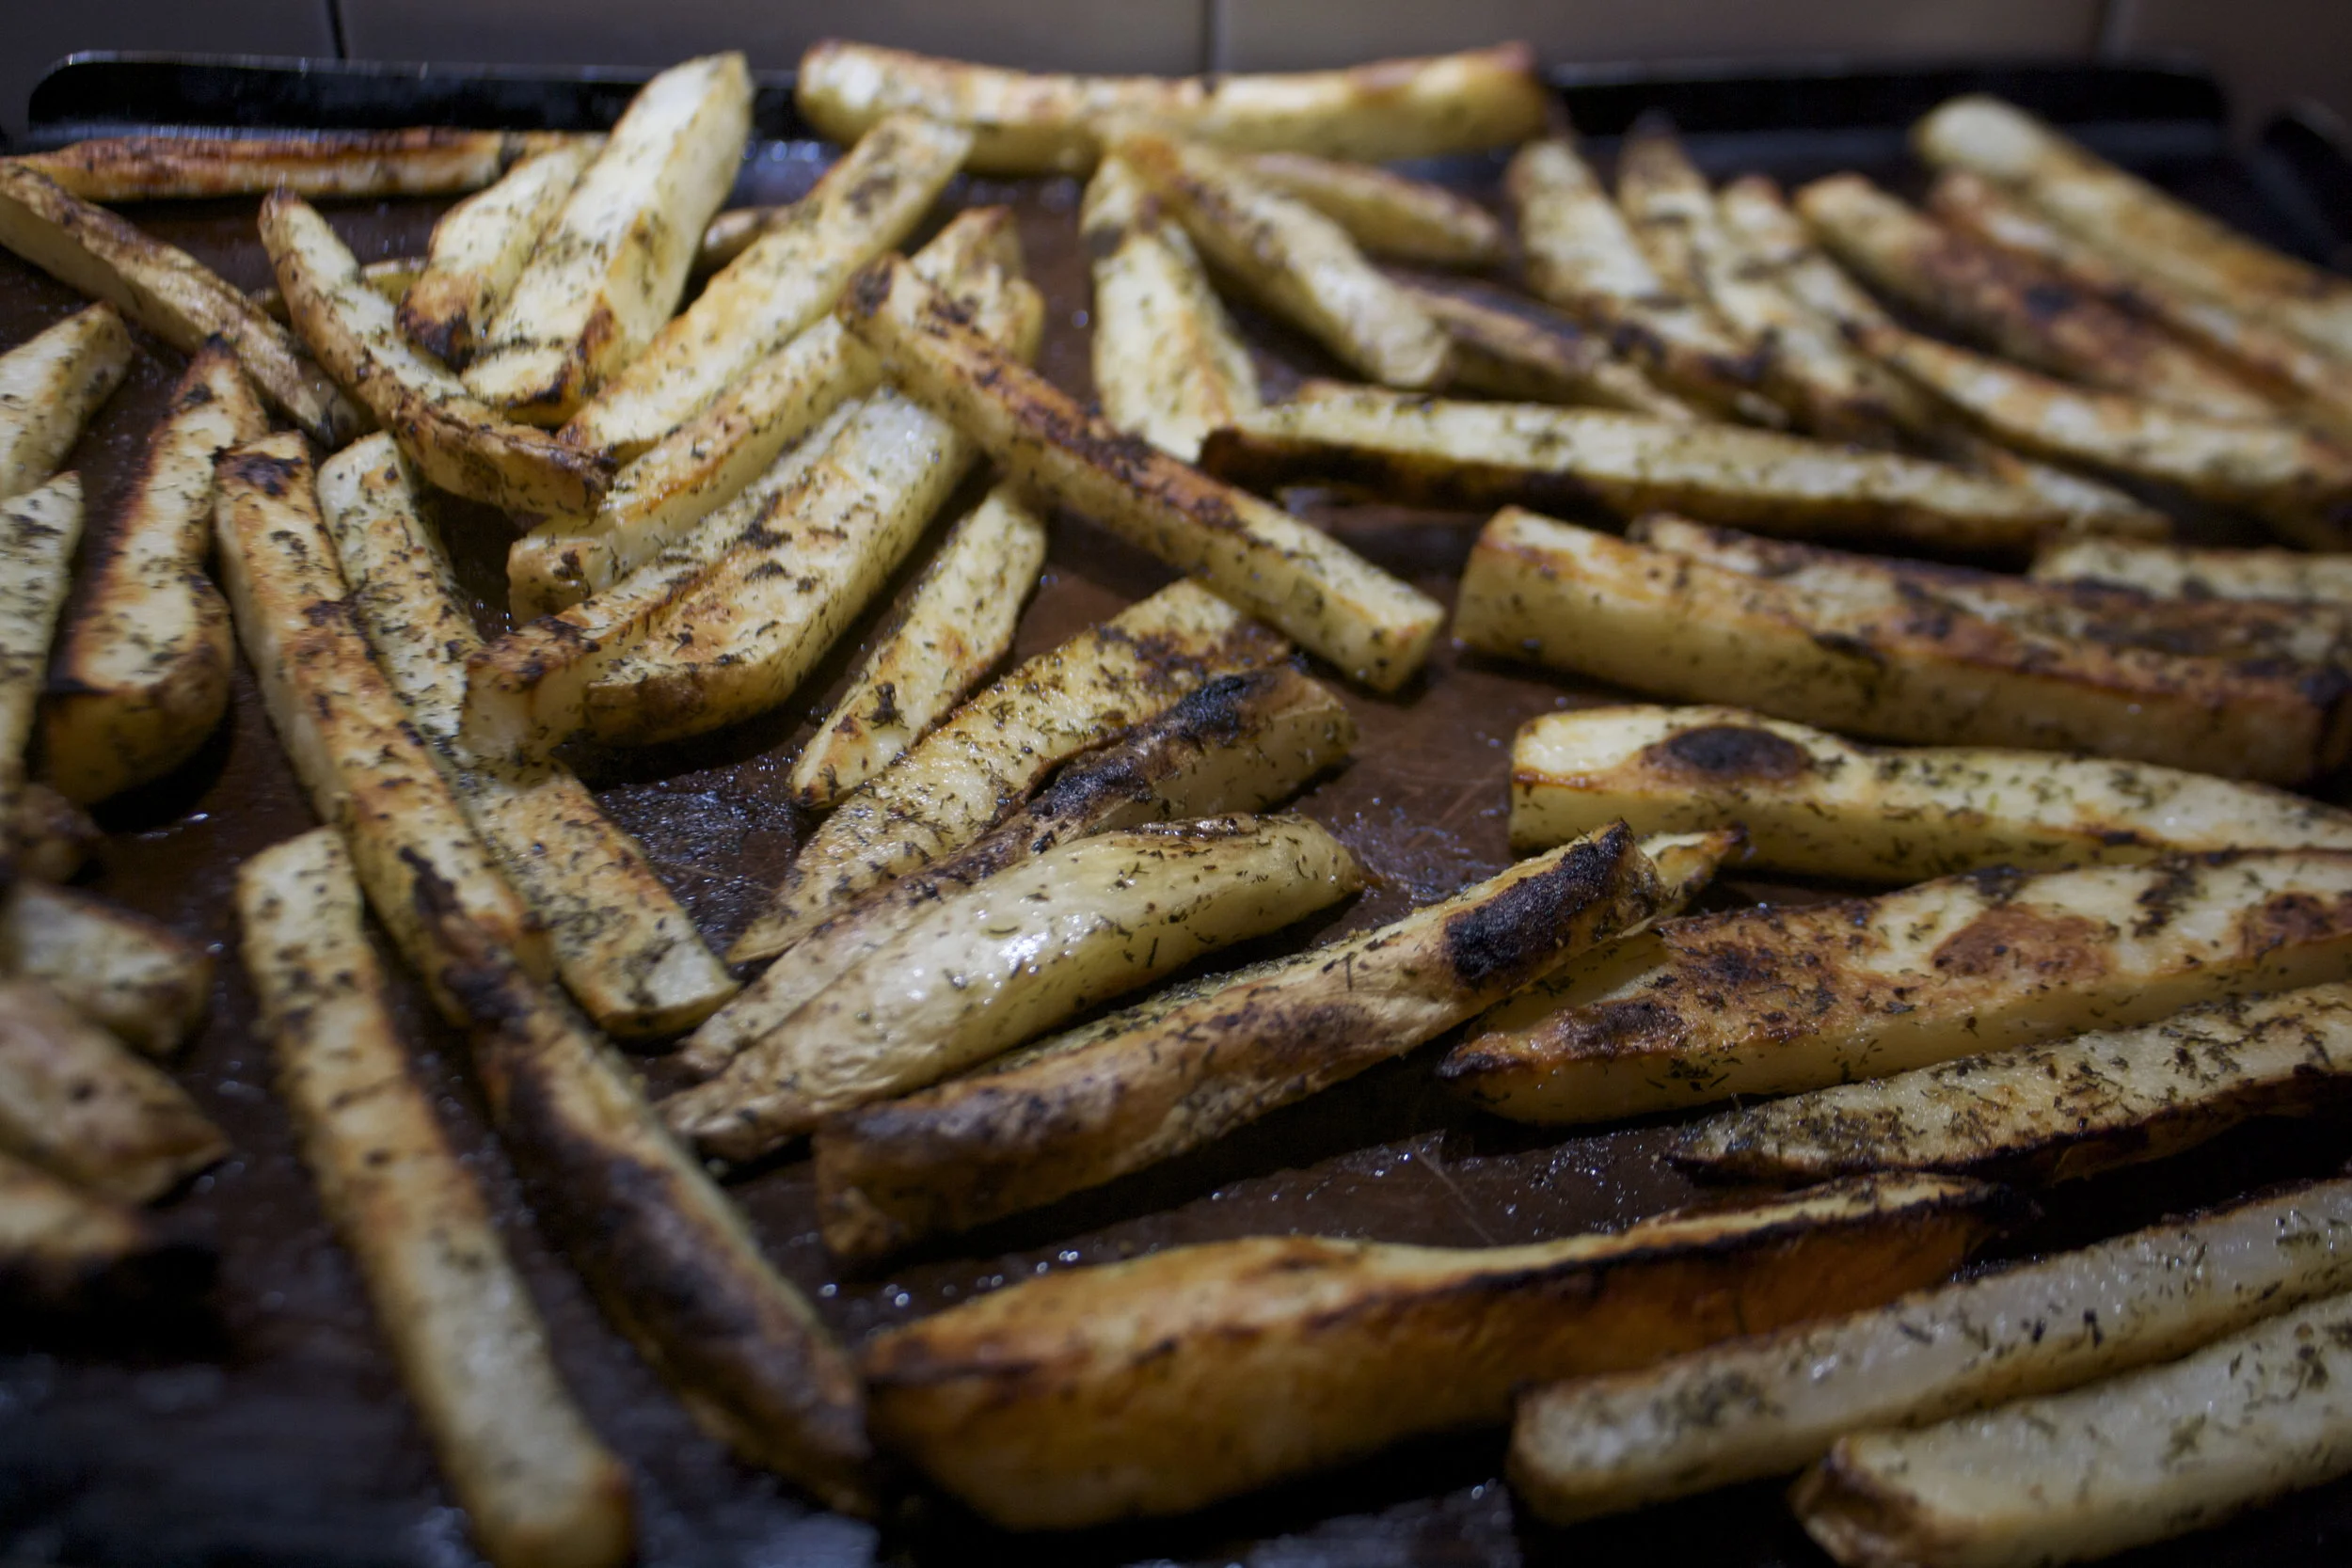
Keeping it simple and just chopping the parsnip up into mouth sized pieces. If you are a peeler, go ahead and peel those parsnips first. Me, never a peeler.%u00a0
A little trick I have learned when roasting veggies is to roast them in a really hot cast iron pan. What I usually do is preheat the oven and while I am doing that I preheat the pan on the stove top. It gets hot fast and the veggies roast better when tossed into a hot pan. You can also preheat whatever dish you are using in the oven while it preheating. Whatever works for you.%u00a0
So parsnips Into a cast iron pan (or any oven safe dish)%u00a0tossed with just a touch of olive oil and salt and pepper.%u00a0
Parsnips cook pretty fast so after about 15 minutes check for doneness. Once they are for tender and browning, toss the cranberries into the pan and keeping roasting.
Once the cranberries are all roasted and bursted and nice, remove the pan from the oven and immediately drizzle with a touch of maple (just a touch or else it will be too sweet)%u00a0
There you go. Simple, fast, and oh so delicious.%u00a0
Have an awesome weekend!%u00a0%ud83e%udd4b%ud83e%udd3e%ud83c%udffb%u200d%u2640%ufe0f%ud83c%udf84%u2603%ufe0f (interrupt those any way you see fit)
-C
serves about 4 as a side dish %u00a0or makes for 2 good snack bowls
Preheat oven to 425
Grab whatever pan or oven safe dish you are using and %u00a0preheat either place it in the oven while its preheating of if you can place it on the stove, get it really hot on a high flame.
Grab your parsnips and chop into about an inch sized pieces (or a good size that will fit into you mouth. Feel free to peel the parsnips first if you want to. Once the oven and pan are preheated, drizzle the parsnips with a tiny bit of olive oil and toss with salt and pepper. Place onto really hot pan and stick into oven. %u00a0Roast for about 15-20 minutes or until the parsnips are golden brown and fork tender. Remove form oven and toss in the cranberries. Place back into oven for about another 10 minutes or until the cranberries start to burst and get soft. Remove again and drizzle with a teaspoon of maple syrup (or more if you like it sweeter)%u00a0
Serve right away.%u00a0
This weekend was pretty fantastic. I got a lot of little things done around the house that needed to be done and spent half of that time hanging out in my pjs. (Pjs can be working loathes too) And all the while I was doing stuff, I was making these rolls. (I am nothing if not a great multi-tasker) That’s my favorite kind of weekend.. Baking, while doing house chores. and maybe watching tv or listening to music. (or NPR.. but saying that makes me sound so old).%u00a0I am like a little old house wife (I am close) and it makes me feel like I have achieved greatness!
And baking bread is the best. I love making bread. I %u00a0love the act of mixing and kneading the dough. The waiting and anticipation of the dough rising.The smells of good bread baking. It’s a very cathartic experience, and it also results in some very tasty bread that,%u00a0in my house, get’s eaten at an alarming speed (fresh bread doesn’t last long with the mr) But don’t let all that time waiting around scare you away from making bread, cause when you take out the time spent letting dough rise, bread really takes about 8 minutes to make. And people who make fresh bread are always the coolest people.%u00a0
So these rolls. These rolls are soft and fluffy and tender,, slight sweet, slightly spicy, and all over freaking fantastic.%u00a0I mean, it’s parsnip and pepper so what can go wrong with that?. The mr ate a good few pretty much as soon as I pulled them out of the oven(again..fresh bread doesn’t last long)%u00a0and when I brought the rest over to my sisters house, those were devoured as well. Even the littles were super into them. %u00a0And I now that it’s a few weeks away but%u2026. Thanksgiving is only a few weeks away!!! It’s creepy up oh so fast (as usual) and I am not going to let it get the best of me this year. And now that I got my roll game down for the big day (or 3.. there are 3 Thanksgivings that we are attending), I can move onto more pressing things.. like al the pies.(I’ll be sharing some pies with you soon)
The stuff. %u00a0We gots some flour, salt, cracked pepper and a really big parsnip. Also have water, yeast, sugar and some melting earth balance .%u00a0
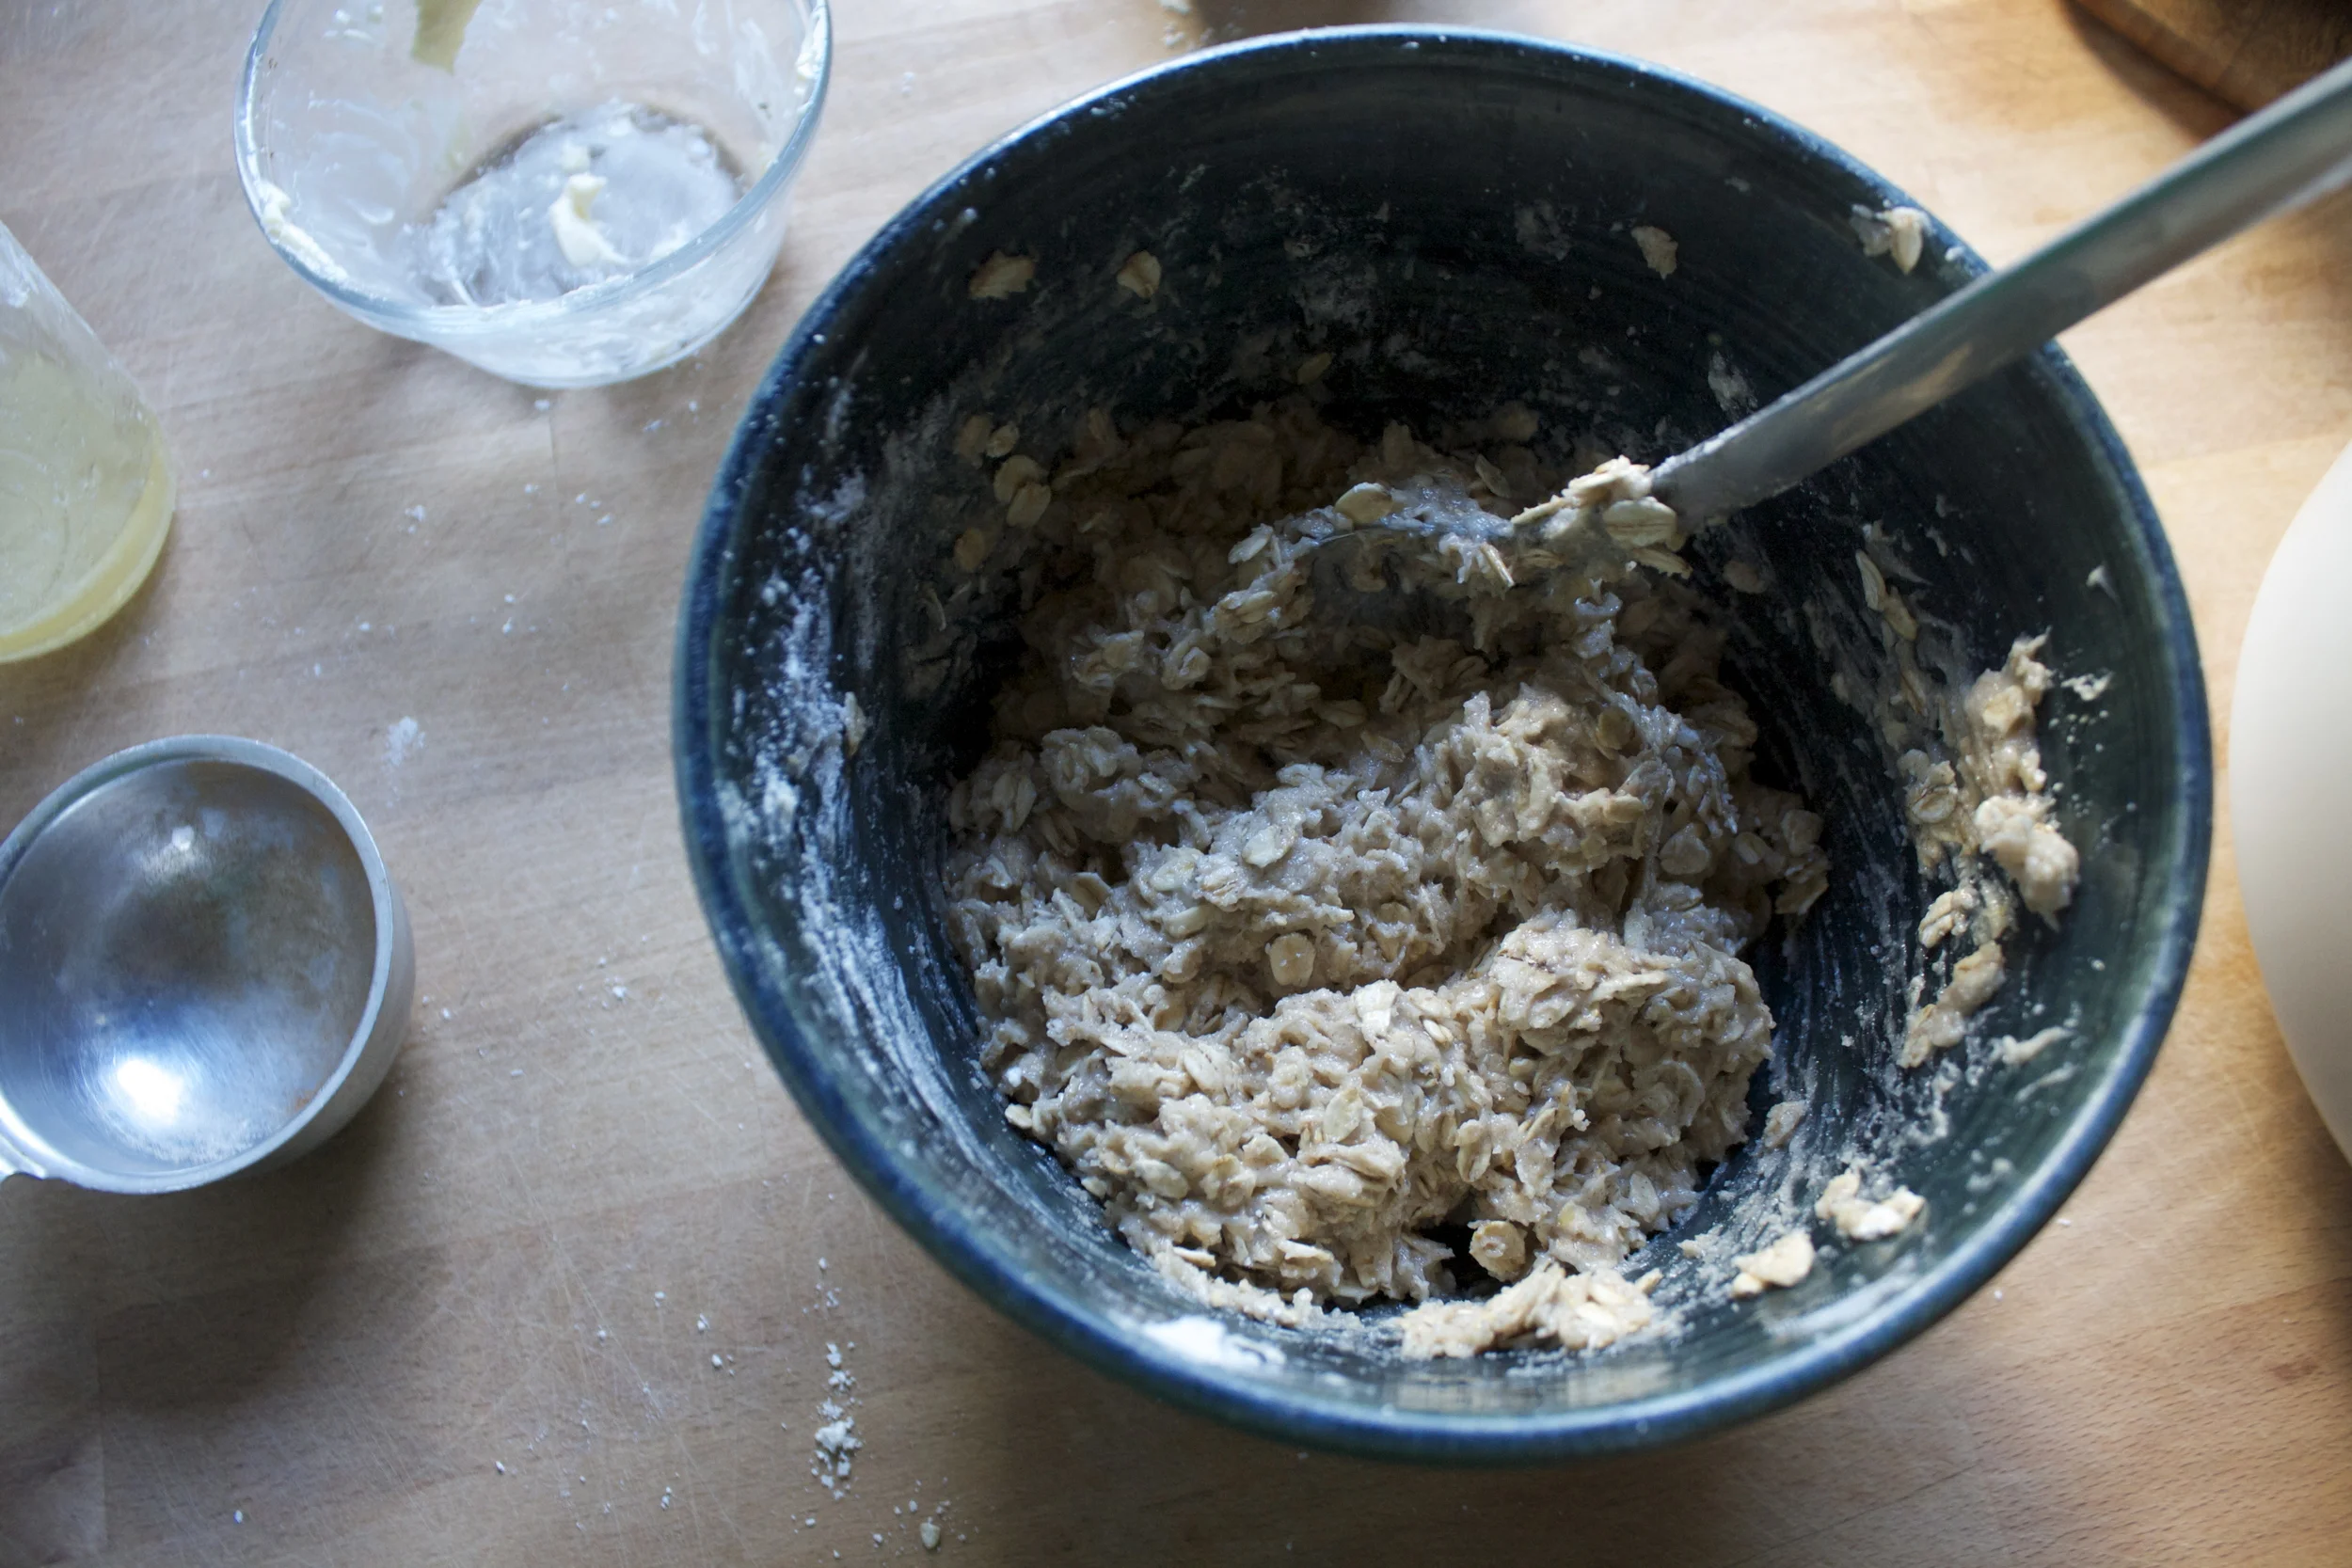
To start, chop up the parsnip into small chunks and stick them into a pot with enough water to fully semerge the chunks. Place on stove and bring to a boil then turn heat to medium high and let the parsnips cook.
Once the parsnip are fork tender, strain the water (reserving 3/4 cup of that water)%u00a0and puree the parsnip until smooth.
Take %u00a0that parsnip water and (once cooled a bit) place in bowl with the sugar and the yeast and mix it all around. Let sit for a few minutes until the yeast is visibly active.
Now dump the parsnip puree and melted butter into with the yeast and mix it all up
Salt, pepper, and flour mixed into a bowl
The yeast and parsnip mixture goes into the flour.%u00a0
And mix until it looks kind like this. When it’s no longer mixable with the spoon, dump dough out onto lightly floured surface and knead, adding a little bit of flout to the work surface when needed to prevent it from sticking..
And keep kneading unitl dough is all nice and smooth and pretty.
Dough then goes into a lightly oiled bowl %u00a0and is covered with a towl and let to sit for about an hour until the dough doubles in size.%u00a0
When the dough has doubled, dump onto the counter and cut into 12 equalish sized balls. (my balls were not equal)
The balls then go into a %u00a0large, lightly oiled pan. Let those sit for some more time,covered with a towel,%u00a0unit the dough %u00a0doubles again and the balls are all touching each other. They are ready to bake.. but right before you place them in the oven, brush the tops with a little melted earth balance.
And into the oven they go!!!
And when the rolls are all golden brown and smelling so nice,%u00a0remove from oven. Brush tops with some more melted earth balance and sprinkle with salt and more pepper.
Serve up to people you like
Have a n awesome day!
-C
Makes 12-16 rolls (depending on the size you make them)
To start, chop parnsips into chunks and place into a pot full of water. Bring to boil and cook until the parsnips are fork tender. Remove parsnips from water and measure out 3/4 cups of the water and set aside Take cooked parnsips and stick in a blender and puree until smooth. Measure out 3/4 cups of the puree.(any left eat as a snack)
Let both the puree and water cool enough that %u00a0you can stick a finger in it and its not to hot (or a thermometer that says its below 110.. your call).
Once cooled, stick the water, sugar, and yeast into a bowl, mix around, and let yeast activate. When yeast is foamy and clearly noted that it is not dead, dump in the parsnip mash, 2 tablespoons melted earth balance,and mix together. And then for the flour. Mix in the salt and pepper to the flour mix in the parsnip yeast mixture until a dough forms. The dough should be a little sticky, but still workable. If the dough seems to wet, add in another 1/4 cup flour at a time, just till it is bot overly sticky.%u00a0
Dump dough onto a floured surface and knead for about 5 minutes, or until the dough starts to look glossy and ihas an elastic quality to it.%u00a0
Stick dough into a greased bowl, over with a towel, and place in a warm place for about an hour, or until the dough has doubled in size. Once doubles, dump dough out onto counter and using a dough cutter or serrated knife, cut the dough into 12 -16 equal pieces Take each piece and roll into a ball and place into a greased 9×12 baking pan. Once all balls are in, cover with towel and let the dough rise %u00a0until the balls are doubled in size and are toughing each other,for another 30 minutes or so. Preheat the oven to 350. Once the rolls are double again, right before you stick them into the oven, brush tops with melted earth balance
Place rolls into preheated oven and baked for about 25 minutes or until the tops are golden brown.%u00a0
Remove and right away, brush on any remaining earth balance to the tops and sprinkle with salt and pepper.
Serve right away!%u00a0
Best eaten the day the are made.. but will last a few days in an air tight container.%u00a0
I have been strategic about the roots and veggies that I have chosen to bring home the past few weeks.(My farm lets you pick what you want) %u00a0I know what I can buy at the store, things like carrots and potatoes, so I have been passing those up, but the roots like beets and celeriac%u2026 I have been bringing home baskets of those and hoarding them in the fridge and basement in preparation for the laps in farm fresh food and knowing that if I want to by these at the store it s going to coast me a million dollars %u00a0a pound. (a for real million dollars)
Yup, lots of roots around here, especially celeriac root which is fantastic.%u00a0I am kind of obsessed with celeriac, with its fibrous, knobby exterior, soft but almost meaty texture inside, and a flavor that %u00a0is close to celery but so much better. %u00a0I don’t know why it has taken me so long to do a posting featuring this amazing root vegetable %u00a0(I eat it almost every day)
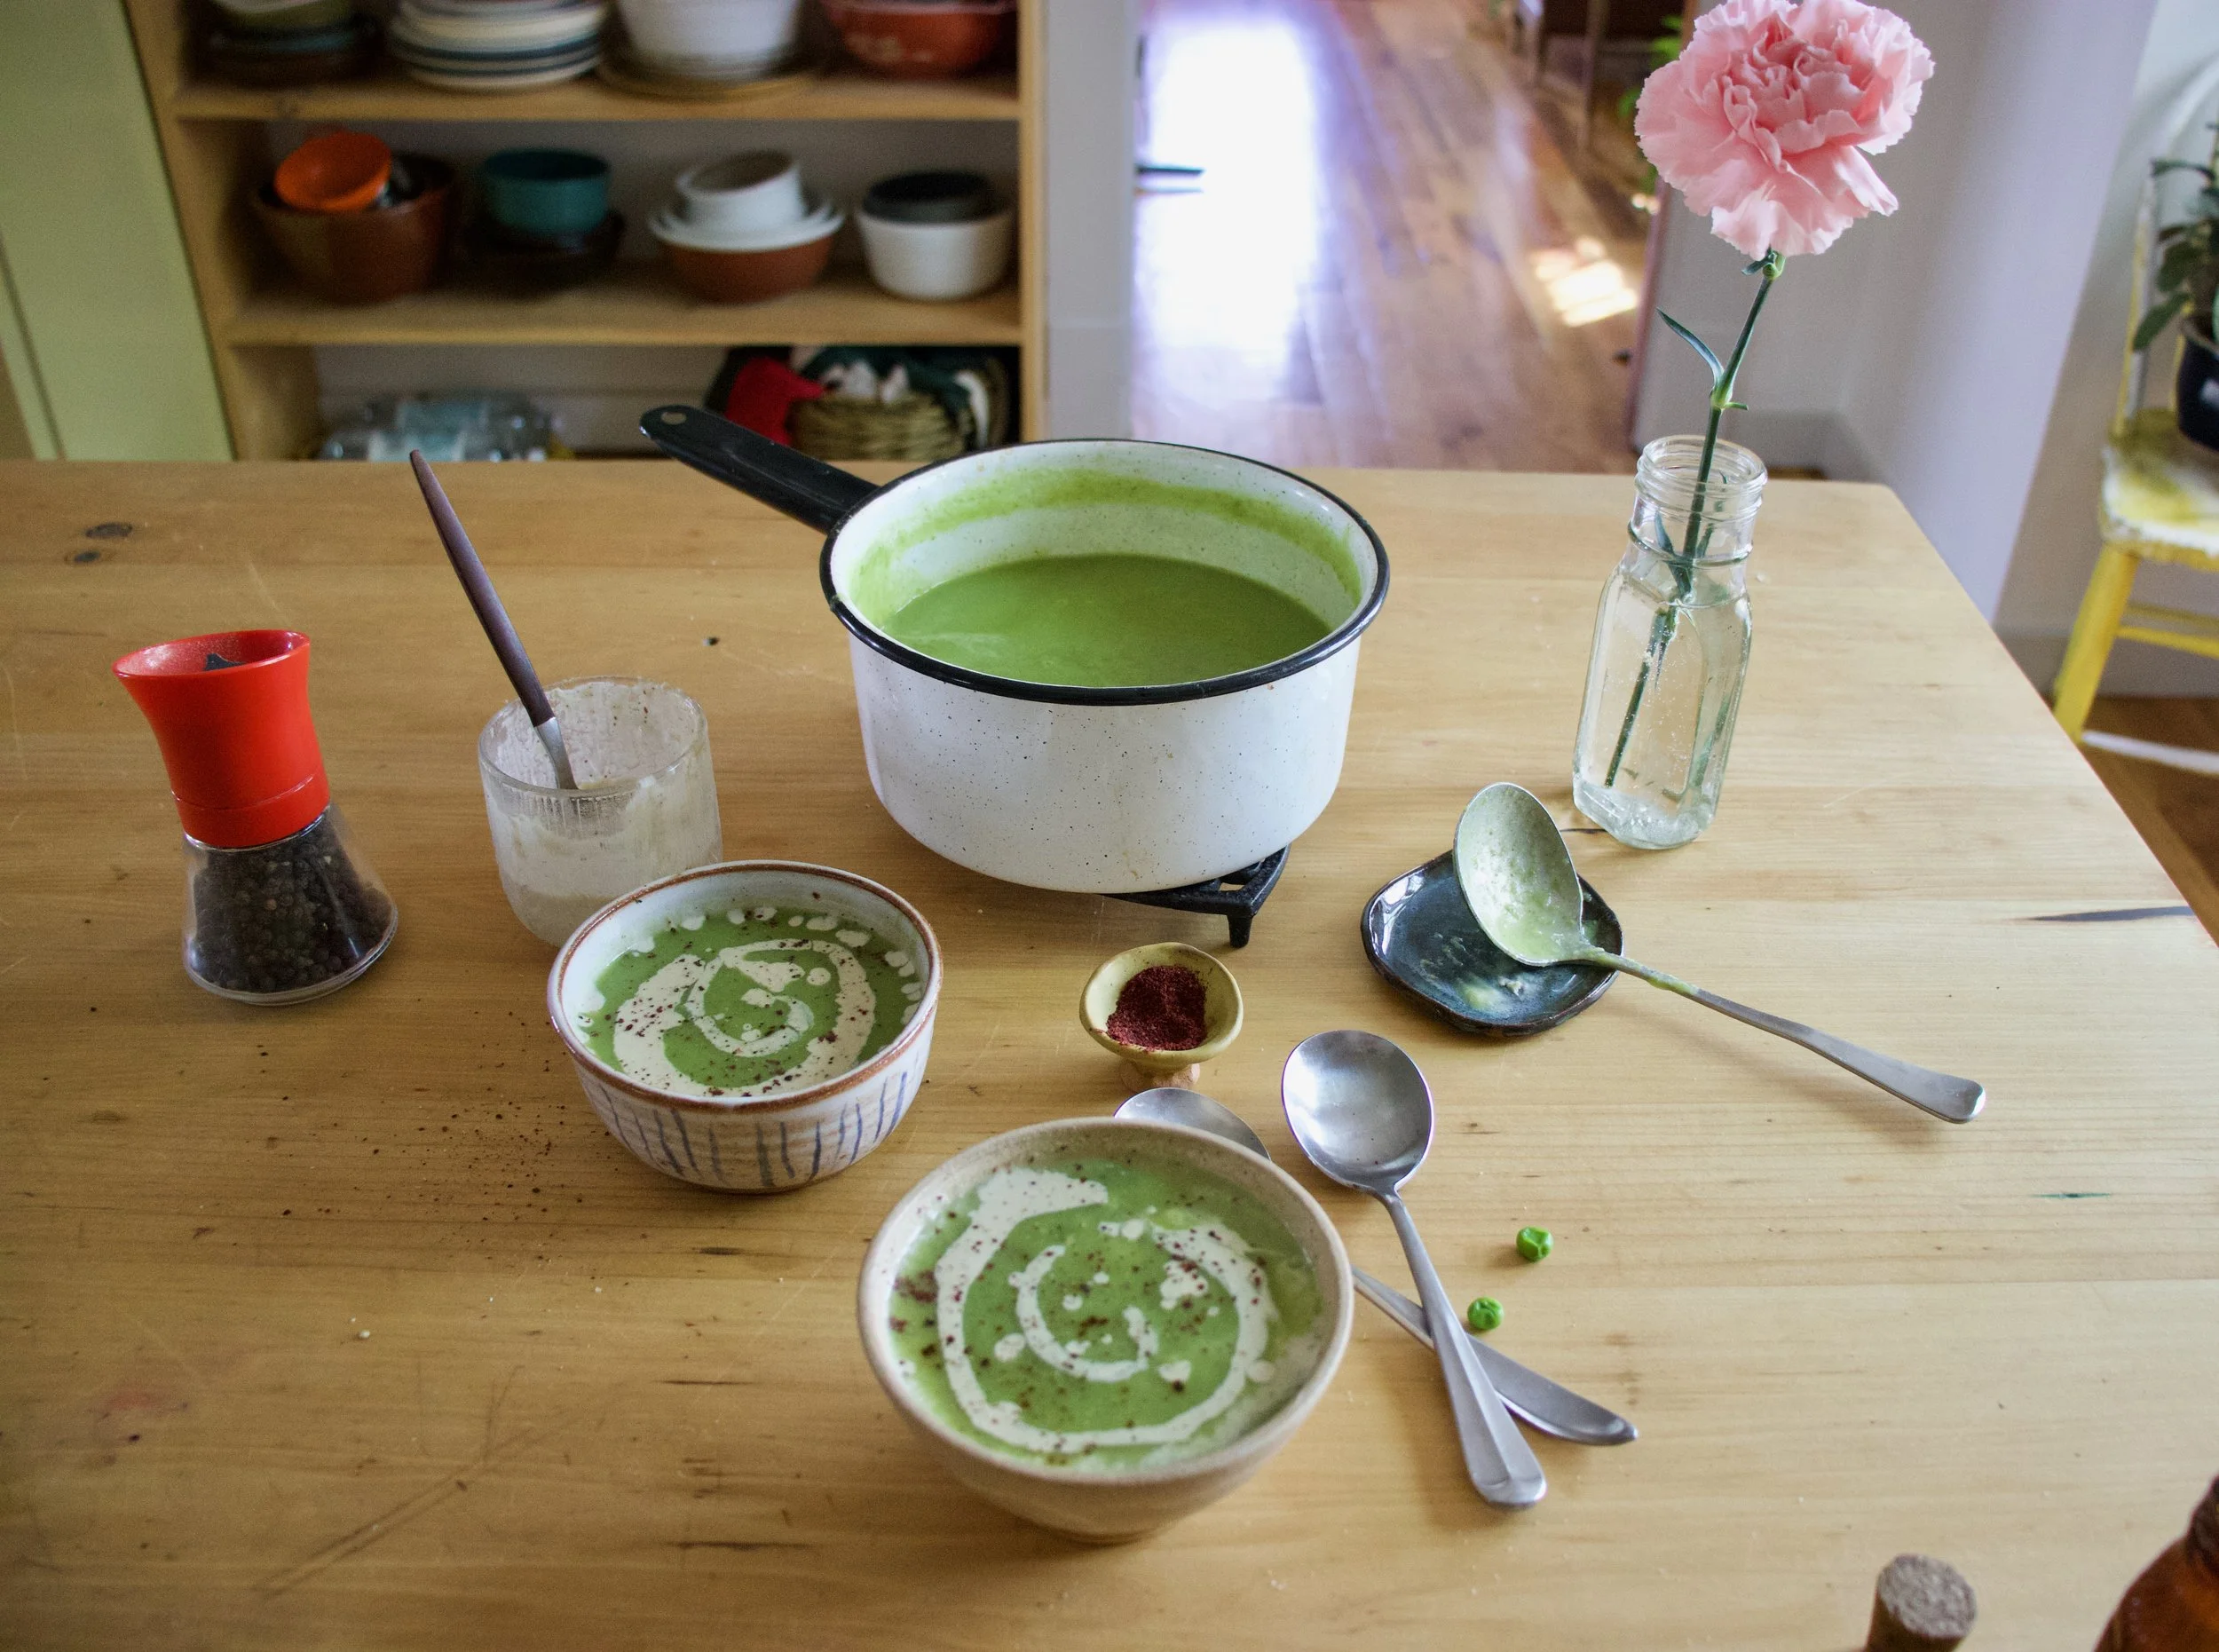
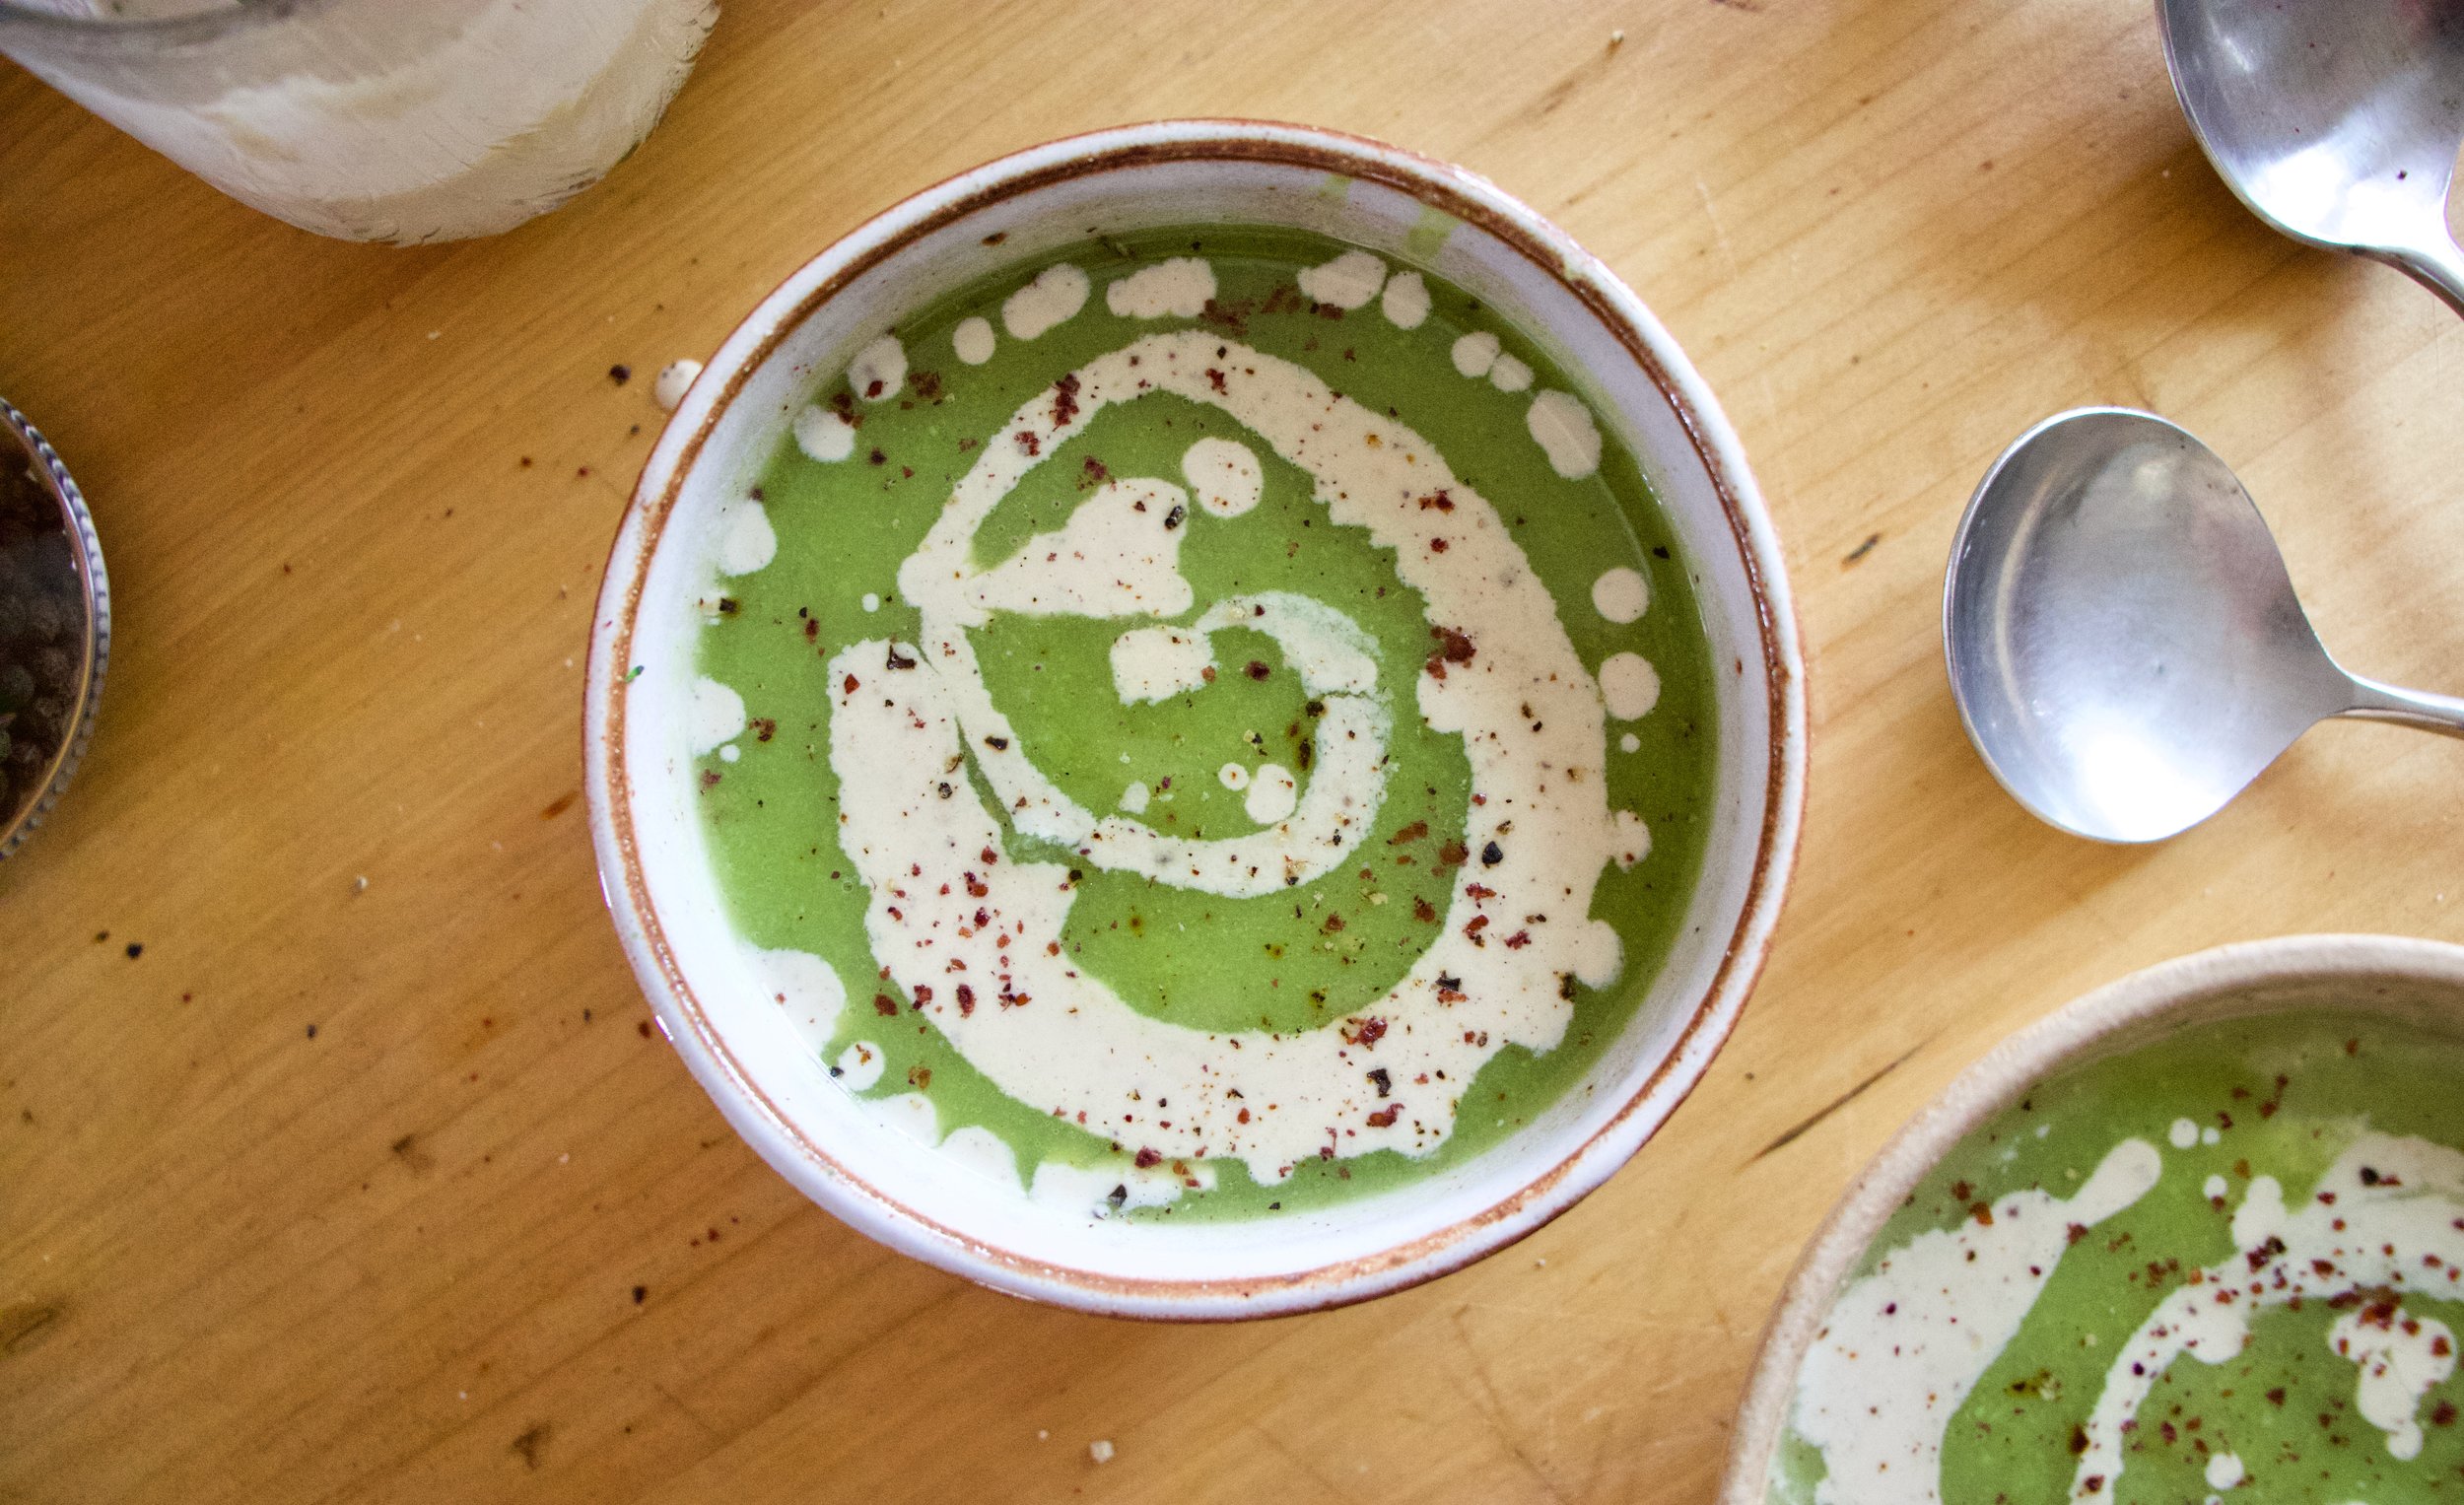
So here, an amazingly tasty, hearty but not heavy, celeriac recipe. %u00a0Perfect for spring and the change into summer%u2026. Mustard roasted celeriac with an fanatic split peas gravy that will have you licking you bowl clean.
*Note. I don’t peel my celeriac root. I really enjoy the fibrous exterior but realize that some don’t(The mister does not like it) so peel it if you want.%u00a0
While the gravy is cooking, %u00a0take the celeriac rounds and brush each side with yellow mustard, sprinkle with pepper, and place on a baking sheet. Stick into the oven to roast for about 25 minutes, flipping the rounds after about 10 minutes.
Serve with the fanciest knife and fork you can find. Extra yellow mustard and sriracha sauce are great condiments to have close by.
Happy Tuesday!
-C
Mustard Roasted Celeriac with Split Pea Gravy
Preheat oven to 400 degrees
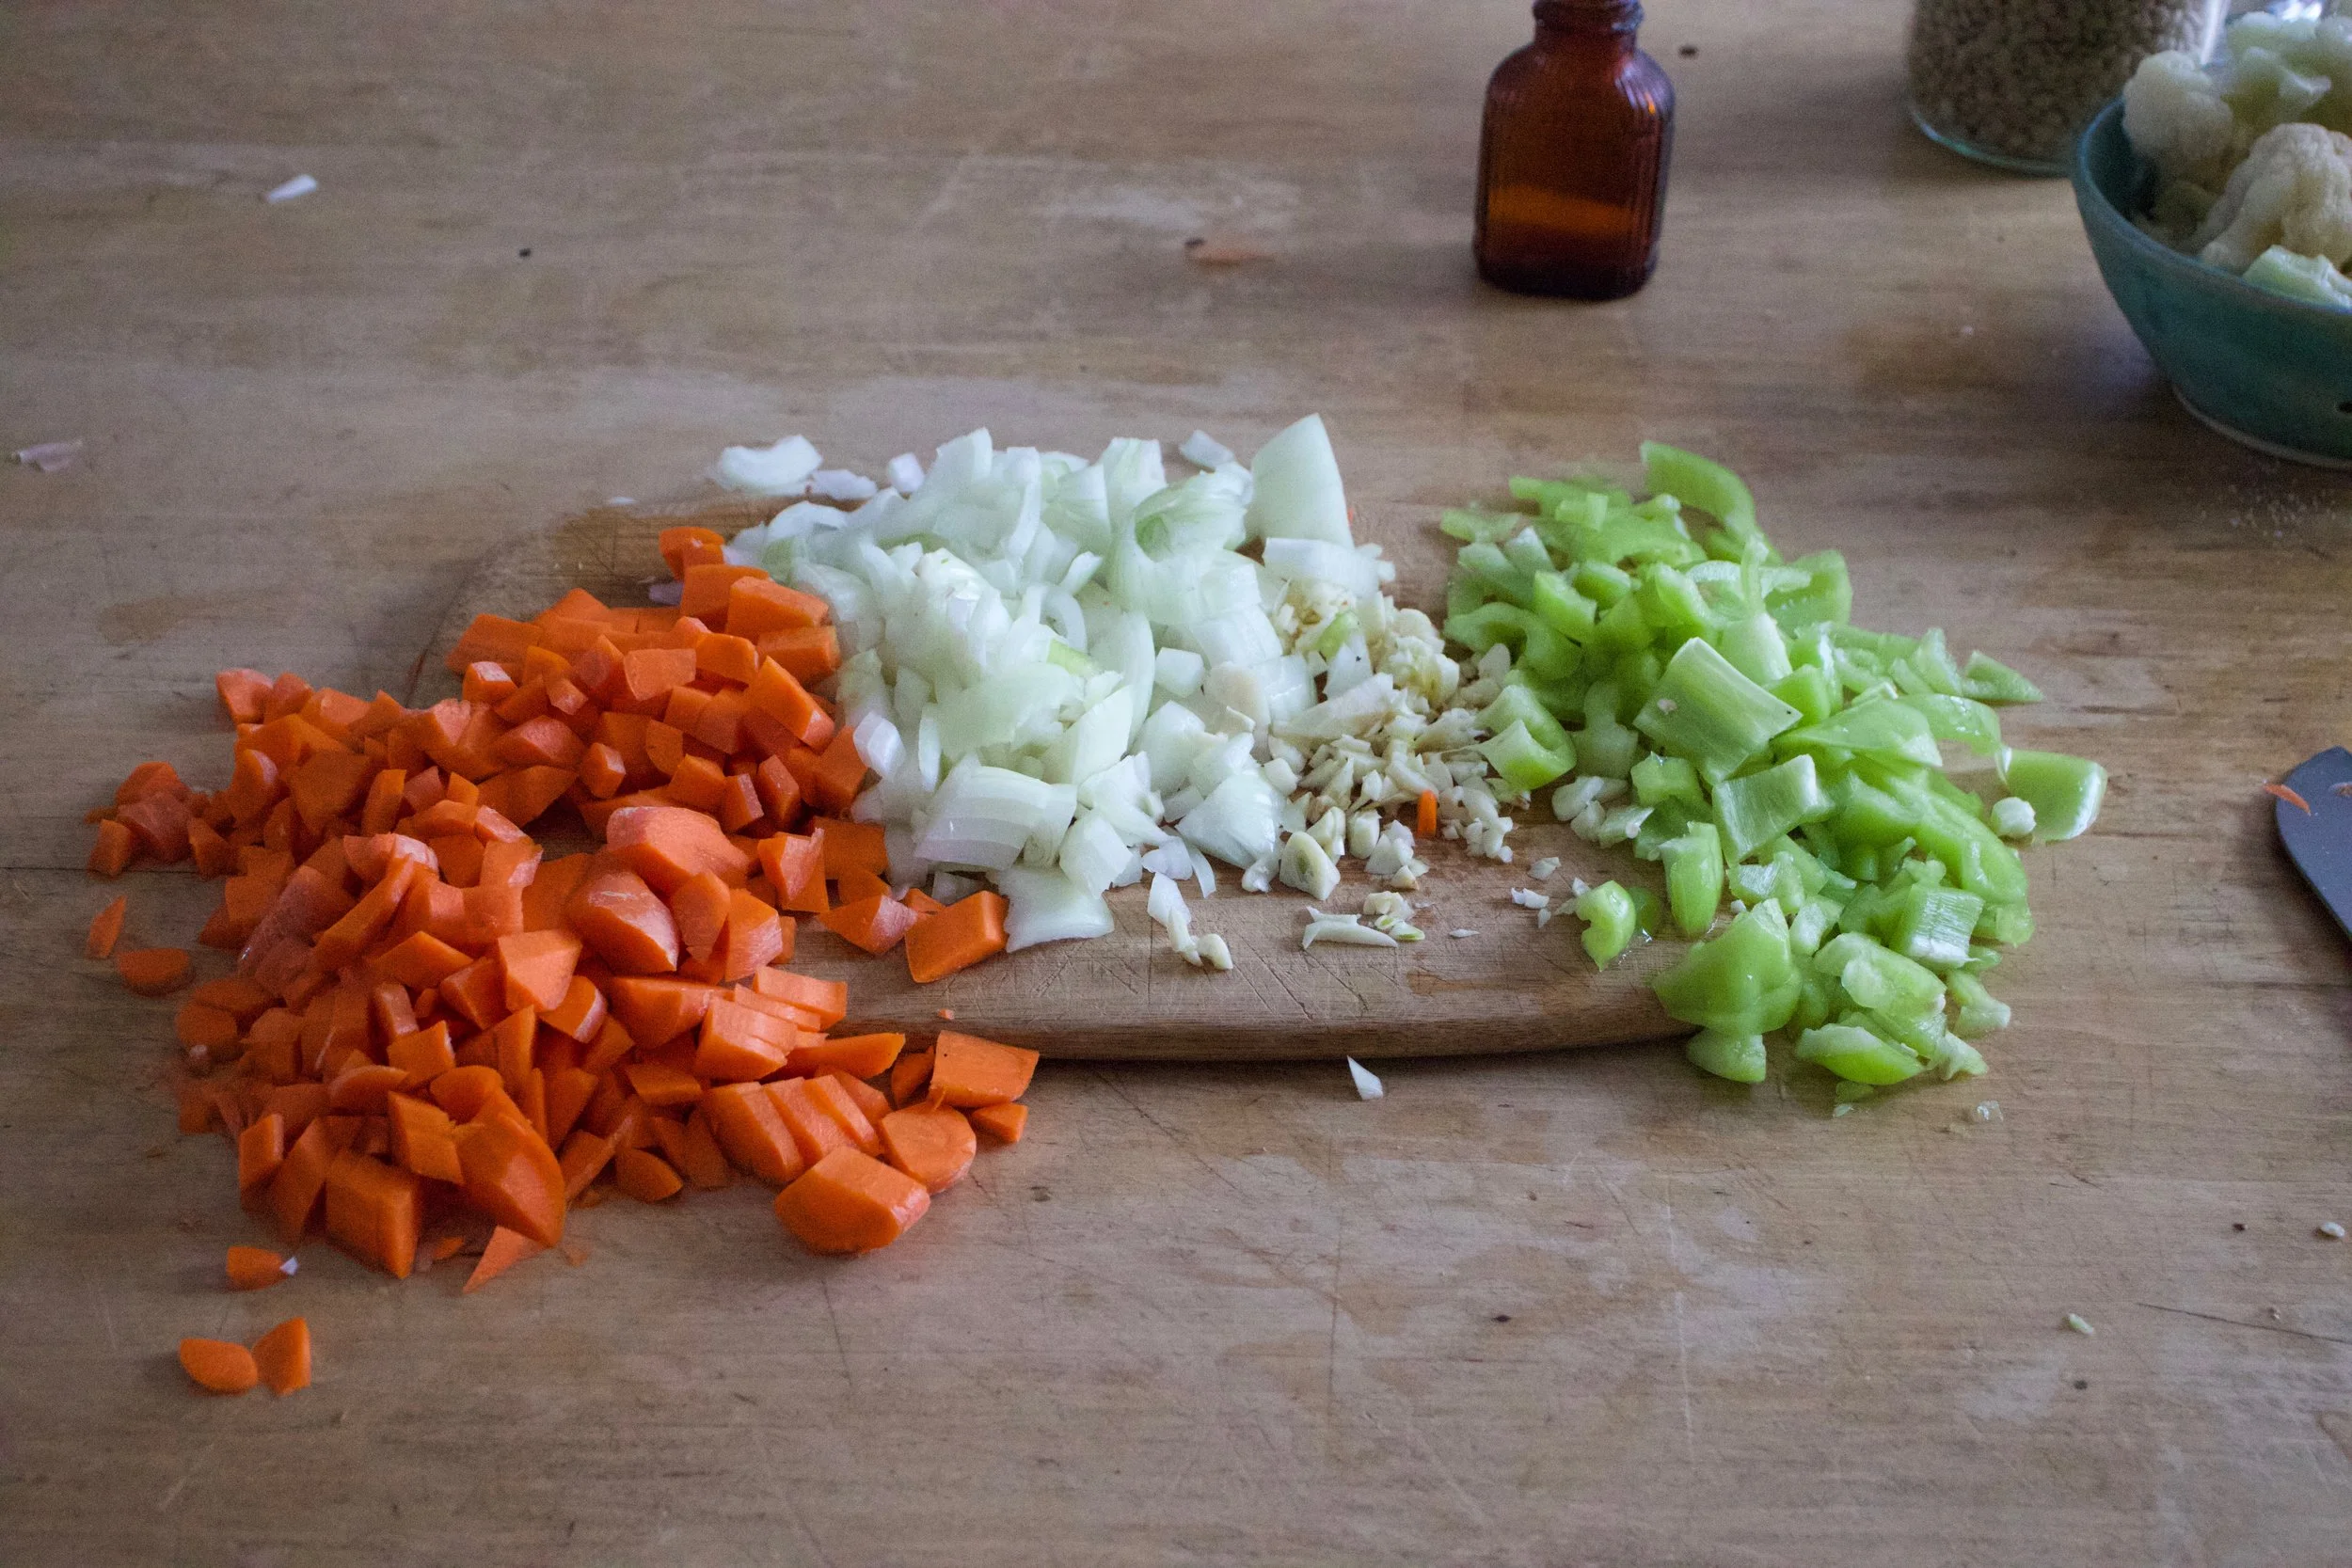
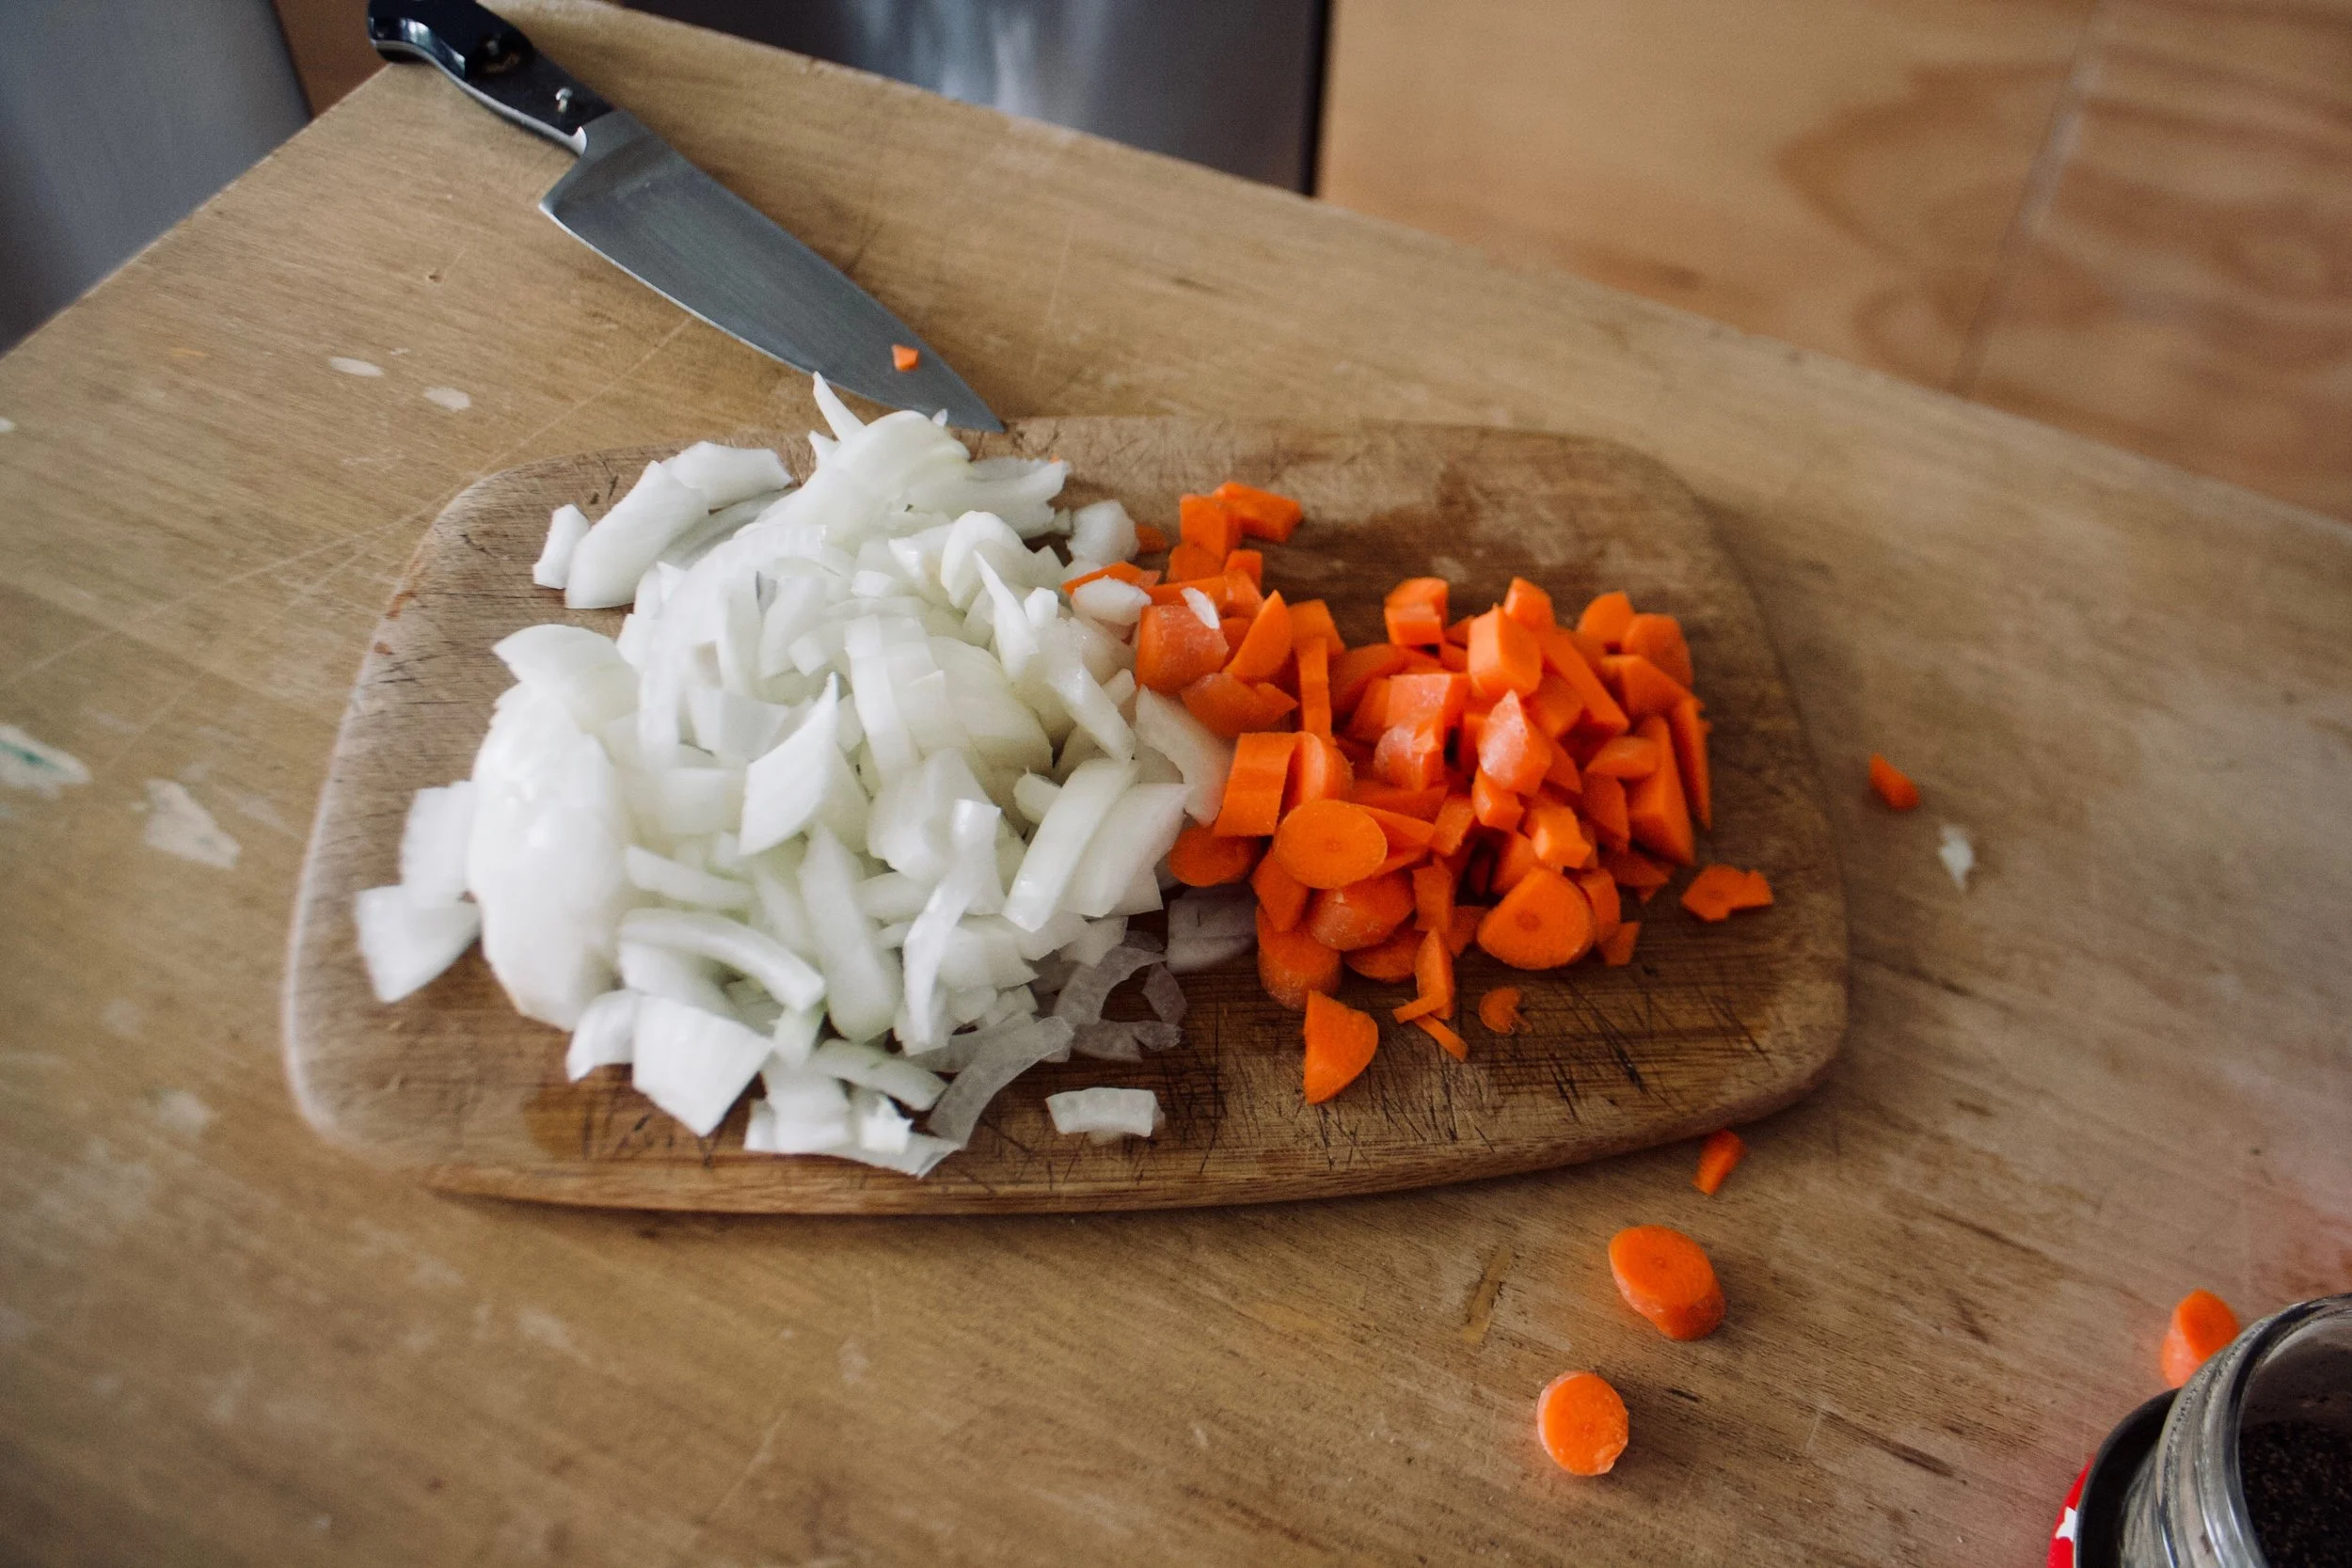
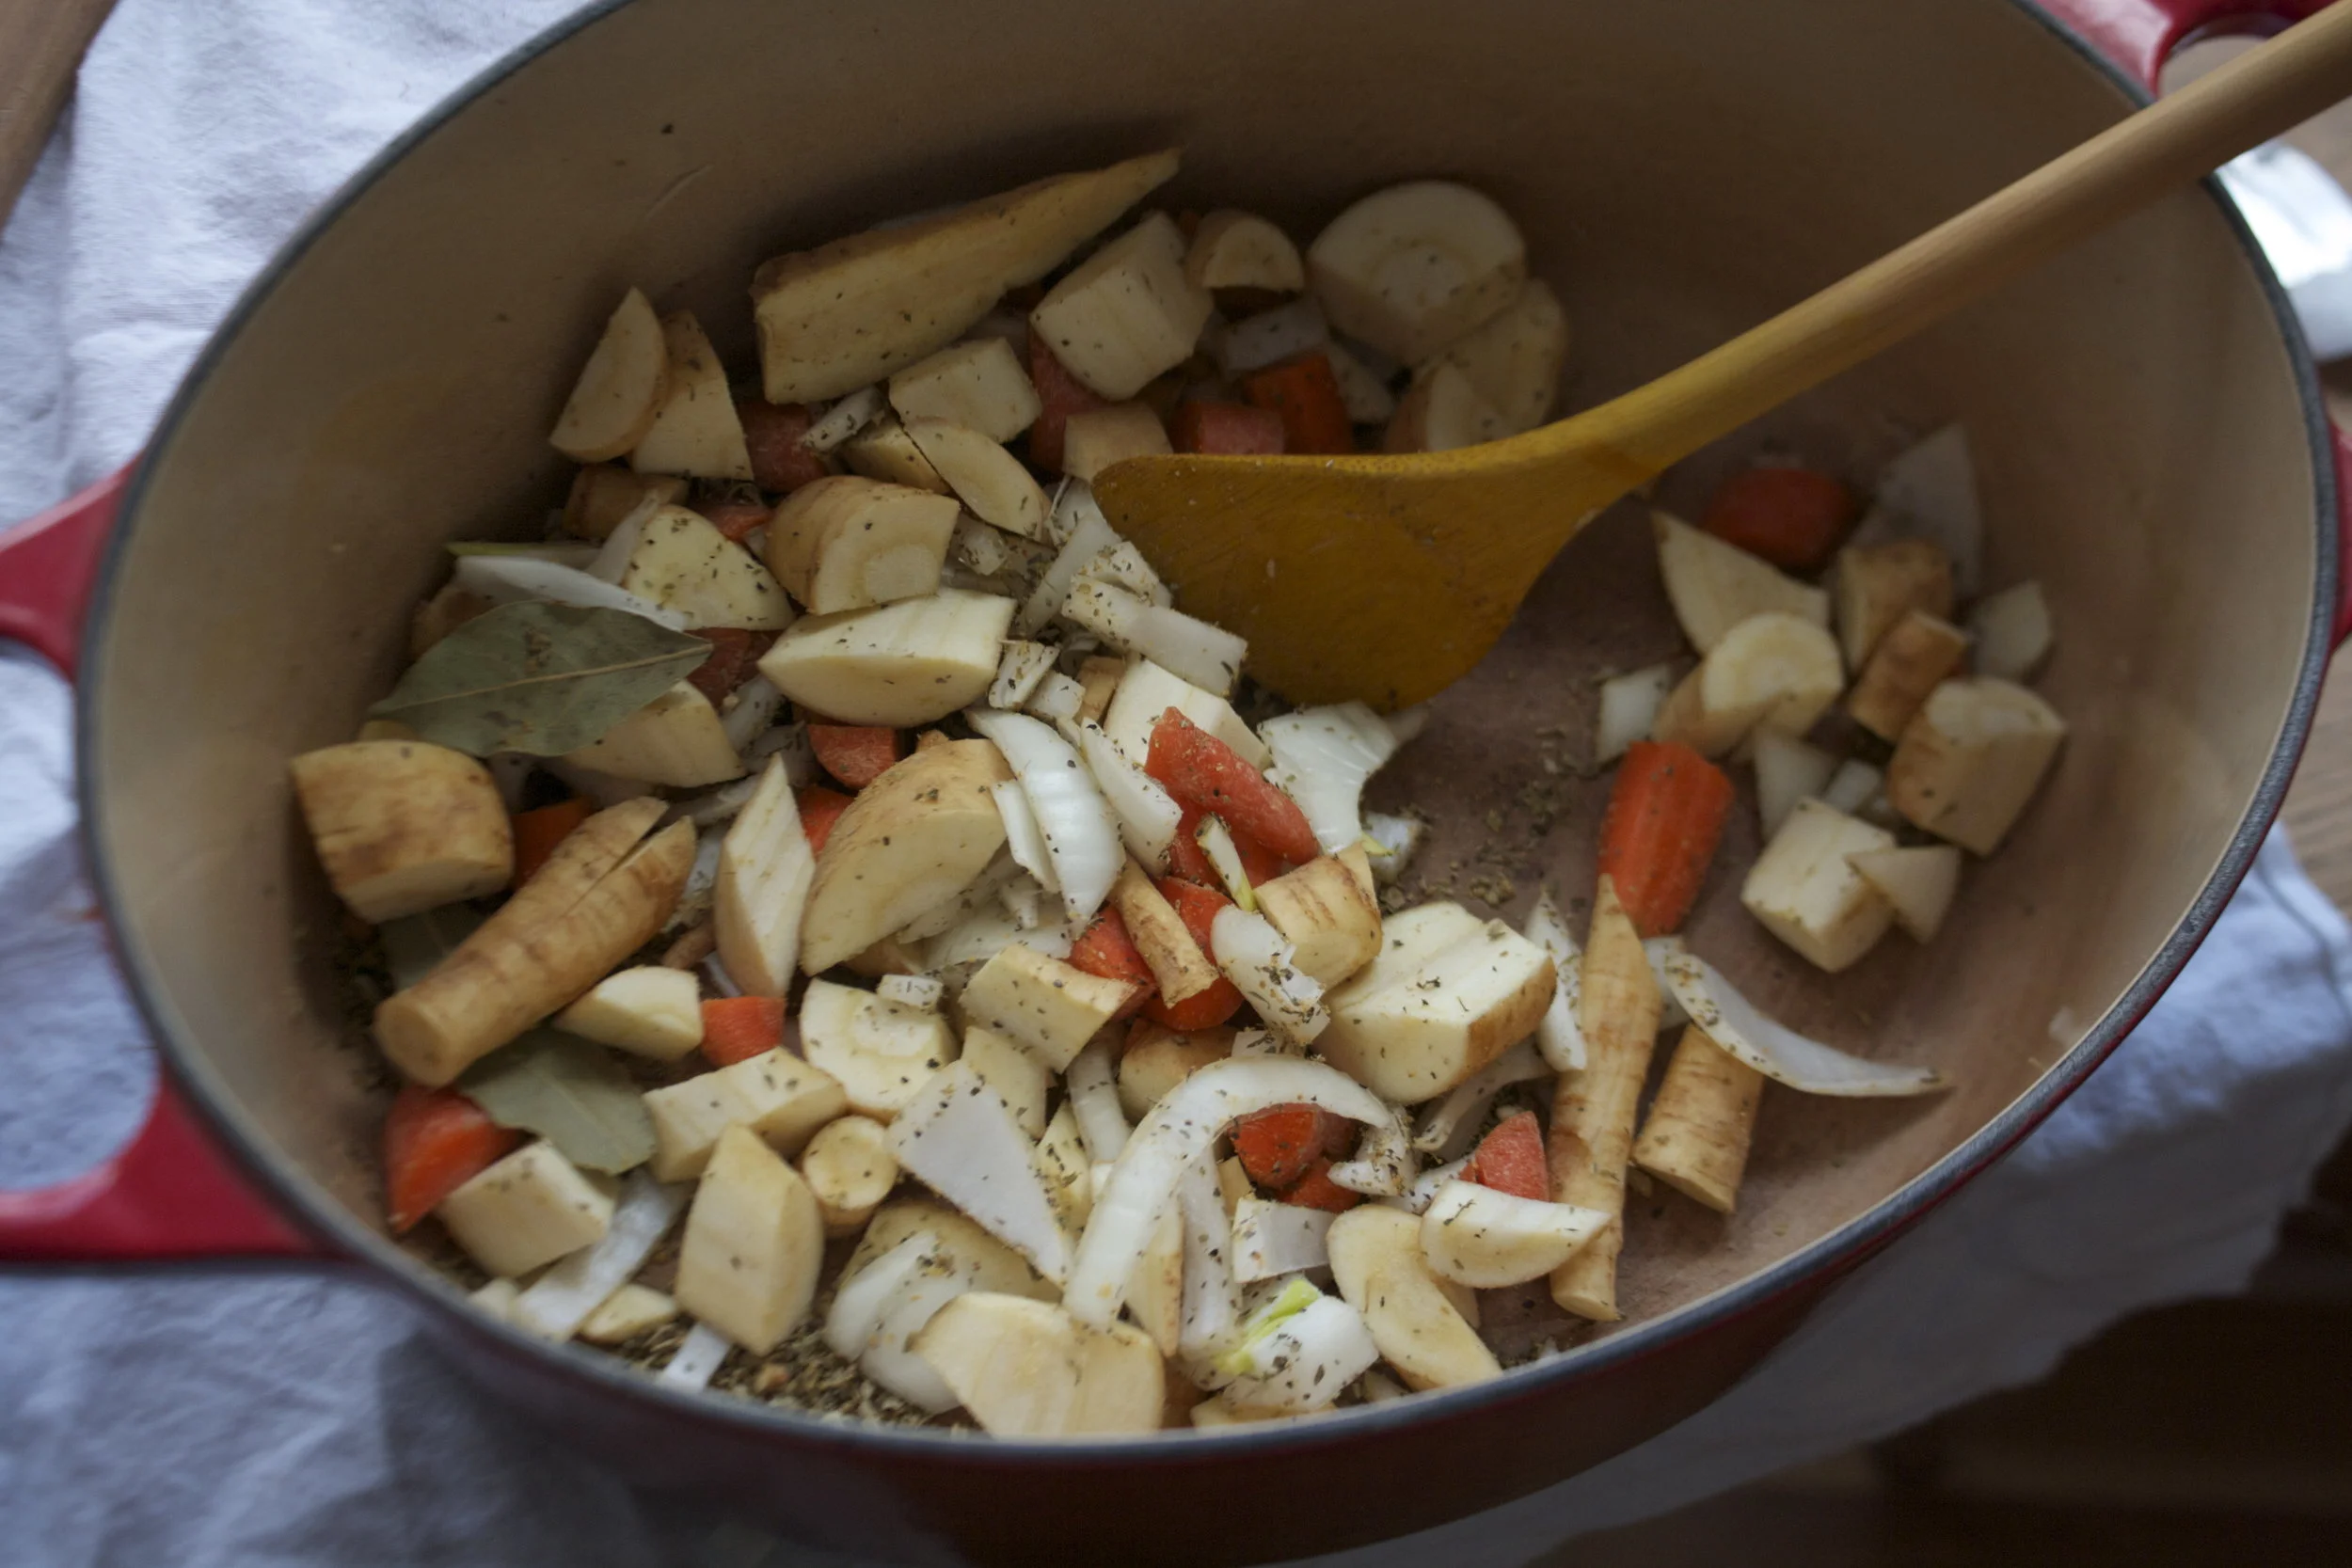
Small dice the carrot, parsnip and onion and throw into a large pot. Spinkle with salt and pepper, add in the thyme and bay leaf and add a splash of water. Stick on stove on medium heat and stir. Let cook until the veggies become soft and fragrant. Now add in the split peas and 2 cups of water. Bring to a boil then cover and turn heat down to medium low. Let cook until the split peas become tender (about 25 minutes) string on occasion and adding more water if the peas are not completely summered while cooking.
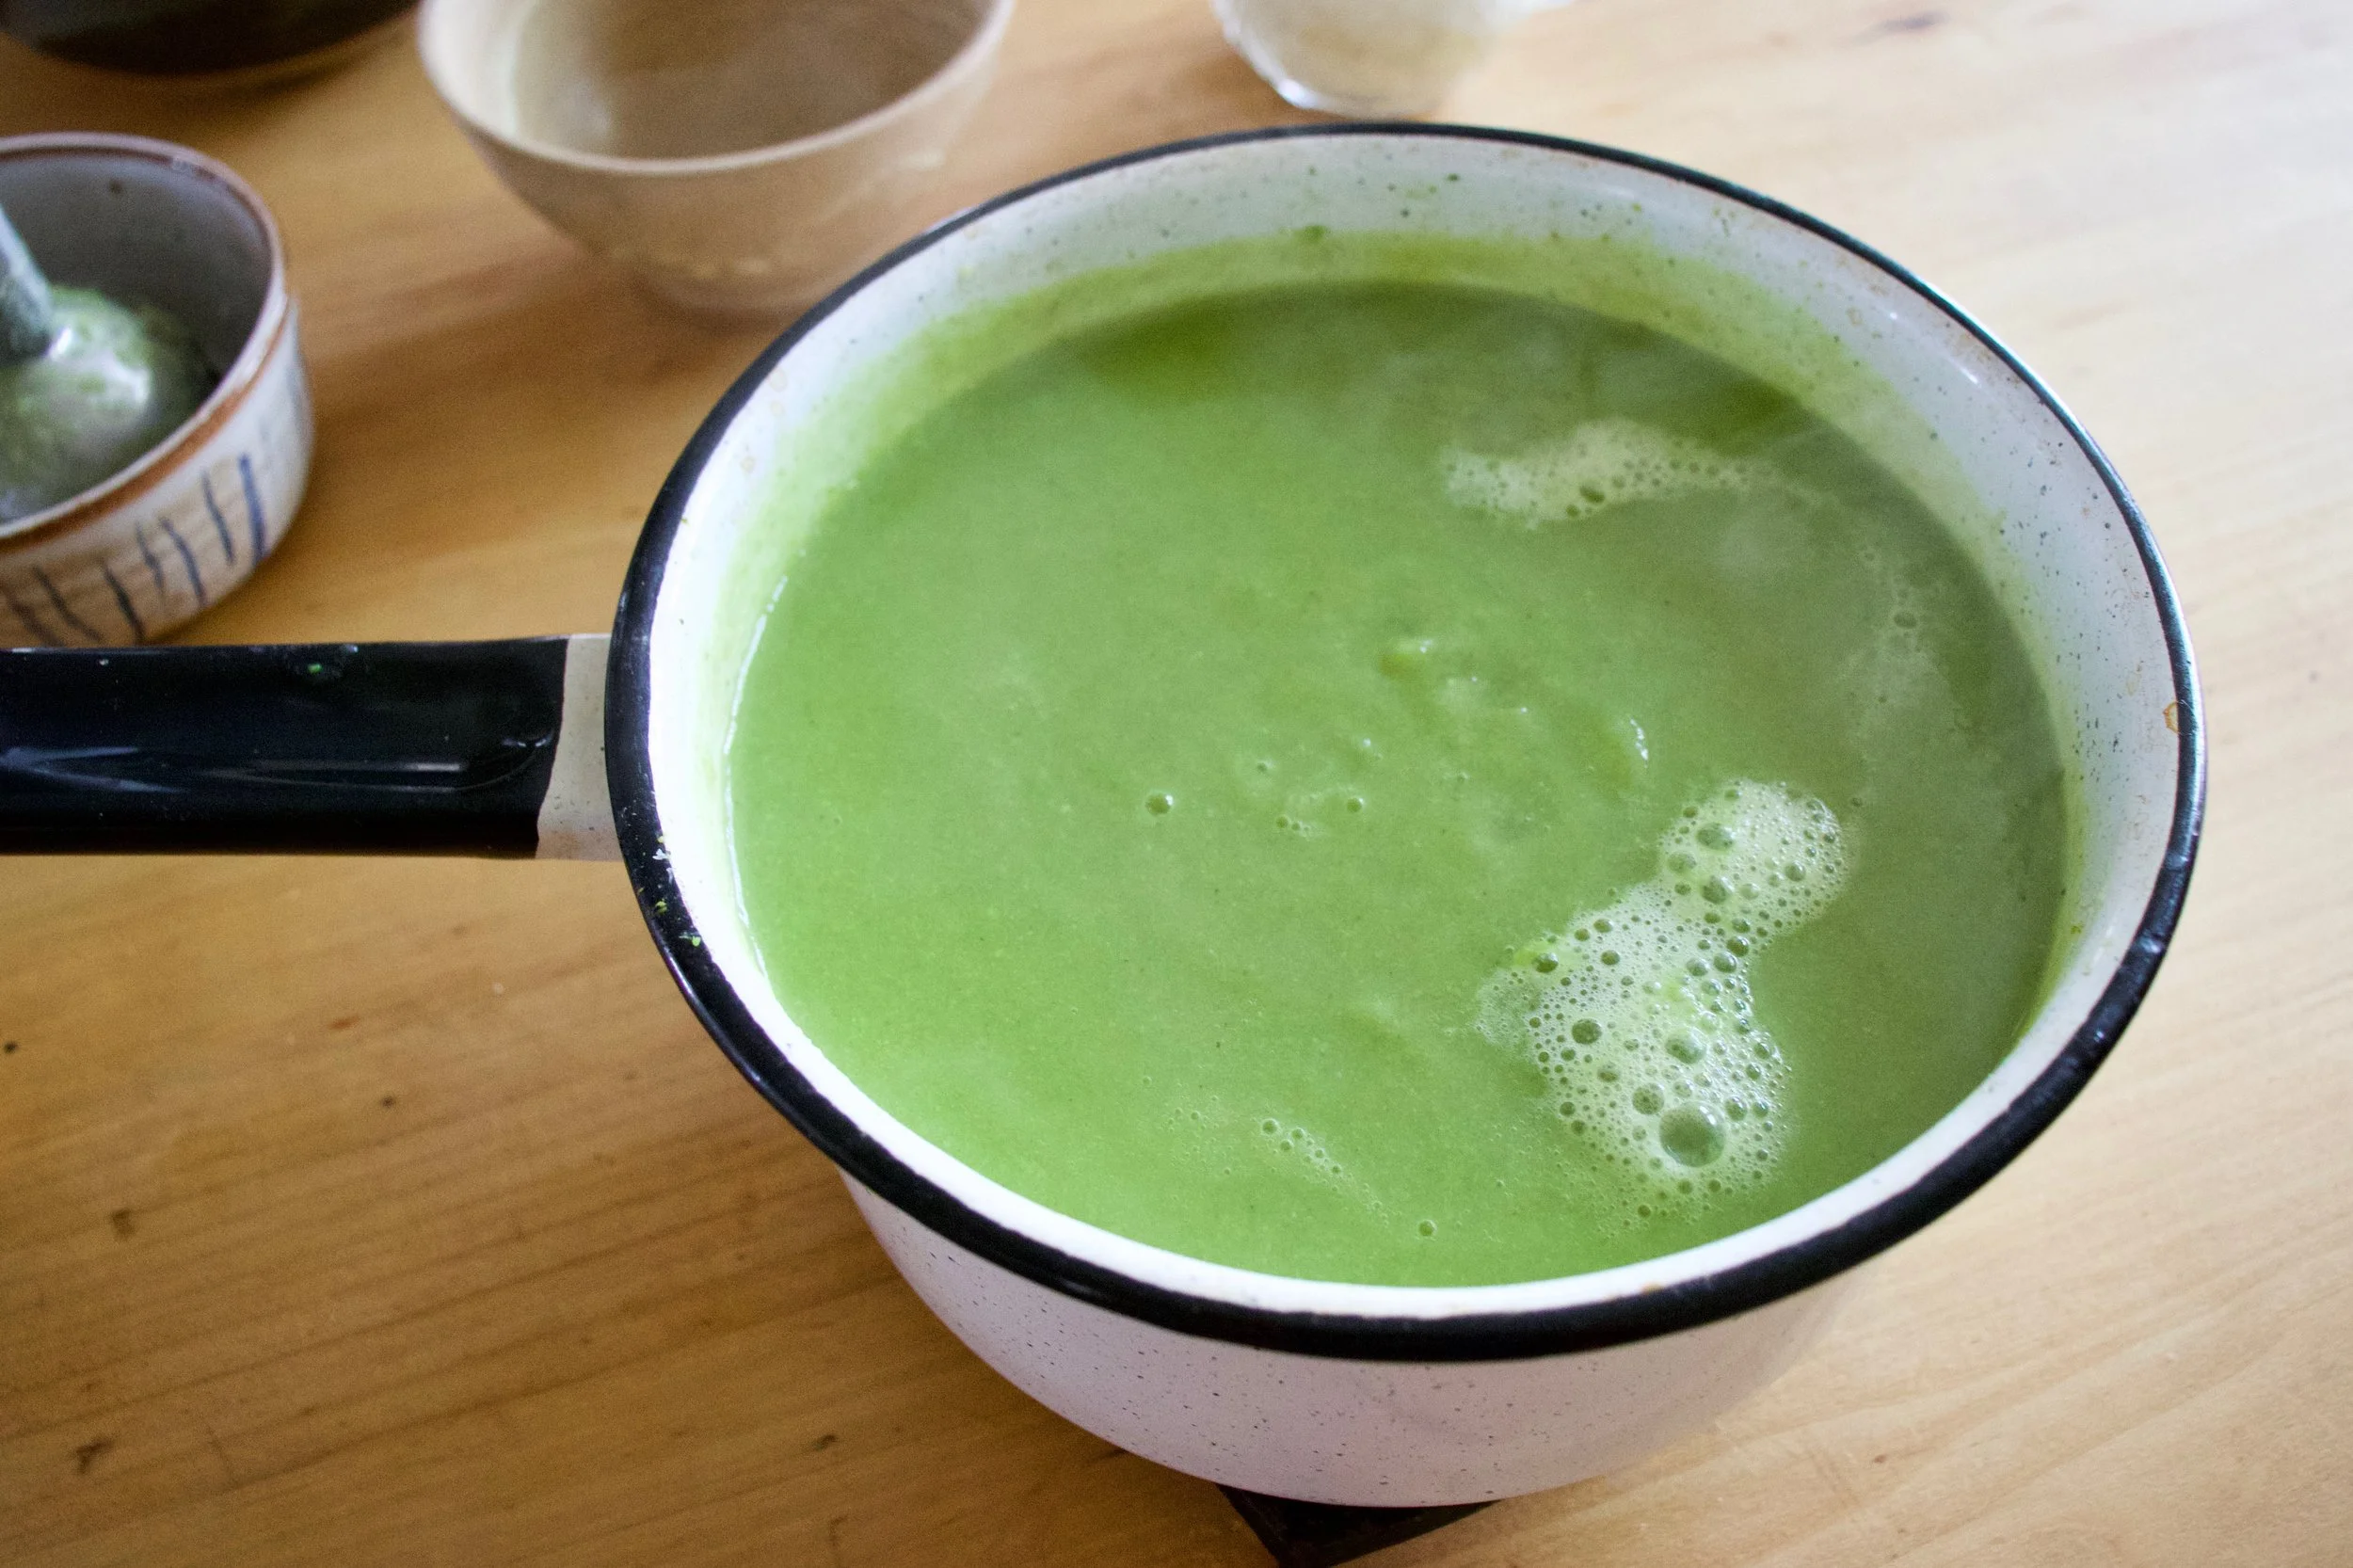
Once the peas are tender, let cool for a few minutes, remove bay leaf, and either dump into a blender or blend with an immersion blender until nice and creamy. If gravy seems to thick, add in more water.%u00a0
Scrub or peel celeriac roots and slice them into 1/2 inch think rounds. Place on a baking sheet and brush mustard on both sides and spindle with pepper. Stick into oven for about 10 minutes, flip, then back into the oven for another 15 or so minutes, or unit the celeriac is tender.
When the celeriac is done remove from oven and %u00a0stick a few rounds on a bed of spinach (or not, or any kind of grain or green you like) Top with a hearty helping of the gravy and toss on some chopped up tomatoes.
Eat with at knife and fork like a fancy person.