
THE LOVELY CRAZY
Let%u2019s talk about how soup is the perfect food. It can be light and fresh, hearty and deep, chunky or smooth. You can eat it with a spoon, or somtime a fork if warranted, or just drink it from a mug. It%u2019s usually a one pot meal, a small pot for one, a big pot for many. Make a pot of soup and eat some now and save some for later. It freezes amazingly well. Got a few extra sad carrots and wilted greens? Toss them into a pot with whatever you have on hand, maybe those veggies scraps and you got yourself a meal. Want something more filling, just add in some grains. Feeling sick, warm soup will make it all better. Feeling fresh and springy, well soup is there for you too. Seriously soup, you can do anything. If I could, I would marry you. %u2665%ufe0f
This soup is one of this velvety smooth, light but rich, delicious beyond delicious soups. A fresh spring time soup. Not to hearty or heavily spiced. Super rich and creamy and flavorful. Bright ass green which makes it amazing in itself, but then with a nice tangy sumac tahini swirl on top, well it is just about the most perfect soup. I made to share, which I did, (and everyone licked their bowls clean) but then hoarded the little bit left over and ate it cold for a late afternoon snack. That is another thing about soup, you can eat is cold and it is still amazing.
Tasty and delicious, and nutritious. This soup does it all.
To the soup!

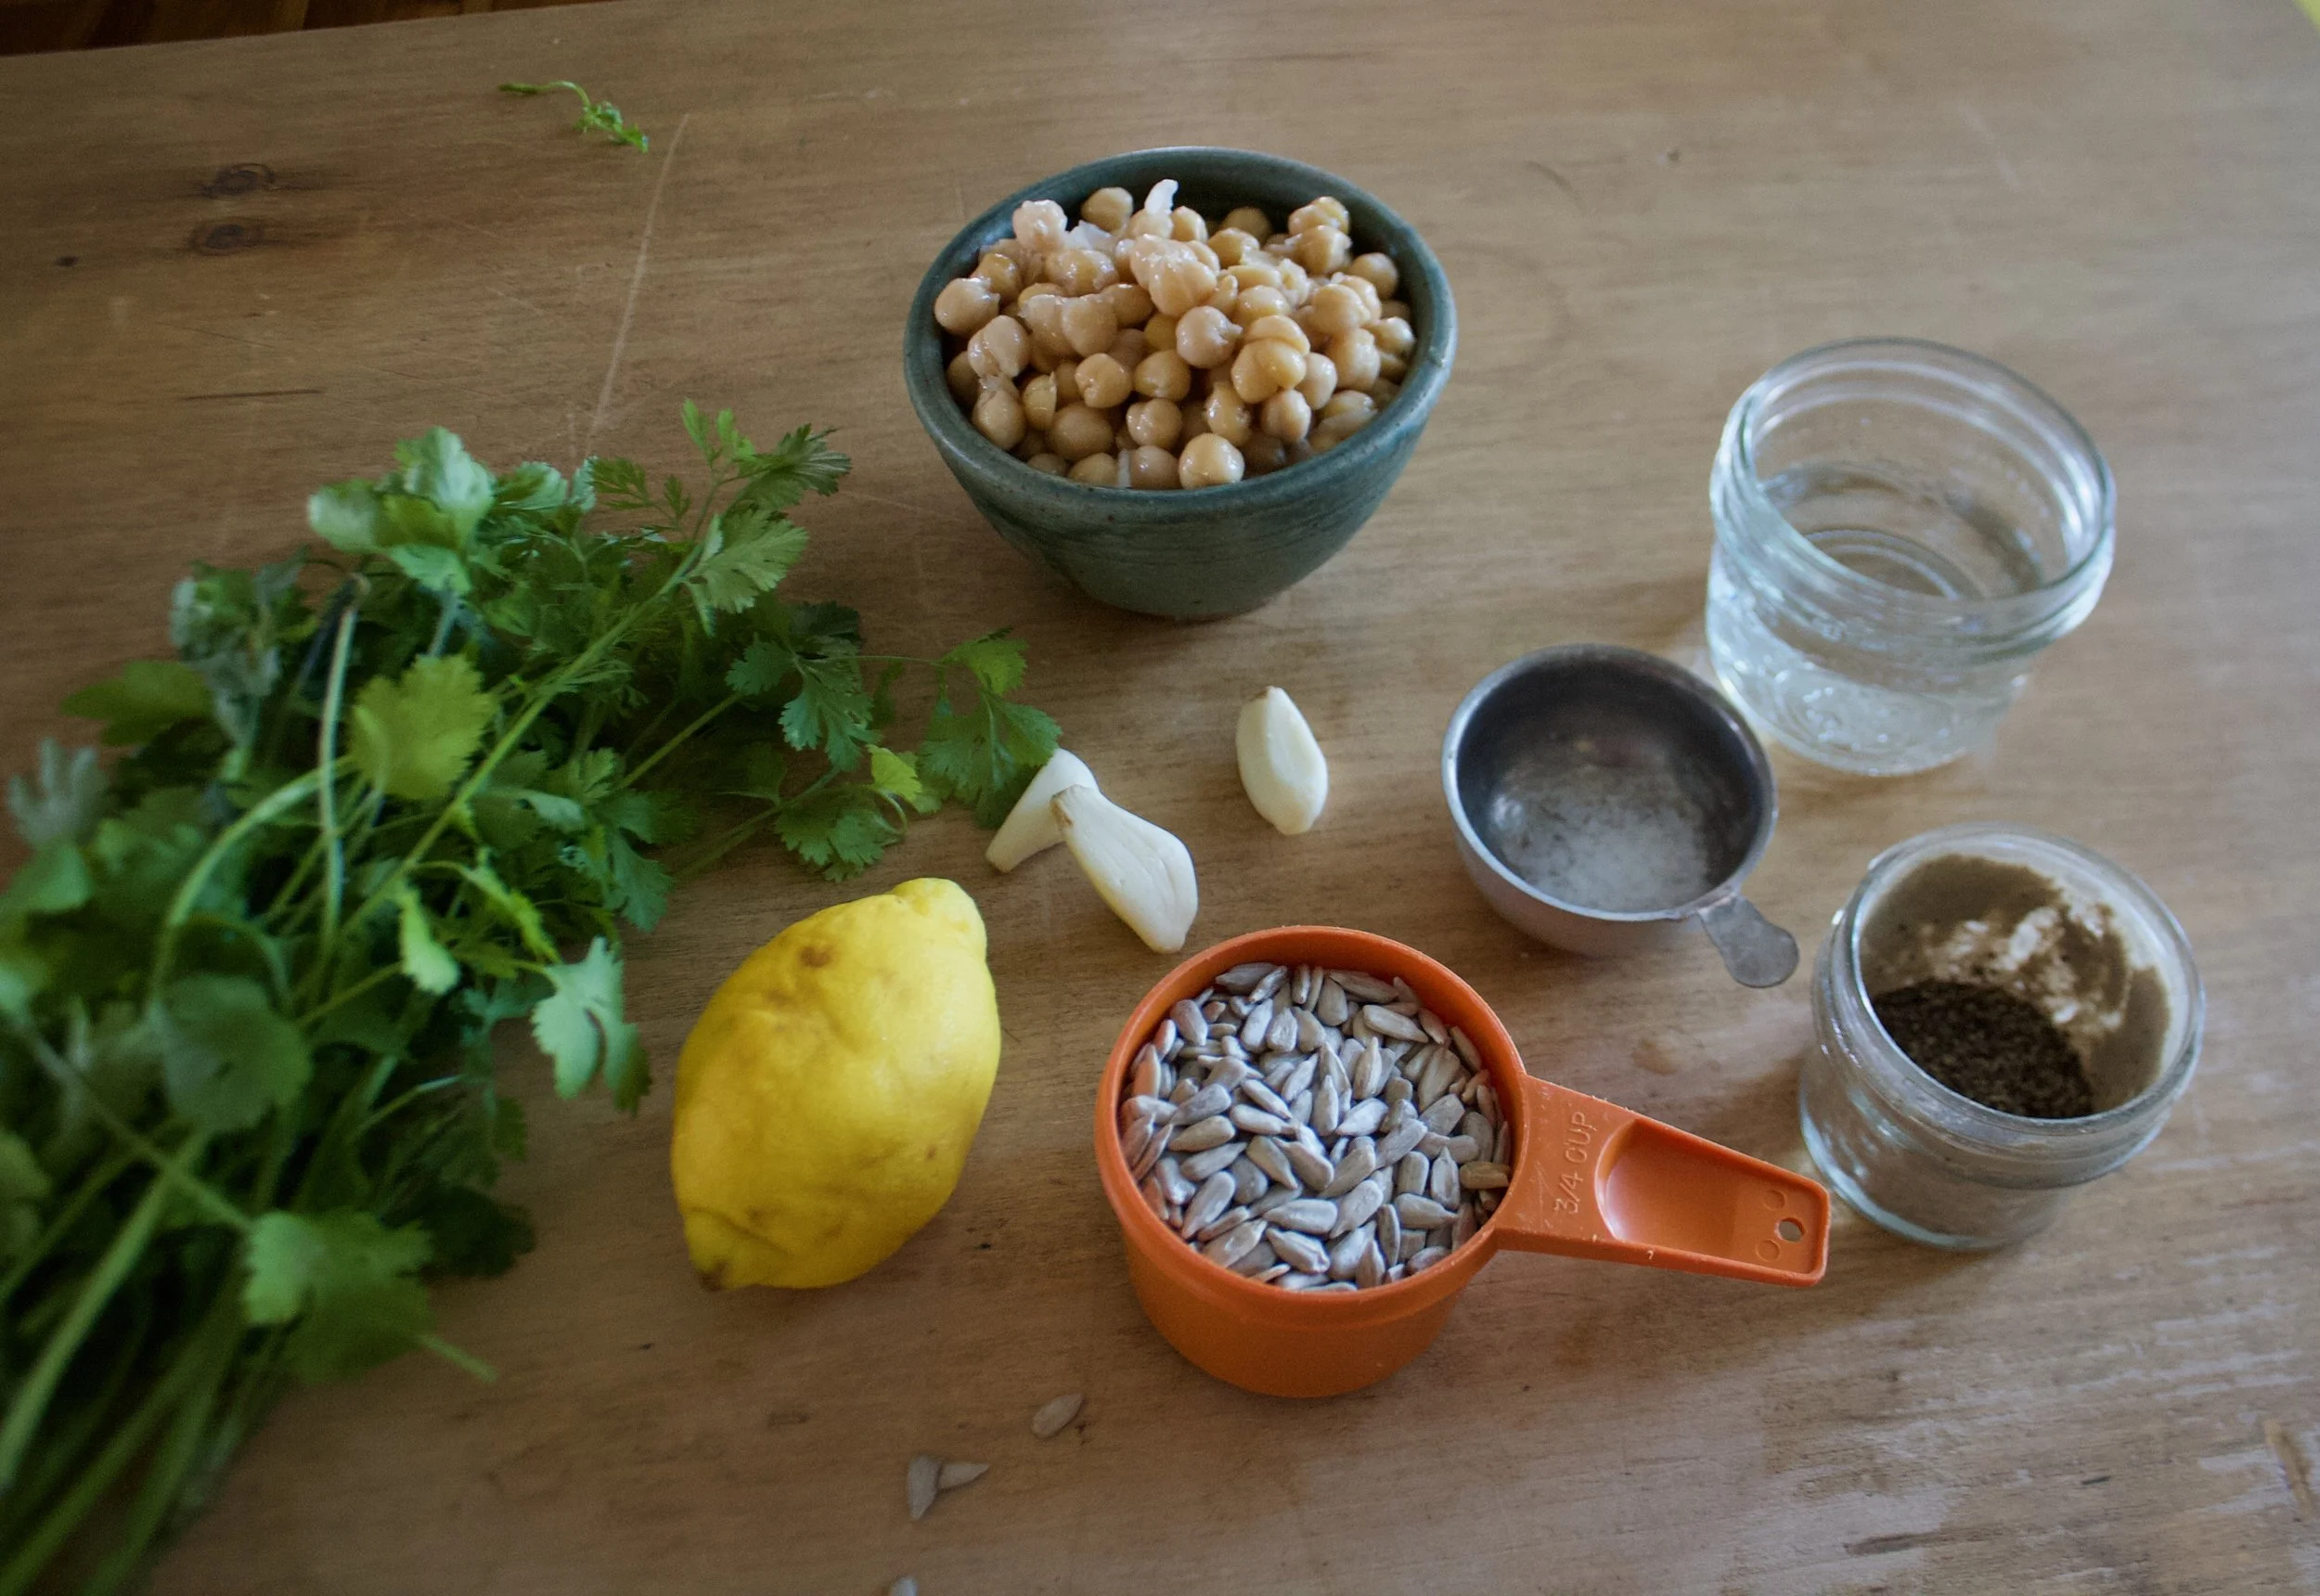
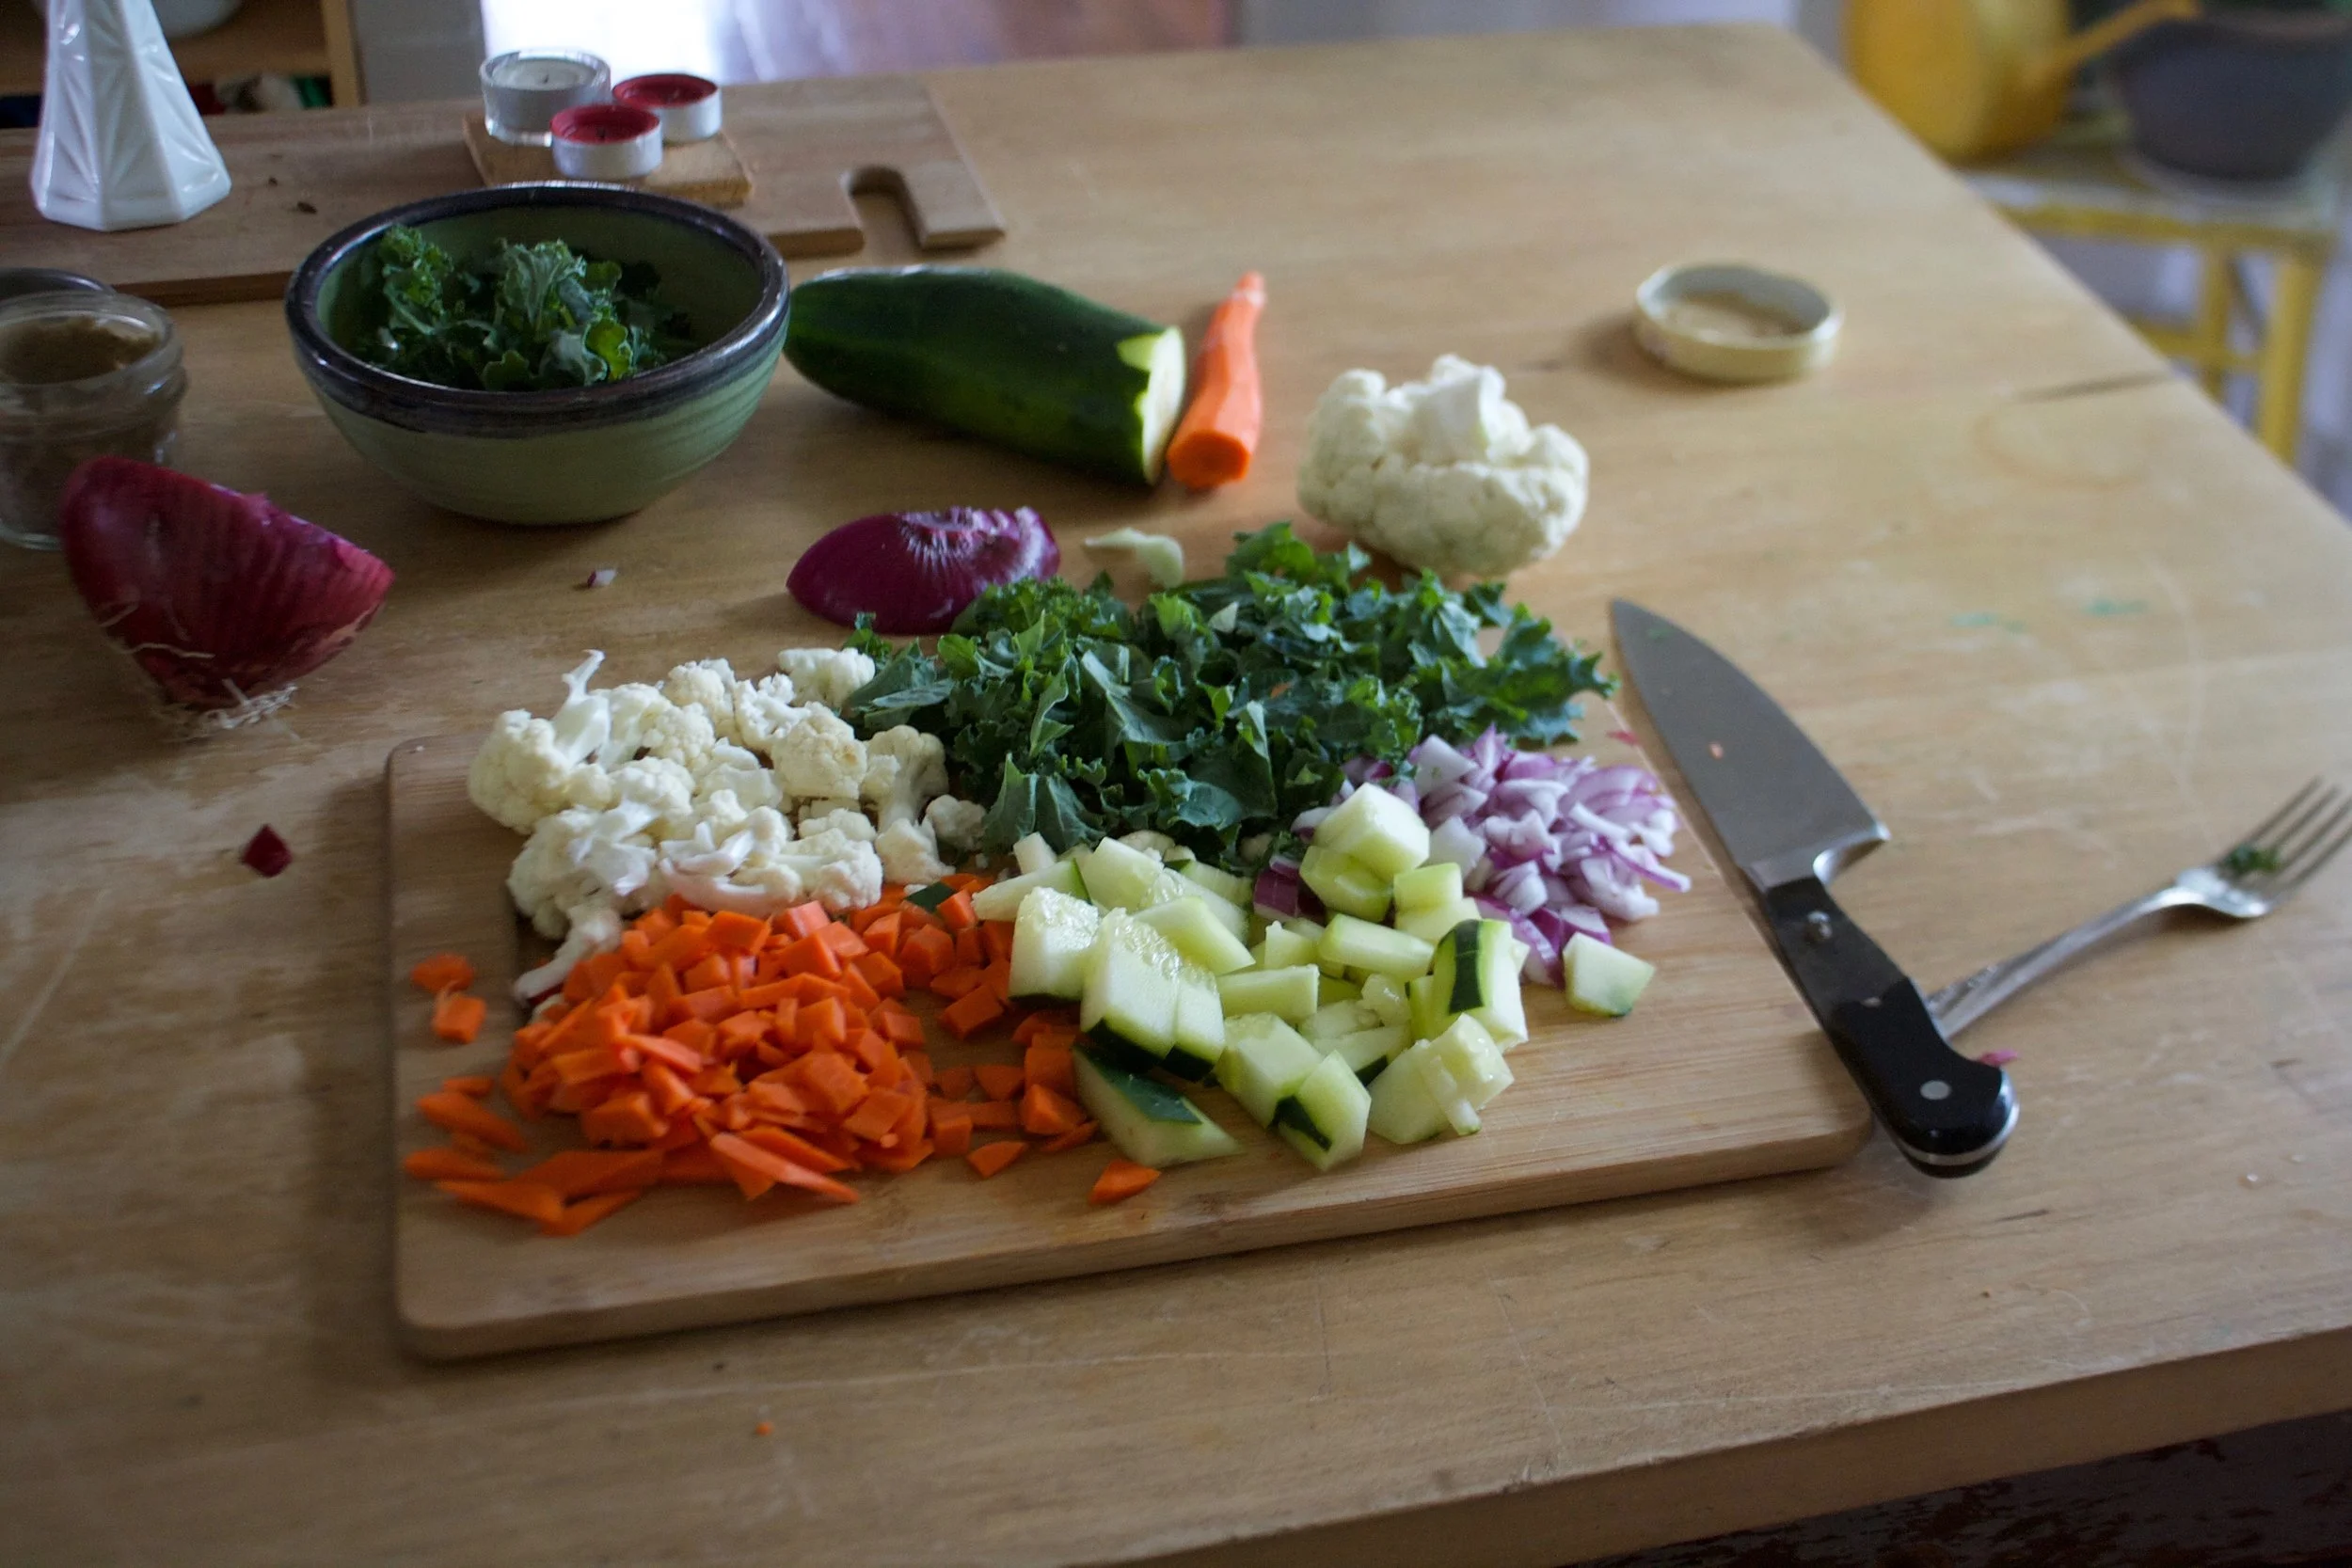
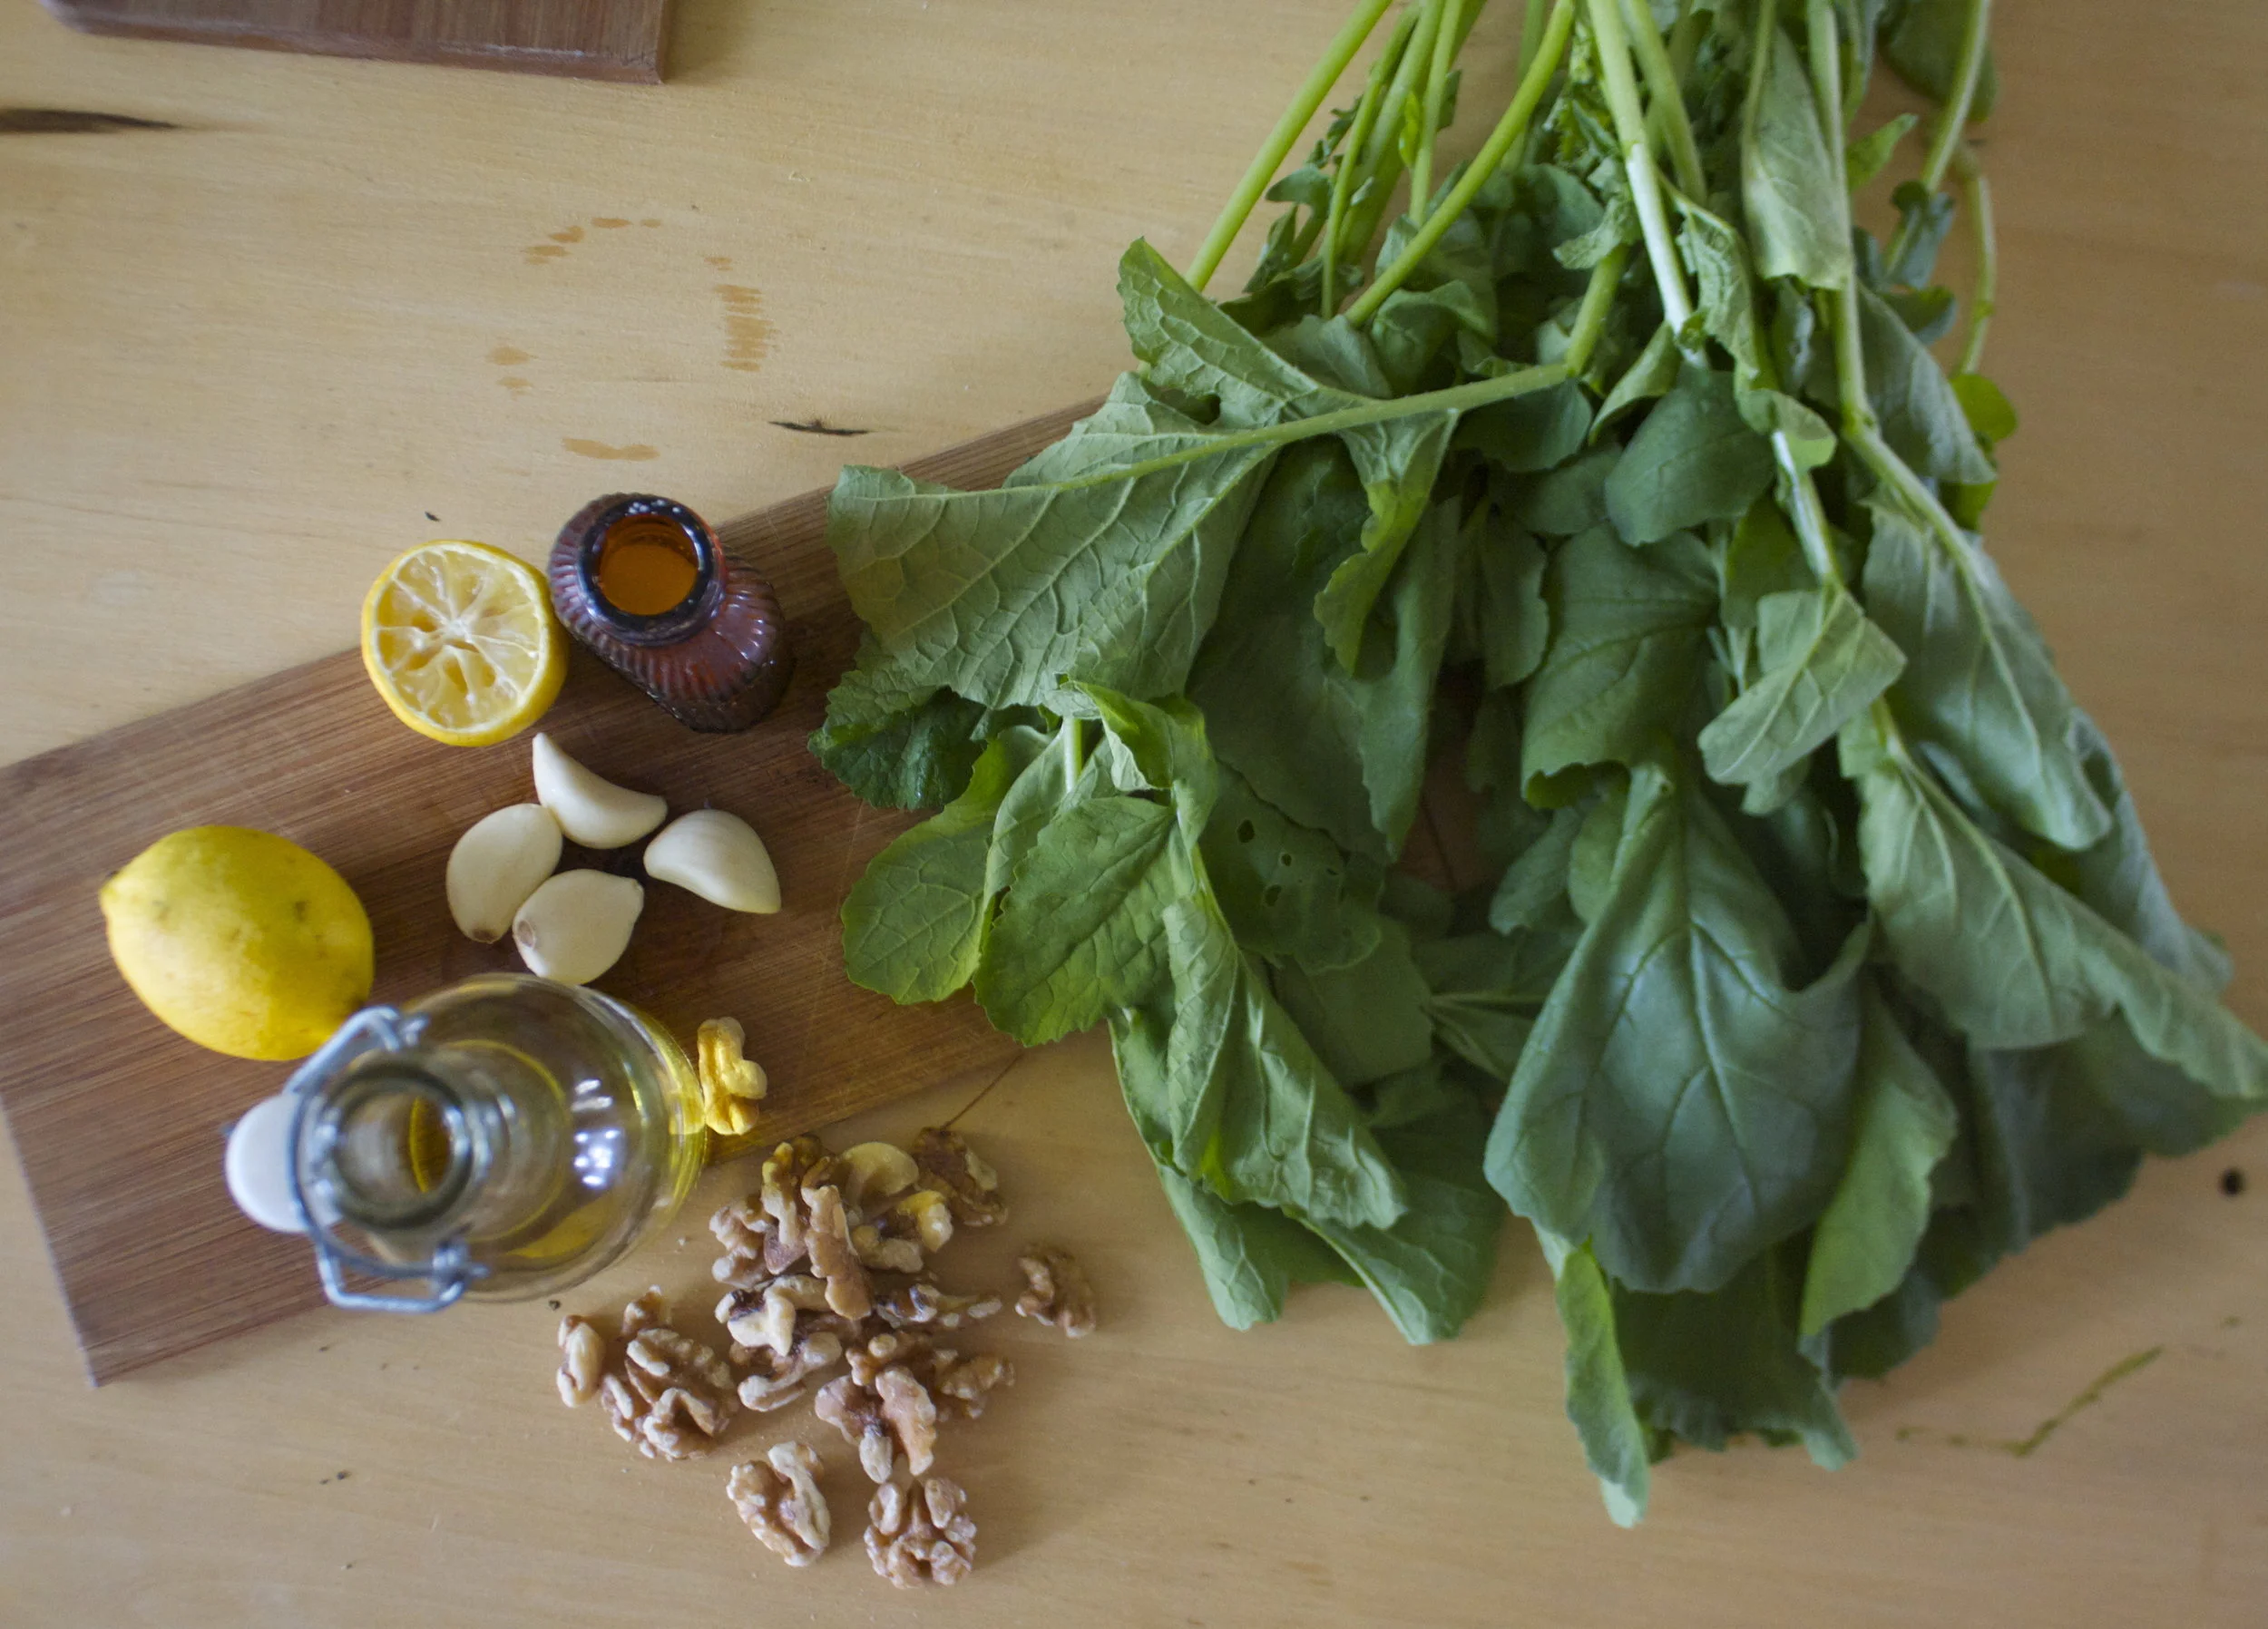
The stuff. Peas, chopped broccoli, and chopped cauliflower which are all frozen and slightly thawed. You can totally use fresh here too, but I just so happen to have it frozen so you might as well save the fresh stuff for fresh eating. Also have a big yellow onion, a few cloves garlic, some tahini, a lemon, sumac, and salt and pepper. You need water which I did not picture here.
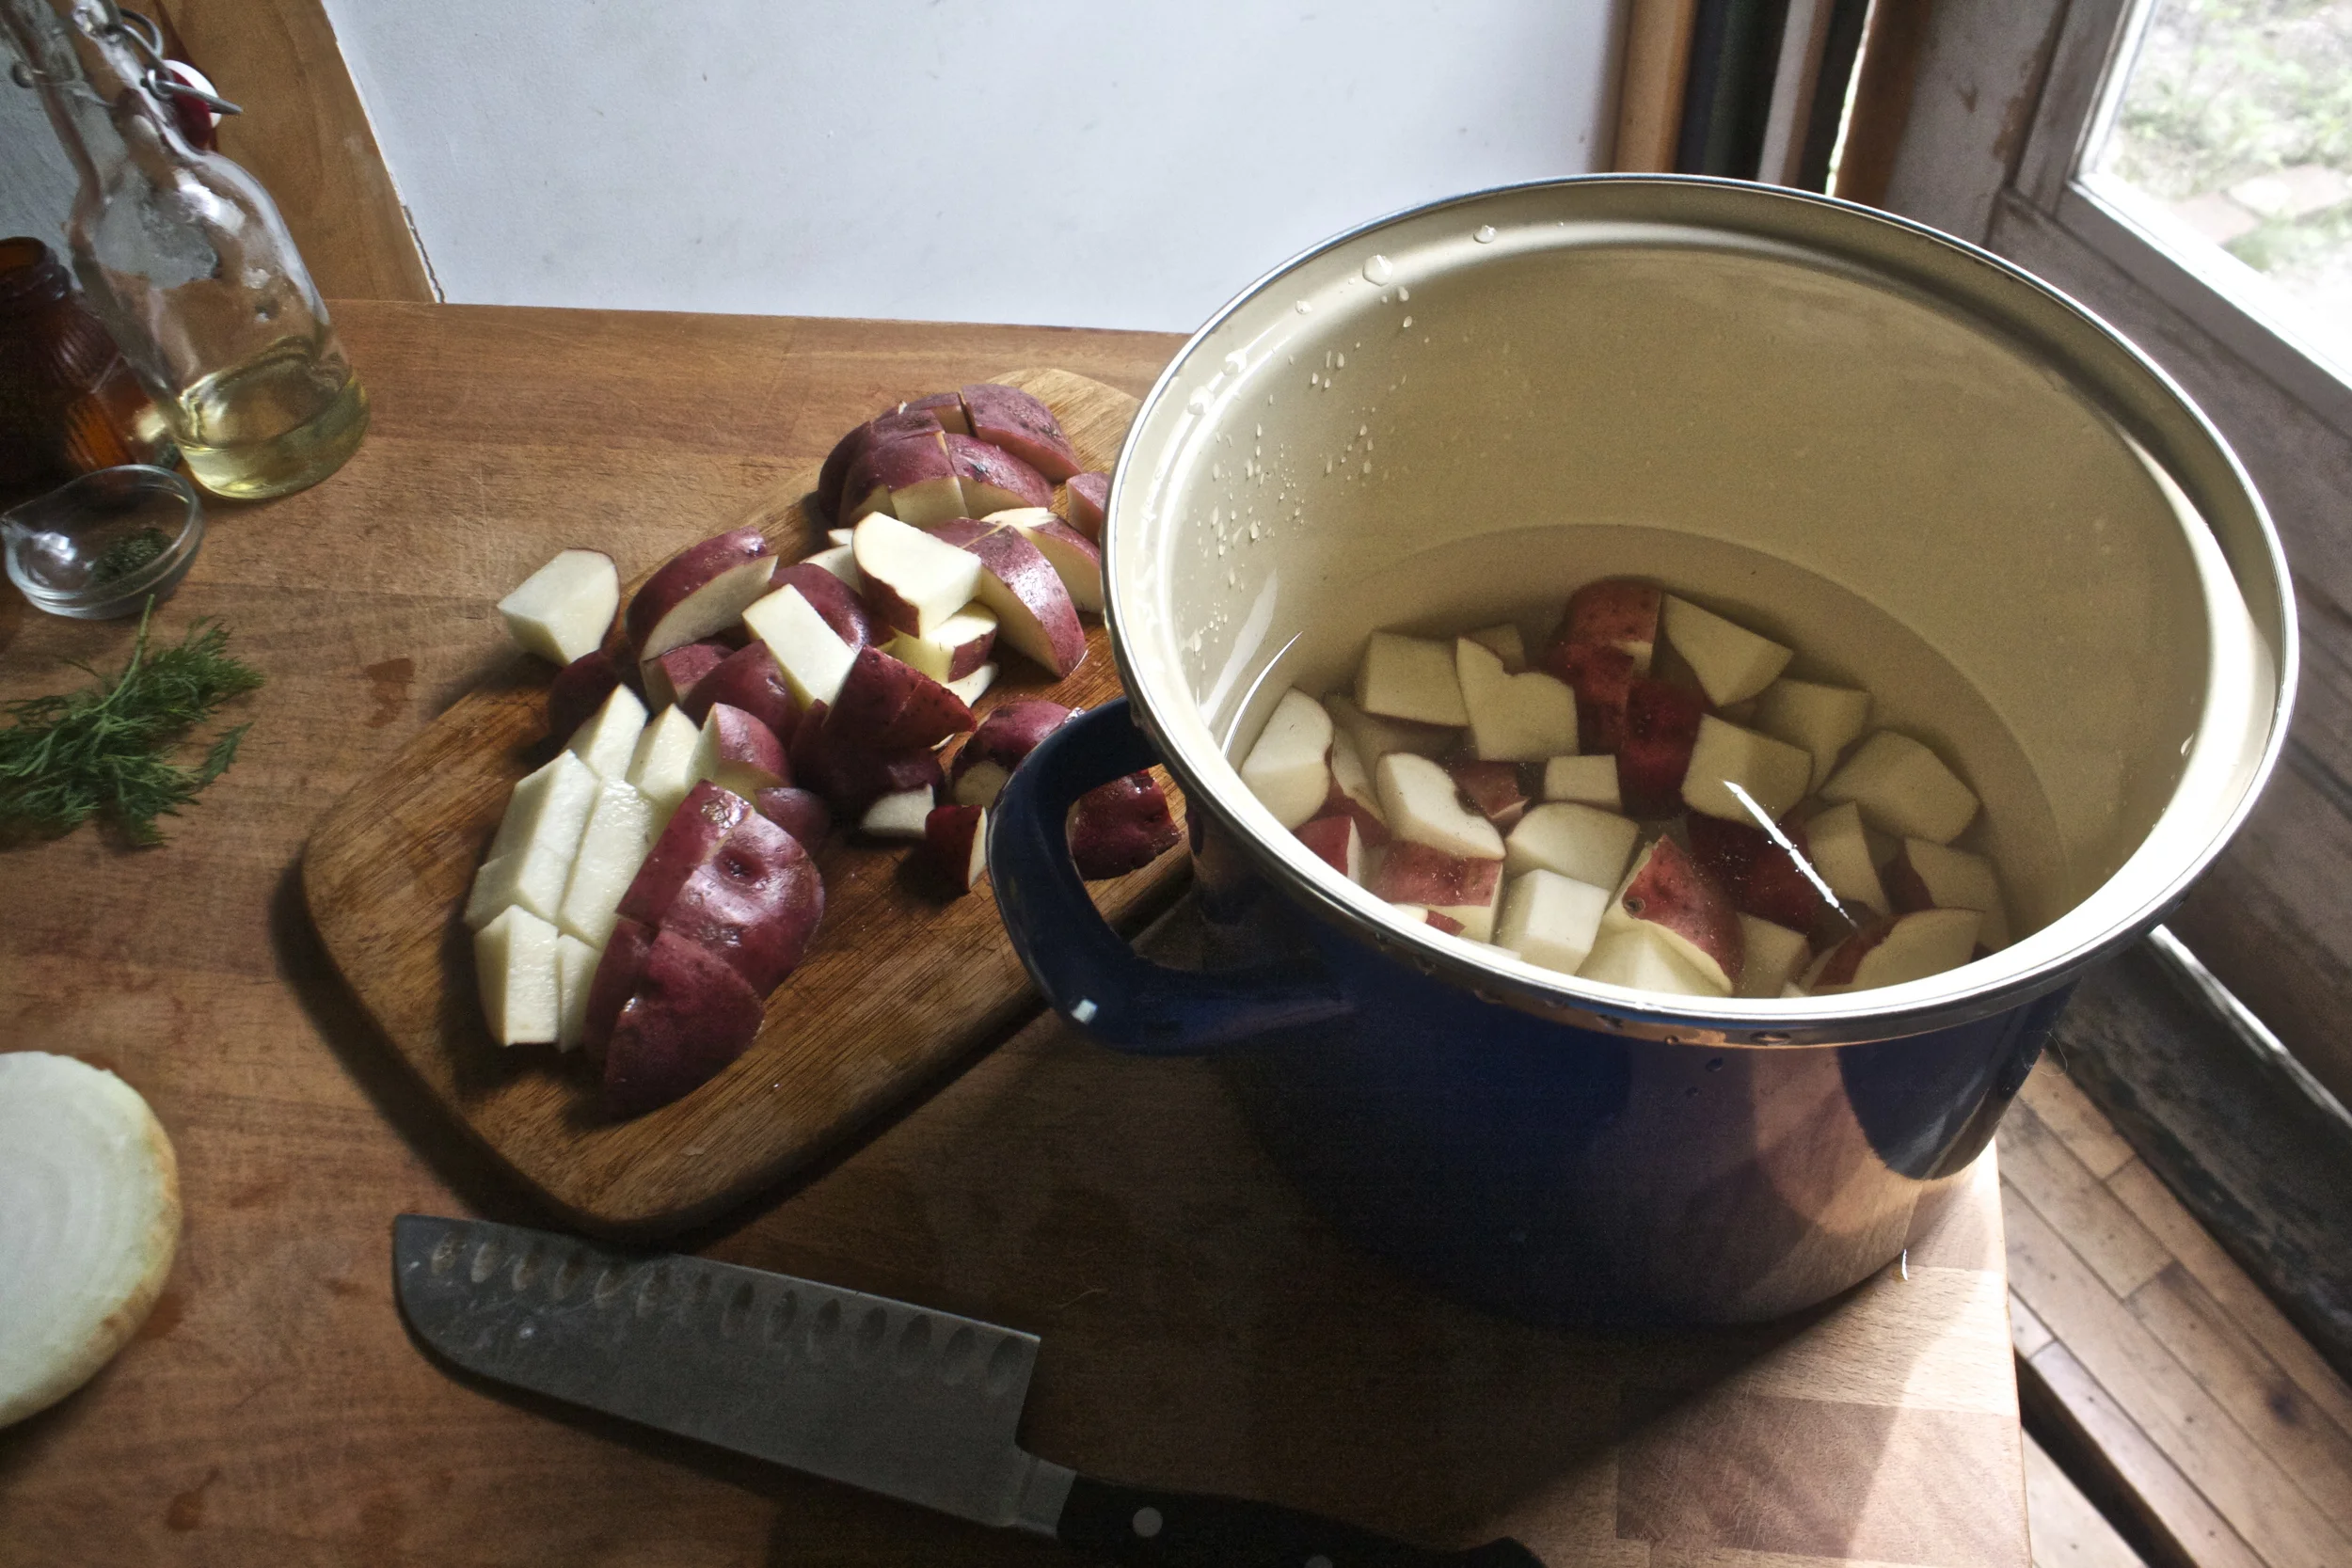
A pot, some water and a roughly chopped onion and the garlic start off this soup. Bring the pot to a boil, then turn to medium and let the onion and garlic cook until very tender. I have been making a lot of soups starting with this step lately. Boiling the onion and garlic until tender and fragrant really make for a super flavorful and clean soup base. Or soup in itself.

Now add in the broccoli and cauliflower to the pot and cook until tender.
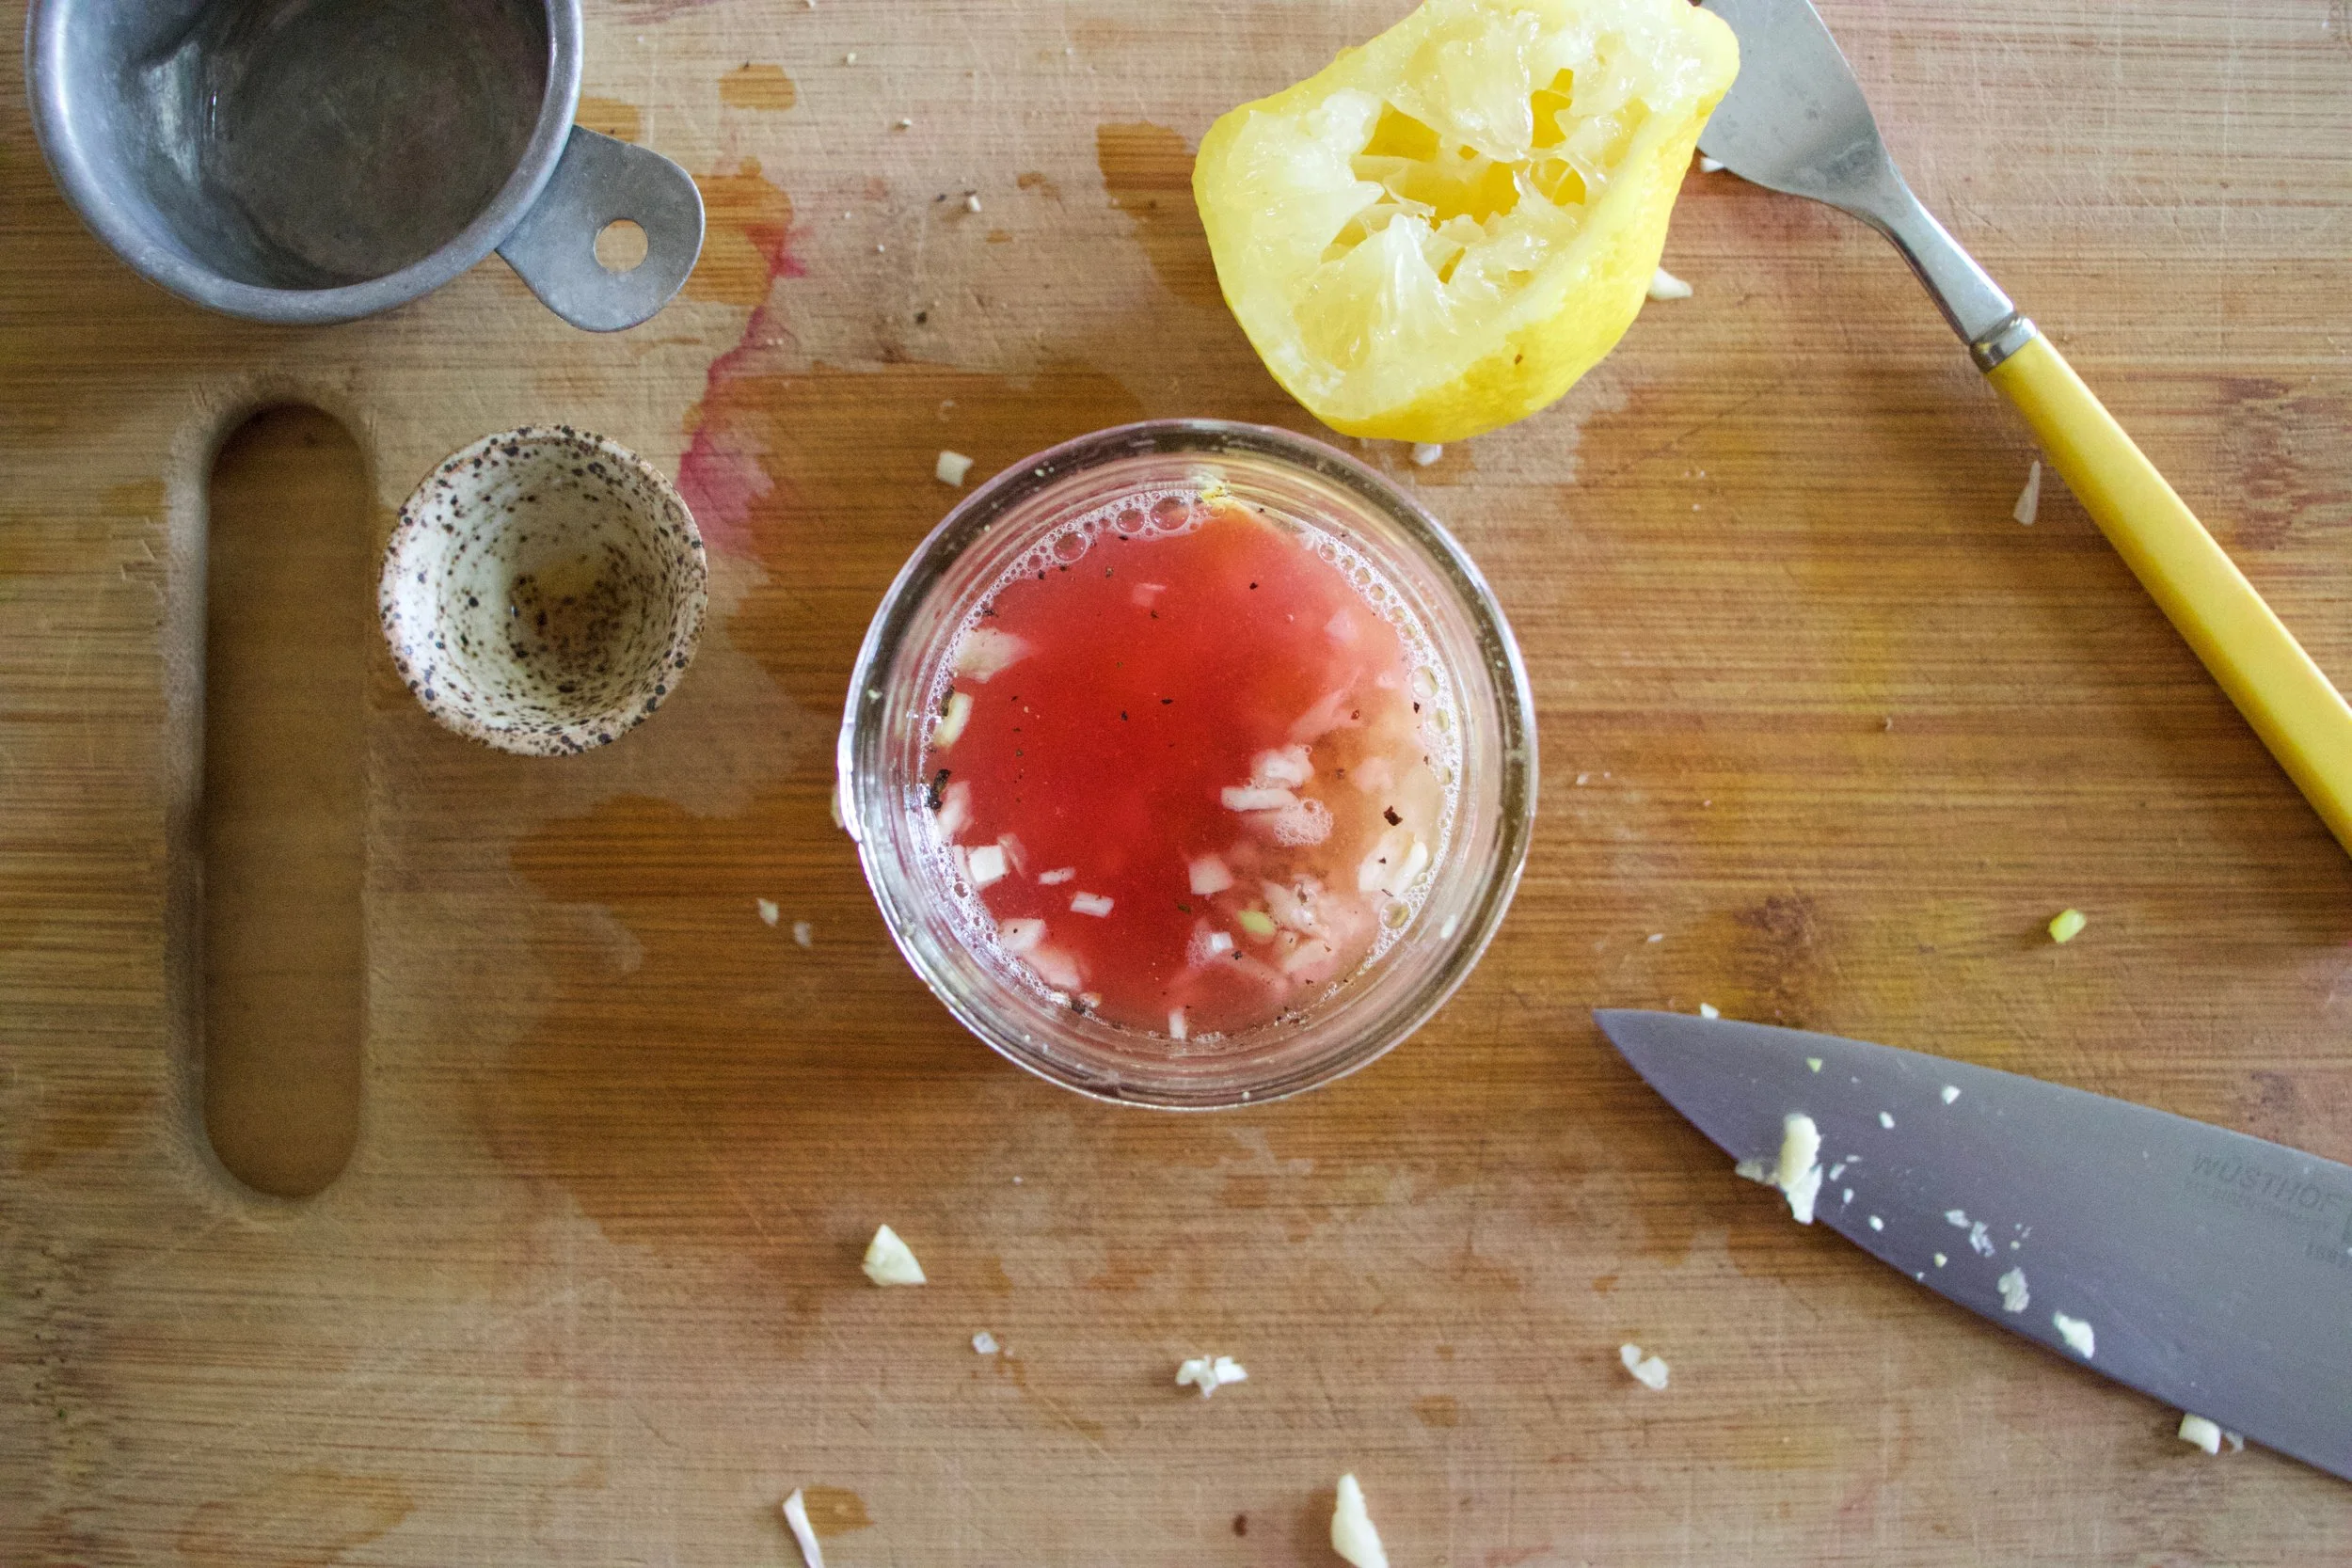
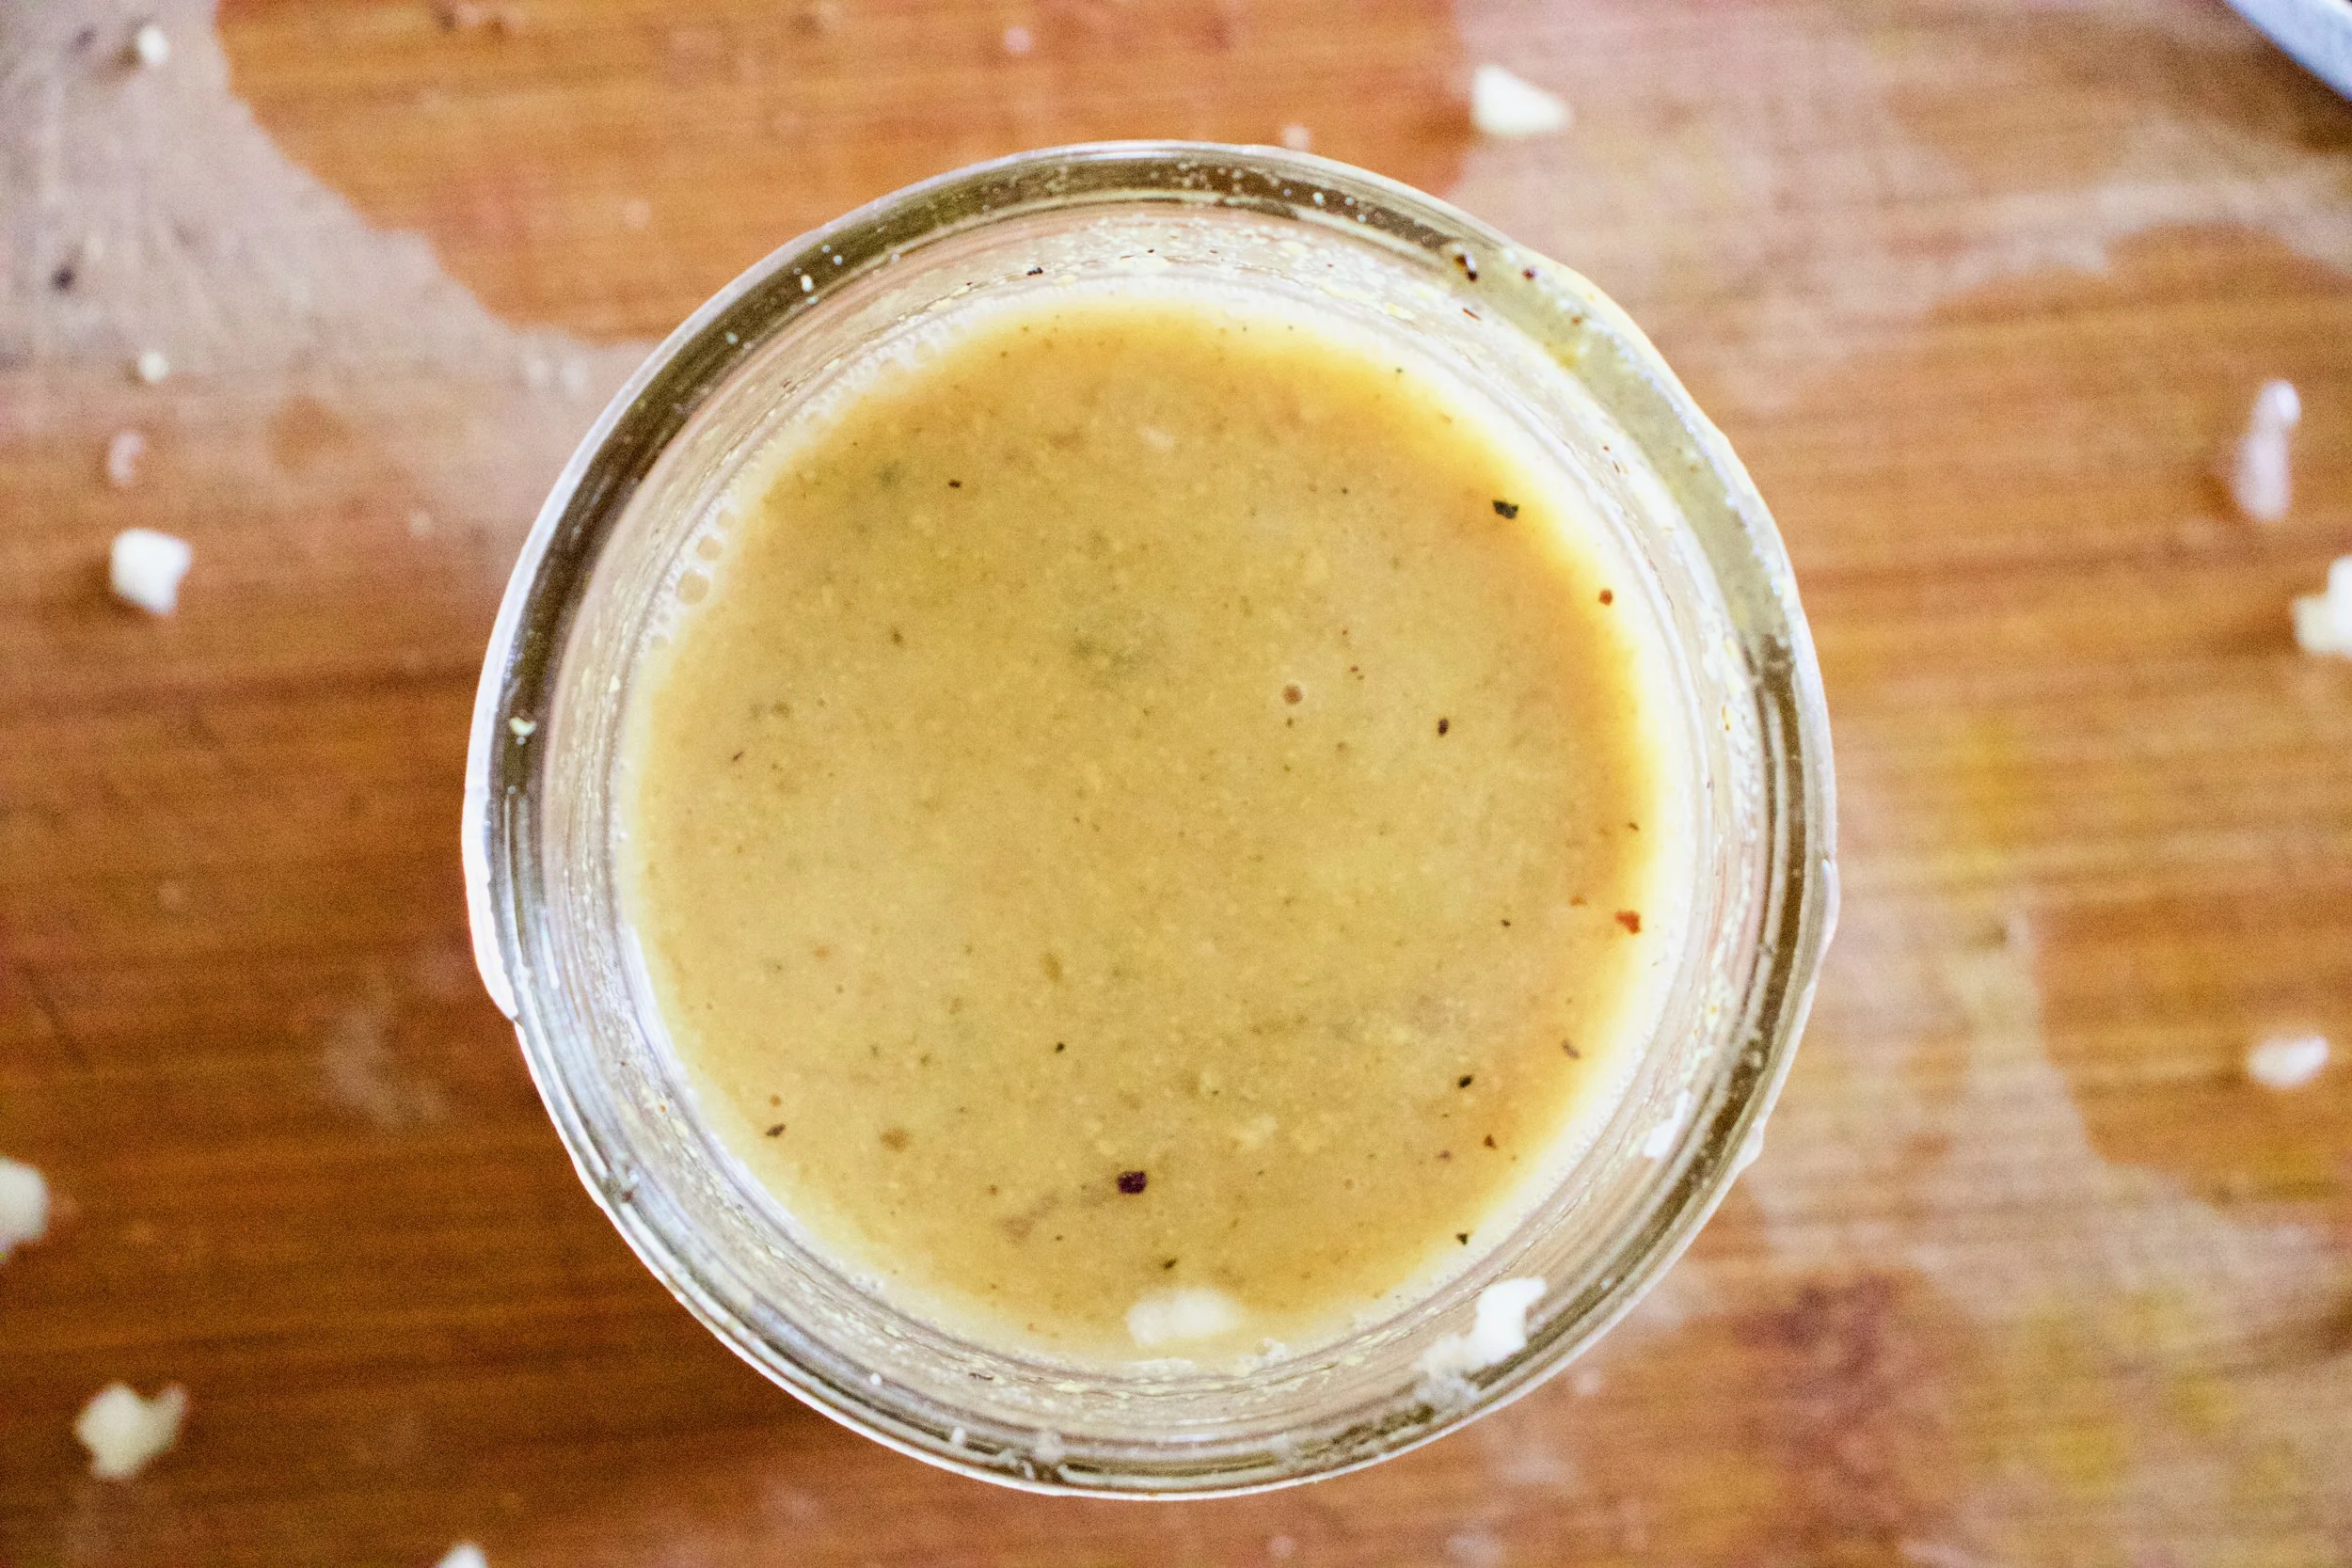
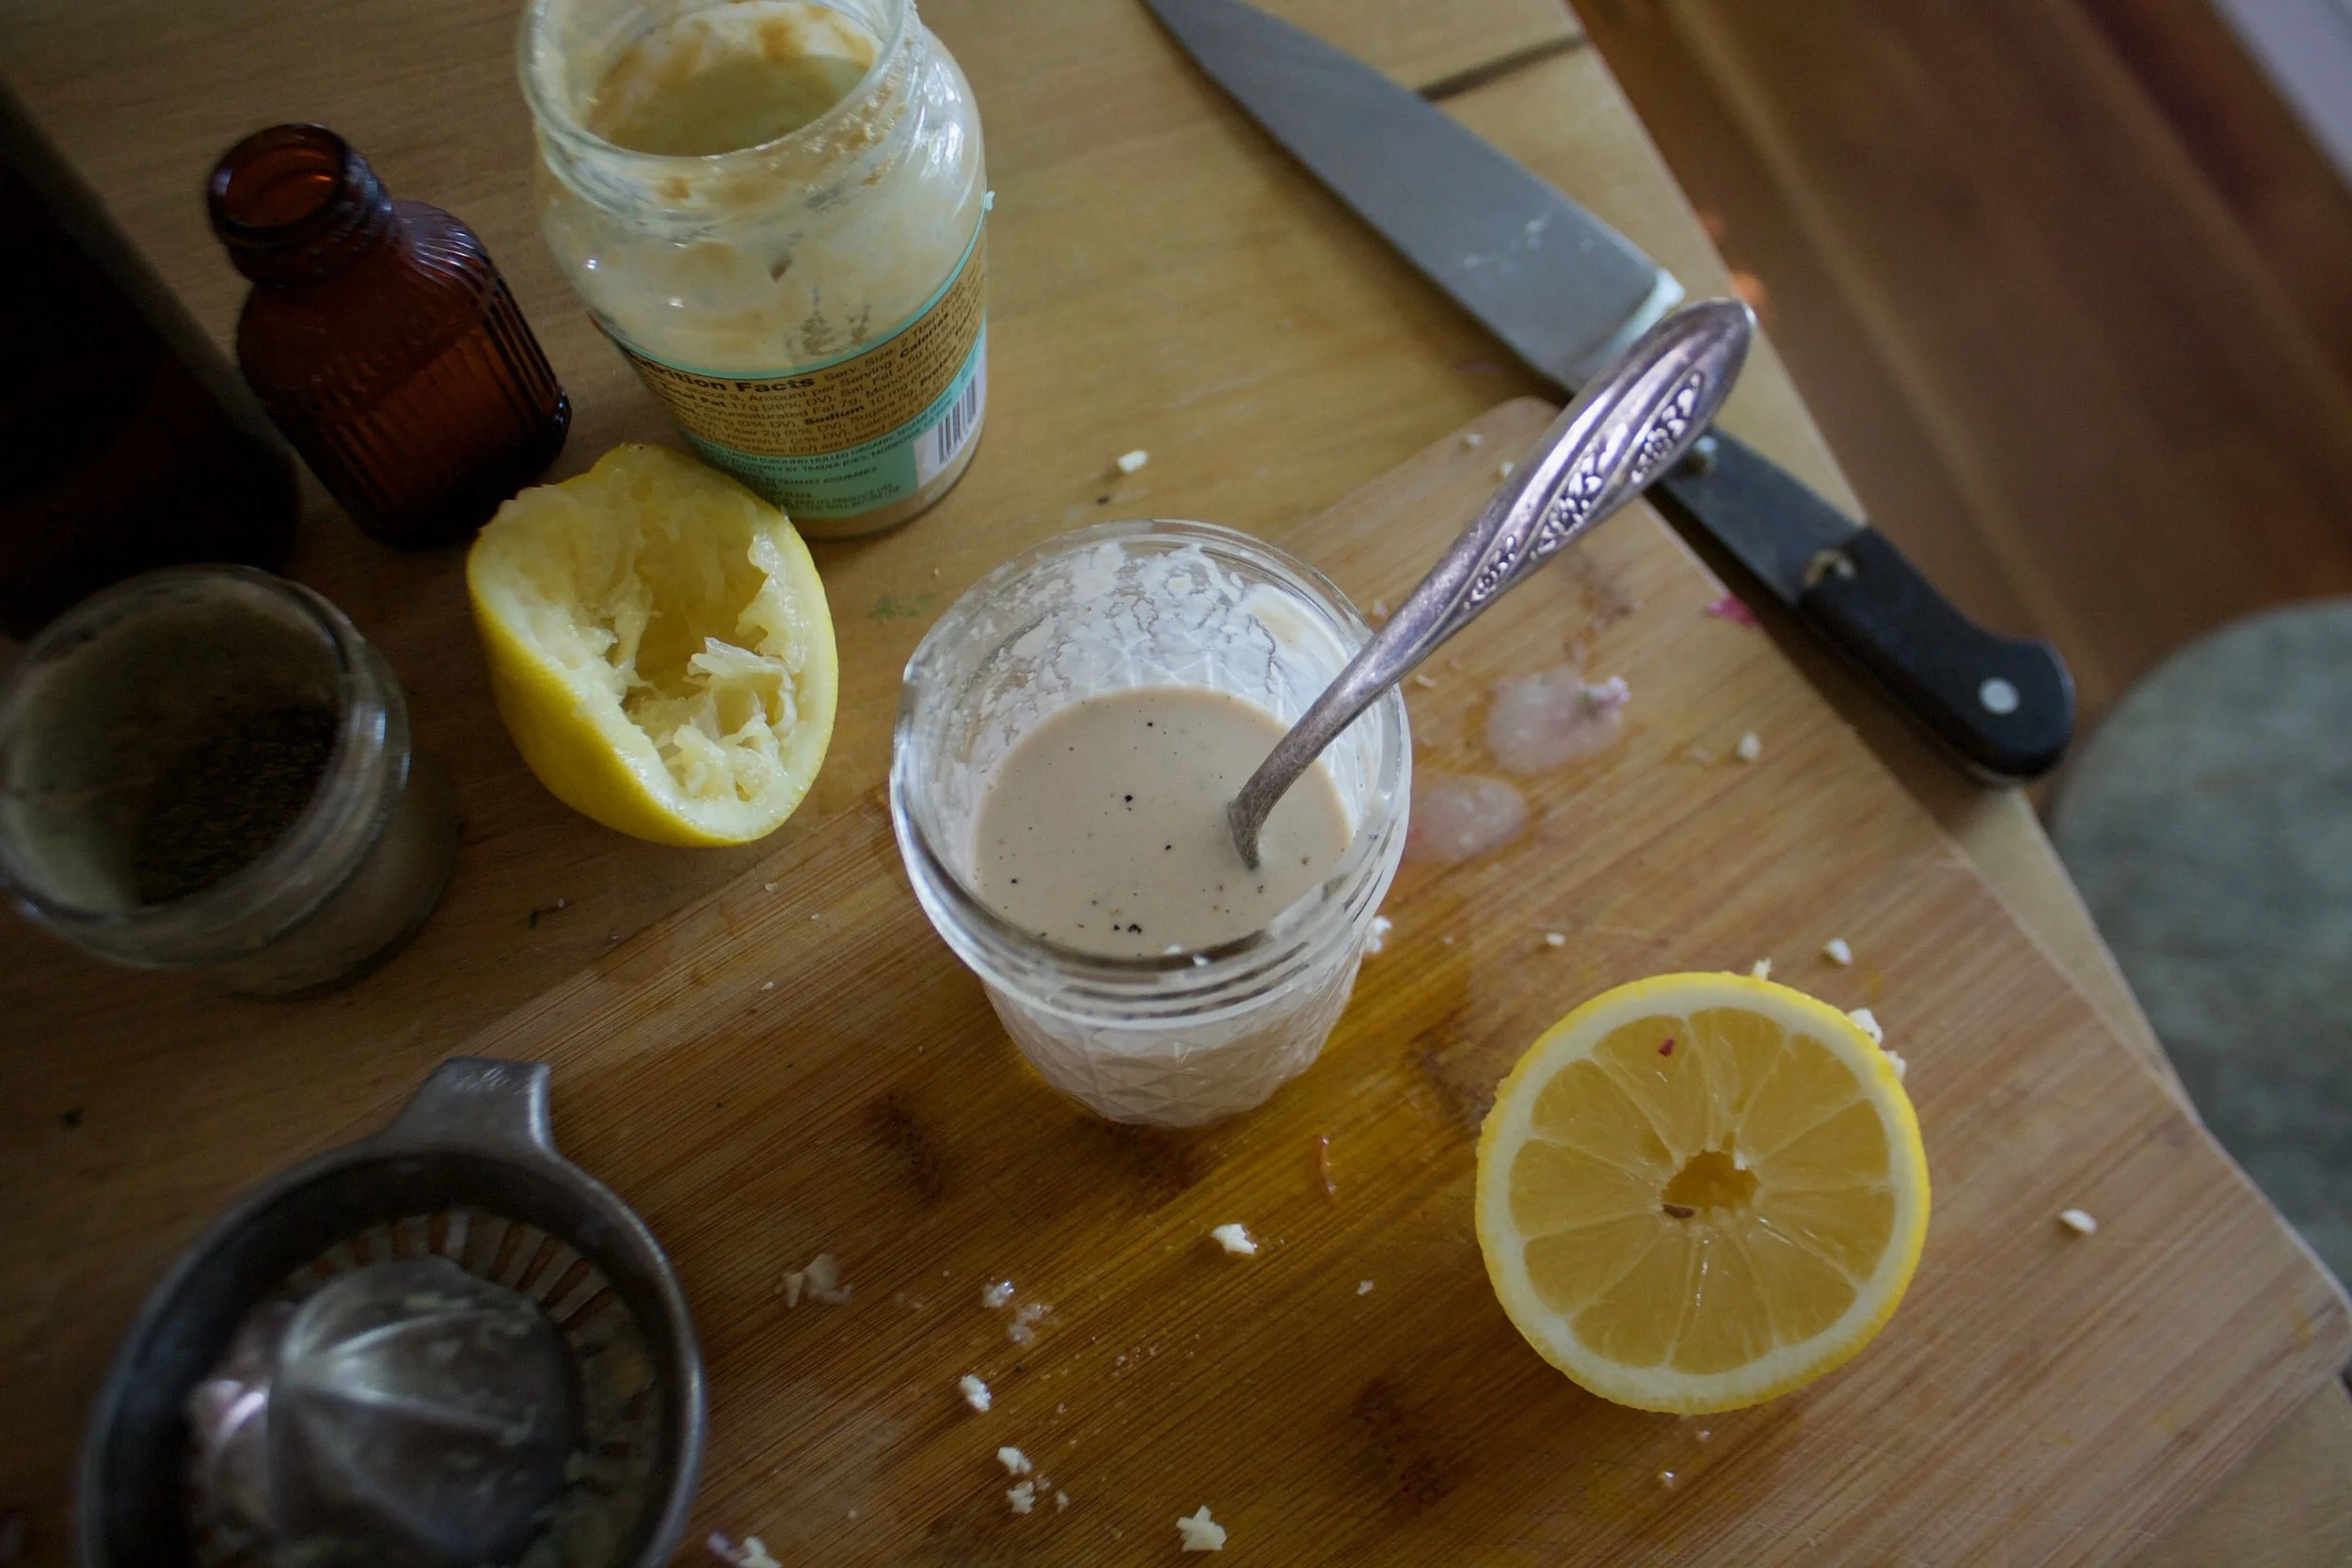
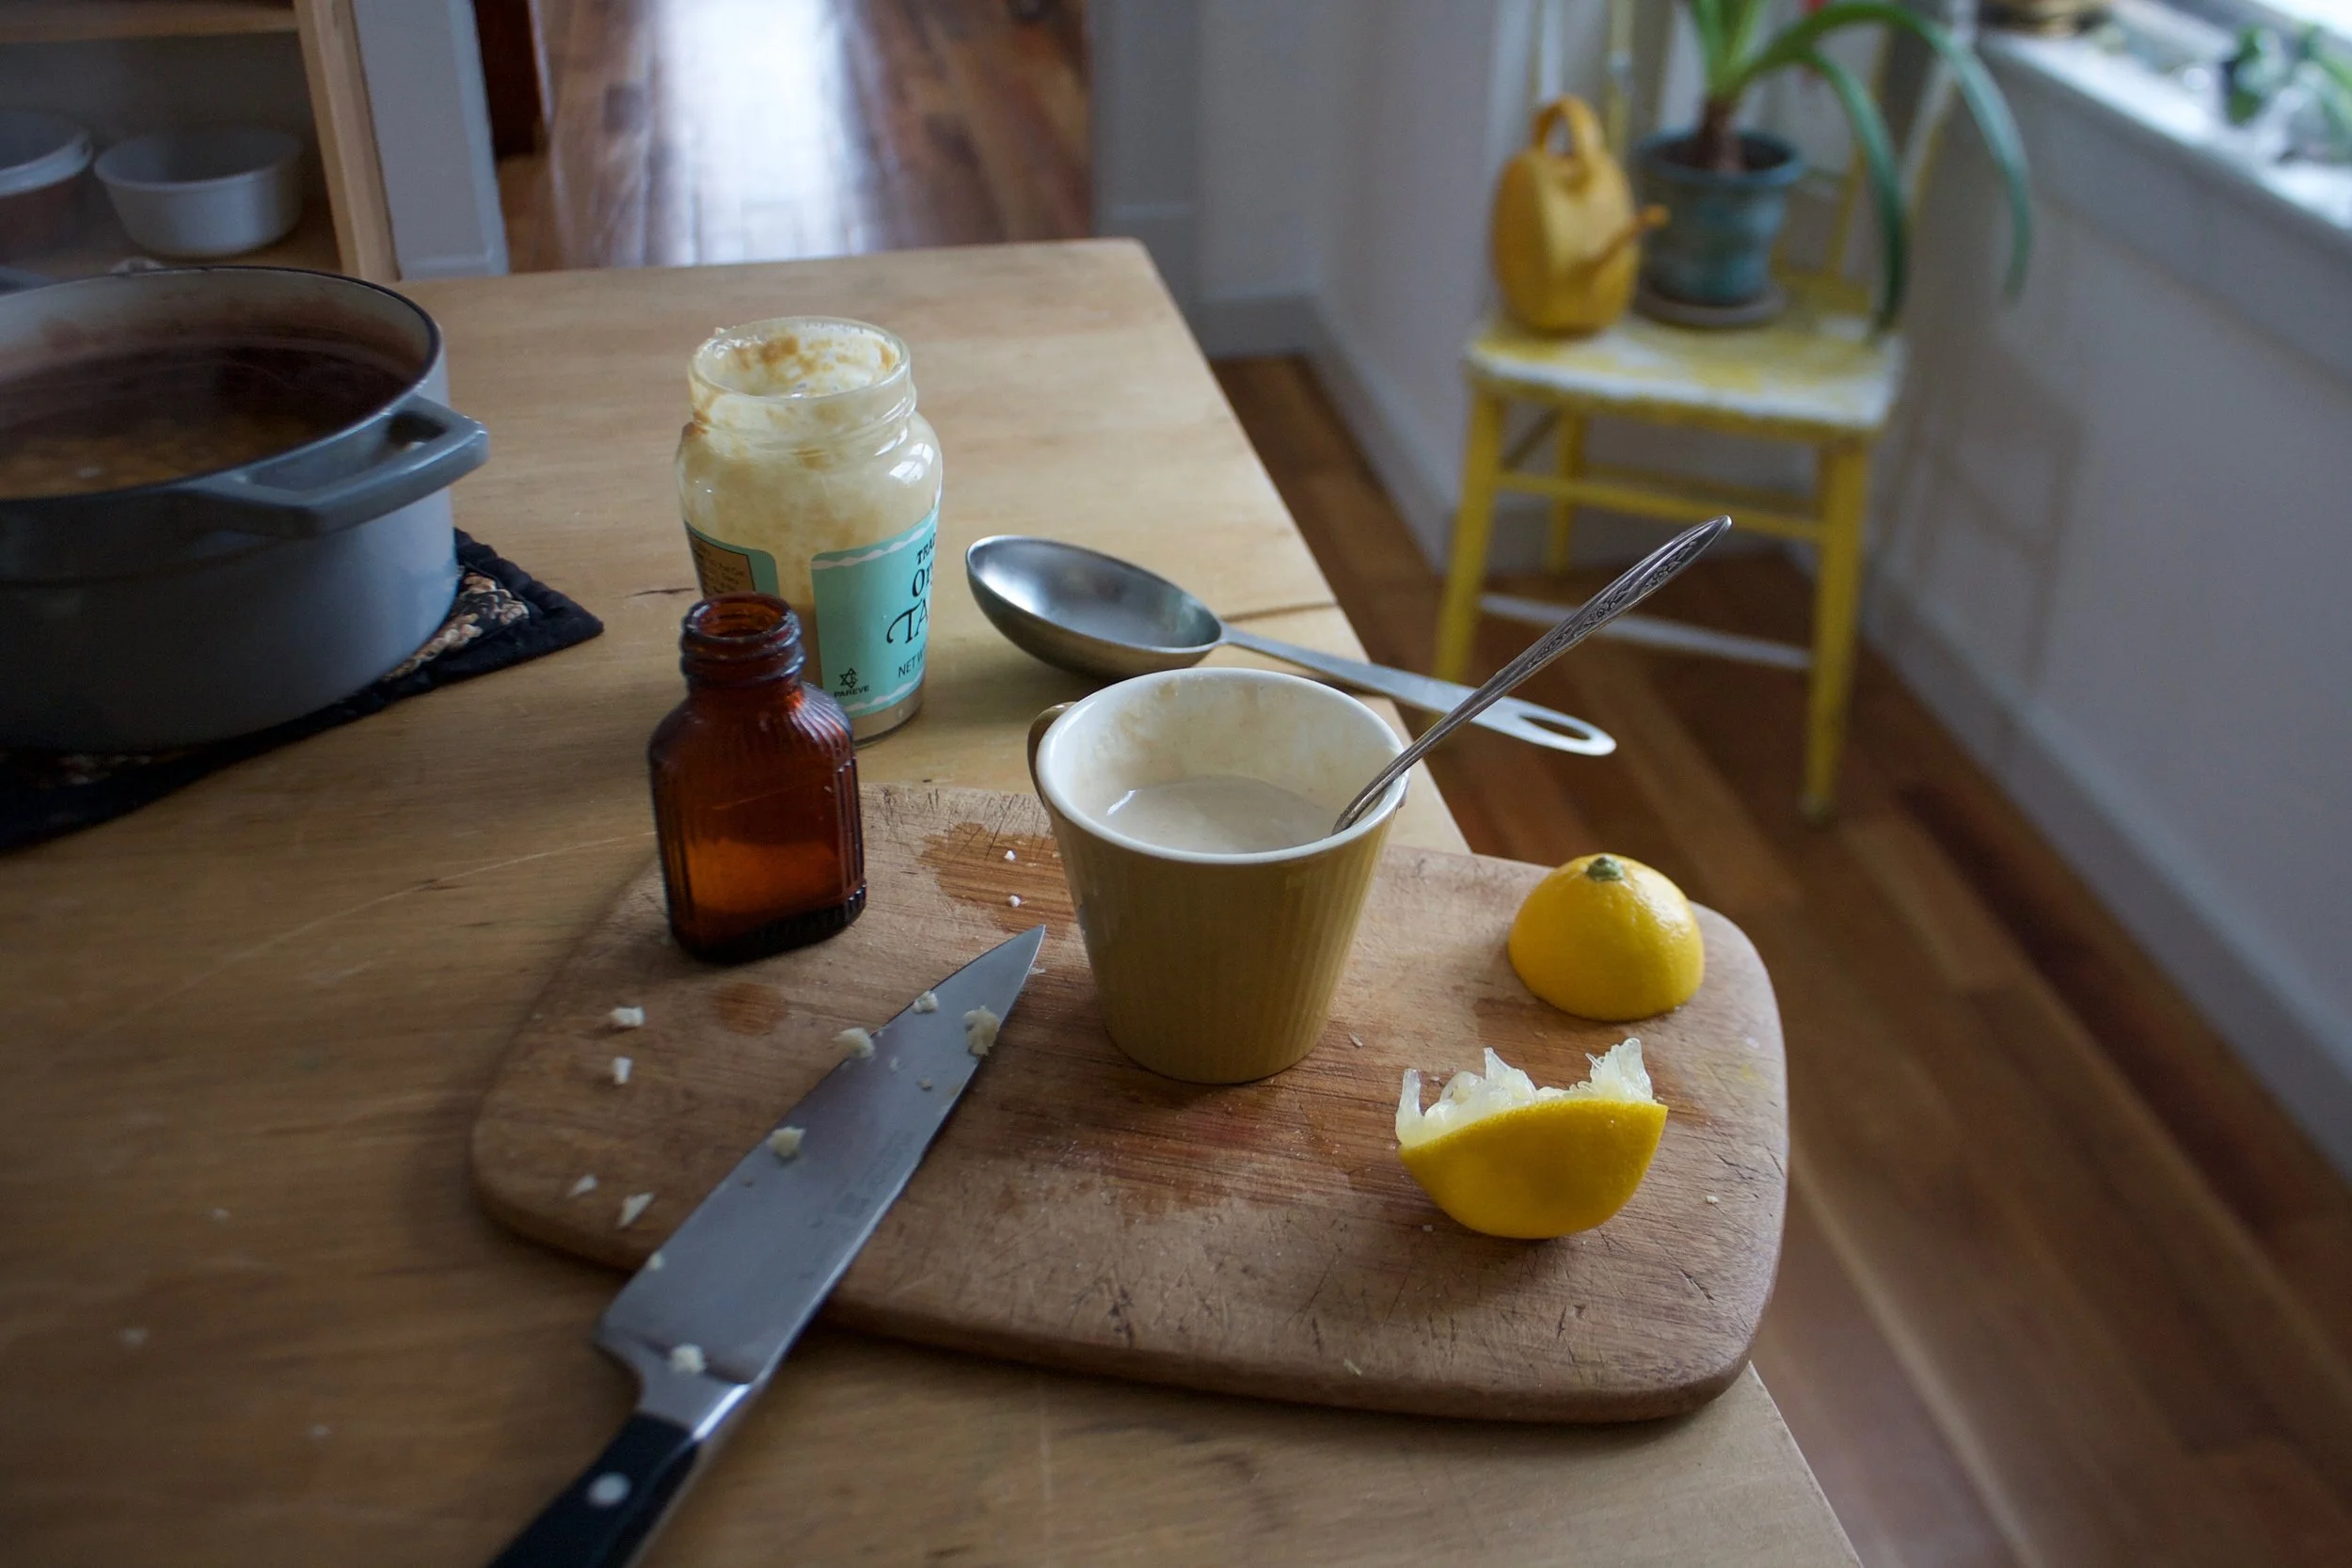
Mid soup cooking time is a good time to make the sumac tahini sauce for the swirl. Basics here, just mix the tahini, the sumac, a pinch of salt and pepper, the juice of the lemon and a tablespoon of warm water together until smooth.

Last but not least, the peas. Add them in and they just need a few minutes to cook through.
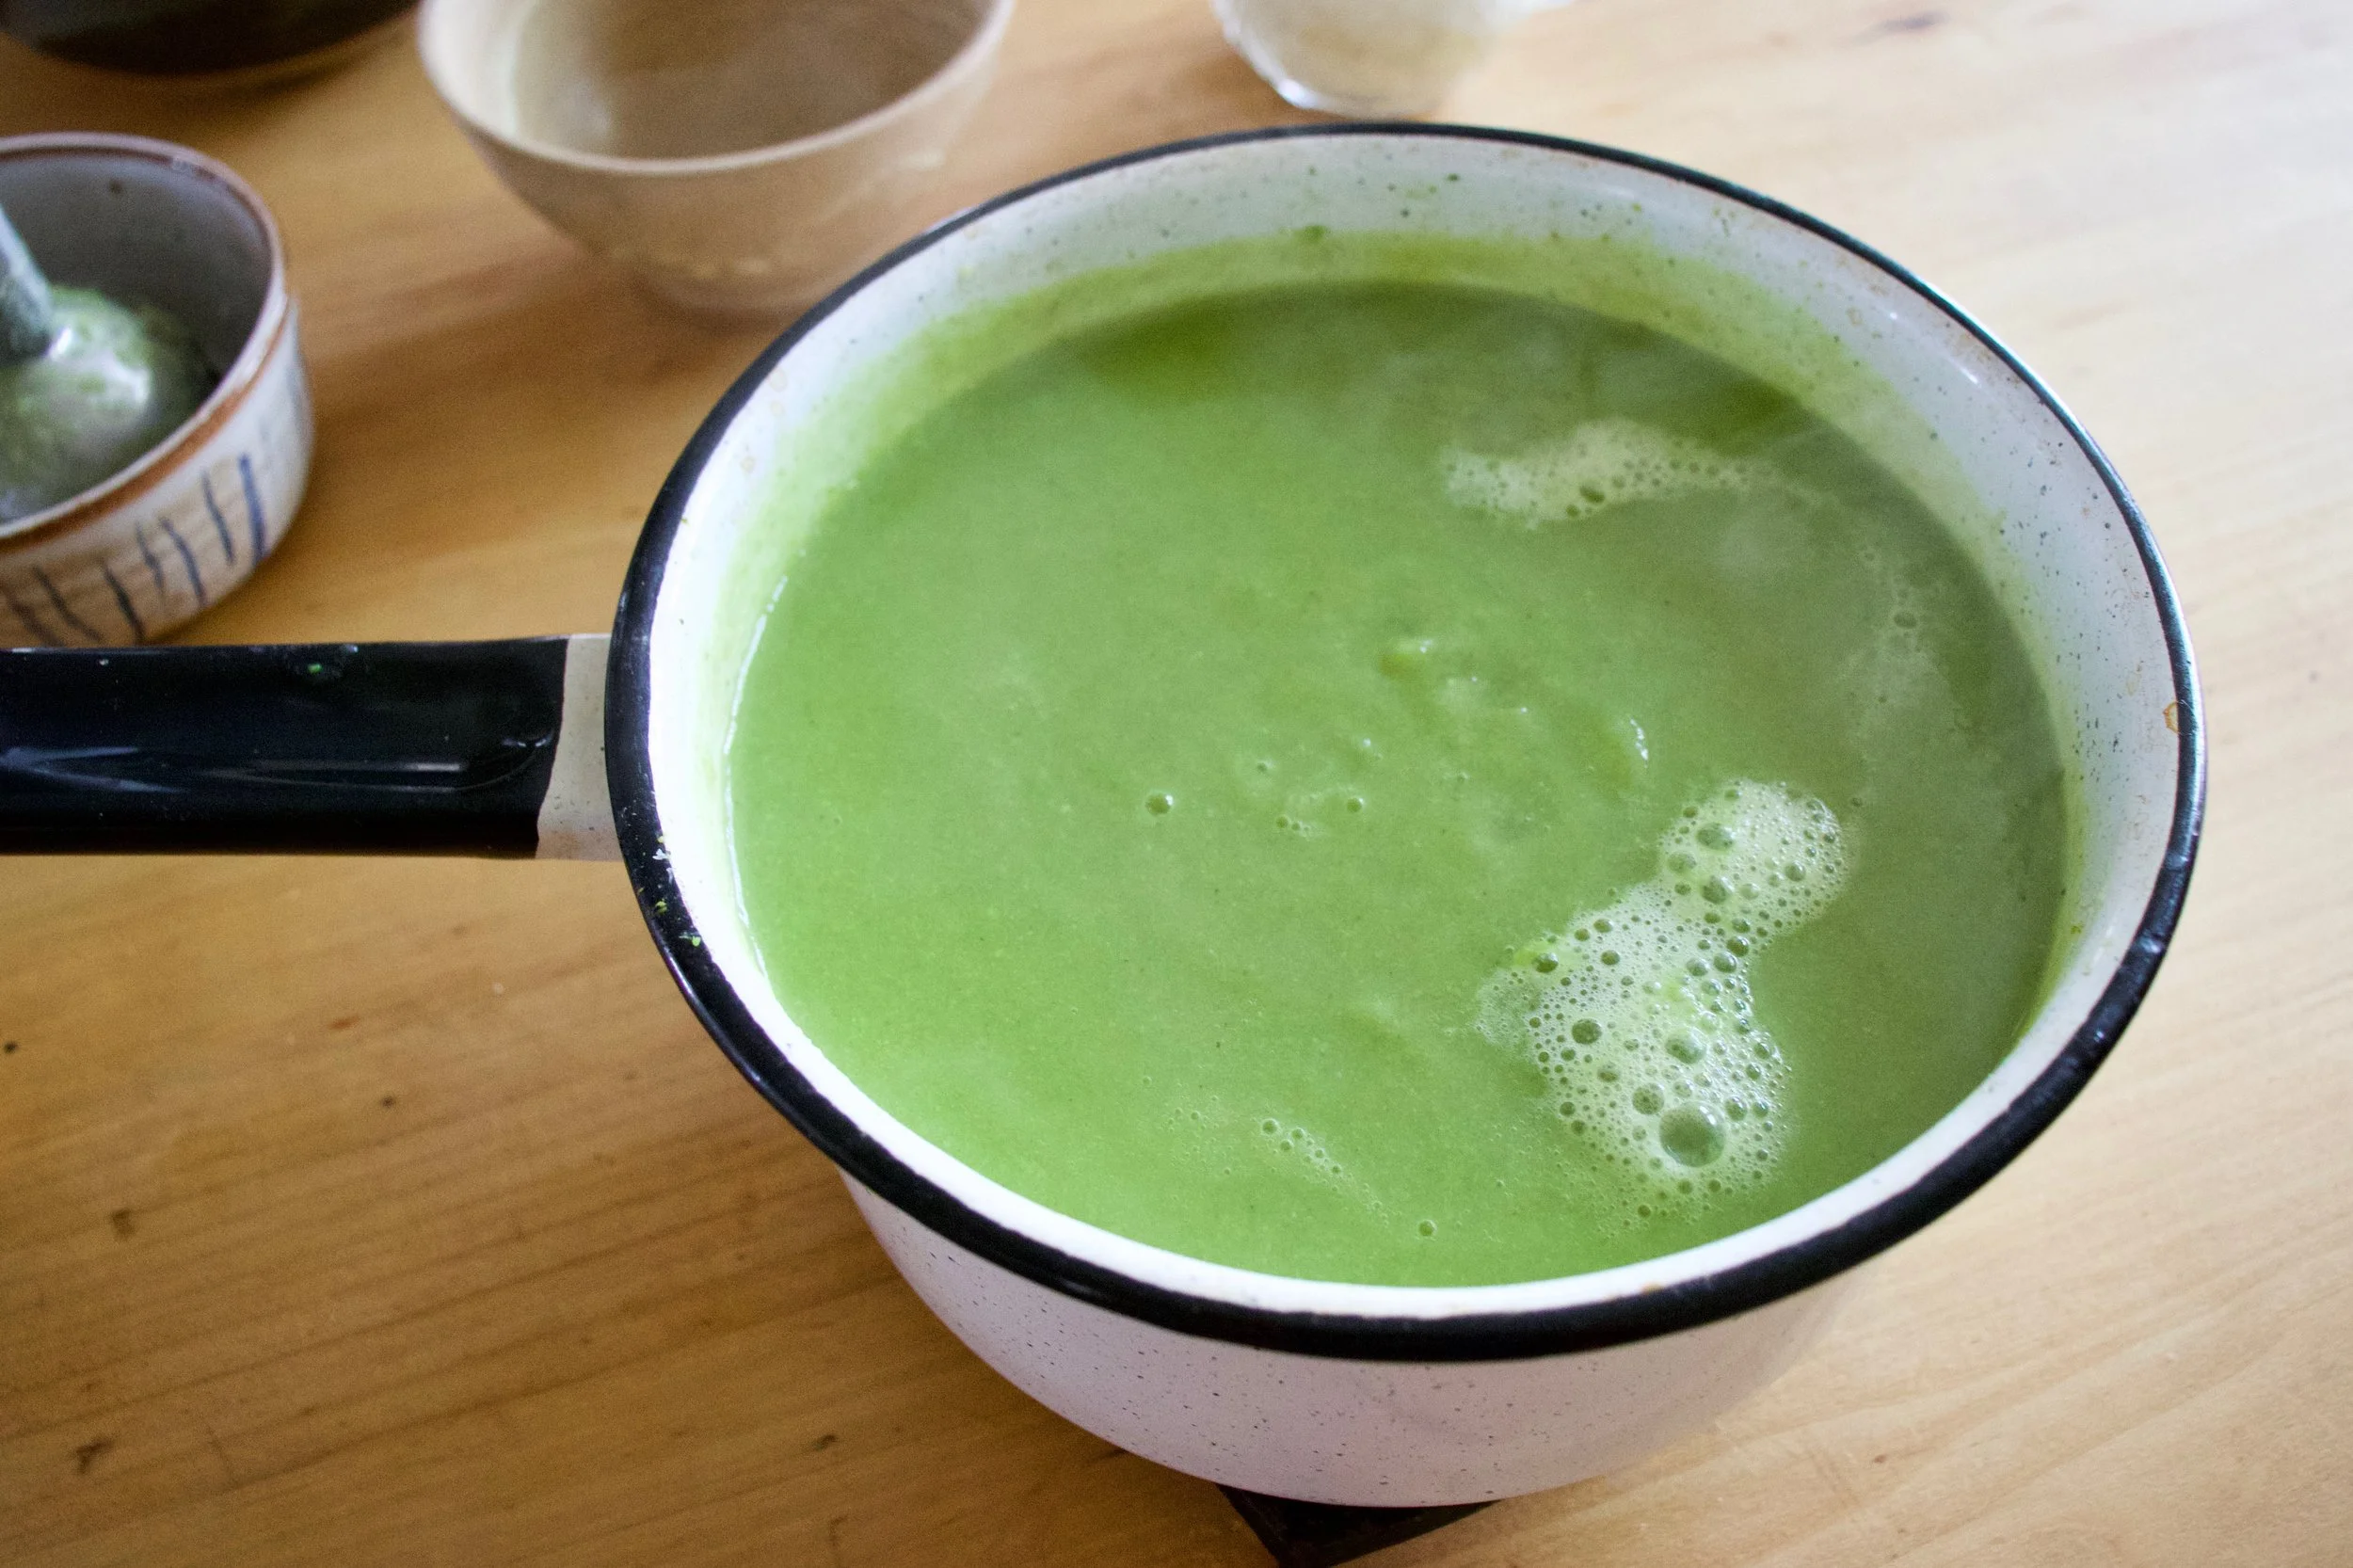
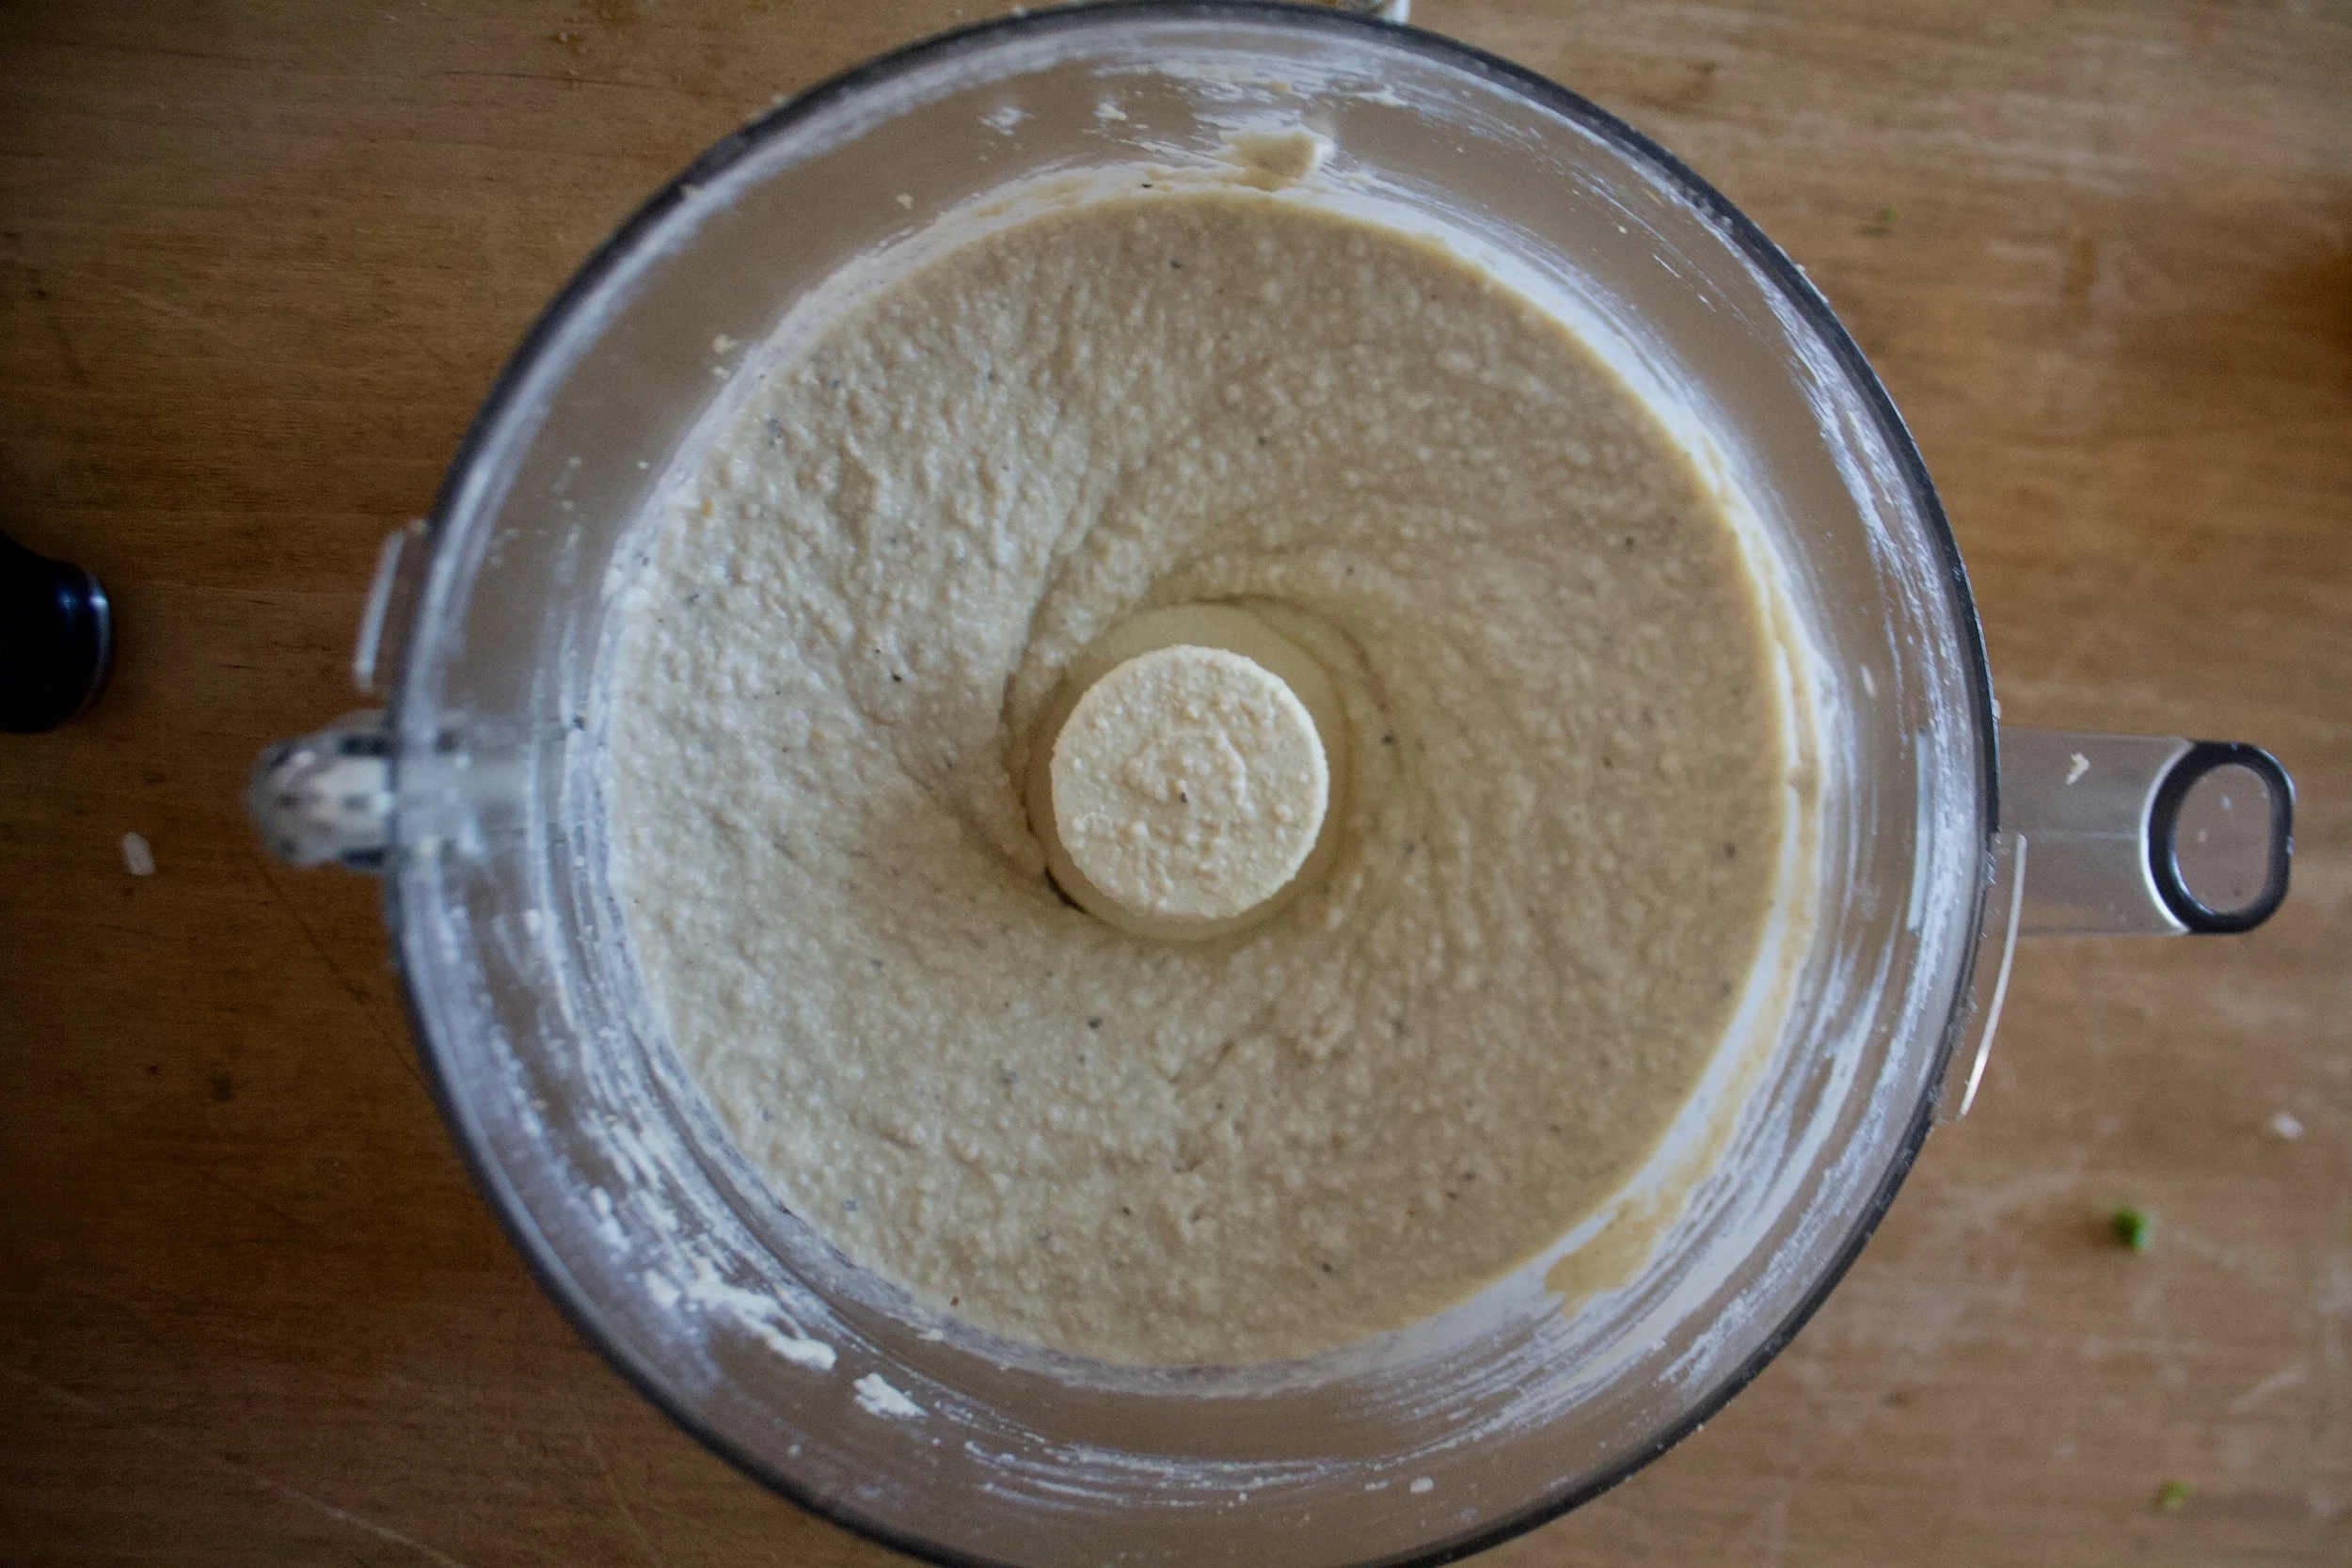
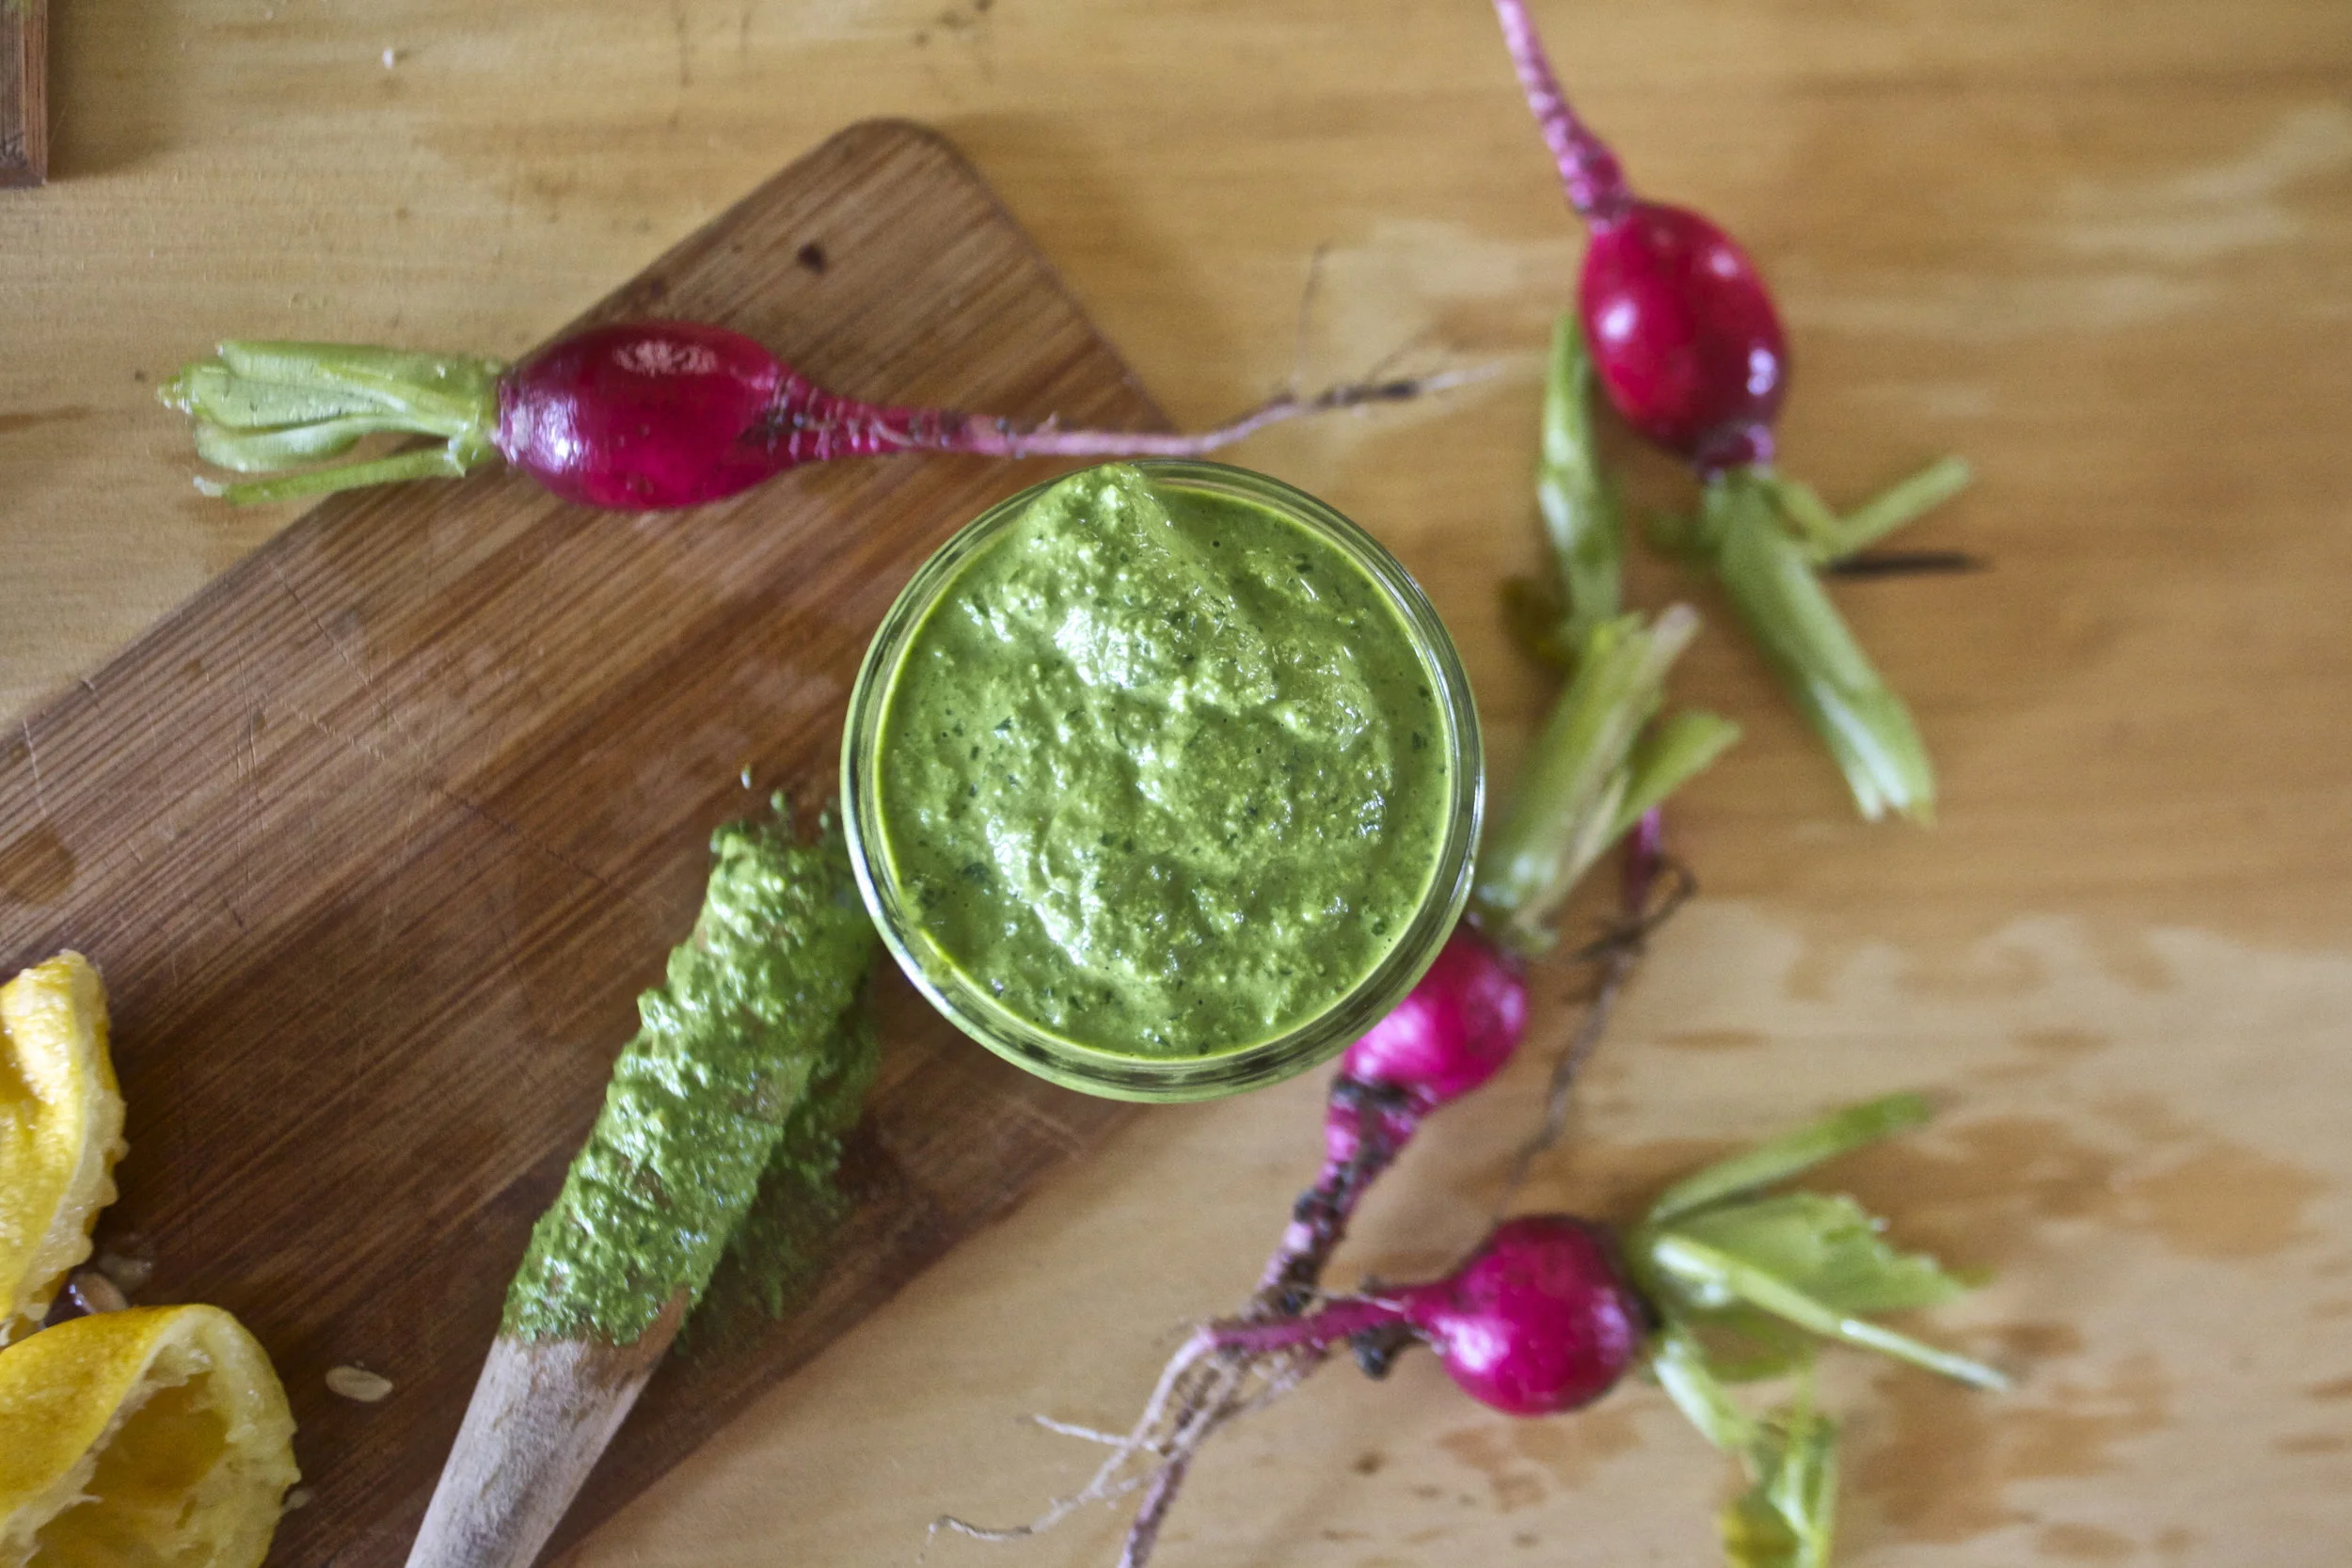
And then it all gets blended to become this green creamy goodness.
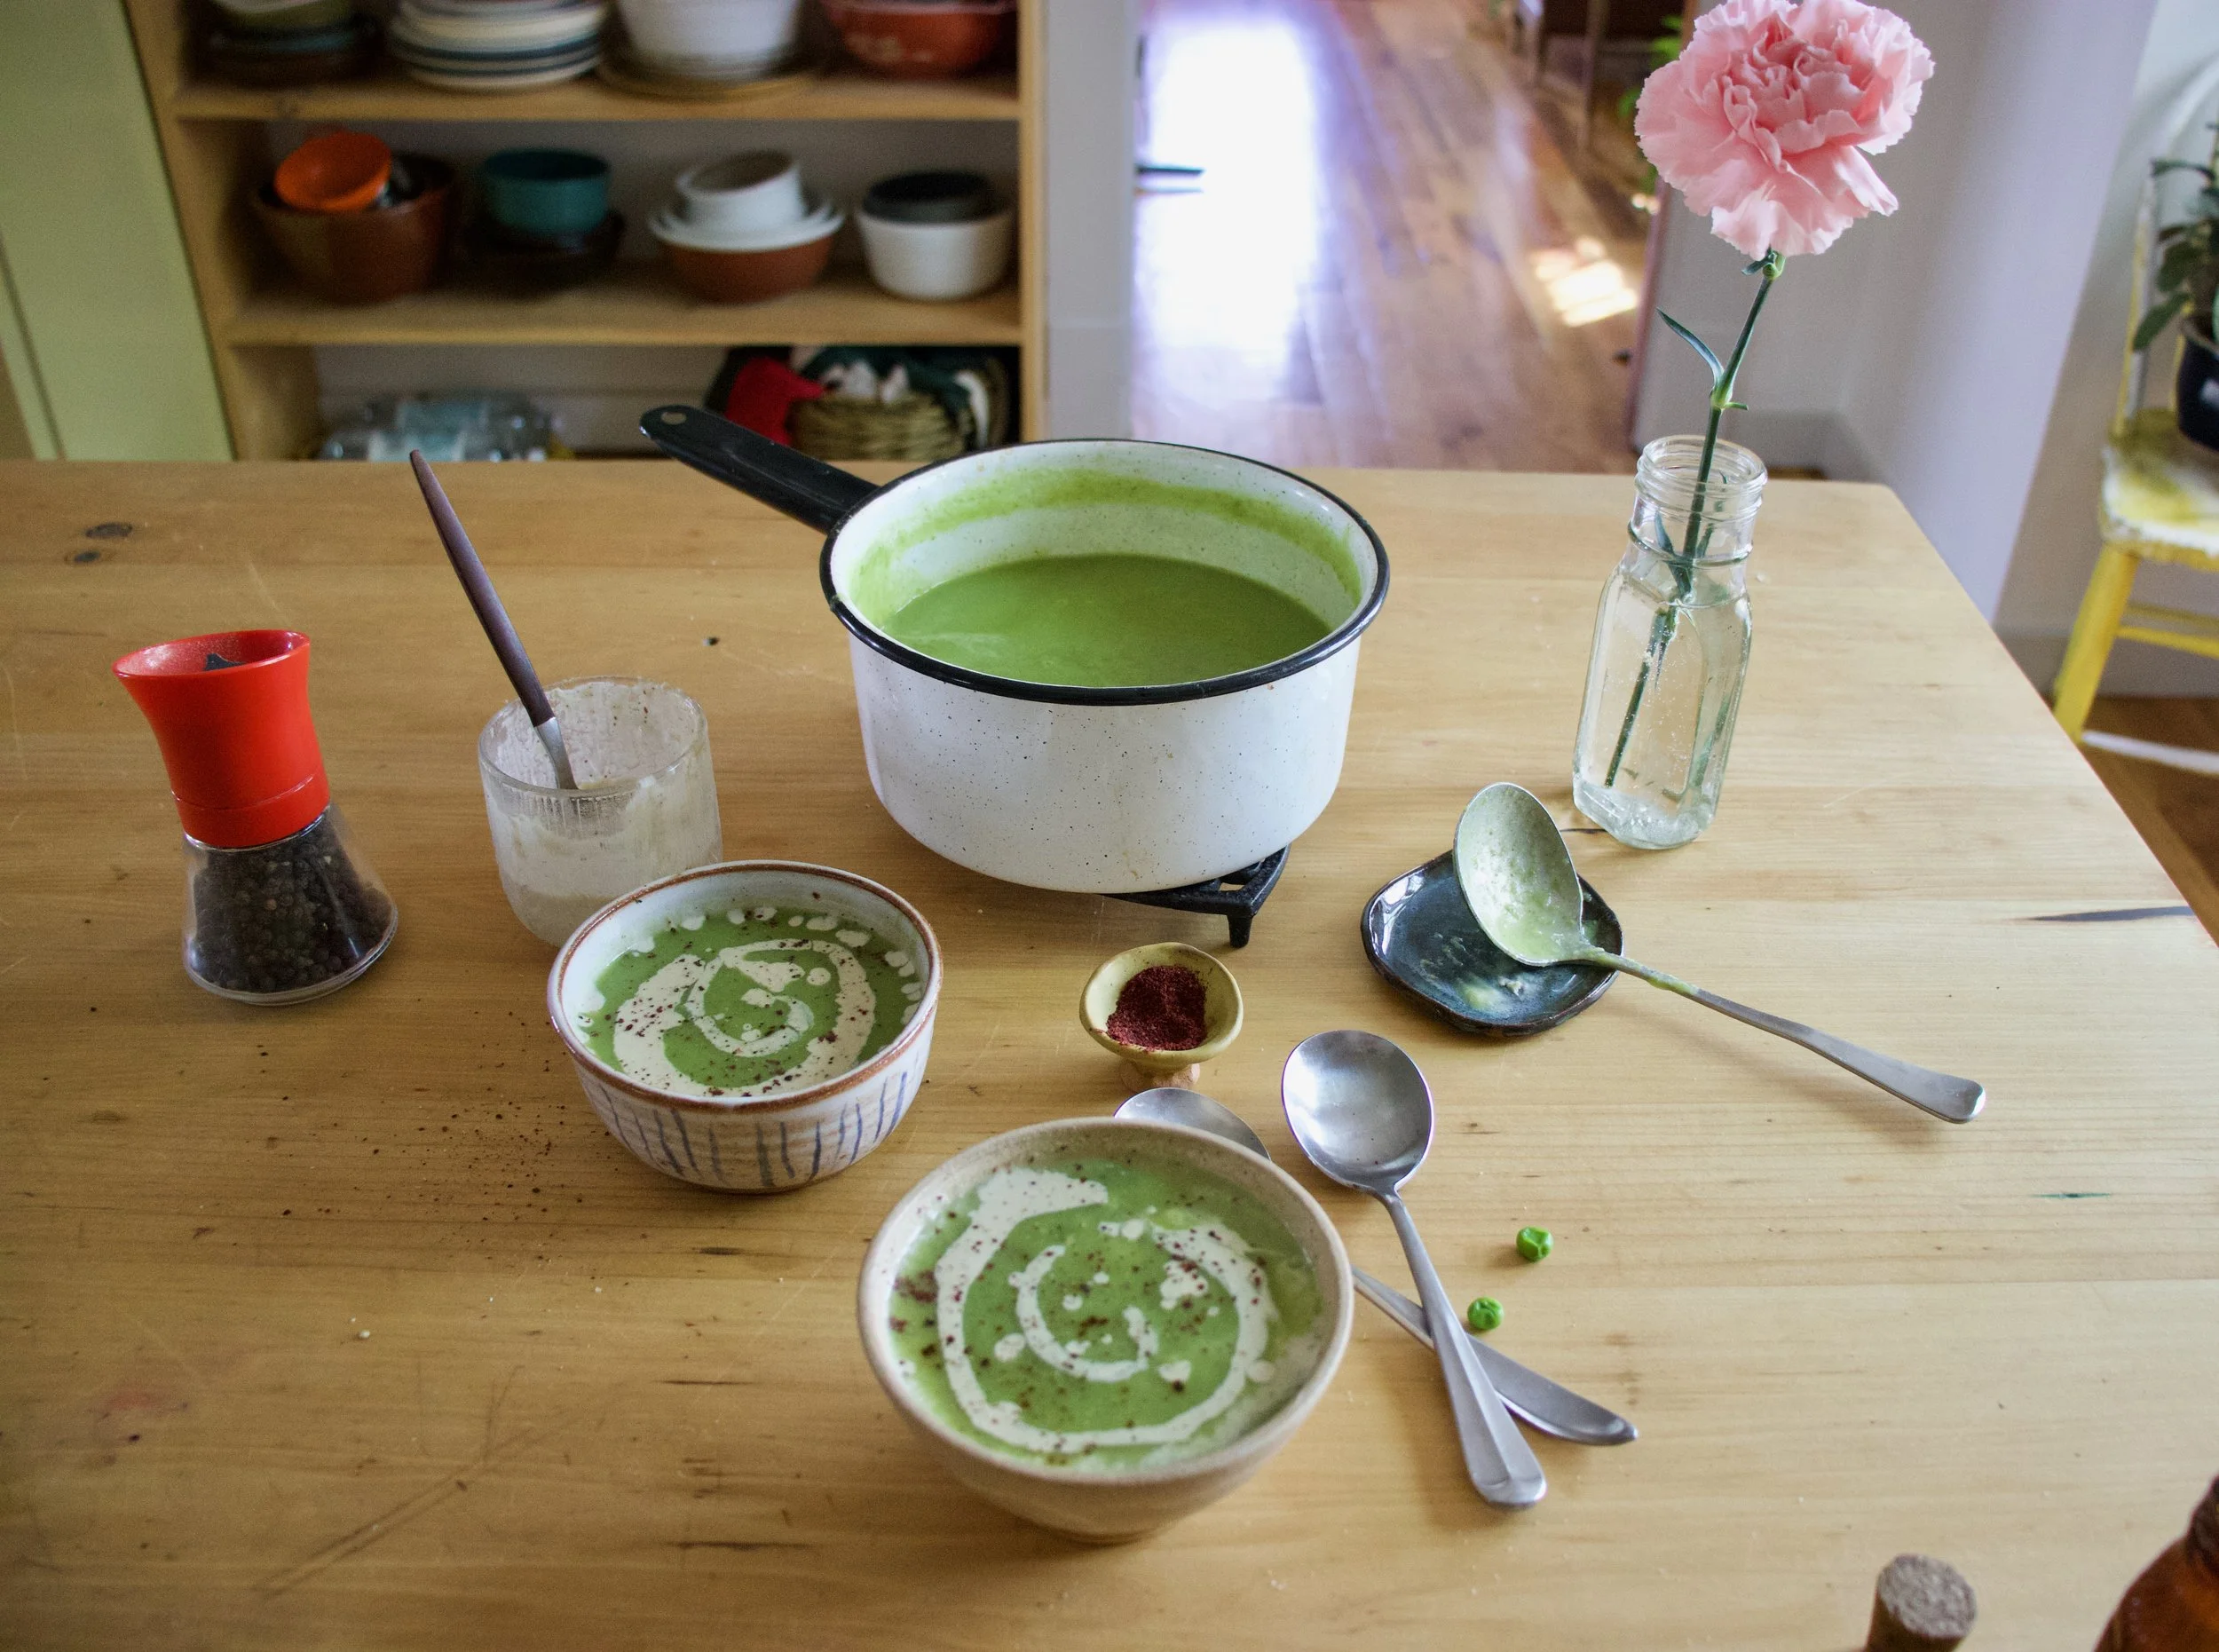
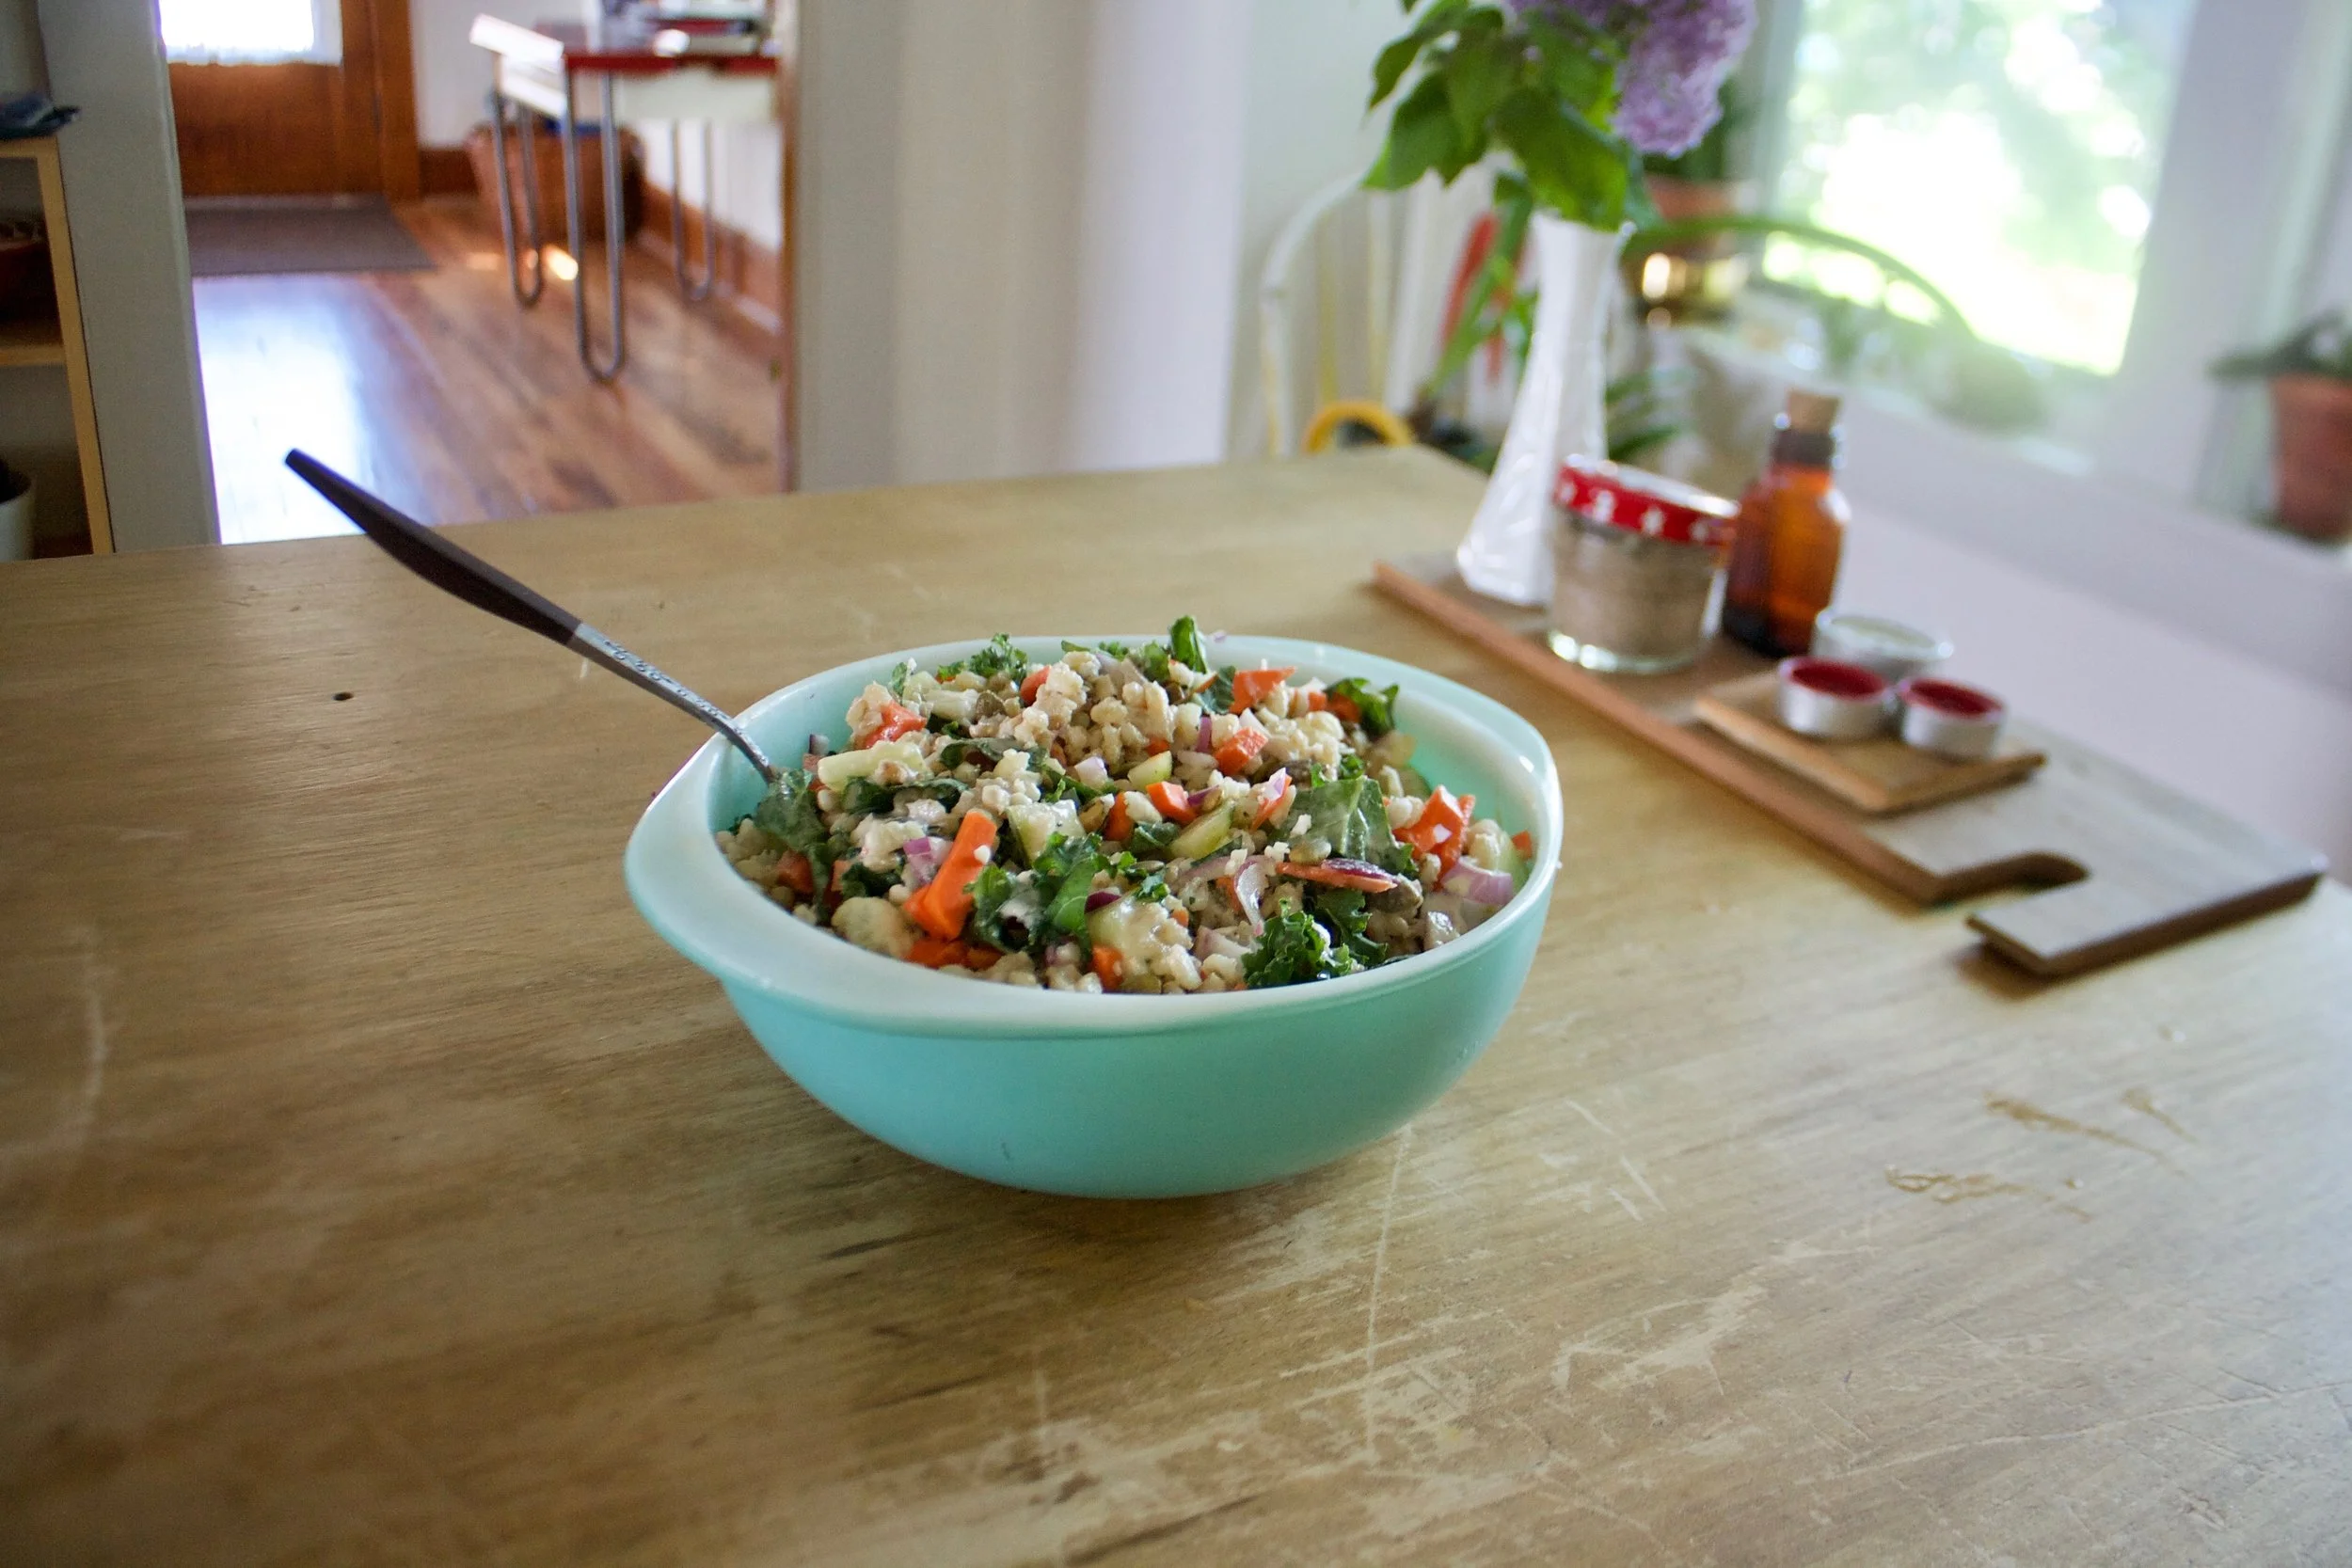
Ladle into bowls, grab the sumac tahini sauce and swirl it on in. A tablespoon or so is good. And don%u2019t forget a little more pepper and another pinch of sumac for good measure.
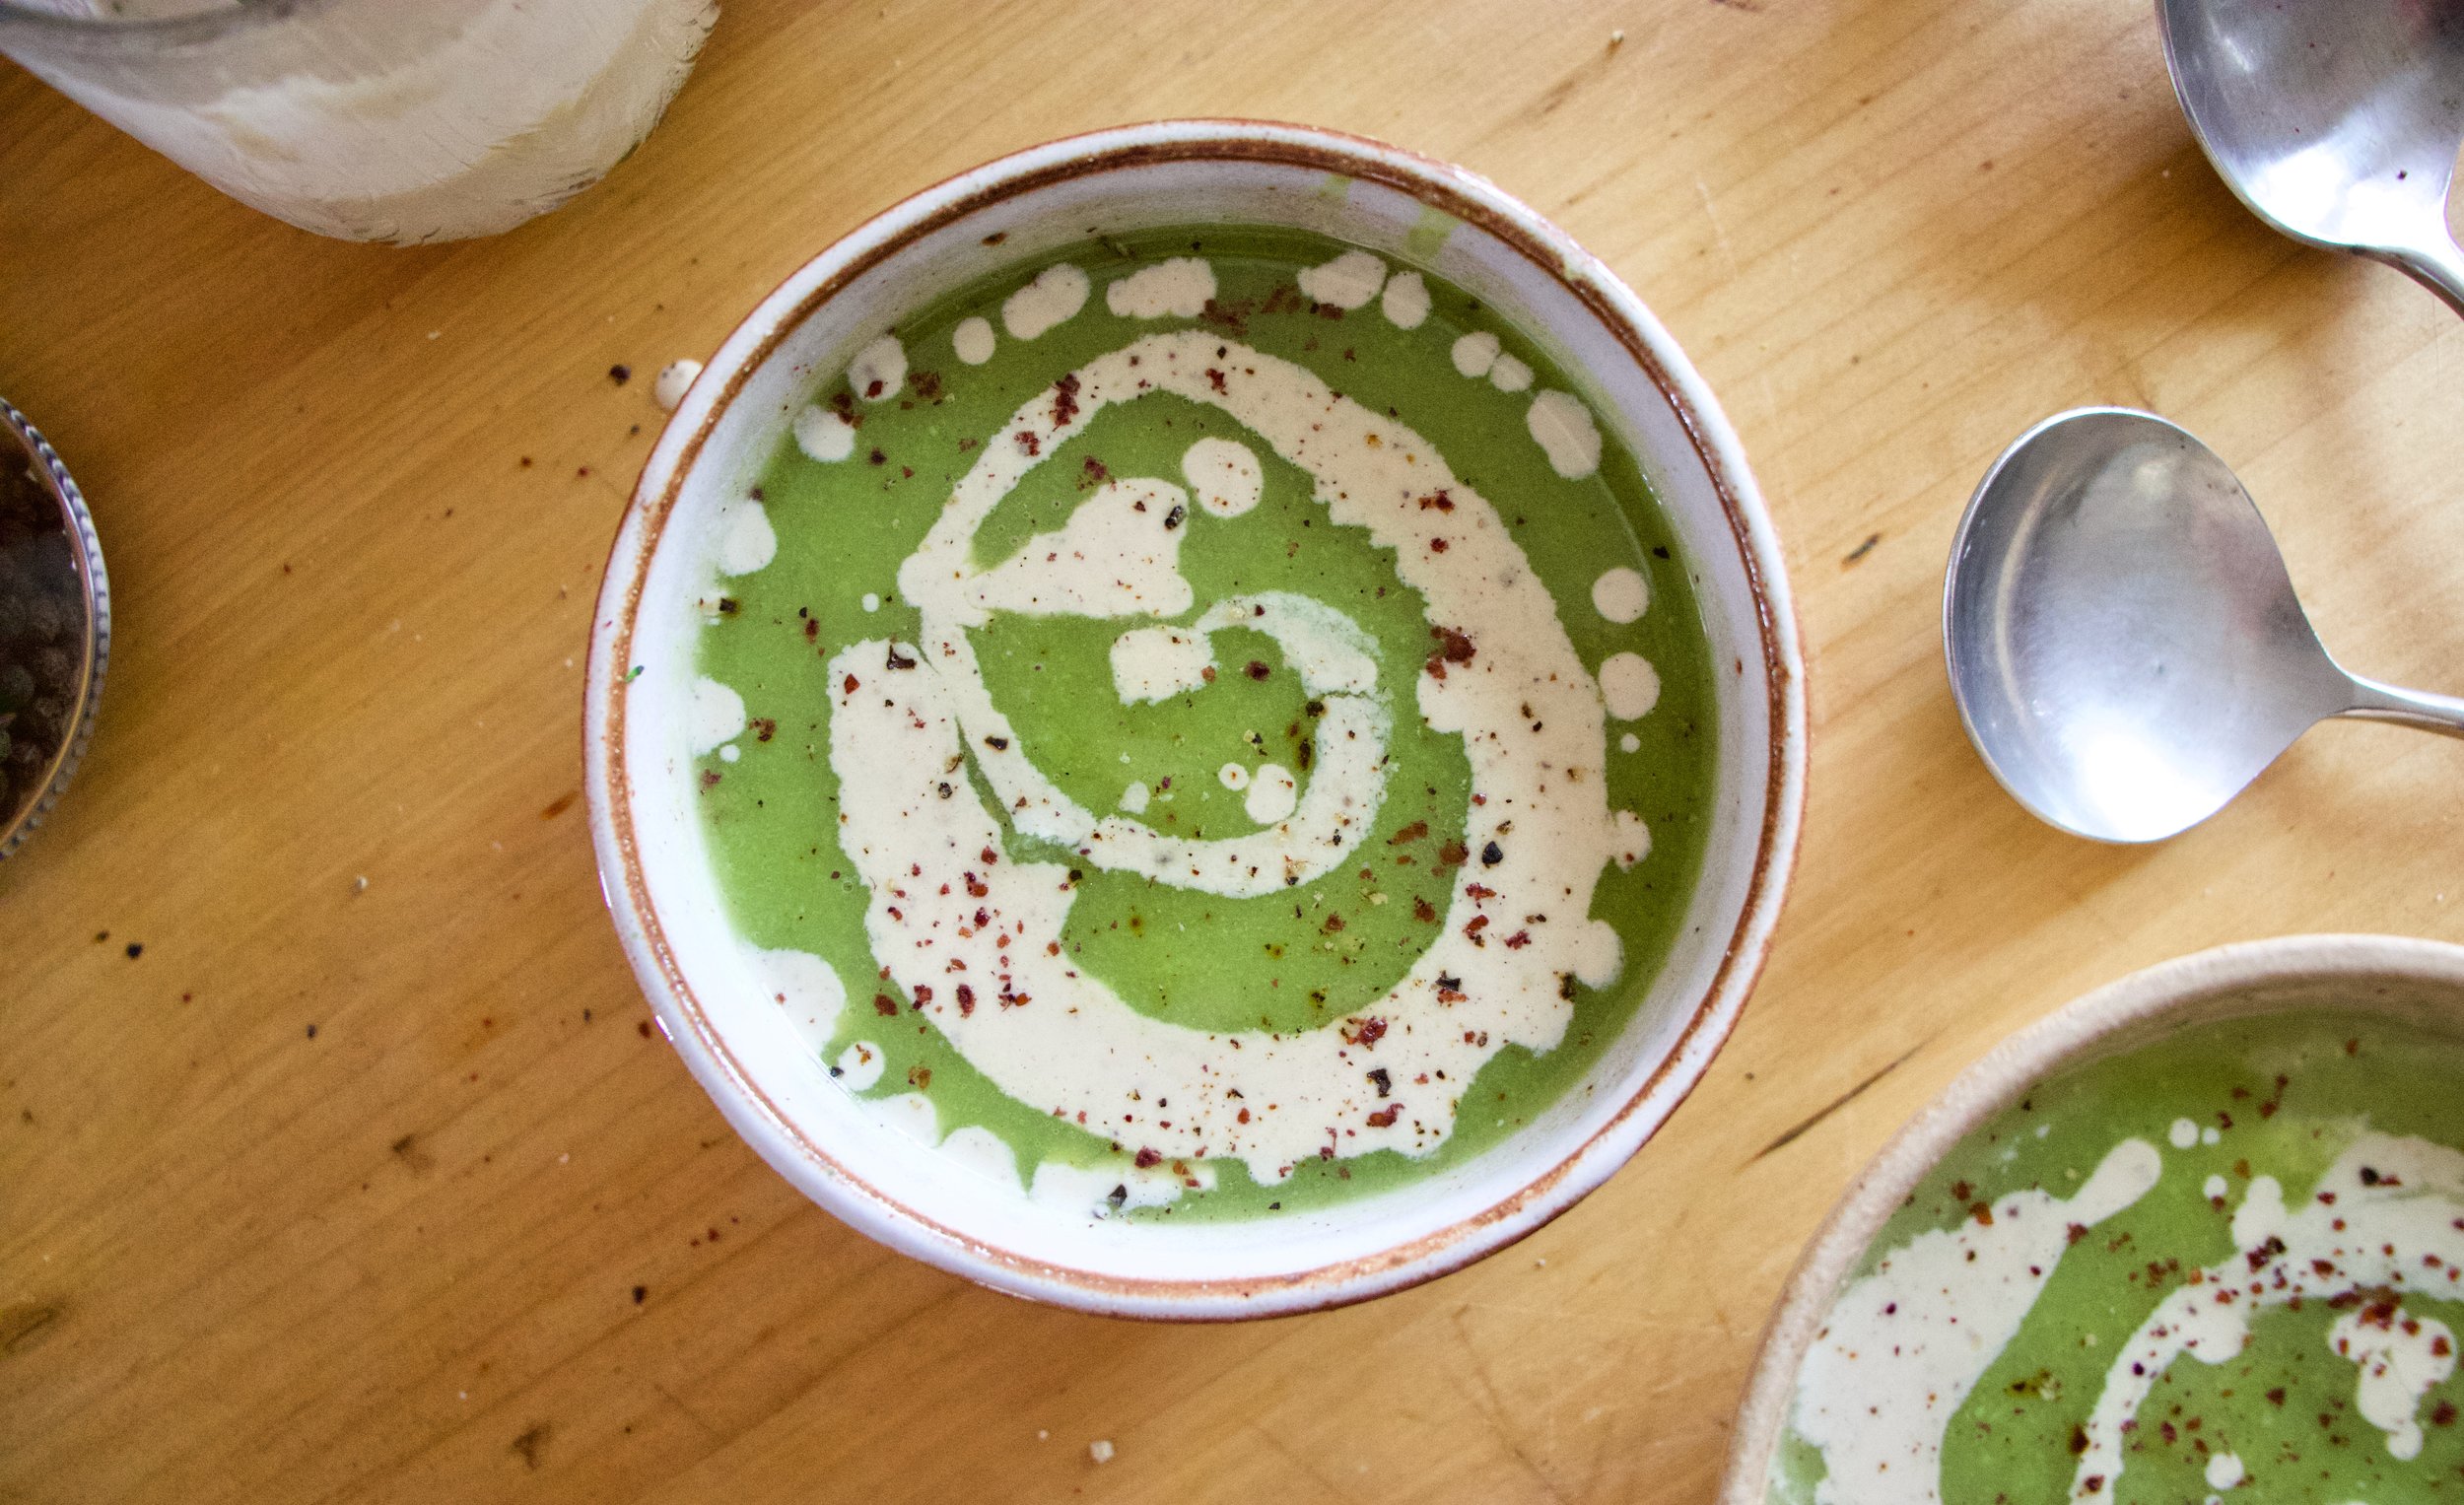
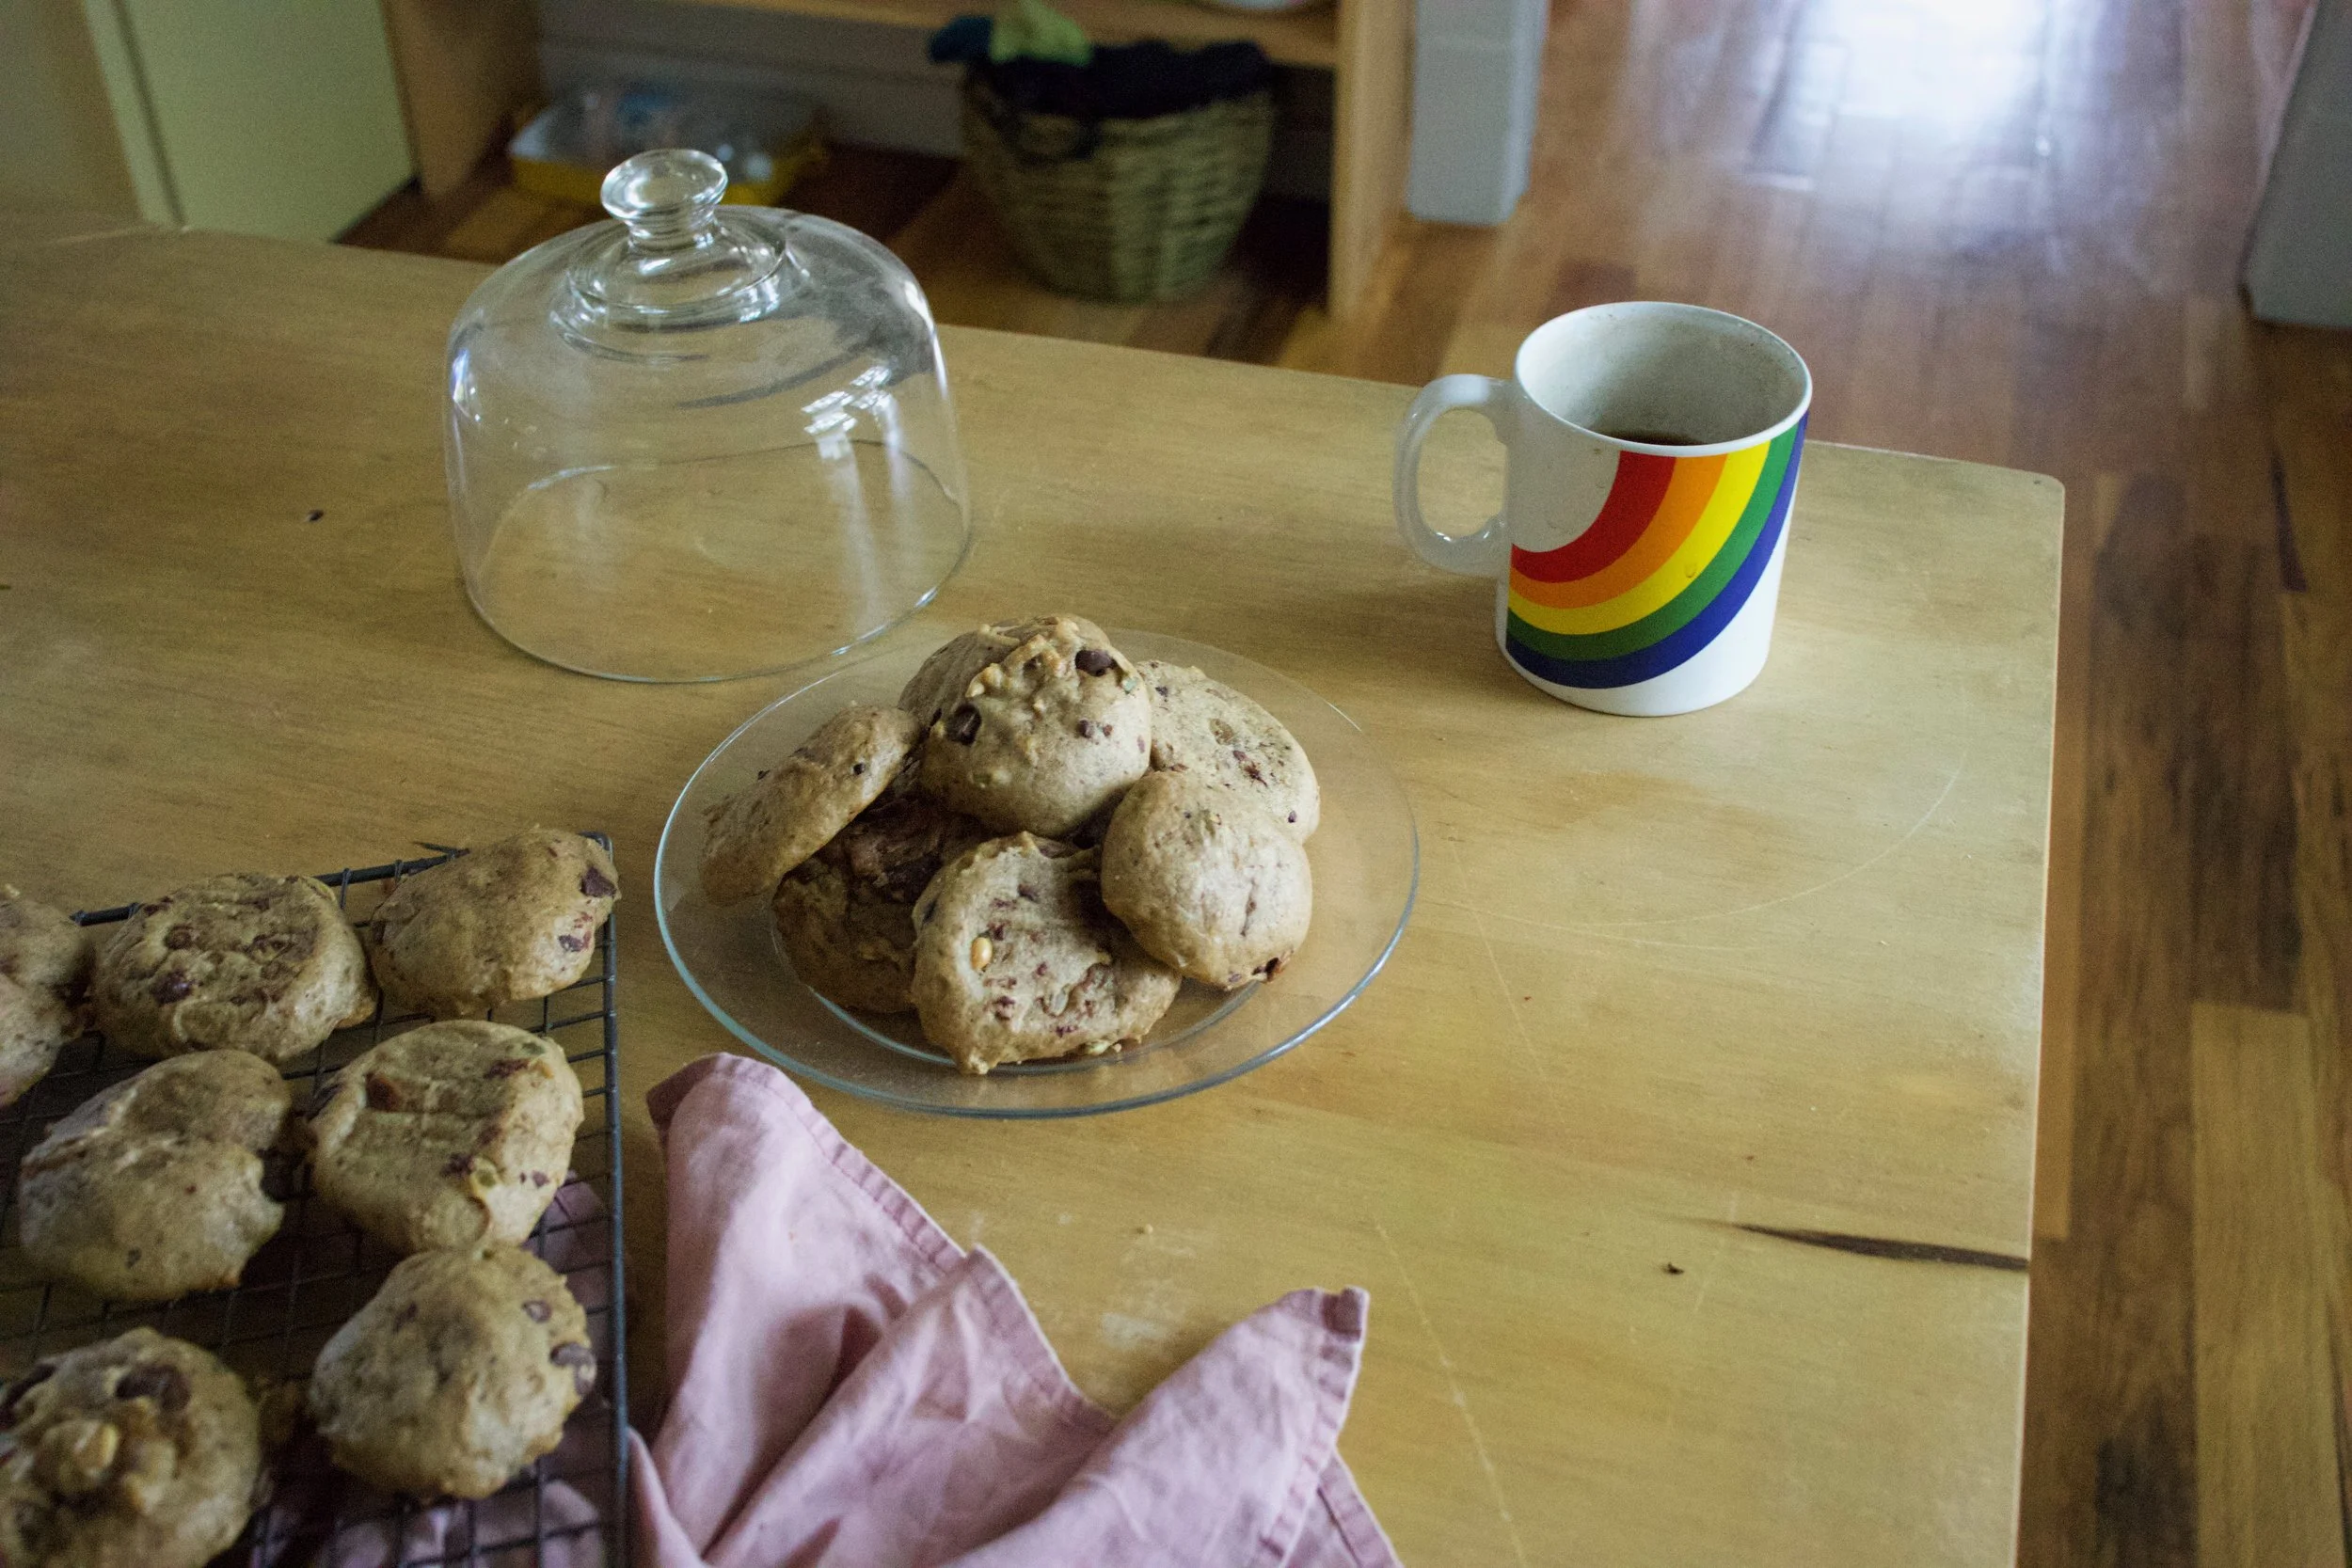
Just appreciate for a moment. That is one good looking bowl of soup. And it taste even better then it looks.
-C
Makes about 4 serving
-
1 1/2 cups fresh or frozen peas
-
1 1/2 cup chopped fresh or frozen cauliflower
-
1 1/2 cup chopped fresh or frozen broccoli
-
1 large onion
-
3-4 cloves garlic
-
4-5 cups water
-
Salt and pepper
-
1 teaspoon sumac
-
2 tablespoons tahini
-
2-4 tablespoons warm water
Start by removing the papery skin from the onion and chop into a few big chunks. Remove the skin from garlic too. Place into pot with 4 cups water. Turn heat on high and bring to a boil then turn heat to medium and let onion are garlic cook until tender which should take about 15-20 minutes
Once the onion is cooked, add in the broccoli and cauliflower. Turn heat back to high and bring to a boil again then turn back down to medium heat. Keep cooking until tender (another 15 minutes or so) then add in the peas. Keep on heat until peas are cooked through then remove the pot from heat and either transfer to a blender or use a immusrian blender to blend the soup until smooth. Add a little more water if needed to get to the right consistency to blend right. Or if you want a thinner soup.
For the tahini sumac swirl just mix the tahini and sumac together along with the juice of the lemon, two tablespoon warm water and a pinch of salt. Mix together until smooth. If the mixture is to thick, add another tablespoon of water.
To serve. Ladle or pour soup into bowls and drizzle and swirl the tahini sumac on top. Sprinkle with pepper and a pinch more sumac and you are good to go.
Nothing here but a mere craving, the fact that I had a fresh head of cauliflower, and I really wanted tahini. TA DA. I made exactly what I wanted and it was so so sooooo good. Maple Cumin is one of those super A+++ taste pairings and anything roasted cover in tahini is basically going to be a win so I had no fear when making this dish that it was going to be anything but fanatic.
And of course I was right. It was so freaking good, like now I am going to make it again and again because I don%u2019t want make cauliflower any other way ever or at least until I get sick of it or of roasted vegetables. But that probably won%u2019t happen for a while.
So if you like cauliflower and tahini and amazingness, here, make this.
To the cauliflower
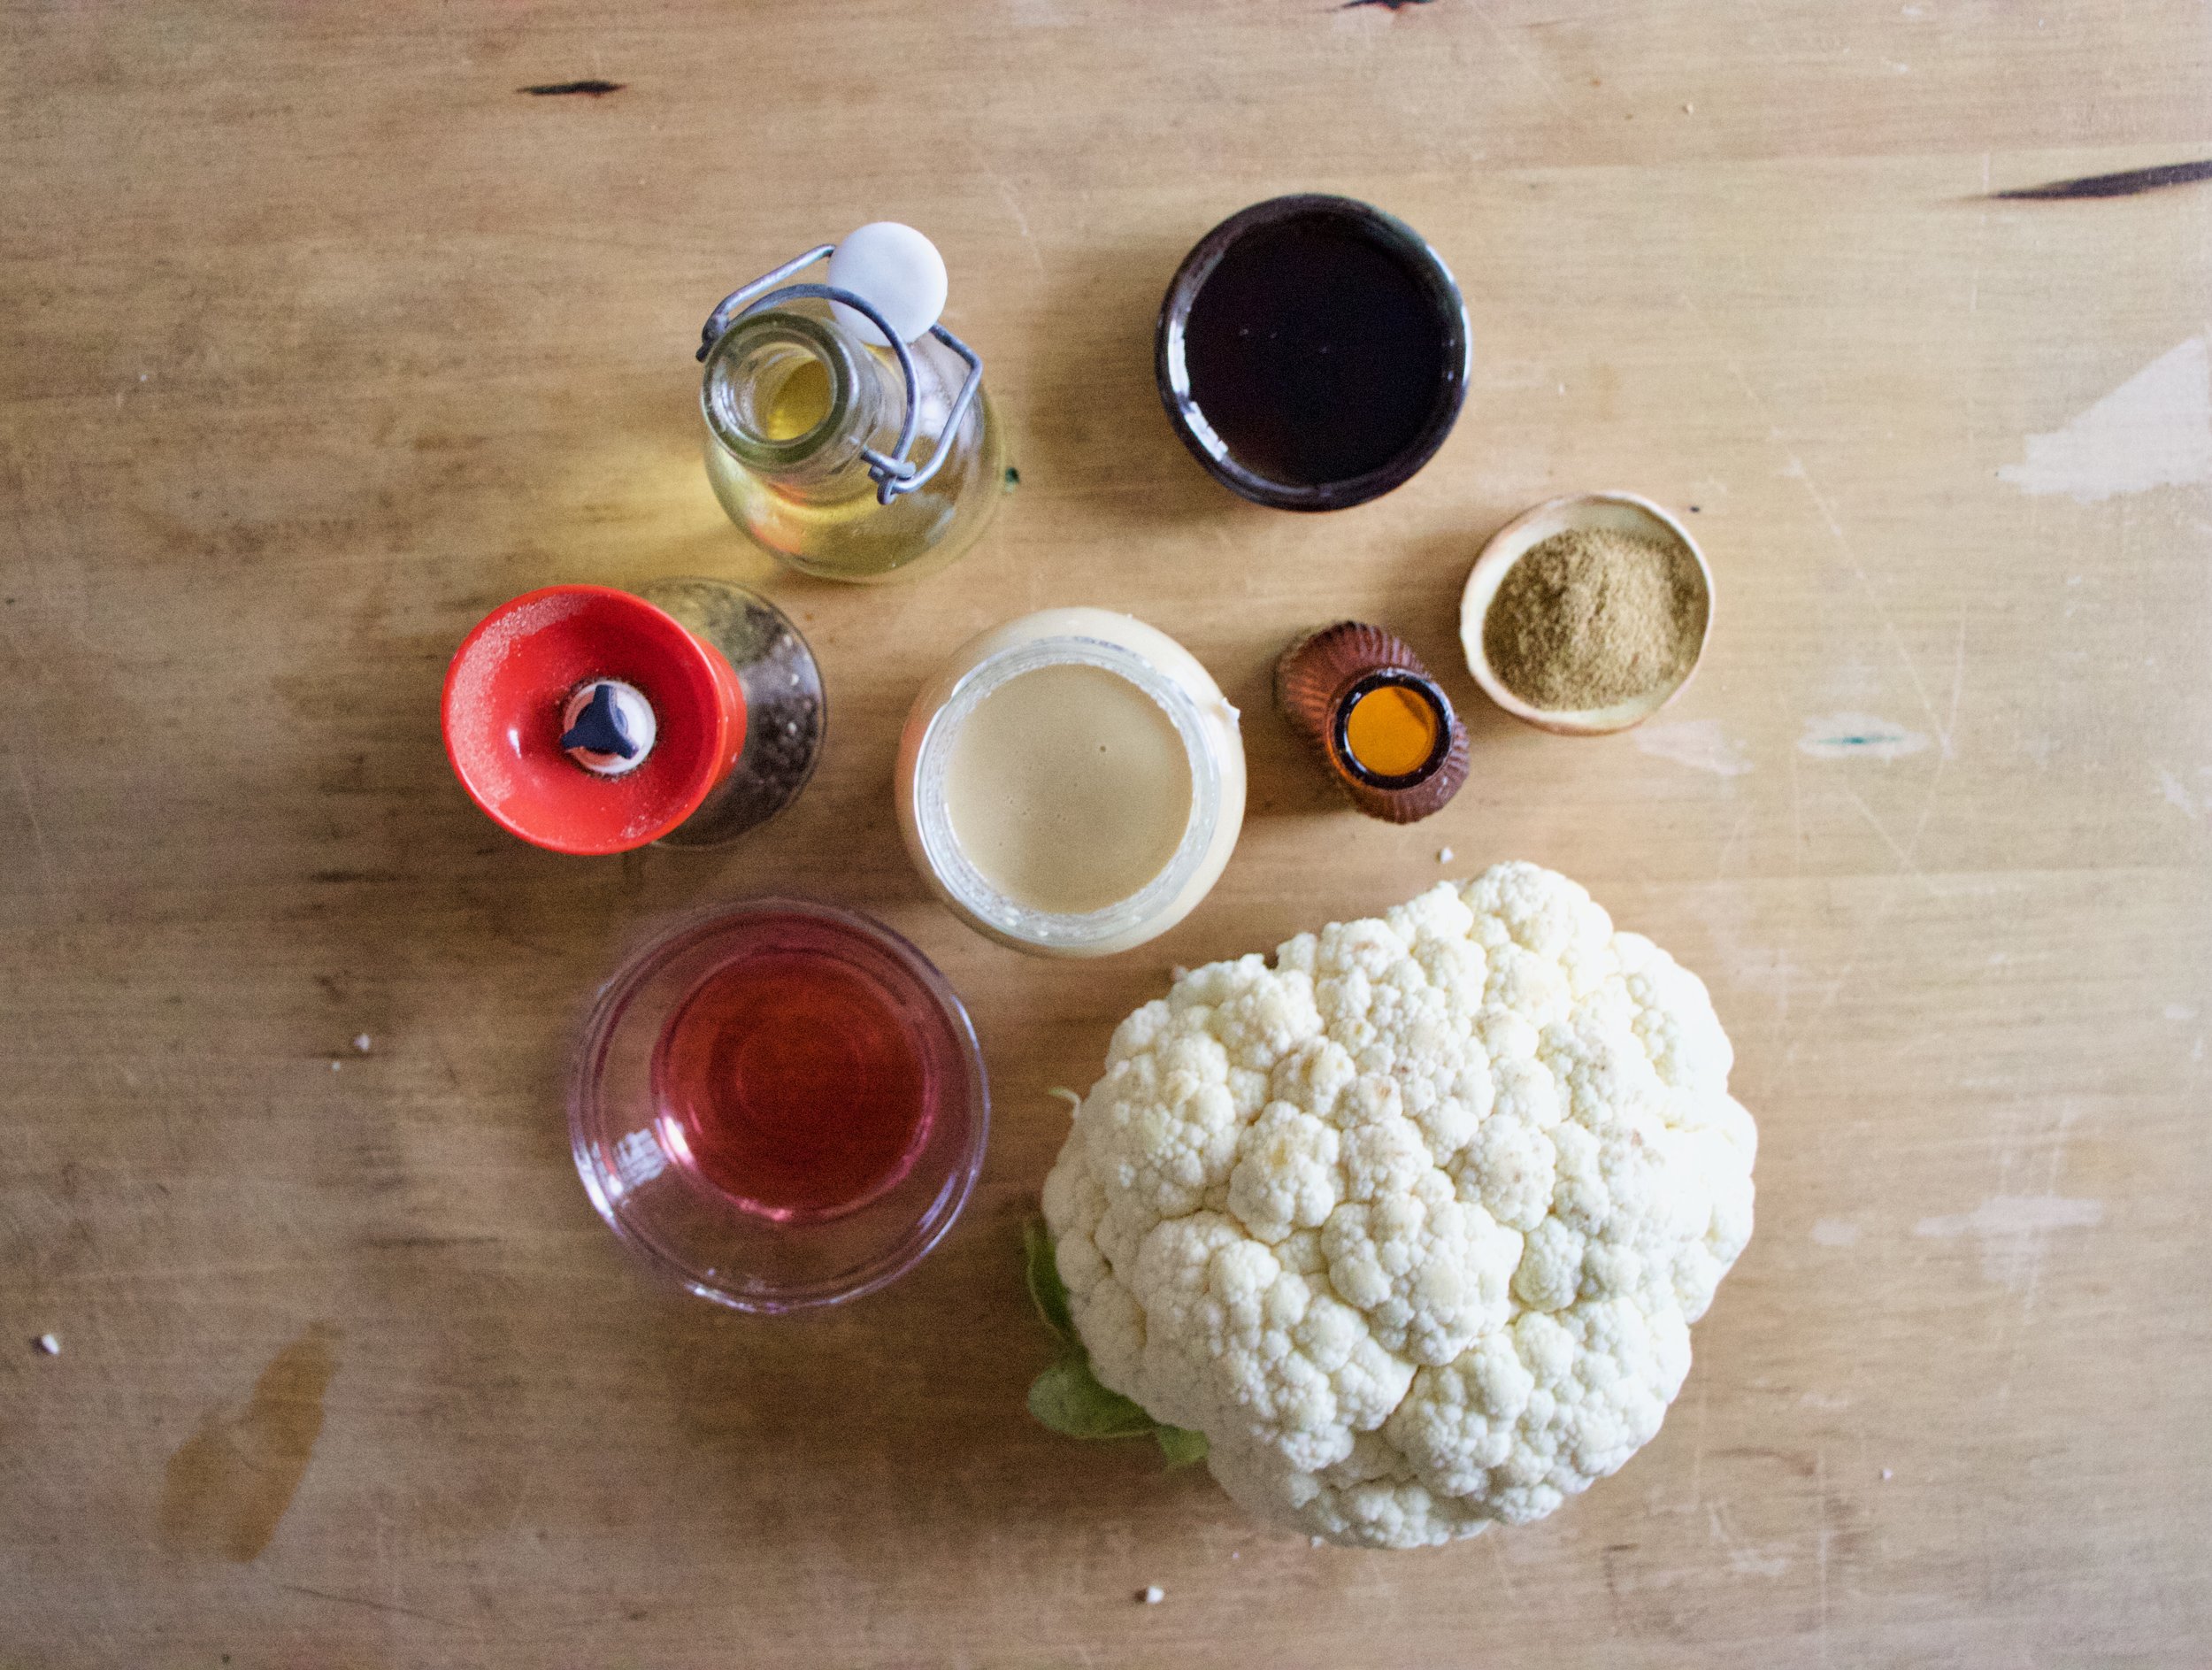
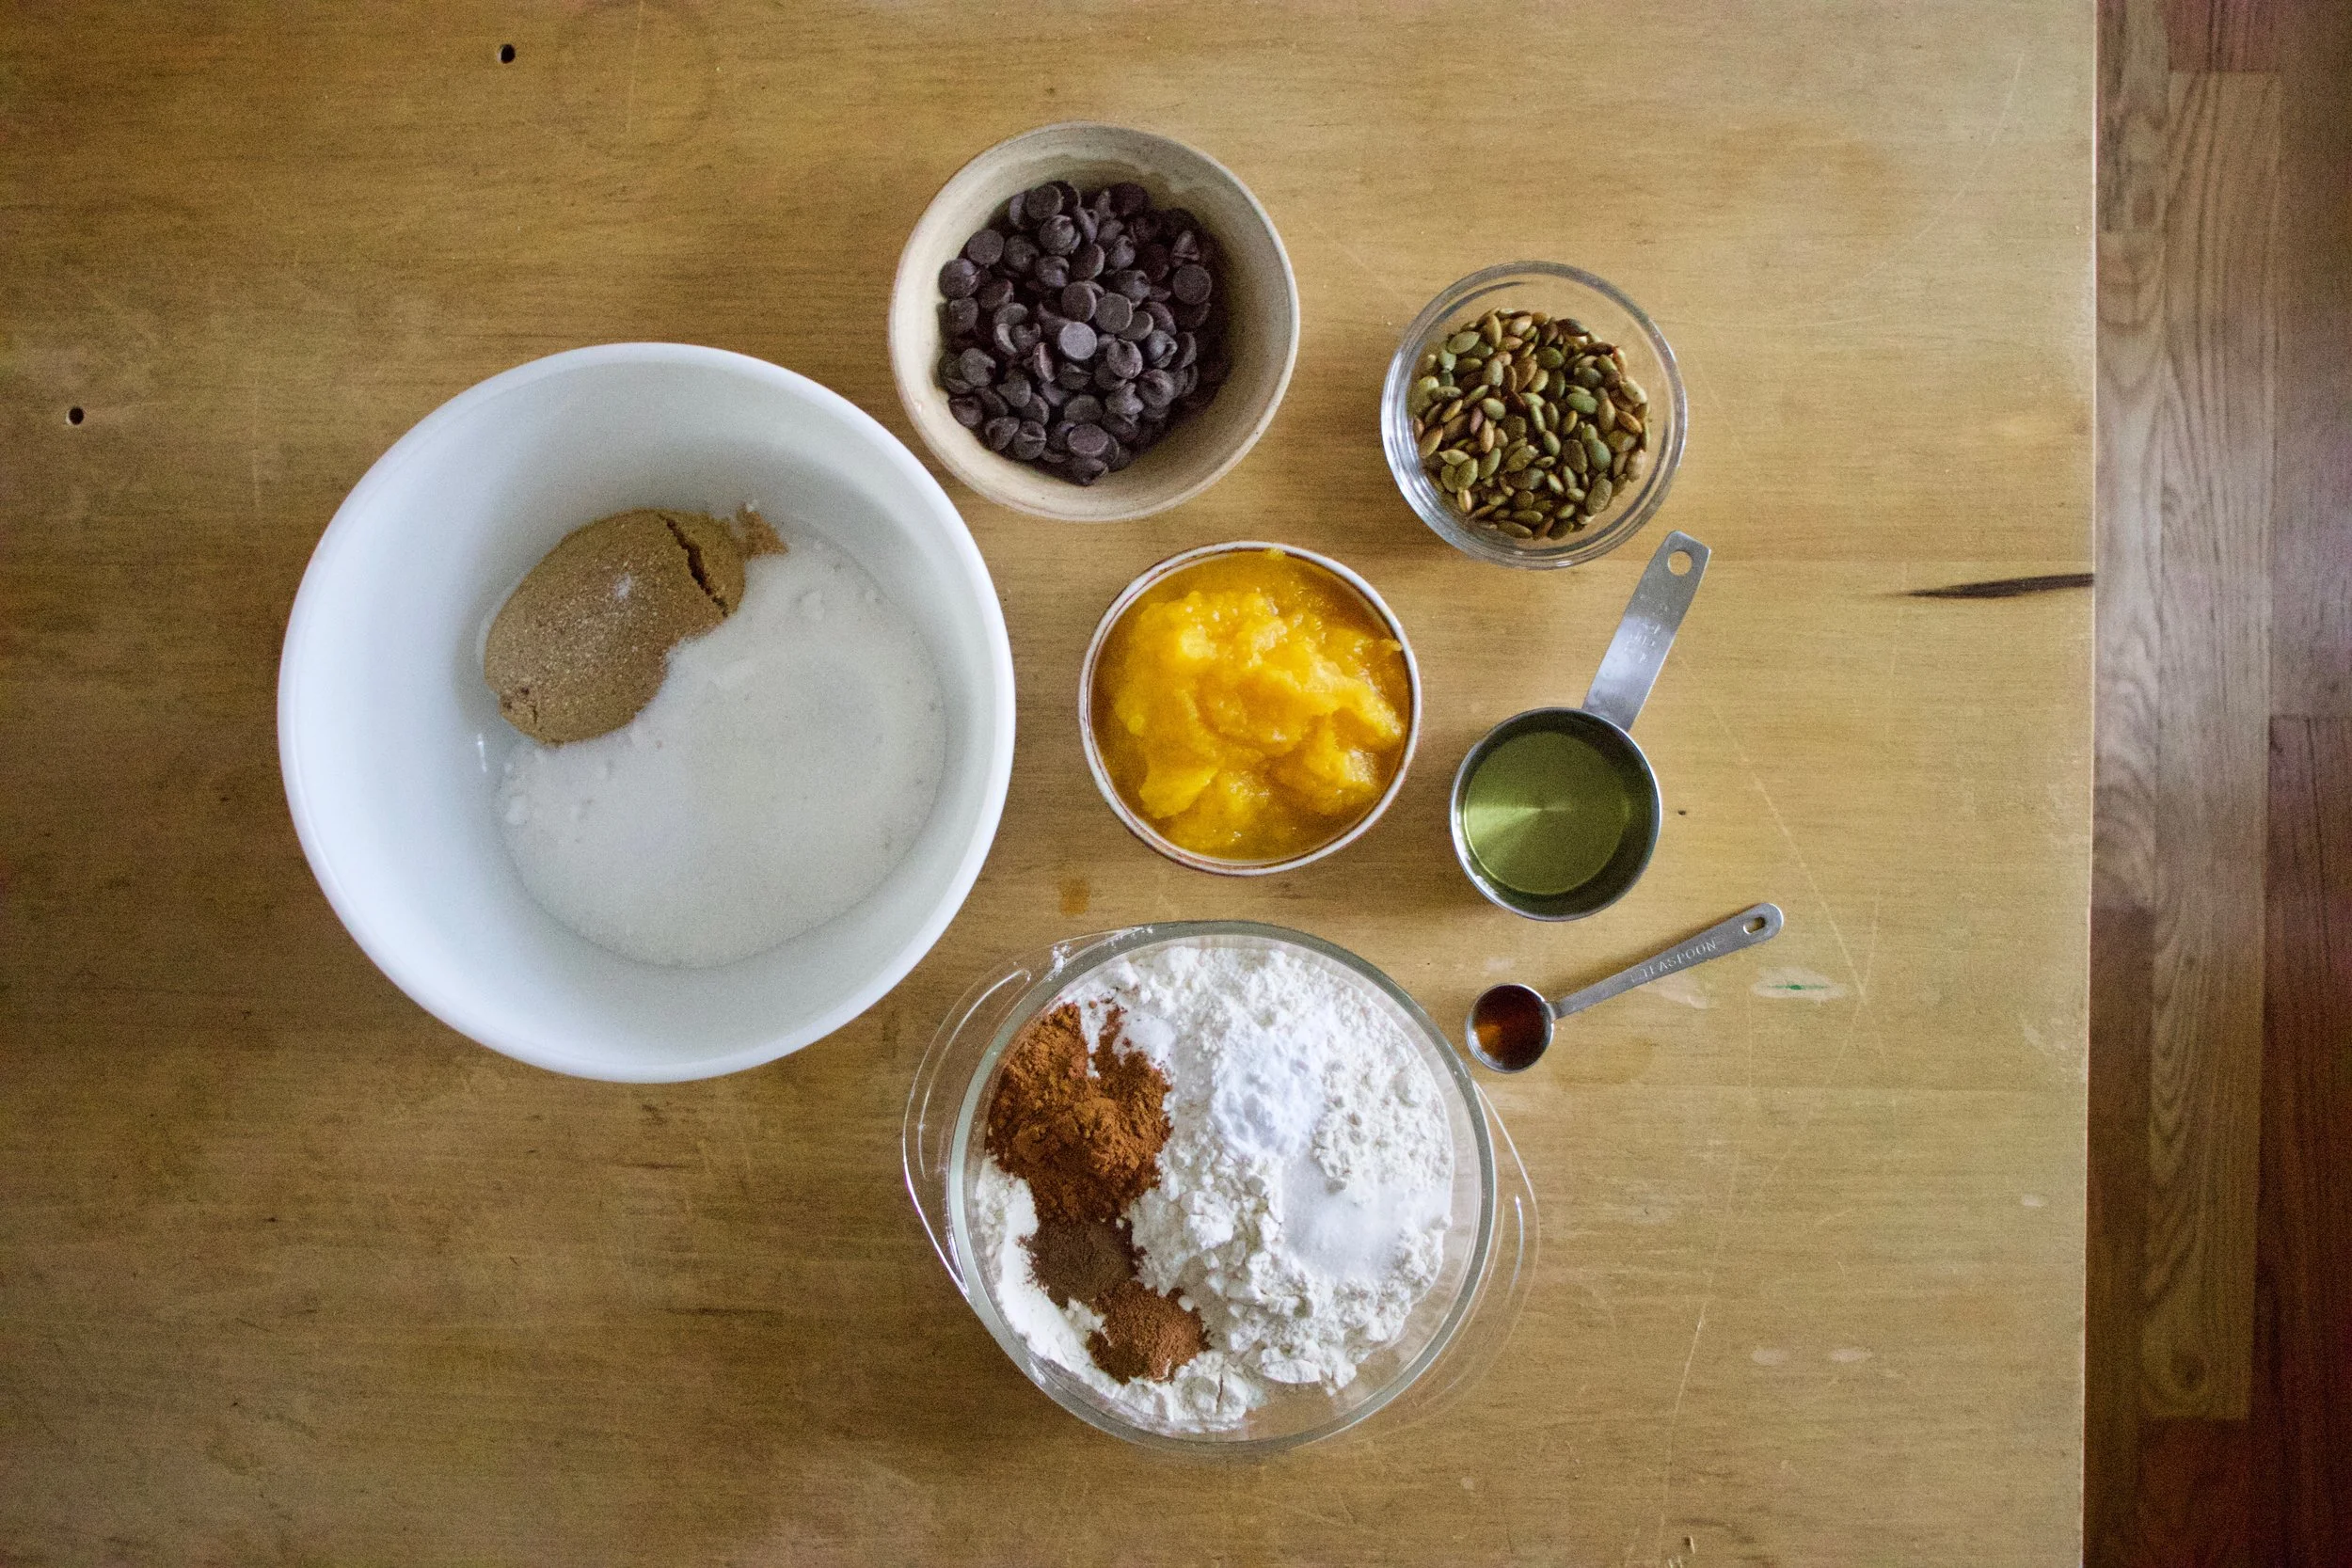
The stuff. A head of cauliflower, tahini, maple syrup, cumin powder, red wine vinegar, salt and pepper, and olive oil.
Break or cu the head of cauliflower up into florets and toss with a little oil, the maple and cumin, and a little salt and pepper.

Scatter on a baking sheet and stuff it into a hot oven.

Meanwhile mix tahini with vinegar, salt and pepper, and enough warm water to thin out.
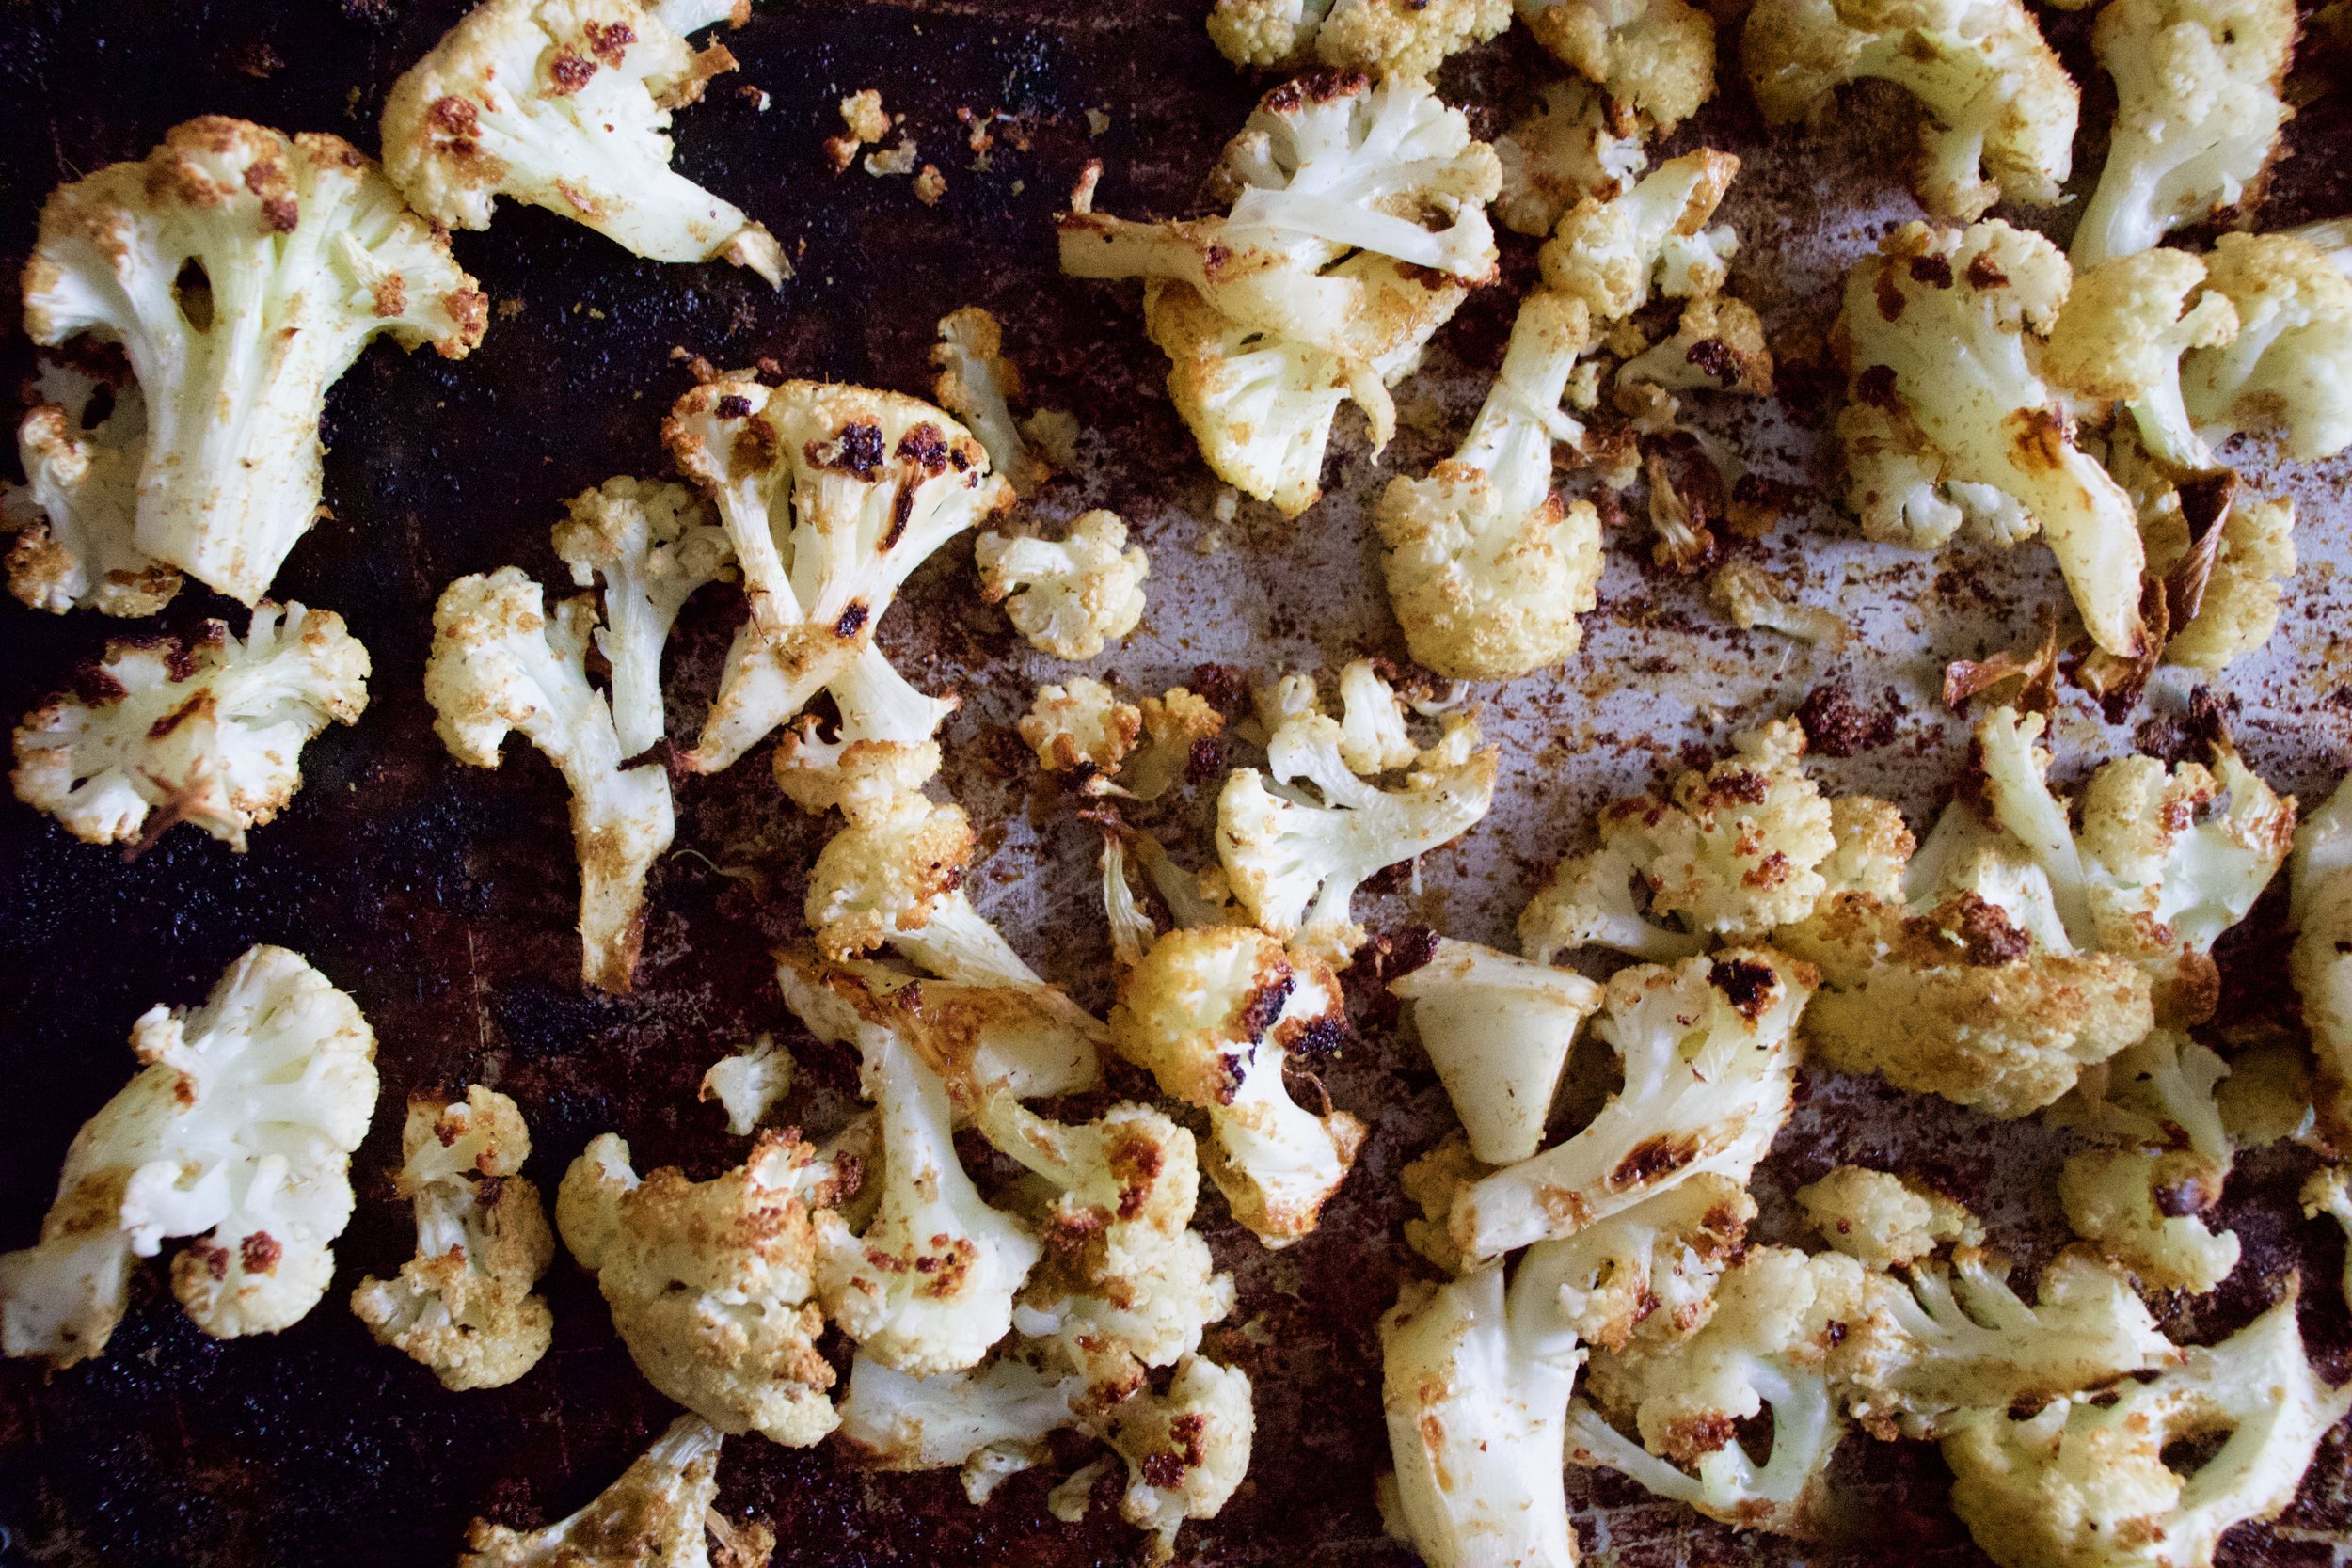
Roasted all nice and crisp and delightful.

And now you gather up all that cauliflower and cover with all the tahini you want. Grab a bowl, or just eat off baking sheet, and get to it.
And there is no shame in eating a whole head of cauliflower because hey, its cauliflower.
-C
Makes a meal for one or a side for a few
-
a head of cauliflower
-
3 teaspoons cumin
-
2 tablespoons maple syrup
-
olive oil
-
3 tablespoons tahini
-
2 tablespoons red wine vinegar
-
2-3 tablespoons warm water
-
salt and pepper
Preheat oven to 450
Break or cut the cauliflower into medium sized florets. Place in a bowl and drizzle with a teaspoon or so olive oil and toss around. Drizzle in maple, add in the cumin, and a pinch of salt and pepper. Toss until coated then dump the cauliflower onto a baking sheet. Place in hot oven for 25-30 minutes or until roasted to your liking.
While that%u2019s roasting, mix up the tahini, vinegar, and a pinch of salt and pepper. Add in warm water until the mixture is a drizzlable consistency.
Once cauliflower is out of oven, cover with tahini.
Now eat.
There will be no left overs so don%u2019t worry about it.

Finally, it’s safe to turn the oven back on. No more heatwave (PLEASE NO MORE!!!) Last week was such a bust of life, I still feel like I am recovering. But let’s not talk about anymore. Lets talk about this cauliflower situation that was a highlight of my week.
I have been meaning to do this for a while now. And I have attempted, I’ll have the intention, get the cauliflower and peppers,%u00a0%u00a0then somehow forget that I was going to cook it and just feed it to the mr raw, or he will just start eating at it and then the head is not intact anymore (He loves raw cauliflower). And sure, you don’t need to have a whole head of cauliflower to roast it and enjoy it, but come on, doesn’t it look super badass and pretty whole? And you can slices of it like you would a cake, a really yummy veggie cake. So yeah, it should be a whole head. Anyways, besides being pretty, this thing was freaking amazing. I love cauliflower,%u00a0roasted cauliflower even more. Add to it some slightly sweet and cheesy pepper sauce, holy ho%u2026I almost ate the entire thing myself. It was everything and more how I wanted it to turn out and am now forever going eat my cauliflower exactly like this (but probably not always). And the sauce%u2026. I am going to make giant jars of it and stick it on everything. So good.
Now lets get to it.

The stuff. A whole head of cauliflower, a couple colorful peppers, nutritional yeast, garlic, lemon, salt and pepper, and a little bit of olive oil.%u00a0

Start with the cauliflower, Trim away any big leaves from the bottom and stick the whole head into a oven safe pot big enough to hold it.. Add in a little water and stick on the stove top on medium heat to cook for a few minutes, just to give it a little head start.
And preheat the oven
Pre roasted, slightly streamed cauliflower goes into the oven until a nice golden brown and all pretty like.
While the cauliflower is roasting, roasted the peppers too.I place mine whole onto a lightly oiled cast iron pan* and stick into the oven.
Once the peppers are starting to char and have become soft and tender, remove from the oven and let cool for a few minutes or long enough for you to handle them. When cooled enough, remove the stem, seeds and any of the skin that is coming off.
*Last year I used the same cast iron pan over and over to rasot peppes and never cleaned it, or bothered to oil it. By the end of the summer, there was a 1/2 inch thick layer of hard as rock caramelized pepper juice that I had to chip it away with a chisel%u2026 so yeah. be careful of pepper juice.

Toss the roasted peppers into a food processor along with the garlic, lemon juice, nutritional yeast, a splsh of oil and s little salt and pepper. %u00a0

And taste.. and try not to eat it all right now (It is so f ing good)%u00a0

And take that sweet, so delocouis sauce and smother all over the roasted cauliflower.
If you want, stick it back into the oven for a few minutes to crust up a little bit, but not a necessary.You can call it here and go to town.

I stuck in back in the oven for a few minutes%u2026 But again, not necessary.

And now you have this giant, amazing, head of delicious cauliflower, waiting to be eaten.%u00a0I recommend removing the head and sticking it on a cutting board, you know, for easier cutting, and also it looks pretty badass.%u00a0
Cut into chunks and serve right away. %u00a0
Goodness gracious was this thing so freaking good!
Have a fantastic day!
-C
- 1 fresh head of cauliflower
- 2 red(yellow or orange work too) peppers
- 2 -3 tablespoons nutritional yeast (the more the cheesier)
- 4-5 cloves of garlic
- juice of a lemon
- salt and pepper
- olive oil
Take whole head of cauliflower and trim any big leaves or stem off bottom. Stick into a big oven safe pot with about 1/2 inch of water. Place a lid on pot and stick on medium heat for about 8-10 minutes, or until water has evaporated. and cauliflower is slightly tender.
Preheat oven to 425.
After the brief cook on the stove top, remove lid, drizzle cauliflower with a tiny bit of oil and sprinkle with a little salt and pepper. Stick into oven without the lid.
Now that the oven is on, toss peppers into oven, either on a baking sheet,%u00a0pan, or on the rack if you have the space and cook until all roasted and soft (should take about 15 minutes). Remove when cooked and let cool off for a few minutes. Once cool enough to handle, remove seeds and stem and any of the skin that want to come off and stick into a food processor. Add in the garlic, nutritional yeast, lemon juice and a tiny drizzle of olive oil. Blend until smooth. Add salt and pepper to taste.
Once the head of cauliflower is cooked and browned, remove from oven and dump/ smear with the red pepper sauce. If you want, place back into oven for a few more minutes, or not. Good both ways.
Remove from pot and cut into big ass chunks. Garnish with something green and eat until you can’t eat anymore.
If by chance you have any left overs (which I highly doubt) try blending it up as soup. It is freaking fantastic!
 %u00a0 %u00a0 %u00a0
 Spicy, crispy cauliflower%u2026 um yes please.%u00a0 I really like cauliflower. The mister loves it, or at least likes it better than any other vegetable. So when he asked for spicy cauliflower, well yea I am going to make it because I am so nice and really, could I say no to a veggie request? (I might have said no if it involved deep frying) Also, I found fresh cauliflower on sale! ($2.25) I don’t usually cook fresh cauliflower, but %u00a0I figured at that price, it wouldn’t be bad to cook a head. (If I am cooking cauliflower, which I do a lot, I just use frozen%u2026.casue it be waaaay cheaper)%u00a0
Fresh, cheap and requested veggies%u2026.those are must makes. And the mister was happy with I handed him the plate of oh so lovely looking crispy crunchy loveliness. (I kind of like to make him happy%u2026sometimes)
 The stuff. Cauliflower, chopped and broken into pieces. Corn meal mixed with salt, pepper, onion and garlic powder, and because I made this for the mister, parmesan cheese. And in the green bowl, srirsachi and a little oil.
  The%u00a0cauliflower%u00a0gets a coat of the hot sauce and then tossed around in the corn meal mixture. Handling as little as possible, place coated pieces on a lightly oiled baking sheet and stick those suckers in the oven for%u00a0about a half hour, taking them out and%u00a0flipping half way.
 And take them out of the oven when pieces tuned golden brown, stik them on a plate, and serve immediately.
A bit of spice, a bit of crispy , a lot a yum. %u00a0Serve with some crunchy veggies, maybe a squeeze of lemon and definitely some type of avocado situation.
A beer would be lovely too!
Have a fantastic weekend!%u00a0
-C
Spicy Crispy baked Cauliflower
- 1 head cauliflower, chopped or broken into florets
- 1/2 cup corn meal
- 3-4 tablespoon sriracha or your favorite hot sauce
- 1 tablespoon olive or coconut oil
- salt and pepper
- Any seasonings you might like (garlic or onion powder,%u00a0parmesan cheese,%u00a0national yeast%u2026. whatever%u00a0floats your boat)
Preheat oven to 400 degrees%u00a0
In a bowl, mix together sriracha and oil. In a separate %u00a0bowl, mix salt, pepper, any seasonings you might like, and corn meal. %u00a0Take cauliflower and toss in sauce to coat. Remove from sauce and toss around in cornmeal mixture till fully coated, but try not to hand too much%u00a0so the coating doesn’t come off. Place pieces on a lightly oiled baking sheet and stick into oven. Bake for about 15 minutes, remove and flip pieces. Back into the oven for another 15-20 minutes (depending on you crispy preference) Remove when golden brown (or darker if you like) and%u00a0serve immediately.
Cucumber, celery, and carrots are great accompaniments.. also a little mashed avocado or guacamole is much appreciated.

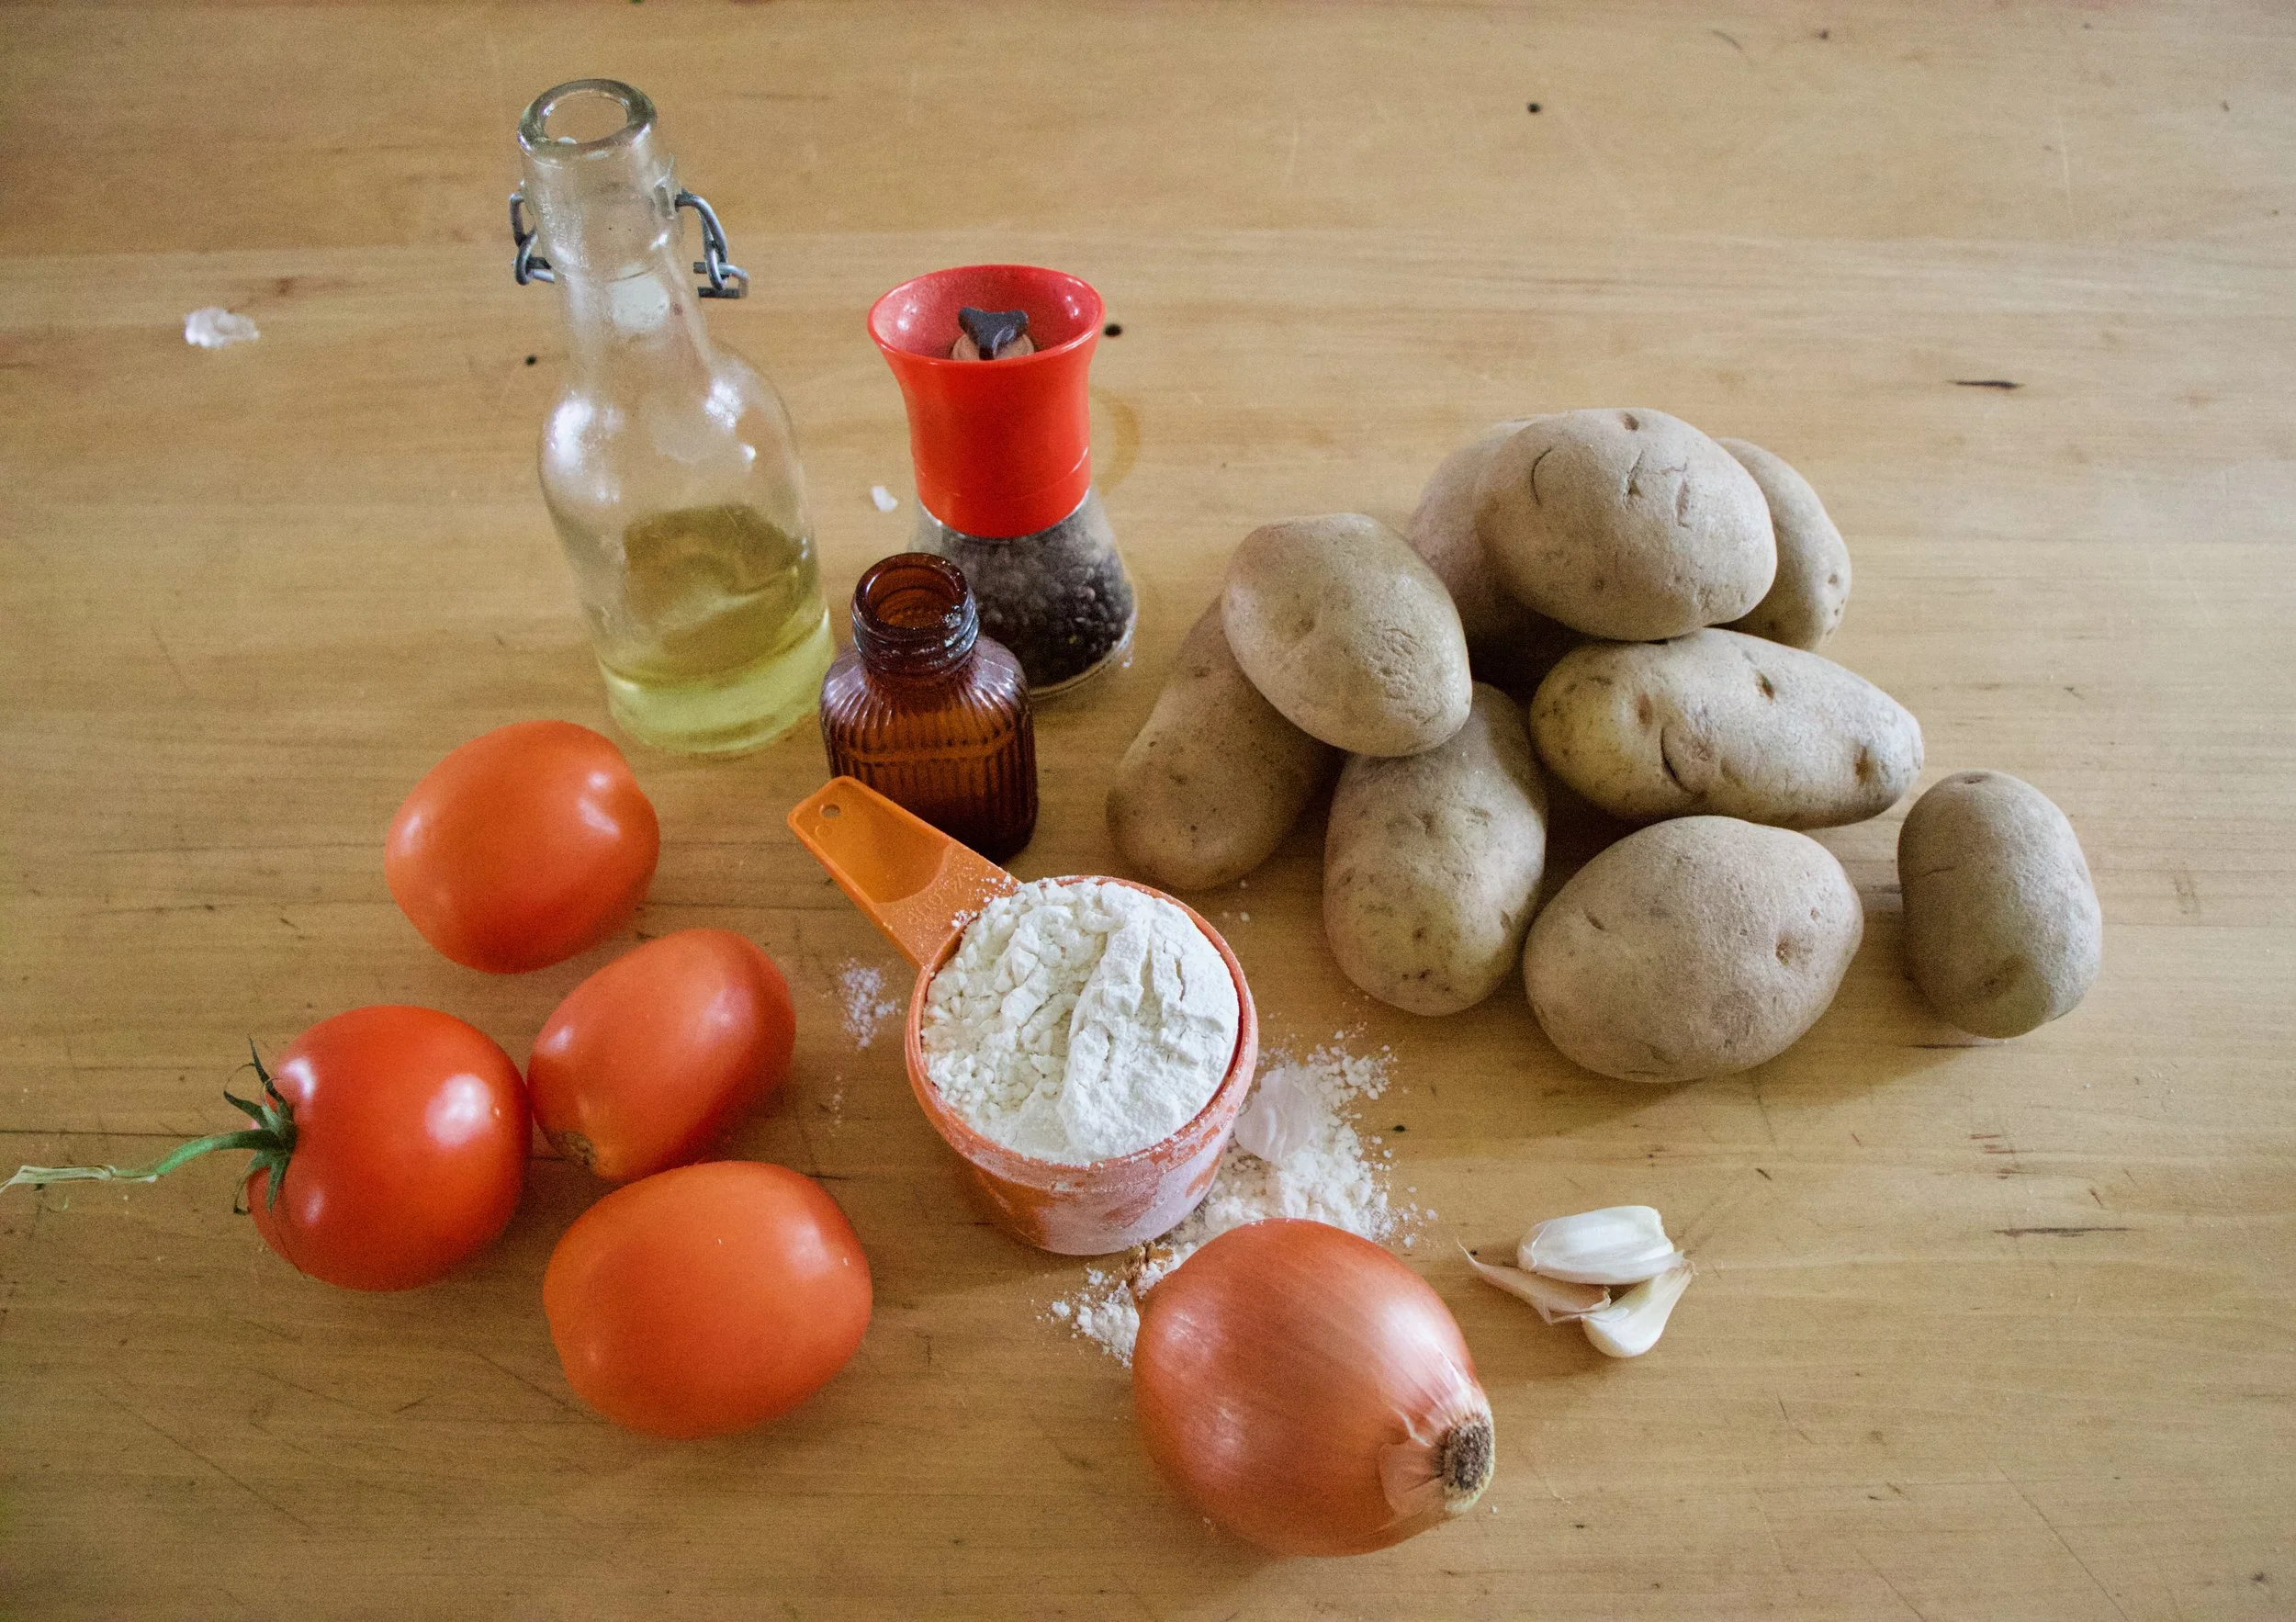
I am such a sucker for the reduced price produce at the grocery store. I save at least half of the original price for stuff that might look a little weird or have a brown spot or something. Sometimes I can’t believe what ends up on in the bin, stuff that I wouldn’t consider reduced bin material, but hey, if they want to stick it in there, then I will be more than happy to buy it.A couple days ago I found some good looking roma tomatoes in that said reduced produce bin..the skins the tiniest bit wrinkled (like I could care less), least hen 50 cents a pound. Um, yea, I bought those and put them to good use.%u00a0
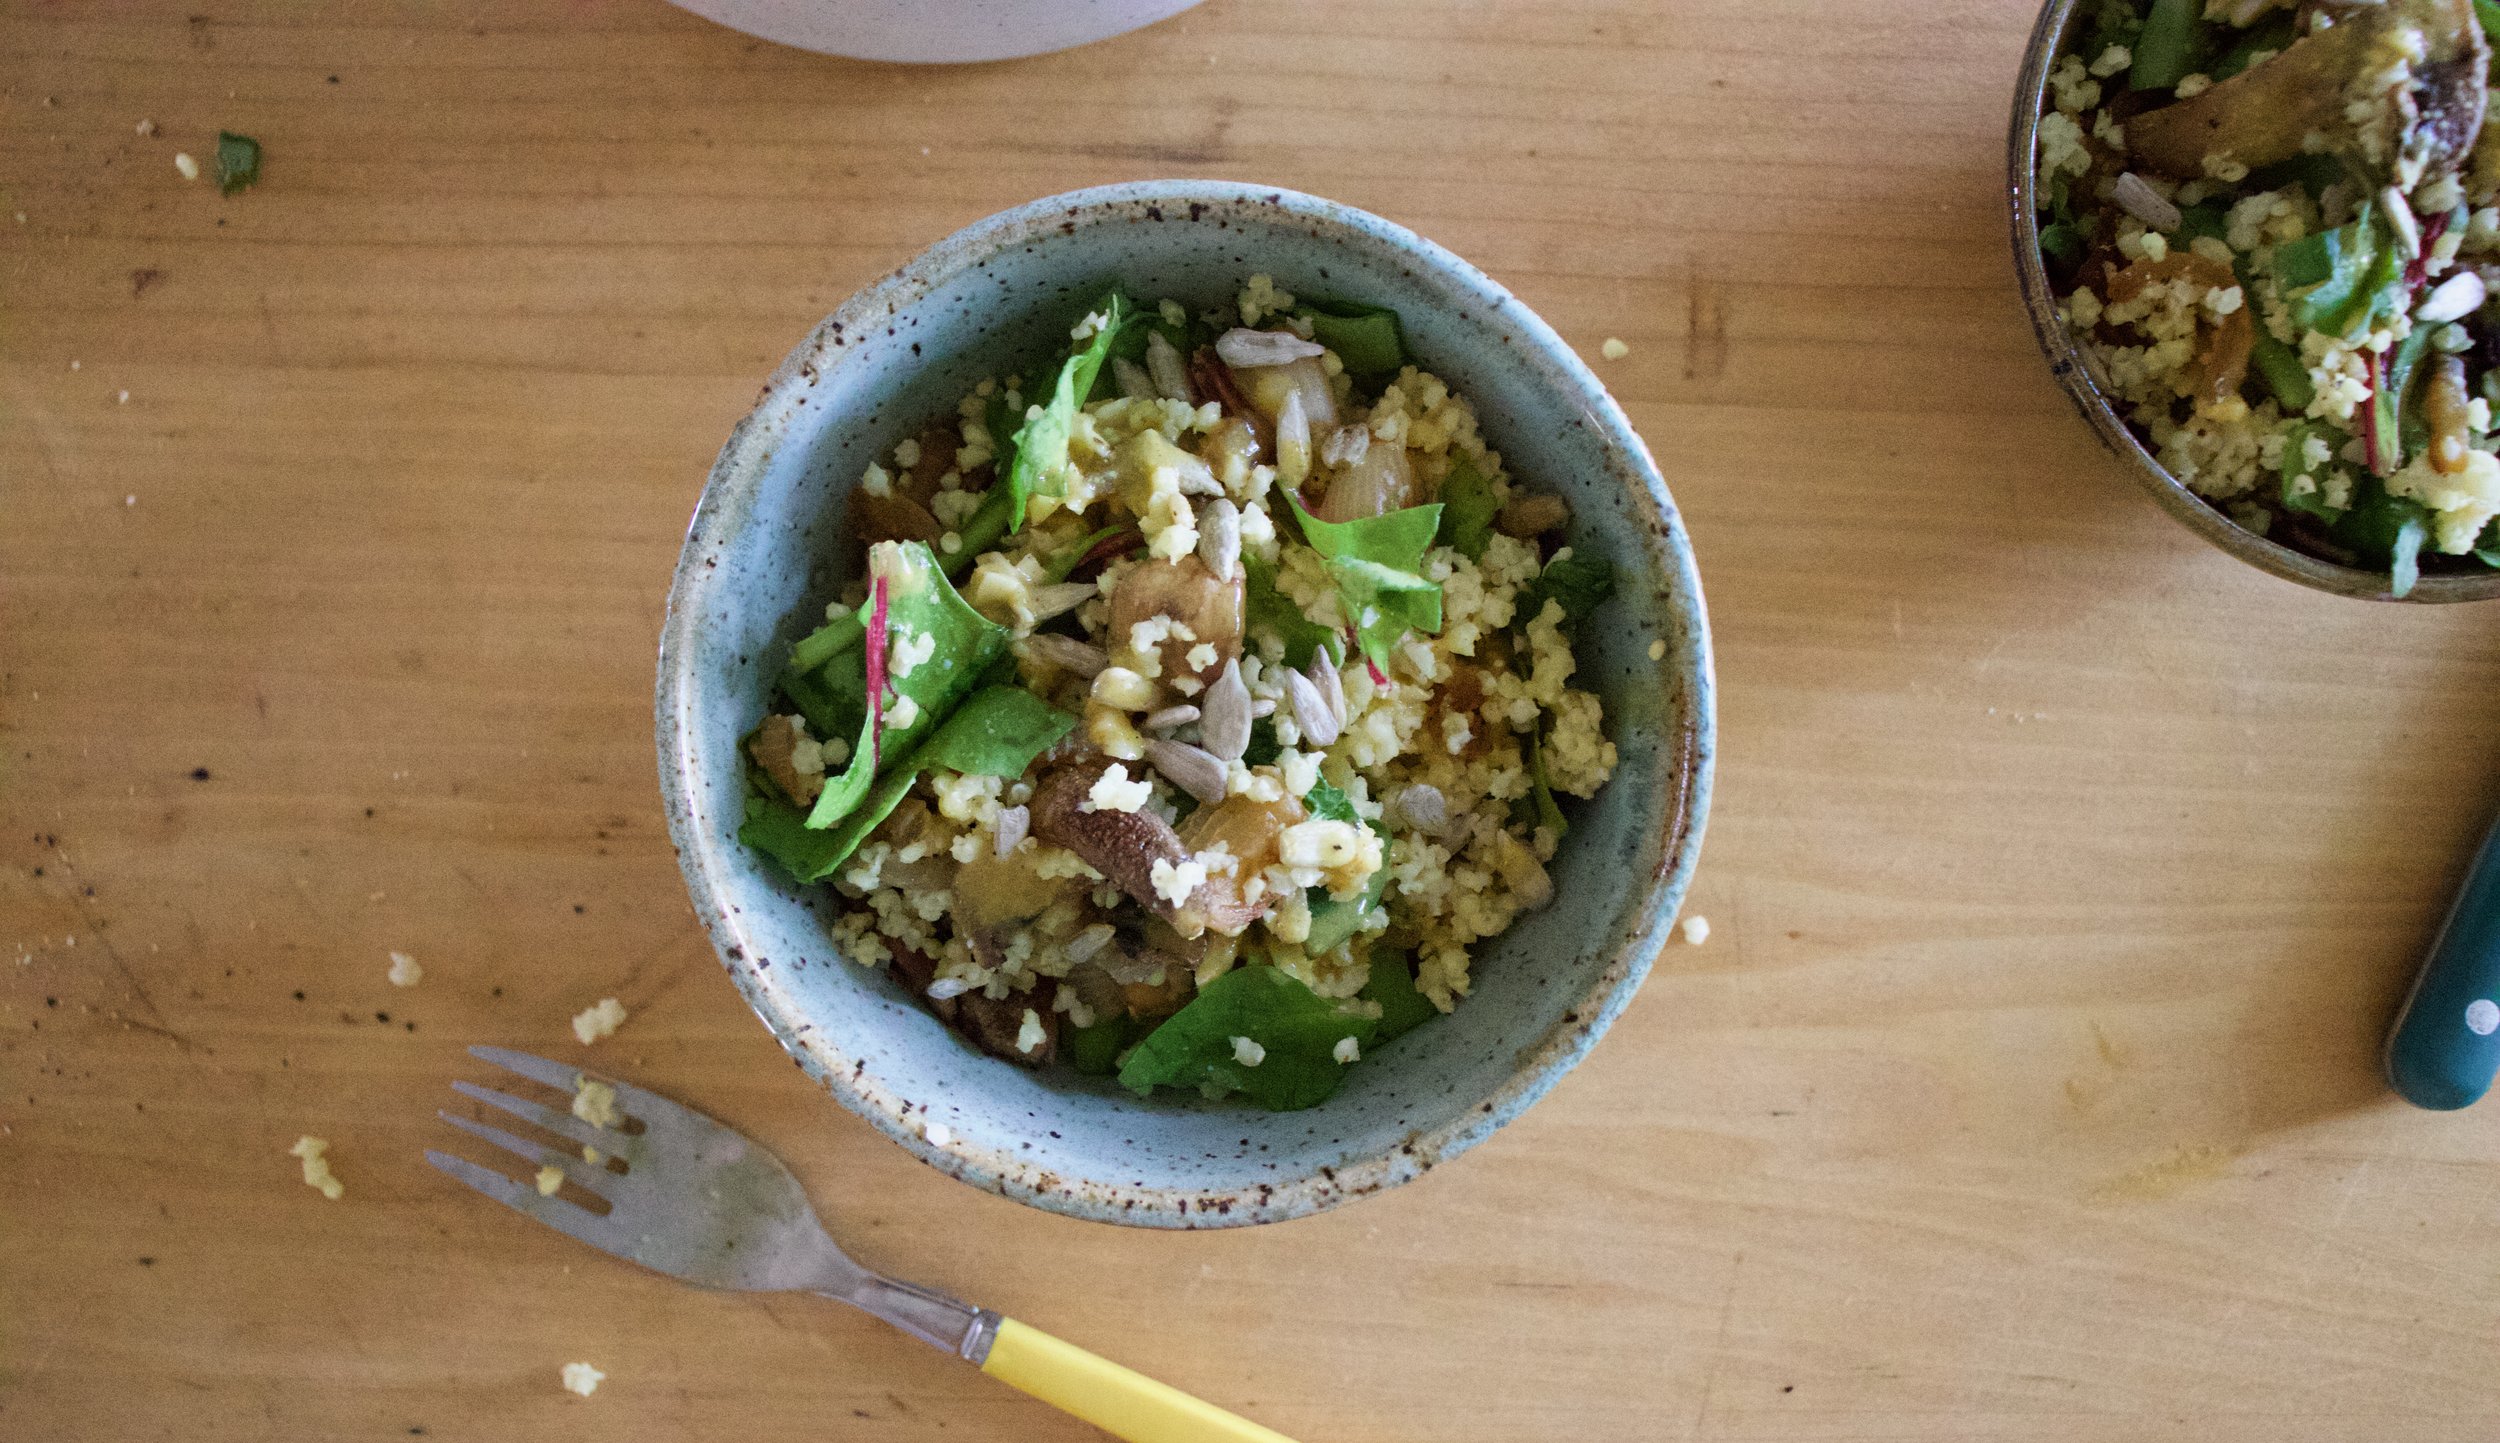
Tomatoes roasted until they fell apart with a few other chunks of stuff, then piled onto a base of spinach and couscous. %u00a0This meal cost me pennies and was stupid easy and fast to make. And pretty to boot. Perfect for a quick healthy meal on a busy day or maybe for those people looking for a tasty, not too completed dinner to make for %u00a0a special someone for Valentines day? Or make just for yourself%u2026its pretty much the perfectly dish. Anyone can get into it. And if you don’t happen to have a grocery store with a reduced produce bin full of tomatoes%u2026it’s cool, you’ll just have to pay full price for the perfect ones.


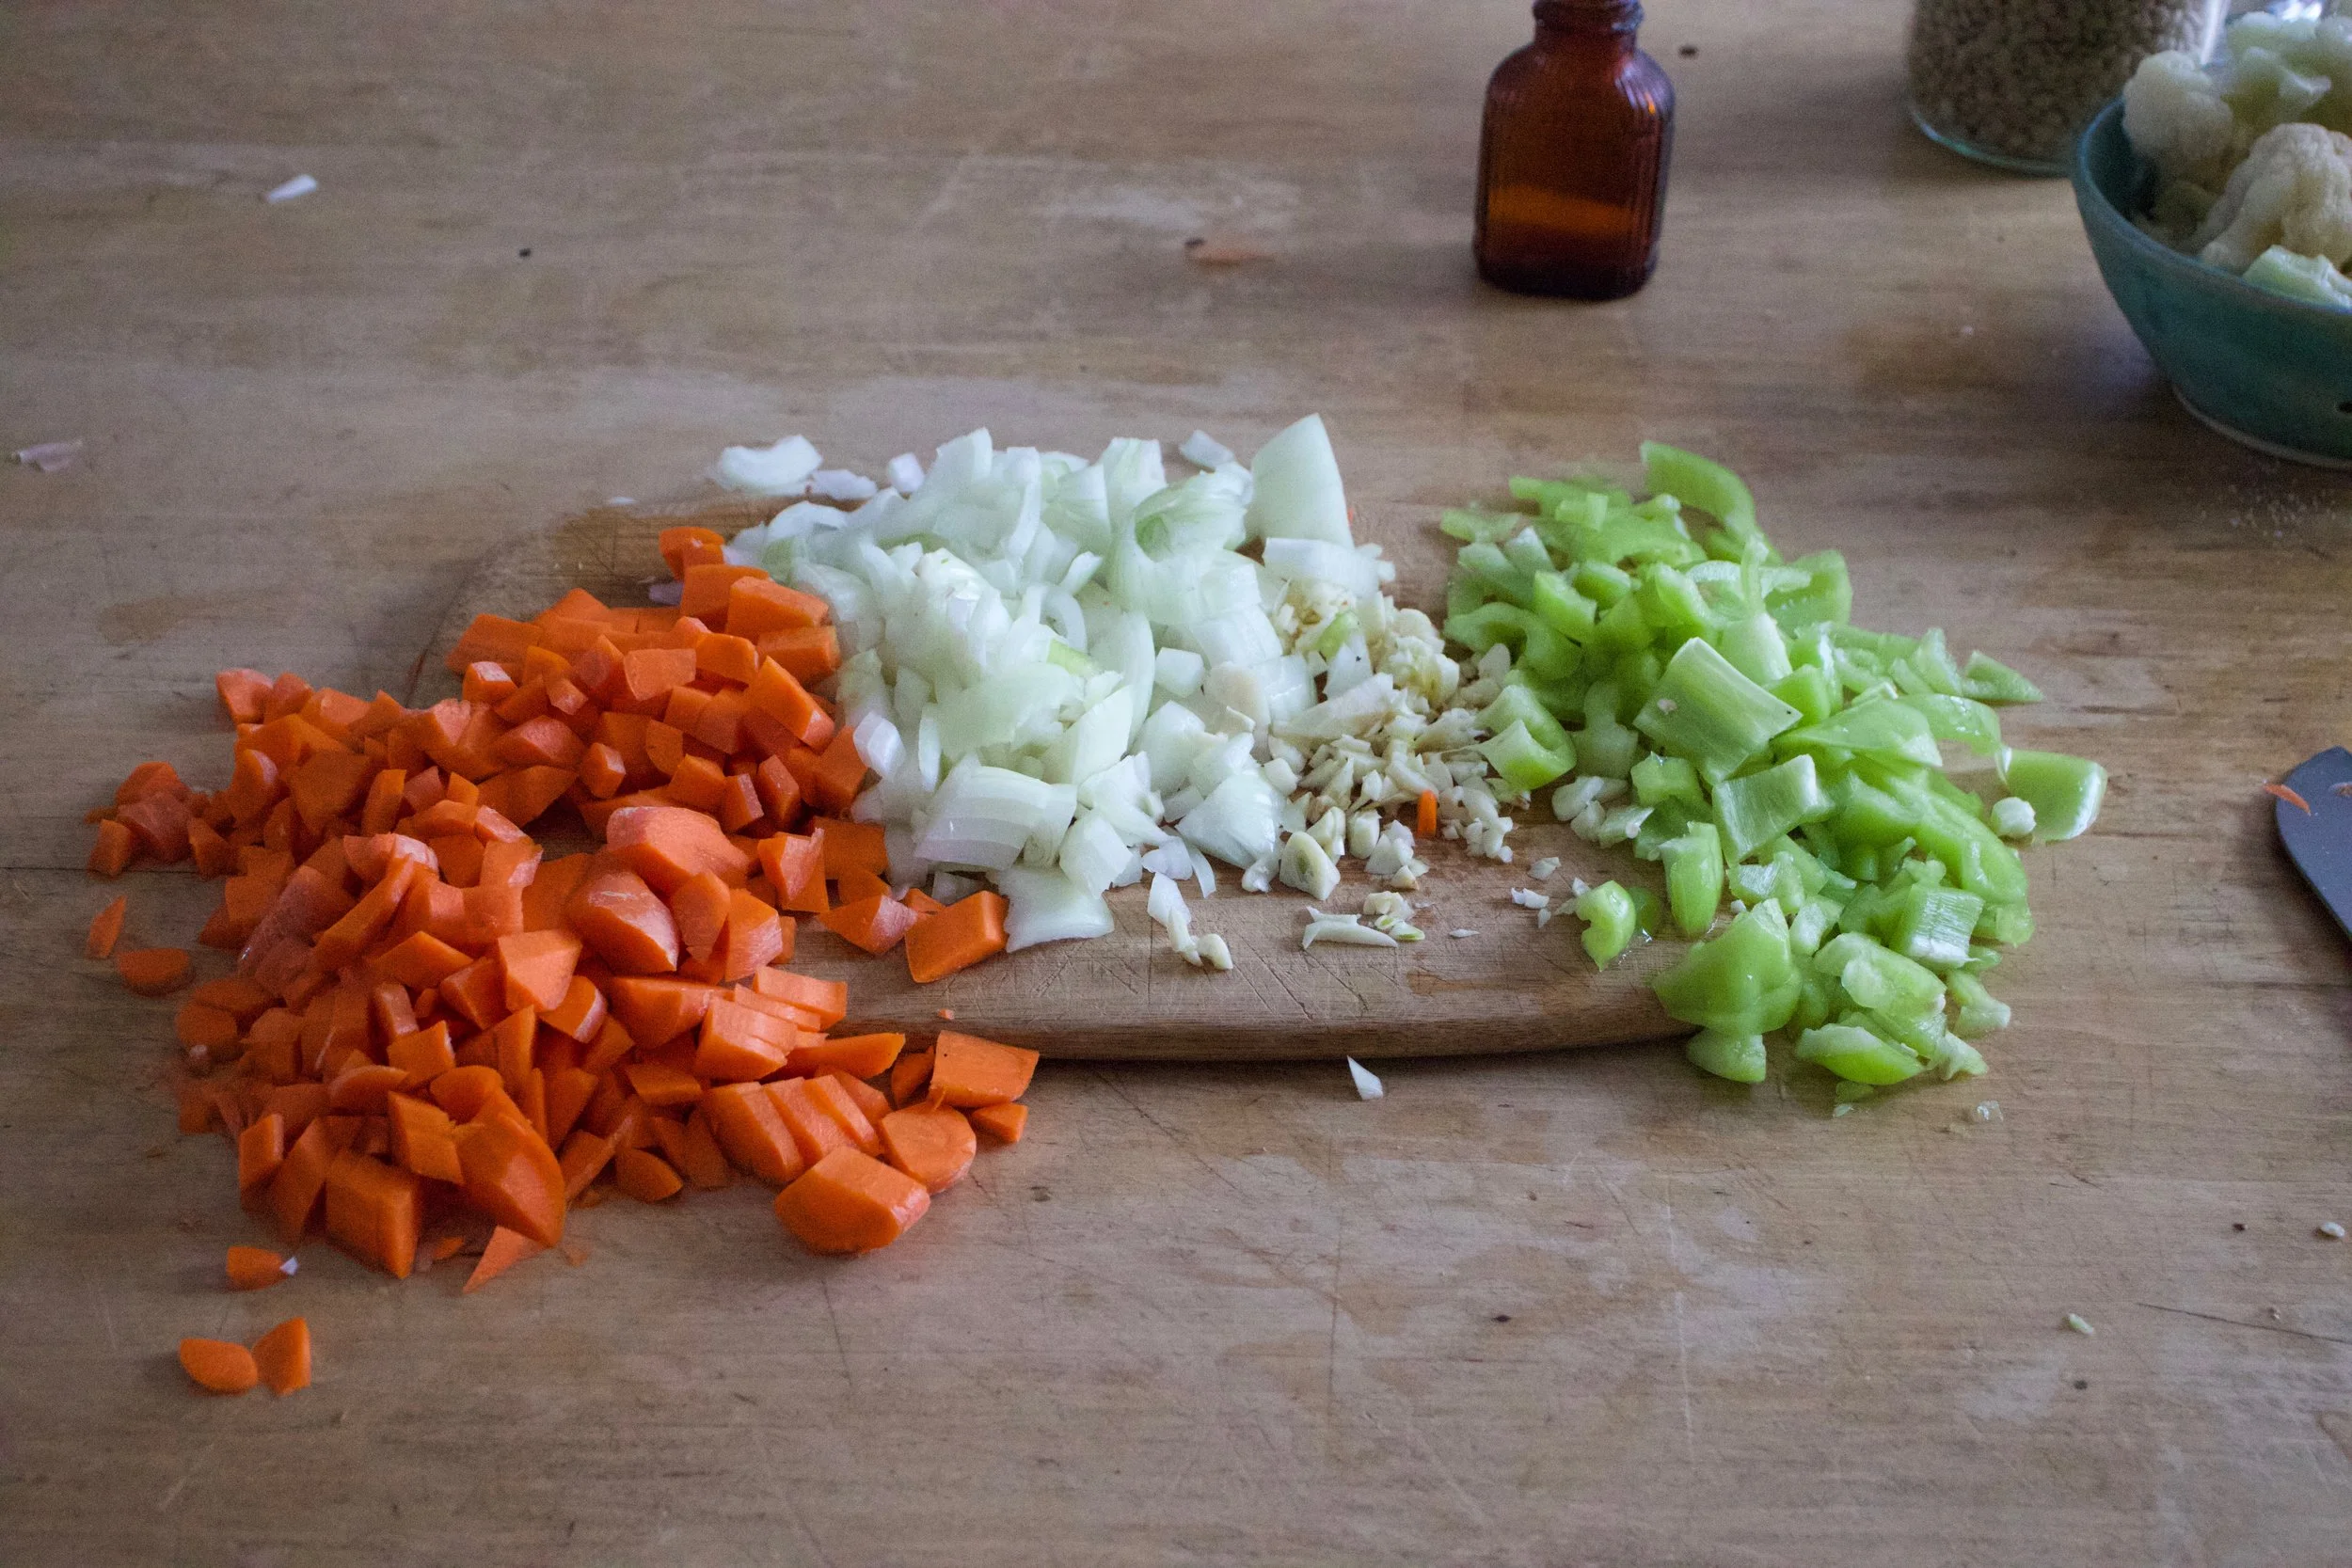
So simple. A little olive oil in pan. Chunk the tomatoes and throw in pan with the chopped onion, carrot, cauliflower, garlic and chick peas. Drizzle a bit more oil and top with salt and pepper. Give it all a toss and stick into oven. That’s that. Just leave it in there until everything is so nice and soft and falling apart.


One of the best things about couscous is that%u00a0you don’t even need to dirty a pot or a bowl to make it, %u00a0just add dried couscous to the bowl you are going to eat out of with a cup of boiling water and a pinch of salt. %u00a0(I added the spinach with the water too) After about 8 minutes, the couscous absorbs all the water and you just fluff it up with a fork. Easy, freaking Peasy!!!%u00a0Out of the oven and piled on%u2026..

I mean, if this isn’t one classy looking meal, then I don’t know what is.
Sprinkle with a little parmesan or nutritional yeast if you want and step back and admire. And now eat it to you face.
And barely any dishes to wash. No big mess to clean up. %u00a0I could get used to that.%u00a0
-C%u00a0
Serves 2
- 3/4 cup Couscous
- 1 cup boiling water
- Handful of chopped spinach
- 4-5 roma tomatoes chopped
- 1 medium carrot diced
- Half of an onion diced
- Cup or so of cauliflower (fresh or frozen)
- Cup of prepared chick peas
- 4 or 5 cloves garlic minced
- Olive oil to drizzle
- Salt and pepper
Preheat oven to 400
Place onion, carrot, cauliflower,tomatoes, chick peas and garlic into a large skillet. Drizzle with olive oil, sprinkle with salt and pepper, and give everything a light toss. Stick into oven for 35-40 minutes until tomatoes are falling apart and everything is nice and roasted.
In a medium bowl, (or serving bowl) add cup of boiling water to dry couscous and spinach. Sprinkle with salt and cover. Let sit for at about 8 minutes, or until the couscous had fully absorbed all the water. Fluff with a fork and top with roasted tomato stuff.
Top with parmesan or nutritional yeast if you are into it.
Enjoy!
 There is a joke about Vermonters, that all we talk about is the weather. Well, it’s kind of true. But to our defense, we get a lot of weather, and it’s always changing and intense and both lovely and crazy and all over. So yeah, we talk. A lot, about the weather. And on that topic, I am trying so hard not to complain, but%u00a0honestly, I am getting a little sick, both physically and mentally from all of these %u00a0super, to freaking cold temperatures. Yesterday the high was 0 ( which was at like 2 in the morning) %u00a0and factor in the windchill, the temp stayed at like 25 below. It f**king sucks. I can’t %u00a0stay outside for too long or else I will probably die. The dog %u00a0is having a hard time making it around the block before he gets ice paws, and the mister, well he even started wearing gloves (he wears a sweater all winter and never gets cold%u2026..he is officially cold)
%u00a0And not only is the cold keeping us all indoors, but its making us all borderline sick. We both have been fighting something for the past few week. The headaches, stuffy nose, chest congestions. The puppy is getting super dry skin and gave himself a hot spot. BLAh!! Ok, enough! No more complaining
Because %u00a0I do really love the winter and all the pretty snow!!!!
But we are feeling kind of sick so to make us feel oh so much better, a fantastic, super tasty, healing, good for me, good for you, soup. Turmeric ginger carrot%u2026 oh man. Made with lots of ginger, turmeric and garlic and finished with a drizzle of raw honey. This soup is exactly what we need. All ingredients scream.. FEEL GOOD, BE WARM AND COZY! Almost everything in it has antibacterial and anti inflammatory properties. The veggies are hearty and heathy and just eating soup helps to keep hydrated. And the best part..it tastes so freaking amazing.%u00a0
So whether %u00a0you are feeling a little mah, or just a little hungry.%u2026this soup is where it’s at!

Lots of chopped up carrots, a small onion, a little bit of cauliflower I had left over and a small beet. If you don’t have the cauliflower and or a beet, just use %u00a0ares pepper or another 2 carrots.. no biggy.%u00a0
Then we have the fresh ginger ( you can use powdered) turmeric and garlic. %u00a0All the good healthy spicy and yummy stuff.%u00a0
 I accidentally spilled the turmeric on the counter..but it kind of looks like I might have done it on purpose%u2026 yeah, let’s go with that. %u00a0Chop the garlic and he ginger into %u00a0 %u00a0chunks
 And toss into the pot to warm and activate. Just a little toasty toast.%u00a0
 And the veggies are roasted and tender and smell so good. %u00a0It took a lot of will power to not eat the whole pan right there.
 I added the roasted veggies and 3 cups water straight into my pot %u00a0with the spices because I used an emulsion blender. If you are using normal blender, add the veggies, the toasted spices and the water to the blender and blend until smooth. Then transfer to a pot.
 Pretty much all blended together%u2026.(I left a few big chunks in there to snack on while I was waiting to eat serve%u2026I was really hungry) and let to simmer for a little longer…

And now ladle into a bowl and get ready for a fantastic finish%u2026 drizzle a spoonful of raw honey into soup%u2026%u2026.so so good. You could add the honey before serving, but heating it kills all the good antibacterial stuff so that’s why we wait.%u00a0Then %u00a0I sprinkle some chopped kale and chives. (do it if you want, but not necessary)
Now enjoy. Let the warmth wash over you and feel all those good spices helping to fight the good fight to keep you well and all the yummy to satisfy your hunger.
And lets hope for some warm (above 0!!) weather!
-C
Turmeric Ginger%u00a0Carrot Soup
Ingredients
- 5 large carrots
- 1 small onion
- 1 small beet*
- quarter head cabbage ( or a cup of frozen)*
- 2-3 teaspoons %u00a0turmeric%u00a0
- 2-3 tablespoons fresh %u00a0ginger (1/2 teaspoon if using powdered)
- 4-6 cloves garlic
- salt pepper
- raw honey (omit if vegan)
* If you don’t have or want to use beet and or the cauliflower, you can use a red pepper, a small sweet potato, or just use a few more carrots.%u00a0
Chop all veggies into similar sized chunks and toss into a lightly oiled pan or on a baking sheet and sprinkle with salt. %u00a0Stick in oven at 425 for about 30 minutes or until all veggies are fork tender.%u00a0
In a large soup pot or dutch oven, toss chopped garlic, ginger and the turmeric and place on medium heat for a few minutes to activate the spices. Add the roasted veggies and 3 cups water to pot (if using emulsion blender) and blend until smooth. If using a blender, add the toasted spices, roasted veggie and 3 cups water and blend until smooth then transfer to a large pot or dutch oven. Add salt and pepper to taste. Turn heat down to%u00a0%u00a0simmer and let cook for an addition 10 minutes.%u00a0
When ready to serve, ladle soup into bowl and drizzle a spoonful of raw honey into soup. Garnish with fresh chopped kale, chives, cabbage or whatever you want. (or nothing is good too)
 I was informed yesterday that if I was going to make tortilla chips, that I better make some sweet ass dips to go with them. %u00a0I kind of agree%u2026 tortilla chips need dip%u2026 or better yet, two dips. Queso and guacamole. It’s what needed to be done, and so I did it.
Guacamole is amazing%u2026 anything avocado is amazing%u2026this guacamole is amazing. White bean guacamole is amazing. And not that we really care, but this guac is half the fat then straight up guacamole. %u00a0Plus it’s packed full of protein making it a kind of super duper, must eat all of it, kind of dip. %u00a0And sweet potato anything will make me happy. %u00a0Making queso dip with sweet potato and cauliflower is probably one of my best food combos so far. (after eating a butt load, I felt like I was a genius and made an amazing discovery) Again, not that we need it to be, but this is also a fat-free, vegan, gluten-free, super healthy, packed full of B12,%u00a0%u00a0fiber and nutrients, dip for all kind of dip.%u2026. just another reason why you cannot feel bad when you finish off half a batch before you get a chance to stick it in a serving bowl. (I might have done that)
%u00a0Here is what you need for a good time:
%u2212These tortilla chips%u00a0%u2026.Check.
%u2212Some %u00a0Chopped Veggies (I want the veggies)%u2026..Check
%u2212Cauliflower Sweet Potato Queso.%u2026Check.
%u2212White Bean Guacamole%u2026Check.%u00a0
You are now ready for it. It being this party, that party, the Super Bowl, or a Wednesday afternoon. %u00a0
%u00a0 %u00a0 %u00a0 %u00a0
 %u00a0
To the left we have the makings for the cauliflower sweet potato queso.. Steamed cauliflower, a baked sweet potato, nutritional yeast, garlic, and chopped up red onion, red bell pepper and jalape%u00f1o. To make all you need to do it take the chopped peppers, onion, and garlic and saut%u00e9 for a few minutes just to slightly soften and bring out flavors. While that’s going on, take the steamed cauliflower and sweet potato(skin off..but eat it, or save it for soup or feed it to the dog) and puree together with a blender or food processor. Add in nutritional yeast, about a tablespoon or two of hot water and, salt and pepper to taste. Blend for about 5 minutes until super creamy smooth. Add in saut%u00e9ed stuff and pulse just enough to incorporated the veggies but not complete blend in. %u00a0Stick in a bowl.
To the right we have white bean guacamole stuff. %u00a0Two cups (or one can) rinsed white beans, one ripe avocado, a lime, a few cloves of garlic,(I also added a bit of garlic powered%u2026I like my garlic) and some chopped up red onion and tomato. %u00a0Place beans, garlic, avocado and lime juice in a blender or food processor and blend until smooth. Add salt to taste and toss in the chopped tomato and onion. Blend for sec to mix that in%u2026Stick in a bowl%u00a0
 Perfect…
 To think that both of these dips took about 10 minutes total to make. (I had pre baked the cauliflower and sweet potato) %u00a0And for real, I would spend much more time if I had too because both of these dips are so freaking good, I%u00a0definitely will be making these on the regular.
So there , dips for those sweet ass chips or whatever you want to dip or them spread them on.%u00a0
And he guys%u2026It’s FRIDAY! Have a fantastic day!
-C
White Bean Guacamole%u00a0
- 2 cups white beans (or 1 can) rinsed and drained
- 1 ripe avocado
- 3 cloves garlic
- 1 lime
- 1/4 %u00a0small red onion
- 1 small tomato
- 1-2 teaspoons salt
Finley chop onion and tomato. Set aside. Place the beans, avocado, garlic, garlic powder, 1 teaspoon salt and the juice from one lime into a blender or food processor and blend until smooth. Add a splash of water if needed to help keep things moving. Taste and add more salt if needed. When smooth, add %u00a0the onion and tomato and pulse a few times to mix in. Scoop into a serving dish and finish with a squeeze of lime and a bit of chopped onion and tomato.%u00a0
Cauliflower Sweet Potato Queso
- 1 1/2 cups pre cooked steamed or roasted cauliflower
- 1 medium pre baked sweet potato
- 1/2 cup nutritional yeast
- 1-2 tablespoons hot water
- 1/2 a small red pepper
- 1/4 small red onion
- 1 jalape%u00f1o
- 3 cloves garlic
- salt and pepper
Finely dice the red pepper, jalape%u00f1o, onion and garlic and saut%u00e9 in a skillet for a few minutes until slightly soften and fragrant. Take the pre-cooked cauliflower, sweet potato (skin removed), and nutritional yeast and place in a blender or food processor. Blend for about 5 minutes until creamy and smooth. Add in a tablespoon %u00a0of water %u00a0to keep things moving. When completely smooth, add in saut%u00e9ed veggies and pulse a few times to combine. Scoop into a serving dish. If your feeling it, %u00a0top with scallions and cracked pepper.
Serve dips with chips, veggies or anything you want. Also make great spreads for sandwiches and crackers too!

CHILI MONDAY!Well it is, but I am talking about making some super duper, yes I’ll have seconds, tummy filling, bone warming, pumpkin chili.. And heathy oh so healthy to boot. Reals, it’s the best.
This pumpkin chili recipe had evolved over the years. The first time I made pumpkin chili was for my very first dinner party that I %u00a0threw back in college. %u00a0Instead of cutting the pumpkin and adding it into the chili, I chopped the little pumpkins in half, roasted them, and used the halves as bowls..A good idea except no one at the pumpkin and I was left with a bunch of slobbered on roasted pumpkin halves. ( I probably should have said something, but being a few drinks in, I didn’t think to say anything about the edible bowls and I don’t think I noticed the abandoned pumpkins until the next morning). After that somewhat failed attempt, I started adding the pumpkin to the chili and left the drinking tip after the food is served. ( I learned so much in college)
But yeah, this recipe has traveled a few years with me and every time I make it, I always think, jeez, why don’t I make this every weekend. %u00a0Well maybe now I will.

Don’t let this spread scare you.. it’s just veggies from the fridge, a chopped up pie pumpkin and pre soaked beans. Oh and some canned tomato and spices. It took about 10 minutes of hands on time and one big pot. No big mess to clean up and you can get rid of those veggies in the fridge that are on the way out. WIN WIN WIN!

All the chopped veggies, the chopped pumpkin go into the pot with salt. pepper , and spices.( I added a fresh jalapeno and about 5 cloves of garlic to this mixture) Let the mixture sweat for about 5 minutes, giving it a %u00a0quick stir or two.

Now toss in the beans and the tomatoes%u2026 Add a cans worth of water as well. Bring to a boil, then turn to low heat and cover.

A last minute addition.. I added a few chopped up kale leaves. I wanted a little more bright color and adding kale to anything is a good idea.

I added a little sliced avocado to one of the bowls (I only had enough for one) and cut up some lime wedges to squeeze on top. (I did, Nick didn’t)%u00a0

Best chili I have made in a long time%u2026and yes, there is a bunch of left over which is fantastic because now I have lunch for the next couple days%u2026%u00a0
HOORAY FOR FOOD!!!
Have a good Monday!
-C
- %u00a0small sugar pie pumpkin
- 2 cups dried beans..I used a 1 1/2 cups black and 1/2 cup kidney or 2 cans of beans
- 28 oz can of crushed or diced tomatoes
- 1 small onion
- 1 small
- 1 carrot
- 1 /4 head of cabbage
- a small broccoli crown
- 1/4 head of cauliflower
- a few kale leaves
- 1 jalape%u00f1o%u00a0
- 5 cloves garlic
- 2 tablespoons chili powder
- 2 tablespoons cumin
- 1 tablespoon coriander
- salt and pepper
Either the night before or morning of, presoak dried beans..(beans in pot with about 4 cups water and a sprinkle of salt)
Take pumpkin and slice in half, de-seed and chop flesh into little chunks. (You can peel it if you want, but really, there is no reason to) Rough chop all the veggies (minus the kale) and stick into a large pot with the pumpkin. Pot on medium heat.. let the veggies sweat for about five minutes. %u00a0Now add the garlic and the spices and let cook for a few more minutes.
When the mixture starts to become fragrant%u2026 drain, rinse and add presoaked (or canned) beans. Then the tomatoes, and 1 1/2 cans worth of water.%u00a0
Bring chili to a boil then cover and reduce heat to low. Let cook for about an hour, giving it a stir every now and then%u2026%u2026…
Add in chopped kale a few minutes before serving
Serve in a bowl and top with sliced lime, avocado, a sprinkle of cheese%u2026.Whatever you want.%u00a0


THE LOVELY CRAZY
September 19, 2019 by maximios • Blog
I have had a shit ton of rhubarb in the freezer all winter and the other day I just needed it gone so I made a big old batch of rhubarb jam. I was actually saving the rhubarb to make the mr a pie for his birthday, but that was like 2 months ago and he ended up with ice cream sandwiches and that is why the rhubarb was still there. Oops. But now we have rhubarb jam. And I think I was feeling a little guilty about not making the pie so I, like the nicest girlfriend in the entire universe (self proclaimed yes, but so so true), used that jam to make little hand pies. And in the shape of hearts no less because hearts are amazing and it doesn’t hurt that it is Valentine Day next week.%u00a0%u00a0
%u00a0Valentines Day. What does that even mean? I think the primary meaning of Valentines Day is that all things should be in the shape of hearts. The rest is to be determined by however you may feel about the day. Whether you hate it or love it, (we love it, It’s an excuse to take the day off and cover the house in hearts) you get to make the day yours. Just make sure that whatever you do, you make it with hearts. And with pie.%u00a0
These heart pies make for great little additions to hand made Valentines day cards ( I see maybe for a kids class), are great for breakfast because they are basically just like heart shaped pop tarts,%u00a0or even for an evening of bindge watching Netflix with a loved one or by yourself. It’s pie my friends. Eat it whenever, and with whomever you want.
Also, hearts are not just for Valentines Day. And pie sure the hell isn’t either. They both just happen to work for the occasion.%u00a0
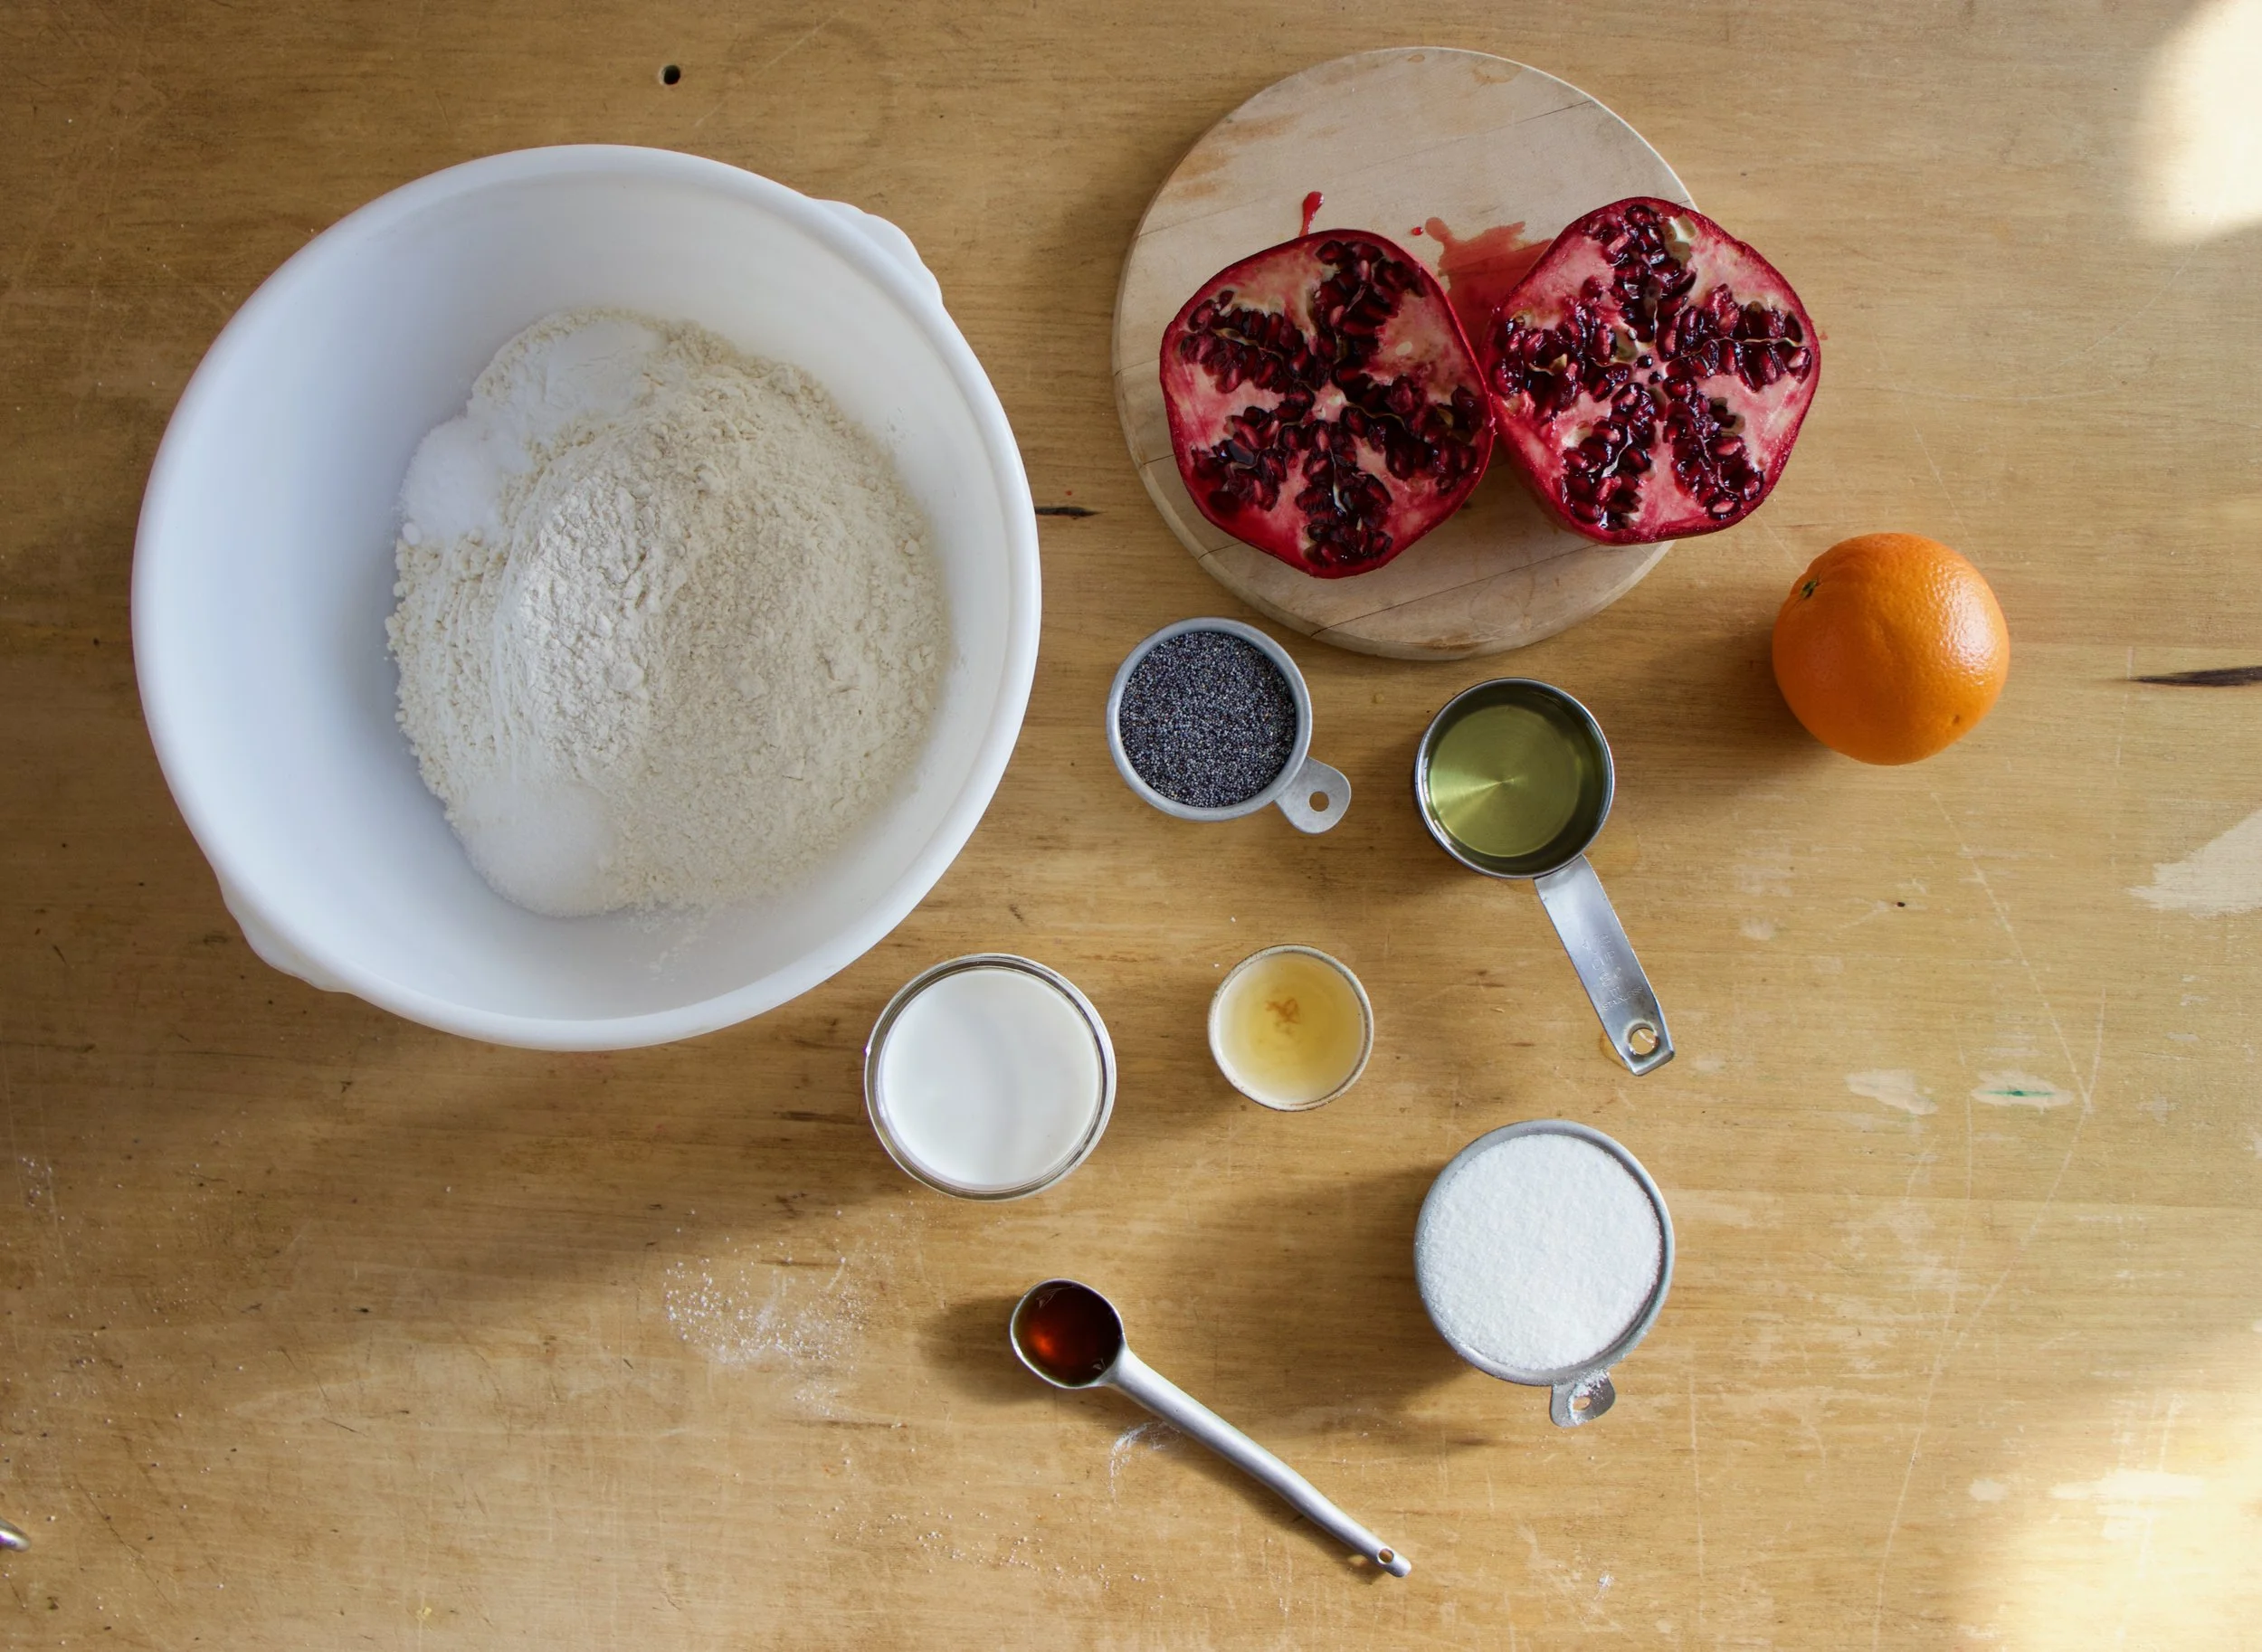
The stuff. Basically just pie crust things. Flour, a little sugar, salt, coconut oil, and ice water. Then you need jam. Jam or perseveres of any flavor(s)%u00a0%u00a0you like. I used grape and rhubarb and %u00a0had raspberry here, but I didn’t use it because I didn’t want to open it.%u00a0
Make the crust. Flour gets mixed with the salt and sugar %u00a0and the the coconut oil gets cut in until it %u00a0looks all crumbly.
The water is added %u00a0in tablespoons until a shaggy from forms.
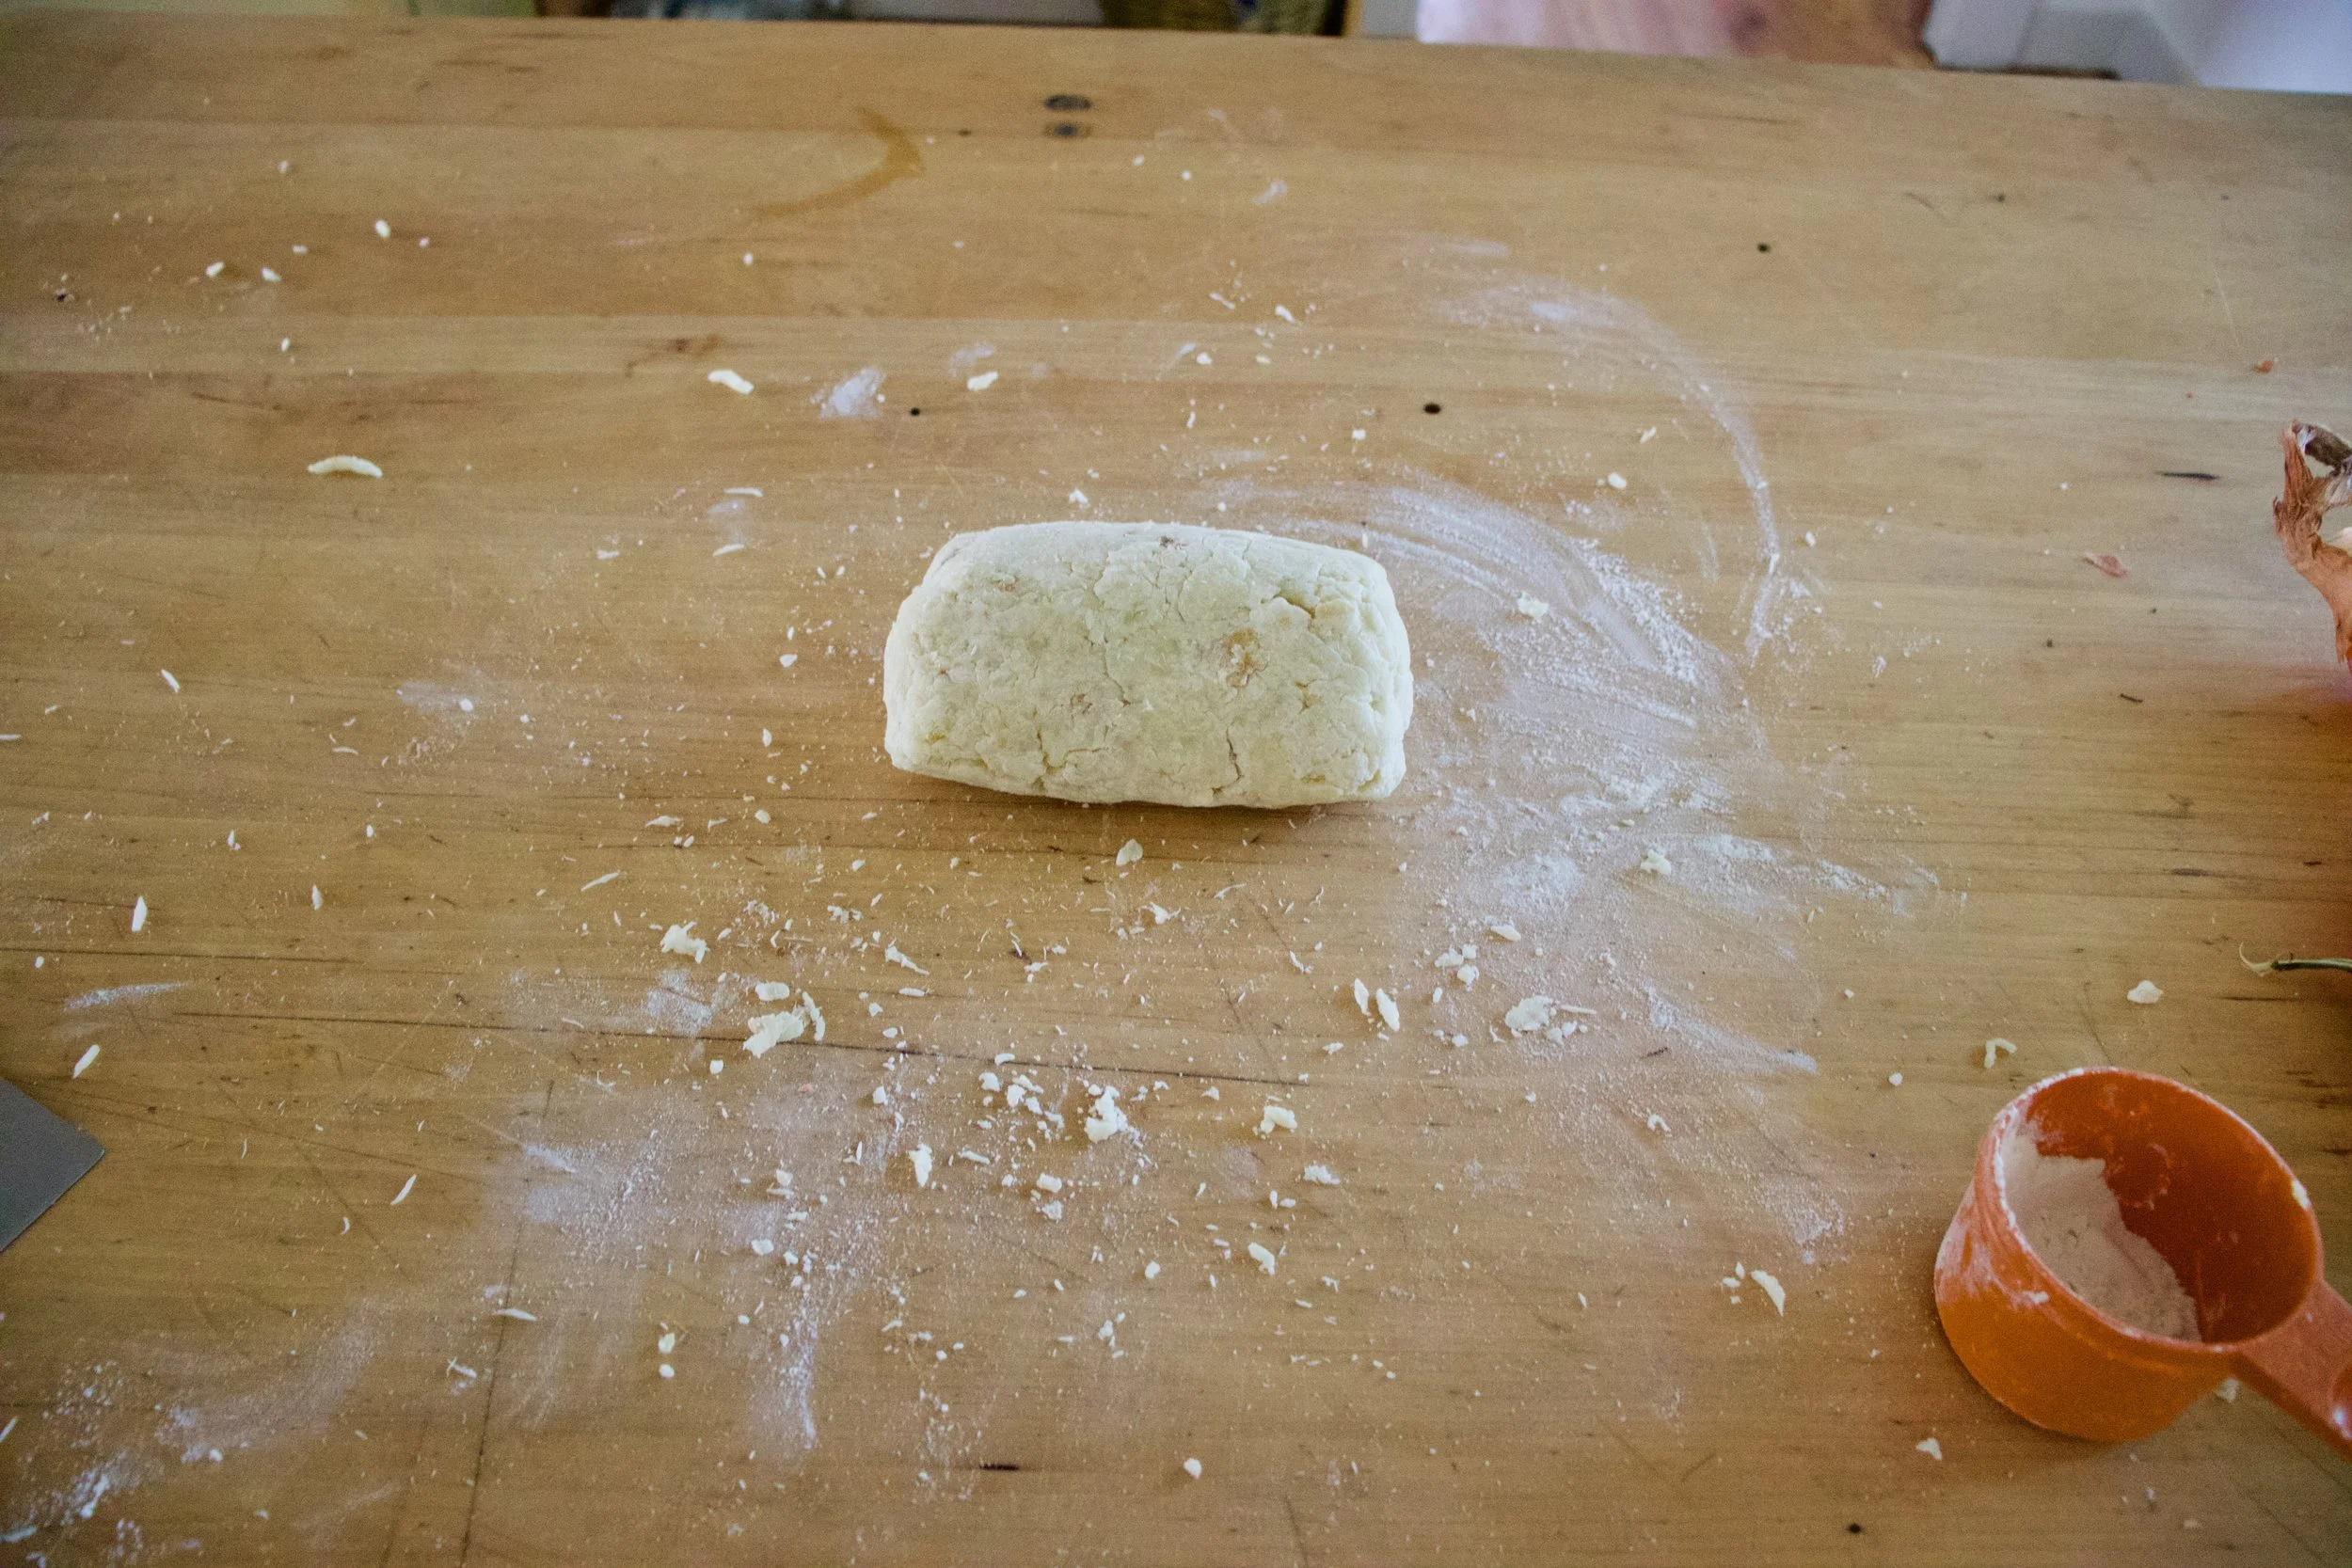
Dump the dough onto the counter to gather all together and rest for a bit. Or if you like, wrap in plastic and refrigerate %u00a0for up to a day or two.
After the dough got a good rest, roll it out and cut your hearts out. (Not your actual heart. Please and thank you)
Half of the hearts get a dollop of jam
Then each heart gets a top and crimped together with a fork. Poke a little hole into the tops to allow for steam to escape then all of the hearts get stuck into the fridge (or place on the back porch) to get nice and cold for a bit.
%u00a0After the chill, off they go into the hot oven to bake and be.
Look at these cuties. A little jam overflow, but all is good.%u00a0
I decided last minute that they needed a little something. Powdered sugar, lime zest, and lime juice. The easiest of glazes. You could do lemon, or vanilla, or almond, or even melt a little chocolate and drizzle that on. Next time I will do chocolate because because.%u00a0
Drizzle that glaze all over.%u00a0
There you have it. The cutest little hand pies ever .
Share if you like, or just eat them all. They are your hearts so do what you will.%u00a0
-C
makes 18 %u00a0three inch pies
Combine the flour, salt and sugar in a large bowl. add coconut oil in large chunks then with a pastry cutter or a fork (I used a fork) cut the oil into the flour until the flour looks crumbly and there are lots of tiny little chunks of coconut oil throughout the mixture. Add in 5 of the tablespoons ice water, toss around, then add in another 3. Mix around until the dough starts to come together when squished. If it still seems too dry, add in a tablespoon or 2 more water. (I always end up using a little more in the winter months) You want the dough to just be able to come together. Dump dough onto counter and press and smoosh dough into a ball. Let dough sit for 1/2 hour or wrap in plastic and place in fridge and using within the next day or two.%u00a0
After the dough has had some time to sit, flour the counter and roll it out to about 1/2 inch thick. Take a cookie cutter ( I used a 3 inch at the widest part heart cookie cutter) and cut out the hearts (or whatever shape you want) Make sure you have 2 cutouts for each hand pie. After you have cut out as many as you can, gather dough into a ball and roll out again. Repeat until dough it gone.%u00a0
To assemble.
Place a tablespoon of jam into the middle of half of the cut out hearts . Gently place the remaining heart cut outs on top of those.%u00a0. Take a fork and press the edges together and then with the fork or a knife, pierce of cut a small slit into the tops to allow the steam to escape while baking. I did this directly on the baking sheet but found out after it was easier to do on the counter and then move it to the baking sheet. Do what ever it easier for you. Once they are all assembled and on the baking sheet,%u00a0refrigerate for 15 minutes.%u00a0
Preheat oven to 350
After the time in the fridge, remove and place directly into the hot oven. Bake for 20-25 minutes or until the bottoms are a nice %u00a0%u00a0golden brown. The tops will be slightly pale so check the bottoms.%u00a0
Remove and let cool on the baking sheet.%u00a0
While they are cooing, make the glaze. Zest the lime and juice the lime and combine with the sugar. If it is too runny, add a little more sugar, too dry, add in a splash of water. Once the pies are cooled,%u00a0drizzle each one with icing.
Now you have a bunch of cute little heart shaped hand pies and you should probably eat one (or a few)
The house next door to us is for sale and in the backyard of the house is a whole lot of blackberry bushes. The mr and I have been hopping the fence over there like ninjas and filling large bowls of berries and sneaking back home to eat our weight in those blackberries. (Ok, not entirely true. We are not good enough ninjas to jump the fence so we have been walking through the fence gate. Plus we checked with the current owner, she told us to pick all we wanted to. We are not asshole ninjas stealing fruit)
So many berries. I check every few days and they just keep on coming and I am not one to let perfectly good berries (or any food) go to waste, so I just keep picking. I froze some , ate so so many, and then I was going to make a straight up pie but decided to do pie bars instead because one, I couldn’t find my pie plate (I think Shannon has it) and two, these are just a bit less formal, like pie can sometime be. Plus easier to share because they are cut into little squares and hold there shape really well. And lets be honest, I didn’t want to have to roll out pie dough if I didn’t have to.
Such a good way to use up and share an excess of berries. Now off you go to make some pie crumble bars while I go play with the kittens (I’ll tell you all about the kittens tomorrow….)
The stuff. Flour, sugar, baking powder, and salt. A little soy milk and coconut oil, a lemon, and arrowroot powder. And of course lots of blackberries.
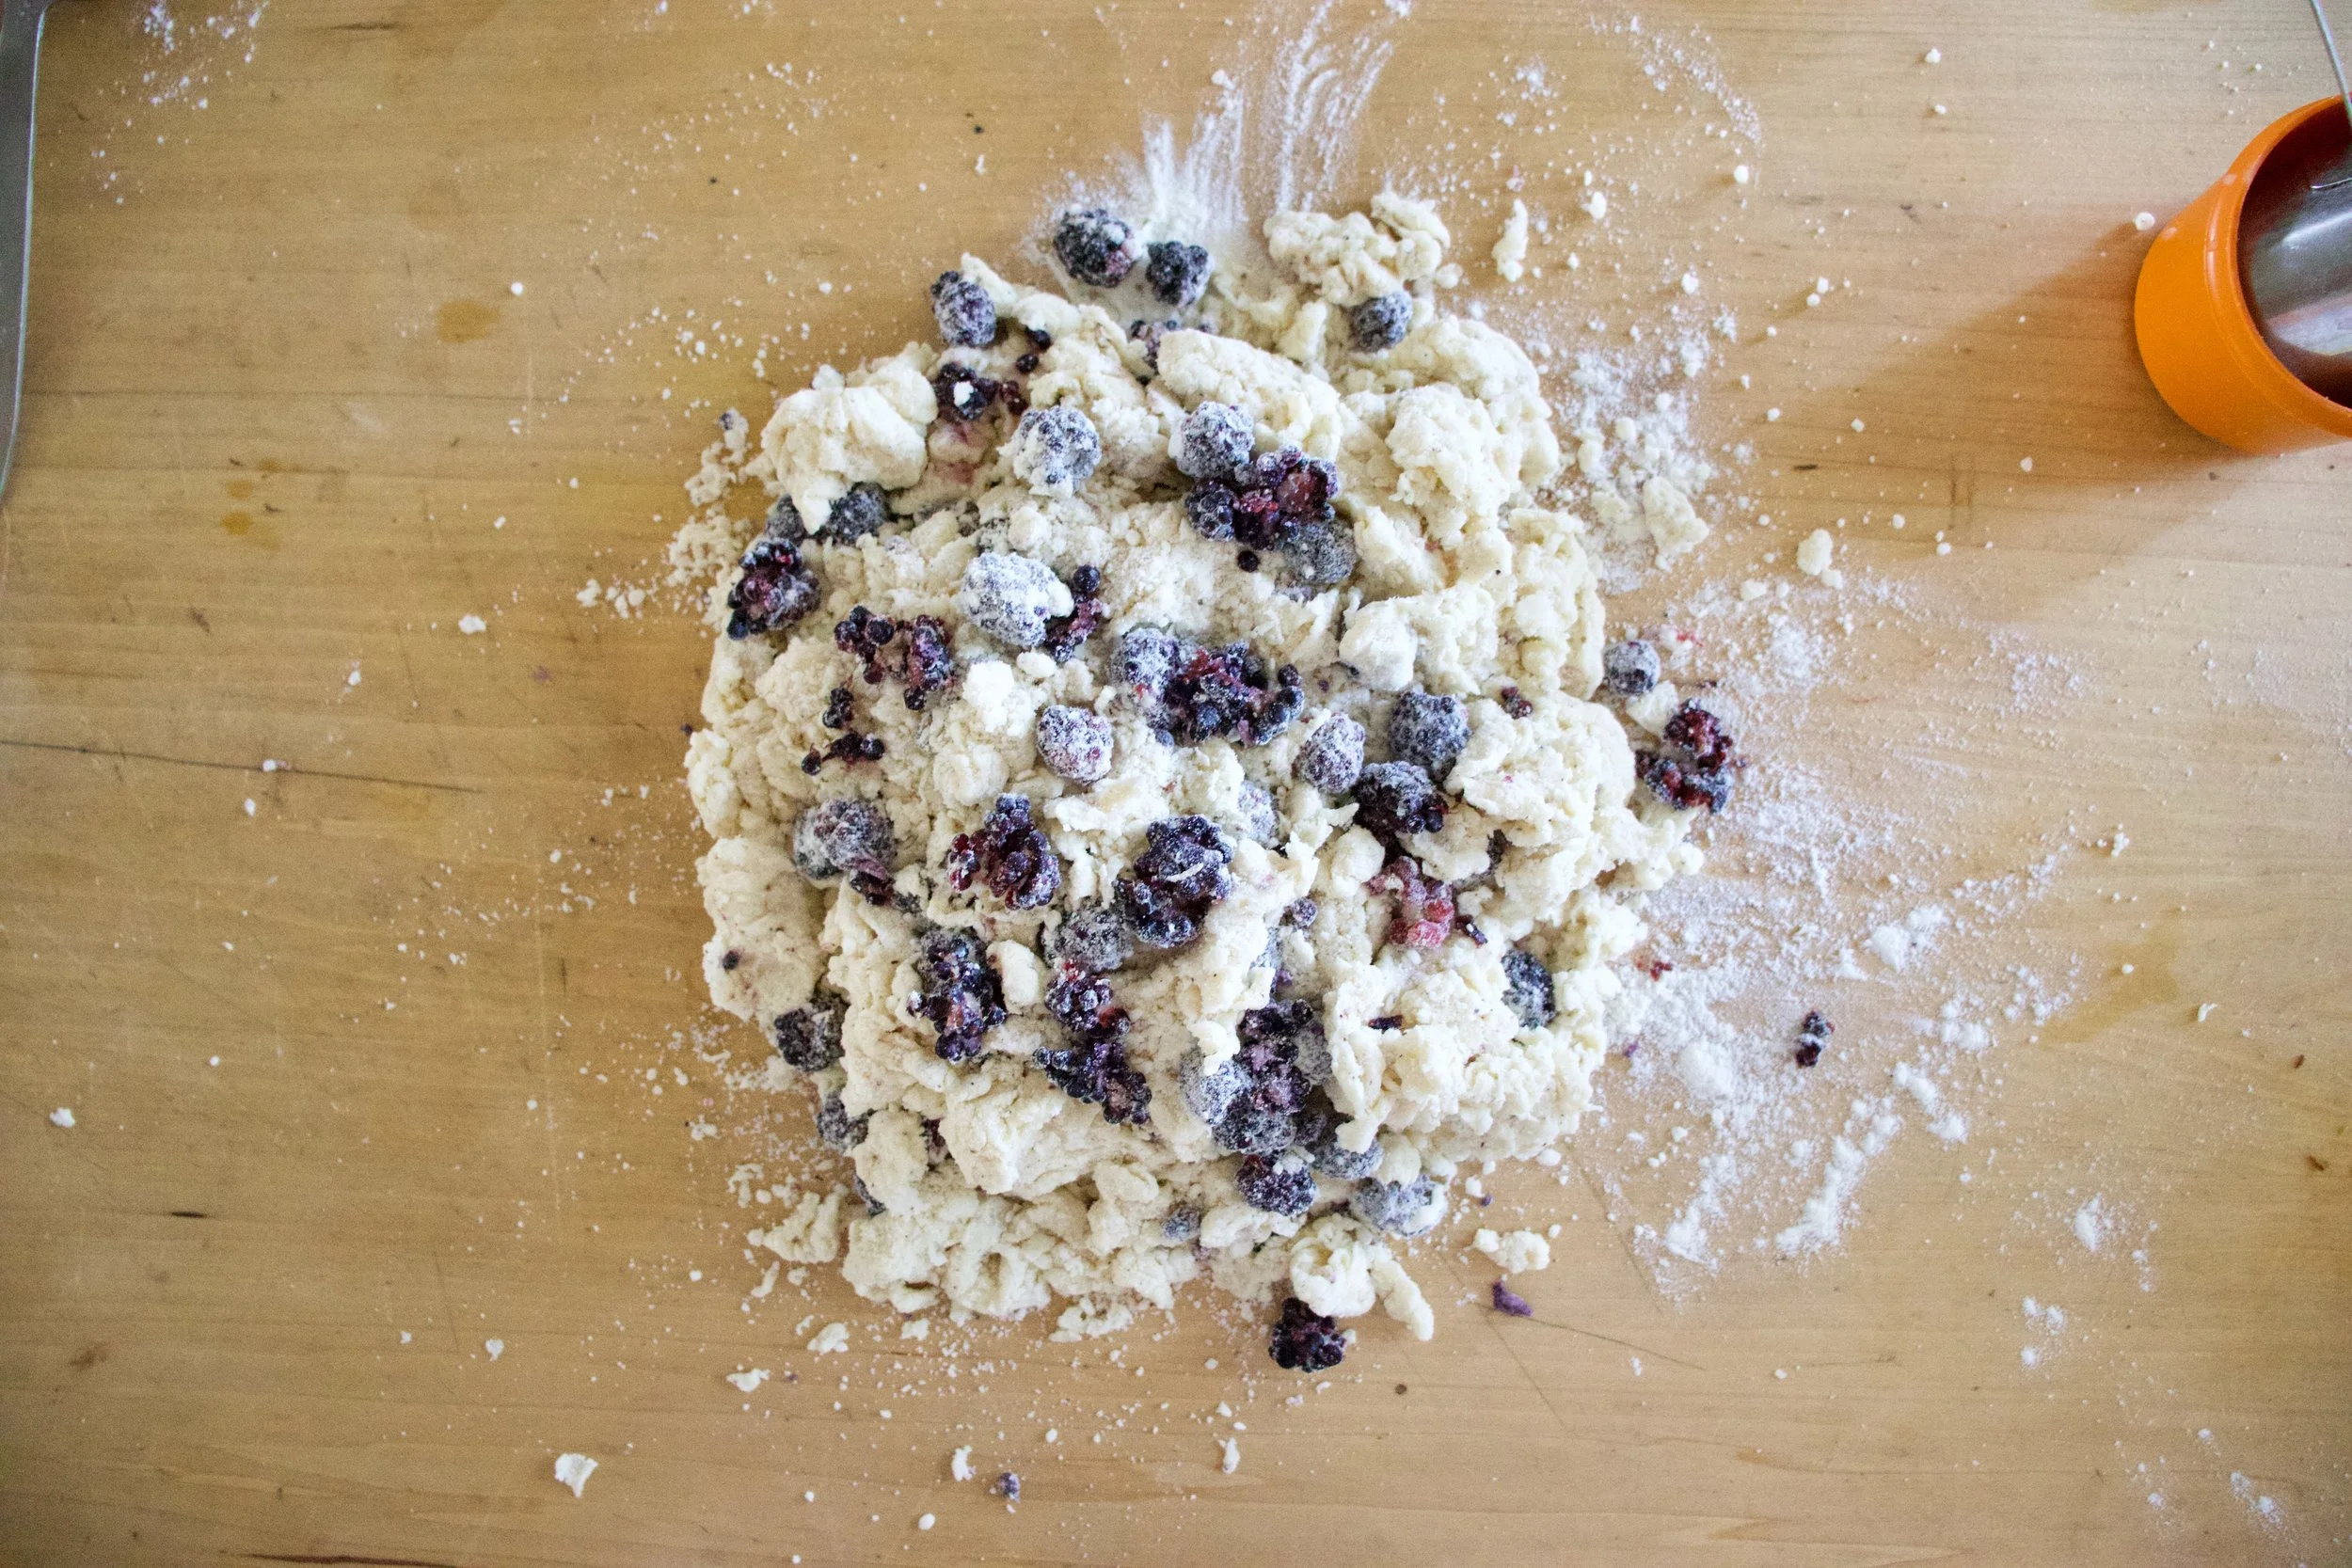
The flour, salt, baking soda, and sugar get mixed in a big bowl then the coconut oil get mixed in into a crumble.%u00a0 Now in goes the soy milk to get it all a little wet.
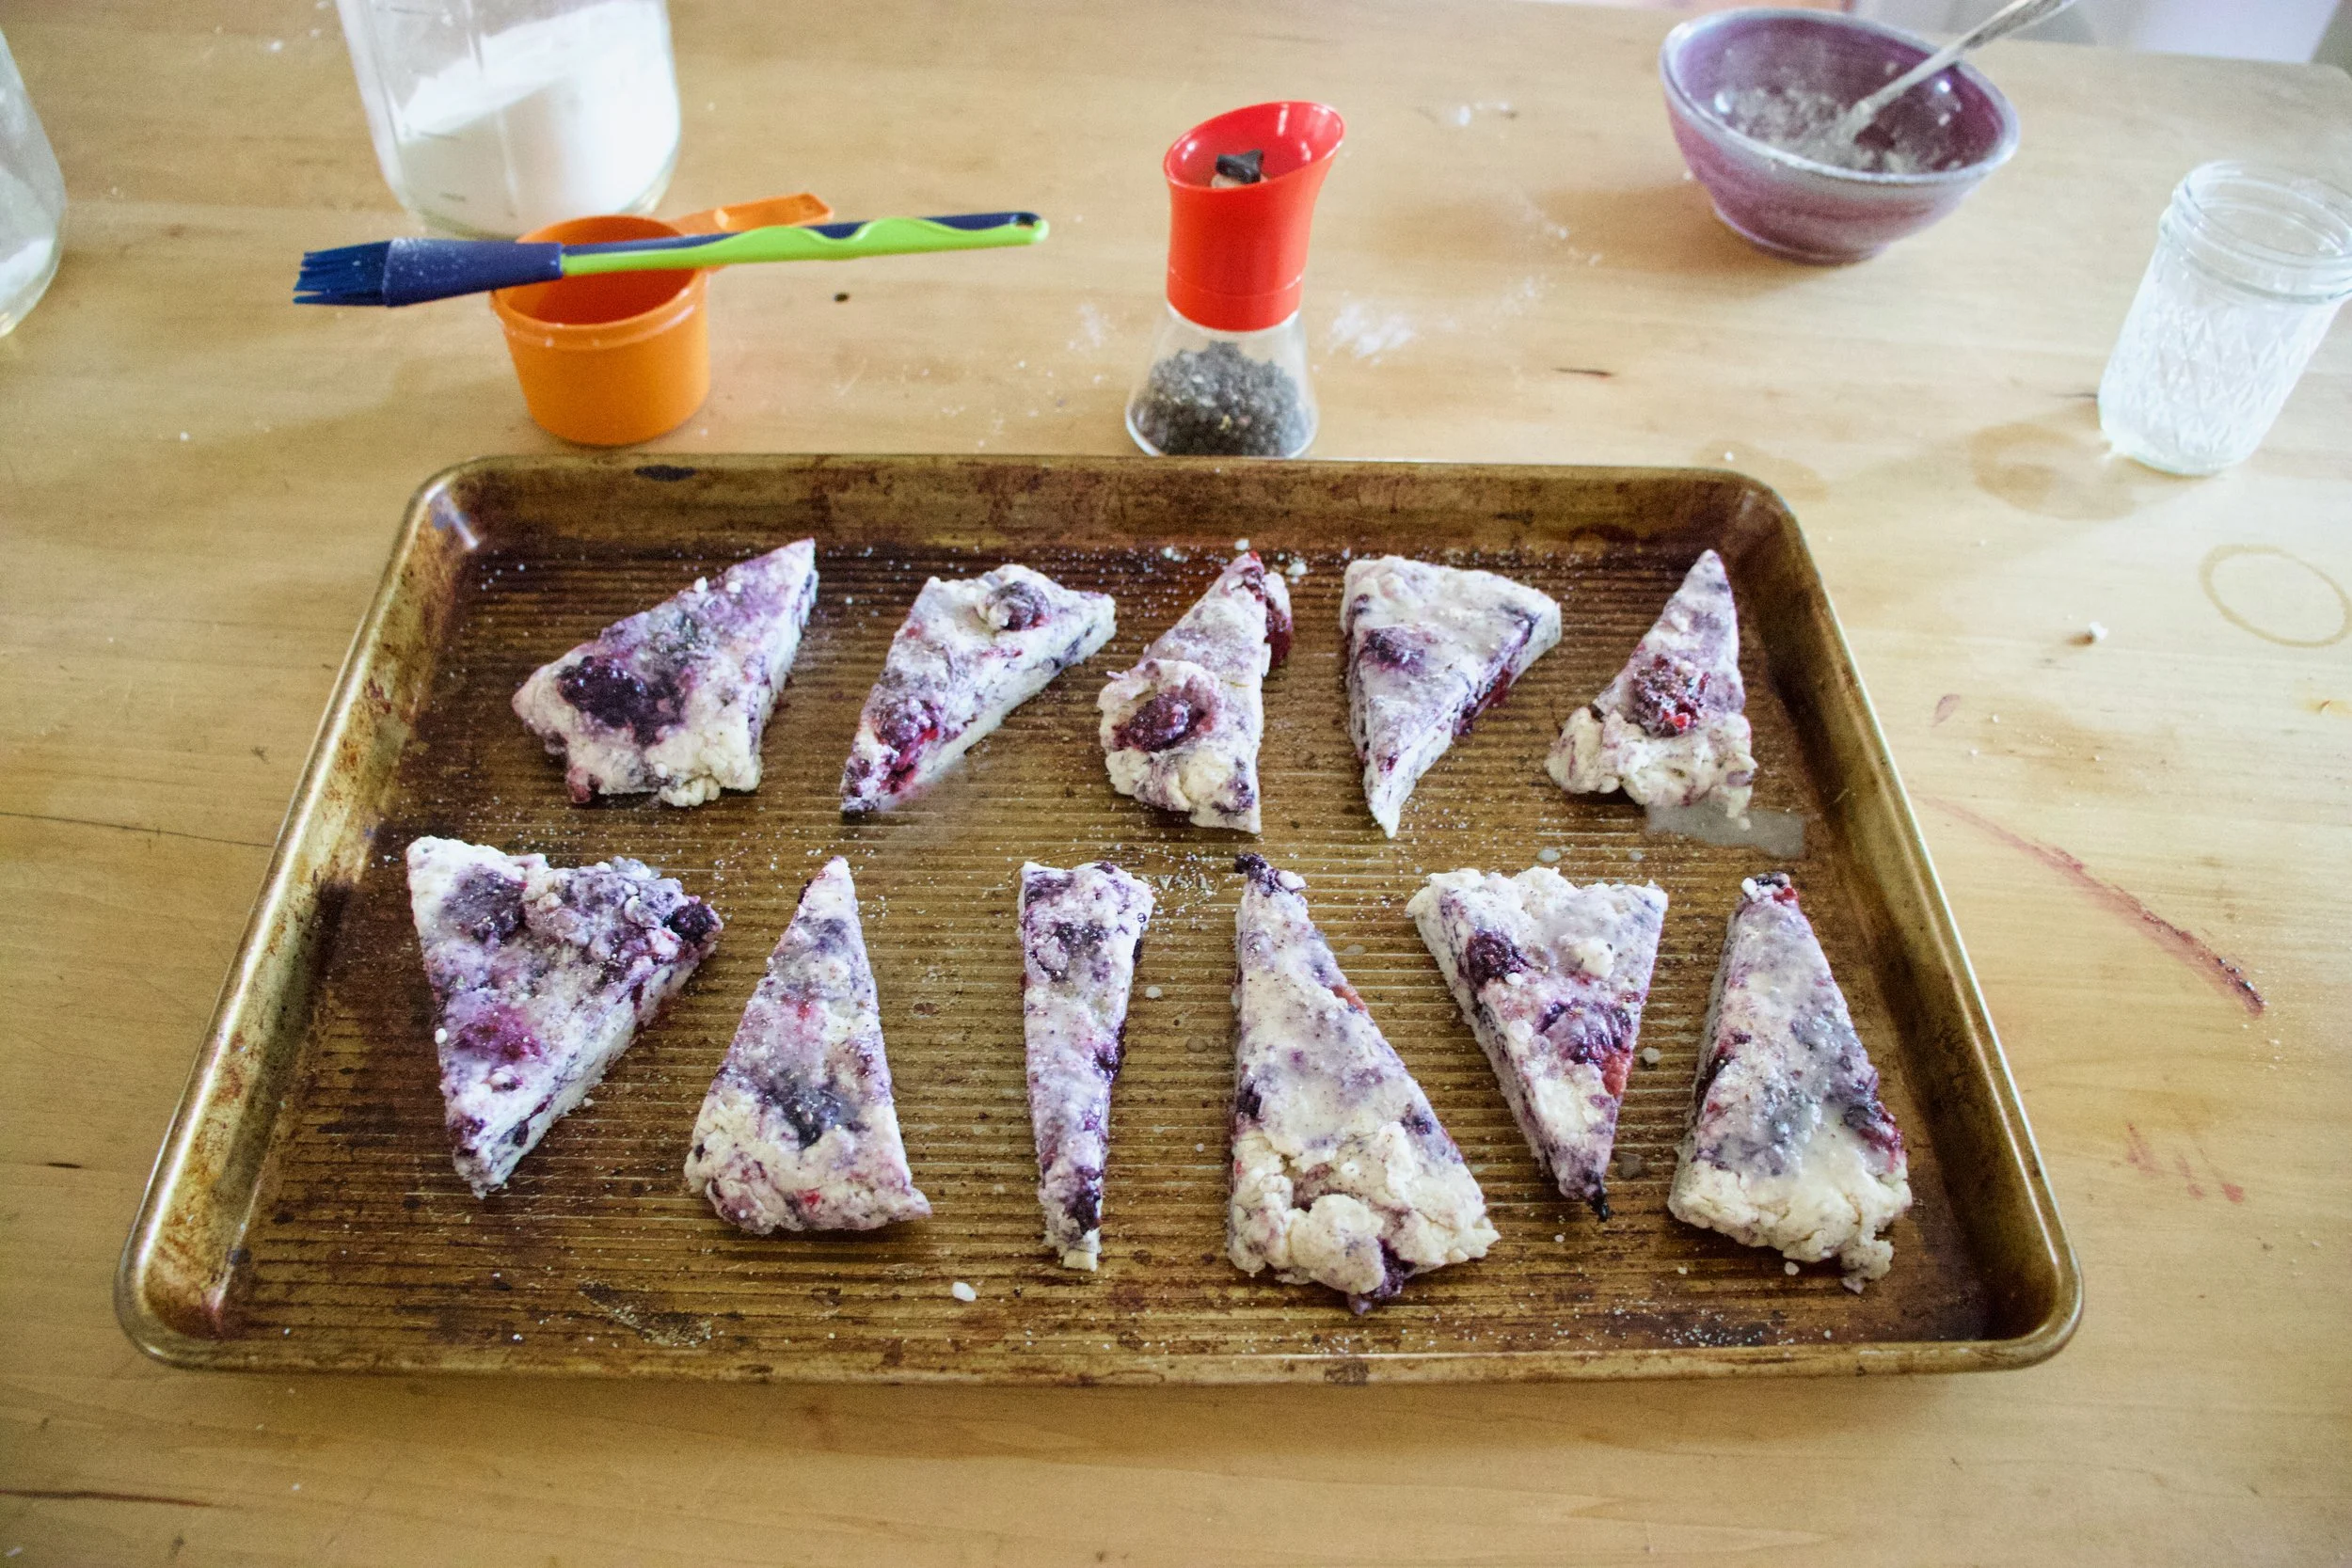
A little more then half the mixture gets patted down into a greases and lined pan
Berries, sugar, arrowroot powder, lemon juice and lemon zest go into a bowl. Give it a mix.
Dump and distribute all over recently patted down dough..
And crumble the rest of the crumble all over the top.
Now into the oven it go.
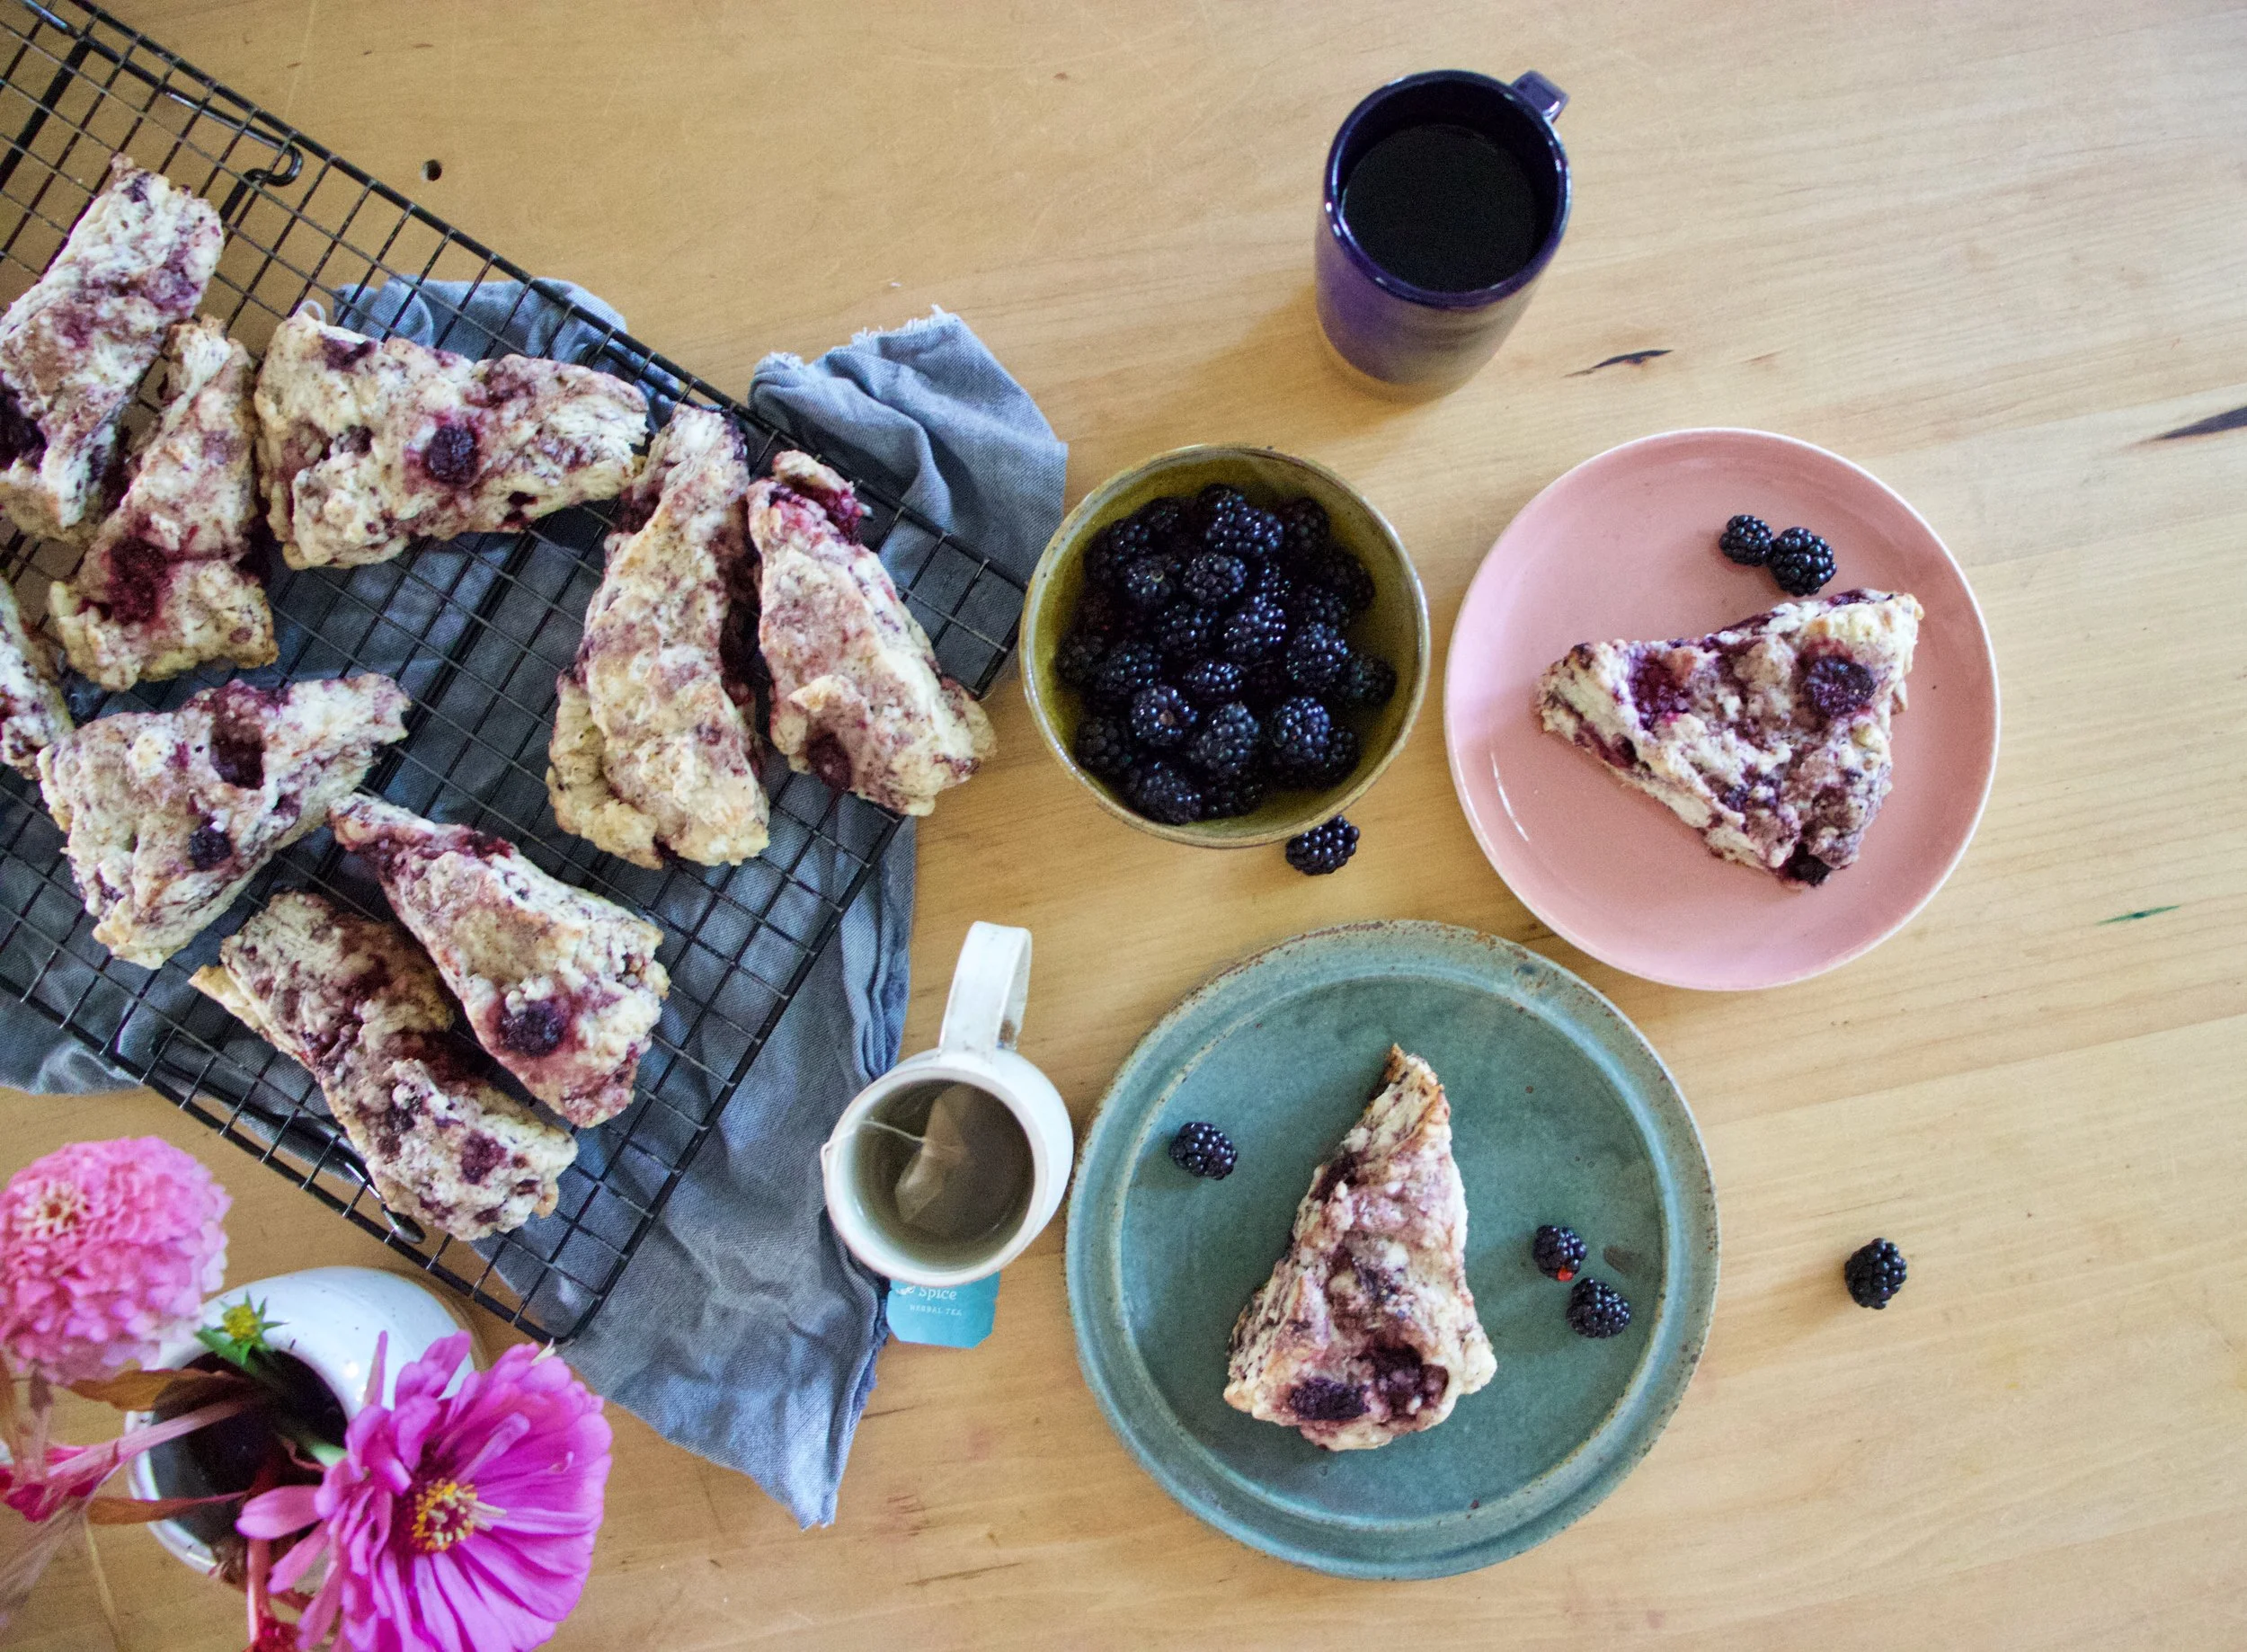
All cooked and cooling while you put away the clean dishes (or anything that will distract you for at least a half hour while they cool.)
And when they have cooled enough to cut, it’s time for you to eat.
And yes, these are totally perfect for dessert and breakfast.
-C
makes 16 squares
For the crust
For the berry filling
Preheat oven to 375
Mix the flour, sugar, salt, and baking powder together in a large bowl. Add in coconut oil and incorporate with a fork or pastry cutter until the dough looks crumbly, add in soy milk and mix in with for again just til until incorporated. (think pie dough-like)%u00a0 Don’t worry if some of the dough seems dry, it’s fine.
Grease and line a 9×9 pan. Dump a little more then half of the dough mixture in and pat down to cover bottom of pan. Try to make sure it’s all an even thickness.
In a separate bowl, toss together the berries, sugar, arrowroot powder, lemon zest and juice of that lemon. Dump the mixture into pan and evenly distribute over dough. Take the remaining dough and crumble all over the top then just stick it into the hot oven.
Bake for about 50 minutes or until the crumble on top is a nice golden brown.
Remove and let cool completely before cutting.
Cut then eat.
Store squares in fridge, some even say they taste better cold.