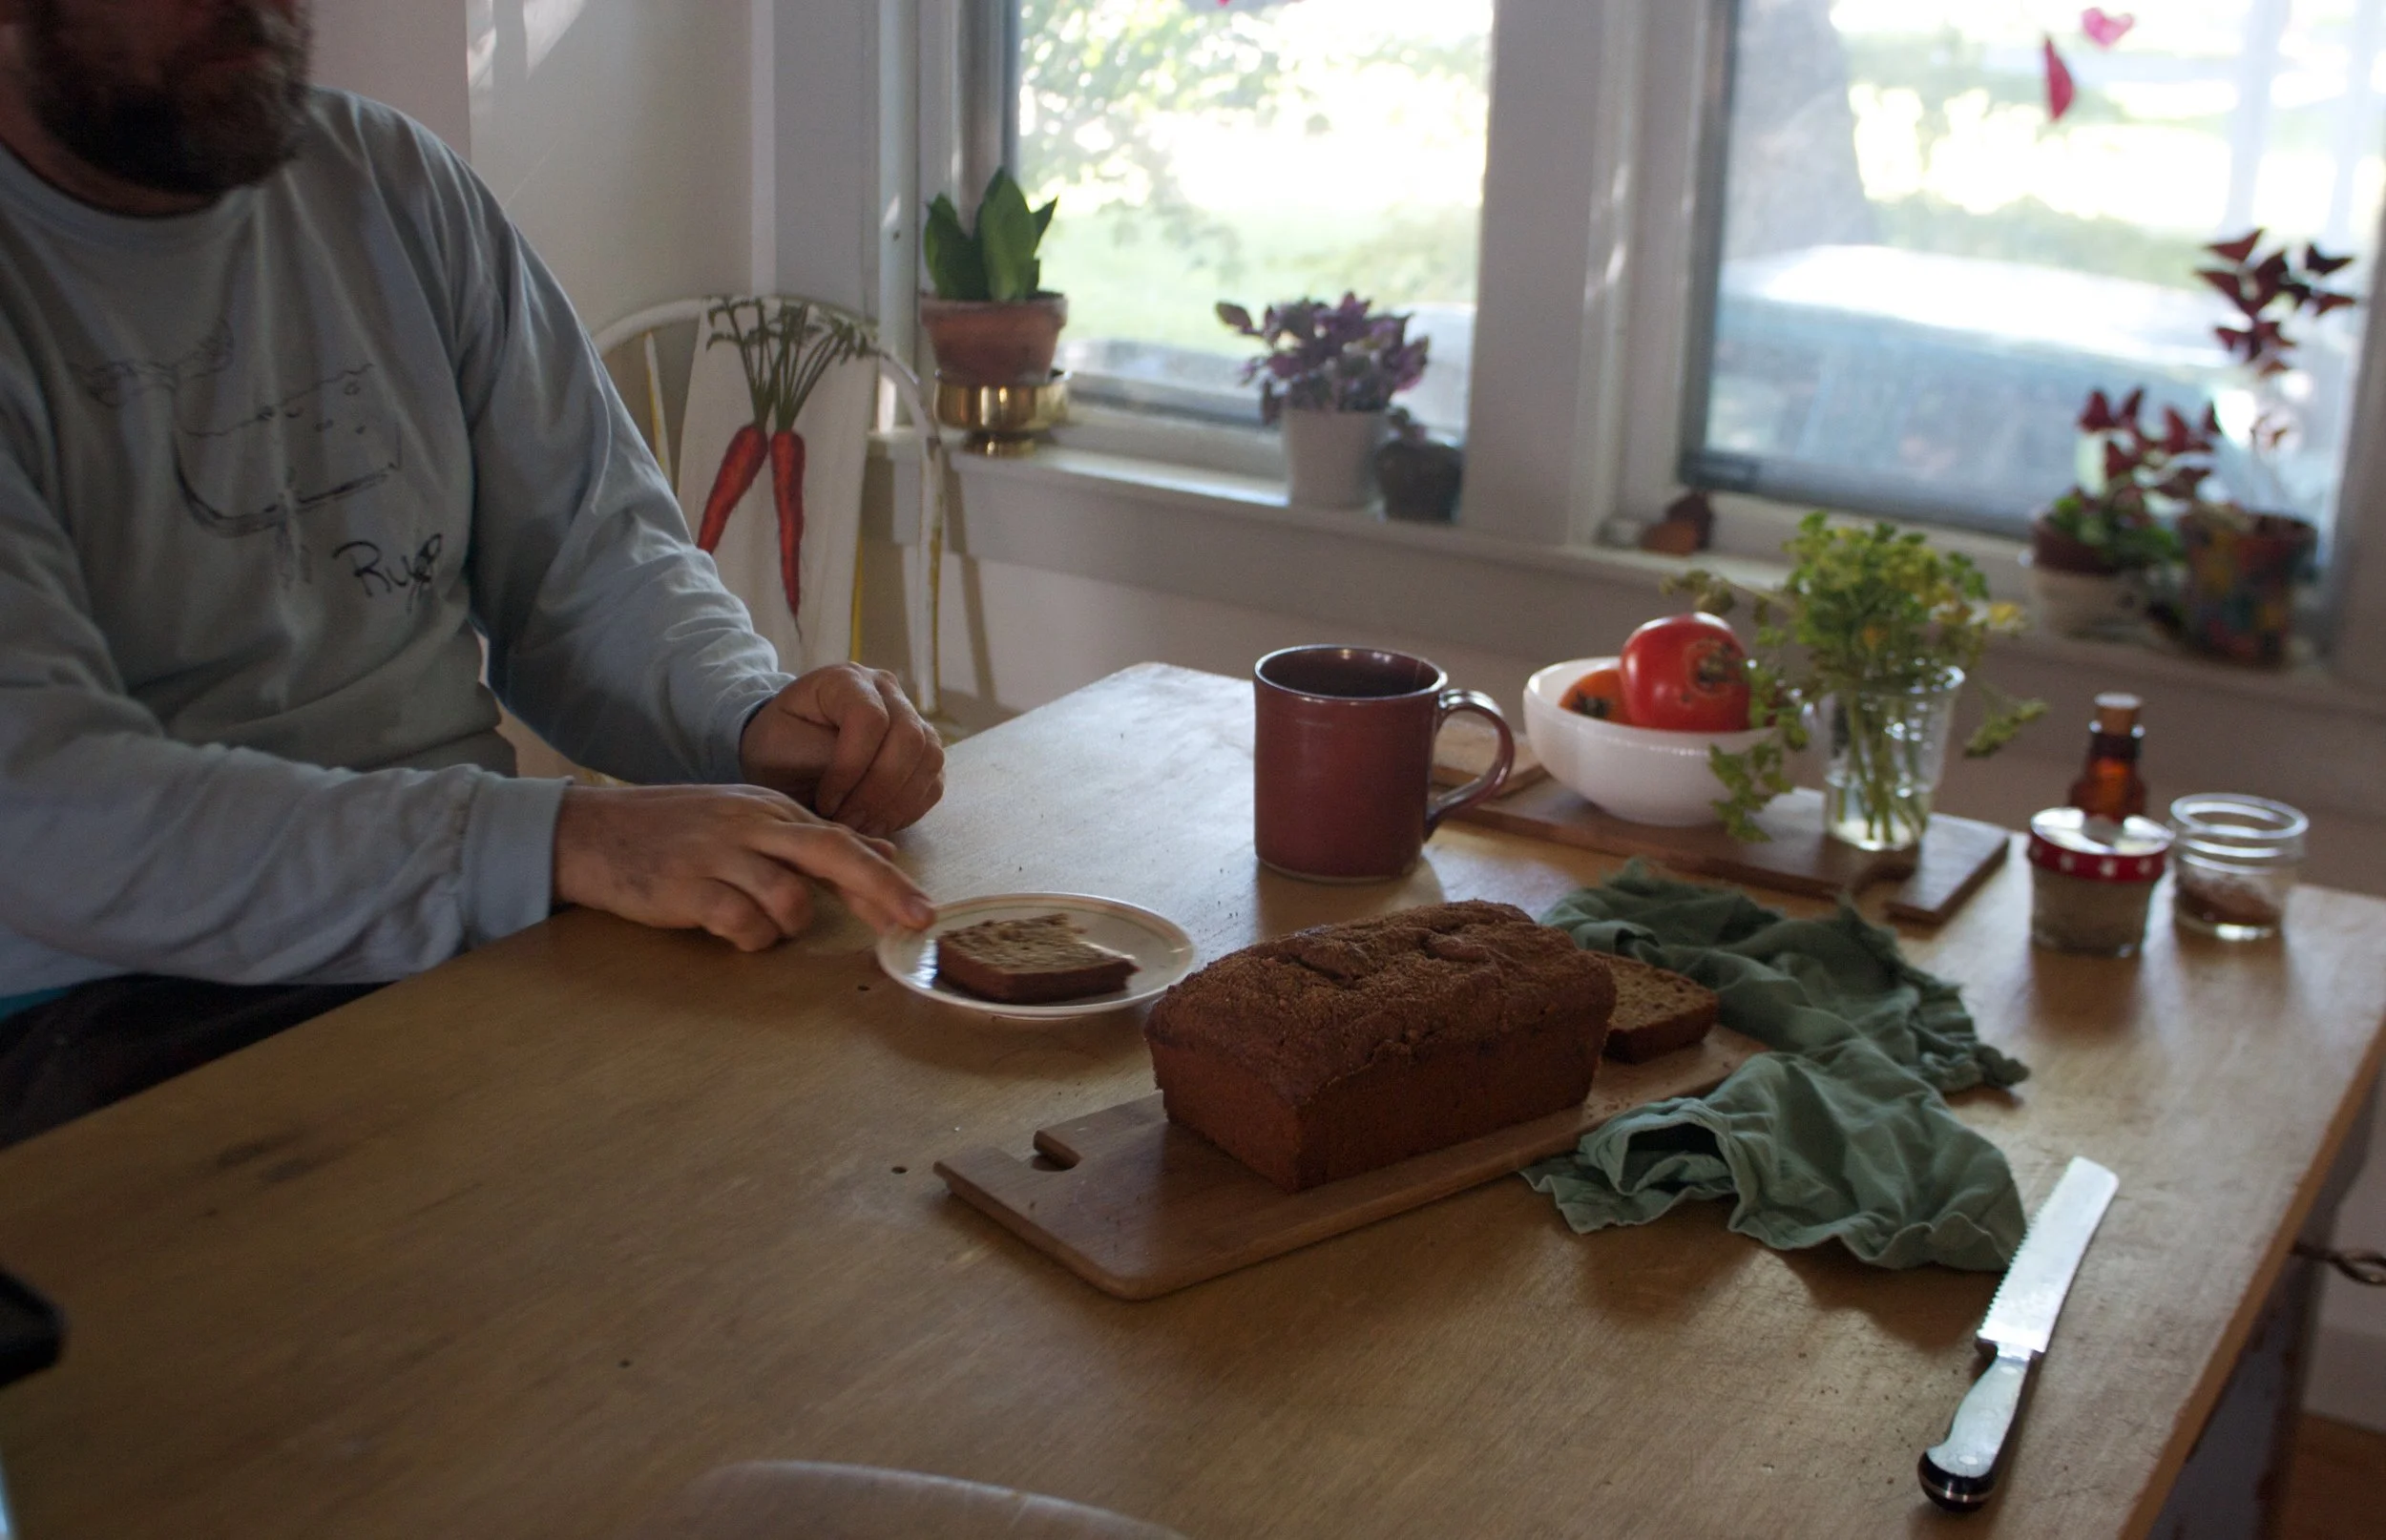
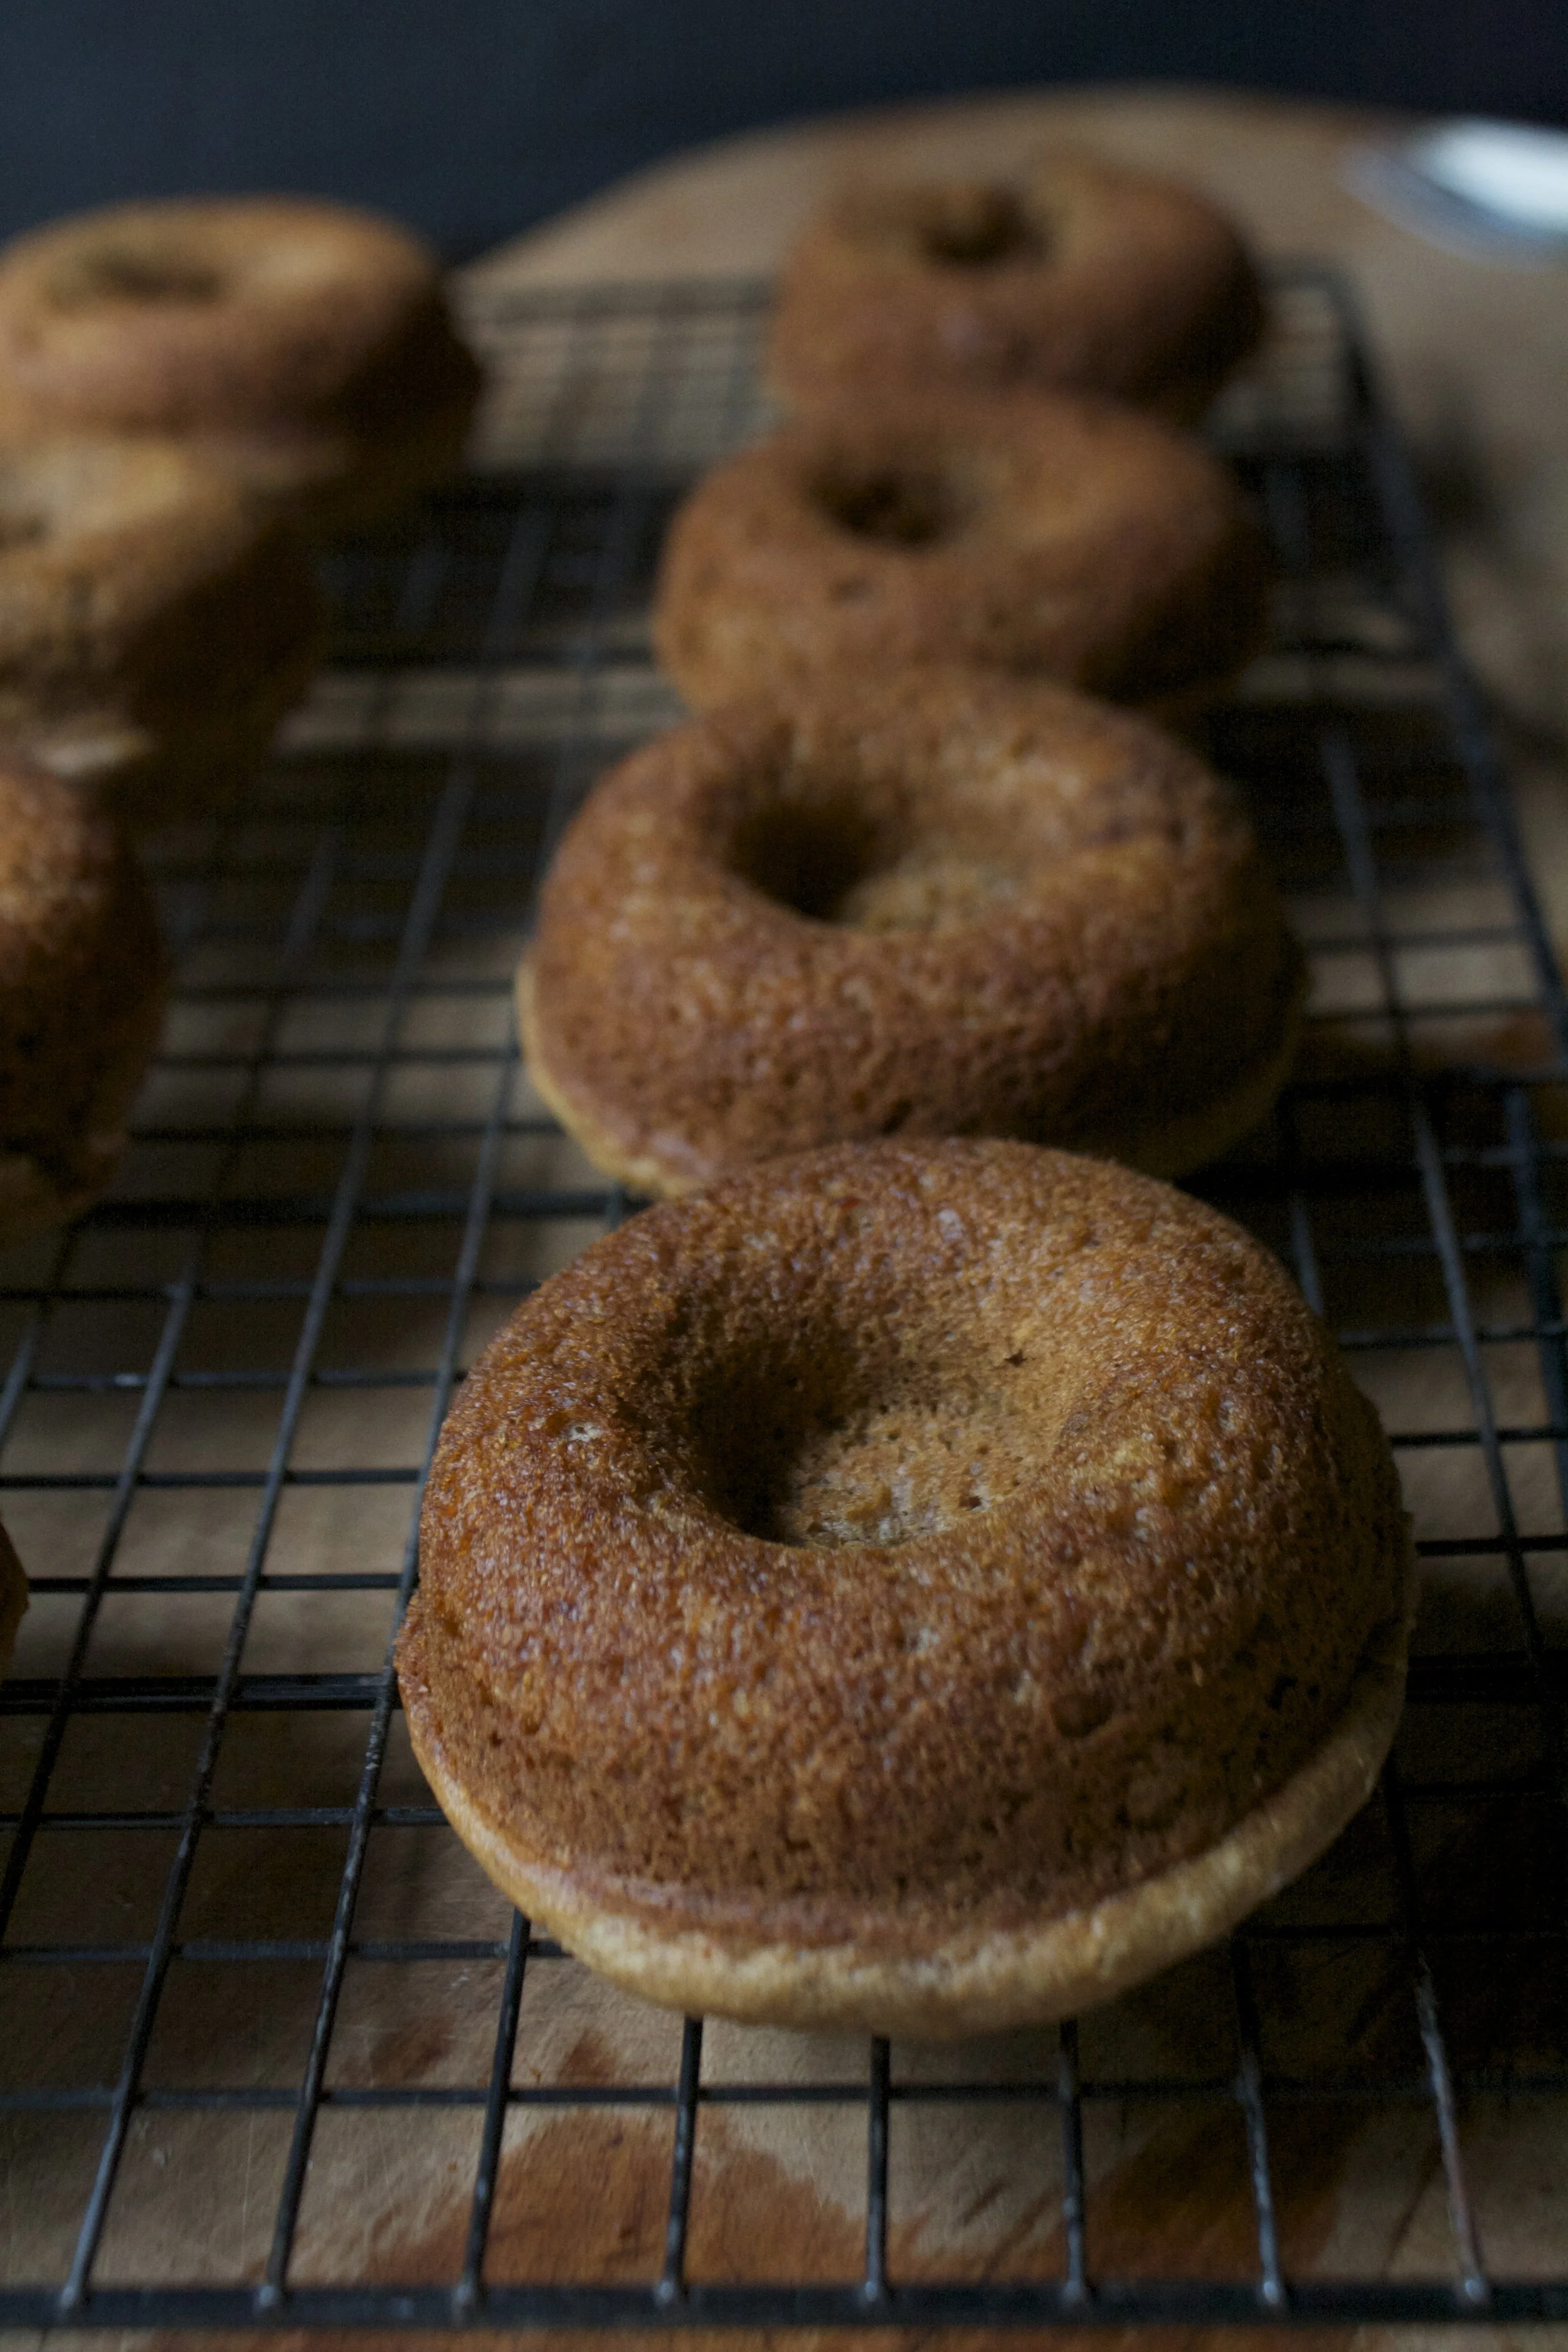
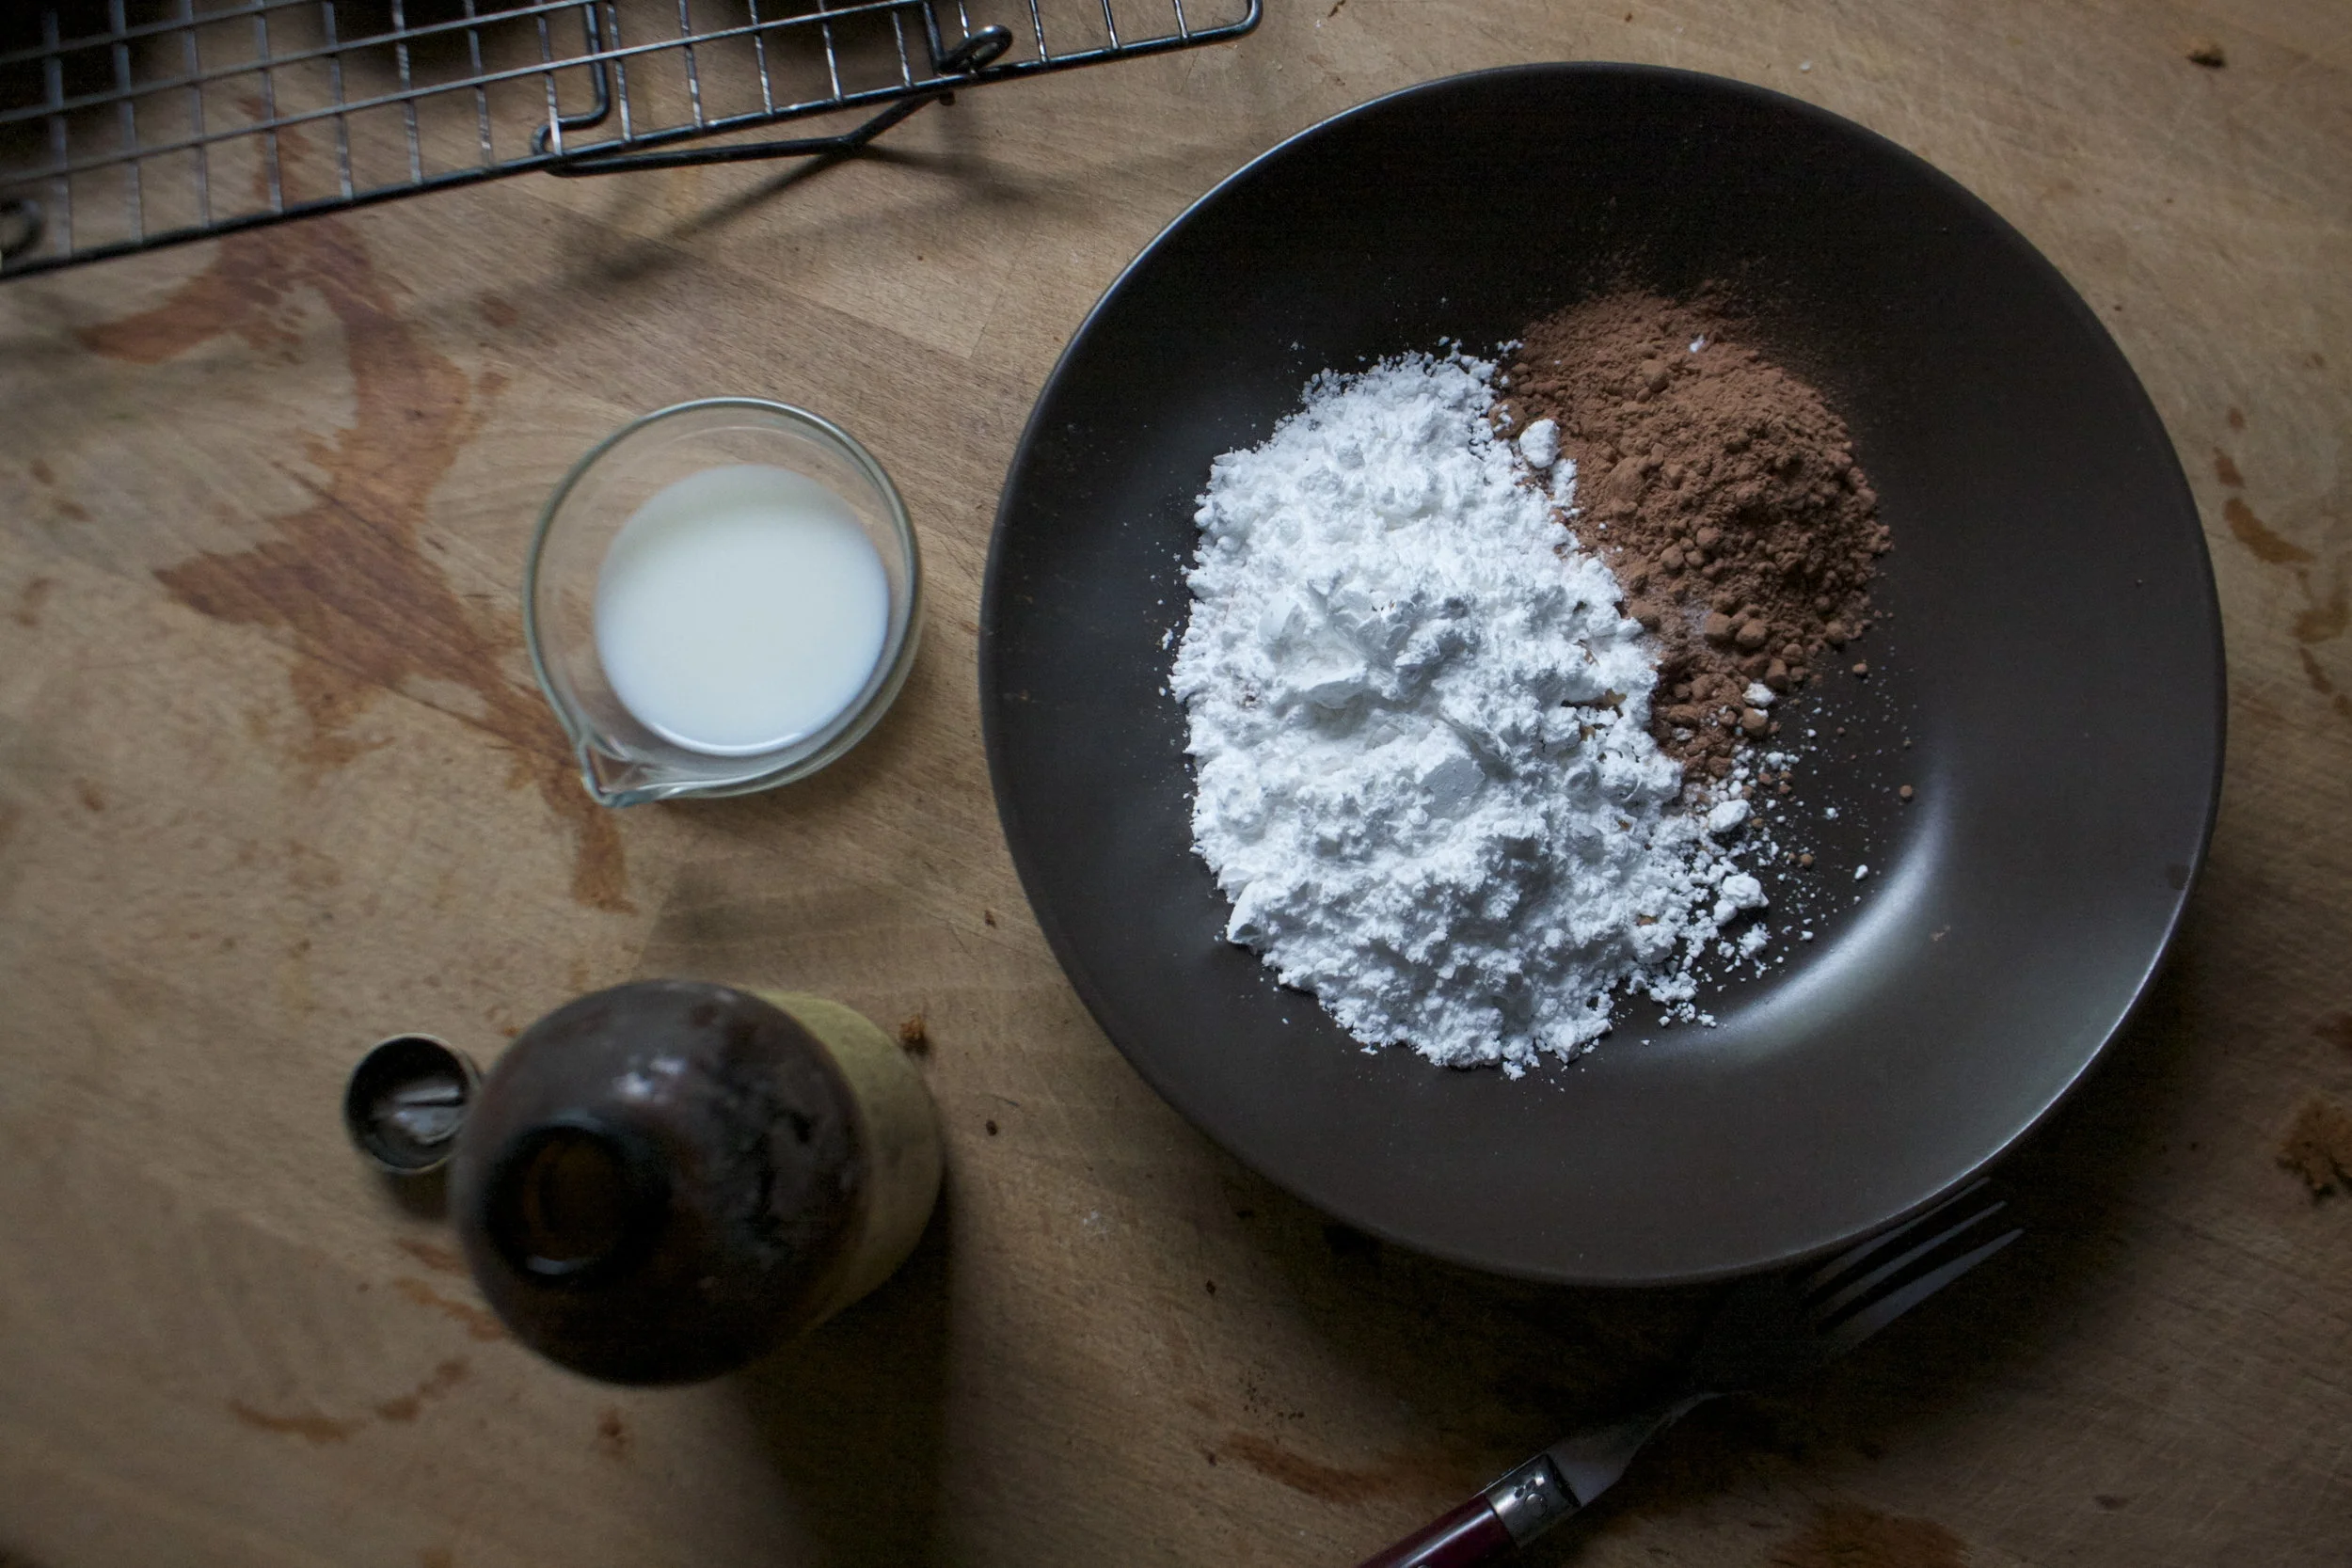
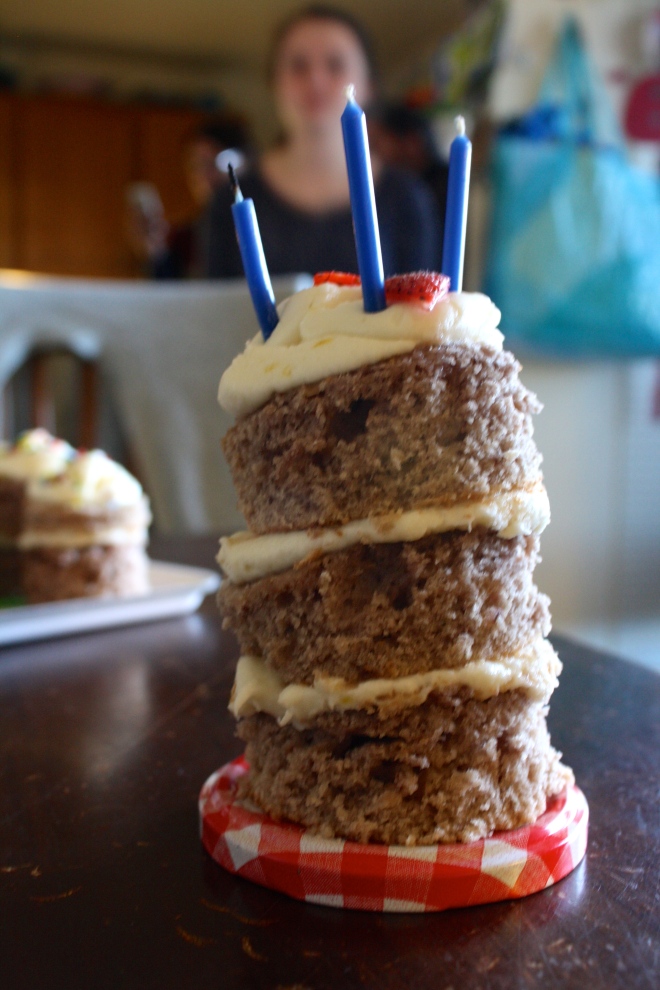
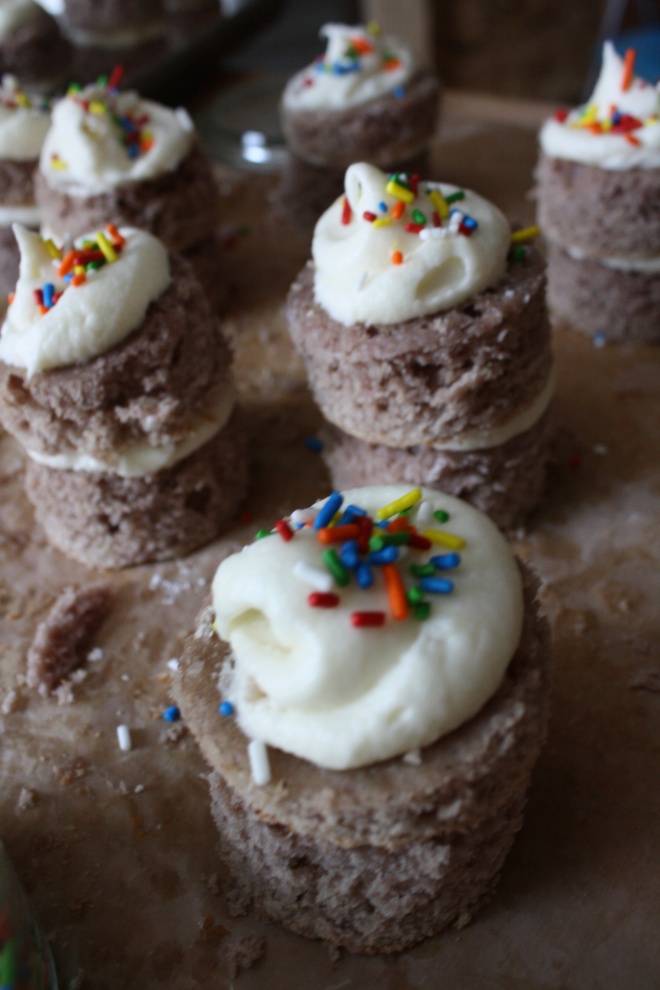
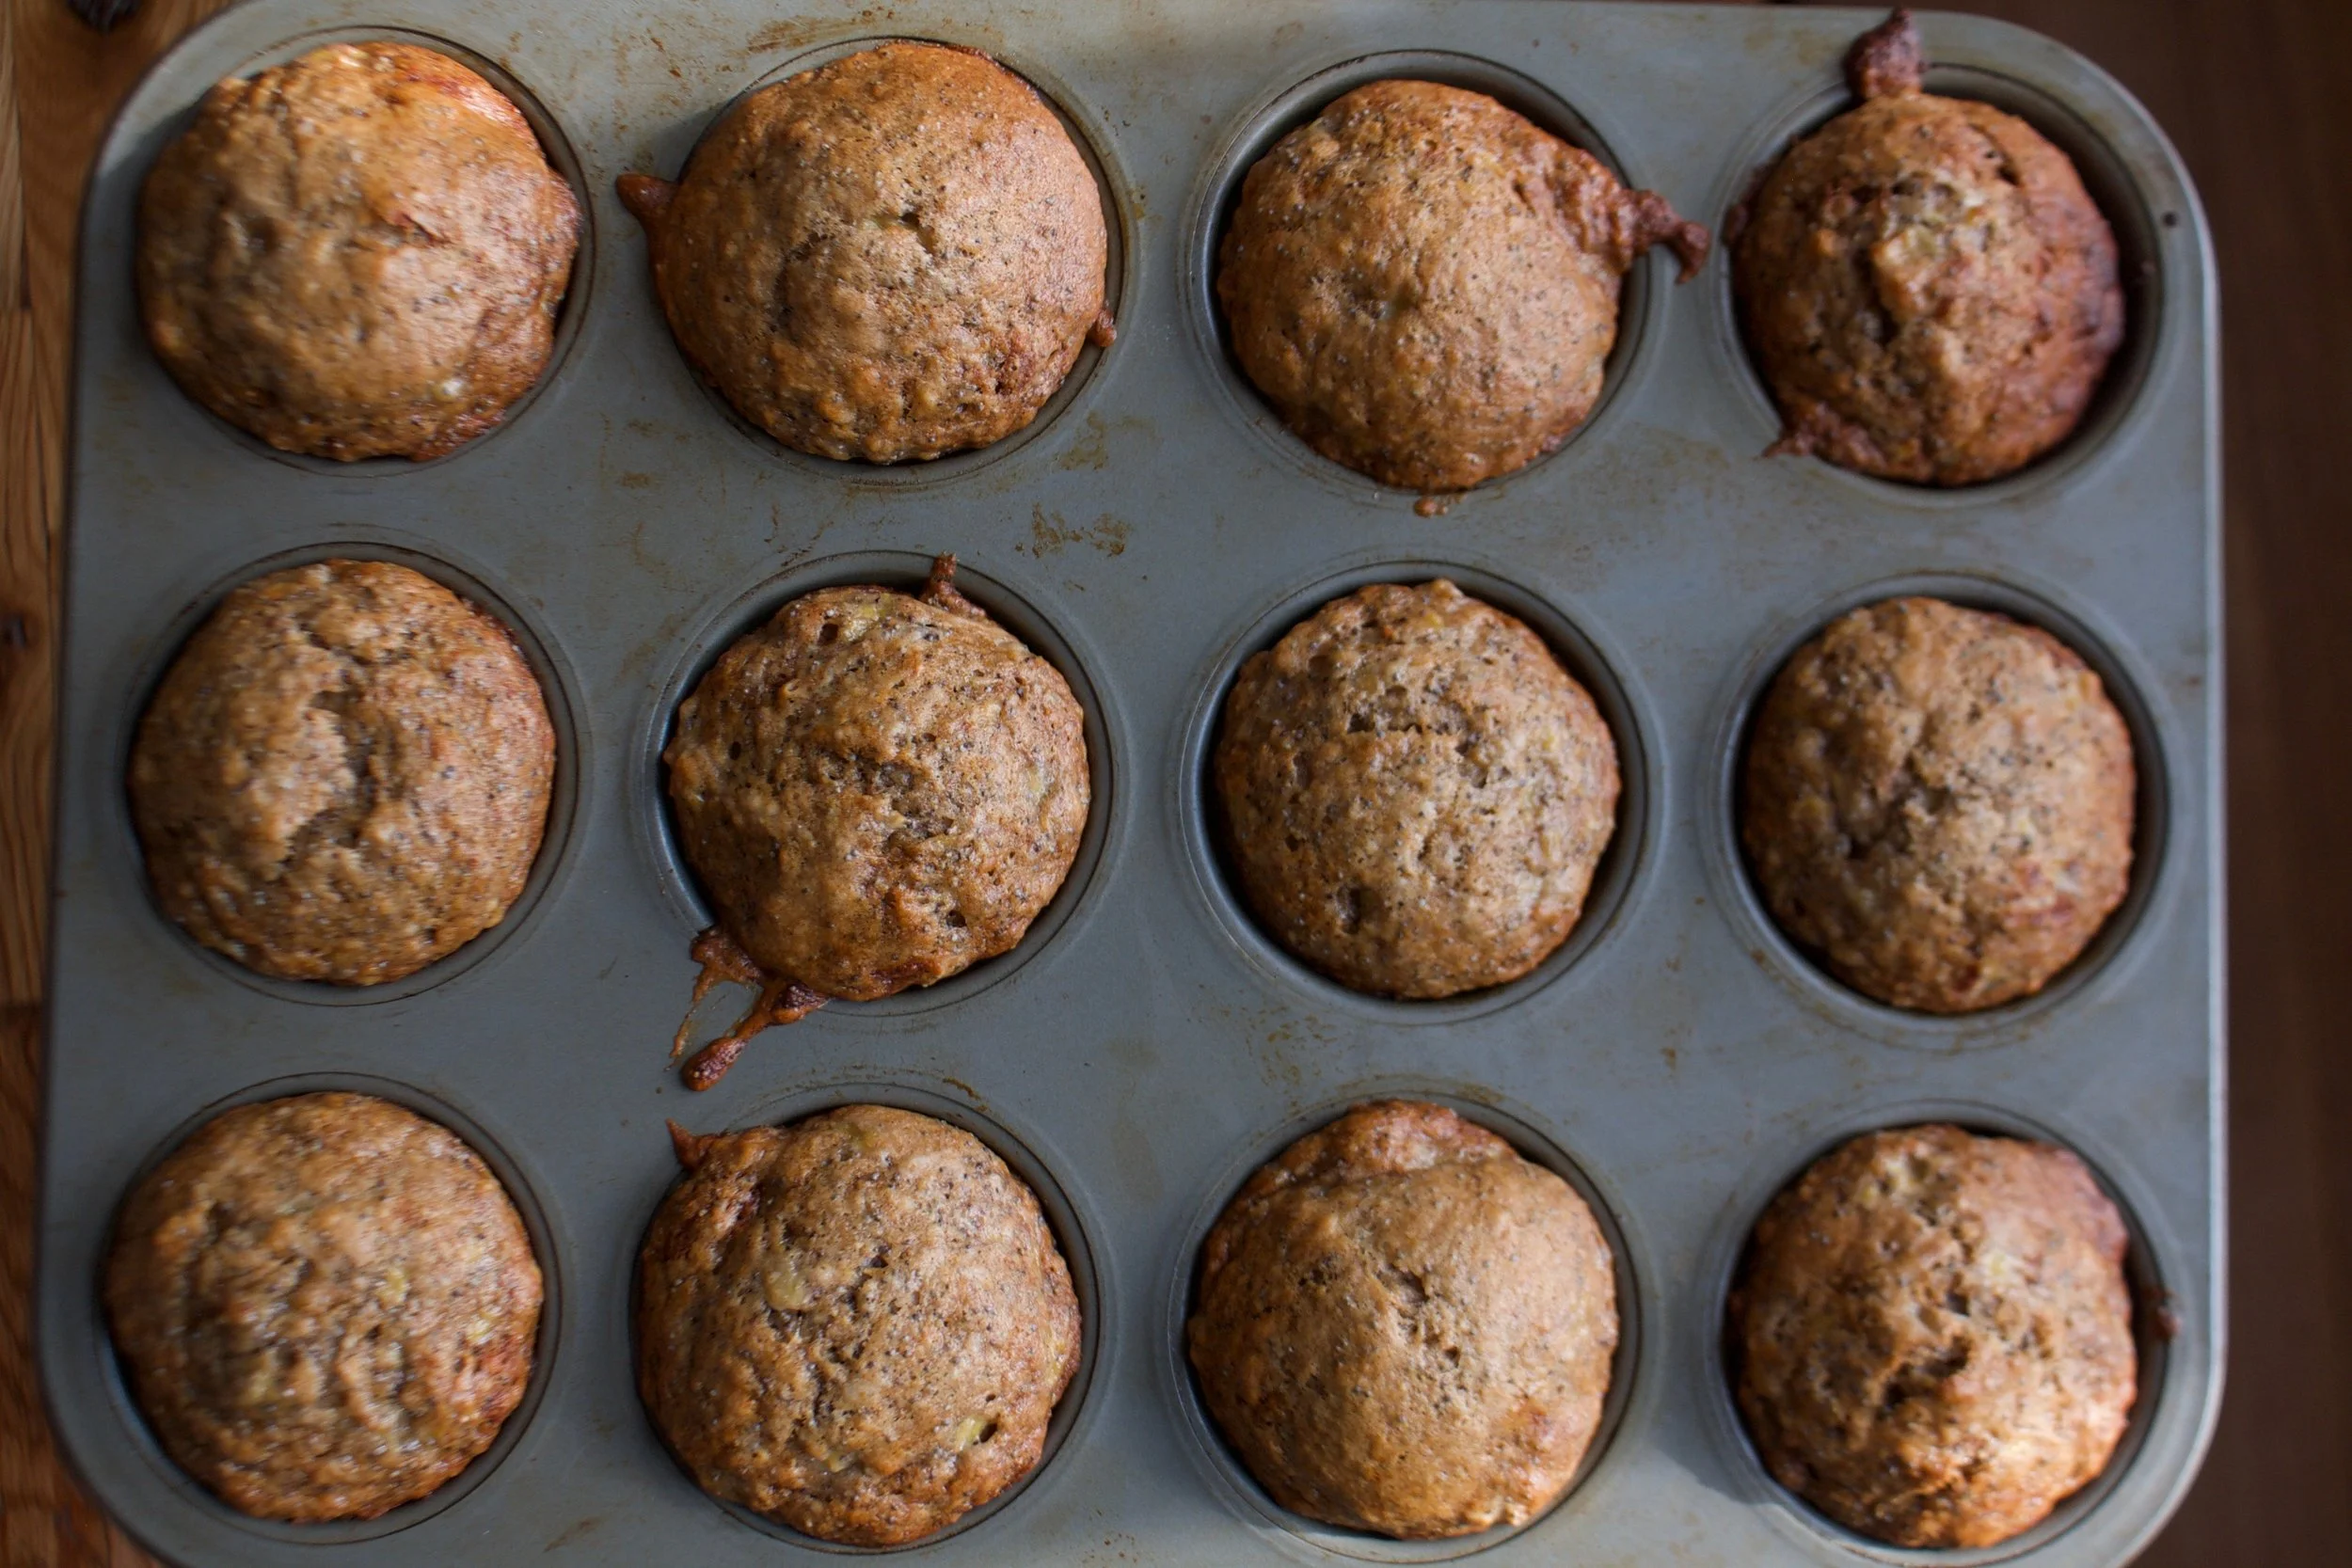
Banana bread never goes out of style. It is a clsasic, everyday, everybody type of food. Have a slice for dessert, maybe drizzled with some chocolate, definitely.%u00a0%u00a0How about for a grab and go breakfast, sure sure.. A chunk slathered in peanut butter for snack time or anytime, well %u00a0isn’t that’s why you make it?%u00a0 And who doesn’t always have a banana bowl in the kitchen? A banana bowl that is always full of bananas because the banana just always makes it’s way home. They seem to pile up, even when I don’t mean for them to. And I know I am not the only one. I see it all the time. A fruit bowl in the kitchen with a least a couple of really really ripe bananas, waiting for that moment when you know there is no freaking way anyone in their right mind would eat those banana because gross. That’s when you have it, the perfect banana for some banana bread, or in this case, banana muffins. %u00a0
Here I went muffin style because I had already made a loaf of banana bread earlier in the week and because I wanted to send half of the muffins to the boys at the front desk at the gym. (They give me coffee, I give them muffins) And also, muffins cook a lot faster then bread so if you are a little low on time, muffins are the way to go. But if you would rather bread, you can make it bread. Bananas are there for you and are not fussy.%u00a0
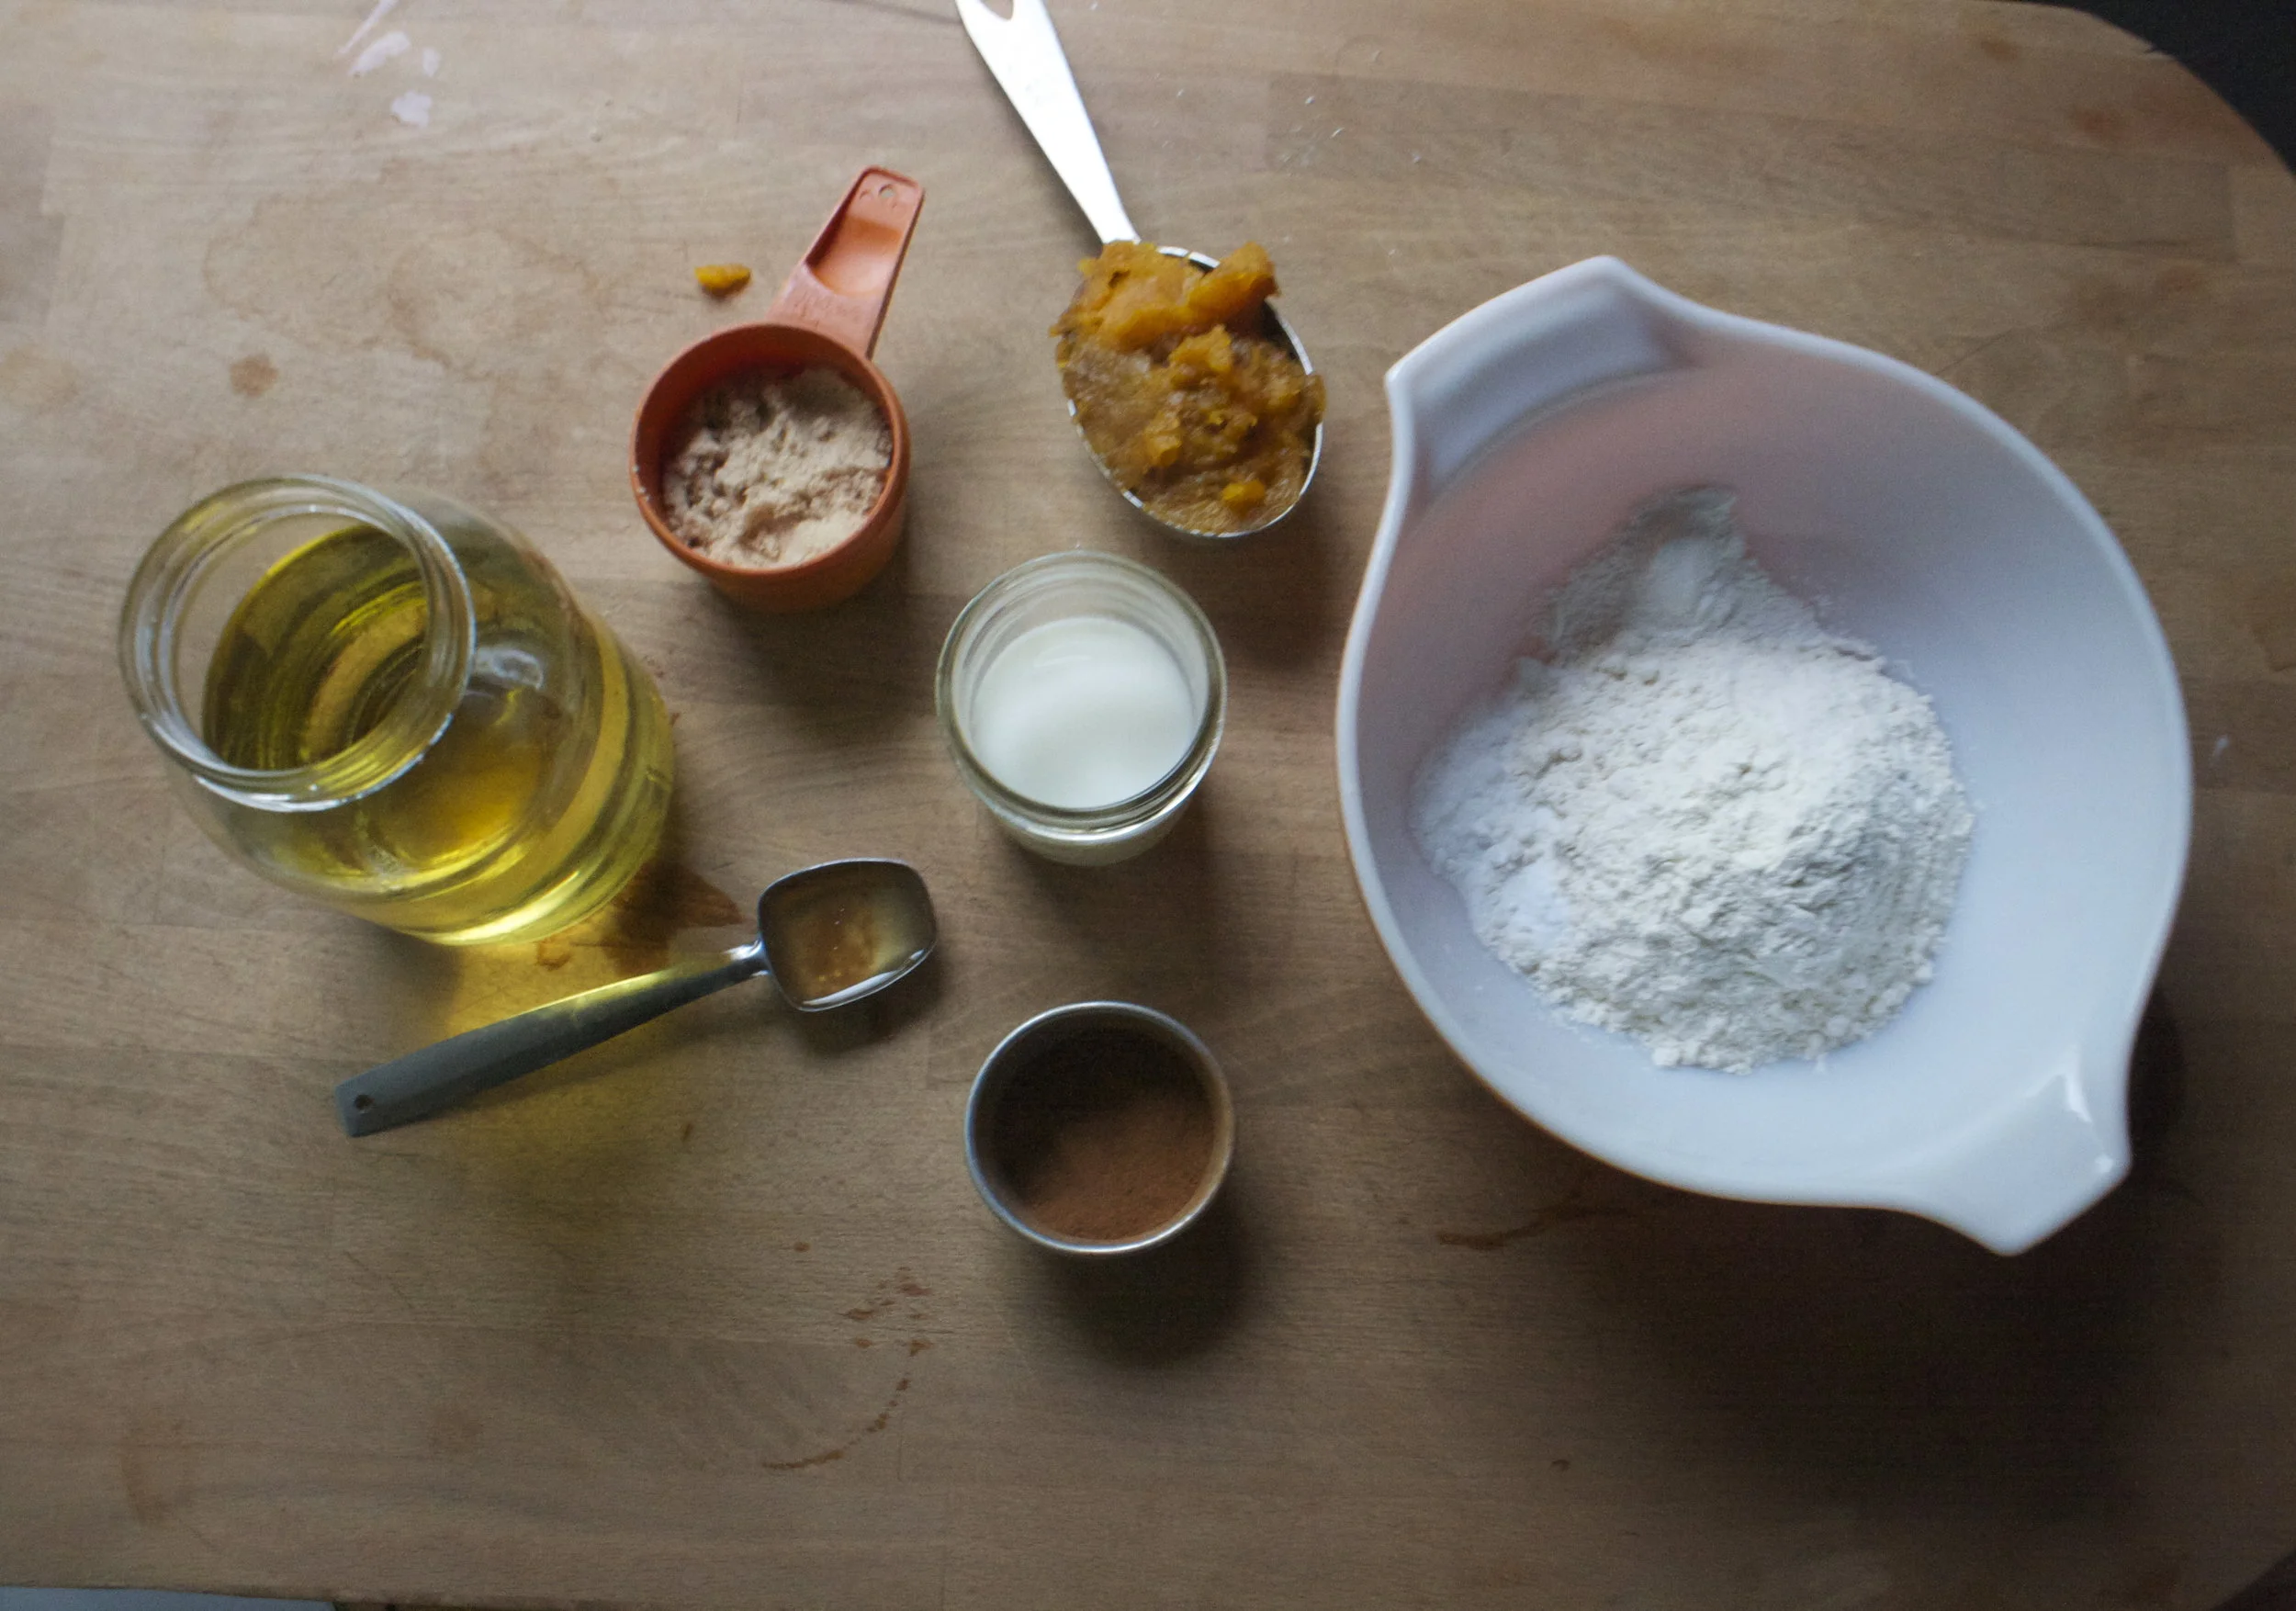
The stuff. Ripe bananas, poppy seeds, brown sugar, oil, and apple cider vinegar. Also have flour, cinnamon, baking soda, baking powder, and a little salt in the bowl.%u00a0
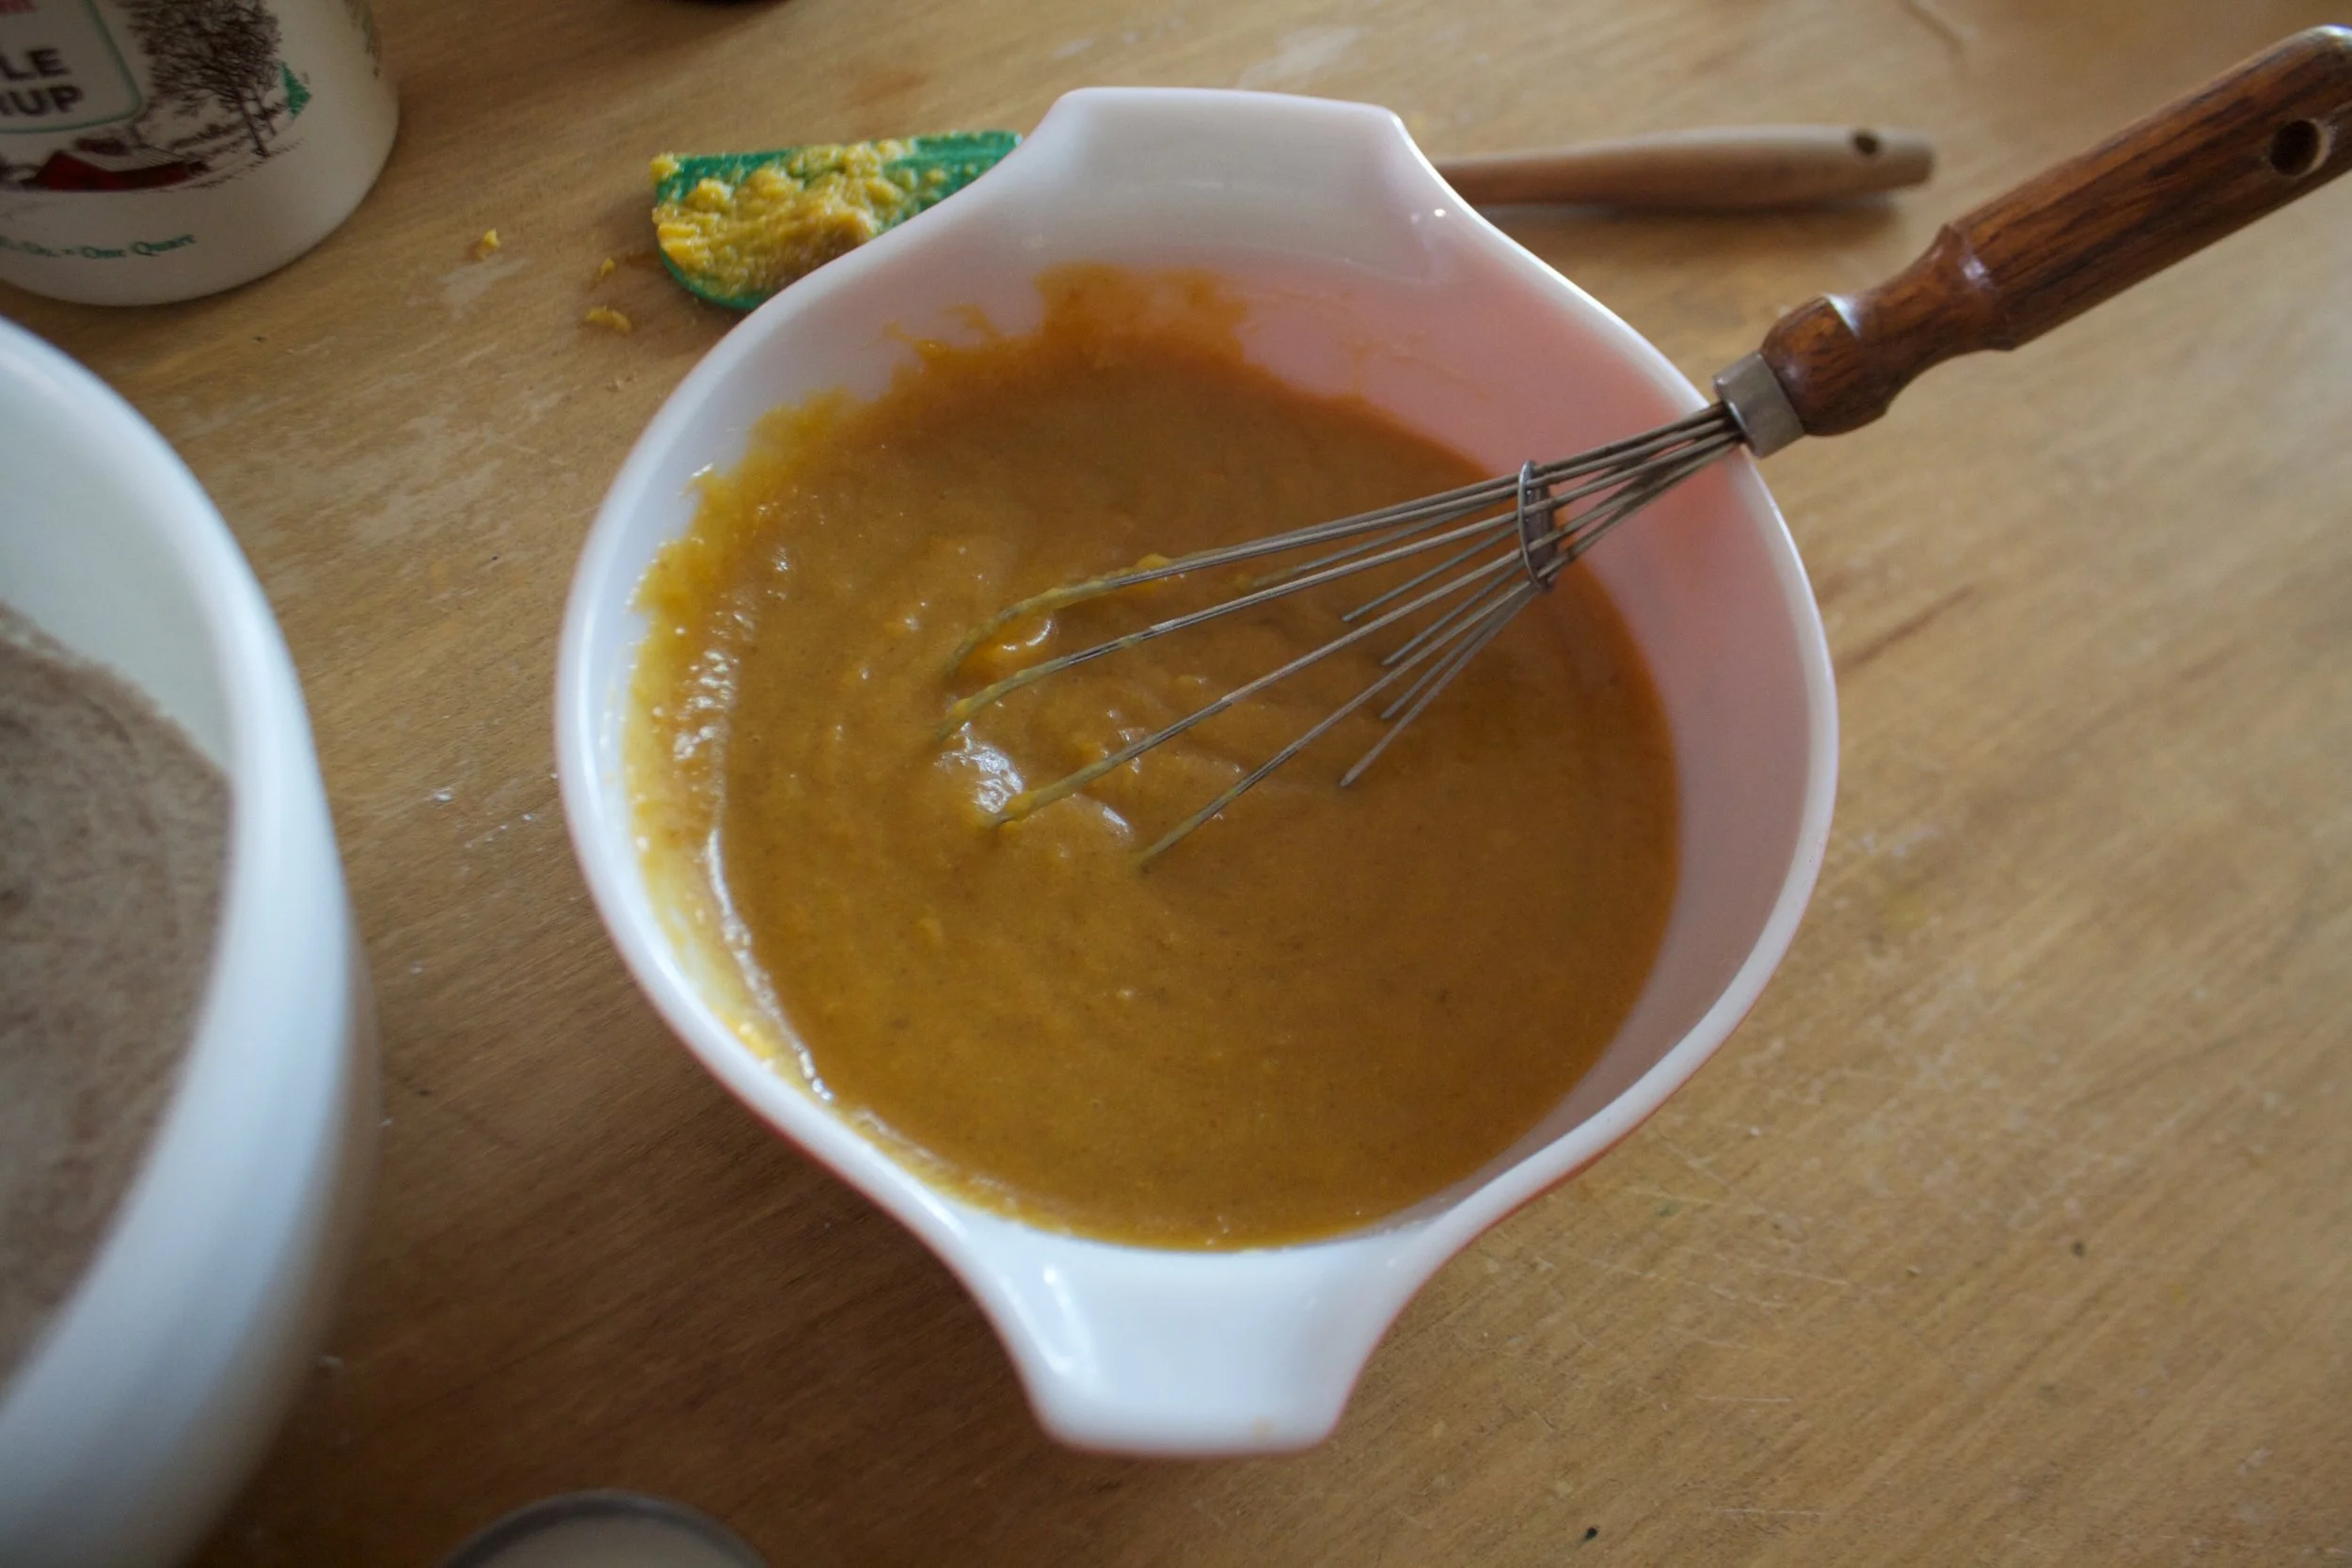
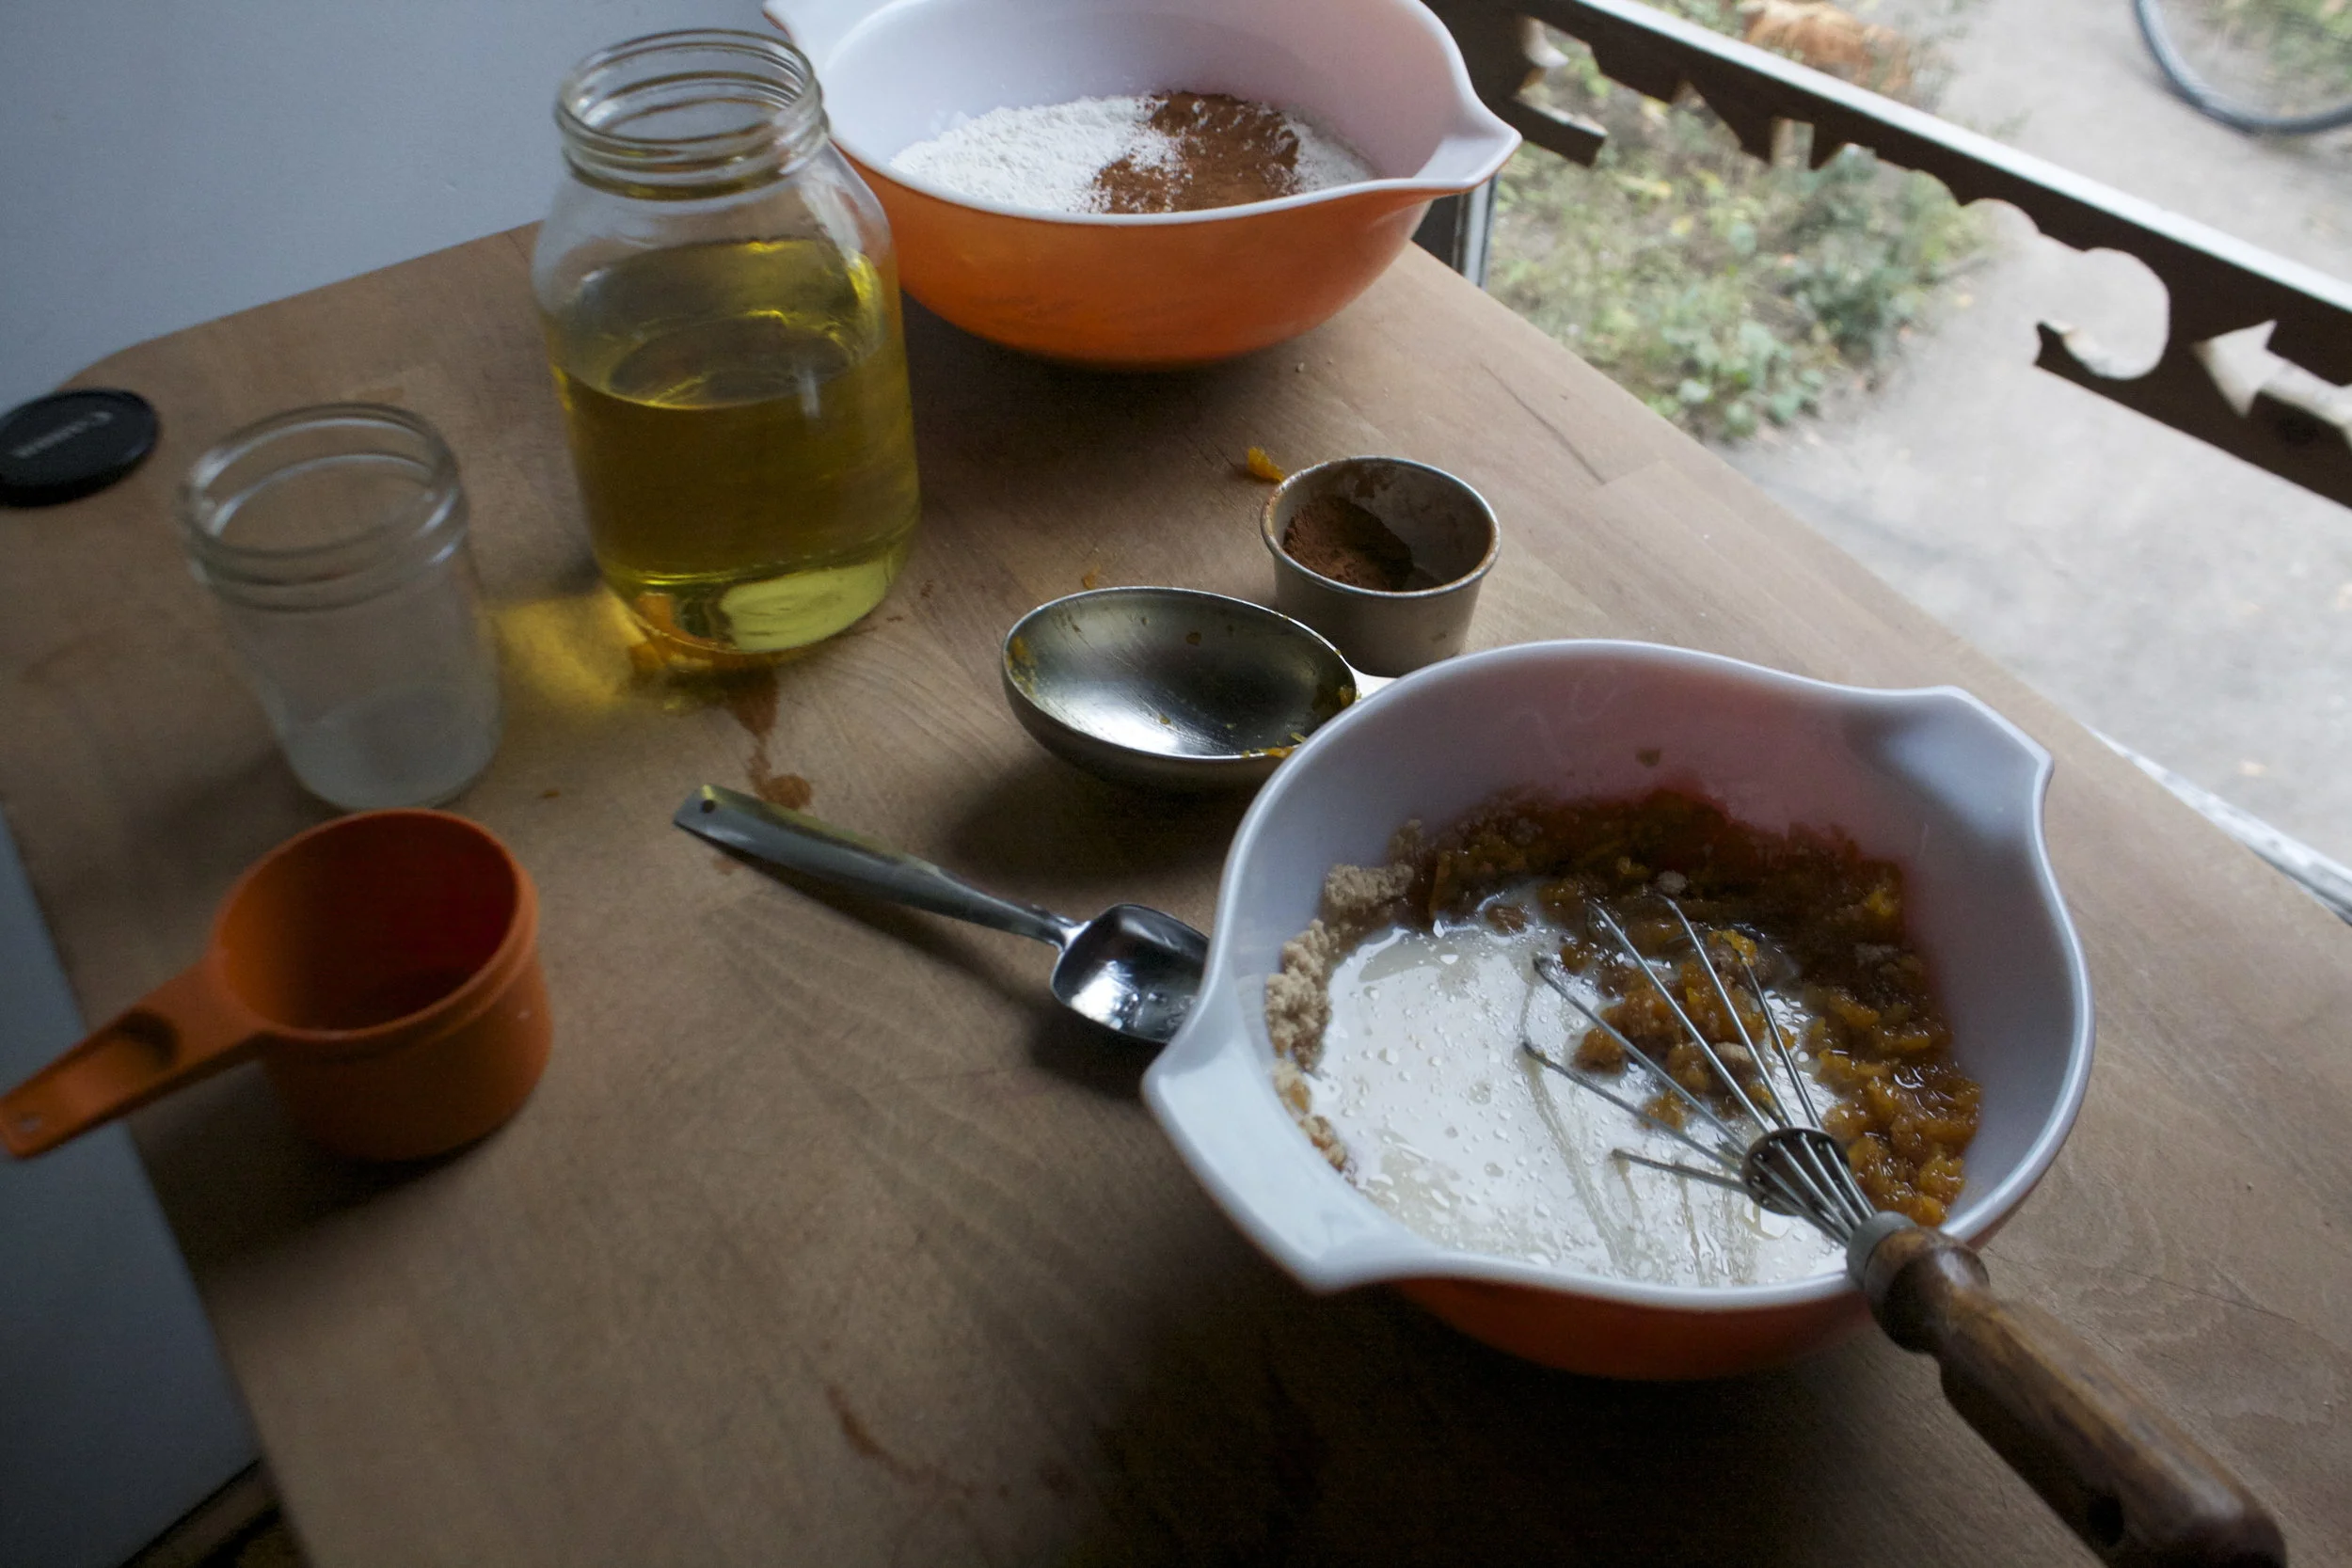
Mash the bananas in a bowl, like really mash them up until it turns to a sugar banana slop.%u00a0Then add in the oil and the vinegar and mix together.
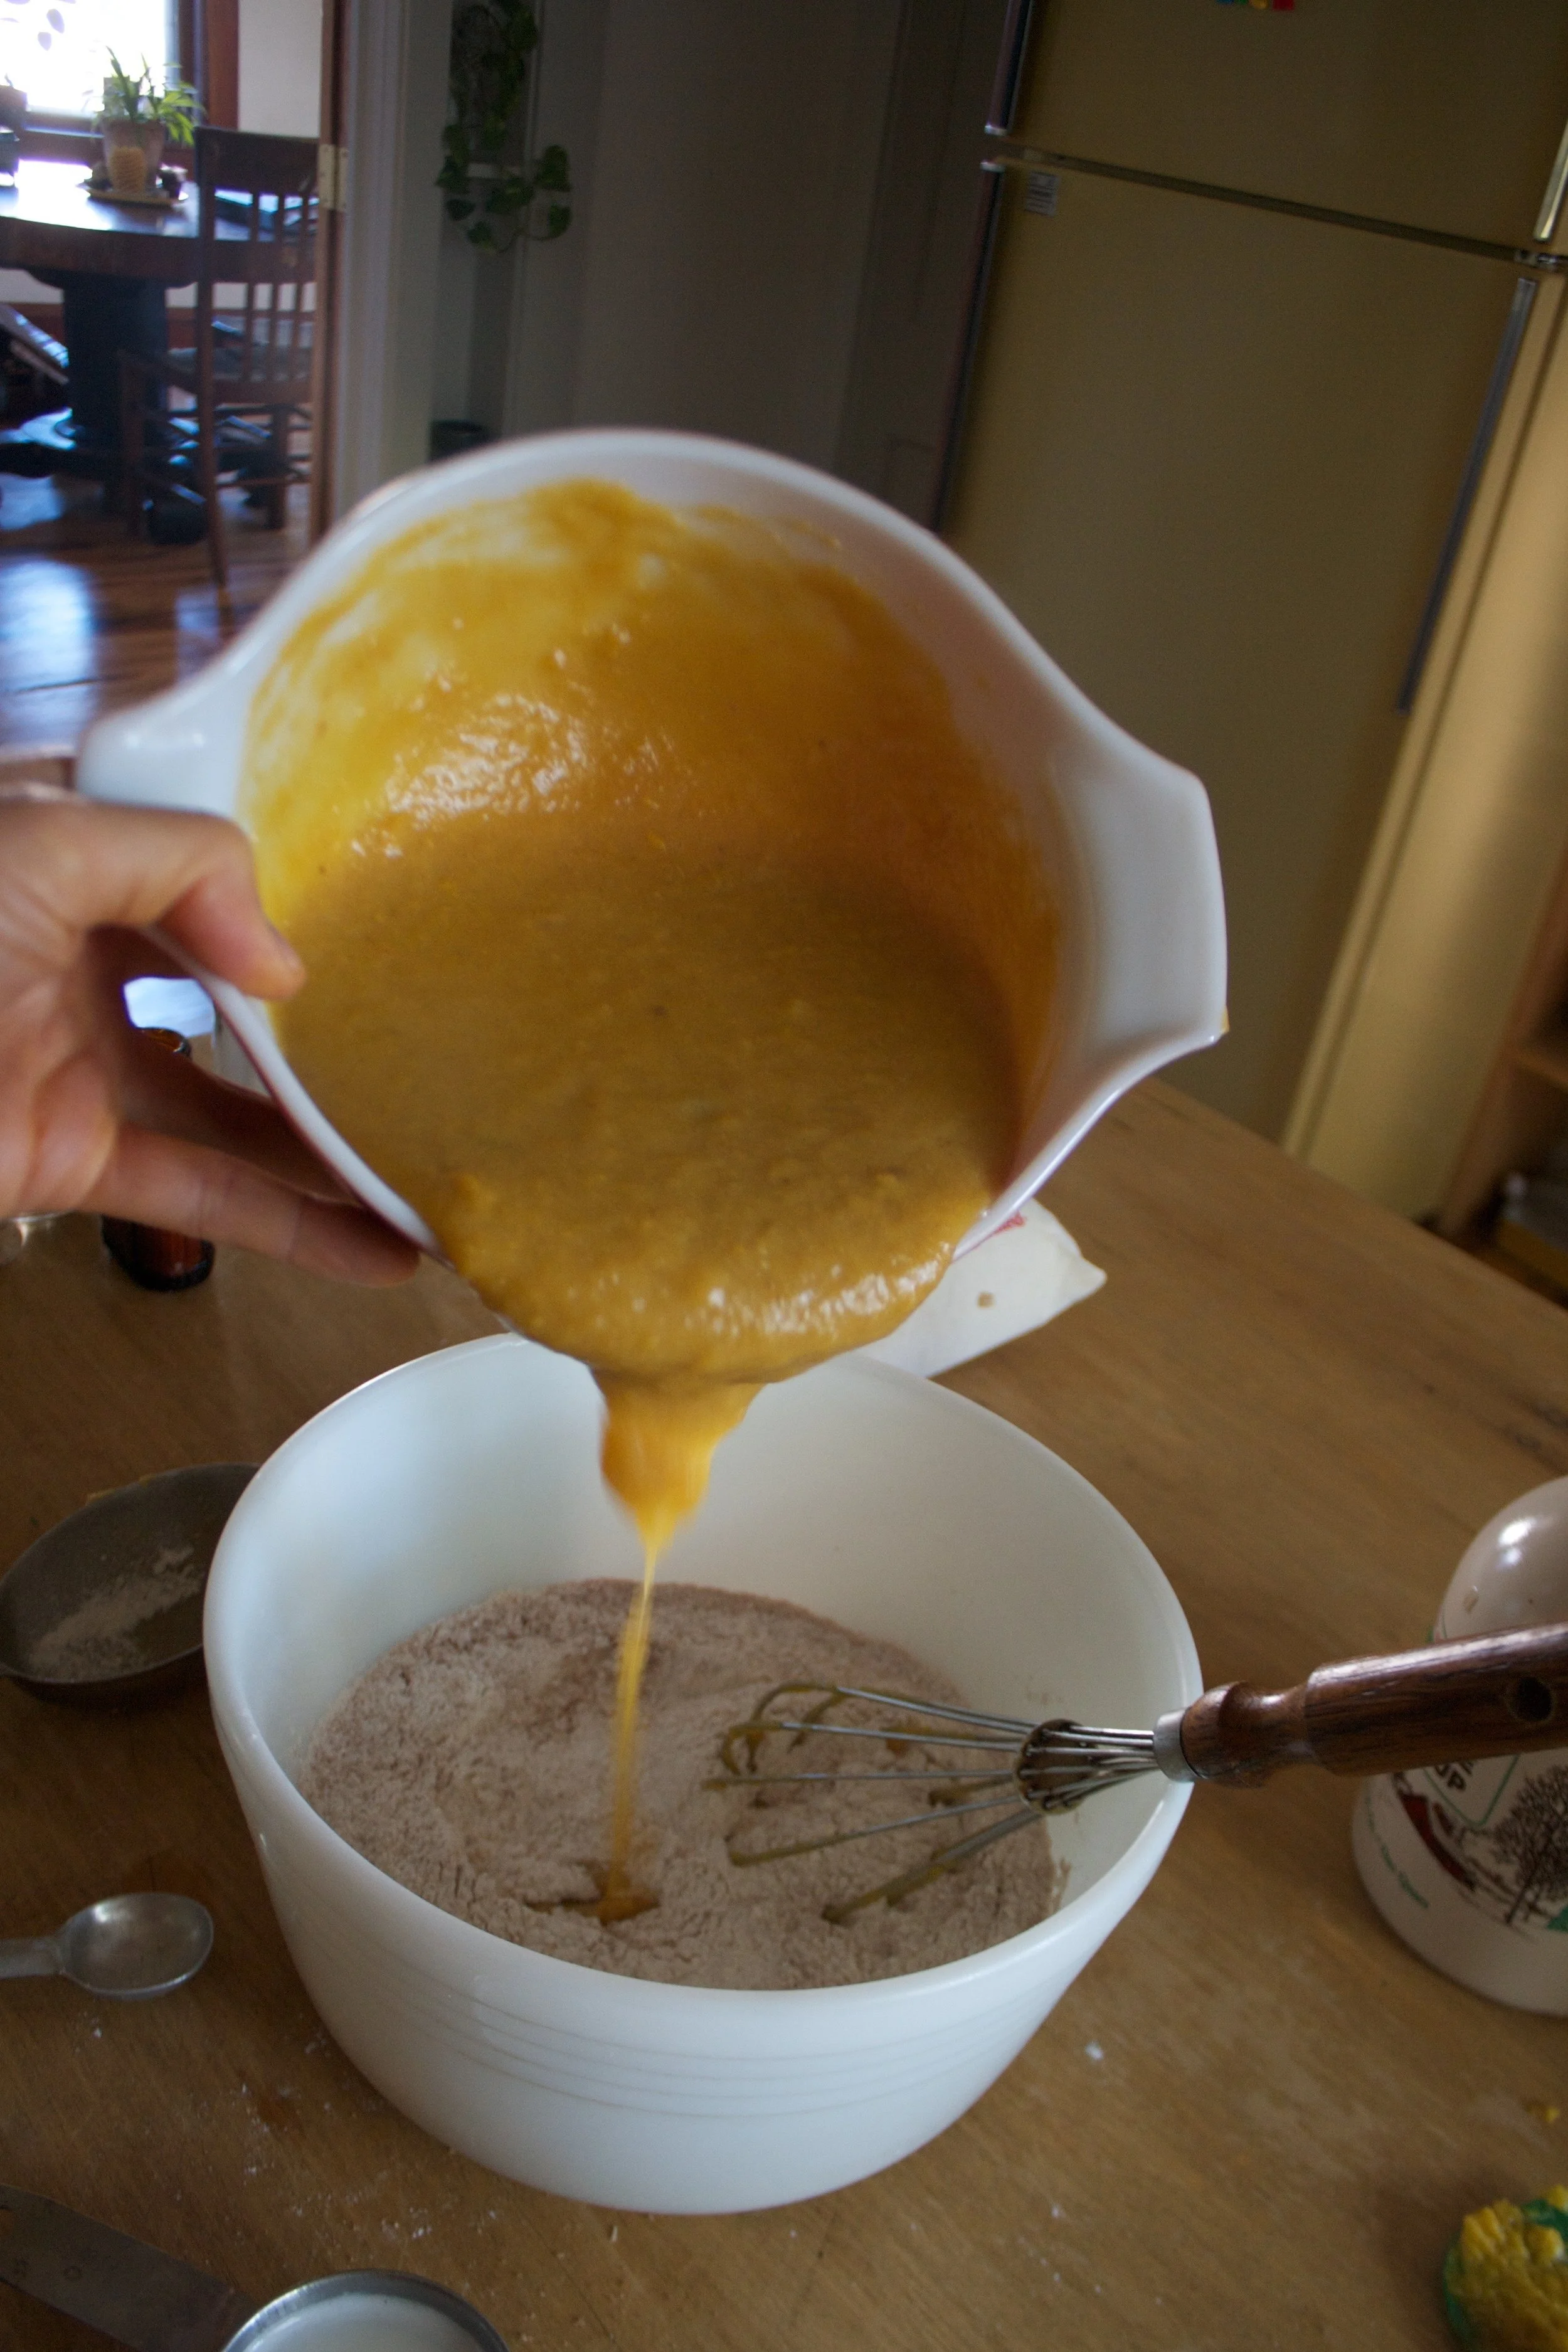
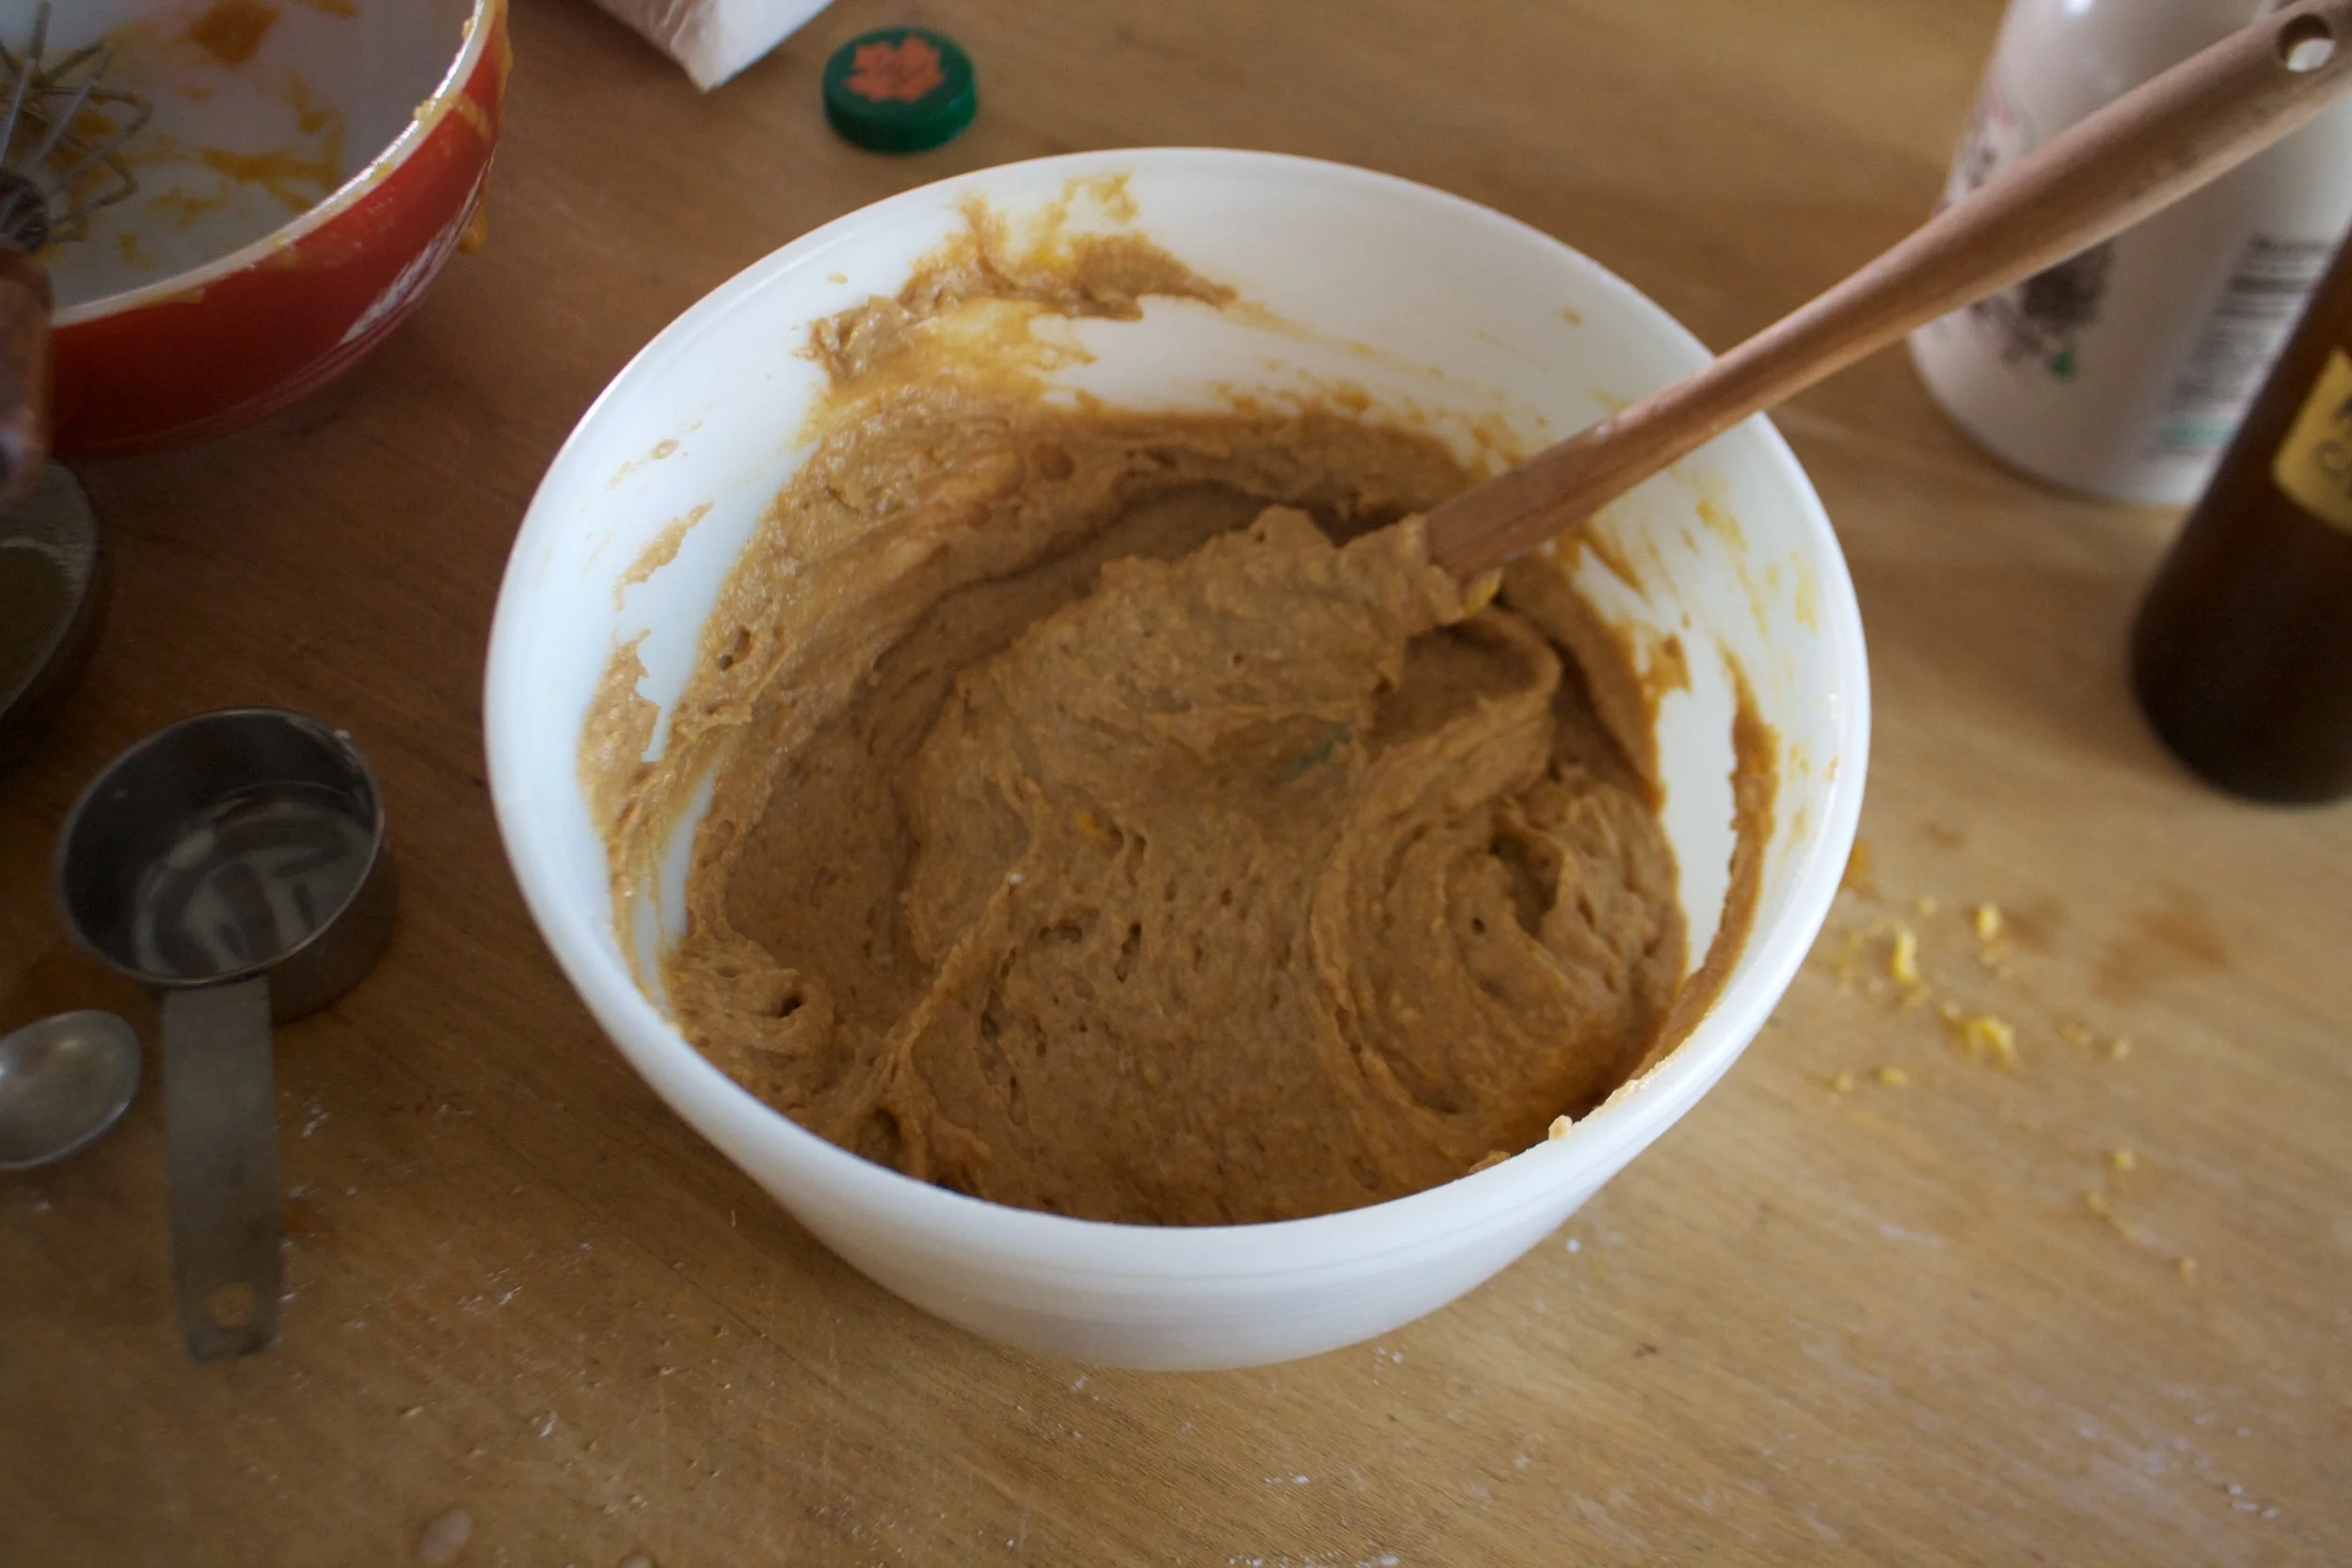
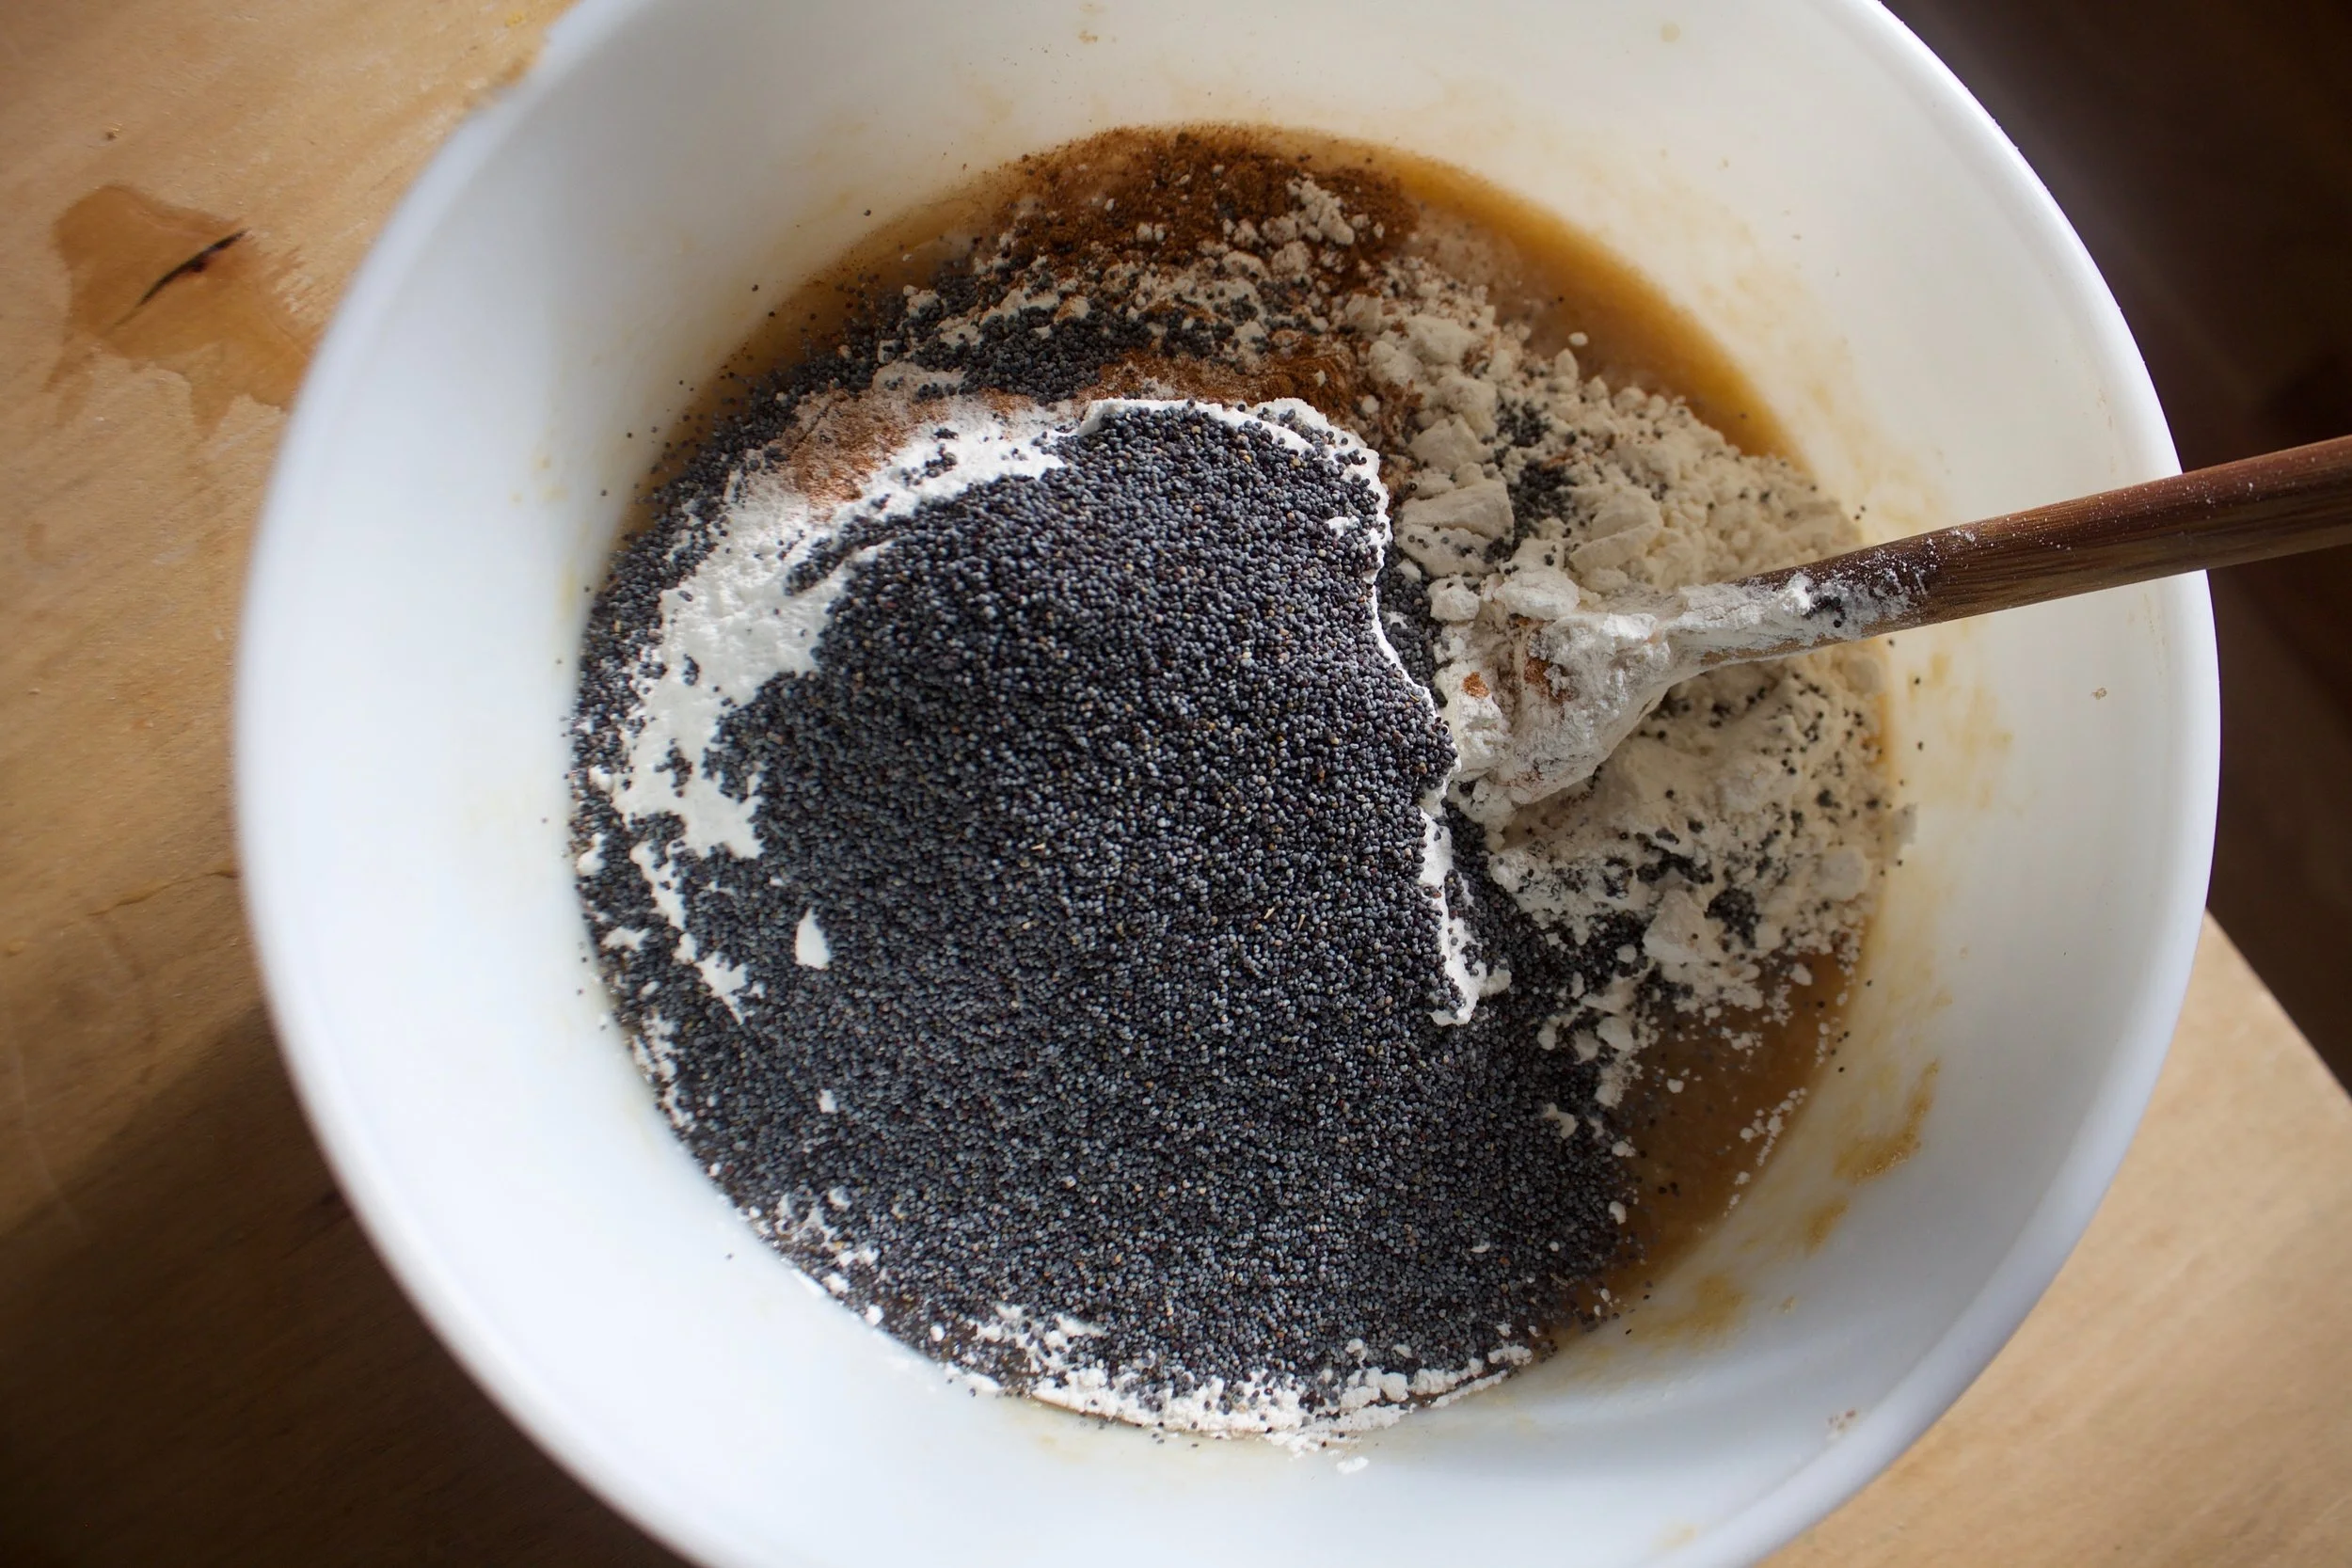
Dump in the dry and the poppy seeds and mix it all up until combined but then stop. Don’t over mix the batter or else you will get tuff muffins.%u00a0
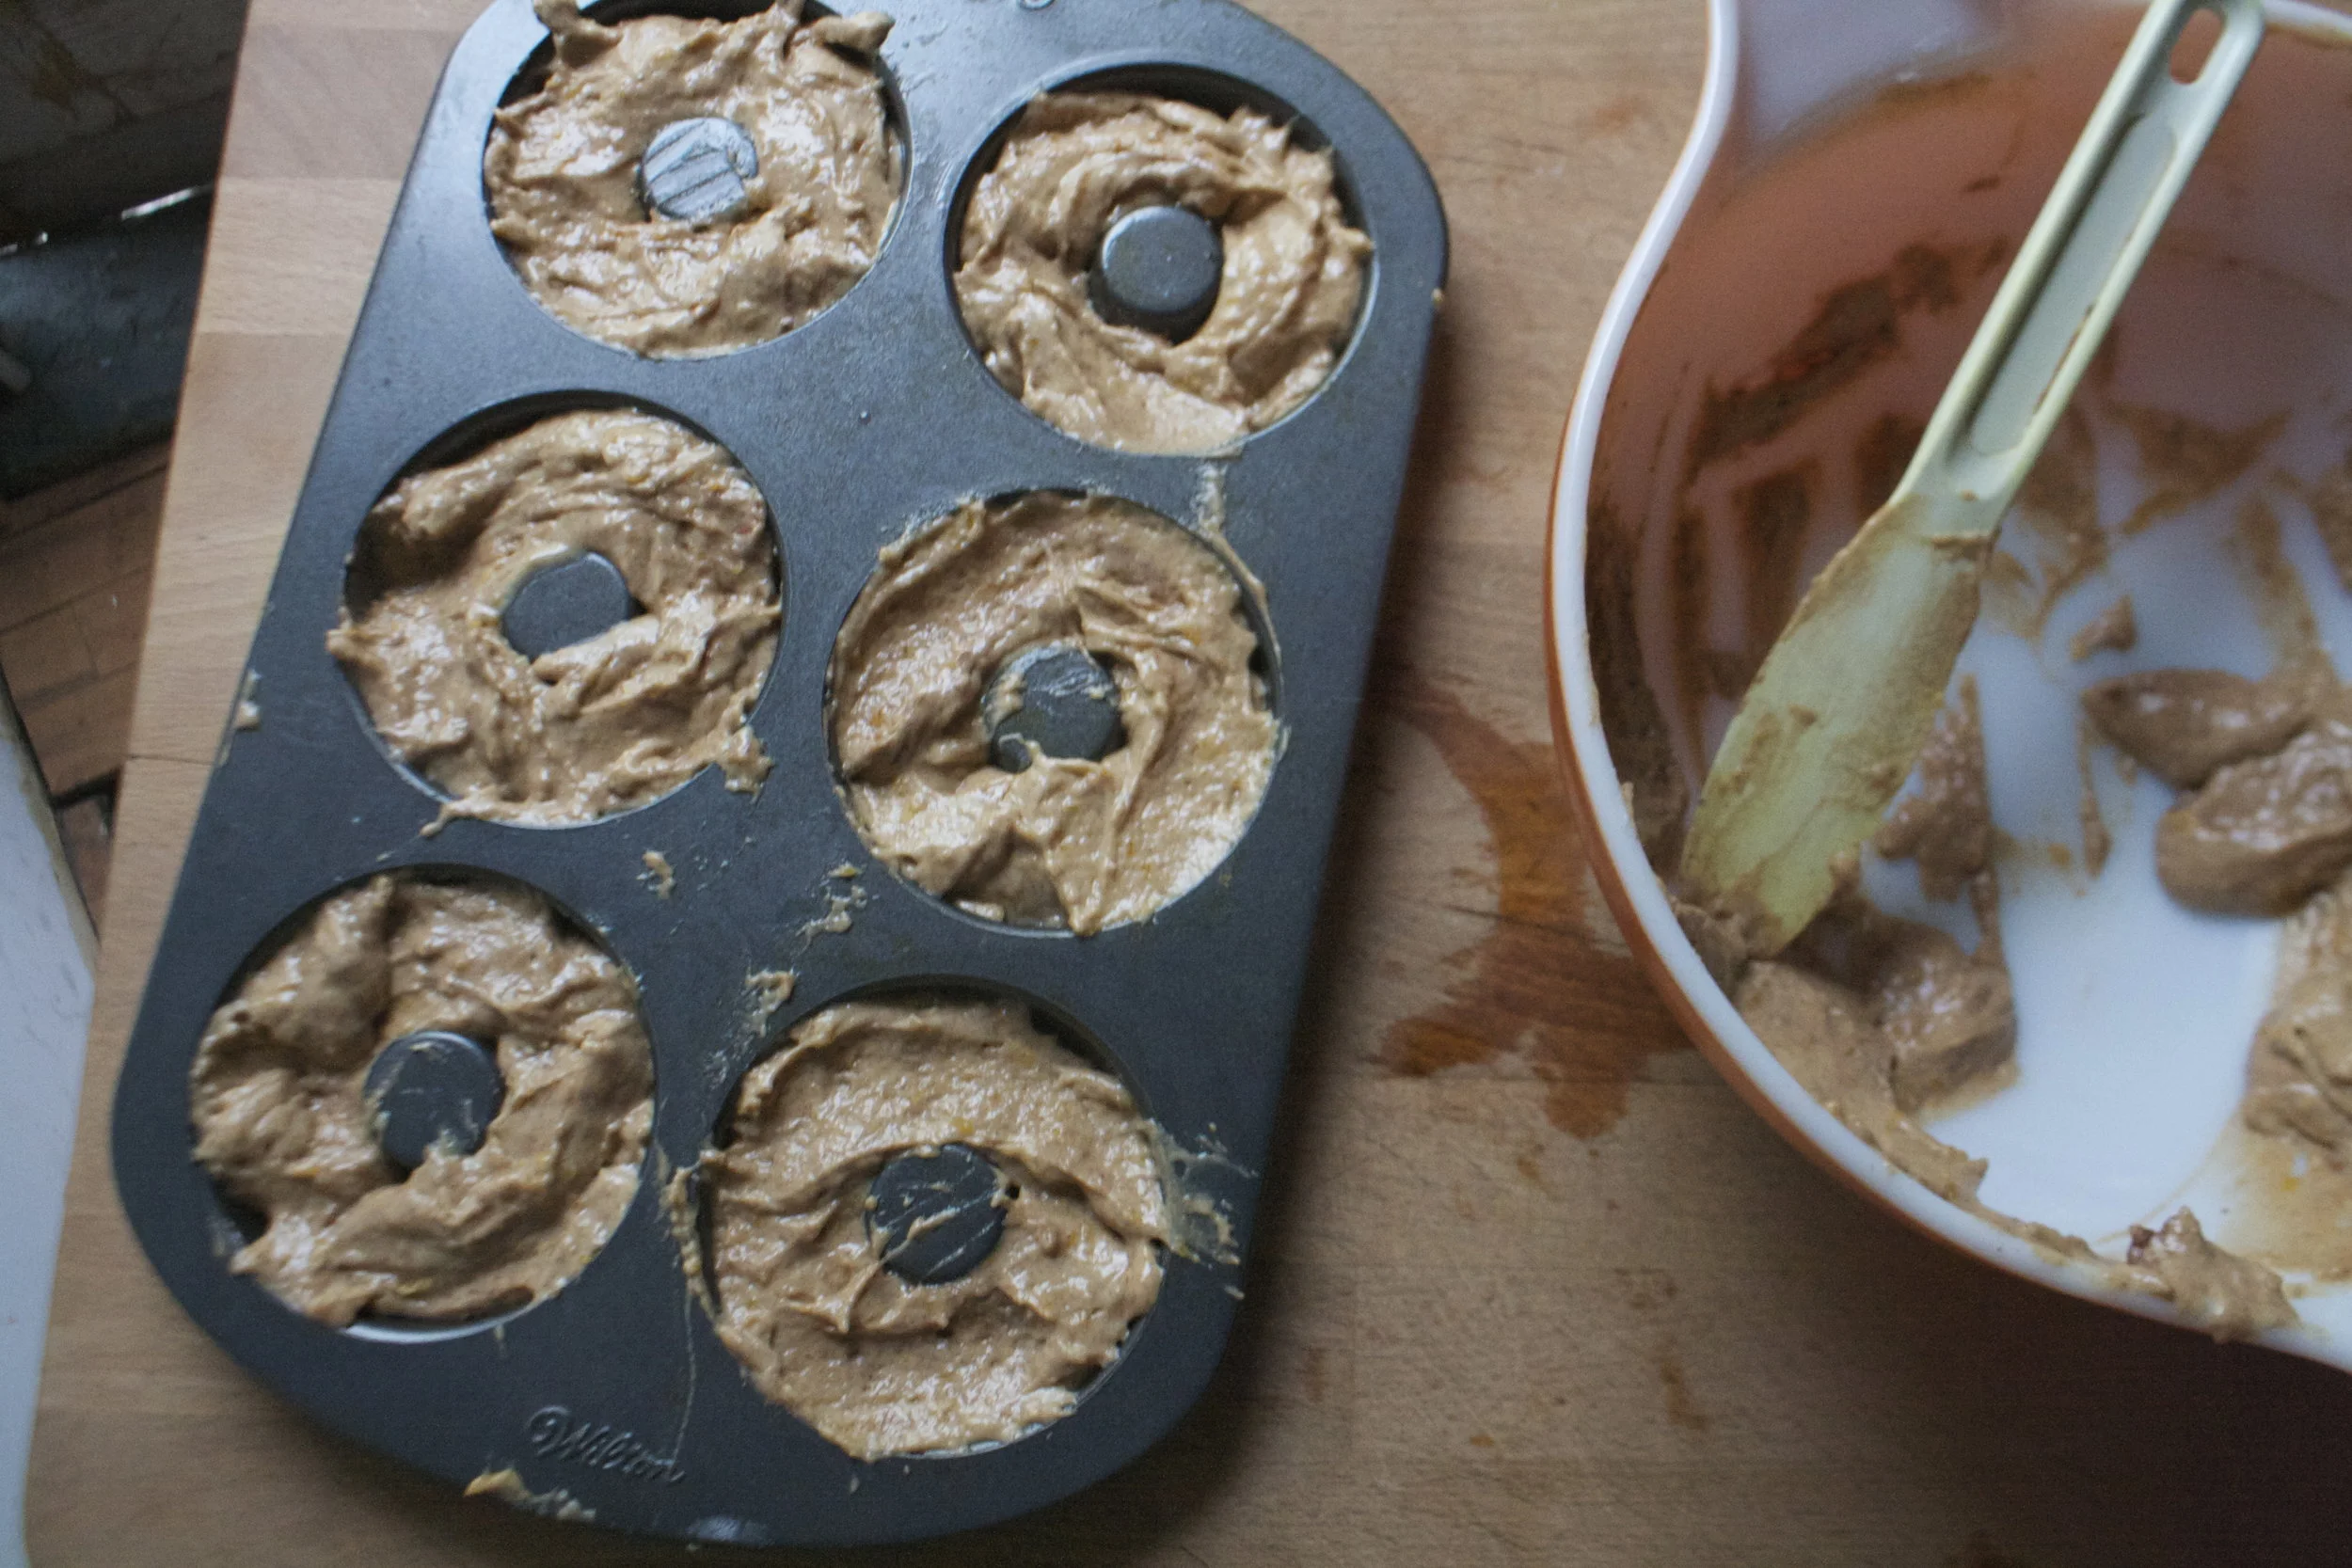
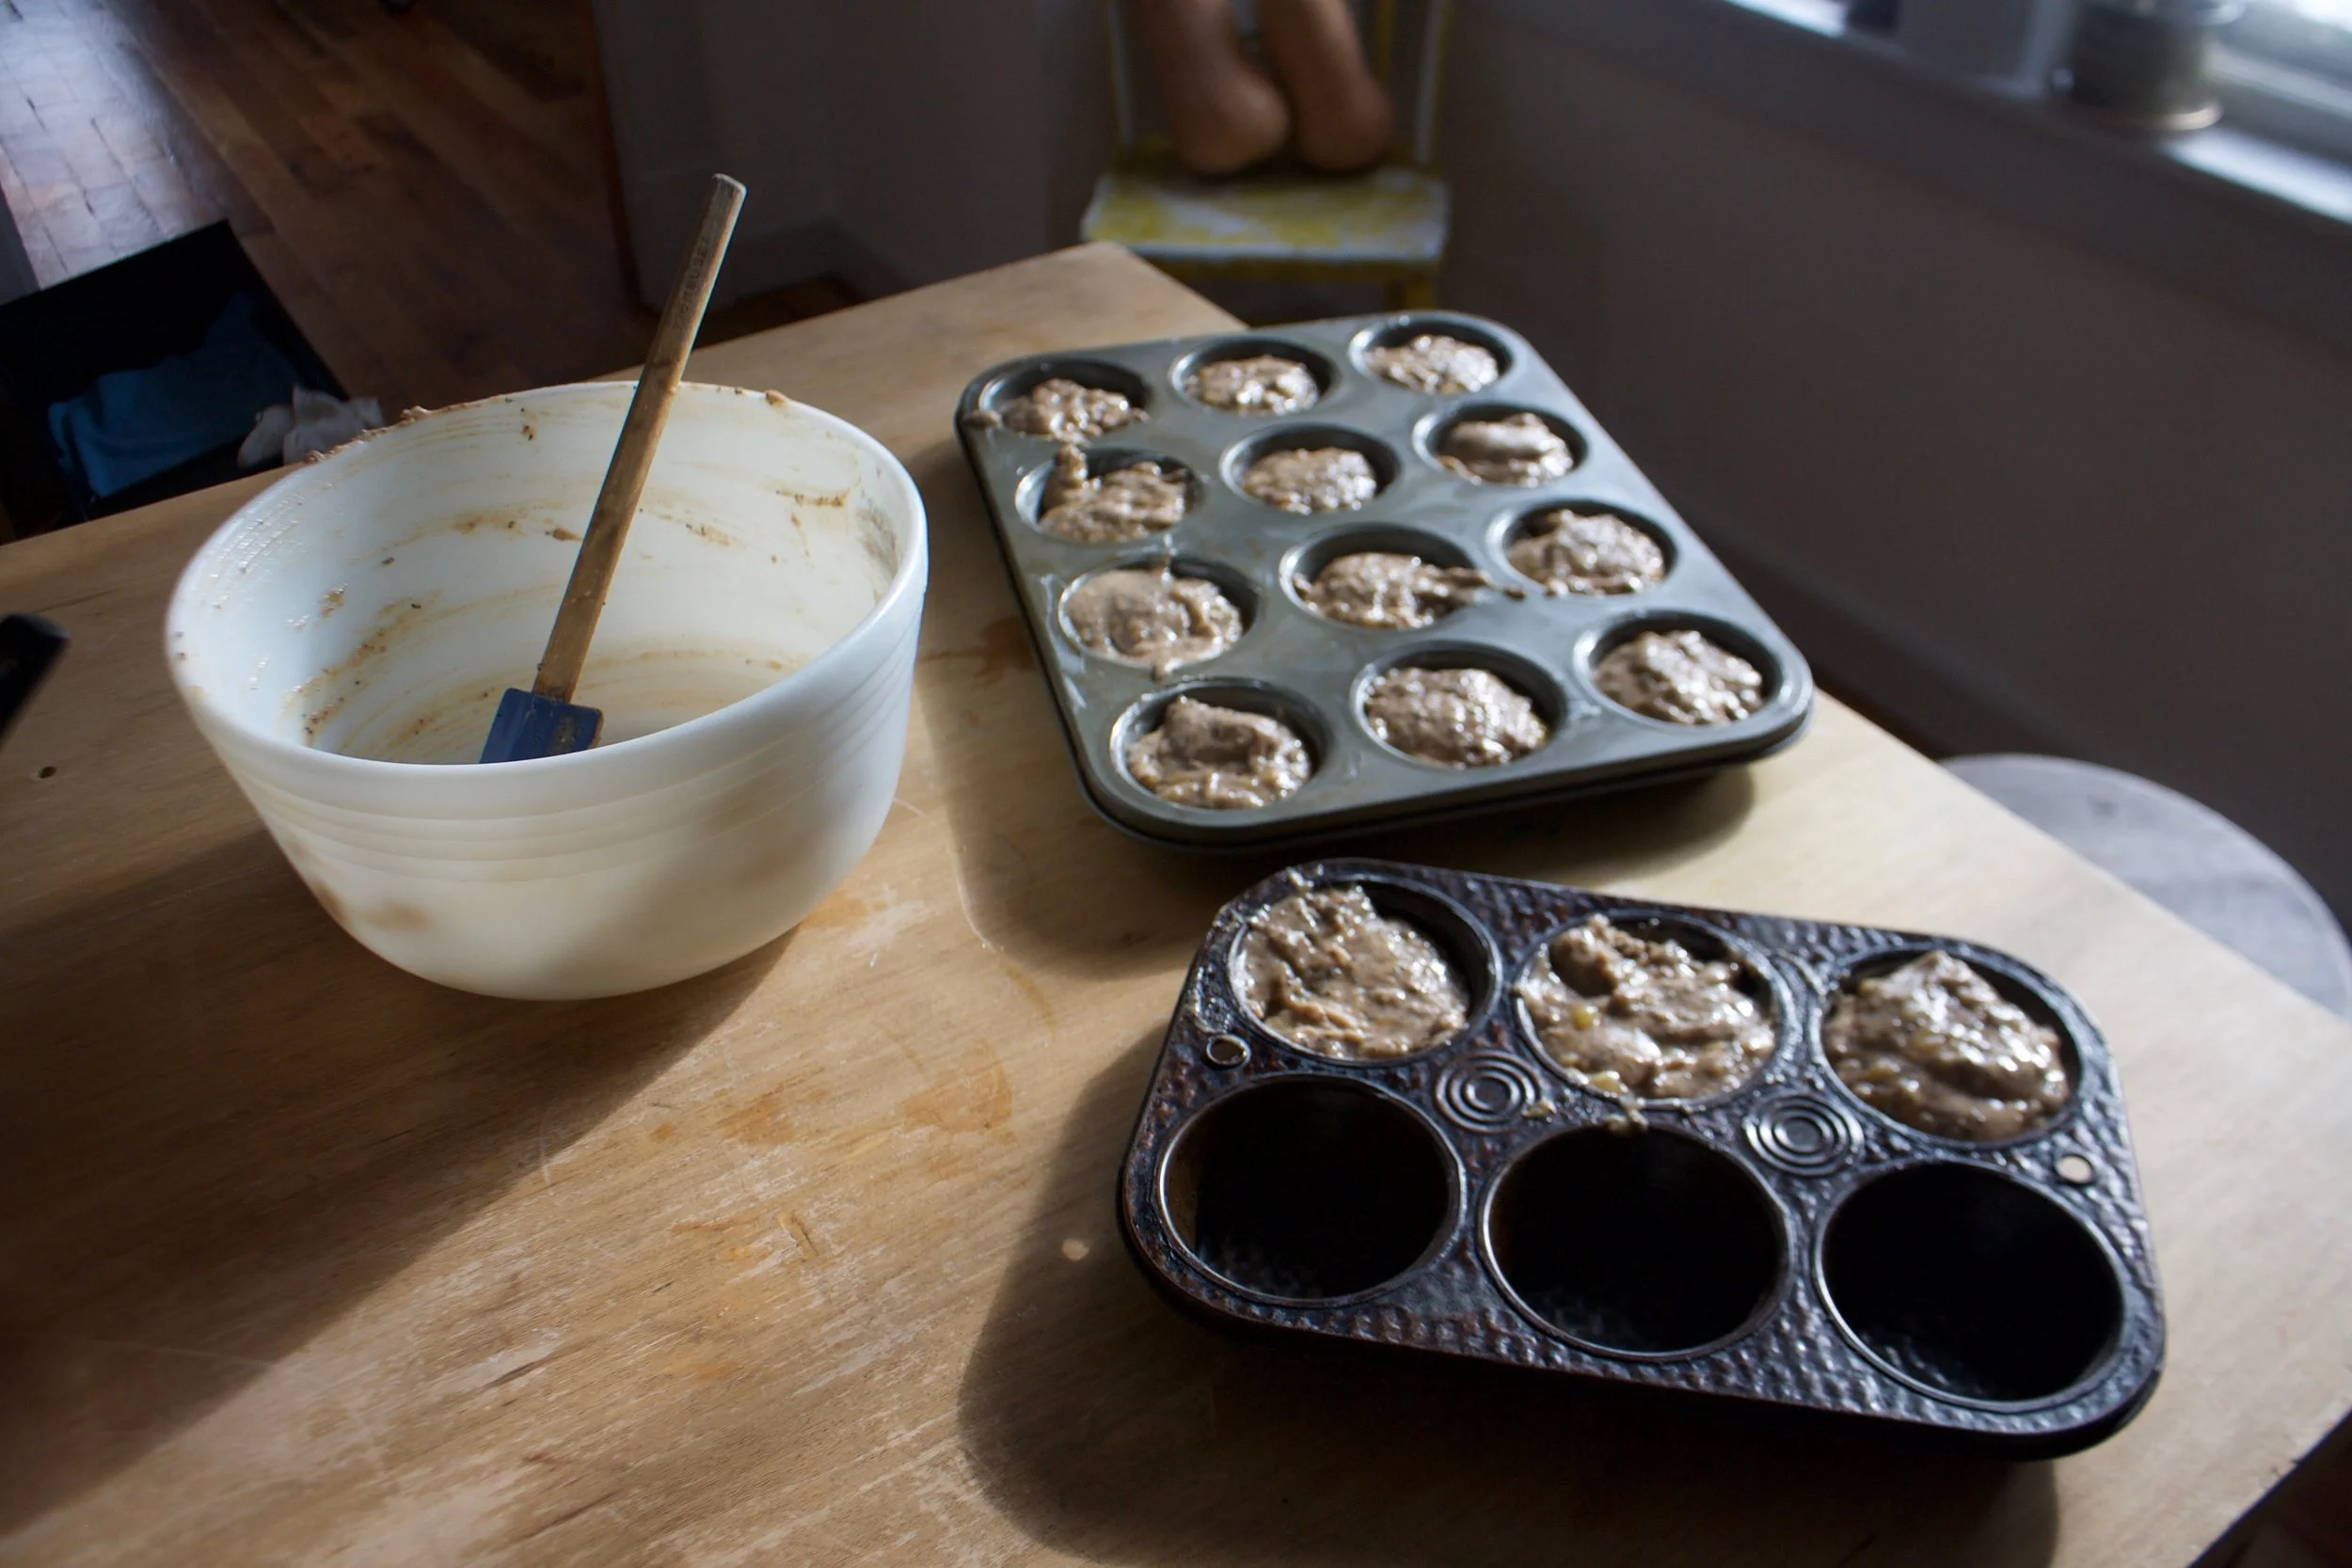
Scoop into well greased muffin pans and pop them into the preheated oven to bake.%u00a0
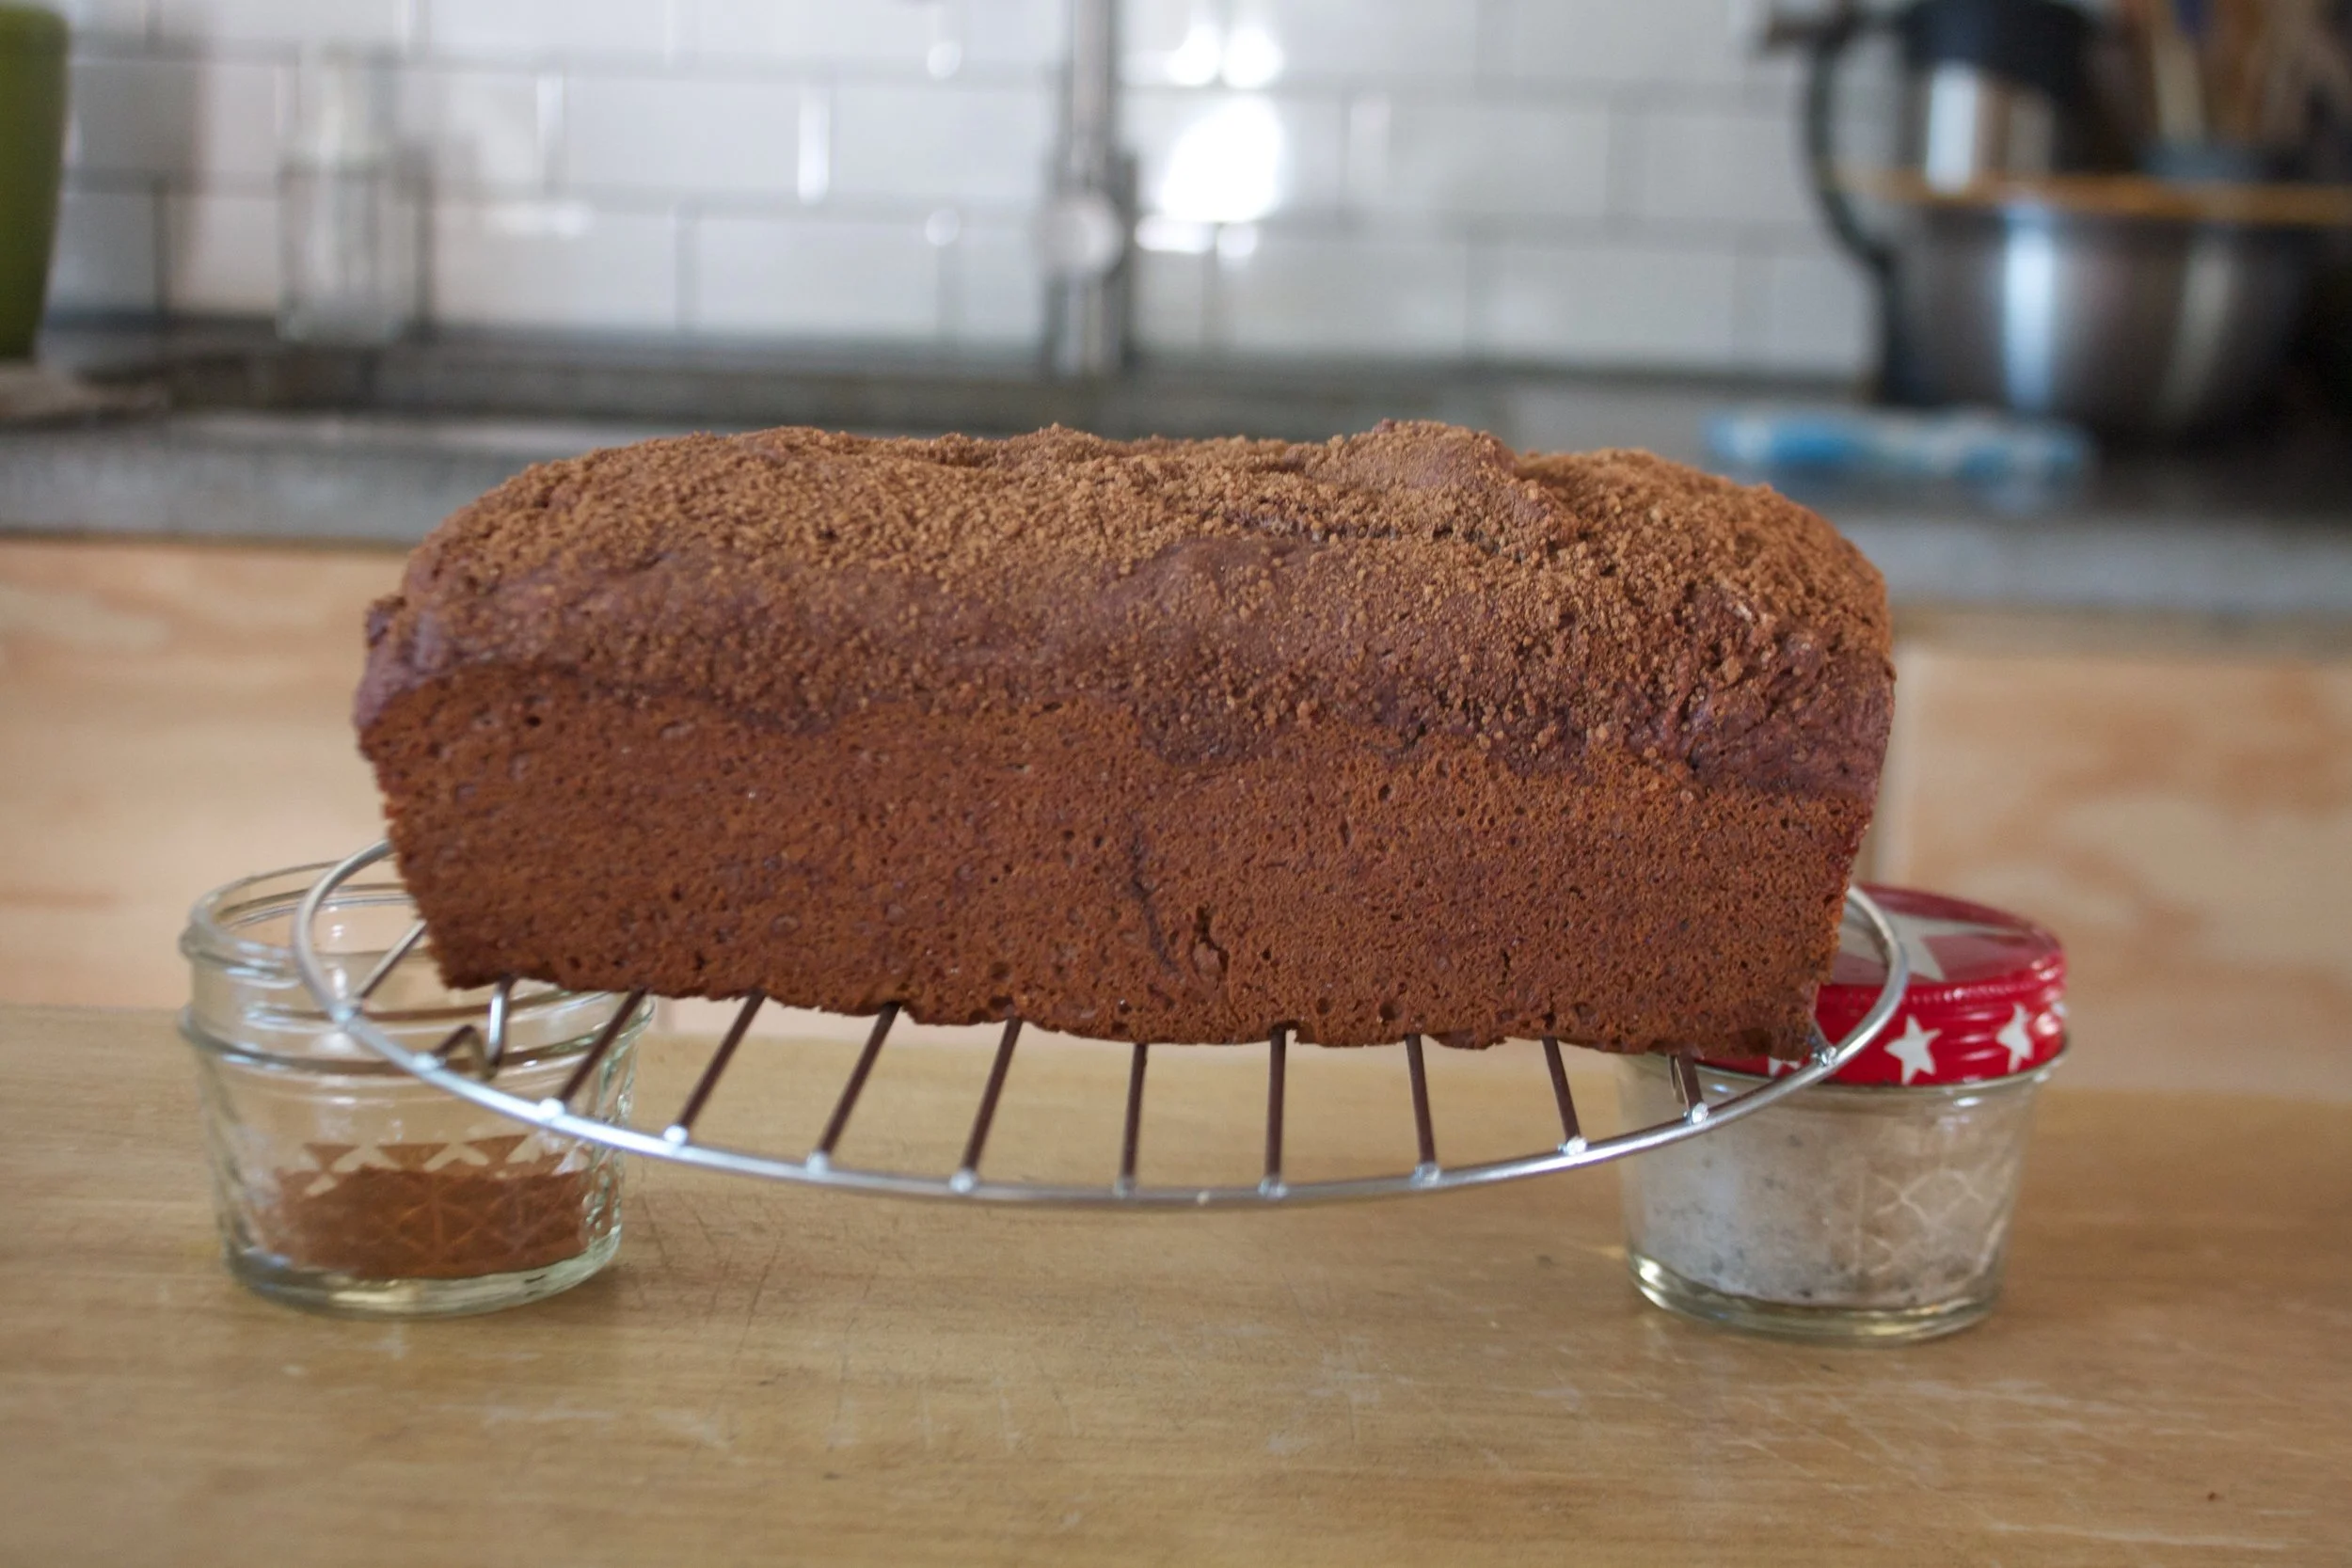
Done! And in only took like 20 minutes appose to an hour if I made banana bread.%u00a0
And here is when you grab a coffee, a muffin, and have yourself a moment.
Stay good.
-C
makes 12-14 muffins
2 cups flour
1 teaspoon baking soda
1 teaspoon baking powder%u00a0
1 teaspoon salt
1 tablespoon cinnamon%u00a0
1/4 cup poppy seeds
2/3 cups packed %u00a0brown sugar
1/2 cup neutral flavored oil
4 really ripe bananas (they need to be really ripe of the mixture will be to dry)
1 tablespoon apple cider vinegar%u00a0
Preheat oven to 350
In a large bowl,%u00a0mash the bananas with the sugar until the mixture turns wet and sloppy, but there are still a few little chunks of banana.%u00a0%u00a0Mix in the oil and vinegar. In a separate bowl mix the %u00a0flour, cinnamon , baking powder and soda, salt, and poppy seeds together. Dump the dry into the wet and mix until all is combined but then stop. Don’t over mix batter.%u00a0
Scoop mixture into well greased muffin tins and place into oven once it has preheated.%u00a0Bake the muffins for about 20- 22 minutes or until nicely browned and a tester stuck into the middle of one comes out clean.
Remove from oven and let sit in tin for a few minutes until it cools down. Remove the muffins from the tin and let completely cool on a wire rack.%u00a0
Eat whenever and how many you want, store the rest in an air tight container for a couple of days or wrap a few and %u00a0freeze.%u00a0
Every year I play this game with myself.. Is it allergies or am I sick. The past few days I have been feeling kinda crappy, waking up with itchy, gunky eyes. My throat hurts, my head is like a balloon, and I am just feeling beat..%u00a0
I think it’s that I am sick (because I don’t want to have allergies) but whatever it is, it sucks, but usually goes away after a week (like every year because its really allergies). Blah.
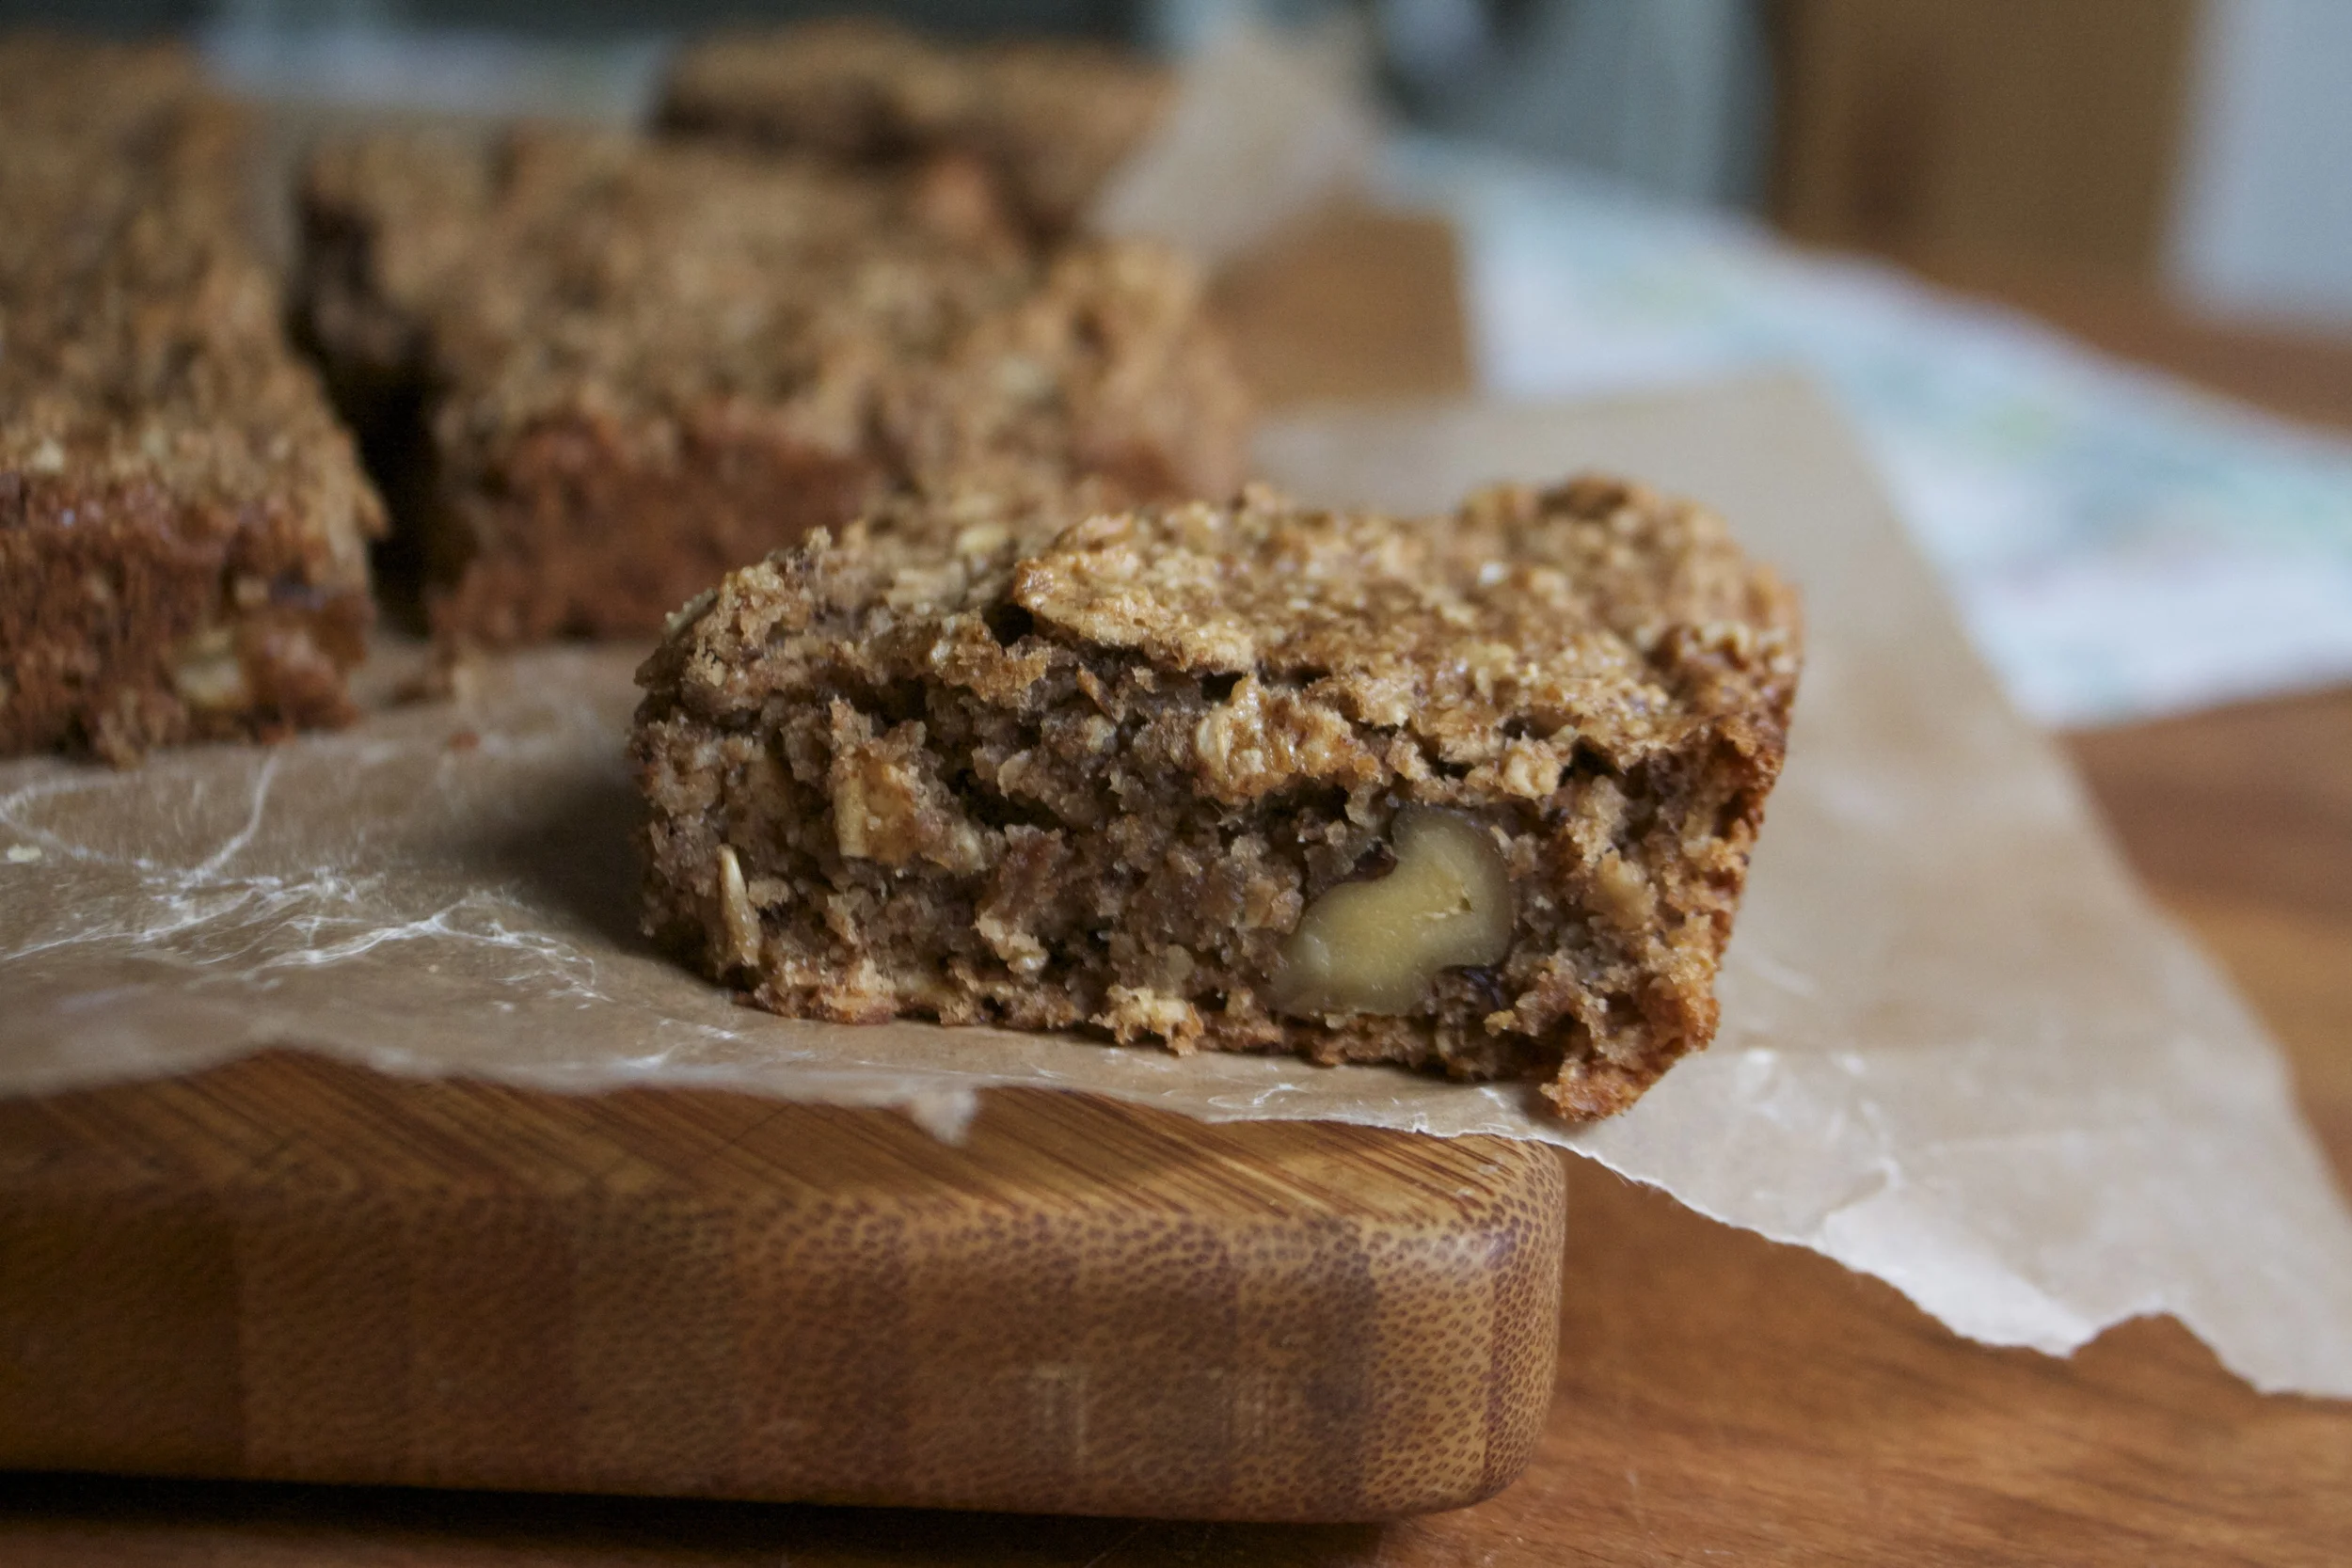
But enough about my balloon head, lets talk these maple banana walnut oat squares. These yummy gems of the oat square world are just what you need in your life. Healthy, protein packed, nutty, and a touch sweet. No junk, just good stuff all made with little to no effort. If you like banana bread, you will be all into them. I was inspired to make these by the extremely ripe bananas that need to be eaten asap and the mr’s lack of eating a healthy breakfast (I want him to eat, and I want it be oatmeal). I know him well enough that if I make a snack like thing and leave it out to eat, that he will eat it. For breakfast.
So weather or not you are looking for a good way to get in some good stuff into your tummy or just want some good tasting stuff in your mouth, this is the breakfast/dessert for you.
The stuff. A couple of ripe bananas, a bunch of rolled oats, some yummy walnuts, real maple syrup, cinnamon, baking soda and a wee bit of water.
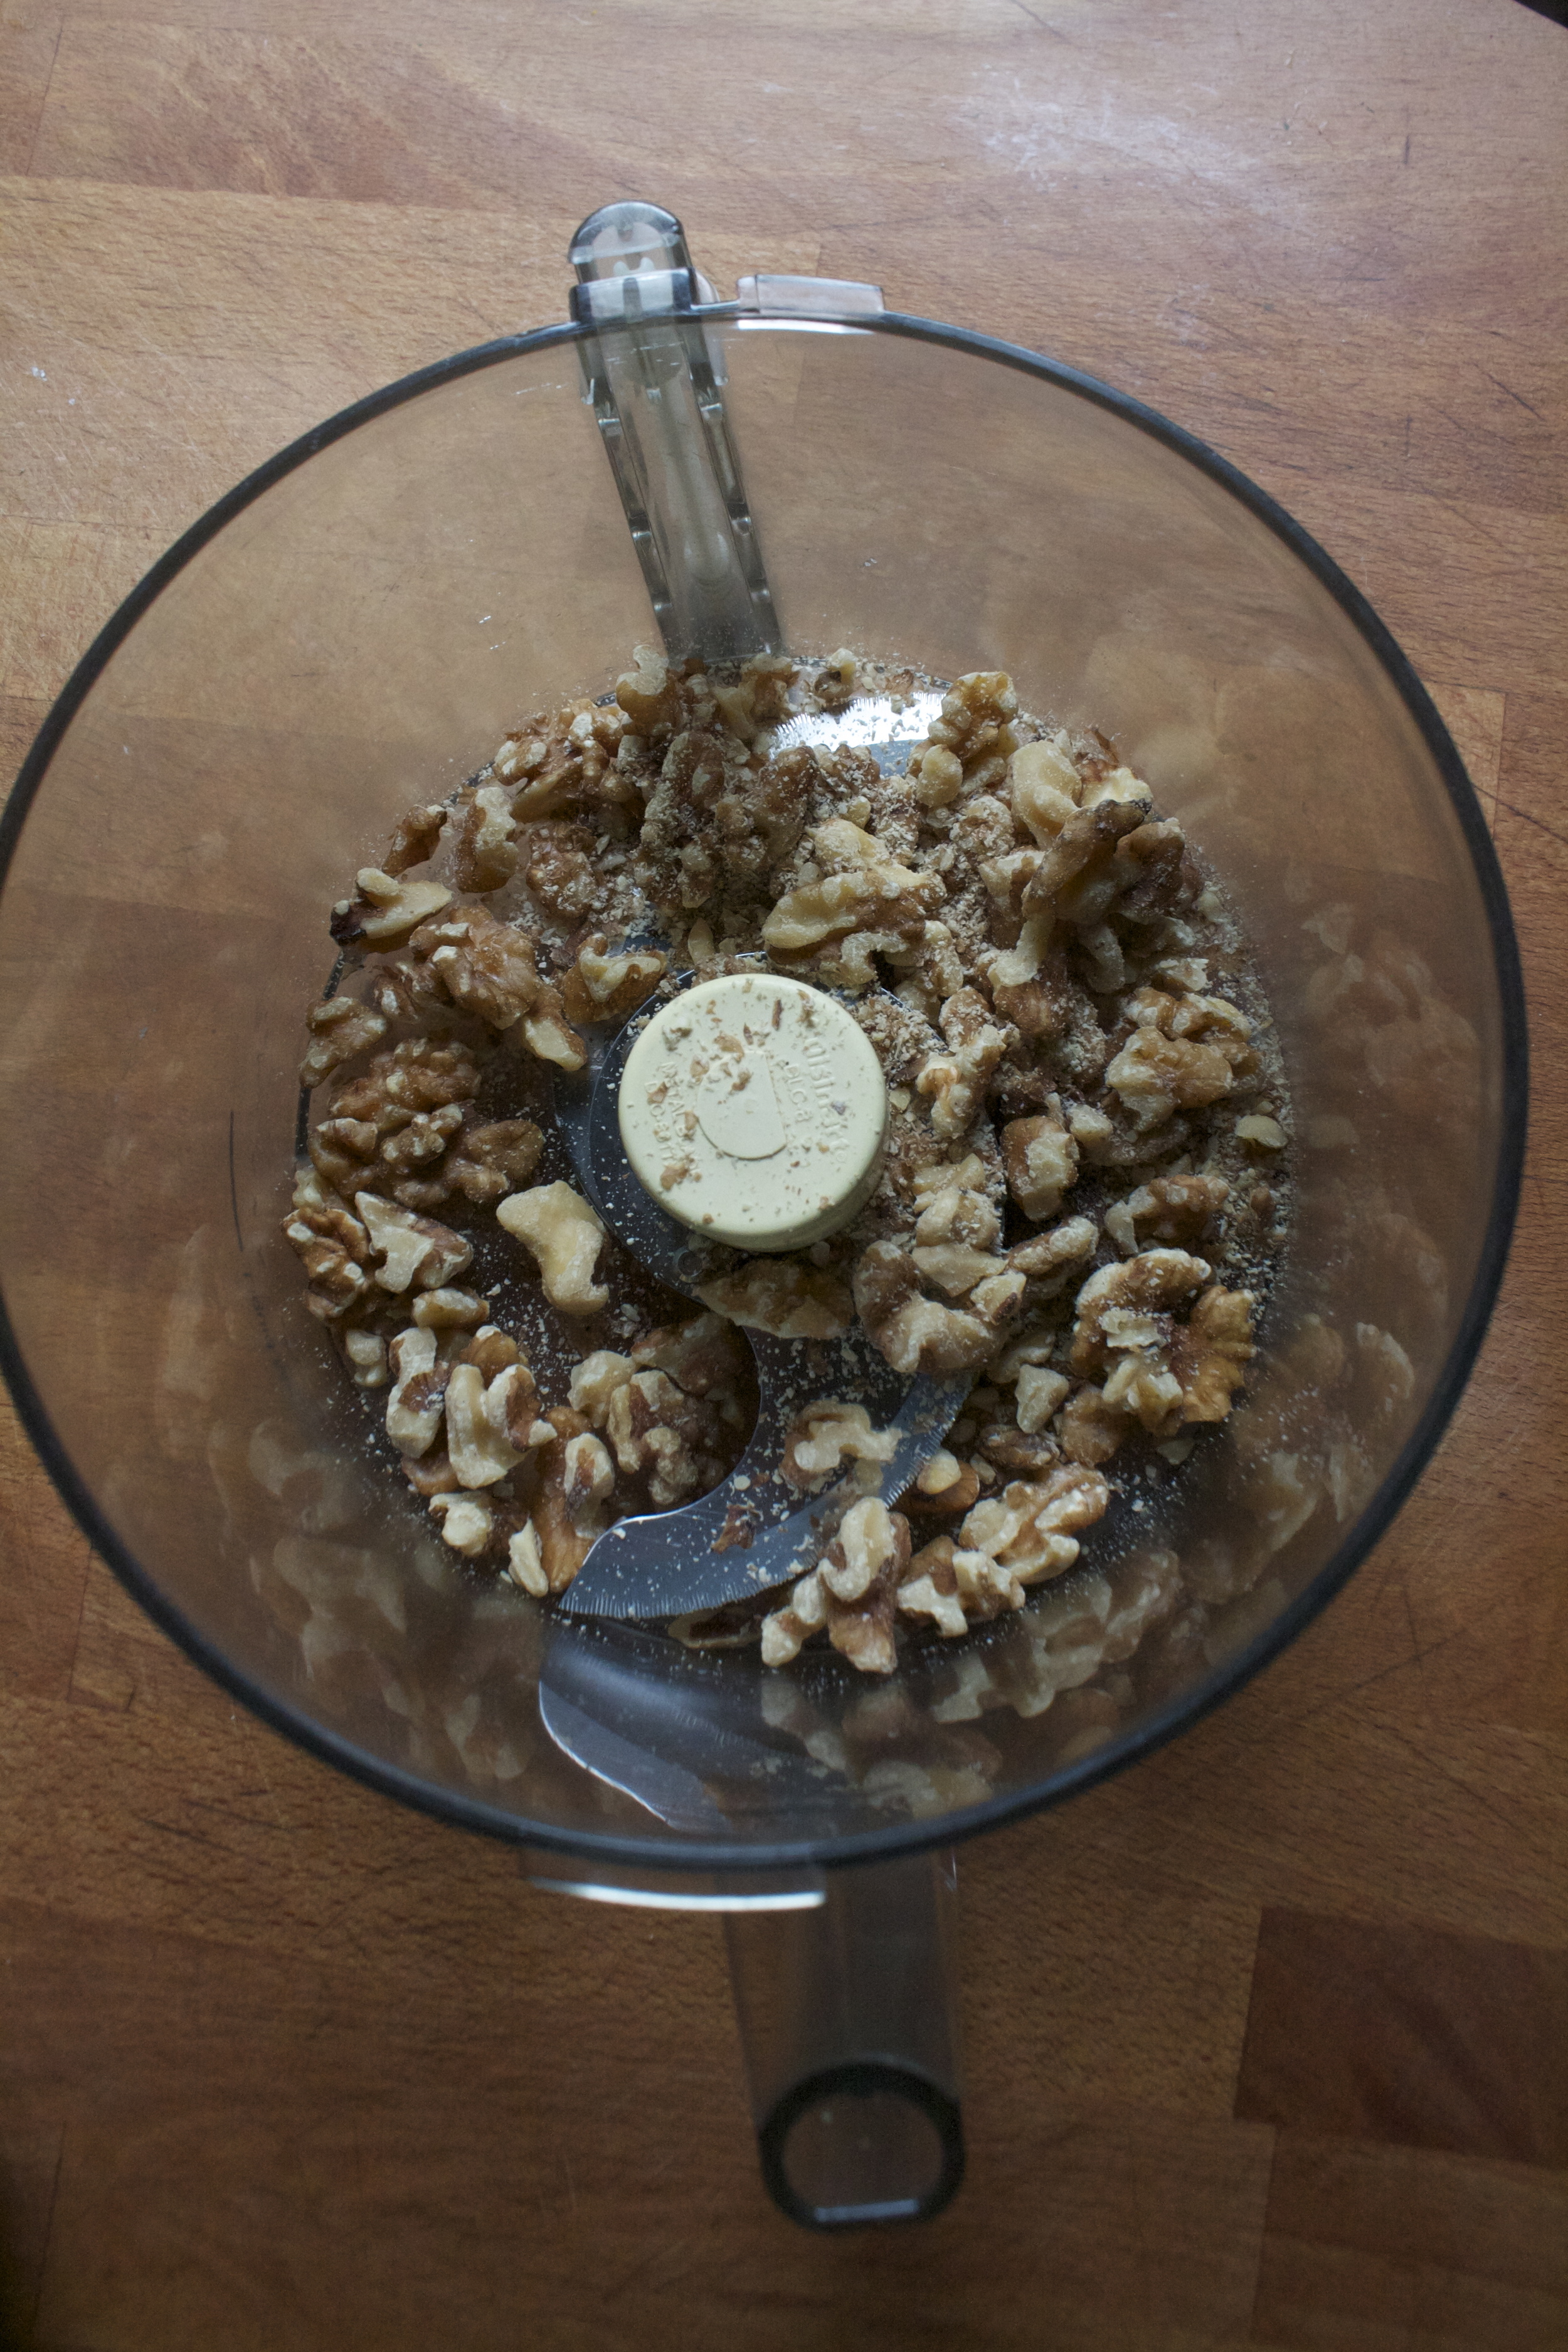
Start with the walnuts in a food processor. Turn it on and process until….
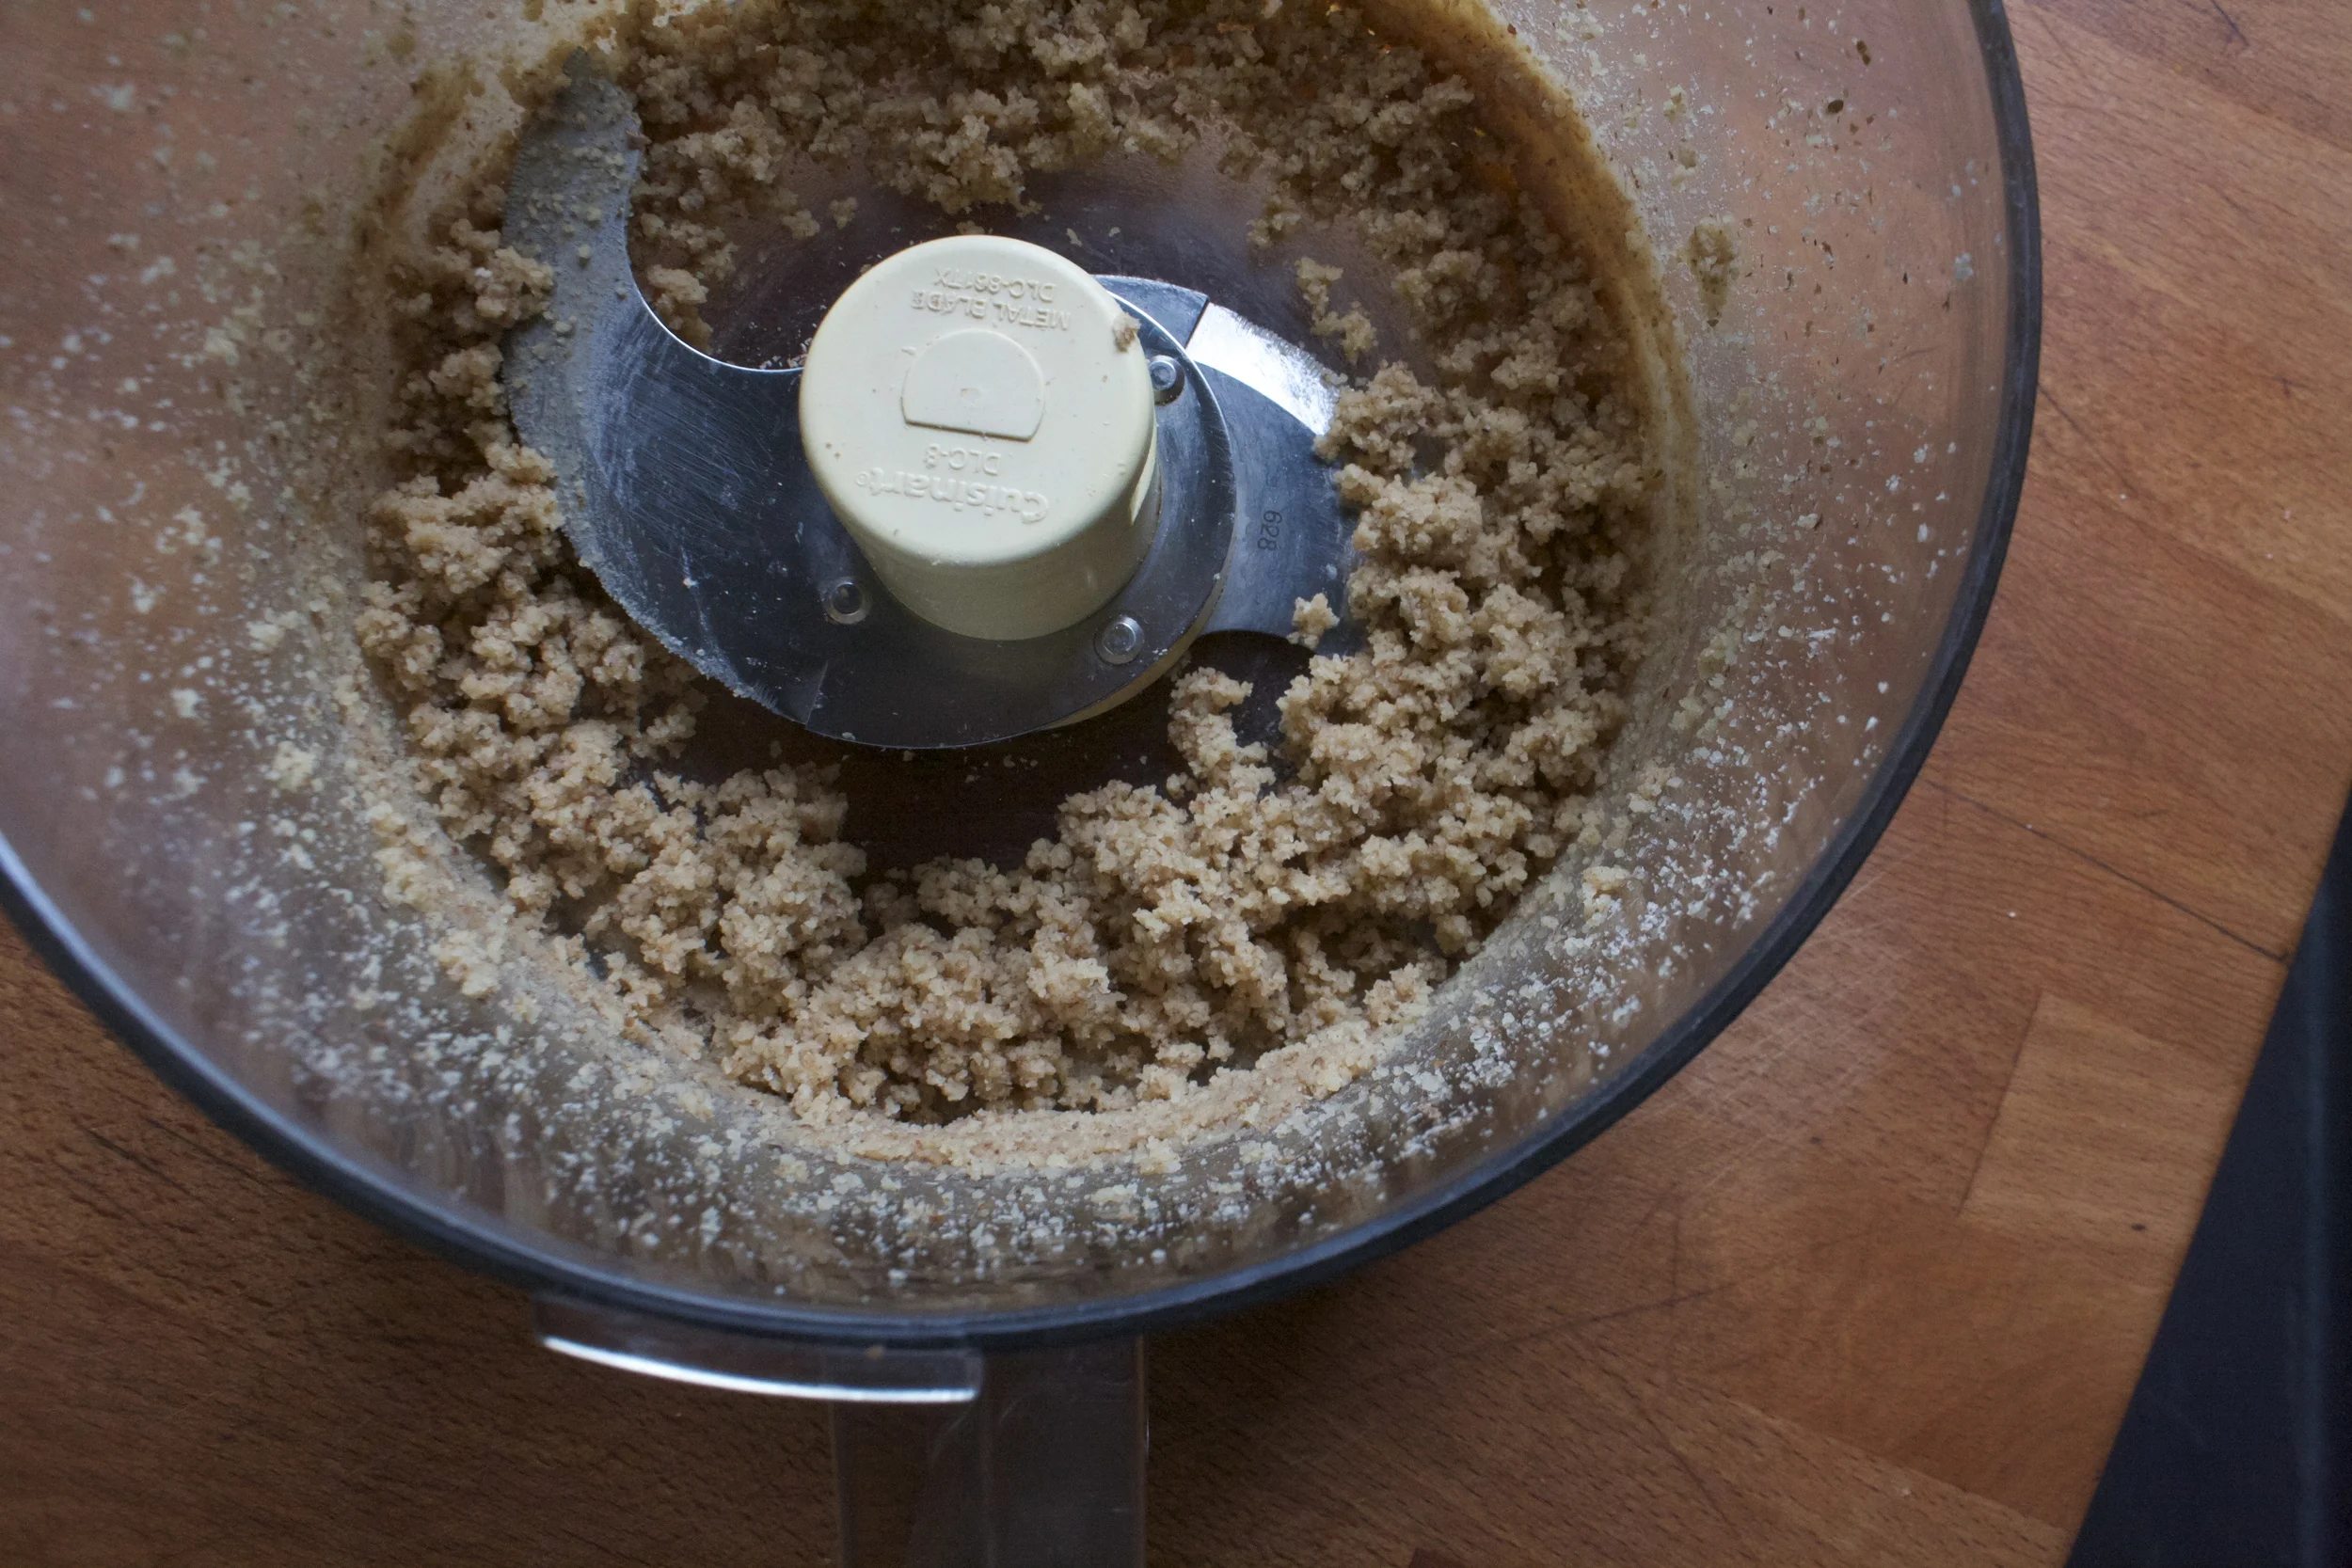
You got this walnut butter. Do not eat it, it’s for the squares (it is so good).
Add in the oats, cinnamon and baking soda and turn the processor back on until you get a nice unified crumbly mixture.
Now in goes the bananas and the maple syrup. And you guessed it, blend some more. While you are blending, if the mixture seems to dry, add in a splash of water, to wet, just toss in another handful of oat. The mixture should be like a muffin batter consistency.
And that’s it. If you want some nut chunks, add in a handful more of walnuts (do it) and pulse just to get them mixed into batter.
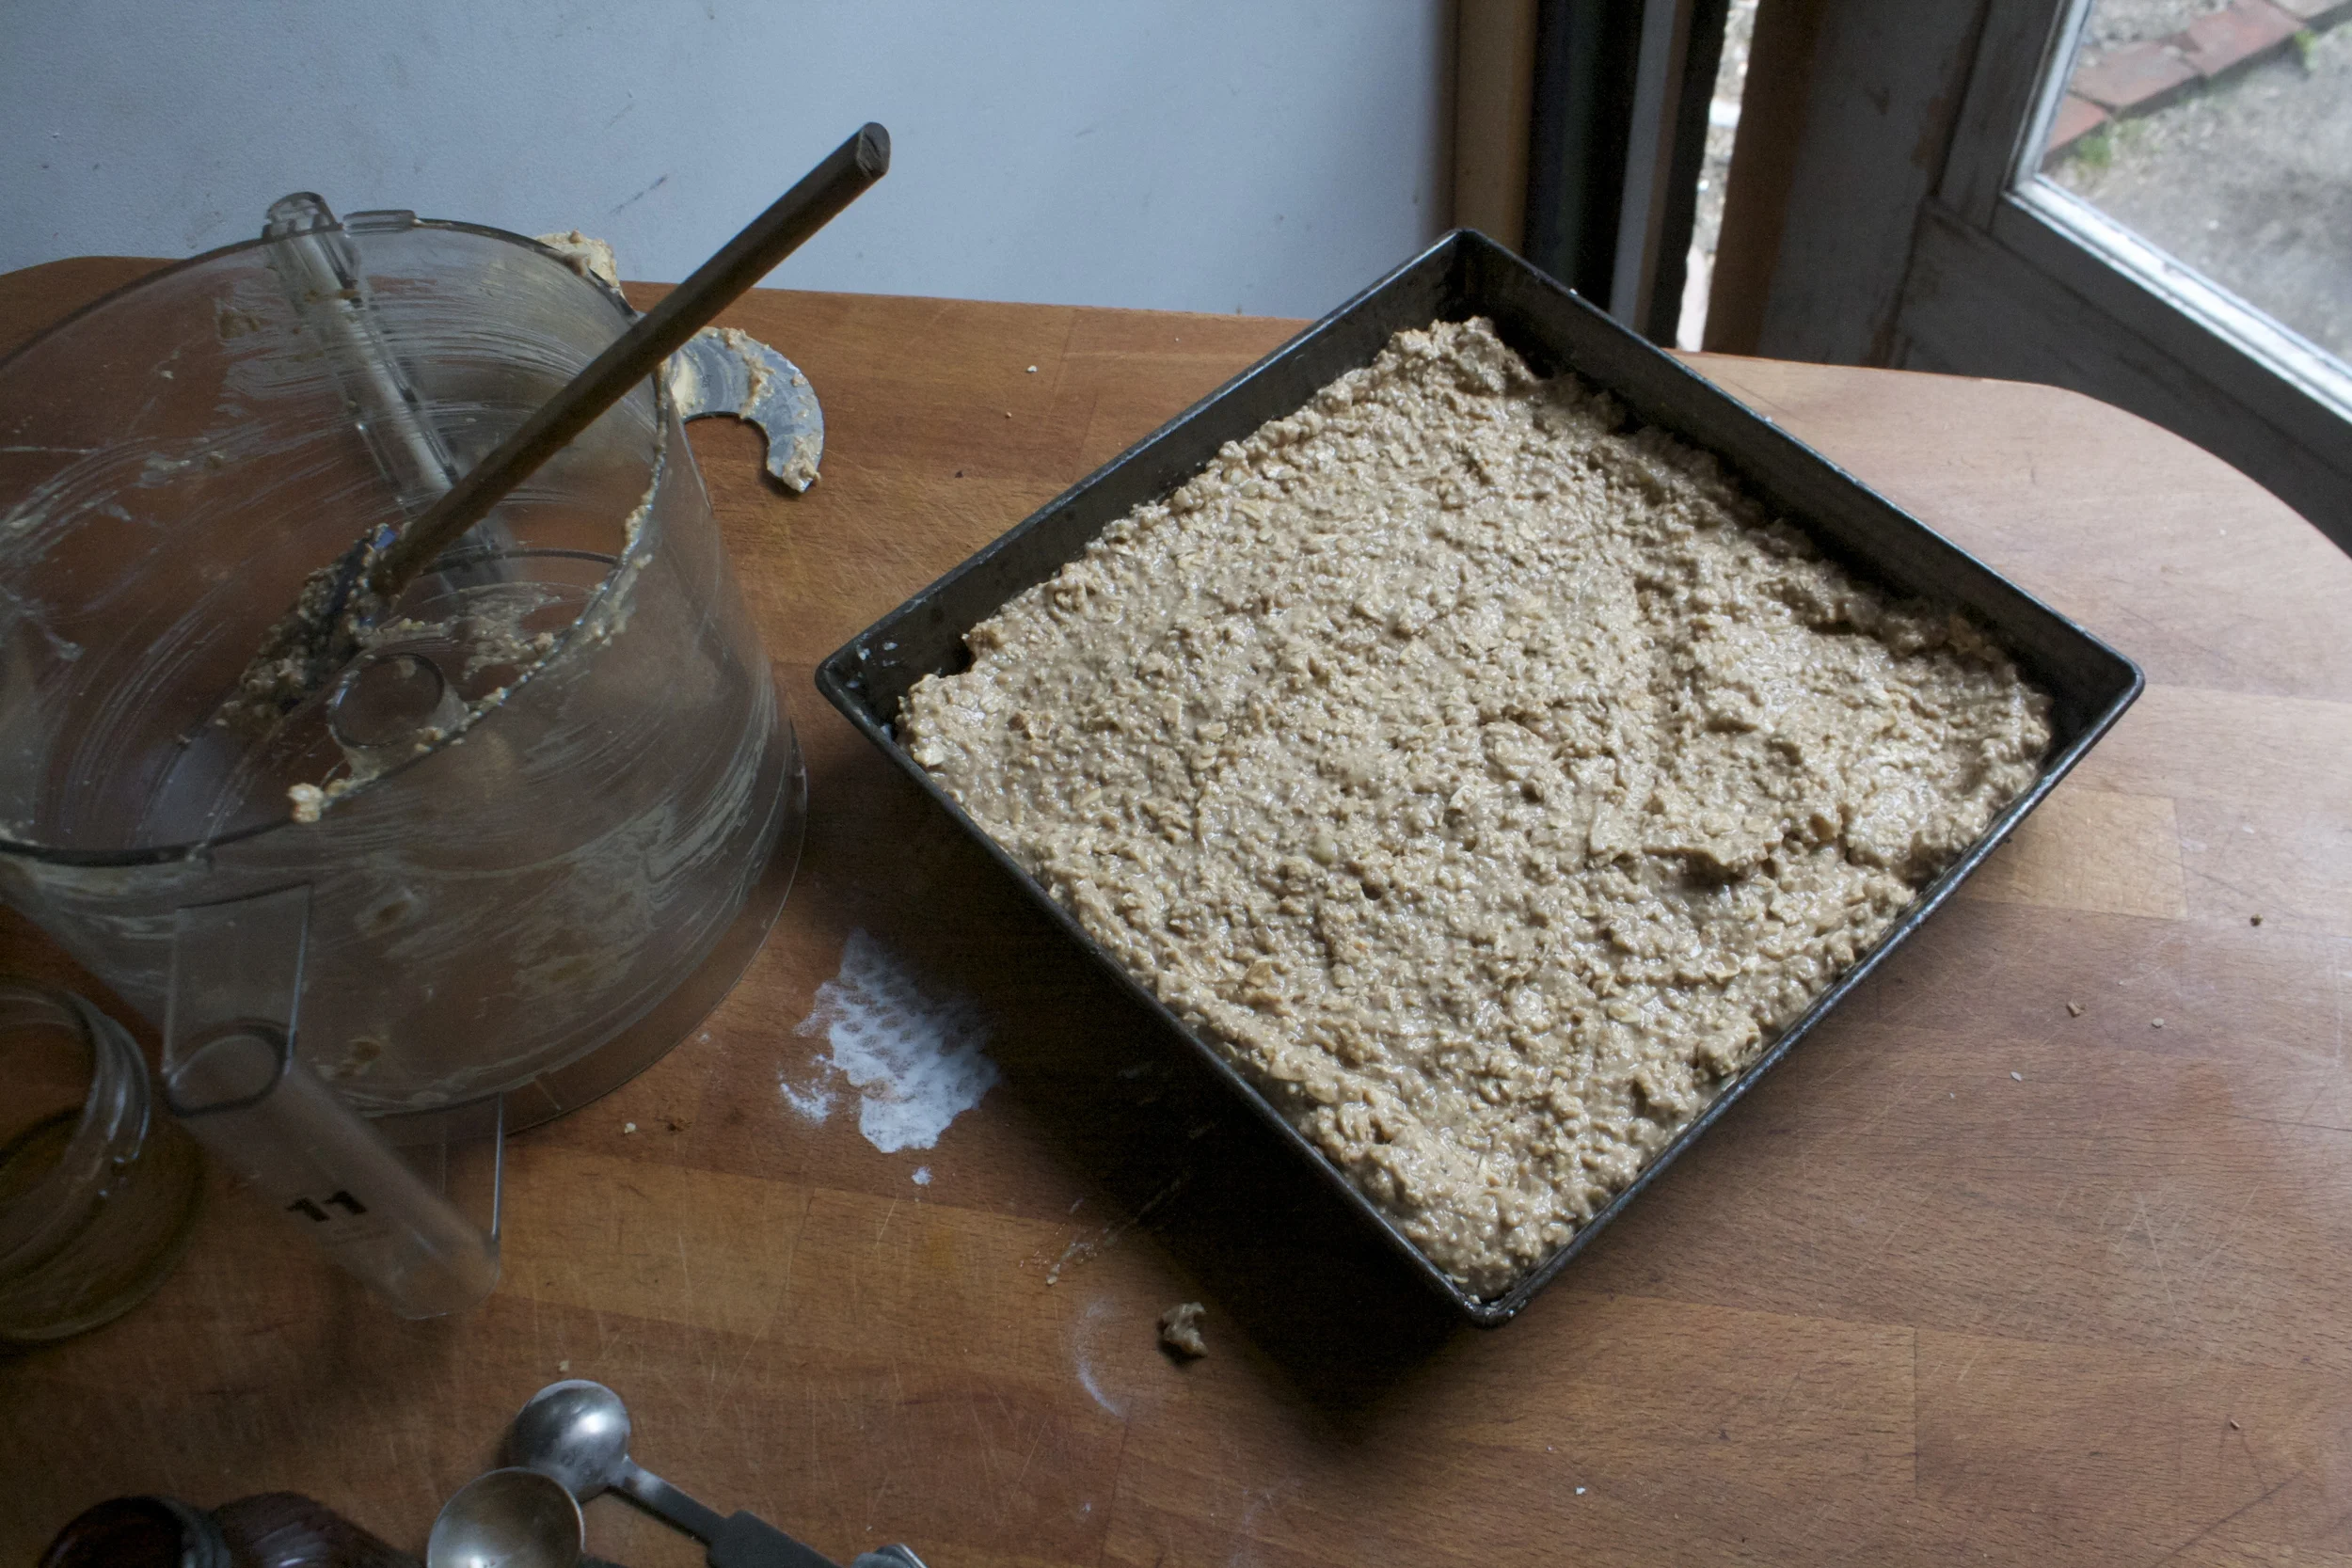
Then pourthe mixture into a well greased 9×9 baking pan and spread out evenly. Toss those suckers into the oven to bake.
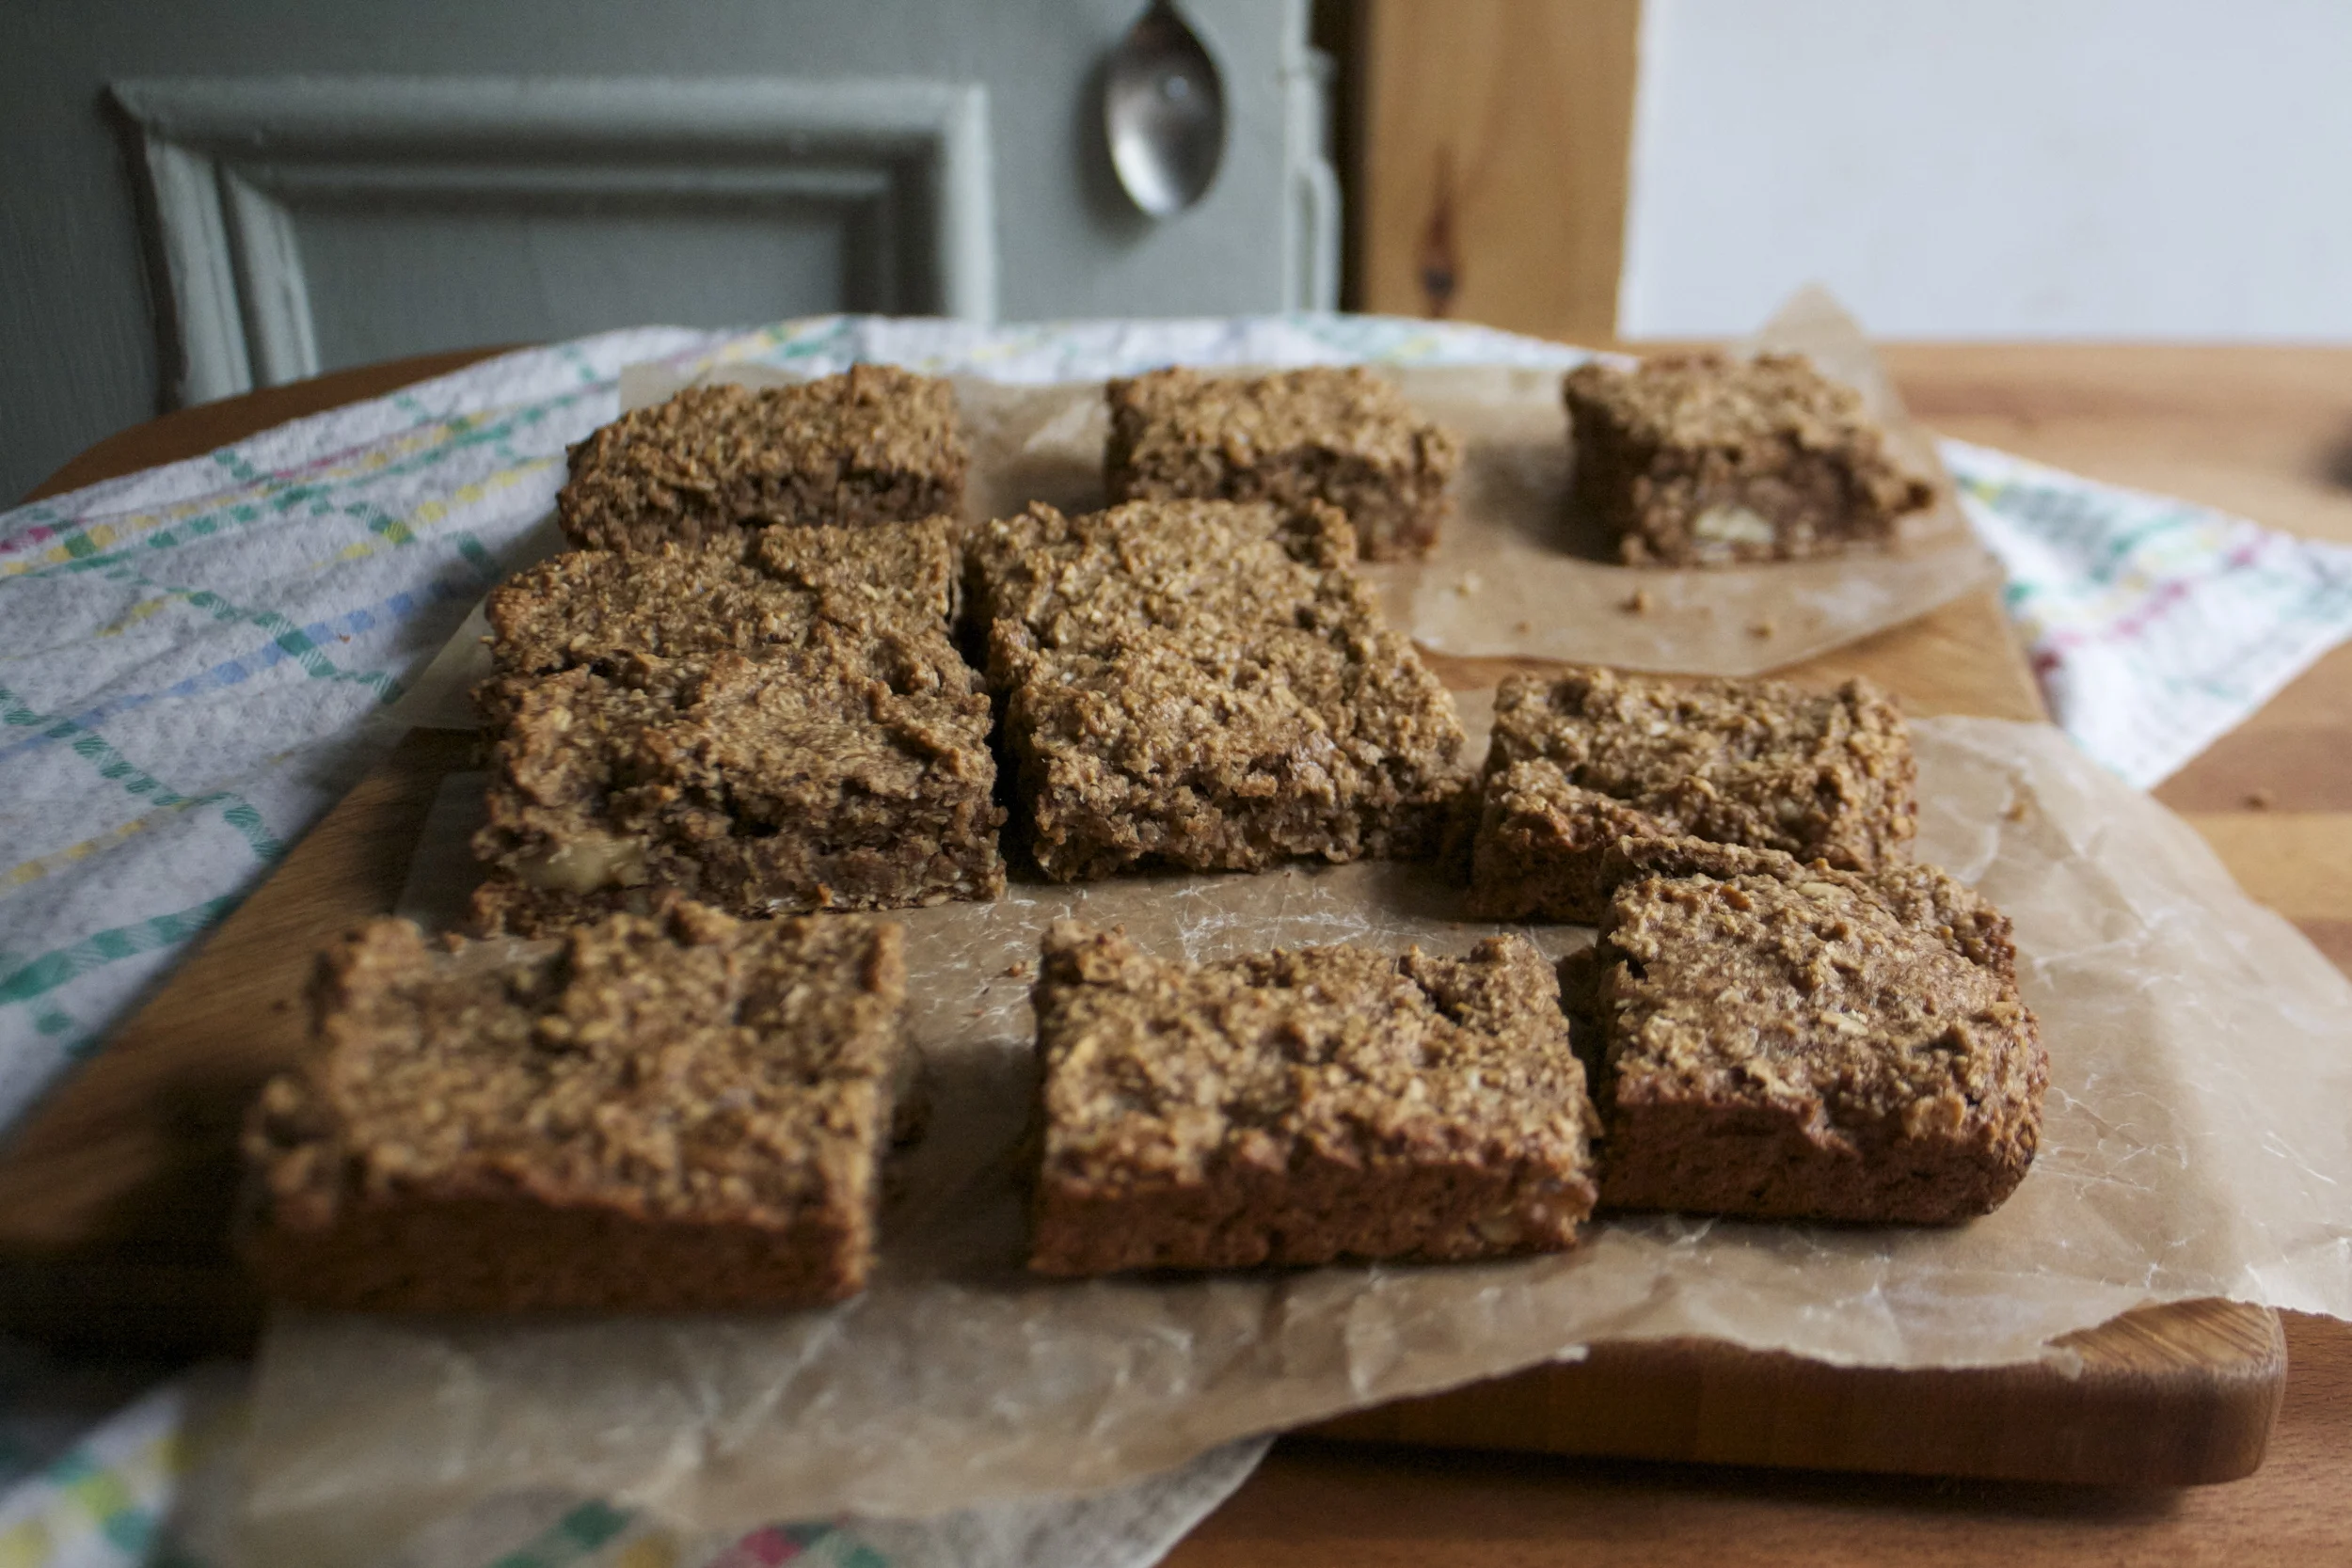
Oh so good bananas give off the best smell when baking. After about a 1/2hour, these bars are nice and golden brown and a fork stuck in the center comes out clean, which means, they are done.
Cut into square , eat one or two, and save the rest. Eat for breakfast, as a snack, or for dessert. And a smear of peanut butter on top is aces too!
Later dudes.
-C
3 cups old fashion rolled oats (gluten free ones to keep in GF)
1 cup plus a a small handful walnuts
1/2 cup maple syrup
2 rip bananas
1 /2 teaspoon baking soda
1 teaspoon cinnamon (optional)
Place 1 cup of walnuts into a food processor and blend until it turns into walnut butter.. about 3 minutes. Add in the oats and blend together until it becomes a crumbly mixture. Add in the maple, baking soda, cinnamon and the bananas (break into chunks) and blend until incorporated. If the mixture seems lie its too dry, add in a splash of water, and if to wet, add in another handful of oats. The batter should resemble a muffin batter.%u00a0 Once blended, mix in the remaining walnuts and pulse just to mix them in.
Pour mixture into a well greased 9×9 baking pan and stick into the fridge for 10ish minutes and preheat oven 350
And after the time in the fridge, remove the pan and slide them into the oven. Bake until golden brown and a tester stuck into te middle comes out clean. (about 30 minutes)
Remove and let cool. Pop out of pan, cut into square, and eat to you face.
Squares will last 3-4 days in a airtight container or freeze them and they will last until you eat them.
%u00a0This week was good. %u00a0Two days in a row the front door was open, the window was open and the heater was off, which pretty much made me that happiest person in the world. My spring cleaning brain has kicked in and I want to clean everything (even the walls). I even spent a good part of an afternoon moving and rearranging furniture. (The house ended up basically the same as when I started) And one of the best parts of the week%u2026.most of the snow melted! I am getting super hyped to start raking, cleaning, planting and weeding and and just getting really dirty! Oh how I love the spring!
Here are a few internet things from the week
-%u00a0Ancient Grains are new again%u00a0About time!
-%u00a0This article about the chemistry of cookies is a good one%u2026.
– Oooohh pretty. %u00a0String art
-How to Do Fishtail or Herringbone Braids Step by Step%u00a0 I need to start doing something with my hair besides a really sloppy pony tail that I don’t take out for days on end.%u00a0
-I think I want to make this Honeycomb shelves.
And %u00a0some real life happy%u00a0Oh Intervale Community Farm..I love you. I picked up my farm share and was especially pumped %u00a0for another gigantic kohlrabi and some locally grown, locally milled wheat flour.
%u00a0%u00a0The trees, they are a budding
%u00a0The perfect ripeness, destined for naner ice-cream!
My sister and I took this little for a sled ride through the wood where there was snow (but it was 45 degrees!) The hike ended up with me %u00a0pulling her through a field of mud. It was fantastic.%u00a0
One year ago today. Dinner with my favorite people.%u00a0
Hope your weeks was awesome and warm..Spring is just about here to stay!
This past Christmas, my (kinda)mother- in-law gave me and the mr these really cool honey bee pins in our stockings. Nothing fancy, just a little pin, but I think it was one of the best gifts that I had gotten all year. The pin lives on my winter jacket.
And now I am into pins.
So a couple of the little’s came over yesterday after school for crafts and dinner and I figured a bit of pin making would be a perfect little project for us to do. And being that it’s the big V day coming up,%u00a0 making these pins heart shaped was more then overly appropriate. (What’s Valentines day without cute little hearts?) Well pin making we did, or I did, not so much for them. They made a few, but in the end, they were more excited to beat the crap out of the mr and to eat carrot shavings with peanut butter and nutella.. Totally ok with me because really, I was the one that wanted a little craft time and the mr did need to get his butt kicked.
Sure I made these pins pretty much for myself, but imagine the possibilities. Make a bunch to give out to your friends, family, neighbors, or even the mail man!? Or if you have yourself a little, how great would these pins be make and to give to all their little classmates. I know that if received one of these pins in my homemade shoe box mail box meant to collect all of my candy studded, drugstore bought valentines. I would have been elated and rocked that pin all year long on my super cool backpack.(grade schooler, they have all the fun) Right after I finished painting and gluing all my pins, Miley then decided that they were freaking awesome and wanted to make a bunch more…. Well little little, to late, time to go home. But I did give her a bunch to bring back with her. She will just have to bug her mom to make some more.
And sure, I mention valentines day when talking about these pins, but really, hearts are for everyday, and are still really great long after V day is over.
Handmade heart pins = love!
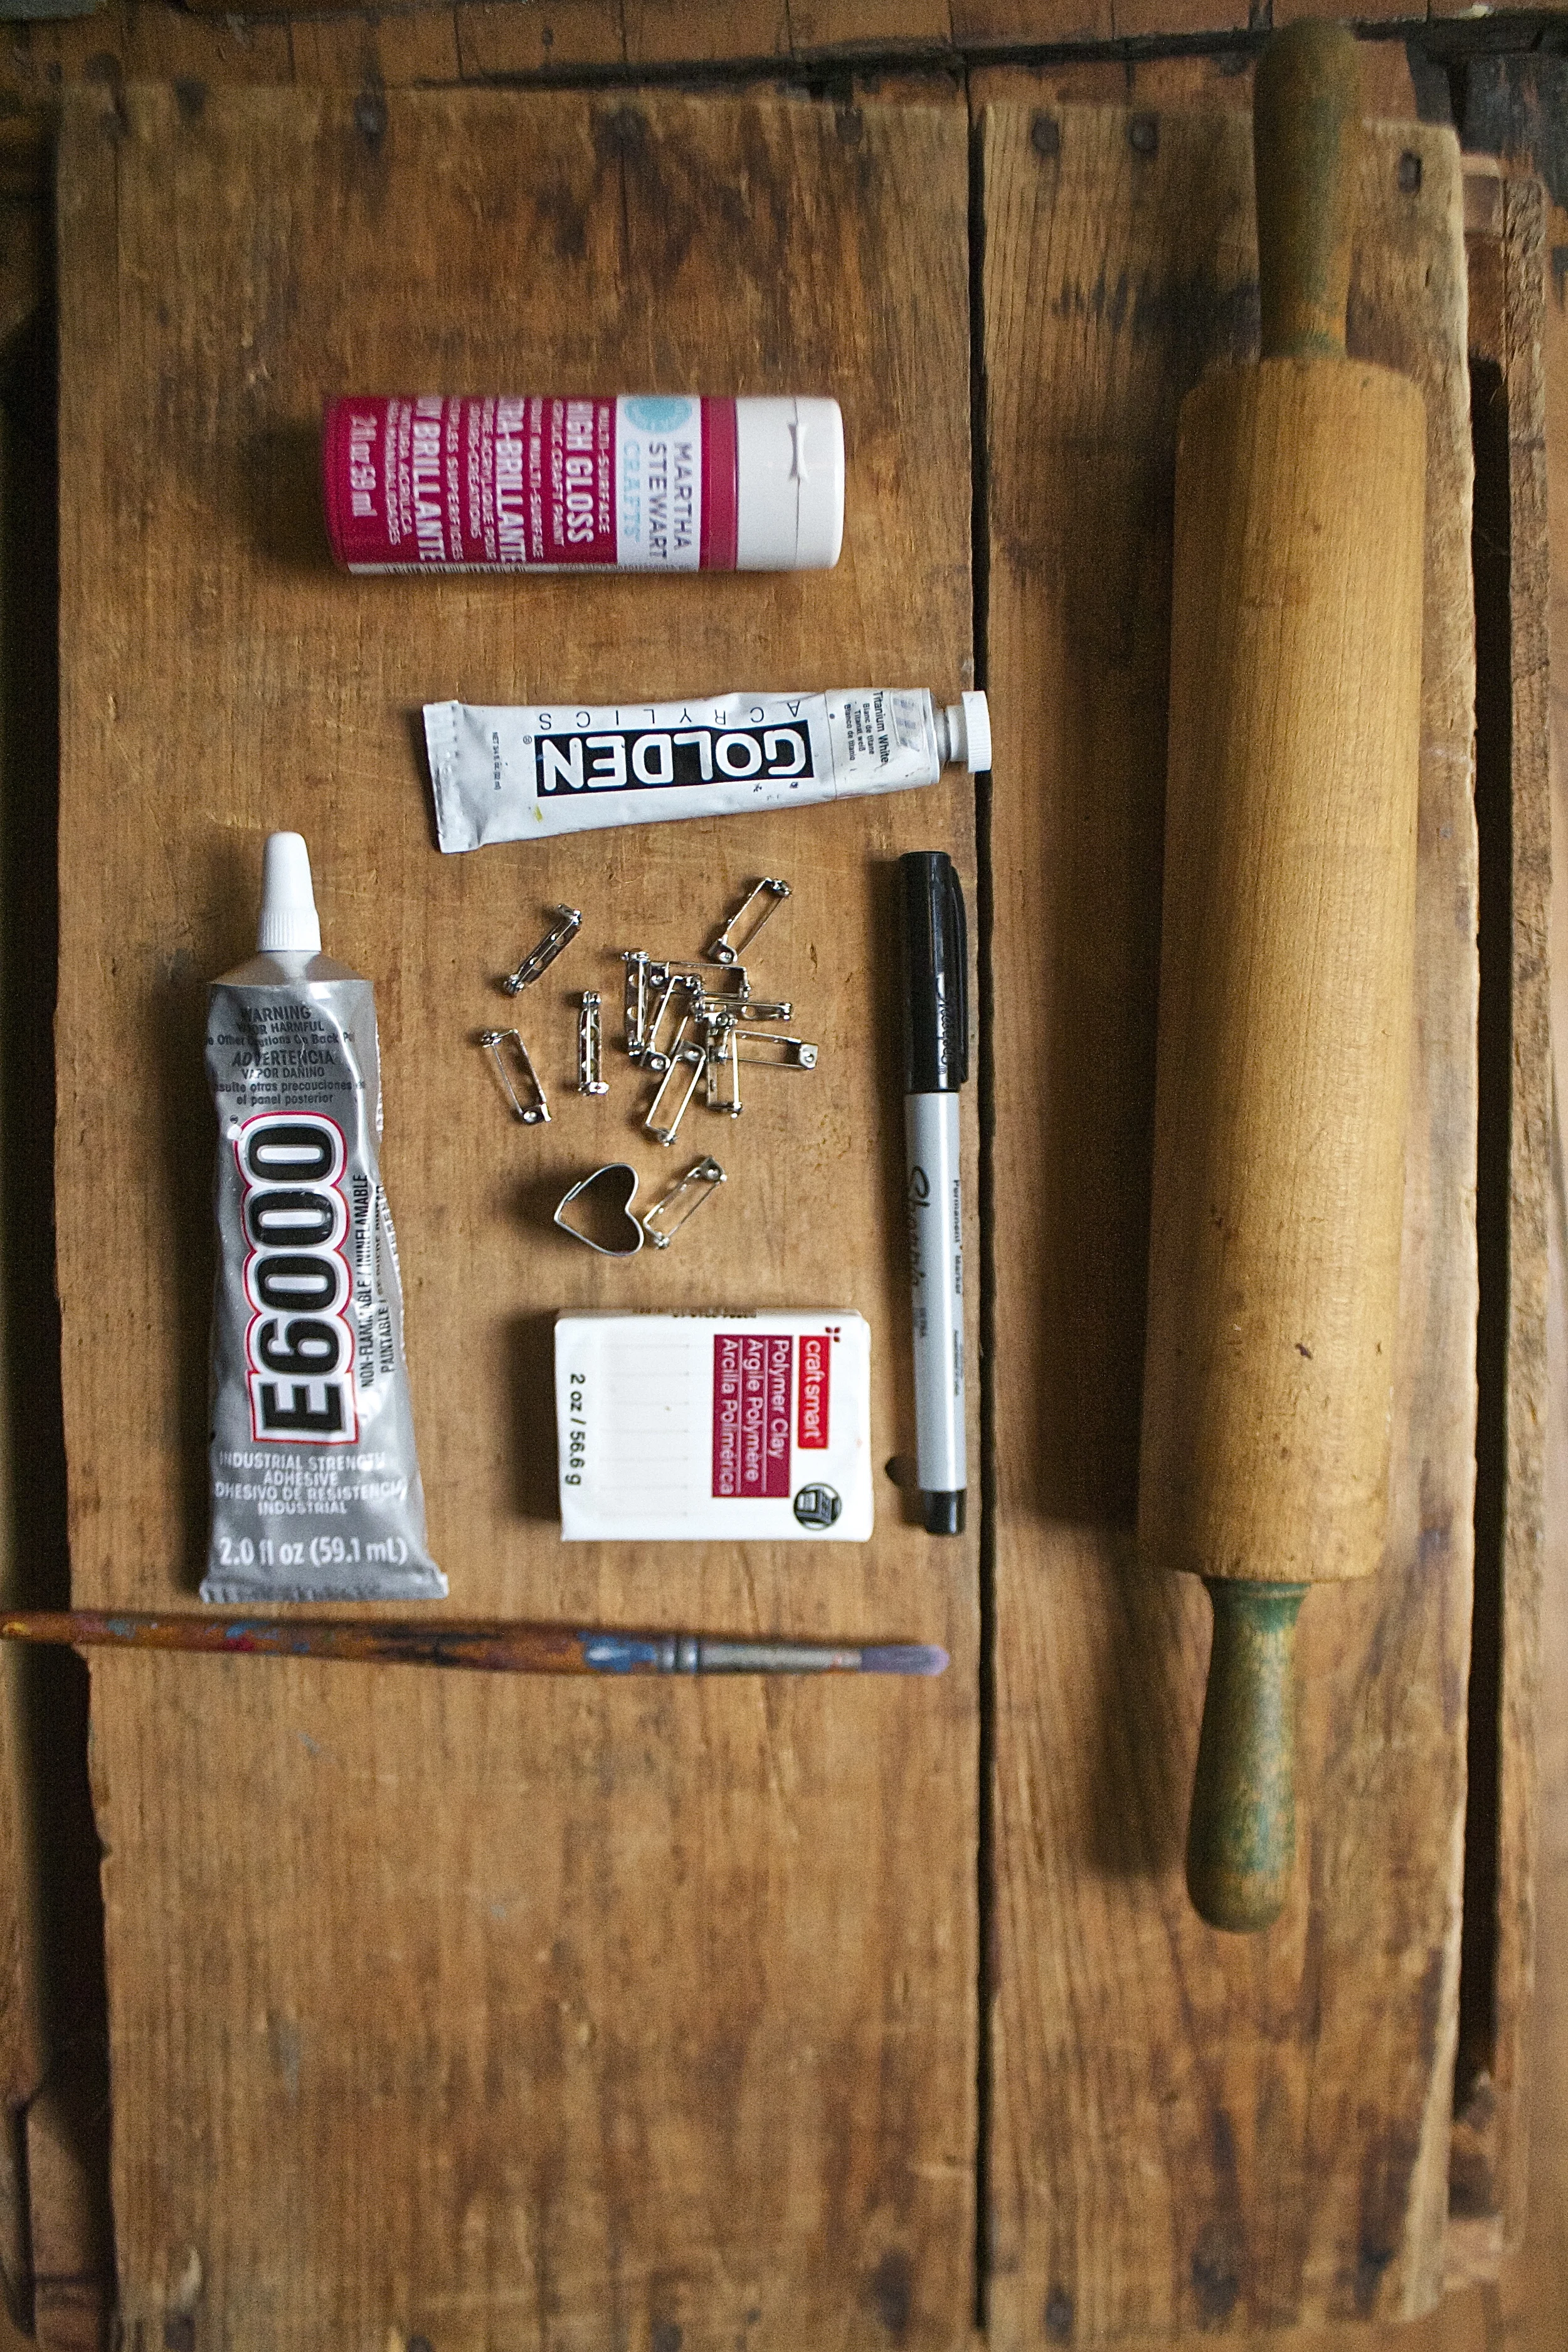
Stuff you need for some awesome pins.
Polymer clay (I used white but any color will do)
red and white paint (preferably enamel or a high gloss paint) and a paint brush
bar pin backs (I bought these at Michael ‘s craft store. 64 for like 3 bucks!)
industrial strength glue (E600 is great and is used and recommended by many a crafters)
rolling pin or wooden dowel
small heart shaped cutter
sharpie pen to write on pins (optional)
Glitter( also optional)
A couple notes. You could use red clay but I have found that when I buy the red dyed clay, its always harder to work with and plus, it stainsyour hands. Also, I like to seal the clay and enamel paint does the trick. If you don’t want to paint it, just pain on a coat of clear sealer.
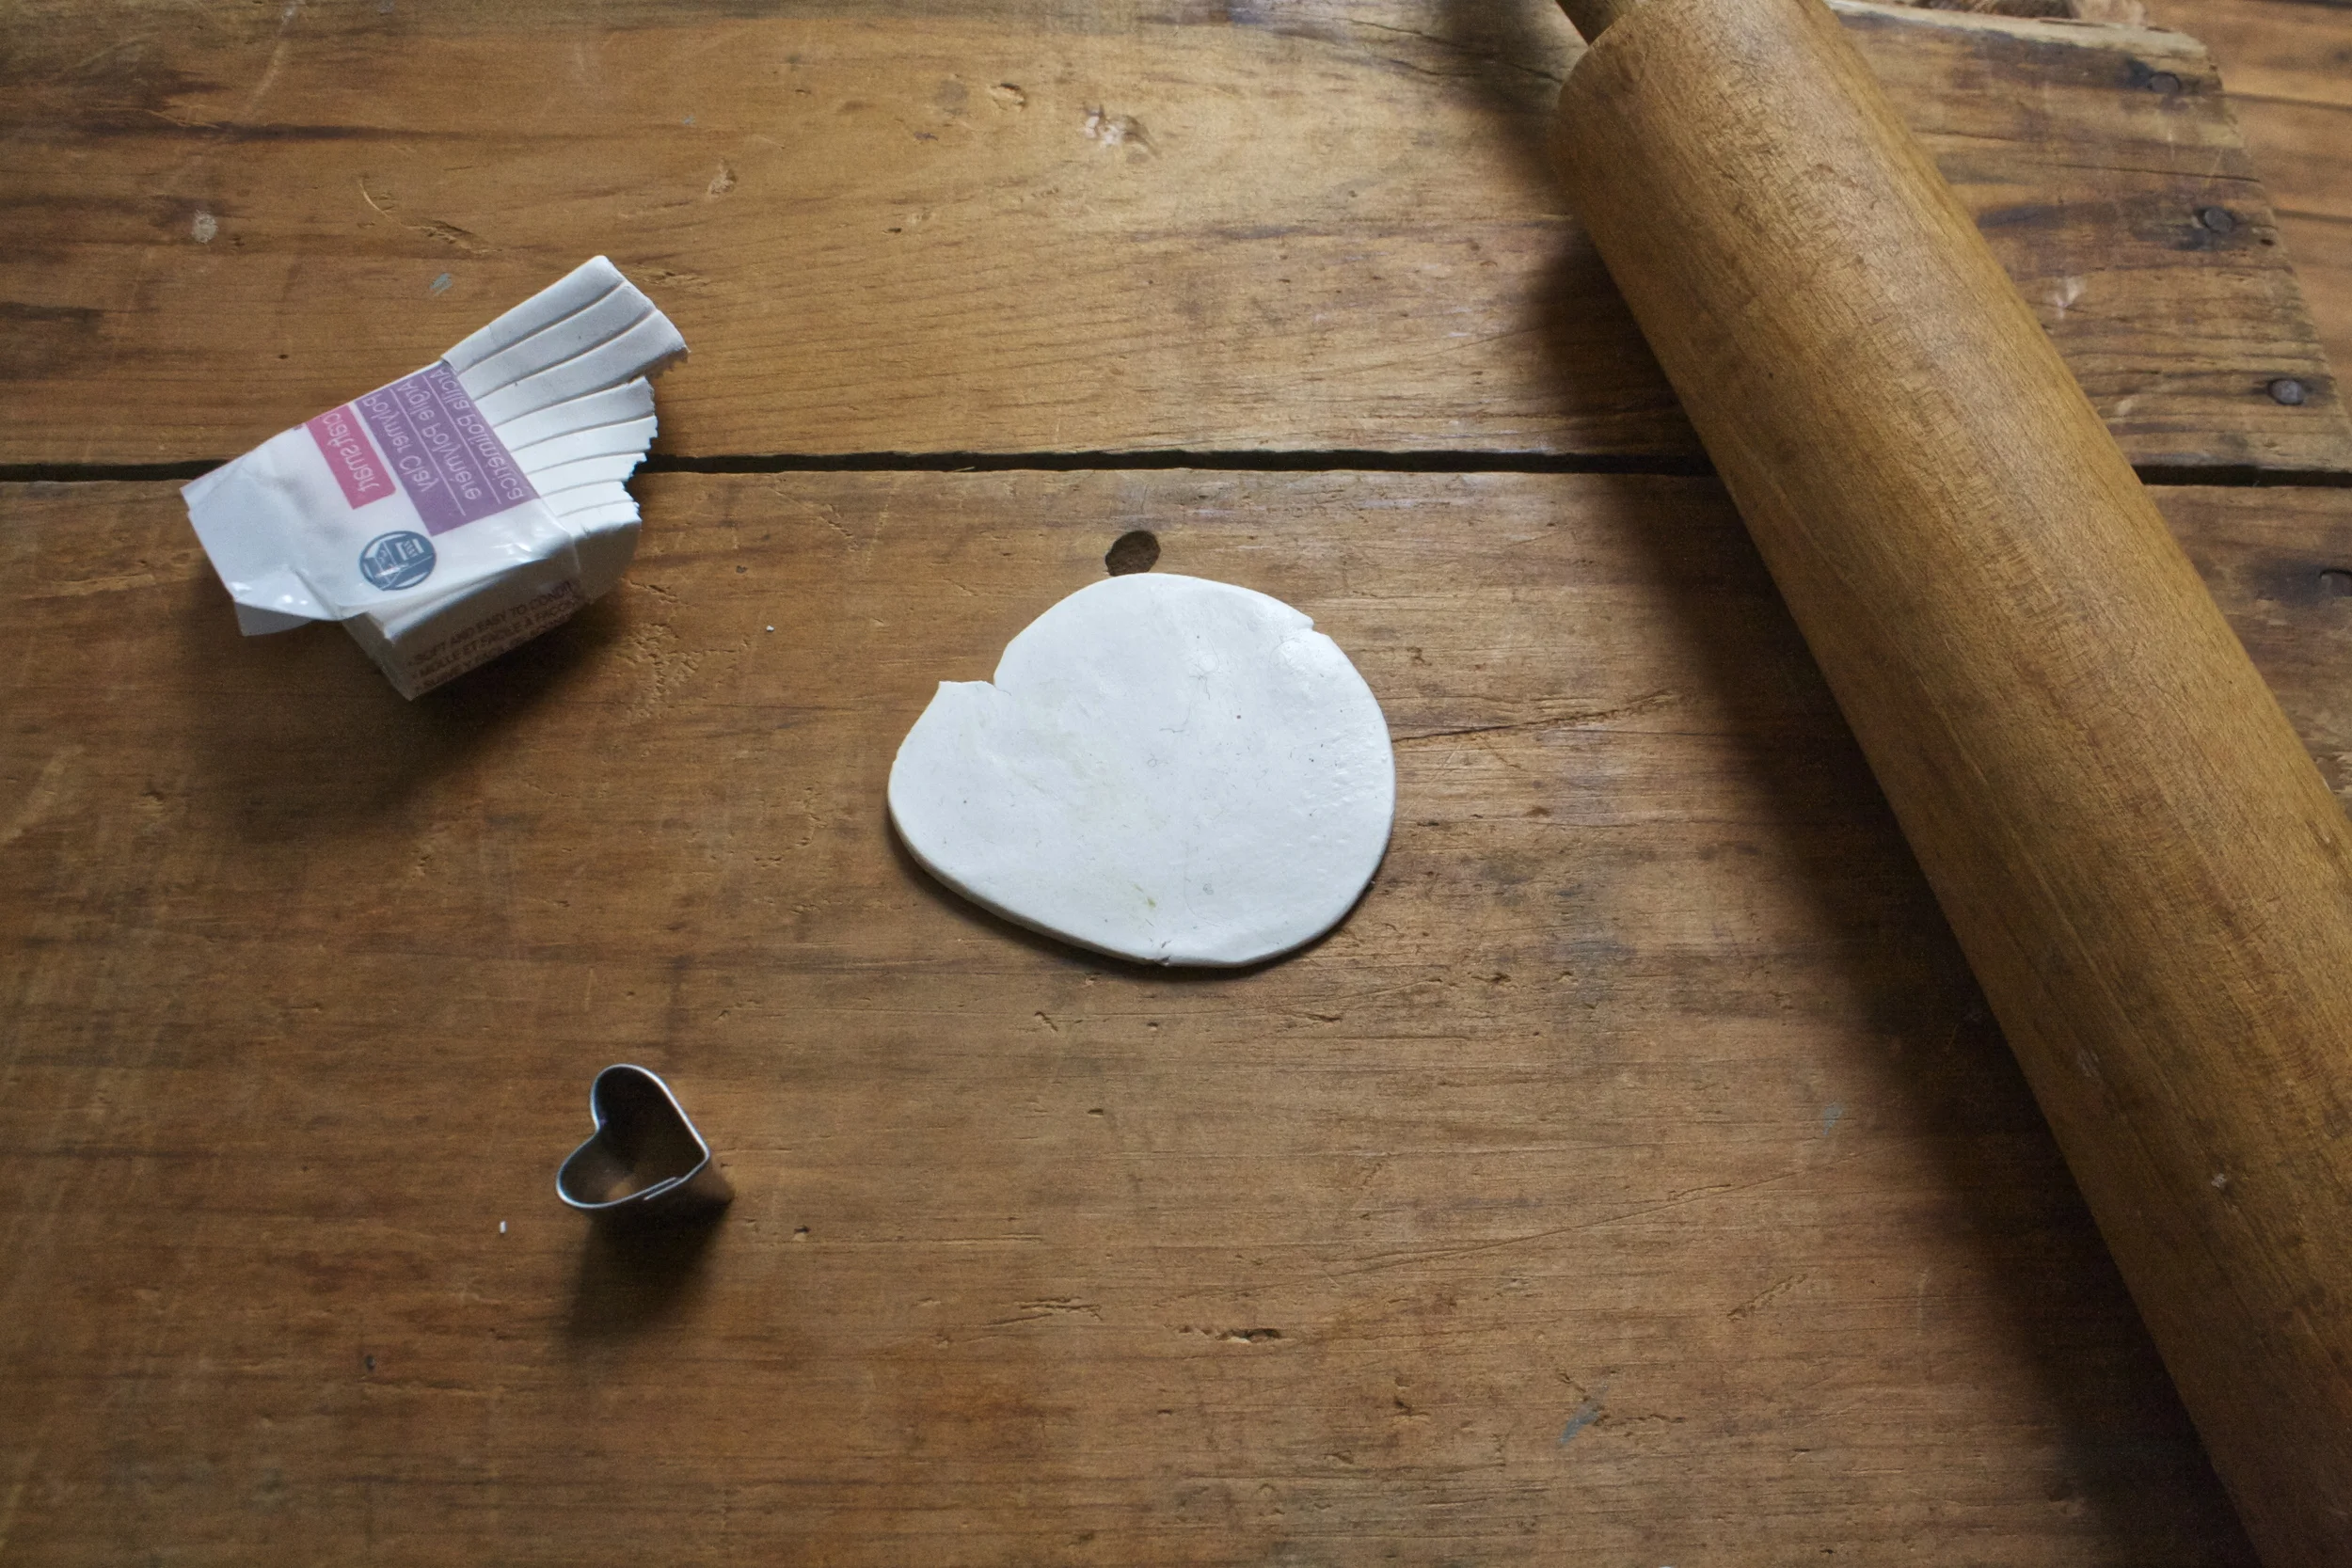
Start buy kneading a chunk of clay a little bit to get it to a workable state, then roll into a ball and roll out flat. I rolled mine out about 1/3 of an inch, but I also knew I wanted to squish it out a little flatter once I cut the shapes out.
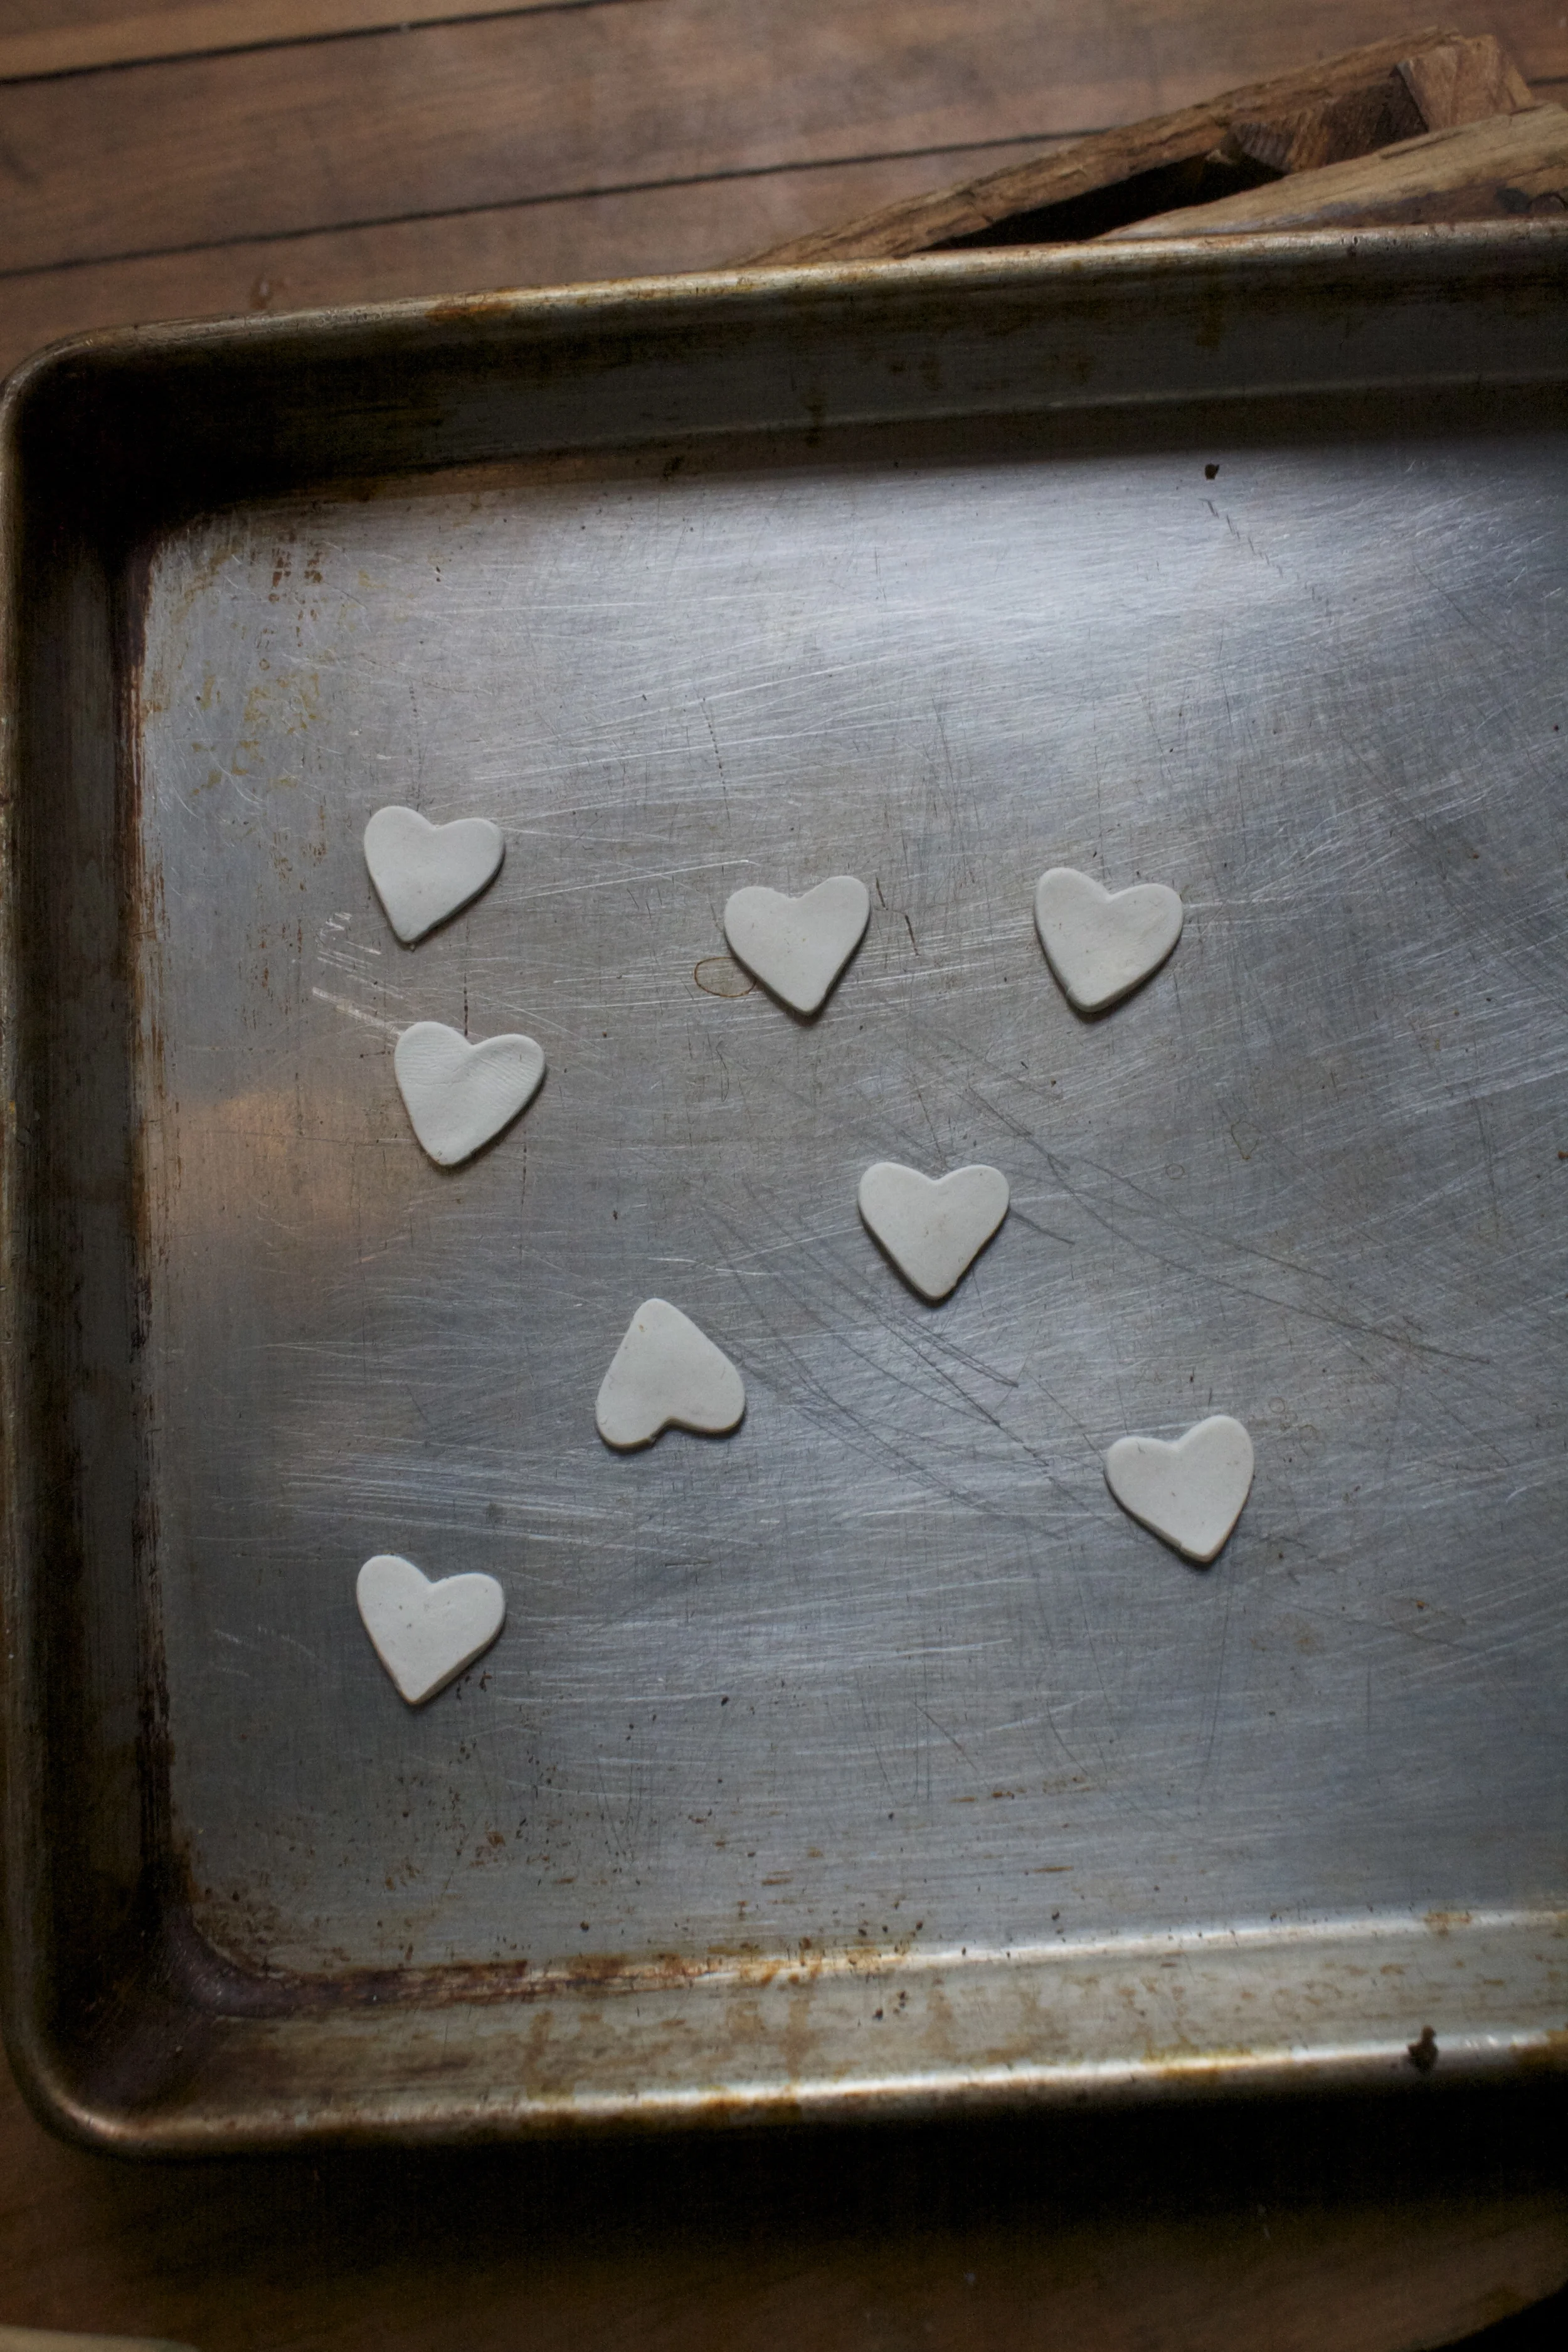
Cut out your hearts, or if you want, free form them.%u00a0 What I did was used my tiny heart cookie cutter to cut the initial shape, but then used my thumb and squished them all out a bit bigger.
Note here.. Hears are awesome and amazing, but other shapes….Go for it. You probably have a shit tone of those pin backs.
And just before you bake them, make sure that the pins you are using will fit behind the hearts. (if you notice any visible pin, just smoosh the heart out a little more).
Into the oven,, out of the oven. Read the package to make sure, but the stuff I used only needed to be baked for 15 minutes at 275
Once out of the oven, let completely cool and harden.
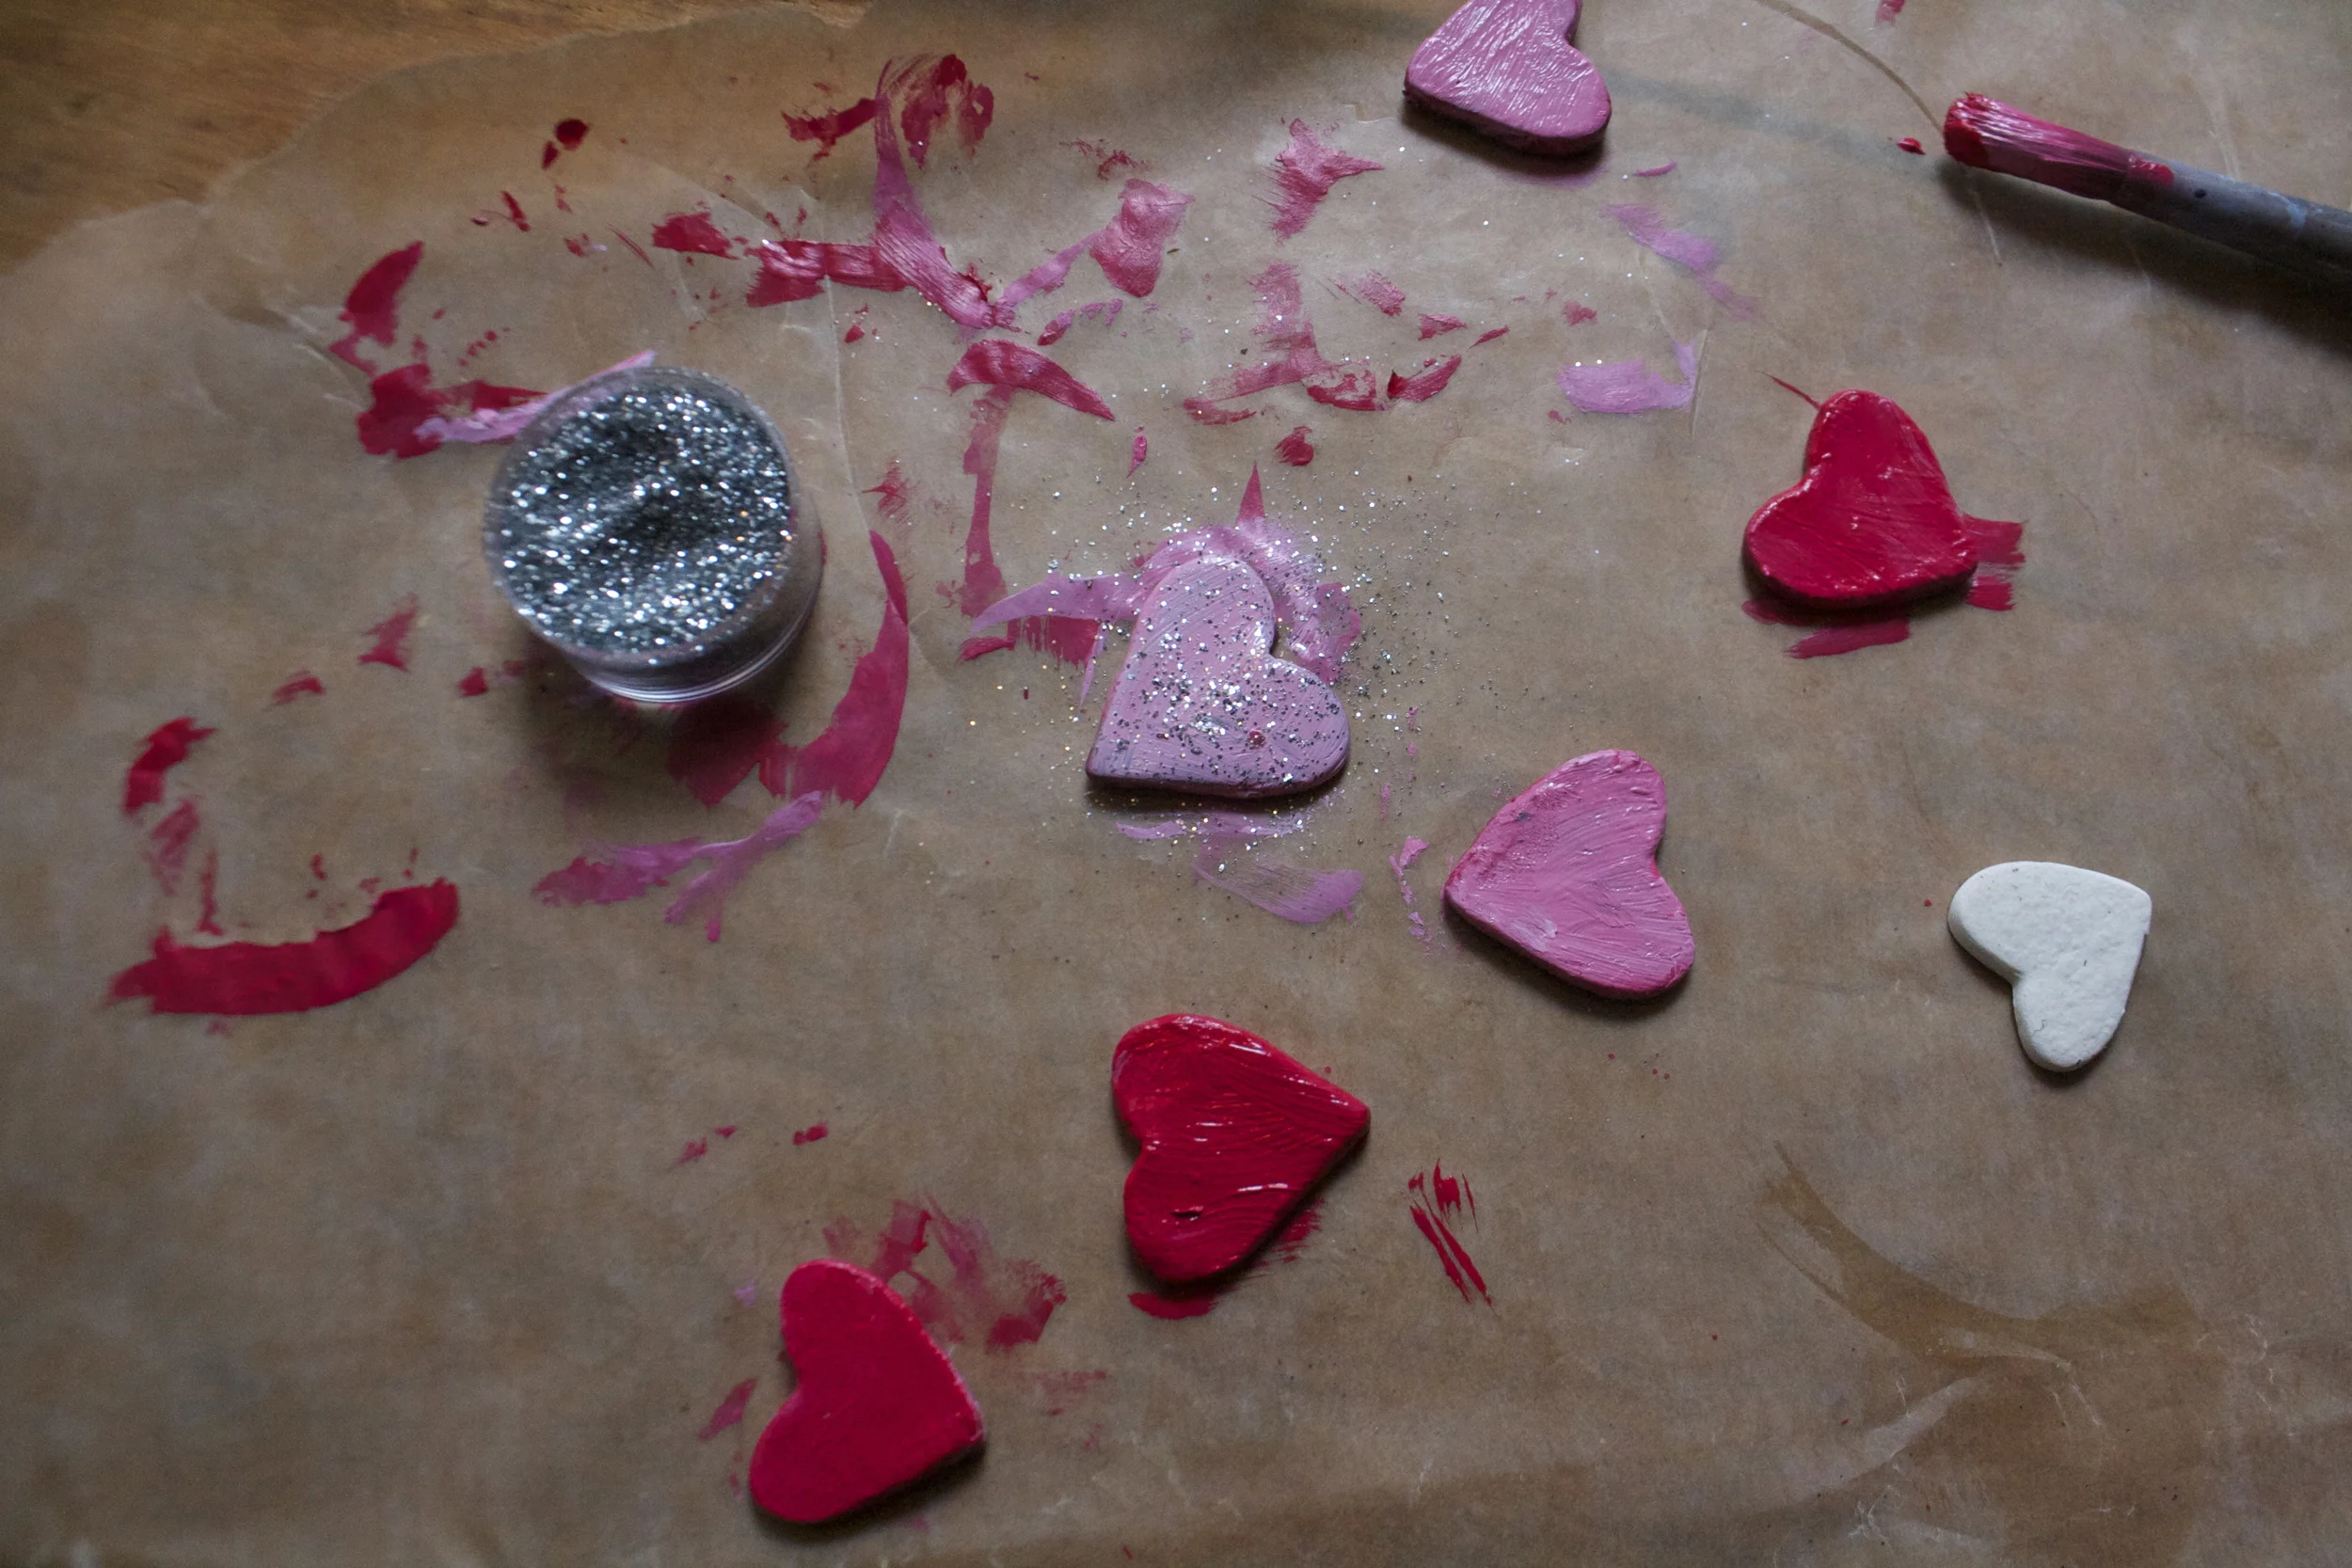
Once the hearts are cooled, go ahead and paint them. Use straight up one color, or mix and make a few different shades. (red, white and pink are nice together)
You can add some glitter to the wet paint to add a little bling….
Or add designs or what have you. Do whatever feels right.
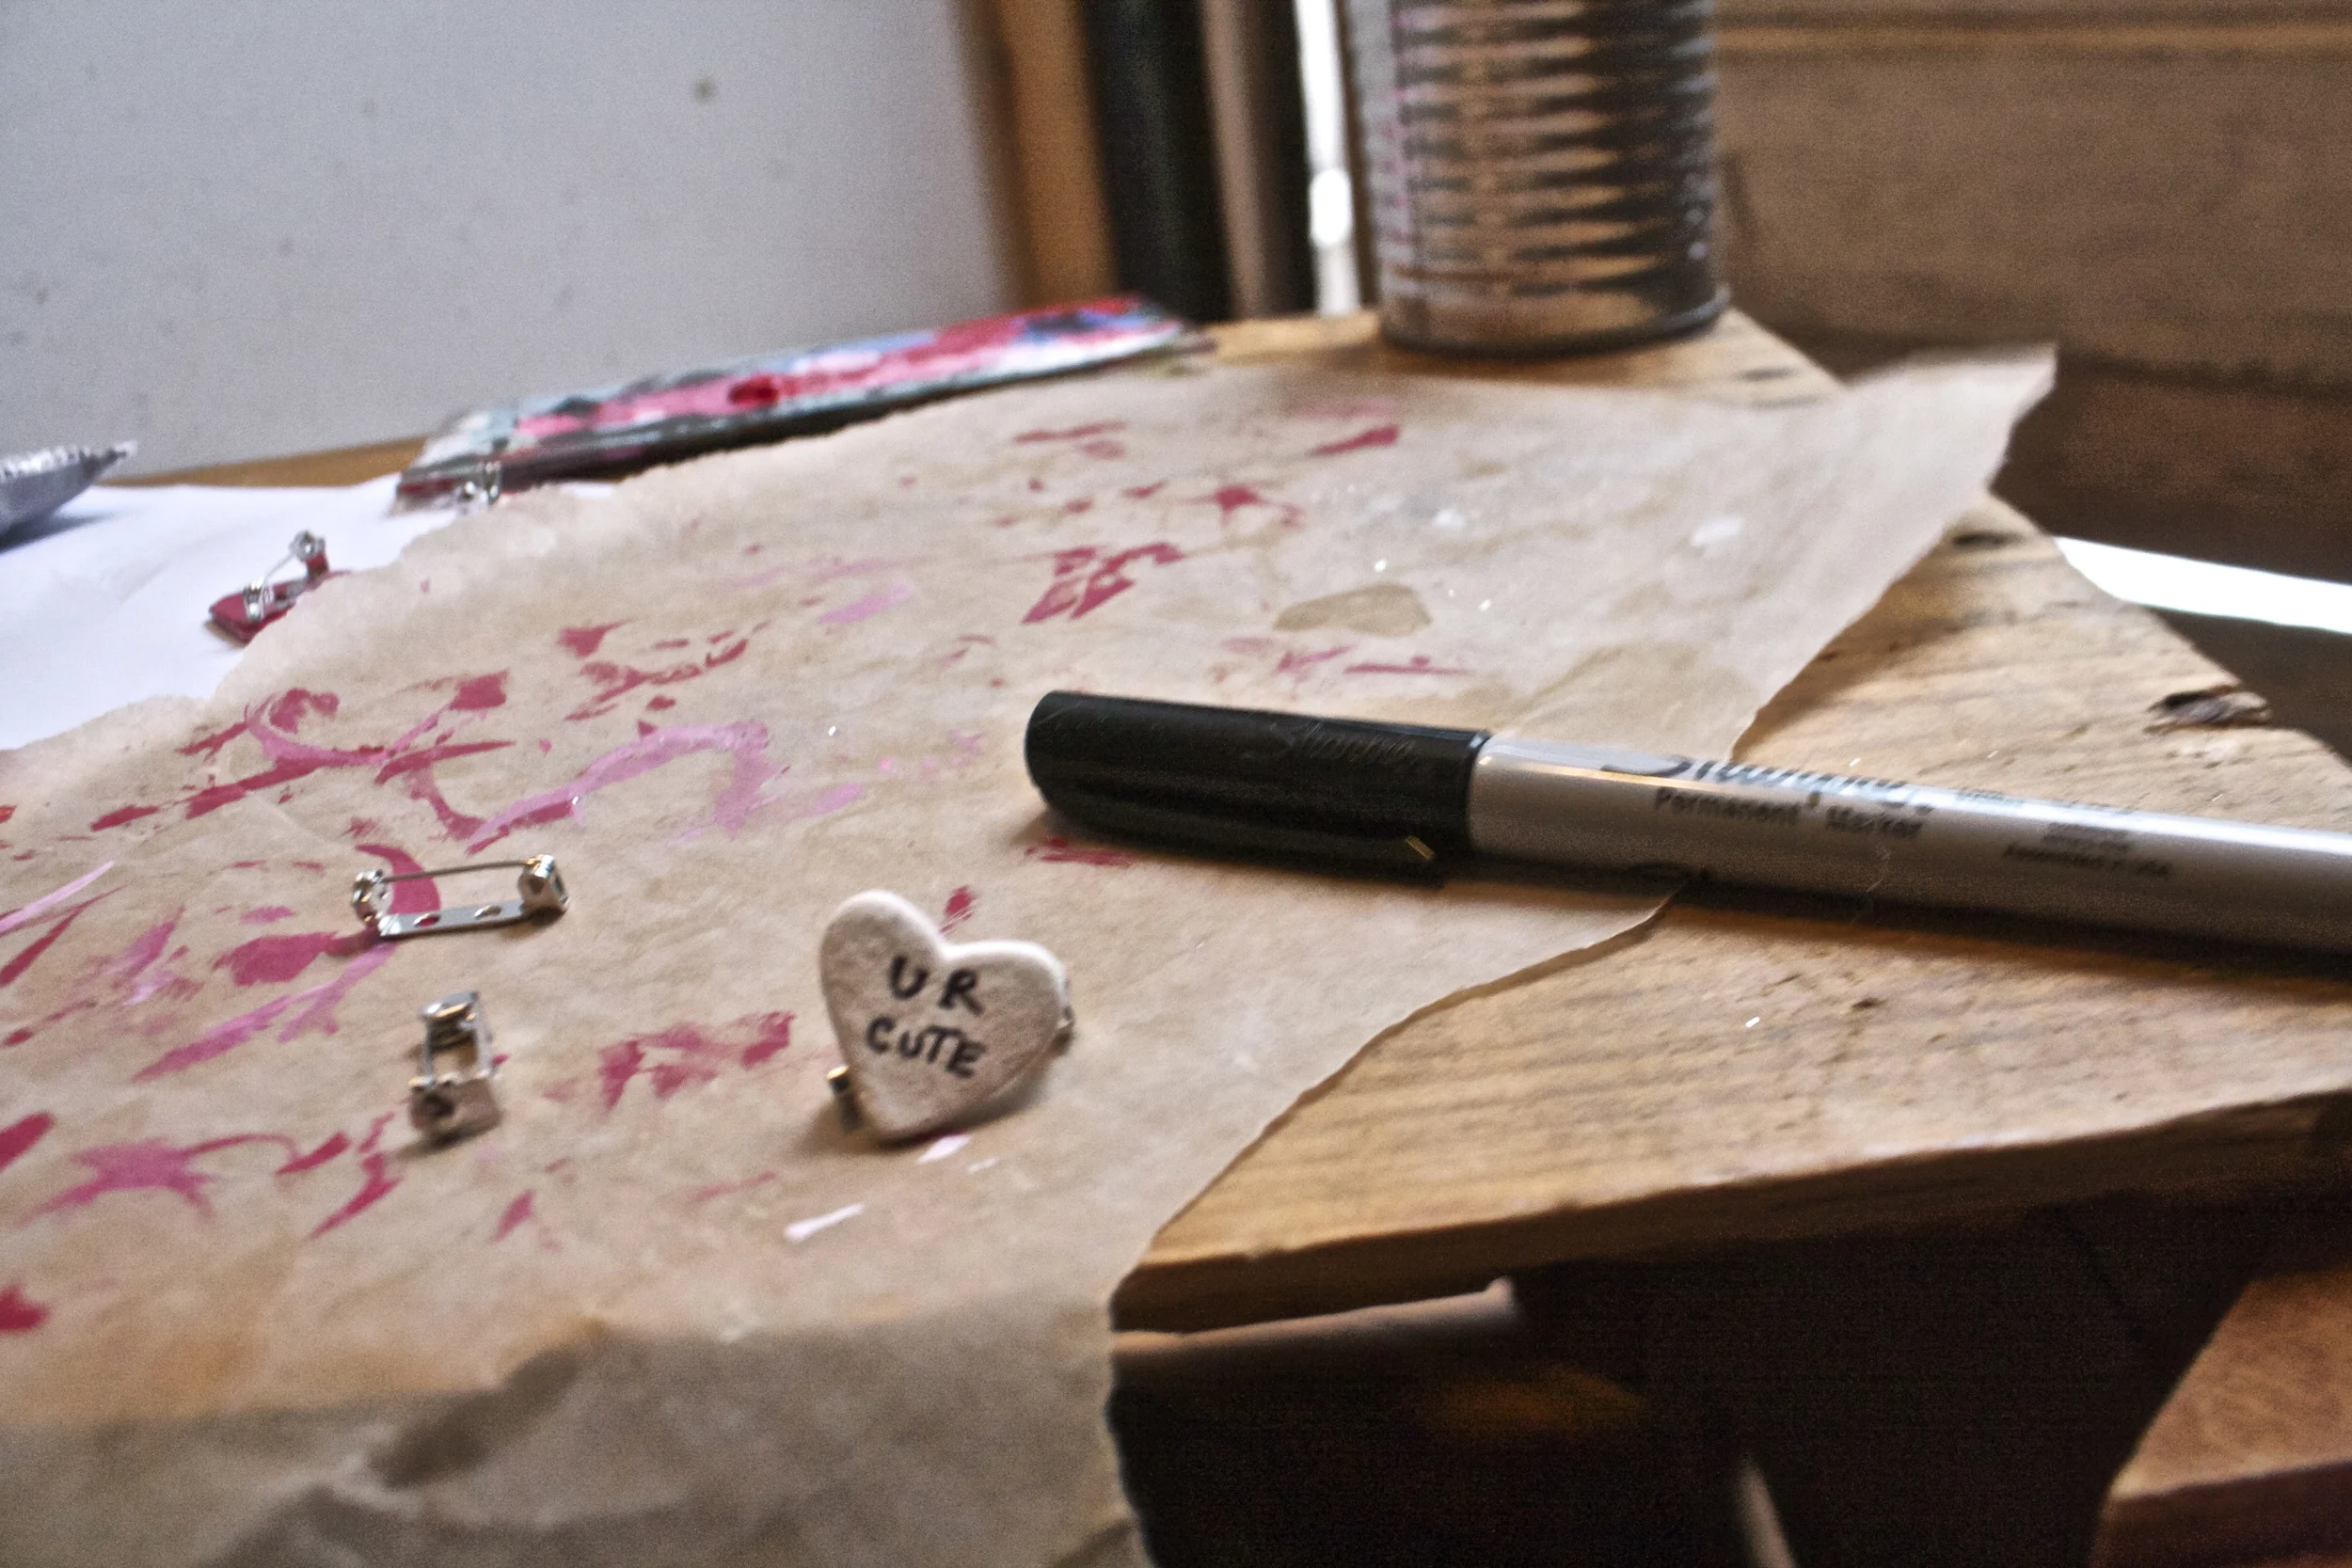
Now stick a pin thingy on the back of each heart with a blob of glue. (If you use the E600, make sure to use it near a window or somewhere ventilated.. it really stinks for a few minutes)
Let the glue dry (this glue was completely dry within an hour, but follow glue package instructions)
And if you want, grab the sharpie, make sure the paint is really dry (at least an hour) and write a little something on the hearts.
And now the hard part.. which one goes to who and which one (or 4) do you keep for yourself. (you can always make more!)
Have fun!
-C
It’s Mother’s Day weekend which means that you and I and everyone out there should feel the slightest bit obligated to at least do a little something nice for your mom for the mere fact that you were borned. And really what better way to celebrate mom than with food%u2026 It really is the least that you can do. (I think mom’s also like flowers and cards and handmade pasta necklaces) My mom is defiantly about the food. (she has had her fair share or pasta necklaces) %u00a0A many years back on Mother’s day, this sweet little girl (me) made her mother a special %u00a0breakfast treat%u2026blueberry scones. And ever since that day, for every freaking holiday, birthday, whatever day, my mother requests (demands) a batch of those scones. She is always saying that these are her favorite treat and that no one has ever made them as good as I do. (I guess that just reiterates that I am her number 1 child)
And for the last few months my mom has been up my butt, trying to get me to make her some. Not going to lie, I have been saying I’ll get her a batch, but for some reason, I haven’t gotten around to making them. So two birds here.. Make the scones and she gets off my back for a least a little while (a month.. maybe 2) and I give her a fantastic Mothers day gift that I know she will love.
So here they are , oh mother of mine. Blueberry scones!
The stuff. Flour, baking soda, baking powder and salt. A bit of sugar, vanilla, buttermilk, and butter (use vegan butter and nut milk if you want to make them vegan) And of course we need the blueberries which can be fresh or frozen. I usually use fresh, but the store I stopped at only had really big containers of fresh that were like $1000 dollars a piece and the organic frozen happen to be on super sale. So you know, the cheap in me won that battle.%u00a0So into the bowl goes all the dry stuff; flour, baking powder and soda, salt, and the sugar. Give it a good whisk.
Now for my special trick for a perfectly distributed cold butter in a pastry. Freeze your butter and grate it!
With a large wholed grater, grate the frozen butter directly into the bowl with the dry, stoping a few times to toss the butter chunks around so you don’t end up with a huge pile of grated butter. When it’s all grated, gently toss around so the butter is evenly distributed.%u00a0Now dump the blueberries into the flour mixture. Toss them around to give them a coat of flour. Add in the buttermilk and vanilla and give a little mix until liquid is absorbed. We are trying to handle the dough as little as possible.Turn mixture onto counter. It’s very loose, but thats what it should look like. Very gently and with as little handling as possible, gather dough up, knead a few times till everything %u00a0just comes together. Press dough into a disk that is roughly an inch thick%u2026. and it doesn’t need to be perfect.%u00a0Cut the disk into even sized pieces. Do 6 big, 8 normal, maybe even 10 smaller. Whatever size you like. (I did 8) Place the scones onto a baking sheet, using a spatula to transfer, and sprinkle the tops with a little bit of sugar. Into a preheated oven for about 20 minutes.And when the scones look all nice and browned and a tester comes out clean. remove and either serve right away warm, preferably with huge cup of coffee or tea, or stick on a rack to cool before storing in %u00a0air tight container.
Perfect to serve as a breakfast pastry, at brunch, or even as a dessert. A nice little treat for a special lady. (dudes can eat them too)%u00a0
Happy Mothers Day Mom! Thanks for having me!
And Happy Weekend!!!
-C
Blueberry Scones%u00a0
2 cups all purpose flour
1/3 cup sugar plus%u00a02 tablespoons %u00a0to sprinkle on top
1 %u00a0teaspoon baking powder
1 teaspoon baking soda
1/2 teaspoon salt
1/2 cup (1 stick) unsalted %u00a0butter frozen or really cold (use non dairy butter like Earth Balance for vegan)
1 cup blueberries (fresh or frozen)
1 teaspoon %u00a0vanilla%u00a0
%u00a03/4 cup buttermilk (use non dairy milk for vegan)
Preheat oven t0 400 degrees
In a large bowl, whisk together flour, baking soda, baking powder, sugar, and salt. Take the frozen butter and grate directly into flour mixture, tossing around to evenly disrupted. Add in blueberries and toss around till coated with flour, then lastly, add vanilla to buttermilk and mix into mixture until just barely coming together. Turn mixture out onto counter and with your hands, knead mixture a few times until it forms a solid dough. Shape into a disk and smoosh down until about an inch thick. Cut into 6-10 triangles %u00a0and place on a non greases baking sheet and sprinkle tops with remaining sugar. Stick into oven and bake for 20 minutes or until tops start turning a golden brown and a tester in the middle of a scone comes out clean.%u00a0
Remove from baking sheet and serve warm or let cool on a rack.
Mom gets first dibs, and if she is willing to share, eat one yourself with%u00a0your face.%u00a0
This weekend I made a stand of paper hearts that live all around the house. An early Valentines for my mister. We don’t do fancy dinners, %u00a0store bought cards or gifts%u2026.. Handmade and pretty is what we do.
These hearts hang from the ceiling and toss pretty heart shadows on the walls%u2026..and make both of us smile.%u00a0
%u00a0 The making of stringed paper hearts is so very simple. What you need is..
One or more different colors of card stock paper
scissors
A sewing machine with thread..(can be hand sewn for sure)
To start, cut out a bunch of hearts, as many as you want. You can free form cut them (that’s what I did) or you can either make a template and rouse %u00a0a cookie cutter or something and trace, if you want perfect uniform hearts.%u00a0
Decide on a color pattern (I did red, pink, white, brown, repeat) or random is nice too.
Start sewing the hearts. (I used a scrap to get started..and use the scrap piece for tacking to the ceiling). You can either sew hearts close together or leave an inch or two in between each. One trick I have learned when sewing strands of paper is to give a little tension to the strand as you are sewing%u2026it helps keep the machine from jamming up.
You are done when all the hearts are sewn%u2026 And hang them up or, if you want to save them for a surprise for Valentines day, wrap strand around a piece of cardboard. %u00a0Leave up for a day, for a week, or like us, all year long.
Hearts everywhere%u2026so simple, so pretty, so much love!
-C
Made from necessity, a seat near the door to sit and remove shoes, %u00a0store winter stuff and doesn’t look like I threw a bunch of milk crates together..I threw them together and added %u00a0a nice blanket, I’m classy like that. I do love a good milk crate%u2026there has always been something so satisfying to me about a free plastic receptacle that has a world of uses. These three crates and some scrap wood %u00a0have changed my entire living situation. The entryway of our 200 sq ft loft is now super functional, looks fantastic, and makes me happy. .All from a the scrape pile. It’s not what you think%u2026we have a barn that is pretty much dedicated to scrap wood and some other building material that has come from buildings we have worked on. This picture does not do our scrap wood(and junk) pile any justice. It is pretty crazy, and drives me nuts. I don’t know how many times I have threatened a 30 yard dumpster, but you know what? When Nick or I are in need of some wood, we always find ourselves rummaging through the pile and can almost always find a piece of what we are looking for. The pile somehow always redeems itself, %u00a0 for that reason it still lives on(for now). Being %u00a0that you as a %u00a0sane person, you probably don’t have a barn full of scrap wood(and junk), so what you will need for this project is..
Materials
Two 39.5 X13 inches pieces %u00a0of 3/4 inch ply wood(top and bottom)
Two pieces %u00a0 13X13 of 3/4 inch plywood(sides)
Four 10 inch 2×4 (Legs)
about twenty-five 2 inch finishing screws
3 milk crates(you can do 2 or 4%u2026just have to measure out for wood)
Tools
Drill
%u00a0circular saw
measuring tape
t square or a long straight edge.
pencil
Note: If you are not comfortable buying a full sheet of ply wood and cutting it down or you don’t own necessary tools, go to Home Depot or Lowes and have them cut the pieces to size for you.. Also, I have never really gone through a project step by step so if you are making %u00a0this and somethings seems off or you have any questions, totally email or comment to me%u2026 but I will try my best to make each step clear%u2026..
Three milk crates..What I found was that there are some milk crates that are not the same size so make sure that you have three that are the same. These crates are 13x13x11.
Measure%u00a0and cut ply wood. The %u00a0top and a bottom %u00a0are the same measurements%u2026Here comes some math%u2026. three milk crates that are 13 inches long = 39 inches. One crate deep is 13 inches. . Cut two pieces %u00a039.5 inches by 13 inches. (The extra 1/2 inch is so the crates can move in and out easier)
Now measure and cut sides. Two pieces at 13×13.The crates are 11 inches high, but you need to add the extra 1.5 inches %u00a0because of the thickness of the plywood. If your milk crates are a different height, %u00a0use that measurement plus 1.5 inches.
If you haven’t heard this saying before, it will change your life%u2026Measure TWICE!! cut once. Dont get overly cocky, cause even the seasoned wood worker screws up measurements.. I screw up sometimes so the saying is not lost on me.
%u00a0 %u00a0%u00a0
Once you have all four pieces cut, its time to assemble. Having an extra hand will help a lot, but you can do this on your own.
Screw the side pieces into the top and bottom. We stood the top and bottom vertically and place and lined up the side. Now sink four screws into both sides to secure to the other pieces. %u00a0When sinking the screws, make sure you are drilling straight down so your drew doesn’t come out of the side of the wood. If that happens, just remove and start again, no biggy. Once you have done one size, flip and screw in the other.
I caught that piece of wood he is throwing at me. Ok, not really, but I could have. Here Nick is cutting %u00a0four 10 inch pieces of 2×4 for the legs. We decided on 10 inch legs because we wanted a bench that was a %u00a0little taller than the average chair, which is about 18 inches floor to seat. If you wanted to make the legs shorter or taller, by all means, I just wouldn’t go to much taller or you might not be able to sit conformably on it.
After you have all your legs cut, mark out where you want to place them. We did a one%u00a0inch recessed from the front and the side%u2026but do whatever looks best to you. Mark where the legs go and place two screws into inch leg, screwing from the inside of the bench.%u00a0And thats%u00a0it%u2026 ..now you have the frame. Take a minute here to admire your handy wood working skills. If you are not into the raw wood look, this would be the time to paint it.
With the crates inserted%u2026Doesn’t it look magnificent! I choose these 3 crates for the colors and the patterns..I wish I has a grey crate that fit. That would have looked awesome.
Test one%u2026%u2026%u2026.the crate slides out perfectly and my mittens fit!!
Now for the big%u00a0test%u2026%u2026….and it works!! My butt safely seated. My feet touch the ground and I can bend over and tie my shows%u2026 can’t get any better%u2026
But it did. The addition of a folded blanket as a cushion. I was going to make a cushion but found a really pretty blanket at the second-hand store that was perfect. It was 2 bucks and is actually way more practical than a cushion. I can wash this blanket, a hand-made cushion, I probably wouldn’t want to mess with that, plus a piece of foam alone cost like 25 bucks. The blanket was meant to be.
A great success.. This bench is really great, I definitely recommend it to anyone and everyone.. It’s the perfect place to sit and remove wet shoes, store all of our hats, mittens and canvas shopping bags and it just looks cool. It was really simple to make, cheap, and took very little time. You could even make two, one for you and one for a friend(think holiday gift)
A perfect weekend project!! DO IT!!!! and if %u00a0you make one, please, send a pic on over, I would love to see it!
Do you realize that Christmas is just a handful and a half of days away? I knew it, but like didn’t really register it. And now I am like, fa la la la fuck! We have been so busy and distracted that I haven’t really focused to much on the holiday, but at least we decorate the tree. And if I am remembering correctly, there were a few years, long ago, that the mr and I wouldn’t even start celebrating or get our tree until a few days before Christmas so if I am judging us on my past selves, well we are golden. And now we let the celebrating begin!
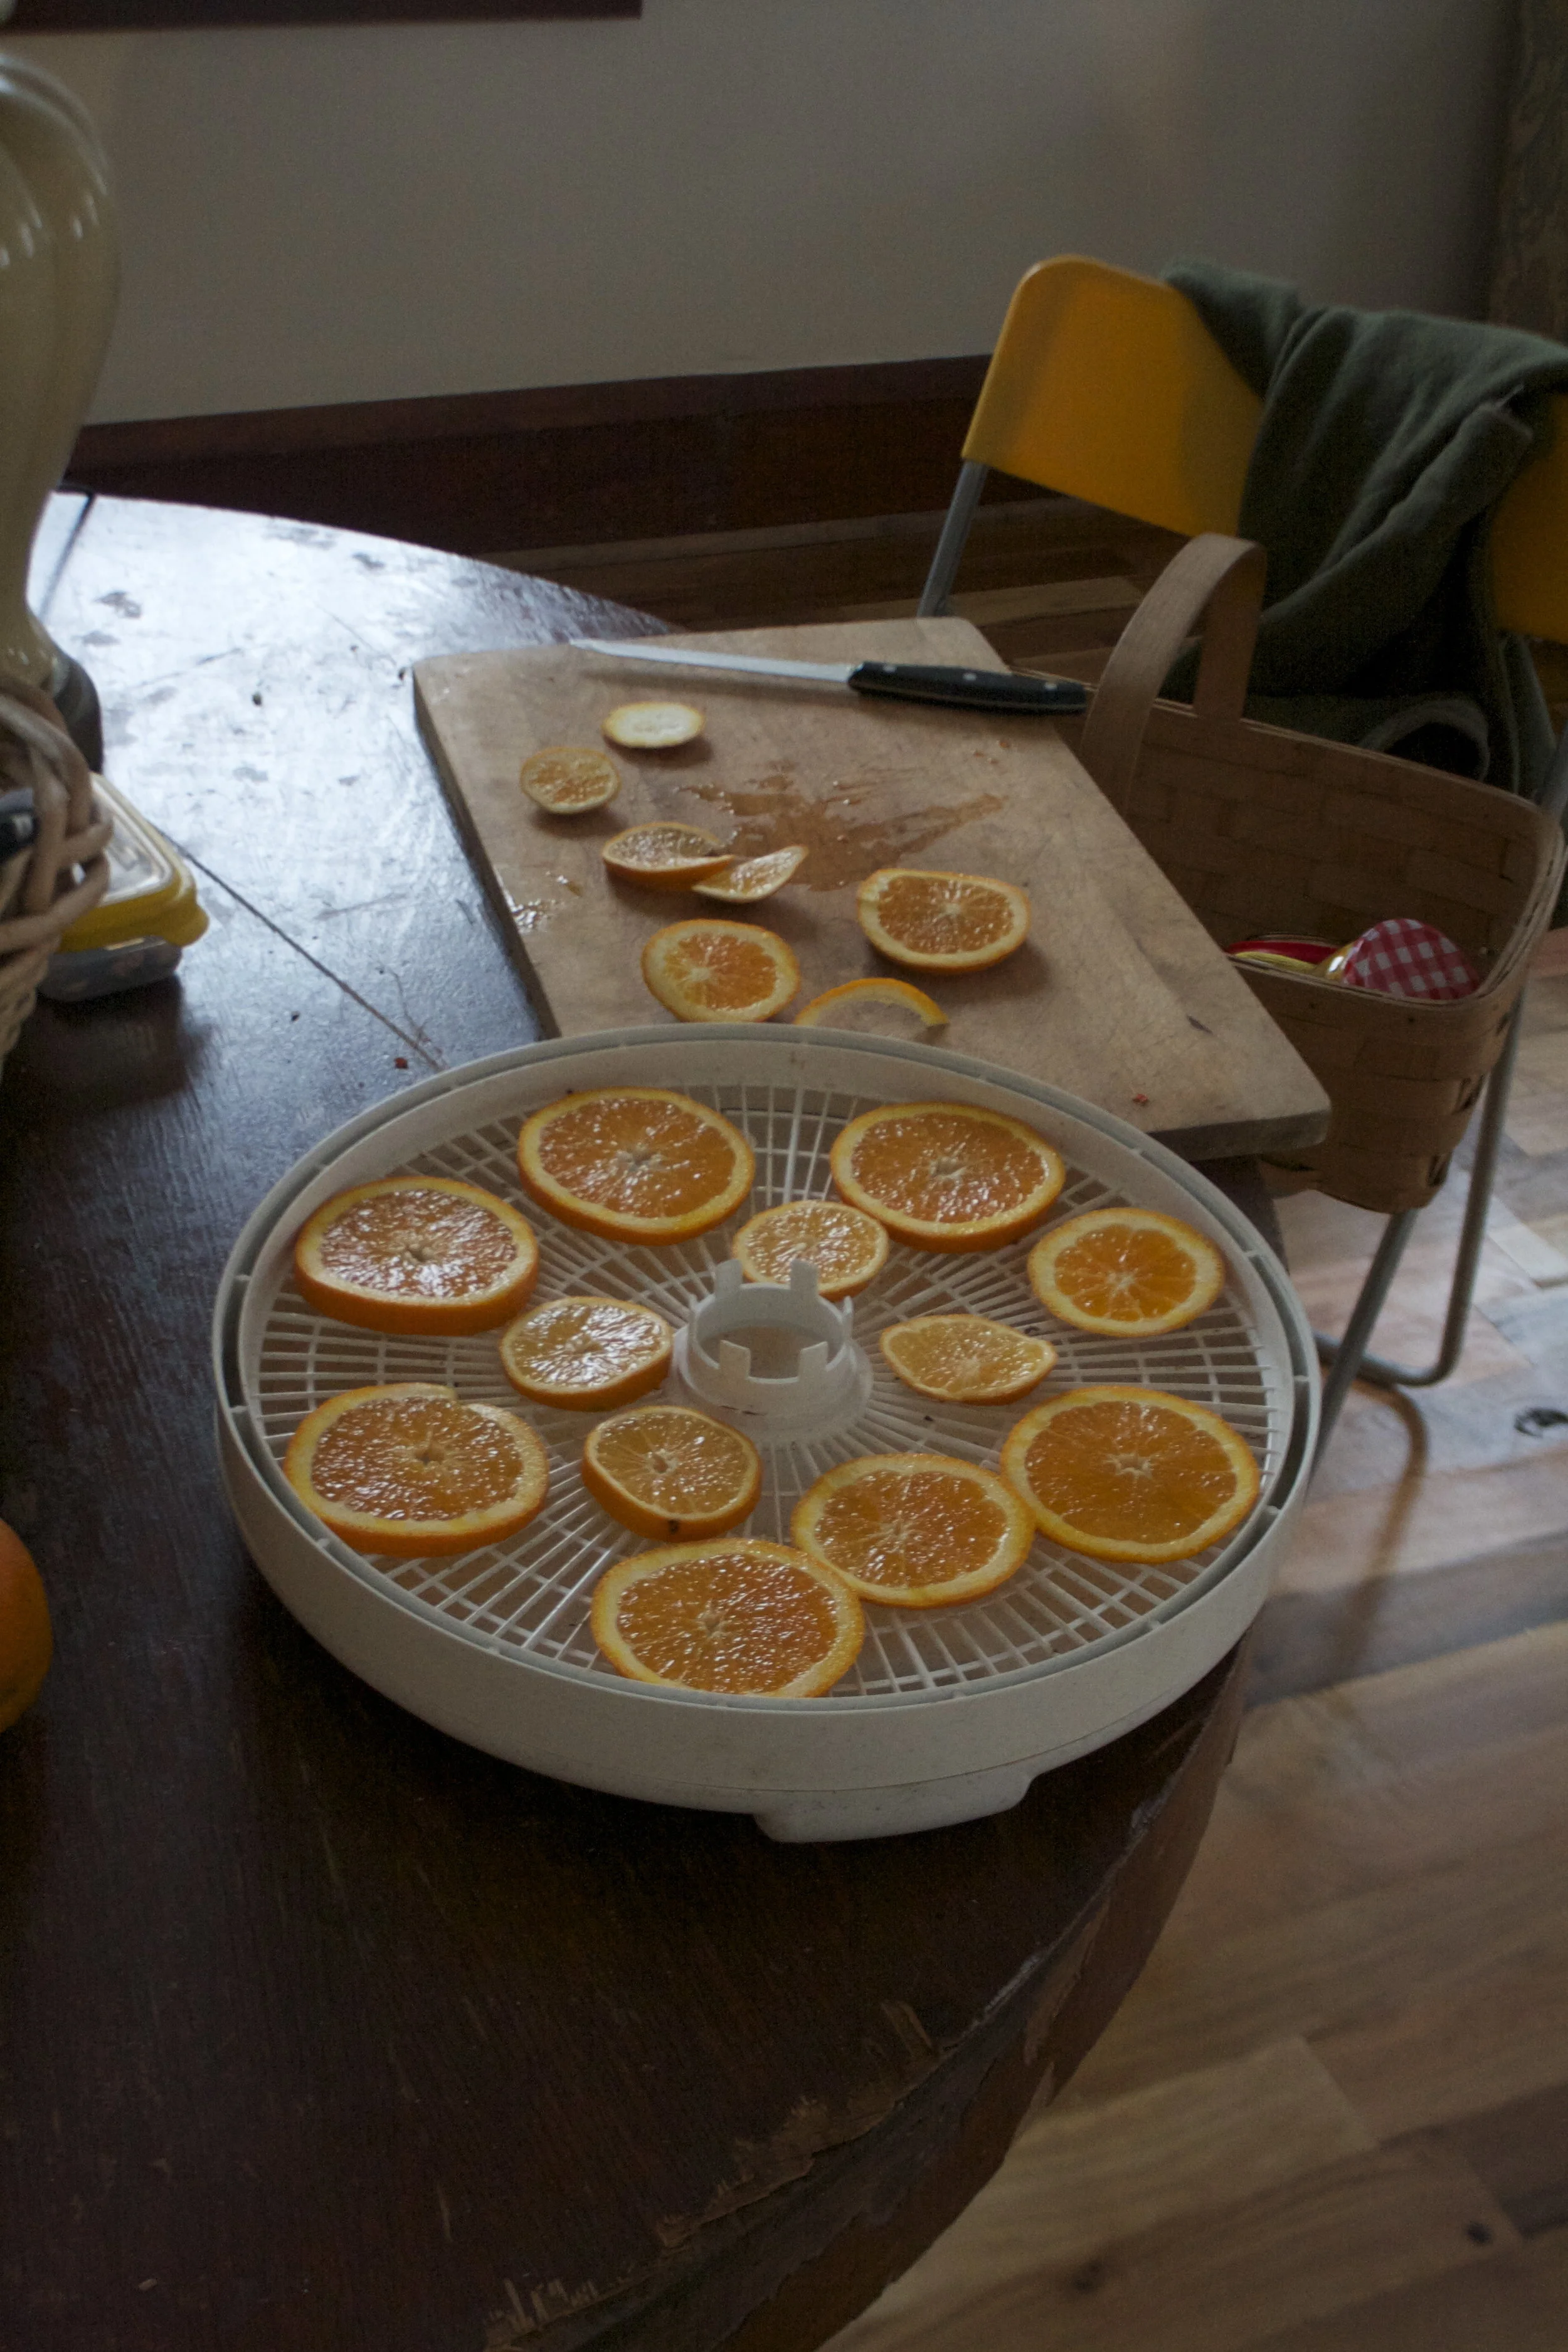
One of our Christmas traditions is to string popcorn while watching elf for the tree. This is a big deal night because I won’t let myself watch it until that night, but after that, I can watch it as many times that I want. (once a day) We got our tree like two weeks ago, and finally late last week we did the popcorn, watched some elf, and a few days after that we decorated, kinda.%u00a0 It was much lacking in ornaments. We had the lights, the popcorn garland, the paper chain (we made it a few years back), and the carved wooden carrots, but the bulbs we usually stick on it, I just wasn’t feeling. The tree was looking pretty good but was still lacking something. That’s when I went to my fruit bowl and grabbed an orange, a clementine and the dehydrator out of the basement over at the loft and went to work. I turned on the Christmas music (A very special Christmas, the red cover) sliced the citrus, stuck it in the dehydrator, and then, well, then I waited a good few hours. During those hours, the music was going, the house smelled up like citrus and lovely, and I felt that slight holiday tingle.
I think these orange slices are going to be a new holiday tree decorating tradition. I will probably tweak it next year ans spend the 6 hours waiting for the fruit to dry baking cookies and not pouring concrete, but maybe not.
And if you are thinking its too late to make any more holiday stuff, well you are wrong. And honestly, I might just make a sting of these slices to hang up all year long.
To make the orange slice ornaments..
All you need is..
oranges or whatever citrus you want to use
a sharp knife
needle and thread or ornament hangers
a dehydrator or a baking sheet.
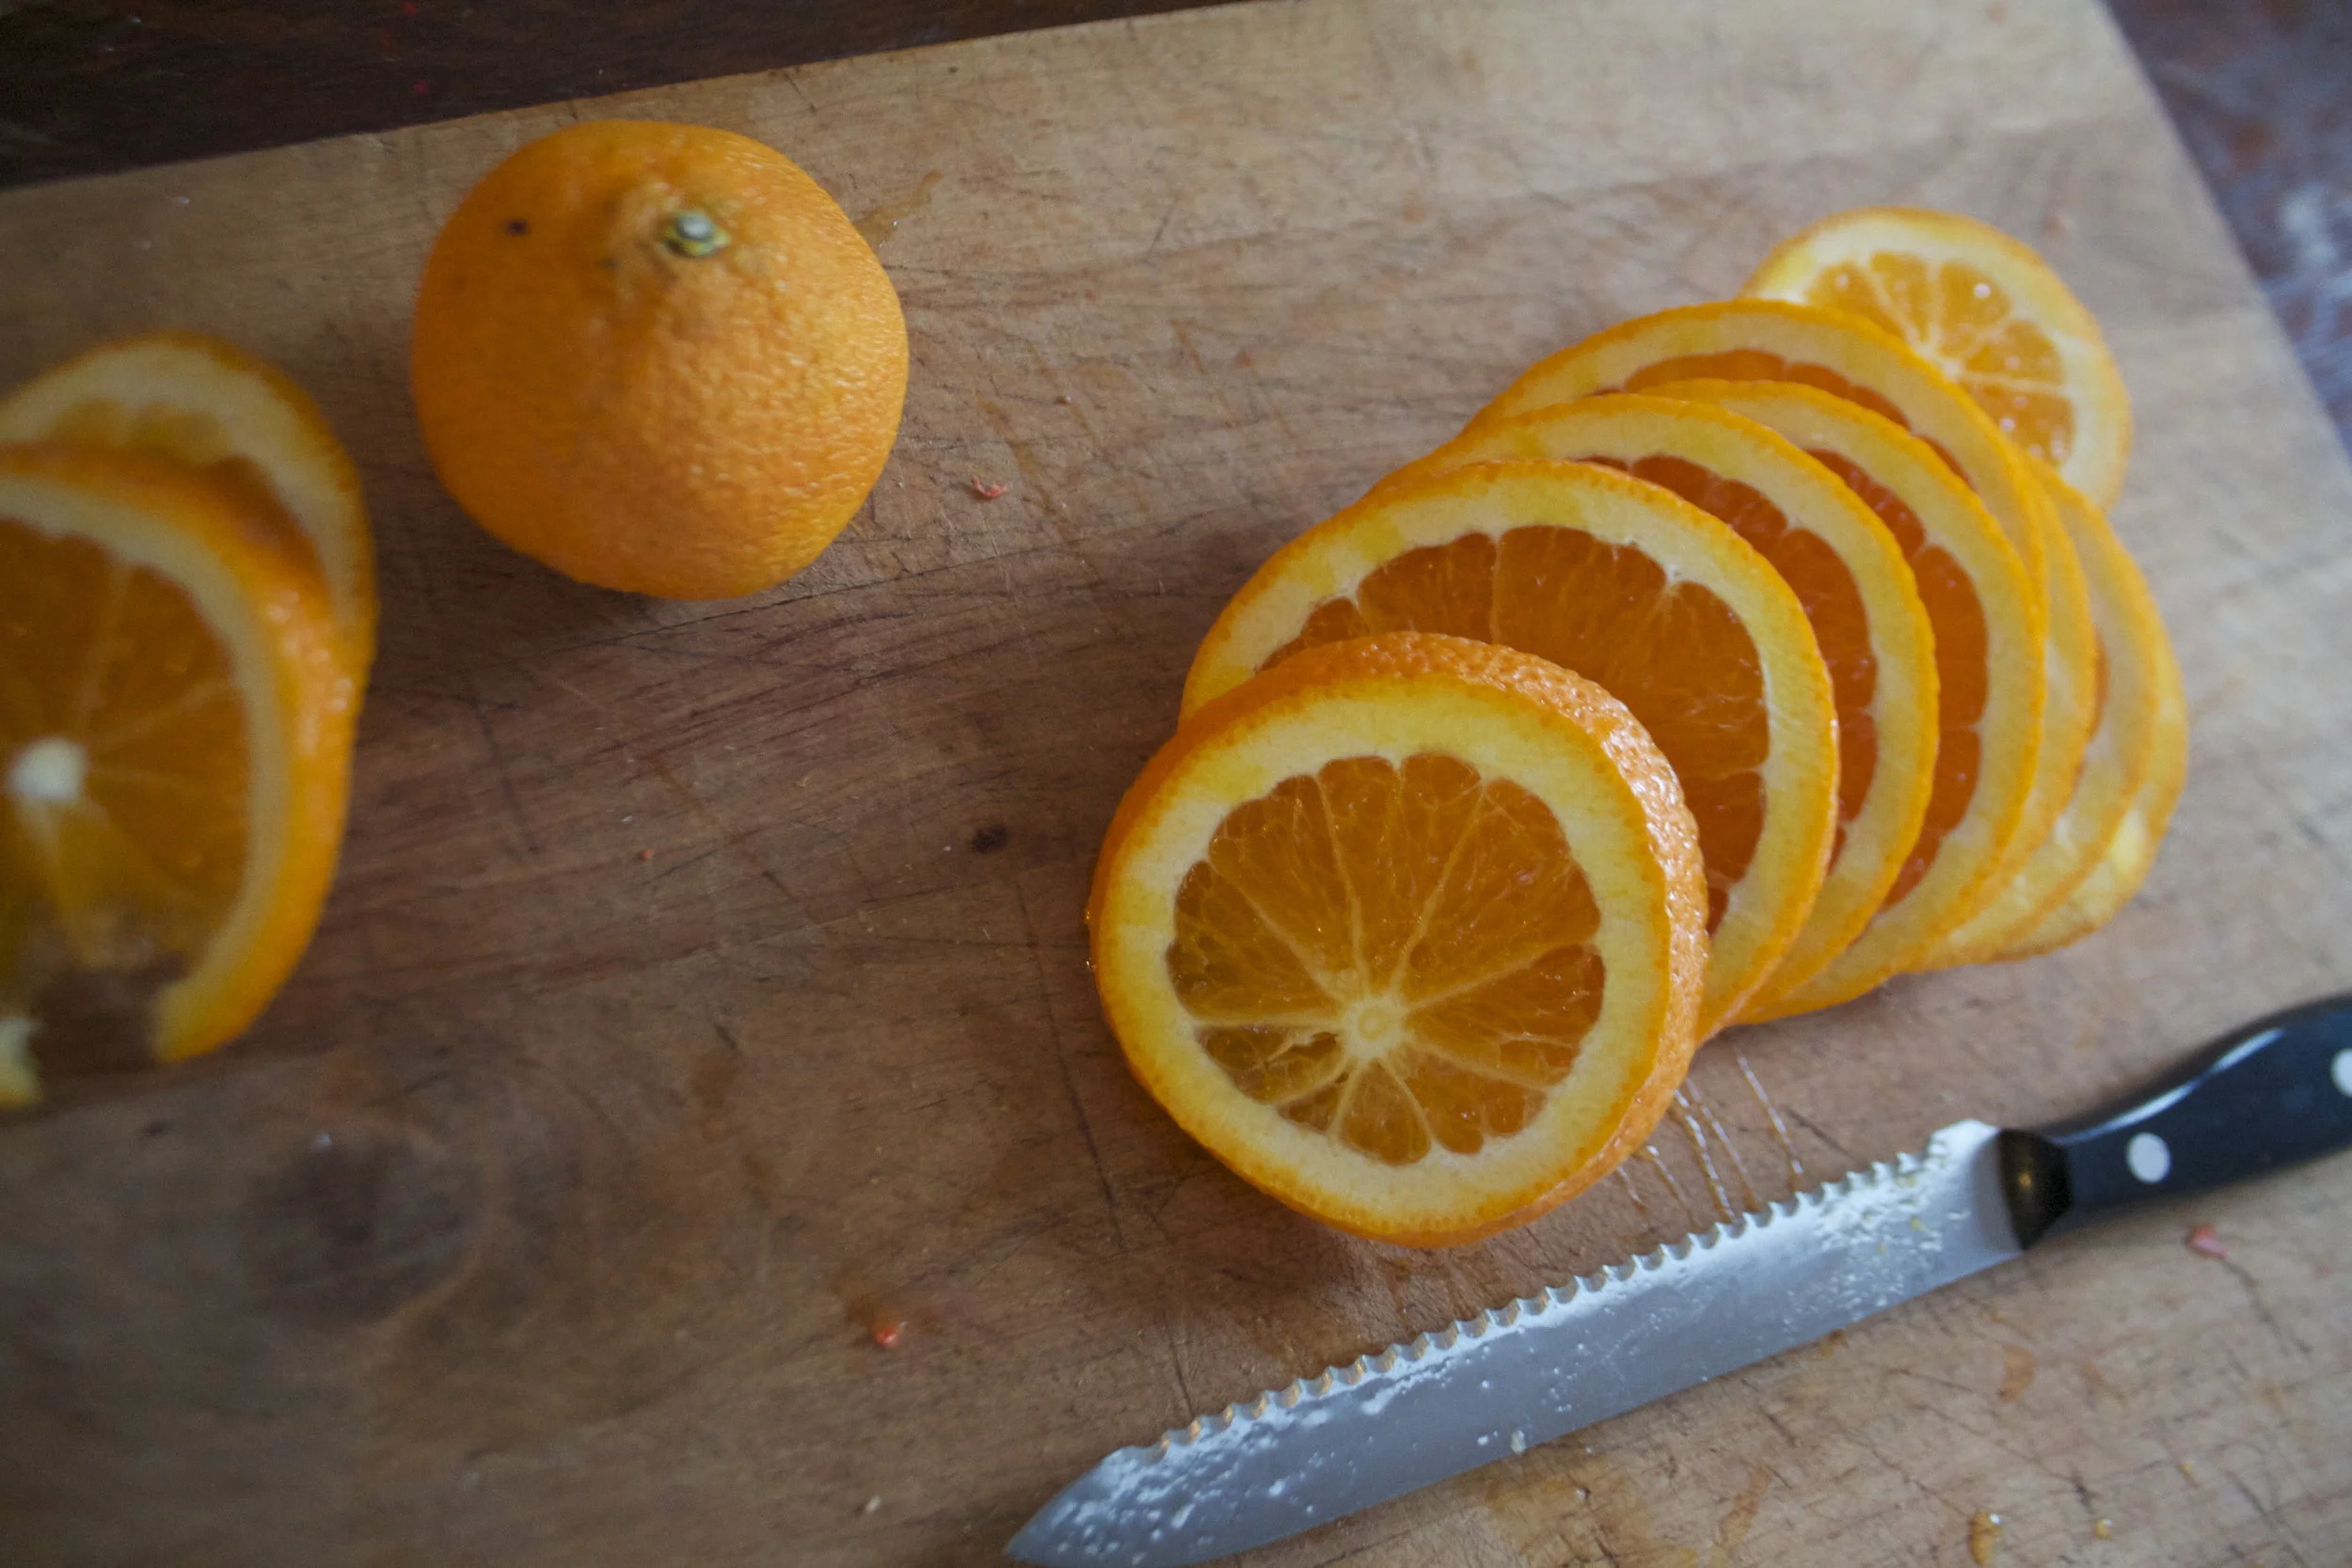
The dirty work. Slice the orange about a 1/4 inch thick. Try to make all the slices the same thickness.
I am using my dehydrator so the slices go single layer onto a rack. If you are using the oven, line a baking sheet with parchment and single layer the slices. Pop those suckers into the oven at the lowest possible setting you got. Either way you do it, the slices are going to take anywhere between 5-8 hours to completely dehydrate. It all depends on how juicy your oranges are. Just keep an eye on them after the first few hours. You want them to dehydrate, not burn into crisp.
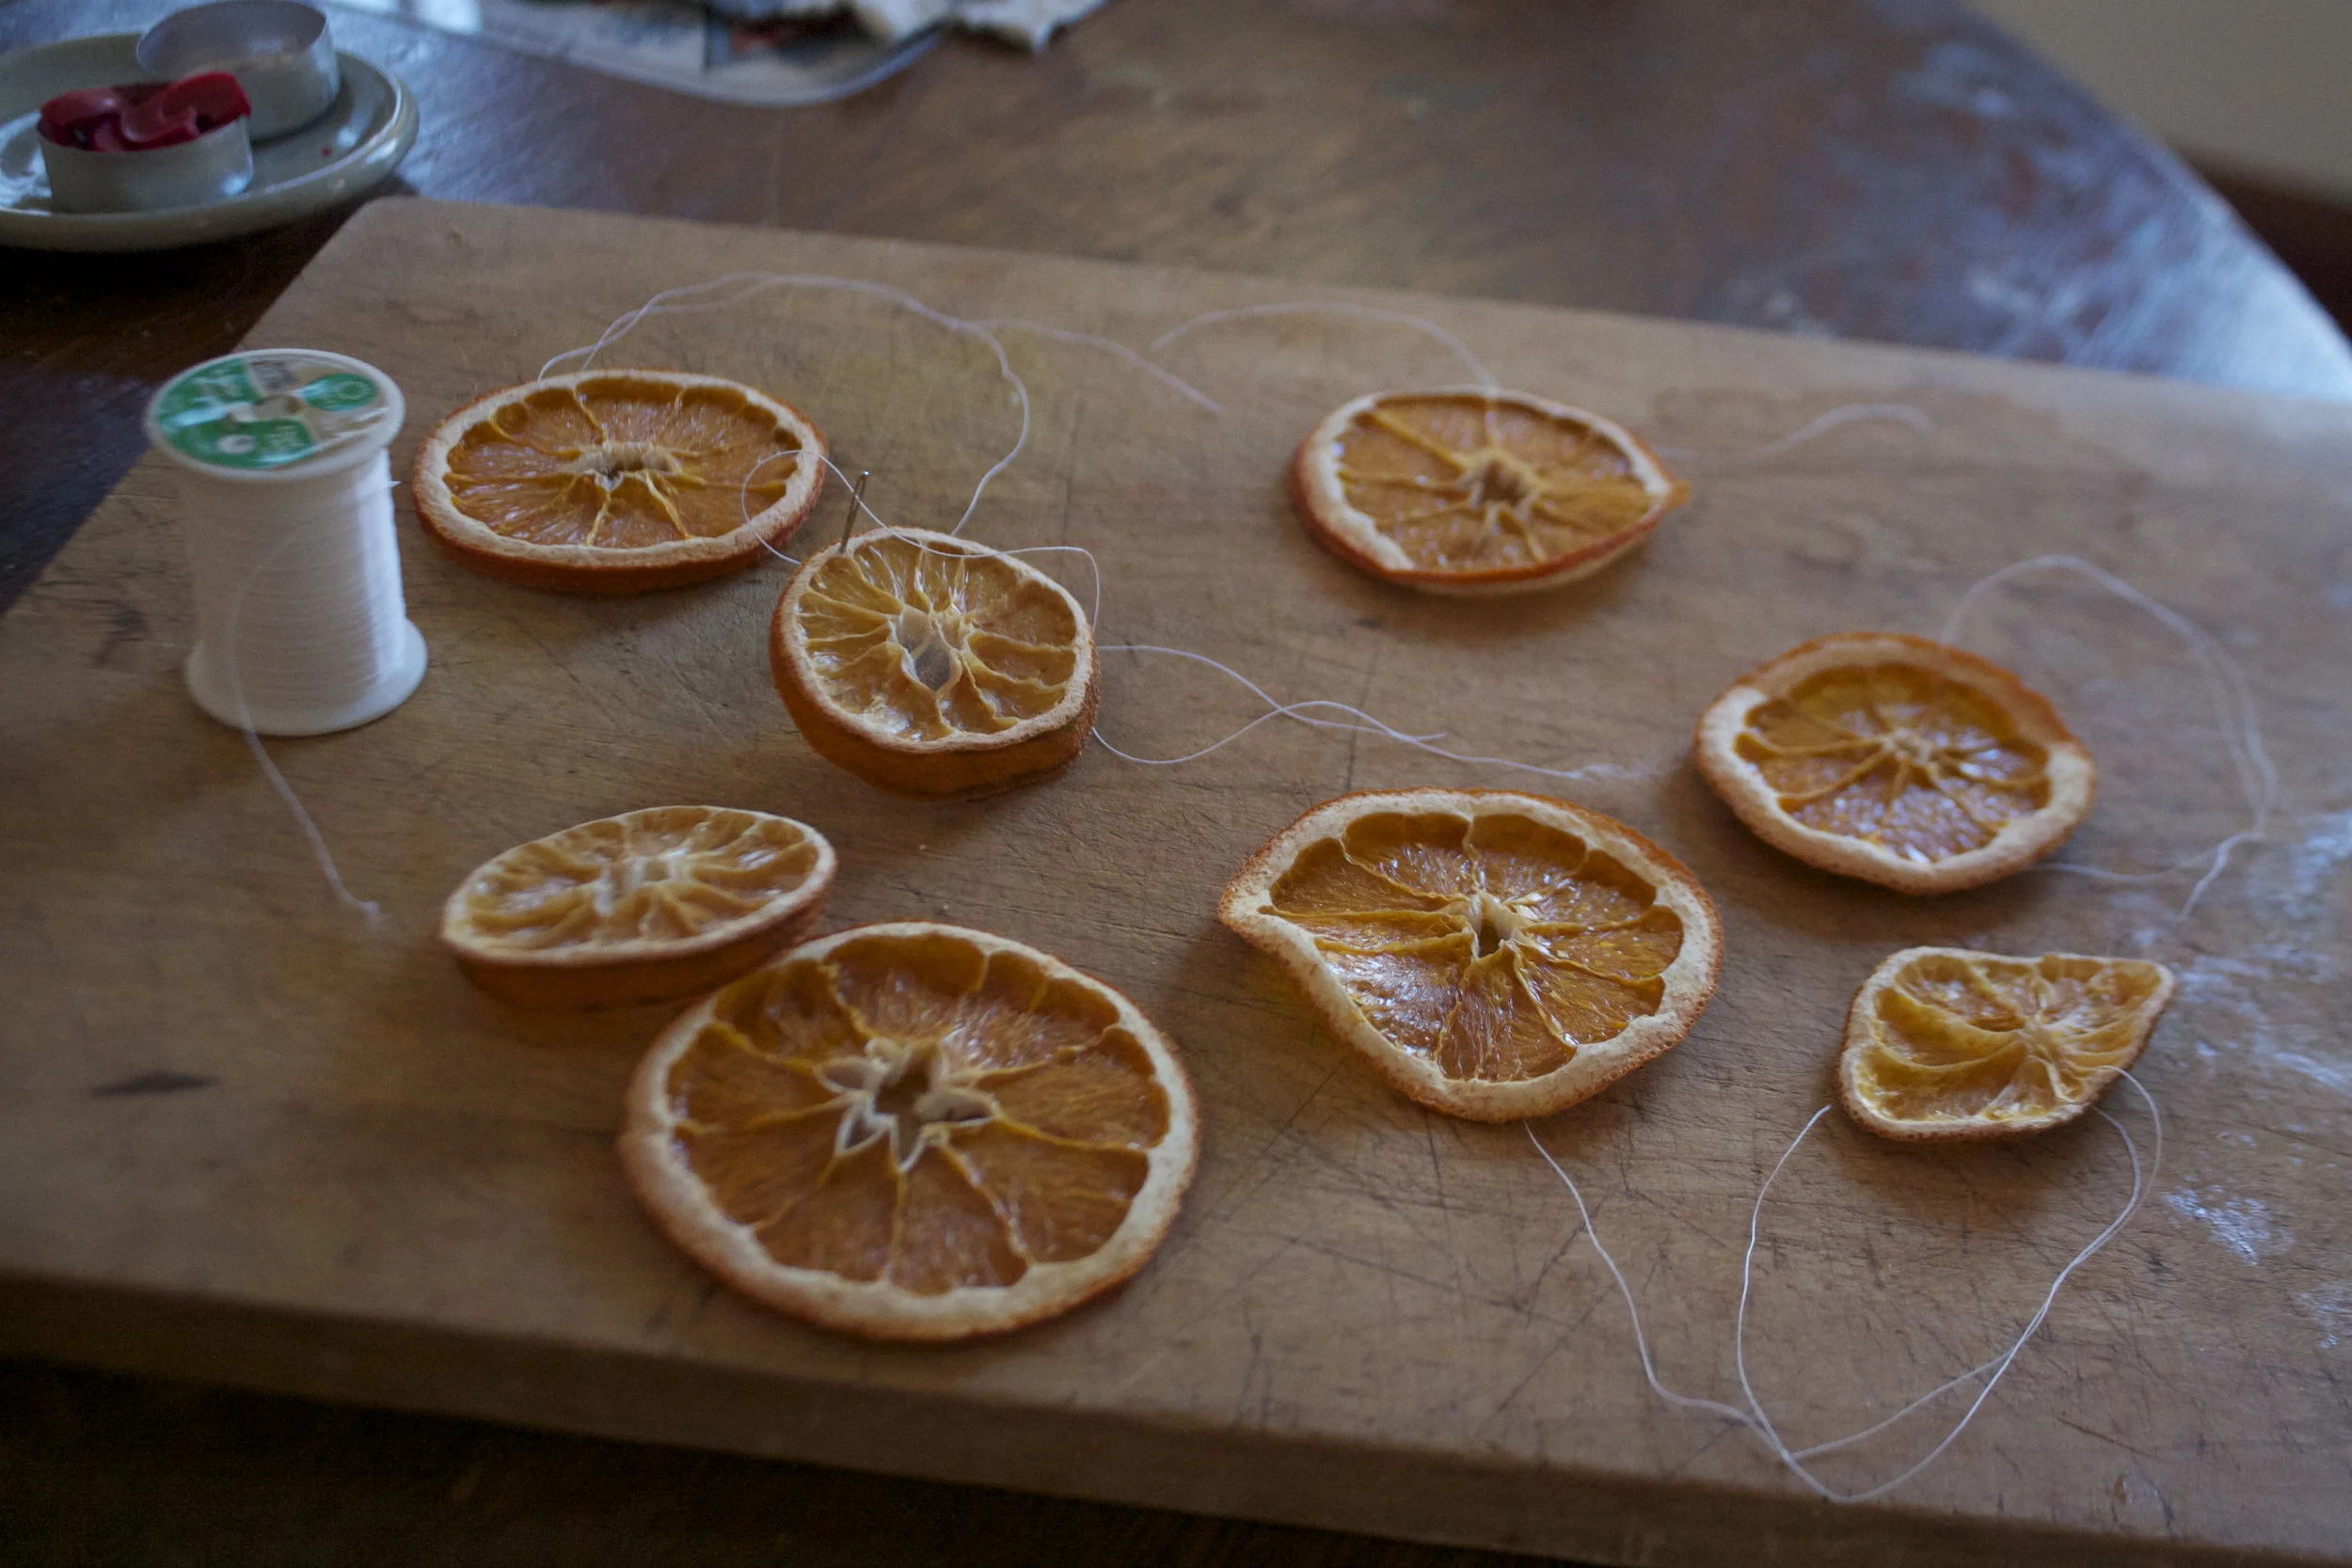
They are done when they look like so, all dried and crispy and delicate. They should feel dry to the touch.
%u00a0Once the slices have cooled off a bit, they are ready to be handled and hung. I used thread to hang my orange slices, but feel free to use whatever you want.(I was going to use ornament hangers but didn’t have any and I was not about to go buy some)
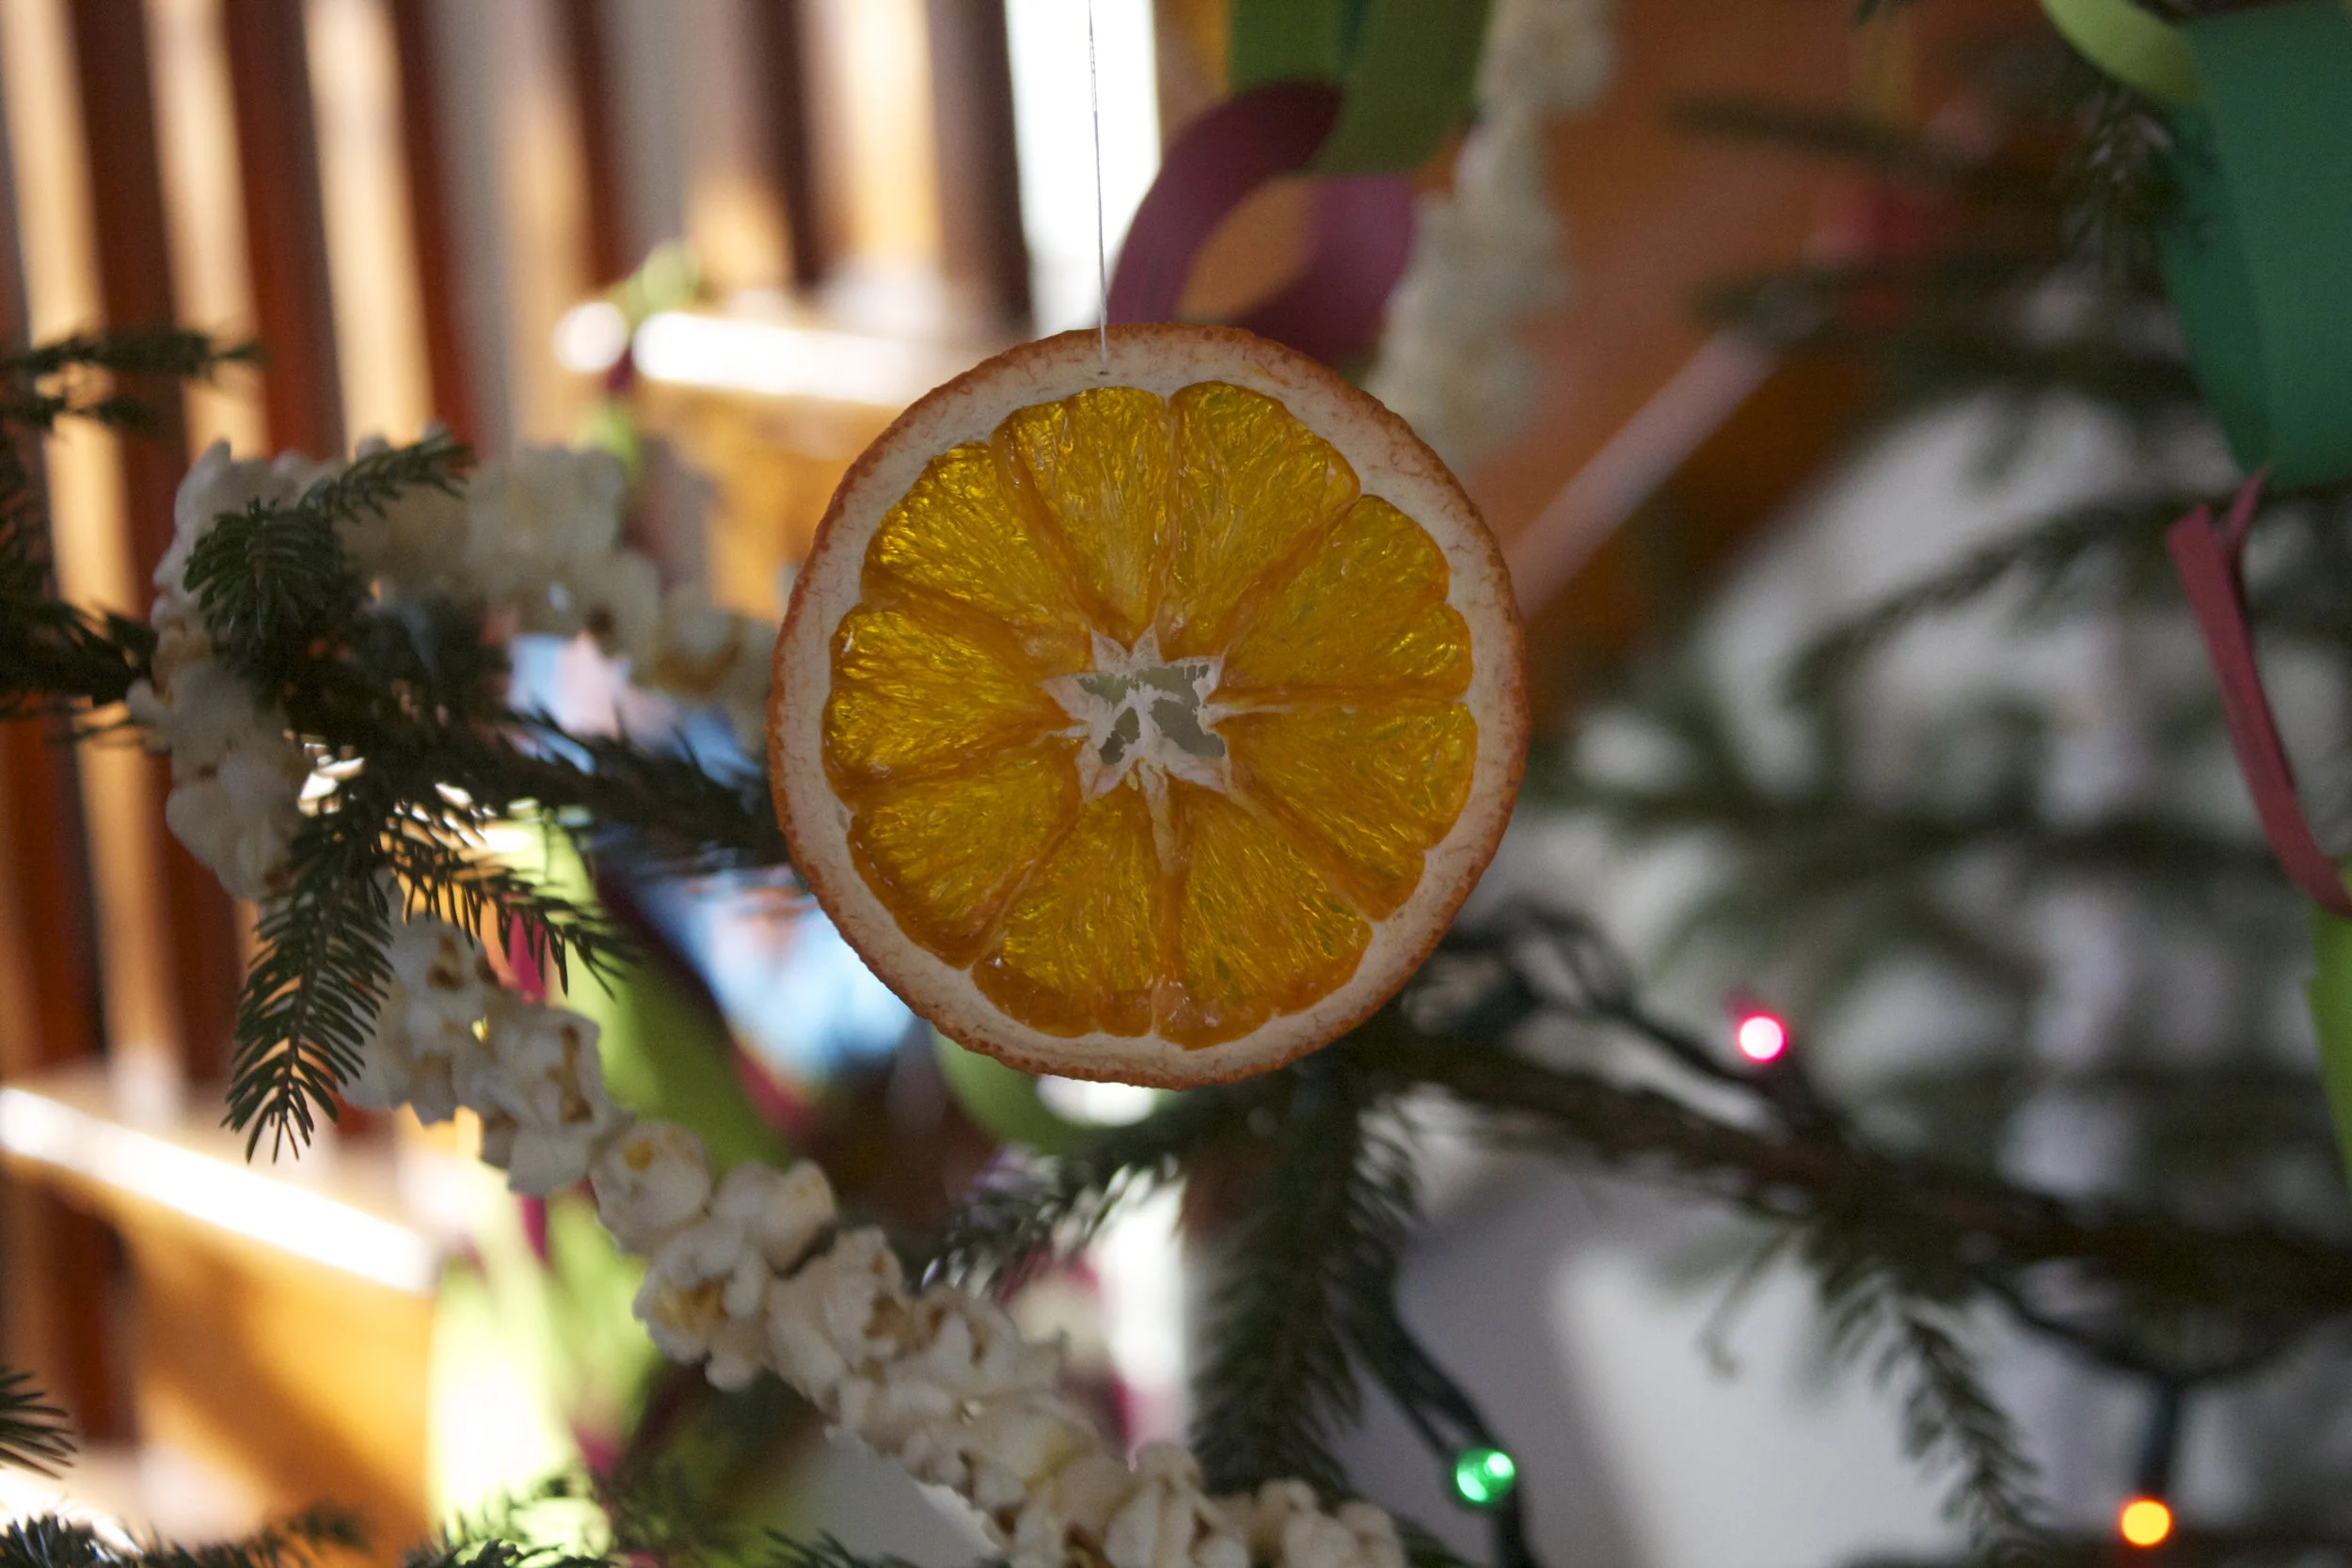
Slices of orange so pretty. They look so good with the wooden carrots, the popcorn garland, and the glittery acorns on the tree.
I definitely will be making more.
Enjoy!
-C
This past Christmas, my (kinda)mother- in-law gave me and the mr these really cool honey bee pins in our stockings. Nothing fancy, just a little pin, but I think it was one of the best gifts that I had gotten all year. The pin lives on my winter jacket.
And now I am into pins.
So a couple of the little’s came over yesterday after school for crafts and dinner and I figured a bit of pin making would be a perfect little project for us to do. And being that it’s the big V day coming up,%u00a0 making these pins heart shaped was more then overly appropriate. (What’s Valentines day without cute little hearts?) Well pin making we did, or I did, not so much for them. They made a few, but in the end, they were more excited to beat the crap out of the mr and to eat carrot shavings with peanut butter and nutella.. Totally ok with me because really, I was the one that wanted a little craft time and the mr did need to get his butt kicked.
Sure I made these pins pretty much for myself, but imagine the possibilities. Make a bunch to give out to your friends, family, neighbors, or even the mail man!? Or if you have yourself a little, how great would these pins be make and to give to all their little classmates. I know that if received one of these pins in my homemade shoe box mail box meant to collect all of my candy studded, drugstore bought valentines. I would have been elated and rocked that pin all year long on my super cool backpack.(grade schooler, they have all the fun) Right after I finished painting and gluing all my pins, Miley then decided that they were freaking awesome and wanted to make a bunch more…. Well little little, to late, time to go home. But I did give her a bunch to bring back with her. She will just have to bug her mom to make some more.
And sure, I mention valentines day when talking about these pins, but really, hearts are for everyday, and are still really great long after V day is over.
Handmade heart pins = love!
Stuff you need for some awesome pins.
Polymer clay (I used white but any color will do)
red and white paint (preferably enamel or a high gloss paint) and a paint brush
bar pin backs (I bought these at Michael ‘s craft store. 64 for like 3 bucks!)
industrial strength glue (E600 is great and is used and recommended by many a crafters)
rolling pin or wooden dowel
small heart shaped cutter
sharpie pen to write on pins (optional)
Glitter( also optional)
A couple notes. You could use red clay but I have found that when I buy the red dyed clay, its always harder to work with and plus, it stainsyour hands. Also, I like to seal the clay and enamel paint does the trick. If you don’t want to paint it, just pain on a coat of clear sealer.
Start buy kneading a chunk of clay a little bit to get it to a workable state, then roll into a ball and roll out flat. I rolled mine out about 1/3 of an inch, but I also knew I wanted to squish it out a little flatter once I cut the shapes out.
Cut out your hearts, or if you want, free form them.%u00a0 What I did was used my tiny heart cookie cutter to cut the initial shape, but then used my thumb and squished them all out a bit bigger.
Note here.. Hears are awesome and amazing, but other shapes….Go for it. You probably have a shit tone of those pin backs.
And just before you bake them, make sure that the pins you are using will fit behind the hearts. (if you notice any visible pin, just smoosh the heart out a little more).
Into the oven,, out of the oven. Read the package to make sure, but the stuff I used only needed to be baked for 15 minutes at 275
Once out of the oven, let completely cool and harden.
Once the hearts are cooled, go ahead and paint them. Use straight up one color, or mix and make a few different shades. (red, white and pink are nice together)
You can add some glitter to the wet paint to add a little bling….
Or add designs or what have you. Do whatever feels right.
Now stick a pin thingy on the back of each heart with a blob of glue. (If you use the E600, make sure to use it near a window or somewhere ventilated.. it really stinks for a few minutes)
Let the glue dry (this glue was completely dry within an hour, but follow glue package instructions)
And if you want, grab the sharpie, make sure the paint is really dry (at least an hour) and write a little something on the hearts.
And now the hard part.. which one goes to who and which one (or 4) do you keep for yourself. (you can always make more!)
Have fun!
-C
I think of myself as a problem solver. I see a problem and I look for a solution. And not to sound like a broken record, but the problem that I am having now is that it is winter here in Vermont, but you wouldn’t know it cause it’s 50 degrees and there is no f-ing snow. Yes, this is a problem for me. I don’t think its just me, everything around here is acting weird.%u00a0 My plants are not going into winter mode and are starting to droop and be sad. My fall allergies are coming back, plants are starting to bud again, Washer is shedding like crazy, and my snowshoes have not left the barn. It’s just weird and it makes me sad.Vermont is suppose to be cold ans snowy right now. Sure, there are people that might like this wonky weather, think they are getting a little extra treat, but not me. NOT ME!%u00a0 So this is the problem. And the solution that I have come up with, short of moving, is to cover all the windows with wax paper snowflakes.
See. Problem solver.
We have been spending a good amount of time over at the new house working away so this is where I decided to plaster my flakes. In between cleaning up pieces of broken wall and moving 500 lb bags of trash out of the house, I sat down at the little table, plugged in the Christmas lights, turned on some Christmas music, and totally zoned out. Sipping coffee and sniping away..it felt so right. And the results were quite good if I do say so myself. A window full of flakes that made me smile. Maybe the snow gods will see my effort and grace us with a huge ass storm. Wouldn’t that be so lovely!
All you need to make some flakes is
wax paper (mine is slightly tan because it’s not bleached)
scissors
tape
Optional things
glitter/glue
paint/brush
Christmas music
A hot beverage such as coffee or cocoa
Note. Why wax, well wax paper is really thin and makes cutting through all the folds easy. It also lets light shine through rather nicely and best part, the wax keeps the paper from getting soggy and gross from window condensation. But if you want, use paper. I don’t mind.
This is how learned to make a snowflake… Start with a square piece of wax paper (any size you like) and fold it in half on the diagonal. Then fold that in half at the point.%u00a0 And fold old again at the point. One more time after that. (from start to finish, 4 folds) You end up with a little dart like triangle with a little extra point at the top. Cut that extra bit off.
And snip away.. It can be thought-out or random (I like random snips)%u00a0 Just make sure that you don’t cut off all the folded paper parts cause that is what is holding it together.
Now for the most exciting part. Open (very gently) and see your snowflake creation.
Note. This is important to remember.. No snowflake is the same, and no snowflake is ugly.
Now tape the flake to where ever it should land (the window)
Stand back and enjoy all of the snow you can handle. I have gotten to one window, just 10 more to go!
This one is my favorite.
Happy weekend full of snow!
-C
I love me a good tree, pretty much any tree, real or fake.%u00a0 And come December, my house if full of different little trees, of all sizes, shapes and colors. It’s my holiday thing because really, there is nothing better then a tree.
And yeah, I was feeling crafty, and maybe a little bit sad that there is no snow around here. And we still hadn’t gotten our real tree yet (but we just got it!) so I wanted to make some more little trees to make me feel better, and this time I wanted them to light up. I was also thinking that it might be nice to bring a few little tree decorations over to the new house so I have happy little trees over there while we are working. So yeah, I needed some more little trees. And I figure you do too, that’s why I am sharing this.
This is a great project to do with a few littles (they make the trees, you use the hot glue and sharp blade) or make while baking bread and watching a festive movie.%u00a0 You could even make and share with a loved one as a sweet little gift. And best part…it doesn’t need to be packed away after the holidays because trees are not just for Christmas. These are pretty little winter trees, for everyone who is awesome and likes a tree to enjoy all winter long!(even if winter hasn’t come yet)
The stuff you will need
A piece of cardboard about 12×16 (I used an old pizza box I found in the recycling)
assorted paper of size an color
white tissue paper (optional)
a strand of 20 lights (colored or white)
a ruler
scissors
hot glue gun
glue stick
tape
pencil
xacto knife
Note. If you have an empty shallow box that is a good size for you, just use that. And hot glue works best, bt can be subed out with any glue, or tape for that matter (if you don’t mind seeing tape on your trees)
Start with making the cardboard box base. Measure each corner in 1 inch and cut our the corner. Repeat with all corners. Once they are allcut, fold each side at the cuts to make the sides.
Tape the corners together and now you got yourself a sallow box. (now you can make boxes for everything !!!) Set box aside
Now to make the trees. Take a piece of paper and, depending if it is already a square or not, but it into a square. (does not have to be perfect, just eyeball it)
Got your square paper, now take an edge and fold it over about 1/2 inch. And then taking you scissors and snip of the corner edge at an angle (again, not going for perfections here)
The poin is the tip that was cut, now fold the two sides together.
So you can stop here ans glue or if you want light holes…..
Unfold the paper and with a pencil, mark off where you wnt the holes (random is good). Take the xacto blade and cut little x’x over each hole.
Then push through each x with the eraser end of the pencil
Now glue the cone together using the hot glue gun.
You will have a weird tail left on the bottom of the cone, so just trim that off and any extra that needs to come off to make it stand up straight.
Ta Da!! A paper cone tree. Now make a bunch of them, all different sizes and colors (or all the same size and color.. up to you) And not all of them need to have light holes in them either, a couple non light trees are good.
Once you have made all the cone trees, grab the box base and set up the trees how you want them to be on the base
Take the trees off and mark the spots with the pencil. Grab the xacto and cut X’s into the marks.
Take your lights and push the bulbs through (there will be a extra bulbs on the underside…. it makes the box glow.)
And tape down the trees back into place
So cute!
Note.. I stuck a couple extra lights through the box that have no trees. They will be covered in a minute with snow.. So you can do the same. (if you want)
Now you check it out!!! Love it right?%u00a0 And stop here if you like, or go one more step and add some fake snow.
Before you tape down the trees, take glue stick and glue random pieces of tissue paper all over the box, leaving the lights uncovered. (I covered over the extra lights I popped through to make it look like glowing snow)
Stick trees back on.. same way with the tape (You might need to fanagle the trees a little bit to get them to stay)%u00a0 and plug it in.
This makes me happy.
Now go get some paper and start making some trees.
Have fun!
-C
I am not a fancy person by any means, like super, no frills, no one would ever consider me fancy. EVER.%u00a0With that said, I am always and forever a cloth napkin lady. I have a drawer full of them, in all sizes and color. I use one with every meal %u00a0(I am a sloppy eater).And napkin use is not just about functionality, it is also about looking pretty.%u00a0 When I go for a clean napkin, I like to pick one that looks good with the meal that I am eating. I think a pretty clean napkin really makes any meal just a tiny bit better. Does that sound weird? I don%u2019t know but this is just a little look into how my mind works.
And recently I have set a few too many of my kitchen textiles on fire (towels, napkins, and potholders) so I am in need of a few new, nice looking napkins.%u00a0
And let’s get this straight. Cloth napkins are not about being fancy, they are about wiping you hands and face with something lovely, that doesn’t need to be tossed into the trash after use. Cloth napkins are also a great way to add a nice splash of color tot a table settings or a nice doth barrier between your lap and all the food that ends up landing on it. I have even been known to do a cloth napkin-tuck into the shirt- type situation if I am eating something particularly messy and have on decent, clean shirt (doesn’t happen too often).%u00a0Cloth napkins also double up as a rag when the inevitable spill happens at the table. See, not just for fancy people. Cloth napkins just make sense. And sure, if you are introducing them at the Thanksgiving table that happens to set a bunch of guests, or maybe making a few, wrapping them up with a ribbon and gifting them for Hanukah to Christmas%u2026that would totally be cool and not at all showy and over fancy. You just seem like a leveled headed person that uses and or gifts totally cool and useful things. And whatever if it makes you badass for making them yourself%u2026. cause you probably are badass anyway.%u00a0
So if you got the desire and a little bit of time (this project is great to do while watching a good holiday movie) you should make yourself (or someone else ) some cool ass cloth napkins.
What you will need, besides a sew machine
Cotton Fabric that you would like to wipe you face with.%u00a0I use around a 15-20 inch square piece per napkin but you can make it any size you want.. just as log as it has 90 degree conners So count how many napkins you ant to make and get hat touch in fabric.
scissors%u00a0
sewing pins
thread that looks good with your fabric
ruler or tape measurer
iron (optional)
Step 1.
Start by laying out you fabric flat, and if you want, run an iron over it to remove creases %u00a0(I would haven but my iron%u2026 can’t find it anywhere!)
When your ready, fold all the edges in 1 inch and crease with either an iron, or a flat edge (my ruler works great here)
Step 2.
Unfold last fold and the refold %u00a0each side 1/2 inch and crease.
. You now have 1/2 inch and a 1 inch crease on all sides of your fabric.
Step 2.
Now go back to the 1/2 inch crease and stick few pins in otto hold it in place.%u00a0
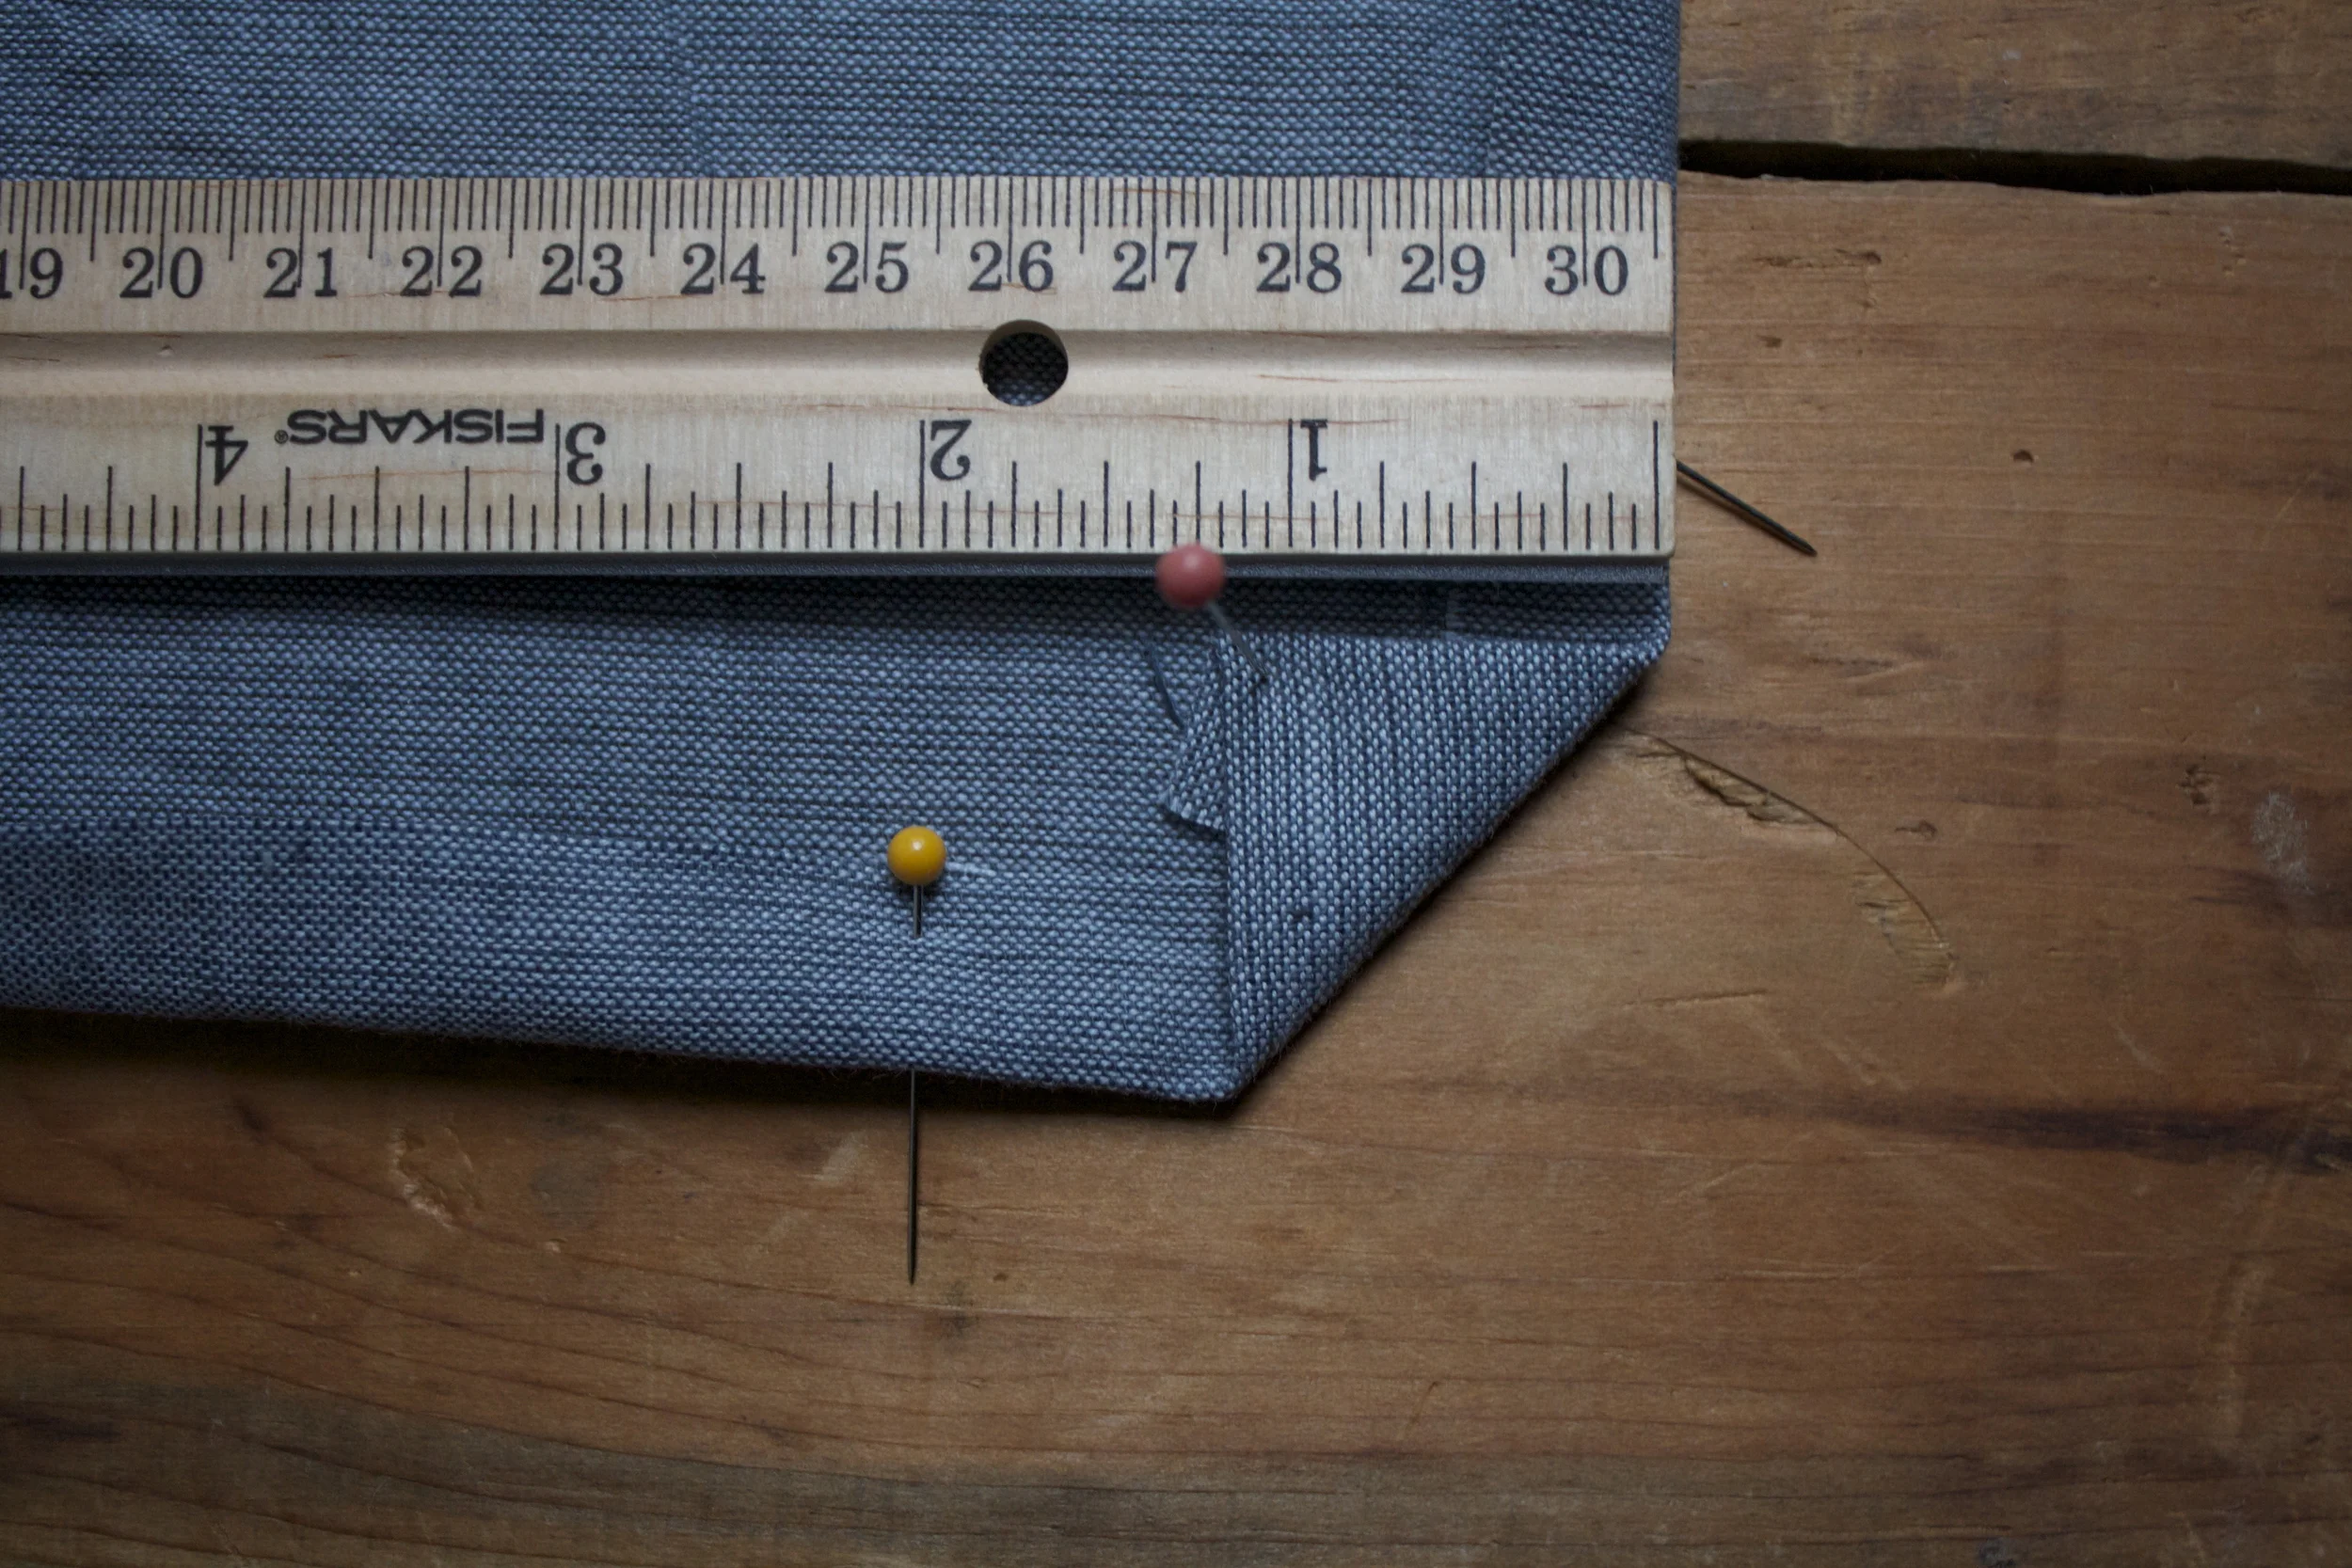
Start with any corner %u00a0and fold the corner over 1 inch and crease.%u00a0
Step 3.
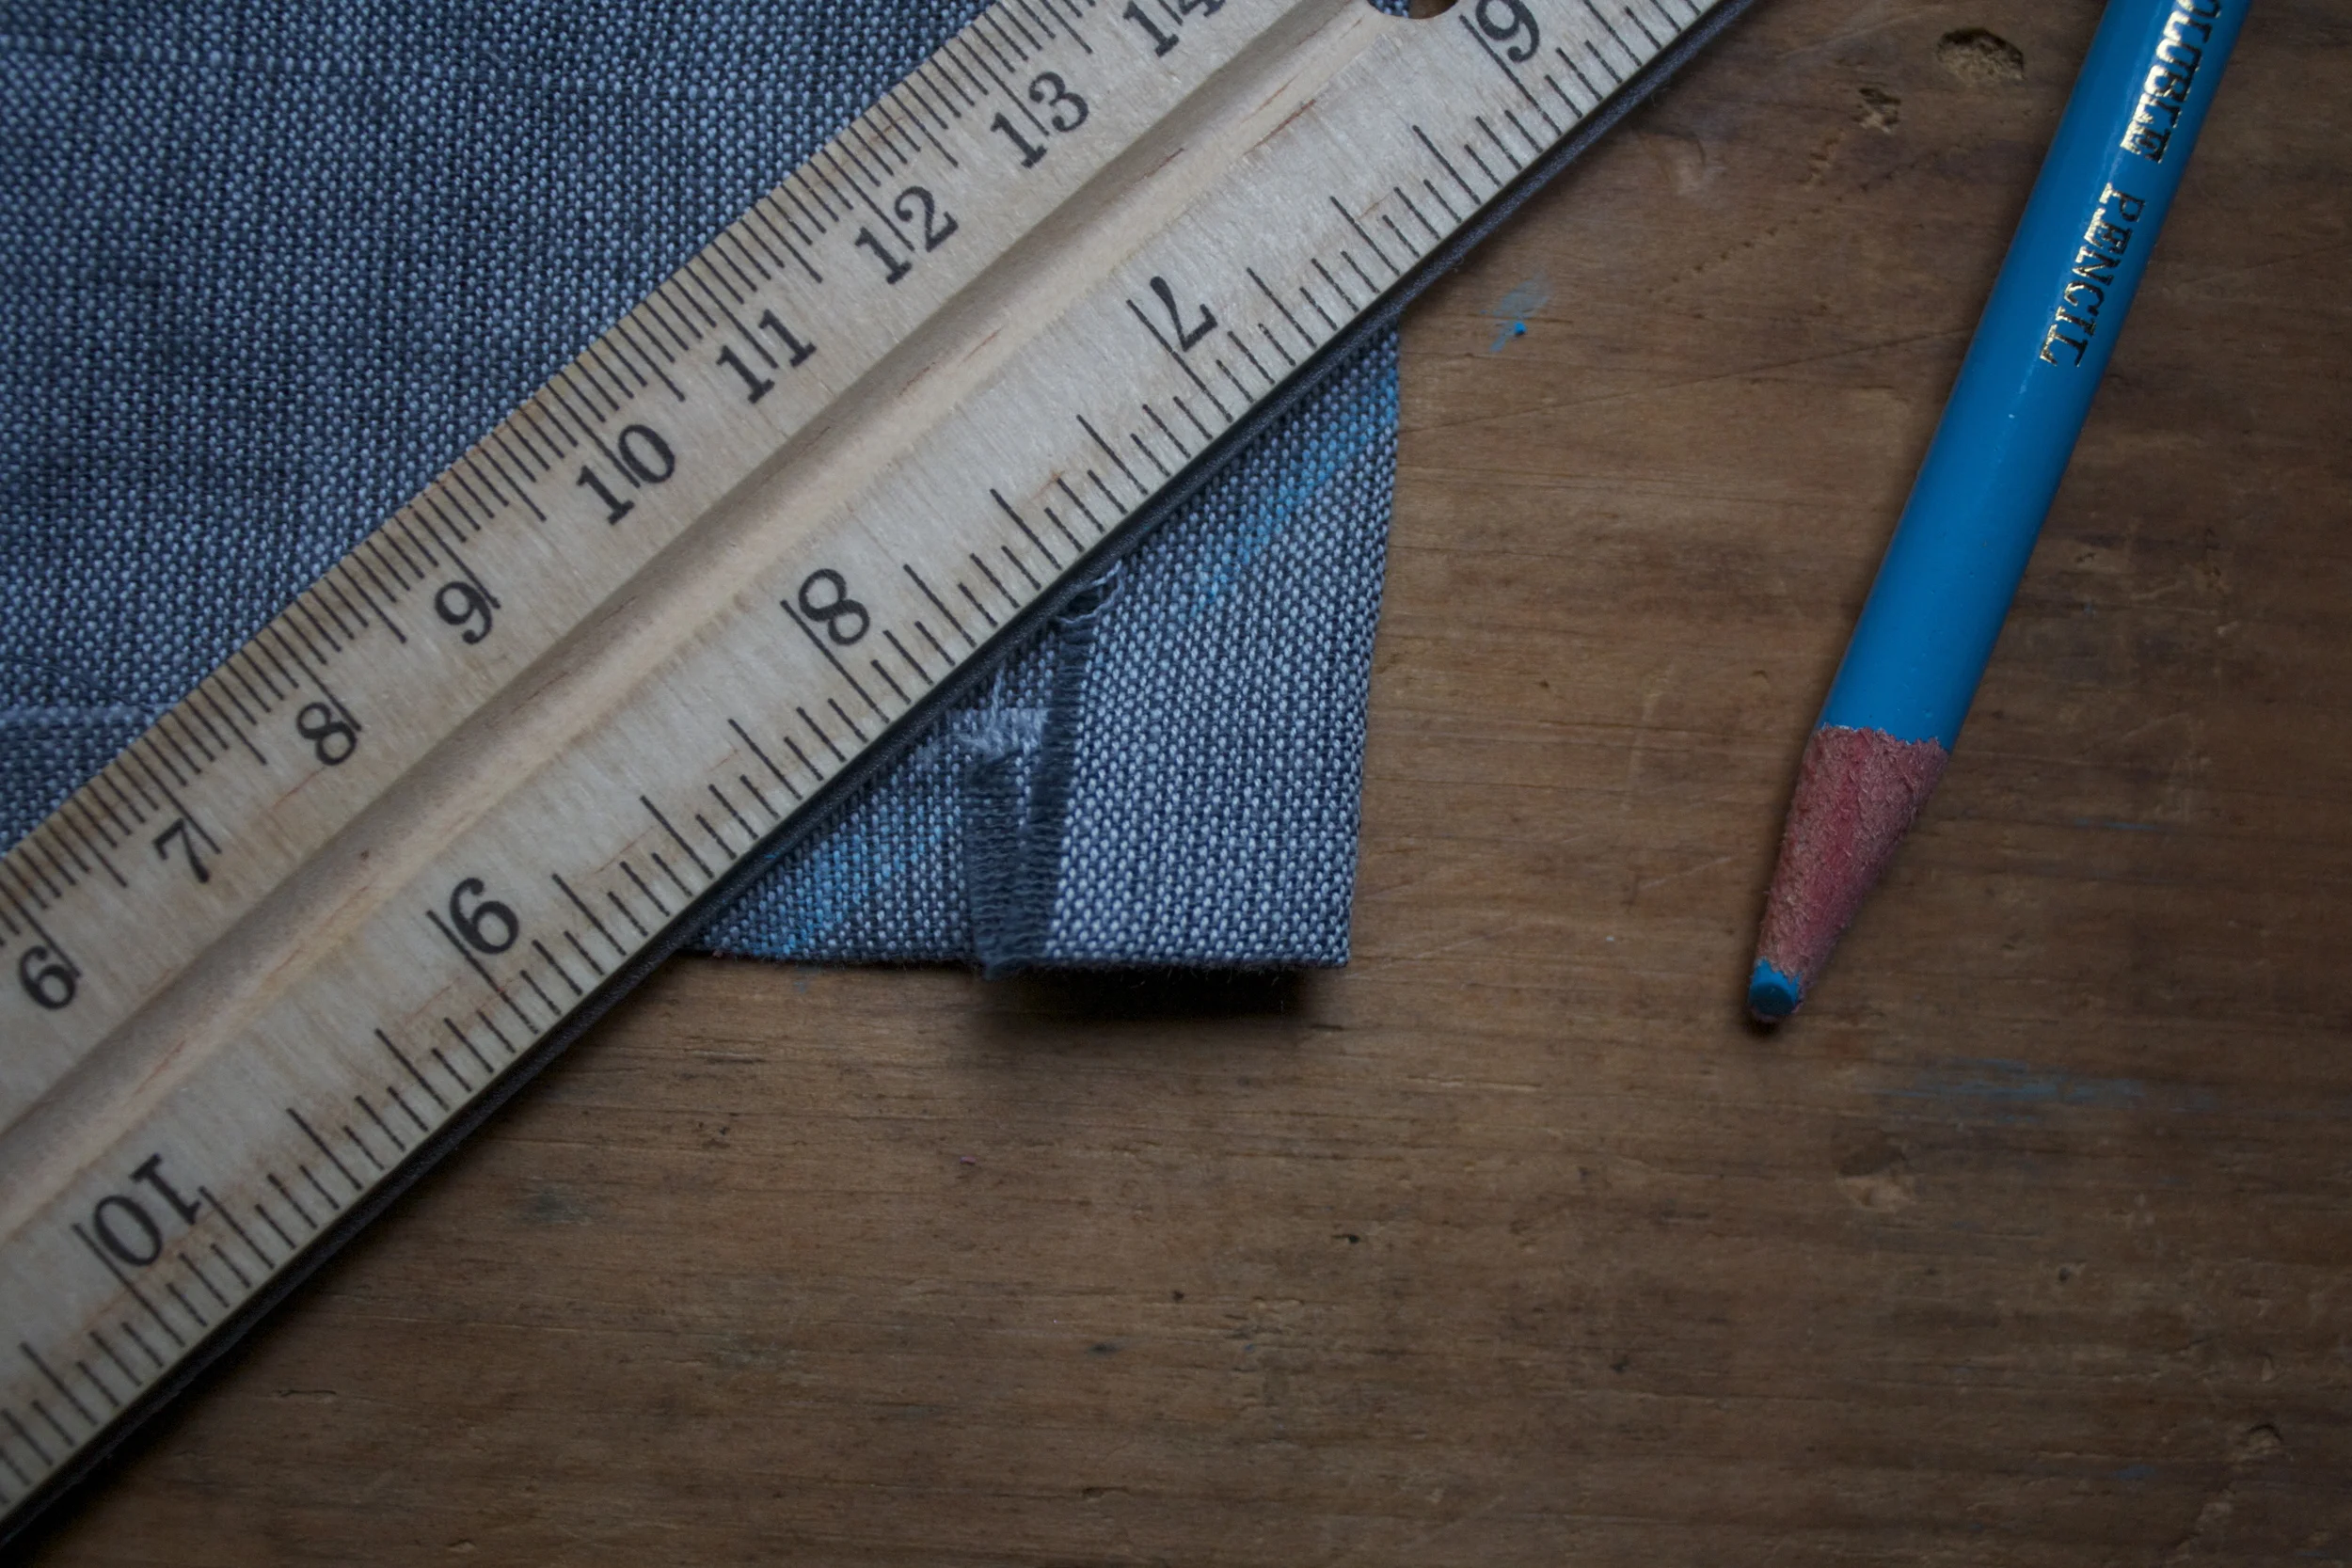
Take a fabric marker and mark that crease Repeat with all corners.
Step 4.
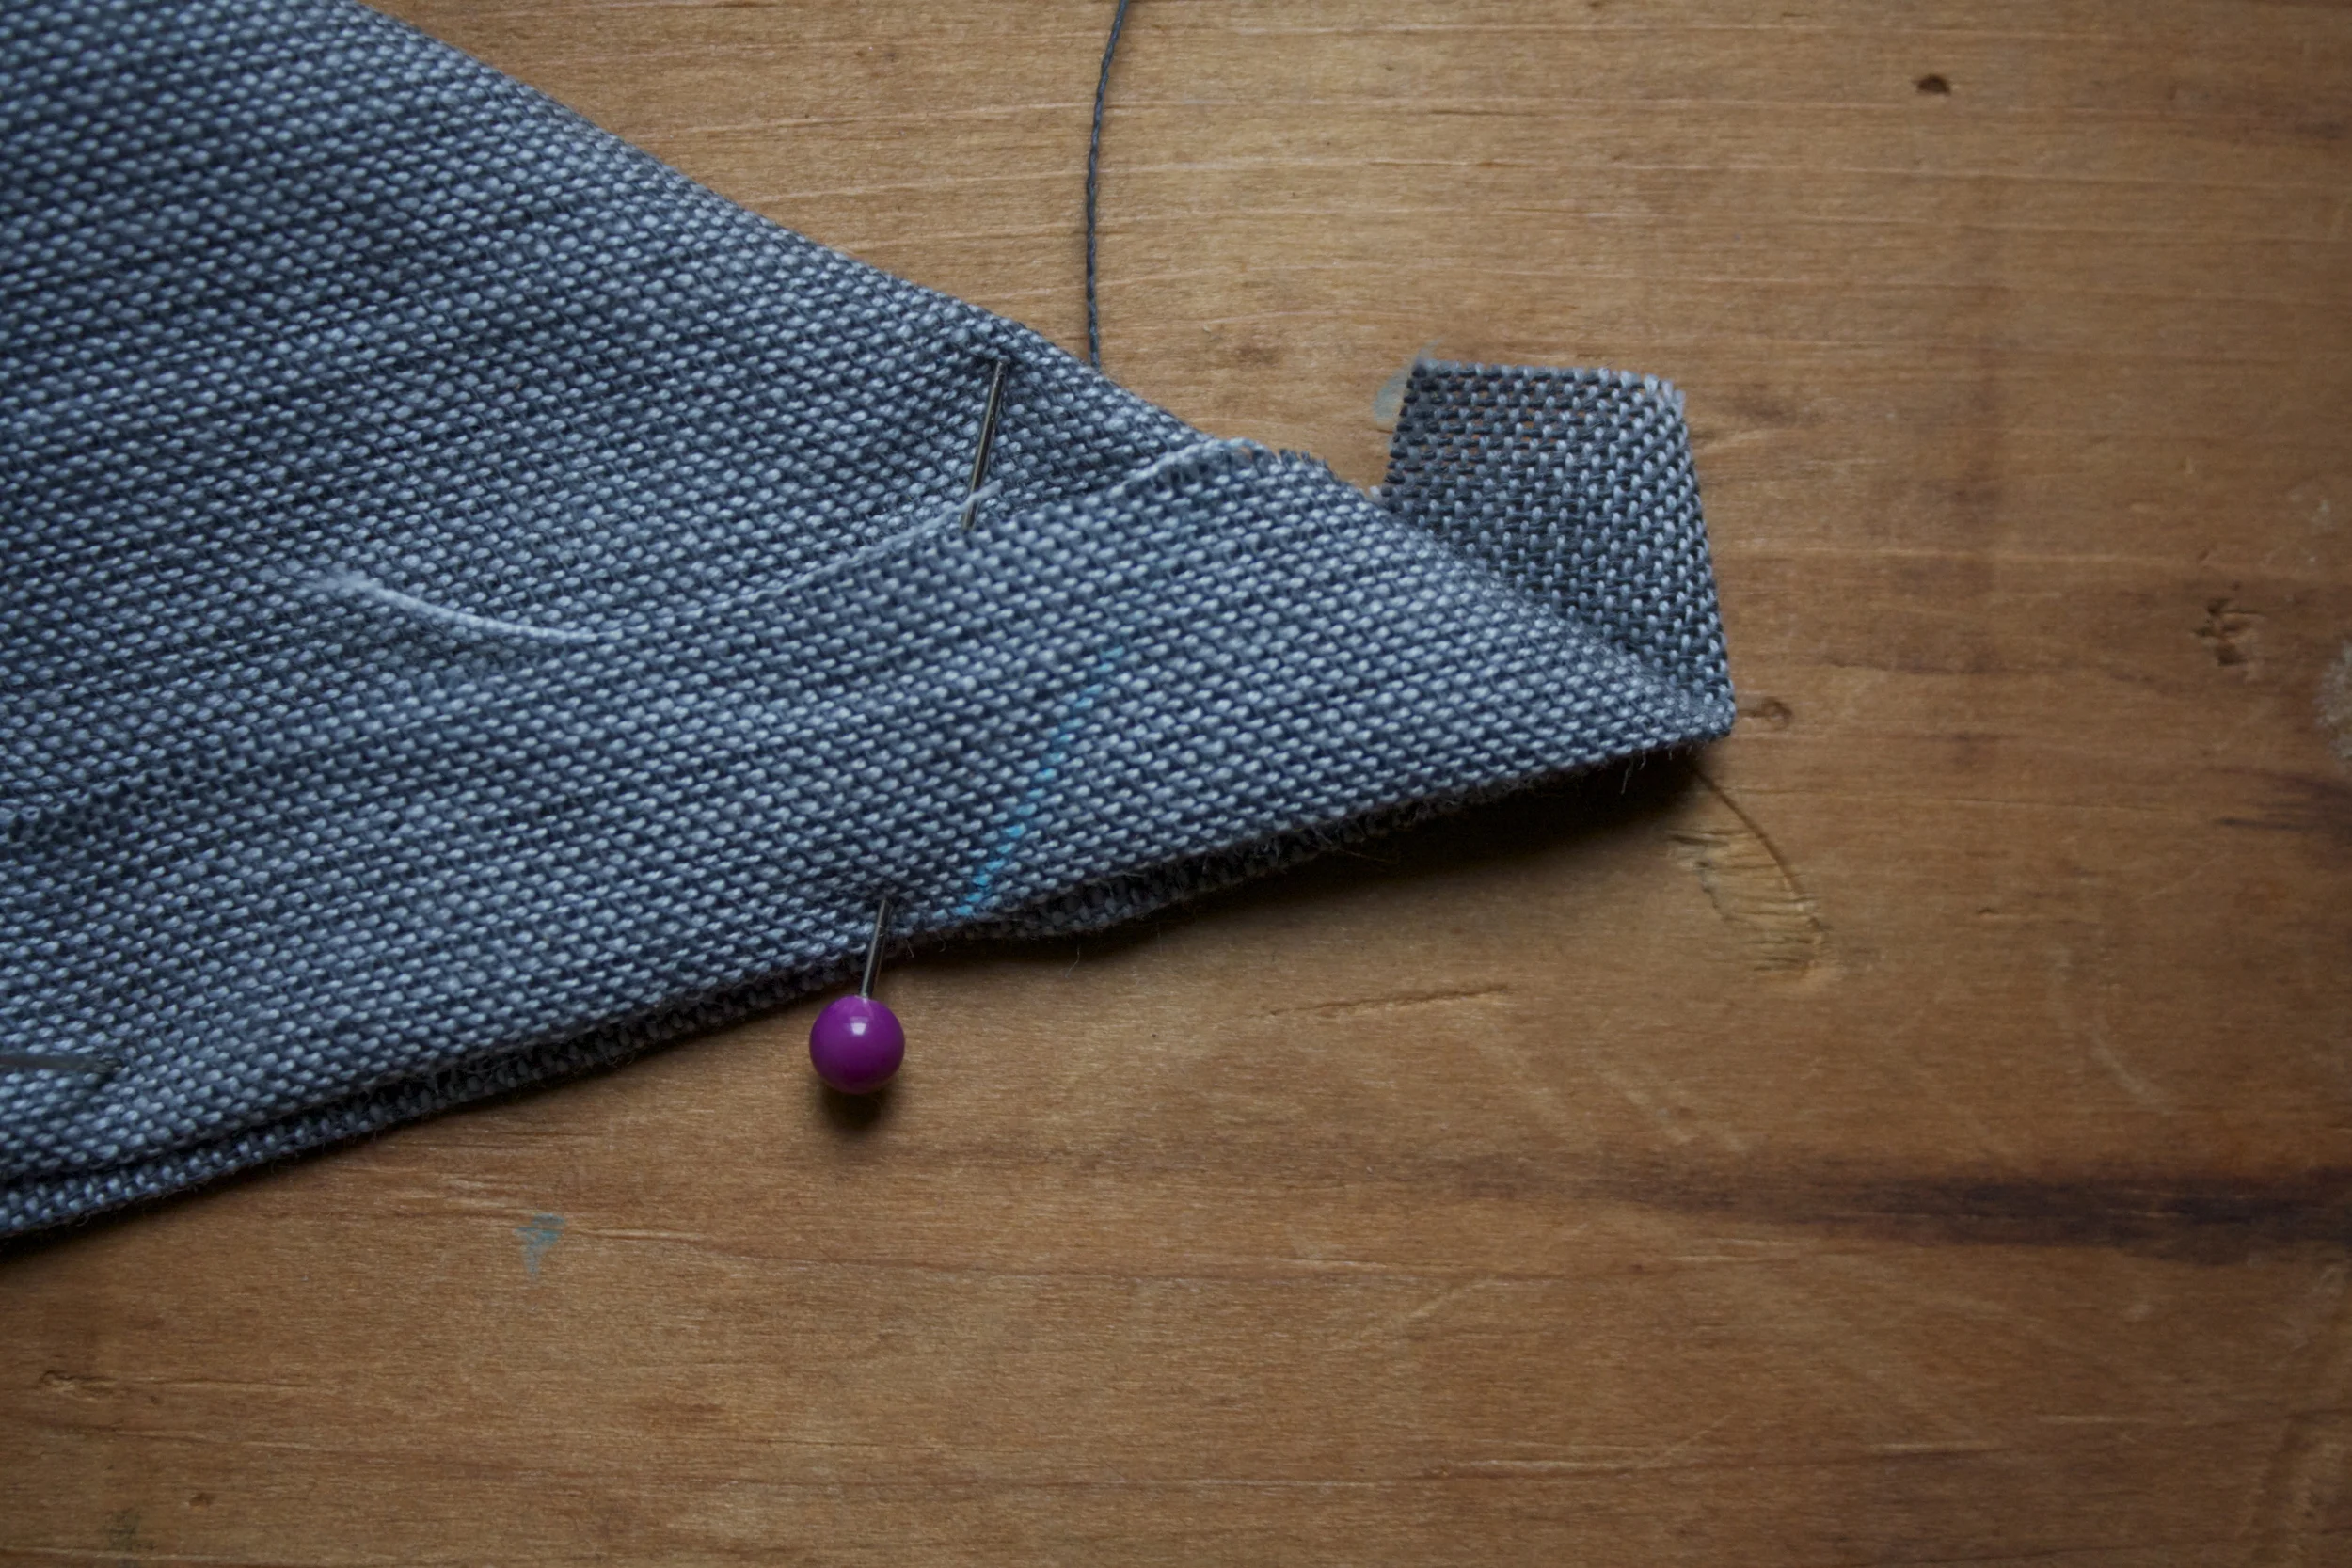
Grab a marked corner and fold the napkin in half, right side together,making sure the line you just marked match up, Stick a pin in it so it stays put.
Step 5.
Run a stitch through that line.
Step 6.
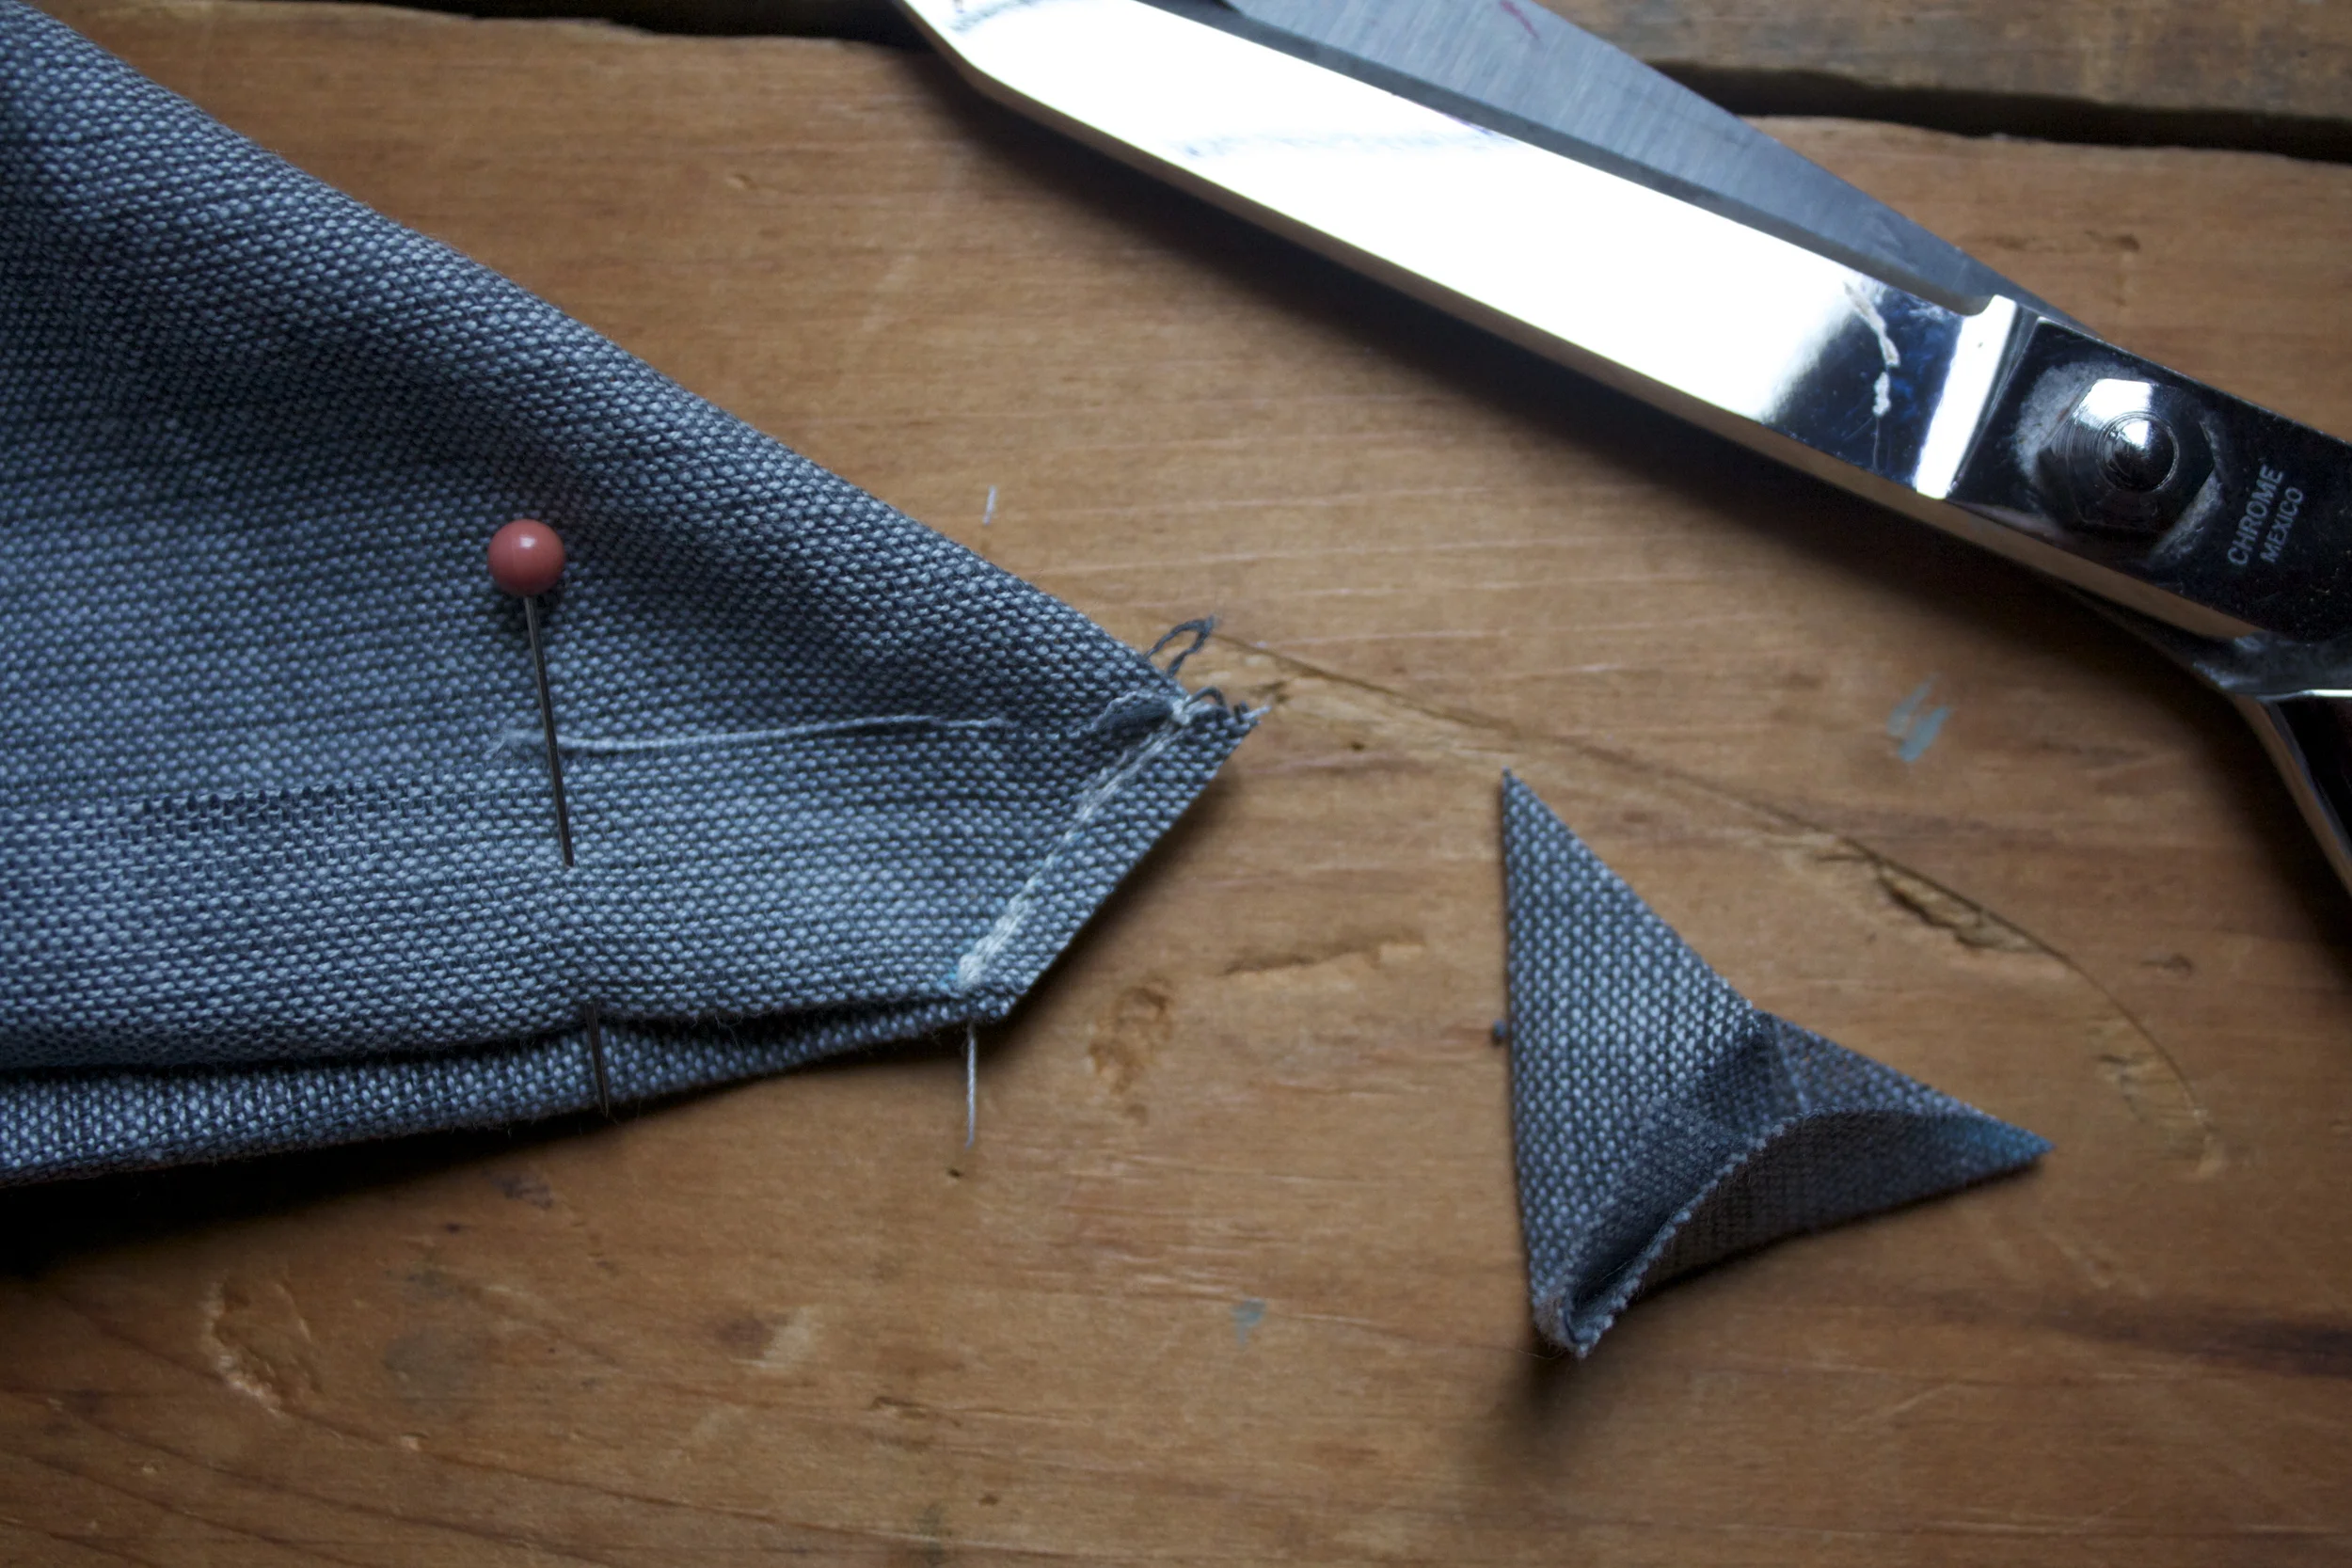
Snip off the remaining tip of fabric
Repeat step 3-6 with all corners.
Step 7.
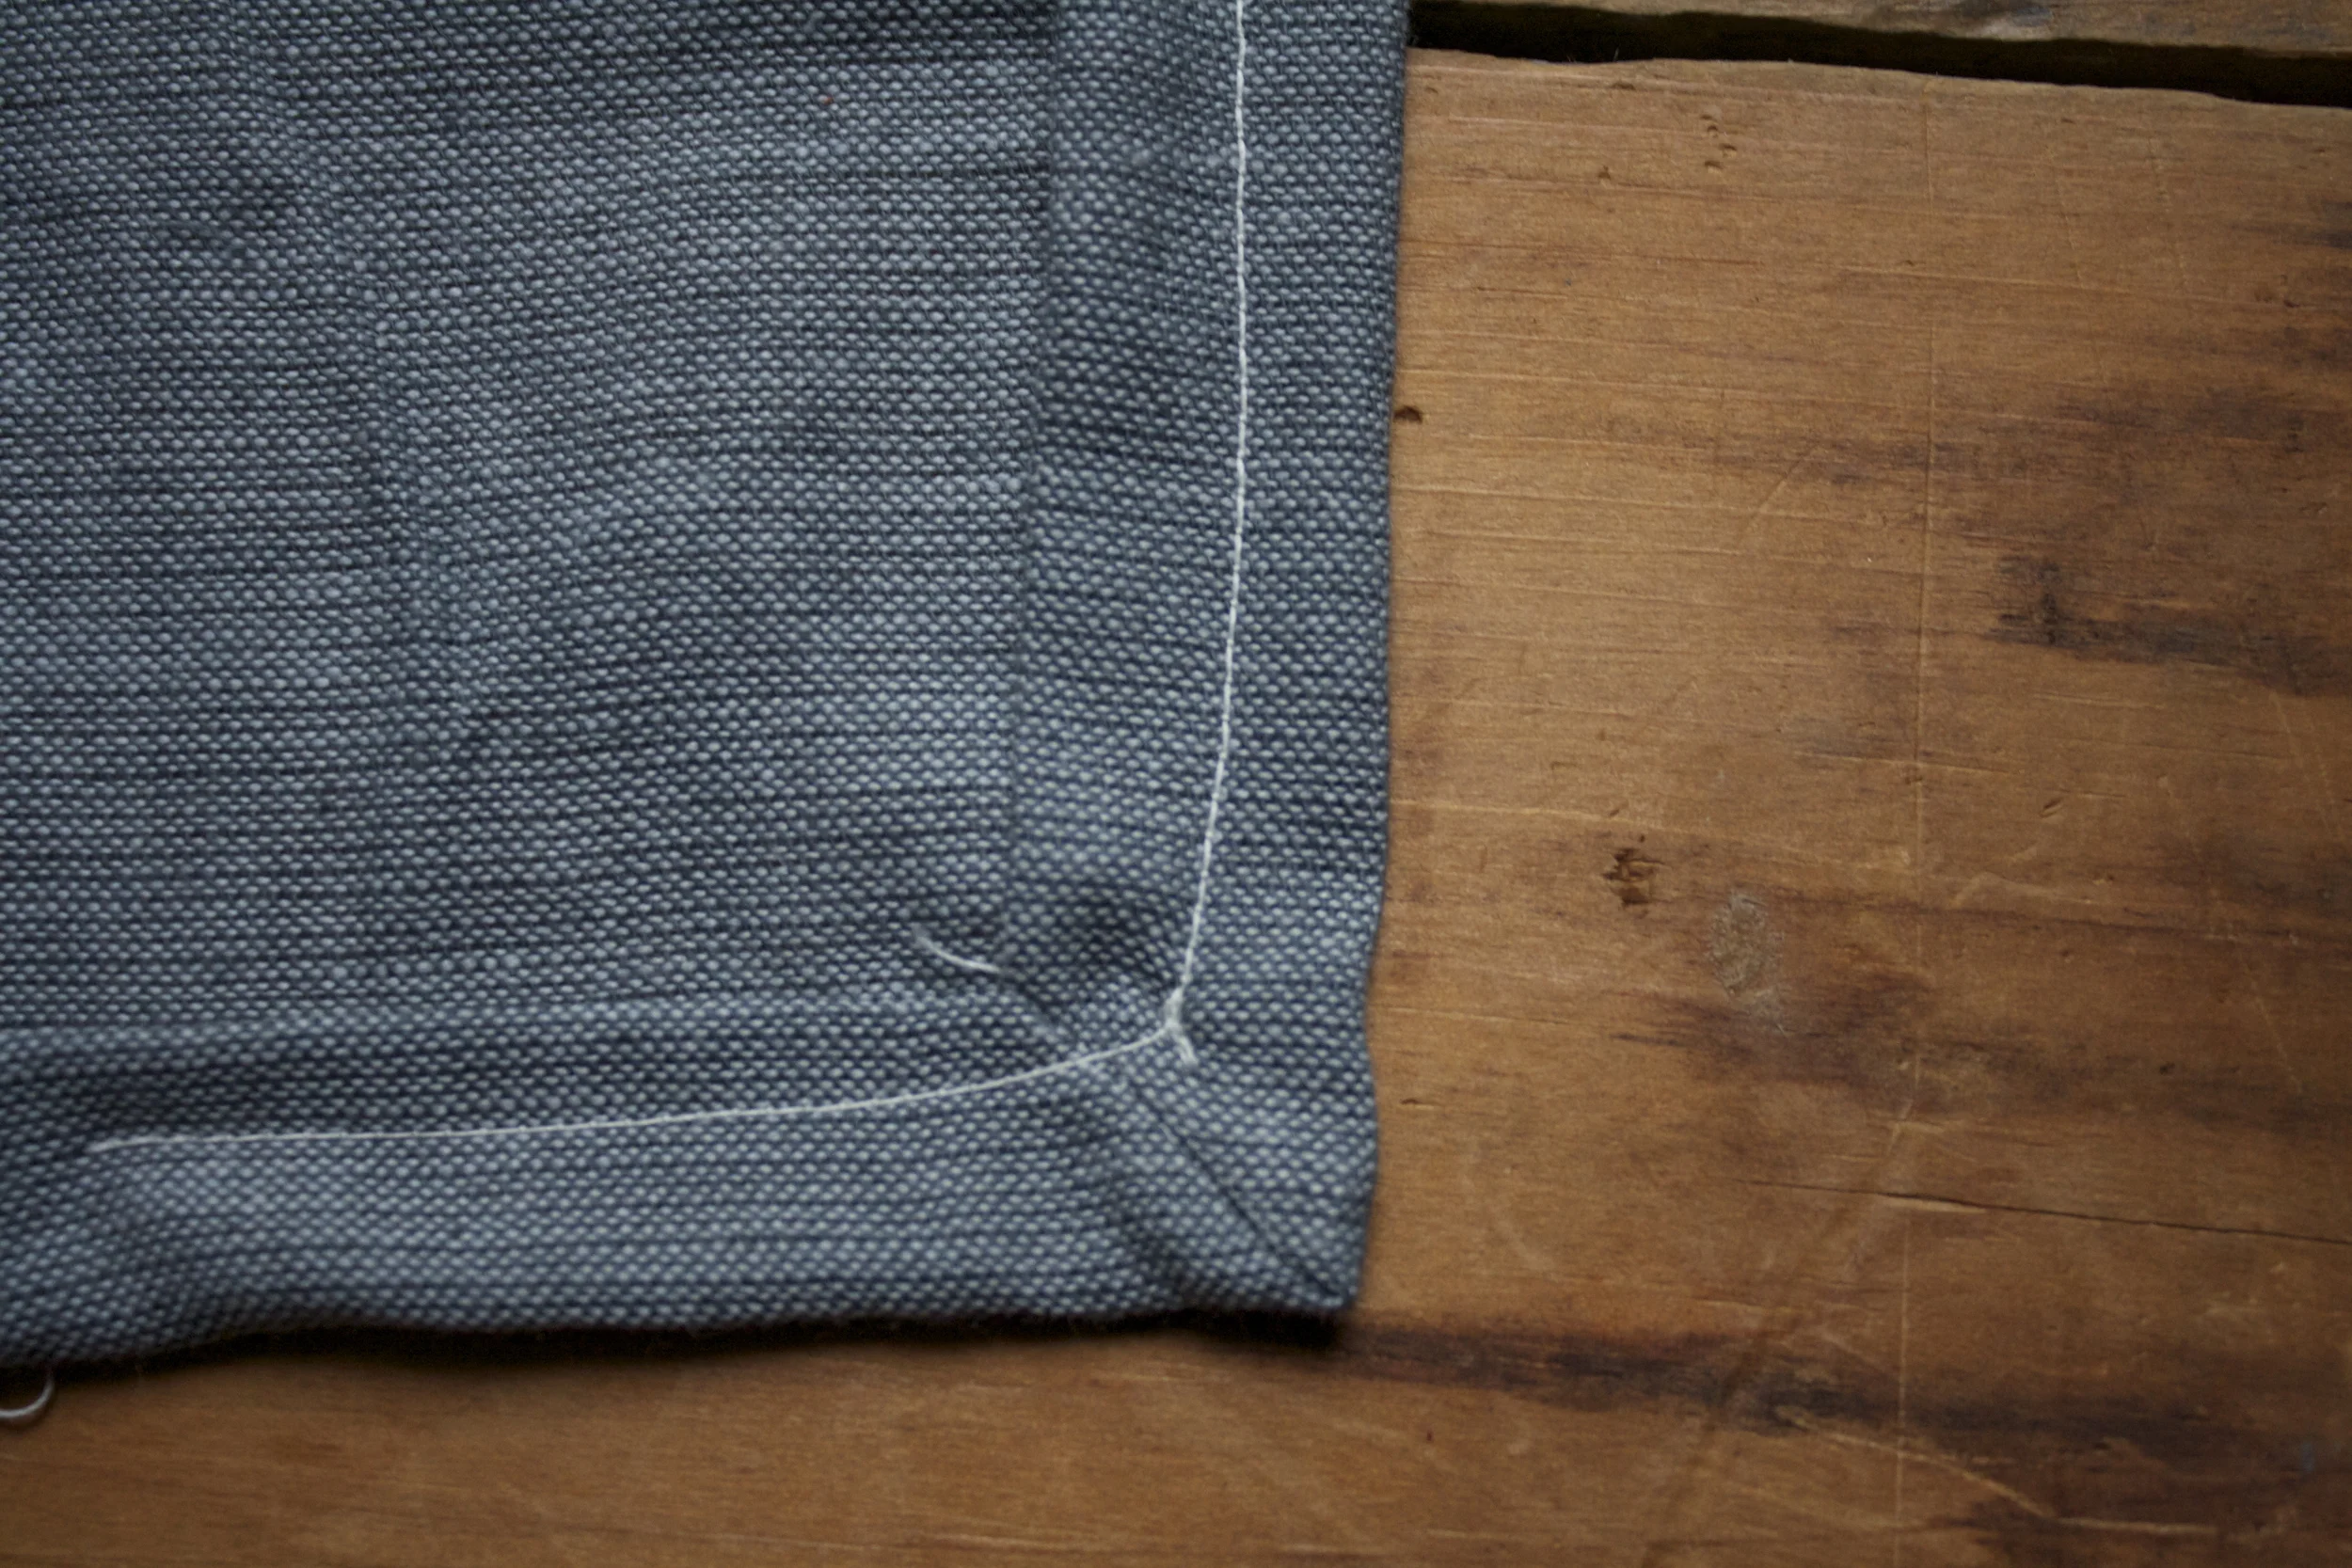
And for the most fgratifing part,%u00a0fold over %u2026 Repeat to all corners
ALmost done!
Step 8.
Lastly, run a nice stitch around the border. I went with a simple stitch, but if you are feeling a little zig zag or some other funky-ness your machine can do.. go for it.%u00a0
See, fancy(but not), pretty, made by you. napkins.. and they are so easy!%u00a0
Have fun and if you know me and end up making yourself some, let me know so I don’t end up giving you more napkins for the holidays.
Have fun!
-C
A simple little artsy craft project to get down with%u2026 apple printing. ALmost the same as potato print, except smells better and your apple comes with an interior fun shape to print with. And you have to use apple this time of year cause its apple season and there are apples everywhere!
I usually do things like this with a little or two, but at the time, I had no littles in my possession, so I went it did it all by my lonesome.%u00a0(which was actually a lot of fun)%u00a0I made myself big cup of hot coffee, put on some tunes, and zoned out and did a bunch of prints. It was a great little afternoon project that anyone, little or not so much, can do. And the best part about printing is%u2026 you can’t screw it up
And I know that this is going to be a cold dreary weekend%u2026 so this might just be the perfect indoor project to do!%u00a0
Things you are going to need..
apple(s).. And the apple that I use are fallen apples.. so I don’t feel bad about using them.
paper
a knife (or something sharp enough to cut the apple)
paint ( I used cheap-o acrylic paint, but any paint would work)
paint-brush
Cup of water (to rinse brush)
rag (to wipe hands)
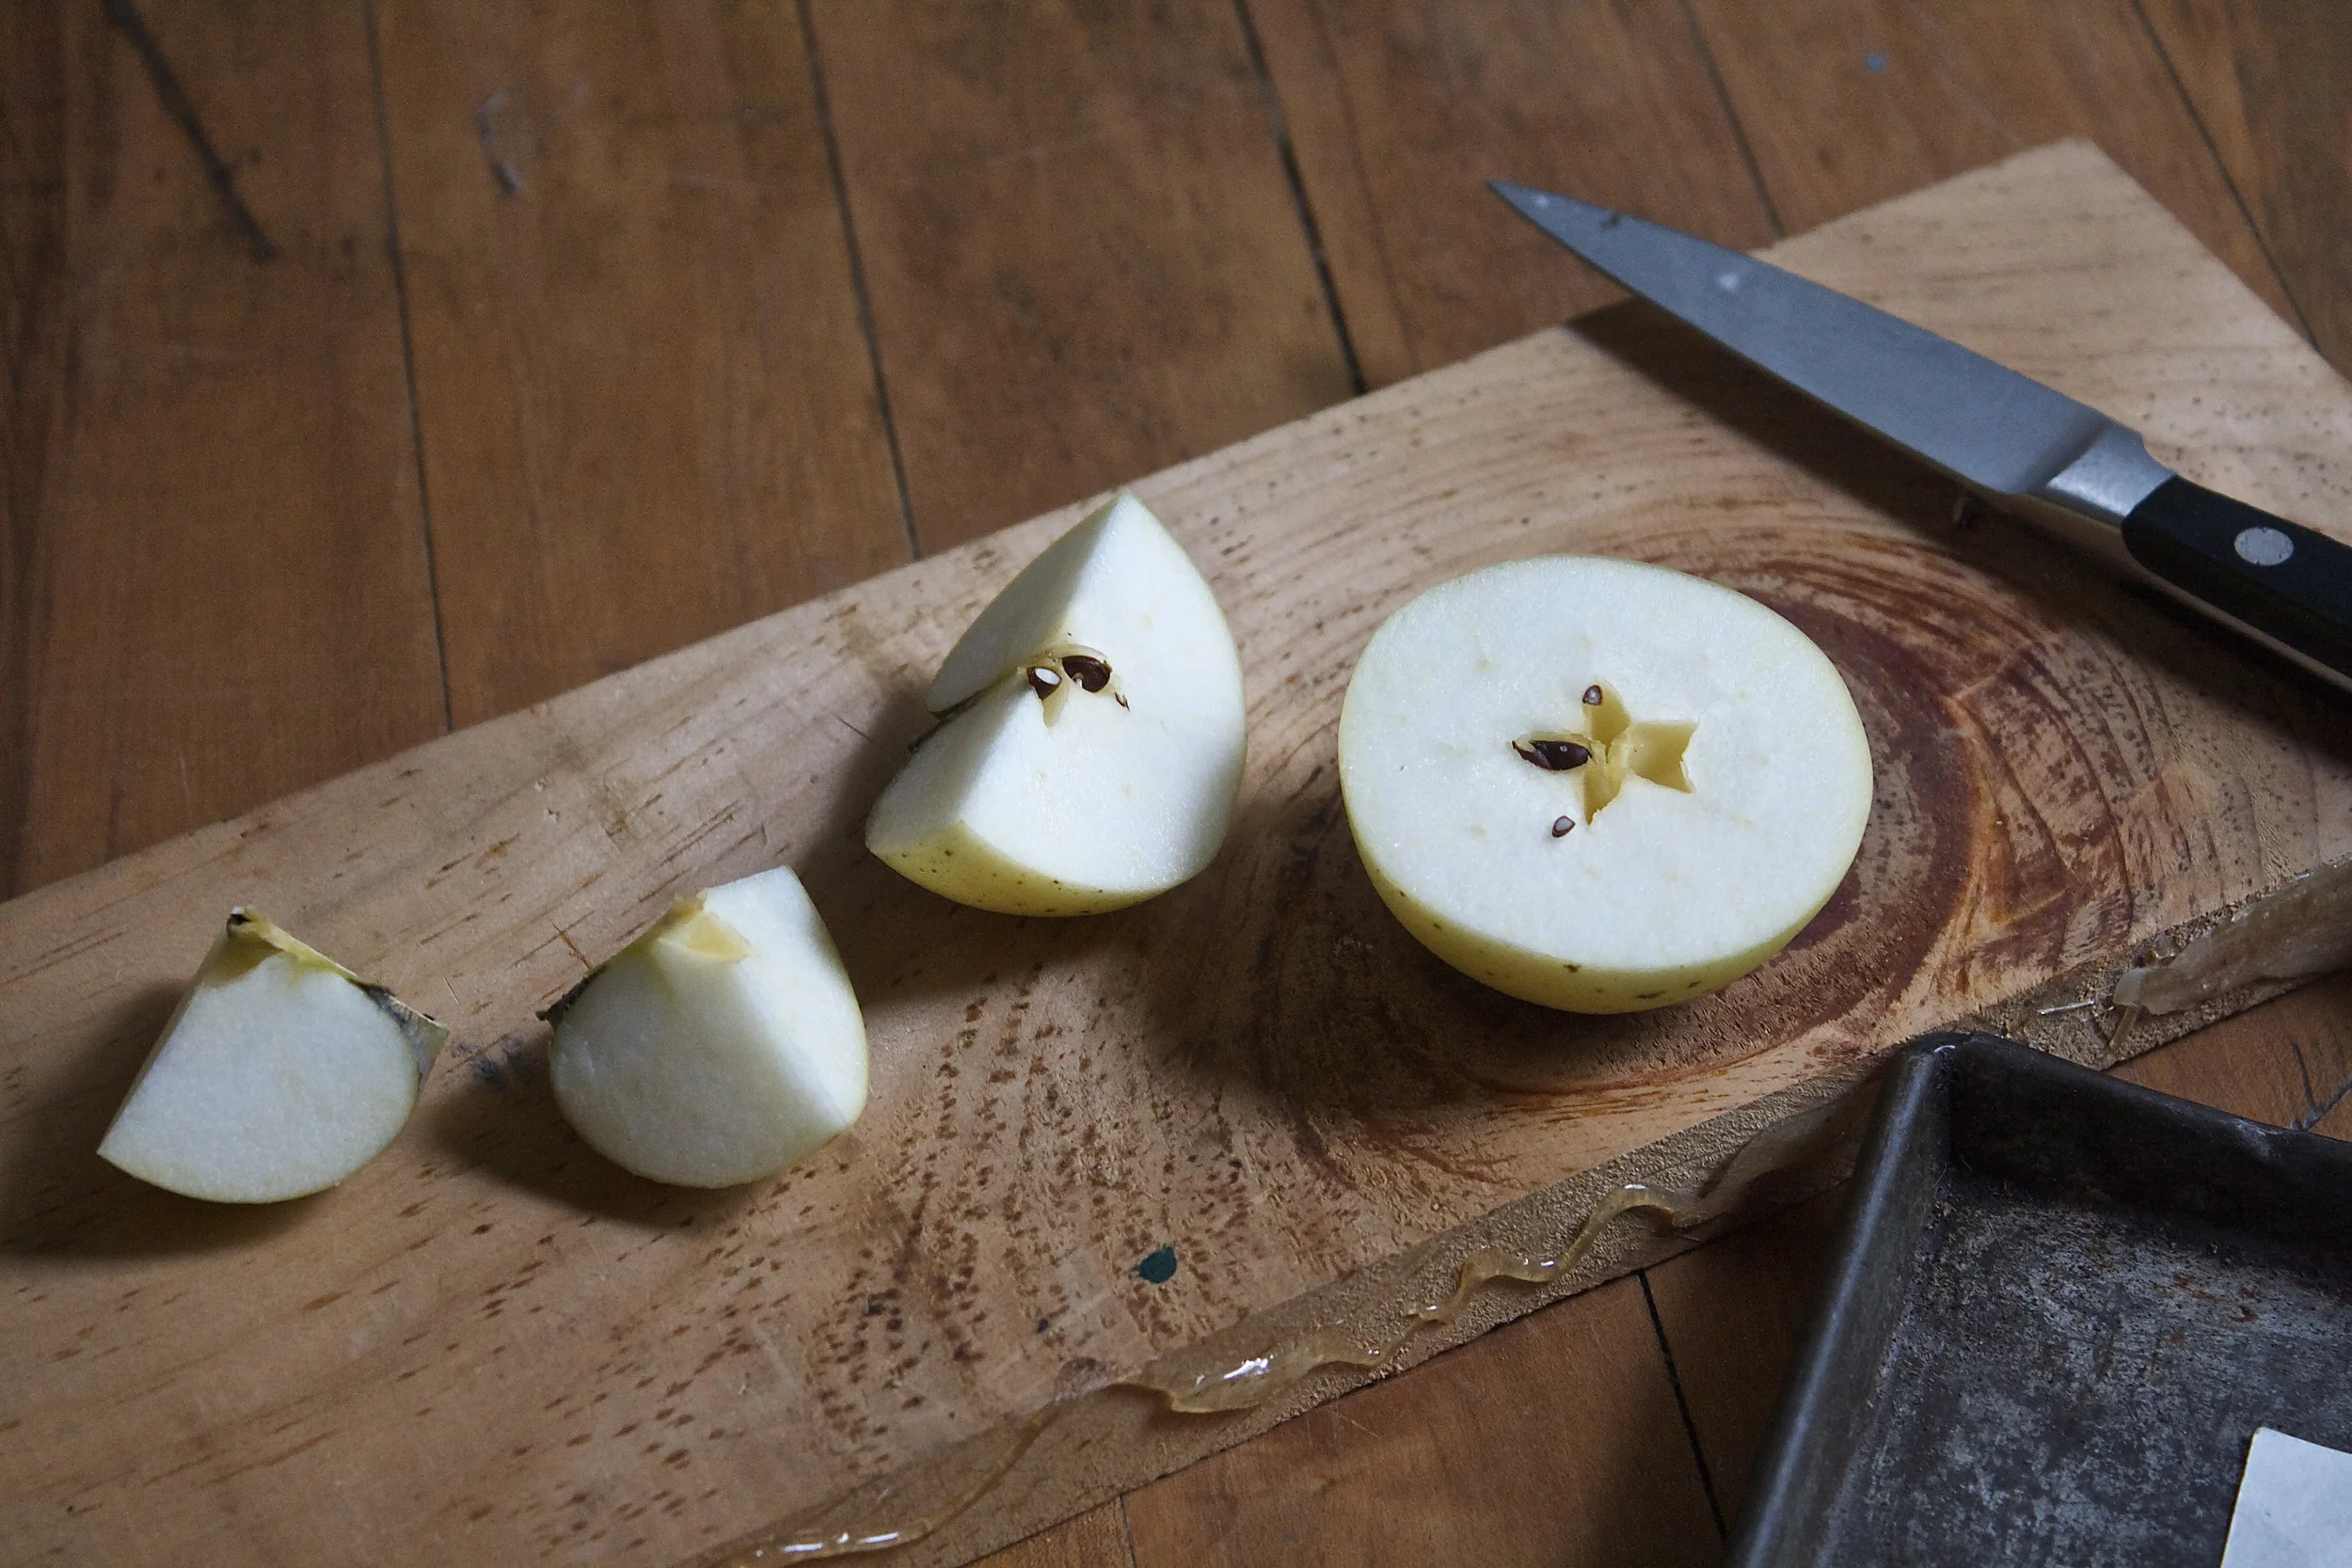
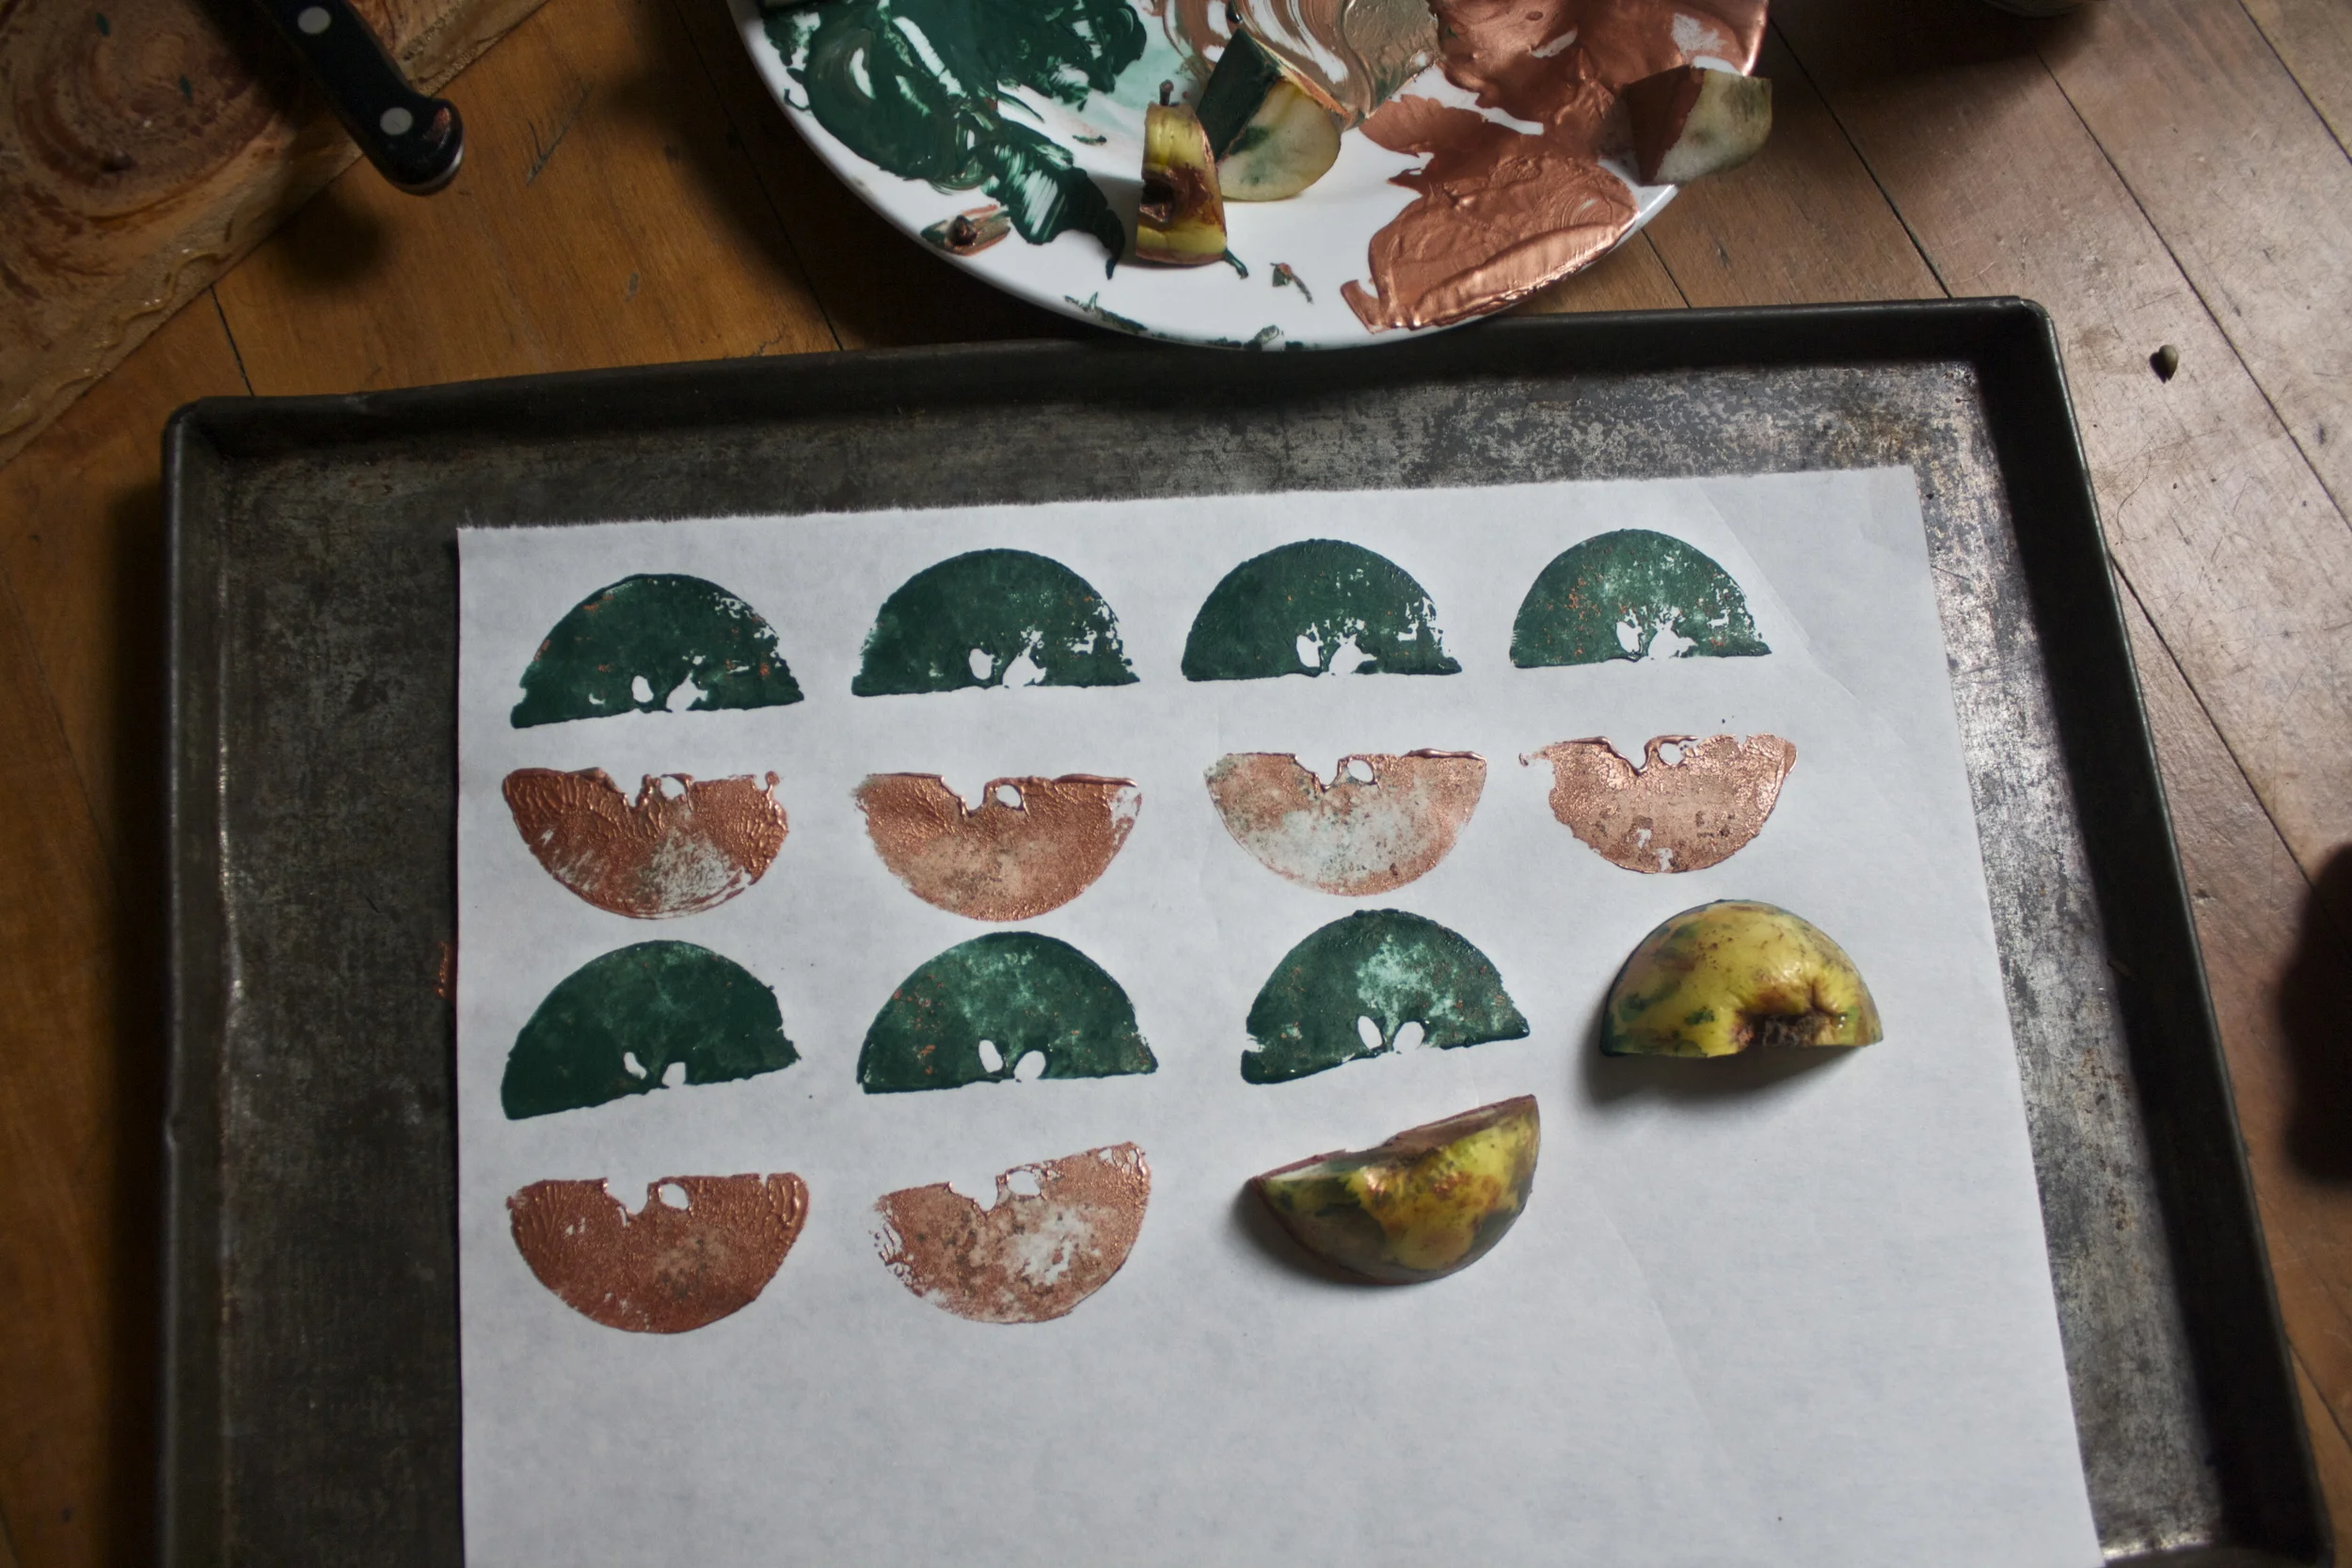
Start by slicing your apple. If you cut in in half, you get the cool star shape in the middle, or just chop it into cool shaped pieces.%u00a0
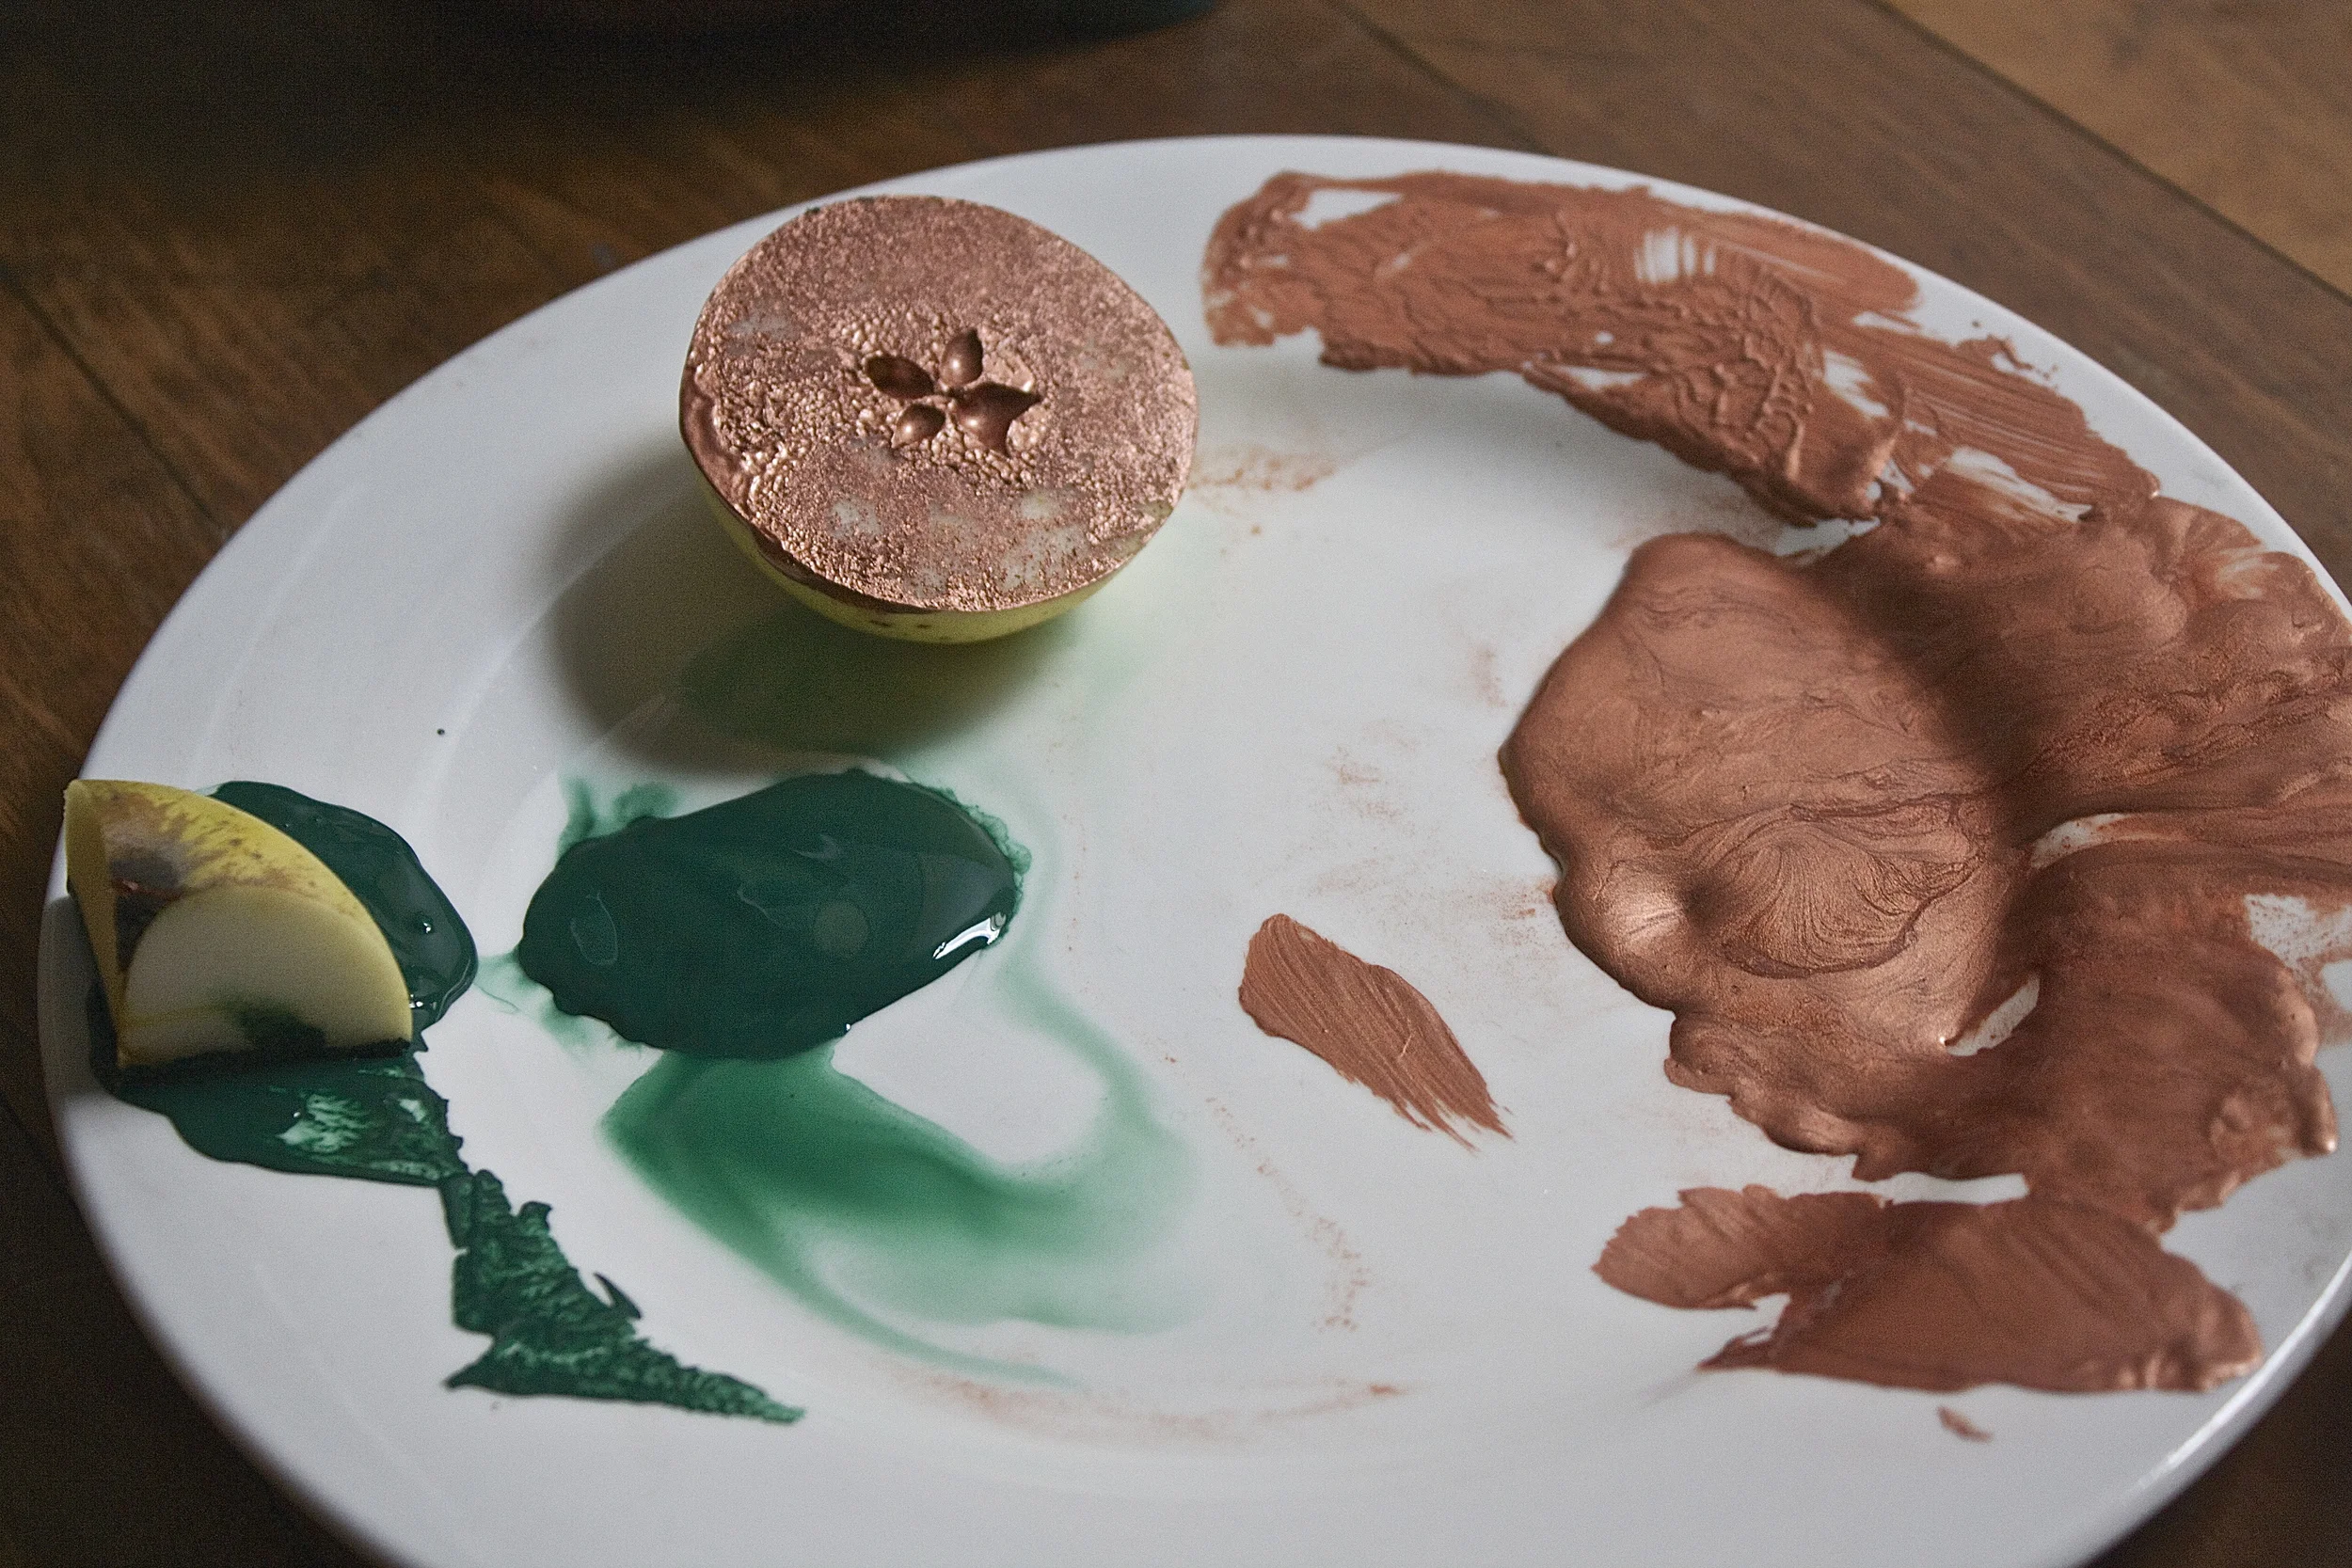
Apply paint to the apple. I found that if I dipped the apple, then remove to much excess paint with a paint brush to work the best for me.. My suggestion is to play around with what works best for you.
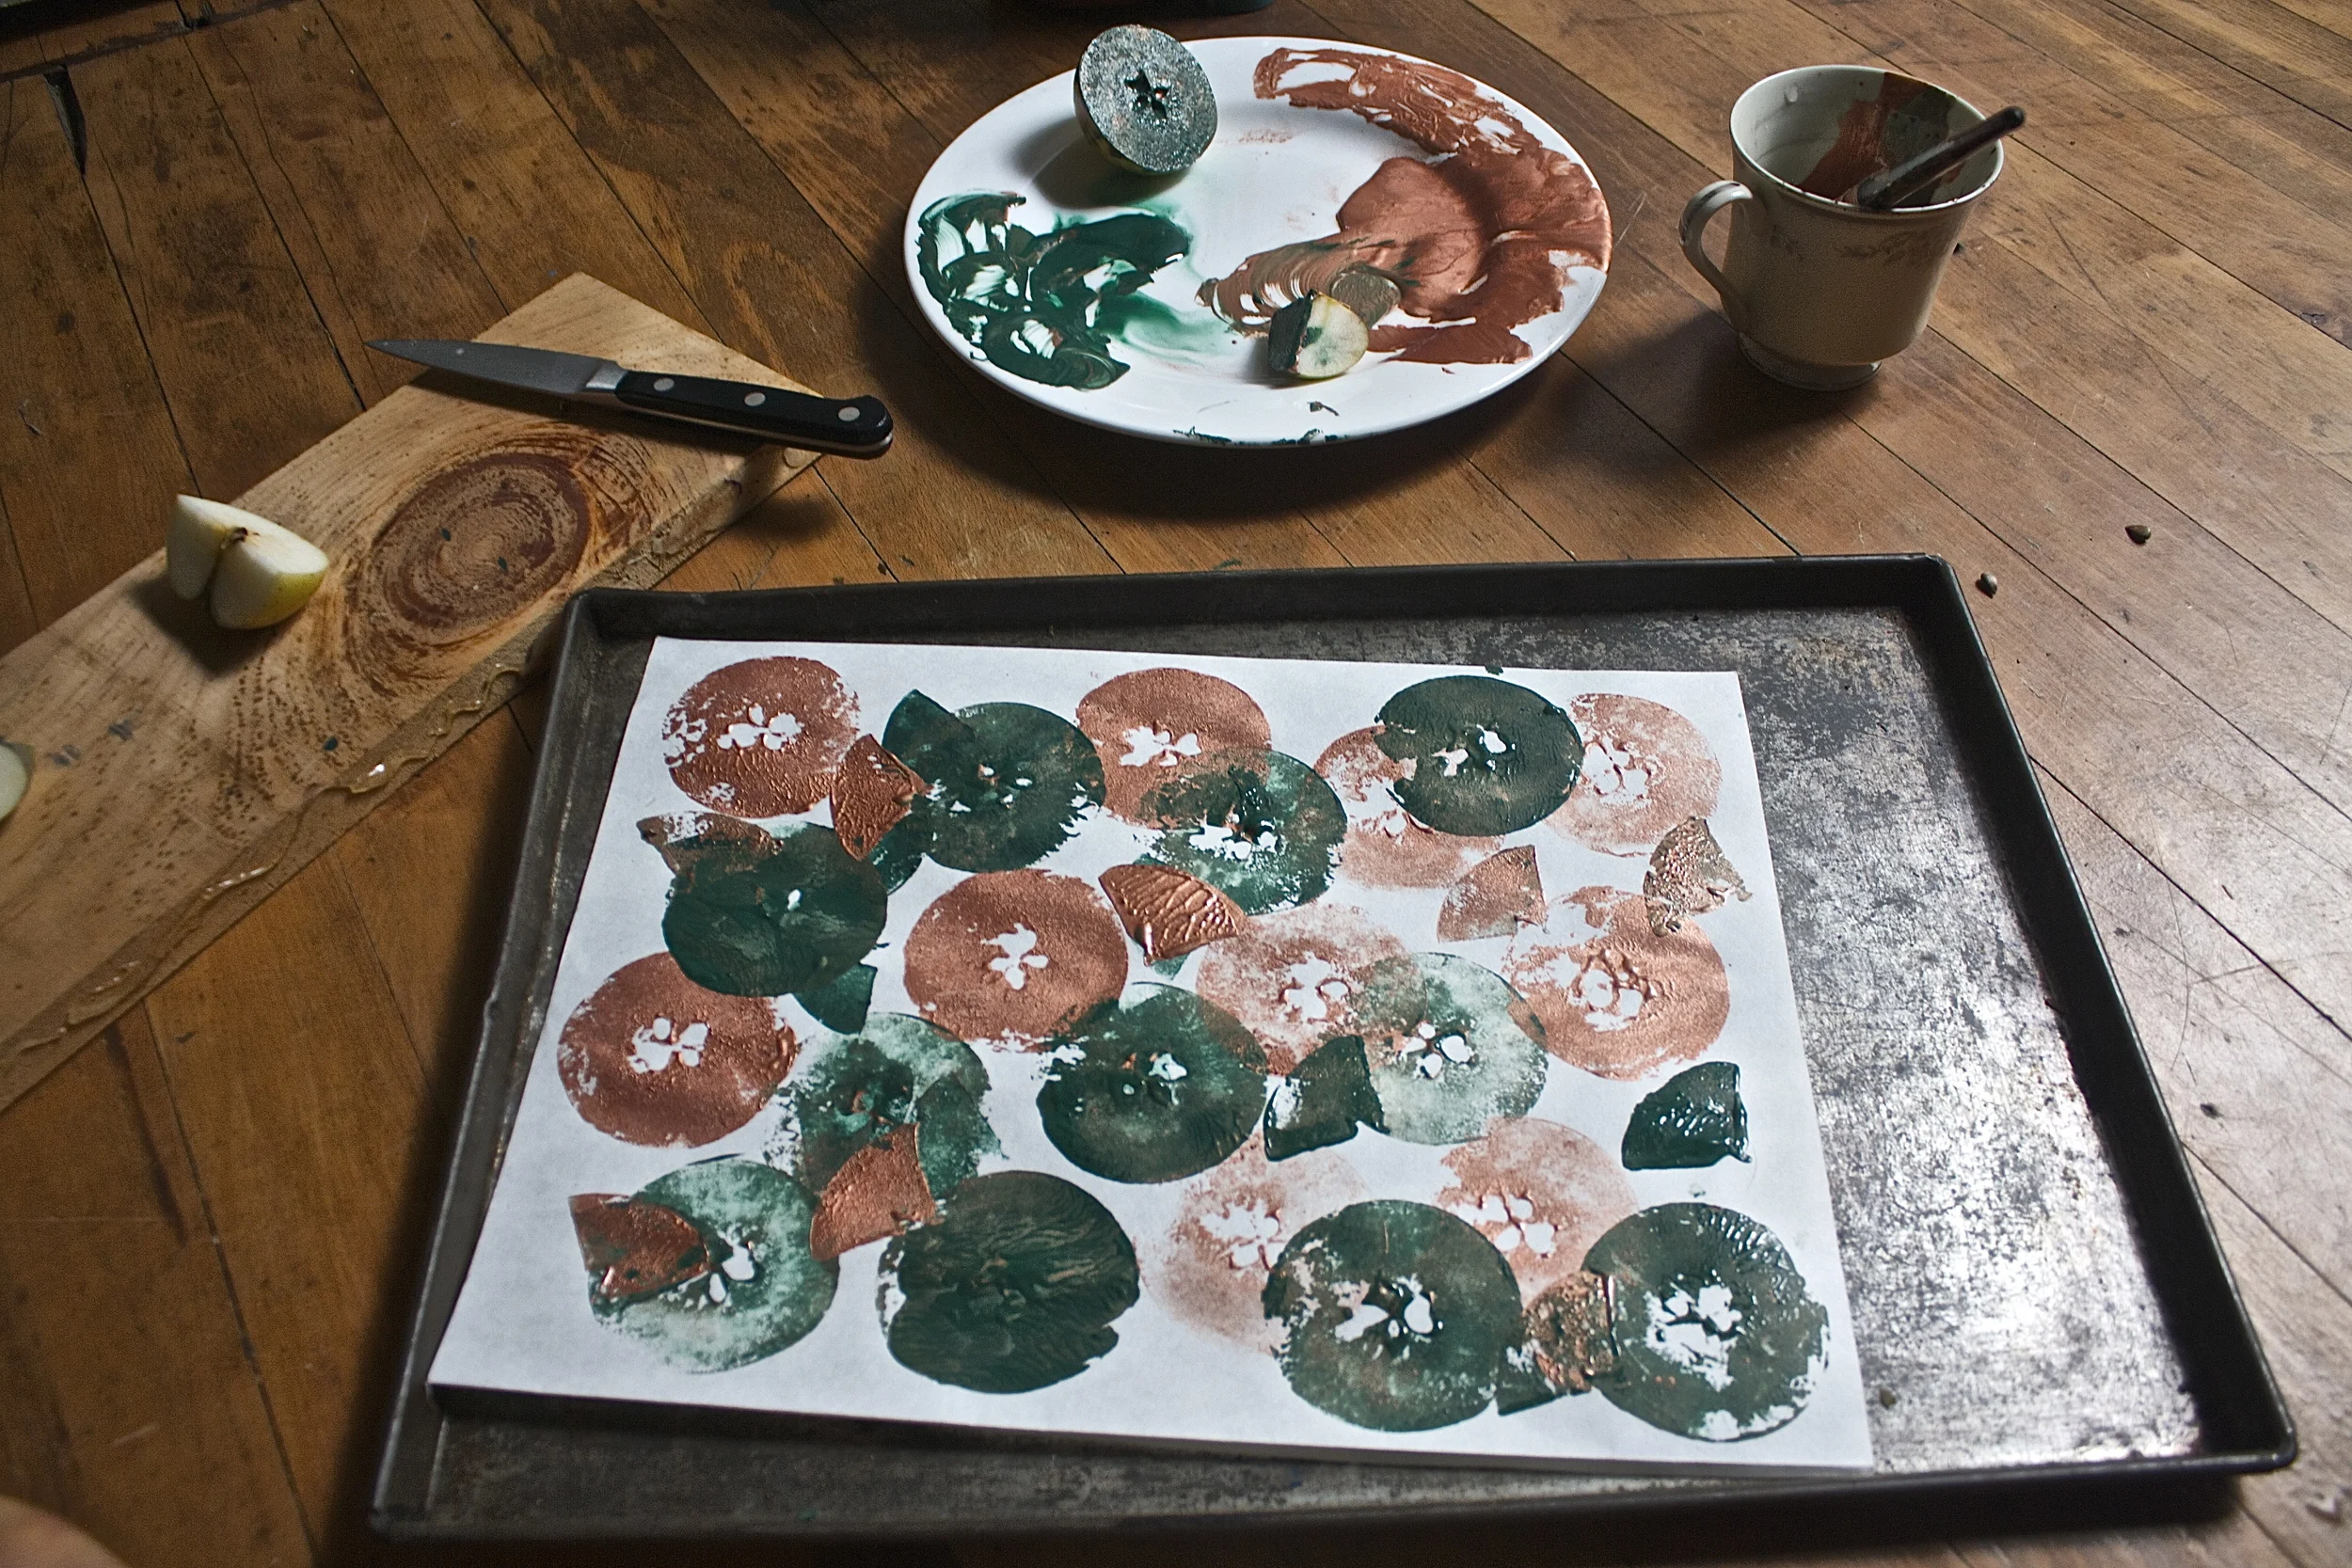
Apple goes paint side down on paper%u2026 and that’s how it goes. Now repeat, either with the same shape, or use a new one. OR change up the color.. it’s all how you want to do it.%u00a0
If%u00a0
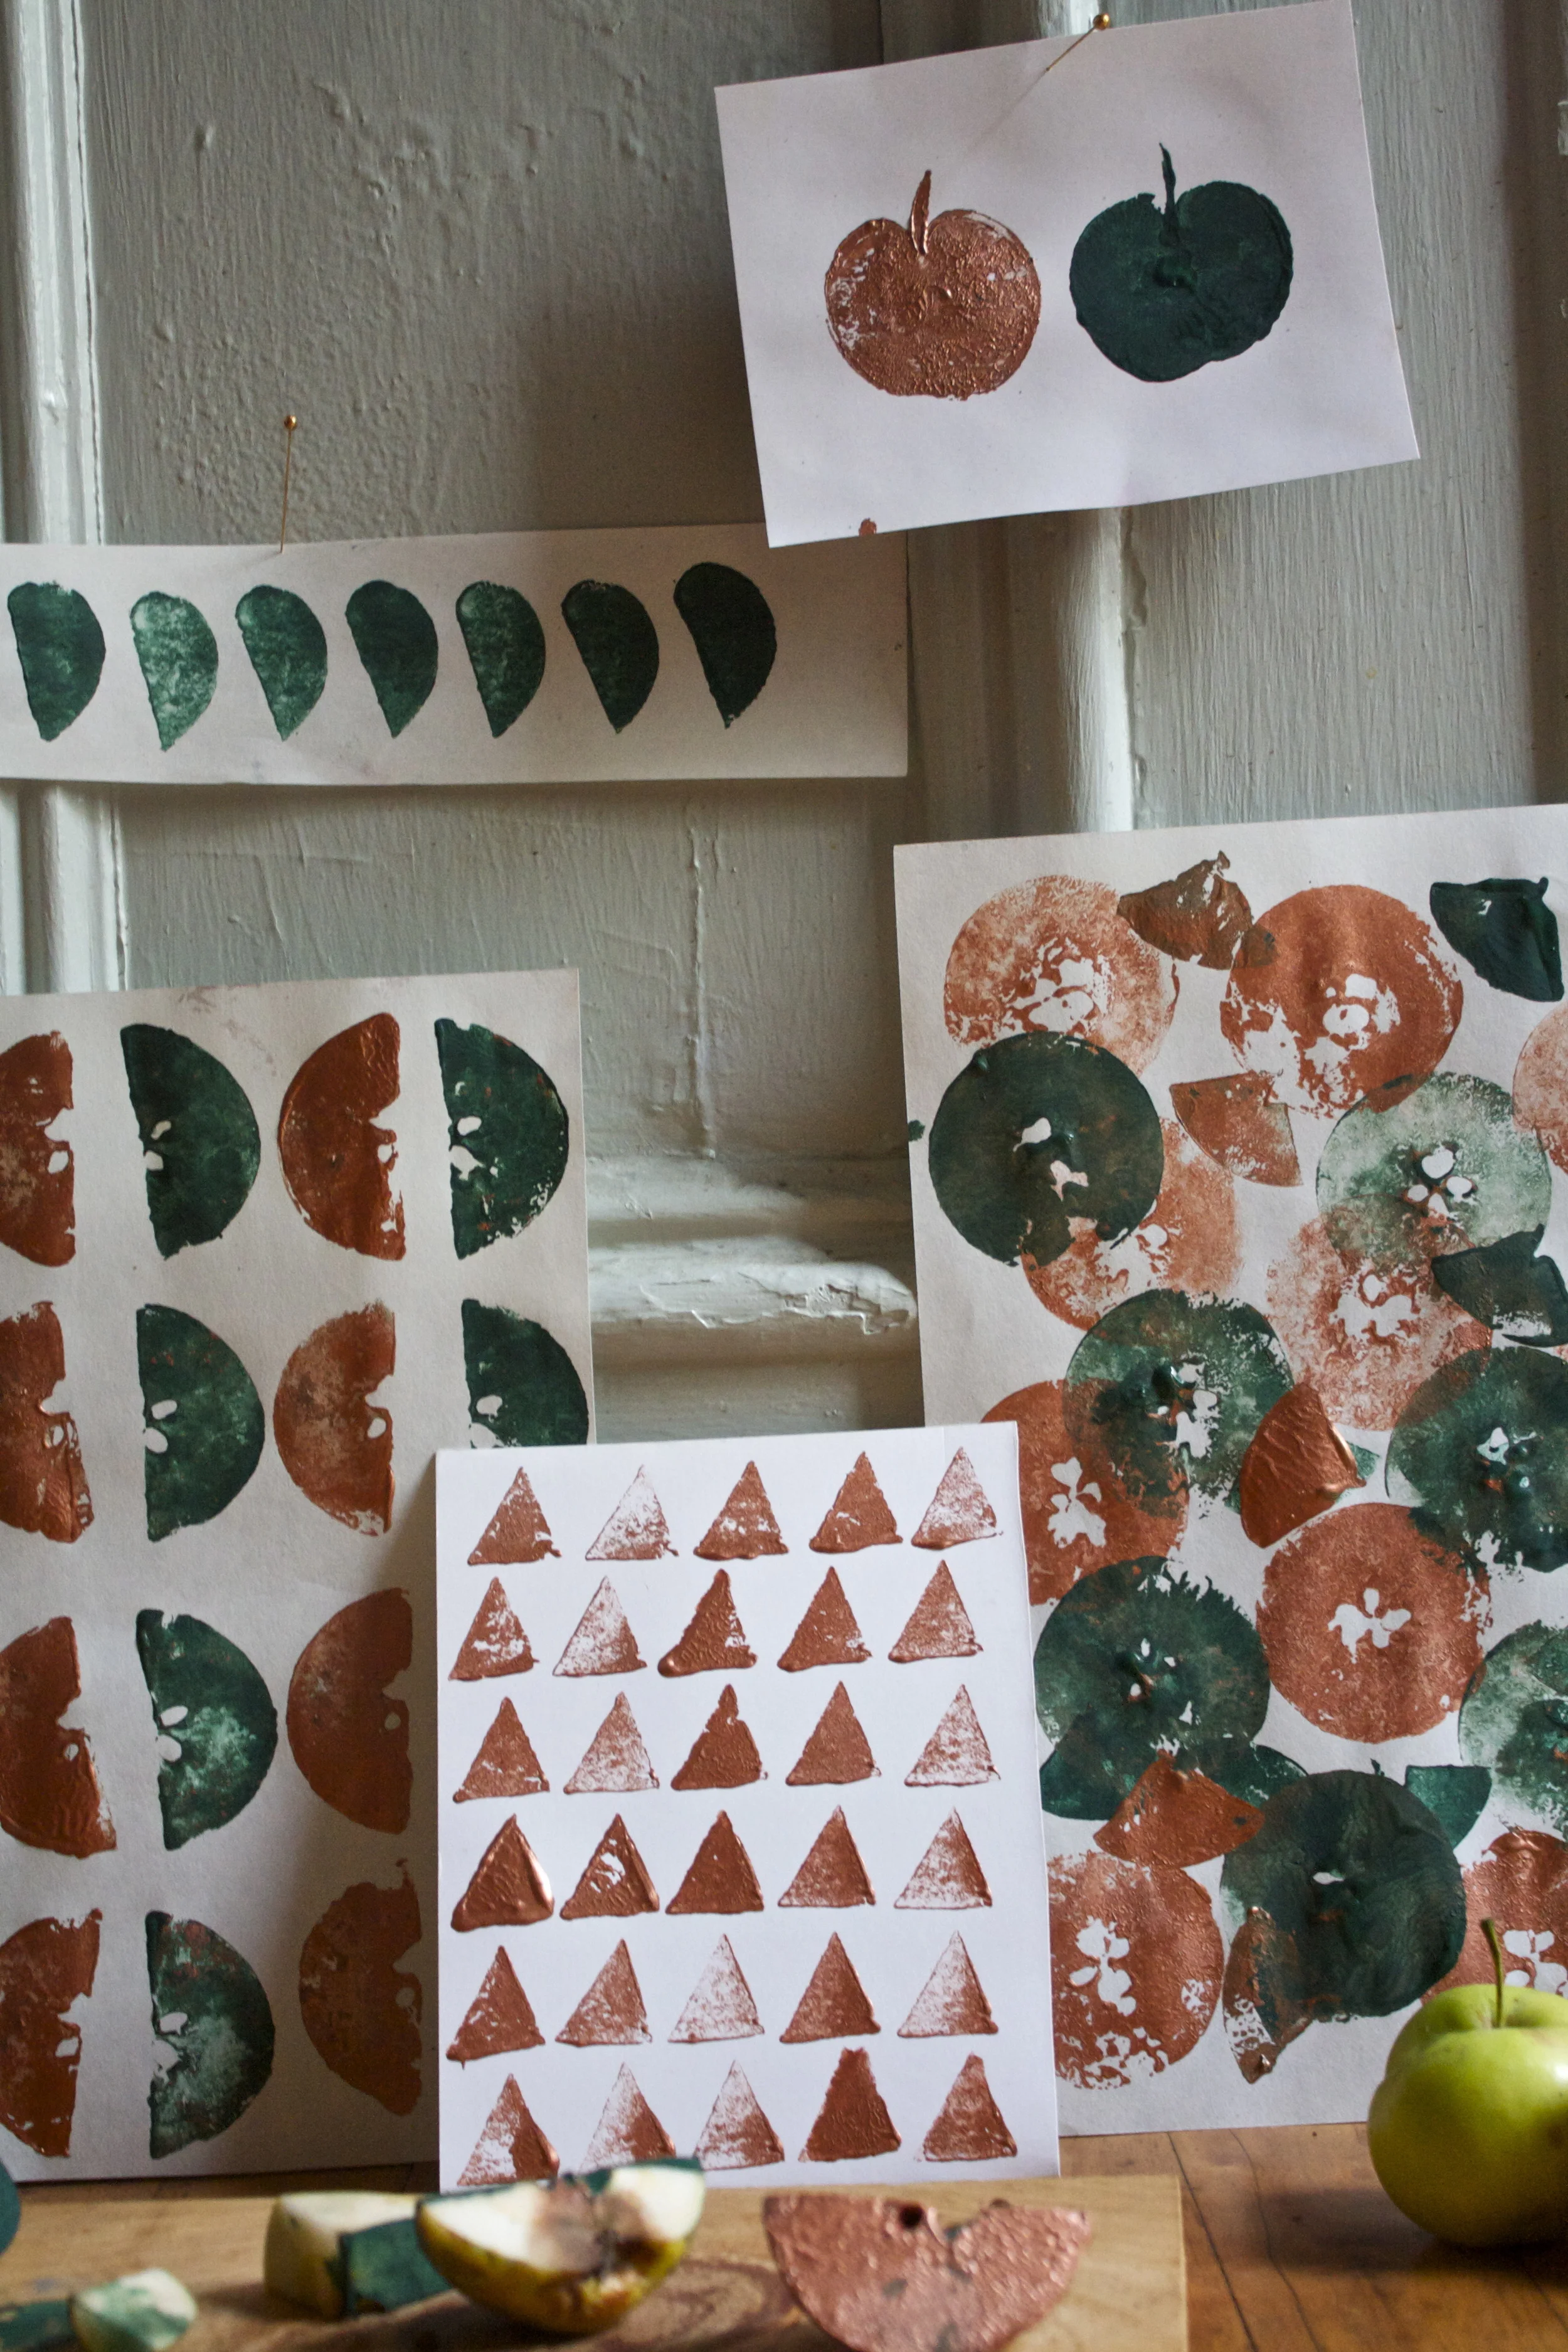
. I got a little excited with my fist print turned out a little chaotic(note print above)%u00a0but then I rained myself in.%u00a0
And did a few more simpler designs. %u00a0%u00a0
But do it anyway you want cause it’s going to look cool no matter what.
Have fun!
-C
I never can really tell how I honestly feel about halloween. I love fall, I love pumpkins and cider, but thats fall ,not halloween.%u00a0%u00a0I love to see all the happy little littles running around being super cute. all jacked up on way to much sugar.%u00a0%u00a0And %u00a0I know when I was a kid I was all about it. I mean, what kid doesn’t get jazzed to run around, dressed up (I was alway a black cat),%u00a0with a pillowcase full of candy all night long? That is just magic.%u00a0But as an adult, I haven’t really done too much. Sure I help wit the costumes of the littles and sometime I hand out candy, but where we live now, it’s not possible to give out candy. And the littles, they go do stuff with there friends, not there old lady aunt.%u00a0And I guess me and the mr could dress up and go to a party or something, but %u00a0honestly, we are not really party people%u2026. So yeah, don’t know. I think when I finally have my own kids It will be more fun.%u00a0But whatever, at least I can do a little decorating.
For as long as I have been as adult with my own living place, I have really gotten into holiday decoataing. But here is the thing. I like my decor to be minimalistic,%u00a0not to over the top, or super cheesy. (although I really do like when other people go super overboard and cheesy) But no, you won’t find a 20 foot blow up of a witch or severed hands in my front lawn.(maybe a few dead mice, but thats the cat, not me)%u00a0And I like to make my decorations. I even like to get some littles in one it, cause hand made kiddo decorations are the best.%u00a0
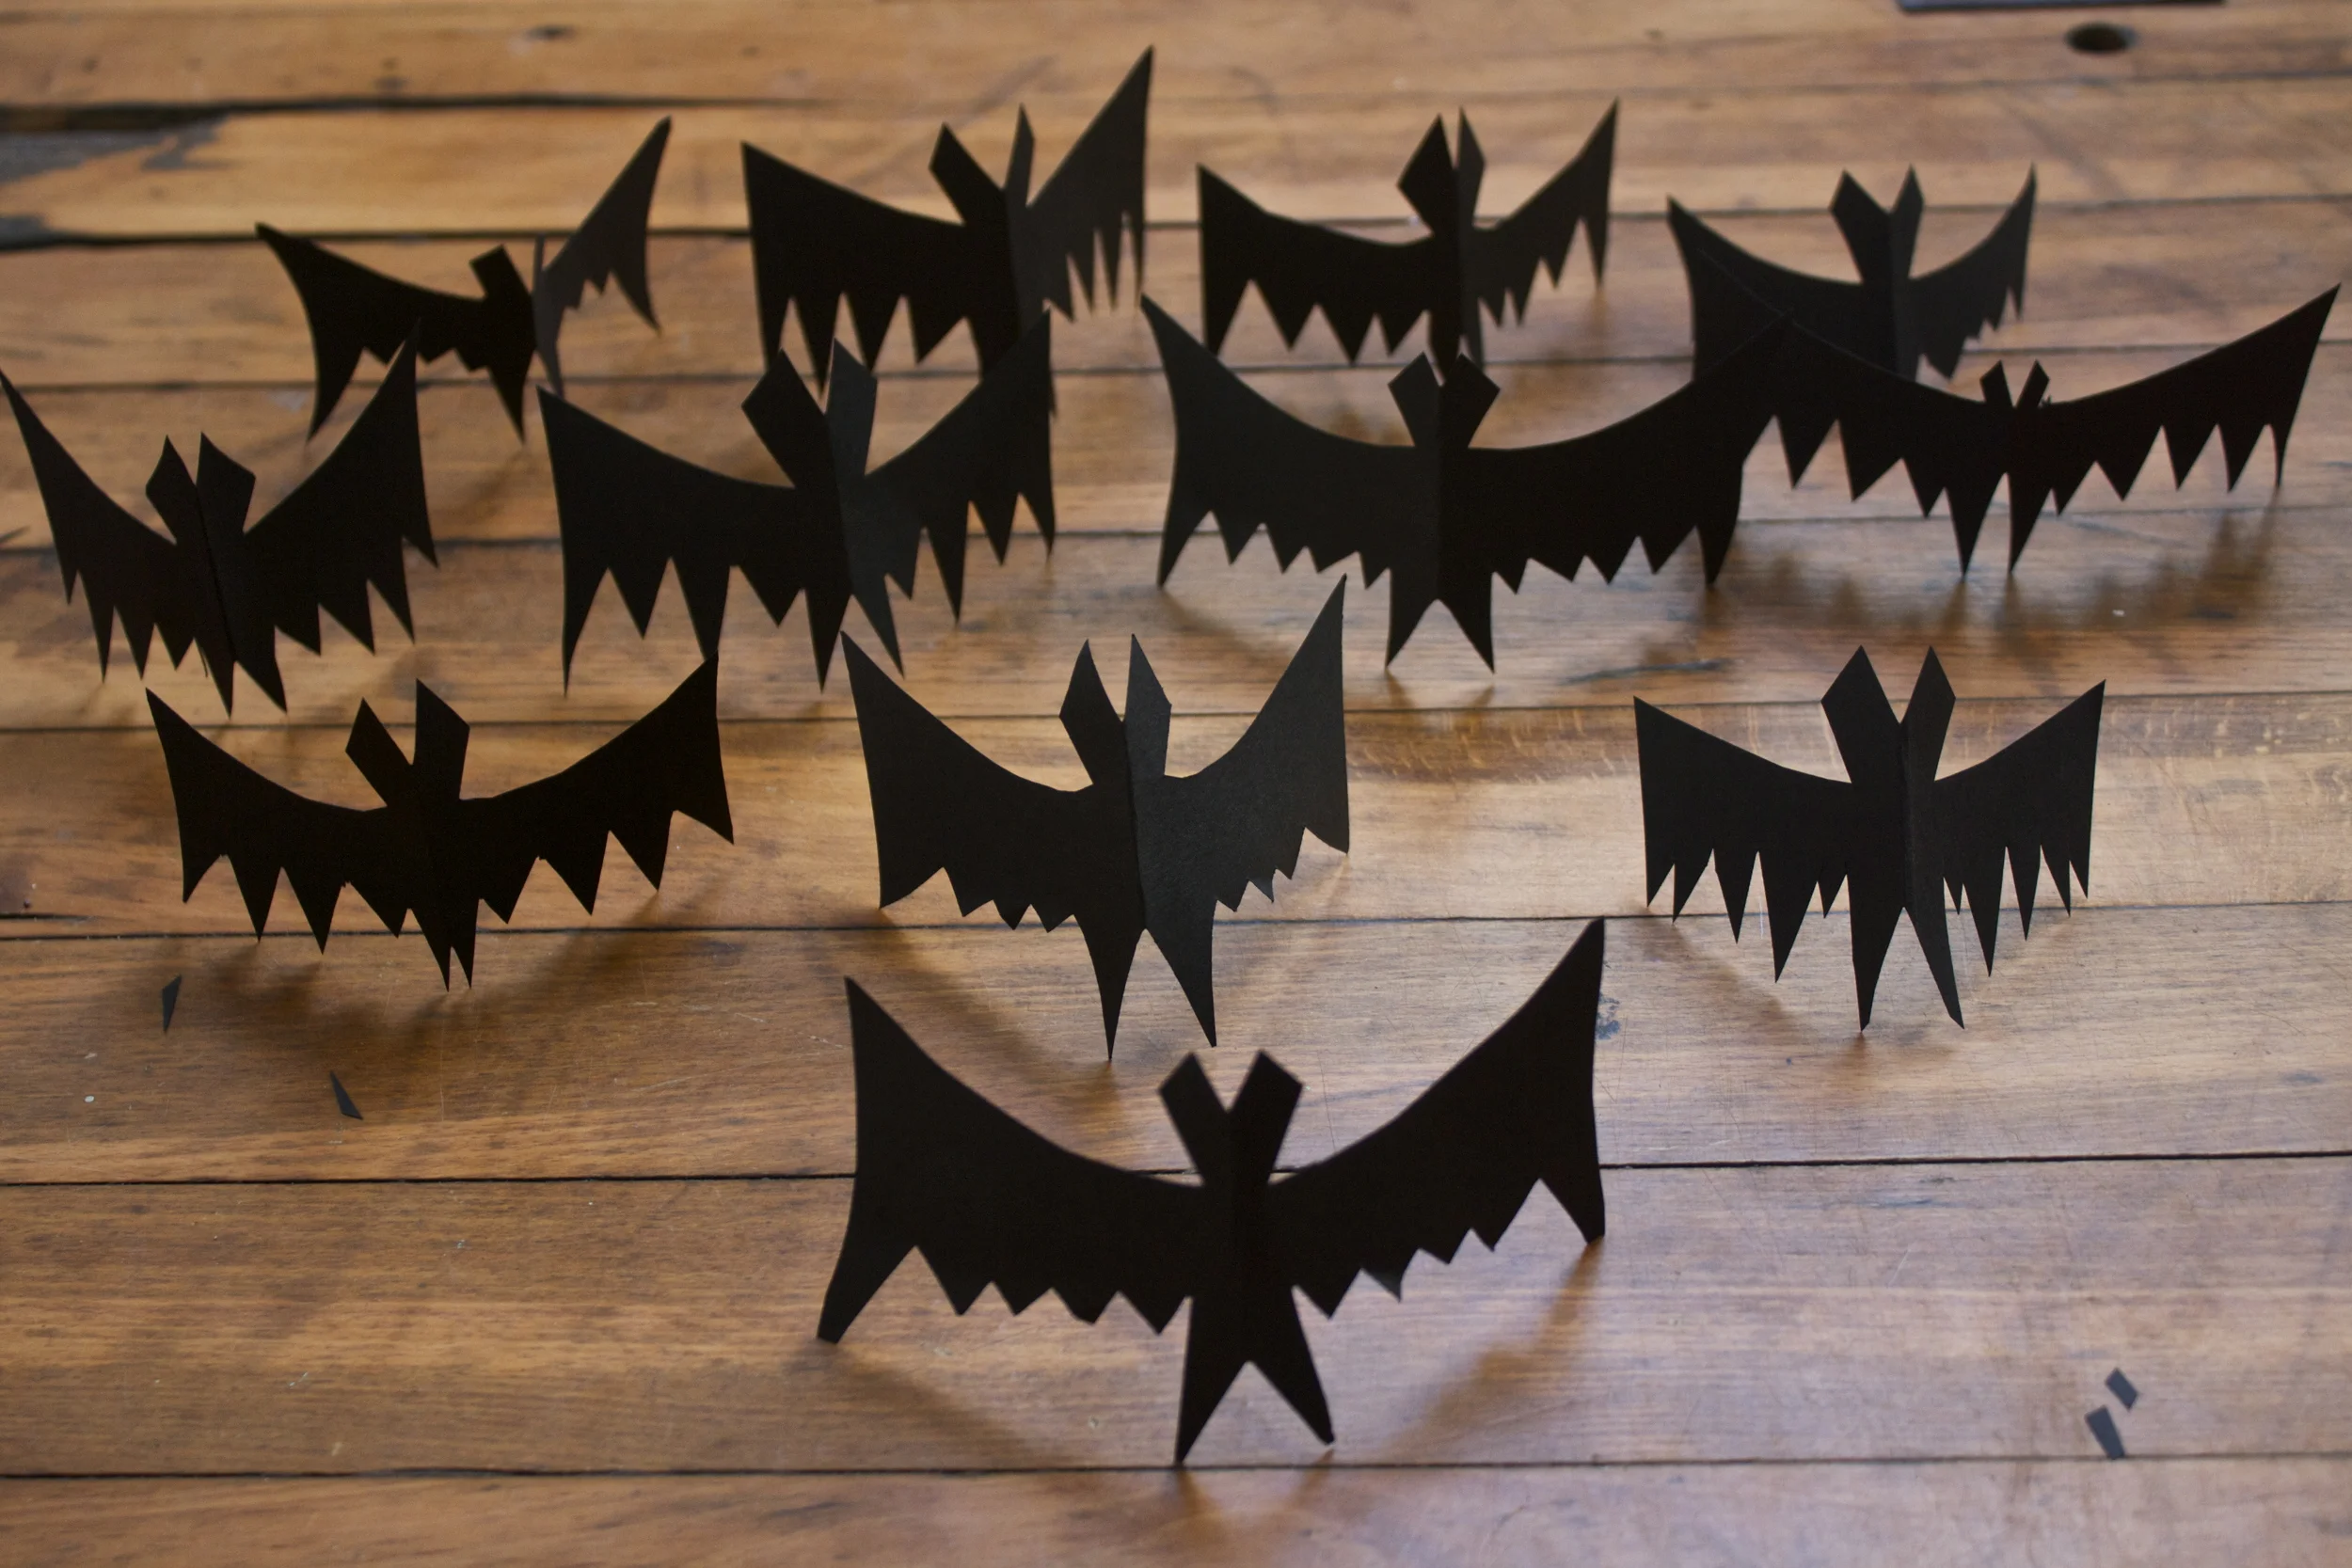
These bats are the perfect bit of halloween decoration. I made a ton of them a few years back and lost them, so I just whipped up a new strand.%u00a0Fast and easy to make, are not overly crazy or gory, and can be hung anywhere. An yeah, making them with a few littles is fun, but you don’t need them. I made them all on my lonesome%u2026. Oh me..
Anyway, to the bat mobile (garland)!
The bat stuff
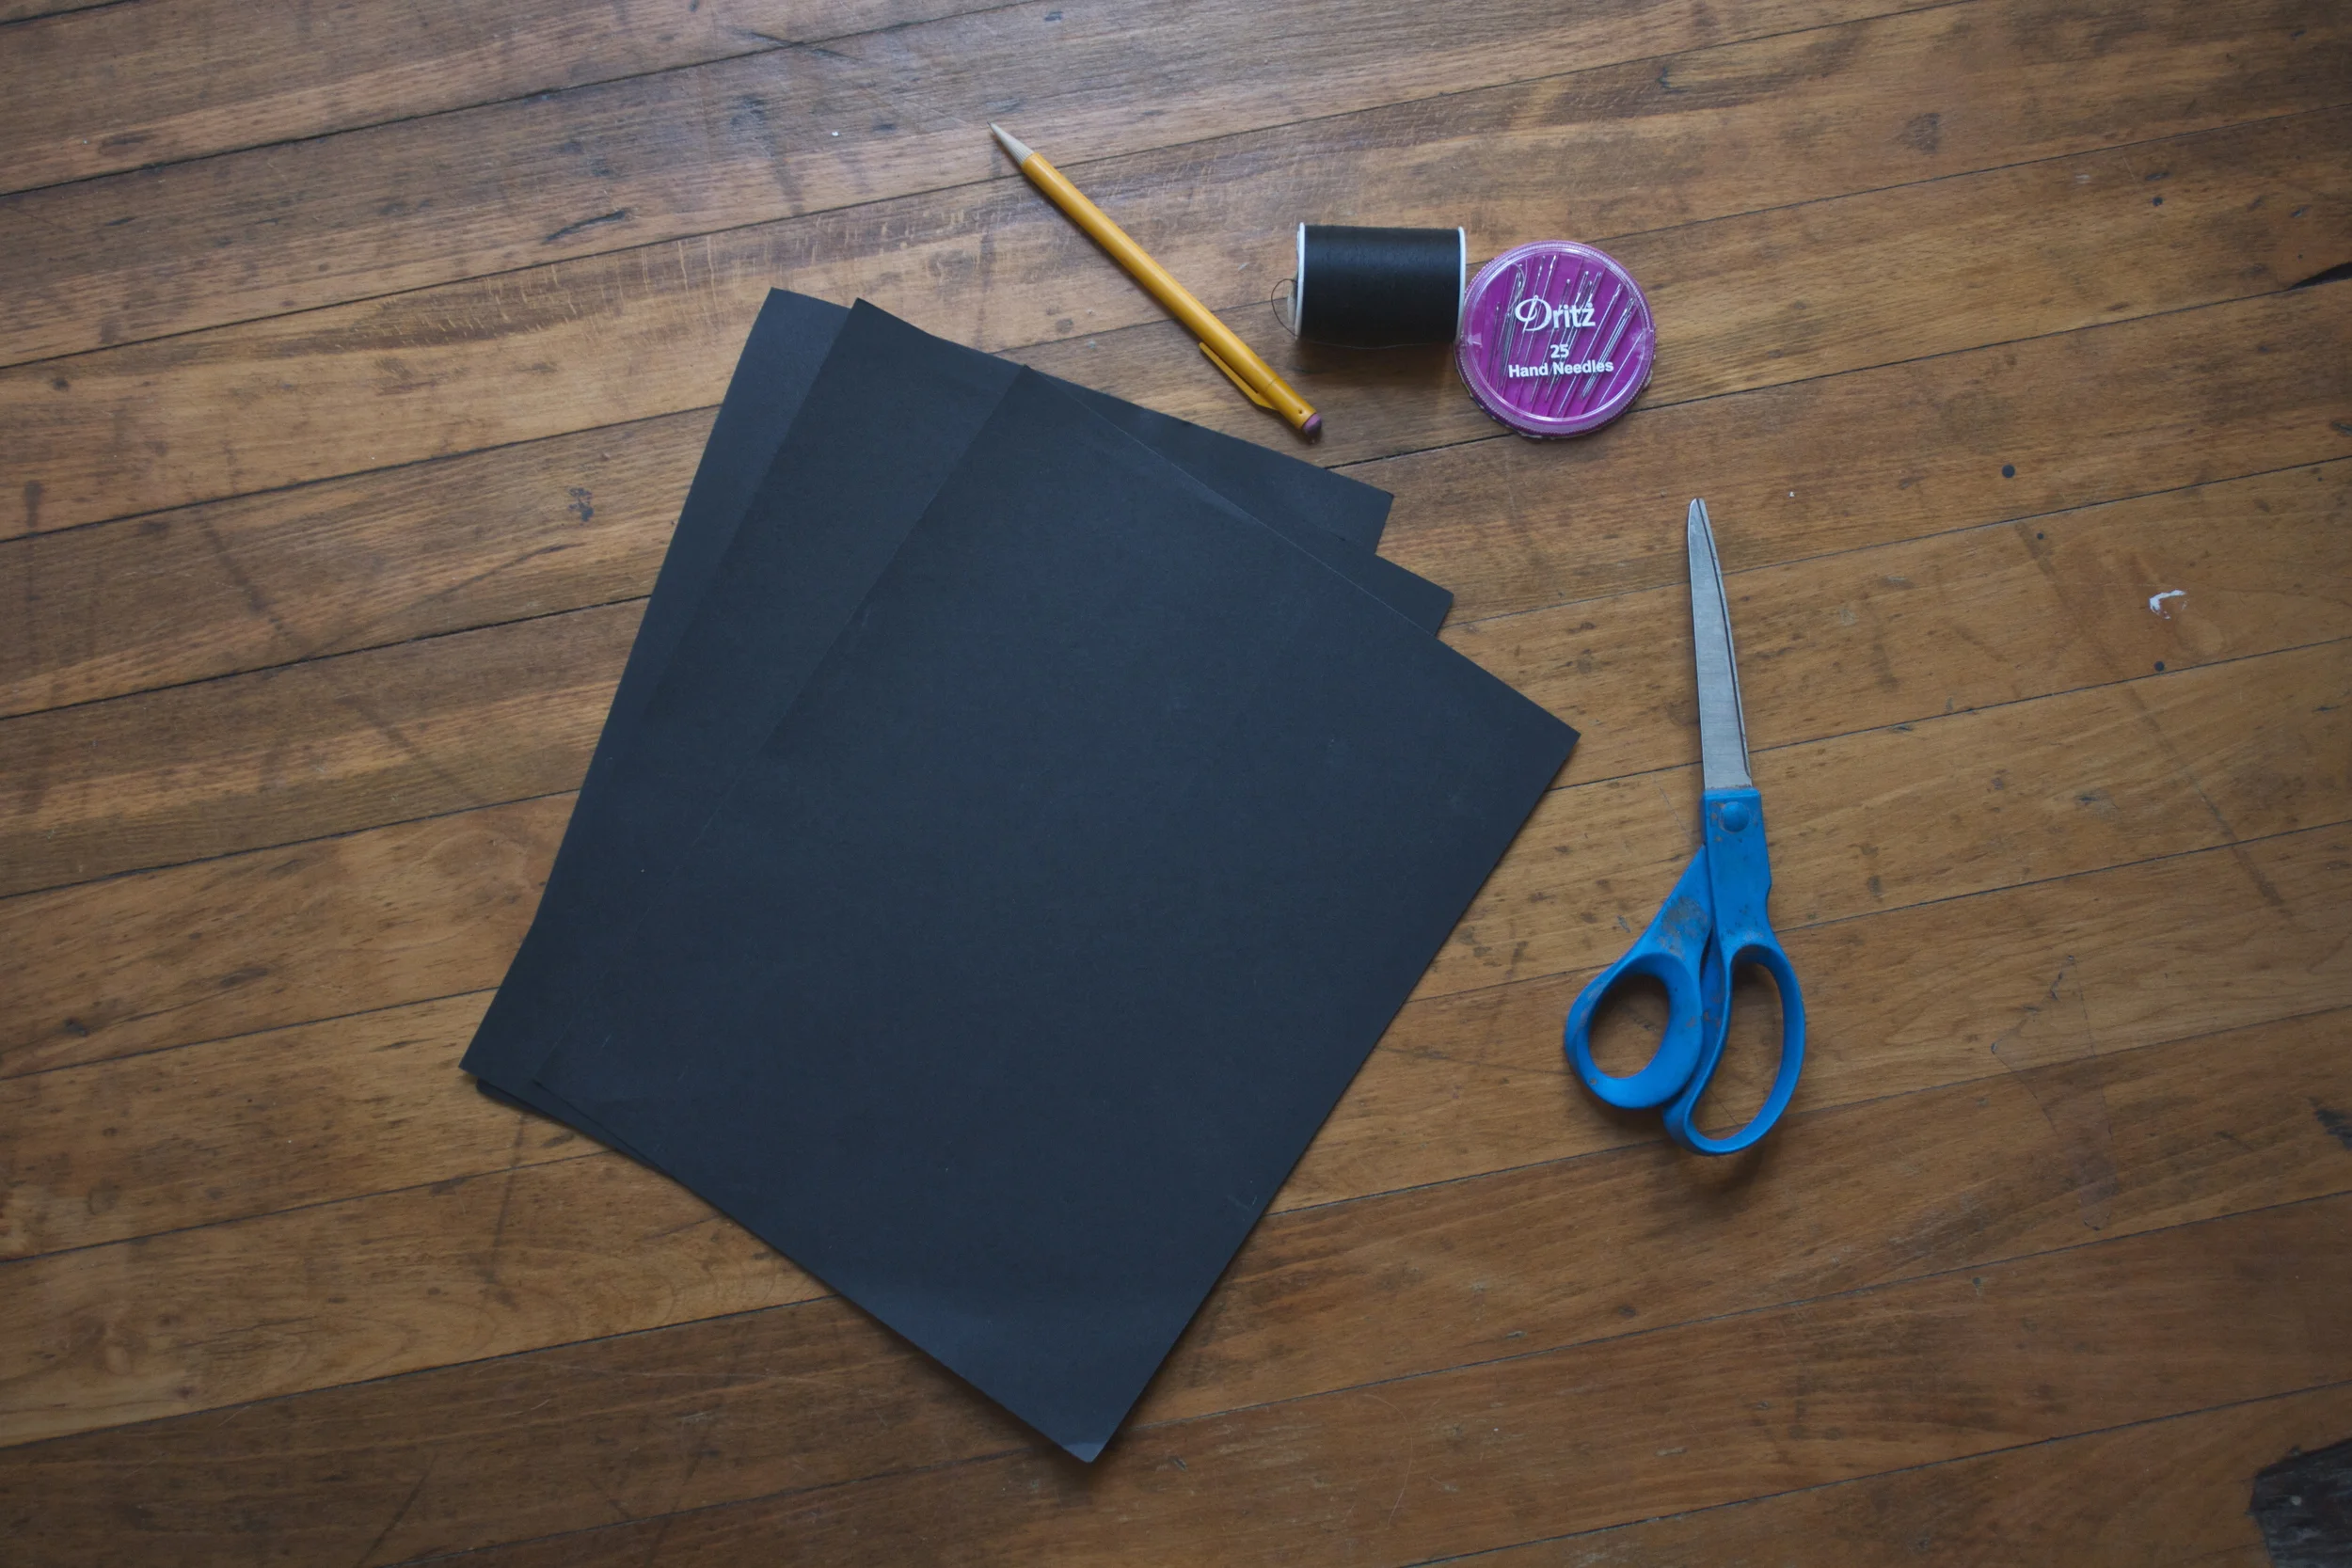
2-3 pieces of Black card stock (construction paper %u00a0is fine, but will the color will fade over time)
scissors
pencil
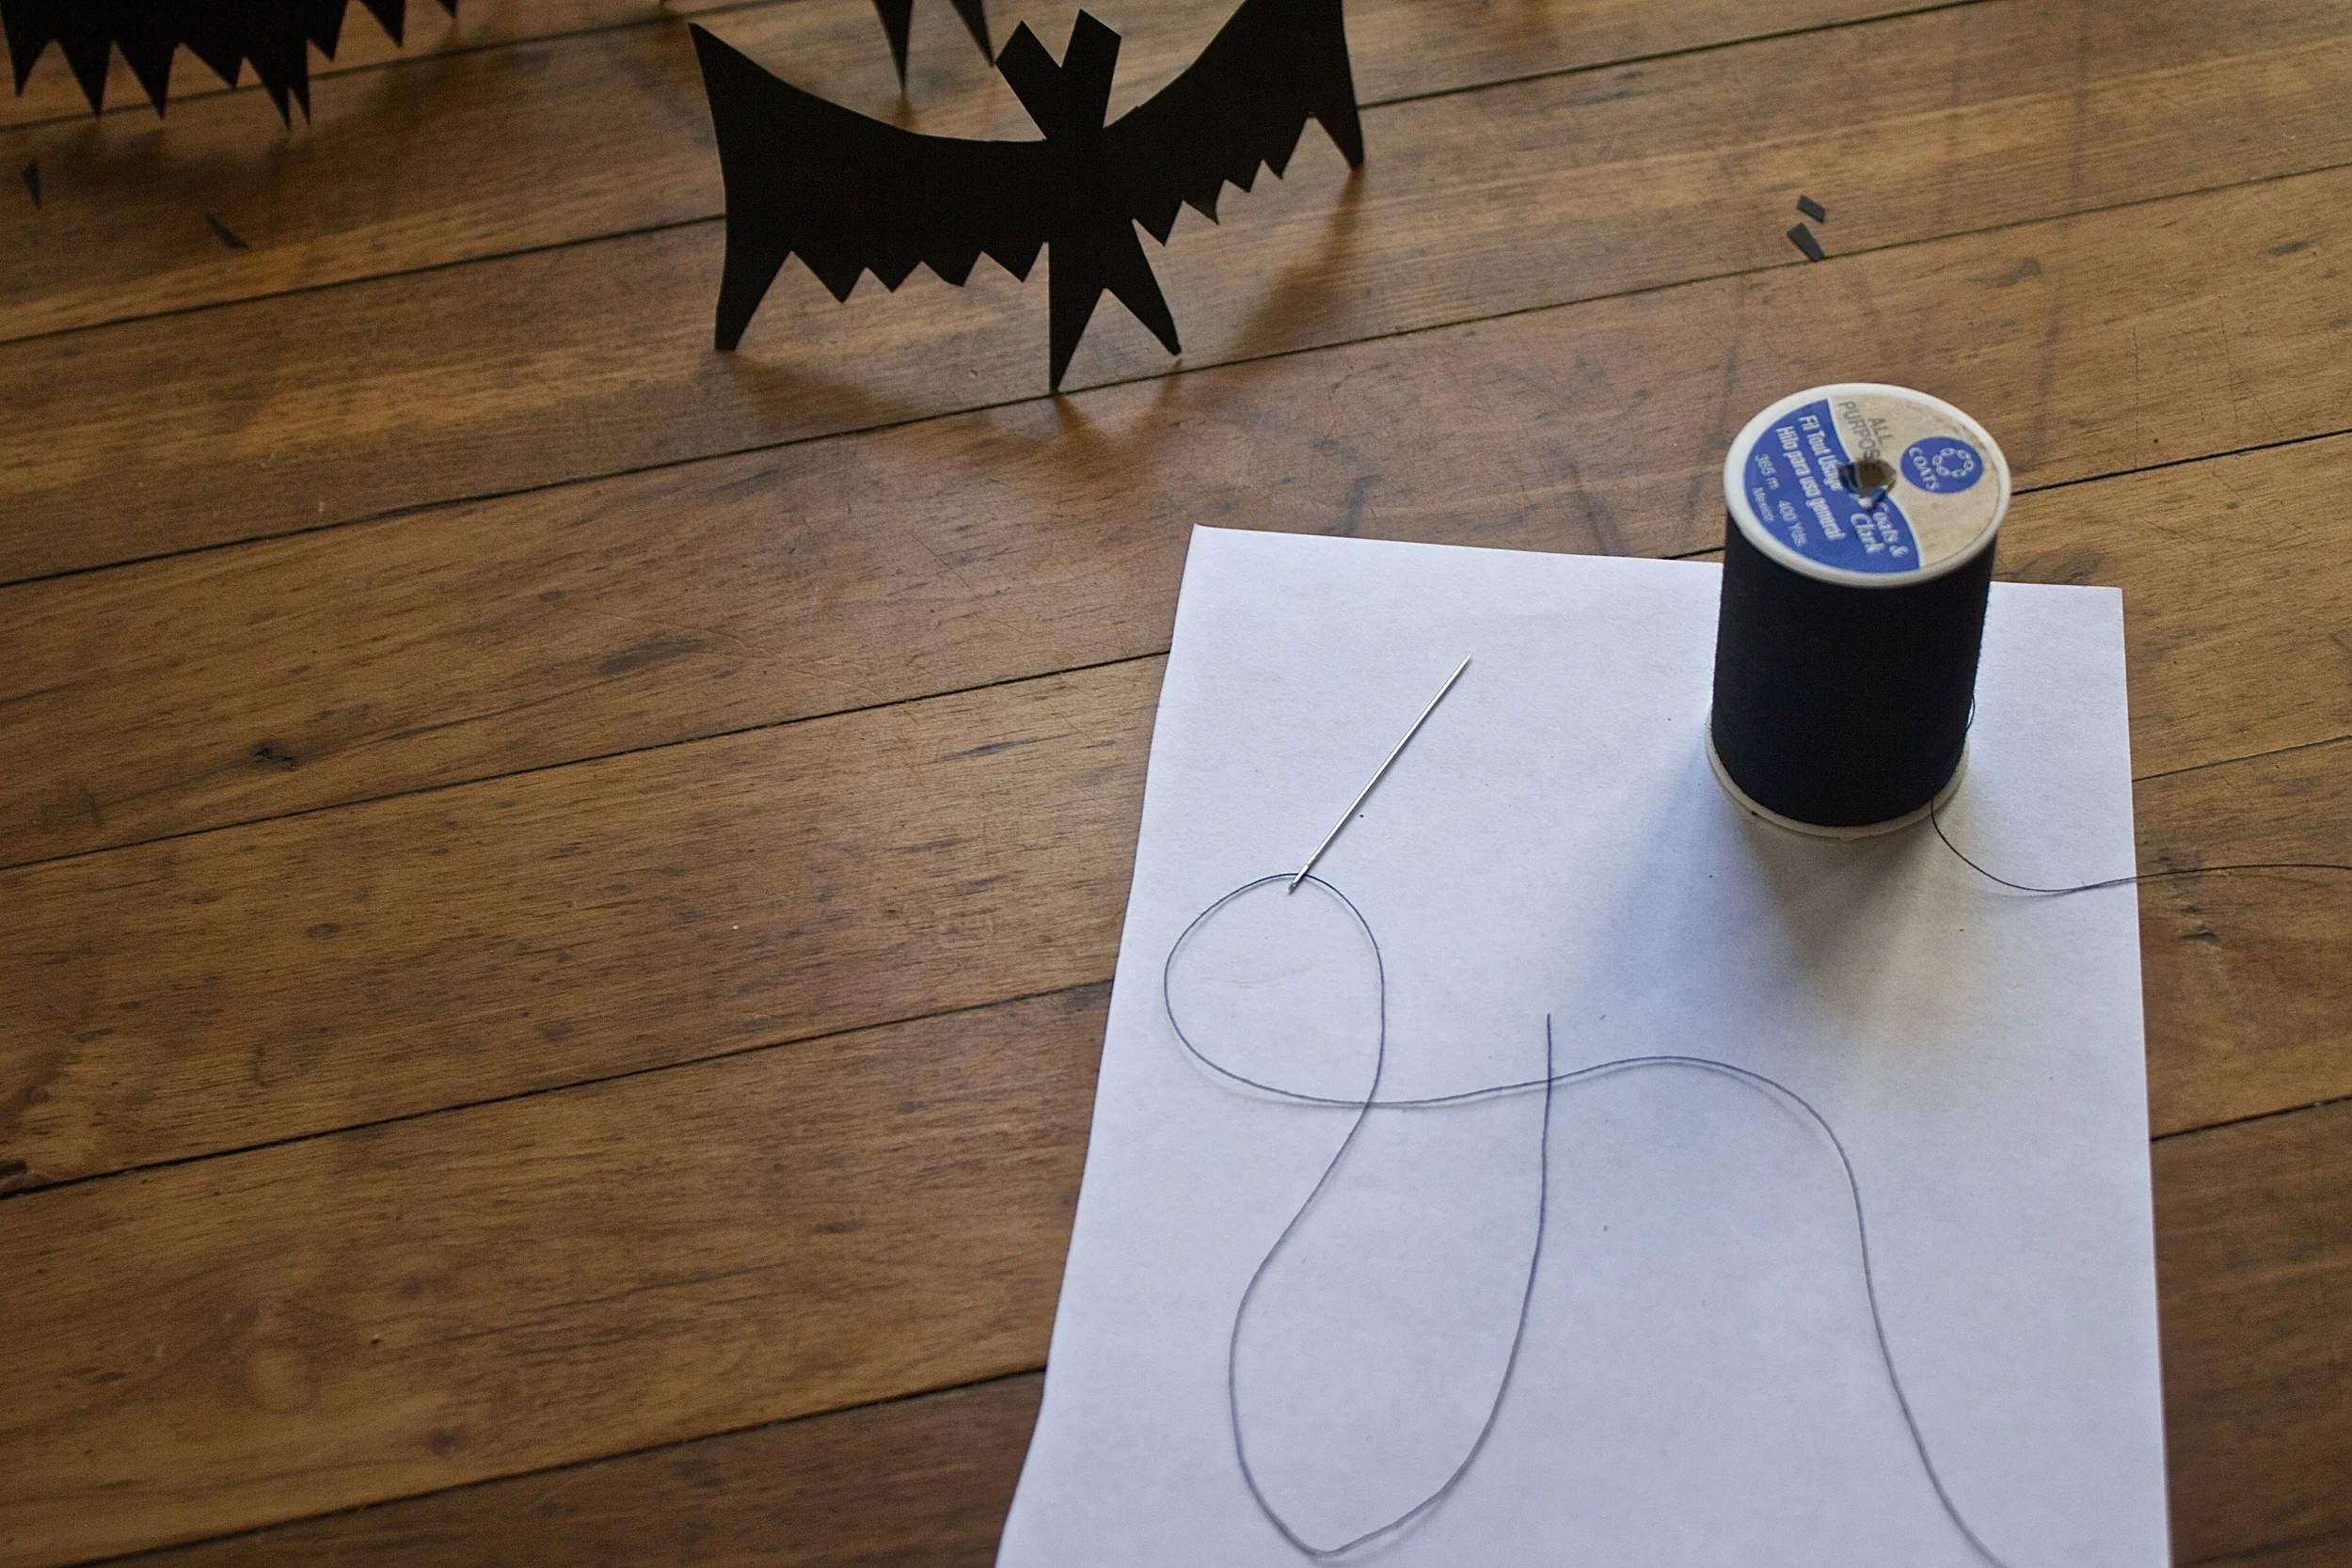
needle and thread*
clear tape or tacks (not shown.. to hang bats)
Note. You can use embroidery floss instead of thread, but the thread is much more visible and you are going to need a tapestry needle.%u00a0
Take a piece of paper and fold in half, either length or width wise.( If you do lenght wise, you can cut out a few more bats per piece of a paper, width wise, the bats wings are longer.. up to you, do it both ways if you want)%u00a0
Outline a bat.
Bats are all jagged %u00a0lines.. nothing too complicated so I figured a stencil is not needed. If you really need a stencil, I can email you one…
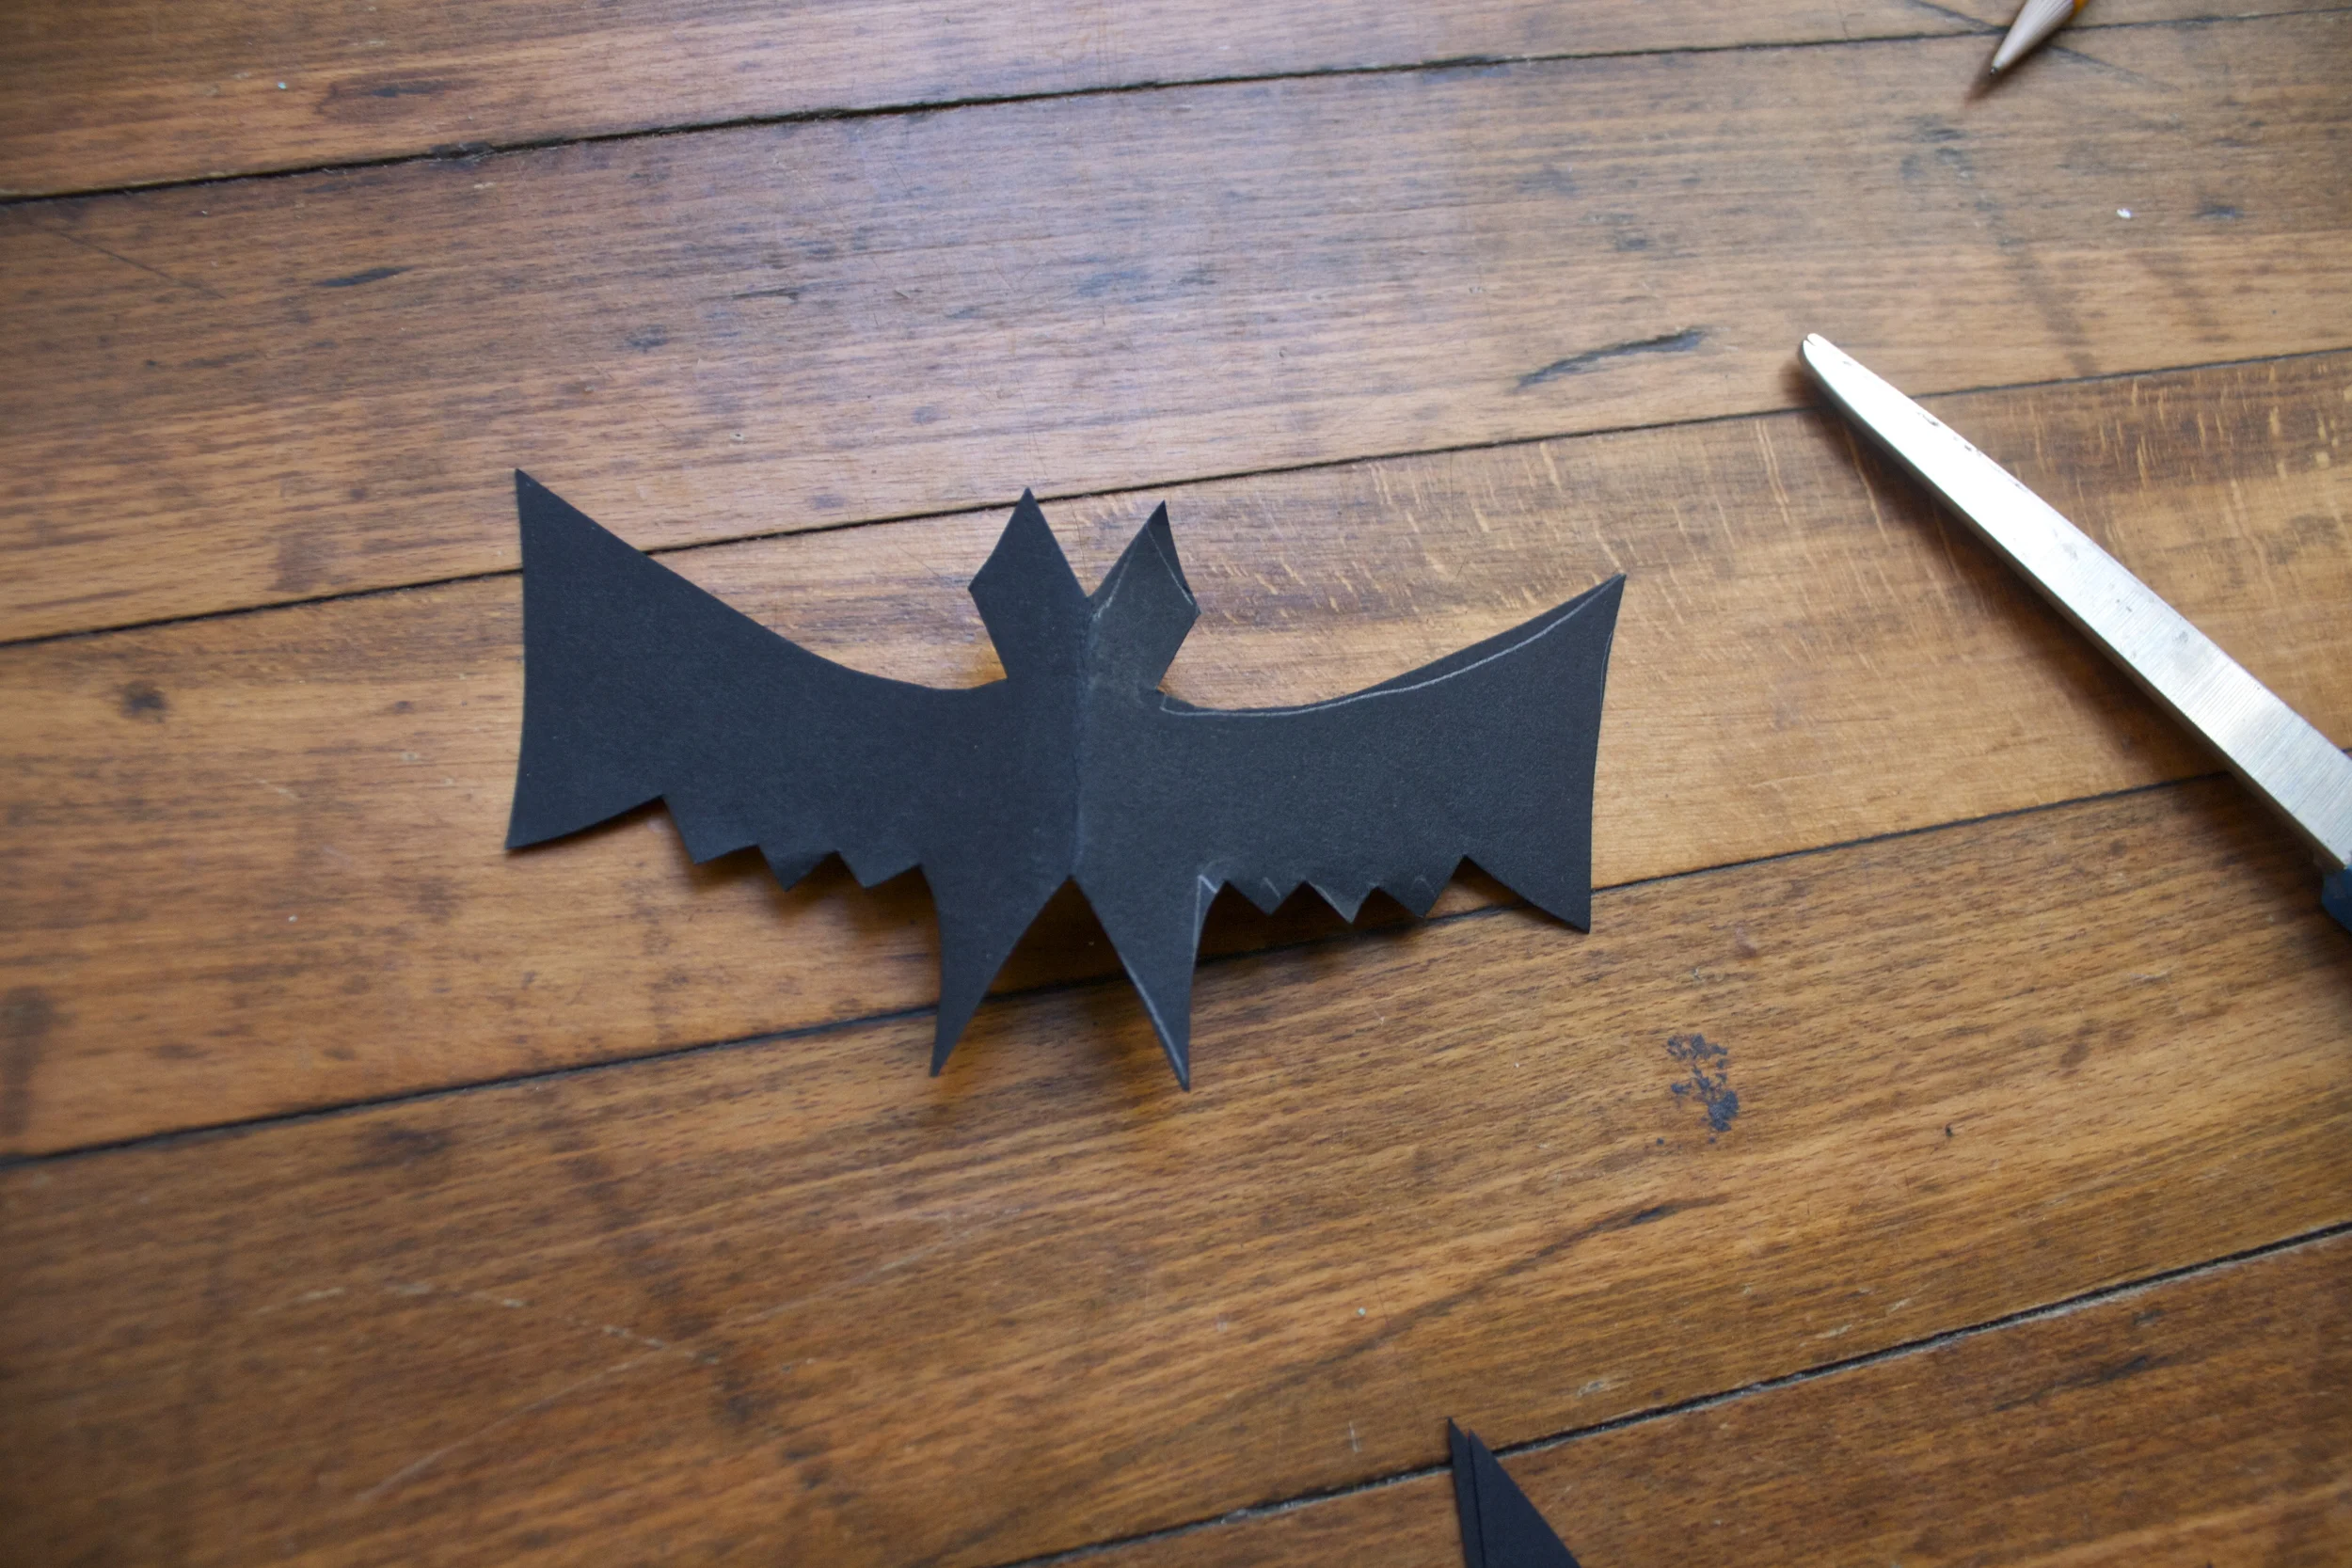
Cut out bat and open up.
See, easy. And now you have a bat. If you do not like the exact way it looks, fold in again and cut a little more, but don’t get to picky, you have many more to cut.
Now make yourself a %u00a0bat army. As many or as few as you like. I think 12 is a good number. If you want, take the first bat that you cut out and use that as a stencil. Me, actually just free form cut the guys, so none of them look the same.
Bats are ready, now thread you needle.%u00a0%u00a0Don’t cut the end loose or tie the two ends together.
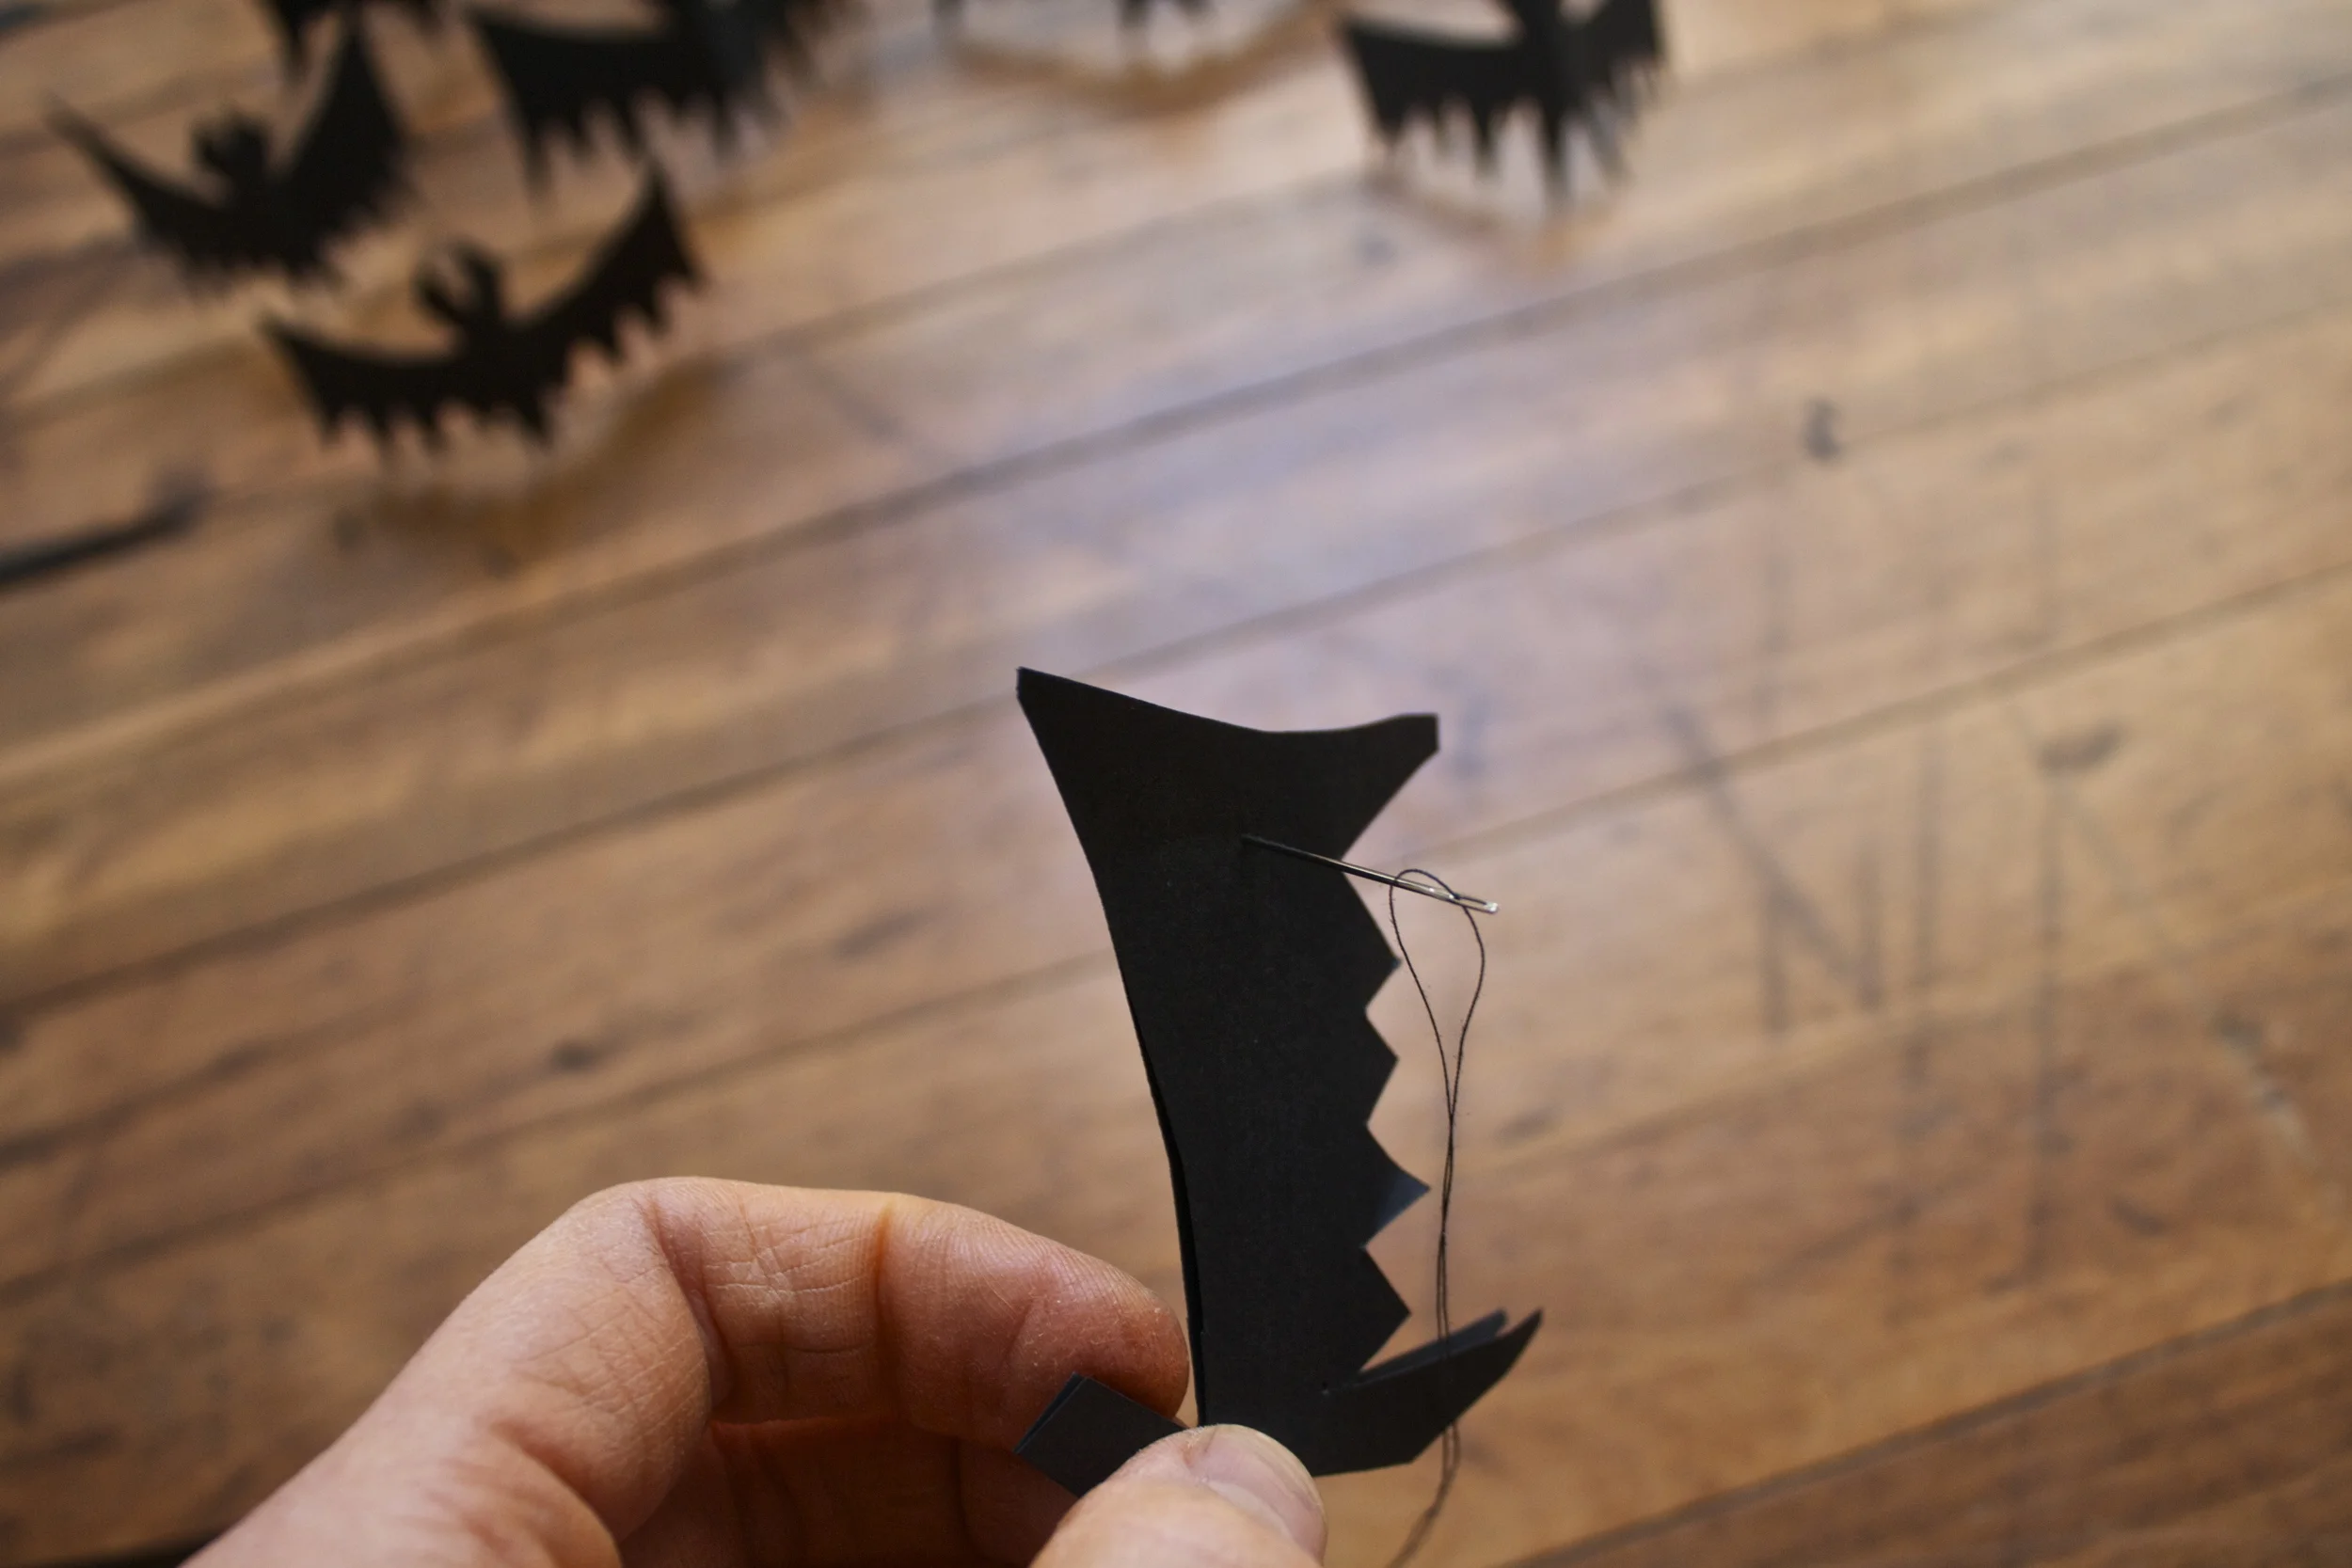
Fold bats back flat and thread them through the upper portion of the wings.%u00a0%u00a0Do that to all your bats.. and make sure that you are threading them on all the dame direction (if you care)
Once all the bats are threaded on. remove needle and tape the end of the thread. Space the bats out evenly or however you like, and hoe ever far apart you like, and cut thread of spool. Tape that end off too.
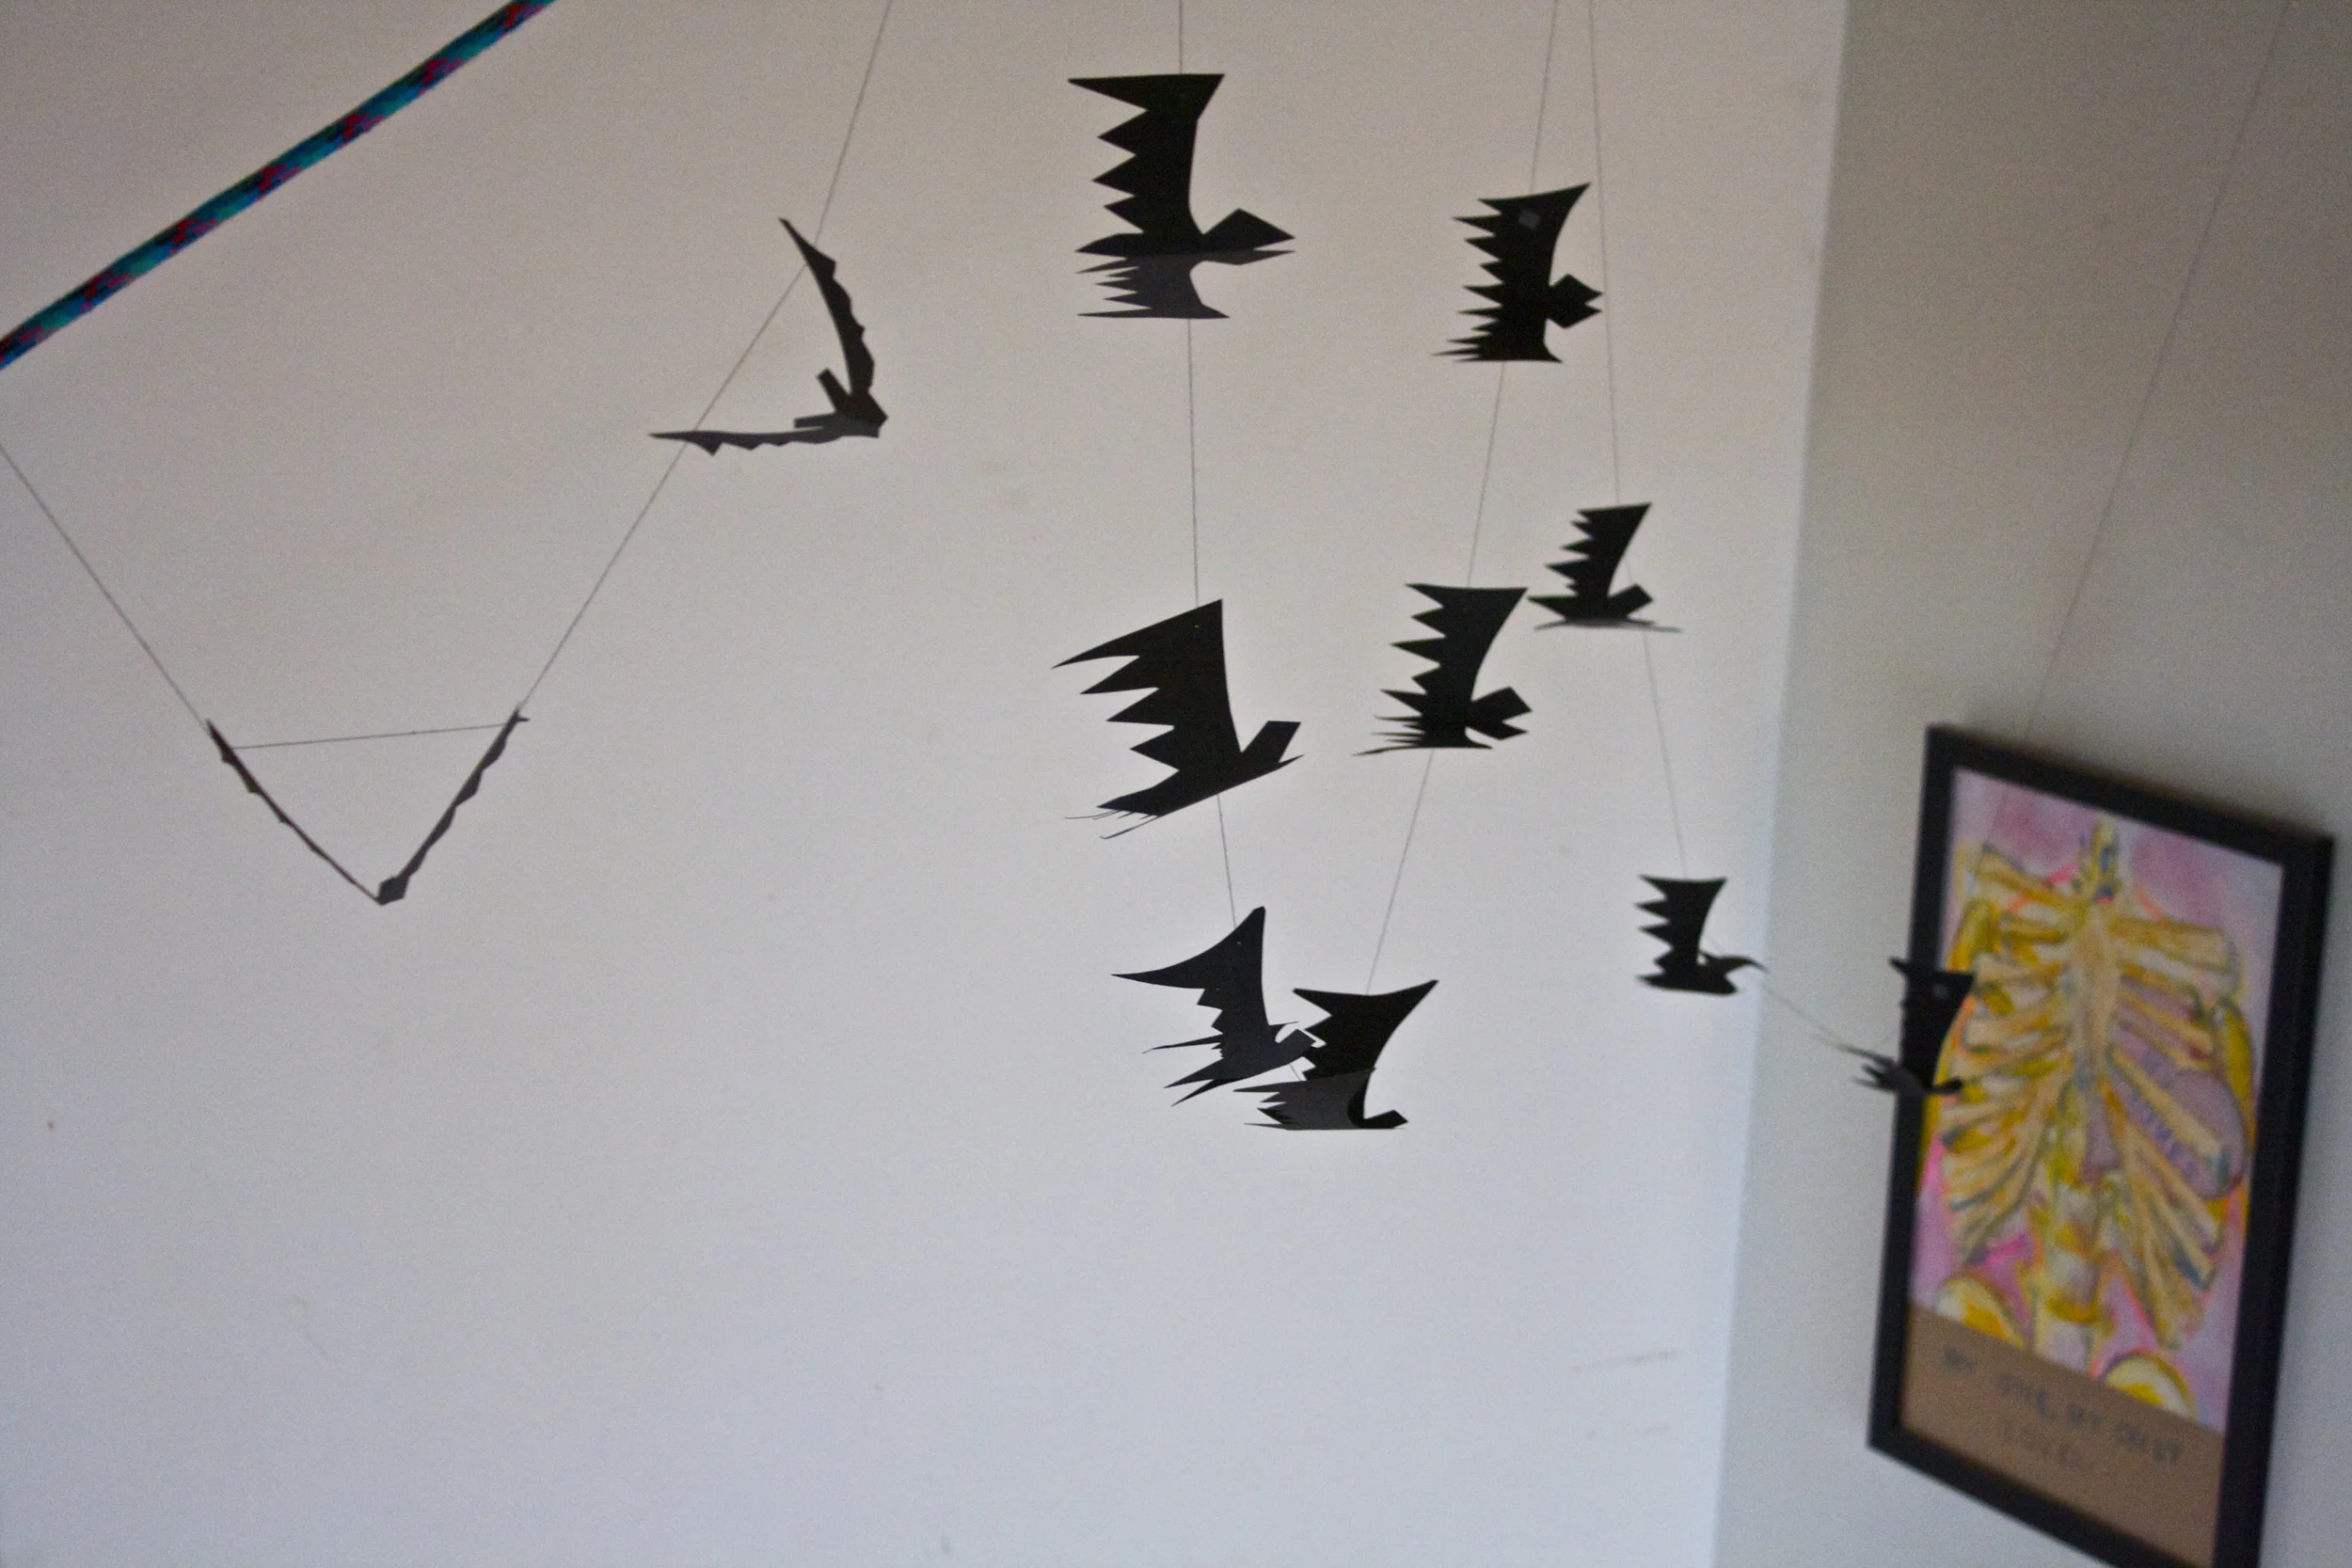
And hang them%u2026.%u00a0Most of my bats stay where I placed them, but a couple wanted to slide around on the thread, so I just stuck a tiny piece of tape on the inside of the wing over the thread to stop that.
They can fly threw the air%u2026.
Or drape on the wall.%u00a0
Any way, these bats are freaking bad ass and the coolest!
This past Christmas, my (kinda)mother- in-law gave me and the mr these really cool honey bee pins in our stockings. Nothing fancy, just a little pin, but I think it was one of the best gifts that I had gotten all year. The pin lives on my winter jacket.
And now I am into pins.
So a couple of the little’s came over yesterday after school for crafts and dinner and I figured a bit of pin making would be a perfect little project for us to do. And being that it’s the big V day coming up,%u00a0 making these pins heart shaped was more then overly appropriate. (What’s Valentines day without cute little hearts?) Well pin making we did, or I did, not so much for them. They made a few, but in the end, they were more excited to beat the crap out of the mr and to eat carrot shavings with peanut butter and nutella.. Totally ok with me because really, I was the one that wanted a little craft time and the mr did need to get his butt kicked.
Sure I made these pins pretty much for myself, but imagine the possibilities. Make a bunch to give out to your friends, family, neighbors, or even the mail man!? Or if you have yourself a little, how great would these pins be make and to give to all their little classmates. I know that if received one of these pins in my homemade shoe box mail box meant to collect all of my candy studded, drugstore bought valentines. I would have been elated and rocked that pin all year long on my super cool backpack.(grade schooler, they have all the fun) Right after I finished painting and gluing all my pins, Miley then decided that they were freaking awesome and wanted to make a bunch more…. Well little little, to late, time to go home. But I did give her a bunch to bring back with her. She will just have to bug her mom to make some more.
And sure, I mention valentines day when talking about these pins, but really, hearts are for everyday, and are still really great long after V day is over.
Handmade heart pins = love!
Stuff you need for some awesome pins.
Polymer clay (I used white but any color will do)
red and white paint (preferably enamel or a high gloss paint) and a paint brush
bar pin backs (I bought these at Michael ‘s craft store. 64 for like 3 bucks!)
industrial strength glue (E600 is great and is used and recommended by many a crafters)
rolling pin or wooden dowel
small heart shaped cutter
sharpie pen to write on pins (optional)
Glitter( also optional)
A couple notes. You could use red clay but I have found that when I buy the red dyed clay, its always harder to work with and plus, it stainsyour hands. Also, I like to seal the clay and enamel paint does the trick. If you don’t want to paint it, just pain on a coat of clear sealer.
Start buy kneading a chunk of clay a little bit to get it to a workable state, then roll into a ball and roll out flat. I rolled mine out about 1/3 of an inch, but I also knew I wanted to squish it out a little flatter once I cut the shapes out.
Cut out your hearts, or if you want, free form them.%u00a0 What I did was used my tiny heart cookie cutter to cut the initial shape, but then used my thumb and squished them all out a bit bigger.
Note here.. Hears are awesome and amazing, but other shapes….Go for it. You probably have a shit tone of those pin backs.
And just before you bake them, make sure that the pins you are using will fit behind the hearts. (if you notice any visible pin, just smoosh the heart out a little more).
Into the oven,, out of the oven. Read the package to make sure, but the stuff I used only needed to be baked for 15 minutes at 275
Once out of the oven, let completely cool and harden.
Once the hearts are cooled, go ahead and paint them. Use straight up one color, or mix and make a few different shades. (red, white and pink are nice together)
You can add some glitter to the wet paint to add a little bling….
Or add designs or what have you. Do whatever feels right.
Now stick a pin thingy on the back of each heart with a blob of glue. (If you use the E600, make sure to use it near a window or somewhere ventilated.. it really stinks for a few minutes)
Let the glue dry (this glue was completely dry within an hour, but follow glue package instructions)
And if you want, grab the sharpie, make sure the paint is really dry (at least an hour) and write a little something on the hearts.
And now the hard part.. which one goes to who and which one (or 4) do you keep for yourself. (you can always make more!)
The mr was being awesome and spent the afternoon in the pantry adding a few finishing touches I requested ( more shelves and more supports) There really isn’t enough room in there for the both of us and the air compressor, but I needed to be close by to tell him what to do (in a non annoying way) so I figured the best way I could help was to be in the kitchen and make cookies. That’s helpful right? Answer is yes, cookies are always helpful.%u00a0
It’s been a while since I made cookies and I am pretty sure that these were the first cookies that I have made in this kitchen which seems crazy and I should go on a cookie making binge. I finally moved all of my food and baking stuff over from the loft so now I can bake on a whim. Cookies, cakes, bread… whatever I want whenever I want.%u00a0 It is so nice having my baking things all around me. I feels like home.
And I think from now on whenever we have a house project that I am not to interested in doing (like we need to empty and clean out he basement) I will just make cookies instead. I’ll be like “Oh, I could help with that or….I can make you favorite cookies” (with a wink, wink and a kissy face)%u00a0 We will see if that floats with the mr. I’ll let you know.
The stuff. Coconut flour, regular flour, and a little bit of salt. Sugar, coconut oil, ground chia seeds with water and a lime.
Zest the limeand mix into the flour.%u00a0 Add the juice to the chia seeds.
Mix together the chia seeds, sugar and melted coconut oil until evenly combined
Then dump dry into wet and mix until it turns into dough.
Take any liberties in shape you want here. I rolled some into balls and some I made into hearts. These cookies don’t spread so pretty much any shape you make it’s going to stay that way. Just make sure to smoosh the doughwith you hand or a fork to an even 1/2 inch so it bakes evenly.
Once the baking sheet is full, stick it in the preheated oven.
12-15 minutes laterthe kitchen smells all nice and the cookies are golden and ready. Stick them on a rack to cool.
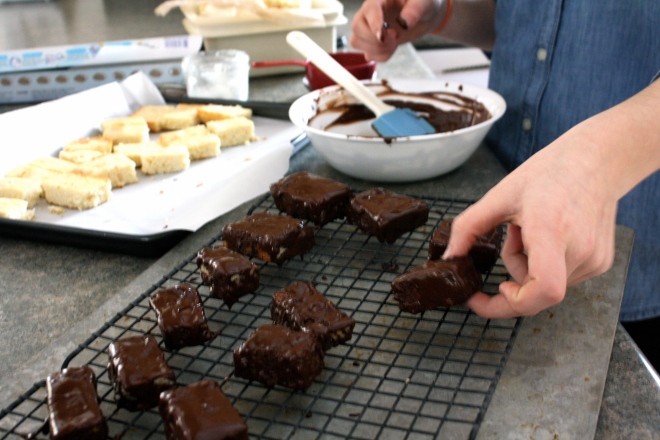
Oh but wait, why not add some chocolate drizzle.%u00a0 Easy easy. Justmelt some chocolate chips with a bit of coconut oil.
And drizzle it all like yeah
Sweet coconut lime goodness. My pantry is all done and the mr got some love cookies. All in a days work.
bye!
-C
makes about 12-15 cookies
1/2 cup flour
1/2 cup coconut flour
1/2 cup sugar
1/2 cup coconut oil (melted and cooled)
1 lime (juice and zest)
1/2 teaspoon salt
2 tablespoons plus 4 tablespoons water
1/4 cup chocolate chips and teaspoon coconut oil for drizzling (optional)
Preheat oven to 350
In a medium bowl, whisk the flours, the salt and the zest of the lime. After zesting lime, juice it and mix2 tablespoons of the juice into the chia seeds along with the water. In a separate larger bowl, mix together the sugar and coconut oil until combined then mix in the chia seeds. Dump the dry mixture into the wet and mix until combined and dough has formed.
Roll cookie dough into balls the size of walnuts. Place on cookie sheet and about 1/2 inch smoosh flat with either your hand or a fork. If you want, shape the dough into a shape (like a heart) just make sure to flatten it so it bakes evenly. The cookies don’t spread so you can place then really close together on the cookie sheet. Place i oven and bake for about 13-15 minutes or until the bottoms of the cookies are a nice deep golden brown. Place cookies on a wire rack to cool. Now they don’t need it, but I was told the chocolate drizzle was awesome…
Place chocolate chips and coconut oil in a microwave safe bowl and place in microwave at 30 second intervals until the chocolate and oil can be mixed together into a drizzable consistency. Now take that and drizzle all over tops of cookies.
Eat. Store uneaten cookies in airtight container
This past Christmas, my (kinda)mother- in-law gave me and the mr these really cool honey bee pins in our stockings. Nothing fancy, just a little pin, but I think it was one of the best gifts that I had gotten all year. The pin lives on my winter jacket.
And now I am into pins.
So a couple of the little’s came over yesterday after school for crafts and dinner and I figured a bit of pin making would be a perfect little project for us to do. And being that it’s the big V day coming up,%u00a0 making these pins heart shaped was more then overly appropriate. (What’s Valentines day without cute little hearts?) Well pin making we did, or I did, not so much for them. They made a few, but in the end, they were more excited to beat the crap out of the mr and to eat carrot shavings with peanut butter and nutella.. Totally ok with me because really, I was the one that wanted a little craft time and the mr did need to get his butt kicked.
Sure I made these pins pretty much for myself, but imagine the possibilities. Make a bunch to give out to your friends, family, neighbors, or even the mail man!? Or if you have yourself a little, how great would these pins be make and to give to all their little classmates. I know that if received one of these pins in my homemade shoe box mail box meant to collect all of my candy studded, drugstore bought valentines. I would have been elated and rocked that pin all year long on my super cool backpack.(grade schooler, they have all the fun) Right after I finished painting and gluing all my pins, Miley then decided that they were freaking awesome and wanted to make a bunch more…. Well little little, to late, time to go home. But I did give her a bunch to bring back with her. She will just have to bug her mom to make some more.
And sure, I mention valentines day when talking about these pins, but really, hearts are for everyday, and are still really great long after V day is over.
Handmade heart pins = love!
Stuff you need for some awesome pins.
Polymer clay (I used white but any color will do)
red and white paint (preferably enamel or a high gloss paint) and a paint brush
bar pin backs (I bought these at Michael ‘s craft store. 64 for like 3 bucks!)
industrial strength glue (E600 is great and is used and recommended by many a crafters)
rolling pin or wooden dowel
small heart shaped cutter
sharpie pen to write on pins (optional)
Glitter( also optional)
A couple notes. You could use red clay but I have found that when I buy the red dyed clay, its always harder to work with and plus, it stainsyour hands. Also, I like to seal the clay and enamel paint does the trick. If you don’t want to paint it, just pain on a coat of clear sealer.
Start buy kneading a chunk of clay a little bit to get it to a workable state, then roll into a ball and roll out flat. I rolled mine out about 1/3 of an inch, but I also knew I wanted to squish it out a little flatter once I cut the shapes out.
Cut out your hearts, or if you want, free form them.%u00a0 What I did was used my tiny heart cookie cutter to cut the initial shape, but then used my thumb and squished them all out a bit bigger.
Note here.. Hears are awesome and amazing, but other shapes….Go for it. You probably have a shit tone of those pin backs.
And just before you bake them, make sure that the pins you are using will fit behind the hearts. (if you notice any visible pin, just smoosh the heart out a little more).
Into the oven,, out of the oven. Read the package to make sure, but the stuff I used only needed to be baked for 15 minutes at 275
Once out of the oven, let completely cool and harden.
Once the hearts are cooled, go ahead and paint them. Use straight up one color, or mix and make a few different shades. (red, white and pink are nice together)
You can add some glitter to the wet paint to add a little bling….
Or add designs or what have you. Do whatever feels right.
Now stick a pin thingy on the back of each heart with a blob of glue. (If you use the E600, make sure to use it near a window or somewhere ventilated.. it really stinks for a few minutes)
Let the glue dry (this glue was completely dry within an hour, but follow glue package instructions)
And if you want, grab the sharpie, make sure the paint is really dry (at least an hour) and write a little something on the hearts.
And now the hard part.. which one goes to who and which one (or 4) do you keep for yourself. (you can always make more!)
Right now it is all about the holiday cookies. There are the chocolate ones, the filled ones, the nutty ones and all at the other ones, but really, what is the holiday without a good basic sugar cookie covered in way to much icing and sprinkles? Not right it what it is.
So to kick off holiday cookie baking I had a cookie decorating and pizza %u00a0party with the littles and big littles. Cookies, icing and frosting, and so many sprinkles. I went the smart route with preparation and precut all the cookies before the party. I was thinking that I would have everyone cut there own cookies out but then I was thinking %u00a0a bunch of little and hot pans and more likely then not burnt cookies. I just didn’t want to deal with it and it was a good choice on my part. I am so smart.%u00a0
These cookies are kind of your basic sugar cookies with a little lemon twist. The lemon adds that extra something, a little zip behind the sweetness, especially after all the glaze.%u00a0And they can be baked to be slightly soft or to have a nice crisp edge. A good, tasty, %u00a0all around cookie, perfect for any holiday cookie party.%u00a0
And just a warning about cookie parties. There will be madness and states of being that only an emense amount of sugar can produce.
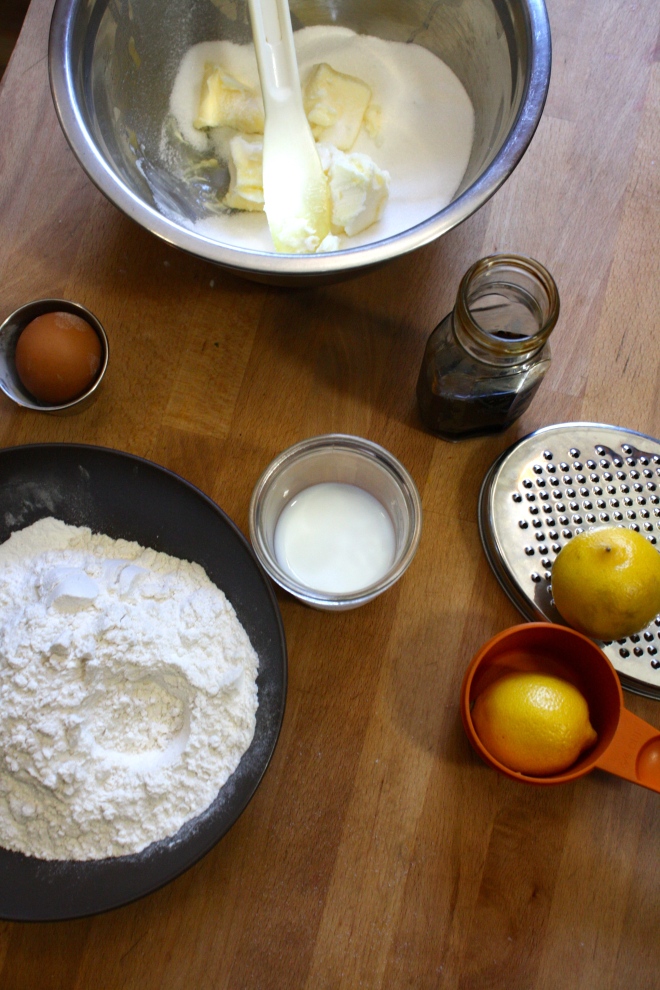
The stuff. Flour, baking powder sugar, and salt. Squash puree, earth balance, vanilla, and some lemons.%u00a0
Sugar, butter, puree, lemon zest, lemon juice and the vanilla get cozy into big bowl and then mixed together.
Some people prefer to do this step with an electric beater but I like to use a wooden spoon because arm powder. Either way, make sure the mixtures is completely mixed and that there are no huge chunks of butter.%u00a0
Now add in the dry and mix mix mix until if forms a dough.
%u00a0Don’t be afraid to use your hands here.. I started out with the spoon and finish with my hands. It is much easier.
The dough needs a little time in the fridge so wrap it in plastic (or a large plastic bag) and stick in the fridge for a least and hour or up to a day.%u00a0
When your ready for cookie cutting time, remove dough and let sit on counter for a few minutes to warm up. Then place on a lightly floured surface and roll out about 1/4 inch thick (you can go a little thinner if you like)
And keep gathering and rolling ou the dough until all the dough is a cookie.
Bake the cookies for anywhere between 10-13 minutes. This is dependent on if you like a softer cookie or one with more of a crunch.%u00a0
And you are probably going to want to make some glaze,%u00a0which is super simple. Powedred sugar, water, corn syrup, and vanilla extract.%u00a0
You of course need to get crafty with colors so color the icing %u00a0to your liking.
Then it’s all about decorating. The mr and I did a few cookies ourselves before the cookie party began. We figured we wouldn’t really get a chance to once all the littles showed up. We were right.%u00a0
Also I bought brand new synthetic paint brushes (important that they are new) to use to paint on the glaze. It was a very good idea. We loved it and so did all the little.%u00a0
Our cookie masterpieces. Who doesn’t love a rapper snowman?
Let the party begin. I ended up making 3 batches of cookies because the more cookies the better. And again, so smart to have the cookies all precut and ready. I couldn’t imagine having to deal with cutting cookies with everyone. There would have been tears (most likely mine)%u00a0
Christmas music on, happy little littles, it started out so wholesome and good.%u00a0%u00a0Glaze, frosting, so many sprinkles. I could smell the sugar in the air. I also said that there was to be no cookie eating until after dinner so naturally I think that each little ate about 5 cookies before dinner. It would have been worse if I had they could eat any at all.%u00a0
And then we ate dinner and more cookies and they all went freaking crazy. Like running around screaming, stoping once in a while to maybe think they might throw up,%u00a0%u00a0then kept on running and screaming. %u00a0Sugar can do crazy things.%u00a0
%u00a0Just a few of the creations from the night. There were snowmen, 3D trees and reindeer, and stars. I guess I don’t have a snowflake which bummed me out but stars made do. And yes, that is indeed a target employee cookie.. so awesome.
All in all, the party was a success. The cookies came out great. The decorations were on point. The littles and big littles had fun and were all in a sugar coma by the end of the night.%u00a0%u00a0Annnd my house is covered in a light film of stickiness.%u00a0
Enjoy your weekend and make lots of cookies because that is what you are suppose to do.%u00a0
-C
makes 20-25 cookies (all depending on you shapes ands sizes of cutters)
Cookie
2 1/4 %u00a0cups flour%u00a0
1/2 teaspoon salt
1 teaspoon baking powder
1/4 cup squash puree
3/4 cup white sugar
1 teaspoon vanilla
1/2 cup room temp %u00a0vegan butter
1 tablespoons lemon juice
2 teaspoons lemon zest
Icing%u00a0
2 tablespoons corn syrup
2 cups powdered sugar
2 tablespoons plant milk or water
1 teaspoon extract (vanilla, almond, or lemon)%u00a0%u00a0
food coloring (optional)%u00a0
preheat oven to 350
In a large bowl beat %u00a0together butter, sugar, vanilla, squash, lemon zest and lemon juice until fully incorporated. Add in flour, salt, and baling powder and mix until it all comes together. When dough gets a little hard to mix with a spoon, use your hands and compress the dough into a ball. %u00a0Take dough and wrap in plastic wrap or place in a zip lock pulled to dough tight and place in the fridge for at least 1 hour or up to a day.
After the dough has had time in the fridge, remove and let sit for a few minutes.. Lightly flour the counter and roll dough out to about a quart inch thick. Grab your cookie cutter and cut away at rolled out dough. Place cut cookies on a baking sheet, gather up remaining dough and roll out all over again. Repeat process until all the dough has been used. Place cookies %u00a0in oven and bake for 10 minutes or until cookies are just barely turning golden brown. %u00a0If you like a crispier cookies, cook for 2-3 minutes longer.%u00a0Remove and place on a cooling rack to cool.%u00a0
Prepare your icing.
Mix all the ingerdients together until full incorporated. Color to your liking.%u00a0
And once the cookies are %u00a0cool its time to start you decorating! You can dip, pour, paint, or pip icing onto cookies. Embellish with sprinkles and candies.
Eat your cookies%u00a0
This past Christmas, my (kinda)mother- in-law gave me and the mr these really cool honey bee pins in our stockings. Nothing fancy, just a little pin, but I think it was one of the best gifts that I had gotten all year. The pin lives on my winter jacket.
And now I am into pins.
So a couple of the little’s came over yesterday after school for crafts and dinner and I figured a bit of pin making would be a perfect little project for us to do. And being that it’s the big V day coming up,%u00a0 making these pins heart shaped was more then overly appropriate. (What’s Valentines day without cute little hearts?) Well pin making we did, or I did, not so much for them. They made a few, but in the end, they were more excited to beat the crap out of the mr and to eat carrot shavings with peanut butter and nutella.. Totally ok with me because really, I was the one that wanted a little craft time and the mr did need to get his butt kicked.
Sure I made these pins pretty much for myself, but imagine the possibilities. Make a bunch to give out to your friends, family, neighbors, or even the mail man!? Or if you have yourself a little, how great would these pins be make and to give to all their little classmates. I know that if received one of these pins in my homemade shoe box mail box meant to collect all of my candy studded, drugstore bought valentines. I would have been elated and rocked that pin all year long on my super cool backpack.(grade schooler, they have all the fun) Right after I finished painting and gluing all my pins, Miley then decided that they were freaking awesome and wanted to make a bunch more…. Well little little, to late, time to go home. But I did give her a bunch to bring back with her. She will just have to bug her mom to make some more.
And sure, I mention valentines day when talking about these pins, but really, hearts are for everyday, and are still really great long after V day is over.
Handmade heart pins = love!
Stuff you need for some awesome pins.
Polymer clay (I used white but any color will do)
red and white paint (preferably enamel or a high gloss paint) and a paint brush
bar pin backs (I bought these at Michael ‘s craft store. 64 for like 3 bucks!)
industrial strength glue (E600 is great and is used and recommended by many a crafters)
rolling pin or wooden dowel
small heart shaped cutter
sharpie pen to write on pins (optional)
Glitter( also optional)
A couple notes. You could use red clay but I have found that when I buy the red dyed clay, its always harder to work with and plus, it stainsyour hands. Also, I like to seal the clay and enamel paint does the trick. If you don’t want to paint it, just pain on a coat of clear sealer.
Start buy kneading a chunk of clay a little bit to get it to a workable state, then roll into a ball and roll out flat. I rolled mine out about 1/3 of an inch, but I also knew I wanted to squish it out a little flatter once I cut the shapes out.
Cut out your hearts, or if you want, free form them.%u00a0 What I did was used my tiny heart cookie cutter to cut the initial shape, but then used my thumb and squished them all out a bit bigger.
Note here.. Hears are awesome and amazing, but other shapes….Go for it. You probably have a shit tone of those pin backs.
And just before you bake them, make sure that the pins you are using will fit behind the hearts. (if you notice any visible pin, just smoosh the heart out a little more).
Into the oven,, out of the oven. Read the package to make sure, but the stuff I used only needed to be baked for 15 minutes at 275
Once out of the oven, let completely cool and harden.
Once the hearts are cooled, go ahead and paint them. Use straight up one color, or mix and make a few different shades. (red, white and pink are nice together)
You can add some glitter to the wet paint to add a little bling….
Or add designs or what have you. Do whatever feels right.
Now stick a pin thingy on the back of each heart with a blob of glue. (If you use the E600, make sure to use it near a window or somewhere ventilated.. it really stinks for a few minutes)
Let the glue dry (this glue was completely dry within an hour, but follow glue package instructions)
And if you want, grab the sharpie, make sure the paint is really dry (at least an hour) and write a little something on the hearts.
And now the hard part.. which one goes to who and which one (or 4) do you keep for yourself. (you can always make more!)
Have fun!
-C
I think of myself as a problem solver. I see a problem and I look for a solution. And not to sound like a broken record, but the problem that I am having now is that it is winter here in Vermont, but you wouldn’t know it cause it’s 50 degrees and there is no f-ing snow. Yes, this is a problem for me. I don’t think its just me, everything around here is acting weird.%u00a0 My plants are not going into winter mode and are starting to droop and be sad. My fall allergies are coming back, plants are starting to bud again, Washer is shedding like crazy, and my snowshoes have not left the barn. It’s just weird and it makes me sad.Vermont is suppose to be cold ans snowy right now. Sure, there are people that might like this wonky weather, think they are getting a little extra treat, but not me. NOT ME!%u00a0 So this is the problem. And the solution that I have come up with, short of moving, is to cover all the windows with wax paper snowflakes.
See. Problem solver.
We have been spending a good amount of time over at the new house working away so this is where I decided to plaster my flakes. In between cleaning up pieces of broken wall and moving 500 lb bags of trash out of the house, I sat down at the little table, plugged in the Christmas lights, turned on some Christmas music, and totally zoned out. Sipping coffee and sniping away..it felt so right. And the results were quite good if I do say so myself. A window full of flakes that made me smile. Maybe the snow gods will see my effort and grace us with a huge ass storm. Wouldn’t that be so lovely!
All you need to make some flakes is
wax paper (mine is slightly tan because it’s not bleached)
scissors
tape
Optional things
glitter/glue
paint/brush
Christmas music
A hot beverage such as coffee or cocoa
Note. Why wax, well wax paper is really thin and makes cutting through all the folds easy. It also lets light shine through rather nicely and best part, the wax keeps the paper from getting soggy and gross from window condensation. But if you want, use paper. I don’t mind.
This is how learned to make a snowflake… Start with a square piece of wax paper (any size you like) and fold it in half on the diagonal. Then fold that in half at the point.%u00a0 And fold old again at the point. One more time after that. (from start to finish, 4 folds) You end up with a little dart like triangle with a little extra point at the top. Cut that extra bit off.
And snip away.. It can be thought-out or random (I like random snips)%u00a0 Just make sure that you don’t cut off all the folded paper parts cause that is what is holding it together.
Now for the most exciting part. Open (very gently) and see your snowflake creation.
Note. This is important to remember.. No snowflake is the same, and no snowflake is ugly.
Now tape the flake to where ever it should land (the window)
Stand back and enjoy all of the snow you can handle. I have gotten to one window, just 10 more to go!
This one is my favorite.
Happy weekend full of snow!
-C
YEAH! We got our tree this past weekend and now there is even less room to move around. (It takes up approximately1/4 of our living space, but I don’t care. I love it!. We ventured south toth e rangers station, picked up our tree permit, and drove into the great mountains to find the smallest amount of (but still some) snow and the most perfect (so not even remotely close) tree growing snug, deep in the woods. We have been dong this for at least the past 5 years and every year, the trees we pick out get fatter and a little funnier. But they are always awesome and beautiful and make me the happiest! And now that we got our tree, I finally got to watch Elf. I say finally because me and the mr have a tradition where we string popcorn for the tree while watching it, so I usually wait until that night to watch it.(then I can watch it as much as I want after that)%u00a0 Along with the popcorn,%u00a0the mr suggested we do a paper chain (he is so smart) which came out so good and really classys up the tree.. I haven’t taken any pictures of the decorated tree, but I will be sure to take some and show you later.
Other then the tree, this week was a world wind. Birthday parties, family crazy, new house stuff.%u00a0 I powered through a couple of long nights and finished a quilt for one of the littles birthday. We have been going over to the new house almost everyday and doing a little this and a bit of that, on top of whatever else we do. Yup, another busy, fun and good, but very busy week. And now it’s finally Sunday and all I am hopping for is a few hours of couch sitting with my book, and coffee, and some snow. (I have given up a little on winter here. What the F… Its just not right!)%u00a0 And that’s what I hope for you today, well I hope you take some time to do you and relax a bit. Maybe not go shapping ALL DAY or even feed the kids left over popcorn,%u00a0%u00a0peanut butter sandwiches , and cookies for dinner tonight and just take some time to kick back. We all need it.
Oh, and to all of those celebrating.. Happy Hanukkah!
Internet things from the week to check.
-Just in case you need to know, here is a step by step to paper snowflakes%u00a0
-%u00a0Research says, having a dog as a kid is amazing for your mental health
–Super into this interior look
-Speaking of interiors…
%u00a0-survival food%u2026. not something I want to ever have to get down with
-$5 CHRISTMAS TREES AVAILABLE IN THE GREEN MOUNTAIN NATIONAL FOREST… This is what we do.
-Now I understand why some rugs cost like a million bucks..%u00a0Gorgeous Geometric Carpets Modernize An Ancient Weaving Technique
-The dutch, they know what they are doing.%u00a0The many treats of a Dutch pre-Christmas celebration.
–See a salt shaker in a menu? Think twice.%u00a0Sodium Warnings Hit New York City Menus
I love me a good tree, pretty much any tree, real or fake.%u00a0 And come December, my house if full of different little trees, of all sizes, shapes and colors. It’s my holiday thing because really, there is nothing better then a tree.
And yeah, I was feeling crafty, and maybe a little bit sad that there is no snow around here. And we still hadn’t gotten our real tree yet (but we just got it!) so I wanted to make some more little trees to make me feel better, and this time I wanted them to light up. I was also thinking that it might be nice to bring a few little tree decorations over to the new house so I have happy little trees over there while we are working. So yeah, I needed some more little trees. And I figure you do too, that’s why I am sharing this.
This is a great project to do with a few littles (they make the trees, you use the hot glue and sharp blade) or make while baking bread and watching a festive movie.%u00a0 You could even make and share with a loved one as a sweet little gift. And best part…it doesn’t need to be packed away after the holidays because trees are not just for Christmas. These are pretty little winter trees, for everyone who is awesome and likes a tree to enjoy all winter long!(even if winter hasn’t come yet)
The stuff you will need
A piece of cardboard about 12×16 (I used an old pizza box I found in the recycling)
assorted paper of size an color
white tissue paper (optional)
a strand of 20 lights (colored or white)
a ruler
scissors
hot glue gun
glue stick
tape
pencil
xacto knife
Note. If you have an empty shallow box that is a good size for you, just use that. And hot glue works best, bt can be subed out with any glue, or tape for that matter (if you don’t mind seeing tape on your trees)
Start with making the cardboard box base. Measure each corner in 1 inch and cut our the corner. Repeat with all corners. Once they are allcut, fold each side at the cuts to make the sides.
Tape the corners together and now you got yourself a sallow box. (now you can make boxes for everything !!!) Set box aside
Now to make the trees. Take a piece of paper and, depending if it is already a square or not, but it into a square. (does not have to be perfect, just eyeball it)
Got your square paper, now take an edge and fold it over about 1/2 inch. And then taking you scissors and snip of the corner edge at an angle (again, not going for perfections here)
The poin is the tip that was cut, now fold the two sides together.
So you can stop here ans glue or if you want light holes…..
Unfold the paper and with a pencil, mark off where you wnt the holes (random is good). Take the xacto blade and cut little x’x over each hole.
Then push through each x with the eraser end of the pencil
Now glue the cone together using the hot glue gun.
You will have a weird tail left on the bottom of the cone, so just trim that off and any extra that needs to come off to make it stand up straight.
Ta Da!! A paper cone tree. Now make a bunch of them, all different sizes and colors (or all the same size and color.. up to you) And not all of them need to have light holes in them either, a couple non light trees are good.
Once you have made all the cone trees, grab the box base and set up the trees how you want them to be on the base
Take the trees off and mark the spots with the pencil. Grab the xacto and cut X’s into the marks.
Take your lights and push the bulbs through (there will be a extra bulbs on the underside…. it makes the box glow.)
And tape down the trees back into place
So cute!
Note.. I stuck a couple extra lights through the box that have no trees. They will be covered in a minute with snow.. So you can do the same. (if you want)
Now you check it out!!! Love it right?%u00a0 And stop here if you like, or go one more step and add some fake snow.
Before you tape down the trees, take glue stick and glue random pieces of tissue paper all over the box, leaving the lights uncovered. (I covered over the extra lights I popped through to make it look like glowing snow)
Stick trees back on.. same way with the tape (You might need to fanagle the trees a little bit to get them to stay)%u00a0 and plug it in.
This makes me happy.
Now go get some paper and start making some trees.
Have fun!
-C
I never can really tell how I honestly feel about halloween. I love fall, I love pumpkins and cider, but thats fall ,not halloween.%u00a0%u00a0I love to see all the happy little littles running around being super cute. all jacked up on way to much sugar.%u00a0%u00a0And %u00a0I know when I was a kid I was all about it. I mean, what kid doesn’t get jazzed to run around, dressed up (I was alway a black cat),%u00a0with a pillowcase full of candy all night long? That is just magic.%u00a0But as an adult, I haven’t really done too much. Sure I help wit the costumes of the littles and sometime I hand out candy, but where we live now, it’s not possible to give out candy. And the littles, they go do stuff with there friends, not there old lady aunt.%u00a0And I guess me and the mr could dress up and go to a party or something, but %u00a0honestly, we are not really party people%u2026. So yeah, don’t know. I think when I finally have my own kids It will be more fun.%u00a0But whatever, at least I can do a little decorating.
For as long as I have been as adult with my own living place, I have really gotten into holiday decoataing. But here is the thing. I like my decor to be minimalistic,%u00a0not to over the top, or super cheesy. (although I really do like when other people go super overboard and cheesy) But no, you won’t find a 20 foot blow up of a witch or severed hands in my front lawn.(maybe a few dead mice, but thats the cat, not me)%u00a0And I like to make my decorations. I even like to get some littles in one it, cause hand made kiddo decorations are the best.%u00a0
These bats are the perfect bit of halloween decoration. I made a ton of them a few years back and lost them, so I just whipped up a new strand.%u00a0Fast and easy to make, are not overly crazy or gory, and can be hung anywhere. An yeah, making them with a few littles is fun, but you don’t need them. I made them all on my lonesome%u2026. Oh me..
Anyway, to the bat mobile (garland)!
The bat stuff
2-3 pieces of Black card stock (construction paper %u00a0is fine, but will the color will fade over time)
scissors
pencil
needle and thread*
clear tape or tacks (not shown.. to hang bats)
Note. You can use embroidery floss instead of thread, but the thread is much more visible and you are going to need a tapestry needle.%u00a0
Take a piece of paper and fold in half, either length or width wise.( If you do lenght wise, you can cut out a few more bats per piece of a paper, width wise, the bats wings are longer.. up to you, do it both ways if you want)%u00a0
Outline a bat.
Bats are all jagged %u00a0lines.. nothing too complicated so I figured a stencil is not needed. If you really need a stencil, I can email you one…
Cut out bat and open up.
See, easy. And now you have a bat. If you do not like the exact way it looks, fold in again and cut a little more, but don’t get to picky, you have many more to cut.
Now make yourself a %u00a0bat army. As many or as few as you like. I think 12 is a good number. If you want, take the first bat that you cut out and use that as a stencil. Me, actually just free form cut the guys, so none of them look the same.
Bats are ready, now thread you needle.%u00a0%u00a0Don’t cut the end loose or tie the two ends together.
Fold bats back flat and thread them through the upper portion of the wings.%u00a0%u00a0Do that to all your bats.. and make sure that you are threading them on all the dame direction (if you care)
Once all the bats are threaded on. remove needle and tape the end of the thread. Space the bats out evenly or however you like, and hoe ever far apart you like, and cut thread of spool. Tape that end off too.
And hang them%u2026.%u00a0Most of my bats stay where I placed them, but a couple wanted to slide around on the thread, so I just stuck a tiny piece of tape on the inside of the wing over the thread to stop that.
They can fly threw the air%u2026.
Or drape on the wall.%u00a0
Any way, these bats are freaking bad ass and the coolest!
This past Christmas, my (kinda)mother- in-law gave me and the mr these really cool honey bee pins in our stockings. Nothing fancy, just a little pin, but I think it was one of the best gifts that I had gotten all year. The pin lives on my winter jacket.
And now I am into pins.
So a couple of the little’s came over yesterday after school for crafts and dinner and I figured a bit of pin making would be a perfect little project for us to do. And being that it’s the big V day coming up,%u00a0 making these pins heart shaped was more then overly appropriate. (What’s Valentines day without cute little hearts?) Well pin making we did, or I did, not so much for them. They made a few, but in the end, they were more excited to beat the crap out of the mr and to eat carrot shavings with peanut butter and nutella.. Totally ok with me because really, I was the one that wanted a little craft time and the mr did need to get his butt kicked.
Sure I made these pins pretty much for myself, but imagine the possibilities. Make a bunch to give out to your friends, family, neighbors, or even the mail man!? Or if you have yourself a little, how great would these pins be make and to give to all their little classmates. I know that if received one of these pins in my homemade shoe box mail box meant to collect all of my candy studded, drugstore bought valentines. I would have been elated and rocked that pin all year long on my super cool backpack.(grade schooler, they have all the fun) Right after I finished painting and gluing all my pins, Miley then decided that they were freaking awesome and wanted to make a bunch more…. Well little little, to late, time to go home. But I did give her a bunch to bring back with her. She will just have to bug her mom to make some more.
And sure, I mention valentines day when talking about these pins, but really, hearts are for everyday, and are still really great long after V day is over.
Handmade heart pins = love!
Stuff you need for some awesome pins.
Polymer clay (I used white but any color will do)
red and white paint (preferably enamel or a high gloss paint) and a paint brush
bar pin backs (I bought these at Michael ‘s craft store. 64 for like 3 bucks!)
industrial strength glue (E600 is great and is used and recommended by many a crafters)
rolling pin or wooden dowel
small heart shaped cutter
sharpie pen to write on pins (optional)
Glitter( also optional)
A couple notes. You could use red clay but I have found that when I buy the red dyed clay, its always harder to work with and plus, it stainsyour hands. Also, I like to seal the clay and enamel paint does the trick. If you don’t want to paint it, just pain on a coat of clear sealer.
Start buy kneading a chunk of clay a little bit to get it to a workable state, then roll into a ball and roll out flat. I rolled mine out about 1/3 of an inch, but I also knew I wanted to squish it out a little flatter once I cut the shapes out.
Cut out your hearts, or if you want, free form them.%u00a0 What I did was used my tiny heart cookie cutter to cut the initial shape, but then used my thumb and squished them all out a bit bigger.
Note here.. Hears are awesome and amazing, but other shapes….Go for it. You probably have a shit tone of those pin backs.
And just before you bake them, make sure that the pins you are using will fit behind the hearts. (if you notice any visible pin, just smoosh the heart out a little more).
Into the oven,, out of the oven. Read the package to make sure, but the stuff I used only needed to be baked for 15 minutes at 275
Once out of the oven, let completely cool and harden.
Once the hearts are cooled, go ahead and paint them. Use straight up one color, or mix and make a few different shades. (red, white and pink are nice together)
You can add some glitter to the wet paint to add a little bling….
Or add designs or what have you. Do whatever feels right.
Now stick a pin thingy on the back of each heart with a blob of glue. (If you use the E600, make sure to use it near a window or somewhere ventilated.. it really stinks for a few minutes)
Let the glue dry (this glue was completely dry within an hour, but follow glue package instructions)
And if you want, grab the sharpie, make sure the paint is really dry (at least an hour) and write a little something on the hearts.
And now the hard part.. which one goes to who and which one (or 4) do you keep for yourself. (you can always make more!)
This past Christmas, my (kinda)mother- in-law gave me and the mr these really cool honey bee pins in our stockings. Nothing fancy, just a little pin, but I think it was one of the best gifts that I had gotten all year. The pin lives on my winter jacket.
And now I am into pins.
So a couple of the little’s came over yesterday after school for crafts and dinner and I figured a bit of pin making would be a perfect little project for us to do. And being that it’s the big V day coming up,%u00a0 making these pins heart shaped was more then overly appropriate. (What’s Valentines day without cute little hearts?) Well pin making we did, or I did, not so much for them. They made a few, but in the end, they were more excited to beat the crap out of the mr and to eat carrot shavings with peanut butter and nutella.. Totally ok with me because really, I was the one that wanted a little craft time and the mr did need to get his butt kicked.
Sure I made these pins pretty much for myself, but imagine the possibilities. Make a bunch to give out to your friends, family, neighbors, or even the mail man!? Or if you have yourself a little, how great would these pins be make and to give to all their little classmates. I know that if received one of these pins in my homemade shoe box mail box meant to collect all of my candy studded, drugstore bought valentines. I would have been elated and rocked that pin all year long on my super cool backpack.(grade schooler, they have all the fun) Right after I finished painting and gluing all my pins, Miley then decided that they were freaking awesome and wanted to make a bunch more…. Well little little, to late, time to go home. But I did give her a bunch to bring back with her. She will just have to bug her mom to make some more.
And sure, I mention valentines day when talking about these pins, but really, hearts are for everyday, and are still really great long after V day is over.
Handmade heart pins = love!
Stuff you need for some awesome pins.
Polymer clay (I used white but any color will do)
red and white paint (preferably enamel or a high gloss paint) and a paint brush
bar pin backs (I bought these at Michael ‘s craft store. 64 for like 3 bucks!)
industrial strength glue (E600 is great and is used and recommended by many a crafters)
rolling pin or wooden dowel
small heart shaped cutter
sharpie pen to write on pins (optional)
Glitter( also optional)
A couple notes. You could use red clay but I have found that when I buy the red dyed clay, its always harder to work with and plus, it stainsyour hands. Also, I like to seal the clay and enamel paint does the trick. If you don’t want to paint it, just pain on a coat of clear sealer.
Start buy kneading a chunk of clay a little bit to get it to a workable state, then roll into a ball and roll out flat. I rolled mine out about 1/3 of an inch, but I also knew I wanted to squish it out a little flatter once I cut the shapes out.
Cut out your hearts, or if you want, free form them.%u00a0 What I did was used my tiny heart cookie cutter to cut the initial shape, but then used my thumb and squished them all out a bit bigger.
Note here.. Hears are awesome and amazing, but other shapes….Go for it. You probably have a shit tone of those pin backs.
And just before you bake them, make sure that the pins you are using will fit behind the hearts. (if you notice any visible pin, just smoosh the heart out a little more).
Into the oven,, out of the oven. Read the package to make sure, but the stuff I used only needed to be baked for 15 minutes at 275
Once out of the oven, let completely cool and harden.
Once the hearts are cooled, go ahead and paint them. Use straight up one color, or mix and make a few different shades. (red, white and pink are nice together)
You can add some glitter to the wet paint to add a little bling….
Or add designs or what have you. Do whatever feels right.
Now stick a pin thingy on the back of each heart with a blob of glue. (If you use the E600, make sure to use it near a window or somewhere ventilated.. it really stinks for a few minutes)
Let the glue dry (this glue was completely dry within an hour, but follow glue package instructions)
And if you want, grab the sharpie, make sure the paint is really dry (at least an hour) and write a little something on the hearts.
And now the hard part.. which one goes to who and which one (or 4) do you keep for yourself. (you can always make more!)
If a big ass pile of balloon animals (and balloon swords and flowers) doesn’t make you crack a smile, well then, that just sucks for you.
A couple of littles slept over this week and took over the house with balloons. Not only did the kids bring their own balloon kits, but the mr has a crap load of balloons himself that he inherited from my late brother-in- law Richard (he would be so happy to know that the mr uses these balloons to drive me crazy….thanks dude) And to top it off, we stopped over at the loft with the kids to grab a few things and there was as large bag of blown up party balloons that must have blown into our yard. Those also ended up in the car ans back at the house. Seriously, the house was flooded with balloons. It was kinda amazing.
This week has gone by like a blur. %u00a0 The mr finally got his wish and got himself a couple of fish. One is a gold fish which he named Lefty, and the other might be a goldfish that I named Dead -in- Two- Weeks (yes, I am an asshole). I am not exactly thrilled to have fish for a few reasons, mainly that I have been fish traumatized. Back in college the mr went through a fish faze. He would get a beta fish, name it, feed it, love it, then a week later the thing would jump form it’s fish bowl and commit fish suicide. It happened 3 times.%u00a0 So yeah, fish don’t do it for me, but the mr is happy so I deal. Plus these fish are goldfish and the tank has a cool lid that grows plants. We shall see.
There was some other stuff, like apartment stuff that happened this week, but mainly it was a quite week.%u00a0 We did finally tackle the kitchen pantry which I painted pink,and started putting up the shelves. Now i just need to pick a color tile for the floor and just get it finished already because once that happens the kitchen will basically be all done. And I will be so happy and I will take lots of picture to show you.
And it’s Sunday. You got any plans? Doing anything spectacular? I am still not feeling 100% which I blame on the weather. Super cold and crazy warm… the ups and downs really screw with me. (but those warm days were really so nice) Winter just needs to dump some snow and let me be cozy for a bit. (not happening this week) But what can you do? For me, I hope to keep it slow today, maybe do some napping, reading, drinking of too much coffee. Just as long as I order the flooring, I should be all set.
Some of the internet browsing I did this week.
-It’s 6 am, I am running at the gym, and I get a text from the mr. It’s a link to this, Dyson 360 Eye. Why he was looking at vacuums at 6am, i could not tell you but what I can tell you is no cleaning robots. NO.
-The world after a snow storm always makes me so happy and peaceful. There’s actually a scientific reason why the world gets quieter after it snows.
–The More You Swear, the More Honest You Are. Fuck yeah.
%u00a0
-I think I might try this for the mr this week. Roast Pasta Before Cooking it.
-I love mustard and am very interested in trying some on this list. THE MODERN PANTRY GUIDE TO THE WORLD’S BEST MUSTARDS
-Saving my pennies for a someday purchase of this Staub Round Cocotte. But this one by Martha is really good too and sooooo much cheaper.
-Muffins are basically cupcakes that people eat fro breakfast, don’t be fooled. Why Muffins Are a Trap.
–Walking In America Remains Dangerous. I would be lying if I said I was never afraid of getting hit.
–Bees Have Just Made the Endangered-Species List. It sucks that it has come to this, but it’s good that there is awareness and protection now.
-This dude is pretty badass. Sweater Selfies: Man Knits His Way Around The World
Everyone is asking how that house is going so I figured an update was in order.
Around the beginning of March we hired a guy (with another guy that was like 80 years old) to remove the back roof and to frame out the addition. We were planning on doing it ourselves but when it came down to it, it was going to take to long and was not something that I was entirely comfortable doing. It was still winter out, I have never removed a roof, and it just seemed like it was better to just have someone that does it all the time do it. And oh am I glade we did. These guys were awesome and a little nuts. We had a start date for a Tuesday, but on Monday morning, the mr gets a phone call from the head guy asking if he was going to go to the house and let him in. “Of course, I’ll be there at 8 tomorrow” said the mr.%u00a0 “No, we are here right now” said the roof ripper off man. “Ok, be right over” and the mr rushes over to the house. When he gets there, the guys were already in the house. The had claimed onto the roof and started ripping it off from the outside.
And then two days later , the roof was gone and the skeleton of the addition was up.%u00a0 It was fantastic and amazing and we were so excited. SO worth hiring it out!!!!
Our next move was the roof,(to keep out the snow ans rain) which those guys ended up came back and throwing on for us. That was another job we were planning on doing, but when the mr crawled onto the roof to measure for materials, he came back down and said to me”hell no. not doing it” (He is terribly afraid of heights)
After the roof went up, we still had a lot of demo to do. It took us a few days to finish removing the rest of the walls and all the layers of flooring. Then it got really freaking cold out so we boarded off the upstairs with insulation and did some stuff downstairs.
We were on a good roll, getting shit done, about to start framing, then the shittest shit ever happened and Sean died. We didn’t go back over to the house for like 2 weeks. (shit head, you were suppose to help us) We lost all motivation and I was in no state to be doing any work that required power tools or crow bars.( I probably would have cut a hand off or accidentally set the house on fire) So yeah, no house work. But over these past 2 weeks we have slowly gotten back into the swing of things. We have cleaned up the upstairs, framed out all the wall and are moving right along. Next is windows, (which is now more just a matter of picking some we like and ordering them) running all the electrical, plumping the bathroom, insulation the ceiling and walls, then getting an inspection! But that will be a breeze…. haha.
So that’s what’s been going on in the house. Fun fun fun!
Hopefully I will have another update on other parts of the house for you guys soon!
-C
This past Christmas, my (kinda)mother- in-law gave me and the mr these really cool honey bee pins in our stockings. Nothing fancy, just a little pin, but I think it was one of the best gifts that I had gotten all year. The pin lives on my winter jacket.
And now I am into pins.
So a couple of the little’s came over yesterday after school for crafts and dinner and I figured a bit of pin making would be a perfect little project for us to do. And being that it’s the big V day coming up,%u00a0 making these pins heart shaped was more then overly appropriate. (What’s Valentines day without cute little hearts?) Well pin making we did, or I did, not so much for them. They made a few, but in the end, they were more excited to beat the crap out of the mr and to eat carrot shavings with peanut butter and nutella.. Totally ok with me because really, I was the one that wanted a little craft time and the mr did need to get his butt kicked.
Sure I made these pins pretty much for myself, but imagine the possibilities. Make a bunch to give out to your friends, family, neighbors, or even the mail man!? Or if you have yourself a little, how great would these pins be make and to give to all their little classmates. I know that if received one of these pins in my homemade shoe box mail box meant to collect all of my candy studded, drugstore bought valentines. I would have been elated and rocked that pin all year long on my super cool backpack.(grade schooler, they have all the fun) Right after I finished painting and gluing all my pins, Miley then decided that they were freaking awesome and wanted to make a bunch more…. Well little little, to late, time to go home. But I did give her a bunch to bring back with her. She will just have to bug her mom to make some more.
And sure, I mention valentines day when talking about these pins, but really, hearts are for everyday, and are still really great long after V day is over.
Handmade heart pins = love!
Stuff you need for some awesome pins.
Polymer clay (I used white but any color will do)
red and white paint (preferably enamel or a high gloss paint) and a paint brush
bar pin backs (I bought these at Michael ‘s craft store. 64 for like 3 bucks!)
industrial strength glue (E600 is great and is used and recommended by many a crafters)
rolling pin or wooden dowel
small heart shaped cutter
sharpie pen to write on pins (optional)
Glitter( also optional)
A couple notes. You could use red clay but I have found that when I buy the red dyed clay, its always harder to work with and plus, it stainsyour hands. Also, I like to seal the clay and enamel paint does the trick. If you don’t want to paint it, just pain on a coat of clear sealer.
Start buy kneading a chunk of clay a little bit to get it to a workable state, then roll into a ball and roll out flat. I rolled mine out about 1/3 of an inch, but I also knew I wanted to squish it out a little flatter once I cut the shapes out.
Cut out your hearts, or if you want, free form them.%u00a0 What I did was used my tiny heart cookie cutter to cut the initial shape, but then used my thumb and squished them all out a bit bigger.
Note here.. Hears are awesome and amazing, but other shapes….Go for it. You probably have a shit tone of those pin backs.
And just before you bake them, make sure that the pins you are using will fit behind the hearts. (if you notice any visible pin, just smoosh the heart out a little more).
Into the oven,, out of the oven. Read the package to make sure, but the stuff I used only needed to be baked for 15 minutes at 275
Once out of the oven, let completely cool and harden.
Once the hearts are cooled, go ahead and paint them. Use straight up one color, or mix and make a few different shades. (red, white and pink are nice together)
You can add some glitter to the wet paint to add a little bling….
Or add designs or what have you. Do whatever feels right.
Now stick a pin thingy on the back of each heart with a blob of glue. (If you use the E600, make sure to use it near a window or somewhere ventilated.. it really stinks for a few minutes)
Let the glue dry (this glue was completely dry within an hour, but follow glue package instructions)
And if you want, grab the sharpie, make sure the paint is really dry (at least an hour) and write a little something on the hearts.
And now the hard part.. which one goes to who and which one (or 4) do you keep for yourself. (you can always make more!)
This past Christmas, my (kinda)mother- in-law gave me and the mr these really cool honey bee pins in our stockings. Nothing fancy, just a little pin, but I think it was one of the best gifts that I had gotten all year. The pin lives on my winter jacket.
And now I am into pins.
So a couple of the little’s came over yesterday after school for crafts and dinner and I figured a bit of pin making would be a perfect little project for us to do. And being that it’s the big V day coming up,%u00a0 making these pins heart shaped was more then overly appropriate. (What’s Valentines day without cute little hearts?) Well pin making we did, or I did, not so much for them. They made a few, but in the end, they were more excited to beat the crap out of the mr and to eat carrot shavings with peanut butter and nutella.. Totally ok with me because really, I was the one that wanted a little craft time and the mr did need to get his butt kicked.
Sure I made these pins pretty much for myself, but imagine the possibilities. Make a bunch to give out to your friends, family, neighbors, or even the mail man!? Or if you have yourself a little, how great would these pins be make and to give to all their little classmates. I know that if received one of these pins in my homemade shoe box mail box meant to collect all of my candy studded, drugstore bought valentines. I would have been elated and rocked that pin all year long on my super cool backpack.(grade schooler, they have all the fun) Right after I finished painting and gluing all my pins, Miley then decided that they were freaking awesome and wanted to make a bunch more…. Well little little, to late, time to go home. But I did give her a bunch to bring back with her. She will just have to bug her mom to make some more.
And sure, I mention valentines day when talking about these pins, but really, hearts are for everyday, and are still really great long after V day is over.
Handmade heart pins = love!
Stuff you need for some awesome pins.
Polymer clay (I used white but any color will do)
red and white paint (preferably enamel or a high gloss paint) and a paint brush
bar pin backs (I bought these at Michael ‘s craft store. 64 for like 3 bucks!)
industrial strength glue (E600 is great and is used and recommended by many a crafters)
rolling pin or wooden dowel
small heart shaped cutter
sharpie pen to write on pins (optional)
Glitter( also optional)
A couple notes. You could use red clay but I have found that when I buy the red dyed clay, its always harder to work with and plus, it stainsyour hands. Also, I like to seal the clay and enamel paint does the trick. If you don’t want to paint it, just pain on a coat of clear sealer.
Start buy kneading a chunk of clay a little bit to get it to a workable state, then roll into a ball and roll out flat. I rolled mine out about 1/3 of an inch, but I also knew I wanted to squish it out a little flatter once I cut the shapes out.
Cut out your hearts, or if you want, free form them.%u00a0 What I did was used my tiny heart cookie cutter to cut the initial shape, but then used my thumb and squished them all out a bit bigger.
Note here.. Hears are awesome and amazing, but other shapes….Go for it. You probably have a shit tone of those pin backs.
And just before you bake them, make sure that the pins you are using will fit behind the hearts. (if you notice any visible pin, just smoosh the heart out a little more).
Into the oven,, out of the oven. Read the package to make sure, but the stuff I used only needed to be baked for 15 minutes at 275
Once out of the oven, let completely cool and harden.
Once the hearts are cooled, go ahead and paint them. Use straight up one color, or mix and make a few different shades. (red, white and pink are nice together)
You can add some glitter to the wet paint to add a little bling….
Or add designs or what have you. Do whatever feels right.
Now stick a pin thingy on the back of each heart with a blob of glue. (If you use the E600, make sure to use it near a window or somewhere ventilated.. it really stinks for a few minutes)
Let the glue dry (this glue was completely dry within an hour, but follow glue package instructions)
And if you want, grab the sharpie, make sure the paint is really dry (at least an hour) and write a little something on the hearts.
And now the hard part.. which one goes to who and which one (or 4) do you keep for yourself. (you can always make more!)
Have fun!
-C
Happy 2016! Happy Winter! Happy Snow!(a few weeks late, but super happy for it to come at last)
So did you have a great week off, or a slower then normal week? Lots of lounging, binge watching of the Netflix and eating all the left over cookies? Or was it back to work and back to reality? We go from holiday madness to all out crazy the week after Christmas.. There are birthday parties, littles out of school that need babysitting, and work. We keep on working cause that’s what we do. And remember last week how I told you I was losing my voice. Well it turned out that I lost it for the entire week. So I was a little sick and really quite which made for a weird and interesting one fore sure.. (especially babysitting without a voice. That got crazy)
And it happened again. New years. Did you party party and stay up til midnight to watch the (fill in the blank) drop? Not going to lie, the mr and I brought in the new year trying to watch tv together, but I just ended up reading. Then I actually fell asleep at 930. What can I say. I am an old lady. And no resolutions, just the average everyday, I need to do “this” or ‘that’ a little better/faster/cleaner or what not. Goals are what I have and there is not time line. But if you have resolutions, well good for you.
Today is actually the first day off we have taken since last Sunday.%u00a0 As of now, there are a few little things we are going to work on over at the house but we are not getting into the nitty gritty of it all until we get back from our plane rides of fun in February. Last week we got the ceilings sheet rocked and the mr is now doing the tape/mud this week. (I don’t even try because 1. I suck ass at it. 2. he is so good and3. he really likes doing it) I’ve got a butt load of paper/ bills/ things people want, to go through so this will be a good week to do that and to start whittling away at my spoon. Plus we have a lot of things that need to be done before we depart, like watching scary you tube videos of people trying to drive around Ireland on the right side of the road, figure out whether or not I can bring dried lentils in my carry on, and gather enough reading material to last me plane rides and early mornings spent drinking tea by the sea side.
So much. But not today. Today is for reading, coffee and tea,%u00a0 a warm cozy sweater and most likely some ice on the old back (sheet rocking ceilings kinda sucks)
I hope your day is spend well, doing good things and being happy.
Stuff I liked on the internet this week.
– I think this could work. The Taco Cleanse Is a Thing, So 2016 Will Be the Best Year Ever
–Keep Your New Year%u2019s Resolutions to Yourself, Please.
-I’ll take this cabin , just stick it in the woods
To all you party peoples out there. Want To Avoid A Hangover? Science Has Got You Covered
-Winners & Honorable Mentions of the 2015 National Geographic Photography Competition
-The hottest food trends in 2016 according to Whole Foods and even better… Grandparents Predict the Food Trends of 2016
–These toys are the greatest!
-Keep Things Simple For A Healthy, Long Life
-If you stuck wheels on our living space now, it would kinda look like this.
And some pictures from the week.
I think of myself as a problem solver. I see a problem and I look for a solution. And not to sound like a broken record, but the problem that I am having now is that it is winter here in Vermont, but you wouldn’t know it cause it’s 50 degrees and there is no f-ing snow. Yes, this is a problem for me. I don’t think its just me, everything around here is acting weird.%u00a0 My plants are not going into winter mode and are starting to droop and be sad. My fall allergies are coming back, plants are starting to bud again, Washer is shedding like crazy, and my snowshoes have not left the barn. It’s just weird and it makes me sad.Vermont is suppose to be cold ans snowy right now. Sure, there are people that might like this wonky weather, think they are getting a little extra treat, but not me. NOT ME!%u00a0 So this is the problem. And the solution that I have come up with, short of moving, is to cover all the windows with wax paper snowflakes.
See. Problem solver.
We have been spending a good amount of time over at the new house working away so this is where I decided to plaster my flakes. In between cleaning up pieces of broken wall and moving 500 lb bags of trash out of the house, I sat down at the little table, plugged in the Christmas lights, turned on some Christmas music, and totally zoned out. Sipping coffee and sniping away..it felt so right. And the results were quite good if I do say so myself. A window full of flakes that made me smile. Maybe the snow gods will see my effort and grace us with a huge ass storm. Wouldn’t that be so lovely!
All you need to make some flakes is
wax paper (mine is slightly tan because it’s not bleached)
scissors
tape
Optional things
glitter/glue
paint/brush
Christmas music
A hot beverage such as coffee or cocoa
Note. Why wax, well wax paper is really thin and makes cutting through all the folds easy. It also lets light shine through rather nicely and best part, the wax keeps the paper from getting soggy and gross from window condensation. But if you want, use paper. I don’t mind.
This is how learned to make a snowflake… Start with a square piece of wax paper (any size you like) and fold it in half on the diagonal. Then fold that in half at the point.%u00a0 And fold old again at the point. One more time after that. (from start to finish, 4 folds) You end up with a little dart like triangle with a little extra point at the top. Cut that extra bit off.
And snip away.. It can be thought-out or random (I like random snips)%u00a0 Just make sure that you don’t cut off all the folded paper parts cause that is what is holding it together.
Now for the most exciting part. Open (very gently) and see your snowflake creation.
Note. This is important to remember.. No snowflake is the same, and no snowflake is ugly.
Now tape the flake to where ever it should land (the window)
Stand back and enjoy all of the snow you can handle. I have gotten to one window, just 10 more to go!
This one is my favorite.
Happy weekend full of snow!
-C
I love me a good tree, pretty much any tree, real or fake.%u00a0 And come December, my house if full of different little trees, of all sizes, shapes and colors. It’s my holiday thing because really, there is nothing better then a tree.
And yeah, I was feeling crafty, and maybe a little bit sad that there is no snow around here. And we still hadn’t gotten our real tree yet (but we just got it!) so I wanted to make some more little trees to make me feel better, and this time I wanted them to light up. I was also thinking that it might be nice to bring a few little tree decorations over to the new house so I have happy little trees over there while we are working. So yeah, I needed some more little trees. And I figure you do too, that’s why I am sharing this.
This is a great project to do with a few littles (they make the trees, you use the hot glue and sharp blade) or make while baking bread and watching a festive movie.%u00a0 You could even make and share with a loved one as a sweet little gift. And best part…it doesn’t need to be packed away after the holidays because trees are not just for Christmas. These are pretty little winter trees, for everyone who is awesome and likes a tree to enjoy all winter long!(even if winter hasn’t come yet)
The stuff you will need
A piece of cardboard about 12×16 (I used an old pizza box I found in the recycling)
assorted paper of size an color
white tissue paper (optional)
a strand of 20 lights (colored or white)
a ruler
scissors
hot glue gun
glue stick
tape
pencil
xacto knife
Note. If you have an empty shallow box that is a good size for you, just use that. And hot glue works best, bt can be subed out with any glue, or tape for that matter (if you don’t mind seeing tape on your trees)
Start with making the cardboard box base. Measure each corner in 1 inch and cut our the corner. Repeat with all corners. Once they are allcut, fold each side at the cuts to make the sides.
Tape the corners together and now you got yourself a sallow box. (now you can make boxes for everything !!!) Set box aside
Now to make the trees. Take a piece of paper and, depending if it is already a square or not, but it into a square. (does not have to be perfect, just eyeball it)
Got your square paper, now take an edge and fold it over about 1/2 inch. And then taking you scissors and snip of the corner edge at an angle (again, not going for perfections here)
The poin is the tip that was cut, now fold the two sides together.
So you can stop here ans glue or if you want light holes…..
Unfold the paper and with a pencil, mark off where you wnt the holes (random is good). Take the xacto blade and cut little x’x over each hole.
Then push through each x with the eraser end of the pencil
Now glue the cone together using the hot glue gun.
You will have a weird tail left on the bottom of the cone, so just trim that off and any extra that needs to come off to make it stand up straight.
Ta Da!! A paper cone tree. Now make a bunch of them, all different sizes and colors (or all the same size and color.. up to you) And not all of them need to have light holes in them either, a couple non light trees are good.
Once you have made all the cone trees, grab the box base and set up the trees how you want them to be on the base
Take the trees off and mark the spots with the pencil. Grab the xacto and cut X’s into the marks.
Take your lights and push the bulbs through (there will be a extra bulbs on the underside…. it makes the box glow.)
And tape down the trees back into place
So cute!
Note.. I stuck a couple extra lights through the box that have no trees. They will be covered in a minute with snow.. So you can do the same. (if you want)
Now you check it out!!! Love it right?%u00a0 And stop here if you like, or go one more step and add some fake snow.
Before you tape down the trees, take glue stick and glue random pieces of tissue paper all over the box, leaving the lights uncovered. (I covered over the extra lights I popped through to make it look like glowing snow)
Stick trees back on.. same way with the tape (You might need to fanagle the trees a little bit to get them to stay)%u00a0 and plug it in.
This makes me happy.
Now go get some paper and start making some trees.
Have fun!
-C
Another week gone by and another week without snow, except for yesterday morning. I got to enjoy a brief %u00bd walk with the pup in the wee hours of the morning to see the tiny dusting that developed over night. But even that was gone by mid morning. I am bumming here. I Want SNOW!
And I know that it isn%u2019t for another 11 day, but Thanksgiving. It%u2019s it 11 DAYS!%u00a0 That%u2019s 10 more day to contemplate pies and sides and all the things that could be made into existence. (I spend way too much time thinking about different pie variations, it actually causes me headaches.)
So what about you? Are you feeling the slight buzz of the holiday crazy yet? Are you a planner or a procrastinator, or are you just a guest and hanging pretty with nothing to worry about? Me. I am a planner but usually deviate from said plan and do something completely on the fly. What can I say; I have an overactive mind and am a bit indecisive about things. But the little bit of buzz…. that%u2019s part of the fun. Just as long as a little crazy doesn%u2019t turn into a lot of crazy, then I am good.
And as for my Sunday plans, I think the mr, the pup, and I are going to pack up and head for higher ground to get us some snow, although I should be doing so many things around here. Hum.. Chores or snow, we shall see!
Hope you are where you are having a relaxing fun day!
Some internet stuff from the week if you are feeling it.
-Definitely gong to go seer his exhibit . %u00a0This Art Exhibit Makes You ‘Wonder’ %u2014 And That’s The Whole Point.%u00a0
–You cat doesn’t really want to kill you%u2026.. But I am pretty sure mine does.
-Before and after photos of an amazing farm to home renovation.
-10 Easy Pieces: Problem-Solving Electrical Outlets/Covers%u00a0Some of these are pretty fantastic.
-Farmers Have Been Enjoying The Fruits Of Bee Labor For 9,000 Years
-Cool little prefab homes%u00a0
-I love looking at all the pretty colors ans patterns
-What to Simmer for a Fresh, Seasonal-Smelling Home.. Who doesn’t wasn’t a tasty smelling home?%u00a0
-The largest art festival in the world.. And it looks amazing! Another bucket list thing for me to do!
–I love these button lunch bags.. Thinking of making for gifts.
-So When I am being sarcastic.. I am just being smart.%u00a0According to science, here’s how sarcastic people are different from everyone else%u00a0
nd some pictures from the %u00a0week (note the gigantic bear%u2026 Out of control!)
I am not a fancy person by any means, like super, no frills, no one would ever consider me fancy. EVER.%u00a0With that said, I am always and forever a cloth napkin lady. I have a drawer full of them, in all sizes and color. I use one with every meal %u00a0(I am a sloppy eater).And napkin use is not just about functionality, it is also about looking pretty.%u00a0 When I go for a clean napkin, I like to pick one that looks good with the meal that I am eating. I think a pretty clean napkin really makes any meal just a tiny bit better. Does that sound weird? I don%u2019t know but this is just a little look into how my mind works.
And recently I have set a few too many of my kitchen textiles on fire (towels, napkins, and potholders) so I am in need of a few new, nice looking napkins.%u00a0
And let’s get this straight. Cloth napkins are not about being fancy, they are about wiping you hands and face with something lovely, that doesn’t need to be tossed into the trash after use. Cloth napkins are also a great way to add a nice splash of color tot a table settings or a nice doth barrier between your lap and all the food that ends up landing on it. I have even been known to do a cloth napkin-tuck into the shirt- type situation if I am eating something particularly messy and have on decent, clean shirt (doesn’t happen too often).%u00a0Cloth napkins also double up as a rag when the inevitable spill happens at the table. See, not just for fancy people. Cloth napkins just make sense. And sure, if you are introducing them at the Thanksgiving table that happens to set a bunch of guests, or maybe making a few, wrapping them up with a ribbon and gifting them for Hanukah to Christmas%u2026that would totally be cool and not at all showy and over fancy. You just seem like a leveled headed person that uses and or gifts totally cool and useful things. And whatever if it makes you badass for making them yourself%u2026. cause you probably are badass anyway.%u00a0
So if you got the desire and a little bit of time (this project is great to do while watching a good holiday movie) you should make yourself (or someone else ) some cool ass cloth napkins.
What you will need, besides a sew machine
Cotton Fabric that you would like to wipe you face with.%u00a0I use around a 15-20 inch square piece per napkin but you can make it any size you want.. just as log as it has 90 degree conners So count how many napkins you ant to make and get hat touch in fabric.
scissors%u00a0
sewing pins
thread that looks good with your fabric
ruler or tape measurer
iron (optional)
Step 1.
Start by laying out you fabric flat, and if you want, run an iron over it to remove creases %u00a0(I would haven but my iron%u2026 can’t find it anywhere!)
When your ready, fold all the edges in 1 inch and crease with either an iron, or a flat edge (my ruler works great here)
Step 2.
Unfold last fold and the refold %u00a0each side 1/2 inch and crease.
. You now have 1/2 inch and a 1 inch crease on all sides of your fabric.
Step 2.
Now go back to the 1/2 inch crease and stick few pins in otto hold it in place.%u00a0
Start with any corner %u00a0and fold the corner over 1 inch and crease.%u00a0
Step 3.
Take a fabric marker and mark that crease Repeat with all corners.
Step 4.
Grab a marked corner and fold the napkin in half, right side together,making sure the line you just marked match up, Stick a pin in it so it stays put.
Step 5.
Run a stitch through that line.
Step 6.
Snip off the remaining tip of fabric
Repeat step 3-6 with all corners.
Step 7.
And for the most fgratifing part,%u00a0fold over %u2026 Repeat to all corners
ALmost done!
Step 8.
Lastly, run a nice stitch around the border. I went with a simple stitch, but if you are feeling a little zig zag or some other funky-ness your machine can do.. go for it.%u00a0
See, fancy(but not), pretty, made by you. napkins.. and they are so easy!%u00a0
Have fun and if you know me and end up making yourself some, let me know so I don’t end up giving you more napkins for the holidays.
Have fun!
-C
How was your week? Are you in need of a good, causal, no expectations day? Me too, not that I have had a terrible week, it just wasn’t the greatest. My body is still recuperating from falling down the stairs (I am starting to wonder if I broke my thumb), and it’s been one of those weeks where a bunch of stupid little things have happened, like how I have set at least 3 dish towels and my last potholder on fire, or spending 1/2 hour on hold with the garbage company about paying the bill only to have the phone cut out.%u00a0And topper, this past farmshare pick up was the last one of the season.. BUMMER!%u00a0I could do a winter share, but the way our winter is planning out, I would end up missing most of it, so it doesn’t work.%u00a0I am coming to terms with it by knowing %u00a0I can just go to the weekly farmers market%u2026. so I am ok. Oh, and the weather.. WTF! Not exactly complaining, %u00a0(kinda not). but 70 in November is not ok. Sure I enjoyed not having to wear a coat or that we still haven’t turned our heat on, but to be honest, I want cold. I want to feel crisp and fresh. I want to snuggle in warm sweaters and blankets.%u00a0%u00a0And yes, I want snow!!! Bah!! But as any good Vermonter knows, blink and the weather will change. (I have been blinking a lot)
Today is going to be a %u00a0good reset day. I am going to do my chores early, get some food, maybe a trip the the library (I might have a few overdue books.. oops), make some new potholders, %u00a0and then sit on my butt (leaning to the right cause my left butt check still hurts), ice my hand, and rotate between reading and watching christmas movies (ones with lot of snow in them) for the rest of the day. And if I end up just doing one of those things, I’ll call it a success because again, today is all about no expectations.%u00a0
Interent stuff from the week.
-The Norwegian Secret to Enjoying a Long Winter%u2026. Good advice for those cranky winter people
–I love reading about apples.%u00a0Beyond the Honeycrisp Apple
-The Gum wall is being removed (old gum makes me gag)
-YES!! Harry Potter people..%u00a0Here’s a First Look at ‘Harry Potter’ Prequel ‘Fantastic Beasts and Where to Find Them
-In love with this house%u00a0.. and %u00a0this one too.%u00a0
-Buying Bags of Air%u2026. good reason to not buy that crap anymore.
-Any way to get more sky%u2026 the “more sky” window%u00a0
–Sicko me.. I have been visiting Martha Stewarts website.. always around the holidays.
Not a lot, but a few pictures from the week.
Happy Sunday! Have a great day!
-C
A simple little artsy craft project to get down with%u2026 apple printing. ALmost the same as potato print, except smells better and your apple comes with an interior fun shape to print with. And you have to use apple this time of year cause its apple season and there are apples everywhere!
I usually do things like this with a little or two, but at the time, I had no littles in my possession, so I went it did it all by my lonesome.%u00a0(which was actually a lot of fun)%u00a0I made myself big cup of hot coffee, put on some tunes, and zoned out and did a bunch of prints. It was a great little afternoon project that anyone, little or not so much, can do. And the best part about printing is%u2026 you can’t screw it up
And I know that this is going to be a cold dreary weekend%u2026 so this might just be the perfect indoor project to do!%u00a0
Things you are going to need..
apple(s).. And the apple that I use are fallen apples.. so I don’t feel bad about using them.
paper
a knife (or something sharp enough to cut the apple)
paint ( I used cheap-o acrylic paint, but any paint would work)
paint-brush
Cup of water (to rinse brush)
rag (to wipe hands)
Start by slicing your apple. If you cut in in half, you get the cool star shape in the middle, or just chop it into cool shaped pieces.%u00a0
Apply paint to the apple. I found that if I dipped the apple, then remove to much excess paint with a paint brush to work the best for me.. My suggestion is to play around with what works best for you.
Apple goes paint side down on paper%u2026 and that’s how it goes. Now repeat, either with the same shape, or use a new one. OR change up the color.. it’s all how you want to do it.%u00a0
If%u00a0
. I got a little excited with my fist print turned out a little chaotic(note print above)%u00a0but then I rained myself in.%u00a0
And did a few more simpler designs. %u00a0%u00a0
But do it anyway you want cause it’s going to look cool no matter what.
THE LOVELY CRAZY
January 8, 2020 by maximios • Blog
Banana bread never goes out of style. It is a clsasic, everyday, everybody type of food. Have a slice for dessert, maybe drizzled with some chocolate, definitely.%u00a0%u00a0How about for a grab and go breakfast, sure sure.. A chunk slathered in peanut butter for snack time or anytime, well %u00a0isn’t that’s why you make it?%u00a0 And who doesn’t always have a banana bowl in the kitchen? A banana bowl that is always full of bananas because the banana just always makes it’s way home. They seem to pile up, even when I don’t mean for them to. And I know I am not the only one. I see it all the time. A fruit bowl in the kitchen with a least a couple of really really ripe bananas, waiting for that moment when you know there is no freaking way anyone in their right mind would eat those banana because gross. That’s when you have it, the perfect banana for some banana bread, or in this case, banana muffins. %u00a0
Here I went muffin style because I had already made a loaf of banana bread earlier in the week and because I wanted to send half of the muffins to the boys at the front desk at the gym. (They give me coffee, I give them muffins) And also, muffins cook a lot faster then bread so if you are a little low on time, muffins are the way to go. But if you would rather bread, you can make it bread. Bananas are there for you and are not fussy.%u00a0
The stuff. Ripe bananas, poppy seeds, brown sugar, oil, and apple cider vinegar. Also have flour, cinnamon, baking soda, baking powder, and a little salt in the bowl.%u00a0
Mash the bananas in a bowl, like really mash them up until it turns to a sugar banana slop.%u00a0Then add in the oil and the vinegar and mix together.
Dump in the dry and the poppy seeds and mix it all up until combined but then stop. Don’t over mix the batter or else you will get tuff muffins.%u00a0
Scoop into well greased muffin pans and pop them into the preheated oven to bake.%u00a0
Done! And in only took like 20 minutes appose to an hour if I made banana bread.%u00a0
And here is when you grab a coffee, a muffin, and have yourself a moment.
Stay good.
-C
makes 12-14 muffins
Preheat oven to 350
In a large bowl,%u00a0mash the bananas with the sugar until the mixture turns wet and sloppy, but there are still a few little chunks of banana.%u00a0%u00a0Mix in the oil and vinegar. In a separate bowl mix the %u00a0flour, cinnamon , baking powder and soda, salt, and poppy seeds together. Dump the dry into the wet and mix until all is combined but then stop. Don’t over mix batter.%u00a0
Scoop mixture into well greased muffin tins and place into oven once it has preheated.%u00a0Bake the muffins for about 20- 22 minutes or until nicely browned and a tester stuck into the middle of one comes out clean.
Remove from oven and let sit in tin for a few minutes until it cools down. Remove the muffins from the tin and let completely cool on a wire rack.%u00a0
Eat whenever and how many you want, store the rest in an air tight container for a couple of days or wrap a few and %u00a0freeze.%u00a0
Every year I play this game with myself.. Is it allergies or am I sick. The past few days I have been feeling kinda crappy, waking up with itchy, gunky eyes. My throat hurts, my head is like a balloon, and I am just feeling beat..%u00a0
I think it’s that I am sick (because I don’t want to have allergies) but whatever it is, it sucks, but usually goes away after a week (like every year because its really allergies). Blah.
But enough about my balloon head, lets talk these maple banana walnut oat squares. These yummy gems of the oat square world are just what you need in your life. Healthy, protein packed, nutty, and a touch sweet. No junk, just good stuff all made with little to no effort. If you like banana bread, you will be all into them. I was inspired to make these by the extremely ripe bananas that need to be eaten asap and the mr’s lack of eating a healthy breakfast (I want him to eat, and I want it be oatmeal). I know him well enough that if I make a snack like thing and leave it out to eat, that he will eat it. For breakfast.
So weather or not you are looking for a good way to get in some good stuff into your tummy or just want some good tasting stuff in your mouth, this is the breakfast/dessert for you.
The stuff. A couple of ripe bananas, a bunch of rolled oats, some yummy walnuts, real maple syrup, cinnamon, baking soda and a wee bit of water.
Start with the walnuts in a food processor. Turn it on and process until….
You got this walnut butter. Do not eat it, it’s for the squares (it is so good).
Add in the oats, cinnamon and baking soda and turn the processor back on until you get a nice unified crumbly mixture.
Now in goes the bananas and the maple syrup. And you guessed it, blend some more. While you are blending, if the mixture seems to dry, add in a splash of water, to wet, just toss in another handful of oat. The mixture should be like a muffin batter consistency.
And that’s it. If you want some nut chunks, add in a handful more of walnuts (do it) and pulse just to get them mixed into batter.
Then pourthe mixture into a well greased 9×9 baking pan and spread out evenly. Toss those suckers into the oven to bake.
Oh so good bananas give off the best smell when baking. After about a 1/2hour, these bars are nice and golden brown and a fork stuck in the center comes out clean, which means, they are done.
Cut into square , eat one or two, and save the rest. Eat for breakfast, as a snack, or for dessert. And a smear of peanut butter on top is aces too!
Later dudes.
-C
Place 1 cup of walnuts into a food processor and blend until it turns into walnut butter.. about 3 minutes. Add in the oats and blend together until it becomes a crumbly mixture. Add in the maple, baking soda, cinnamon and the bananas (break into chunks) and blend until incorporated. If the mixture seems lie its too dry, add in a splash of water, and if to wet, add in another handful of oats. The batter should resemble a muffin batter.%u00a0 Once blended, mix in the remaining walnuts and pulse just to mix them in.
Pour mixture into a well greased 9×9 baking pan and stick into the fridge for 10ish minutes and preheat oven 350
And after the time in the fridge, remove the pan and slide them into the oven. Bake until golden brown and a tester stuck into te middle comes out clean. (about 30 minutes)
Remove and let cool. Pop out of pan, cut into square, and eat to you face.
Squares will last 3-4 days in a airtight container or freeze them and they will last until you eat them.
Here are a few internet things from the week
-%u00a0Ancient Grains are new again%u00a0About time!
-%u00a0This article about the chemistry of cookies is a good one%u2026.
– Oooohh pretty. %u00a0String art
-How to Do Fishtail or Herringbone Braids Step by Step%u00a0 I need to start doing something with my hair besides a really sloppy pony tail that I don’t take out for days on end.%u00a0
-I think I want to make this Honeycomb shelves.
And %u00a0some real life happy%u00a0
Oh Intervale Community Farm..I love you. I picked up my farm share and was especially pumped %u00a0for another gigantic kohlrabi and some locally grown, locally milled wheat flour.
%u00a0
%u00a0The trees, they are a budding
Hope your weeks was awesome and warm..Spring is just about here to stay!
Have a great week!
-C