Just the other day I was at the gym talking to someone when all of a sudden, she coughed into my face, like full fledge hacking. This and then she continued to tell me that she has been sick for like weeks and blah blah blah. After that all I was thinking was, Oh Fuck, she just gave me her ick%u2026.GET AWAY FAST!!!!
So it%u2019s that time of year. Everyone all sick and shit. And that means getting my stash of stuff made, my feel better, don%u2019t get sick stuff. The tonics and elixirs and hocus pocus things that I use all year long, but mostly during the winter months when everyone starts getting sick.
One of the things I make is fire cider. First off, let me tell you I am no doctor, just in case you thought I might be. But I l am a strong believer in food as medicine. So the fire cider is a heath tonic of sorts, made with all sorts of yummy and highly potent things like fresh grated horseradish, hot peppers, garlic, and so forth. All things that are good for your health in many ways, but also taste really good. And let me tell you, if you are into the healing powers or not, a swing of this infused cider tonic will surely open up your sinus cavity like whoa.
And now before you get super excited about going and making yourself this fantastic health tonic/salad dressing/drink mixer, and thinking it will be ready and done as soon as you do a little grating, well hold up. You can throw it together super fast, but it does take a good 4-6 weeks of chilling and infusing before you really want to get into it. But don%u2019t let that stop you, it is 100% worth all the waiting. And wouldn%u2019t you know, the holidays are about 4-6 weeks away and I was just thinking after I made a batch for myself how I should make another big batch and give away in little jars for Christmas this year. Now there is a good idea. (Might not be a doctor, but I sure am a smarty pants%u2026HAHAHA)
Now to the Fire cider!
Garlic, onion and hot peppers, chopped into bits. Place it all into a clean 32oz jar.
Grated horseradish, turmeric, and ginger. Into jar it goes. And watch out, freshly grated horseradish can be a little intense.
Sliced lemon. Into said jar along with thyme, oregano, and peppercorns.
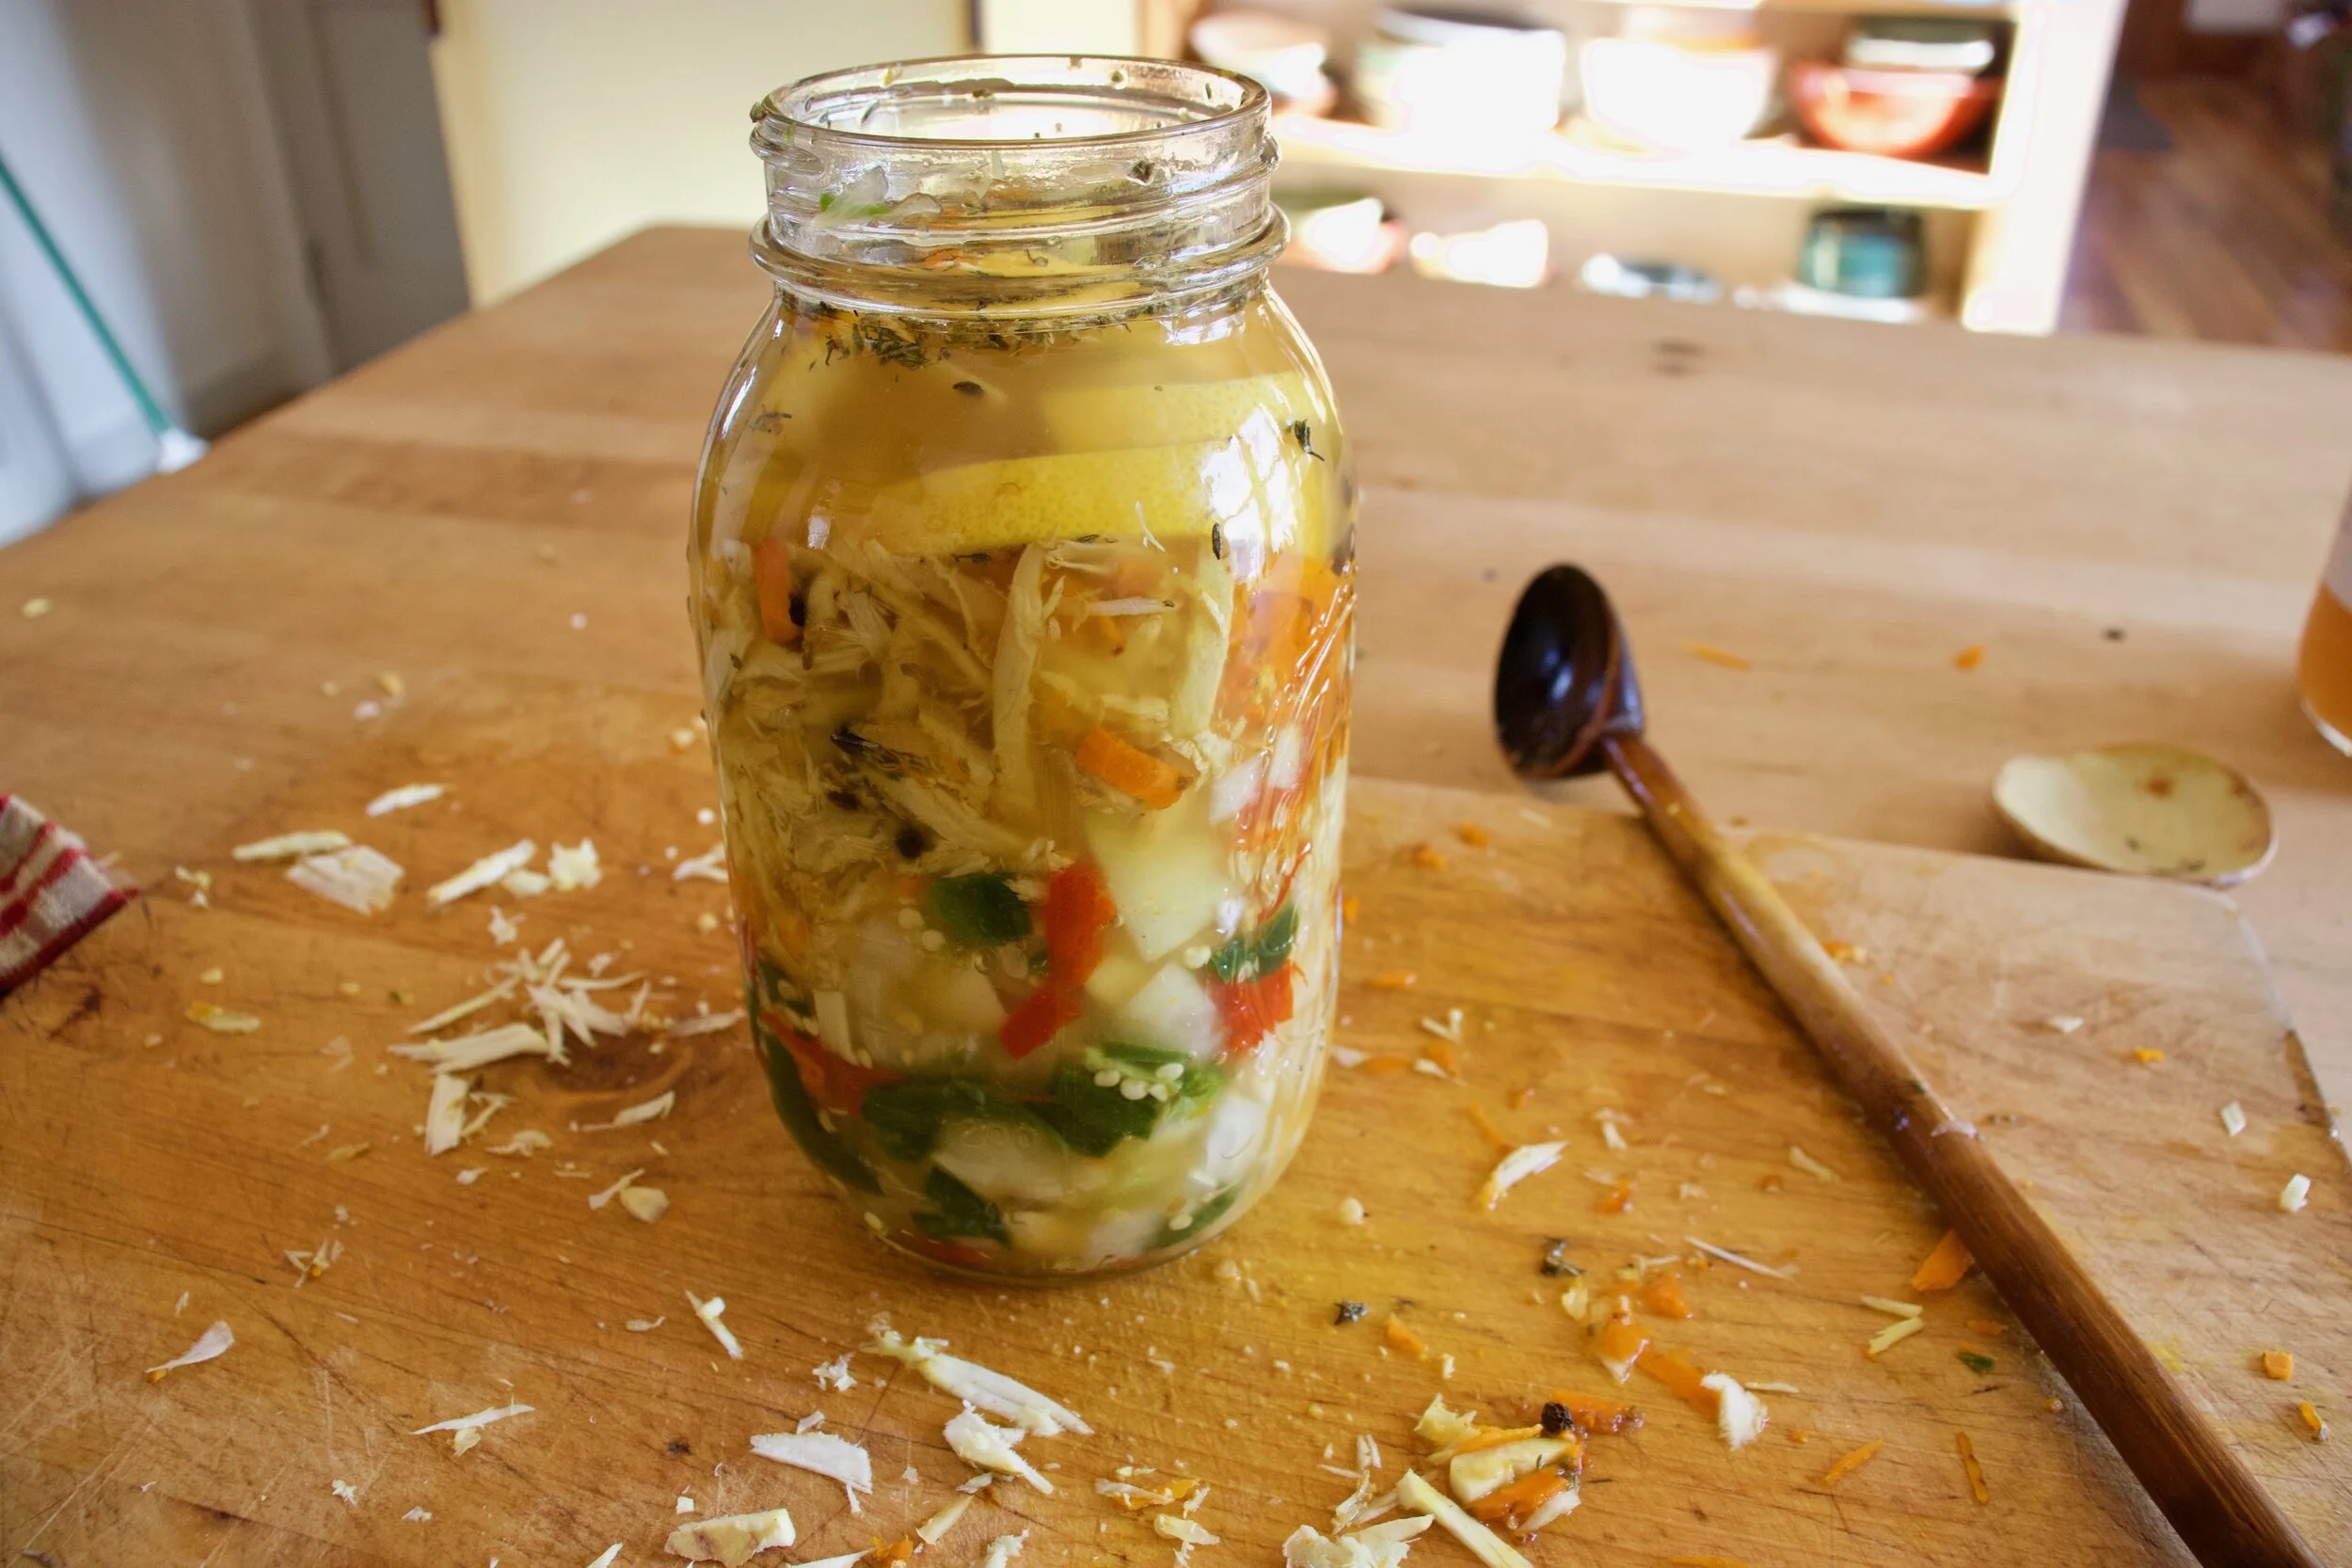
Packed and filled with raw apple cider vinegar.
Now a lid and some time in a cool dark place and you got yourself some liquid gold.
Remember, I am not a doctor so yeah, but this cider helps me feel better when I need it to and I think you will find it will help you too. And it tastes freaking awesome on food so theres that!
-C
makes 16-20 oz
1/3 cup fresh grated horseradish
1/4 cup fresh grated ginger root
1/4 cup fresh grated tumeric
1 chopped onion
3-5 heads of garlic chopped
2%u20144 hot peppers (depending on the type you use and the heat level you want) chopped
1 lemon sliced
1 teaspoon peppercorns
1 teaspoon oregano
1 teaspoon thyme
Raw apple Cider Vinegar
Honey or maple syrup (optional)
Note. Feel free to change the amounts of all of the ingredients. Want to use less horseradish, then do so. No hot peppers, then don%u2019t add them. Leave out the oregano and thyme and add dill or rosemary. You can be creative with your own flavors.
Now to make fire cider.
Place all ingredients besides vinegar into a 32 oz jar. Pack down with a wooden spoon then fill jar with apple cider vinegar.(Make sure all the stuff is submerged in the vinegar.) Place a lid on jar. If using a metal lid, line top with wax paper first or just use a plastic lid if you have one. Place jar in a cool dark place for 4-6 weeks, giving it a shake every day.
After at least 4 weeks, remove lid of the jar, strain the liquid from the solids through a fine mesh strainer or cheesecloth, squeezing out as much as the liquid as you can. You can discard the solids or make something tasty with them (saut%u00e9ed with potatoes?). Then taste the liquid. Add sweetener if you want, maybe a few tablespoons to start and go from there.
And thats it. Store the cider a lidded jar in a cool dark place. Or in the fridge if you want it cold.
To use, just take a swig when feeling crappy, stuffy, cold, or just want a tasty little pick me up. Or use as condiment on food, like in a salad or wherever.
Are you aware that it is the last week of November? I know right. Every year this happens but seriously, it’s just flying by so fast.
The mr and I did the norms for the week. Went for a amazing hike in nice snow. We worked on work, the mr made paper, I cut up the paper. I spent some time with clay, works the studio, organized some stuff and watched it snow and loved every bit of it. Then it rained and got kind of sad that all the snow melted.☹️ We picked up farm share, had dinner with my mom and Paul, hung out with the littles for a bit, and fed Barb some soup. Nothing terribly exciting, besides feeding Barb. She makes every exciting.
And then we get to Saturday. Family thanksgiving plus is was Erin’s birthday. (Happy Birthday Beotch!) Always crazy, what with every one of my family members together in my house, eating food, and hopped up on booze and sugar. The day started early with me running away to the gym to get in some sane time, then one last stop at the grocery store before heading home to finish baking and getting all the food ready. Barb came over early to help cut up veggies but really, for her and the mr to make fun of me and gossip like little old ladies. So food got prepare, then I cooked it all. (Minus the main which mom made. She made a crazy chicken thing, cooked in her oven, and brought it over. No meat gets cooked in my house.) And then the family descended on the house, hungry and crazy. Food got served/ thrown all over and for a few short minutes, everyone was sitting down all at once together. But that lasted 2 seconds, and the kids went off and I ran back to the kitchen while everyone was eating to straighten up a bit and because I don’t need to see people dropping chicken bits all over. I just let them eat in peace while I hid for a few minutes in the pantry and snacked on roast Brussel sprouts, carrots and mustard.
After everyone ate, we all ran around the house, picked secret Santa names, had a massive dance party in the kitchen and did dessert and birthday cake. Erins birthday yes, but Coco got to blow out the candles. So cute, that little loving the candles and all but I am going to be watching out for him. I think he might turn into a little pyromaniac. HAHAHA. But for real. Dinner ended with everyone leaving except Barb, Megan,and So. We picked up a little but basically just sat in the pantry eating raw Brussel sprouts from the stock, with mustard of course, and talking about boys. Then they left too and the mr and I were left alone to assess the damages.
The house. Oh my, oh my. It is a FUCKING DISATSER! I know I tell you all that I spend a good chunk of time every weekend cleaning…Well this time, today, all Sunday, I’m a be cleaning. Cleaning the cake and ice cream and cookies crumbles all over. Cleaning up the dinner rolls behind the couch, all the ripped paper, smashed potates, food and drinks particles. Chicken bits, which everyone was super awesome about and tried not to get anywhere, are everywhere. All. Over. The house. Then the kitchen. Every single piece of silverware and then some plus at least 40 plates and bowls are waiting for cleaning. Not to mention the the pots and pans. The compost is overflowing. The recycling is a mess, and I have at least 2 laundry loads of rags and napkins and dirty towels to do. The fridge looks like a freaking bomb blew up in it with tons of half lidded containers precariously stacked on top of each other, waiting for just the right movement of the neighboring jar or the movement of the hot sauce to have it all come crashing down. Aye ya ya. But all worth it because I love my family and we had a blast. I just need to remember next time I am at one of their houses to like pee on their toilet seat or mash some frosting into their couch cushions, you know, to be fair and all.
Anyway, so today I clean and maybe try to hang up some Christmas decorations? The mr is off to do very nice things for people that might not appreciate it, but do it he is going to do (he is too good a person). Hopefully by the time he comes home later tonight, I will be done cleaning, he will be done helping for a good long while, and we can eat soup and maybe watch a movie together. Or more realistically, he watches a movie while I read and probably fall asleep on the couch. Real life.
Reads I read from the internet this week.
-A long but good read. RuPaul: The Philosopher Queen. who doesn’t love RuPsul?
-I just pulled out a nice tablecloth, covered in stains mind you, but maybe i’ll be able to get some of them out now. A Cheat Sheet to Get Rid of Every Type of Holiday Stain. Or not. I don’t think I care enough. HA
-This is so appealing to me especially since the mr loves his heavy comforter and I just want a light blanket with the window thrown open in 20 degree weather. The Scandinavian Sleep Secret: Mine and Yours Duvets. HE is always covering me up at night.
–The best health foods? Soup, garlic and cake. Food is healing, and if cake makes you feel better, well then cake it be.
-These cakes remind me of my 5ht grade volcano science project. I made it out of cake and whipped cream. It was awesome. Antarctic Research Takes The Cake In These Science-Inspired Confections
–Vegan man sues Burger King claiming meatless burger is cooked on same grill as meat. This is one reason I do not eat out. Oe of the last times I did eat out, there were egg shells in my scamp bled vegan tofu dish….. So yeah.
-Who doesn’t love a good TV tray? A Brief History of the TV Tray
-HAve you ever raised a adolescent dog… It is crazy to say the least. Animal adolescence is filled with teen drama and peer pressure
-So there is this ti look forward to. Cockroaches Are Evolving And in the Future They can Become Impossible To Kill
–A Brief and Buttery History of Libby’s Pumpkin Pie Recipe. The pie of my childhood.
Just the other day I was at the gym talking to someone when all of a sudden, she coughed into my face, like full fledge hacking. This and then she continued to tell me that she has been sick for like weeks and blah blah blah. After that all I was thinking was, Oh Fuck, she just gave me her ick%u2026.GET AWAY FAST!!!!
So it%u2019s that time of year. Everyone all sick and shit. And that means getting my stash of stuff made, my feel better, don%u2019t get sick stuff. The tonics and elixirs and hocus pocus things that I use all year long, but mostly during the winter months when everyone starts getting sick.
One of the things I make is fire cider. First off, let me tell you I am no doctor, just in case you thought I might be. But I l am a strong believer in food as medicine. So the fire cider is a heath tonic of sorts, made with all sorts of yummy and highly potent things like fresh grated horseradish, hot peppers, garlic, and so forth. All things that are good for your health in many ways, but also taste really good. And let me tell you, if you are into the healing powers or not, a swing of this infused cider tonic will surely open up your sinus cavity like whoa.
And now before you get super excited about going and making yourself this fantastic health tonic/salad dressing/drink mixer, and thinking it will be ready and done as soon as you do a little grating, well hold up. You can throw it together super fast, but it does take a good 4-6 weeks of chilling and infusing before you really want to get into it. But don%u2019t let that stop you, it is 100% worth all the waiting. And wouldn%u2019t you know, the holidays are about 4-6 weeks away and I was just thinking after I made a batch for myself how I should make another big batch and give away in little jars for Christmas this year. Now there is a good idea. (Might not be a doctor, but I sure am a smarty pants%u2026HAHAHA)
Now to the Fire cider!
Garlic, onion and hot peppers, chopped into bits. Place it all into a clean 32oz jar.
Grated horseradish, turmeric, and ginger. Into jar it goes. And watch out, freshly grated horseradish can be a little intense.
Sliced lemon. Into said jar along with thyme, oregano, and peppercorns.
Packed and filled with raw apple cider vinegar.
Now a lid and some time in a cool dark place and you got yourself some liquid gold.
Remember, I am not a doctor so yeah, but this cider helps me feel better when I need it to and I think you will find it will help you too. And it tastes freaking awesome on food so theres that!
-C
makes 16-20 oz
1/3 cup fresh grated horseradish
1/4 cup fresh grated ginger root
1/4 cup fresh grated tumeric
1 chopped onion
3-5 heads of garlic chopped
2%u20144 hot peppers (depending on the type you use and the heat level you want) chopped
1 lemon sliced
1 teaspoon peppercorns
1 teaspoon oregano
1 teaspoon thyme
Raw apple Cider Vinegar
Honey or maple syrup (optional)
Note. Feel free to change the amounts of all of the ingredients. Want to use less horseradish, then do so. No hot peppers, then don%u2019t add them. Leave out the oregano and thyme and add dill or rosemary. You can be creative with your own flavors.
Now to make fire cider.
Place all ingredients besides vinegar into a 32 oz jar. Pack down with a wooden spoon then fill jar with apple cider vinegar.(Make sure all the stuff is submerged in the vinegar.) Place a lid on jar. If using a metal lid, line top with wax paper first or just use a plastic lid if you have one. Place jar in a cool dark place for 4-6 weeks, giving it a shake every day.
After at least 4 weeks, remove lid of the jar, strain the liquid from the solids through a fine mesh strainer or cheesecloth, squeezing out as much as the liquid as you can. You can discard the solids or make something tasty with them (saut%u00e9ed with potatoes?). Then taste the liquid. Add sweetener if you want, maybe a few tablespoons to start and go from there.
And thats it. Store the cider a lidded jar in a cool dark place. Or in the fridge if you want it cold.
To use, just take a swig when feeling crappy, stuffy, cold, or just want a tasty little pick me up. Or use as condiment on food, like in a salad or wherever.
Enjoy!
I can%u2019t remember the last time I have gone a day without eating lentils. Seriously, even when we travel I buy or bring along a bag of lentils. Or when we are camping, its basically all we eat. So it is safe to say that I know my way around a lentil or two. They are probably my favorite food (I say that about all my favorites)
Other then lentils being amazing delicious, the are so versatile. I am sure I say it all the time, but there is nothing you cannot make with lentils, sweet or savory. And nutritional as all heck. So much iron and a super amount of protein. Lentils are basically the perfect food in tiny little coin shaped form. Take it from this vegan lady here. Lentils help keep me alive. HA.
But enough about how many lentils I eat, what we need to address is this chili. It doesn%u2019t matter if you are a lentil feen or not, you will very much enjoy yourself a big bowl of this hearty, slightly spicy, warming goodness. Especially now, when it%u2019s cold outside and the days are short and you just want to eat something filling and healthy and that is not left over holiday cookies. And big bonus, this is a chili that you could come home to start at 5 and basically have it ready to eat by 6. That is just one bit of the magic of lentils, they so cook so fast.
And it%u2019s chili and chili is the best so you really should just get it made. It%u2019s what you need, I can tell.
To all the lentil goodness!
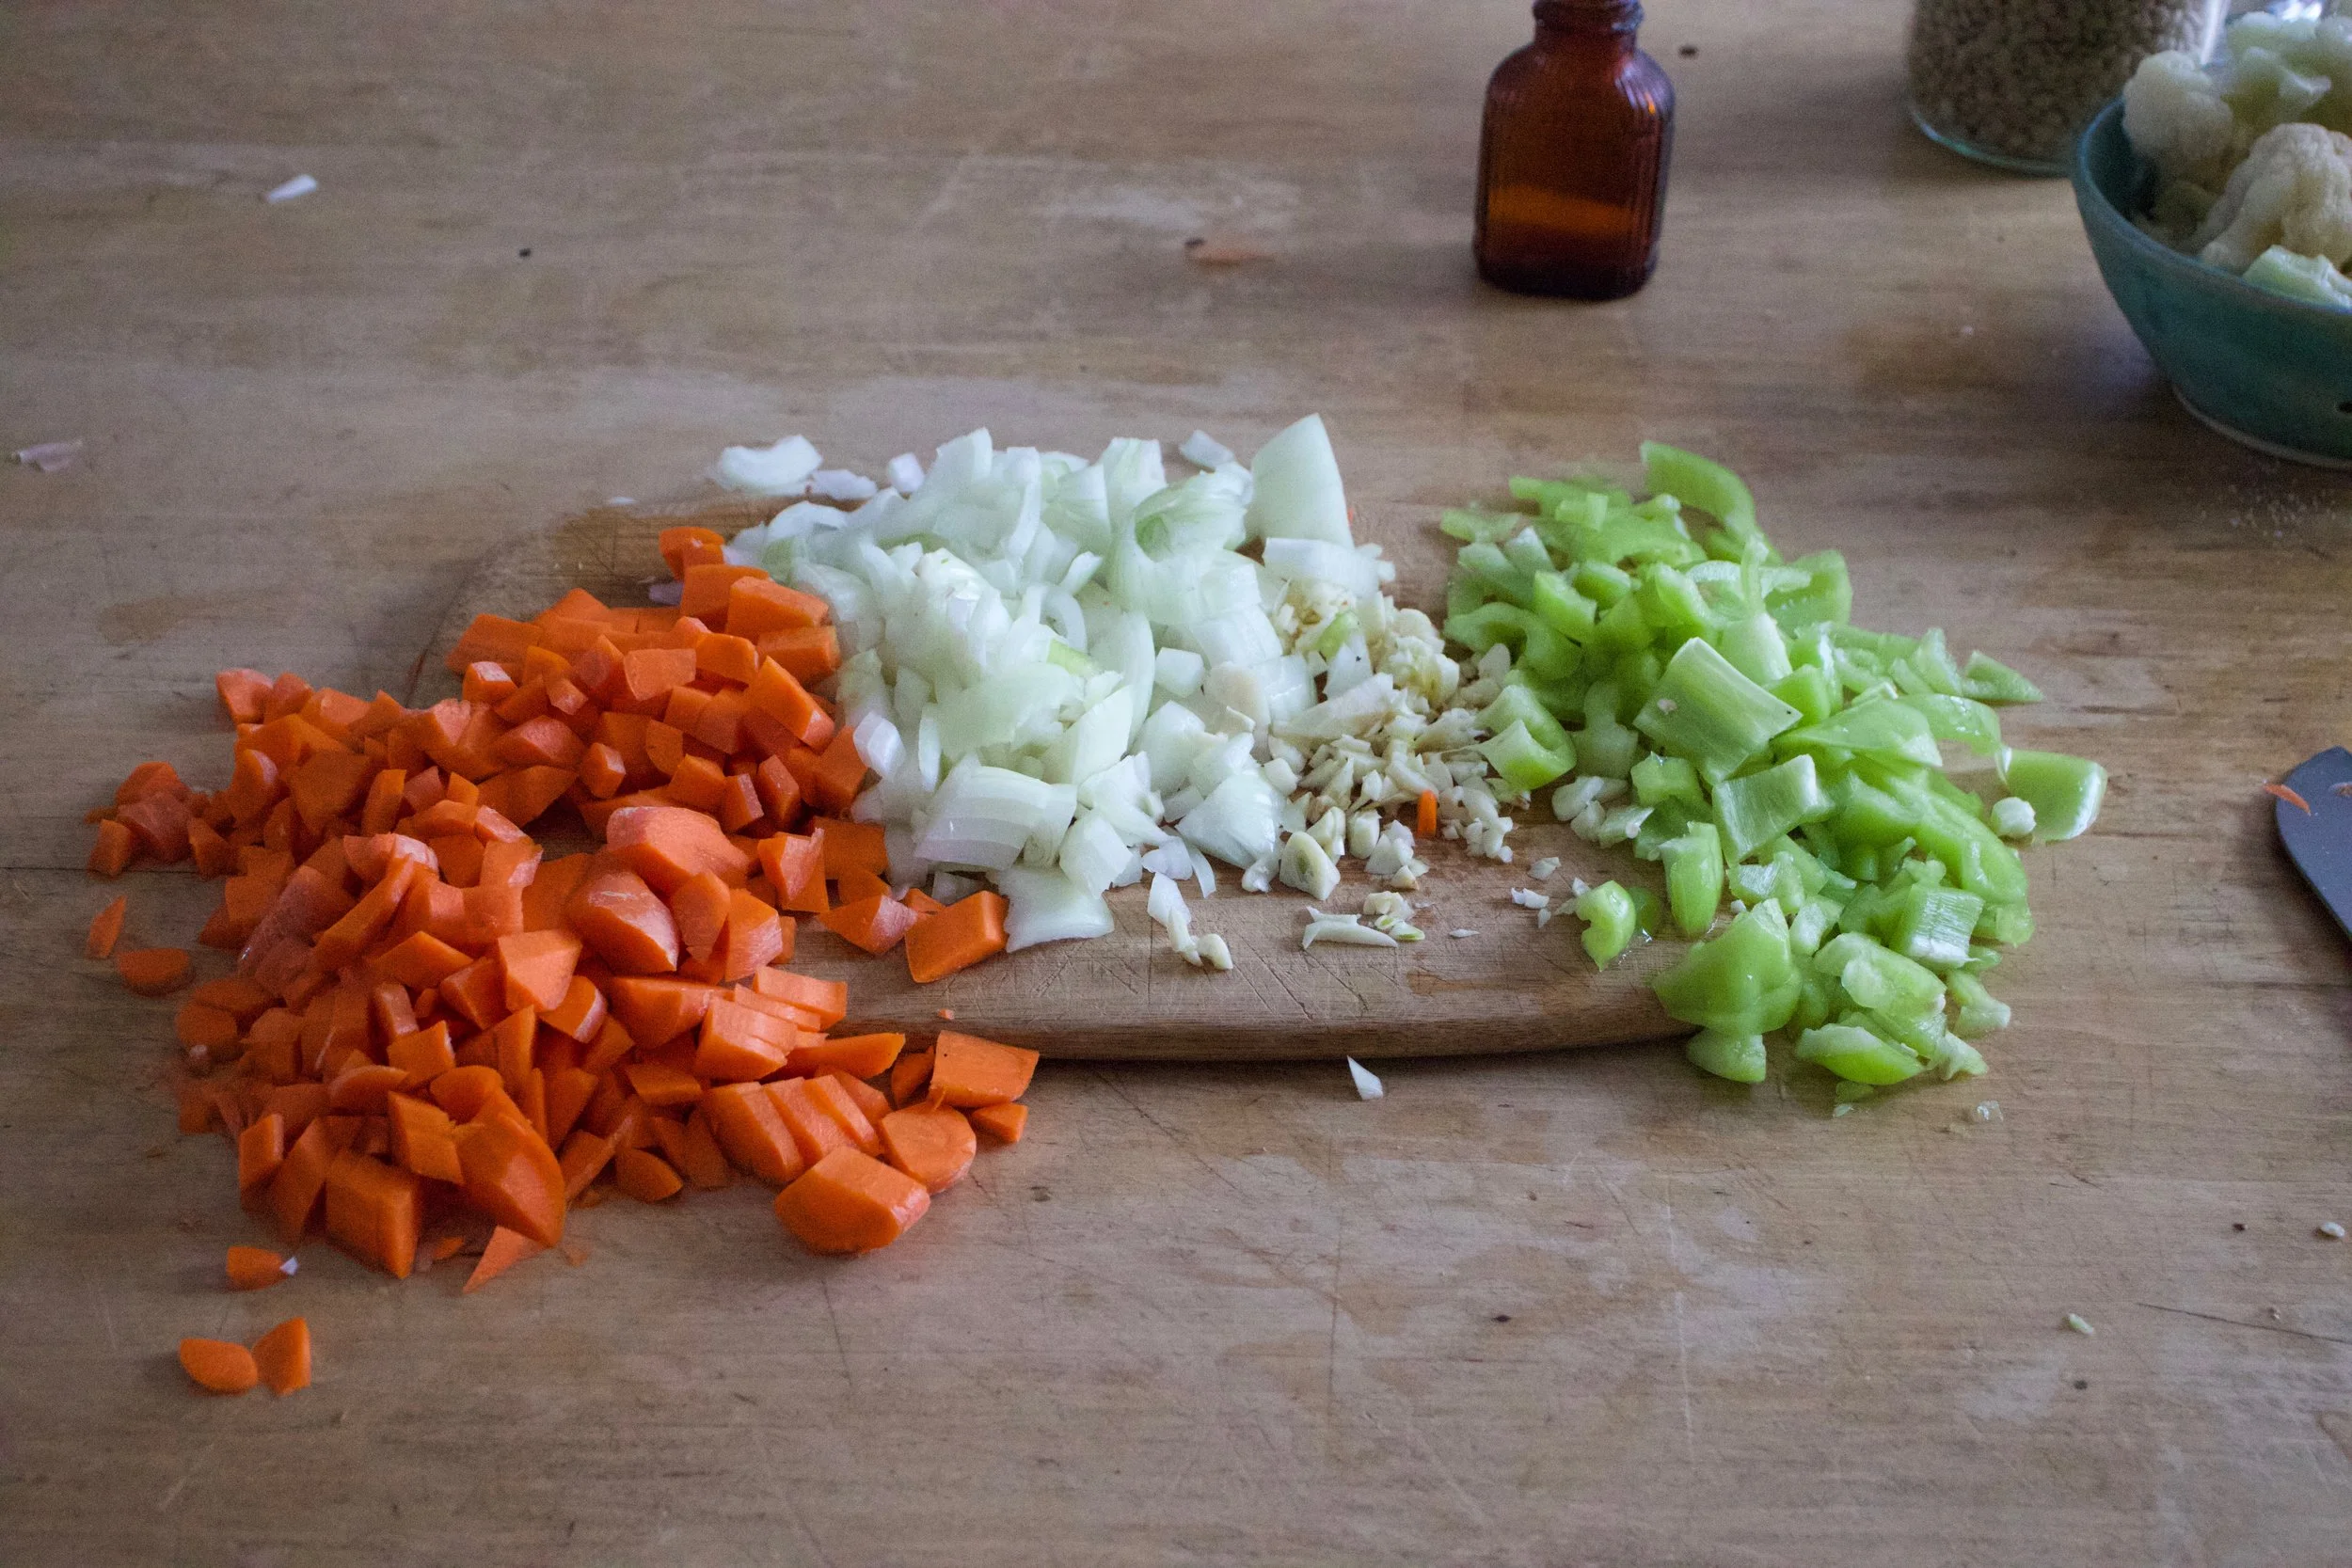
The stuff. Green lentils, crushed tomatoes, a cubanelle pepper, an onion, a couple carrots, and some cauliflower. Also a few cloves or garlic, cumin, chili powder, ground ginger, a red jalape%u00f1o, and salt and pepper.
Get started by small choping the carrot, onion, and pepper. Mince up the garlic too.
Grab that jalape%u00f1o and remove steam (and seeds if you want heat) and dice into very very small piece.
Into a big old pot it all goes, along with the cauliflower and all the spices. Add a splash of water and a sprinkle of salt and pepper and stick it on the stove for a few minutes to warm up the veggies and spices.
Looking good.. So good I wanted to eat it all, but don%u2019t, it%u2019s for the chili.
Now add all the tomatoes and water and place back on stove on high heat until it starts to boil, then reduce heat to a medium and cook until lentils are tender.
Well look at that, chili.
And why not top with a little avocado while you are at it. It is a very good addition, to the spiciness.
Very little amount of works for such great rewards. Probably going to be your new favorite chili recipe just so you know.
Lentil chili. Grab a bowl, kick up your feet, and dig on it.
-C
makes a lot of chili, like 10-12 servings
1 pound green lentils
1 large onion
5-6 cloves or garlic
1 cubanelle pepper (or any green or sweet pepper)
2 large carrots
3 cups chopped cauliflower (fresh or frozen)
6 cups (two 28 oz cans) crushed tomatoes
2 hefty tablespoons cumin
1 hefty tablespoon chili powder
1 teaspoon ground ginger
1 jalape%u00f1o pepper
6-8 cups water
salt and pepper
diced avocado for serving (optional)
Remove steam and seeds from cubanelle pepper and small dice it along with the carrots and onion then place int all nto a large heavy bottom pot. Mince the garlic add into pot. Remove steam and seeds from jalape%u00f1o pepper and finely dice it and add to pot. Last but not least, add the spices to the mix. Add a splash of water and place on high heat and cook the veggies and spices until for 5 or so minutes, just to give them a little heads start and to activate the spices.
Once the veggies have had a few minutes of heat, dump in the dried lentils, the tomatoes, and 6 cups of water. Stir around and keep on high heat until it starts to boil then turn down to medium and continue to cook, stirring once in a while, until the lentils are tender and the chili has thickened, which should take about 35-40 minutes. If at any time you the lentils are not submerged in liquid but are not cooke through, add more water. And once the lentils are cooked you can thicken bu continuing to cooke does or thin it out by adding more water. Taste soup and season with salt and pepper as you see fit.
To serves, ladle into bowls and tope with diced avocado.
Left overs are fantastic hot or cold and will last in the fridge for about a week. Or if you want, you can freeze a few servings.
Just the other day I was at the gym talking to someone when all of a sudden, she coughed into my face, like full fledge hacking. This and then she continued to tell me that she has been sick for like weeks and blah blah blah. After that all I was thinking was, Oh Fuck, she just gave me her ick%u2026.GET AWAY FAST!!!!
So it%u2019s that time of year. Everyone all sick and shit. And that means getting my stash of stuff made, my feel better, don%u2019t get sick stuff. The tonics and elixirs and hocus pocus things that I use all year long, but mostly during the winter months when everyone starts getting sick.
One of the things I make is fire cider. First off, let me tell you I am no doctor, just in case you thought I might be. But I l am a strong believer in food as medicine. So the fire cider is a heath tonic of sorts, made with all sorts of yummy and highly potent things like fresh grated horseradish, hot peppers, garlic, and so forth. All things that are good for your health in many ways, but also taste really good. And let me tell you, if you are into the healing powers or not, a swing of this infused cider tonic will surely open up your sinus cavity like whoa.
And now before you get super excited about going and making yourself this fantastic health tonic/salad dressing/drink mixer, and thinking it will be ready and done as soon as you do a little grating, well hold up. You can throw it together super fast, but it does take a good 4-6 weeks of chilling and infusing before you really want to get into it. But don%u2019t let that stop you, it is 100% worth all the waiting. And wouldn%u2019t you know, the holidays are about 4-6 weeks away and I was just thinking after I made a batch for myself how I should make another big batch and give away in little jars for Christmas this year. Now there is a good idea. (Might not be a doctor, but I sure am a smarty pants%u2026HAHAHA)
Now to the Fire cider!
Garlic, onion and hot peppers, chopped into bits. Place it all into a clean 32oz jar.
Grated horseradish, turmeric, and ginger. Into jar it goes. And watch out, freshly grated horseradish can be a little intense.
Sliced lemon. Into said jar along with thyme, oregano, and peppercorns.
Packed and filled with raw apple cider vinegar.
Now a lid and some time in a cool dark place and you got yourself some liquid gold.
Remember, I am not a doctor so yeah, but this cider helps me feel better when I need it to and I think you will find it will help you too. And it tastes freaking awesome on food so theres that!
-C
makes 16-20 oz
1/3 cup fresh grated horseradish
1/4 cup fresh grated ginger root
1/4 cup fresh grated tumeric
1 chopped onion
3-5 heads of garlic chopped
2%u20144 hot peppers (depending on the type you use and the heat level you want) chopped
1 lemon sliced
1 teaspoon peppercorns
1 teaspoon oregano
1 teaspoon thyme
Raw apple Cider Vinegar
Honey or maple syrup (optional)
Note. Feel free to change the amounts of all of the ingredients. Want to use less horseradish, then do so. No hot peppers, then don%u2019t add them. Leave out the oregano and thyme and add dill or rosemary. You can be creative with your own flavors.
Now to make fire cider.
Place all ingredients besides vinegar into a 32 oz jar. Pack down with a wooden spoon then fill jar with apple cider vinegar.(Make sure all the stuff is submerged in the vinegar.) Place a lid on jar. If using a metal lid, line top with wax paper first or just use a plastic lid if you have one. Place jar in a cool dark place for 4-6 weeks, giving it a shake every day.
After at least 4 weeks, remove lid of the jar, strain the liquid from the solids through a fine mesh strainer or cheesecloth, squeezing out as much as the liquid as you can. You can discard the solids or make something tasty with them (saut%u00e9ed with potatoes?). Then taste the liquid. Add sweetener if you want, maybe a few tablespoons to start and go from there.
And thats it. Store the cider a lidded jar in a cool dark place. Or in the fridge if you want it cold.
To use, just take a swig when feeling crappy, stuffy, cold, or just want a tasty little pick me up. Or use as condiment on food, like in a salad or wherever.
Enjoy!
For the longest time now, I have been drinking a little turmeric with a little lemon first thing in the morning. It started as a medicinal drink, but quickly became a tasty habit. I have some stupid weird circulation condition called raynaud’s where changes in temp turn my fingers and toes into icicles. And for me, the worst time of the year for this condition is the spring (but spring is still my favorite). All the up and down of temperature and the wet cold damp weather is my trigger, not to forget to mention that those temp swings can get a girl sick. (I can’t get sick!!)
So way back when I started to drink for my health and the feeling in my fingers. Turmeric, ginger, and cinnamon , all super warming spices that help greatly with blood circulation, not to mention a whole bunch of other good things. (I could tell you and go on and on, but you can just look it up yourself) Ever since I started drinking and eating lots of these spices, my raynauds has gotten soooo sooo soooo much better. I still get cold finger and toes, but no where as severe and the way less often.
Now a few weeks ago the mr started making himself an afternoon turmeric tea. He read something on the internet about how it’s the best anti-inflammatory and good for achy joints. (Sure dude, listen to the internet and not me) Being a big guy doing construction and such, he gets really achy joints and there is only so much arnica and frozen peas a guy can do. So now he drinks this and I think he is starting to notice a difference. (less time with the frozen peas) And since he is making himself tea every afternoon, I started to make a spicy tea for myself in the afternoons too. I figured that a little extra goodness to ward off the chills and any larking illness is only a plus. It’s our after lunch treat that tastes good, is warm and soothing and is doing the body all sorts of good.
Spicy turmeric tea. You will get addicted and feel like awesomeness.
The stuff. Ground turmeric, ground ginger, saigon cinnamon and hot water. Additional yums with a little lemon and some honey if you like it sweet or have a scratchy throat.
Spices into a drinking vessel (I like a big jar)
And in goes the hot water. Give it a good stir and a squeeze of lemon (and sweeten if your gonna)
And watch it swirl. A drink that keeps this girl happy and healthy.
Something great to look forward.
-C
1 tablespoon ground turmeric
1 teaspoon ground saigon cinnamon (can use regular, but it’s not as spicy sweet)
1/2 teaspoon ground ginger
1 1/2- 2 cups hot water (not quite boiling)
honey to taste (I only use if my throat is sore)
lemon juice (optional)
Note… My measurements are just guidelines. You might like a little less turmeric or more ginger so make this drink any way that tastes best for you.
Grab yourself a big mug or jar, add in the spices and hot water, honey if you want it and a squeeze of lemon juice if using. Stir with a spoon and drink. Keep spoon handy to give it a good stir every now and then
%u00a0I’ll let you know now, I am a make and eat soup all year long person. I can think of few things better then sitting outside, basking in the sun, hopefully with a light wind, a book in hand, enjoying a nice big cup of some good homemade soup. (Doesn’t that sound so freaking lovely?) This soup right here is perfect for just that. Parsnips are the best, kind of like a big white sweet, yet starchy carrots. And cooked together with a little bit of light and lemony thyme, rich earthy turmeric and a couple more chopped veggie%u2026.. you got yourself a%u00a0nice thick and fragrant bowl of happiness that fills you up without weighing you down. It’s food you can eat that fills you up, leaves you feeling cozy, yet still wanting to hop on a bike or lace up the running shoes. %u00a0Hearty without the feeling of all the heaviness.
A perfect soup for spring! (or summer, winter, or fall)
The stuff. Parsnips, carrots, onion and garlic. Thyme and turmeric, salt and pepper. the tinniest bit of oil and water (water not shown)Chop all the veggies and the garlic, drizzle a dutch oven or a pot with oil, toss in the veggies. Add the turmeric, the thyme, and 1/2 cup of water.%u00a0Sweet sweating the veggies. Turn pot on medium and cook until the water completely cooks out. When the veggies start to brown and stick to the pot, deglaze with water. Give a good stir and keep cooking. Repeat the deglazing process until the veggies are super soft and ready to blend. (I did this 4 times.. it only took 10 minutes)Add enough water to cover the cooked veggies.%u00a0And now blend the heck out of it.. Go as smooth or chunky as you want. I blended as smooth as I could get with this crappy immersion blender. (Blender on loan until I finally decide on, and buy a new one)And there you have it. Scoop into bowls, add lots of cracked black pepper, and go to town. I made enough to save a bowl for later%u2026 %u00a0it didn’t last for later.%u00a0
Soup so good.%u00a0
-C
Parsnip Thyme and Turmeric Soup%u00a0
4 large parsnips
2 carrots
1 whole onion
3-4 cloves garlic
2 teaspoons thyme
2 teaspoons turmeric%u00a0
salt and pepper
olive oil
water
Dice up the parsnips, carrots, garlic and onion and place into a large dutch oven or pot. Drizzle with a bit of olive oil, %u00a0sprinkle on the spices, salt and pepper and add about 1/2 cup of water. Turn heat on medium and start cooking down the veggies. Once the water evaporates and the veggies start to caramelize, deglaze pot with about a 1/2 cup of water. Give pot a stir, and continue to cook until water evaporates. %u00a0Repeat this 2-3 more times until the veggies are super soft and fragrant.%u00a0
When the %u00a0veggies are ready, add enough water to the pot to submerge the veggies. Bust out the immersion blender or dump into a blending device and blend until smooth (or the consistency that you want) Have a cup of water ready to thin out if needed. When blended, taste for salt and pepper, add more if you want, and cook on low heat until you are ready to serve.
Garnish with a lot of good cracked pepper
Eat from a vessel, use a spoon
There is a joke about Vermonters, that all we talk about is the weather. Well, it’s kind of true. But to our defense, we get a lot of weather, and it’s always changing and intense and both lovely and crazy and all over. So yeah, we talk. A lot, about the weather. And on that topic, I am trying so hard not to complain, but%u00a0honestly, I am getting a little sick, both physically and mentally from all of these %u00a0super, to freaking cold temperatures. Yesterday the high was 0 ( which was at like 2 in the morning) %u00a0and factor in the windchill, the temp stayed at like 25 below. It f**king sucks. I can’t %u00a0stay outside for too long or else I will probably die. The dog %u00a0is having a hard time making it around the block before he gets ice paws, and the mister, well he even started wearing gloves (he wears a sweater all winter and never gets cold%u2026..he is officially cold)
%u00a0And not only is the cold keeping us all indoors, but its making us all borderline sick. We both have been fighting something for the past few week. The headaches, stuffy nose, chest congestions. The puppy is getting super dry skin and gave himself a hot spot. BLAh!! Ok, enough! No more complaining
Because %u00a0I do really love the winter and all the pretty snow!!!!
But we are feeling kind of sick so to make us feel oh so much better, a fantastic, super tasty, healing, good for me, good for you, soup. Turmeric ginger carrot%u2026 oh man. Made with lots of ginger, turmeric and garlic and finished with a drizzle of raw honey. This soup is exactly what we need. All ingredients scream.. FEEL GOOD, BE WARM AND COZY! Almost everything in it has antibacterial and anti inflammatory properties. The veggies are hearty and heathy and just eating soup helps to keep hydrated. And the best part..it tastes so freaking amazing.%u00a0
So whether %u00a0you are feeling a little mah, or just a little hungry.%u2026this soup is where it’s at!
Lots of chopped up carrots, a small onion, a little bit of cauliflower I had left over and a small beet. If you don’t have the cauliflower and or a beet, just use %u00a0ares pepper or another 2 carrots.. no biggy.%u00a0
Then we have the fresh ginger ( you can use powdered) turmeric and garlic. %u00a0All the good healthy spicy and yummy stuff.%u00a0
I accidentally spilled the turmeric on the counter..but it kind of looks like I might have done it on purpose%u2026 yeah, let’s go with that. %u00a0Chop the garlic and he ginger into %u00a0 %u00a0chunksAnd toss into the pot to warm and activate. Just a little toasty toast.%u00a0
And the veggies are roasted and tender and smell so good. %u00a0It took a lot of will power to not eat the whole pan right there.
I added the roasted veggies and 3 cups water straight into my pot %u00a0with the spices because I used an emulsion blender. If you are using normal blender, add the veggies, the toasted spices and the water to the blender and blend until smooth. Then transfer to a pot.
Pretty much all blended together%u2026.(I left a few big chunks in there to snack on while I was waiting to eat serve%u2026I was really hungry) and let to simmer for a little longer…
And now ladle into a bowl and get ready for a fantastic finish%u2026 drizzle a spoonful of raw honey into soup%u2026%u2026.so so good. You could add the honey before serving, but heating it kills all the good antibacterial stuff so that’s why we wait.%u00a0Then %u00a0I sprinkle some chopped kale and chives. (do it if you want, but not necessary)
Now enjoy. Let the warmth wash over you and feel all those good spices helping to fight the good fight to keep you well and all the yummy to satisfy your hunger.
And lets hope for some warm (above 0!!) weather!
-C
Turmeric Ginger%u00a0Carrot Soup
Ingredients
5 large carrots
1 small onion
1 small beet*
quarter head cabbage ( or a cup of frozen)*
2-3 teaspoons %u00a0turmeric%u00a0
2-3 tablespoons fresh %u00a0ginger (1/2 teaspoon if using powdered)
4-6 cloves garlic
salt pepper
raw honey (omit if vegan)
* If you don’t have or want to use beet and or the cauliflower, you can use a red pepper, a small sweet potato, or just use a few more carrots.%u00a0
Chop all veggies into similar sized chunks and toss into a lightly oiled pan or on a baking sheet and sprinkle with salt. %u00a0Stick in oven at 425 for about 30 minutes or until all veggies are fork tender.%u00a0
In a large soup pot or dutch oven, toss chopped garlic, ginger and the turmeric and place on medium heat for a few minutes to activate the spices. Add the roasted veggies and 3 cups water to pot (if using emulsion blender) and blend until smooth. If using a blender, add the toasted spices, roasted veggie and 3 cups water and blend until smooth then transfer to a large pot or dutch oven. Add salt and pepper to taste. Turn heat down to%u00a0%u00a0simmer and let cook for an addition 10 minutes.%u00a0
When ready to serve, ladle soup into bowl and drizzle a spoonful of raw honey into soup. Garnish with fresh chopped kale, chives, cabbage or whatever you want. (or nothing is good too)
If you are a falafel fan, as I am, then this one is for you. Carrot ginger falafel. Oh yes. Warm and spicy and carroty and all the things that are good, packed into a chickpea ball of mouth sized proportions. When I thought of it it sounded good, When I made it and ate it, it was everything and more I could have asked for in a freaking fantastic falafel. As for the tahini cabbage slaw, I might just be making it in my house every dang day. Super easy, super tasty, goes with the falafel like whoa but is just as good eaten on it%u2019s own. Eaten together the pair make every inch of mouth space happy. A happy mouth space, what more can you ask for?
To the falafel!
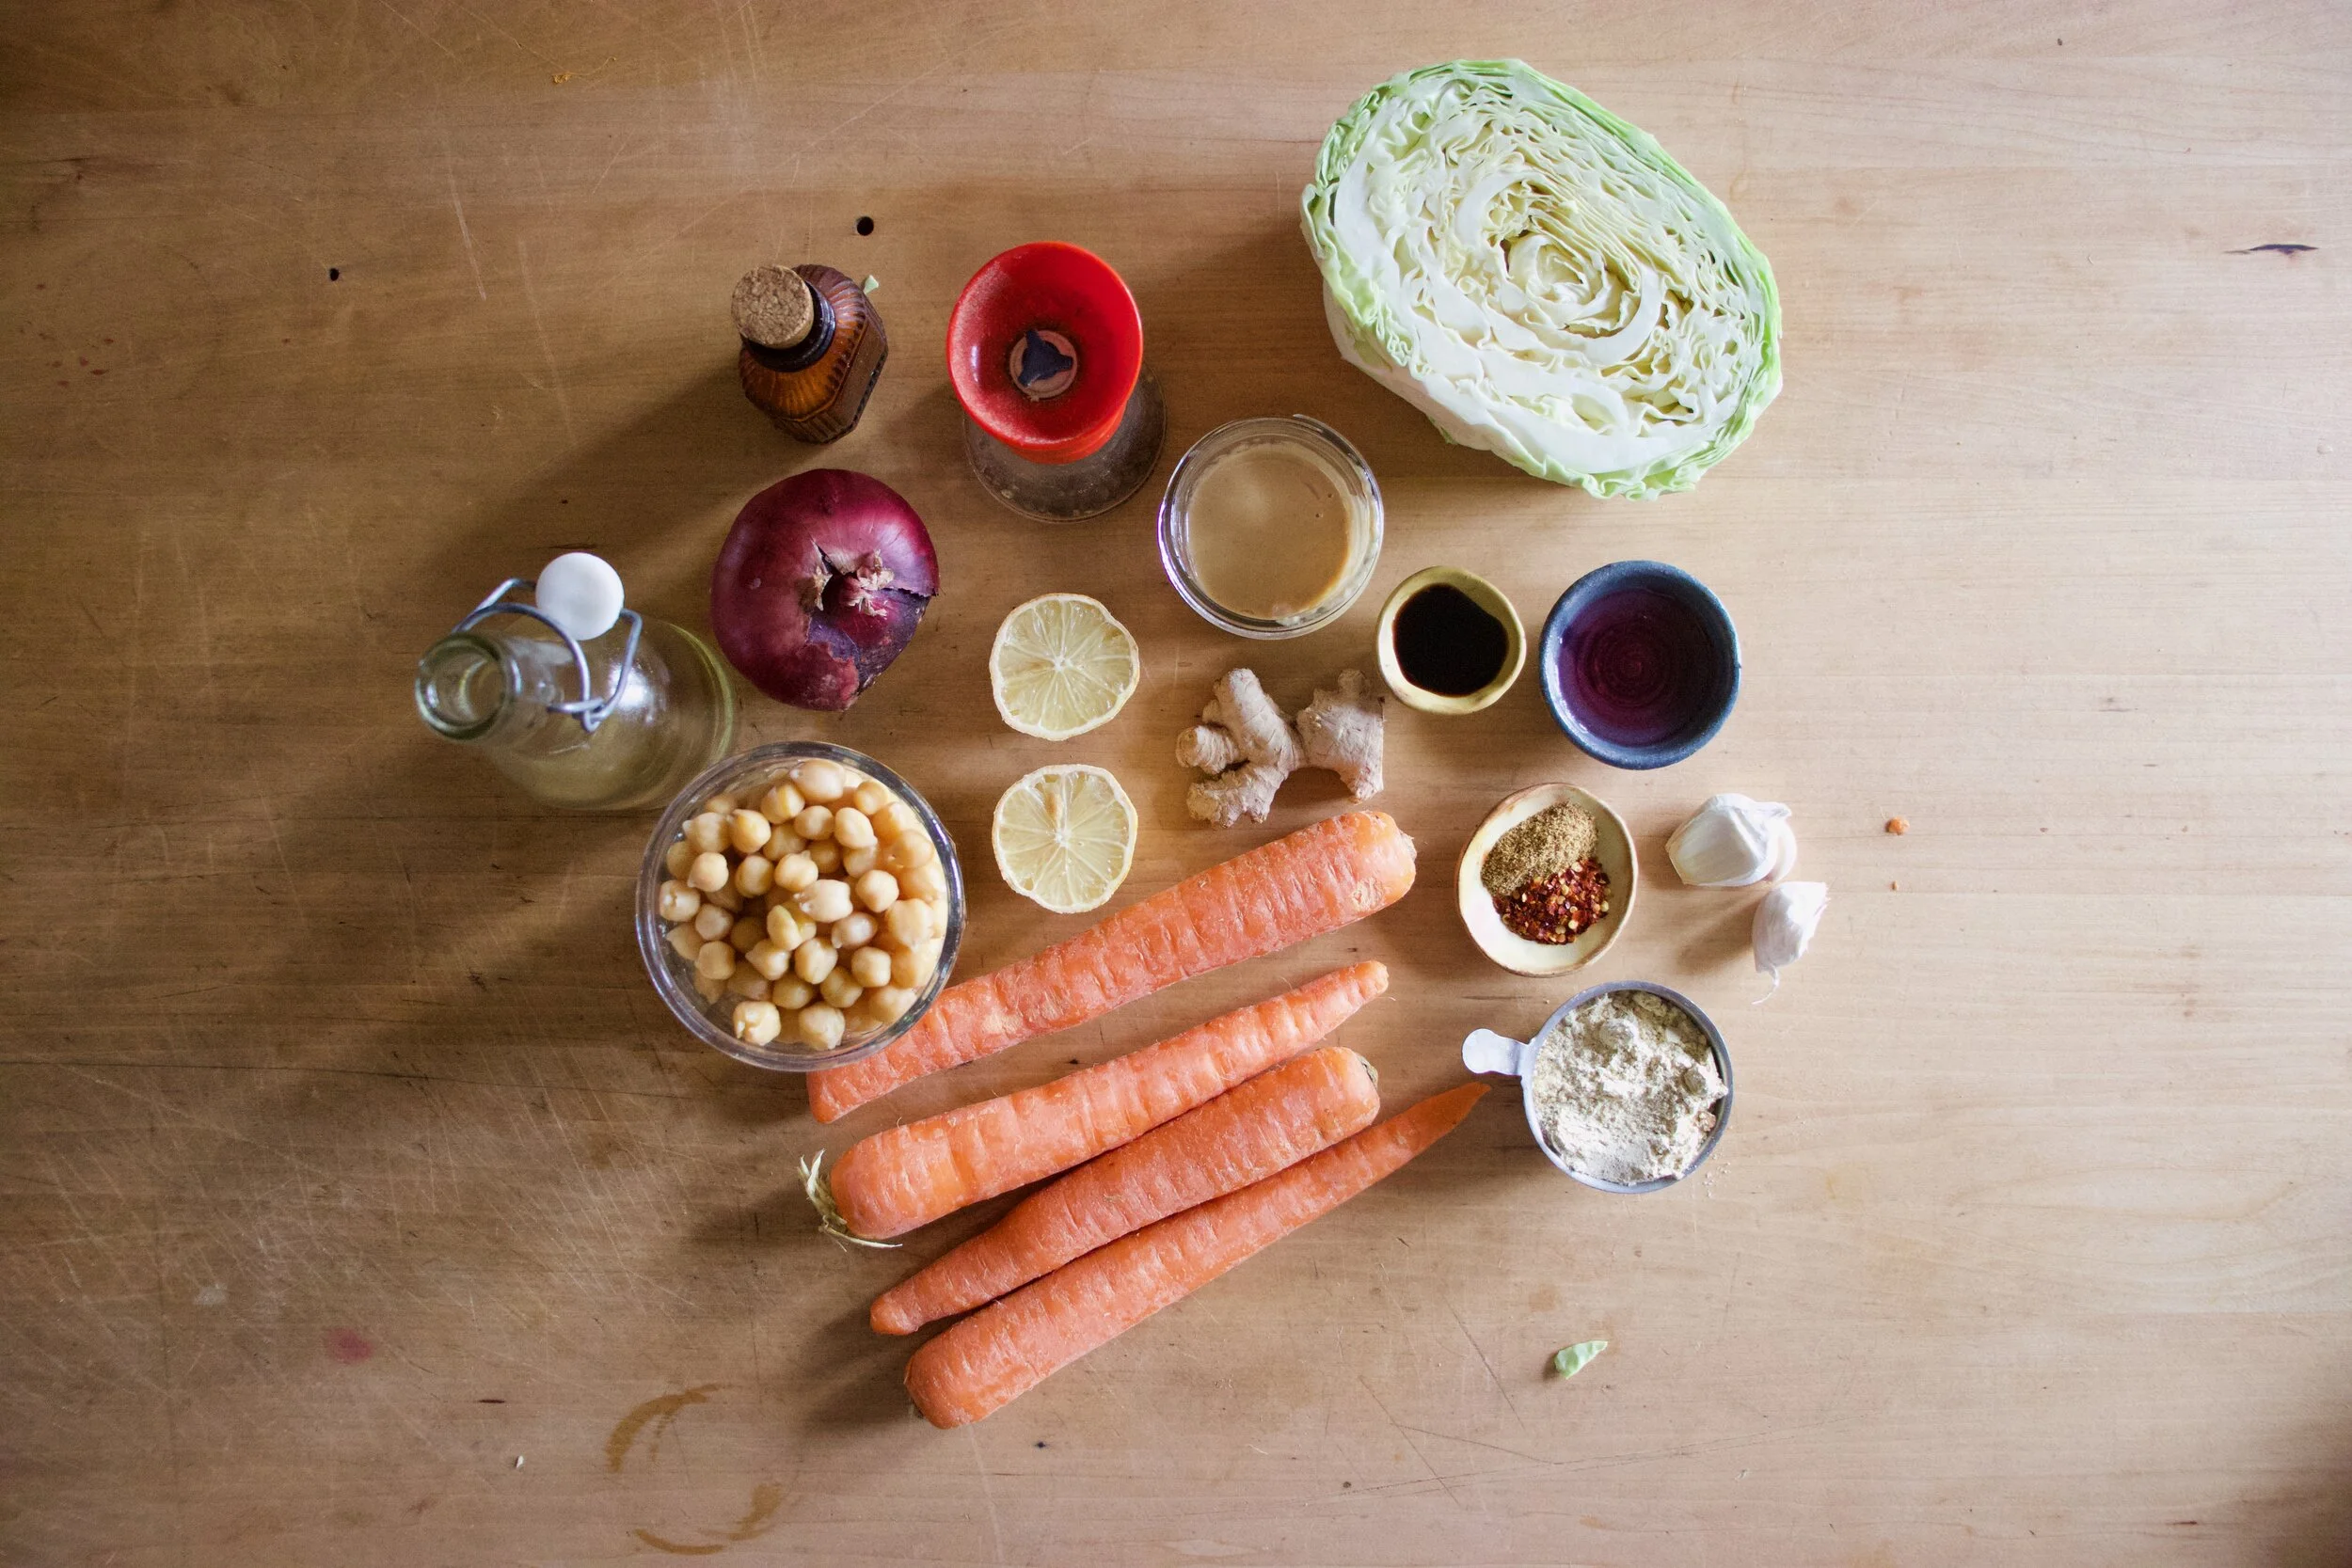
The stuff. Cooked chickpeas, carrots, a piece of fresh ginger, tahini, soy sauce, cabbage, an onion, a few cloves of garlic, red wine vinegar, some cumin and red pepper flakes, a lemon, chickpea flour, salt and pepper, and oil.
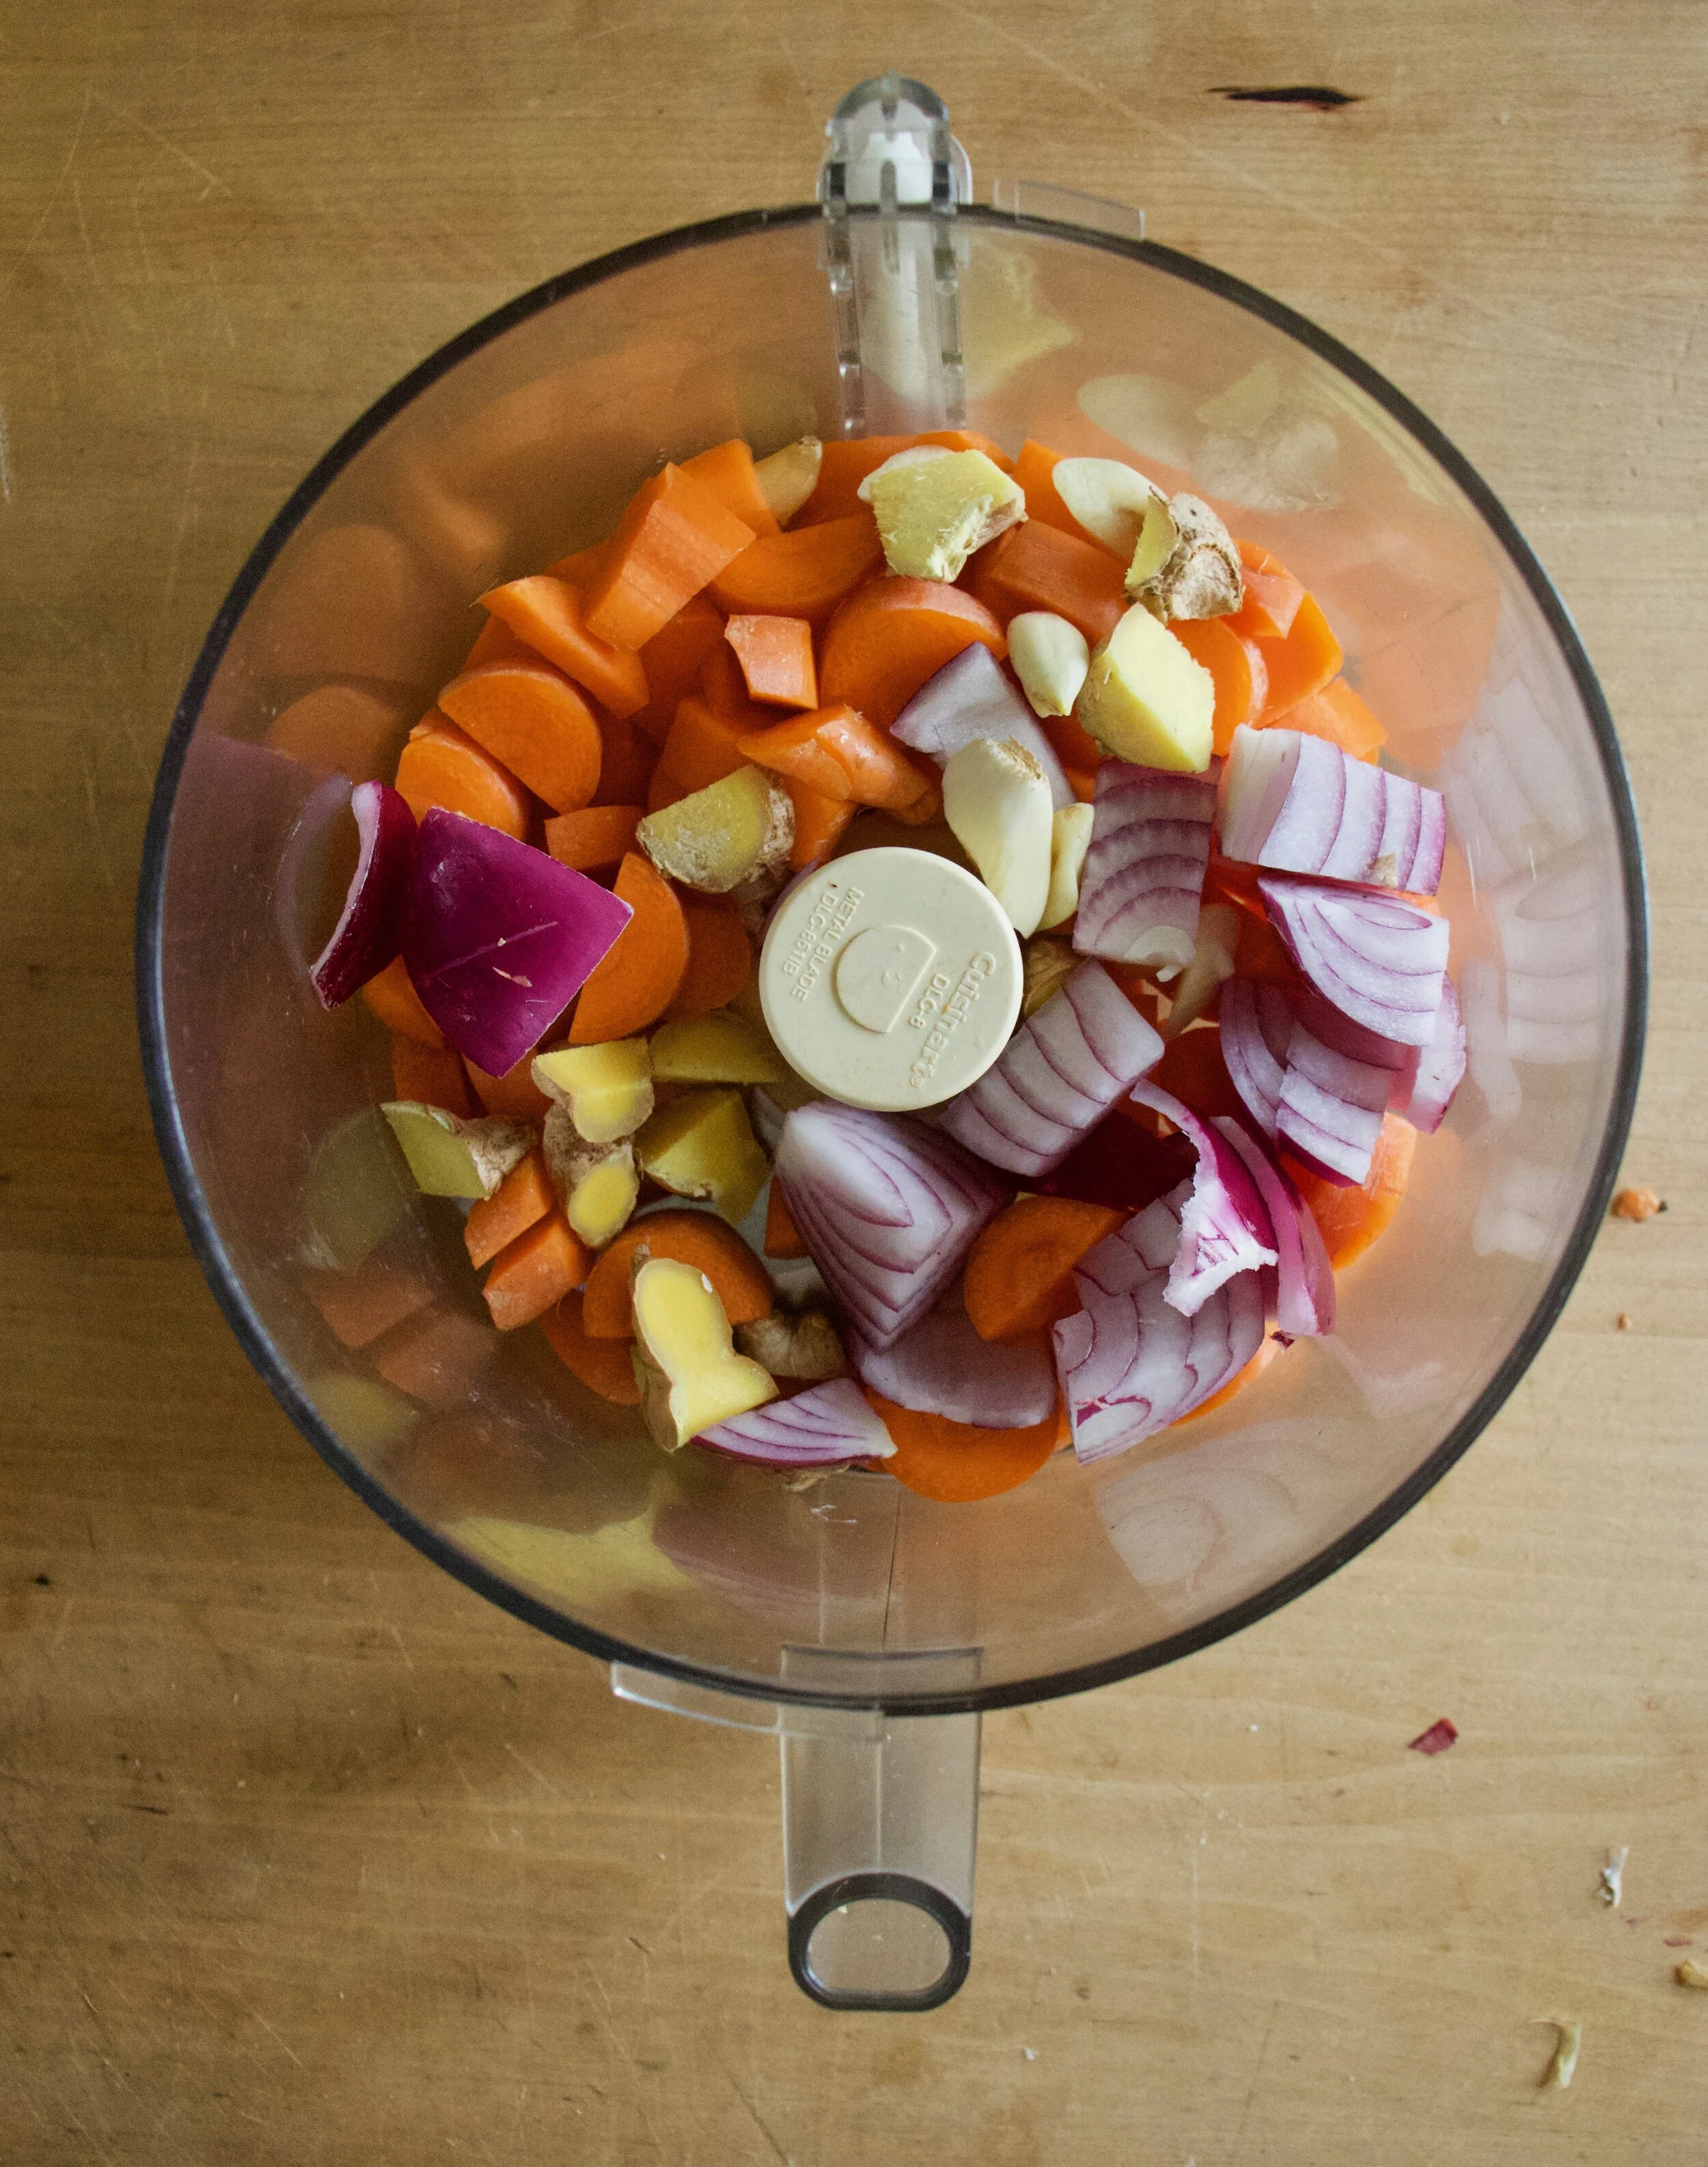
Start off by chopping the carrots into small pieces. Then cut half of the onion into small pieces. Rough chop the garlic and the ginger as well. No need to peel ginger unless you really want to.
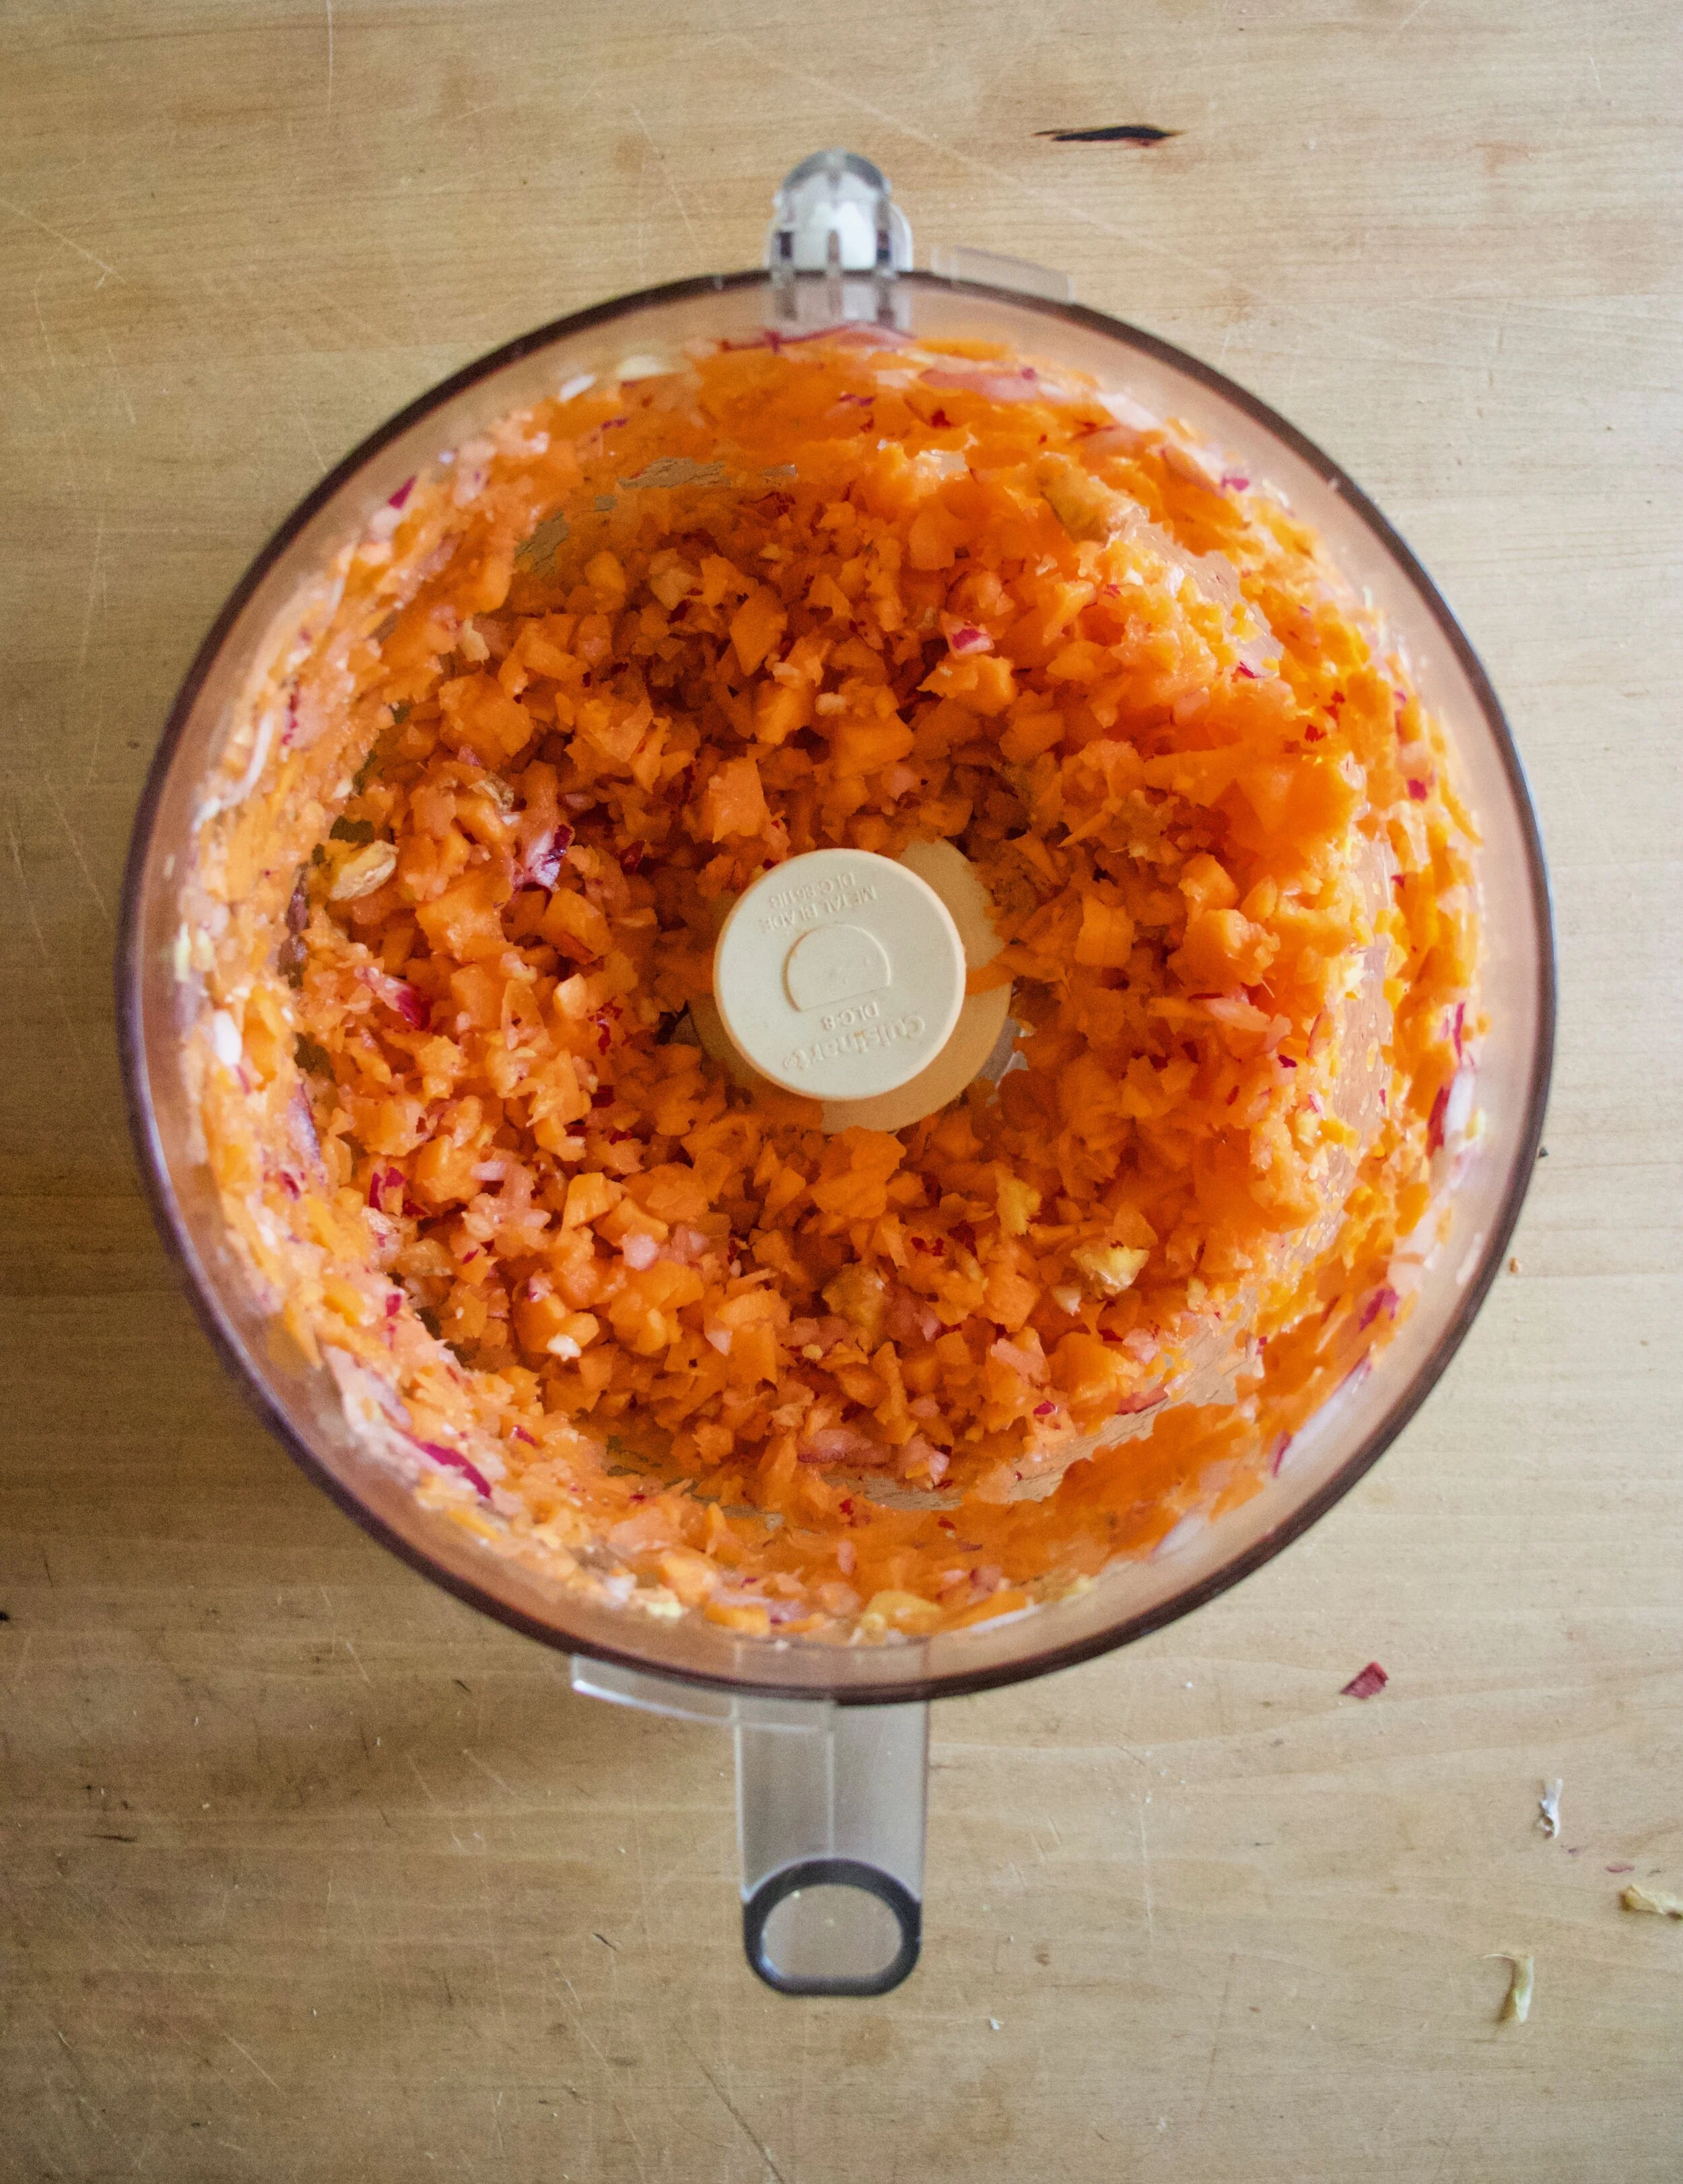
Place it all into food processor and pulse until a small crumble.
Carrot onion garlic ginger mixture.
Dump mixture into a skillet with a splash of water. Add in the cumin, chili flakes, and a good pinch of salt and pepper and cook on the stove for 5-8 minutes until the crumble softens and becomes fragrant.
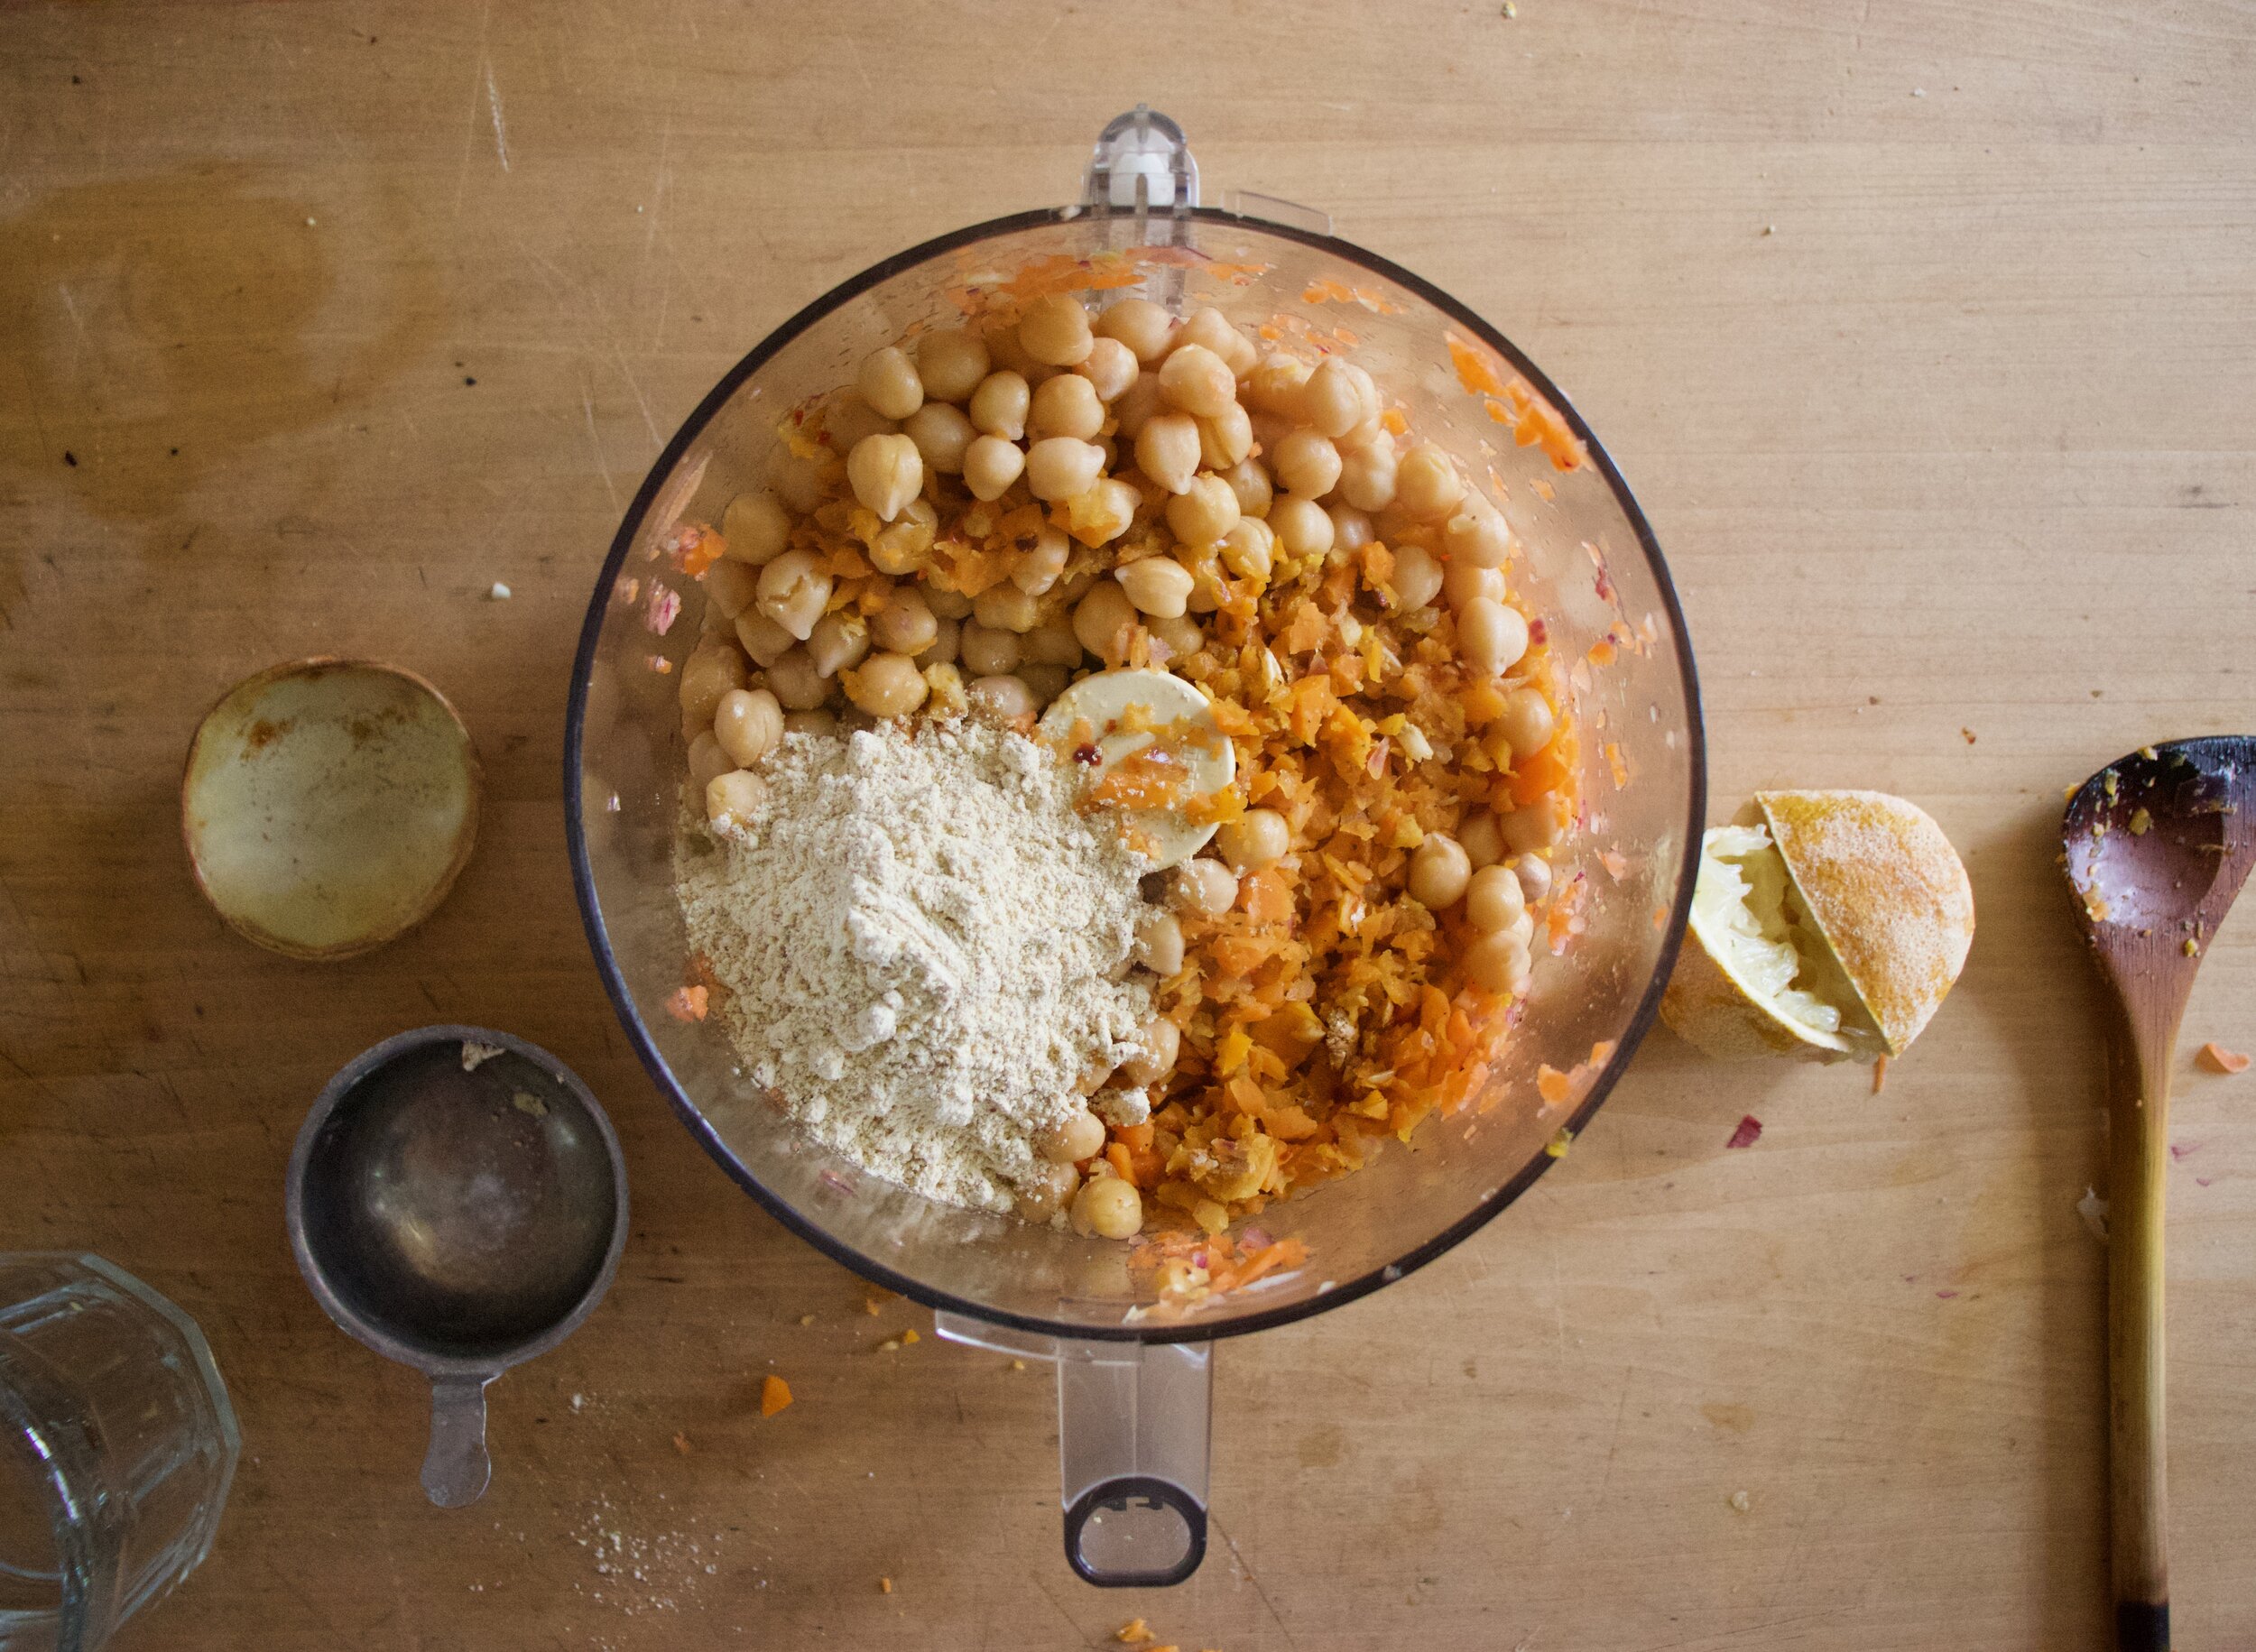
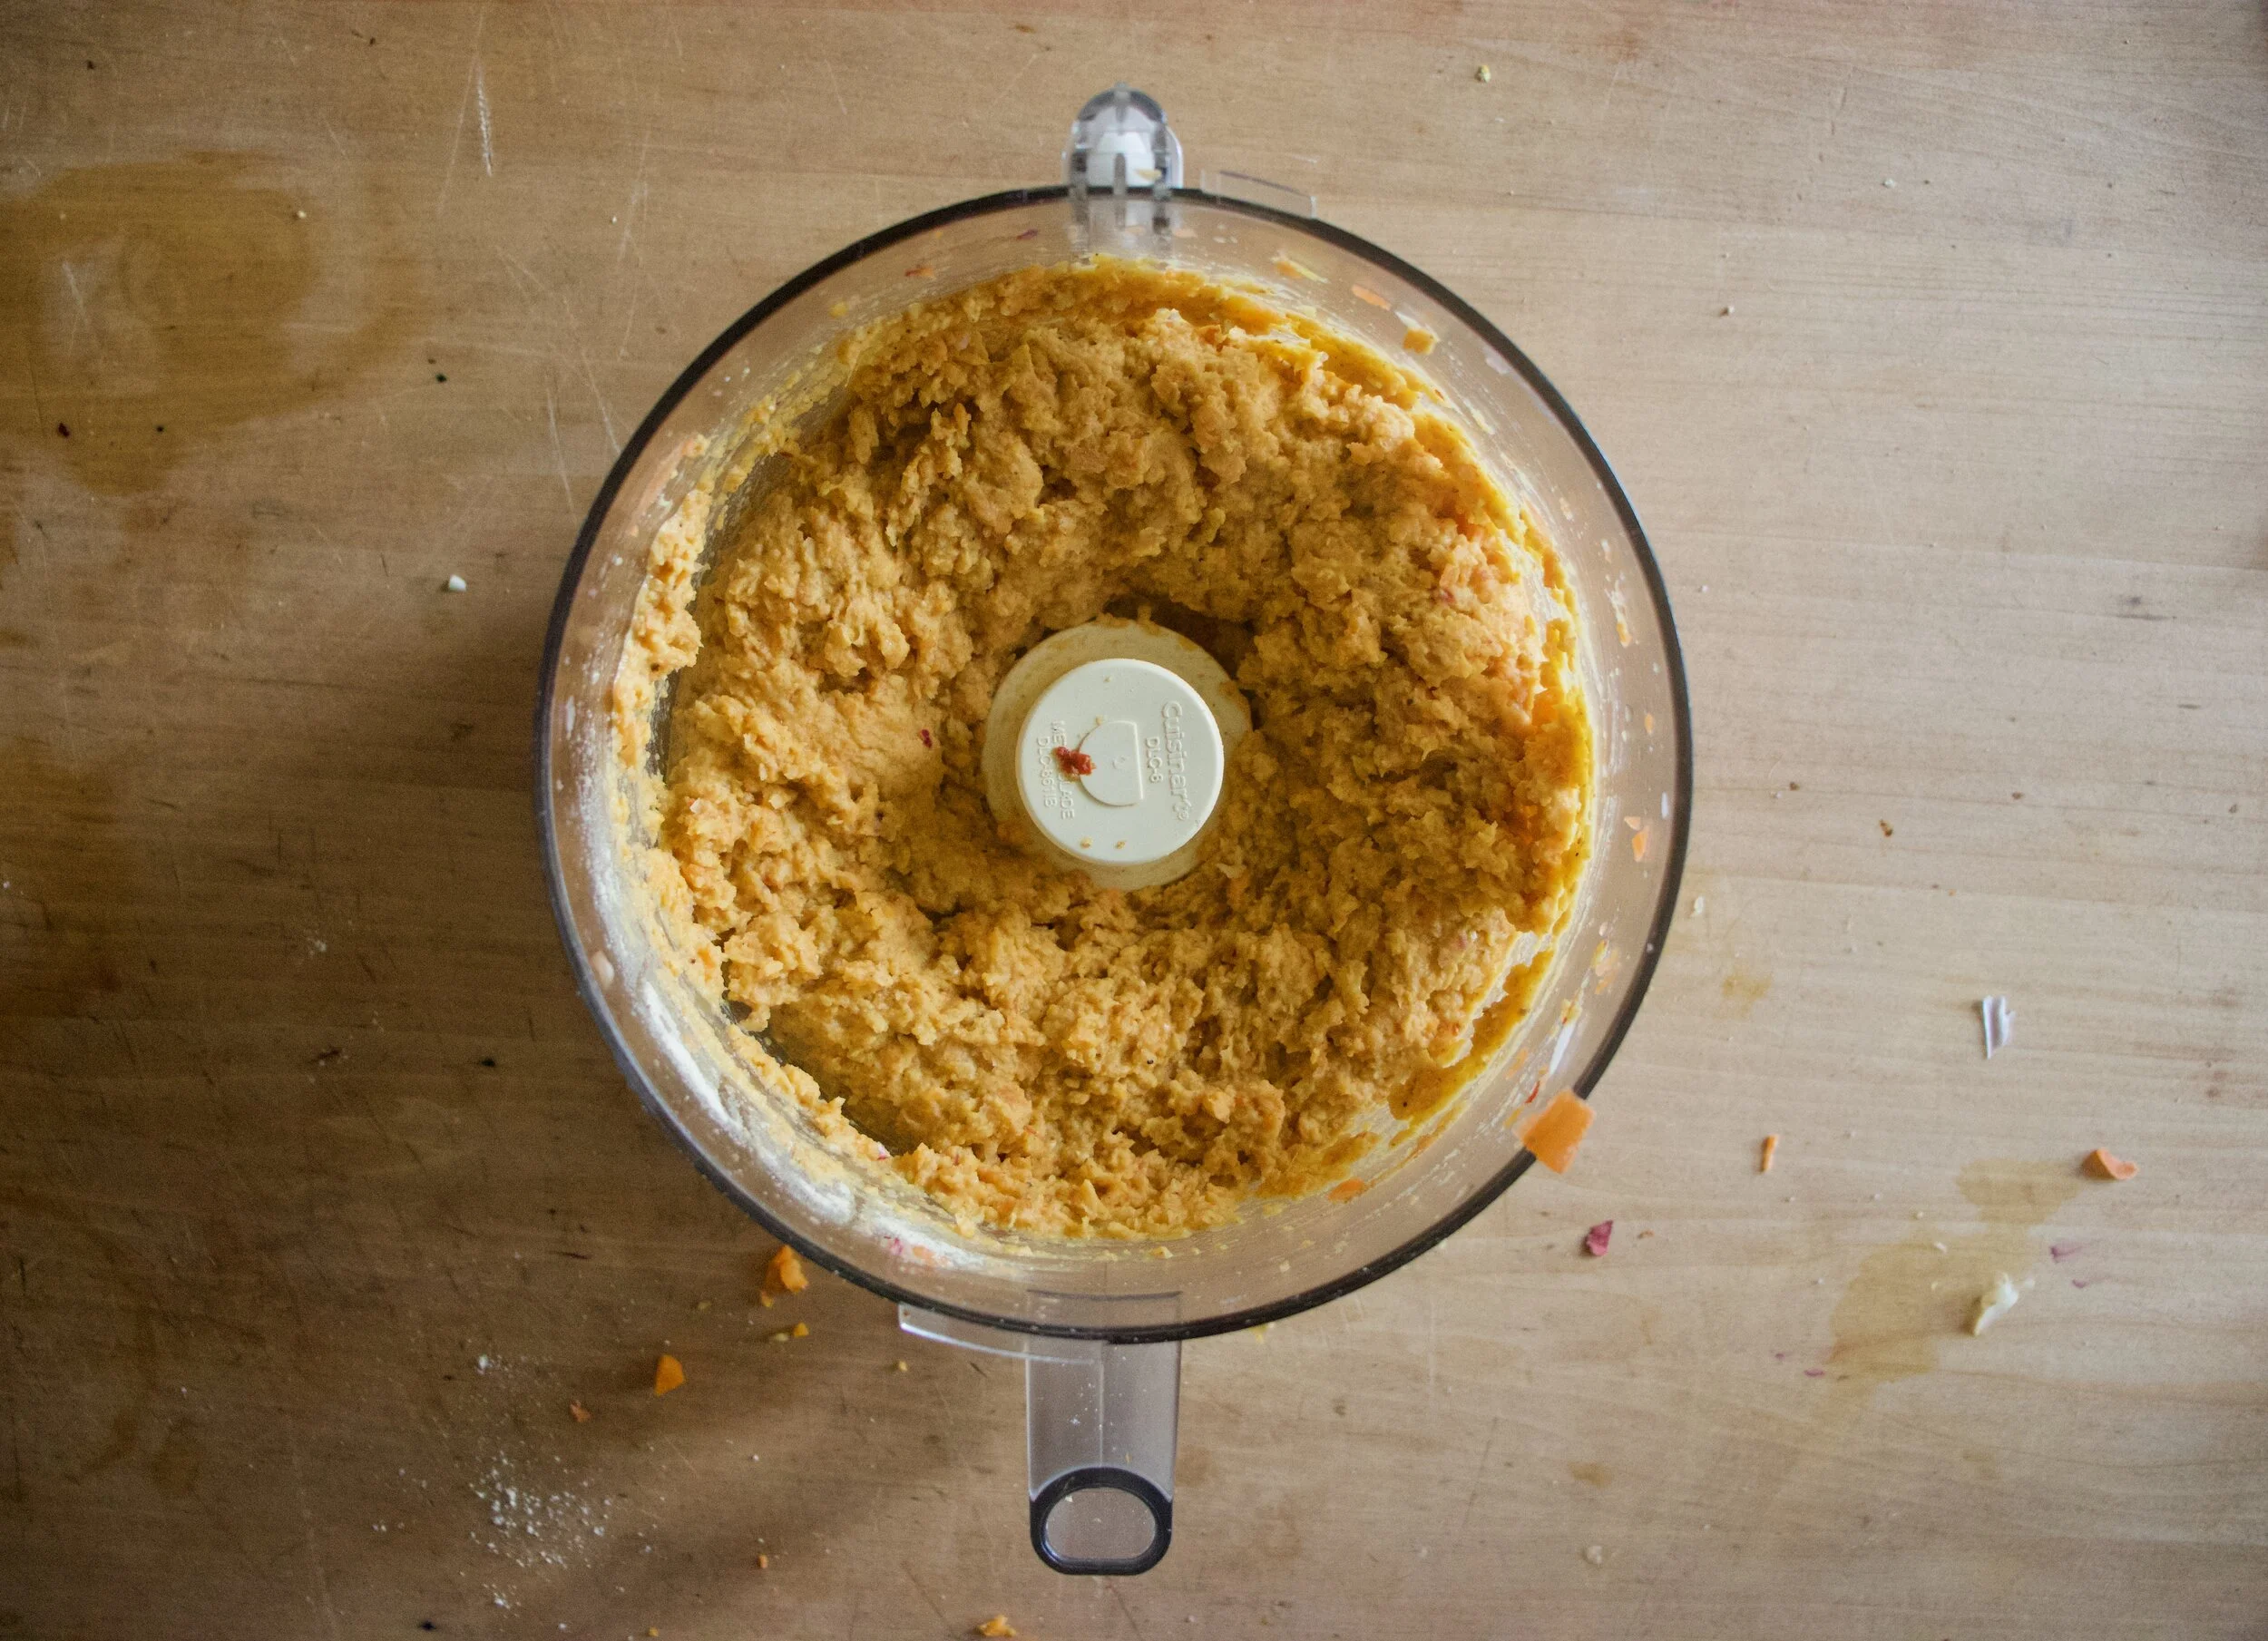
Dump carrot ginger mixture back into food processor along with the chickpeas, chickpea flour, and the juice of the lemon. Puree until smooth.
Carrot ginger falafel mixture. Now stick it in the fridge. For a little while to a day, just to let it set up a bit.
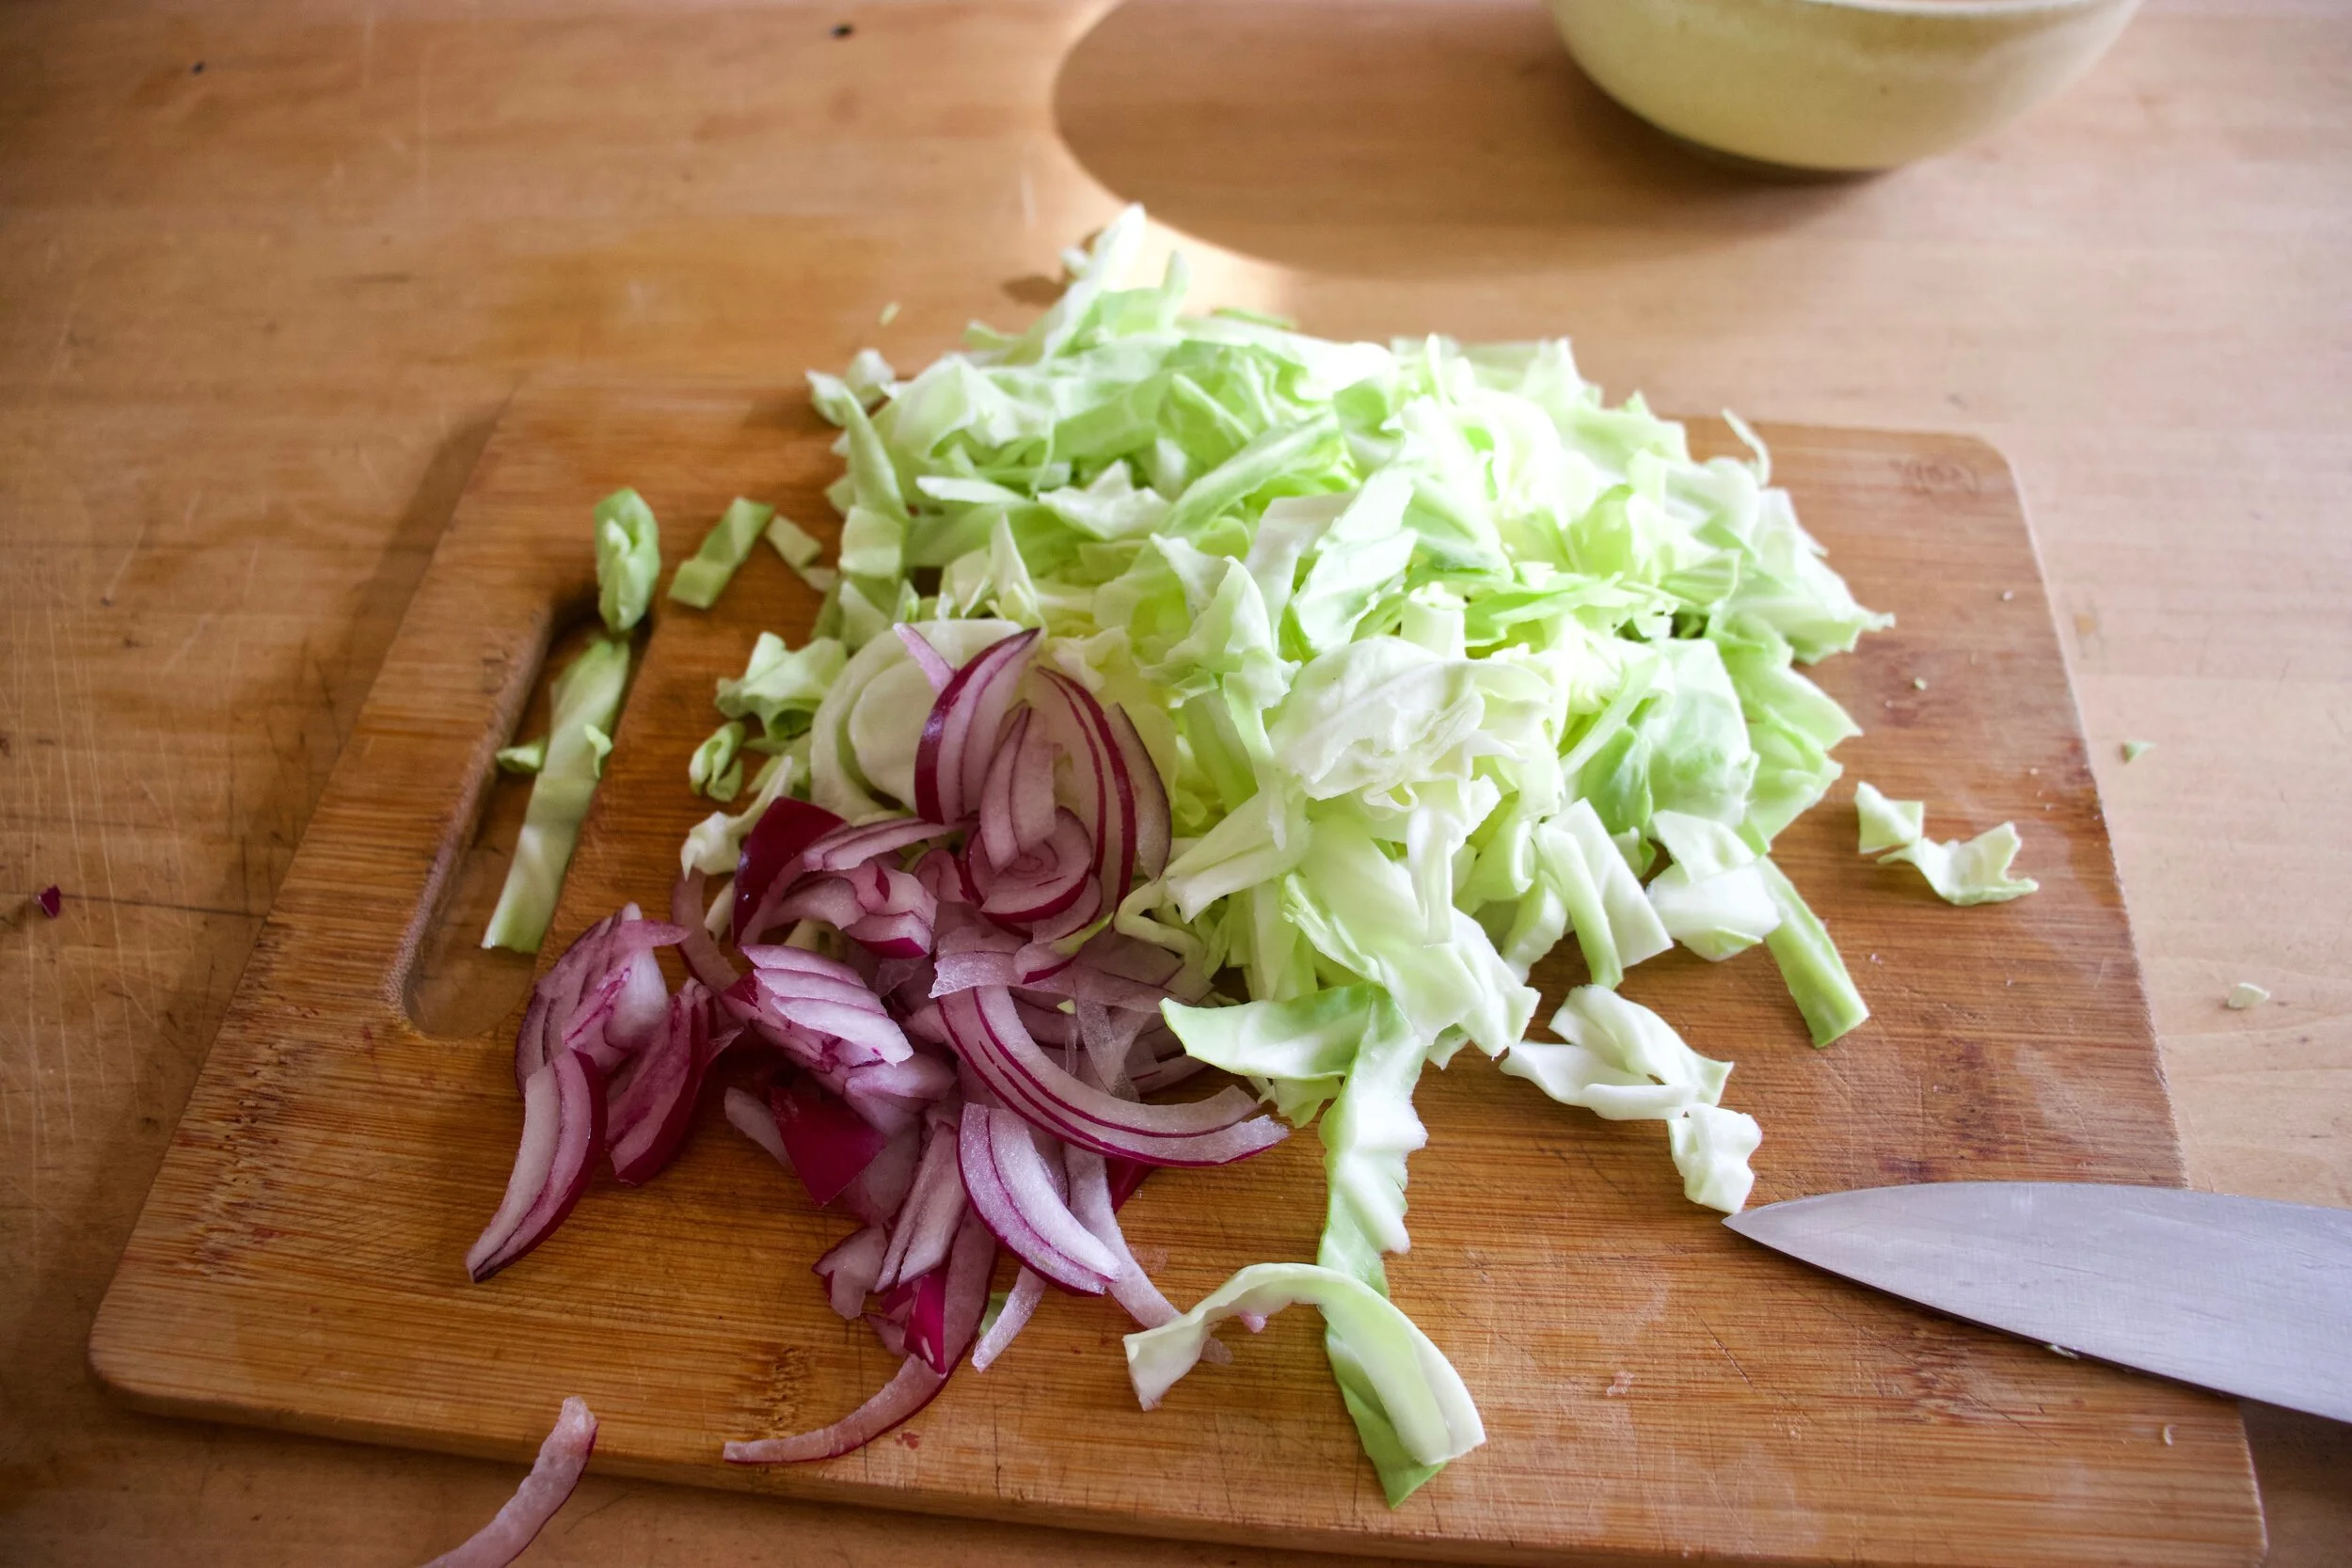
And in the mean time you can make the slaw. Shred cabbage and cut up onion all nice and thin.
Dump tahini, soy, vinegar, and a few tablespoons warm water into bowl and mix until creamy and good.
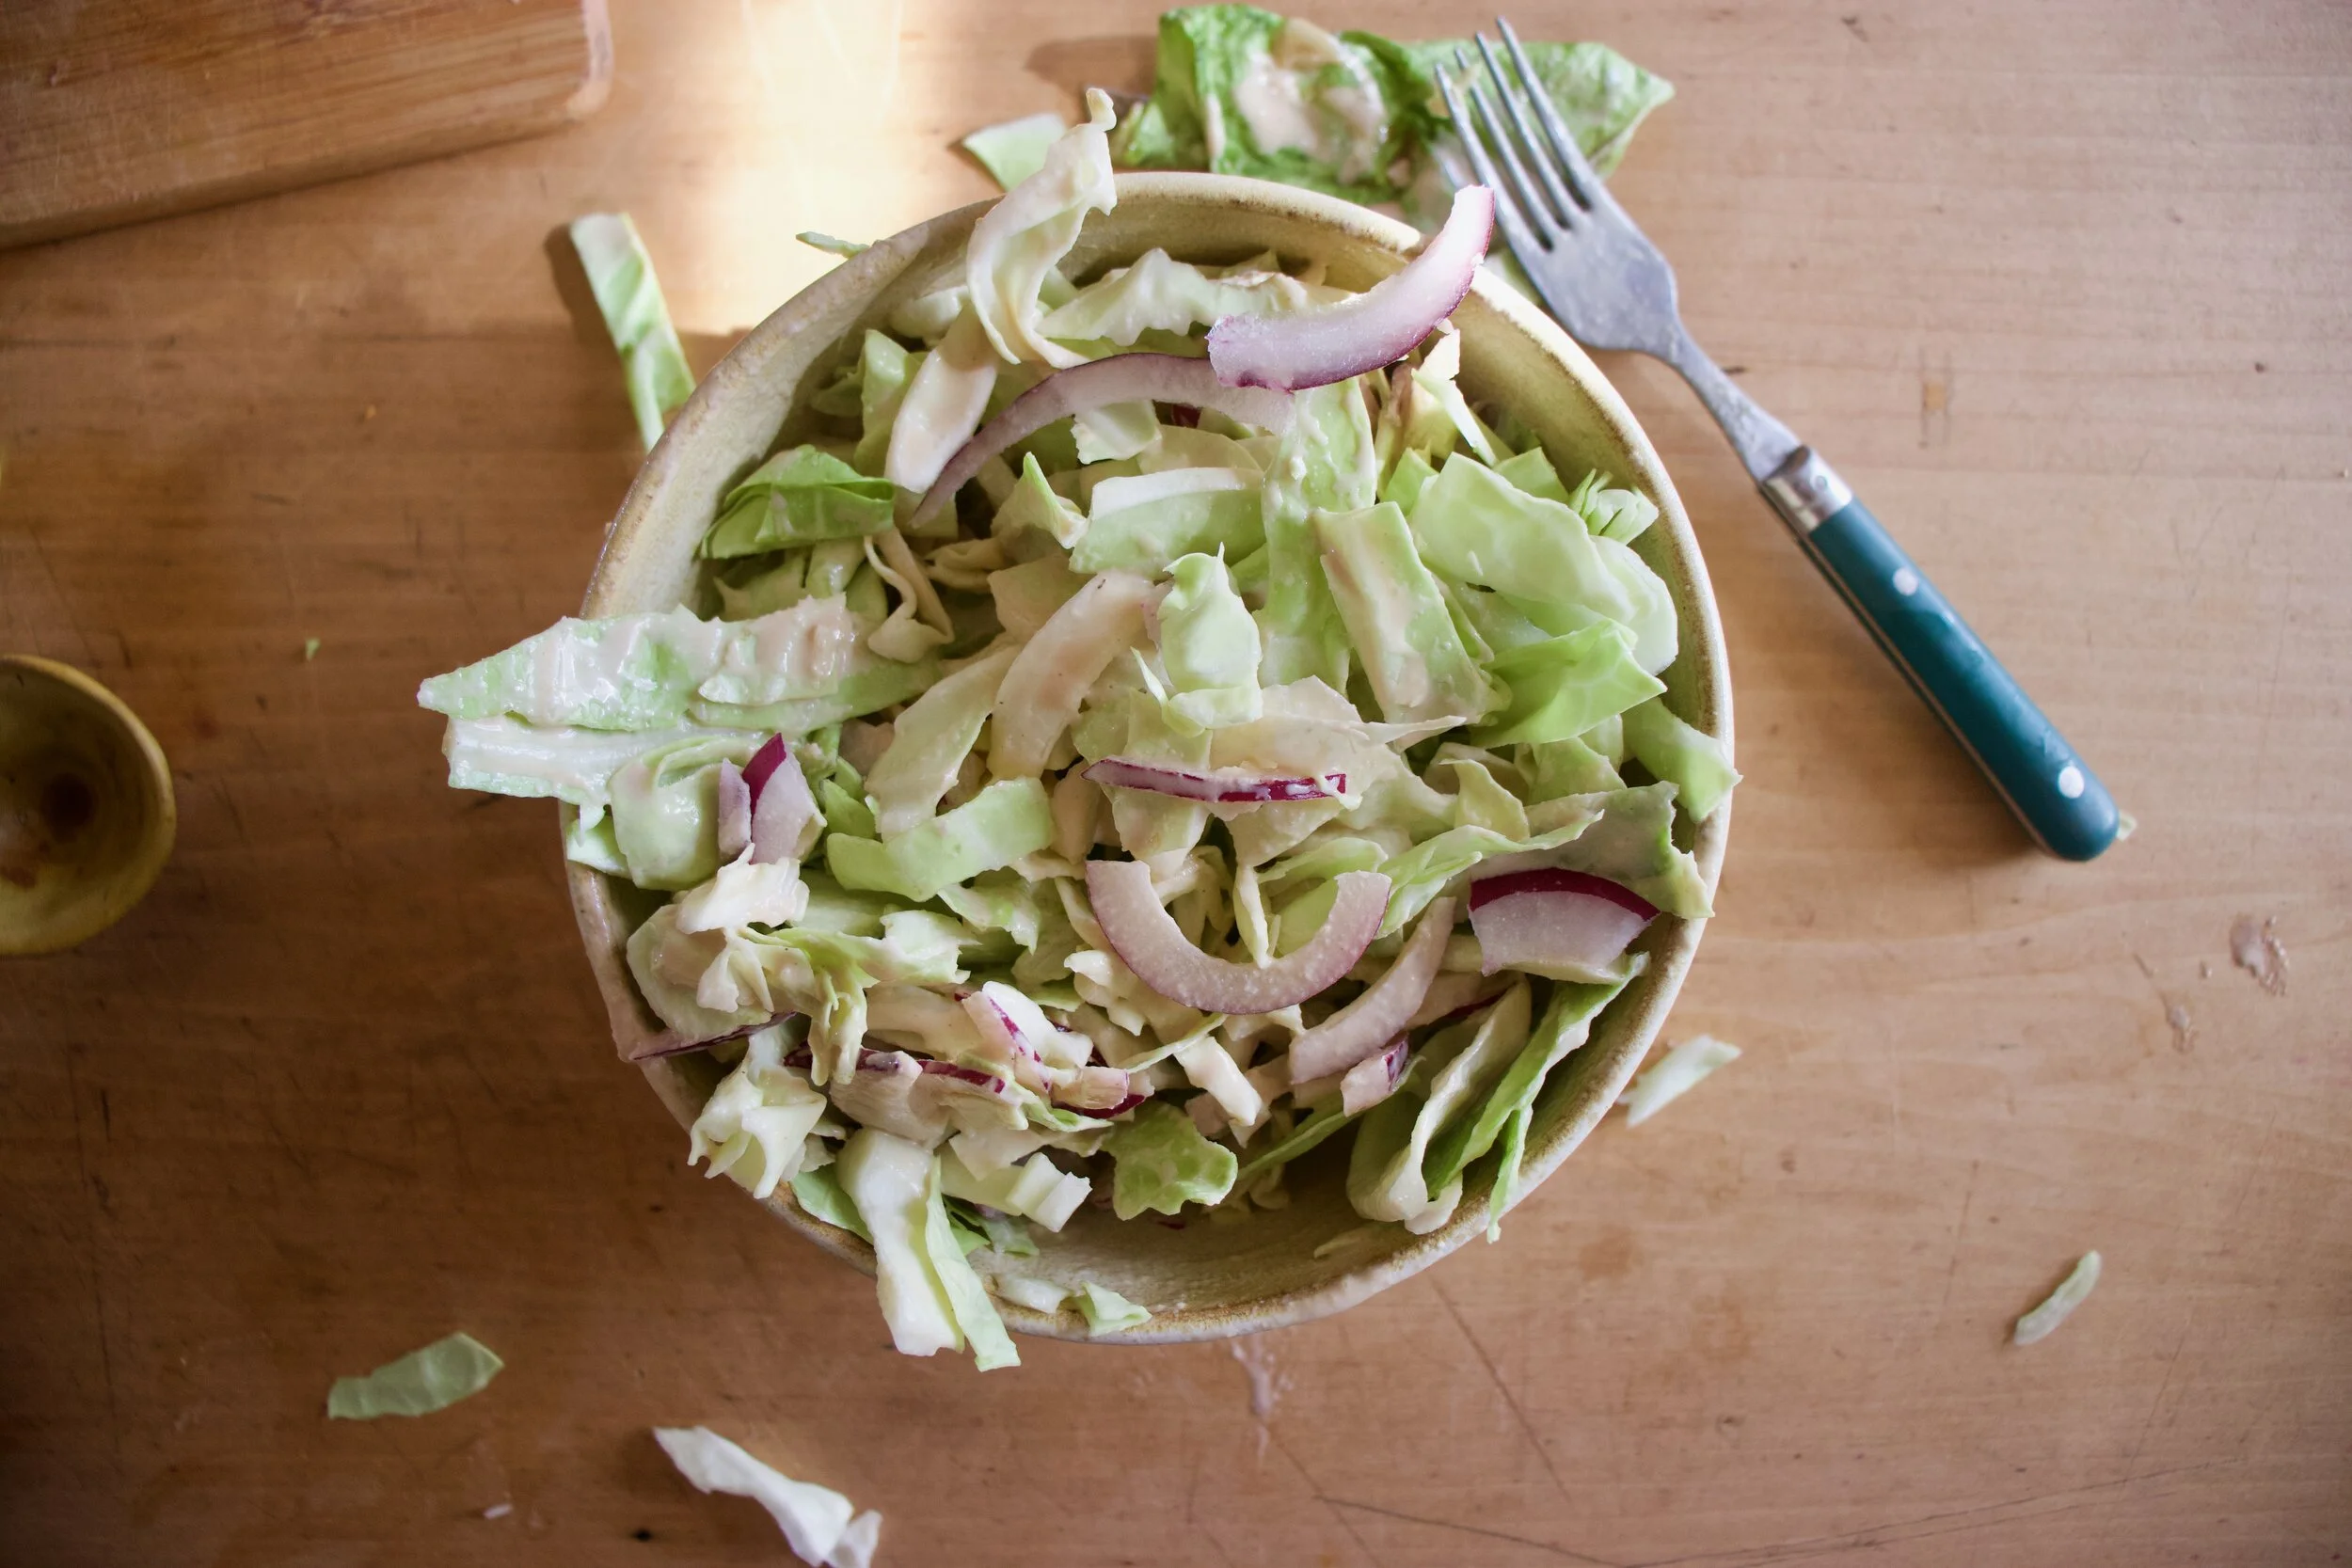
Toss in that cabbage and onion. Now you have tahini cabbage slaw.
Now to cook falafel. Grab the batter, scoop into balls then smoosh into disks. Place in a light oiled skillet and brown each side a nice golden brown.
After browning, place on a baking sheet. Once all the falafel has been browned, place the baking sheet into the oven to finish up cooking. 20 minutes or so and you got yourself falafel.
Then eat it. Falafel topped with tahini cabbage slaw. That is how it%u2019s done, with or without wraps or pitas or whatever your want. Just as it is. Falafel, cabbage slaw, into mouth.
Good things friend.
-C
serves 3-4 people or makes 14-16 falafel balls
For the falafel
2 cups cooked chickpeas drained
3-4 carrots (around 2 cups diced)
1/2 of a red onion
2 inches fresh ginger
2-3 cloves garlic
1 teaspoon cumin
1/2 teaspoon chili flakes
1/3 cup chickpea flour (can sub in oat flour if needed)
juice of a small lemon
salt and pepper
For Tahini Cabbage Slaw
1/2 head red or green cabbage (about 3 cups shredded)
1/2 of a red onion
3 tablespoon tahini
1 tablespoon soy or liquid aminos
2 tablespoon red wine vinegar
a few tablespoons warm water
Grab carrots and red onion. Chop carrots into small chunks and cut onion in half. Cut one half into chunks. Place in food processor. Take the ginger and cut into small chunks (you don%u2019t need to peel it) and peel and slice garlic and cut into small pieces. Add that to the food processor. Pulse the mixture into a very small crumble then dump the mixture into a skillet with a splash of water. Add in the cumin, chili flakes, and a good pinch of salt and lots of pepper, and place on medium heat and cook for 5-8 minutes until soft and fragrant. Once cooked, scoop back into food processor along with the chickpeas, chickpea flour, and the juice of the lemon. Turn on and and puree until smooth, stopping when needed to scrap down the side. Then either dump mixture into a bowl or leave in the container you processed it in and place in fridge for 1/2 hour to a day.
When ready to cook, preheat oven to 400.
After letting the dough sit for a bit, remove from fridge. Grab skillet and lightly oil it and place on medium heat. Take a cookie scoop or just a spoon and scoop balls of falafel into your hand and roll them around so they are packed together. Smoosh then balls a little into disks and place into hot skillet. Let cook until bottom is golden brown then gently flip and cook the other side until browned. Place cooked falafel on a baking sheet. Once you have browned all the falafel, place into oven to bake for about 20 minutes or until the falafel has firmed up to your liking.
To make the tahini cabbage slaw. Shred cabbage and cut the remaining half of red onion into thin pieces. Place tahini, soy, vinegar, and 2 tablespoons warm water into a big bowl. Mix together until light and creamy. If the mixture seems to thick, add another tablespoon of warm water. When happy with consistency, add in the cabbage and onion and toss around until everything is coated.
Now when the slaw is made, the falafel is cooked, you eat it. Serve with warm pita or wraps or a bed of greens or nothing. Just slaw on top of falafel. And FYI, this whole shebang can be eaten hot or cold or anywhere in between.
What%u2019s up with dinner rolls? Do people eat them all year round, like on a Tuesday in the middle of March or maybe a nice blue sky sunny day in July? Is that a weird question? But seriously, think about it. Dinner rolls, at least in my world of people, are pretty much only eaten in and around Thanksgiving and Christmas. Huh. Kind of strange seeing that dinner rolls are bread which everyone eats all the time and are basically made specifically for dinner (although can and should be eaten for breakfast and lunch as well) which most people eat. Every. Single. Day. Well, whatever the reason, it%u2019s weird. So yes, I am making these here dinner rolls now at the traditional holiday time but I think as of now, I am going to start making them all the time. It%u2019s going to be my new thing. Fourth of July dinner rolls. Yup.
And so yes, we need dinner rolls right now for the holiday food feasts and these dinner rolls are the perfect accompaniment to any and all dinners. They are nice and fluffy and all dinner roll like, just as any good roll should be, but also slightly more nutty and soft and healthy because oats and wheat flour and homemade which is always the best.
And if you are like, hell yes I am a dinner roll person and hell no I am sticking to store bought cause that is that and how it%u2019s done, well hey, no judgment here. I made these for my people for our family Thanksgiving, (which is happening today at my house. There are going be so many people) and I know that everyone will love and be happy to eat them, but I too also bought some of those super white, take and bake ones that I know if I don%u2019t have on the table next to these gorgeous and amazing rolls, that I will probably get punched in the face. So we will have both. And then at dinner I can bask in the glory of all the comments about how much better my rolls are then the store bought ones. (Secretly why I am having both. Fishing for compliments. HAHA!)
Now to those soft and fluffy dinner rolls!
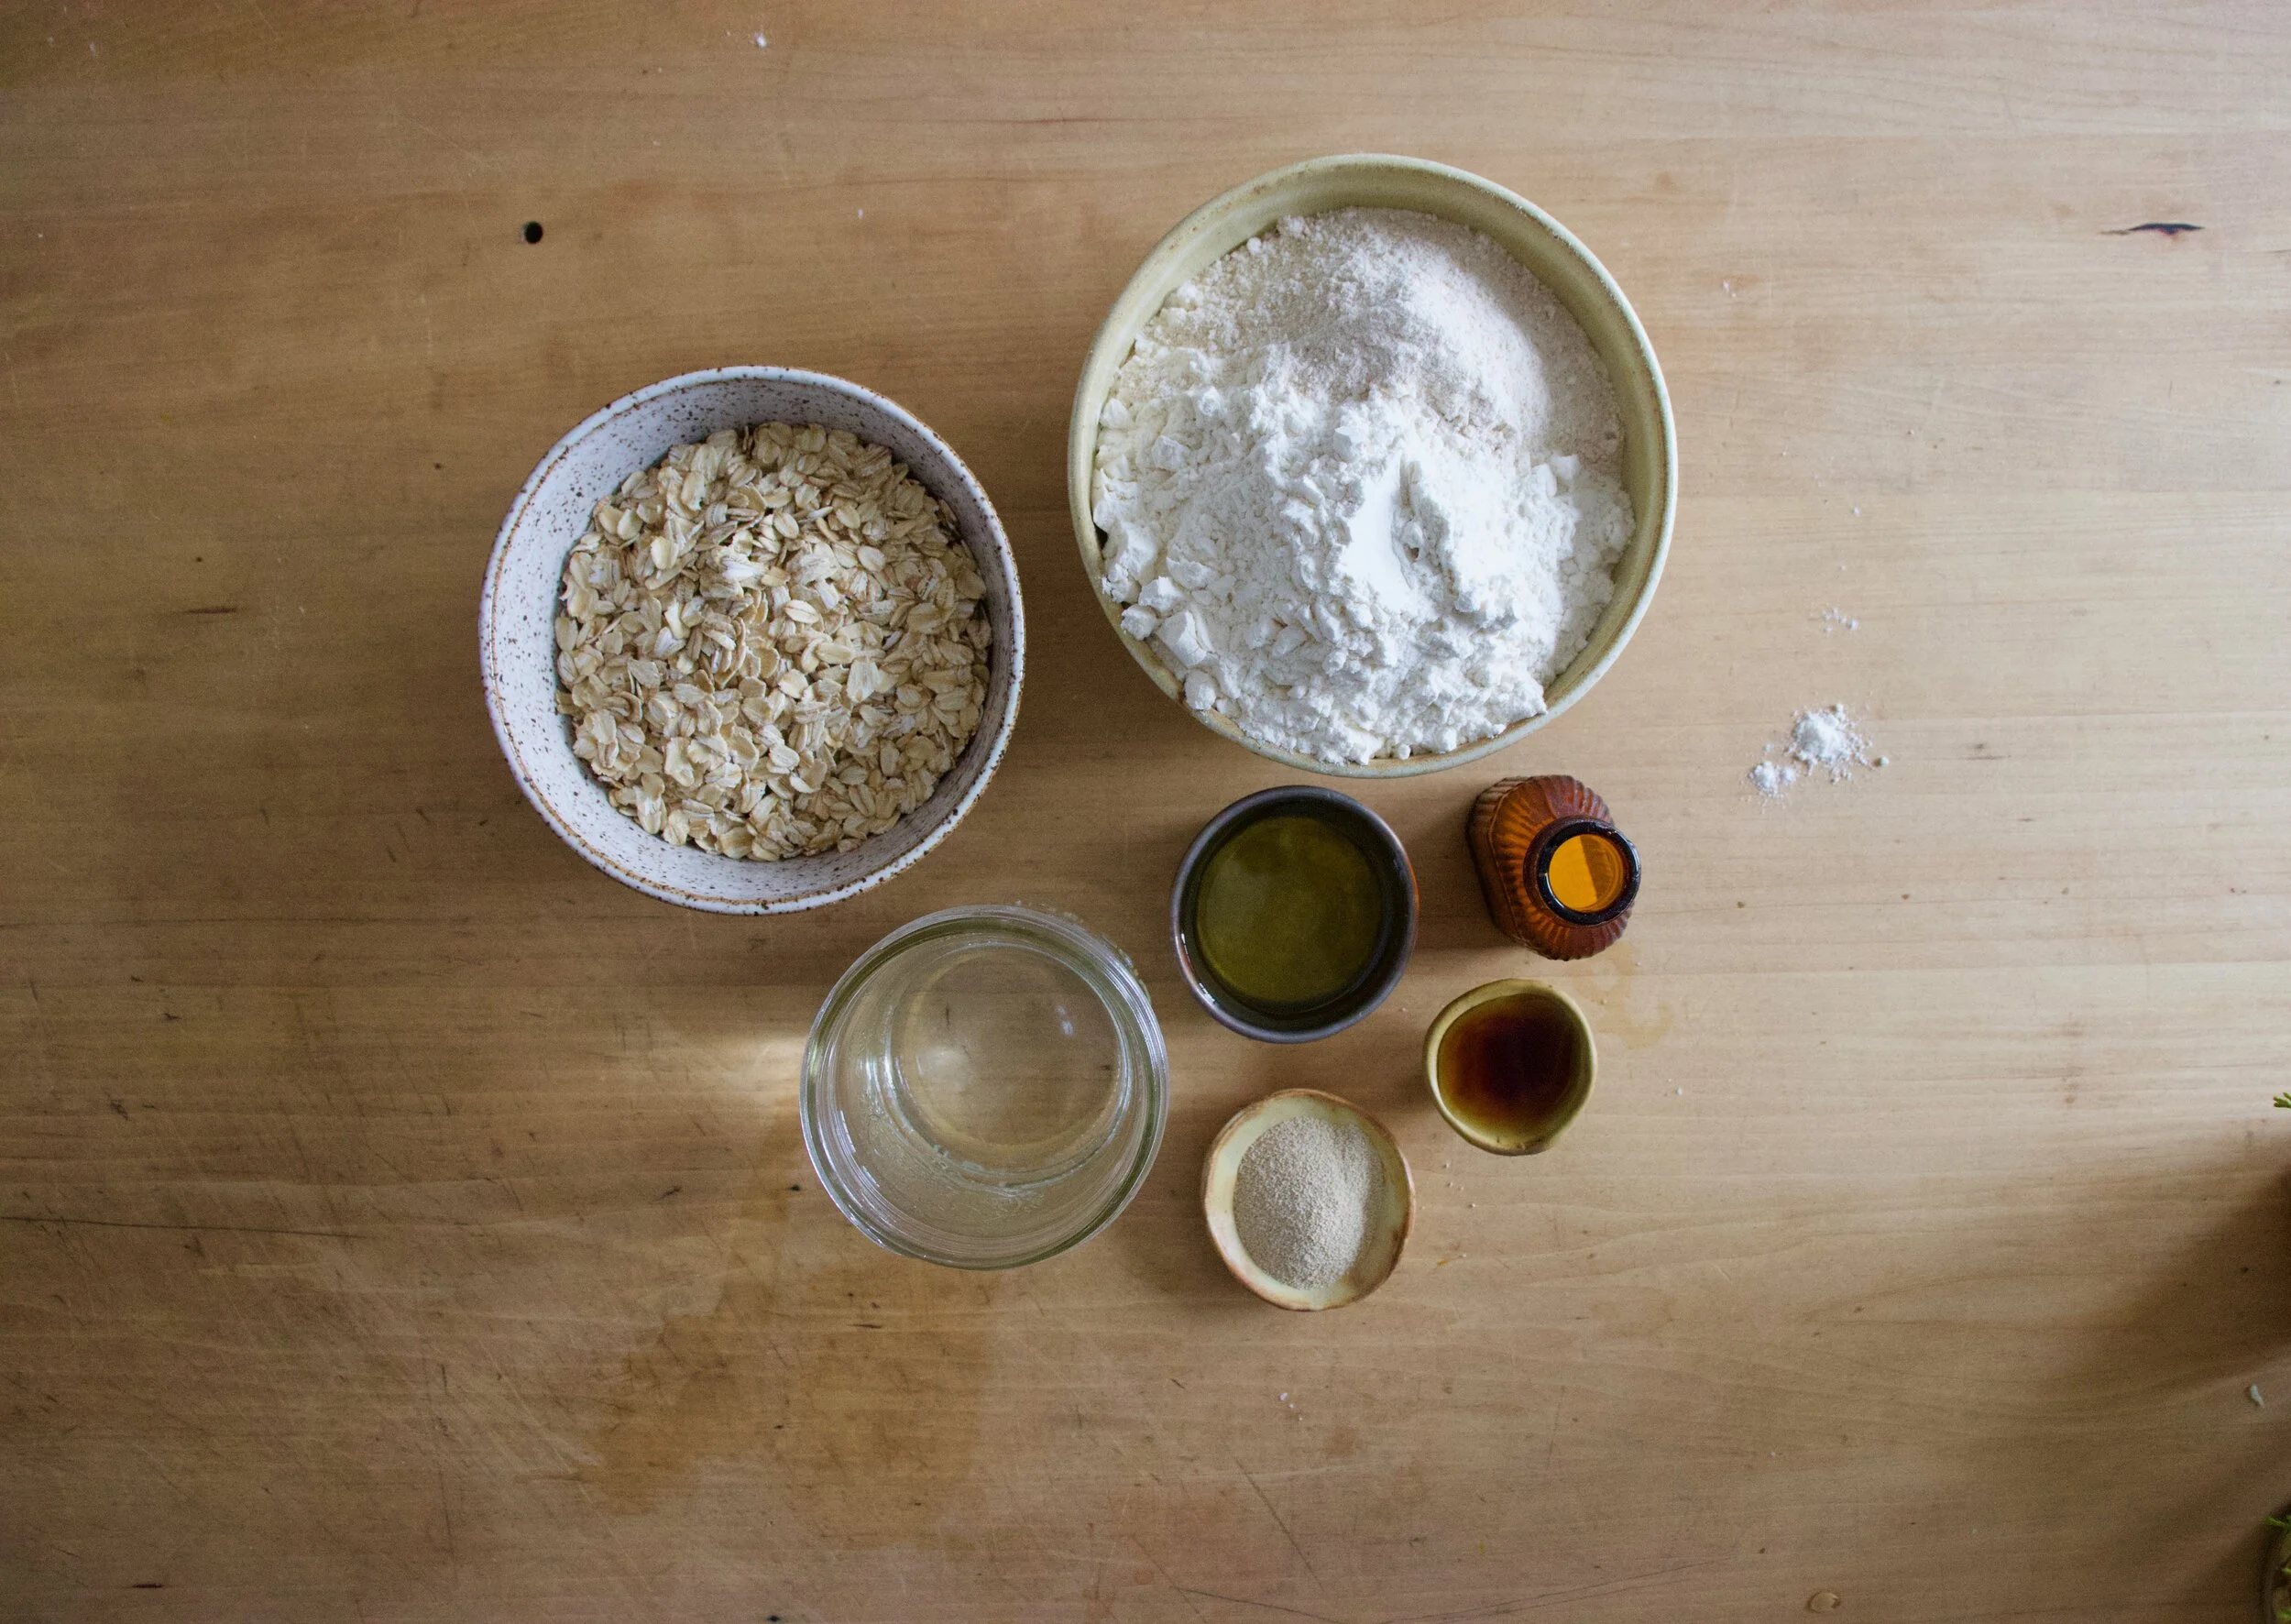
The stuff. Old fashion oats, all purpose and white whole wheat flour, yeast, oil, water (hot and room temperature), maple syrup, and salt.
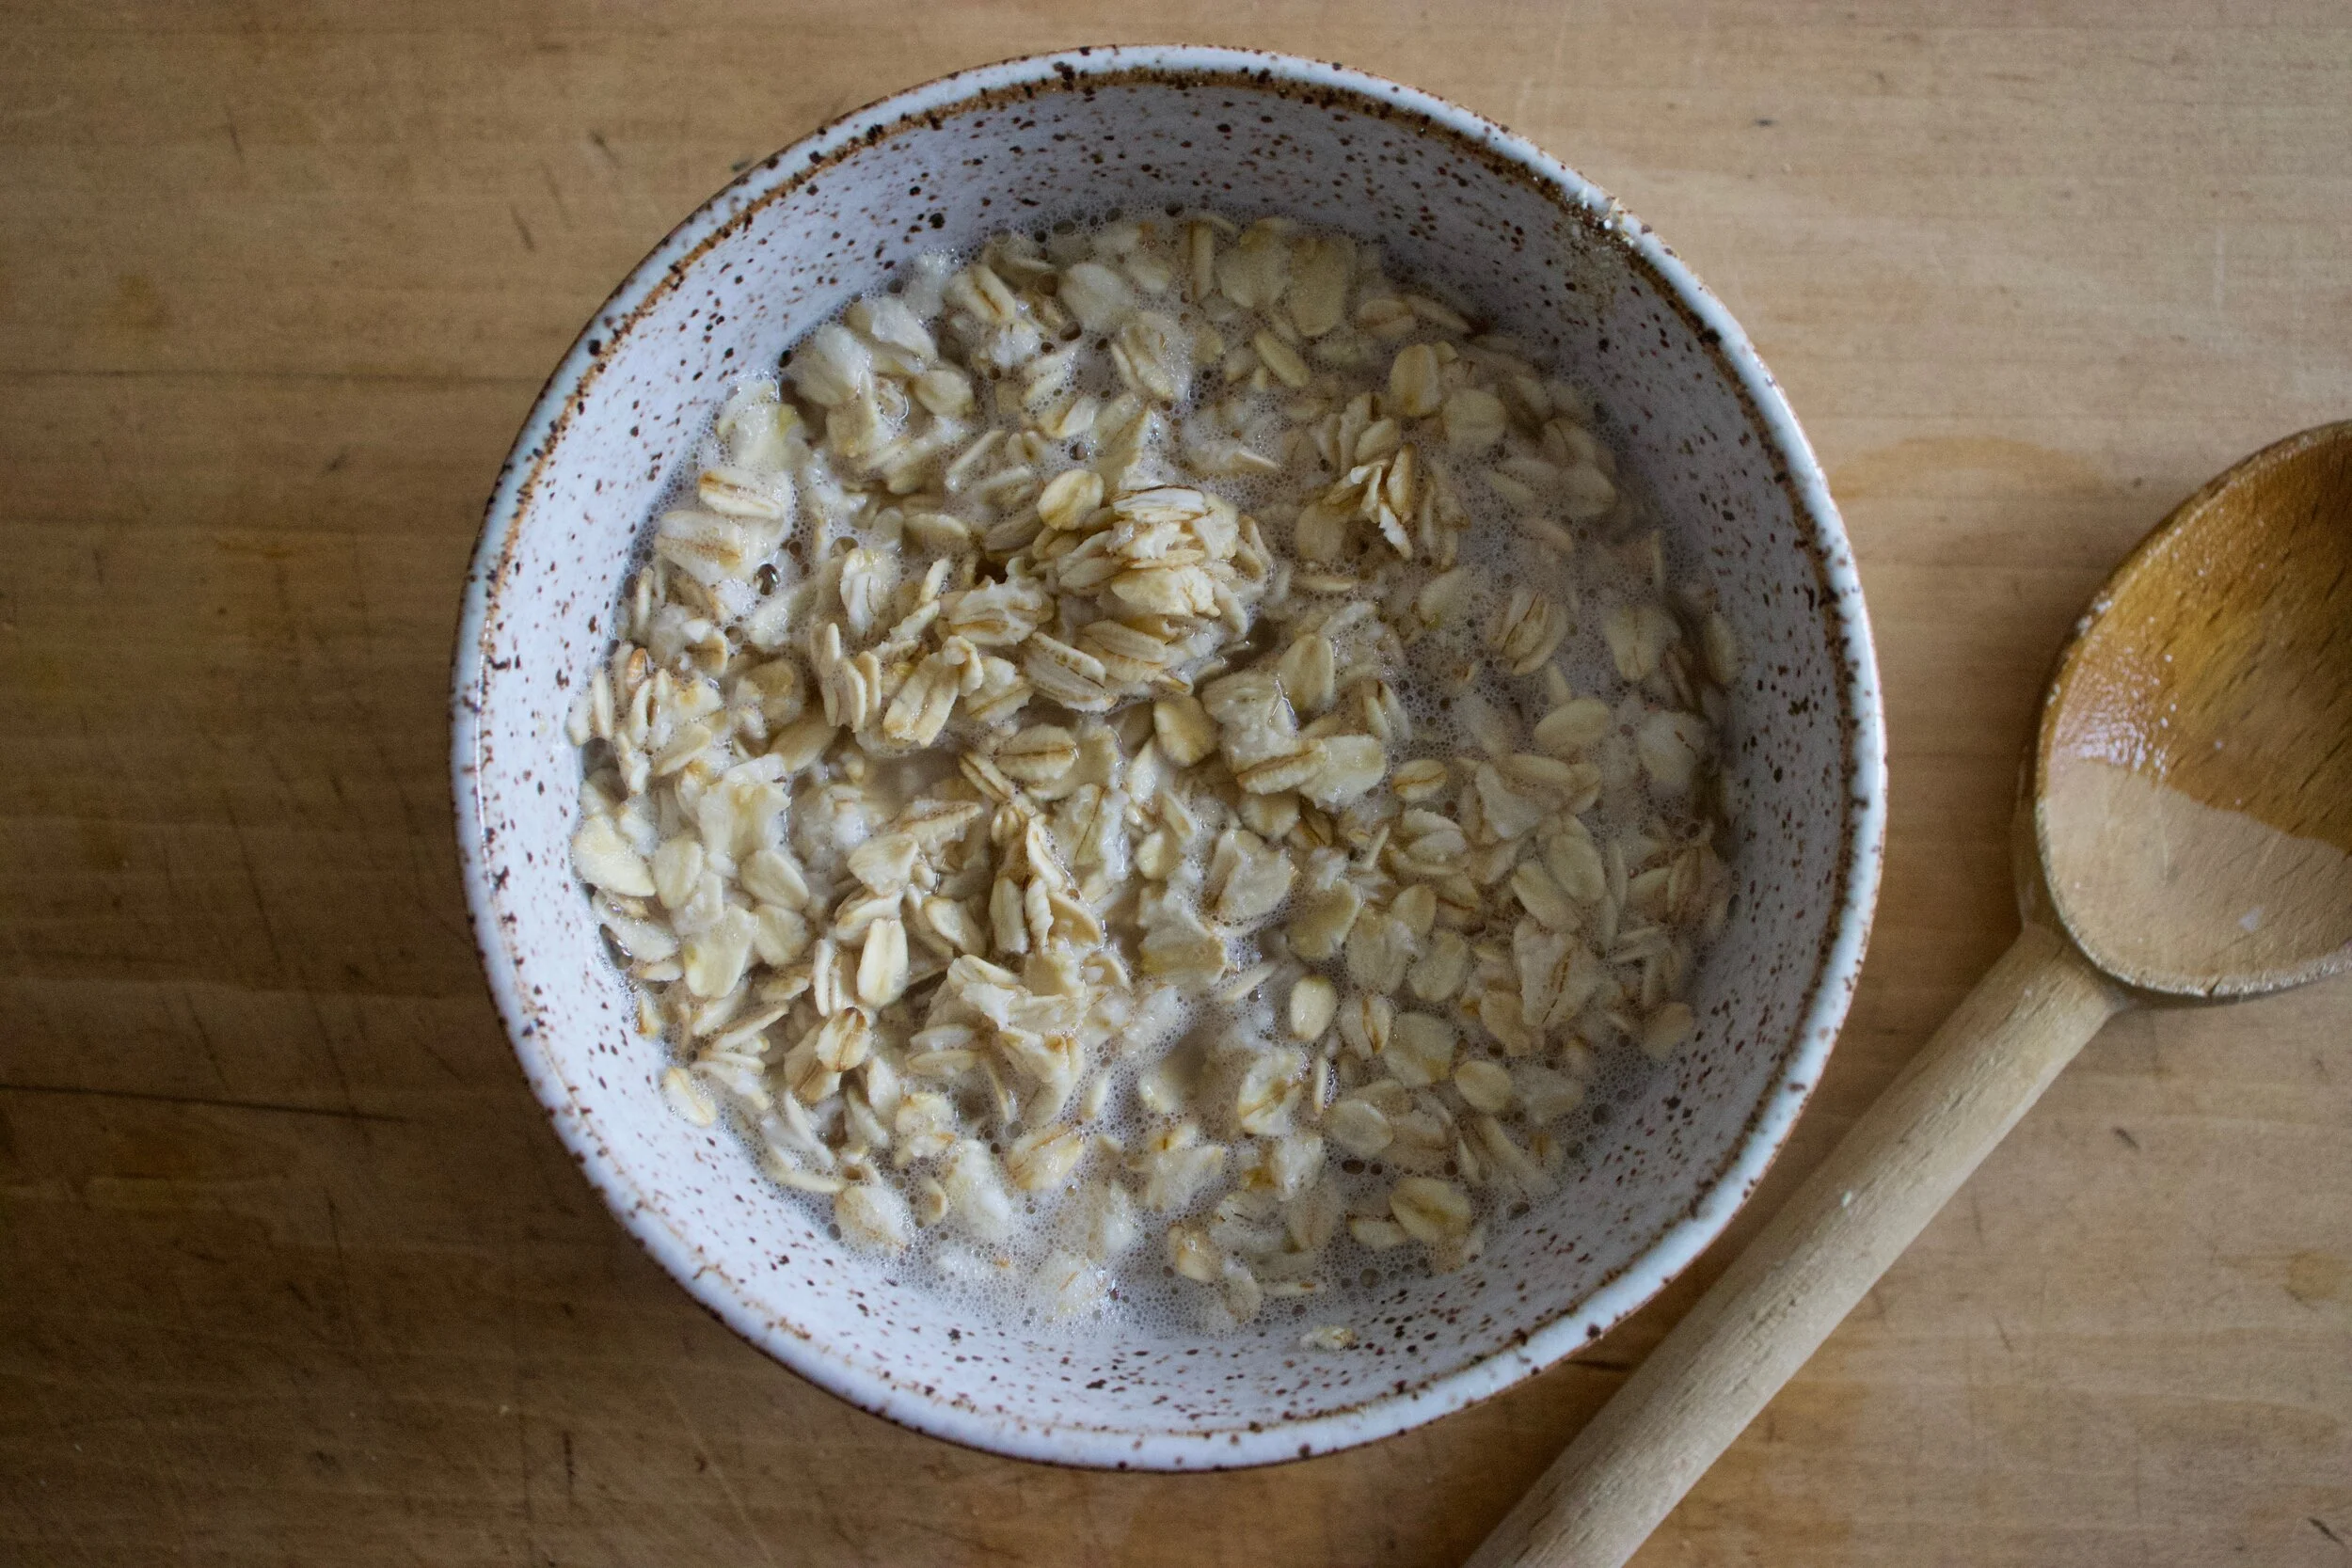
First, take the boiling water and pour it over the oats. Mix them and let them soak and cool for 10 or so minutes.
While oats are soaking, add the room temp water to a big bowl with the yeast. Once the oats are soft and cooled off a bit, add them to the yeast mixture along with the oil, and maple. Mix together. The add the flours and mix until combined.
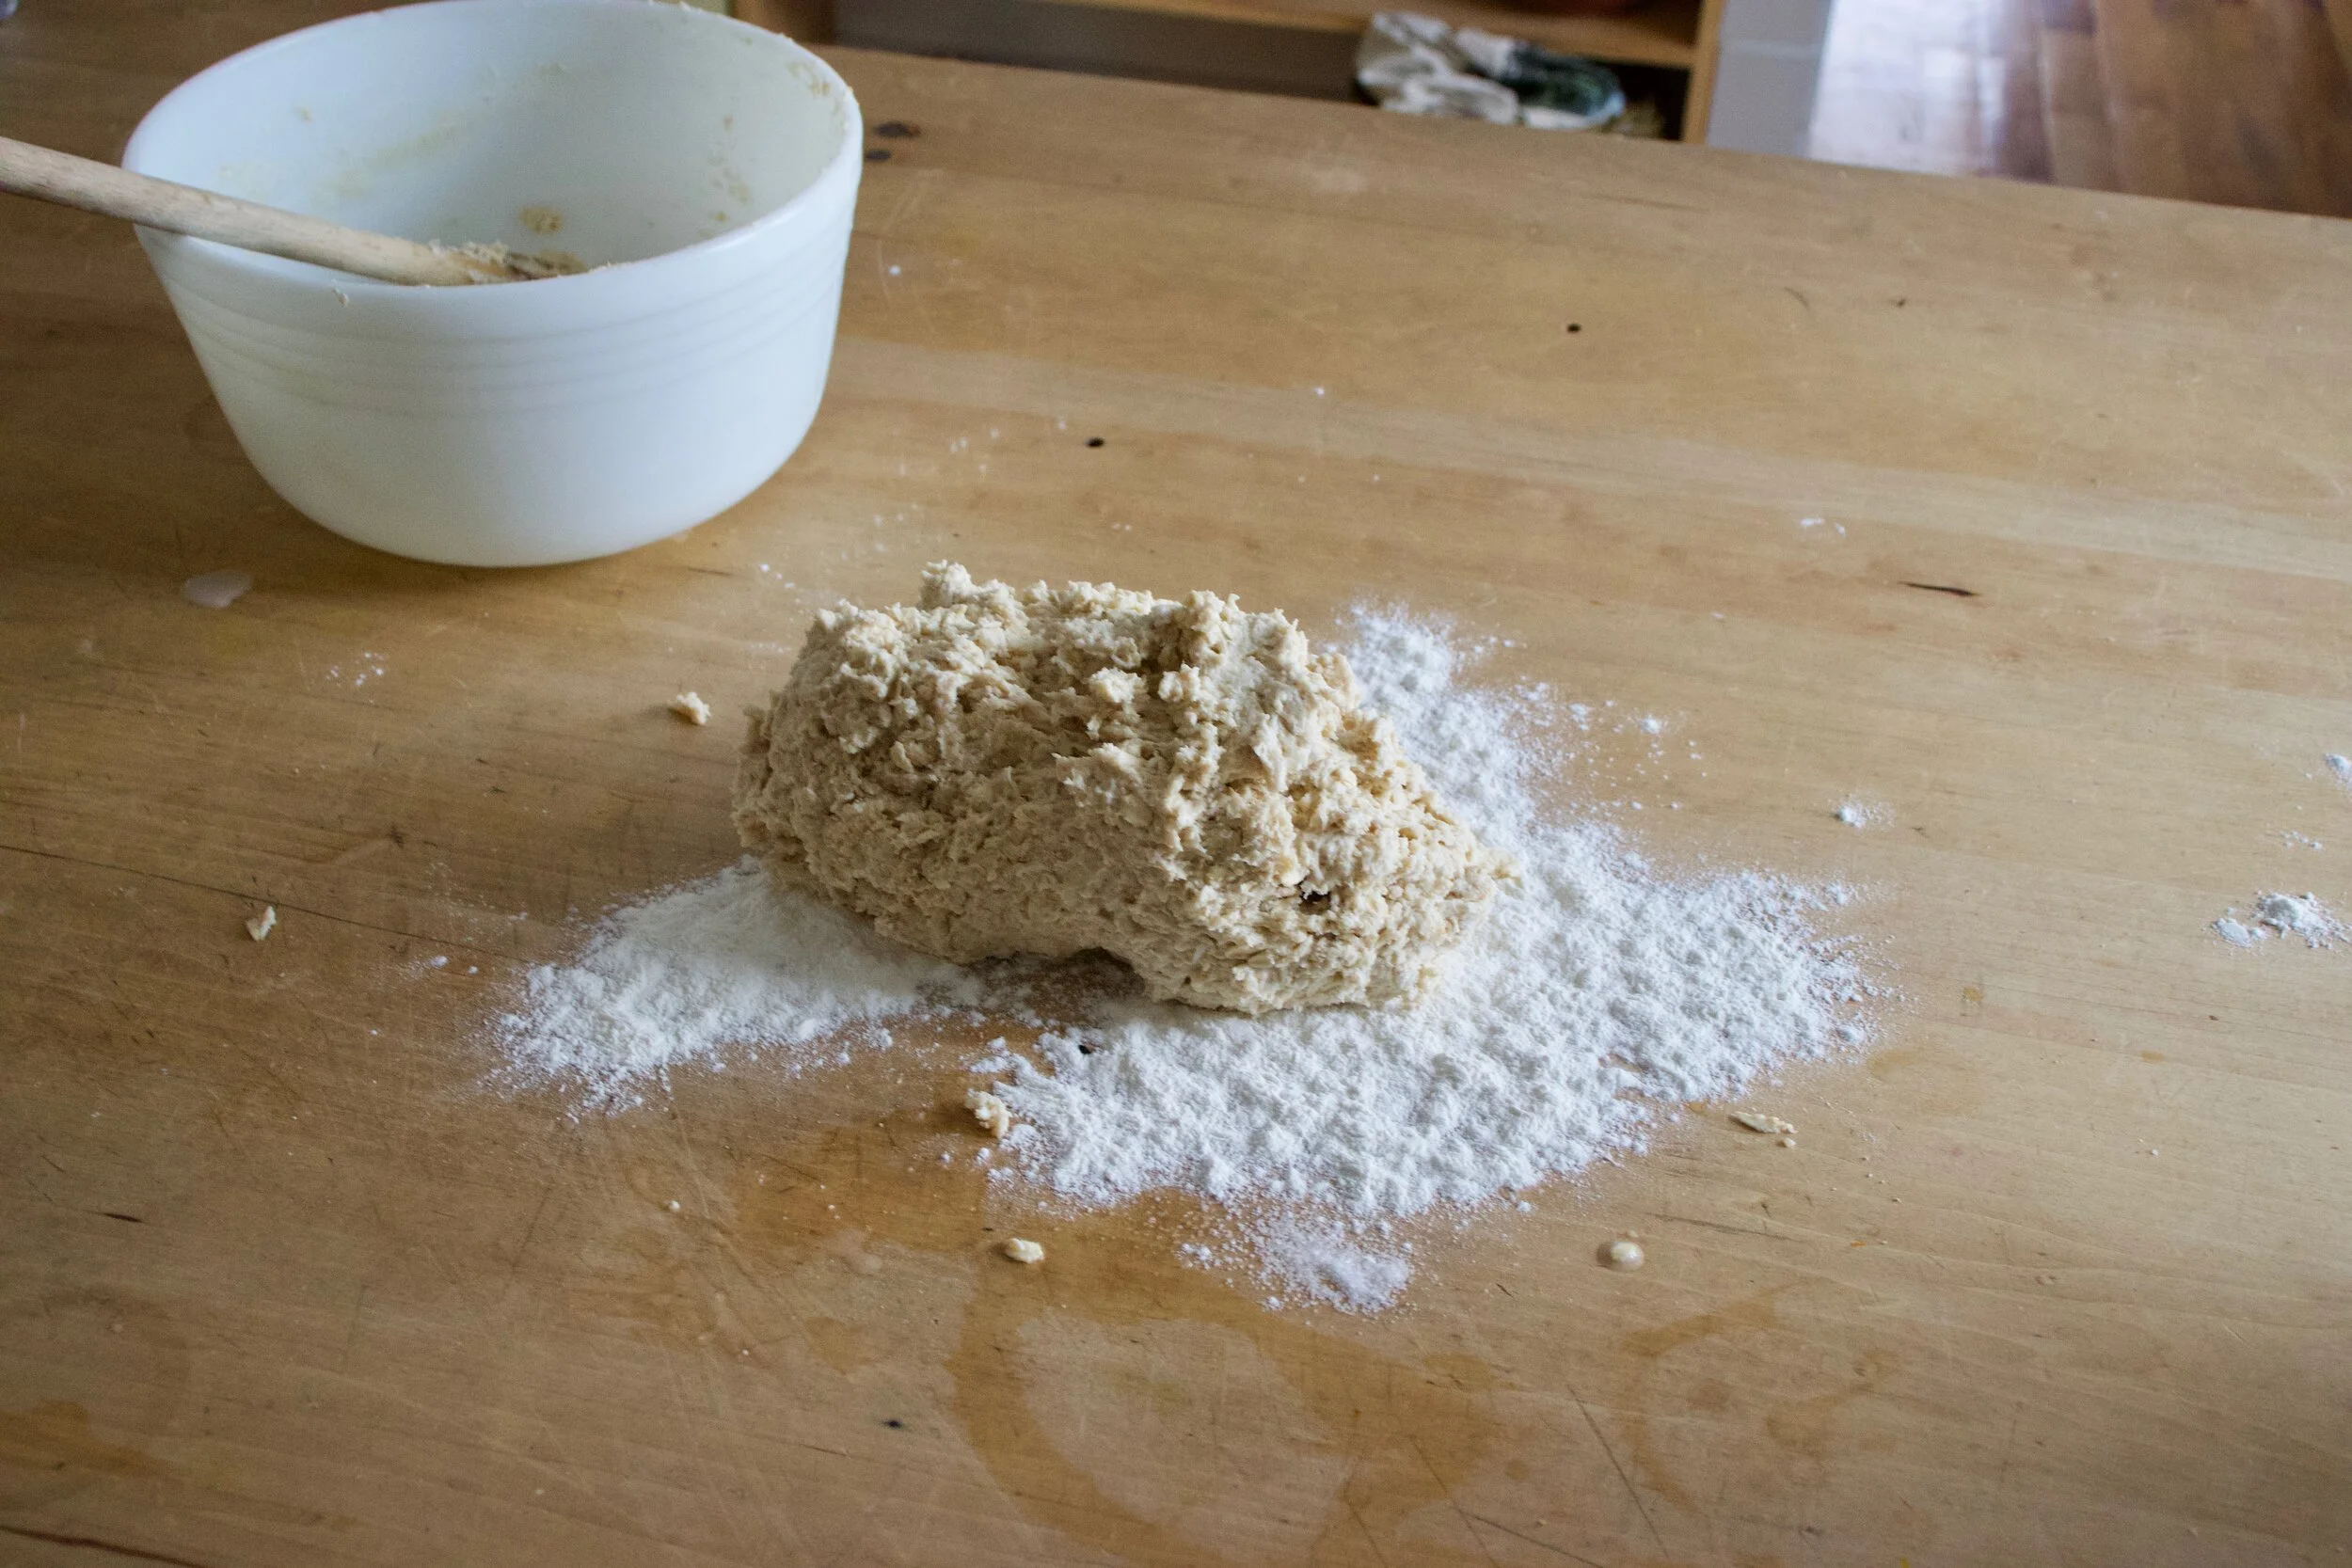
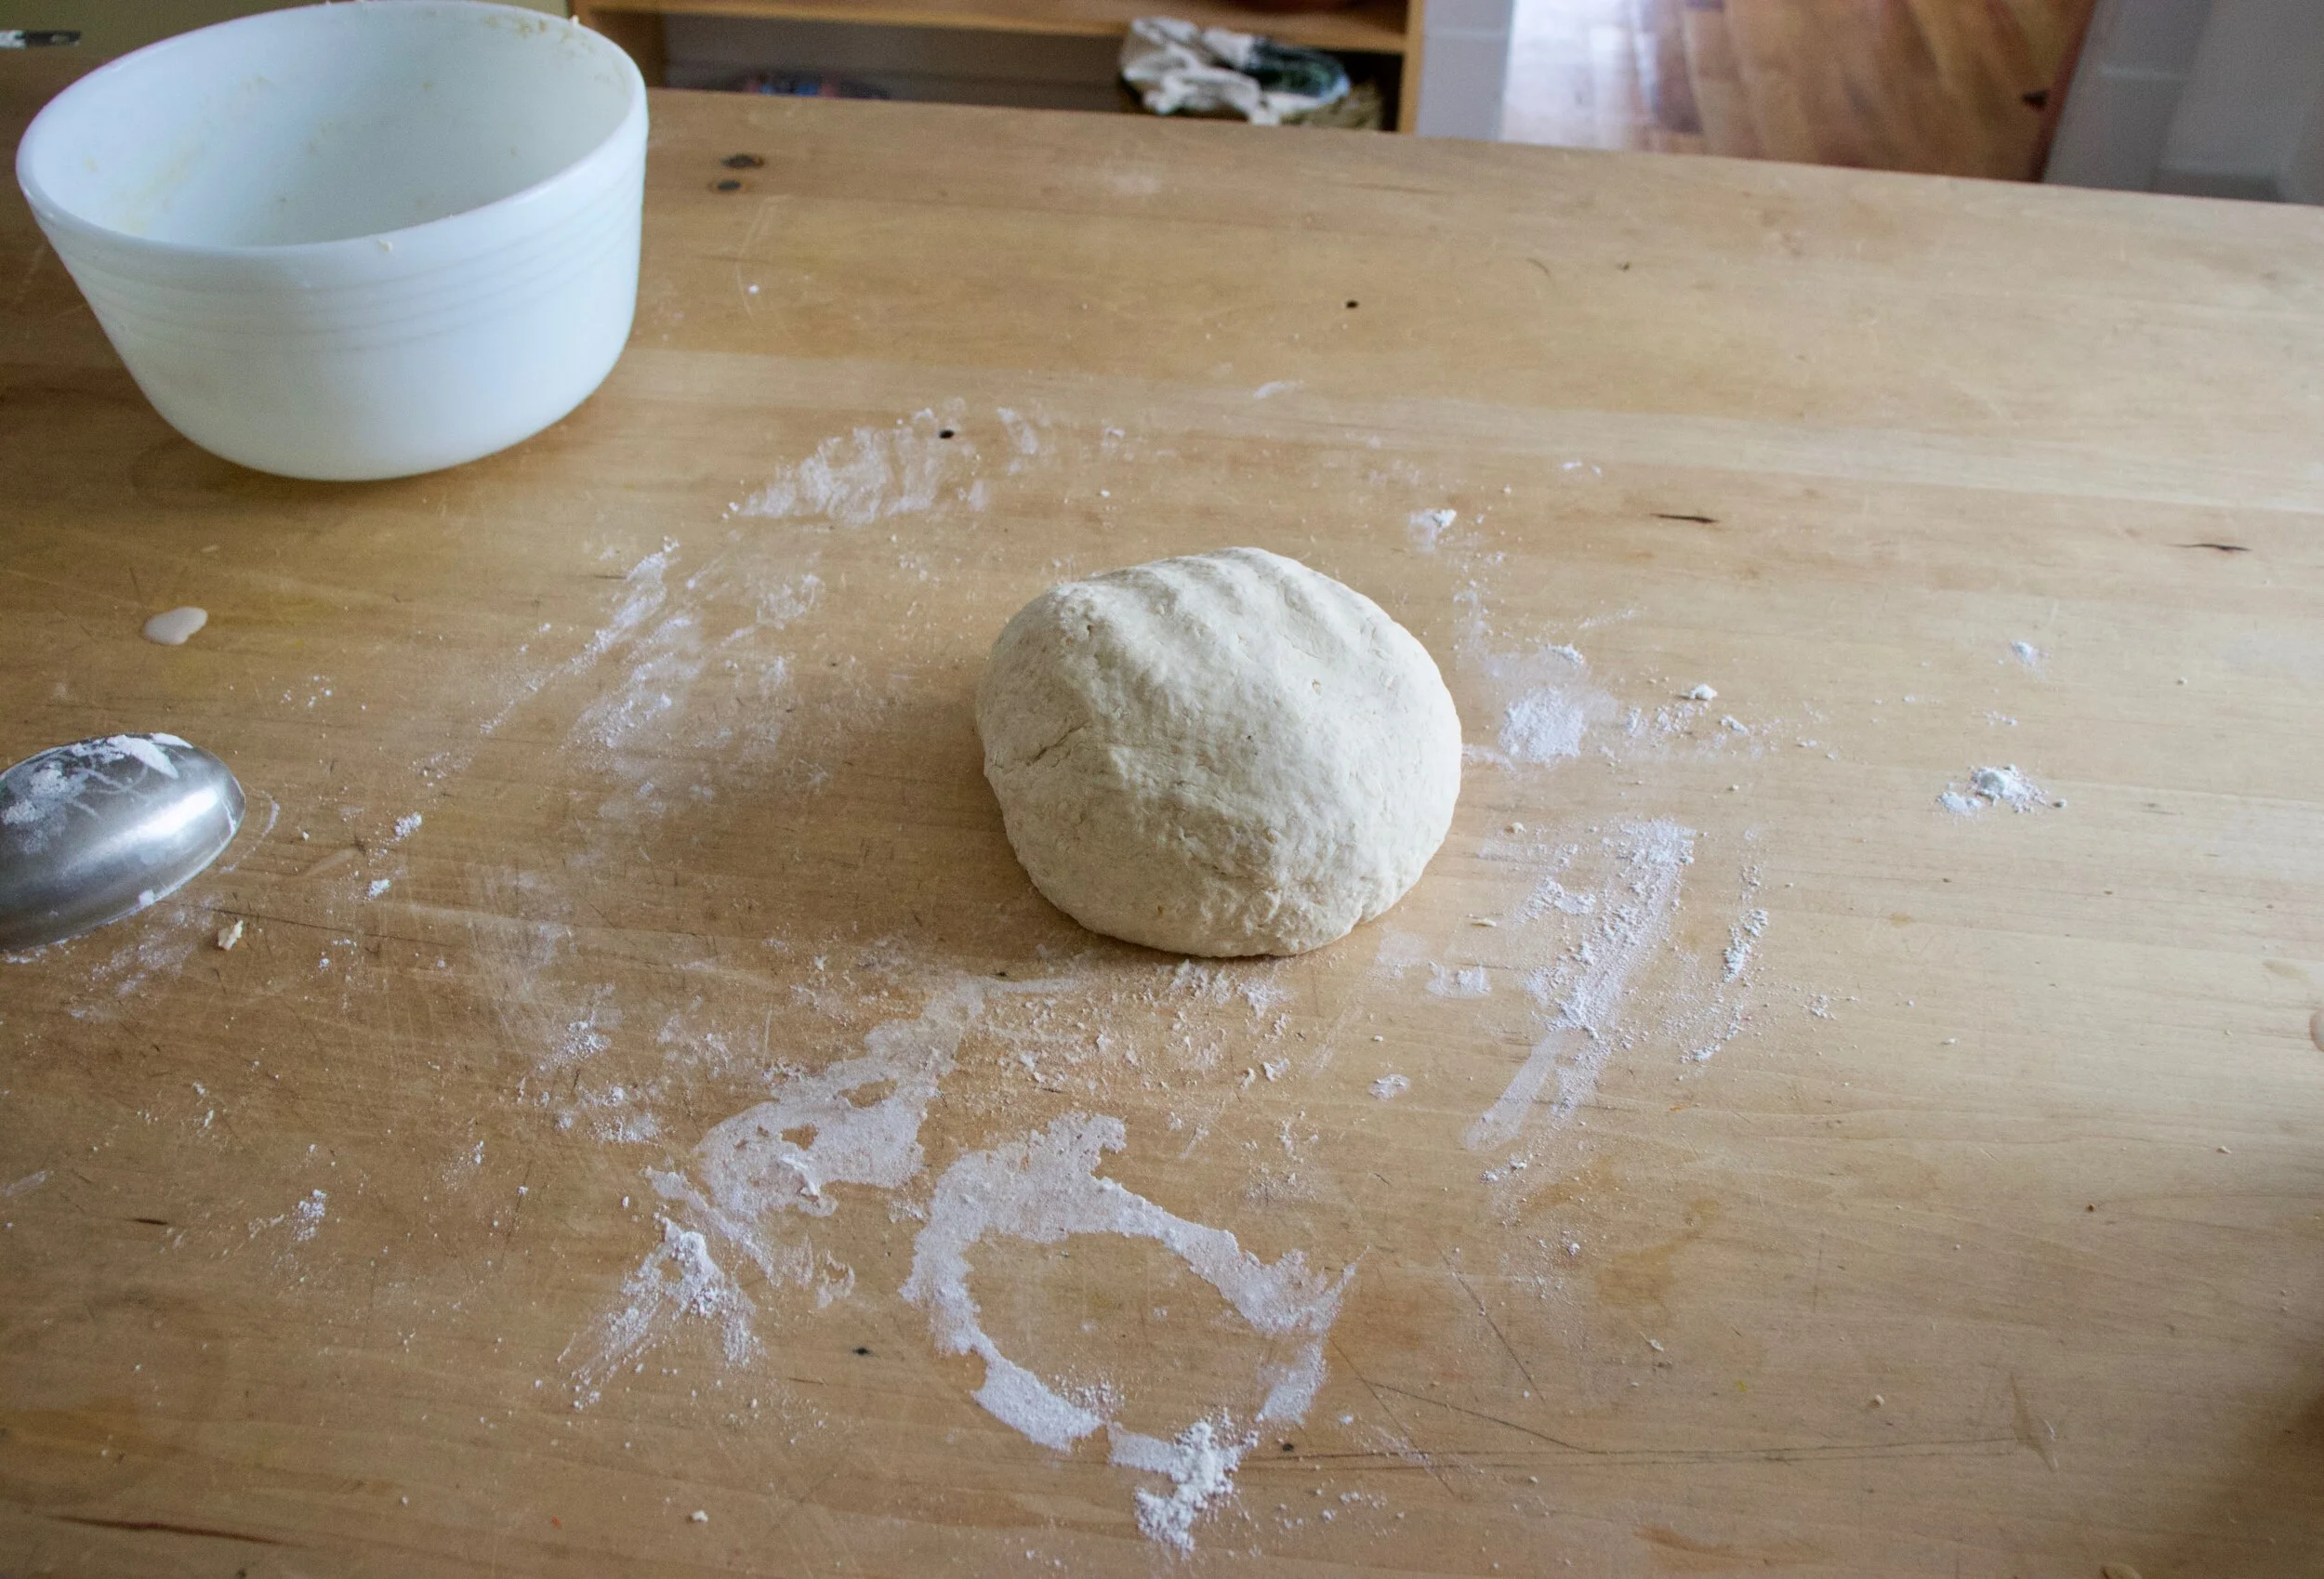
Dump dough onto a floured surface and knead for about 3-5 minutes, adding a little more four as needed to keep from being to sticky, but don%u2019t over flour. The dough is and should be a little tacky.
Soft and supple. Kneaded and ready.
Place the dough back into the bowl and cover with a damp towel. Leave alone and let rise for about an hour or until it doubles in size.
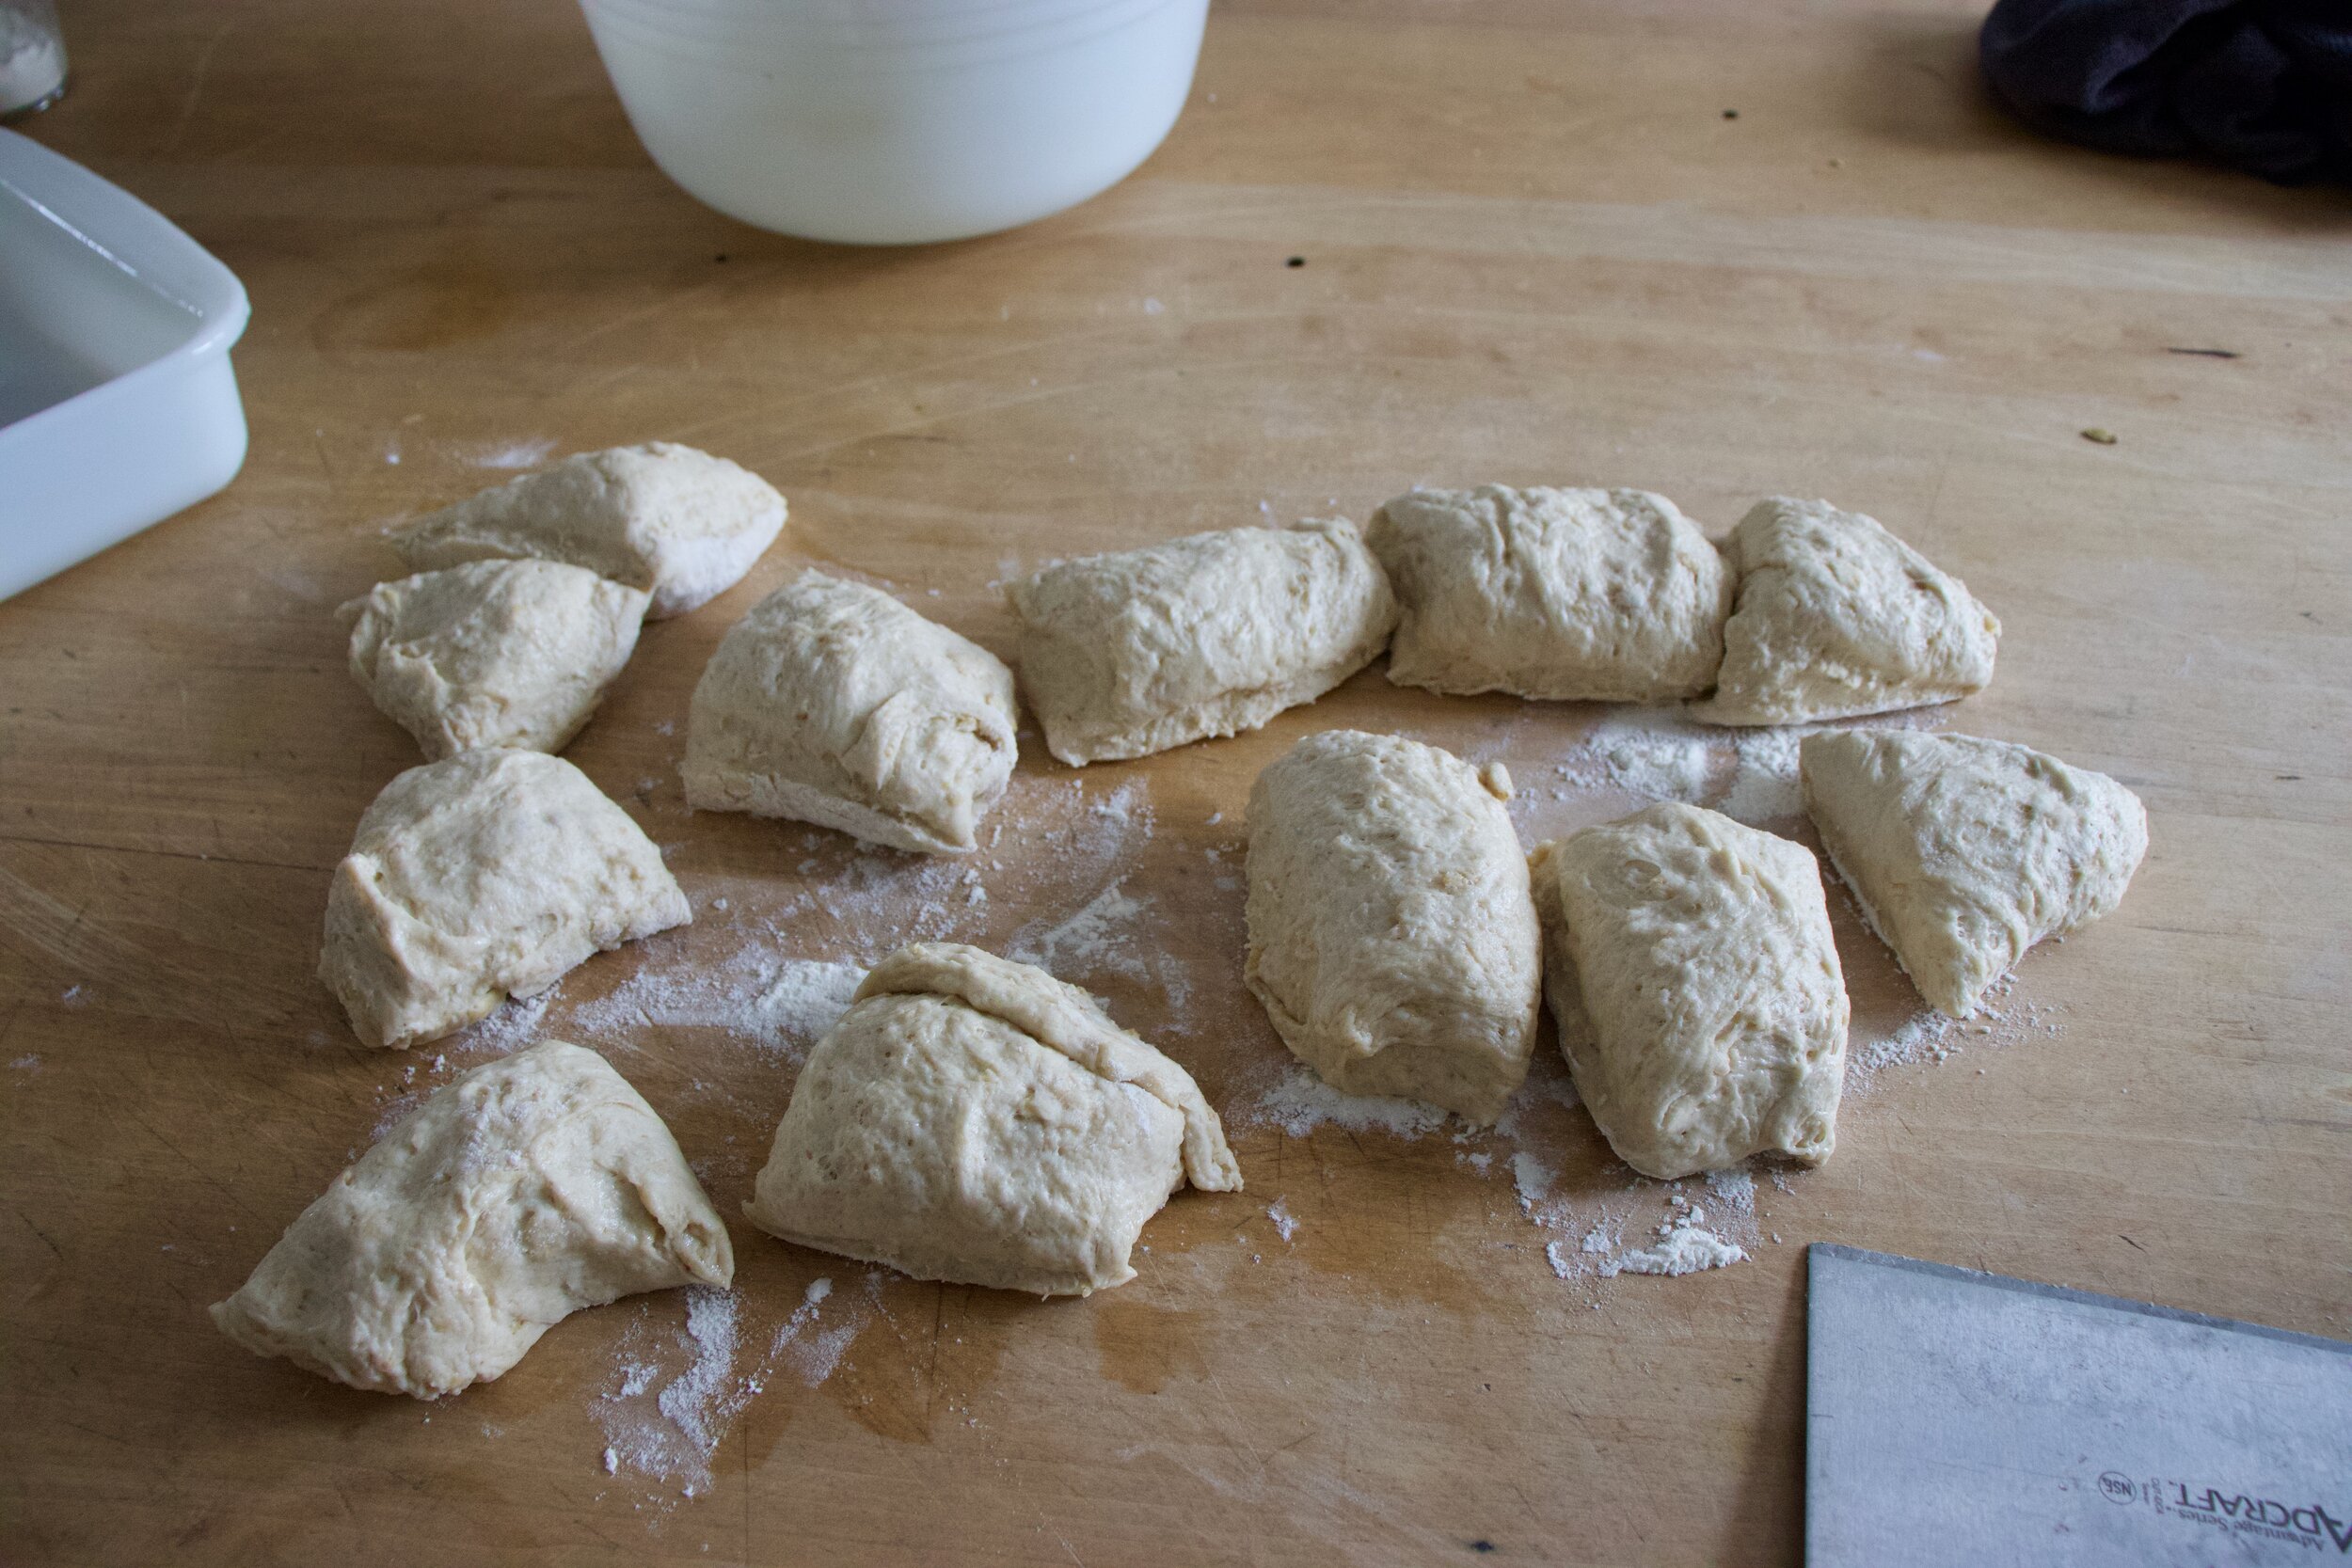
Once the dough doubles, dump out onto a lightly floured surface and cut into 12-16 equal sized pieces .
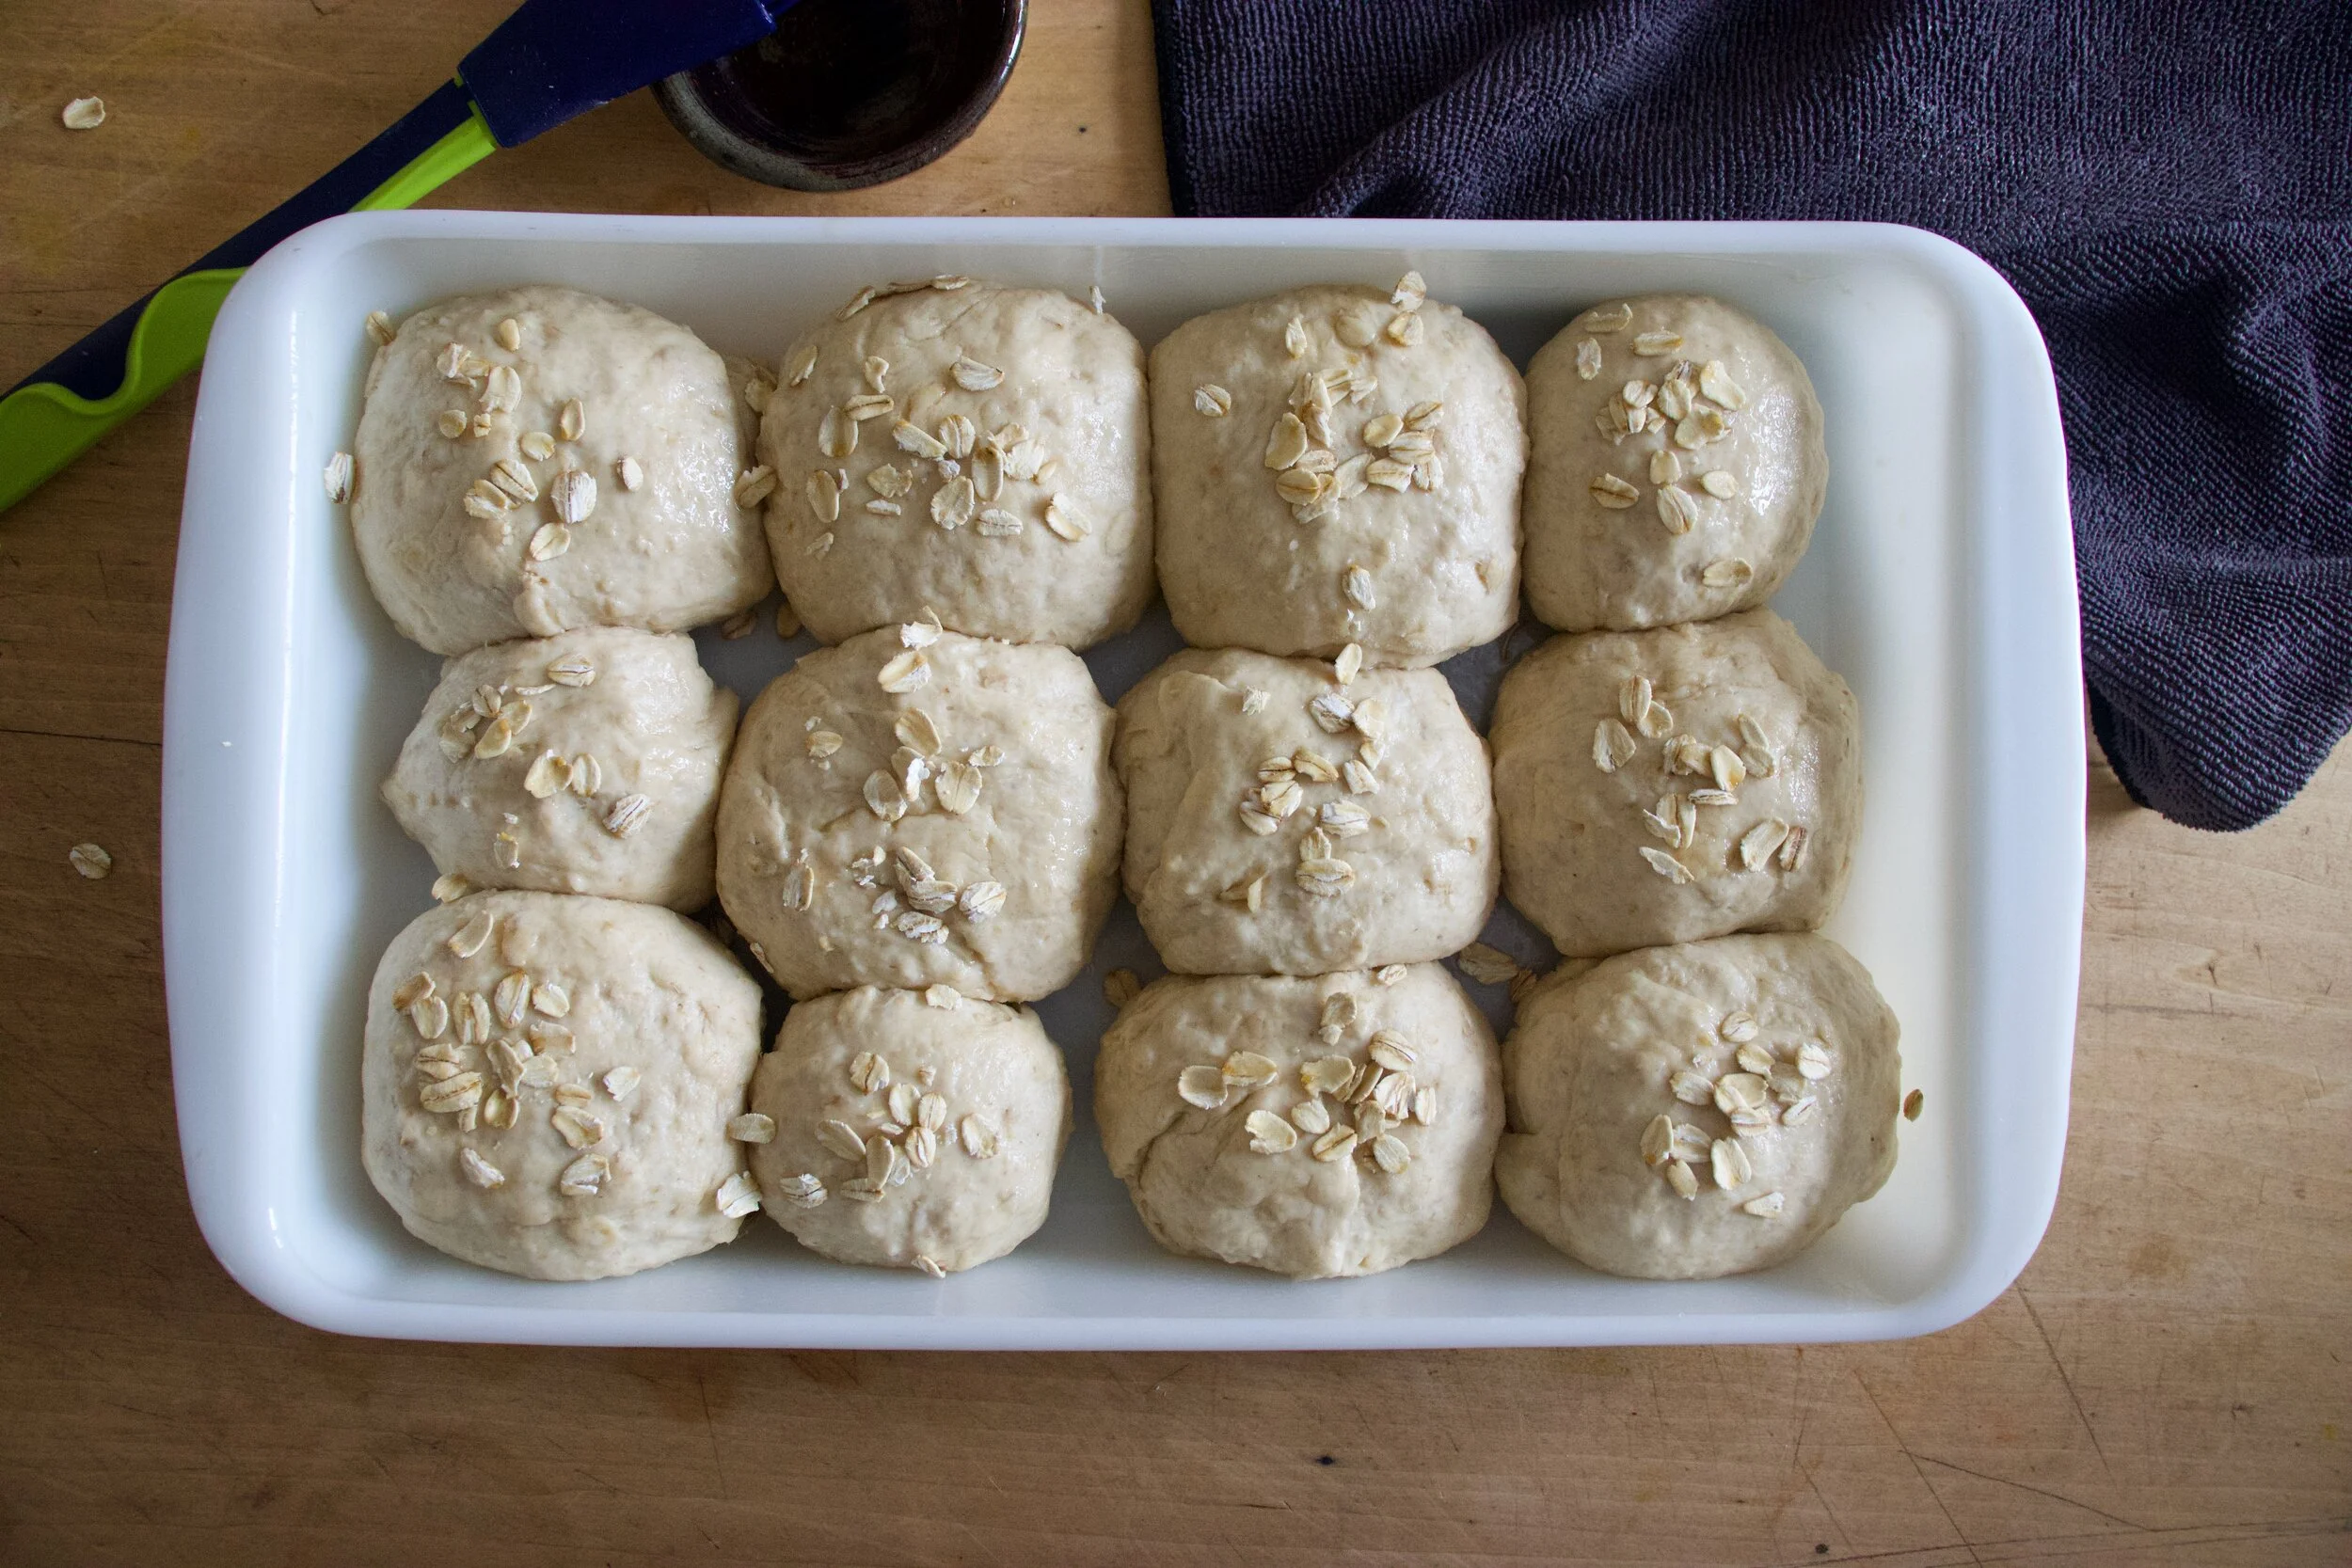
Roll each roll into a roll shape and place them in a lightly greased baking dish. Cover for another 15-20 minutes to let rest and rise a little more.
Rolls risen again, just a little plumper. And now right before you place them in the oven, brush tops with a maple/water mixture and sprinkle with a few oats. To look pretty. And into the oven they go, 30ish minutes, until nice and golden brown.
Baked to golden dinner roll perfection.
And there you have it. Soft and fluffy dinner rolls. Warm out of the oven, looking and smelling like all the good things that you want and need.
And can, and should, be made now and all year round.
-C
makes 12-16 rolls
1 1/2 cups old fashion oats
2 cups all purpose flour plus more for kneading
1 1/2 cups white whole wheat flour
2 cups boiling water
1 cup room tempature water plus 2 tablespoons for brushing tops
2 teaspoons salt
2 tablespoons maple or honey
2 teaspoons yeast
1/4 cup neutral oil
In a bowl, mix oats with boil water and let sit and soak for about 10 minutes. In the meantime, in a large bowl, mix the room temp water with the yeast and 1 tablespoon of maple and mix. Once oats have soaked and cooled to a point that they are not super hot, but still just warm, mix them in with the yeast mixture. Add the salt and oil and mix then and both the white and white wheat flour. Mix until combined. The dough is going to be sticky, but that how is should be. Dump the dough onto a lightly floured surface and knead for 3-5 minutes, adding a little flour as needed to keep from sticking too much, until dough is nice and uniformed in texture. Place dough back into big bowl (after you clean it out and lily oil it) and cover with a damp towel. Place somewhere warm for about an hour until it doubles in size.
Once dough has doubled, dump out onto a lightly floured surface and with a knife of dough cutter, cut into 12- 16 equal sized pieces. Roll each piece into a ball, pinching any ends together and place them into a 9×13 inch baking pan. Once all pieces are in, over and let rest for another 15 minutes.
While dough is resting again, preheat oven to 350.
After the dough has rested, and right before you place them in the oven, mix 1tablespoon of maple with about 2 tablespoons warm water and brush the tops of the rolls. Sprinkle with a handful of oats and then place them into the oven to bake. 30-35 minutes, until they are a nice golden brown.
Once baked remove from oven and let cool to a reasonable temperature and serve.
These can certainly be made a few days ahead of time of eating. Just remove baked rolls from pan and let cool completely then place the into an airtight bag. To reheat, just place on a baking sheet and stick in a hot oven until warm.
Corn is the name of the game, and this game I won!
The mr doesn%u2019t much like to eat corn. But I do. And this time of year I get like 10 ears of corn every week from farm share, which is a lot of corn for one person to have to eat every week and sometimes I just can%u2019t do it. So every now and then I make something that I think the mr will tolerate, if not like, to get him to help me eat the stash of a hundred ears or corn that I have going on in the fridge.
These fritters helped me with that and I think with all the future corn that I will get from the farm. They are soooo good! The mr liked them! As for me, I couldn’t stop eating them and almost didn’t want to share because they we just so dang good. Sweet fresh corn, nutty and slightly chewy oats. Scallions. And that%u2019s pretty much it. So fresh and clean and yummy tasting. A summertime fritter situation that takes corn to a place where even the corn hater likes it.
Although who the hell hates corn? I know one person. One. And I live with him. Weirdo.
Anyway, to the fritters!
The stuff. Fresh sweet corn, old fashion rolled oats, and a few scallion. Also some ground flax seed, water, baking powder, salt and pepper, and a little oil.
Start with oats. Add most of what we need to a blender and blend until it becomes oat flour.
Then the corn. Remove the kernels from the cobs. Best way is to hold corn in a large bowl and cut downward. Don%u2019t want corn flying all over the place!
Add most of the corn you just cut off the cob to the blender with the oat flour, along with with flax and water. Blend until smooth.
Chop the scallions into thin and tiny pieces.
Now dump the contents of the blender into a bowl, add in the scallions, the baking powder, and the extra oats and corn. Mix it all up and then let the batter rest for a few minutes (like 10) so the oats have a chance to really absorb all the liquid.
And then to cook them. Heat a lightly oiled skillet to medium high heat. Once skillet is hot, drop scoops of batter into it. Cook for 3-4 minutes or until the bottom is a nice deep golden brown. Flip and cook the other side the same.
When fritters are done cooking, place them on a wire rack. So they don%u2019t get soggy.
And then serve them right away. I ate mine with fresh salsa. Definitely the way to go. So GOOD!
Now eat your corn.
-C
makes about 12 fritters
3 ears fresh corn ( about 1 1/2 cups of kernels)
1 1/2 cups rolled oats (gluten free if needed)
1/2 teaspoon baking powder
2-3 scallions
1 tablespoon flax meal
3 tablespoons water
salt and pepper
a little oil for skillet
Combine water and flax meal, mix and set aside.
Place 1 cup of oats into blender or food processor and blend for about a minutes or until the oats are a fine flour.
Grab corn and remove from cob. Best way to do this is to place corn vertically in a big bowl and cut downwards so the bowl catches all the kernels. Cut enough corn until you have about 1 1/2 cups of kernels. Also, garb scallions and chop into very small, thin pieces.
Add in a cup of the corn, the flax and water mixture, baking powder, and a pinch of salt and pepper. Pulse or blend until completely combined and the mixture is mostly smooth.. Dump mixture into a bowl and add in the remaining corn, chopped scallions, and oats and mix together. The mixture should not be runny, but also should not be dry enough to pack together. If the mixture seems too dry and tight, add in a tablespoon or two more or water. To wet, add in a small handful of oats.
Once batter is mixed, set aside for about 10 minutes to rest.
Grab skillet and place on medium high heat. Add a touch of oil to pan and make sure it evenly coats the bottom. Once pan is preheated, add scoops batter into pan (about 2 tablespoons each). Cook first side for about 3-4 minutes or until dark golden brown, then flip and cook the other sides for another 2-3 minutes until a dark golden brown. Remove from pan and either place on a wire rack or a plate. ( I recommend a wire rack just to keep them from getting soggy.)
Serve right away. Fresh salsa goes amazingly with them!
Any left overs can be stored in fridge and reheated in the oven.
Salad season is here. Green salads, fruit salads, potato salads, and grain salads. All the salads and we are not mad about it.
This is a good grain salad using millet, which I am sightly surprised to hear that a lot of people have never had. Millet is kind of like quinoa, but not. I cooks fluffy and looks kind of the same, and is gluten free like quinoa. I think the biggest difference is that millet is slightly softer and tastes a bit more nutty. It also is really good at absorbing liquid flavors.
But who are we to compare. The main thing is that it is nutritious and delicious so we will eat it.
Back to the salad. This is one of those grain salads that is good cooked and served warm but only gets better with a little age (like an hour or a day) in the fridge. Served hot or cold or room tempature, and is hearty enough to be meal like but is also a fantastic addition as a side to any of you meal plans. Like maybe a BBQ? Whatever the occasion, or non occasion, this is just a really good grain salad situation and I think you will be pleased, smiling all smiles while eating it.
To the millet salad.
The stuff. Millet, a couple handful of greens, a few mushrooms, an onion, dijon mustard, a little maple syrup, red wine vinegar, a lemon, a couple cloves or garlic, some toasted sunflower seeds, and salt and pepper.
Start by giving the millet a little toast, just enough to really up the nutty flavor and make it that much more yummy. It only takes a few minutes in a skillet on medium heat. Not an entirely necessary step, but you should do it.
Toasted millet goes into pot with water. Bring pot to a boil and then turn to the lowest simmer and cover.
While millet is cooking, get to the mushrooms and onions. Chop the onion thin and small and the mushrooms thin and small as well. Place them into the skillet with a drizzle of oil and place on medium heat. Mix around every now and then and cook until the mushrooms and onions are soft and a nice golden brown.
And make the vinaigrette. Minced garlic, mustard, vinegar, the juice of the lemon, and maple syrup get put into one place.
Mixed and now all is one.
Millet. Cooked and fluffed and ready to go.
Cooked mushrooms and onions go into the pot, along with the greens, the sunflower seed, and the vinaigrette. This step can be right away or you can wait a little while for things to cool as to not wilt the greens. Up tp you.
Mixed with love and hunger.
Even if you are making it ahead of time, just do yourself a favor. Grab a bowl, grab a fork, and get down on it.
-C
Seves 4-6
3/4 cup uncooked millet
2 cups water
1 sweet onion
3-4 big button mushrooms
Large handful or two of bitter greens like arugula, spinach or a mixture.
2 tablespoon brown or dijon mustard
2 tablespoon red wine vinegar
1 teaspoon maple syrup
2 cloves garlic
salt and pepper
handful toasted sunflower seeds
To start, toast millet. Dump the uncooked millet into a pan and place on a medium heat tt for about 5 minutes or until you start hearing the millet crackle.This gives the millet a slightly more nutty flavor but you can skip this step if you don%u2019t care.
Dump millet and water into medium pot. Place on high heat until water starts to boil then tun heat down to simmer and over. After about 15 or 20 minutes, when most of the water is gone, turn pot completely off. Let sit, covered for another 10ish minutes then take a fork and fluff it.
While the millet is cooking, cook the veggies. Grab the onion and slice it up into thin pieces. Clean off the mushrooms and chop them into small thin pieces too. Place the chopped stuff into the skillet with a drizzle of olive oil and a pinch of salt and place on a medium heat. Stir occasionally and cook for about 15 minutes or until the onion and mushroom are a nice dark, golden brown.
And make the mustard vinaigrette. Mince garlic and place into a jar or bowl with the vinegar, the mustard, the maple, and the juice of the lemon. Mix and set aside.
Once the millet is cooked, the mushrooms and onions are cooked, and the vinaigrette is made, all you have left to do is mix everything together. You can do this while things are slightly warm which will wilt the greens a bit, o let them cool so the greens stay fresh. Up to you. (I like the greens fresh)
Finally, dump cooked mushrooms and onions into pot with cooked millet. Add in the greens and sunflower seeds and drizzle the vinegertte all over. Toss around until fully mixed. Sprinkle with lots of fresh cracked pepper.
Then eat. Or place in a container to bring to the BBQ.
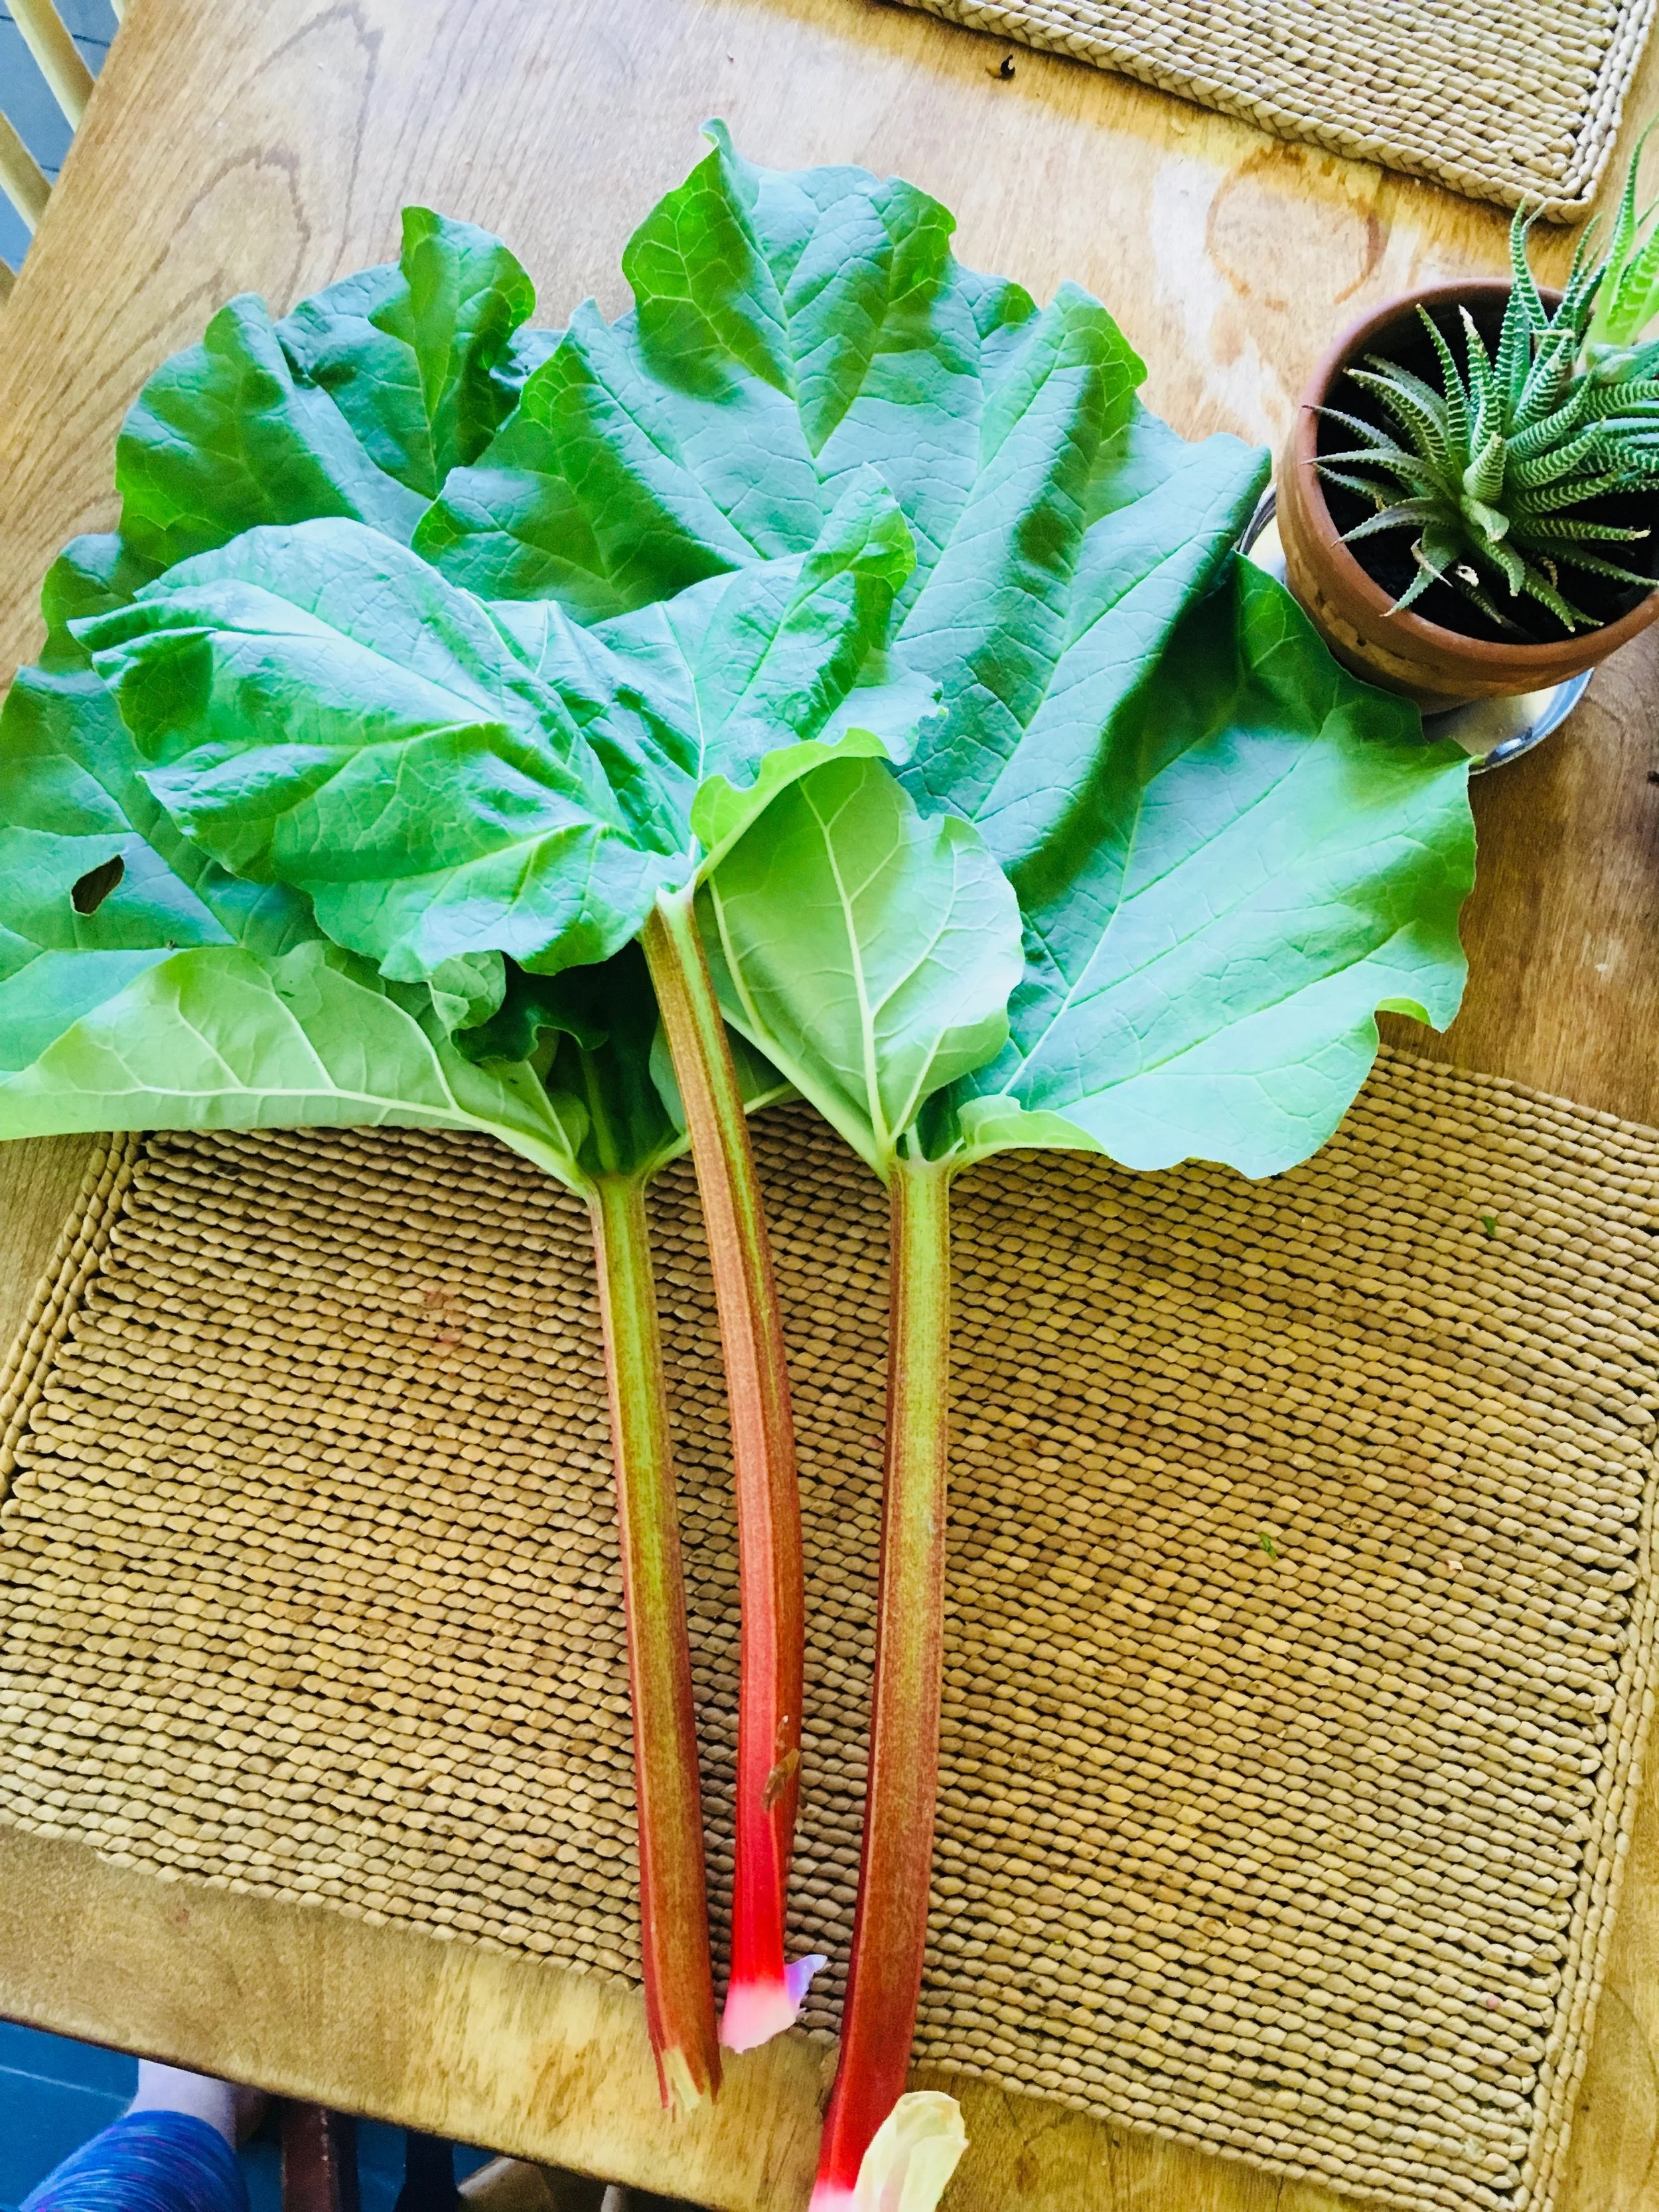
I am sadly at my last few bags of frozen garden foods from last season. As of now I have a bag of tomatoes, a couple bags of shredded zucchini, and a bag of rhubarb. Well, had a bag of rhubarb. I think I have eaten almost all of it already. My rhubarb patch better get up and producing stalks soon. And as for the rest of the veggies that I will require. Guess I am going to be surviving mostly on roots from farm share (we are getting a lot more greens though!!!!) and probably doing a bit more grocery shopping then I care too. A few more months. I can do it.
Anyway, enough about my freezer and lack of fresh produce problems.
Here in Vermont maple season is well on it%u2019s way making it a perfect time for anything maple. And rhubarb. Yeah I am using my frozen rhubarb from last year, but any time now (after the snow melts) there will be plenty of stalks for the taking. There will be so much maple and so much fresh rhubarb which are the perfect taste combination. Exciting times! And when added to oatmeal, things just get more gooder. (I know gooder is not a word but I think it should be) Oatmeal, especially baked, is the stuff where all gooder things start.
Have you had baked oatmeal yet? It truly is fantastic. Not at all gummy and gloopy like stove topped cooked oatmeal (but I like it like that too). It still has a good bite to it while still being soft and creamy and boy oh boy is it just the bees knees. With the addition of some crunchy almond friends, well even better. Trust me. If you are a oatmeal eater, you must try it baked. Best part is that it can be eaten as breakfast but also I have been serving it to the mr for dessert with a healthy drizzle of more maple. It%u2019s that good friends. From breakfast to dessert. Everyone is happy.
To the baked oatmeal.
The stuff. Old fashion oats, cinnamon, salt, baking powder, rhubarb (fresh or frozen), REAL maple syrup, some plant milk, a few flax eggs, a bit of tahini, and some almonds.
To start. Oats, cinnamon. salt, baking powder and almonds get a quick toss together in a big bowl.
If you rhubarb is not already chopped up into inch long pieces, do that. I already did before freezing it so yea me. Once its chopped, layer almost all of it (reserve a few small needful to toss on top) into a lightly greased 9×9 inch baking dish then cover evenly with the oat mixture.
In now empty bowl mix together the milk, the flax eggs, the tahini, and the maple until evenly incorporated.
Pour the wet mixture all over the oats and let it absorb.
Once the liquid is all absorbed , top with any left over almonds and the left over rhubarb. For good looks.
Pop into a hot oven to bake.
Golden brown with crispy edges. Rhubarb and maple baked oatmeal for all your maple, oaty and rhubarbie needs.
Fresh from the oven scooped warm into bowls. Top with extra maple if thats what you should want do.
Enjoy and happy maple season!
-C
Make a 9×9 pan of oatmeal
2 1/2 cups old fashion oats (make sure gluten free if need be)
2 1/2 cups fresh or frozen rhubarb chopped into inch long pieces
1 1/2 cup plant milk (water works but it won%u2019t be as creamy)
1/2 cup chopped almonds (optional)
Preheat oven to 375
Lightly grease a 9×9 inch baking pan (I used metal because it makes for crisper edges but glass works too) and dump 2 cups of the rhubarb in and evenly distribute on the bottom. In a large bowl mis the oats, the baking powder, salt, and cinnamon together. Mix in chopped nuts if you are using. Evenly cover rhubarb with oat mixture. In now empty bowl mix together the milk, flax eggs, maple syrup, and tahini until evenly incorporated. Pour mixture over oats. Let the mixture sit for a few minutes until the oats have abosbed all the liquid. Toss the rest of the diced rhubarb and a few more chop nuts to the top and pop into the oven to bake.
Bake for 30-40 minutes (shorter time for a wetter oatmeal, longer for a denser crispier oatmeal)
Once baked to your likeness, remove from oven and let cool for a few minutes just so it is not super hot. Scoop into bowls and serve warm with extra maple and milk or whatever you might want to serve with it.
Left overs last great in fridge for 3-4 days or individual portions can be frozen for a month or two. Just pop into microwave for a couple minutes to warm up.
Roasted veggies of any kind can get this girl in trouble. Place a sheet pan meant for many full of roasted veggies and watch out, I will probably eat them all. I can%u2019t stop, won%u2019t stop and you know what, I am not sorry, especially if its roasted brussel sprouts and squash.l I am grabbing at every last bit, especially all the really crispy, almost burnt pieces. Burnt food is one of my favorite flavors.
This dish is pretty basic, but also not. A slightly overlooked grain, spelt, makes for a hearty backdrop to the magic of roasted sprouts and squash, covered with a sunflower butter sauce which is a nice spin on a traditional peanut sauce. It%u2019s pretty easy to make and pretty to look at as well. A nice hearty and warming meal for all of those cold winter nights. And it%u2019s not going to make you feel heavy or gross, like if you sat and ate an entire lasagna. No, you will feel full and fantastic and ready for a cookie (it is the holidays after all).
The ingredients in this dish are mainly inspired by the half eaten jar of sunflower butter a friend of mine gave me at the gym, plus the fact that I have been getting a few stocks of brussel sprouts each week at farm share so we are eating them at ever meal, (plus I LOVE brussel sprouts) and me trying to use up all of the grains and such in the pantry before restocking anything more or new. A dish of convenience sure, but also a damn delicious one at that. With this being said, if you had a different grain you wanted to use, or an abundance of some other veggies that you have or prefer, well go ahead and use them. You do you my friend.
And really, I was thinking of you when I made this dish. Sometimes at this time of year people tend to forget to eat, or tend to eat on the not so healthy side. This grain bowl situation is just what your body is in need of. Simple delicious nourishment.
The stuff. Spelt that has been soaking in water for a while, half a butternut squash, brussel sprouts, a red onion. Also sunflower butter, a few cloves garlic, a lime, soy sauce, a touch of maple, salt and pepper, and olive oil.
The spelt will probably take the longest so get it on the stove. Strain away the soaking water and place into with fresh water. Bring to boil then reduce heat to a simmer. Place a lid on pot ans let it go.
Next, get to the veggies. Halve the big sprouts (small ones can stay whole) chop onion into chunks and cube the squash.
A drizzle of oil, a sprinkle of salt and pepper, and a good toss around and it ready for the oven.
Meanwhile, make the sunflower butter sauce. Its pretty basic. The sunflower butter, minced garlic, soy, maple, and juice of the lime all into a vessel that can hold it. Add a couple tablespoons of warm water to thin it out and done. Sunflower butter sauce. Easy Peasy.
After about an hour, your slept should be cooked (that sounds aggressive to me) Tender and chewy and just right.
The veggies should be roasted and done too. Crisp as you like ( I actually like mine even darker, but the mr does not so I went a light roast this time)
And it%u2019s all ready for you to eat.
Roasted butternut squash and brussel sprouts on a warm bed of spelt covered in sunflower butter sauce. Living the good life here.
Take care of yourself this week, and always for that matter. Eat some good food. Your body will be happy for it.
Bye.
-C
Serves 2-3
1 cup spelt berries (soaked in water overnight if you remember)
3 cups water
about 1/2 of a butternut squash
about a pound of Brussel sprouts
a medium red onion
1/4 cup sunflower seed butter (unsalted and unsweetened)
2 tablespoons liquid amionos or soy
1 teaspoon maple or honey
1 lime
2 cloves garlic
salt and pepper
olive oil
Preheat oven to 425
Place soaked spelt berries in a pot with water and a pinch of salt. Bring a boil then reduce heat, place a lid on pot and simmer for 45 minutes to an hour or until spelt berries are tender and all the water has been absorbed.
While spelt is cooking, cut sprouts in half (unless they are very small), cube the butternut into pieces about an inch big, and chop the onion up into chunks. Place all that you just chopped onto a baking sheet, drizzle with a teaspoon or two of olive oil and toss around. Sprinkle the veggies with a pinch or so of salt and pepper and pop into the hot oven. Roast for 40-45 minutes or until roasted to your desired doneness. (I like things a lot darker then the mr so I would leave my veggies in for closer to an hour)
For the sunflower butter sauce. Mince garlic and place into bowl or cup with the sunflower butter. Add in the maple, soy, and the juice of the lime. Mix together and add in a 2 tablespoons of warm water to thin out. Add more water if needed to get to a thick but pourable consistency.
Once the spelt is cooked, the veggies are roasted and the sauce is made, well you can assemble and eat. Spelt in a bowl, toss on some roasted veggies, and cover in the sauce. And then you eat it.
I feel like this salad is kind of a summery salad, or better yet, a salad that highlights all the best of what summer has to bring. All the fresh tender dill that is still growing (but not for long) , all the brightly colored and amazing veggies that are being harvested and are nearing the end (bye fresh cucumbers.) This salad might just be my little last hurrah of summer cooking before it is all root veggies and dried herbs and hot and hearty food. And not going to lie and say that I am sad to see summer go because I am so so ready for it to be over, but I will miss all the fresh fresh produce. And I will especially miss all the fresh dill because fresh dill is seriously the best.
Eat up what is left of summer now before it%u2019s too late!
The stuff. Quinoa, a bunch of dill, a cucumber, a pepper, an onion, and some cherry tomatoes. Also a clove of garlic, some salt and pepper, and red wine vinegar.
Mince the garlic, chop the onion, mince the pepper and the cucumber, half the tomatoes, and last but noblest, rough chop the dill.
All that goodness goes into. big bow, along with a sprinkle of salt and pepper, and the vinegar Tossed around and left to meld.
Uncooked quinoa with water turns to cooked quinoa
Quinoa meets the bowl of veggies
And after a good mix, viola!
You got yourself a yummers fresh dill and veggie quinoa salad.
-C
serves 3-5 as a side or 2 as a meal
1 cup uncooked quinoa
2 cups water
I bunch fresh dill (like a 1/3 cup chopped%u2026 But use as much as you want)
1/2 a small red onion
1 clove garlic
1 small Persian cucumer
1/2 of a sweet red or yellow pepper
handful or two of cherry tomatoes
4 tablespoons red wine vinegar
salt and pepper to taste
Start by cooking the quinoa. Place the water and the uncooked quinoa into a medium sized pot. Place on high heat until sorts to boil, then reduce heat to a simmer and place lid on the pot. Let cook for about 15 minutes, checking at 10 minutes, to see if all the water has absorbed. When it has, remove from heat and let sit for a few more minutes then fluff with a fork.
While the quinoa id cooking, mince the garlic and chop all the veggies into small little pieces. Place into a big bowl. Chop up the fresh dill and toss into bowl too, along with the vinegar and a good sprinkle of salt and pepper. Mix it all around and let sit on the counter for a little so the veggies get nice and vinegary. Once quinoa is cooked and fluffed, dump into the bowl and mix around. Season with more salt and pepper if needed. Eat warm or refrigerate and eat cold. It%u2019s defiantly one of those salads that taste great right away but tastes even better the next day.
I am one of those people that hangs out for far to long in the grocery store, mostly in the bulk section, looking al all the types of rice, and grains, and beans, and seeds, admiring the variety and colors and also wishing I was one of those people that had an extra $25 to drop on a pound of pistachios.%u00a0%u00a0(Them were some pricey pistachios fo sho.) I take my time, peruse the bins, maybe take a little taste or two, %u00a0and go for what I need. And maybe if something is on sale, get a little of that too. Things that usually make the list are spices,%u00a0oats, beans, maybe rice or quinoa, flours, and seeds. Pumpkin seeds were on sale so those were the seeds of choice and I also got some barely because when I was starting at all the grains,%u00a0it dawned on me that I don’t know many people that eat barley, or even care about it, which is a shame because it is awesome. It might not be trendy like farro or freekeh, but it is just as good, and damn if it is not a hell of a lot cheaper.%u00a0
With the barley and pumpkins seed in hand, I had the start of a salad. So I grabbed some oats, a few spices, some beans and ran away from the builk section, past the nuts before things got bad and I either a) got kicked out for eating my weight in cashews and almonds,%u00a0pretending to just need a taste, or b) paid the $25 for a pound of pistachios that I might not eat because I would need to save them for something really special because they cost $25 a pound. Then I grabbed veggies, walked around the wellness section for good measure, did another lap around the store just in case I forgot something, then finally made my way out of the store only to realize when I got home that I forgot something. (I always forget something)%u00a0
But I had all I needed for a barley salad situation so things went well. This is a fantastic salad. It’s quick and easy and tasty and good. Barley, tahini, veggies and pumpkin seeds… It’s all you need for a just right dinner, or a fantastic side to any meal. Or as a snack at anytime. Bring it to a BBQ, a graduation party, or a pot luck. it will get eaten, and if by chance you end up with a little left over, bring it on home and eat it for breakfast. It will still be just as good.%u00a0%u00a0
The stuff. Pearled barley, tahini, pumpkin seeds and garlic. And some red wine vinegar, salt and pepper, kale, a carrot, some cauliflower, a lemon, a red onion, and a cucumber. (you are not going to need the full amount of all these veggies)%u00a0
First off, cook the barley. The barley and water go into a pot, brought to a boil, then left on low %u00a0to cook until tender. Once cooked, strain away excess water
While barley is cooking (or is cooked) chop up the veggies into mouth sized pieces. I used half the cucumber, half the onion, some of the cauliflower, all the kale, and all the carrot. It’s not an exact measurement, you just want a good amount to toss into the salad.%u00a0
Barley in bowl, topped with the veggies and pumpkin seeds…. The pretty before the mix. You don’t need to add it like this, I just did it cause it looks good.
And the tahini sauce. Mince garlic and add to a jar or bowl with the juice of the lemon, vinegar, a pinch of salt and pepper and give it a really good mix.
Creamy, zippy, oh so good.%u00a0
Drizzle and toss the dressing with the barley and veggies.
And that’s that. Now you are ready for eating.%u00a0
Enjoy wherever this salad takes you.%u00a0
-C
If eaten as a meal, serves 2-3. As a side dish, serves 6-8
1 cup pearl barley%u00a0
3 cups water
1/4 cup tahini%u00a0
1 large lemon%u00a0
3 tablespoons red wine vinegar
2 cloves garlic
salt and pepper
1/2 of a cucumber%u00a0
1 small carrot
2 large kale leaves
1/2 of a red onion
1 cup of cauliflower florets%u00a0
1/4 cup toasted pumpkin seeds
Note. The vegetable amount and type is more of a preference. You could use all cucumber and onion or add %u00a0broccoli and pepper, just make sure to have a least 3 good cups of some chopped up color.%u00a0
Place barley and water into a pot and bring to a boil. Turn heat down to low and continue to cook until barley is tender, but not mushy, which should take about 45 minutes. Once cooked, strain excess water.
While the barley is cooking, chop all the veggies into small mouth sized pieces.%u00a0%u00a0And make the tahini sauce. Mince garlic and place in a bowl or jar. Add in tahini, the juice of the lemon, and the vinegar. Mix well until smooth then season with salt and pepper to taste. %u00a0
When barley is cooked and drained, let cool for a few minutes then place in a big bowl. Add in all the veggies and the toasted pumpkin seeds, then drizzle with the tahini sauce and toss all around. Season with salt and pepper to taste..%u00a0
Now eat still warm, or later at room renature, or place in fridge for it to get cold. It can be a filling meal or a great side dish.%u00a0It’s good all ways, any way.
Another note. This salad is great for parties and BBQ’s and can be made a day or two ahead. If you do make ahead, hold off on mixing the pumpkin seeds and the tahini sauce with the rest of the salad until you are about to serve it.%u00a0
Are you aware that it is the last week of November? I know right. Every year this happens but seriously, it’s just flying by so fast.
The mr and I did the norms for the week. Went for a amazing hike in nice snow. We worked on work, the mr made paper, I cut up the paper. I spent some time with clay, works the studio, organized some stuff and watched it snow and loved every bit of it. Then it rained and got kind of sad that all the snow melted.☹️ We picked up farm share, had dinner with my mom and Paul, hung out with the littles for a bit, and fed Barb some soup. Nothing terribly exciting, besides feeding Barb. She makes every exciting.
And then we get to Saturday. Family thanksgiving plus is was Erin’s birthday. (Happy Birthday Beotch!) Always crazy, what with every one of my family members together in my house, eating food, and hopped up on booze and sugar. The day started early with me running away to the gym to get in some sane time, then one last stop at the grocery store before heading home to finish baking and getting all the food ready. Barb came over early to help cut up veggies but really, for her and the mr to make fun of me and gossip like little old ladies. So food got prepare, then I cooked it all. (Minus the main which mom made. She made a crazy chicken thing, cooked in her oven, and brought it over. No meat gets cooked in my house.) And then the family descended on the house, hungry and crazy. Food got served/ thrown all over and for a few short minutes, everyone was sitting down all at once together. But that lasted 2 seconds, and the kids went off and I ran back to the kitchen while everyone was eating to straighten up a bit and because I don’t need to see people dropping chicken bits all over. I just let them eat in peace while I hid for a few minutes in the pantry and snacked on roast Brussel sprouts, carrots and mustard.
After everyone ate, we all ran around the house, picked secret Santa names, had a massive dance party in the kitchen and did dessert and birthday cake. Erins birthday yes, but Coco got to blow out the candles. So cute, that little loving the candles and all but I am going to be watching out for him. I think he might turn into a little pyromaniac. HAHAHA. But for real. Dinner ended with everyone leaving except Barb, Megan,and So. We picked up a little but basically just sat in the pantry eating raw Brussel sprouts from the stock, with mustard of course, and talking about boys. Then they left too and the mr and I were left alone to assess the damages.
The house. Oh my, oh my. It is a FUCKING DISATSER! I know I tell you all that I spend a good chunk of time every weekend cleaning…Well this time, today, all Sunday, I’m a be cleaning. Cleaning the cake and ice cream and cookies crumbles all over. Cleaning up the dinner rolls behind the couch, all the ripped paper, smashed potates, food and drinks particles. Chicken bits, which everyone was super awesome about and tried not to get anywhere, are everywhere. All. Over. The house. Then the kitchen. Every single piece of silverware and then some plus at least 40 plates and bowls are waiting for cleaning. Not to mention the the pots and pans. The compost is overflowing. The recycling is a mess, and I have at least 2 laundry loads of rags and napkins and dirty towels to do. The fridge looks like a freaking bomb blew up in it with tons of half lidded containers precariously stacked on top of each other, waiting for just the right movement of the neighboring jar or the movement of the hot sauce to have it all come crashing down. Aye ya ya. But all worth it because I love my family and we had a blast. I just need to remember next time I am at one of their houses to like pee on their toilet seat or mash some frosting into their couch cushions, you know, to be fair and all.
Anyway, so today I clean and maybe try to hang up some Christmas decorations? The mr is off to do very nice things for people that might not appreciate it, but do it he is going to do (he is too good a person). Hopefully by the time he comes home later tonight, I will be done cleaning, he will be done helping for a good long while, and we can eat soup and maybe watch a movie together. Or more realistically, he watches a movie while I read and probably fall asleep on the couch. Real life.
Reads I read from the internet this week.
-A long but good read. RuPaul: The Philosopher Queen. who doesn’t love RuPsul?
-I just pulled out a nice tablecloth, covered in stains mind you, but maybe i’ll be able to get some of them out now. A Cheat Sheet to Get Rid of Every Type of Holiday Stain. Or not. I don’t think I care enough. HA
-This is so appealing to me especially since the mr loves his heavy comforter and I just want a light blanket with the window thrown open in 20 degree weather. The Scandinavian Sleep Secret: Mine and Yours Duvets. HE is always covering me up at night.
–The best health foods? Soup, garlic and cake. Food is healing, and if cake makes you feel better, well then cake it be.
-These cakes remind me of my 5ht grade volcano science project. I made it out of cake and whipped cream. It was awesome. Antarctic Research Takes The Cake In These Science-Inspired Confections
–Vegan man sues Burger King claiming meatless burger is cooked on same grill as meat. This is one reason I do not eat out. Oe of the last times I did eat out, there were egg shells in my scamp bled vegan tofu dish….. So yeah.
-Who doesn’t love a good TV tray? A Brief History of the TV Tray
-HAve you ever raised a adolescent dog… It is crazy to say the least. Animal adolescence is filled with teen drama and peer pressure
-So there is this ti look forward to. Cockroaches Are Evolving And in the Future They can Become Impossible To Kill
–A Brief and Buttery History of Libby’s Pumpkin Pie Recipe. The pie of my childhood.
What%u2019s up with dinner rolls? Do people eat them all year round, like on a Tuesday in the middle of March or maybe a nice blue sky sunny day in July? Is that a weird question? But seriously, think about it. Dinner rolls, at least in my world of people, are pretty much only eaten in and around Thanksgiving and Christmas. Huh. Kind of strange seeing that dinner rolls are bread which everyone eats all the time and are basically made specifically for dinner (although can and should be eaten for breakfast and lunch as well) which most people eat. Every. Single. Day. Well, whatever the reason, it%u2019s weird. So yes, I am making these here dinner rolls now at the traditional holiday time but I think as of now, I am going to start making them all the time. It%u2019s going to be my new thing. Fourth of July dinner rolls. Yup.
And so yes, we need dinner rolls right now for the holiday food feasts and these dinner rolls are the perfect accompaniment to any and all dinners. They are nice and fluffy and all dinner roll like, just as any good roll should be, but also slightly more nutty and soft and healthy because oats and wheat flour and homemade which is always the best.
And if you are like, hell yes I am a dinner roll person and hell no I am sticking to store bought cause that is that and how it%u2019s done, well hey, no judgment here. I made these for my people for our family Thanksgiving, (which is happening today at my house. There are going be so many people) and I know that everyone will love and be happy to eat them, but I too also bought some of those super white, take and bake ones that I know if I don%u2019t have on the table next to these gorgeous and amazing rolls, that I will probably get punched in the face. So we will have both. And then at dinner I can bask in the glory of all the comments about how much better my rolls are then the store bought ones. (Secretly why I am having both. Fishing for compliments. HAHA!)
Now to those soft and fluffy dinner rolls!
The stuff. Old fashion oats, all purpose and white whole wheat flour, yeast, oil, water (hot and room temperature), maple syrup, and salt.
First, take the boiling water and pour it over the oats. Mix them and let them soak and cool for 10 or so minutes.
While oats are soaking, add the room temp water to a big bowl with the yeast. Once the oats are soft and cooled off a bit, add them to the yeast mixture along with the oil, and maple. Mix together. The add the flours and mix until combined.
Dump dough onto a floured surface and knead for about 3-5 minutes, adding a little more four as needed to keep from being to sticky, but don%u2019t over flour. The dough is and should be a little tacky.
Soft and supple. Kneaded and ready.
Place the dough back into the bowl and cover with a damp towel. Leave alone and let rise for about an hour or until it doubles in size.
Once the dough doubles, dump out onto a lightly floured surface and cut into 12-16 equal sized pieces .
Roll each roll into a roll shape and place them in a lightly greased baking dish. Cover for another 15-20 minutes to let rest and rise a little more.
Rolls risen again, just a little plumper. And now right before you place them in the oven, brush tops with a maple/water mixture and sprinkle with a few oats. To look pretty. And into the oven they go, 30ish minutes, until nice and golden brown.
Baked to golden dinner roll perfection.
And there you have it. Soft and fluffy dinner rolls. Warm out of the oven, looking and smelling like all the good things that you want and need.
And can, and should, be made now and all year round.
-C
makes 12-16 rolls
1 1/2 cups old fashion oats
2 cups all purpose flour plus more for kneading
1 1/2 cups white whole wheat flour
2 cups boiling water
1 cup room tempature water plus 2 tablespoons for brushing tops
2 teaspoons salt
2 tablespoons maple or honey
2 teaspoons yeast
1/4 cup neutral oil
In a bowl, mix oats with boil water and let sit and soak for about 10 minutes. In the meantime, in a large bowl, mix the room temp water with the yeast and 1 tablespoon of maple and mix. Once oats have soaked and cooled to a point that they are not super hot, but still just warm, mix them in with the yeast mixture. Add the salt and oil and mix then and both the white and white wheat flour. Mix until combined. The dough is going to be sticky, but that how is should be. Dump the dough onto a lightly floured surface and knead for 3-5 minutes, adding a little flour as needed to keep from sticking too much, until dough is nice and uniformed in texture. Place dough back into big bowl (after you clean it out and lily oil it) and cover with a damp towel. Place somewhere warm for about an hour until it doubles in size.
Once dough has doubled, dump out onto a lightly floured surface and with a knife of dough cutter, cut into 12- 16 equal sized pieces. Roll each piece into a ball, pinching any ends together and place them into a 9×13 inch baking pan. Once all pieces are in, over and let rest for another 15 minutes.
While dough is resting again, preheat oven to 350.
After the dough has rested, and right before you place them in the oven, mix 1tablespoon of maple with about 2 tablespoons warm water and brush the tops of the rolls. Sprinkle with a handful of oats and then place them into the oven to bake. 30-35 minutes, until they are a nice golden brown.
Once baked remove from oven and let cool to a reasonable temperature and serve.
These can certainly be made a few days ahead of time of eating. Just remove baked rolls from pan and let cool completely then place the into an airtight bag. To reheat, just place on a baking sheet and stick in a hot oven until warm.
Bread is probably, no, definitely one of my upmost favorite things to bake. There is just something so gratifying about the whole process of mixing ingredients, kneading, watching it rise, shaping, then baking. It calms me and make me a better person. Seriously.
And this might sound sad, but this week when my Dad told me that my grandmother died, well I went home and made bread because that is what felt right to do. It gave my mind and hands a good something to do far a little while. Plus I ended up with a loaf of bread to feed people with. I also like to feed people when I am feeling sad.
I chose to use cinnamon and cardamom because of the smells. They are just delightful and happy smells. And swirls are happy so a happy swirl of happy smells in a loaf of bread that I was making to share that was (and did) make people happy. (See, bread baking is making me so nice because I am sharing it) It was just the right thing to do.
So if you are in need of a little happy pick me up, may I suggest making some bread? It might make you feel a little better, or at least get your mind off of things for a bit. And you will have bread so there is that too. It%u2019s a win win.
Now to the bread, which you can also make when you are happy. Or bored, or hungry, although it takes some time so if you are starting off hungry, you will be starving by the time it is done. Maybe eat a snack will you are making it%u2026..
The stuff. White and whole wheat flour, salt, sweet potato puree, soy milk, yeast, brown sugar, oil, cinnamon, cardamom, some flax seeds, and an orange.
In a big bow, mix together the yeast, warm milk, sweet potato puree, a little sugar, and oil. Let it sit for a minute to active yeast.
Flours and salt get a good mix to be mixed.
Then dry gets dumped into the yeast mixture along with the zest of the orange.
Mix it until a dough forms then dump it out onto a lightly floured surface.
Knead dough for about 6-8 minutes or until supple, uniform, and smooth.
Place dough into a well oiled bowl and cover. Let rise for about and hour or so or until it doubles in size (could take a little longer then a hour)
Place risen dough back out onto a lightly floured surface.
Roll it out about 2 feet long and as wide as a bread pan.
Don%u2019t forget mix up your brown sugar with the cinnamon and cardamom.
Brush rolled out dough with the flax mixture. This will help the cinnamon cardamon sugar stick.
And evenly distribute the mixture all over the dough.
Roll it up nice and tight and once it%u2019s all rolled, pinch then end to the rest of the dough.
Gently place the rolled dough, pinched side down, into a well greased bread pan. Cover in a plastic bag for about another hour or until the dough has risen a good amount and is doming over the rim of the pan. Now preheat the oven.
Once the bread is sufficiently risen, place into hot oven and bake for 40-45 minutes.
Now the hard part. Get it out of the bread pan and get it cooling off. You cannot cut into it until it cools or you will smoosh the swirl and make it gummy. Just wait, at least a half hour. For real. Wait. You can do it!
And when the bread cools and the wait it over, slice and be amazed. A thing of beauty that smells of greatness.
Bread is so great. Great great great! Especially a swirl bread. I mean. Look at that.
Happy day to you.
-C
Makes 1 loaf
2 cups all purpose flour
1 cup white whole wheat flour
1/3 cup sweet potato puree
1 cup soy milk
2 teaspoons (or one packet) yeast
3 tablespoons neutral oil like canola
2 tablespoon light brown sugar
1 teaspoon salt
Zest of 1 orange
For the cinnamon cardamom filling
1/2 cup light brown sugar
2 tablespoon cinnamon (I used Vietnamese Cinnamon which is a little spicier and sweeter)
1/2 teaspoon ground cardamom
2 teaspoons ground flax mixed with 4 teaspoons warm water
Start by grabbing a big bowl. Mix together the yeast, the 2 tablespoons brown sugar, warm milk, sweet potato puree, and oil. Let sit for a minute to active yeast. In a separate bowl mix together the flours and salt. Dump the dry mixture into the wet. Zest the zest of an orange into bowl and mix it all together until it forms a dough. Dump the dough onto a lightly floured surface and knead for 5-8 minutes or until the dough gets supple and shinny and uniform. Place dough into a well oiled bowl and cover for about an hour or until doubled in size.
Once dough has doubled, dump out onto a well floured surface and roll out to as wide as a bread pan and roughly 24 inched long. After you have rolled it out brush the flax and water mixture all over surface . Combine the brown sugar with the cinnamon and cardamom and evenly distribute the mixture all over flaxed dough. And for the fun part. Careful roll the dough into a log. Roll it tightly so the bread doesn’tt end up with big gaps after it bakes. Once rolled, pinch the rolled end and place the log rolled side down into a well greased bread pan. Place dough into a a plastic bag with plenty of space for dough to rise. Let sit for about another hour or until the dough has risen a little bit above the rim of baking pan.
Preheat oven to 375
When dough has risen, place on middle rack in hot oven and bake for 40-45ish minutes or until bread is a deep golden brown and when you give it a tap, it sounds slightly hollow. Also check it with a intsant read thermometer. Get it to 190.
When it done baking, pull from oven and remove from pan. Place on a wire rack and let completely cool. Seriously, you got to let it cool for at least 1/2 and hour, but longer is better!
When it%u2019s cooled, cut into slices. Eat as you wish.
Uneaten bread stores well for a day or two in a airtight plastic bag but if you don%u2019t eat it that fast, cut into slices and freeze. That way you can just pop a piece out and stick it into toaster. Smart.
A couple of nights ago we had a little impromptu birthday dinner at my sisters house for the mr.%u00a0 And what did he want to do for dinner, his very own special birthday dinner? Well what he wanted was to cook, with absolutely no help from me. So cook he did. And what did he make? He made grilled cheese sandwiches, on white bread and with bright orange cheddar cheese along with some classic canned Campell’s tomato soup. I was not even allowed to make a salad (but he was being so nice when permitting me to make my own food)
But come on dude, it’s your birthday dinner. I was determined to make something so I said I was going to make a dessert. Nothing fancy and no cake (he is not a big cake guy), just something fast and easy. So I went with brownies of the sweet potato chocolate chip kind.%u00a0 Yeah I know what you are thinking..%u00a0 why am I not sharing those brownies? I’ll tell you why. They came out like shit. Like really gross, almost jello like and just not anything anyone would ever want to eat. Just shit.%u00a0 OH I was pissed. I mean, the one thing I got to do I screwed up. And there was no fixing them (I tried) So bum, there were no sweet dessert brownies ( but there was ice cream.. thanks Shannon) And worst of all, wasted food. Bah, I hate wasting food! ( I would have fed them to the dog but they were chocolate…. I miss having chickens that eat anything)
Side note here. Watching a lifetime original Christmas movie at the moment (don’t judge me)%u00a0 and it has Harriet and Carl Winslow in it. Talk about a throw back.. and now all I can think about is Urkel and his catch phrase”did I do that?” Anyways….
After the brownie disaster I really needed to make something that didn’t suck. I was going to go the brownie route again but unfortunately I used up all of my chocolate and cocoa for the shit batch before, so I went the blonde route. Blondies. close to a cookie, but not quite. A vanilla version of a chewy chocolate brownie.%u00a0 Chock full of super nutty macadamia nuts and big chunks of chocolate. Nothing missing, the perfect texture and sweetness.%u00a0 All and more of a better dessert then the night before. Perfection is what I call them and the mr is much happy with his birthday treat (with the added scoop of strawberry ice cream of course)
The stuff. A little bit of white whole wheat flour, some brown sugar, melted earth balance, a couple chia eggs,salt, a pinch of baking powder and some vanilla.%u00a0 And the mix in that make these blondies so great, the macadamia nuts and chocolate chunks.
It’s all super simple. The sugar, chia eggs, earth balance ans vanilla go into a bowl and get mix together until smooth. Then the salt gets sprinkled on along with the baking powder and lastly the flour on top.
And them mix it together unit its all incorporated… and don’t over mix!
Chop the macadamia nuts and chocalate chunks in somewhat smaller pieces…
And fold them into the batter.
And grab yourself a square pan, line it with foil or parchment paper, grease it a little, then dump in the batter and evenly pat in down into the pan.
Stick into the oven to bake.
And after 35-40 minutes of the amazing smells coming from your oven, the blondies should be done. Slightly browned, lookng like a cross between a cookie and a brownie, and raw in the middle, but only just.
Let the blondies cool for a few in the baking sheet, but then remove by the foil and cut into squares.
Keep them flat or stack them high. A dessert of the most fantastic kind.
My blonde redemption.
And lastly… HAPPY BIRTHDAY LOVE!
-C
makes a 9×9 pan of goodness
-1 cup white whole wheat flour
1 cup brown sugar
1/2 cup melted earth balance
2 tablespoons ground chia seeds plus 6 tablespoons warm water
1/2 teaspoon baking powder
1 teaspoon salt
2 teaspoon vanilla
3/4 cup roughly chopped macadamia nuts
3/4 cup of mini chocolate chunks (or chips)
Preheat oven to 350
Grab a bowl and cream together the earth balance and the sugar. Add in the chia eggs, the vanilla,salt, and baking powder and mix . Then add in the flour then mix that until just incorporated with the wet. And lastly, fold in the chopped nuts and chocolate chunks
Dump batter into a foil/ parchment paper lined and slightly greased 9 inch square baking pan and pat down with the spoon or your hand (hand is the way to go) and tick into the oven. Bake for 40 minutes or so until the top is starting to brown almost like a cookie but nice and all brownie like. Check for doneness with a toothpick in middle and if it comes out kinda clean, you can pop them out right there. (Don’t over cook.. and if you like a little under baked, do it up, just take them out a few minutes earlier)
Let cool in the pan and pop them out by the liner. Cut into squares (size to be determined by you) Eat one, maybe two, and share the rest (or not).
I still can’t believe that we bought a new house,%u00a0 not even a week ago. %u00a0Like whoa holy crap!
And with any fantastic and great house that the mr and I would buy, this place needs a fair amount of work (a few walls down, a small addition to the upstairs, and new kitchen and bathrooms to start) But other then the small details of that, this place is a freaking gem. I am more then excited to get to it and start removing, ripping and tearing out the crap to unearth and enhance the beautiful old house to it’s glory! Oh man is it going to be a long, fun filled, couple of months ahead of us!
So the day after we closed, we had a bunch of our family and friends come over to check out the place. Me being me, I needed to test out the new kitchen before we completely gut it and like any good hostess, I just had to make sure I had some snacky , good smelling, bakes treat for all the folks coming in and out of the place. So I made muffins. My initial thought was cookies, but I really didn%u2019t want to have to hover over the stove and plus, I had a bunch of sweet potatoes and cranberries that needed using up (sound familiar, this is the muffin for you)
And bonus, the house filled up wit the sweet smell of baking. (That was my plan) and the muffins, they were a hit!
The kitchen!!! Isn%u2019t it %u00a0so freaking ugly cute fantastic? Check those windows out.%u00a0
So back to the muffins.%u00a0I was being practical and premixed up some of the stuff %u00a0and brought it over to the house.%u00a0
The stuff. A bowl of all purpose and whole wheat flour along with some salt, baking powder and soda, cinnamon and ginger. And a bowl of wet which has a a bakes sweet potato, oil, and brown sugar. And a cup of almond millk with a bit of vinegar mixed in and a jar of mostly %u00a0chopped up fresh cranberries
Mix the crap out of the wet until the mixture is mostly smooth. I used a plan old baked sweet potato %u00a0for this but feel free to use any left over seer potato %u00a0casserole you have laying around for this, just adjust spices if there are a bunch already in the potato.
Dump the wet mixture into the (already mixed up) dry mixture and mix along with the vinegar-%u00a0almond milk until everything is just combined (don’t over mix the batter!).
Grab cranberries and fold them into batter. Also can totally use up any cranberry situation you might have left over (maybe not the canned jello kind})
Batter into greased muffin tins and into the preheated oven they go.
More kitchen. Check out that dish washer, its pretty awesome. I am not going to keep it, but I don’t want to trash it, its too freaking cool. So anyone want a dishwasher? (still work)%u00a0%u00a0The fridge is new, but we are going to move it to storage and use it in one of our apartments eventually and get a new fringe.%u00a0 The counters and the cabinets are getting donated and the fake brick background is staying. (HAHA) F no.. That%u2019s coming down like today and unfortunately the super cute flower wallpaper has to come down with it. (I kinda wanted to keep it.. oh well)
%u00a0And the little window.. so my favorite part. I have never had me a nice kitchen window before.%u00a0
The othe side of kitchen, where this amazing stove lives.%u00a0 The stove works, but it%u2019s a little rough. The door is slightly coming off and broiler pan is broken, but other then that, it works fine.%u00a0I have even though I might try to fix it up and keep it. (the mr is not into that) We will see, but I think we are going to get a new one. (and donate this one).%u00a0
So kitchen tour is done Back to the muffins.
%u00a0Once they are all nice and golden brown and a tester comes out clean, these babies are done! Take out of oven and remove from pan and let cool on a rack.
The perfect snack for any occasion%u00a0
Happy (hopefully relaxing) weekend!
-C
makes 12-14
1 cup sweet potato puree
3/4 cup all purpose flour
1 cup whole wheat flour
1 teaspoon baking soda
1 teaspoon baking powder
1 teaspoon salt
1 teaspoon cinnamon
1 teaspoon ginger
3/4 cup brown sugar
1/3 cup oil
1cup almond (or whatever) milk
1 tablespoon apple cider vinegar
1 cup fresh chopped cranberries%u00a0
Note.. use any left over sweet potato stuff or cranberry sauces that you might have left over.. just adjust seasonings to taste.
Preheat oven to 350
Start by measuring out your almond %u00a0milk and adding in the tablespoon of apple cider vinegar. Set aside.%u00a0In a large bowl whisk together the flours, baking soda and powder, the salt and the cinmoan and ginger. In a separate bowl, mix together the sugar, sweet potato, and the oil until well combined. Dump the wet into the dry and mix together along with the almond milk unit just combined (don’t over mix!)%u00a0Dump in chopped cranberries and fold them in.%u00a0
Grease a muffin pan and scoop equal amonts of batter into the tin and place into oven. Bake until golden brown and a tester comes clean from a muffin middle.%u00a0
Remove from oven and let cool on a rack
Eat.
This cake was born from my anxiety. Whenever I am feeling crazy,%u00a0anxious, kinda sick, or even just really happy, I want to be in the kitchen making something. It’s probably some deep seeded control issue that I have (I can’t control my brain, but I can control bread dough), but whatever.%u00a0Being in the kitchen takes my head out of life , even just for a little while, and let’s me concentrate on something else that really has nothing to do with whatever I am thinking about (unless I am thinking about food, in which I bake whatever food I am thinking about) Does this all make sense or am I just nuts?
So yeah, the other day I was having one of those days. I was extra crazy (for so many reasons) and really needed to just step away from my thoughts. I rushed home and just started grabbing stuff.. cake stuff.%u00a0%u00a0I figured that If I was going to bake something that I might as well bake a little snack cake for the mr, especially sense he has to deal with this crazy. I had a large quantity of pears that were all ripening %u00a0at once sitting in the fruit basket, so I grabbed some of those. And I grabbed the ginger%u2026 well because why not.
And I made this cake.. and I felt better. And the mr got cake (also brought some to my sisters.. her and the kids ate it all within minutes). It was a win win situation.%u00a0
So now you know. If you are my friend and I am feeling some feelings, at some point,%u00a0you will proably get a cake.
The stuff. A few pears,some fresh ginger, brown sugar and cinnamon. %u00a0Also have some white whole wheat flour, baking soda, baking powder and salt. And some oil, apple cider vinegar and a little bit of water.
Start with the pears. Cut in half, remove seed and stems, then chop/mince the crap out of them. It’s cool to have a few big chunks., it adds some good texture. Take the pears and as much as the juice you can scrap from the counter and stick into a bowl.
Grate up a few good tablespoons of fresh ginger..
Tip.%u00a0I keep my ginger in the freezer. its easier to grate and it doesn’t go bad!
The ginger goes into the bowl with the pears, along with the oil, cinnamon,%u00a0sugar, water and vinegar. Mix it all up . Then all that wet mixture goes into the bowl with the flour, baking soda and powder and the salt.
And that get’s all mixed.. and now you have cake batter!%u00a0
Depending on you pears and how juicy they are,%u00a0you might find that your batter seems to dry, just add in another 1/4 %u00a0cup of water. The batter should be the consistency of like greek yogurt, not ruing, but not stiff either.
Preheat you cook box (oven)
Dump the batter into a well greased 9×9 inch pan. Slice up another pear into thin strips (I only used half, then ate the other half)
Lay the slices on top to make it look all pretty. Do what I did, or some other design (it’s your cake to make pretty any way you want). Once you do that, stick the cake into the oven.
When the cake is a nice deep golden brown, take it out of the oven.
Maybe let it cool for a few minutes, letting the smell wrap around your head so that you smell like baking all day. No cut yourself a slab, grab some coffee, and go for it.%u00a0
Enjoy
-C
Makes a 9×9 inch single layer cake
2 cups white whole wheat flour
2 cups minced , super ripe and jucey pears (about 2 whole pears)
2 tablespoon freshly frated ginger
1/2 cup canola oil
1/4- 1/2 cup water
2/3 %u00a0cup brown sugar
2 teaspoons cinnamon
1 teaspoon salt
1 teaspoon baking powder
1 teaspoon baking soda
1 tablespoon apple cider vinegar
Preheat oven to 350
Take pears, remove seeds and stem, and chop the crap out of them until they are tiny little pieces. Scoop pears, and any juice they leave behind into a bowl. Add in the sugar, oil, cinnamon, %u00a0ginger, vinegar,%u00a0%u00a0and %u00a01/4 %u00a0cup of water and mix until incorporated.%u00a0In a seprertare big bowl, mix together the salt, baking soda and powder with the flour. Add in the wet mixture and mix until fully incorporated.%u00a0%u00a0If the batter seems to dry (should be the constancy of whipped potatoes or greek yogurt), add in another 1/4 cup of water.%u00a0
Scoop batter into a greased 9×9 inch baking pan.%u00a0If you want to make it pretty, grab another pear and cut into thin slices and place right on top of the batter in any fashion you like.%u00a0
Place cake into oven and bake until a nice dark golden brown,about 40-45 minutes ,or until a tester stuck in the middle comes out clean.%u00a0
Remove, let cool in pan, and cut yourself a big slab, grab some coffee e to tea, grab a book, and eat it.%u00a0.
What are your%u00a0weekend plans?
Me%u00a0well,%u00a0I need to can, pickle and eat as much zucchini as I can. And it’s not just zucchini anymore%u2026 we are getting into cucumbers too%u2026AAAHHH %u00a0I know I have said this a few times in the past weeks, but man, I have so manning freaking zucchinis.. and the more I eat, the more I end up with%u2026 It’s getting pretty crazy here!
So anyway, yesterday my dad came back to VT,%u00a0WOO%u00a0HOO! and I was his first%u00a0stop on his rotating dinner schedule.%u00a0(cause I am his favorite child. I think..maybe) I made zucchini noodles for dinner (I have made them%u00a0every night for the past week) and I wanted to make him dessert, %u00a0I have all sorts of pretty fruit%u00a0that I wanted to make and prepare,%u00a0%u00a0but I also had little time and honestly, little desire to move all that much (it was so f ing hot!)%u00a0%u00a0I already had out the shredder and a bowl, and the%u00a0zucchini was just sitting there, in the basket%u00a0%u00a0taunting me with it’s gigantic green whaleness. %u00a0So I figured I’d just make a%u00a0zucchini cake, or better yet, cause my dad really likes chocolate, a%u00a0chocolate zucchini cake.%u00a0
This cake is tender and moist, almost like a cakey brownie, so it%u00a0does not require any frosting%u00a0%u00a0which is nice when your dead tired and it’s so hot that any frosting would probably just melt off anyway.%u00a0(although you could totally frost it up) It makes a%u00a0great dessert, but I%u00a0would not hesitate to serve this for breakfast either because, %u00a01. It has a lot of zucchini in it which automatically justifies eating it whenever, %u00a02. %u00a0also made with whole wheat, and%u00a03. it’s totally ok to eat chocolate cake for breakfast. I mean people eat donuts for breakfast and that shit is usually fried.%u00a0
Yeah, this is for sure a dessert/breakfast cake.
The stuff for cake%u2026. Regular all purpose flour,%u00a0white whole wheat flour, and cocoa powder. Some sugar, salt, baking soda and oil. A little vanilla extract and a bit of coffee. And of course, shredded zucchini
Dump the sugar, salt and baking soda into flour,%u00a0whisk together, then mix in the oil,%u00a0vanilla and the coffee. Now add in%u00a0the shredded zucchini, but right before adding it in,%u00a0%u00a0give it a squeeze to remove a little bit of the liquid.%u00a0
Mix until combined.
And pour batter%u00a0into a well oiled%u00a0pan
Feeling fancy? I was so I peeled the green skin%u00a0from a zucchini and make a little starburst%u00a0on top
And into%u00a0the oven to bake…
And it comes out looking so fancy. %u00a0Let cake cool for a few minutes and carefully%u00a0flip from pan.
Note. It might not be the best idea to test your cake with a blunt chop stick.. I did and it made the middle sink in a little. No big deal, but next time I will use a fork.
Cooled and removed from pan. Now%u00a0all you need to do now is%u00a0eat%u00a0cake.. I think that’s something you can handle.
Happy Friday!!!!%u00a0
-C
1 cup white whole wheat (can use regular whole wheat or alll purpose)
1 cup all purpose flour
1 cup white sugar
1/2 cup cocoa powder
2 teaspoons vanilla extract
1/2 cup oil (veggie, canola, sufflower)
1 teaspoons baking soda
1 teaspoon salt
%u00a02 cups of shredded zucchini%u00a0
1/2 cup of coffee
Preheat oven to 350
In a large bowl, whisk together the flours, salt, baking soda, cocoa powder, salt and sugar. Then add in the oil, vanilla and coffee. Add in the zucchini. Mix until incorporated.%u00a0
Oil a 9 inch cake pan and pour in the batter. If you want, use %u00a0zucchini skin to make a pretty design on top (completely optional), and place into preheated oven.
Bake for about 45-50 minutes, or until a tester stabbed in the middle comes out clean.%u00a0
Remove from oven and let cool in pan for at least 5 minutes the gently invert pan to remove cake and place on a rack to cool.
Serve as soon as you want..
Place in mouth, chew, and swallow%u2026..Smile!!!
First day of Spring!! Well kind of I guess. I think it actually starts at like 6:20 tonight, when the temperature is going to dip back done to 10.(Spring my ass) I don’t know about you people out there but here in Vermont, we are really hanging on to winter. I have to keep telling myself%u2026″ It will be warmer soon and you’ll be looking forward to this weather in a few months.. so stop bitching!” %u00a0I give myself good pep talks.
Anyway, last week at the farm share pick up, there was a nice little surprise. We got a few pounds of some sweet locally grown and milled whole wheat flour. There was a little sign with the information about the wheat and where it came from, but in my haste of gathering all of my other veggies, I failed to take notes and forgot the name of the farm that it came from. But I do know that my farm traded some celeriac for the wheat. %u00a0I was really excited because I am really into the idea of using locally grown grains and I don’t know, it just made me really happy, especially because it was a trade. %u00a0Food framing and local sharing is stuff that makes me happy.
I wanted to make something to kind of showcase the hearty, nutty flavor of the wheat and I also wanted to make something that my mister would eat for breakfast. Well what better way to do that then with muffins!%u00a0Banana coconut whole wheat%u00a0(that just happen to be vegan) Hearty, fruity, and smells like the word lovely and the color yellow.%u00a0A few to eat and a few to share. Hanging at home, running away or %u00a0getting ready for a day of spring cleaning%u2026.This is a great weekend to make muffins!%u00a0
The stuff%u2026 Light, nutty local whole wheat flour, ripe oh ripe bananas and coconut flakes are the stars in this muffin%u2026 But we need the other stuff too. Brown sugar, vanilla, coconut oil and a chia egg. %u00a0Baking powder, baking soda, and last but not least, salt.
%u00a0Yup, that sounds about right%u00a0 %u00a0The salt, baking soda, and baking powder are whisked together. The banana and all the rest of the stuff are mixed up%u2026 Then mix the wet mixture into the dry. Stir until combined and then add in the coconut flakes,Scoop mixture %u00a0into 12 lined muffin cups%u2026 A scoop like mine works very nicely. Don’t have one, well I recommend you get yourself one. Until then, use a spoon. Something I always do when baking any muffin is sprinkle the tops of each muffin with a bit of %u00a0sugar or brown sugar. It melts and caramelizes and adds a sweet little crunch to the tops.%u00a0
Now stick the muffins into the oven.%u00a0Remove from oven when they look like this, nice and golden brown. Also good idea to check with a tester stuck into the middle. When it comes out clean, they are done.12 happy little muffins cooling on a rack, waiting to be eaten with you mouth.%u00a0
Doesn’t the sight of pretty food make you happy, like sing a song happy?%u00a0Muffins, whoa yah!! %u00a0Friday yah yah!! %u00a0Spring%u2026What, Yah!! %u00a0Yah%u2026Yah Yah!!!
Terrible I know, but at least you were spared hearing my actual voice.%u00a0
Have a great weekend. Do lots of springy stuff!
-C
2 Cups Whole Wheat Flour
4 Ripe bananas
1 Teaspoon Baking Soda
1/2 Teaspoon Baking Powder
1 teaspoon Salt
1 teaspoon Vanilla Extract
3/4 Cup Brown Sugar
1/3 cup melted Coconut Oil
1 Tablespoon Chia Seeds + 3 Tablespoons warm water
1/2 Cup Unsweetened Coconut Flakes
Preheat oven to 350
In a small bowl, mix 3 tablespoons warm water to the chia seeds and let sit for at least 5 minutes (10 is better) In a large bowl, peel and mash the bananas until they turn into a kind of chunky soupy puree. %u00a0Add in brown sugar, chia seed mixture, vanilla extract, and the melted coconut oil (make sure it’s melted or it won’t incorporate into the mixture) Mix together. In another bowl, whisk together the flour, baking soda, baking powder and salt. Mix the wet mixture with the dry until combined then mix in the coconut flakes.%u00a0
Line a 12 cup muffin tin and fill each cup about 3/4 the way up with batter. Sprinkle each muffin with brown sugar and place in oven on center rack. Bake for 25-30 minutes or until the tops 0f the muffins are golden brown and a tester inserted into the middle comes out clean.%u00a0
Remove muffins from tin and let cool.
Serve as is or maybe with a smudge of coconut butter, or anything you want really.
No need for fork, just use you mouth.
%u00a0%u00a0There is irish soda bread in your future. I can see it. A nice hardy hunk slathered in butter and honey, crumbs all over the place.%u00a0 So all you have to do know is make it.%u00a0
I remember reading somewhere (I wish I could remember where) that irish soda bread is just four ingredients, flour, sea salt, baking soda and buttermilk and adding %u00a0anything else would make %u00a0it a cake. So when I decided to make irish soda bread, thats all I used. ( I made it with some wheat flour) What you end up with is a highly dense, super fragrant, soft, chewy bread with a crunchy crust. Definitely not a cake.
Note%u2026.You can for sure add in a bit of sweetener or even little fat to make it richer and softer, but then it wouldn’t be bread (or so that’s what I read) There are tons of other recipes out there that have other stuff in them. This is just a really simple basic recipe.%u00a0
White whole wheat flour and all purpose flour mixed together. Salt baking soda and buttermilk. That’s it.All the dry whisked together and in goes the buttermilk. Mix together until dough starts to form then dump onto a floured surface. %u00a0Handling dough as little as possible, knead into ball.
Place on a baking sheet and dust with flour. Take a sharp knife and cut %u00a0an X through the top about 1/2 inch deep.
Stick in into the oven for 50 ish minutes, or unit la tester stuck into the middle comes out clean and there is kind of a hollow thunk when tapped on.%u00a0
And now you have a very pretty, dense hunk of irish soda bread.%u00a0
Cut and serve with butter and honey (thats how the mister likes it) or whatever you want to eat it with.
-C
Irish Soda Bread
1 cup all purpose flour%u00a0
1 cup white whole wheat flour (or you can use all purpose)%u00a0
1 teaspoon baking soda
1 teaspoon salt
1 cup buttermilk (or your choice if milk plus a tablespoon lemon juice)%u00a0
Preheat oven to 375
In a large bowl, whisk together flours, baking soda and salt. Mix in buttermilk until the dough starts to come together. If the dough seems to dry, add another splash or two of milk. Dump out dough onto a floured surface and shape into a ball. transfer onto a baking sheet, dust with flour and cut a x about 1/2 inch into the top. Stick into oven for 50 minutes until a toothpick comes out clean and the bread makes a hollow sound when tapped.
Let cool enough to handle.
Cut into and serve with a smear of whatever you want
We got SNOW!!! I was, and am, so happy for it. And sure, it might seem a little early to some (to most is what I am hearing%u2026 People, you can%u2019t change the weather so you might as well embrace it!) but not too early for me. It is just about the right time and I love it. Cold temperatures and all.
The week went by fast but it was good. Got the winter tires changed just in the nick of time (big thanks to Justin and Sophia whom I now owe some cookies), watched the sky open and snow down the snow, hung out with Sophia and made snowflakes because we wanted to, then went to a happy birthday dinner for Shannon (please stop getting old, it makes me get old too!). We also went to Erin%u2019s house to make more snowflakes while the mr made spaghetti for the older littles and Coco made his own peanut butter sandwich and drank milk from the container like a gagster. Real life there. I also worked the studio, made phone calls, did paperwork (all in my sweat pants), and went a little crazy all the while the mr worked the streets, took meetings, and did the things that he does. A week as any week, although we are getting so close to the holidays and I%u2019ve noticed that Christmas decorations are going up all over the neighborhood. I think that I might just have to throw the outside lights up soon over here and get the bits of Christmasy things I stick up around the house close so when the mood strikes, out they go. As for the Christmas music, the one cd that has ever been in the CD player in the car is still in there (Hanson Christmas) waiting for that right time, and I am not going to lie, I have listensed to Sufjan Stevens Christmas a few times already. I CANT HELP IT! It is Sufjan and so it is ok. (Listen for yourself and tell me it%u2019s not ok%u2026 you can%u2019t. It is too good.)
Sunday again. So fast these weeks are flying by. Next weekend is family Thanksgiving at my house (24-28 people%u2026 oh boy oh boy!) and then real Thanksgiving. Then its birthdays galore and Christmas, and New Years and holy shit, the time is just spiraling. I need to get a grip on things before it all goes crazy. So today we are going to go for a hike but then I am coming home to work in my studio for a little bit then I am going to make some lists to get ready for the next month. And then go to bed early. I haven%u2019t been sleeping very well and I am already butt ass tired. Reading. I need to stop staying up all night reading. (But do I really?)
Here is where I went on the internet this week.
–Yes, Your Joints Do Hurt More When It’s Cold Out%u2014Here%u2019s Why. Yup, but my shit hurts in the summer too so whatever. Cold forever!
-Are you into pink? I very much enjoy it. The Surprising History of Pink: How the Rosy Hue Has Taken Over Interiors
–Wild boar sniff out and destroy stash of cocaine worth %u00a317,000 in Italy. So maybe don%u2019t bury cocaine in a hillside or anywhere for that matter.
-Please come back in stock, I need (want) them. Weck 1 1/2 Liter Cylindrical Jar
-I like the graphics. Gorgeous Infographics Show How Kitchen Appliances Have Evolved Over the Past 100 Years
–Watch This 9-Year-Old Girl Drum Her Heart Out To Nirvana’s ‘In Bloom’ BADASS.
-Doing this. HAHAHA. How to Make a Paper Bag Turkey
–Your stretching intestine is what tells your brain to stop eating. I think mine intestines are broken. I could eat all day.
-Truth be told. The Role of the Artist in the Age of Trump.
-I like to take pictures of fungus too. Spectacular Mushrooms and Fungi Documented by Photographer Alison Pollack
If you are a falafel fan, as I am, then this one is for you. Carrot ginger falafel. Oh yes. Warm and spicy and carroty and all the things that are good, packed into a chickpea ball of mouth sized proportions. When I thought of it it sounded good, When I made it and ate it, it was everything and more I could have asked for in a freaking fantastic falafel. As for the tahini cabbage slaw, I might just be making it in my house every dang day. Super easy, super tasty, goes with the falafel like whoa but is just as good eaten on it%u2019s own. Eaten together the pair make every inch of mouth space happy. A happy mouth space, what more can you ask for?
To the falafel!
The stuff. Cooked chickpeas, carrots, a piece of fresh ginger, tahini, soy sauce, cabbage, an onion, a few cloves of garlic, red wine vinegar, some cumin and red pepper flakes, a lemon, chickpea flour, salt and pepper, and oil.
Start off by chopping the carrots into small pieces. Then cut half of the onion into small pieces. Rough chop the garlic and the ginger as well. No need to peel ginger unless you really want to.
Place it all into food processor and pulse until a small crumble.
Carrot onion garlic ginger mixture.
Dump mixture into a skillet with a splash of water. Add in the cumin, chili flakes, and a good pinch of salt and pepper and cook on the stove for 5-8 minutes until the crumble softens and becomes fragrant.
Dump carrot ginger mixture back into food processor along with the chickpeas, chickpea flour, and the juice of the lemon. Puree until smooth.
Carrot ginger falafel mixture. Now stick it in the fridge. For a little while to a day, just to let it set up a bit.
And in the mean time you can make the slaw. Shred cabbage and cut up onion all nice and thin.
Dump tahini, soy, vinegar, and a few tablespoons warm water into bowl and mix until creamy and good.
Toss in that cabbage and onion. Now you have tahini cabbage slaw.
Now to cook falafel. Grab the batter, scoop into balls then smoosh into disks. Place in a light oiled skillet and brown each side a nice golden brown.
After browning, place on a baking sheet. Once all the falafel has been browned, place the baking sheet into the oven to finish up cooking. 20 minutes or so and you got yourself falafel.
Then eat it. Falafel topped with tahini cabbage slaw. That is how it%u2019s done, with or without wraps or pitas or whatever your want. Just as it is. Falafel, cabbage slaw, into mouth.
Good things friend.
-C
serves 3-4 people or makes 14-16 falafel balls
For the falafel
2 cups cooked chickpeas drained
3-4 carrots (around 2 cups diced)
1/2 of a red onion
2 inches fresh ginger
2-3 cloves garlic
1 teaspoon cumin
1/2 teaspoon chili flakes
1/3 cup chickpea flour (can sub in oat flour if needed)
juice of a small lemon
salt and pepper
For Tahini Cabbage Slaw
1/2 head red or green cabbage (about 3 cups shredded)
1/2 of a red onion
3 tablespoon tahini
1 tablespoon soy or liquid aminos
2 tablespoon red wine vinegar
a few tablespoons warm water
Grab carrots and red onion. Chop carrots into small chunks and cut onion in half. Cut one half into chunks. Place in food processor. Take the ginger and cut into small chunks (you don%u2019t need to peel it) and peel and slice garlic and cut into small pieces. Add that to the food processor. Pulse the mixture into a very small crumble then dump the mixture into a skillet with a splash of water. Add in the cumin, chili flakes, and a good pinch of salt and lots of pepper, and place on medium heat and cook for 5-8 minutes until soft and fragrant. Once cooked, scoop back into food processor along with the chickpeas, chickpea flour, and the juice of the lemon. Turn on and and puree until smooth, stopping when needed to scrap down the side. Then either dump mixture into a bowl or leave in the container you processed it in and place in fridge for 1/2 hour to a day.
When ready to cook, preheat oven to 400.
After letting the dough sit for a bit, remove from fridge. Grab skillet and lightly oil it and place on medium heat. Take a cookie scoop or just a spoon and scoop balls of falafel into your hand and roll them around so they are packed together. Smoosh then balls a little into disks and place into hot skillet. Let cook until bottom is golden brown then gently flip and cook the other side until browned. Place cooked falafel on a baking sheet. Once you have browned all the falafel, place into oven to bake for about 20 minutes or until the falafel has firmed up to your liking.
To make the tahini cabbage slaw. Shred cabbage and cut the remaining half of red onion into thin pieces. Place tahini, soy, vinegar, and 2 tablespoons warm water into a big bowl. Mix together until light and creamy. If the mixture seems to thick, add another tablespoon of warm water. When happy with consistency, add in the cabbage and onion and toss around until everything is coated.
Now when the slaw is made, the falafel is cooked, you eat it. Serve with warm pita or wraps or a bed of greens or nothing. Just slaw on top of falafel. And FYI, this whole shebang can be eaten hot or cold or anywhere in between.
THE LOVELY CRAZY
November 29, 2019 by maximios • Blog
Just the other day I was at the gym talking to someone when all of a sudden, she coughed into my face, like full fledge hacking. This and then she continued to tell me that she has been sick for like weeks and blah blah blah. After that all I was thinking was, Oh Fuck, she just gave me her ick%u2026.GET AWAY FAST!!!!
So it%u2019s that time of year. Everyone all sick and shit. And that means getting my stash of stuff made, my feel better, don%u2019t get sick stuff. The tonics and elixirs and hocus pocus things that I use all year long, but mostly during the winter months when everyone starts getting sick.
One of the things I make is fire cider. First off, let me tell you I am no doctor, just in case you thought I might be. But I l am a strong believer in food as medicine. So the fire cider is a heath tonic of sorts, made with all sorts of yummy and highly potent things like fresh grated horseradish, hot peppers, garlic, and so forth. All things that are good for your health in many ways, but also taste really good. And let me tell you, if you are into the healing powers or not, a swing of this infused cider tonic will surely open up your sinus cavity like whoa.
And now before you get super excited about going and making yourself this fantastic health tonic/salad dressing/drink mixer, and thinking it will be ready and done as soon as you do a little grating, well hold up. You can throw it together super fast, but it does take a good 4-6 weeks of chilling and infusing before you really want to get into it. But don%u2019t let that stop you, it is 100% worth all the waiting. And wouldn%u2019t you know, the holidays are about 4-6 weeks away and I was just thinking after I made a batch for myself how I should make another big batch and give away in little jars for Christmas this year. Now there is a good idea. (Might not be a doctor, but I sure am a smarty pants%u2026HAHAHA)
Now to the Fire cider!
Garlic, onion and hot peppers, chopped into bits. Place it all into a clean 32oz jar.
Grated horseradish, turmeric, and ginger. Into jar it goes. And watch out, freshly grated horseradish can be a little intense.
Sliced lemon. Into said jar along with thyme, oregano, and peppercorns.
Packed and filled with raw apple cider vinegar.
Now a lid and some time in a cool dark place and you got yourself some liquid gold.
Remember, I am not a doctor so yeah, but this cider helps me feel better when I need it to and I think you will find it will help you too. And it tastes freaking awesome on food so theres that!
-C
makes 16-20 oz
1/3 cup fresh grated horseradish
1/4 cup fresh grated ginger root
1/4 cup fresh grated tumeric
1 chopped onion
3-5 heads of garlic chopped
2%u20144 hot peppers (depending on the type you use and the heat level you want) chopped
1 lemon sliced
1 teaspoon peppercorns
1 teaspoon oregano
1 teaspoon thyme
Raw apple Cider Vinegar
Honey or maple syrup (optional)
Note. Feel free to change the amounts of all of the ingredients. Want to use less horseradish, then do so. No hot peppers, then don%u2019t add them. Leave out the oregano and thyme and add dill or rosemary. You can be creative with your own flavors.
Now to make fire cider.
Place all ingredients besides vinegar into a 32 oz jar. Pack down with a wooden spoon then fill jar with apple cider vinegar.(Make sure all the stuff is submerged in the vinegar.) Place a lid on jar. If using a metal lid, line top with wax paper first or just use a plastic lid if you have one. Place jar in a cool dark place for 4-6 weeks, giving it a shake every day.
After at least 4 weeks, remove lid of the jar, strain the liquid from the solids through a fine mesh strainer or cheesecloth, squeezing out as much as the liquid as you can. You can discard the solids or make something tasty with them (saut%u00e9ed with potatoes?). Then taste the liquid. Add sweetener if you want, maybe a few tablespoons to start and go from there.
And thats it. Store the cider a lidded jar in a cool dark place. Or in the fridge if you want it cold.
To use, just take a swig when feeling crappy, stuffy, cold, or just want a tasty little pick me up. Or use as condiment on food, like in a salad or wherever.
Enjoy!