
THE LOVELY CRAZY
To know me is to know that I eat a shit load of lentils. And not just one kind, I eat them all, in all the ways, all day, everyday. Vegetables and lentils. That is my truth.
Lentil flour. One more way to consume the mighty legume. Blended while dry into a fine powder, it takes the lentil to a whole other level. You can use the flour in all sorts of things like bread, soup, even in baked goods. it really is a great flour to have on hand, especially if you are hungry and want to toss something quick and easy, heathy, and delicious together like these here pancakes.
These pancakes. All they are made of is lentil flour and pureed up zucchini and onion. Now that might sound a little on the dull side, but trust me here, they are far from dull. They are freaking delicious. And better for it that they take like 10 minutes from start to finish to make. And no oven which is necessary these days with all the stupid hot weather.
Anyway. lentil zucchini pancakes. Give them a try. They will probably become your favorite.
To the lentil flour and zucchini pancakes!
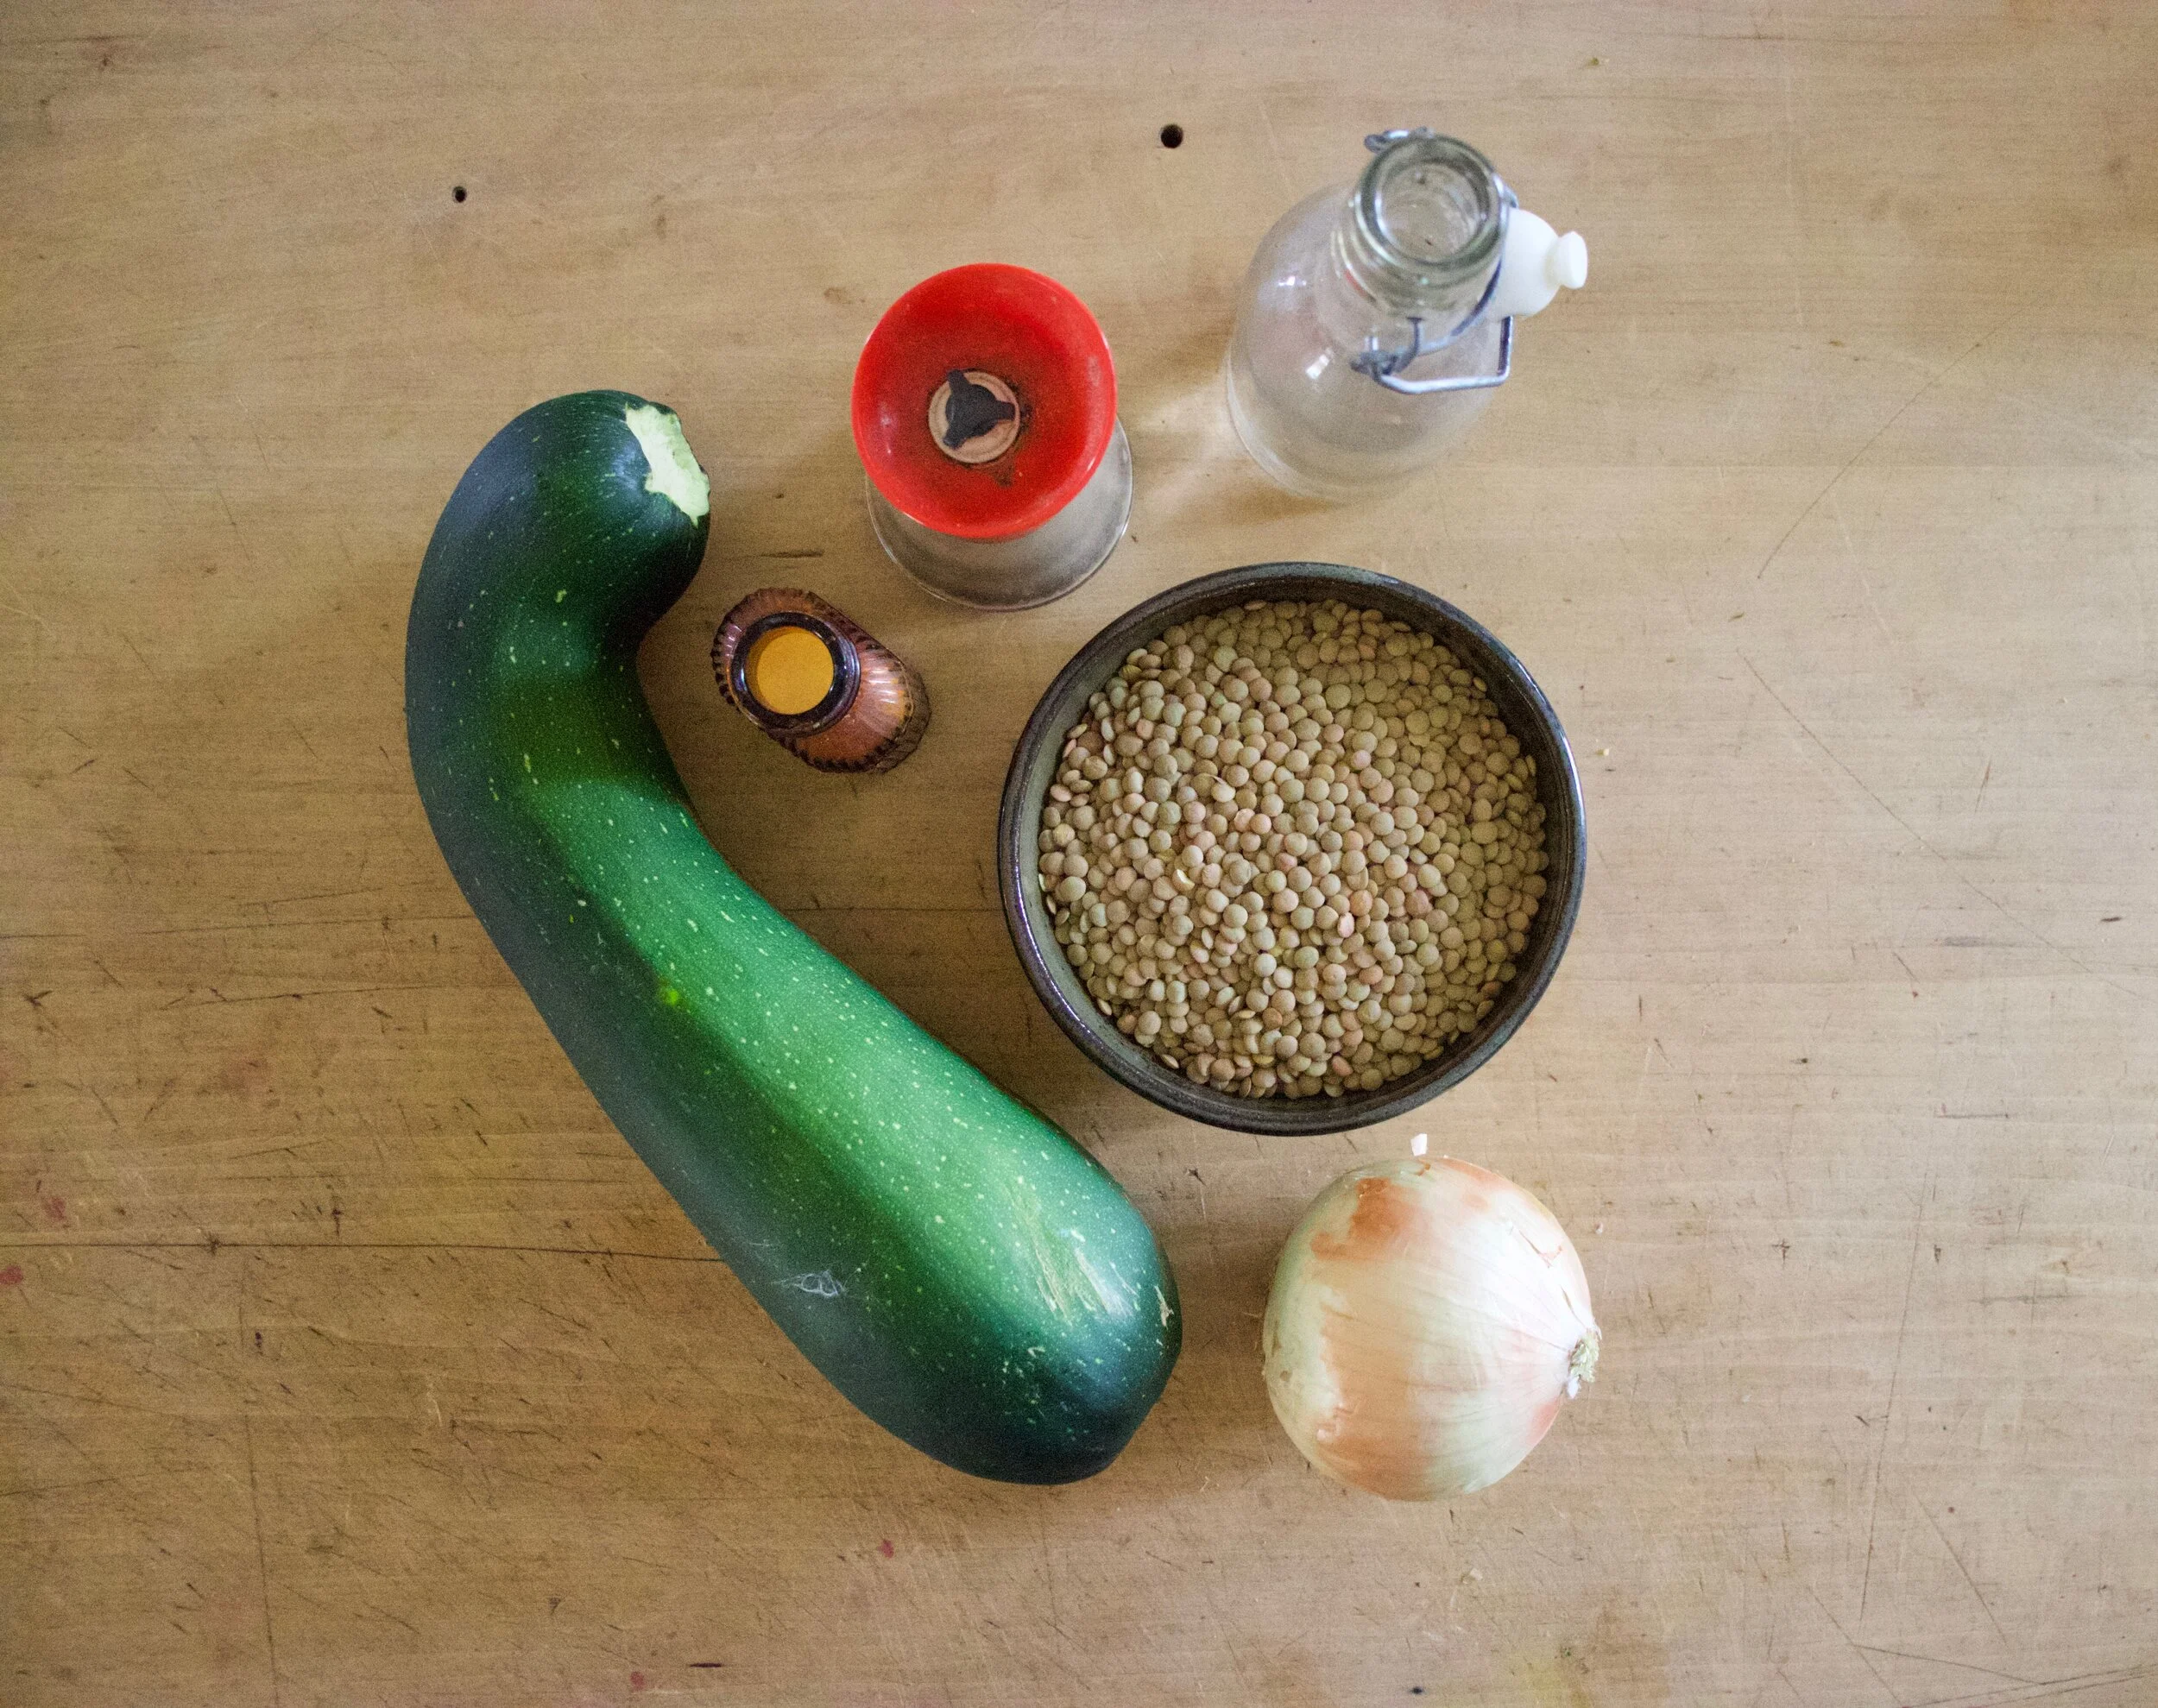
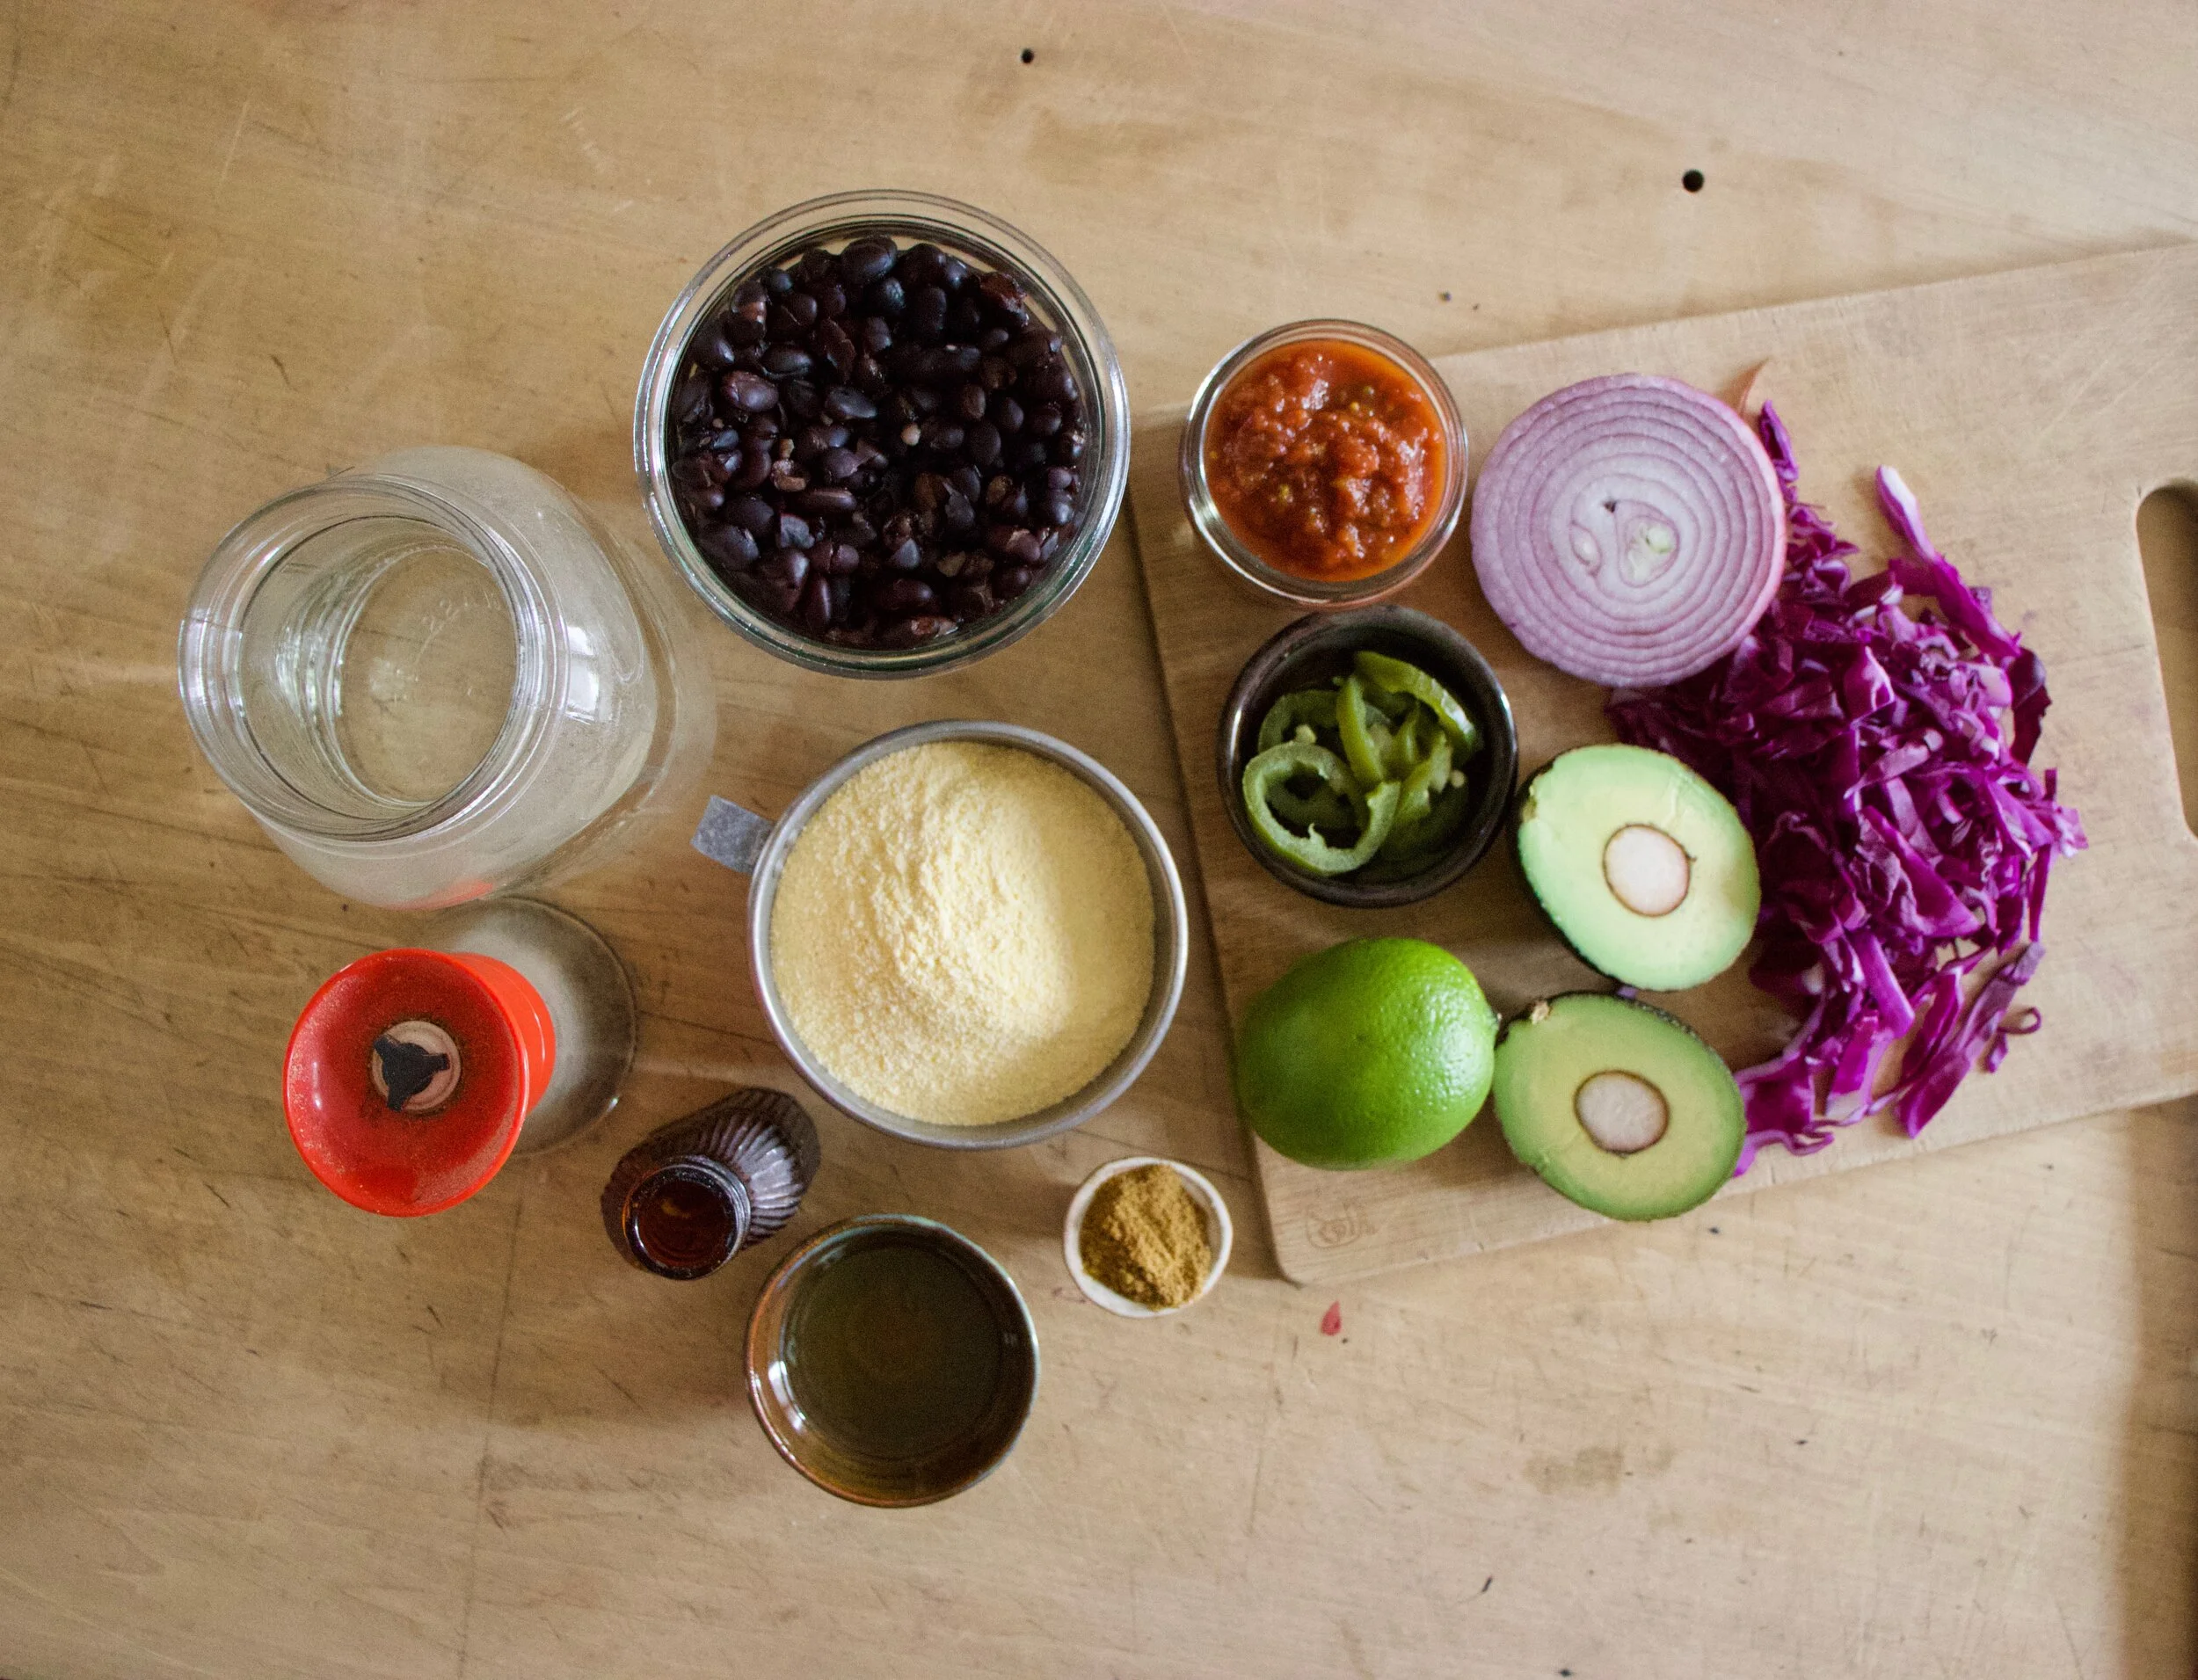
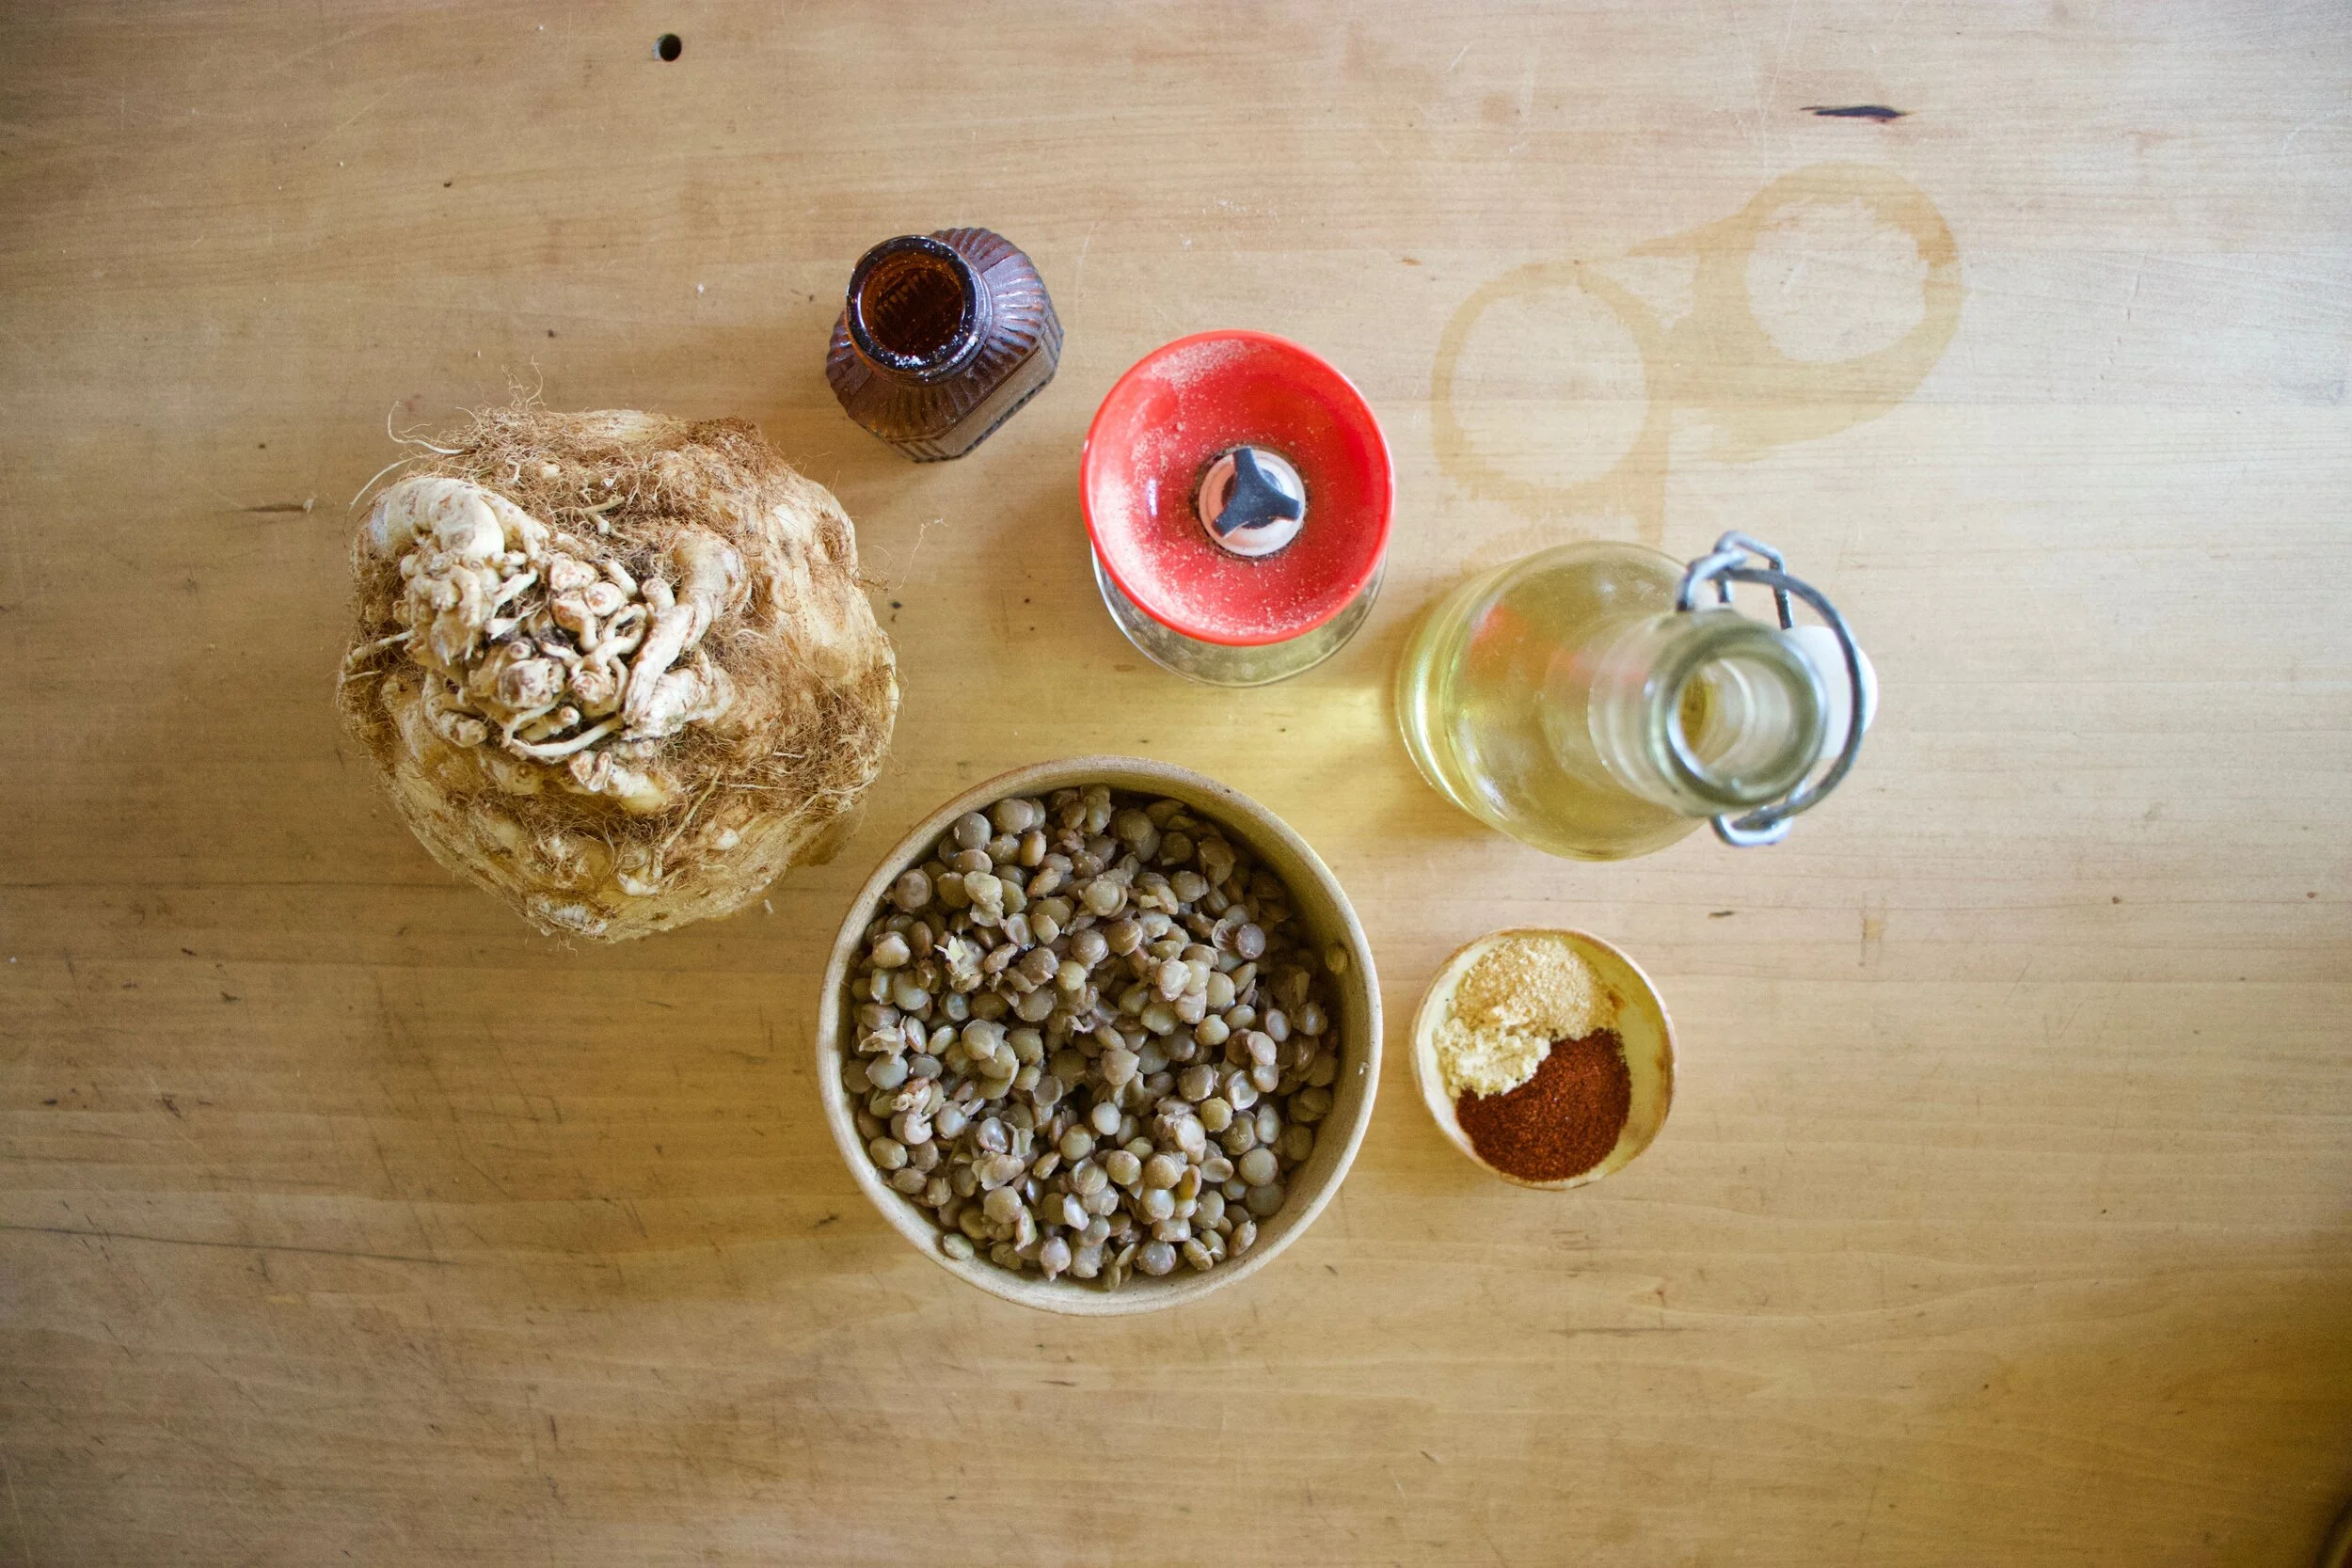
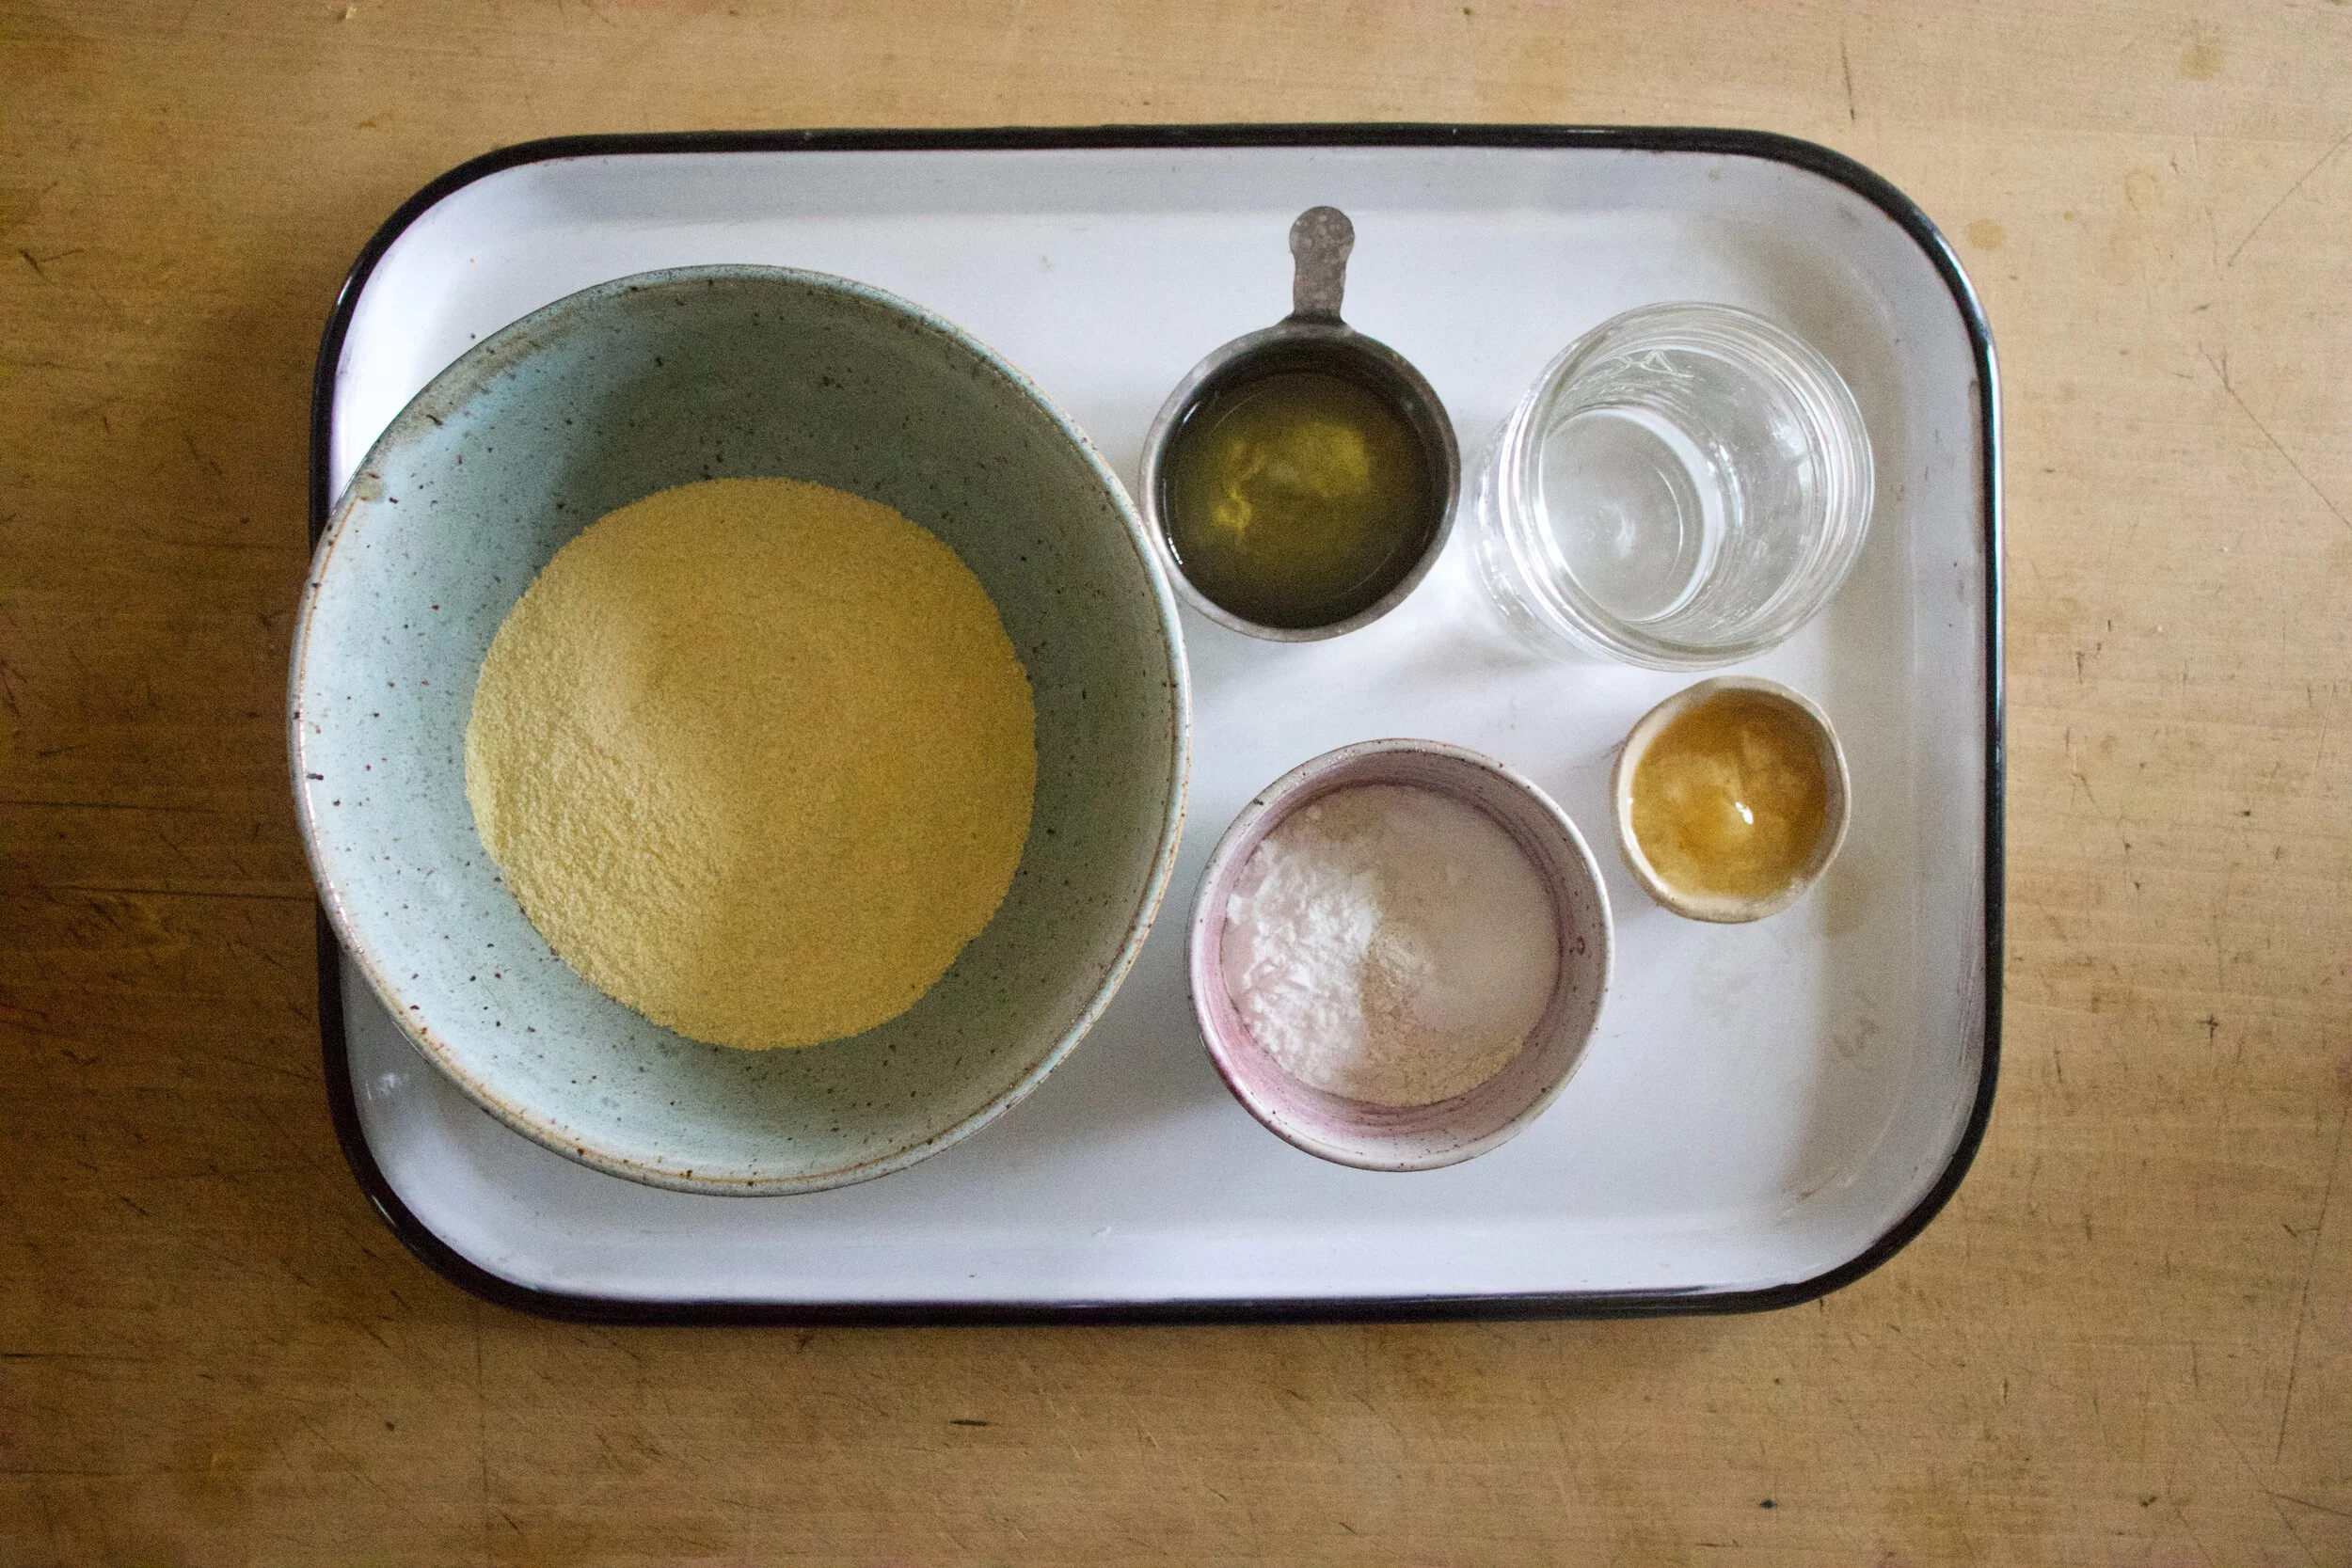
The stuff. Dry green lentils, a zucchini, and onion, salt and pepper, and a splash of oil.
Te make lentil flour. Place dried lentils into a high speed blender and blend until it turns into a fine flour.
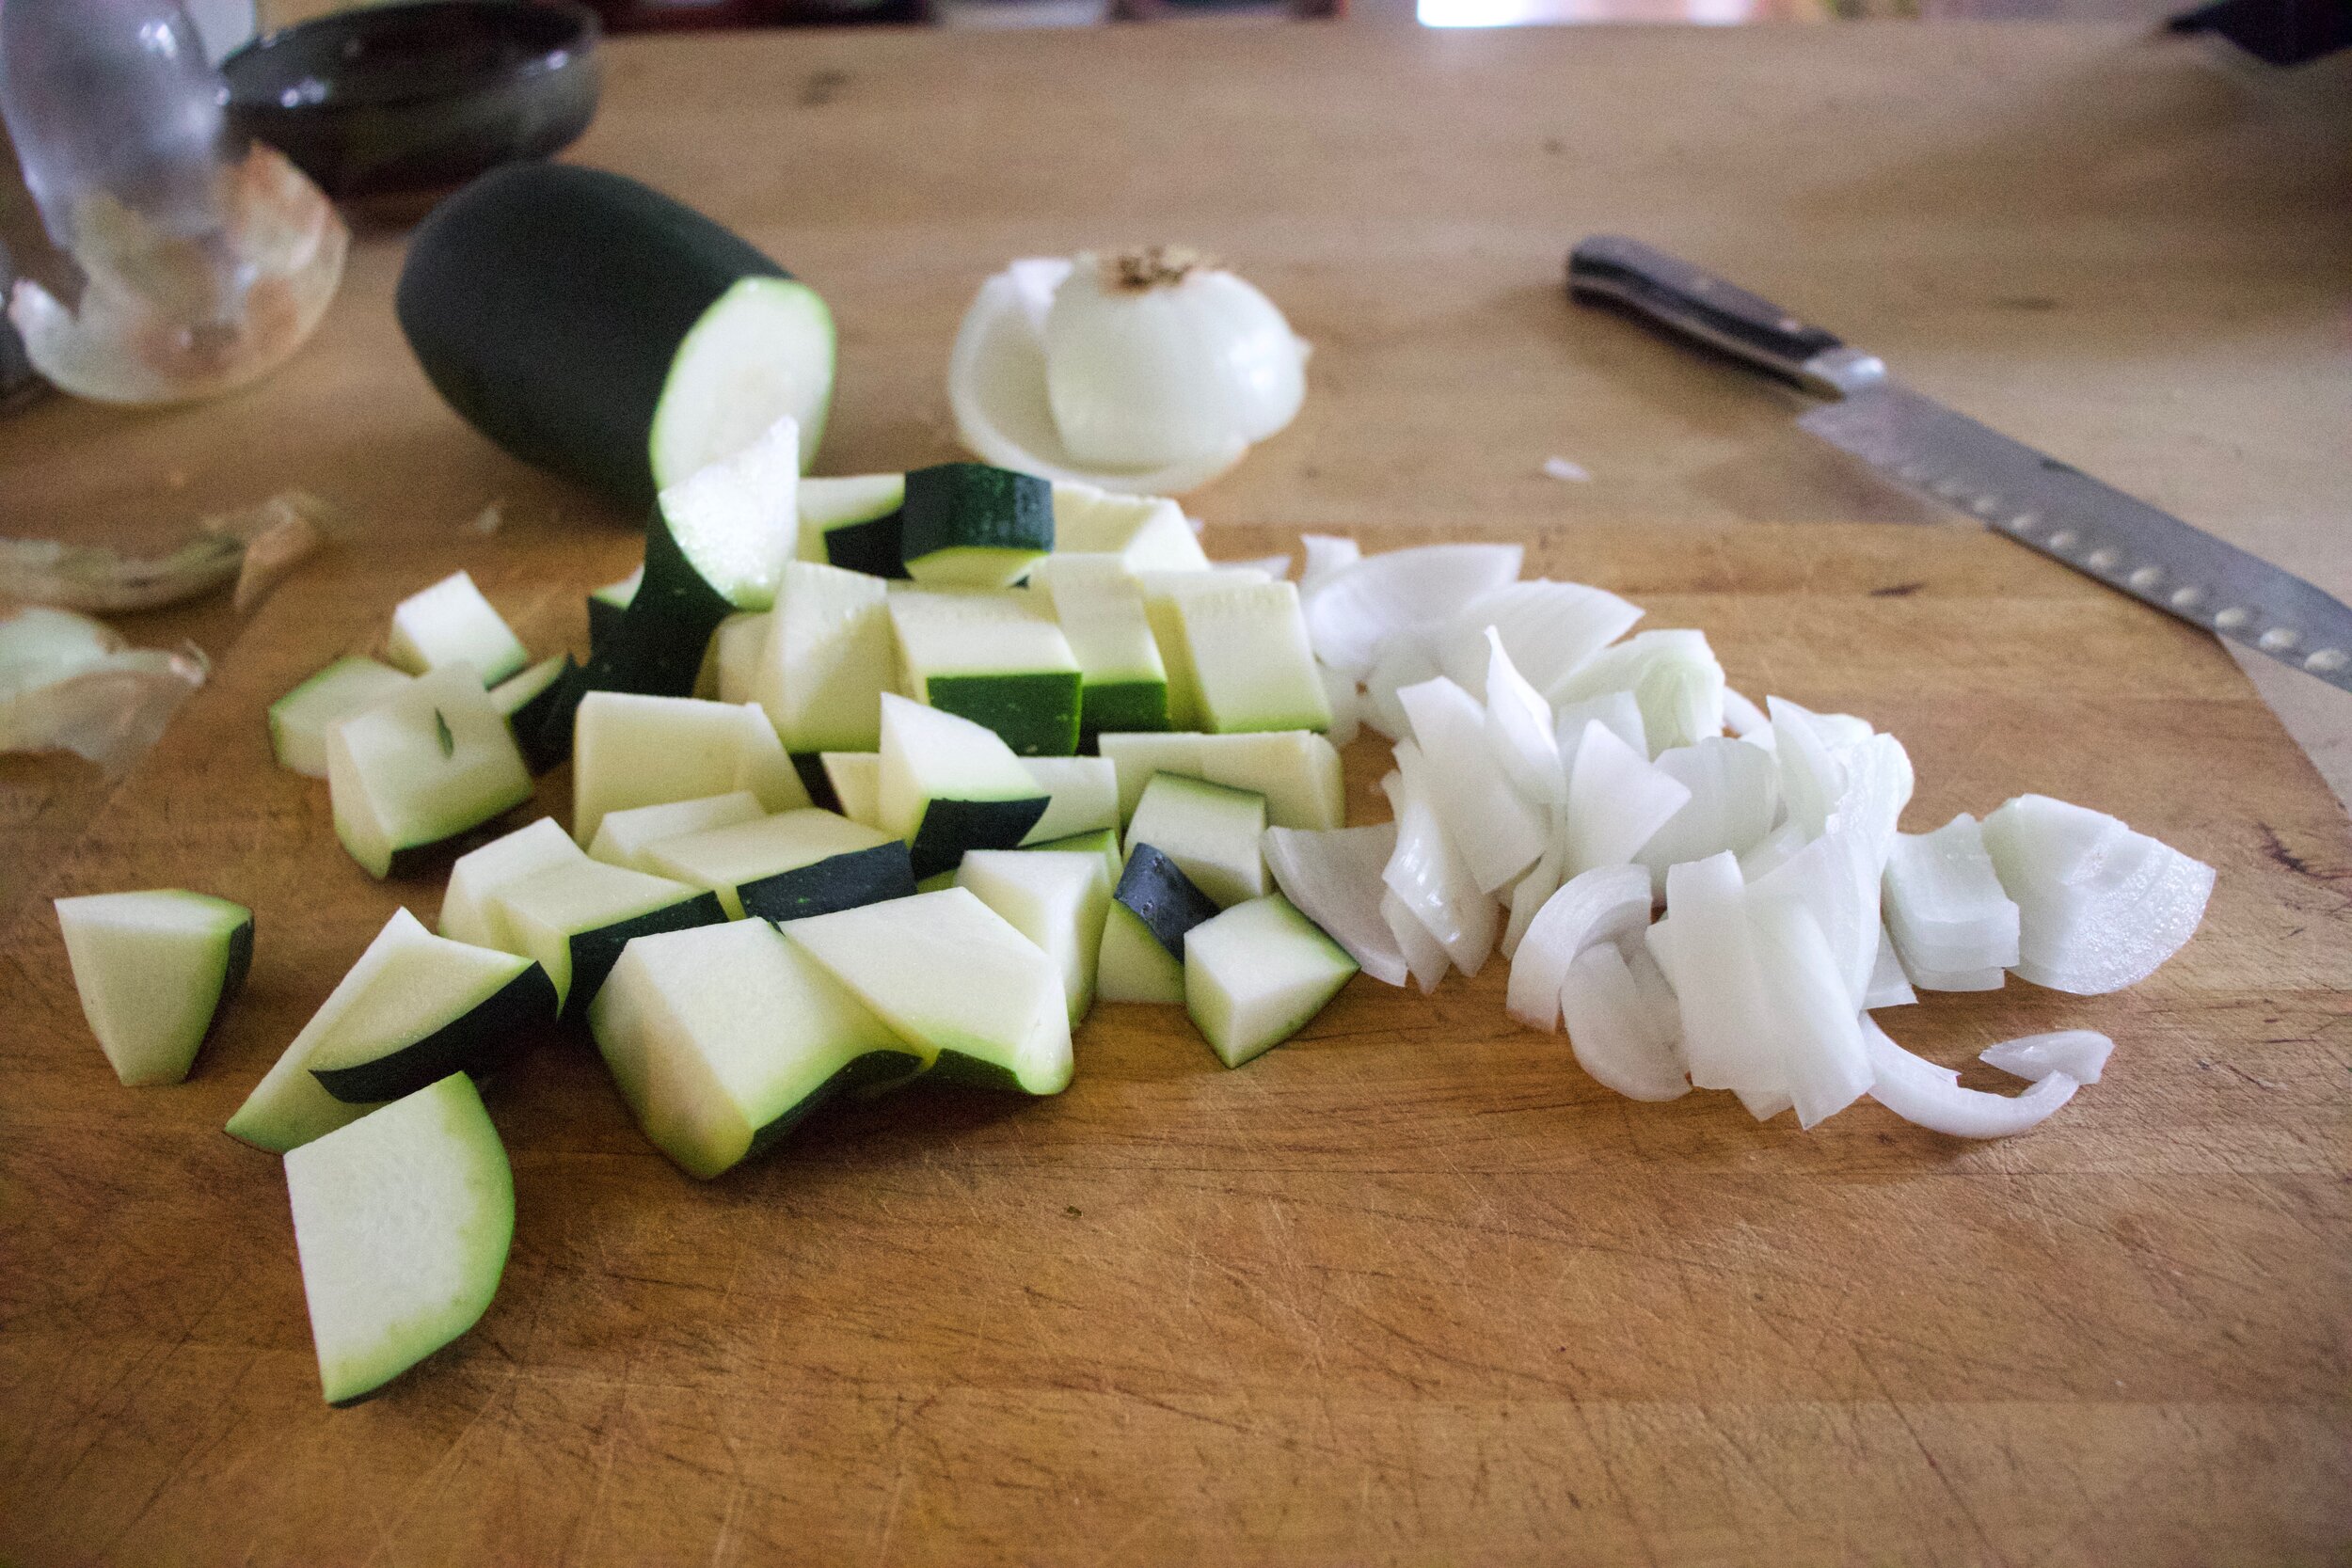
Once you have the flour made, cut up the zucchini and onion into chunks.
Drop into the blender and blend until pretty smooth.
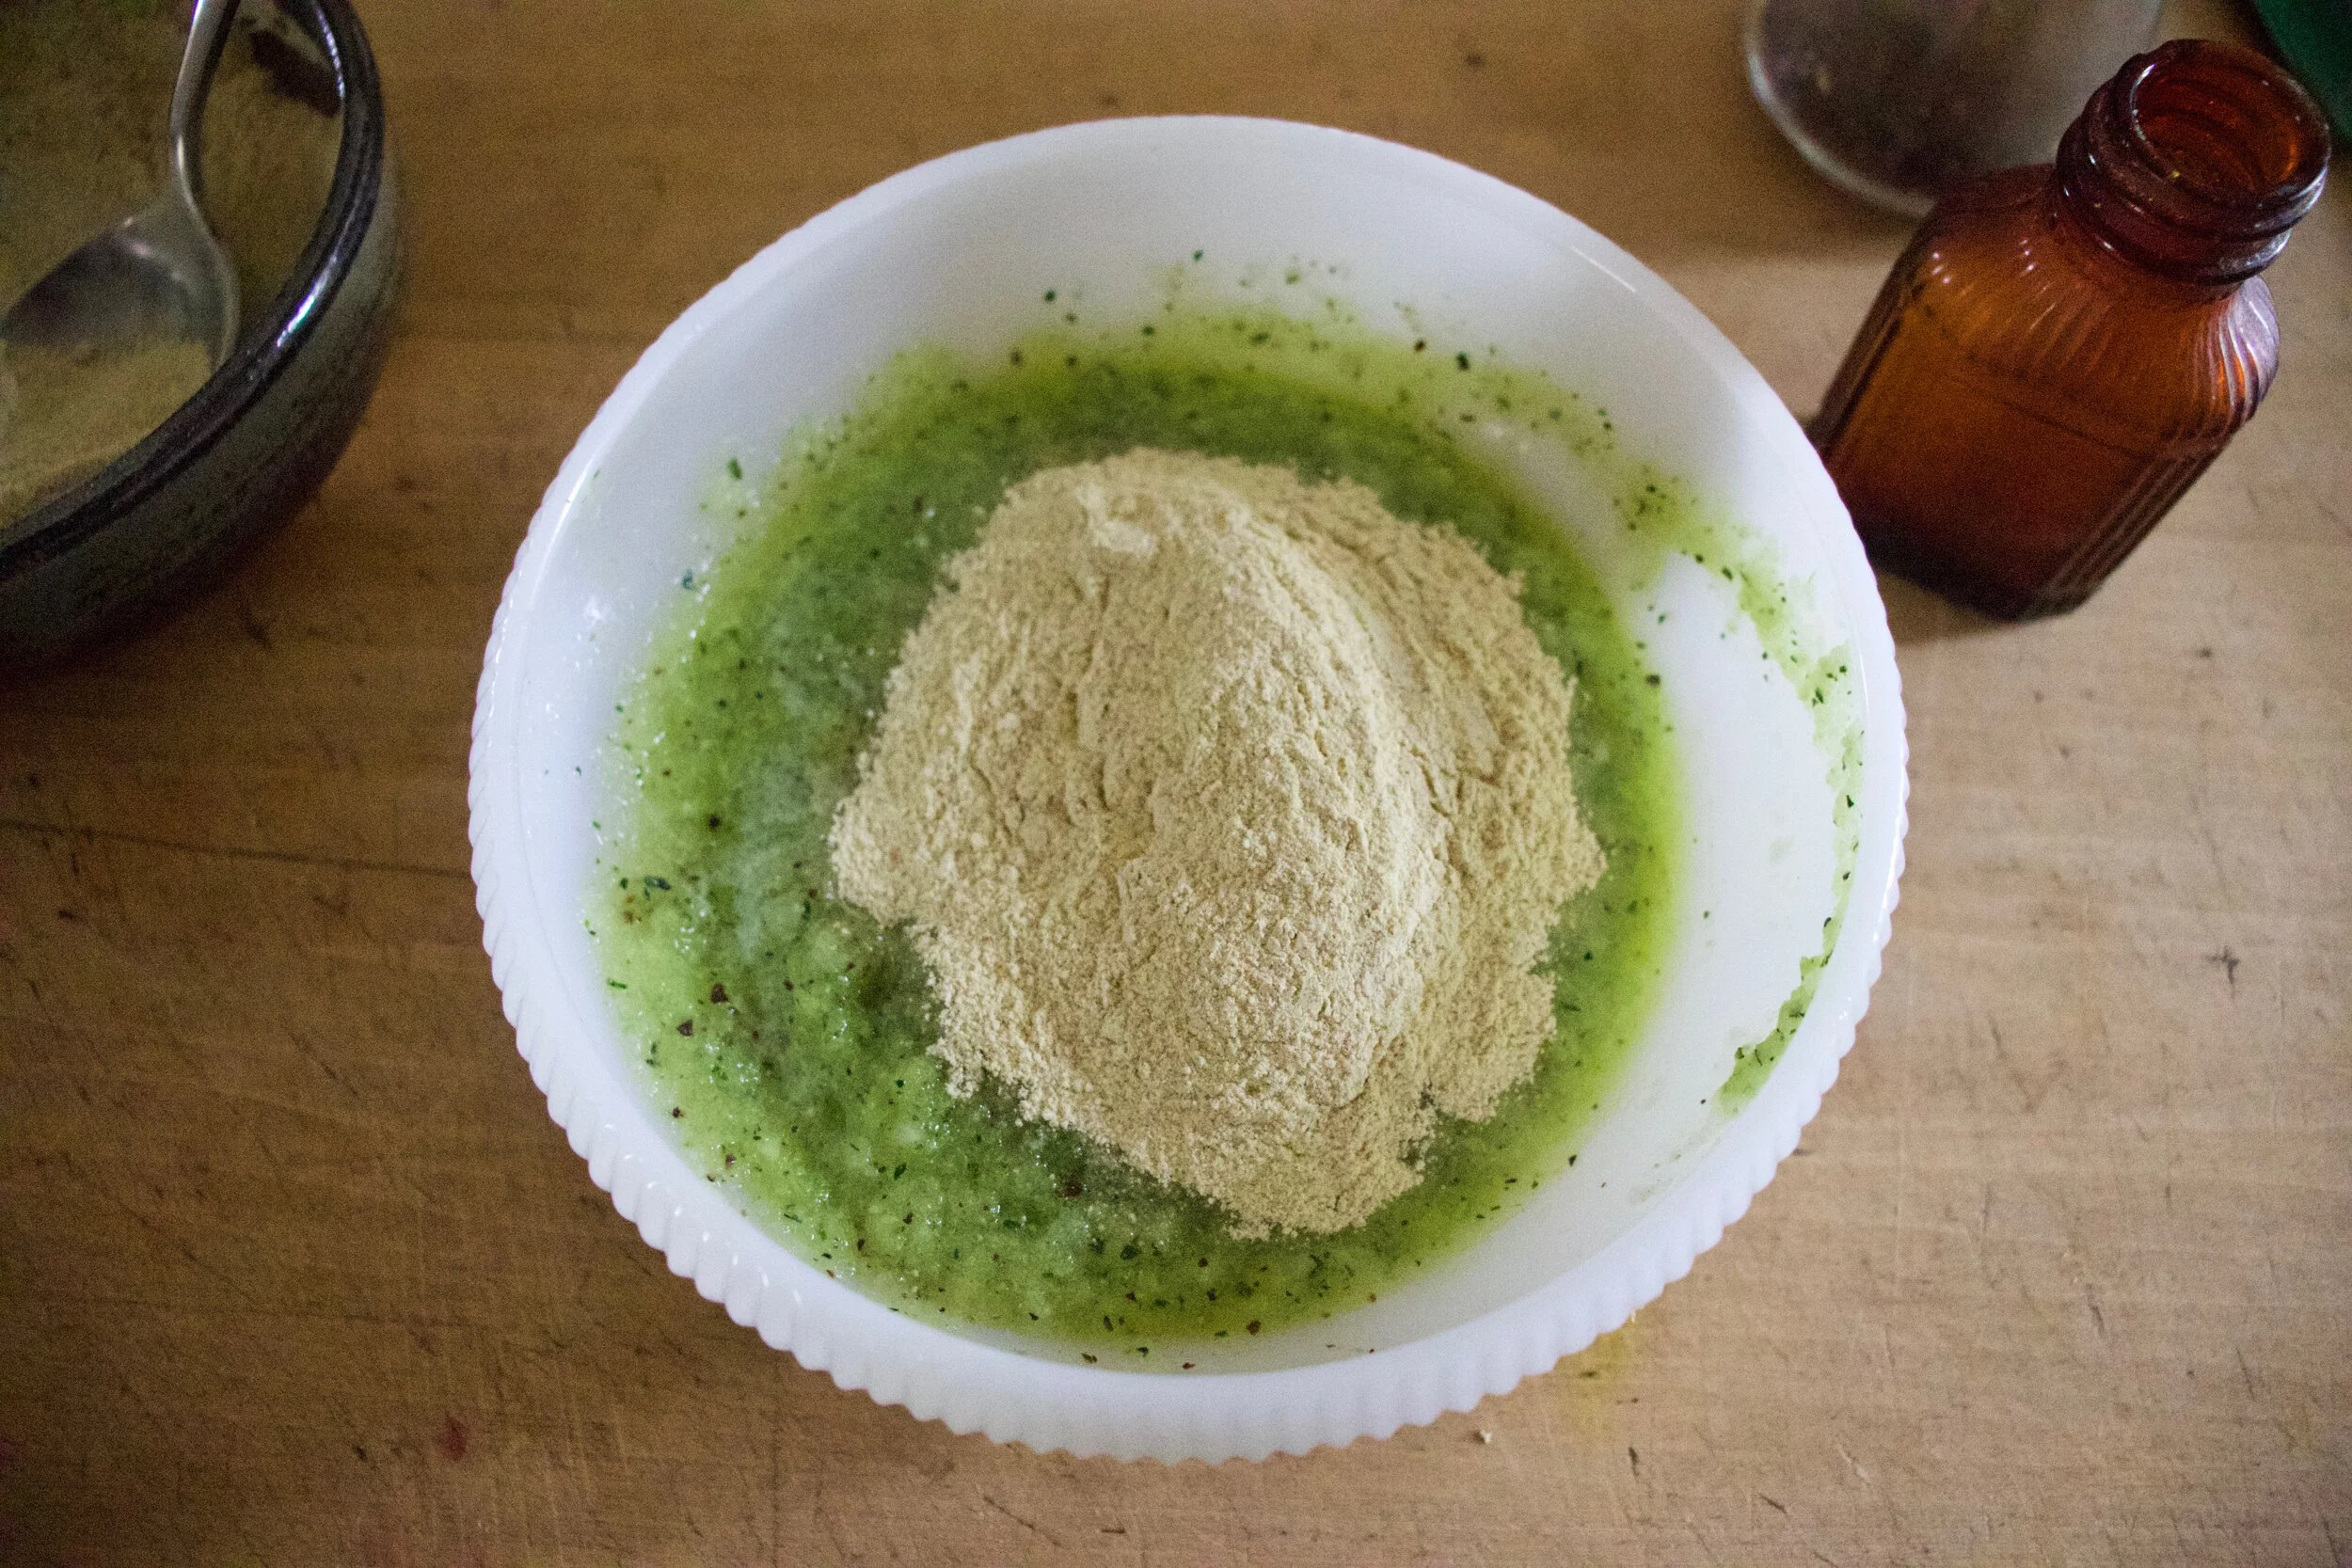
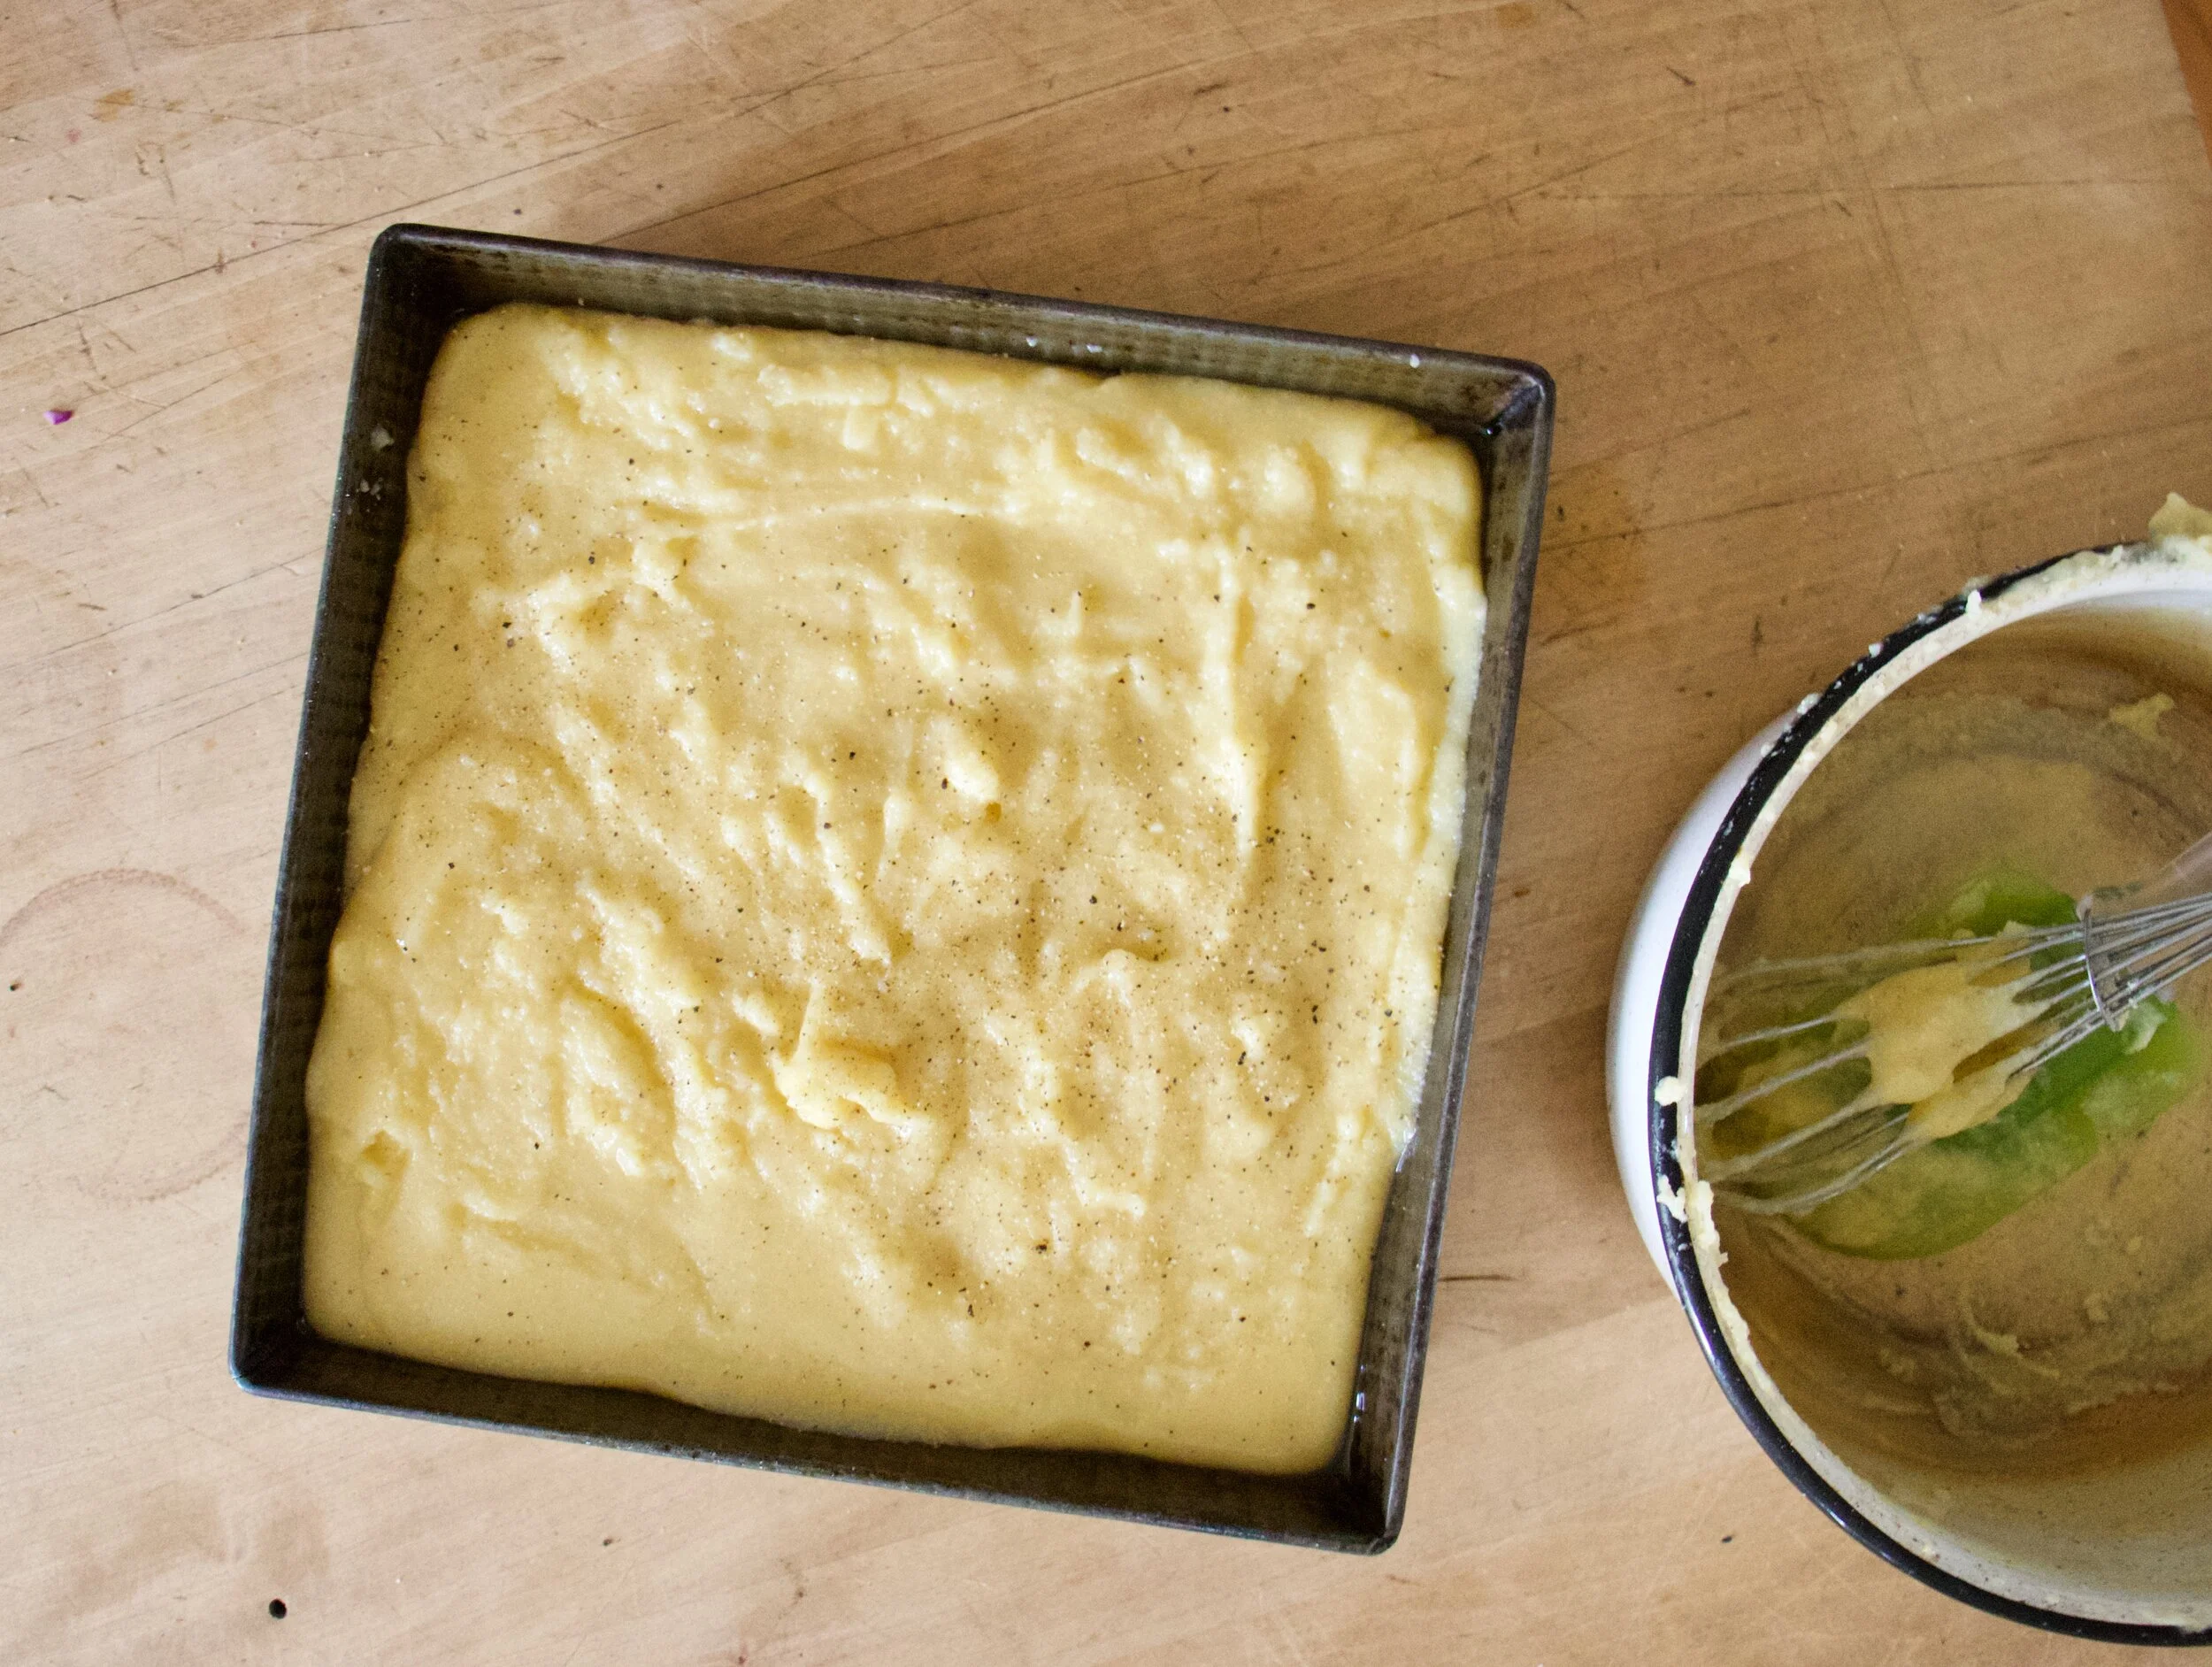
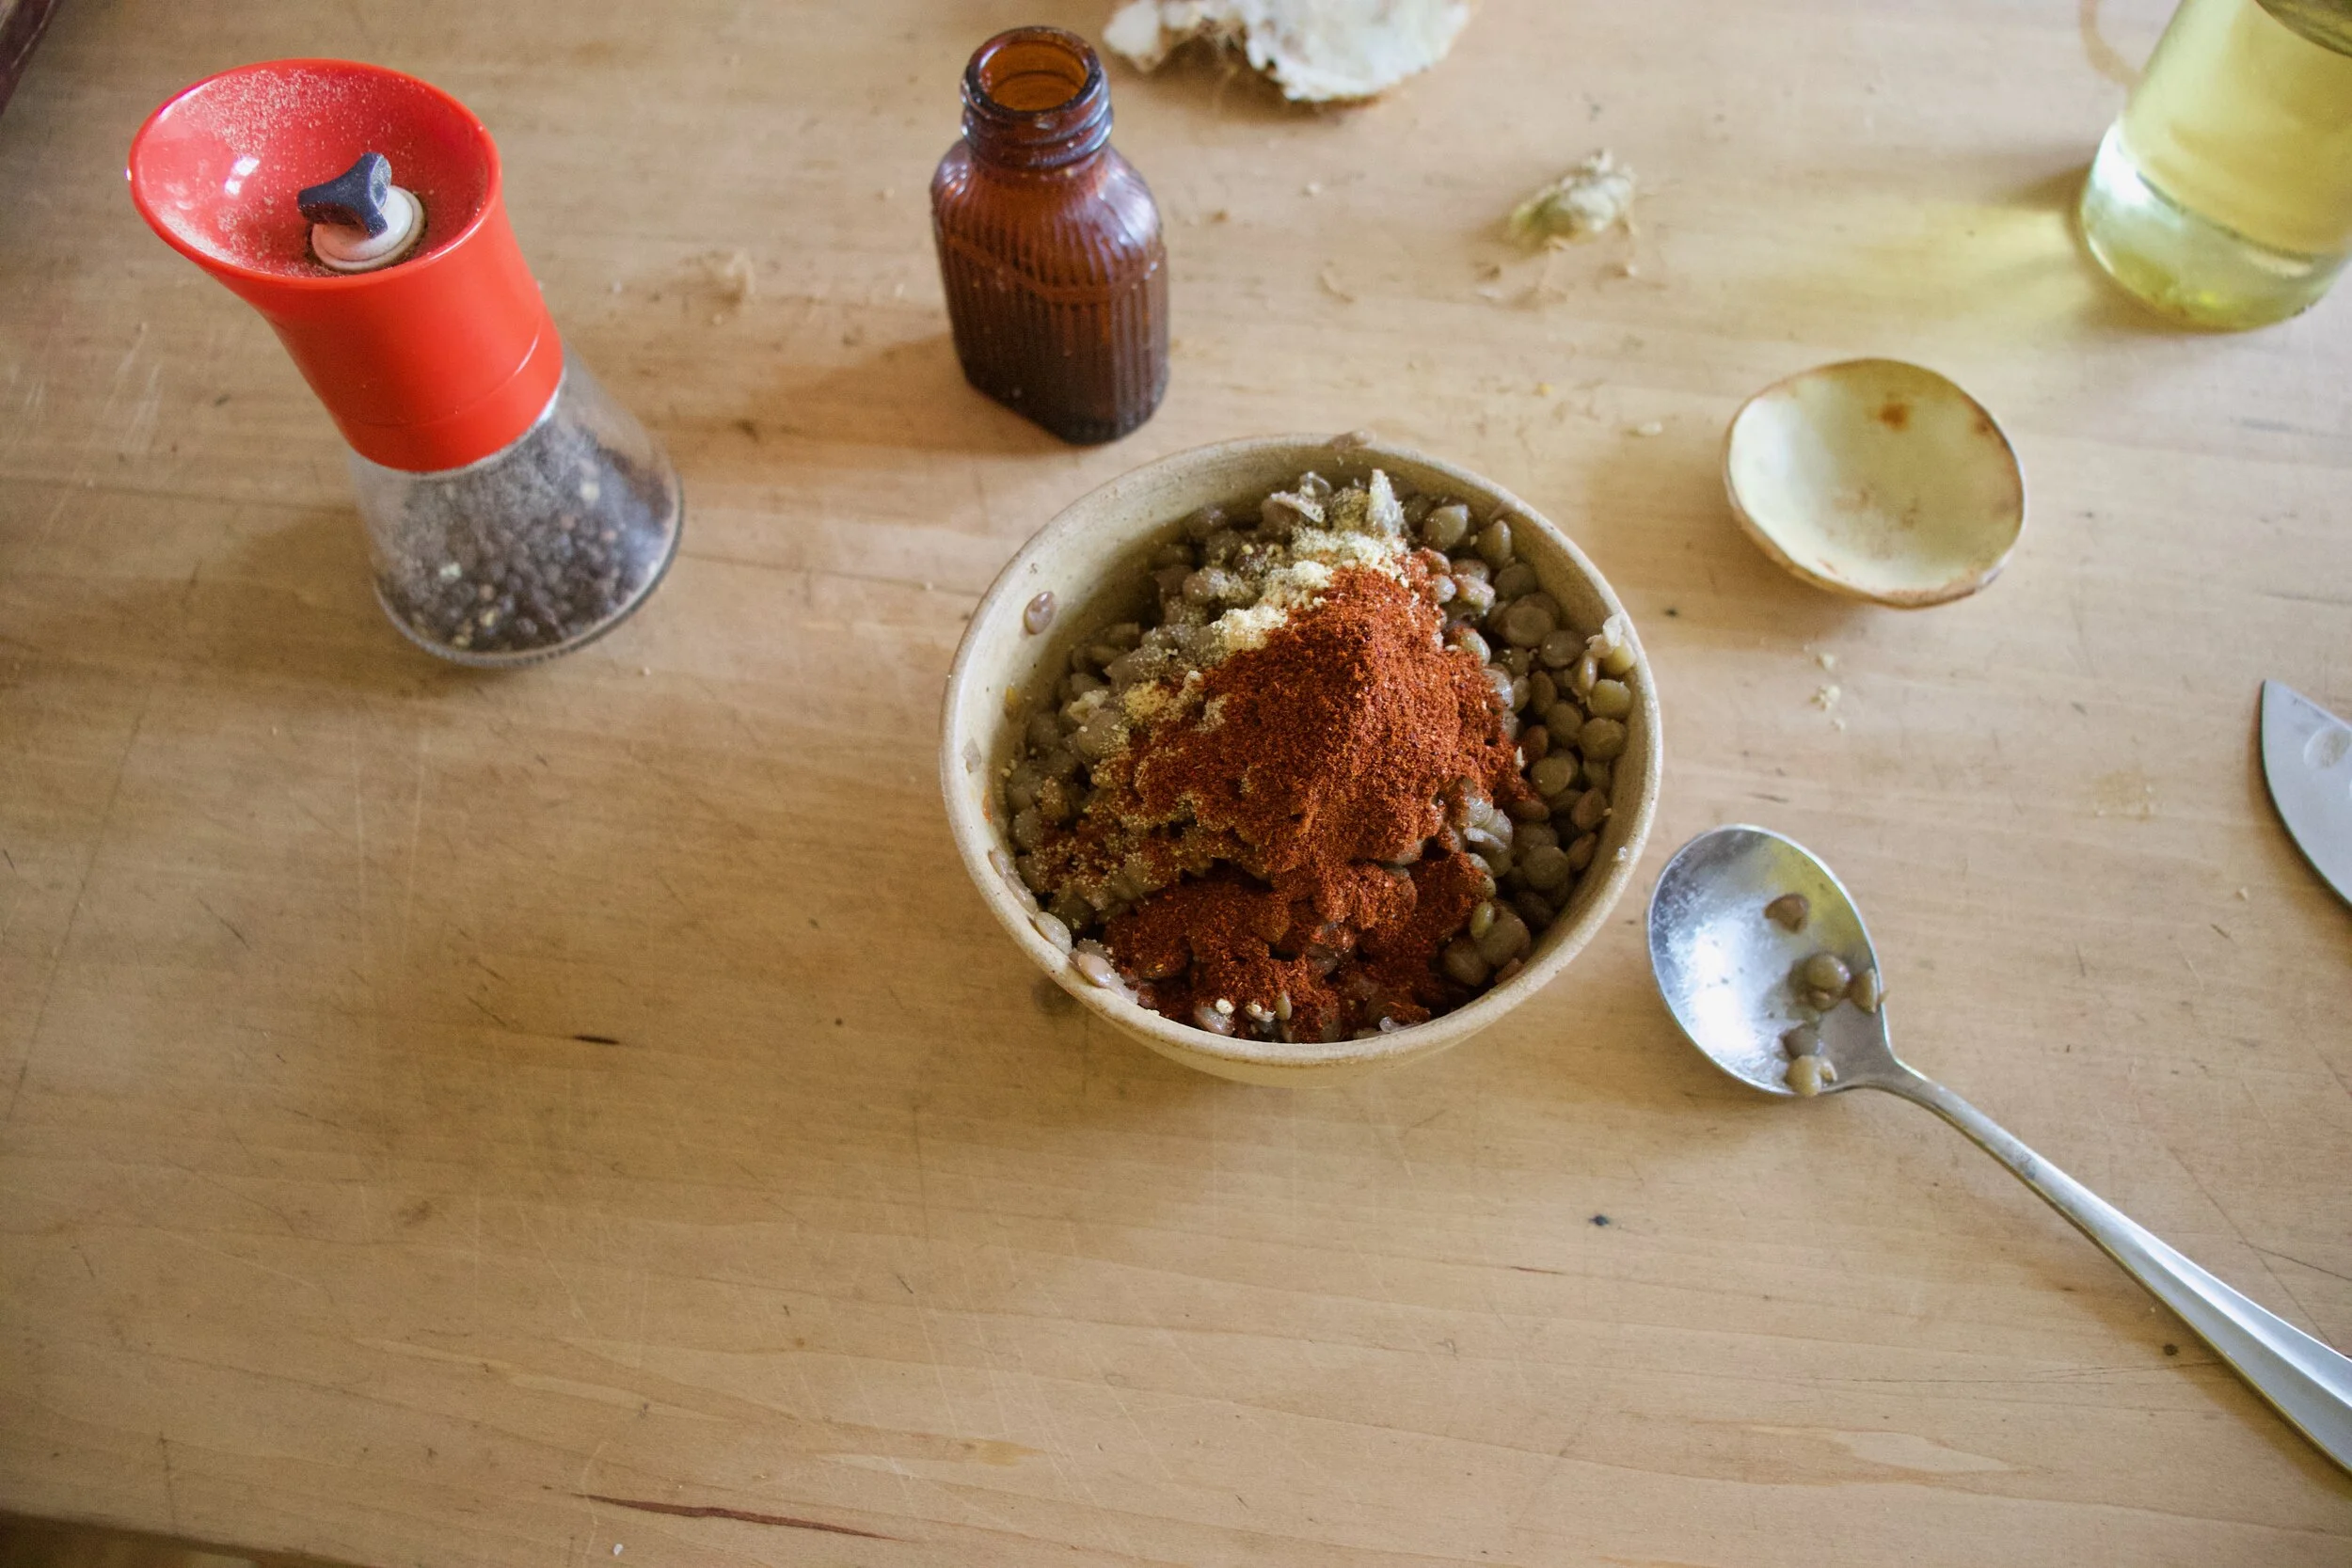
Dump puree into bowl and top with some lentil flour.

Mix until completely combined. The batter should be kind of thic but still spoonable. Also, season with salt was pepper here.
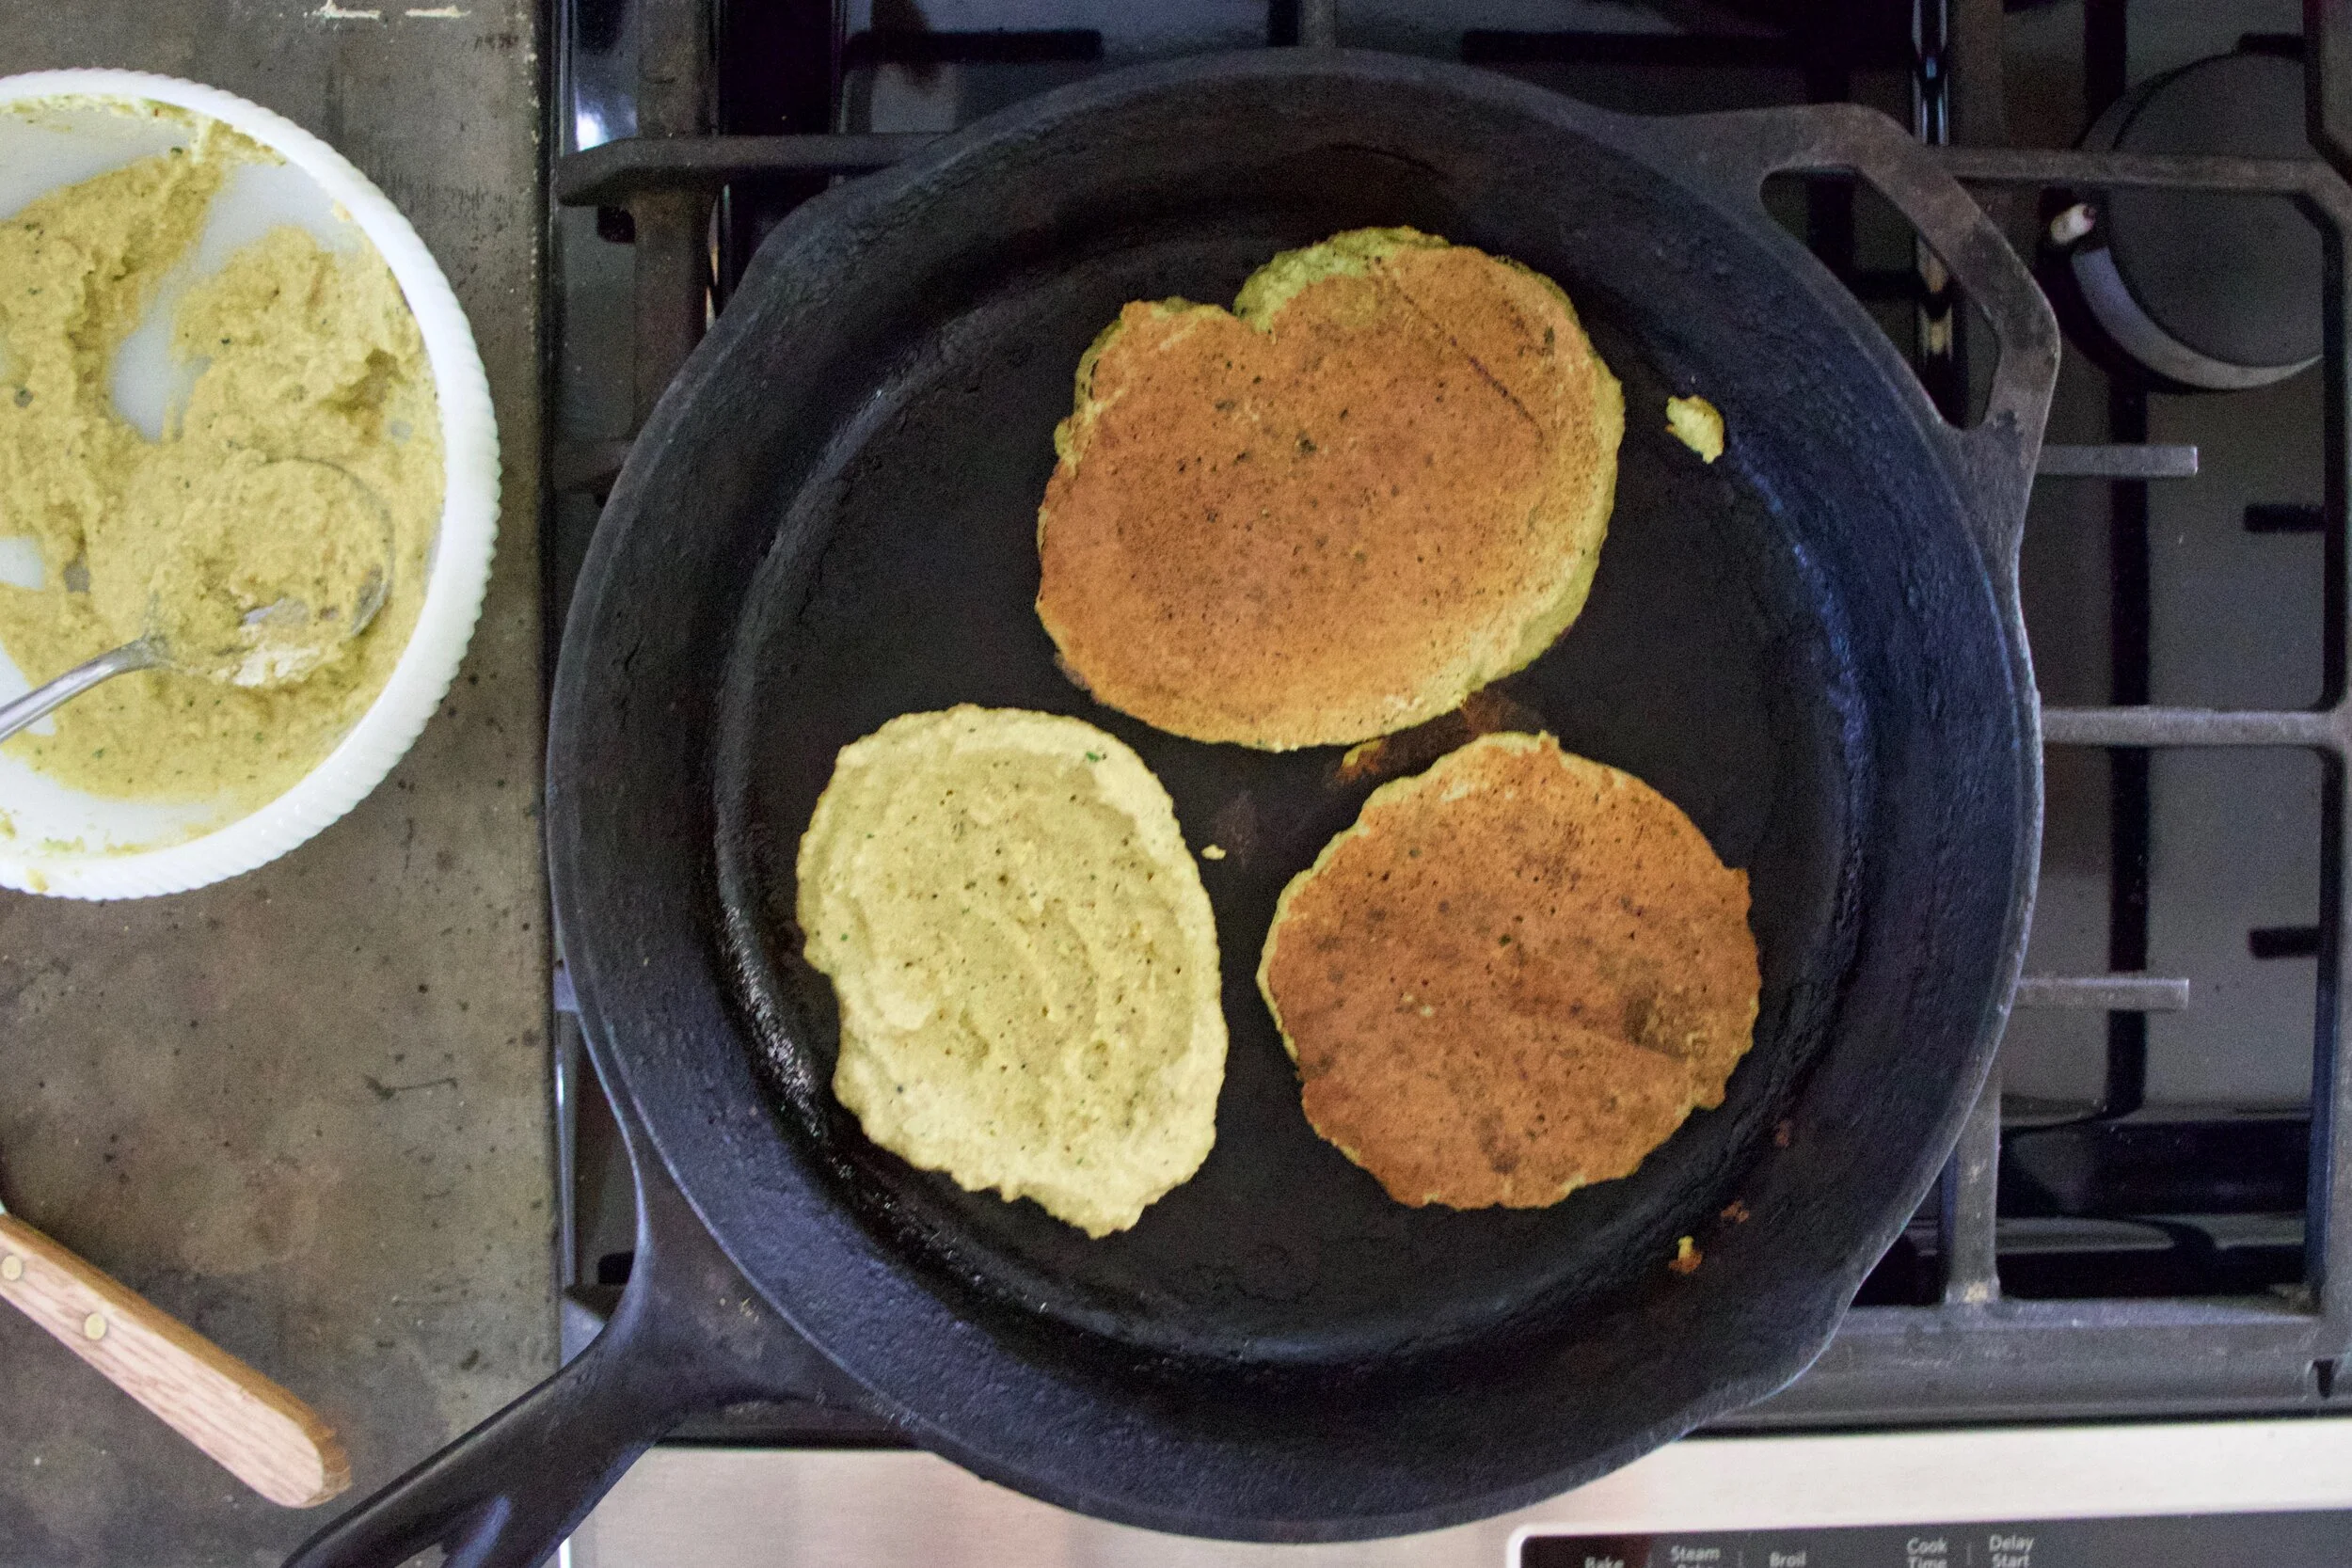
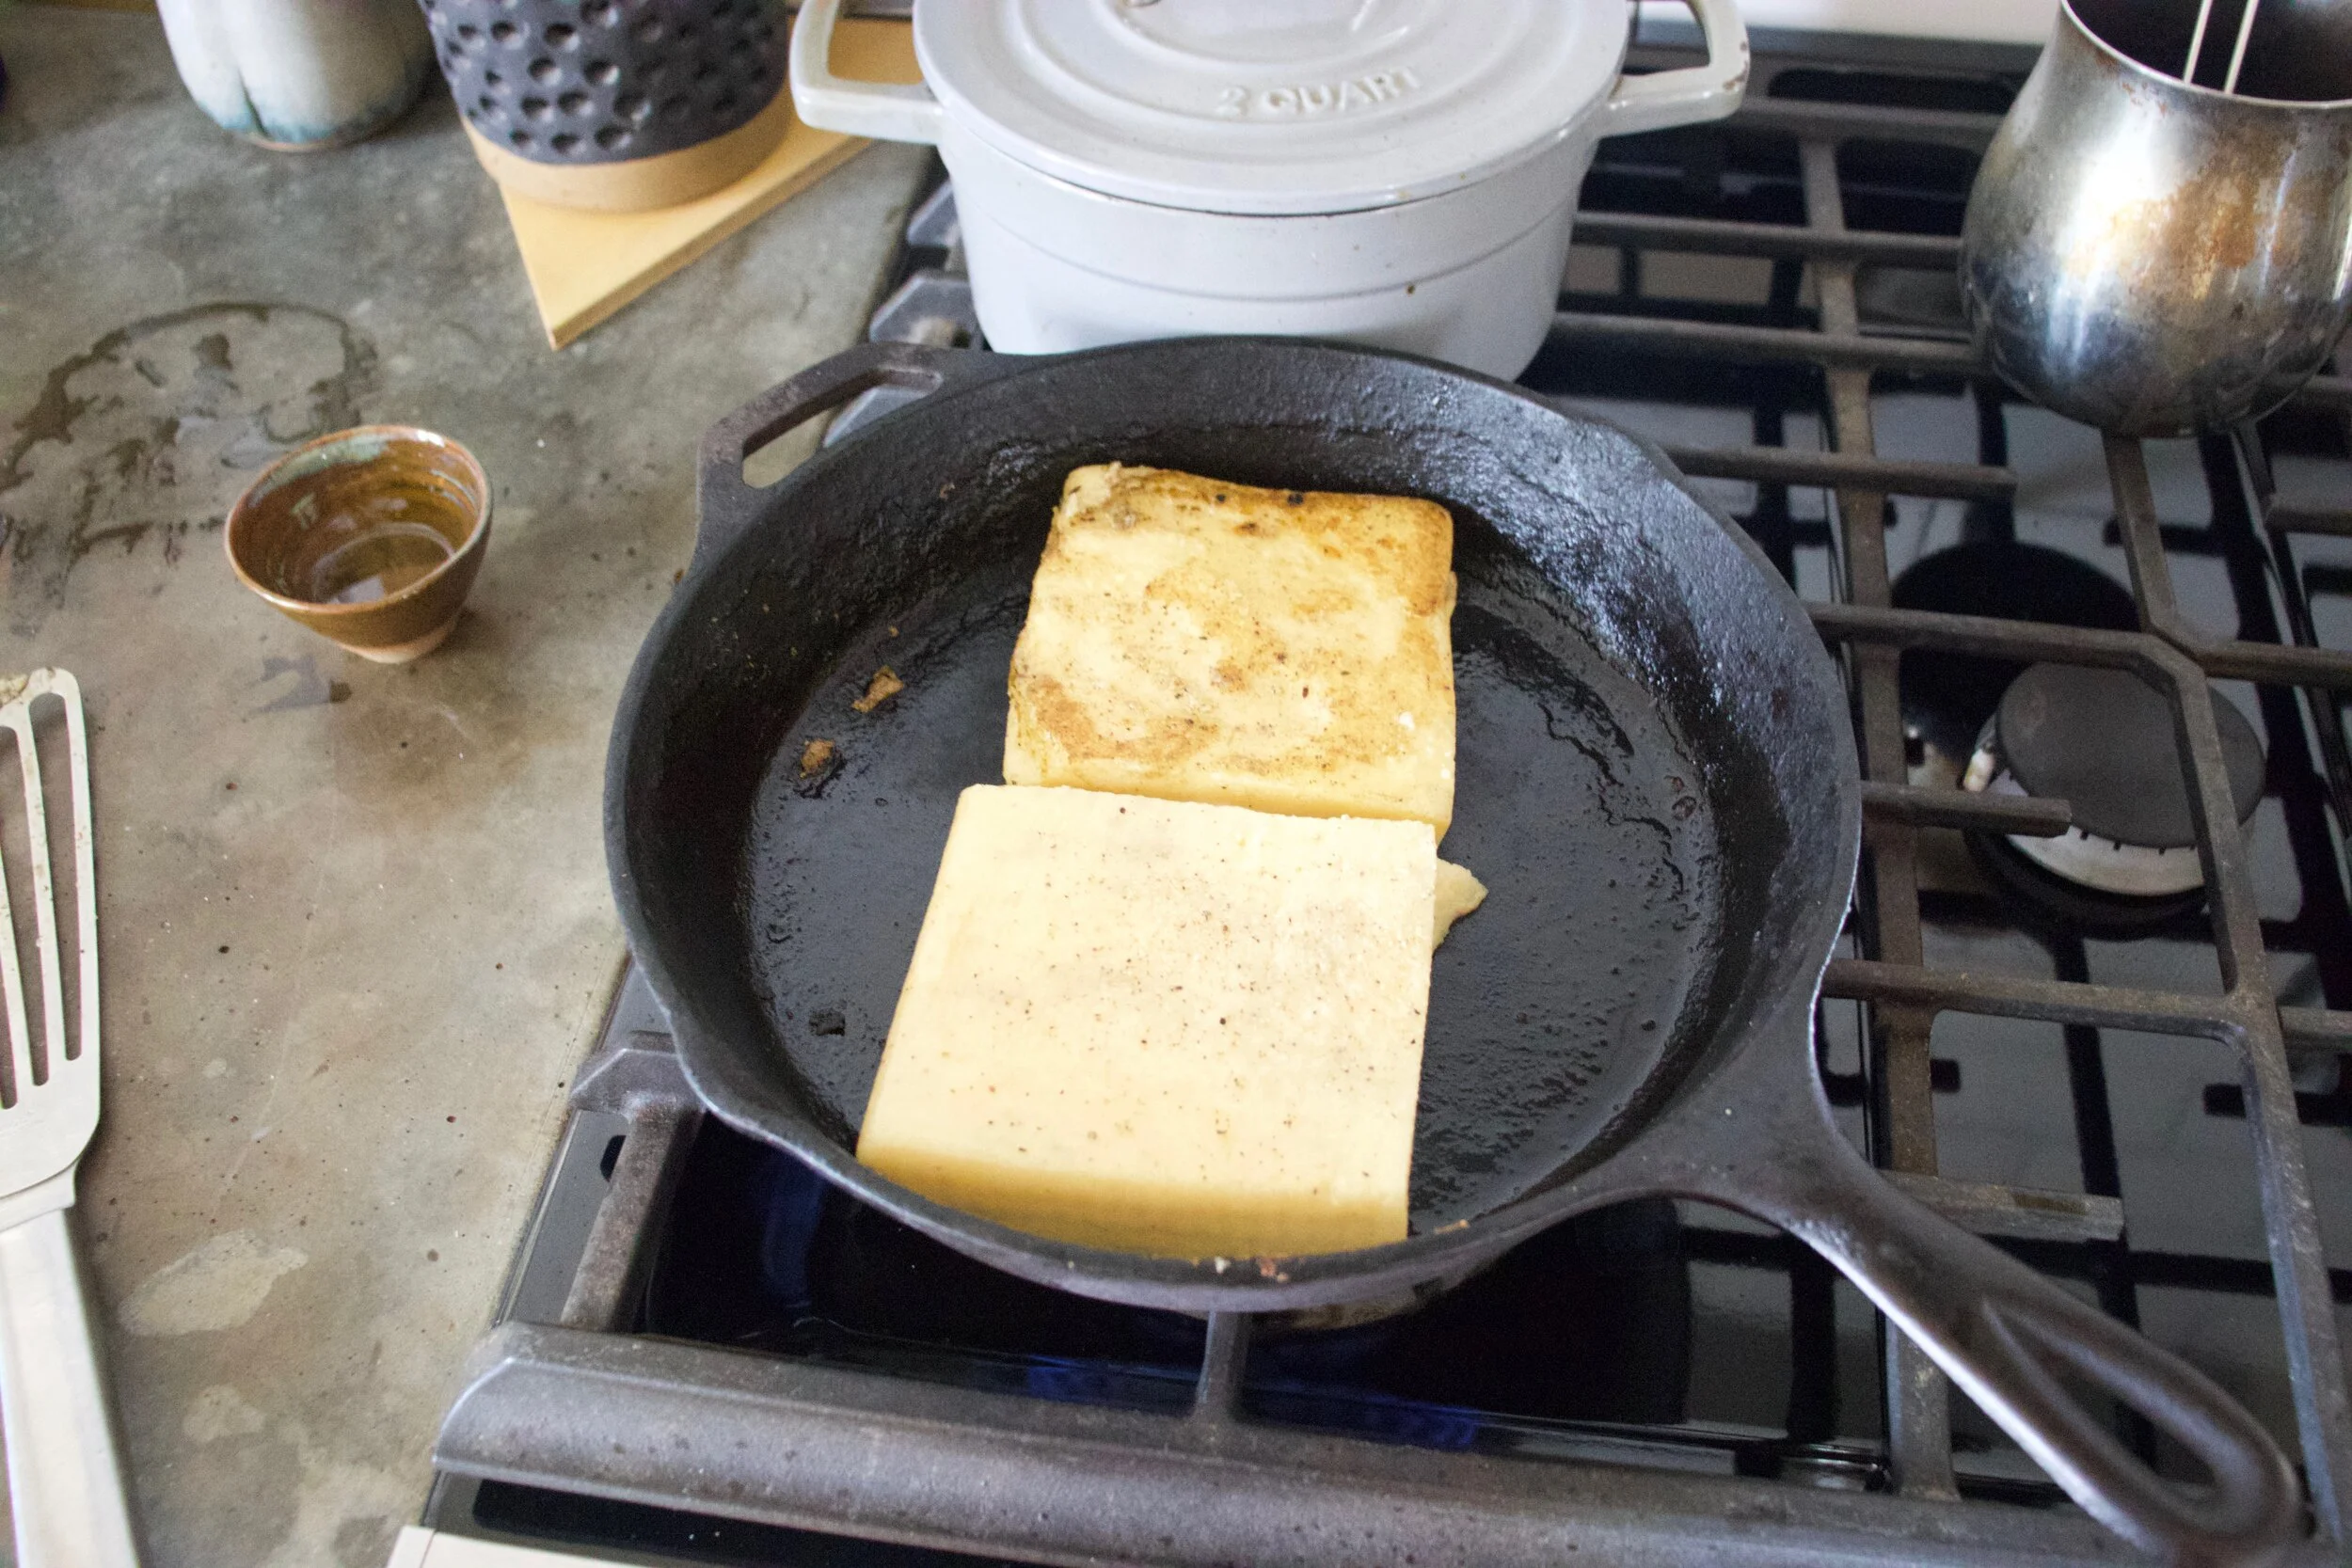
Heat up a skillet with a splash of oil. Once hot, scoop spoonfuls of batter into pan and spread it evenly about 1/4 inch thick. Cook first side fr 4-6 minutes or until nice and brown then flip and cook the other side until done. Repeat until batter is gone.
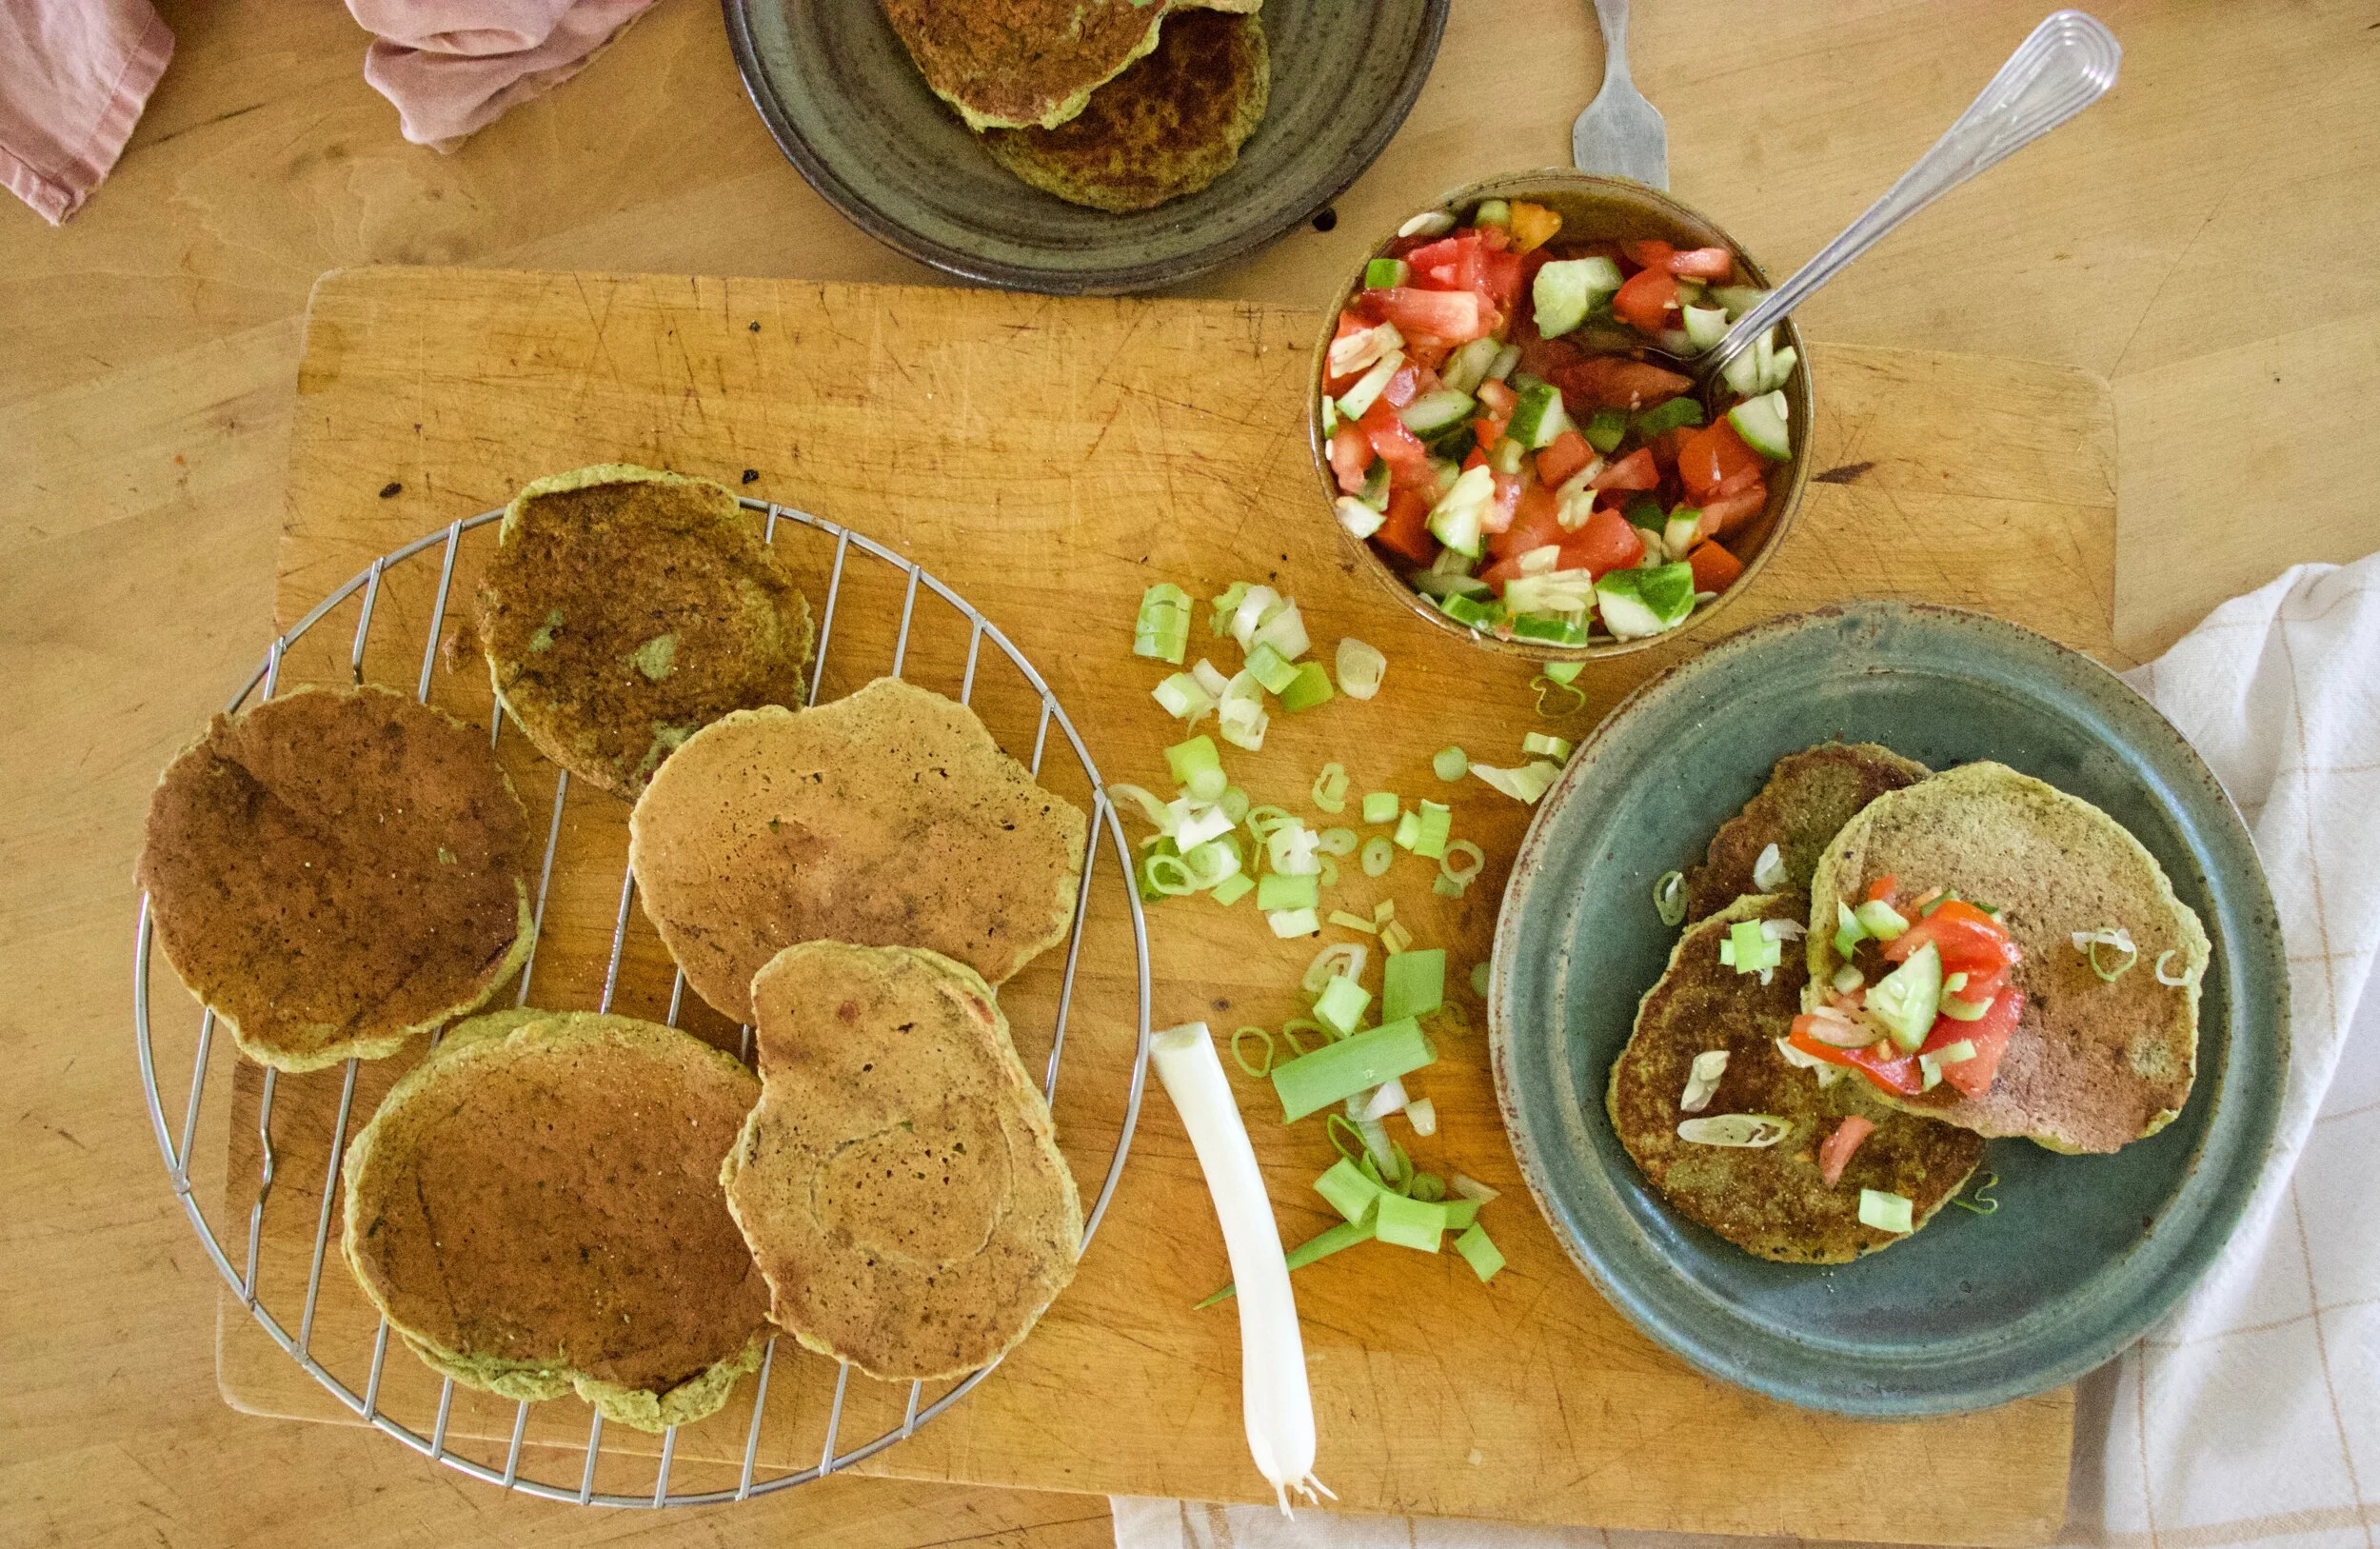
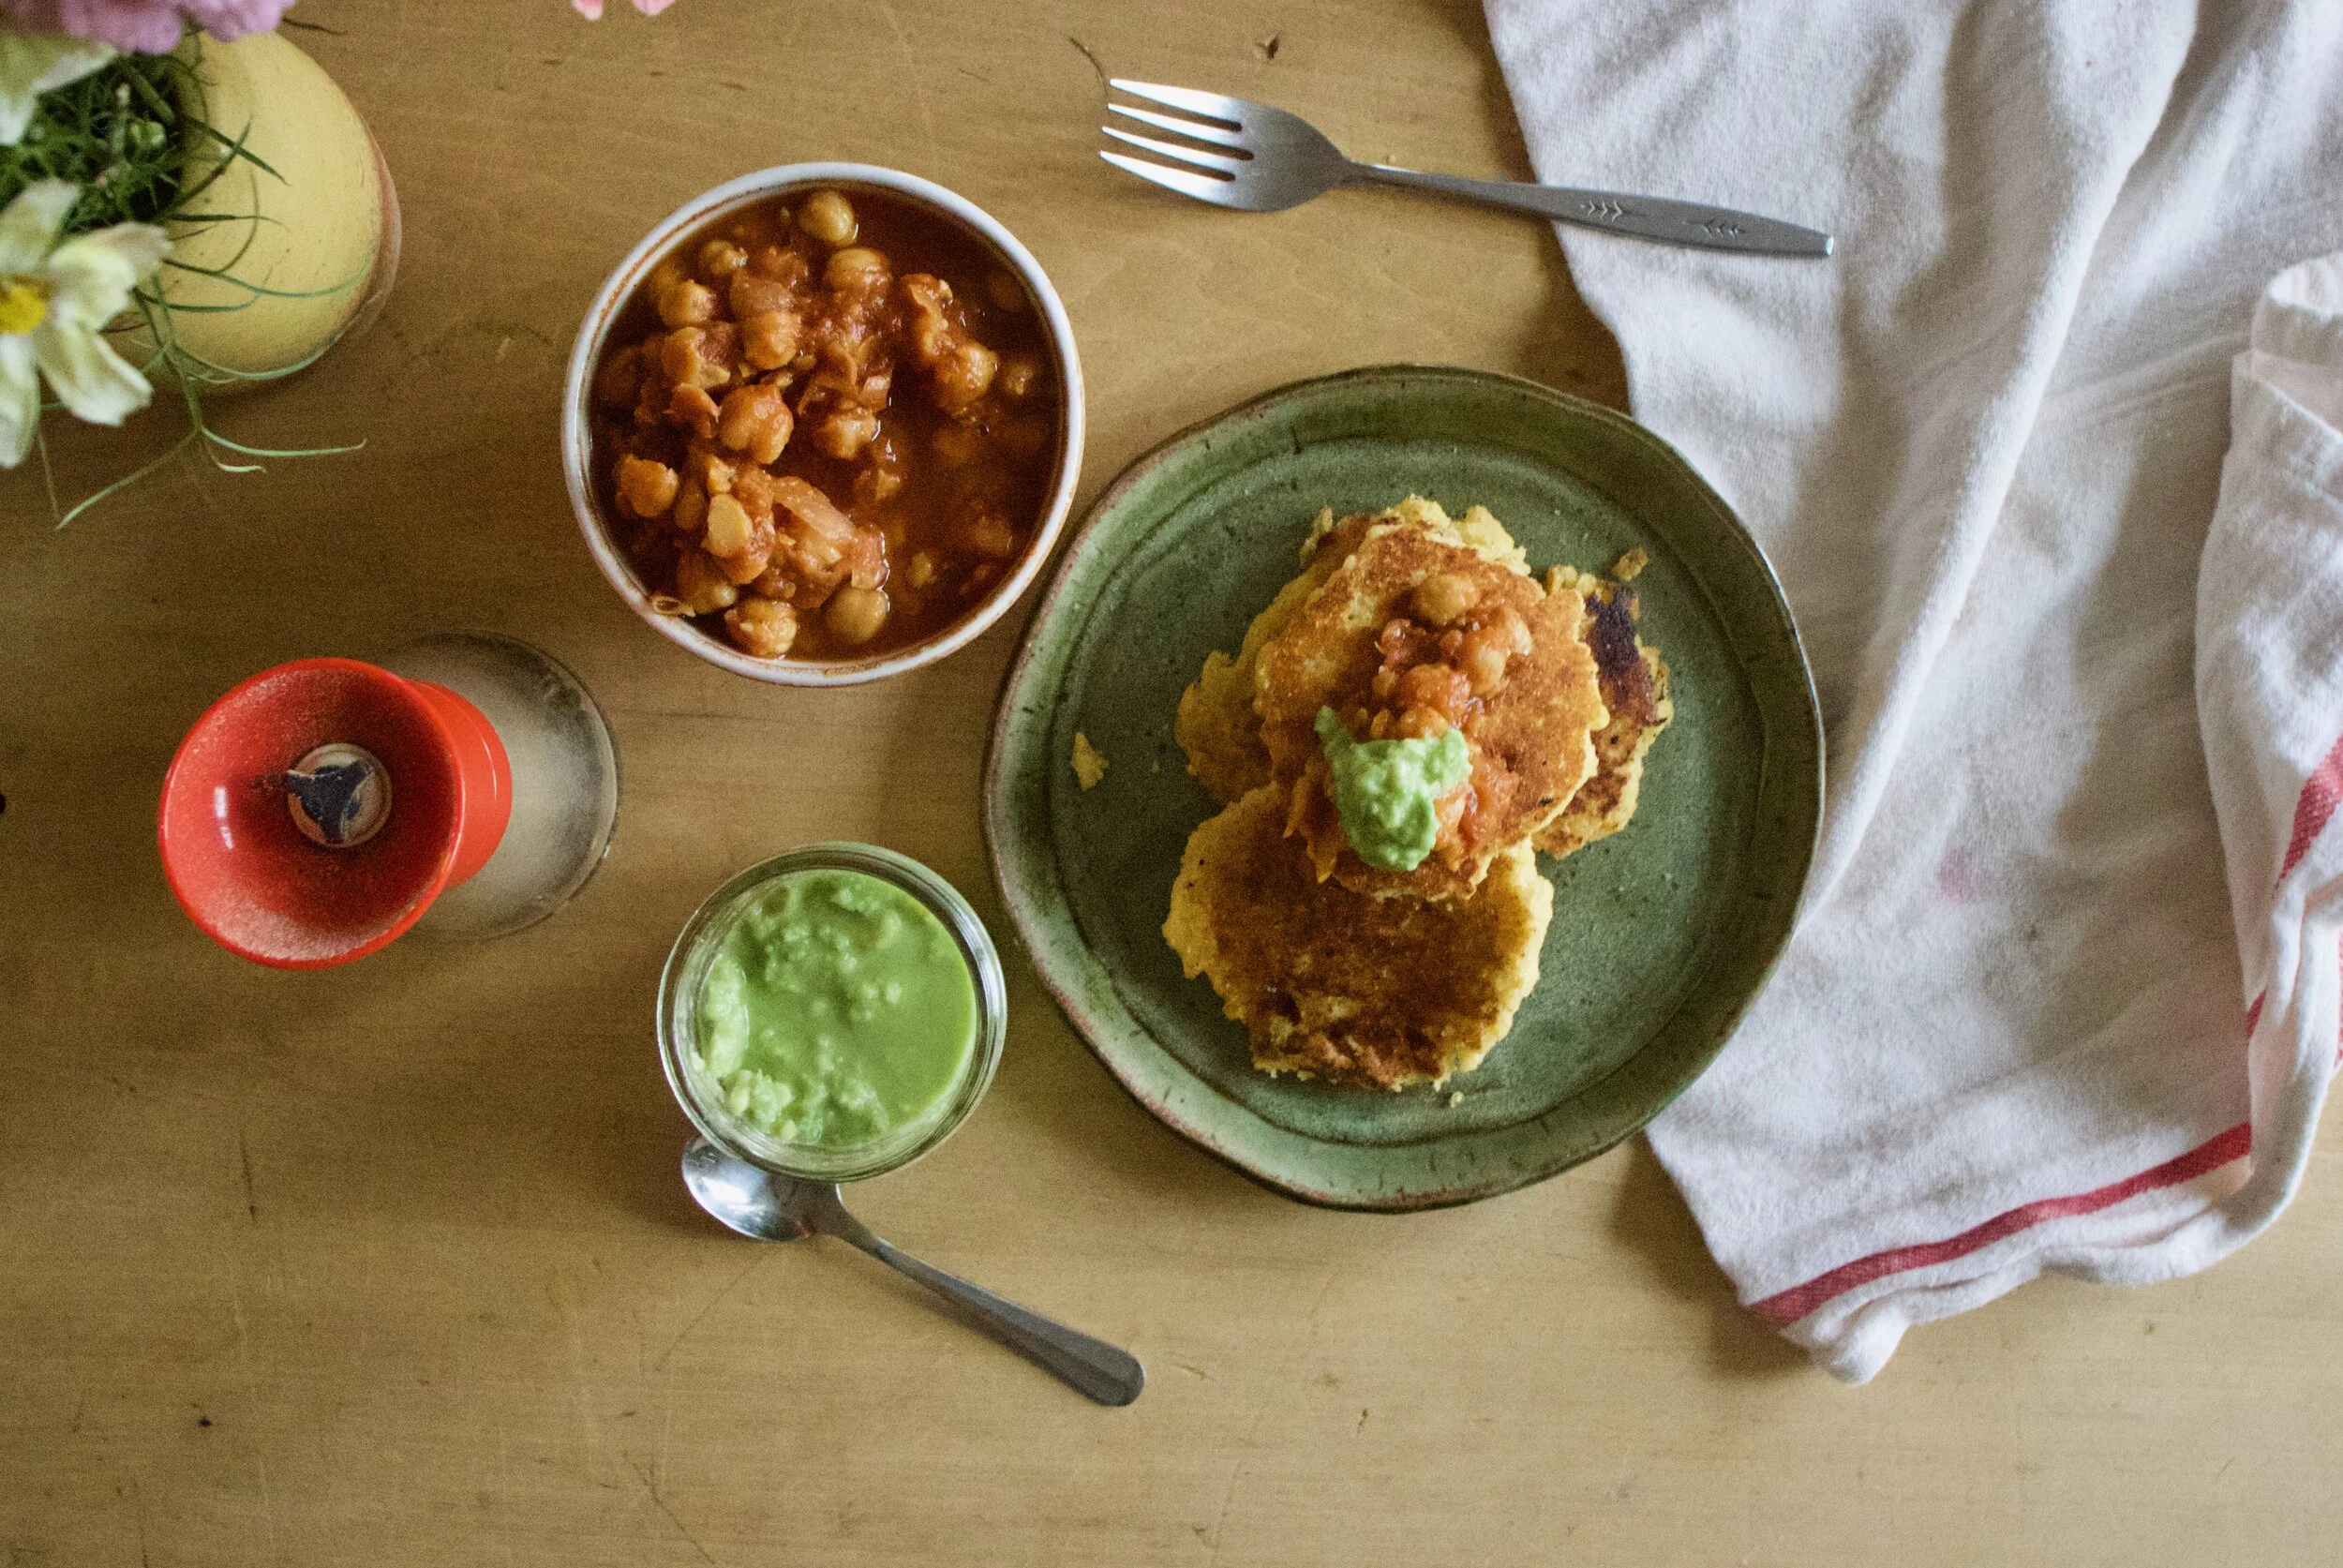
Now eat your amazing delicious lentil zucchini pancakes. I served with fresh salsa, and I have also made tahini dip and used hummus to smear on them which was also freaking amazing, but you can serve with whatever floats your boat.
-C
-
1 pound dry green lentils
-
1 large zucchini
-
1 onion
-
salt and pepper
-
splash of oil
Start with the by making the lentil flour. Place lentils into a high speed blender and blend until it has turned into a fine flour. You might need to stop the blender ever once in a while to move things around with a spoon (when it is turned off!). It should only take about a minute or so in a Vitamix, but maybe a few extra minutes if using a less powerful blender.
Once flour is achieved, dump into a jar with a lid. You probably won%u2019t be using it all right now.
Now grab the zucchini and onion and cut into chunks. Place the chunks into the blender and blend until smooth.
Dump puree into a bowl. Add about 1 cup of lentil flour and stir. IF the batter is really loss, add in another 1/4 cup or more to get the batter to a thick but spreadable consistency (kind of like hummus). Season with salt and pepper.
Grab a skillet and place on medium heat with a splash of oil. Once skillet is heated place spoonfuls of the batter in and spread around until between 1/2-1/4 inch thick. Cook fist side for 4-6 minutes or until a nice golden brown then flip and cook the other for a few minutes until browed. Repeat until batter is gone.
Place cooked pancakes on a plate, grab a fork and some savory type condiment (hummus, salsa, tahini, cashew cream) and eat.
I have been on a severe citrus kick lately. Oranges, limes, lemons, kumquats. I want it all and have been eating it all. A lot of it all. Espeically the oranges which are just so good right now. We have been going through bags of them faster then ever and I am not mad about it.
Which then brings us to chili. Chili is one of the things that I make on a very regular bases. It%u2019s beans, veggies, tomatoes, and a ton of spices. Easy as can be, most people like it, and I never get sick of it. I mean, how could you get sick of it, it is so good! Anyway. Chili, its great but have you ever added orange to it? Oh man is it amazing. Bright and acidic and sweet. The whole pot of chili just radiates more goodness, more intensity, more, moreness. (I know that doesn%u2019t make sense but you get it.) It%u2019s a whole new level of chili and I don%u2019t if there will ever be a time when I don%u2019t add orange to my chili again. Well at least during citrus season.
But enough about all that, what you really want is to just start making this orange black bean chili so you can eat it. I hear you, so I%u2019ll let you at it.
To the chili!

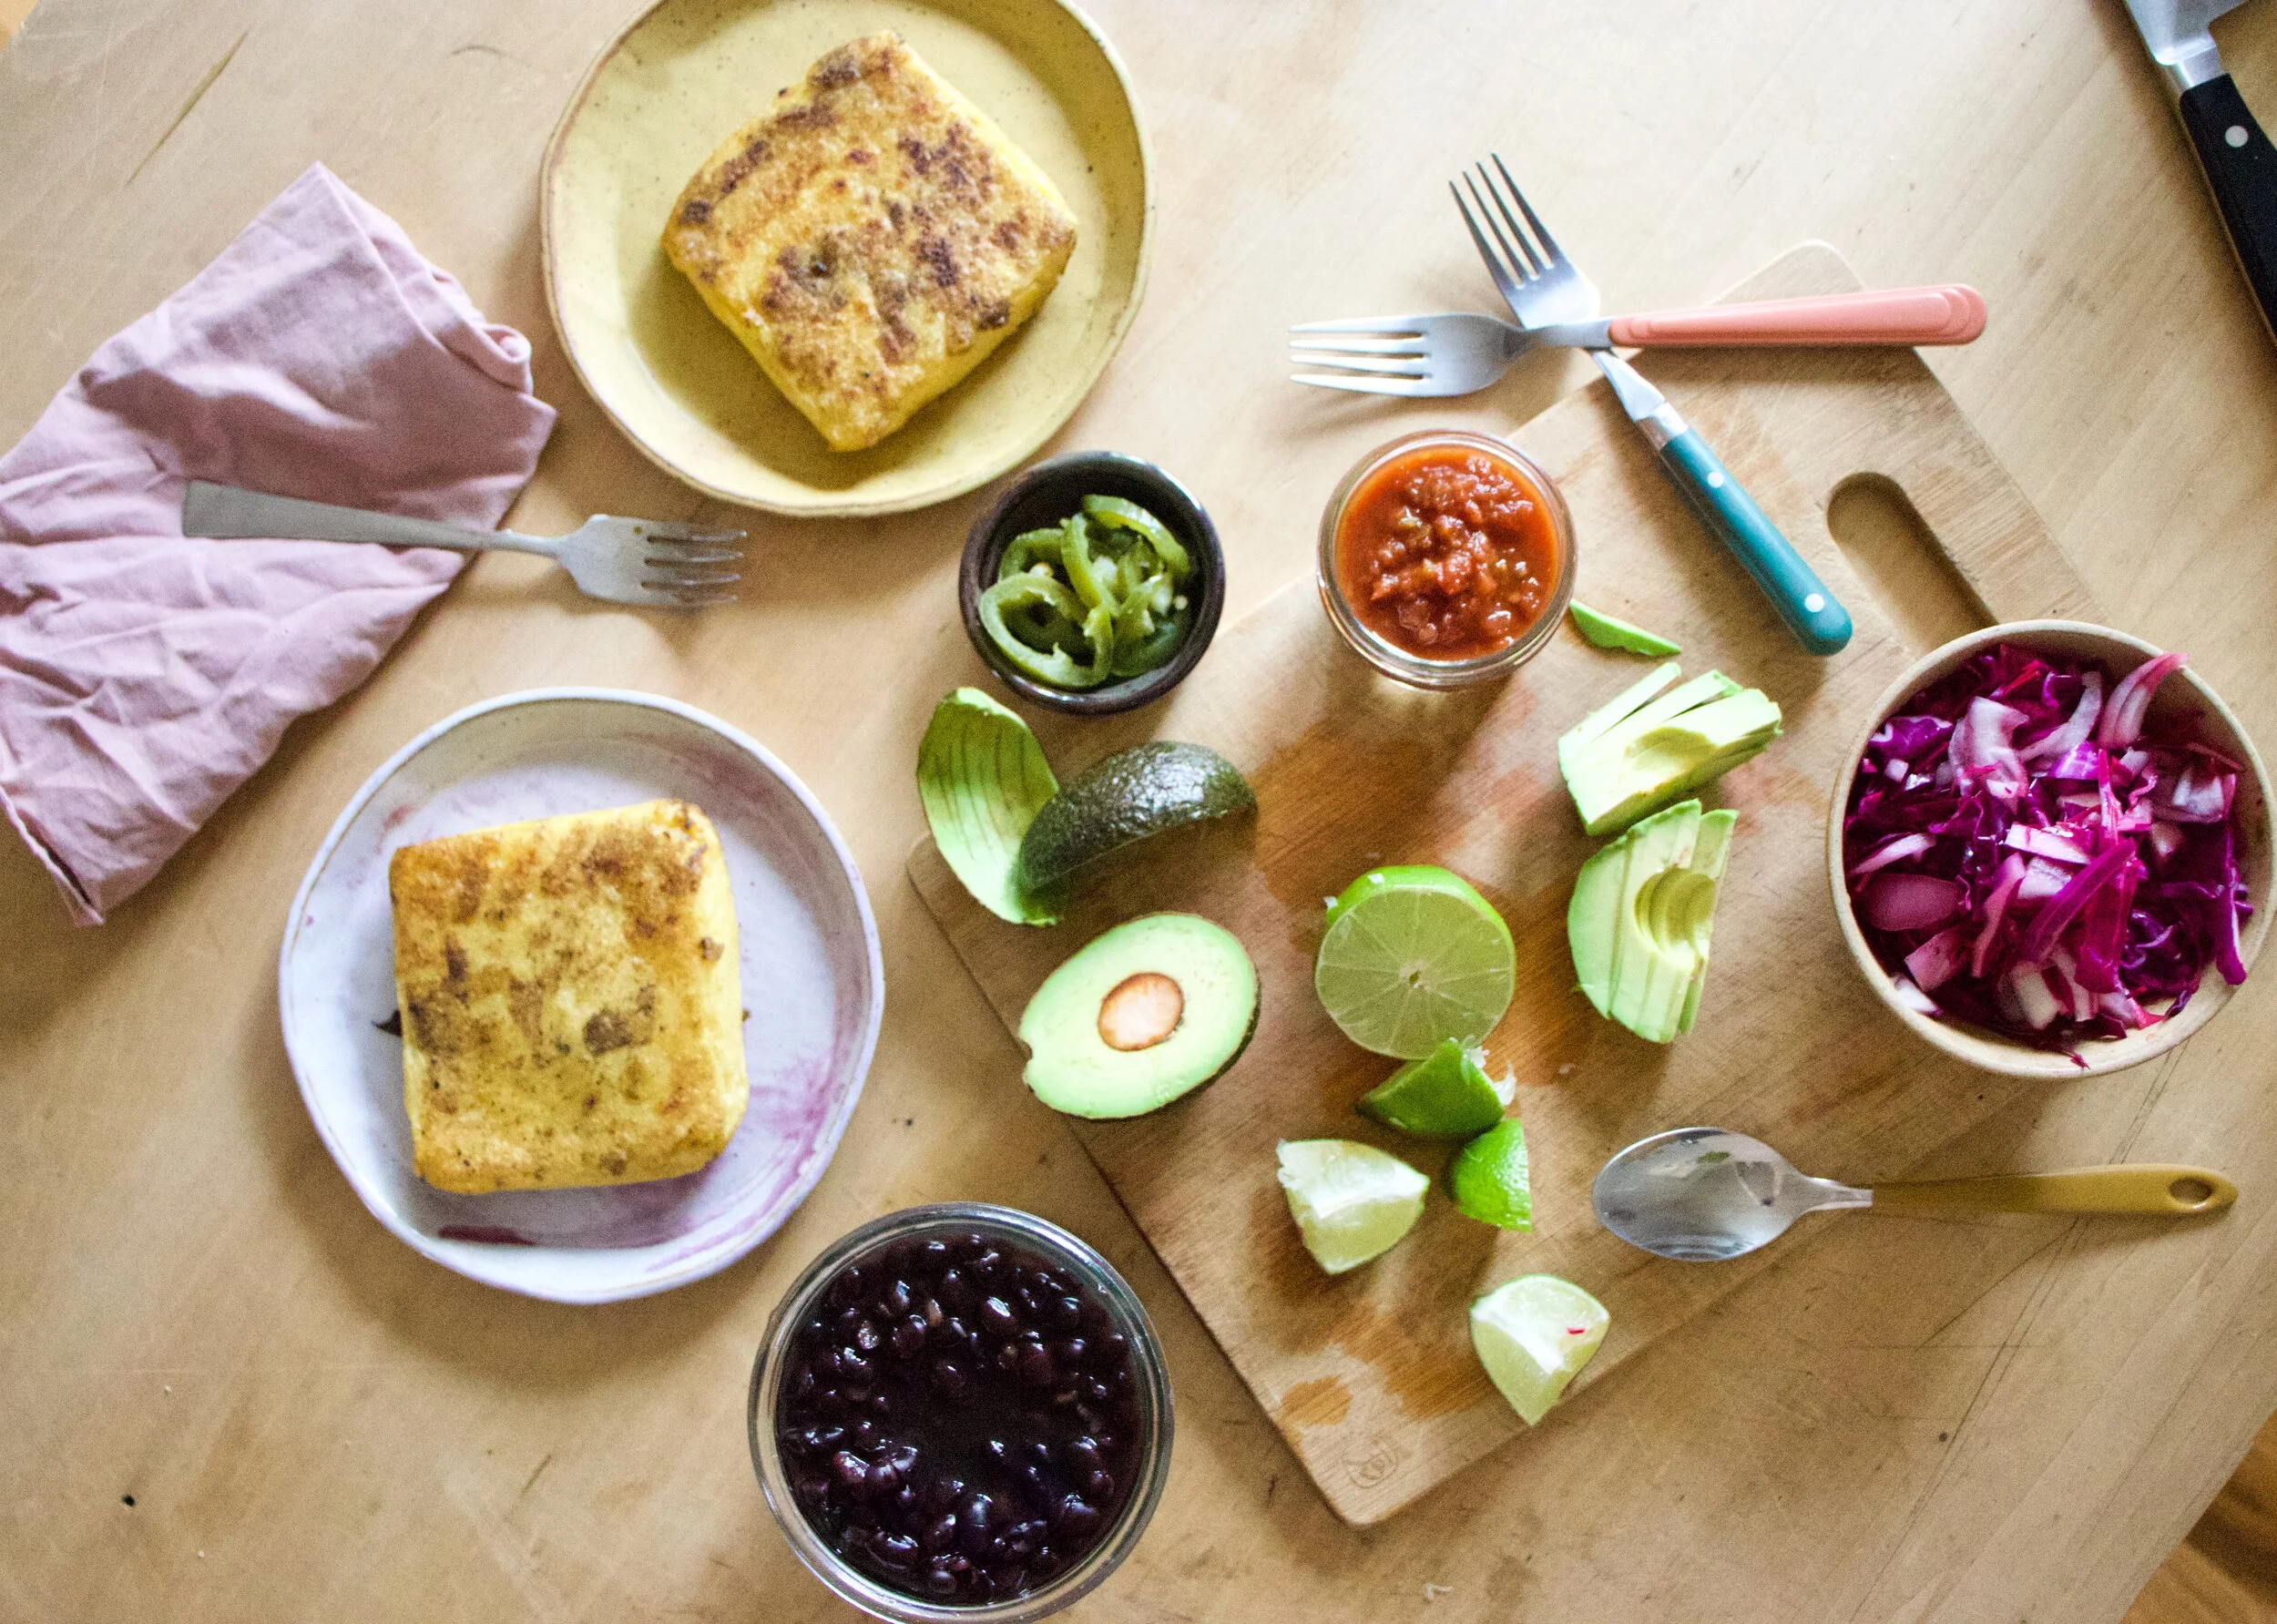
The stuff. Oranges, black beans, crushed tomatoes, an onion, a couple carrots, a pepper, and jalape%u00f1os. Also lots of cumin, chili powder, ground ginger, garlic powder, and salt and pepper.

Small dice up the pepper, onion, carrots, and jalape%u00f1os. Don%u2019t want it super spicy, don%u2019t add the jalape%u00f1os.
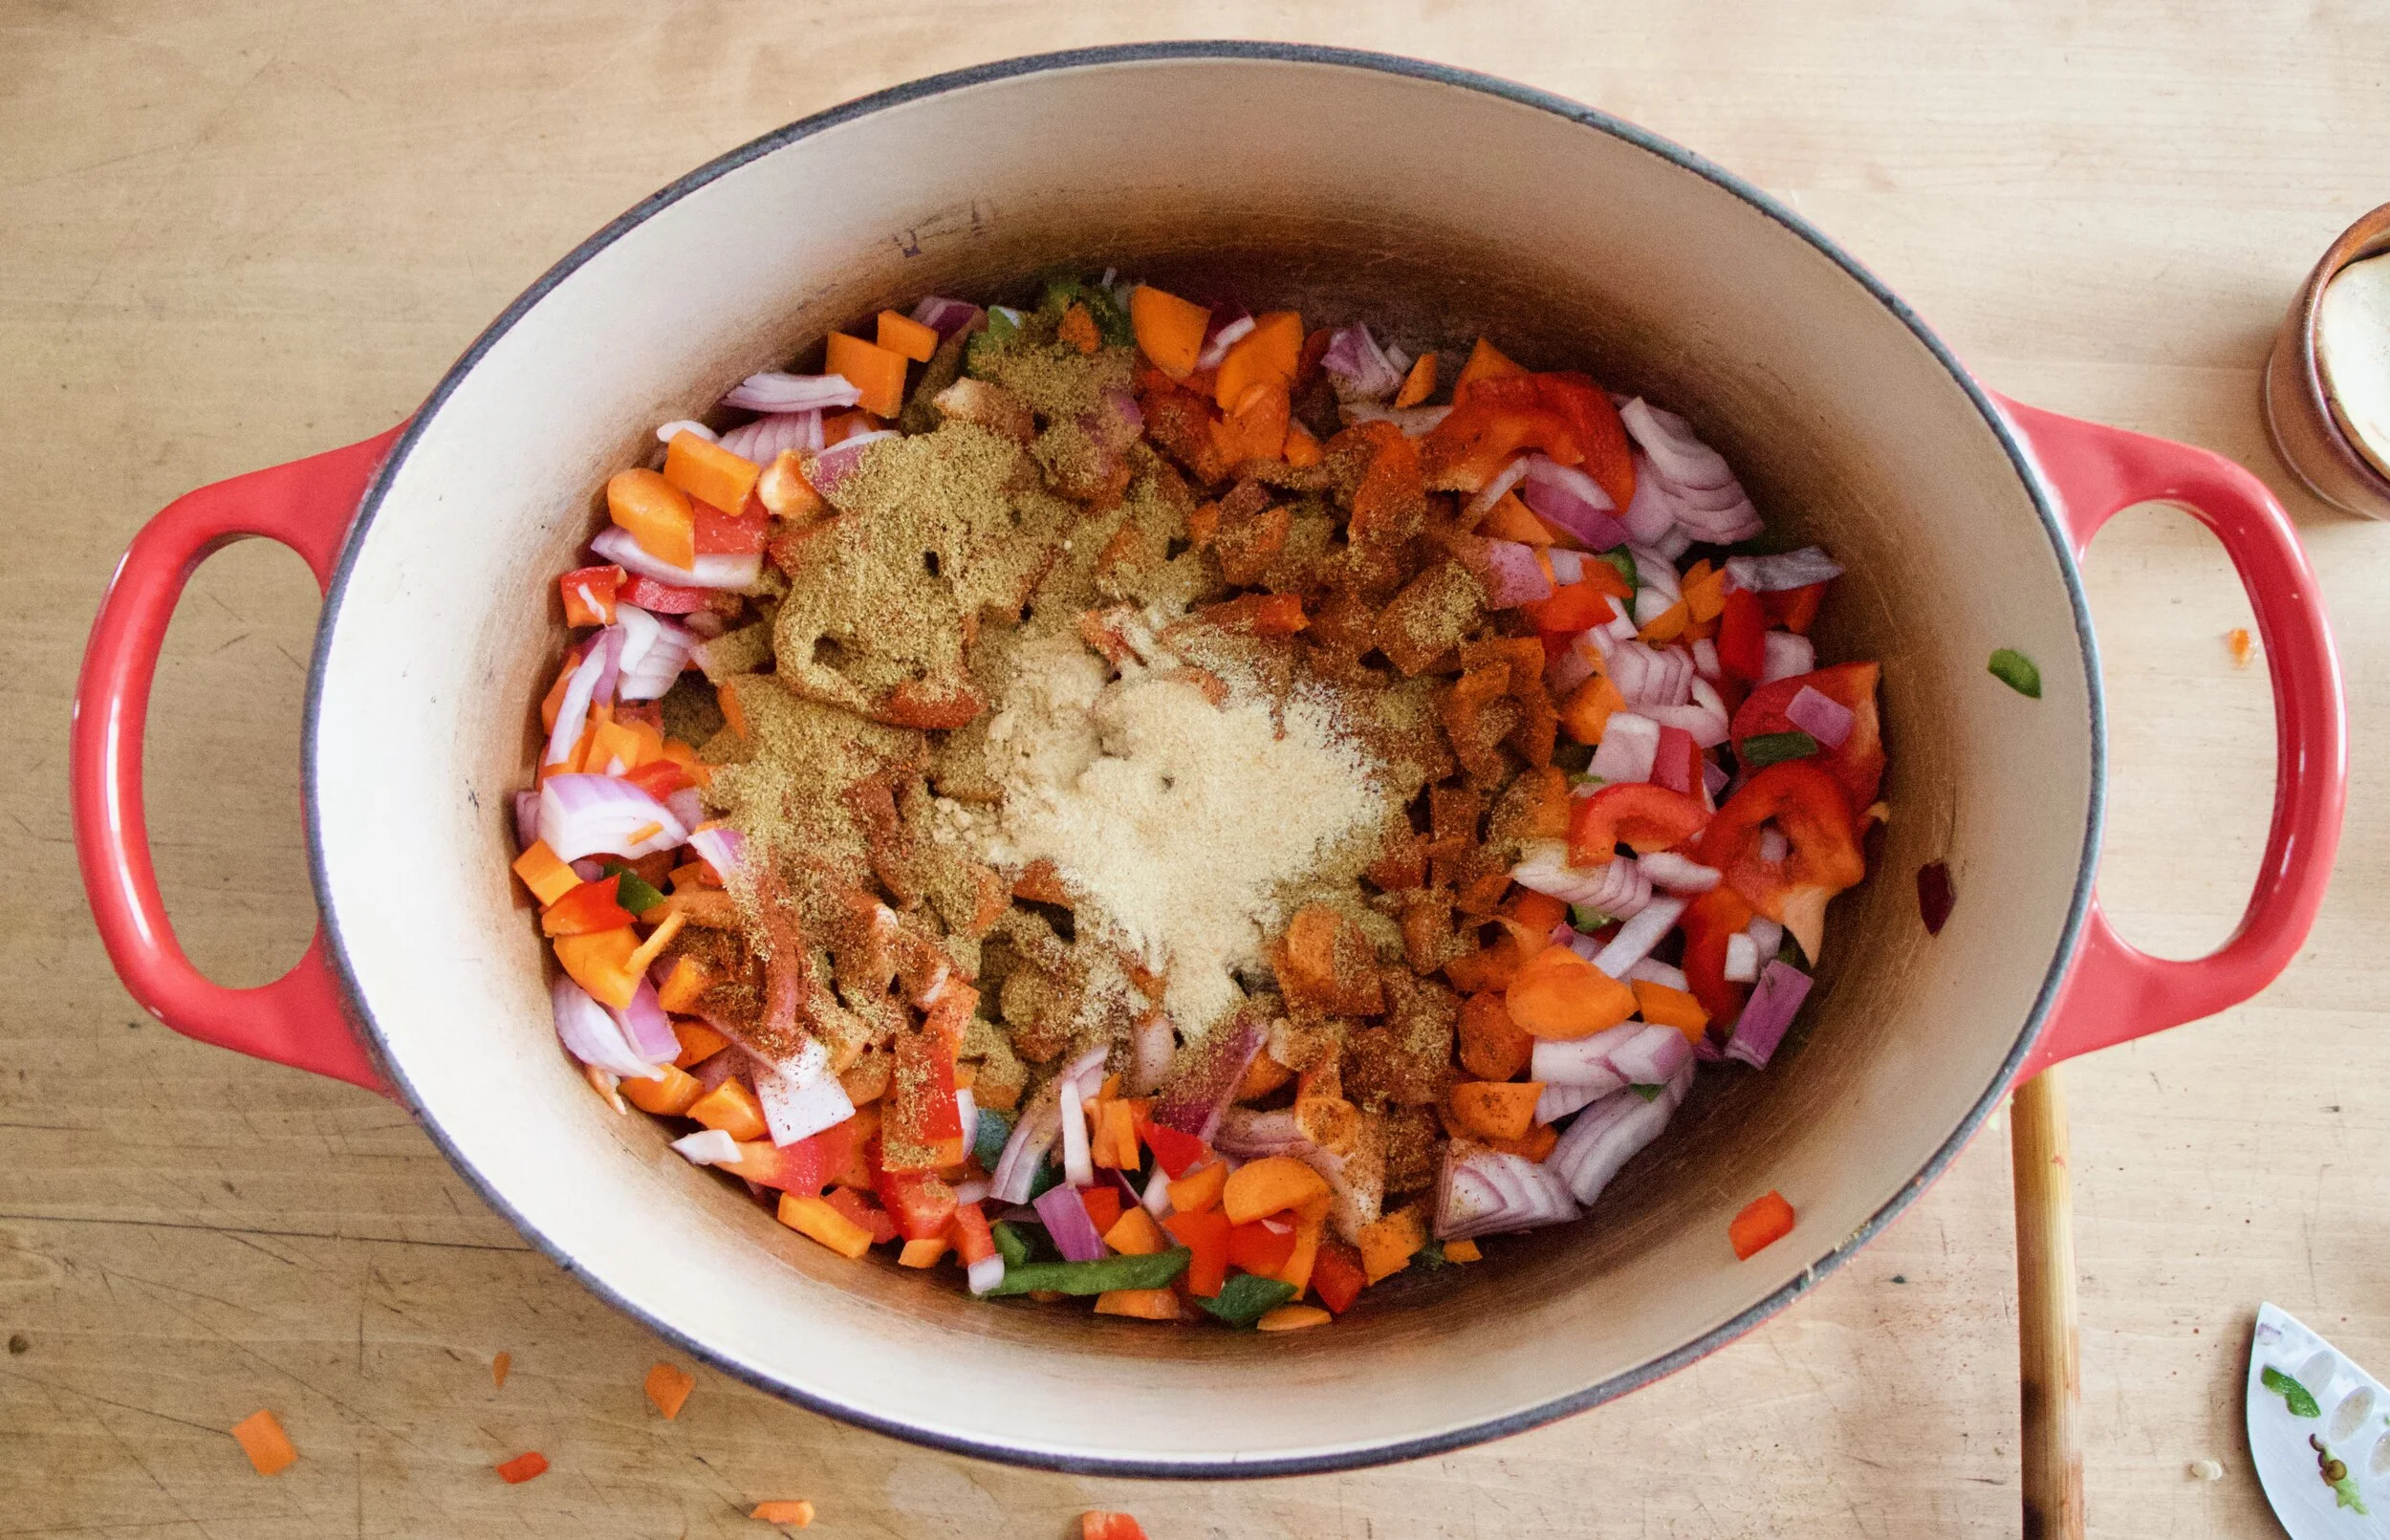
All that stuff gets tossed into a big pot along with all the spices, some salt and pepper, and a little water too. Place on stove to start cooking down the veggies.

Slightly tender and smells amazing.
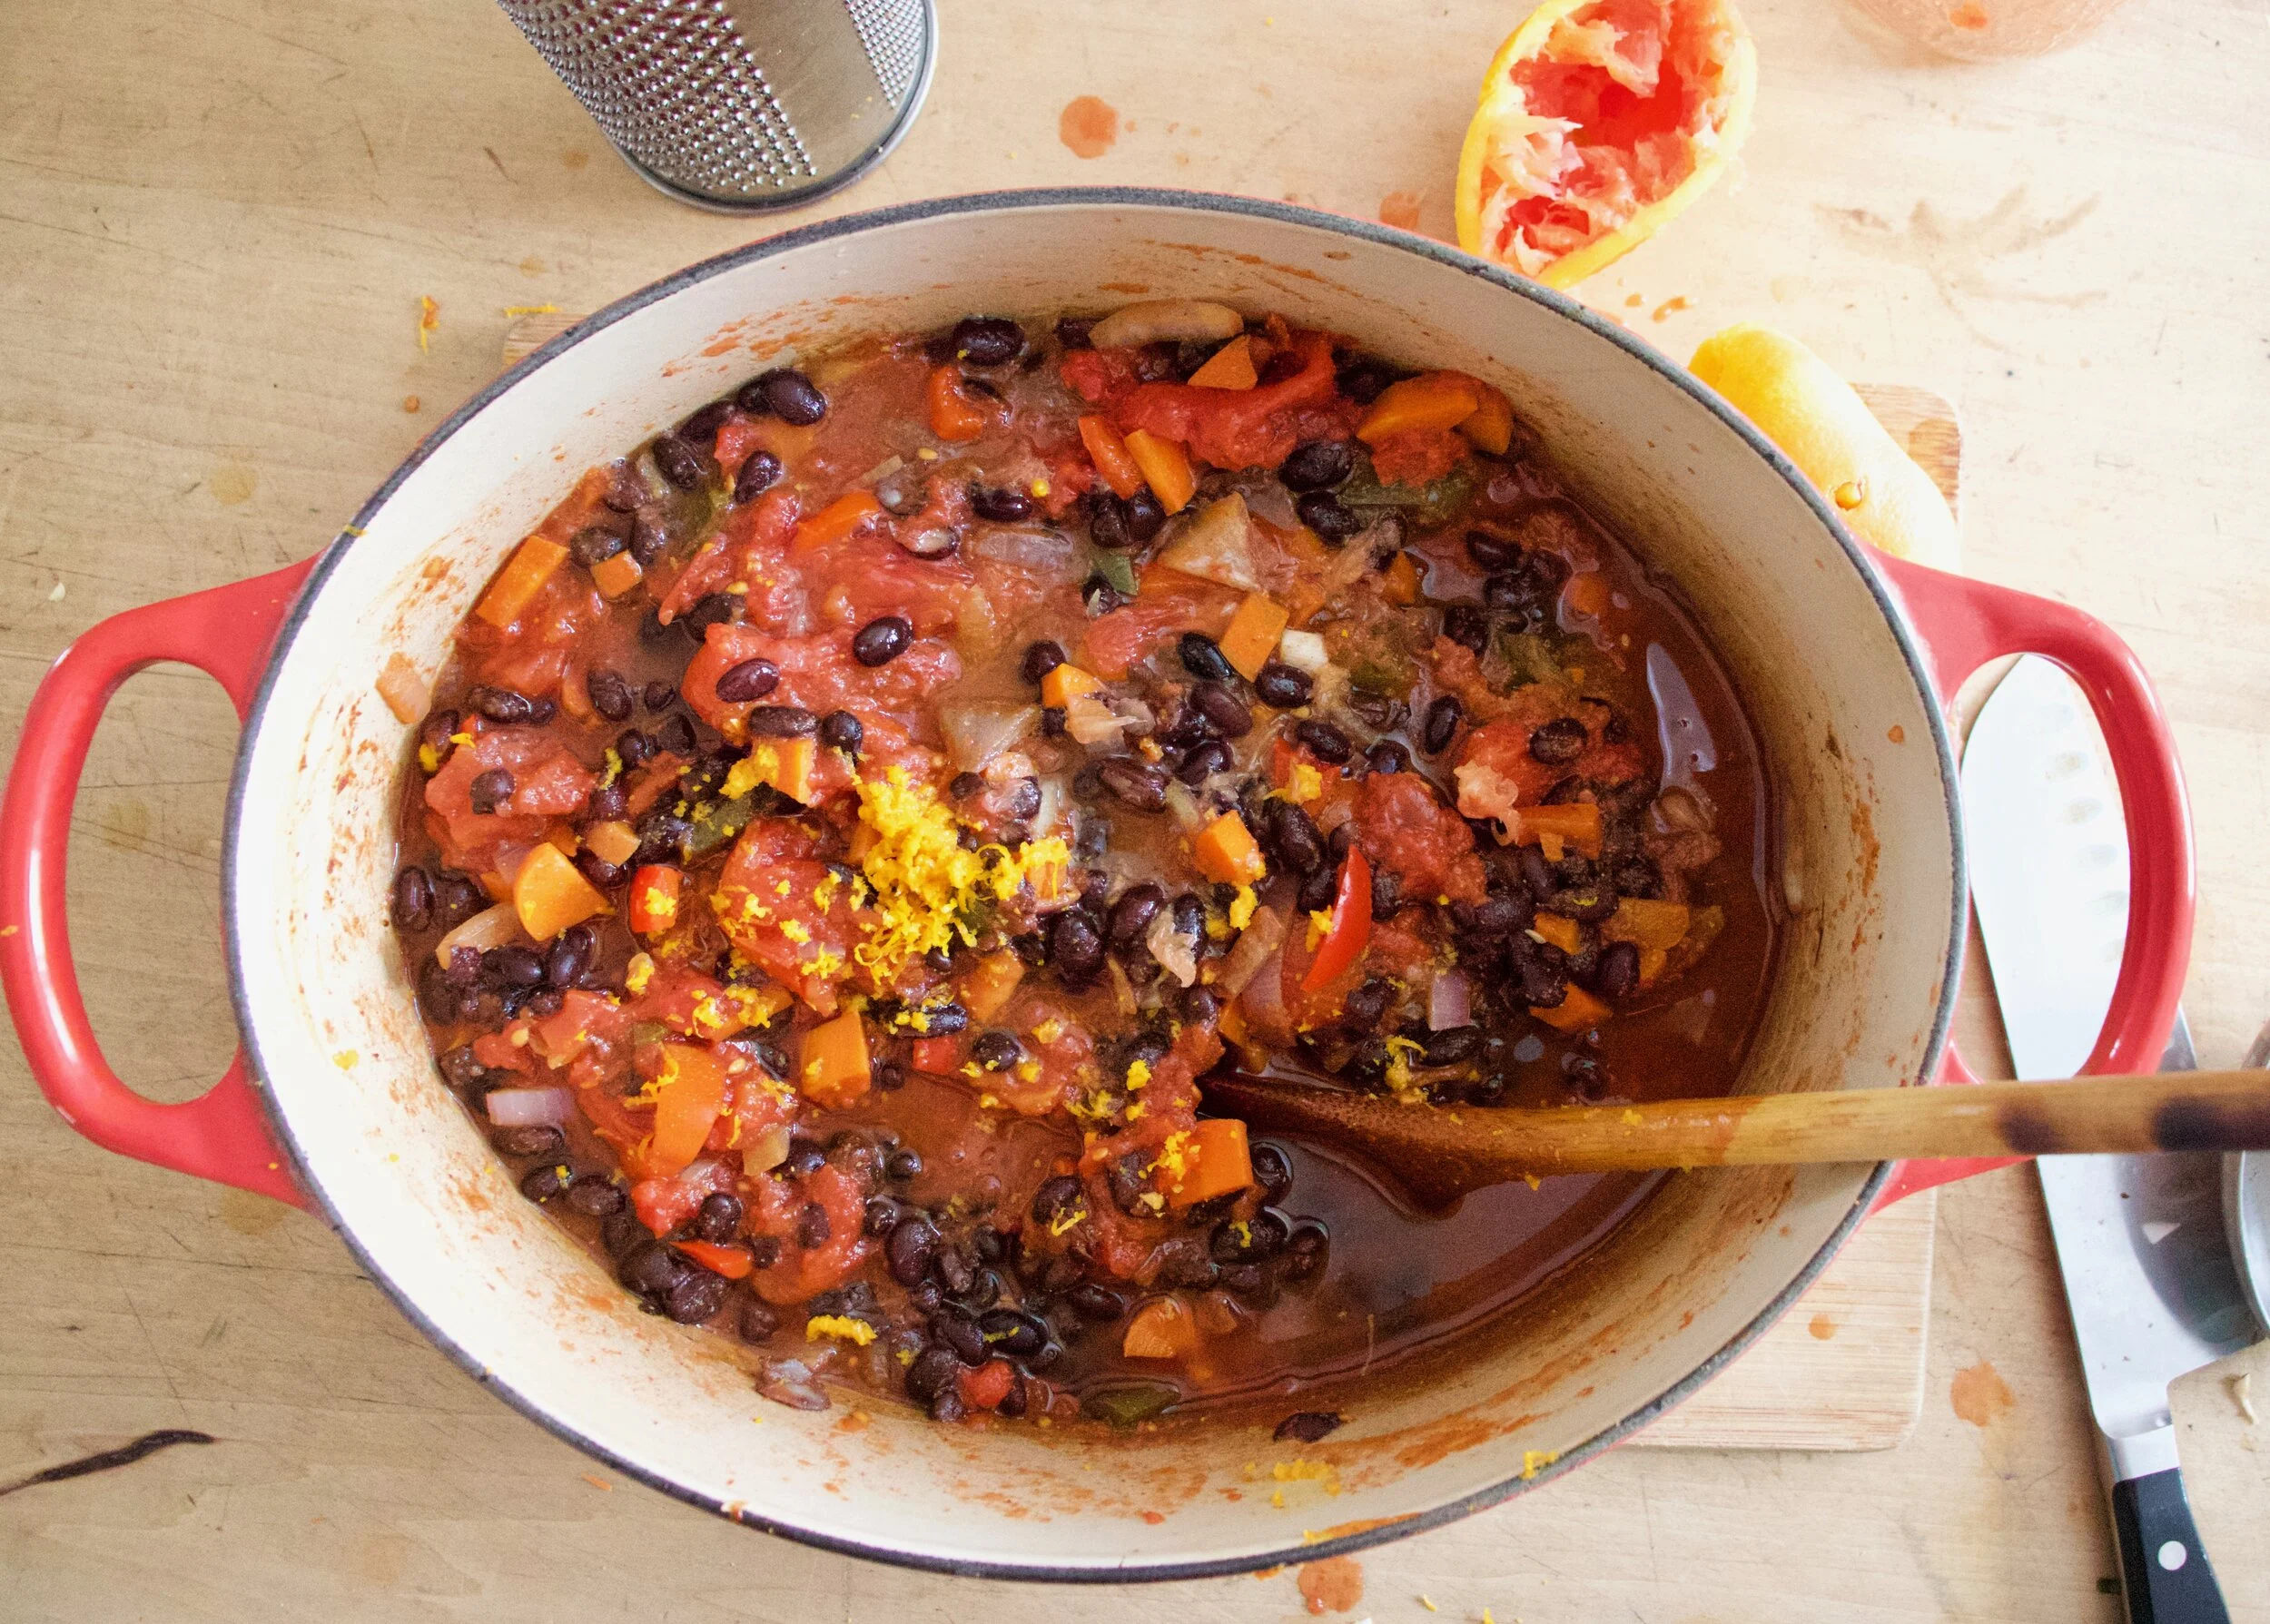
Now add in the beans, the tomatoes, and the zest and juice of an orange. Mix it all up, set it back on stove and keep on cooking,
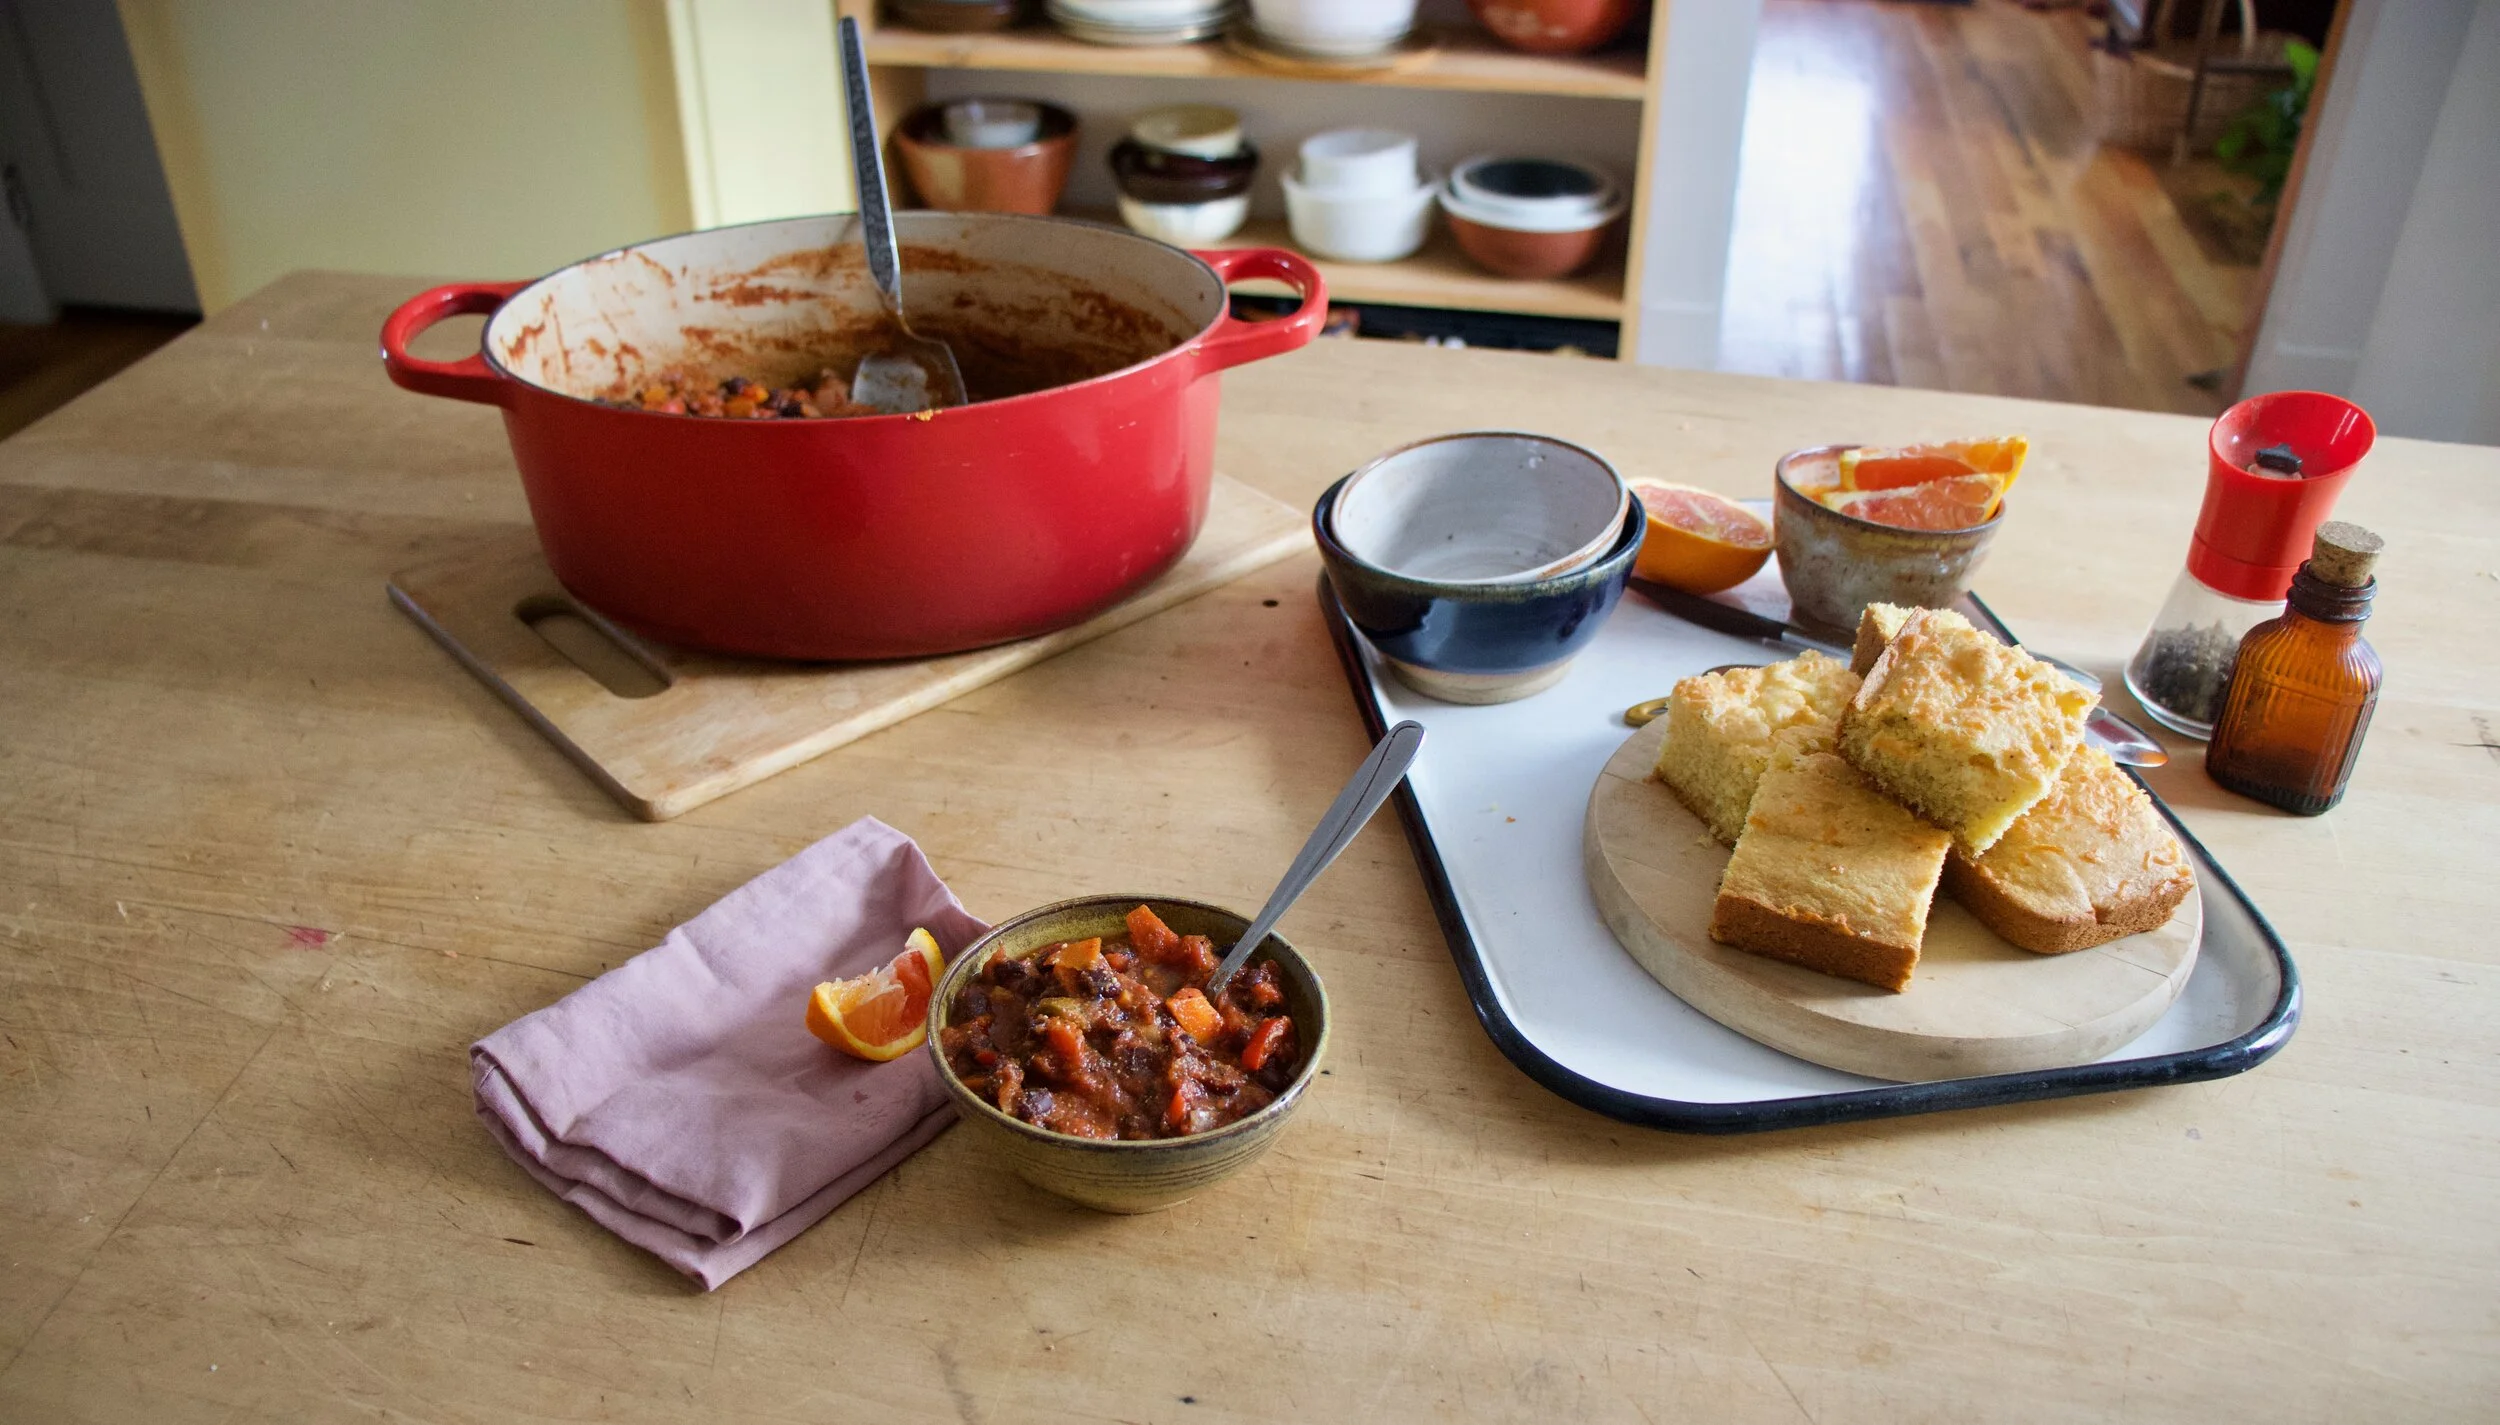
Now eat your chili, with extra orange slices to squeeze all over it of course. And maybe you want to serve it with some corn bread? That is entirely up to you, but who would be made about it?
-C
Serves 4-6 people
-
1 pound cooked black beans drained (about 5 cups or 3 cans)
-
5 cups crushed tomatoes (or 2 28oz cans)
-
2 oranges (navel or cara cara work)
-
2 carrots
-
1 large onion
-
1 bell pepper
-
2 jalapenos (optional)
-
2 heaping tablespoons cumin
-
2 tablespoon chili powder
-
2 teaspoons garlic powder
-
2 teaspoons ground ginger
-
salt and pepper
Start by chopping up the veggies. Small dice the carrot, the onion and the pepper. If using jalape%u00f1o, dice that into small little bits too. And remove seeds for less heat or leave them if you like it. Once that is all cut up, dump it all into a large heavy bottom pot along with the cumin, chili powder, garlic and ginger powder, and about a teaspoon or so each of salt and pepper. Add about 1/2 cup water, mix it all up, and place the pot on stove on medium heat and start to cook the veggies and spices until they begin to smell fragrant and are ever so slightly tender, which should take 5-10 minutes.
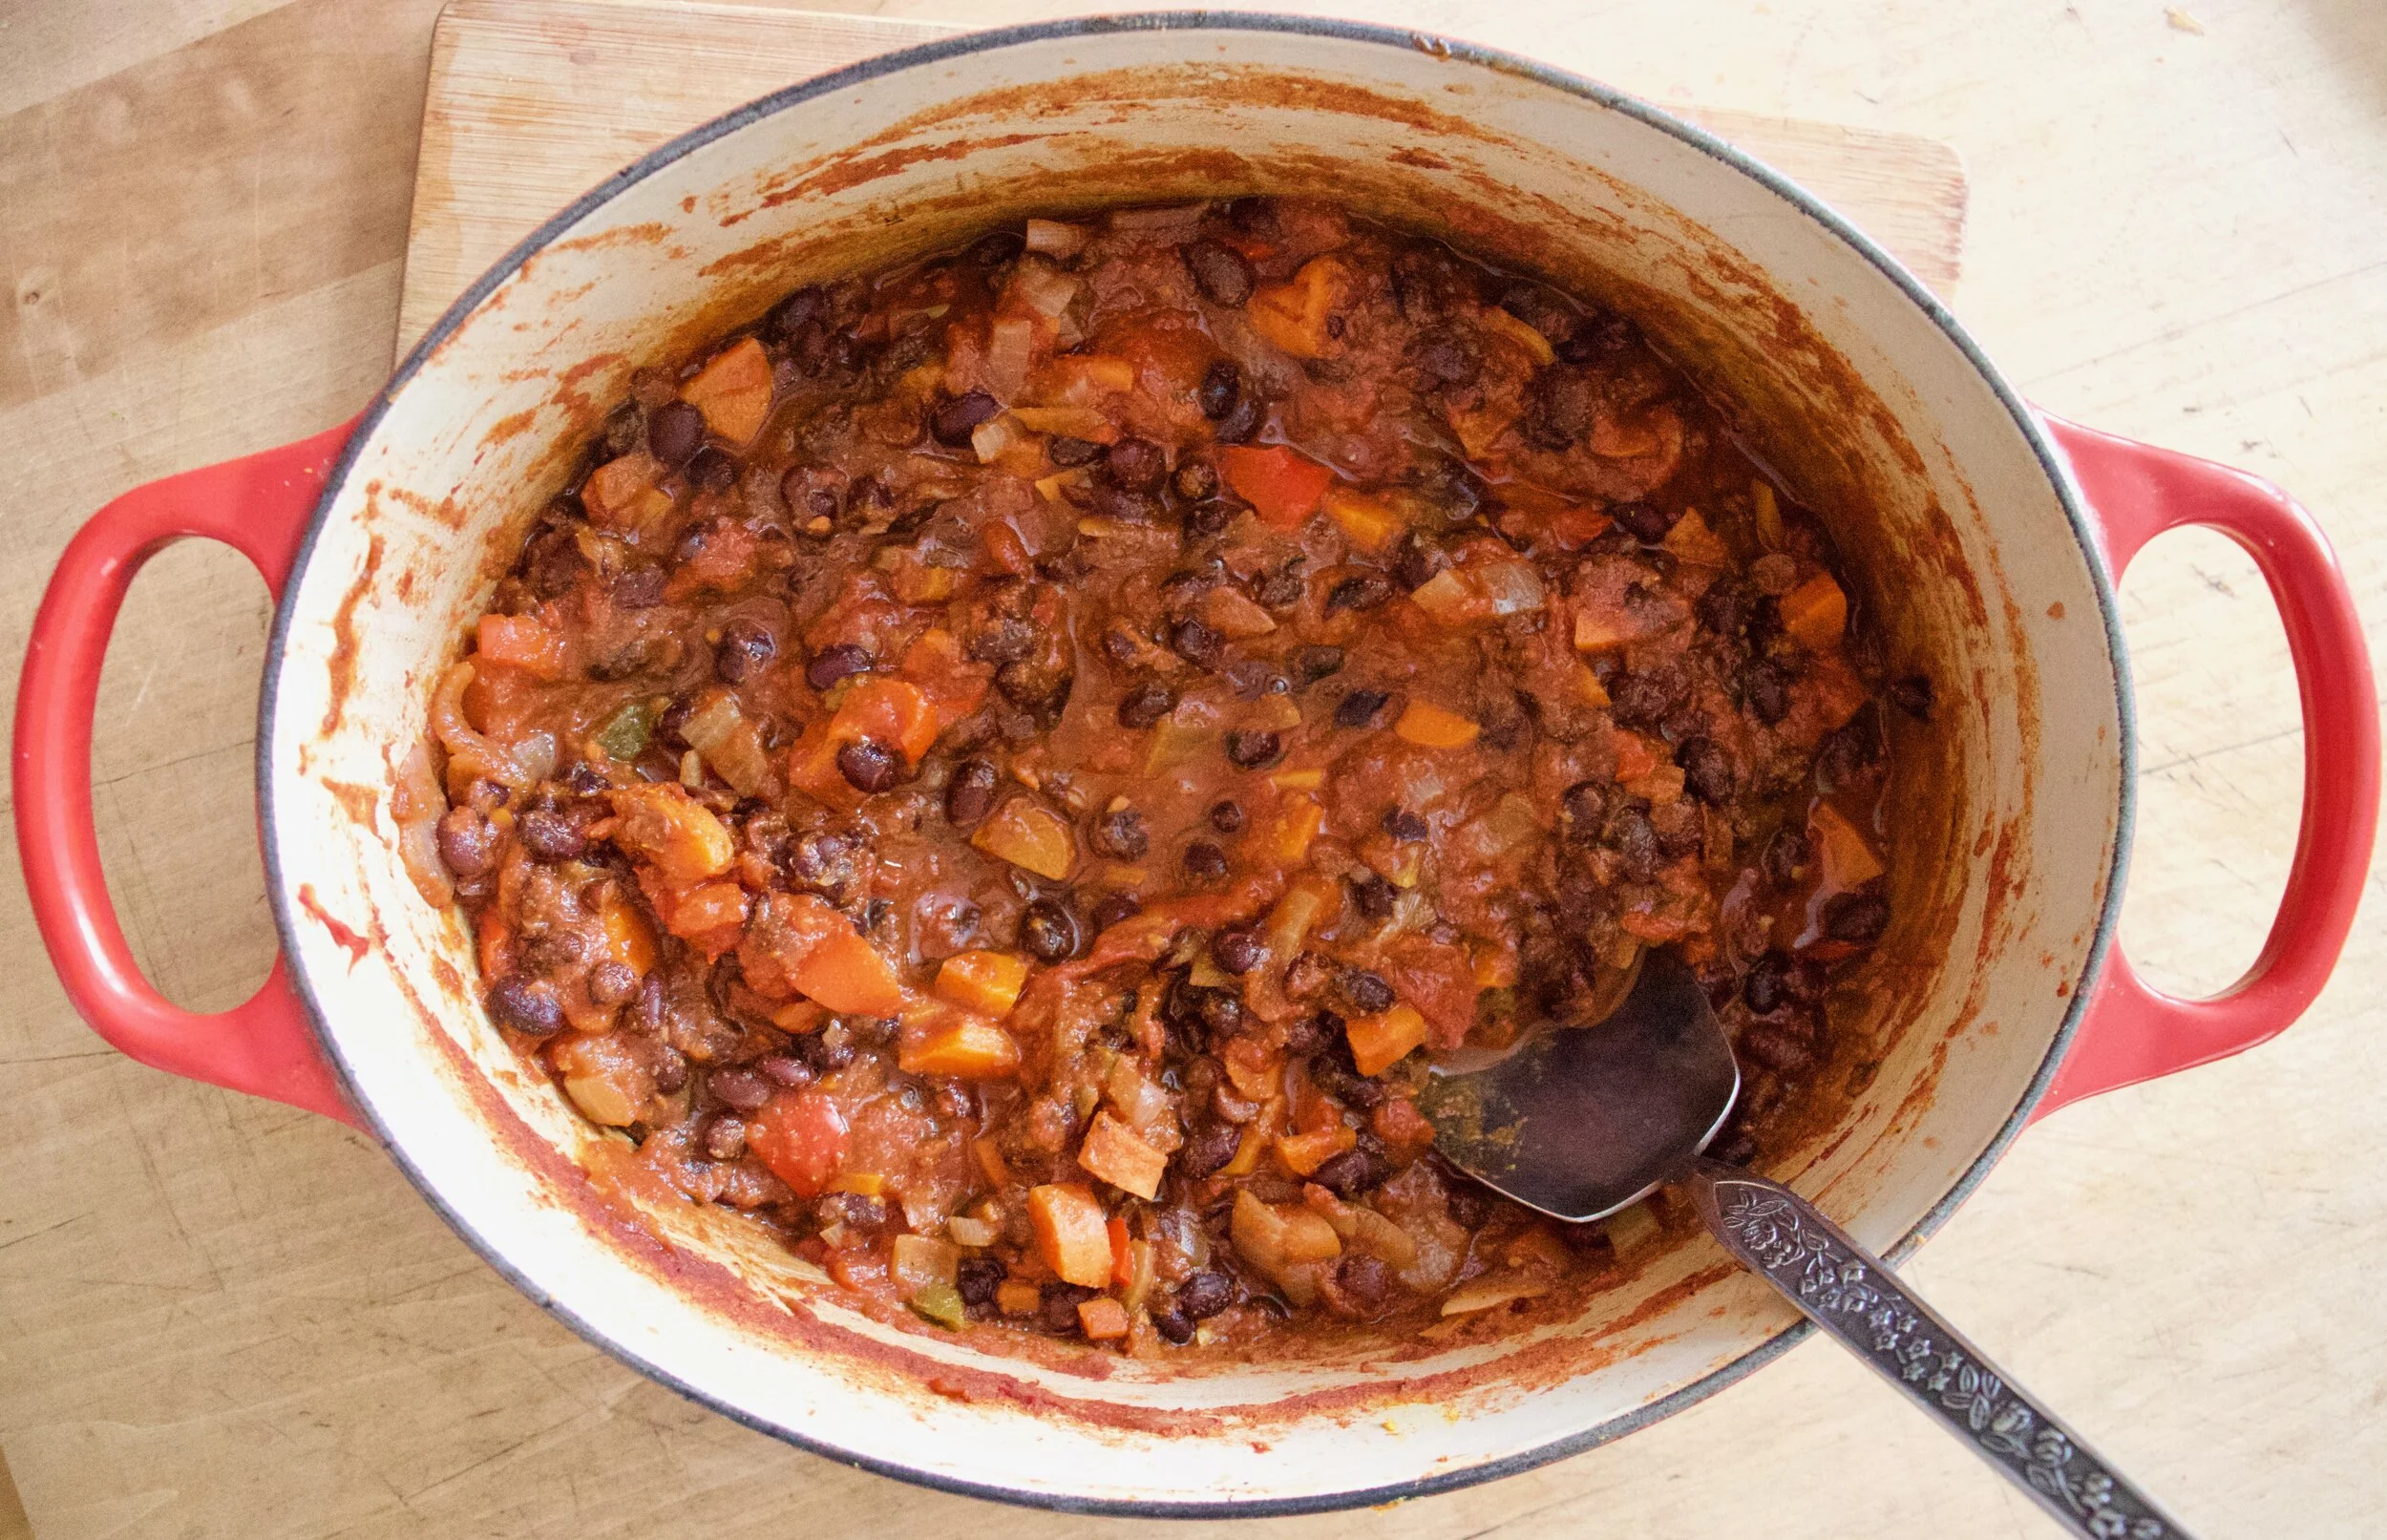
Now add in the beans, the tomatoes, and the zest and juice of one orange. Mix together and keep cooking on medium heat, partially lidded, for about 45 minutes to an hour, stirring once in a while, until the chili has thicken and tastes good to you.
Once done, season to taste with more salt and pepper and either stir the juice of the second orange into the whole pot or serve with slices of orange to squeeze on top.
Eat. Store any left overs in fridge. Tastes delicious cold too.
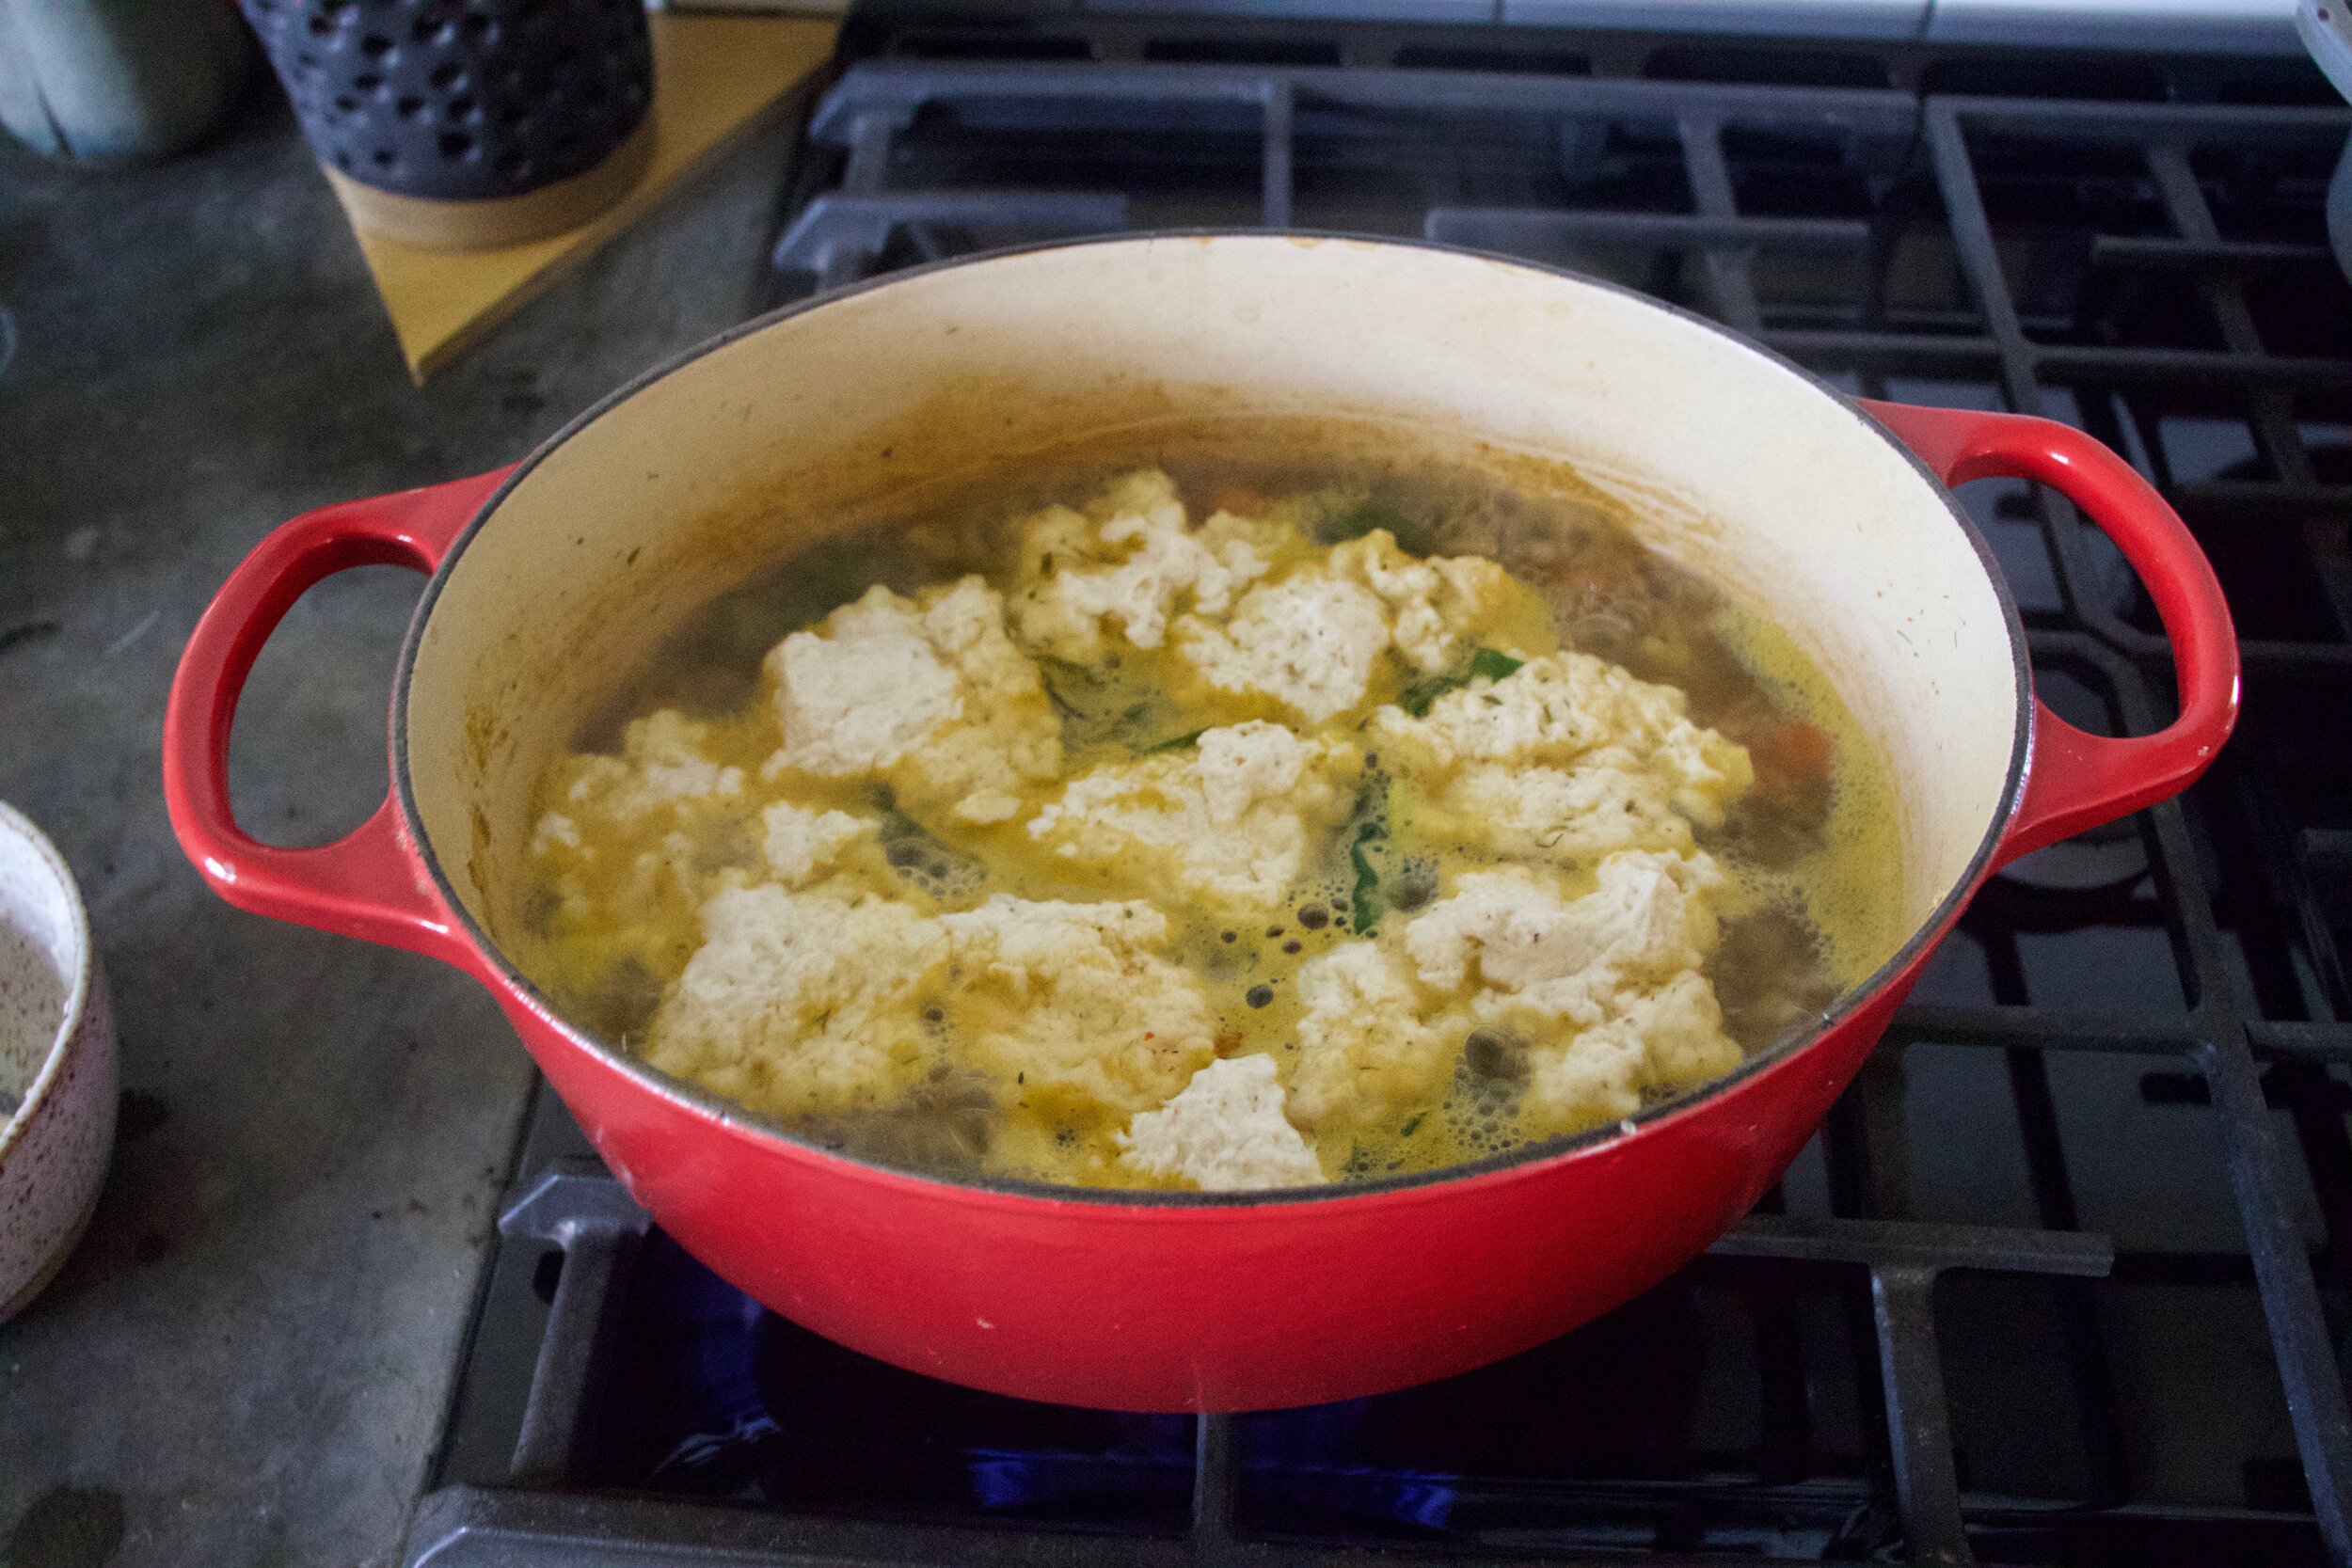
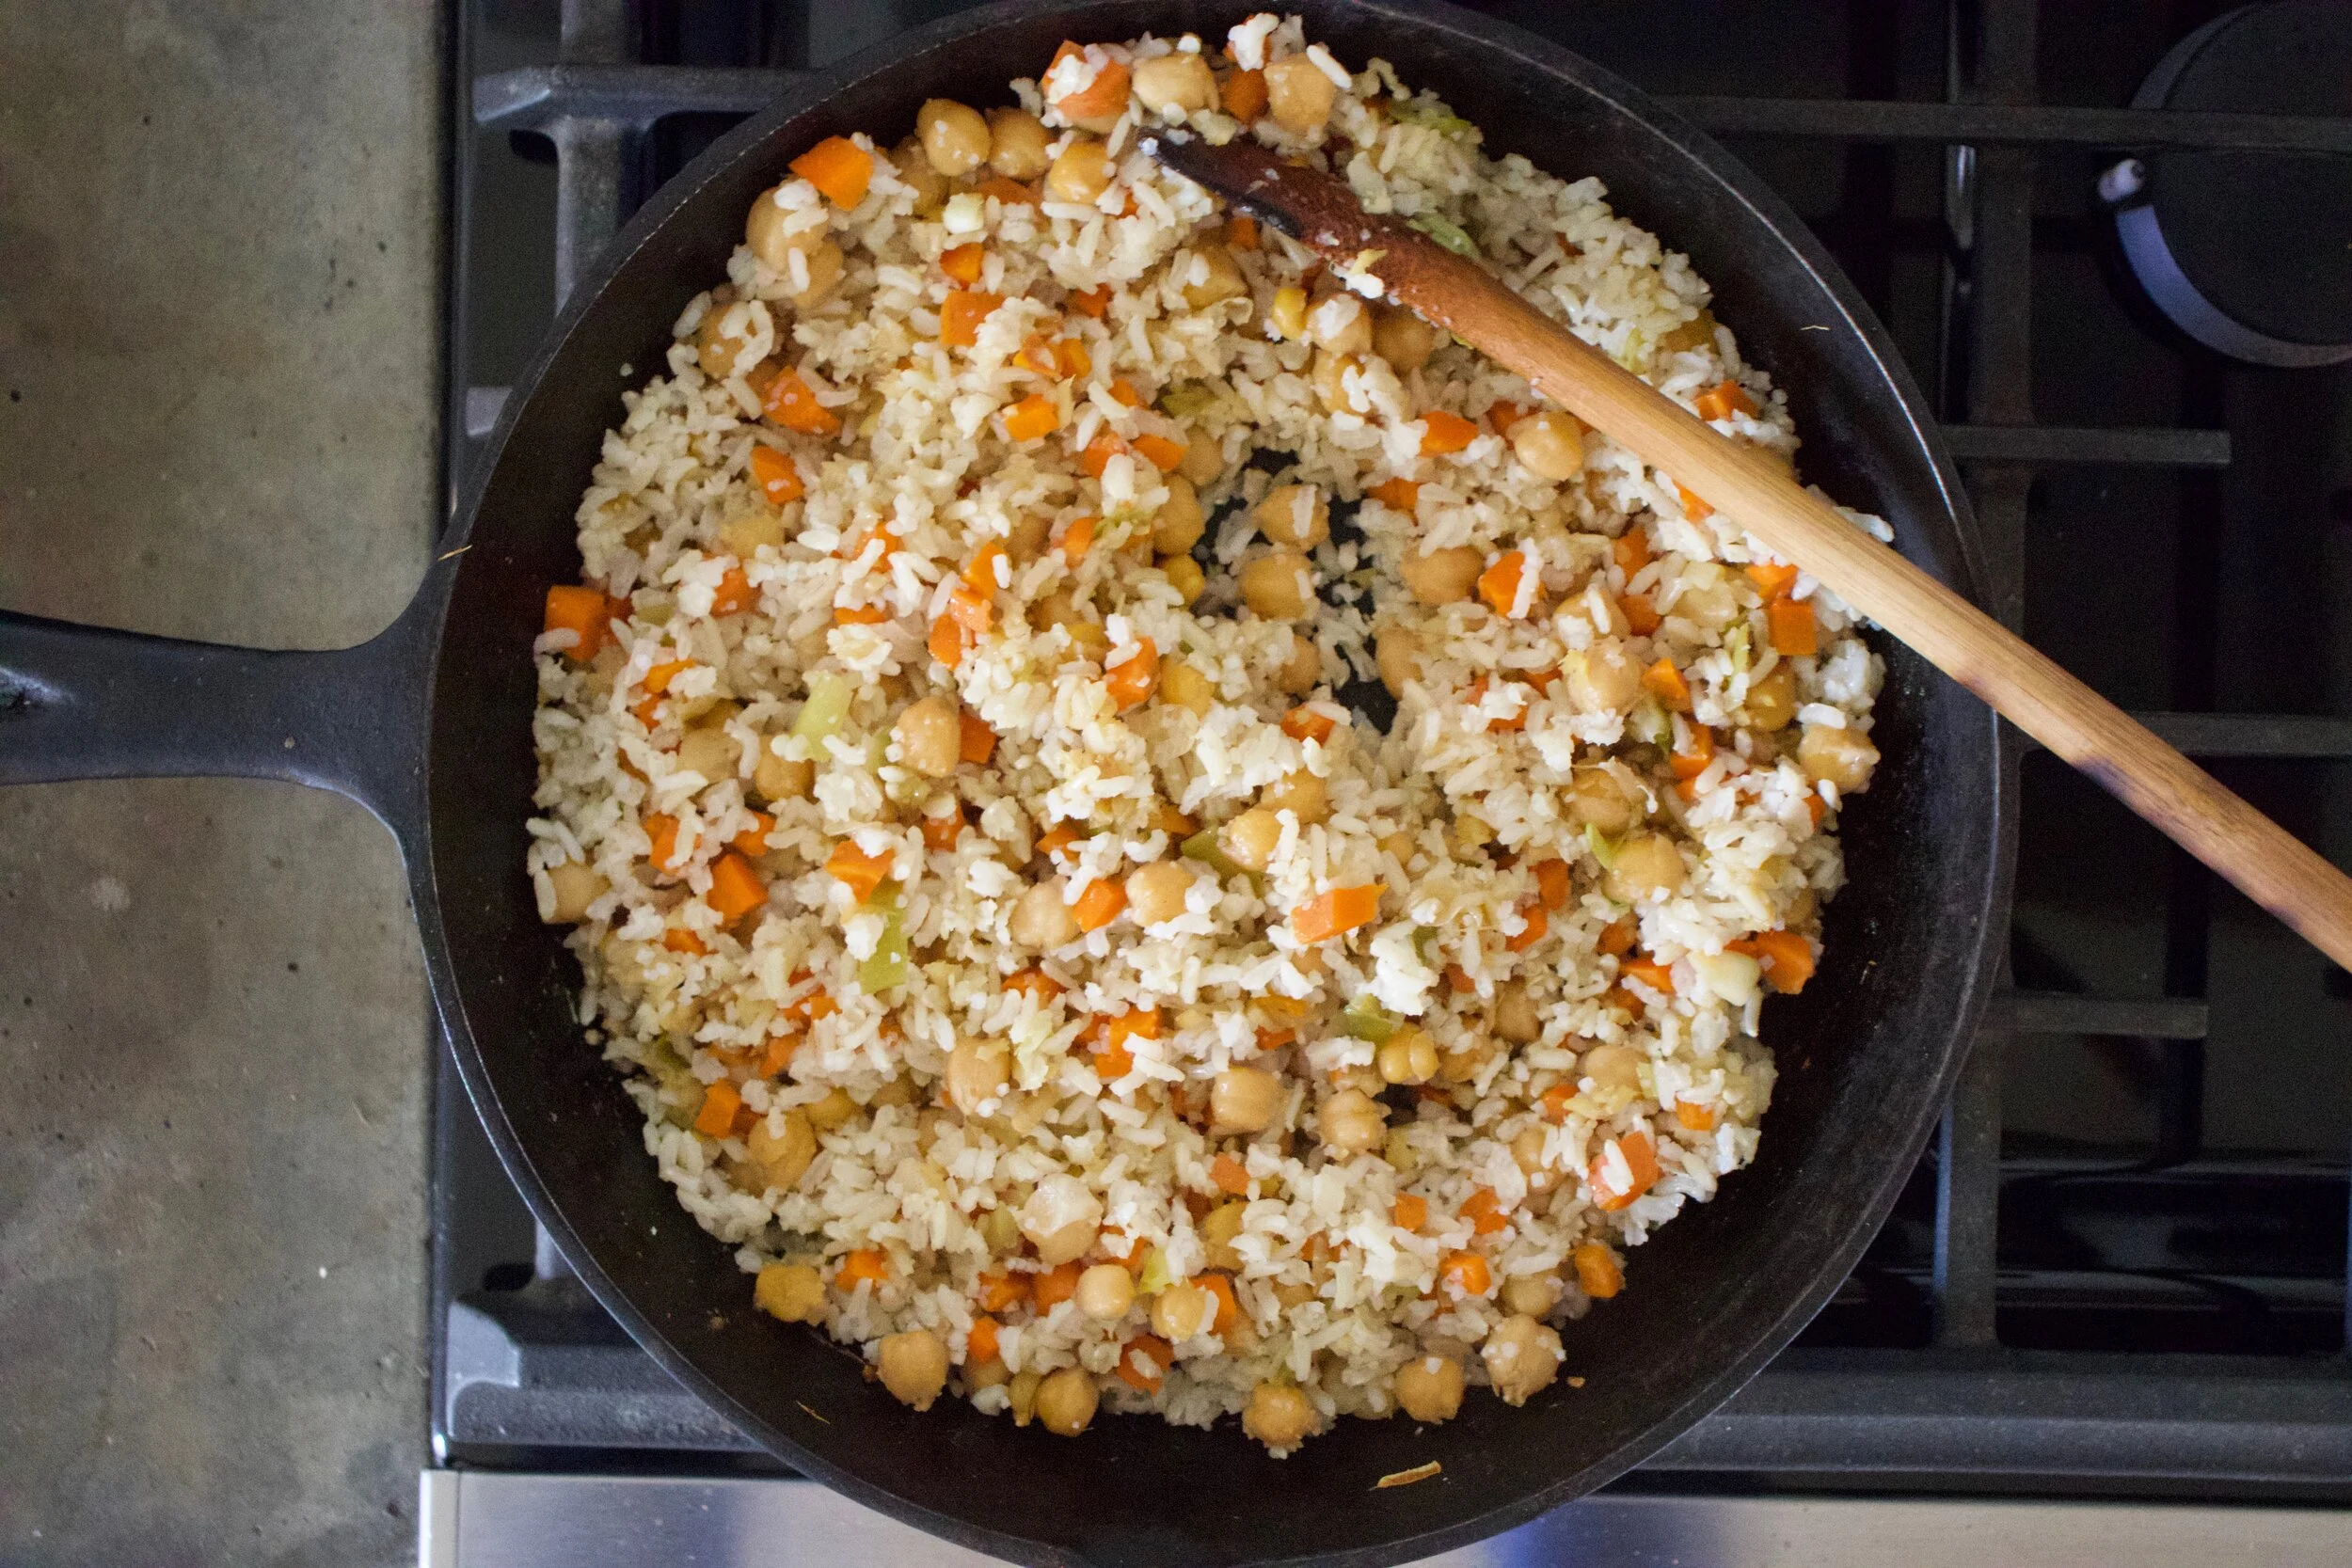
If you are a falafel fan, as I am, then this one is for you. Carrot ginger falafel. Oh yes. Warm and spicy and carroty and all the things that are good, packed into a chickpea ball of mouth sized proportions. When I thought of it it sounded good, When I made it and ate it, it was everything and more I could have asked for in a freaking fantastic falafel. As for the tahini cabbage slaw, I might just be making it in my house every dang day. Super easy, super tasty, goes with the falafel like whoa but is just as good eaten on it%u2019s own. Eaten together the pair make every inch of mouth space happy. A happy mouth space, what more can you ask for?
To the falafel!
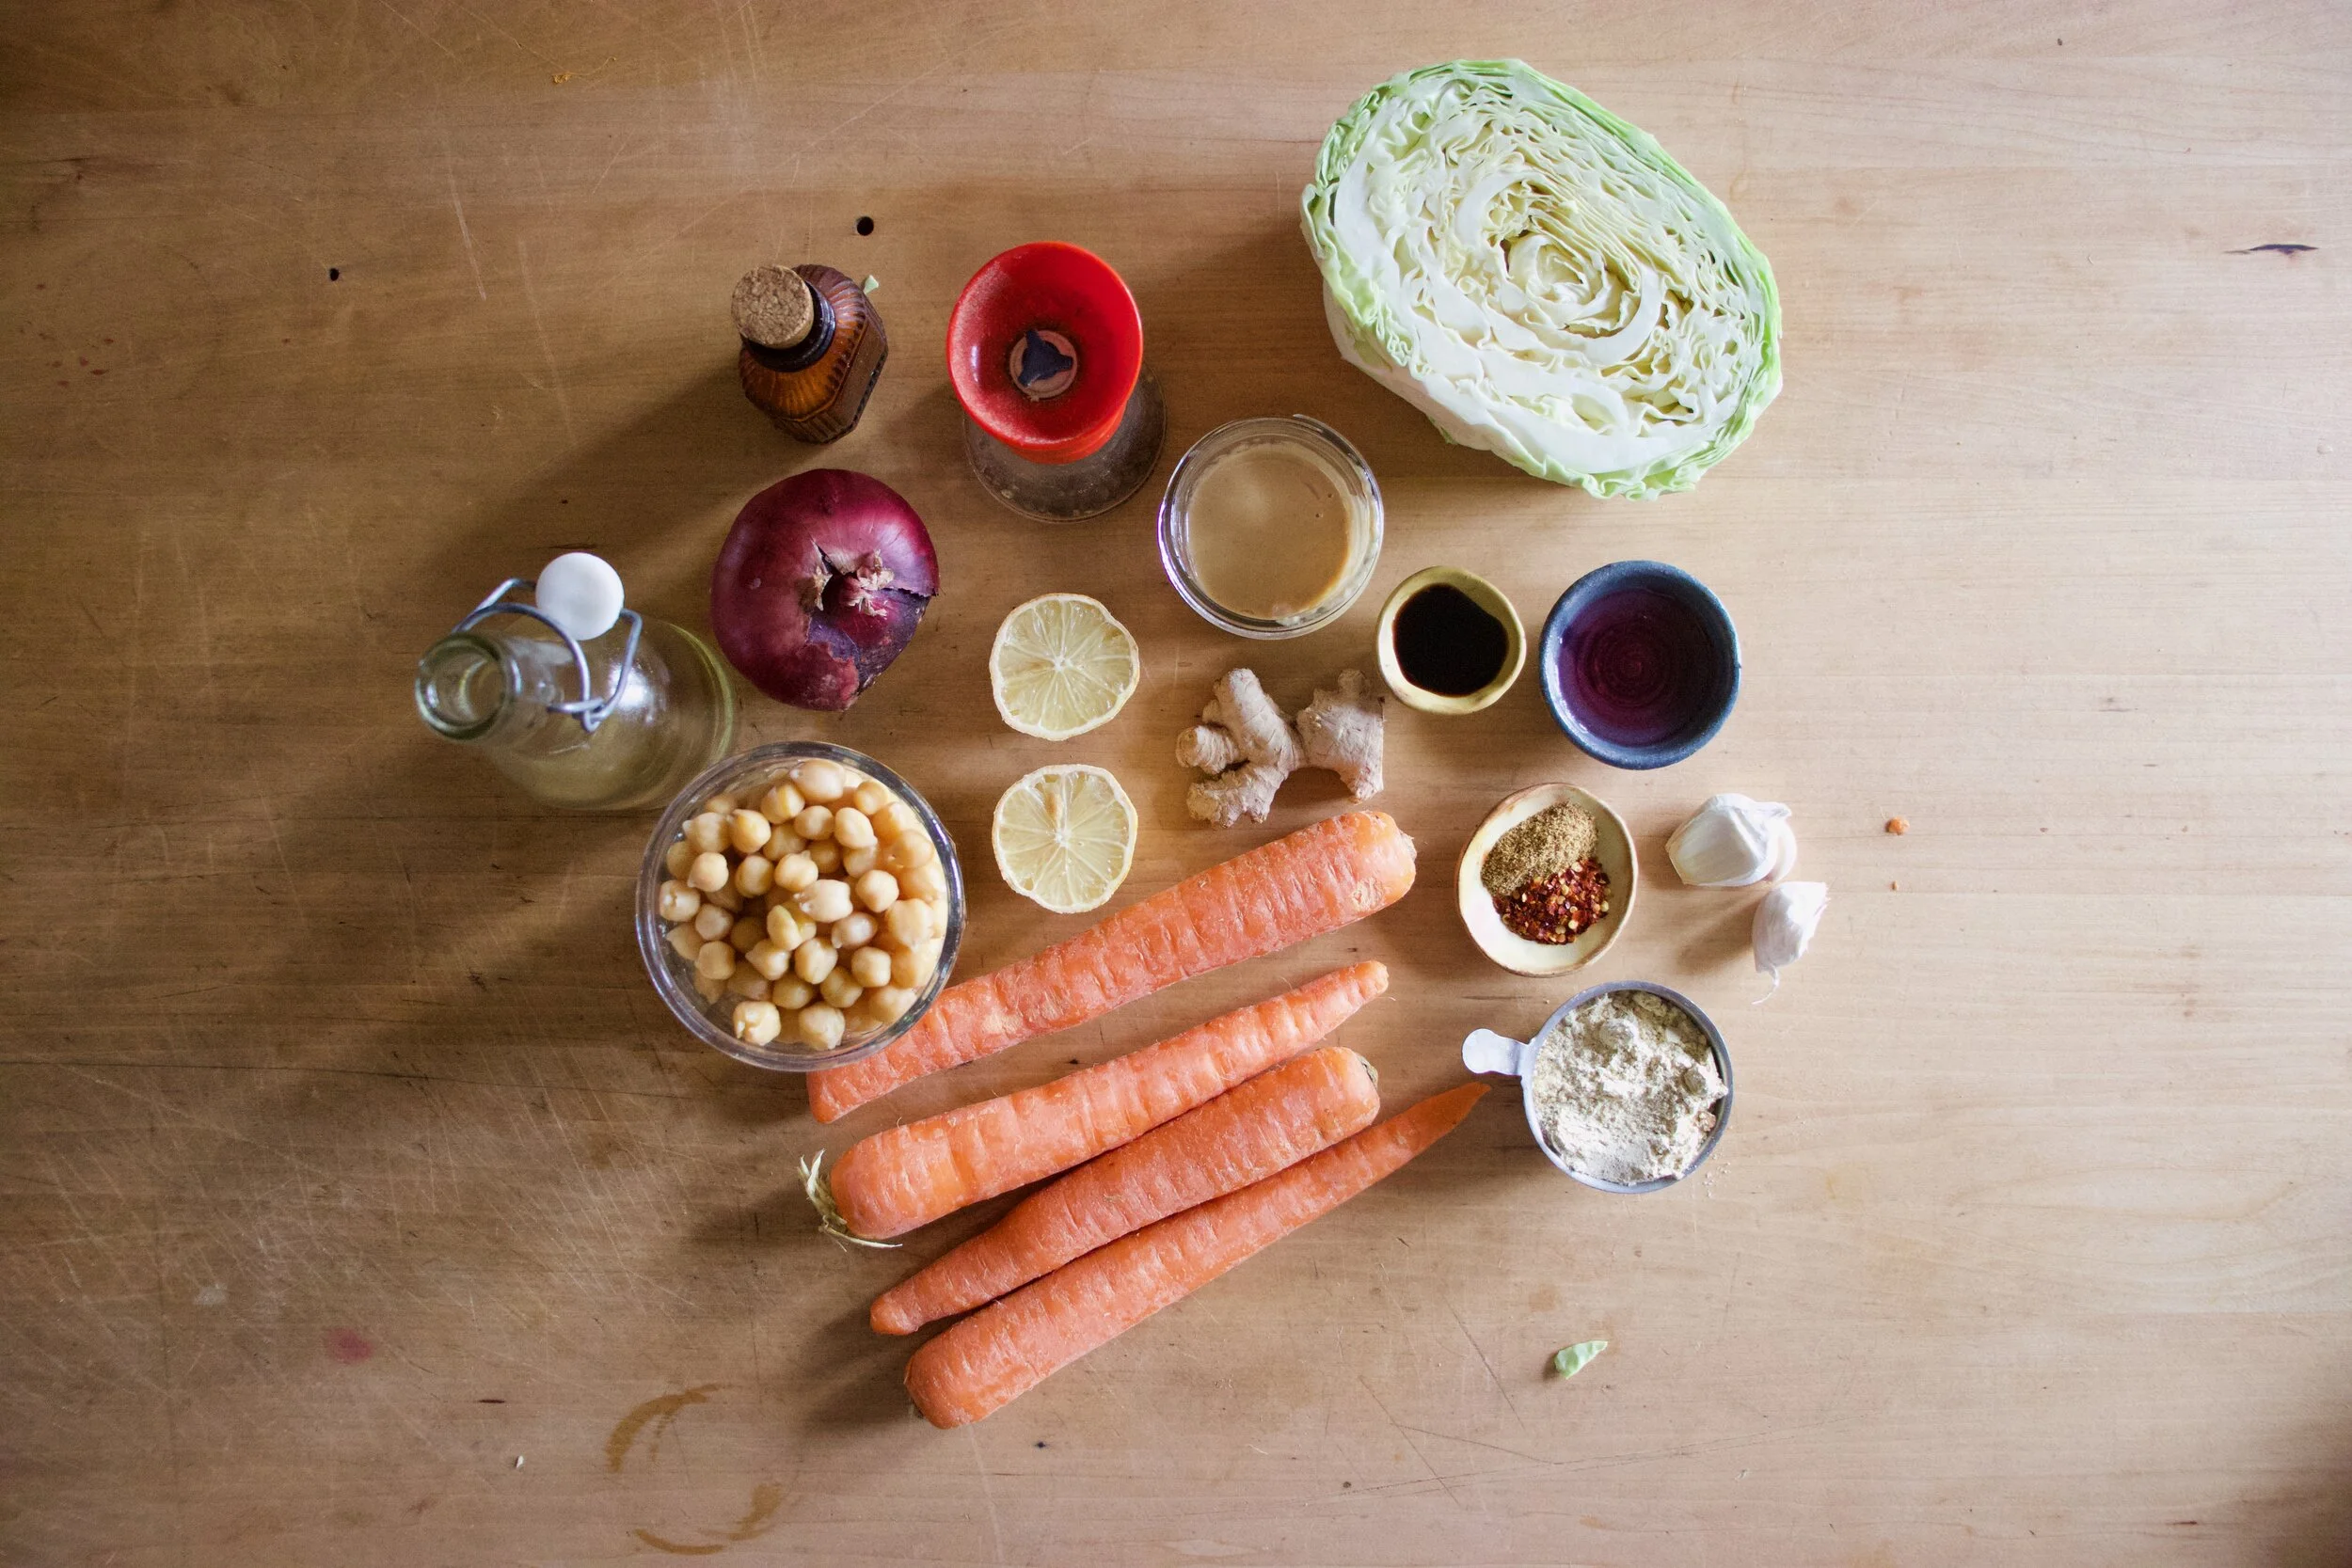
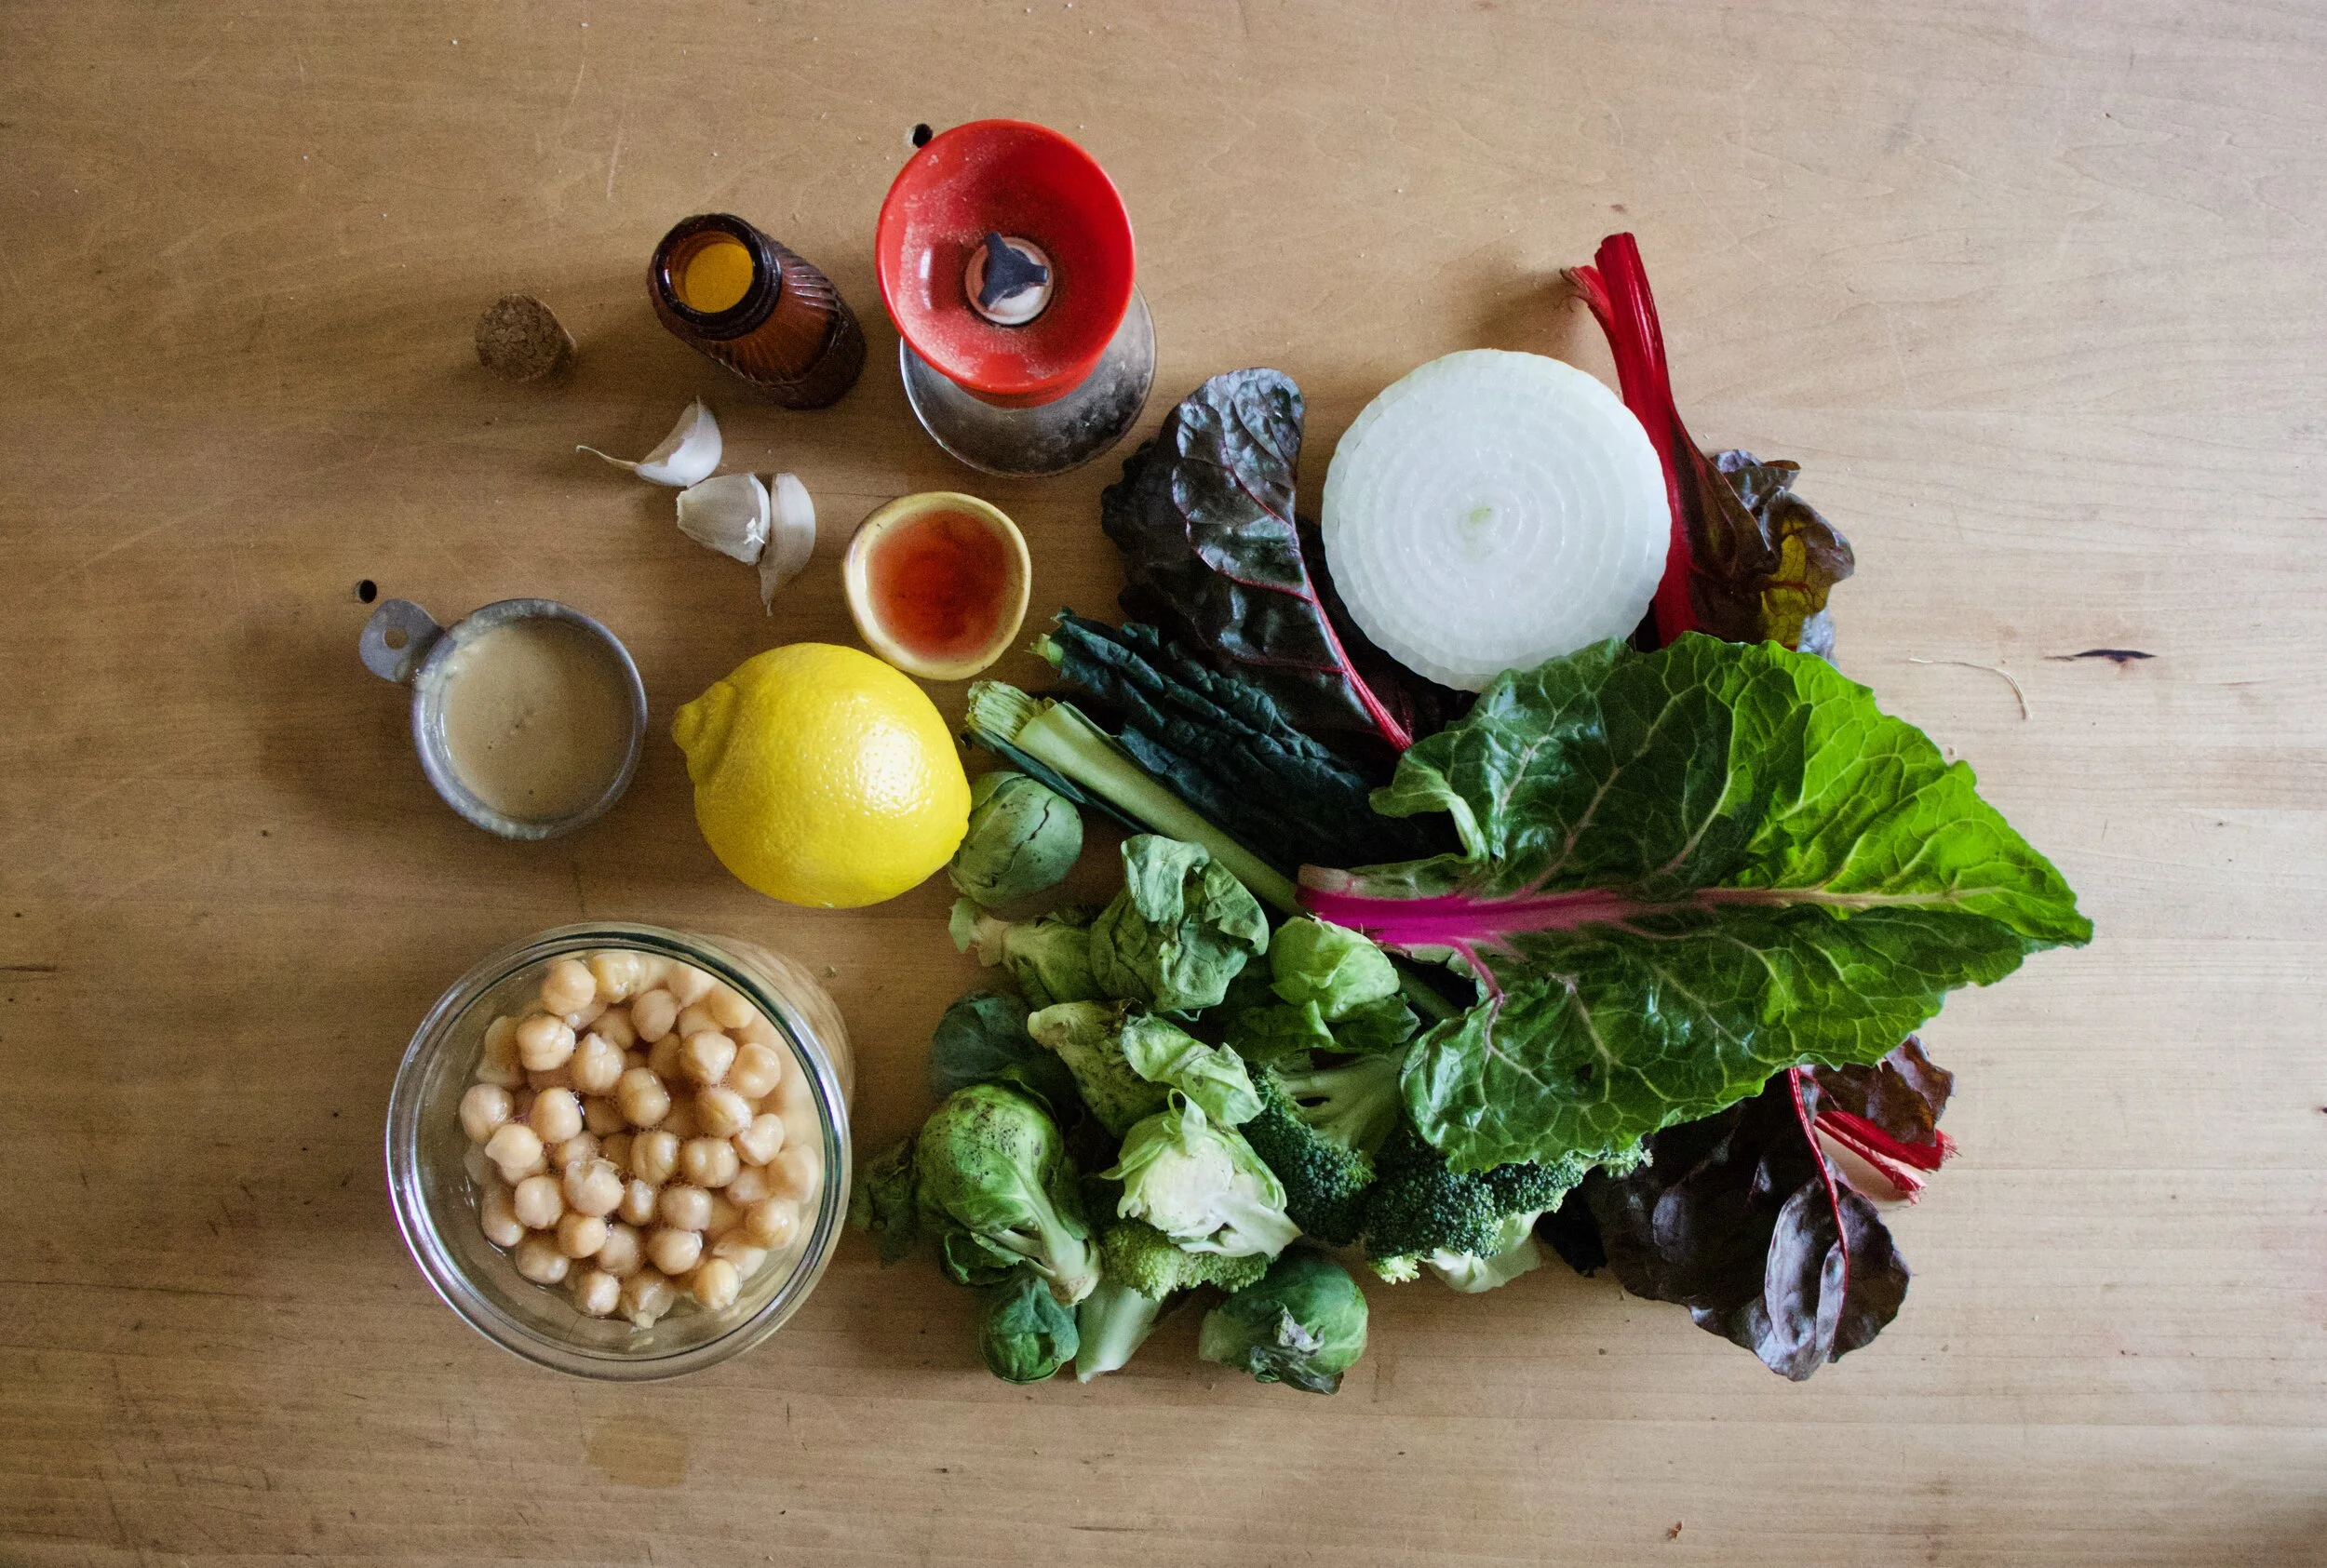
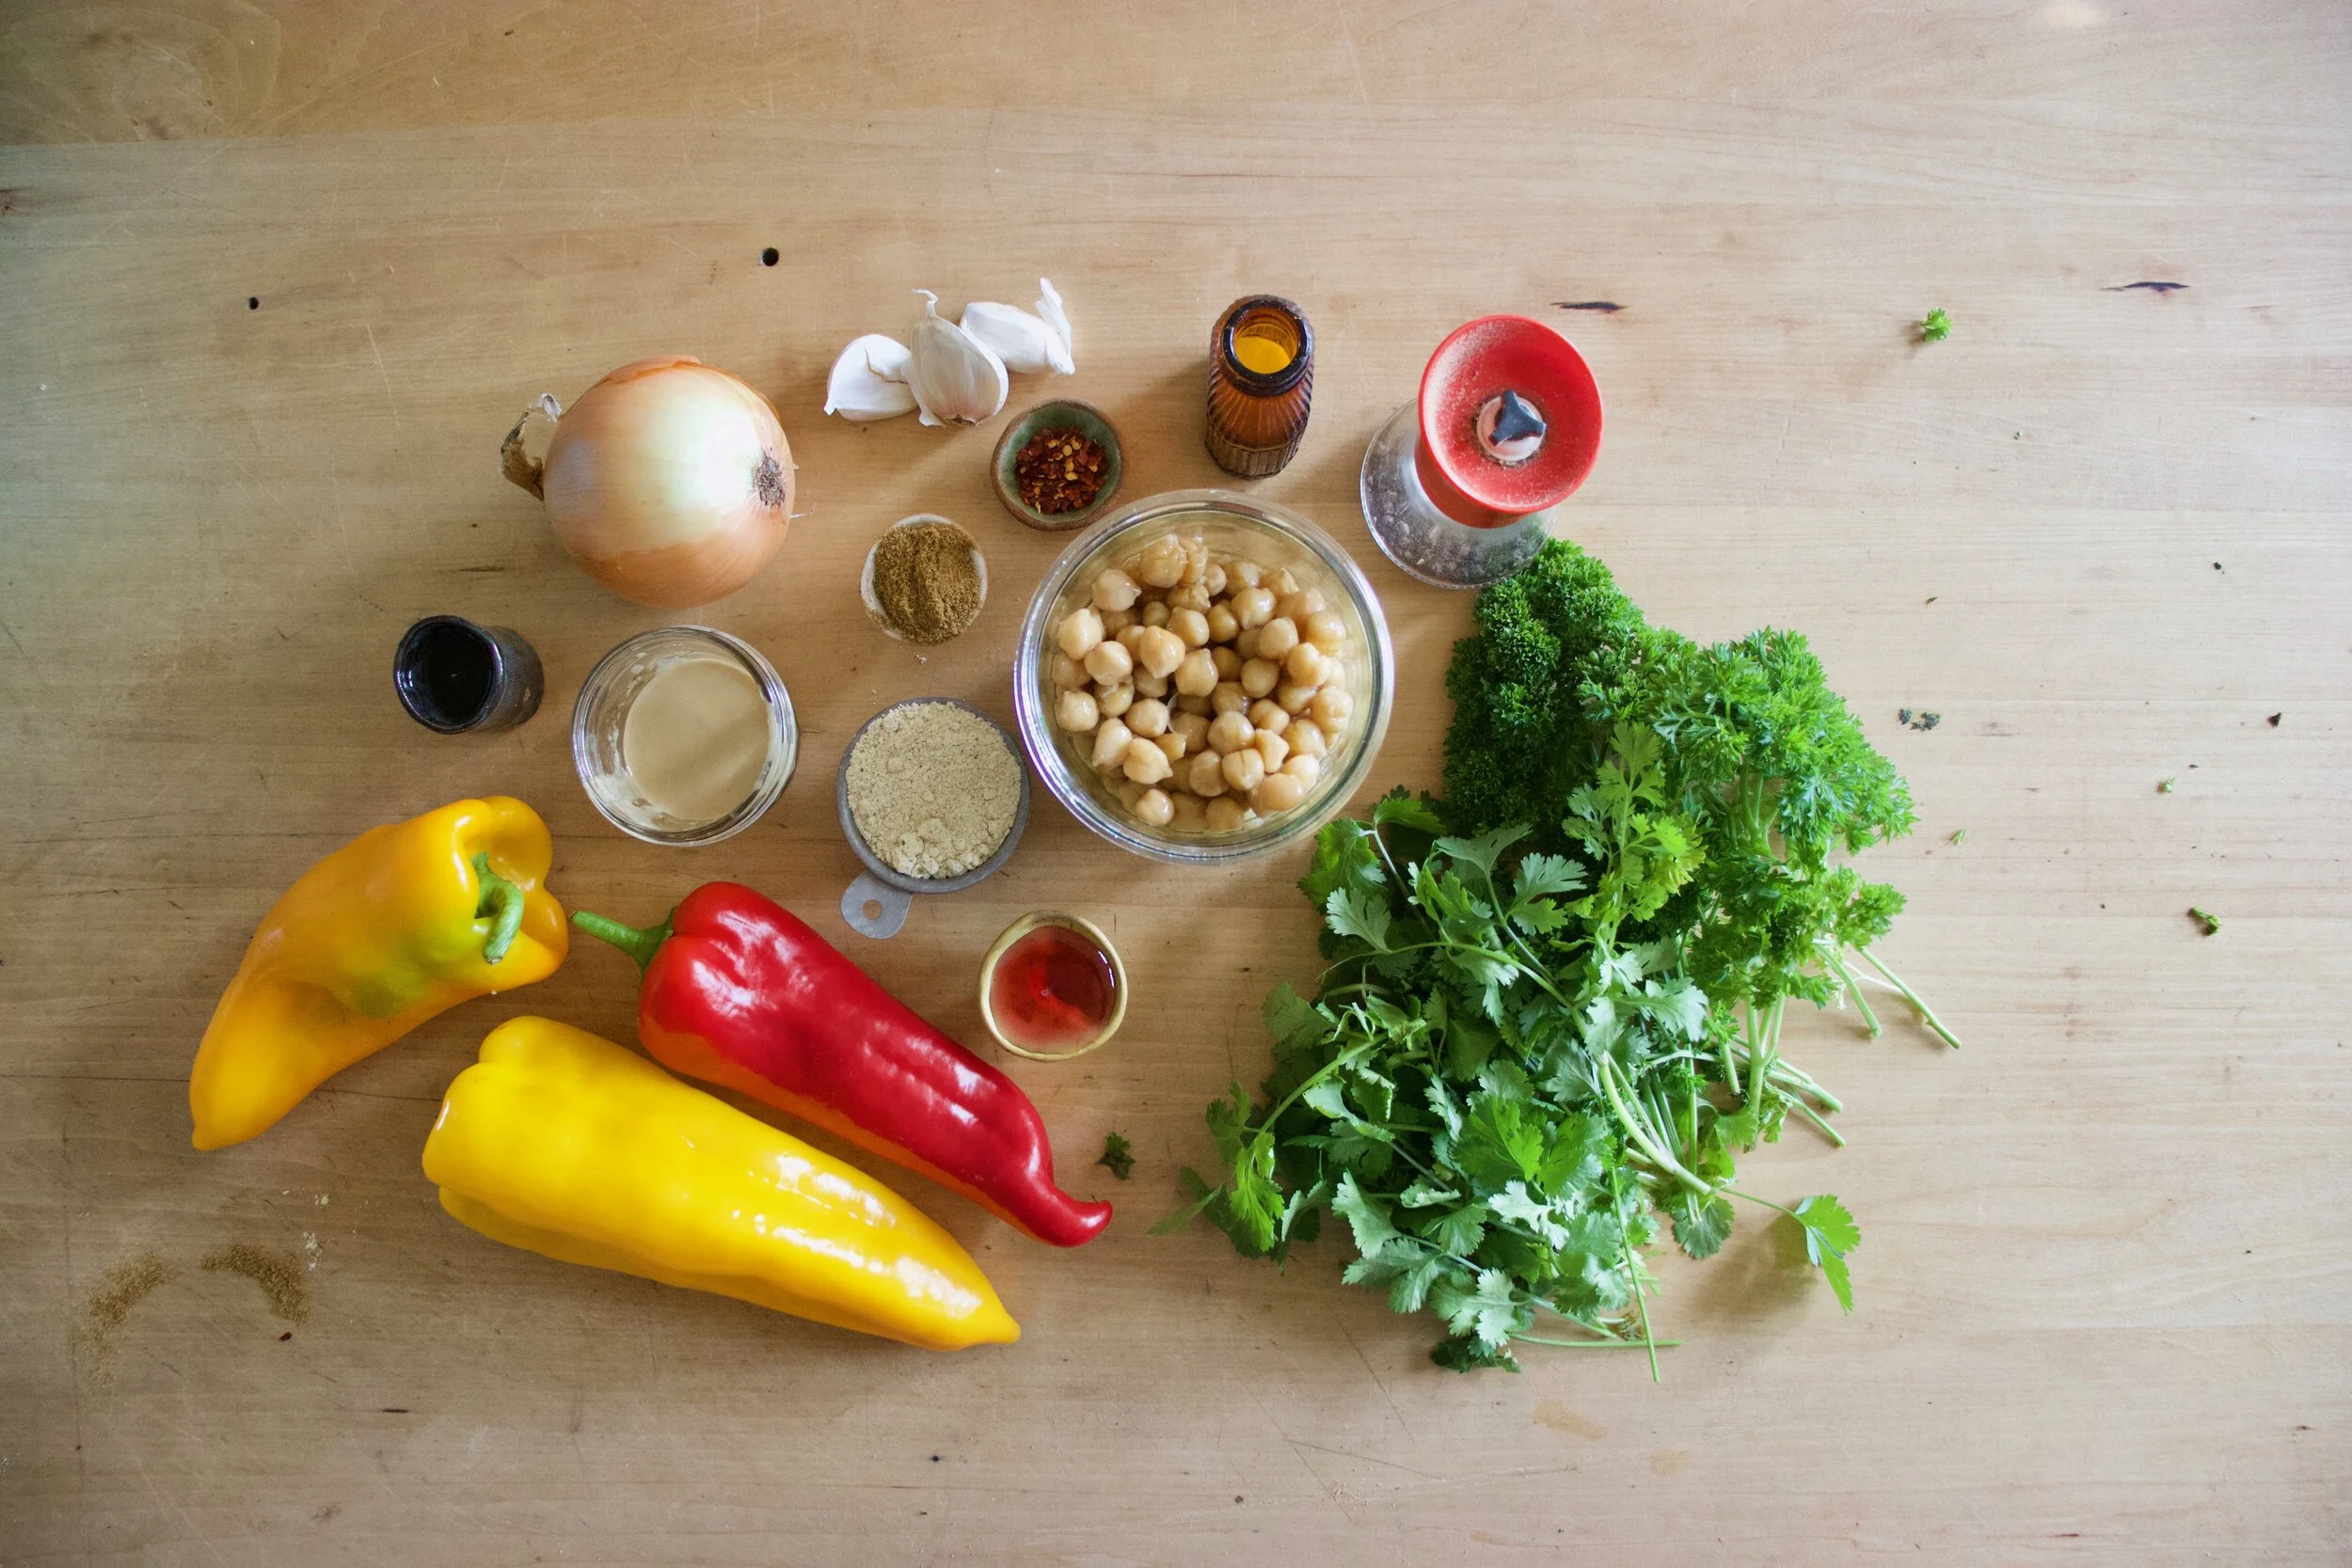
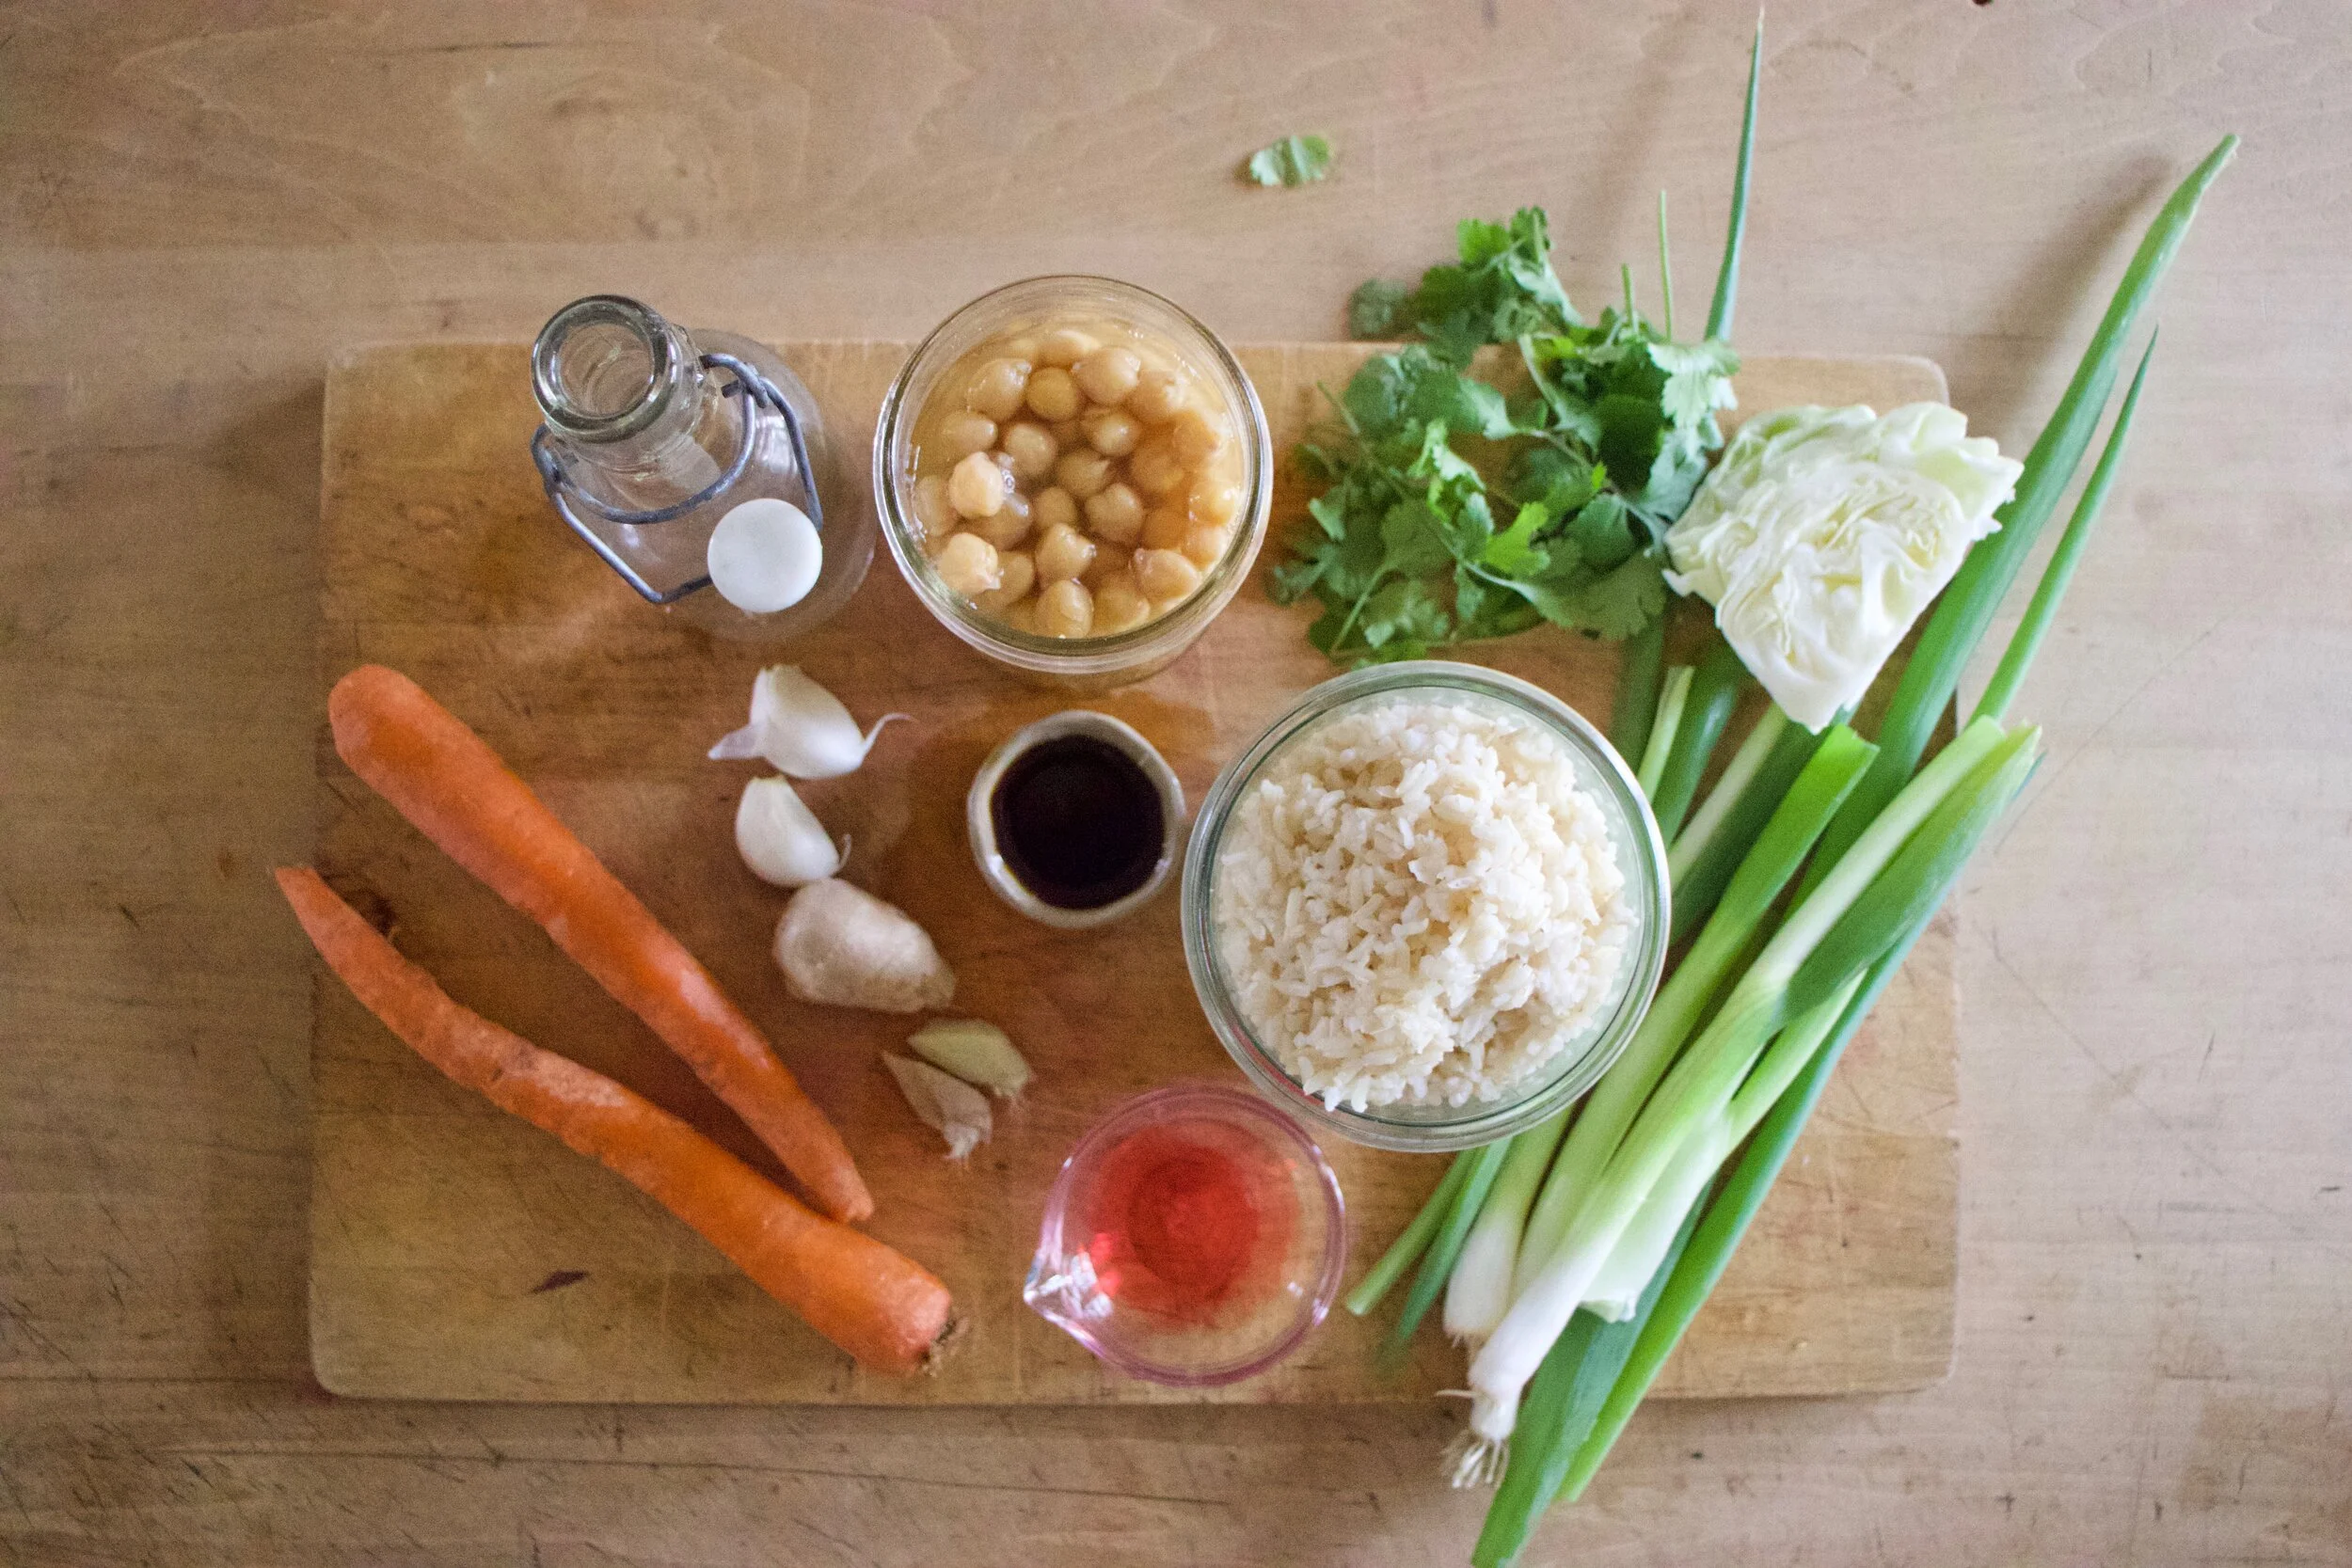
The stuff. Cooked chickpeas, carrots, a piece of fresh ginger, tahini, soy sauce, cabbage, an onion, a few cloves of garlic, red wine vinegar, some cumin and red pepper flakes, a lemon, chickpea flour, salt and pepper, and oil.
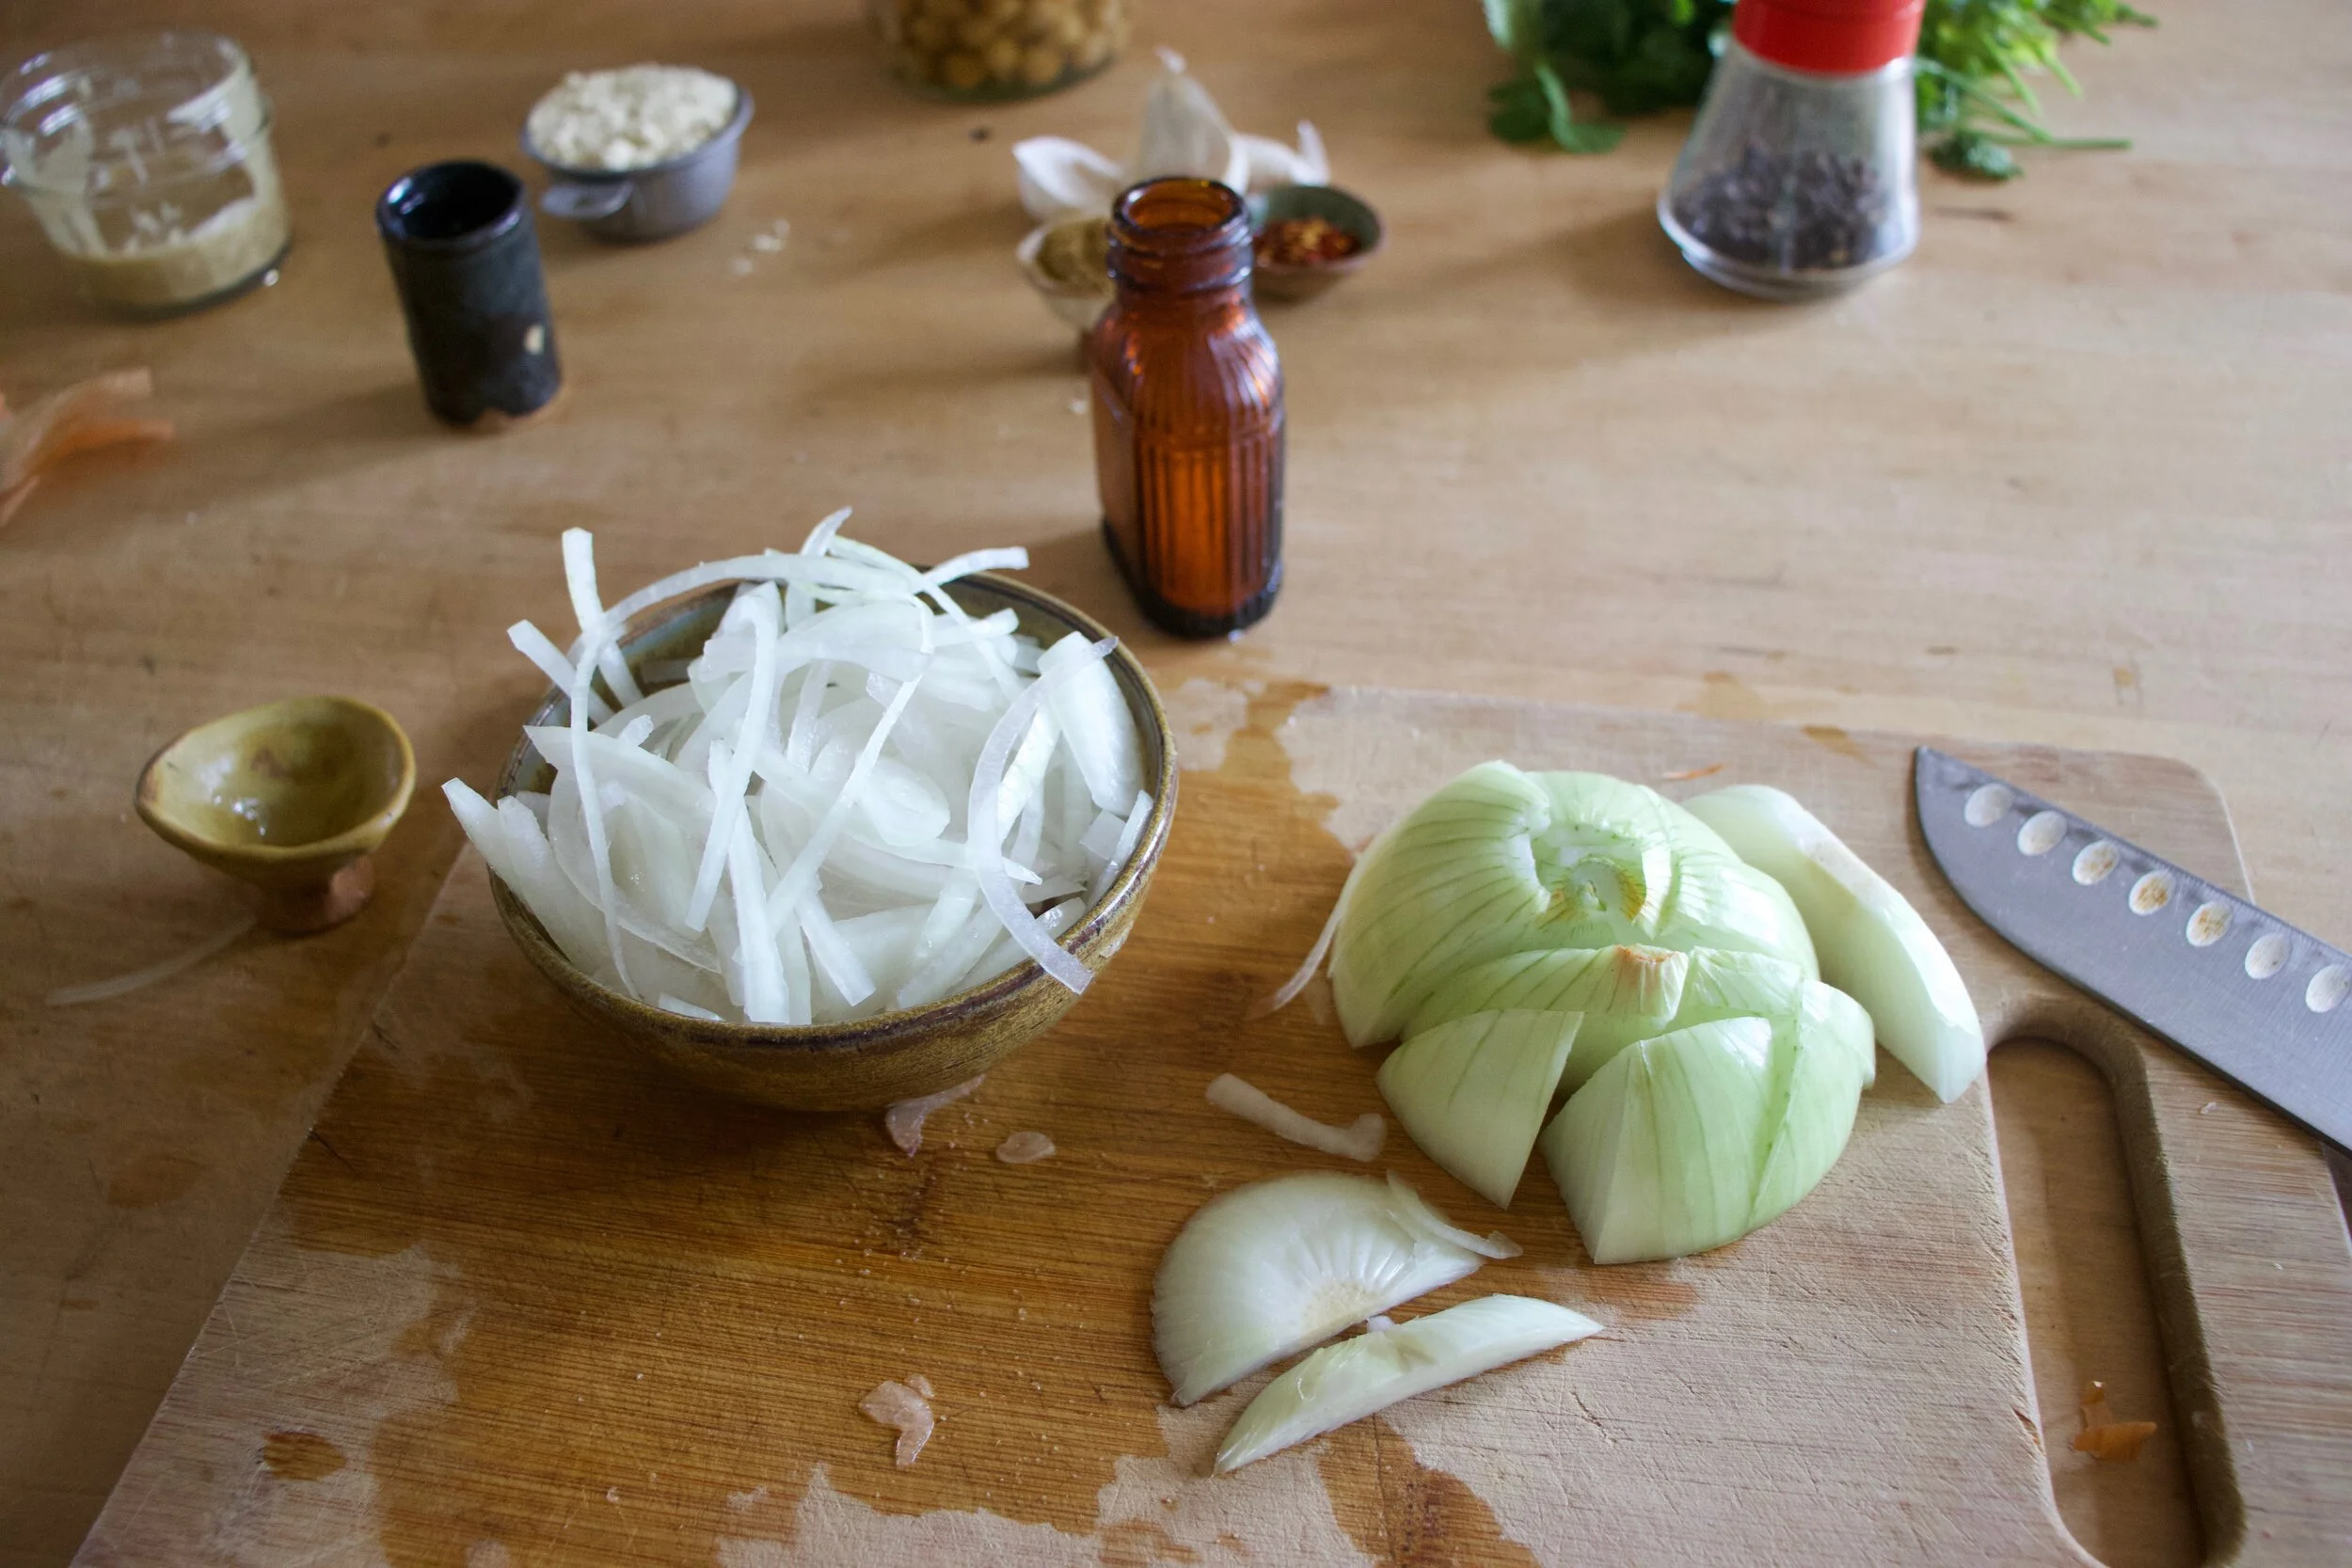
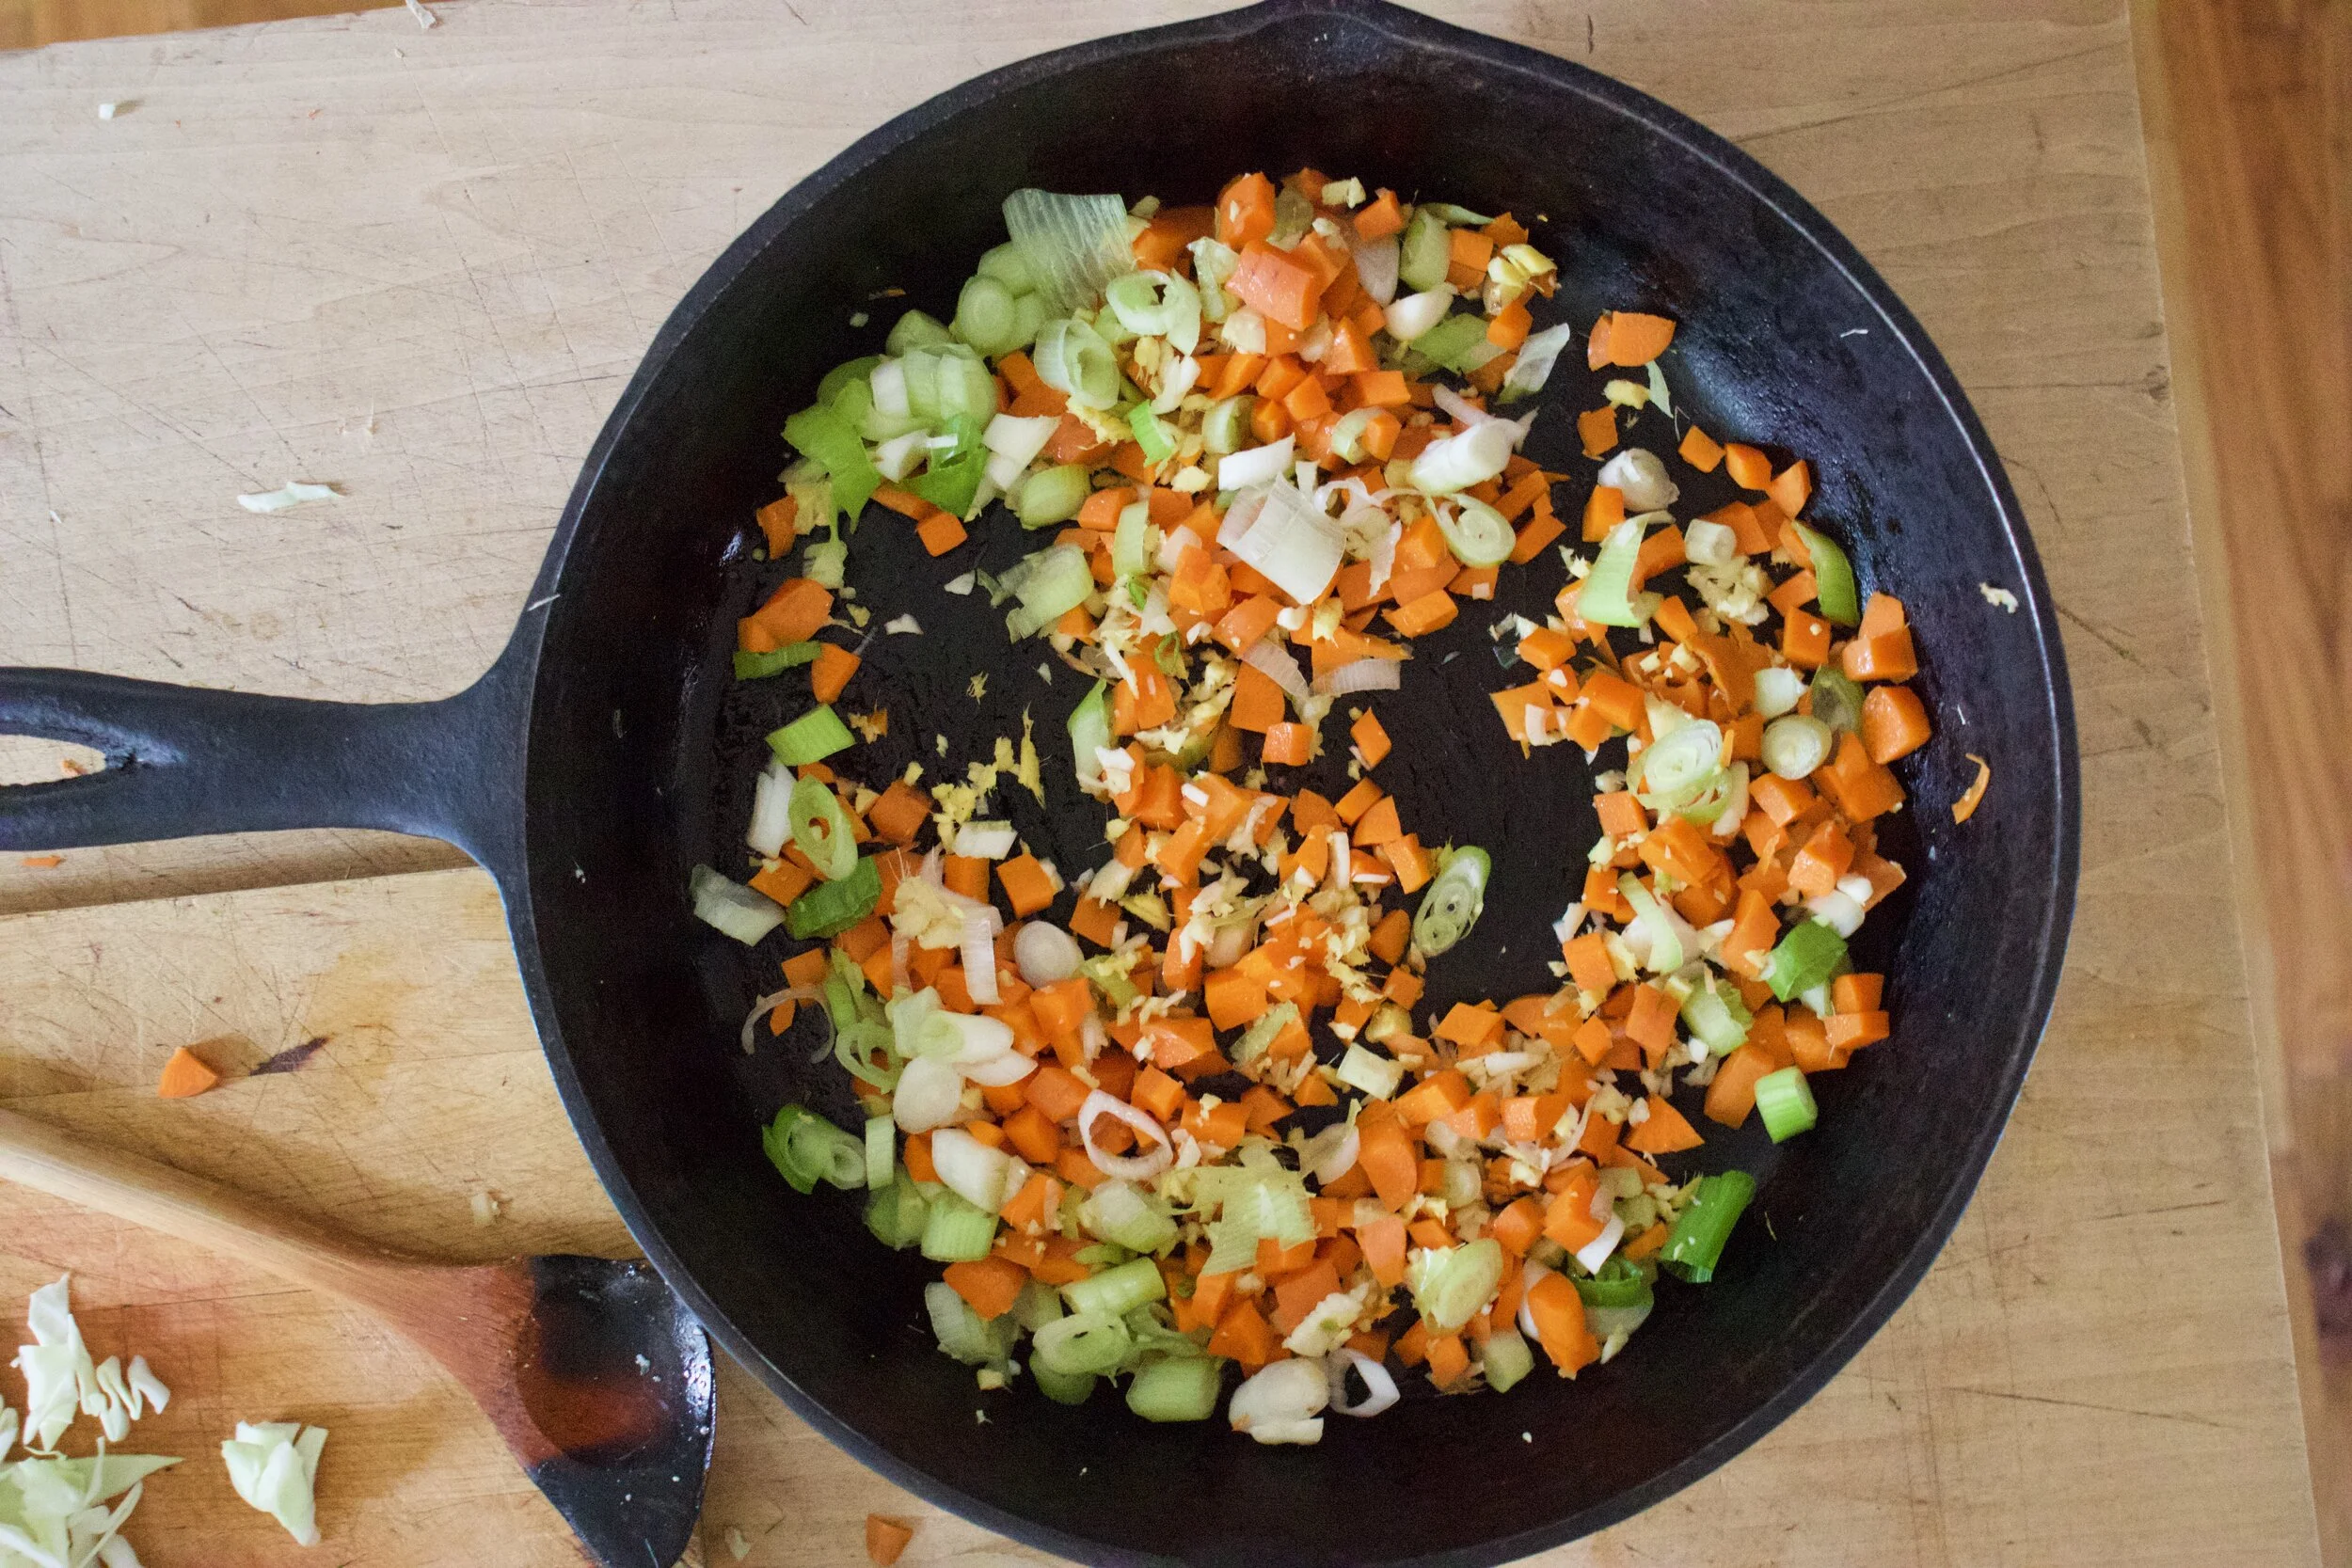
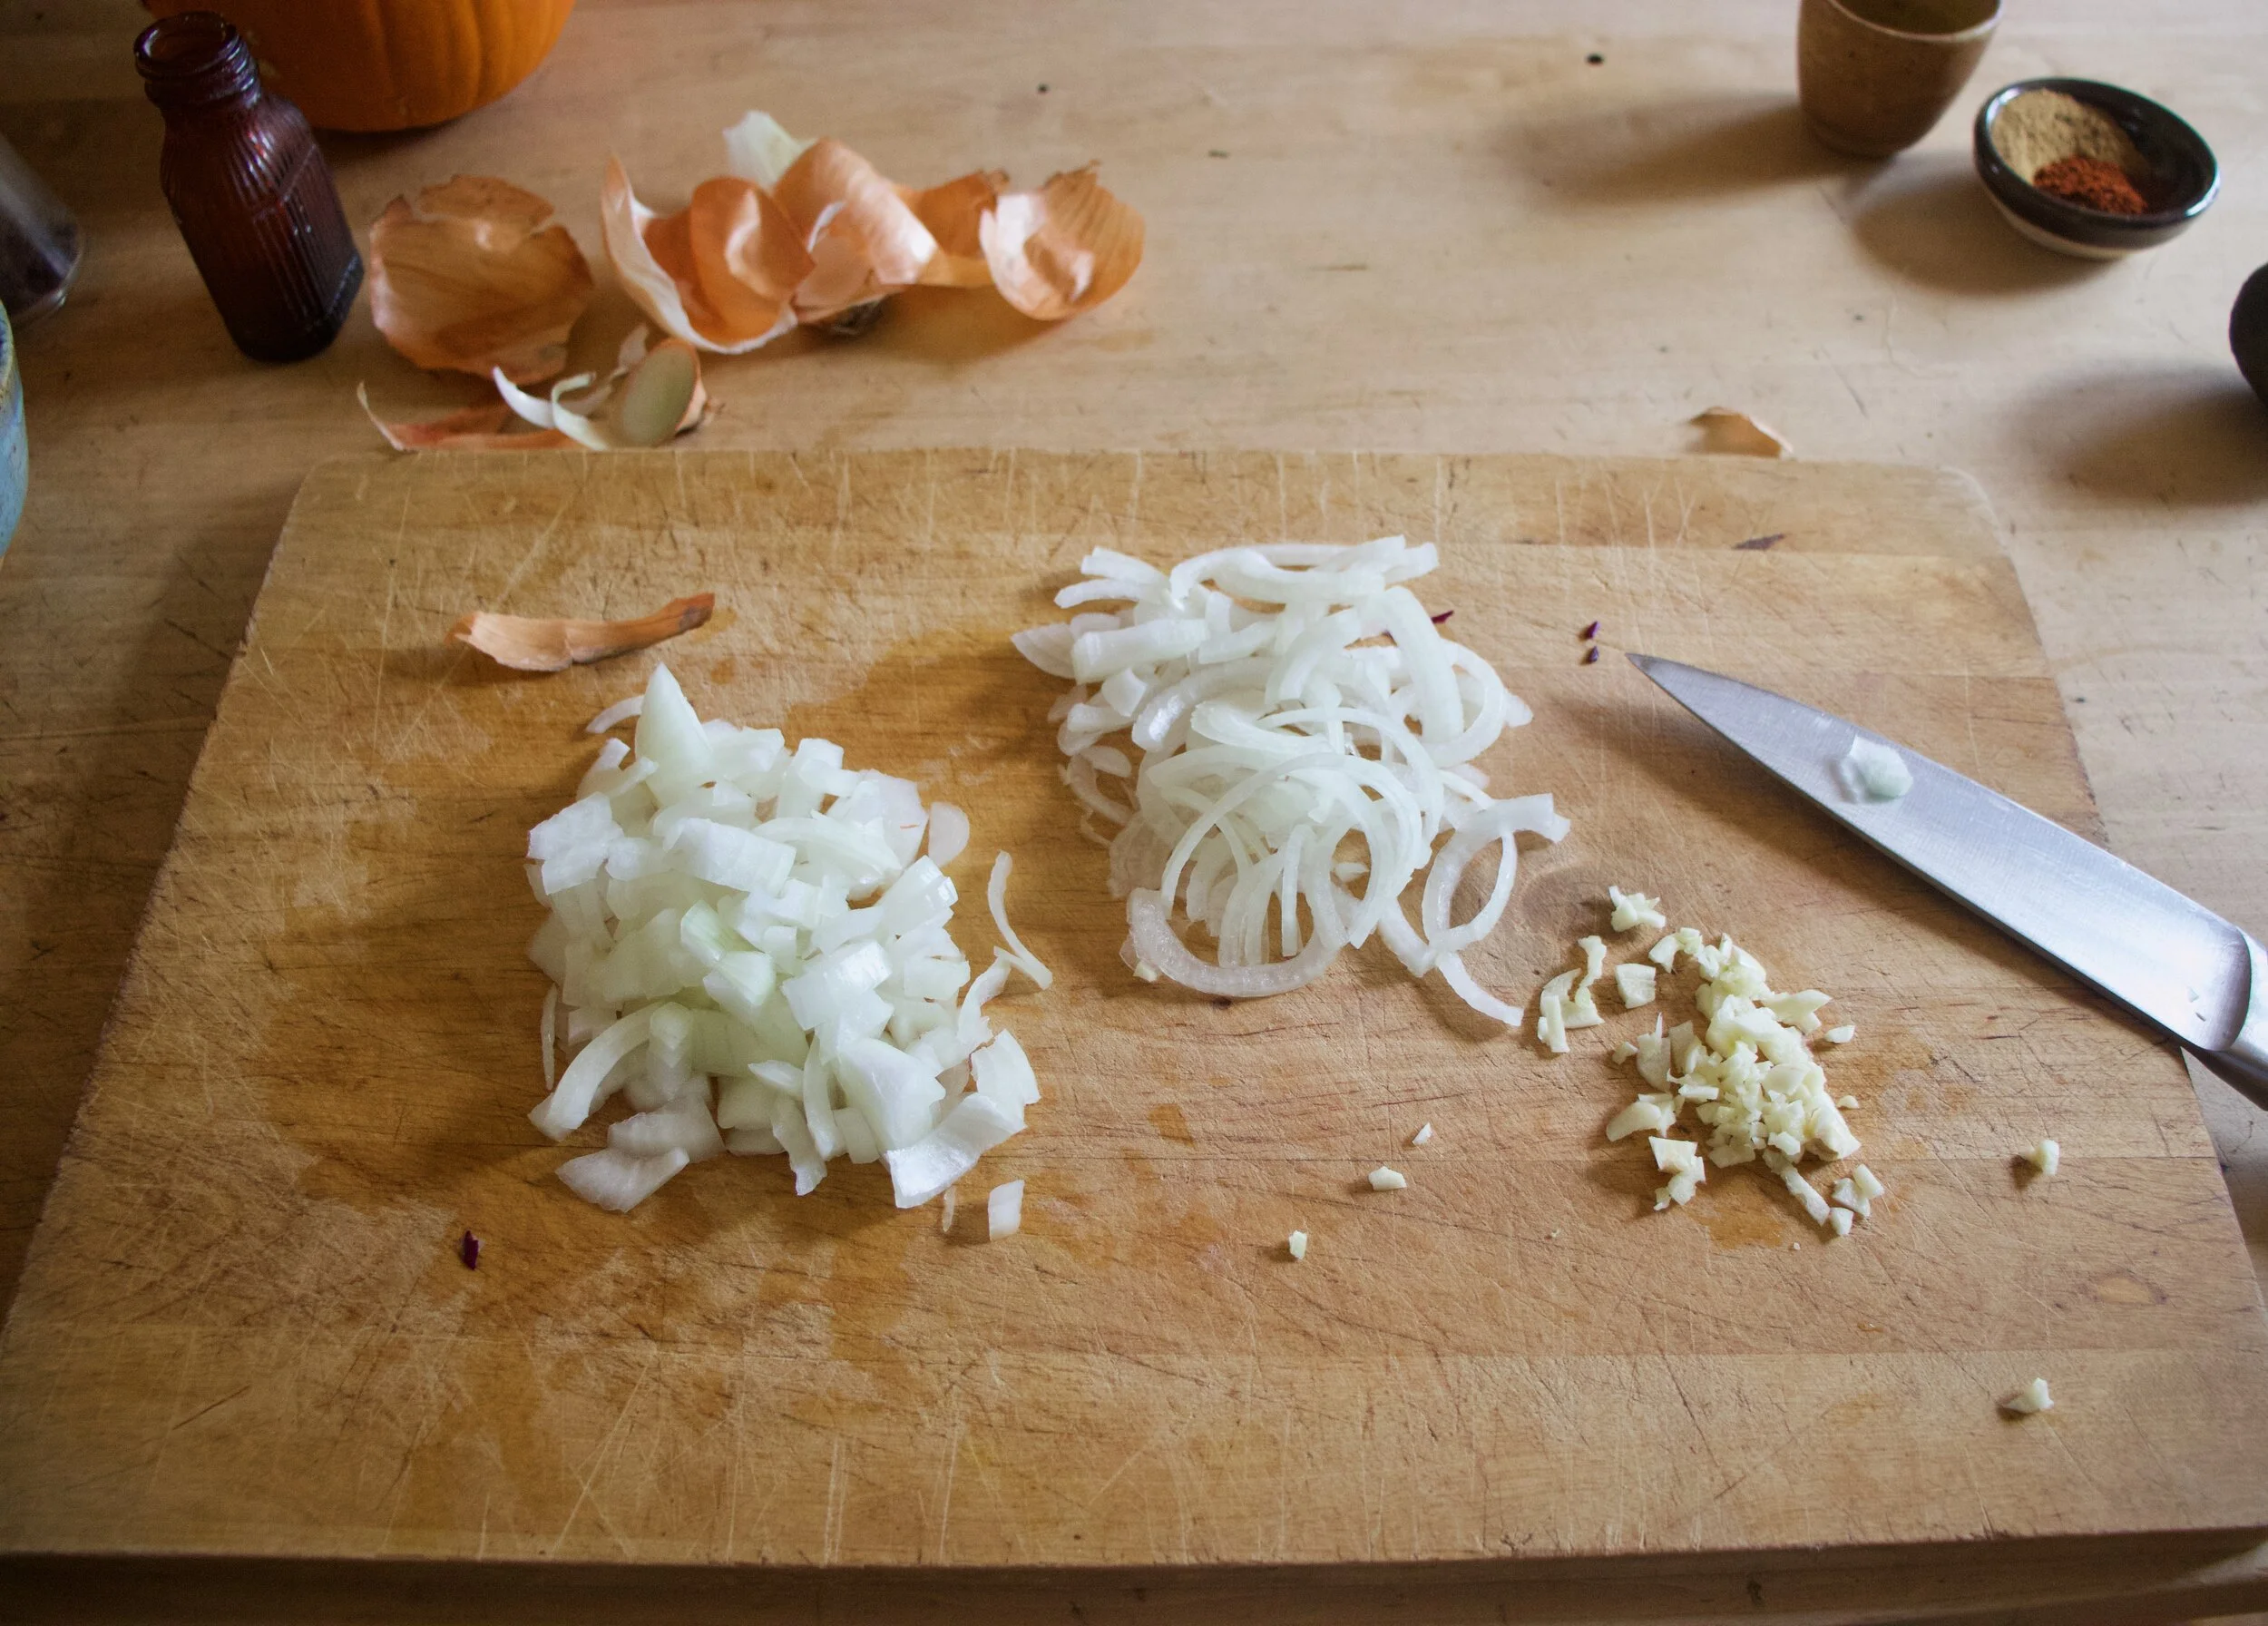
Start off by chopping the carrots into small pieces. Then cut half of the onion into small pieces. Rough chop the garlic and the ginger as well. No need to peel ginger unless you really want to.

Place it all into food processor and pulse until a small crumble.
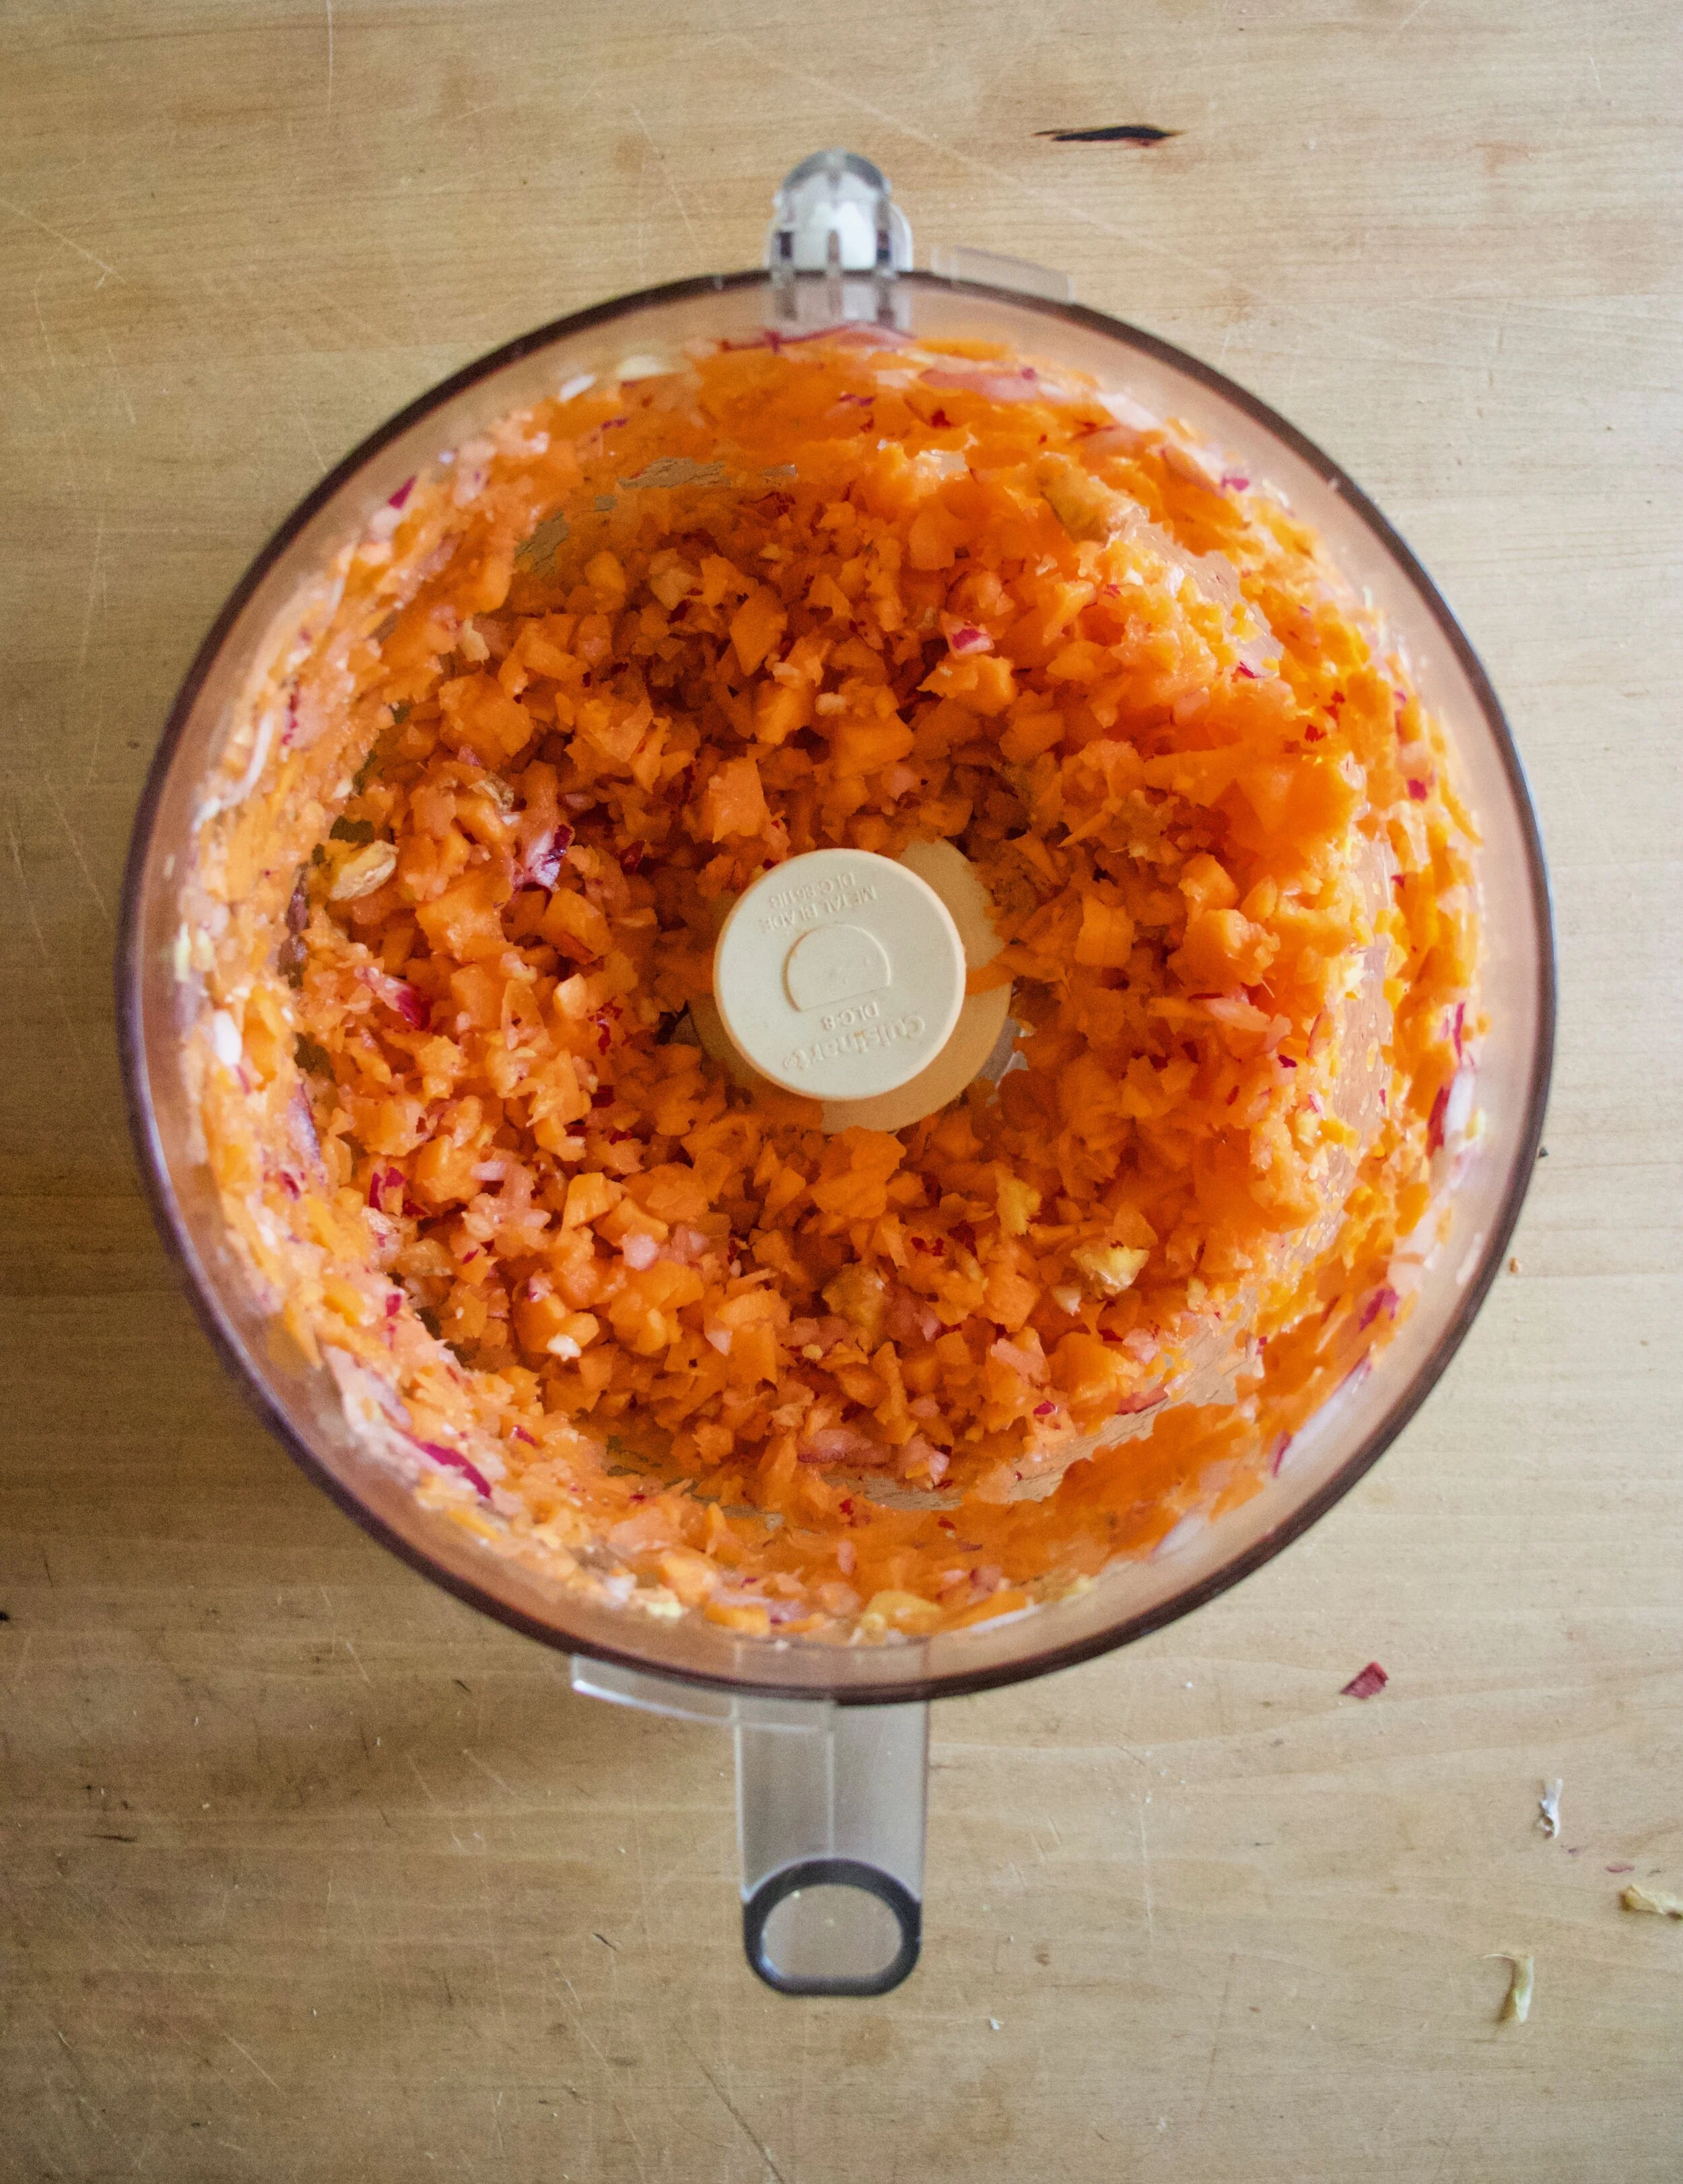
Carrot onion garlic ginger mixture.
Dump mixture into a skillet with a splash of water. Add in the cumin, chili flakes, and a good pinch of salt and pepper and cook on the stove for 5-8 minutes until the crumble softens and becomes fragrant.
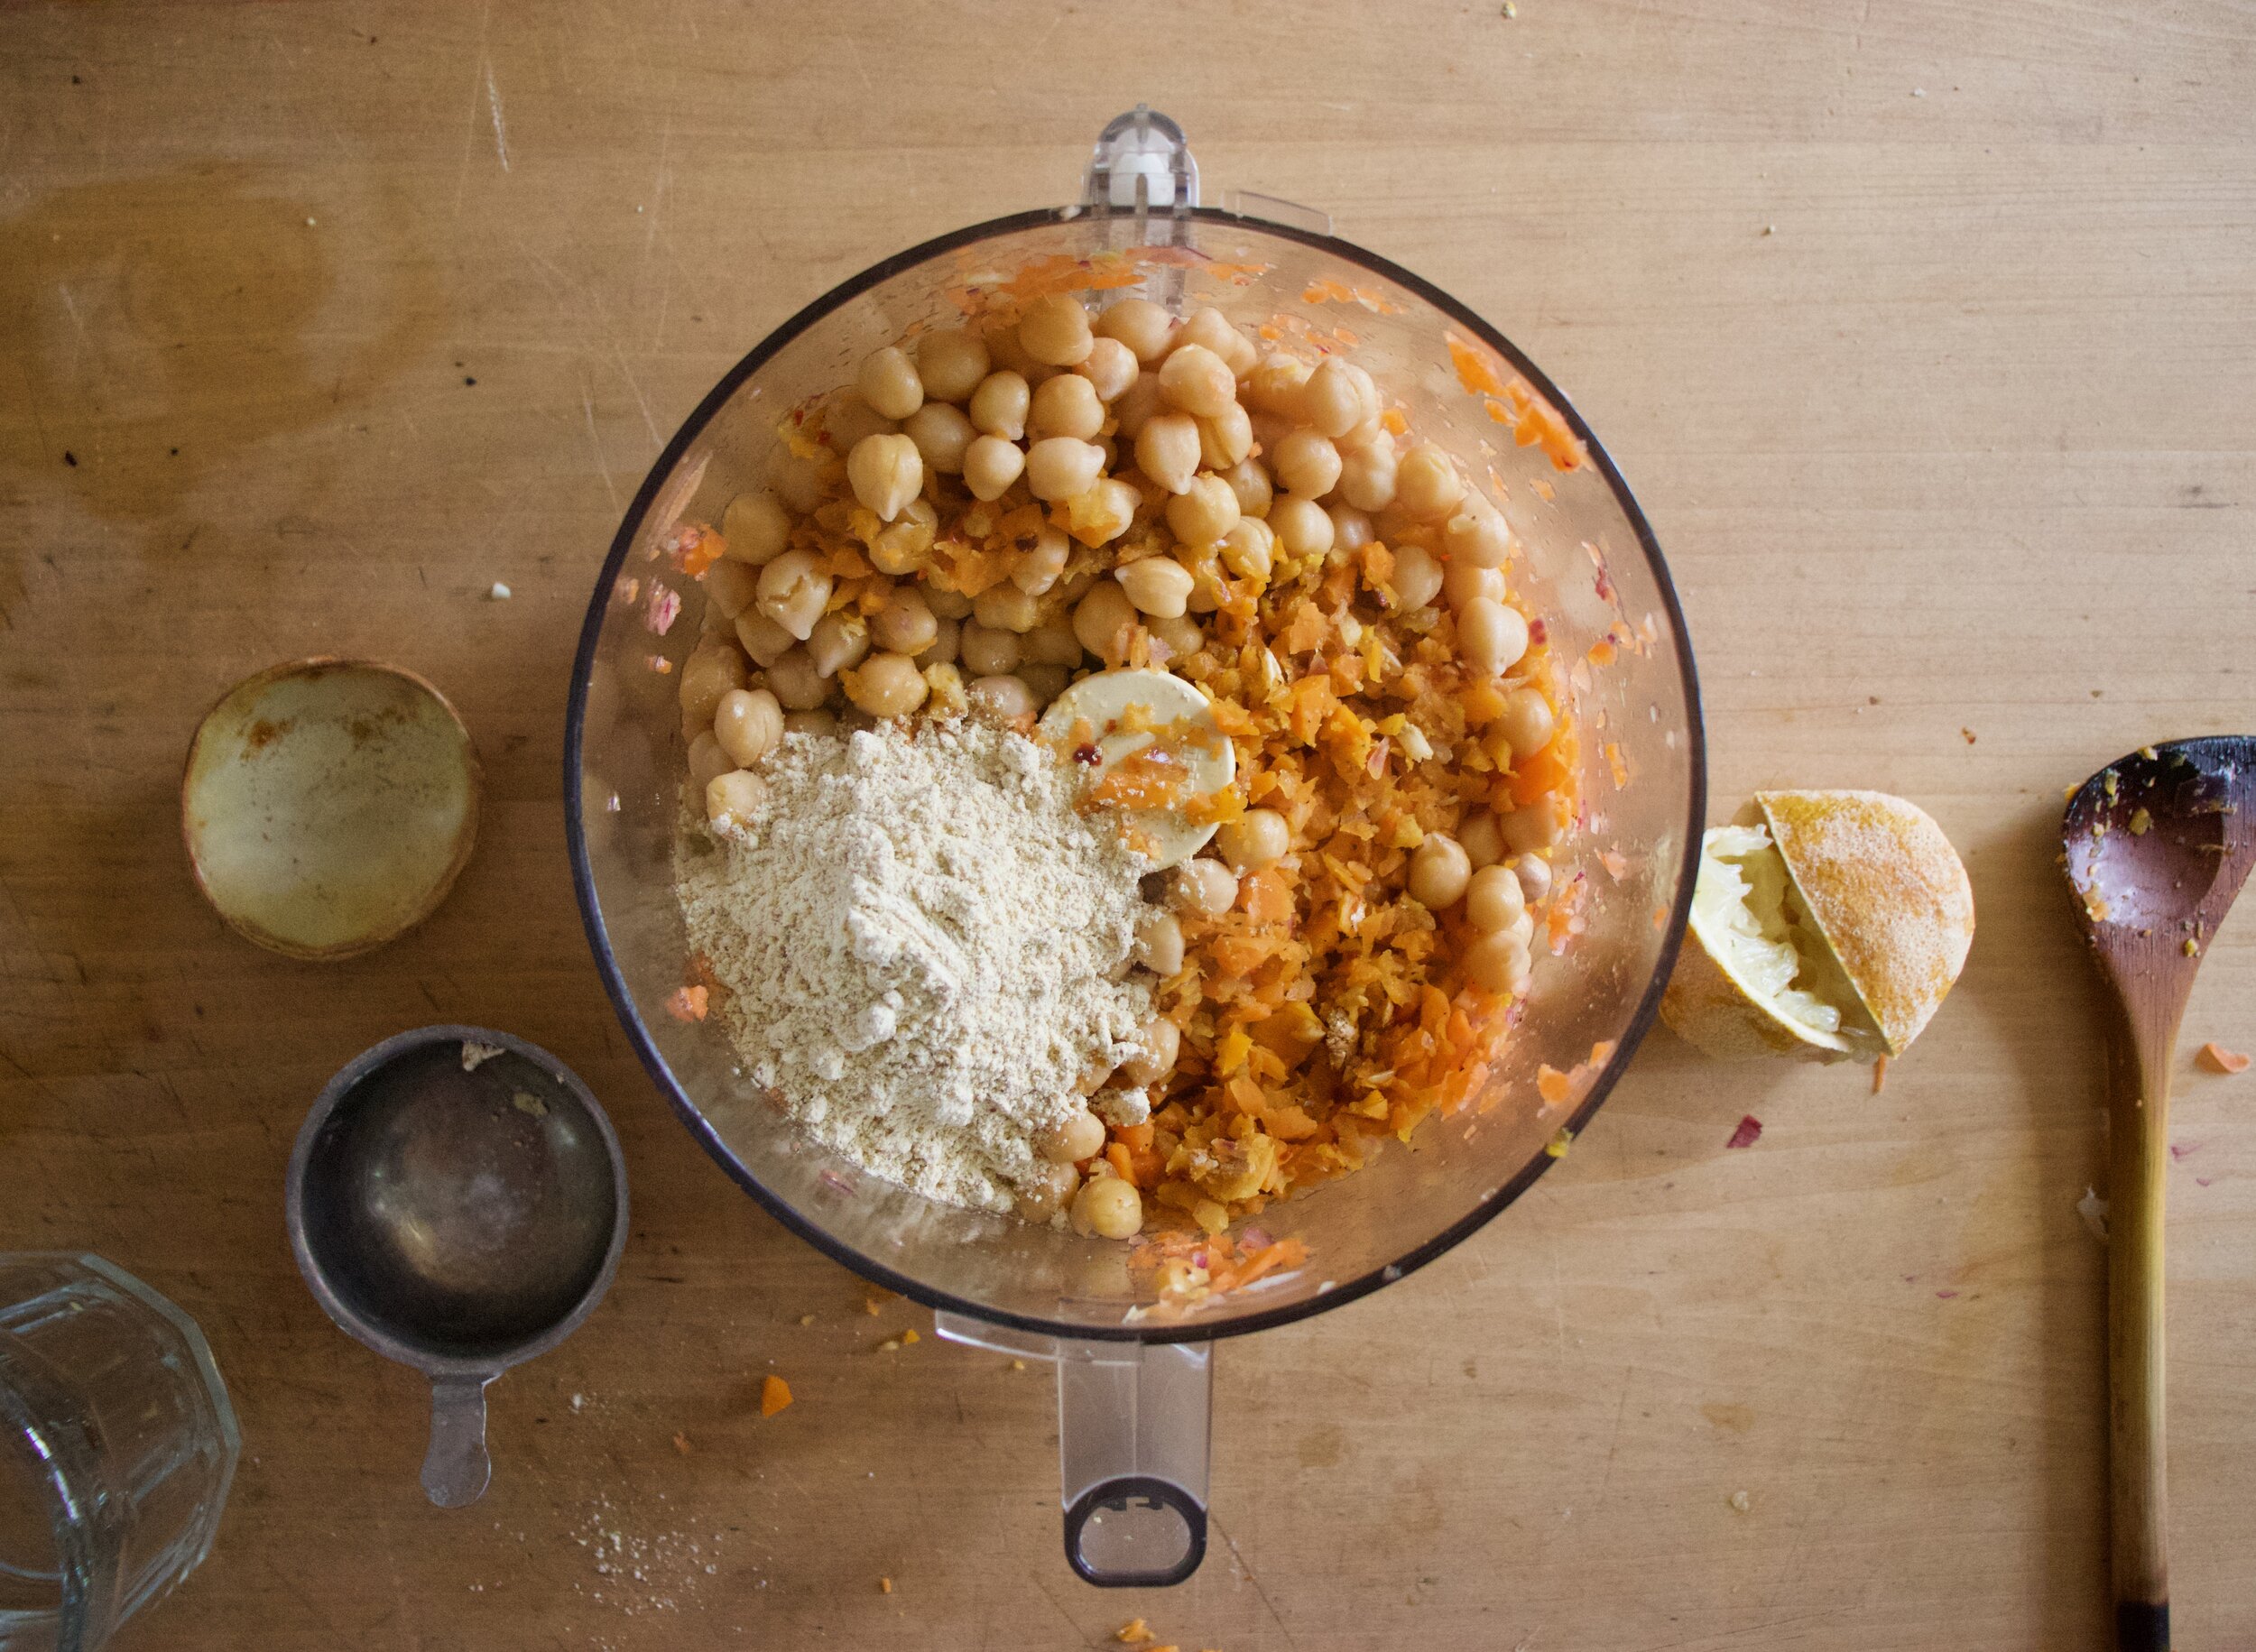
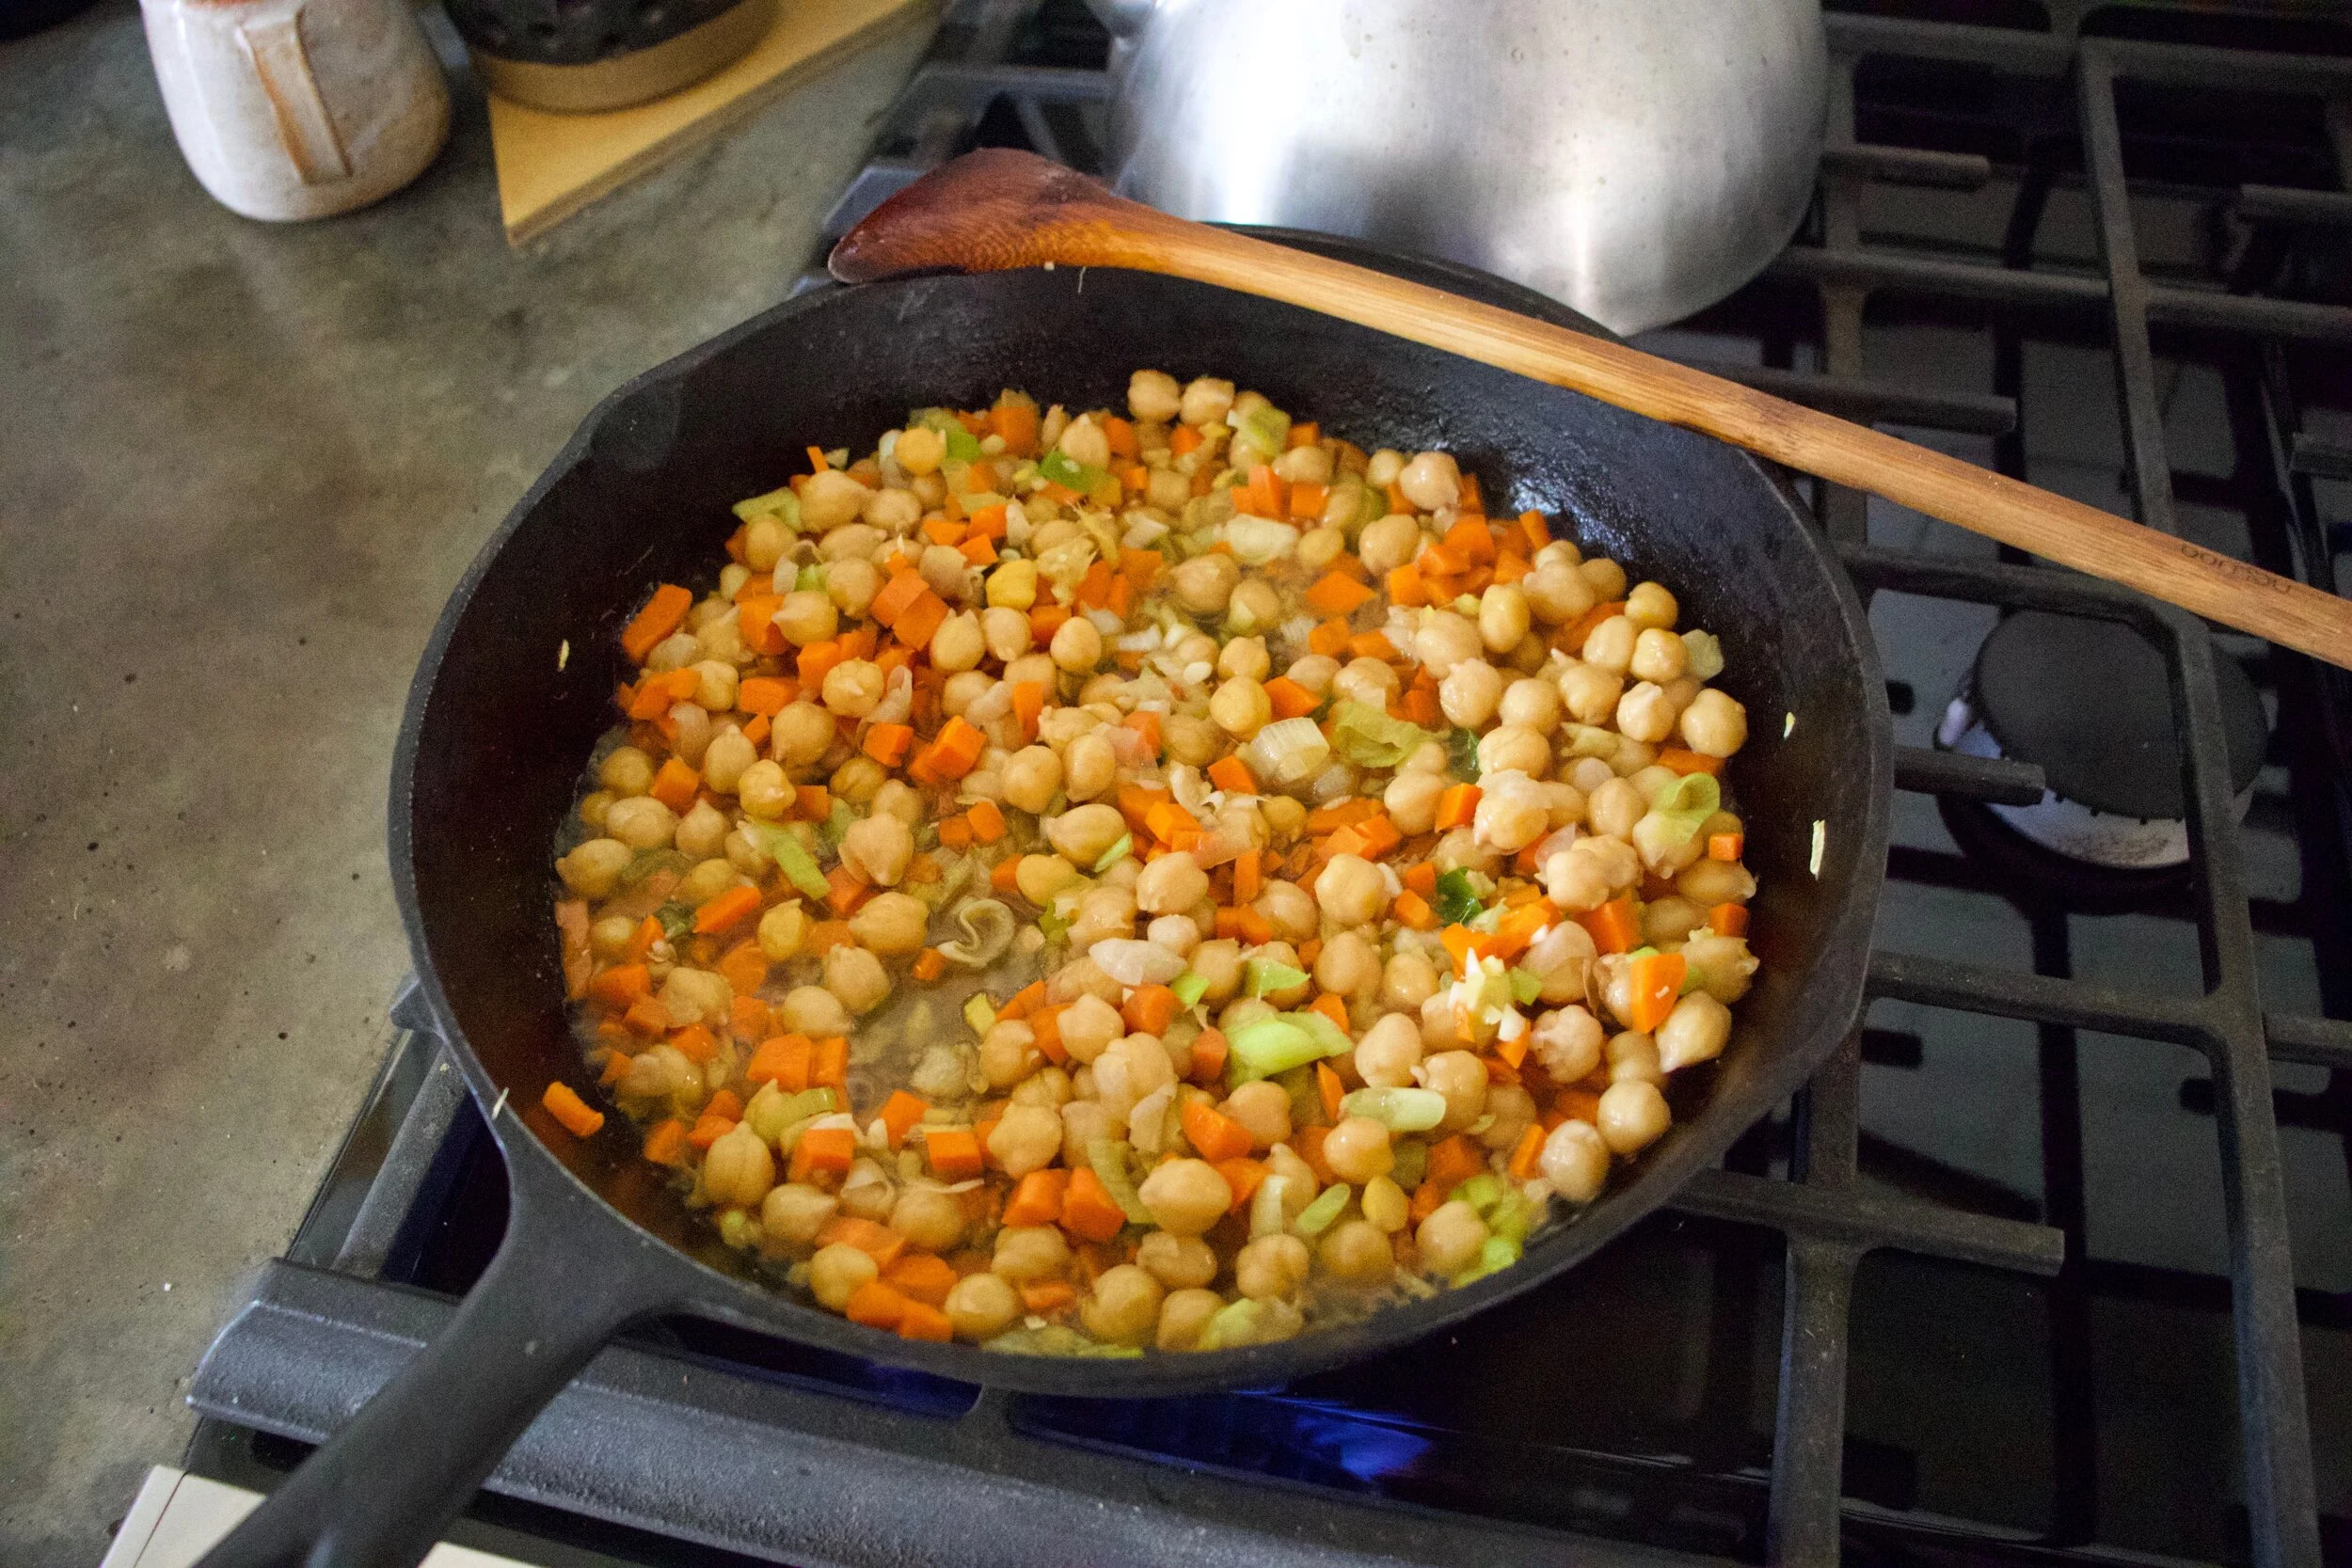
Dump carrot ginger mixture back into food processor along with the chickpeas, chickpea flour, and the juice of the lemon. Puree until smooth.
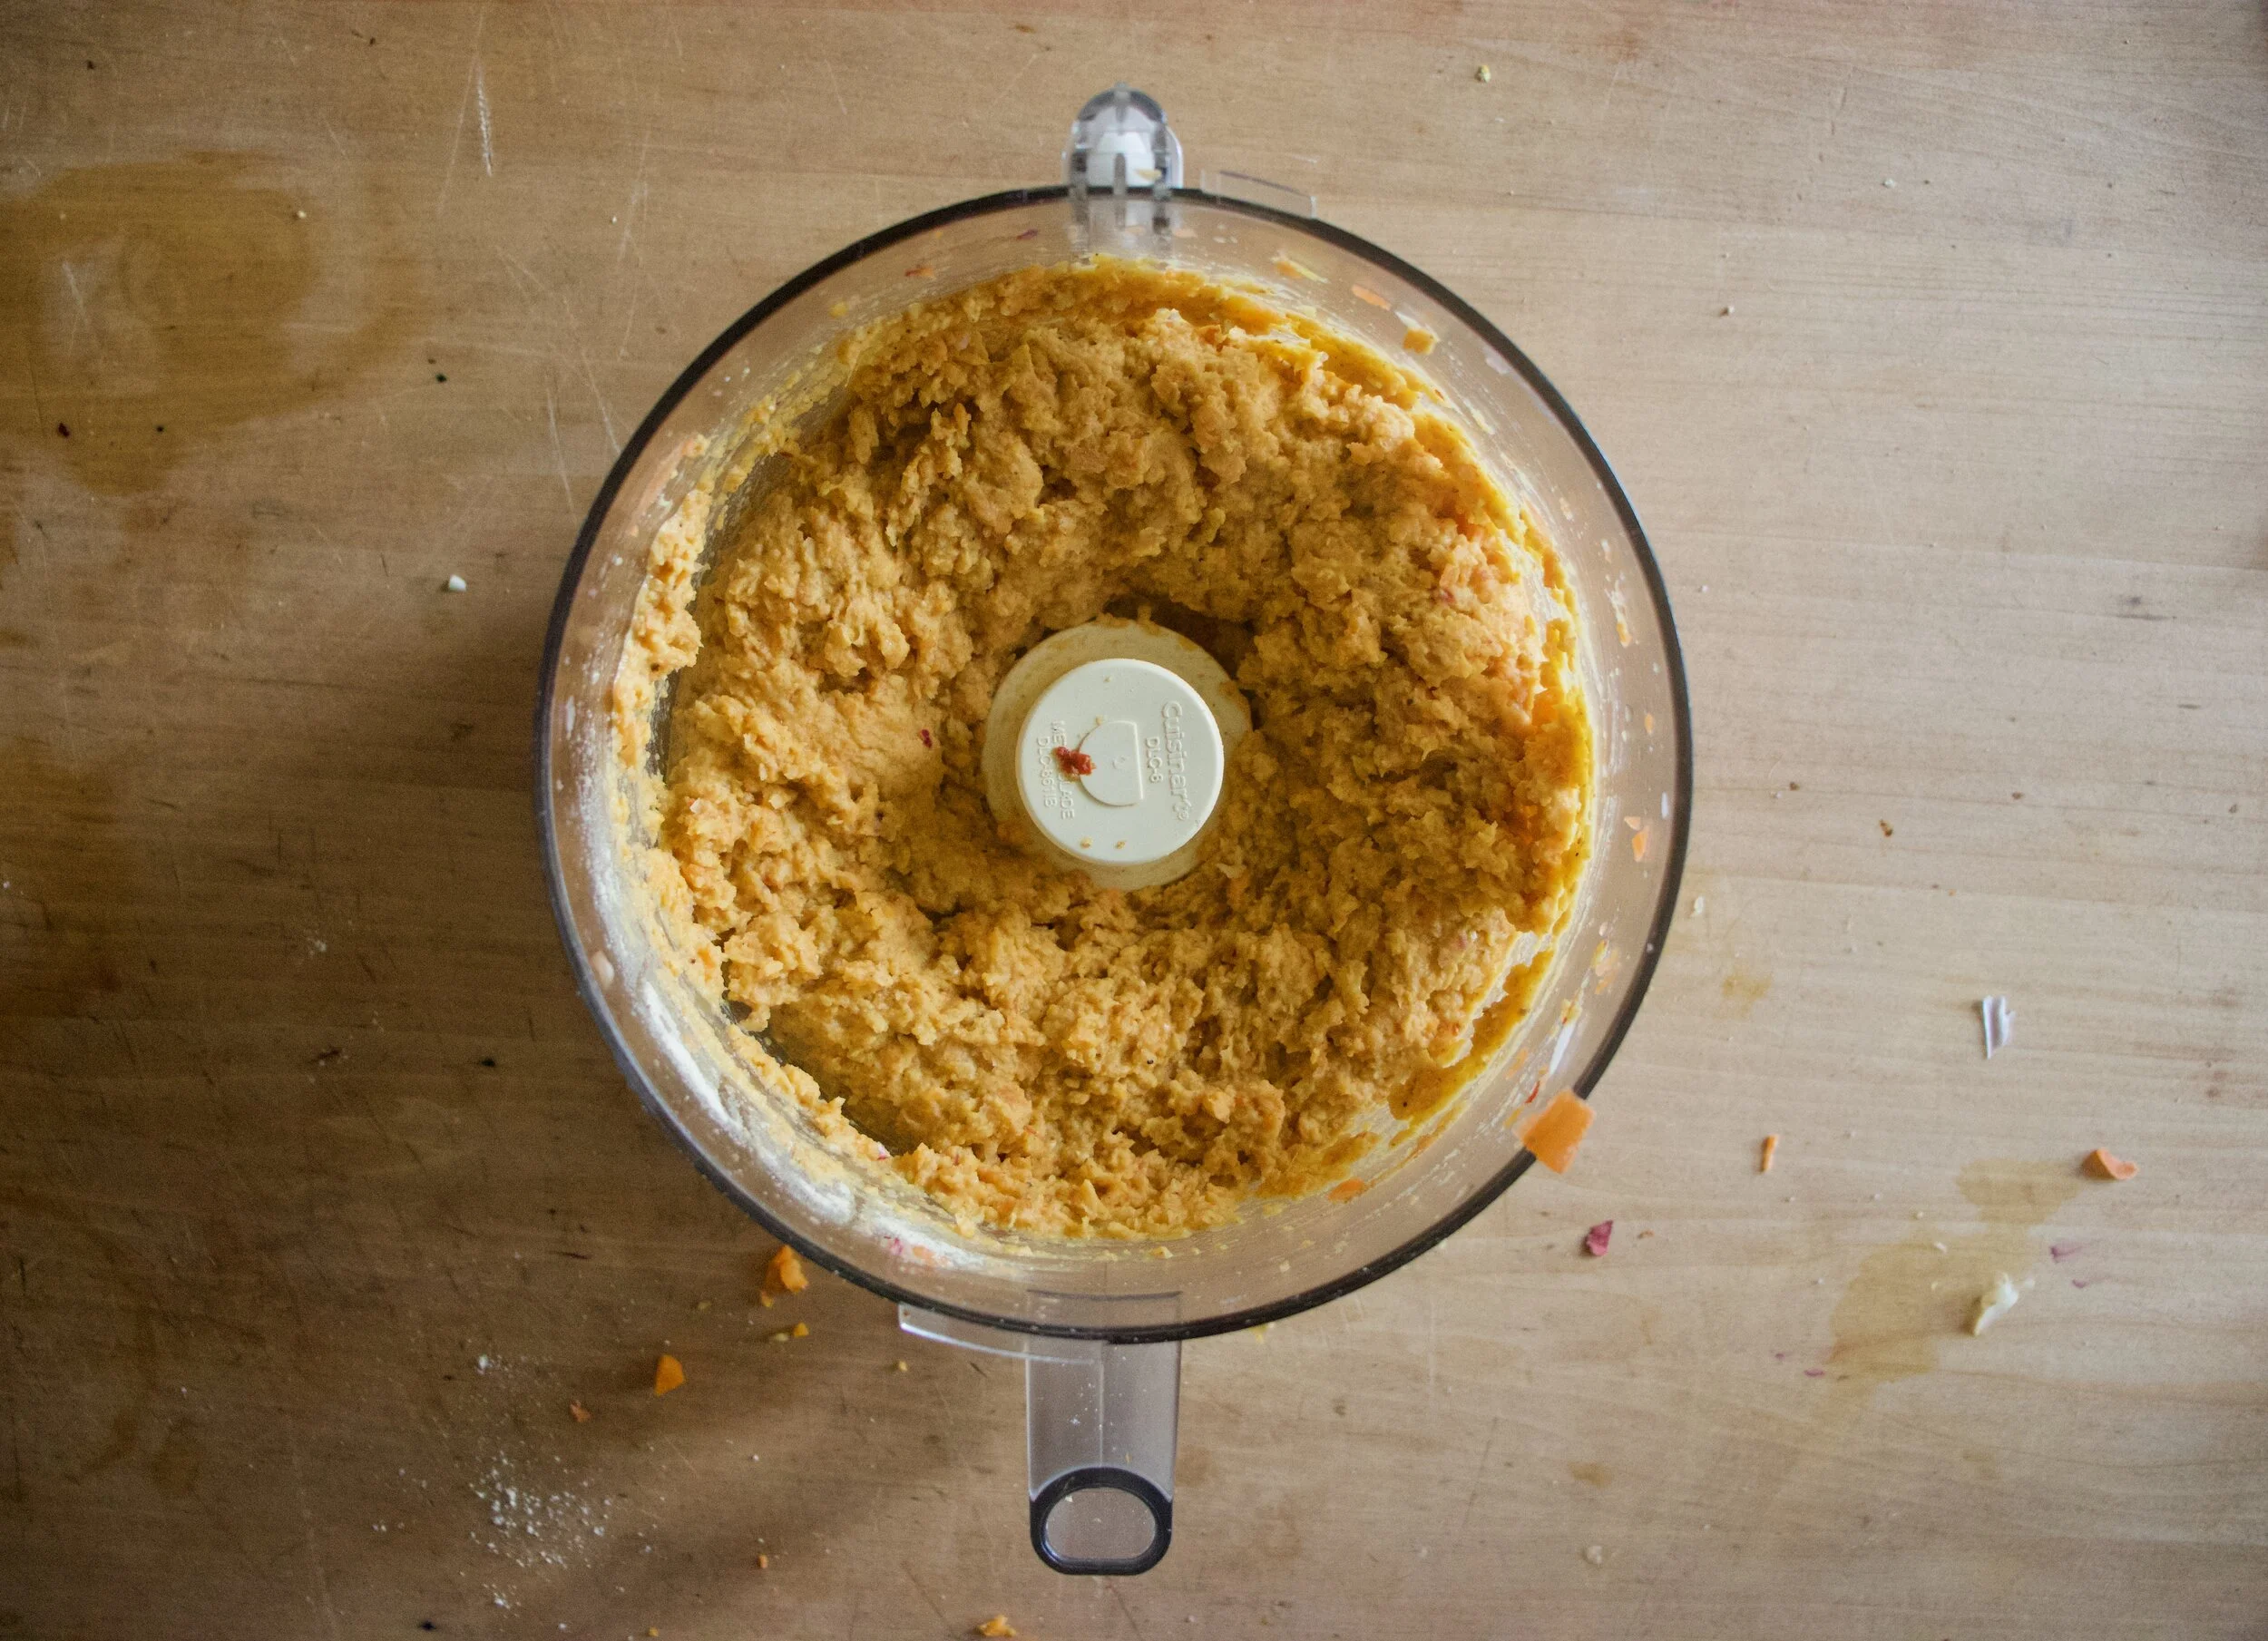
Carrot ginger falafel mixture. Now stick it in the fridge. For a little while to a day, just to let it set up a bit.
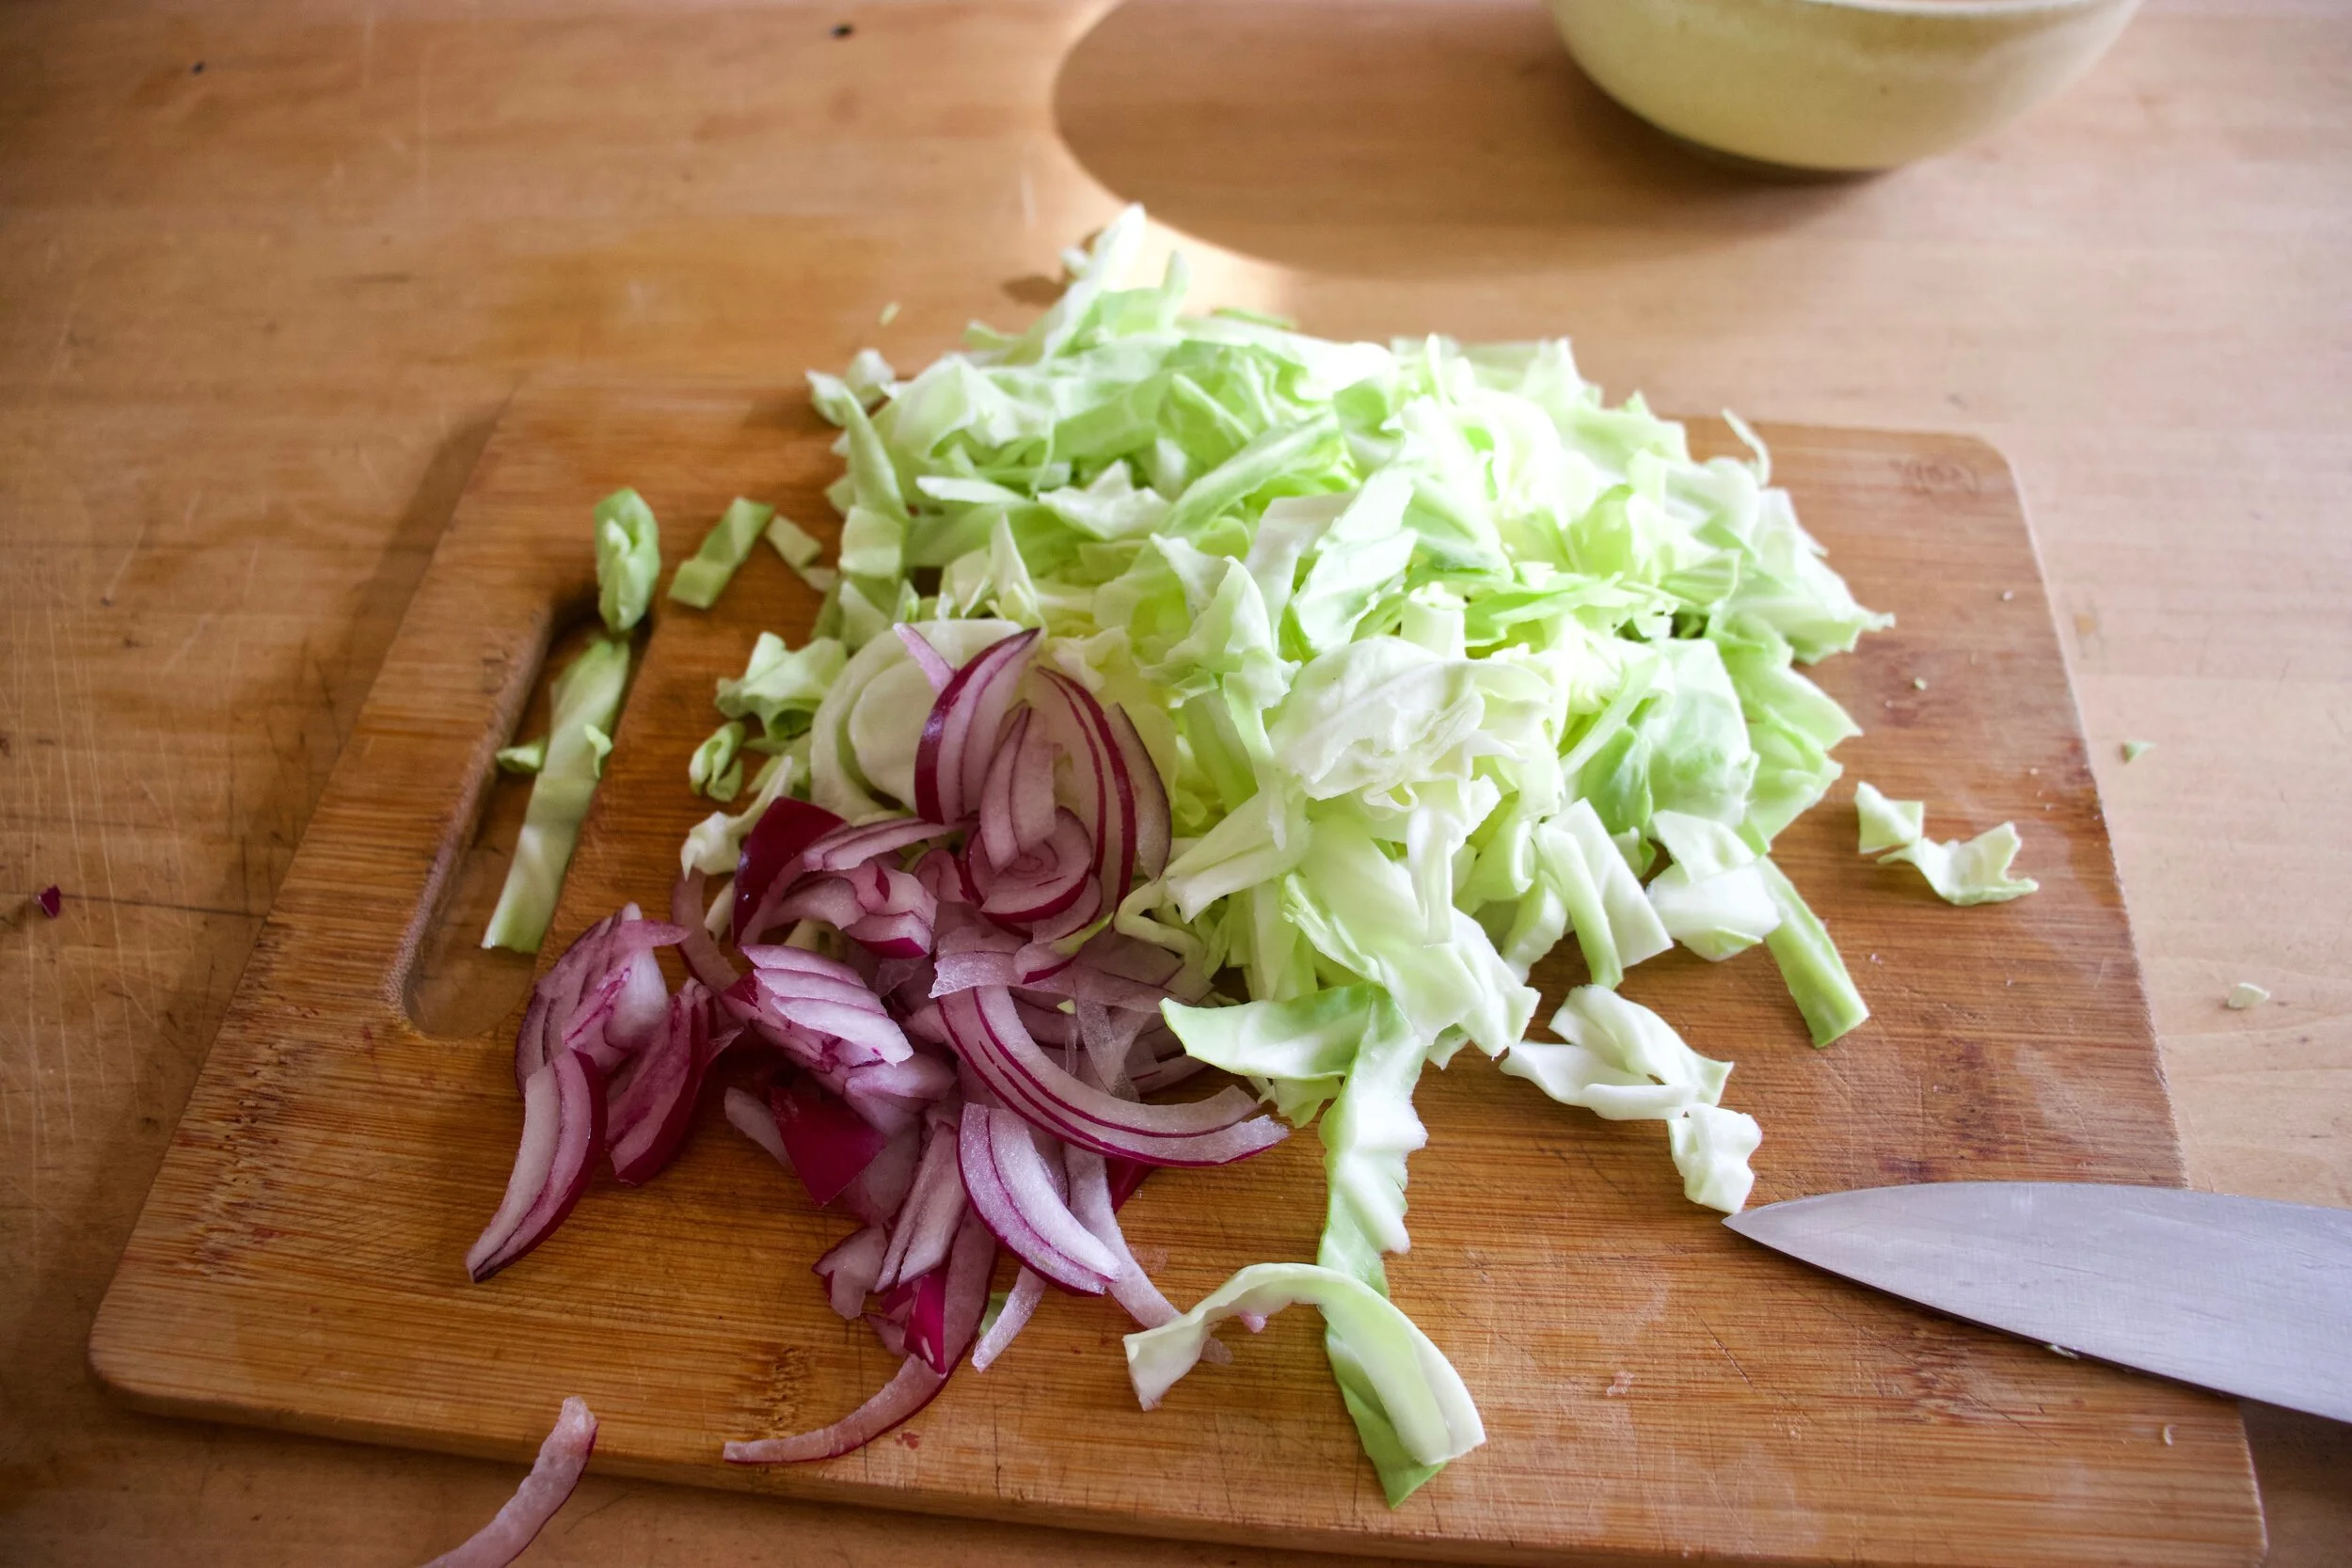
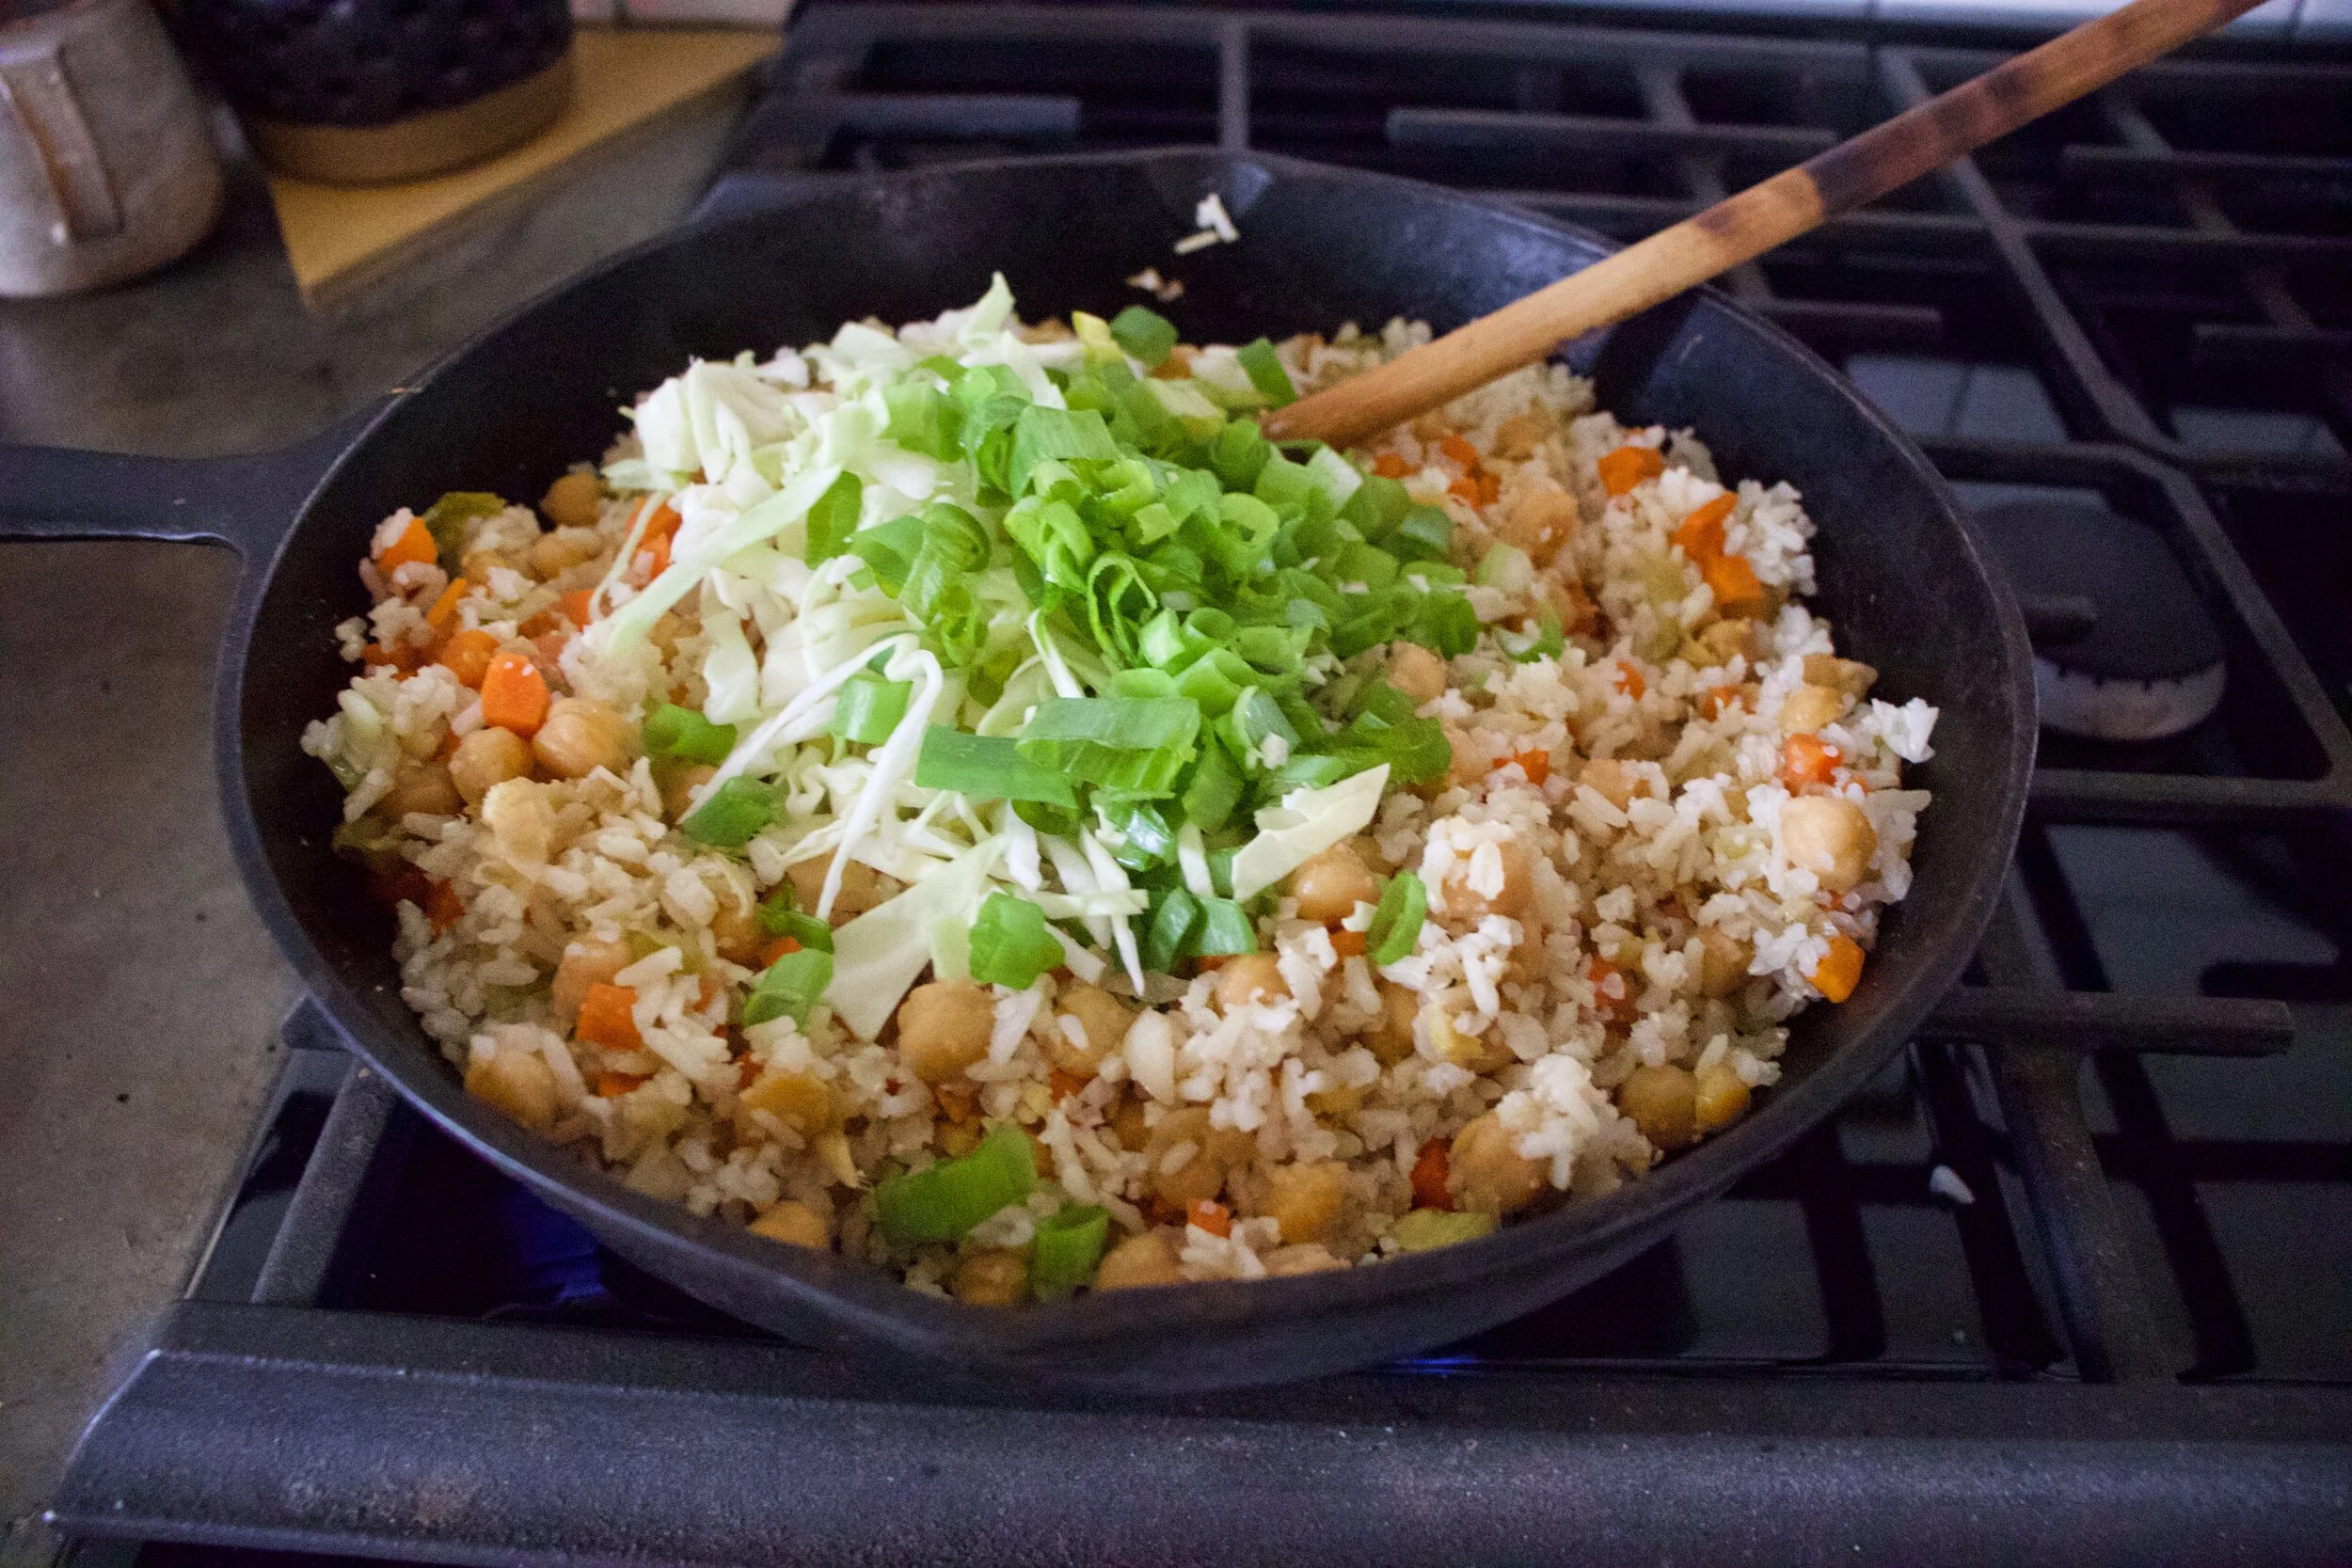
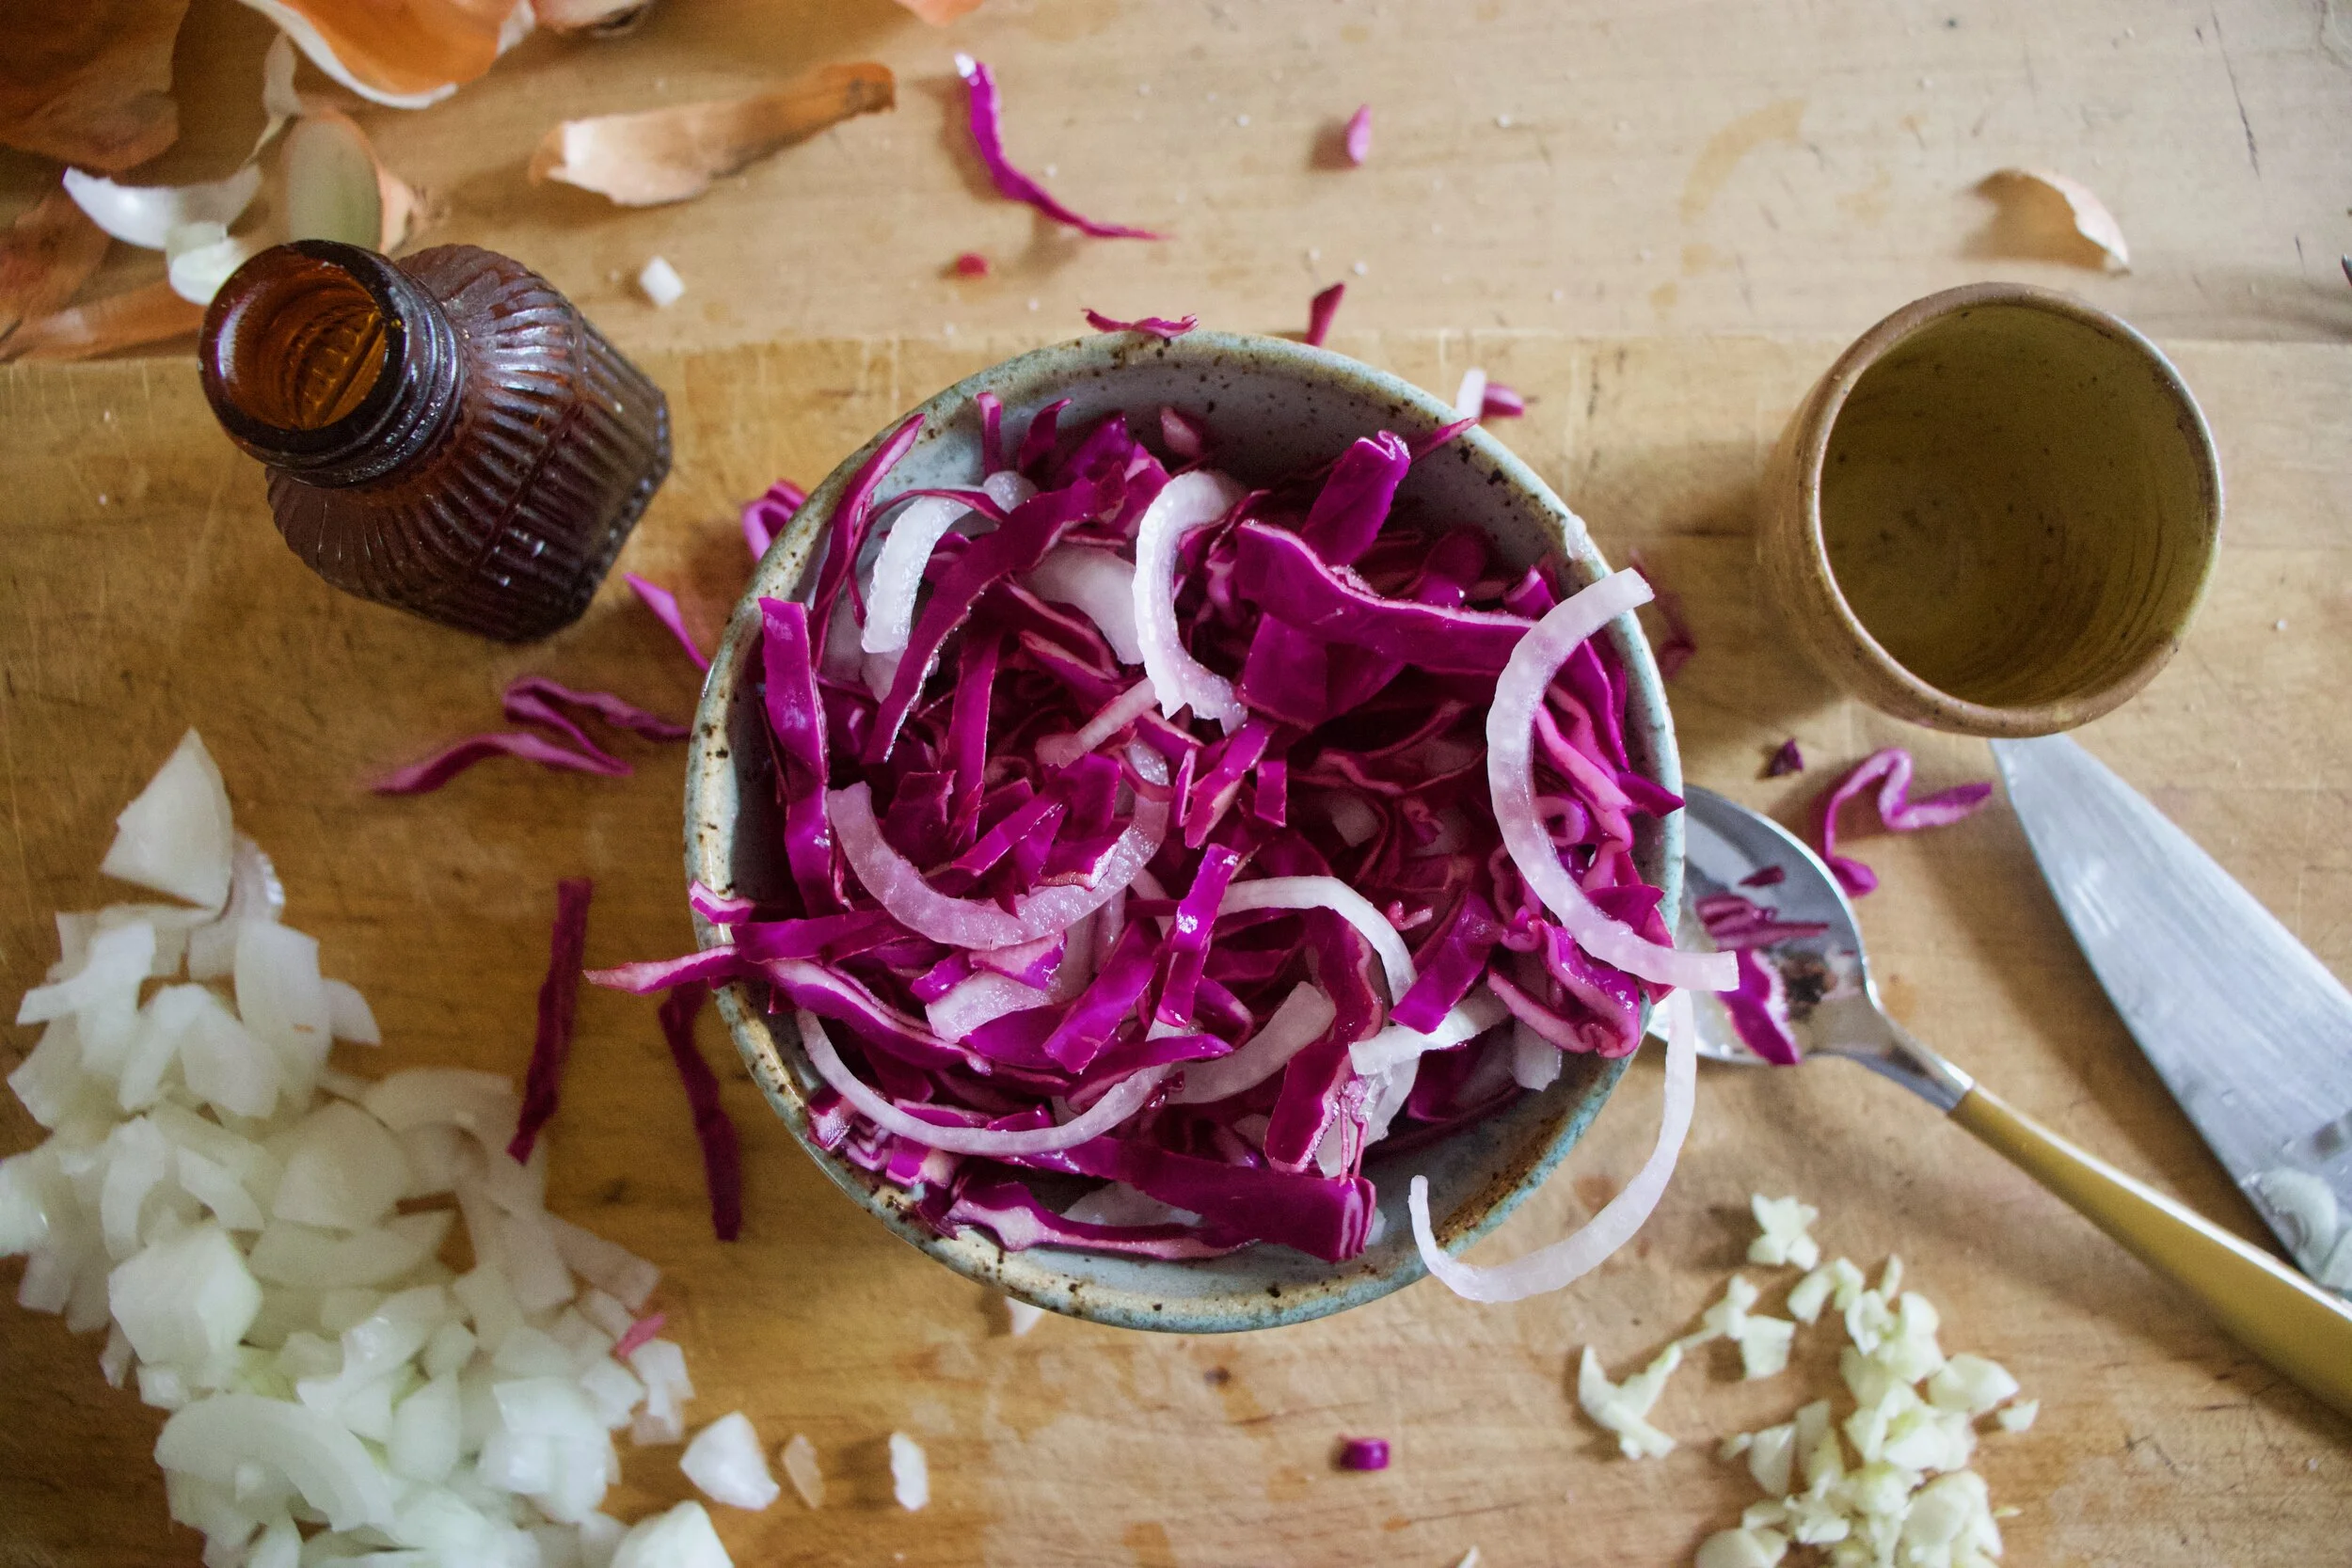
And in the mean time you can make the slaw. Shred cabbage and cut up onion all nice and thin.
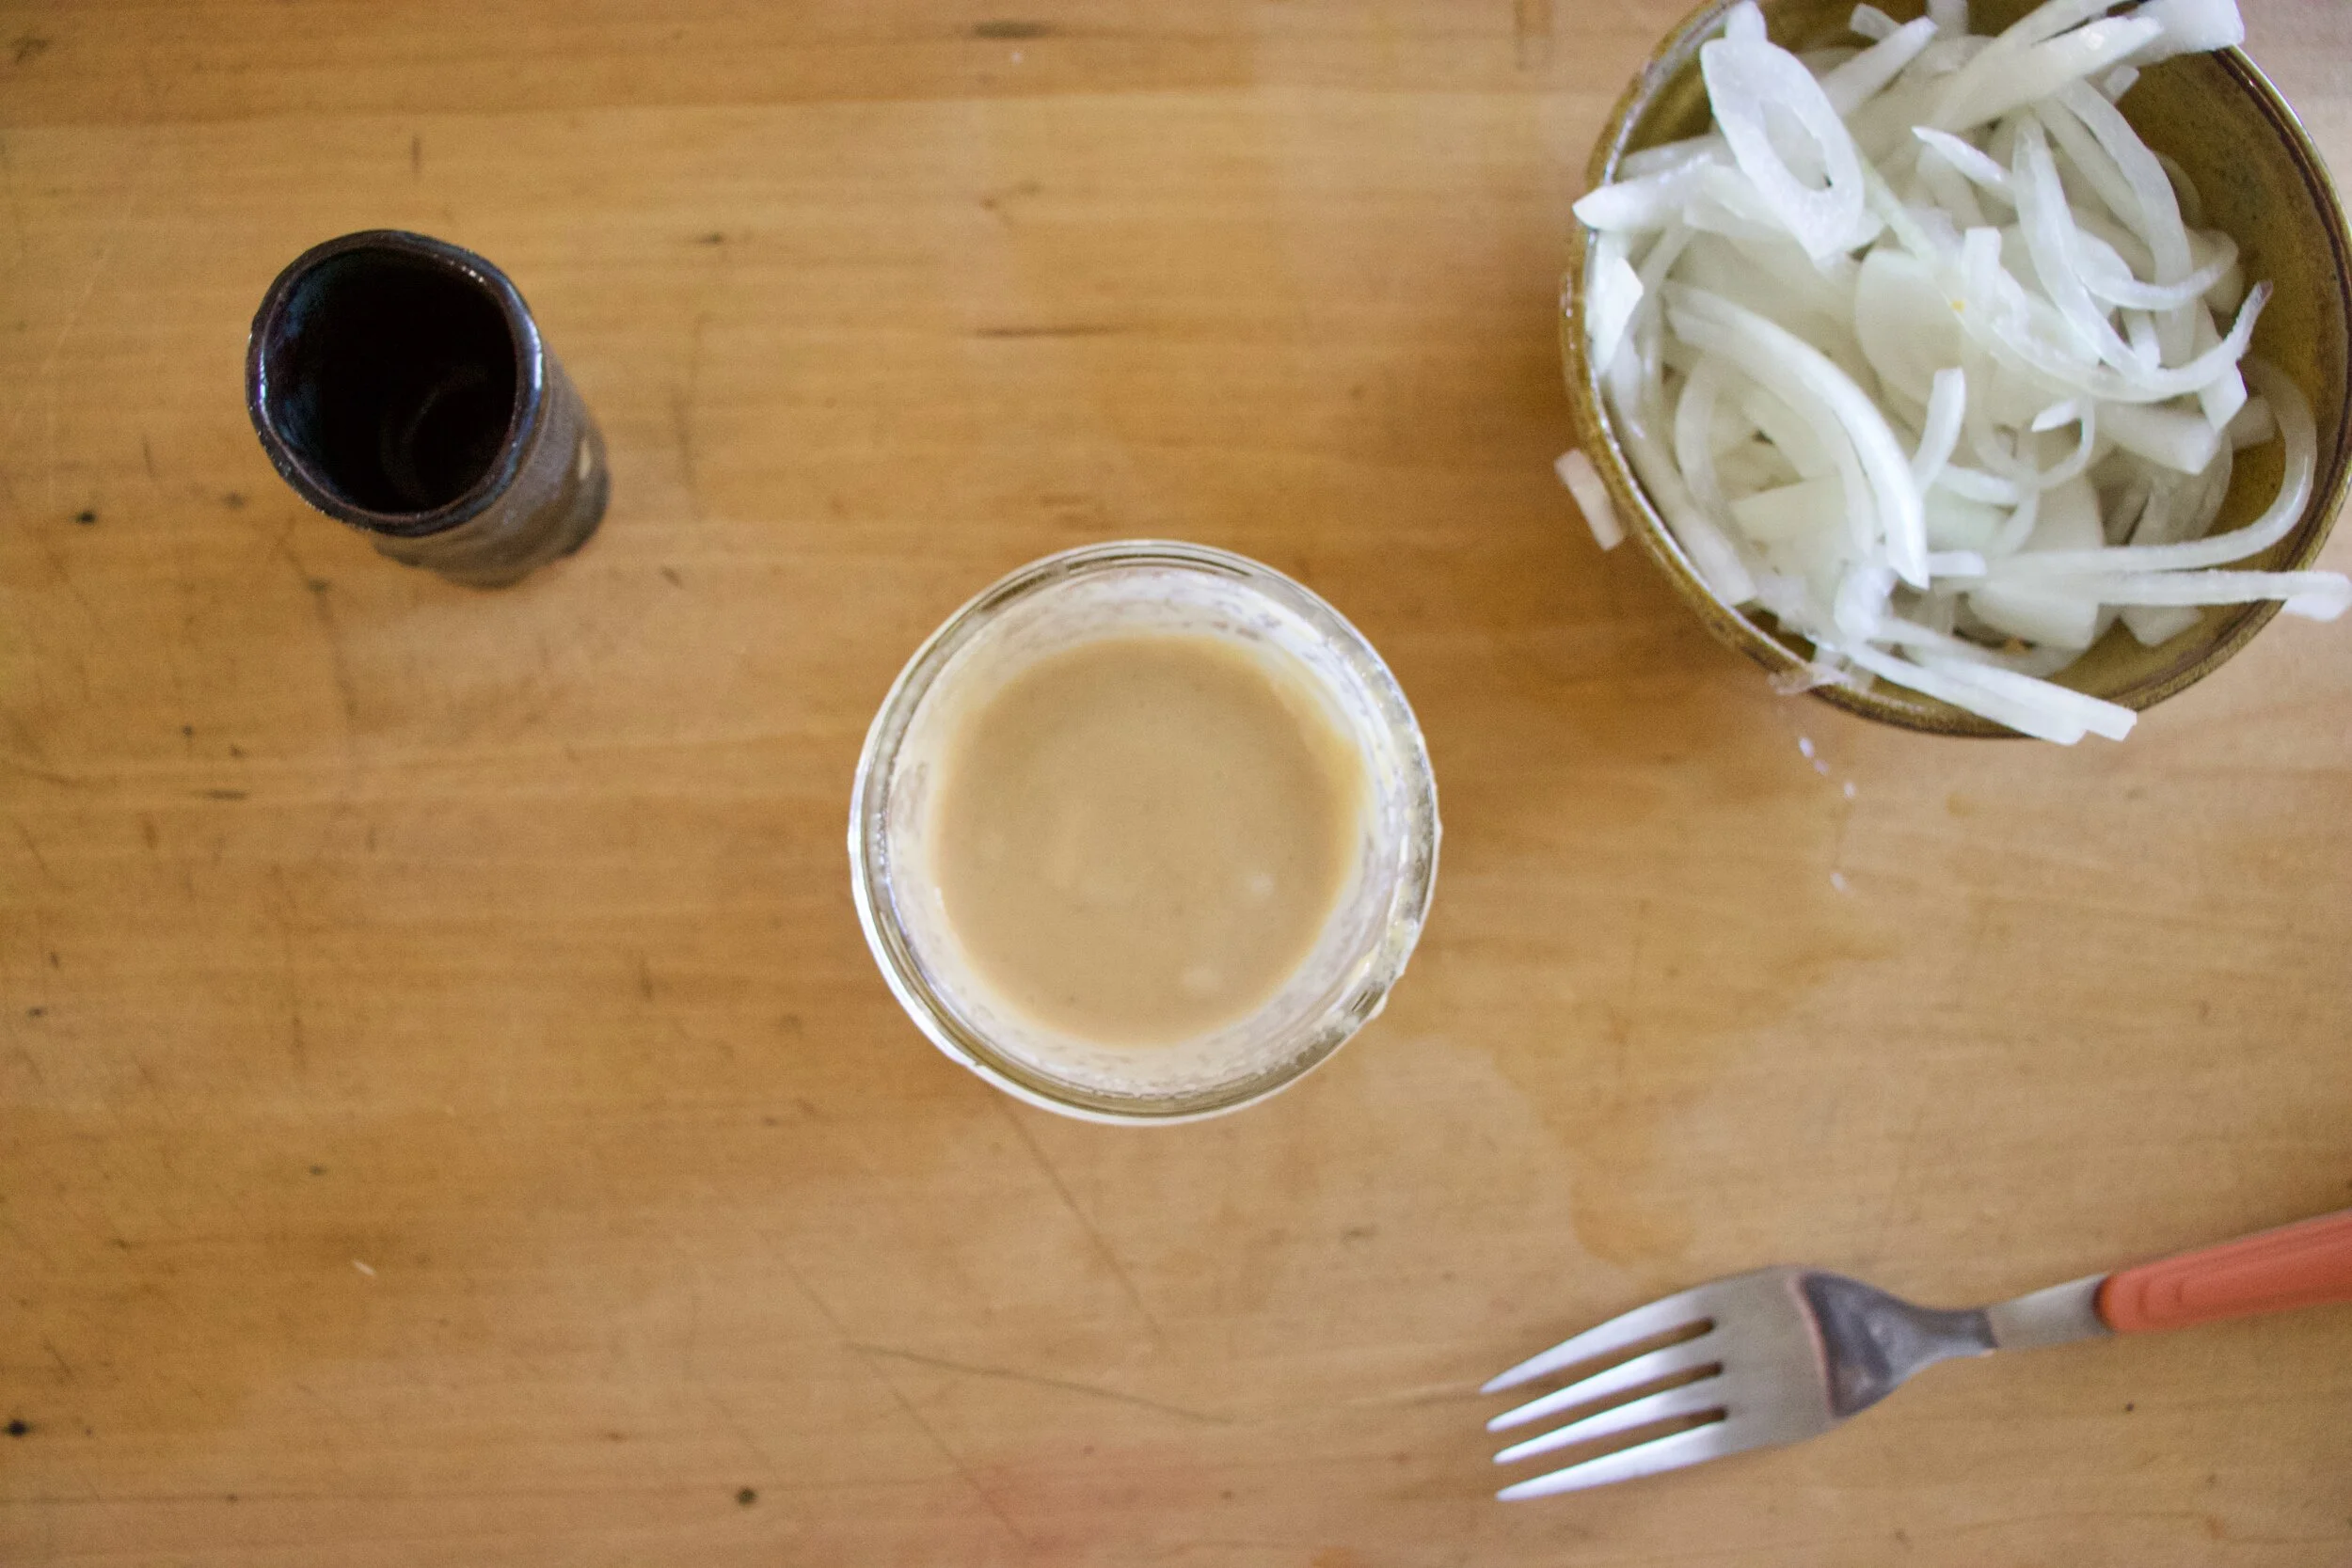
Dump tahini, soy, vinegar, and a few tablespoons warm water into bowl and mix until creamy and good.
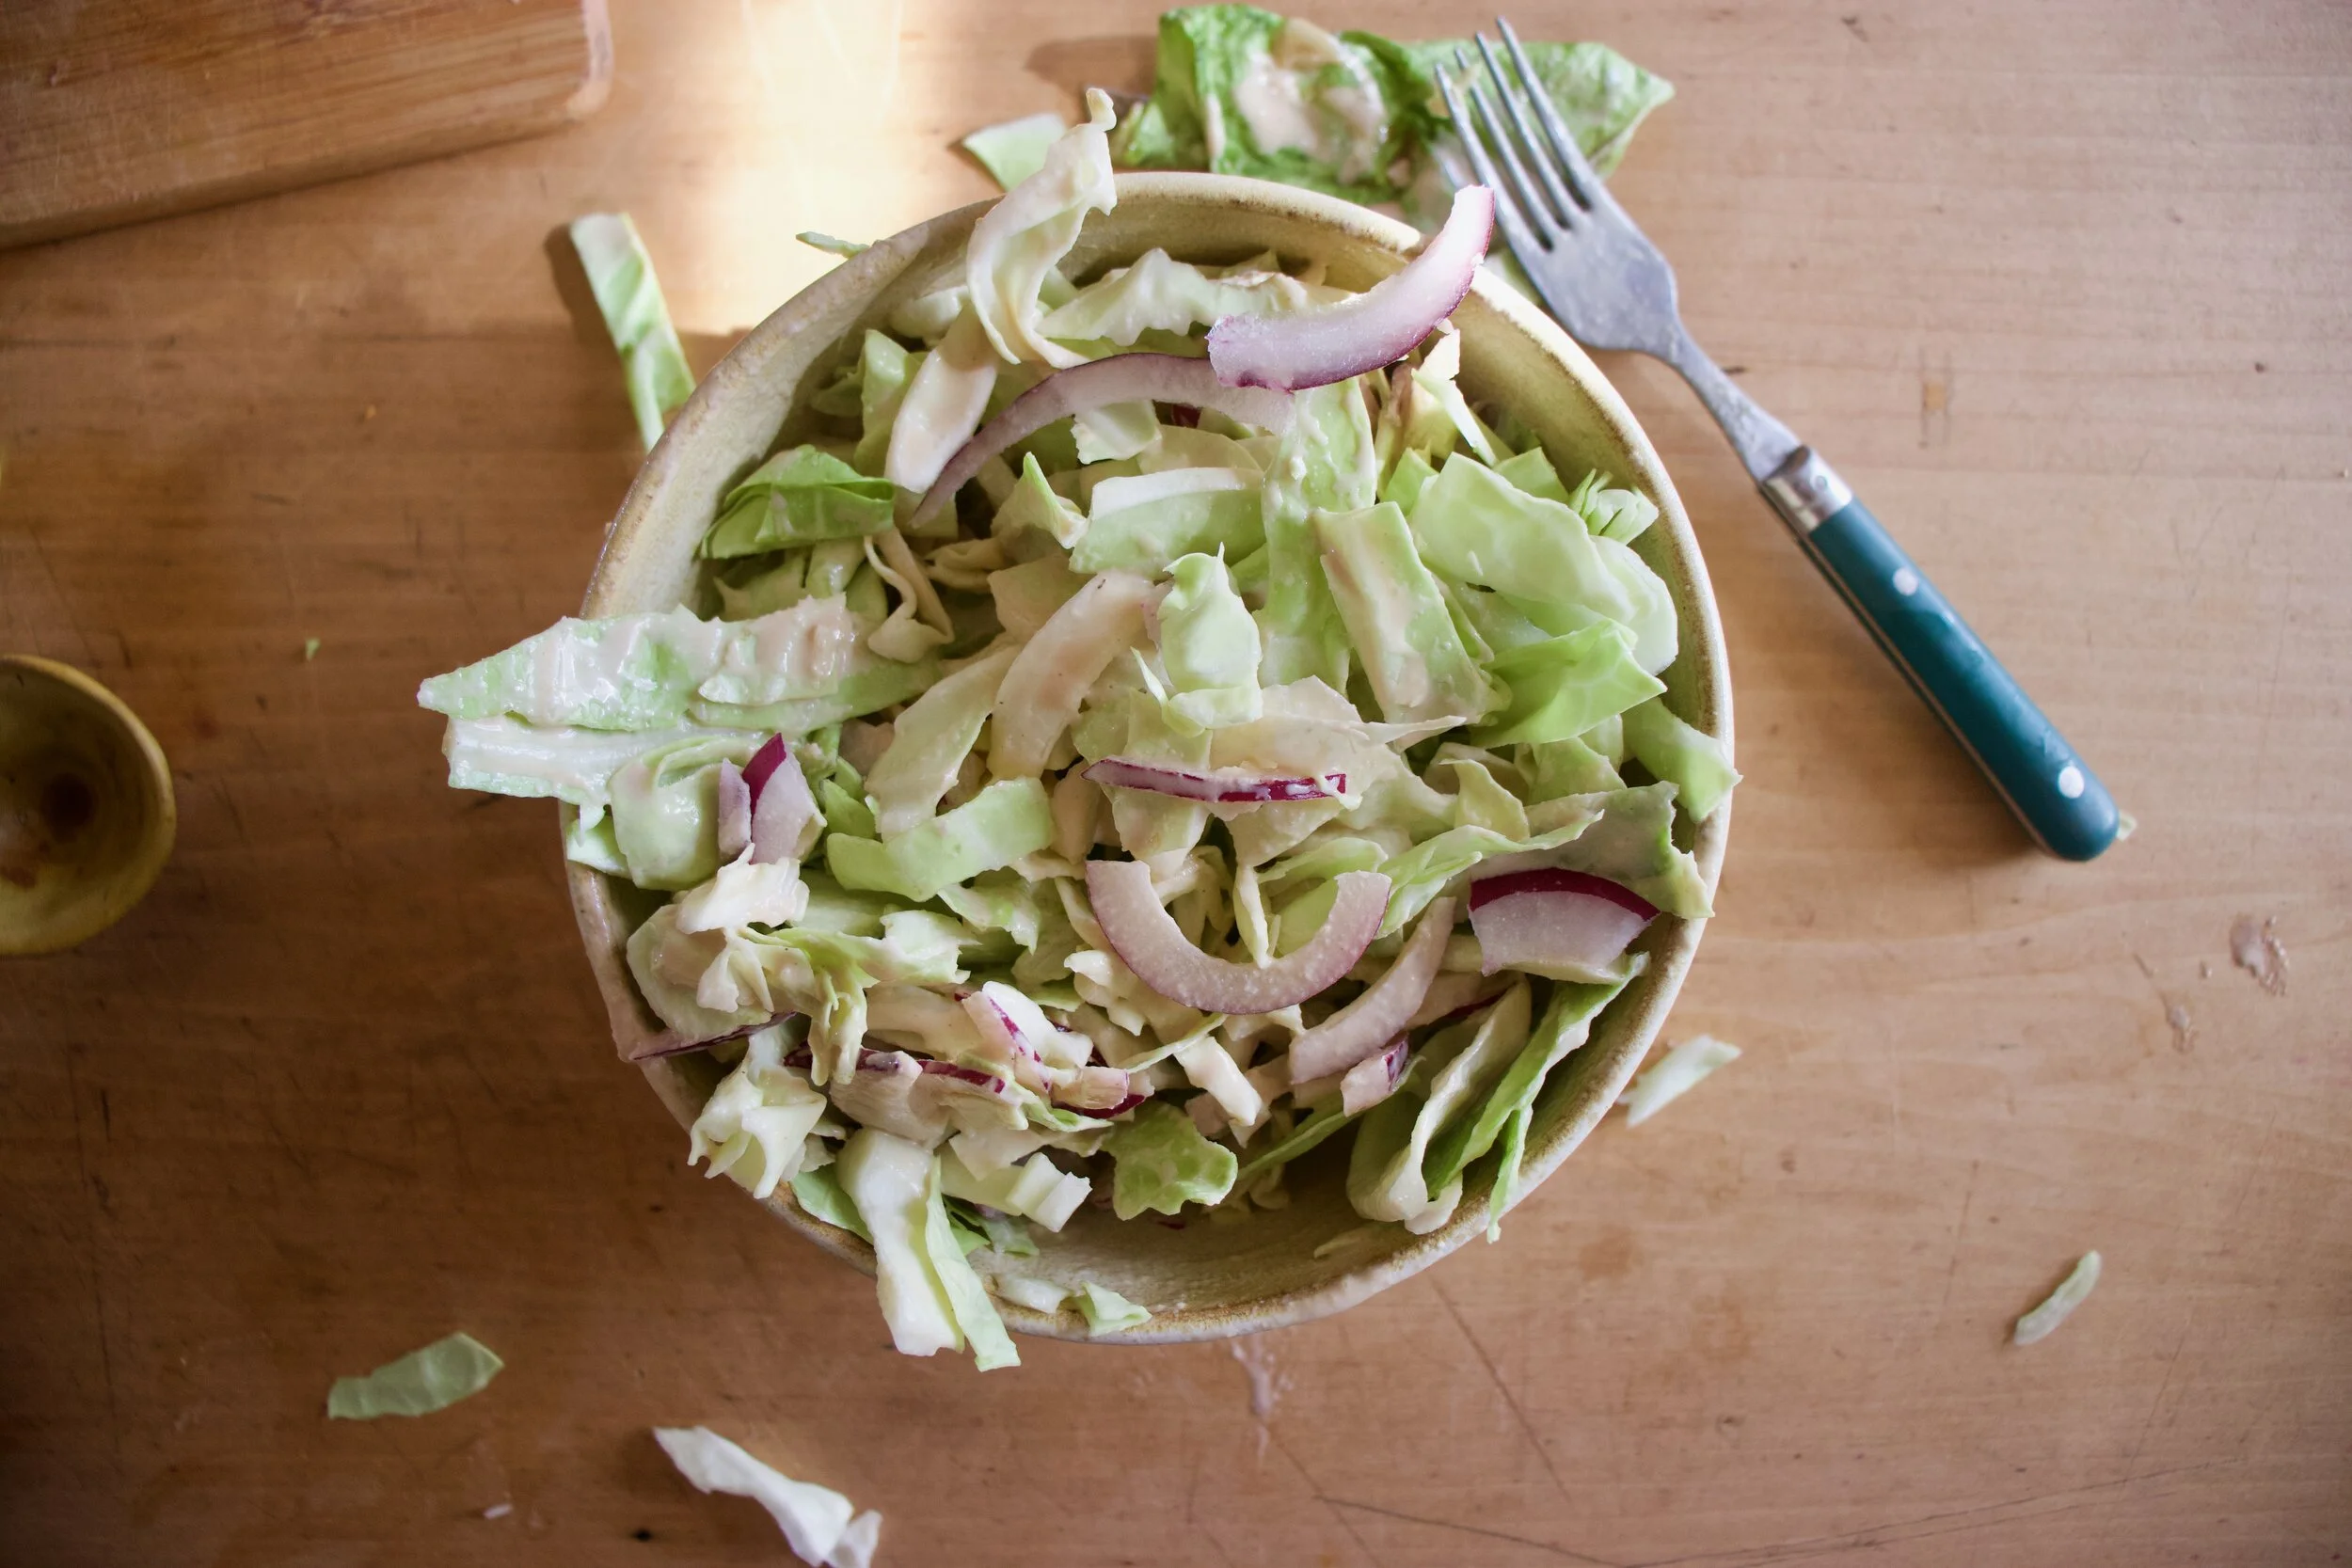
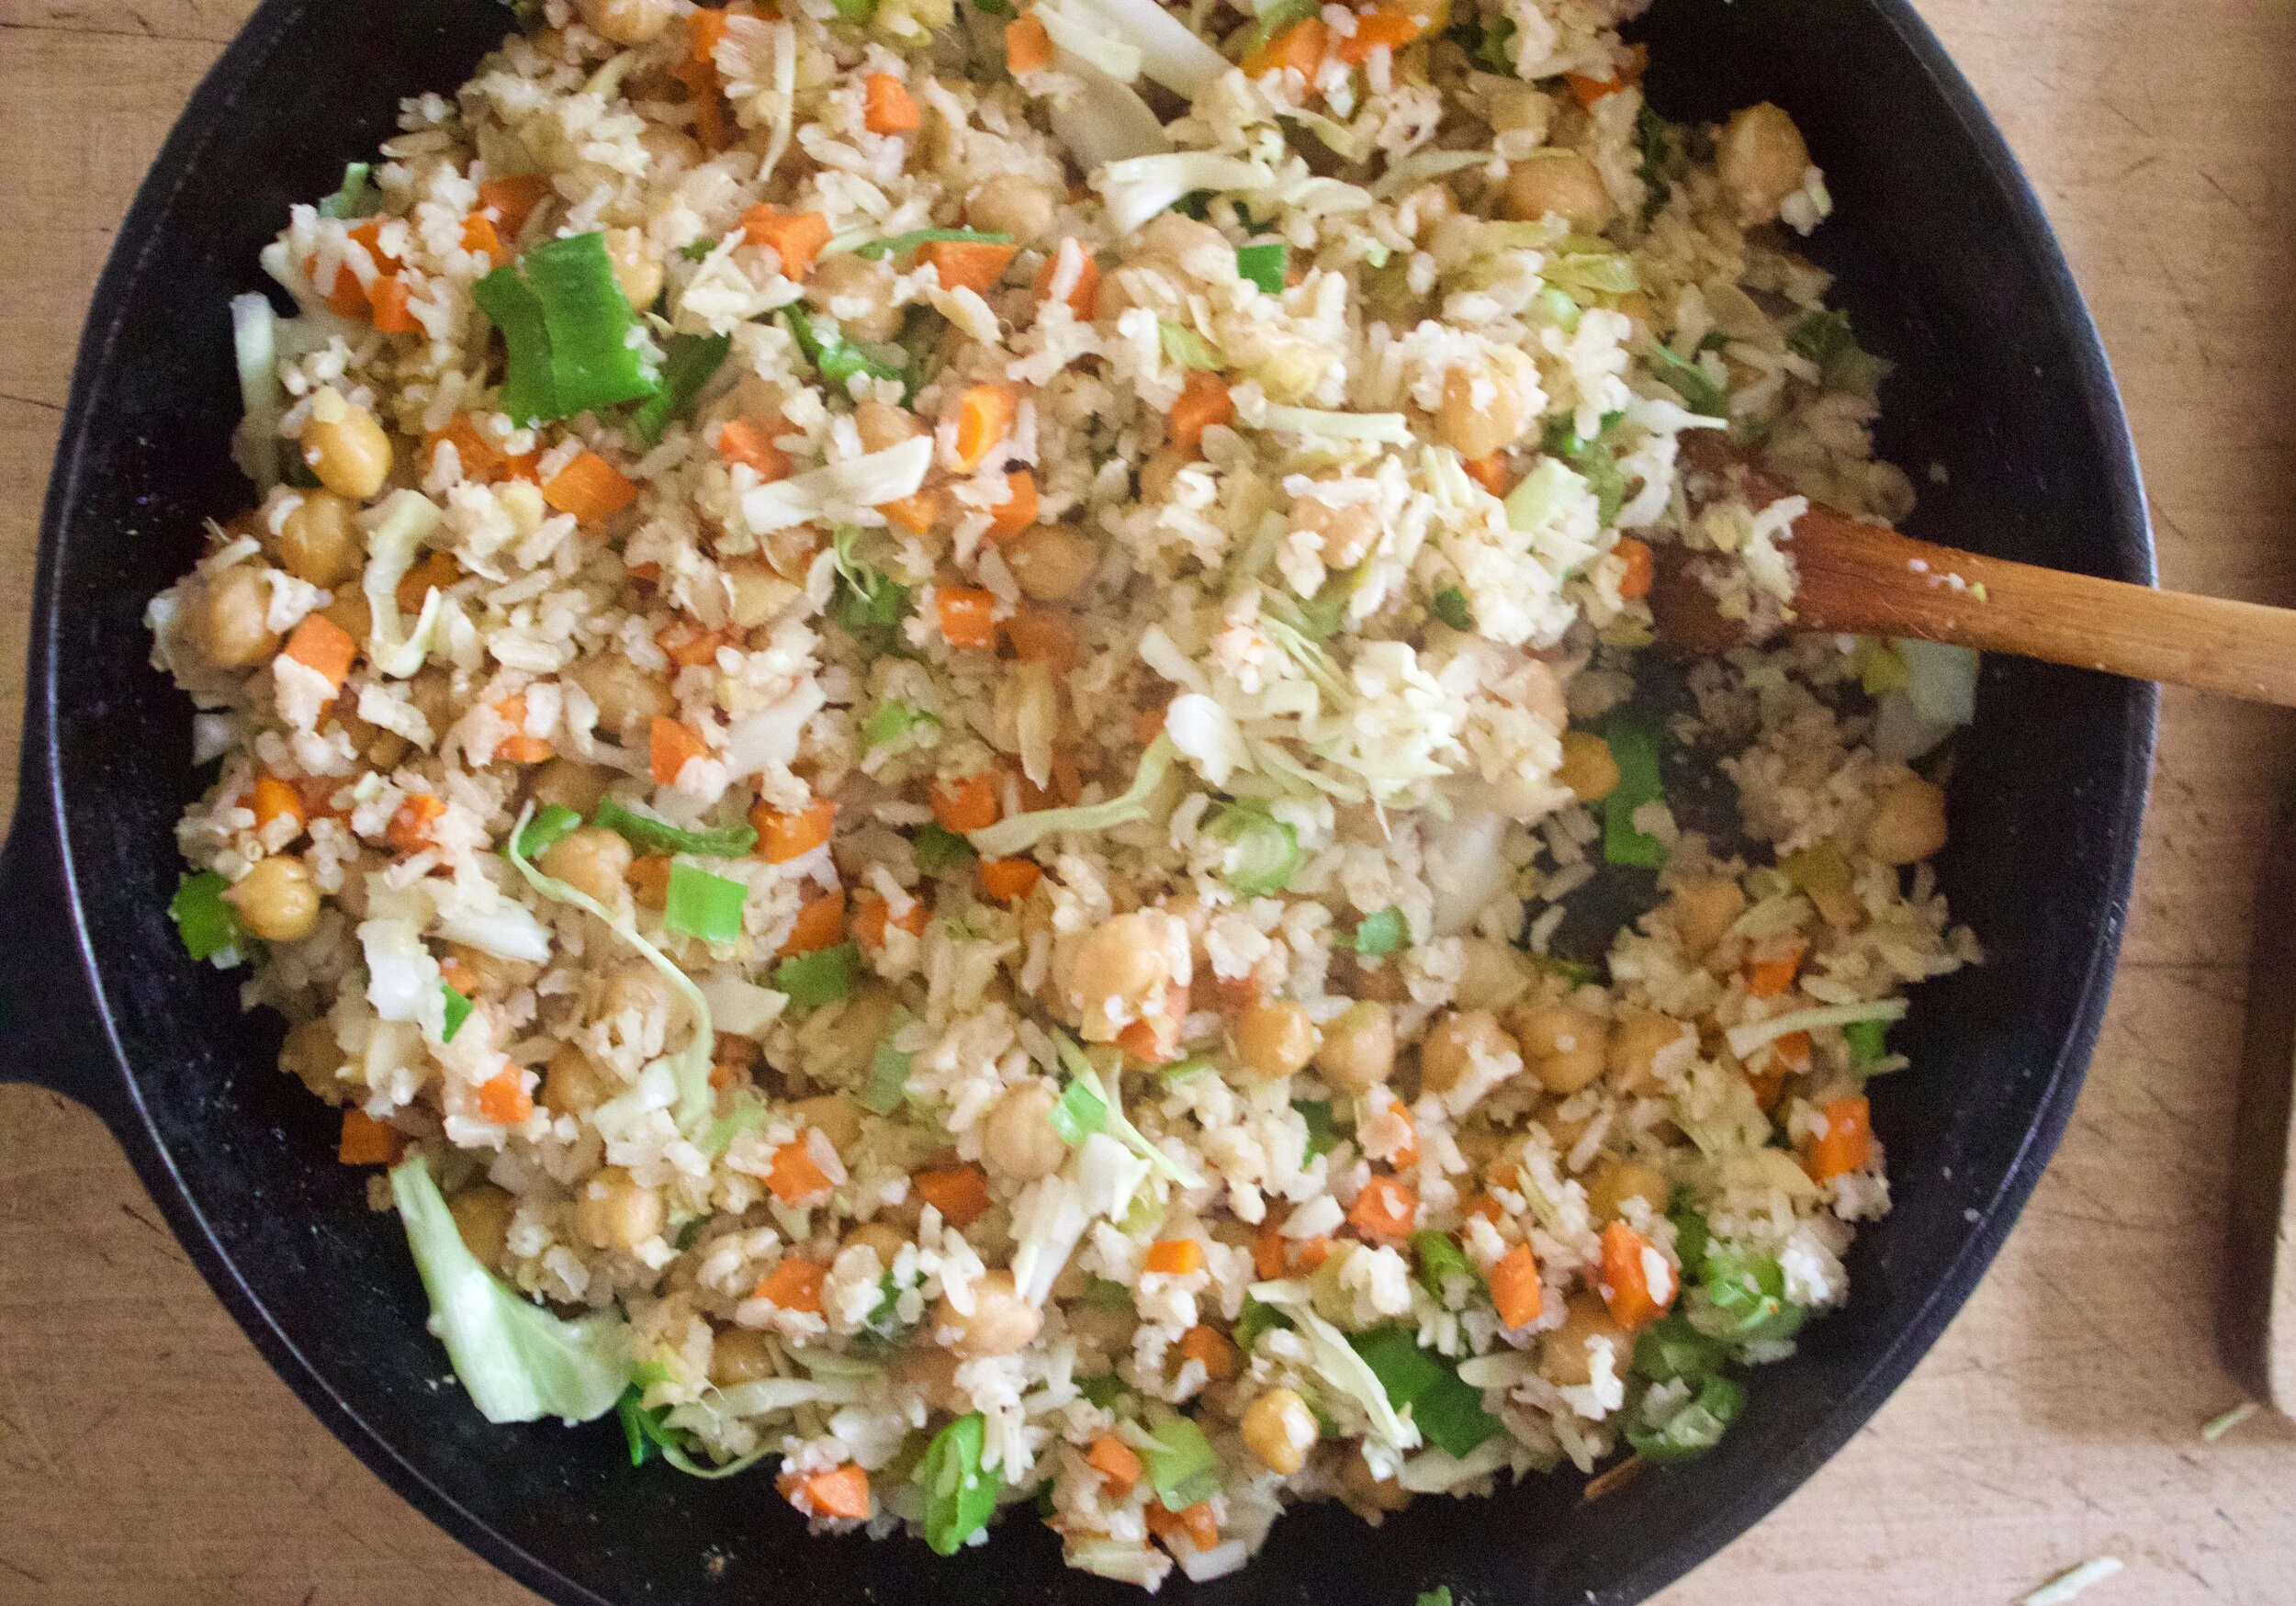
Toss in that cabbage and onion. Now you have tahini cabbage slaw.

Now to cook falafel. Grab the batter, scoop into balls then smoosh into disks. Place in a light oiled skillet and brown each side a nice golden brown.
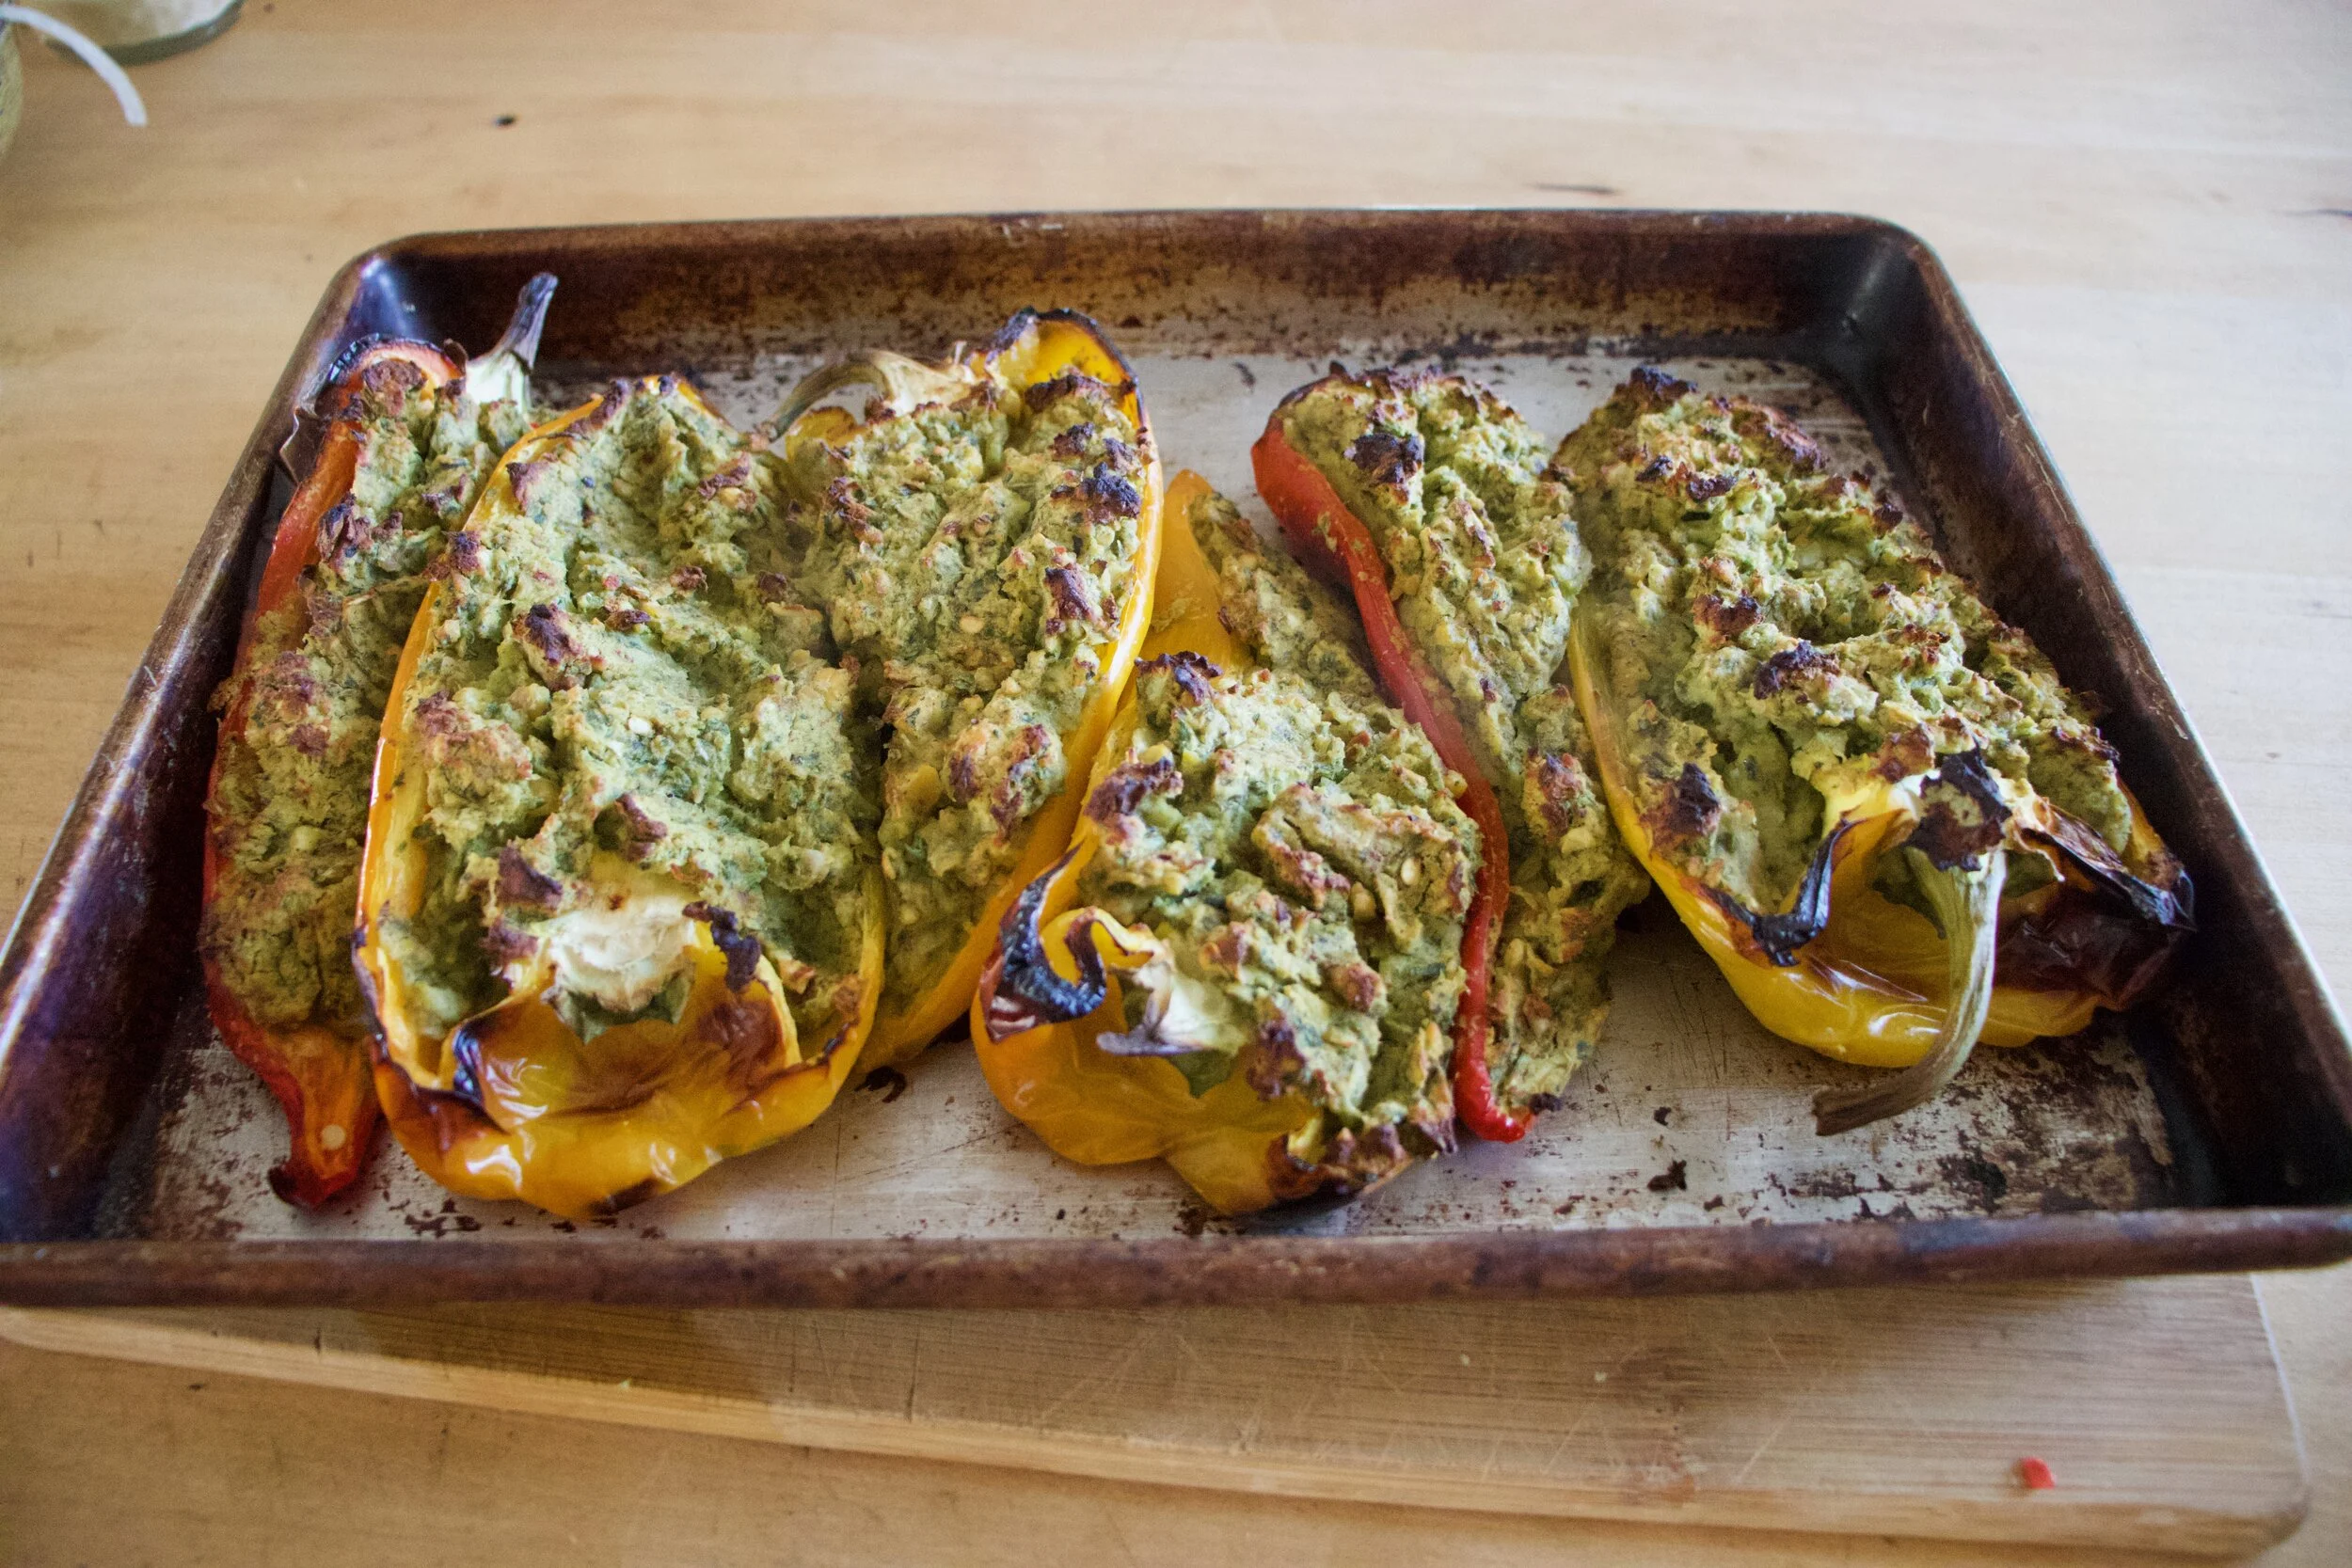
After browning, place on a baking sheet. Once all the falafel has been browned, place the baking sheet into the oven to finish up cooking. 20 minutes or so and you got yourself falafel.

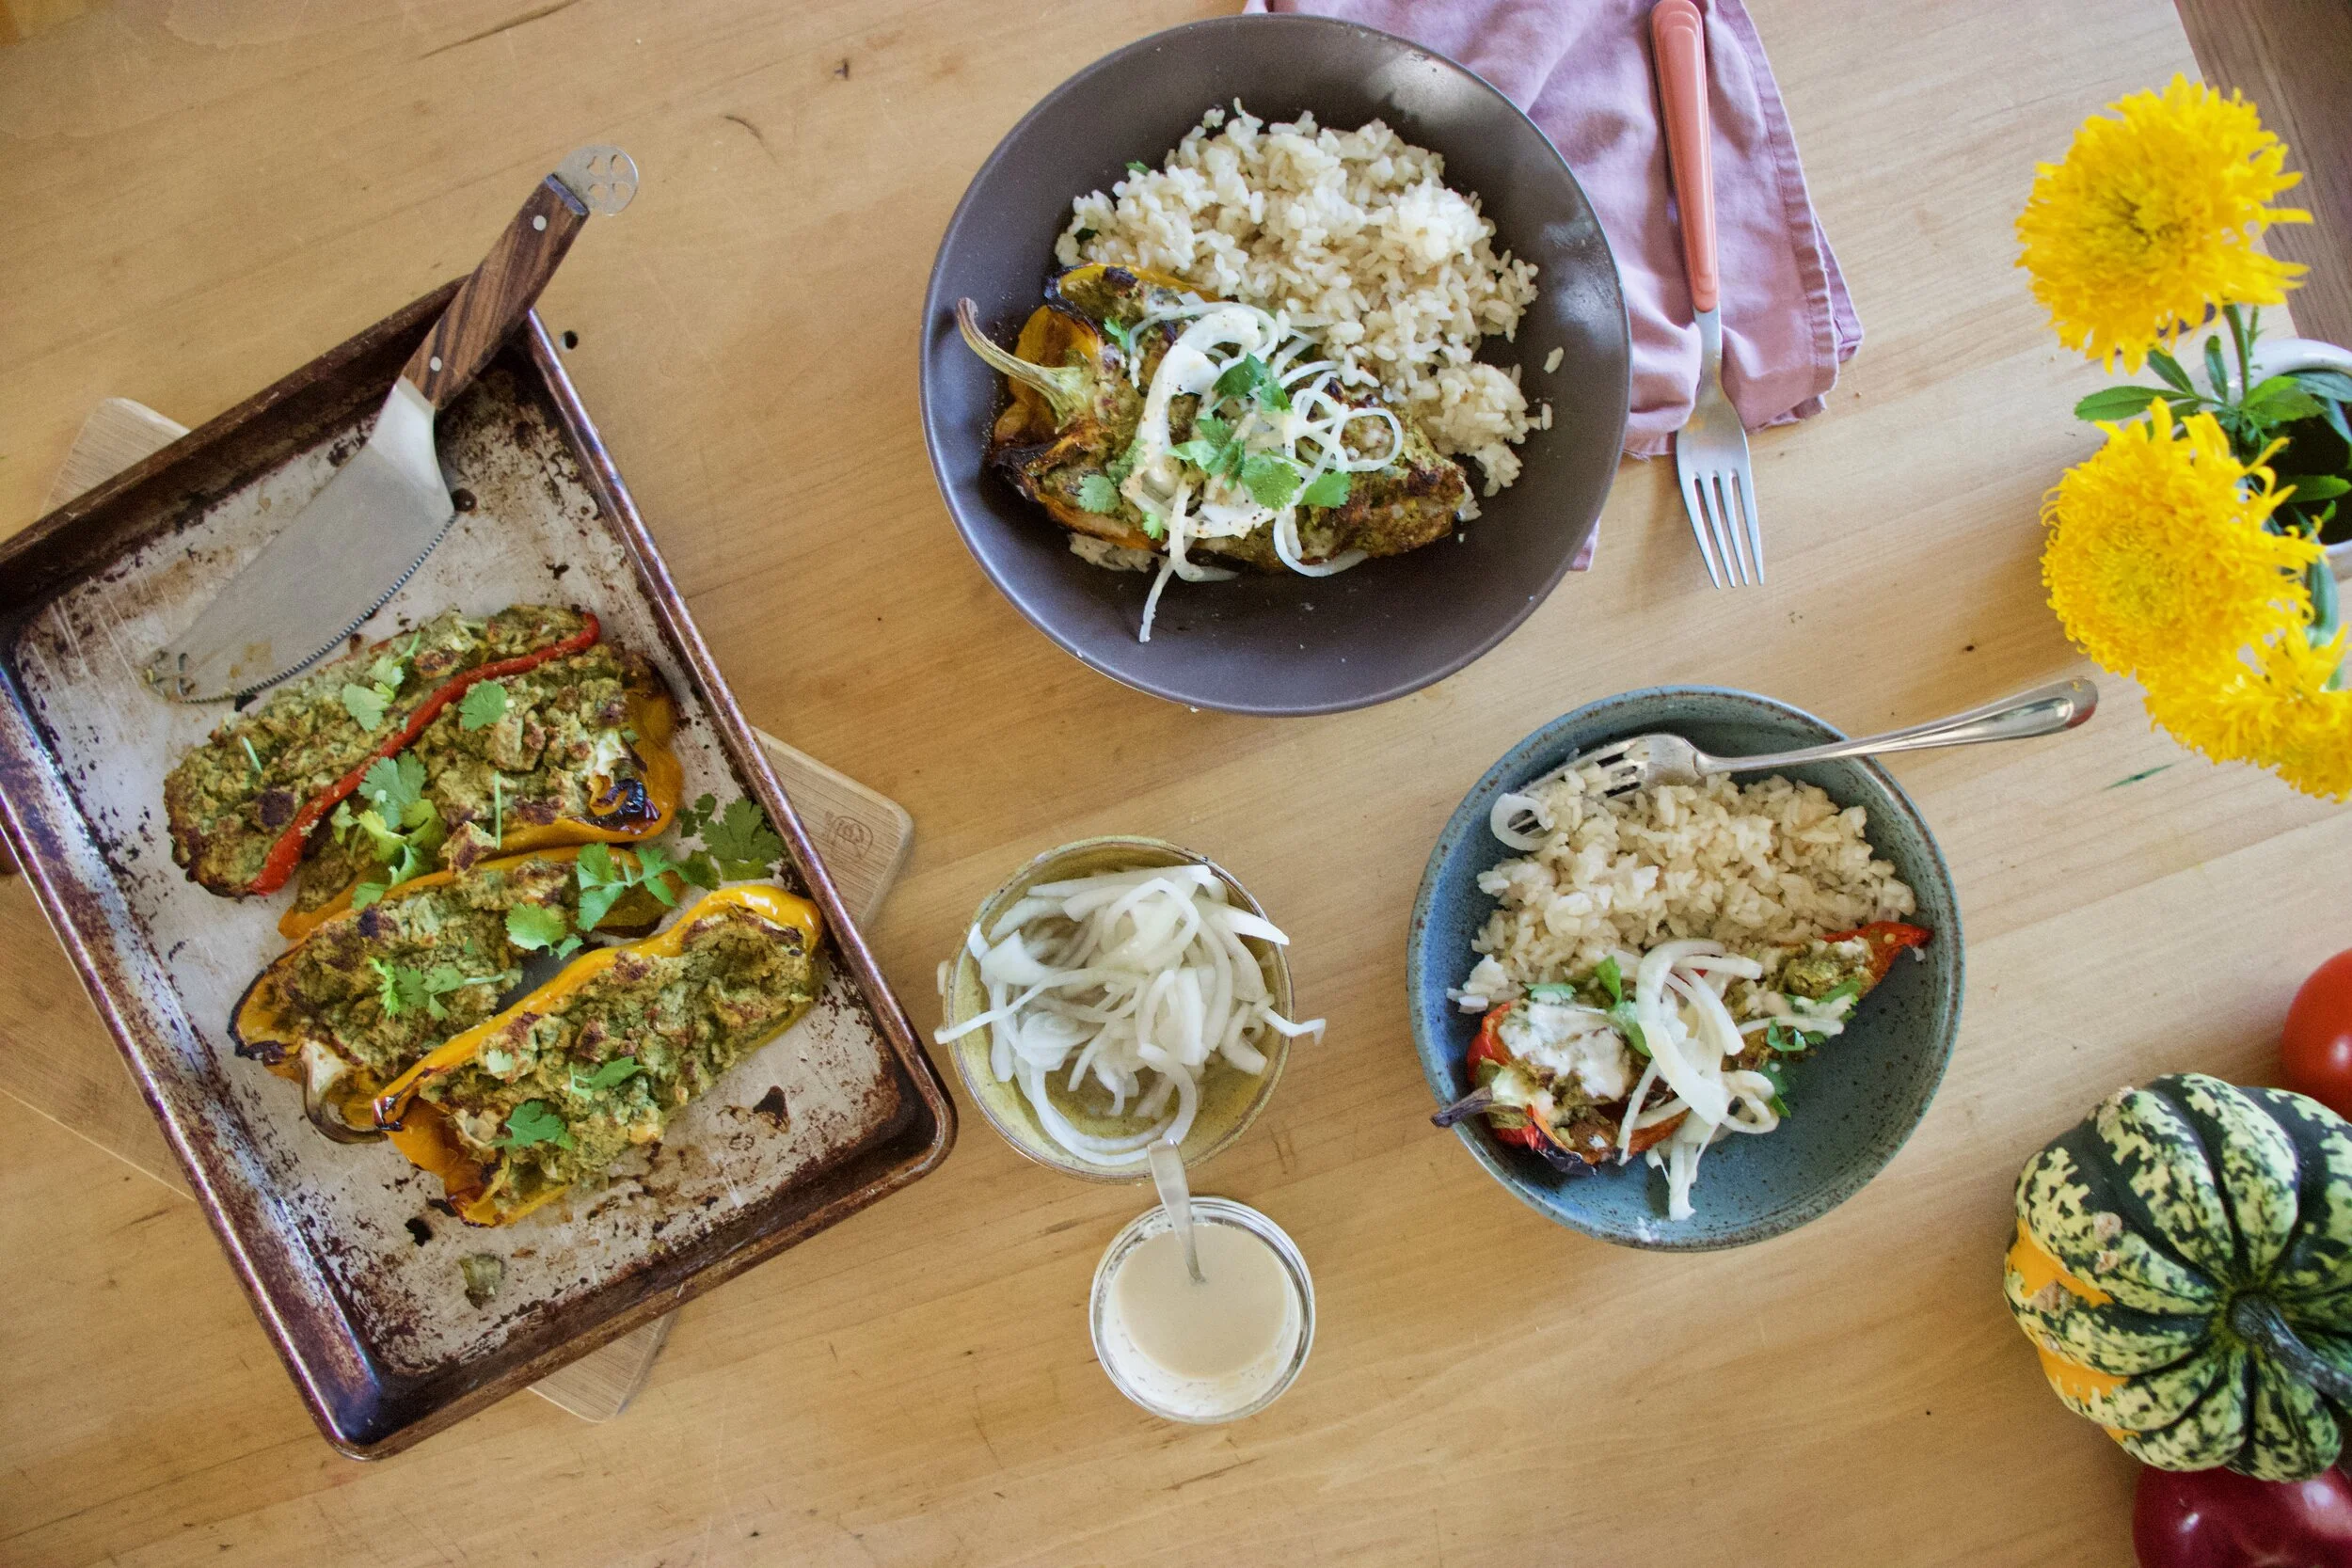
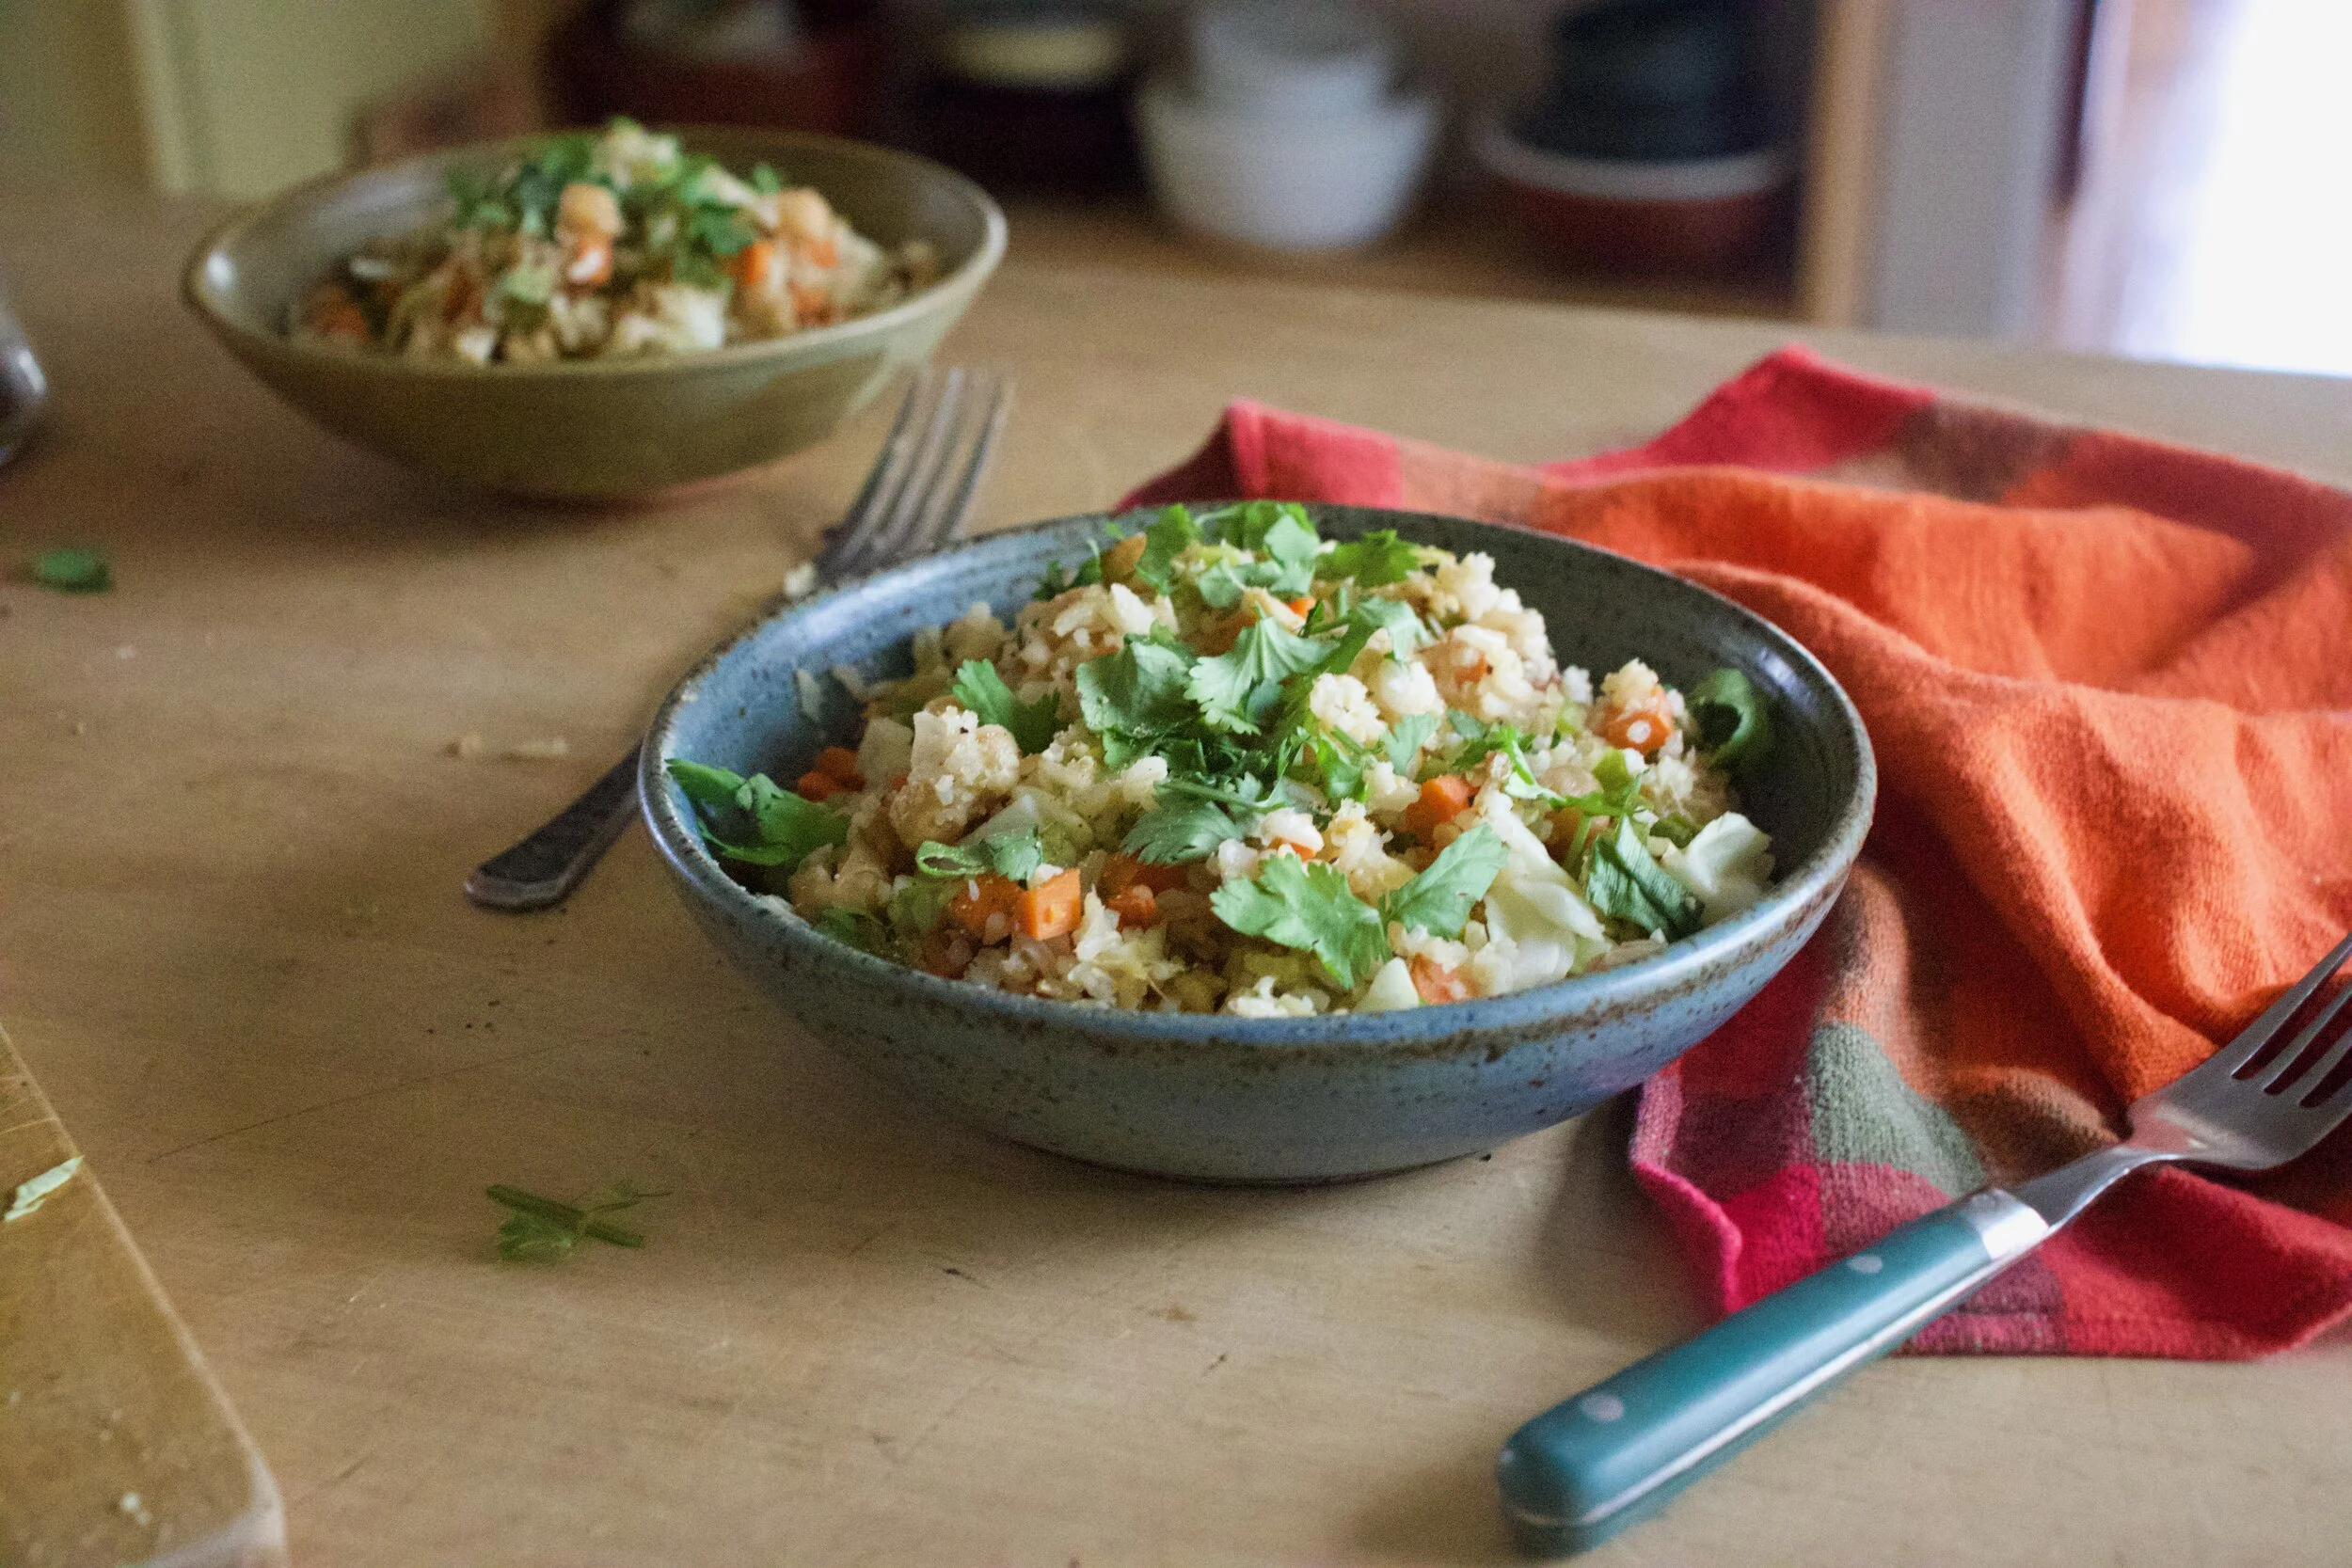
Then eat it. Falafel topped with tahini cabbage slaw. That is how it%u2019s done, with or without wraps or pitas or whatever your want. Just as it is. Falafel, cabbage slaw, into mouth.
Good things friend.
-C
serves 3-4 people or makes 14-16 falafel balls
-
For the falafel
-
2 cups cooked chickpeas drained
-
3-4 carrots (around 2 cups diced)
-
1/2 of a red onion
-
2 inches fresh ginger
-
2-3 cloves garlic
-
1 teaspoon cumin
-
1/2 teaspoon chili flakes
-
1/3 cup chickpea flour (can sub in oat flour if needed)
-
juice of a small lemon
-
salt and pepper
-
For Tahini Cabbage Slaw
-
1/2 head red or green cabbage (about 3 cups shredded)
-
1/2 of a red onion
-
3 tablespoon tahini
-
1 tablespoon soy or liquid aminos
-
2 tablespoon red wine vinegar
-
a few tablespoons warm water
Grab carrots and red onion. Chop carrots into small chunks and cut onion in half. Cut one half into chunks. Place in food processor. Take the ginger and cut into small chunks (you don%u2019t need to peel it) and peel and slice garlic and cut into small pieces. Add that to the food processor. Pulse the mixture into a very small crumble then dump the mixture into a skillet with a splash of water. Add in the cumin, chili flakes, and a good pinch of salt and lots of pepper, and place on medium heat and cook for 5-8 minutes until soft and fragrant. Once cooked, scoop back into food processor along with the chickpeas, chickpea flour, and the juice of the lemon. Turn on and and puree until smooth, stopping when needed to scrap down the side. Then either dump mixture into a bowl or leave in the container you processed it in and place in fridge for 1/2 hour to a day.
When ready to cook, preheat oven to 400.
After letting the dough sit for a bit, remove from fridge. Grab skillet and lightly oil it and place on medium heat. Take a cookie scoop or just a spoon and scoop balls of falafel into your hand and roll them around so they are packed together. Smoosh then balls a little into disks and place into hot skillet. Let cook until bottom is golden brown then gently flip and cook the other side until browned. Place cooked falafel on a baking sheet. Once you have browned all the falafel, place into oven to bake for about 20 minutes or until the falafel has firmed up to your liking.
To make the tahini cabbage slaw. Shred cabbage and cut the remaining half of red onion into thin pieces. Place tahini, soy, vinegar, and 2 tablespoons warm water into a big bowl. Mix together until light and creamy. If the mixture seems to thick, add another tablespoon of warm water. When happy with consistency, add in the cabbage and onion and toss around until everything is coated.
Now when the slaw is made, the falafel is cooked, you eat it. Serve with warm pita or wraps or a bed of greens or nothing. Just slaw on top of falafel. And FYI, this whole shebang can be eaten hot or cold or anywhere in between.
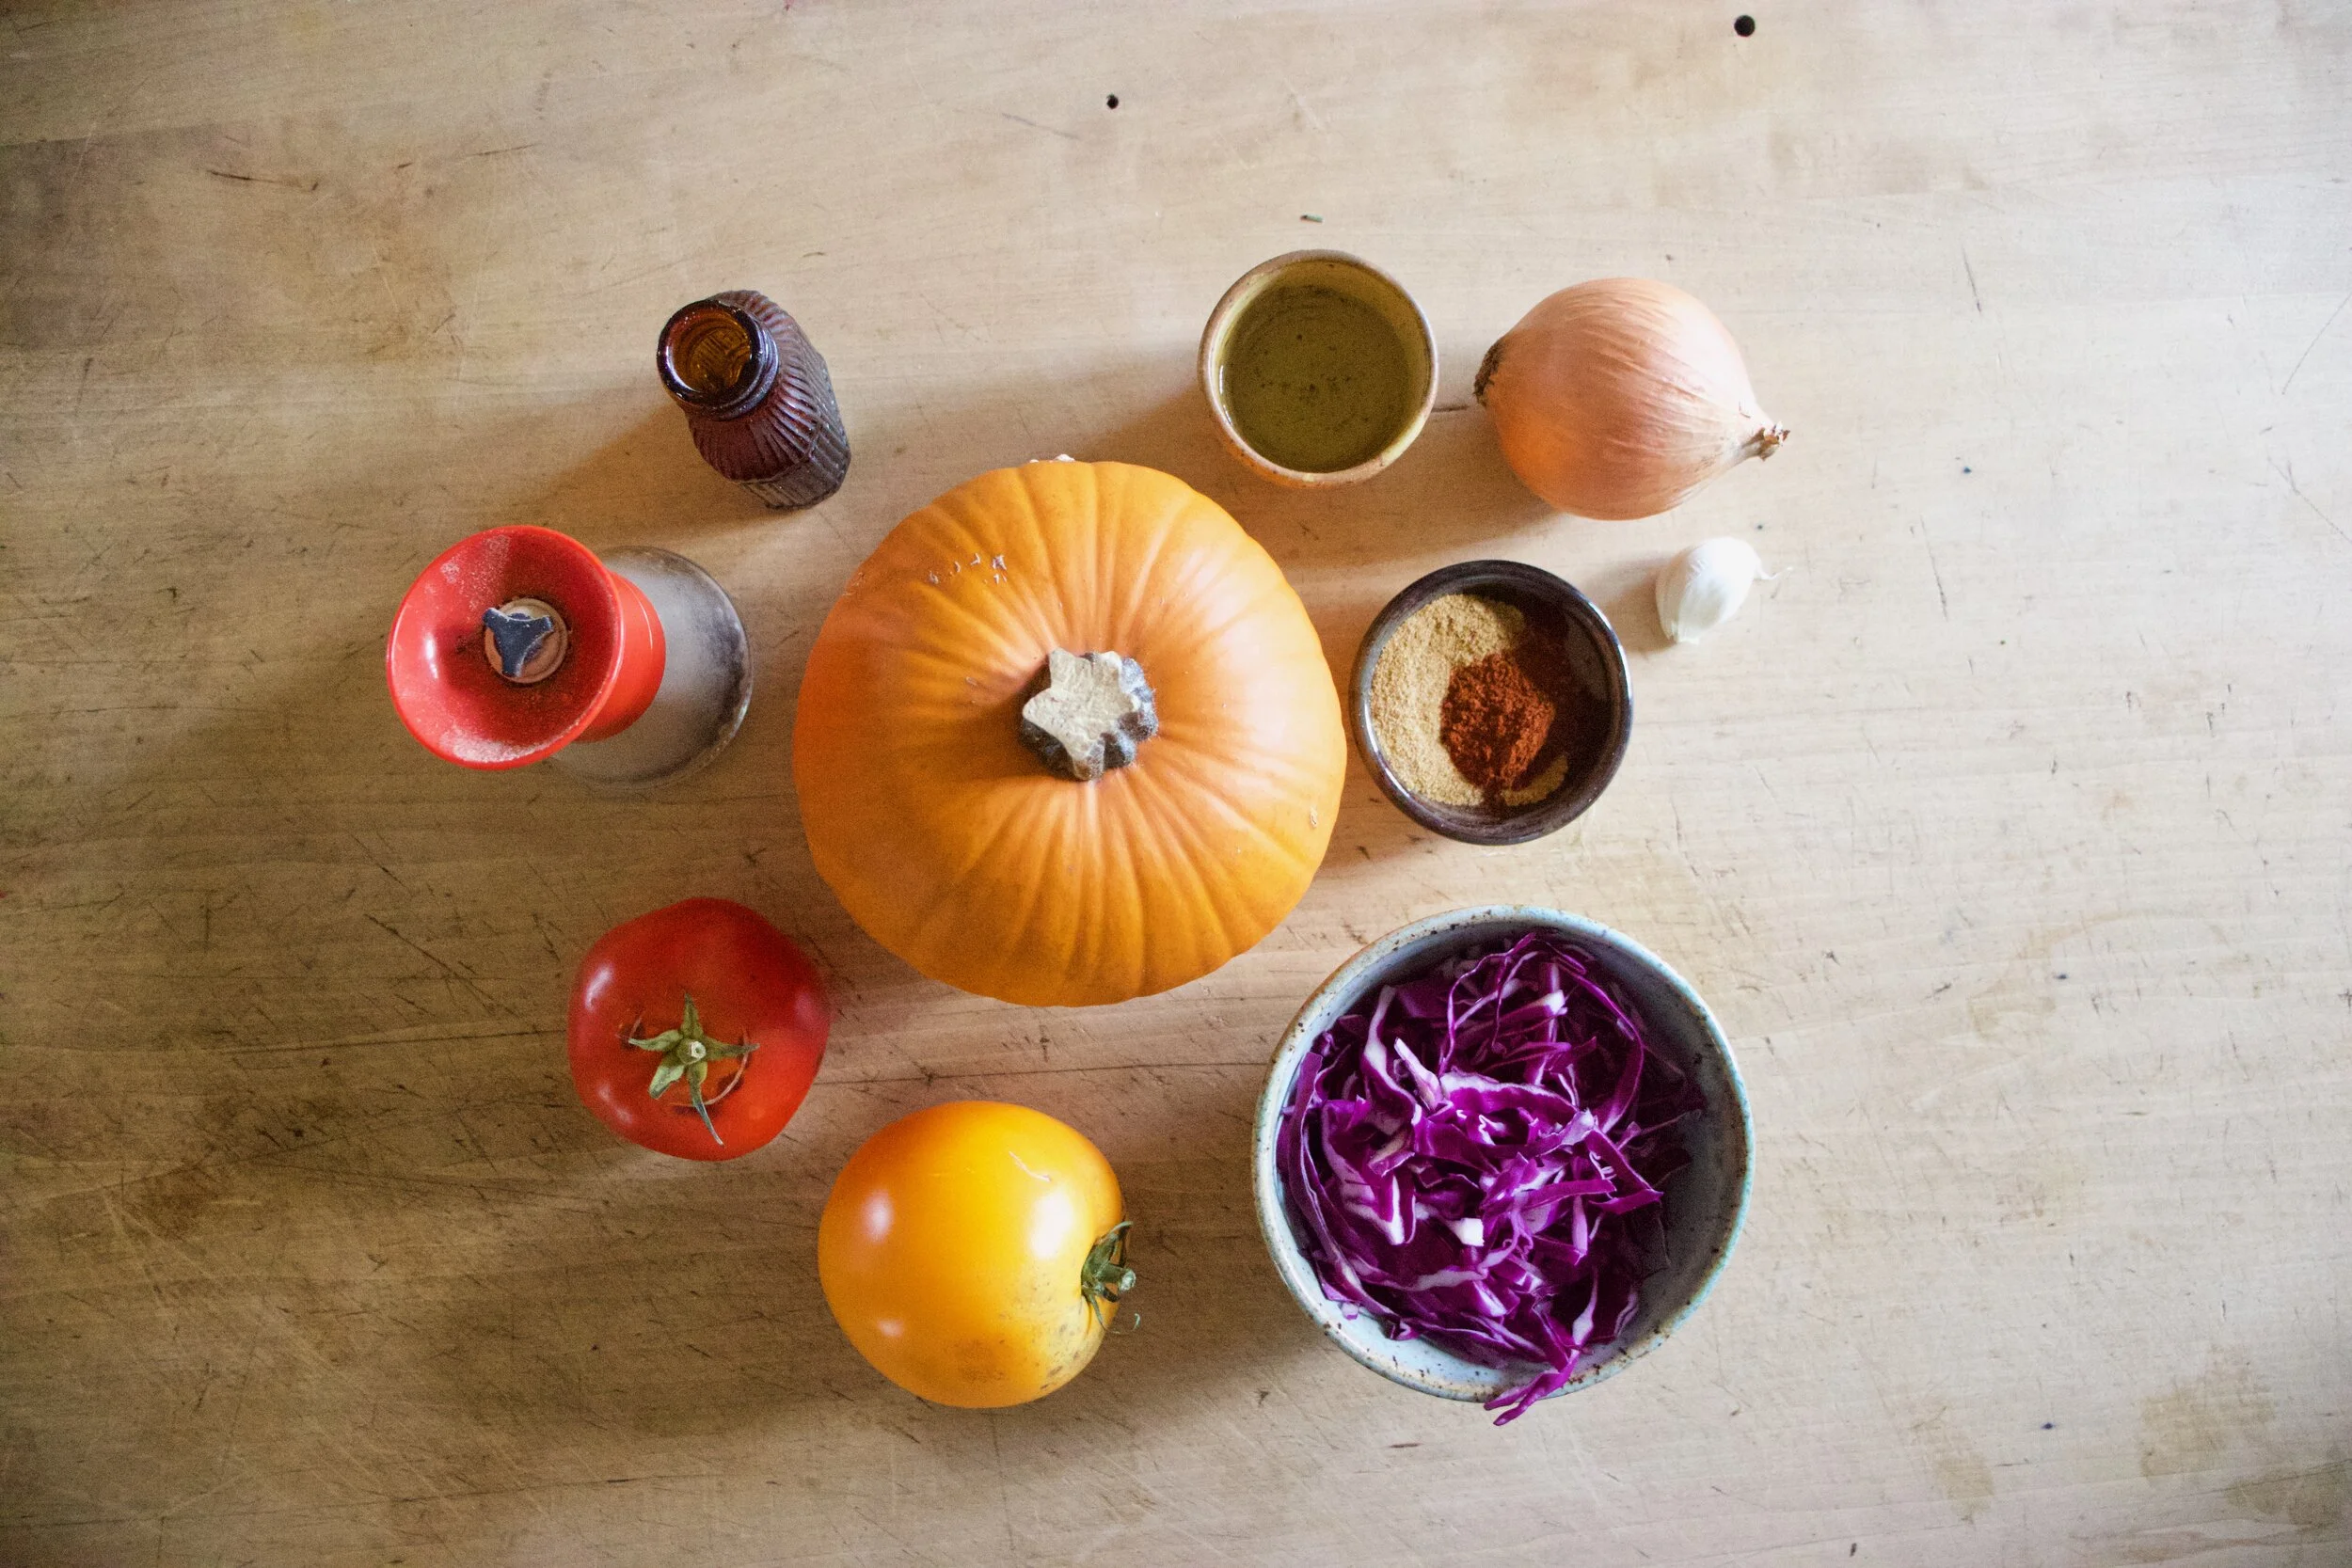
Are you as excited about pumpkin season as I am. And not because of pumpkin spice this or that, I am talking about real squash pumpkin. I am so excited, and have started a stash. I have about 10 sugar pumpkins all through the house. Equal parts fall decor and dinner. Being able to eat your decorations is key to a successful life. I am 100 percent sure about that.
So now that we have established that it%u2019s time to eat pumpkin, we also have to realized that there are more ways to eat pumpkin then in baked goods. Savory pumpkin is just as good, if not better then sweet pumpkin. I mean, it%u2019s a squash and don%u2019t we all love a good ssavory squash situation? If you don%u2019t, well you are in the wrong place my friend.
This dish here pretty much sums up all that I ever want to eat again. Roasted pumpkin with cumin is one of the best things ever. No joke. Swiss chard is definitely my favorite green, besides spinach, (and I love kale, but chard is better then kale too!) and red lentils are my favorite kind of lentils. All I all, this small list of ingredients makes for one heck of a dish. I was pre making this for dinner for Barb and the mr. and ended up making something else for dinner so I could eat and save it all for myself. I did not share one bit of this and feel zero bad about it. I mean, I made it so it is mine. They had chili, I secretly ate this.
It%u2019s come to that. I am hiding my pumpkin and lentil dish. What is wrong with me? Ha!
Now to the best pumpkin dish ever!

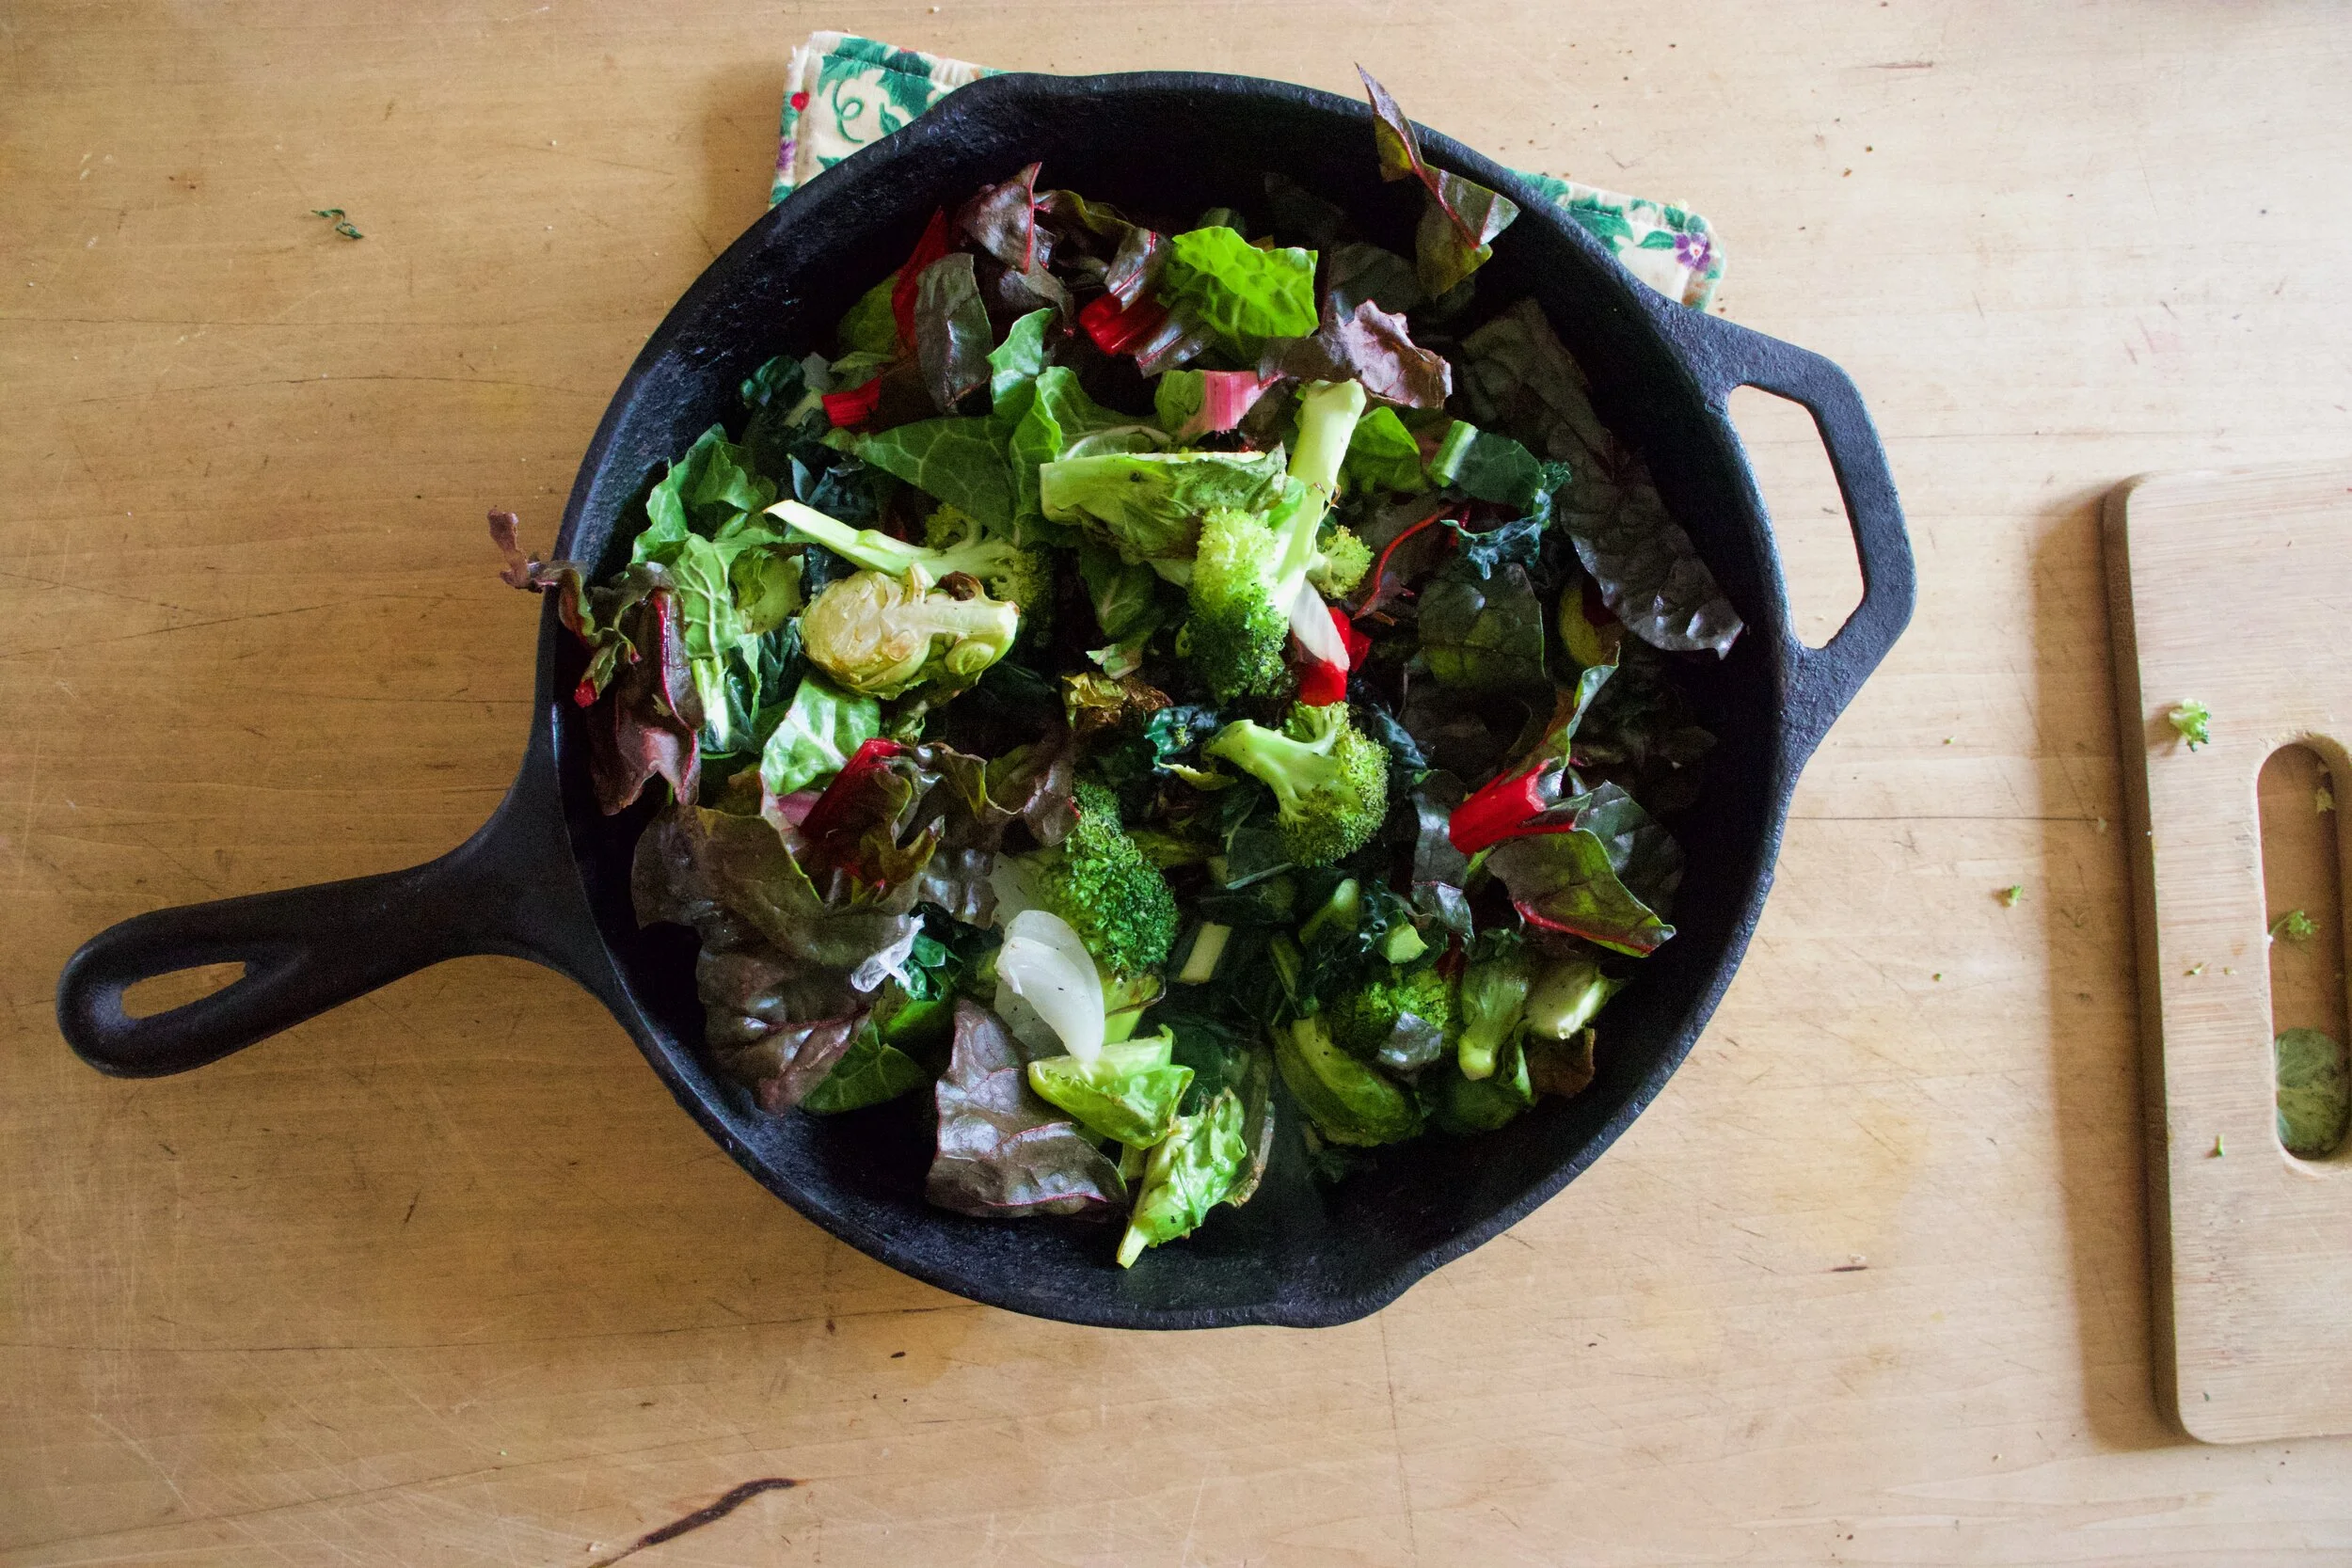
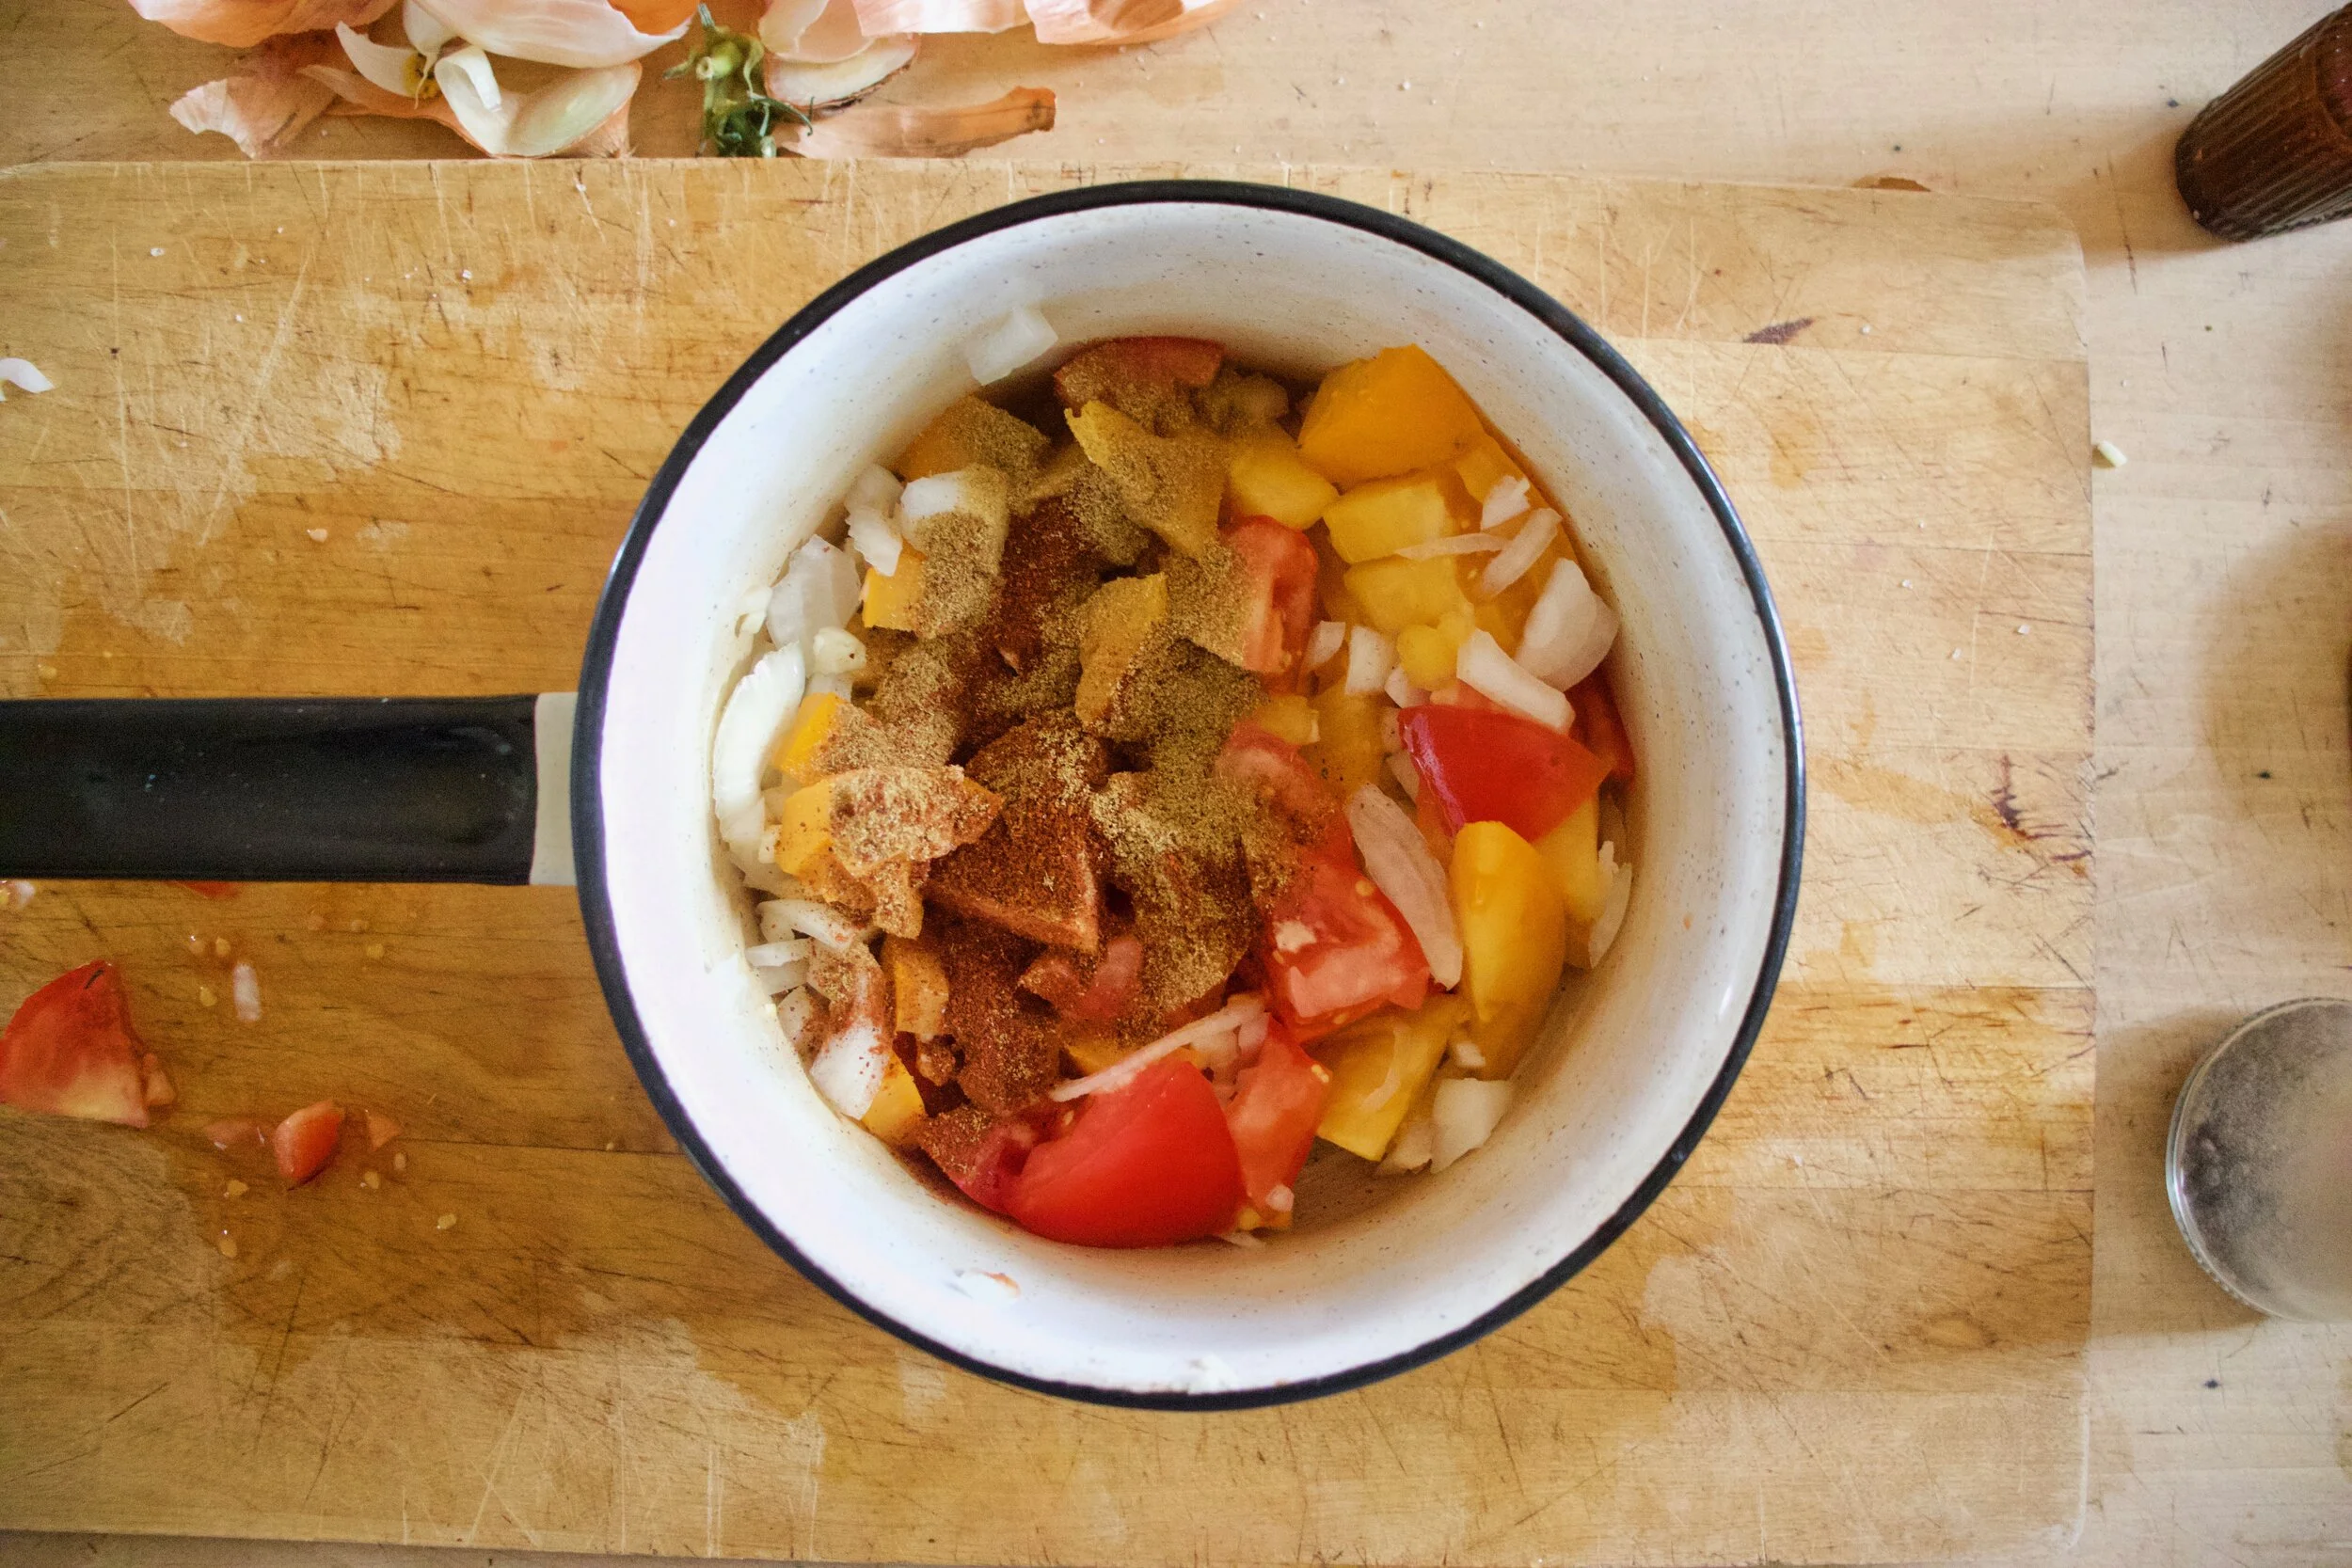
The stuff. A sugar pumpkin, some swiss chard, an onion, red lentils, a few cloves of garlic. cumin, salt and pepper, and olive oil.
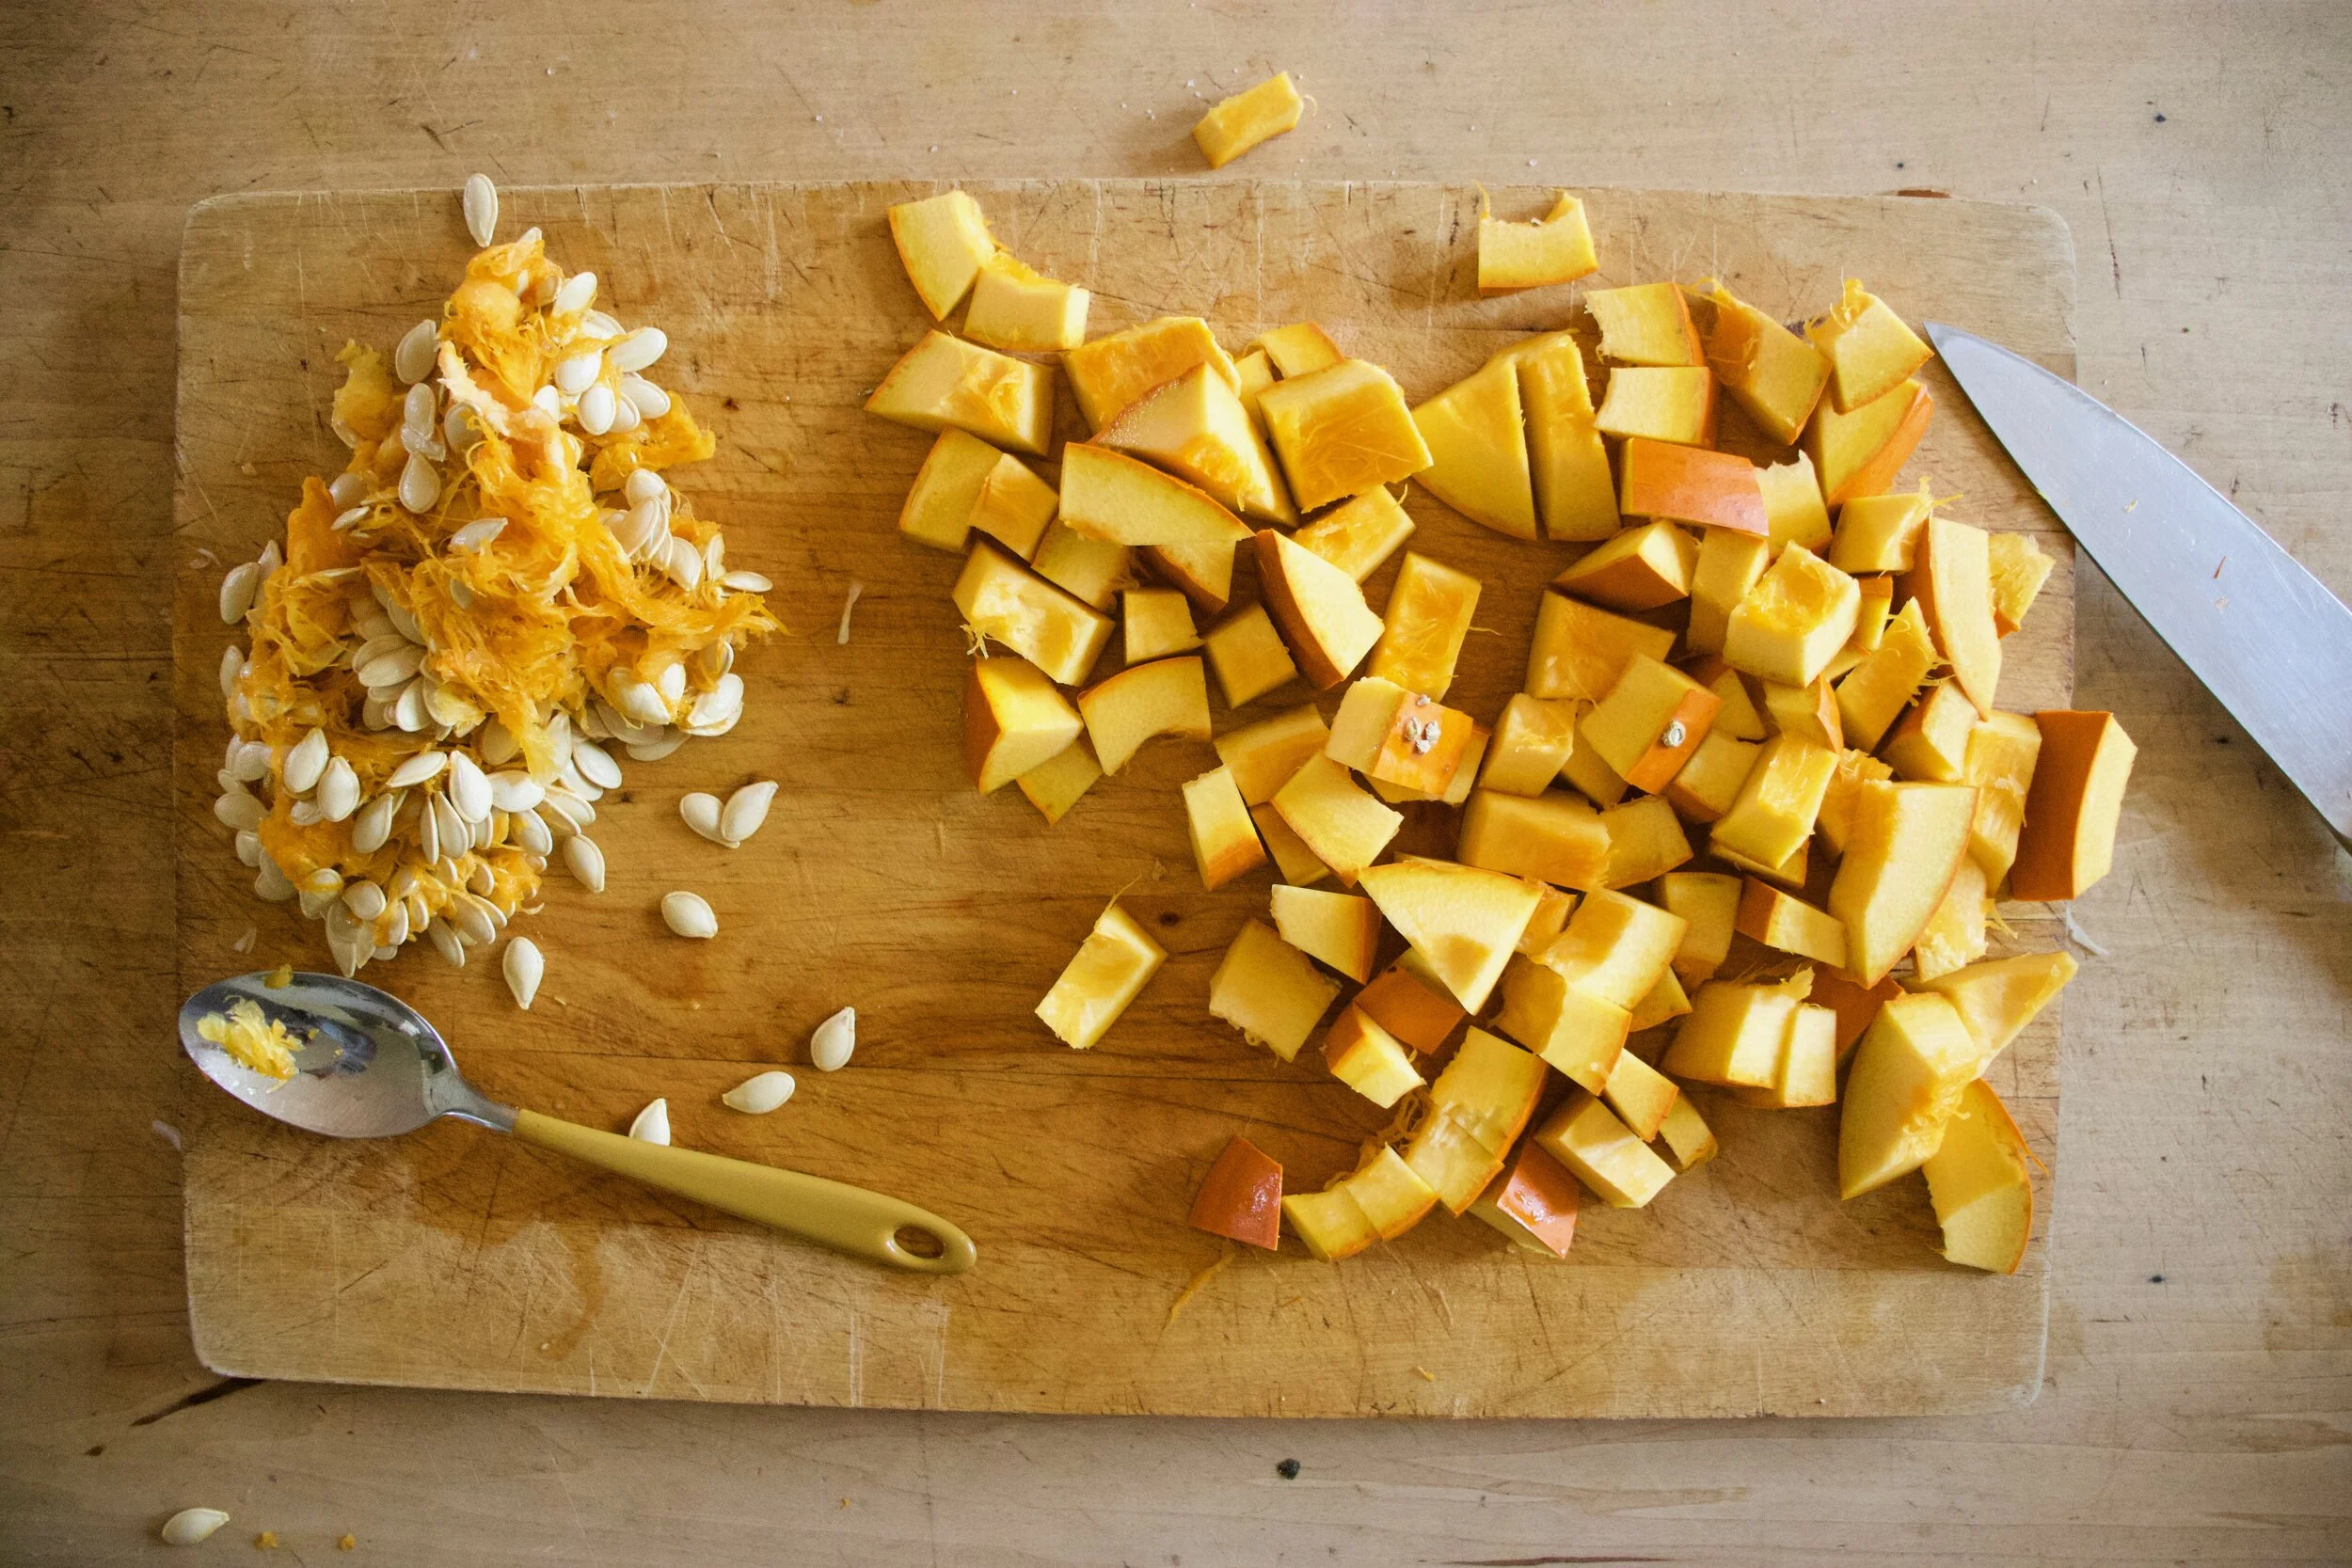
Cut the pumpkin in half, scoop the seeds out (save for roasting later), and chop into mouth sized chunks. Dice the onion up, and remove the stalk and thicker part of the rib from the chard leaves and dice up the stalk. Stick the leaves to the side.
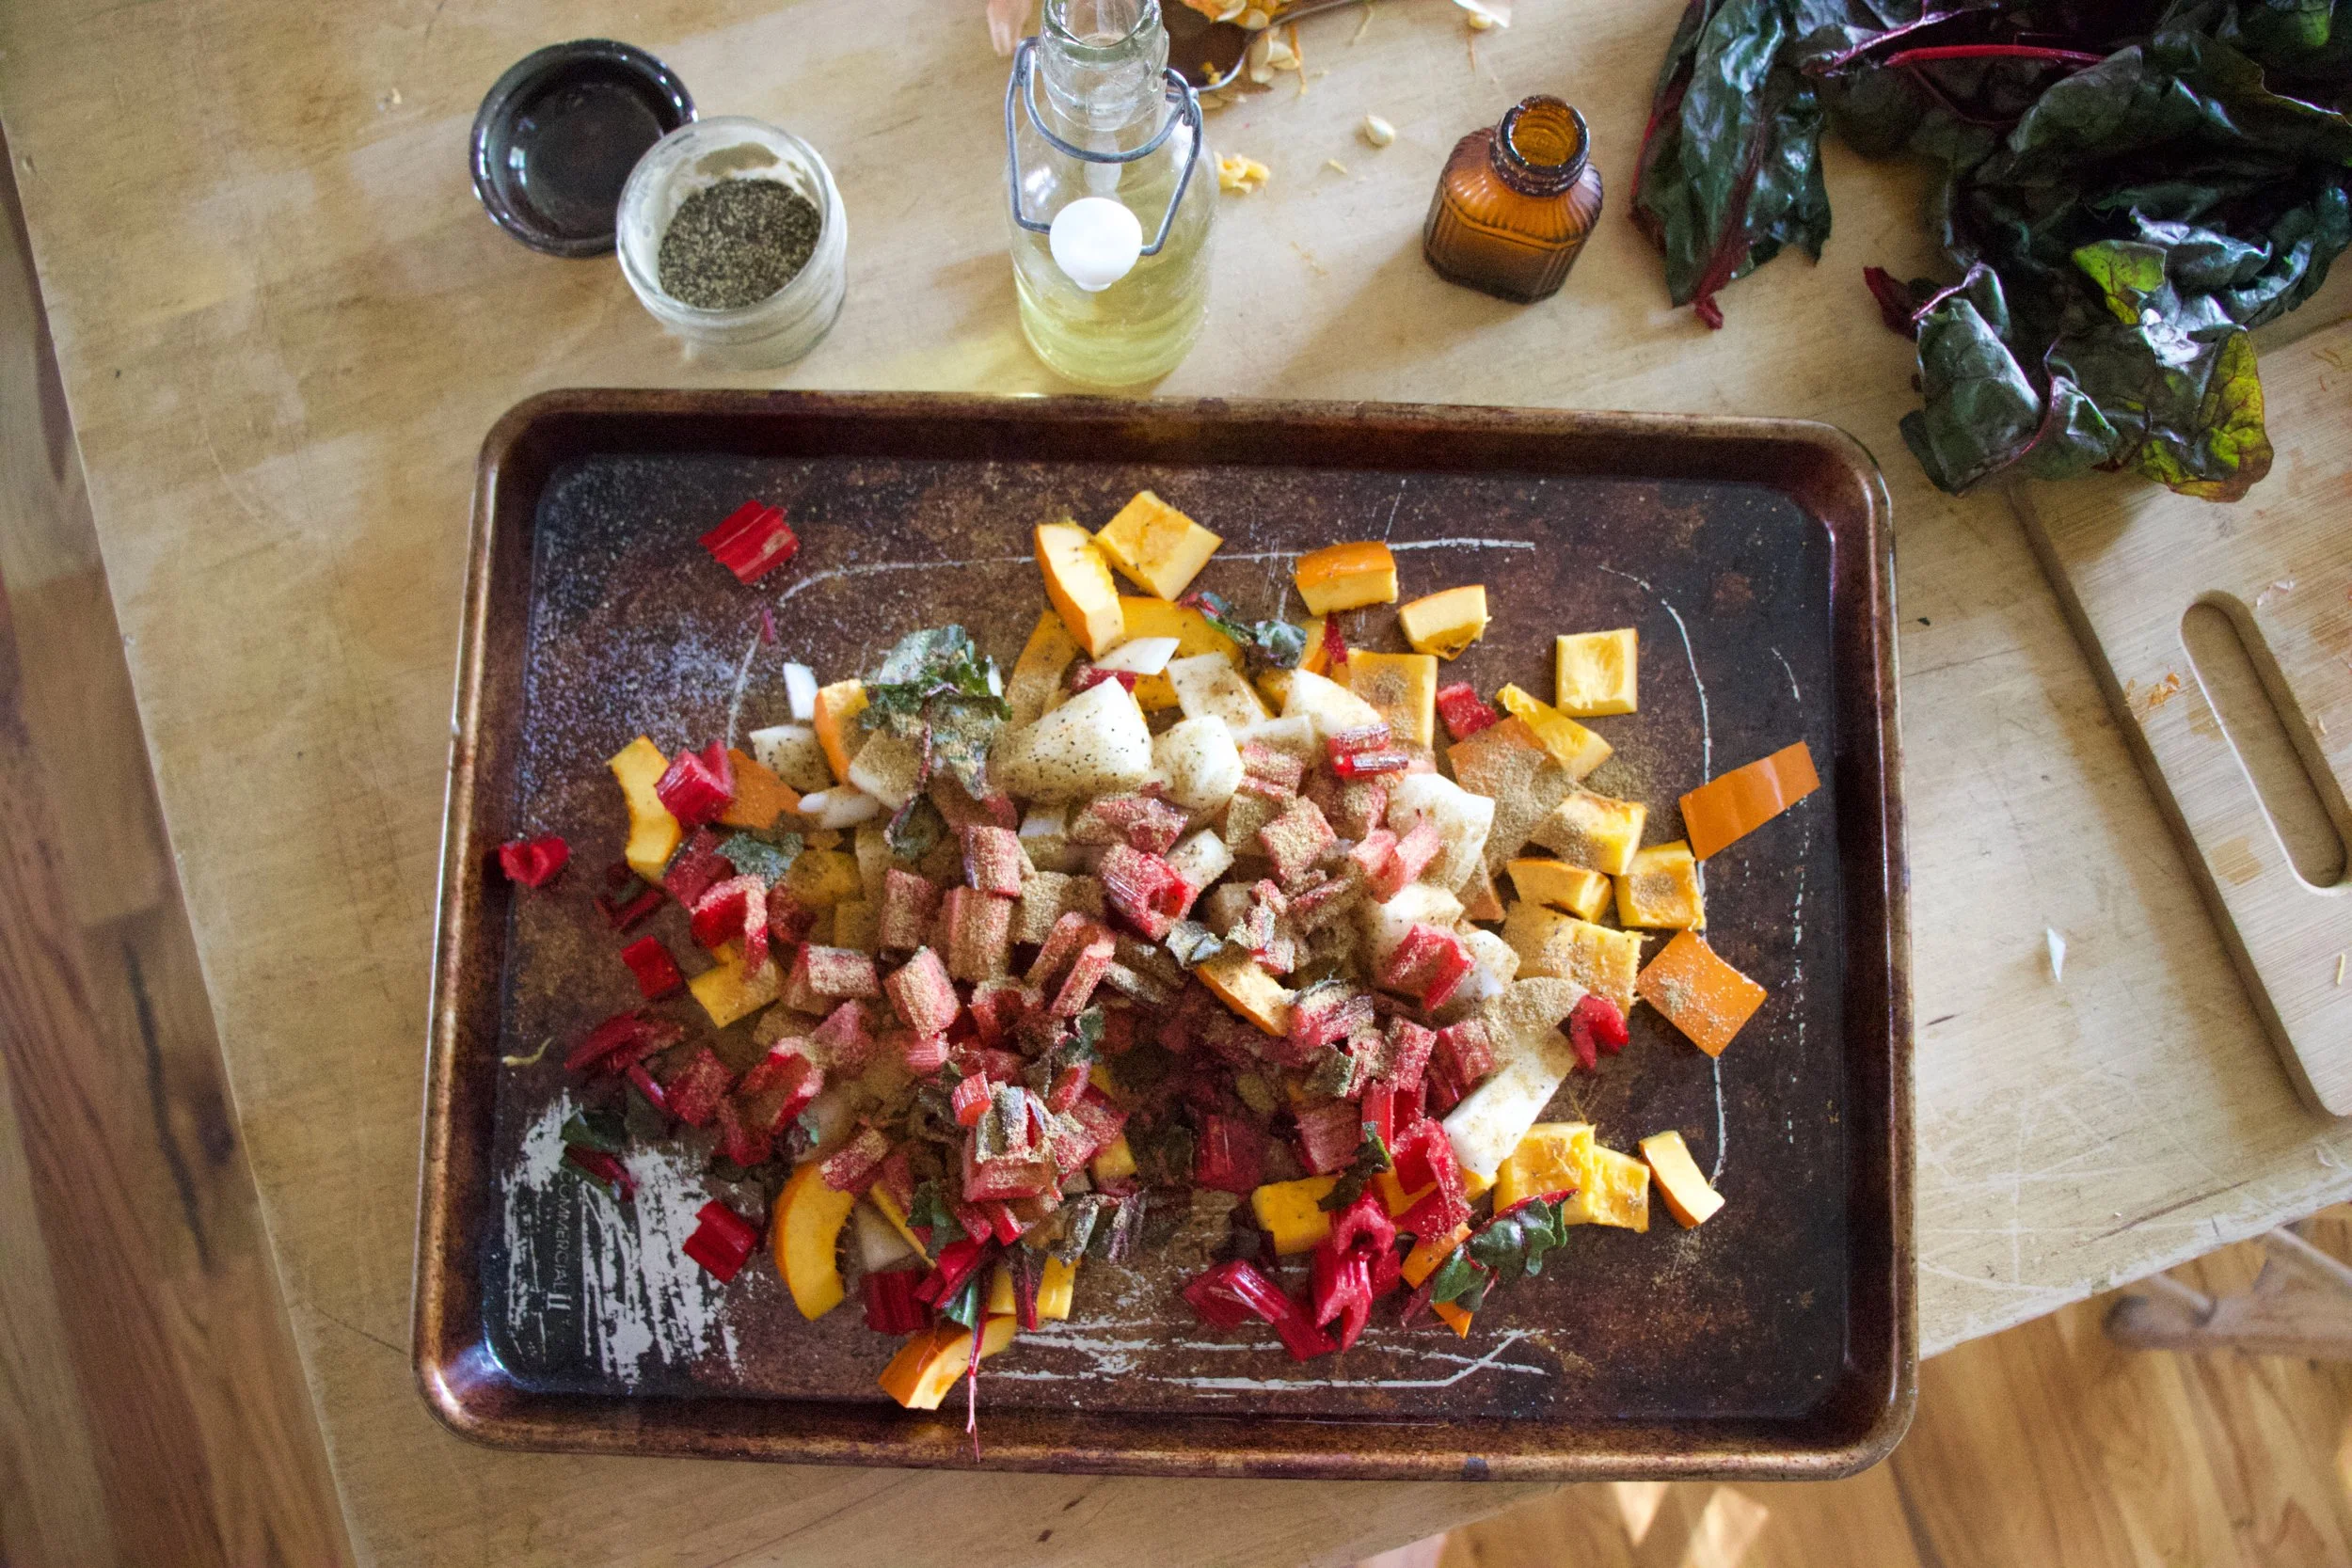
Place all the chopped up stuff onto a baking sheet, drizzle with a little bit of oil, dump on some cumin and sprinkle with salt and pepper then toss it all around.
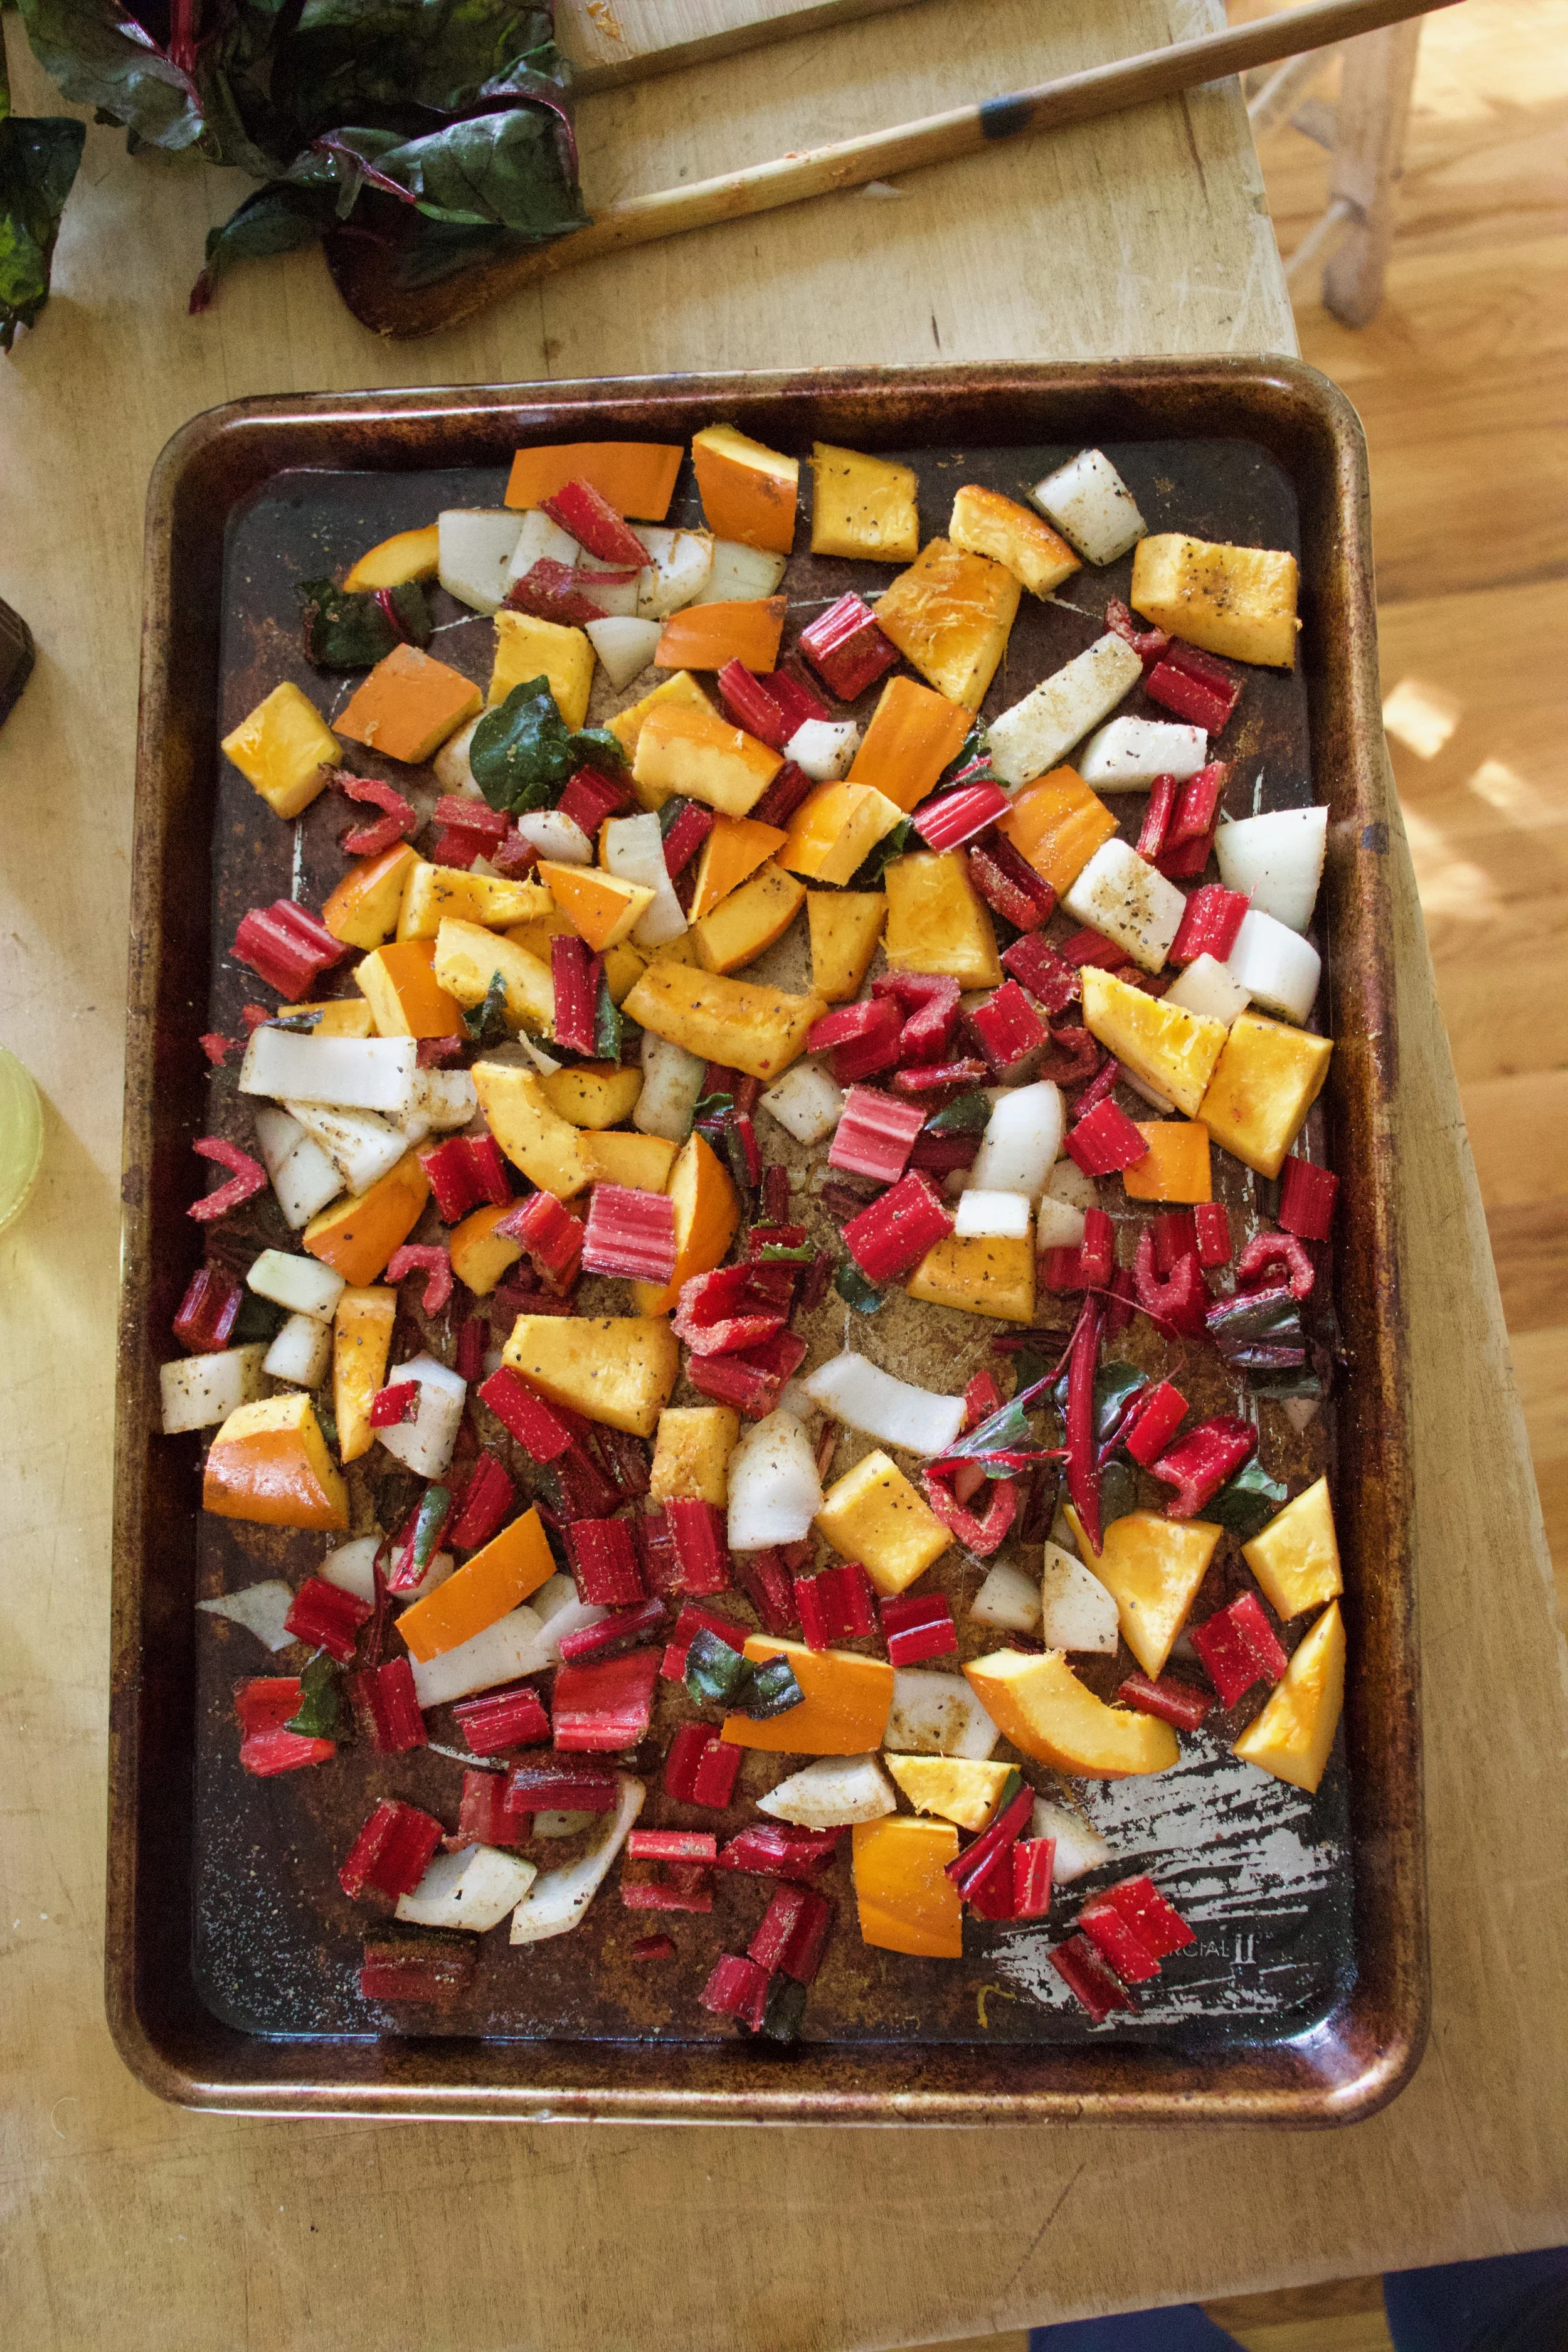
A fall roast ready for the oven.
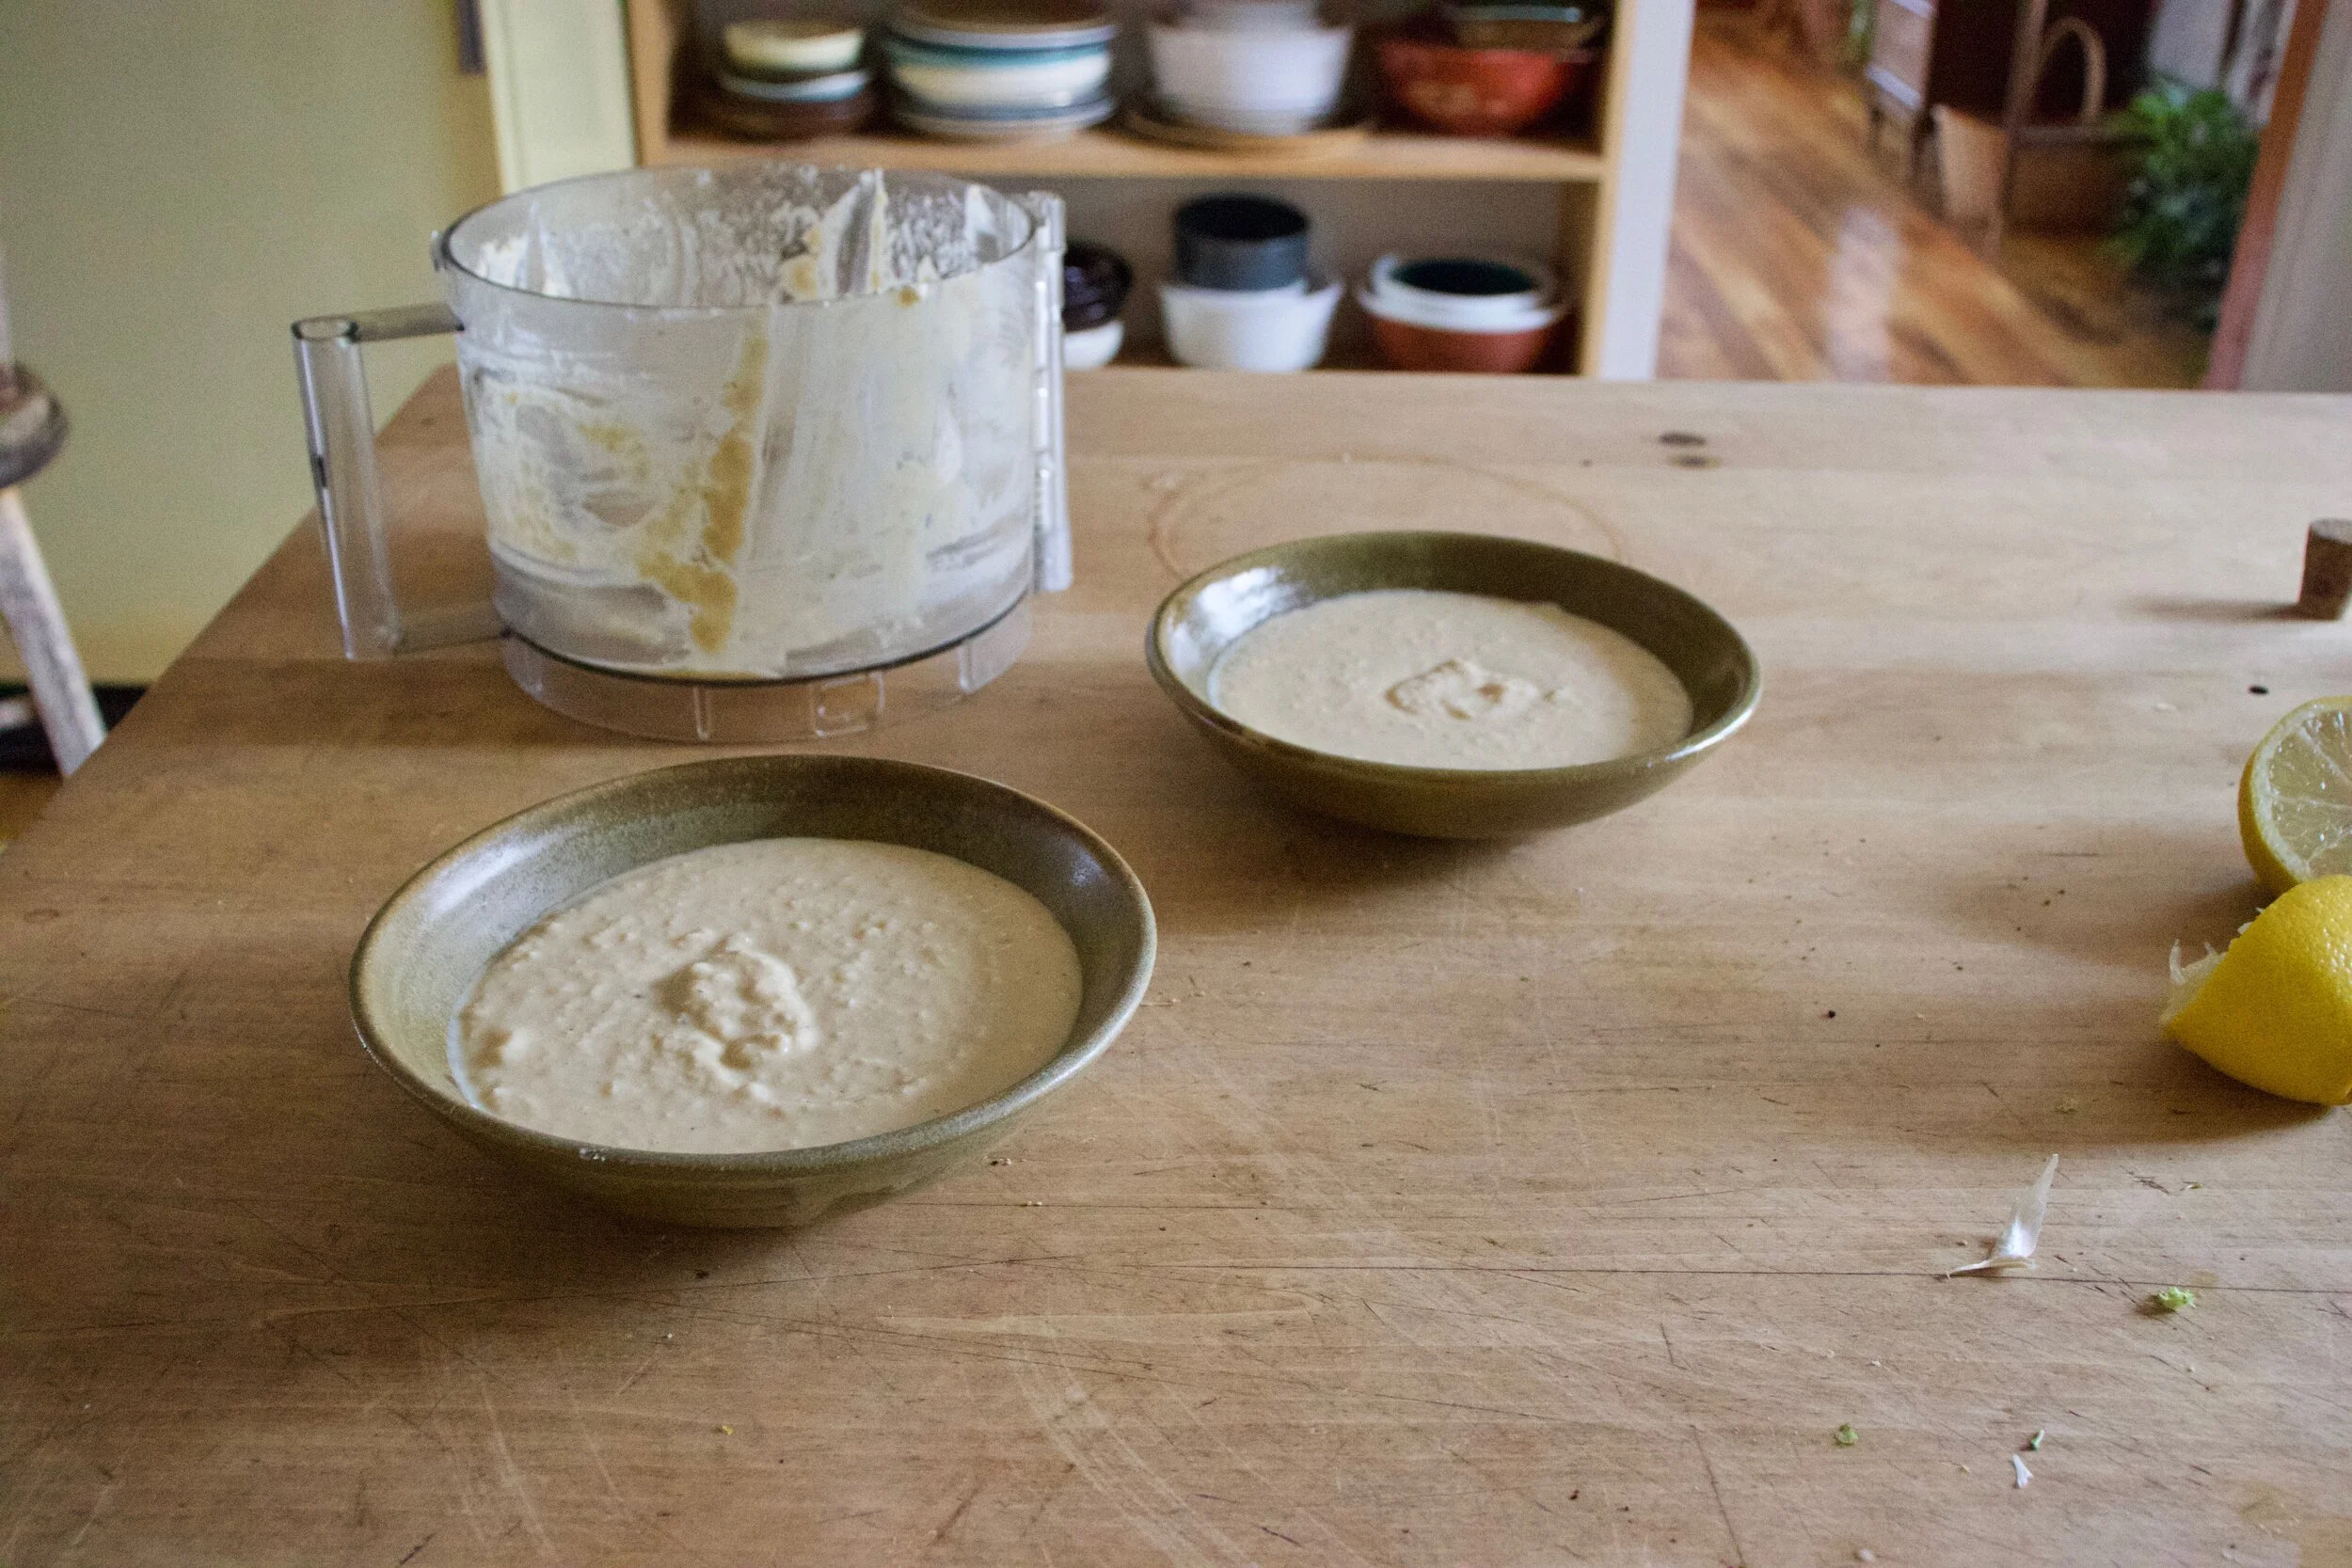
Once veggies are in oven roasting, make the lentils. Water and lentil in a pot, bring to a boil, turn on low and let cook until lentils are done. Once cooked, sprinkle in a pinch of salt.
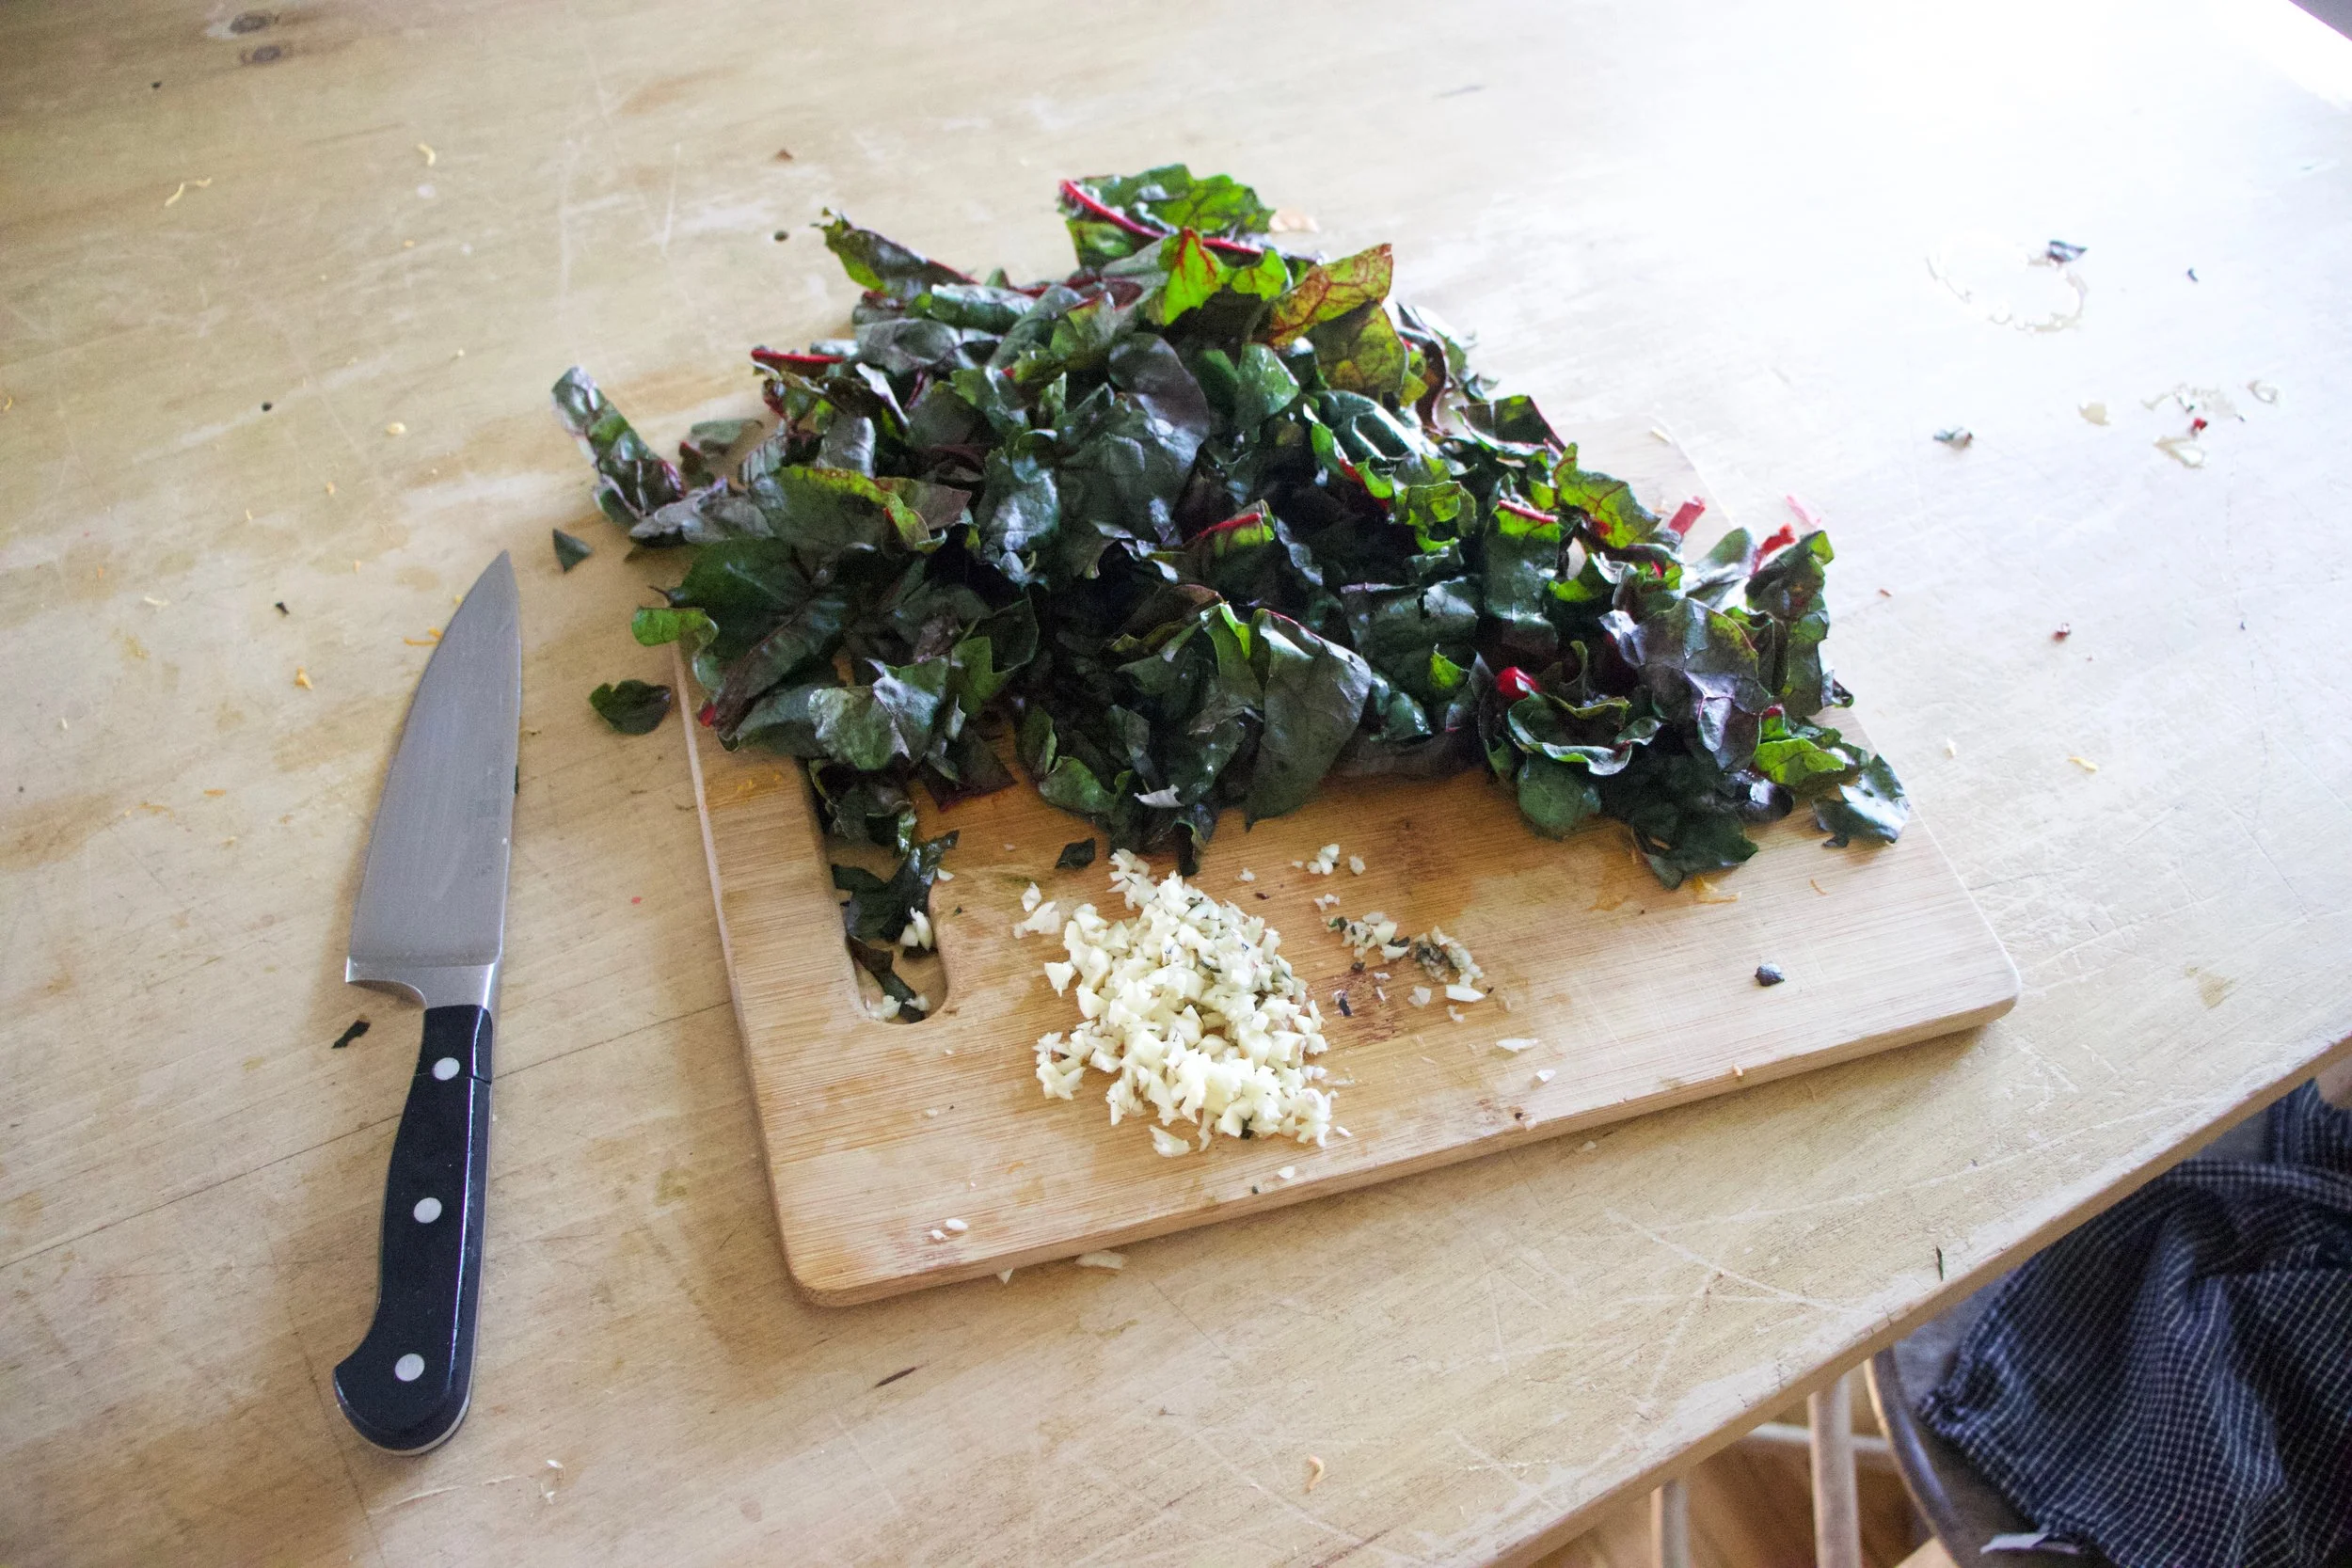
Also mince up the garlic and rough chop up the chard leaves.
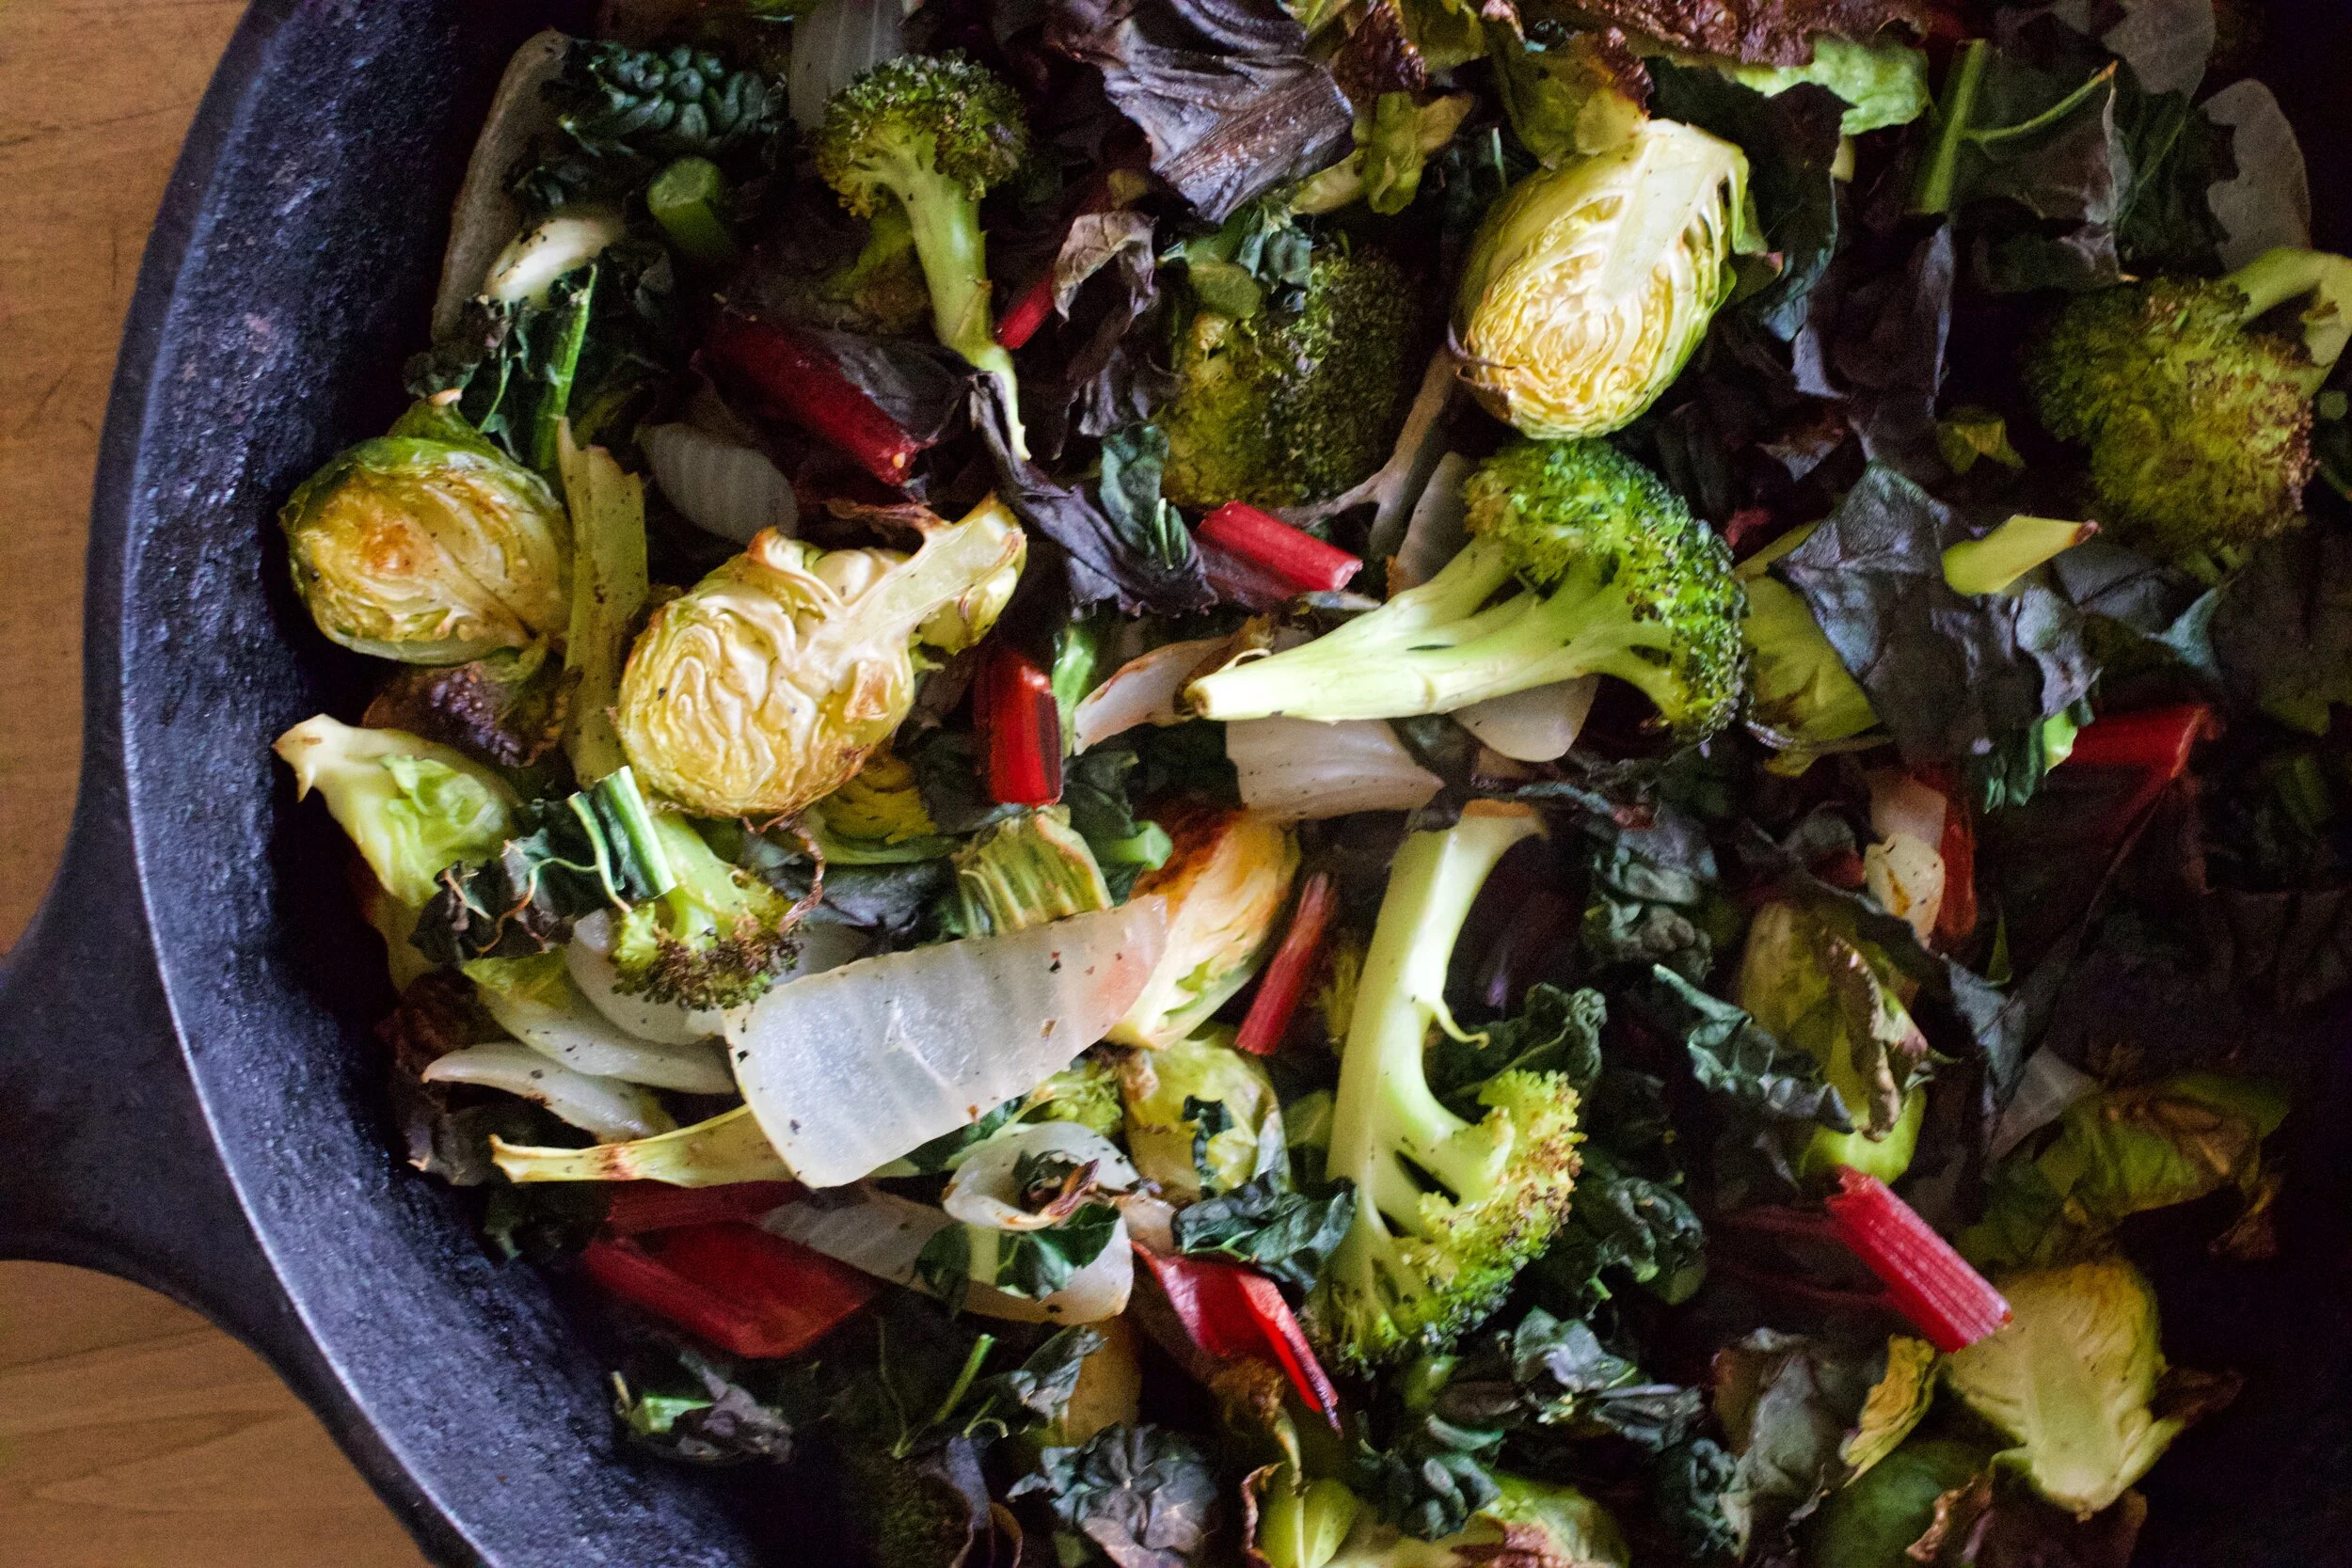
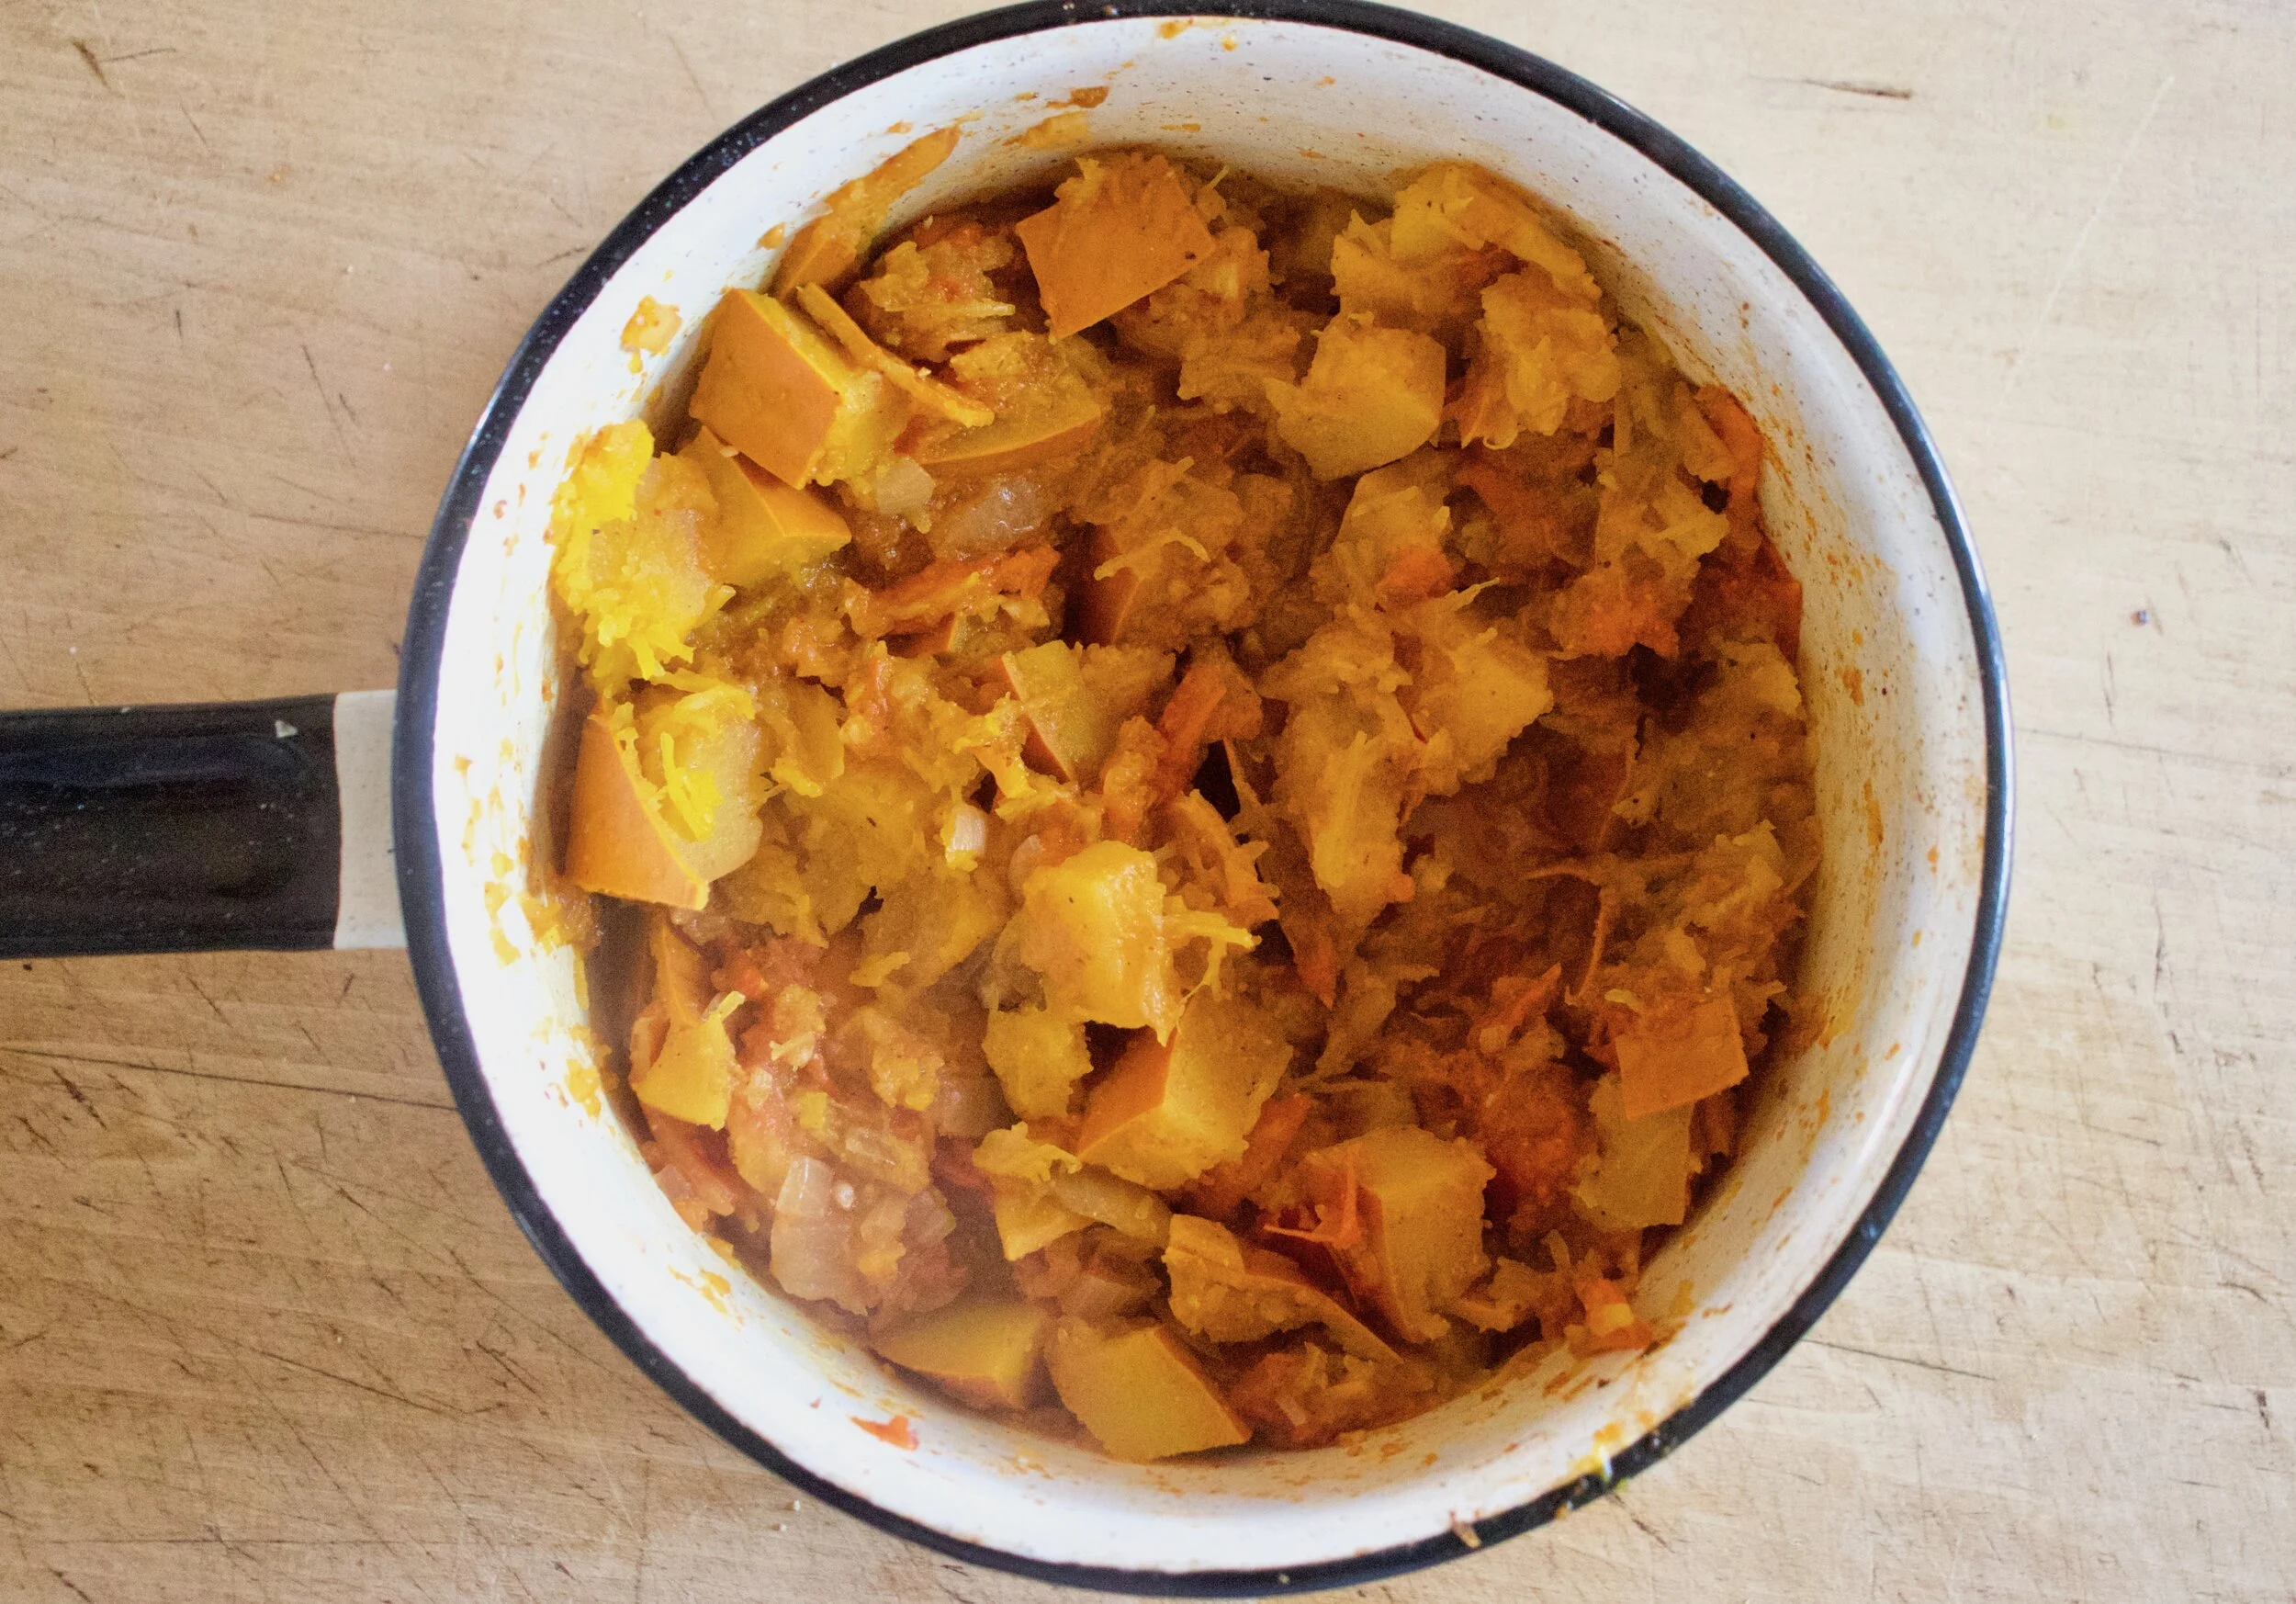
Fall veggies are looking nice and roasted and tasting all so good. Toss in the minced garlic and chopped chard leaves and pop the baking sheet back into the oven for a little longer just until the garlic and leaves are cooked too.
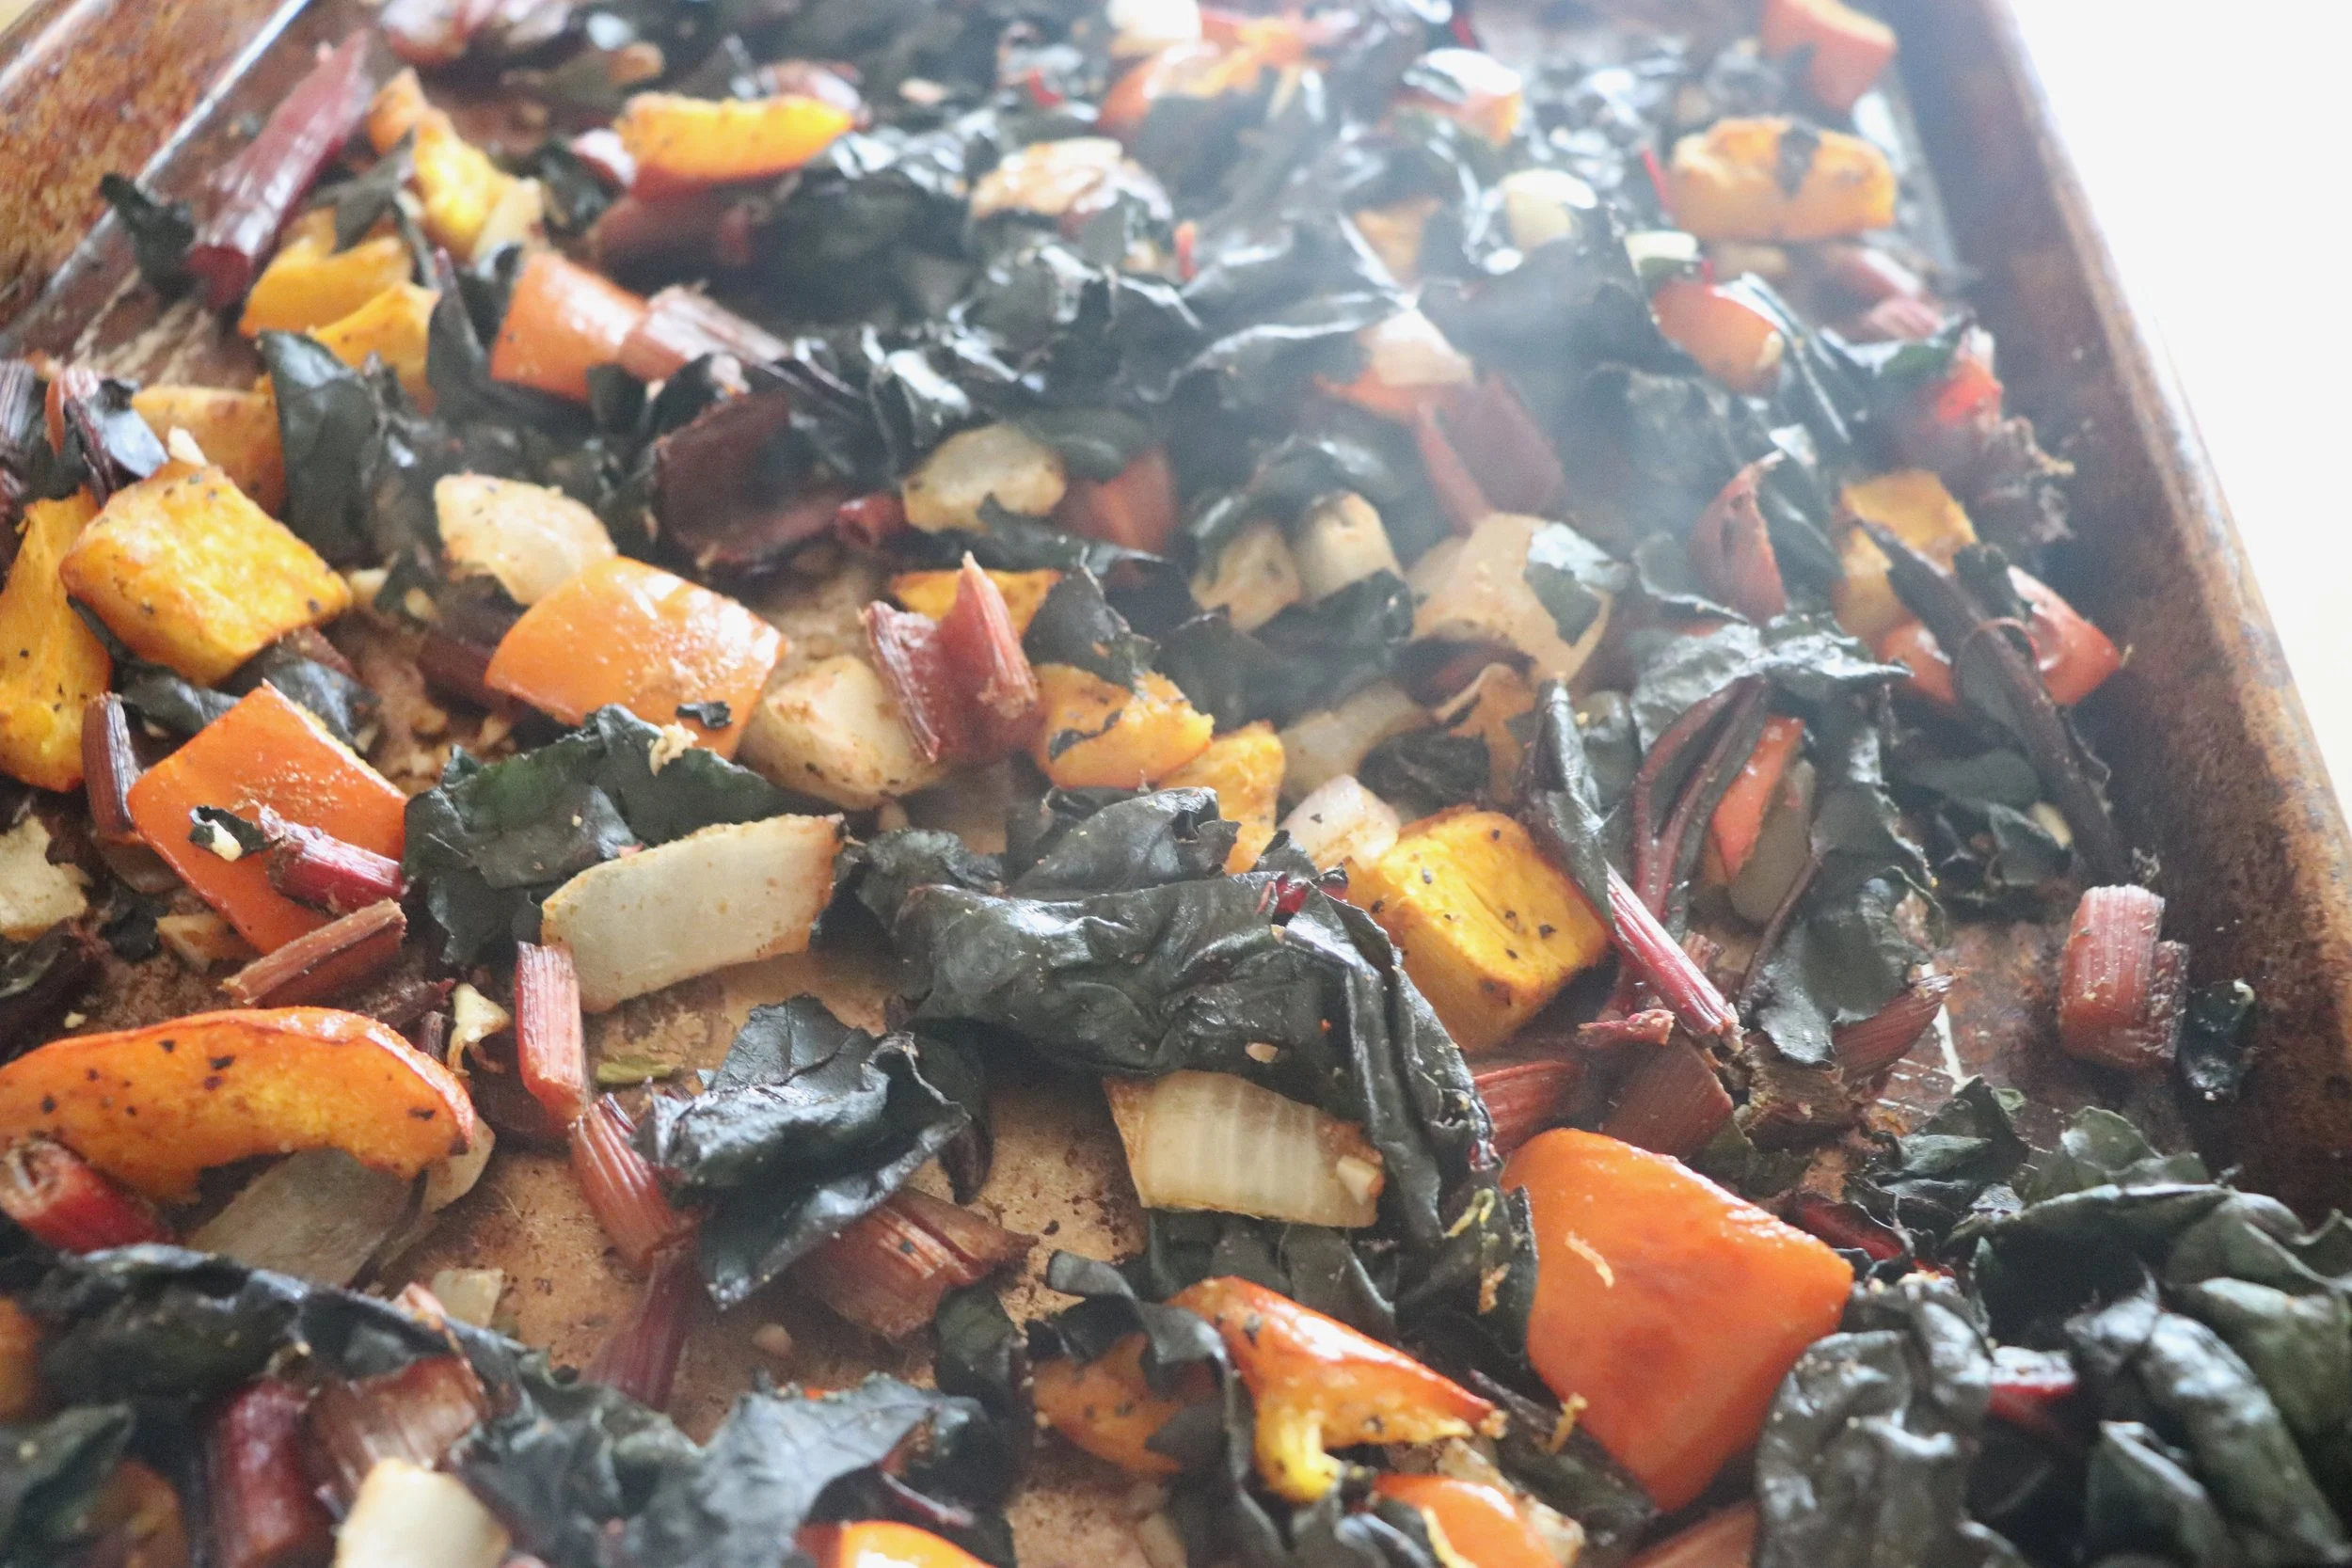
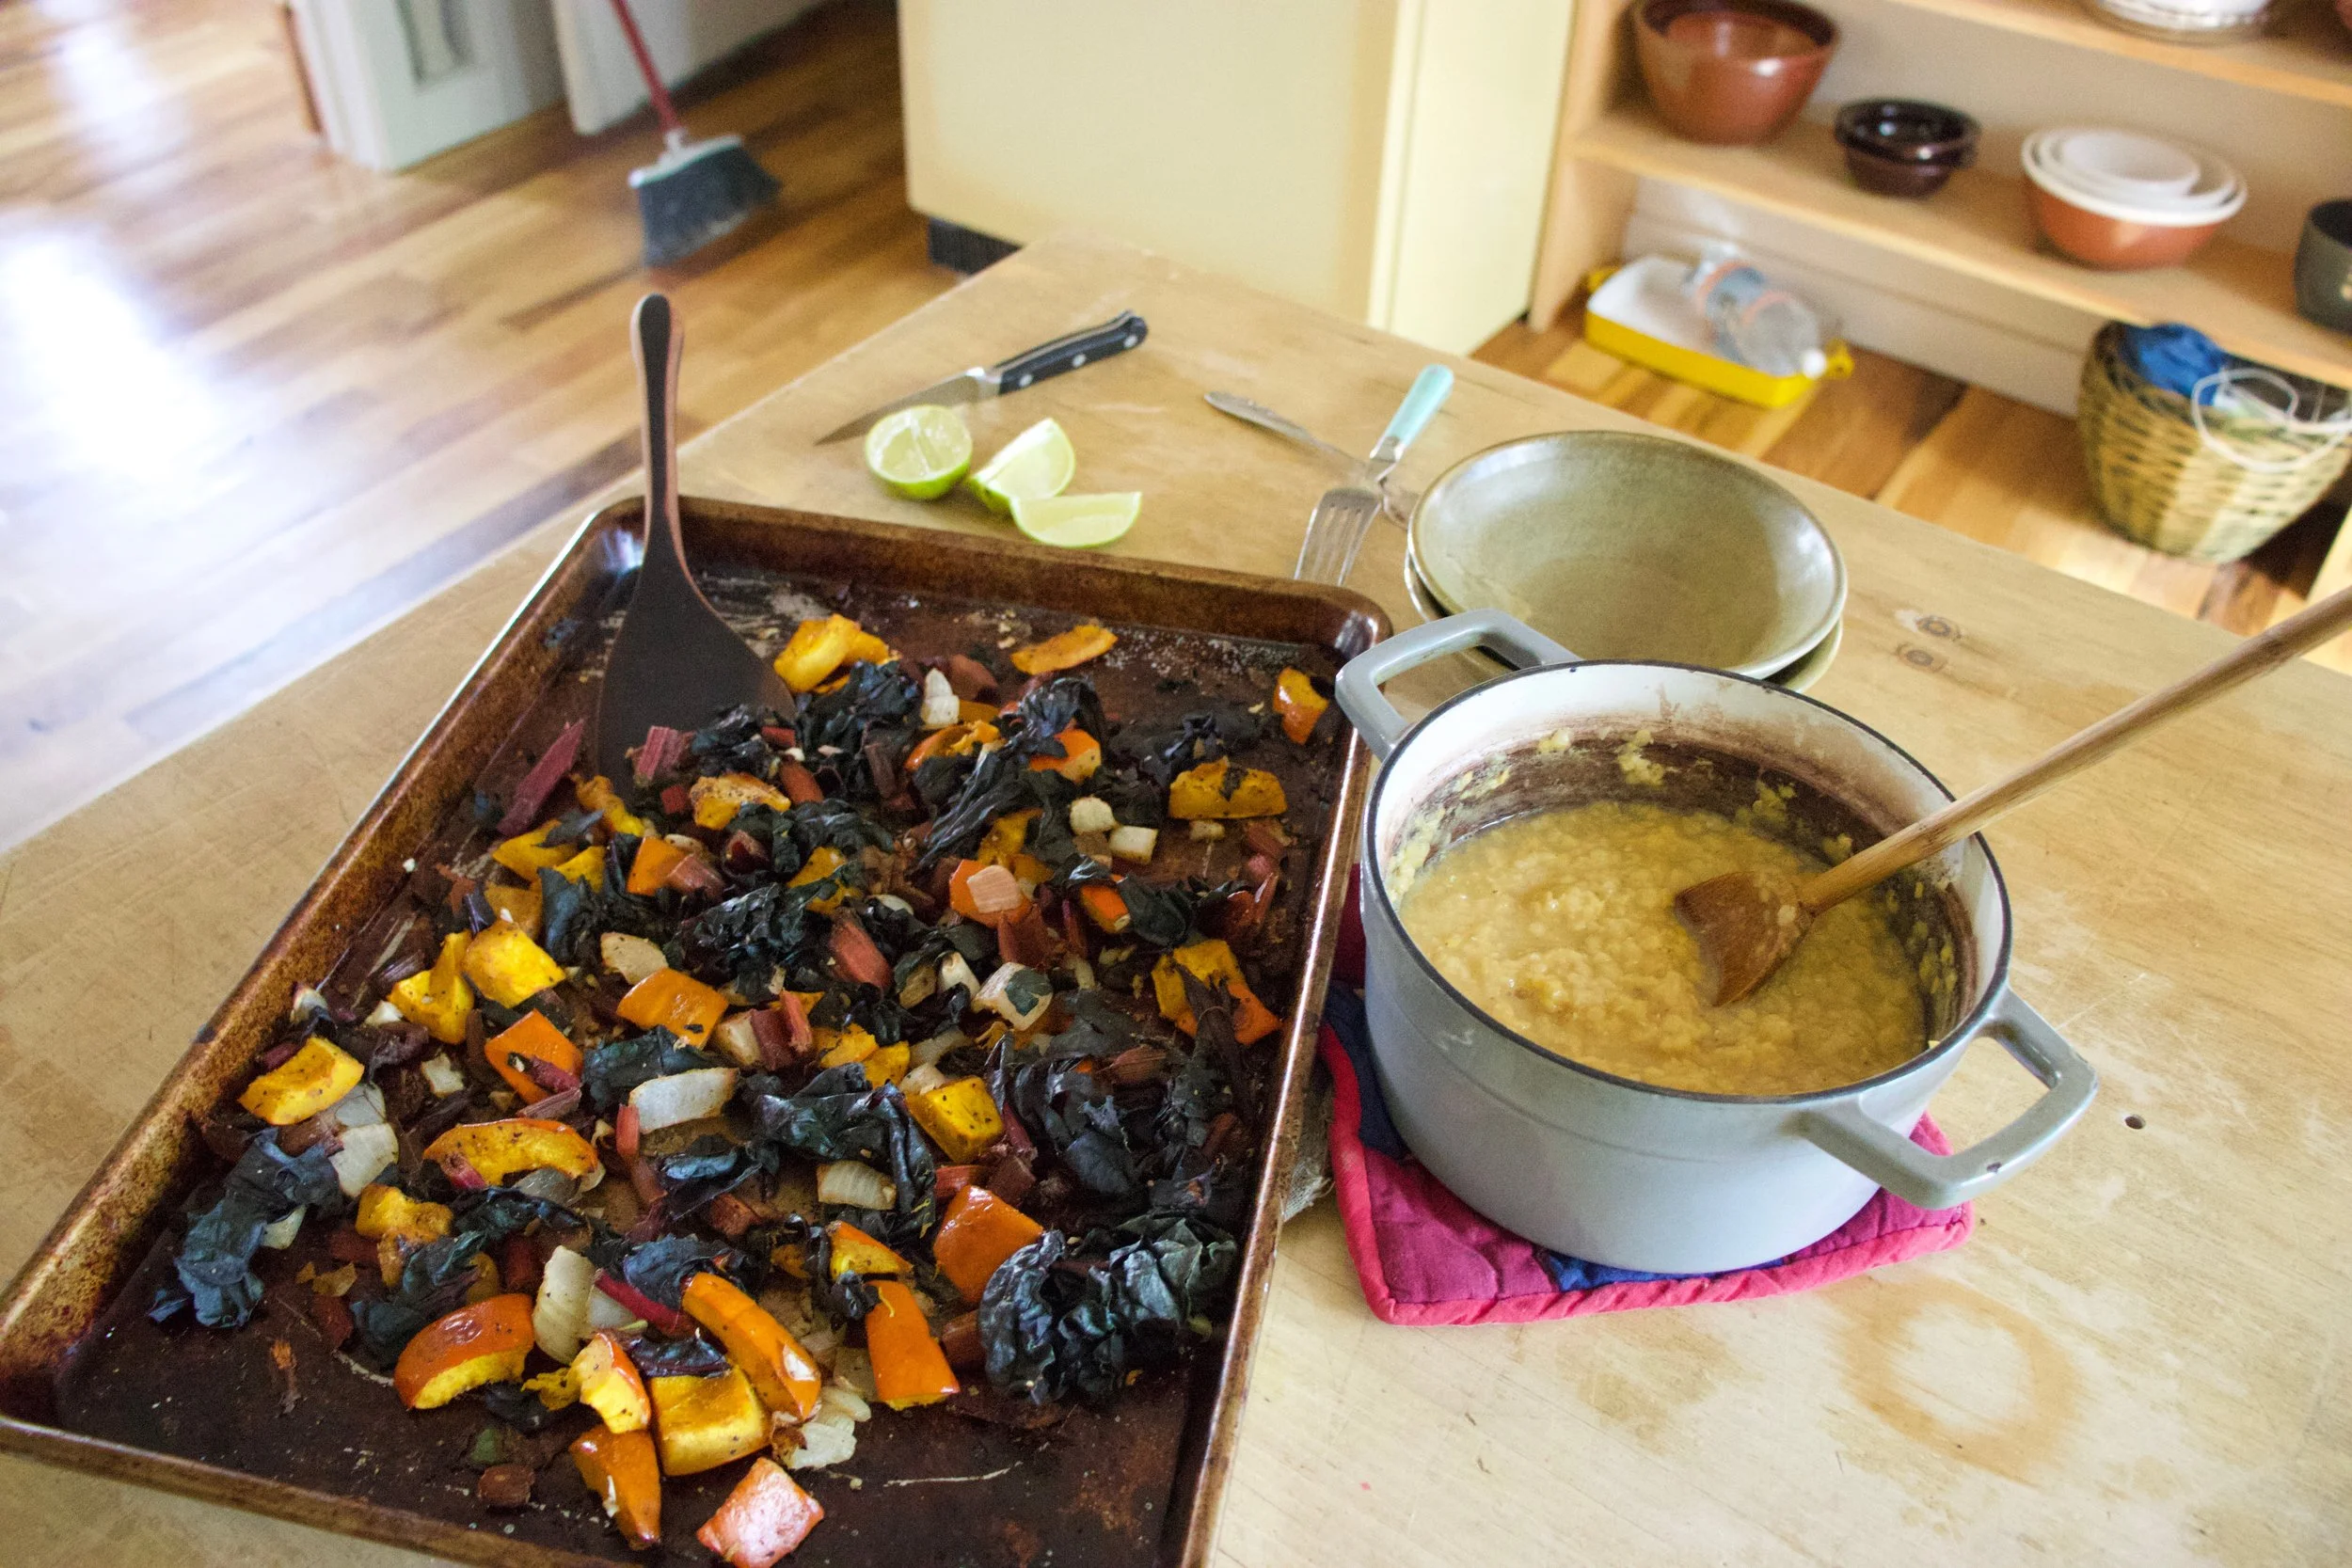
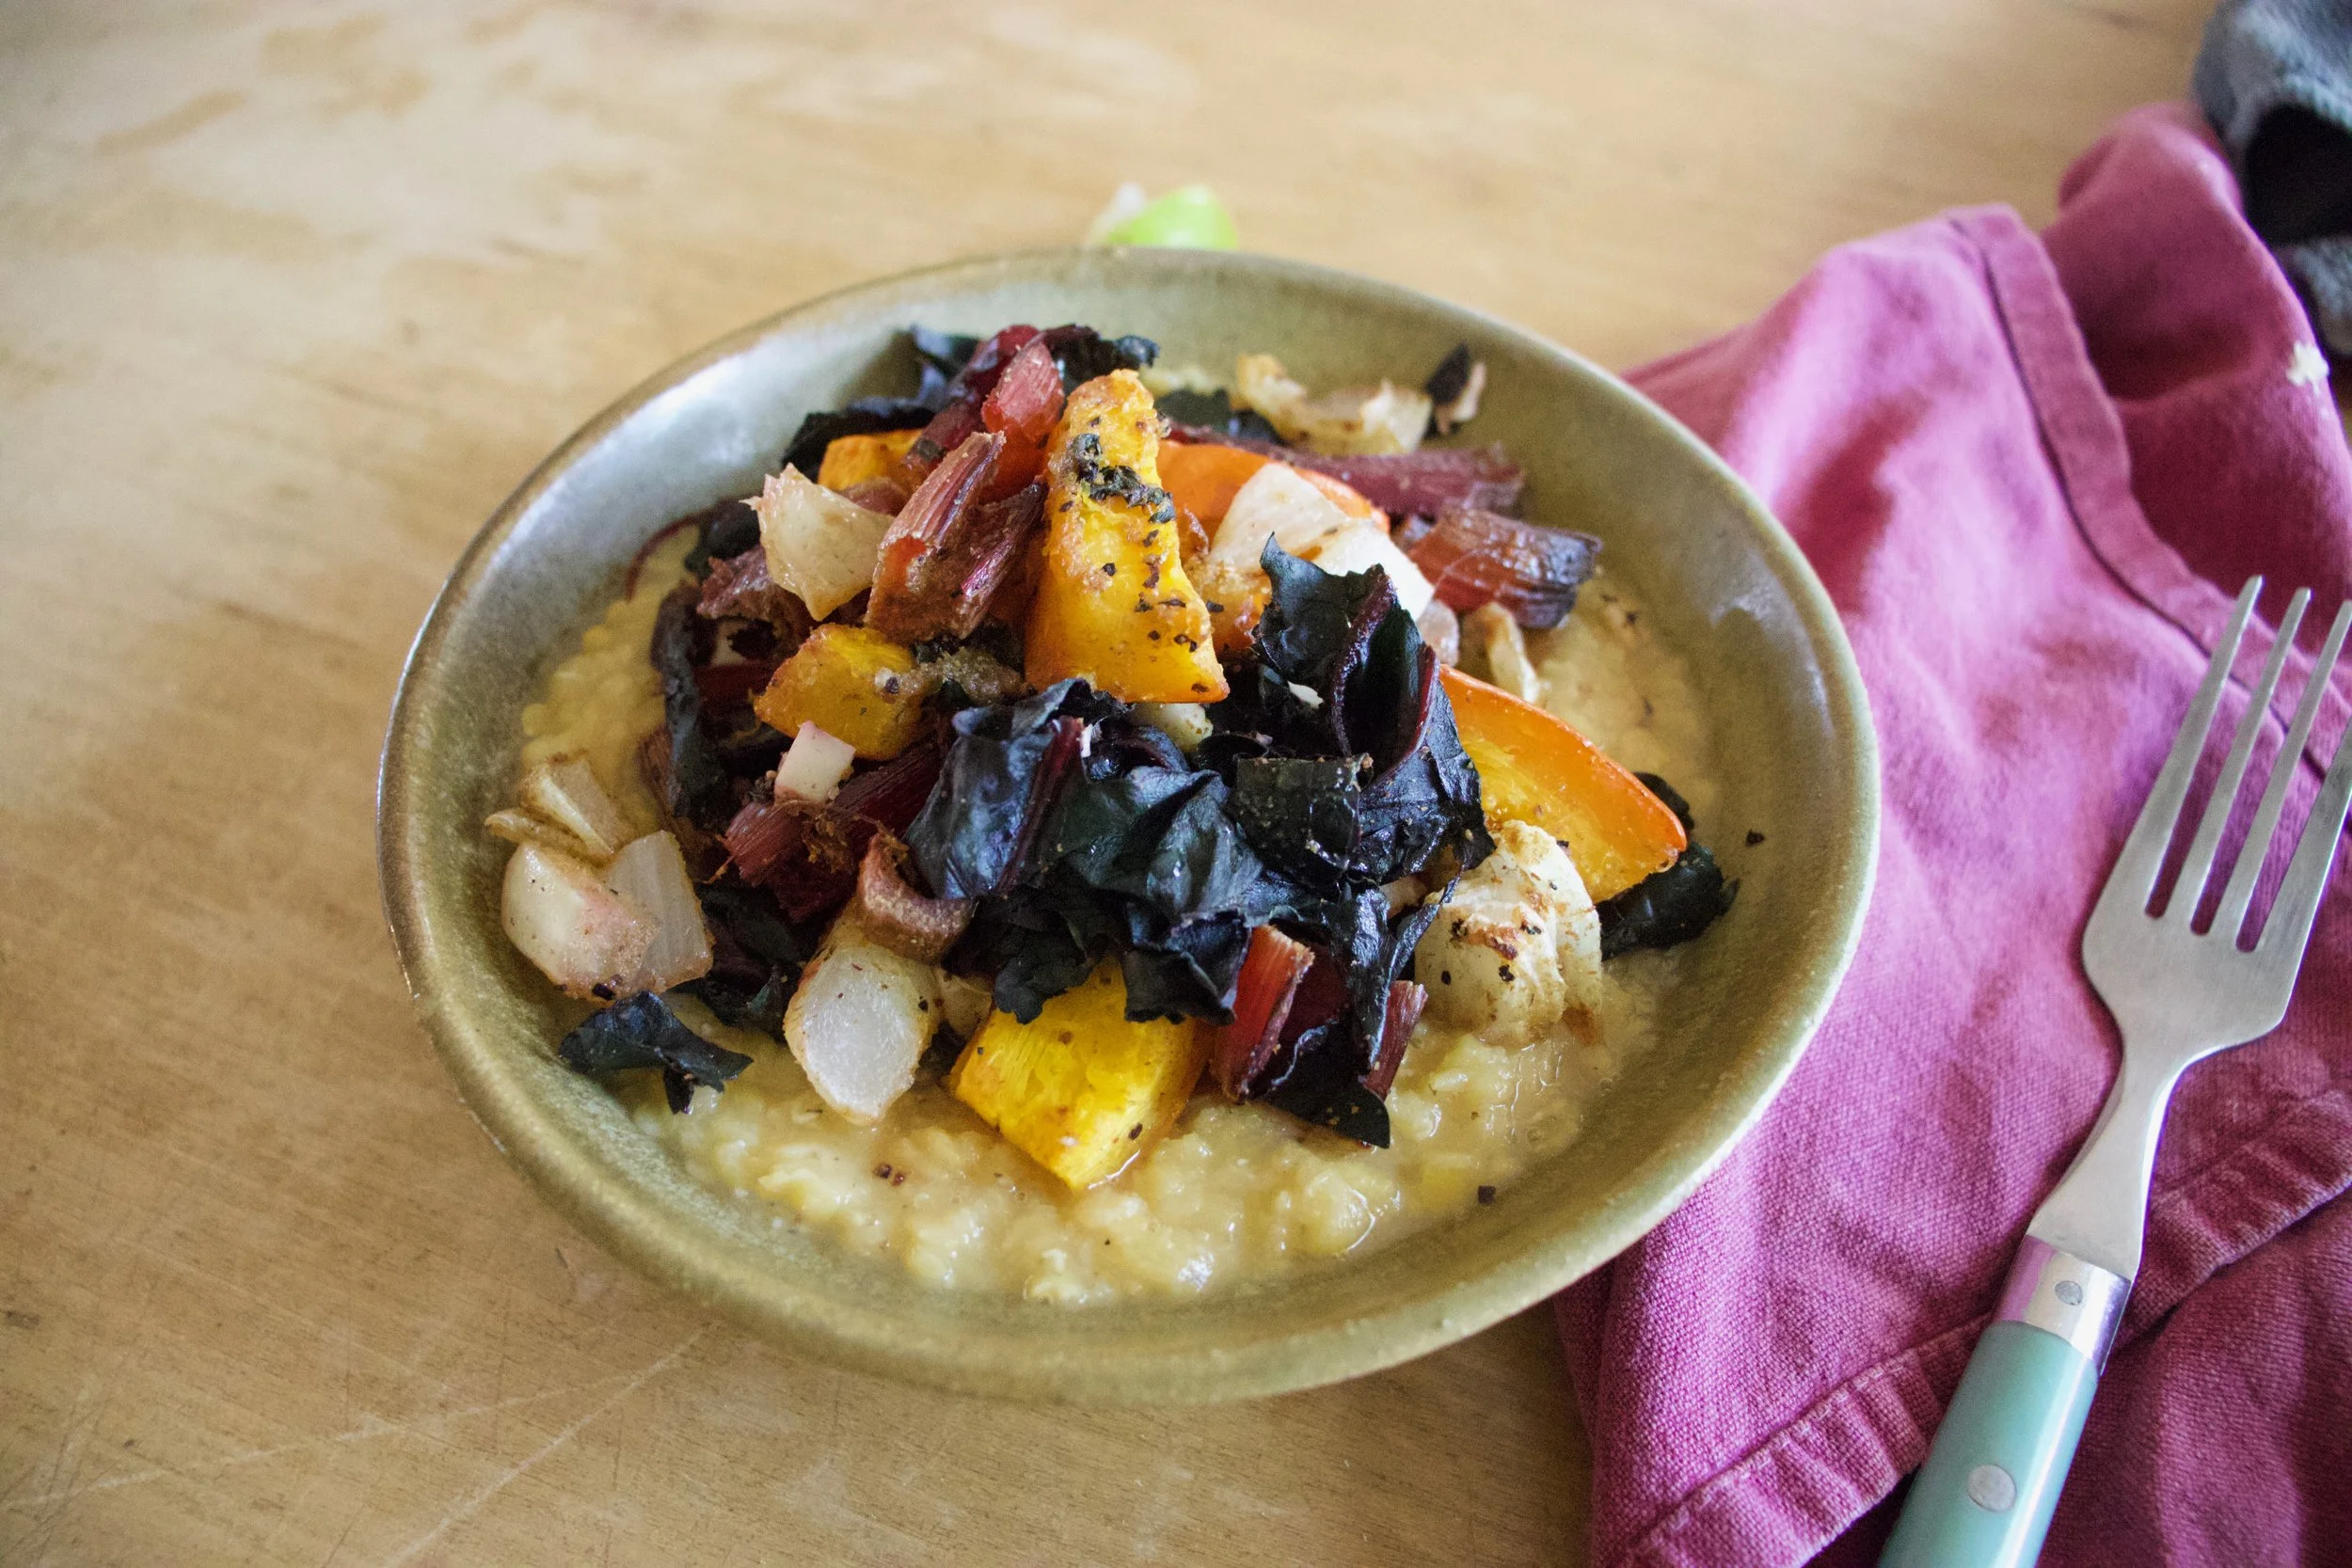
Now you have your lentils and the cumin roasted pan of goodness. If you have a lime, cut that up too because it will make this all just perfect. Perfect I tell you.
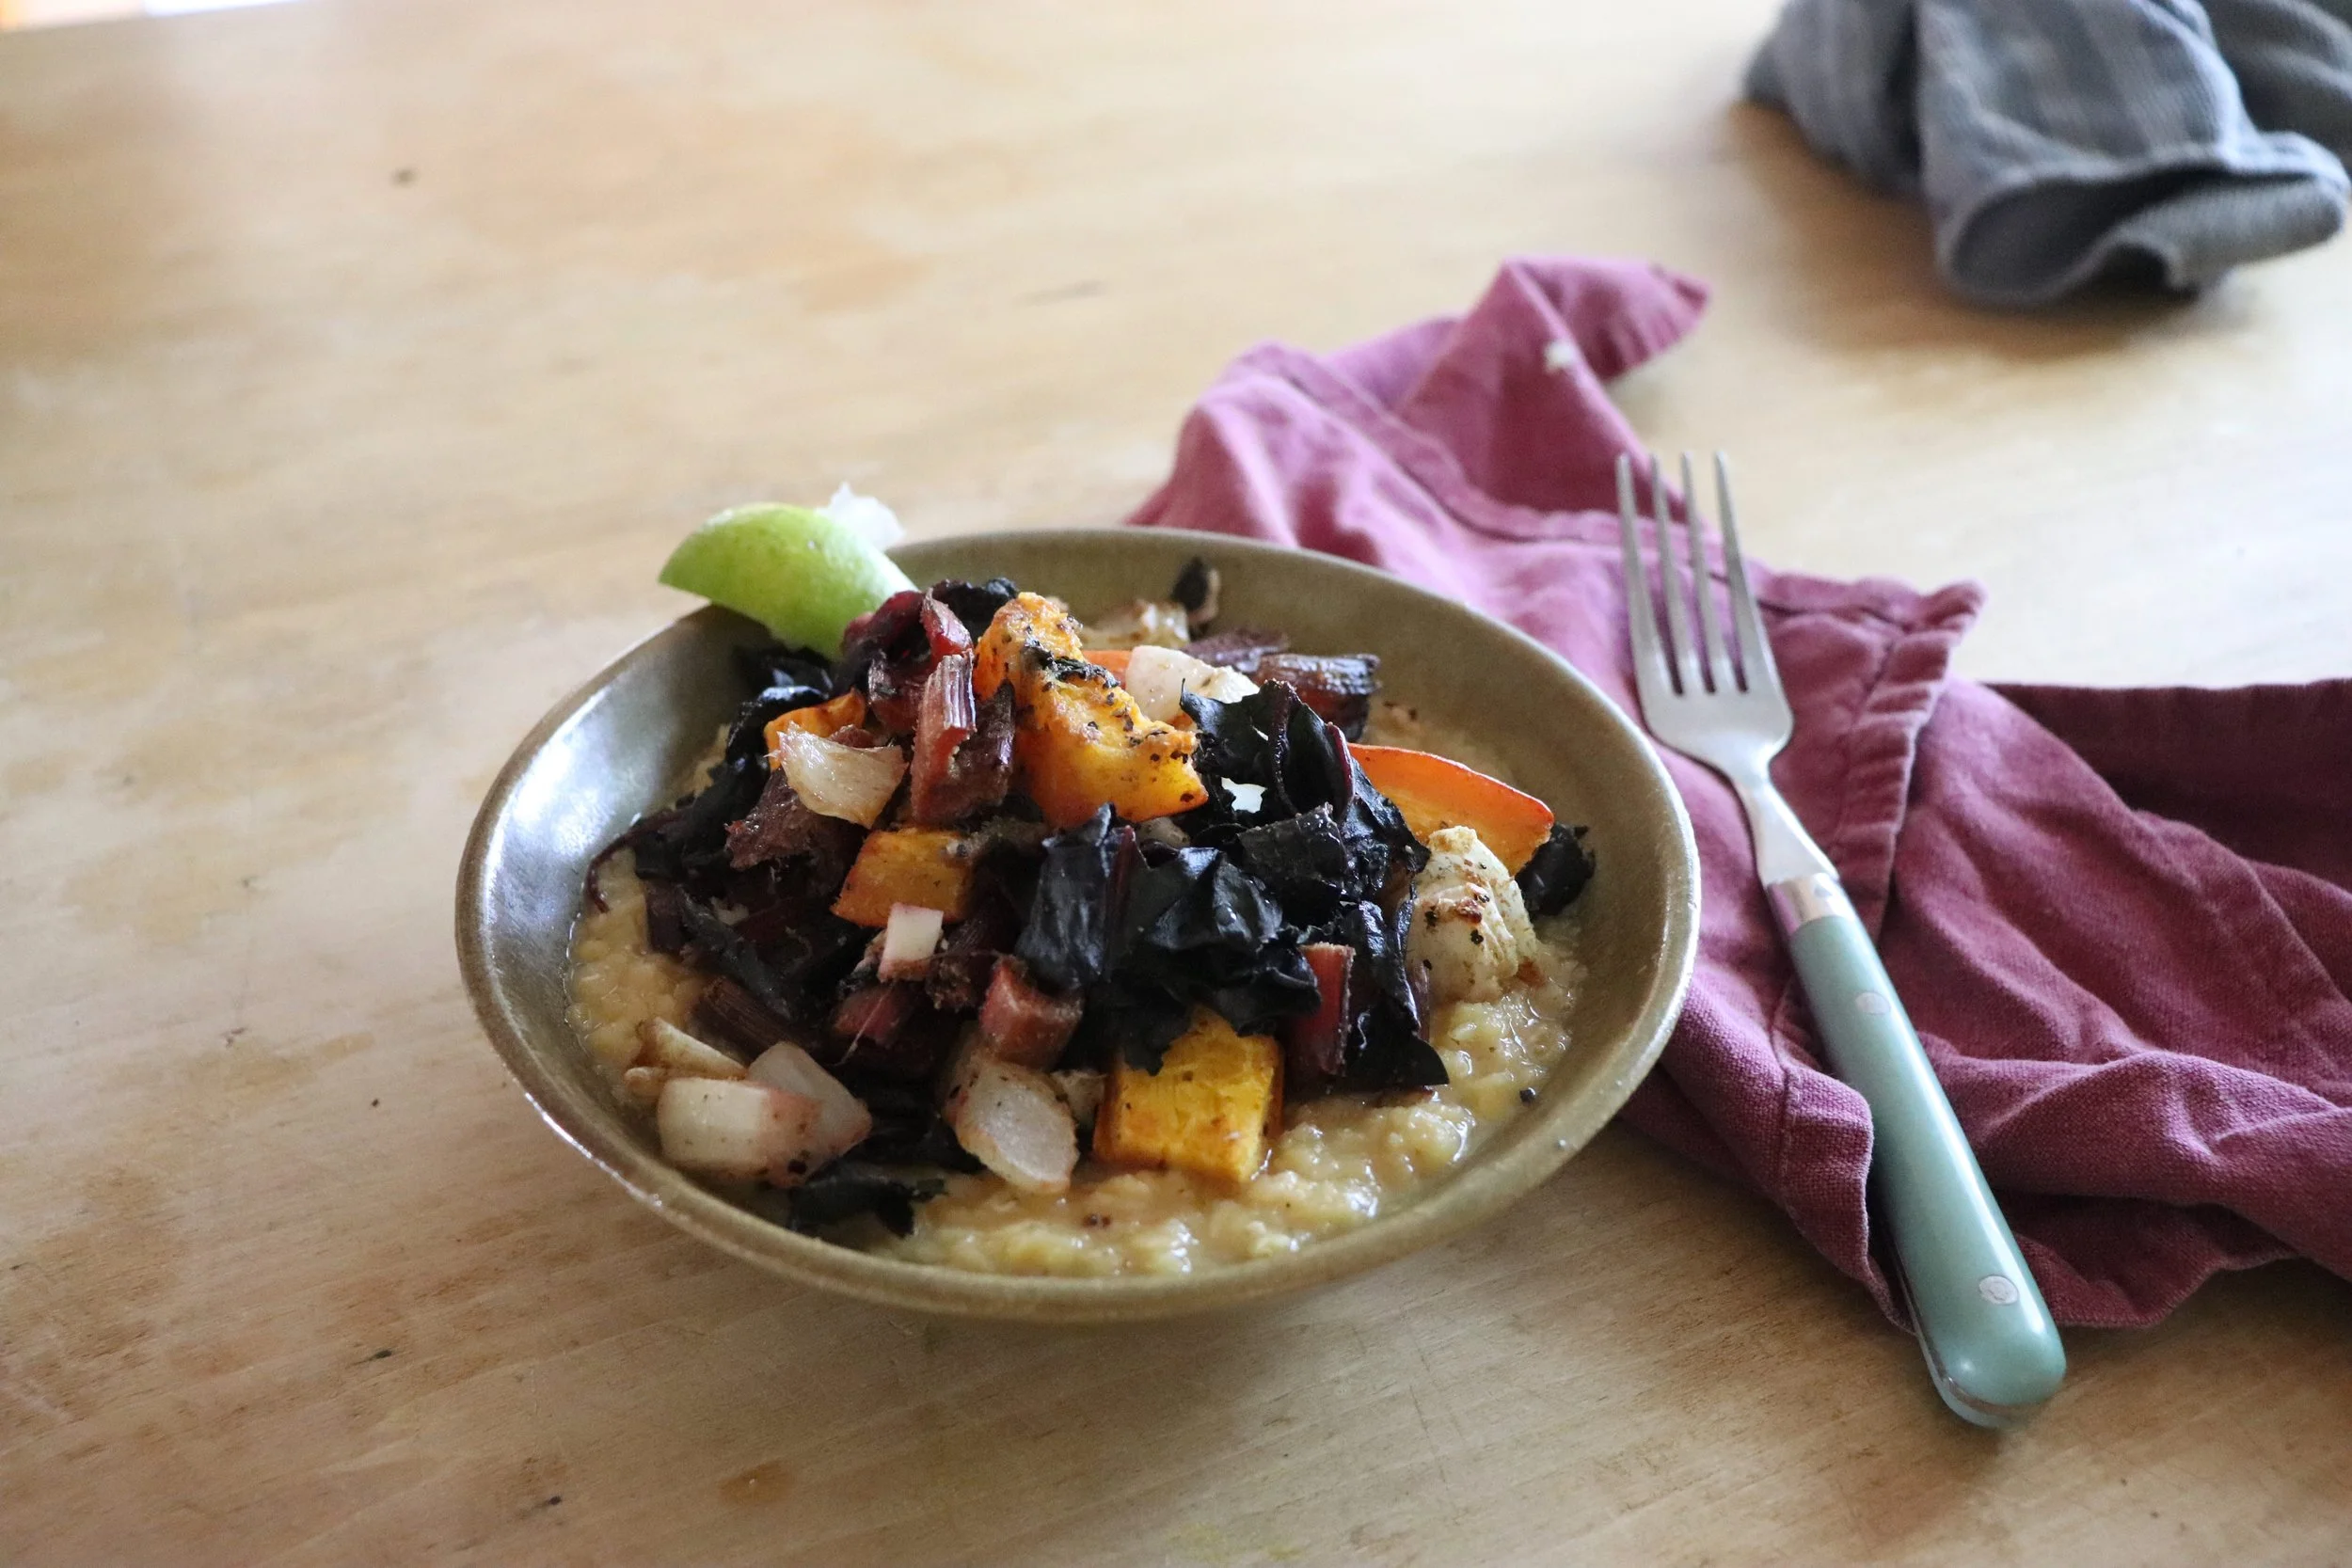
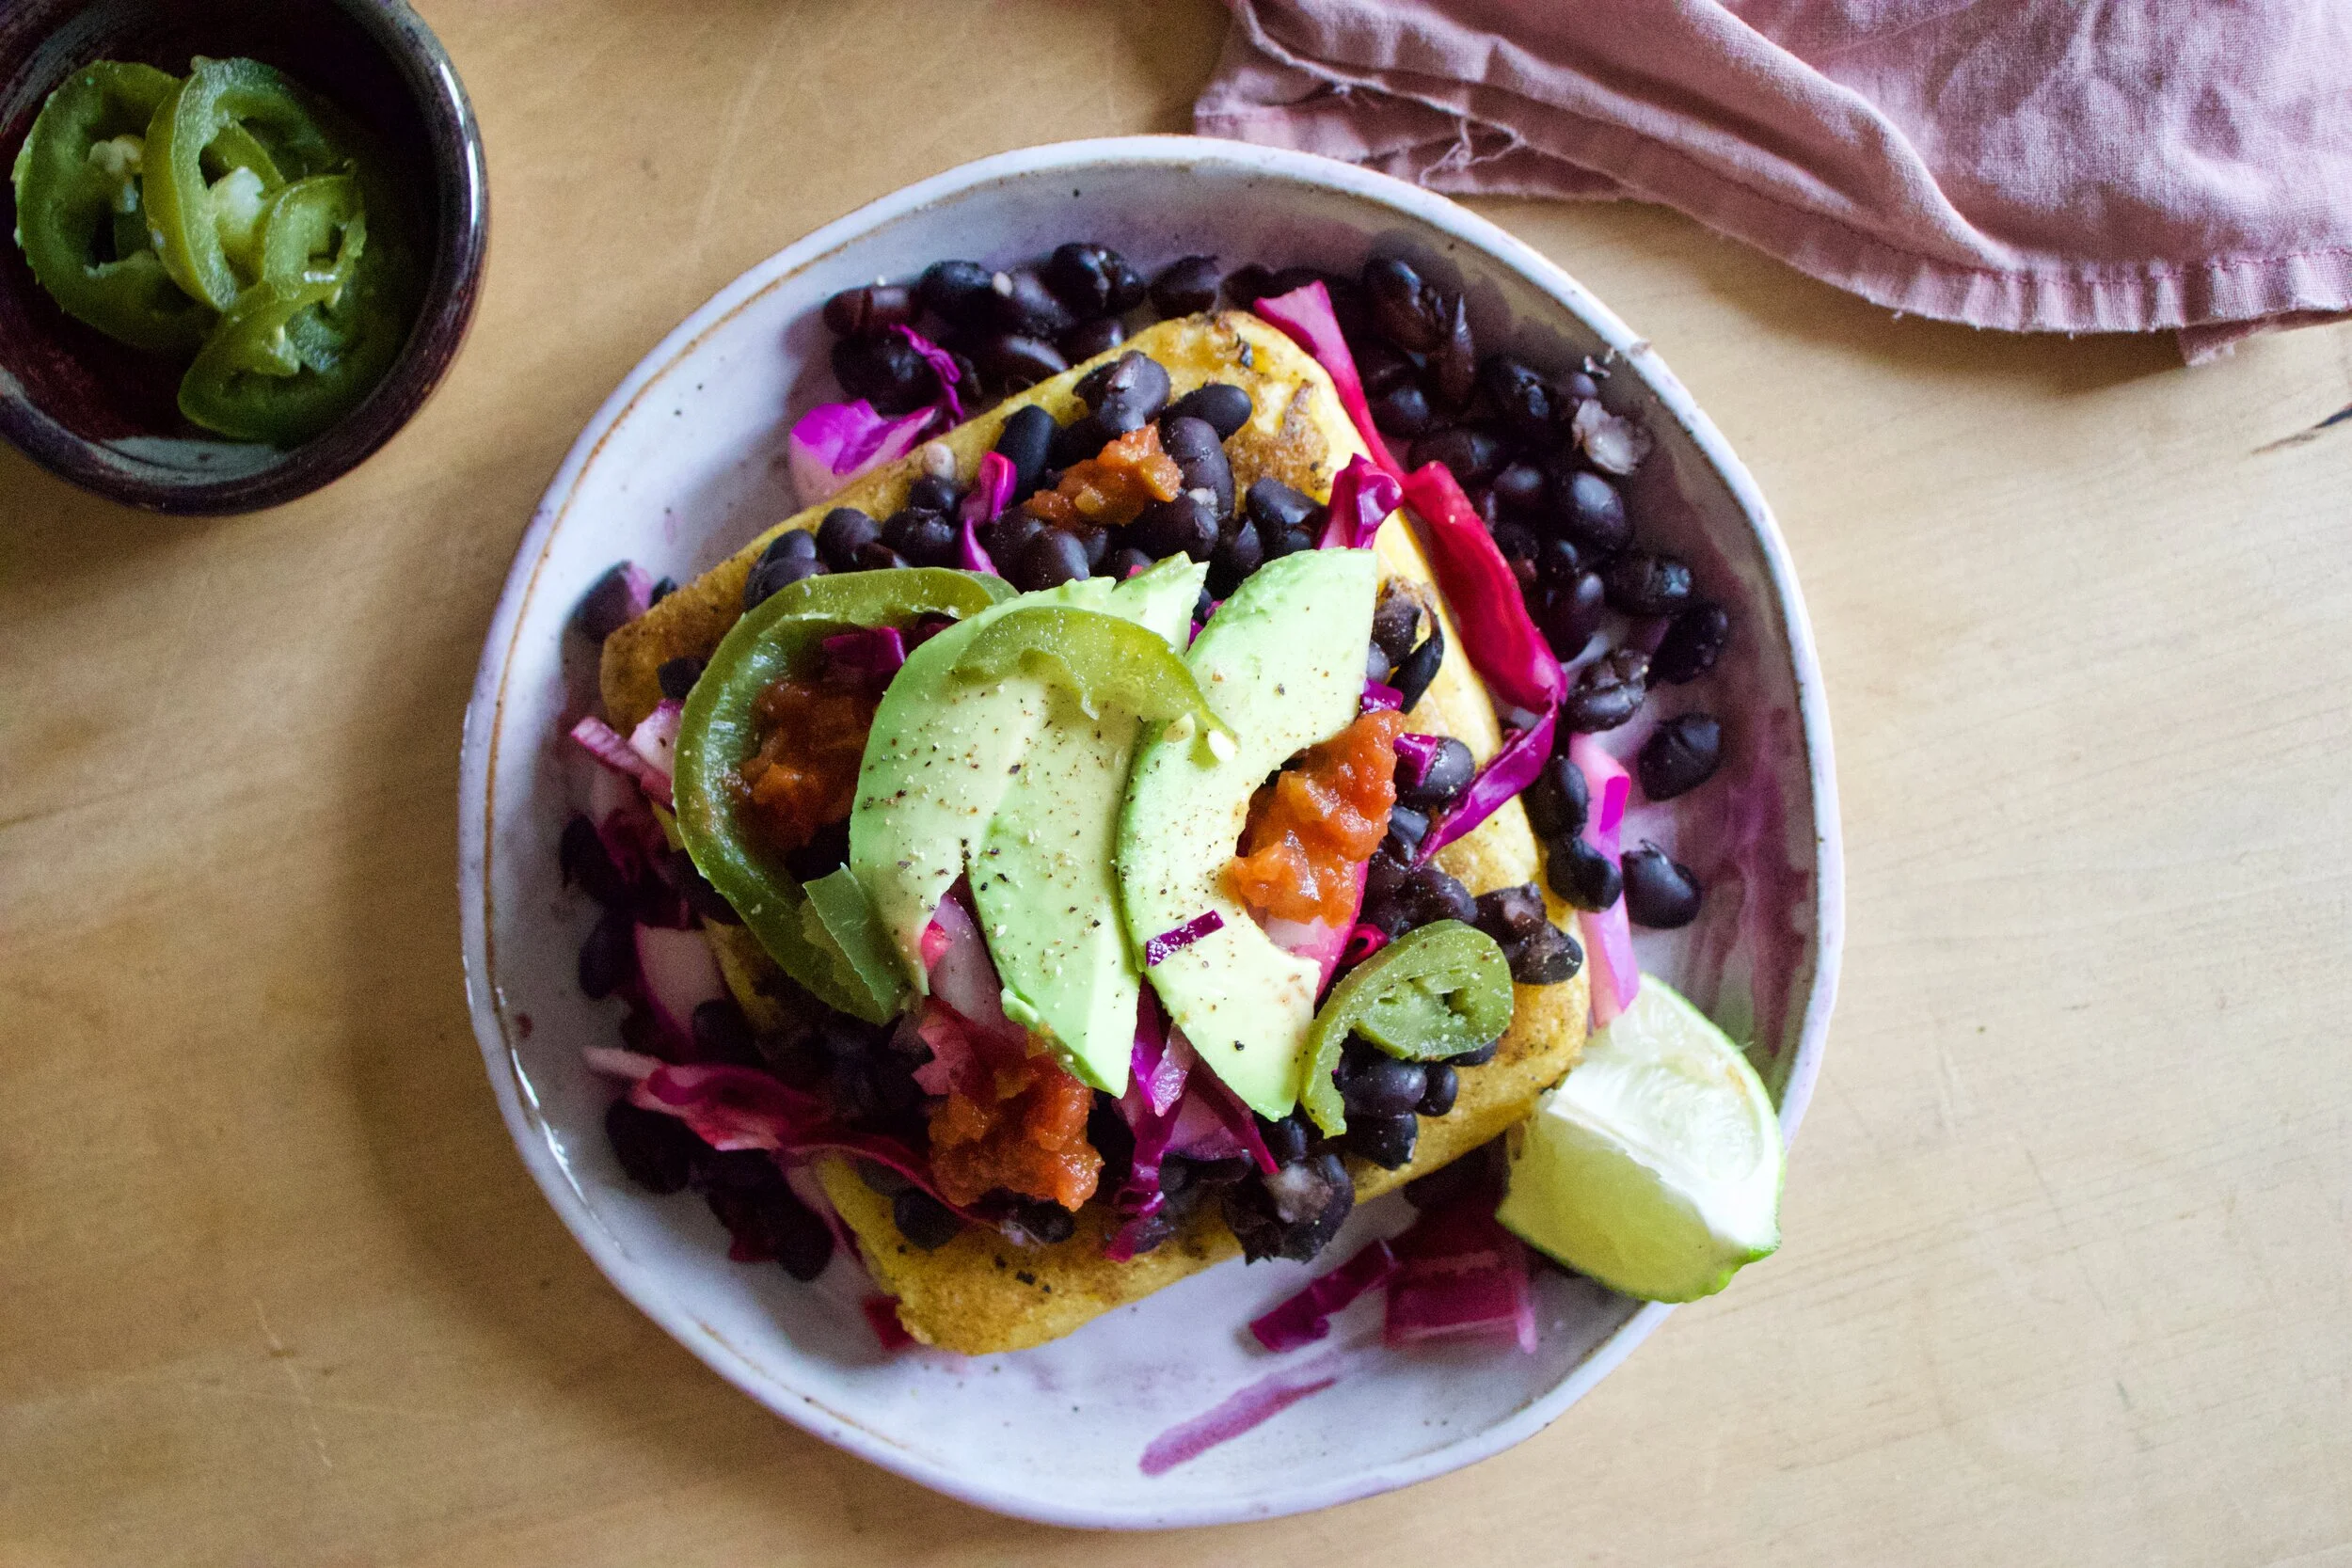
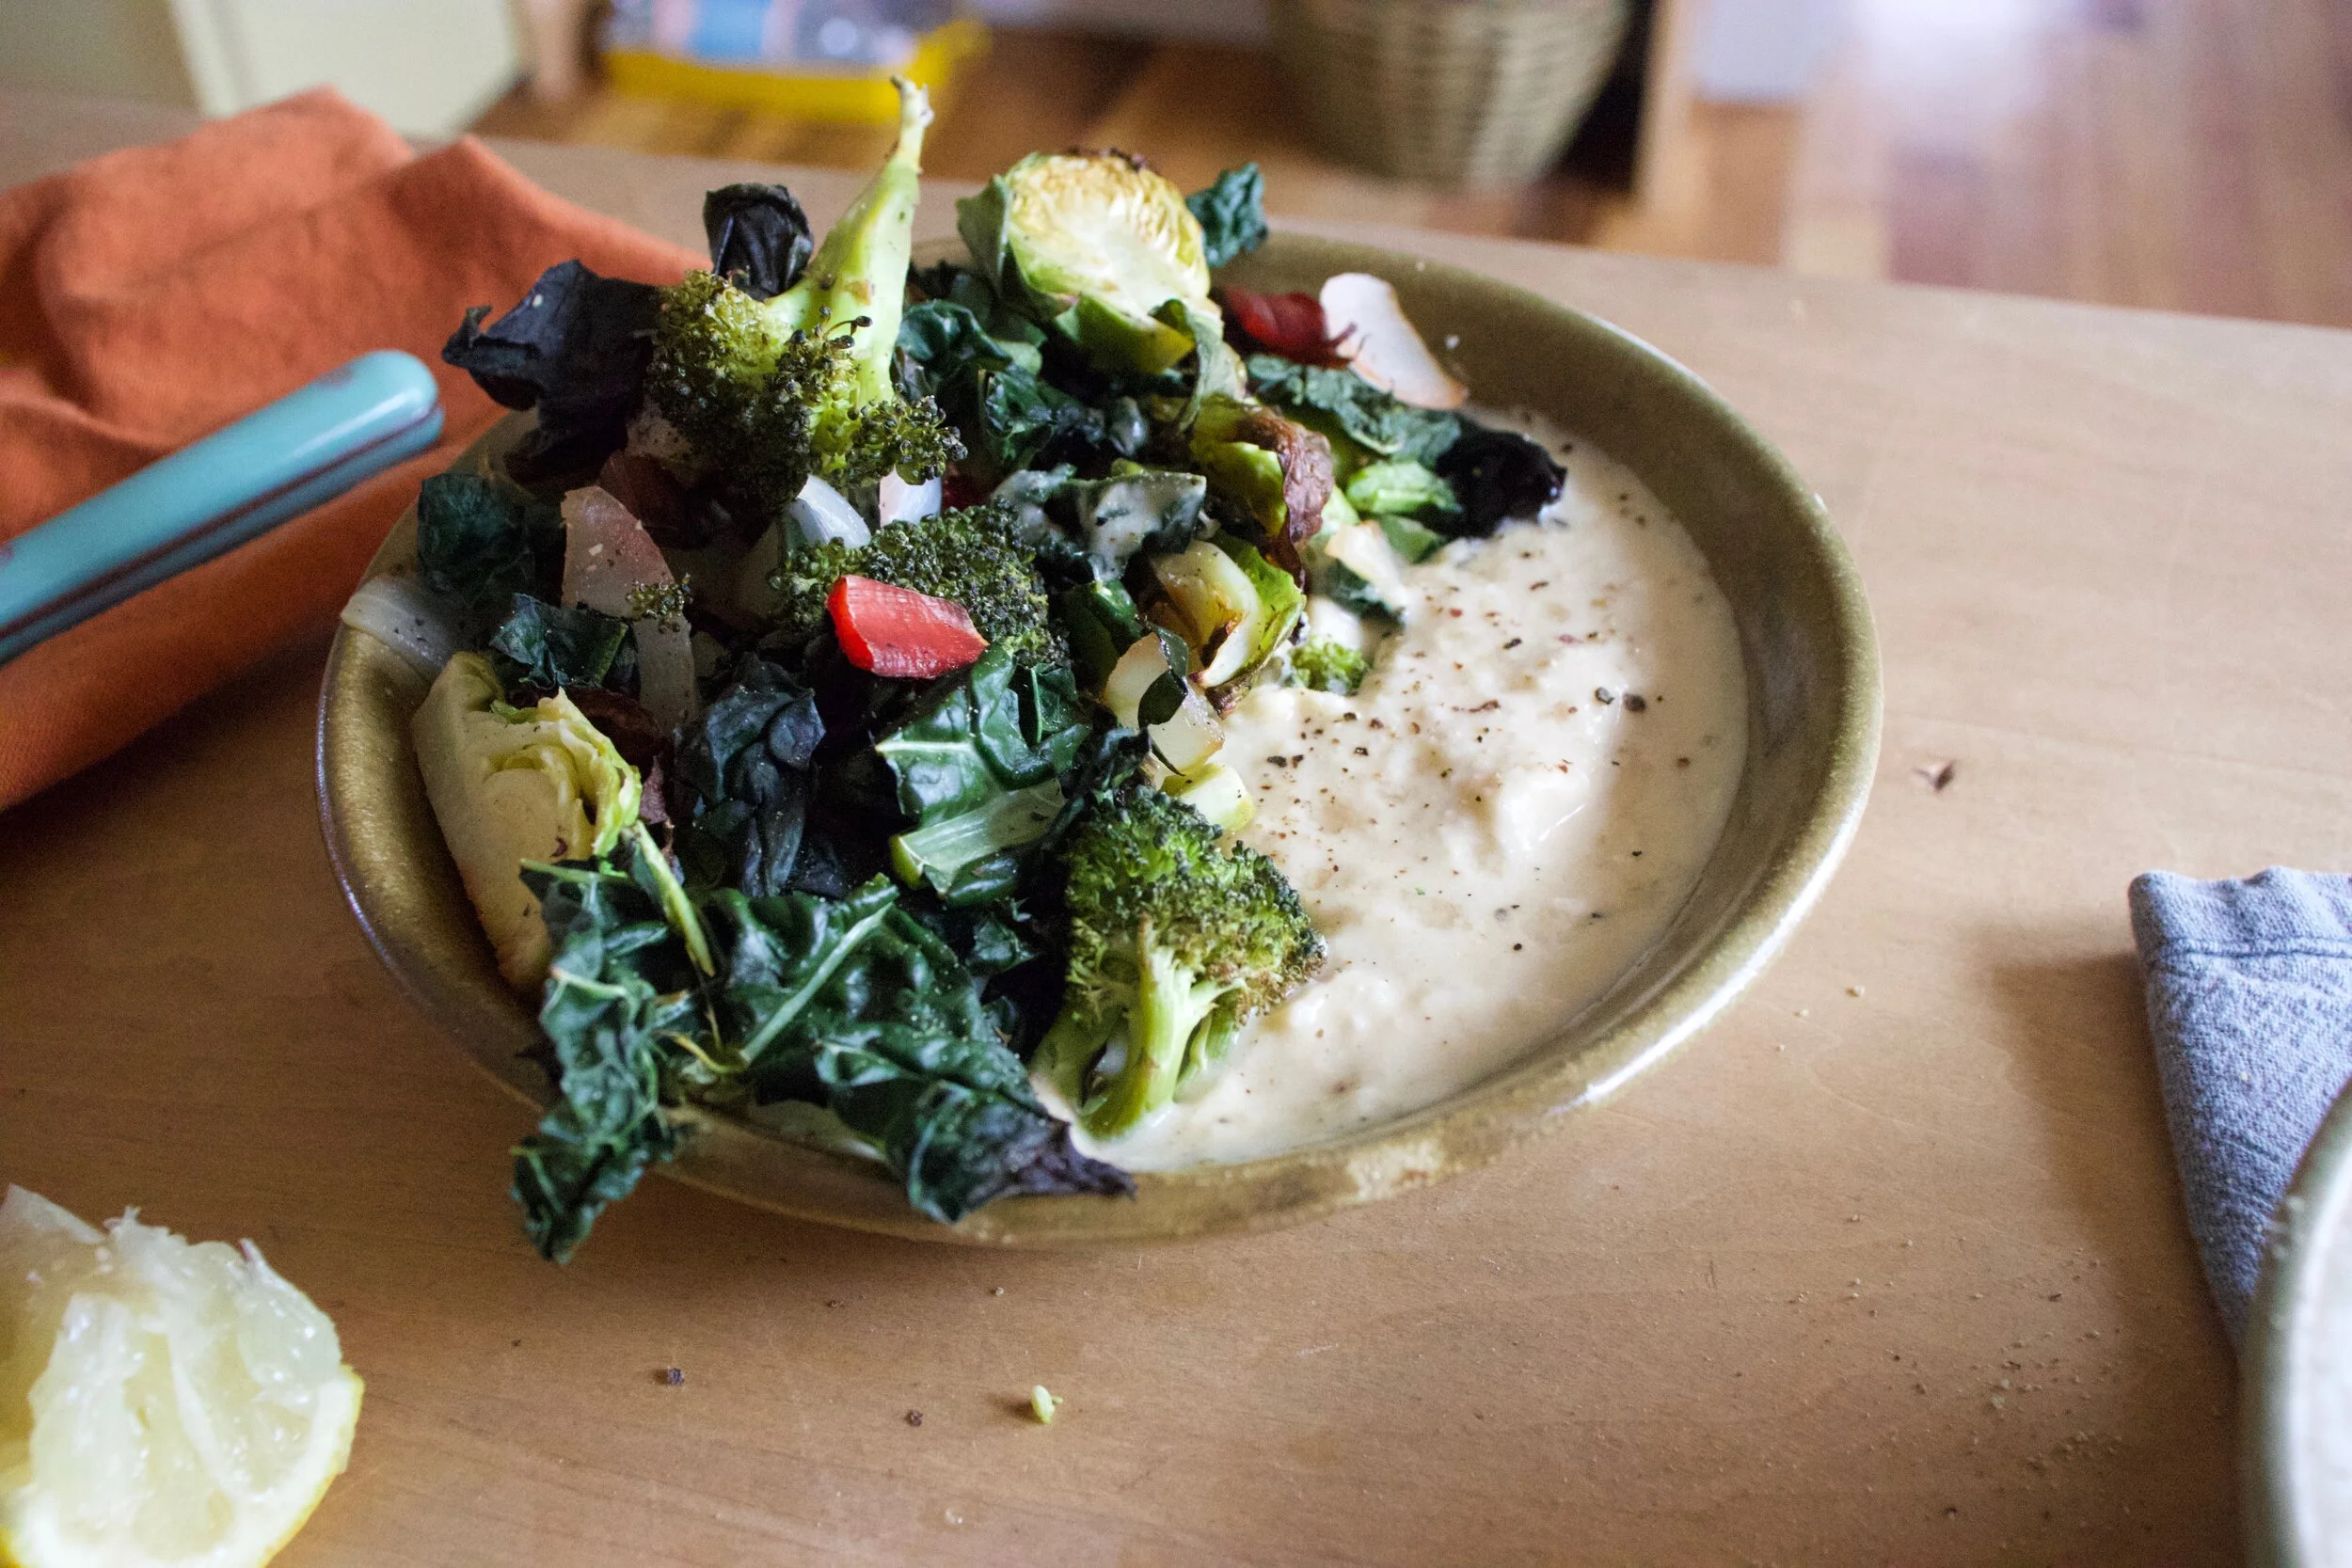
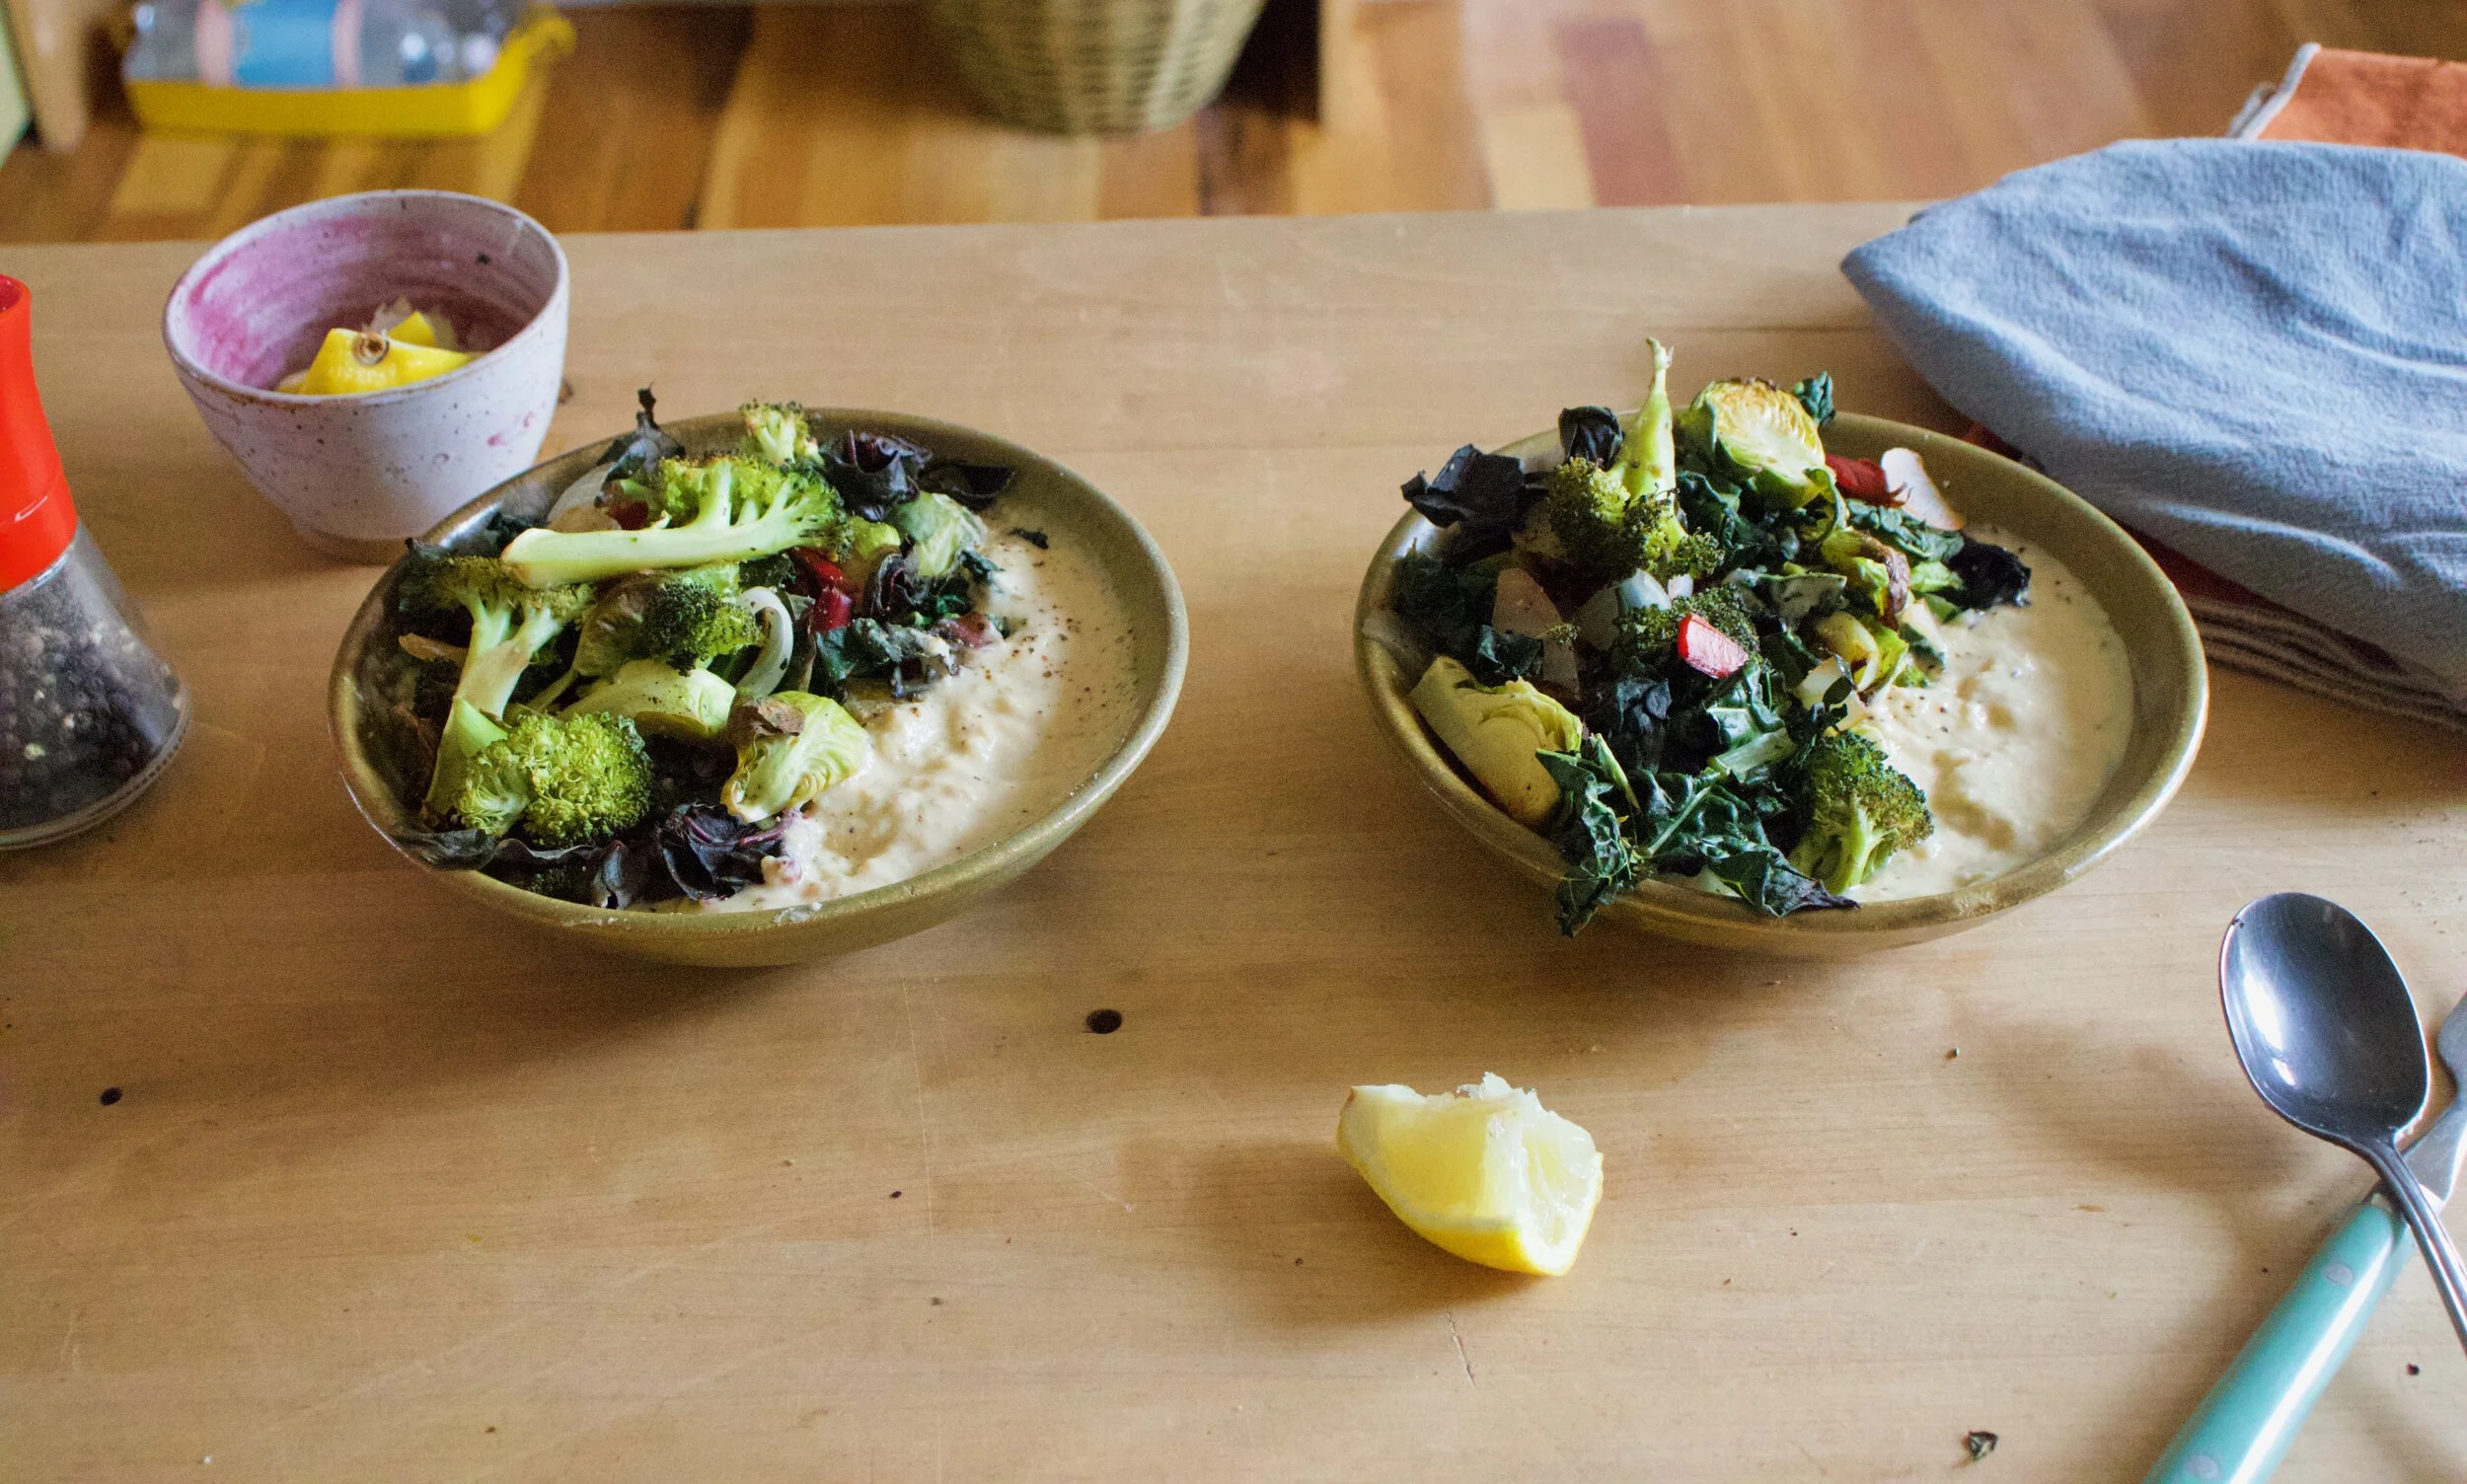
Here it is. A bowl of red lentils, piled high with cumin roasted pumpkin and chard with a fresh squeeze of lime. Once you aat a few bites, tell me. Best fall dish ever, right!?!
Have a fantastic fall weekend.
-C
serve 2-3
-
1 pie pumpkin
-
1 bunch of Swiss chard (between 5-6 large stalks, more if the stalks are small)
-
1 yellow onion
-
2-3 cloves garlic
-
1 cup died red lentils
-
3 cups water
-
2 tablespoons cumin
-
A lime (optional)
-
salt and pepper
-
olive oil
Preheat oven to 400
Start by cutting pumpkin in half and removing seeds, (place seeds aside for later to roast), then cut the pumpkin into inch or so cubes. Grab the chard, remove the stalks and ribs from the leaves, place leaves to the side, and dice the stalks up. Dice onion into medium sized chunks and place all of what you have just chopped on a baking sheet. Drizzle a teaspoon or two of oil all over. Spinkle on the cumin and a pinch of salt and pepper and toss around. Evenly distribute the veggies on the pan and stick into the oven to roast, for about 25 minutes, or until the pumpkin and chard stalks are fork tender. In the meantime rough chop the leaves and mince the garlic. When the pumpkin and chard are just about done, remove pan from oven and toss in the garlic and leaves. Place pan back into oven for another 8-10 minutes or until the leaves have cooked. Remove from oven.
While the veggies are roasting, make the lentils. Place the water and lentils into a medium sized pot and bring to a boil. Once boiling, turn down to low, giving it a stir ever few minutes until lentils are soft.Once cooked, remove from heat and season with pinch of salt salt.
When the lentils are cooked and the veggies are roasted, it%u2019s time to eat. Spoon lentils into a bowl and top with roasted veggies. Season with more salt and pepper if needed and cut up lime (optional) and squeeze juice all over. Eat right away and save any for later.
There are just some things in life that are always right, like puppies, rainbows, human decency,%u00a0or the smell of %u00a0springtime flowers. And tacos. Tacos are always right. Seriously, have you ever meet someone that doesn’t enjoy a taco of some sort, of some variety? Everyone has a taco, that is a fact. (Even if you skip the tortilla and go straight for all the fillings like me.)
And if you are like me, lentils and butternut squash are always right too. So are all the veggies and %u00a0the avocado.%u00a0Together all this goodness makes for one amazingly fantastical, very right taco.%u00a0
We all need a little bit rightness in our lives right now. Why not start with dinner.%u00a0
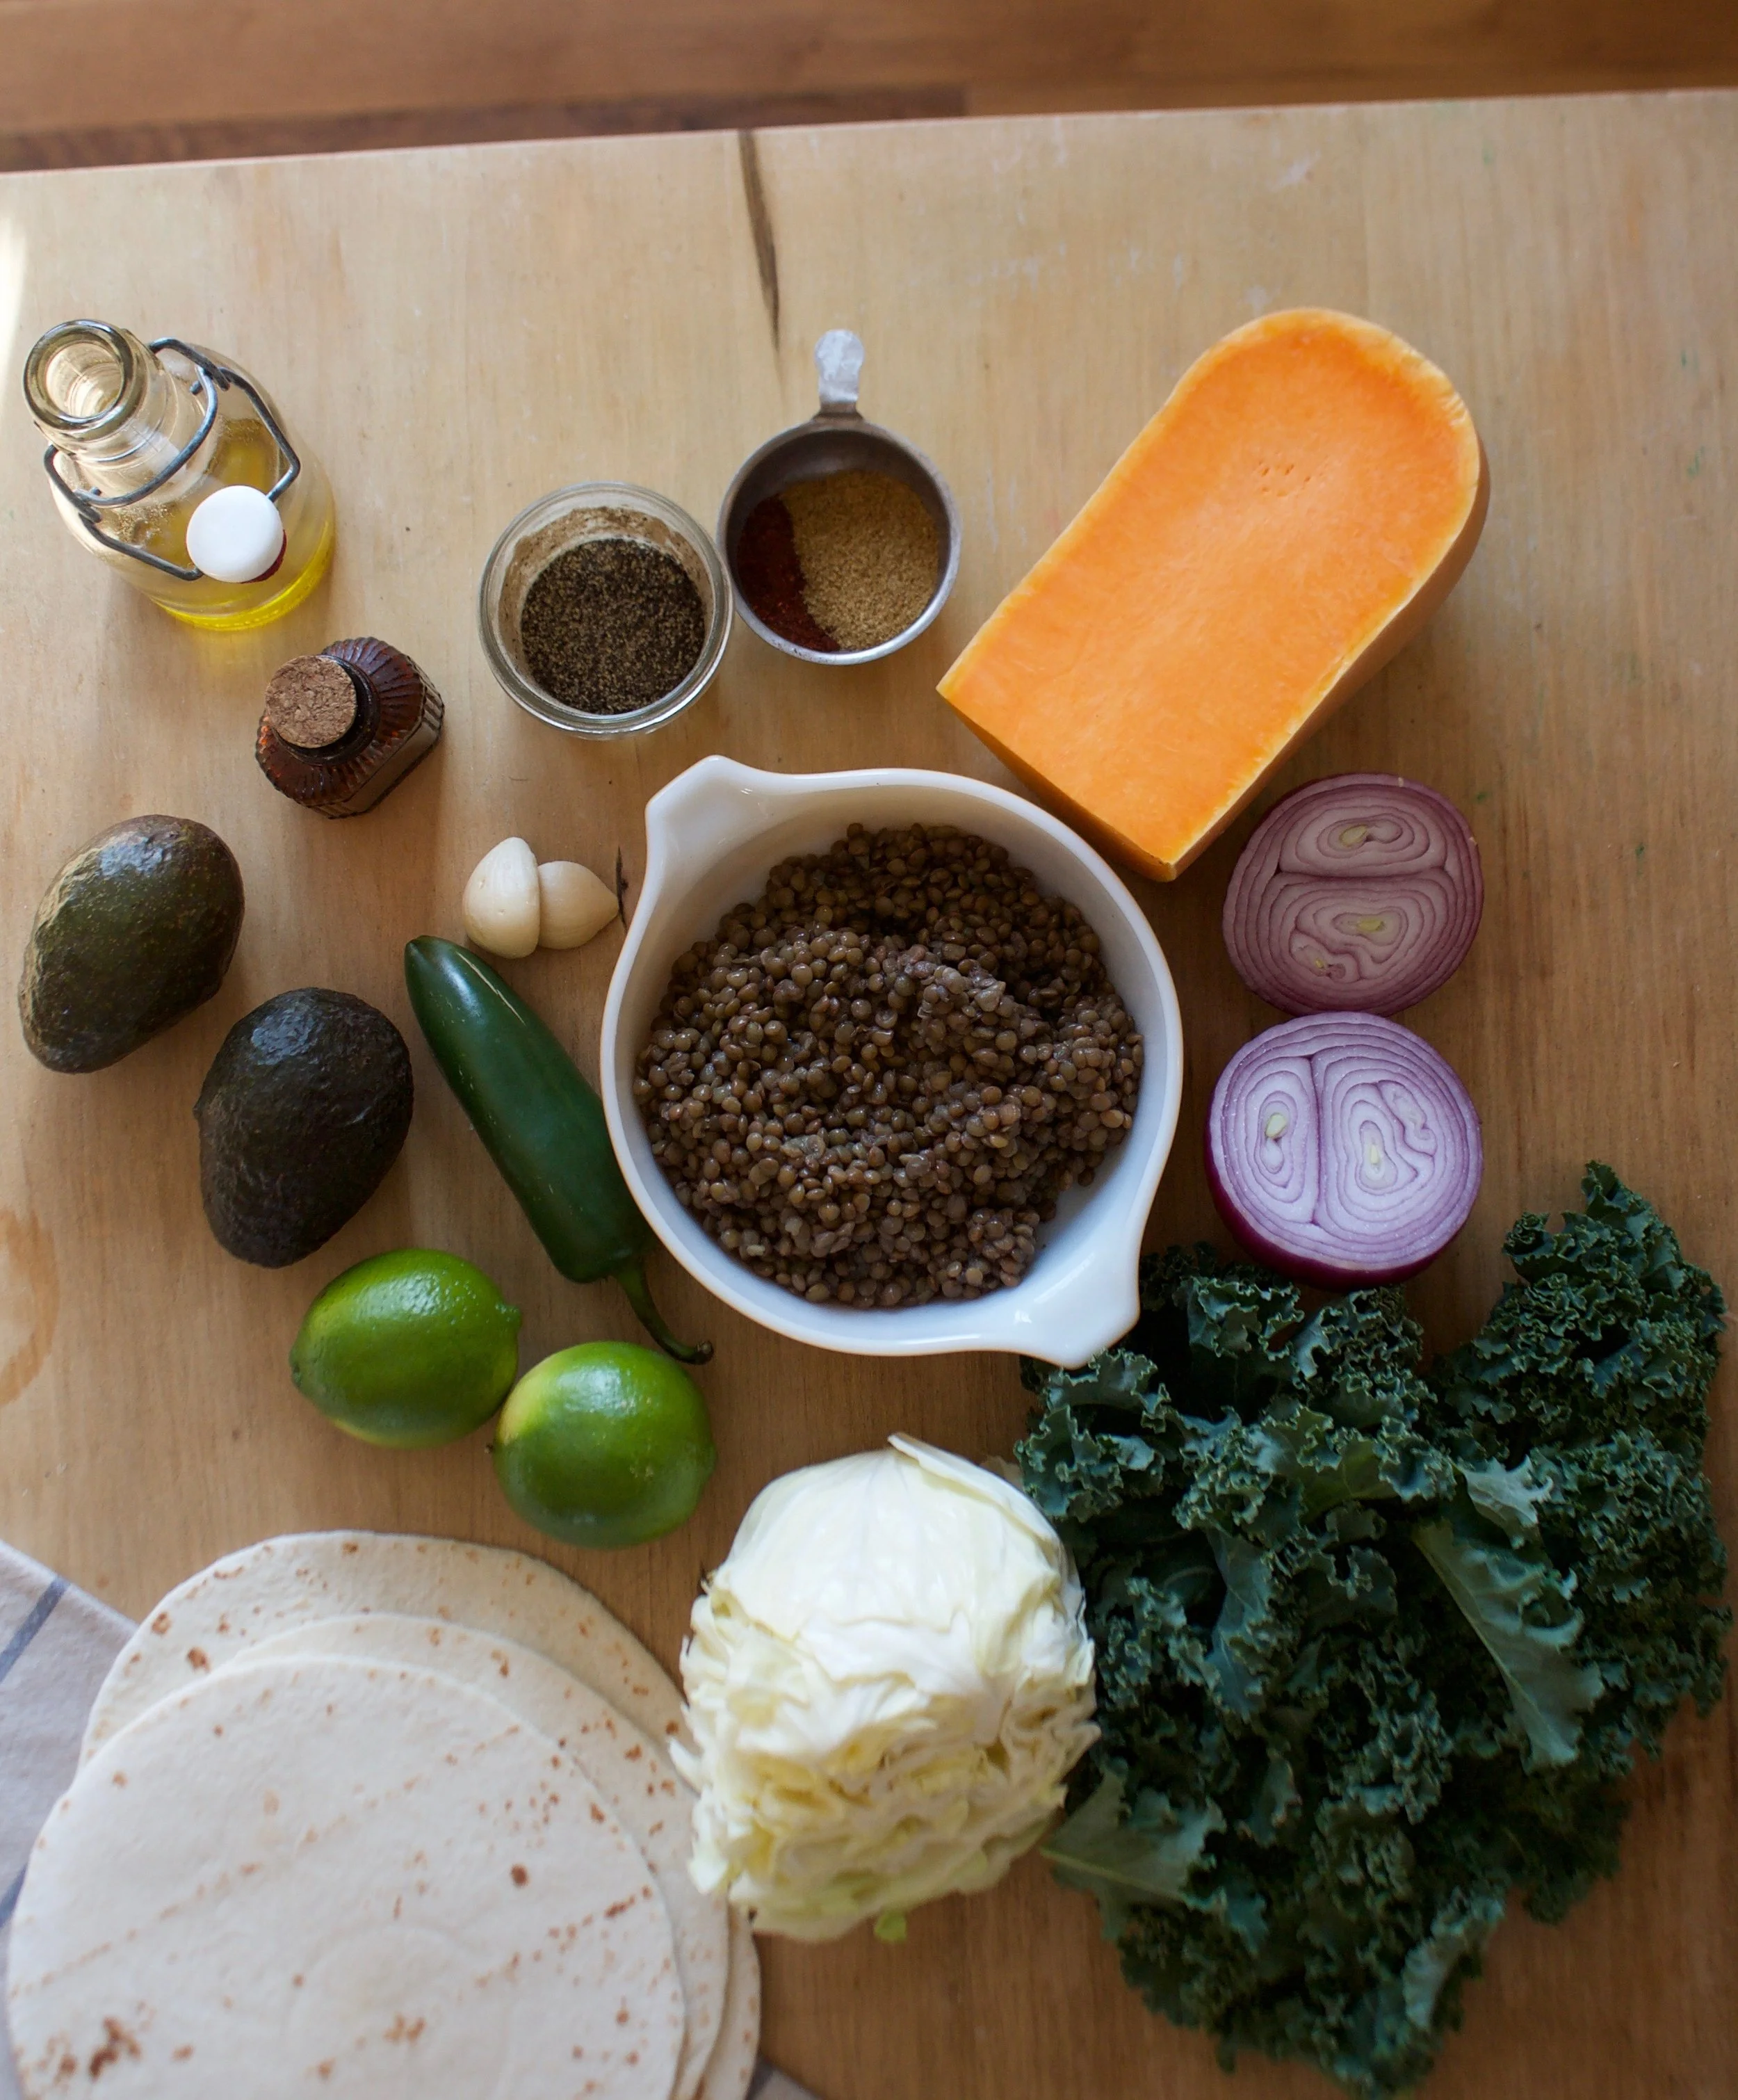
The stuff. You got to get lenitls, butternut squash, cumin, chili pepper, salt and pepper, and olive oil. Also kale,%u00a0red onion, cabbage, avocados, a jalape%u00f1o,%u00a0limes, and garlic. And you need something to stick it all in, so flour or corn tortillas.%u00a0

Start with making the veggie slaw. Basic here, just chop up the kale, onion, and cabbage into small thin pieces.
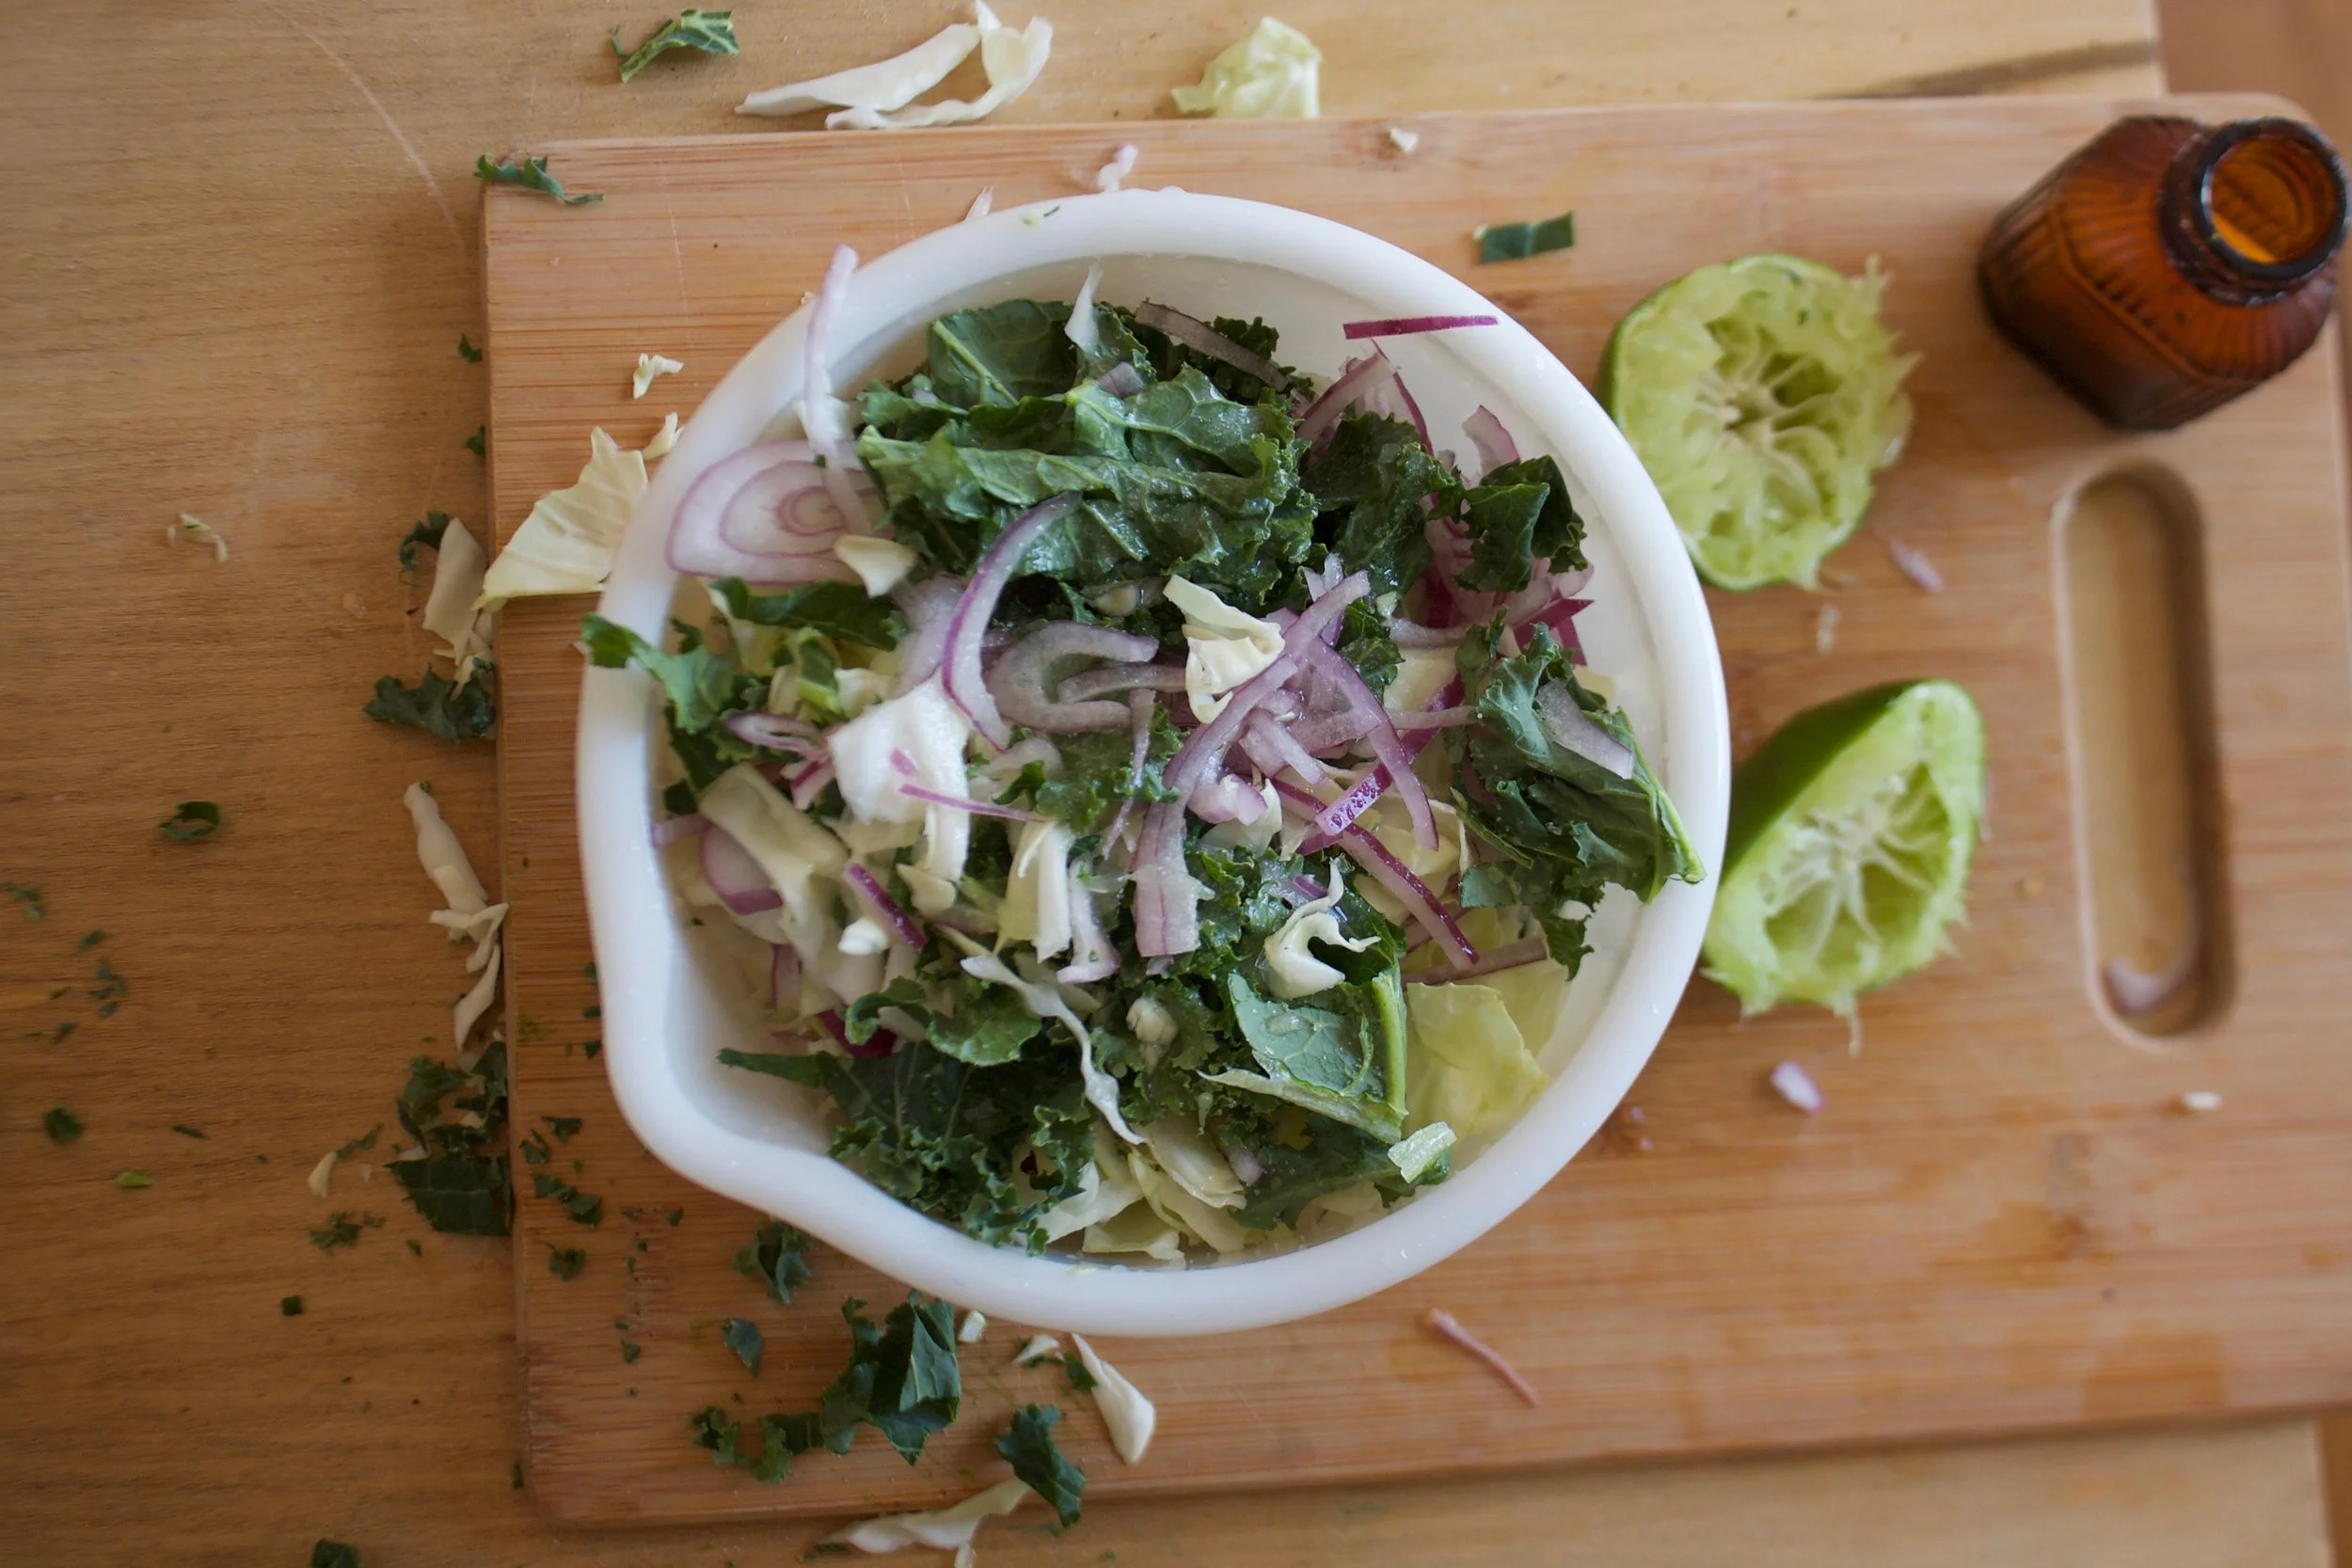
All that veggie goodness goes right into a bowl with a sprinkle of salt and the juice of a lime. Give it a good toss to coast it all and set aside to do it’s magic. The longer it sits, the better it gets.

Now to roast the squash. %u00a0Dice it into small mouth sized pieces. I usually don’t peel, but most people do and the mr has been avoiding he peel when he eats the squash so I peeled it (and roasted it and ate it myself)%u00a0
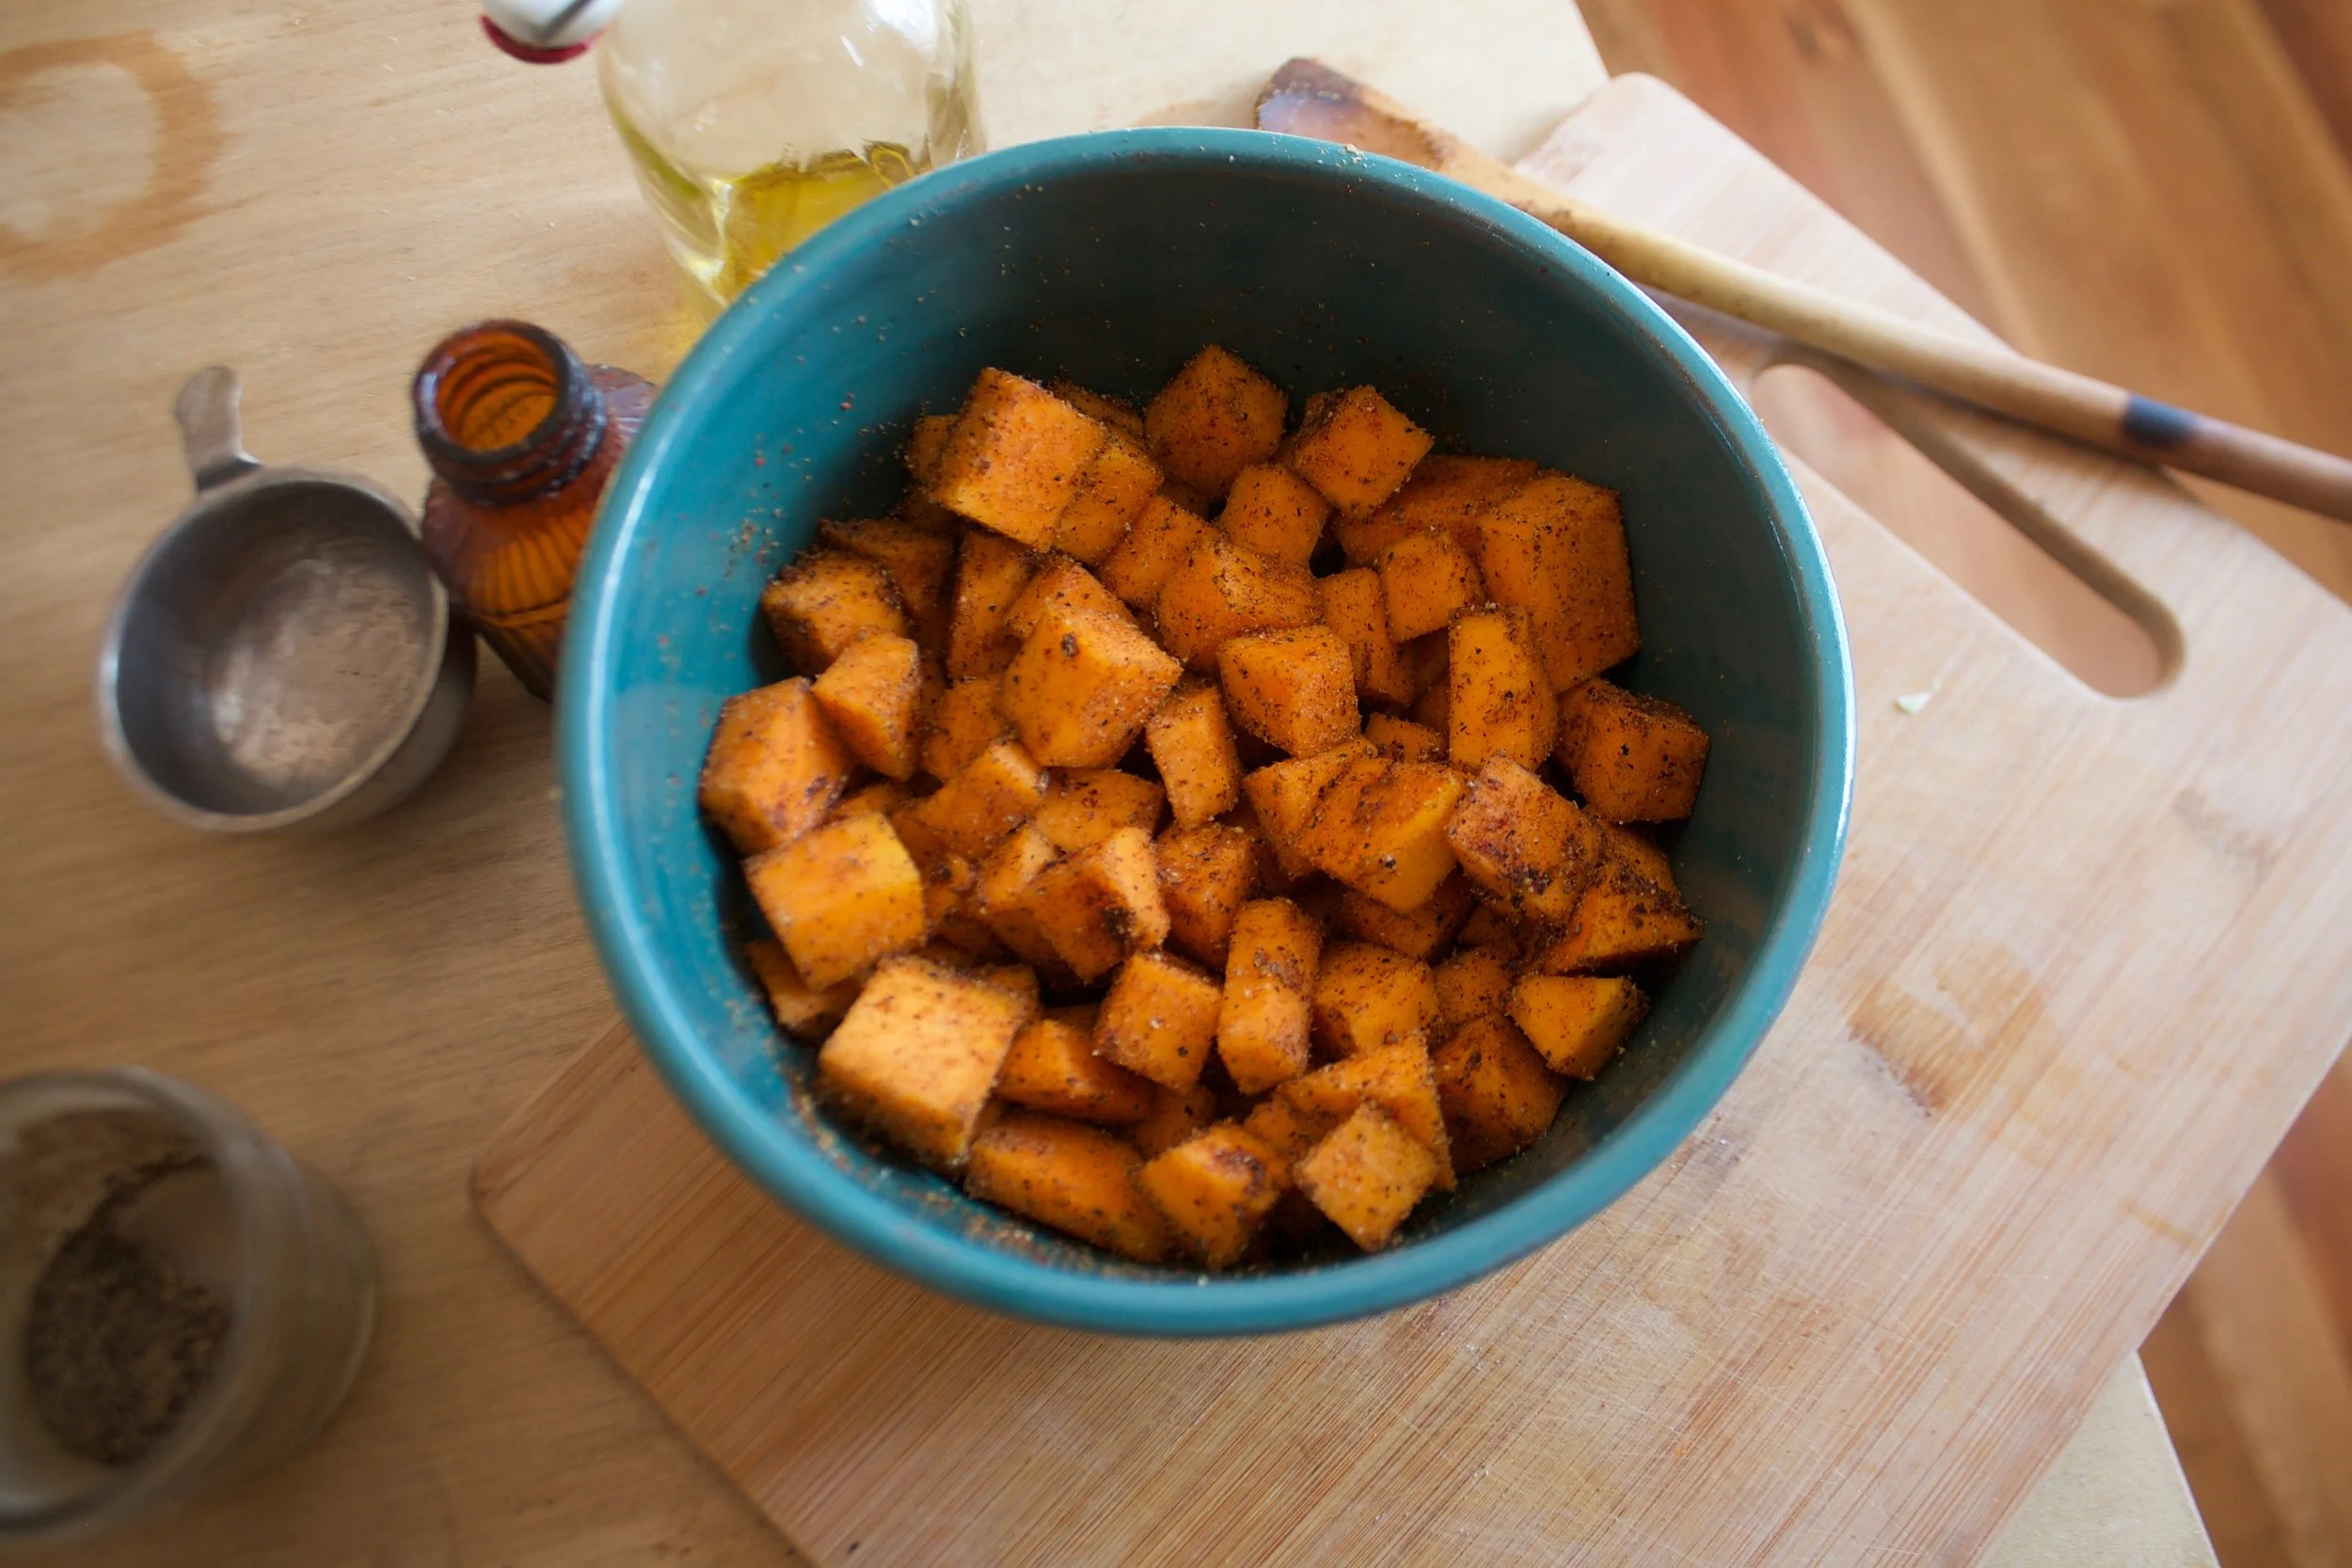
Toss the squash in a drizzle of olive oil and the cumin and chili powder and a little salt and pepper.%u00a0
Raw squash goes into a preheated skillet (or baking sheet) and roasted until browned and tender.%u00a0
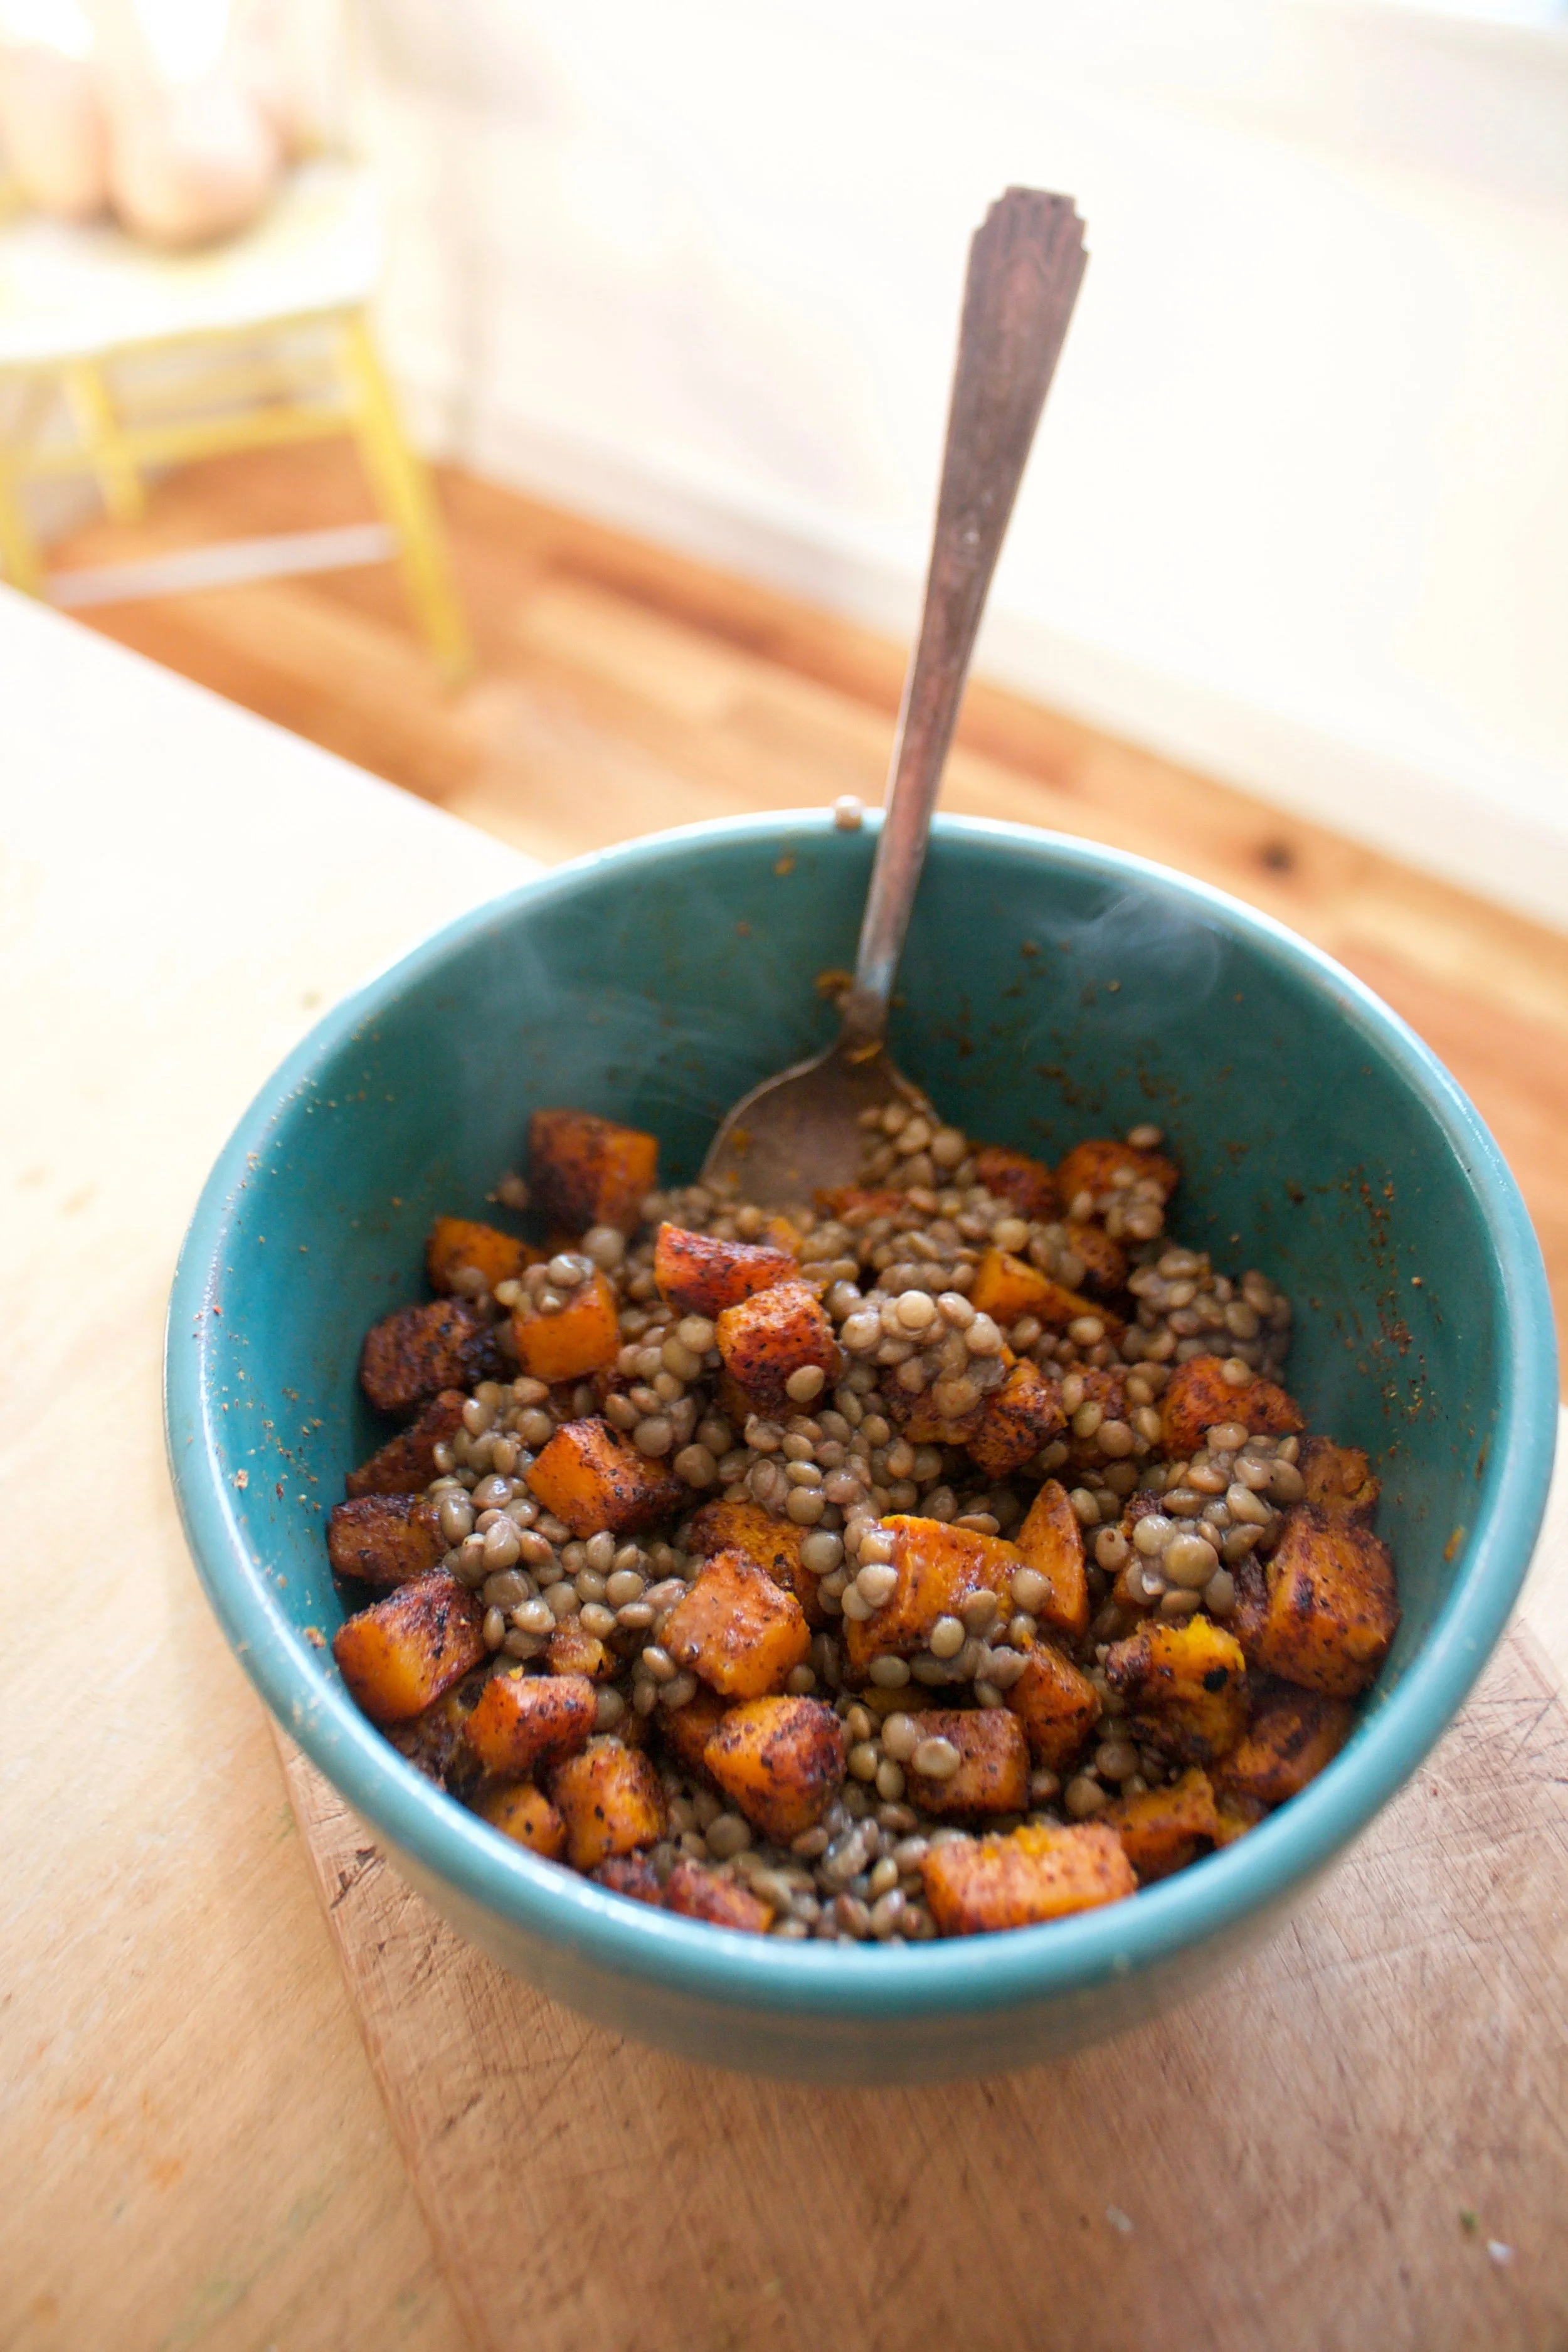
Squash meets lentils and it is good. So so good.%u00a0

And don’t forget the jalape%u00f1o mousse.%u00a0. Dice the jalapeo and the garlic and toss into a blender (or jar to use an emulsion blender) with the avocado, juice of a lime, a sprinkle of salt, %u00a0and a little bit of water.


A pillowy cloud of green goodness.%u00a0

You got all the stuff,%u00a0you know what to do.

Fact. Tacos = happiness.%u00a0Now get on it.%u00a0
-C
make about 6 tacos%u00a0
- 1 1/2 cups cooked french lentils
- 1/2 of a small butternut squash (about 3 cups cubed)
- 1 tablespoon cumin
- 1 teaspoon chili powder%u00a0
- salt and pepper
- olive oil
- 2-3 large kale leaves
- 1/4 head of cabbage
- small red onion
- 2 limes
- 1 large or 2 tiny avocados%u00a0
- 2-4 tablespoons water cup
- 1 jalapeno
- 2 cloves garlic
- 6 small %u00a0flour or corn tortillas%u00a0
Grab the kale, cabbage, and red onion and thinly slice and dice into small pieces. Place into bowl, sprinkle with 1/2 teaspoon salt and add in the juice of a lime. Give it all a good mix around and set aside.%u00a0
Preheat oven to 450. %u00a0Place your cast iron skillet or baking sheet in oven while preheating.
Take squash, peel the skin off (if you want) and cut into cubes about an inch big. Place in a bowl and toss with a little olive oil and the cumin and chili powder. Sprinkle a little salt and pepper in and toss it all around. When the oven is preheated, carefully remove the pan and dump the squash in it. Evenly disperse the squash then place the pan back into the oven and roast squash until browned and tender, which takes about 25 minutes.%u00a0
When the squash is done, remove and dump into a big bowl along with the lentils.
While the squash is roasting you can go ahead and make the avocado mousse. Scoop avocado fruit into a bowl %u00a0or blender and add in the jalape%u00f1o (seeds and ribs removed) and the garlic. Add in the juice of a lime and 2 tablespoons water. Blend until smooth. Add in more water to thin out to desired consitancey.%u00a0
Now you have everything ready to taco. Grab your tortillas and heat them up if want and start to pile it all on. Lentil squash mixture, a good handful of the veggie slaw, topped with a dollop or two of the avocado mousse. Now you got yourself a taco and it’s ready for your face.%u00a0

This is what I am talking about. Winter has finally come with it’s snowy snow and super freezing cold temperatures. It just feels right, even if I freeze a little every time I leave the house to walk the dog. But that’s ok, it is suppose to happen.
And when it’s cold and snowy we are all suppose to eat lots of warm and hearty good things to warm us up in our insides. So we soup.. Soup all day, everyday, all winter long, especially in the case of feeling slightly ill (which I have been for the past week) Eating soup makes everything better.%u00a0 Soup soup soup.
Soup, what a weird word. Anyway.
This soup is amazingly easy to make and even easier to eat. Full of veggies, spices and lots of beans. A perfect meal to satisfy your frozen self. And bonus, not full of shit. It’s super healthy, protein packed and just plan ol good. Warm. hearty, healthy.. What more can you ask for? (you could ask for some crackers and I would probably give them to you)
Soup time!

The stuff. Navy beans, a sweet potato, and some chopped up kale. A couple carrots, an onion, a few cloves of garlic, a little olive oil and water.* And lets not forget some spices…. I used a couple bay leaves, some dried rosemary and thyme. Oh and there should be a lemon here.(I think it rolled off the counter)
*Note. Some people get all up and up about not using a stock in soup. This soup creates it’s own stock with all the veggies and spices and time spent simmering but if you want, go ahead and use stock.
Start by chopping up the carrots, the onion, and the garlic and tossing it all into a really big pot along with a drizzle of olive oil, some salt and pepper and the spices. Stick on the stove on medium high heat for a few minutes until the veggies start to brown.. This gives the veggies and spices a chance to develop more flavor.%u00a0

Now chop up the sweet potato into 1 inch chunks and toss that into the pot too.

And the dried beans and water go into as well. Get it all in there, give it a mix and stick the pot on high heat and bring to a boil, then bring the heat to low.%u00a0 Add a lid to the pot and let cook for a while,like an hour,%u00a0 stirring every now and then.

Once the beans in the soup are cooked to your preferred done-ness (I like mine on al dente) remove pot from heat.

Dump in the chopped up kale…


And that lemon that rolled away. I found it. So slice up lemon. Ladle a large amount of the soup into a pretty bowl and finish it off with some cracked pepper and a squeeze of lemon.

Soup! Now grab a big spoon, a cozy sweater or blanket (or snuggy) , and maybe some crackers or bread if you feel so inclined and eat. You will be filled with warmth and happiness.%u00a0
Have a great day.
-C
- 1 cup dried white bean (I used navy, but you could use any white bean you like)
- 1 large sweet potato
- 1 bunch of kale (about 5 cups chopped)
- 6-7 cups water (add 6 then another cup as its cooking if you think it needs it)
- 1onion
- 2 carrots
- 4-5 cloves of garlic
- 1 heaping tablespoon thyme or Italian seasoning
- 1 heaping tablespoon dried, chopped or ground rosemary
- 2 bay leaves
- salt and pepper to taste
- a lemon (optional but you want it)
Chop carrots, onion and garlic and stick them all into a large pot with a drizzle of olive oil, all the spices, and a pinch of salt and pepper.%u00a0 Stick on the stove and cook until the veggies start to brown. While veggies are cooking, cut sweet potato into 1 inch chunks and toss the potato into the pot along with the beans and the water. Bring to a boil then reduce the heat to low. Stick a lid on the pot and simmer fir about an hour or until the beans are cooked to you liking.
Once the beans are cooked through, dump in the chopped up kale, mix it around, then call it done.
Ladle into bowls, top with cracked pepper (and more salt if you want) and serve with a wedge of lemon.
Grab a spoon, eat the soup. Be happy.
Got some left over… Well yeah, soup for later! (will last in fridge for a few days, but freezes super well too)

Had some littles over for dinner halloween dinner the other night %u00a0and I made them some mac n’ cheese.
Kinda, cause it wasn’t really cheese. Let me explain.%u00a0
These particular littles are tough. Getting them to eat things that are not pizza, hot dogs,%u00a0or some other crap is not always easy.(although they will always eat carrots)%u00a0So whenever they come over, I try to feed them a healthier version of something that I know that they like, %u00a0like tofu dogs or homemade whole wheat pizzas. So this night, I though I would give my vegan mac and cheese and try.%u00a0%u00a0I mean,what kid doesn’t like it? But what kind is the question. If you ask them, its got to be boxed Kraft mac and cheese.%u00a0I knew when I was making it that there was a great chance that I might have to make peanut butter banana sandwiches as well, but whatever These little littles need to stop being such picky crappy eaters and yeah. Even if that means I make them eat what why don’t like or that on the ride home I tell them that any pizza that is not home made will probably end up killing them)%u00a0So I try, and sometimes it works.%u00a0
So I made it, no cheese in sight and served it up.%u00a0The verdict…. The mr, he loved it. My sister (she came too) she was into it as well. One little ate almost an entire bowl, and the other, well he spit it out,%u00a0but he is more a hot dog guy then a mac and cheese guy so his opinion doesn’t count. So to conclude,%u00a0yes, this is a fantasic mac and cheese that just happened to be cheese less,%u00a0%u00a0full of veggies, and damn tasty!
And serving suggestion DON”T LET THE LITTLE KNOW IT”S NOT REAL CHEESE!!! They don’t need to know
To the mac!
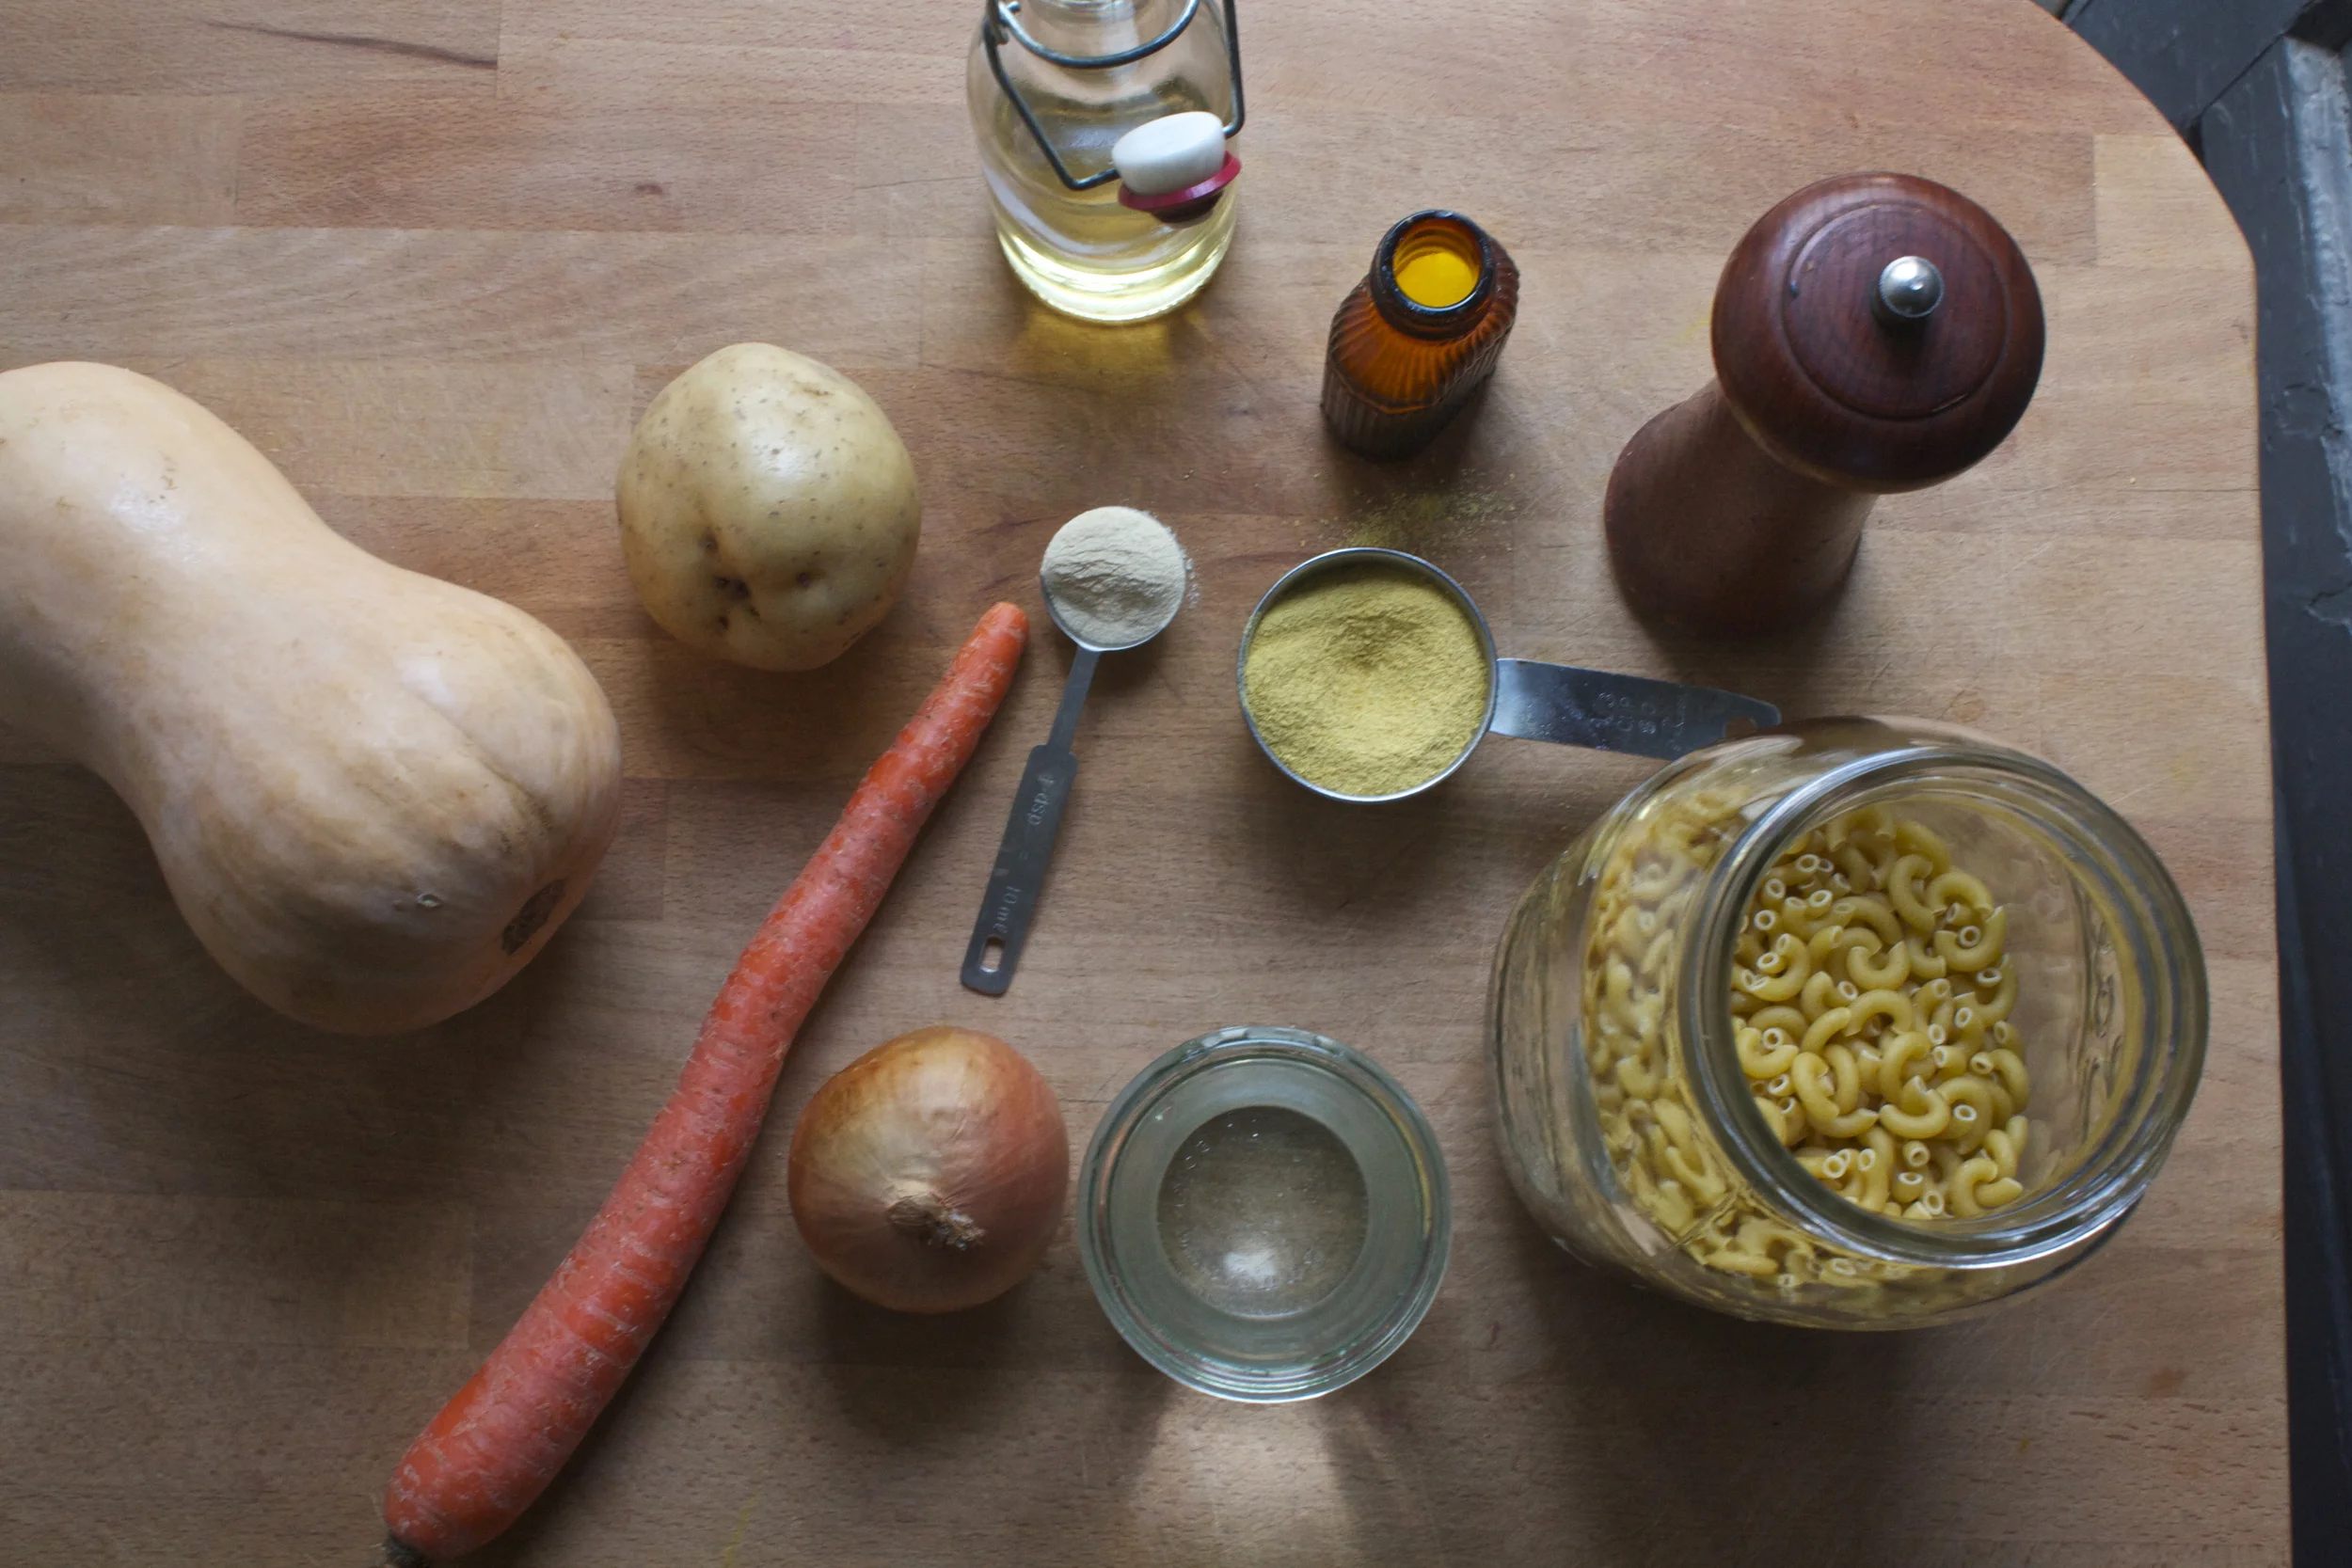
The stuff. A small butternut squash, a potato, an onion, and a carrot. Also needed is nutritional yeast (the cheeze), garlic powder, olive oil, salt and pepper, and some water. And pasta.. don’t forget the pasta.%u00a0
Start with the onion and carrot in a big pot with some oil. Stick that on the stove and turn on the heat, and when that’s going, chop up the butternut sqauh and the potato and toss that into the pot too. Let the stuff cook for just a few minutes.

Pour in water (enough o submerge all the veggies) %u00a0and add in the garlic powder and some salt and pepper. Bring the water to a boil then turn heat down to medium and stick a lid on the pot.
Now is a good time to boil up your pasta situation (cook it the way the package says too)
When it’s done, strain it. And if it happens that it is done a little before the sauce, it’s cool, just drizzle it with a little oil so that the noodles don’t all stick together and set aside.
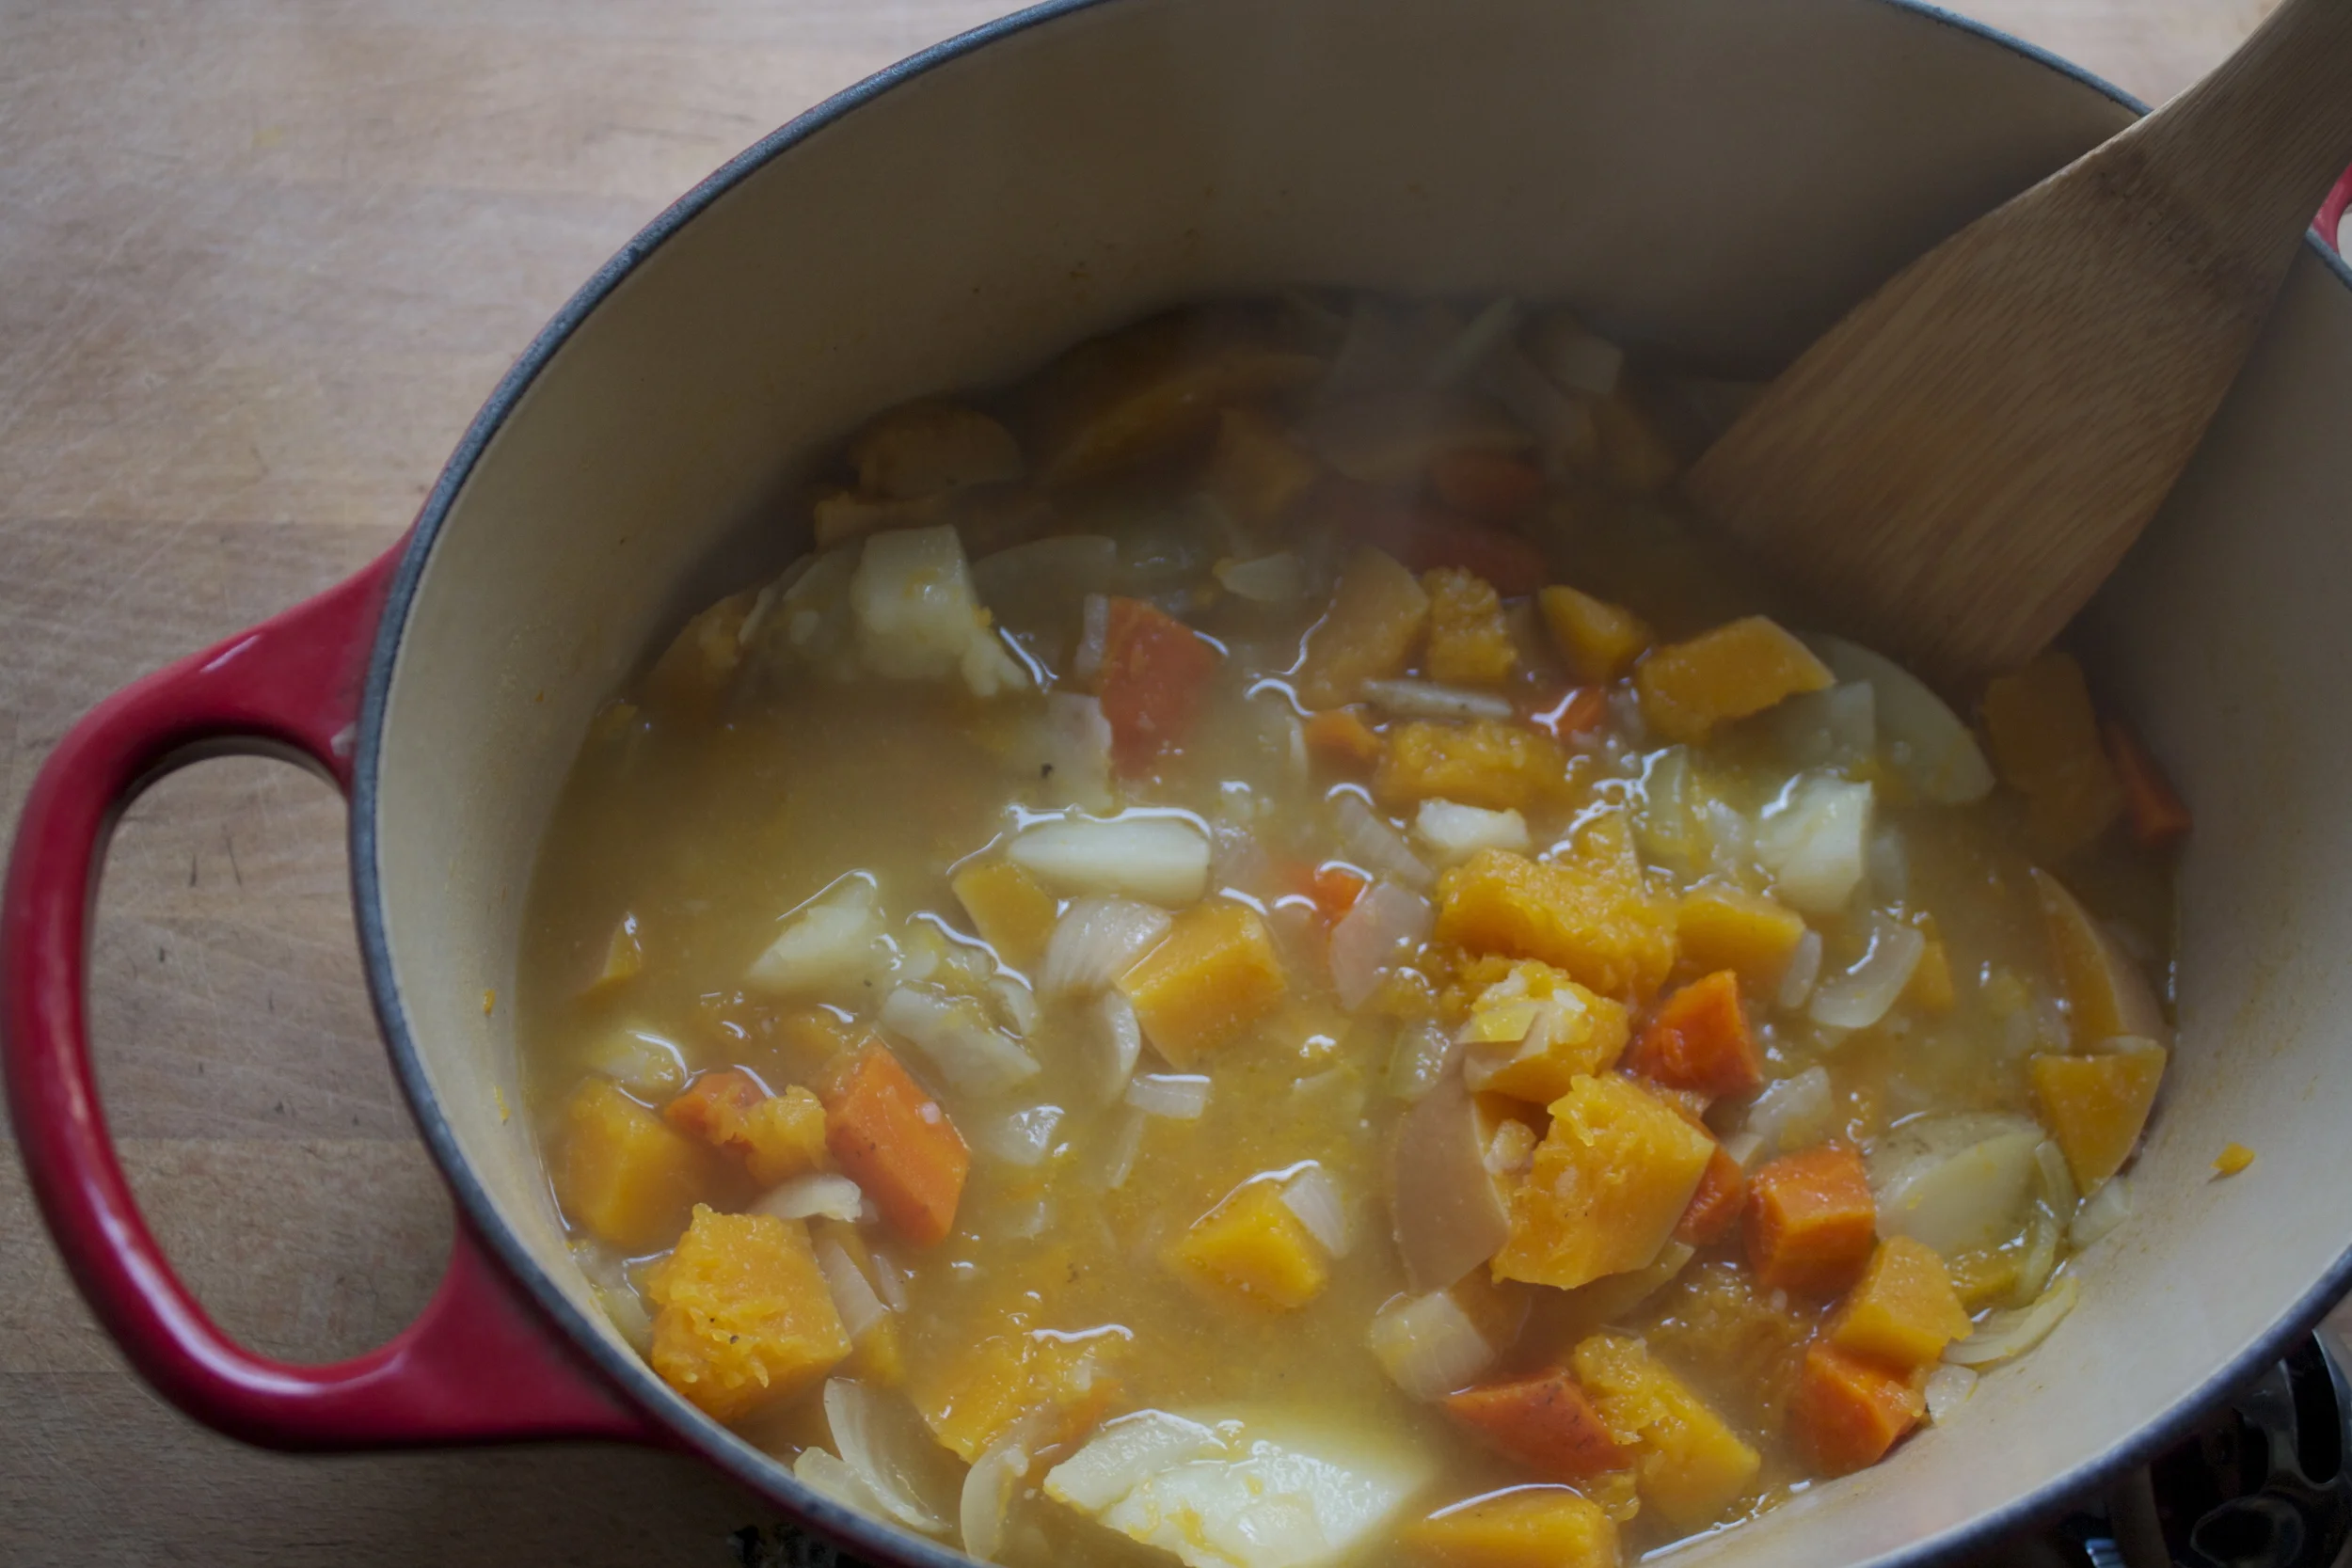
Back to the sauce. Once the pot of veggies is all tender and falling apart, take it off the stove.
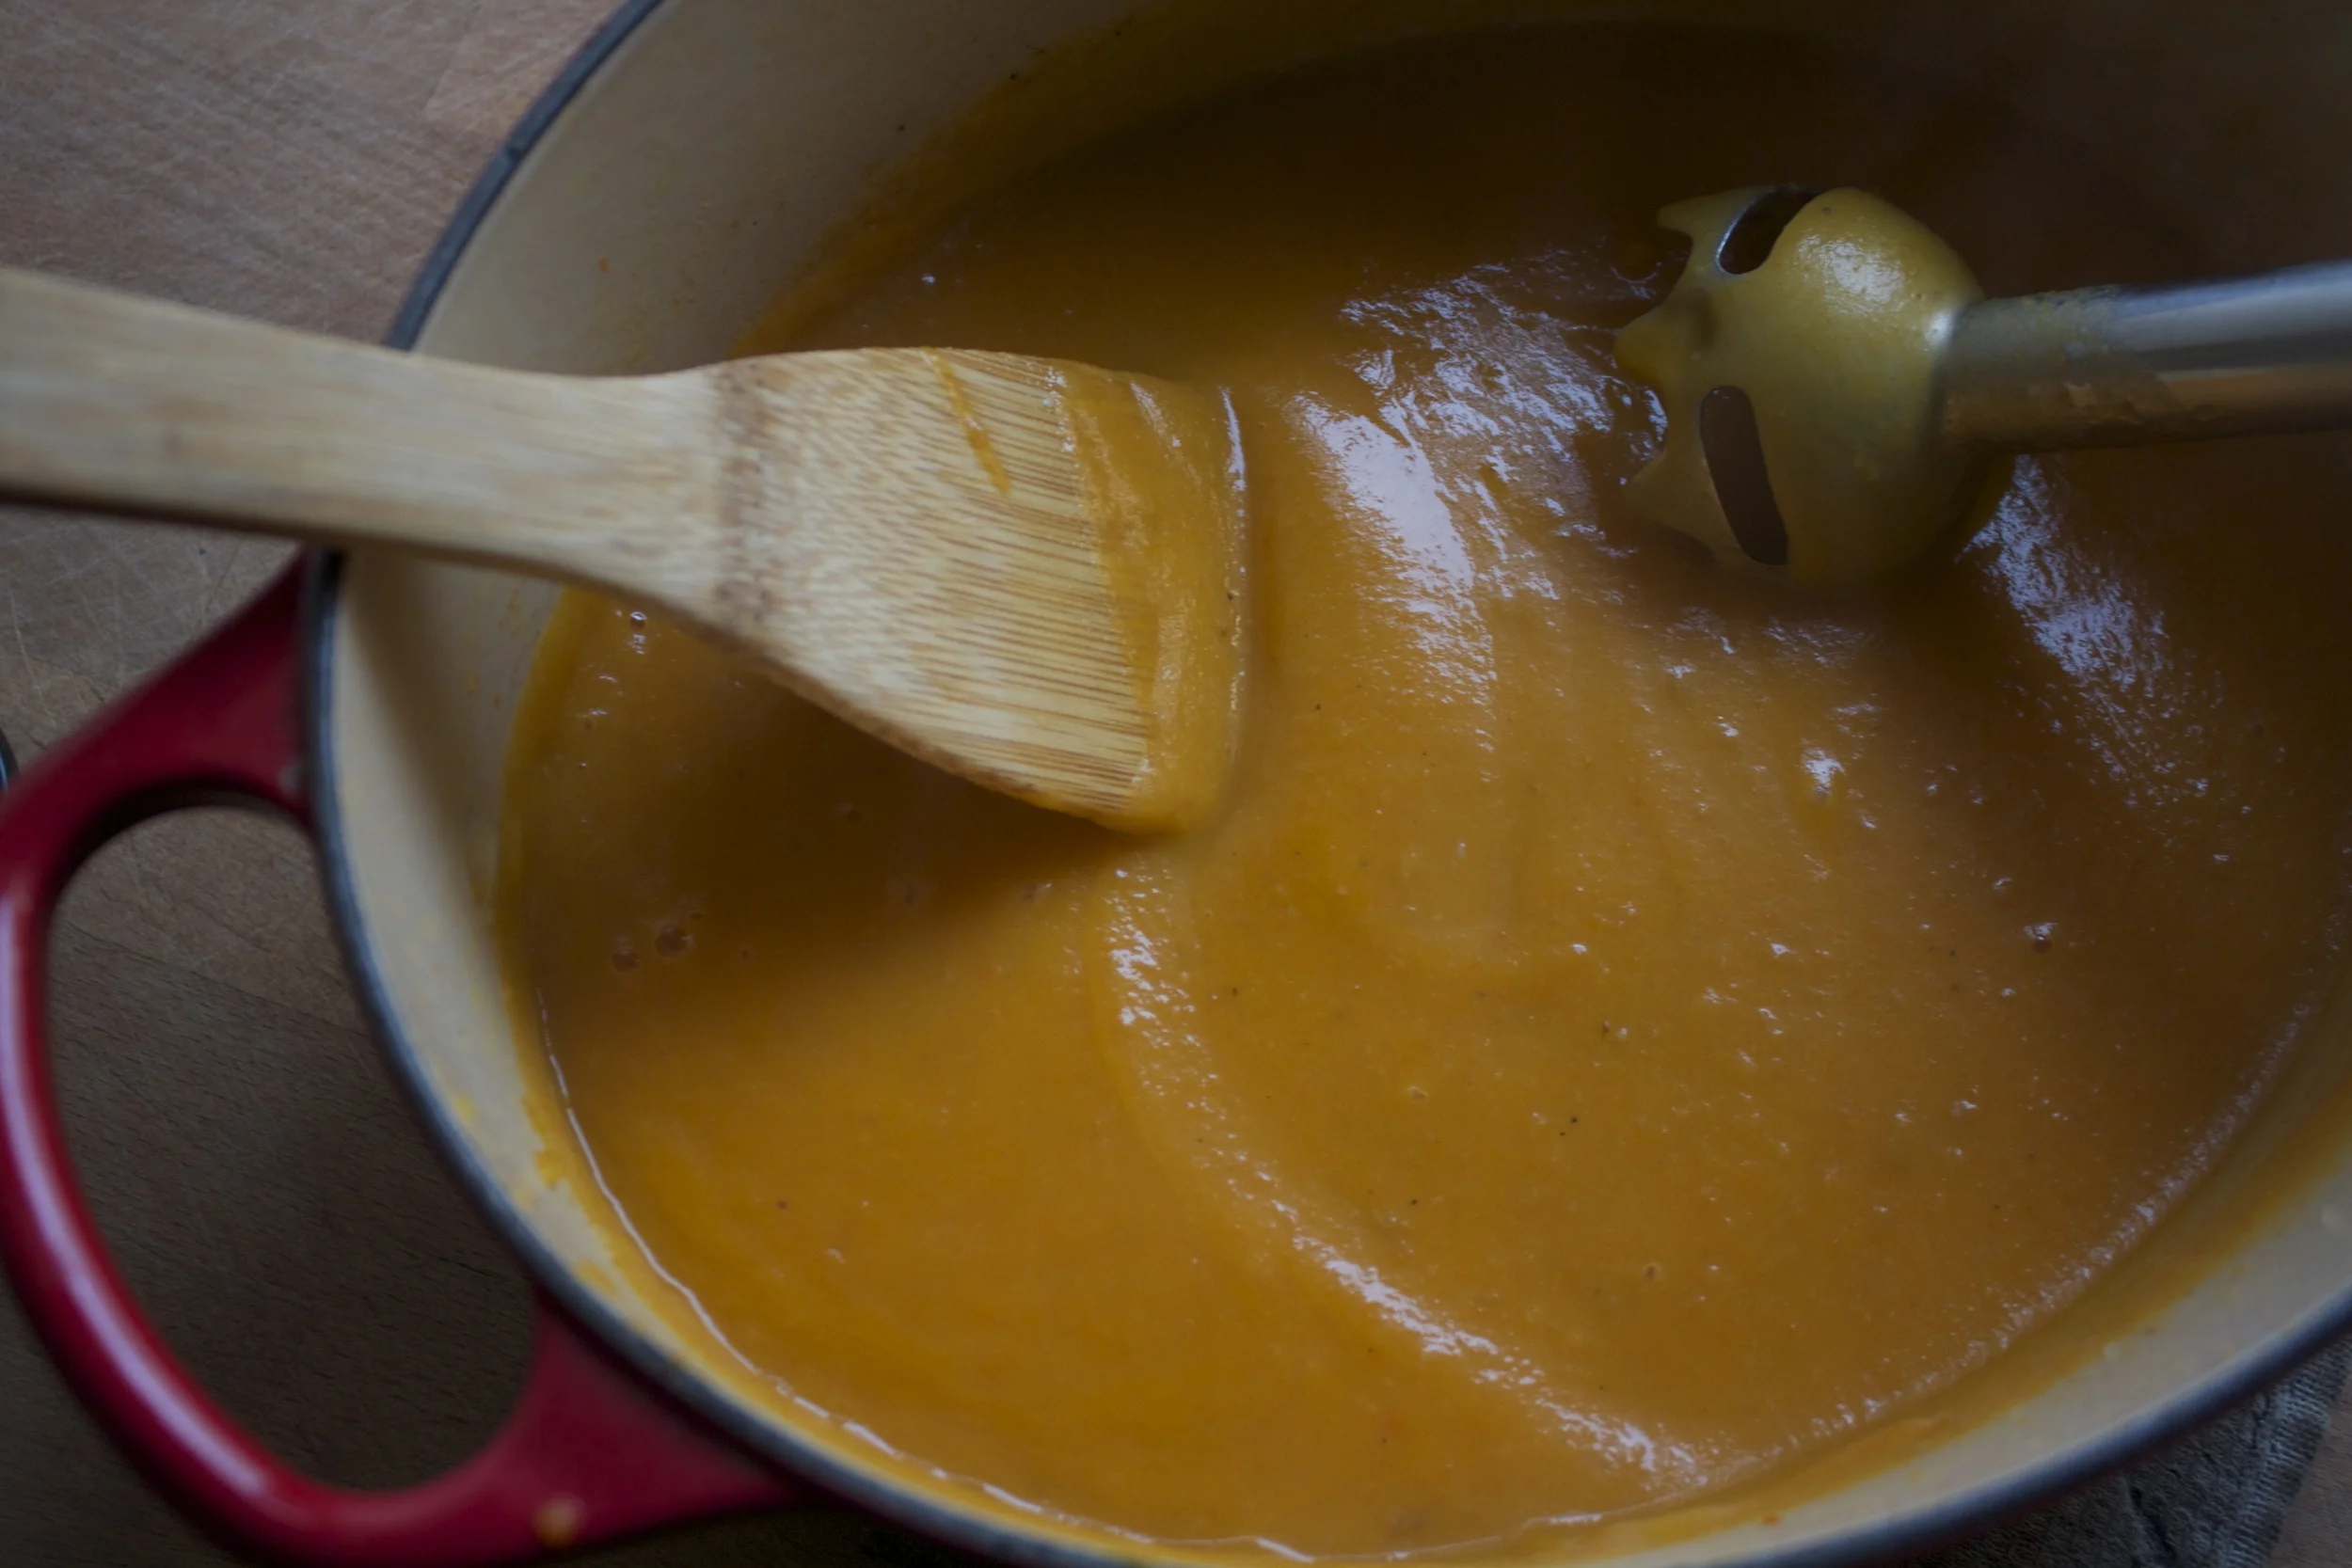
And blend the crap out of it with your blending method of choice (a hand o a regular blender)
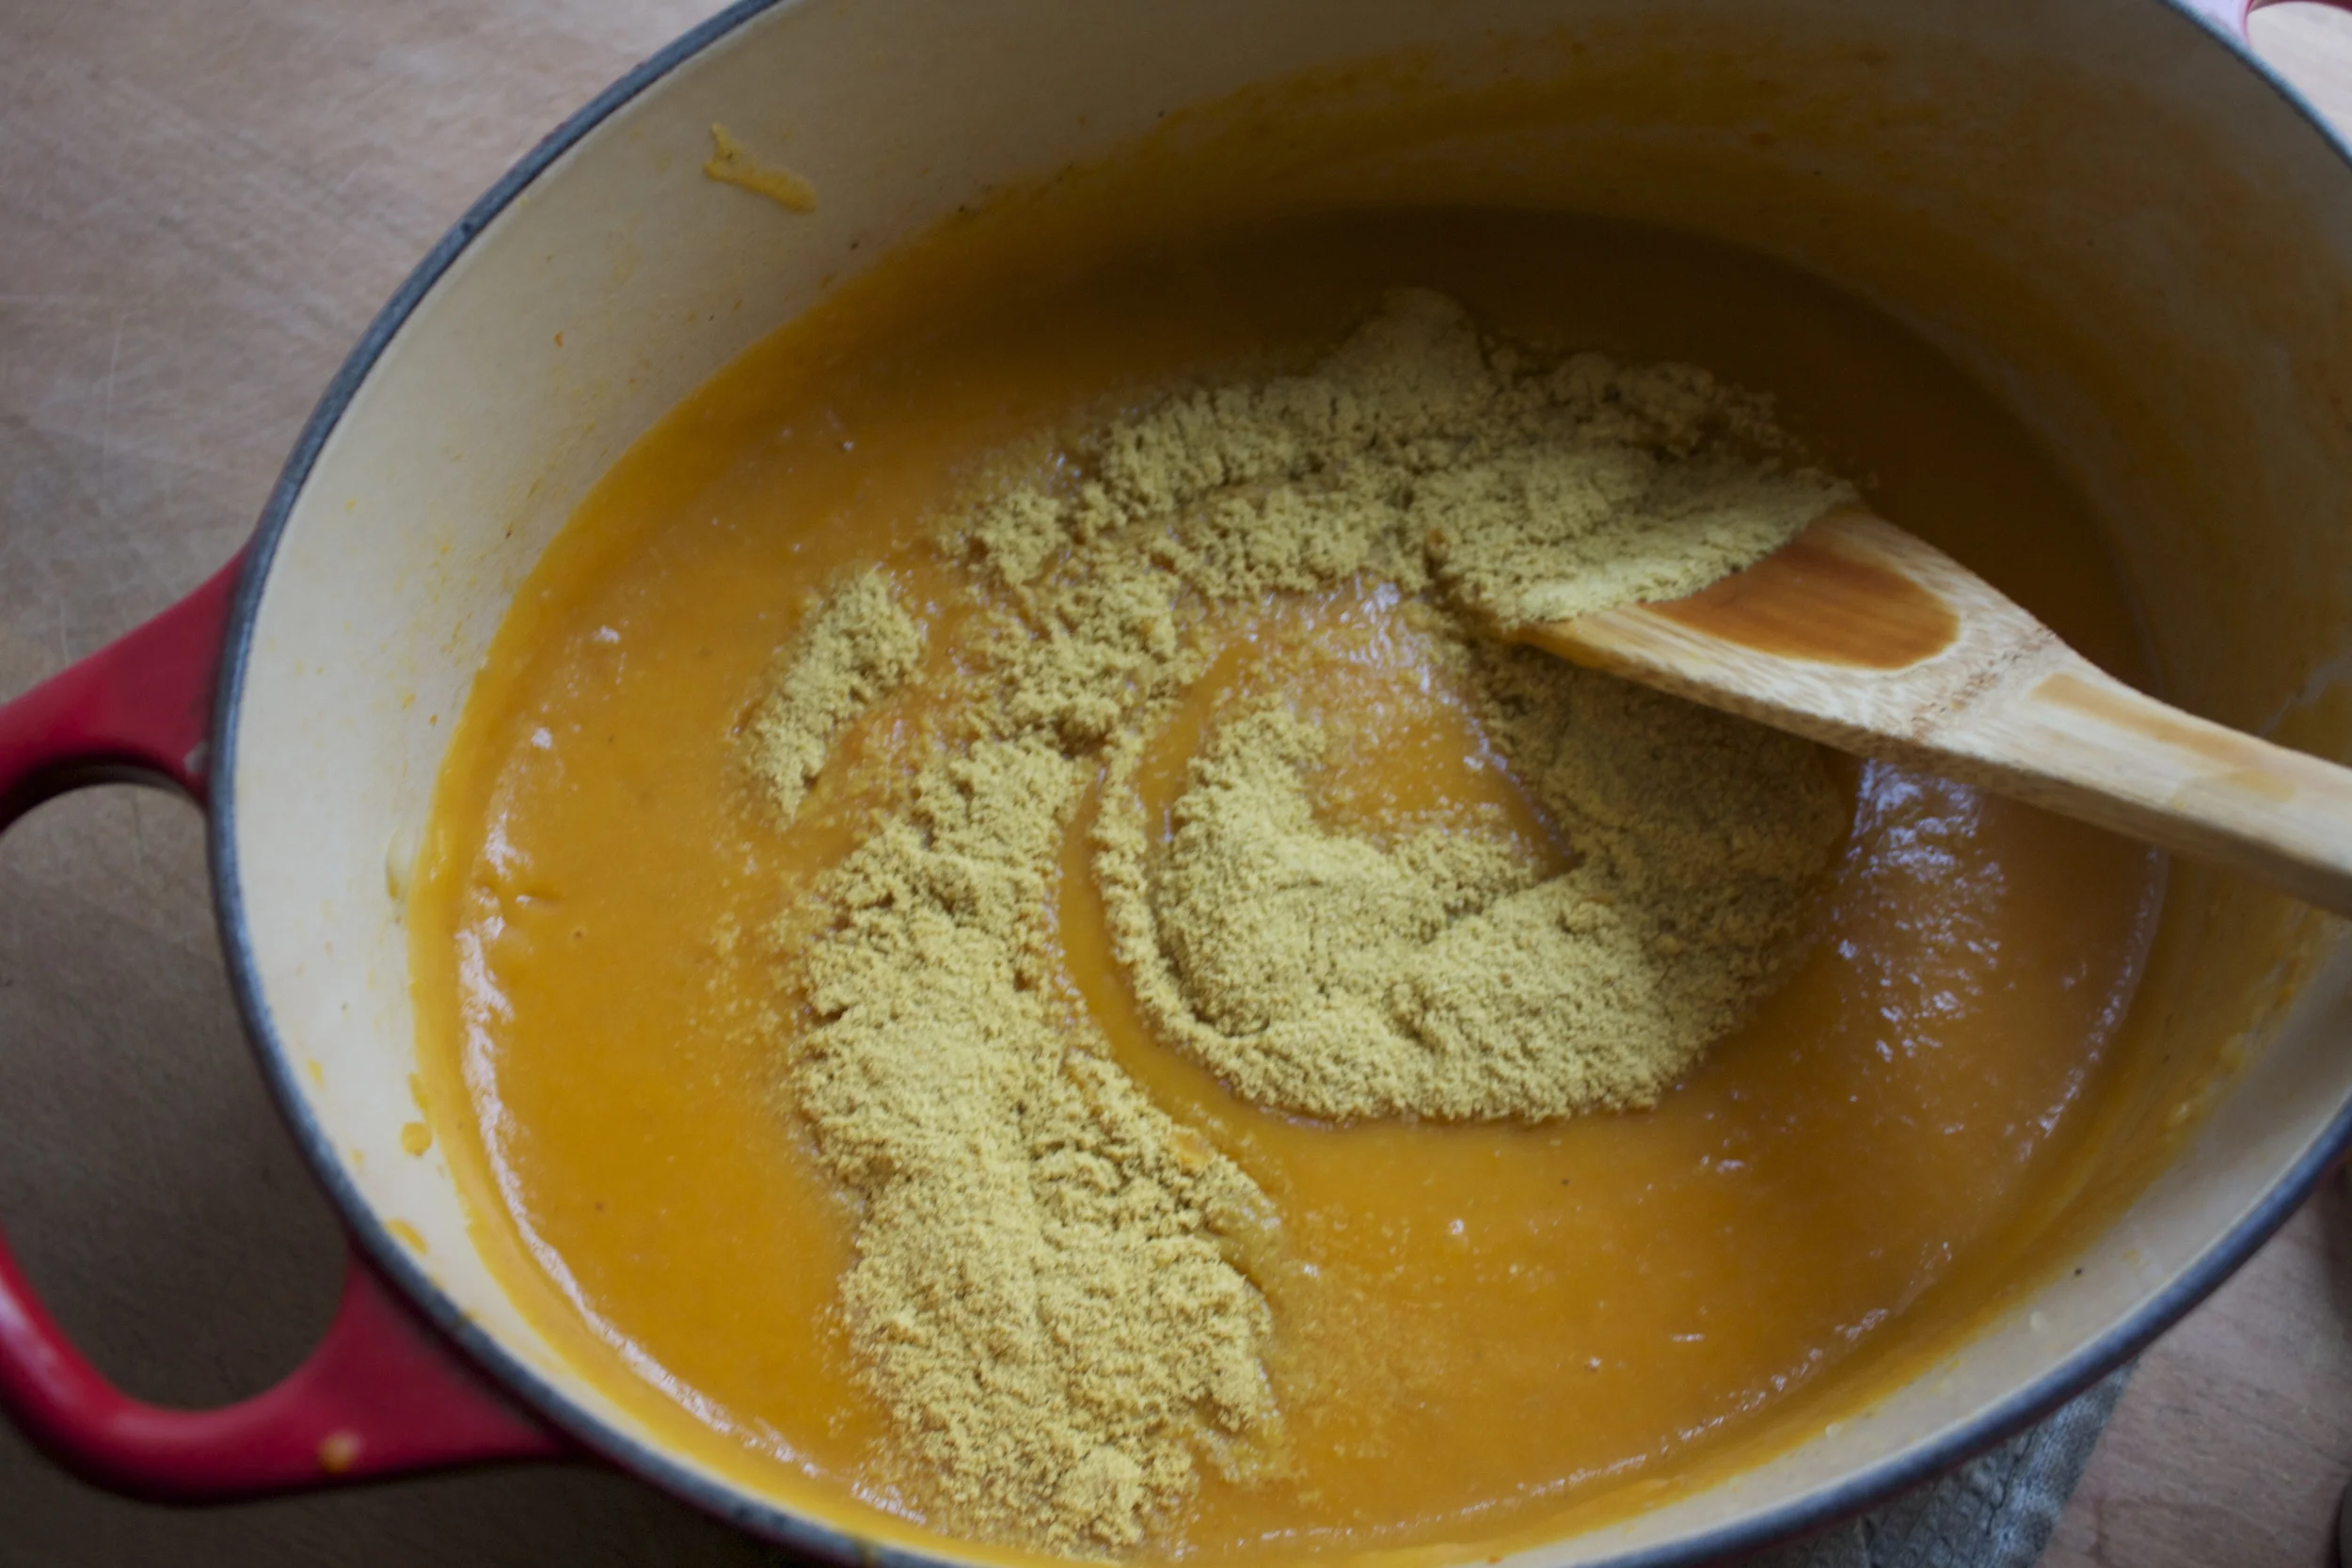
Oh, and mix in the nutrioanl yeast (can add it in at the blending stage%u2026 I just forgot too) and season with any more salt and pepper if needed.
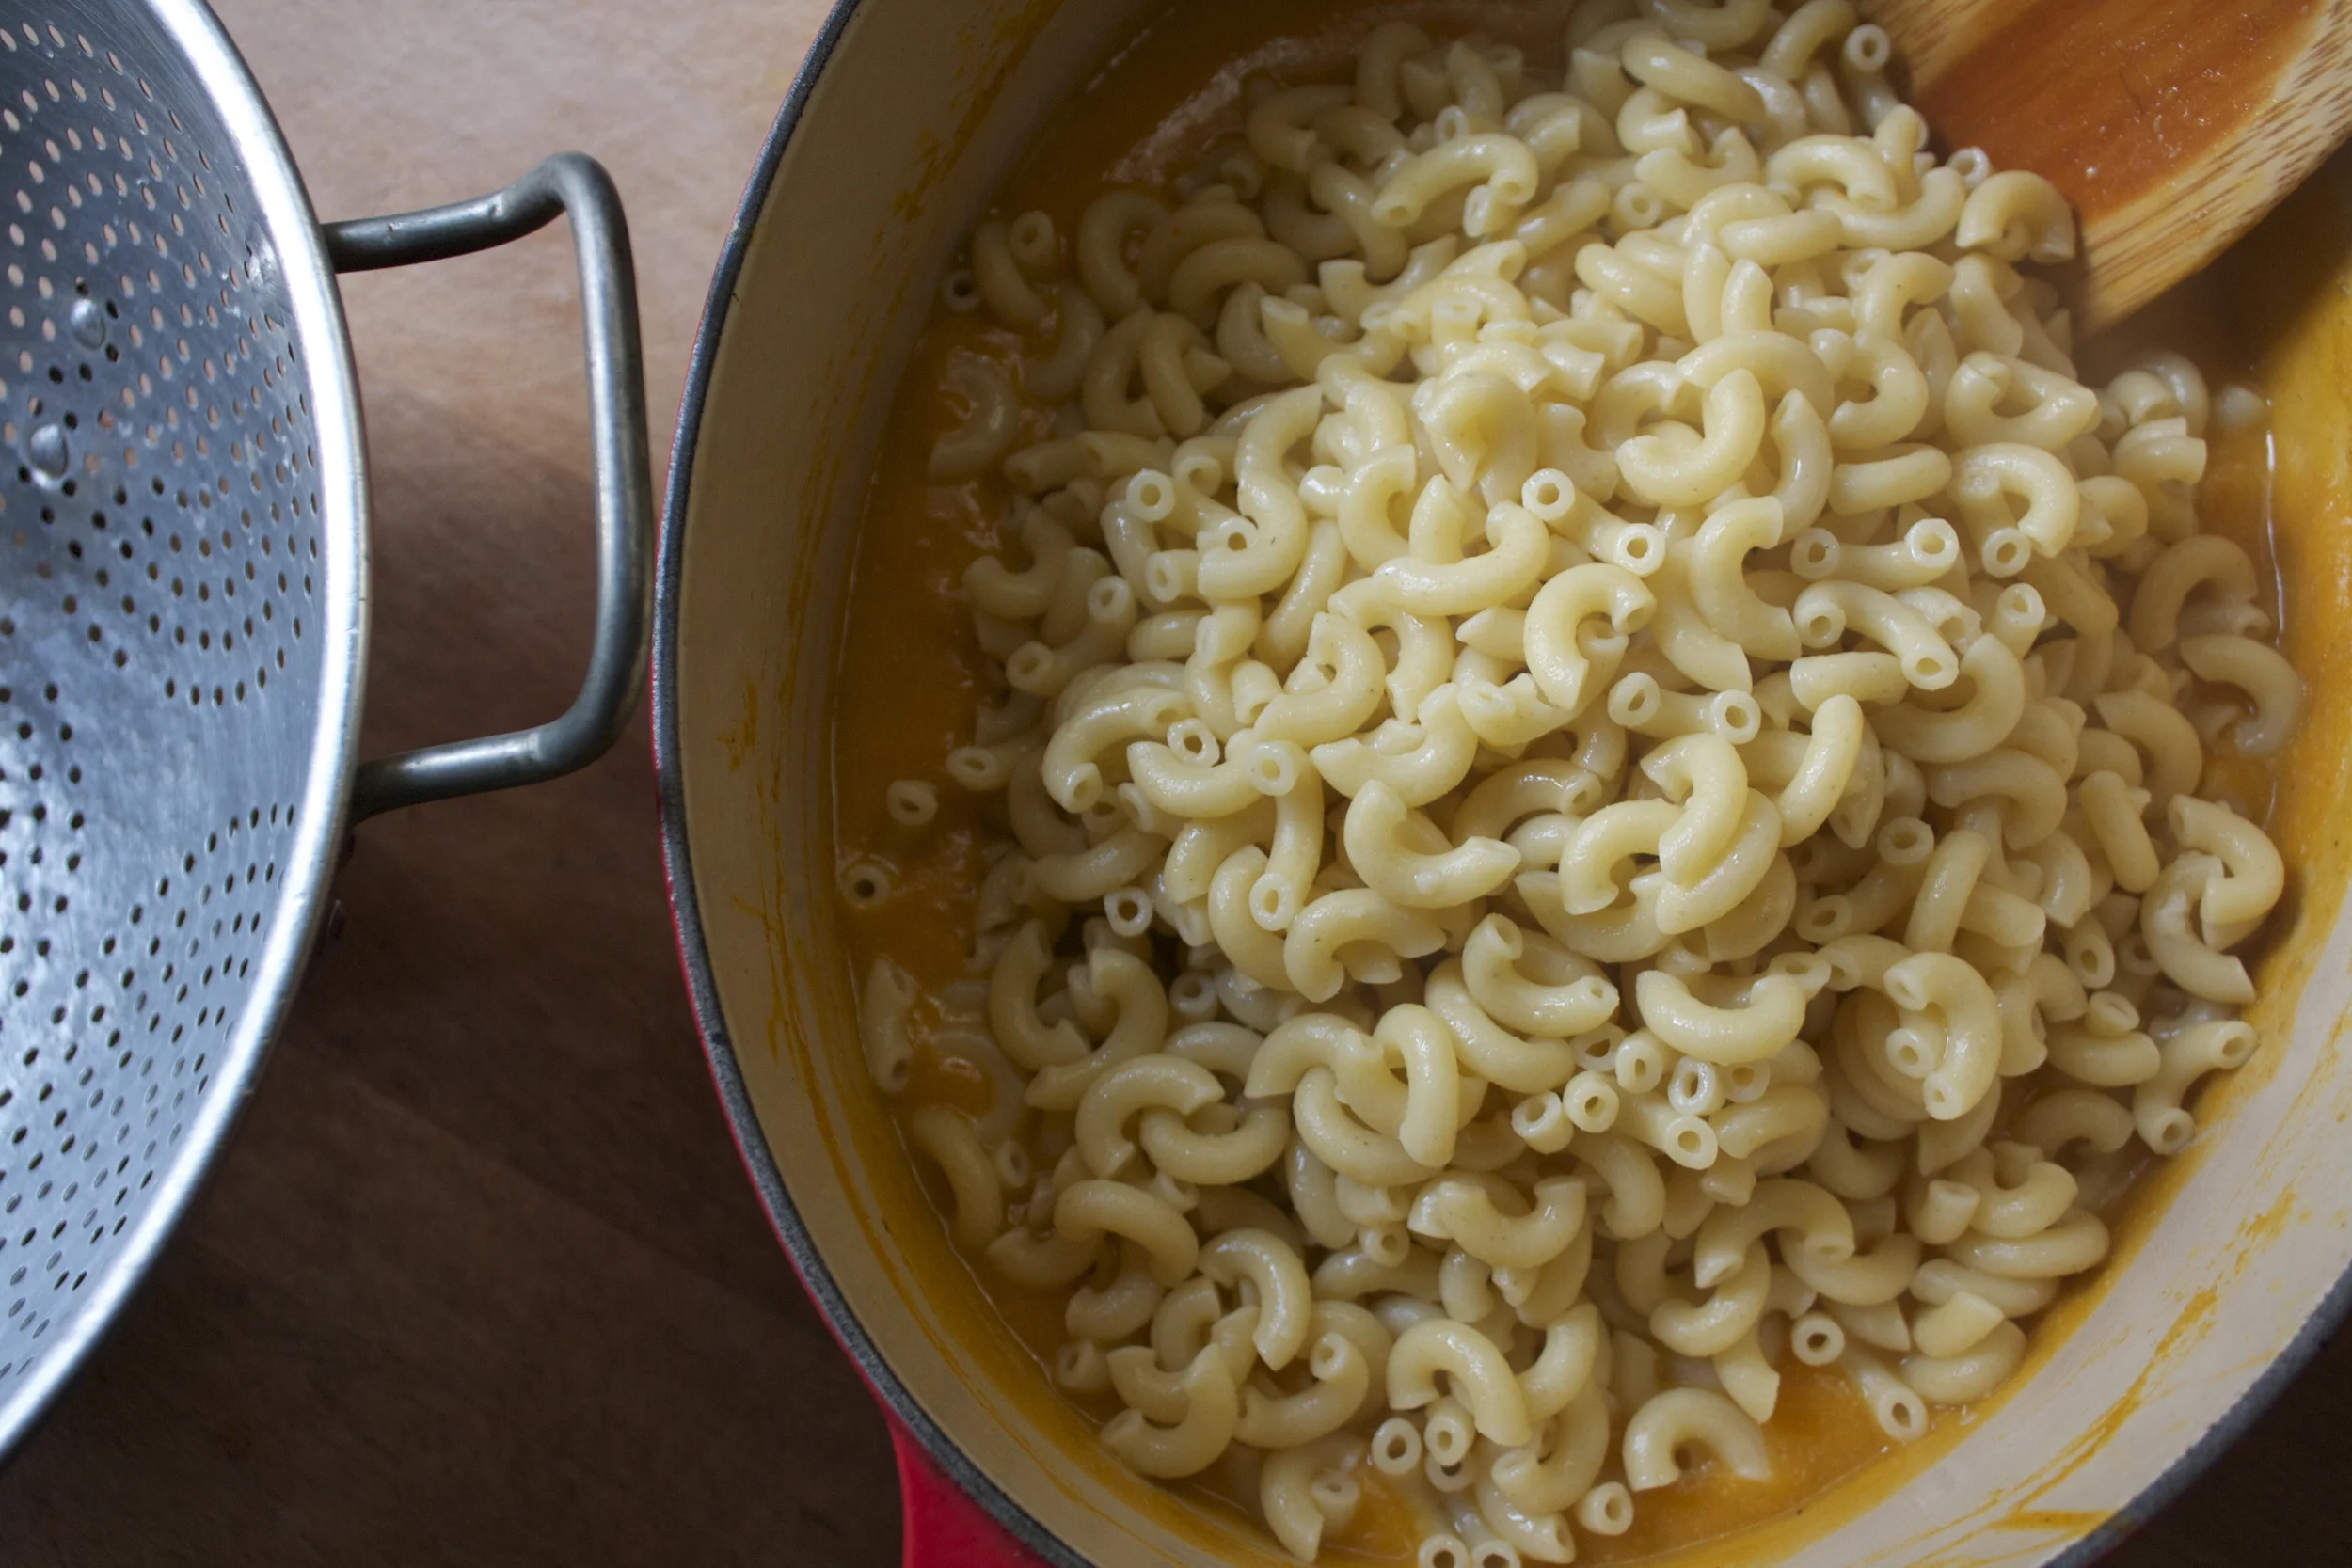
Grap the cooked noodles,%u00a0dump them into the sauce and give a good mix.
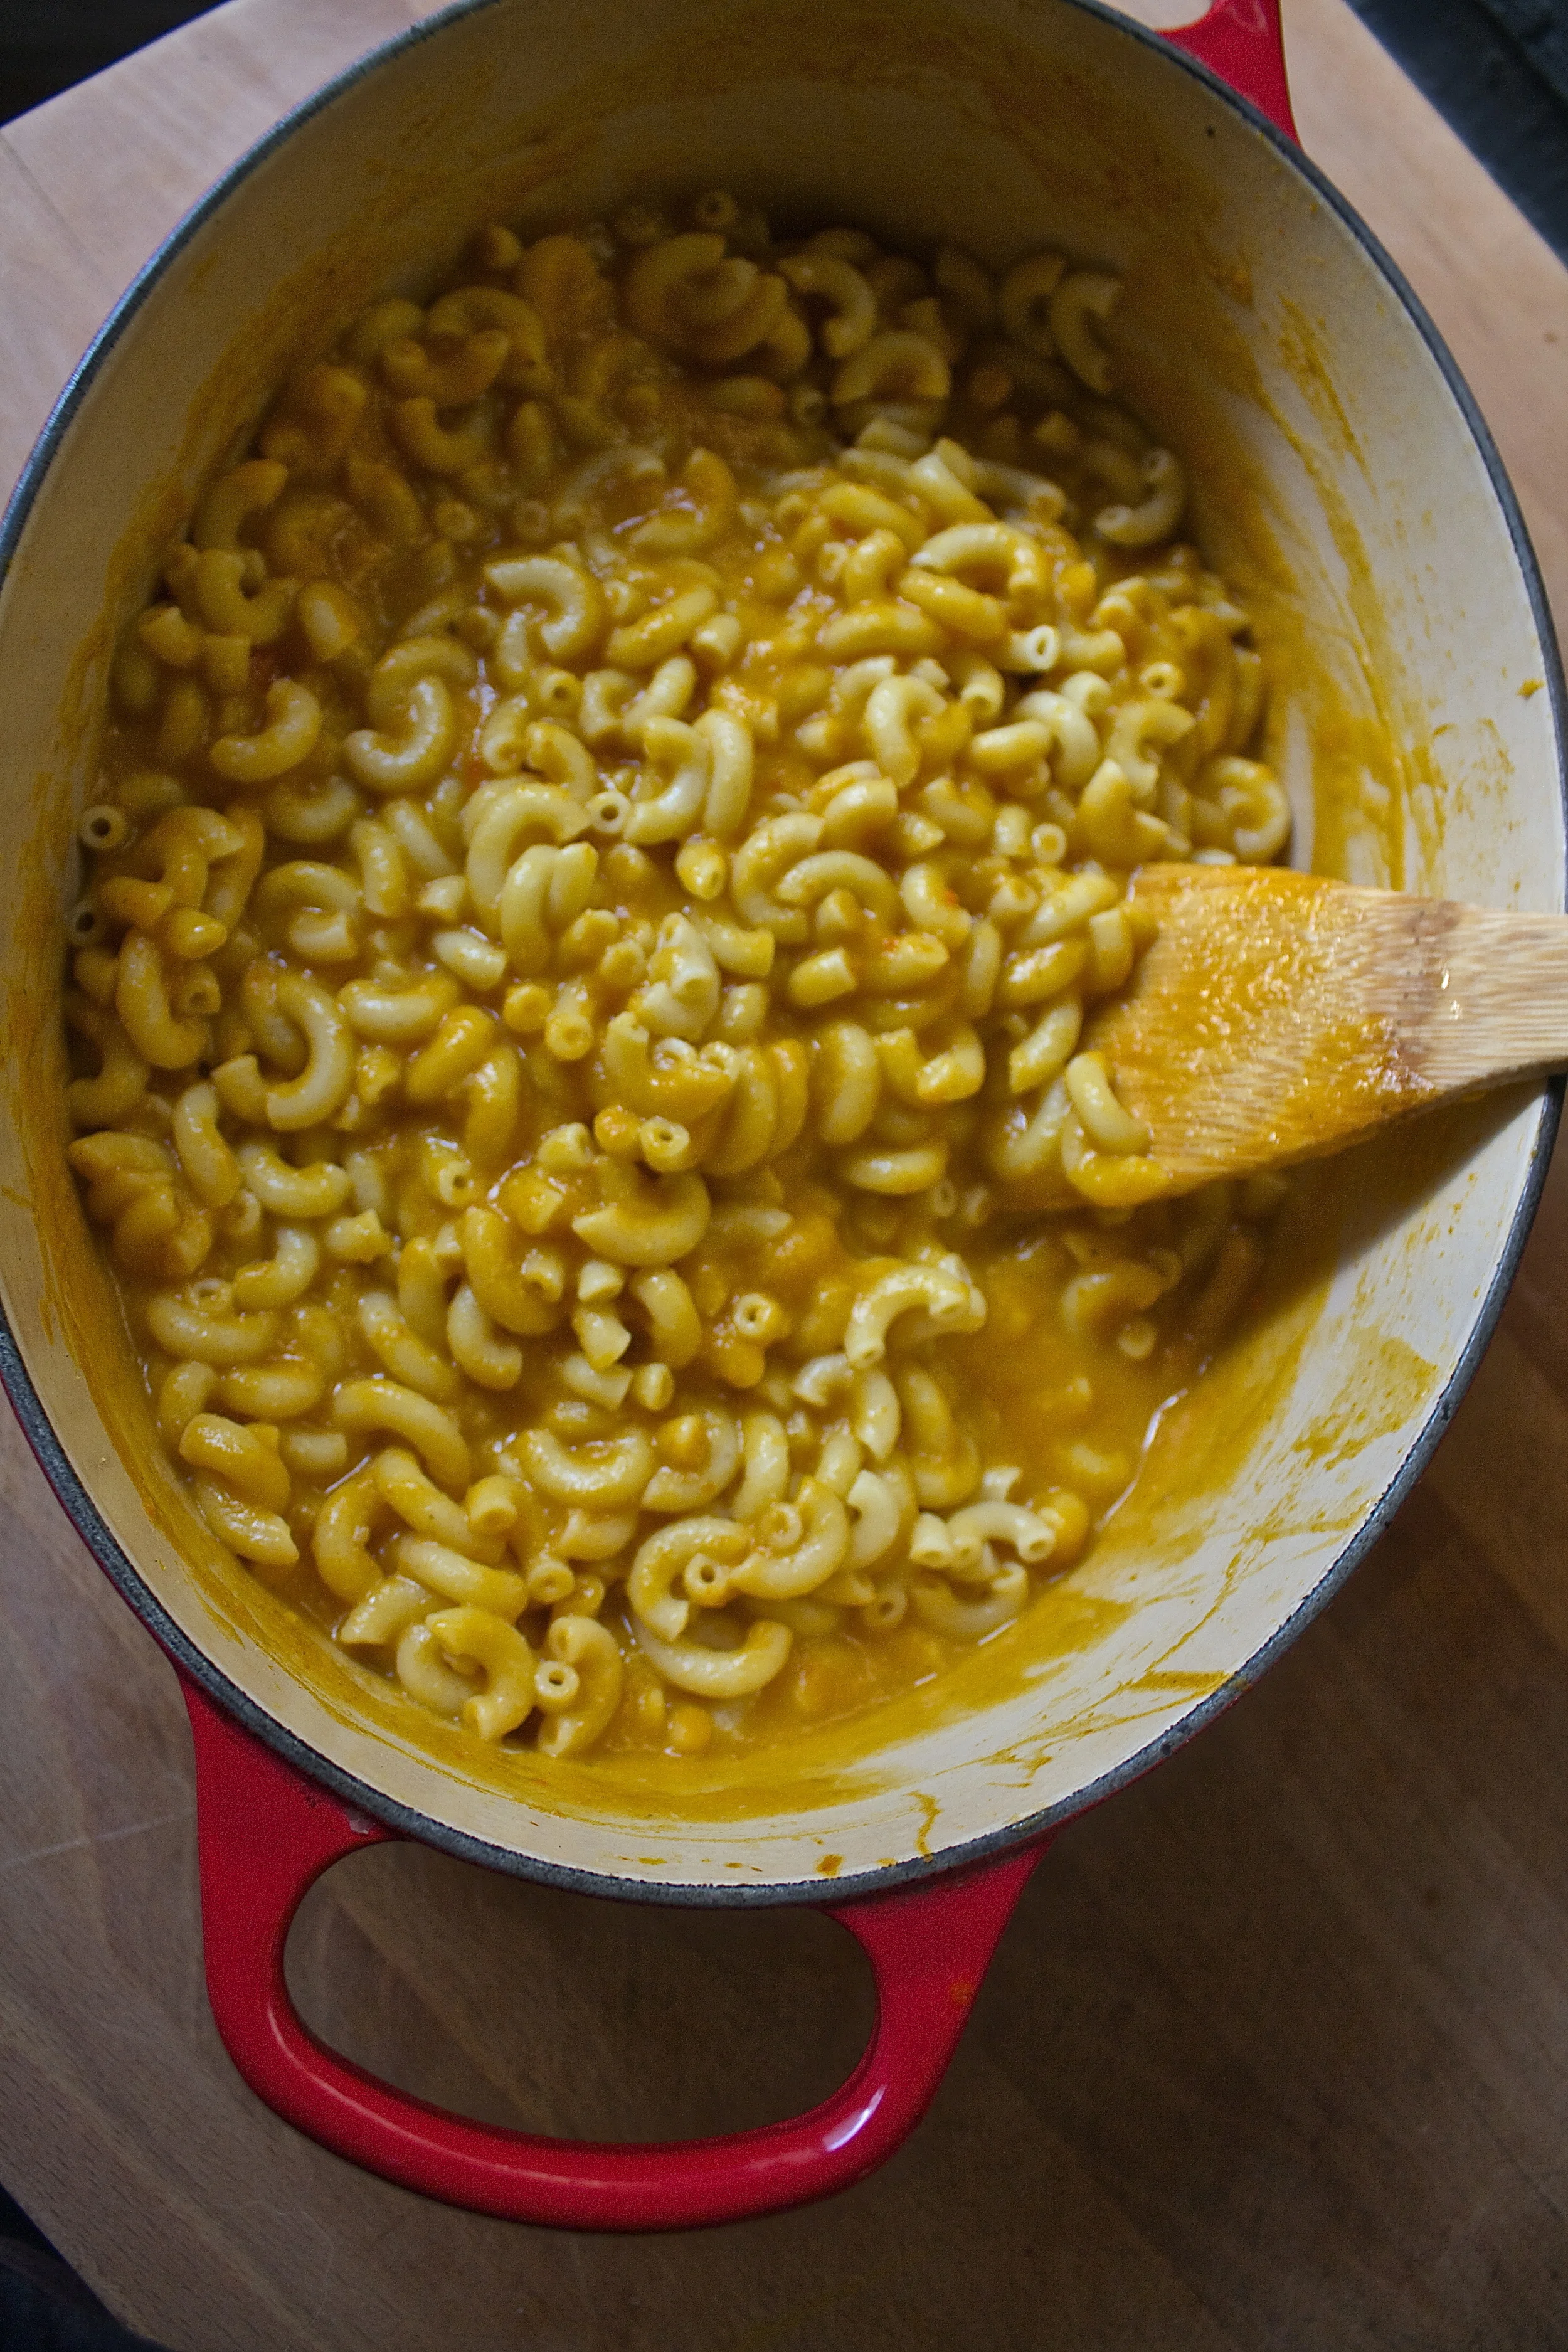

Scoop into food eating vessels,(handled coffee mugs are great for the littles.. and cute)%u00a0Maybe sprinkle on some chopped green stuff(my people enjoyed the addition of chopped up kale) and serve right away!
Now you can eat all the mac n cheeze.%u00a0
Happy Thursday!
-C
Serve 6 or so people
- 1 lb macaroni noodles (any kind you like. vegan, gluten free, whole wheat)%u00a0
- half a small butternut squash (about 2 1/2 ish cups chopped)
- 1 medium white potato
- 1 medium yellow onion
- 1 large carrot
- 1/3 cup nutritional yeast
- 1 tablespoon garlic powder
- salt and pepper to taste
- olive oil
- water
Chop up the onion and the carrot and stick into a large heavy bottom pot with a splash or two of olive oil and stick on the stove on medium heat.%u00a0While that’s %u00a0going on, chop up the butternut and potato into reasonable small chunks and toss that into the pot with the other stuff. Add in the garlic powder, season well with salt and pepper, and add enough water to full submerge the contents of the pot. Bring the water to a boil then reduce heat to medium and stick a cover on the pot.
While the veggies are boiling, boil the pasta up, slightly al denta (follow what the pasta people on the package tells you to do)
Once all the veggies in the pot are super tender, even falling apart (about 20 minutes) remove pot from heat and using your blending method of choice (hand or normal blender)%u00a0%u00a0blend everything together until smooth and creamy and then add in the nutritional yeast. Taste and if you think it needs it, add more salt and %u00a0pepper.%u00a0If you find that the sauce seems to thick, add in a splash or two of water.. to thin, stick back on stove and cook long to reduce.%u00a0
So you got you cooked pasta and you sauce. Mix it all together. And wa la%u2026 Mac N’ Cheeze
serve right away and eat it all. But any left overs can be refrigerated. Tastes great %u00a0the next day warmed in a skillet with a little oil.%u00a0
 A couple of days ago, during a grocery store porous, I stumbles upon a produce item that I have not seen sold in stores before, Broccoli leaf. And I%u00a0was kind of surprised %u00a0to see that they were selling bunches of the leaf, %u00a0organic, %u00a0at 2 bucks a bunch.%u00a0I was very excited ! But wait.. You can eat broccoli leaves? Heck yes you can! Broccoli leaves %u00a0are fantastic. They taste kind of like broccoli, have a hearty texture like a collard, and can be used raw or cooked just like any other green. Its just one more super yummy green to add to your repertoire.%u00a0 So when I bring home something that I find to be a good score, like a bunch of broccoli leaves, I feel like I have to share it with the mister. (I am so nice) And this dish was how I shared them%u2026. Tossed into a bowl of garlic raging pasta.
  The stuff%u2026. A bunch of broccoli leaves, lots of garlic, pasta, olive oil, salt and a lemon. Pretty simple right?
  Fist off, get your water boiling for the pasta. Once its ready, drop a pinch of salt into the water and stick pasta in for the amount of time recommend by pasta box people. While the pasta is boiling, mince up the garlic (I used my garlic press) into a skillet and add in the oil. %u00a0Stick on a burner on medium for a few minutes, stirring around to make sure the garlic doesn’t stick and burn.%u00a0
  %u00a0 %u00a0%u00a0
 Once you start to smell the garlic, turn heat onto low, chop up the broccoli leaves (stems and all) %u00a0and stir around until wilted and add in the juice of half a the lemon.When the pasta is cooked, remove a few tablespoons of starchy water and %u00a0strain the noodles. Add water and pasta right into the skillet with the other stuff. %u00a0Toss around, taste, season with salt and pepper.%u00a0 Go ahead and add some chopped tomato and or parmesan cheese if you want. %u00a0
 And serve your amazingly amazing pasta. %u00a0And make sure that you are ok with really smelly garlic breath%u2026Casue it’s going to happen. Keep it good! -C
Broccoli Leaf and Garlic Noodles
- 1 bunch fresh broccoli leaves (about 3 cups chopped)
- 2 servings of your favorite pasta (spaghetti, penne, vegan, gluten free%u2026..)
- 8 or so fresh garlic cloves
- 1/4 cup olive oil
- salt and%u00a0pepper
- lemon (optional)
- parmesan cheese (optional)
Start by bringing a pot of water to a boil with a pinch of salt. Add in pasta and cook per instructions on box. While pasta is cooking, mined garlic and add to a skillet with the oil. Place on a burner on medium heat and cook and stir until the garlic becomes fragrant. Chop the broccoli leaves (stems and all) into bit sized pieces and add to the garlic oil and toss around to wilt the leaves. Squeeze in some lemon juice. Once the pasta is done cooking, remove a few tablespoons of the starchy water and strain the pasta. Add the water and the noodles to the skillet, toss to evenly coat the pasta and call it down. Serve in a bowl or on a plate, topped with freshly chopped tomatoes and parmesan cheese if you so shall please and another little squeeze of lemon juice if you like. Watch your mouth.. it will be breathing out garlic like whoa.%u00a0
 My winter farm share is coming to an end this week. One more pick and then a three week stretch until the summer share starts%u2026 WHAT AM I GOING TO DO!!! Stock up as much as I can is what.
I have been strategic about the roots and veggies that I have chosen to bring home the past few weeks.(My farm lets you pick what you want) %u00a0I know what I can buy at the store, things like carrots and potatoes, so I have been passing those up, but the roots like beets and celeriac%u2026 I have been bringing home baskets of those and hoarding them in the fridge and basement in preparation for the laps in farm fresh food and knowing that if I want to by these at the store it s going to coast me a million dollars %u00a0a pound. (a for real million dollars)
Yup, lots of roots around here, especially celeriac root which is fantastic.%u00a0I am kind of obsessed with celeriac, with its fibrous, knobby exterior, soft but almost meaty texture inside, and a flavor that %u00a0is close to celery but so much better. %u00a0I don’t know why it has taken me so long to do a posting featuring this amazing root vegetable %u00a0(I eat it almost every day)
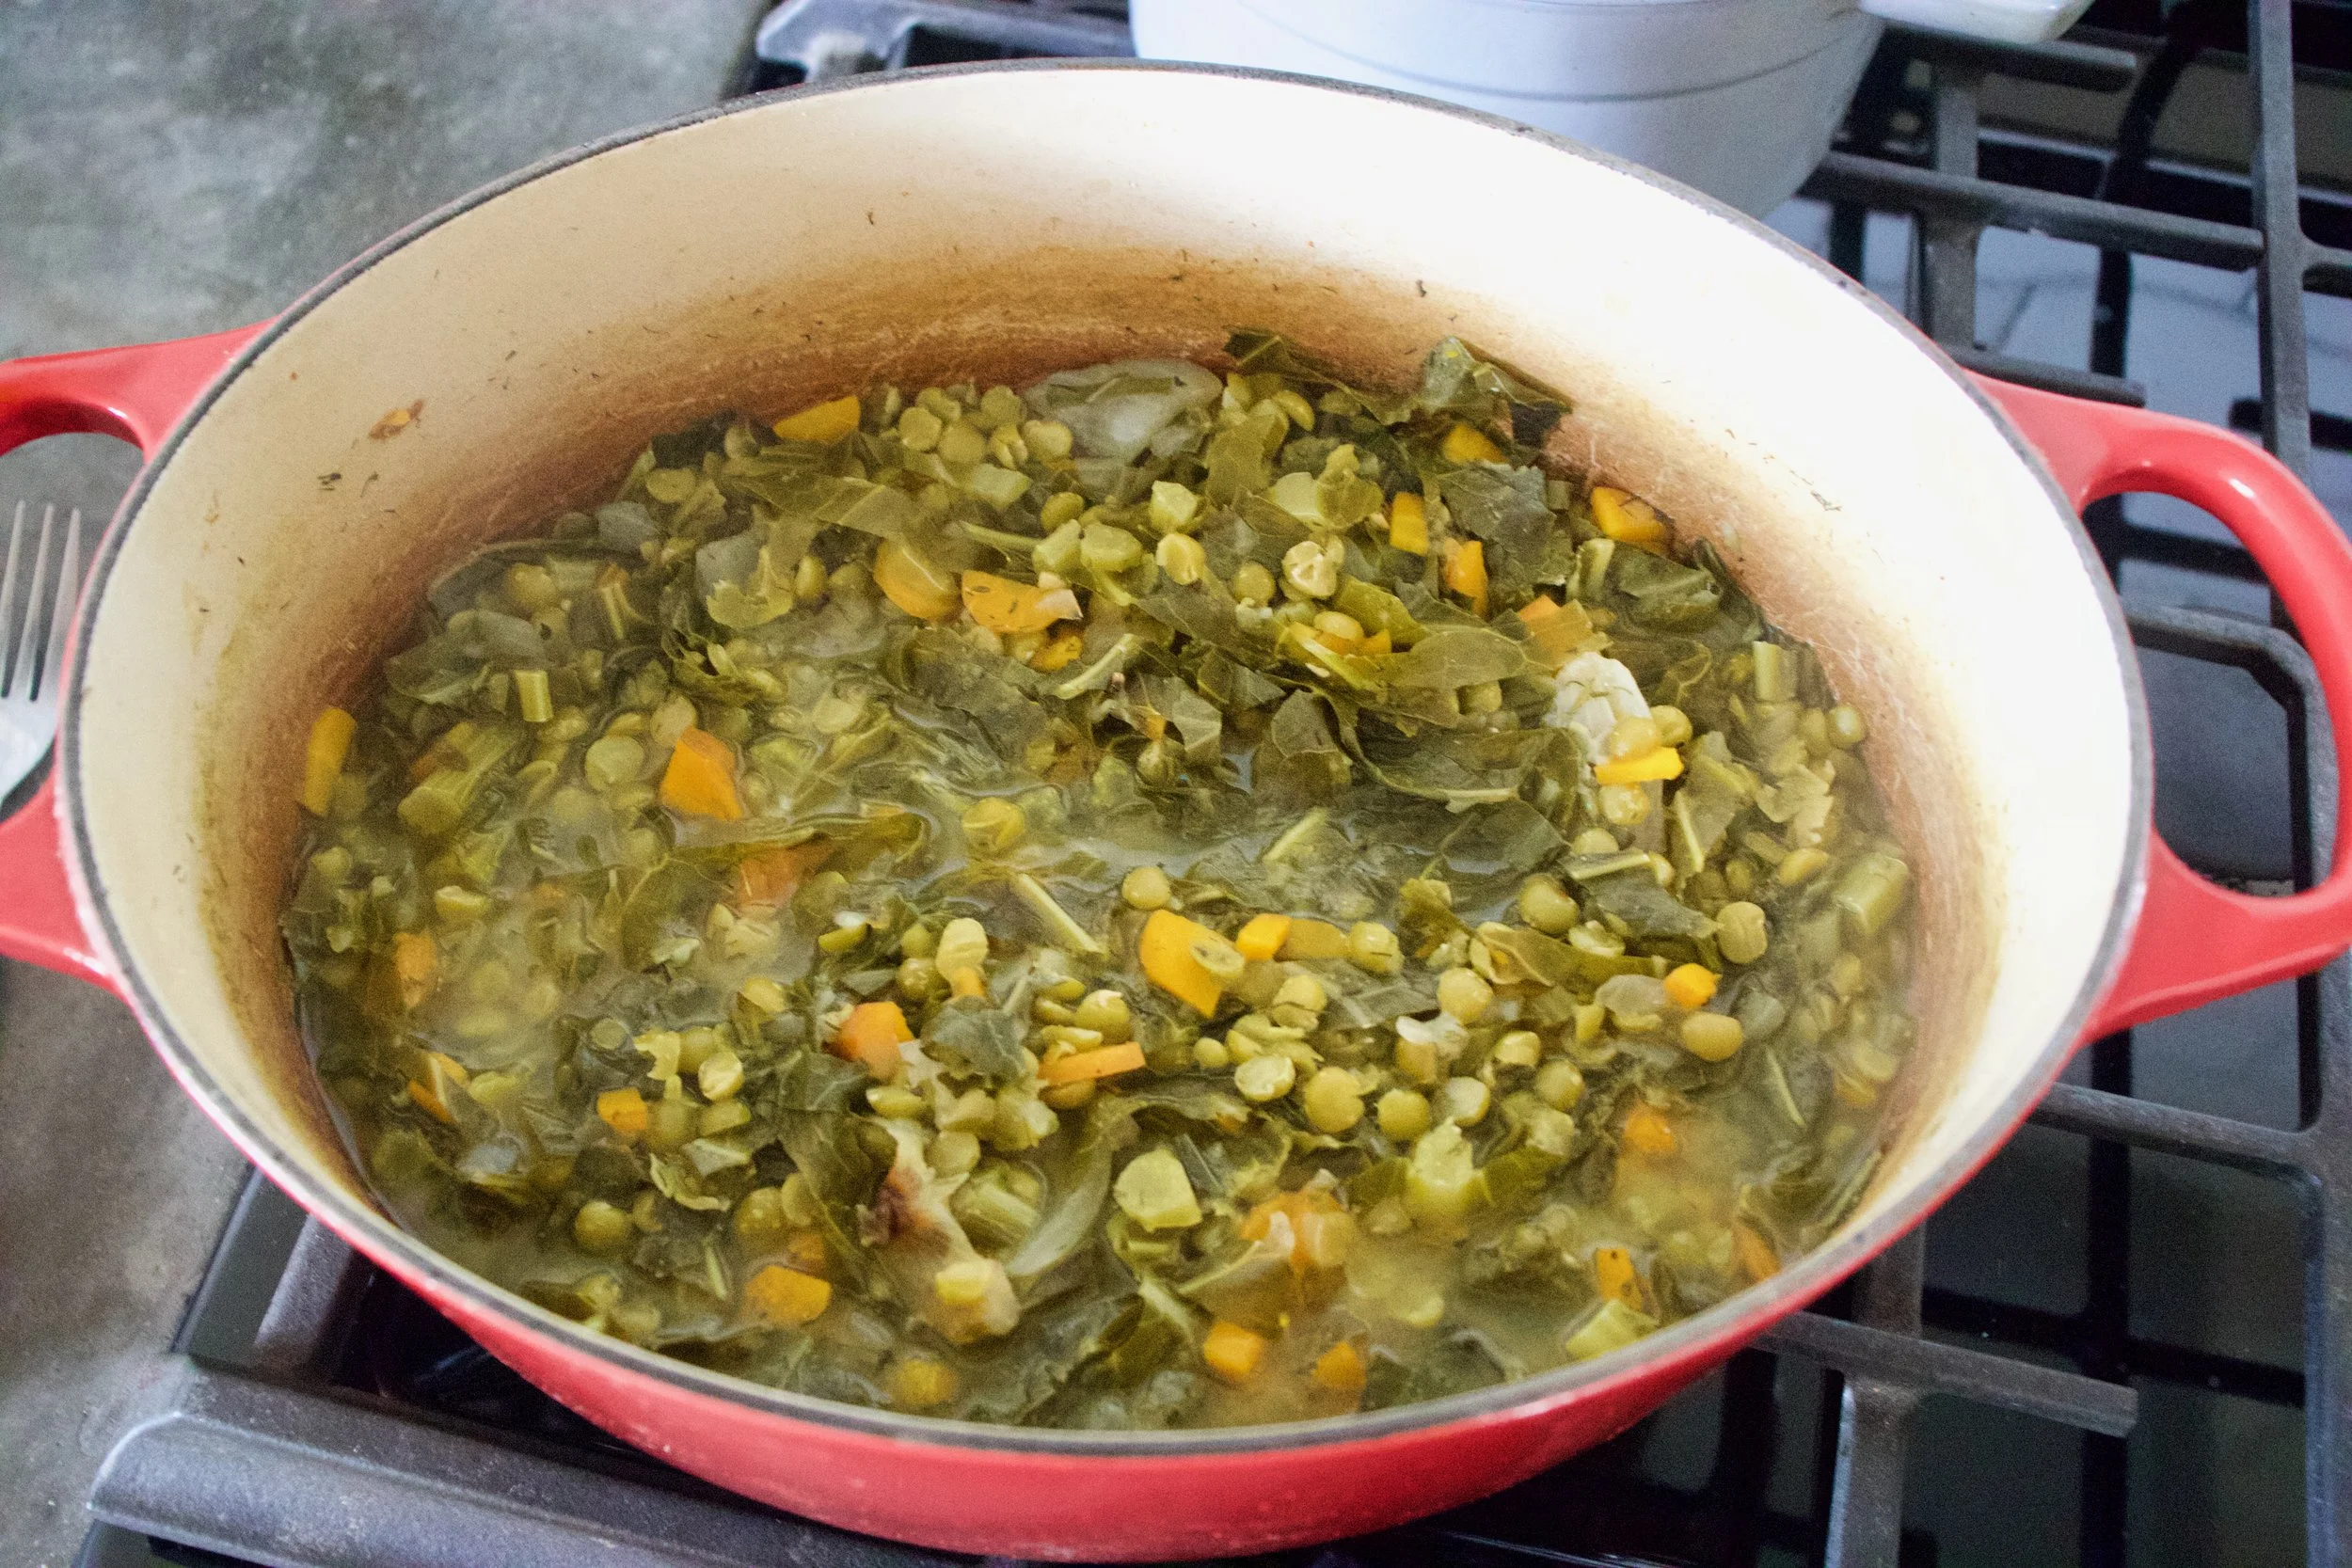
So here, an amazingly tasty, hearty but not heavy, celeriac recipe. %u00a0Perfect for spring and the change into summer%u2026. Mustard roasted celeriac with an fanatic split peas gravy that will have you licking you bowl clean.
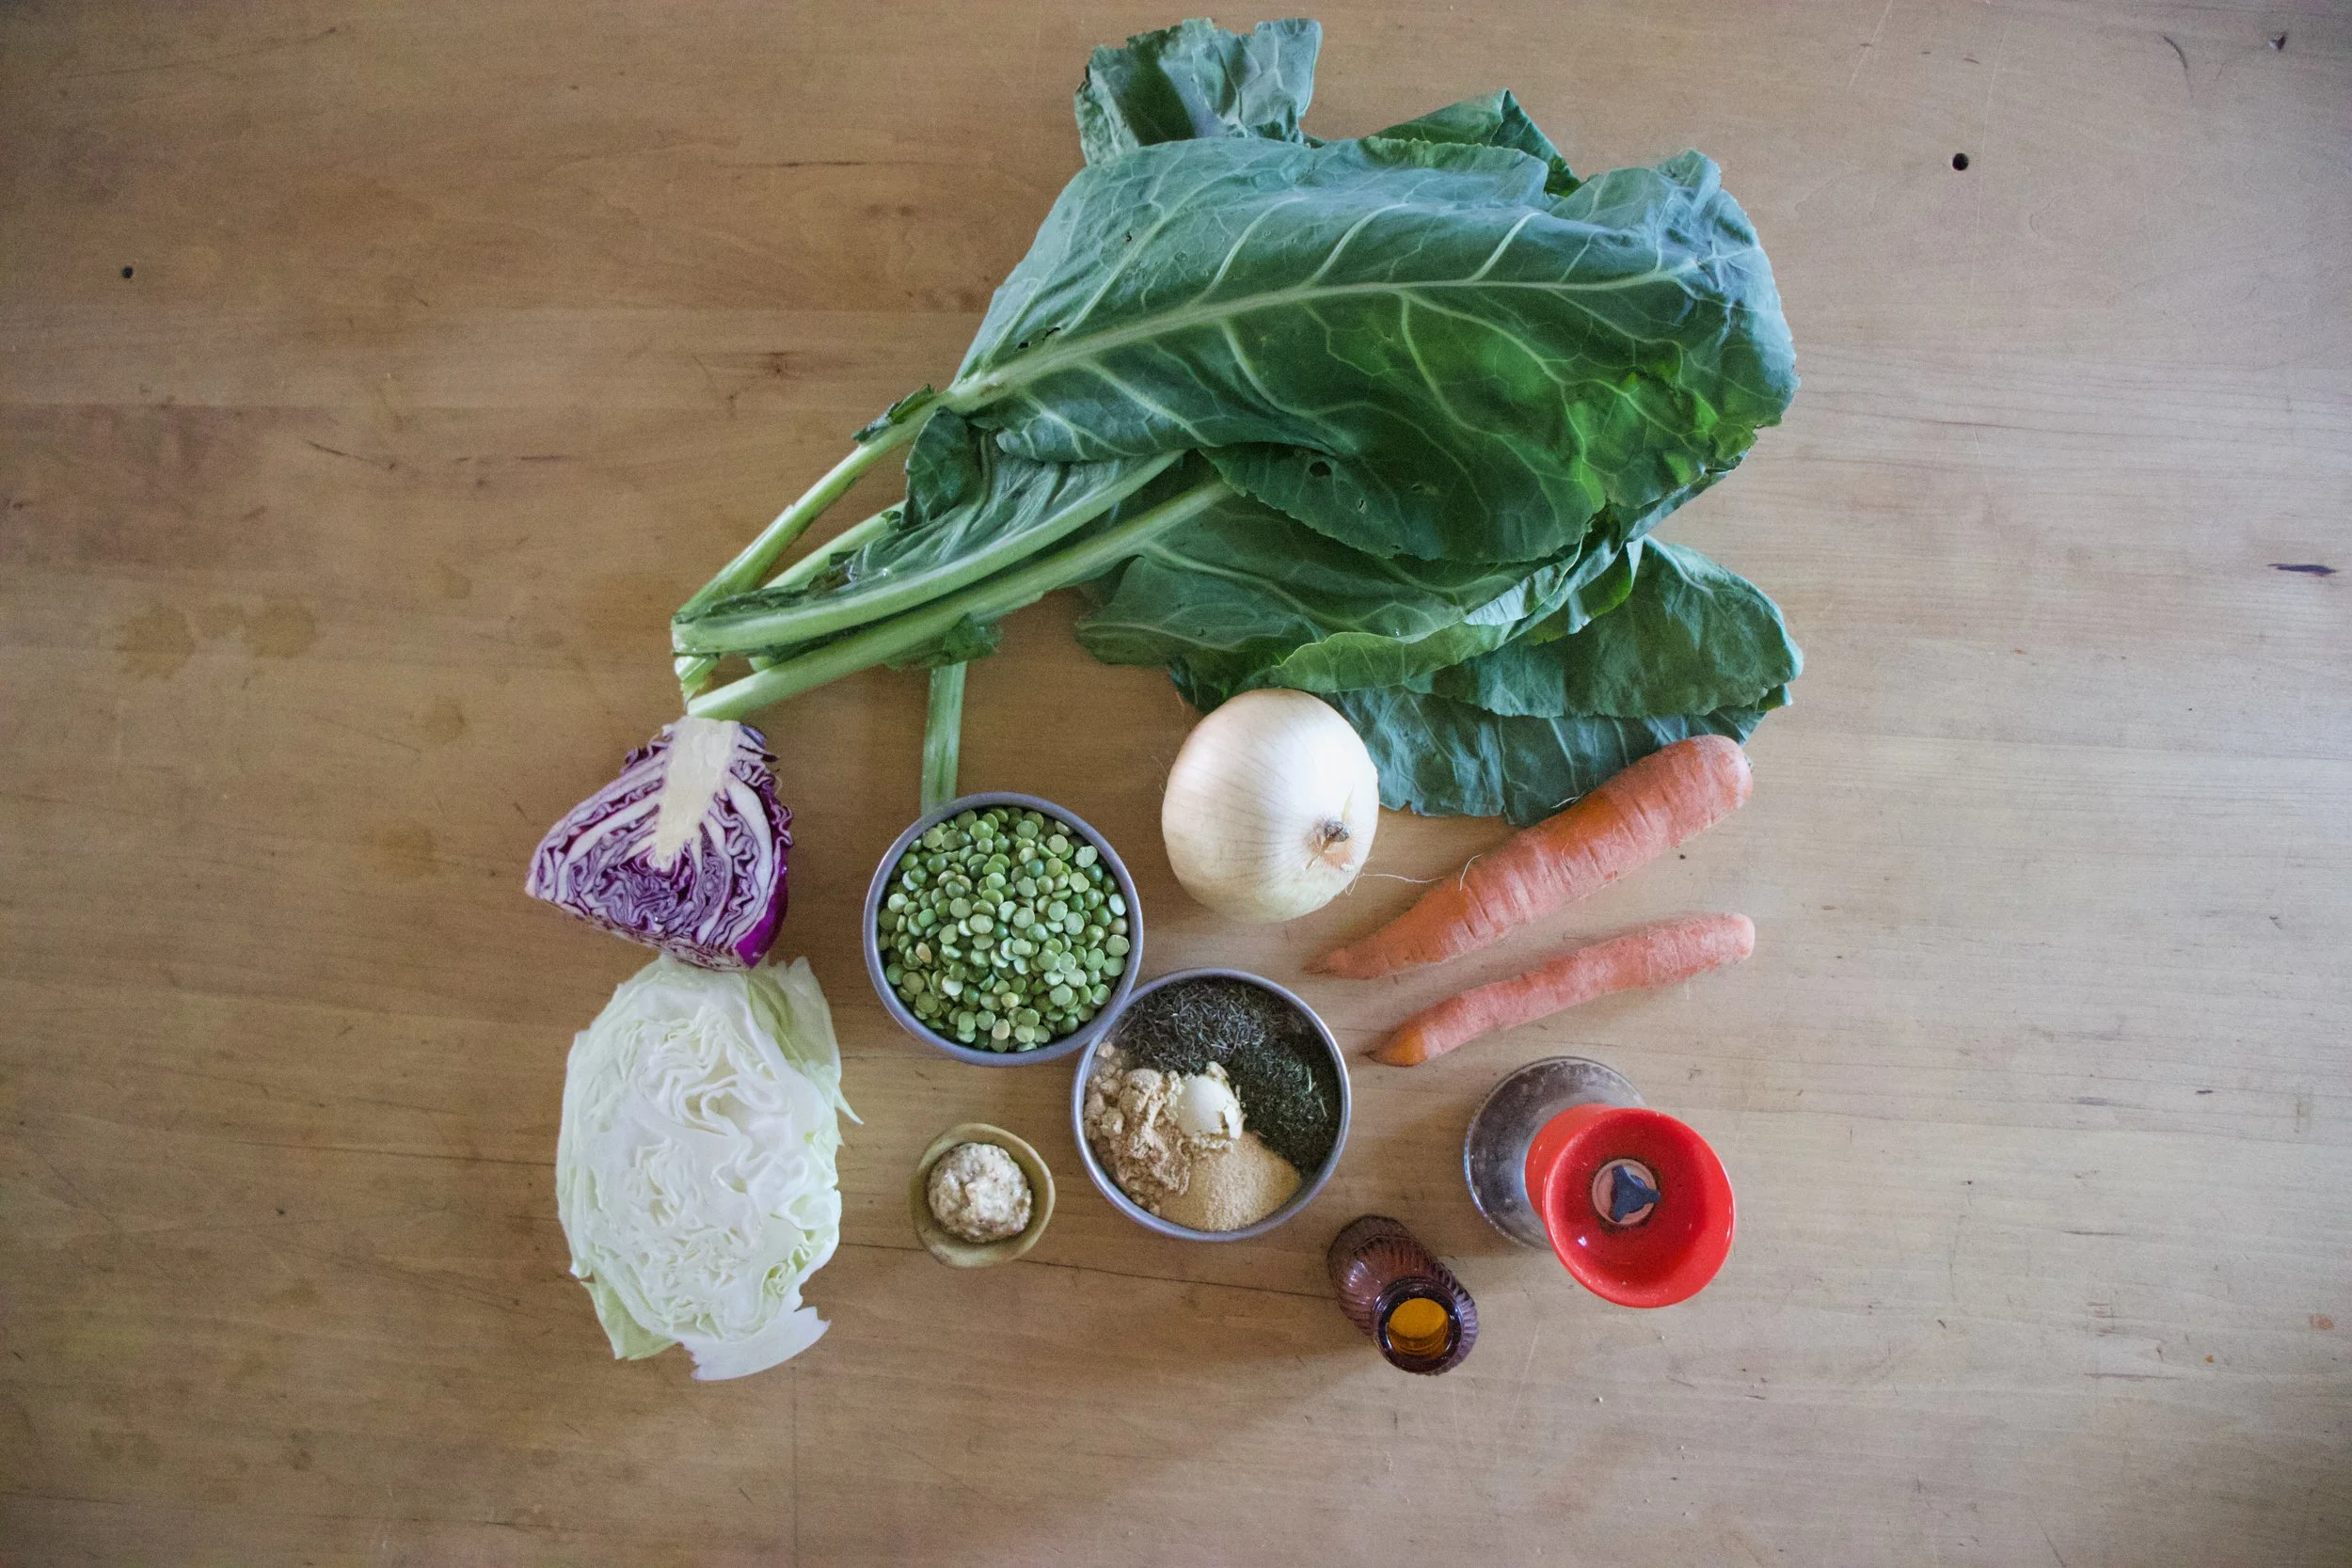
 %u00a0The stuff%u2026.For the split pea gravy we have a carrot, a parsnip and a large onion chopped into small chunks. %u00a0Salt, thyme, a bay leaf and of course the split peas. Then there is the celeriac root* sliced into 1/2 inch thick rounds and some plain old yellow mustard .
*Note. I don’t peel my celeriac root. I really enjoy the fibrous exterior but realize that some don’t(The mister does not like it) so peel it if you want.%u00a0
 Toss the chopped parsnip, carrot, onion and the spices into a pot on medium heat and let veggies sweat a few minutes until tender. %u00a0Add in the split peas and enough water to cover everything. %u00a0Turn pot on high and bring to a boil, then cover and turn to low. Make sure to give the pot a good stir ever few minutes and add more water if needed%u00a0
While the gravy is cooking, %u00a0take the celeriac rounds and brush each side with yellow mustard, sprinkle with pepper, and place on a baking sheet. Stick into the oven to roast for about 25 minutes, flipping the rounds after about 10 minutes.
 Once the peas have soften, remove the bay leaf and puree until smooth and oh so creamy. Taste and add more salt and pepper if needed. If you find that the gravy seems to thick, just add in more water until it’s the consistency that you want.%u00a0
 The gravy is made, the celeriac is roasted%u2026 now we are ready to eat!!%u00a0
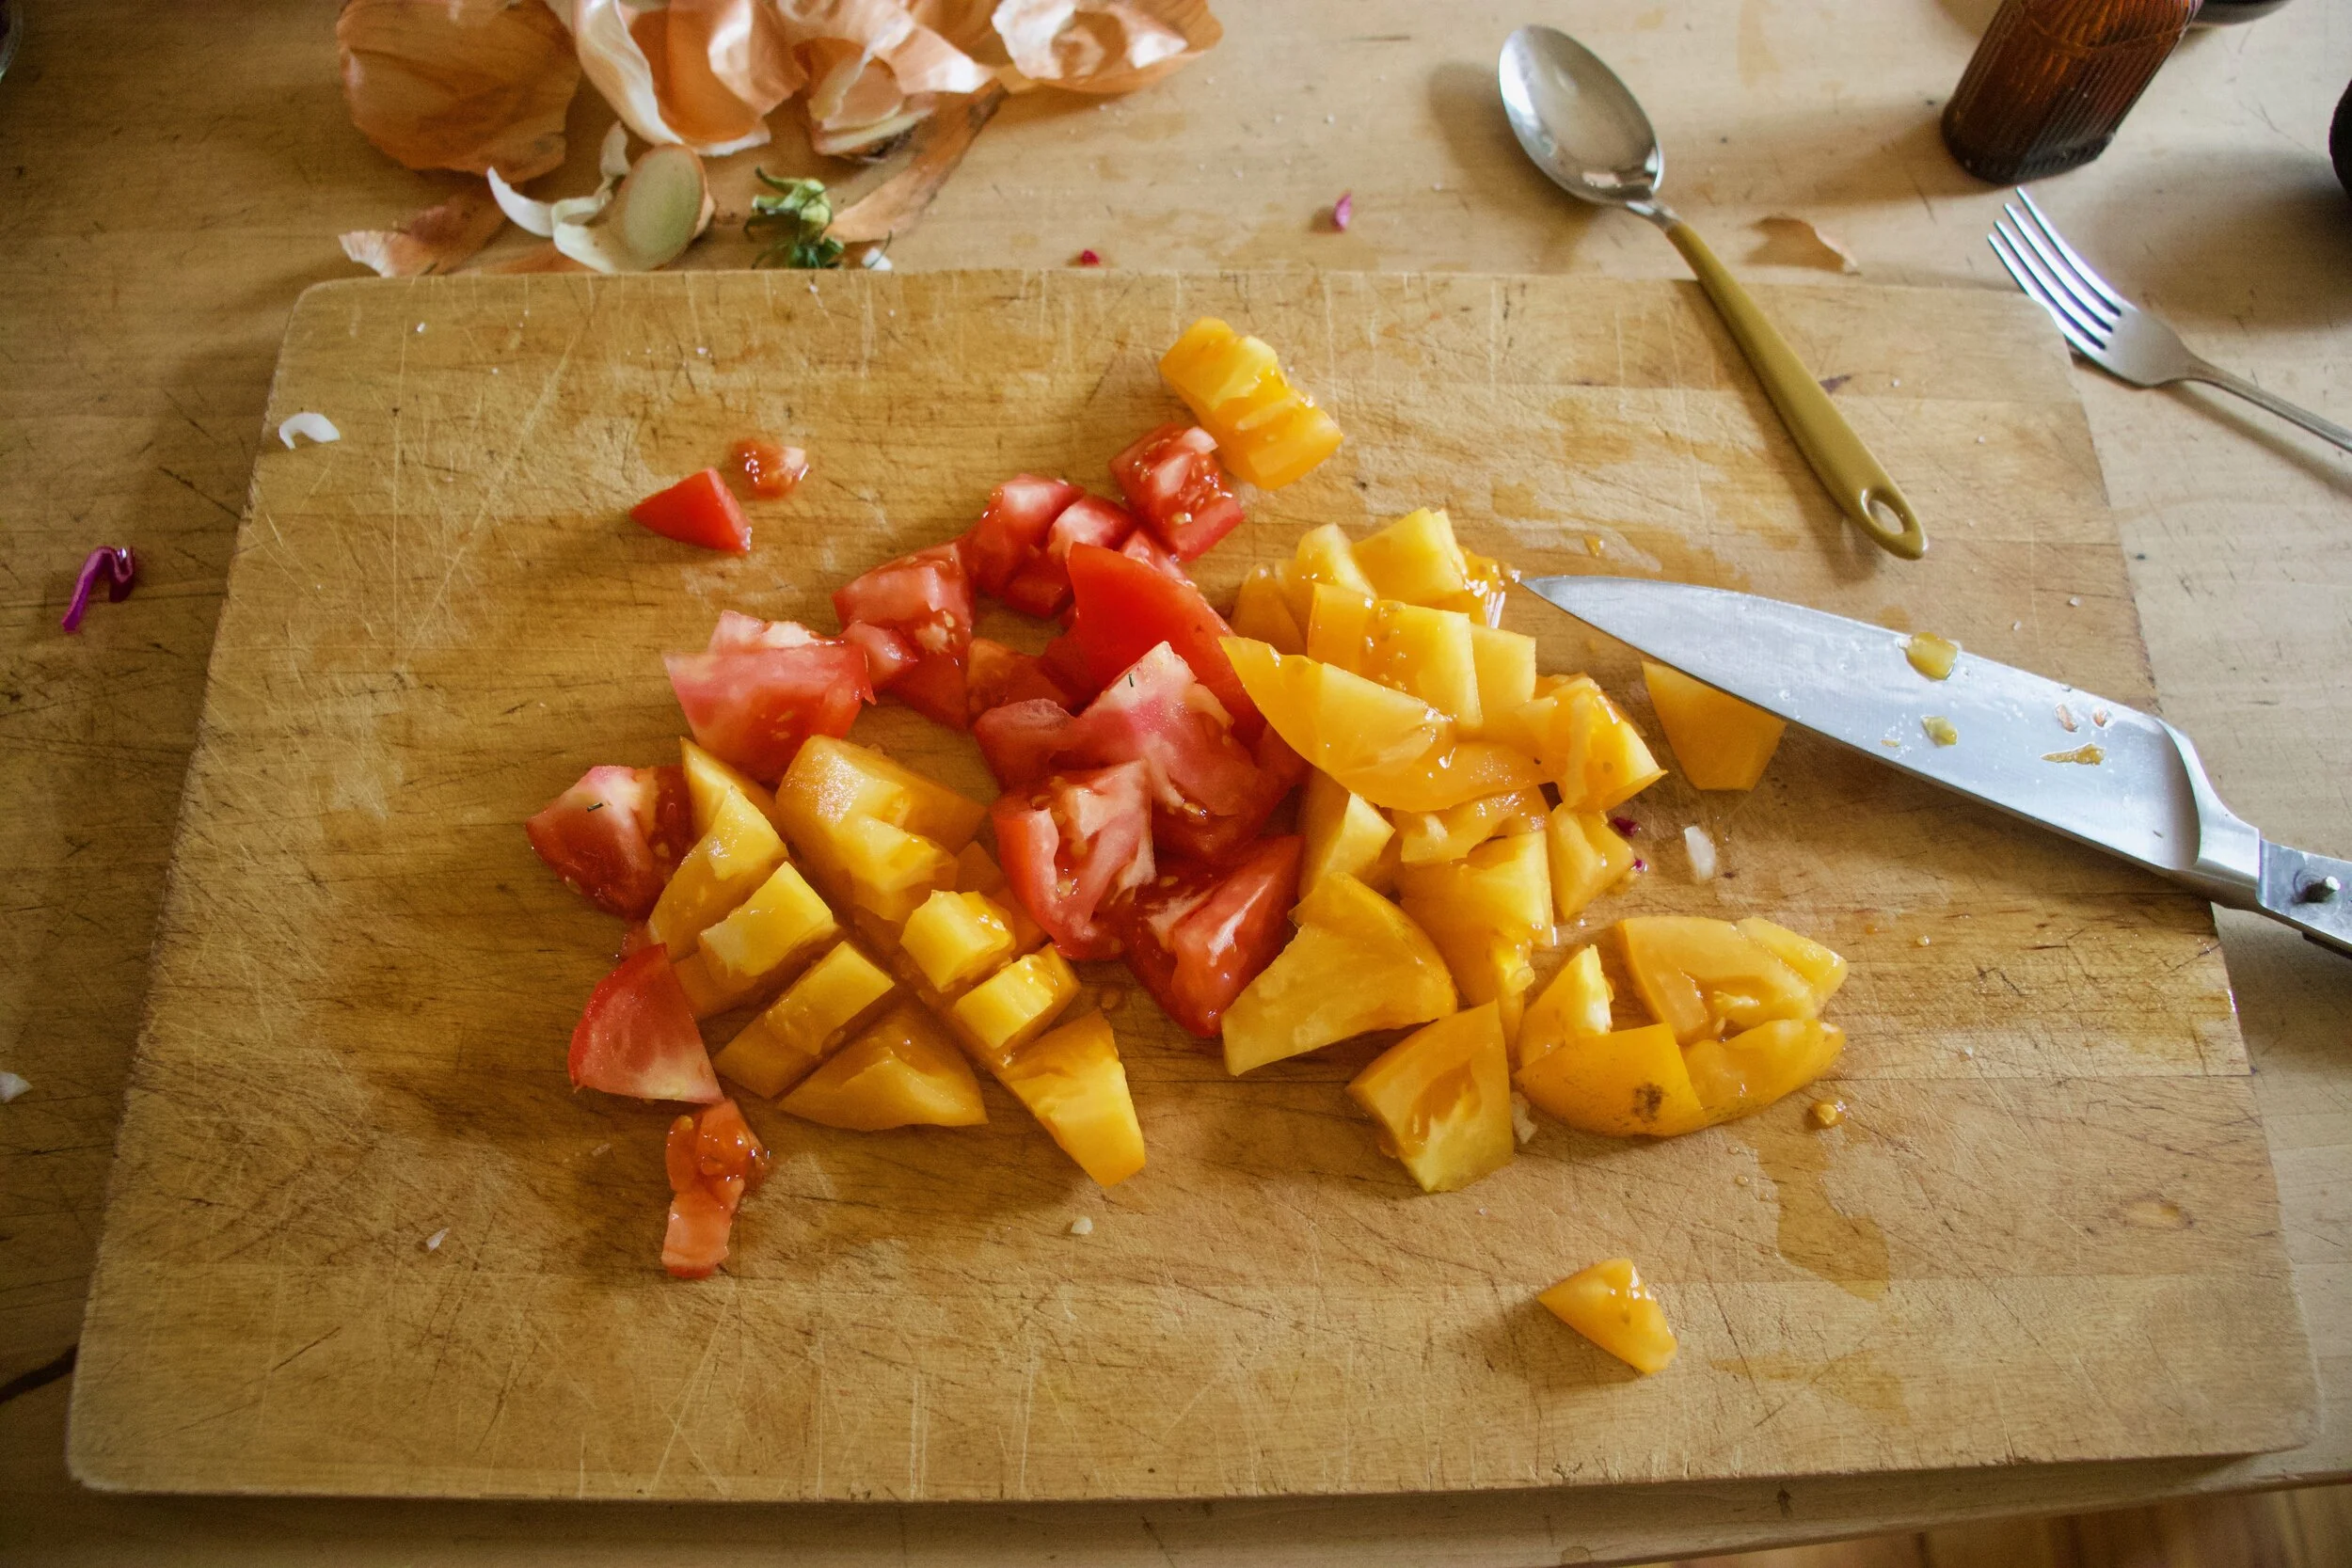
 Stick the celeriac on a plate and dump good amount of that gravy right on top. Feel free to add a bed of spinach, or a grain or anything you want, because why not, and also some chopped tomatoes for a little acid and prettiness.
Serve with the fanciest knife and fork you can find. Extra yellow mustard and sriracha sauce are great condiments to have close by.
Happy Tuesday!
-C
Mustard Roasted Celeriac with Split Pea Gravy
- 2 medium celeriac roots
- 6 tablespoons mustard
- 1 large carrot
- 1 medium parsnip
- 1 large yellow onion
- 2/3 cup split peas
- 2-3 cups water%u00a0
- 1 bay leaf
- 2 teaspoons thyme or italian spice mix
- salt and pepper
- spinach (optional)
- diced tomatoes(optional)
Preheat oven to 400 degrees
Small dice the carrot, parsnip and onion and throw into a large pot. Spinkle with salt and pepper, add in the thyme and bay leaf and add a splash of water. Stick on stove on medium heat and stir. Let cook until the veggies become soft and fragrant. Now add in the split peas and 2 cups of water. Bring to a boil then cover and turn heat down to medium low. Let cook until the split peas become tender (about 25 minutes) string on occasion and adding more water if the peas are not completely summered while cooking.
Once the peas are tender, let cool for a few minutes, remove bay leaf, and either dump into a blender or blend with an immersion blender until nice and creamy. If gravy seems to thick, add in more water.%u00a0
Scrub or peel celeriac roots and slice them into 1/2 inch think rounds. Place on a baking sheet and brush mustard on both sides and spindle with pepper. Stick into oven for about 10 minutes, flip, then back into the oven for another 15 or so minutes, or unit the celeriac is tender.
When the celeriac is done remove from oven and %u00a0stick a few rounds on a bed of spinach (or not, or any kind of grain or green you like) Top with a hearty helping of the gravy and toss on some chopped up tomatoes.
Eat with at knife and fork like a fancy person.


 Happy Hanukkah!!! Today is the first day of the %u00a0festival of lights and I wanted to send a little love towards those who celebrate it.
 I didn’t actually use all the potatoes in the picture, but I wish I did. There was the perfect amount for dinner for two people, but I wanted to make a few extra for left overs%u2026.there were none. Oh well.
 %u00a0I did a matchstick dice for the apples.. I didn’t want the apples to be to chunky%u00a0and I didn’t want them to turn into sauce so the match stick worked well. After I diced the apples, I squeezed a little lemon over the top to keep the apple from turning brown.
 I start grating the potatoes and onion, and whoa! %u00a0Imagine my surprise when %u00a0one of the potatoes was purple%u2026 I got pretty excited.The color is so beautiful. and made the latkes look so nice%u2026It was meant to be.
 Super squeeze the juices out of the grated potato and onion. If you don’t get most of the liquid out, the potato won’t crisp up and will fall apart and be and it will be gross. So SQUEEZE!
 %u00a0Add in the egg, cornstarch, salt and pepper and mix it on up. Did I mention that I was making these for the mister and the GF sister..No flour, just cornstarch. I think they might have come out even better without the flour%u2026so yeah, these babies are gluten-free.
 Your mixture is going to start to get a little watery again. Its cool, just squeeze it out with your hands and smash into patties.
 Enough oil to cover the bottom of the pan on medium heat. Test the oil to make sure its hot enough before sticking the latke n the pan. To test, sprinkle water in pan, if it sizzles, its ready.Working in batches, %u00a0fry each latke on each side for around 5 minutes..you don’t want to cook to fast or the inside of the latkes will be raw. I always do a tester and feed it to nick. He’s my guinea pig%u2026.He said they were awesome..
 %u00a0With every batch made, stick on a wire rack and keep in the oven to stay warm. The rack keeps the bottom from getting soggy on the pan… so use it. %u00a0
 %u00a0 Roasted apples are the BOMB!!! %u00a0Its like eating apple sauce sticks or little bites of heaven(A bit dramatic, but these are so good) I roasted mine for 20 minutes, until they were nice and soft but not completely failing apart. If you are into it, add a touch of cinnamon%u2026I did’t this time, but you bet %u00a0I am going to be making myself a big ol bowl of roasted apples this week, and yes, I will top with cinnamon.%u00a0
 A %u00a0bowl of apple slaw, sour cream and lemon wedges%u2026.I put the latkes on a nice little pile of greens. A very good idea. %u00a0A dinner worth celebrating!
  I also served the latkes with roasted chickpeas and cailflower%u2026for more of a meal%u2026( Mini recipe%u2026 Cauilfower and chick peas drizzled in olive oil, %u00a0tossed in salt pepper and garlic, roasted 30 minutes and topped with lemon) A little added veggie and protein%u2026.I am looking out for you people.
 There we have it%u2026my variation on a traditional food. Enjoy your fried pancakes of potato and onion, they are a food worth a celebration.
 When something goes on sale at the grocery store, I tend to buy it. Being that it is Valentines Day this week, all the stores are having specials on all sorts of sexy things… and strawberries are one of them. Now I am not a huge fan of buying produce that is terribly out of season, but I can’t help myself…a good deal is a good deal and the strawberries were a super good deal. I was just going to make some sweet ass strawberry jam or maybe a lovely strawberry cake with them (and I probably still will), but these strawberries are actually super juicy and full of flavor, and it’s always nice to eat some full flavor freshy strawberries… especially soaked in balsamic vinegar. And yeah, I think that this salad is pretty sexy, so it makes for a perfect Valentines day dish.
 A handful of ingredients and 5 minutes will get you to a fantastic salad experience.
 Pour the vinegar on the strawberries and let sit for at least 5 minutes. (the longer the strawberries can sit with the vinegar, the better)
 Pile it on.. thinly slice avocado.. rough chopped toasted almonds… It’s pretty much as easy as it can get.
 And last but not least, toss on the balsamic soaked strawberries and drizzle the remaining vinegar. (if you made hearts, place on top to make pretty) Sprinkle with a pitch of salt and pepper and pow! Fancy, sexy, delicious salad.
Sunday Happy — The Lovely Crazy
November 5, 2020 by maximios • Blog
My counter is covered with tomatoes, melons, pears, and zucchini. I have a long sleeve shirt draped over the chair by the front door to throw on when I leave the house in the morning, the camping stuff is now in our weekly rotation, and all the sunflowers have bloomed and are big and mighty%u2026 This is the best part of summer, wouldn%u2019t you agree?
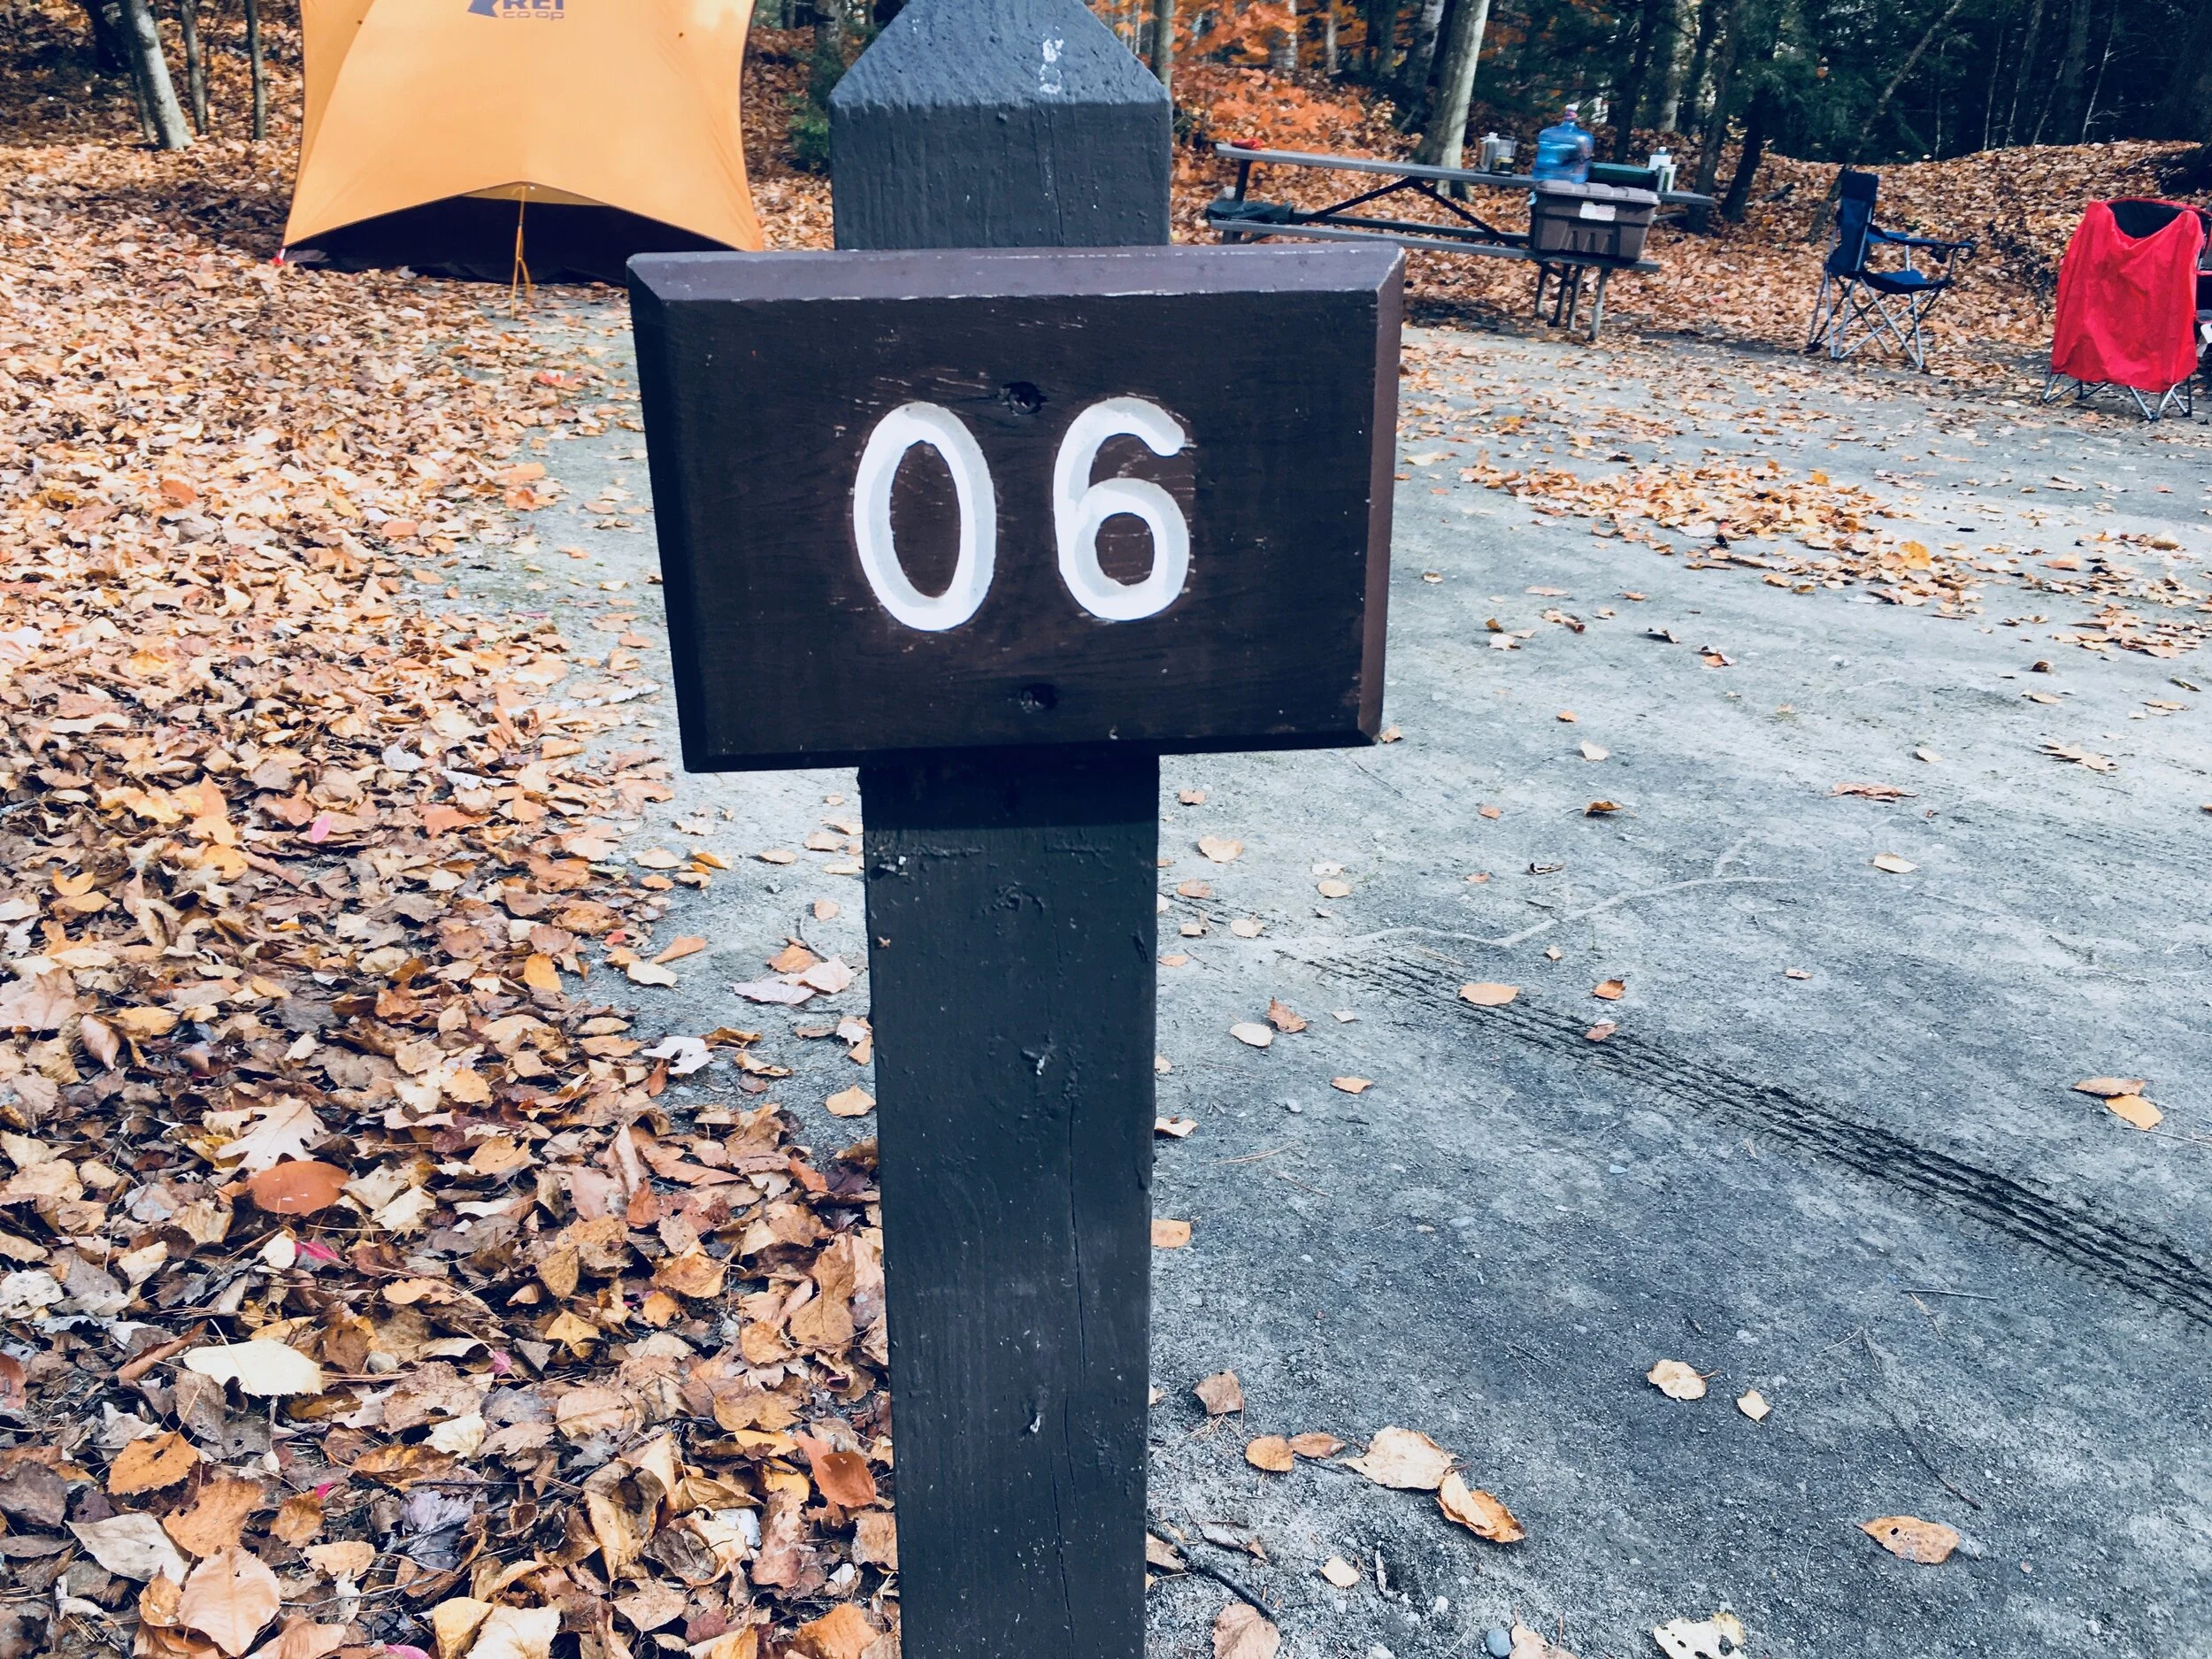
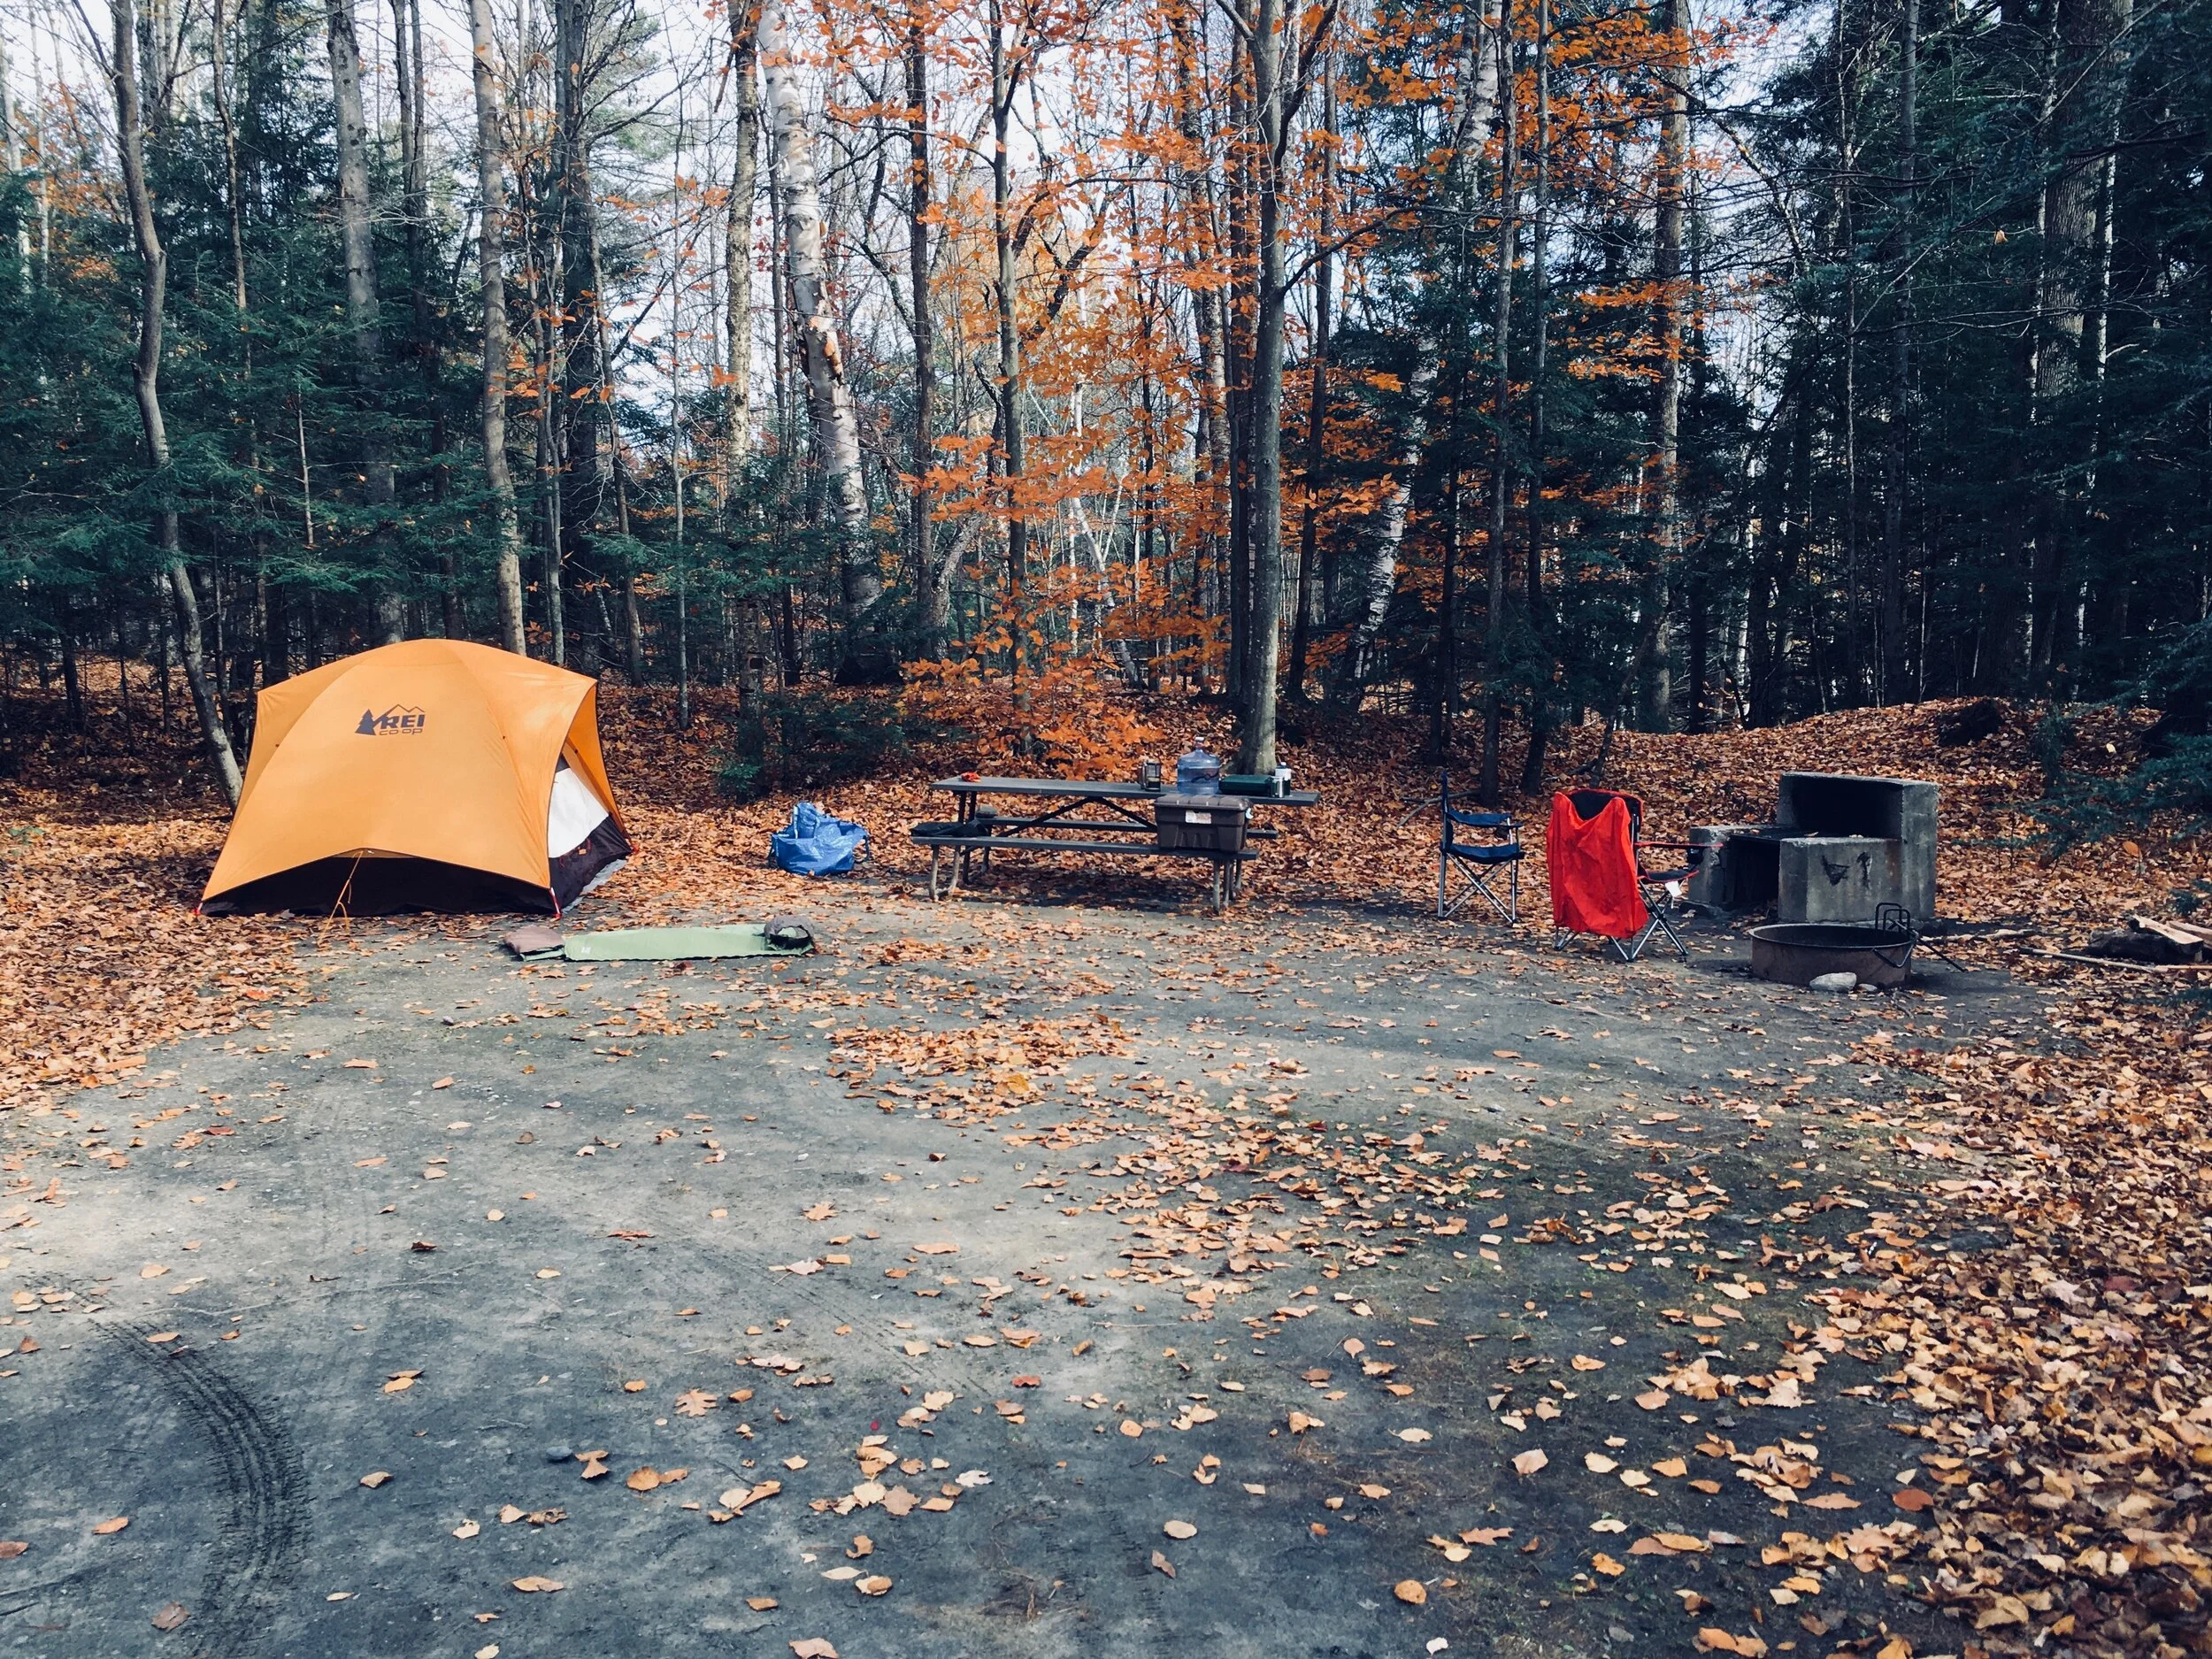
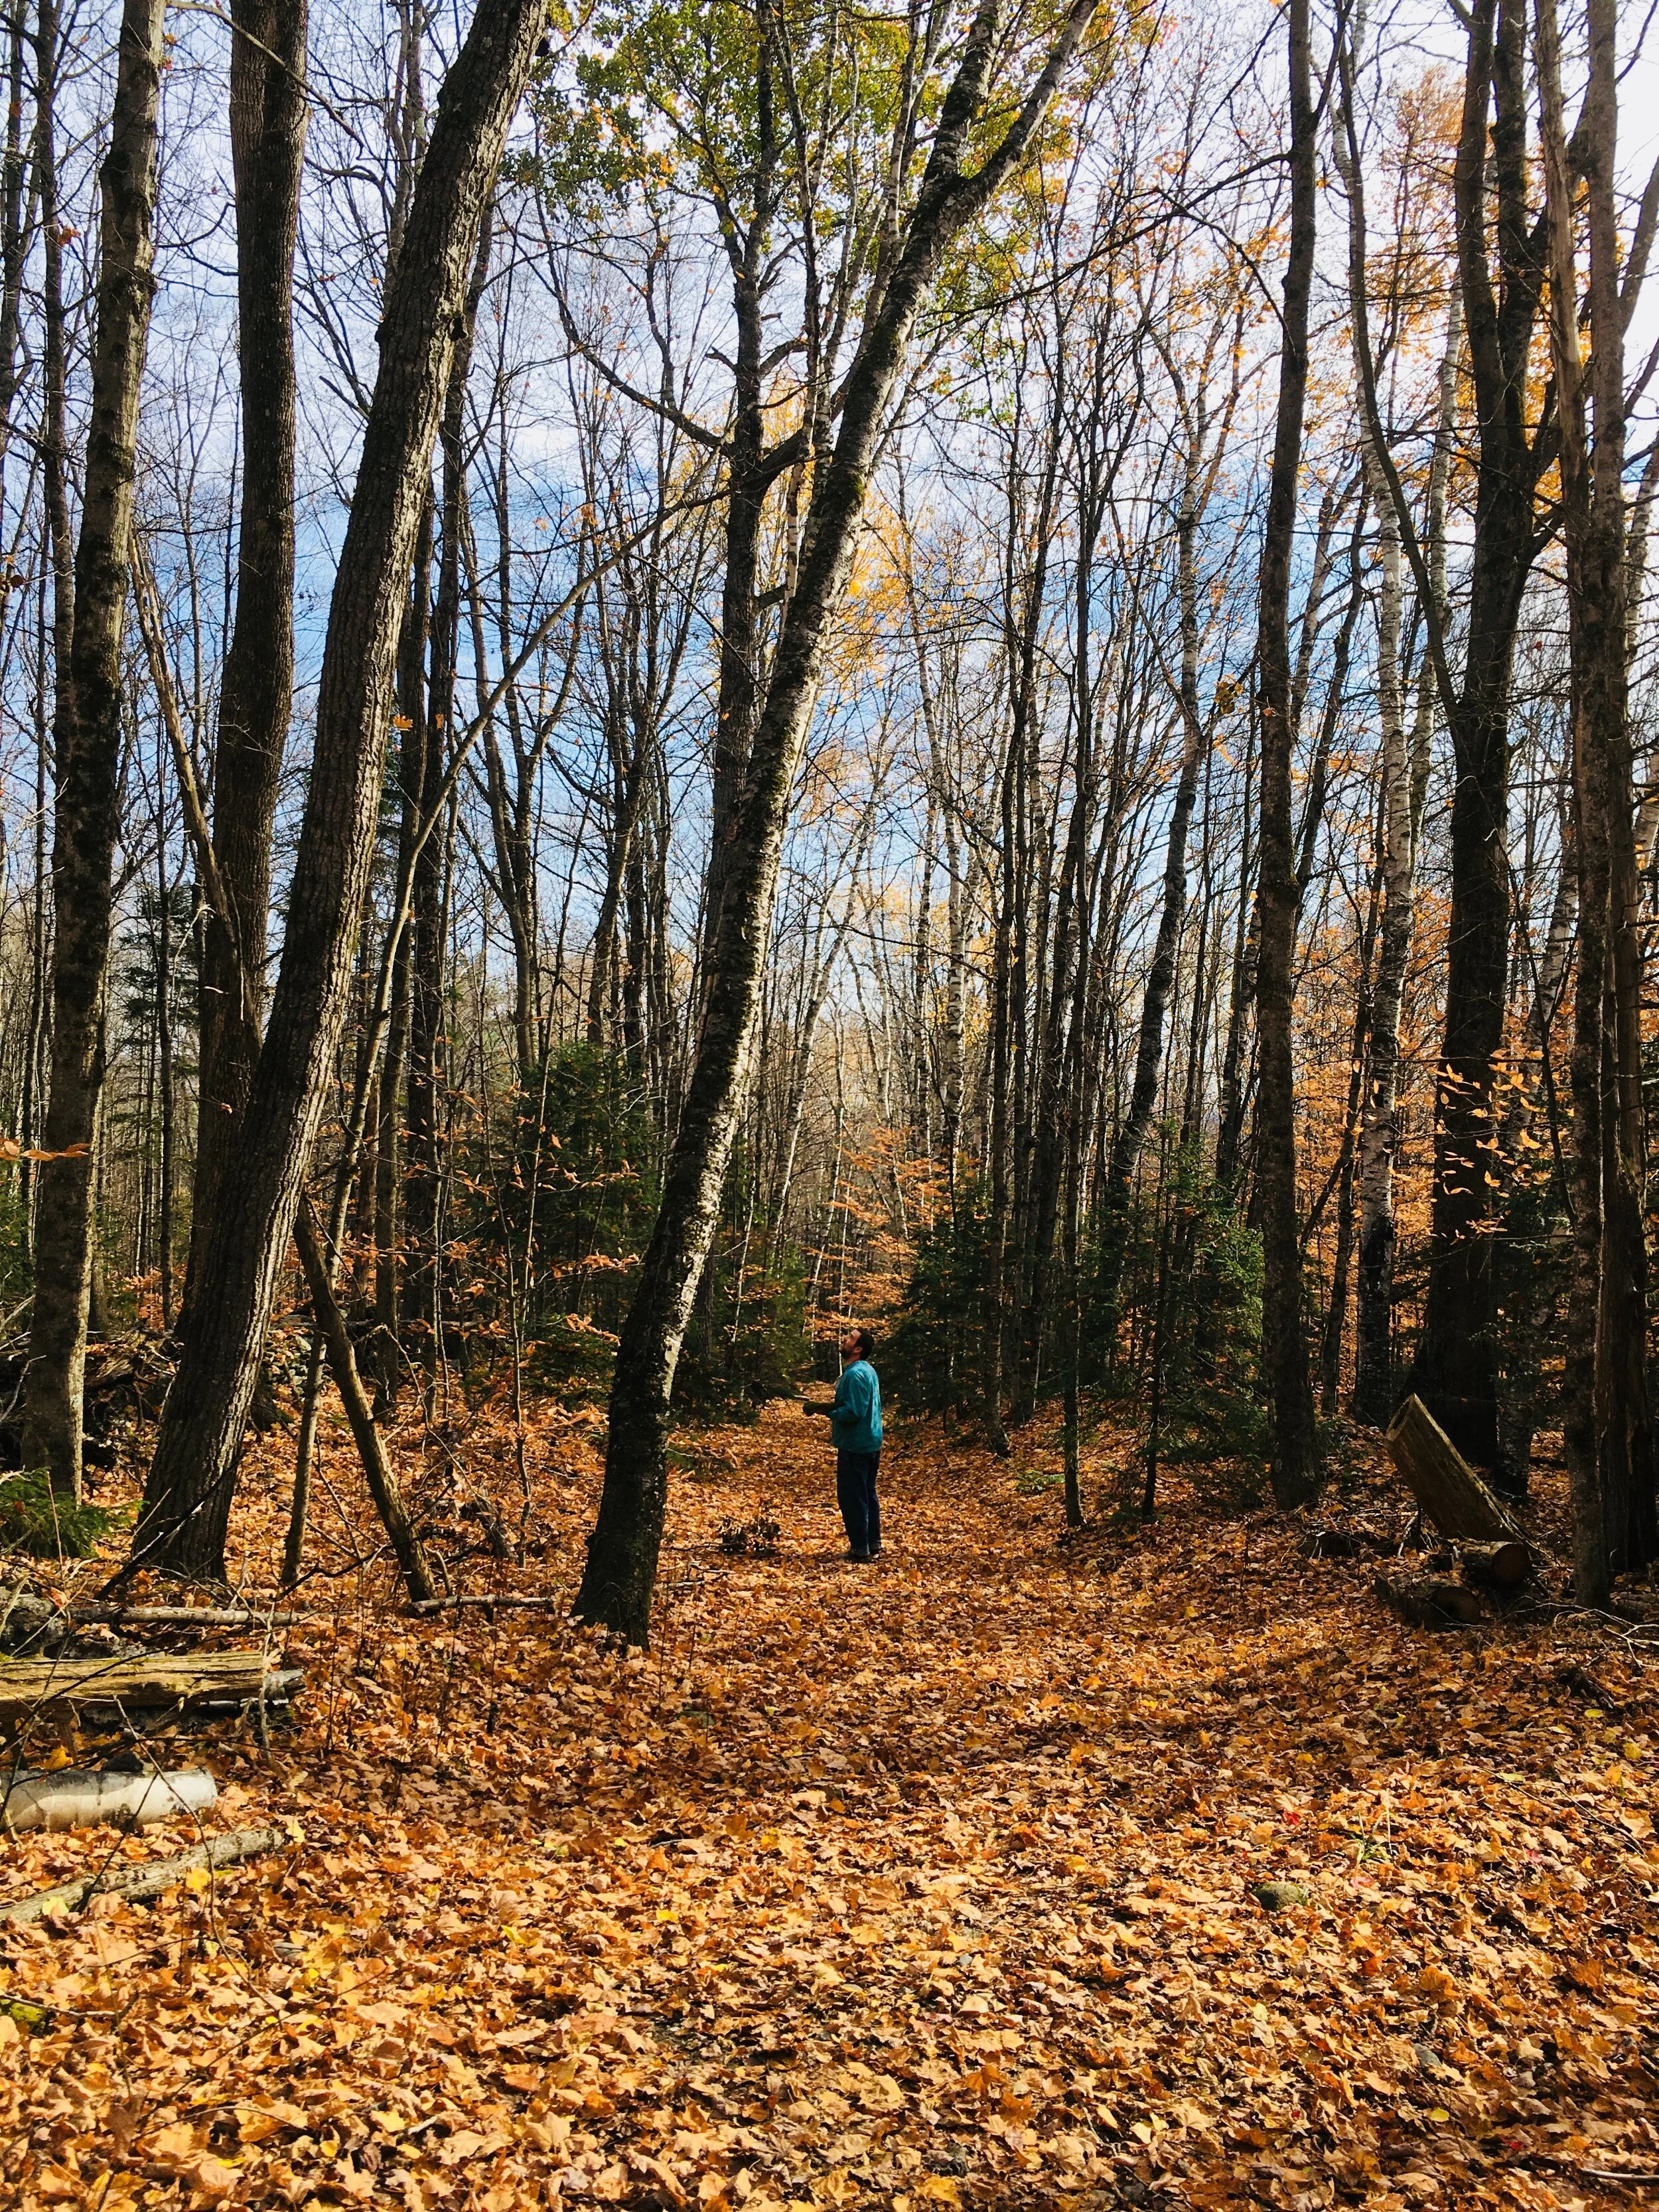
What a good week. The mr and I started off with a camping adventure up in Belvidere. A great day. We went for a hike, made a nice soup dinner, relaxed and enjoyed the solitude before crawling into the tent to ass out. But I think I only just fell asleep when the lightning started. Then the thunder, and then the torrential downpours. It was crazy. I have never seen so much lightning or heard thunder as loud and as long as I did that night. I was laying awake for what felt like hours just watching the tent light up and thinking that the thunder was actually the world falling in on itself. But then it stopped, I fell asleep for a little while, and then we woke up before the dawn, picked up our sopping wet tent, and came on home. So sure, we were a wee bit wet and exhausted but I was also feeling more normal and happy then I have in a while. I guess all I need is to pitch a tent in the woods and I am good. So good in fact. Even if it we are camping during a tornado warning. (I guess we missed that one.%ud83d%ude33)
The rest of the week consisted of a few more hikes, a kayak adventure where we both ended up getting sunburnt, lots of tomatoes from the farm, and a neighbor basically throwing all the pears at me that I could possible take from him pear tree. We did dinner with Mom, had lunch Barb, and played with Gigi. And all the usual this and that. The mr finished anther free pantry (this one is gonna have a fridge too), I made all the phone calls and would be happy if I never talk on the phone again. I weeded the garden (probably for the last time), and we both voted by mail. Productive as alway.
Today the mr and I are heading out early early. Gonna toss the tent and kayaks into the truck and head on out into the mountains once again for a night away. Just let the day be however its gonna be out in the woods. Very much looking forward to it. VERY MUCH!
Stuff I read on the internet.
–Jumping for Justice Chris Facey%u2019s photographs recall summer in the %u201990s.. I am obsessed with this photos.
-Love my local flour company! The Riotous Success of King Arthur Baking%u00a0Company
–Golden Girls%u2019 Wallpaper Exists%u2014And It%u2019s Not Hard to Picture It in Your Place. Not sure if I think its creepy or I love it%u2026.. Think I love it.
-You can really see when people really care about quality of their products.How One Company Has Been Making Tofu by Hand Since 1911
-‘Columbusing’: The Art Of Discovering Something That Is Not New.
-It%u2019s watermelon season! Why You Should Be Eating Watermelon Seeds, Instead Of Spitting Them Out
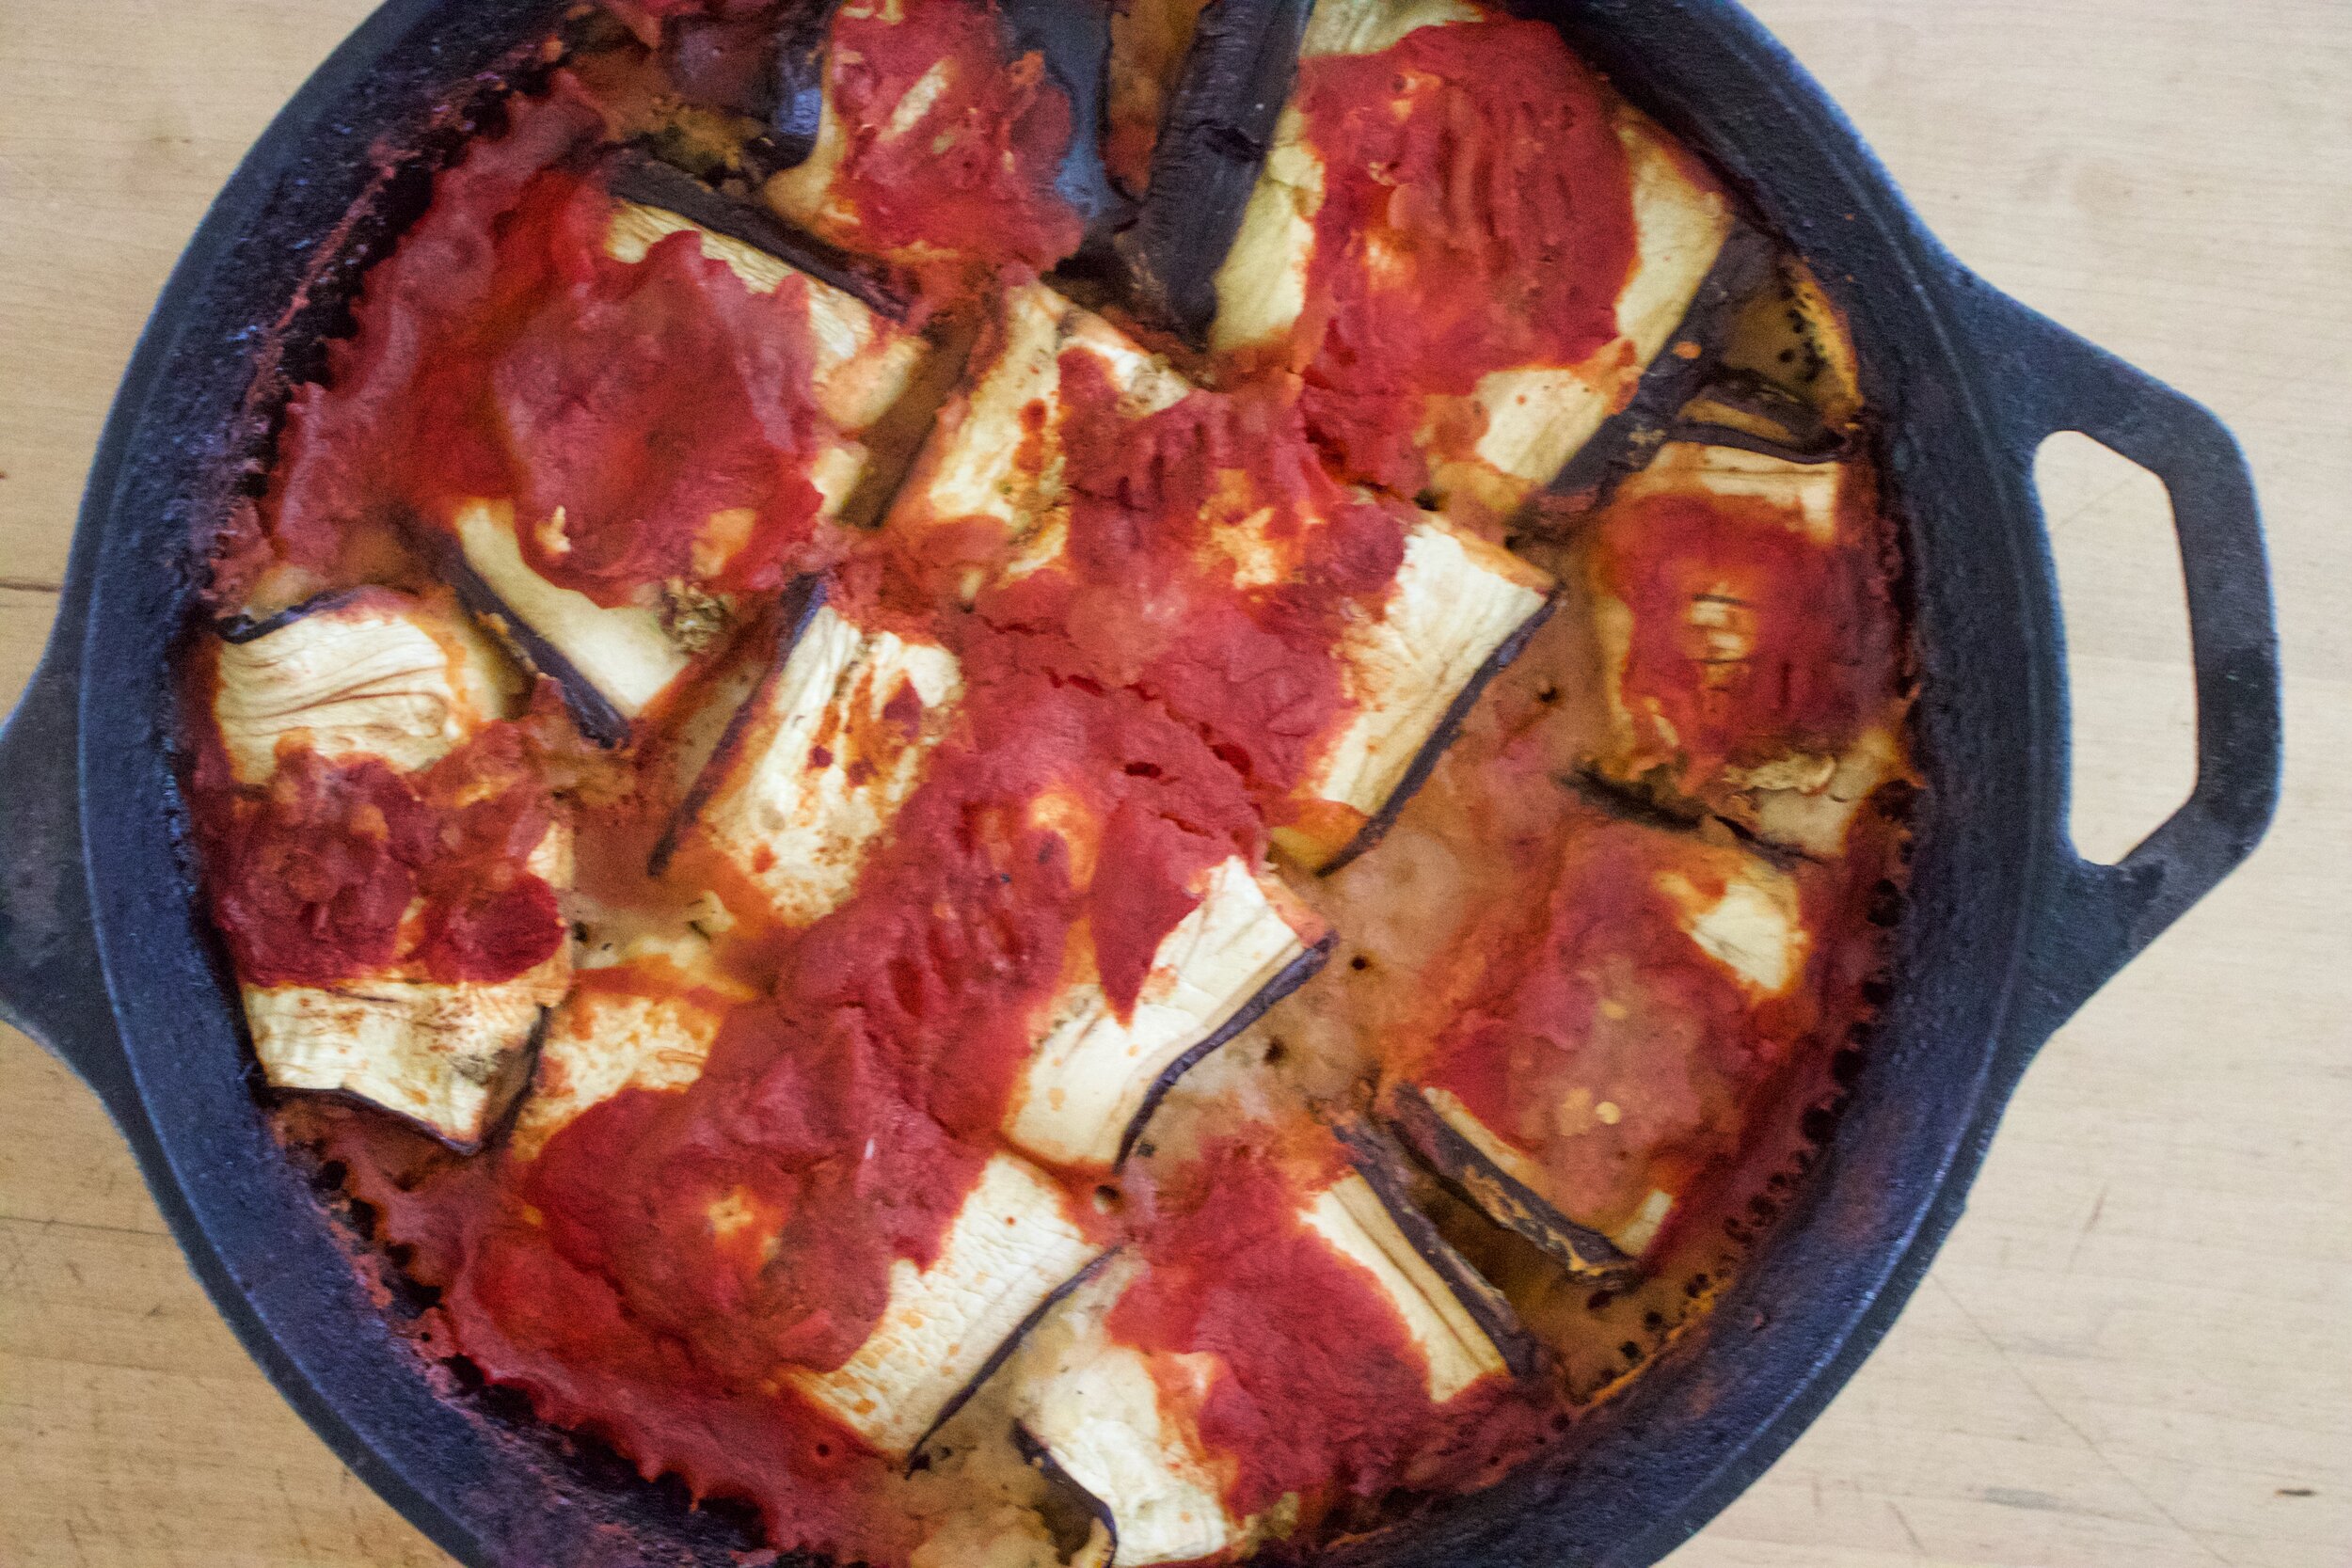
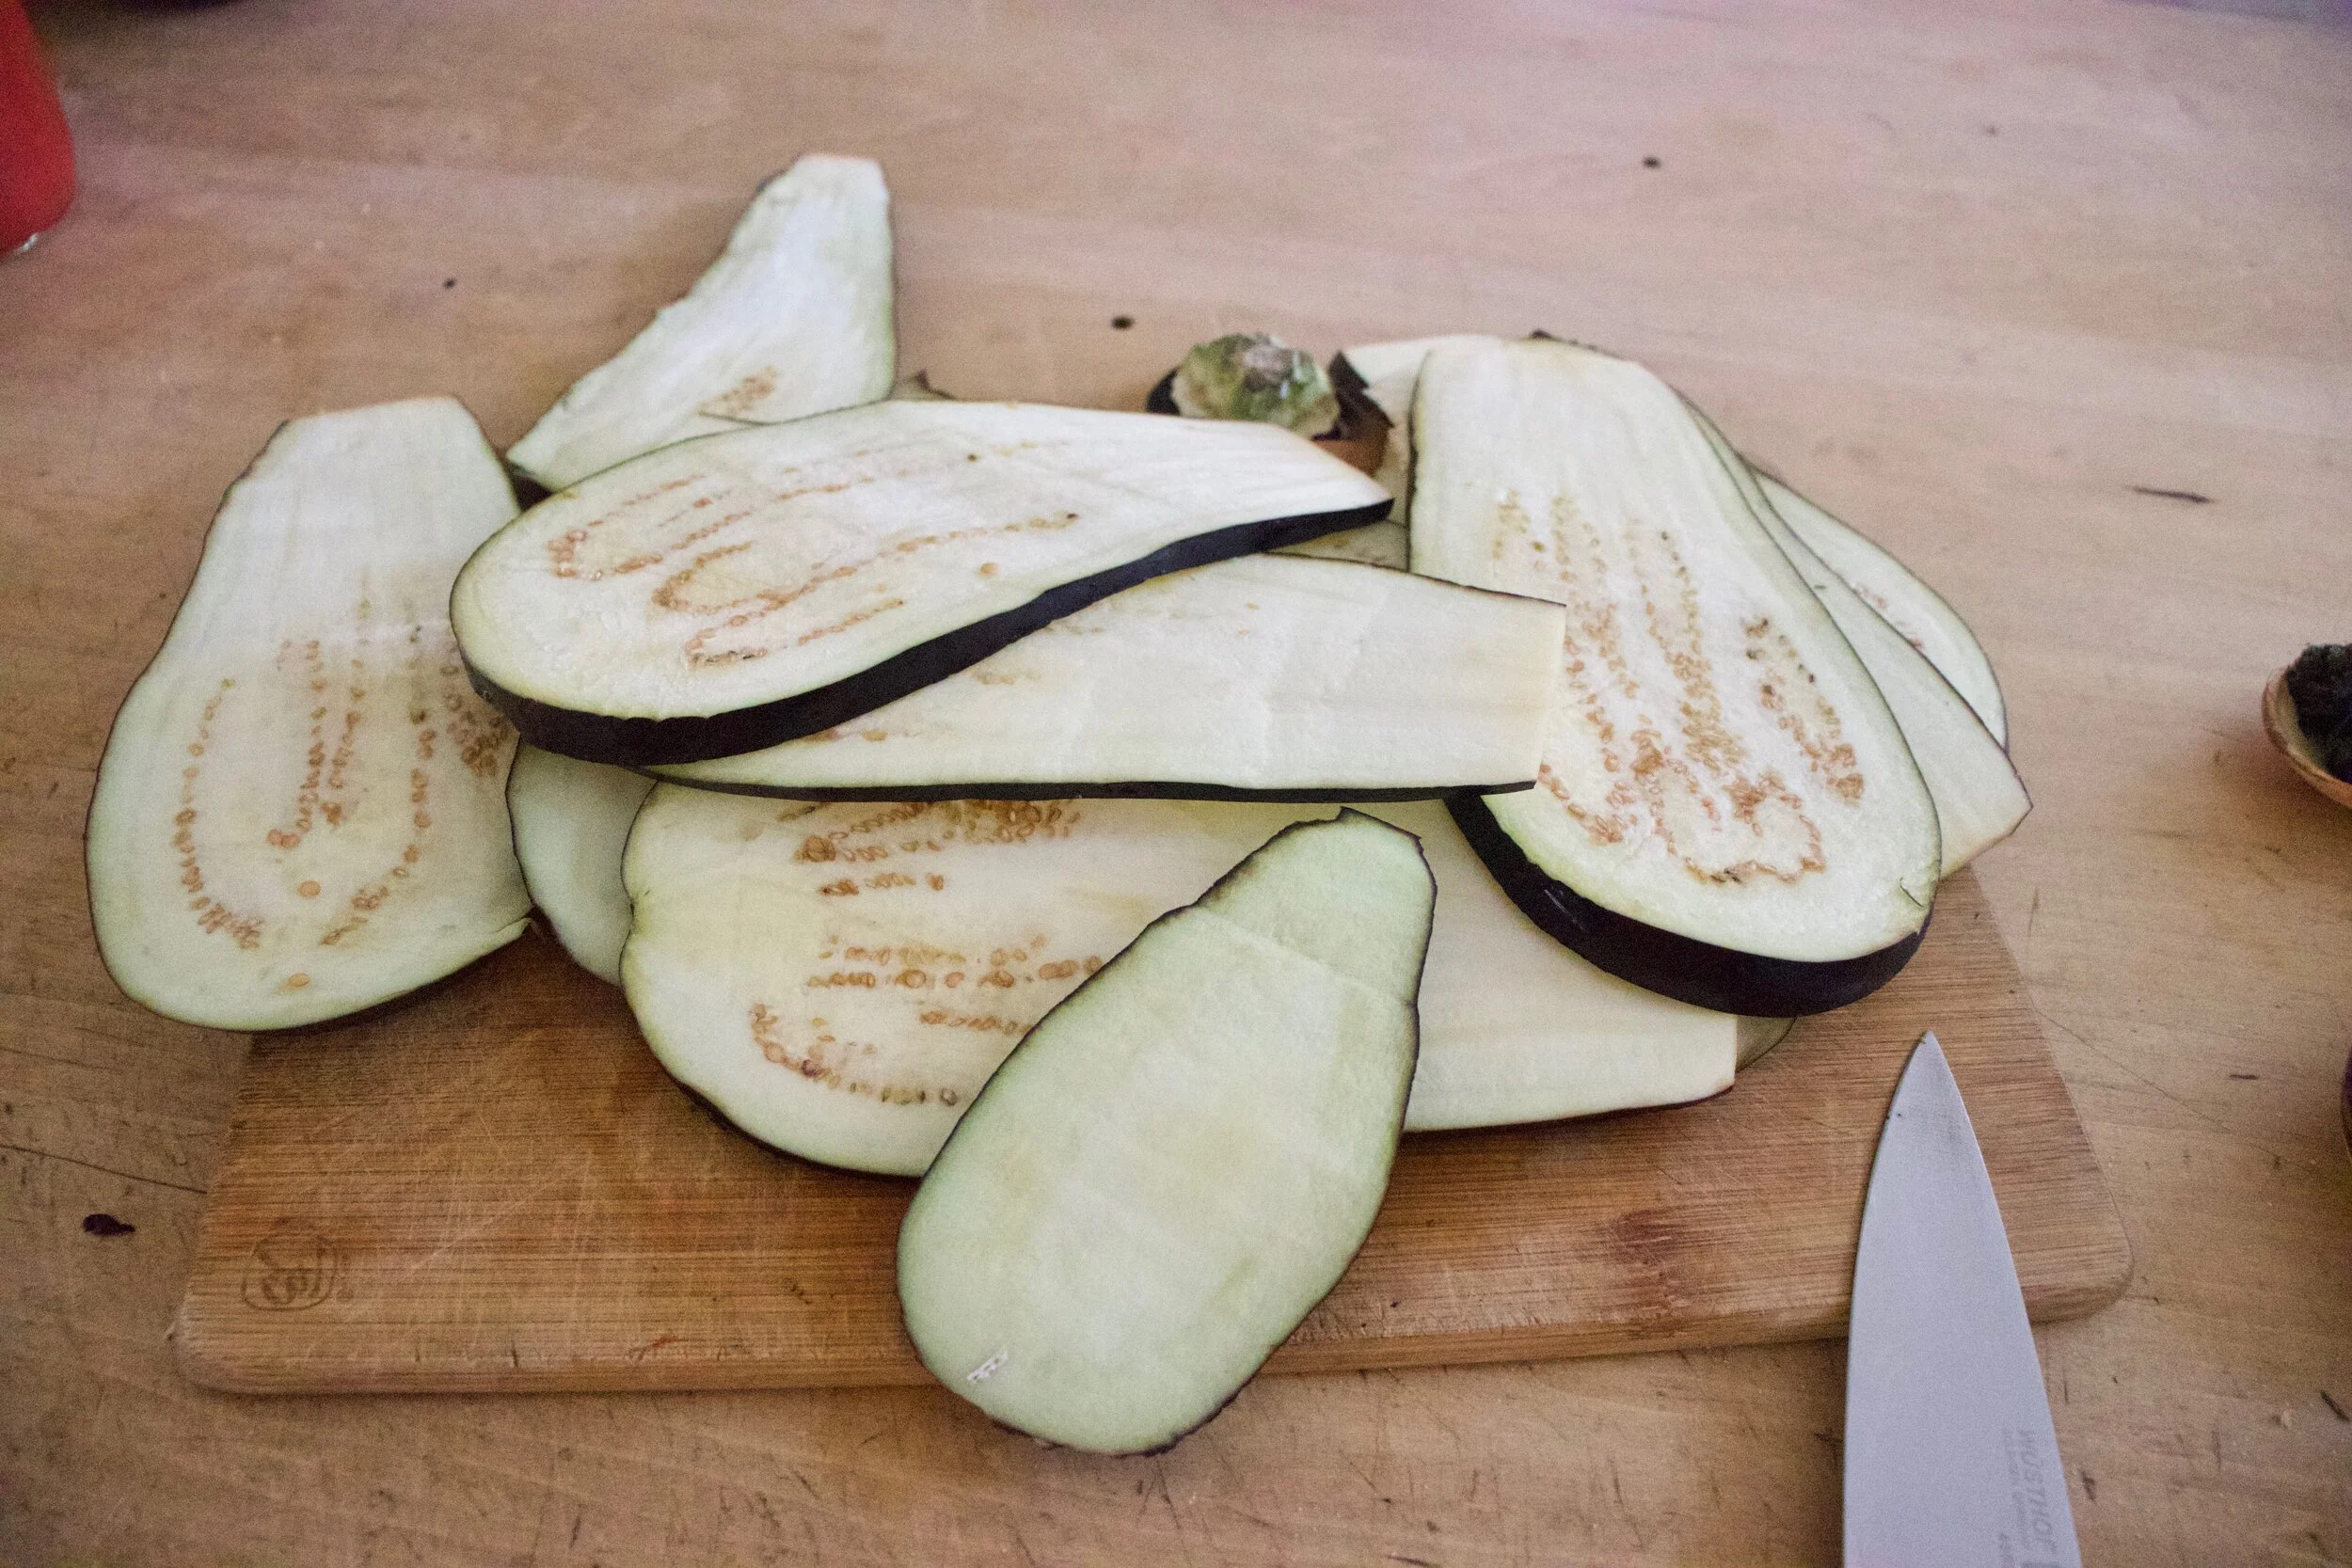
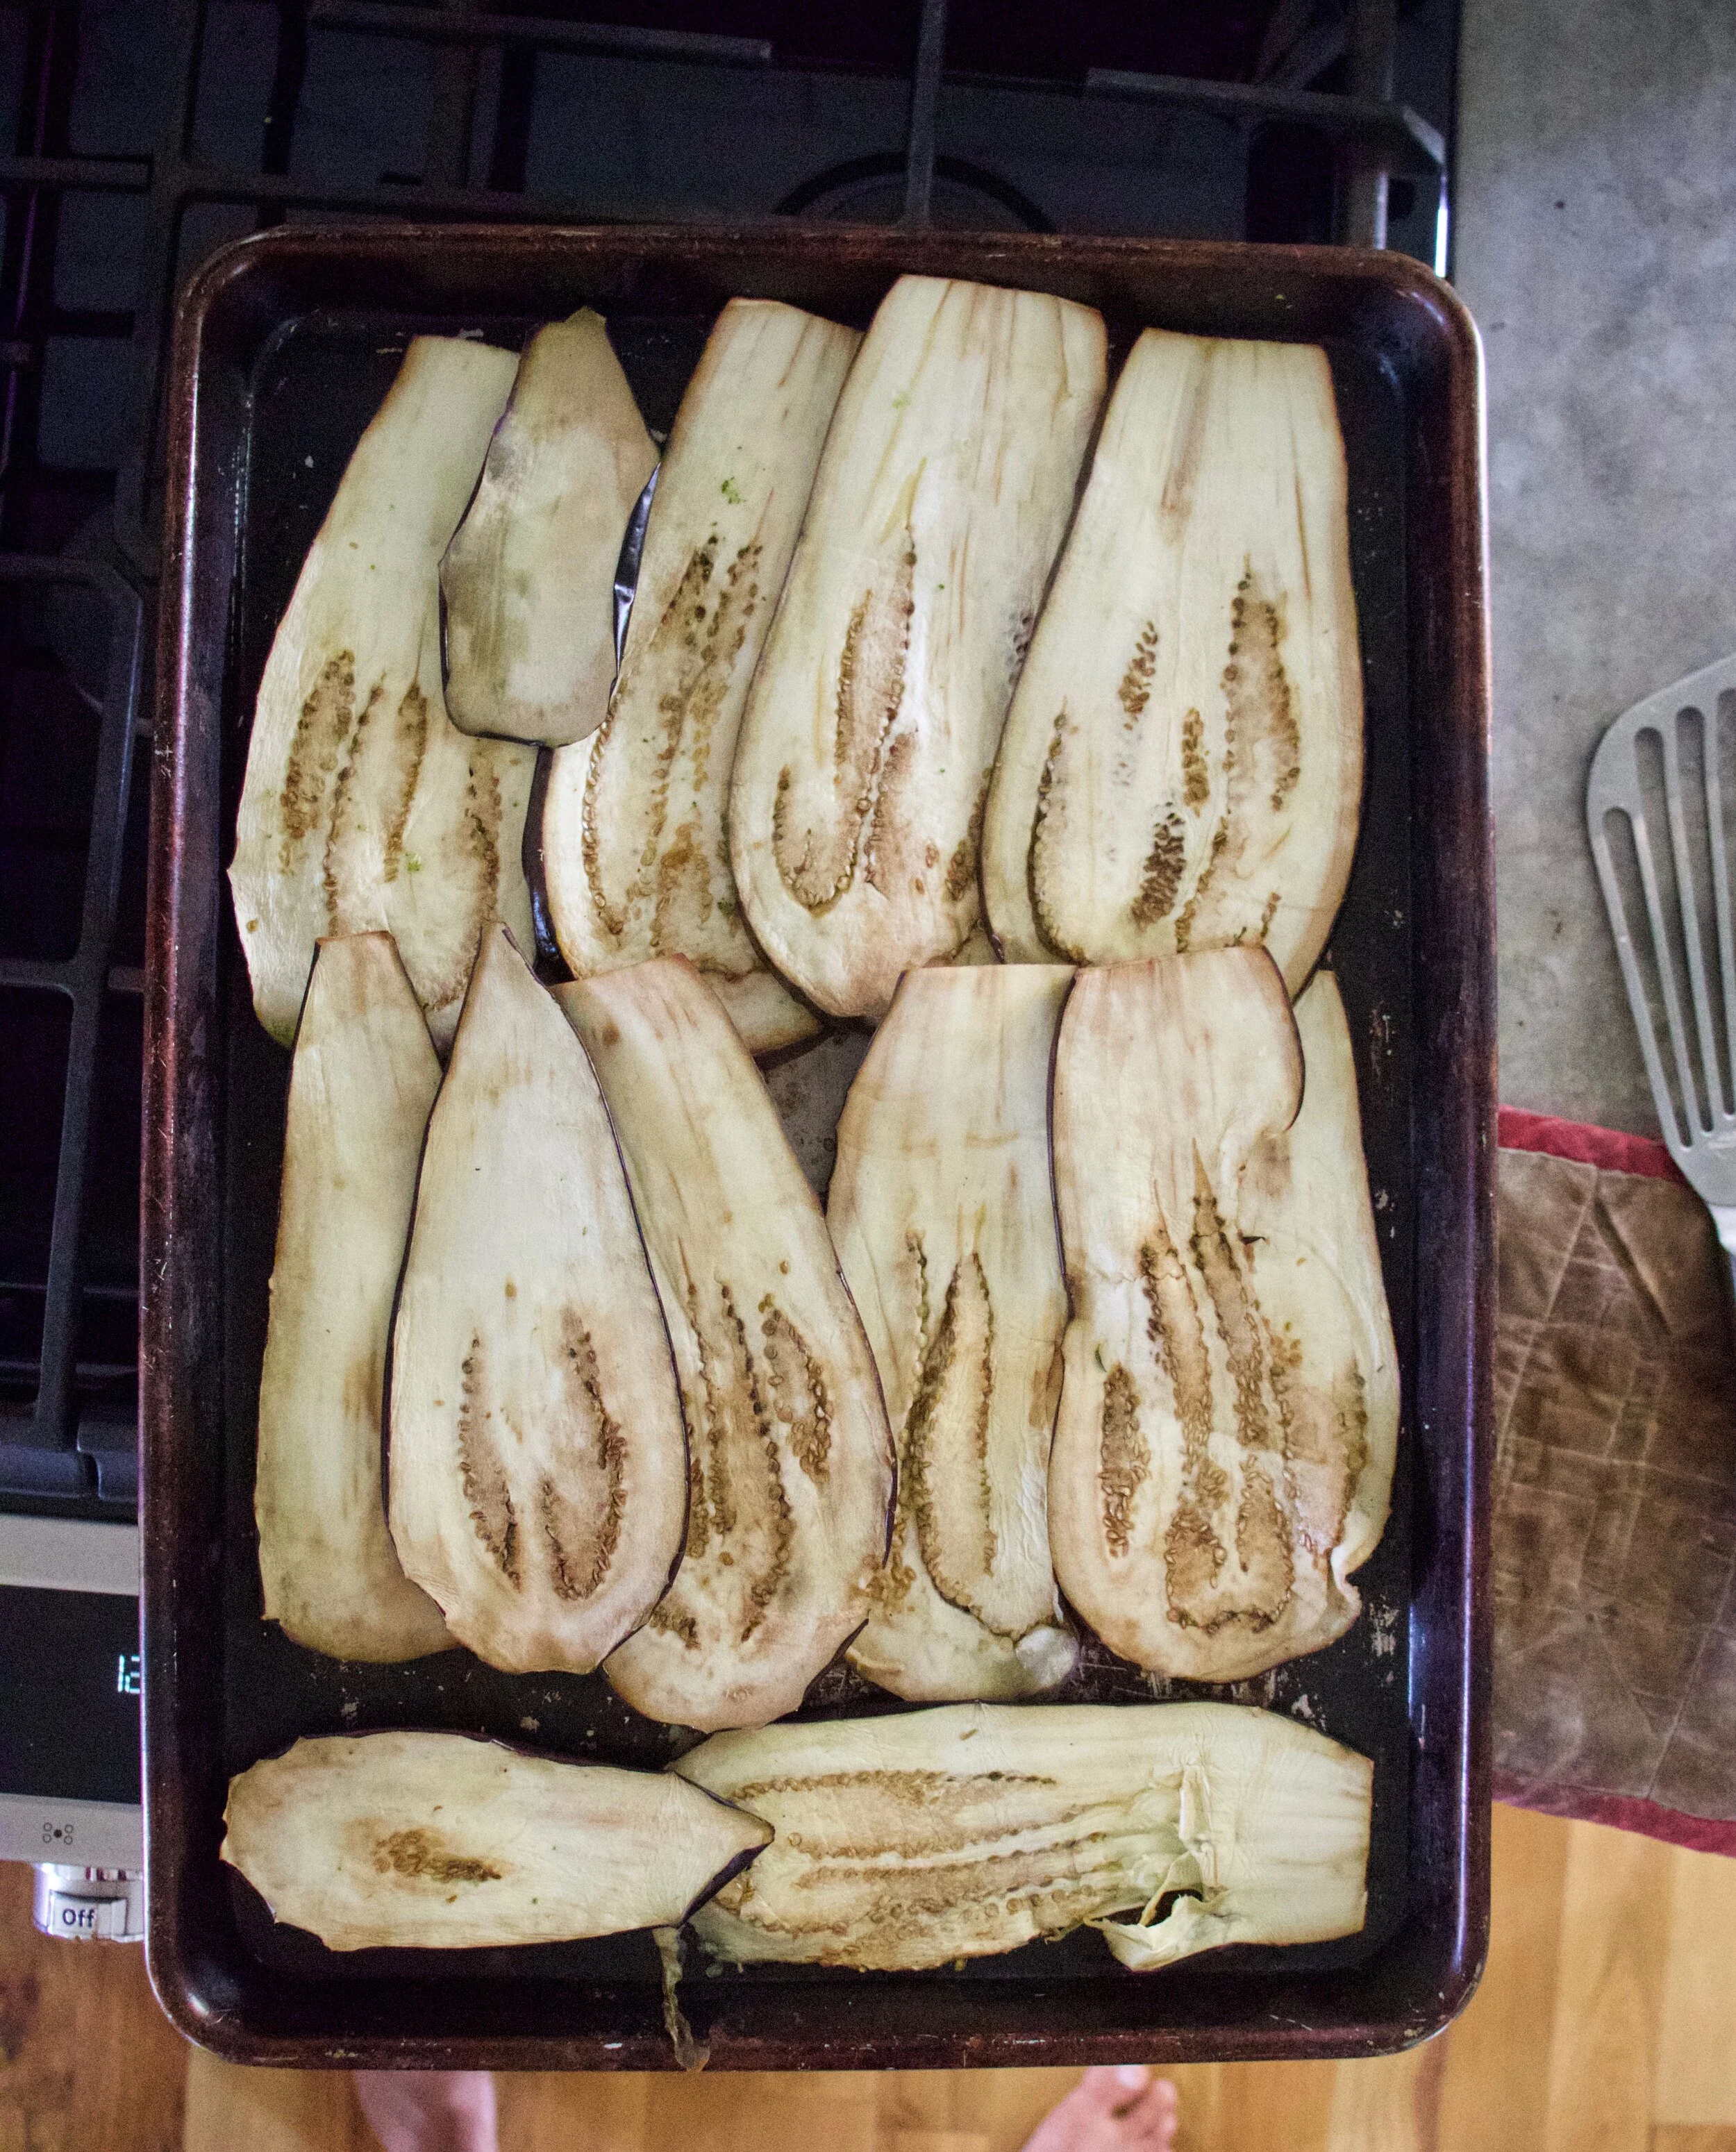
-It is also eggplant season! What Is an Eggplant, I Beg of You?
–DIY Drying Rack. On my list of things to do!
-Not to sound like a downer or anything but if you think socializing now is hard, The Winter Will Be Worse. It is sick that I am actually really excited for winter and not having to see ANYONE?
–Not Flying This Summer? Many Americans Are Hitting The Road %u2014 In RVs. I have talked to a lot of people RVng this year. Just wait until next summer. I bet there are going to be a shit load of people trying to get rid of those RVs they just bought.
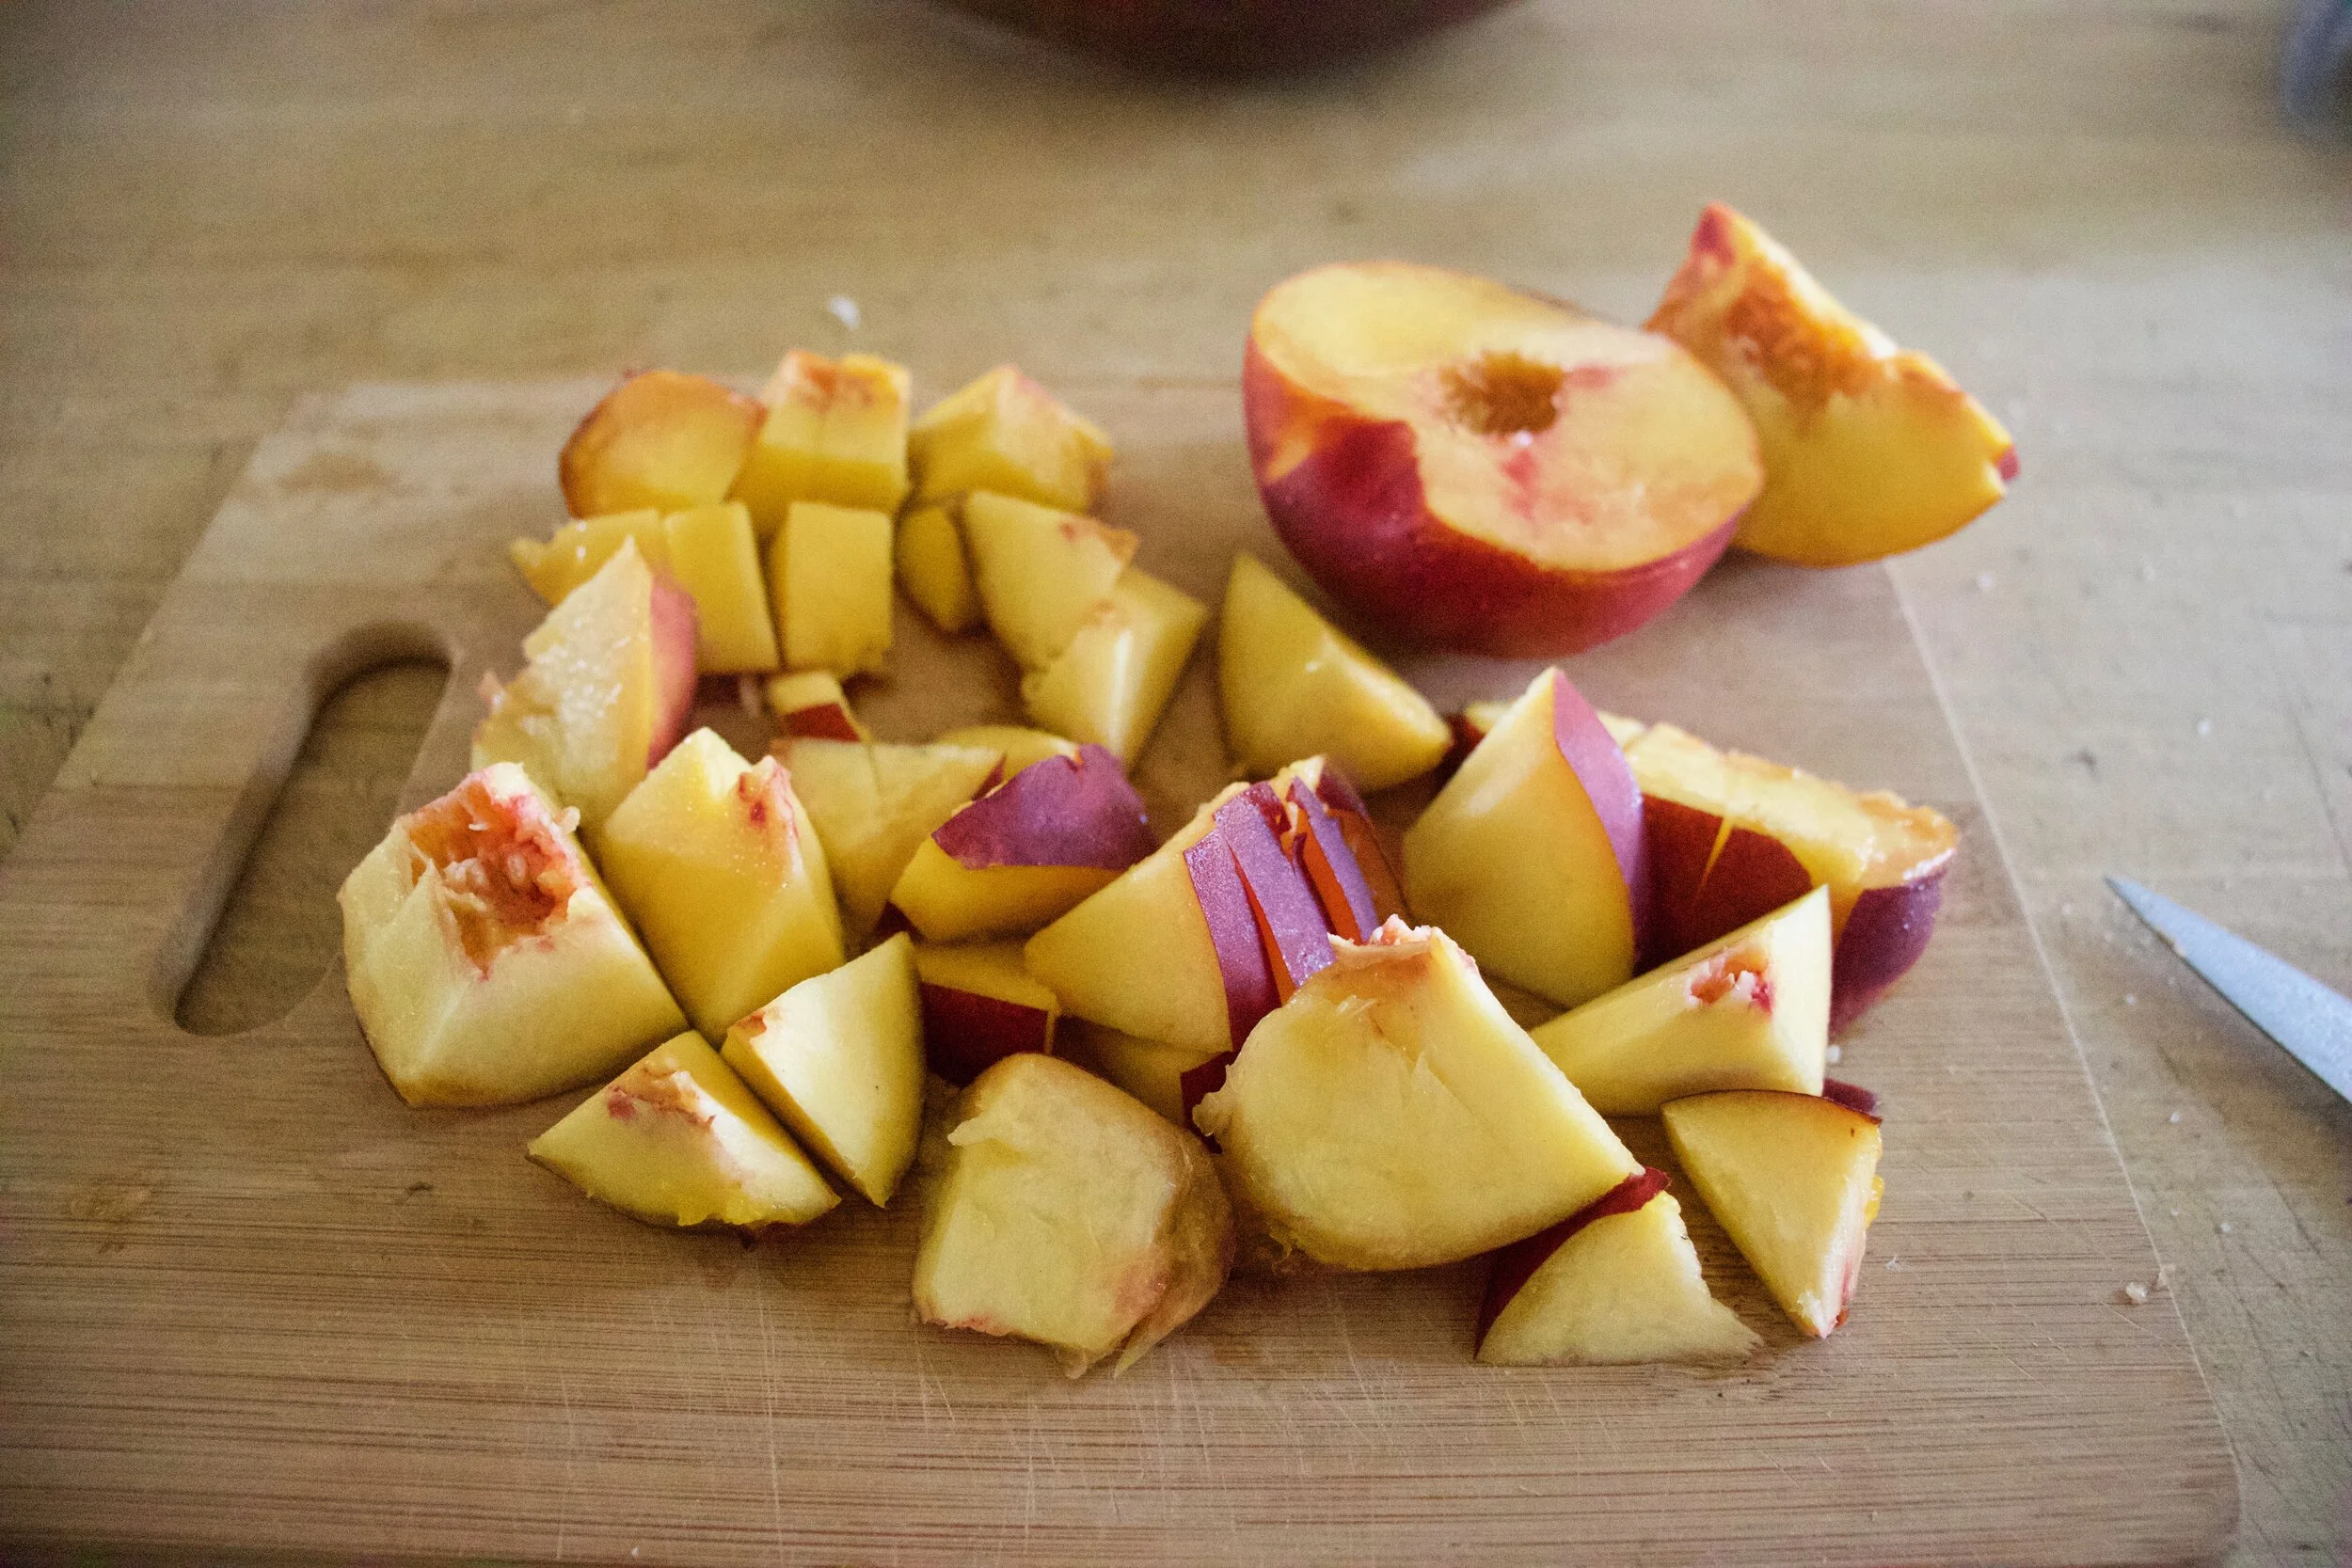
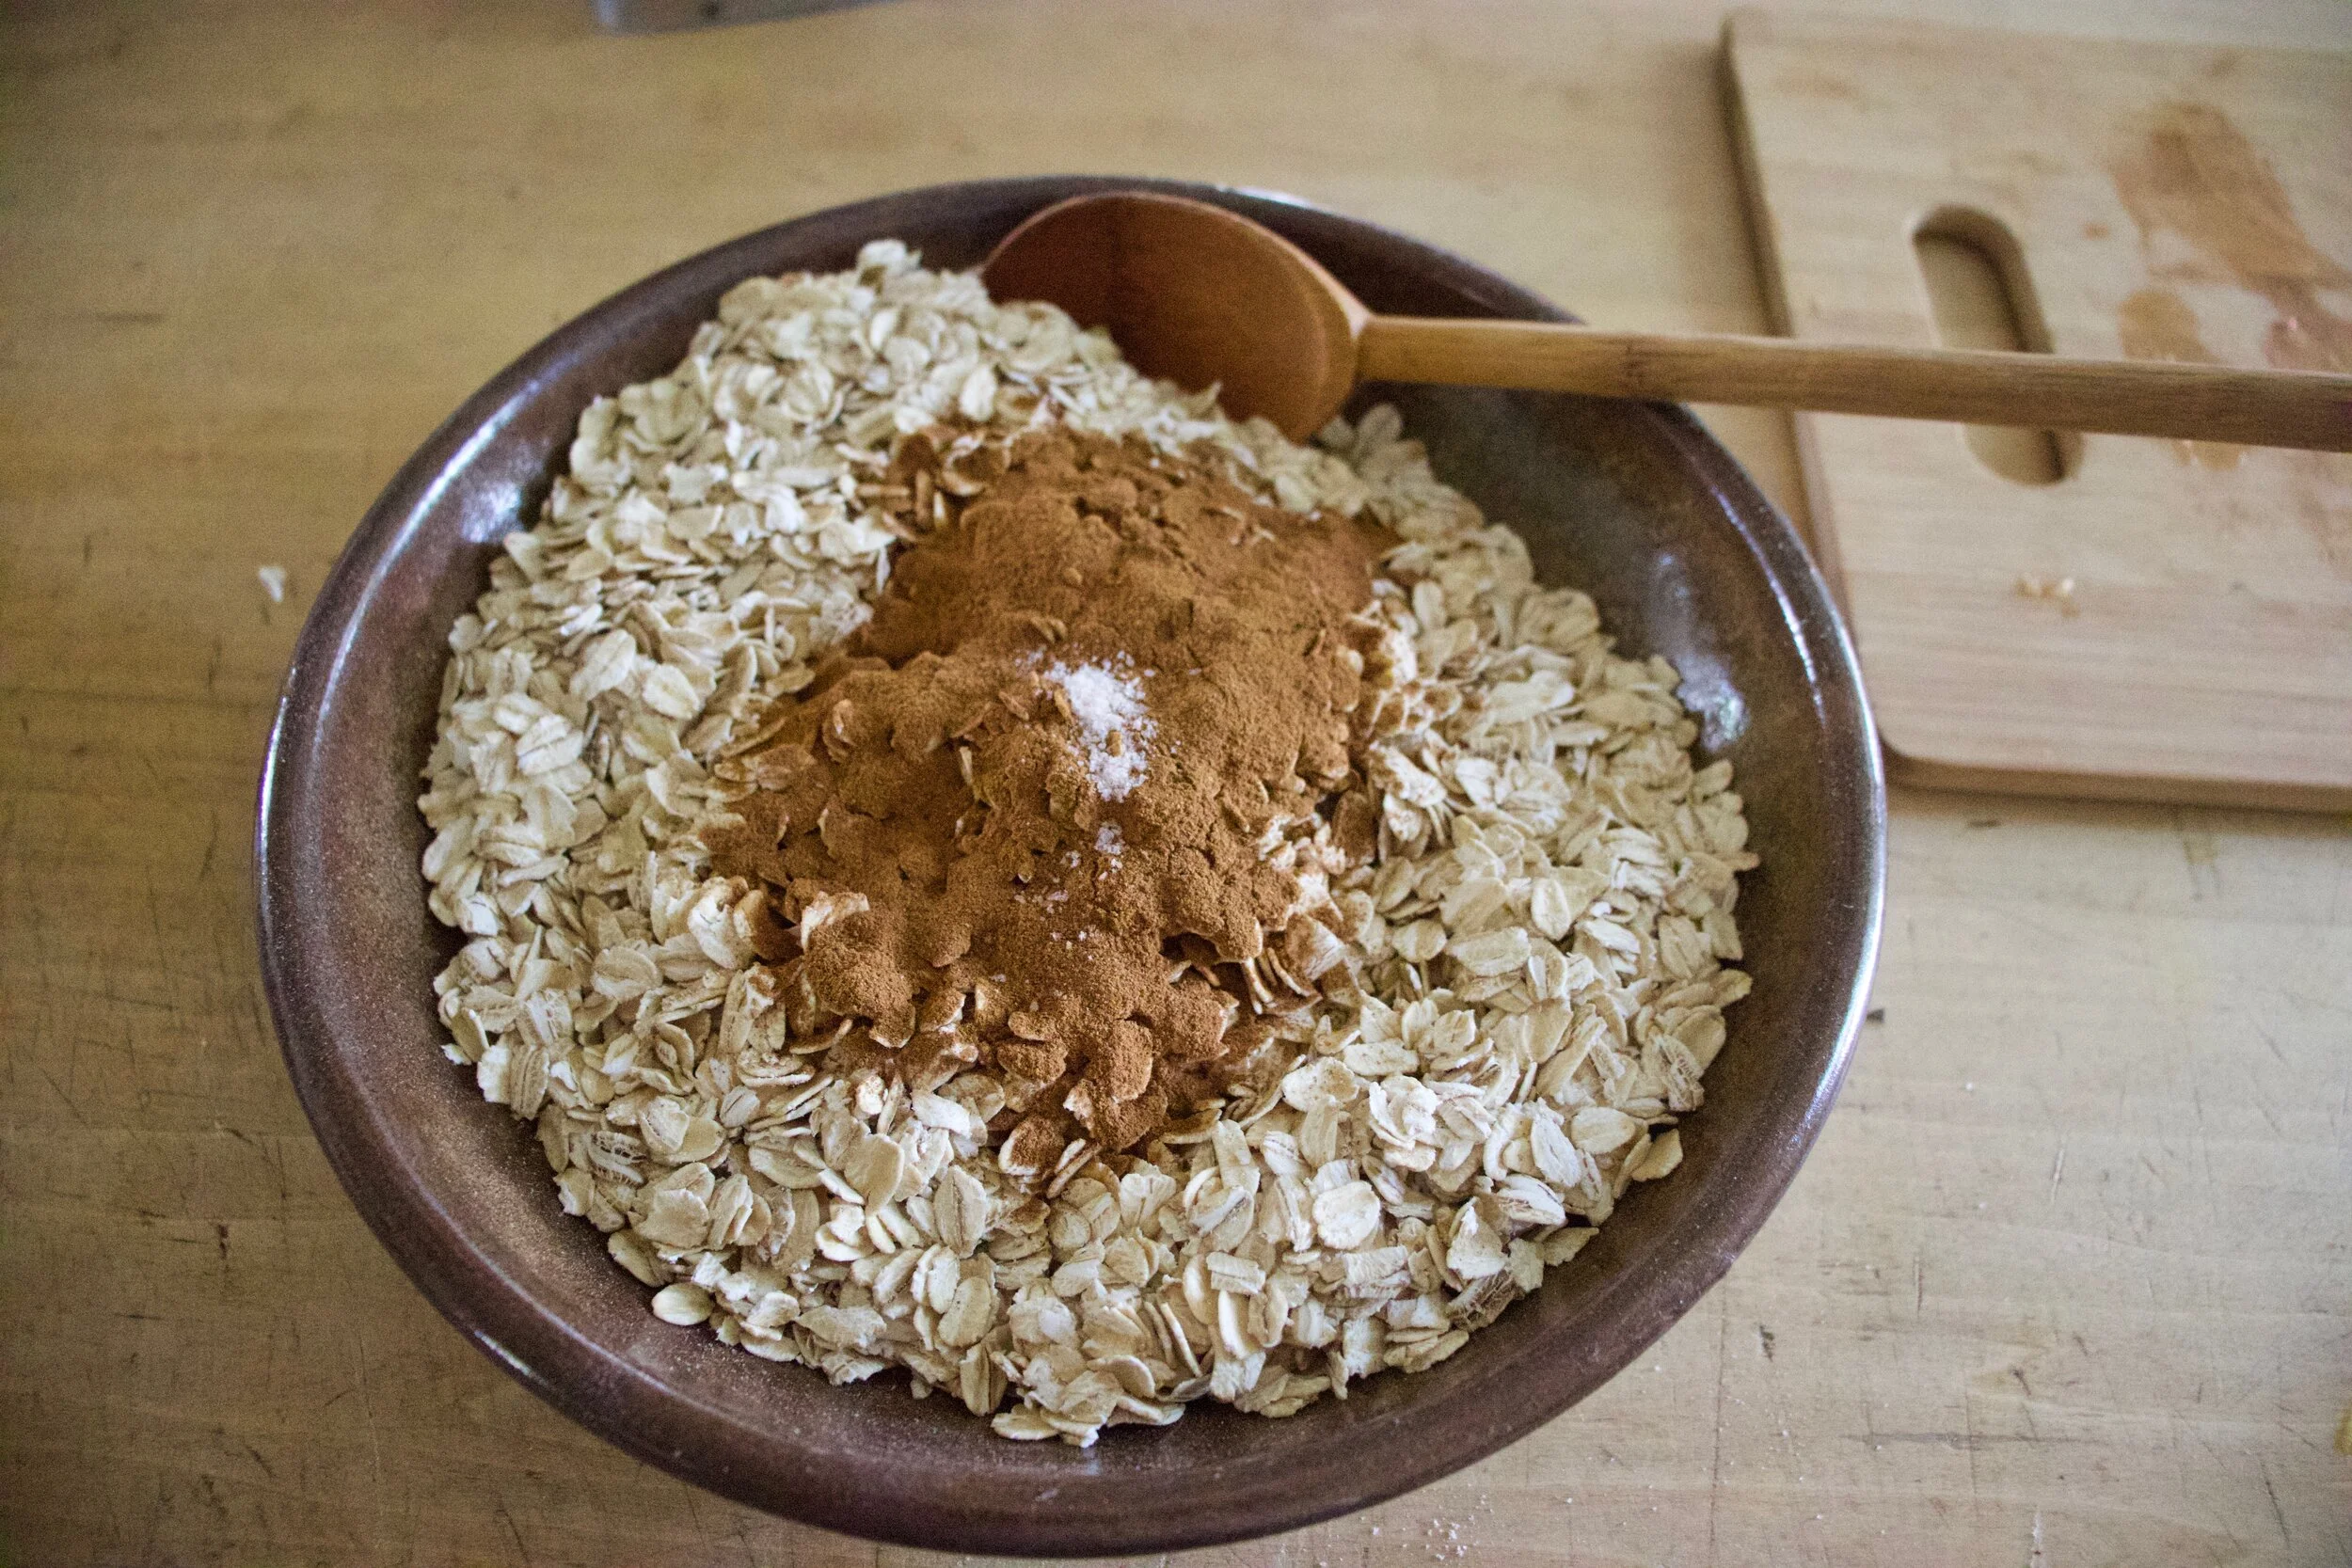
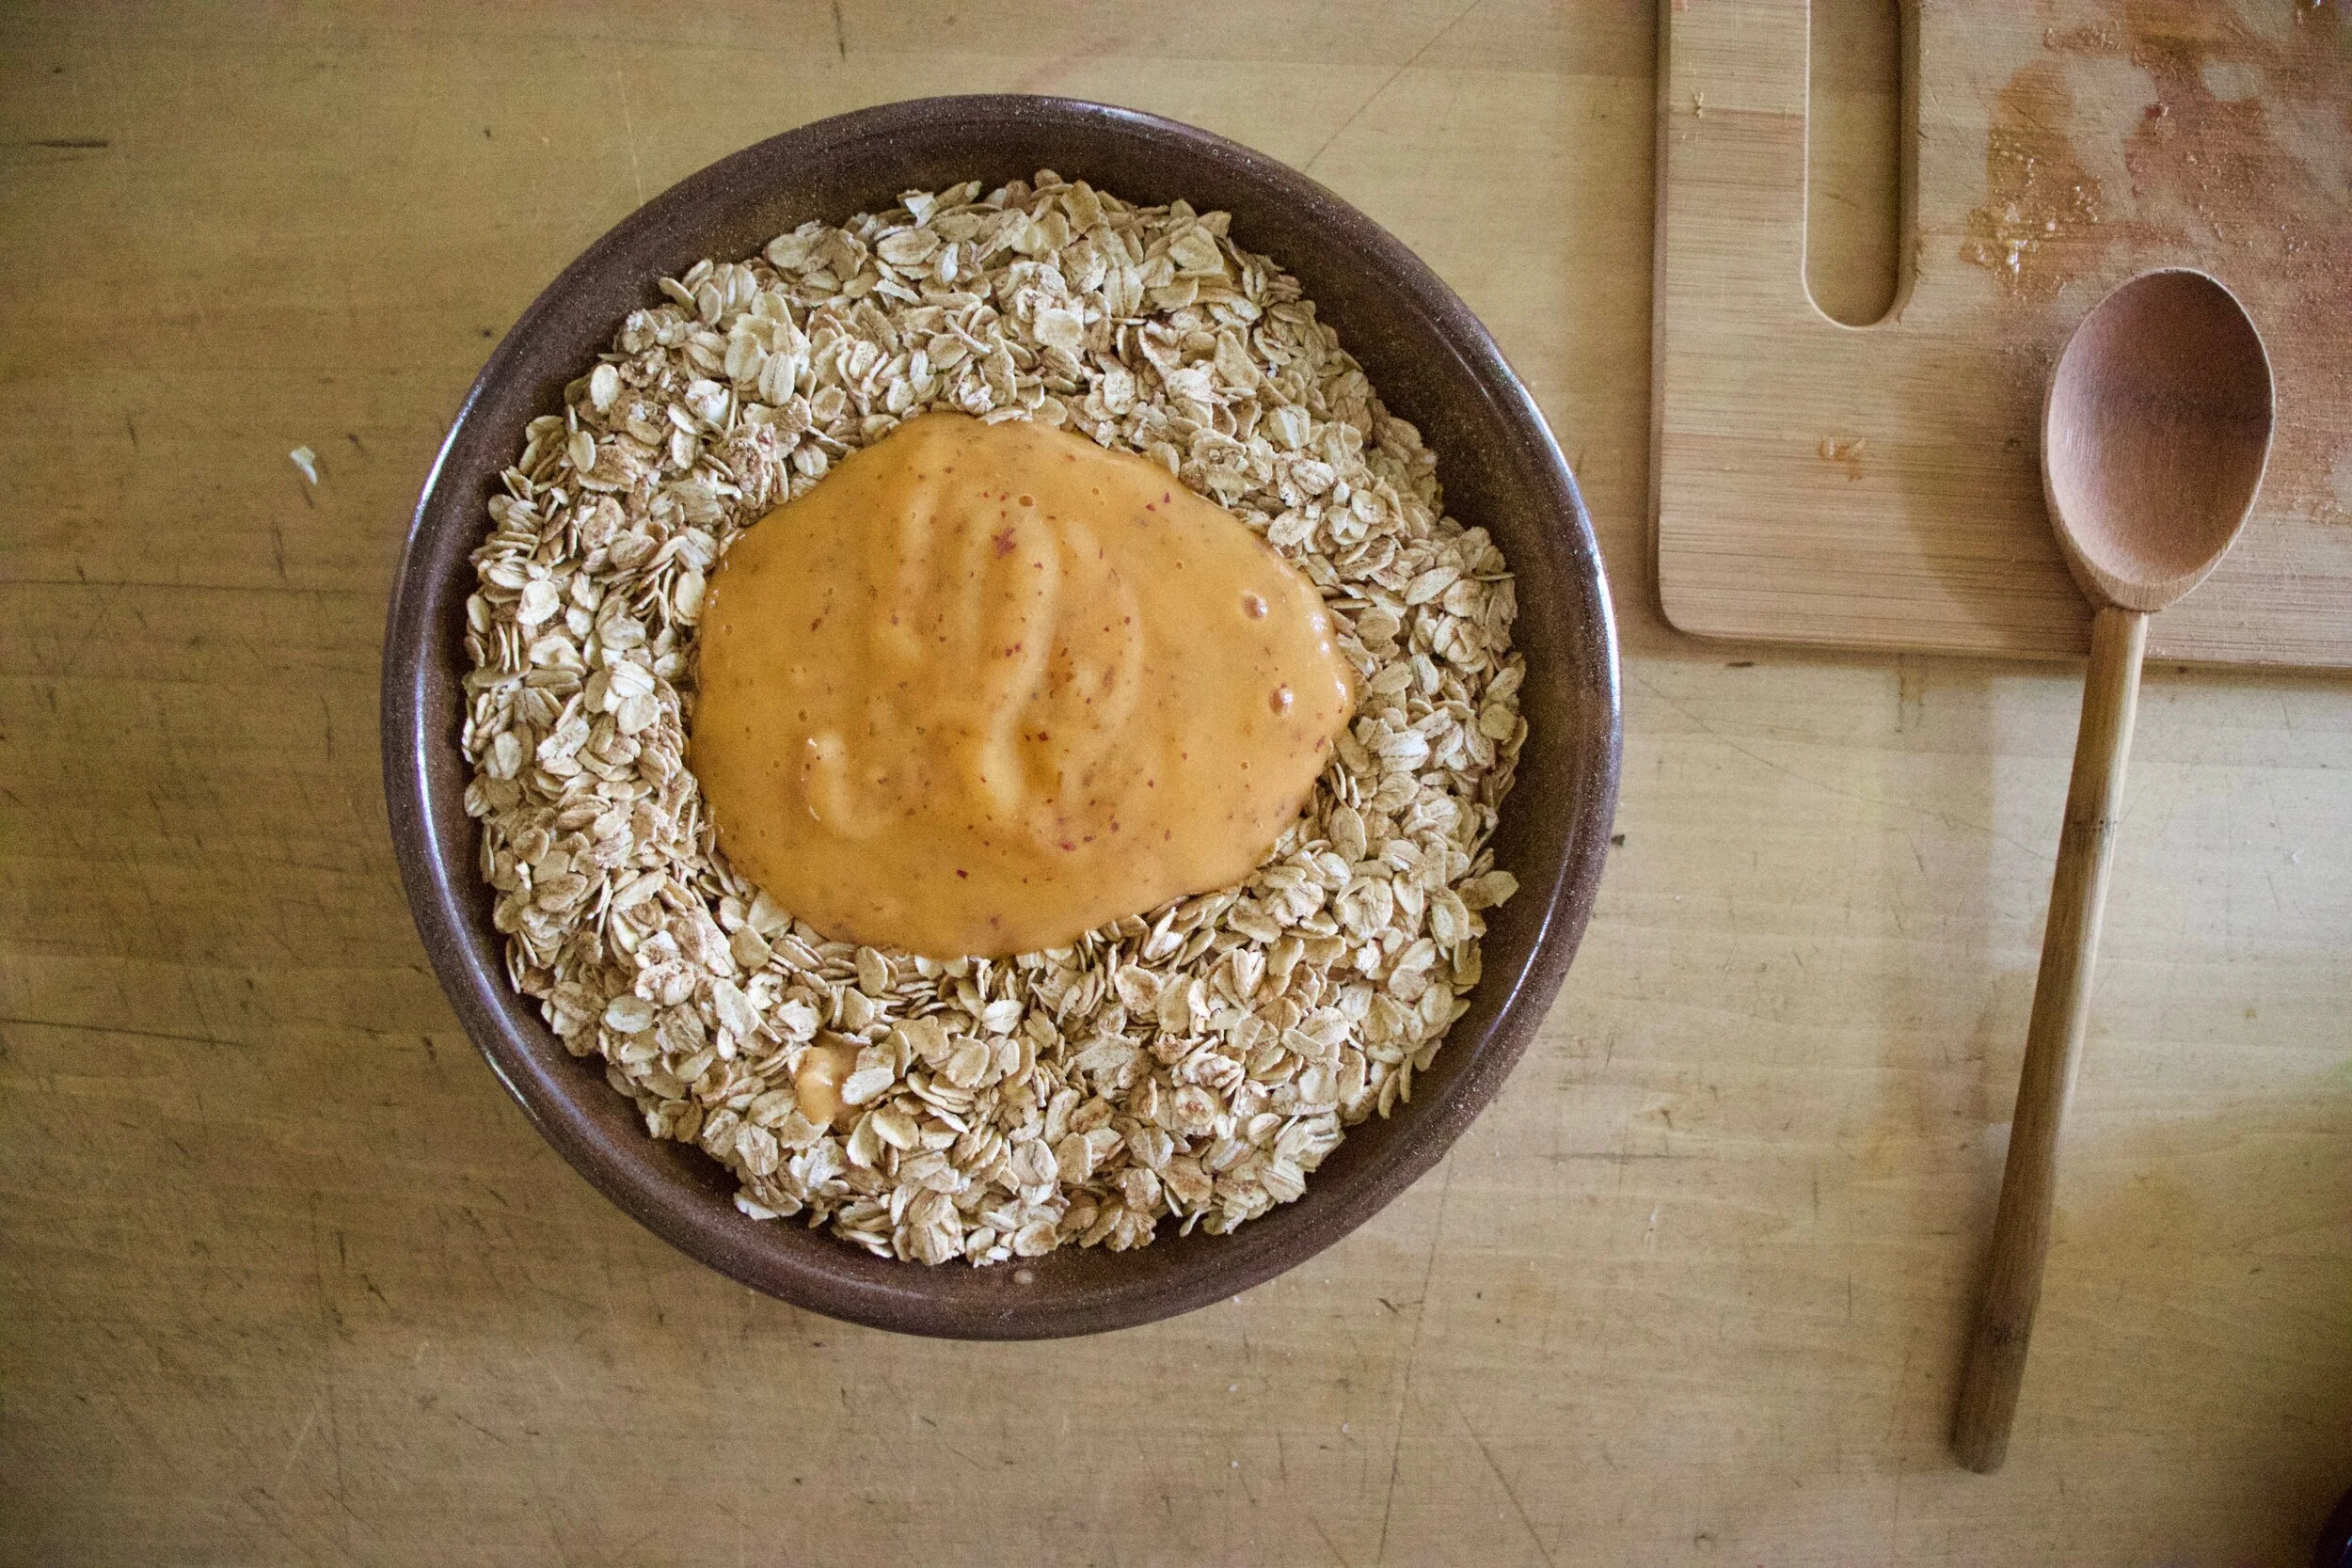
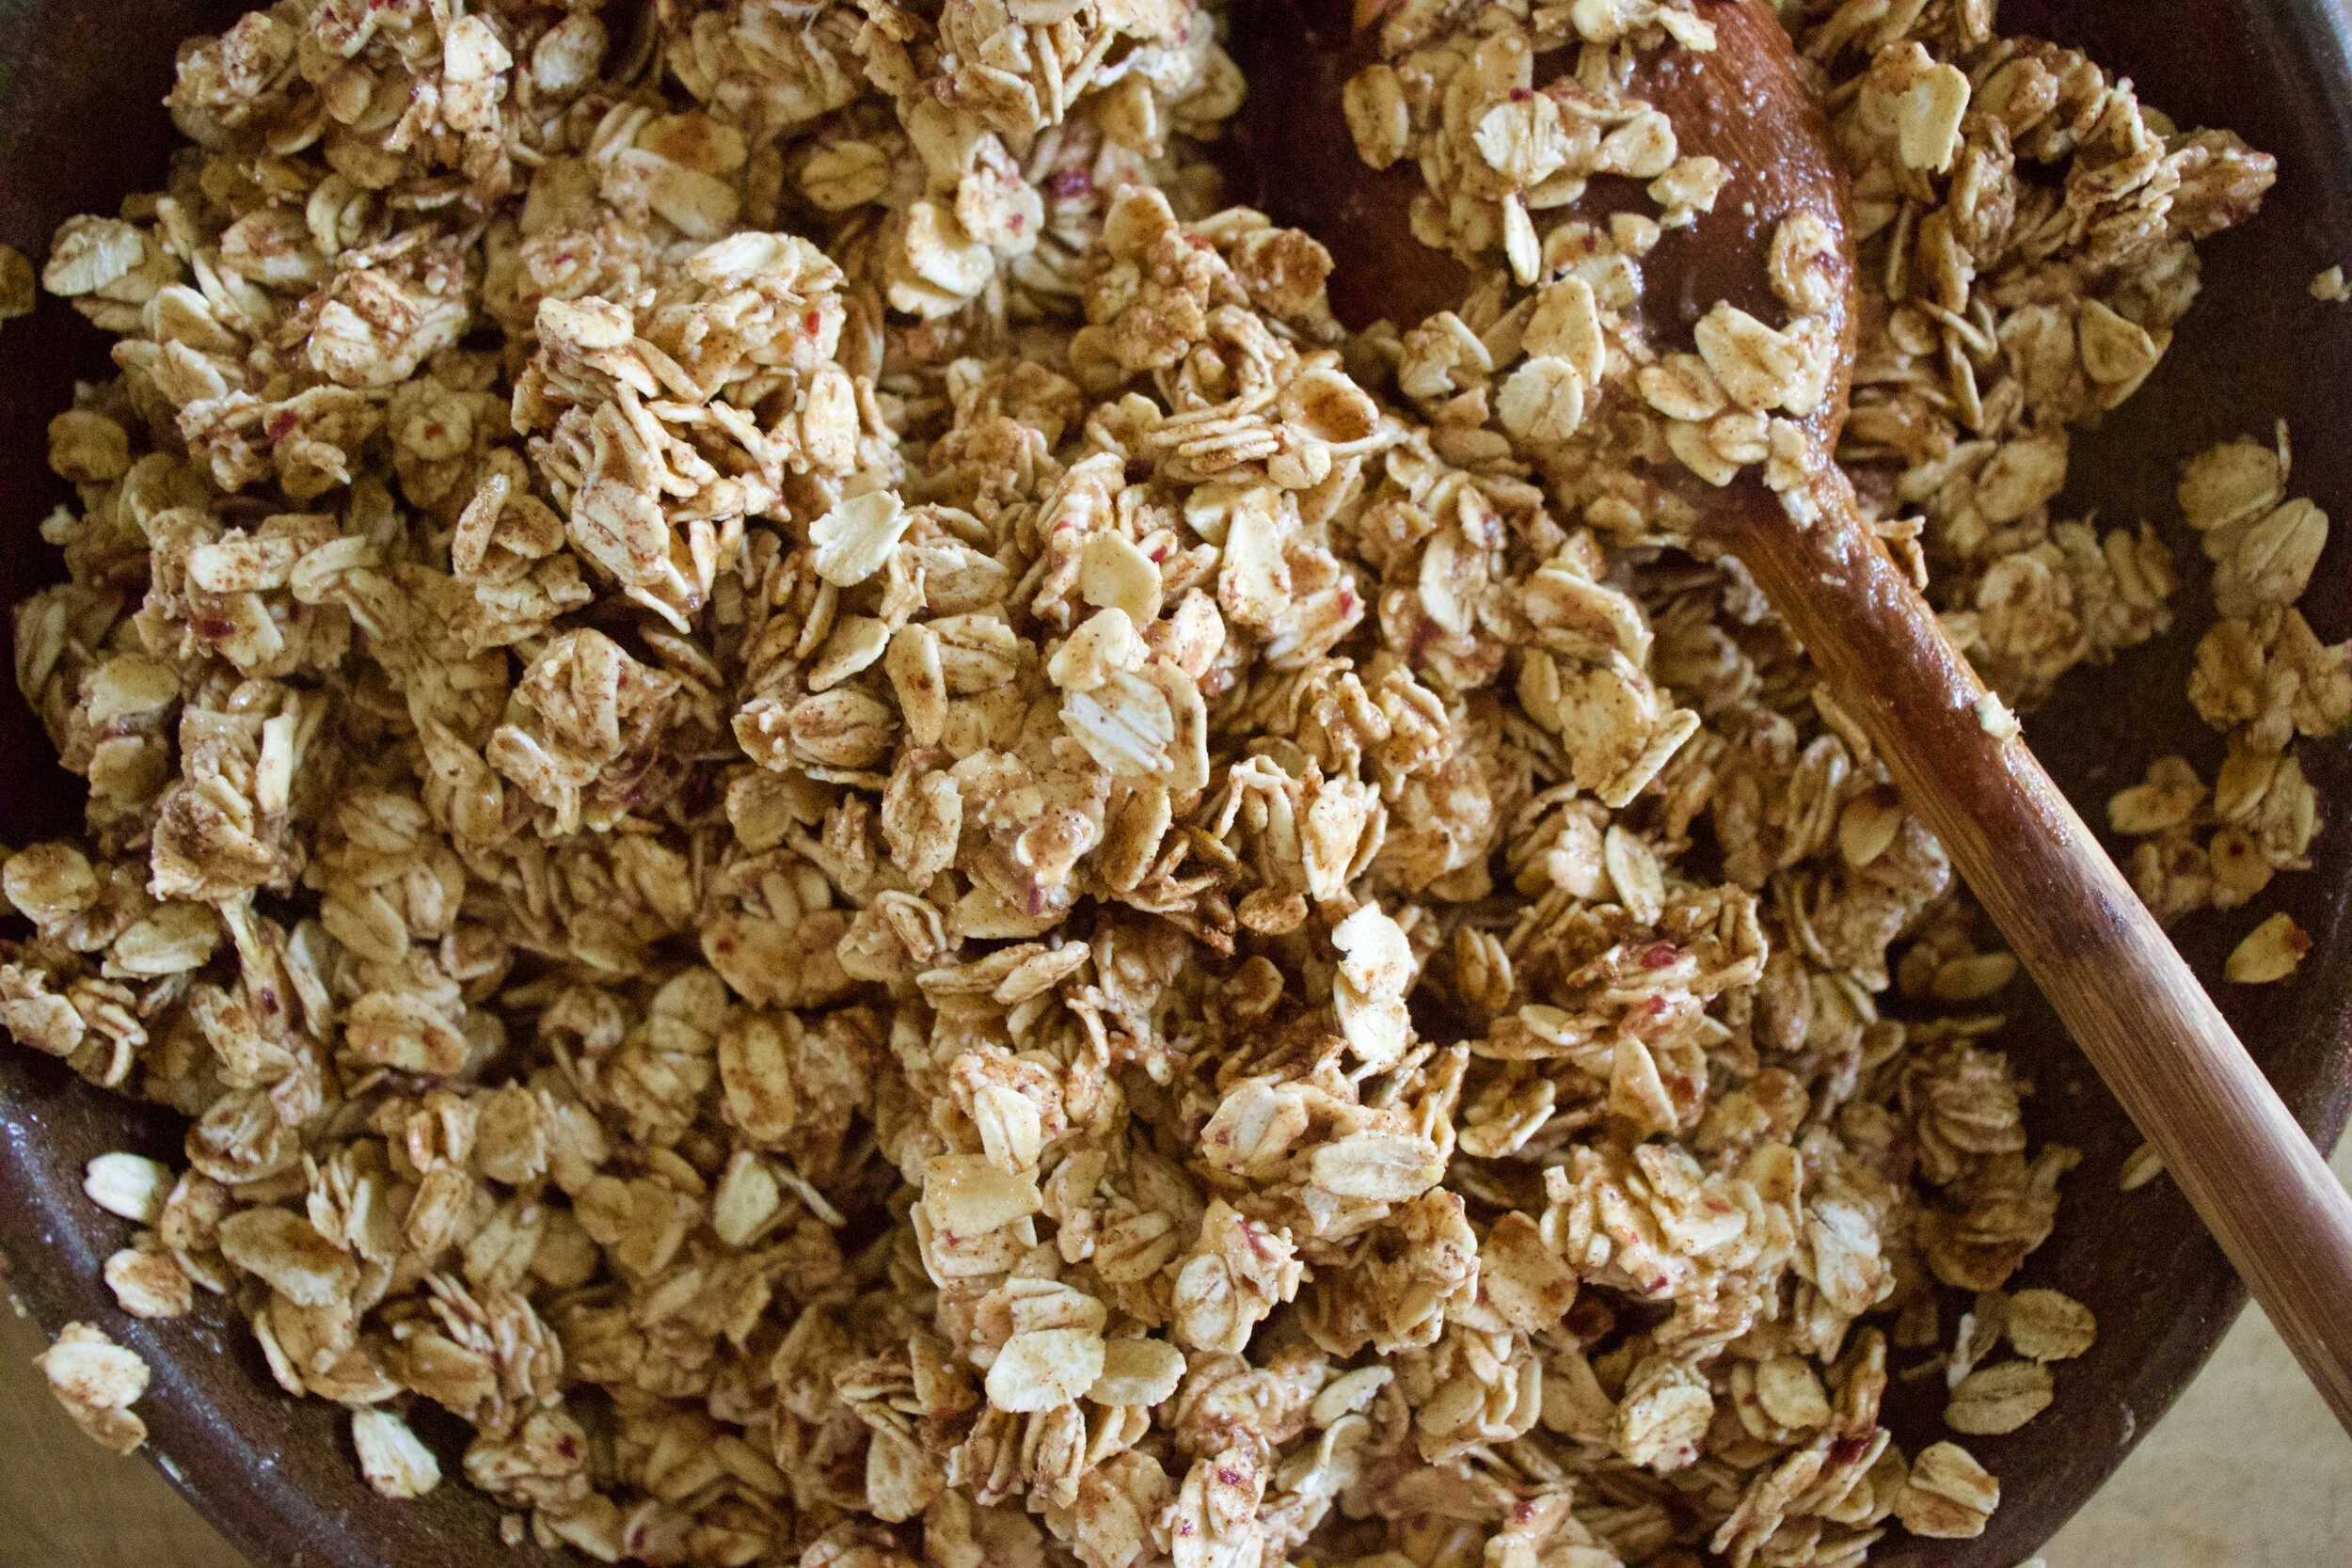
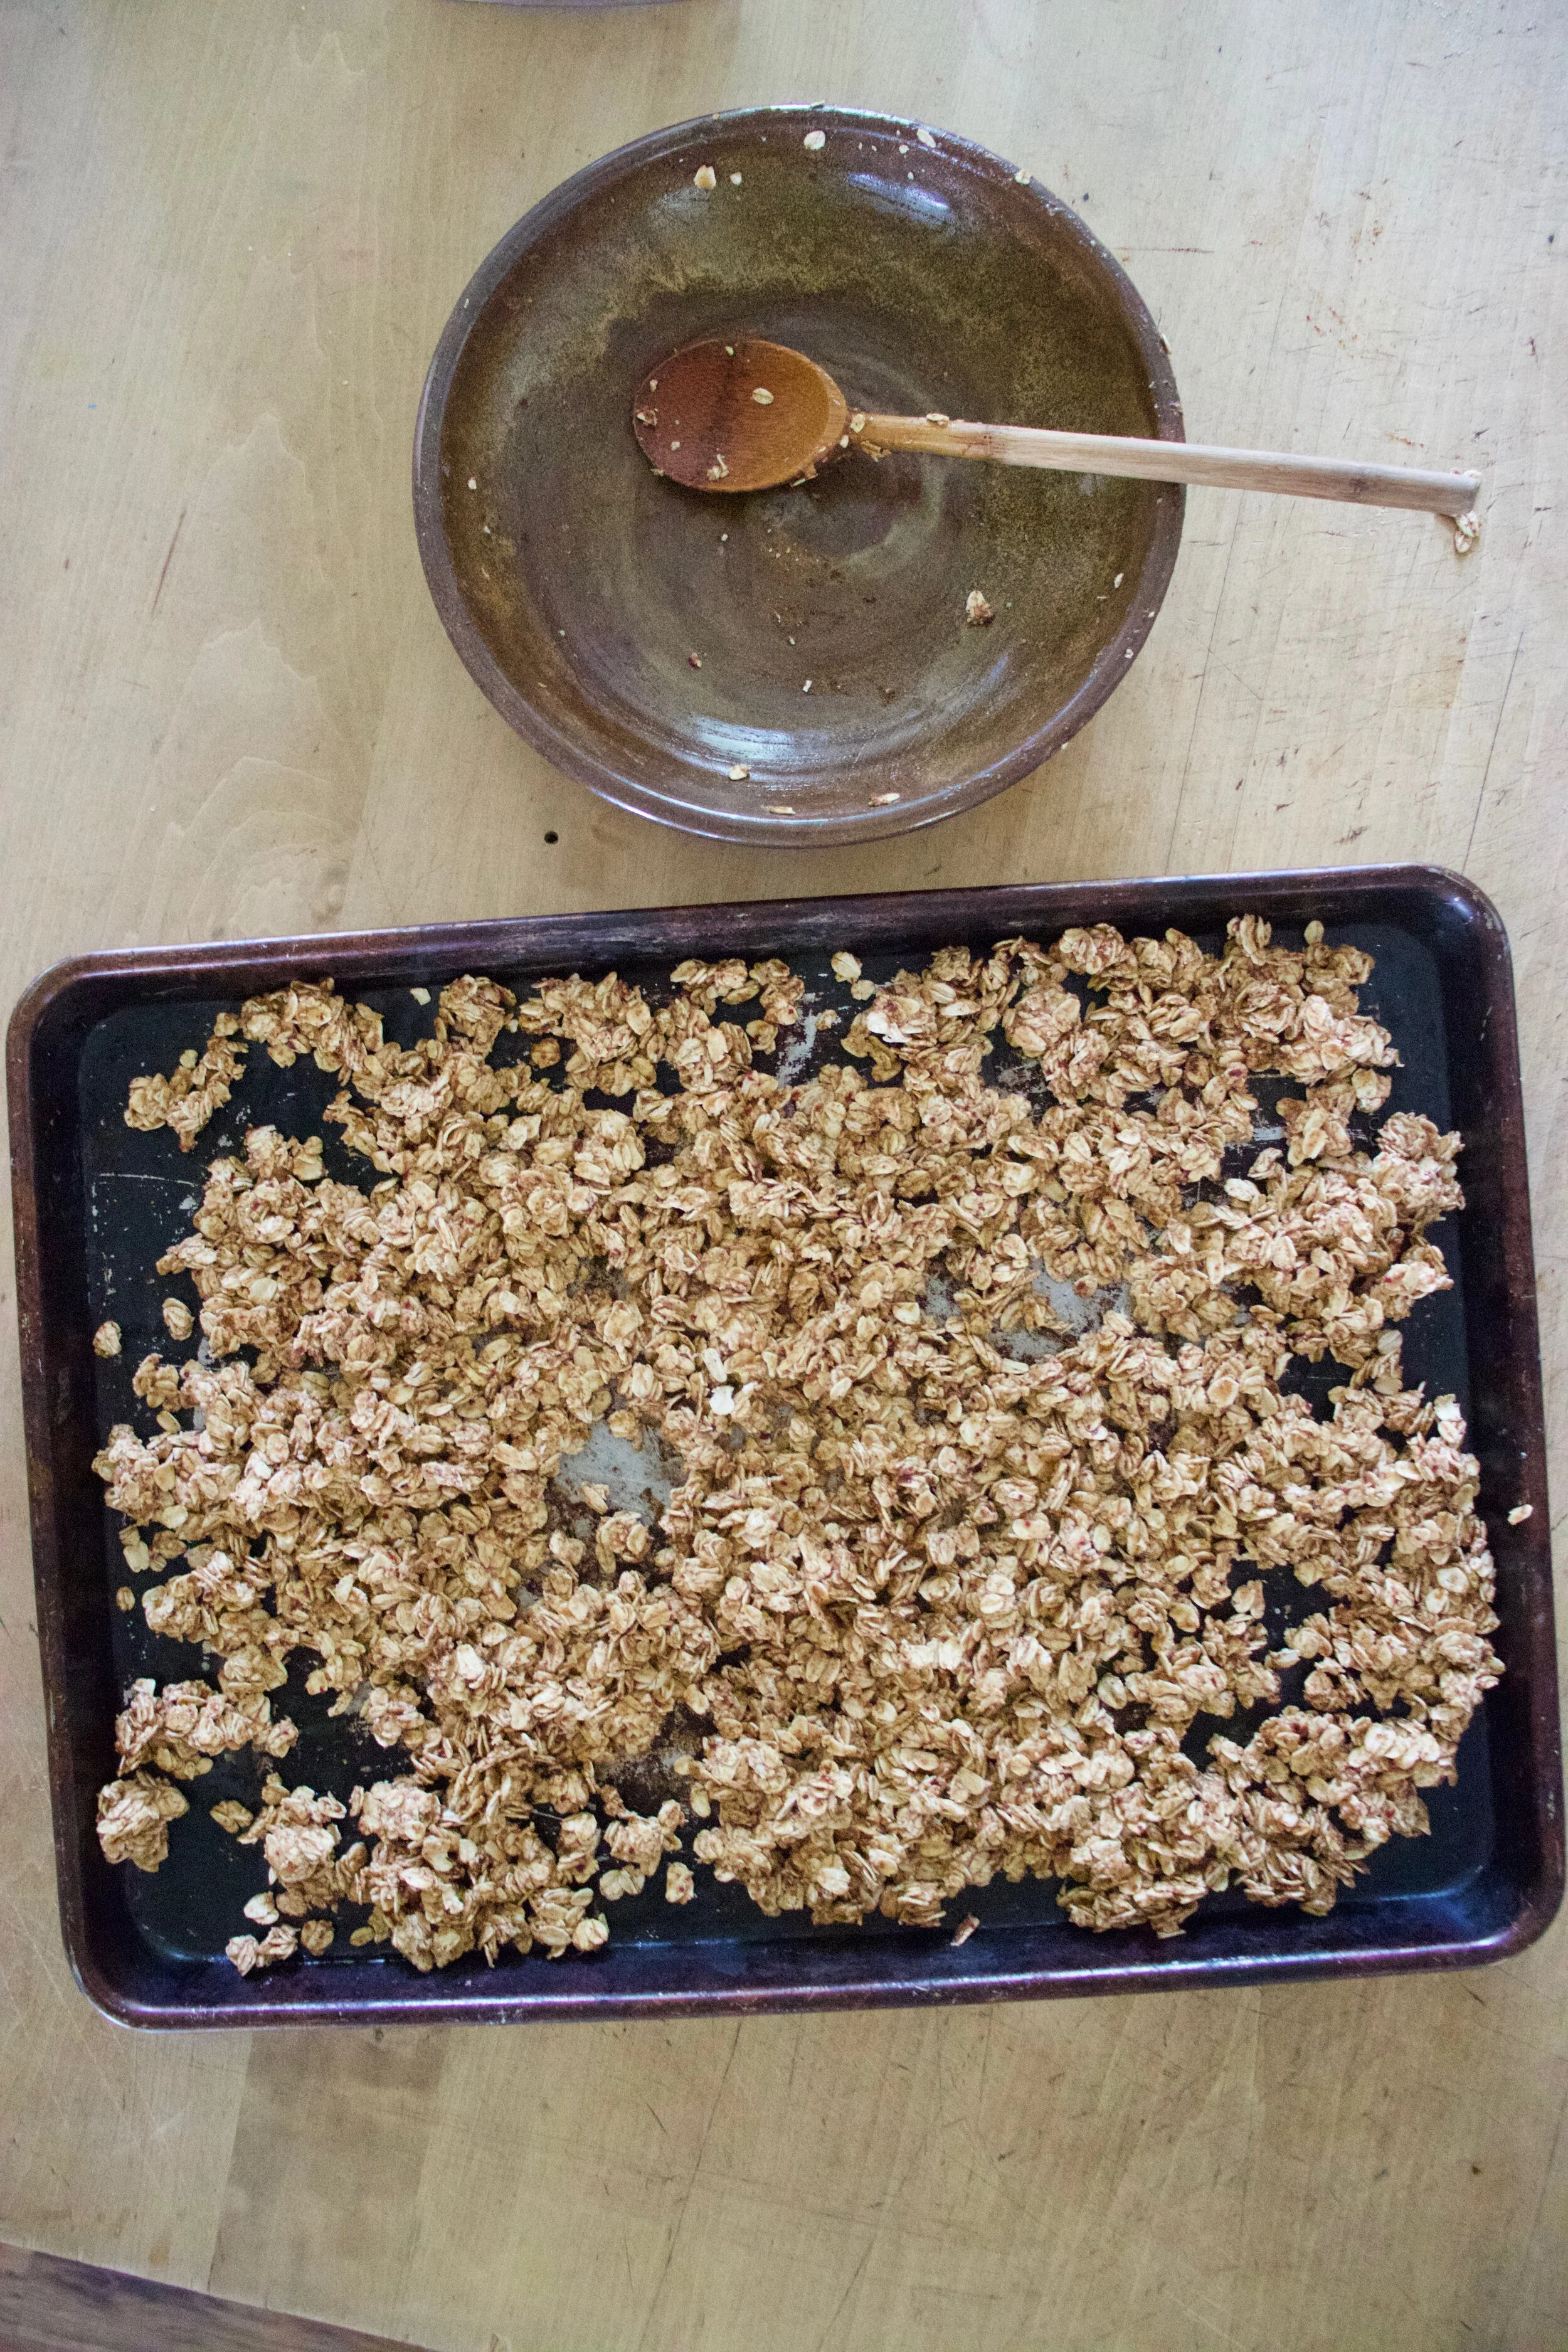
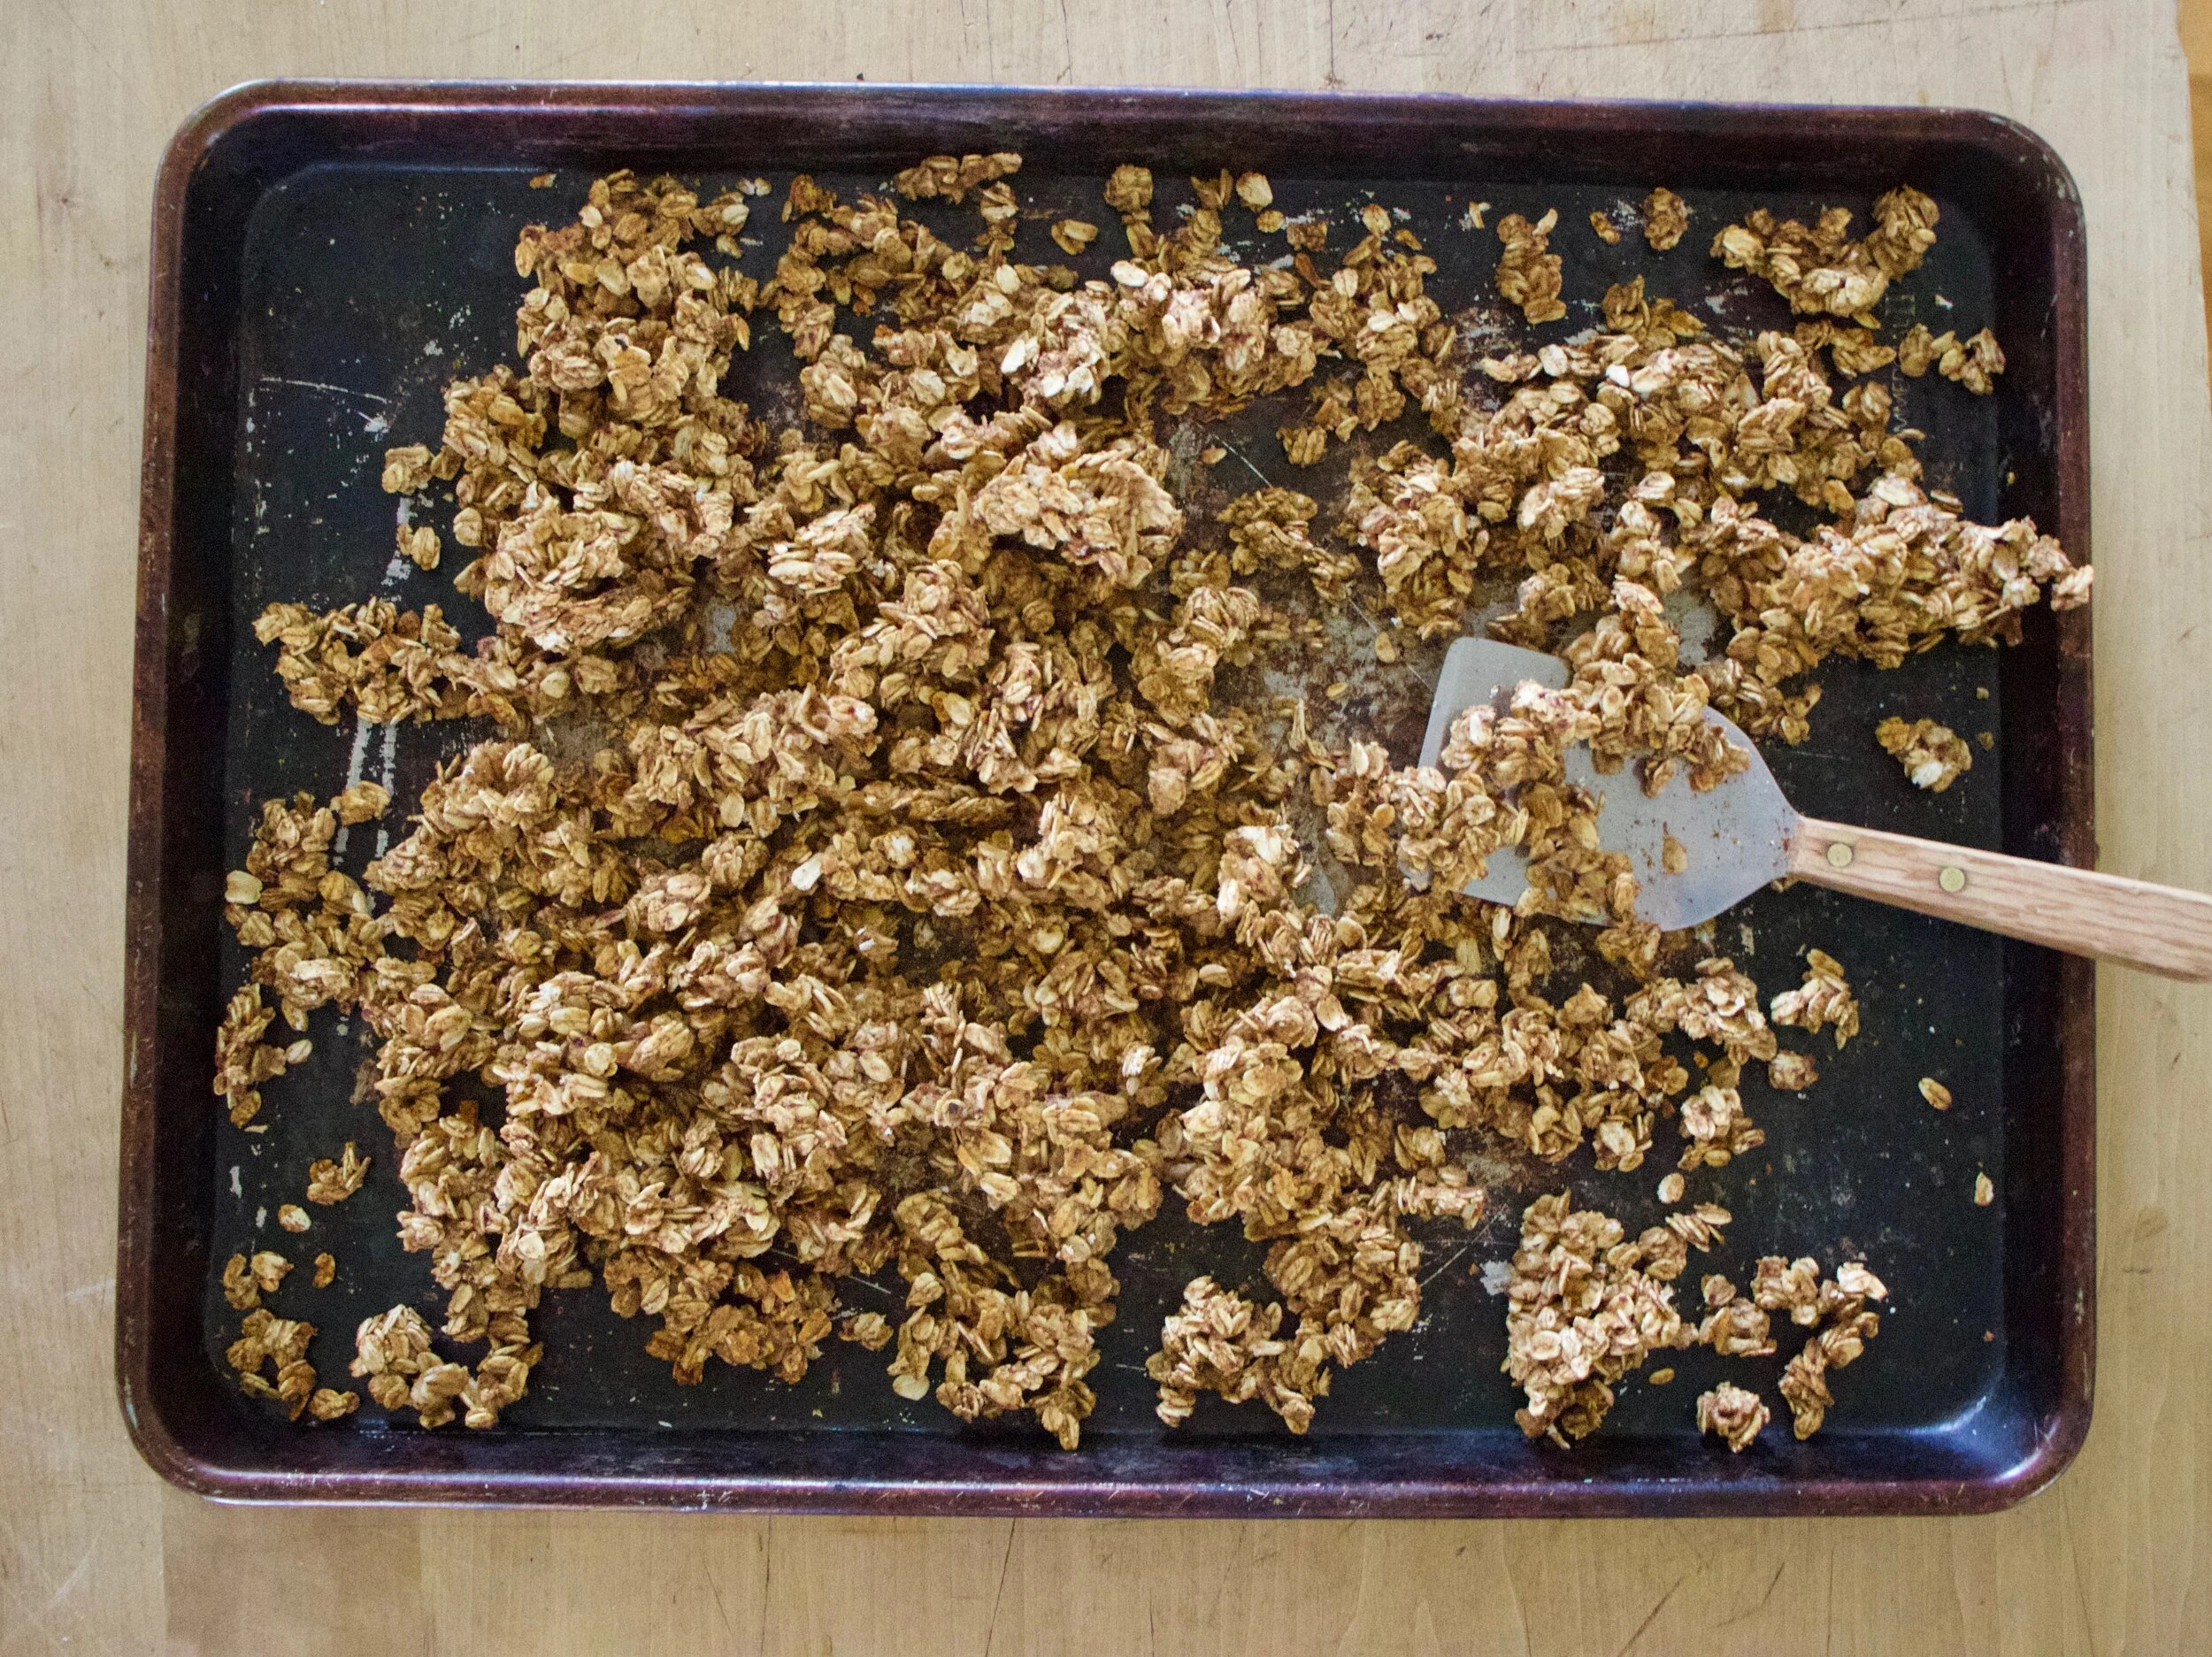
Pictures from the week