
THE LOVELY CRAZY
Rice is a hit or miss in this house. Whenever I make it fresh, I either make too much or not enough so I like to air on the side of too much because when there is too much, you just save for a later day and make fried rice, which to some, might be even better then fresh rice. So there you go.
Fried rice. Not really a complicated dish. Basically it is just reheating rice up in a skillet with some stuff. This version is carrot ginger with chickpeas because those flavors are on point and also I had just made a huge batch of chikepeas and always have carrots and ginger on hand. The rice was just waiting to be reheated and I was glad for it because fried rice take a quarter of the time to make then fresh rice (I use brown rice) and I was trying to get dinner done without having to make much of an effort. And because there is veggies and chickpeas in this rice, it is a complete meal and did not need to make anything else. One pot dinner and done. Good things.
Now to the fried rice!
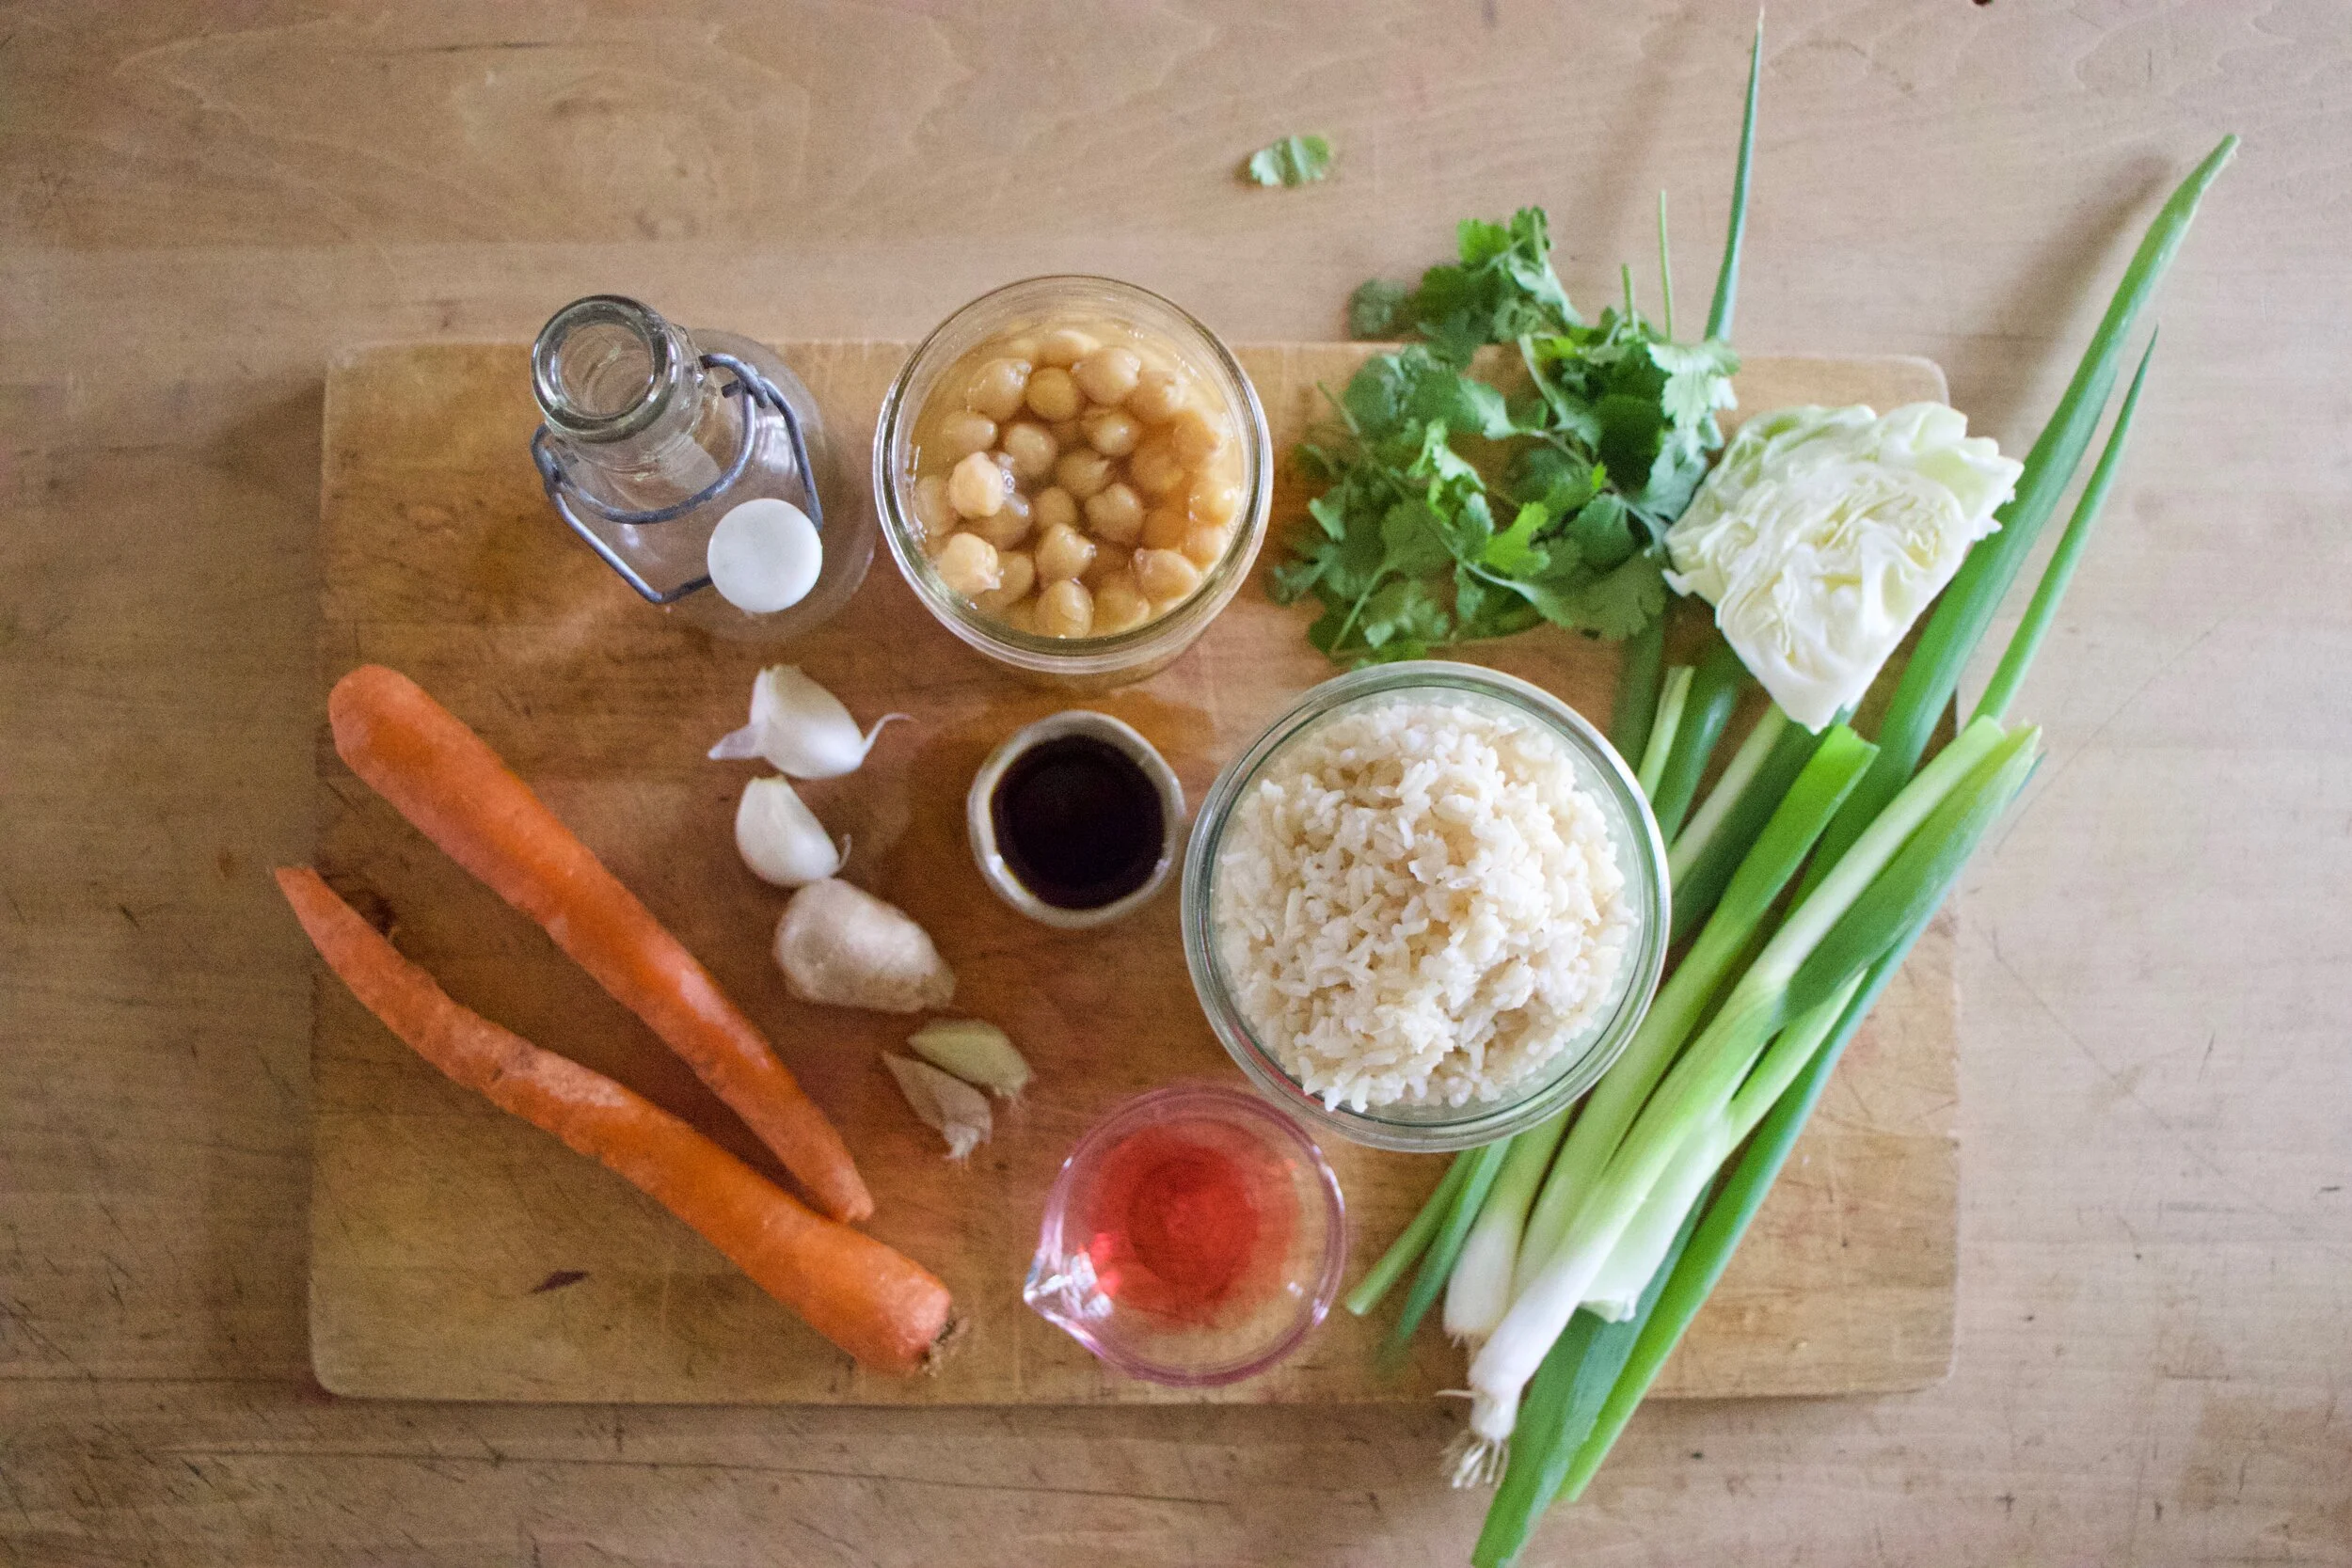
The stuff. Cooked rice, chick peas, carrots, fresh ginger, garlic, soy, red wine vinegar, olive oil, scallions, cabbage, and cilantro (optional). Also going to need a little water. And black pepper.
Start with veggies. Dice the carrots into very small little pieces. Toss into lightly oiled skillet with a splash of water and set on low heat. Then start mincing garlic and the fresh ginger. Toss that into skillet with carrots. Grab scallions and cut the thick white parts from he green and slice thinly and toss into skillet. And lastly shredded cabbage and thinly slice the greens of the scallions and set that aside.
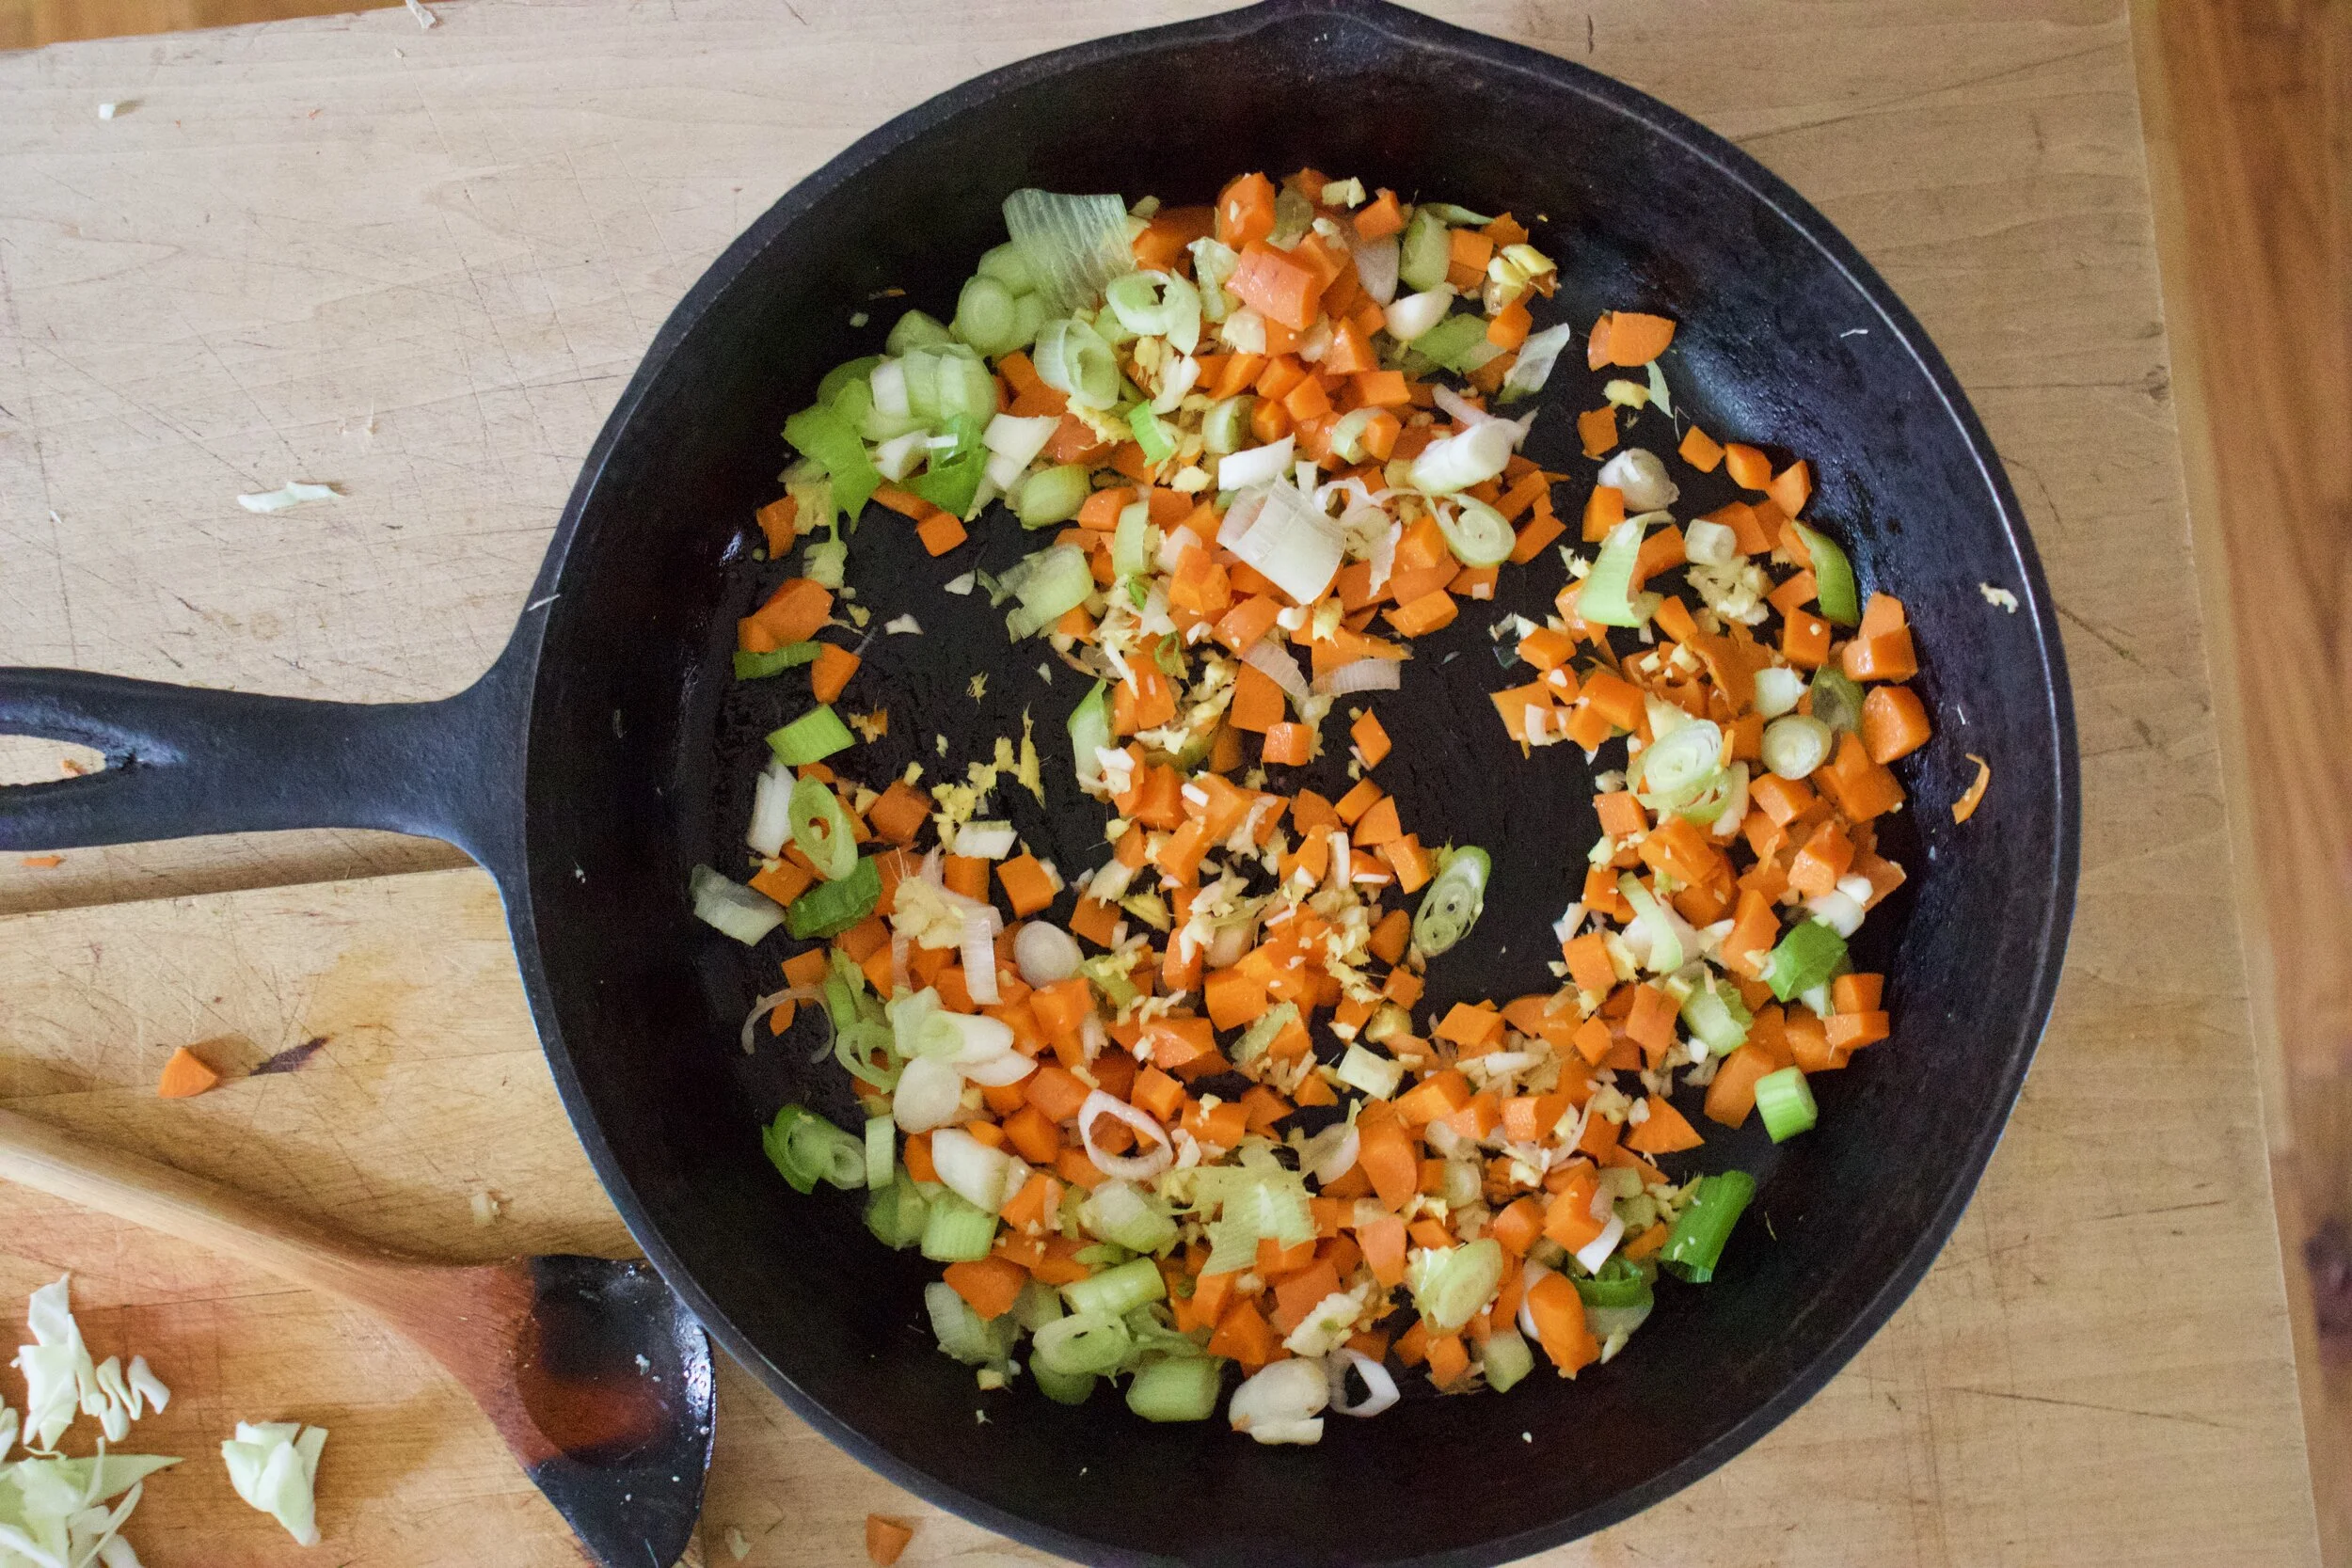
Carrot, ginger, garlic, and scallions are in skillet getting a little heat. Turn heat up to medium, add a splash or two of water, and cook until the carrots are just starting to get a little soft and the ginger and garlic are fragrant. If the
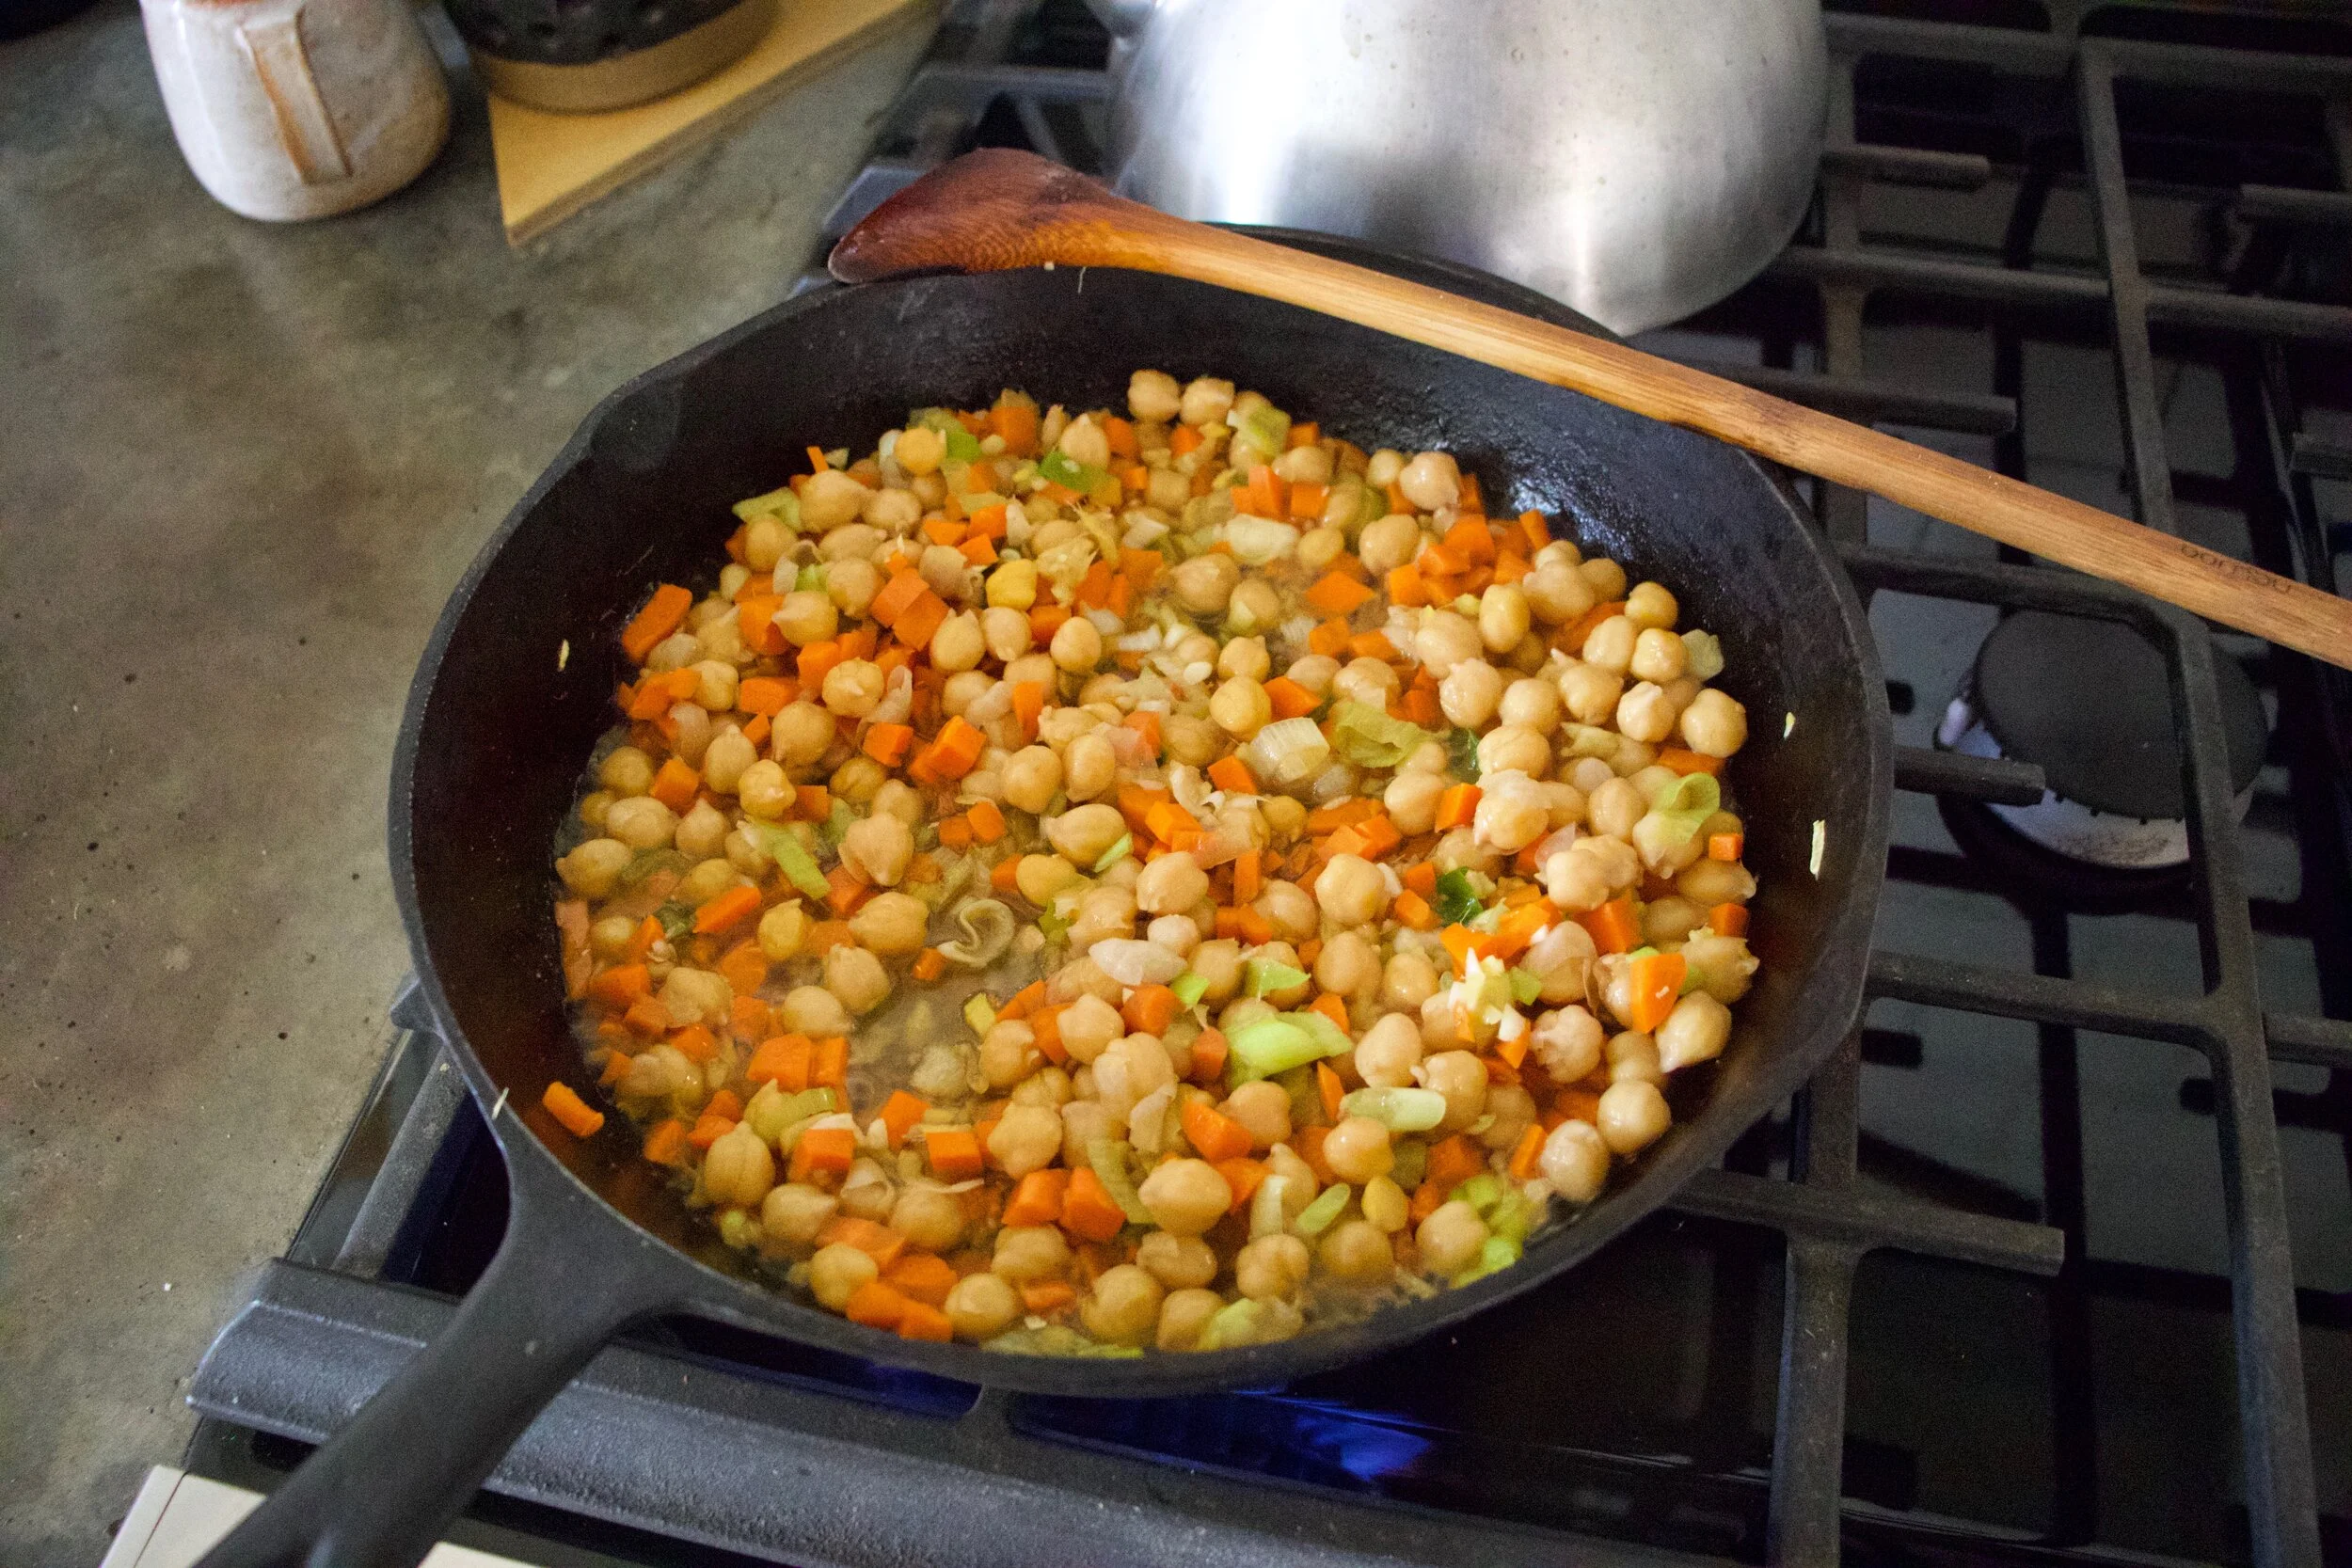
Add in the chick peas, the soy, and the vinegar and cook away.
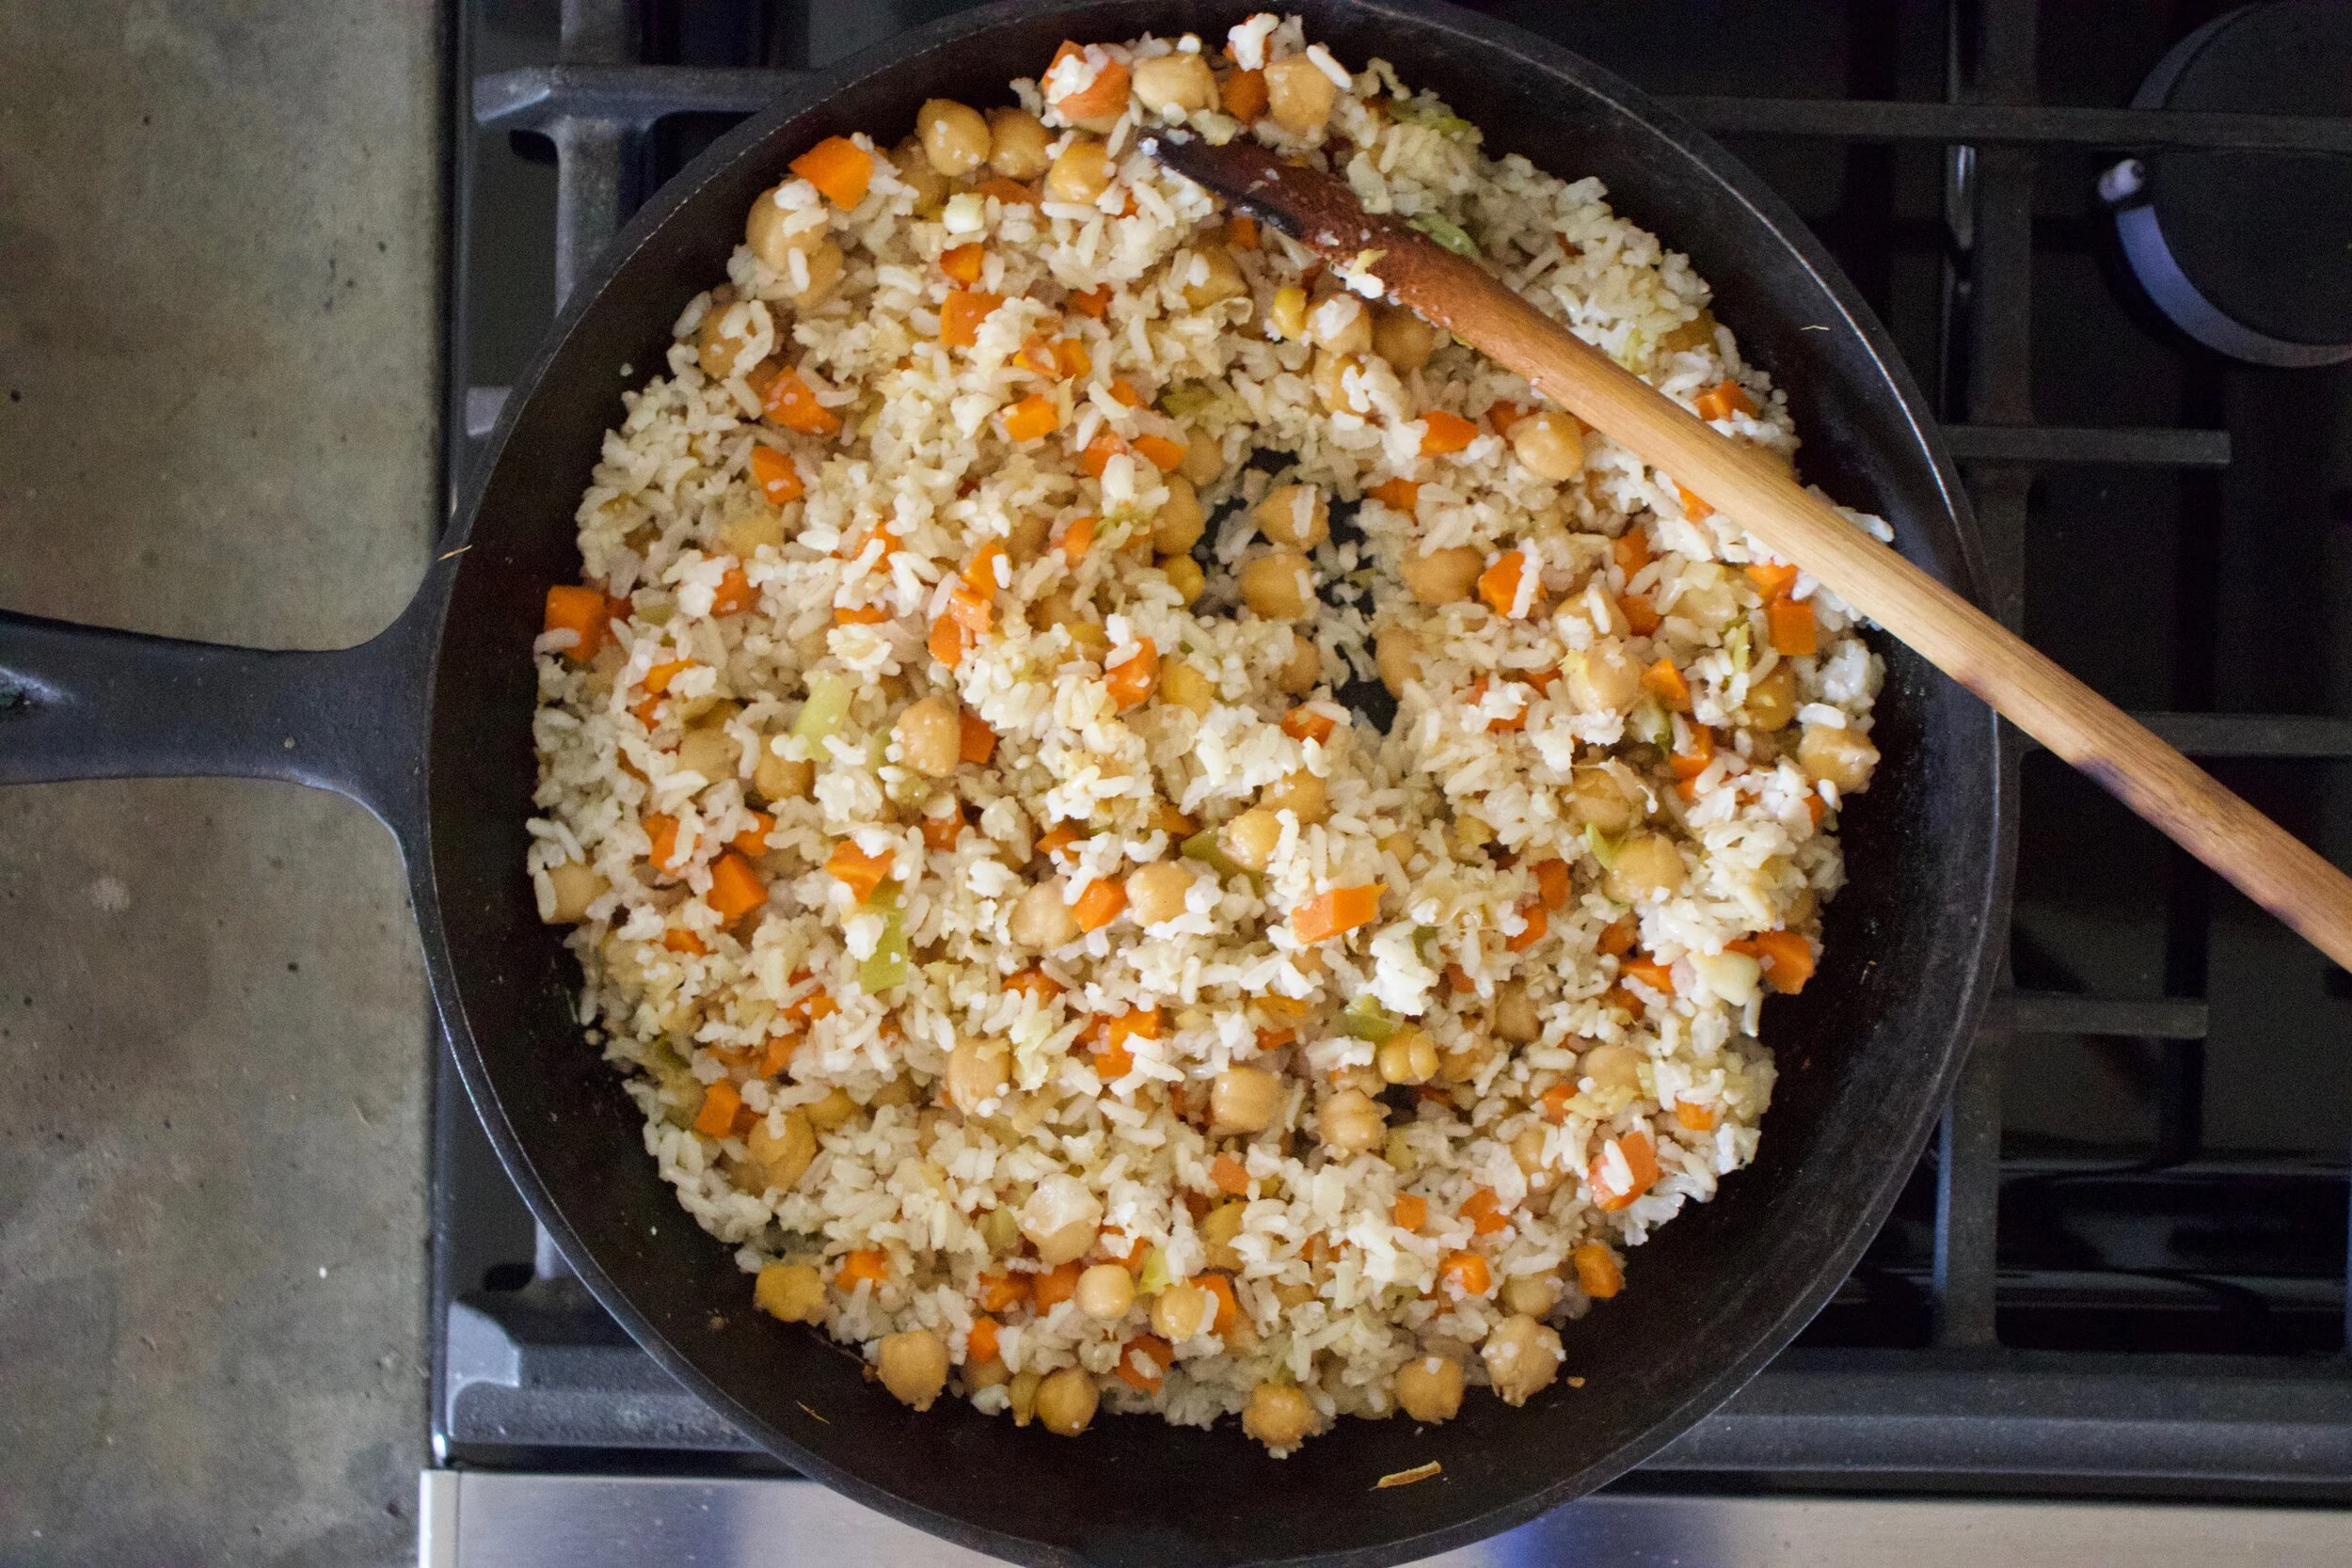
Once chick peas are warm through, add in the rice and another splash of water and mix around.
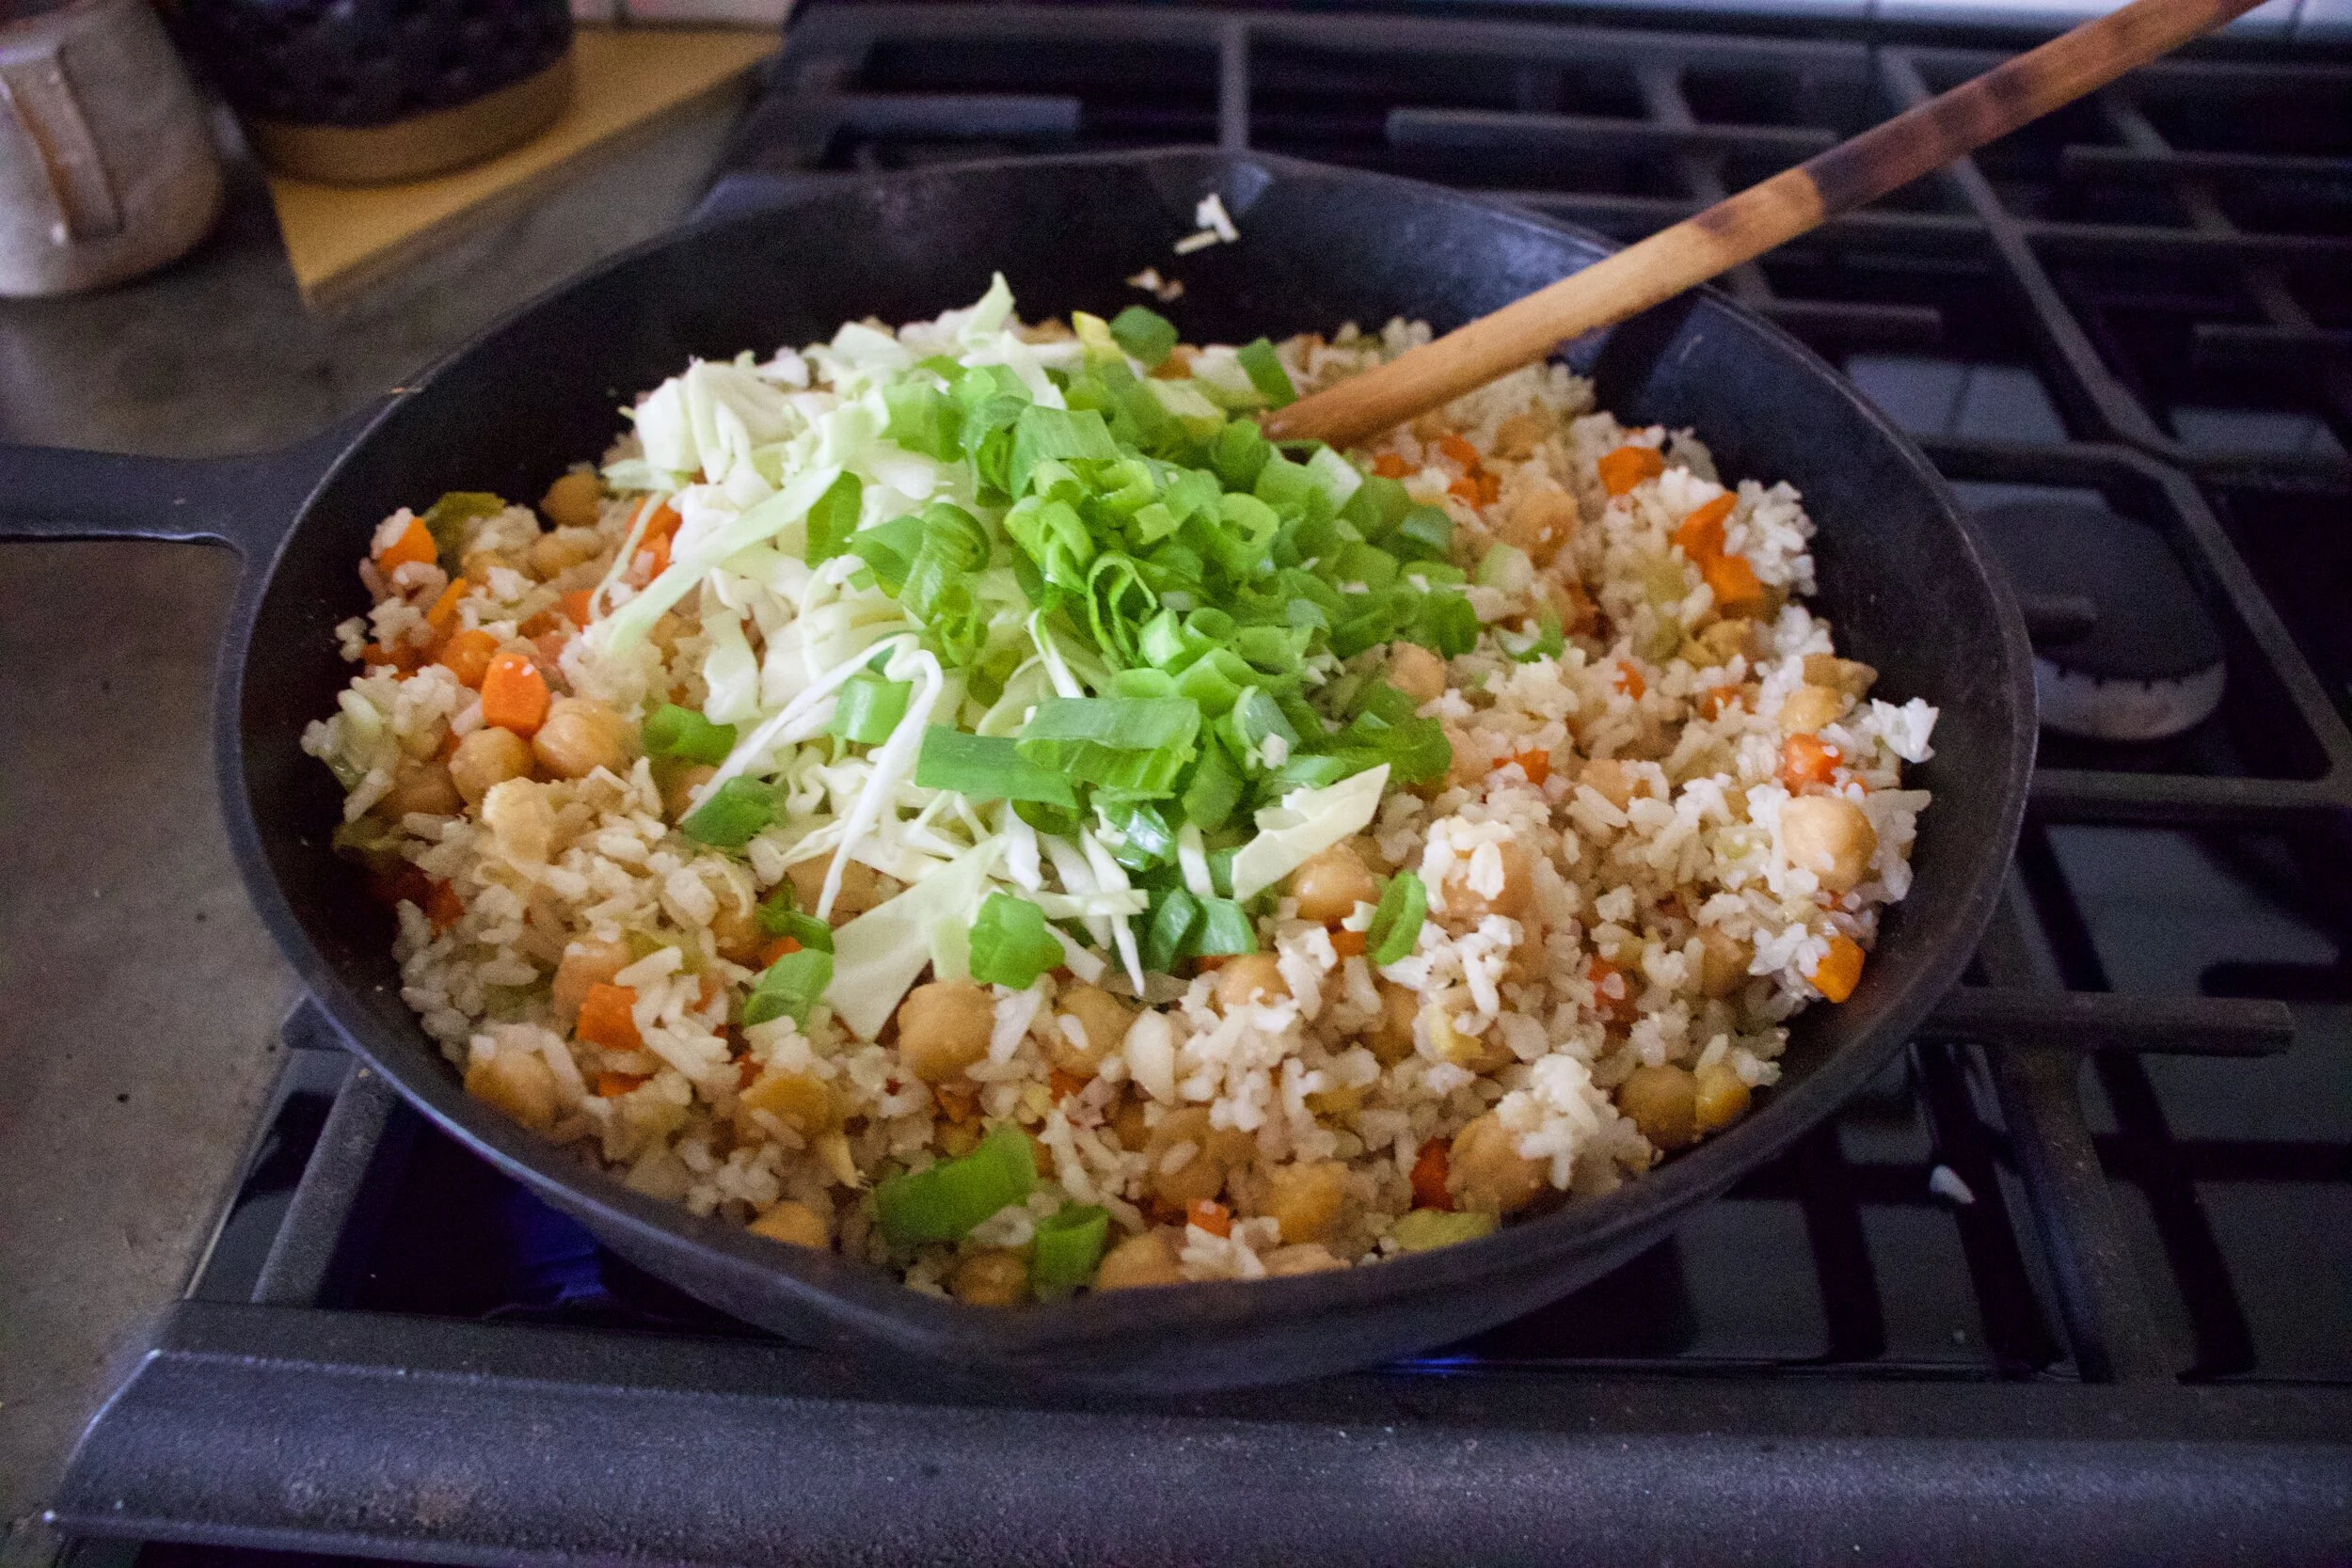
And when the rice is warm, add in he cabbage and greens of the scallion and mix until incorporated.
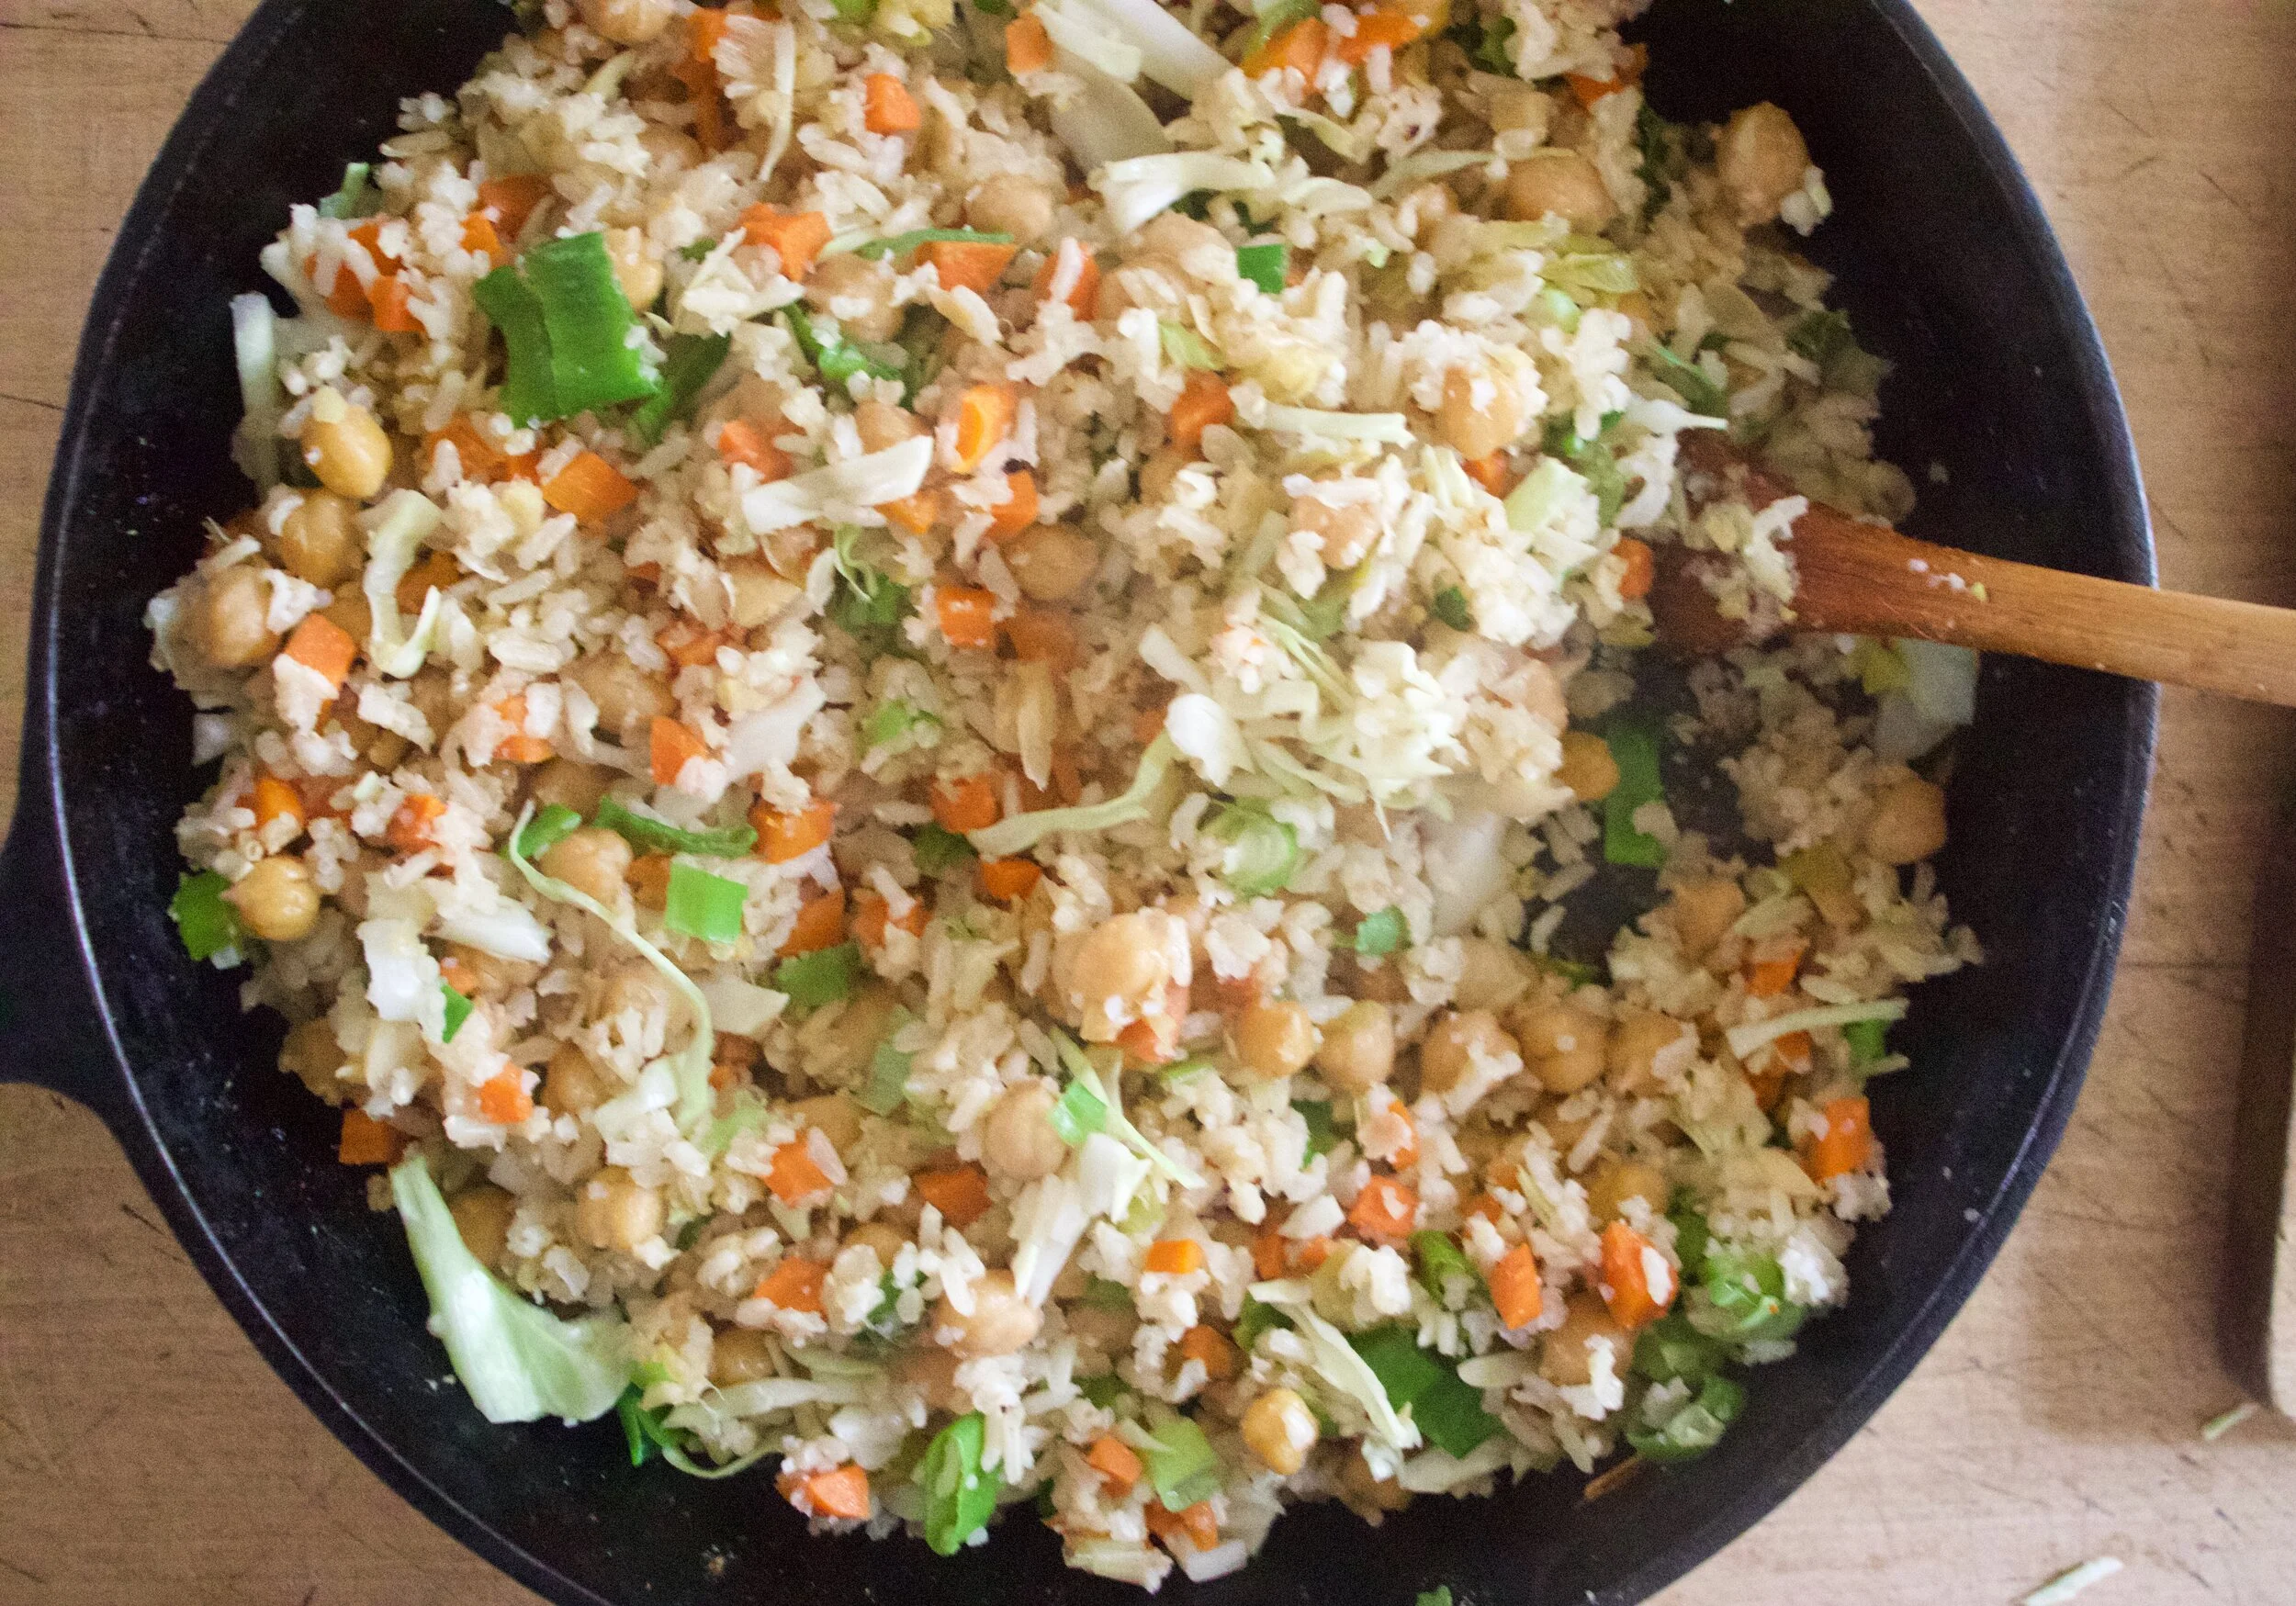
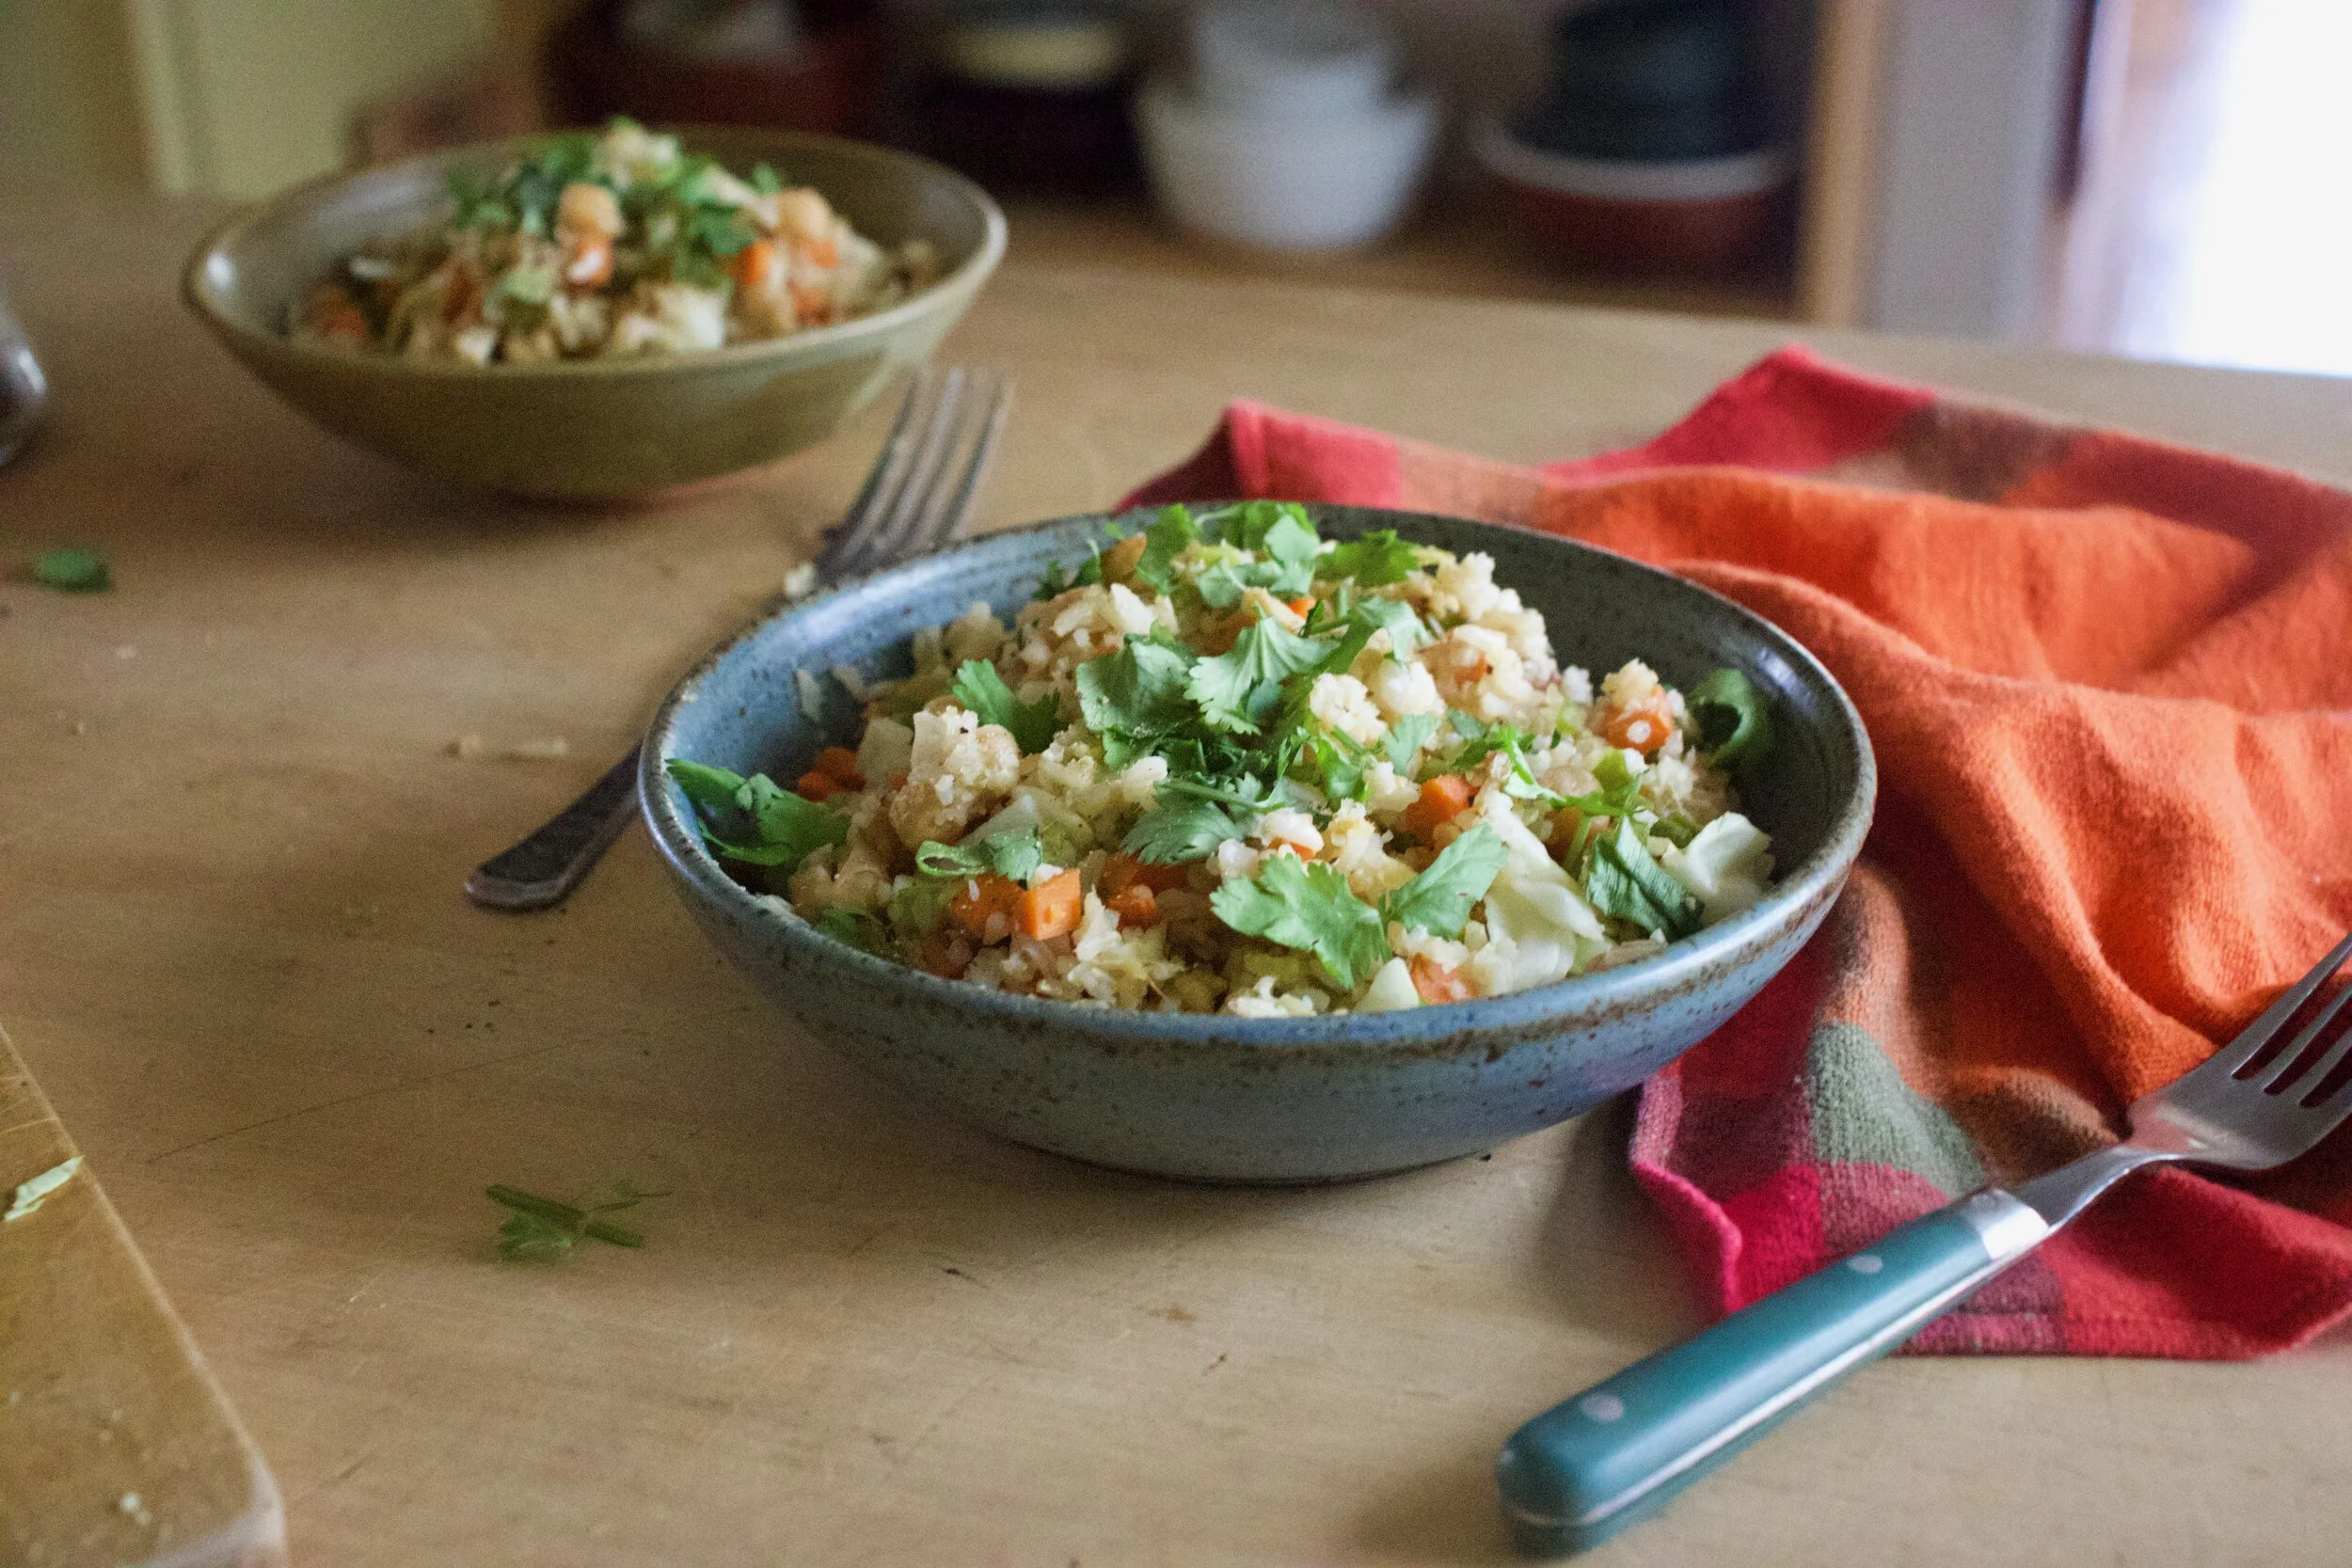
Now scoop into bowls, toss some cilantro and black pepper on for good measure then grab a eating utensil.
And eat.
-C
serves 2-3 as a meals or 5-6 as a side
-
3 cups already cooked rice (white or brown, I used brown)
-
2 cups cooked chick peas
-
2 carrots
-
2 inches fresh ginger root
-
2 gloves garlic
-
3-4 teaspoon soy or liquid aminos
-
1 tablespoon red or white wine vinegar
-
1-2 teaspoons olive oil
-
2-3 large scallions
-
small hunk of cabbage
-
black pepper
-
Few tablespoons water
-
fresh cilantro (optional)
Start by prepping the veggies. Cut the carrots into very small little pieces and toss into a large, lightly oiled skillet Place on stove on low heat with a splash of water. Now mince the garlic and ginger and toss it into the skillet was well. Shredded the hunk of cabbage and set aside Grab the scallion, cut the green parts from the white, then thinly slice the the white, thicker part and toss into the skillet and thinly slice the green and add to the pile with the shredded cabbage. Mix all the veggies around, add another tablespoon or two of water, turn heat up to medium, and cook until carrots are slightly soft and the garlic and ginger are fragrant.
Once it is all starting to cook, toss in the drained chickpeas and add in the vinegar and 2-3 teaspoons of soy. Mix and cook until chickpeas are warm all the way through.
Now for the rice. Toss that in and mix around. Once rice is warm, toss in the greens of the scallions and the shredded cabbage. Cook until the rice is hot. Taste, and if you need more soy, add in in another teaspoon.
Once its all hot, it ready to eat and that is what you do. So scoop into bowls, add some chopped cilantro and black pepper and eat.
If you were to ask me what my favorite winter squash would be, I would have to say that I couldn%u2019t choose, I love them all. But when I really, really think about it, when I look deep into my food soul, I could, and I think it would be pumpkin. Yup, pumpkin is my favorite.
Pumpkin is amazing and delicious, Not just as a pie or bread, but eaten in any way that any other winter squashed can be eaten. Fantastic in a soup or roasted or saut%u00e9ed. And yes, blended up into all sorts of baked goods. It tastes somewhat like butternut squash but less sweet and has a nice nutty, earthiness to it and pairs well with al sorts of great spices, not just pumpkin spice. If you haven%u2019t had it outside of a baked good, well then, make this. You are in for a really treat!
But don%u2019t carve a jack o lantern pumpkin then eat that. Those big pumpkins are not very tasty. Get a small pie pumpkin, those are ones to eat.
Now to the tomato stewed pumpkin!
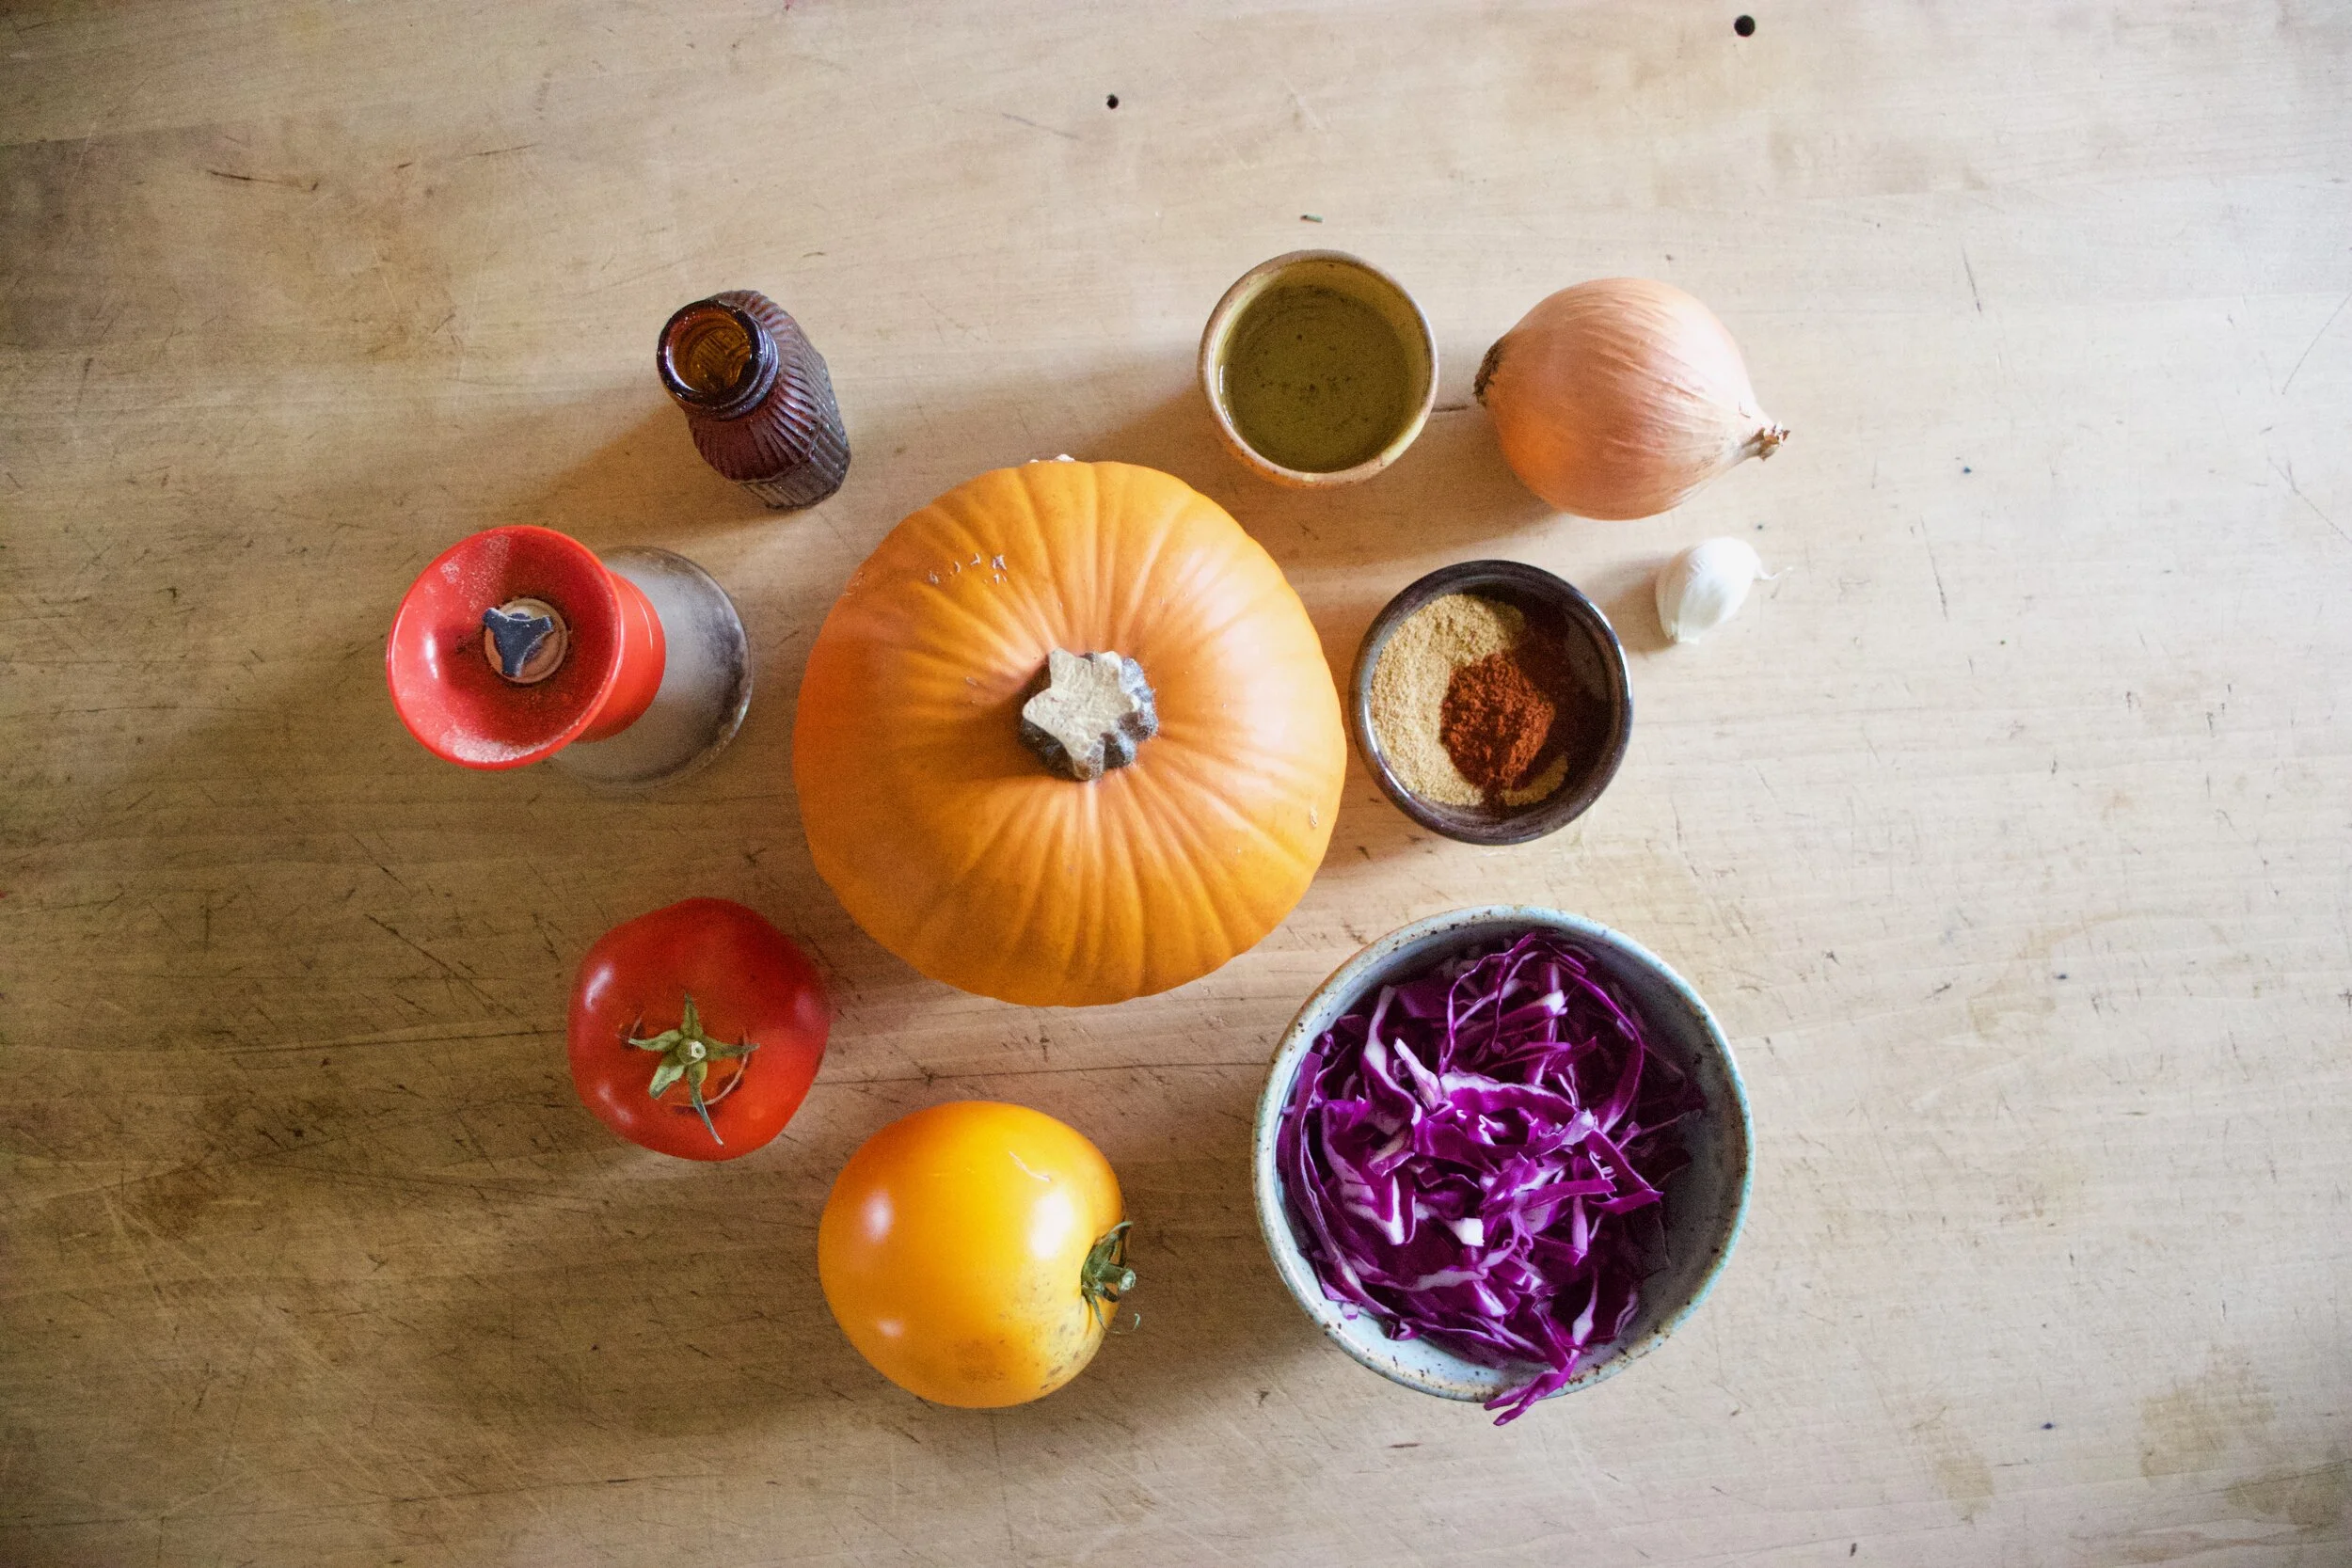
The stuff. A sugar(pie) pumpkin, a couple nice big ripe tomatoes, a large onion, a clove or two or garlic, cumin and chili powder, vinegar, shredded cabbage, and salt and pepper.
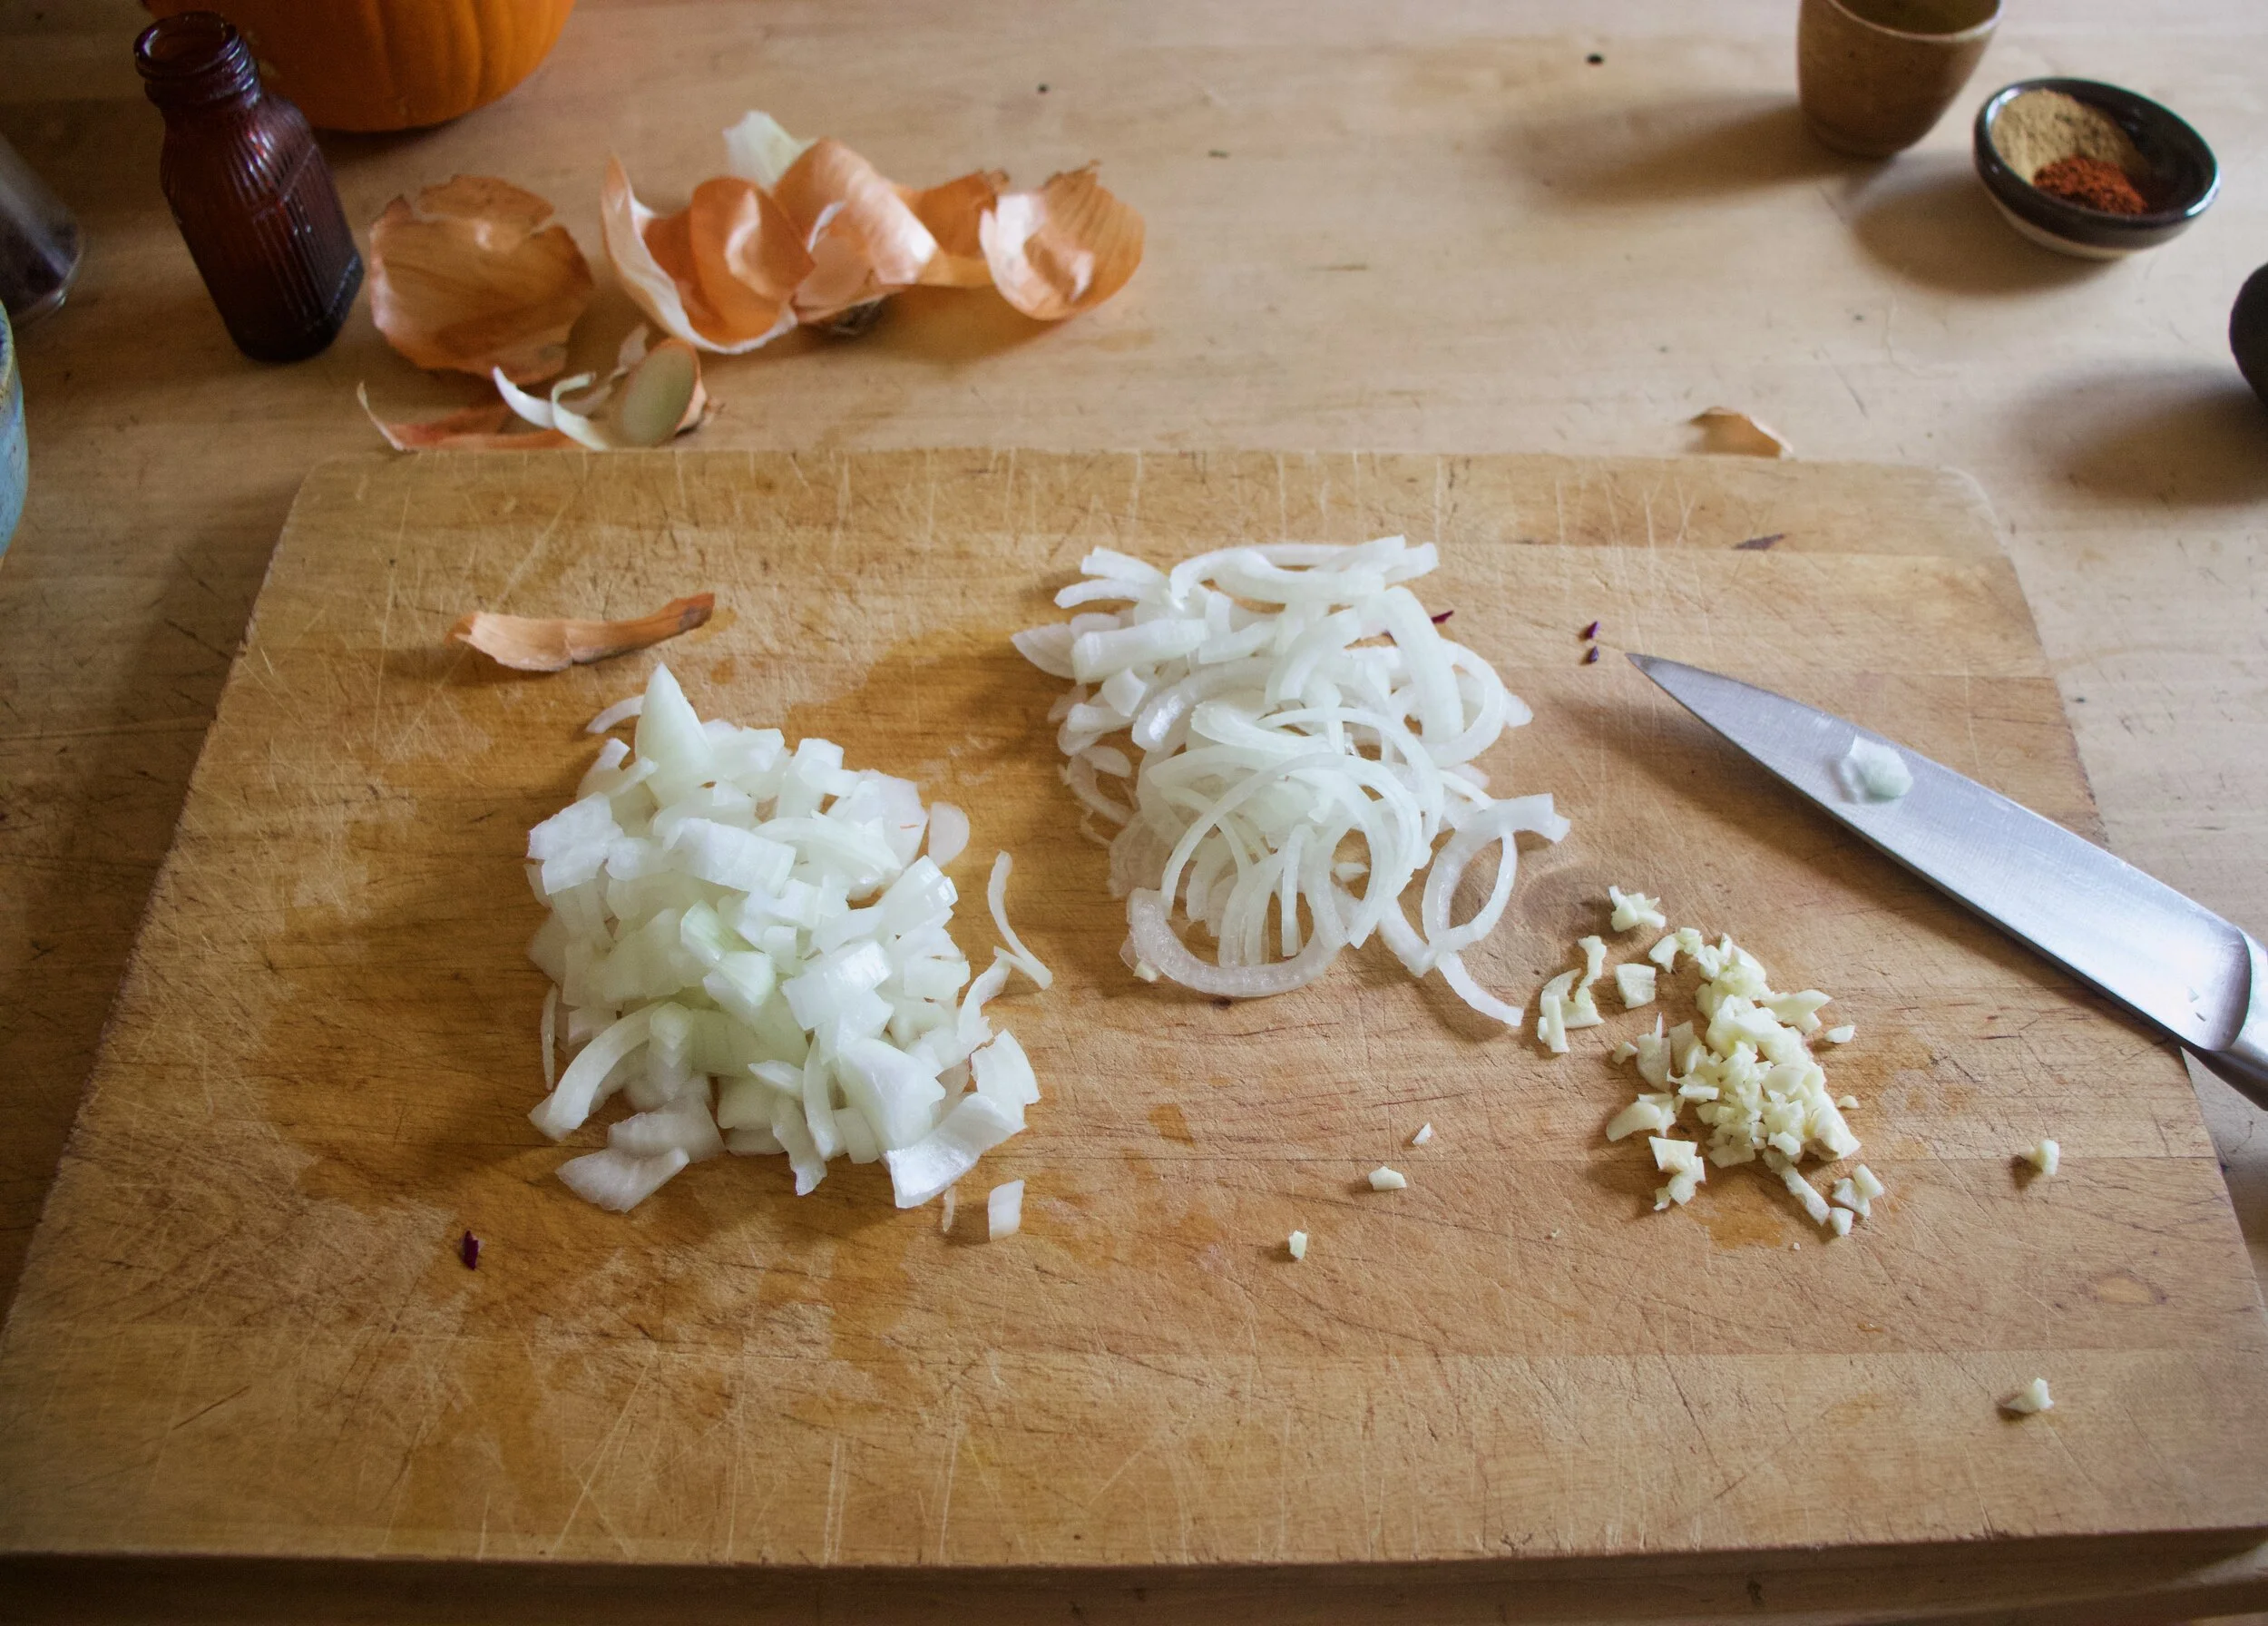
Start with the onion. Cut in half and thinly shred about 1/3 or it. Small dice the rest Also mince up the garlic too.
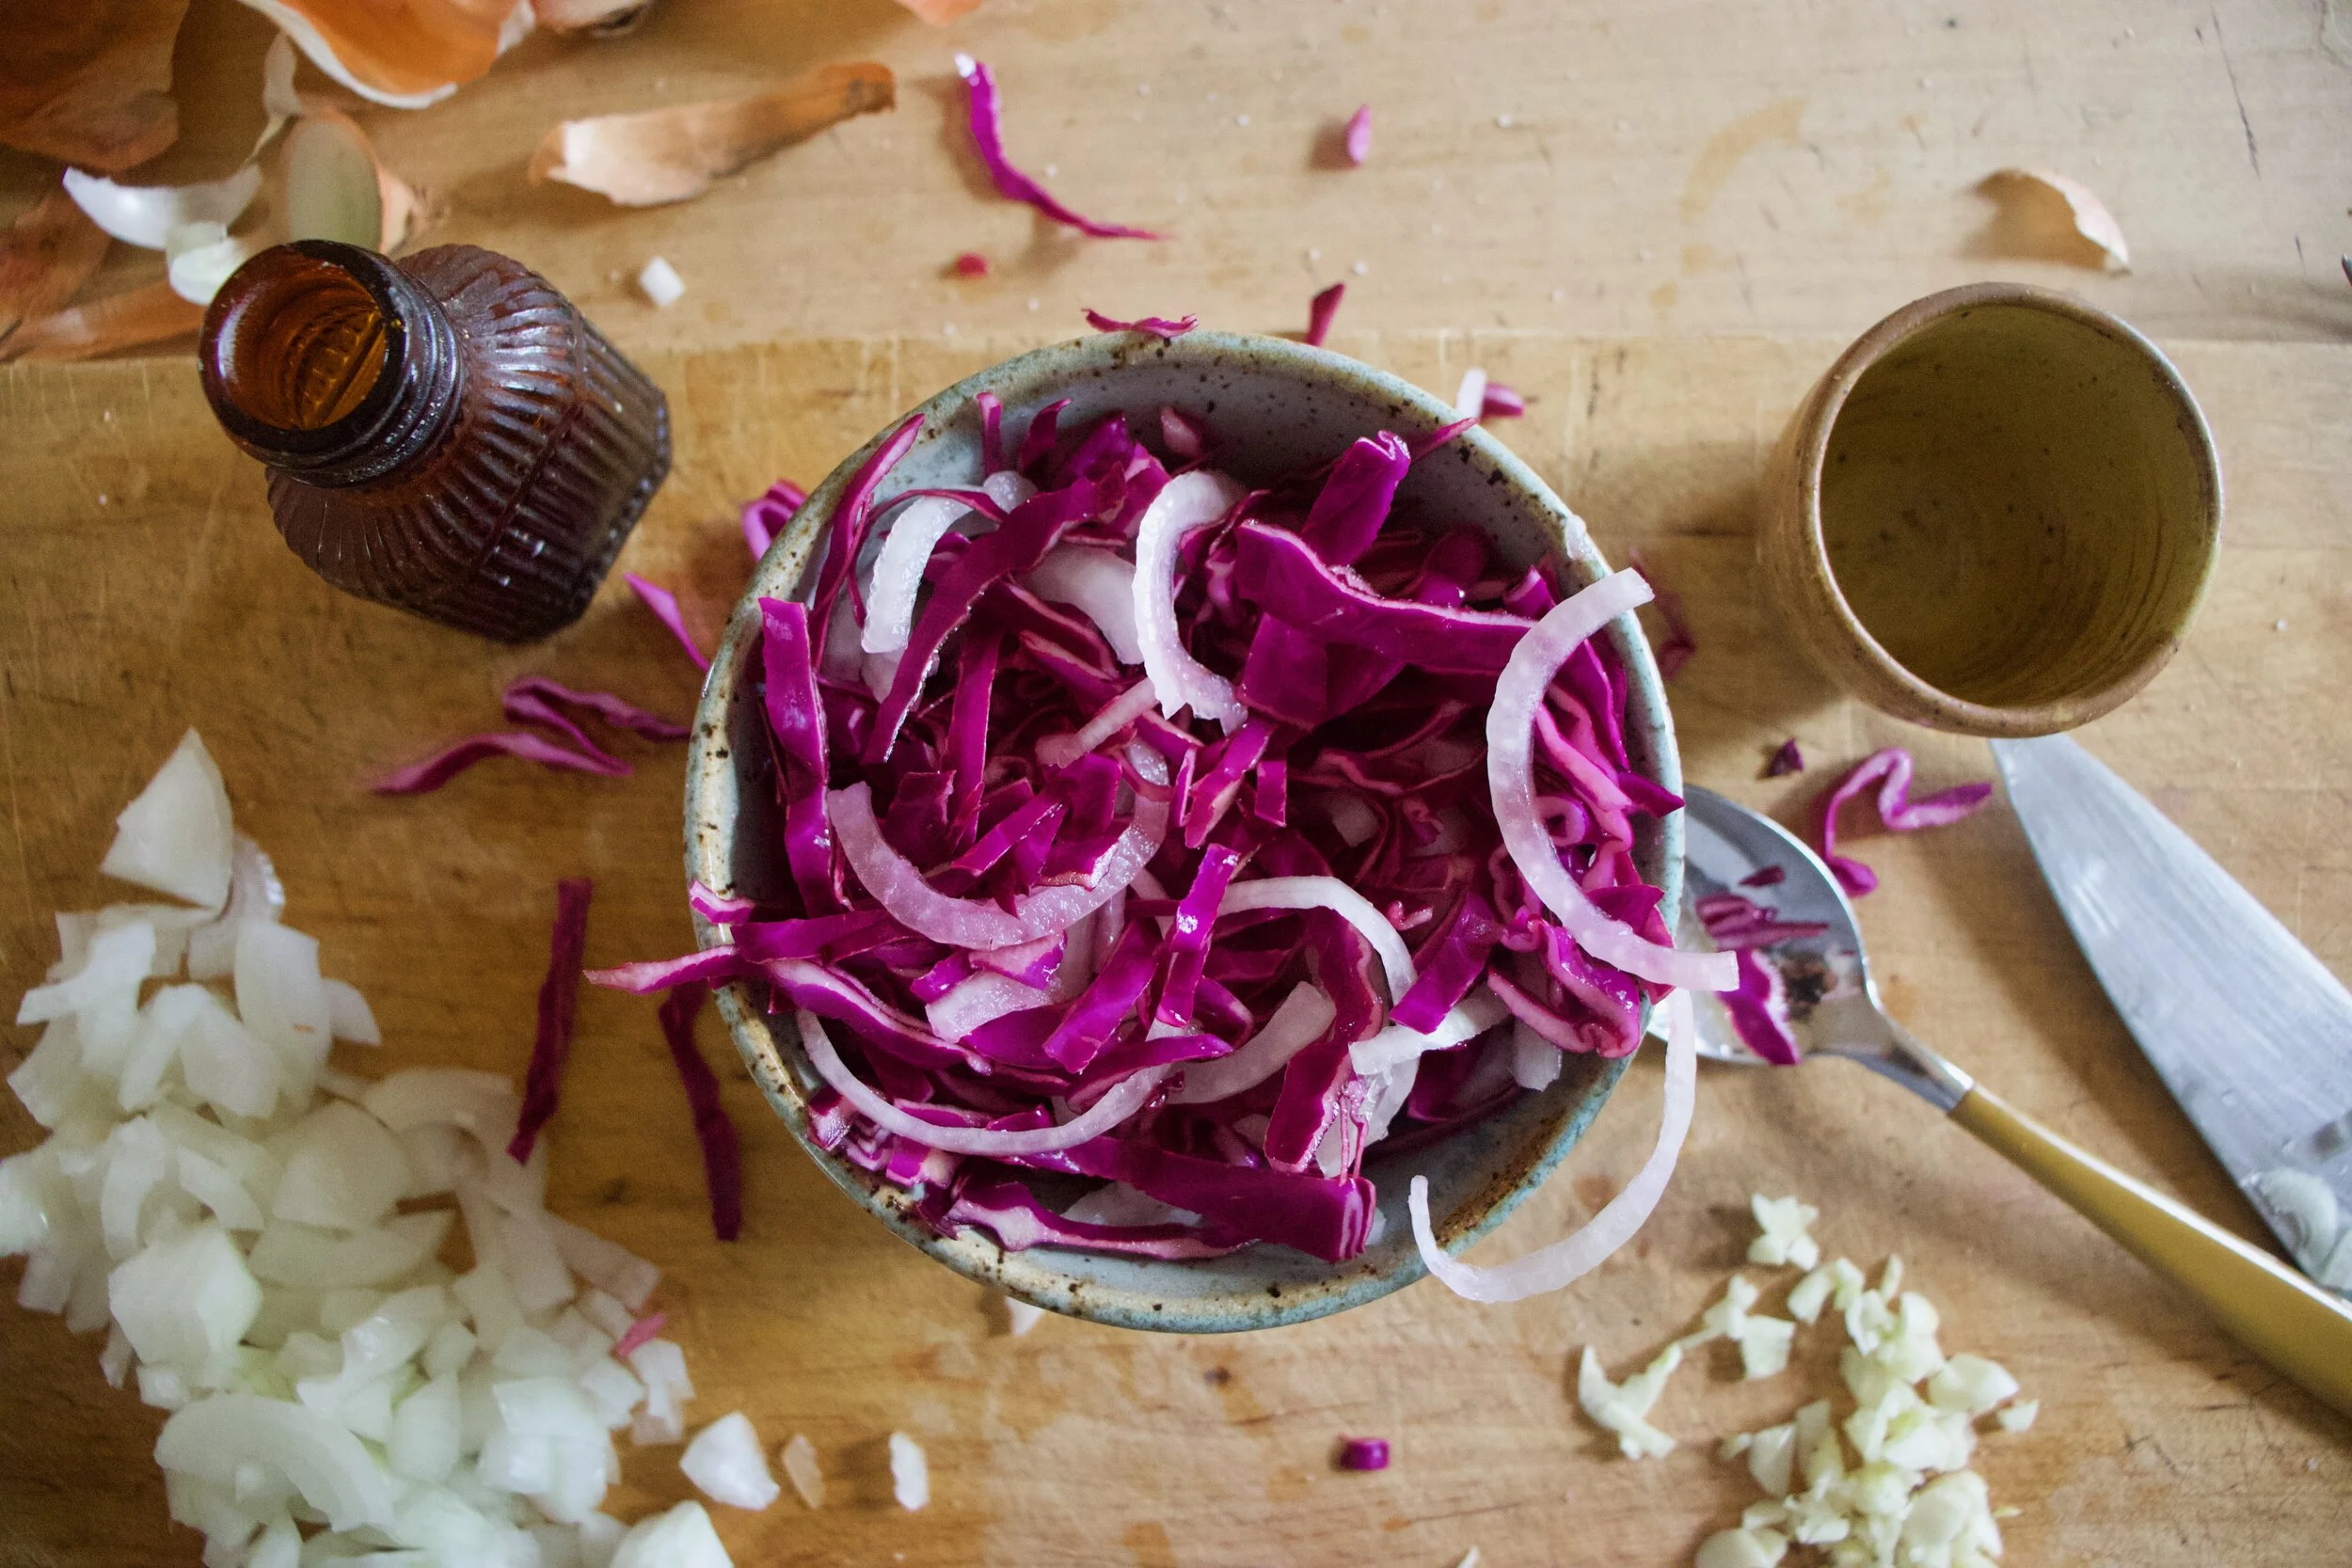
Add the thinly shredded onion to the shredded cabbage and toss around with vinegar a little salt and pepper then set aside.
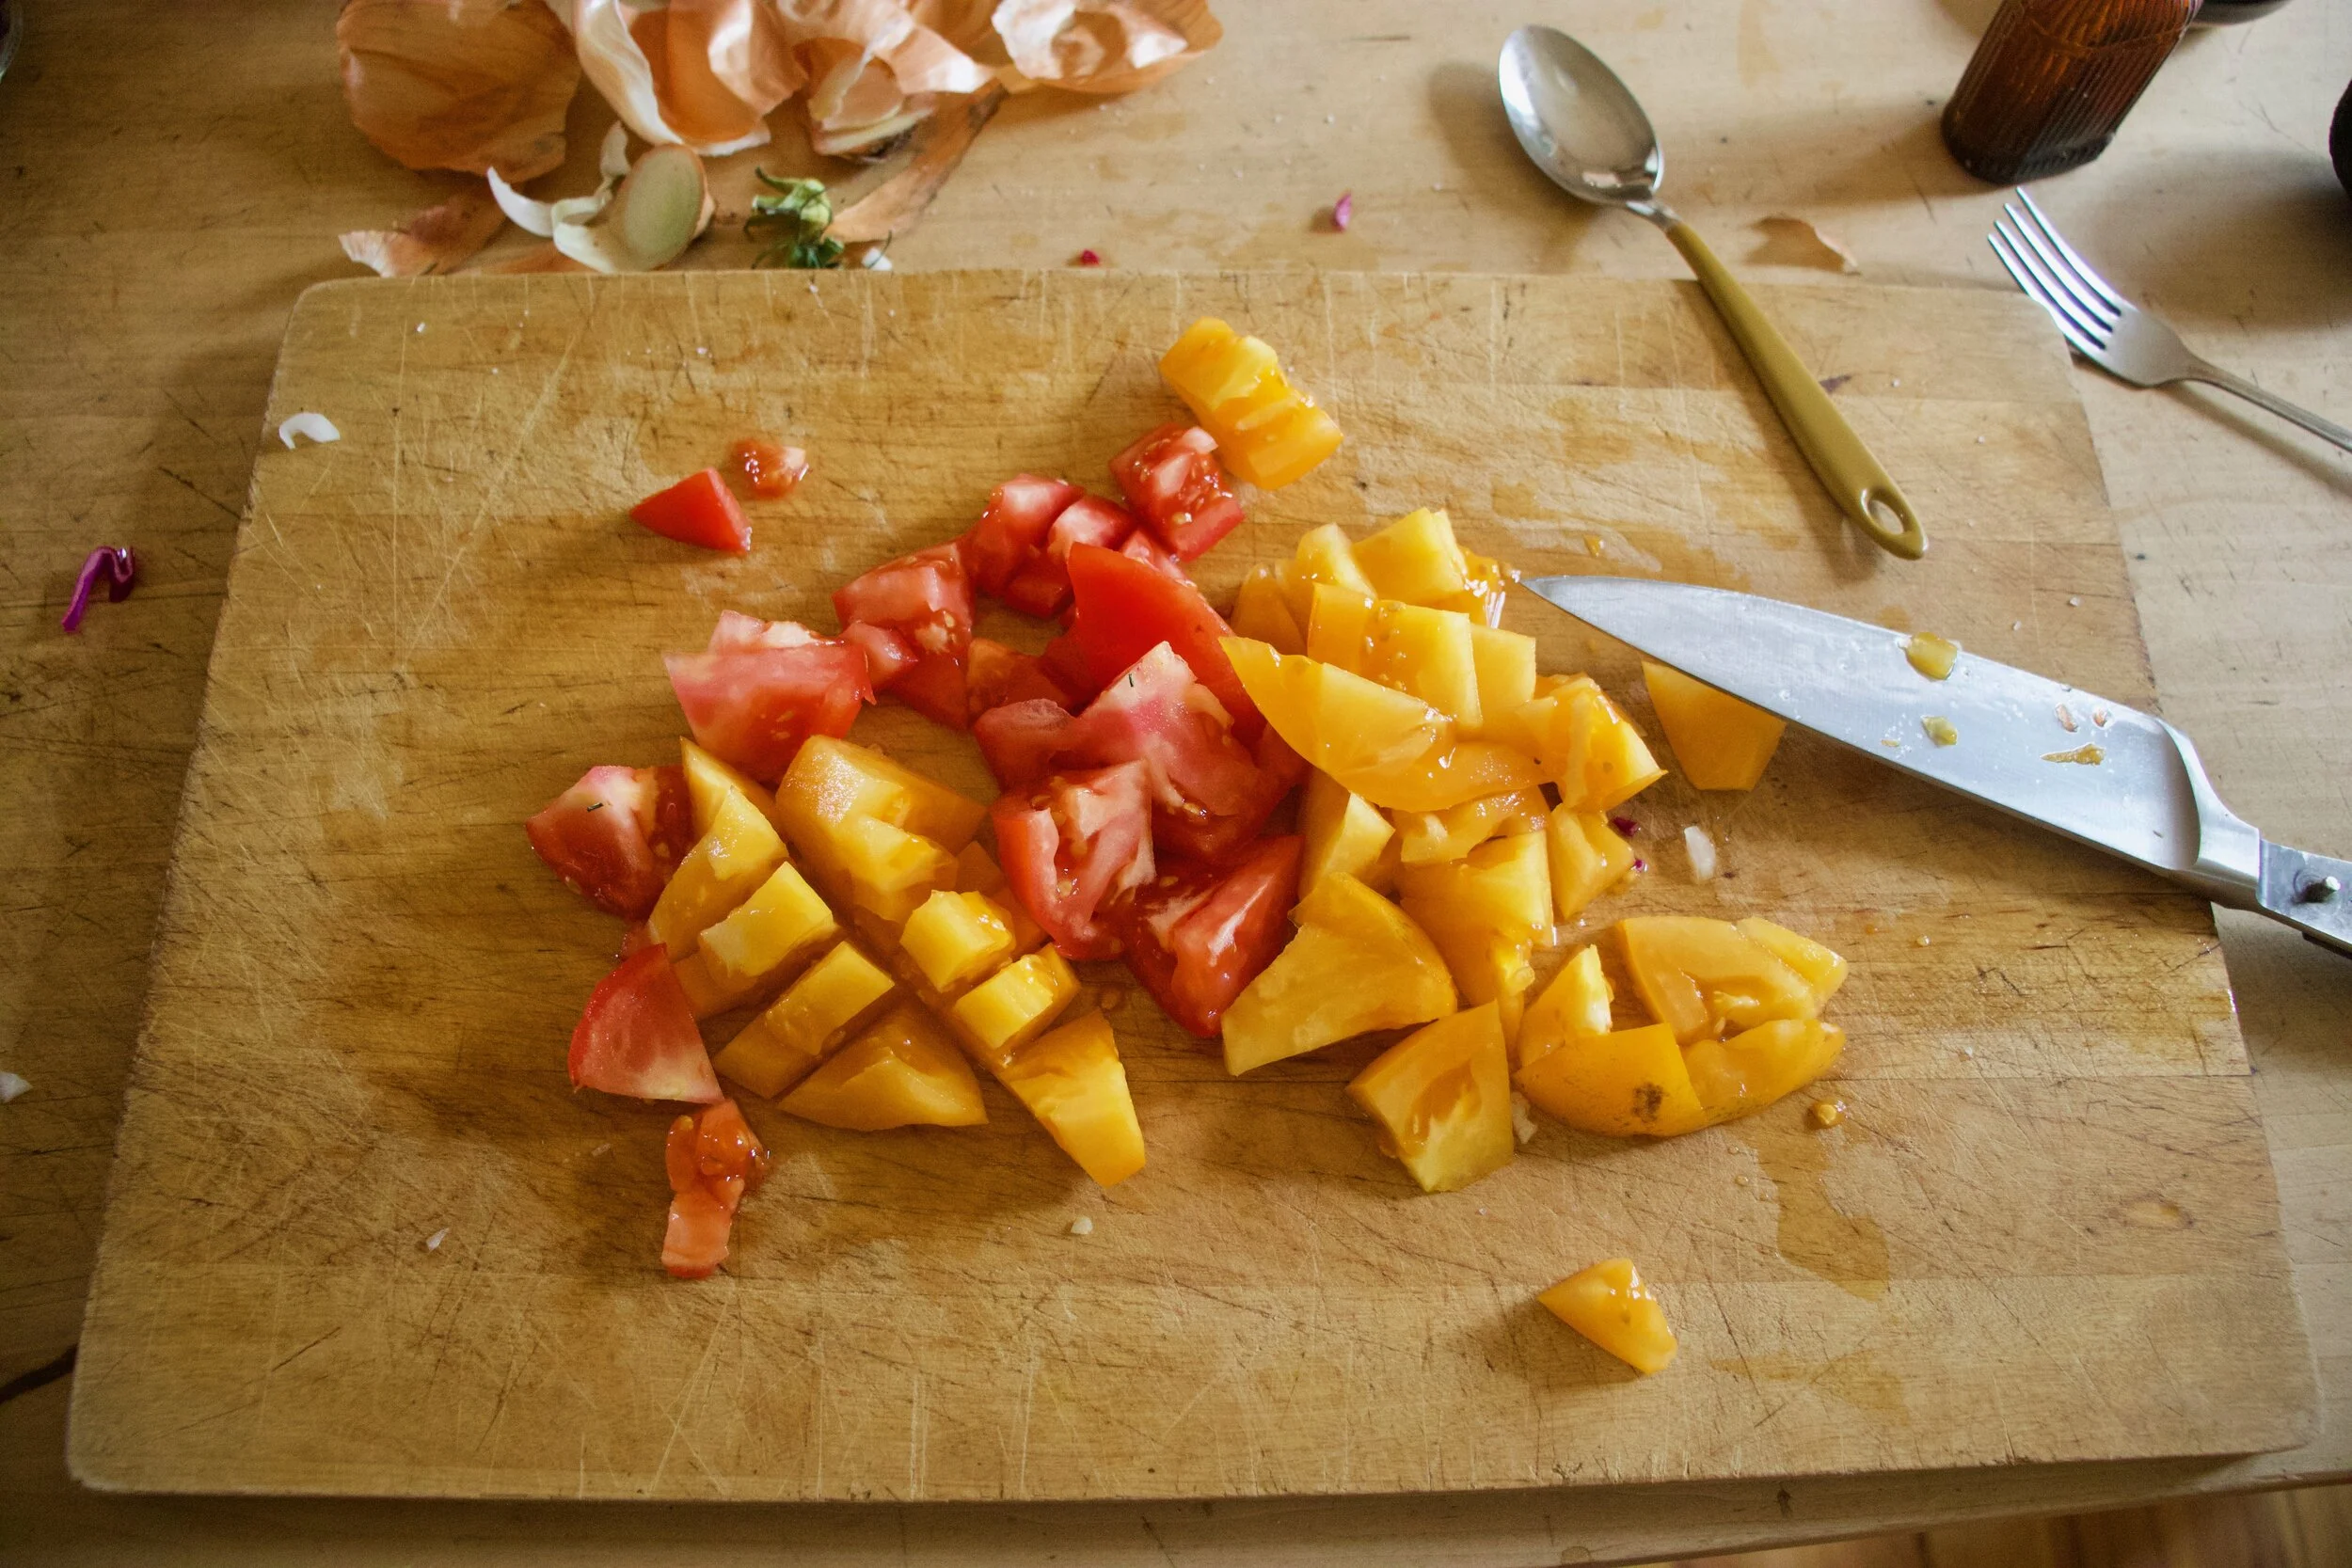
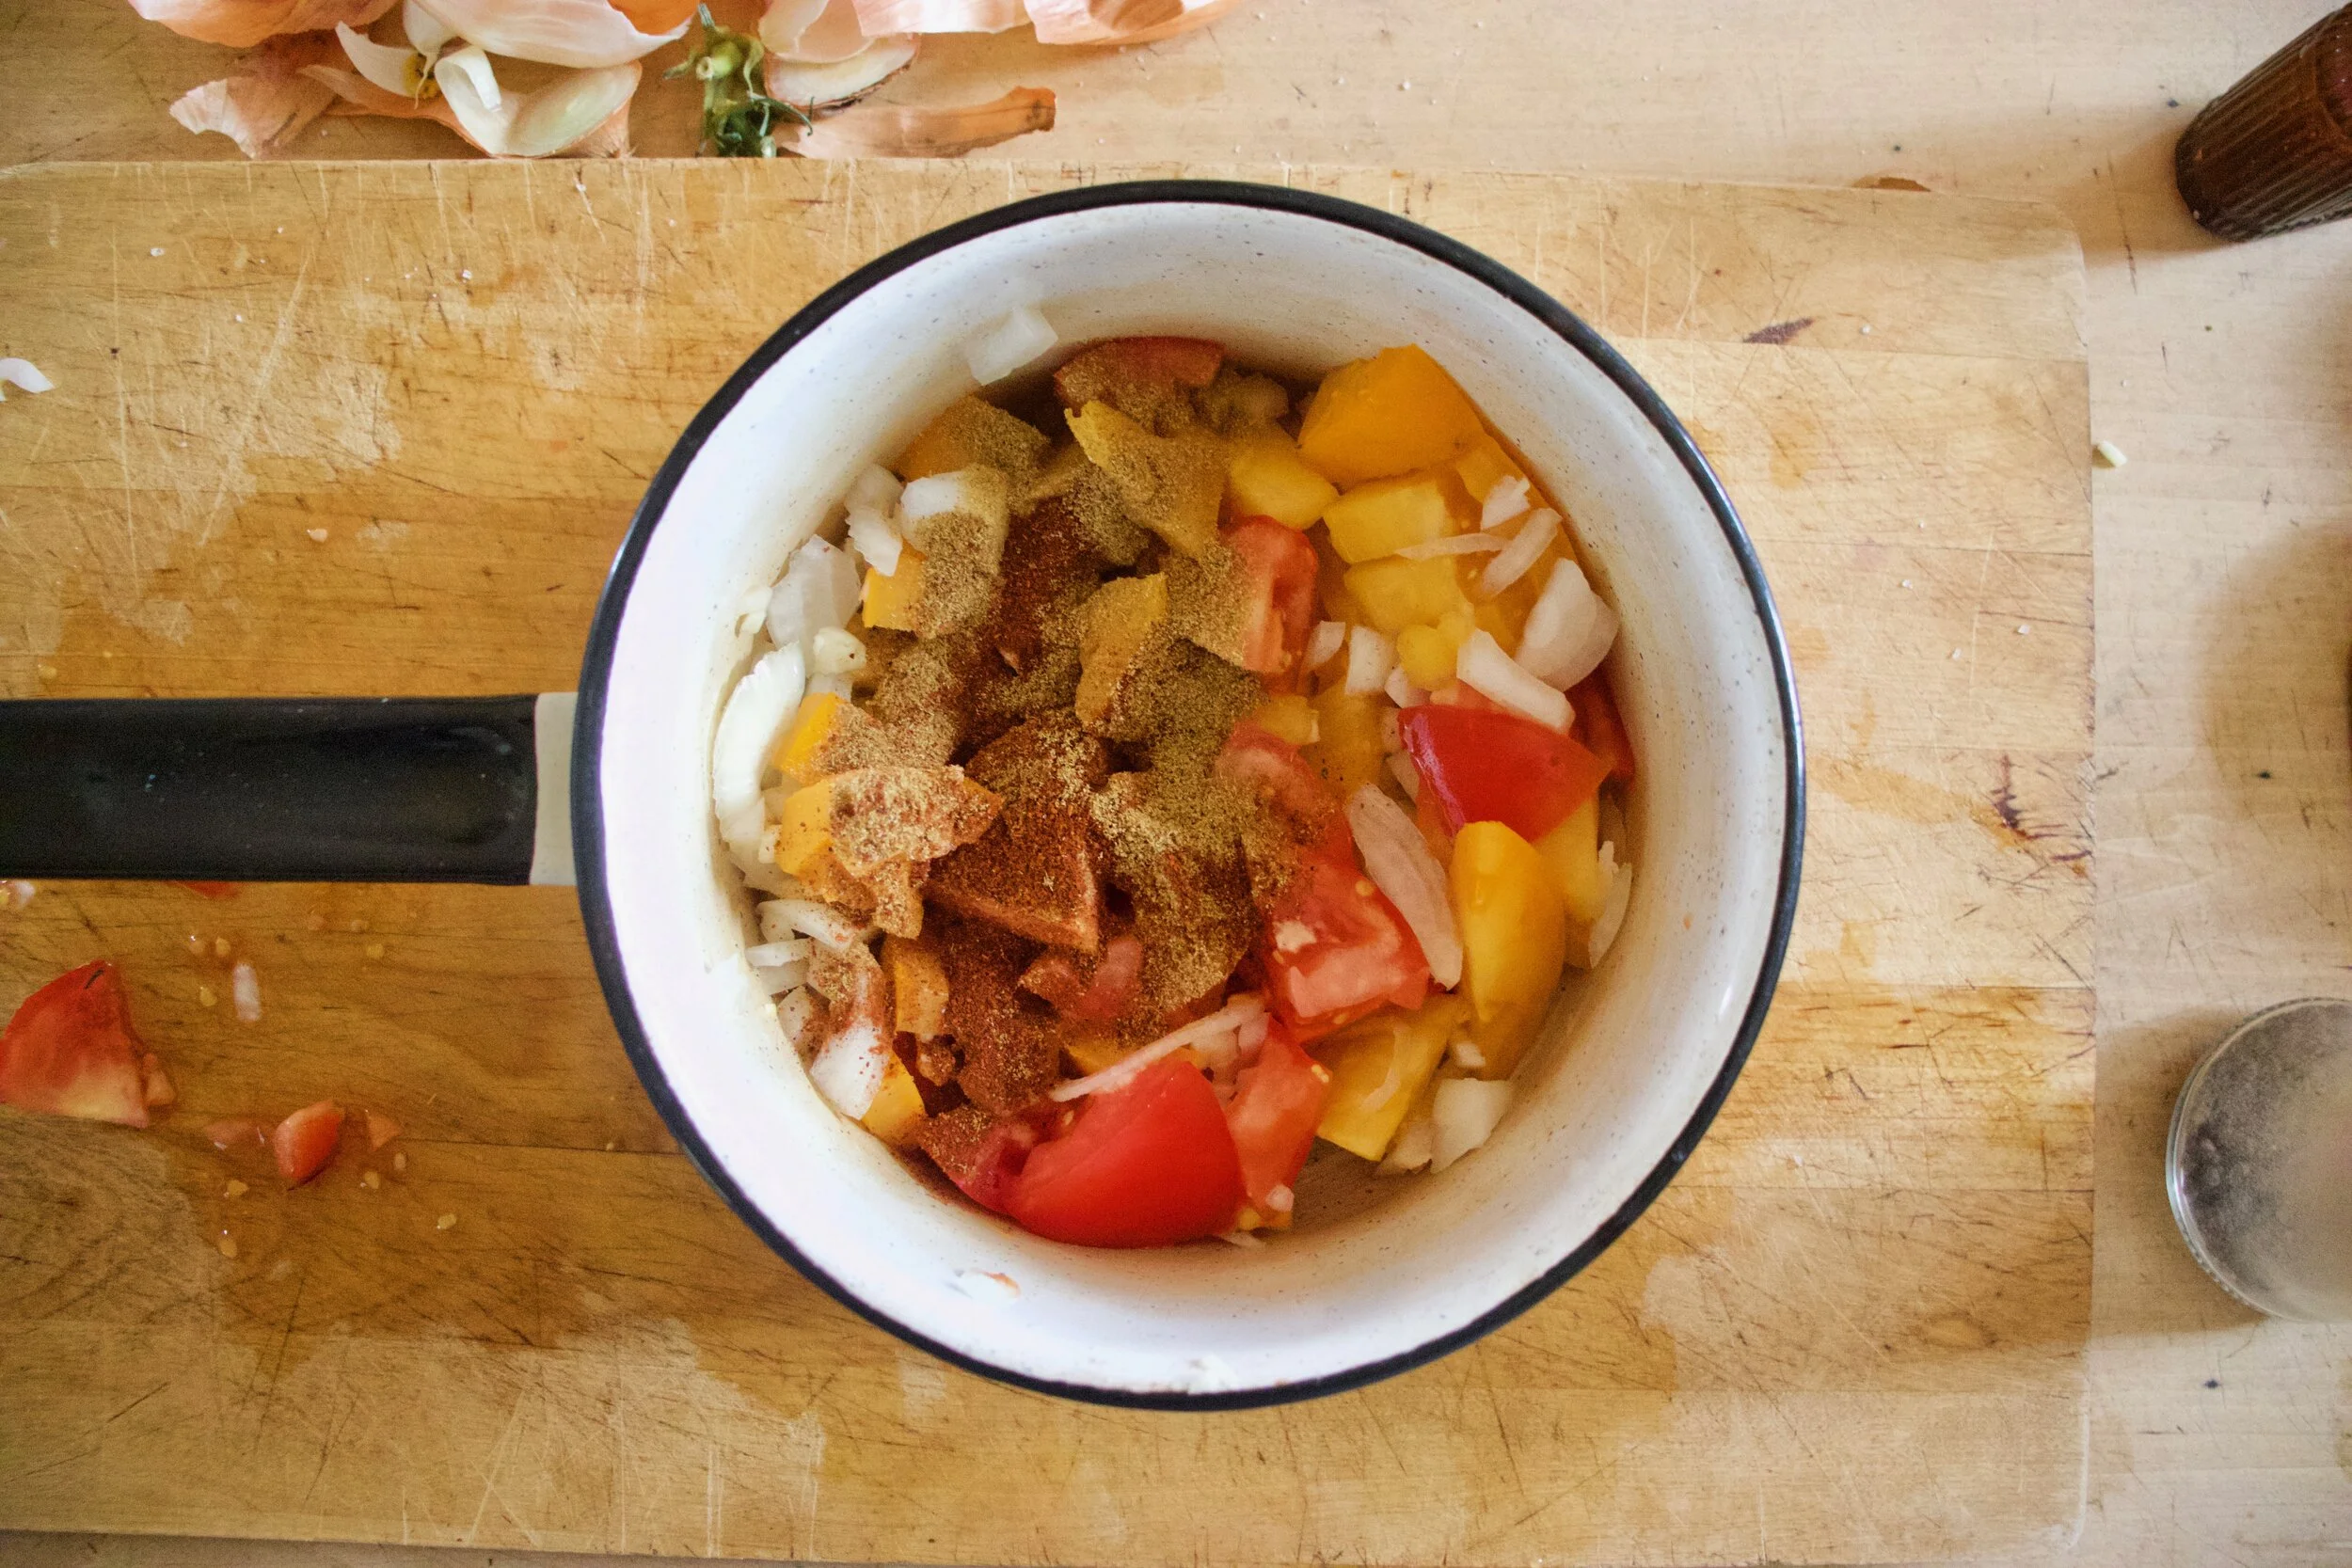
Place the diced onions, minced garlic, tomatoes, and cumin ans chili powder into a big pot with a splash of water and stick on medium heat on stove to start to stew the tomatoes.
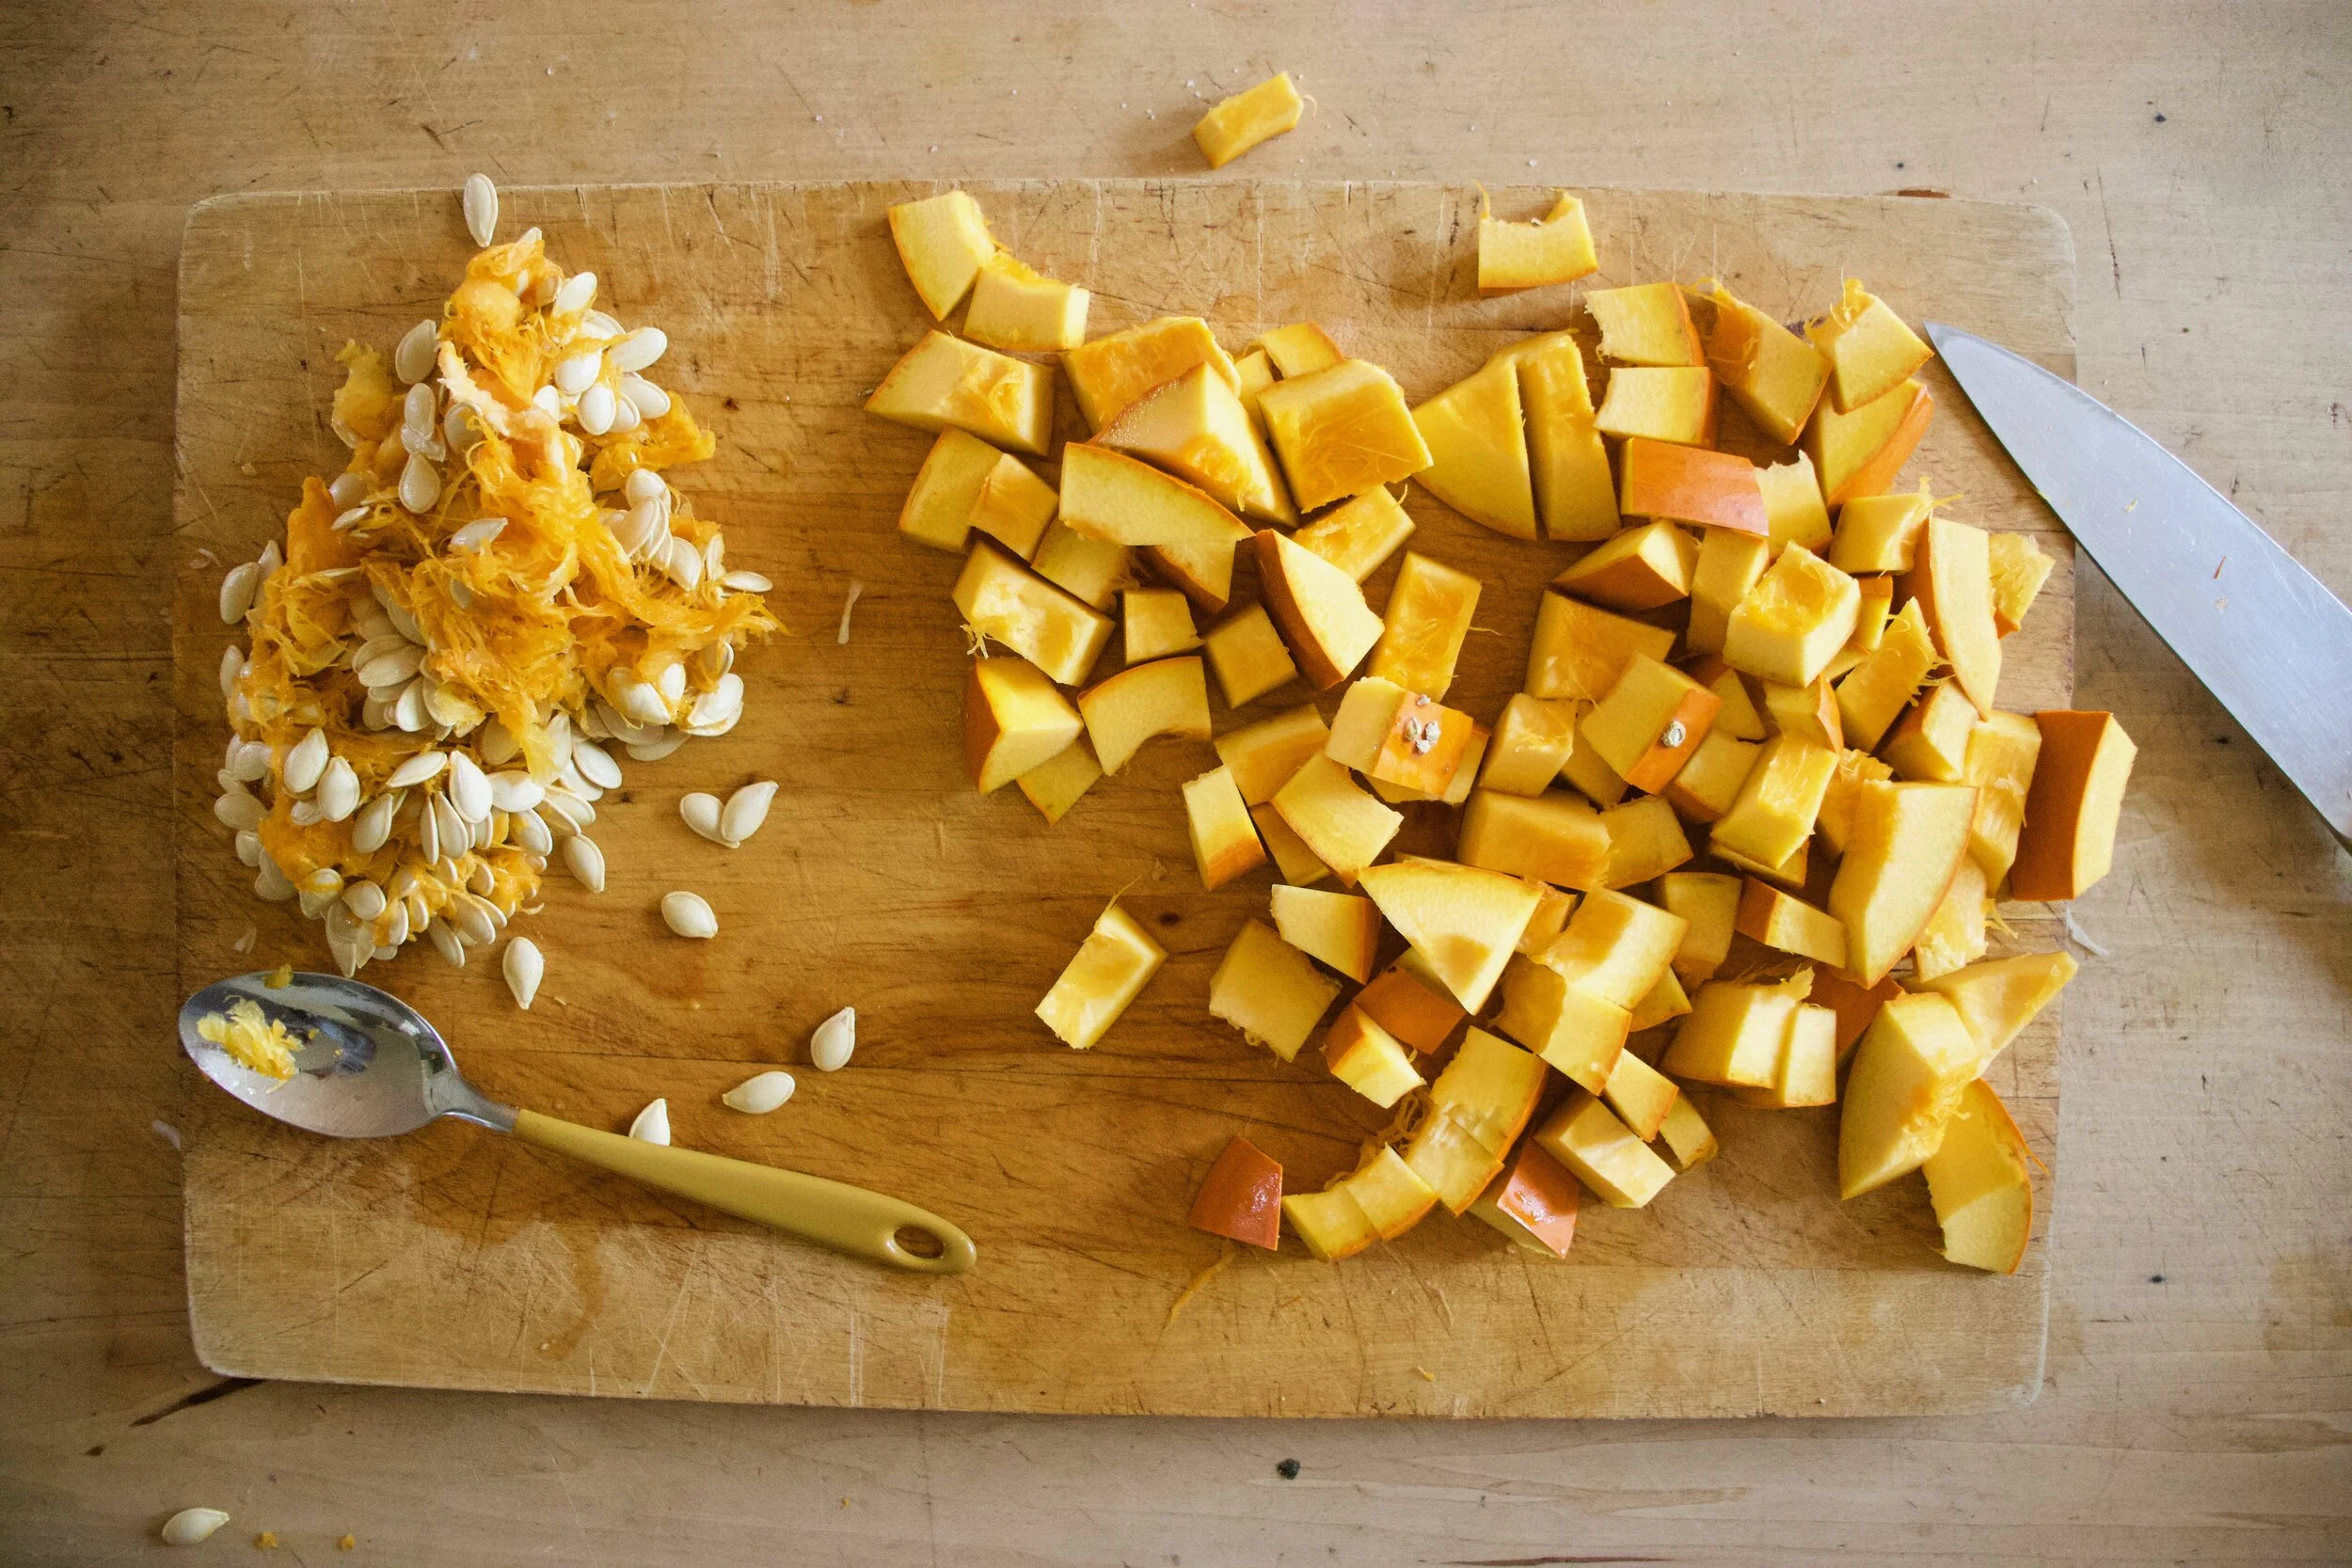
While the tomatoes are going, cut up pumpkin. Just cut in half, remove seeds (save for roasting) and cut into small cubes. And sure, if you are not a fan of the skin (my favorite part) just peel the pumpkin with a potato peeler before cutting it up small. But really the skin, it is sooo GOOD!
Once the tomatoes are soft and mushy, add in the pumpkin. Keep on heat and place a lid mostly over pot. Let cook.
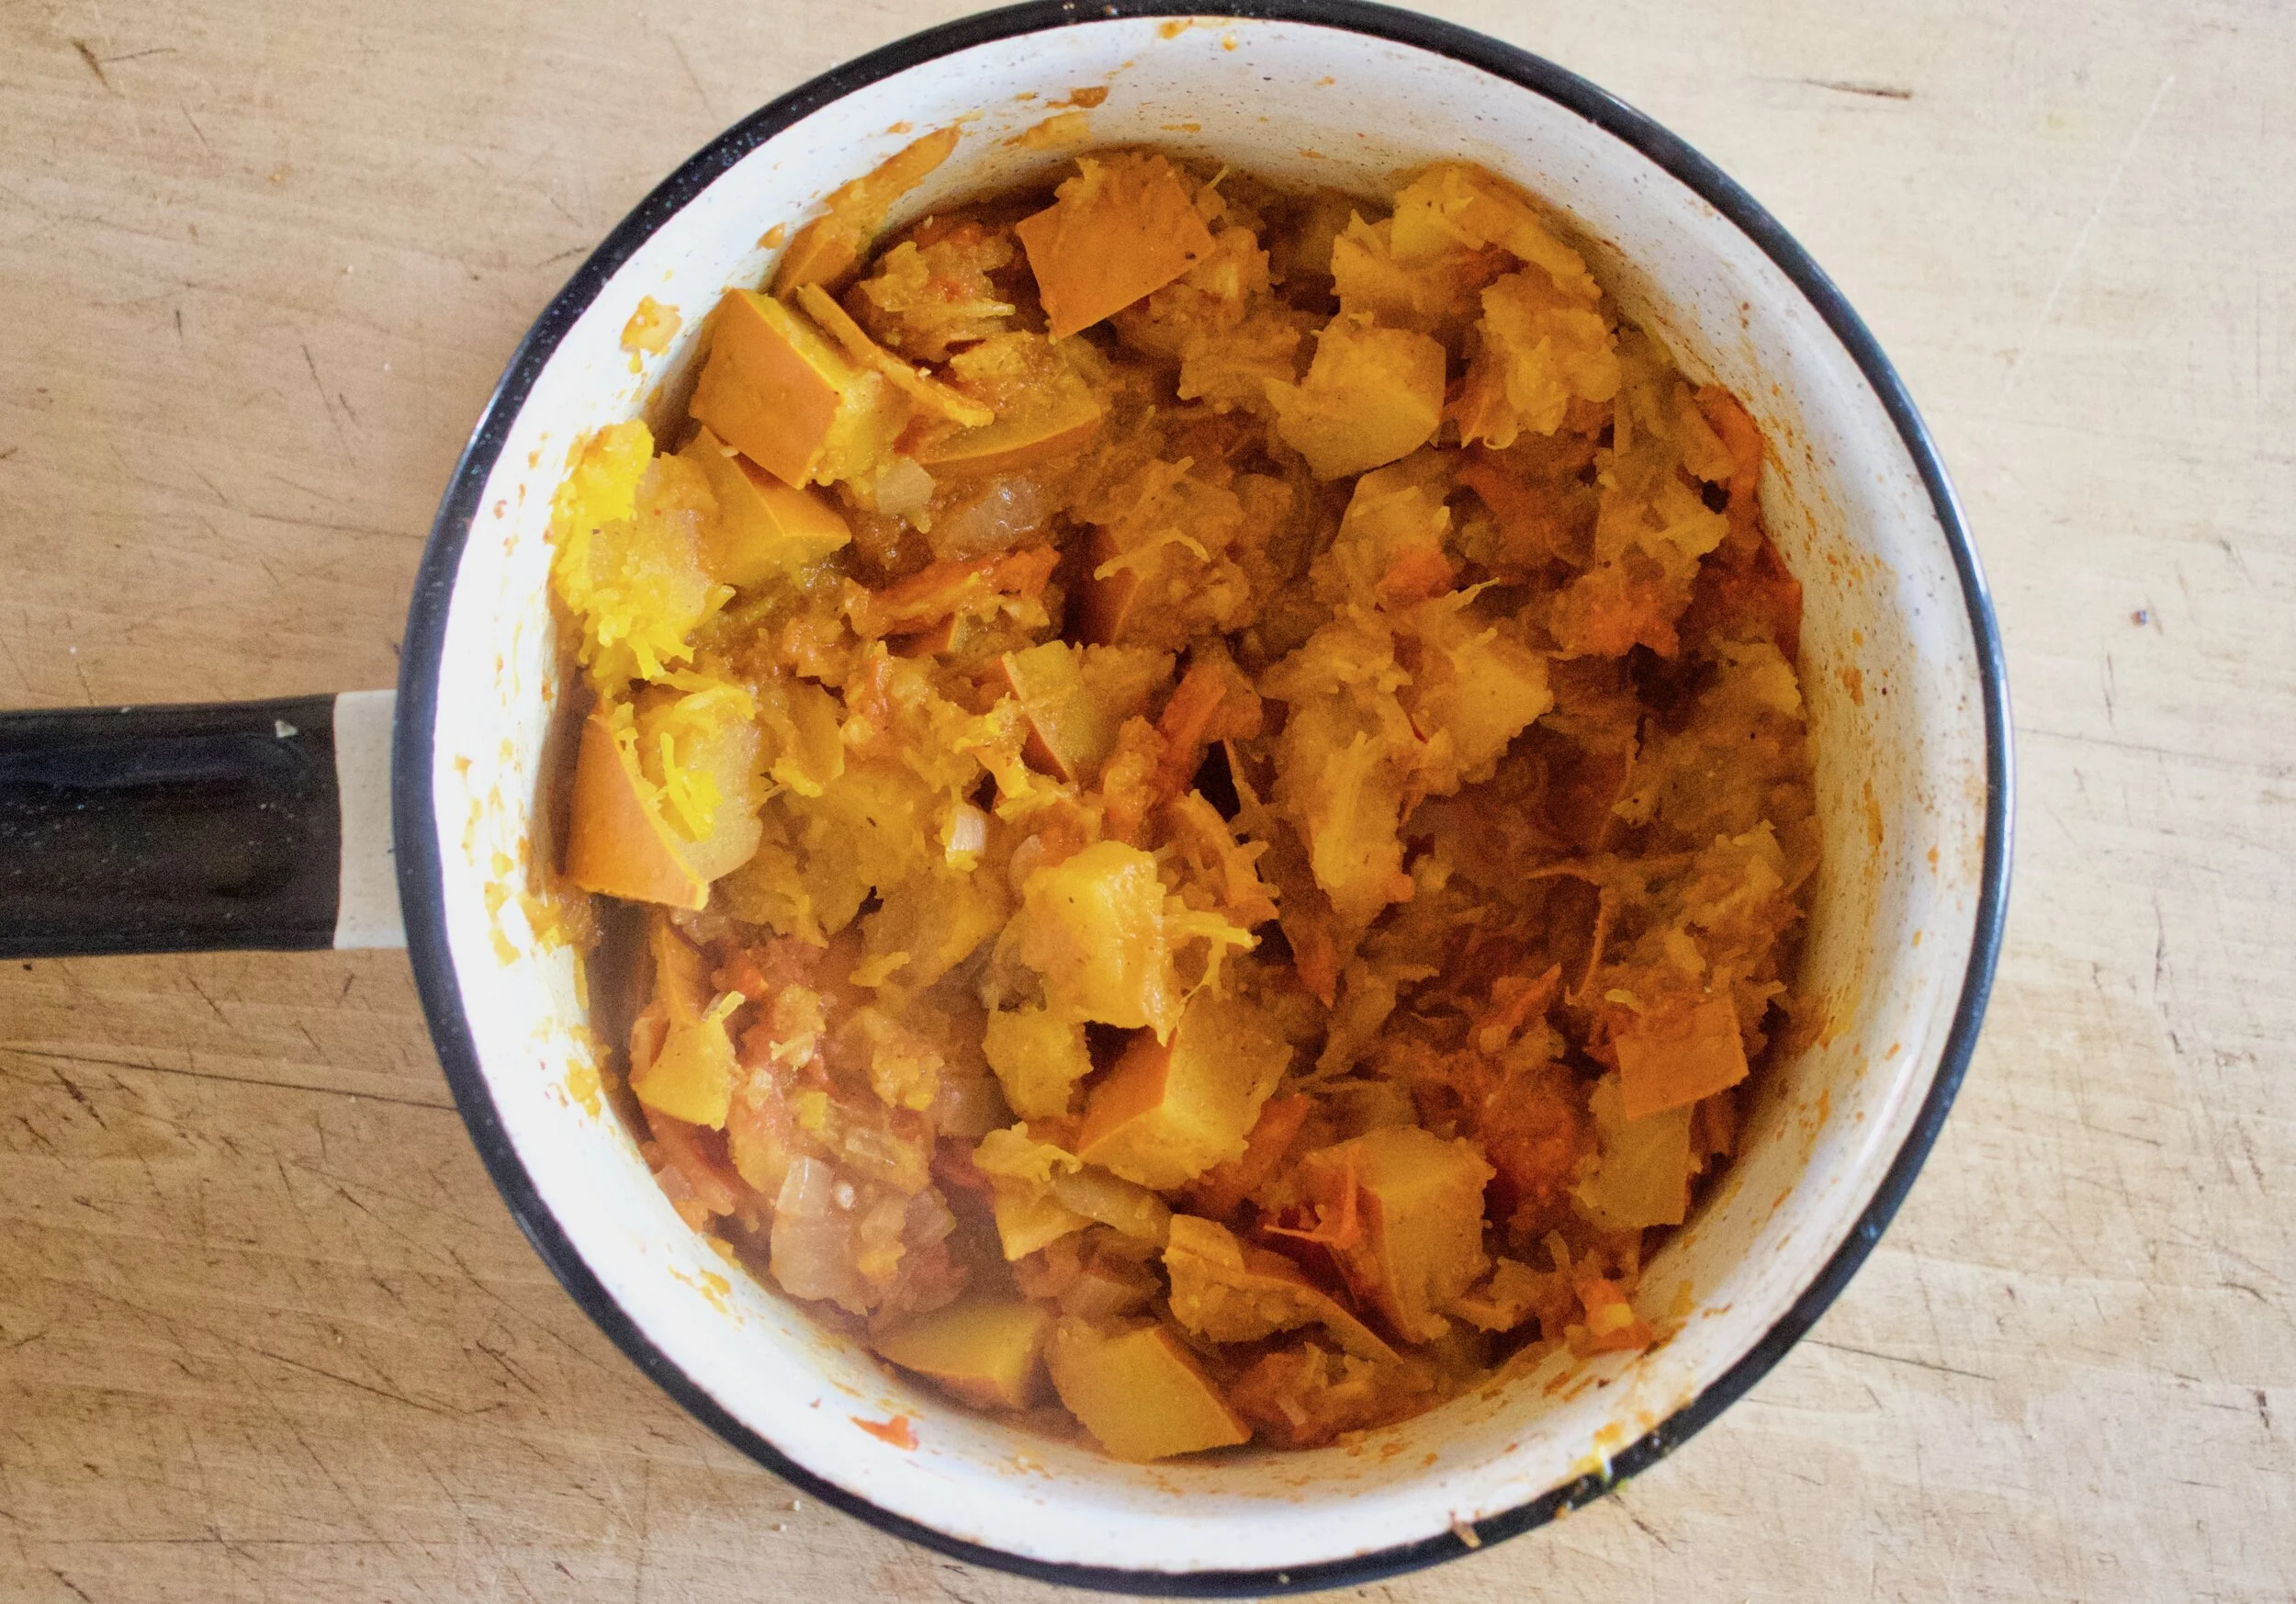
Soft and stewed and all sorts of everything good.

And then you scoop it into bowls, top with the cabbage slaw, sprinkle with pepper and fresh cilantro if you just so happen to have some, and eat it.
Yeah, pumpkin is my favorite.
-C
makes 2 bigger or 4 smaller serving
-
1 small sugar pumpkin (around 3 or a little more cups cubed)
-
2 large tomatoes
-
2 heaping teaspoons cumin
-
1 teaspoon chili powder
-
A few tablespoons water
-
1-2 cloves garlic
-
1 large onion
-
2 cups shredded red or green cabbage
-
2 tablespoons white vinegar
-
salt and pepper
Start with the onion. Cut in half and thinly slice a little more then half of the half. Toss with the cabbage, the vinegar, and a pinch of salt. Set aside
Dice the rest of the onion and place into a big pot. Grab tomatoes and dice them up as well and place them into the pot with the onions. Sprinkle with a pinch pf salt and pepper and add in the cumin and chili powder. Add 2 tablespoons of water and place on stove on medium heat to start to cook down.
While the tomatoes are stewing away, cut up the pumpkin. Just cut in half, remove seeds (and reserve for roasting) and dice it into small chunks. If you are not one to enjoy the greatness of pumpkin skin (it is really good) then before dicing it, just peel it with a potato peeler.
Once tomatoes have cooked down a bit, place the diced pumpkin into the pot. Add another tablespoon or so of water, mix around, partially place a lid on the pot, and let cook for about 20-25 minutes, stirring occasionally, until the pumpkin starts to fall apart. If at any time it seems like it needs more liquid, just add in another tablespoon or so of water.
Once it is all stewed up, remove from heat, scoop into a bowl or bowls, and top with the cabbage slaw that was made early.
Eat.
Sometimes it is the simplest of simple things that really get me excited about food. Take for instance burnt broccoli. What exactly is there to say about it other then it is broccoli roasted until it is burnt.
Well I tell ya, it%u2019s amazing and delicious.
I have always been in love with broccoli but lately I have taken to eating more and more of it then usual. Partly because I have been getting a lot of it at the farm, but mostly because I have been craving it in the weirdest way, like every time I get hungry, all I want is to eat is burnt broccoli. What I do is I roast the broccoli unit it is basically burnt. And then I eat it, just like that, nice and burnt and crispy and I just can%u2019t get enough.
Is that a little weird? Maybe sure, but whatever, it is fantastic and I really don%u2019t care if it is weird. I%u2019m doing me and eating a plate of burnt ass broccoli every day makes me happy.
You should try it. It will portably make you happy too.
To the broccoli!

The stuff. All you need is broccoli. You could toss int n a a tiny bit of oil if you want, but I forgo the oil. And salt and pepper if you want too, but again, I don%u2019t want it.

So basically all you do is brake apart broccoli crowns and stick them on a baking sheet and pop it into a really hot oven for 45 minutes to an hour, depending on how burnt you want your broccoli.

Good and crispy. I might leave it in a tad bit longer but at this point I just wanted to eat it so I just called it.

Then once it is burnt, you eat it. Plain and unadulterated or splashed with lemon juice or even dipped in hummus. Any way is a good way because burnt broccoli is alway going to be good.
-C
-
Broccoli crowns (at least 1, if not a whole lot. Make as much as you want)
-
olive oil (optional)
-
salt and pepper (optional)
Preheat oven to 450
Break of cut apart broccoli crowns into florets and place on a baking sheet. If you want, lightly oil the baking sheet and or toss broccoli in a teaspoon or so oil.
Place in oven and cook for 45 minutes to an hour or until broccoli is burnt to your liking.
Remove broccoli from oven when done and eat, as a side, in a sandwich, or on it%u2019s own as a great snack.
It%u2019s that time of year again. Time to make the hot sauce!
This year I wanted to do a little twist on my usual plain old jalape%u00f1o hot sauce. And to be honest, I wanted to use up the pineapple juice that I had stashed away in the pantry that I was using to make popsicles for the littles all summer. But mostly it%u2019s because pineapple and jalape%u00f1o are a fantastic flavoring pairing and I knew that adding the pineapple to the hot sauce would only be a great idea.
A great idea it was.
This hot sauce is basic. Hot peppers, vinegar, and a little onion, garlic, and salt. The pineapple juice adds more body, some sweetness, and just a nice undertone of pineappleiness that you didn%u2019t know you really wanted. It is really really good. And about the jalape%u00f1os. They are one of those peppers that can be pretty mild but also can get pretty dang hot. I am not sure of the variety that I have been picking at that farm for the past few years (that is where I get my peppers), but they are always on the pretty dang hot side so my hot sauces always have a good amount of kick to them. If you find your peppers to be a little too mild for you, well go ahead and add a few habaneros to the mix.
Now to the hot sauce!

The stuff. Jalape%u00f1os of course (green, red, or both. I picked both), an onion, a couple cloves garlic, pineapple juice, white vinegar, and salt.

Chop onion and garlic up into chunks on the small side.

Jalape%u00f1os. Chop them up. You want to get rid of the stems and depending on how hot you want your sauce, you might want to remove the seeds and ribs. I don%u2019t bother because we like it hot, but also it%u2019s annoying. HA.
Note. When dealing with any hot peppers, make sure to not touch your face during or after. You will feel it. They are hot.

Toss it all into a pot. Sprinkle with salt and add a splash of water. Place on stove on medium heat to give the peppers and onion a little head start on cooking.
After softening the peppers and onions for about 10 minutes, add the liquid.

Partially cover with a lid and simmer the peppers until they are fall apart tender. Probably about 35-40 minute.

Peppers so soft, ready to go.

Let it cool a few minutes then dump it all Into a blender. Blend until completely blended.

Smooth as smooth can be.
Taste it (like dip a carrot of a piece of bread into it) and add more salt if nessacery. Also, if it is too thick for your liking, add a little water to thin it out.


Hot hot hot sauce for the taking.
And look here, enough for you and maybe even a friend or two%u2026 Holidays are coming!
Enjoy the sauce!
-C
makes between 5-6 cups
-
25-30 good sized jalape%u00f1os (green or red or both)
-
2-3 cloves garlic
-
2 cups pineapple juice
-
2 cups white vinegar
-
2 teaspoons salt
-
water
Cut the onion into small chunks and roughly mince the garlic. Grab jalape%u00f1os and remove stems. Remove seeds and ribs if you want less heat in the sauce, then chop into small pieces. Place the onion, garlic, and peppers into a big pot with a splash of water. Sprinkle with salt and stick on stove on medium heat and cook for 5-10 minutes or until you can smell the onion and peppers starting to cook.
Dump in the pineapple juice and 1/2 the vinegar. Stir and bring to a boil. Once boiling, partially cover then reduce heat to low. Simmer for about 30-40 minutes or until peppers are very tender.
NOTE.. Have a window open or exhaust fan going.. the fumes are spicy!
Once peppers have soften, remove form heat and let cool a few minutes. Dump or scoop the contents of pot into a blender. Add in the remaining vinegar and blend until very smooth. Once blended, taste and season with more salt if needed. Also if the consistency is to thick for your liking, add in a little water to thin out.
And then bottle it. Whatever sized jars you like, just make sure the lids are not metal if you can avoid it. The acidity of the vinegar will corrode the metal.
Add a label, stick in fridge, and eat on whoever the heck you want! (Also makes a great gift and there is defiantly enough here to give some away!)
If you are a gardener or farmer (or know one) you know. It%u2019s that time of year where there are so many tomatoes, and I right? And with the bounty of ripen tomatoes comes the many green tomatoes, There are always green tomatoes and they are not to be dismissed.
Sure a freshly picked gorgeous red or orange tomato, ripe and sweet, eaten within minutes of being plucked from the plant is one of life%u2019s greatest pleasures , but don%u2019t turn a nose at all those tomatoes that don%u2019t make it to ripeness, that fall from the plant. or that you accidentally pick off while getting to the rip ones. Those green tomatoes might not seem like much, but given a little attention, well they can shine just as bright as all those ripe and colorful ones!
All green tomatoes need to be delicious is to be roasted. Then they are amazing, like seriously freaking delicious. Just as bright and flavorful as ripen tomatoes, maybe even more so.
Once roasted you then can make them into sauce. Sauce for pasta, for pizza, for eating straight out of the jar (That is me). It can do anything red tomato sauce can do.
So don%u2019t just let those green tomatoes go to waste. Heck, maybe pluck a few extra green ones before they ripen just so you can enjoy the goodness of roasted green tomatoes!
To the green tomato sauce!

The stuff. Green tomatoes, a large onion, a few cloves of garlic, olive oil, salt and pepper, spaghetti, fresh basil, and a few rip cherry tomatoes.
Cut the onion into large chunks and slice all the green tomatoes in half (or quarters if they are large)

Place it all on a baking sheet and toss with a drizzle of olive oil and sprinkle on salt and pepper. Also place the unpeeled garlic into a corner and pop the baking sheet into a hot oven to roast.

Ah, all soft was tender and roasted.
(The garlic was removed after 15ish minutes of roasting, peeled and set aside.)
Dump it all into a blender and blend until smooth. Season with more salt and pepper if needed.

And make spaghetti. I trust you know how to do this.

Ripe up some fresh basil and chop the cherry tomatoes in half and%u2026

Place some of the cooked pasta into a bowl, pour in your desired amount of the sauce, and top with fresh basil and a few red cherry tomatoes.
It is ready. Now eat.
-C
Makes 5-6 cups
-
Around 20 smaller green tomatoes (or how many you can fit on a a large baking sheet)
-
a large sweet onion
-
4-5 cloves garlic
-
1-2 tablespoons olive oil
-
salt and pepper
-
Spagetthi (as much as you want to eat)
-
handful of fresh basil for erving of pasta resh basil
-
a few red cherry tomatoes for each serving of pasta
Preheat oven to 450
Cut tomatoes in half (or in quarters if they are large). Peel skin from onion and cut into large chunks. Place both cut tomatoes and onion onto a large baking sheet and drizzle with about a tablespoon of olive oil. Toss around and then sprinkle with salt and pepper. On the corner of the pan, place the garlic(still in skin) Place into oven.After 15ish minutes, remove the garlic and set aside. Continue baking the tomatoes and onions for another 35-45 minutes or until the tomatoes are fork tender.
Once the tomatoes are cooked, remove from oven and, being oh so careful, dump or scoop the tomatoes and onion into a blender. Add in the roasted garlic (skin removed) and blend until smooth. Taste the sauce then season with more salt and pepper and add another tablespoon of olive oil if you think it needs it.
To eat with spaghetti.
Make spaghetti as in instructed on box. Once you have cooked spaghetti, drained it, and placed it into a bowl, pour or scoop the green tomato sauce on top. Top with a handful of fresh basil and a few red cherry tomatoes.
Then eat.
Extra tomato sauce can be placed in a jar or container with a lid and refrigerated for about a week.
I feel like people are constantly throwing shade at iceberg lettuce. When talked about, it is always subpar with other greens in the world, that it has no nutritional value, that it is always soggy, that it is just not classy enough.
Well what I say is that iceberg is a hell of a lot more nutritional than a lot of things (like a bag of chips), that if it is soggy, well you bought it when it was no good, and that I love me some iceberg lettuce and I am classy as fuck.
The wedge, It is exactly what is sounds like, a big wedge of lettuce. Traditionally I think it is covered in a mass amount of blue cheese and bacon, but yeah, I don%u2019t get down with that. Hummus and tomatoes ad mustard, that is how I roll. This %u201csalad%u201d is probably one of my all time favorite salads. Crisp and light lettuce, summer fresh tomatoes, creamy hummus, and the slight tang of mustard. I have been eating this for years and it still never stops being a favorite snack (because It really is what I snack on. And I will eat the whole head of lettuce with a few tomatoes. Nothing better on a hot afternoon). Out of all honesty though, I usually don%u2019t eat it like a wedge, I usually just tear off a hunk of lettuce, slice a a slab of tomato, then dunk it straight into the hummus. That goes straight into my mouth and then I squirt a little mustard in there. That is class.
Now to the wedge!

The stuff. A head of iceberg lettuce (cut into wedges), hummus (store bought or home made), a couple of fresh tomatoes, scallions, yellow mustard, and pepper.

Thinly slice the tomatoes and chop up the scallions

Grab a wedge of the lettuce and stick it on a plate. Grab hummus and mix around until loose. Add a tablespoon or two or water to help loosen it if it is too thick, then slather wedge in hummus.

Layer on sliced tomatoes, add more hummus, and drizzle the top with mustard. Oh, and cracked pepper.
And then eat it. One wedge or the whole damn head. No shade from me.
-C
Makes 4 wedges
-
a head of iceberg lettuce
-
3/4 cup homemade or store bought hummus
-
1/4 cup water(if needed)
-
2 large fresh tomatoes
-
2-3 scallions (the green parts)
-
Yellow mustard
-
cracker pepper
Take the head of iceberg and slam it core side down onto a hard surface. This should dislodge the core (a good trick to know) Then cut the head into 4 equal wedges and place each wedge on a plate.
Slice up tomatoes thinly and chop up the green parts of the scallions.
Grab hummus and mix around until loose. If it is really thick add water until it is the consistency of lets say, a creamy thick dressing. Take the hummus and lather each wedge. Layer on sliced tomato, then top with more hummus.
Grab mustard and drizzle (squeeze) all over each wedge. And last but not least, season with pepper.
Now eat it.
The other morning I woke up chilly, lke legit had to grab a sweater. It made me smile so hard. And when I left for my morning run through the woods, I spent the entire time in a long sleeve shirt, not stupid hot, thinking about all the food that I was suddenly craving. An hour of soups, casseroles, and basically everything hot and comforting running through my mind. Honestly, it%u2019s what I think about during most of my runs. Anyway I was going through my food inventory I had at home and decided what I was going to make myself lunch on this fine cool day was this. Roasted sweet potato with broccoli, onion, and kale. Tahini too. And za%u2019atar. I was drooling while running, again not out of the norm. Good times.
So I came home, did stuff, and made myself lunch. Exactly as I wanted, all for me, and it was everything that I thought it would be. Simple, fresh, hot but not heavy, and just the right amount of comfort to feel all the feels of soon to be fall. I grabbed my food, a book, and sat out on the porch, still in a long sleeved shirt, and ate my lunch. A fine lunch that was. A fine fine lunch.
You should have yourself a fine lunch (or any meal) too.
Now to the food!

The stuff. A sweet potato, a head of broccoli, 1/2 a large onion (or 1 small one), tahini, a lemon, a clove or garlic, za%u2019atar, and salt and pepper.

Start by chopping up the sweet potato into mouth sized pieces, break apart the broccoli into smaller mouth sized pieces, and slice up the onion.

Toss it all onto a sheet pan and cover with the za%u2019atar seasoning. You can toss around in a little oil if you want, but I actually just spray it wit ha little water and call it. I am over roasting with oil, it is to oily.
Put the seasoned goodness into hot hot oven.
Oh and place clove or garlic on pan too, just for a few minutes to get a little roasted and remove. It%u2019s for the tahini dressing.

Make the tahini dressing. Tahini, roasted garlic minced up, lemon juice, and a little hot water. Mix tighter until creamy smooth. Season with salt and pepper.


Grab kale and toss it around with everything while it is still hot so the kale kind of wilts. You can also pop it into the oven for a few more minutes to really get that wilt on.

Dump it all into a big bowl.

Drizzle that tahini all over, grab a fork (or not),and make you teeth dance with all this goodness in the mouth.
-C
Serves 1 as a meal
-
1 sweet potato
-
1 head of broccoli
-
a small onion (or half a big one)
-
a few kale leaves
-
1 tablespoon za%u2019atar seasoning
-
1 heaping tablespoon tahini
-
a lemon
-
a clove of garlic
-
a few tablespoon hot water
-
salt and pepper
Preheat oven to 450 degrees
Grab the sweet potato and cut into mouth sized chunks. Break apart the head of broccoli into florets And cut up stem into chunks, and slice onion into thick pieces. Place on a baking sheet, sprinkle on the za%u2019atar, and toss around. Sprinkle or spray(with a spray bottle) with a little water. Also throw the garlic clove onto the pan too and place it into the oven.
After about 10 minutes, grab the garlic from the pan and keep everything else roasting.
In the meantime, make tahini dressing. Mince the roasted garlic and add to the tahini with the juice of half the lemon and a splash of hit water. Mix together until completely incorporated, adding in a little more hot water as needed to make the dressing into a thick, but drizz-able consistency. Season with salt and pepper.
And chop kale into smaller pieces.
After 20ish minutes, remove pan from oven and toss the veggies around and place back into oven and roasted for another 10ish minutes or until the sweet potato is soft and tender and the broccoli is looking all roasted. Remove and right away toss the kale with the hot veggies to get the kale to wilt a bit. Also can stick the pan back into oven for a minute to wilt it even more.
And then dump the contents of the pan into a big bowl, drizzle the tahini all over, and eat that shit.
To know me is to know that I eat a shit load of lentils. And not just one kind, I eat them all, in all the ways, all day, everyday. Vegetables and lentils. That is my truth.
Lentil flour. One more way to consume the mighty legume. Blended while dry into a fine powder, it takes the lentil to a whole other level. You can use the flour in all sorts of things like bread, soup, even in baked goods. it really is a great flour to have on hand, especially if you are hungry and want to toss something quick and easy, heathy, and delicious together like these here pancakes.
These pancakes. All they are made of is lentil flour and pureed up zucchini and onion. Now that might sound a little on the dull side, but trust me here, they are far from dull. They are freaking delicious. And better for it that they take like 10 minutes from start to finish to make. And no oven which is necessary these days with all the stupid hot weather.
Anyway. lentil zucchini pancakes. Give them a try. They will probably become your favorite.
To the lentil flour and zucchini pancakes!
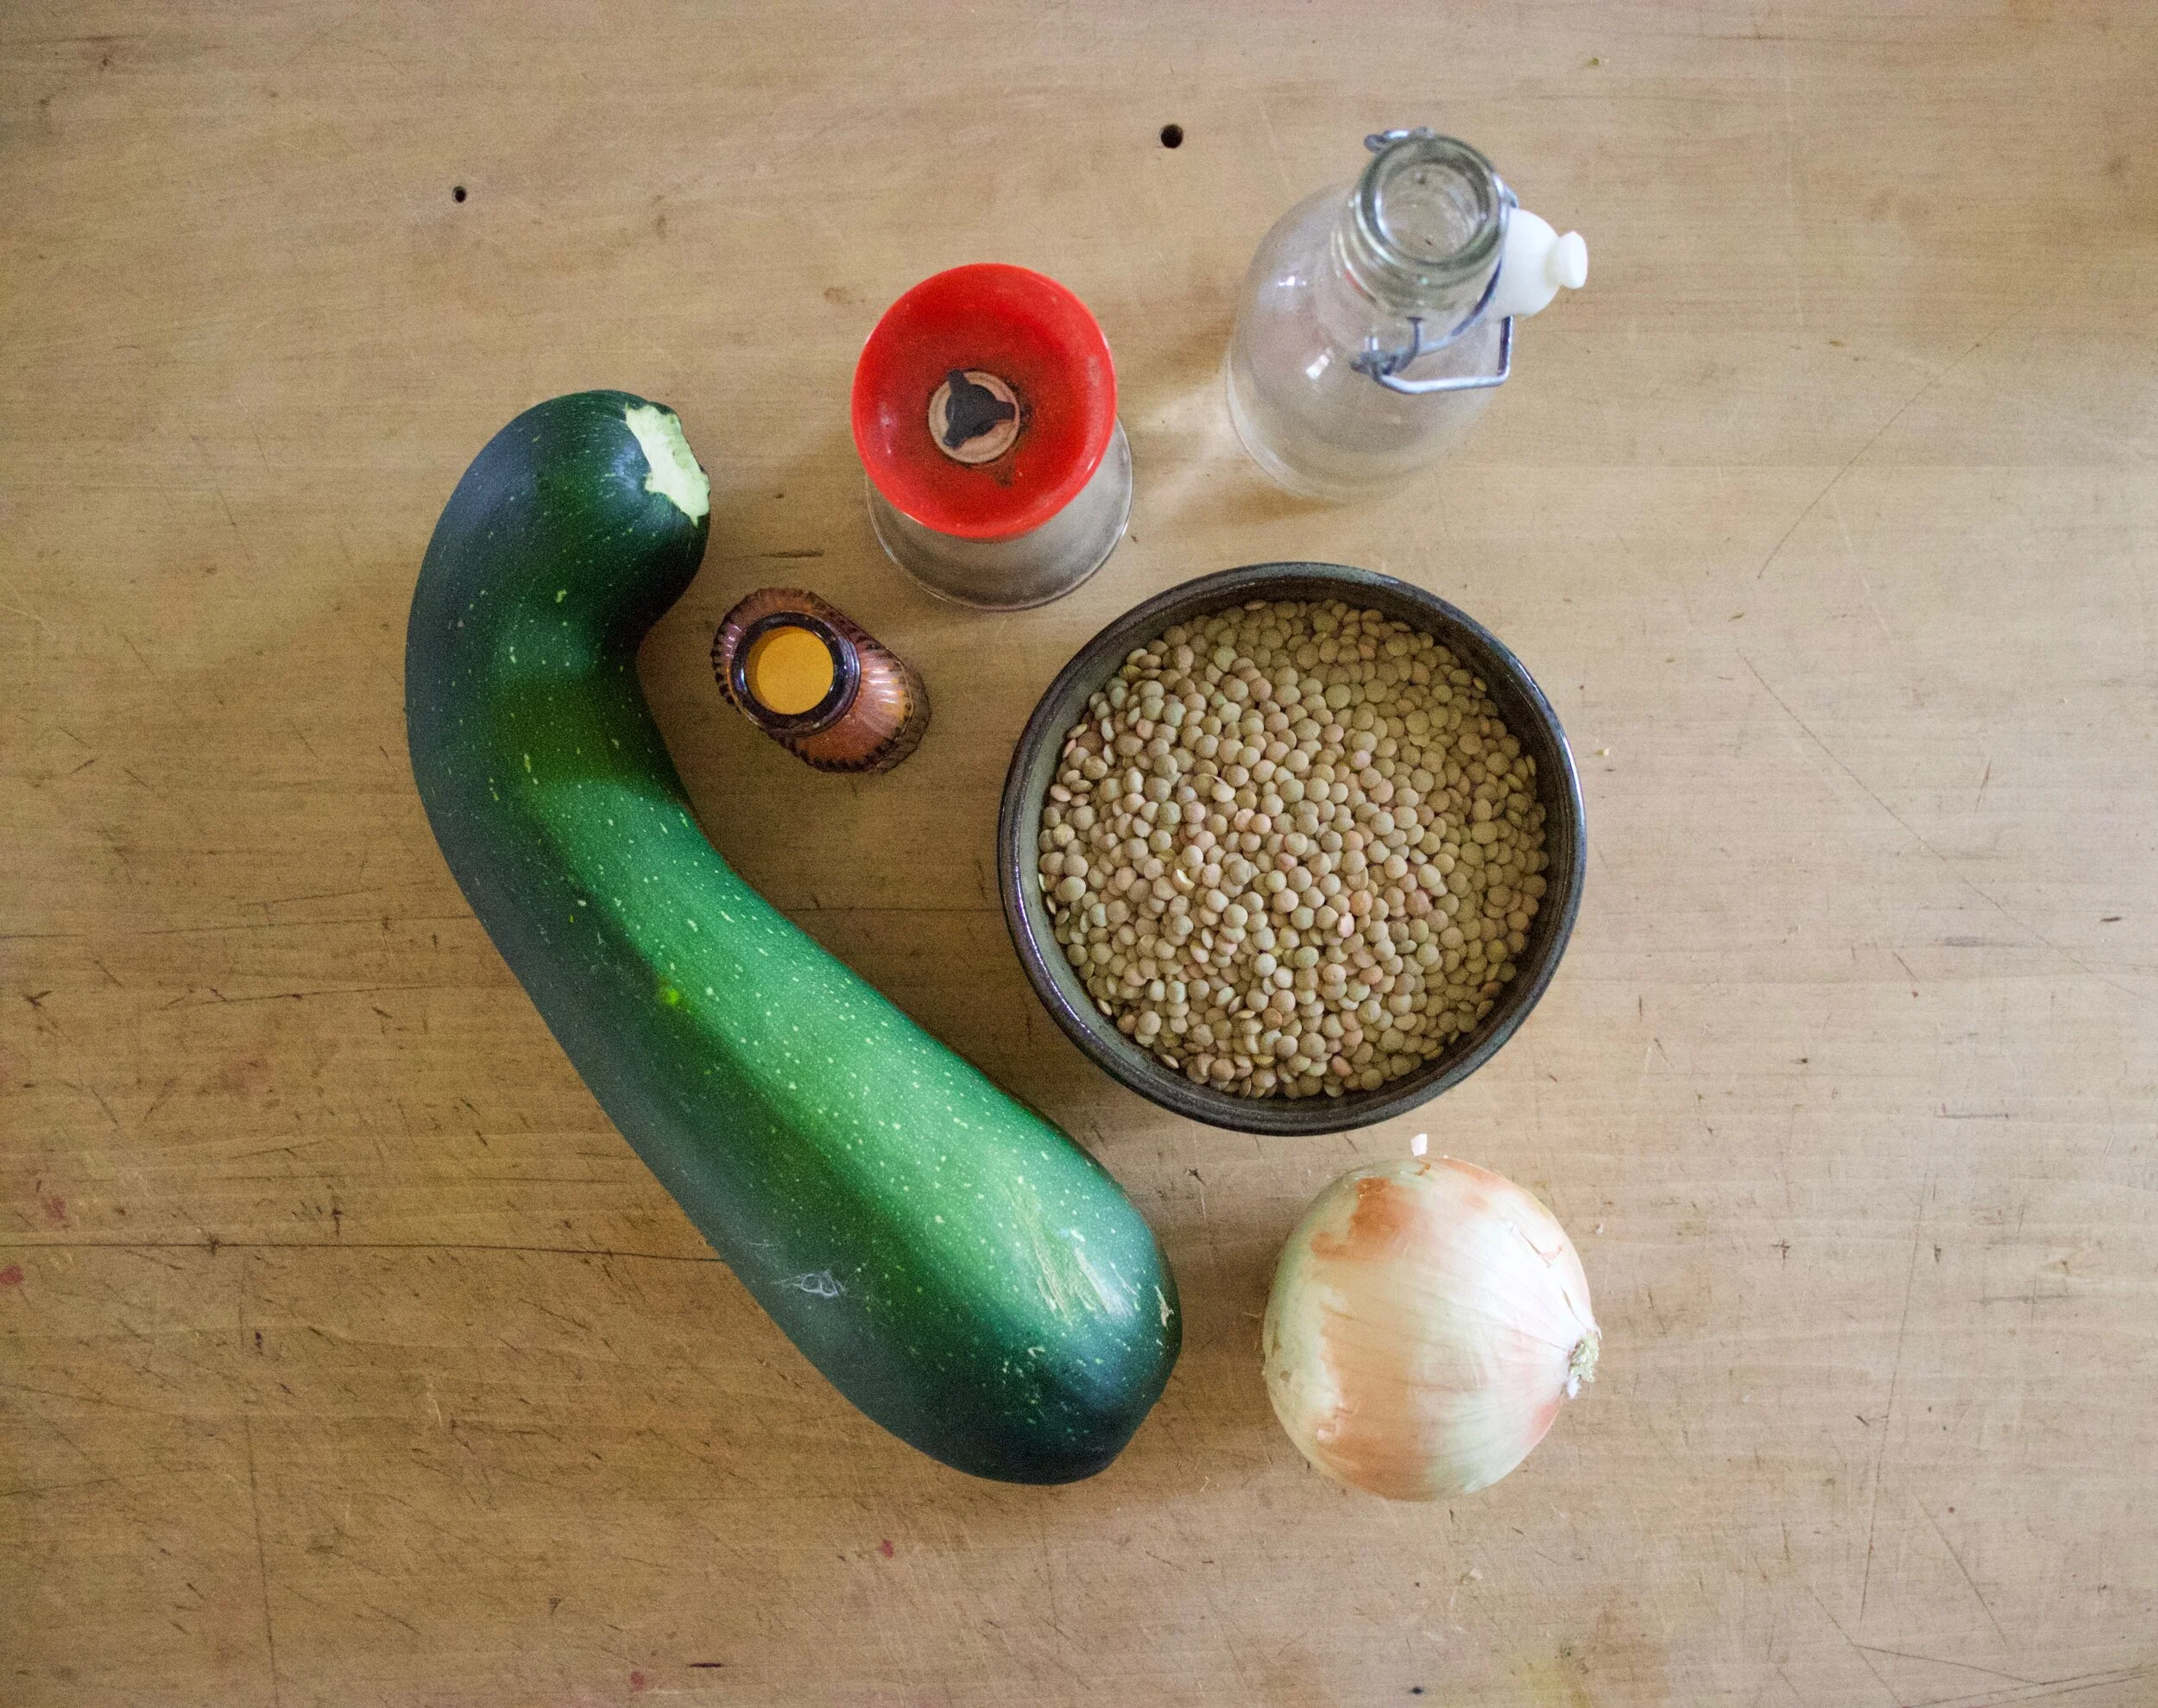
The stuff. Dry green lentils, a zucchini, and onion, salt and pepper, and a splash of oil.
Te make lentil flour. Place dried lentils into a high speed blender and blend until it turns into a fine flour.
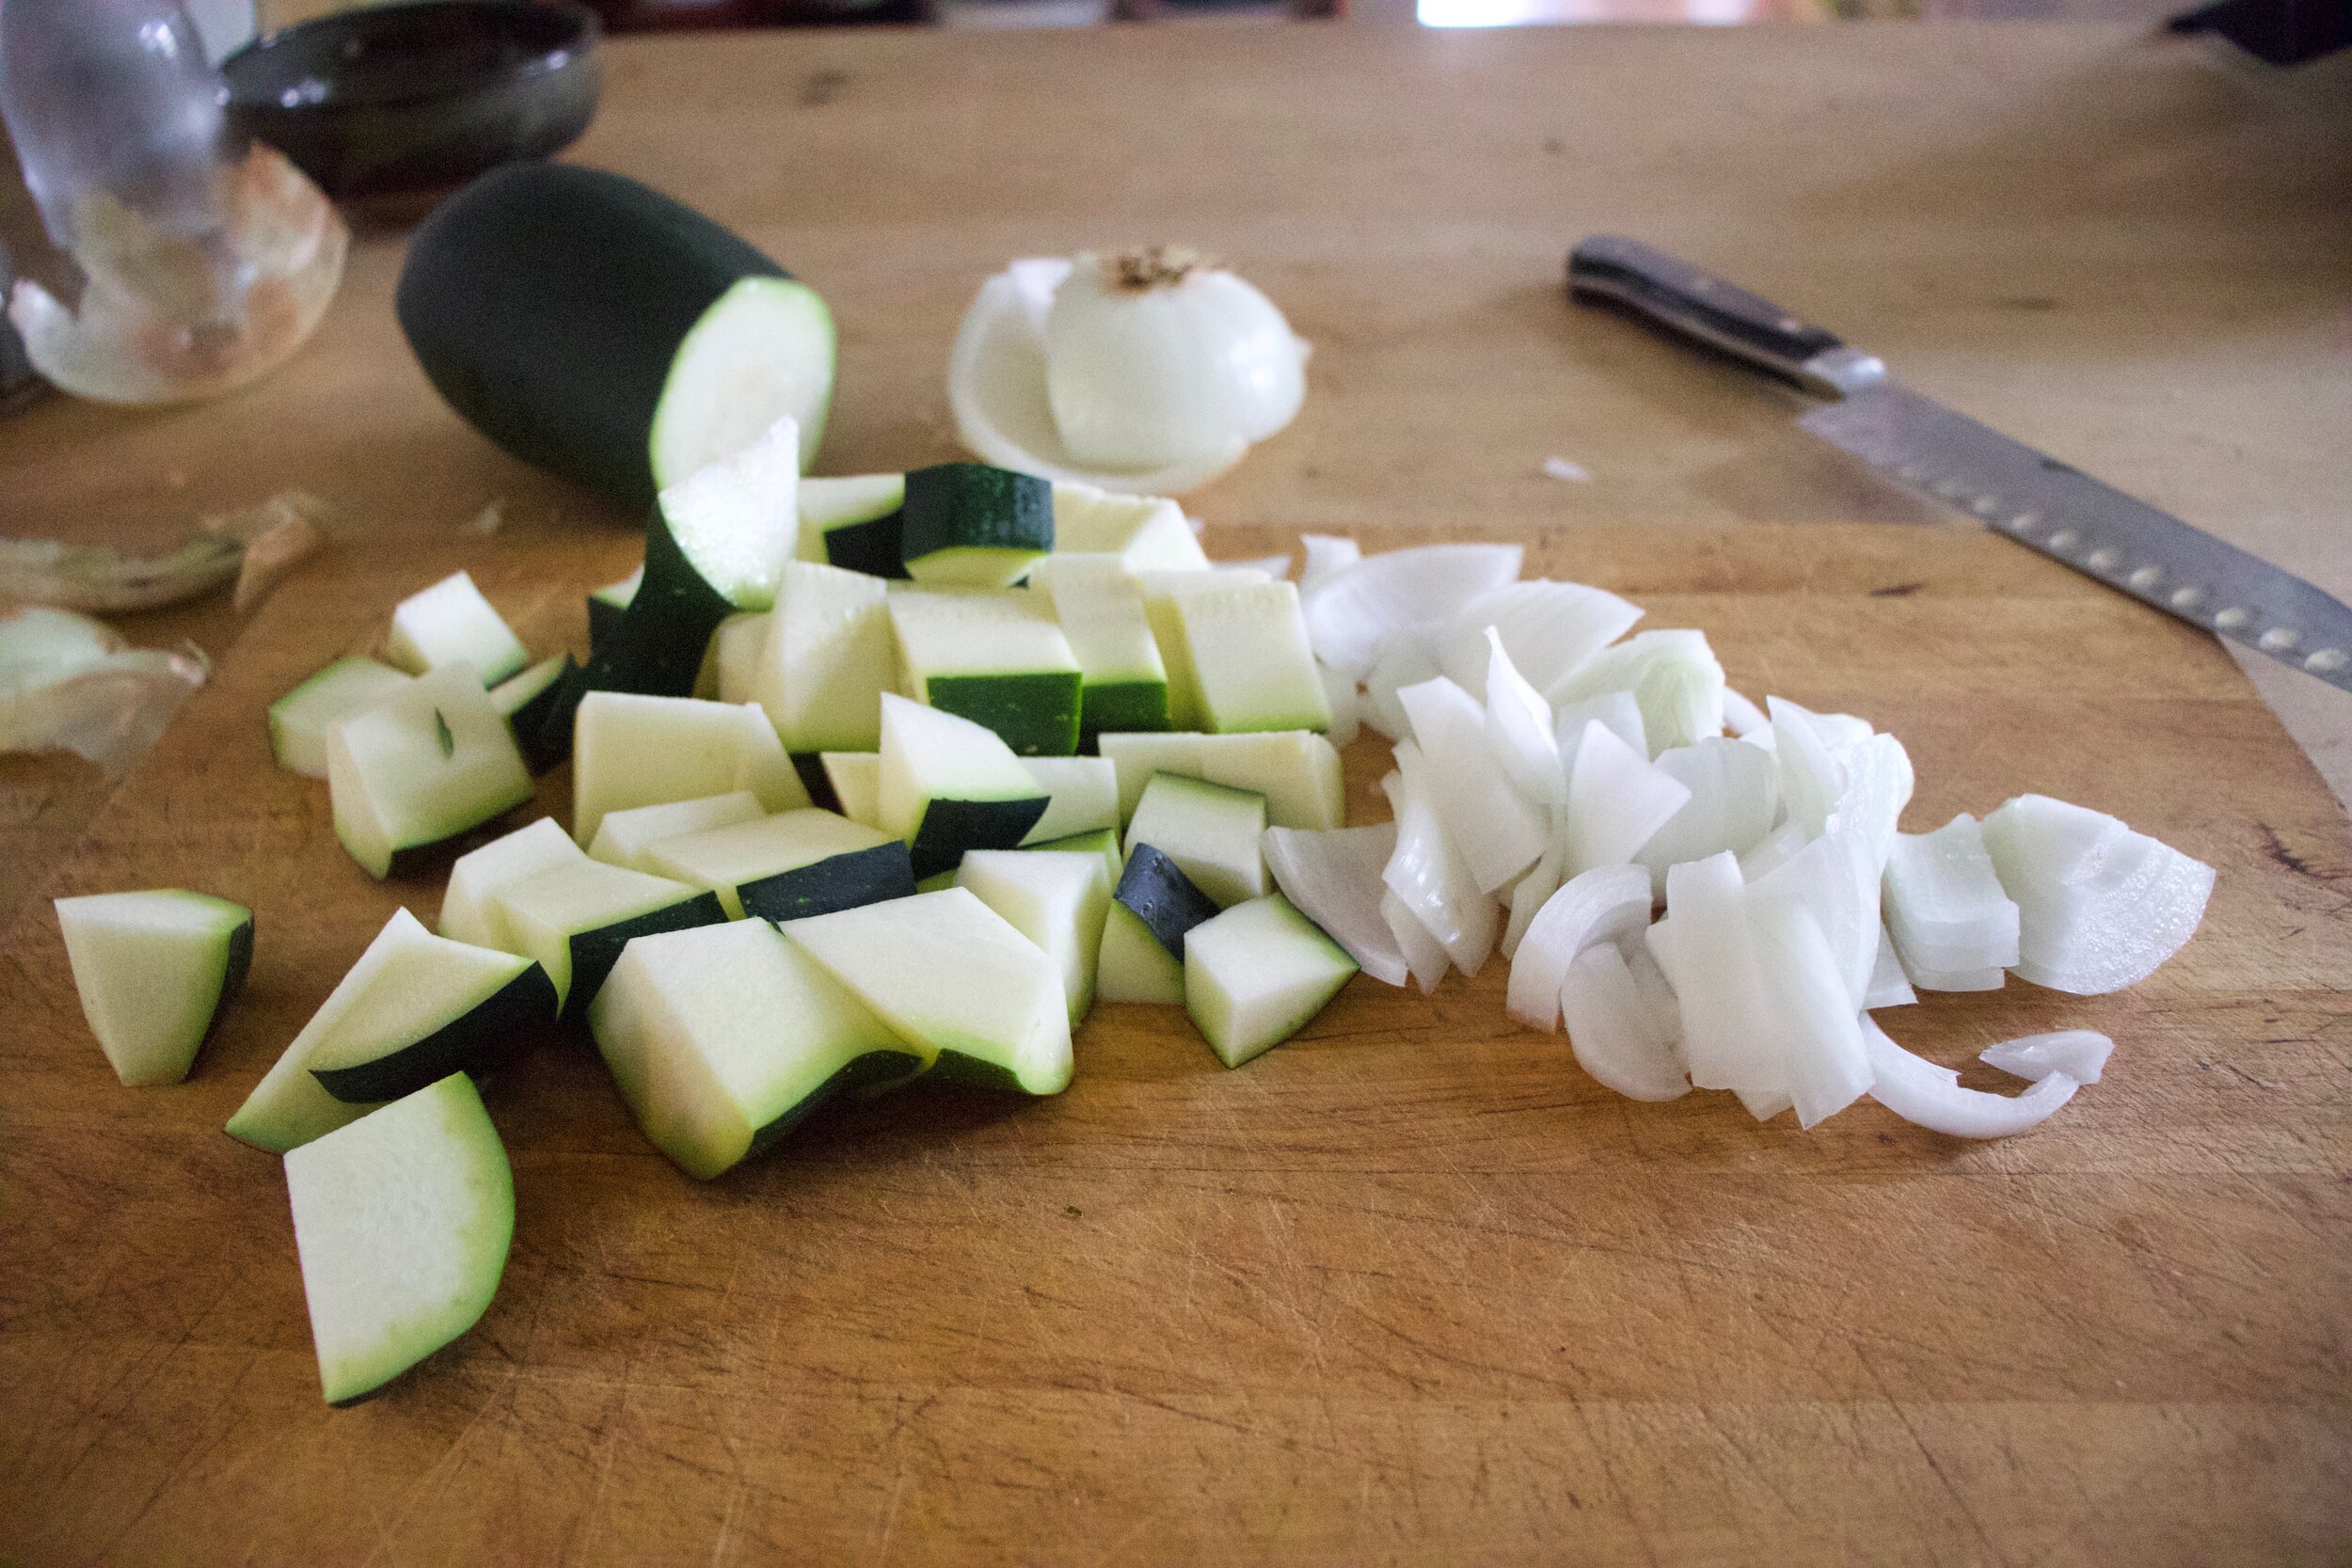
Once you have the flour made, cut up the zucchini and onion into chunks.
Drop into the blender and blend until pretty smooth.
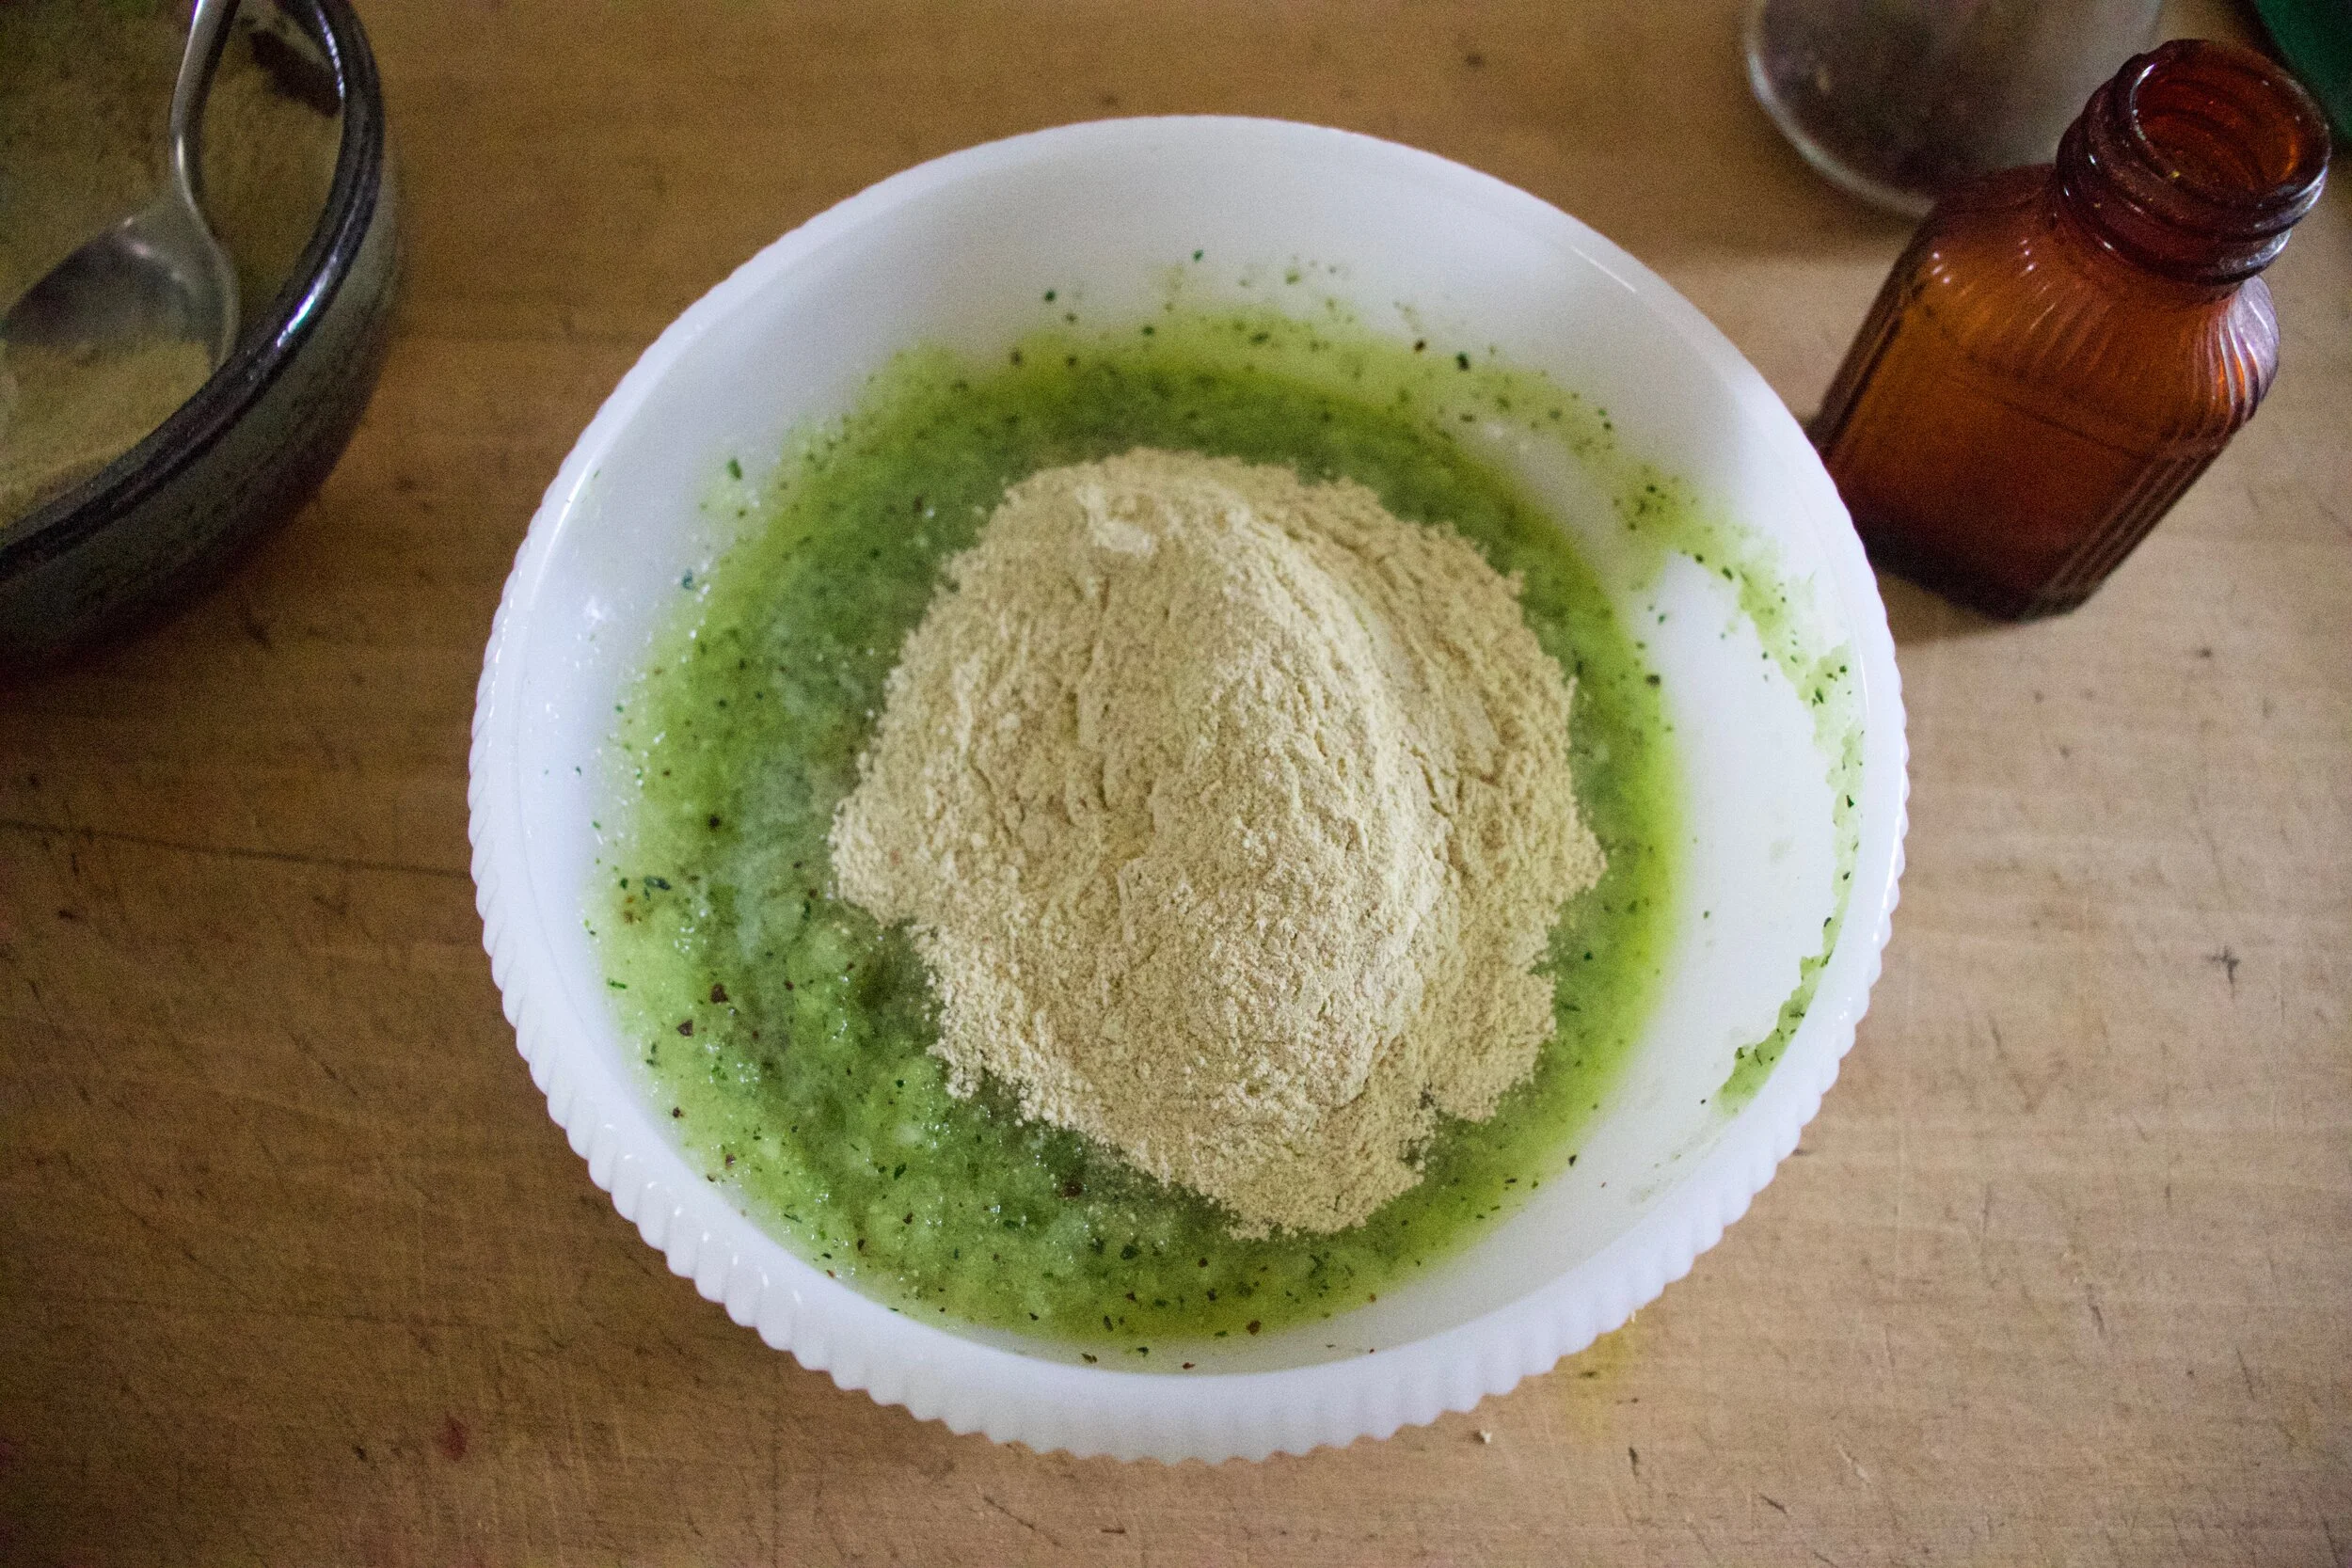
Dump puree into bowl and top with some lentil flour.

Mix until completely combined. The batter should be kind of thic but still spoonable. Also, season with salt was pepper here.
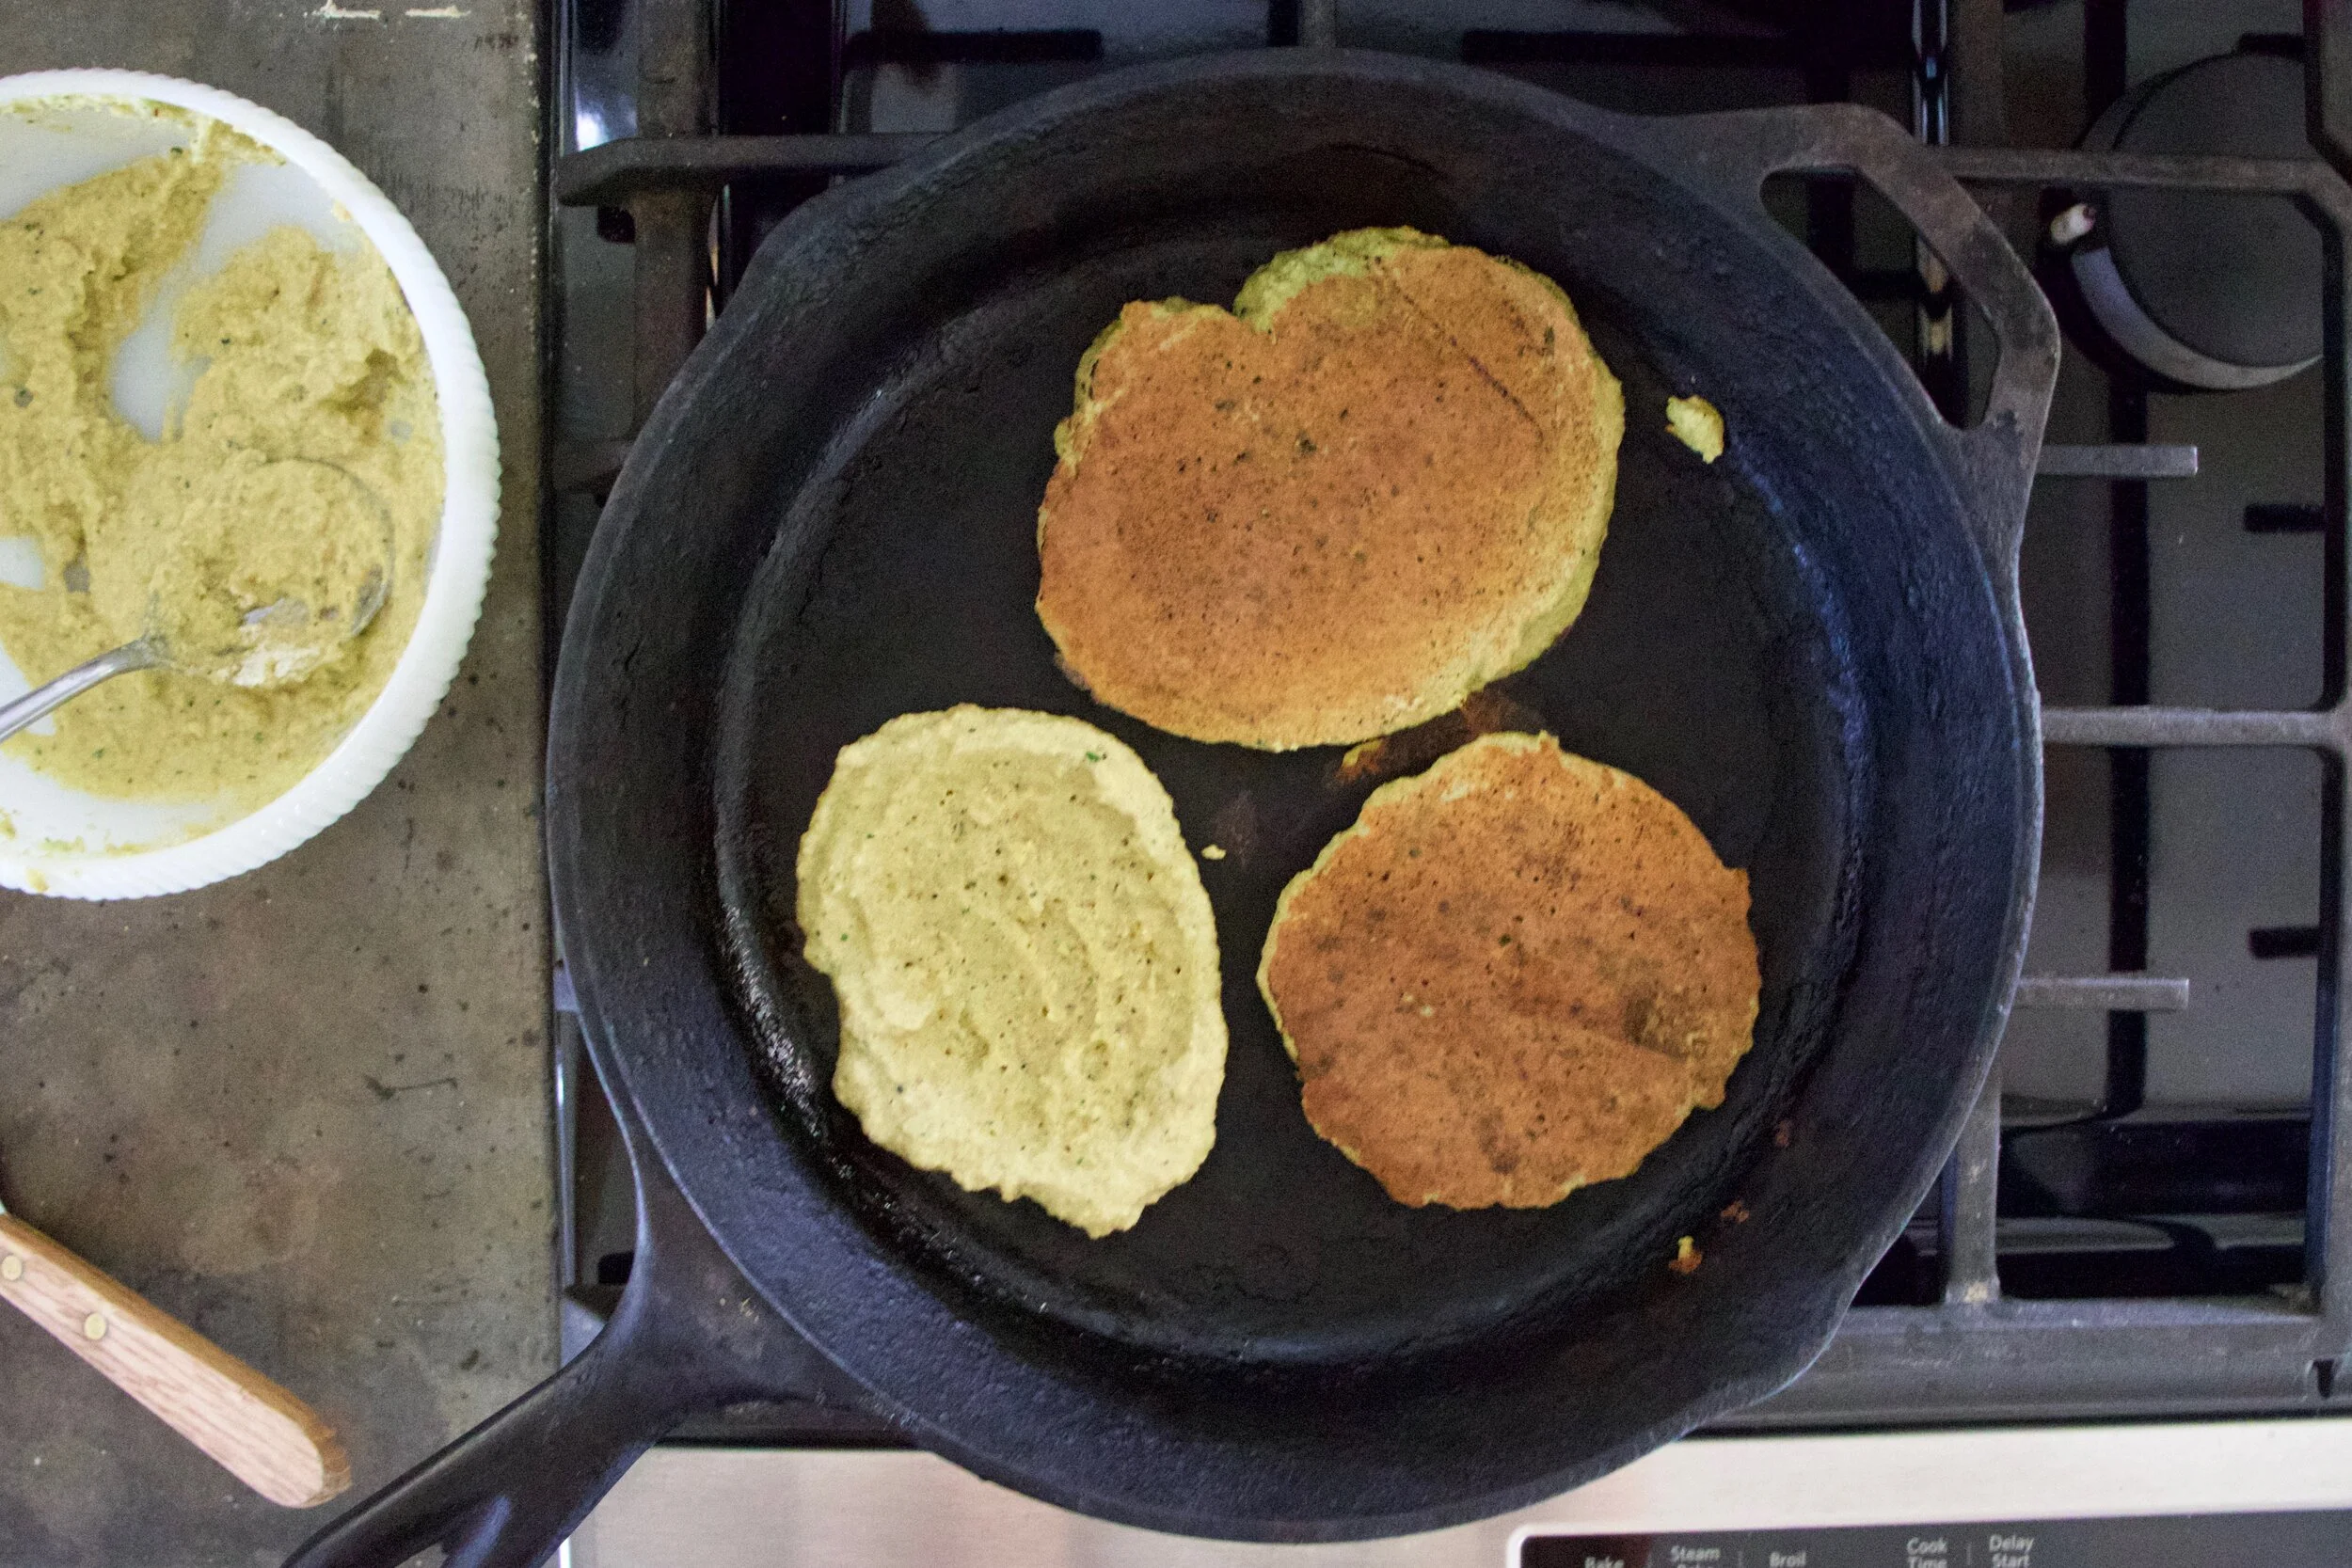
Heat up a skillet with a splash of oil. Once hot, scoop spoonfuls of batter into pan and spread it evenly about 1/4 inch thick. Cook first side fr 4-6 minutes or until nice and brown then flip and cook the other side until done. Repeat until batter is gone.
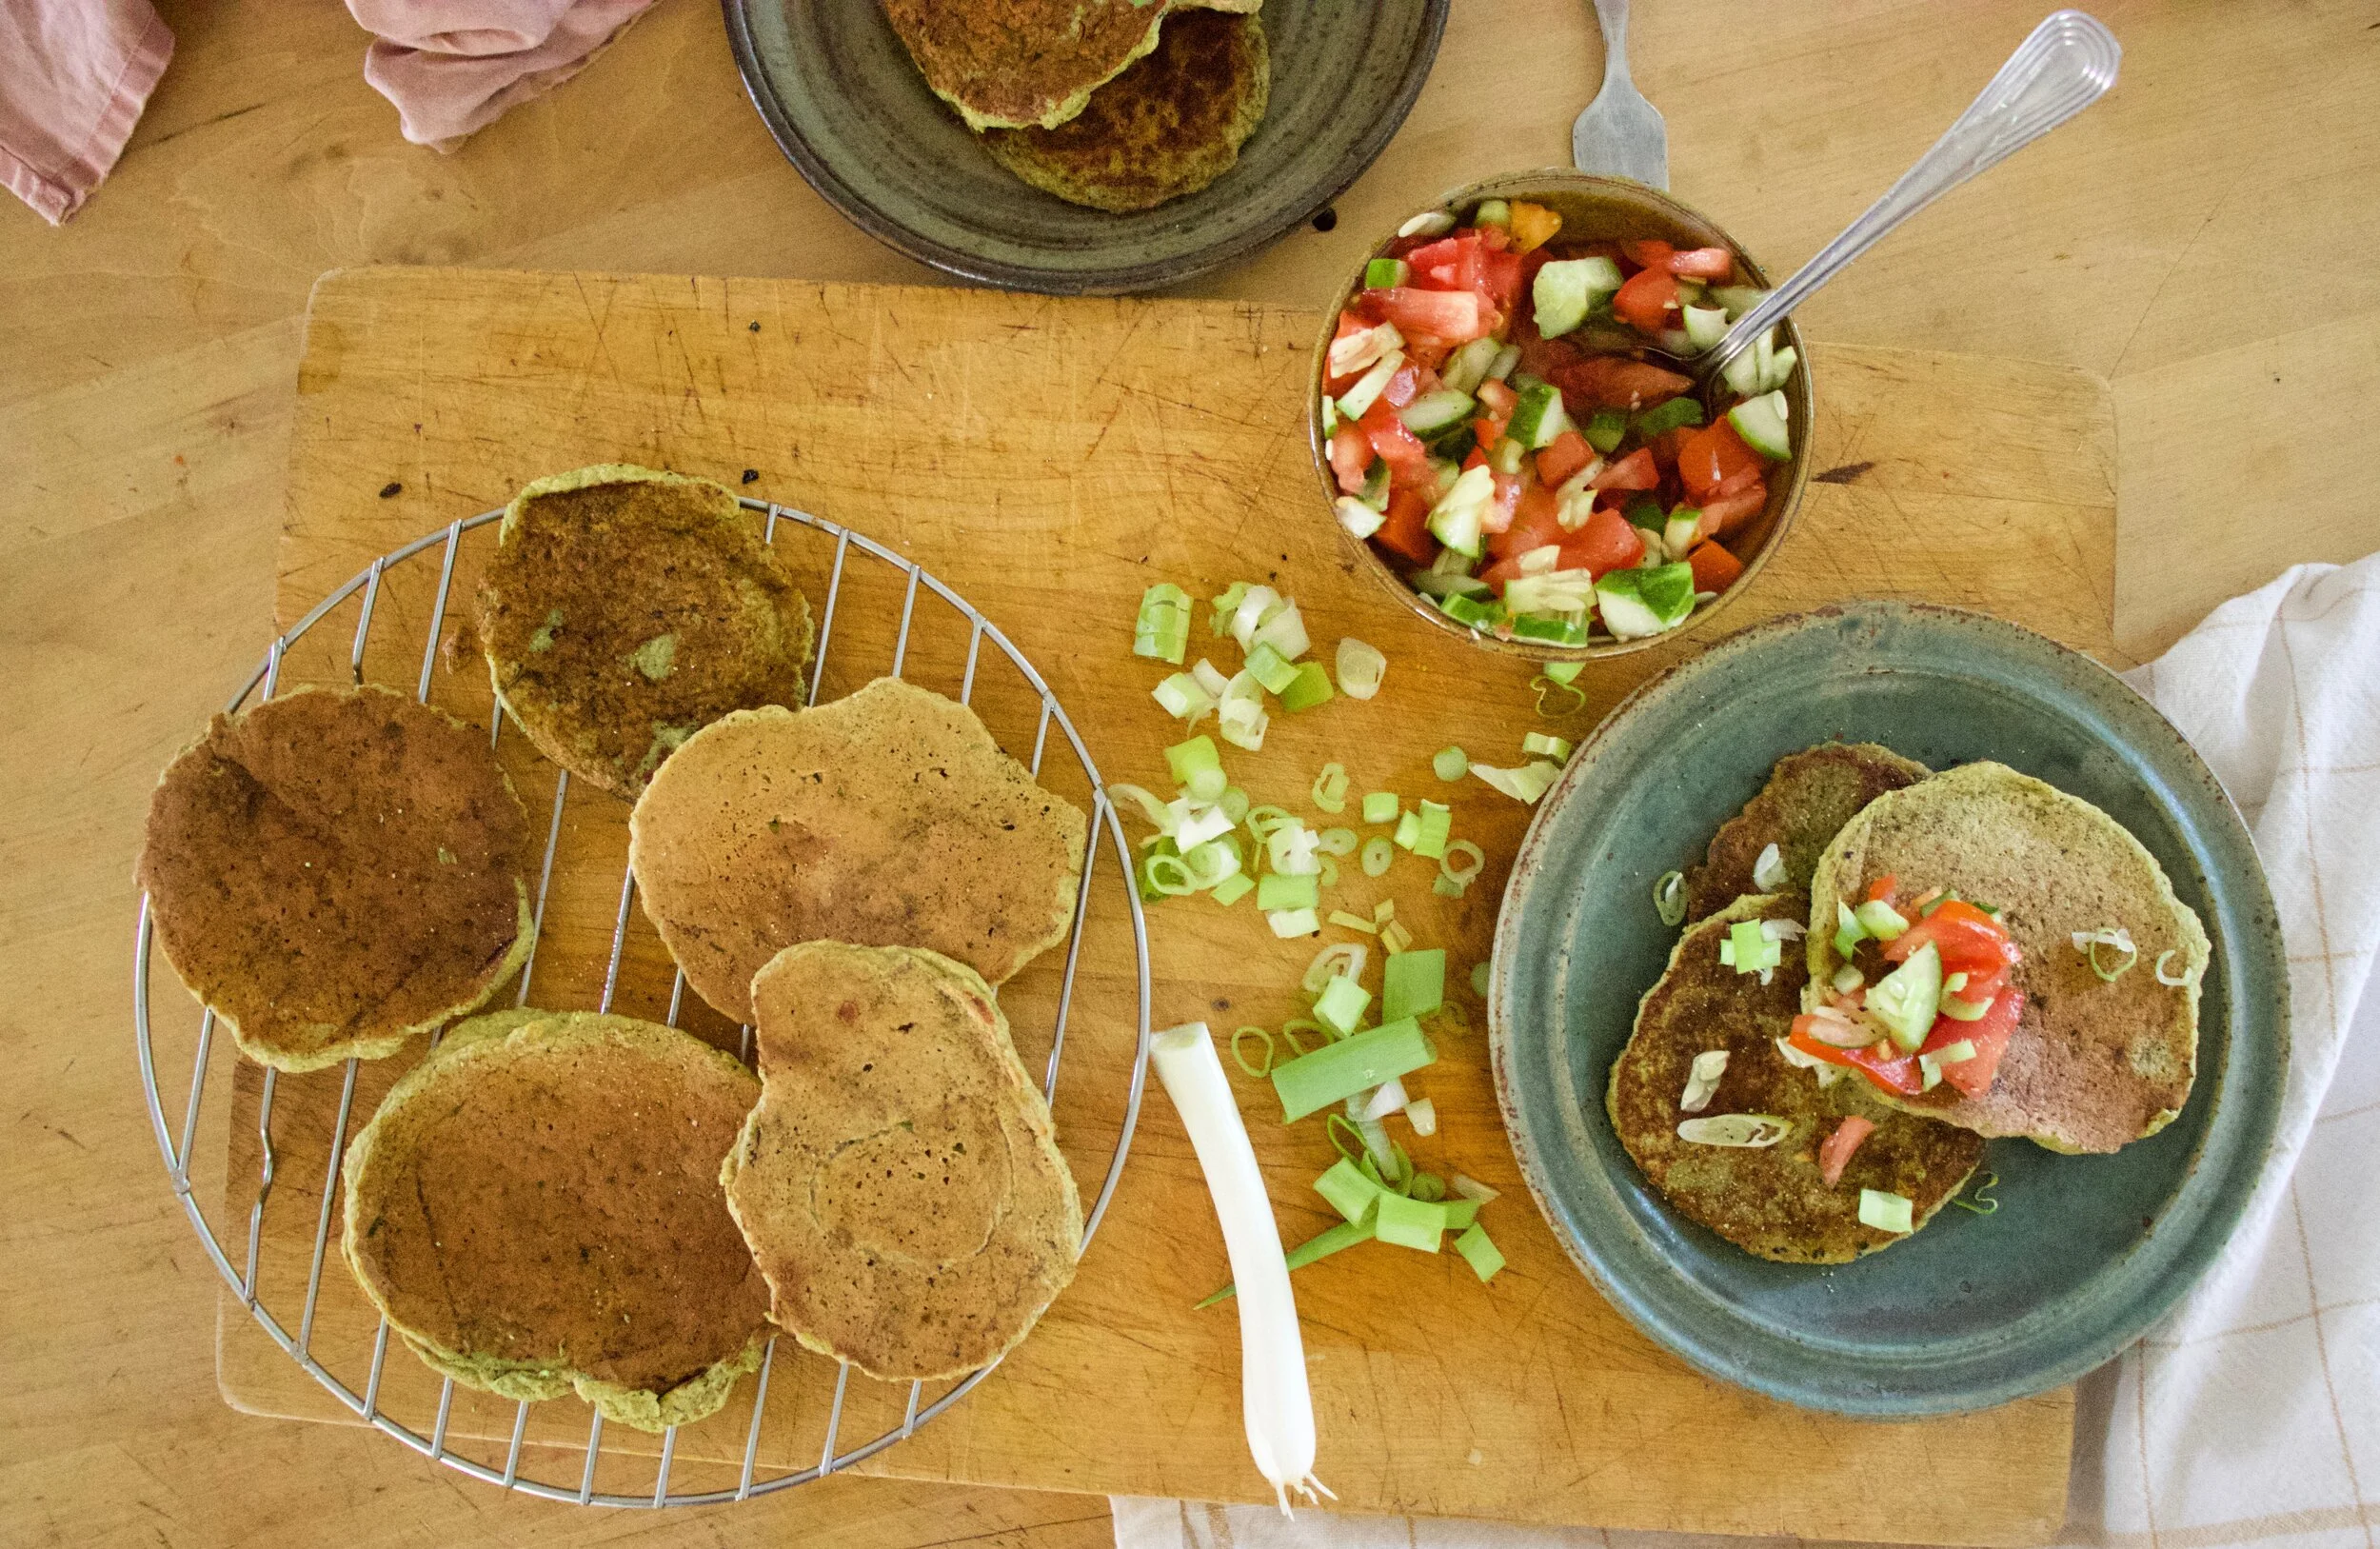
Now eat your amazing delicious lentil zucchini pancakes. I served with fresh salsa, and I have also made tahini dip and used hummus to smear on them which was also freaking amazing, but you can serve with whatever floats your boat.
-C
-
1 pound dry green lentils
-
1 large zucchini
-
1 onion
-
salt and pepper
-
splash of oil
Start with the by making the lentil flour. Place lentils into a high speed blender and blend until it has turned into a fine flour. You might need to stop the blender ever once in a while to move things around with a spoon (when it is turned off!). It should only take about a minute or so in a Vitamix, but maybe a few extra minutes if using a less powerful blender.
Once flour is achieved, dump into a jar with a lid. You probably won%u2019t be using it all right now.
Now grab the zucchini and onion and cut into chunks. Place the chunks into the blender and blend until smooth.
Dump puree into a bowl. Add about 1 cup of lentil flour and stir. IF the batter is really loss, add in another 1/4 cup or more to get the batter to a thick but spreadable consistency (kind of like hummus). Season with salt and pepper.
Grab a skillet and place on medium heat with a splash of oil. Once skillet is heated place spoonfuls of the batter in and spread around until between 1/2-1/4 inch thick. Cook fist side for 4-6 minutes or until a nice golden brown then flip and cook the other for a few minutes until browed. Repeat until batter is gone.
Place cooked pancakes on a plate, grab a fork and some savory type condiment (hummus, salsa, tahini, cashew cream) and eat.
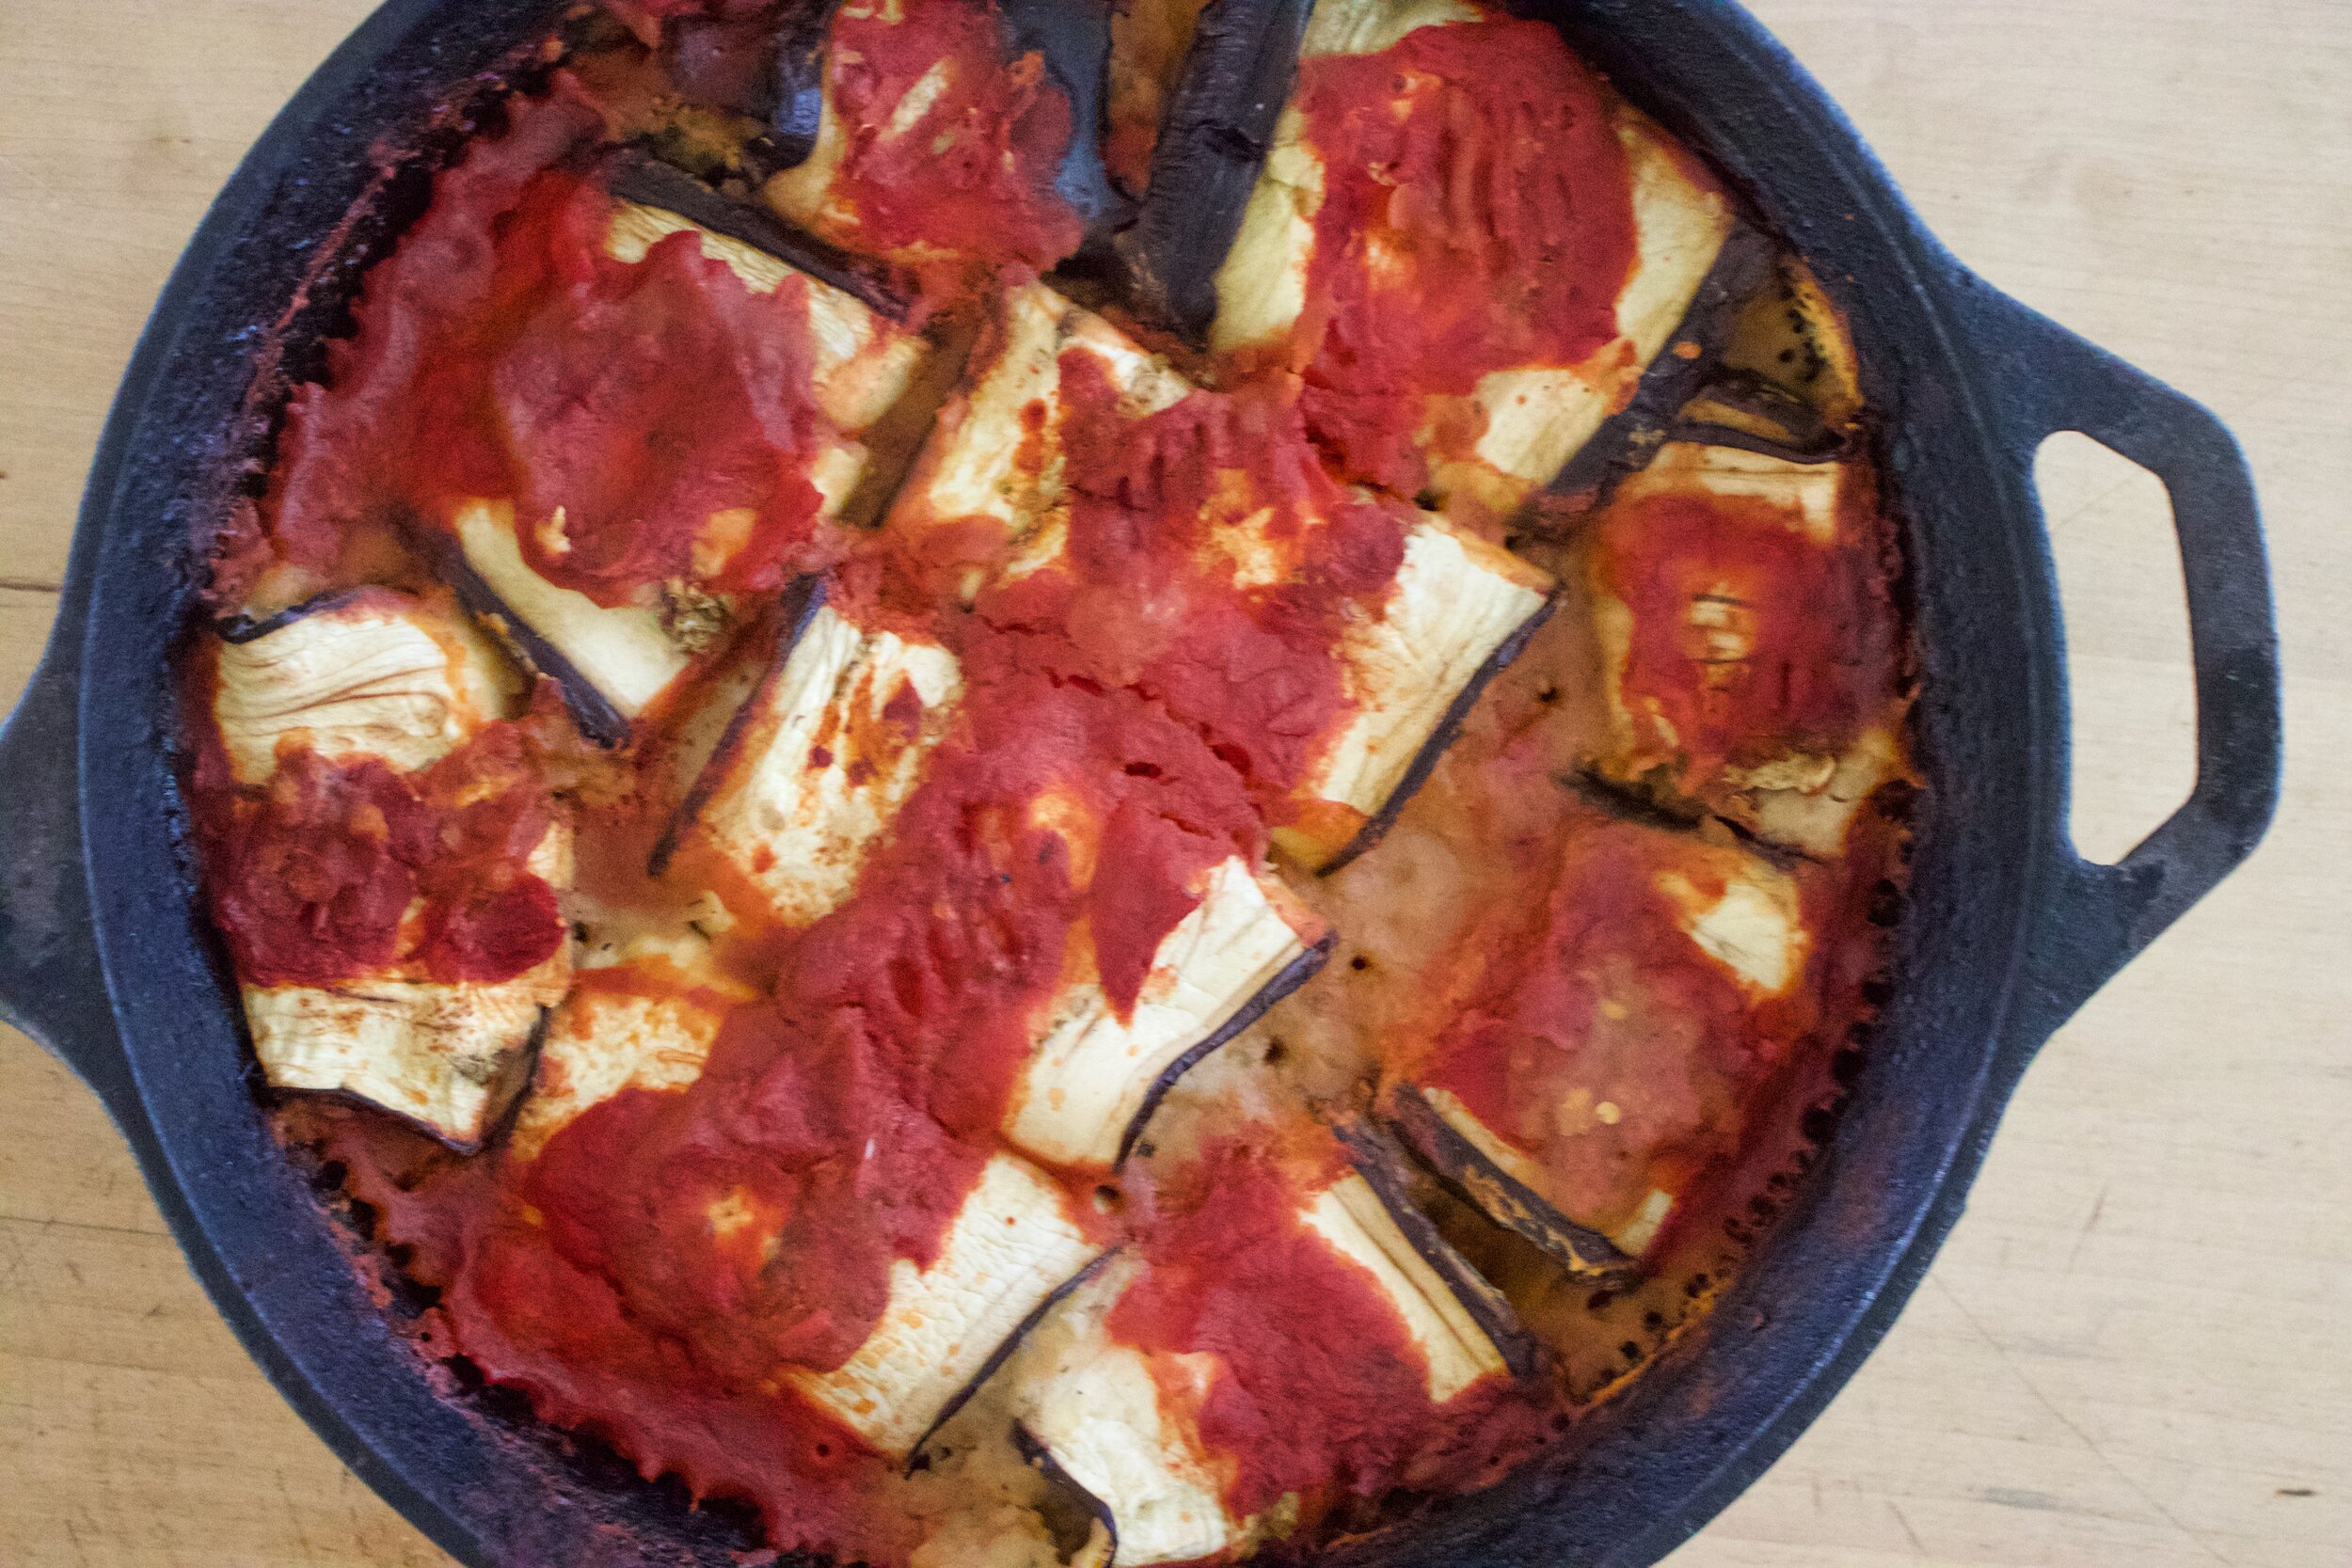
Eggplant and I are having real moment right now. I honestly think I have been eating one, in some way or another, just about every day for the last week or so. And no, I am not sick of them at all. But yes, I have been lazy about doing much other roasting or braising the old plant and just eating it straight into my mouth hole. But I guess sometimes my lazy ass wants more substance and also, it is nice to feed the mr something good too. I figured I should maybe do something a little more classy, more meal like, and might actually require a fork to eat it with. (I have a real tendency to eat with my hands, even the things that most people would probably say could not be eaten with hands. You should see me eat soup! Ha!) And so I prepared for us a feat of greatness (not really a feat, but great for sure). Eggplant roll ups.
These rolls are way more tasty and delicious then the effort it takes to make them. Really, they are super simple to make. Just a thick herby bean filling rolled up in eggplant and roasted in tomatoes. Sounds so good right? Well then taste even better. And then you can top that whole shebang with some fresh basil and everyone is all good to go.
So ok, I feed some to the mr for dinner because the goal was to fee us both with one dish, but I sure did eat more then half (like 3/4 of it) to myself. Without a fork.
There is no shame in my game.
Now to the eggplant rolls!

The stuff. An eggplant, an onion, some white beans, crushed tomatoes, a lemon, some thyme, oregano,and garlic powder, salt and pepper, oil, and basil. (I just pureed all my fresh basil into a paste so yeah).
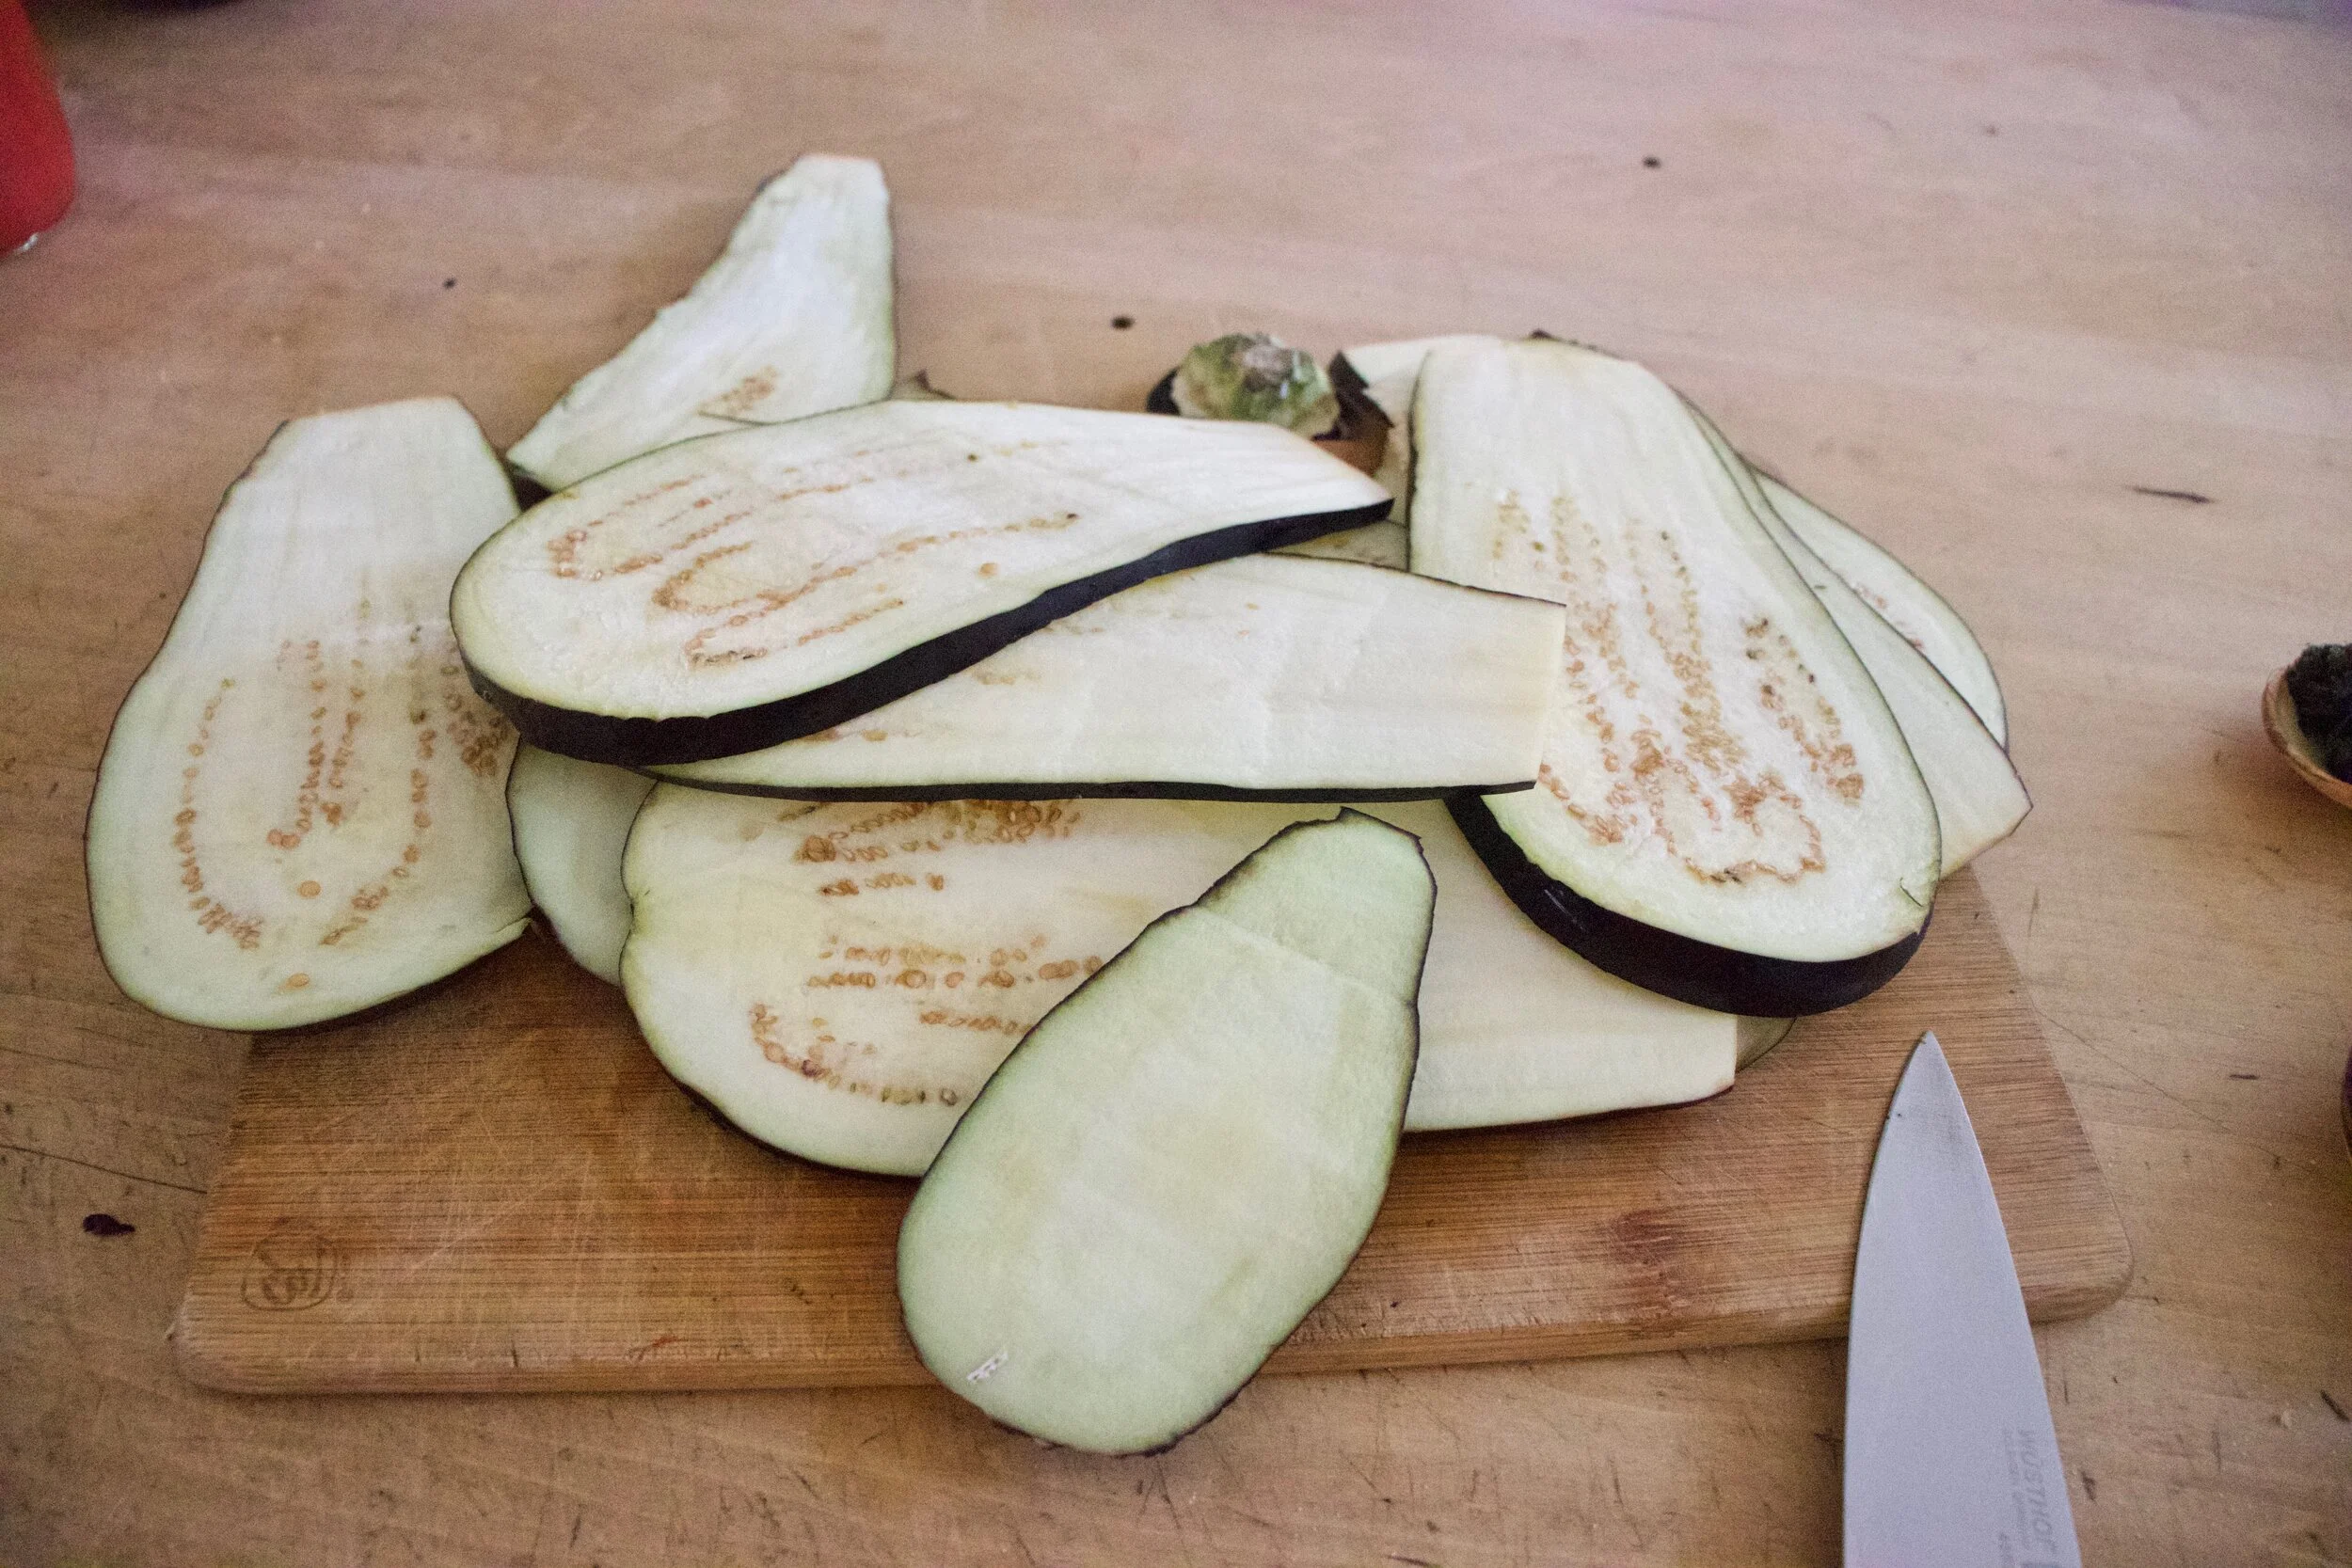
First up, slice the eggplant lengthwise into 1/2 inch thick pieces.

Place the pieces on a baking sheet and sprinkle with a pinch of salt. It is ok if they overlap a little, we are just trying to soften them a bit. Stick into a hot oven.

Into a skillet it goes to cook up until soft and fragrant.
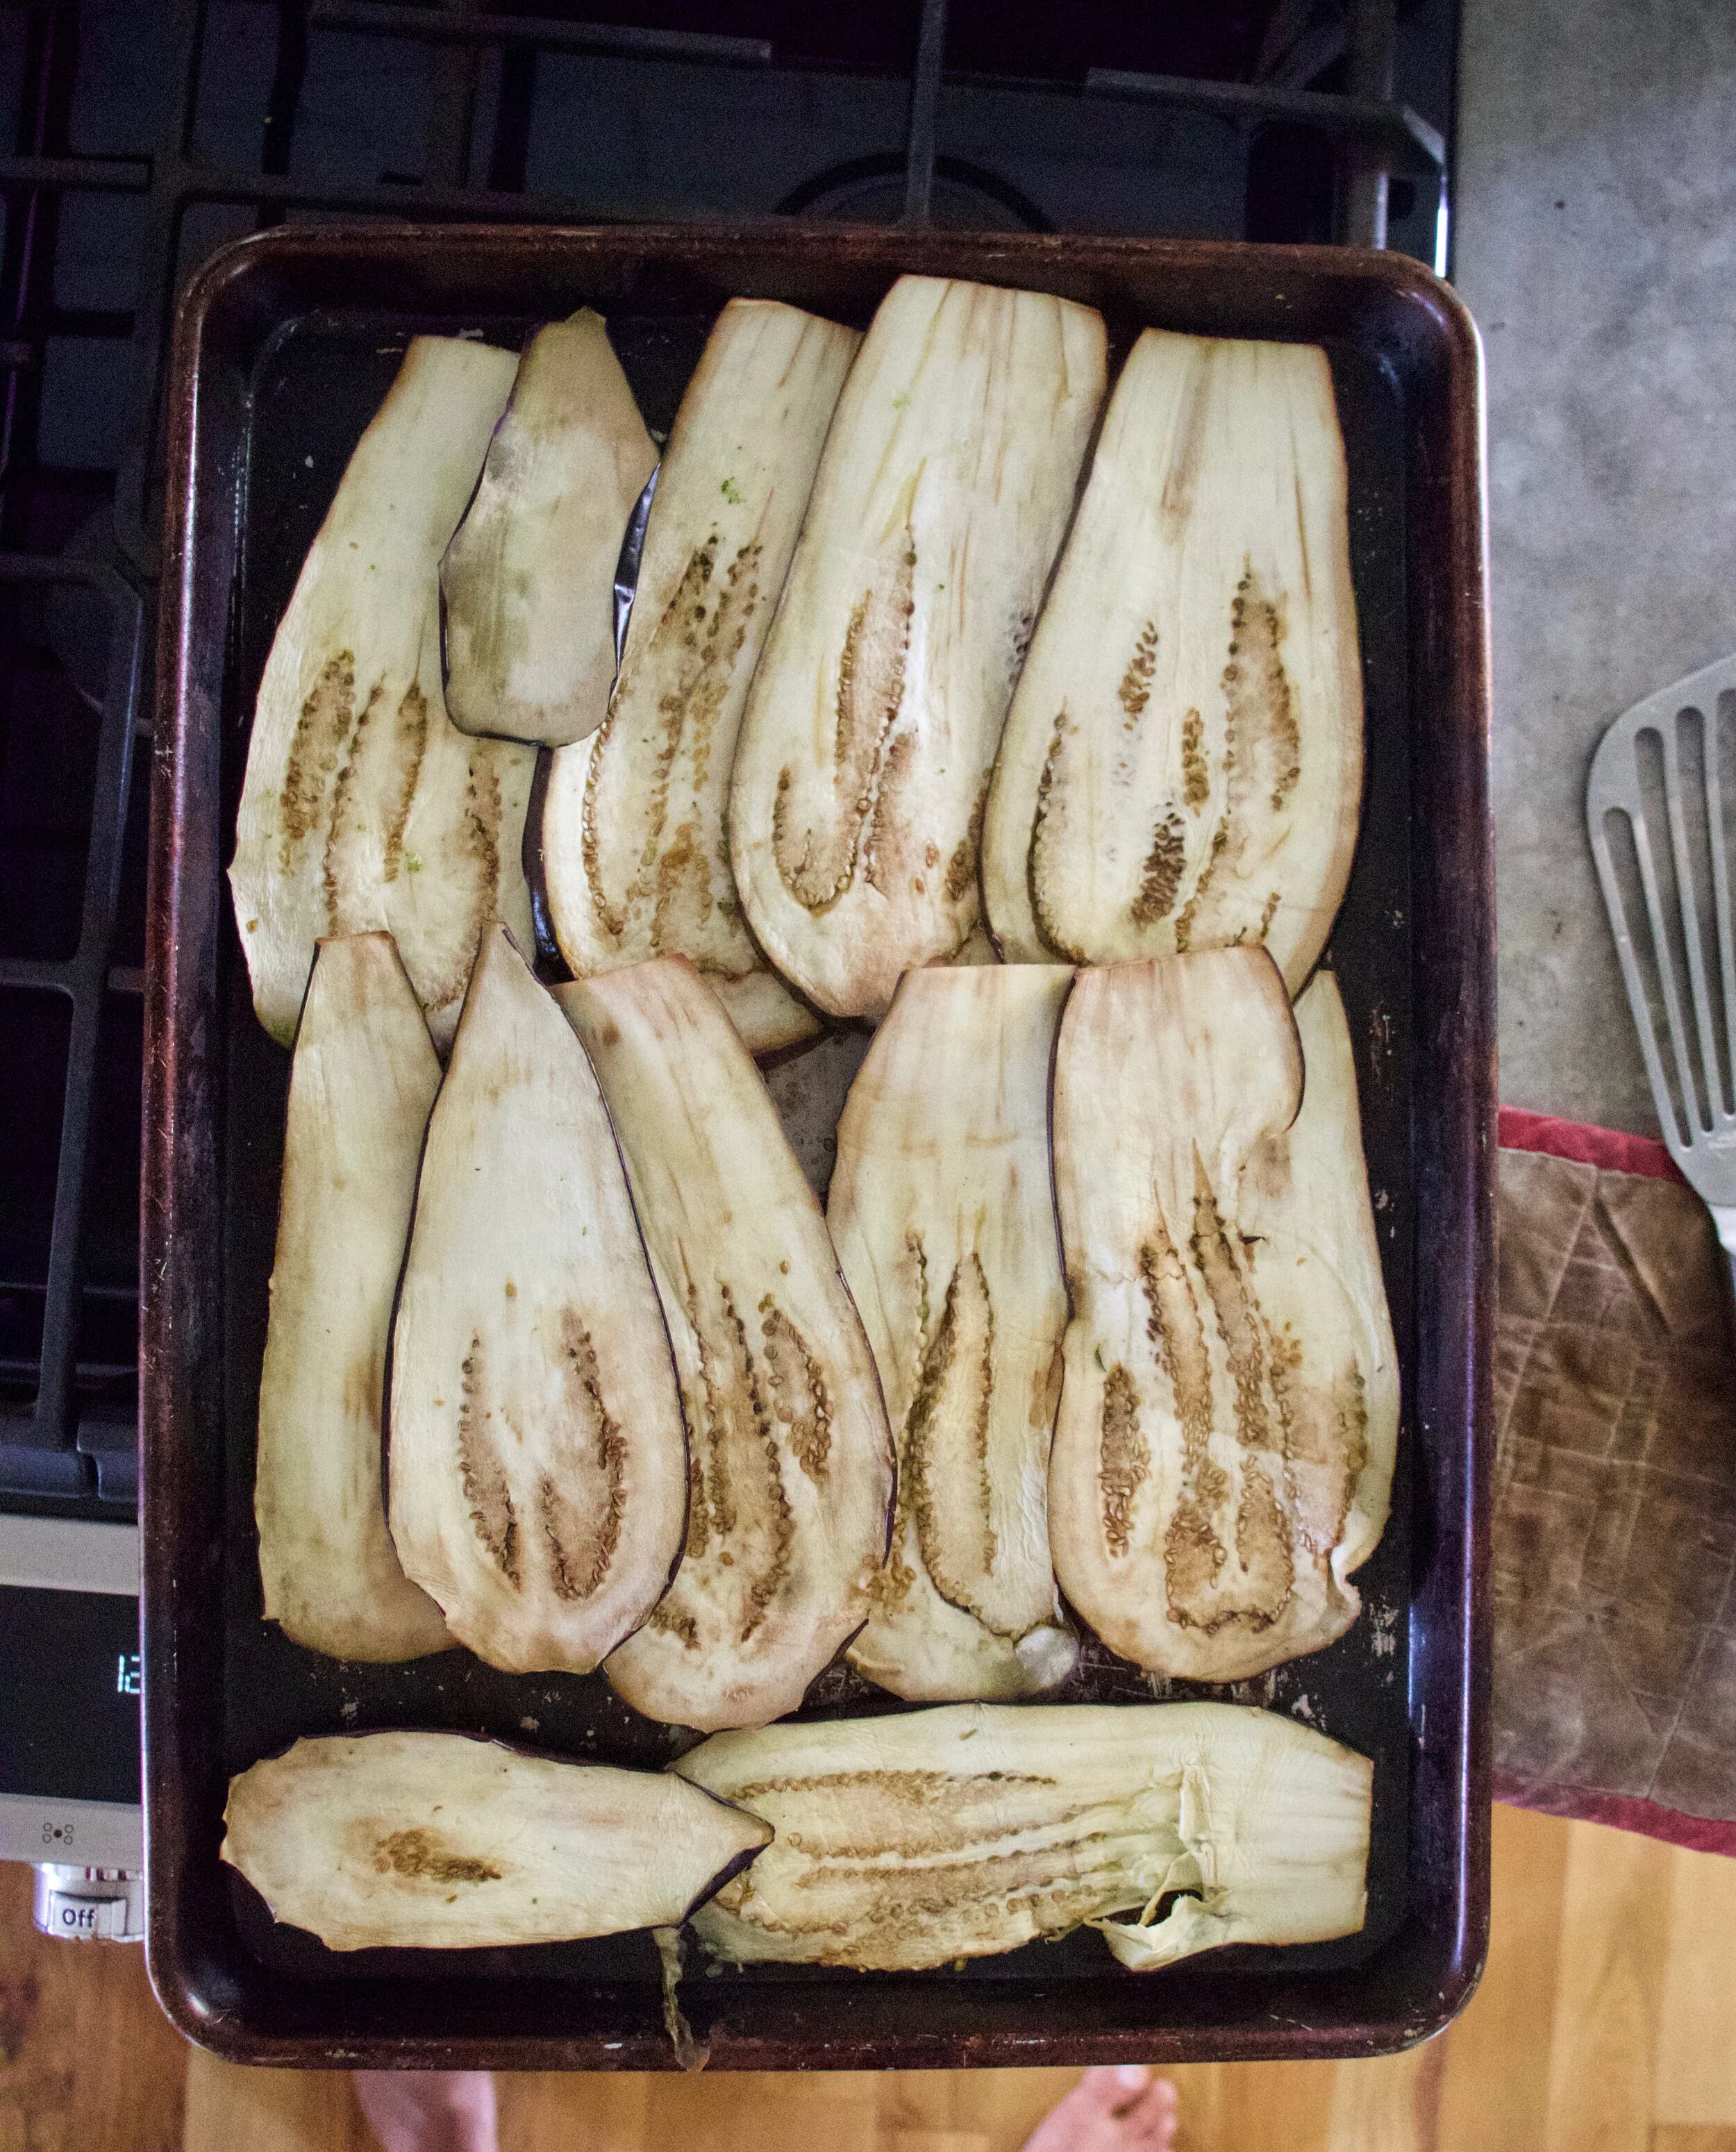
Eggplant, comes out of the oven all nice a pliable.
Now make the bean filling. Beans, onions, spices, juice of lemon, and a good crank of pepper and a pinch of salt go into food processor. Blend until smooth.
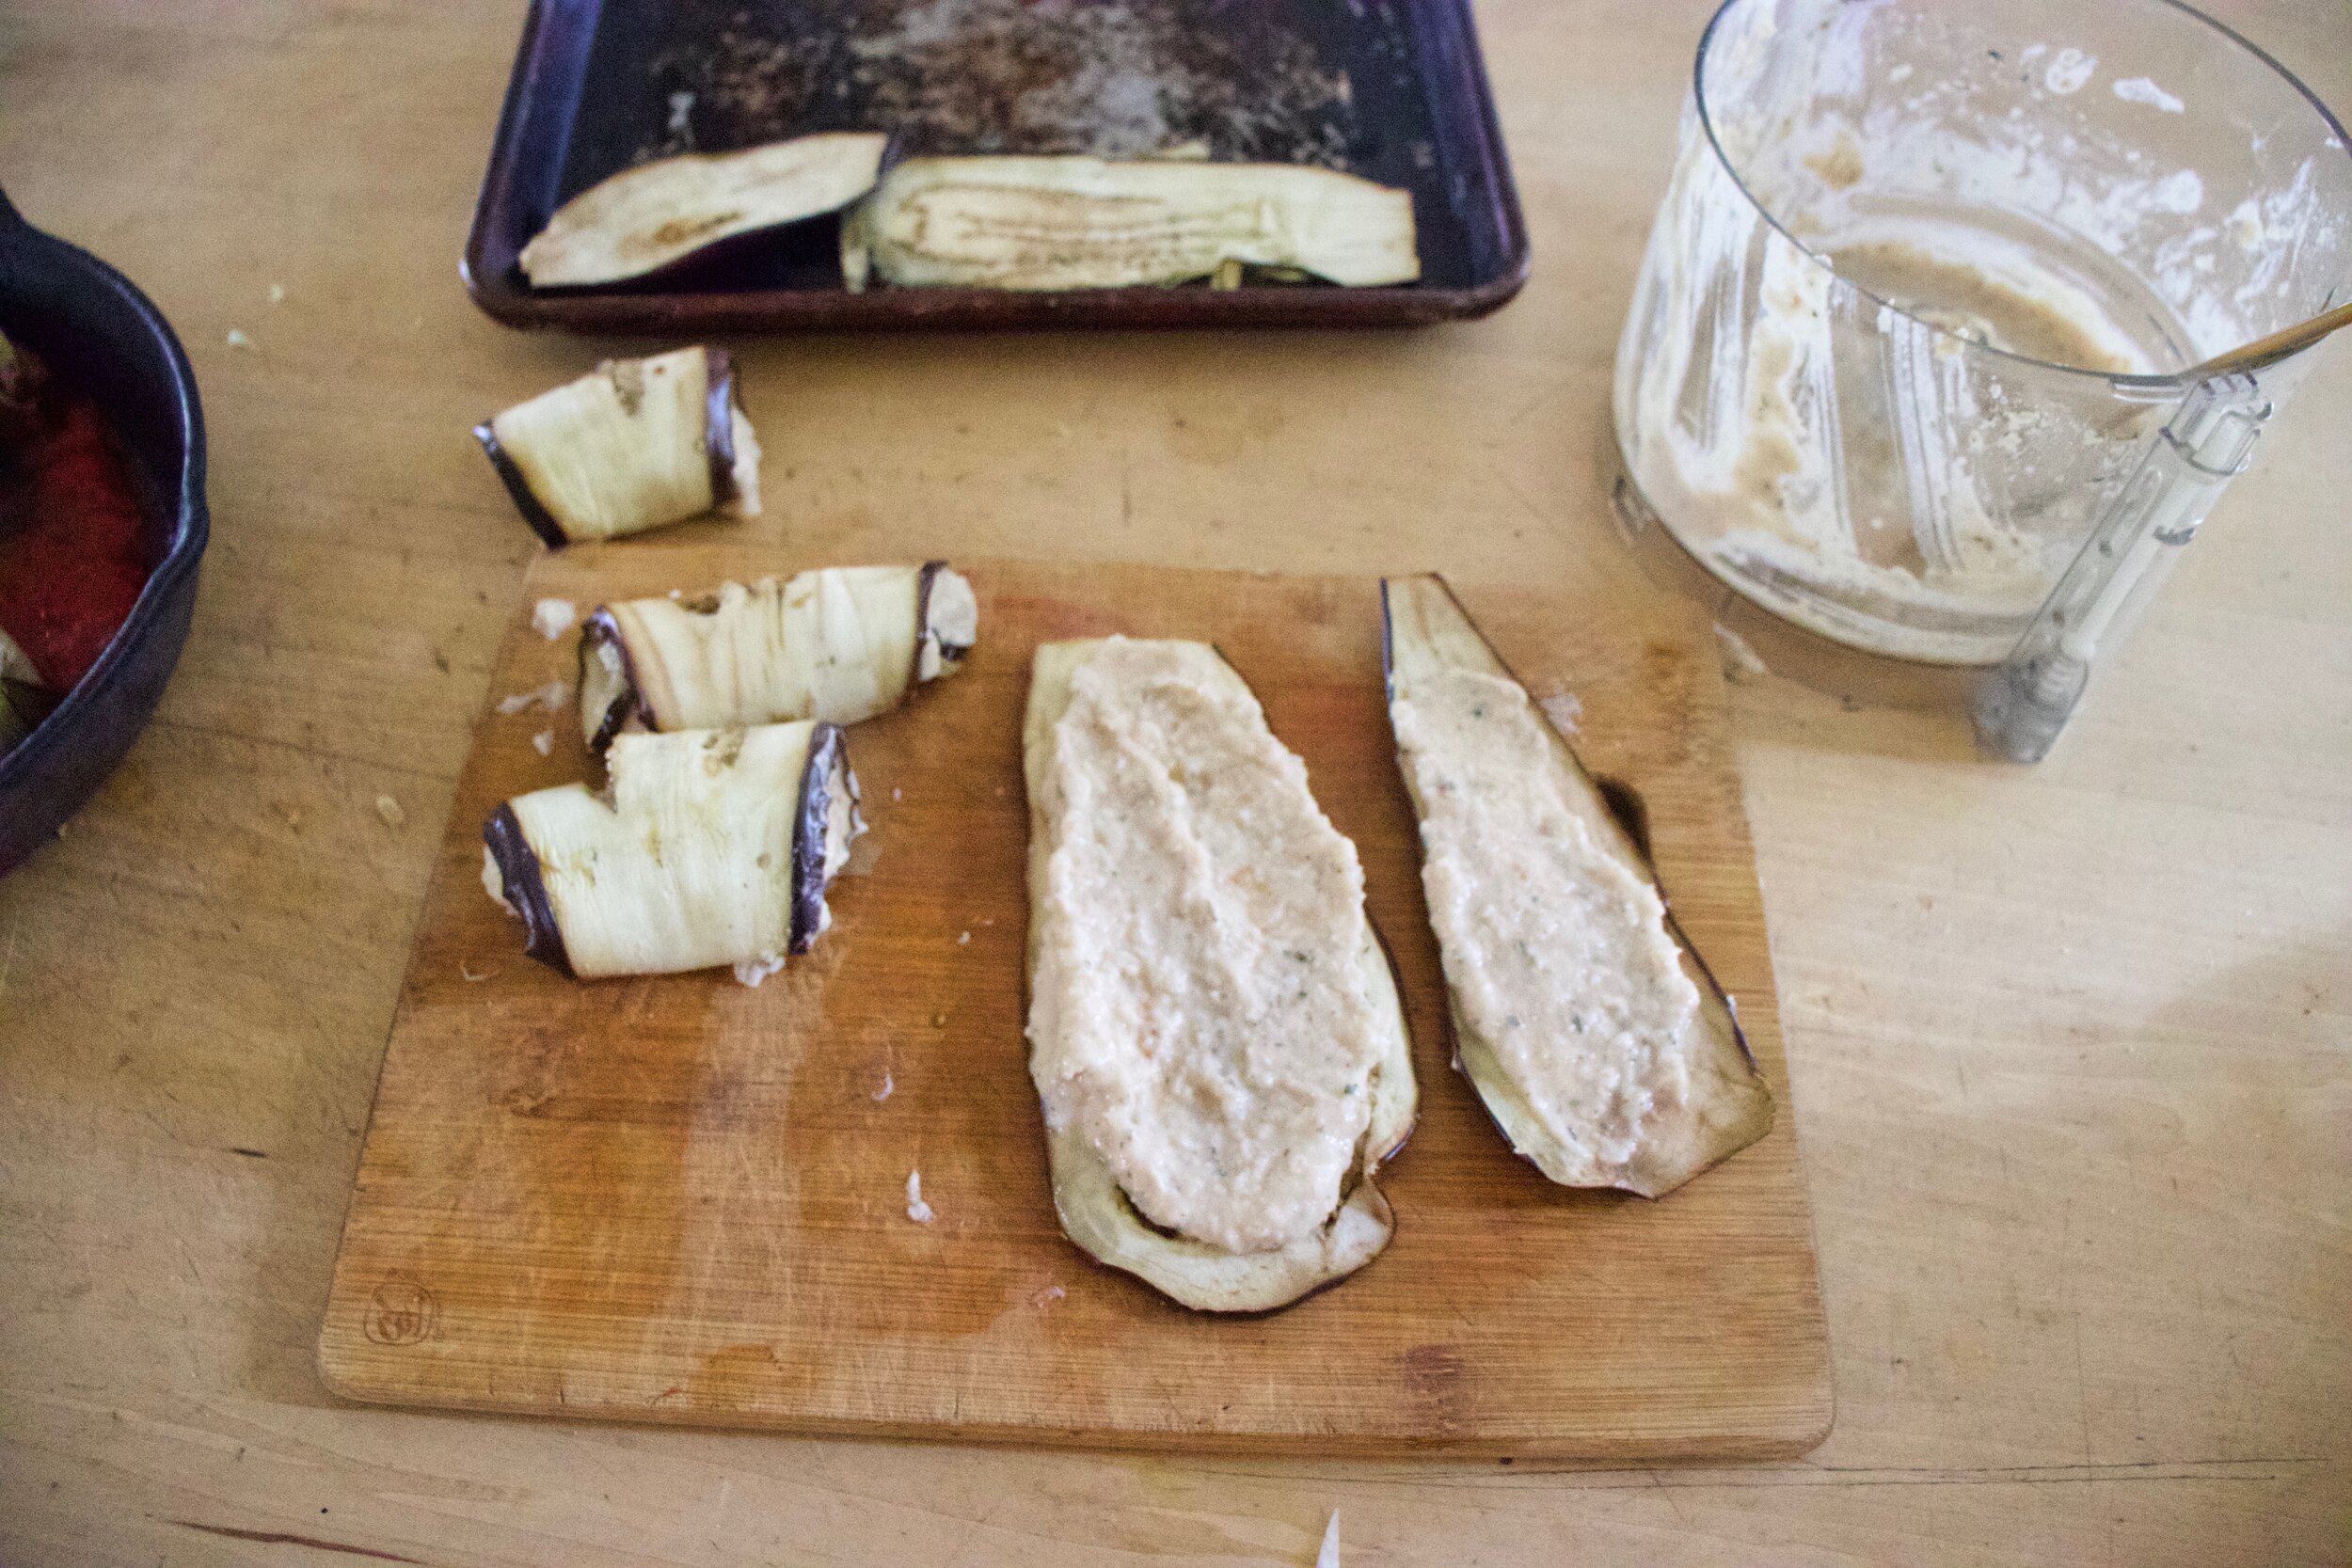
Gently grab an eggplant cut and cover one side with the bean mixture. Don%u2019t skimp our but don%u2019t add ore then you can roll up. And then roll it up.

Add a cup or so of sauce to a skillet or casserole dish, then place the rolls on in. Once all the rolls are in, cover with the remaining crushed tomato or marinara sauce.
Pop into hot oven to bake.

And then when the eggplant is tender and the sauce is all bubbly, pop it out.

Add some fresh basil (or basil puree) and grab that fork.
Nothing left for you to do beside eat it.
-C
serves 3-5
-
a medium to large eggplant
-
1 yellow onion
-
2 1/2 cups white beans (or one can)
-
a lemon
-
teaspoon each of thyme, garlic powder and oregano
-
3 cups crushed tomato or a simple marinara sauce
-
salt and pepper
-
splash of oil
-
fresh basil (optional)
Preheat oven to 400 degrees
Grab the eggplant and cut the very top off then cut slices lengthwise about 1/2 inch thick. You should get about 10-12 slices. Place the slices onto a baking sheet, overlapping a little if necessary, sprinkle with a pinch of salt, and place into oven. Cook for about 10 minutes or until the eggplant is just barely starting to soften and becomes pliable. Remove from oven and let cool a bit.
Meanwhile chop up the onion and place into a lightly oiled skillet. Cook for 5-8 minutes or until the onion starts to become translucent and fragrant. Once cooked, place into a food processor along with the beans (drained but keep the liquid),the spices, and the juice of the lemon. Pulse until smooth and if needed, add a few tablespoons of the bean liquid to loosen it up enough to blend. Taste and season with salt and pepper.
Now to make the rolls. Grab cooled off piece of eggplant, lay it flat, and cover with the bean mixture. Not too much or too little, probably a bit less then 1/4 cup. Then roll the eggplant up. Either grab a skillet or baking dish and add about 1 cup of the crushed tomato or marinara sauce to the bottom. Place rolls as they are being made into the dish. Once you have filled the dish with the rolls, cover with the remaining sauce.
Place the rolls into the oven and bake for 30ish minutes or until eggplant is nice and fork tender.
Once baked, remove from oven, left cool for a few minute and then serve. Top with fresh basil (or basil puree) if you want.
Eat with a fork.
Granola is a weakness of mine, well good granola is. I don%u2019t really call most stuff of the stuff you can buy at the store really granola, it is more like sugary candy crap that is marketed to be good for you when it really is not. That shit is gross and that%u2019s my truth.
Real granola, or the kind I make, is the basic bitch of granola. All it is is oats, a spice or two, salt, and a pureed up fruit (or veggies). Sometimes I will add a seed or nut at the end, or maybe even a little coconut or some other dried fruit. There is no added sweetener added, no added oils, just straight up oats and fruit.. And it%u2019s clumpy and crunchy, and all sorts of frantastic. It really is what every granola should strive to be.
The last batch I made was peach because, if you didn%u2019t know, it is peach season. Plus peach granola is delicious. That is fact. (unless you don%u2019t like peaches).
Now to the granola!
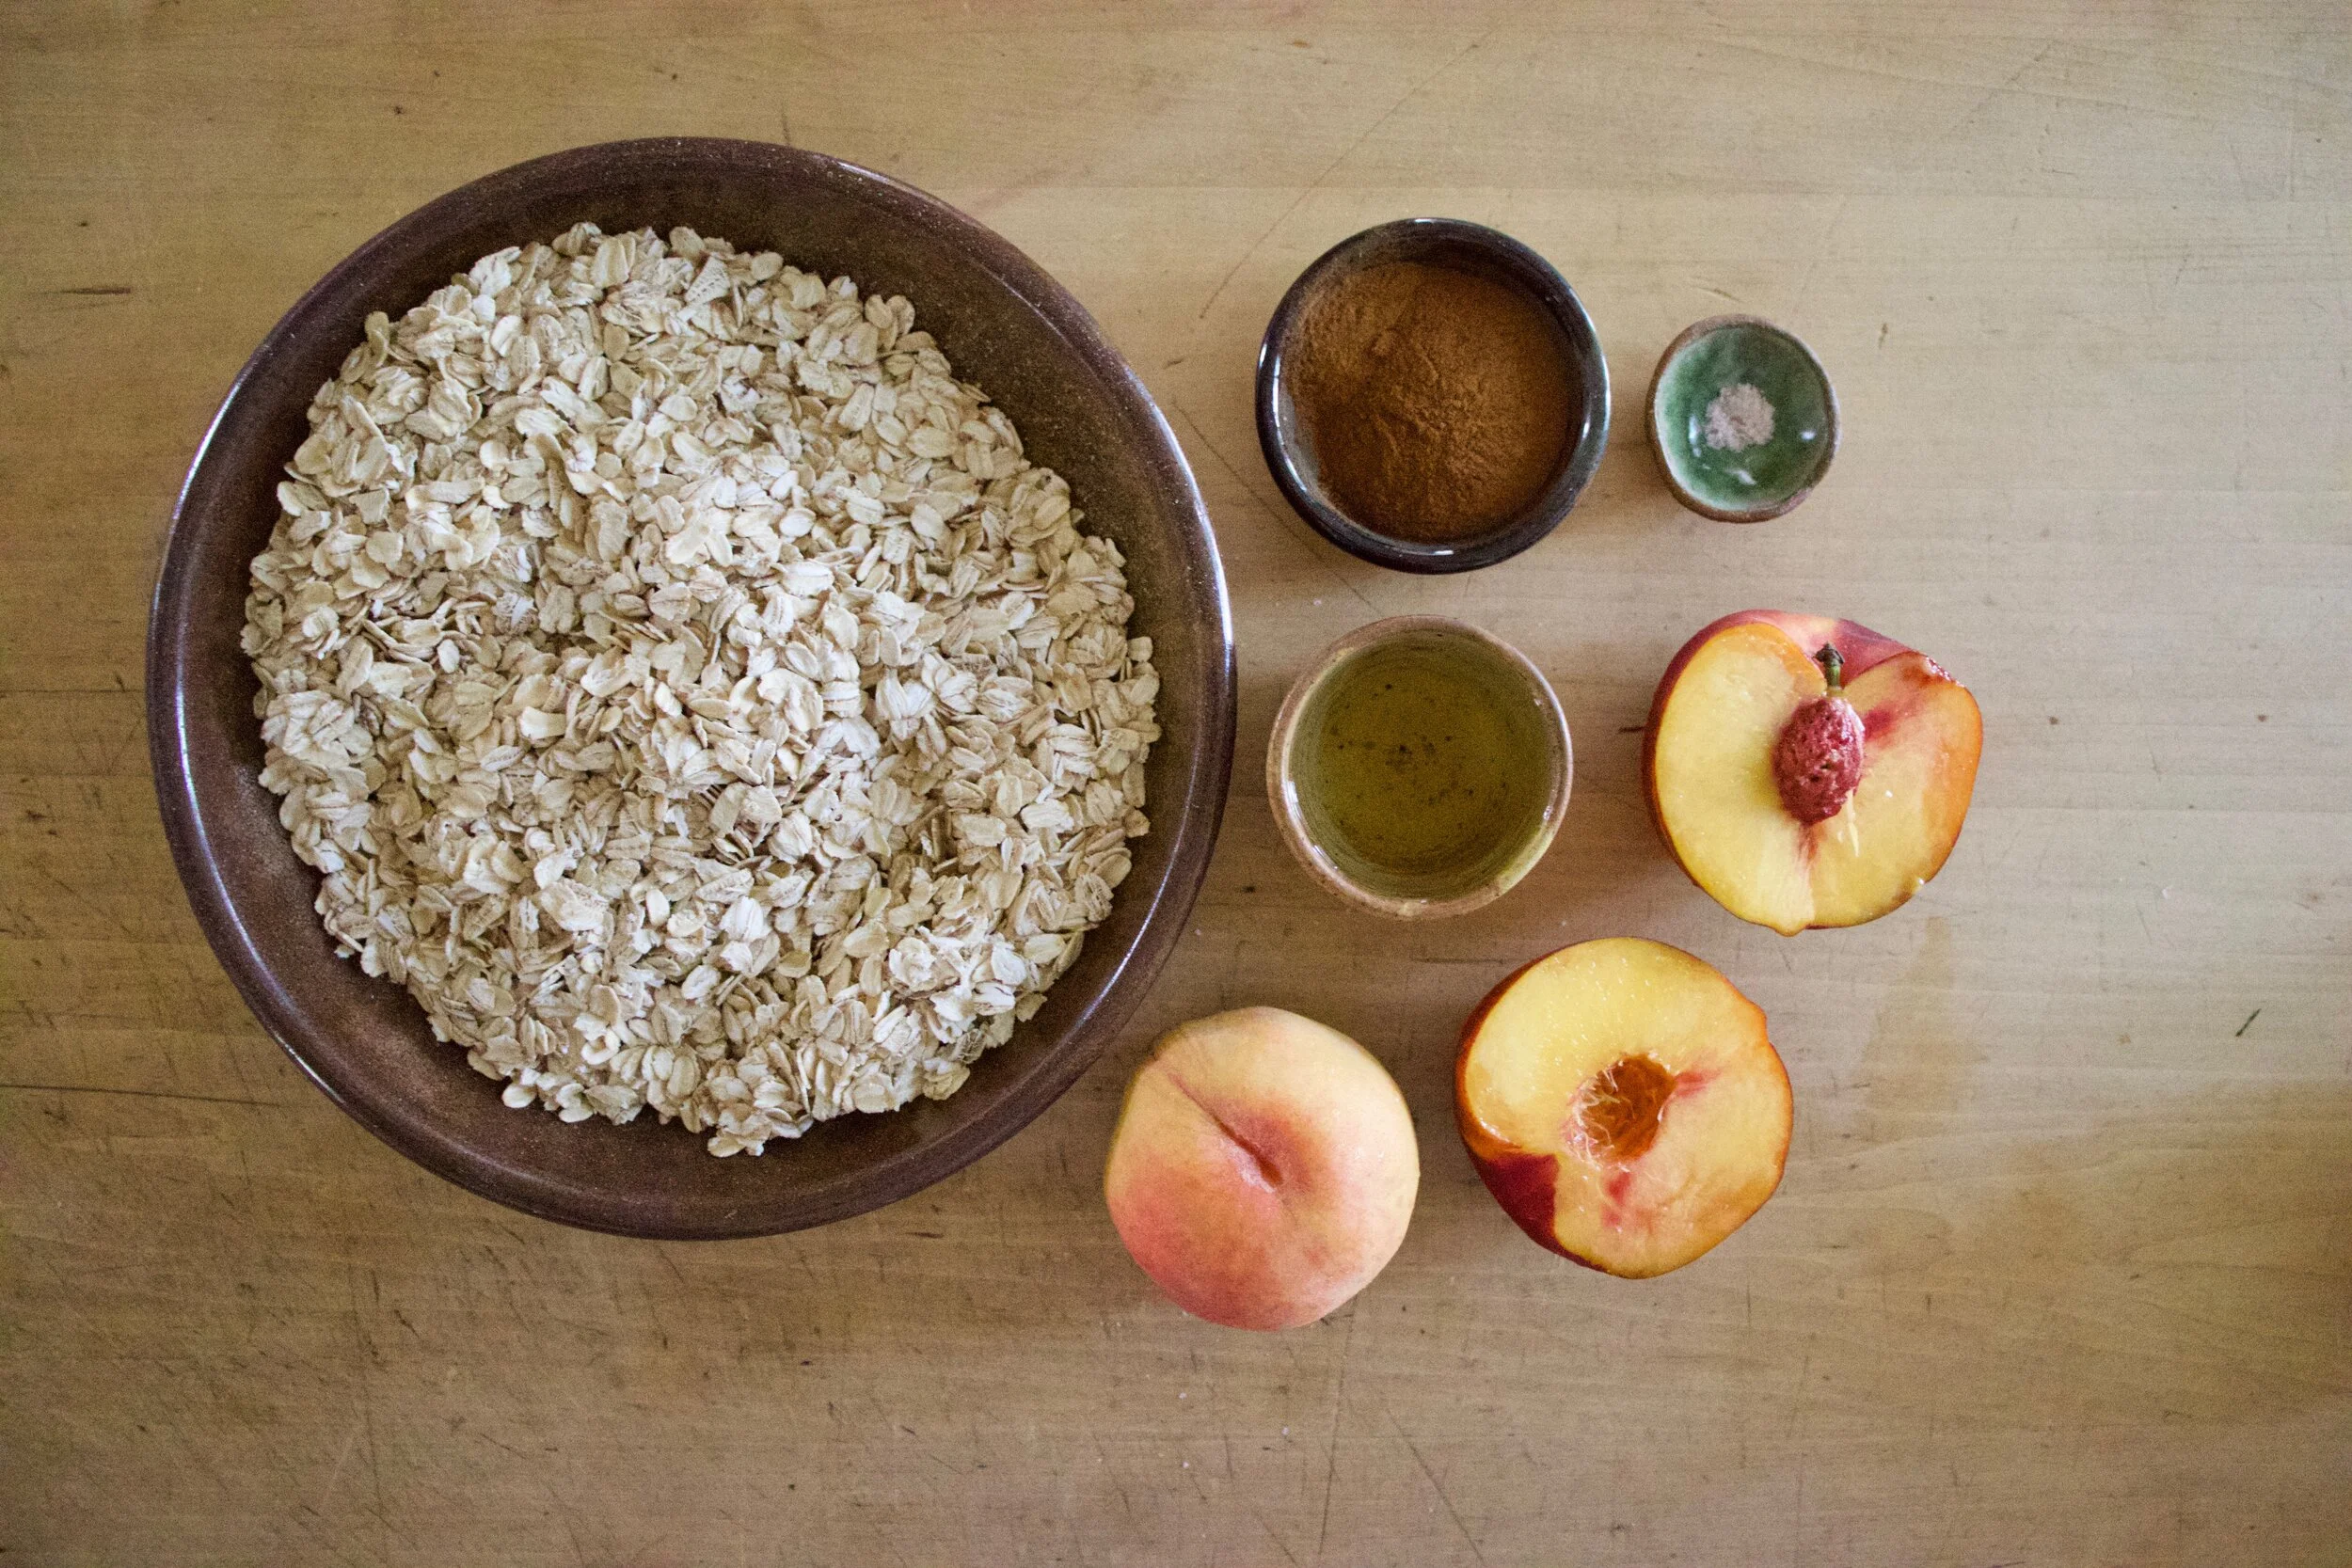
The stuff. Old fashion oats, a couple of ripe peaches, cinnamon, salt, and a little water.
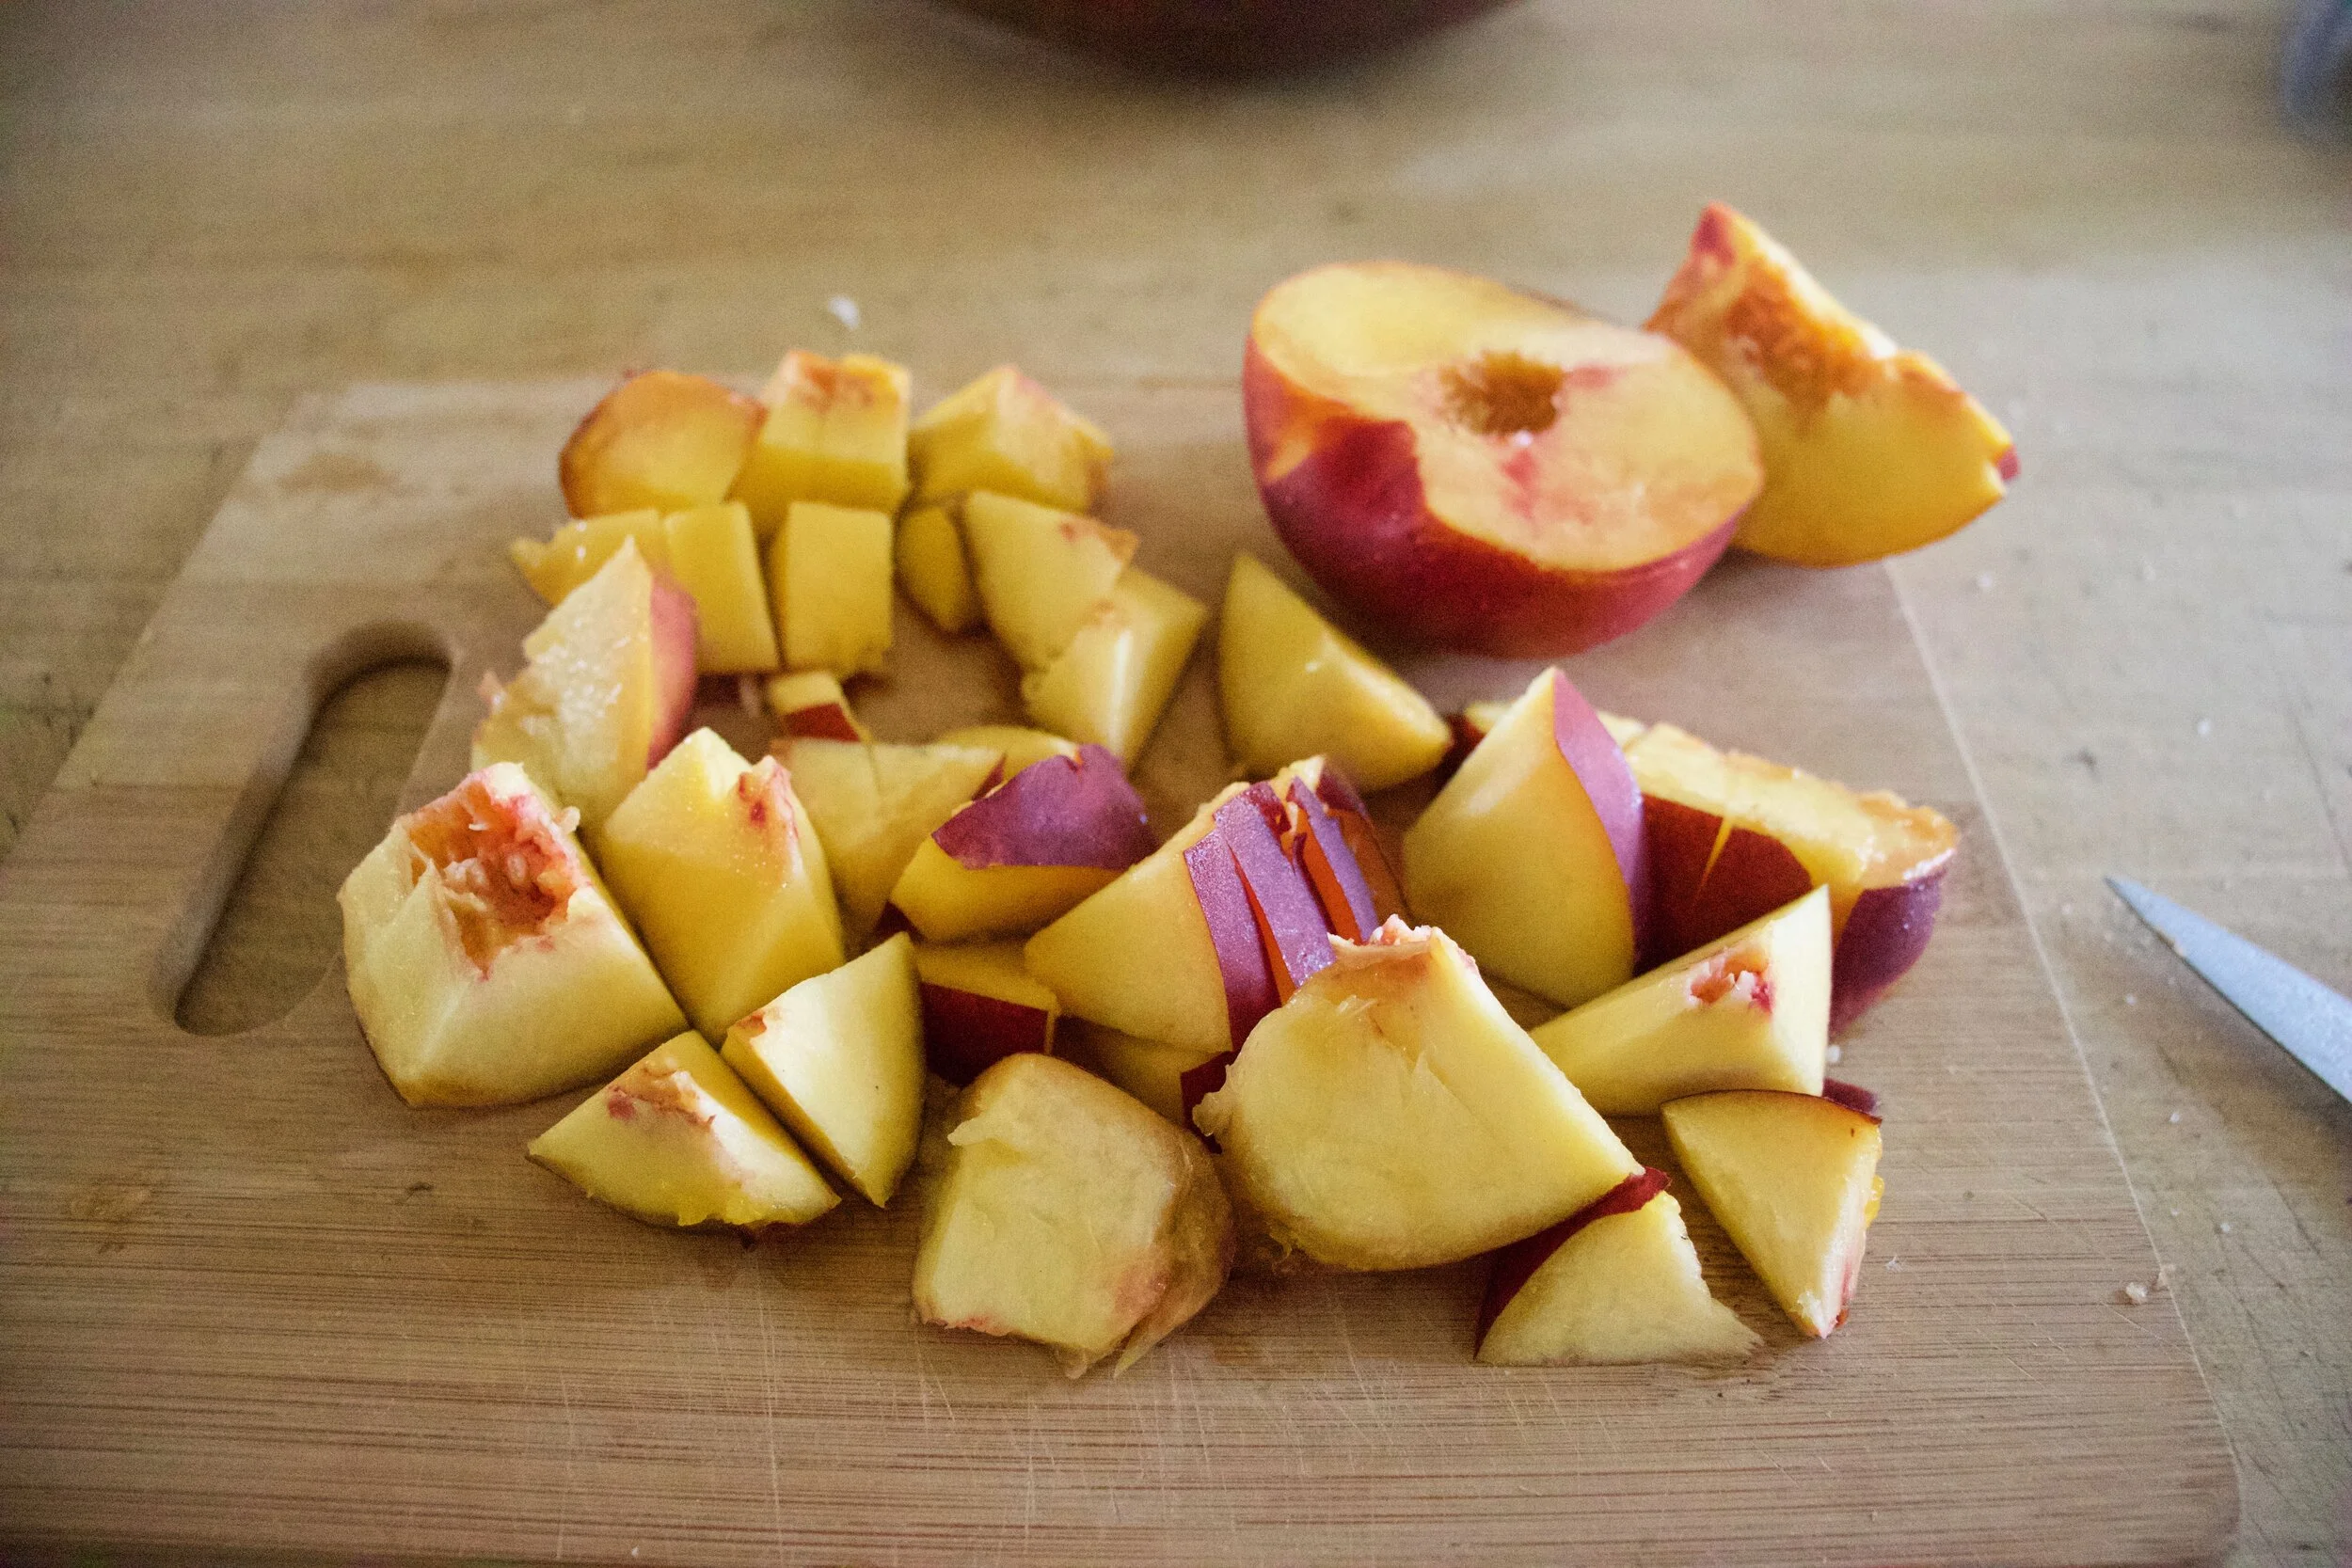
Cut peaches in half, remove pits, and cut into chunks.
Place peach chunks into blender and blend until smooth.
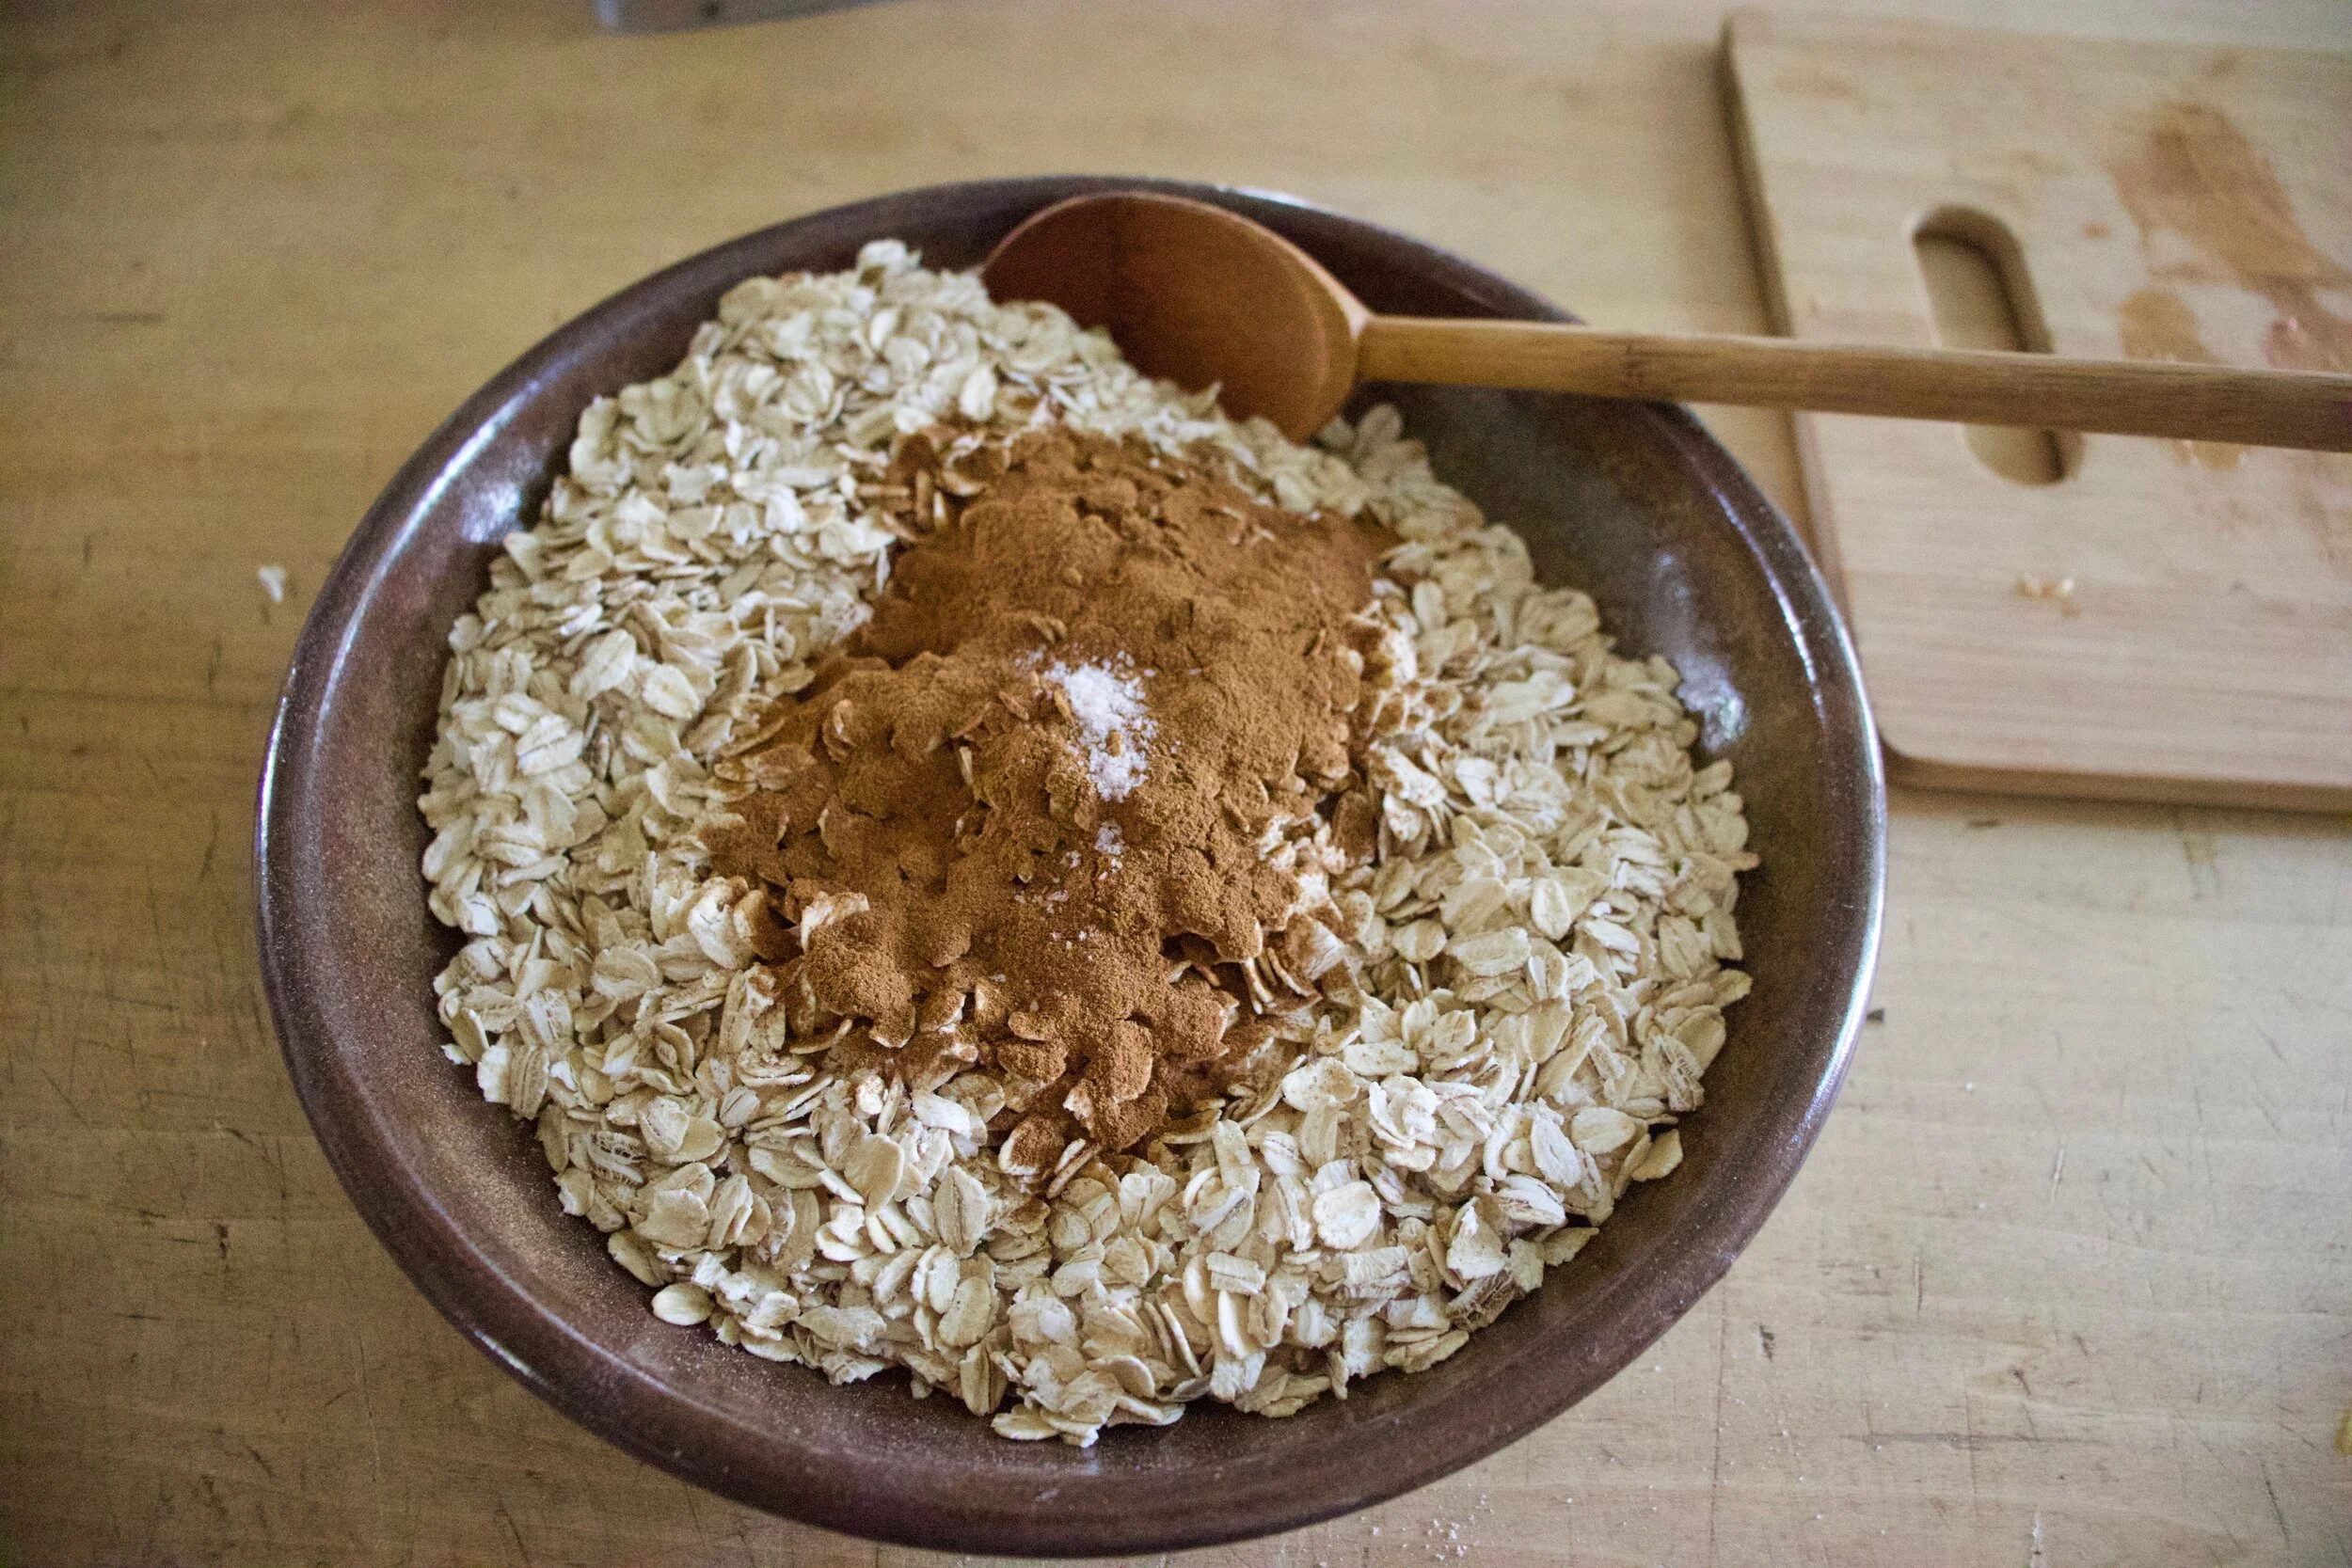
Mix the cinnamon and salt with the oats.
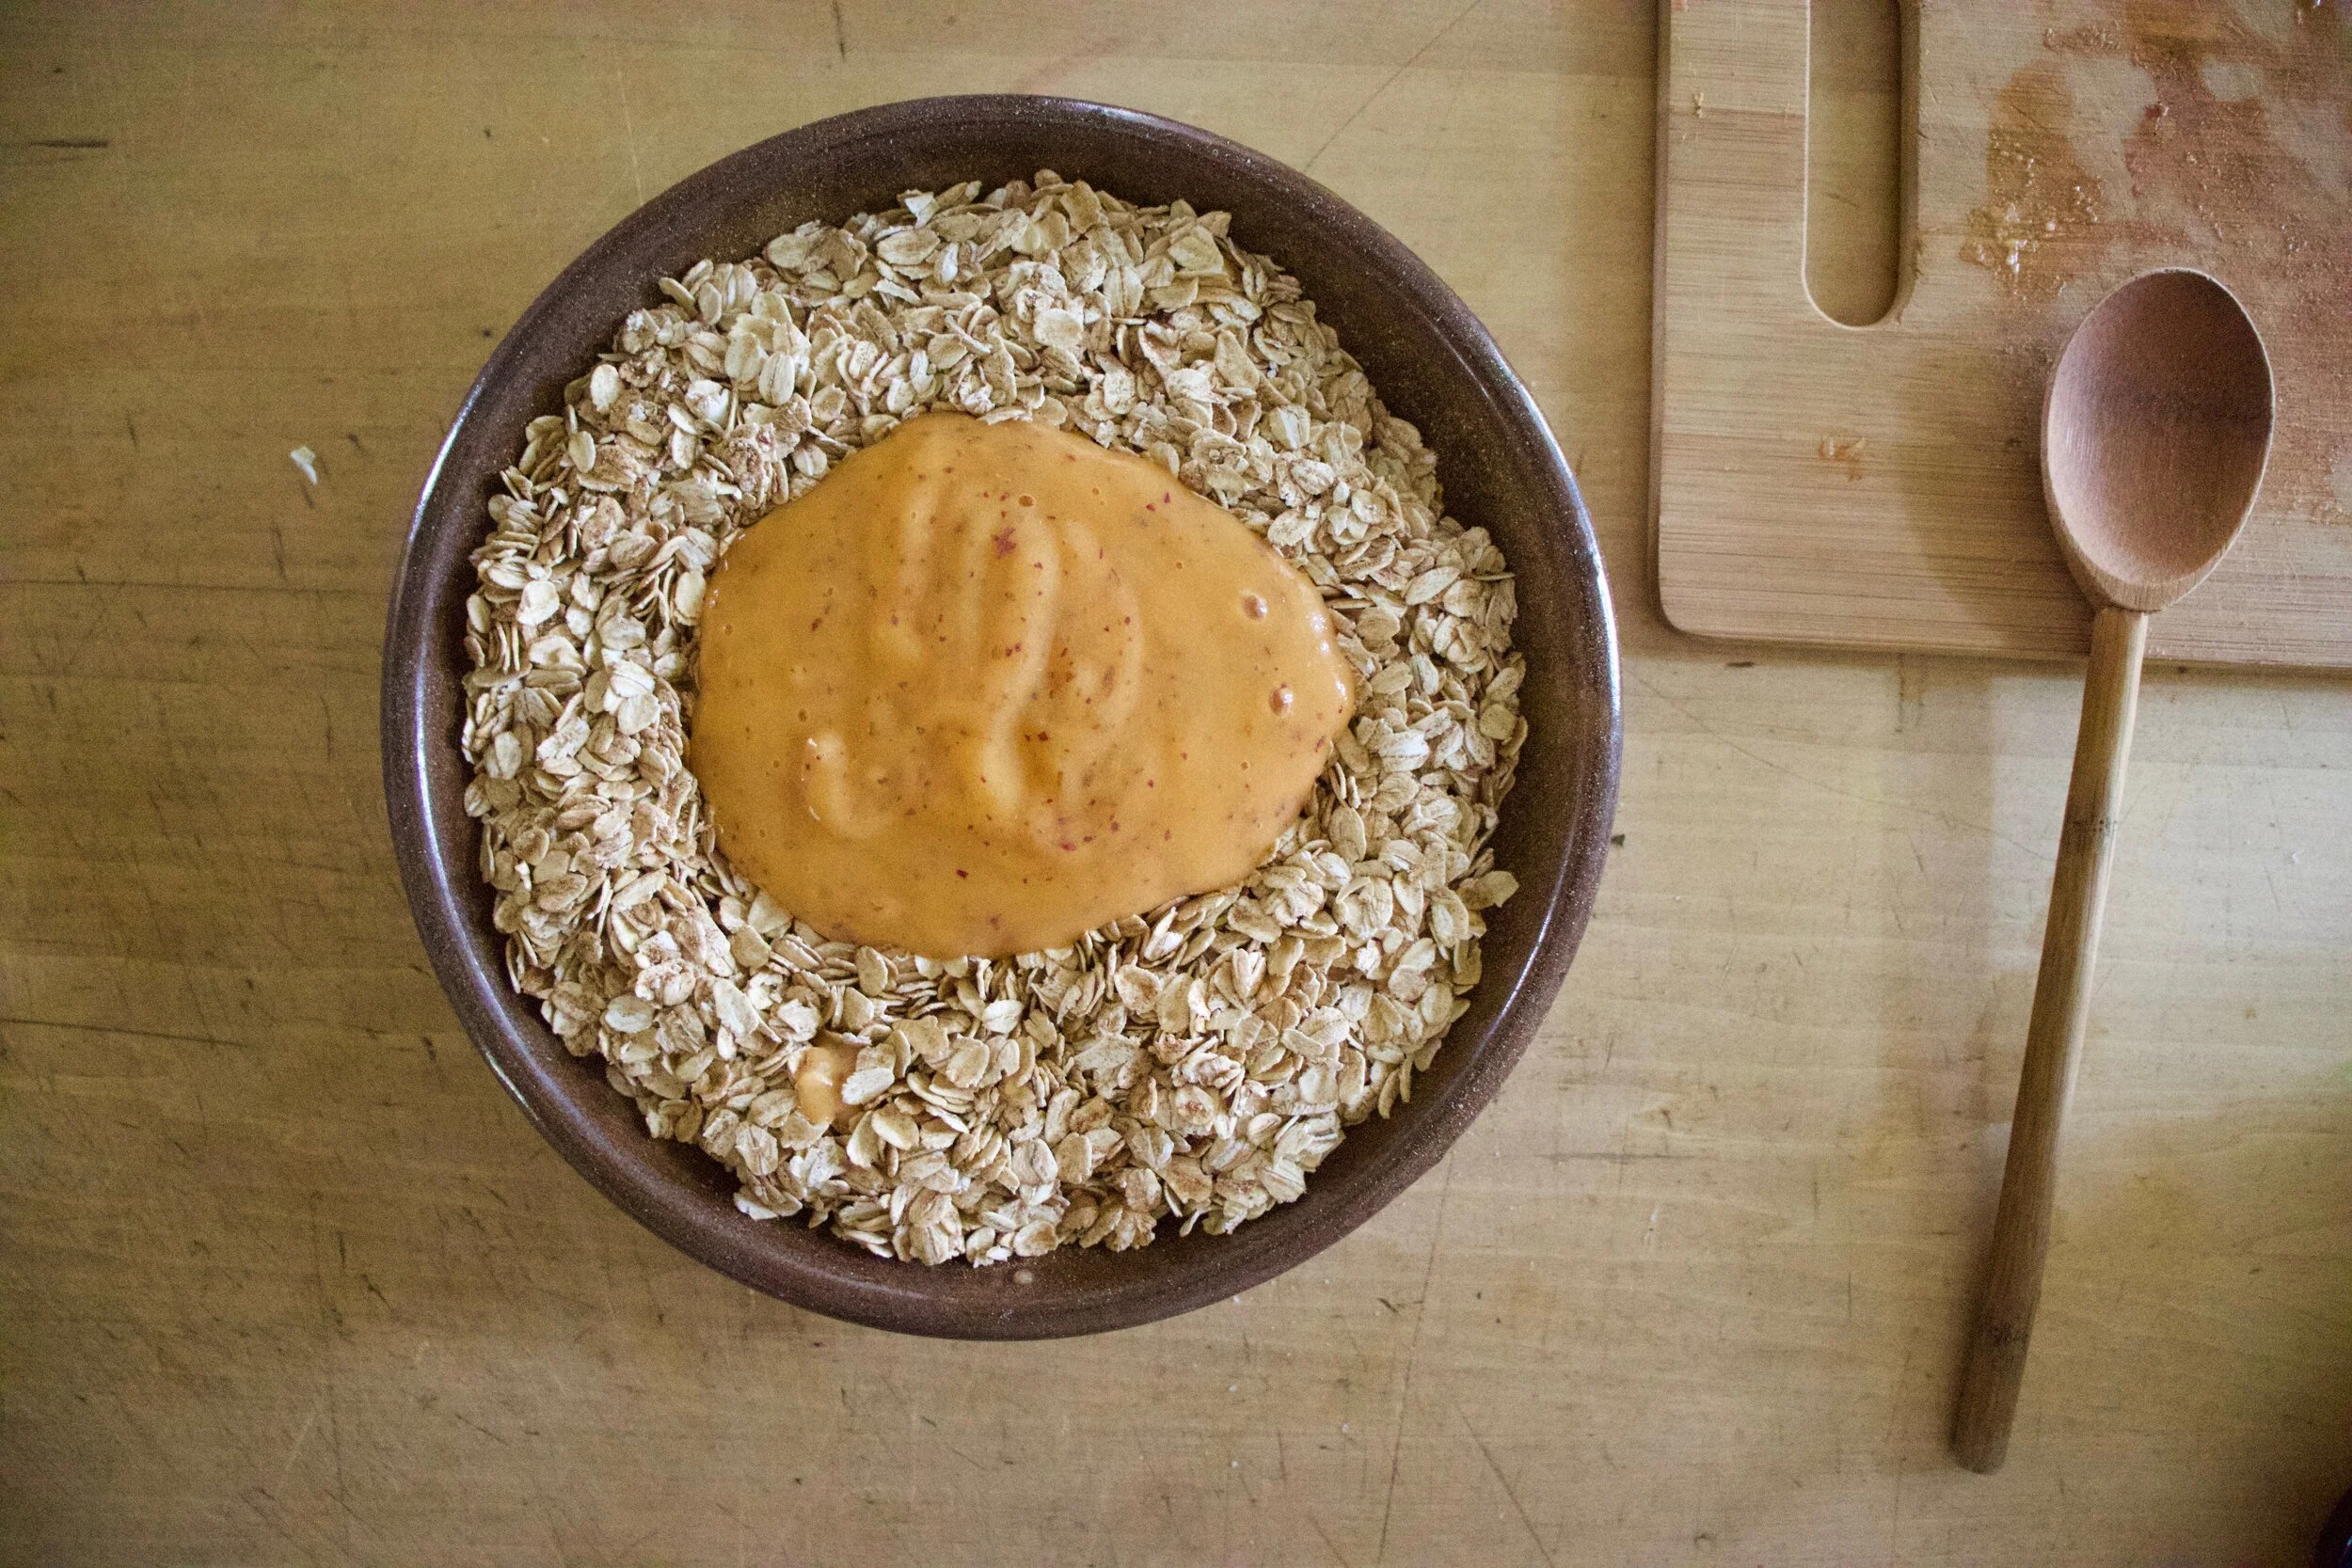
Pour the peach puree into the oats.
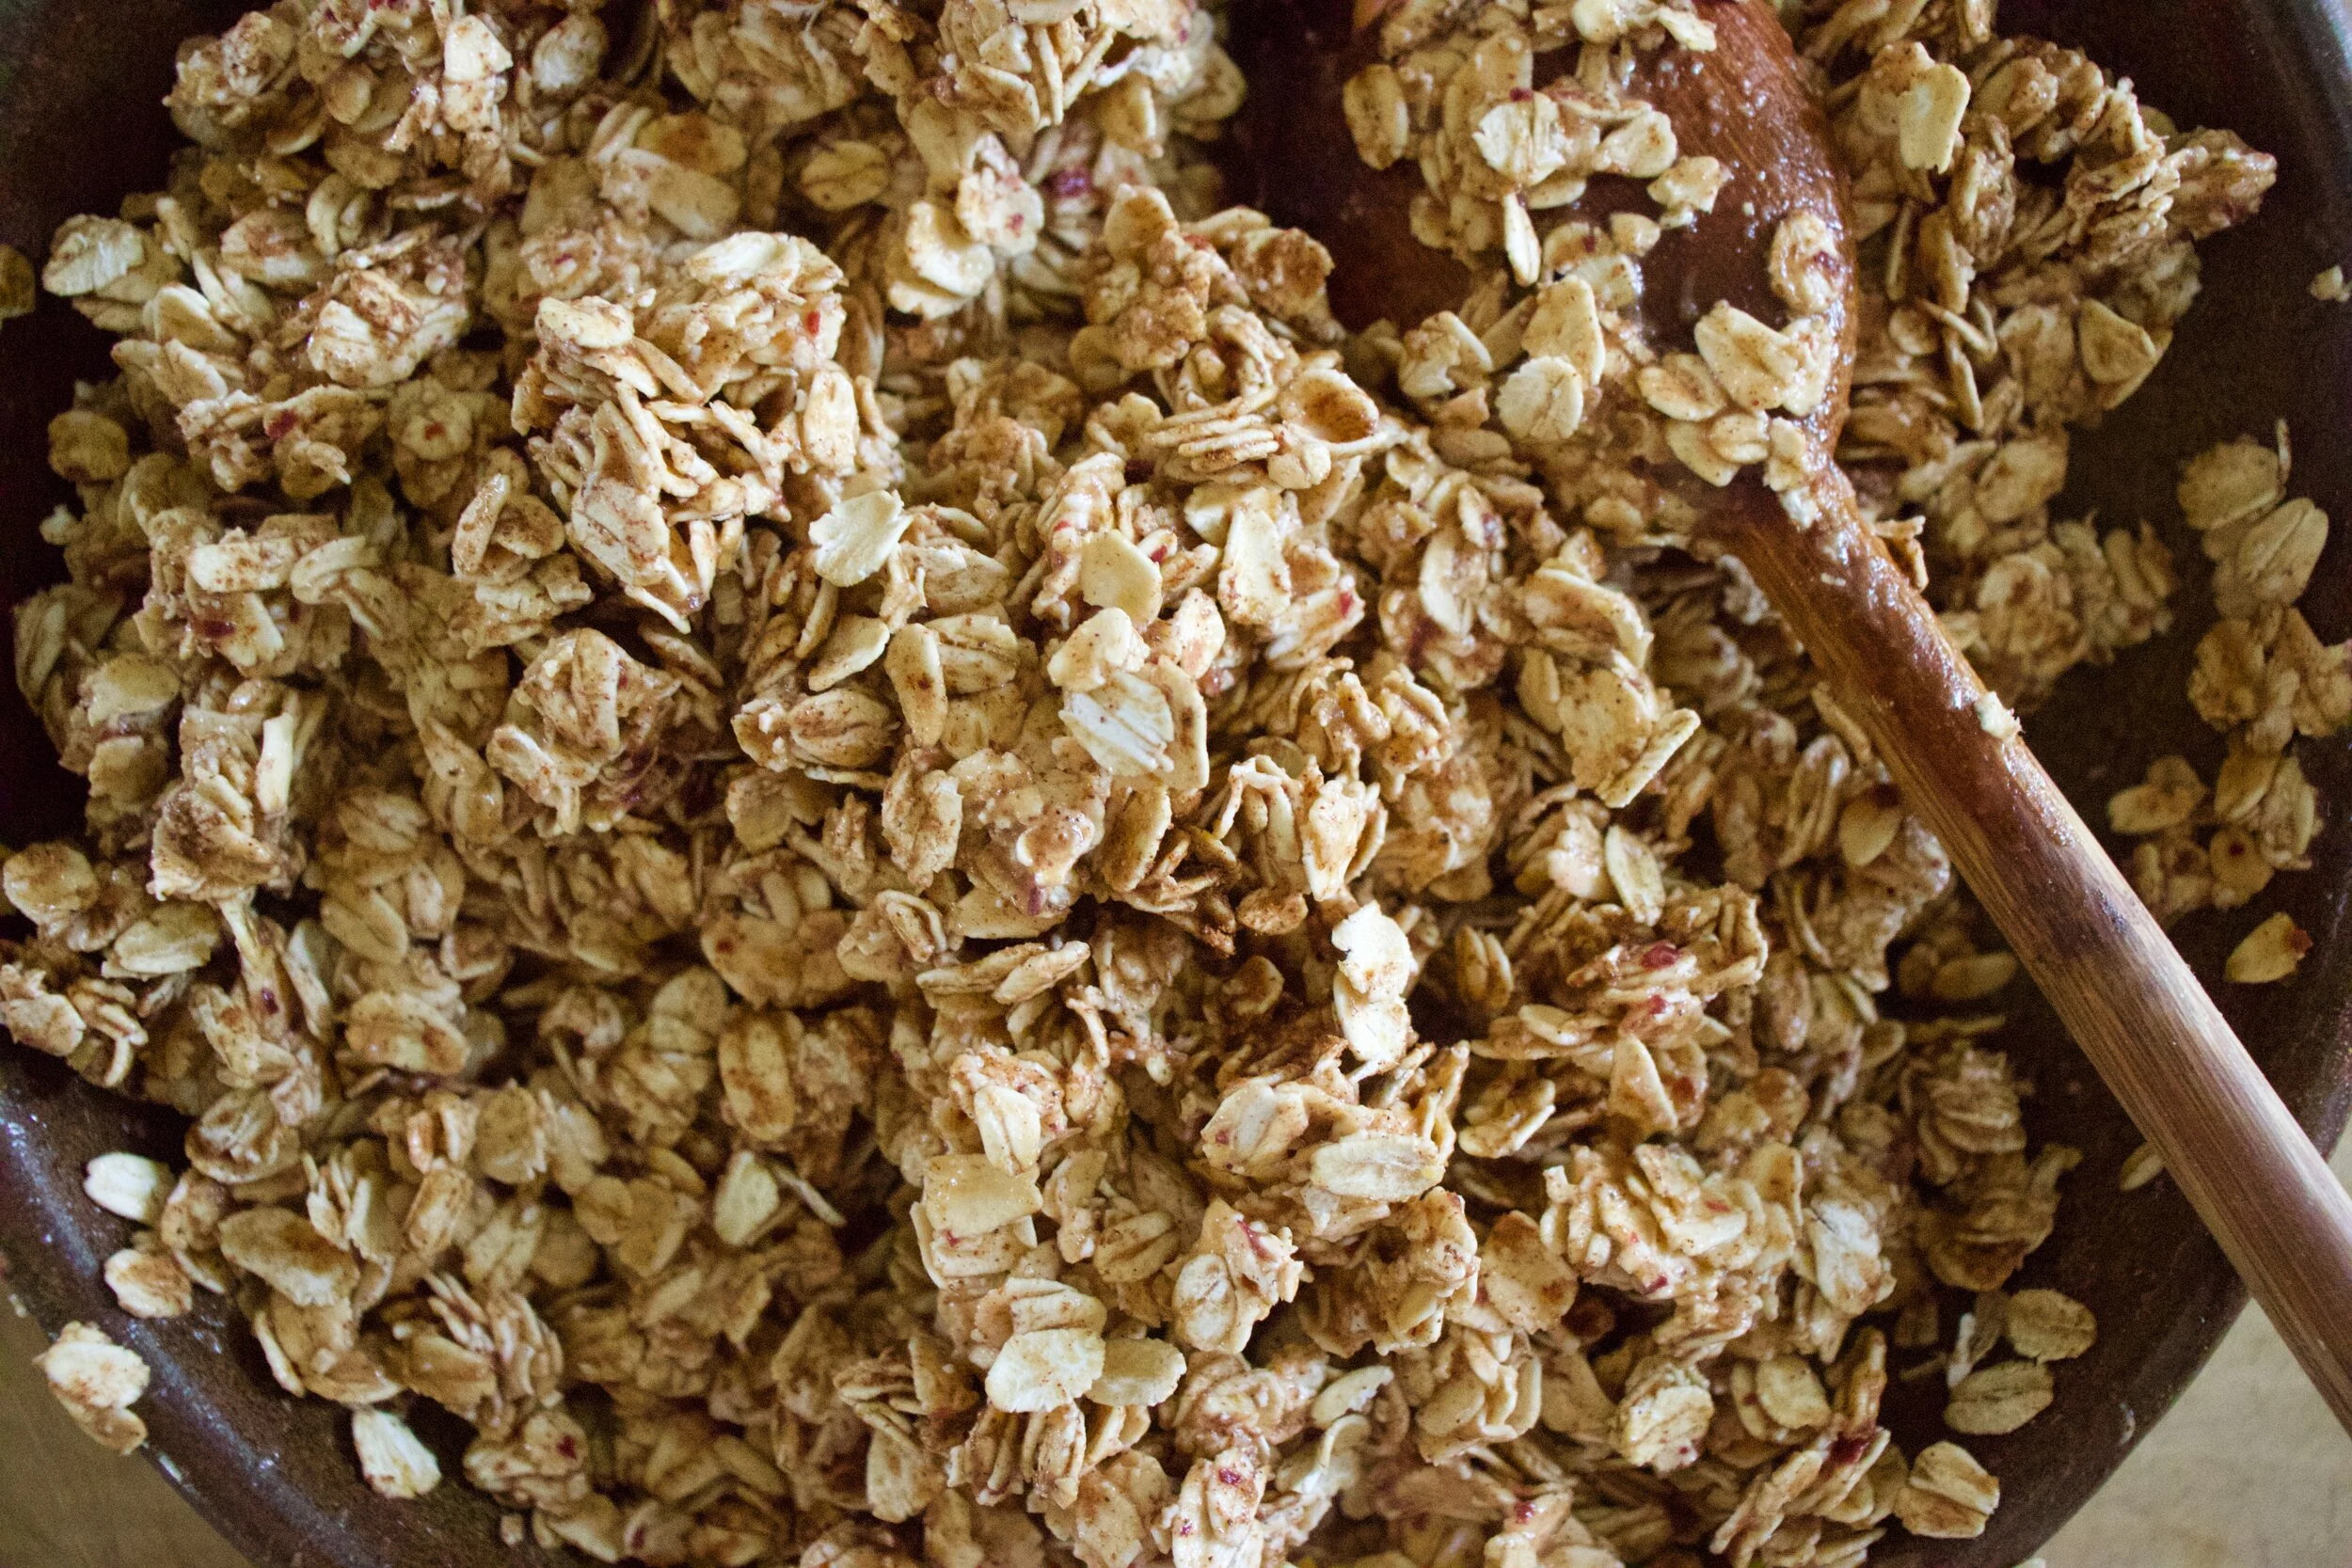
Mix until evenly incorporated and a little clumpy. If the oats are all moist but not creating any clumps, add a few tablespoons water until there is some clumping going on.
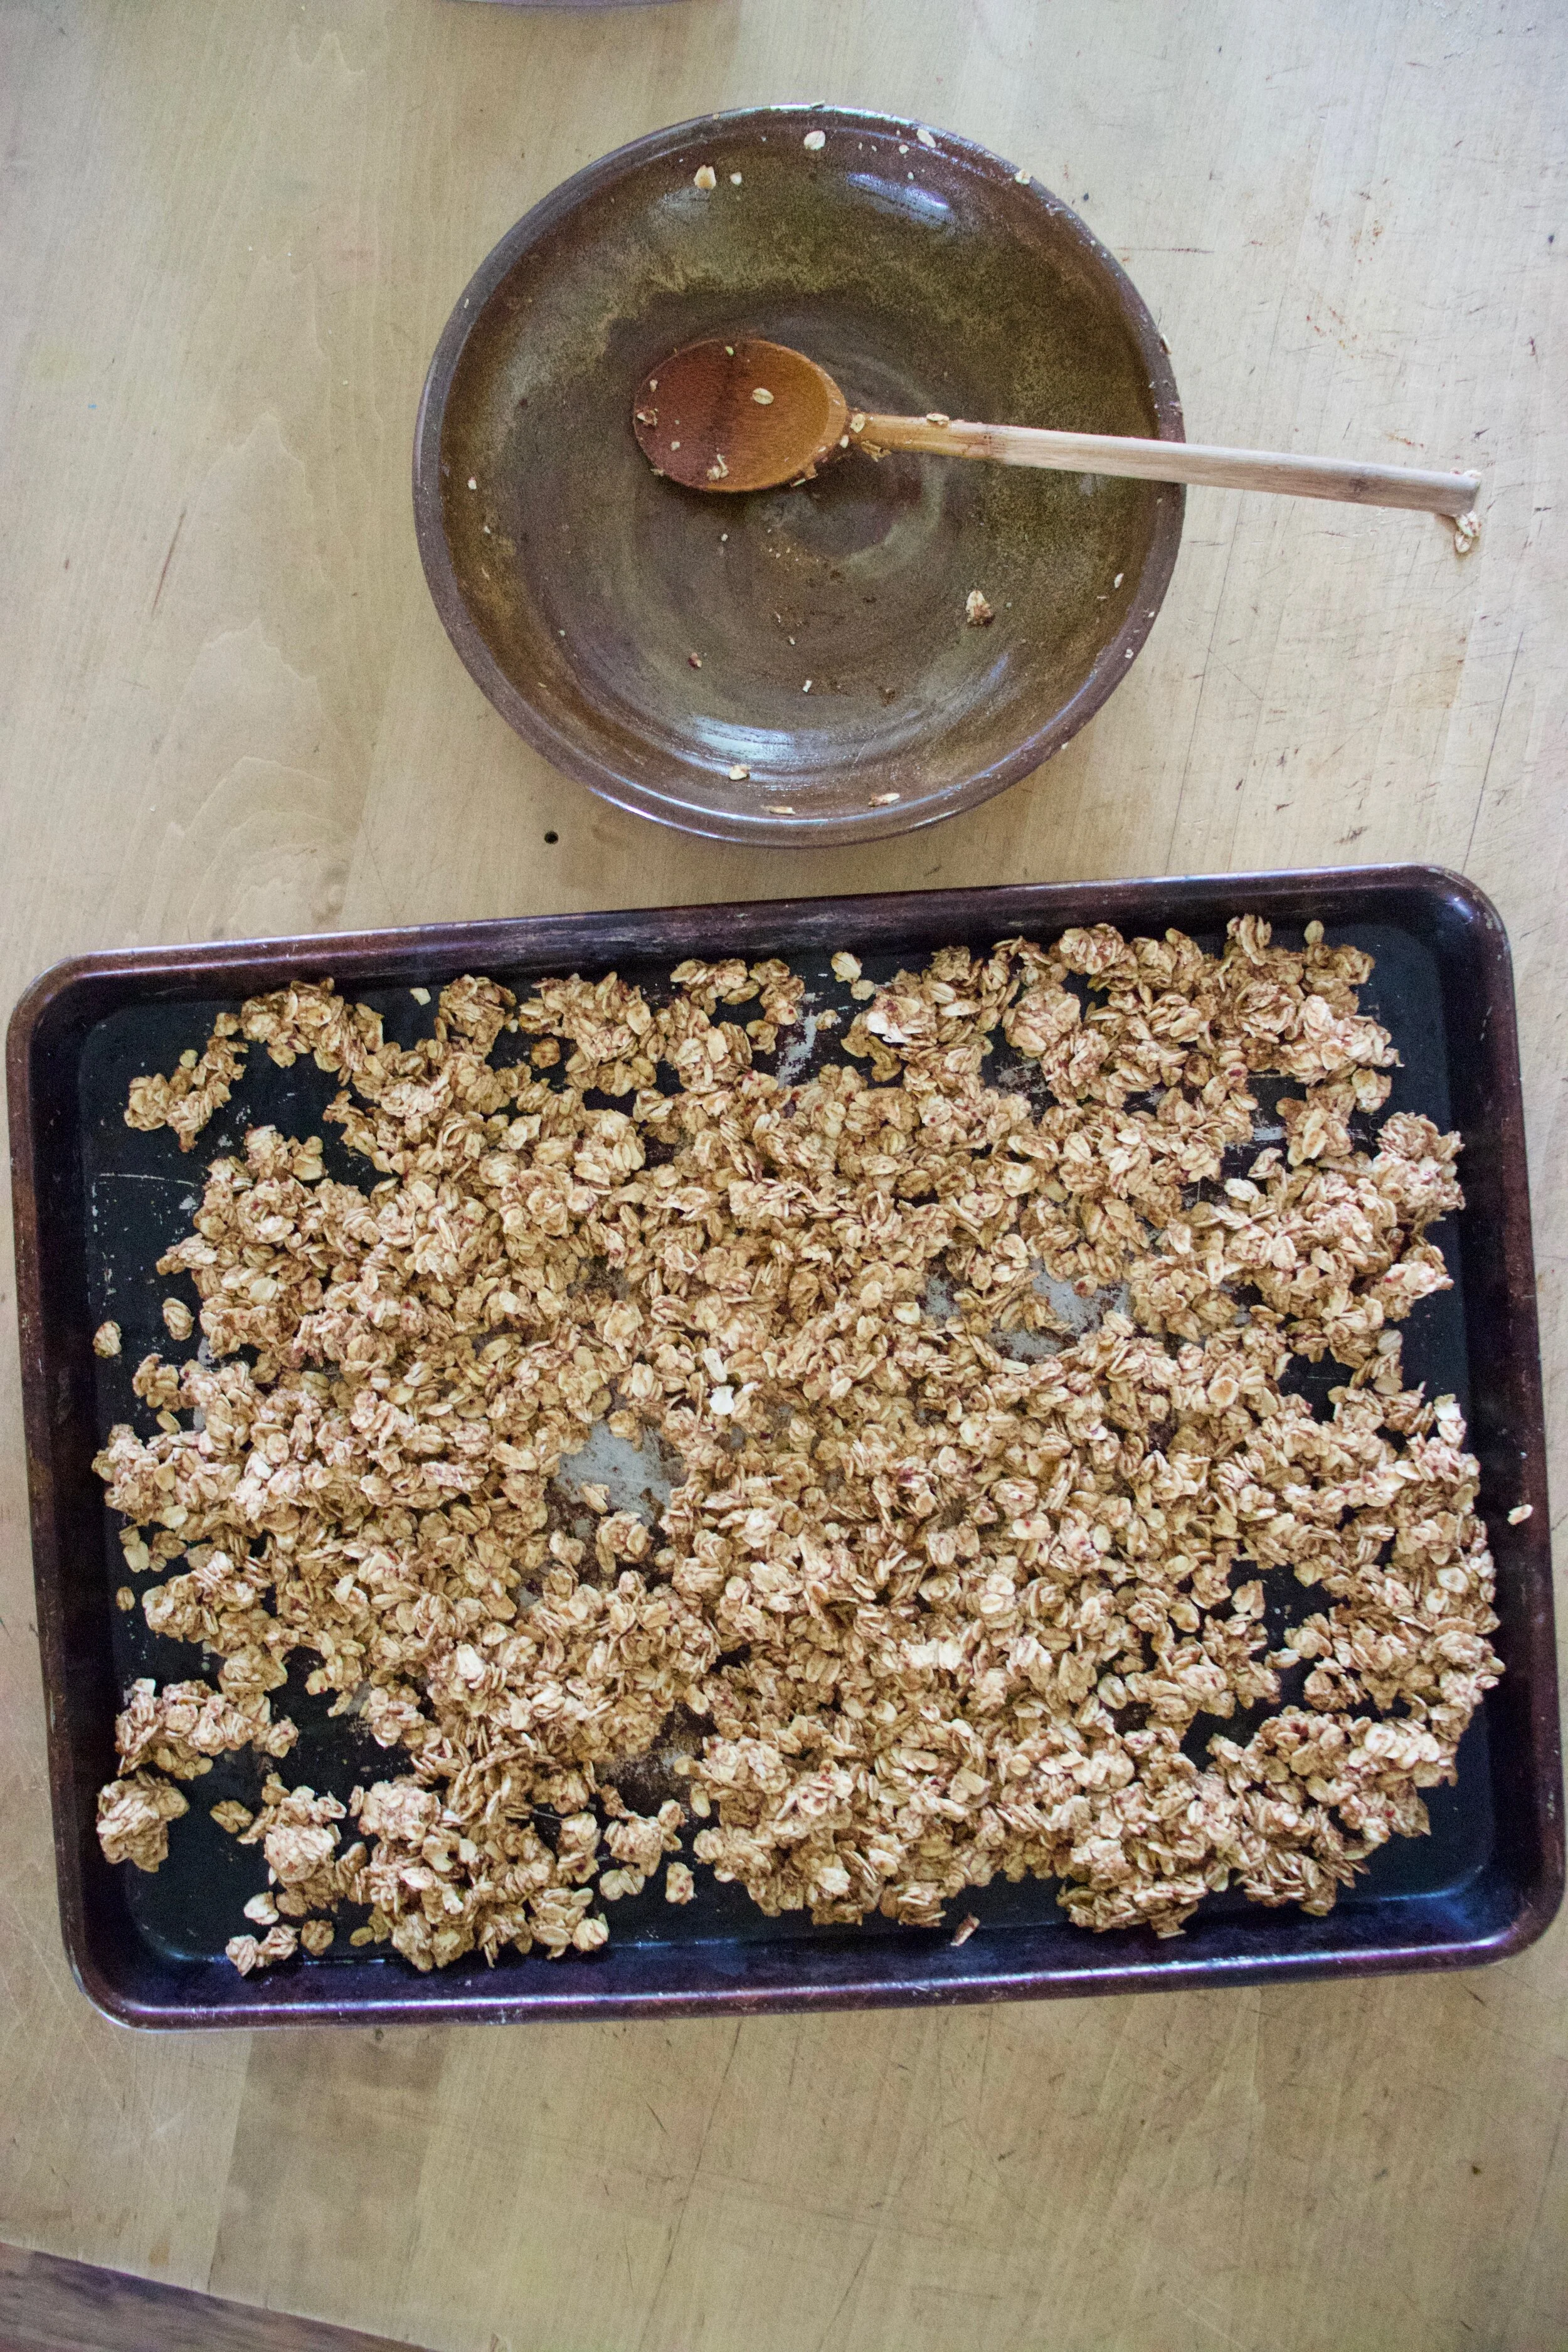
Dump mixture onto a baking sheet, You can line it, but I don%u2019t bother.
Pop into preheated oven to bake for about 25 minutes then remove from oven and toss around. Stick it back into oven for 25 more minutes or so. After 45-50 minutes of being in the oven, turn oven off and just let granola cool in oven. It%u2019s key to crispy granola.
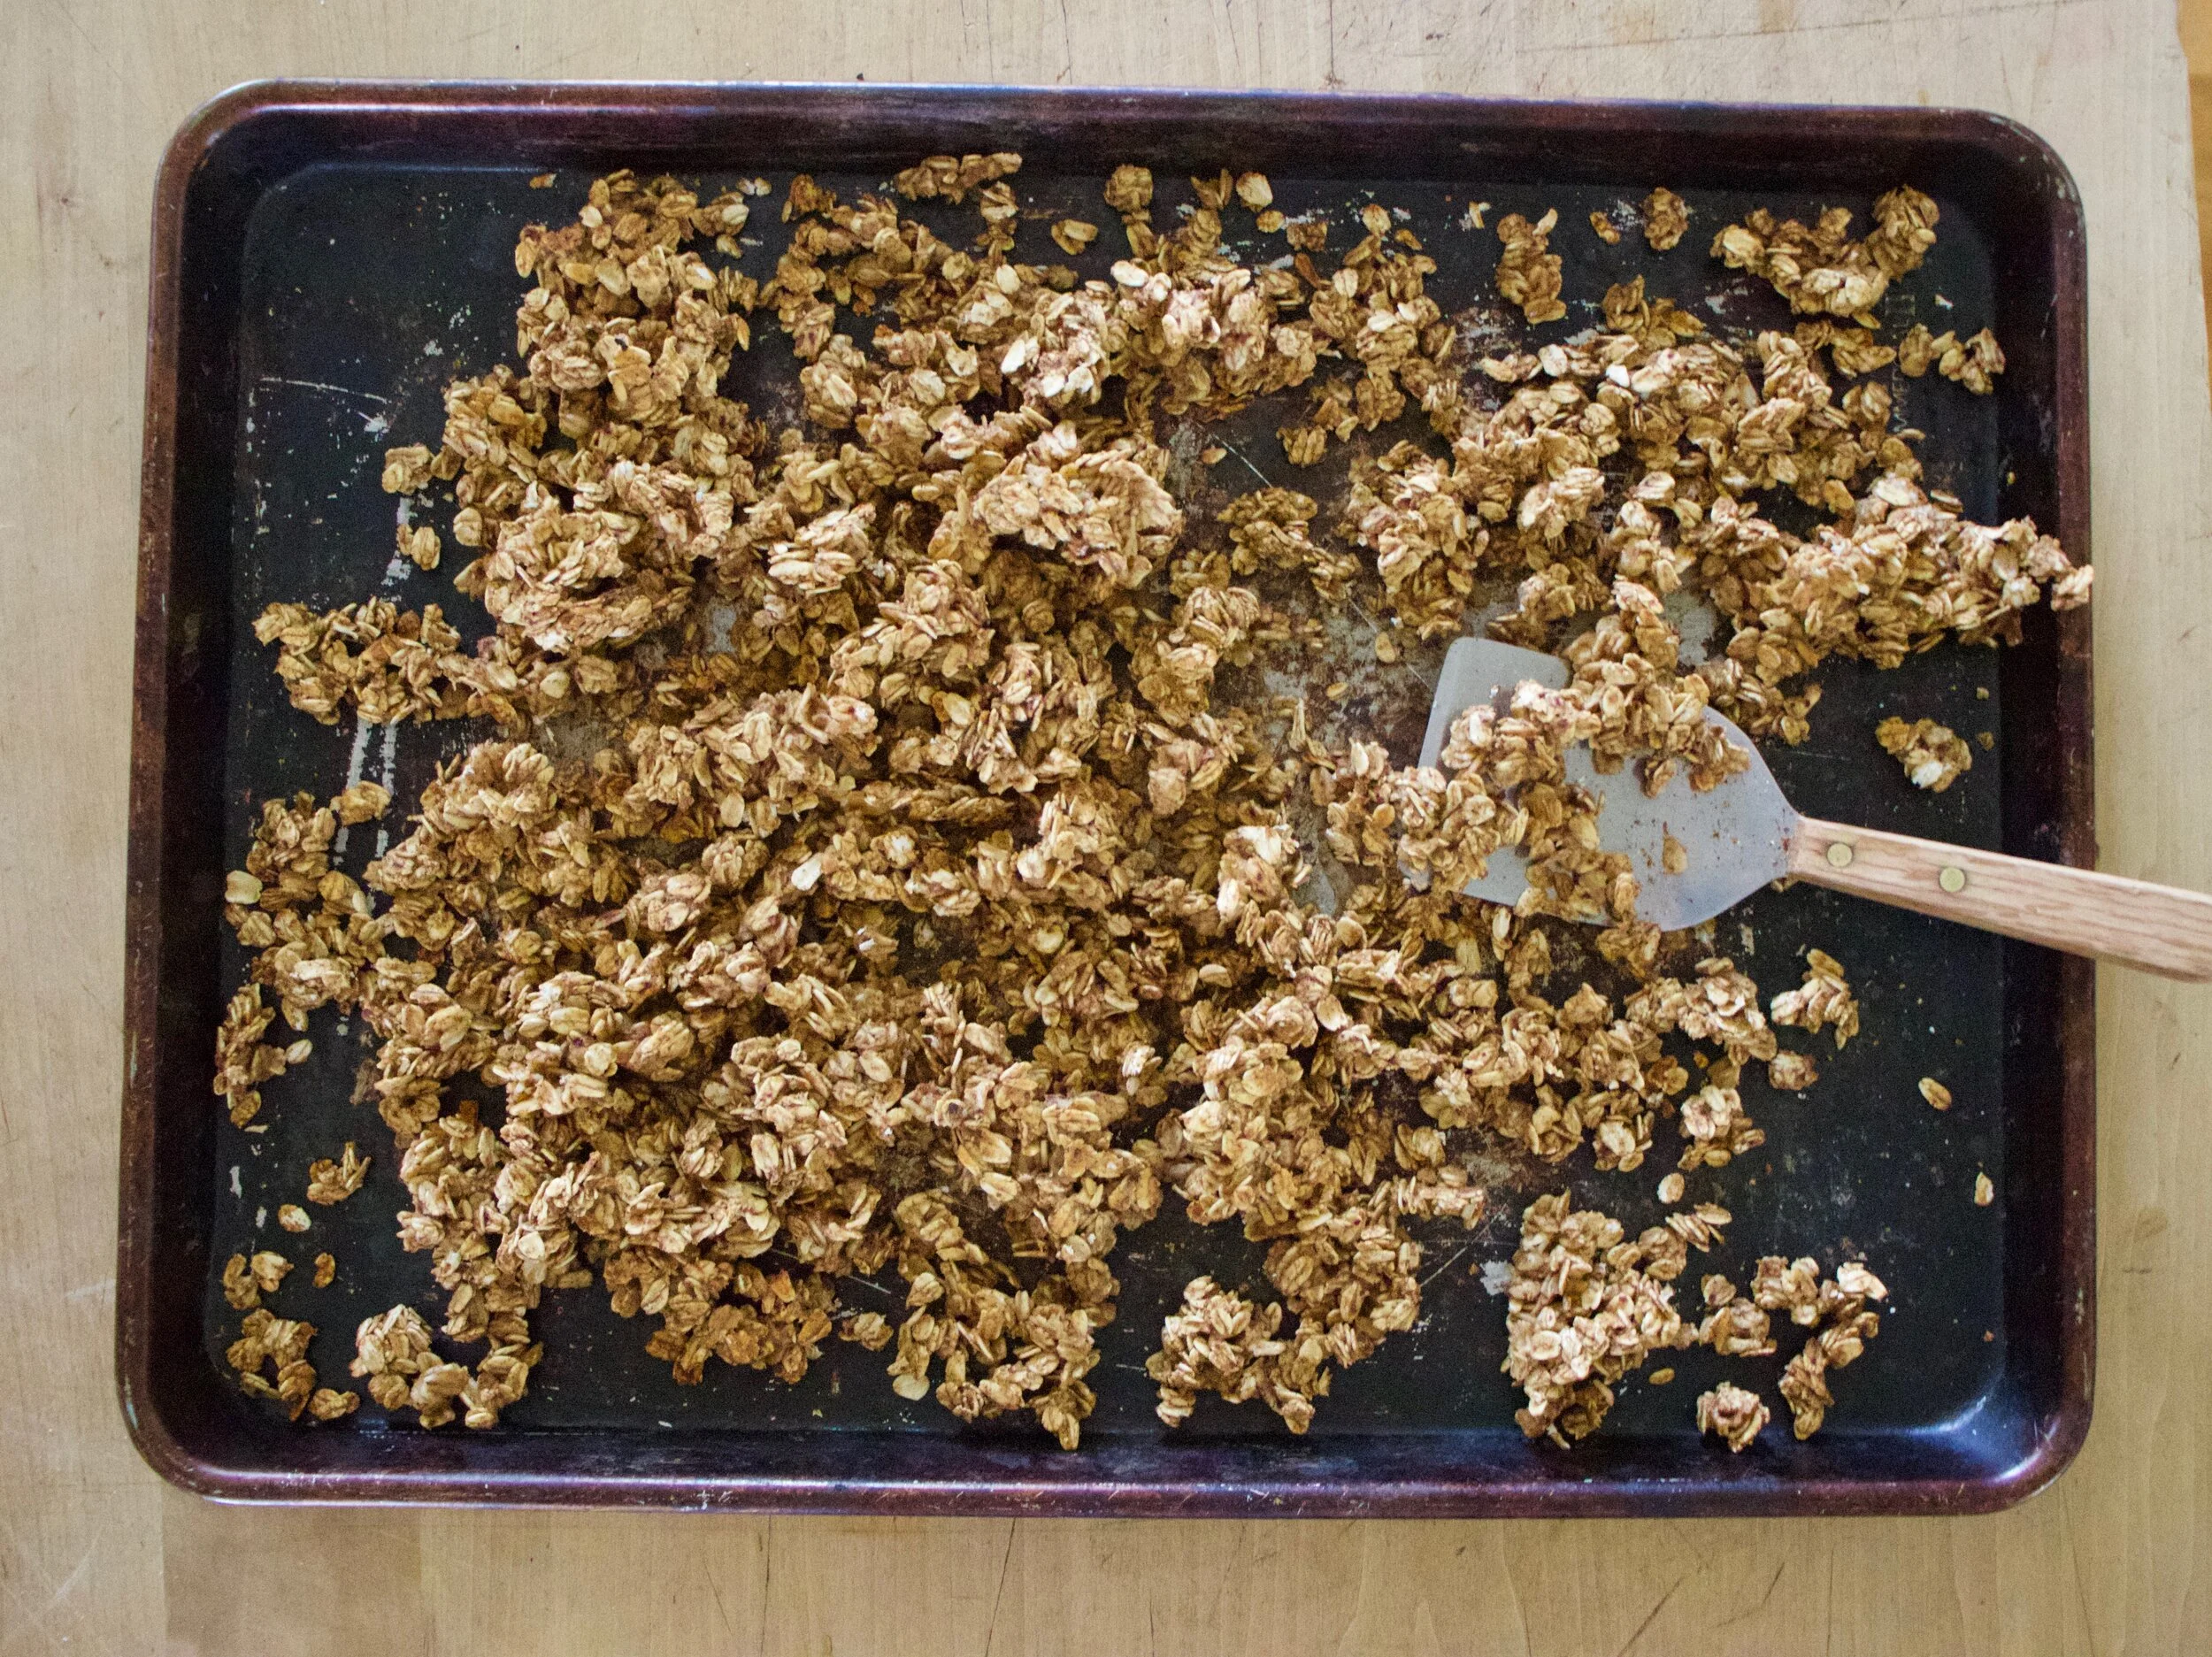
Cooled off and all crispy and clumpy. Granola at it%u2019s finest.

Into a jar to save some for later to eat however you want.
Me, I like handfuls straight into my mouth, chased by a little oat milk. Hehe!
-C
makes 2 1/2 cups
-
2 peaches
-
2 1/2 cups old fashion oats
-
a few tablespoons of water (if needed)
-
1-2 tablespoons cinnamon
-
pinch of salt
Preheat oven to 375
Cut peaches in half, remove pits, and cut into a few chunks. Place chunks into a blender and blend until smooth.
Place oats into a big bowl and mix in the salt and cinnamon then dump in the peach puree. Mix until completely incorporated and a little clumpy. IF there are no clumps, add a few tablespoons water and mix. Dump mixture onto a baking sheet and evenly distribute. Place baking granola into oven to bake.
Bake for 25 minutes, remove the granola and toss around with a spatula, then place back into oven and bake for another 25-30 minutes. After being in the oven for a total of 45-50ish minutes, turn oven off but keep granola in oven to cool. This is key to a good crispy granola.
After cooling off in oven, remove and eat. Place what is not eaten in an airtight container. Eat within a week or so.
The short of it is, people, stop wasting your beet greens!
The long of it is that I went to pick up my farm share this week and ooh lovely we got bunch beets. Bunched beets are my favorite becuase when they come bunched, they come with the greens and I can honestly say that the greens are some of my favorites. So I grabbed my bunched beets and continued picking up the rest of my veggies. As I tuned the corner I passed the compost. Know what I saw? Beet greens. People were grabbing there beets and ripping the greens off and tossing them into the compost. Oh that just pissed me off. First because it still shocks me that people don%u2019t realize they can, and should, eat the greens but more because I wish they just left the greens in the extras pile. I would have gladly taken them home. I almost went into the compost but there was some gross stuff in there and plus there was a line of people waiting patiently to get the to cucumbers. I had to walk away.
Oh how I can%u2019t stand wasted food!
So now that we all know that beet greens are food and are amazing, you might ask how do you eat beet greens? Any way you want really, but you can use them like any other green. They are kind of like chard orkale, but more beety and are just really really good. One on my favorite and simple things to do is beet greens saut%u00e9ed with garlic and ginger and a little soy with thinly sliced vinegary onions. Fast, easy, and tasty as hell.
There you go. Now never waste your beet greens again. Or if you don%u2019t want them you can give them to me!
Now to the beet greens!

The stuff. A bunch of beet greens (you don%u2019t need the beets) an onion (Or 2 really small onions) soy or aminos, garlic, ginger, red wine vinegar, and a splash of oil.

First, thinly slice onion and place into a bowl. Dump in the vinegar and toss around.

Grab the beet greens and cut the leafy parts from the stem. Chop the stems up into small pieces.

Place stems into a skillet with a tiny splash of oil and water and cook on medium heat.

Mince up garlic and ginger.

Once stems are tender, toss in the garlic and ginger and mix around. Keep on heat.

Now grab the greens and rough chop into smaller pieces
Once the garlic and ginger becomes fragrant, toss in the greens and stir in until wilted. Once wilted, dump in the soy and mix around. cook for another minute or so then remove from heat.

Toss in the onions and mix around.

Now just eat. From skillet or grab a bowl. You do you.
-C
serves 1-3
-
1 bunch of beet greens
-
1 regular sized onions (or 2 very small onions)
-
2 cloves garlic
-
inch piece of fresh ginger
-
2 tablespoons red wine vinegar
-
1-2 tablespoons soy, tamari, or aminos
-
a splash of oil.
-
a splash of water
First, if there are beets attached to the greens, cut them off and save them for later.
Take the onion and slice into very thin pieces, place into a bowl, and toss them with the vinegar. Set aside.
Grab greens and cut the leafy parts from the stem. Cut the stem up into little pieces and toss into a skillet with a splash of oil and a splash of water. Set on medium heat to cook. While cooking, mince garlic and ginger and once the stems become tender, toss garlic and given into the pan and mix around. Keep on heat. Now grab greens and give them a good rough chop then toss them into skillet once the garlic and ginger become fragrant. Mix around until wilted. Once wilted, add in the soy and mix. Cook for another minutes or so then remove from heat. Toss in the onions with the vinegar. And that is it. And now you eat.
I am freaking hot. We are currently in a heat wave right this very minute and I am not happy about it. This is my problem with summer, the heat. Or better yet, the heat with humidity. It turns me sour and I can%u2019t deal with anything, including myself. It is not a good look on me.
But a redeeming quality summer does have is all the fresh produce. The farm share is really starting to pick up and we are getting a good amount of fresh goody goods and that is something I can%u2019t not be happy about. But it is still to hot and when it%u2019s to hot, no one (I think) wants to cook. So don%u2019t cook, just compile. A big ass bowl of veggies, some lentil (or use beans if you want) , and creamy peanut sauce. Thrown together within minutes, hardy and satisfying without being heavy and hot, and tasted really freaking good. A meal on it%u2019s own or a fantastic side dish or snack dish or you know, anytime eating time food dish.
It is just a good dish to make and even better to eat. Heatwave or not.
Now to the cauliflower, kale, and lentil bowl with all the peanut sauce!

The stuff. Half a head of cauliflower, a few big kale leaves, half an onion, cooked lentils, peanut butter, apple cider vinegar, hot water, soy sauce, ginger, garlic powder, red pepper flakes, and black pepper.
Cut up cauliflower. Just go at it with a knife until it is a pile of small little pieces. Then dice up the onion into small pieces and cut up kale into small pieces as well.

Toss all of that into a bowl and top with the lentils.
Peanut sauce. Mix together the peanut butter, vinegar, soy, ginger, garlic, and red pepper flakes. Stir and add in enough hot water to make it creamy, smooth, and pourable.

Dump the peanut sauce into the bowl with everything else.

Toss until everything is evenly coated. And don%u2019t forget to add a good amount of black pepper.

And that is it. Now grab a bowl and a fork and eat. It is really really good.
-C
Serves 1-2 as a big salad or 3-4 as a side
-
1/2 head of cauliflower
-
1 1/2 cup cooked lentils
-
2-3 large kale leaves
-
1/2 a small onion
Peanut Sauce
-
1/4 heaping cup of peanut butter
-
2 tablespoons soy or liquid aminos
-
2 tablespoons apple cider vinegar
-
1 teaspoon garlic powder
-
1/2 teaspoon ground ginger
-
1/2 teaspoon chili flakes
-
4-5 tablespoons hot water
-
black pepper
Start by chopping up cauliflower into little pieces. Some pieces will be like crumble and that is good. Also dice up onion into small pieces and chop kale into small pieces. Place it all into a bowl and top with the cooked lentils.
Make peanut sauce. Place peanut butter, soy ,vinegar, the ginger, garlic and red pepper flakes, and 4 tablespoons hot water into a jar or bowl and mix until incorporated. It should be smooth and thick, but pourable. If to thick, add in another tablespoon or two of hot water.
Once sauce is made, dump into bowl with the rest of the stuff and toss until everything is coated and combined. Top with lots of black pepper and then, well, eat. Or set aside until meal time. Then eat.










 Happy Hanukkah!!! Today is the first day of the %u00a0festival of lights and I wanted to send a little love towards those who celebrate it.
 I didn’t actually use all the potatoes in the picture, but I wish I did. There was the perfect amount for dinner for two people, but I wanted to make a few extra for left overs%u2026.there were none. Oh well.
 %u00a0I did a matchstick dice for the apples.. I didn’t want the apples to be to chunky%u00a0and I didn’t want them to turn into sauce so the match stick worked well. After I diced the apples, I squeezed a little lemon over the top to keep the apple from turning brown.
 I start grating the potatoes and onion, and whoa! %u00a0Imagine my surprise when %u00a0one of the potatoes was purple%u2026 I got pretty excited.The color is so beautiful. and made the latkes look so nice%u2026It was meant to be.
 Super squeeze the juices out of the grated potato and onion. If you don’t get most of the liquid out, the potato won’t crisp up and will fall apart and be and it will be gross. So SQUEEZE!
 %u00a0Add in the egg, cornstarch, salt and pepper and mix it on up. Did I mention that I was making these for the mister and the GF sister..No flour, just cornstarch. I think they might have come out even better without the flour%u2026so yeah, these babies are gluten-free.
 Your mixture is going to start to get a little watery again. Its cool, just squeeze it out with your hands and smash into patties.
 Enough oil to cover the bottom of the pan on medium heat. Test the oil to make sure its hot enough before sticking the latke n the pan. To test, sprinkle water in pan, if it sizzles, its ready.Working in batches, %u00a0fry each latke on each side for around 5 minutes..you don’t want to cook to fast or the inside of the latkes will be raw. I always do a tester and feed it to nick. He’s my guinea pig%u2026.He said they were awesome..
 %u00a0With every batch made, stick on a wire rack and keep in the oven to stay warm. The rack keeps the bottom from getting soggy on the pan… so use it. %u00a0
 %u00a0 Roasted apples are the BOMB!!! %u00a0Its like eating apple sauce sticks or little bites of heaven(A bit dramatic, but these are so good) I roasted mine for 20 minutes, until they were nice and soft but not completely failing apart. If you are into it, add a touch of cinnamon%u2026I did’t this time, but you bet %u00a0I am going to be making myself a big ol bowl of roasted apples this week, and yes, I will top with cinnamon.%u00a0
 A %u00a0bowl of apple slaw, sour cream and lemon wedges%u2026.I put the latkes on a nice little pile of greens. A very good idea. %u00a0A dinner worth celebrating!
 I also served the latkes with roasted chickpeas and cailflower%u2026for more of a meal%u2026( Mini recipe%u2026 Cauilfower and chick peas drizzled in olive oil, %u00a0tossed in salt pepper and garlic, roasted 30 minutes and topped with lemon) A little added veggie and protein%u2026.I am looking out for you people.
 There we have it%u2026my variation on a traditional food. Enjoy your fried pancakes of potato and onion, they are a food worth a celebration.
 When something goes on sale at the grocery store, I tend to buy it. Being that it is Valentines Day this week, all the stores are having specials on all sorts of sexy things… and strawberries are one of them. Now I am not a huge fan of buying produce that is terribly out of season, but I can’t help myself…a good deal is a good deal and the strawberries were a super good deal. I was just going to make some sweet ass strawberry jam or maybe a lovely strawberry cake with them (and I probably still will), but these strawberries are actually super juicy and full of flavor, and it’s always nice to eat some full flavor freshy strawberries… especially soaked in balsamic vinegar. And yeah, I think that this salad is pretty sexy, so it makes for a perfect Valentines day dish.
 A handful of ingredients and 5 minutes will get you to a fantastic salad experience.
 Pour the vinegar on the strawberries and let sit for at least 5 minutes. (the longer the strawberries can sit with the vinegar, the better)

 Pile it on.. thinly slice avocado.. rough chopped toasted almonds… It’s pretty much as easy as it can get.
 And last but not least, toss on the balsamic soaked strawberries and drizzle the remaining vinegar. (if you made hearts, place on top to make pretty) Sprinkle with a pitch of salt and pepper and pow! Fancy, sexy, delicious salad.
 I was cleaning my spice shelf (I feel like I do this like once a week) and found some poppy seeds hiding behind some jars. Accidental spice findings happened more often the then one might think in my house.. I like to buy tiny baggies of spices with good intentions of using them, but because of their tiny size, I often lose them or forget about them due to that tininess. But I usually find those tiny little bags, and when I find them, I try to use them right away..(I don’t like having old spices around and no, I will not toss it) And it just so happened that I has a lemon in need of using.. and it was getting close to dinner time. I could wait and make lemon poppy seed cake or muffins, or just start dinner. Then I was like, ” I’ll just make lemon poppy seed pasta.” And so I did. And of course it needed to have lots of garlic and some kind of vegetable to round out the dish, (I know tomatoes are fruit but you know what I mean)
 Start by tuning oven on to 400 degrees. Chopped tomatoes and sprinkle in oil and salt and stick in the oven. Do this first because the rest of the meal only takes about 10 minutes..So fast!!!
 The sauce is pretty much a basic roux…
 Once your pasta is cooked (cook however it says to on package), reserve about a 1/4 cup of pasta water and drain the rest. Add the pasta water and pasta the sauce. (the pasta water helps the sauce and noodles canooddle together)
 And its all mixed up just waiting to be served…and the roasted tomatoes!
 Scooped into a bowl with a scoop of the roasted tomatoes and some chopped chives, served with a couple wedges of lemon..just because.


THE LOVELY CRAZY
November 4, 2020 by maximios • Blog
To know me is to know that I eat a shit load of lentils. And not just one kind, I eat them all, in all the ways, all day, everyday. Vegetables and lentils. That is my truth.
Lentil flour. One more way to consume the mighty legume. Blended while dry into a fine powder, it takes the lentil to a whole other level. You can use the flour in all sorts of things like bread, soup, even in baked goods. it really is a great flour to have on hand, especially if you are hungry and want to toss something quick and easy, heathy, and delicious together like these here pancakes.
These pancakes. All they are made of is lentil flour and pureed up zucchini and onion. Now that might sound a little on the dull side, but trust me here, they are far from dull. They are freaking delicious. And better for it that they take like 10 minutes from start to finish to make. And no oven which is necessary these days with all the stupid hot weather.
Anyway. lentil zucchini pancakes. Give them a try. They will probably become your favorite.
To the lentil flour and zucchini pancakes!
The stuff. Dry green lentils, a zucchini, and onion, salt and pepper, and a splash of oil.
Te make lentil flour. Place dried lentils into a high speed blender and blend until it turns into a fine flour.
Once you have the flour made, cut up the zucchini and onion into chunks.
Drop into the blender and blend until pretty smooth.
Dump puree into bowl and top with some lentil flour.
Mix until completely combined. The batter should be kind of thic but still spoonable. Also, season with salt was pepper here.
Heat up a skillet with a splash of oil. Once hot, scoop spoonfuls of batter into pan and spread it evenly about 1/4 inch thick. Cook first side fr 4-6 minutes or until nice and brown then flip and cook the other side until done. Repeat until batter is gone.
Now eat your amazing delicious lentil zucchini pancakes. I served with fresh salsa, and I have also made tahini dip and used hummus to smear on them which was also freaking amazing, but you can serve with whatever floats your boat.
-C
1 pound dry green lentils
1 large zucchini
1 onion
salt and pepper
splash of oil
Start with the by making the lentil flour. Place lentils into a high speed blender and blend until it has turned into a fine flour. You might need to stop the blender ever once in a while to move things around with a spoon (when it is turned off!). It should only take about a minute or so in a Vitamix, but maybe a few extra minutes if using a less powerful blender.
Once flour is achieved, dump into a jar with a lid. You probably won%u2019t be using it all right now.
Now grab the zucchini and onion and cut into chunks. Place the chunks into the blender and blend until smooth.
Dump puree into a bowl. Add about 1 cup of lentil flour and stir. IF the batter is really loss, add in another 1/4 cup or more to get the batter to a thick but spreadable consistency (kind of like hummus). Season with salt and pepper.
Grab a skillet and place on medium heat with a splash of oil. Once skillet is heated place spoonfuls of the batter in and spread around until between 1/2-1/4 inch thick. Cook fist side for 4-6 minutes or until a nice golden brown then flip and cook the other for a few minutes until browed. Repeat until batter is gone.
Place cooked pancakes on a plate, grab a fork and some savory type condiment (hummus, salsa, tahini, cashew cream) and eat.
I am freaking hot. We are currently in a heat wave right this very minute and I am not happy about it. This is my problem with summer, the heat. Or better yet, the heat with humidity. It turns me sour and I can%u2019t deal with anything, including myself. It is not a good look on me.
But a redeeming quality summer does have is all the fresh produce. The farm share is really starting to pick up and we are getting a good amount of fresh goody goods and that is something I can%u2019t not be happy about. But it is still to hot and when it%u2019s to hot, no one (I think) wants to cook. So don%u2019t cook, just compile. A big ass bowl of veggies, some lentil (or use beans if you want) , and creamy peanut sauce. Thrown together within minutes, hardy and satisfying without being heavy and hot, and tasted really freaking good. A meal on it%u2019s own or a fantastic side dish or snack dish or you know, anytime eating time food dish.
It is just a good dish to make and even better to eat. Heatwave or not.
Now to the cauliflower, kale, and lentil bowl with all the peanut sauce!
The stuff. Half a head of cauliflower, a few big kale leaves, half an onion, cooked lentils, peanut butter, apple cider vinegar, hot water, soy sauce, ginger, garlic powder, red pepper flakes, and black pepper.
Cut up cauliflower. Just go at it with a knife until it is a pile of small little pieces. Then dice up the onion into small pieces and cut up kale into small pieces as well.
Toss all of that into a bowl and top with the lentils.
Peanut sauce. Mix together the peanut butter, vinegar, soy, ginger, garlic, and red pepper flakes. Stir and add in enough hot water to make it creamy, smooth, and pourable.
Dump the peanut sauce into the bowl with everything else.
Toss until everything is evenly coated. And don%u2019t forget to add a good amount of black pepper.
And that is it. Now grab a bowl and a fork and eat. It is really really good.
-C
Serves 1-2 as a big salad or 3-4 as a side
1/2 head of cauliflower
1 1/2 cup cooked lentils
2-3 large kale leaves
1/2 a small onion
Peanut Sauce
1/4 heaping cup of peanut butter
2 tablespoons soy or liquid aminos
2 tablespoons apple cider vinegar
1 teaspoon garlic powder
1/2 teaspoon ground ginger
1/2 teaspoon chili flakes
4-5 tablespoons hot water
black pepper
Start by chopping up cauliflower into little pieces. Some pieces will be like crumble and that is good. Also dice up onion into small pieces and chop kale into small pieces. Place it all into a bowl and top with the cooked lentils.
Make peanut sauce. Place peanut butter, soy ,vinegar, the ginger, garlic and red pepper flakes, and 4 tablespoons hot water into a jar or bowl and mix until incorporated. It should be smooth and thick, but pourable. If to thick, add in another tablespoon or two of hot water.
Once sauce is made, dump into bowl with the rest of the stuff and toss until everything is coated and combined. Top with lots of black pepper and then, well, eat. Or set aside until meal time. Then eat.
Do you ever make cold potato salad when it is not summer? I can%u2019t remember a time when I have. Is that strange? Maybe a little, but it probably has more to do with never wanting to turn the oven on in the summer to cook anything or eating anything that is hot. And fall and winter is not time for anytime cold, I just want my potatoes hot.
I just reasoned myself my own question.
Anyway, cold potato salad. A classic summertime staple just in time for all the BBQ%u2019s, picnics, lazy days spent at home doing nothing , and basically eating anywhere, anytime. Yes,a great side dish but I have been known to have myself a little bowl here or there for a nice snack. Heck, it would make for a nice filling breakfast treat as well. It%u2019s your potato salad ad you can it it whenever you dang well please.
This potato salad is pretty classic in the since that is is boiled potatoes covered with creaminess except the creaminess comes form beans and not mayo. And let me tell you, the mayo is not missed in the slightest here. The bean cream is made from cannellini beans which when blended, are nice and smooth and not overly beany. Added to the cream is pickle juice and mustard for a slight tang. And it all gets mixed together with onions to complete the dish. Simple yes, but so good. And because it is mayo free, everyone can eat it, making it a perfect side dish to bring along or share at any eating event with people that might have a different style of eating. Because we all deserve some so good potato salad, don%u2019t ya think?
Now to the potato salad!
The stuff. Potatoes, caneillini beans, an onion, a few cloves garlic, brown mustard, ground flax seeds, pickle juice, and salt and pepper
Start by dicing up potatoes into inch-ish sized chunks.
Rinse then place the potatoes into a pot completely submerged in cold water. Sprinkle in a good pinch of salt and set on stove to boil.
In the mean time, dice up onions into small pieces. Also chop garlic into smaller pieces.
Place onions into a big bowl along with a pinch of salt and1/4 cup of pickle juice (or vinegar if you prefer)
Now make bean cream. Strain all the liquid from the beans then place 1/4 cup back in. Add the rest of the pickle juice, the mustard, the chipped garlic, and the ground flax seed. Blend until smooth.
Once the potatoes are nice and from tender, remove from heat and strain away the liquid.
Toss the warm potatoes into the bowl with the pickling onion. Let sit for about 10-15 minutes so potatoes have time to cool and absorb picking liquid.
When potatoes have slightly cooled, dump the bean puree an and toss until combined.
And there you have it, super delicious creamy cannellini bean potato salad. If you want to be a little fancy, dice up something green (I used broccoli) to sprinkle on top. It never hurts!
Happy Summertime eating!
-C
About 2 1/2 pounds potatoes ( I used Yukon gold)
a large onion
2 heaping tablespoons spicy brown mustard
1 heaping tablespoon ground flax seed
2 cups cooked cannellini beans with 1/4 cup bean liquid
2-3 cloves garlic
1/2 cup pickle juice (or any type of vinegar)
salt and pepper
Start by dicing up potatoes into cubes about and inch big. Place potatoes in a large pot, rinse in water, strain, then refill pot with cold water until all potatoes are submerged. Add a large pinch of salt to pot and then stick pot on high heat on stove until it starts to boil. Once water is boiling, lower heat but keep at a soft boil. Cook potatoes until fork tender which should take about 15 minutes.
While potatoes are cooking, dice up the onion into small pieces. Place in a large bowl along with a pinch of salt and 1/4 cup of pickle juice. Toss around and set aside.
The cannellini bean cream. Strain the beans but reserve 1/4 cup of liquid. Add liquid back to beans along with the other 1/4 cup pickle juice, the garlic, the mustard and flax seeds, and a small pinch of salt and lots of pepper. With either a hand blender or regular blender, blend until smooth. Taste and add more salt if needed. Also if the puree seems really thick, add in another splash of pickle juice. To thin, add in another tablespoon ground flax seeds.
Once potatoes are fully cooked, strain from water and toss the potatoes, still warm, into the bowl with the onions. Gently toss around and let sit for a few minutes to cool and absorb any pickle liquid. Once the potatoes cooled off a bit, dump the bean cream into the bowl and toss around until potatoes are all evenly coated.
And that is it. You can be fancy and spindle something green like some chopped dill or parsley or broccol on top for a little color and flavor%u2026If you want.
And then eat right away still slightly warm or stick in the fridge to completely chill and eat cold. Last for 3-4 day in the fridge covered.
I love me some onions, I mean I eat one everyday so I asked myself why the heck haven%u2019t I made onion rings before? Probably because when I usually think onion rings, I think greasy and fried and that is not really my jam. But early in the week the lightbulb went off in my brain. I have been making a lot of stuff with bean flours lately and thought that chickpea flour would make an excellent batter for onions. And low and behold, I was right. Very very right.
These onion rings are so f-ing amazing. Sure they might not be the most traditional of onion ring but they are for sure just as good. A spicy crispy crunchy outer layer with a soft and creamy onion inside. Baked, not fried, and just really delightful. Easy to throw together and yeah, you got onion rings. I have made them twice this week already. Probably going to make them again tonight because why the hell not? They are simply a vegetable covered in bean. I should be eating them every day and you probably should be eating them everyday too.
Now to the onion rings!
The stuff. Onions (I used valida but any sweet variety will work) chickpea flour, spices (garlic, ginger, cumin, chili powder, paprika, and a pick or red pepper flakes), warm water, oil, and salt and pepper.
Mix up the batter. All the spices get mix together with the chickpea flour. Add in the water and then mix unit completely combined and all batter like.
Dip the onions into the batter and place on a oiled baking sheet. Try not to overlap too much and use the insides of large rings to place the small ones!
Into the oven and out of the oven. Crispy, dark, and delicious!
Get those rings onto a plate while they are hot, grab some dipping sauce of choice (tahini for me) and eat.
Get into this.
-C
3/4 cup checkpea flour
1 teaspoon each cumin and chili powder
1/2 teaspoon each garlic, paprika and ground ginger
pinch of red pepper flakes
2 medium sized valida onions (or whatever onions you have)
3/4 cup warm water
1/2 teaspoon salt
cracked pepper
tablespoon or so of oil to oil baking sheet
Preheat oven to 425.
In a wide bottomed bowl mix together the chickpea flour. salt. and all the spices. Add in the warm water and mix until completely incorporated and smooth. You want the batter to coat the onions when dipped but not be overly thick. If you think it needs to thicken up a bit, add a tablespoon more chickpea flour. To thin it, just add a splash more water.
Grab onions and peel off papery skin then slice into 1/4-1/2 inch rounds. Take onion rings and dip them into the batter then place rings on a large oiled baking sheet. Try not to overlap to much and definitely place smaller rings inside bigger rings. Also use a second baking sheet if you need to.
Once rings are all battered, place in preheated oven and bake for 40 minutes, giving them a flip atfter about 25-30 minutes.
Once dark brown and crispy, remove from the oven. Place rings on a plate and eat. Dipping sauce recommendation is tahini but anything or nothing at all is also right.
I am all about the quick meal. Sure I love me some kitchen time, but sometimes I just want good food good and fast. Chickpeas lightly saut%u00e9ed, tossed with fresh green peas, thin pieces of raw onion, and tahini sauce. Sounds easy and so simple right? Well it is, simply freaking fantastic.
I am also thinking ahead to those summertime cookouts or when people are flowing through the house in need of food. This is a definite dish to bring to a cookout of potluck dinner situation. You know, when we can do those things safely again. Until then, I make it and eat it to my face. Now you should too.
To the chickpea and peas!
The stuff. Chickpeas, peas, an onion, some tahini, soy sauce, red wine vinegar, and a little oil. Also need a splash of chickpea waster or regular water. And pepper, if you want it.
Tahini, soy, vinegar, and a little bit of chickpea water. Stir until smooth and creamy.
Cut up onion, nice and thin like.
Now saut%u00e9 chickpeas. Drain and rinse the beans and lightly coat a pan with oil. Toss chickpeas into pan on medium high heat and cook until they start to brown.
Once the chickpeas have somef dark color, toss in the peas and the onion. Mix it all tougher and turn heat off.
Dump it all into the bowl with the tahini sauce and mix it all together.
Add pepper, grab a fork, eat.
-C
Serves 1-4 people
2 1/2 cups (or one can) cooked chickpeas
2 cups fresh or frozen (and thawed) green peas
1 small onion
1/4 cup tahini
2 tablespoon red wine vinegar
1-2 tablespoon soy sauce/tamari/liquid aminos
a couple teaspoons olive oil for pan
In a medium sized bowl mix together the tahini, lesser amount of soy, and vinegar. Stir until smooth, adding in a splash or chickpea or regular water to thin out until it is the consistency of heavy cream. Taste. If it needs more soy, add a little more in until it tastes right.
Grab the onion and slice it up, really thinly and into small pieces.
Place a large skiller on medium high heat on stove. Add in a couple teaspoons olive oil to coat. If the chickpeas are still in water, rinse and drain. Dump drained chickpeas into hot skillet and cook for about 5-7 minutes or until they start turn deep brown on some sides. Throw in the peas and the onions, turn heat off, and mix around. Let sit in hot pan for a minutes or two then dump it all into the bowl with the tahini sauce. Mix it all around, add some cracked pepper, then, eat.
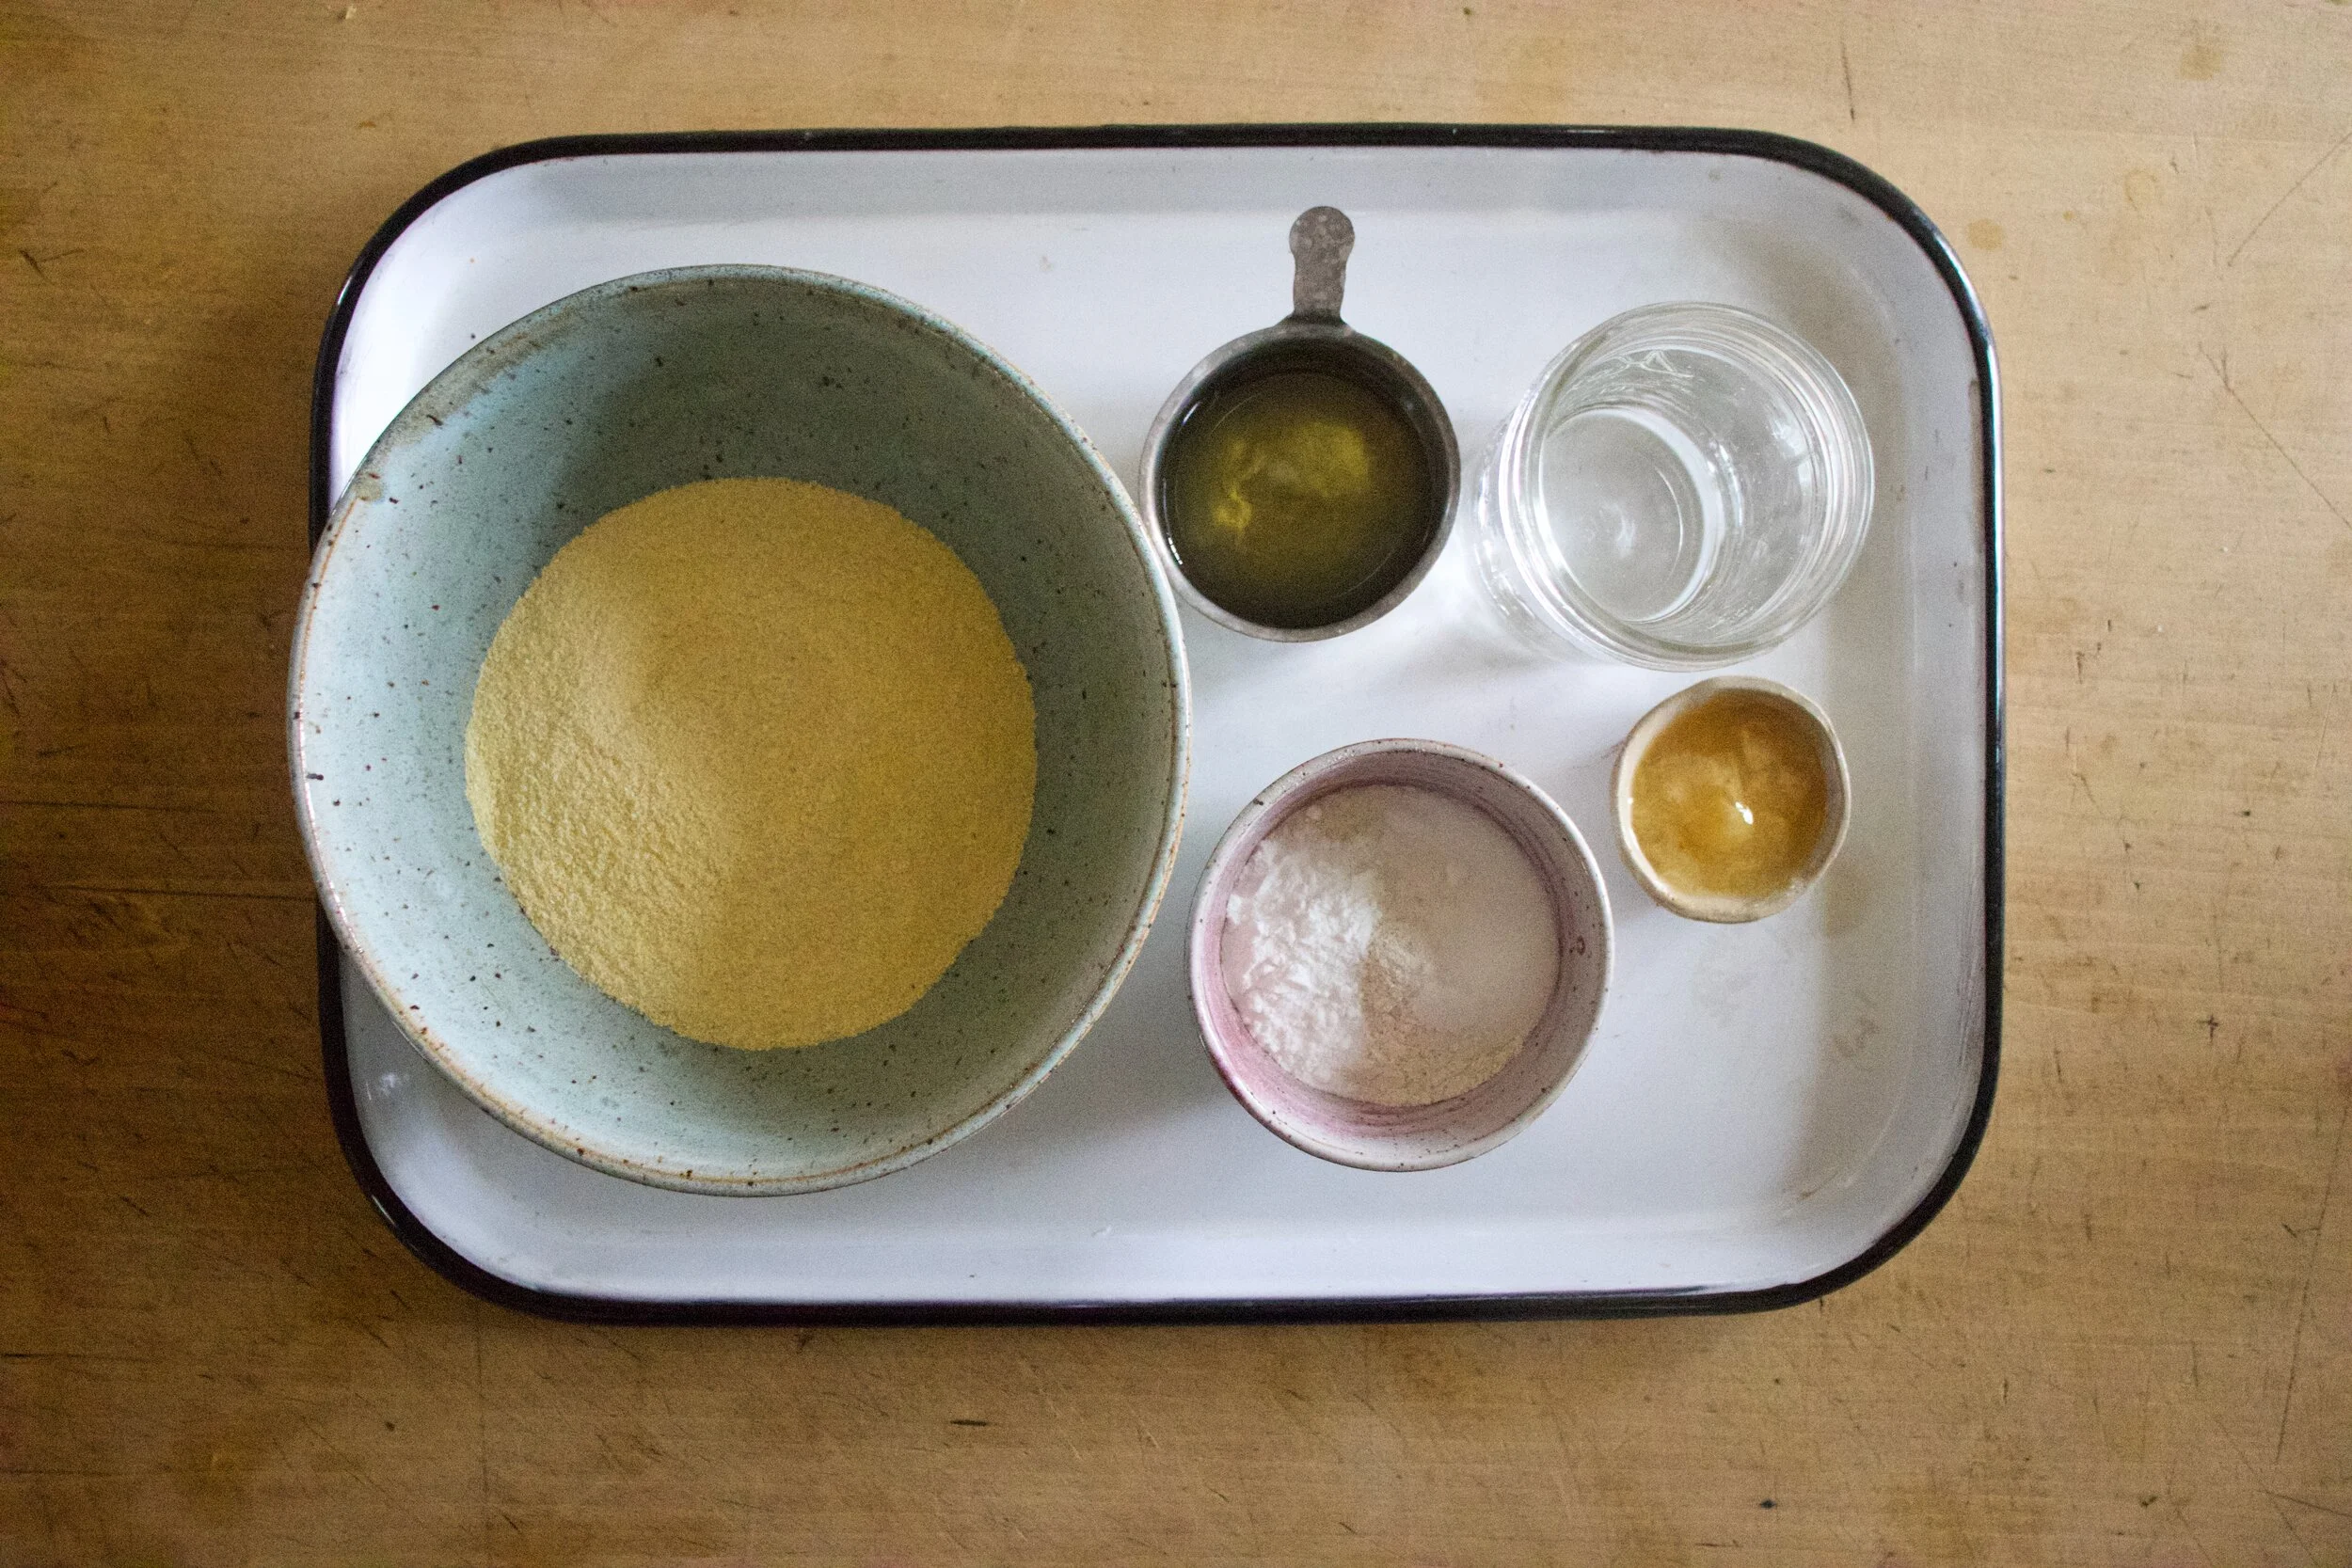
I know that everyone in the world right now is making bread. And that is great, that is awesome, and I am (although I always have been) one of those people making bread. But I was thinking about all those that are not bread eaters, or people that can%u2019t find a freaking bag of flour because the world has gone crazy and all we do now is bake. Well I got you. Polenta friends. Basically all you need for polenta is cornmeal and water and you are good to go. No flour needed.
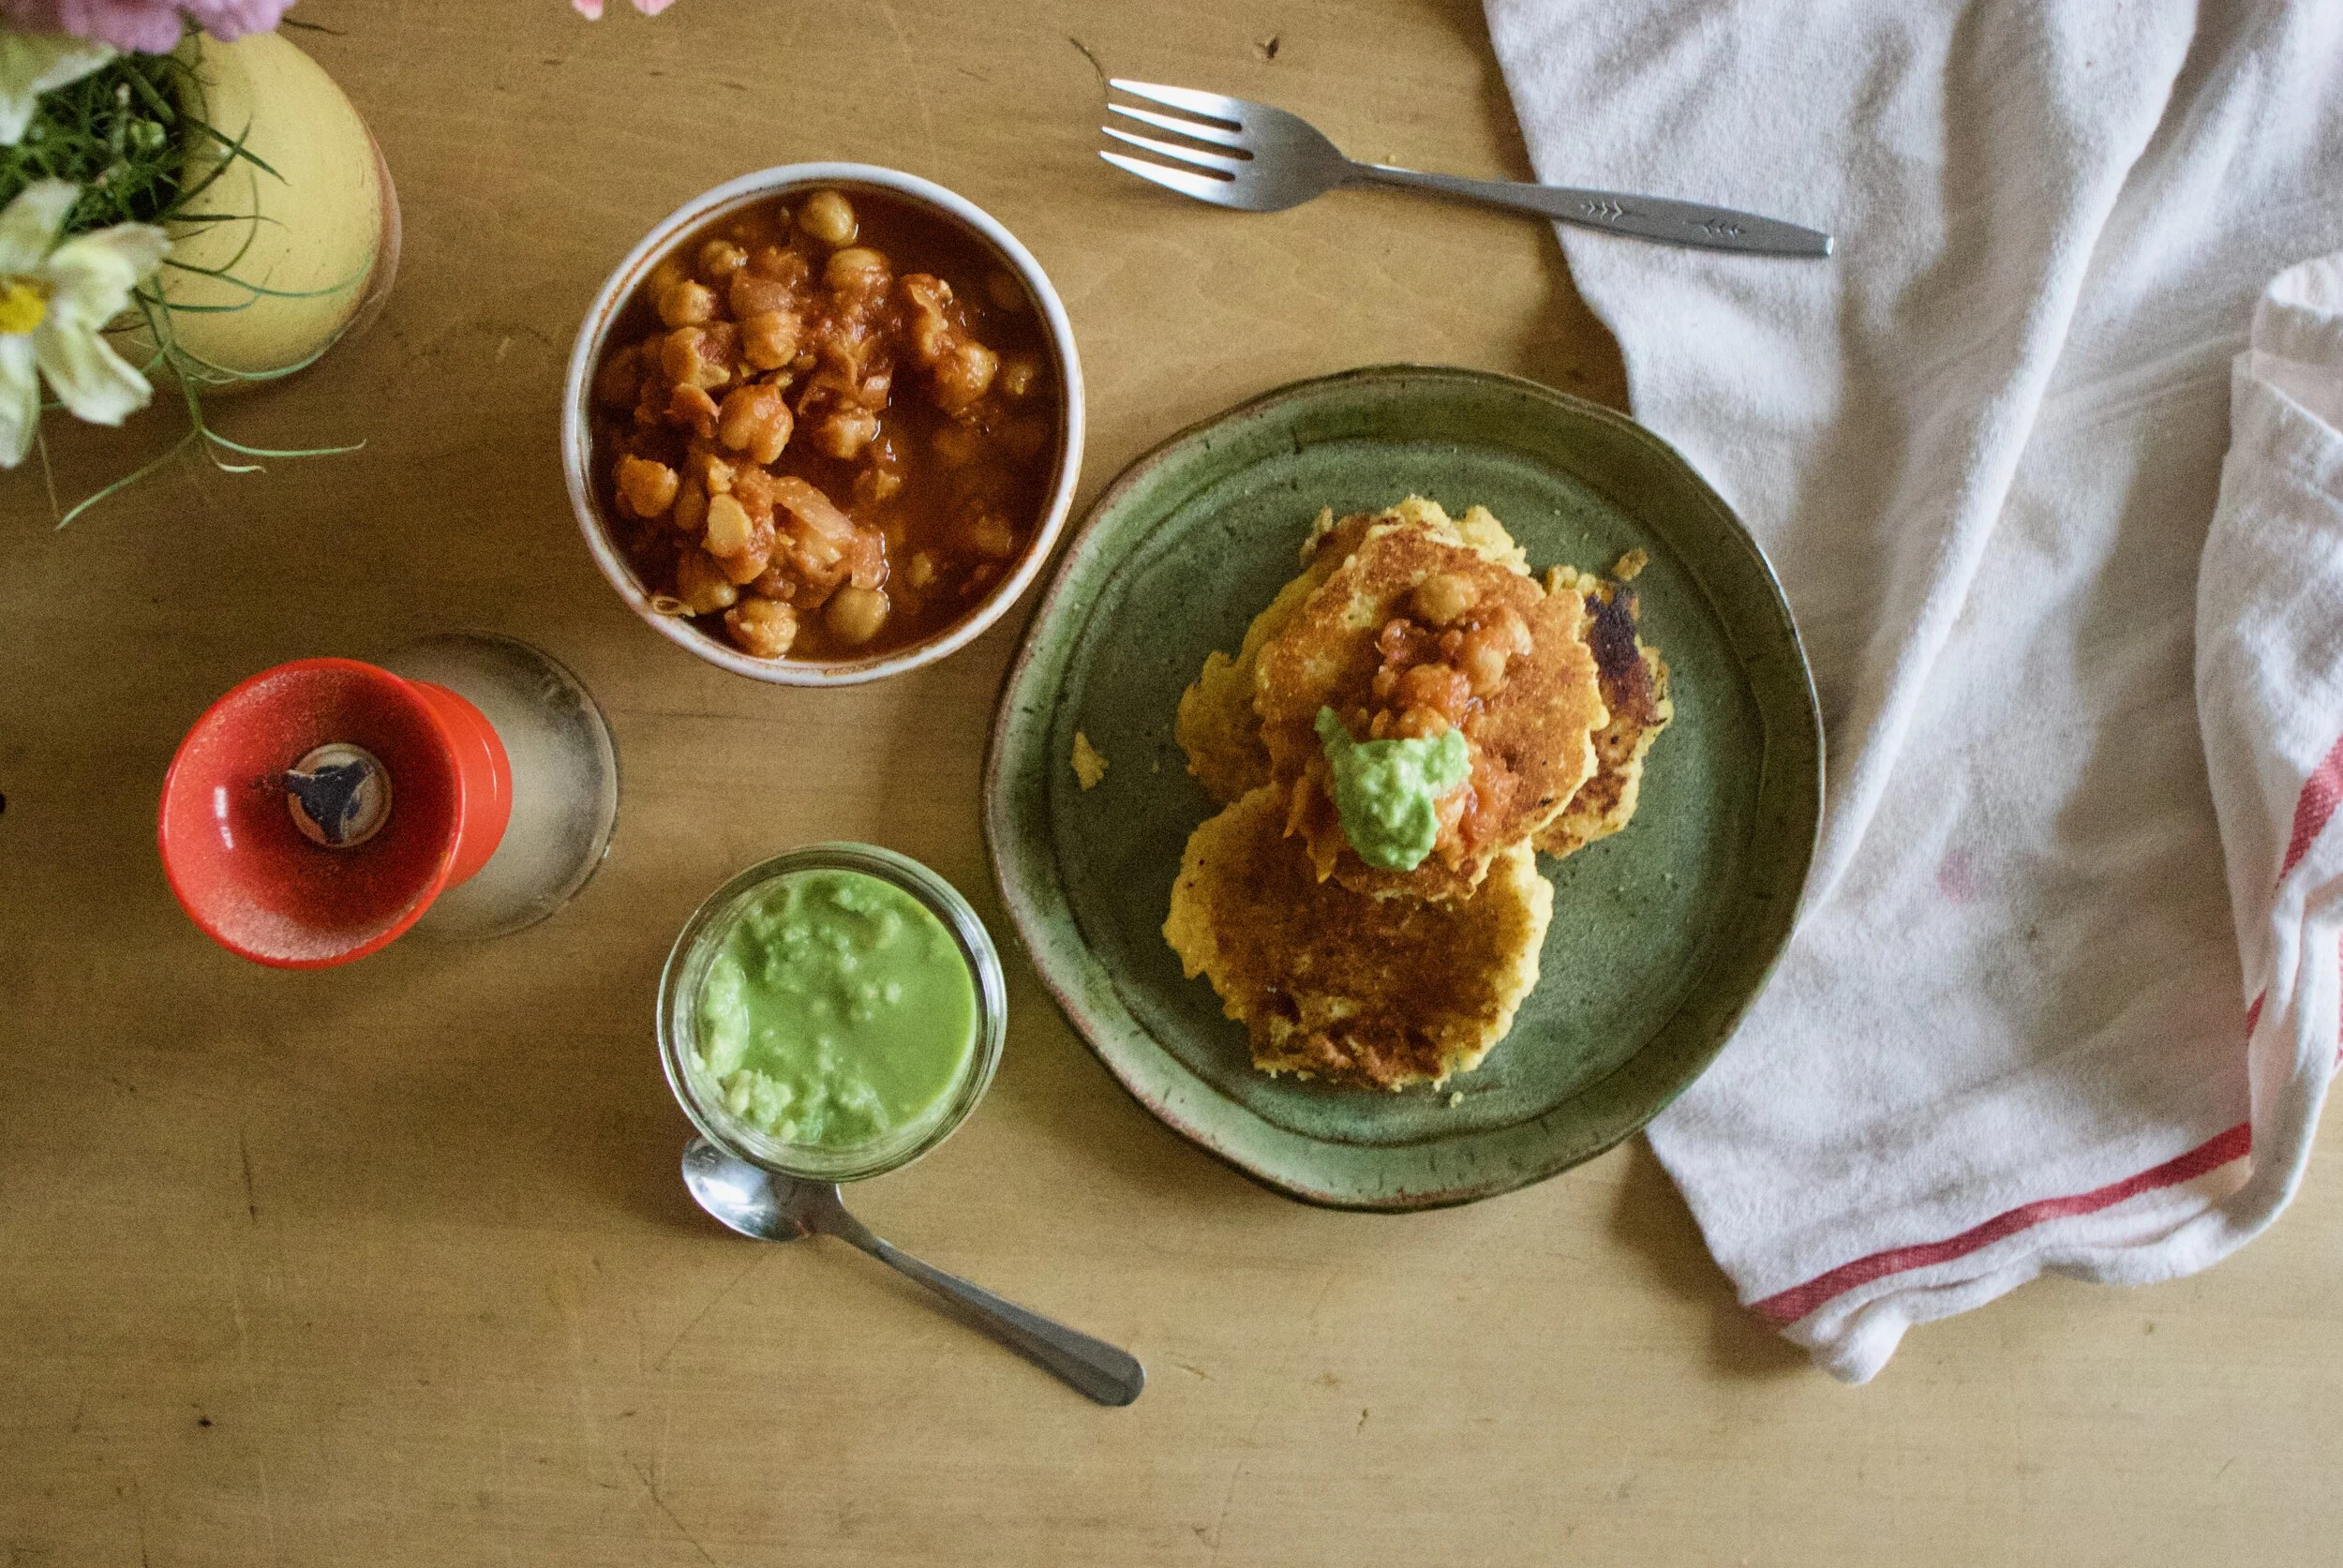
This polenta situation is a little more then just make polenta and eat. No, it has been cooled, seared, baked, then topped with basically anything you would throw into a burrito because why the heck not. And really, that is what you really should do with polenta because it is like a big crispy, yet soft and creamy corn tortilla (I know right.) Plus you can show pictures to all of your friends of this amazing meal you whipped up and made look all nicey nice and shit. You will say %u201cWhat bread, no, you should see this polenta!%u201d And then soon after the internet will be ablaze with polenta cakes with beans. Seriously. It%u2019s gonna happen., and think, it could be you who makes it so. Haha!
To the polenta a fixins!
The stuff. Cornemal, water, salt and pepper, cumin, and olive oil. Then fixing of cooked black beans, salsa, some shredded cabbage, 1/2 a big onion, avocado, a lime, and some pickled jalape%u00f1o.
Note that you can use all these fixings or none of these. Use what you have!
The polenta. First off, you need to make this at least an hour before you start to bake it because it needs time to set so factor that into your time.
To make polenta, water goes into a big pot and placed on stove to boil. Once water is boiling, slowly pour cornmeal into water while continuously whisking. Once all in, turn heat to medium low and keep whisking, for about 15 minute, until polenta is nice and thick and creamy. Remove from heat, dump in cumin and olive oil, mix and mix until incorporated.
Quickly pour polenta into an oiled baking pan and pop that pan into the fridge for the polenta to set.
In the meantime, slice and dice up onion and toss it around with cabbage, a pinch of salt, and juice of lime.
Once polenta is set, turn it out of pan onto a cutting board. Cut into 4-6 equal sized pieces.
Another note. You can for sure only cook a serving or two and save some for a later time. Just place unbaked polenta in a airtight container and it should be good in fridge for up to a week.
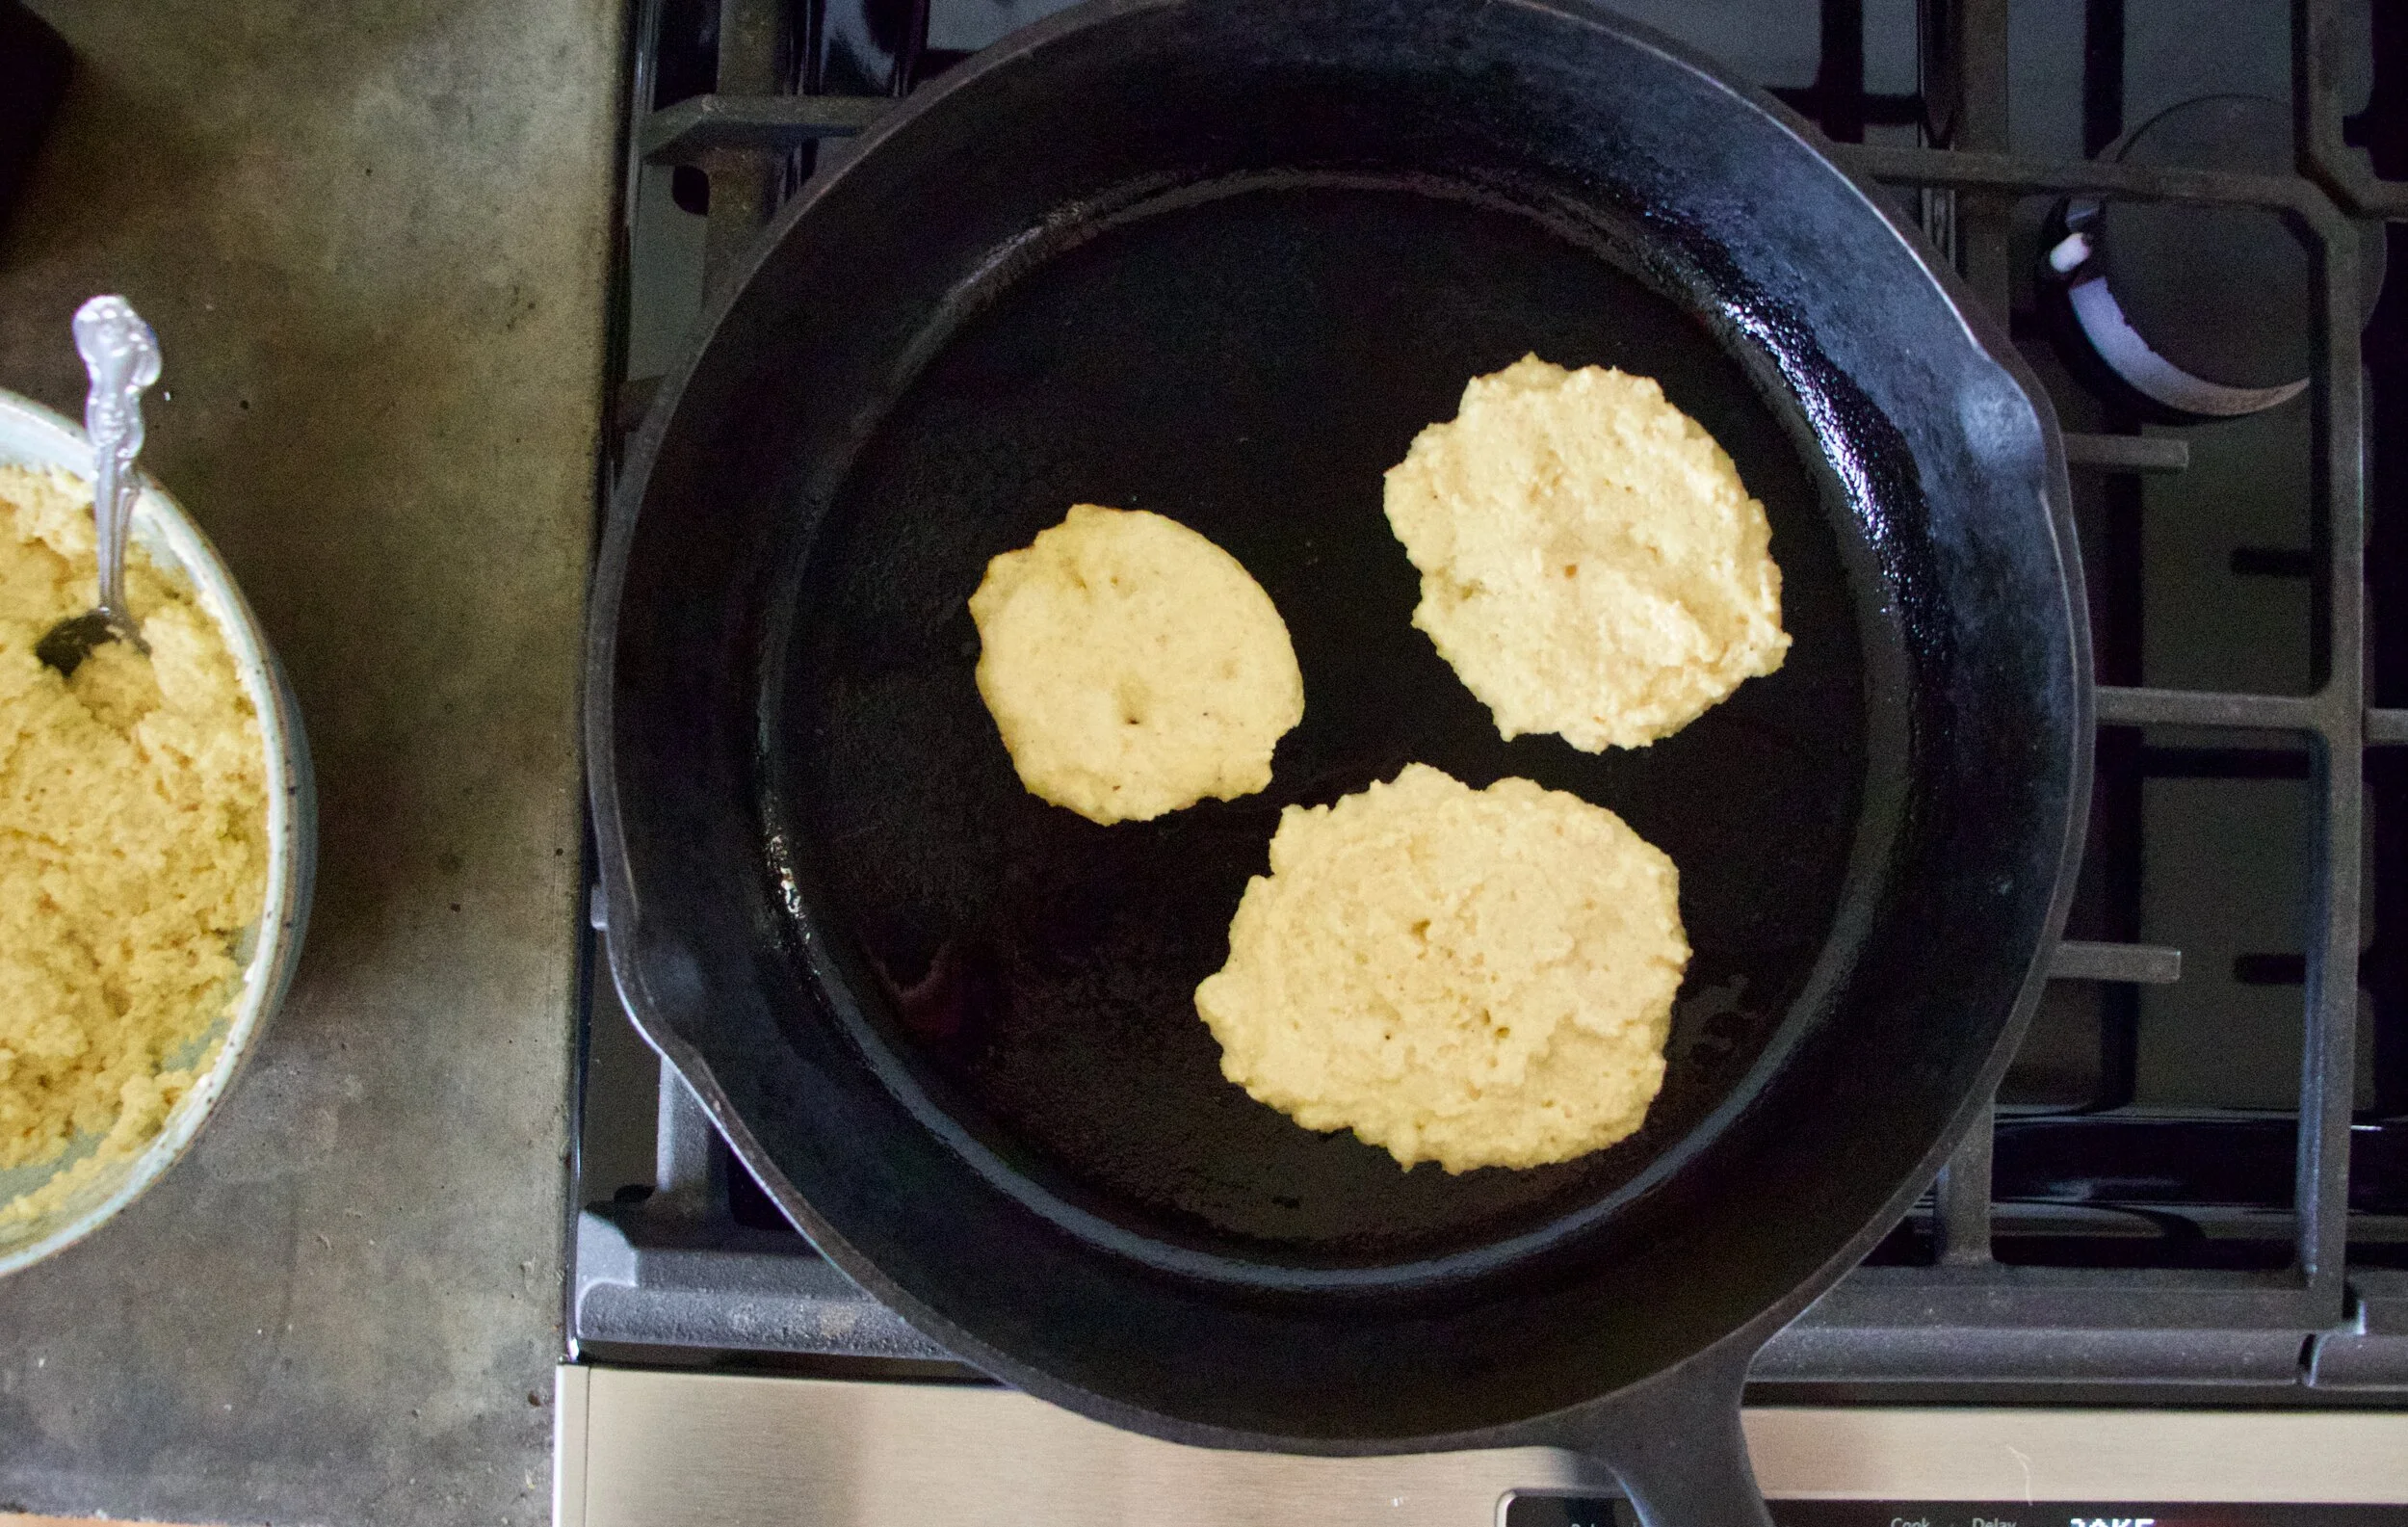
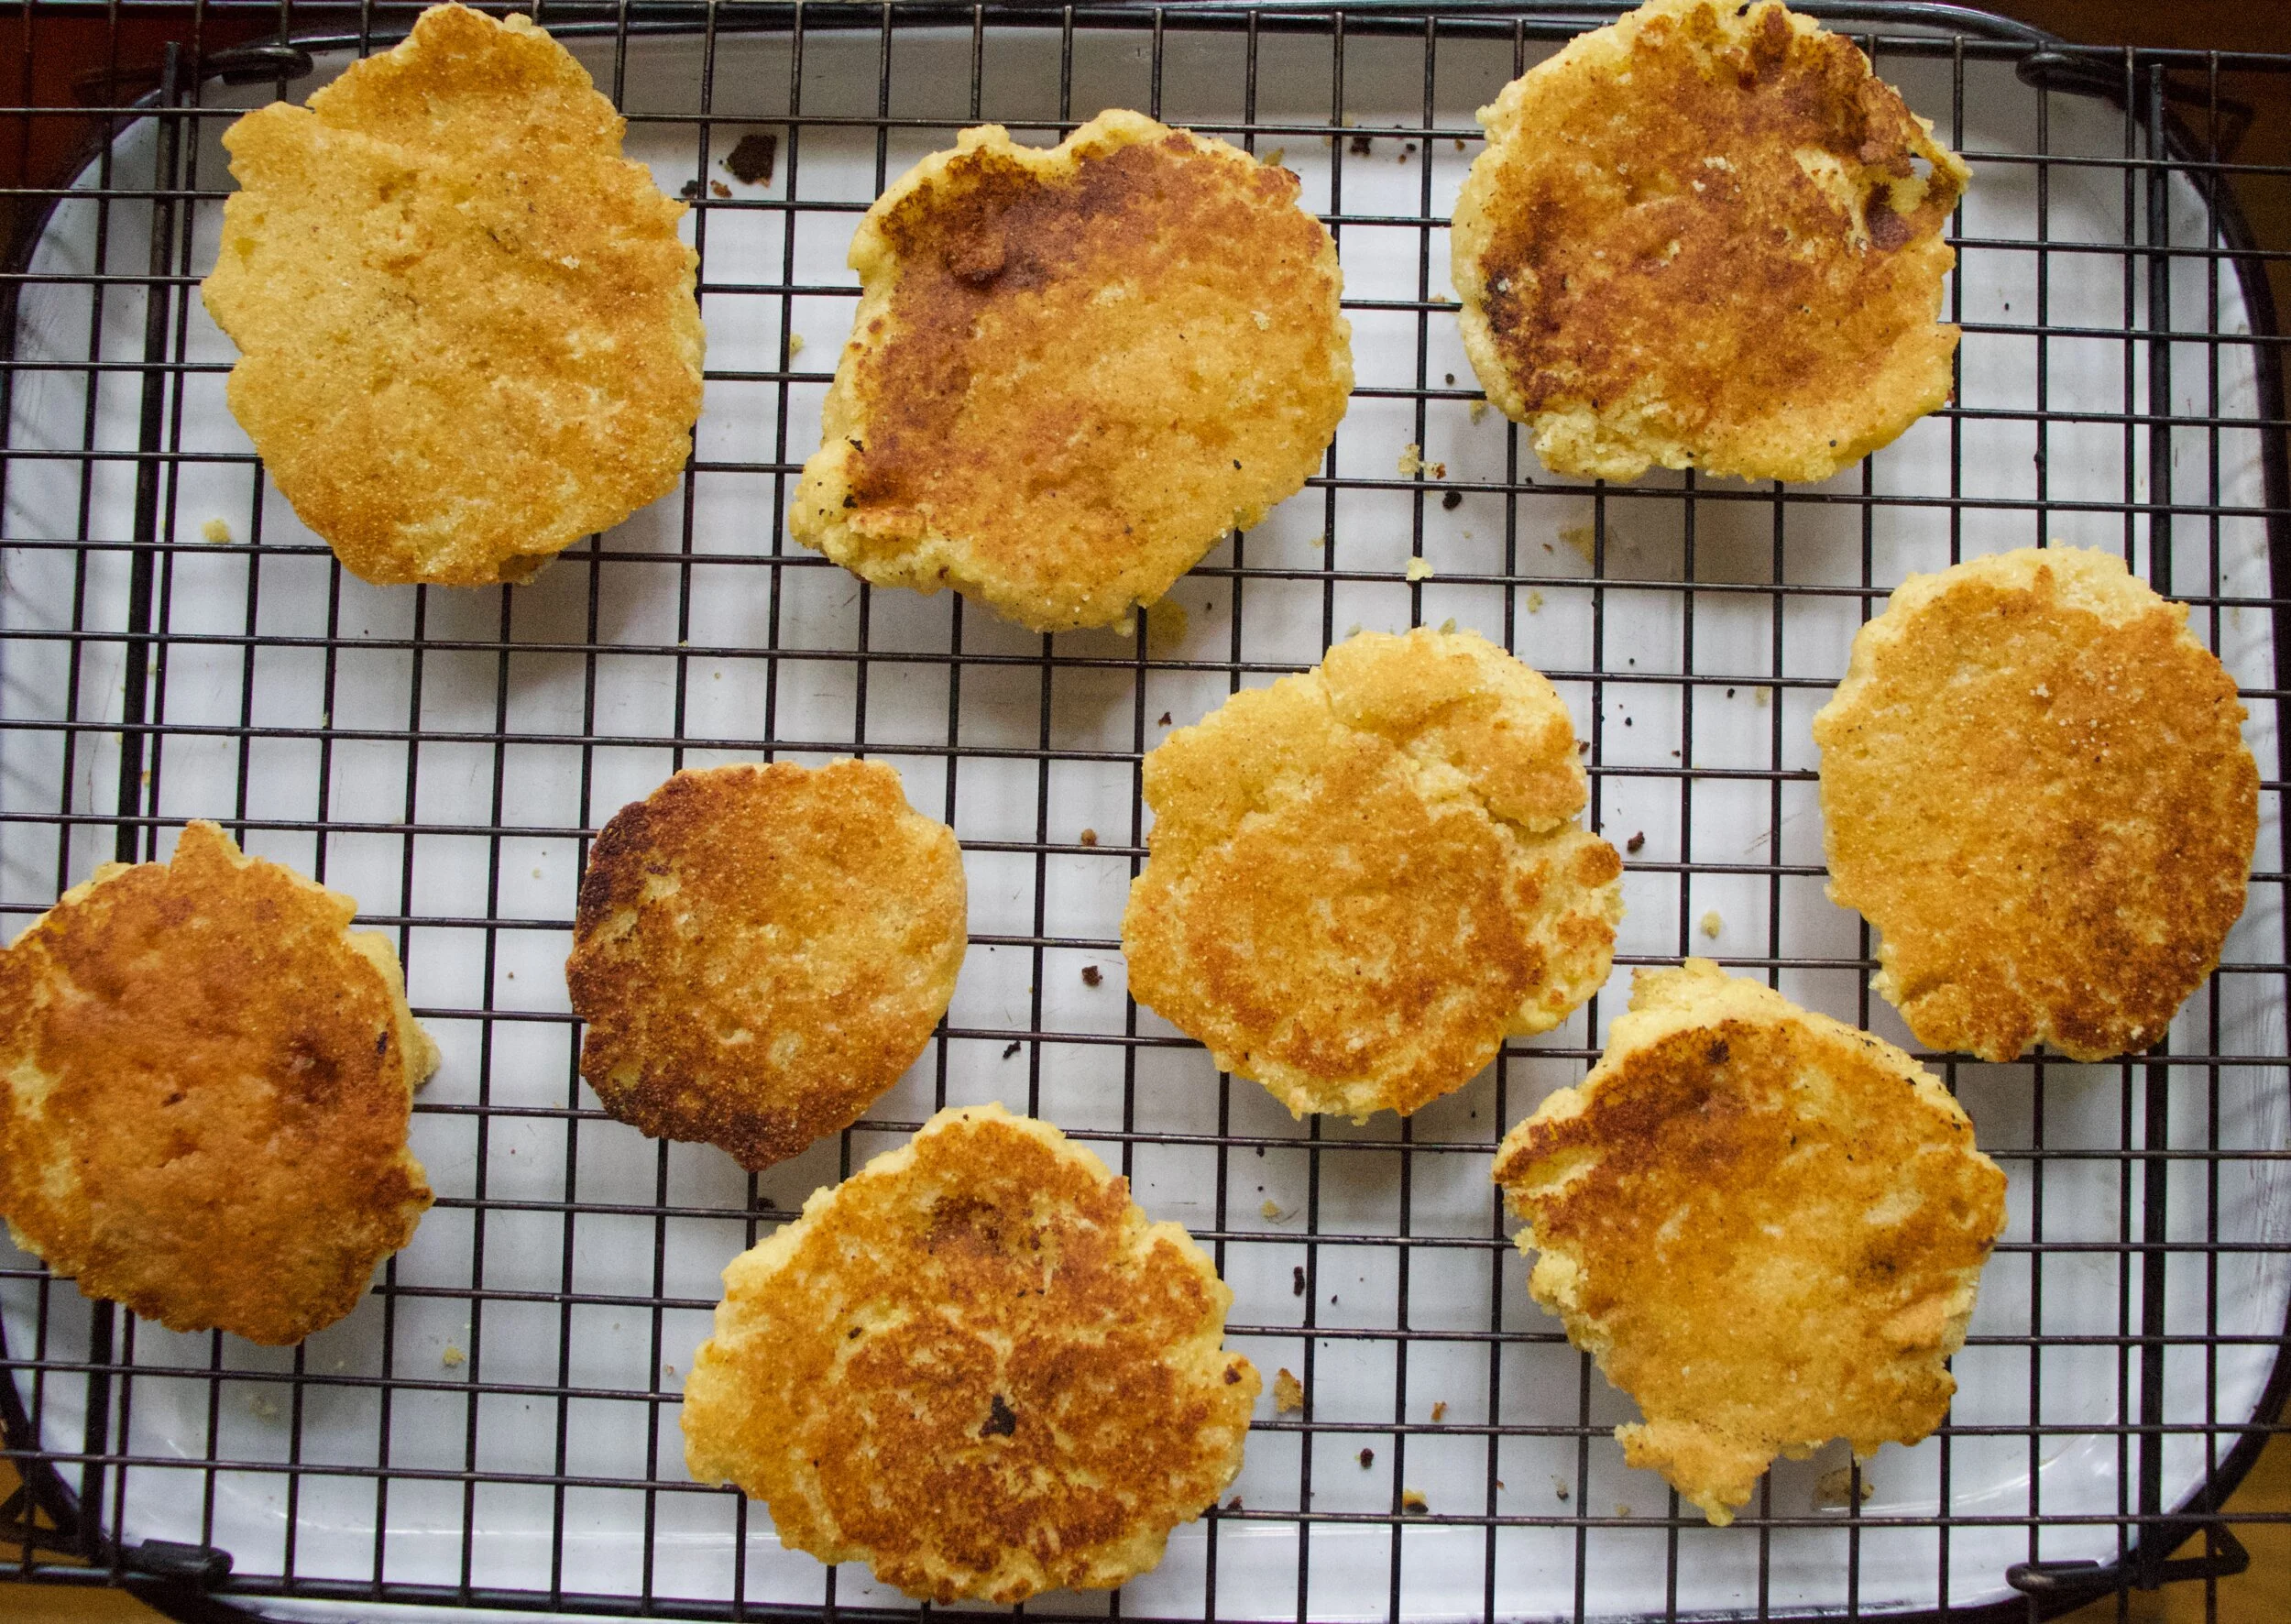
Sear polena. Get a skillet oiled and nice and hot and cook each side for about 5 minutes or until golden crispy. Then either place on a baking sheet or keep in skillet if it%u2019s oven safe and pop into oven to bake for about 1/2 and hour.
Now for the fixins. I won%u2019t go to into details, I trust you know what to do.
What are you waiting for? EAT!
-C
serves 4-6
For the polenta
1 cup cornmeal
4 cups water
2 tablespoons olive oil
salt and pepper
1 tablespoon cumin
FIxins
3 cups cooked black beans (about a 3/4 cup per serving )
3 cups shredded cabbage
1 small or 1/2 a large red onion
A lime
Salsa
An avocado
fresh or pickled jalape%u00f1o
And anything else you want (Greens, cheese, yogurt, sour cream%u2026. )
Start off by making polenta. Add water ro a medium sized pot and bring to a boil. Once boiling, grab a whisk and the cornmeal and slowly add cornmeal into water while whisking. Once all cornmeal is in, turn heat to low and pretty much continuously whisk for about 15 minutes. Careful to really whisk all around the bottom of the pot so you don%u2019t burn the bottom of pot. Once the polenta is nice and thick and creamy, remove from heat and dump in the cumin, a good pinch of salt and pepper, and oil olive. Mix until completely incorporated then pour mixture into a oiled 9×9 or 10×10 baking pan. Place pan in fridge to let the polenta to set, which should take about an hour but can stay all day if you want.
In the meantime, slice onion up and place into a bowl with shredded cabbage. Add juice of 1/2 the lime and a pinch of salt and toss. Set aside.
Once polenta has set, preheat oven to 400.
Take pan and invert it onto a cutting board then cut into 4-6 equal sized pieces (any size and or shape works). Grab a skillet and drizzle a in a little oil. Get it nice and hot on the stove then sear the polenta, both sides for about 5 minutes or until nice and crispy. Once the polenta is seared, place either on a baking sheet or keep in the skillet (if it is oven safe) and place in oven to bake for about 1/2 or until nice and firm and crispy. Warm up the black beans while you are waiting.
When the polenta is baked to your liking, remove from oven and place on plates. Scoop on black beans, grab a handful of cabbage onion slaw, top with salsa, jalape%u00f1os , avocado , and anything else you want.
Eat.
Left over polenta is great to have in the fridge. Just store in an airtight canters for up to a week. Sear it or bake it up whenever you are in the need.
I eat so much hummus. Everyday, all day. Homemade, store bought. If there is hummus, I will be consuming it. But the thing is, I usually don%u2019t eat more then a little at a time. (A little being like 1/2 a cup). And sure, sometimes that is just fine and enough, but other times, what I really want to do is garb a spoon and a bag of carrots and eat it all. And then I do.
But there is that little voice in the back of my head telling me that if someone where to catch me eating mounds of hummus, they would liken my eating behavior to that of someone eating a jar of mustard (Not going to lie, it happens sometimes) or of a bottle of ketchup (but I don%u2019t eat ketchup) and that have a problem and shouldn%u2019t being eating it like that. Because hummus, for some reason, has been put into the condiment category. It%u2019s treated like a dip or a spread and that is fine and dandy to eat it as such, but hummus is so much more. It can, and should be treated more like a main component to a dish. So let us step outside of that box and eat it how we really want to eat it.
Hummus by the bowlful. I know right! It just makes so much sense to me. And now to you too. We need to stop stopping ourselves from just a scoop or two because really, that is just not enough. Nope, this is for real. A bowl, full of hummus, topped with roasted veggies because that is just more deliciousness. And we get to eat it all.
Life can be pretty great sometime, you know. HA
Now to the bowl of hummus!
The stuff. We got chickpeas, tahini, a lemon, red wine vinegar, garlic, salt and pepper. And Veggies. Brussel Sprouts, broccoli, onion, Swiss chard, and kale.
Chop up the broccoli, the onion and half or quarter the Brussel sprouts. And separately, chop up the kale and chard.
Toss the chopped Brussels, broccoli and onion into a baking sheet or oven safe skillet and season with salt and pepper. IF you want to toss in a little oil, go for it. Then pop the veggies into a hot oven to roast away.
Once the veggies are just about done to your liking, grab the chopped kale and chard and off to the veggies. Toss and roast for a few more minutes.
Hummus. Chickpeas with liquid, garlic, tahini, juice of lemon, and blend. Creamy smooth and delicious.
Dump that hummus into bowls.
And top with roasted veggies.
Would you look at that. Now all you need to to is dig in. Serve with extra lemon and black pepper. Grab your utensil of choice and eat.
-C
makes 2 servings if eating as a meal
3 cups cooked chickpeas in liquid
A lemon
1 tablespoon red wine vinegar
2-3 cloves garlic
1/4 cup tahini
salt and pepper
10 or so Brussel sprouts
A small head of broccoli
A small onion
5-6 kale and or Swiss chard leaves
Note. Use whatever veggies you want. Fresh or already prepared. All and any leftovers would be great.
Preheat oven to 450.
Cut Brussel sprouts in half, chop the onion into small pieces, and cut up the broccoli and toss onto a baking sheet or an oven safe skillet. Sprinkle with a little salt and pepper and stick into the oven to roast for about 20 ish minutes or until nice and roasted. Feel free to toss the veggies in a little oil if you want. Chop up the kale and chard into smaller pieces. Once veggies are just a few minutes from being cooked to you liking, remove from oven, and toss in the greens. Cook for another 5 or so minutes until those are nice and wilted. Remove veggies from oven.
While veggies are roasting, make hummus. Place chick peas with liquid, the juice of the lemon, vinegar, garlic, and tahini into a food processor. Blend until smooth and creamy. Taste and season with salt and pepper to your liking. Dump into a bowls.
And when you have hummus make and veggies roasted, its time to compile. Dump the hummus into 2 bowls. Dump half of the roasted veggies into each bowl.. Squeeze more lemon juice onto both then grab a fork.
Eat. And yes, lick bowl clean. No shame.
If you are a falafel fan, as I am, then this one is for you. Carrot ginger falafel. Oh yes. Warm and spicy and carroty and all the things that are good, packed into a chickpea ball of mouth sized proportions. When I thought of it it sounded good, When I made it and ate it, it was everything and more I could have asked for in a freaking fantastic falafel. As for the tahini cabbage slaw, I might just be making it in my house every dang day. Super easy, super tasty, goes with the falafel like whoa but is just as good eaten on it%u2019s own. Eaten together the pair make every inch of mouth space happy. A happy mouth space, what more can you ask for?
To the falafel!
The stuff. Cooked chickpeas, carrots, a piece of fresh ginger, tahini, soy sauce, cabbage, an onion, a few cloves of garlic, red wine vinegar, some cumin and red pepper flakes, a lemon, chickpea flour, salt and pepper, and oil.
Start off by chopping the carrots into small pieces. Then cut half of the onion into small pieces. Rough chop the garlic and the ginger as well. No need to peel ginger unless you really want to.
Place it all into food processor and pulse until a small crumble.
Carrot onion garlic ginger mixture.
Dump mixture into a skillet with a splash of water. Add in the cumin, chili flakes, and a good pinch of salt and pepper and cook on the stove for 5-8 minutes until the crumble softens and becomes fragrant.
Dump carrot ginger mixture back into food processor along with the chickpeas, chickpea flour, and the juice of the lemon. Puree until smooth.
Carrot ginger falafel mixture. Now stick it in the fridge. For a little while to a day, just to let it set up a bit.
And in the mean time you can make the slaw. Shred cabbage and cut up onion all nice and thin.
Dump tahini, soy, vinegar, and a few tablespoons warm water into bowl and mix until creamy and good.
Toss in that cabbage and onion. Now you have tahini cabbage slaw.
Now to cook falafel. Grab the batter, scoop into balls then smoosh into disks. Place in a light oiled skillet and brown each side a nice golden brown.
After browning, place on a baking sheet. Once all the falafel has been browned, place the baking sheet into the oven to finish up cooking. 20 minutes or so and you got yourself falafel.
Then eat it. Falafel topped with tahini cabbage slaw. That is how it%u2019s done, with or without wraps or pitas or whatever your want. Just as it is. Falafel, cabbage slaw, into mouth.
Good things friend.
-C
serves 3-4 people or makes 14-16 falafel balls
For the falafel
2 cups cooked chickpeas drained
3-4 carrots (around 2 cups diced)
1/2 of a red onion
2 inches fresh ginger
2-3 cloves garlic
1 teaspoon cumin
1/2 teaspoon chili flakes
1/3 cup chickpea flour (can sub in oat flour if needed)
juice of a small lemon
salt and pepper
For Tahini Cabbage Slaw
1/2 head red or green cabbage (about 3 cups shredded)
1/2 of a red onion
3 tablespoon tahini
1 tablespoon soy or liquid aminos
2 tablespoon red wine vinegar
a few tablespoons warm water
Grab carrots and red onion. Chop carrots into small chunks and cut onion in half. Cut one half into chunks. Place in food processor. Take the ginger and cut into small chunks (you don%u2019t need to peel it) and peel and slice garlic and cut into small pieces. Add that to the food processor. Pulse the mixture into a very small crumble then dump the mixture into a skillet with a splash of water. Add in the cumin, chili flakes, and a good pinch of salt and lots of pepper, and place on medium heat and cook for 5-8 minutes until soft and fragrant. Once cooked, scoop back into food processor along with the chickpeas, chickpea flour, and the juice of the lemon. Turn on and and puree until smooth, stopping when needed to scrap down the side. Then either dump mixture into a bowl or leave in the container you processed it in and place in fridge for 1/2 hour to a day.
When ready to cook, preheat oven to 400.
After letting the dough sit for a bit, remove from fridge. Grab skillet and lightly oil it and place on medium heat. Take a cookie scoop or just a spoon and scoop balls of falafel into your hand and roll them around so they are packed together. Smoosh then balls a little into disks and place into hot skillet. Let cook until bottom is golden brown then gently flip and cook the other side until browned. Place cooked falafel on a baking sheet. Once you have browned all the falafel, place into oven to bake for about 20 minutes or until the falafel has firmed up to your liking.
To make the tahini cabbage slaw. Shred cabbage and cut the remaining half of red onion into thin pieces. Place tahini, soy, vinegar, and 2 tablespoons warm water into a big bowl. Mix together until light and creamy. If the mixture seems to thick, add another tablespoon of warm water. When happy with consistency, add in the cabbage and onion and toss around until everything is coated.
Now when the slaw is made, the falafel is cooked, you eat it. Serve with warm pita or wraps or a bed of greens or nothing. Just slaw on top of falafel. And FYI, this whole shebang can be eaten hot or cold or anywhere in between.
Every now and then I make something for me. All for me. This is one of those dishes that was not destined to be shared with anyone. That I had no one else in mind to eat besides me. No worring about what anyone else with think. Just a simple little dish that I was craving and wanting.
So I made it and man, was it so freaking satisfying. Cooking for oneself is very much a gratifying experience.
Celeriac, or also know as celery root. Have you ever had it? If not, well duder, you need to. It is in my top 3 favorite vegetables and that is saying a lot. So anyway, celeriac, has a slight celery taste, but also kind of earthy and nutty. It pairs well with anything that a potato might, but also is amazing on it%u2019s own. Roasted, steamed, raw. Just really fantastic. And it is in season so get on it and go find yourself some.
And lentils. In my top 3 favorite foods. Made them crispy because pureed celeriac and crispy lentils just sounded right and I love me crispy things. Again, I was making this dish fo me so crispy was happening.
Together, the creamy, delicious pureed celeriac covered with a bunch of spiced, crispy lentil%u2026.Amazing. Eating it, I couldn%u2019t have been happier. I did myself one good with this one.
I might even have to make it to share someday.
Now to the celeriac and lentils!
The stuff. A bulb of celeriac, some cooked lentils, salt and pepper, chili powder, garlic powder. mustard powder, and oil. (oil is optional)
The celeriac. Ok, so most people peel it. I actually get weird looks from people when I tell them I don’t , but let me do me, you know. So anyway. Peel it if you want, or not, just cut it up into chunks.
Place cut up celeriac into a pot and cover with water. Place on stove on medium heat and cook until fork tender.
Lentils meet spices and get mix all together. Add a pinch of salt and lots of cracked pepper too.
Spread now spiced lentils onto a baking sheet, pop into oven, and bake until crispy. Easy peasy.
And to puree the celeriac. Strain any extra water into a cup. Season with a pinch of salt and pepper and grab the hand blender (or regular blender) and blend it, adding back in some of the strained water as needed, to get to a consistency that you like. Me, I liked it pretty smooth, but also with a little chunk. Heck, you could leave it really chunky or go all out completely smooth. Up to you. Also if you want a creamier texture, add in a teaspoon or so of the olive oil. That is a taste preference. I didn’t add oil this time, but I have before. It%u2019s good both ways.
And there you have it. Add the celeriac puree to a bowl, top with crispy lentils, and garnish with something green if you want.
Then eat it.
Not going to lie. After this picture was taken, I busted out the spicy mustard and covered everything with it. And it was amazing.
-C
serves 1 as a meal, or a few as a side dish
1 1/2 cups cooked green lentils
1 large celeriac bulb (soft ball sized)
1 teaspoon chili power
1/2 teaspoon ground mustard powder
1/2 teaspoon garlic powder
salt and pepper
olive oil (optional)
Grab celeriac and peel if you want, or just give it a really good wash. Cut into chunks and place into pot. Add enough water to just cover the celeriac and place on medium heat on the stove. Cook until fork tender.
In the mean time, mix all the spices and a good pinch of salt and lots of pepper together with the lentils. Dump them and spread them out onto a lightly oiled baking sheet. Place in oven and turn to 400 degrees (you can start cooking the lentils while the oven is preheating). Bake for about 20 minutes or until lentils are crispy.
Once the celeriac is tender, strain water into a cup and either with a hand blender or a regular blender, blend until smooth, adding in some of the poured off water as needed. You can puree as smoothly as you like or leave a few chunks.. Also, you might want to add in a teaspoon or so of olive oil for a slightly richer and creamier taste. Season to taste with salt and pepper.
Ehen the lentils are done, take them from oven. Place large amount (or all) of the celeriac puree to a bowl, cover with some (or all) of the crispy lentils and that is that. Eat away.
Serving suggestion%u2026. Mustard. Any kind. So good.
Soup. No joke (although people make jokes about me), is eaten in my house, at lunch and sometime even at dinner. Every. Single. Day. There is just no going wrong with a big pot or veggies, spices, sometimes beans, sometime not. I make it in big batches, in small batches. Sometimes it%u2019s more a bisque, or a chili or a stew, or just a really really spicy broth. Whatever I have in the fridge or freezer, the stuff that might not be great eaten fresh, sad spinach%u2026. It all turns in soup.
Does that make me some kind of weird soup freak? Maybe, but I am ok with that. And to those who see me walking down the street and yell silly things about me having to get home to eat my soup (it happens more then you know) well, you know you are just jealous and secretly wish you were eating soup with my too. So %ud83d%ude1d.
Are you a soup person too? I mean, who isn%u2019t, especially right now that is is fall time and it%u2019s getting chilly and darker out and all we want to do is hibernate. Definitely a soup time if there was ever a specific time for soup. And this soup, made even more hardy and comforting with the addition on dumplings. I actually made it specifically for the mr because, well just because I love him and thought he would enjoy it. And well, he loved it because dumplings of course. Light and slightly chewy, soup thickening dumplings with hot and comforting soup. A perfect end to a day of him working outside in the cold.
So soup. Make it. Dumplings. Add those too. You will be a winner with food, and in life.
To the soup and dumplings!
The stuff. A few stalks of Swiss chard, a couple carrots and a few potatoes. An onion, dried navy beans, some cherry tomatoes. Then there is flour, with salt and baking powder, a little oil, plant based milk, and salt and pepper.
Veggie chopping time. Dice the potatoes, the onion, the carrots, and the stalks of the chard into small mouth sized pieces. Cut the cherry tomatoes in half and the chard leaves into small ribbons. Set the tomatoes and greens aside.
Dump the carrots, onion, chard stalks, and potatoes into a very large pot, add all the spices, a good pinch of salt, lots of black pepper, and a few splashed of water. Cook on medium high heat for 5-7 minutes to just kind of sweat the veggies a bit.
Add in beans and water. Bring pot to a boil then reduce heat to medium and let cook for about an hour. Just give it a stir once in a while.
After an hour check the beans. If they seem close to being done (almost squish in between fingers), then add in the tomatoes, the chard greens, and a few more cup of water. Keep on heat and start the dumpling batter.
Dumpling batter. Mix together the dry ingredients then add in the wet. Mix until combined.
Soup. All nice and looking just about done. The vegges are soft and tender, the beans are cooked. Check and season for salt now then get ready to drop dumplings.
Drop the dumplings. Tablespoons of batter go right into the soup. Thencook, with a lid slightly covering pot, for about 15 minutes.
Look at that. Soup with soft, fluffy, dumpling ready for consumption.
Now all you have to do it serve it up and eat it up.
Soup all day. Every day. Dumplings too!
-C
makes 4-6 servings
For the soup
1/2 cup dried small white beans
1 large onion
2 carrots
2 small red potatoes
3 Swiss chard leaves and stalks
handful of cherry tomatoes (about a cup or so)
1 teaspoon garlic powder
1 teaspoon dill
1 teaspoon thyme
1 teaspoon ginger
1 teaspoon marjoram
1 teaspoon ground mustard
1/2 teaspoon sage
1/2 red pepper flakes
12 cups water
salt and pepper to taste
For dumplings
1 cup all purpose flour
1 tablespoons oil
1 teaspoon baking powder
1/2 teaspoon salt
1 teaspoon black pepper
1/2 cup warm water or plant based milk
Couple quick notes. I use water but if you really want, use veggie stalk. I find stalk overpowers soup and makes it taste salty, even when it is low sodium. Plus water is there and free but again, use stalk if you want. Also, you can use just about any veggie that you like so if you want to replace chard with celery and spinach or throw some red peppers into the soup, go for it.
Start by small dicing the potatoes, the onion, the carrots, and the stalks of the chard. Dump it all into a large pot, along with all the spices and a good pinch of salt and pepper, and place on the stove on medium high heat with about 1/2 cup water and cook for a few minutes. Cut the cherry tomatoes in half and cut the chard leaves into small ribbons. Set aside.
Once the veggies and spices have had a few minutes on the stove, add in the dried beans and 10 cups of water. Bring the pot to a boil then reduce to a medium heat. Cook for about an hour, giving it a stir once in a while. After an hour, check beans for doneness but removing one or two and pinching between fingers. . They should be close to done by now. If they are still really heard, cook for another 20 minutes, if almost cooked through, toss in the tomatoes, the chard greens and the other 2 cups of water. Keep cooking.
In the meantime, make dumpling dough. Mix the dry together then add in the oil and milk. Mix until just combined. Set aside.
Once the soup is done (the veggies are all soft and tender, the beans are cooked through which should take a total of 1 1/2 hours), it%u2019s time to dumpling. Turn the soup up to a medium high heat and carefully drop tablespoons of the dumpling batter right into the soup. The batter will float. Once all the dumplings are in, half cover the pot and let the dumpling cook for 15 minutes or until the dumplings are big, light. and fluffy.
Remove pot from heat and serve and eat right away. Big bowls, Big spoons. Pinch more of salt if needed. Lots of pepper.
I love me some falafel. I love me some peppers. So I guess it is natural that I would want to stuff falafel inside of peppers and eat them all to my face right? I think so.
As we all already know, most of what I cook is depicted by whatever I get at farm share. And the past few weeks we have been getting a lot of peppers. I have been happily eating one or two a day, just as they are, but I figured it was time that I did something else with them. Now what is the first thing that comes to mind with peppers? Stuffed peppers of course. And there you have it, falafel stuffed peppers.
So I am not going to lie and say the mr ate them and swooned. He is not the biggest fan of peppers (I am starting to realize that he doesn%u2019t have all the right taste buds in his mouth. So sad for him.) so he dumped the falafel out of the pepper and ate it with most of the pickled onions, the tahini, and rice. That he really liked. Lucky me, I wanted his pepper anyway because roasted peppers are freaking fantastic amazing and whatever him. Me, as a pepper and falafel lover, I found these stuffed peppers to be everything that I wanted and needed and then some. Eaten pretty much right away warm, with pickled onion and covered in all the tahini, it was a very very satisfying meal. But also a left over stuffed pepper that was stuck in the fridge, eaten cold standing in front of said fridge, right before bed. That was something great as well. I might have even gone in for a second one%u2026%u2026
Anyway, a pepper stuffed with falafel is a good idea if you want food, like peppers, like falafel, and are cool. Just saying.
To the falafel stuffed peppers!
The stuff. A few sweet peppers, some cooked chickpeas, chickpea flour, an onion, a bunch of fresh cilantro and parsley, a few cloves of garlic, red wine vinegar, a little water, tahini, cumin, chili pepper flakes, and salt and pepper.
First, take the onion and cut in half. Take one half and cut into very thin slices, place in a bowl, sprinkle with a pinch of salt and toss with the vinegar and a few tablespoons of water. Set that bowl aside. The other half of onion just cut into a few smaller chunks.
To make falafel. Add the chunks of onion and garlic to food processor and pules a few times to start chopping it up. Add in the cilantro and parsley, the chickpeas and chickpea flour, the cumin and chili pepper flakes, and a good few pinches of salt and lots of pepper. Pulse until completely combined but still a bit chunky. OR pulse until smooth if you would rather it like that. It%u2019s up to you.
Grab peppers and cut each in half. Remove the ribs ad the seeds.
Take falafel mix and stuff it into peppers.
Place peppers onto a baking sheet and into the oven they go.
In the meantime while the peppers are cooking, toss the onions around in the brine a few times. Then right before you take the peppers from the oven, drain the brine from the onions into a jar with the tahini and mix until smooth. Add a splash of water to the mix if you need to loosen it up a bit more to make the consistency of the tahini drizzle-able.
And out they come when all roasted and crispy and my oh my, so good!
Now you eat. Garb a bowl, maybe a grain of some sort if you like (I made the mr rice), plop a pepper down, add some pickled onions and drizzle that tahini all over.
Eat.
-C
Makes 6 half peppers stuffed
3 medium sized sweet peppers
2 cups cooked and drained chickpeas (or one can)
1 large onion
1 bunch (about 1/2 cup packed) cilantro
1 bunch (about 1/2 cup packed parley
2-3 cloves garlic
2 teaspoons cumin
1 teaspoon chili peper flakes
1/3 cup chickpea flour or oat flour if you don%u2019t have chickpea
salt and pepper
1/4 cup tahini
a few tablespoons water
3 tablespoon red wine vinegar
Preheat oven to 425
Grab the onion and cut in half. Take one half and cut into very thin slices and place in a bowl. Spinkle with a pinch of salt and dump in the vinegar along with about 2 tablespoon water. Toss around until all the onion is coated and set aside.
Take remaining half onion and cut into big chunks. Toss into a food processor along with the garlic and pulse a few times until the onion is chopped up. Add in the cilantro, parsley, chickpeas, chickpea flour, cumin, chili pepper flakes, and a good pinch of salt and lots of pepper. Pulse the hole shebang until the mixture is combined, the herbs are incropeted, but there is a little chunk left. Or you could make it smooth if you wanted too. It%u2019s up to you.
Grab the peppers and cut them in half. Remove the ribs and seeds then take the falafel mixture and evenly distribute it between the peppers halves.
Place stuffed peppers on a baking sheet, falafel side up, and place into oven to bake for about 45 minutes. You want the falafel mix to have a chance to cook inside and out and to get nice and golden brown and crispy on top.
Right before the peppers are done, grab the onions and the tahini. Toss the onions one last time in the briny mix it%u2019s been sitting in, then drain that brine into the tahini. Mix around until smooth. The tahini should be at the consistency to drizzle so if it is still to thick, add in a splash of hot water to loosen it up.
Once peppers are cooked, remove fro oven. Place on a plate with or without some grain, toss on some pickled onion and drizzle tahini all over.
Eat.
Store left over peppers in a the fridge. To eat, just reheat or eat cold. I really enjoyed eating one cold.
Spit peas are one of my go to%u2019s when camping. Besides taking up no room at all to pack, they are also super easy to make. Plus they only take about an hour to cook, which is the perfect amount of time to prepare the rest of the food for a meal and sit and chill out before eating. Not to mention that they are damn freaking tasty, especially after a day frolicking through woods and paddling on water. I mean, who doesn%u2019t like split peas? (If you say you don%u2019t, you probably should try again because I bet you would like these)
Constnaly thinking of our next hiking, kayaking, and camping adventure has got me with split peas on the mind. Especially now that the nights are getting a little cooler. Knowing that I am gonna have a hearty, protein pack and filling meal after a day of activity is just the greatest.
And collard greens. A green that gets overlooked a lot. No super popular, well, not around these parts, which is crazy because they are SO good! They have a more pronounced flavor (in a good way) then most greens. More pungent and earthy, and slitghy salty, if that makes sense. And hold up better then any green when cooked making them perfect to toss into pots with things like spit peas . Plus they travel well. I can bring a bunch camping with me and not worry that if I leave them out for to long they will turn into slimy green mush. If it is really hot, sure they might wilt up a bit, but stick the stems in a little water, they will last all day fine. And that is all you need them to do.
So yeah, this dish is perfect for camping, but also perfect for not camping and just making at home too. Again, super easy, fast and is just a great tasting dish.
Split peas and collard greens. Topped off with mustardy cabbage slaw. Can%u2019t wait to make this again this weekend!
To the spit pas and collard greens!
The stuff. A bunch of collard greens, some split peas, an onion, a couple carrots, some cabbage, stone ground mustard, spices which include garlic, ginger, dill, thyme, and ground mustard. And salt and pepper. And you are gonna need water too.
Start by removing the stems from the leaves of the collards. Then small dice up the carrots, the onion and the stems. Grab the collard leaves, roll them up together, then slice then into thin ribbons.
All that stuff you just cut up now gets tossed into big pot, along with all the spices.
Add in the dried peas and water. Lots and lots of water. Bring pot to boil, then reduce heat to low and loosely cover pot. Cook foe 45-50 minutes or so.
While the peas and greens are cooking, shred up some cabbage.
Add a good dollop or two of some good stone ground or Dijon mustard and mix.
Cooked until the split peas are tender and starting to fall apart. Taste and season with salt and pepper.
And then you eat. A big bowl full of the slpit peas and greens, topped with some mustardy cabbage slaw.
This is good food. Really freaking good.
-C
serves 4-6 folks
2 cups dried split peas
8-9 cups water
1 large onion
2 carrots
1 bunch collard greens (about 6-7large leaves)
1 teaspoon garlic powder
1 teaspoon ginger powder
1 tablespoon dill
1 tablespoon thyme
1 teaspoon ground mustard
salt and pepper
2-3 tabespppms Dijon or stone ground mustard
1/2 head of cabbage (red and or green)
Start by removing the stems from the collards. Grab the carrots and onion and dice them up small, along with the stems. Then take the leaves of the greens and stack and roll them up together. Slice the roll into thin ribbons. Place all of it, carrots onions stems, and greens, into large pot, along with all the spices, (don%u2019t add any salt until the end) and stick o the stove. Add in the split peas and 8 cups of water. Bring pot to a boil, then reduce to low and place a loose lid on pot. Let cook for 45 minutes to an hour, or until the spit peas are tender and just about to fall apart. If you think you might need to add more water to cook the peas through, then add another cup.
Once cooked, season with salt pepper to taste.
For the cabbage slaw,which you can make right after your start the peas, just shred up cabbage and mix it together with the mustard and set aside.
And once the split peas and collard greens are all cooked, scoop into bowls, top with some of the cabbage slaw, and eat to your face.