Not only is it the first week of summer, it’s also popsicle week! Billy over at the sweet ass blog Wit and Vinegar hosts a little (actually quite large) bloggers party that share all sorts of fun and fantastic popsicle recipes and presents that list to the world. There are popsicle flavors up the wazoo…Pretty stinkin cool right.
So my contribution to the world of popsicle eaters is one of my all time favorites (maybe the absolute best one yet).. Carrot Ginger Orange.
For those who know me, this flavor combination should come as no surprise. Carrots are my thing. I eat them all day, every day. Sure I eat a shit ton of other stuff, but always carrots. Carrots are in my breakfast,lunch, and dinner. If I need a snack, I grab a carrot. There is just something so satisfying not to mention so easy about carrots. Eaten alone, with mustard or hummus, or dipped in peanut butter of cinnamon..Carrots can do just about anything. I mean I eat so many carrots that no shit, my skin is a slight tint of orange (seriously for reals. Something about an abundance of carotene) Crazy I know, but what can I say. I really like carrots. %u00a0%u00a0%u00a0%u00a0%u00a0%u00a0%u00a0 (that’s what I say when people ask me why I am glowing orange)
So naturally the carrot made it’s way into my popscile mold. And now it’s for real. Carrots really can do anything.
Another win for carrots everywhere.
And popsicles.. Just in time for that hot as shit weekend we are about to have.
GO POPSICLES CO!
The stuff. Carrots, an orange, some fresh ginger, and some water. Simple simple and no, I didn’t forget the sweetener… these pops have no need (although if you want, go ahead and add a smidge or splash of something sweet)
Start by chopping up the carrots and sticking them into a pot with some water. Not a lot, just enough that it almost cover the carrots, and stick that pot onto the stove, cover and cook on medium heat until tender. Make sure to check that the water doesn’t completely evaporate or you will have burnt carrots which taste just fine, but not as a sweet popsicle
While the carrots are tenderizing, zest the orange then juice it and grate up some fresh ginger.
Once the carrots are fork tender, dump in the juice, the zest, and the ginger. Stick pot back on heat for just a few more minutes to meld the flavor together.
Dump the contents of the pot into the blender and blend blend blend until smooth.
Grab your mold and pour blended mixture into it.. Because the mixture is thick, you don’t have to wait to stick the sticks in so go ahead and do that now.
And into the freezer they go!
Serious popsicle goodness right there.
Happy Popsicle Week. Go ahead and make them all!
-C
Makes about four or five 3.5 oz popsicles
3 medium sized carrots
1 orange (zest and juice)
1-2 teaspoons fresh ginger
water
Note. I did not use and sweetener and did not miss it but if you really think you need it, add a little bit of honey or sugar. But really, they are sweet enough so maybe give them a chance without it.
Start by chopping the carrots up into coins and stick them into a pot with enough water to just about cover the carrots. Stick on stove on medium heat and place a lid on the pot. Cook carrots until tender.
While that’s happening, zest and juice orange and grate up the fresh ginger. (I used 1 teaspoon of ginger at first, but after I blended it, I decided that I wanted a little more so I added another teaspoon)%u00a0 Once the carrots are soft, dump in all the juice, zest and ginger. keep on heat for a few more minutes to let the flavors all meld together.
%u00a0And now dump the pot of carrot goods into the blender and blend the crap out of it until smooth. (add in a splash or two of water if needed. Taste your puree and if you want more ginger, add it it.( can also decide now if you want any sweetener..
Now pour the mixture into you popsicle molds and follow the mold directions on how to use it (add popsicle sticks and stick it in the freezer)
Freeze until frozen.
Remove from freezer and let sit until pops slip from mold.
Eat until gone.
Make more popsicle.
This little guy asked me to make him some%u00a0popsicles, and of course I said yes because, well look at him.%u00a0
So we made a date. A popsicle and playground date to be exact.
For these particular%u00a0pops, I decided to use watermelon, mainly because I had just broken into%u00a0one and once I open a melon, I have a race with myself as to how fast I can consume the in entire%u00a0thing. ( It’s a sick form of watermelon gluttony) But also because%u00a0the little was really really excited to hear that I%u00a0could in fact make%u00a0watermelon popsicles.%u00a0And the other stuff I added because I had it and it all tastes really good together.%u00a0
%u00a0I made the popsicles the day before %u00a0so they would be ready for our date.%u00a0%u00a0He came over, we ate lunch,(peanut butter sandwich and carrot sticks)%u00a0wondered around the neighborhood with the pup,%u00a0and made a quick stop at%u00a0the playground. (we only managed a couple runs on the%u00a0slide %u00a0before it was too hot and%u00a0our sweat had us sticking to the slide%u00a0and it was more of a painful scoot then a glide) We then%u00a0made our way home and rewarded ourselves for a walk well done%u00a0with these%u00a0amazing, super refreshing, and healthy frozen treats that I made just%u00a0for us. While we were eating the popsicles, our conversation turned to food. We talked about%u00a0all the different varieties of popsicle that we could make, and how we could eat them for breakfast, lunch or dinner because they are%u00a0made of only good things and are really healthy (he is really trying to eat healthy)%u00a0%u00a0It was the perfect ending to a fantastic afternoon with a five year old, or any human for that matter…
I would have a popsicle date with this kid every day
The Stuff. %u00a0Fresh seedless watermelon (make sure to have lots on hand cause you are going to be eating it as you make these), a fresh lime, a handful of blueberries and a sprig of fresh mint. And don’t forget%u00a0%u00a0a mold of some kind that form%u00a0the liquid into a popsicle (if you don’t have a mold, little paper cups work too)
Remove watermelon from rind and cut into small chunks. Juice the lime and add that, the watermelon chunks, the mint and the blueberries to a blender or vessel if using%u00a0a hand blender) and blend everything%u00a0until smooth.%u00a0
Look at how pretty that is.%u00a0%u00a0And so tasty%u2026.%u00a0I am not going to lie and say that I didn’t make a little%u00a0extra to drink, cause I did.
Now pour the puree into your molds to the fill line%u00a0(follow the%u00a0instructions that your molds give you) and place into the freezer.
And yes Shannon, these are in fact, your popsicle molds. Don’t worry, I’ll bring them back soon. (I am thinking some type of booze infused situation)
Once the freezer has done its job freezing%u2026 pop those suckers out.. (I let the mold sit on the counter for a few minutes so the popsicle pops out clean)
And heres to%u00a0the best popsicle date ever!
Happy Summer!%u00a0Happy Tuesday!
-C
A big chunk of seedless Watermelon (aboutt 11/2%u00a0cups)
1/2 ish cup of blueberries%u00a0(fresh or frozen)
Juice of 1 lime
a few fresh mint leaves
note. The popsicle mold that I used only needed 2 cups of popsicle juice. If you have a larger mold, just use%u00a0more of everything to get the amount you need
Remove rind from watermelon and add to a blender with the lime juice, mint and blueberries. Blend until eveytthing is pureed%u00a0and mixed all together. Pour liquid into popsicle molds and stick in freezer for at least 4 hours.
When ready to eat%u2026, pop those suckers out of there molds and%u00a0EAT!%u00a0
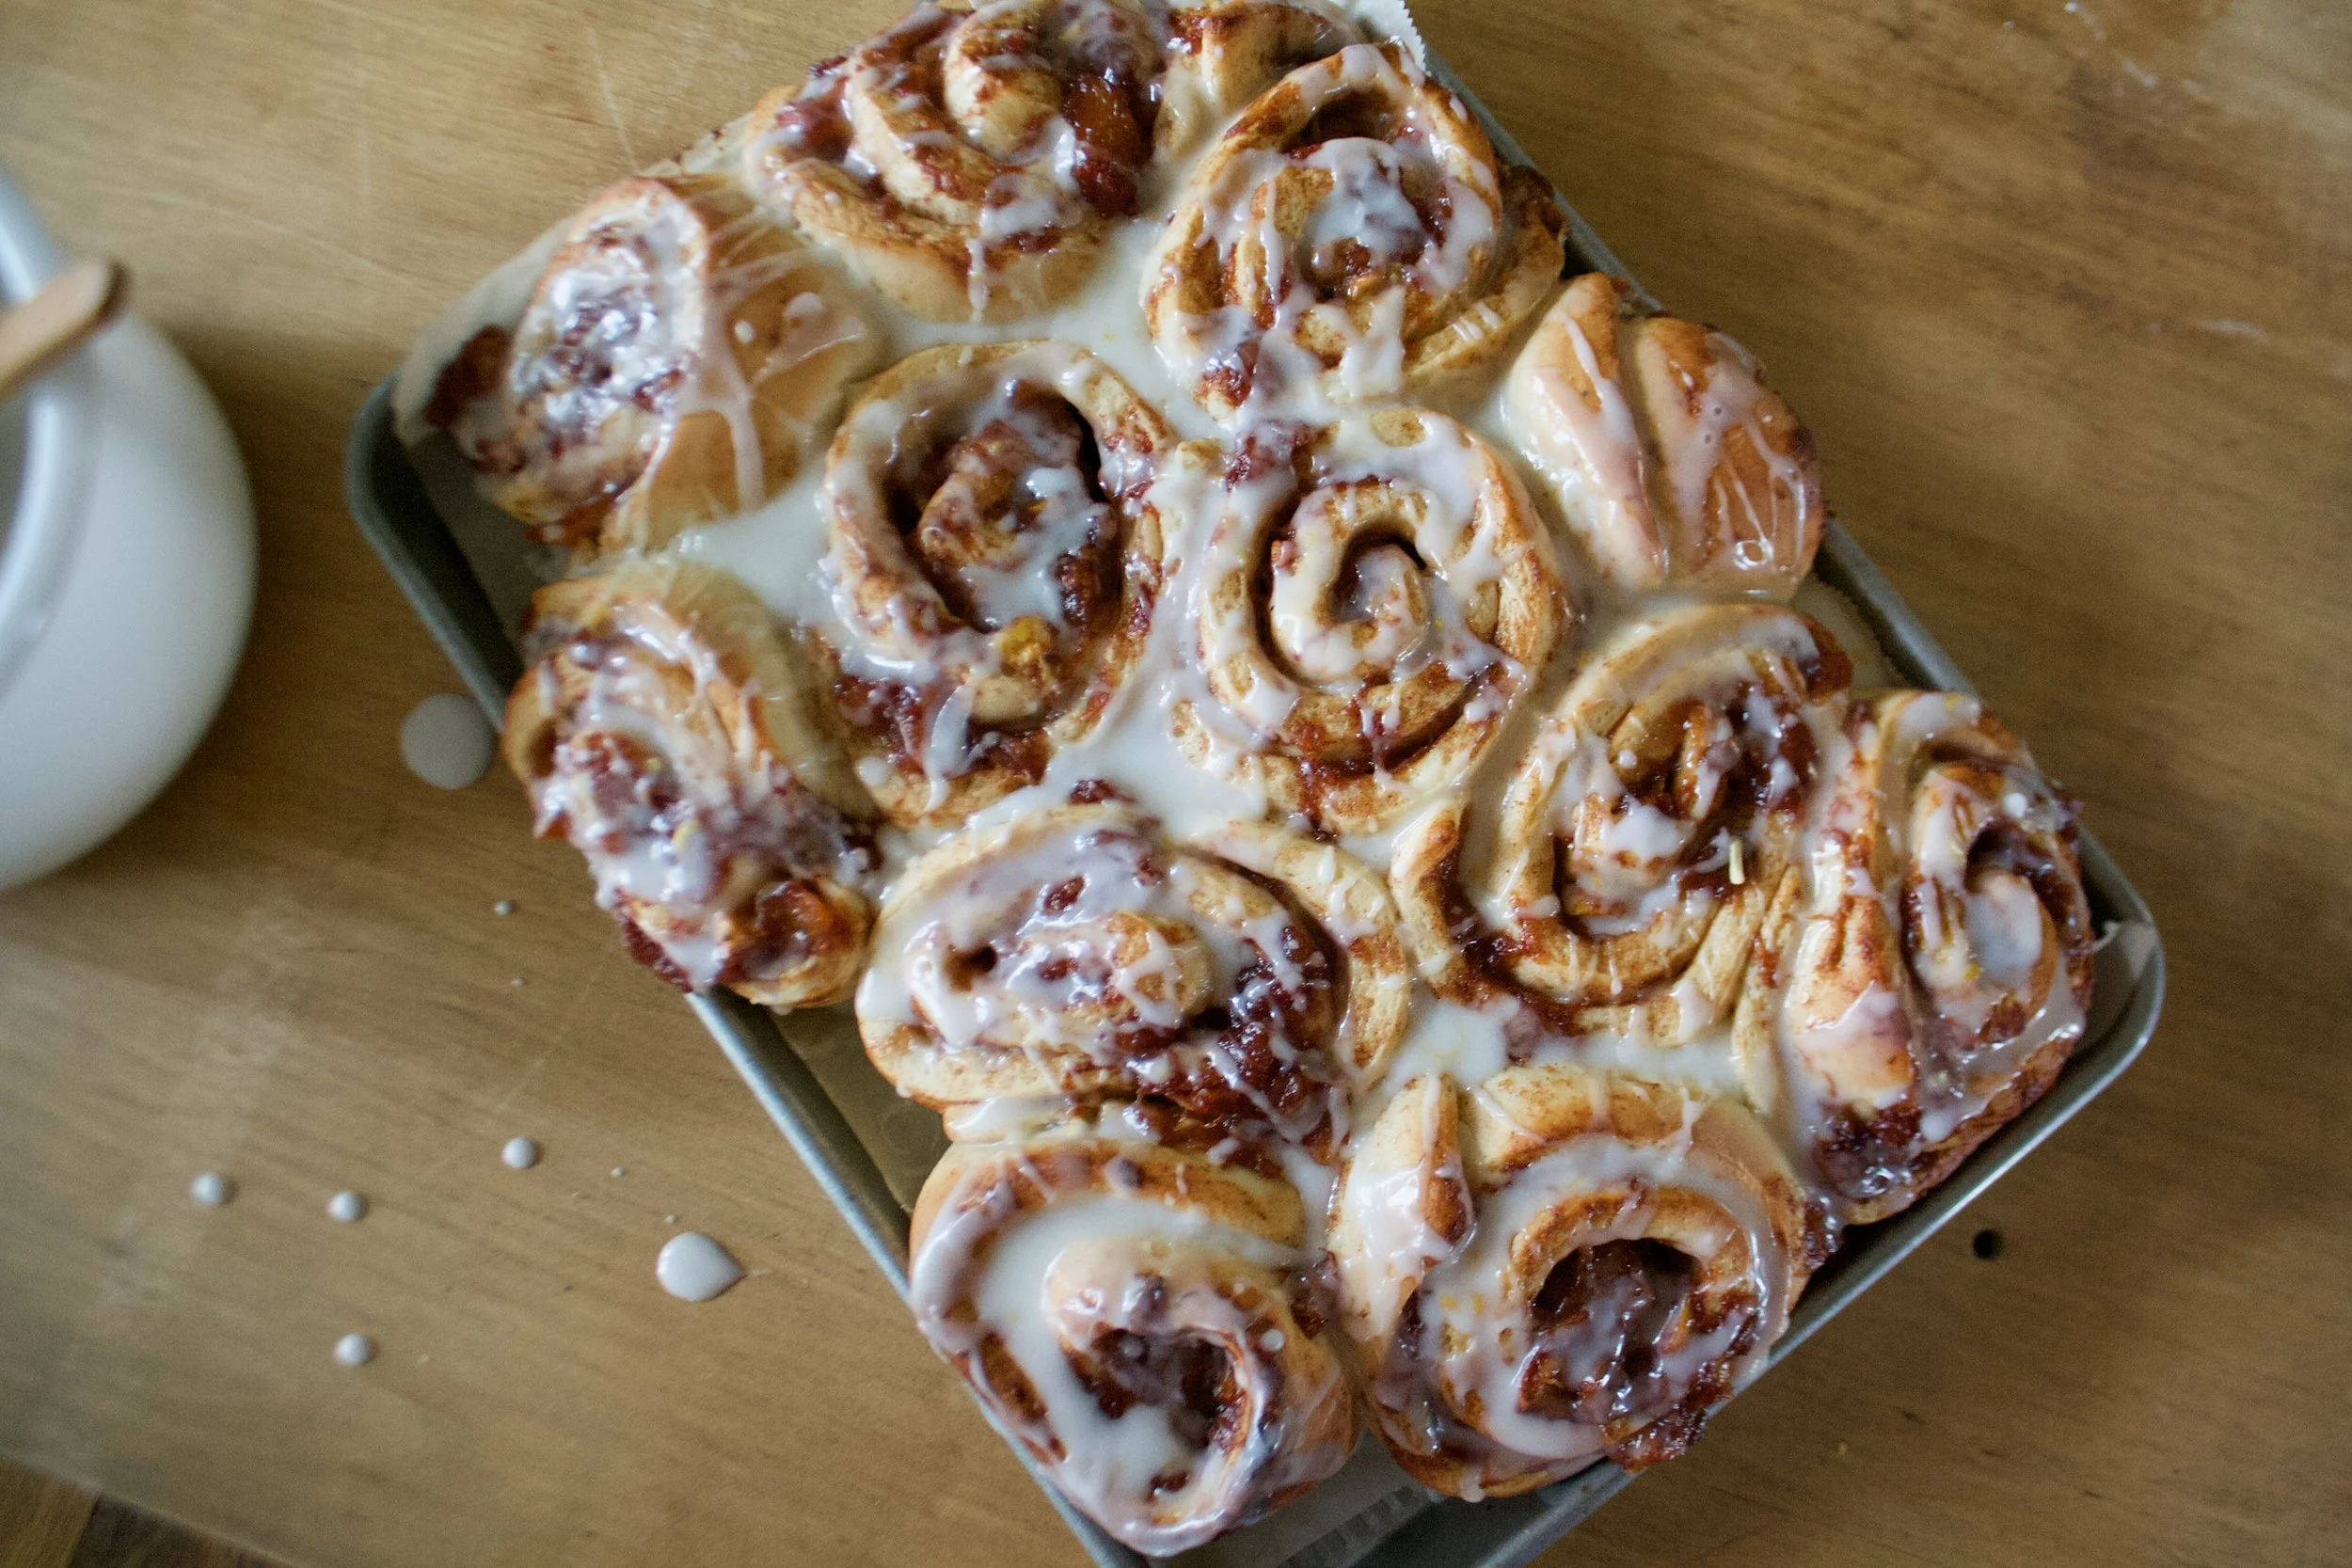
Who doesn’t like a good bun, right? %u00a0And just because this is where my mind wonders, peachy sweet buns. Doesn’t that sound like a pick up line or something you say to your significant other. Like, “Oh hey peachy sweet buns, you are looking good. Woo hoo”…….. Anyway, this is not about anyones peachy sweet buns, it it about actually sweet buns so u-hum, yeah.%u00a0
I am not trying to float my own boat here, but I am really really good at making buns, and you know what, I bet that you are too. They may seem a little intimidating, but really, it’s quite easy. I think what throws some people off is the yeasted dough and having to knead and waiting for the dough to rise,%u00a0but don’t let that stop you from sweet sweet buns. They are no harder to make then a boxed cake (maybe a little harder) and the results are by far more amazing and delightful (we don’t use the word delightful enough around here) then any old box or pre-made thing will ever be. Ever. Freshly made buns are what is right in this world.
If you are awesome and decide to make buns like any good person with a baking itch or a need for some sweet bun goodness does, make them peachy because its peach season and how can a peach bun not be that much more amazing? %u00a0Just think. Soft sweet dough, jammy cinnamon peaches, covered in a sweet lemony glaze……
Go on now, go and get yourself some peachy sweet buns.
The stuff. Flour and salt in the bowl, melted earth balance, brown sugar, yeast, warm soy milk, cane sugar, cinnamon, powdered sugar, a couple of lemons, and af course, peaches.
Warm (not hot) soy milk, yeast, cane sugar, an melted (but again, not hot) earth balance go into a big bowl and get whisked around. Then add in the flour and salt ans mix around until you just can’t.
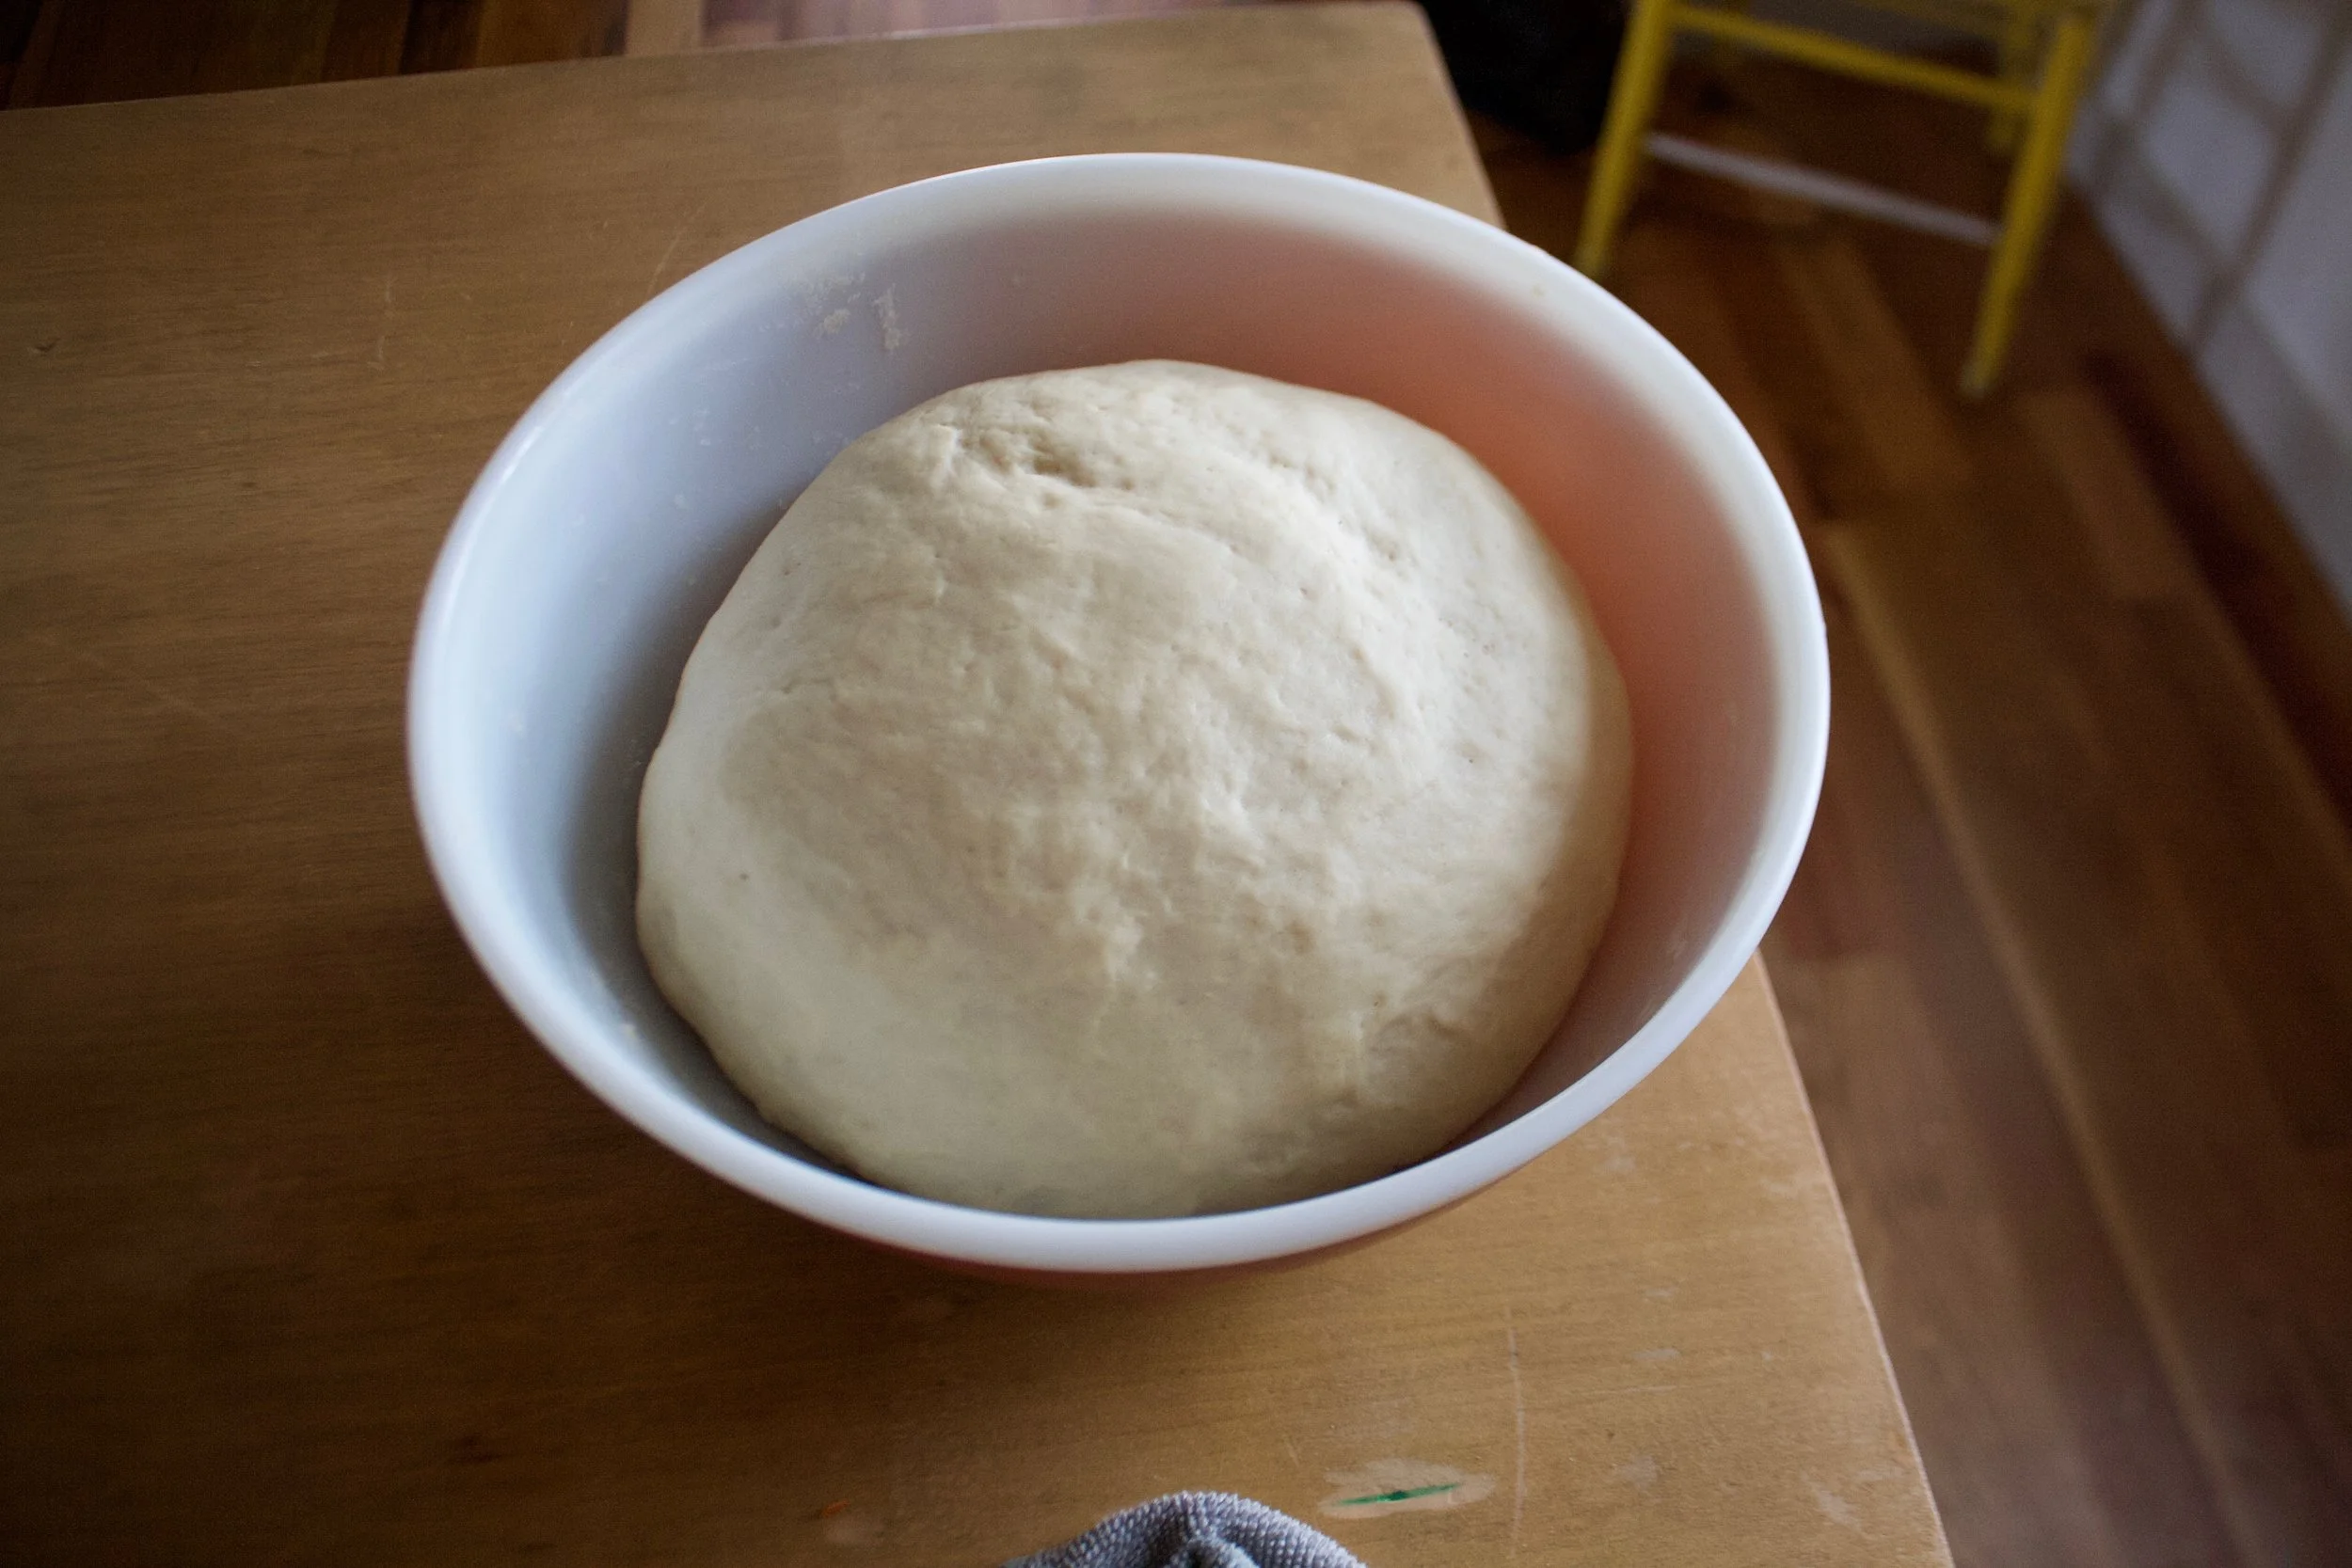
Time to knead. Dump the dough ad all the little bits onto a flour surface. Gather it all together and knead away, for about 5-8 minutes, or until the dough looks like….
This. Nice and soft and glossy. %u00a0Lightly grease the bowl ans stick the dough back into it, covered with a towel, and set for about 1 hour to rise and double in size.%u00a0
As soon as the dough is set ti rise, start on your peach filling. Chop up enough peaches that you have about 2 1/2 cups of chunks.
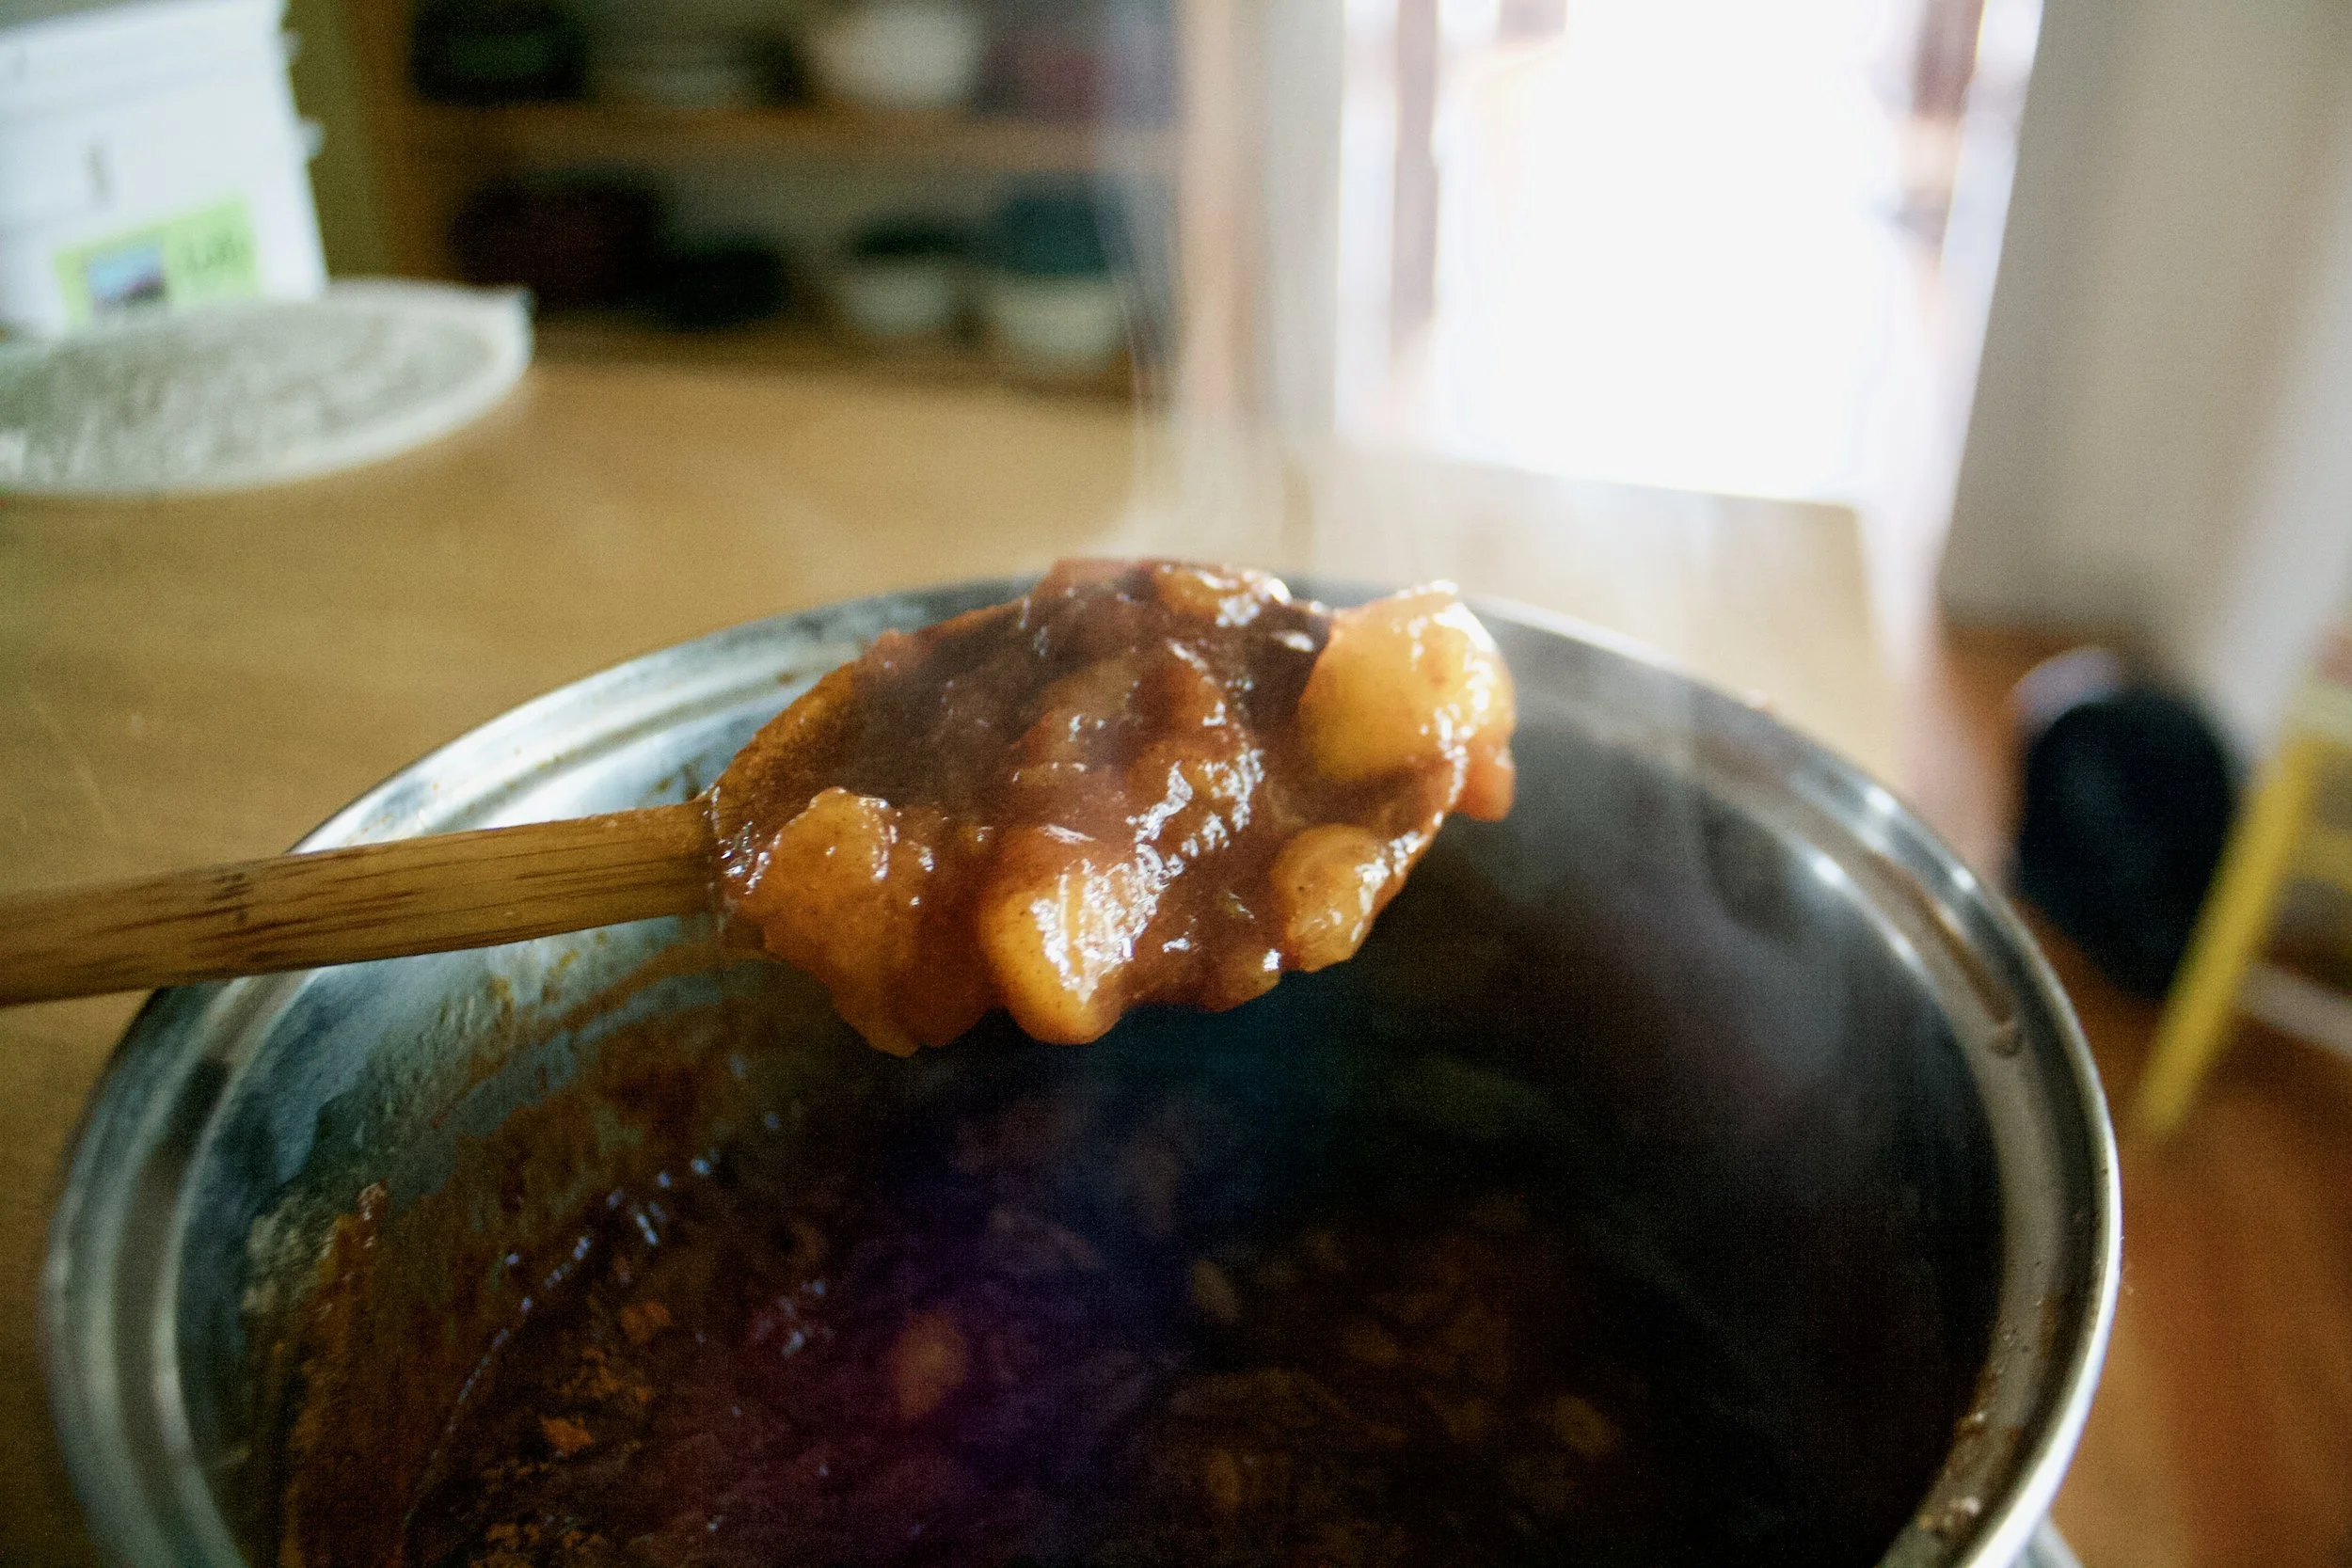
Brown sugar and peach chunks go into a pot and stuck on a medium heat until they start to bubble then set to a low simmer for about 20 minutes or until the peaches all break apart and reduce by half.
Add in the cinnamon and stir.. Peachy goodness. Now quick and stick that shit in the fridge or freezer to cool down.
BOOM. Dough did what it’s job and doubled. Time o make the buns.%u00a0
Place the dough on a lightly floured surface and roll our into a rectangle of sorts that is about 1/2 an inch thick%u00a0
Cover the surface with all the peachy jammy goodness, and sprinkle on the remaining finely chopped peaches.
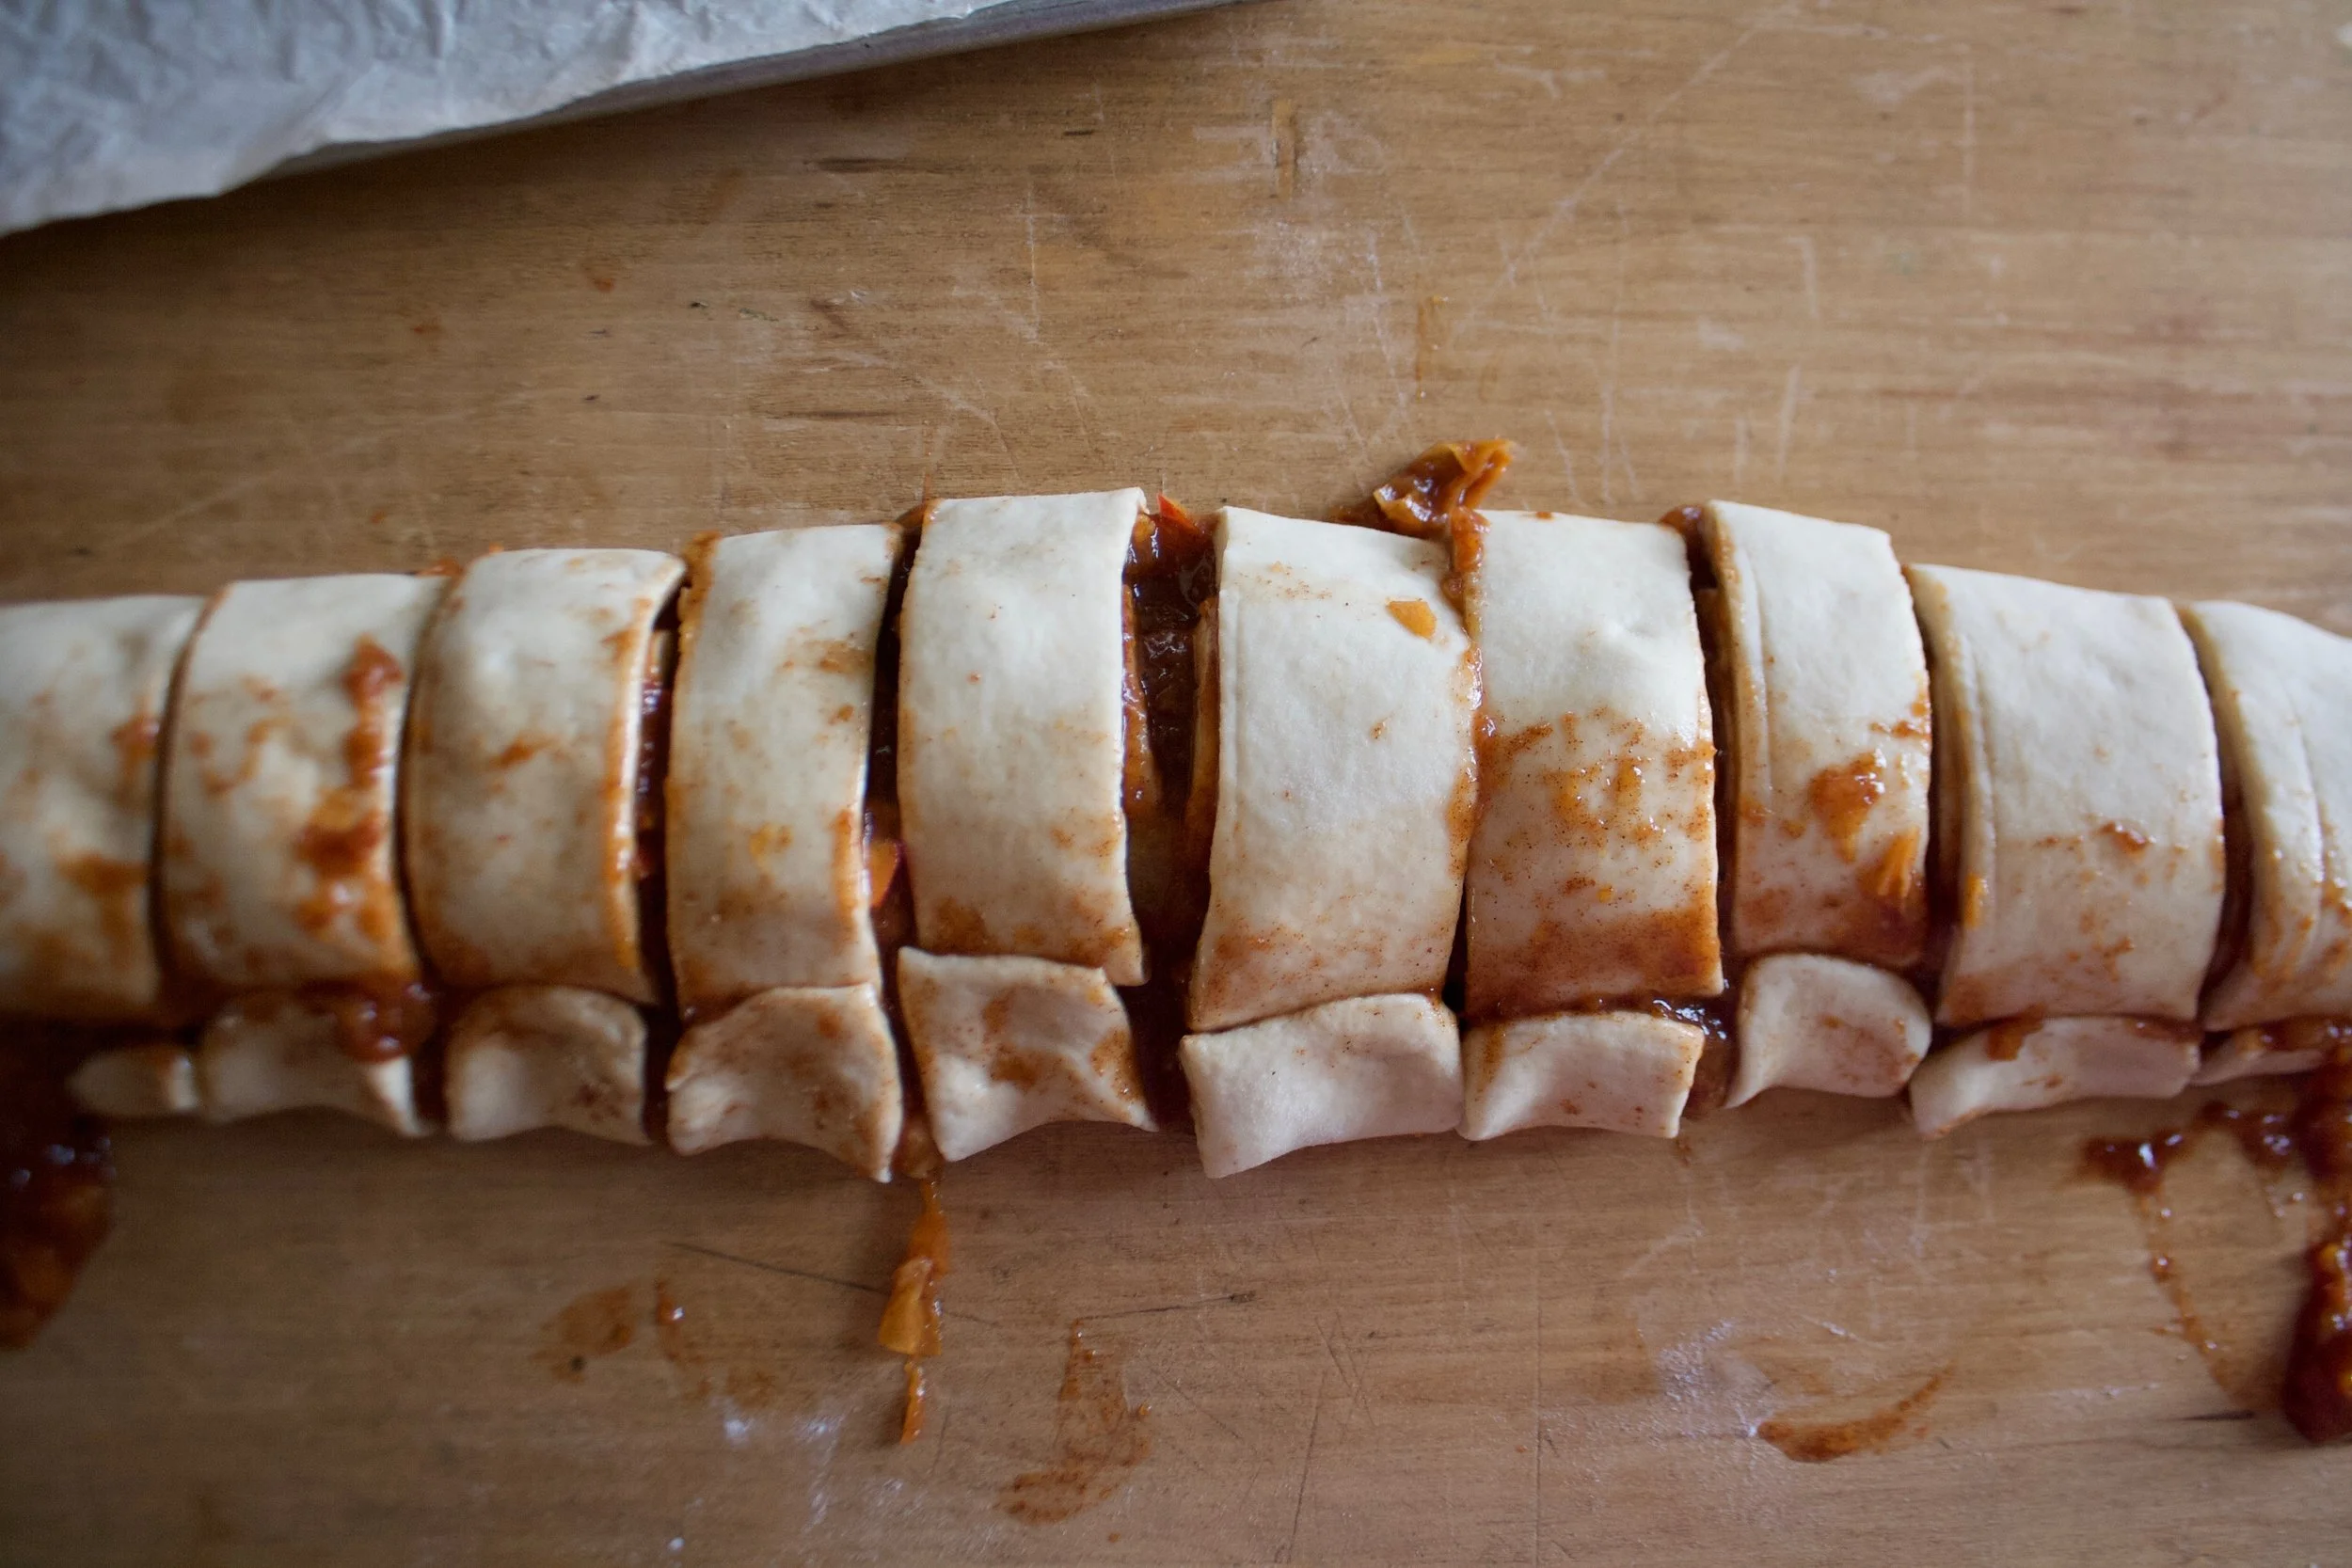
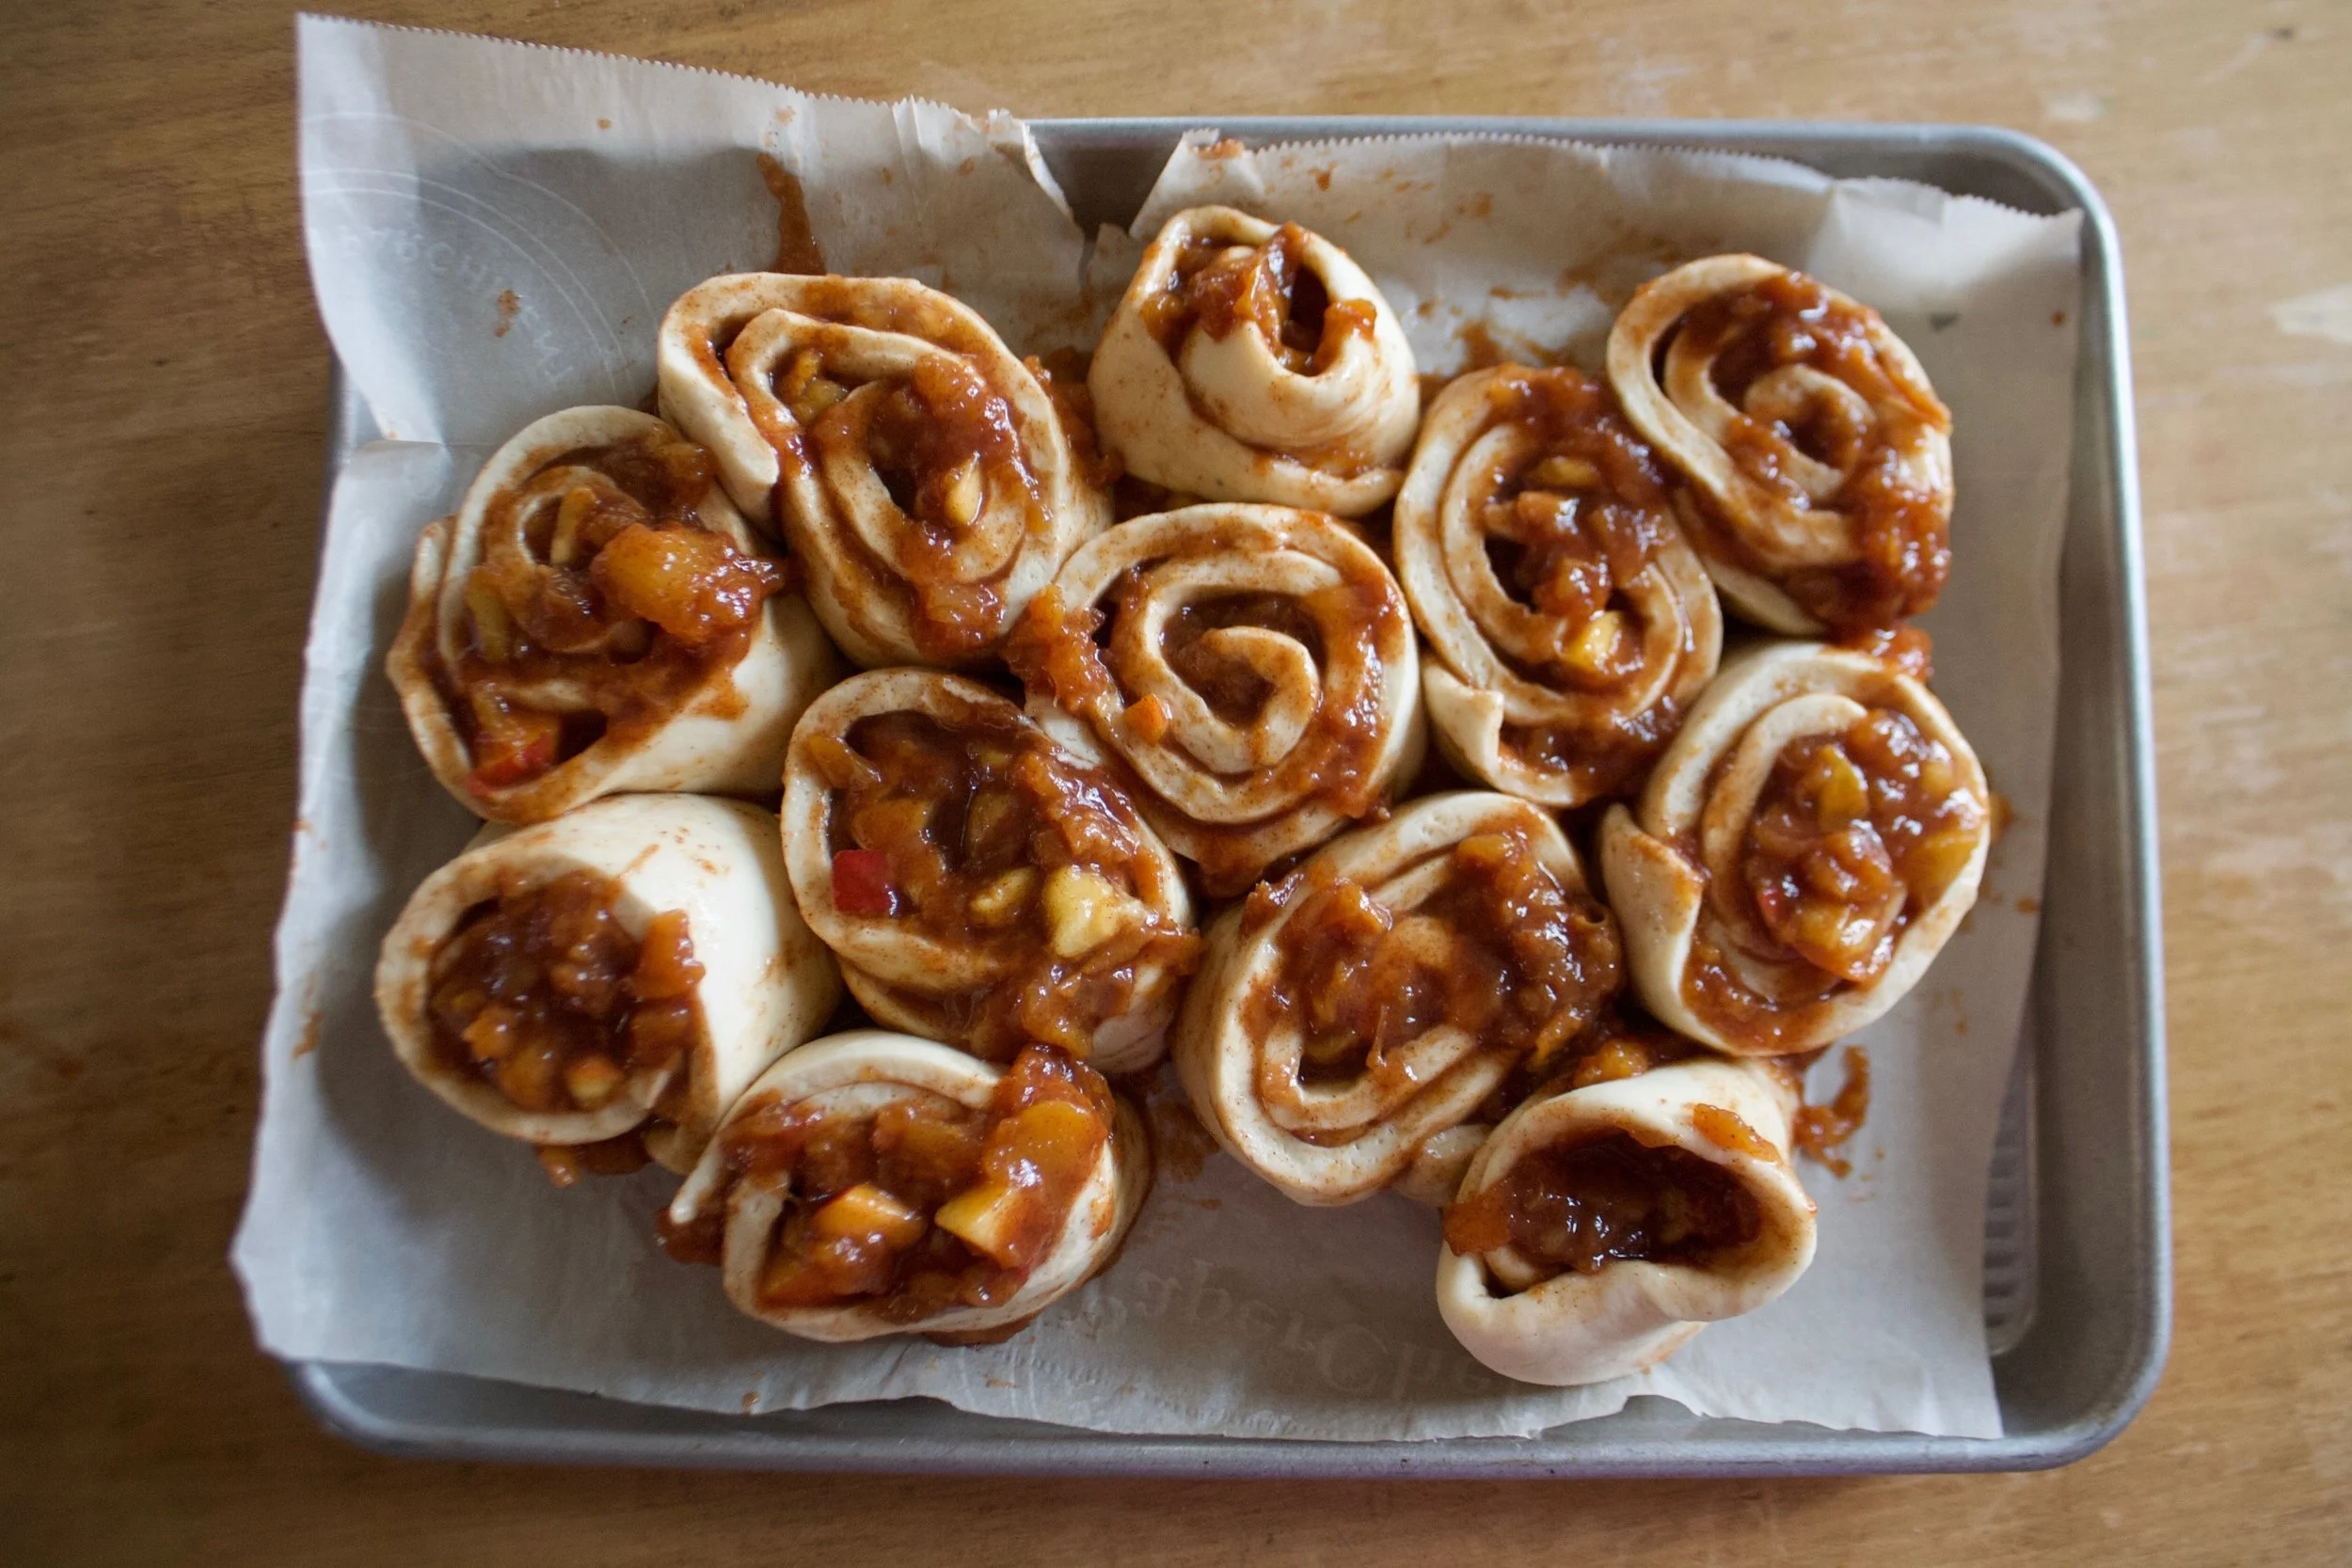
And roll, as tightly as you can, without squeezing all the filling out. I roll towards me, but roll away from you if it is easier. %u00a0It might get a little sloppy… it’s ok, just lick your fingers and keep going.%u00a0
Rolled and cut into 12 pieces.
Place the rolls carefully onto a grease and parchment lined baking 9×13 baking dish. In my picture I used a baking pan, which was not what I wanted to do, but I wasn’t thinking properly and so that’s what I did. Something with sides is preferable, but the baking pan did the job so really, your call.%u00a0
When you place the buns in the dish, place them toughen a bit, it helps then bake up high instead of out. %u00a0And any remaining go on jam that spilled out can get scraped right on top of the buns,%u00a0if you didn’t already eat it.
Now into the preheated oven these %u00a0babies go.
Look at those beauts. And they smell. A-MAZ-ING!!%u00a0
Right away get that glaze made. Powdered sugar, lemon zest, ans lemon juice. Super easy, just add the zest and juice to sugar and mix until smooth and glaze.%u00a0
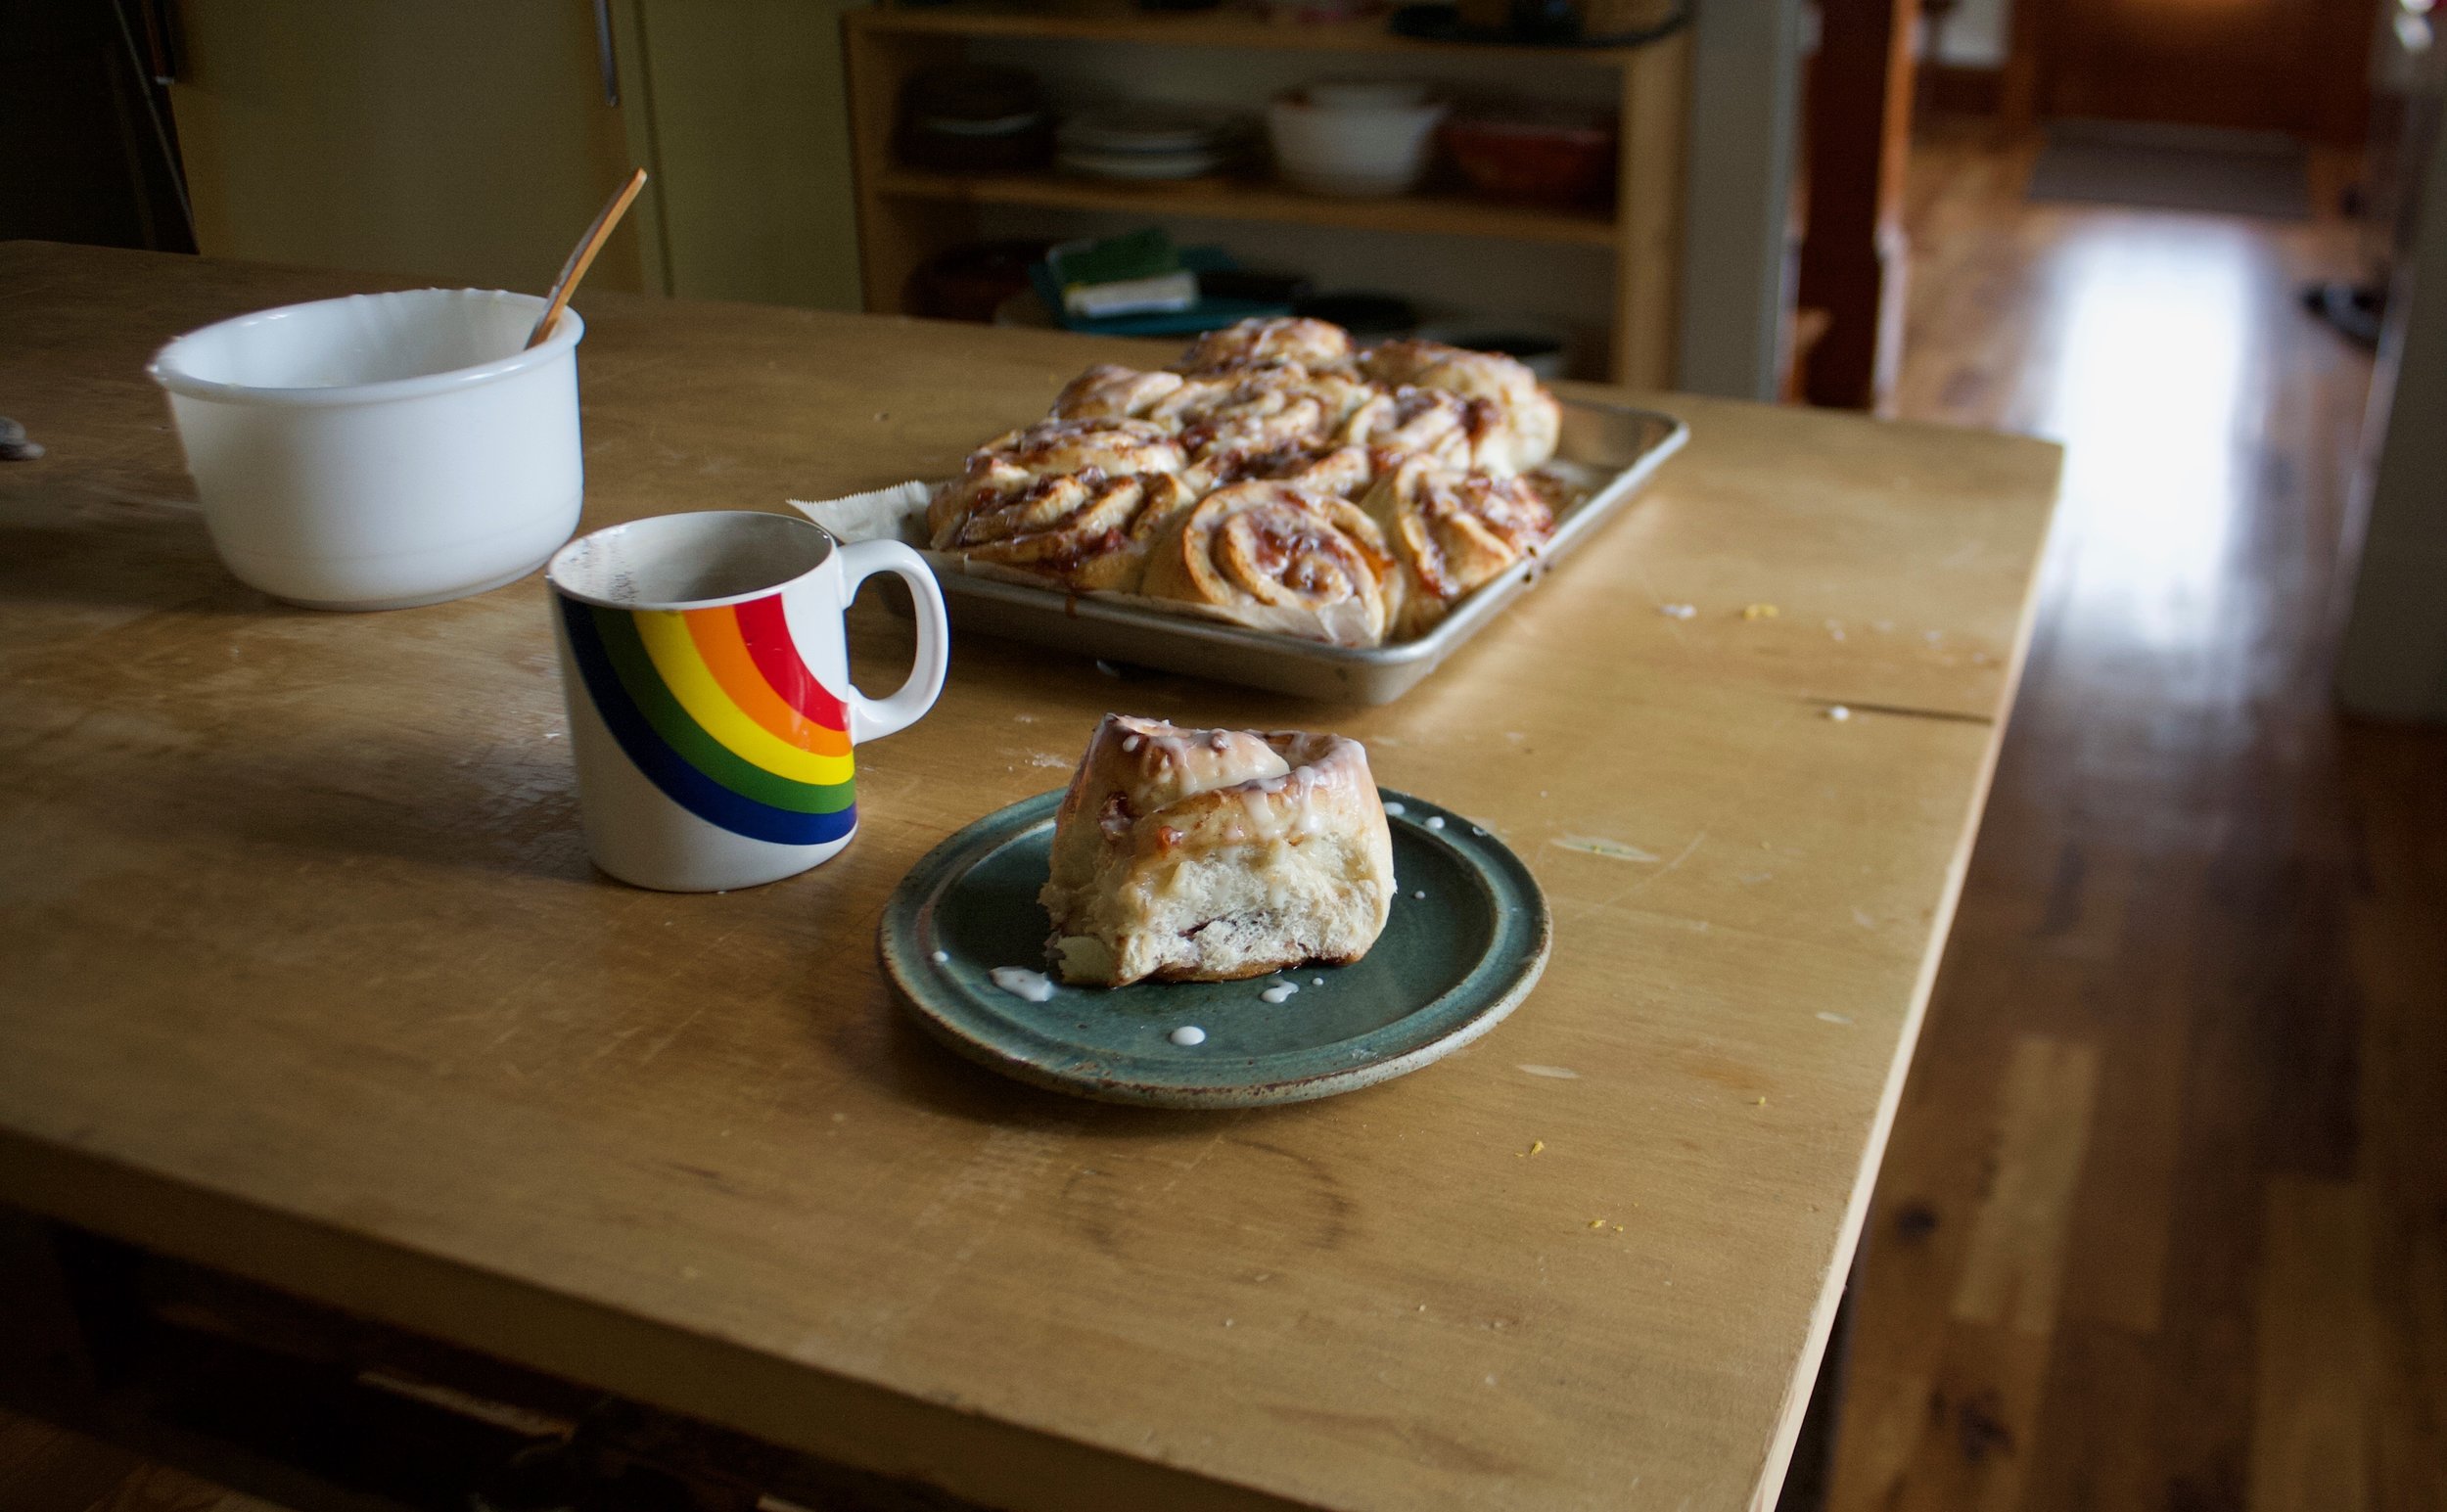
Pour glaze over warm buns. Make sure to hit them all or someone is going to be pissed they didn’t get enough glaze…..%u00a0
Then it’s really just up to you whether you wait for coffee or tea or not, but really, just eat right away. There should be very little time between newly glazed buns and a bun in your face.
Enjoy the peaches!
-C
Makes 12 Buns
For the Dough%u00a0
3 1/2 cups all purposes flour
1/4 %u00a0cup cane sugar
1 cup warm soy milk
2 teaspoon or 1 packet yeast
4 tablespoons melted vegan butter%u00a0
1 teaspoon salt
For the Filling%u00a0
3-4 good sized ripe peaches (about 3 cups chopped peaches)
3/4 cup brown sugar
1 tablespoon cinnamon
Juice of half a lemon
For the Glaze
1 lemons
1 1/2 cup powered sugar
In a large bowl mix together the yeast,%u00a0warm (not hot) soy milk,%u00a0sugar, and melted but cooled butter. Now add in %u00a0the salt and the flour. Mix until it’s too hard to mix then dump it all onto a lightly floured surface and knead for 7-10 minutes until the dough is %u00a0soft, elastic-y,%u00a0and smooth. Place dough back into a clean lightly greased bowl and drape with a damp towel. Let dough rise for about 1 to 1.5 hours or until it has doubled in size.
While the dough is rising, chop the peaches up until you have about 3 cups.%u00a0Place 2 1/2 cups of the %u00a0peaches into a medium sized pot with the brown sugar and lemon juice and stick on medium heat. Set the rest aside. Cook for about 20 minutes, stirring and mashing with a wooden spoon every few minutes,%u00a0until mixture has become thick and reduced by about 1/2. Remove from heat, stir in cinnamon,%u00a0%u00a0and place in fridge to cool.%u00a0
Once thee dough has doubled, dump onto a flour surface and roll our into a retacnge that is about 1/2 inch thick %u00a0Grab your peach mixture and spread the mixture evenly over the dough. Evenly distribute %u00a0the remaining chopped peaches over jam. %u00a0And then it’s the to roll.
Start from the long side and start to roll toward the other end, keeping it as tight as possible without squeezing out all the filling. %u00a0Once rolled, slice into 12 even sized buns.
Place on a lightly greased and parchment lined 9×13 inch baking sheet or pan and let rest and rest for another20 minutes or so. OR if you want to wait to bake them off,%u00a0cover them with plastic and set into the fridge for up to 24 hours. When you are ready to bake, remove from fridge and let the buns set on counter to come to room temperature before baking.%u00a0
Preheat oven to 350.
Place rolls into oven. Bake for 30-35 minutes or until all the buns have gotten a nice golden brown on top, and if you want to take the internal temp, that the temp has reached 190.%u00a0
Once the buns are done %u00a0baking, mix together the zest and juice of the lemon and powdered sugar. If the glaze seems to thick, add more juice or water, to think, add more sugar. Pour glaze all over warm (but not hot) buns.
And now all you need to do is serve up those buns right away, nice and warned.
Any left overs should be stored in the fridge for 3-4 days but should definitely be warmed up in the microwave for a minute or two before serving. They also freeze well too.%u00a0
I still can’t believe that we bought a new house,%u00a0 not even a week ago. %u00a0Like whoa holy crap!
And with any fantastic and great house that the mr and I would buy, this place needs a fair amount of work (a few walls down, a small addition to the upstairs, and new kitchen and bathrooms to start) But other then the small details of that, this place is a freaking gem. I am more then excited to get to it and start removing, ripping and tearing out the crap to unearth and enhance the beautiful old house to it’s glory! Oh man is it going to be a long, fun filled, couple of months ahead of us!
So the day after we closed, we had a bunch of our family and friends come over to check out the place. Me being me, I needed to test out the new kitchen before we completely gut it and like any good hostess, I just had to make sure I had some snacky , good smelling, bakes treat for all the folks coming in and out of the place. So I made muffins. My initial thought was cookies, but I really didn%u2019t want to have to hover over the stove and plus, I had a bunch of sweet potatoes and cranberries that needed using up (sound familiar, this is the muffin for you)
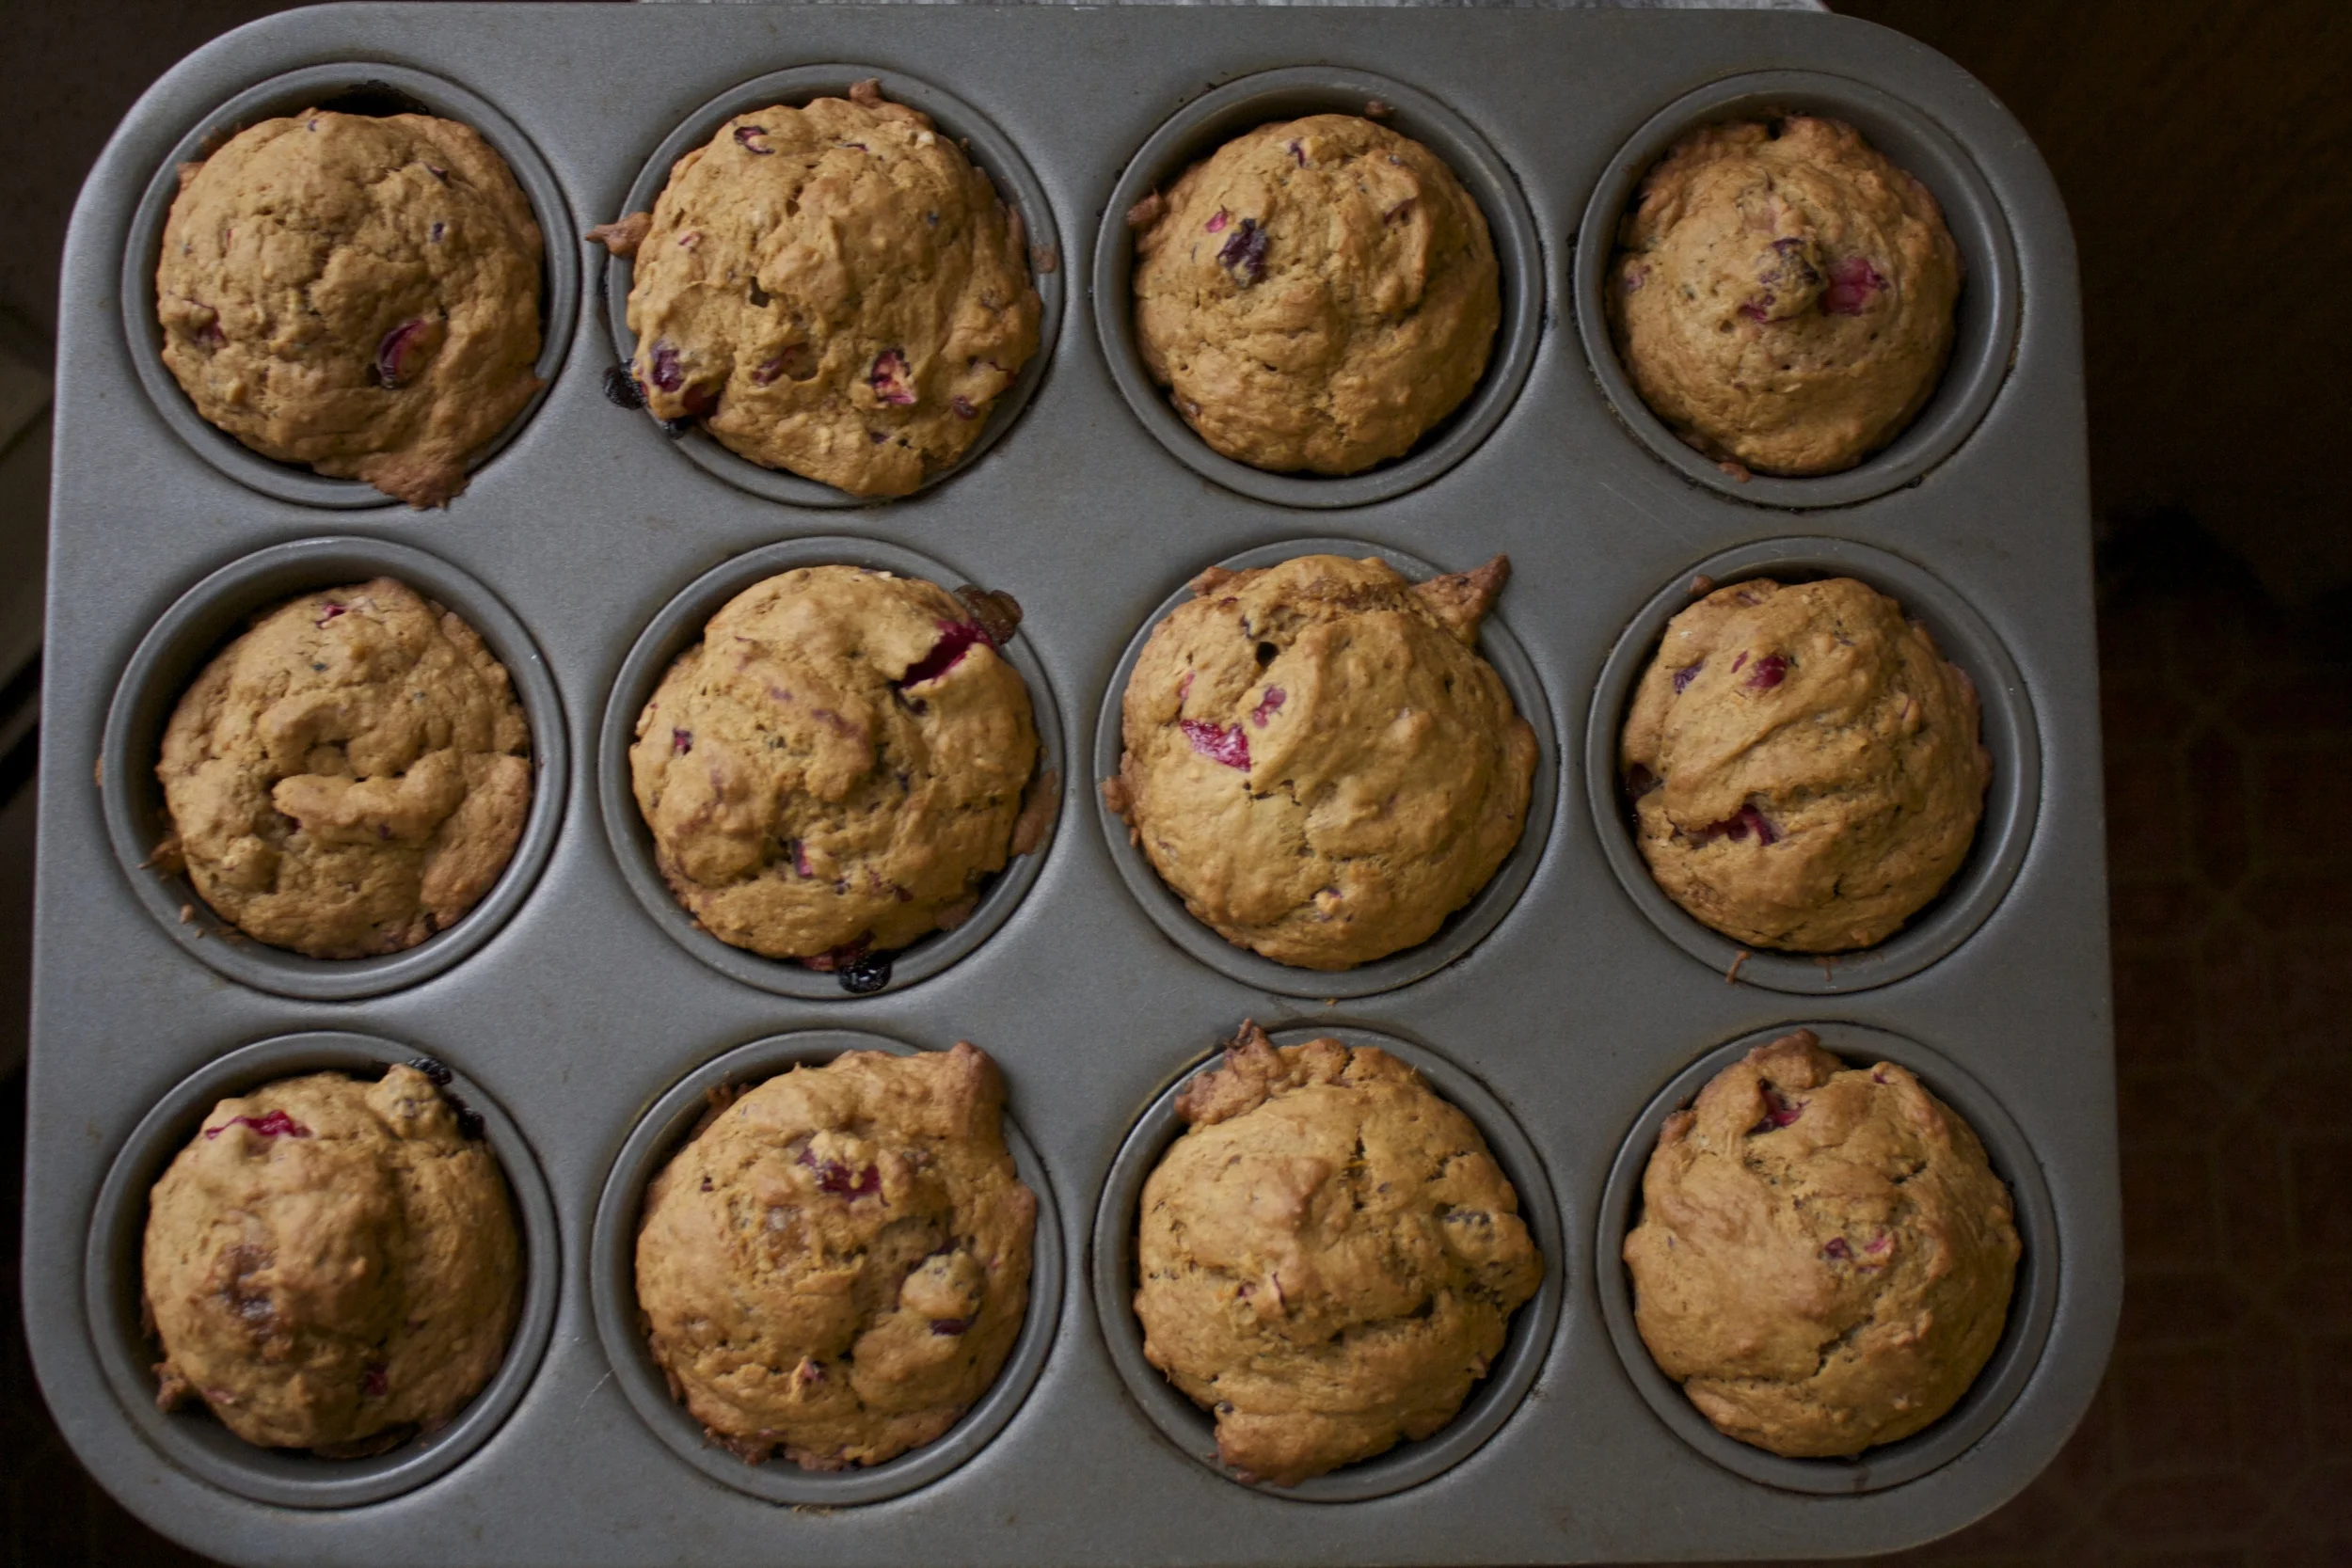
And bonus, the house filled up wit the sweet smell of baking. (That was my plan) and the muffins, they were a hit!
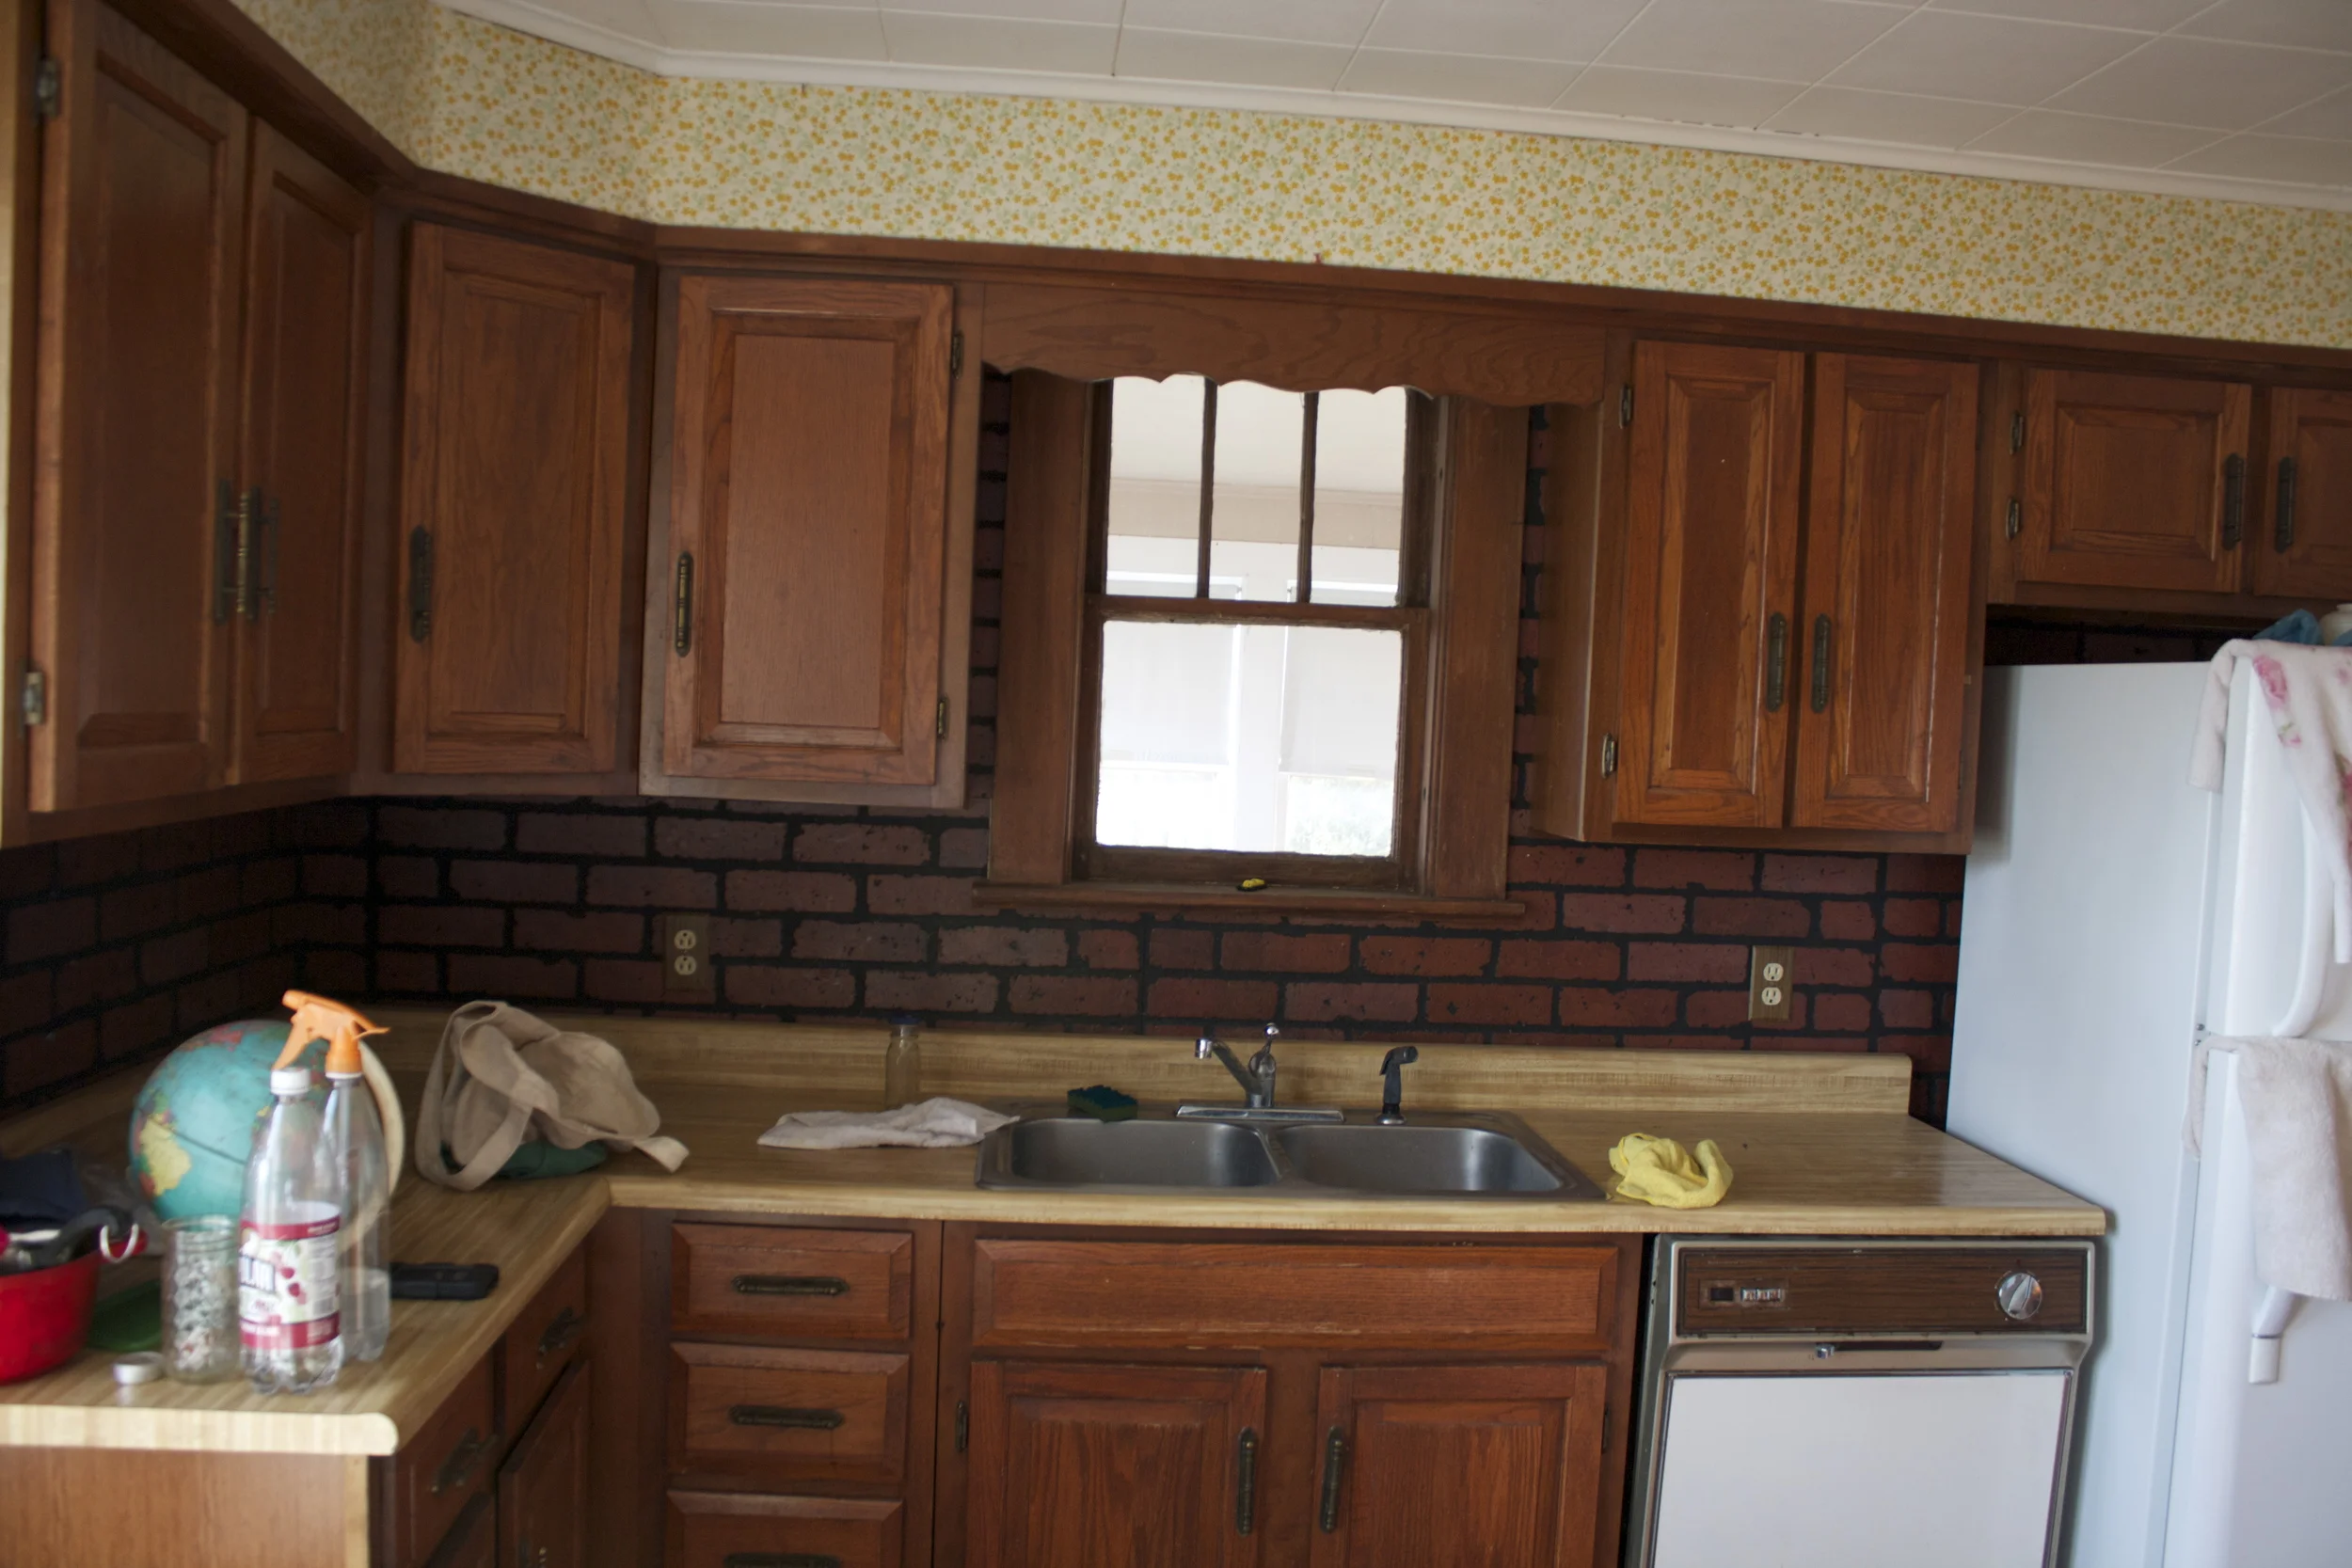
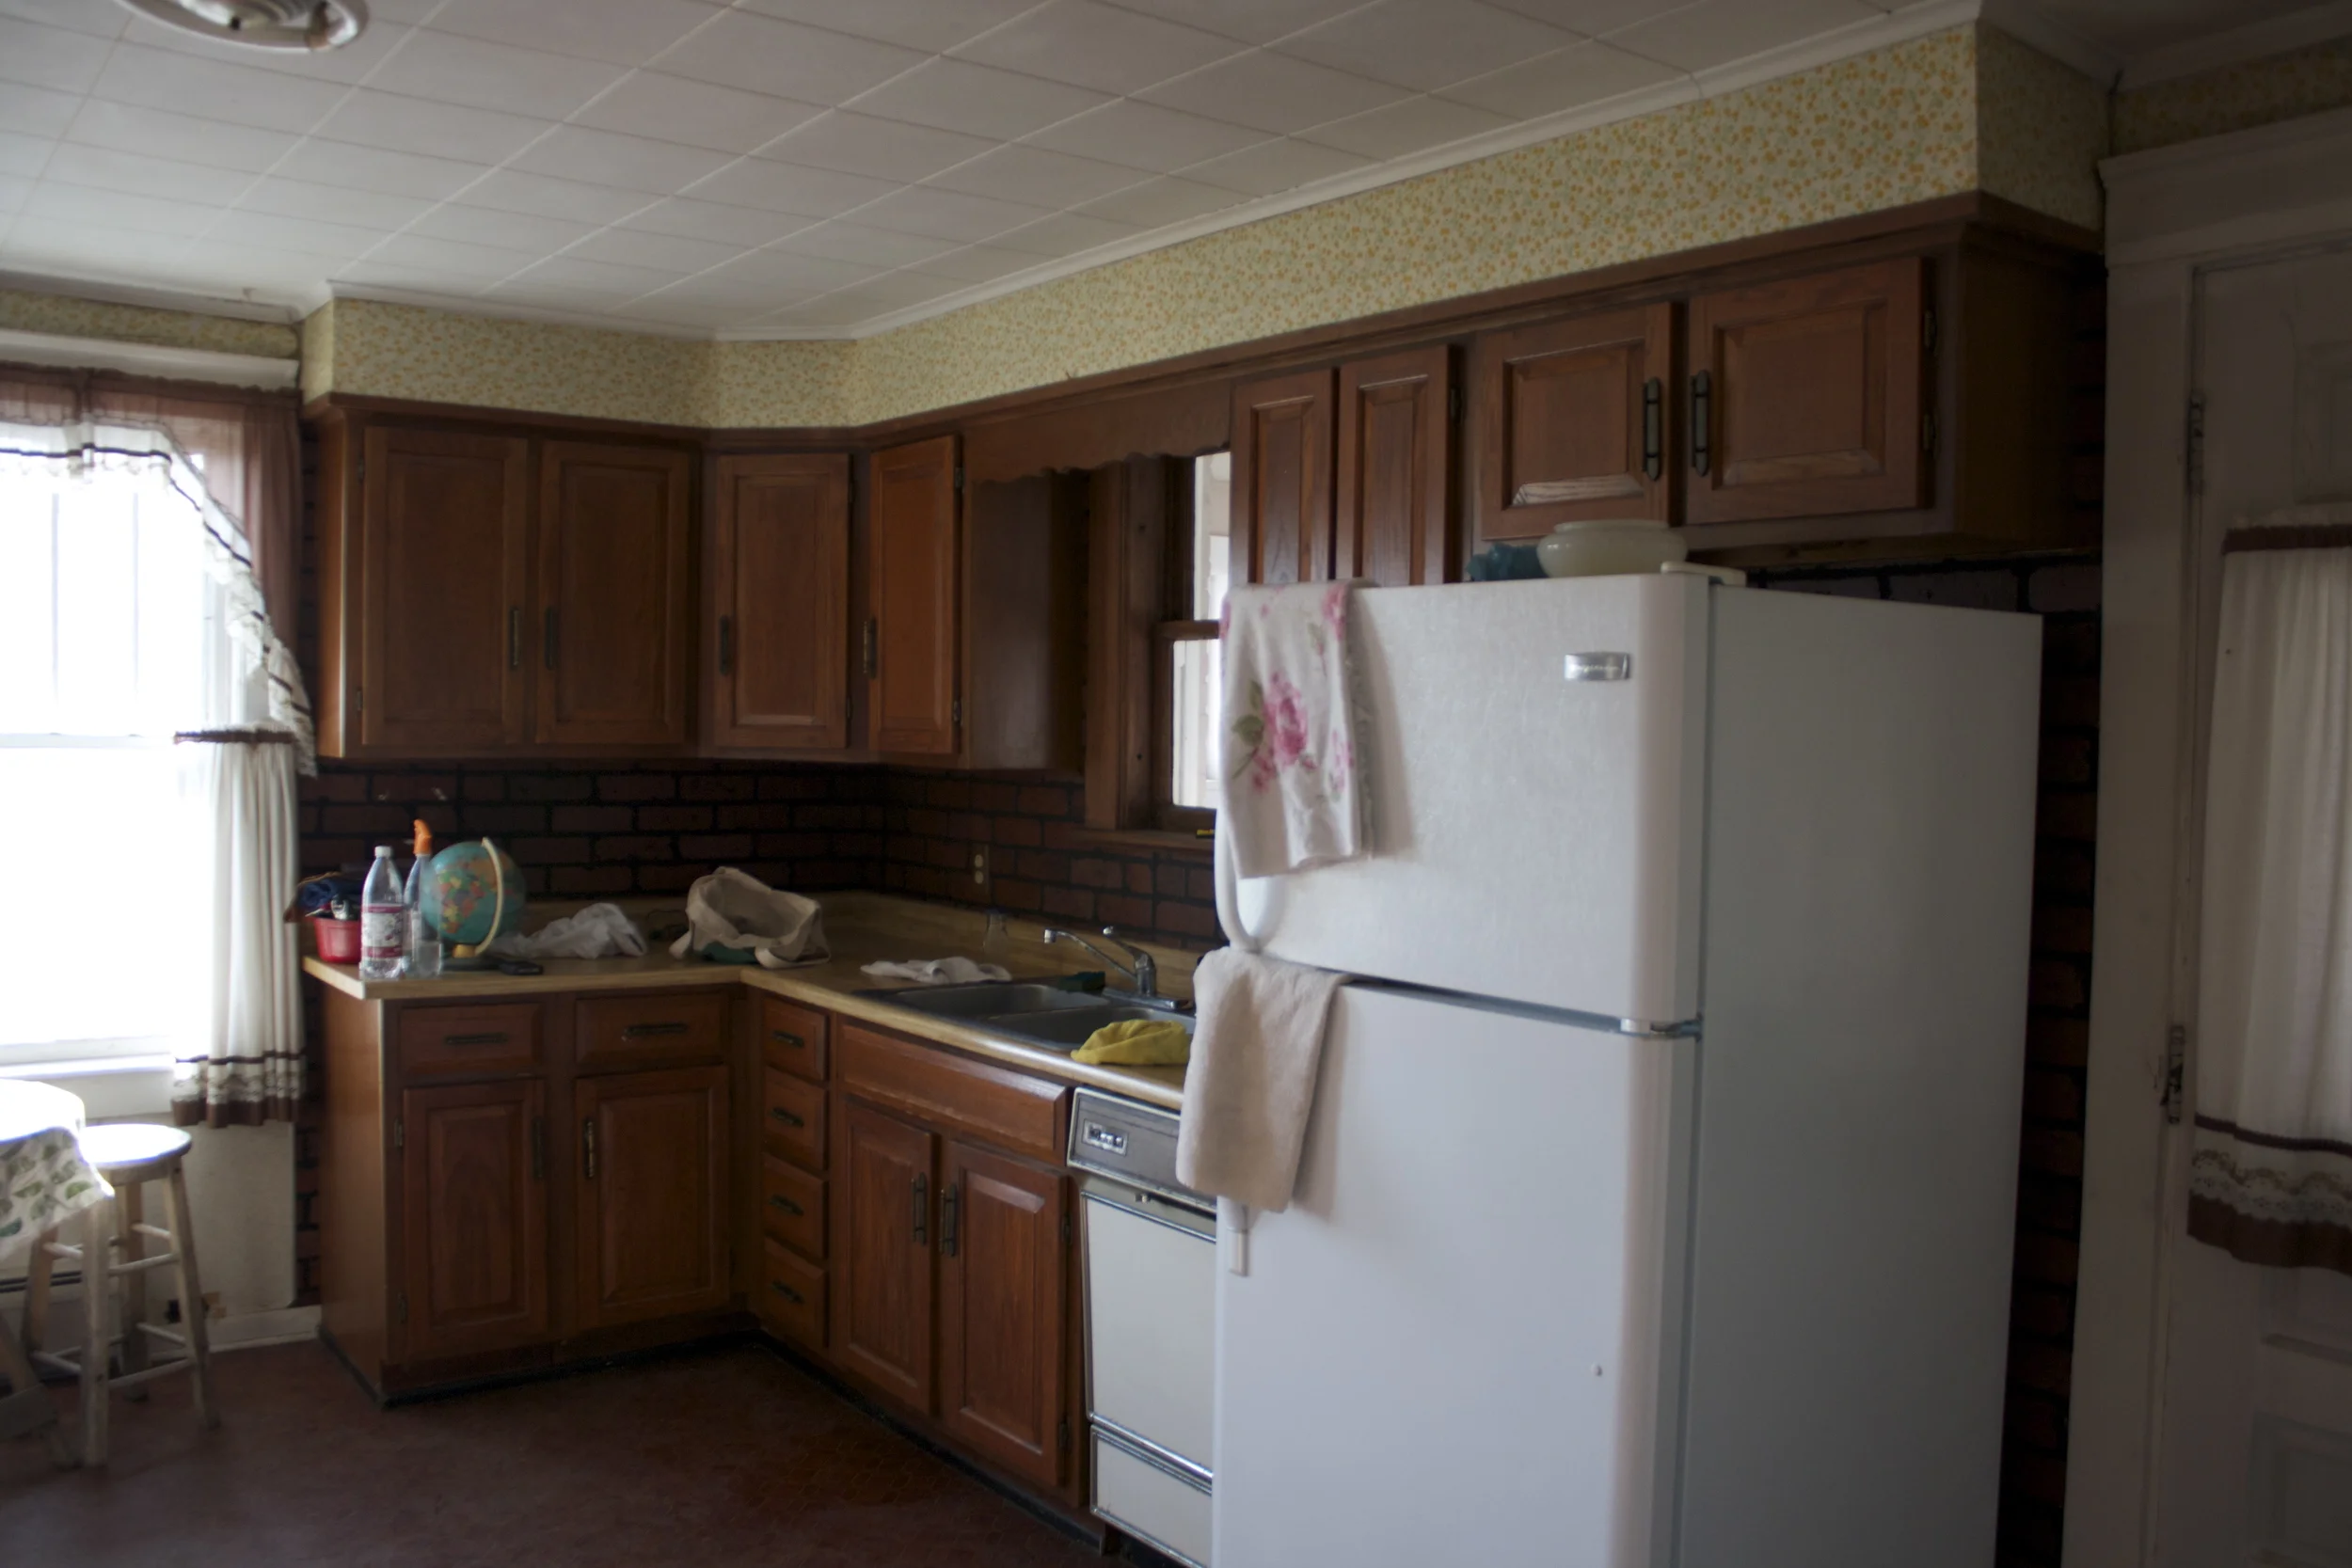
The kitchen!!! Isn%u2019t it %u00a0so freaking ugly cute fantastic? Check those windows out.%u00a0
So back to the muffins.%u00a0I was being practical and premixed up some of the stuff %u00a0and brought it over to the house.%u00a0
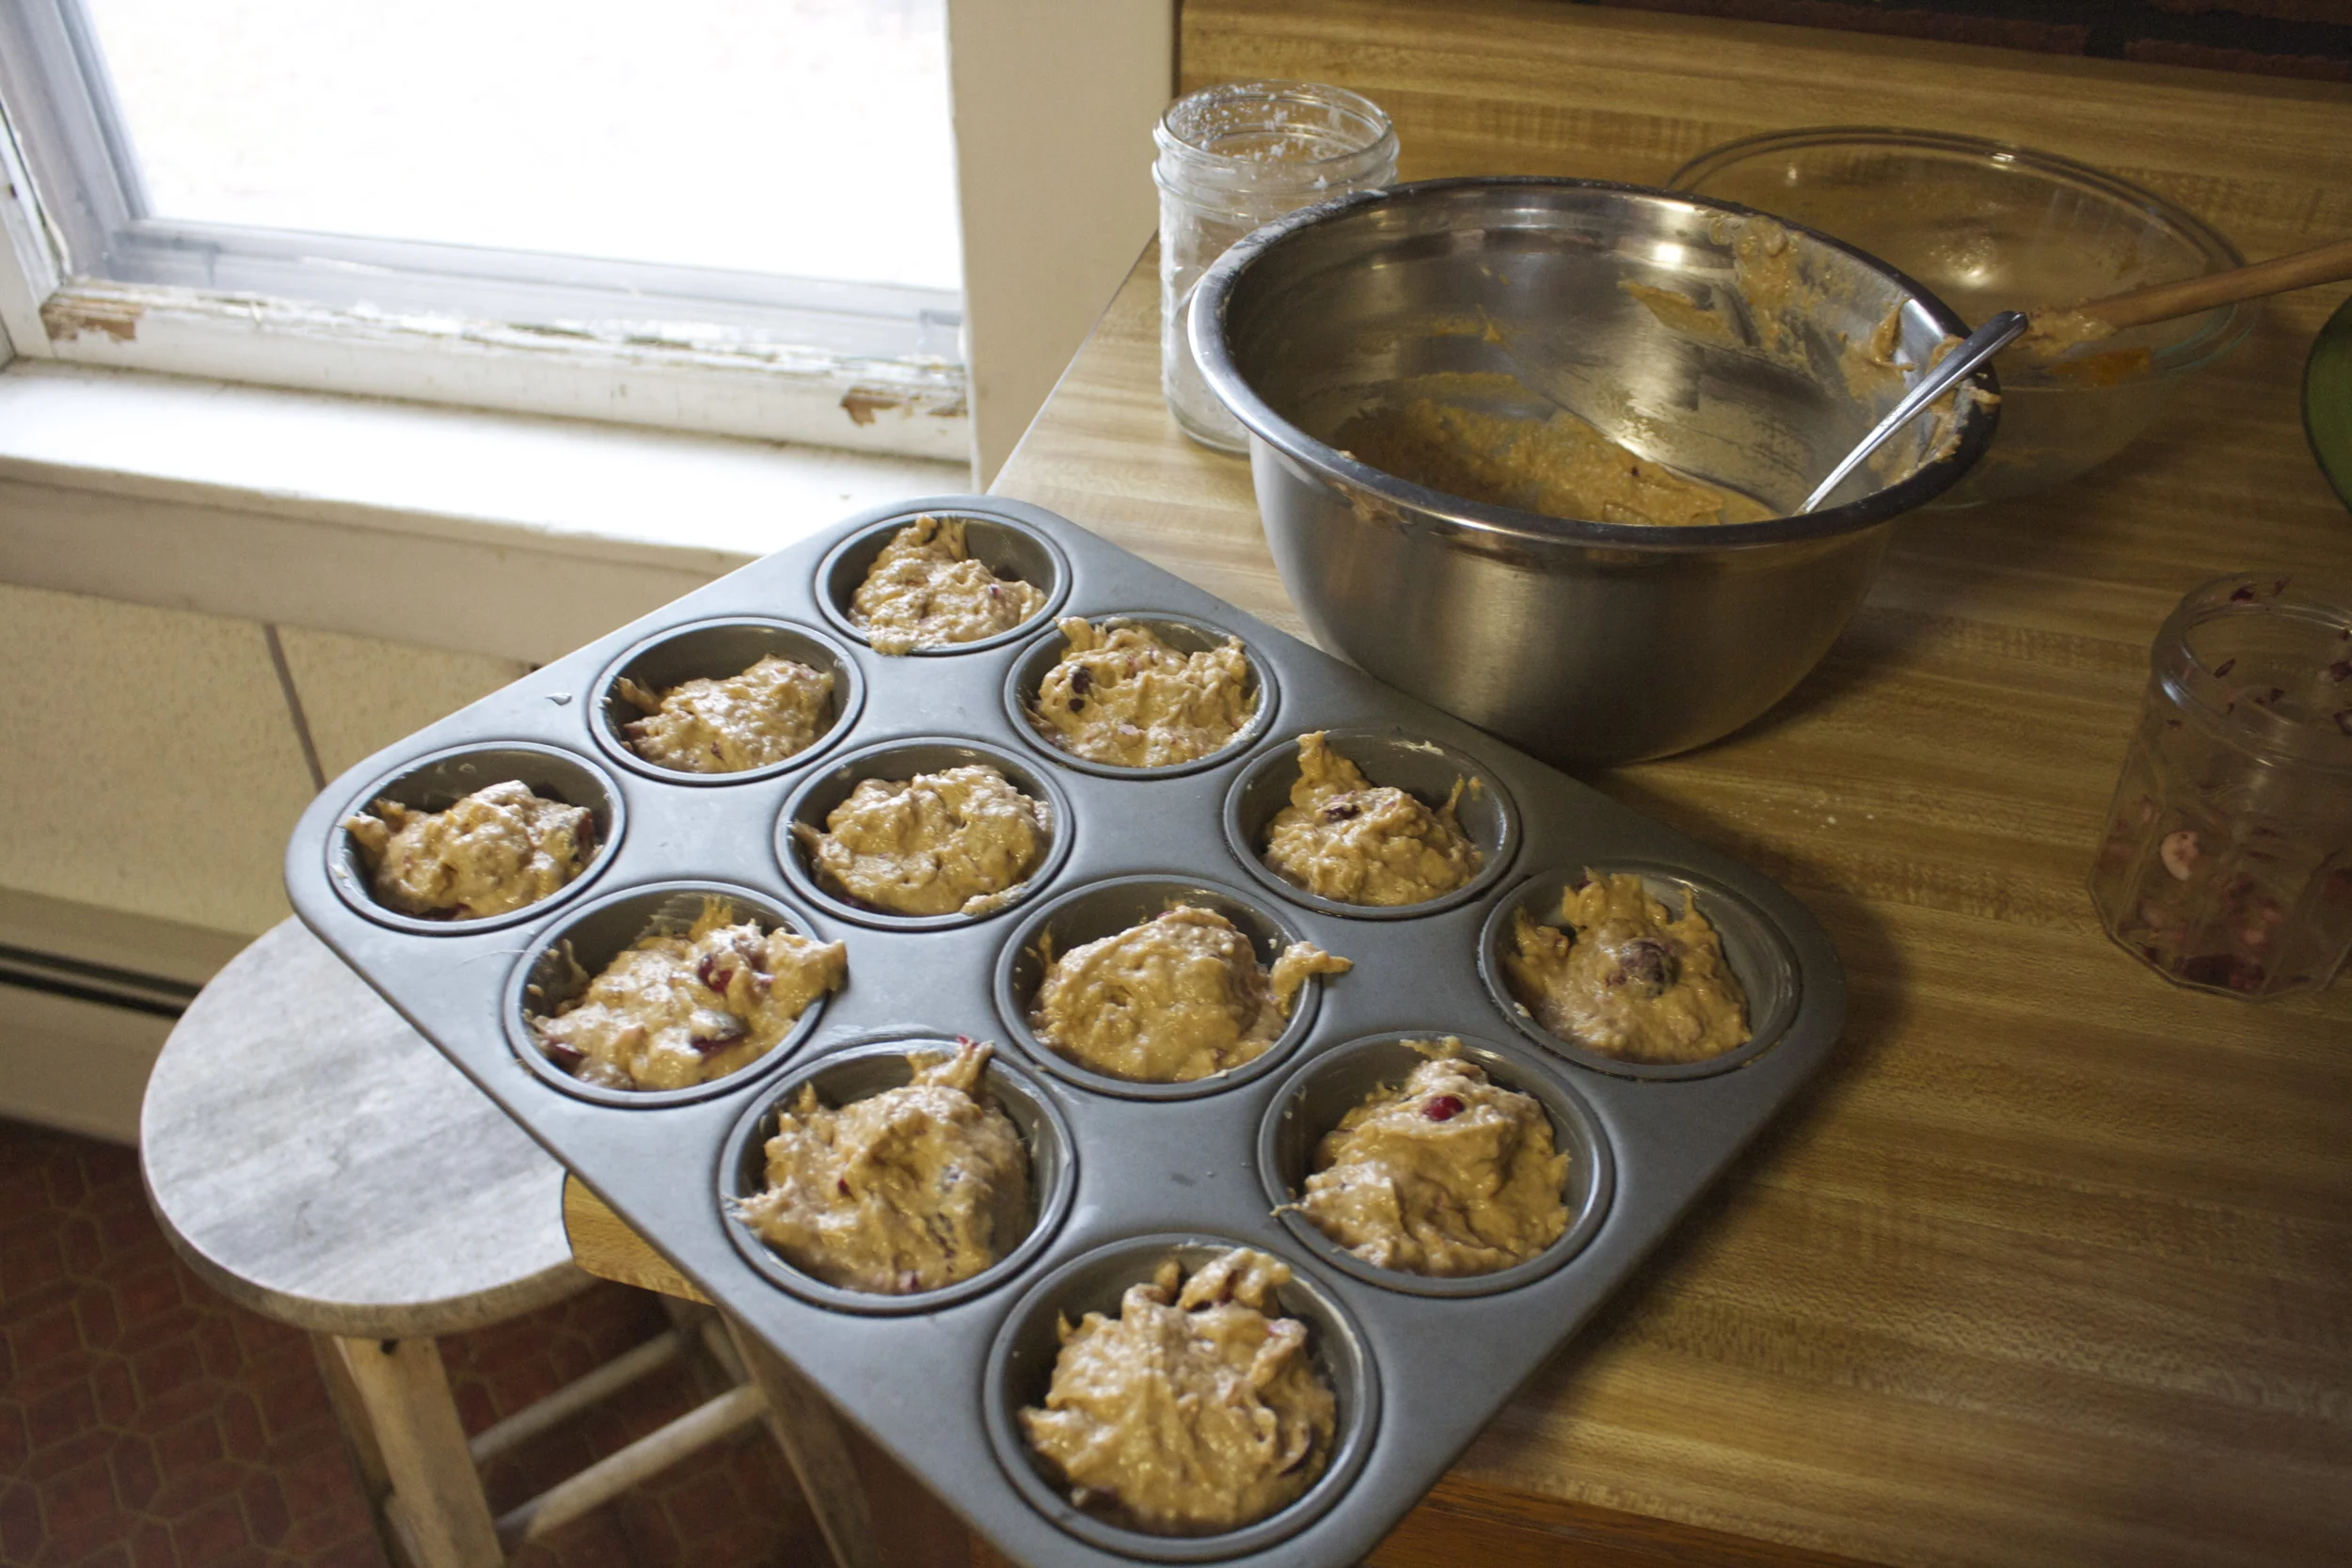
The stuff. A bowl of all purpose and whole wheat flour along with some salt, baking powder and soda, cinnamon and ginger. And a bowl of wet which has a a bakes sweet potato, oil, and brown sugar. And a cup of almond millk with a bit of vinegar mixed in and a jar of mostly %u00a0chopped up fresh cranberries
Mix the crap out of the wet until the mixture is mostly smooth. I used a plan old baked sweet potato %u00a0for this but feel free to use any left over seer potato %u00a0casserole you have laying around for this, just adjust spices if there are a bunch already in the potato.
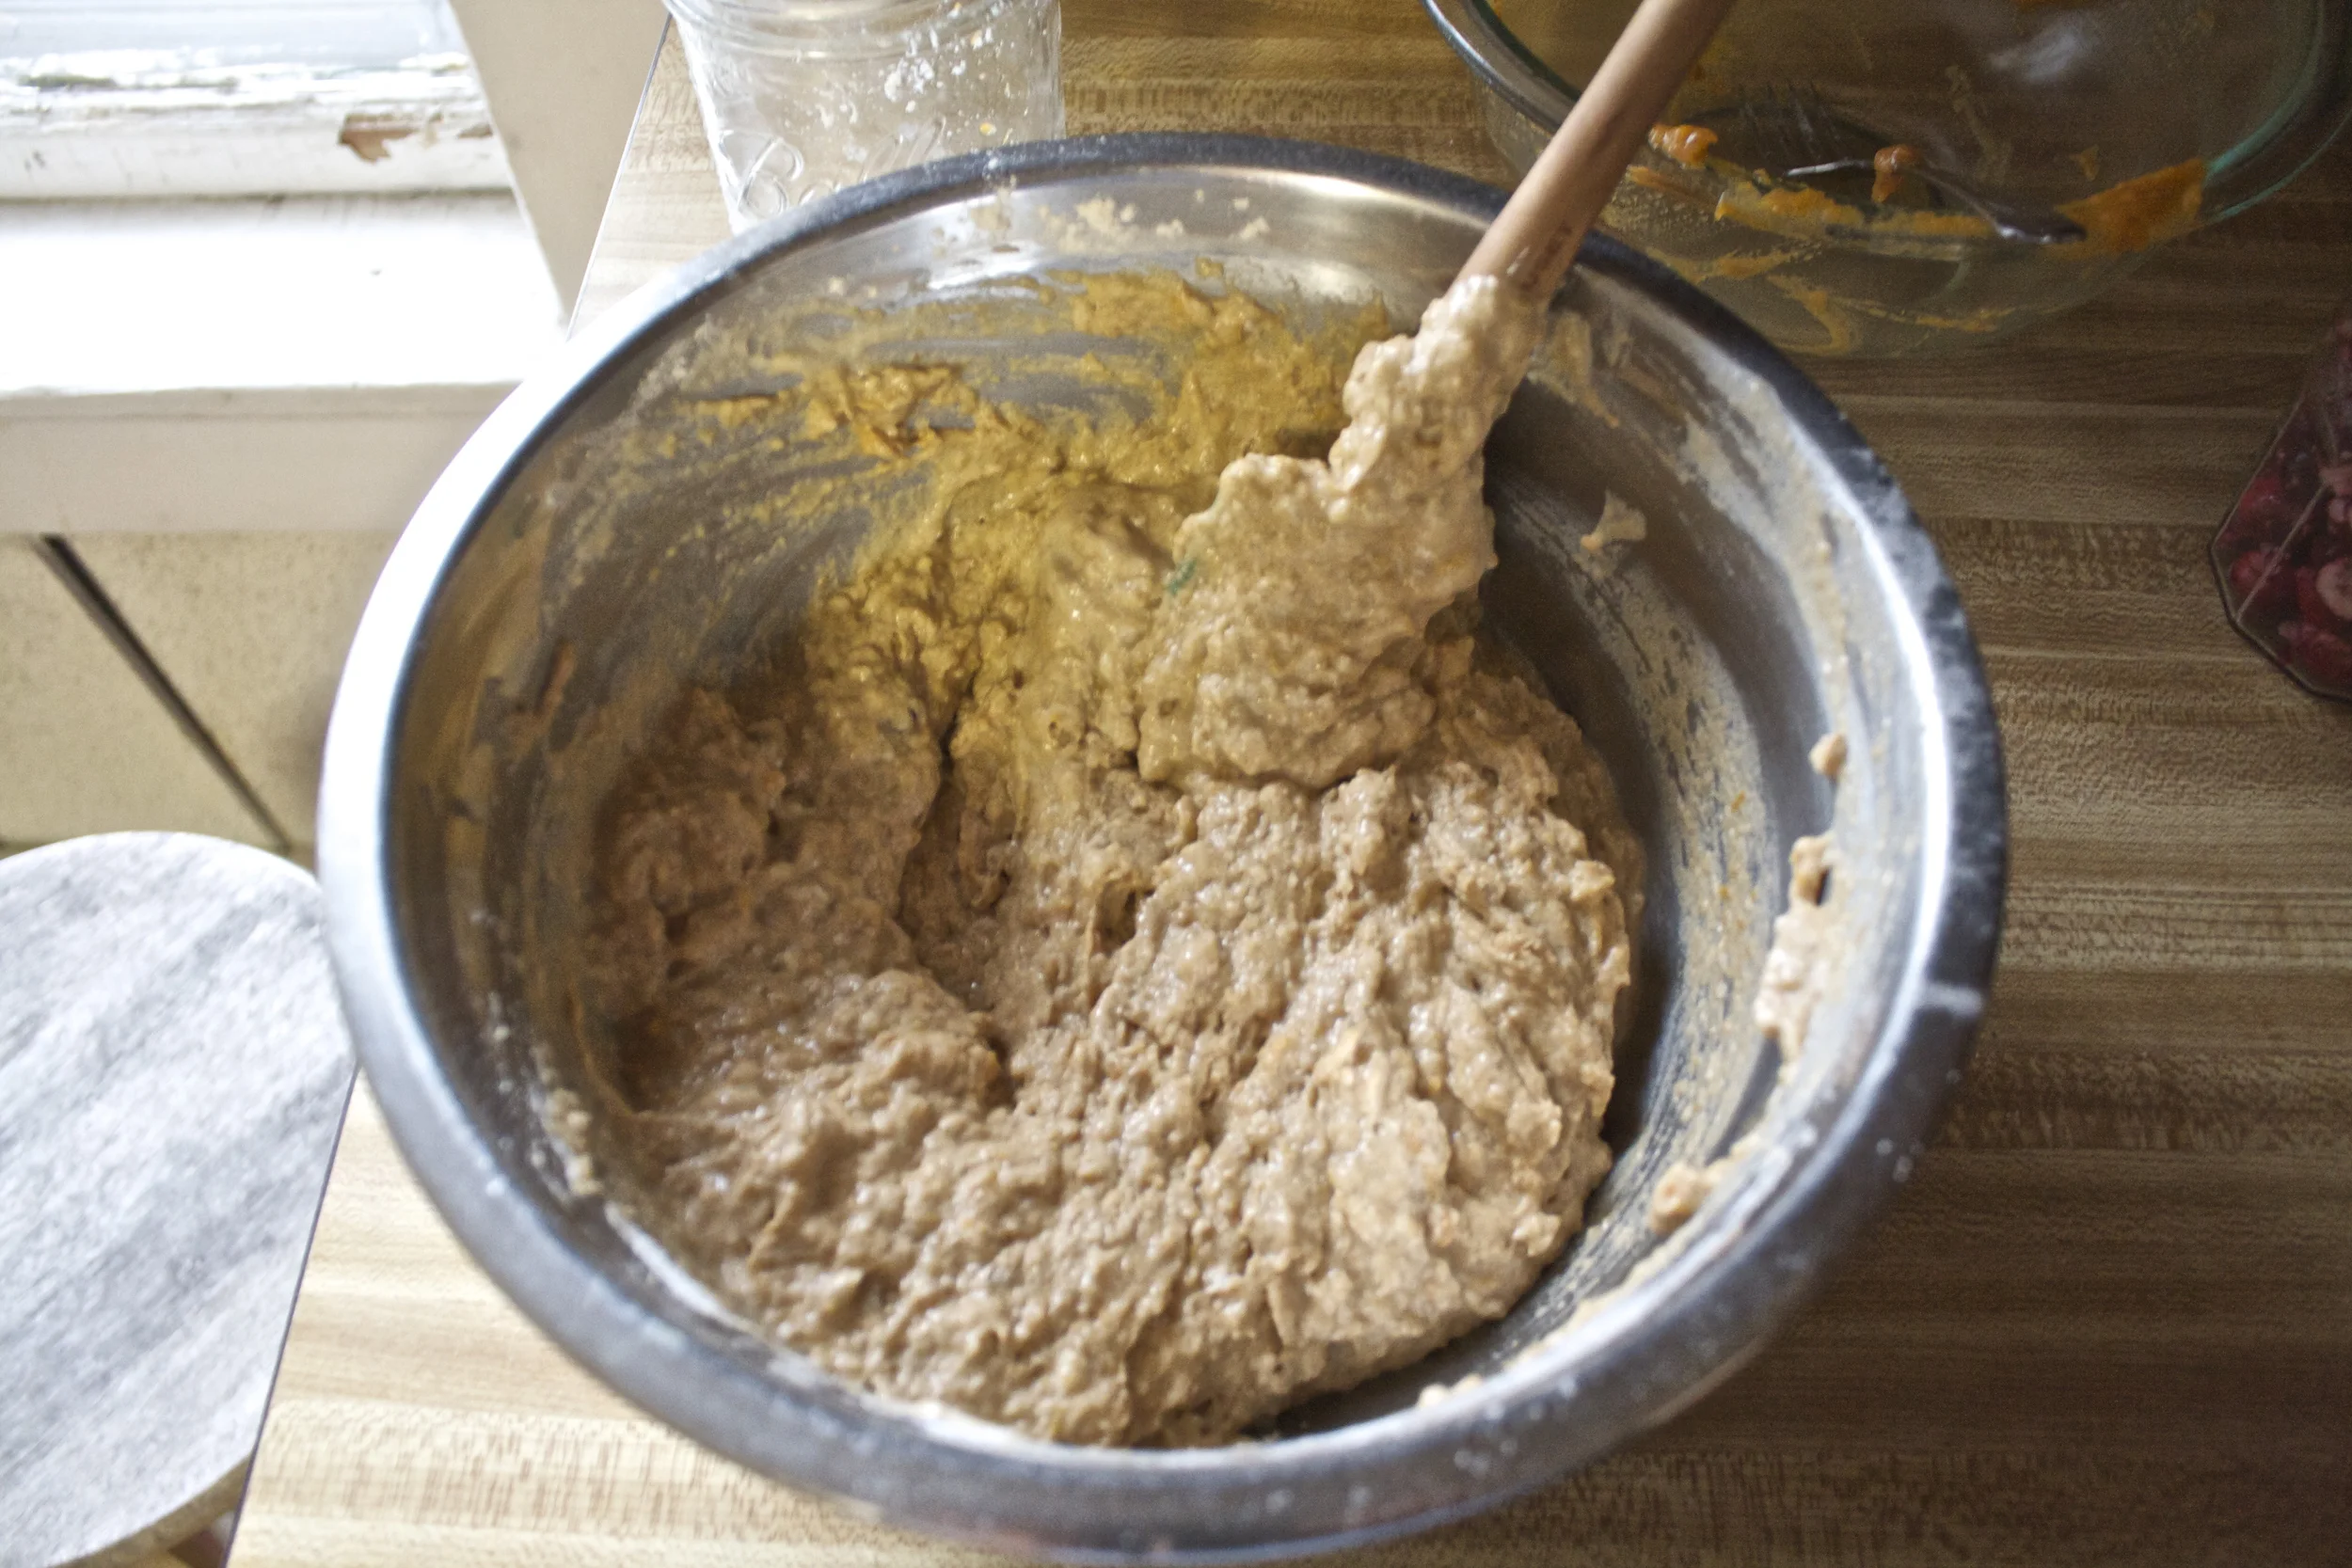
Dump the wet mixture into the (already mixed up) dry mixture and mix along with the vinegar-%u00a0almond milk until everything is just combined (don’t over mix the batter!).
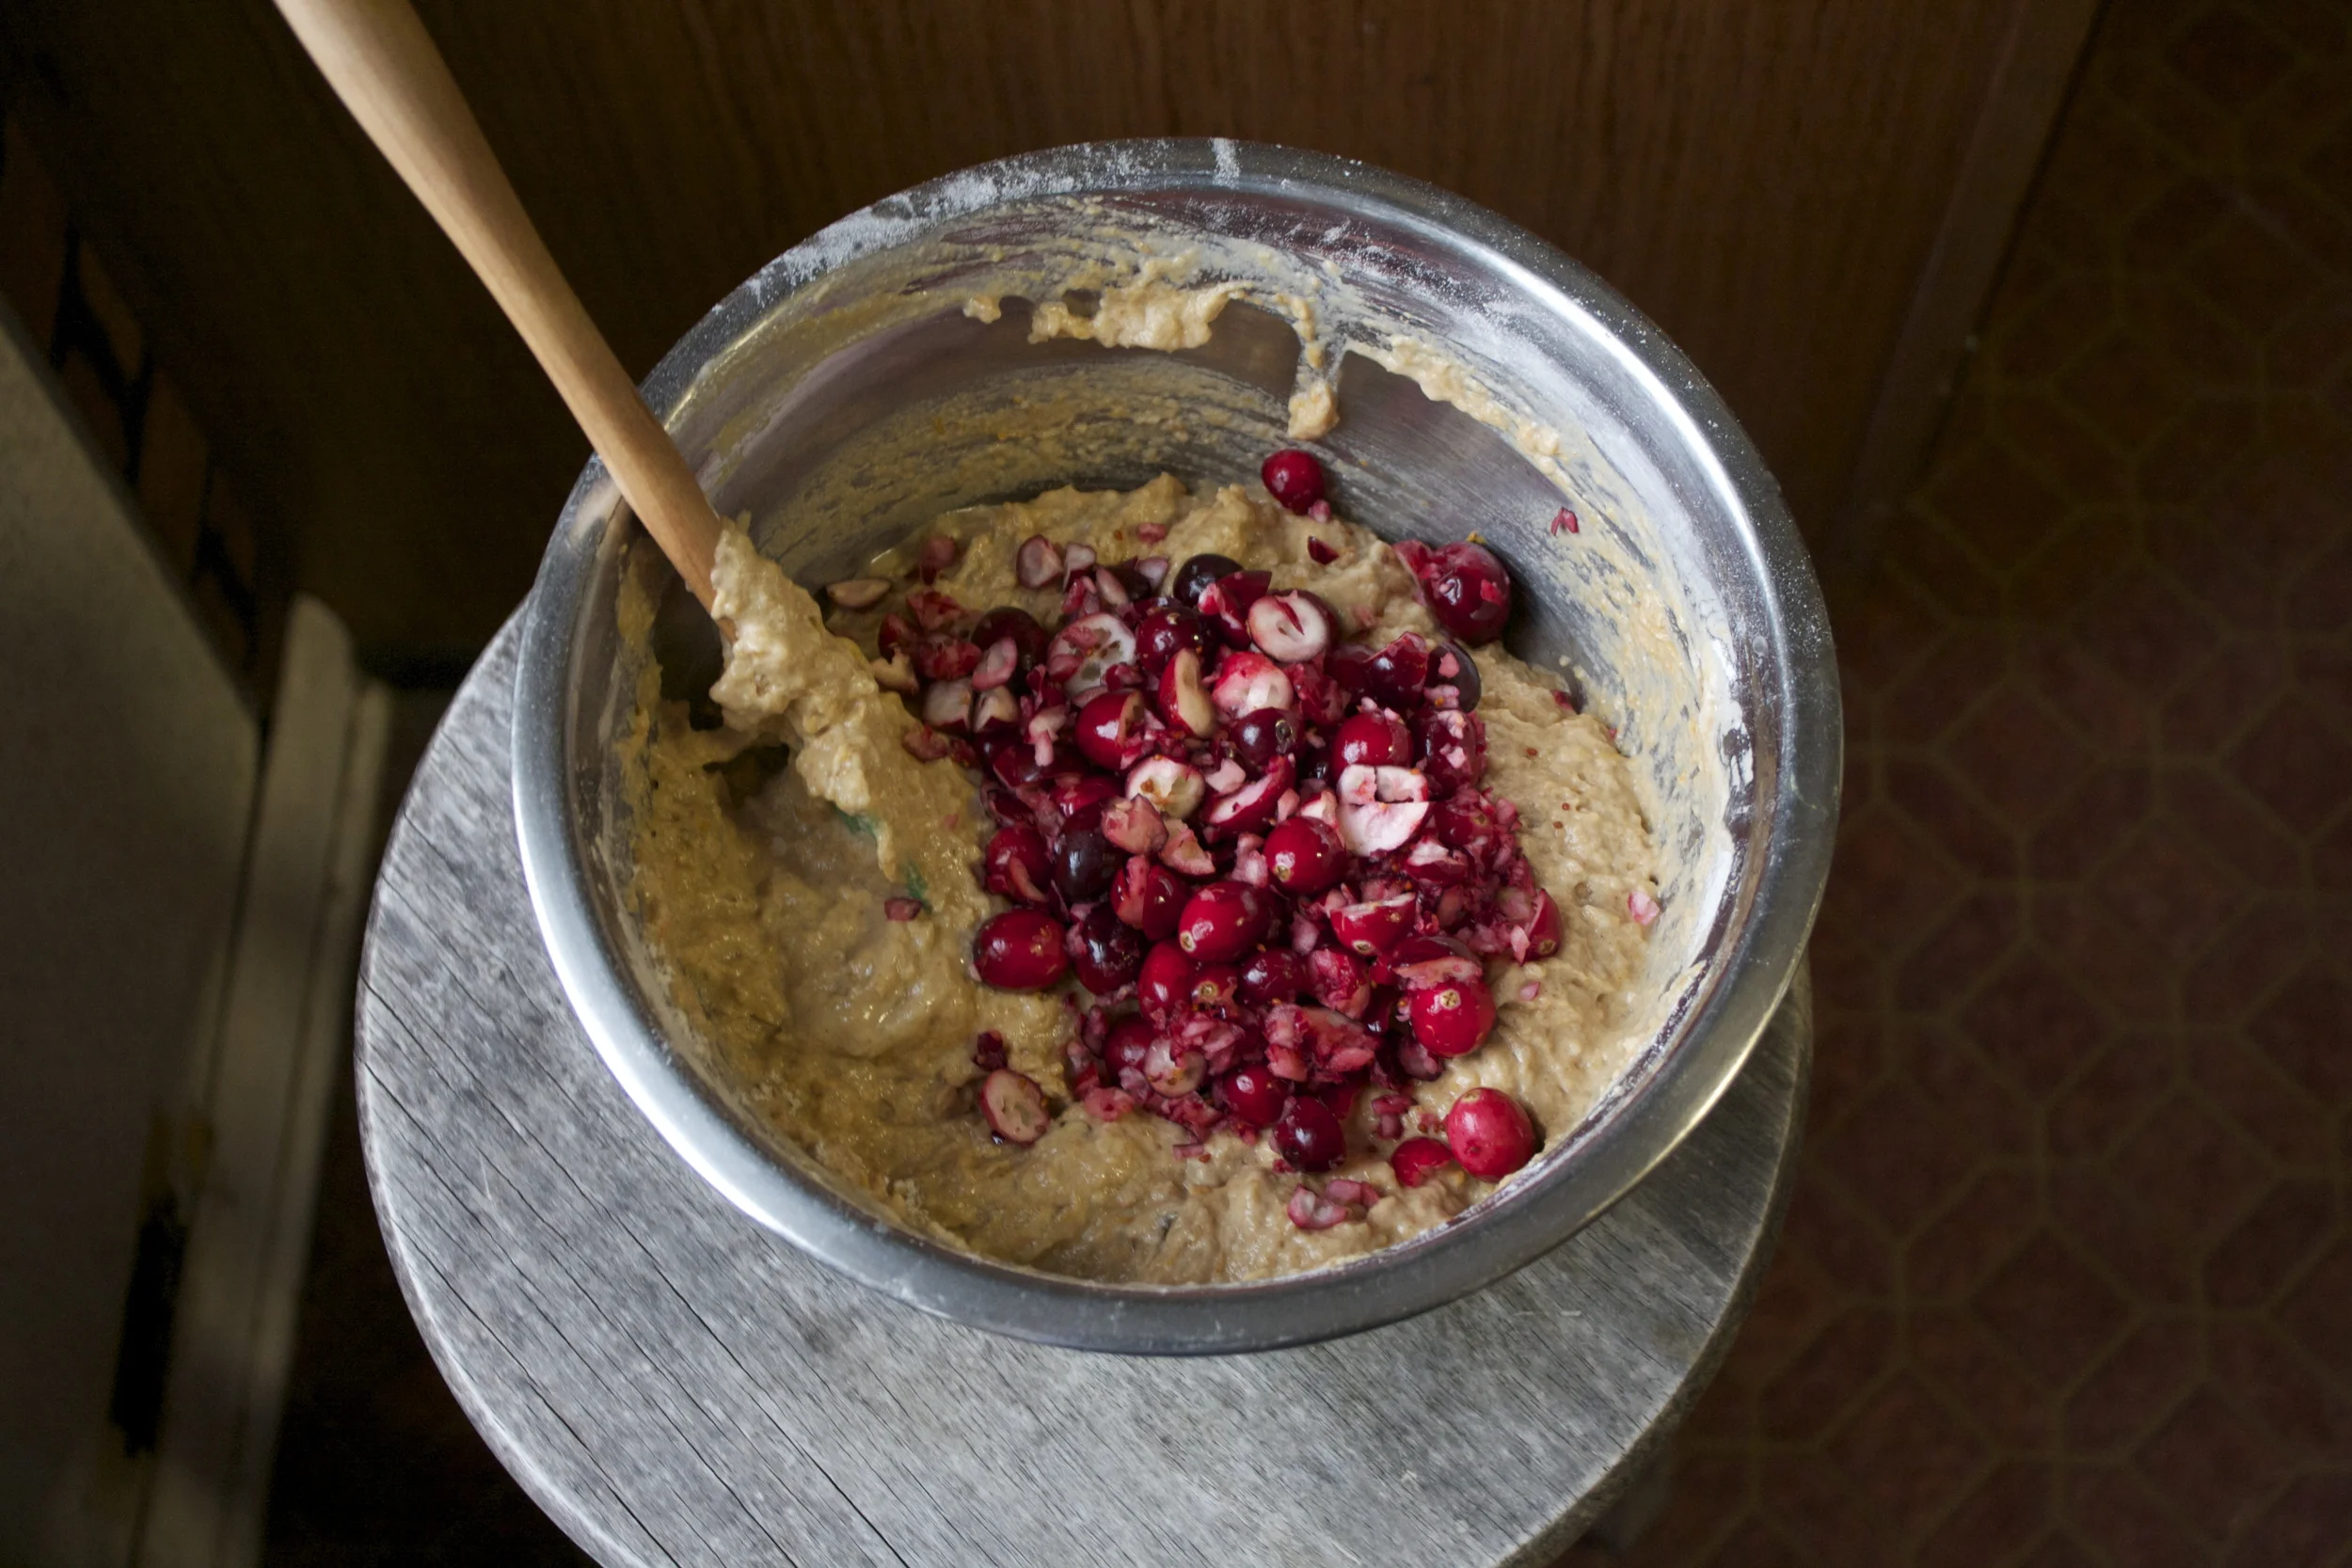
Grab cranberries and fold them into batter. Also can totally use up any cranberry situation you might have left over (maybe not the canned jello kind})
Batter into greased muffin tins and into the preheated oven they go.
More kitchen. Check out that dish washer, its pretty awesome. I am not going to keep it, but I don’t want to trash it, its too freaking cool. So anyone want a dishwasher? (still work)%u00a0%u00a0The fridge is new, but we are going to move it to storage and use it in one of our apartments eventually and get a new fringe.%u00a0 The counters and the cabinets are getting donated and the fake brick background is staying. (HAHA) F no.. That%u2019s coming down like today and unfortunately the super cute flower wallpaper has to come down with it. (I kinda wanted to keep it.. oh well)
%u00a0And the little window.. so my favorite part. I have never had me a nice kitchen window before.%u00a0
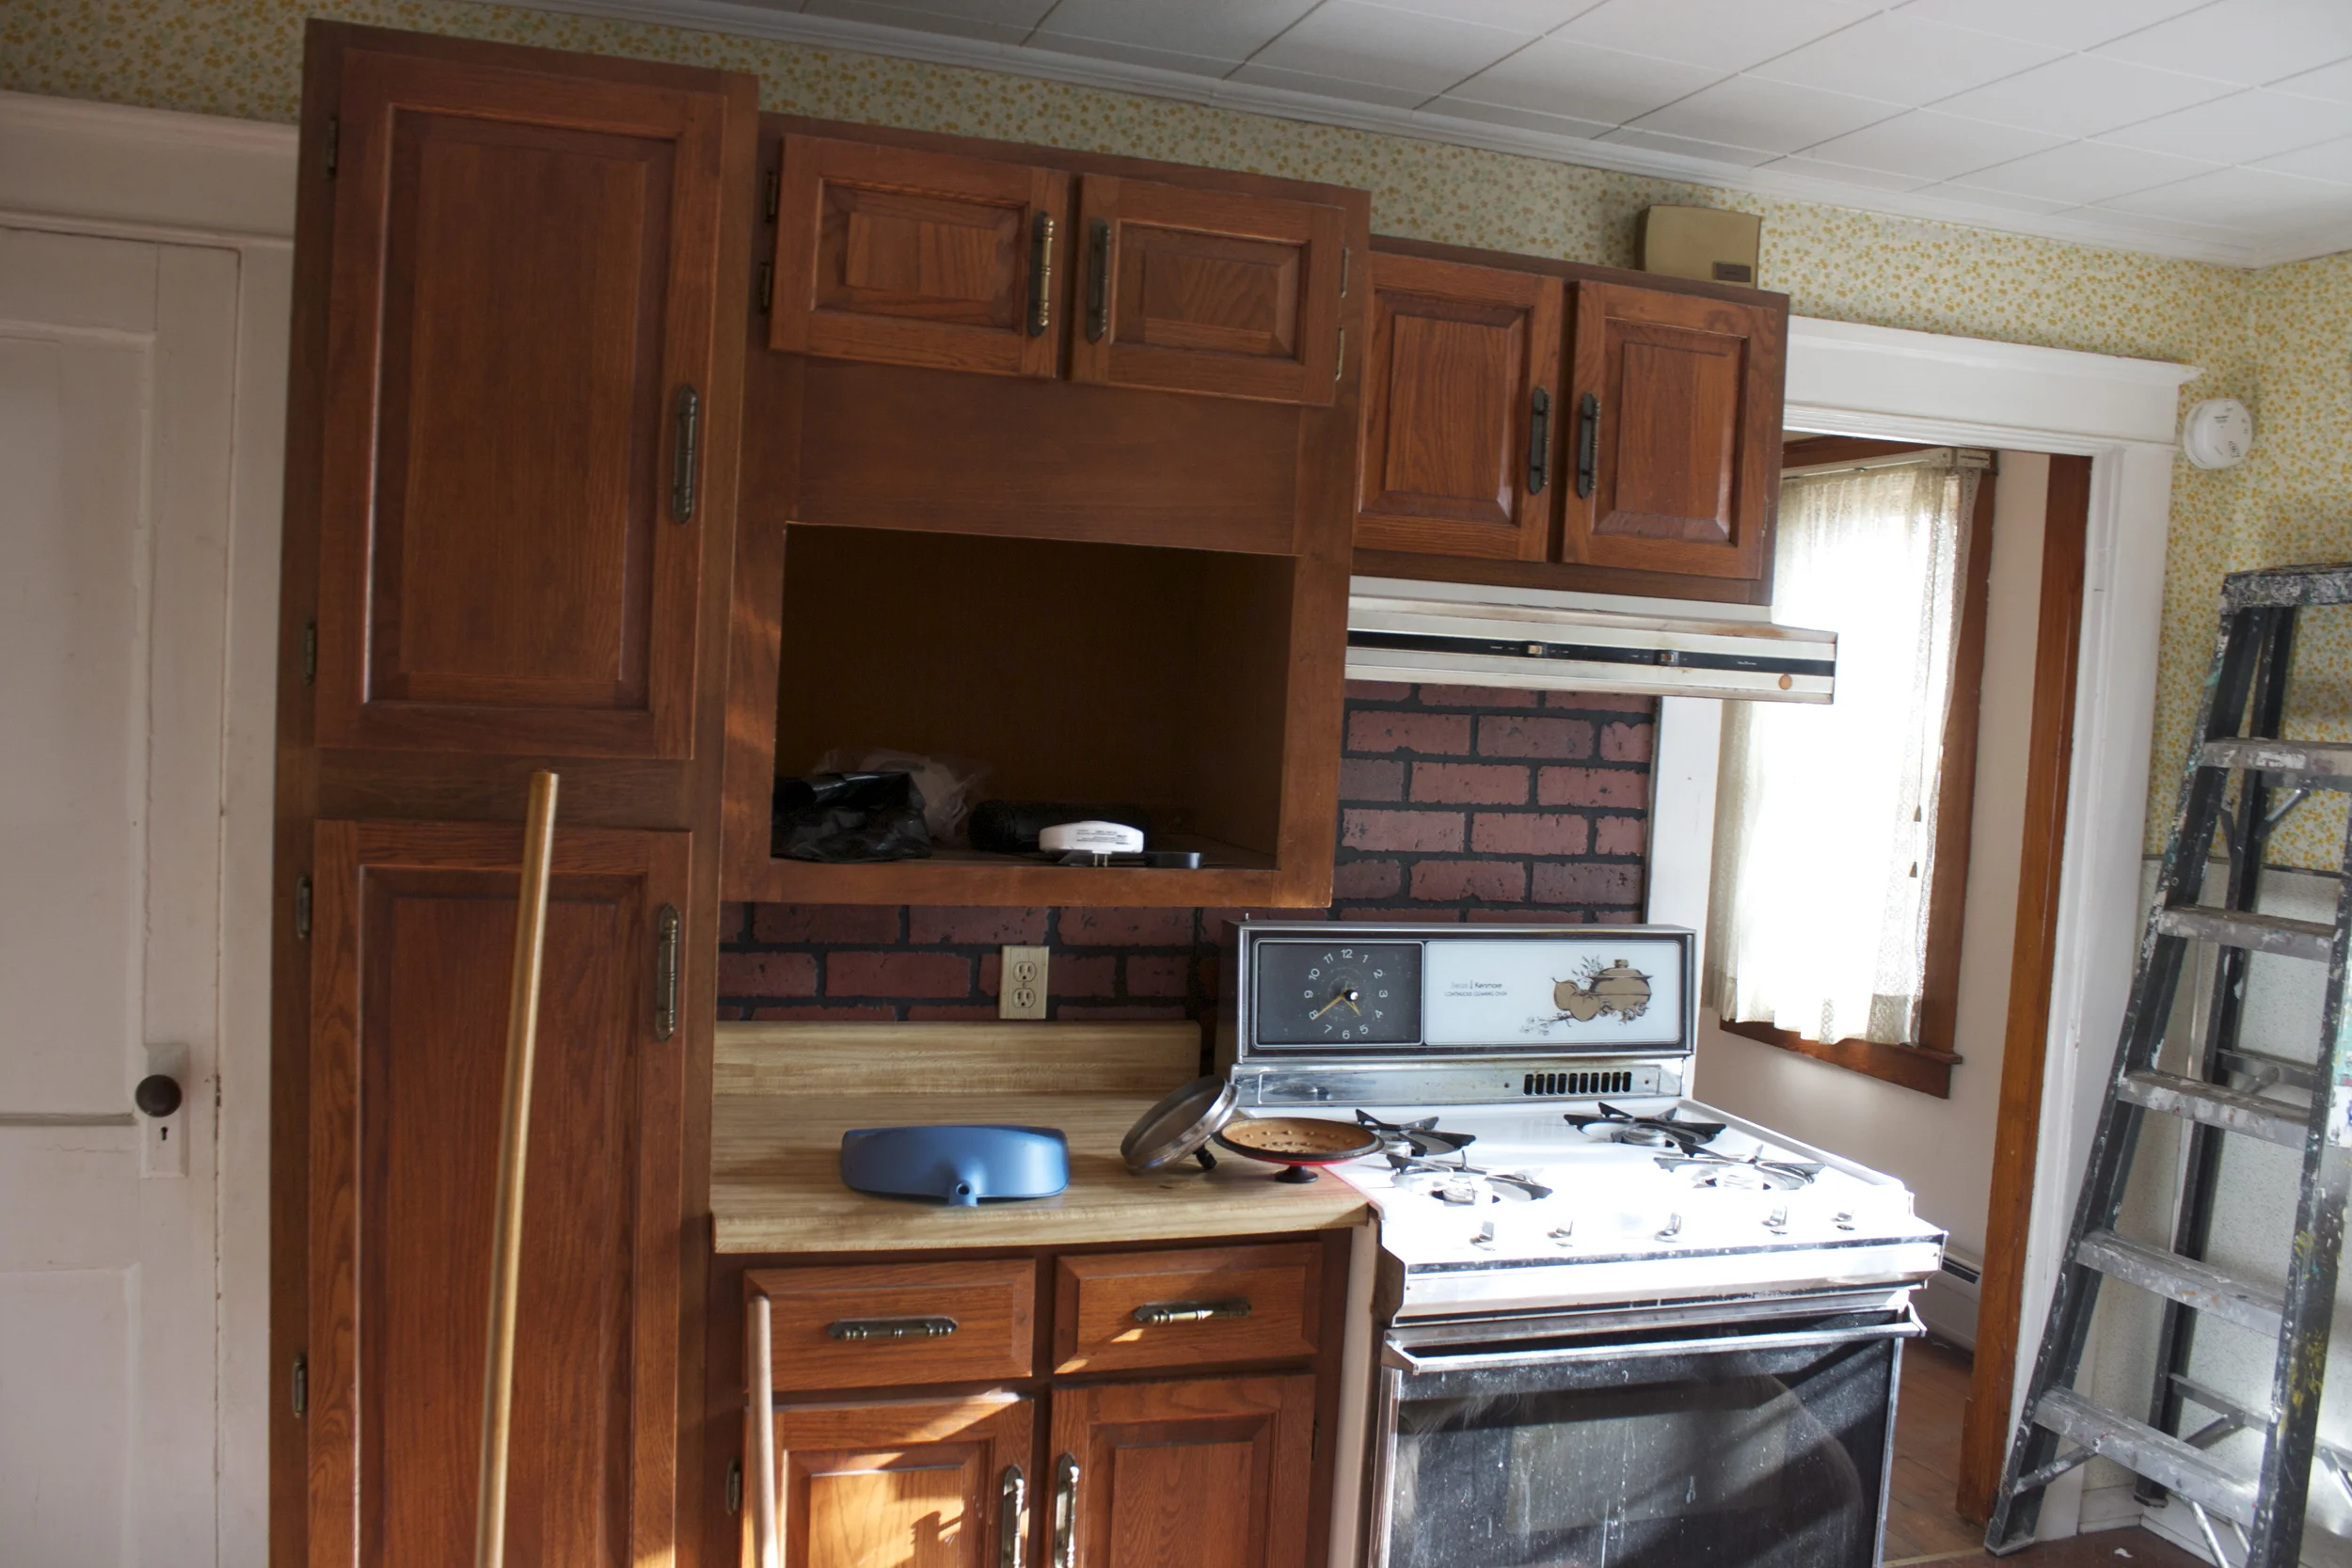
The othe side of kitchen, where this amazing stove lives.%u00a0 The stove works, but it%u2019s a little rough. The door is slightly coming off and broiler pan is broken, but other then that, it works fine.%u00a0I have even though I might try to fix it up and keep it. (the mr is not into that) We will see, but I think we are going to get a new one. (and donate this one).%u00a0
So kitchen tour is done Back to the muffins.
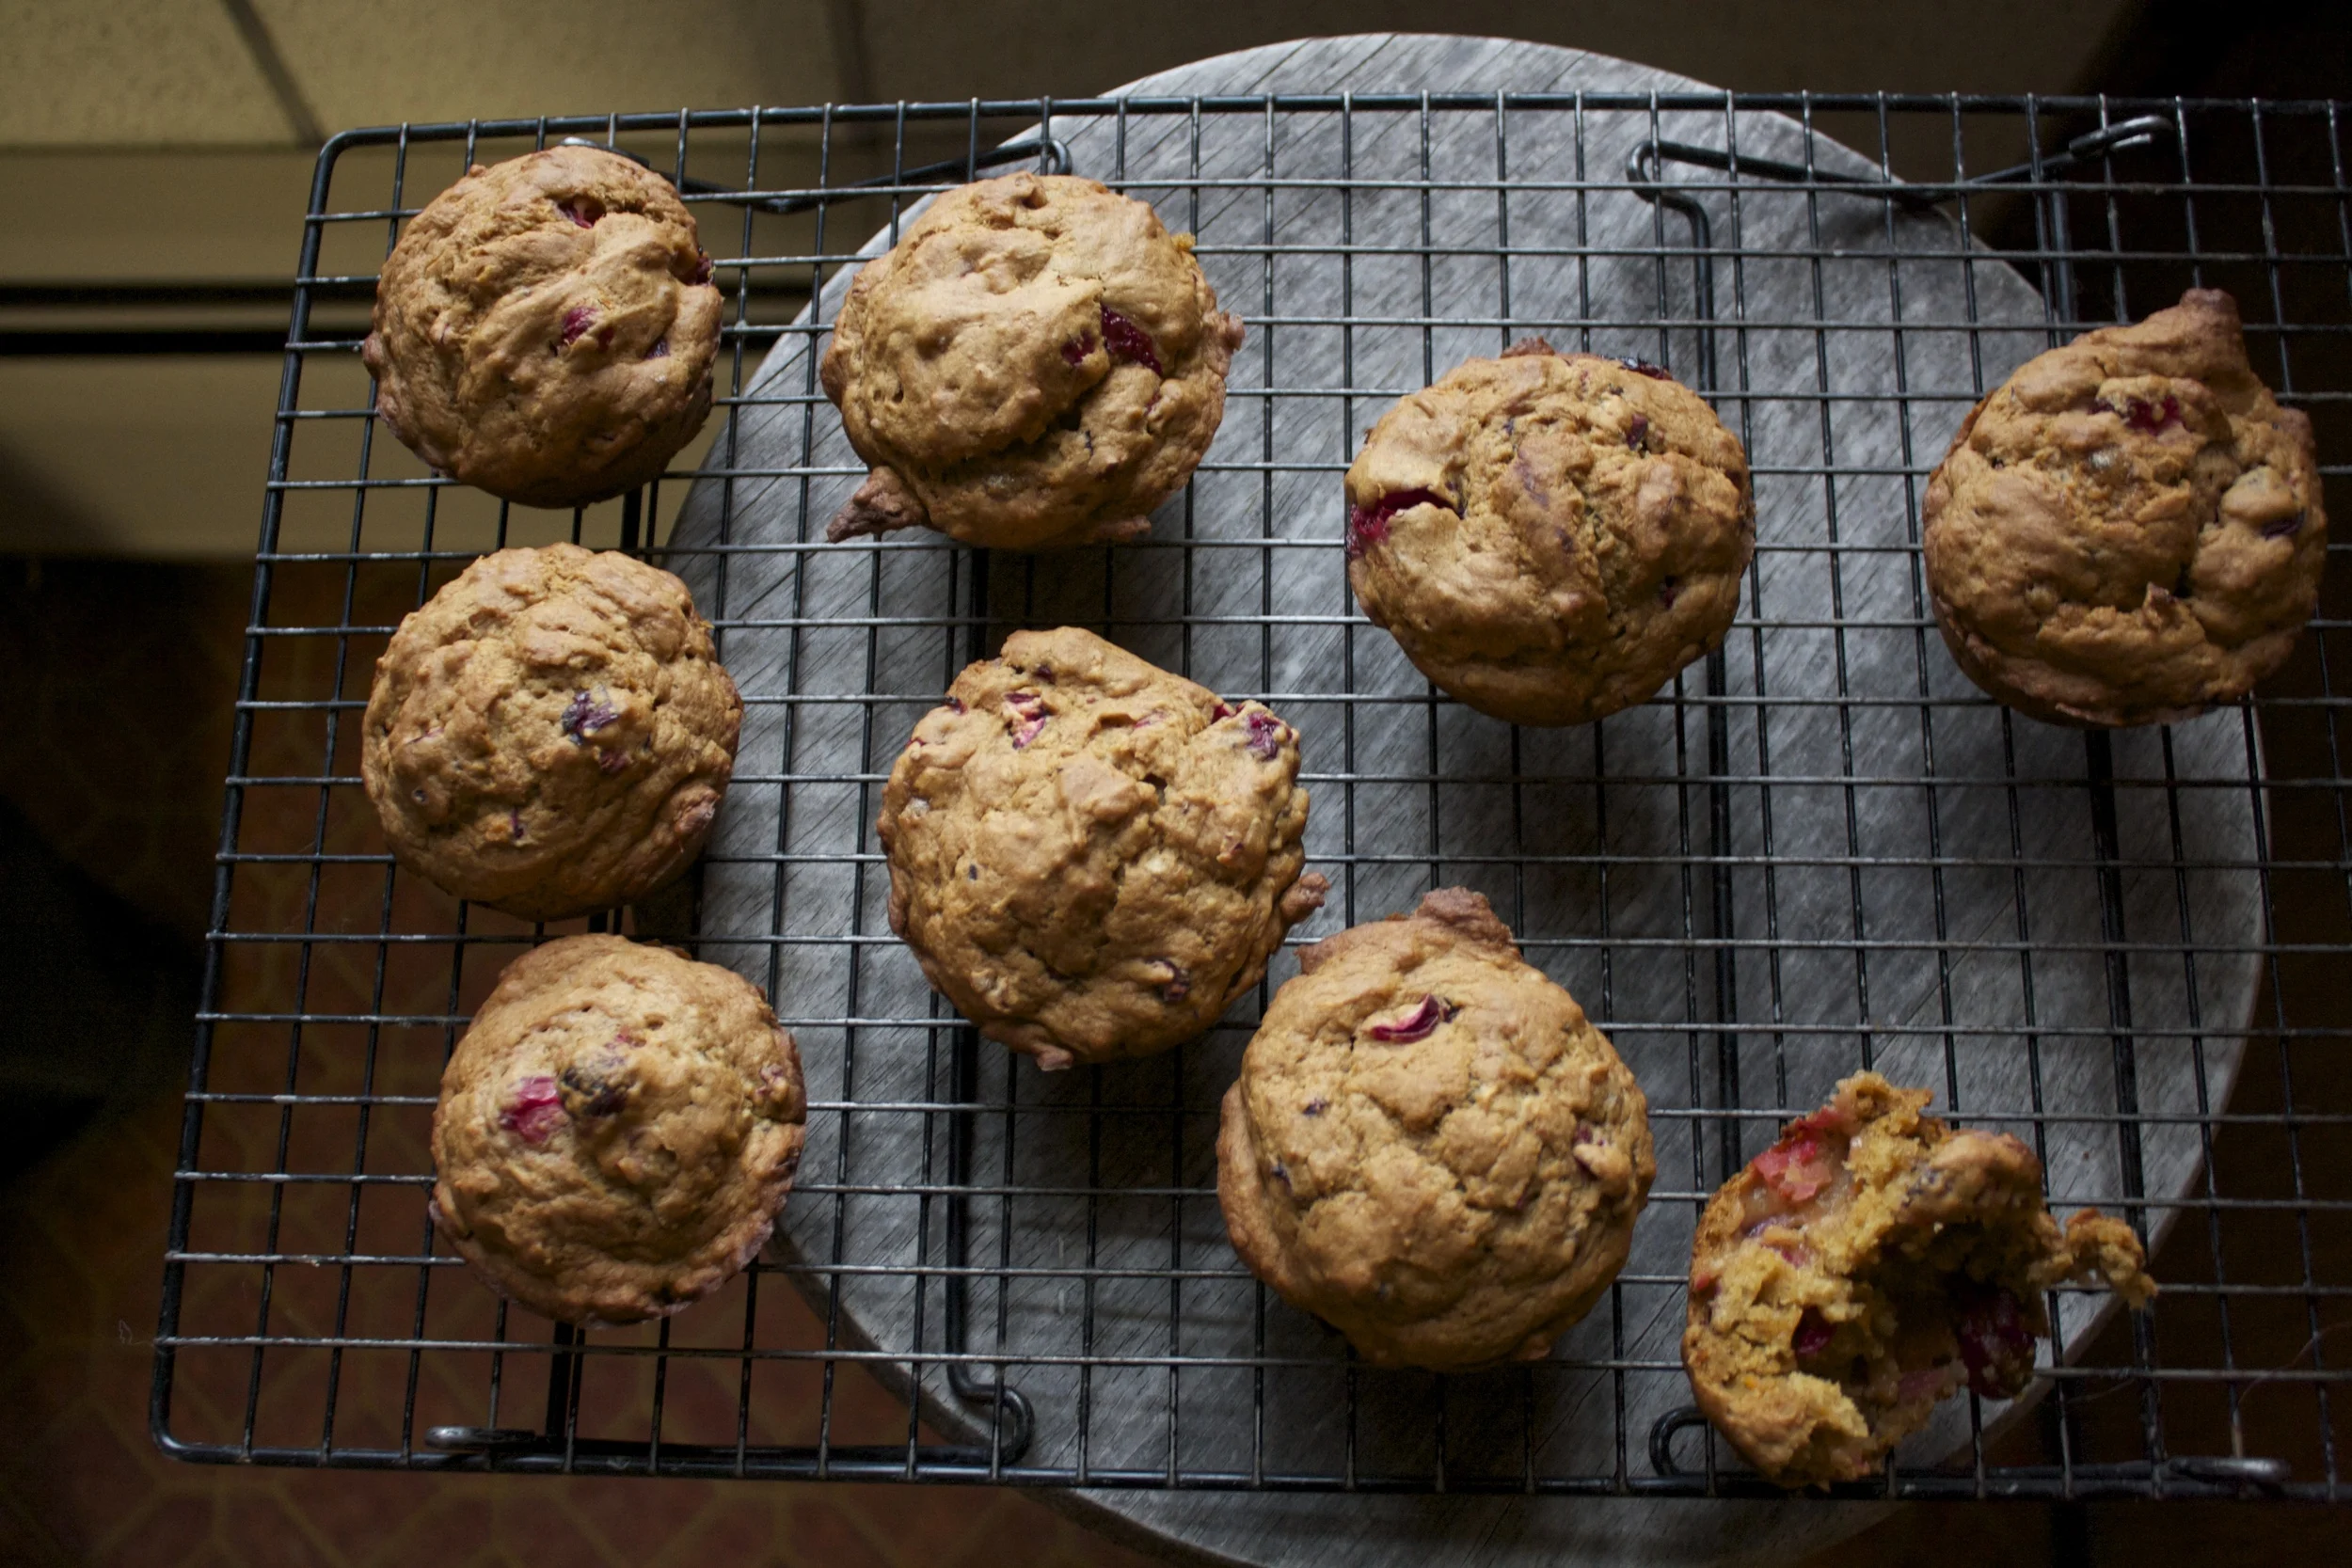
%u00a0Once they are all nice and golden brown and a tester comes out clean, these babies are done! Take out of oven and remove from pan and let cool on a rack.
The perfect snack for any occasion%u00a0
Happy (hopefully relaxing) weekend!
-C
makes 12-14
1 cup sweet potato puree
3/4 cup all purpose flour
1 cup whole wheat flour
1 teaspoon baking soda
1 teaspoon baking powder
1 teaspoon salt
1 teaspoon cinnamon
1 teaspoon ginger
3/4 cup brown sugar
1/3 cup oil
1cup almond (or whatever) milk
1 tablespoon apple cider vinegar
1 cup fresh chopped cranberries%u00a0
Note.. use any left over sweet potato stuff or cranberry sauces that you might have left over.. just adjust seasonings to taste.
Preheat oven to 350
Start by measuring out your almond %u00a0milk and adding in the tablespoon of apple cider vinegar. Set aside.%u00a0In a large bowl whisk together the flours, baking soda and powder, the salt and the cinmoan and ginger. In a separate bowl, mix together the sugar, sweet potato, and the oil until well combined. Dump the wet into the dry and mix together along with the almond milk unit just combined (don’t over mix!)%u00a0Dump in chopped cranberries and fold them in.%u00a0
Grease a muffin pan and scoop equal amonts of batter into the tin and place into oven. Bake until golden brown and a tester comes clean from a muffin middle.%u00a0
I am sadly at my last few bags of frozen garden foods from last season. As of now I have a bag of tomatoes, a couple bags of shredded zucchini, and a bag of rhubarb. Well, had a bag of rhubarb. I think I have eaten almost all of it already. My rhubarb patch better get up and producing stalks soon. And as for the rest of the veggies that I will require. Guess I am going to be surviving mostly on roots from farm share (we are getting a lot more greens though!!!!) and probably doing a bit more grocery shopping then I care too. A few more months. I can do it.
Anyway, enough about my freezer and lack of fresh produce problems.
Here in Vermont maple season is well on it%u2019s way making it a perfect time for anything maple. And rhubarb. Yeah I am using my frozen rhubarb from last year, but any time now (after the snow melts) there will be plenty of stalks for the taking. There will be so much maple and so much fresh rhubarb which are the perfect taste combination. Exciting times! And when added to oatmeal, things just get more gooder. (I know gooder is not a word but I think it should be) Oatmeal, especially baked, is the stuff where all gooder things start.
Have you had baked oatmeal yet? It truly is fantastic. Not at all gummy and gloopy like stove topped cooked oatmeal (but I like it like that too). It still has a good bite to it while still being soft and creamy and boy oh boy is it just the bees knees. With the addition of some crunchy almond friends, well even better. Trust me. If you are a oatmeal eater, you must try it baked. Best part is that it can be eaten as breakfast but also I have been serving it to the mr for dessert with a healthy drizzle of more maple. It%u2019s that good friends. From breakfast to dessert. Everyone is happy.
To the baked oatmeal.
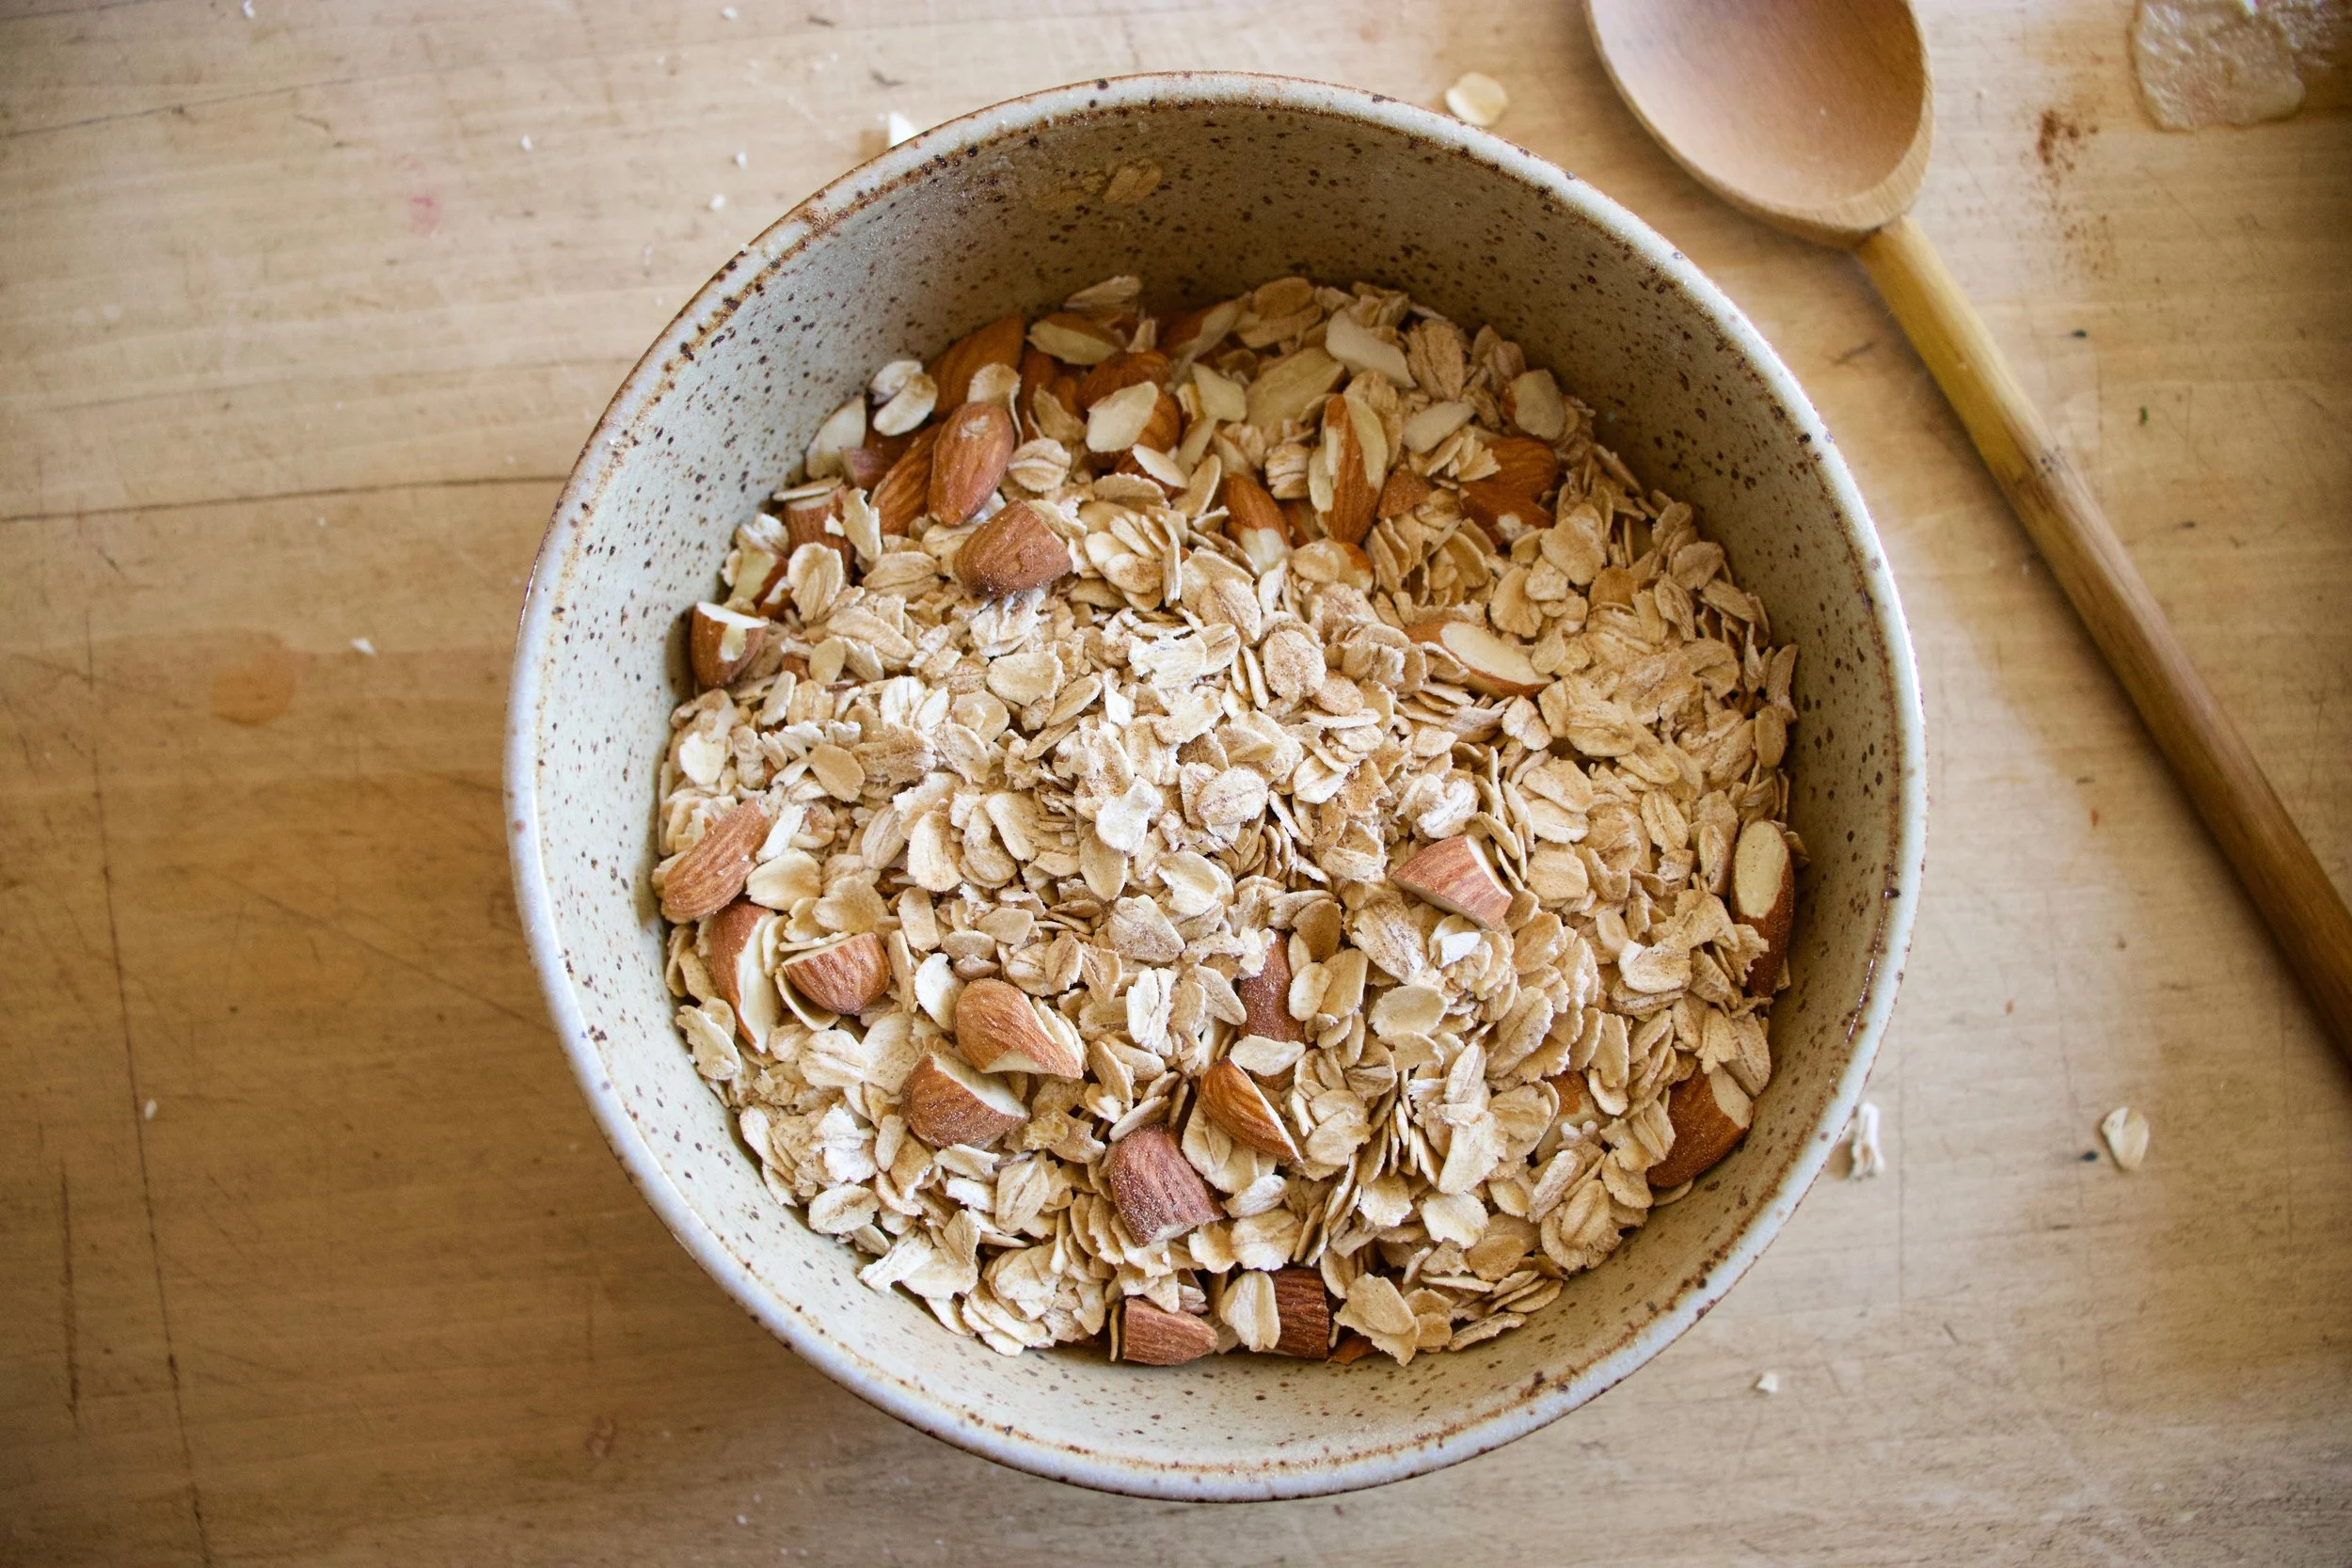
The stuff. Old fashion oats, cinnamon, salt, baking powder, rhubarb (fresh or frozen), REAL maple syrup, some plant milk, a few flax eggs, a bit of tahini, and some almonds.
To start. Oats, cinnamon. salt, baking powder and almonds get a quick toss together in a big bowl.
If you rhubarb is not already chopped up into inch long pieces, do that. I already did before freezing it so yea me. Once its chopped, layer almost all of it (reserve a few small needful to toss on top) into a lightly greased 9×9 inch baking dish then cover evenly with the oat mixture.
In now empty bowl mix together the milk, the flax eggs, the tahini, and the maple until evenly incorporated.
Pour the wet mixture all over the oats and let it absorb.
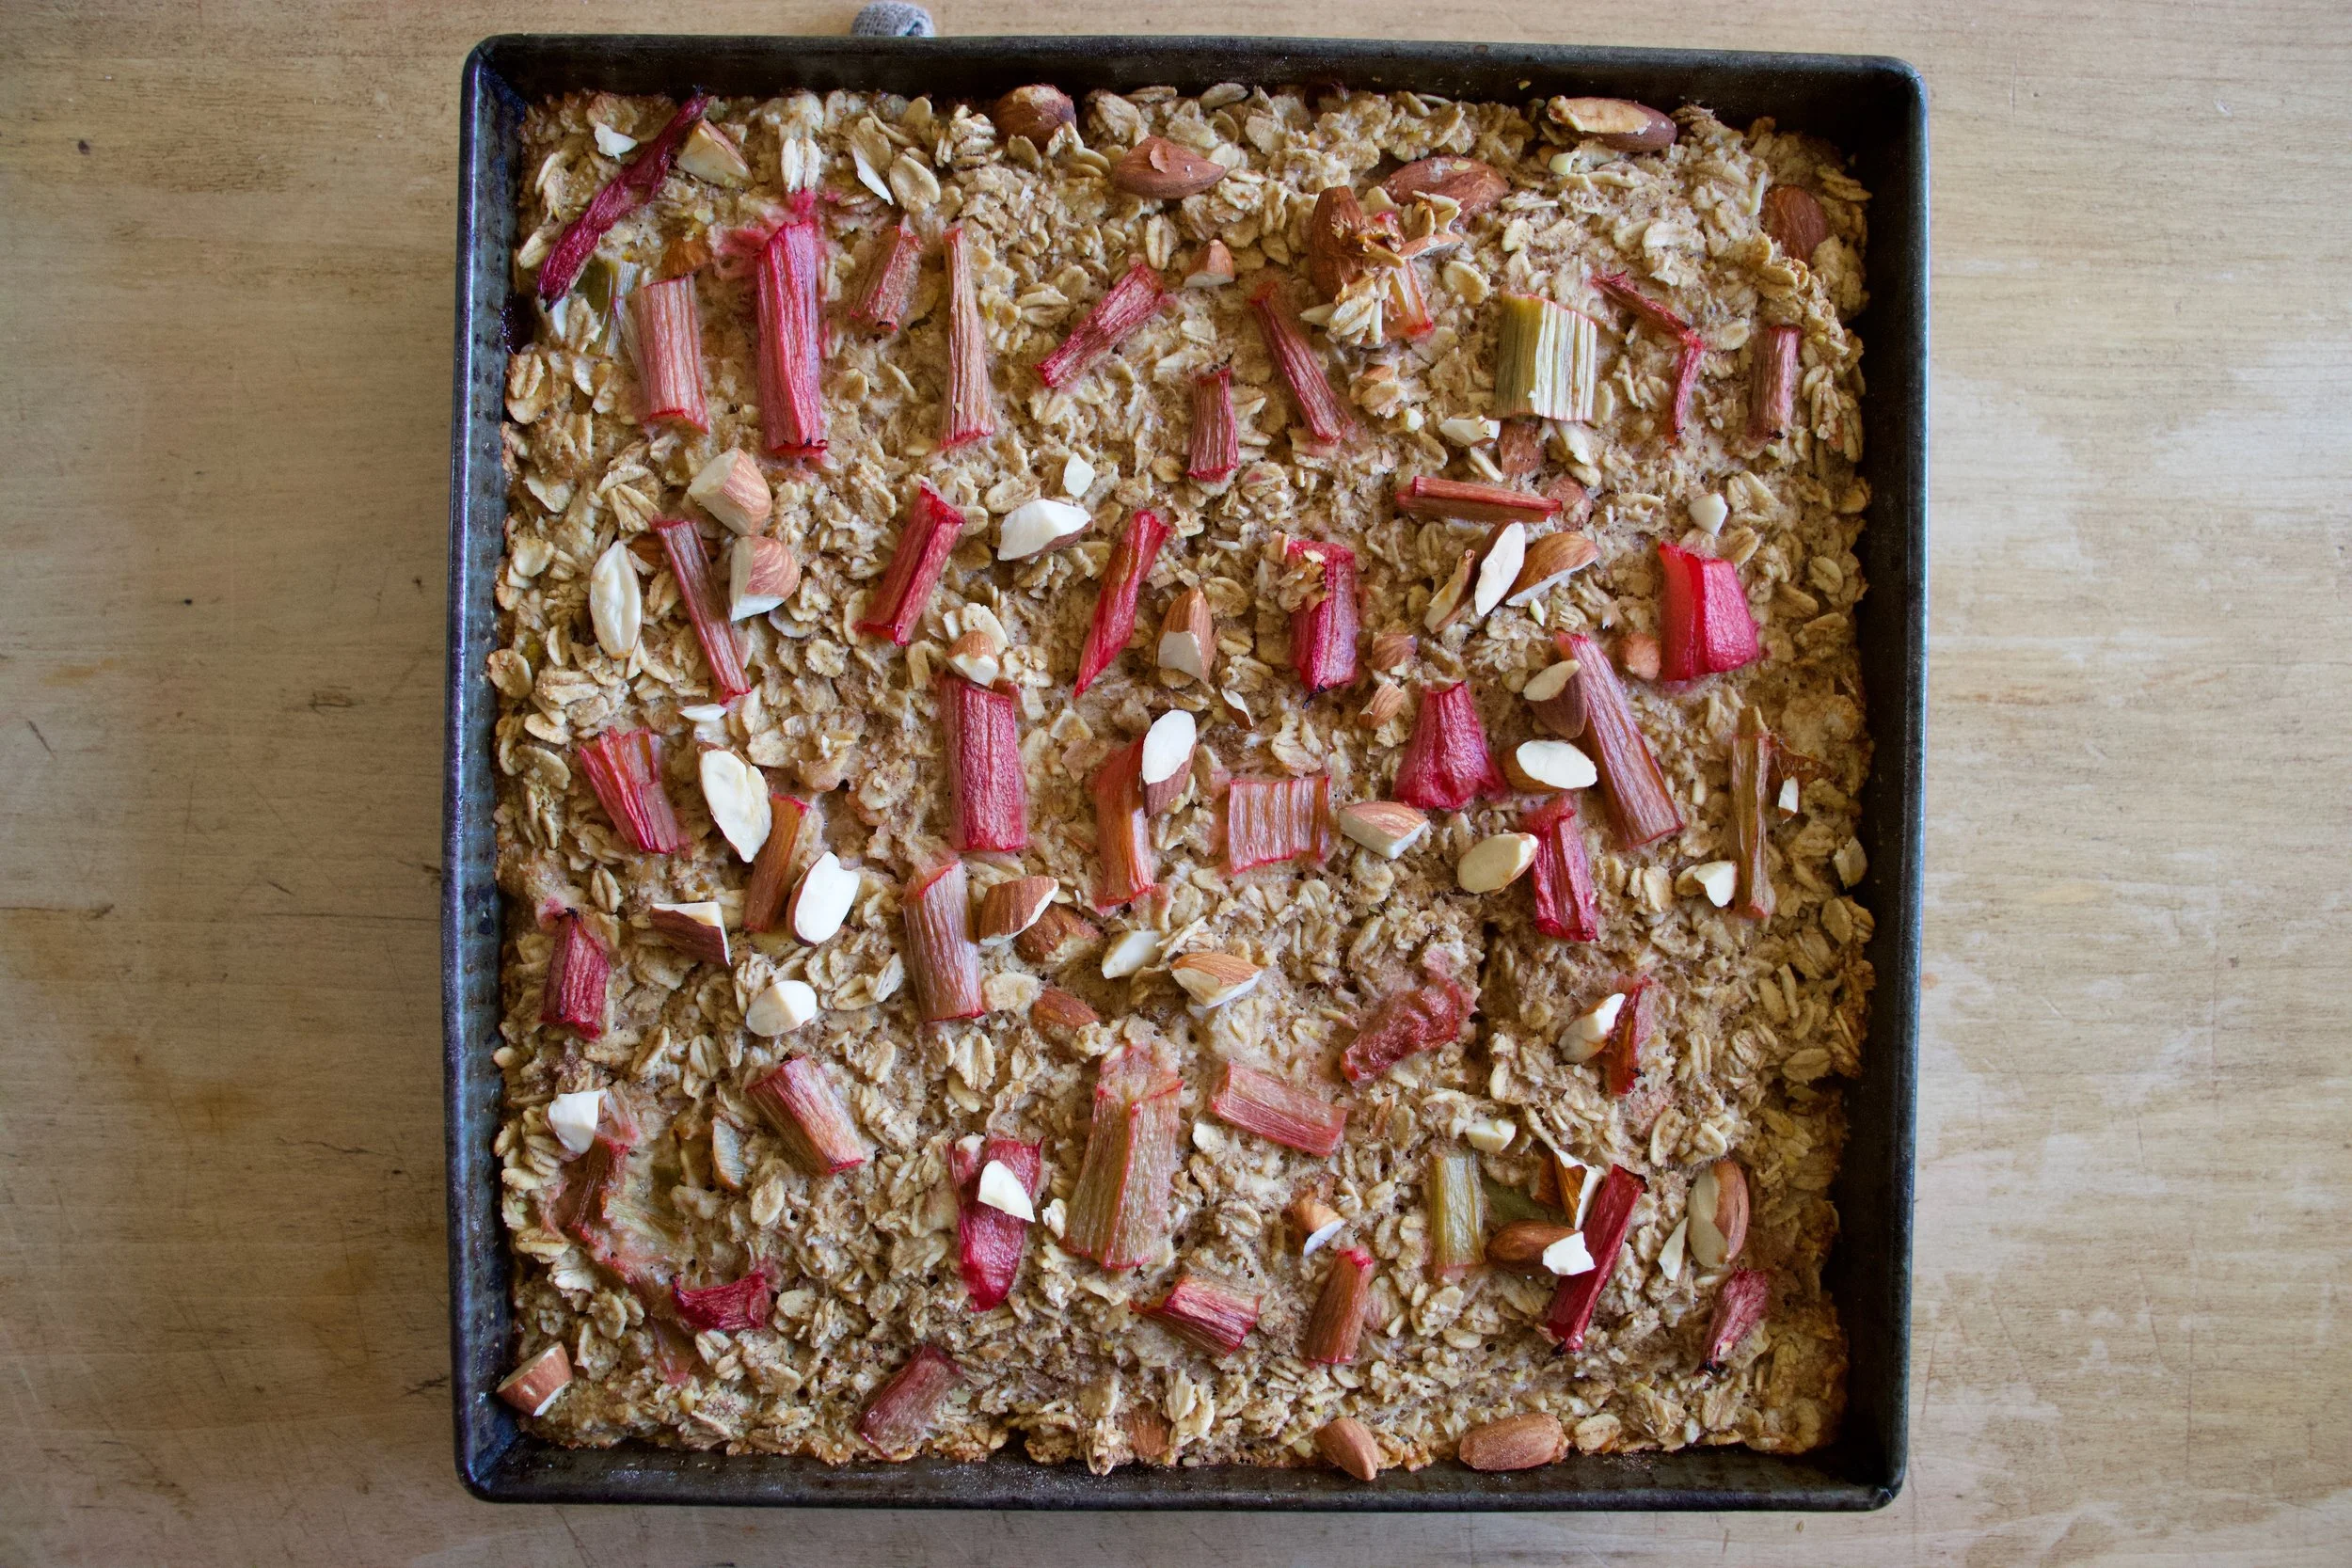
Once the liquid is all absorbed , top with any left over almonds and the left over rhubarb. For good looks.
Pop into a hot oven to bake.
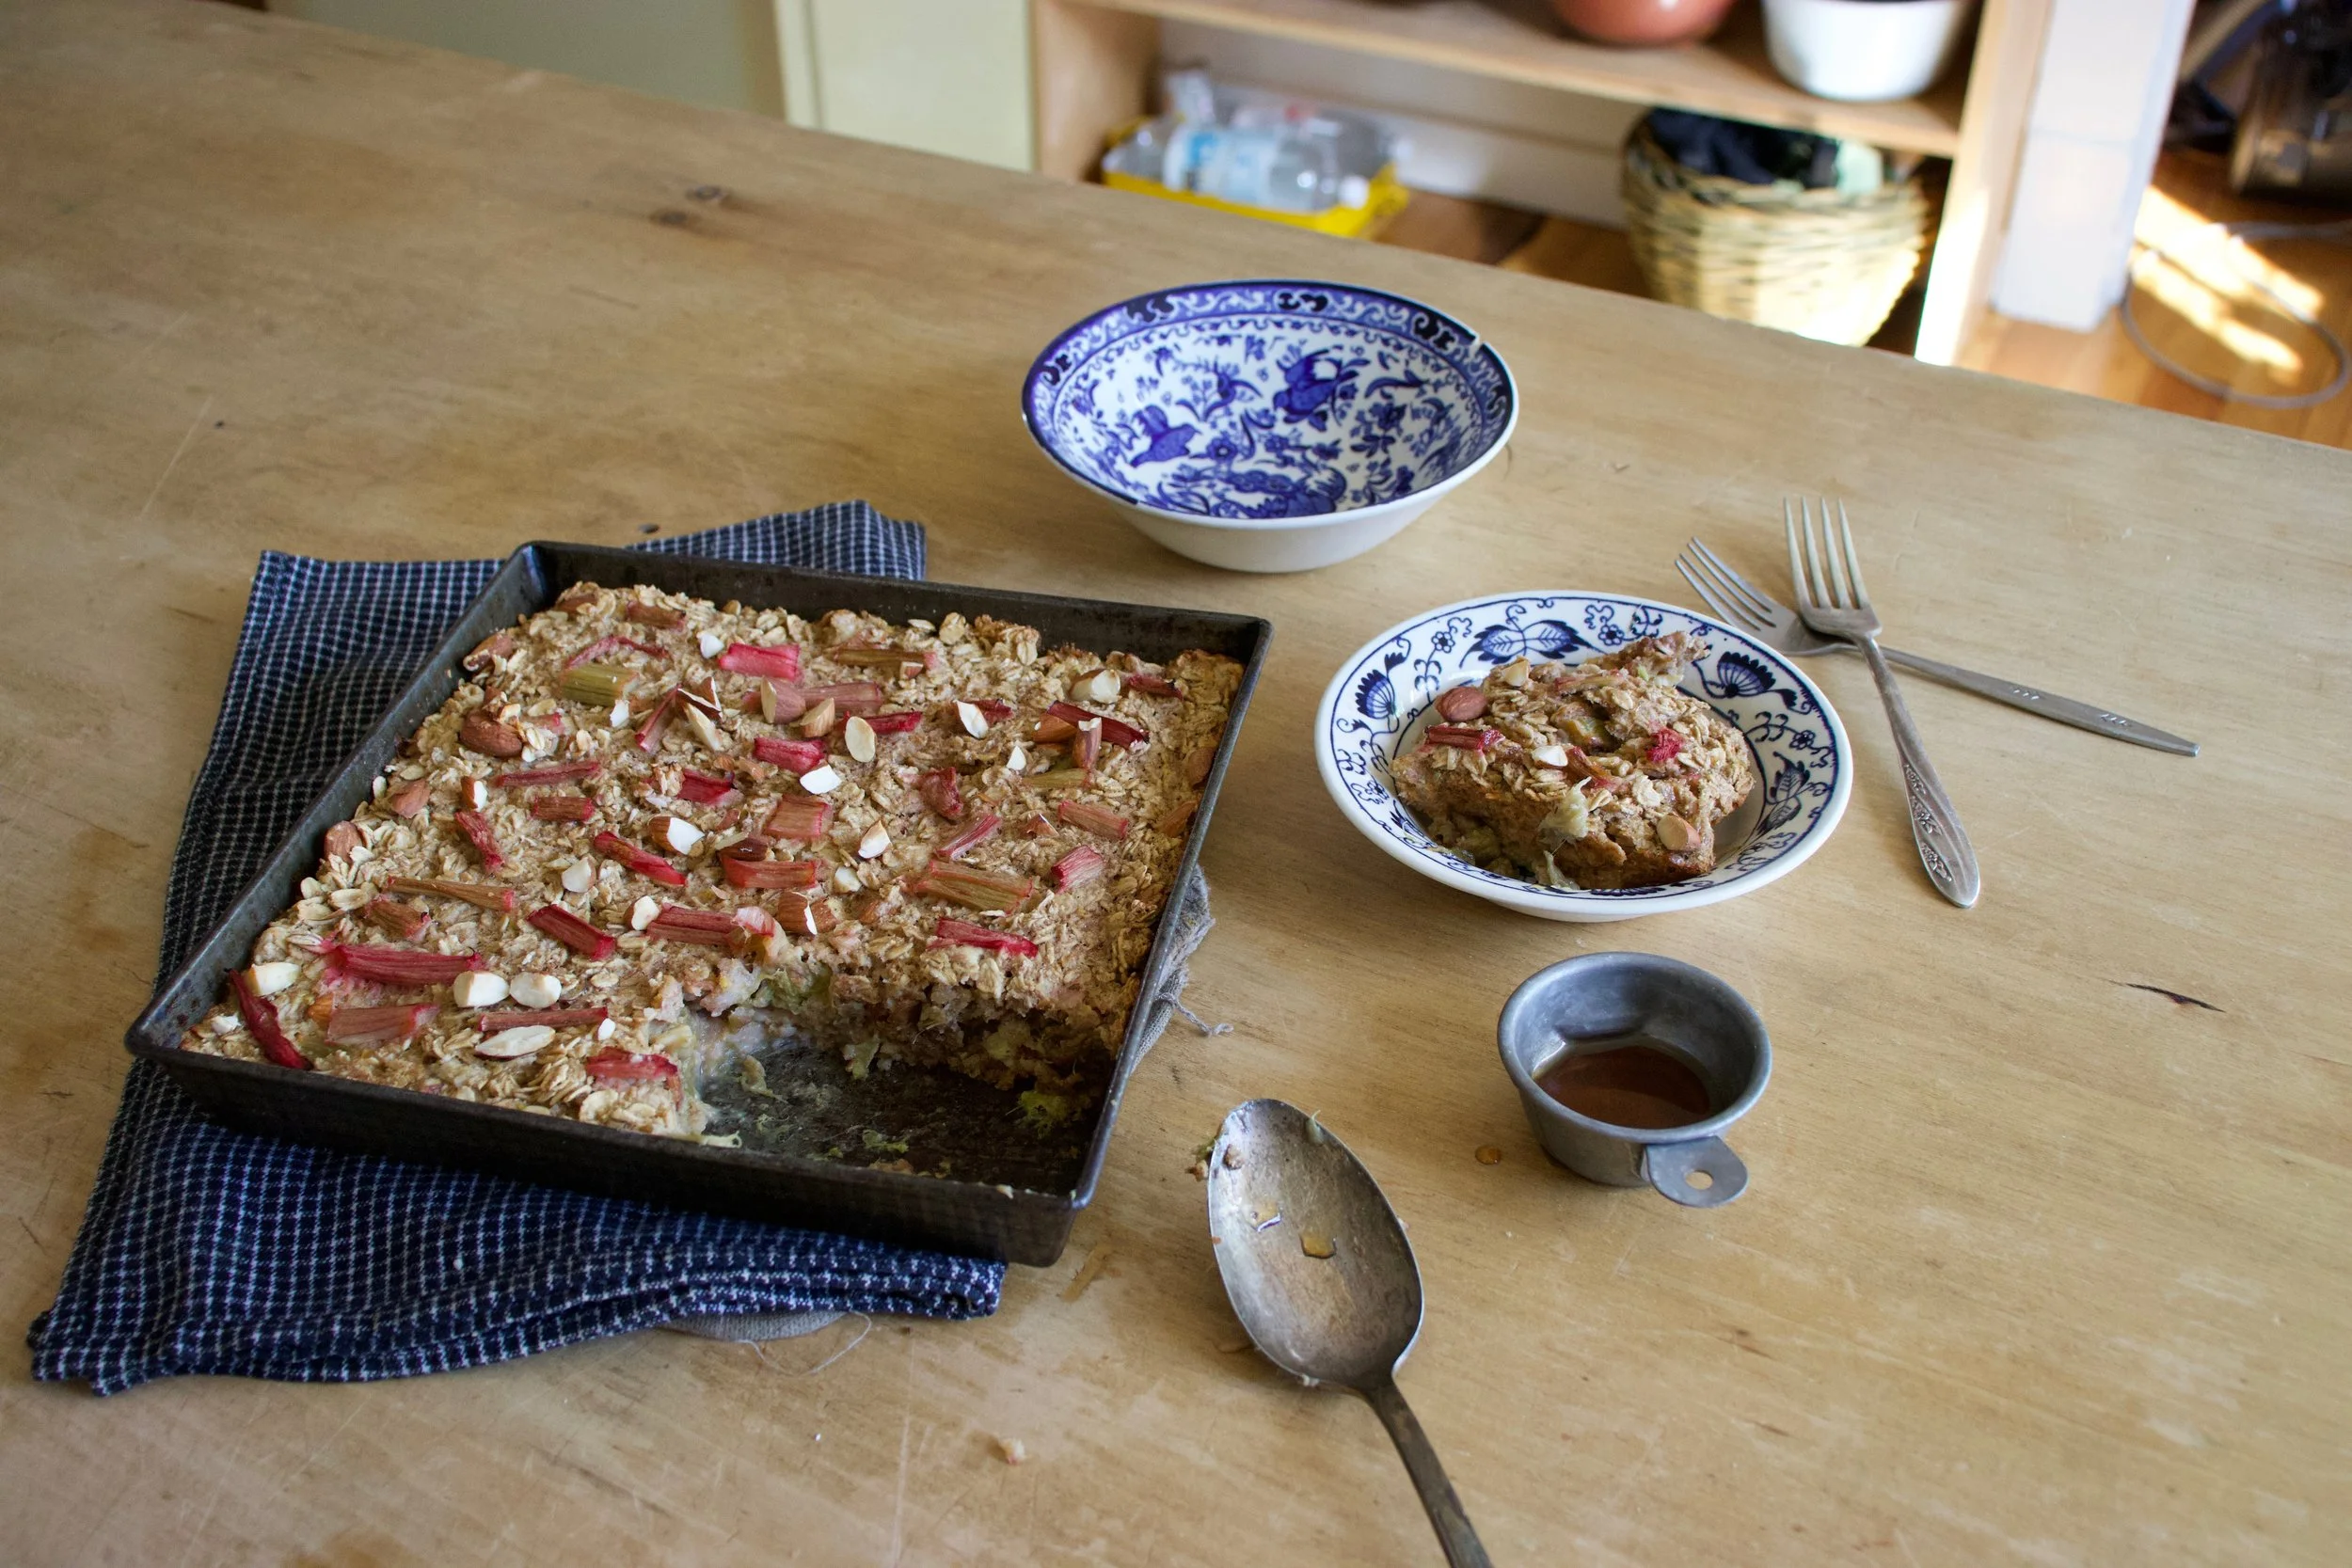
Golden brown with crispy edges. Rhubarb and maple baked oatmeal for all your maple, oaty and rhubarbie needs.
Fresh from the oven scooped warm into bowls. Top with extra maple if thats what you should want do.
Enjoy and happy maple season!
-C
Make a 9×9 pan of oatmeal
2 1/2 cups old fashion oats (make sure gluten free if need be)
2 1/2 cups fresh or frozen rhubarb chopped into inch long pieces
1 1/2 cup plant milk (water works but it won%u2019t be as creamy)
1/2 cup chopped almonds (optional)
Preheat oven to 375
Lightly grease a 9×9 inch baking pan (I used metal because it makes for crisper edges but glass works too) and dump 2 cups of the rhubarb in and evenly distribute on the bottom. In a large bowl mis the oats, the baking powder, salt, and cinnamon together. Mix in chopped nuts if you are using. Evenly cover rhubarb with oat mixture. In now empty bowl mix together the milk, flax eggs, maple syrup, and tahini until evenly incorporated. Pour mixture over oats. Let the mixture sit for a few minutes until the oats have abosbed all the liquid. Toss the rest of the diced rhubarb and a few more chop nuts to the top and pop into the oven to bake.
Bake for 30-40 minutes (shorter time for a wetter oatmeal, longer for a denser crispier oatmeal)
Once baked to your likeness, remove from oven and let cool for a few minutes just so it is not super hot. Scoop into bowls and serve warm with extra maple and milk or whatever you might want to serve with it.
Left overs last great in fridge for 3-4 days or individual portions can be frozen for a month or two. Just pop into microwave for a couple minutes to warm up.
The other night I made Megan’s birthday dinner which consisted of pizza and salad. The pizza was pizza and everyone loved it and ate it, but what surprised me was how everyone was really into the salad. A big ass bowl or fresh greens with onions and I think carrots and cabbage and some cranberries I pulled form the freezer and candies almonds. Simple and not fussy, and everyone was just so happy to eat it. I felt like a salad genus and now I am full on into making fun awesome spring salads. (I have to keep reminding myself that yes, it is indeed spring.%u00a0So what we got snow yesterday, it will melt, right????%u00a0)%u00a0
So I bring to you a a bowl of fresh crispy spring greens with crunch and bite and creaminess and flavor. A salad that will bring you joy and satisfaction and maybe even anticipation for your next salad adventure.%u00a0Not to mention a salad that looks so dang pretty.%u00a0
Get into the green. You will be as happy as a rabbit in a garden.%u00a0
The stuff. Greens, red onion, an avocado, almonds, blueberries, and a lemon. Also need some maple syrup, olive oil, red wine vinegar, and salt and pepper.%u00a0
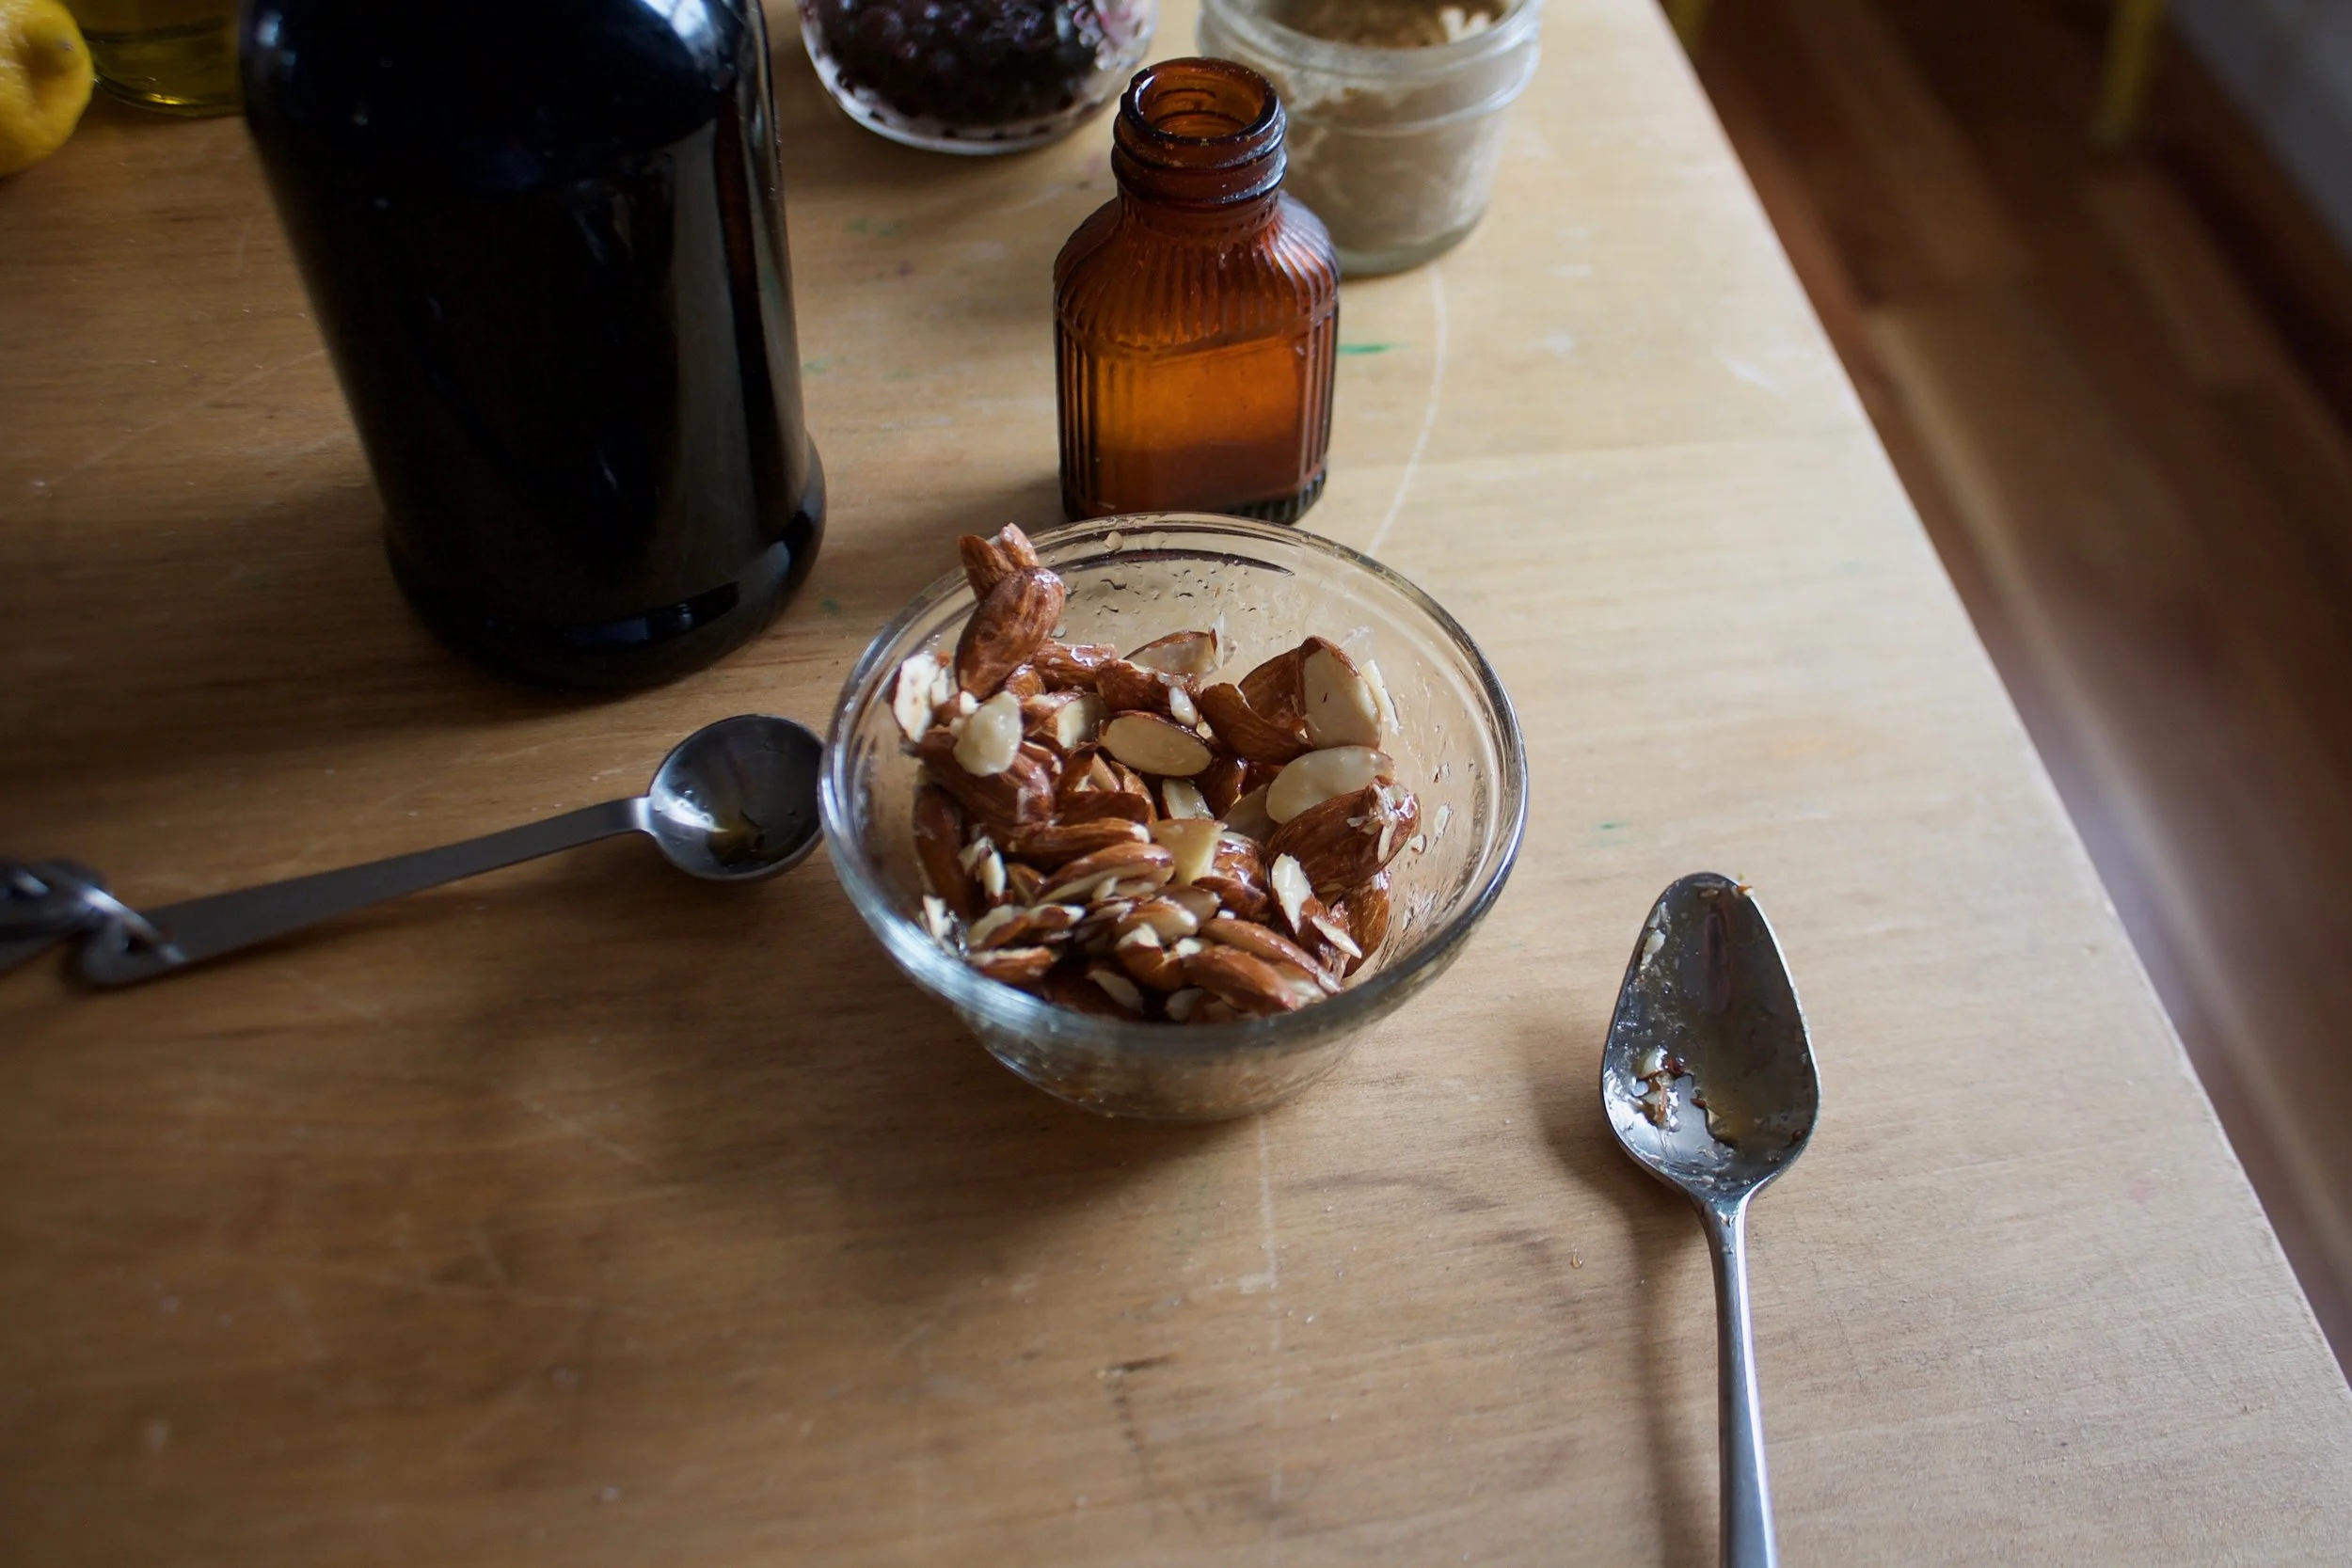
A couple teaspoons of maple %u00a0go in with the almonds. Really toss make sure they are all coated.
Place the almonds into a hot skillet cook for about 5-7 minutes or until the maple has become sticky and the almonds no longer raw.%u00a0
When they are done,%u00a0dump them onto a piece of parchment to cool. Don worry if they clung a little, you can break them apart once they are hard.%u00a0
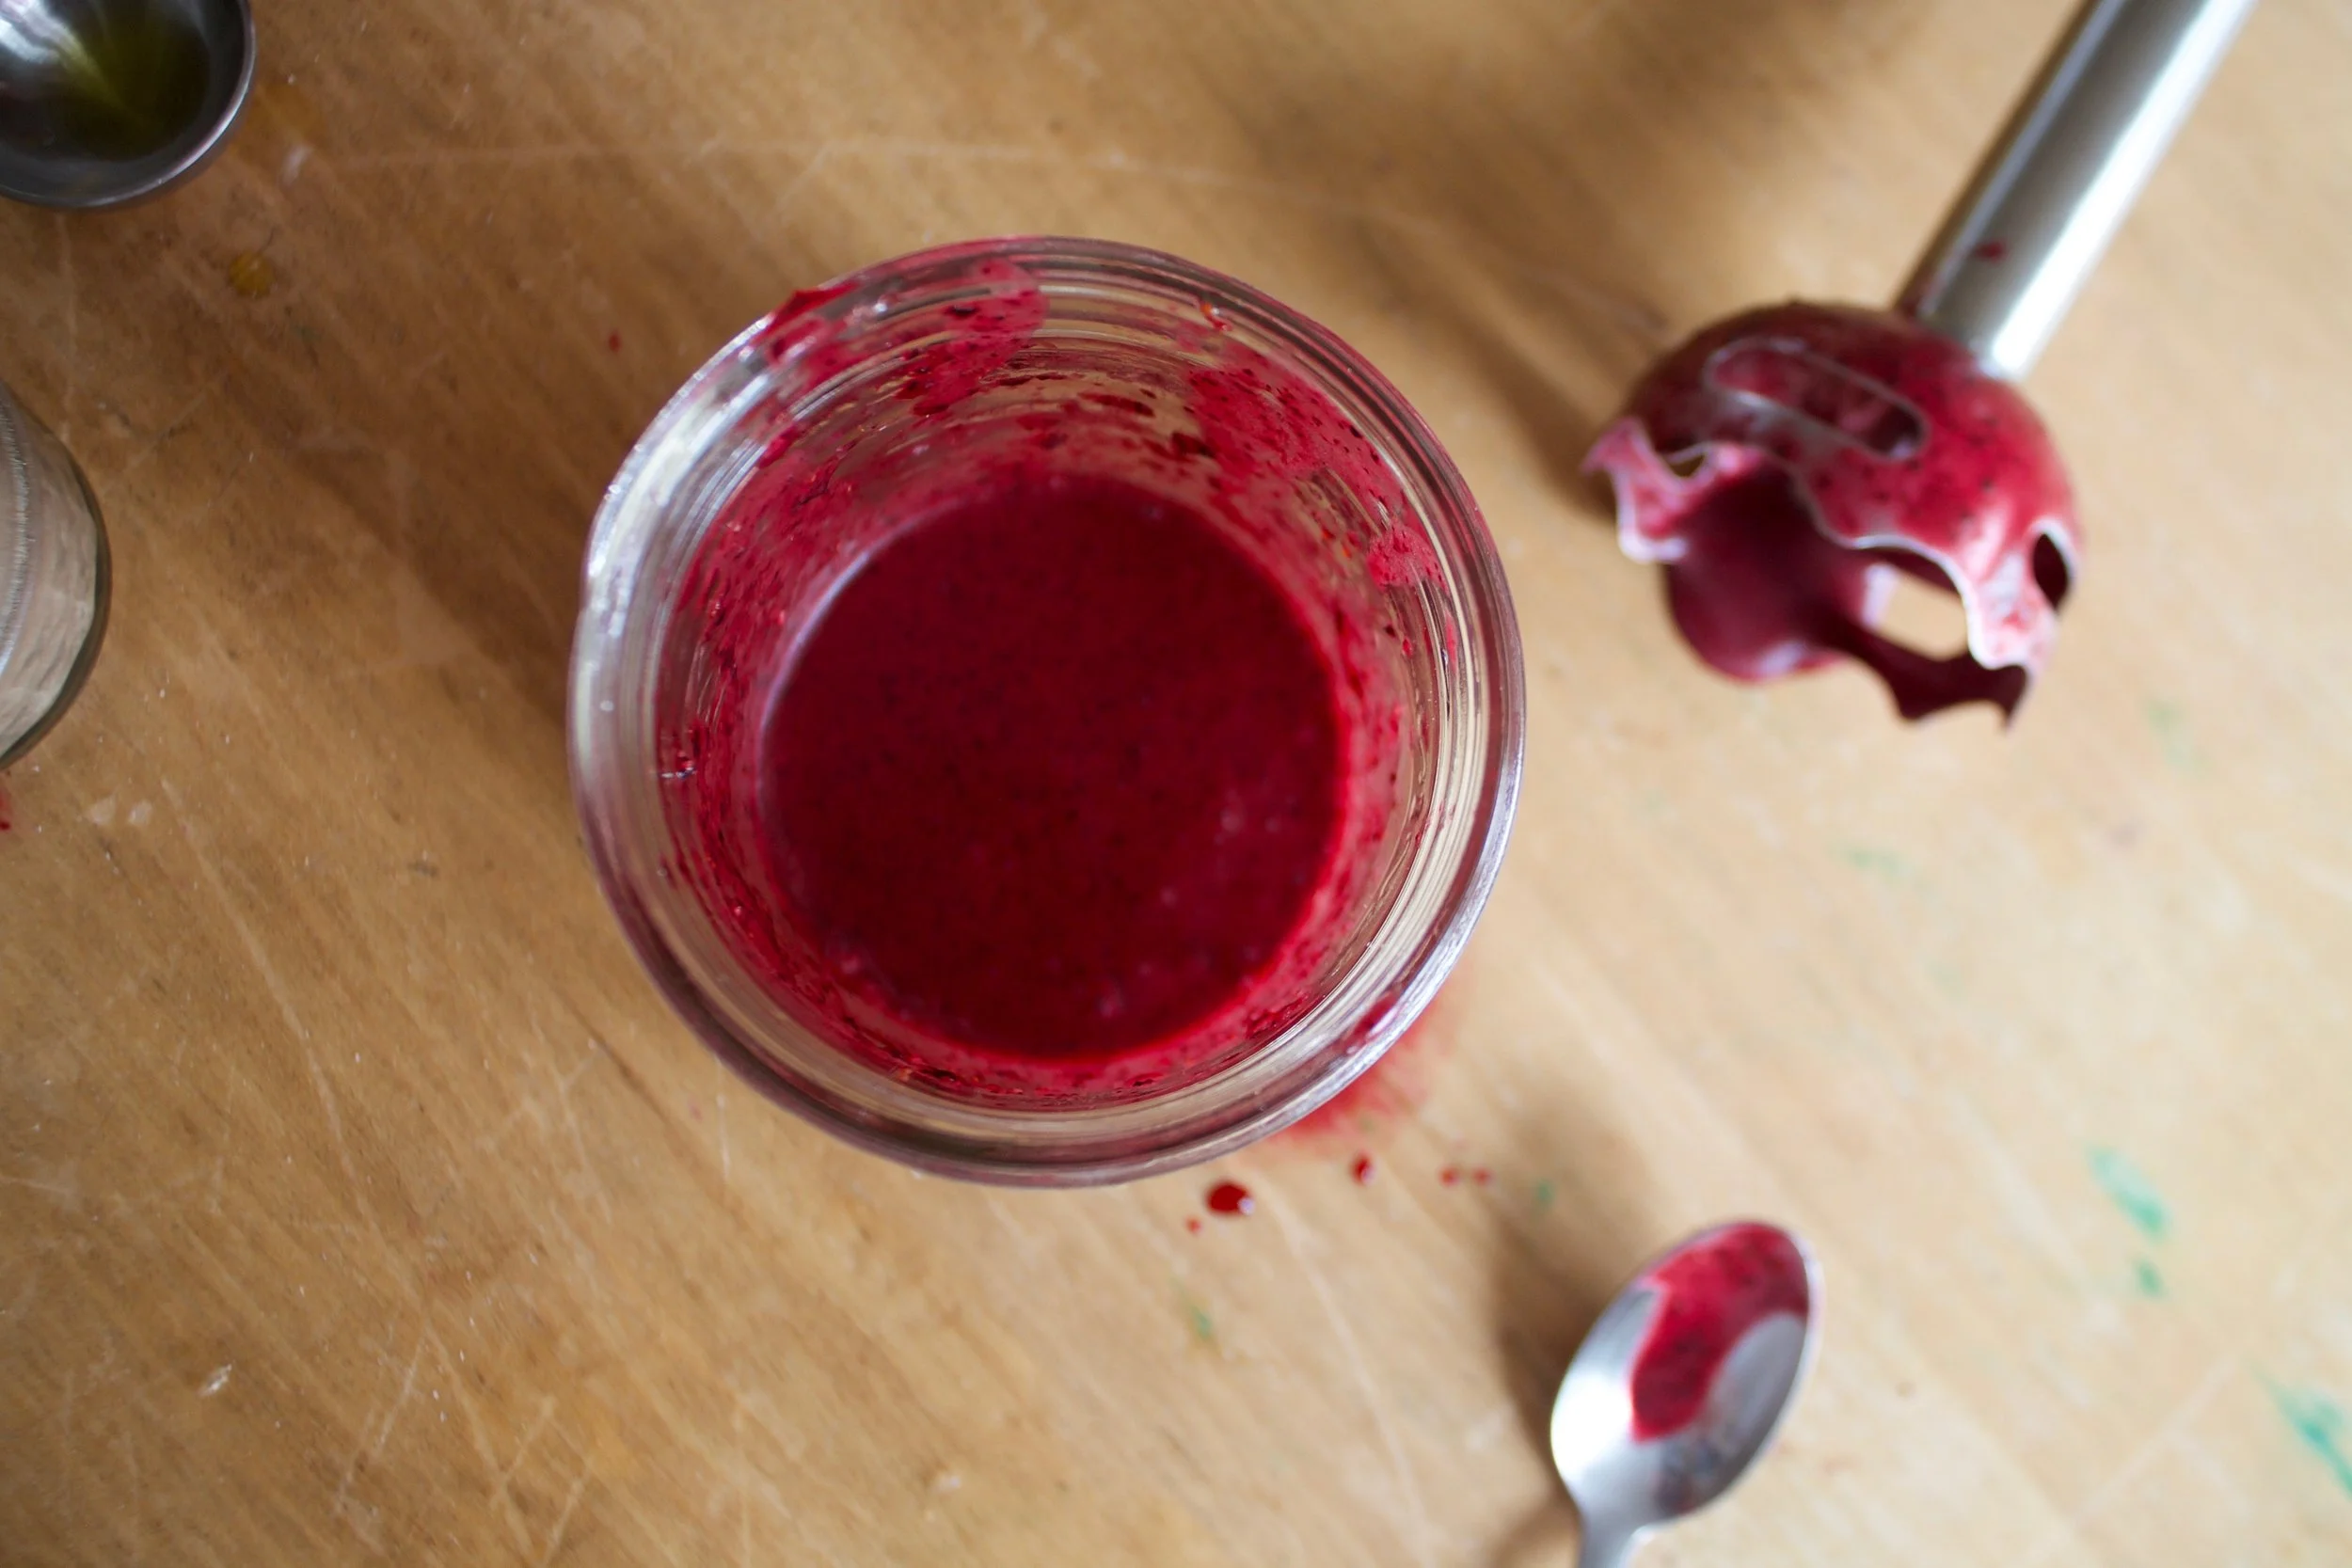
Easy ass dressing. Blueberries. juice from the lemon, olive oil, vinegar, a tiny splash of maple, and a good pinch or pepper.%u00a0
Blended then done. Taste and season with salt if needed.%u00a0
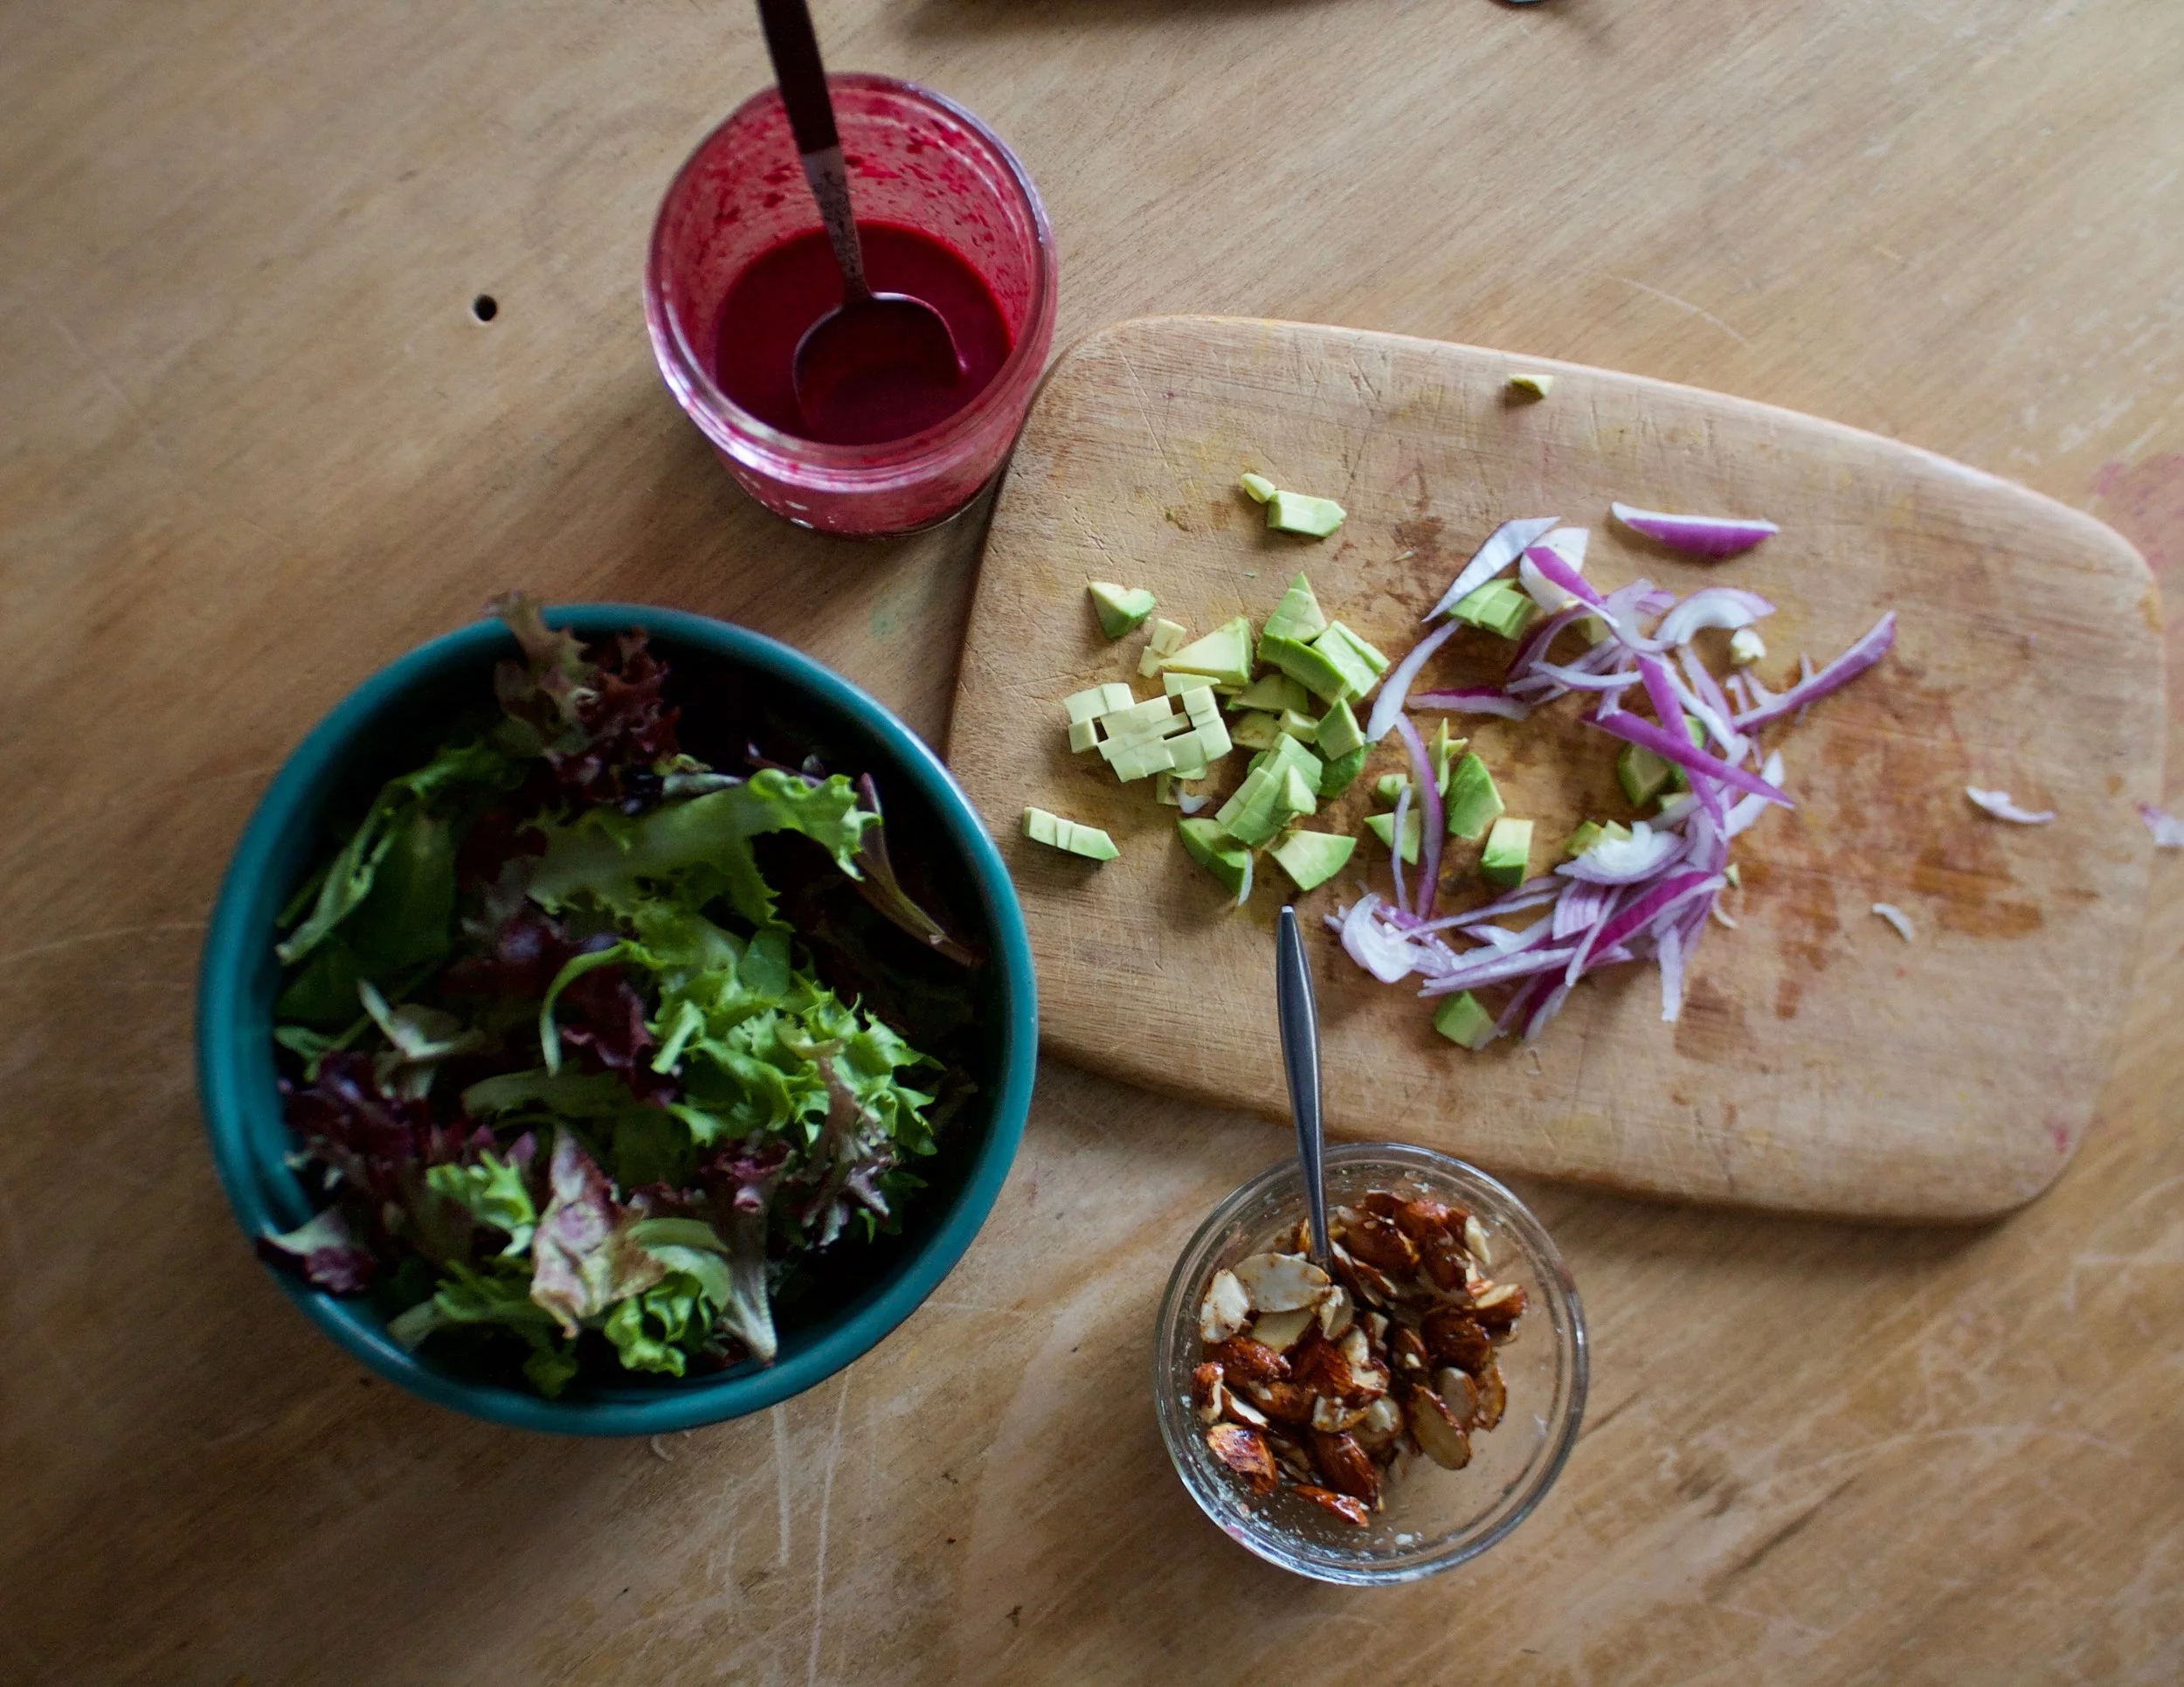
Avocado gets cut into small chunks and the onion get s thinly sliced.
It’s all ready, so now make a salad
Makes 2-3 %u00a0salads%u00a0
1/4 pound greens ( I used spring mix but mesclun mix or spinach is good too)%u00a0
1/2 %u00a0red onion
1 avocado
For the Almonds%u00a0
1/3 cup raw halved or slivered almonds
2 teaspoons maple syrup%u00a0
For the Blueberry lemon Vinaigrette%u00a0
1/3 cup blueberries (I used %u00a0frozen)
1 lemon
1 Tablespoon olive oil
2 Tablespoon red wine vinegar
1/2 teaspoon maple syrup
pinch or salt
pinch or pepper
To make the %u00a0candied almonds, preheat a skillet to on medium heat on top of the stove.%u00a0Place almonds into a small bowl and drizzle with maple syrup. Stir to coat. When the pan is hot, dump the maple covered almond into it and spread them out. Cook for a 3 minutes, then give a stir and cook for a 3 or so more minutes or until the maple has evaporated and the almonds are starting to brown. Dump the almonds directly onto a piece of parchment paper to cool and hardened. Do worry if they stick together a bit, you can break them apart after.%u00a0
To make the vinaigrette,%u00a0place the berries into a jar (if using stick blender) or blender with the juice of the lemon, olive oil, vinegar, maple, and a pinch of pepper Blend until smooth. Taste then add a very small pinch of salt or more to taste.%u00a0
For salad. Thinly slice the onion and dice the avocado. Place greens into bowl(s) and toss with onions and avocado. Top with %u00a0candied almonds and drizzle all over with the vinaigrette. Grab a fork and eat.
Any left over dressing will last in fridge for about a week and left over almonds will be good for.a few weeks in a airtight container.%u00a0%u00a0%u00a0
The other night I made Megan’s birthday dinner which consisted of pizza and salad. The pizza was pizza and everyone loved it and ate it, but what surprised me was how everyone was really into the salad. A big ass bowl or fresh greens with onions and I think carrots and cabbage and some cranberries I pulled form the freezer and candies almonds. Simple and not fussy, and everyone was just so happy to eat it. I felt like a salad genus and now I am full on into making fun awesome spring salads. (I have to keep reminding myself that yes, it is indeed spring.%u00a0So what we got snow yesterday, it will melt, right????%u00a0)%u00a0
So I bring to you a a bowl of fresh crispy spring greens with crunch and bite and creaminess and flavor. A salad that will bring you joy and satisfaction and maybe even anticipation for your next salad adventure.%u00a0Not to mention a salad that looks so dang pretty.%u00a0
Get into the green. You will be as happy as a rabbit in a garden.%u00a0
The stuff. Greens, red onion, an avocado, almonds, blueberries, and a lemon. Also need some maple syrup, olive oil, red wine vinegar, and salt and pepper.%u00a0
A couple teaspoons of maple %u00a0go in with the almonds. Really toss make sure they are all coated.
Place the almonds into a hot skillet cook for about 5-7 minutes or until the maple has become sticky and the almonds no longer raw.%u00a0
When they are done,%u00a0dump them onto a piece of parchment to cool. Don worry if they clung a little, you can break them apart once they are hard.%u00a0
Easy ass dressing. Blueberries. juice from the lemon, olive oil, vinegar, a tiny splash of maple, and a good pinch or pepper.%u00a0
Blended then done. Taste and season with salt if needed.%u00a0
Avocado gets cut into small chunks and the onion get s thinly sliced.
It’s all ready, so now make a salad
Makes 2-3 %u00a0salads%u00a0
1/4 pound greens ( I used spring mix but mesclun mix or spinach is good too)%u00a0
1/2 %u00a0red onion
1 avocado
For the Almonds%u00a0
1/3 cup raw halved or slivered almonds
2 teaspoons maple syrup%u00a0
For the Blueberry lemon Vinaigrette%u00a0
1/3 cup blueberries (I used %u00a0frozen)
1 lemon
1 Tablespoon olive oil
2 Tablespoon red wine vinegar
1/2 teaspoon maple syrup
pinch or salt
pinch or pepper
To make the %u00a0candied almonds, preheat a skillet to on medium heat on top of the stove.%u00a0Place almonds into a small bowl and drizzle with maple syrup. Stir to coat. When the pan is hot, dump the maple covered almond into it and spread them out. Cook for a 3 minutes, then give a stir and cook for a 3 or so more minutes or until the maple has evaporated and the almonds are starting to brown. Dump the almonds directly onto a piece of parchment paper to cool and hardened. Do worry if they stick together a bit, you can break them apart after.%u00a0
To make the vinaigrette,%u00a0place the berries into a jar (if using stick blender) or blender with the juice of the lemon, olive oil, vinegar, maple, and a pinch of pepper Blend until smooth. Taste then add a very small pinch of salt or more to taste.%u00a0
For salad. Thinly slice the onion and dice the avocado. Place greens into bowl(s) and toss with onions and avocado. Top with %u00a0candied almonds and drizzle all over with the vinaigrette. Grab a fork and eat.
Any left over dressing will last in fridge for about a week and left over almonds will be good for.a few weeks in a airtight container.%u00a0%u00a0%u00a0
The other night I made Megan’s birthday dinner which consisted of pizza and salad. The pizza was pizza and everyone loved it and ate it, but what surprised me was how everyone was really into the salad. A big ass bowl or fresh greens with onions and I think carrots and cabbage and some cranberries I pulled form the freezer and candies almonds. Simple and not fussy, and everyone was just so happy to eat it. I felt like a salad genus and now I am full on into making fun awesome spring salads. (I have to keep reminding myself that yes, it is indeed spring.%u00a0So what we got snow yesterday, it will melt, right????%u00a0)%u00a0
So I bring to you a a bowl of fresh crispy spring greens with crunch and bite and creaminess and flavor. A salad that will bring you joy and satisfaction and maybe even anticipation for your next salad adventure.%u00a0Not to mention a salad that looks so dang pretty.%u00a0
Get into the green. You will be as happy as a rabbit in a garden.%u00a0
The stuff. Greens, red onion, an avocado, almonds, blueberries, and a lemon. Also need some maple syrup, olive oil, red wine vinegar, and salt and pepper.%u00a0
A couple teaspoons of maple %u00a0go in with the almonds. Really toss make sure they are all coated.
Place the almonds into a hot skillet cook for about 5-7 minutes or until the maple has become sticky and the almonds no longer raw.%u00a0
When they are done,%u00a0dump them onto a piece of parchment to cool. Don worry if they clung a little, you can break them apart once they are hard.%u00a0
Easy ass dressing. Blueberries. juice from the lemon, olive oil, vinegar, a tiny splash of maple, and a good pinch or pepper.%u00a0
Blended then done. Taste and season with salt if needed.%u00a0
Avocado gets cut into small chunks and the onion get s thinly sliced.
It’s all ready, so now make a salad
Makes 2-3 %u00a0salads%u00a0
1/4 pound greens ( I used spring mix but mesclun mix or spinach is good too)%u00a0
1/2 %u00a0red onion
1 avocado
For the Almonds%u00a0
1/3 cup raw halved or slivered almonds
2 teaspoons maple syrup%u00a0
For the Blueberry lemon Vinaigrette%u00a0
1/3 cup blueberries (I used %u00a0frozen)
1 lemon
1 Tablespoon olive oil
2 Tablespoon red wine vinegar
1/2 teaspoon maple syrup
pinch or salt
pinch or pepper
To make the %u00a0candied almonds, preheat a skillet to on medium heat on top of the stove.%u00a0Place almonds into a small bowl and drizzle with maple syrup. Stir to coat. When the pan is hot, dump the maple covered almond into it and spread them out. Cook for a 3 minutes, then give a stir and cook for a 3 or so more minutes or until the maple has evaporated and the almonds are starting to brown. Dump the almonds directly onto a piece of parchment paper to cool and hardened. Do worry if they stick together a bit, you can break them apart after.%u00a0
To make the vinaigrette,%u00a0place the berries into a jar (if using stick blender) or blender with the juice of the lemon, olive oil, vinegar, maple, and a pinch of pepper Blend until smooth. Taste then add a very small pinch of salt or more to taste.%u00a0
For salad. Thinly slice the onion and dice the avocado. Place greens into bowl(s) and toss with onions and avocado. Top with %u00a0candied almonds and drizzle all over with the vinaigrette. Grab a fork and eat.
Any left over dressing will last in fridge for about a week and left over almonds will be good for.a few weeks in a airtight container.%u00a0%u00a0%u00a0
Bread is probably, no, definitely one of my upmost favorite things to bake. There is just something so gratifying about the whole process of mixing ingredients, kneading, watching it rise, shaping, then baking. It calms me and make me a better person. Seriously.
And this might sound sad, but this week when my Dad told me that my grandmother died, well I went home and made bread because that is what felt right to do. It gave my mind and hands a good something to do far a little while. Plus I ended up with a loaf of bread to feed people with. I also like to feed people when I am feeling sad.
I chose to use cinnamon and cardamom because of the smells. They are just delightful and happy smells. And swirls are happy so a happy swirl of happy smells in a loaf of bread that I was making to share that was (and did) make people happy. (See, bread baking is making me so nice because I am sharing it) It was just the right thing to do.
So if you are in need of a little happy pick me up, may I suggest making some bread? It might make you feel a little better, or at least get your mind off of things for a bit. And you will have bread so there is that too. It%u2019s a win win.
Now to the bread, which you can also make when you are happy. Or bored, or hungry, although it takes some time so if you are starting off hungry, you will be starving by the time it is done. Maybe eat a snack will you are making it%u2026..
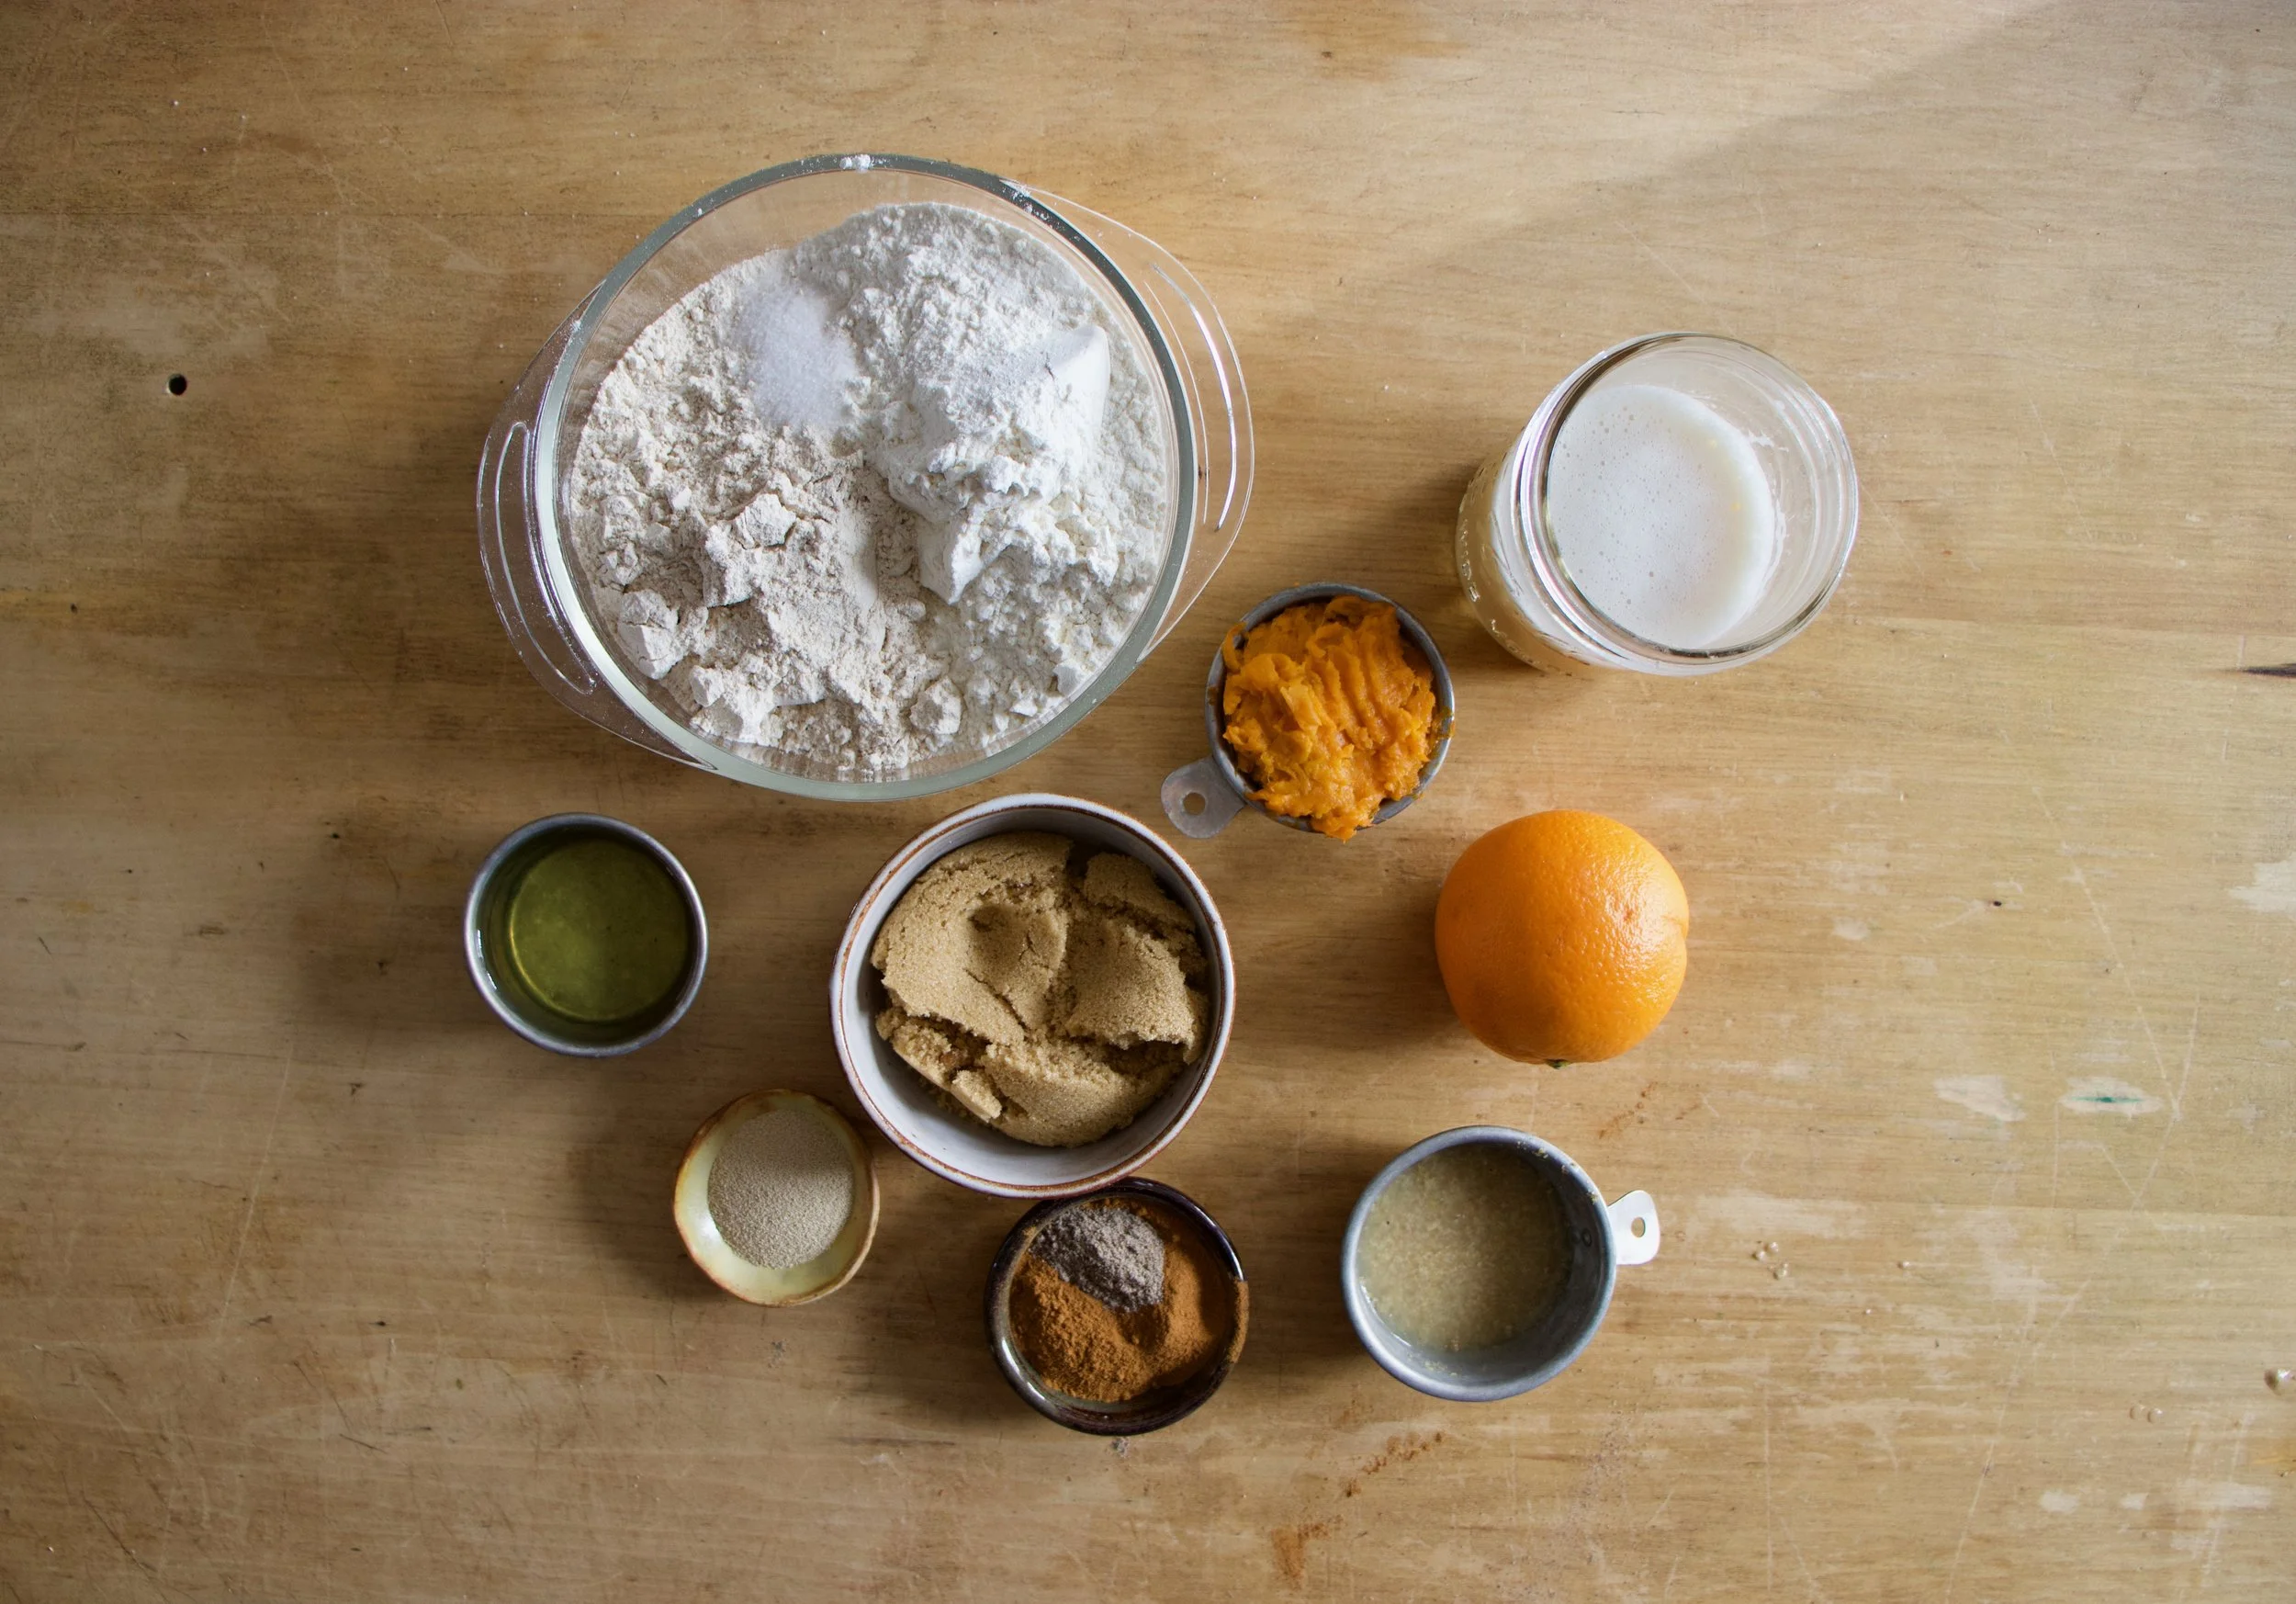
The stuff. White and whole wheat flour, salt, sweet potato puree, soy milk, yeast, brown sugar, oil, cinnamon, cardamom, some flax seeds, and an orange.
In a big bow, mix together the yeast, warm milk, sweet potato puree, a little sugar, and oil. Let it sit for a minute to active yeast.
Flours and salt get a good mix to be mixed.
Then dry gets dumped into the yeast mixture along with the zest of the orange.
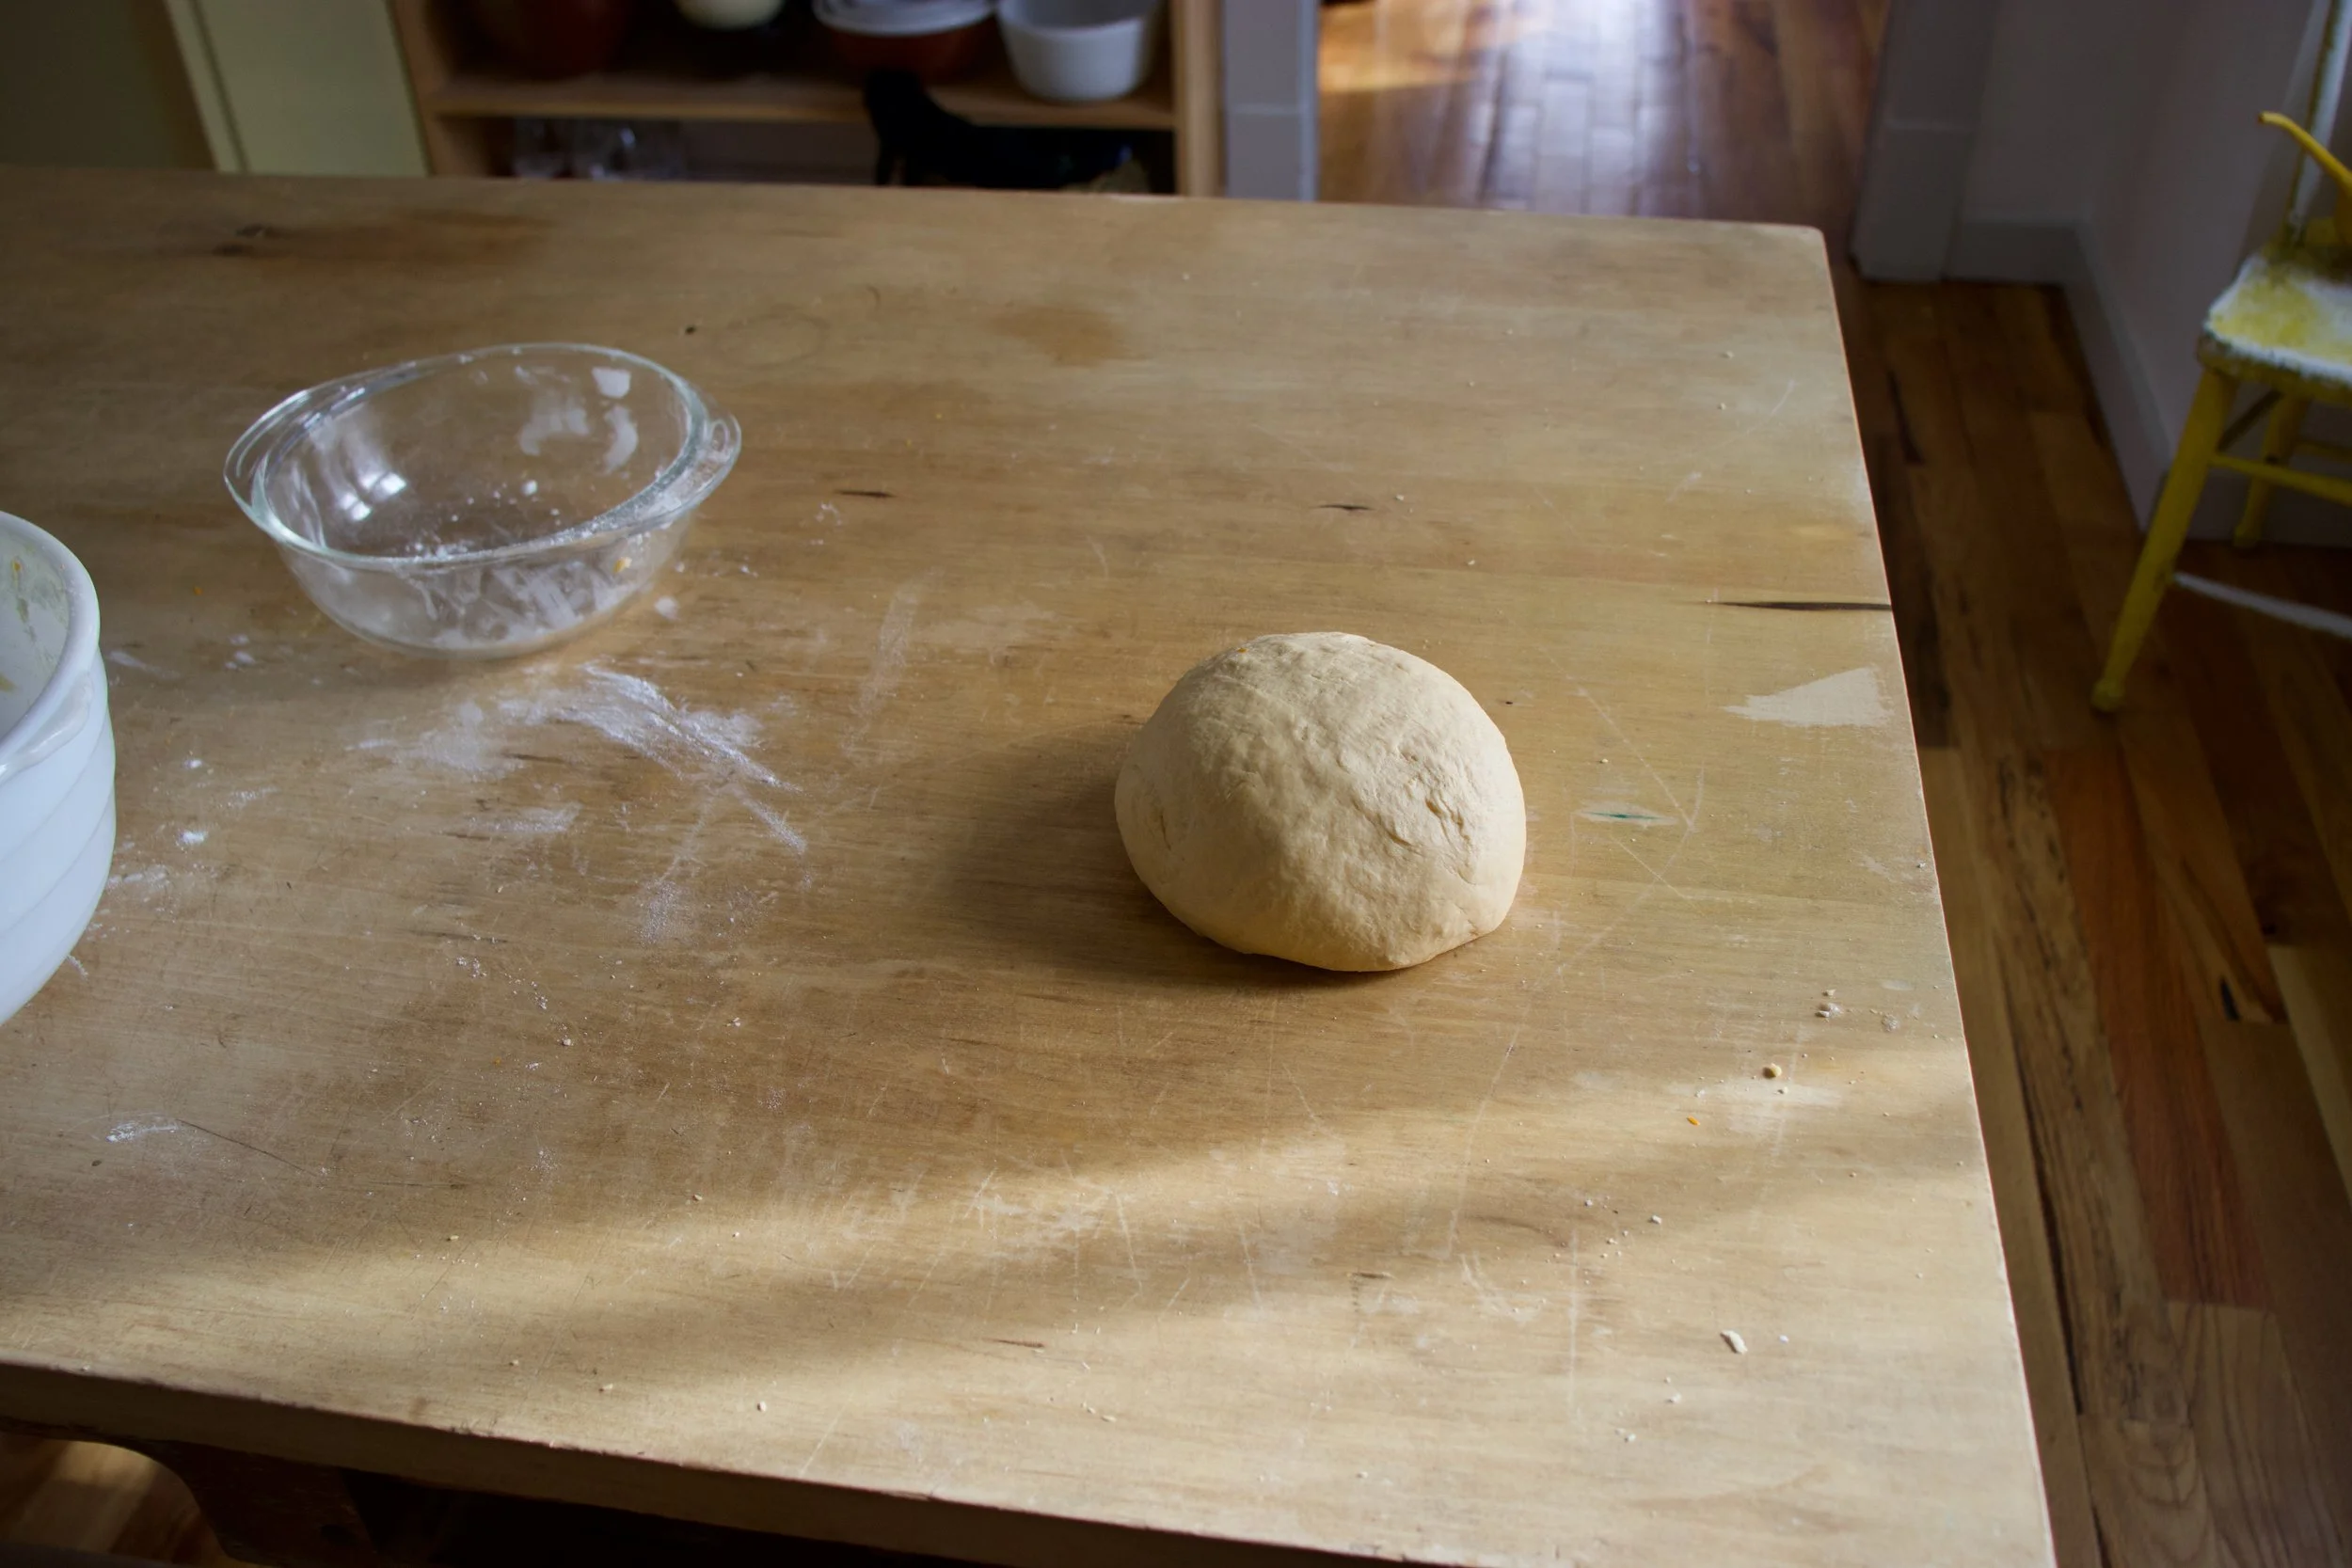
Mix it until a dough forms then dump it out onto a lightly floured surface.
Knead dough for about 6-8 minutes or until supple, uniform, and smooth.
Place dough into a well oiled bowl and cover. Let rise for about and hour or so or until it doubles in size (could take a little longer then a hour)
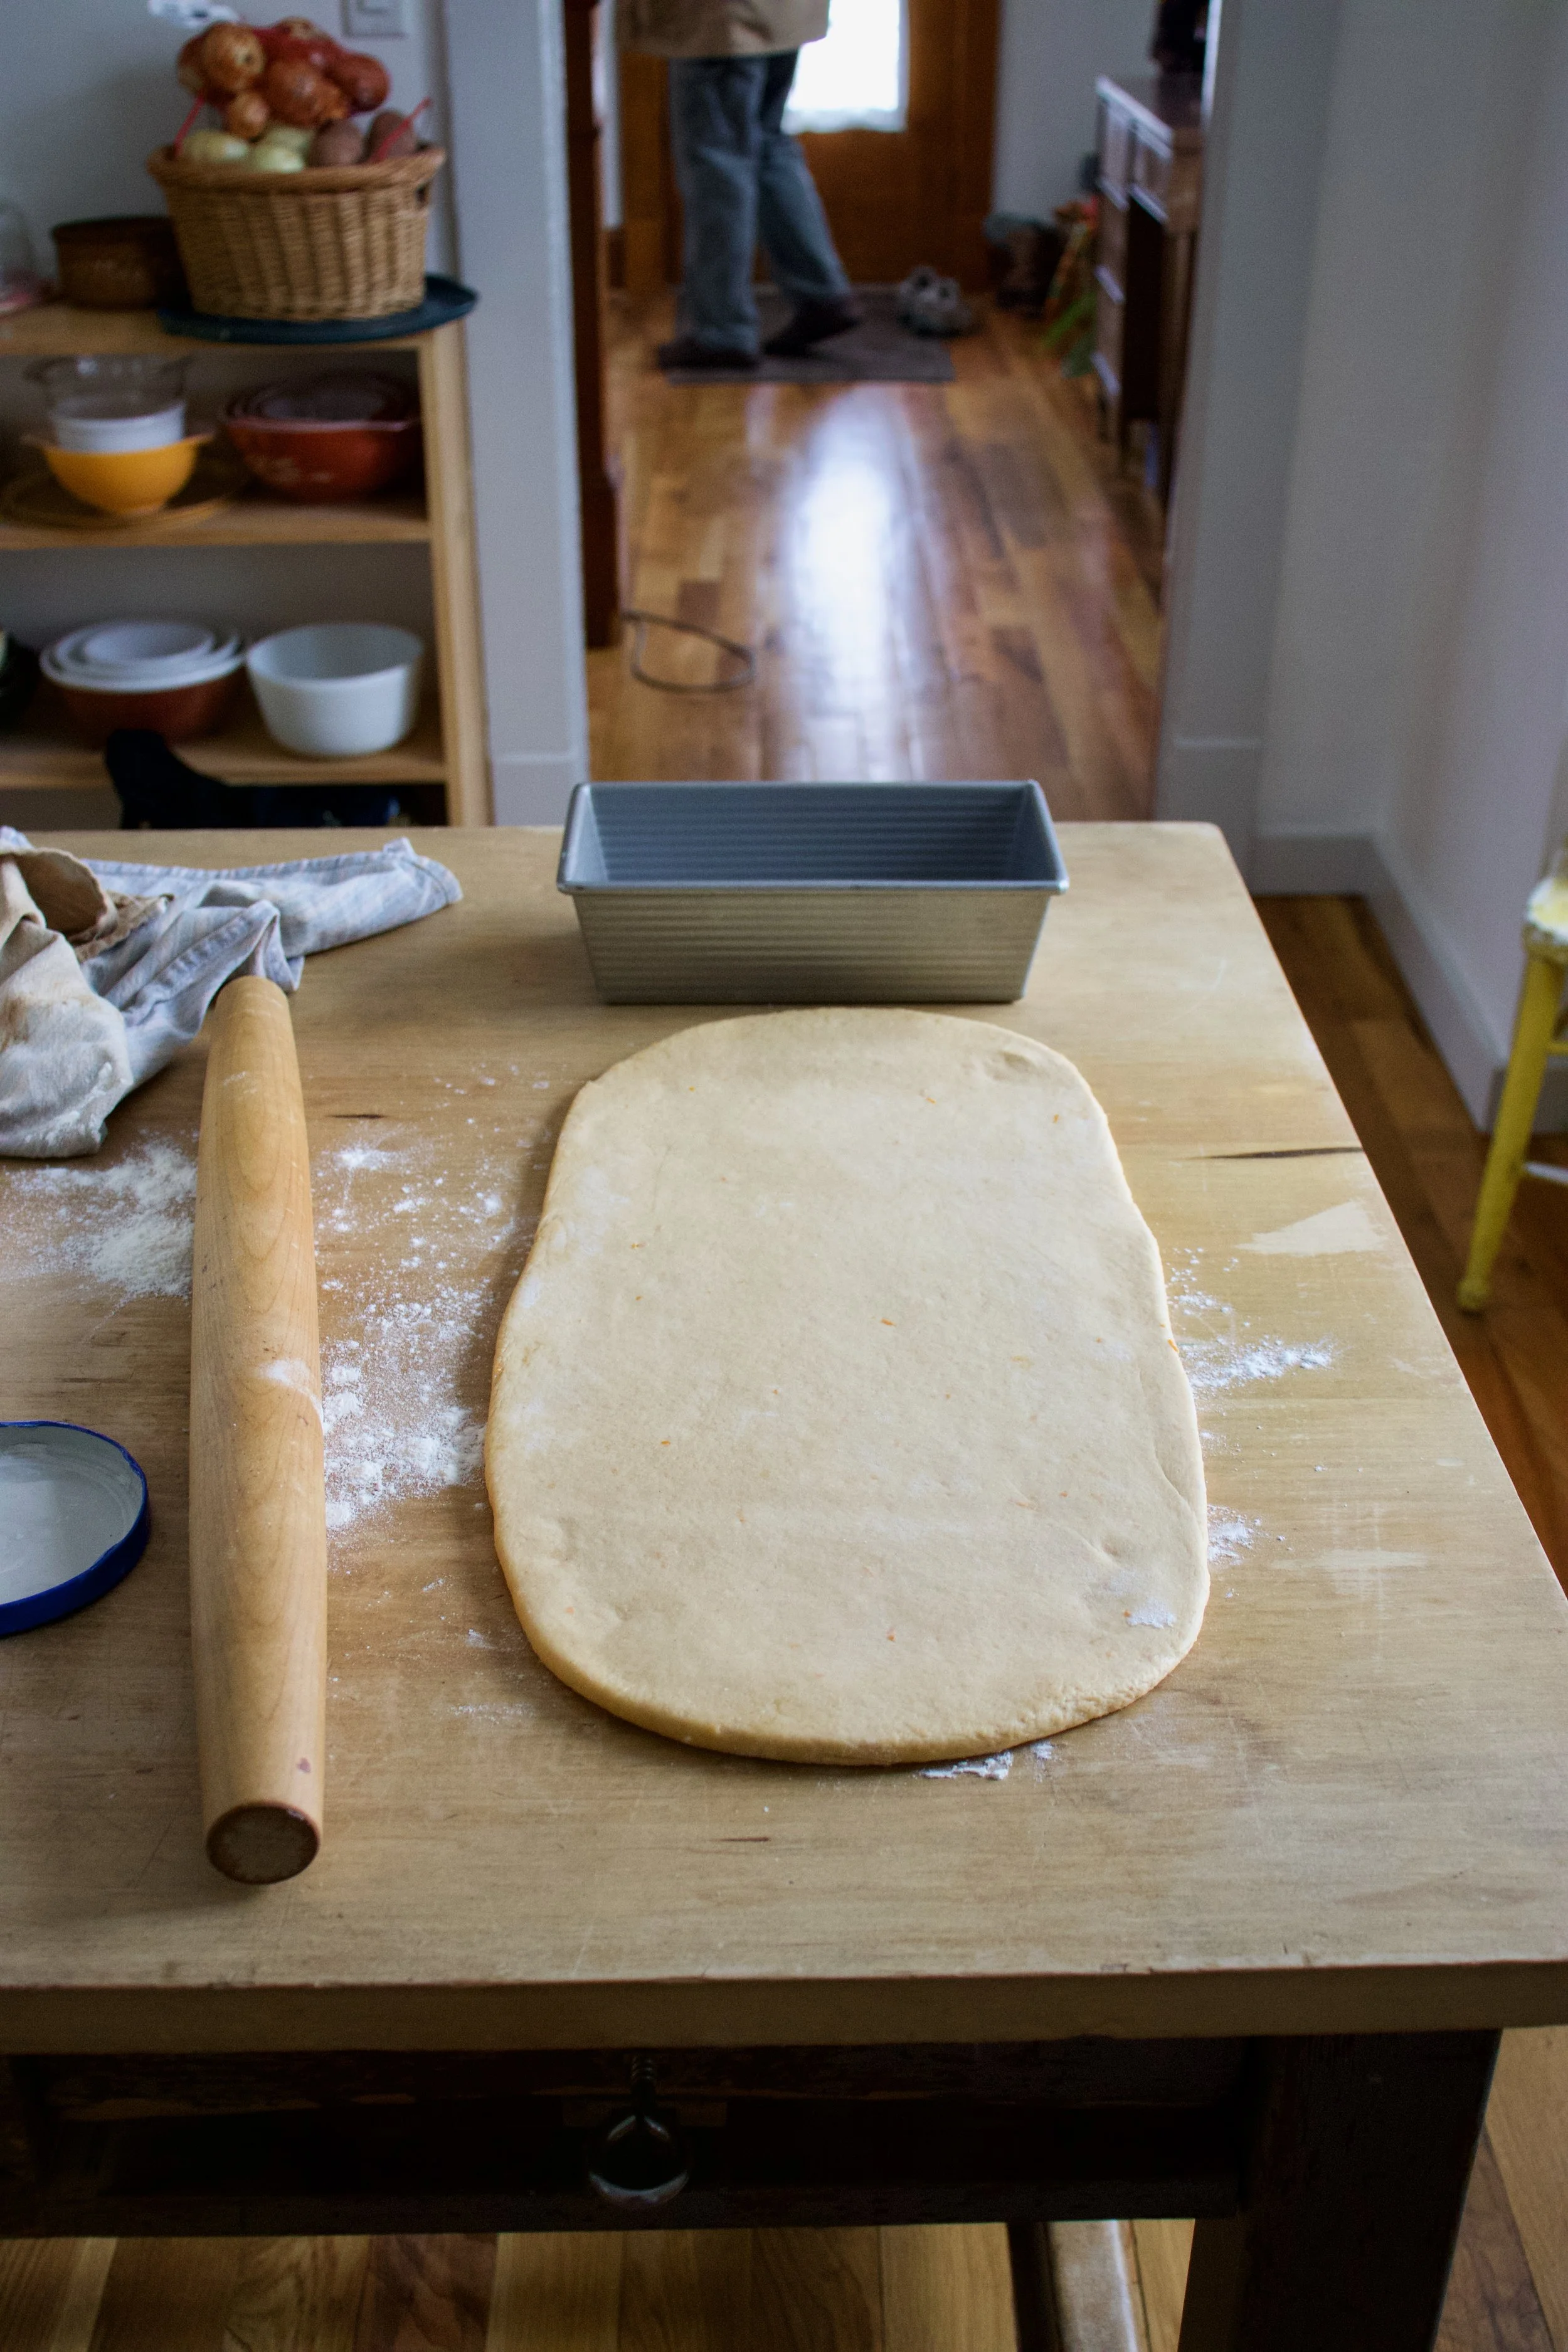
Place risen dough back out onto a lightly floured surface.
Roll it out about 2 feet long and as wide as a bread pan.
Don%u2019t forget mix up your brown sugar with the cinnamon and cardamom.
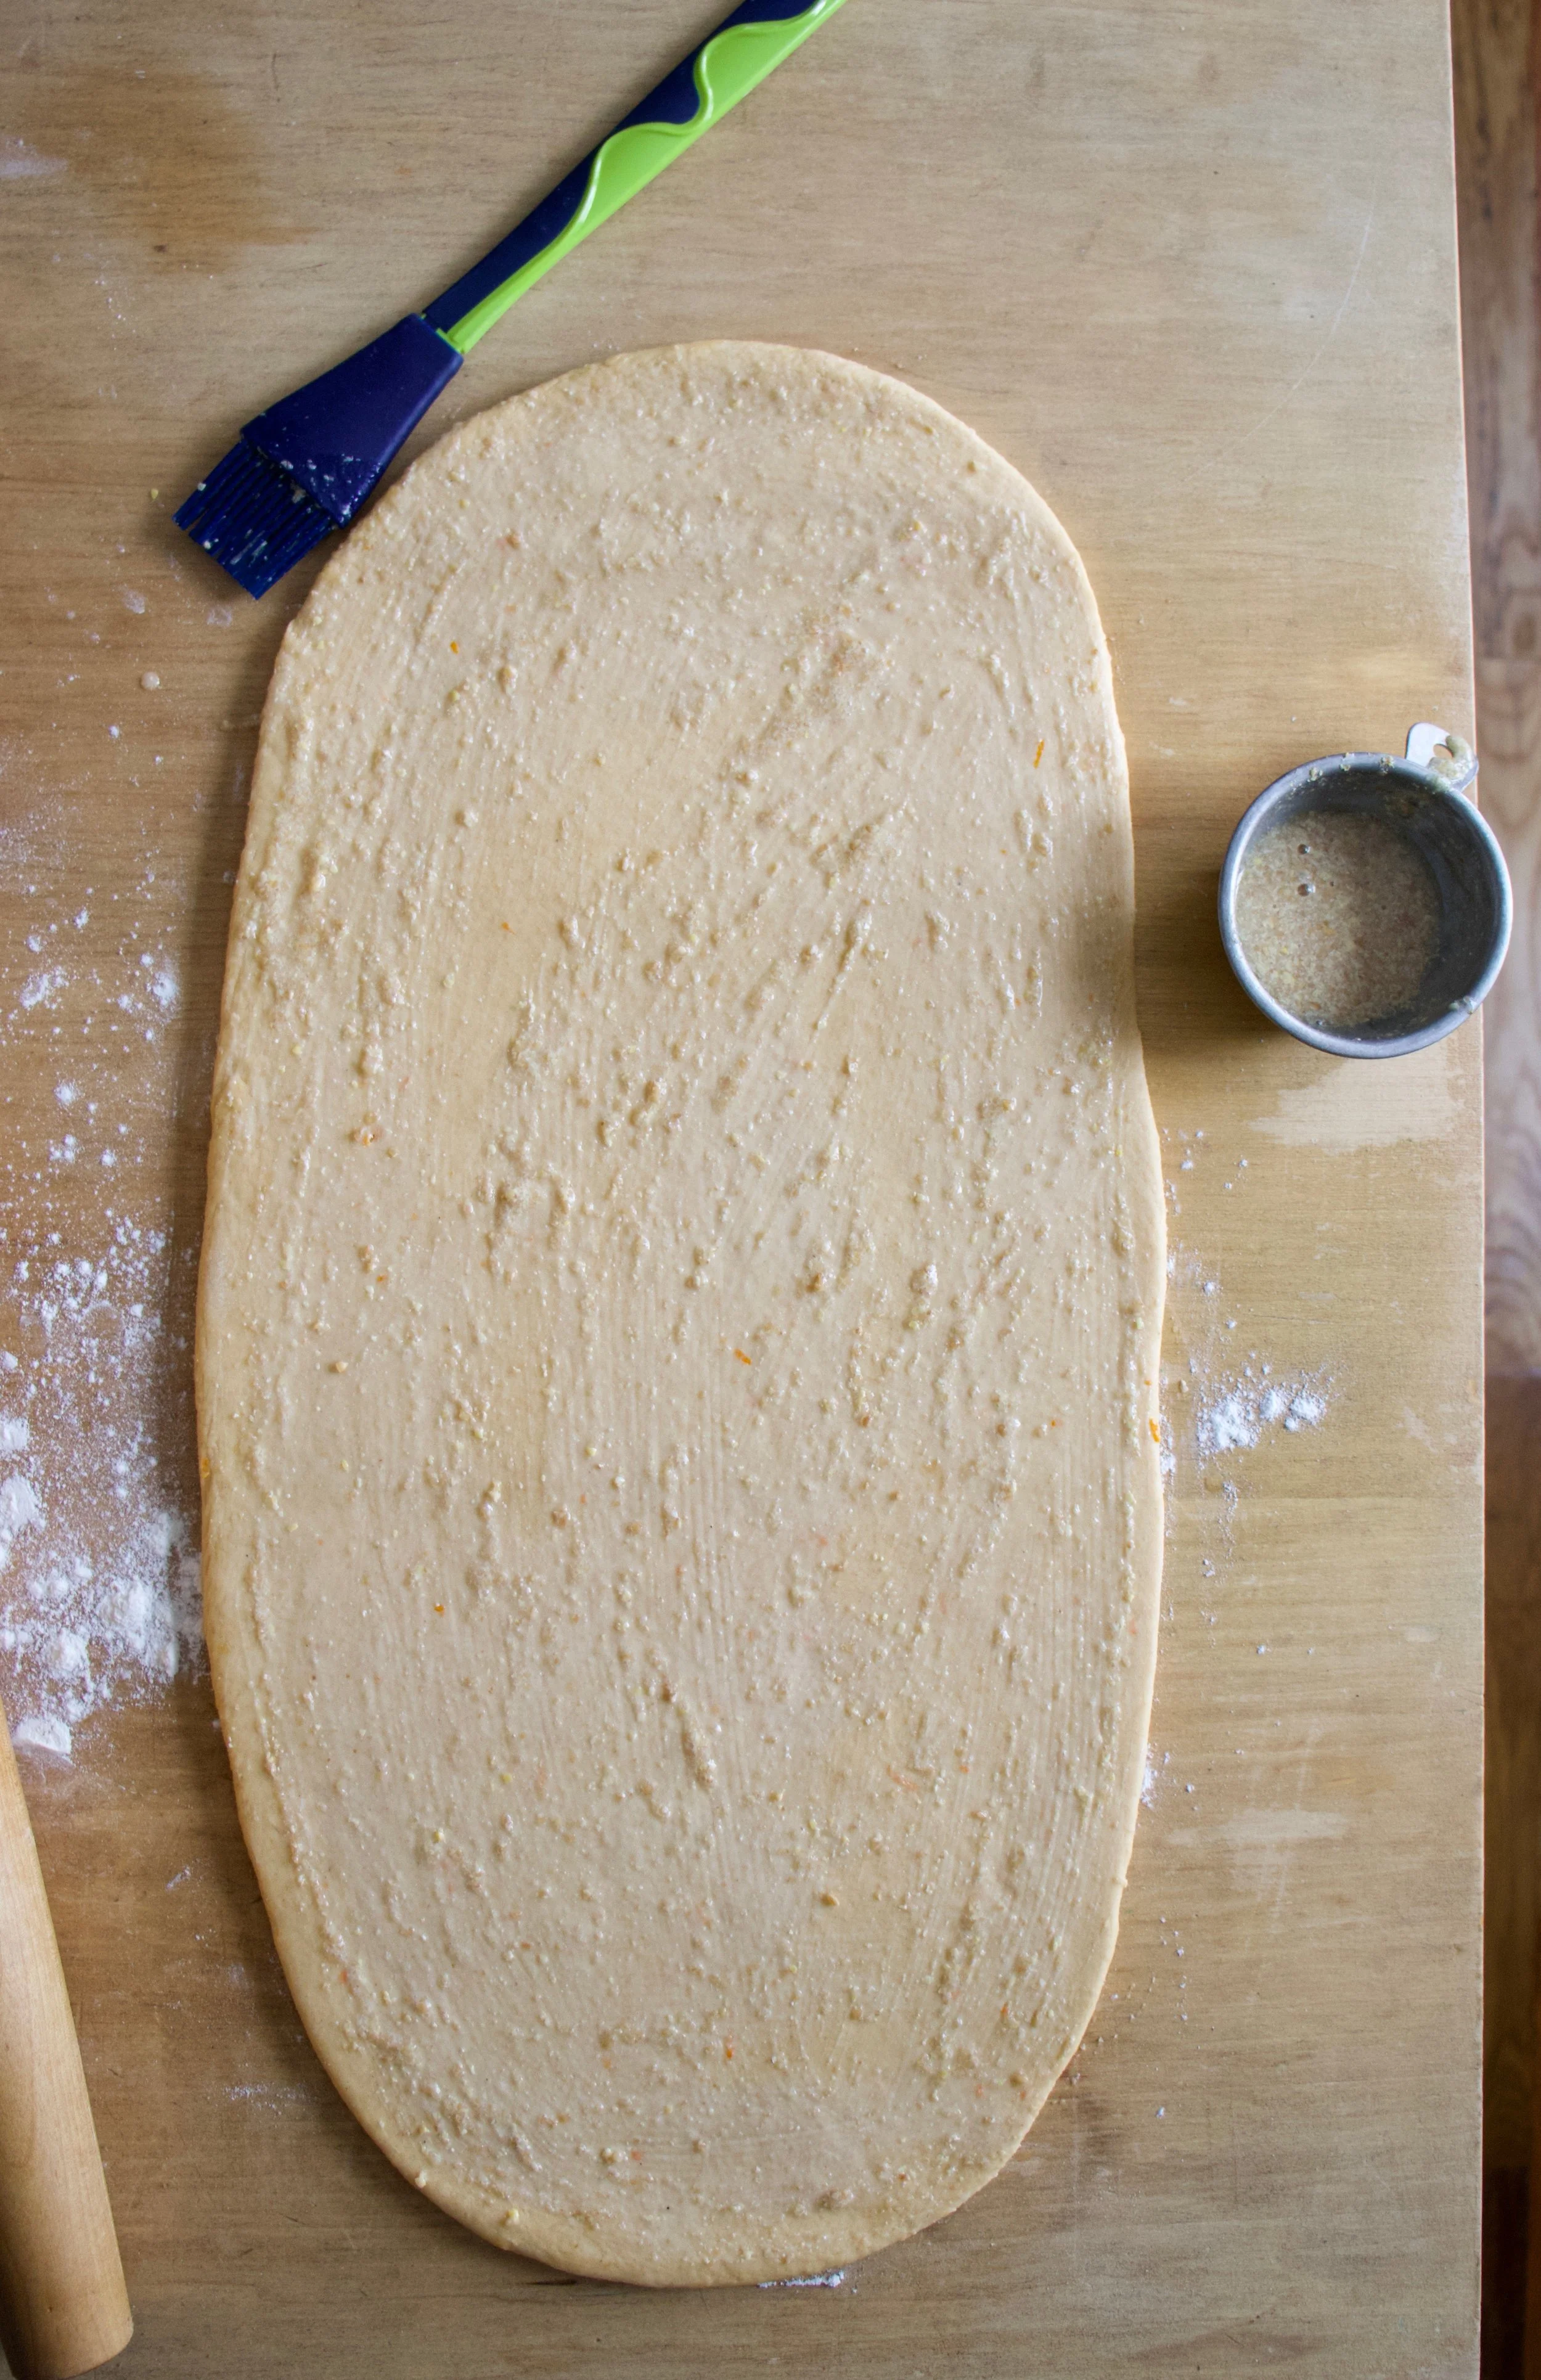
Brush rolled out dough with the flax mixture. This will help the cinnamon cardamon sugar stick.
And evenly distribute the mixture all over the dough.
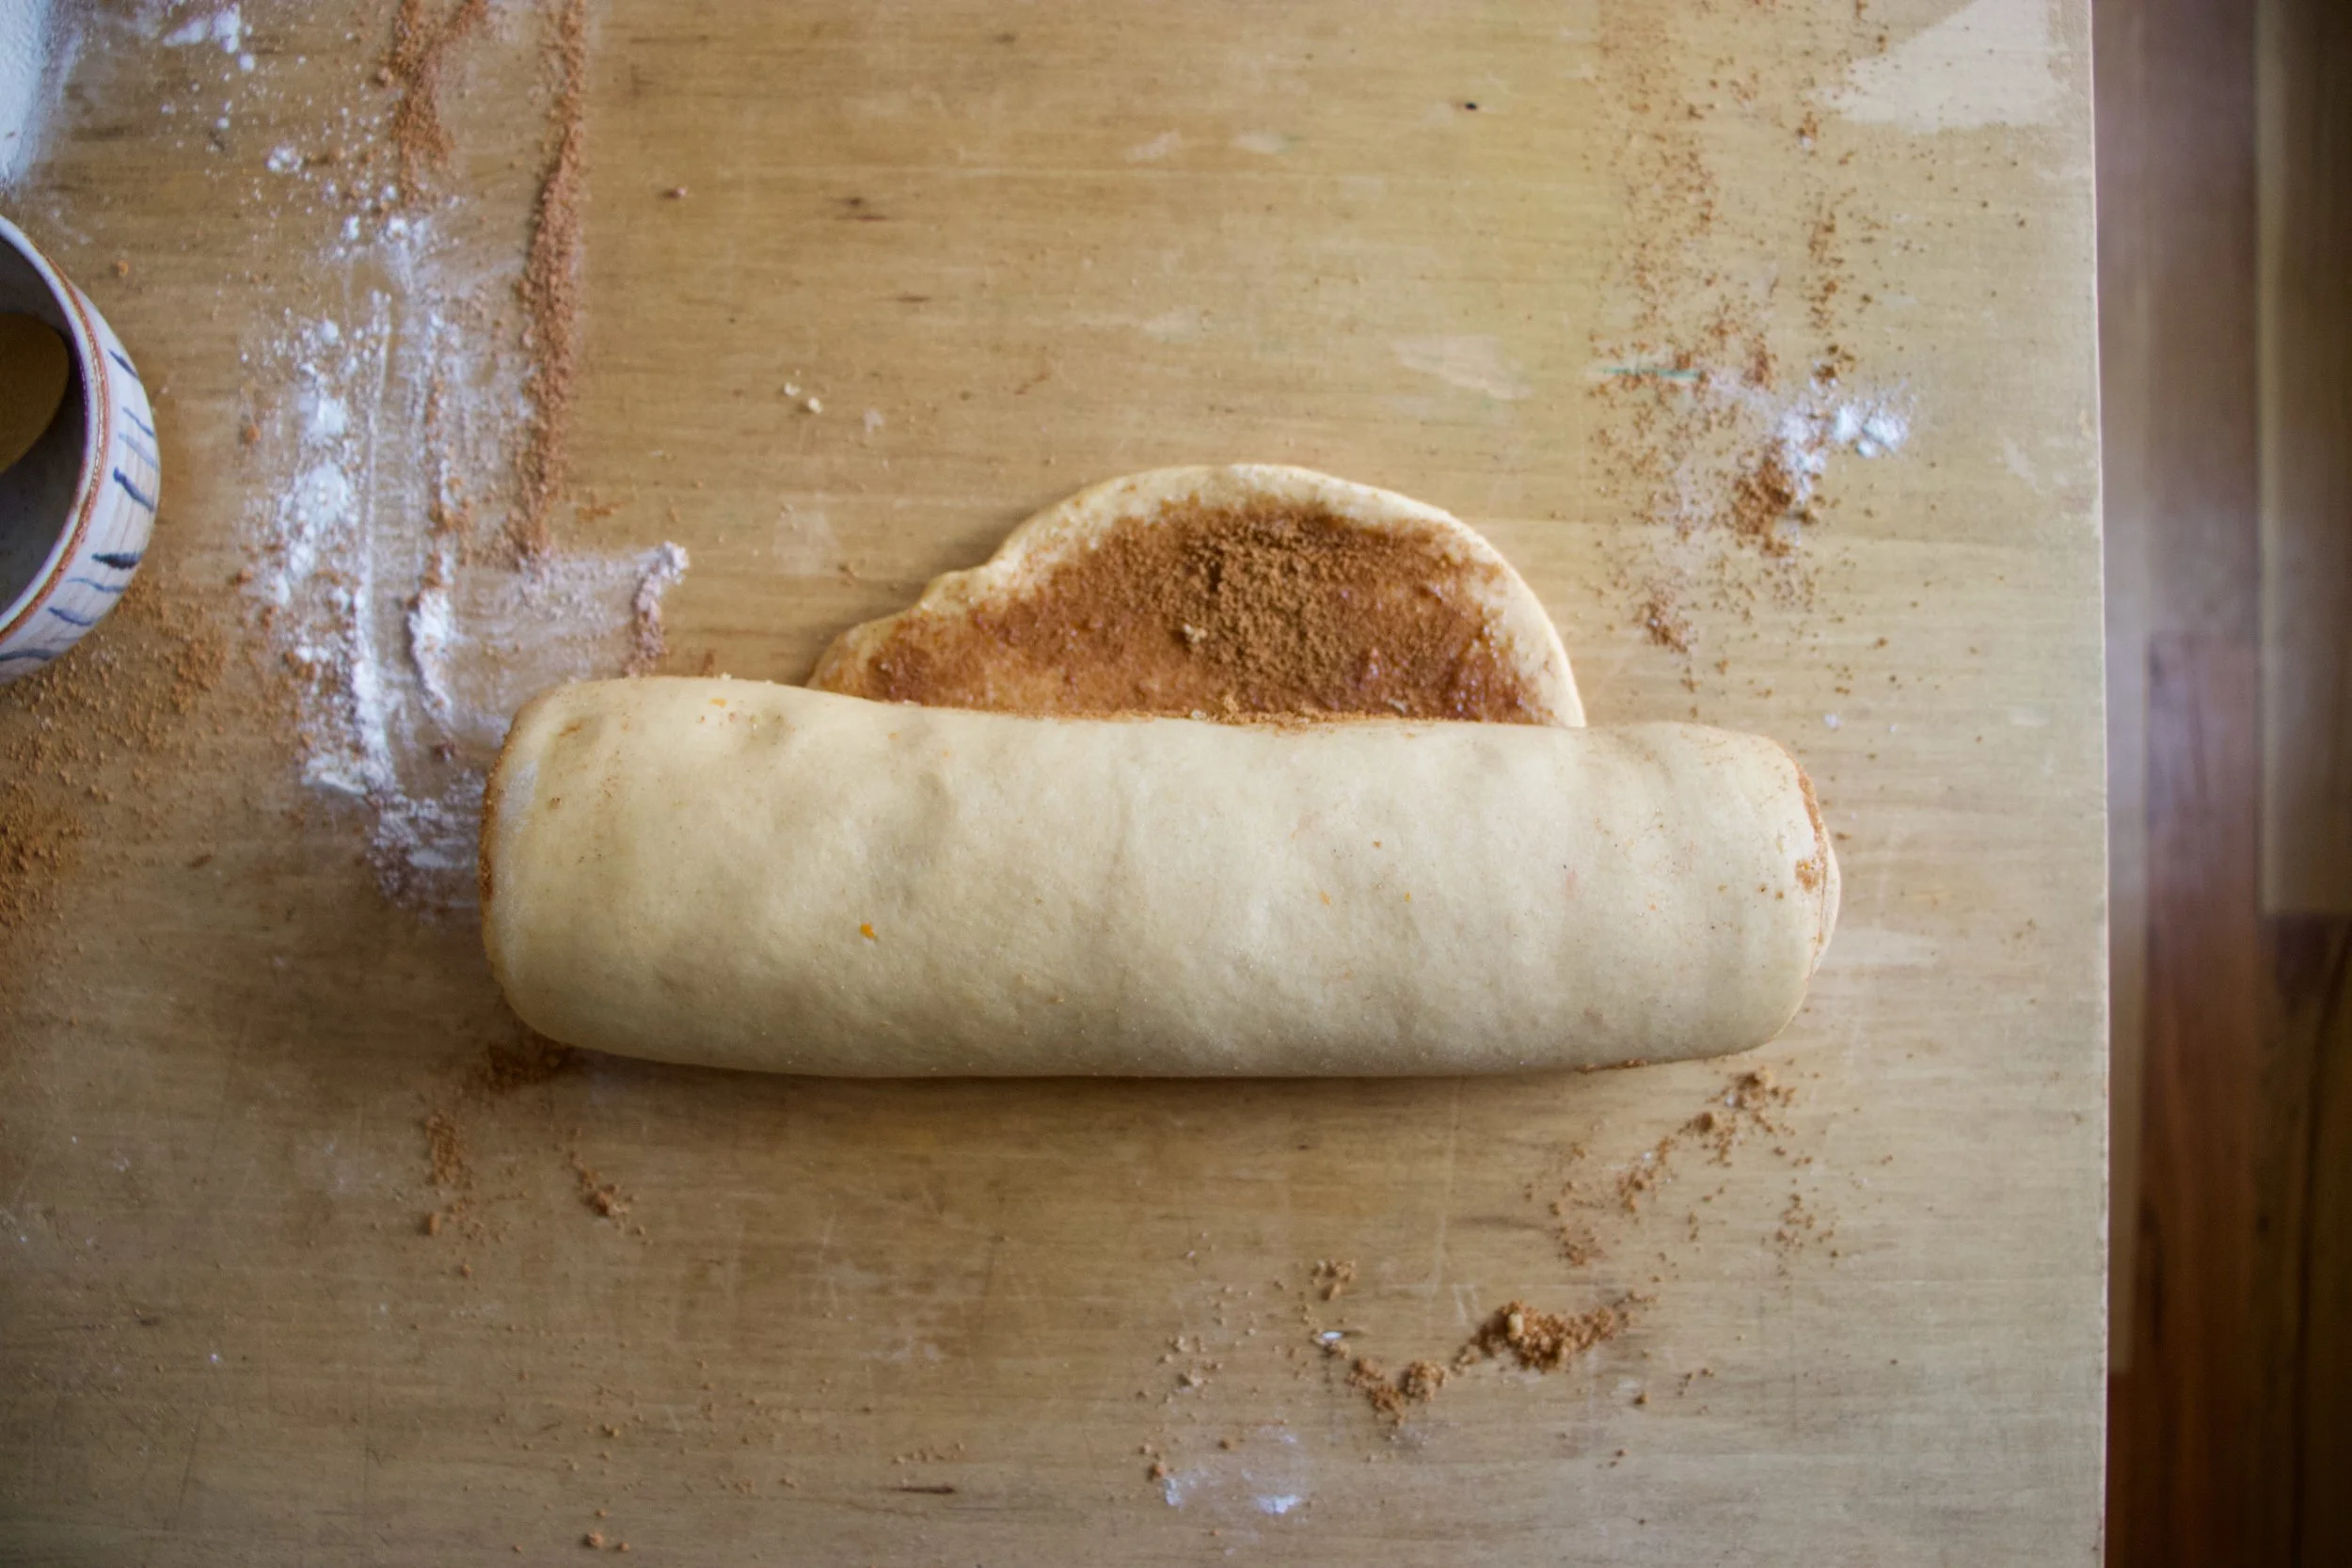
Roll it up nice and tight and once it%u2019s all rolled, pinch then end to the rest of the dough.
Gently place the rolled dough, pinched side down, into a well greased bread pan. Cover in a plastic bag for about another hour or until the dough has risen a good amount and is doming over the rim of the pan. Now preheat the oven.
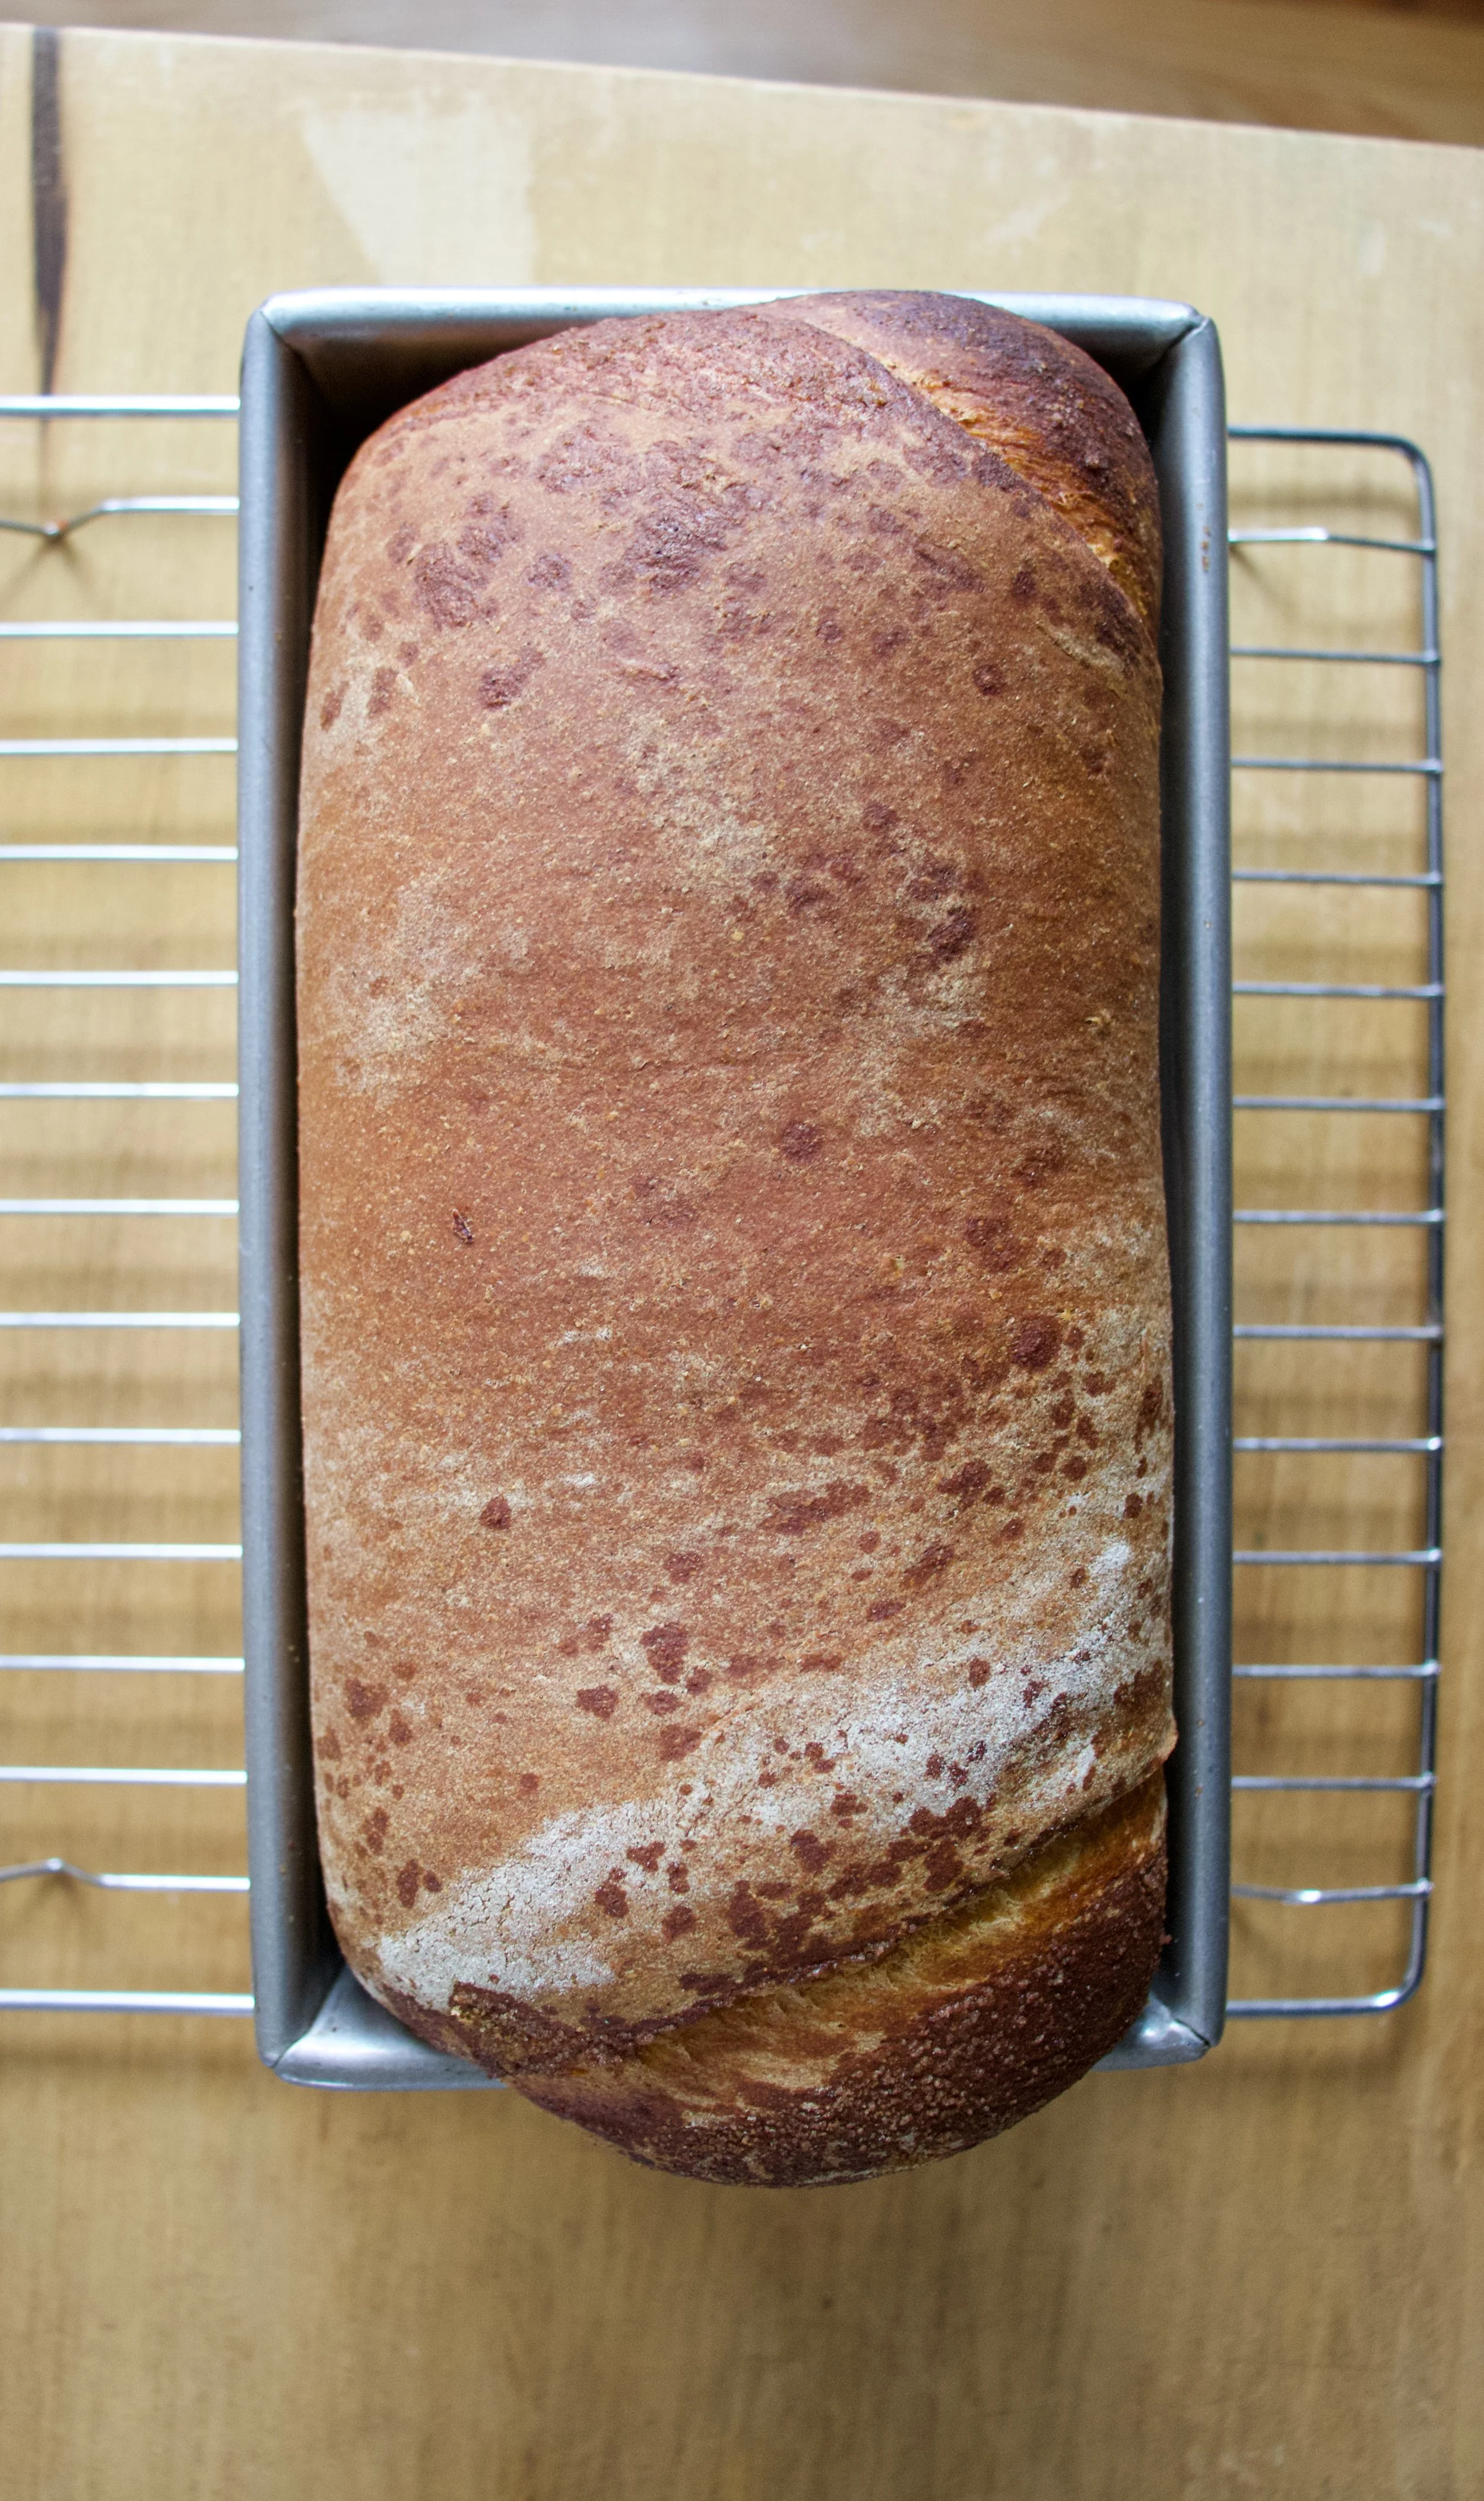
Once the bread is sufficiently risen, place into hot oven and bake for 40-45 minutes.
Now the hard part. Get it out of the bread pan and get it cooling off. You cannot cut into it until it cools or you will smoosh the swirl and make it gummy. Just wait, at least a half hour. For real. Wait. You can do it!
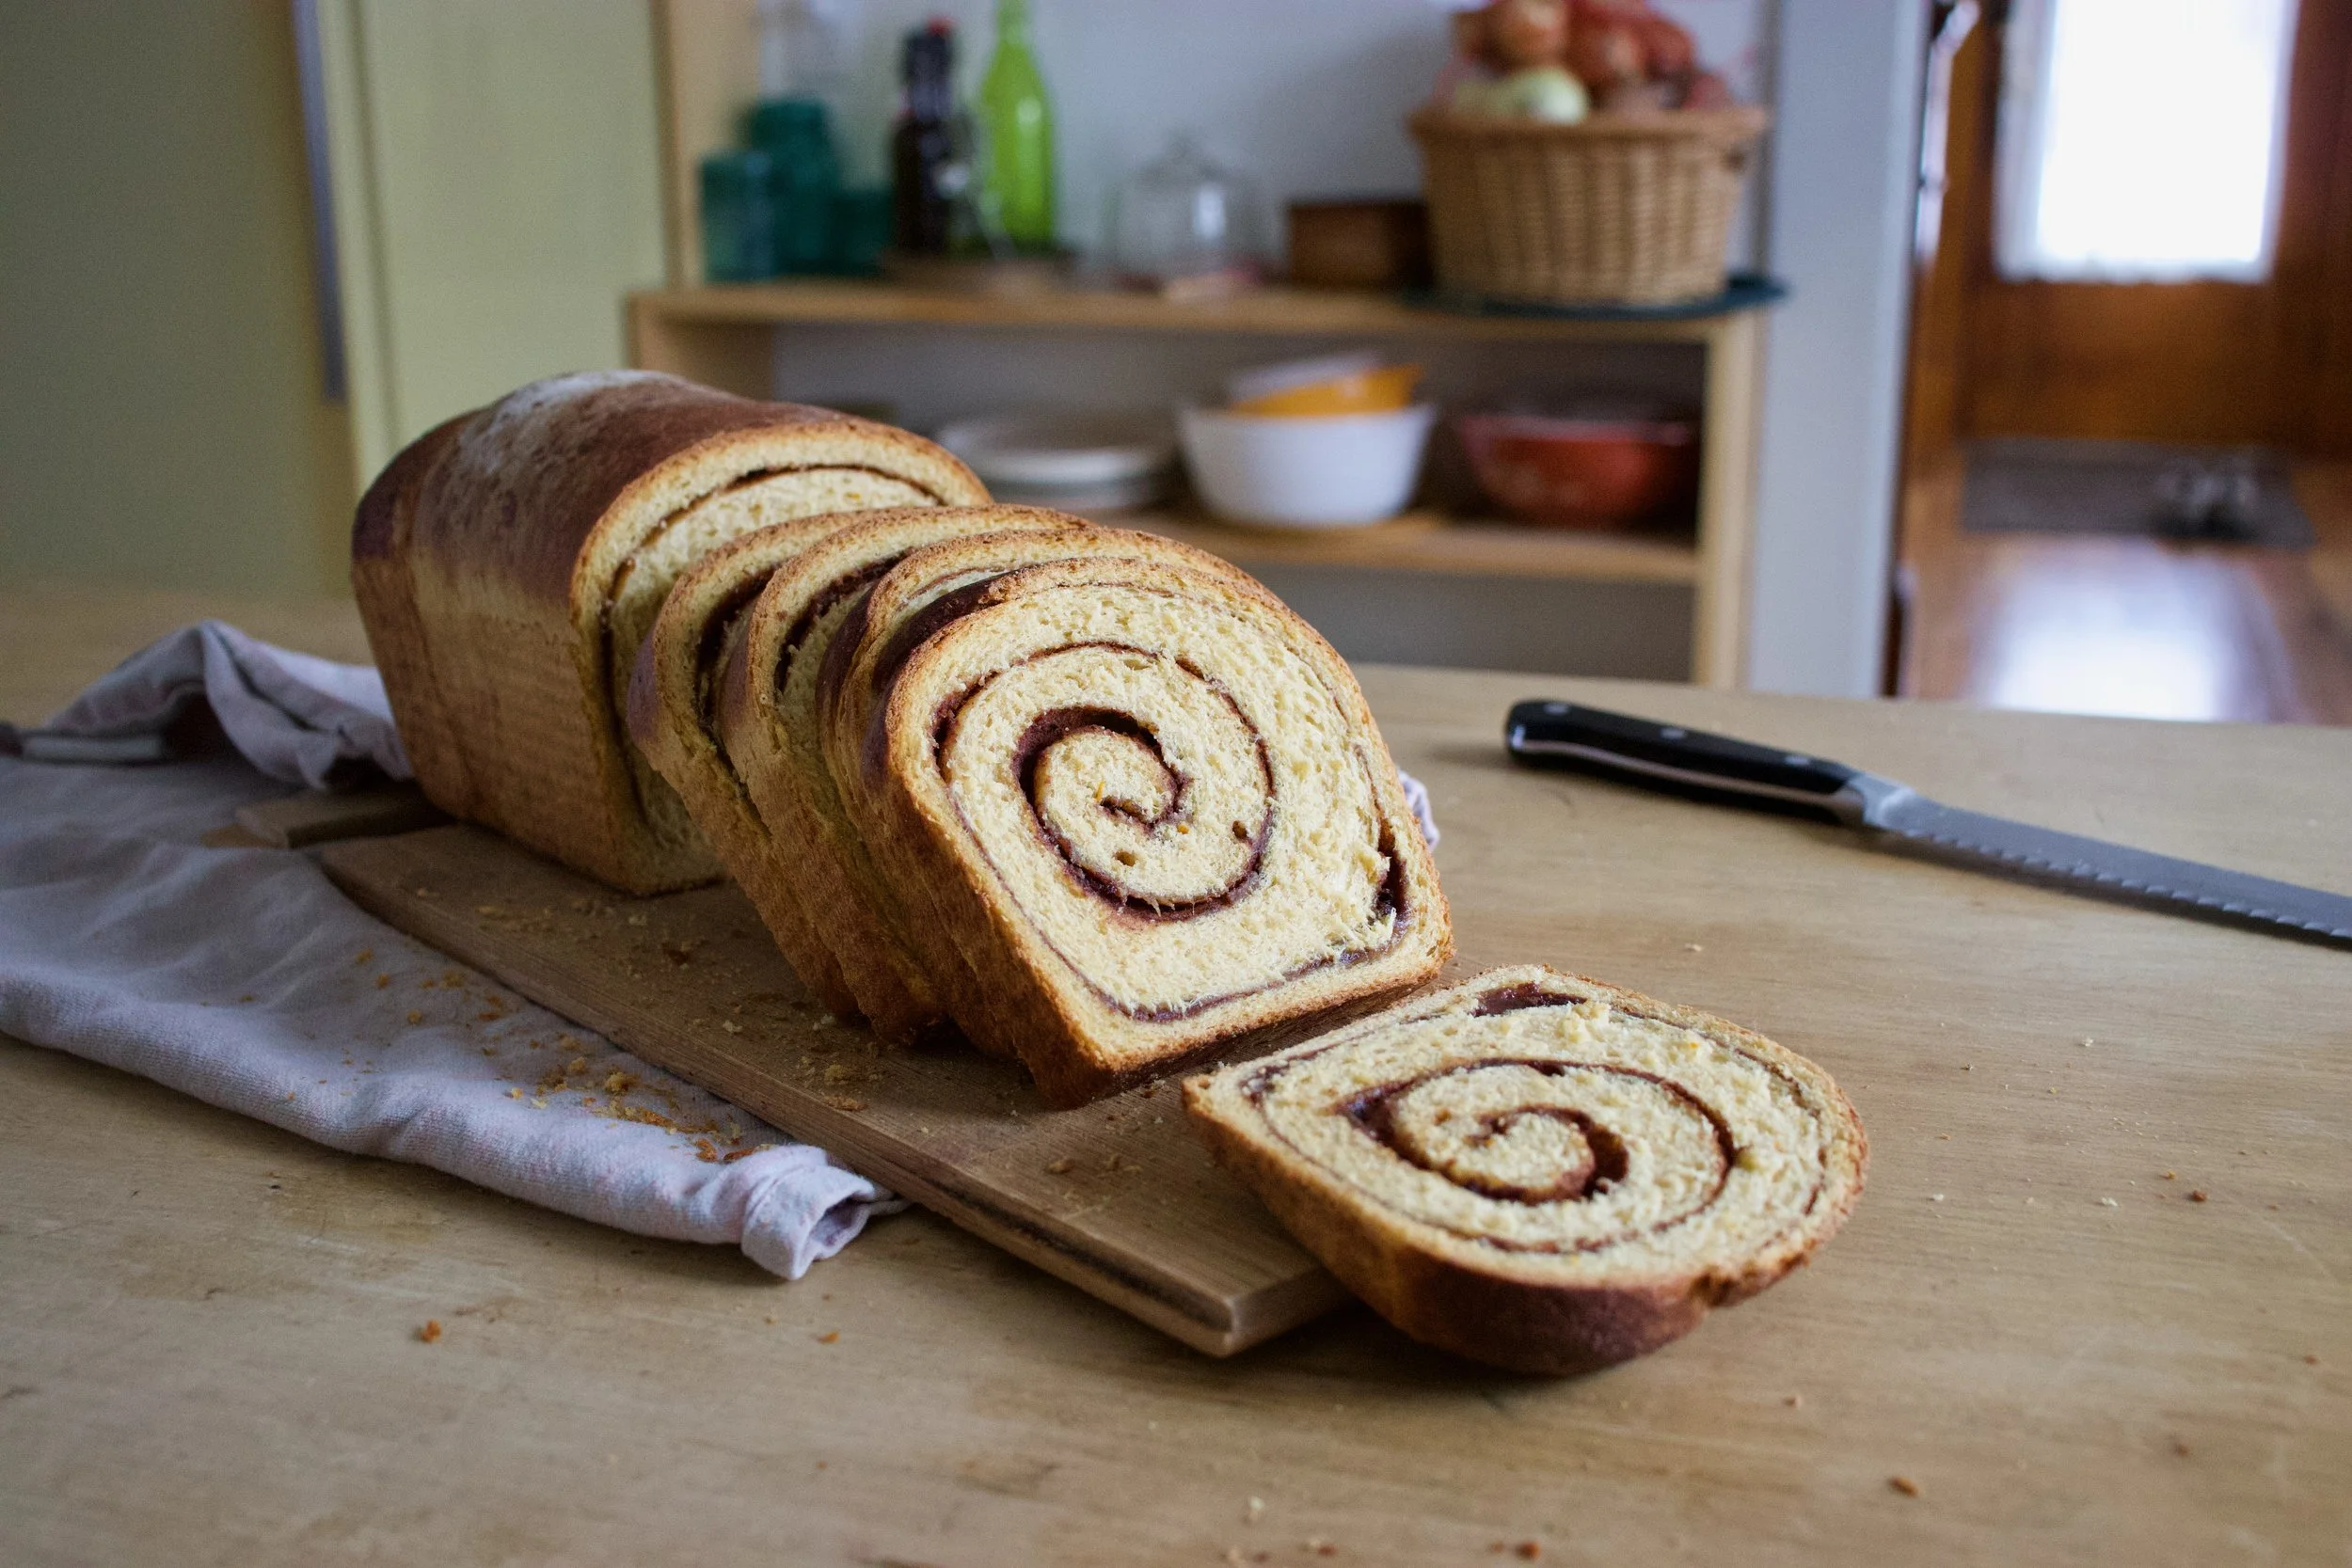
And when the bread cools and the wait it over, slice and be amazed. A thing of beauty that smells of greatness.
Bread is so great. Great great great! Especially a swirl bread. I mean. Look at that.
Happy day to you.
-C
Makes 1 loaf
2 cups all purpose flour
1 cup white whole wheat flour
1/3 cup sweet potato puree
1 cup soy milk
2 teaspoons (or one packet) yeast
3 tablespoons neutral oil like canola
2 tablespoon light brown sugar
1 teaspoon salt
Zest of 1 orange
For the cinnamon cardamom filling
1/2 cup light brown sugar
2 tablespoon cinnamon (I used Vietnamese Cinnamon which is a little spicier and sweeter)
1/2 teaspoon ground cardamom
2 teaspoons ground flax mixed with 4 teaspoons warm water
Start by grabbing a big bowl. Mix together the yeast, the 2 tablespoons brown sugar, warm milk, sweet potato puree, and oil. Let sit for a minute to active yeast. In a separate bowl mix together the flours and salt. Dump the dry mixture into the wet. Zest the zest of an orange into bowl and mix it all together until it forms a dough. Dump the dough onto a lightly floured surface and knead for 5-8 minutes or until the dough gets supple and shinny and uniform. Place dough into a well oiled bowl and cover for about an hour or until doubled in size.
Once dough has doubled, dump out onto a well floured surface and roll out to as wide as a bread pan and roughly 24 inched long. After you have rolled it out brush the flax and water mixture all over surface . Combine the brown sugar with the cinnamon and cardamom and evenly distribute the mixture all over flaxed dough. And for the fun part. Careful roll the dough into a log. Roll it tightly so the bread doesn’tt end up with big gaps after it bakes. Once rolled, pinch the rolled end and place the log rolled side down into a well greased bread pan. Place dough into a a plastic bag with plenty of space for dough to rise. Let sit for about another hour or until the dough has risen a little bit above the rim of baking pan.
Preheat oven to 375
When dough has risen, place on middle rack in hot oven and bake for 40-45ish minutes or until bread is a deep golden brown and when you give it a tap, it sounds slightly hollow. Also check it with a intsant read thermometer. Get it to 190.
When it done baking, pull from oven and remove from pan. Place on a wire rack and let completely cool. Seriously, you got to let it cool for at least 1/2 and hour, but longer is better!
When it%u2019s cooled, cut into slices. Eat as you wish.
Uneaten bread stores well for a day or two in a airtight plastic bag but if you don%u2019t eat it that fast, cut into slices and freeze. That way you can just pop a piece out and stick it into toaster. Smart.
Easy quick dinners are no joke because sometimes life happens and then you are hungry, then hangry, %u00a0then maybe yelling and or tears start and nothing is ever going to be good again. And then you eat and everything is A OK, but that time between tears and food can be long, especially when you just can’t think so one should have a least a good 2 or 3 good dinners up there sleeve (besides pasta) that can be made quick and easily to avoid the fallout of food deprivation.%u00a0This bowl of goodness here is one of those. And sure some people might not always have a sweet potato,%u00a0tahini, or chickpeas is the house %u00a0(I ALWAYS have a sweet potato or some type of winter squash and tahini and chickpeas…%u00a0they are staples here)%u00a0but with a tiny it of foresight, you can make these things happen too. And then you will make it and realize that you must have these ingredients on hand at all times because yeah, a good go to meal that will prevent the tears.
Admittedly I have made this for the mr but he is not that into it. Says he is not a huge fan of sweet potatoes. (what the fuck is wrong with him?) But me, I eat is and I eat it all.. The sweet potato/chickpea/tahini combination is classic fantastic. This hash is sweet potato sweet, a little chickpea crunchy, salty, savory,%u00a0and creamy citrusy. %u00a0It’s all sorts of goodness. I tossed this hash on a big bed of kale (any sturdy green would be good) and only good things happen in my mouth. So the mr.%u00a0might not like it but I am starting to realize (after 15 years) that my taste is far superior to his. Haha. (but really) %u00a0Quick and easy (and healthy) and good. %u00a0Make it once and it will turn into on of your go to dinners, unless you don’t like sweet potatoes. In that case there is pasta.%u00a0
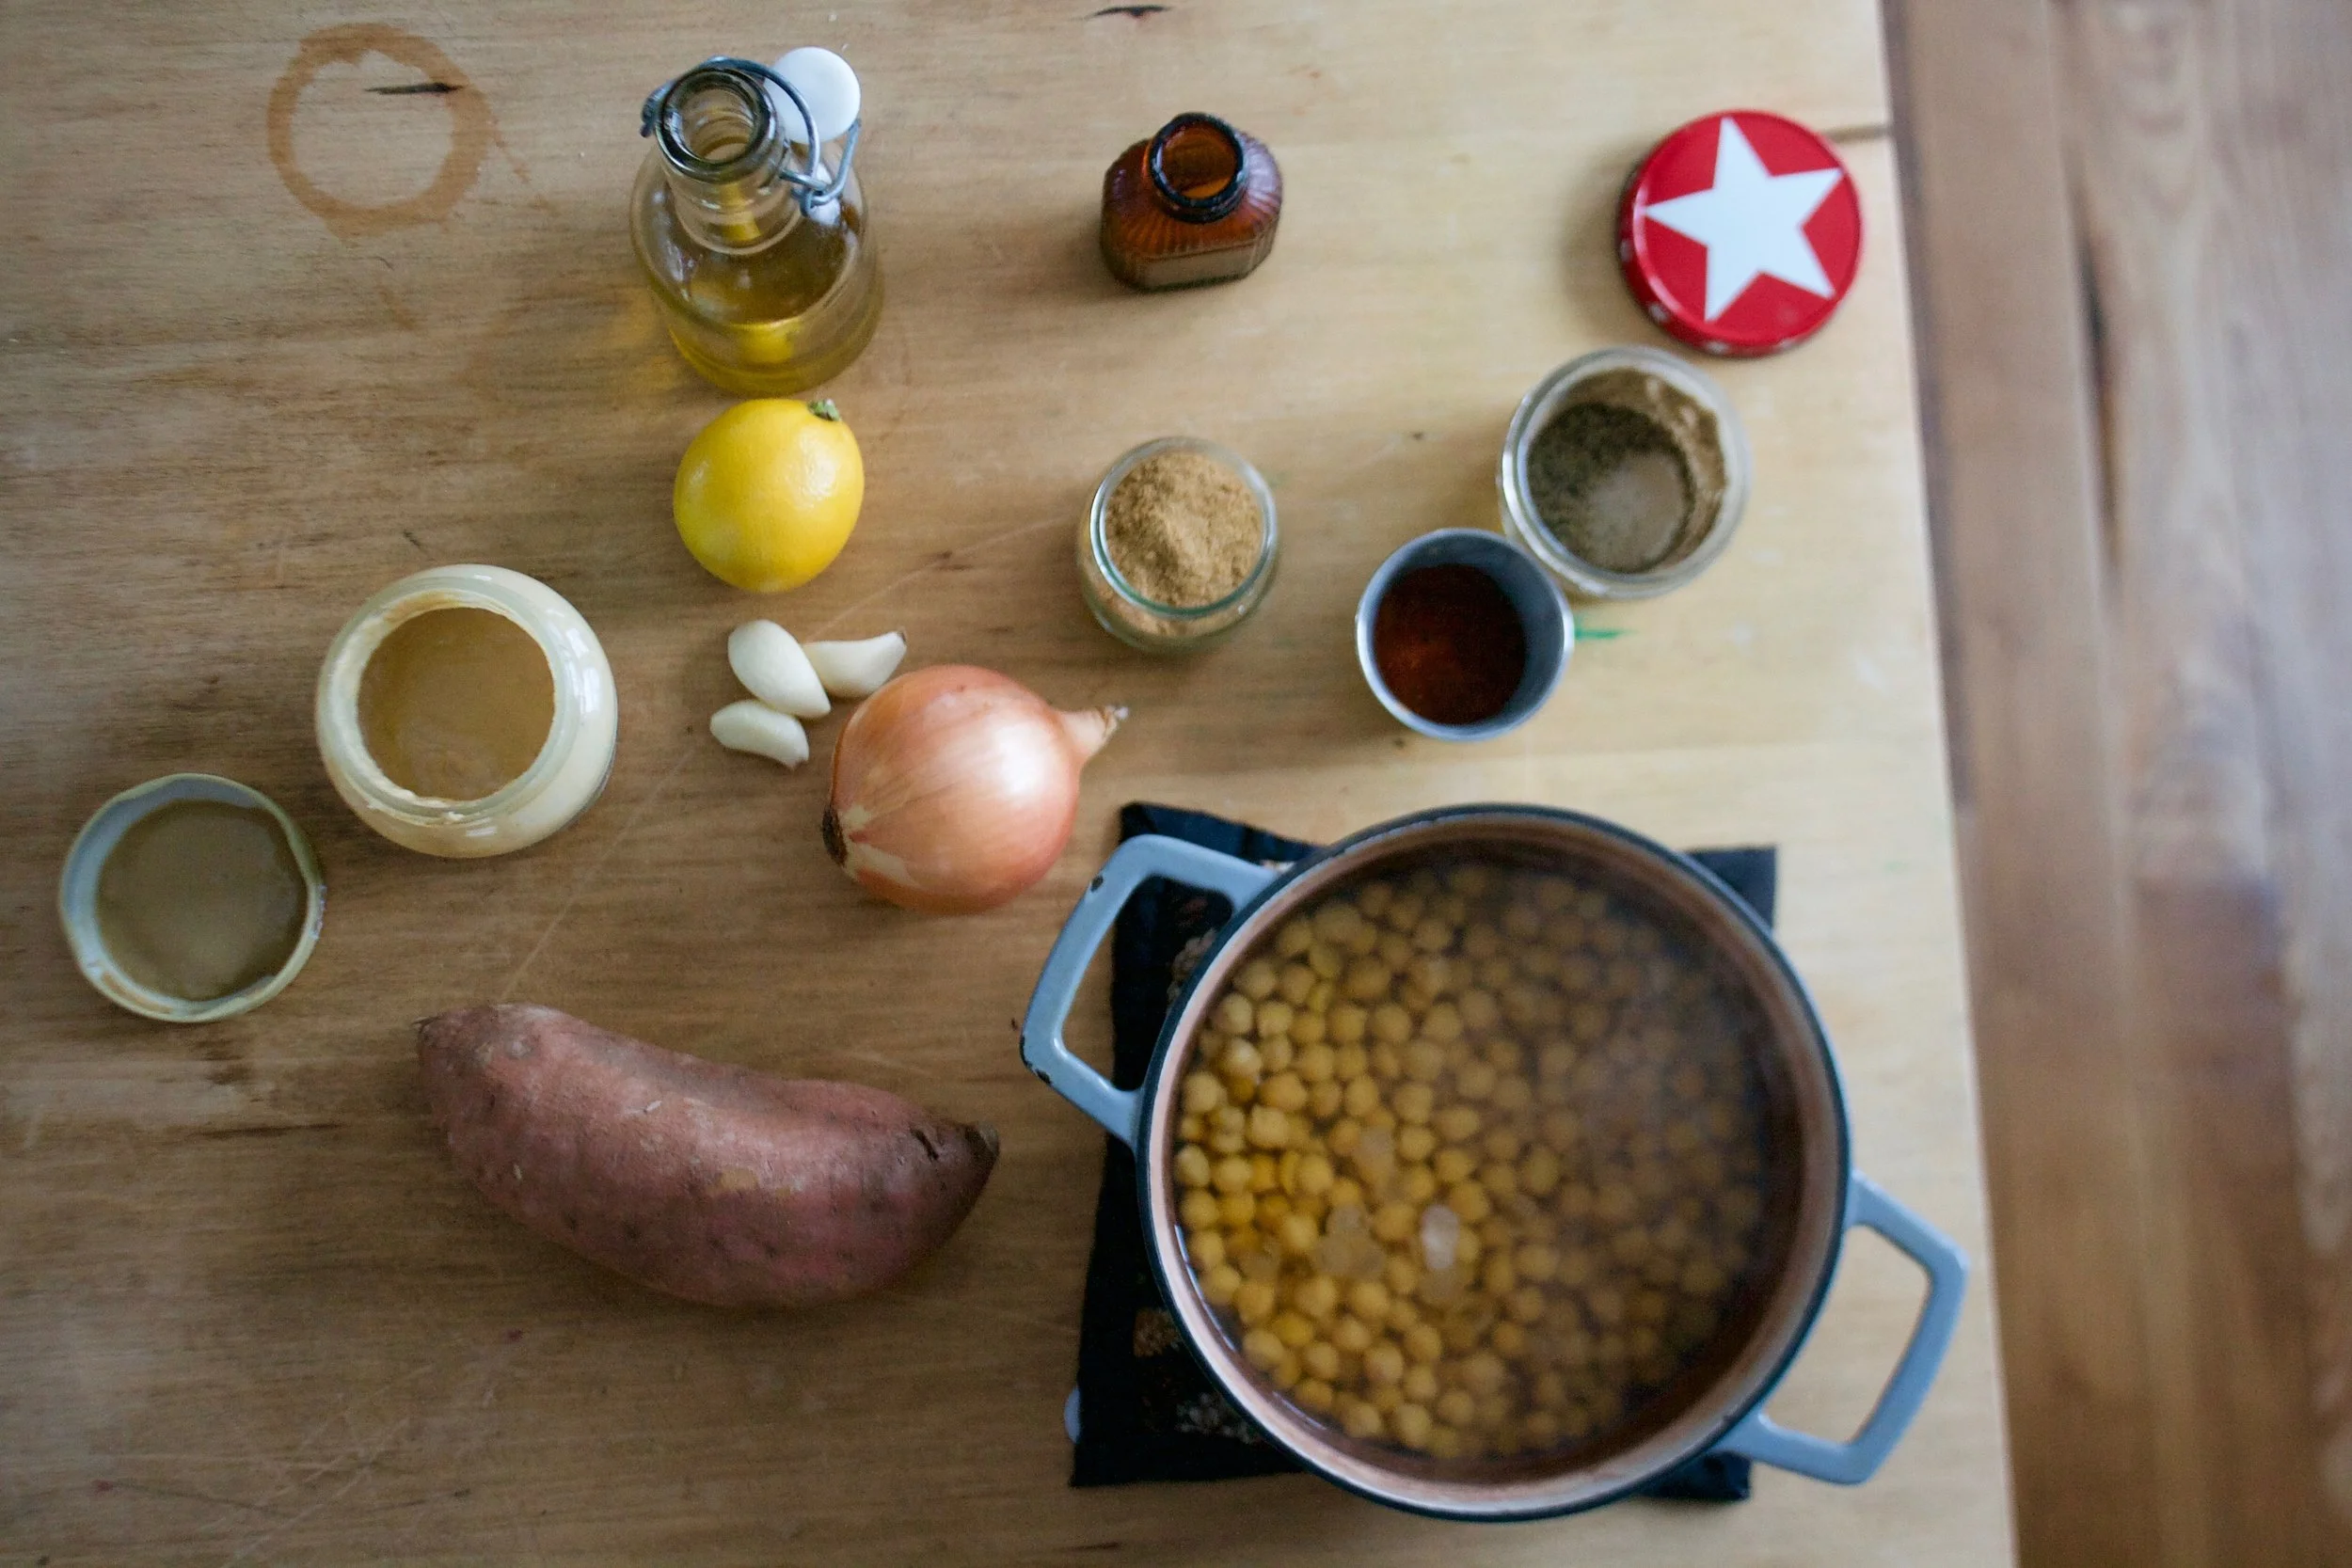
The stuff. Chick peas (I had just made a batch but if you don’t have any made already, grab a can) a sweet potato, an onion, a lemon, some tahini, and garlic Also some cumin and chili powder, olive oil, and salt and pepper.%u00a0
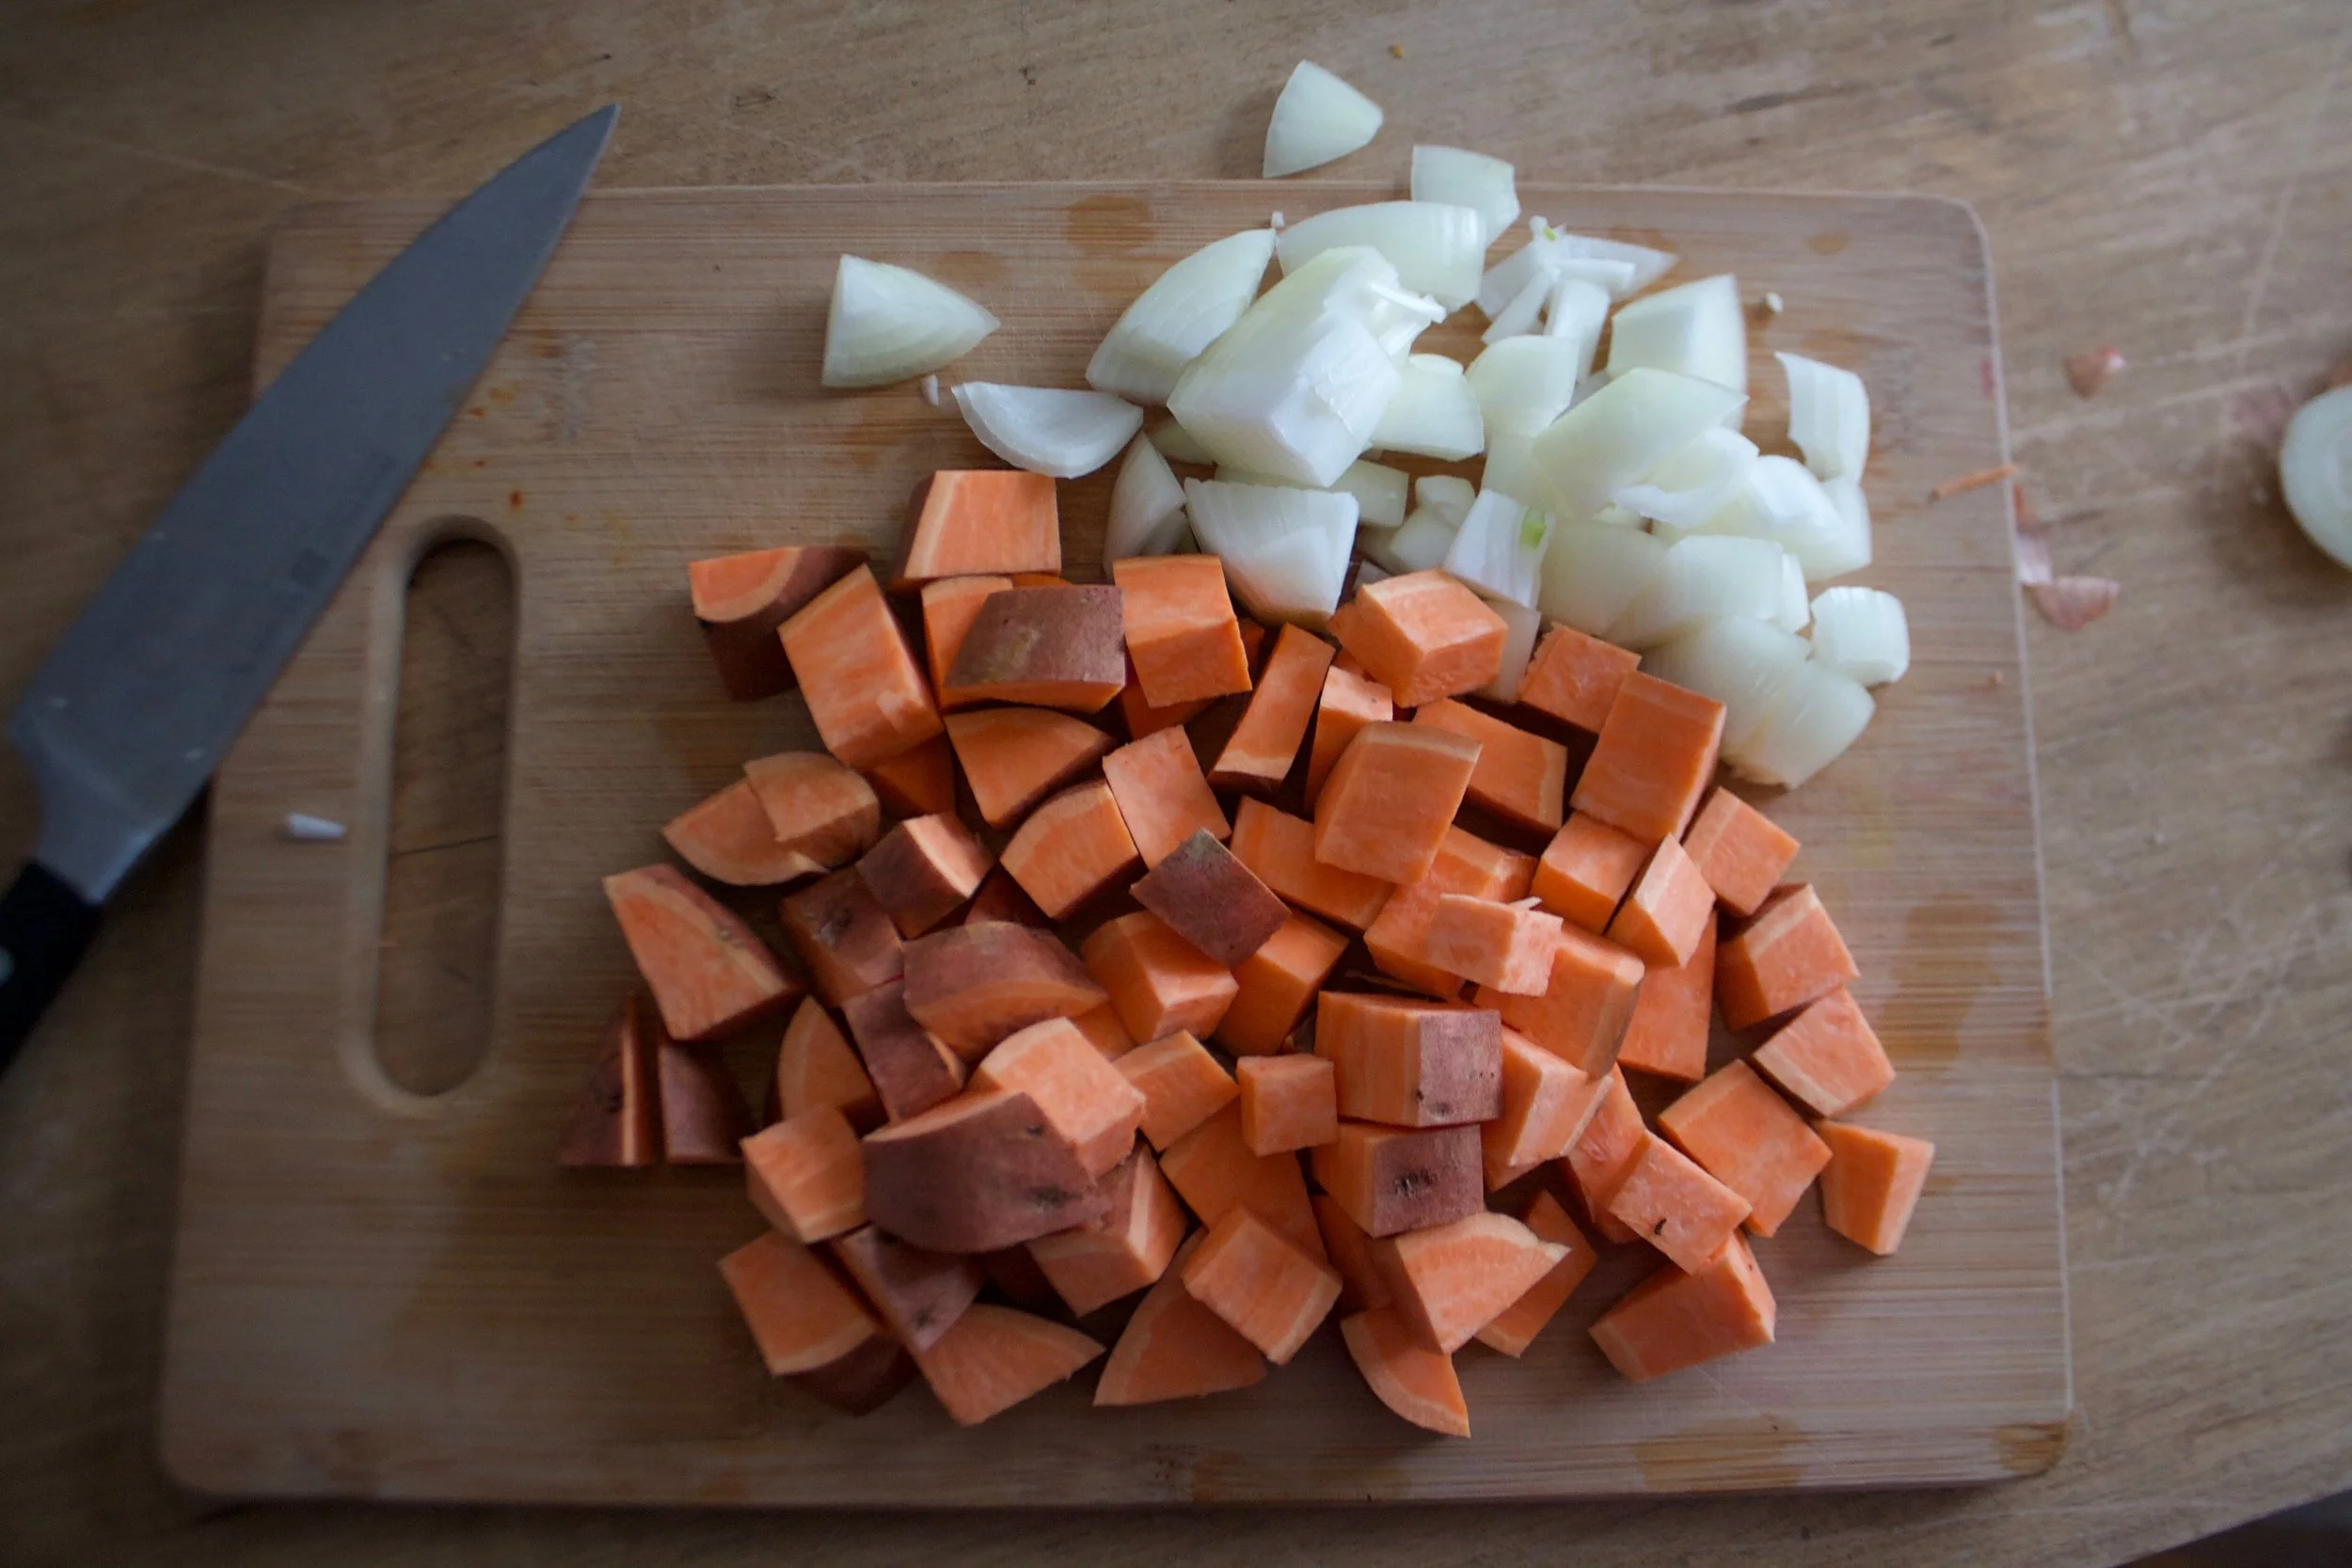
Preheat your oven and chop up the onion and sweet potato into mouth sized pieces.%u00a0
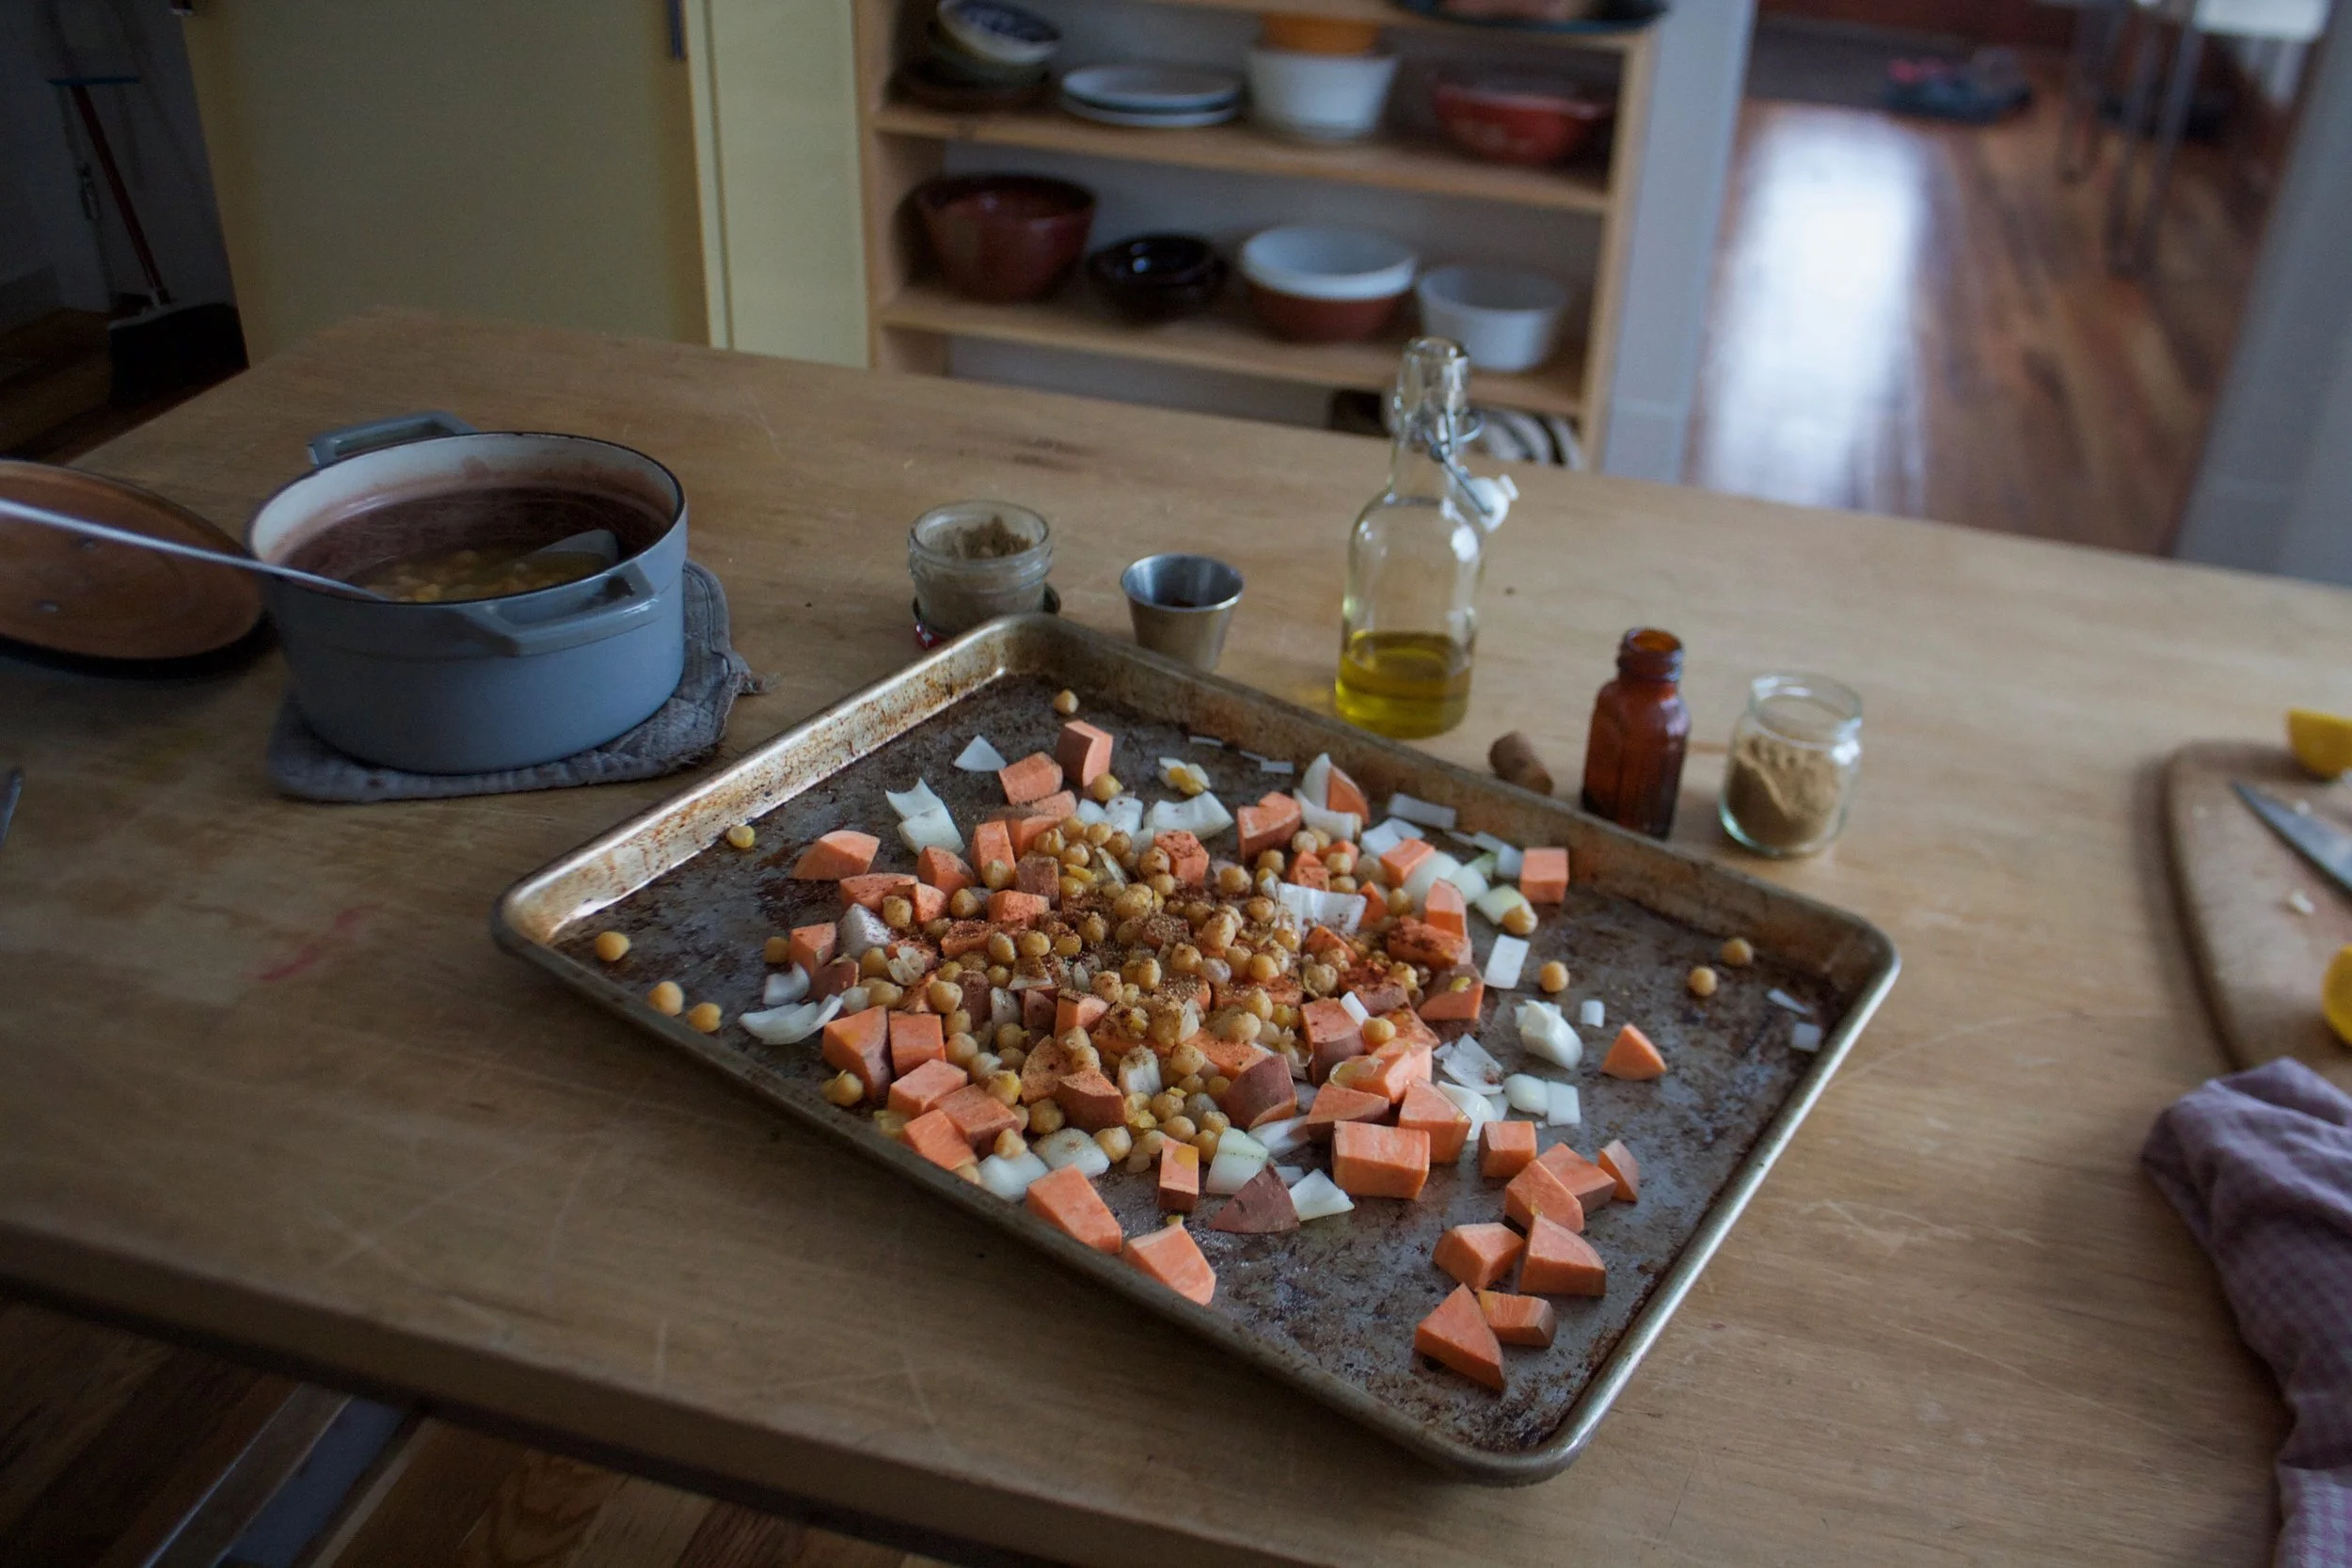
Toss the chopped stuff onto a baking sheet with the chickpeas.
Drizzle the whole shebang with olive oil and toss with cumin, chili powder, and salt and pepper. %u00a0
Into the oven it goes.
Half hour later it is all roasted and ready.
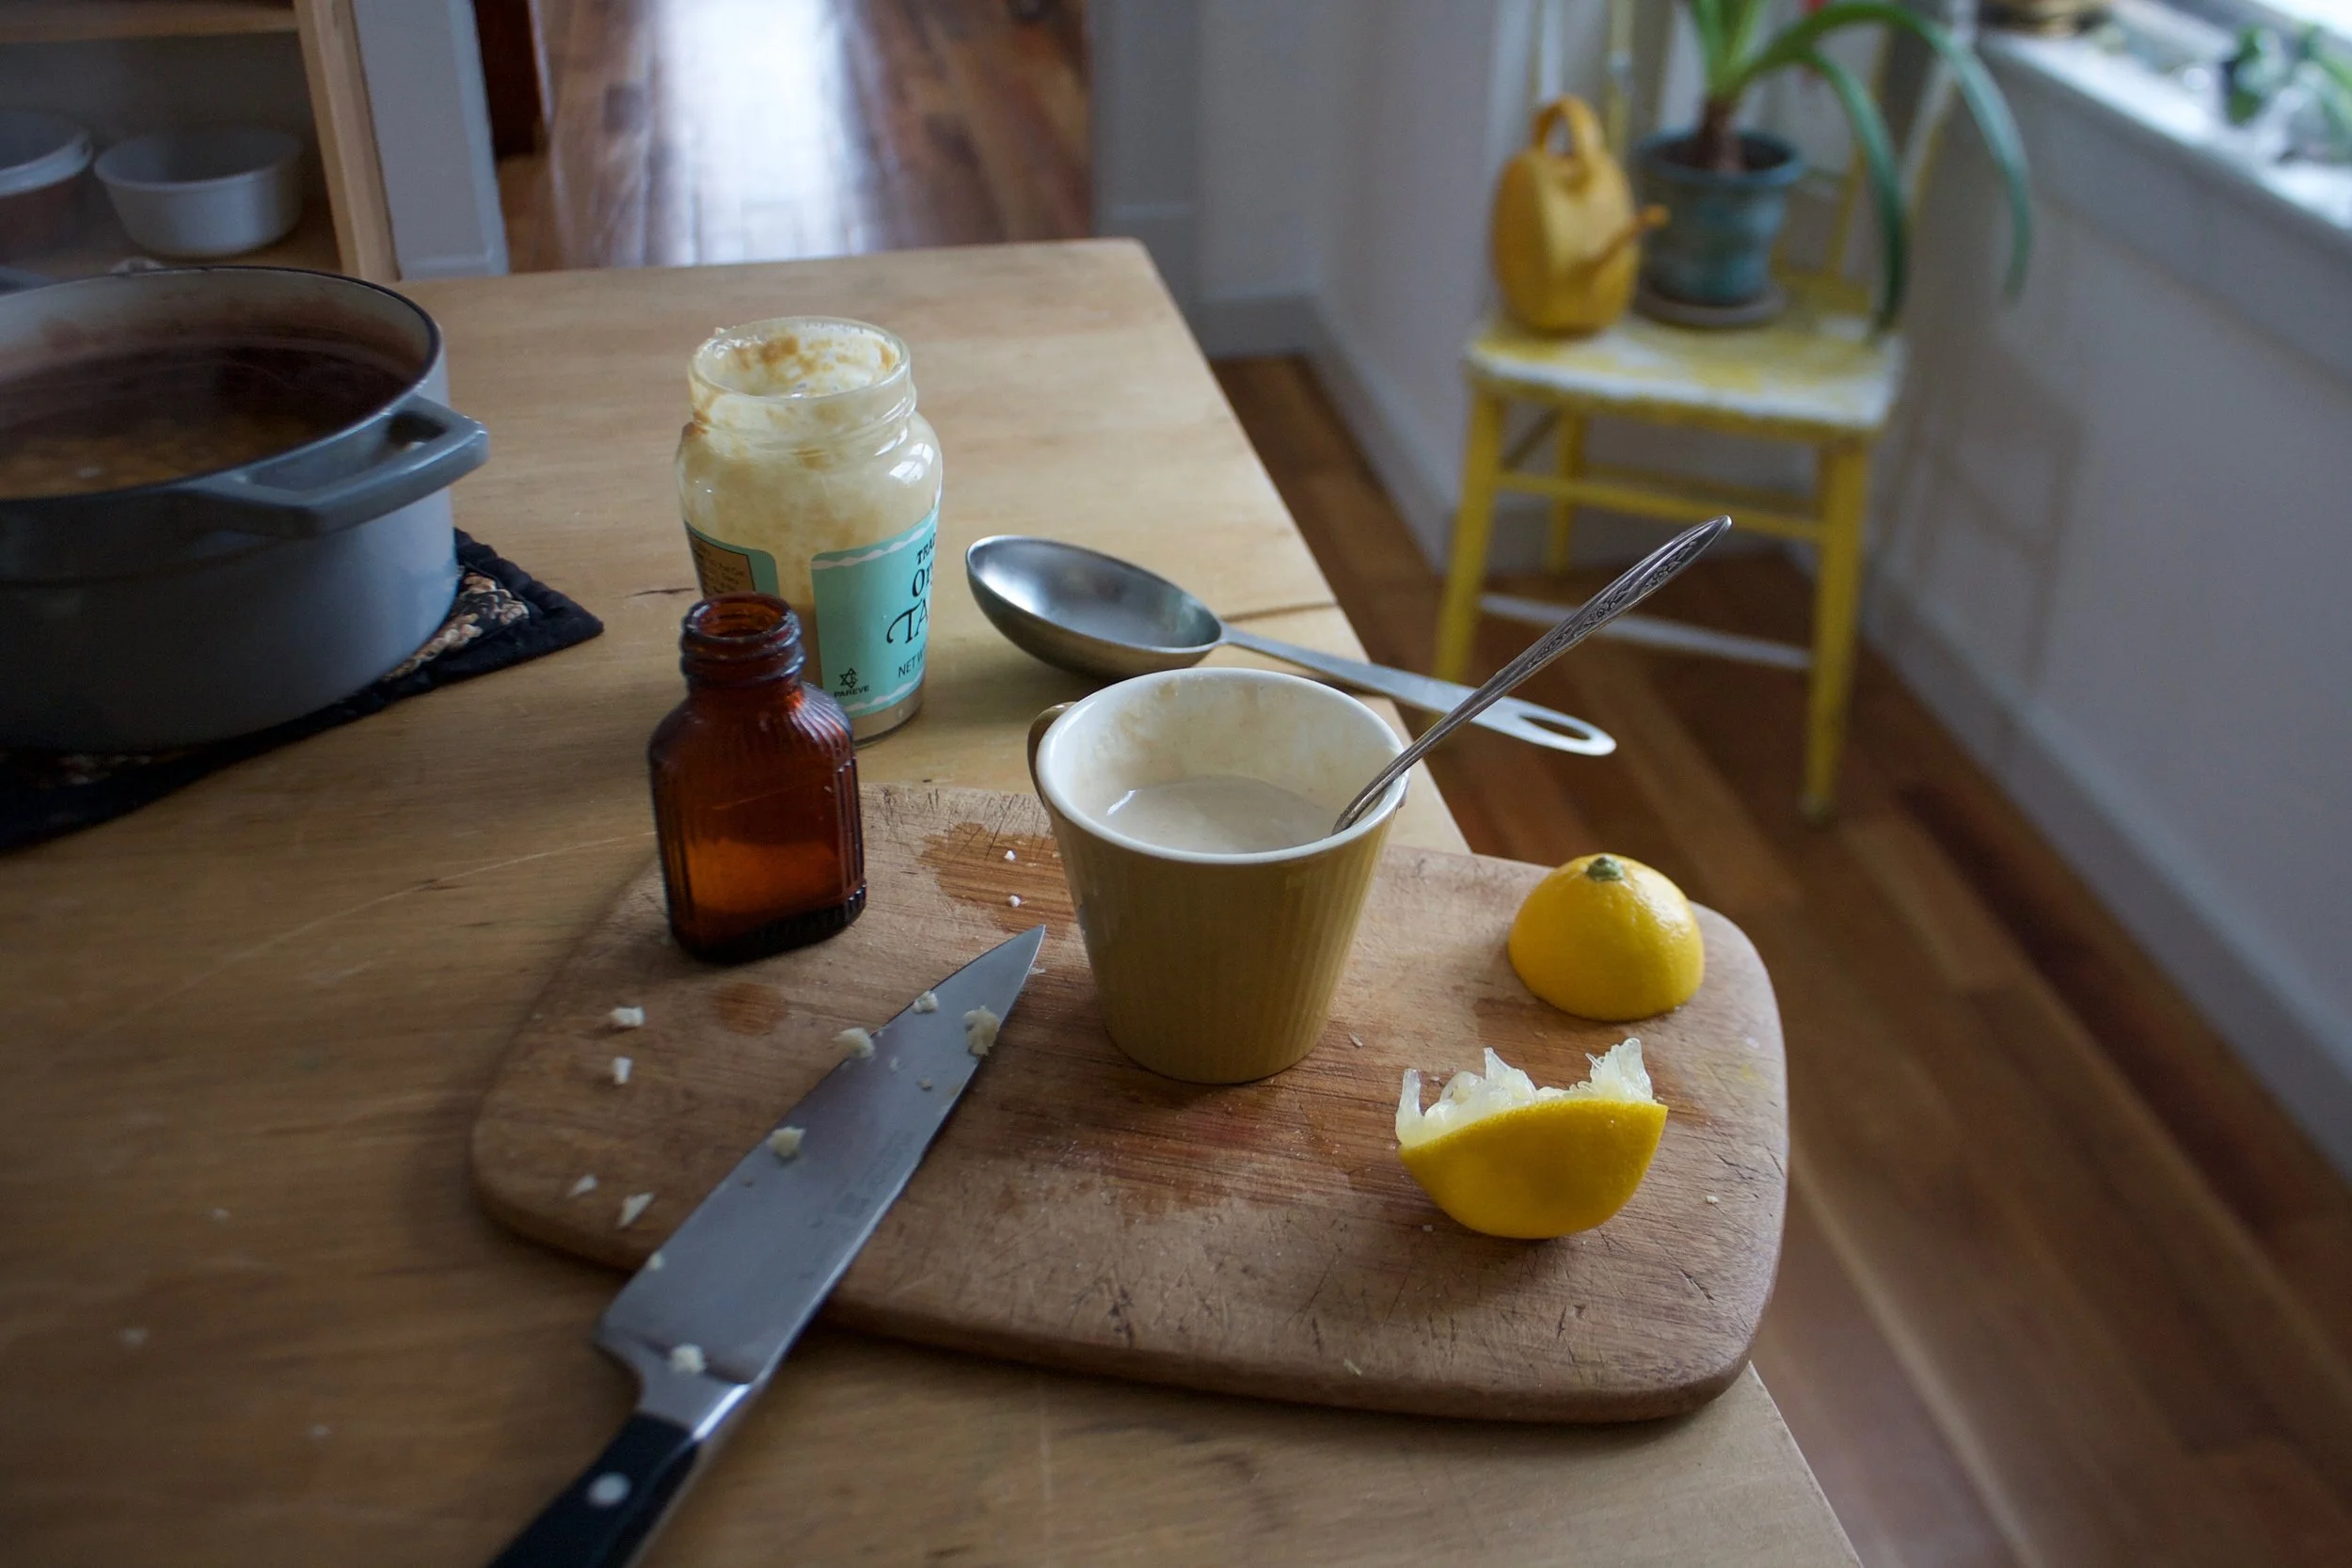
Oh quick, make this before the stuff is out of the oven. Tahini, minced garlic, a dash of salt, a bit of the liquid from the chickpeas and the juice of a lemon. Just stick it all in a cup or bowl and mix it around. Then it’s done.
Scoop the hash into a bowl (I like a large pile of greens underneath) and cover with the tahini sauce.%u00a0
Eat is all to your face.
-C
dinner for one, a side for two.%u00a0Very easily doubled or tripled.%u00a0
1 sweet potato
2 cups or 1 can cooked chickpeas drained but liquid reserved%u00a0
1 medium yellow onion
1 tablespoon cumin
1 teaspoon chili powder
salt and pepper
2-3 tablespoons olive oil
3 tablespoon tahini
1 lemon
1/4- 1/2 cup of aquafaba (chickpea liquid)
2-3 cloves garlic
Preheat oven to 425
Chop sweet potato and onion into mouth sized cubes and place on a baking sheet. Add the drained chickpeas and drizzle with olive oil and toss around. Sprinkle on the cumin, chili powder,%u00a0salt and pepper, and toss that around again. When the oven is preheated, slide the baking sheet on in.%u00a0
While the stuff is baking, mince the garlic and place it in a bowl with the tahini, the juice of a lemon, and a pinch or two of salt to taste. Add in 1/4 cup of aquafaba and mix it all around.%u00a0If to thick for your liking, add a little more of the aqaufaba until its a good consistency.%u00a0
Check the stuff in the oven after 20 minutes and give it a toss.%u00a0%u00a0Keep baking for another 5-10 minutes or until the sweet potato is cooked and starting to brown. Remove from oven and dump into a bowl (maybe on a bed of greens or rice) and drizzle all over with the tahini sauce.
Eat
My little sister came over last night for a homework and dinner night. I love these nights because when she comes over she spends a good amount of time poking and harassing the mr while I get left alone to cook dinner.%u00a0 But then always at some point during the evening,usually after feeding them dinner,%u00a0 they both turn on me and start to poke at me. They are brats like that. But what I also like is I can sometimes help her a bit with the homework. (like last night,… girl did a bit of procrastination.Good thing I am awesome and maybe a little bit of a hard ass. She got it done with a bit of help and it all ended happily ever after) Maybe cause I am an old lady now, but I like the feeling of using my brain for things that I no longer think about. I makes me feel smart again (kinda) SO we get together and eat and do homework and make fun of each other… Good times. I love hanging out with my sister.
Ok, so this pudding, its one of my favorites.. I could probably live off of sweet potatoes in all shapes and forms.. A long while back I started making this pudding and got the sister hooked on it as well. So whenever she comes over for dinner I make it for us. And we eat it and exclaim how, “OMG this is so freaking good” and eat, then lick our bowls clean. And it’s so easy and simple to make. Basically just sweet potato. So amazing.%u00a0 The mr, he likes it, but doesn’t share the same enthusiasm as we do….But he is not a teenage girl and her sister so yeah. who really knows.But Anyone out there with a spare sweet potato.. make this pudding. It will change your life in all the right ways!
Your welcome very much.
The stuff. A sweet potato, a couple of dates, ans some cinnamon. That’s all you need!
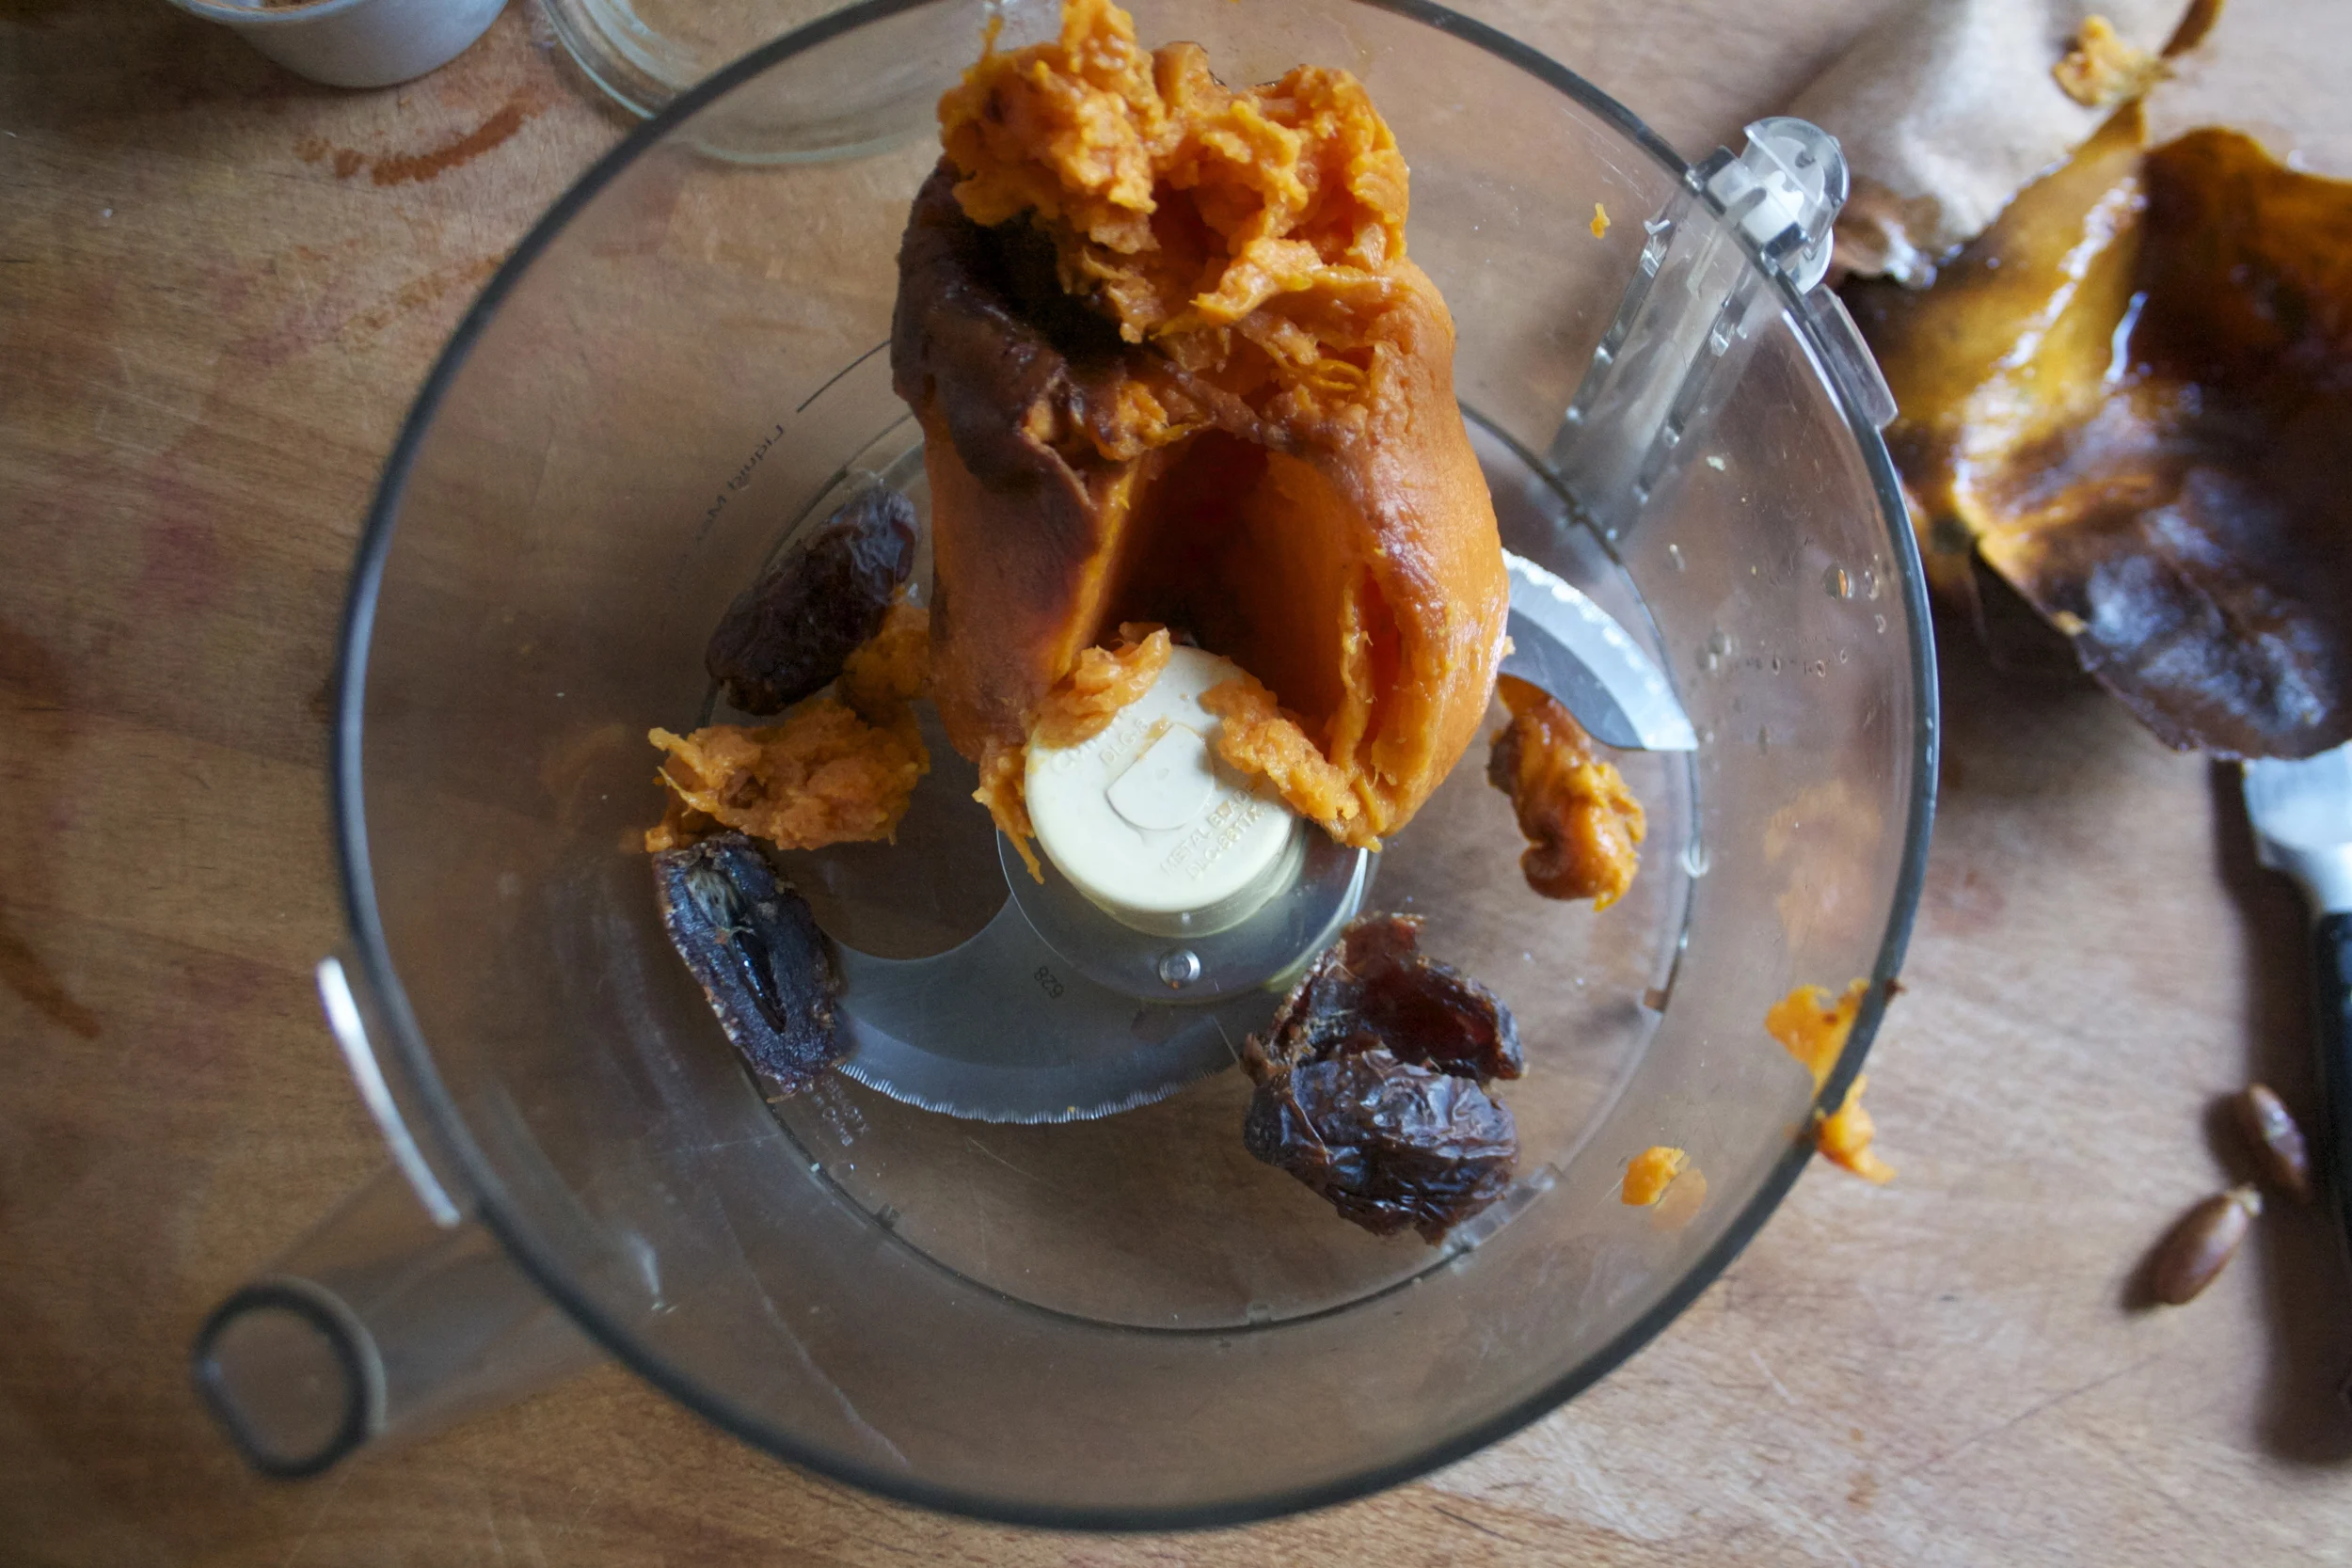
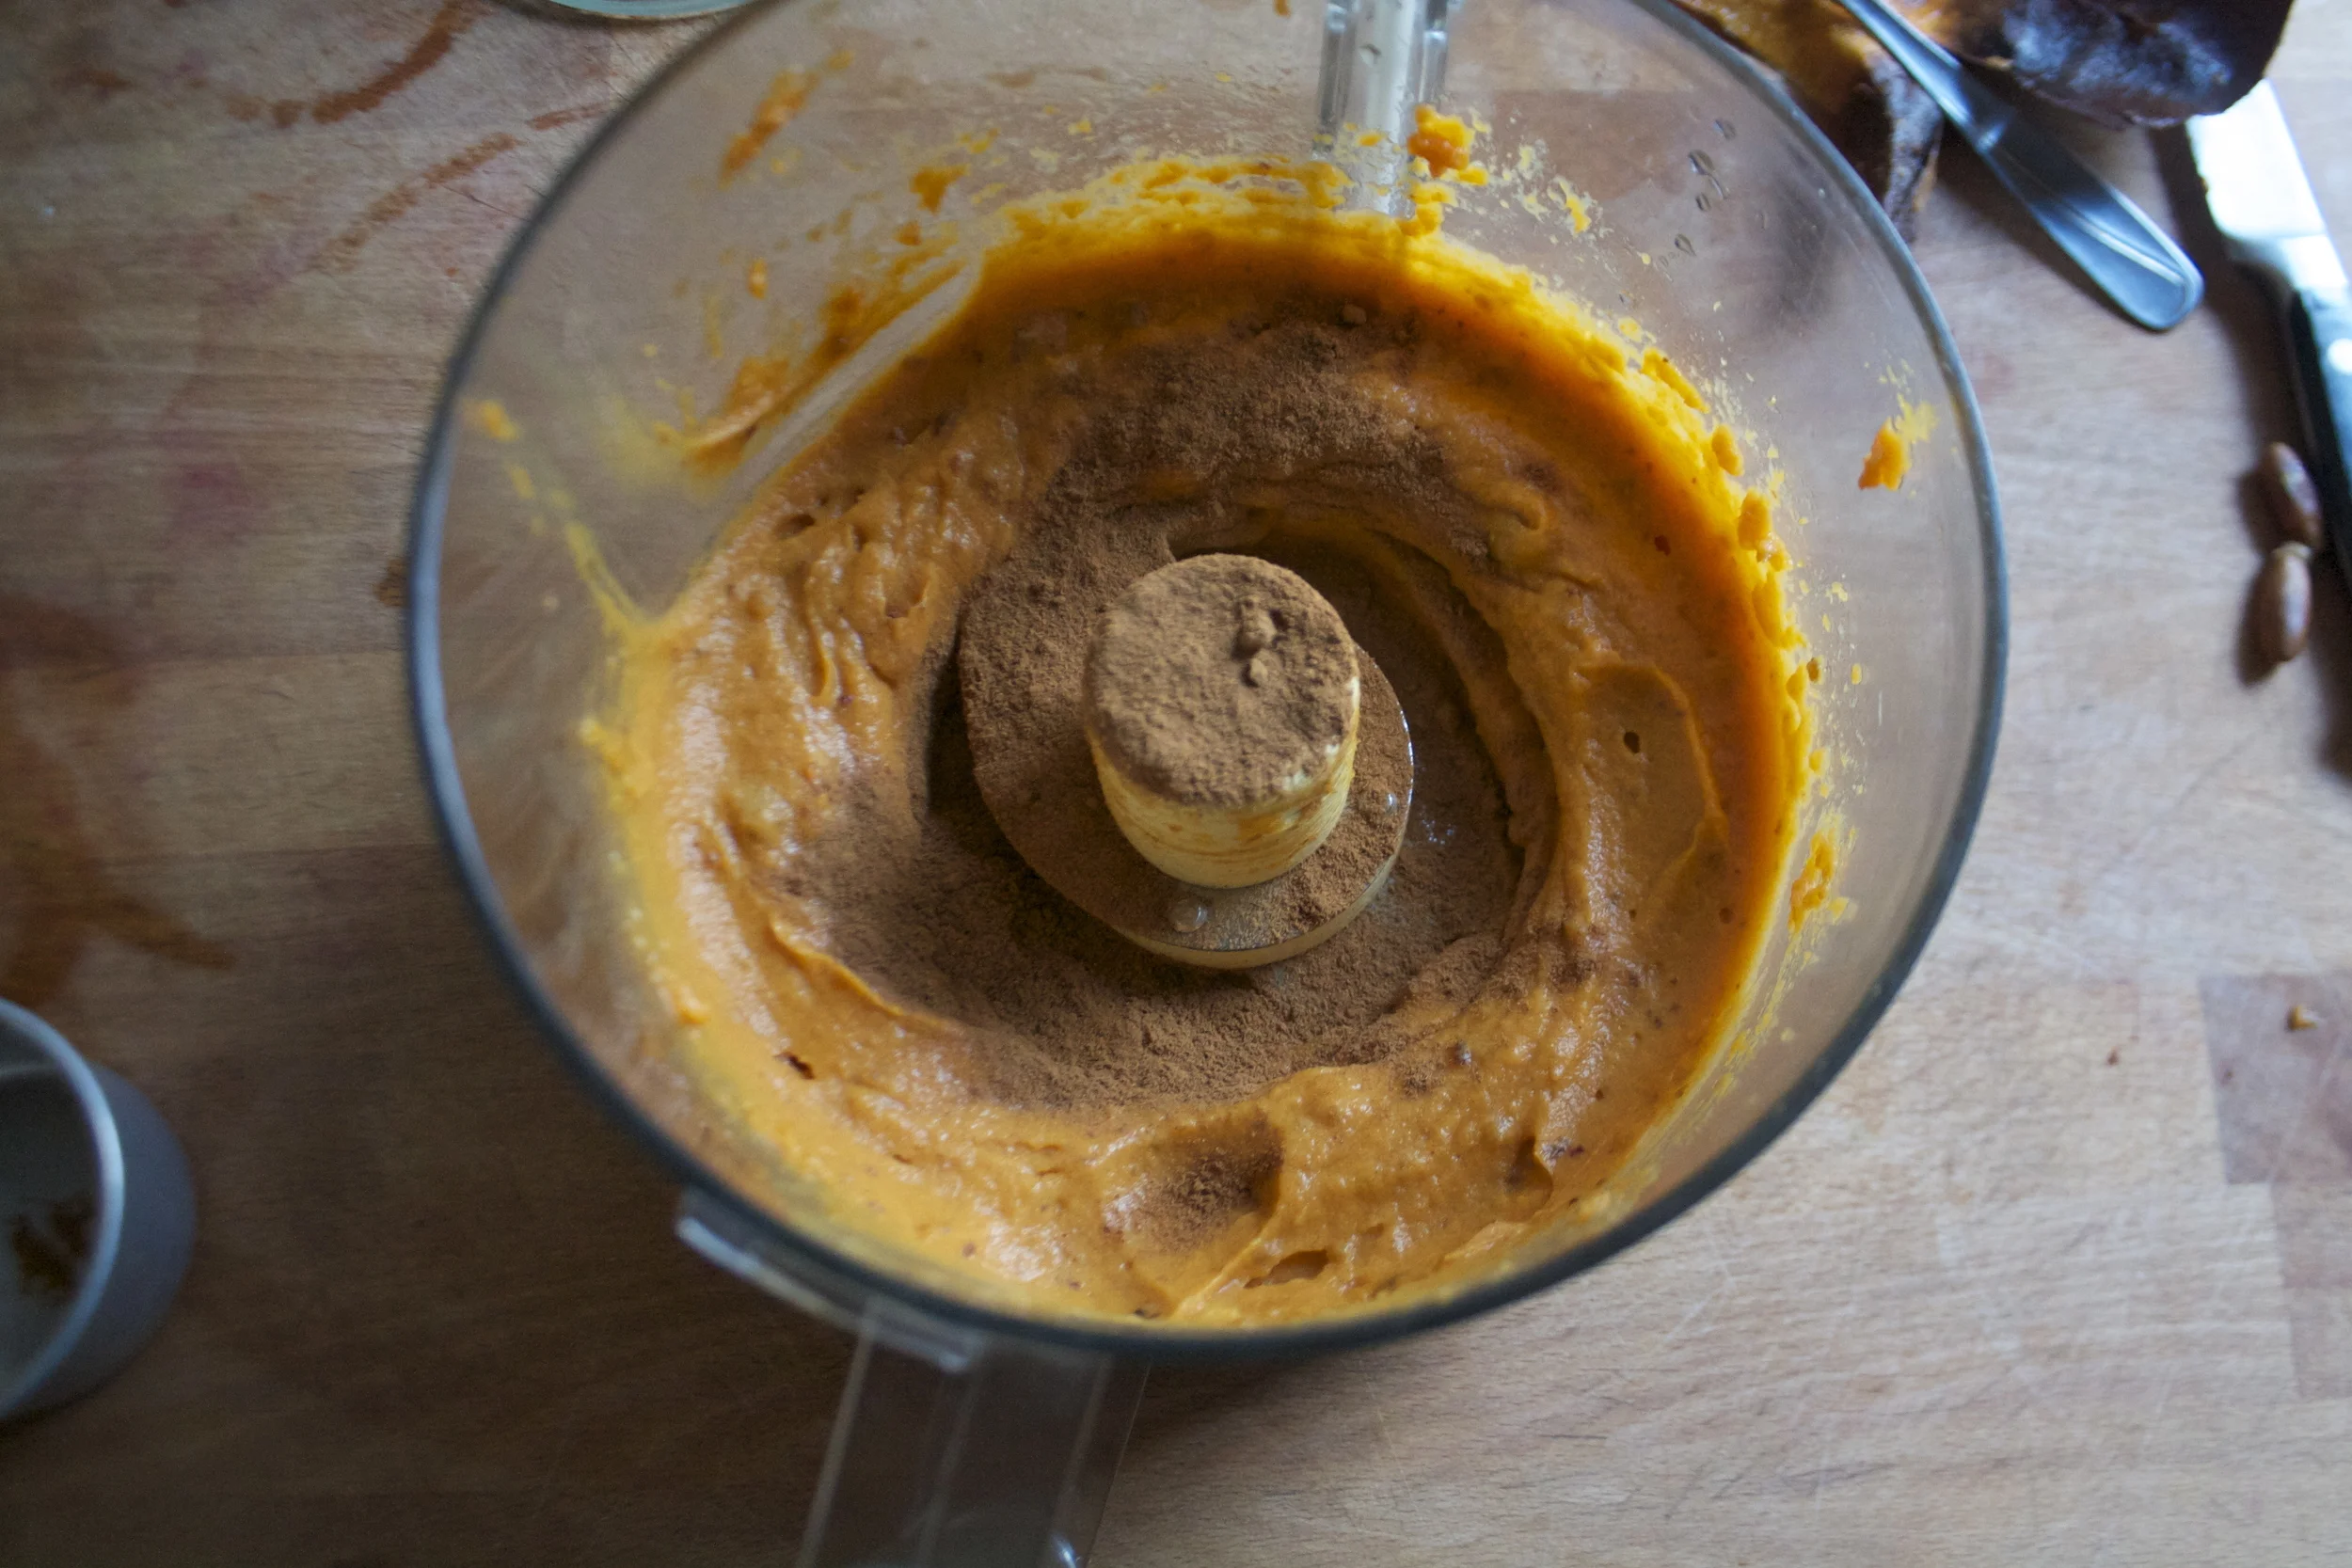
Simple as can be. Bake the sweet potato until soft.%u00a0 Remove the skin (I then eat the skin, but if you don’t like it, the dog also loves potato skins) and stick it onto a food processor with the dates (make sure to remove the pits) and blend together. I usually add in a few a few splashes of water while I am blending just to think it out a tiny bit. But that is a preference I will leave up to you.
Add in the cinnamon and blend some more until so nice and silky smooth.
%u00a0 And a note here. You can omit the cinnamon if you like, the pudding is amazing without it but you could even use more spices like ginger and allspice or added a little splash of vanilla. OR.. Add a scoop of some nut butter… so good.
Once the you have spiced your pudding, scoop it out into jars, bowls, whatever and how much ever you want (1 large sweet potato is good for 2-3 servings)
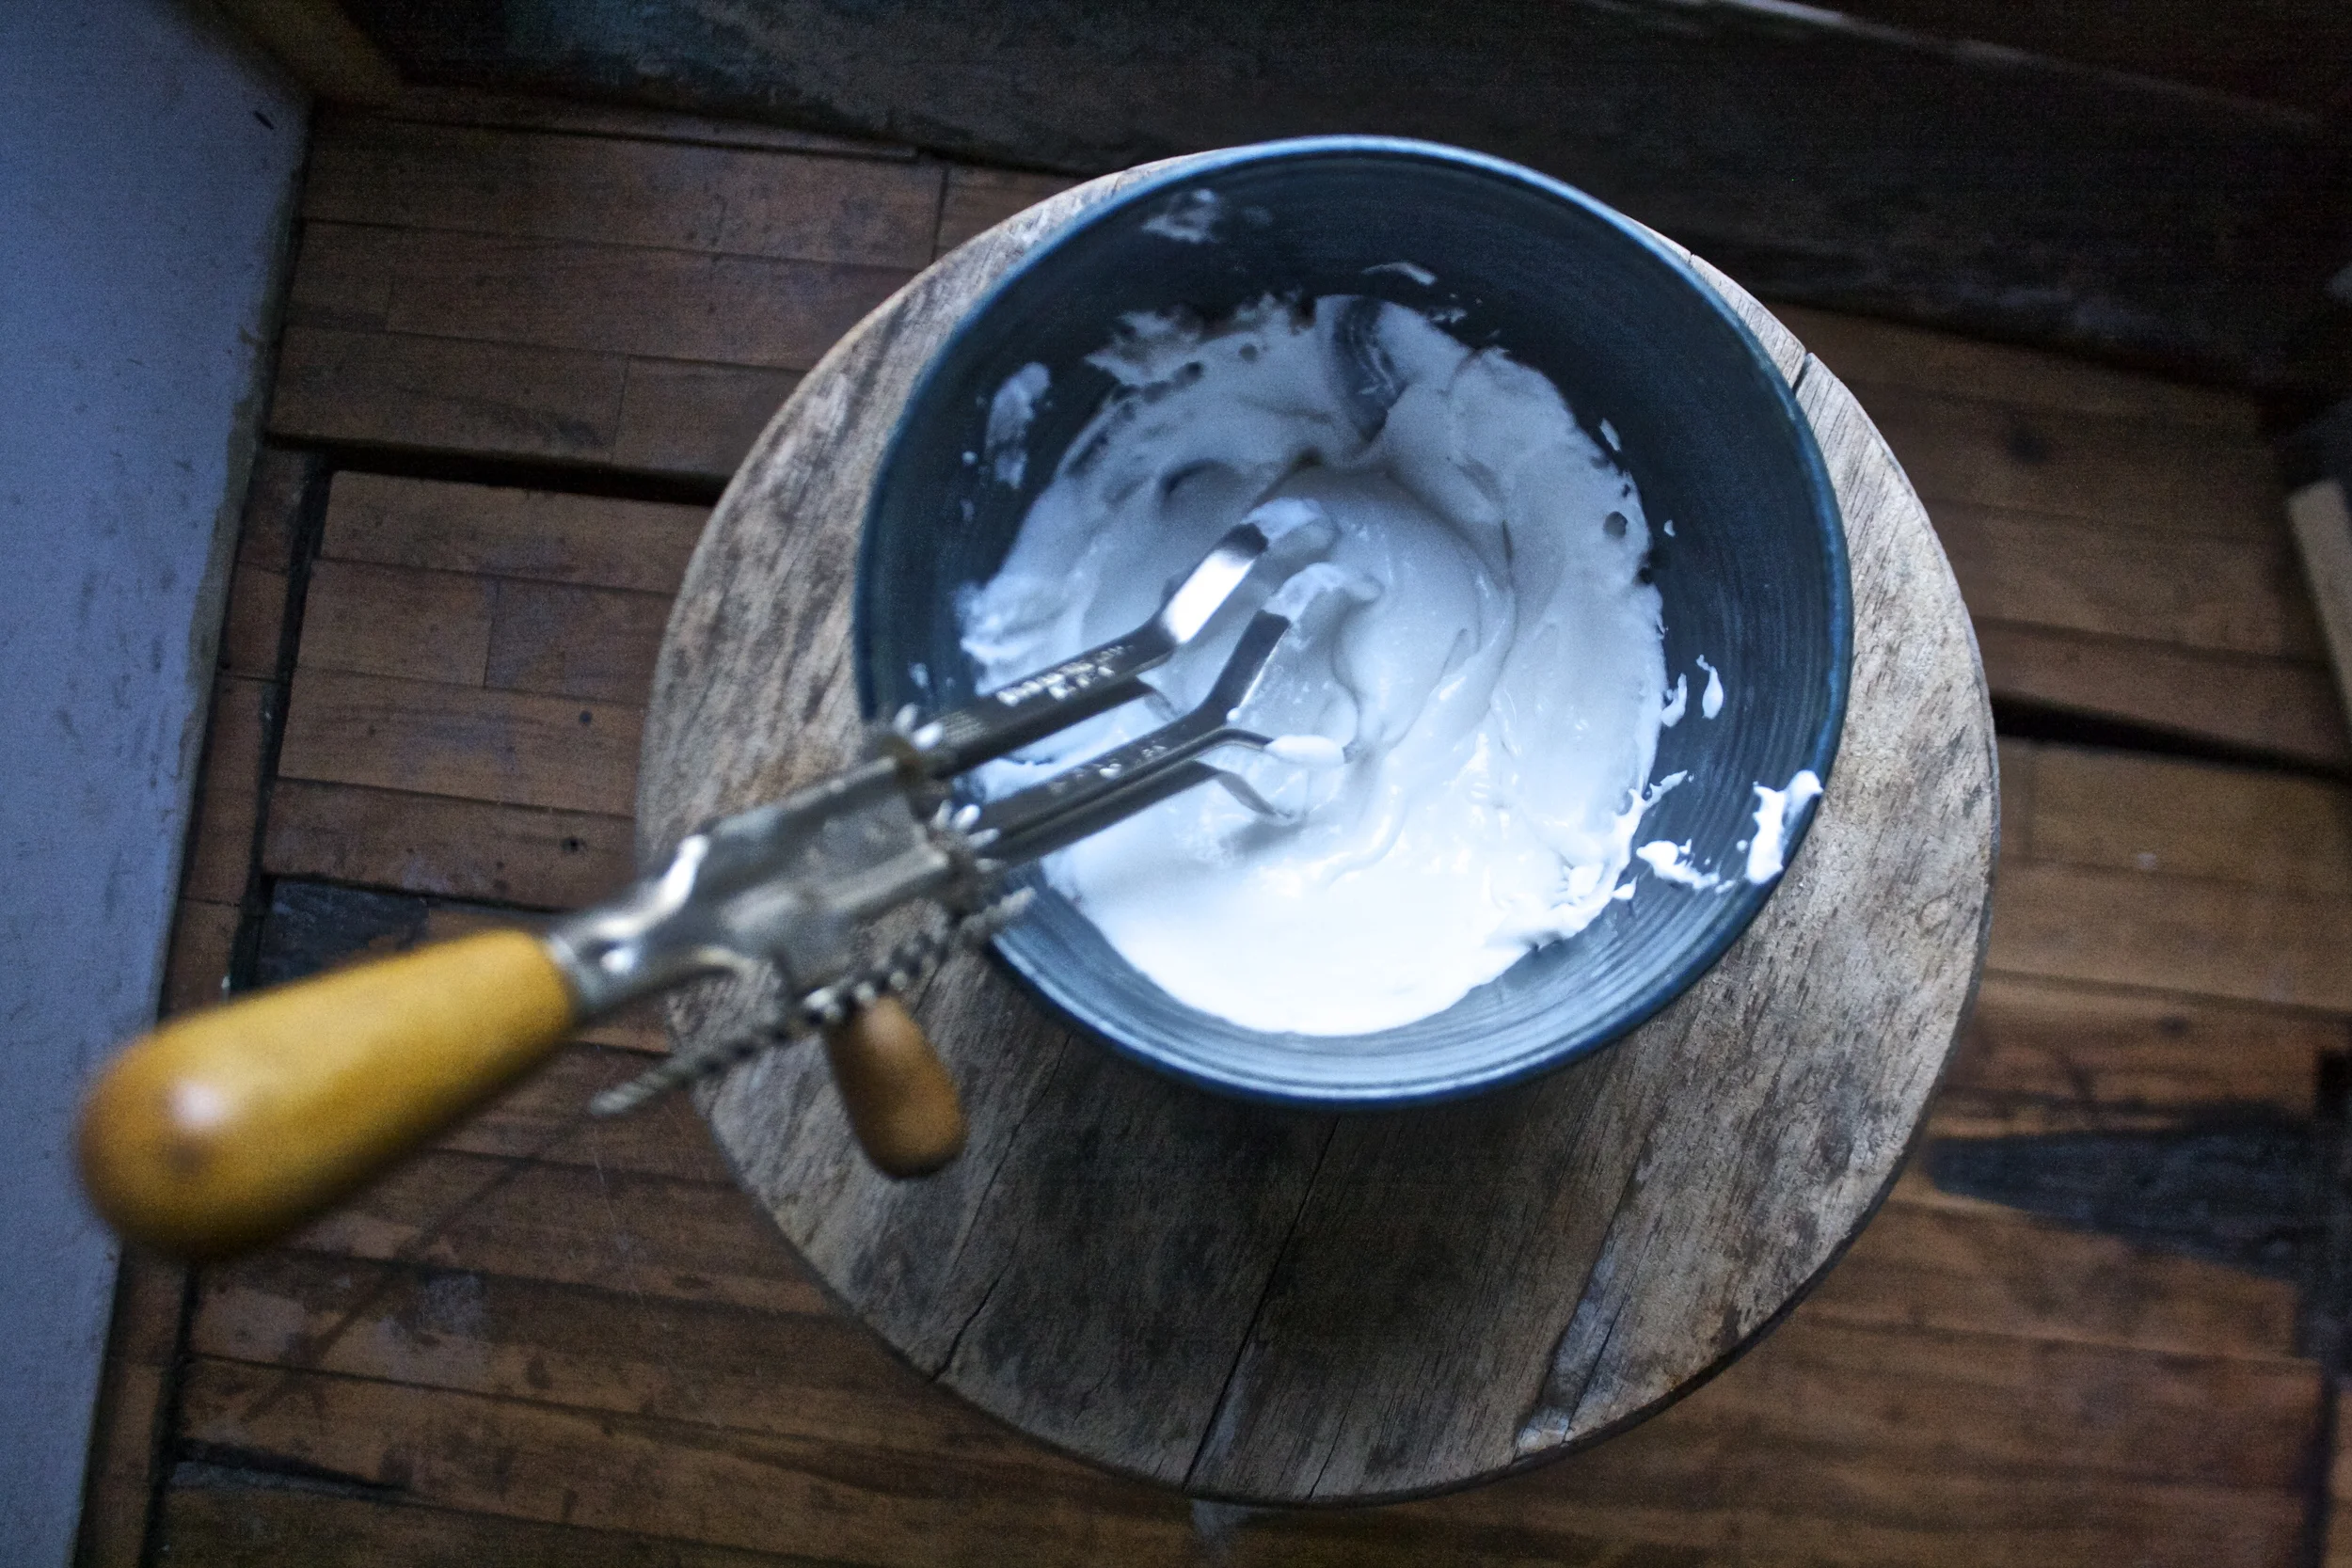
Oh whats this.. Coconut cream!!!! And yes, hand beaten like a boss!
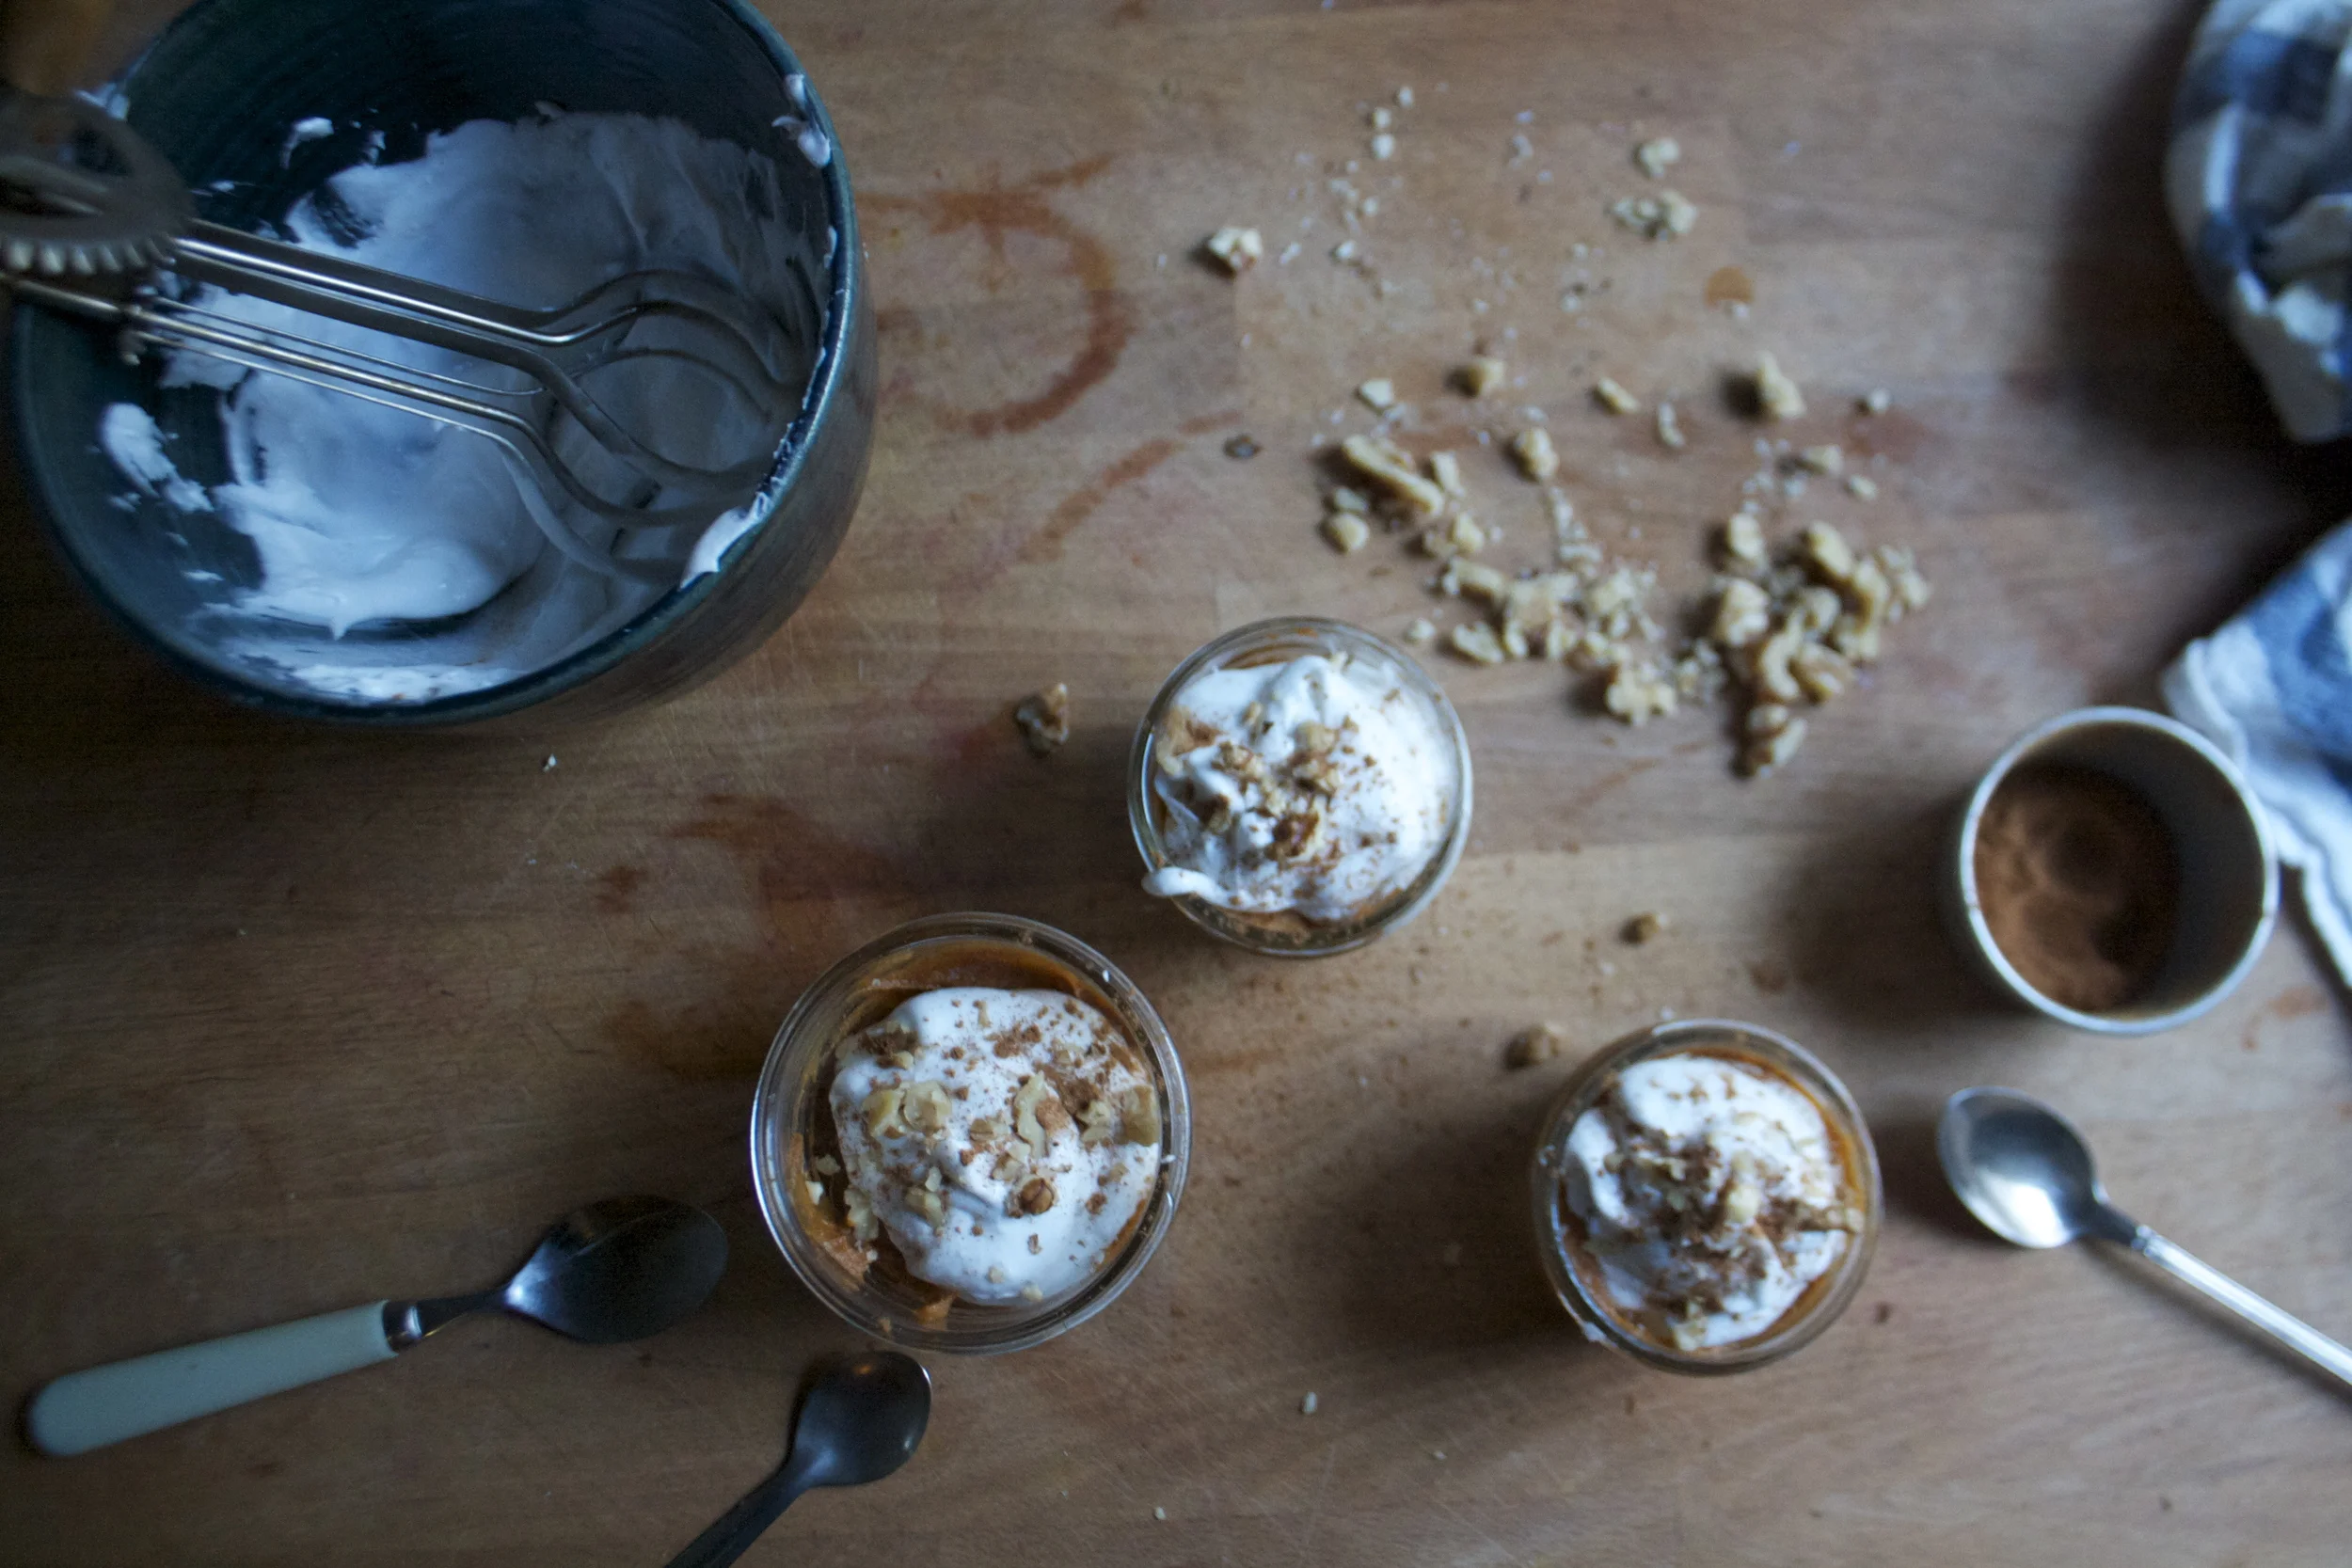
You have the pudding, a the whipped coconut cream. Big spoonful of that right on top.
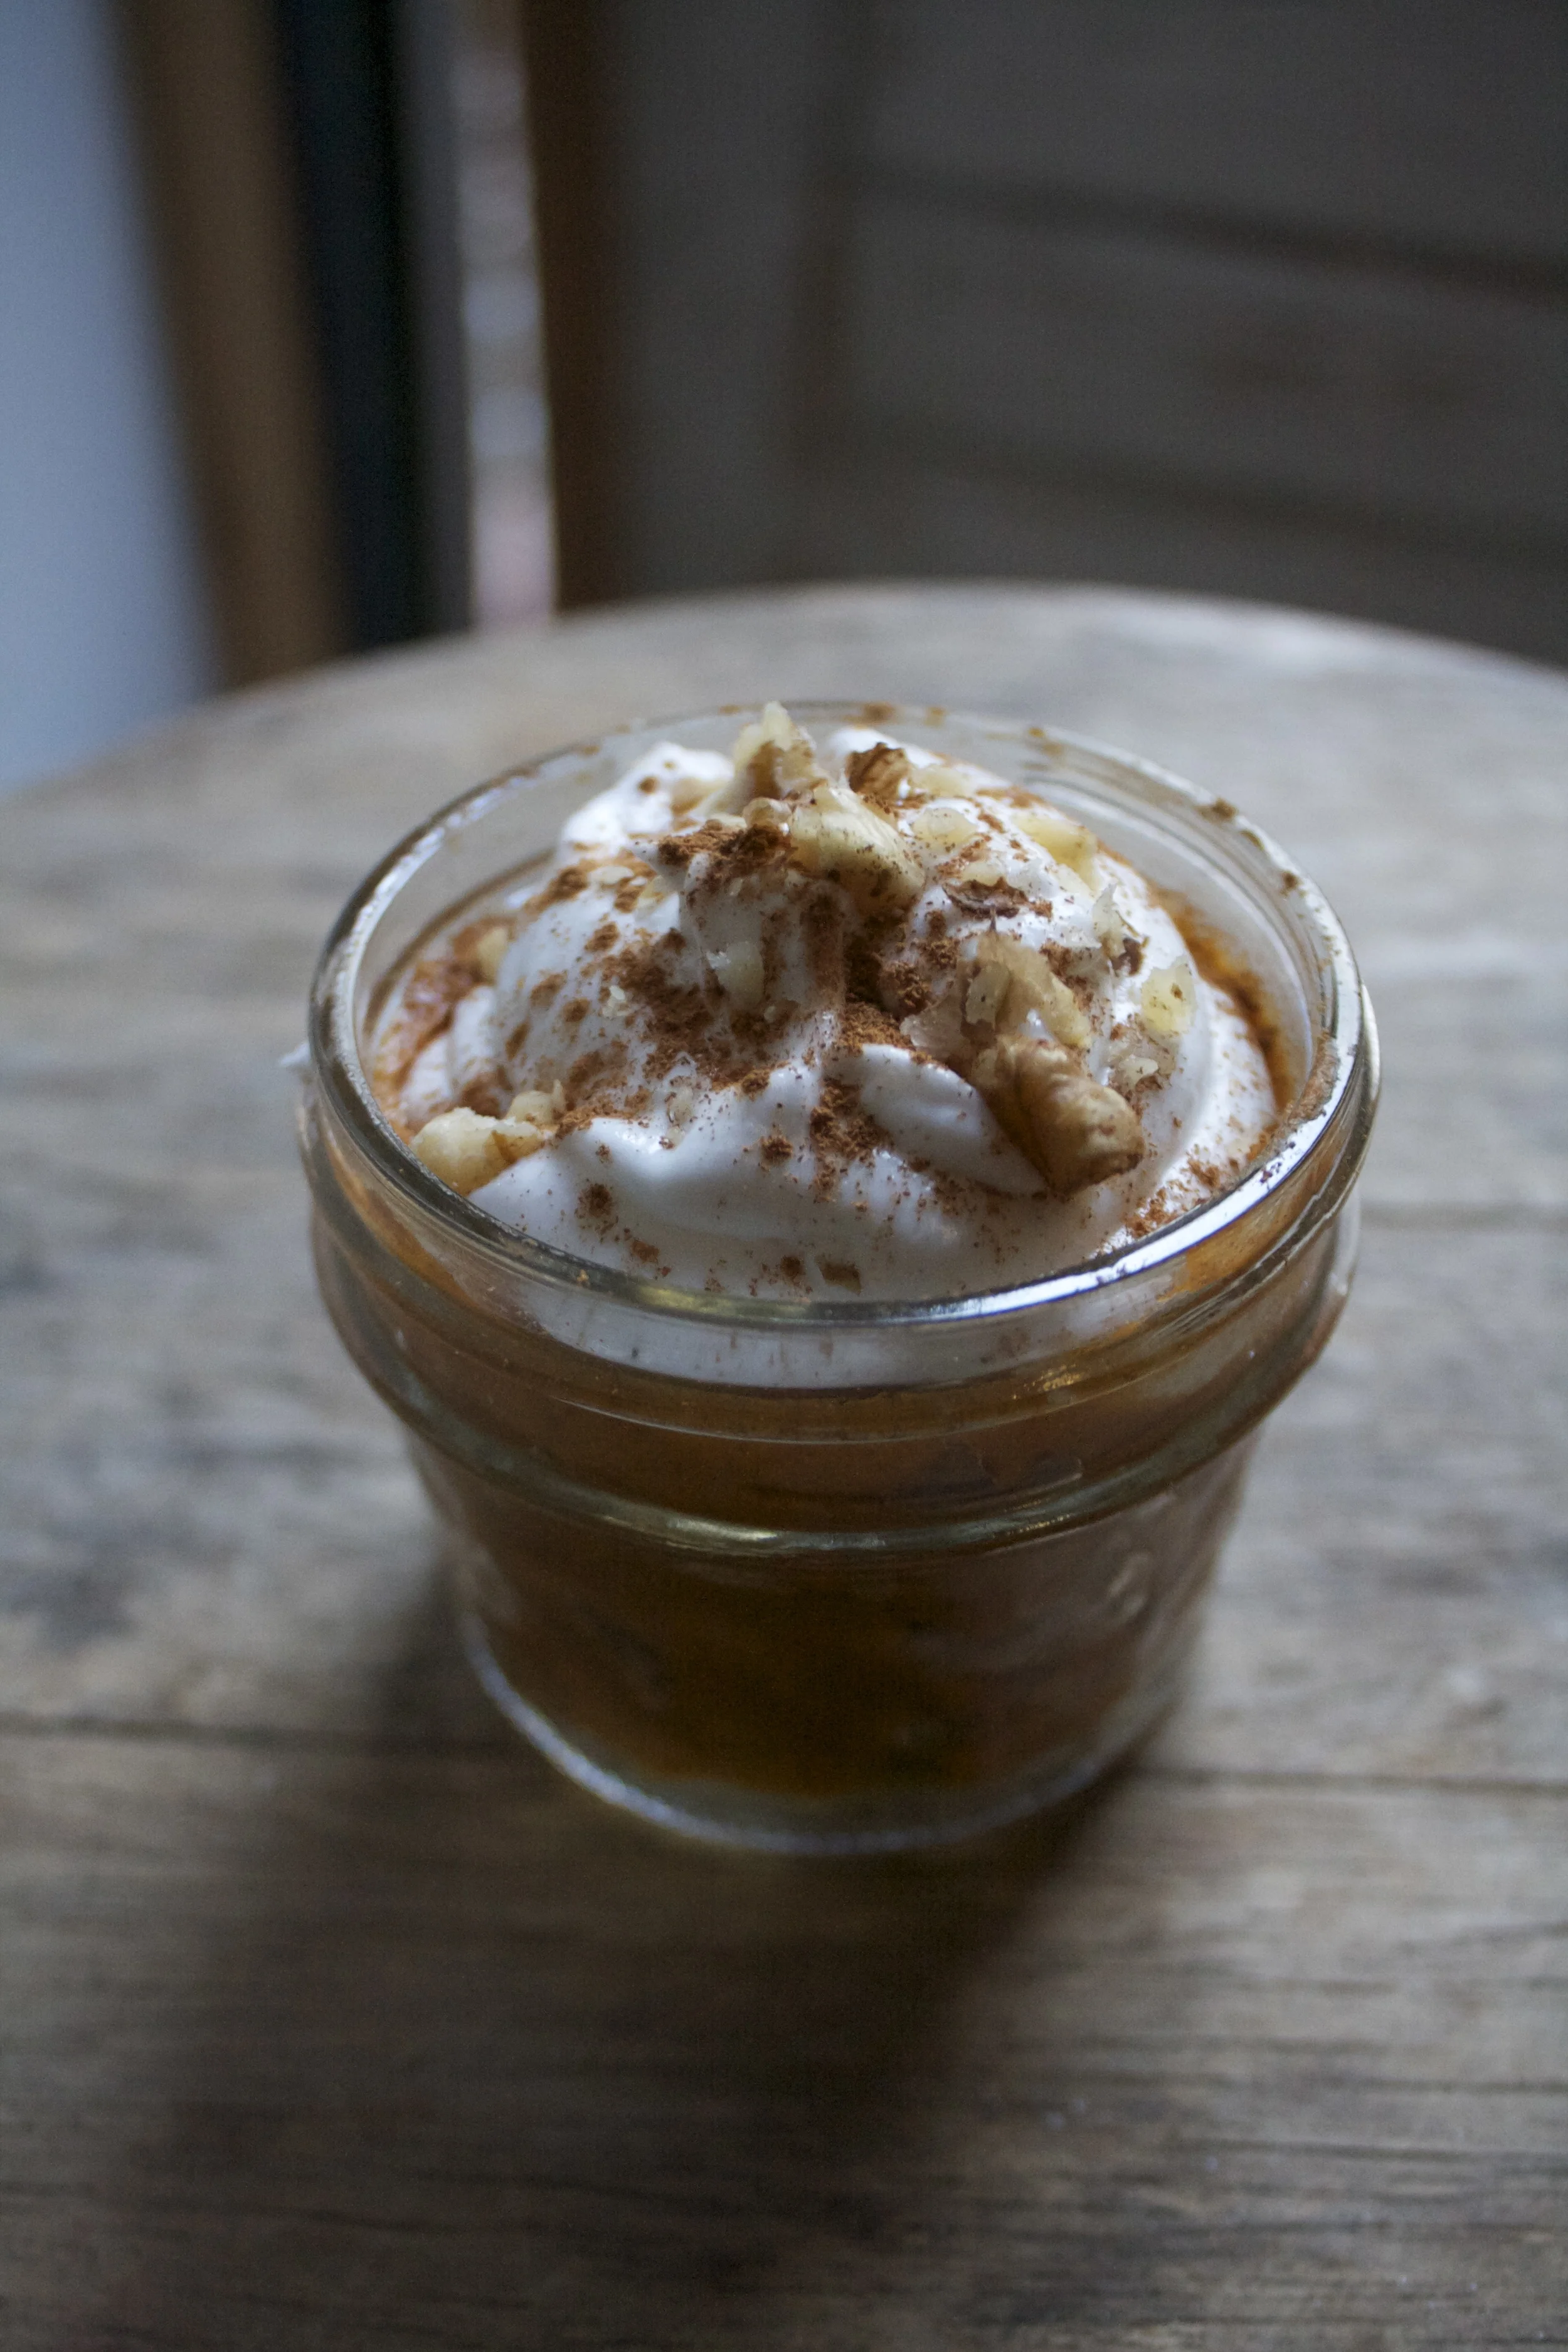
Sprinkled with another pinch of cinnamon and some chopped up walnuts…
Pudding so good and so easy it will knock%u00a0 your socks off!
Have a great weekend!
-C
Serves 1- 3
1 large sweet potato
1-2 pitted dates (If I am making the pudding for myself I sometimes skip the dates)
1 tablespoon Vietnamese cinnamon
Optional. A pinch of ground ginger or allspice. Pumpkin pie spice or a splash of vanilla. A scoop of nut butter or even a handful of nuts. Chocolate chips or creamy nutella. Berries. And whipped coconut cream or some yogurt to top with. So many possibilities.
Bake sweet potato until tender. This can be done a ahead of time or you can use up left over sweet potatoes from dinner….
Remove the skin from the potato and place into a food processor or blender with the dates and the cinnamon or whatever spices you want to use. Blend until smooth. Can add in a few splashes of water to thing out a bit.
Once smooth, scoop out into serving sizes or just into one big jar to eat all to yourself. Top with coconut cream and chopped nuts or nothing.
Eat with spoon, like bowl clean.. And can be eaten without shame for breakfast, lunch, dinner or snack.
Guess what guys %u2026.I got myself a sick vintage waffle/ griddle iron. I couldn’t be more thrilled!!!%u00a0I found this thing at the local recycled goods store the other day, along with a very beautiful old white pyrex mixing bowl. It was one of my best thrift store scores! (Checking out the inventory and the condition of all the old things that day, I would say an old lady had just died and all her perfectly keep, mint condition kitchen stuff had just been donated. %u00a0But it’s cool, cause I get the feeling that she was at least 90, with a big loving family, and was happy until the day she died. And I am sure she would be pleased that I have taken over the waffle maker. Thanks old lady!)
%u00a0And now I am pretty sure that %u00a0everything I make for the next week will be cooked on said waffle/griddle. I am serious, I already have a list of things to try and cook on it; cookies, biscuits, granola bars, potatoes, fruit, some type of pasta situations%u2026. the list of possibilities is endless and I bet that at least 1/2 of these things will be totally awesome and amazing.
But first thing first. I need to make dinner.
So waffles for dinner!!%u00a0
Note. These waffles are completely 100% fantastic for any meal you want to make them for. They consist of nothing more then beans, a shit ton of veggies, and just a bit of cornmeal. But don’t let that fool you because they are super packed full of so much flavor, have a really soft tender inside, with a nice crispy outside and are so super pretty. They are wonderful!%u00a0The stuff. First, we got a big old pile of shredded up veggies which include; carrot, beet, sweet potato, onion, parsnip, celeriac, and a little bit of kale. %u00a0A we got a bowl of rinsed and strained white beans, a little bit of cornmeal and salt, pepper, and garlic powder.%u00a0
The makings of something amazing!Before you do anything. get your waffle iron out and preheat it.%u00a0
While thats going on, take you beans, %u00a0add 3/4 cup water and puree until smooth with whatever blending device want to like to use. (I used my hand blender%u2026less to clean)Now collect all the shredded veggies and dump into a big bowl with the bean puree, the spices and the cornmeal. Mix until combined. The batter should be thick, but not dry. If its seems to wet, add more corn meal, or too dry, add a little more water.
Note how my batter turned a magical pink%u2026 I love beets, they make everything pretty! And check out that bowl!When your waffle iron is preheated, oil it if needed (if your not sure, add a little oil just to really make sure your waffles don’t stick) and take appropriate size spoonfuls of the batter and stick on iron. Close it and wait%u2026..My iron has a little light that turns on when the waffles are done cooking, so I waited patiently (ok iI did open it a few time) until light tuned on and removed the perfectly cooked waffles.
Did I mention how awesome my new/old vintage iron is?
SO AWESOME!!
I made a little gaucamole and gave the mister and little bowl of plain Greek yogurt with lemon juice, but feel free to top, drizzle, or dump whatever you want onto these beauties%u2026%u00a0
Happy waffle Wednesday!!!
-C
Veggie Bean Wonder Waffles
Makes 8-10 waffles (in my iron) feeds 2-3 peeps
1 small carrot shredded
1 small parsnip shredded
1/2 a small celeriac root
1 small beet shredded
2 kale leaves chopped into tiny bits
1/2 an onion, shredded
1/2 a small sweet potato shredded
1/2 cup cornmeal
2 cups(or 1 can) cooked, rinsed and strained white beans
2 teaspoons garlic powder
teaspoon each salt and pepper
oil for iron(if needed)
Note on veggies%u2026 I used what I had in the fridge and shredded, it came to about 3 cups. If you don’t have these specific veggies or only want to use a few.. go for it. Just make sure to have 3 cups of whatever veggies you use.
Take you beans and blend them up with whatever device you would like to use. Once creamy, add to a bowl with the rest of the ingredients. Stir until combined.
Once the waffle iron is preheated, oil it( if needed) and place the recommended amount of batter right on it there. Close and cook until golden brown and waffly.
Serve on a plate with topping of your choice, A few suggestions.. Guacamole, salsa, hummus, mustard, greek yogurt%u2026 anything that tastes good to you.
Eat as breakfast, lunch or dinner…
Fork into face
%u00a0%u00a0 %u00a0%u00a0%u00a0I figured now is a good time to get this recipe out there before we get to far into spring and summer recipes because there is going to be a lot of banana ice cream filled recipe coming and I figured its a good idea to have the basic banana ice cream recipe ready for people to refer too.%u00a0 And because I made so much fantastic naner ice cream, I also made a cookies and cream naner ice cream for my sisters and the mister.
Comments that I got from my sisters and the mister when I made them this ice cream
-Sister one.”I give this my sister seal of approval.. It’s so good. %u00a0The first dessert you have made that I liked! (not including all the other desserts that you have made that I liked)”
-Sister two- “Wow.. it looks like ice cream and feels like ice cream and tastes like ice cream.. You should make me this ice cream!” (I was confused too because I was pretty sure I just made her some)
-The mister- “I am so excited for my new fly fishing pole!”
Ok, so the naner ice cream isn’t new to the mister and he IS very much excited for his new fly fish pole. So excited that he forgot to tell me how amazing that I am and to thank me for making him a big bowl of yumminess. (It’s ok, I forgive him)
And yes, this is probably one of the easiest, most delicious, healthy and amazing frozen dessert that you will ever eat. You will probably find yourself buying mass amounts of bananas and stocking the freezer until things just start falling out. (which is also ok because it’s only bananas and you can’t have too many frozen bananas)
%u00a0 %u00a0The stuff you need for this ice cream%u2026. Nice and ripe bananas, peeled and then frozen* That’s it.
To make it, place frozen bananas into food processor and hit the on button. Process the crap out of the namers until nice and silky smooth.%u00a0
*Note, the smaller the frozen chunks are , the faster and maybe a little easier for the blender to blend the naners into ice cream. So if you think of it, chop bananas into pieces before freezing or even after.
After all blended and smooth, either eat right away or scoop ice cream into a freezer safe container and stick in freezer. That’s the banana ice cream%u2026 %u00a0And it is amazing and so so so so so addictive. I make a batch, think I am only going to eat a scoop, then find myself eating half of what I have made, but it’s ok cause it’s only bananas.%u00a0
Now for the cookies and cream banana ice cream..One%u00a0batch of banana ice cream, either freshly made, still in food processor or made ahead and placed in a food processor and given a good pulse to smooth it up.
Add cookies in, crushing a bit beforehand and pulse till combined.%u00a0Now you have cookies and cream naner ice cream%u2026. and everybody is happy.
Scoop into a cup, a bowl, a freezer safe container, or directly into your mouth.%u00a0Be careful%u2026. You can still get brain freeze from eating naner ice cream too fast!
Keep it real hump day drum bum!
-C
Basic Banana Ice Cream
Makes one batch. Good for 3-4 servings
4-5 %u00a0ripe bananas peeled and frozen
Peel %u00a0bananas and stick in a freezer bag or container and freeze. When bananas are completely frozen, break into pieces and stick into a food processor or blender and puree until silky smooth.%u00a0
Eat right away or scoop into a freezer safe container for later.
Cookies and Cream Banana Ice Cream
1 batch banana ice cream
5-10 (depending on your cookie need) cream filled cookies like oreos or Trader Joe’s Joe Joe’s (These are gluten free)
In a food processor, blend banana ice cream with cookies.
Eat right away, with a utensil of choice in a container of choice.
Bowl licking is acceptable.%u00a0
Before we left for the weekend, I was was trying my hardest to empty the fridge out of all food with the intention of leaning it empty so I could leave it open to defrost while were were gone. Unfortunately I was not able to make it happen. What I did make happen was emptying it almost completely so that when we got home, we had pretty much no food in the house, except for a few things that probably should be eaten. %u00a0Plus one of the last things that I want to do after sitting in a car for 6 hours is go to the grocery store, or anywhere for that matter, so I was determined to make with what wet had in the fridge:
Carrots
half of a gigantic kohlrabi
soy milk
iced tea
bananas that needed to be frozen
strawberries
Perfect! %u00a0A few carrots and half of a gigantic kohlrabi.. plus at the hotel we were staying at, there were fruit bowls in he lobby full apples. Every time I went past the apples (which was a lot) I grab one or two, so I have a few apples (I actually have a lot of apples now). All the things I need for a super awesome salad slaw. Apples with their %u00a0nice sweet crispiness and kohlrabi with its cabbagey, crunchy earthiness, tossed together with some vinegar, some toasted walnuts and some carrots, I mean, so freaking good. And to make it a bit more of a meal, I made some lentils to go with it. But the best part was there was no need to leave the house!!
%u00a0%u00a0 %u00a0%u00a0The stuff%u2026 A huge hunk of a bigger then my head kohlrabi (or 2 normal bulbs). A carrot, an apple, toasted walnuts, red wine vinegar, and some salt.
Pretty simple stuff going on here. Just peel and julienne the kohlrabi, carrot and apple. (no need to peel the carrot or apple unless you want too) and stick it all into a bowl. %u00a0I used my mandolin, which is one of my favorite kitchen tools ever, but if you don’t have one, a box grater works too.Sprinkle with salt and a good glug glug of red wine vinegar. Chop up the walnuts (some big chunks and some very small pieces makes for good eating), toss it all together and, well that’s it. But wait%u2026. let it sit for a few minutes before serving to really let the flavors draw out.And there we have it. Super fast, full of flavors and crunchy texture. A salad slaw after my own heart.
Serve it as it or add to a bed of greens, rice, or lentils%u2026 and make sure to save at least as little%u2026 cause its an awesome little pre-bed snack.
Happy Week!!
-C
Kohlrabi Apple Walnut Slaw
2 medium sized Kohlrabis%u00a0
1 medium apple %u00a0%u00a0
1 small carrot
1/2 cup toasted walnuts
red wine vinegar
salt
In a large bowl, julienne kohlrabi (after peeled) apple and carrot. Sprinkle with salt, add in vinegar. Rough chop walnuts and toss the whole bit together. Let sit for at least 10 minutes, if not longer before serving. (A great salad to make ahead of time)
Eat as is, or toss onto a bed of greens, plate of rice or a bowl of lentils.
Any left overs only end up tasting better the next day.
Last night I had my sister and her kiddos come over for dinner. Nothing fancy, nothing to complicated, %u00a0just something %u00a0fast and something that I knew the littles would eat. %u00a0Spaghetti and meatballs, except replace meatballs were bean balls So they came, we played, did a little drawing and had a bit of first grad gossip. Then came %u00a0dinner time %u00a0when I was told by one little that she was not going to eat.. She had pasta for lunch. Well I made her sit anyway and she mainly just ate carrots (I was ok with that) Then the other little was all into his pasta and bean balls, 1 down, 3 more to go, when the mister let slip that the meatballs were not really meat. He ate around the remaining balls, said he didn’t want them anymore. And my sister, well she doesn’t eat anything that is not pizza.
Good thing a neighbor stopped by while we were eating. He had a few of the balls and told me that they were amazing. I needed someone to tell me that. %u00a0
So yeah, the littles were not overly enthused with the ball, but the Mister the Neighbor, and I thought that they were awesome and delicious. Maybe next time I will make sure that %u00a0pasta was not lunch and tell Nick to keep his mouth shut and stop talking about balls at the dinner table.
I feel like I don’t need to tell you how to boil pasta or heat up the sauce, so I left that portion of the recipe out. I have faith that you are capable in doing that part without my instruction.
The bean ball stuff. Chickpeas (soaked and cooked or canned), sweet potato, carrot, onion, and some chick pea flour. Dried garlic, basil and oregano. Salt and pepper and a little bit of olive oil.%u00a0Small chop all the veggies and toss them and the dry spices into a skillet with a drizzle or two of olive oil. Stick on medium %u00a0heat and add about 1/4 cup of water to pan. Top with %u00a0slid and let veggies cook down until soft and fragrant.
Add the cooked veggies to a food processor or blender with %u00a0the rinsed and drained chickpeas. The mixture gets pulsed until combined, %u00a0keeping a little bit of chunkiness. %u00a0Now go warhead and taste %u00a0the mixture. Add another pinch or two of salt , pepper or any of the spices that you think it need. %u00a0Dump the mixture into a bowl and mix in the chickpea flour than stink the mixture into the fridge for a least a 1/2 hour. Cooling to off is really important to forming the balls. If you don’t, it’s much harder to keep mixture from falling apart and sticking to your hands.
After the mixture has had time to cool and set, start rolling the mixture into balls roughly the size of ping pong balls. In a shallow bowl, add a few tablespoons of the chickpea flour with a pinch of salt, pepper and garlic powder. Take each ball and roll in flour and place each ball on a well oiled baking sheet. When the balls are all rolled, stick into the oven and bake away for about 30-40 minutes, flipping balls after about 20. %u00a0After you flip the balls, get the pasta ready so its finished about the same time the balls are done.You pasta and sauce is cooked and the balls are all crispy and oh so nice.
Serve balls over pasta with sauce and eat with a fork.
Your day is now complete.. balls and all.
Happy Weekend!
-C
Spaghetti and Bean Balls
makes about 20 balls
4 Cups (or 2 cans) Cooked, Rinsed and Drained ChickPeas
1 Small Sweet Potato
1 Small Onion
1 Carrot
1/4 Cup Chickpea Flour plus extra to roll balls in
1 Heaping Teaspoon Basil
1 Heaping Teaspoon Oregano
1 Heaping Teaspoon Garlic Powder
Olive or Vegetable Oil
Salt and Pepper
Your choice of Spaghetti (Use Vegan and or Gluten Free if needed) %u00a0Prepared as package recommends
Marinara or Pasta Sauce of your choice
Preheat Oven to 425 degrees
Small dice the carrot, onion and sweet potato and toss into a skillet on medium high heat with a splash of oil. Add in the dry spices and add in about a quarter cup of water. stir and cover the skillet with a lid and let the veggies cook down until the water has evaporated and the veggies are tender.%u00a0
Add rinsed and drained chickpeas to a food processor with the cooked veggie mixture. Pulse together until the mixture is combined and slightly smooth, but still with a little bit of texture left.Place bean mixture in a bowl %u00a0and mix in the 1/4 cup of chickpea flour. and stick in the fridge for a least a 1/2 hour to cool. (Mixture can be made a day ahead if you want)
Once the mixture has time to cool and set up , remove from fridge and with a light head, roll mixture into ping-pong sized balls. In a separate shallow dish add a bit of chickpea flour with a pinch of salt and pepper. Roll each ball in the flour mixture and place balls on a well oiled baking sheet. Once balls ae made, stick into the oven and bake for about 30-40 minutes, flipping after about 20 minutes. The balls are done when the outsides are once and golden brown and crispy. After about 30 minutes, get to cooking your pasta and mariana sauce.
Once the pasta and sauce is done, plate it and toss on some of those awesome bean balls!
Bean balls also make fantastic bean ball sandwiches or bean balls on a toothpick.%u00a0
%u00a0 %u00a0%u00a0%u00a0%u00a0 TGIF!!!! For reals, because Monday-Thurday were monster days. And now that its friday, I can dig a hole and hide in it until it’s at least 30 degrees with some sunshine. (I might never get to come out.)
A few things I will bring in my hole:
food (lots of food and coffee, lots of coffee)
a soft blanket and pillow
a few books, preferably with pictures, on farming and gardening (think spring!)
the entire series of the Fresh Prince of Bel-air and a device to watch it on
toothpaste (I can use my finger to brush my teeth)
But before I leave for my hole in the ground, I made these little cake bites to get my people through the weekend. Sweet little lemony bites of rich dense cake dipped into bittersweet chocolate. (I am just so nice) %u00a0They have all the pleasure or cake without the need of a fork and are much easier to give away then a big slice of cake. Plus, they are fun to make. My little sister helped and did most of the chocolate dipping. Then she and another little used their mouths to clean up the chocolate mess. It was an afternoon of chocolate all over the kitchen fun day.%u00a0
So make some bites to have and to share. Or if you, like me, are digging a hole to hide in, make a batch of bites to bring with you. That’s the beauty of cake covered in a harden chocolate shell, they travel really well.Simple lemon cake stuff. Flour, baking powder and salt whisked together, Sugar and soft butter in a bowl. An egg, some vanilla, milk, and of course, the lemon.%u00a0
To make the batter, cream the soften butter with the sugar until light and fluffy. Zest lemon(1 big or 2 small) into bowl with the juice of the lemon(s), the vanilla and the egg. Beat until combined. Now beat in the dry and then the milk. Keep beating for another minute until all mixed. Batter should be light and fluffy.
Batter goes into a greased and floured %u00a09x13 baking sheet and stuck into a 375 degree oven for about 30 minutes (You can use a 9×9 baking pan. Just bake fir another 10 minutes and you will end up with thicker bites). Remove from oven and let cool for a few minutes and flip to remove cake from baking sheet. Cut cake into small pieces (I cut 4×6%u00a0 %u00a0to get 24 bites) and place bake into sheet and into freezer (I stuck mine outside, it was -2 degrees ) for at least 2 hours.%u00a0
Frozen bites ready for the chocolate coating%u2026 Bittersweet chocolate chips and a little bit of coconut oil. Melted together all nice and shiny smooth.Now dip and slather those bites in the melted chocolate.%u00a0
Oh what a lovely sister I have.. Look at her dunk%u2026.. like a boss!Fully coated and placed on a rack for the chocolate to harden. I %u00a0ended up sticking the rack in the freezer for 10 minutes%u2026They harder really fast in there.
And now you have some it, bites of cake covered in chocolate.%u00a01 bite, 2 bites%u20265 bites. Eat however many you want because its Friday and because there small little bites and just because you can.
Now if you need me, I’ll be in my hole.%u00a0
-C
Chocolate Lemon Cake Bite
1 1/2 cups all purpose flour
1 teaspoon baking powder
1 teaspoons salt
1 cup %u00a0white sugar
1/2 cup (1 stick) soft butter
1 egg
1 teaspoon vanilla
1 cup milk
1 large or 2 small lemons
2 cups bittersweet chocolate chips
2 tablespoons coconut oil
Add butter %u00a0and sugar to a large bowl and beat on medium unit light and fluffy. Ass in vanilla egg, the zest of the lemon and the juice of the lemon. Beat to incorporate. Now beat in the dry and lastly the milk.
Grease and flour either a 9×9 pan or a 9×13 baking sheet. dump batter in and smooth out. %u00a0Stick in oven and bake for about 3o minutes or until a toothpick stuck into the middle comes out clean. Remove and let cool %u00a0for a few minutes on a %u00a0wire rack. Flip cake to remove from pan. Cut cake into bit sized pieces, 4×6 is a good size, and place back on baking sheet and stick into freezer for at least 2 hours.
When cake bites are as good as frozen, get the chocolate ready. Take the chocolate and the coconut oil and either melt in a double boiler or the microwave. Mix until smooth and make sure to full incorporate the oil. Now remove the cake bites from the freezer and dip each bite into chocolate, trying to full coat all sides. Stick onto a wire rack or a parchment lined pan to harden. They can be stuck back into the freezer to harden faster.
I know that sometime some of the foods that I eat might seem a little strange to people. But think about it. Isn’t there something that you eat that other people think is kinda weird or that you know might be a little on the strange side and yet you love it.%u00a0
So apple lentils. I know some people think it’s weird, but trust me, it’s not, it’s actually pretty freaking magical. Lentils, especially red lentils, have a mild, nutty flavor that make them perfect to use in any type of dish, sweet or savory. And so nutritional value, with protein up the wazoo, these little guys are mega fantastic and yeah. SO don’t knock it till you try it.
Now first off, YAY for apple season!!! Aren’t we just so happy for fresh delicious apples? I am, so much so that I have made up a super cool apple jig where my head bobs up and down and my legs shift and convulse all over the place. ( could be mistaken for a seizure) It’s a sight to see for sure.%u00a0 And a second YAY for warm food again. The past week or two I have been waking up to temps in the 50’s giving the world just enough chill for a cozy morning sweater, a throw blanket and a nice hot bowl of breakfast porridge. (It also taste fantastic made ahead then eaten cold if the world decides to get warm again) My morning have been great, all cuddled on the couch with a book. my coffee, ad a bowl of apple lentil porridge. Best way to start the day.
The stuff. An apple, some red lentils, water, and some cinnamon. You can also add some maple or brown sugar to the mix if you want more sweetness.
Firstly, water ans lentils go into a pot and placed on the stove until the the water is boiling.
While that is happening, chop up you apple.%u00a0 Big pieces, little pieces, or both. I like both because the smaller pieces kinda of dissolve in the lentils and the bigger chunks will keep shape.
So once your lentils have started to boil, dump inmost (save a little bit to toss on after the lentils are cooked)%u00a0 of the chopped up apple and a good pinch or two of cinnamon. Mix it all around and place back on heat on low so simmer and cook.
Soft and all cooked to perfection. Gorgeous.
Dump the porridge into a bowl, add on the left over chunks of apples and give it another good sprinkle of cinnamon.
Breakfast of champions right here.
And because it’s what I eat every day…I am a champion.
You can be one too! (just eat some lentils)
-C
Makes one serving but can easily be double
1/2 cup dried red lentils
1 cup water
an apple ( mac, honey crisp, paula red are good varieties)
1 teaspoon or so of cinnamon
Optional… Add a little sweetener like maple or brown sugar if you want
Stick water and lentils go into a pot and bring to a boil. Chop apple into pieces, some big, some small or all the same size. Once the lentils are boiling, dump in most of the chopped apple (save about 1/4 of it for later) into the pot and sprinkle with cinnamon. Stir around, reduce heat to a low and cook until the lentils are soft (about 10 minutes) Once they are cooked, taste and decide if you need sweetener. If you do, add a teaspoon or two of whatever in now and mix around then,transfer the lentil goodness into a bowl, toss on remaining apple chunks, sprinkle with cinnamon, and go to town.
I sometime struggle with certain veggies, not like in a eating way (I have no snuggle eating any veggie)%u00a0but in a making something with that certain veggie kind of way,%u00a0like I don’t make anything out of them, I just eat them raw as they are. (That was terribly long winded and does it even make sense?)%u00a0I don’t find this to be a problem most of the time, but sometime I think I need to be less lazy about eating and maybe prepare a dish for a meal rather then just eating raw beans out of the garden for lunch…..I mean, I am not going to stop doing that but I am going to start being a little more creative and planning meals with a little more substance. Adding nuts is more substance right?
These beans were freaking fantastic. %u00a0Blistered and charred, and not soggy and soft. They were perfect.%u00a0(I like my veggies either raw or burnt)%u00a0I made them late morning and was going to save them for dinner but the mr, Barb, and I ate them all just on snacking on them. %u00a0Just a really good, A+%u00a0veggies situation here. Highly recommended, hot or cold. Almost beats a bean lunch in the garden. Almost.%u00a0
The stuff. Green beans, almonds, garlic, ginger, soy, and a little oil.%u00a0
Quick fast, rough chop the almonds and give them a toast in a dry skillet (you can skip this part if you have already toasted almonds)%u00a0
And here would be the time to trim the beans if you are a person that does that. I am however, not a bean trimmer. But you must wash them, so give them a good rinse , and keep them a little wet. The moisture will help them cook.%u00a0
Just washed beans go into a medium high hot skillet (add in a tablespoon of oil) and get a nice little cover to start the cooking process. %u00a0Leave them alone for a few minutes, then remove lid and toss them around. Do that ever few minutes.%u00a0
While the beans start cooking, mince the garlic and the ginger and add to the soy sauce.
Smells so good!
Beans have cooked for about 10 minutes here and are all nice and blistered and just about done so now add in the ginger garlic soy mixture and toss around. Keep cooking for a minute or two.
And now don’t forget those almonds, mix those in too. Then it’s into a bowl they go.%u00a0
Green beans so good. Can’t go wrong with these.
Have a marvelous weekend, maybe go pick some green beans!
-C
About a pound of green beans (trimmed if you want to trim them)
2-3 cloves garlic
2 tablespoons freshly grated ginger%u00a0
1/4 cup almonds
3 teaspoons soy sauce
tablespoon oil
Rough chop almonds into small pieces and place in a dry skillet (meaning no oil). Turn heat on to medium high heat to toast for about 5 minutes or until you can start to smell the almonds and they are slightly browning. (you can skip the tasting %u00a0part if your almonds are already toasted, jus chop them into small pieces)
Dump the almonds into bowl and set aside. Keep skillet on heat and add in the oil. Rinse beans off, keeping them damp,%u00a0and very carefully, dump the damp beans into the hot skillet. Place a lid on beans and let cook about 4-5 minutes. In the meantime, mince garlic and ginger and combine with the soy sauce. After a few minutes, remove the lid from beans and toss the bean around. Keep doing this for another 8-10 minutes or until the beans are cooked though and blistered in places. Once the beans are cooked,%u00a0%u00a0dump the garlic ginger soy mixture into pan. Toss around and leave in pan for another minutes then stir the toasted almonds in. Transfer the whole bit of it into a big bowl or plate.%u00a0
Eat right away or.. They taste freaking fanatic cold too.%u00a0
































 %u00a0 %u00a0%u00a0
 %u00a0I figured now is a good time to get this recipe out there before we get to far into spring and summer recipes because there is going to be a lot of banana ice cream filled recipe coming and I figured its a good idea to have the basic banana ice cream recipe ready for people to refer too.%u00a0 And because I made so much fantastic naner ice cream, I also made a cookies and cream naner ice cream for my sisters and the mister.
 %u00a0 %u00a0
 The stuff you need for this ice cream%u2026. Nice and ripe bananas, peeled and then frozen* That’s it.
 After all blended and smooth, either eat right away or scoop ice cream into a freezer safe container and stick in freezer. That’s the banana ice cream%u2026 %u00a0And it is amazing and so so so so so addictive. I make a batch, think I am only going to eat a scoop, then find myself eating half of what I have made, but it’s ok cause it’s only bananas.%u00a0
 One%u00a0batch of banana ice cream, either freshly made, still in food processor or made ahead and placed in a food processor and given a good pulse to smooth it up.
 Now you have cookies and cream naner ice cream%u2026. and everybody is happy.
 Before we left for the weekend, I was was trying my hardest to empty the fridge out of all food with the intention of leaning it empty so I could leave it open to defrost while were were gone. Unfortunately I was not able to make it happen. What I did make happen was emptying it almost completely so that when we got home, we had pretty much no food in the house, except for a few things that probably should be eaten. %u00a0Plus one of the last things that I want to do after sitting in a car for 6 hours is go to the grocery store, or anywhere for that matter, so I was determined to make with what wet had in the fridge:
 %u00a0 %u00a0%u00a0
 The stuff%u2026 A huge hunk of a bigger then my head kohlrabi (or 2 normal bulbs). A carrot, an apple, toasted walnuts, red wine vinegar, and some salt.
 Sprinkle with salt and a good glug glug of red wine vinegar. Chop up the walnuts (some big chunks and some very small pieces makes for good eating), toss it all together and, well that’s it. But wait%u2026. let it sit for a few minutes before serving to really let the flavors draw out.
 And there we have it. Super fast, full of flavors and crunchy texture. A salad slaw after my own heart.
 Last night I had my sister and her kiddos come over for dinner. Nothing fancy, nothing to complicated, %u00a0just something %u00a0fast and something that I knew the littles would eat. %u00a0Spaghetti and meatballs, except replace meatballs were bean balls So they came, we played, did a little drawing and had a bit of first grad gossip. Then came %u00a0dinner time %u00a0when I was told by one little that she was not going to eat.. She had pasta for lunch. Well I made her sit anyway and she mainly just ate carrots (I was ok with that) Then the other little was all into his pasta and bean balls, 1 down, 3 more to go, when the mister let slip that the meatballs were not really meat. He ate around the remaining balls, said he didn’t want them anymore. And my sister, well she doesn’t eat anything that is not pizza.
 I feel like I don’t need to tell you how to boil pasta or heat up the sauce, so I left that portion of the recipe out. I have faith that you are capable in doing that part without my instruction.
 Small chop all the veggies and toss them and the dry spices into a skillet with a drizzle or two of olive oil. Stick on medium %u00a0heat and add about 1/4 cup of water to pan. Top with %u00a0slid and let veggies cook down until soft and fragrant.
 Add the cooked veggies to a food processor or blender with %u00a0the rinsed and drained chickpeas.
  The mixture gets pulsed until combined, %u00a0keeping a little bit of chunkiness. %u00a0Now go warhead and taste %u00a0the mixture. Add another pinch or two of salt , pepper or any of the spices that you think it need. %u00a0Dump the mixture into a bowl and mix in the chickpea flour than stink the mixture into the fridge for a least a 1/2 hour. Cooling to off is really important to forming the balls. If you don’t, it’s much harder to keep mixture from falling apart and sticking to your hands.
 After the mixture has had time to cool and set, start rolling the mixture into balls roughly the size of ping pong balls. In a shallow bowl, add a few tablespoons of the chickpea flour with a pinch of salt, pepper and garlic powder. Take each ball and roll in flour and place each ball on a well oiled baking sheet. When the balls are all rolled, stick into the oven and bake away for about 30-40 minutes, flipping balls after about 20. %u00a0After you flip the balls, get the pasta ready so its finished about the same time the balls are done.
 You pasta and sauce is cooked and the balls are all crispy and oh so nice.
 %u00a0 %u00a0%u00a0
 %u00a0%u00a0 TGIF!!!! For reals, because Monday-Thurday were monster days. And now that its friday, I can dig a hole and hide in it until it’s at least 30 degrees with some sunshine. (I might never get to come out.)
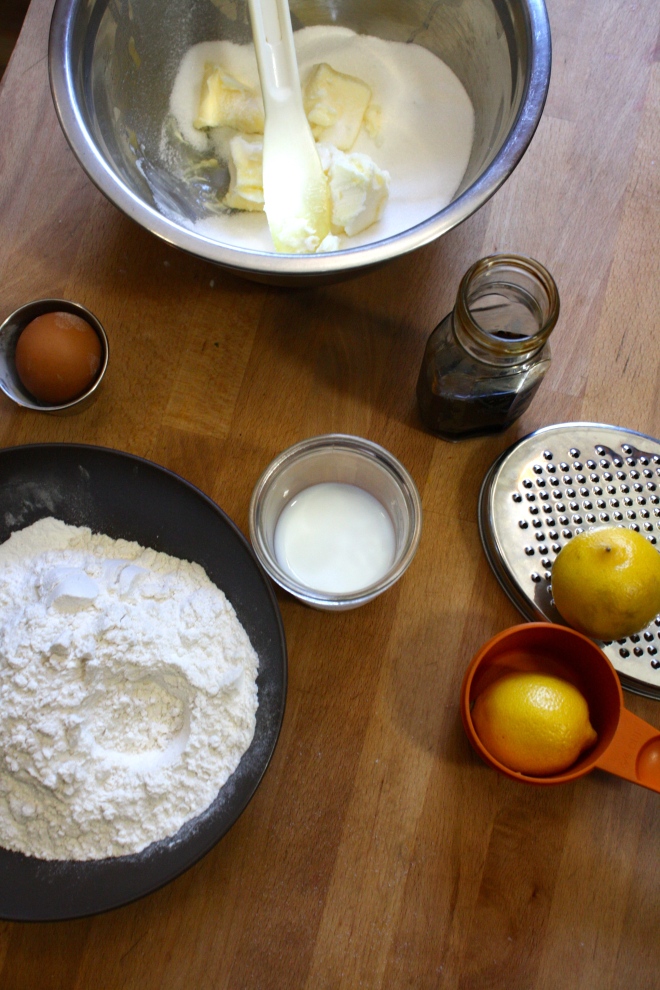 Simple lemon cake stuff. Flour, baking powder and salt whisked together, Sugar and soft butter in a bowl. An egg, some vanilla, milk, and of course, the lemon.%u00a0
 Frozen bites ready for the chocolate coating%u2026 Bittersweet chocolate chips and a little bit of coconut oil. Melted together all nice and shiny smooth.
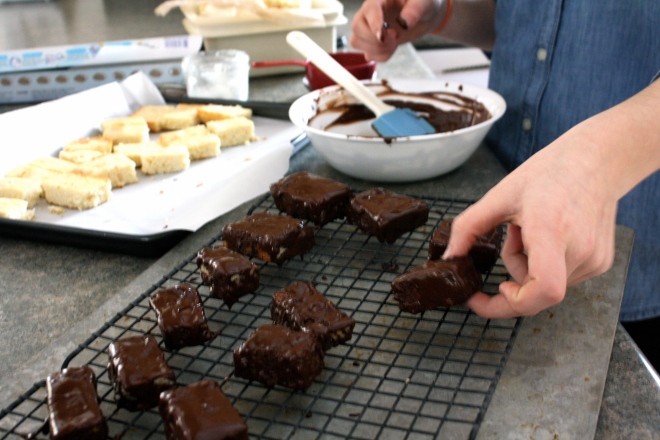 Now dip and slather those bites in the melted chocolate.%u00a0
 Fully coated and placed on a rack for the chocolate to harden. I %u00a0ended up sticking the rack in the freezer for 10 minutes%u2026They harder really fast in there.

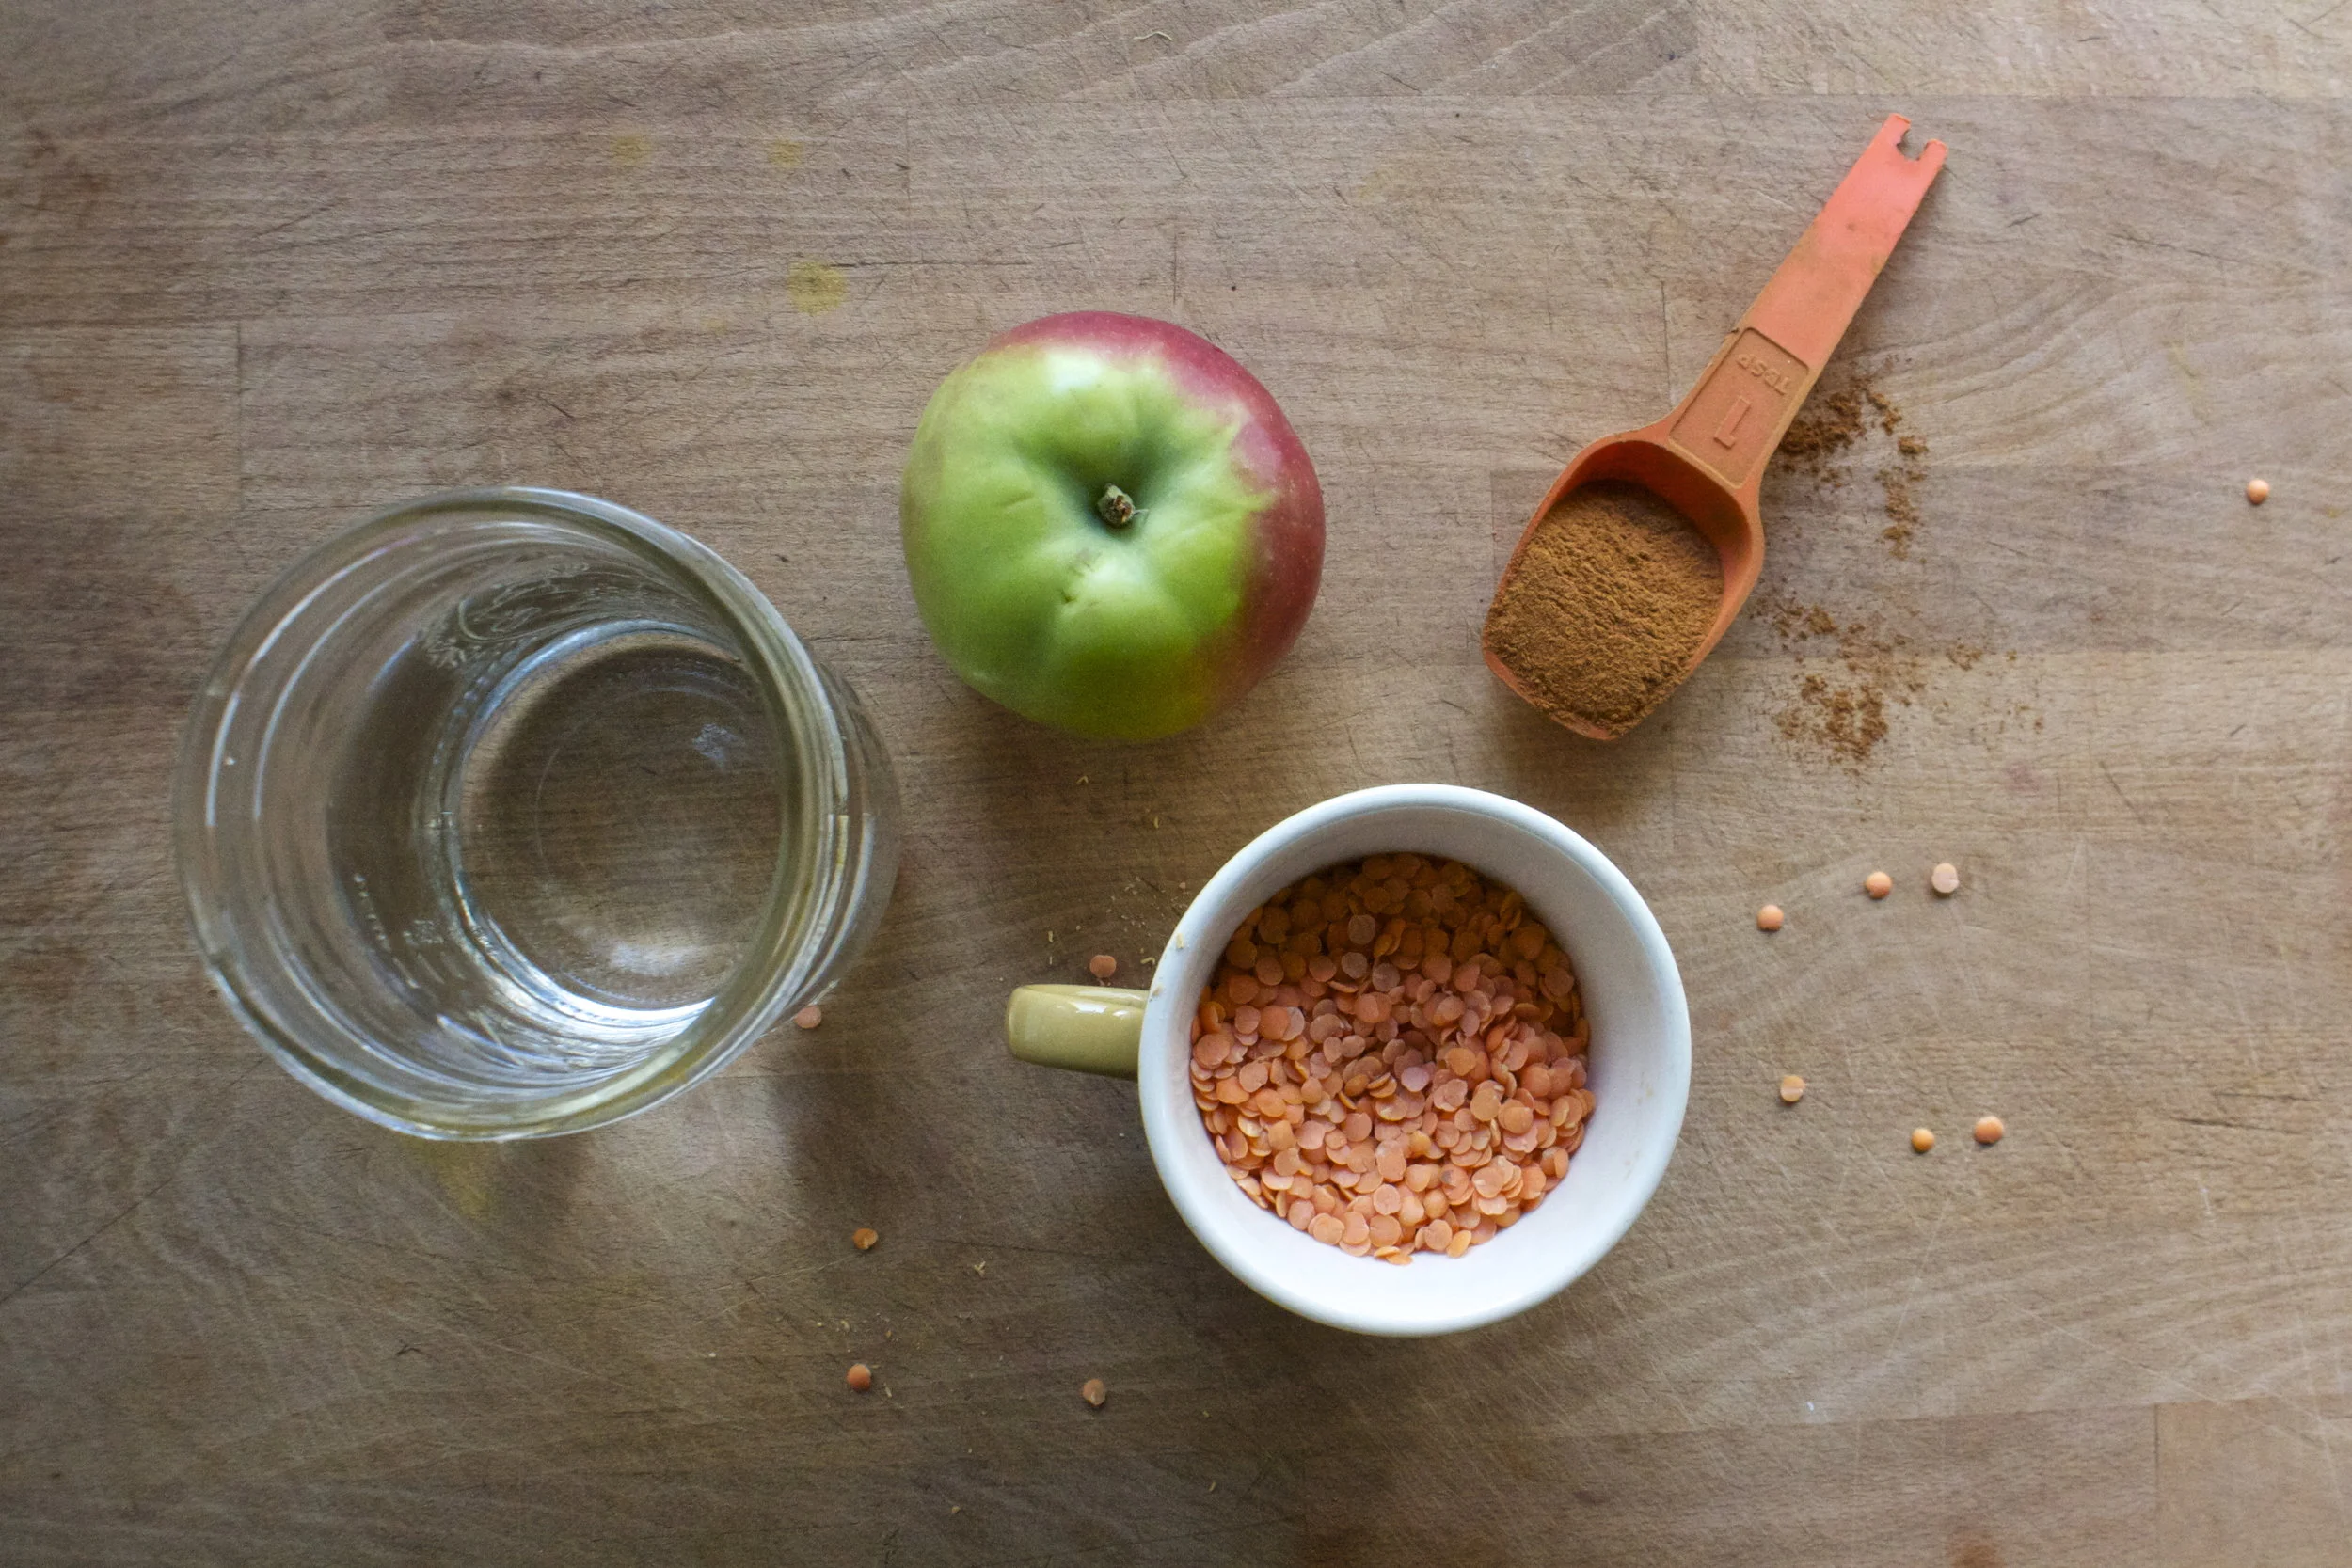

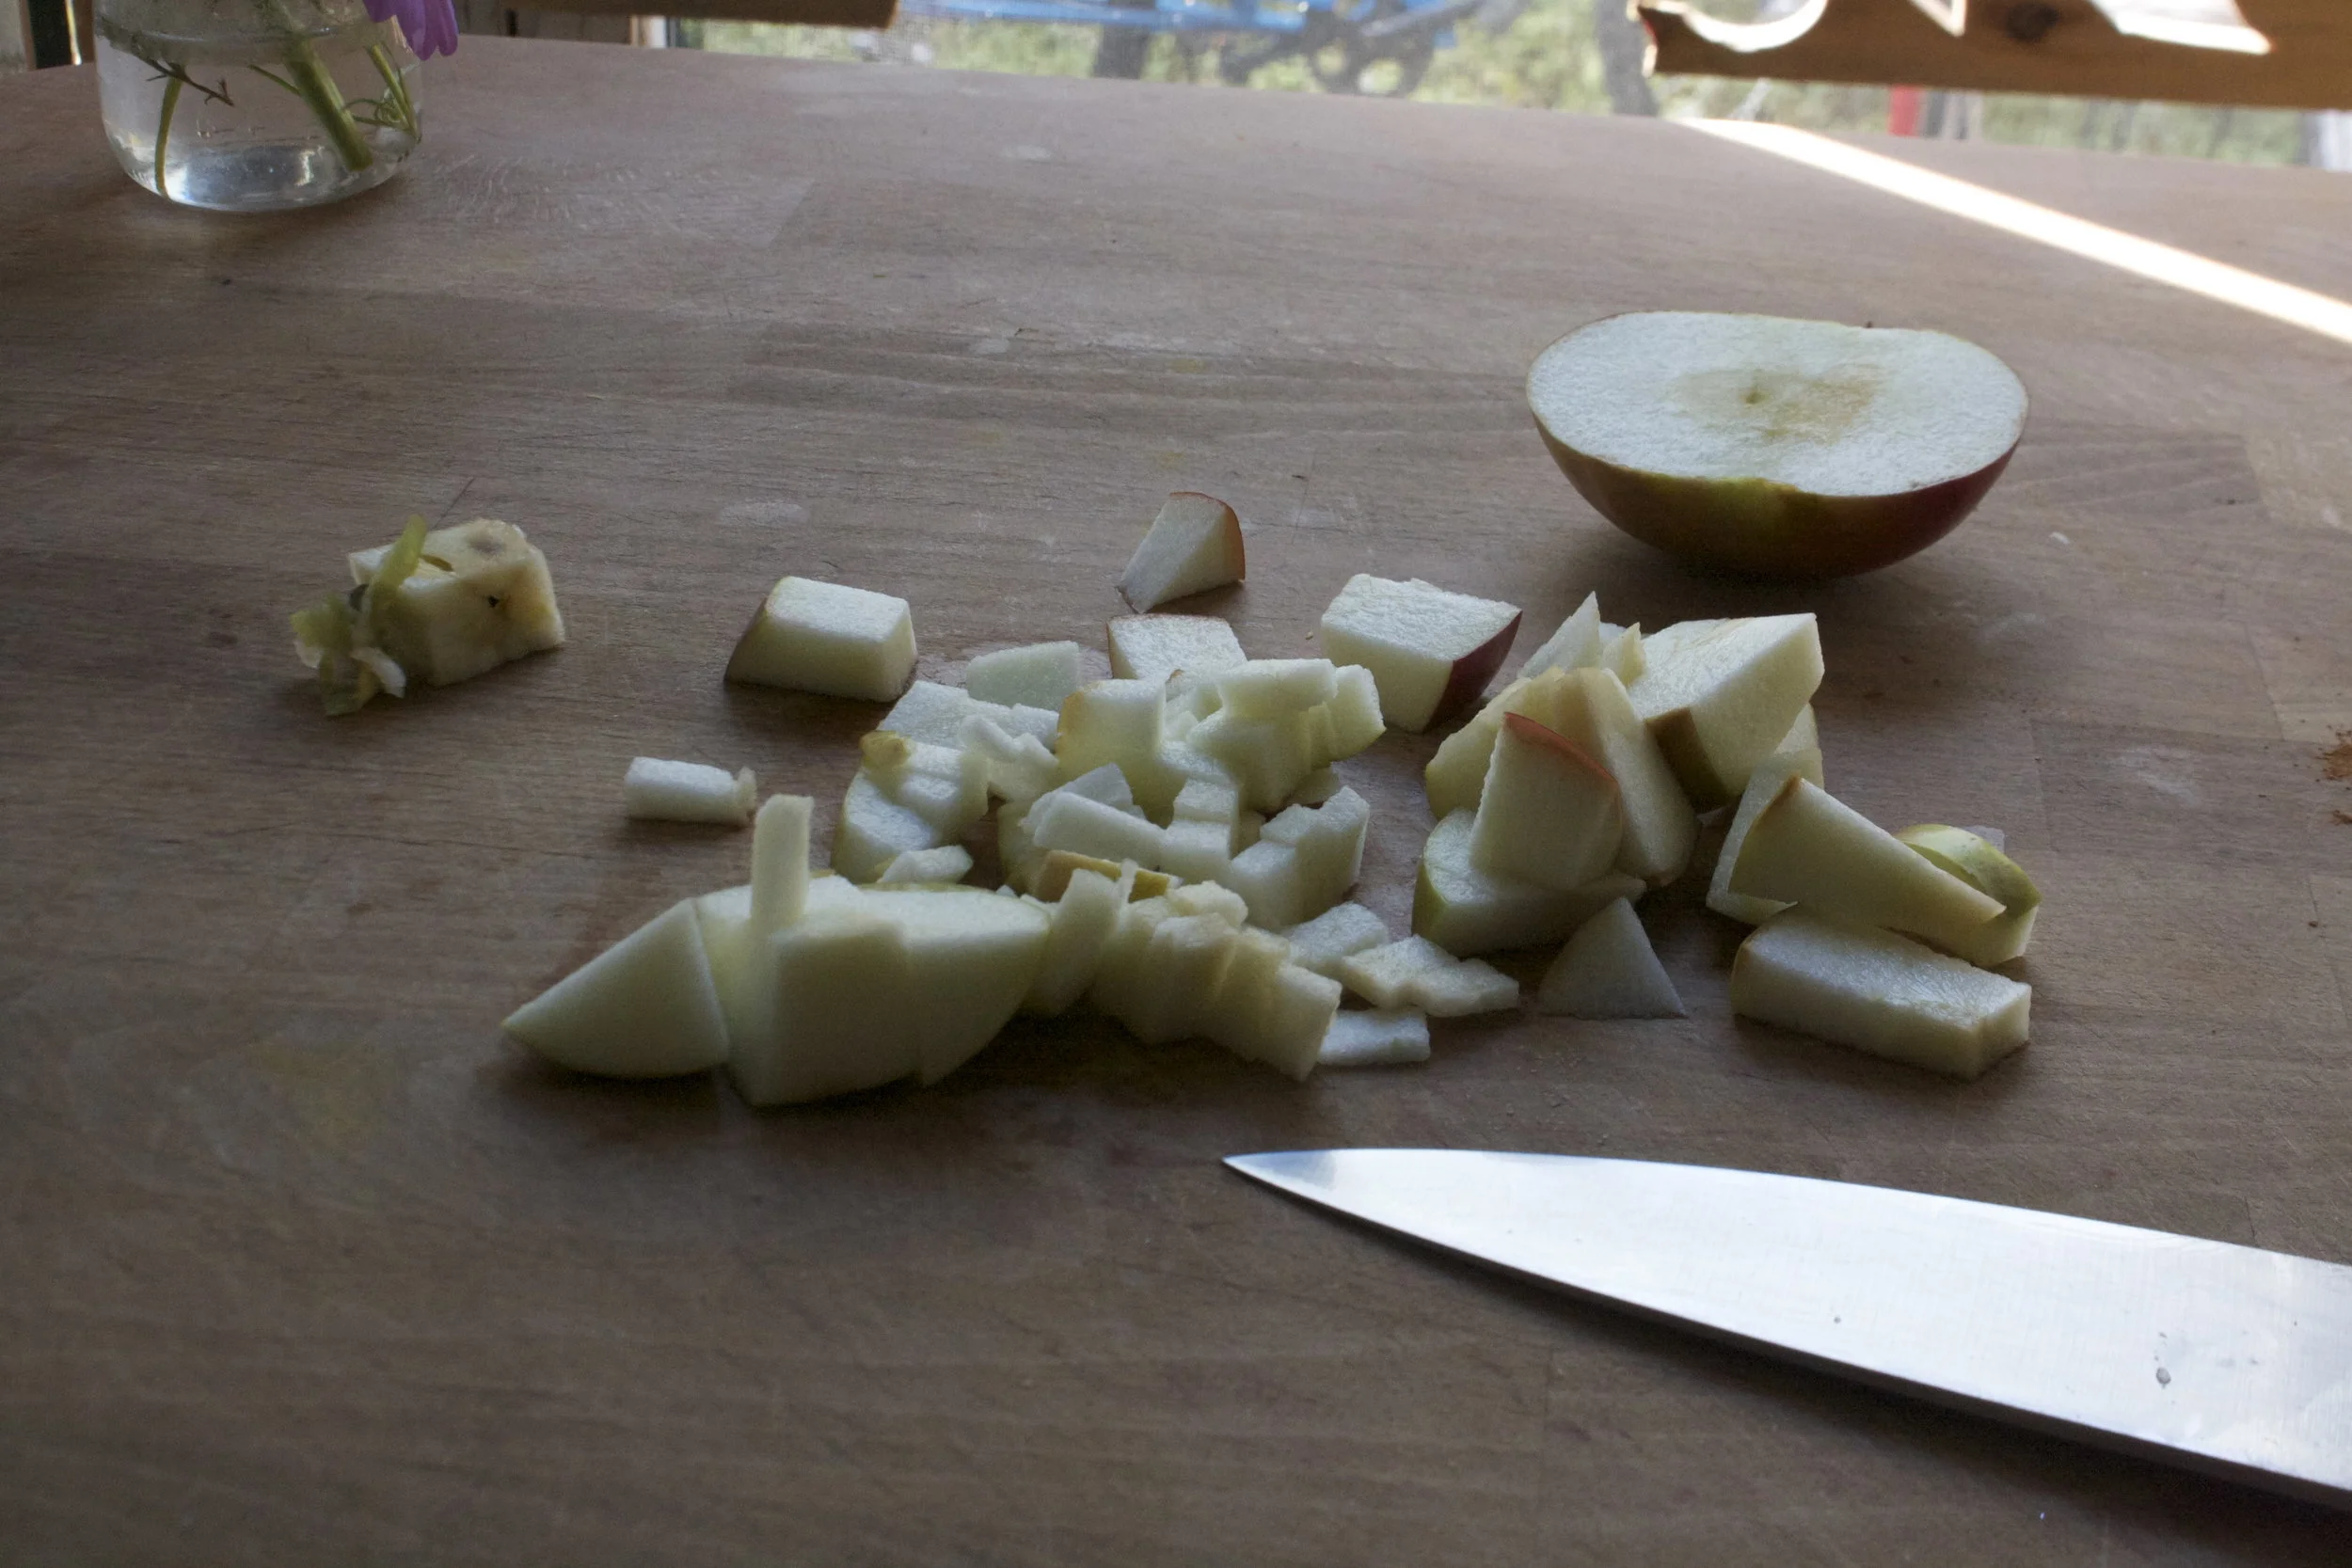
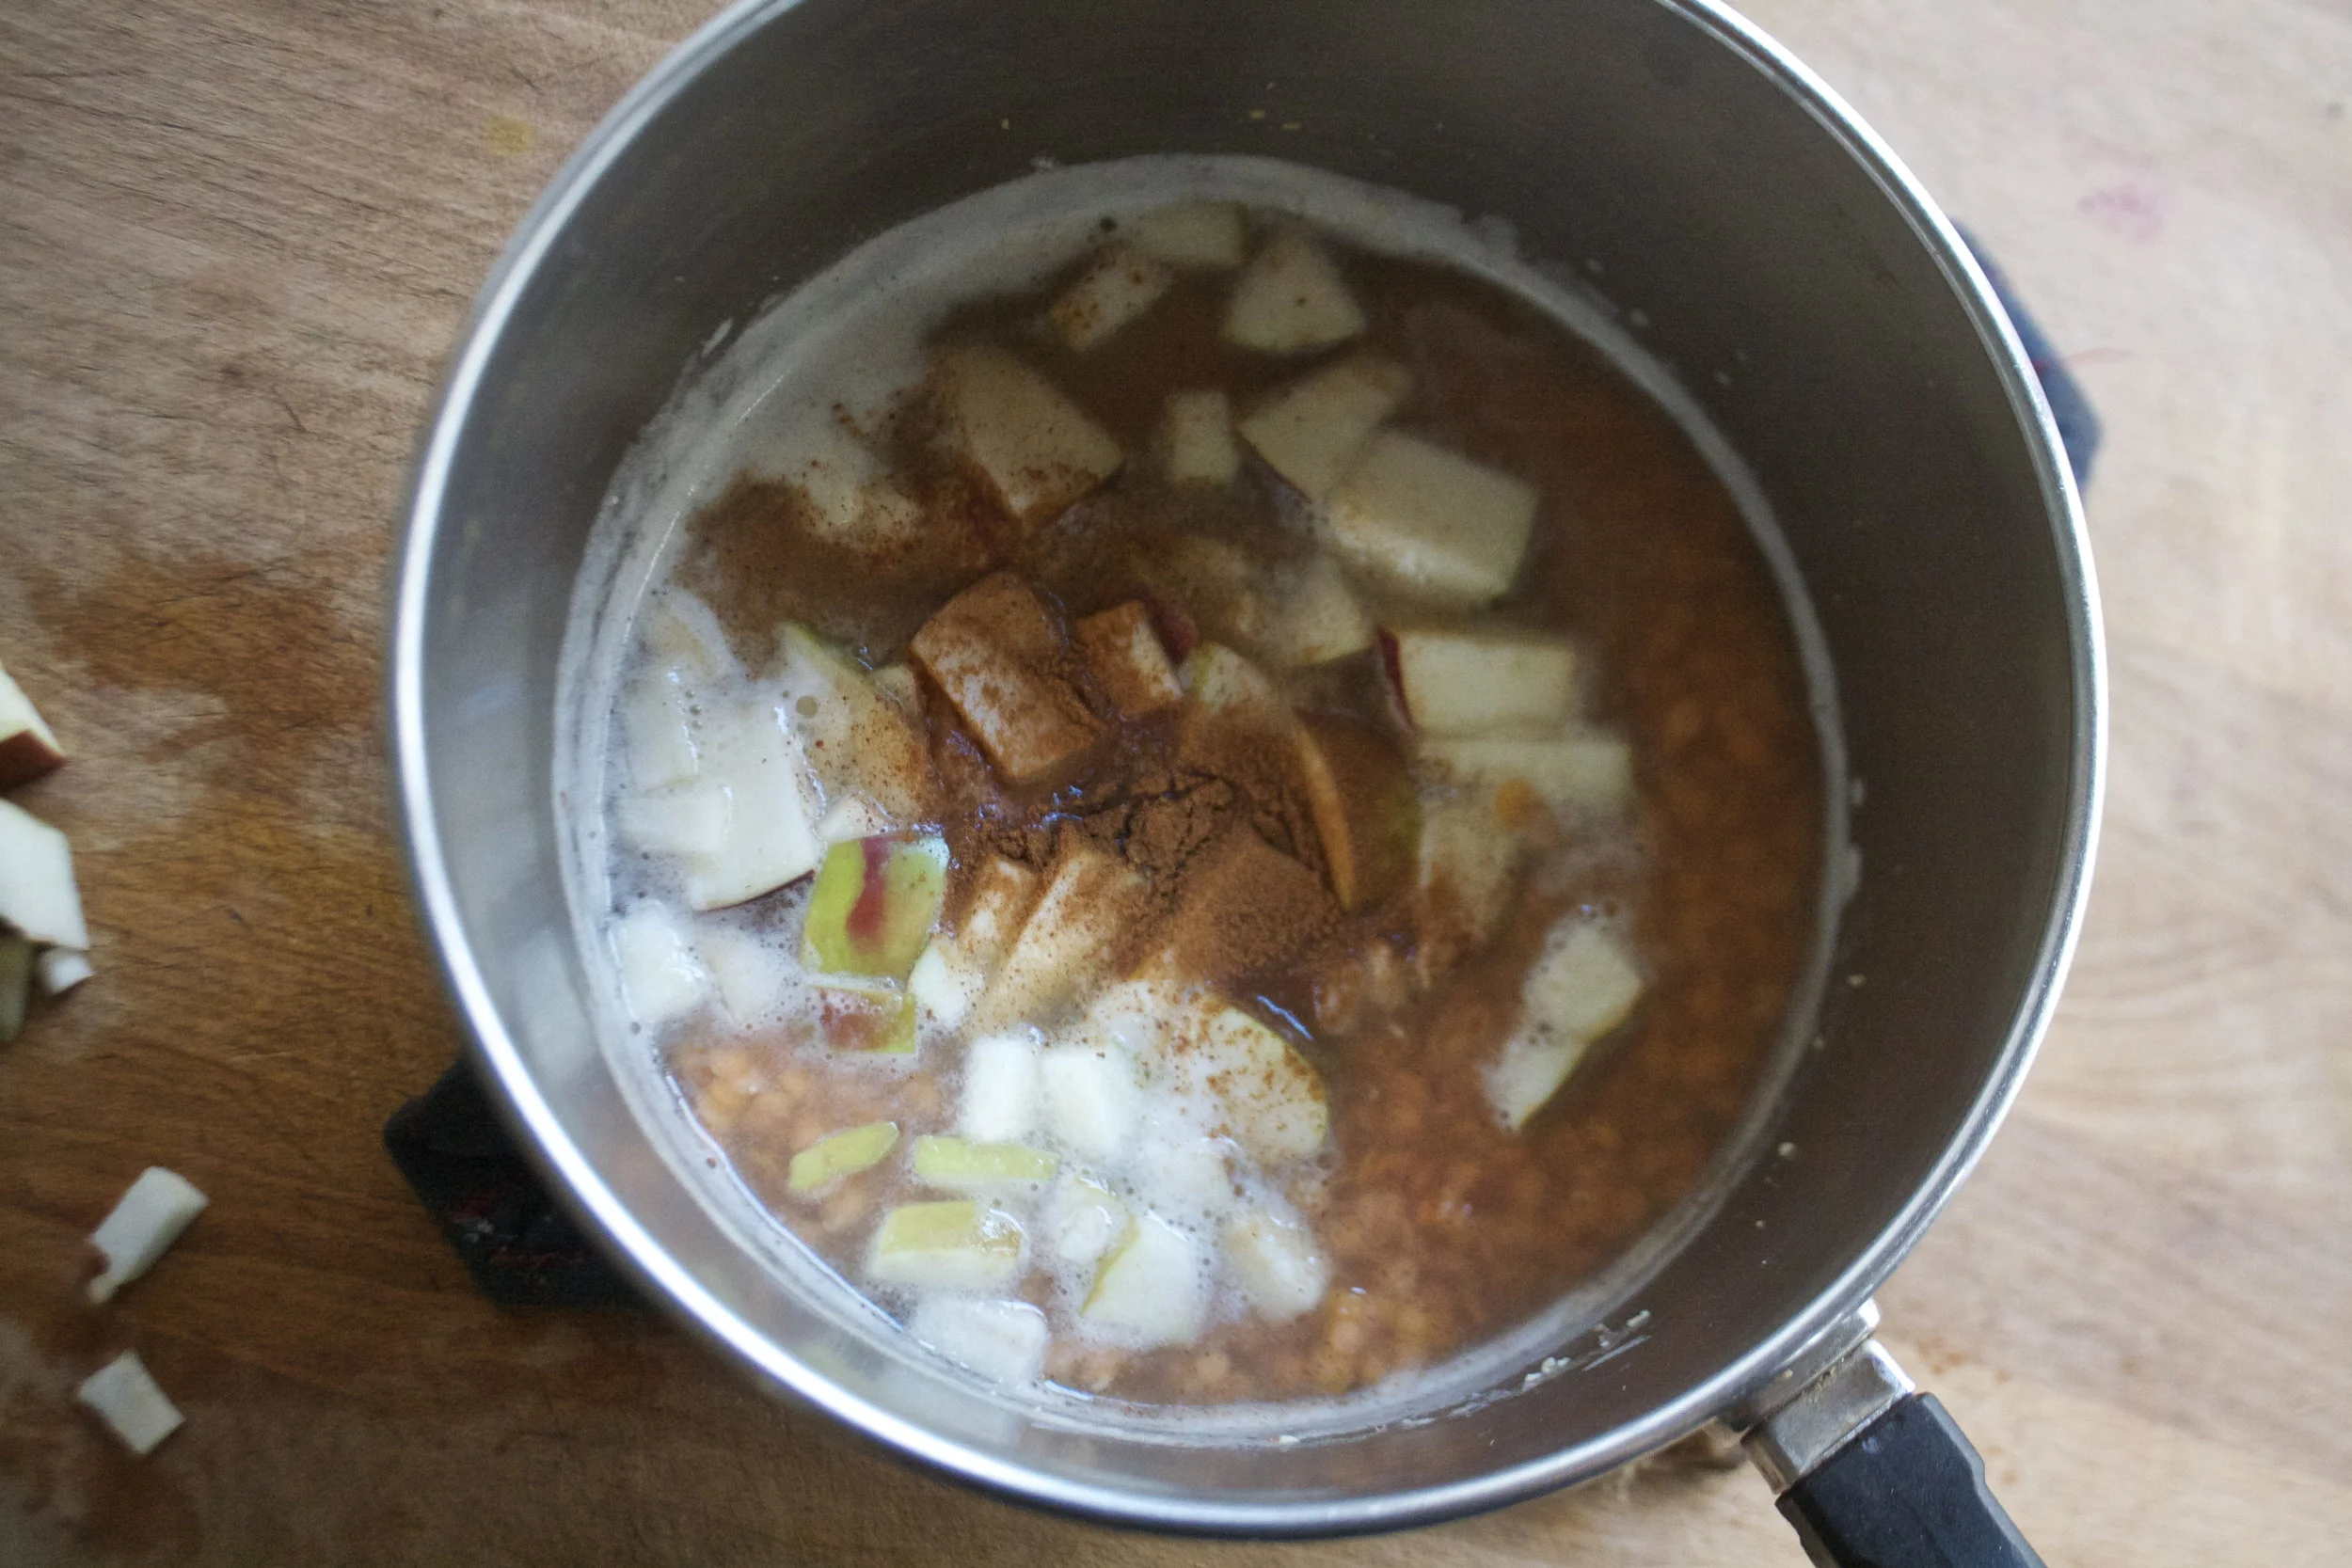
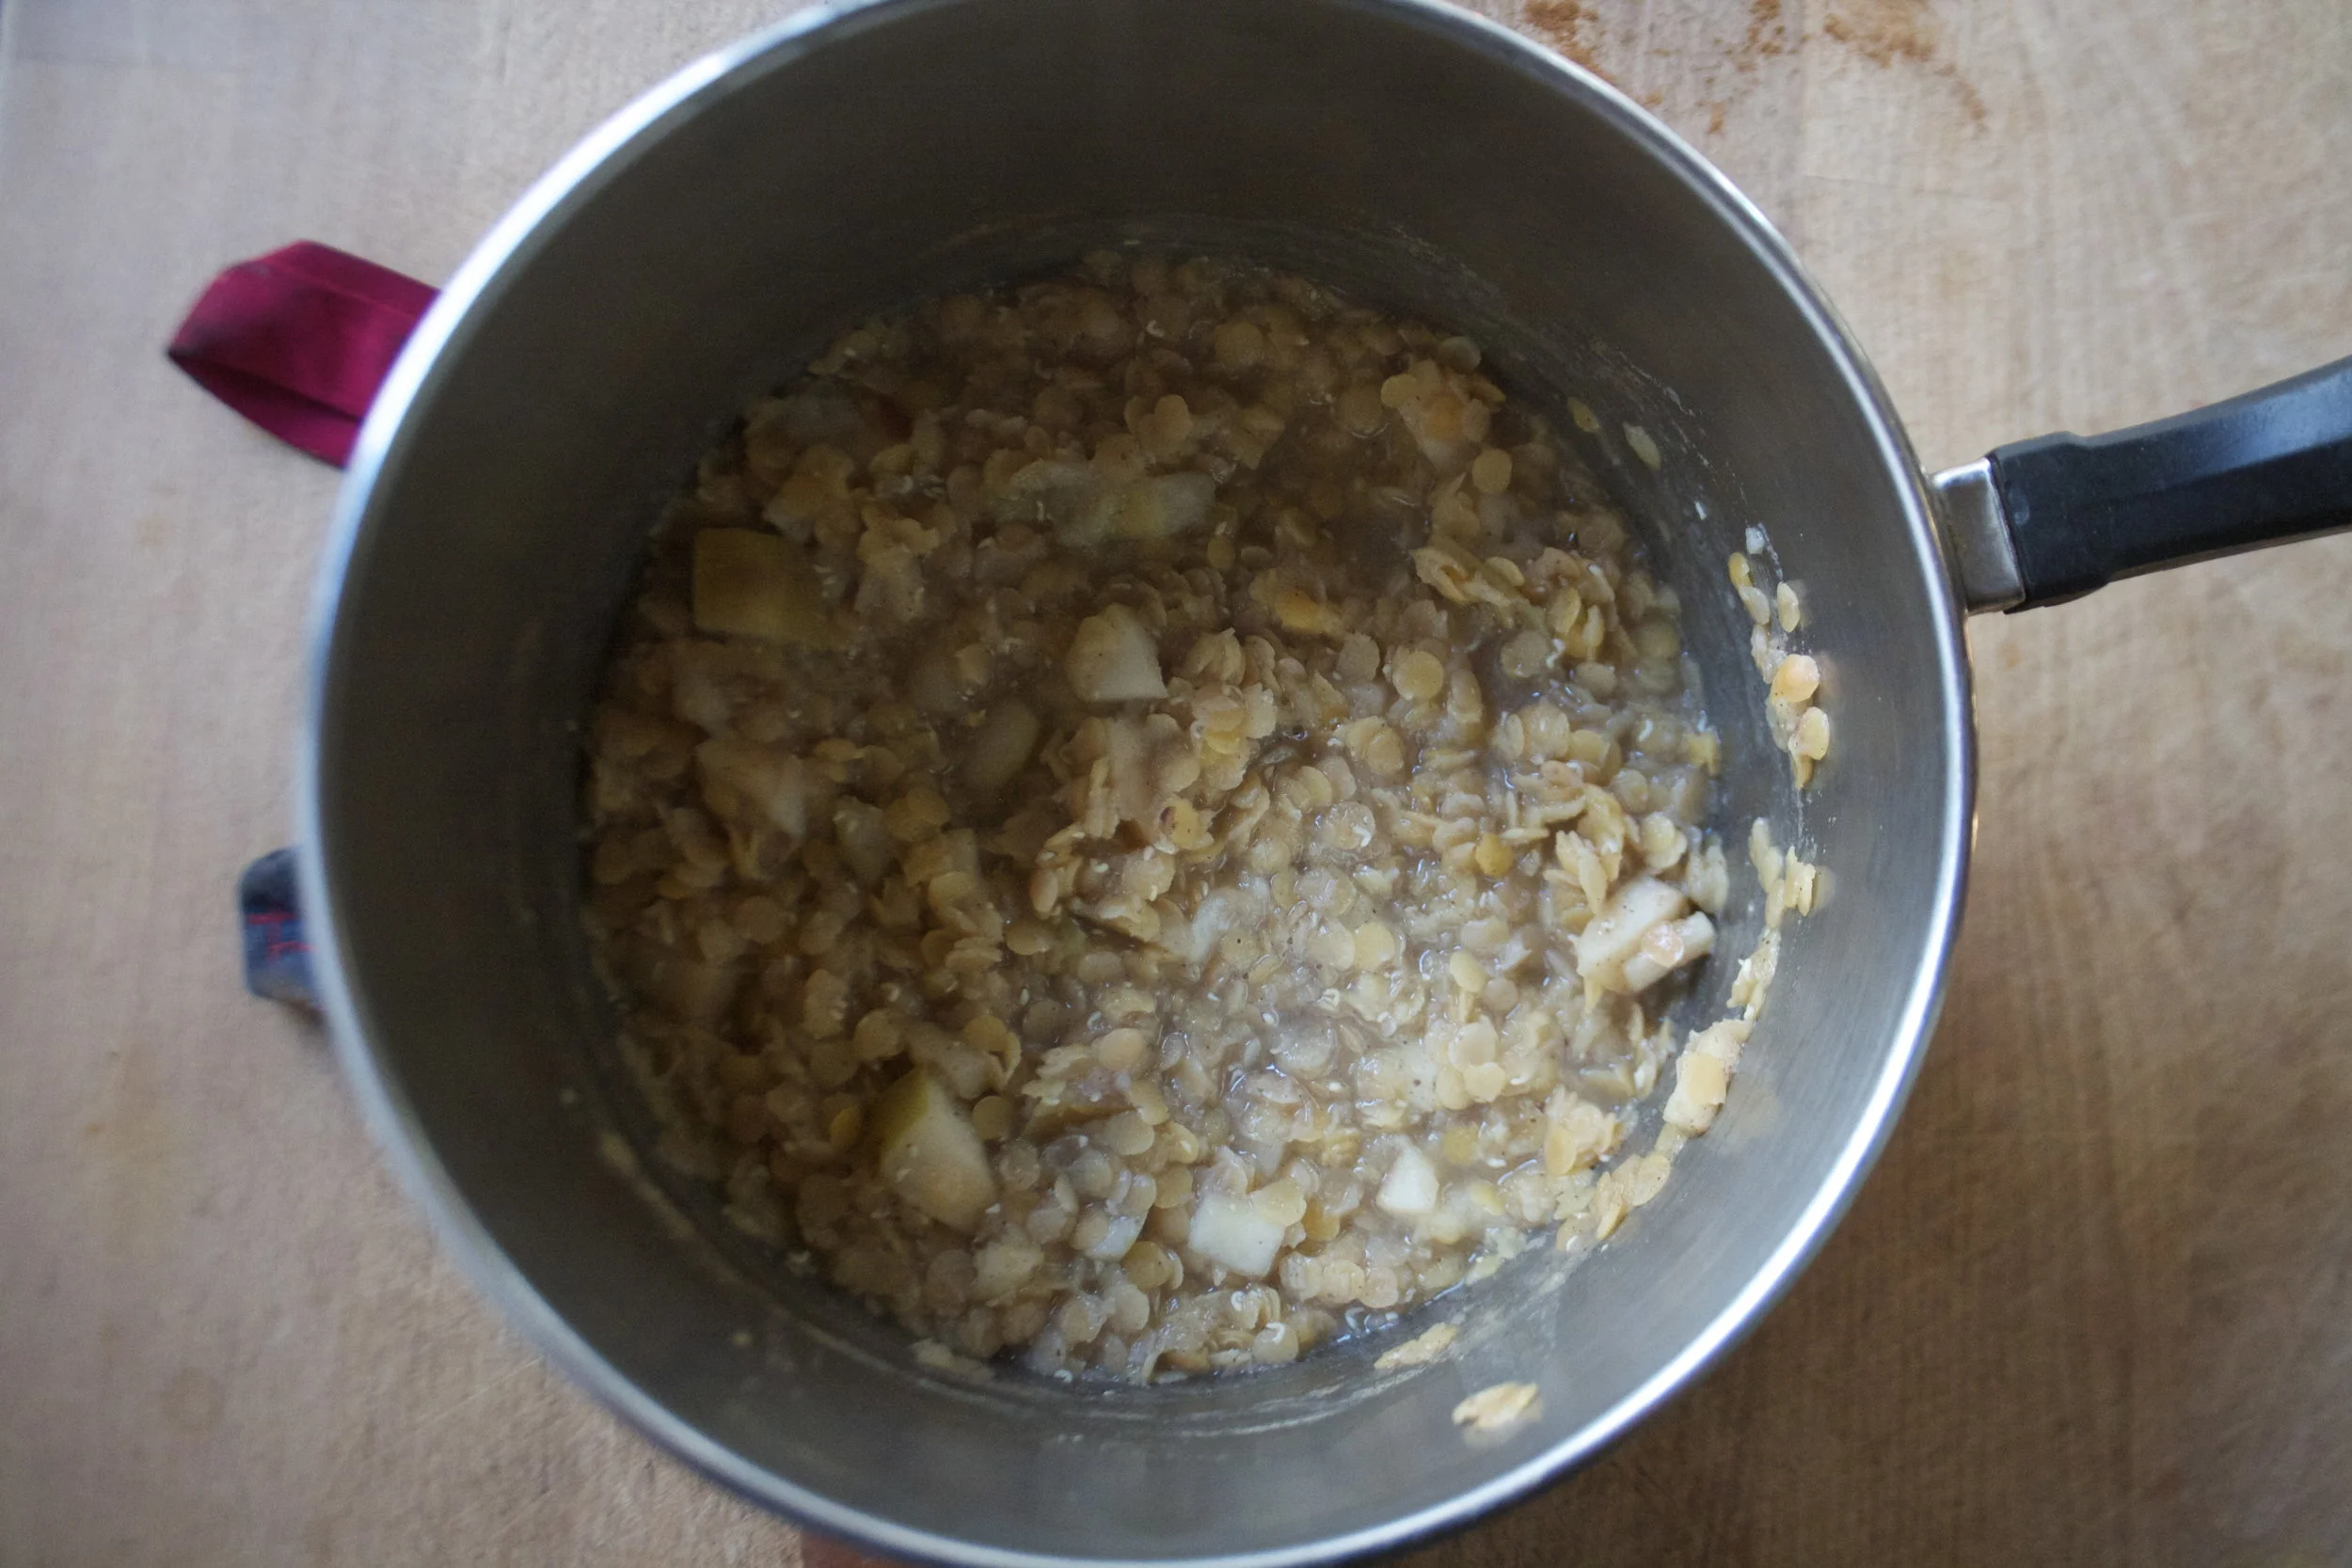


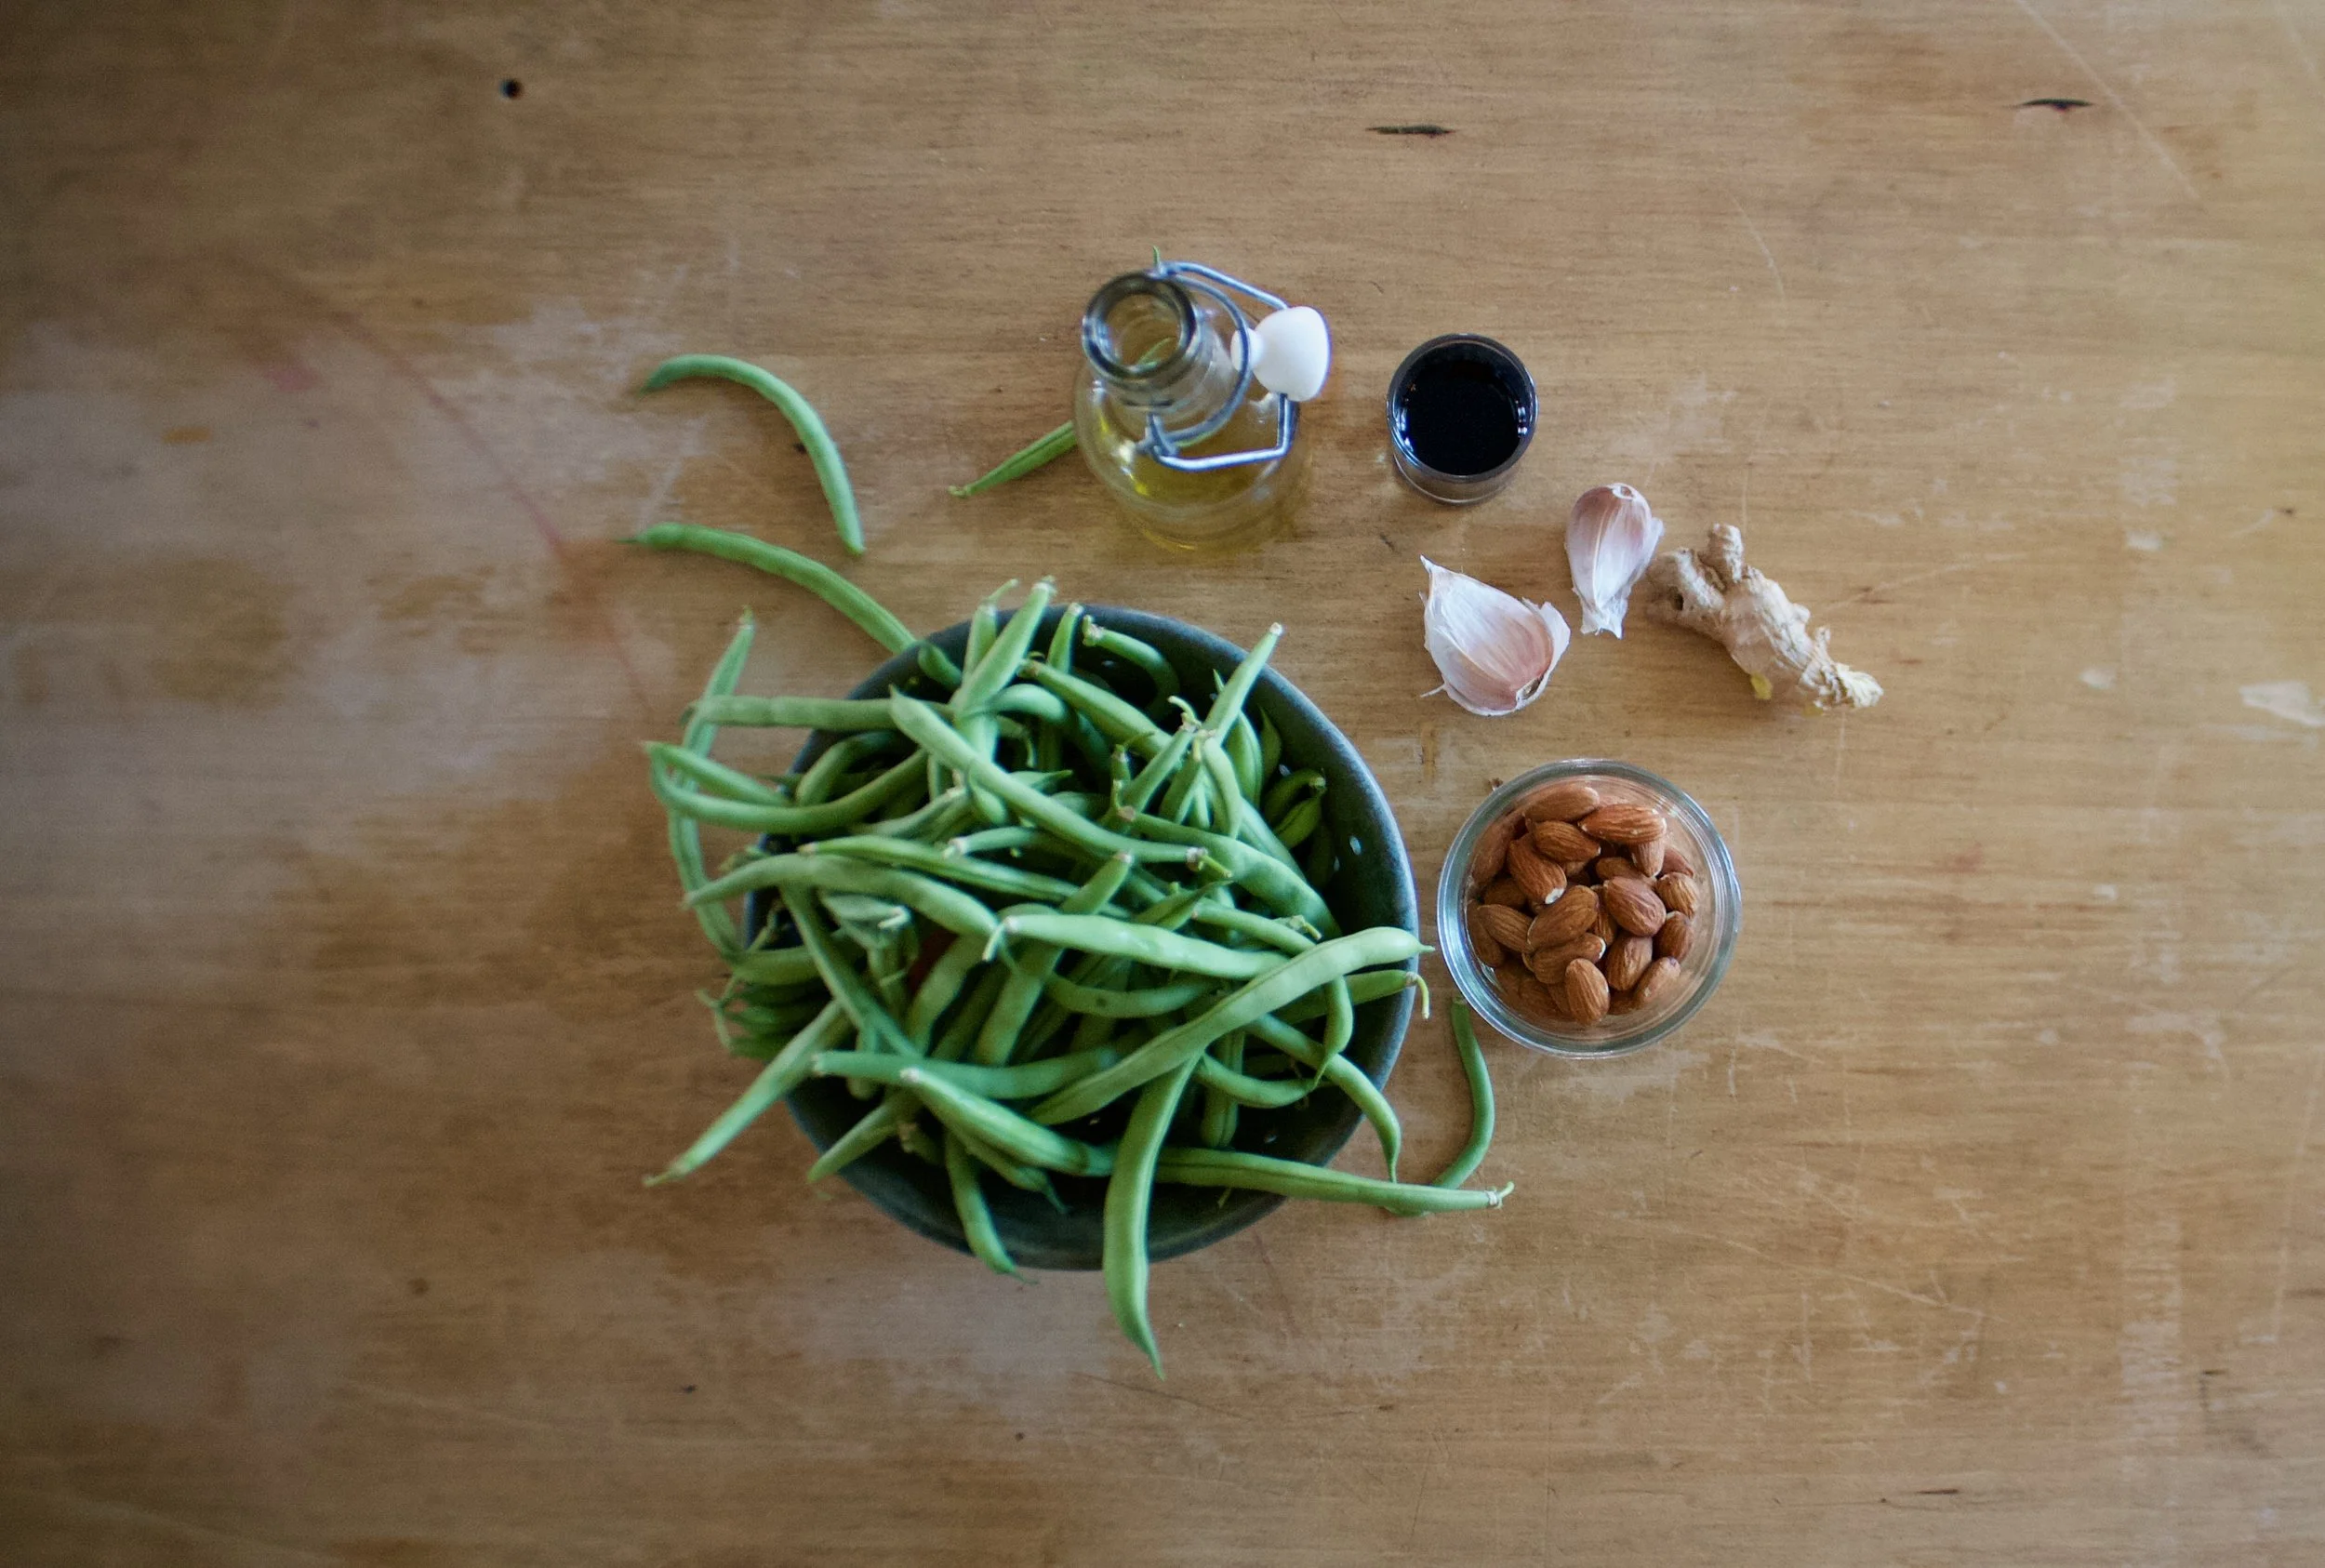

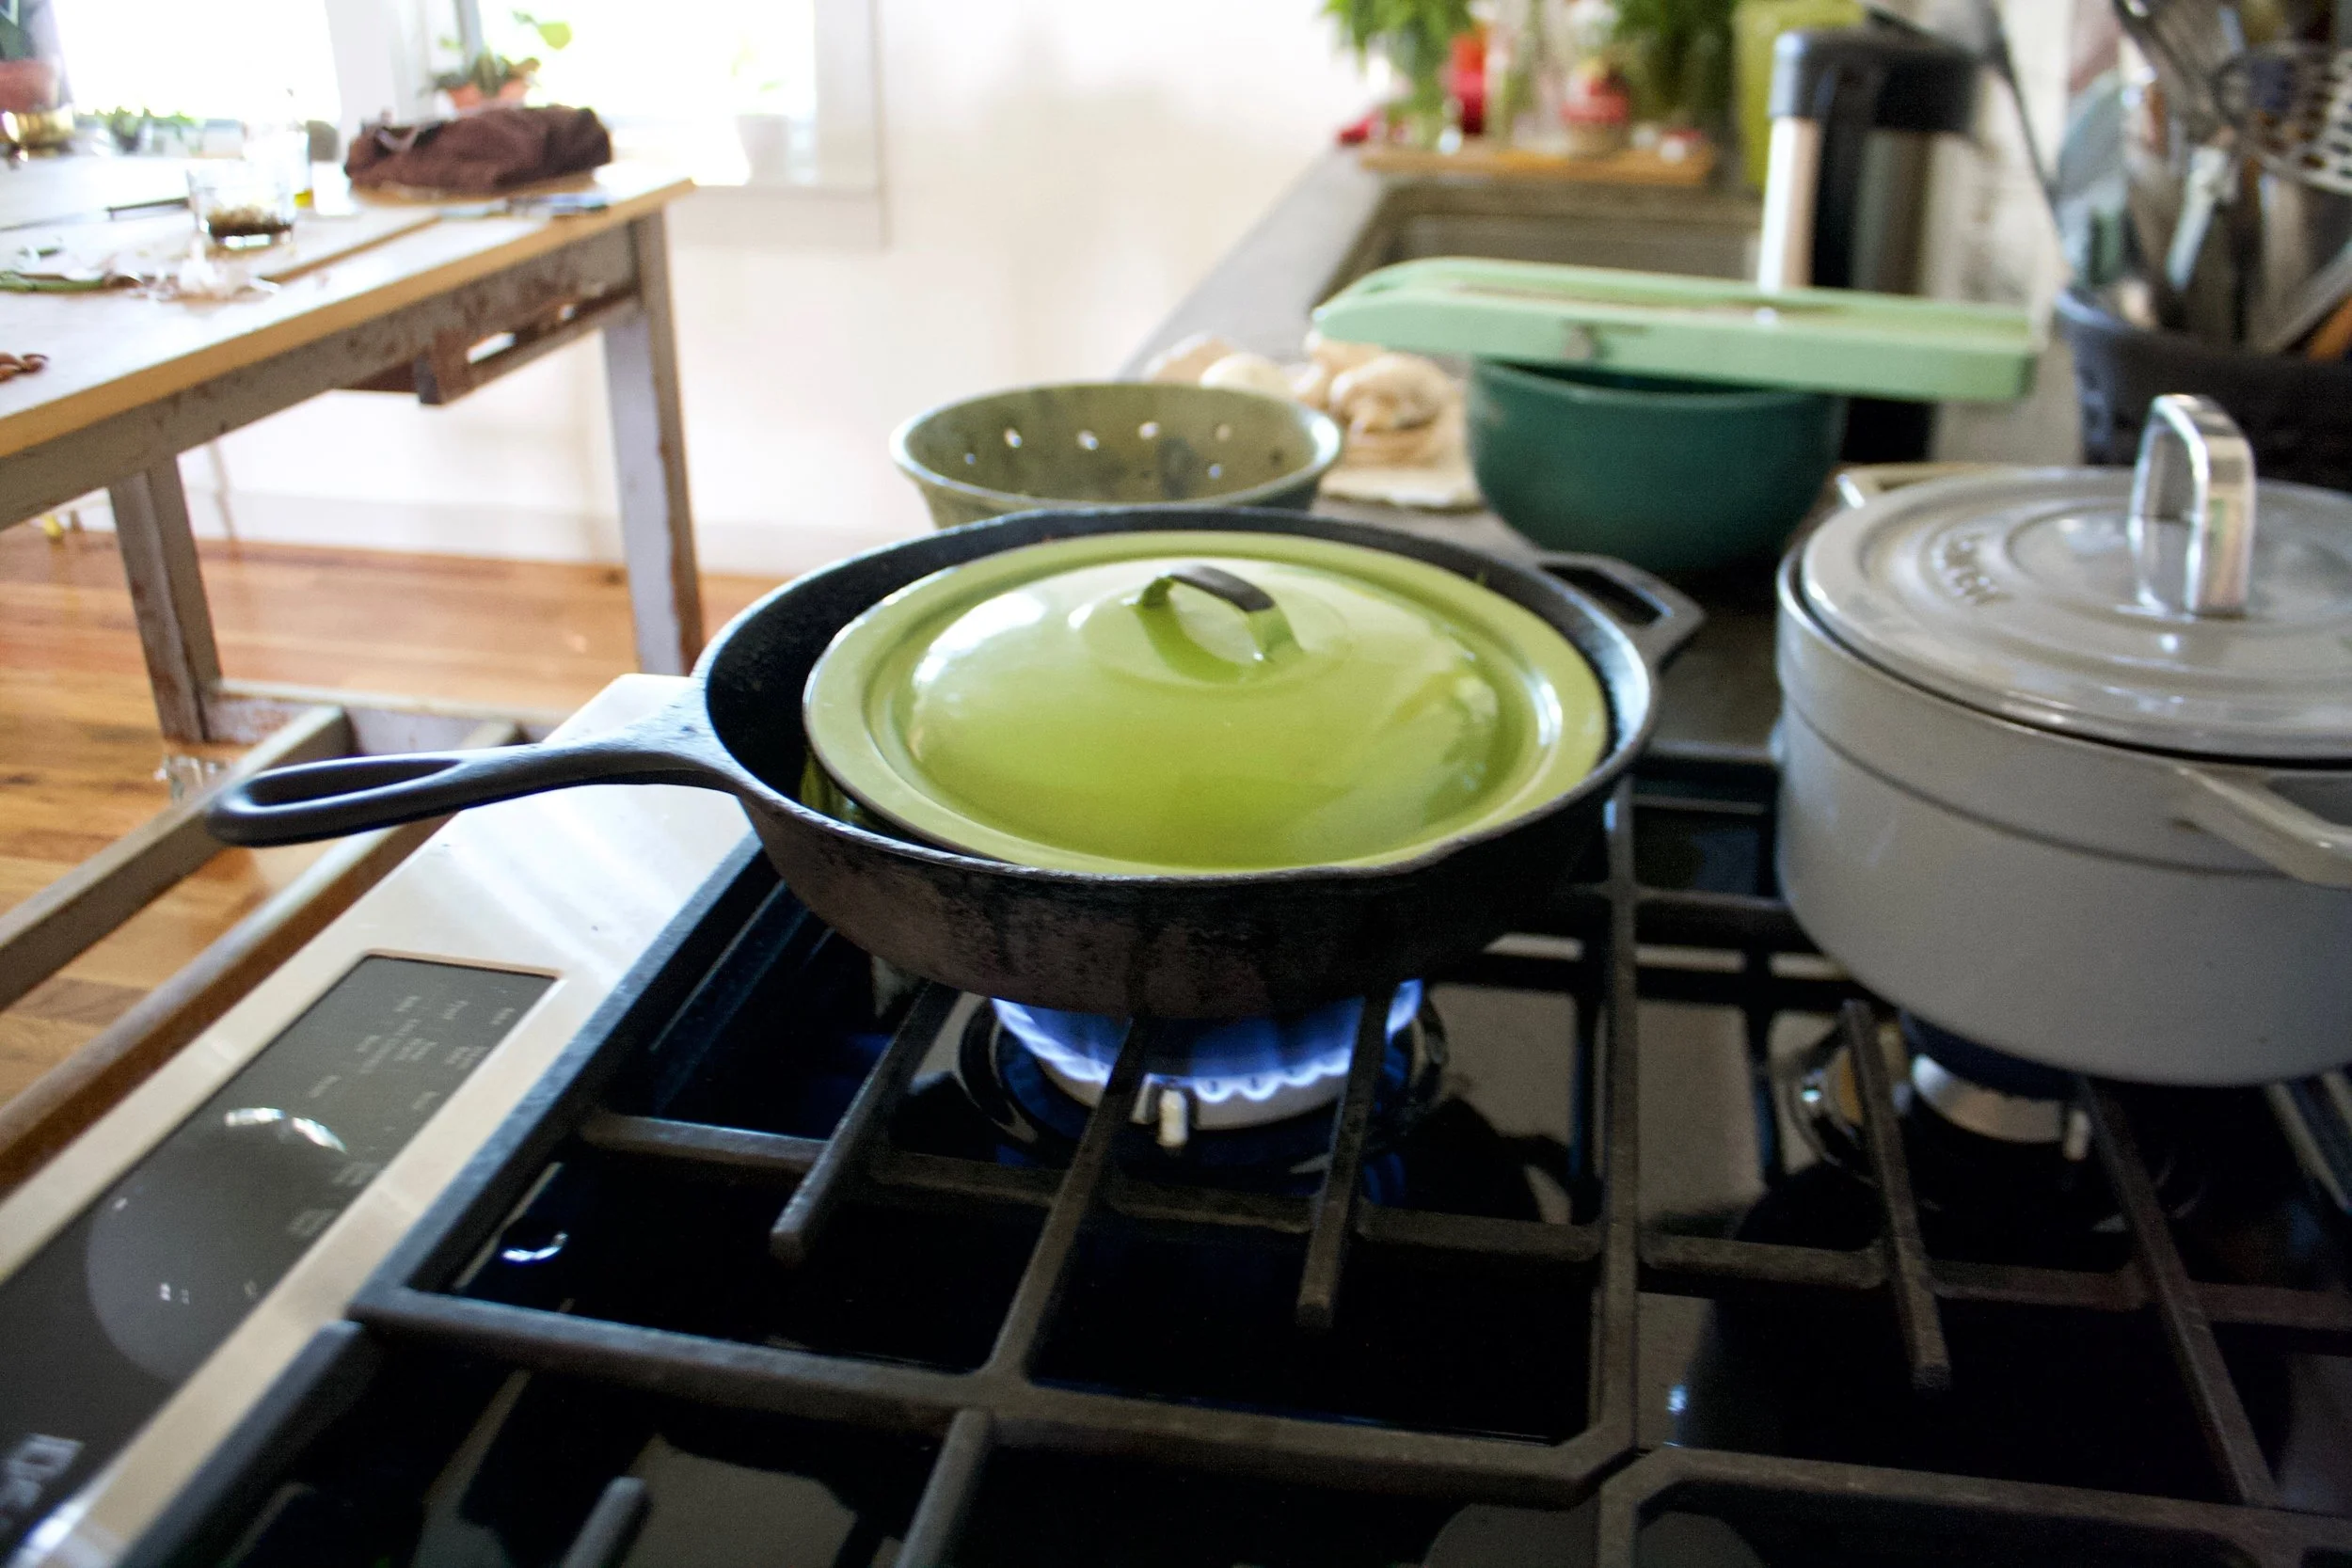
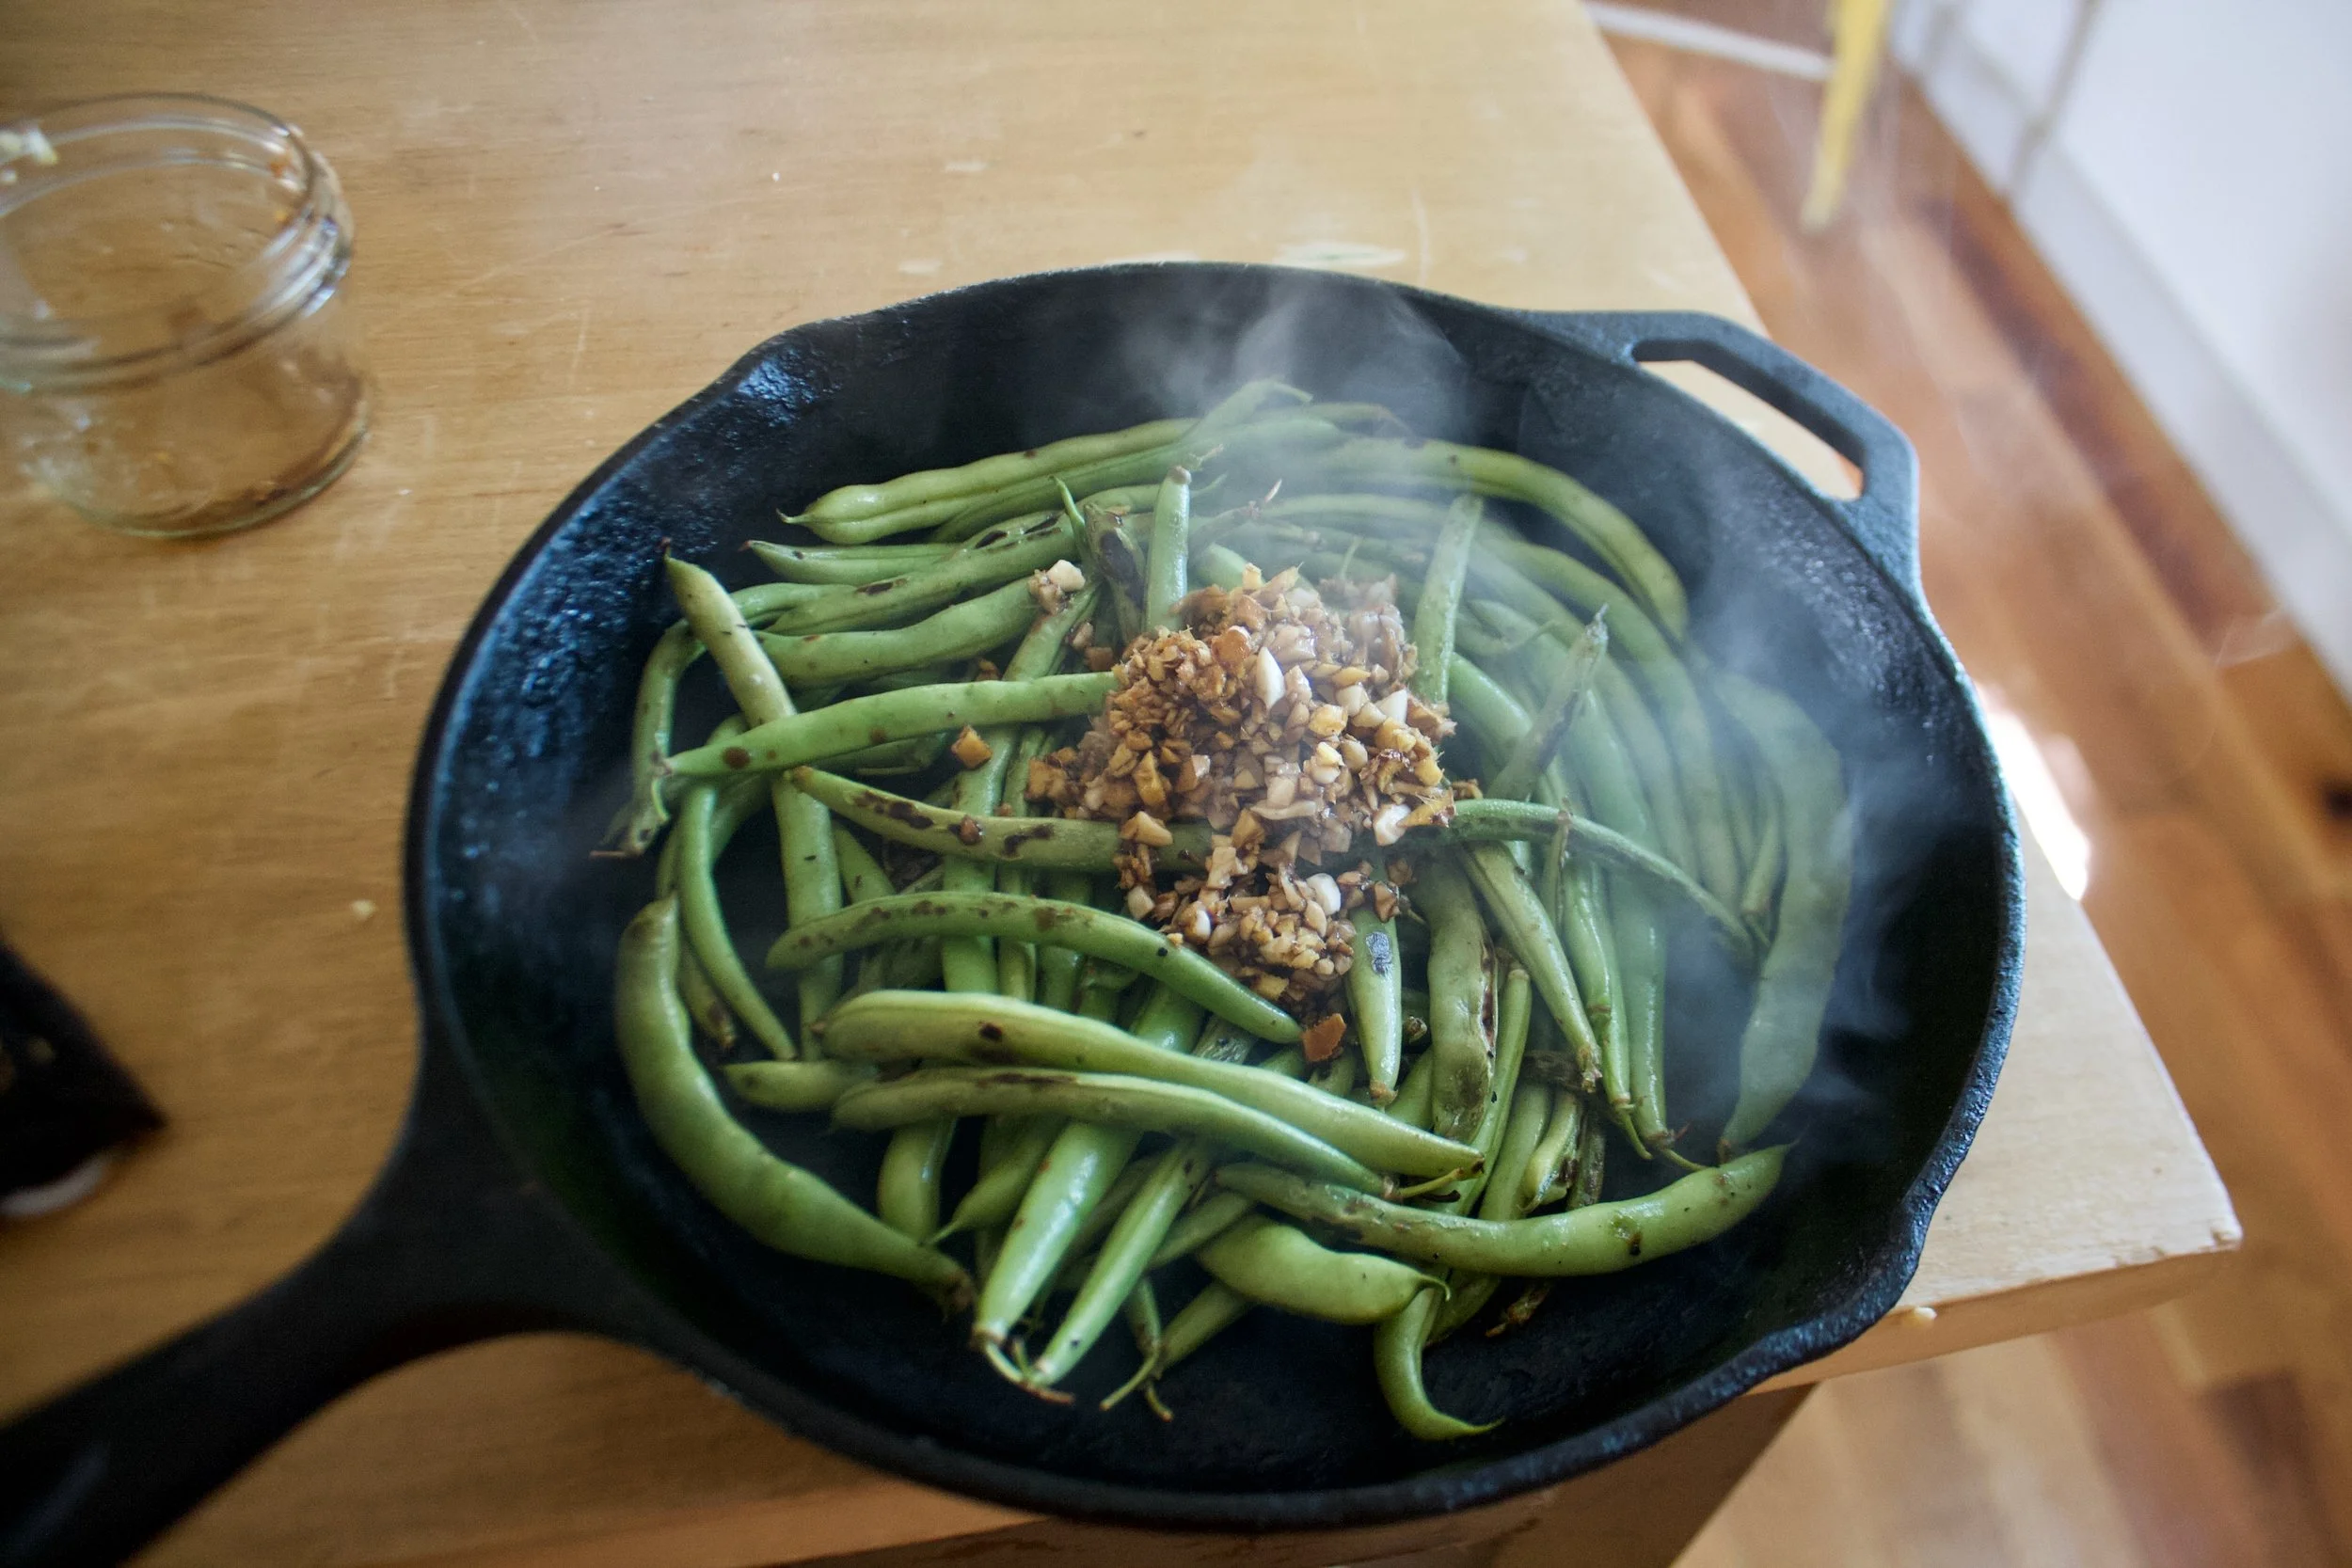


THE LOVELY CRAZY
August 18, 2019 by maximios • Blog
Not only is it the first week of summer, it’s also popsicle week! Billy over at the sweet ass blog Wit and Vinegar hosts a little (actually quite large) bloggers party that share all sorts of fun and fantastic popsicle recipes and presents that list to the world. There are popsicle flavors up the wazoo…Pretty stinkin cool right.
So my contribution to the world of popsicle eaters is one of my all time favorites (maybe the absolute best one yet).. Carrot Ginger Orange.
For those who know me, this flavor combination should come as no surprise. Carrots are my thing. I eat them all day, every day. Sure I eat a shit ton of other stuff, but always carrots. Carrots are in my breakfast,lunch, and dinner. If I need a snack, I grab a carrot. There is just something so satisfying not to mention so easy about carrots. Eaten alone, with mustard or hummus, or dipped in peanut butter of cinnamon..Carrots can do just about anything. I mean I eat so many carrots that no shit, my skin is a slight tint of orange (seriously for reals. Something about an abundance of carotene) Crazy I know, but what can I say. I really like carrots. %u00a0%u00a0%u00a0%u00a0%u00a0%u00a0%u00a0 (that’s what I say when people ask me why I am glowing orange)
So naturally the carrot made it’s way into my popscile mold. And now it’s for real. Carrots really can do anything.
Another win for carrots everywhere.
And popsicles.. Just in time for that hot as shit weekend we are about to have.
GO POPSICLES CO!
The stuff. Carrots, an orange, some fresh ginger, and some water. Simple simple and no, I didn’t forget the sweetener… these pops have no need (although if you want, go ahead and add a smidge or splash of something sweet)
Start by chopping up the carrots and sticking them into a pot with some water. Not a lot, just enough that it almost cover the carrots, and stick that pot onto the stove, cover and cook on medium heat until tender. Make sure to check that the water doesn’t completely evaporate or you will have burnt carrots which taste just fine, but not as a sweet popsicle
While the carrots are tenderizing, zest the orange then juice it and grate up some fresh ginger.
Once the carrots are fork tender, dump in the juice, the zest, and the ginger. Stick pot back on heat for just a few more minutes to meld the flavor together.
Dump the contents of the pot into the blender and blend blend blend until smooth.
Grab your mold and pour blended mixture into it.. Because the mixture is thick, you don’t have to wait to stick the sticks in so go ahead and do that now.
And into the freezer they go!
Serious popsicle goodness right there.
Happy Popsicle Week. Go ahead and make them all!
-C
Makes about four or five 3.5 oz popsicles
Note. I did not use and sweetener and did not miss it but if you really think you need it, add a little bit of honey or sugar. But really, they are sweet enough so maybe give them a chance without it.
Start by chopping the carrots up into coins and stick them into a pot with enough water to just about cover the carrots. Stick on stove on medium heat and place a lid on the pot. Cook carrots until tender.
While that’s happening, zest and juice orange and grate up the fresh ginger. (I used 1 teaspoon of ginger at first, but after I blended it, I decided that I wanted a little more so I added another teaspoon)%u00a0 Once the carrots are soft, dump in all the juice, zest and ginger. keep on heat for a few more minutes to let the flavors all meld together.
%u00a0And now dump the pot of carrot goods into the blender and blend the crap out of it until smooth. (add in a splash or two of water if needed. Taste your puree and if you want more ginger, add it it.( can also decide now if you want any sweetener..
Now pour the mixture into you popsicle molds and follow the mold directions on how to use it (add popsicle sticks and stick it in the freezer)
Freeze until frozen.
Remove from freezer and let sit until pops slip from mold.
Eat until gone.
Make more popsicle.
This little guy asked me to make him some%u00a0popsicles, and of course I said yes because, well look at him.%u00a0
So we made a date. A popsicle and playground date to be exact.
For these particular%u00a0pops, I decided to use watermelon, mainly because I had just broken into%u00a0one and once I open a melon, I have a race with myself as to how fast I can consume the in entire%u00a0thing. ( It’s a sick form of watermelon gluttony) But also because%u00a0the little was really really excited to hear that I%u00a0could in fact make%u00a0watermelon popsicles.%u00a0And the other stuff I added because I had it and it all tastes really good together.%u00a0
%u00a0I made the popsicles the day before %u00a0so they would be ready for our date.%u00a0%u00a0He came over, we ate lunch,(peanut butter sandwich and carrot sticks)%u00a0wondered around the neighborhood with the pup,%u00a0and made a quick stop at%u00a0the playground. (we only managed a couple runs on the%u00a0slide %u00a0before it was too hot and%u00a0our sweat had us sticking to the slide%u00a0and it was more of a painful scoot then a glide) We then%u00a0made our way home and rewarded ourselves for a walk well done%u00a0with these%u00a0amazing, super refreshing, and healthy frozen treats that I made just%u00a0for us. While we were eating the popsicles, our conversation turned to food. We talked about%u00a0all the different varieties of popsicle that we could make, and how we could eat them for breakfast, lunch or dinner because they are%u00a0made of only good things and are really healthy (he is really trying to eat healthy)%u00a0%u00a0It was the perfect ending to a fantastic afternoon with a five year old, or any human for that matter…
I would have a popsicle date with this kid every day
The Stuff. %u00a0Fresh seedless watermelon (make sure to have lots on hand cause you are going to be eating it as you make these), a fresh lime, a handful of blueberries and a sprig of fresh mint. And don’t forget%u00a0%u00a0a mold of some kind that form%u00a0the liquid into a popsicle (if you don’t have a mold, little paper cups work too)
Remove watermelon from rind and cut into small chunks. Juice the lime and add that, the watermelon chunks, the mint and the blueberries to a blender or vessel if using%u00a0a hand blender) and blend everything%u00a0until smooth.%u00a0
Look at how pretty that is.%u00a0%u00a0And so tasty%u2026.%u00a0I am not going to lie and say that I didn’t make a little%u00a0extra to drink, cause I did.
Now pour the puree into your molds to the fill line%u00a0(follow the%u00a0instructions that your molds give you) and place into the freezer.
And yes Shannon, these are in fact, your popsicle molds. Don’t worry, I’ll bring them back soon. (I am thinking some type of booze infused situation)
Once the freezer has done its job freezing%u2026 pop those suckers out.. (I let the mold sit on the counter for a few minutes so the popsicle pops out clean)
And heres to%u00a0the best popsicle date ever!
Happy Summer!%u00a0Happy Tuesday!
-C
note. The popsicle mold that I used only needed 2 cups of popsicle juice. If you have a larger mold, just use%u00a0more of everything to get the amount you need
Remove rind from watermelon and add to a blender with the lime juice, mint and blueberries. Blend until eveytthing is pureed%u00a0and mixed all together. Pour liquid into popsicle molds and stick in freezer for at least 4 hours.
When ready to eat%u2026, pop those suckers out of there molds and%u00a0EAT!%u00a0