alz-il.net
  • Home
  • Blog
  • YouTube
  • TikTok
  • Instagram
RSS

Spaghetti Squash with Roasted Beet Sauce — The Lovely Crazy

June 3, 2025 by maximios • Blog

Are you ready for this weekend? You know what’s coming right? Yup, another arctic blast. -30 degree temperatures, windchill warnings and local news forecasters warning of dangerously cold conditions. “Don’t go outside , your face will freeze off”

Oh yeah, and Valentine Day.

What are your thoughts on the V day? The mr and I, well we could kind of care less, but at the same time, we like the excuse to spend the day together, traditionally going for a hike with the pup (not this year… we would die) and just spending the day together being sweet (pretty much the same way we spend any days off together) We don’t get fancy with dinner dates or overly large stuffed animals. No boxes of chocolate, bottles of champagne or fancy undies.%u00a0 We keep it caj, maybe a sweet hand made card covered in glitter (never a store bought.) a stop for a good cup of coffee and an afternoon trip to the plant store to by a new pretty house plant (1. I really hate red roses and 2. I would much rather get a house plant then flowers that will die) But honesty, we just use V day as an excuse to not work and spend the day together, being left alone, eating whatever we want and doing whatever fun stuff we want.

This dish was kinda inspired by being so pretty bright pink, but also it was just what I wanted to eat for dinner. Spaghetti squash doesn’t get as much play as it should. Sure it’s not the most sweet and nutty of the squashes, but it has a really nice subtle flavor that makes it a fantastic base for pretty much anything. And the beet sauce. Again, it’s such a pretty color, but beside that, I can’t get enough of them. I love me some roasted beets (way better then any chocolate or sweet treat)

I could lie to you and say that this is the dish that I will be making for me and the mr on Valentines day, but no,this dish already happened this week and the mr got into it, but would rather eat his favorite meal (pizza) for dinner.%u00a0 And I will be eating the left over beet sauce with carrot sticks (this beet sauce id for real.. topped with a little yellow mustard… I could eat it for life)%u00a0 then make a hugmongo batch of popcorn covered in peanut butter. We wiil sit on he couch and watch a lot of Netflix (still working my way through the fresh prince) and maybe a cute Wes Anderson movie. I will be in bed by 9.

But don’t mind us old folks here. Go for it. Do up the Valentines Day. Make a pretty dish of food for your sweetheart, or if alone, make it for yourself, especiallyif you are hanging by your lonesome. Valentinesday is about being happy and this dish will make you happy, whether or not you plan on sharing it.

The stuff. One spaghetti squash big enough for at least 2 people (I love left overs so maybe big enough for 4), 2 largish beets, a a small onion. Also grab a clove of garlic of 4, a lemon, the salt and pepper, and some olive oil. Optional, but a very nice addition is a handful of tasted walnuts.

Quick and crank up the oven (make sure you take out the cast iron you left in there from last night), then stick the squash, beets and onion into the hot oven to roast. I stuck them all on a baking sheet and left them completely whole, but if you want, you could chop the beet and onion into chunks and drizzle with oil or you could wrap the beets in foil and bake them that way but really, why go through all that when you can just not? And don’t bother peeling them.(unless you think you must.. but you really really don’t need too)

And same for the squash. You could cut in half and roast it that way, but again, why when you don’t need to.

So anyway, roast the beets and onion until fork tender. And the squash as well (check by stabbing with a fork) All my stuff roasted up pretty much perfectly at the exact same time, but it really depends on the size of your stuff. So check after 40ish minutes.

And once you pull that roasted stuff from the oven, let it cool just enough where you can handle it. Chop the onion into a couple chunks, the beets into smaller chunks and slice the squash in half length wise and set aside.

Grab a blender and toss in the onion, beets the juice of the lemon (start with half) apinch of salt, a few pinches of pepper, and a clove or 2 of garlic (ok, I love raw garlic and used a lot. If you do not like the taste of raw garlic, just toss it with a little oil and stick into the oven with the beets for about 10 minutes. Or you could omit the garlic entirely)

Once all the stuff is in the blender, turn it on. Drizzle in about a tablespoon or two of olive oil and blend until a nice smooth sauce has formed. Taste, season with more salt and pepper if needed. Add the other half of lemon if you think it needs it. You can also add a bit of water to thin it out more.. if you want

So now the squash should be cool enough to handle. Scoop out the seeds and with a fork, scrape up into spaghetti!

Heaps of squash go into bowls then topped with a generous mound of beet sauce. Topped with some roughly chopped toasted walnuts, a sprinkle of pepper and some bits of green stuff (I just diced up some kale)

Look at that. So pretty, so pink and all ready to go. Dinner for 2 with a good bit of left overs for later!

Happy weekend! And Happy Valentines Day if you do it, or if you don’t!

-C

makes 3-4 servings

  • 1 medium sized spaghetti squash
  • 2 large beets
  • 1 small onion
  • 1 lemon
  • 2-4 cloves garlic
  • handful of toasted walnuts (optional)
  • olive oil
  • salt and pepper to taste

Note. You might want to thin out sauce out a bit without the use of a ton of oil. Go ahead and add a little water. Also, I used raw garlic in mine, but some people might not like it raw. Just toss a few cloves of garlic in a bit of oil and stick into the oven for 10-15 minutes with the other stuff to give it a little roast. OR just omit.

Preheat oven to 425.

Stick the onion, beets and squash onto a baking sheet, drzzle the beet and onion with a tiny bit of oil and stick the sheet into the oven. Roast everything until fork tender which should take around 45-50 minutes. (depending on the size of your produce, some thing might take longer or shorter, so just check after 40ish minutes)

Once everything is roasted, let the beets and onion cool just enough to handle and cut into chunks and toss into a blender. Add in the garlic, the juice of the lemon, a few drizzles of olive oil and a pinch of salt and pepper. Now turn blender on and blend until smooth.

And the squash. Cut the thing in half and remove the seeds.%u00a0 Then with a fork, scrap the squash from the skin into spaghetti like strands.

Place squash into bowls, sprinkle with salt and pepper, add a drizzle of oil if you want and top with a good hearty heap of beet sauce. Top with more cracked pepper and a few chopped walnuts and maybe add a little something green, you know, to make it pretty.

Serve warm with love and a fork.. your lips might turn pink with beet love.

THE LOVELY CRAZY

March 31, 2025 by maximios • Blog

Yes I am alive as some of you have asked. And I swear I am not being lazy,I have just been super ass busy because you know life and all that.

So what have I been up to? Just a whole lot of clay business. Right after the crazy holiday rush in December I kinda crashed a little for a week or so and then signed up for another market that was just last week. If you do any type of ceramics, especially selling of ceramics, you know that a few weeks is not a whole lot of time to get a bunch of shit made so that is what I have been doing. Making shit. HA!

And ok, I did do some other stuff. There was more birthdays celebrated (the mr turned the big 40!), tattoos were gotten (by me and the mr.), family gatherings, sledding and snow ball fights with the littles. (Side note. They are not so little anymore. Judah is now officially taller then me and the mr. is teaching Miley to drive. Coco is Coco and has always been an old man, and So, well she started a book club at school and is bacsilly a cooler, younger version of me so yeah, they are all getting old and I can%u2019t even.), the holiday madness of markets. It was a lot. Other than that, not to much else. I am still running through the woods every day and we go hiking or snowshoeing as much as we can. Has the winter weather been great for outdoor winter fun? Not really. It%u2019s been way to freaking warm and there definitely has not been enough snow but what can I do besides bitch about it? Move to Alaska, that is what.

So yeah, hopefully now that this last market is behind me (it was a couple nights ago) I can slow down this week and gather my bearing before the madness of the spring and summer markets really hit. I am trying to be proactive and do more life planning, like garden planning stuff (is it really that time?) and have more pots made so I am not rushing like a mad lady in between markets. We will see how well I do, but first things first. Start the god damn taxes. Every freaking year.

Here are a few internet links from the week. And I don%u2019t have many pictures that are not pots and you can just see those on my instagram (@stemandnode). I%u2019l be better next week, maybe. And hopefully I%u2019ll post a new recipe because I have been making some A+ shit. (SO much soup. Duh.)

–Take your date to the grocery store. This is 100% a great idea. The mr and I LOVE a new grocery store experience. Especially while traveling in other countries. Highly recommend.

–A Gua Sha Technique For Easing Jaw Tension In A Minute Or Less. Has anyone had luck with this? I need to do something because I am constantly clenching my teeth and my TMJ is killing me.

–A bit of a hoarder%u2019: woodpeckers stash 700lbs of nuts in California home. That is a lot of nuts.

–Is Bathroom Carpet Due for a Comeback?%u00a0Fuck no.

-C

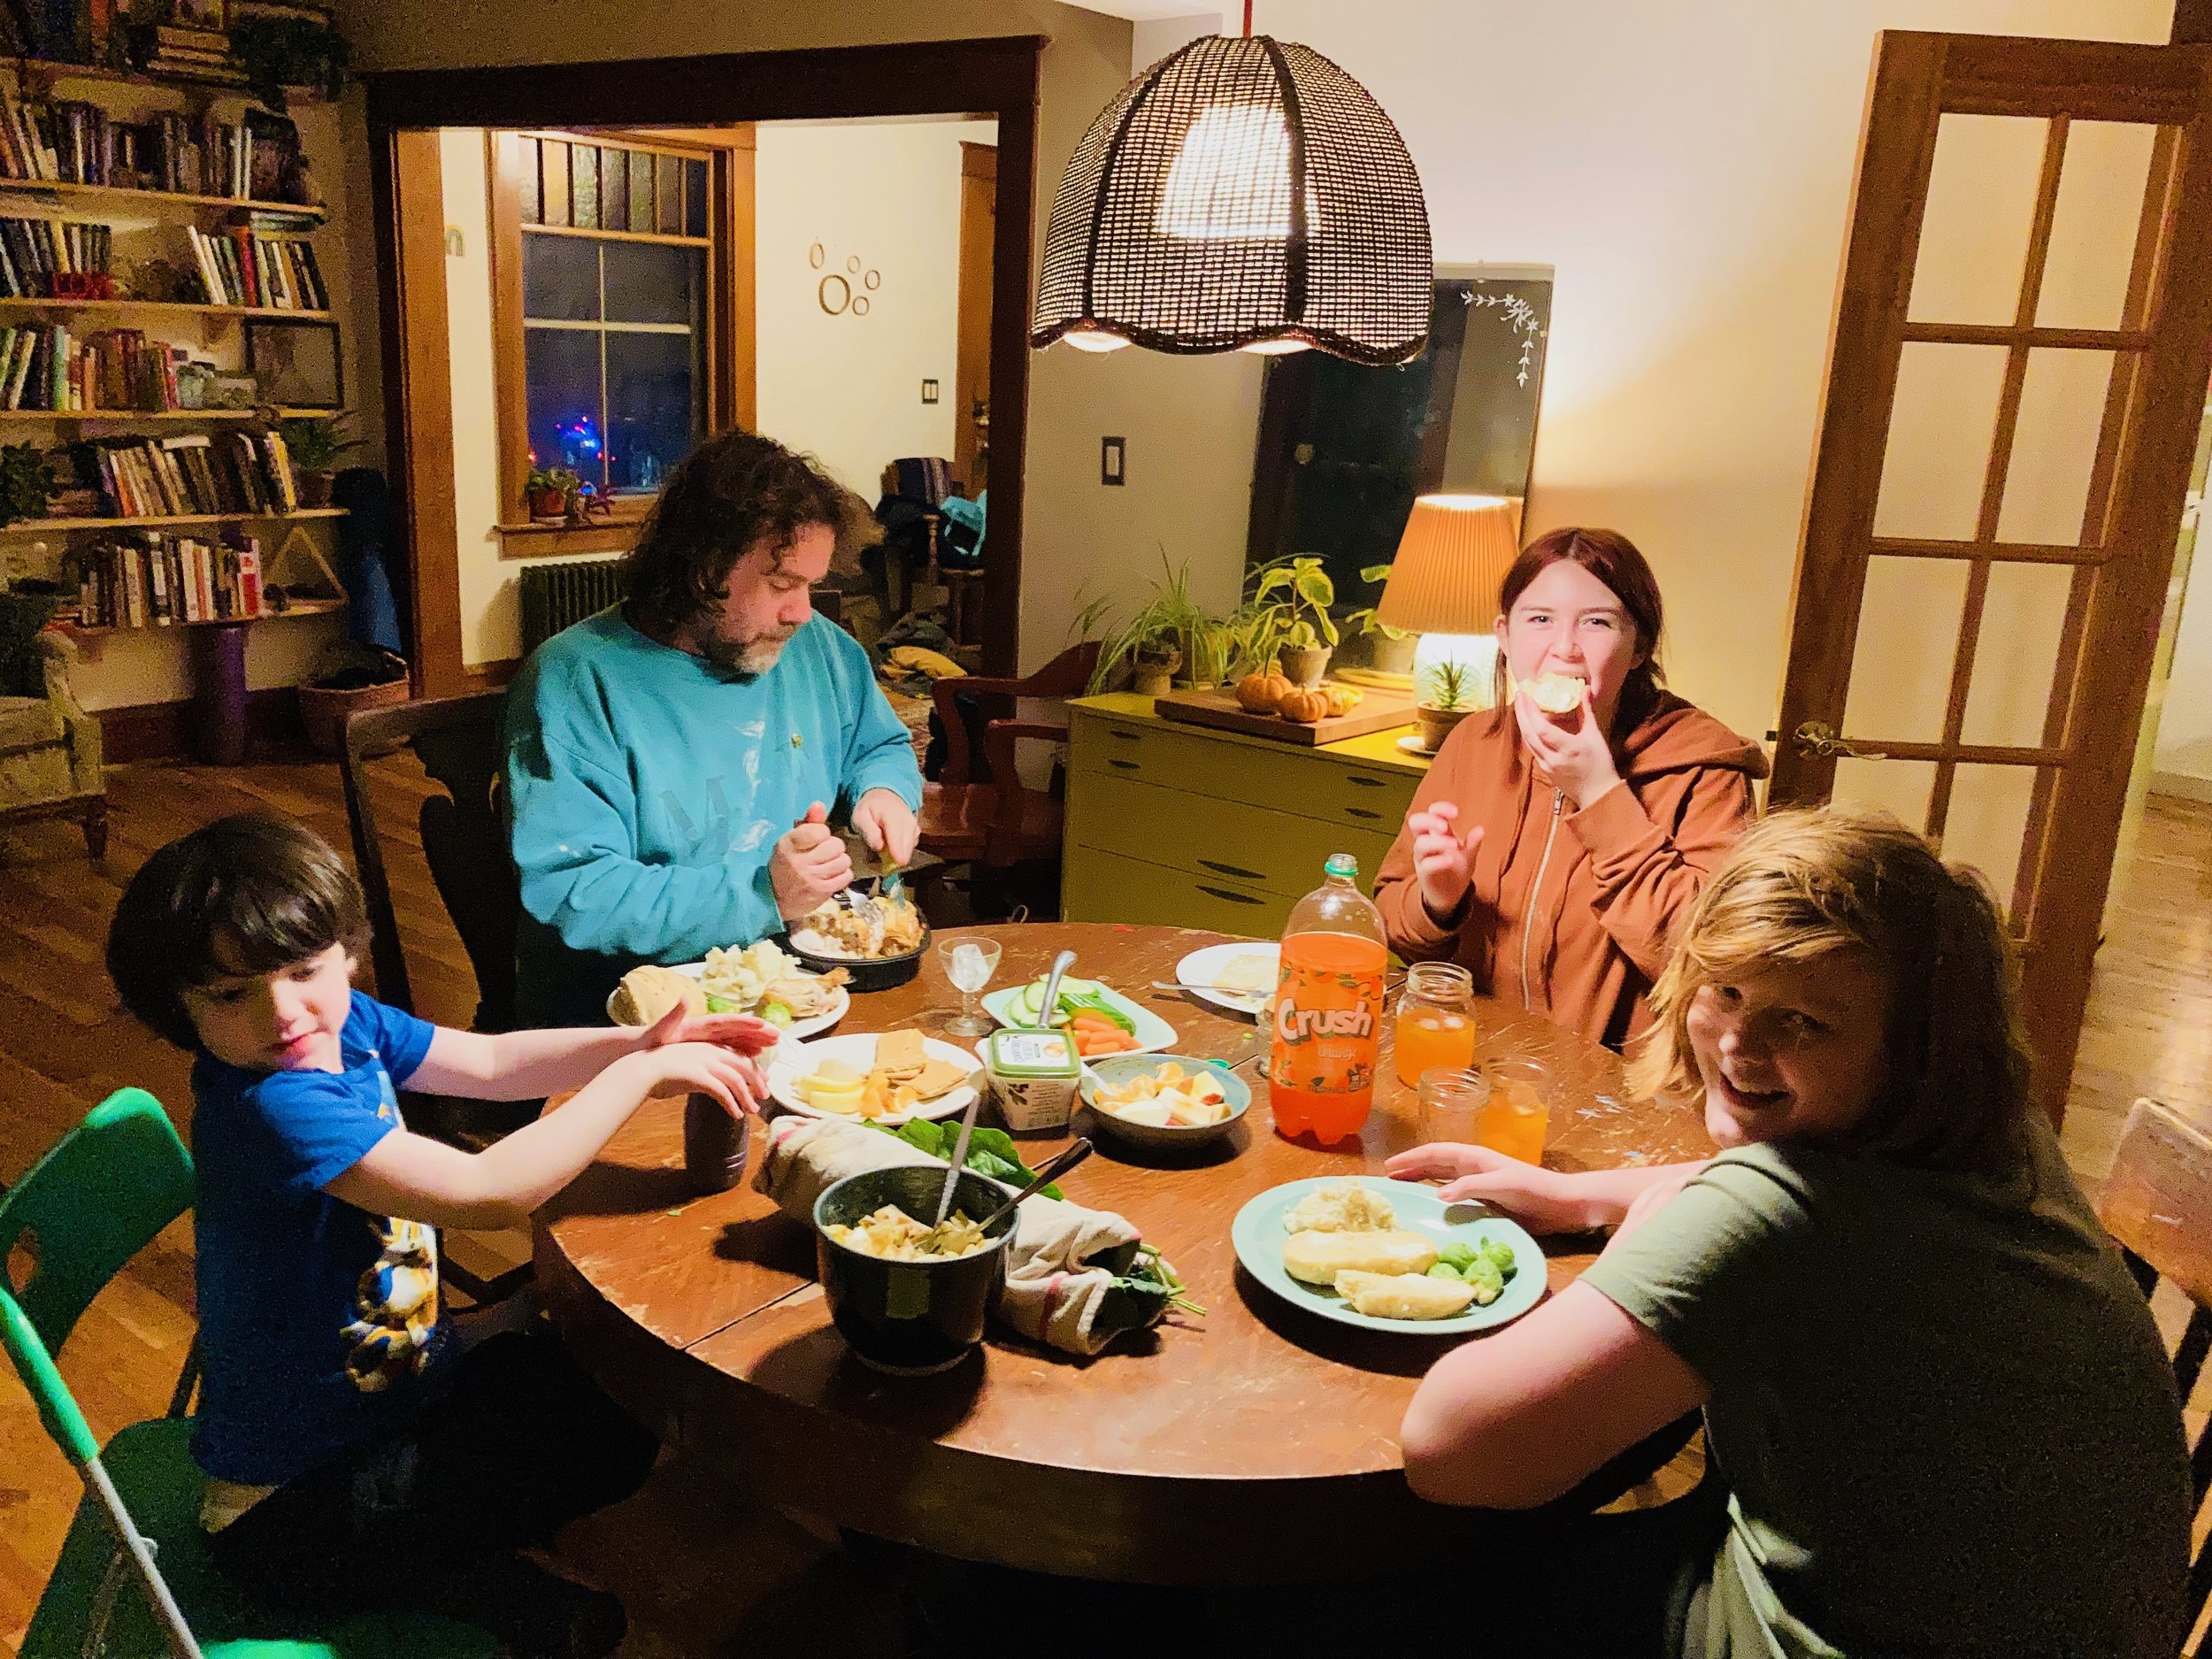
Ok so it%u2019s been a couple weeks and WHOA has it been a couple weeks. There was Thanksgiving, which was chill. We had the littles over, made snowflakes, and did a dinner. The mr got a rotisserie chicken, I made bread and potatoes, and the boys wrote dirty works with fridge magnets all night. Duh.

After that it has just been a blur. Markets started up and I am basically either living in my studio or the commuity studio loading and unloading kilns (I am in charge of the whole community studio firing schedule right now which is basically me saying over and over %u201cYeah dude I get it, it is close to christmas and you want your piece fired but you need to get off my balls!%u201d ) or I am at a market. I and freaking tired as all hell and it is kinda crazy town in my head right now. Two more weeks of this and then I am going to crash. Until then%u2026

Even though I am all out we did go chop our tree down last week. We hiked into the forest with a saw and came out a good time later with the cutest, tall but skinny and slightly bare on the back, tree. It is perfectly imperfect and fits perfectly in the living room. I didn%u2019t even have to move a single piece of furniture!!! And now the lights are on the tree and the lights are up on the house ( I think I threw those up on thanksgiving?), the Christmas music has commenced, and I am drinking all the holiday peppermint tea I can. Living it up!

So yeah, basically that is it. Well that and all the birthdays. Shannon, Erin, Justin. Then So beans last night (the big 10!) and next is the mr%u2019s. This one is a big one too, 40, and not going to lie, I am sick of hearing about it. HA! But that is not for a few more days so until then I will just be hiding away in the basement covered in clay like a little troll.

December is wild right?

A few links.

–End of year NPR Book list. This is the only end of year list I like.

-This a a pretty wild green house. I%u2019m into it. A Kinetic Glass Greenhouse Blossoms into a Massive Open-Air Terrarium

–When should you put up Christmas lights? A new survey illuminates an evergreen debate. I say whenever the heck you want. In this house it s the week after Thanksgiving but I also have lights around the windows in the kitchen all year long because really, they are just nice to use as lighting.

-But do we want the kids to eat them? This Designer Created Kid-Safe, Edible Crayons Out of Vegetables

–Big windows ans a shit ton of boo. I am here for this A Frame Cabin.

And some pictures of the past couple weeks.

The days are short, it%u2019s been cold and we got a good little dump of snow that has stuck around a bit. This is when I thrive in life. Seriously though, the morning it snowed I felt the happiest, most grounded in life that I have felt in a while. I was so excited that I ran a few extra miles on my run just to be out in the snow. It was super fantastic and I don%u2019t want to hear anyone bitching about winter right now, mainly cause I don%u2019t want to hear anyone bitch about anything period. HA!

So it%u2019s Monday and not Sunday but we are ok here, just kinda super busy. Sure I have spent more time in the studio then not and I am wildly stressed but really it is all good and I actually love it. (Not that I am not looking forward to a few weeks off once all the markets are over). Besides that we had the family Thanksgiving over the weekend so 25ish people packed into the house. It was everyone eating food all over, talking to my face while I was maneuvering hot dishes, small children running around, everyone asking all the question about the dikon radishes, and talk about Christmas%u2026 Whoa was that great but all a bit much. I love my family and love that we do the holidays here at my house but man are those butt holes messy! I spent half of my day yesterday wiping, vacuuming, moping and re-vacuuming every surface in the house. It was nasty, especially the bathroom. I think sometimes people forget that pee goes INTO the toilet and not all over it.

Yup, that is about it. And it is Monday which means that I have less then a week to get all my pots finished, packed, and ready to go to market this weekend. I am gonna be wild and have already informed the mr to just let me be and maybe not get to close or else I might bite.

He can]t say I didn%u2019t warn him.

A few links.

-People here live in complete darkness for 2.5 months. Here’s how they do it. Could you do it? I so could.

–Snacking Is the Best Part of Thanksgiving. I agree, mostly because I only really get to snack during family Thanksgiving because I am in the kitchen making, serving, and cleaning all the food while everyone else is eating.

-Shannon was late to family Thanksgiving because she was getting her Christmas tree%u2026 Is it to early? Maybe. For me the tree is the best part of Christmas but I still wait until afterThanksgiving to get one but hey, you do you. Is It Too Early to Put Up Your Christmas Tree?

-So cool. Flickering fireflies pulse to a beat that mathematicians have long been seeking

And a few pictures.

First week into Daylight Savings and I got to tell you, I am so into it. I love when it gets dark out early. I love being able to see the sunrise when I got for runs in the morning. It works for me. What I do not love, better yet hate right now is how warm it has been. It is making me sad and cranky. Mind body and mind crave those crisp, cold, snow filled days where everything seems quiet and all the people are tucked away and the outside world seems to be all mine. I guess I am a true Ice Queen.

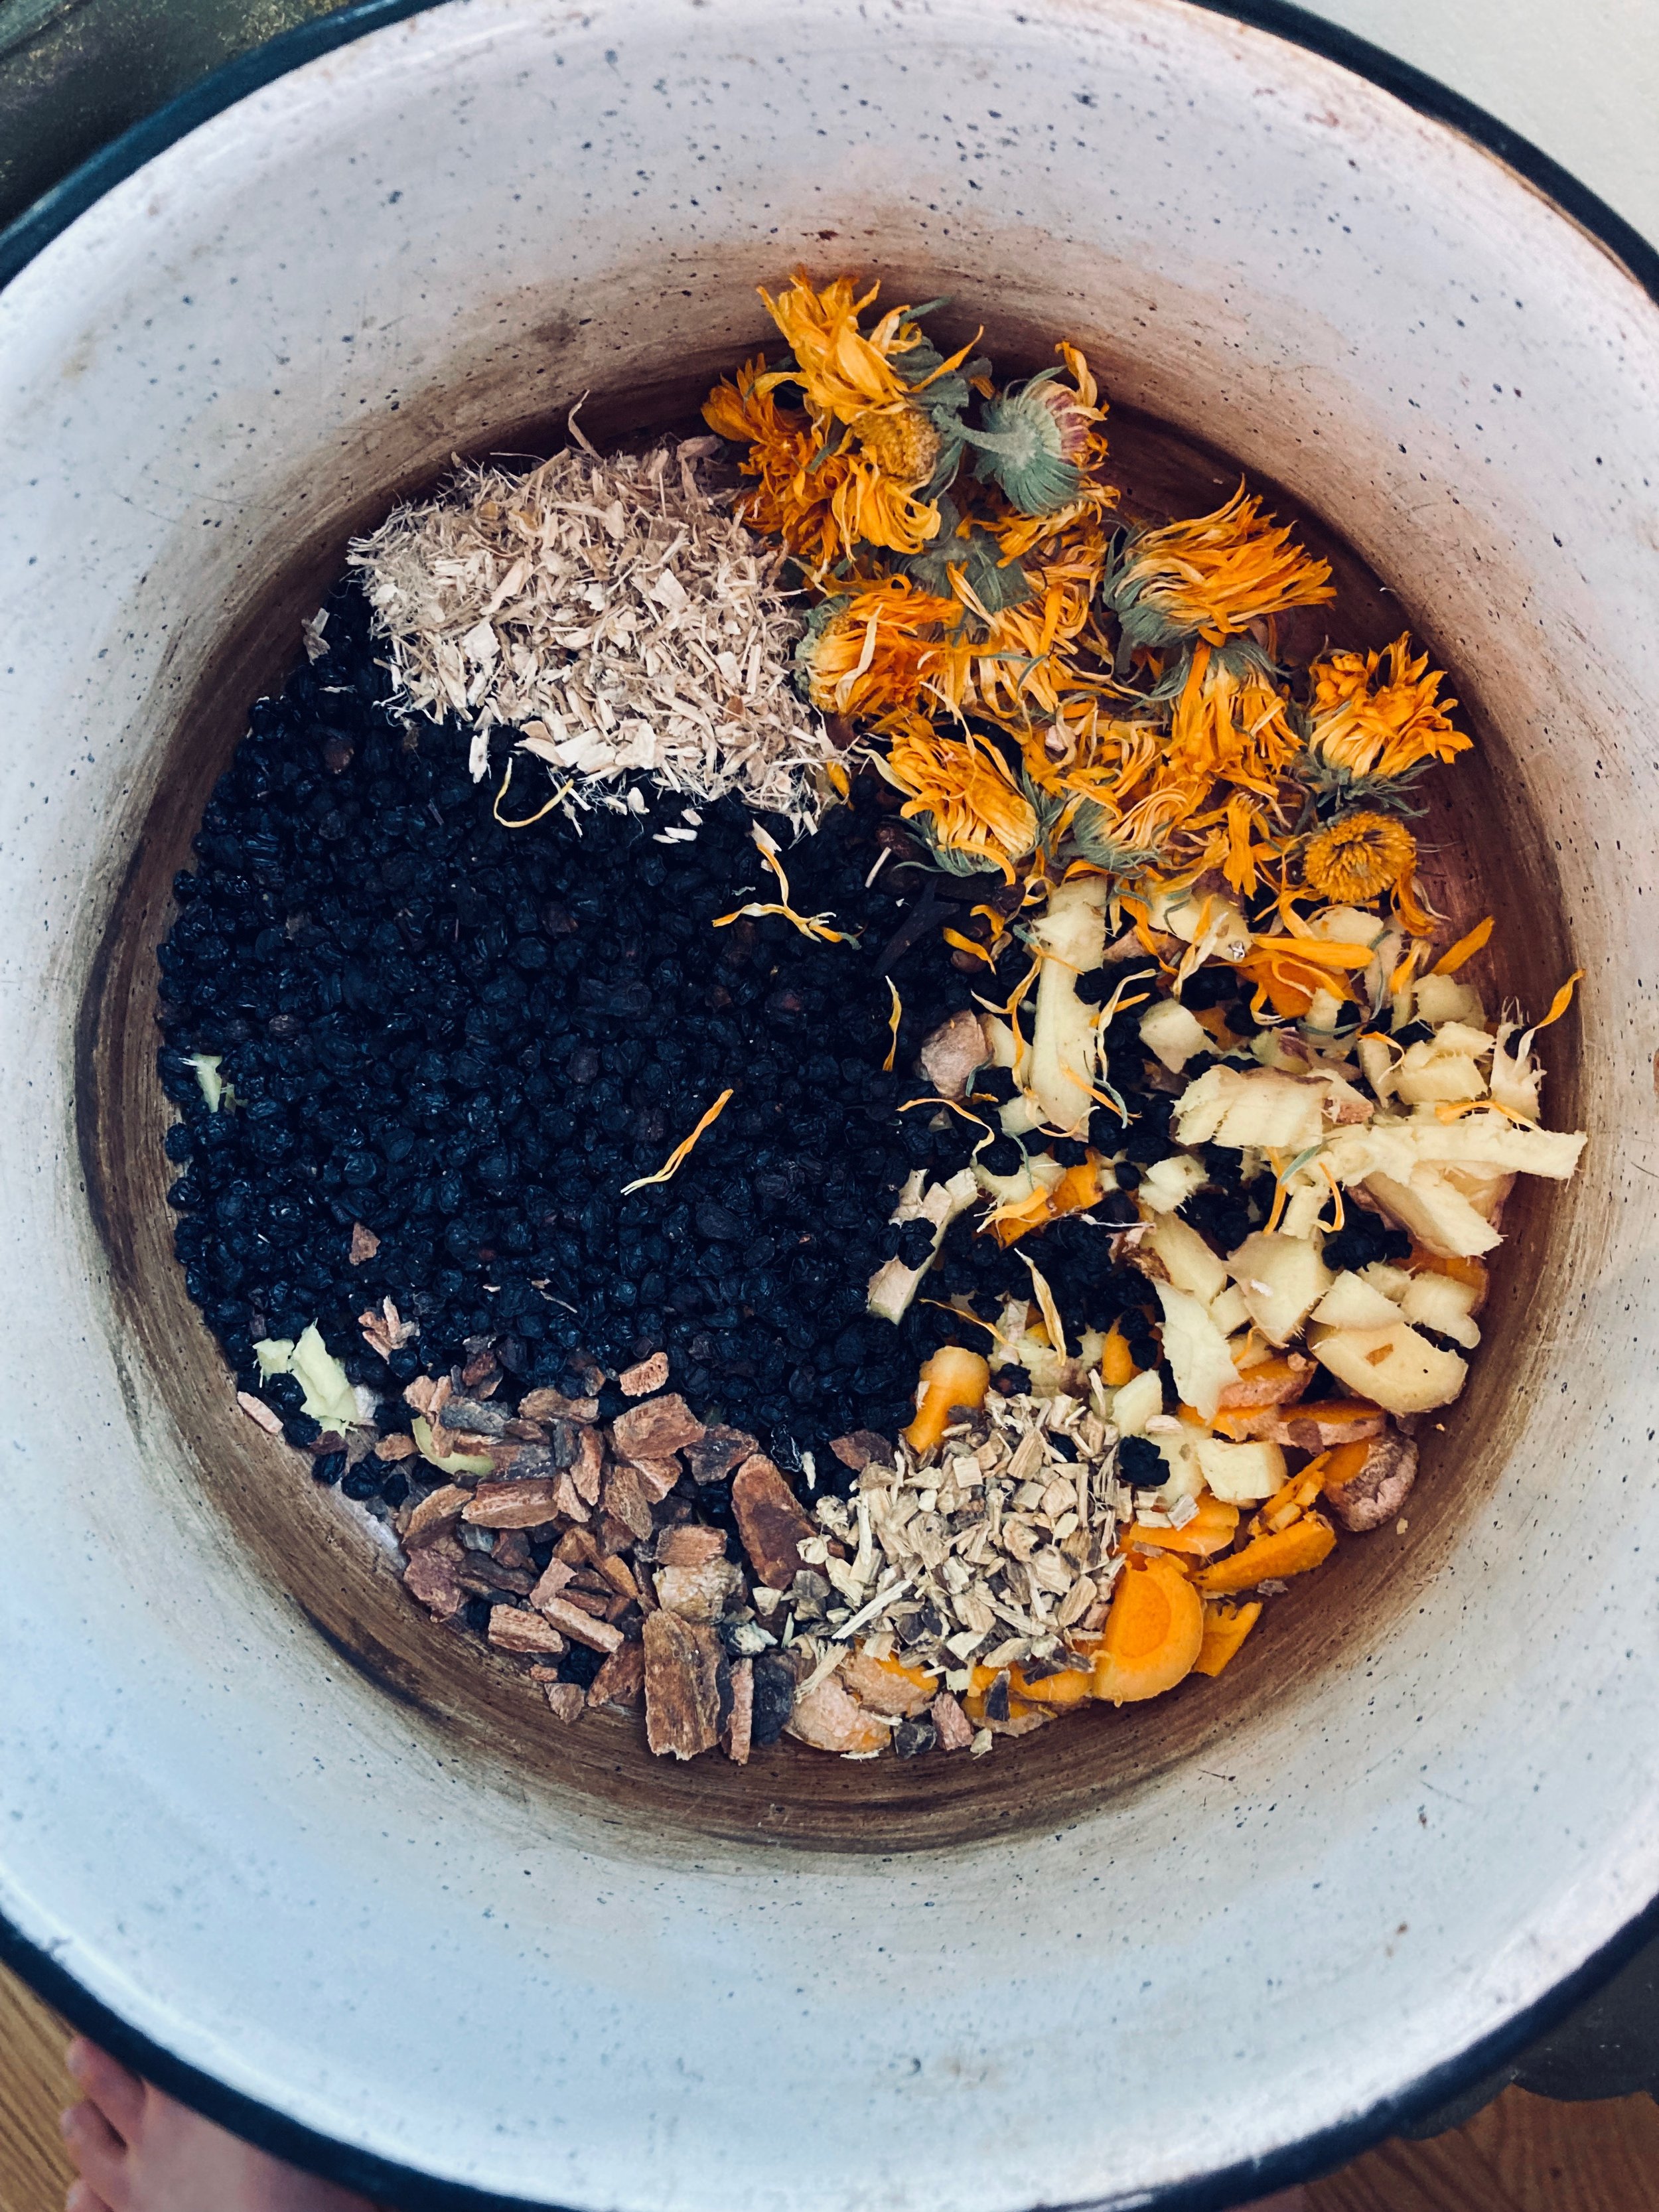
Besides shitty weather the past couple weeks things were good good. Lots of studio time. Lots. And a few nice hikes through the sticks. The mr, Judah, and I cleaned the yard and moved all the leaves to the garden beds. I made fire cider, the mr carved a many spoons. I picked up the first winter farm share, voted, watched the lunar eclipse and cleaned the car. Not like super exciting but exciting enough. That is my life. Ha!

Today the mr and I are going somewhere for a hike. Now that we aren%u2019t camping every weekend we go for a good hike on Sundays instead. It is good to have something to look forward to. And if I have time I should probably go grocery shopping, I have a long list and a shit ton of bread I need to make%u2026The family is descending on the house this weekend for our family Thanksgiving. 23-26 people. Yeah, I am in charge of all bread. We need lots of bread.

Oh and it%u2019s Shannon%u2019s birthday today so yeah, Happy Birthday!

A couple links from the internet.

– I use all my flours so fast that I just keep in in the pantry but this is good info. The Best Way to Store Flour Isn’t What You%u00a0Think.

–Christmas Weather Forecast (2022): Will It Be White, Or What? I sure hope this is wrong.

–Why Prehistoric Herders Didn%u2019t Spit Out Their Watermelon Seeds. I don%u2019t spit them out cause I like them plus they are super good for you.

–This is what%u2019s happening to your brain in the middle of a conflict. I do not like conflict because most conflict could be solved if people just listened to everything I say. For real.

–The Age of Social Media Is Ending. Yeah, I kinda hope so.

Pictures from the weeks.
Whoa has It been a while since I have posted a recipe. Not that I haven%u2019t wanted to or that I haven%u2019t been making food, I just have been busy A.F. And truthfully I am as busy as ever but I happen to have my phone next to me when I was making this little casserole dish thing that I have made a few times now and I think it well worth a share.

What is it you ask? It is a creamy but dense chickpea base covered in tender roasted beets and onions with a lemon tahini drizzle. It is simple to make, super delicious, and can be tweaked in a million different ways to your liking.

Is it a fantastic dish to serve at say a Thanksgiving? Well yes, yes it is. You can serve it as a side or even make it bigger and have it as a sort of main dish. It%u2019s a good protein that is naturally gluten and grain free, vegan, and blah blah blah. What really matters here though is that it is damn tasty and also bonus, it is so siimple to make and can even be prepared a day in advance so no stress. We will take all the wins here.

-C

  • 1 cup chickpea flour

  • 2 cups boiling water

  • 1 teaspoon salt plus more to taste

  • ground black pepper

  • 2 teaspoons cumin (feel free to omit or use a different spice.Thyme or rosemary are equally delicious )

  • 2 medium beets

  • 1 large onion

  • a lemon

  • 1-2 tablespoons tahini

  • teaspoon or so olive oil.

Note. This dish is excellent made and eaten right away but also gets even better (in my opinion) cooled and reheated. Also you can change up the veggie situation and use whatever ones you like.

Place chickpea flour in a bowl and slowly whisk in boil water with a fork so that there are no lumps. Mix in cumin and a teaspoon of salt and a pepper. Scoop batter into a lightly oiled 8X8 casserole dish (you can use a round cake tin or a cast iron skillet as well) and set aside to rest for a few.

Preheat oven to 400.

Grab beets and onion and slice in about 1/8 thick slices. Layer slices on top of chickpea mixture, making it look pretty if you feel like it. Once the veggies are layered, lightly drizzle the top with a teaspoon olive oil and sprinkle with a good pinch of salt and pepper.

When the oven is preheated, covered the baking dish and place in oven,. Bake covered for 1/2 hour then remove covering and bake for another 20-30 minutes or until the beets are nice and tender and a tester poked into the center of the dish comes out clean. Remove from oven,

Once it%u2019s out of the oven grab a little bowl and add the juice of the lemon to the tahini and mix. Season with salt to you liking.

Now serve. Drizzle the top with the tahini mixture and cut yourself a big old piece. Yes drizzle extra tahini on top. Sure squeeze on more lemon. You do you.

Store leftovers in fridge. Reheat in hot oven for 10 minutes..It gets crispy!

So Good Pineapple Dill Kale Salad — The Lovely Crazy

January 30, 2025 by maximios • Blog

Last week pineapples were on sale everywhere……So I bought 5. Don’t judge 

And I bet I am not the only one that got overly excited at $1.50 pineapple and bough themselves a few. We will just call ourselves opportunists.  Now we have plenty of pineapples and don’t have to pay  the $4 a piece prices. (Justification)  

But if you don’t have a pineapple laying around, you must go get one. (Maybe if your lucky, there might still be some sales going on) because you must make this salad. I am on a mission to make everyone I know eat it because, for lake of a better way to say it…….It will rock your world.

Dill and pineapple are a serious match made in heaven. Pineapple, with its sweet, tangy, citrusness  and dill with it’s super fresh earthiness. Mixed together with a few other helpers to create a fresh, clean, chunky, tangy, over the top, flavor. I could stop right there, but toss in a handful of lentils, some creamy avocado and a bed of kale…It’s like the best spring time, celebration on you tongue, happiness in you tummy, kind of salad.

A salad that will make you smile. (and maybe buy  5 pineapples) 

 Stuff for the goodness. We got the kale, some avocado because all salads should have avocado and some cooked lentils because, well, all salads should have lentils (or beans or nuts.. so you could totally something else) Then a few sprigs of fresh dill, a clove of garlic, red wine vinegar, salt and a bowl of chunked up pineapple. The pineapple, dill, garlic, red wine vinegar, a splash of water and a pinch of salt get blended in a blender or whatever blending device you use. Go as smooth or chunky as you like, I recommend going smooth, but leaving a little chunk, like half blended.

The prep is done, now compile.  Kale in bowl, top with lentils,. Toss on avocado chunks, and, last but not least, the blended pineapple dill mixture.So good……So so good.

Happy Friday!!

-C

Serves Two

  • 3 cups washed and chopped Kale
  • 1/2 a avocado, diced
  • 1 cup fresh pineapple chunks
  • 1-2 springs fresh dill
  • 1 tablespoon Red Wine Vinegar
  • Salt 
  • 1/2 cup cooked lentils (or any bean or nut will do)

Note. No fresh dill? You can use dried, just sub in 1 teaspoon for the fresh and after blending with the pineapple, let sit a little longer to really let the flavors meld together. 

Place pineapple, dill, pinch of salt, vinegar and garlic into a blender or whatever you own that blends and blend stuff together, leaving it a little chunky. Let sit for 5-10 minutes.

Kale goes into a bowl and add the lentils and diced avocado. Pour the blended pineapple on. Toss around. 

Now eat.

So Good Pineapple Dill Kale Salad — The Lovely Crazy

January 30, 2025 by maximios • Blog

Last week pineapples were on sale everywhere……So I bought 5. Don’t judge 

And I bet I am not the only one that got overly excited at $1.50 pineapple and bough themselves a few. We will just call ourselves opportunists.  Now we have plenty of pineapples and don’t have to pay  the $4 a piece prices. (Justification)  

But if you don’t have a pineapple laying around, you must go get one. (Maybe if your lucky, there might still be some sales going on) because you must make this salad. I am on a mission to make everyone I know eat it because, for lake of a better way to say it…….It will rock your world.

Dill and pineapple are a serious match made in heaven. Pineapple, with its sweet, tangy, citrusness  and dill with it’s super fresh earthiness. Mixed together with a few other helpers to create a fresh, clean, chunky, tangy, over the top, flavor. I could stop right there, but toss in a handful of lentils, some creamy avocado and a bed of kale…It’s like the best spring time, celebration on you tongue, happiness in you tummy, kind of salad.

A salad that will make you smile. (and maybe buy  5 pineapples) 

 Stuff for the goodness. We got the kale, some avocado because all salads should have avocado and some cooked lentils because, well, all salads should have lentils (or beans or nuts.. so you could totally something else) Then a few sprigs of fresh dill, a clove of garlic, red wine vinegar, salt and a bowl of chunked up pineapple. The pineapple, dill, garlic, red wine vinegar, a splash of water and a pinch of salt get blended in a blender or whatever blending device you use. Go as smooth or chunky as you like, I recommend going smooth, but leaving a little chunk, like half blended.

The prep is done, now compile.  Kale in bowl, top with lentils,. Toss on avocado chunks, and, last but not least, the blended pineapple dill mixture.So good……So so good.
Happy Friday!!

-C

Serves Two

  • 3 cups washed and chopped Kale
  • 1/2 a avocado, diced
  • 1 cup fresh pineapple chunks
  • 1-2 springs fresh dill
  • 1 tablespoon Red Wine Vinegar
  • Salt 
  • 1/2 cup cooked lentils (or any bean or nut will do)

Note. No fresh dill? You can use dried, just sub in 1 teaspoon for the fresh and after blending with the pineapple, let sit a little longer to really let the flavors meld together. 

Place pineapple, dill, pinch of salt, vinegar and garlic into a blender or whatever you own that blends and blend stuff together, leaving it a little chunky. Let sit for 5-10 minutes.

Kale goes into a bowl and add the lentils and diced avocado. Pour the blended pineapple on. Toss around. 

Now eat.

Fluffernutter and Nutella Yule Log — The Lovely Crazy

January 24, 2025 by maximios • Blog

.I am awesome. It’s ok for me to say that today because this is probably the coolest and most fantastic thing I have ever made in my entire life. Phew, I had to get that off my chest.For the last week I have been thinking a lot about what holiday treats I want to make. I have been planning on making a full fledge yule log with the rolled sponge cake, the filling and the candy mushrooms and taking a whole day to do it. Well that is just not happening this season.. The next week is nutters and I have so much other baking to do that I just don’t have time to do a log…bummer

Oh, but how my mind never stops.. See, it’s not the cake that I wanted to make, it was more making a cake look like a piece of wood that was appealing to me.  So I must try, or better yet, create my own version of a yule log……………

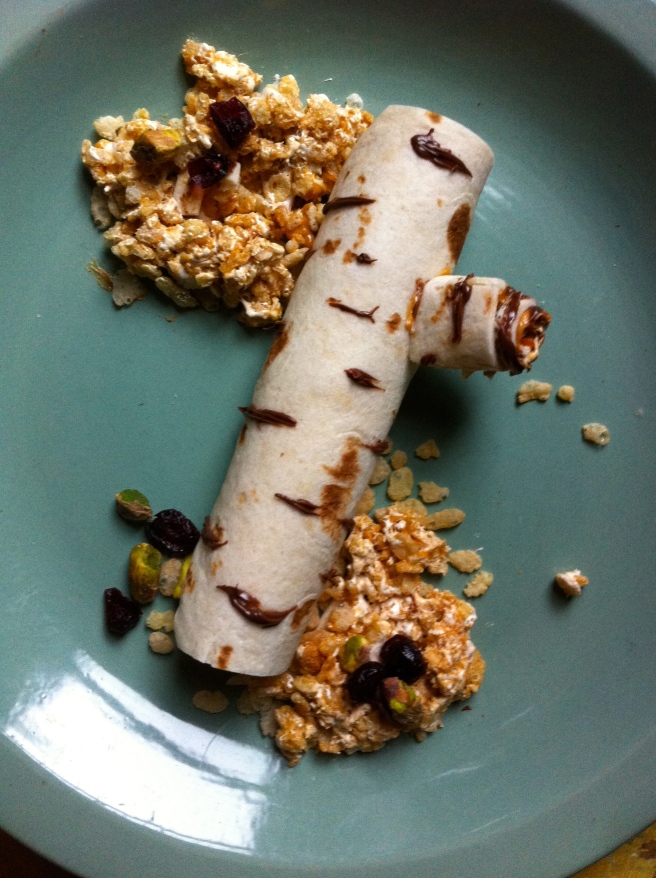
Problem solved. Peanut butter, fluff, nutella and a wrap.  And oh what a piece of wood I made.(insert dirty joke here) A yule log,(or yule branch), but whatever. Its food that looks like a piece of wood. I am happy. 

Simple ingredients…I pictured 2 flour wraps because I was going to make 2, but ended up only making one, so one wrap per log works…… A glob of fluff, a glob of peanut butter… A smaller glob of nutella and a sprinkle of a crunchy cereal (I used crispy rice cereal) The cereal is not essential, but it add a little bulk and crunch to the log and when eating wood, there should be a little snap crackle and pop.  If you want to make this into a vegan log, use vegan marshmallow cream. You can even omit the mallow and use a banana, or jam, or anything you want. Heck, you can make a smorgasbord of logs…That would be fantastic. A bundle of logs of all different flavors….I am doing it!!

 Trim off two opposite  side of the wrap and put them aside, you are going to use one of the trimmings in a second. Smear the peanut butter, fluff, and a bit of the nutella all over, even to the very edge of the wrap.

        Sprinkle the crunches on top  and then starting rolling from one of the non trimmed edges,  Try to get it as tight as you can. 

  Take one of the scraps and smear some more peanut butter and nutella all over it(leave our the crunches) and roll. You will end up with a branch nub. Attach the nub. I smeared more fluff to the bottom and it stuck on pretty well, but (not shown here) I took a little piece of a spaghetti and stuck it in the nub to keep it in place. If you don’t use the fluff in your log, I would use the spaghetti(It is edible and will soften from the peanut butter so you don’t have to worry about taking the noodle out)

Looks good right…You can go ahead and stop here if you want to…Its pretty great, but one more minute and…

A bona-fid Yule log…well its kind of more like a branch, but whatever.

 I used the other end of the spaghetti noodle dipped in the nutella to make the lines. I just free formed it and it really transformed the log into a LOG!!! Just to jazz it up  I added a handful of crunchy rice with the extra glob of pb and fluff, mixed it up and made little piles of  yule log landscape.   Added a few dried  cranberries and pistachios for color…. It like taking walk through the woods. After the mister ate the crispy mounds, I sprinkled some flaked coconut around it and that looked pretty fantastic too.

Needless to say that if you make this, your day will be excellent.Make it for a friend, you will bring them joy. Its hard not to smile when looking at food that looks like wood. Happy.

These little logs would make fantastic party snacks. Fast and tasty … can’t get better than that.  Think about walking into an office party, or better yet, a school party….All the other parents will think you are awesome and then probably start to hate you..Hey, it’s not your fault that you are cool enough to read my blog.(it’s ok, you can share the website) SO make them for friends, for family, for anyone.. Just don’t try to start a fire with the logs….It might not turn out so well.

Have fun splitting wood!!!

-C

One wrap makes one log

  • 1 big glob of Peanut Butter
  • 1 big glob of marshmallow cream (vegan or what not)
  • 1 small glob of nutella (again, vegan if needed)
  • 1 medium flour wrap
  • 1 handful of crunchy rice cereal
  • a spaghetti noodle

Note..Use these flavors or make up you own……PB and Jam…PB and Banana.. PB and Apples ….Cream cheese and Jam.. the possibilities are endless.

With a sharp knife, trip two opposite sides of a wrap and set trimming aside for later. Spread the peanut butter, fluff, and nutella(or whatever ingredients you want) all over wrap, up to the  very edges. Sprinkle crispy rice all over.

Starting from one end, roll wrap leaving the seam on the bottom. With one of the wrap trimmings, spread more peanut butter fluff and nutella all over and wrap as well. Place a dollop of fluff on the bottom of the small nub and place on the roll where ever you see fit. For a better hold, snap small piece of spaghetti noodle and stick through nub into log.

For the tree markings, dip a toothpick or spaghetti noodle into nutella and lightly draw little lines on the log…..And you are done. If you want to jazz it up, sprinkle rice cereal or coconut or whatever you want to make the log look more nature like, do it. .

And now its time to eat your log…..

CRUNCH CRUNCH CRUNCH!!

Mushroom Kale Gravy — The Lovely Crazy

December 27, 2024 by maximios • Blog

This year for Christmas my family decided to do a mid day brunch lunch thing. Everyone has their own little families that they do the morning with and then everyone goes their own ways that nigh(Nick and I do our own Christmas celebrating at night)…That leaves a chunk of mid day to hang, talk, play, exchange stockings and then usually someone gets a little pissed and yup, time to go. Its totally cool, we see each other too much anyway. So food wise, it was pretty basic. Eggs, hash browns, a ham, fruit and bagels… The hash browns were store bought, Me and nick did the eggs frittata style and the ham was just stuck in the oven….Not much to do. But then one of my lovely sisters requested gravy…..and so it was made. And a basic brunch was turned into a gravy laden food feast. And so you know, I am not a huge gravy fan, or I never really have the opportunity to eat gravy, its just not in my food rotation..until now. I was really impressed with myself on this one.

We have white mushrooms, kale, red onion, garlic, soy, nutritional yeast(if you don’t have, no worries, you can get away with not using it), sage and thyme and corn starch…

Dice up onion, mushroom and garlic… Into a pan on medium heat with a bit of olive oil…just to soften up

Toss in the spices, nutritional yeast and the soy sauce and let meld together for a minute or 3

Add 2 1/4  water and whisk in a tablespoon of  corn starch….and let it simmer

 Once the gravy gets to that super nice consistency…add in finely chopped kale and let gravy simmer for another 5 minutes or so

Transfer to a nice bowl or gravy boat, stick a ladle or big spoon and get to graying up all your food!!!!!

Everyone was to busy eating for me to get a good picture of the gravy on food, but trust….it was all over everything!

-C

Makes about 2 1/2 cups 

  • 7-8 white or cremini  mushrooms
  • 1/2 small red onion
  • 2 kale leaves
  • 1 1/2 tablespoons soy or tamari
  • 1 teaspoon ground sage
  • 1 teaspoon thyme
  • 1 tablespoon nurtitional yeast
  • 2-3 cloves garlic
  • 2 1/4 cups water
  • tablespoon corn starch

Dice onion into small bits, slice mushrooms nice and thin and dice garlic into wee little pieces.. Toss into a skillet with a bit of olive oil on medium heat and let mixture soften and smell nice and fragrant. Toss in the dried herbs, nutritional yeast and soy sauce and let cook for another few minutes until the mixture sucks up all the soy sauce and the veggies start to brown.

Add in the water and whisk in the corn starch. Turn heat to low and let simmer until gravy starts to thicken. Finely chop the kale and toss into gravy when its about done.. Simmer for another 5 or so minutes or until you can’t wait any longer….Serve straight from the pan or transfer to a gravy holding device,. Pour gravy on everything!

YUM YUM YUM ENJOY!!!!

No knead Raisin Walnut Sourdough Bread — The Lovely Crazy

May 11, 2023 by maximios • Blog

I bake a lot of bread in my house . A LOT. Like at least 2-3 times a week and have been doing so for years now so I know a thing or two about bread. And when I bake bread, I almost always use starter unless I really really need dough fast. Then I will add yeast but honestly, I haven%u2019t used yeast in bread in probably 3+ years. I have developed such a rhythm with bread that I just have dough in the fridge at all times.

One reason I have never shared a sourdough recipe before on the blog is that I think a lot of people feel intimidated by baking bread and especially making bread with just a starter. Another reason is that up until the past year, I don%u2019t think having a starter was as common as it is now (but thanks to COVID it is more common then ever!). Anyway, now more people are on the home made bread band wagon (about stinkin time) and I am here for it.

A word of advice if you are new to the bread game%u2026. Don%u2019t take it to seriously! I remember back in my early days of bread baking I would freak out about if I was doing it right. About timing and wondering if it is exactly the right amount of rising or if the temperature of this or that was exactly, or if I handled the dough to rough. Now after all these years, I have gotten pretty intuitive with bread dough but also I don%u2019t worry to much. It will be good. It will be bread and you will love ever single bite.

This bread is a basic no knead bread with a little added goodness of walnuts and raisins. Easy, simple, and freaking delicious. A great bread to make if you are just getting into the sourdough bread game. Or if you want really dank ass bread!

To the bread!

The stuff. Ripe starter, flour, warm water, salt, raisins , walnuts, and a little cinnamon.

Start by dumping a little of the warm water onto the raisins to plump them up a bit and to make sure they are not all stuck together.

Make the dough. Stain the water from the raisins into a big bowl and add the rest of the water, along with the starter and a little flour. Mix until incorporated. Add in the salt, cinnamon, and rest of flour and mix until all the dry is mixed into wet you have a shaggy wet dough. Add in the raisins and walnuts and mix until incorporated.

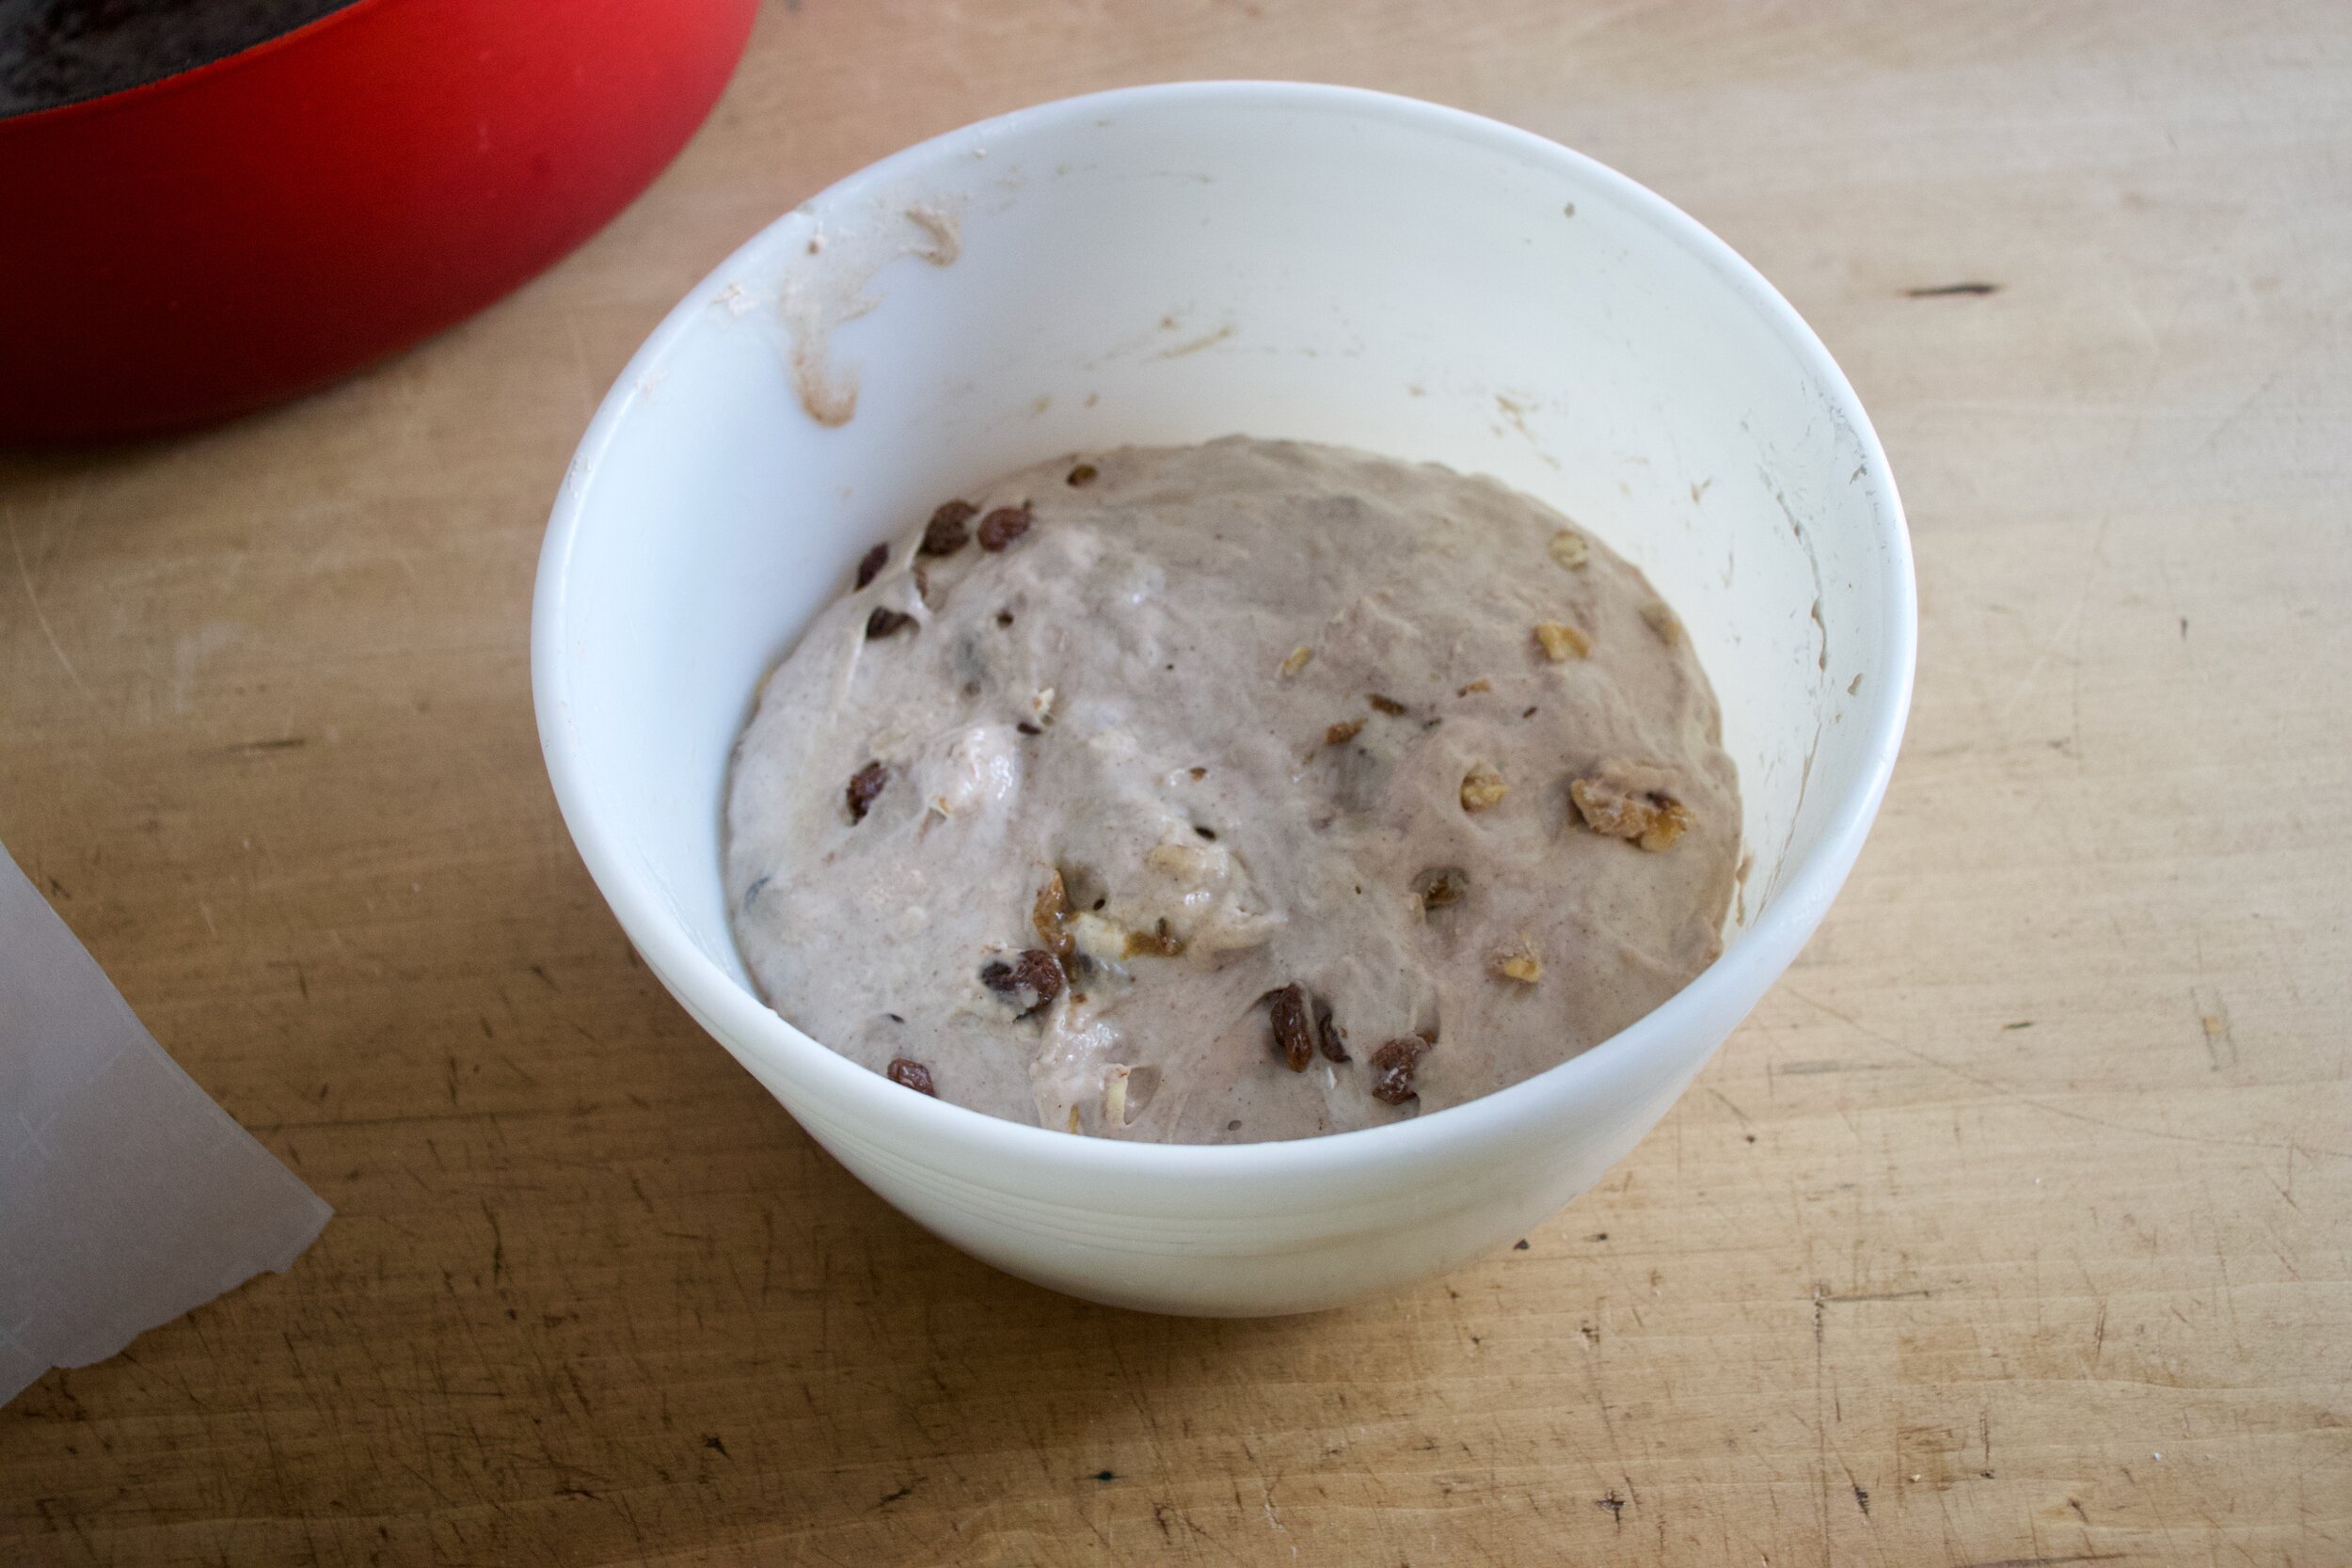
All mixed and ready to rest. Scrap sides of bowl and cover. Place In a warm spot for a couple hours.

After about 2 hours, the dough hasn%u2019t done much rising but that is what is suppose to happen. Take a damp hand and fold dough over itself a few times then cover ( with plastic or a silicon bowl topper) and place dough into fridge. Leave it in there over night. (at least 10 hours or for up to a week)

Dough the next day. It hasn’t double, but that is fine.

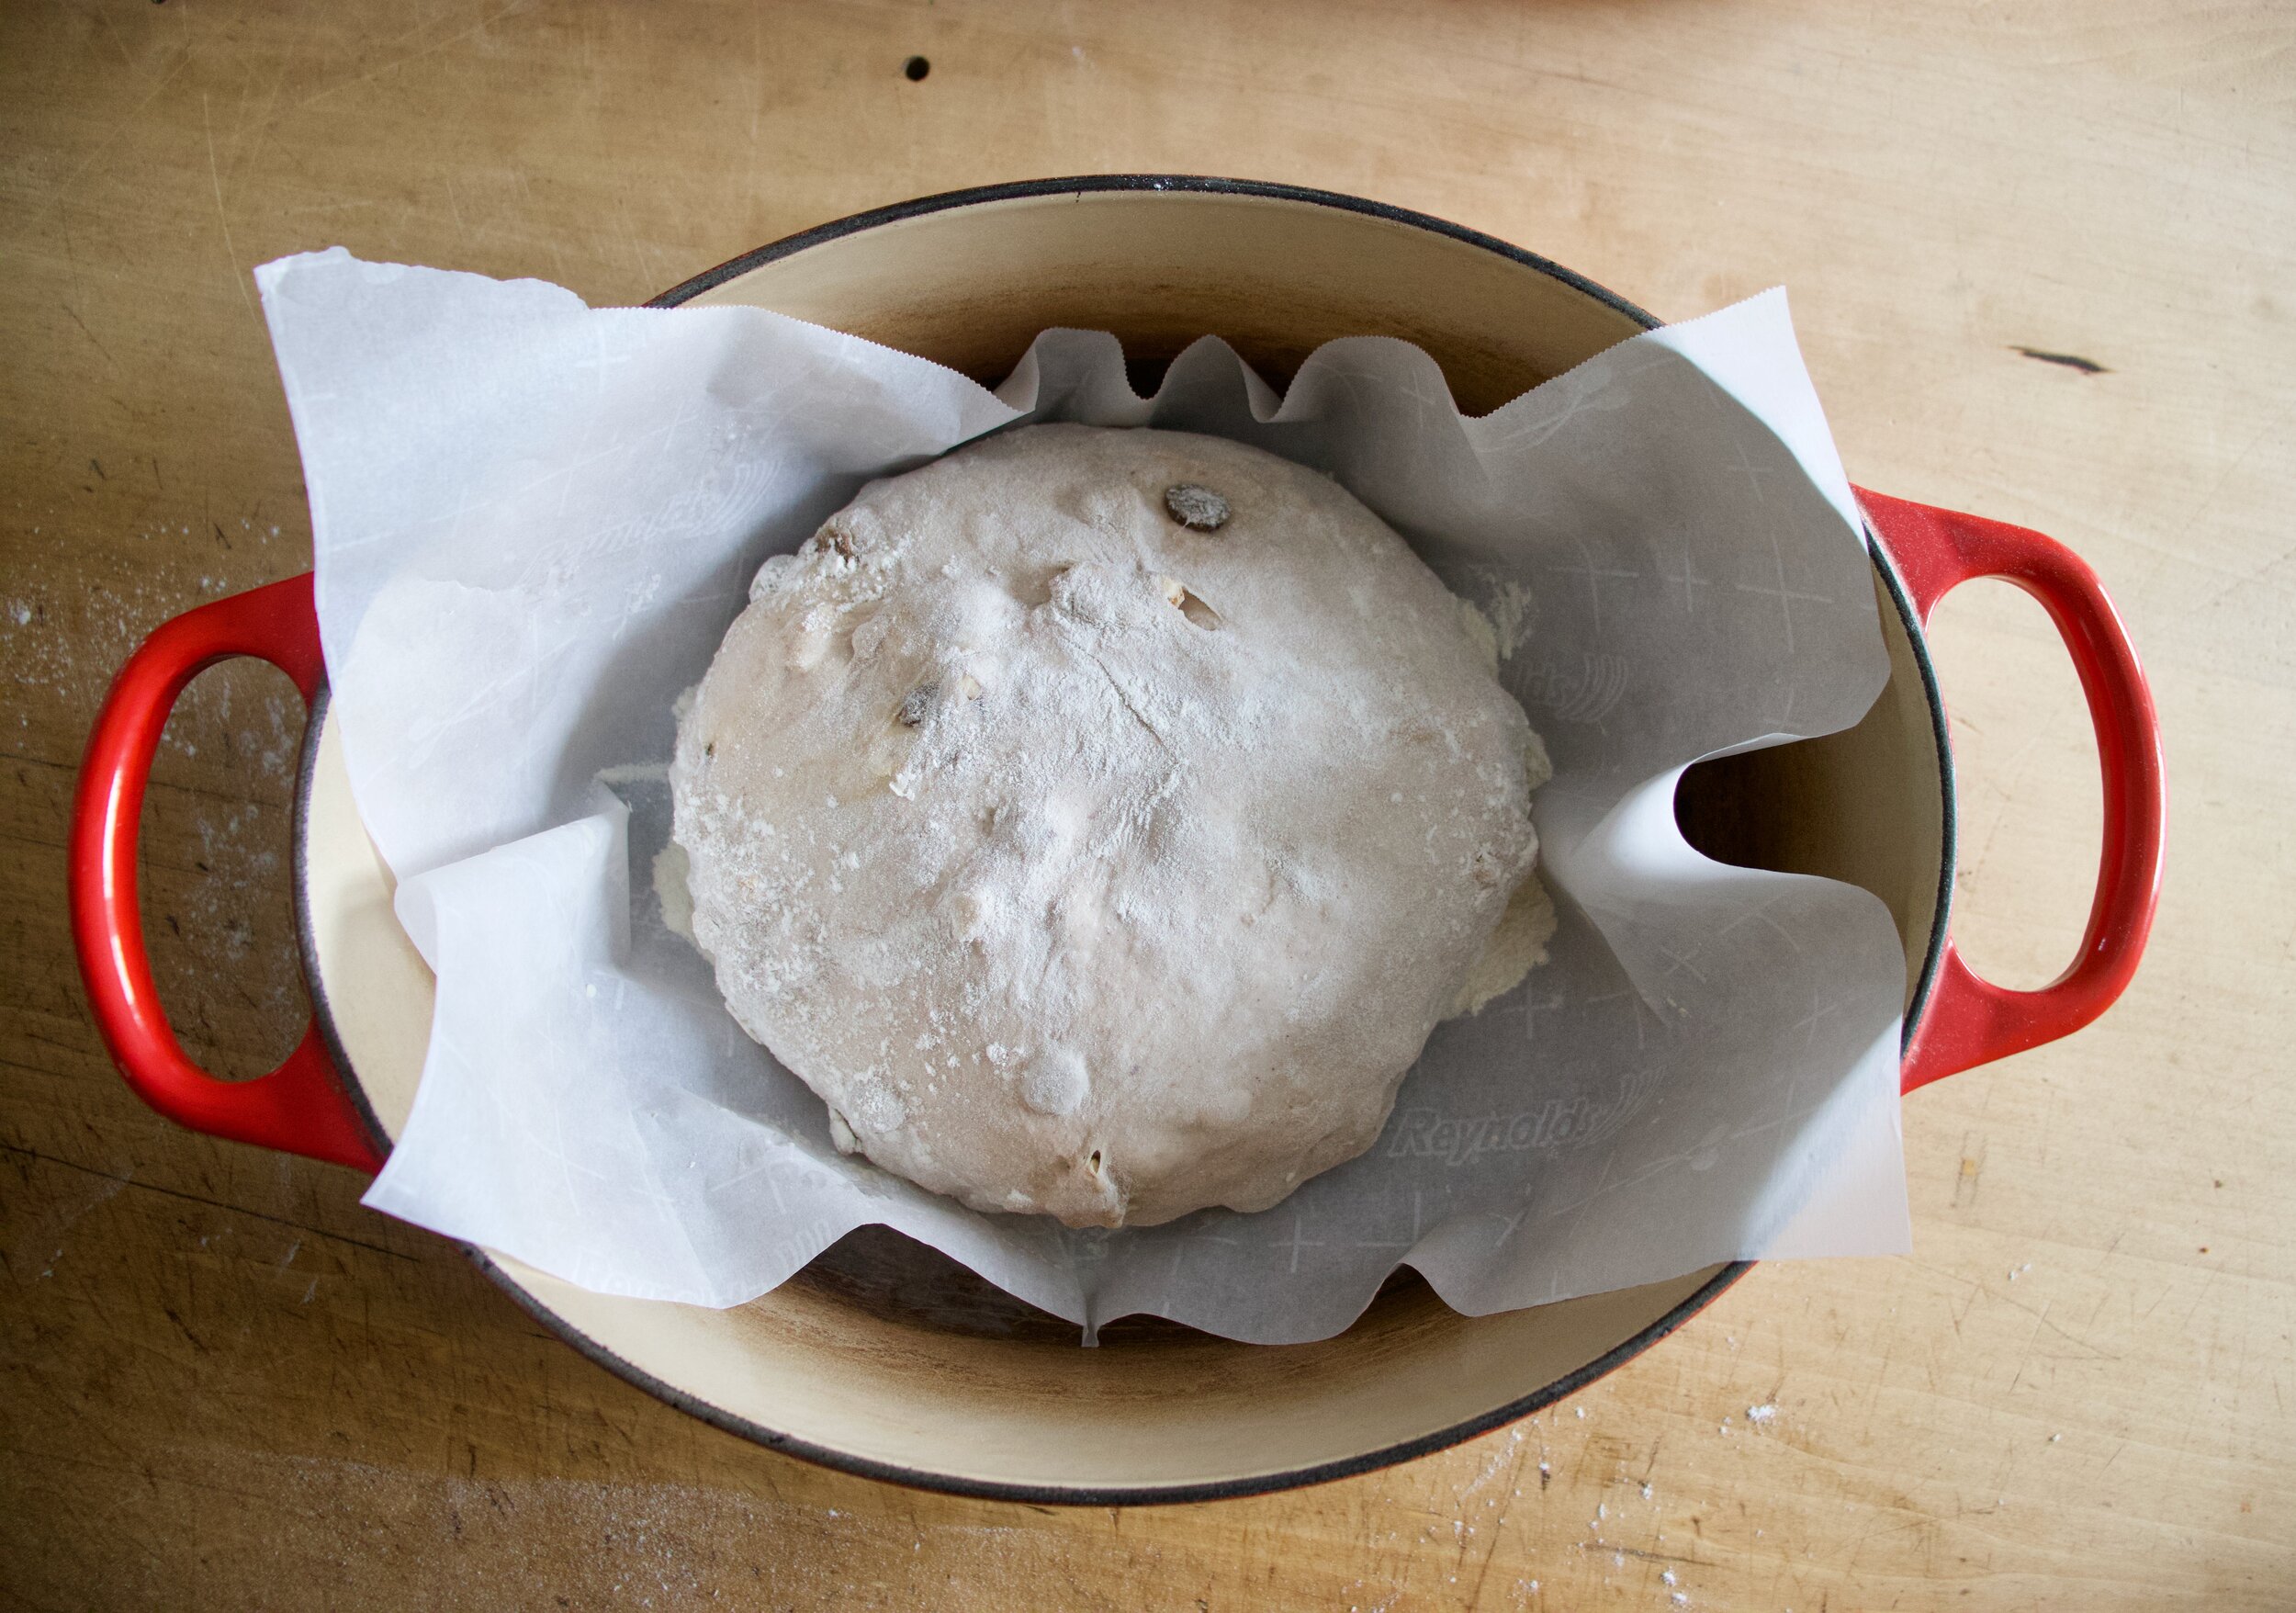
Dump dough out onto a flour piece of parchment. Fold each side over onto the top and them flip top side down. Gently shape into a nice ball.

Place doughstill on parchment into a large dutch oven. Cover and let rest for 2ish hours.

Preheat oven!

After the two hours and once the oven is nice and hot, remove lid and take a lame of serrated knife and slash the top of the loaf. One or two slashes or a few fancy placed ones. Just don%u2019t press down to hard of cut it up to much. Now place lid back onto pot and place pot into hot oven. Bake for 30 minutes then carefully remove lid. Bake for another 20-25 minutes or until a deep golden brown.

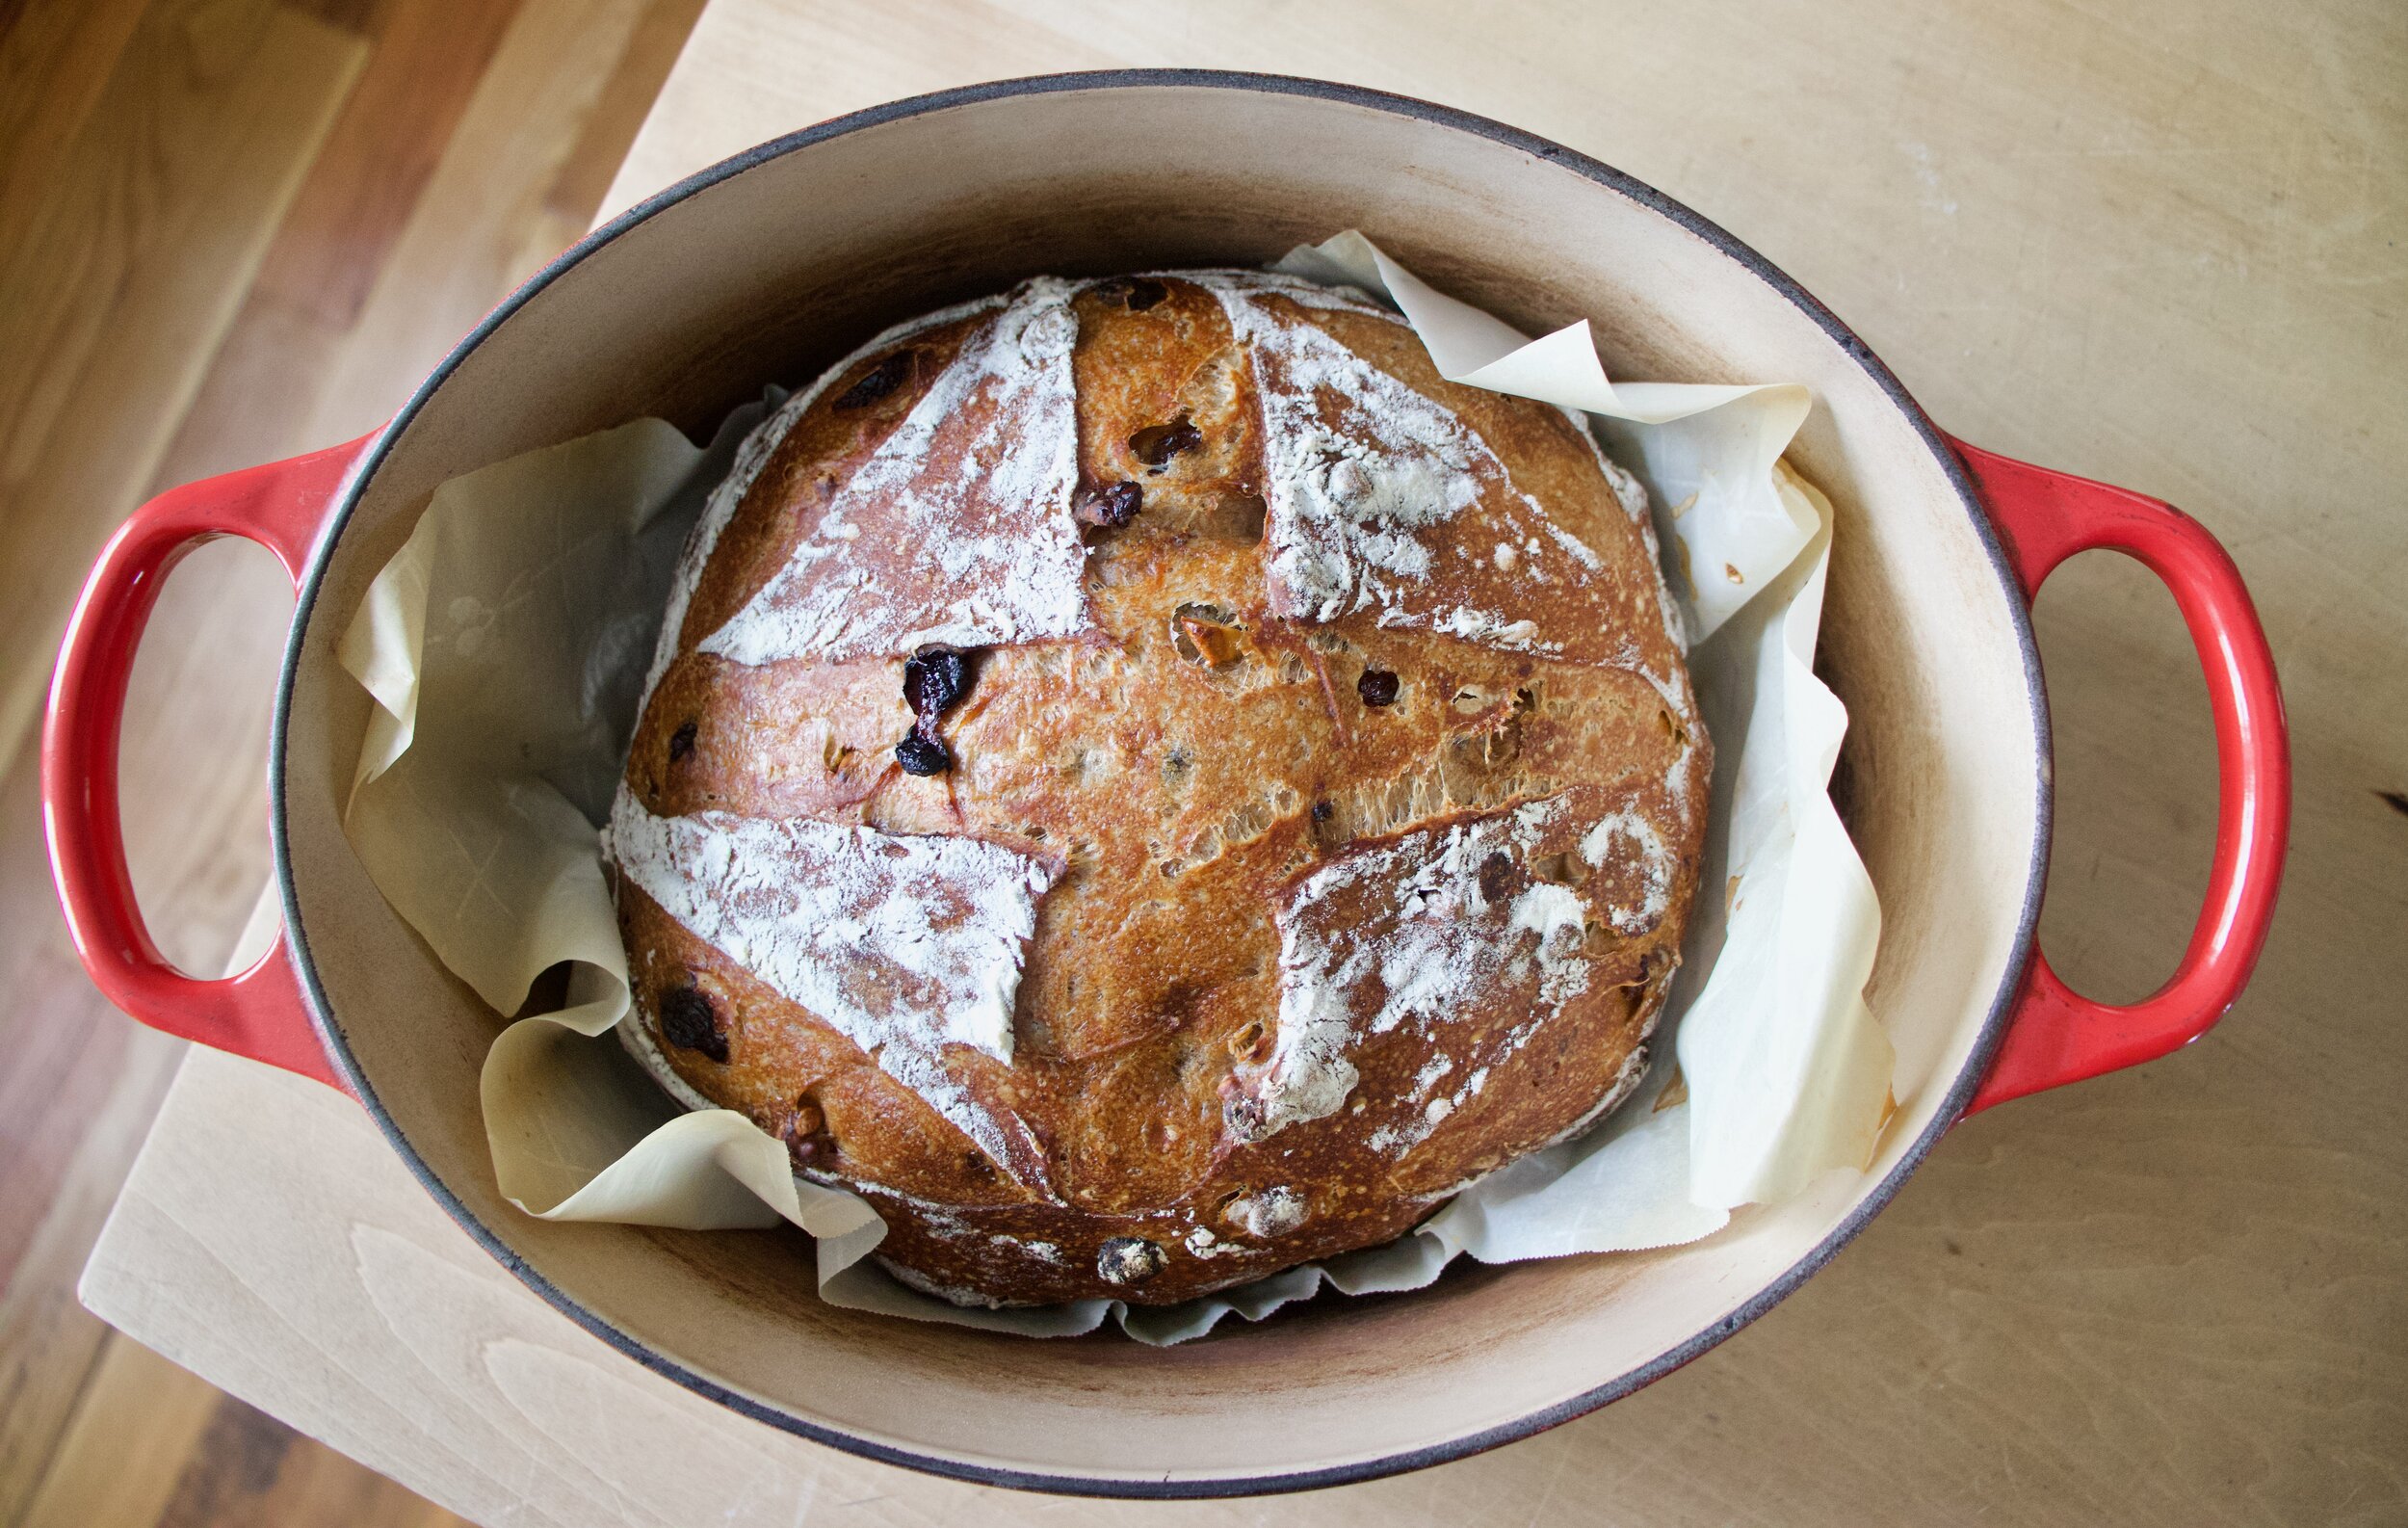
What a beauty! Now take the bread out of pot and yes, you MUST wait to cut into it. Let cool for at least an hour. I know you want bread now but it will not end well if you try to cut into this loaf hot.

But once it is cooled and you slice into.. Worth every minutes of waiting.

-C

Makes one big road loaf but can also make 2 smaller round loafs

  • 4 cups all purpose flour plus more for shaping

  • 1 3/4 cup warm water

  • 1/2 cup ripe sourdough starter

  • 1 cup raisins

  • 1 cup chopped walnuts

  • 1 teaspoon salt

  • 1 heapingtaspoon cinnamon

Start by dumping some of the warm water into a bowl with the raisins. Let sit for a few minutes until the y plump up a bit. Stain the water from raisins into a big bowl only with the starter and the rest of the warm water. Add in a cup or so of flour and mix until incorporated. Next add in the rest of the flour, the salt, and the cinnamon. Mix until all the dry flour is now wet and you have a shaggy wet dough. Dump in the walnuts and raisins and mix in. Scrape down sides of bowl, cover, and place in a warm spot for an hour to two. After sitting for a while, the dough should have risen a bit but to doubled in size. Grab the edge of dough and fold it over itself , cover back up (use plastic of a silicon top), and stick it in fridge overnight (at least 10 hours but up to a week)

The next day when you are ready to bake it off, remove the dough from fridge, dump out onto a floured covered piece of parchment, and fold side over to the top. Then roll the folded side over. Keep on parchment and gently shape into a round. Place shaped dough (pick up by the parchment paper) into a large dutch oven. Put the cover on and let rest. (You can also place on a baking sheet if you don%u2019t have a dutch oven and gently cover a plastic bag that is not touching he dough). After about and hour and a half start reheating the oven to 500 degrees.

After the oven has been preheated (give it a good 1/2 hour so oven temp is truly hot) remove lid (or bag) and sprinkle a little flour on top of dough. With a lame or a sharp serrated knife, score the stop of the bread. One or two slashed should be fine. Now place lid back onto pot and place pot into hot oven. Or if not using dutch oven, add a separate baking pan to the bottom of oven with a cup of water to create steam and just slide baking sheet into oven. i After a few minutes, turn heat down to 450. For dutch oven, bake for 1/2 hour then carefully remove lid from pot and continue to cook for another 20- 25 minutes or until the bread is a nice deep golden brown. If not using dutch oven, the bread will back a bit faster so check after 40 minutes for a nice deep golden brown loaf. (When in doubt of doneness check internal temperature . 200- 210 degrees)

Once baked through, remove pot from oven, pop bread out of pot and place on a cooling rack. Let cool for at least an hour before cutting into it.

Once cooled, slice and eat. Best eaten within 2-3 days and if you are not going to eat it that fast, just slice it up and stick in the freezer.

THE LOVELY CRAZY

January 25, 2023 by maximios • Blog

Whoa has It been a while since I have posted a recipe. Not that I haven%u2019t wanted to or that I haven%u2019t been making food, I just have been busy A.F. And truthfully I am as busy as ever but I happen to have my phone next to me when I was making this little casserole dish thing that I have made a few times now and I think it well worth a share.

What is it you ask? It is a creamy but dense chickpea base covered in tender roasted beets and onions with a lemon tahini drizzle. It is simple to make, super delicious, and can be tweaked in a million different ways to your liking.

Is it a fantastic dish to serve at say a Thanksgiving? Well yes, yes it is. You can serve it as a side or even make it bigger and have it as a sort of main dish. It%u2019s a good protein that is naturally gluten and grain free, vegan, and blah blah blah. What really matters here though is that it is damn tasty and also bonus, it is so siimple to make and can even be prepared a day in advance so no stress. We will take all the wins here.

-C

  • 1 cup chickpea flour

  • 2 cups boiling water

  • 1 teaspoon salt plus more to taste

  • ground black pepper

  • 2 teaspoons cumin (feel free to omit or use a different spice.Thyme or rosemary are equally delicious )

  • 2 medium beets

  • 1 large onion

  • a lemon

  • 1-2 tablespoons tahini

  • teaspoon or so olive oil.

Note. This dish is excellent made and eaten right away but also gets even better (in my opinion) cooled and reheated. Also you can change up the veggie situation and use whatever ones you like.

Place chickpea flour in a bowl and slowly whisk in boil water with a fork so that there are no lumps. Mix in cumin and a teaspoon of salt and a pepper. Scoop batter into a lightly oiled 8X8 casserole dish (you can use a round cake tin or a cast iron skillet as well) and set aside to rest for a few.

Preheat oven to 400.

Grab beets and onion and slice in about 1/8 thick slices. Layer slices on top of chickpea mixture, making it look pretty if you feel like it. Once the veggies are layered, lightly drizzle the top with a teaspoon olive oil and sprinkle with a good pinch of salt and pepper.

When the oven is preheated, covered the baking dish and place in oven,. Bake covered for 1/2 hour then remove covering and bake for another 20-30 minutes or until the beets are nice and tender and a tester poked into the center of the dish comes out clean. Remove from oven,

Once it%u2019s out of the oven grab a little bowl and add the juice of the lemon to the tahini and mix. Season with salt to you liking.

Now serve. Drizzle the top with the tahini mixture and cut yourself a big old piece. Yes drizzle extra tahini on top. Sure squeeze on more lemon. You do you.

Store leftovers in fridge. Reheat in hot oven for 10 minutes..It gets crispy!

Black beans soup is eaten on the regular around here. Not always the same way but pretty much. Why screw with a good thing you know?

Now soup with dumplings. This is not (yet) a regular thing but I was making the usual blacken soup and planing on making corn bread to go with (in a pan) , when I had a moment of clarity and realized that I should just make the corn bread into dumplings and not have to deal with baking and another pan to clean. Duh. Why don%u2019t I do this more often?

And that is it. A black bean soup, nice and thick, with light fluffy cornbread dumplings cooked in one pot. Quick, easy and all sorts of delicious. Can%u2019t complain about that.

Now let%u2019s get to the soup and dumplings!

The stuff. For the soup there are bLackbeans, and onion, spices, a carrot, garlic, tomato paste, apple cider vinegar. For dumplings we have flour, baking powder, salt, oil, and plant milk. Salt and pepper too.

Start by dicing up the carrot and onion and mincing the garlic.

Dump all that you diced into a big pot, along with the spices, some salt and pepper, and about 1/2 cup of water. Place on stove and cook down on medium heat until the onion is becoming translucent and the whole pot is starting to smell fragrant.

Now add in beans and tomato paste and about 5 cups of water. Bring to a boil then turn down to medium an cook for about 20-30 minutes.

Soup. Cooked and all taste but one more little step.

Remove a third of the soup and blend until smooth and then add it back it.

Dumplings. Mix dry together then add in oil and milk. Mix together unit incorporated.

While soup is still on medium heat, scoop the dumping mixture right into the soup.

Place a loose side on top of pot ans let the dumplings cook util list and fluffy which will take about 15-20 minutes.

Cornbread dumplings looking all nice in the soup.

Then you eat it. Add some avocado on top of you want. Avocado is always a good idea.

-C

feeds 3-4

  • 3 cups cooked black beans (or 2 16 oz cans)

  • 1 large onion

  • 1 good sized carrot

  • 3-4 cloves garlic

  • 1 teaspoon chill powder

  • 1 tablespoon cumin

  • 1/2 teaspoon red pepper flakes (or none if you don%u2019t like the spice)

  • 1 tablespoon maple cider vineger

  • 1/3 cup tomato paste

  • 5 cups water

  • salt and pepper

    Dumplings

  • 3/4 cup all purpose flour

  • 1/4 cup corn meal

  • 3/4 cup plant milk

  • 2 tablespoon neutral oil

  • 1 teaspoon baking powder

  • 1/2 teaspoon salt

Start by dicing up the carrot and onion into small pieces. Mince the garlic and then place the garlic, onion, and carrot into a large pot with the cumin, chili powder, and red pepper flakes, a good pinch of salt and pepper, and about 1/2 a cup of water. Place pot on stove on a medium low heat and sweat the mixture for about 10-15 minutes or until fragrant and the onions are slightly translucent.

Add in the tomato paste, beans , and 5 cups water. Bring to a boil then reduce to medium heat and let cook for about1/2 hour. Once soup has cooked down a bit and tastes delicious, remove form heat and carefully transfer 1/3 of the soup to a blender or jar (if using a hand blander) and blend until smooth. Add the blend soup back to the pot and turn the heat back on to medium low. Taste and add more salt and pepper if needed.

Now make dumpling mixture. Mix the dry ingredients together in a bowl then add in the oil and milk and mix until incorporated. Scoops the dumping mixture into the soup while the soup then place a lid loosely on the pot. Cook for another 15-20 minutes or unit the dumplings are nice a n fluffy.

And when they are done, remove lid, tun the heat off, and paddle soup and dumplings into bowl. Eat. Add sliced avocado for a little more yum.

I guess black eyed peas are good to eat on New Years because they bring you good luck or money or something. I have heard this and a lot of other food traditions but I don%u2019t really do New Years so I have never really actively thought about what I consume on the day. But when I went to ponder my bean selection ( I have so many varieties) I figured what the hell, why not make the stew I was about to make into a good luck black eyed pea stew. I mean I was already making it (I was leaning towards black beans) but If there is a chance that eating these delicious beans will give me a little extra luck (and or money) this year, well by all means I%u2019ll take it. And the stew because that is really what I was after.

This stew. It is thick and creamy from the sweet potato and beans, bright and light from the ginger and tangerines, and hearty because it is stew. It is a perfect stew situation to eat on any given day but especially nice on a cold winter evening. And I guess on New Years. Like today.

Now to the black eyed pea stew!

The stuff. Cooked black eyed peas. a sweet potato, some kale, a few tangerine, an onion, some garlic and ginger, tomato puree, and salt and pepper.

Start with chopping up the onion, mincing the garlic and ginger, and dicing up the sweet potato.

Toss the onion, garlic, and ginger into a big pot and add in a splash of water or oil and a pinch of salt. Place on medium heat ans cook until tranlucent and fragrant. Add in the sweet potatoes, tomato puree, and enough water to completely submerge it all. Keep on medium heat and cook until sweet potties are fork tender. Add more water if needed.

In he mean time chop up the kale.

And juice the tangerines.

Once potatoes are tender, add in the black eyed peas, the kale and the tangerine juice. Add more water to completely submerge again. And keep on medium high heat and cook for another 10-15 minutes or went everything is all melded and cooked together.

Like this. A pot of good goodness.

All that is left is to scoop the stew into blows and eat it. Squeeze more tangerine juice on top too, it makes it nice.

Good luck all year long!

-C

  • 2 cups cooked and drained black eyed peas

  • 1 medium sweet potato

  • 2-3 tangerines

  • 1/2 cup tomato puree

  • 1 small onion

  • 2 cloves garlic

  • 1/2 inch fresh ginger root

  • a few leaves of kale, chard, or collard greens

  • 4-6 cups water

Start by dicing up onion and peeling and mincing up the garlic and ginger. Place into a large pot with about 1/4 cup of water or a splash of oil and stick on stove on medium heat. Cook the mixture for 5-8 minutes or unit fragrant and translucent. While that is cooking dice up the sweet pot into small 1/2 inch cubes then add them into the pot once onion mixture has cooked, along with the tomato puree and enough water to completely submerge in all. Stir and and keep on medium heat and cook for another 20 or so minutes or until the sweet potatoes are fork tender.

Chop up kale and juice tangerines.

Once the sweet potato is tender add in the rinsed and drained black eyed peas, the chopped kale, and the tangerine juice. Add a sprinkle of salt and pepper and more water to submerge it all again and keep on medium heat. Cook for another 20 minutes so that all the flavors have time to meld and turn into a great pot of stew. Depending on your preference for thickness, cook down more for thicker stew, or add more water to keep it brothy.

Once cooked, scoop into bowls, season with more salt and pepper, and if you have an extra tangerine, squeeze a little more fresh juice on top.

First off, I am not sure if this is technically a stew, or chili, or just a soup, but I think a stew so I am sticking to it.

Secondly, I don%u2019t give a flying f%$# what it technically is because whatever it is is so freaking good!

Lets talk about this stew and whats in it. Me and tomatillos are having a thing right now and I can%u2019t seem to get enough if them. They are bright and slightly sour, but also sweet with a bit of acidity, kind of like a unripe tomato but just better and taste fantastic. Then I got the pumpkin which is hardy and creamy and I will eat all day, everyday forever if I could. White beans which are also creamy and delicious, all in a pot with a good amount or cumin, some of this and that, cooked down to a delicious pot of stewed goodness.

And isn%u2019t stew just he perfect food for a nice crisp fall day? 100% yes to that and yes to this stew. It will make you happy, smile, and full.

Now to the stew!

The stuff. Fresh Tomatillos, a pie pumpkin, cooked white beans, an onion, a jalape%u00f1o, a couple cloves or garlic, cumin, chili powder, red wine vinegar, salt and pepper, and fresh cilantro.

Start with dicing up the onion, garlic, and jalape%u00f1o. Remove the seeds fro meh jalape%u00f1o to make is less hot.

Toss that stuff into a pot along with the cumin and chili powder, a pinch of salt, ans about a 1/2 cup of water. Place on stove on medium heat and start to cooke.

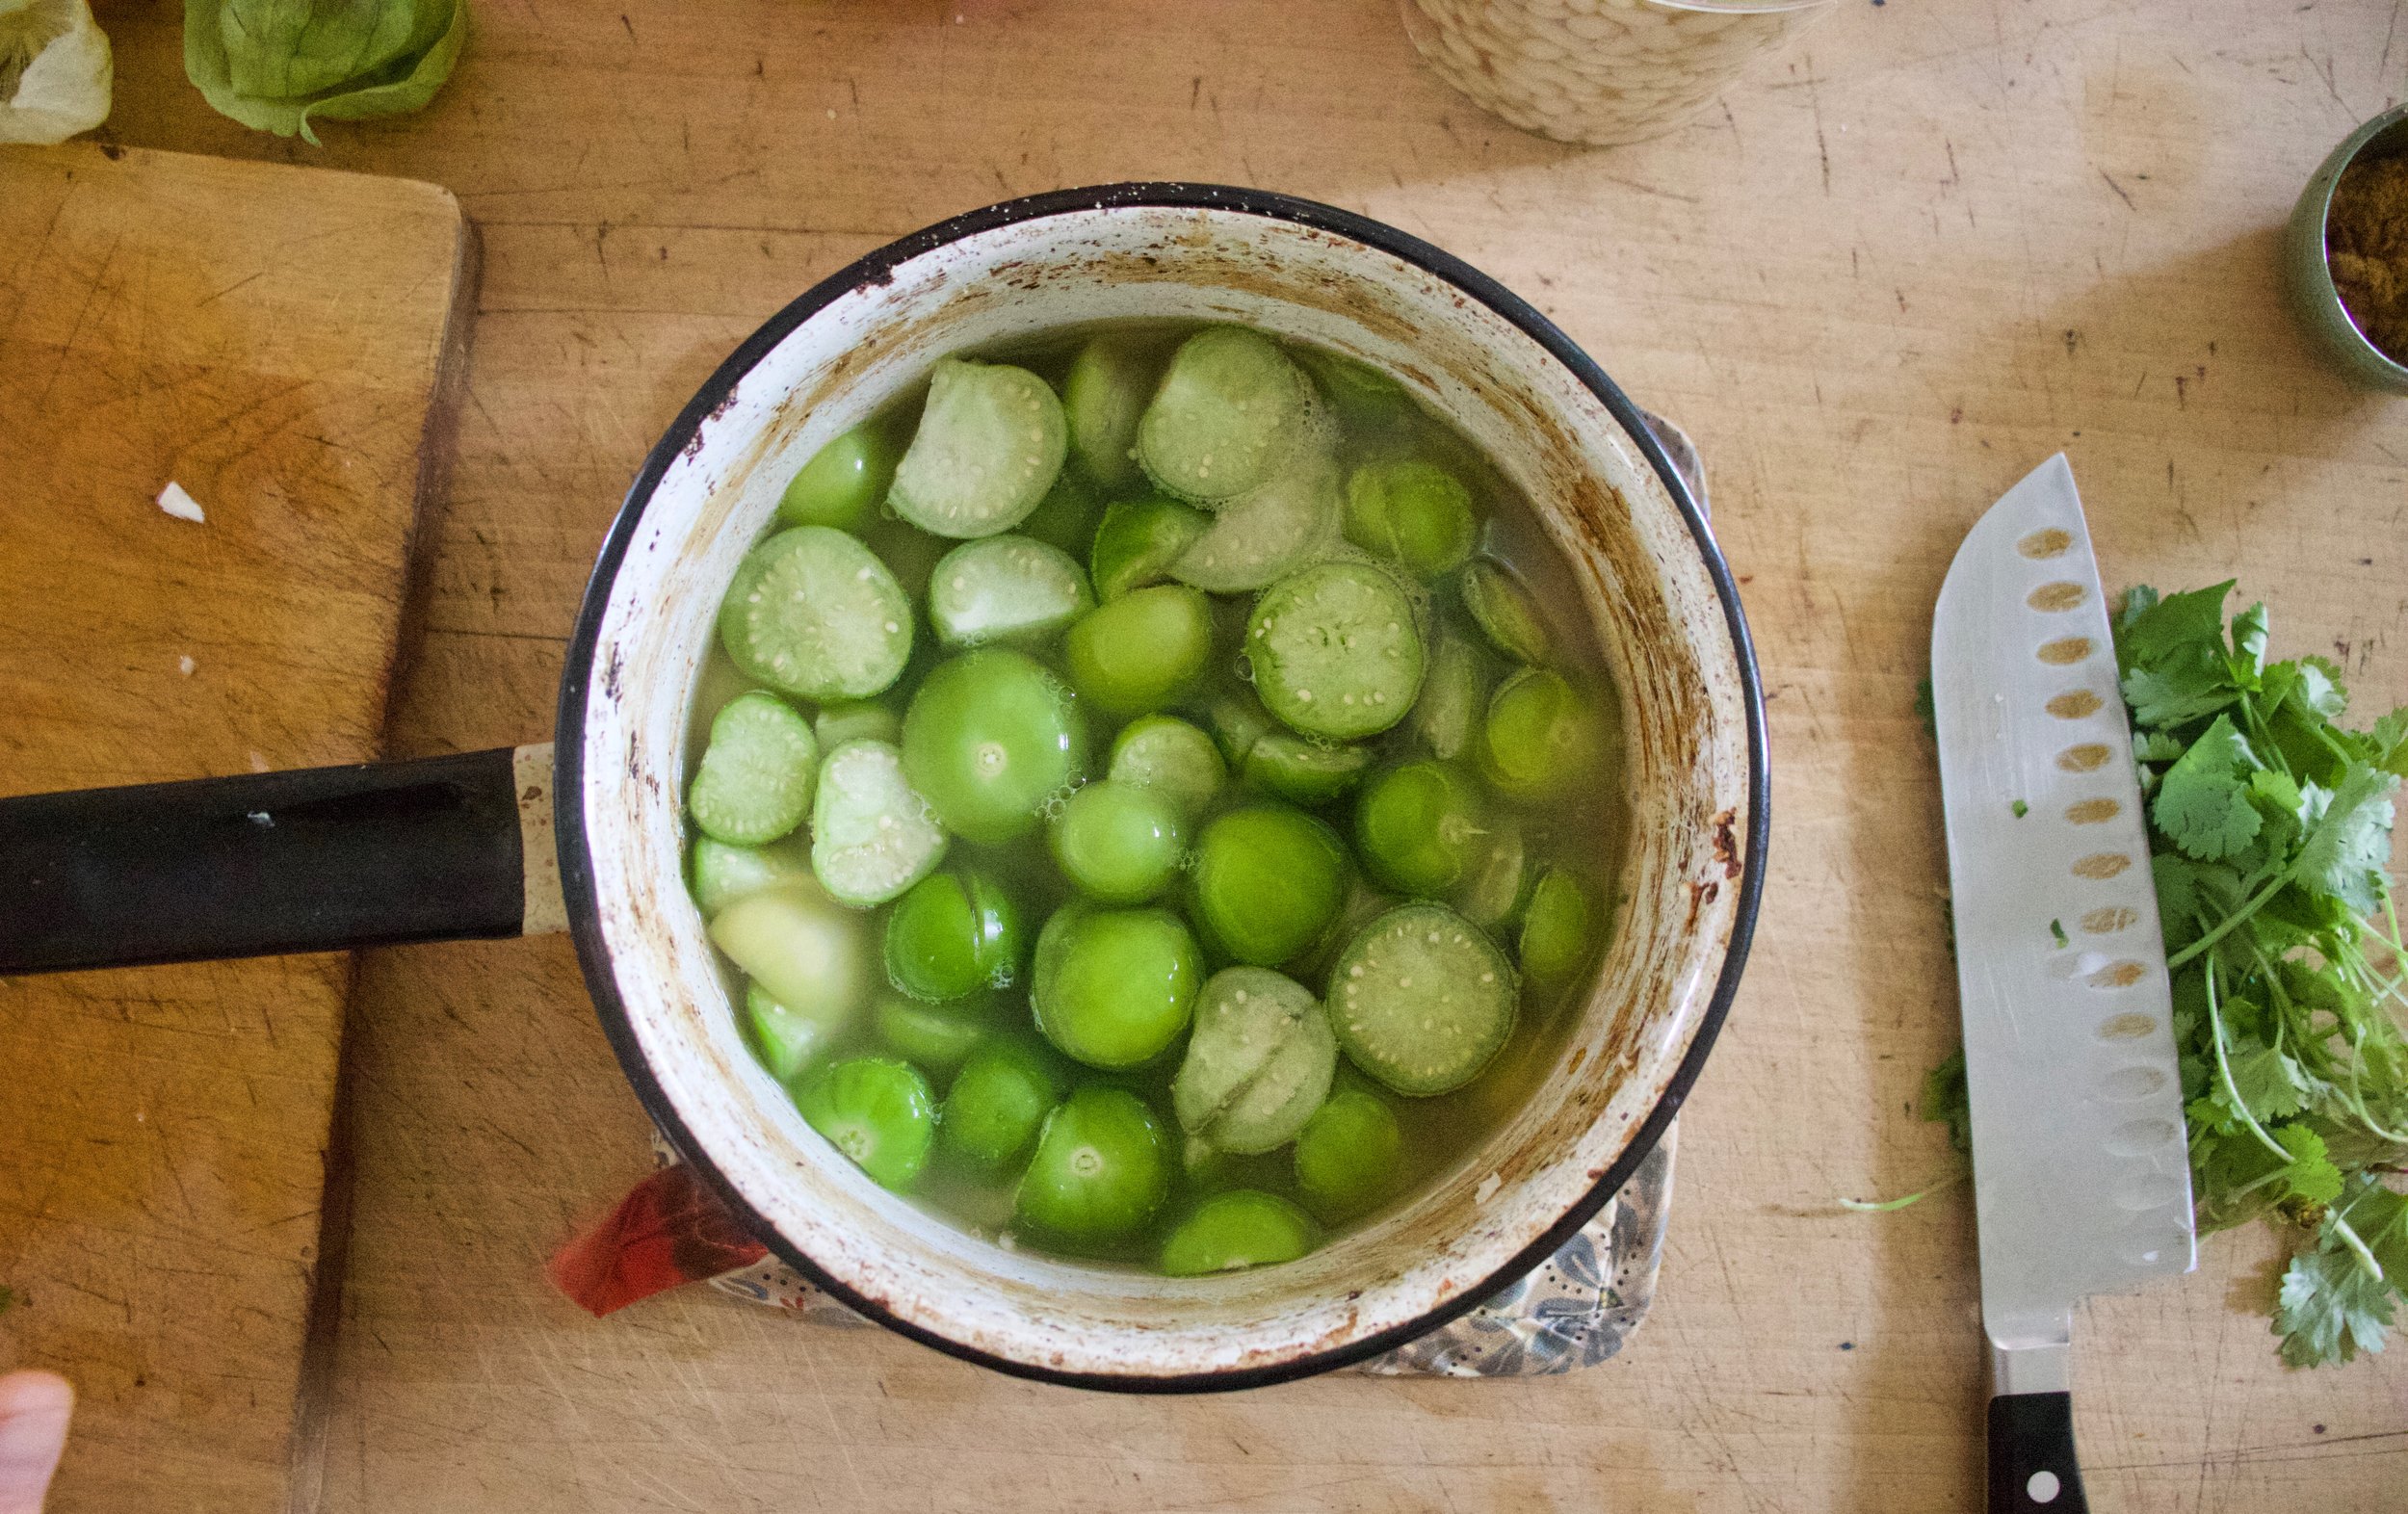
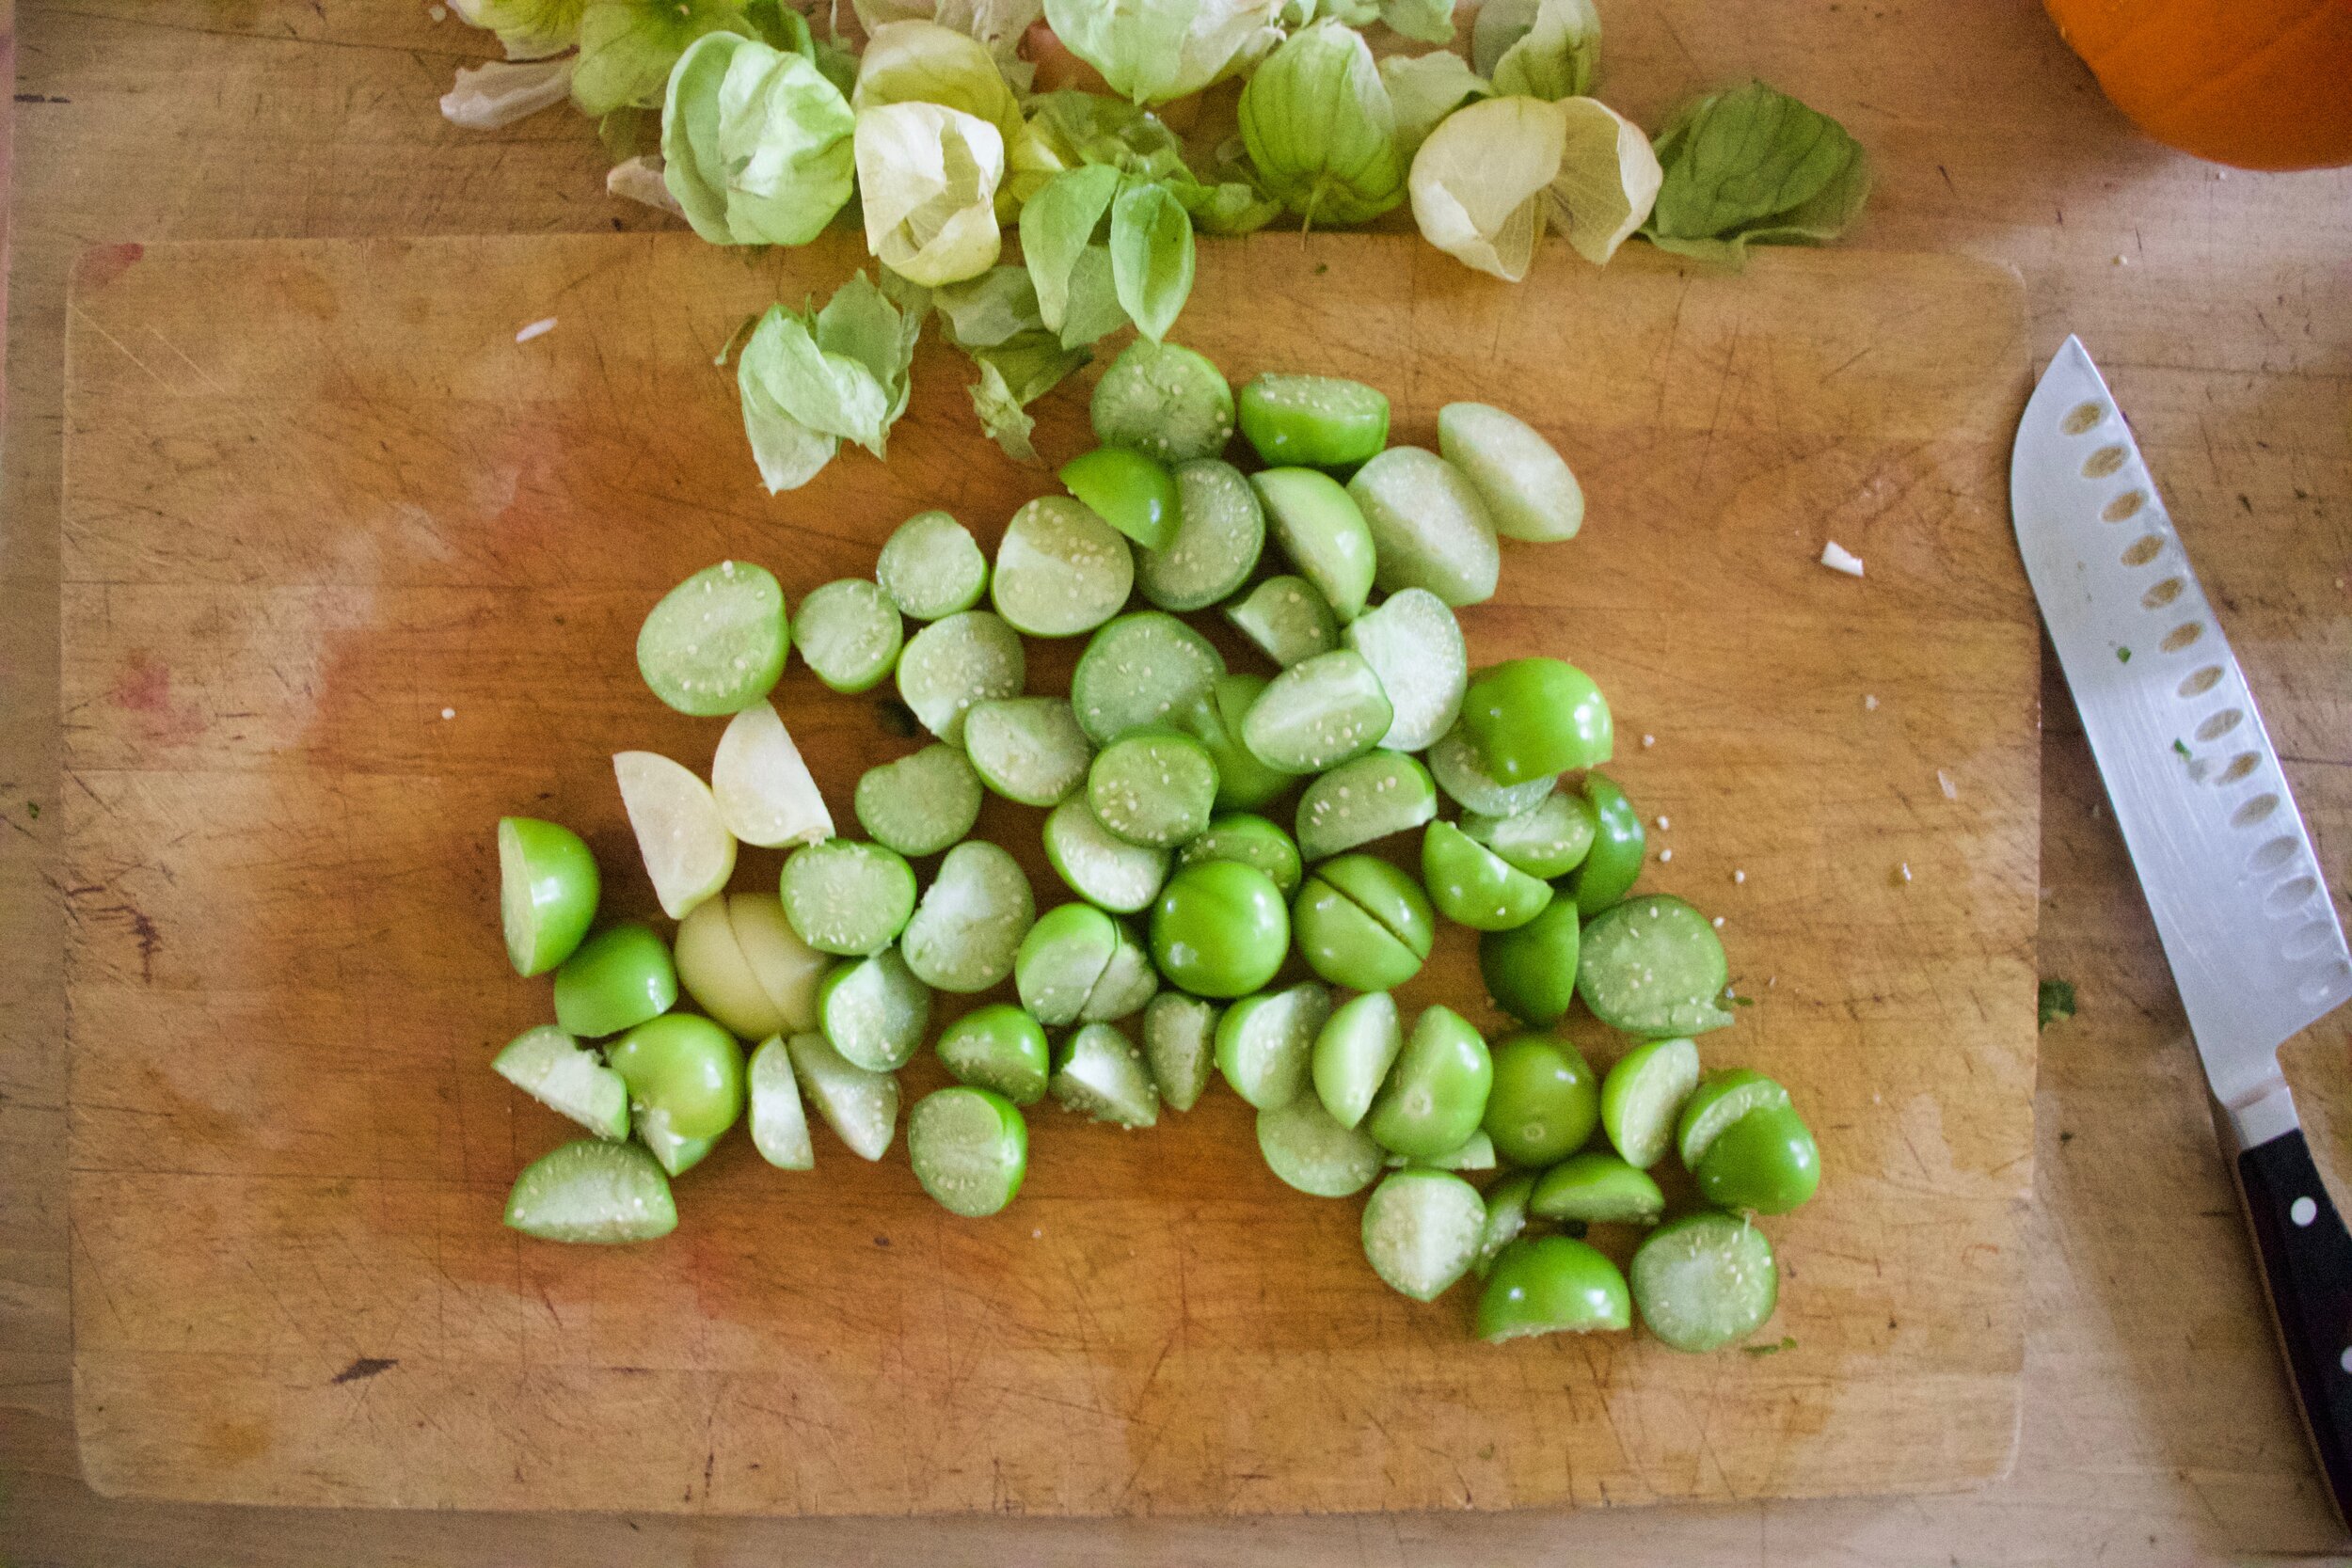
Husk, rinse, and halve tomatillos.

Once the onion and jalape%u00f1o mixture is cooked a bit like this%u2026

Add in the tomatillos and enough water to submerge the all. Place back on stove on high heat.

Now dice up pumpkin into inch sized cubed.

Now add the pumpkin and the white beans into the pot. Bring the whole thing to a boil once more, then turn the heat down to low. Cook for about an hour to hour and a half, string once in a while, until its cooked down nice and thick.

Grab a bowl, fill it up, top with fresh cilantro, and get down on it.

P.S. This is now my new favorite food

-C

2-3 good hardy servings

  • 20-22 tomatillos (about 3 1/2 cups after husked and halved)

  • 1 small pie pumpkin (3 1/2 cups cubed pumpkin)

  • 2 cups (or 1 can) cooked and drained while beans

  • 1 yellow onion

  • 2 cloves garlic

  • 2 tablespoons cumin

  • 1 teaspoon chili powder

  • 1 tablespoon red wine vinegar

  • 6-7 cups water

  • salt and pepper

  • fresh cilantro

Start by dicing up the onion into really small pieces. Mince the garlic and cut the jalape%u00f1o up into small pieces (remove seeds) while you are at it. Place the onions, garlic, jalape%u00f1o,cumin, chili powder, and a pinch of salt into a pot. Add in about 1/2 a cup of water and place on stove on medium heat and start to cook.

While that is cooking a bit, husk, rinse, and halve the tomatillos. When the onion and garlic mixture has cooked down a bit, add the tomatillos to the pot along with a couple of cups of water (enough to submerge the tomatillos). Place back on stove on high heat and bring to a boil.

In the meantime, dice up 3 1/2 cups of pumpkin (remove seeds and save for later and don%u2019t peel pumpkin unless you really want to) into mouth sized cubes. Once diced up, add into the pot along with the with beans and vinegar. Add more water until everything is submerged (about 3-4 more cups) then bring pot back to a boil. Once boiling, reduce heat to low and let cook for about an hour to an hour and a half, stirring on occasion, until the tomatillos have cooked and thickened, the pumpkin is nice and tender, and the whole stew is nice and well, stew like.

And once it is cooked, taste for seasoning (add more salt and pepper if needed). Then ladle into a bowl, toss on some fresh cilantro then dig in.

Left overs store well in fridge for about a week. Its easy to heat up but really, cold stew is amazing!

Another heatwave. I tell you what, If I never live through another 90 + degree day, it will be too soon.

What to eat during a heat wave? Well maybe you don%u2019t care and have air conditioning in your kitchen so you cook whatever. I don%u2019t have air conditioning and after a few days of boiling temps, there is no freaking way I am turning on the oven. I can barely turn on the stove top to boil water, but I did, I boiled water, I just did it early in the morning before the temperatures starting rising again. (A pro tip for you.) That is one of the great things about pasta salad, you can make the pasta ahead of time. You can even make the whole salad in the morning and then you don%u2019t have to do a damn thing when it comes to dinner besides lifting a fork to your face, which I know can be a feat when all you want to do is melt, or slap at something, but still.

This pasta salad, well it is not you everyday pasta salad. It has beans, fresh basil, and a dressing that is made by blending up the most delicious seasonal tomatoes until rich and creamy and dumped all over the orzos. . It is probably going to be the best tasting pasta salad you will ever eat. The thing is, you really need to make it soon because sure you can get tomatoes all year round but don%u2019t do that. Do yourself a favor and make it now while the tomatoes are plentiful and at their peak of deliciousness. And also you don%u2019t have wait for a heatwave to make it. This is a good meal to have at the ready all throughout tomato season, and just in case, a heat wave.

Now to the pasta salad!

The stuff. Just picked tomatoes, some fresh basil, cooked navy beans, orzo pasta, olive oil, red wine vinegar, garlic, and salt and pepper.

Rough chop tomatoes into small pieces. Also peel and dice garlic into small pieces.

Place the tomatoes, garlic, and a good pinch of salt into a blender (I used a hand blender) and blend unit smooth. Add in the vinegar and oil and bend until the mixture starts to emulsify and becomes smooth and creamy.

Cook and strain pasta as instructed. Keep in on the al dente side.

Chop up basil into thin ribbons or whatever.

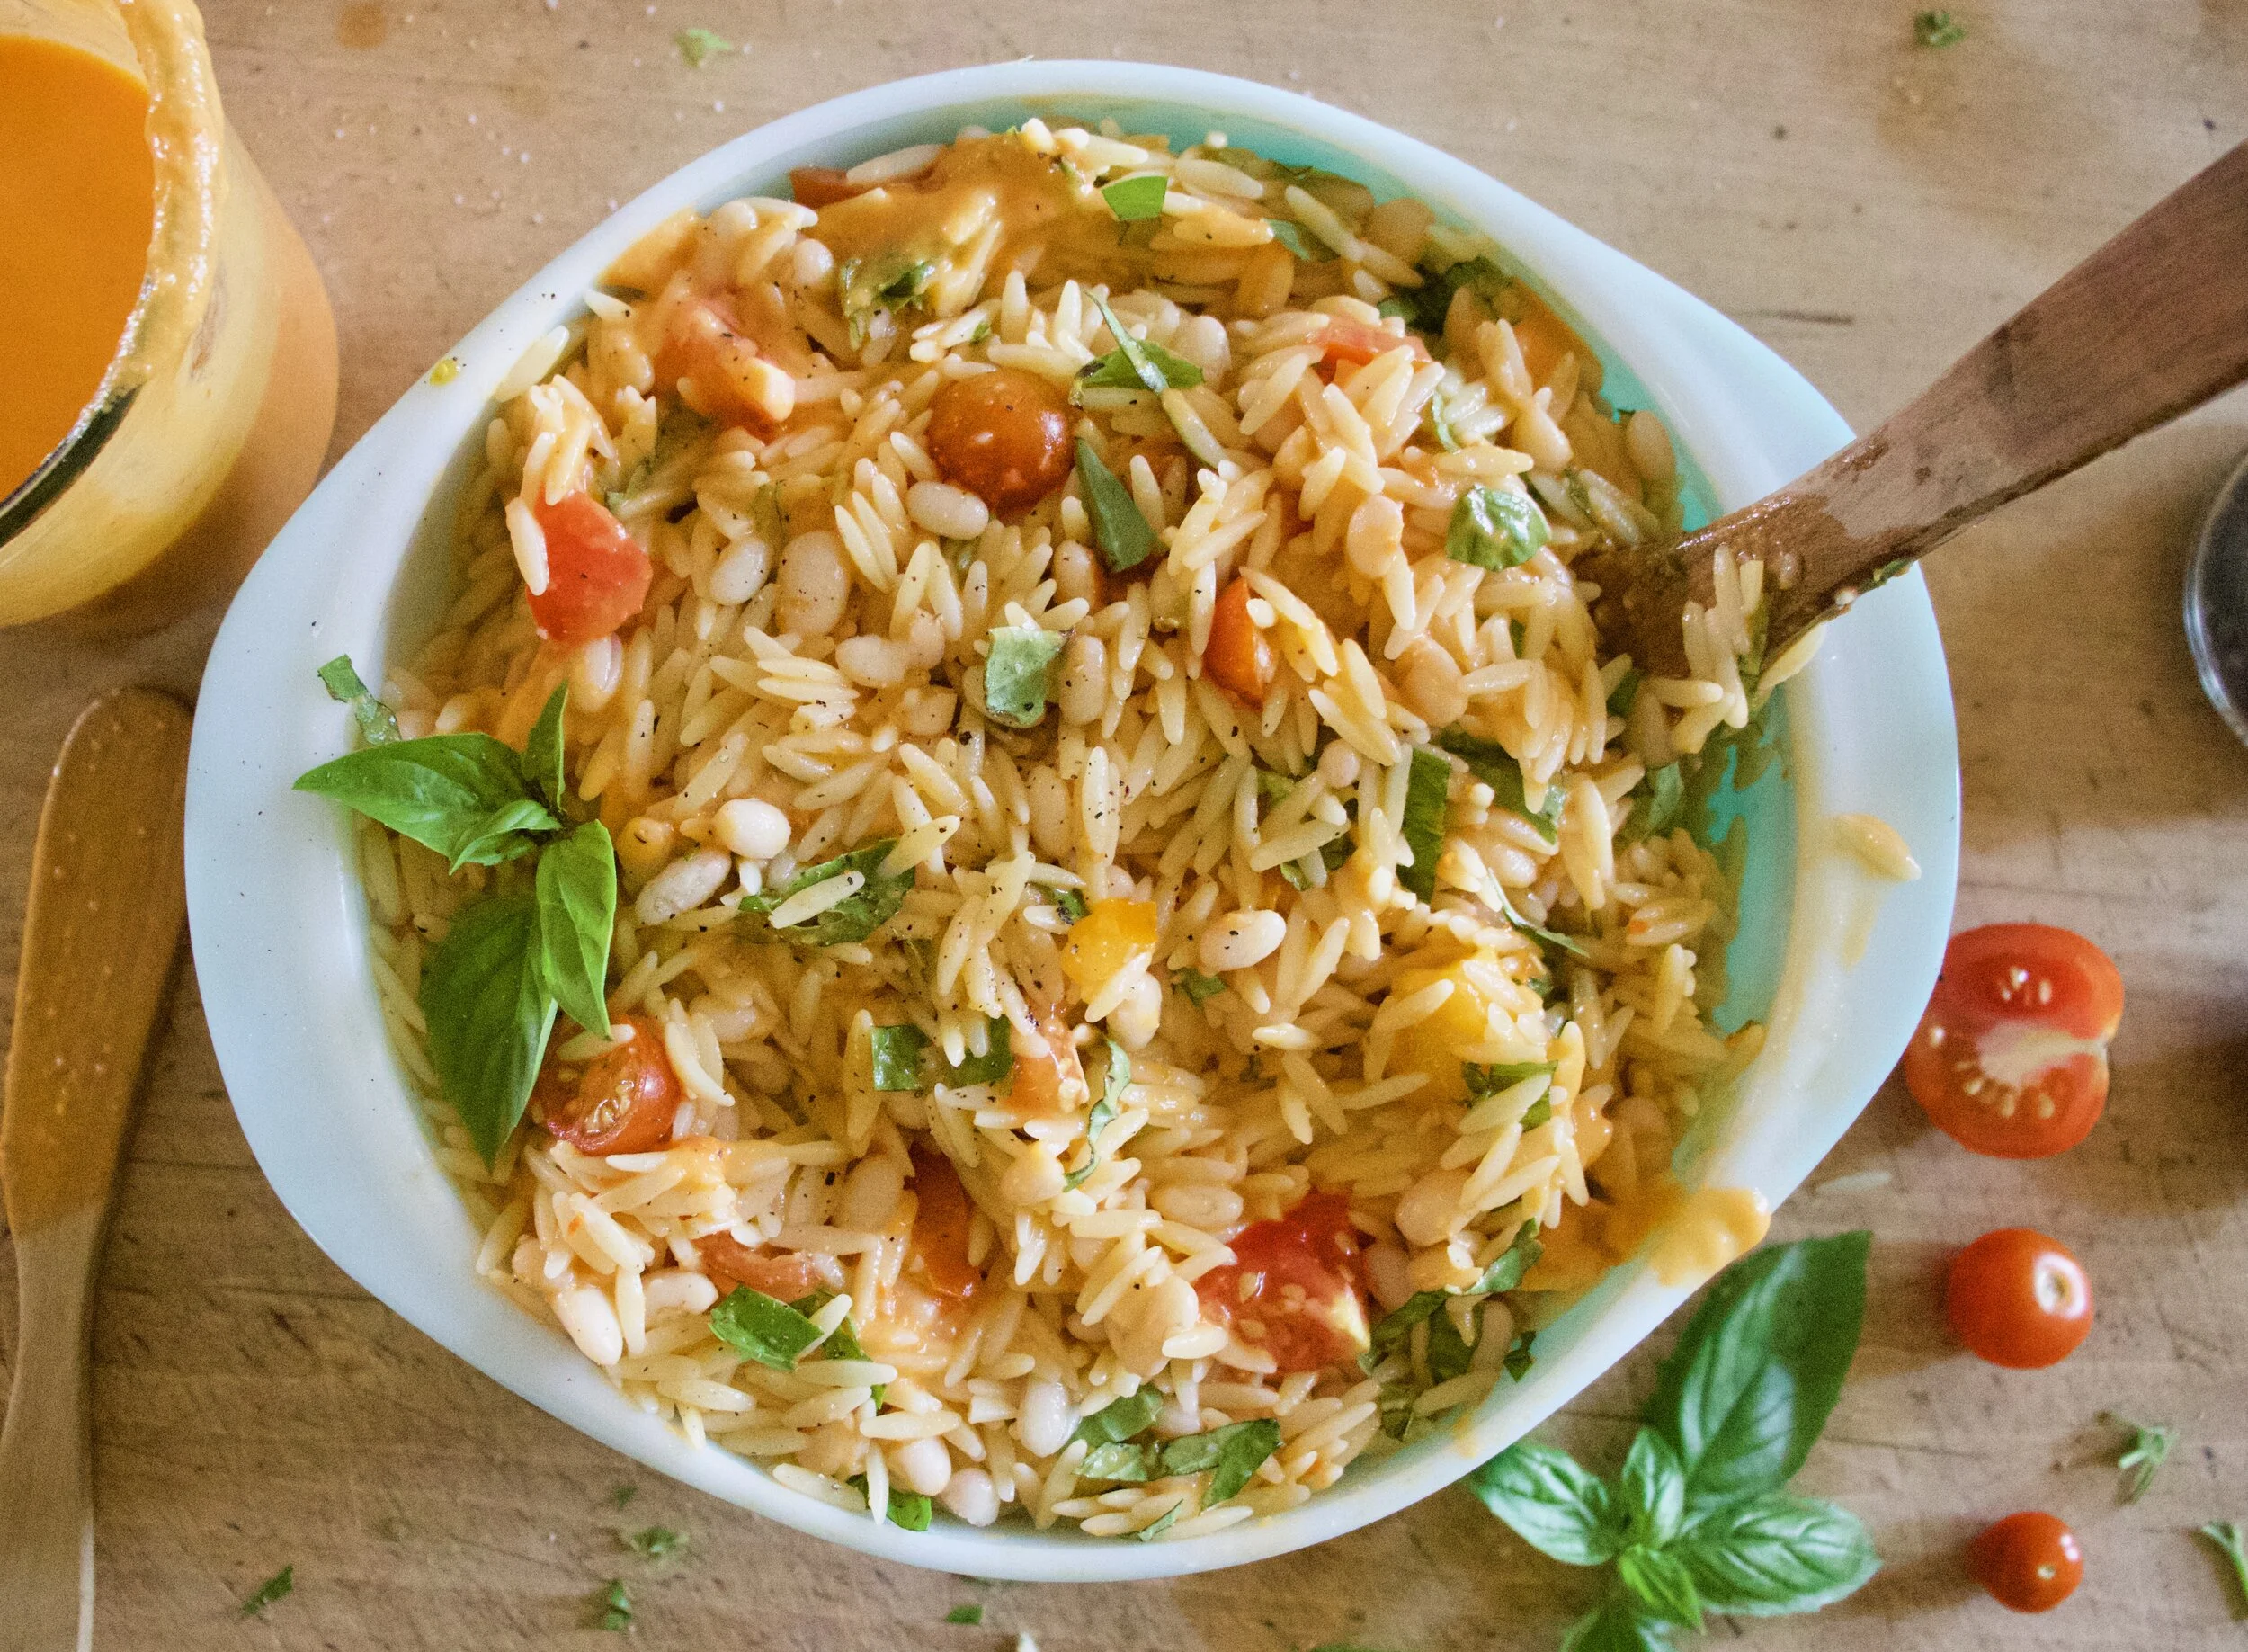
Then dump pasta into a large bowl. Add in cherry tomatoes ( I cut mine in half) and beans. Dump in half the sauce and mix around then mix in the chopped basil.

If you are eating it right away, add in the rest of the sauce. If you are keeping it for later, place pasta and sauce in fridge and a before you are planning on serving it mix in the remaining sauce.

Looks so good right! Season with salt and pepper to taste and then you know%u2026

Grab a bowl and eat it. Probably should grab a from too, eating this with your hands might get messy.

Stay cool friends!

-C

serves 2-3 as a meal or more as a side

  • 2 cups dried orzo pasta (12 oz)

  • 2 large heirloom tomatoes (about 2 cups chopped)

  • 1 1/2 cups cherry tomatoes (or chopped tomatoes)

  • 1/3 cup olive oil

  • 2 tablespoons red wine vinegar

  • 1 1/2 cups cooked and drained white beans ( I used navy but any white bean will do)

  • 1 cup packed basil leaves

  • 2 cloves garlic

  • salt and pepper

Start with making the tomato dressing. Rough chop the 2 large tomatoes into smaller pieces and peel and chop garlic. Place the tomatoes in a blender (or a large jar if using a hand blender) with the garlic and a good pinch of salt and a little pepper. Blend until smooth. Add in the vinegar and oil and continue to blend until the mixture becomes thick and creamy. Taste and add more salt and pepper if needed .

Prepare orzo pasta as instructed on package (make it al dente)

Grab basil and chop into smaller pieces.

Once orzo is cooked and drained, dump it into a large bowl. Add in the beans and cherry tomatoes (slice in half if they are on the large size) and pour in half if the tomato sauce. Mix unit incorporated. Toss in the basil.

Now if you are going to eat right away mix in remaining sauce. If you plan on refrigerating and eating later, save the remaining half of the sauce and mix it in right before serving.

Store left overs in fridge for up to 5 days.

Coconut Oatmeal Ice Cream — The Lovely Crazy

July 9, 2022 by maximios • Blog

Whats summer without some ice cream?%u00a0 That is no summer, that just sounds like Hell. And this past weekend I was pretty sure I was in hell because it was so mother f*ing hot and for a while, I had no ice cream (and no air conditioner)

We used to have an air conditioner. My mom gave us one a few years back because she was worried about washer (so nice she was worried about the dog and not me, but that’s cool) And we used it, not often, but when the temps got above 90, we would bust that mother out, hang blankets from the ceiling and create a little frozen ice box. Washers bed, the couch, and the tv were the only things in the box and it was fantastic.We would spend all day hanging out in the dark little ice box, cuddled on the couch watching tv. Washer would just lay there and I am pretty sure that he loved it just as much. But a couple years ago that air conditioner broke so now we don’t have one. So now when it’s mother f*ing hot, we are just really fucking hot. As for Washer, I send him over to my moms house. She has like 10 air conditioners. And the mr and I.. we bitch and complain and sweat and eat ice cream.

So I made this is my ice cream, a Colleen approved, oh so good I want to eat it for ever meal, type of ice cream. Nice and creamy with nice coconut oatiness. Its really pretty great.

And if there was ever a time when you woke up so hot that all you for wanted for breakfast was ice cream, well that’s completely cool, especially with this kind cause it’s kinda really healthy and made with oats and so it it definitely ok.

Here’s to ice cream all day, every day.

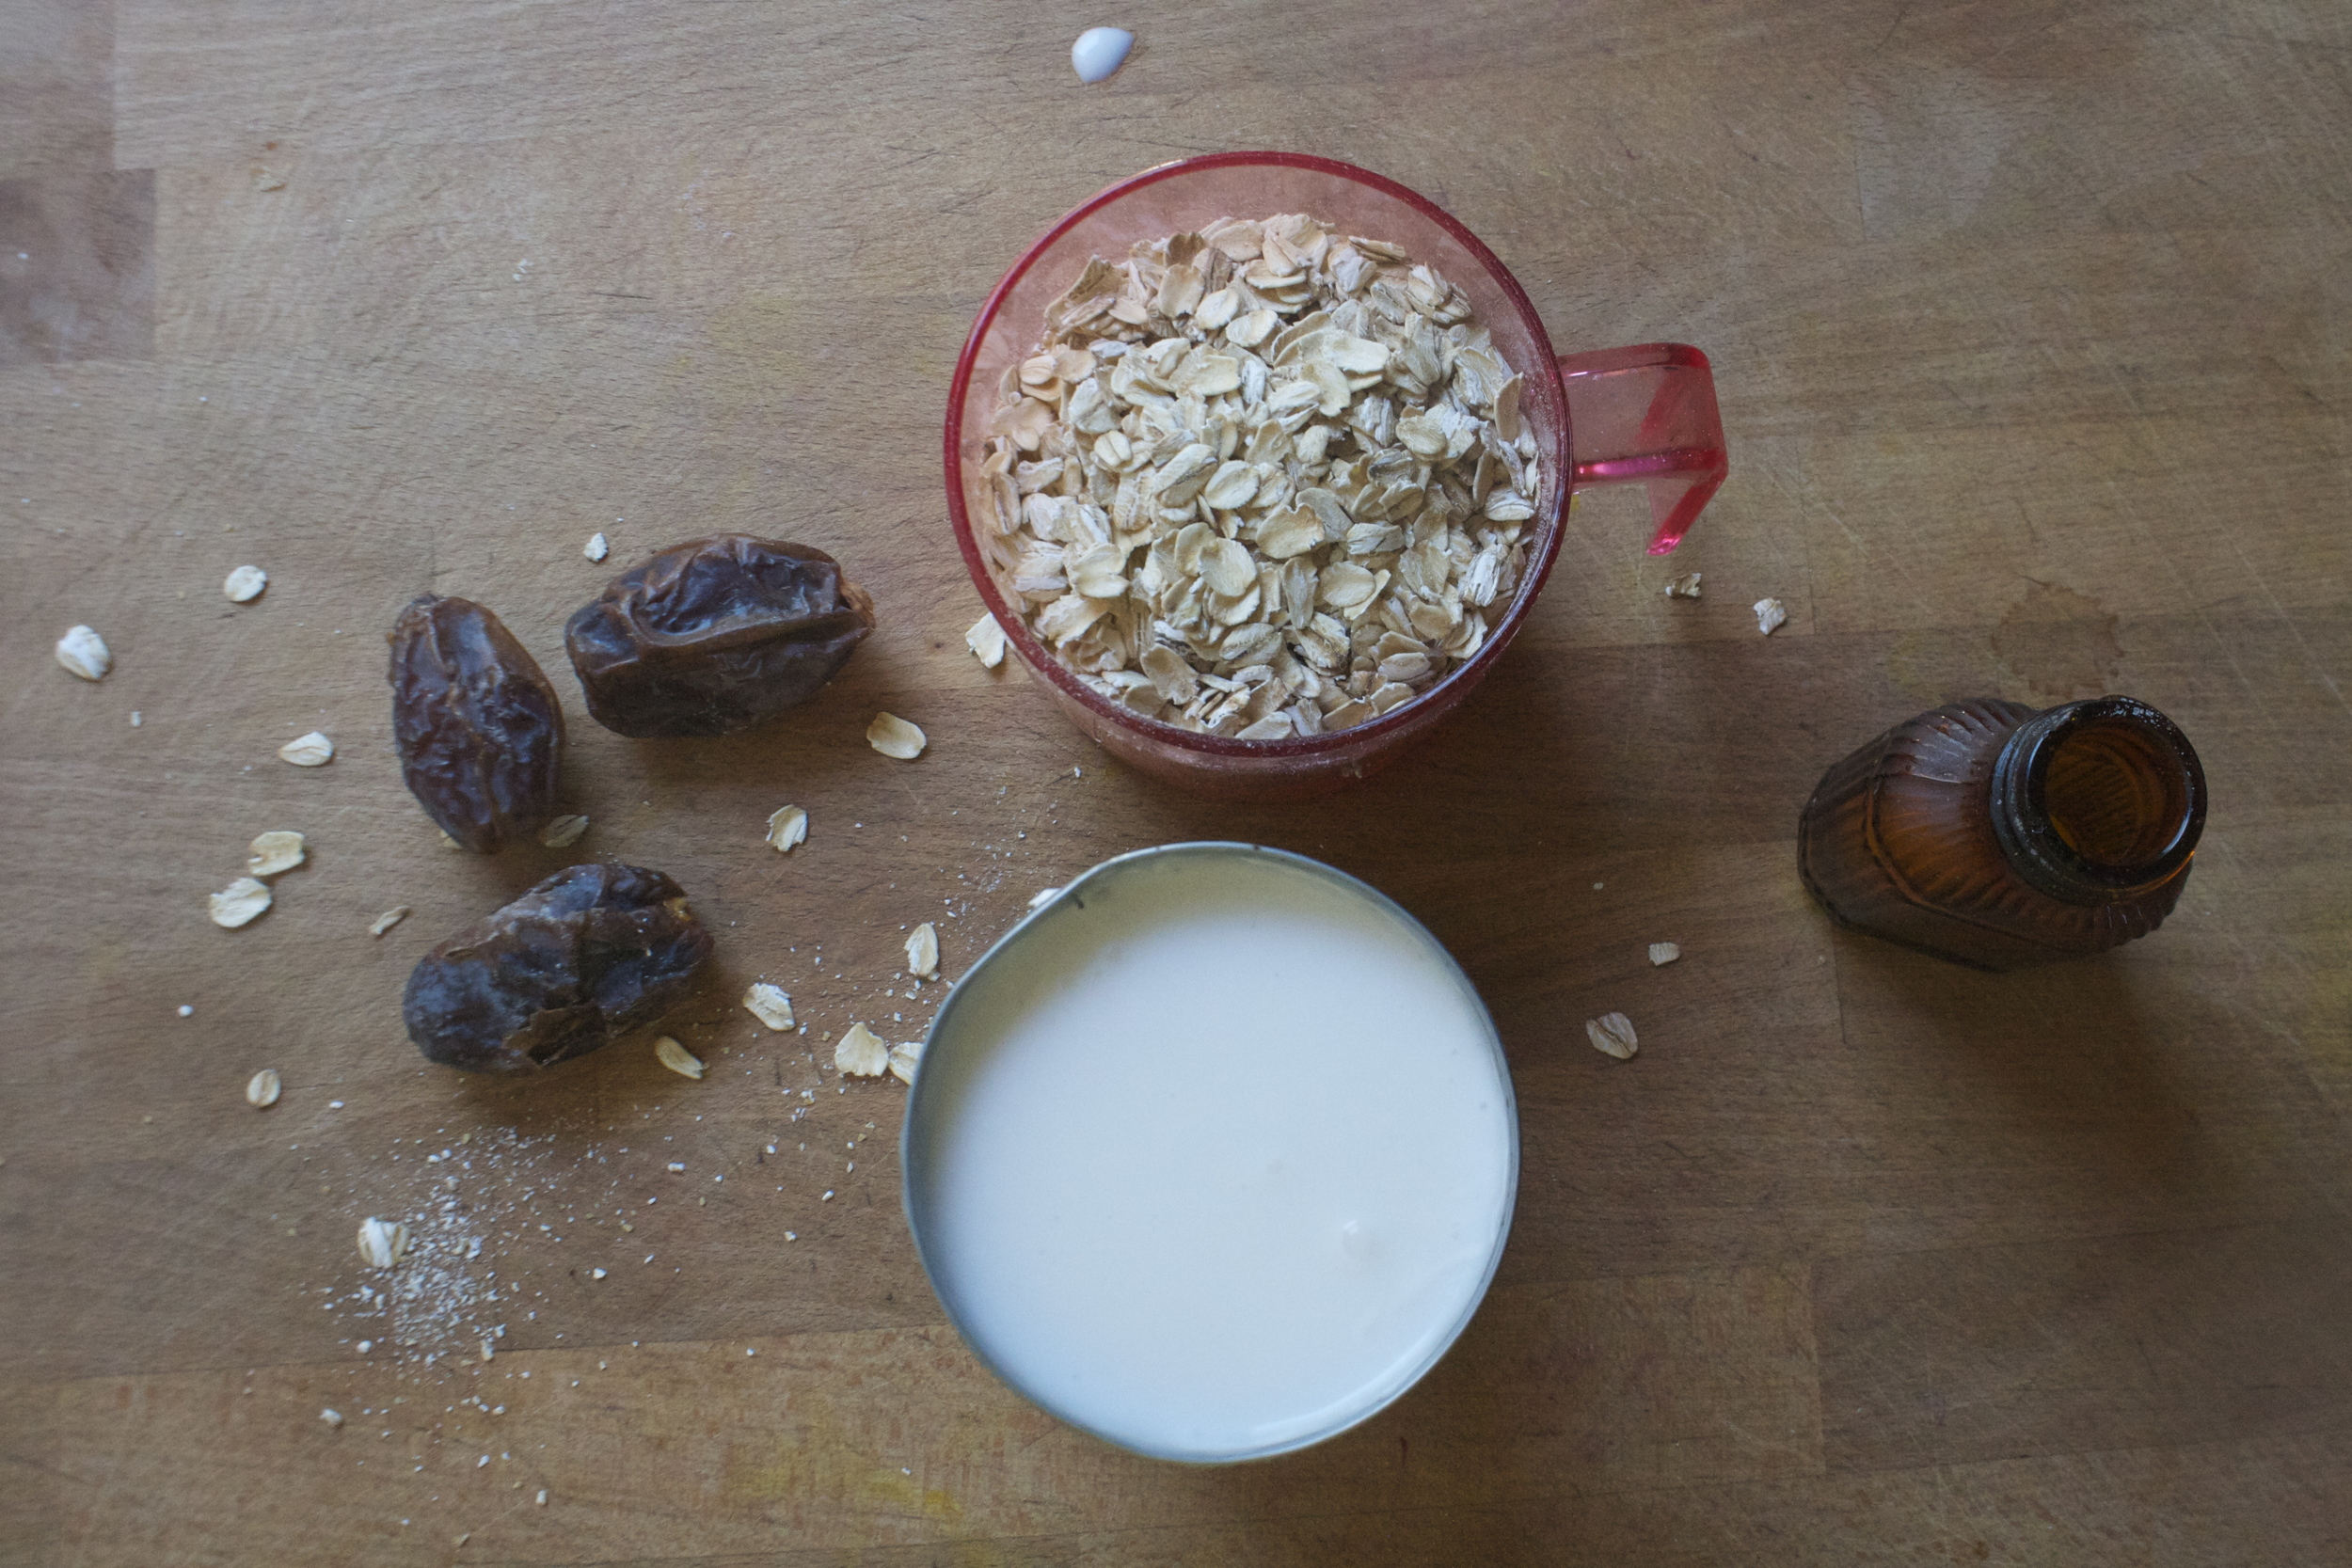
The stuff. We got a can of coconut milk, some old fashion oats, a few dates and salt. ( we need just a pinch) Also need a little water.

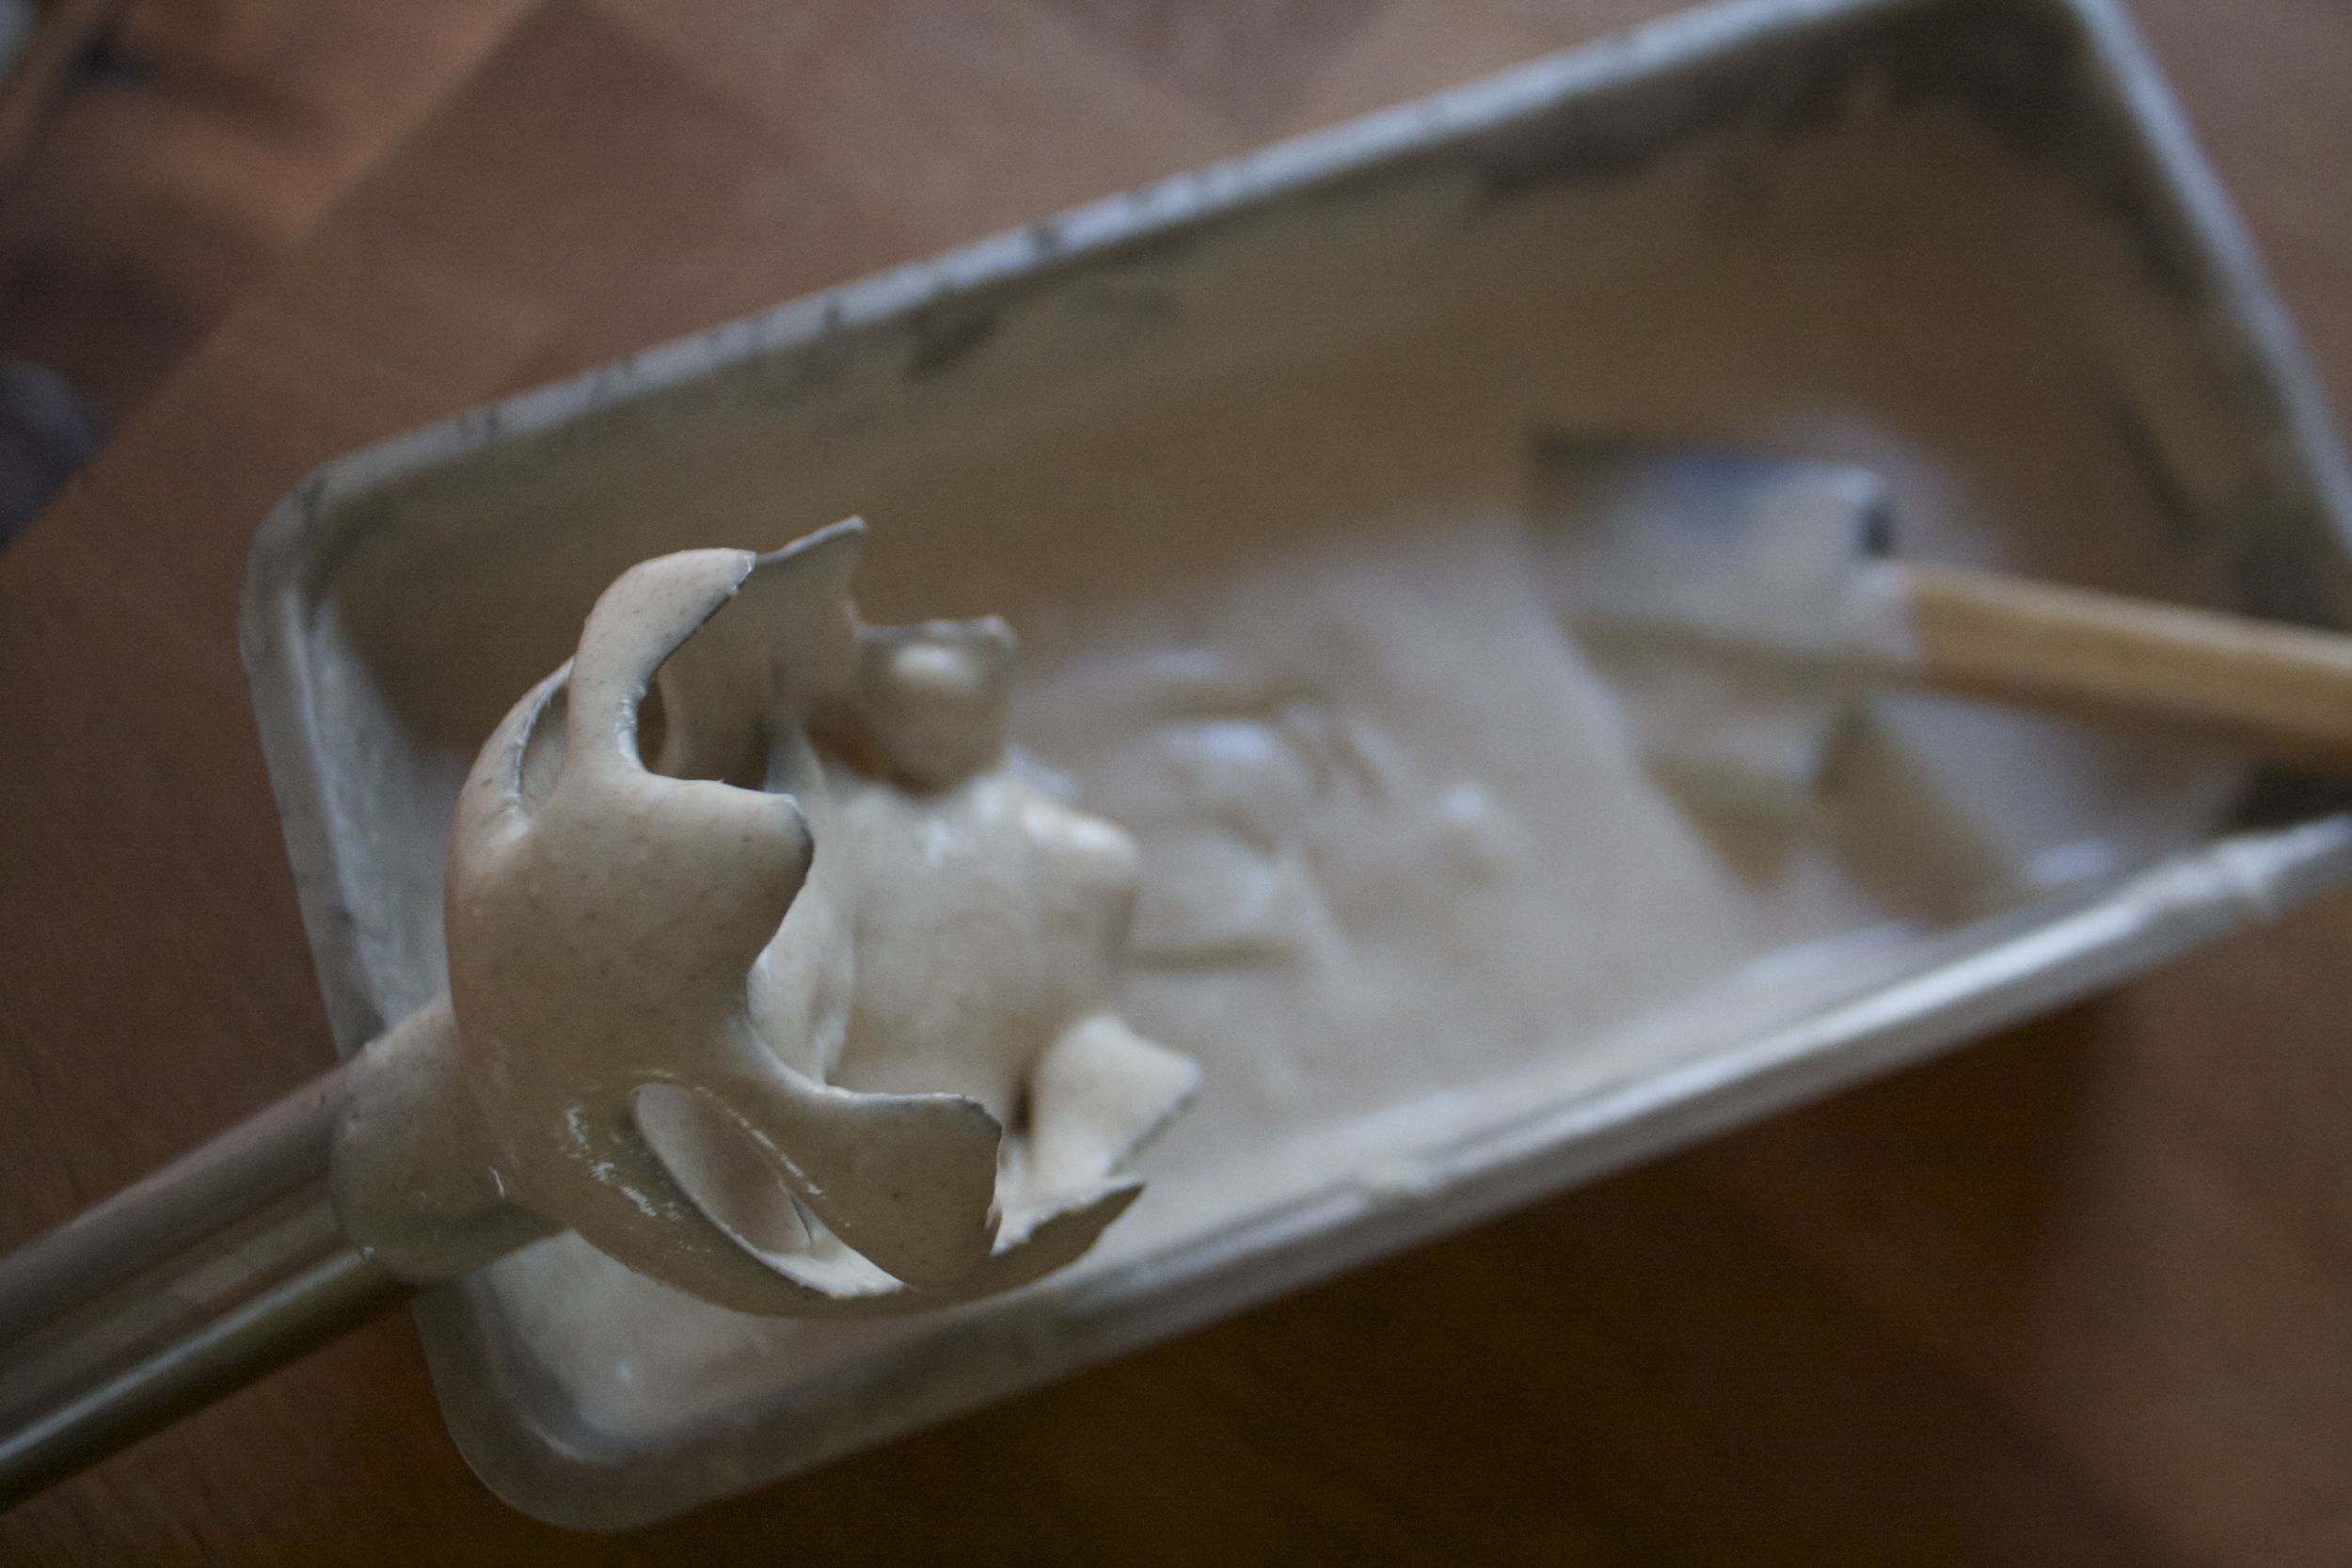
Pretty simple here, just dump the coconut milk, oats,the dates(make sure they are pitted) and a pinch of salt to a blender and blend the crap out of it. And keep blending until its all creamy smooth and oh so nice then stick the blender in the fridge.

After about an hour or so the mixture becomes super thick. Stick it back on the blender stand and give it one last swirl to make sure it’s all mixed up.

Pour/scrap mixture into a freezer safe container and stick it into the freezer… lick blender clean, watch you tongue and fingers.

After a hour or so, remove the kinda frozen ice cream and give it a good whip with a stick blender or if you don’t have, scrap the ice cream back into the blender, and give it a swirl, stick back into freezer container hen back into the freezer until frozen.

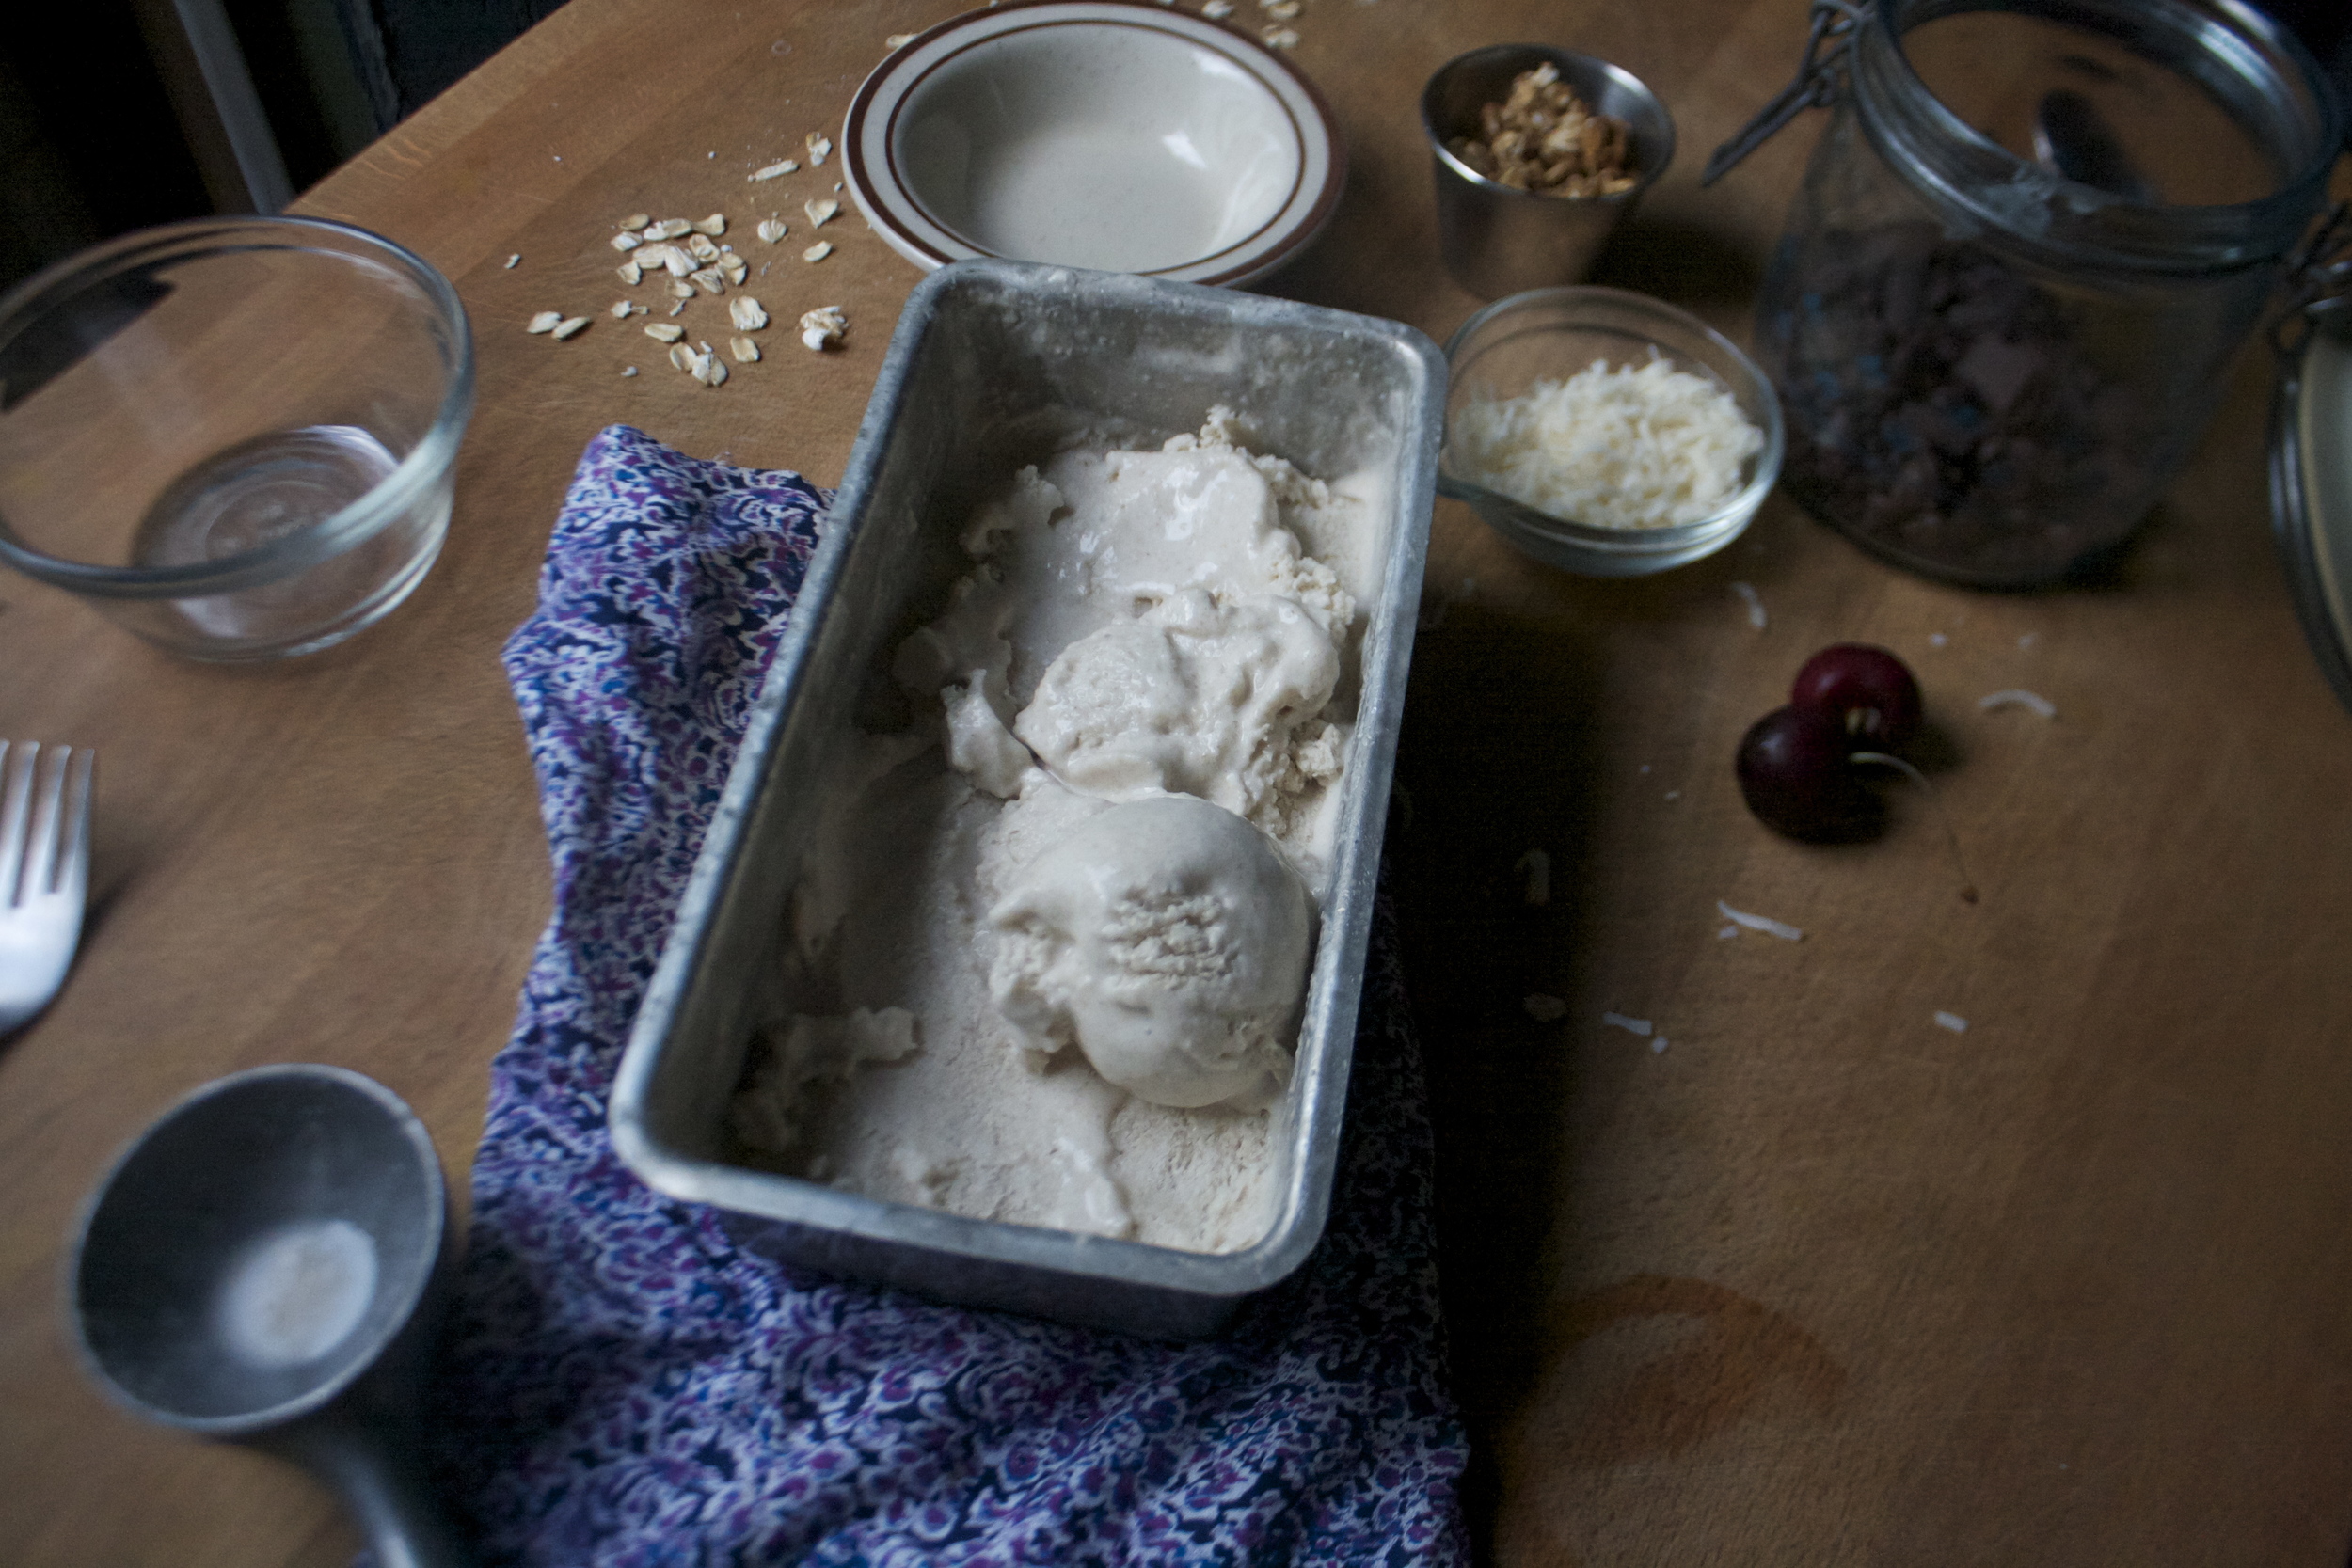
And when you are ready to eat, remove from freezer, let sit out for 5-10 minutes to soften enough to scoop and do what needs to be done.

Look at that. So good.

And not only dessert, but this could be your breakfast tomorrow….and every day from now on.

-C

  • 1 can coconut milk
  • 1/2 cup water
  • 1 1/2 cups oats (gluten free if needed)
  • 3-5 dates*
  • pinch of salt

*Note. I used 3 dates and found it sweet enough but I don’t like things too sweet. If you know you like things sweet, do 5. Also, if the dates are not super soft, soak them water for a little bit.

Grab your blender and place all the ingredients in it. Start blending and blend and blend and blend until all smooth and creamy. (It might take a few minutes.) And once it’s all blended up, stick the blender into the fridge .

After about an hour or so the mixture should have gotten nice and thick .Remove and blend the whole thing up once again and transfer the mixture to a freezer safe container. Place said container into the freezer. Let the mixture set up and get pretty close to frozen and remove from fridge and give it another good blend (I use my hand blender, but you can always scoop back into the regular blender to do it) Place back into freezer until frozen.

When you are ready for ice cream, remove for freezer and let sit out for 5-10 minutes until soft enough to scoop.%u00a0 It might be super hard at first but don’t worry, it soften up quick enough. I find scooping it easier with a ice cream scooper dipped in hot water….

Scoop it, add any toppings you want (toasted coconut and toasted oats are great) and then eat it.

Store left overs in freezer (duh) but place a piece of wax paper over the top to keep from freezer burn.

THE LOVELY CRAZY

January 29, 2022 by maximios • Blog

I was cleaning out the fridge and found that I had a good few really ripe avocados that were in need of eating ASAP. (I bought like 8 at once… super sale!) My first thought was I wish I could freeze these and save them for later. Then I thought well why the heck don’t I freeze them. So that’s what I did. I pureed them up, added a little lemon juice and stuck a jar of tangy green creamy goodness into the freezer and all throughout the week found myself standing in front of the fridge with a spoon scraping at the jar of avocado. It was so good. I even added a little fruit to it toward the end. Avocado and fruit = oh hell yes.
And now that is is officially spring we should be eating popsicles (right?!). I figured you guys are cool enough that I would share my new found love of frozen avocados and you would be down with it.

I know, some might think that plain old frozen avocado doesn’t sound amazing, but when you add a little sweetness and swirl it around with super sweet and creamy mango. Trust me, it’s freaking amazing. The flavors go perfectly together, and the texture, it’s almost like ice cream… SO GOOD! Anyway, I know that it might not be the perfect spring weather as of today, but the beauty of these is that you make them, freeze them and leave them until the perfect moment. Say a good long day of raking up all the cat poop that the neighbors cat has left in all your spring flower beds, or picking up all the recycling that has blow into the bushes all winter long. Maybe a day of cleaning out the closet or dusting the ceilings. Make these popsicles now and treat yourself to one after doing some kind of crappy spring chores, its what you need to do.. Or better yet, bribe a little with a popsicle to do your spring cleaning….. Yeah, I might just do that.

Or just make them and eat them… no spring chores required.

The stuff. A nice ripe mango and a nice ripe avocado. A bit of lemon juice (from half a lemon),%u00a0 a little maple syrup, and a some water.

Scoop the avocado into a jar and cut up the mango ans stick into a jar…..

Splash a little water into each jar and blend them up. (I used my hand blender. but use the blending device of your choice) Add the maple syrup to the avocado.. as much as you need, and if your mango is not super sweet, you can add a little to that too.

Scoop the avocado puree into the mango and gently swirl it around

Now pour/scoop the mixture into your popsicle molds. And because mine was thick enough, I was able to stick the wood sticks without them sinking.

Noe get them quick into the freezer

A good few hours (I didn’t even check until the next day but I bet 4-5 hours in a good freezer will do) the popsicles are nowposicles!!!!!

Pop them out of the mold (a few minutes on the counter and or a quick rinse under warm water) and do what needs to be done.

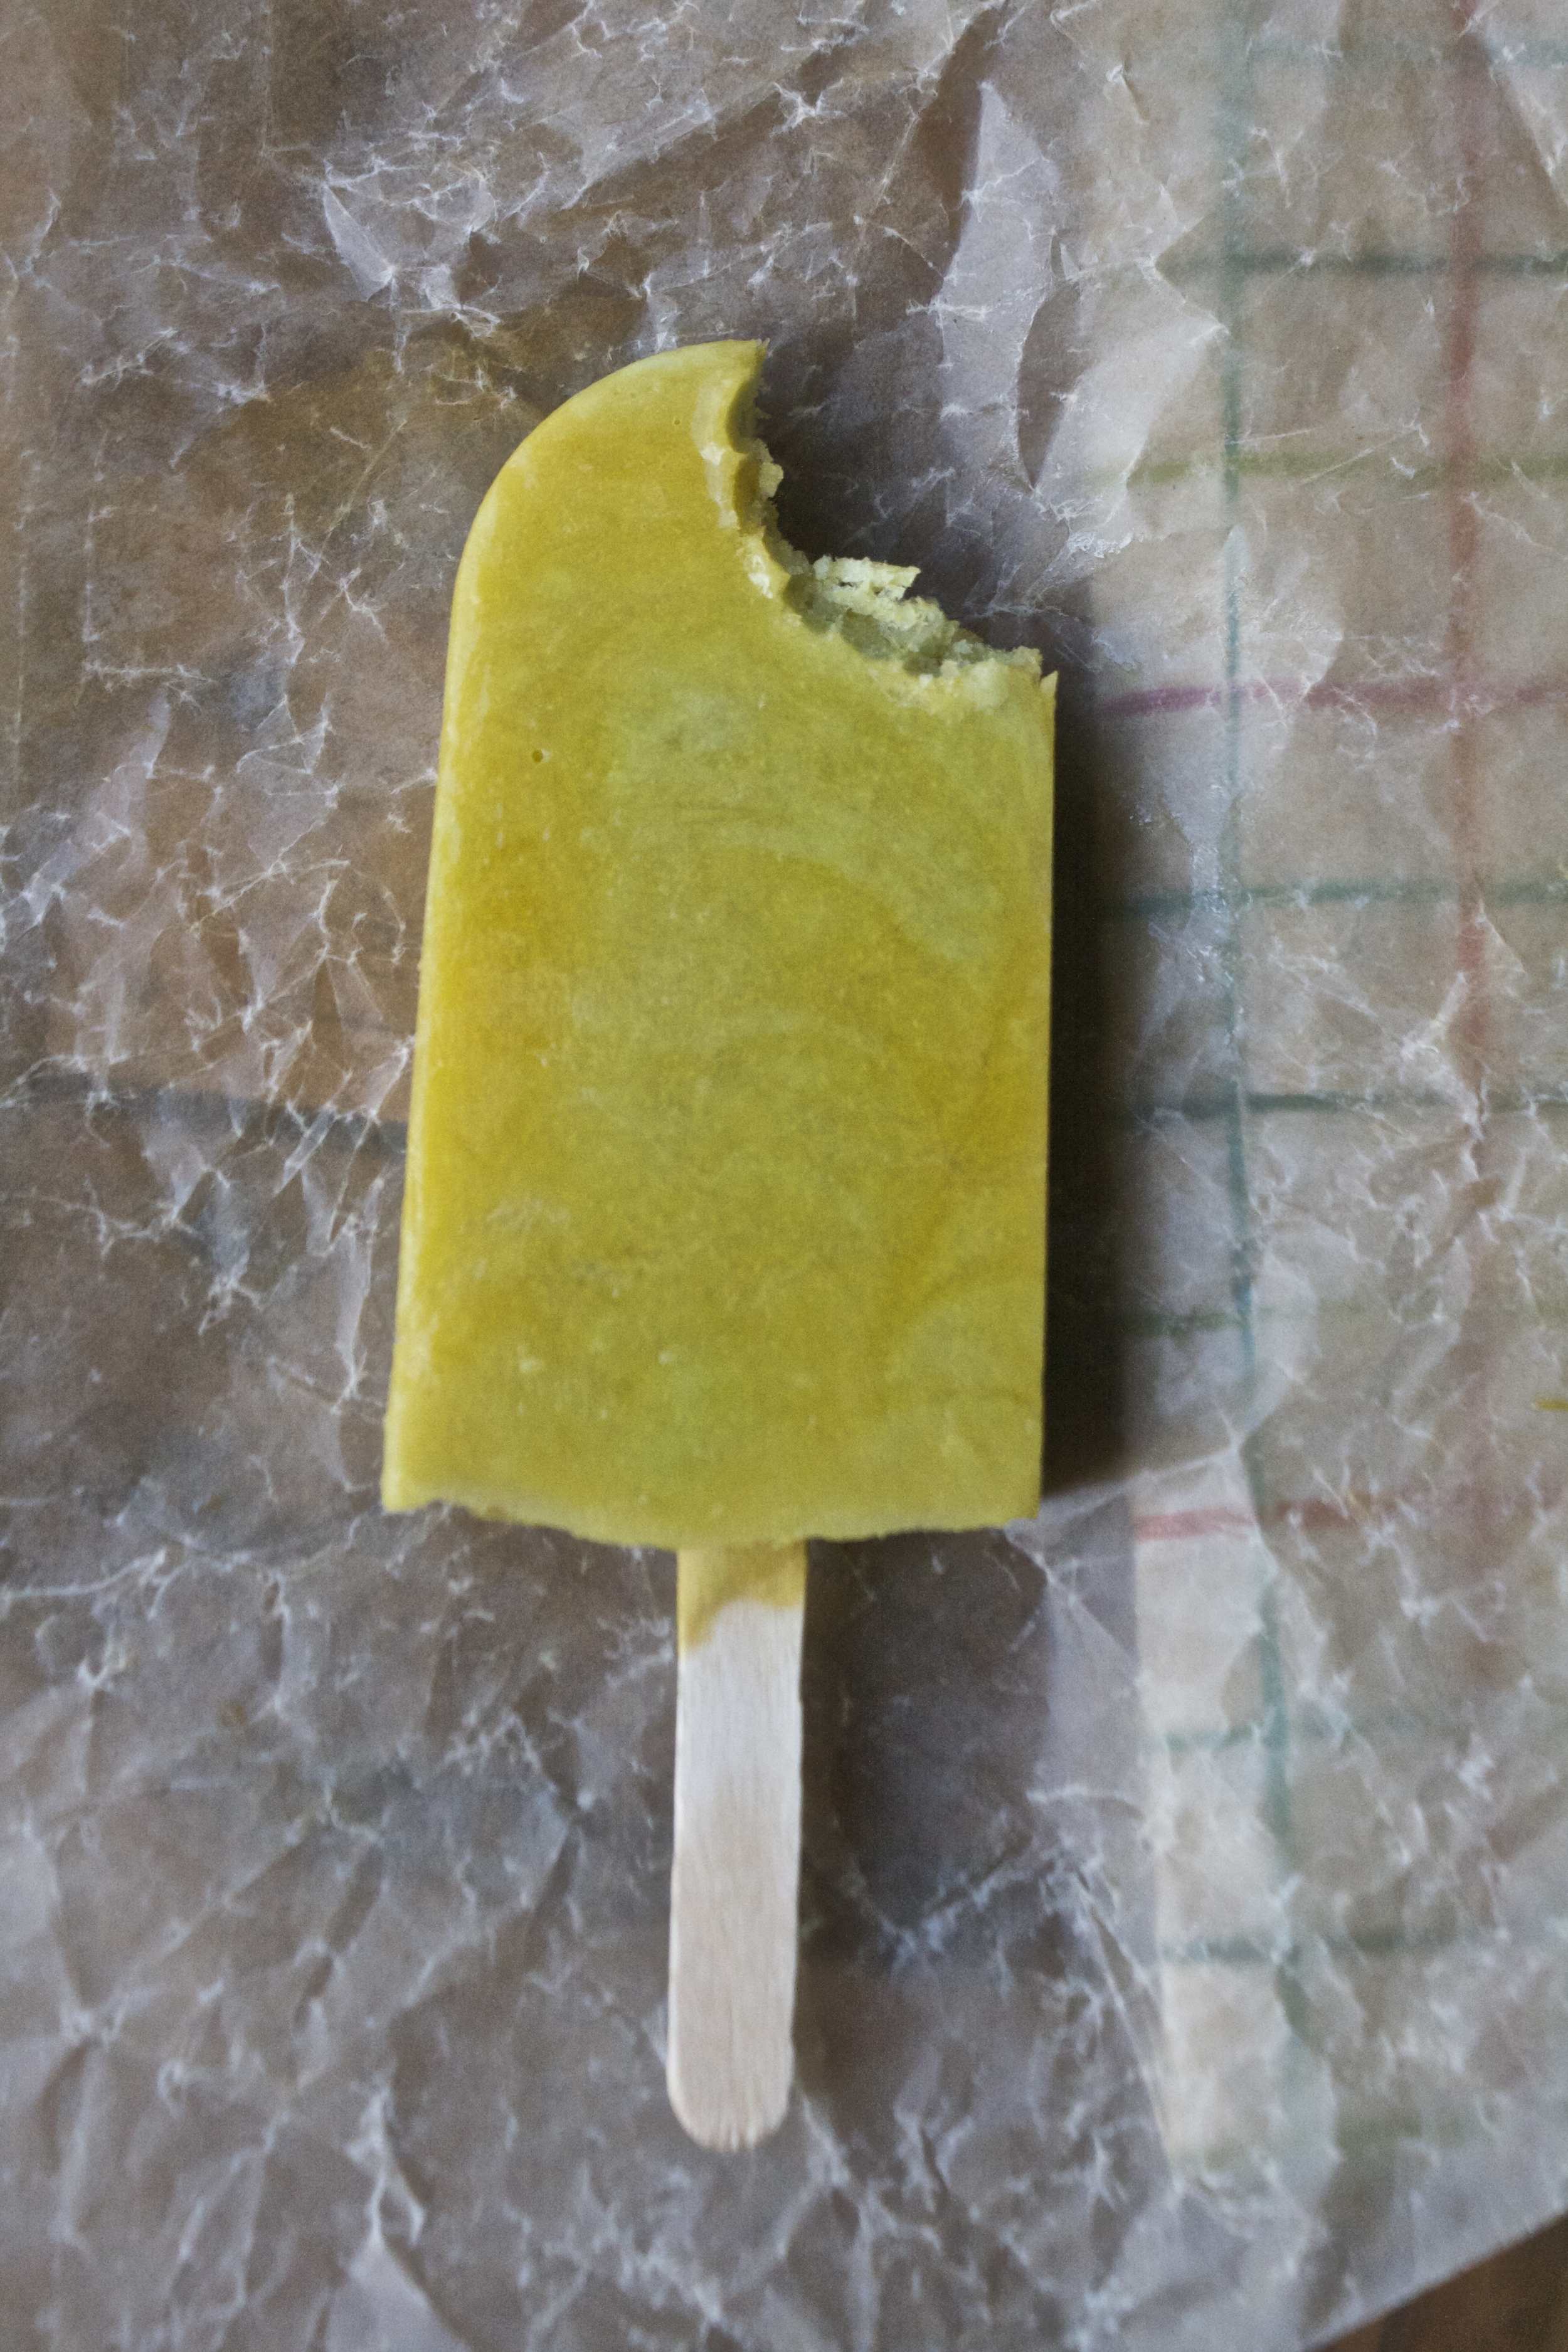
So creamy sweet and refreshing… This is a happy spring popsicle for sure.

Have a great day!

-C

Makes four 4oz popsicles

  • 1 ripe avocado
  • 1 ripe mango
  • 1/2 a lemon or lime
  • 1-2 tablespoons maple syrup (or any sweetener of you liking)
  • about 1/2 cup of water

Note.sIF your mango is not super sweet you might want to add a little maple syrup to thatto that as well. And depending on the actual size of your mango and avocado, you might find yourself with a little extra fruit puree…. so maybe an extra popsicle can be made or you can just eat it now.

Scoop avocado into a jar and cut and dice mango and place in a separate jar. Add maple to the avocado (and the mango if you want) and about 1/4 cup of water to each.%u00a0 With a hand blender, blend each until smooth ( or use a regular blender) Once both are blended, dump one into the other and gently swirl around. Pour mixture into popsicle molds, add the sticks and stick into the freeze. Keep freezing until frozen which should take at least 4-5 hours.

And once frozen, pop out of molds (run mold under warm water or just leave on counter for a few minutes) and eat them like it hot!

«‹ 3 4 5 6›»

Recent Posts

  • 1xBet App for Matchday: A Football Fan’s Setup
  • Aviator Game Bonus and How It Applies
  • Aviator Original vs Copycats: How to Tell Them Apart
  • What $0 Subscriptions Actually Include on OnlyFans
  • First-Time Subscriber Budget Trajectory on OnlyFans

Every Singapore betting site on this list was checked for licence details, market depth and withdrawal time.

A nemzetközi sportfogadó oldalak jellemzően magasabb szorzókkal dolgoznak, mint a hazai piac szereplői.

Denne guide til casino uden rofus i 2026 – spil uden dansk licens forklarer regler, muligheder og risici ved udenlandske platforme.

Et casino med hurtige udbetalinger kan forbedre spiloplevelsen ved at sikre hurtig adgang til dine gevinster.

Vores guide til spillesider uden om rofus hjælper dig med at navigere blandt internationale casinoer.

We ranked the top online casino Malaysia platforms on withdrawal times, not on marketing claims.

Registration takes a few minutes, and this sg online casino guide walks through verification and the first deposit step by step.

A hazai fórumokon rengeteg tippet találhatsz arról, hogyan működik a casino befizetés nélküli bónusz aktiválása promóciós kódokkal.

@lonelyplanet
STUDIO ESCAPE Creative Getaways Quiet stays and bright worktables for a weekend reset. See Places
MAKER ROUTE World Nomads Travel-ready planning and practical coverage for makers. Read Tips