We have officially kicked off our summer camping adventures. And with camping comes all the greatness of all the things, including camping food.
Recently a friend asked me what it is that we do for camp food. So I told her. Camp food is basically aways the same and consists of a big pot of spiced warm lentils or split peas (both cook really fast and have lots of protein), a shredded summer squash in the summer, or pumpkin in the colder months, maybe fresh tomatoes or a bunch of kale to chop and mix in, and a side of cut up carrots, cucumbers, green beens or whatever else I have.. Then I’ll bring a hunk of bread for the mr to eat and me, usually a small head of cabbage to squirt mustard on and crunch into. (Always have the mustard on hand.) And I bring apples to snack on too, but that usually it. (Sometime I%u2019ll back a desert for the mr. If I am feeling nice.)
She was a little taken aback. Said when she (and basically everyone in the world, which I disagreed with) goes camping it is bags of chips, cookies, meat, and everything and anything that she (they) wanted. Basically that camp food was junk food and that she though we were weirdos. But cool weirdos so you know.
So our camp food%u2026 not like many others. But honestly it is everything that I want to eat and I love it so whatever whatever. As for the mr, he is happy with the food and when he is not, he brings along something else, but that rarely happens because my lentils be so good. HA!
But she got me thinking that I should have a few more snack options beside cut up carrots and apples. So that is why I made crackers. These chickpea chili lime, freaking amazing crackers. Because crackers are a very appropriate snack food, and these crackers in particular are even greater because they are made with the goodness of chickpea flour which is packed full of protein and is well received after a day of hiking or other fun outdoor camping activities. And how can you go wrong with chili lime? Well i%u2019ll tell you, you really can%u2019t
So the plan was to make a batch, eat a few, save the rest for this camping weekend. But guess what? I have to make another batch. They didn%u2019t make it. We ate them all. (not sorry) At least I know we will be liking our new camping snack addition well and right.
So if you like crackers, camping or elsewhere, you should really gives these a go. They will not disappoint.
Now to the crackers!
The stuff. Chickpea flour, chili powder, a lime, a little baking powder, olive oil, salt and pepper, and water.
Combine the flour, zest of the lime, half the chili powder and half the salt, and the baking powder and some pepper in a bowl. Mix until completely combined then add in the oil, water and the juice of the lime.
Mix until dough forms. It might feel a little sticky, if that is the case, just mix other tablespoon of chickpea flour.
Knead dough on a well chickpea floured surface for a good minute until the dough is a even consistency then let it sit for a few minutes to rest. Once rested, cut dough into 2-3 pieces because working smaller is easier.
Roll out your first piece of dough about 1/8 inch thick. (Again, make sure to really flour your work surface and rolling pin.) Mix salt and chili powder together and sprinkle on top. Cut out your crackers (squares are nice but triangles would be nice too) then poke each cracker with a fork.
Crackers on a baking sheet before baking and after baking looking all crackery and delicious. And yeah, they shrink a bit.
And lastly, cool the crackers on a cooling rack. They will crisp up a even more. Then it%u2019s all you.
Ready to eat whenever you make the move. You can pack them away for later or place these delicious crackers in a very pretty bowl and eat them away. Or both.
A cracker win!
-C
make 75 crackers
1 1/2 cups chick pea flour plus about 1/3 more for dusting and rolling
1/2 teaspoon baking powder
1 tablespoon olive oil
1/3 cup room temp water
1 teaspoon chili powder split in half
1 lime
1 teaspoon salt split in half
1/2 teaspoon fresh crackers pepper
Preheat oven to 350.
In a bowl combine the chick pea flour, baking soda, pepper, 1/2 teaspoon chili powder, and half a 1/2 teaspoon salt. Mix until evenly incorporated. Add in oil, the juice of the lime, and and water and mix until a dough forms. Dump dough onto counter and knead until completely uniform in texture. Add more flour if the dough is really sticky. Set dough aside for a few minutes to rest.
To make the crackers, really dust the counter with chickpea flour. Cut the dough into 2-3 pieces and roll1 piece out at a time to about an1/8 inch thin. Again, really flour the surface and rolling pin or else the dough will stick Once rolled, combine the remaining chili powder and salt and sprinkle the top with it. And then cut the crackers. Take a knife of bench scrapper or pizza cattier and cut the dough into inch long strips vertically, then diagonally. Poke each cracker with a fork then gently place them onto a baking sheet. Repeat with remaining dough.
Bake crackers for 15-20 minutes or until a nice deep golden brown. Remove from oven and let cool on a wire rack.
And then eat.
Store uneaten crackers in an airtight container for about a week.
I am obsessed. For real. That might seem like a strong statement for a feeling about a food, but right now, it is truth. I spend more time then I want to admit thinking and drooling over Socca, which is, to those who do not know, the most basic chickpea flour pancake-y bread thing. Chickpea flour, water and salt. Cooked fast under the broiler in a screaming hot skillet. That is it. And it is amazing. Depending on how you make it, it can be creamy and soft or more cracker like with some crisp crunch to it. Either way, it is just so freaking good. Of course, what I am dreaming about regarding it is not just plan basic socca (which I have made 3 times in the past 3 days) but different flavored soccas (I have experimented with lot of seasoning, and they are all A+) with all sorts of different topping and using it in all sorts of different ways. But for now, I wanted to keep basic so we all know how good simplicity is. We will go from here.
There is no stopping me. There is no stopping the socca.
Now to my new favorite food, the socca.
Chickpea flour, salt and water. That is it. Mix it all up.
Batter all smooth and now in need of a rest. Half an hour or up to a day of rest is good.
Now to cook the socca. You need to use something oven safe like cast iron. The trick here is to preheat the skillet while you are preheating the oven. Crank oven to 450 with the skillet in oven and once the oven reaches temp, turn oven over to a high broil. Let the skillet get really hot for another minute or two then remove skillet from oven (carefully!!!) and give it a splash of oil. Don%u2019t preheat the skillet with oil in it or else it will start to smoke and get gross.
Now that you got a nice hot and oiled skillet, grab the rested batter and pour half of it in. Tilt skillet around to coat bottom then stick skillet back into oven under broiler and cook for 4-8minutes. ( It depends on your broilers strength and your preference for blisters)
Out from the broiler. Cooked and slightly blistered. I went easy on this one. The next one got a few more blisters.
2 soccas, one a little thicker then the other. One a little more blistered then the other. Both in my belly.
So many Soccas to come.
So. many. Soccas.
-C
makes two 10 inch soccas
1 cup chickpea flour
1 cup room temperature water
1/2 teaspoon salt
olive oil for pan
Mix chickpea flour, salt and water together into a bowl until smooth. Let mixture rest for at least half an hour or up to a day.
When ready to make the socca, preheat oven to 450 with a 10 inch oven safe skillet (I used cast iron but any oven safe dish would work) in oven.
Once oven reaches temp, turn oven over to broil and place skillet under it for a minute to really heat the skillet. Carefully, with oven mitts, remove hot skillet from oven and brush or pour a smidge of oil into the hot skillet to coat bottom. Pour in half the batter and tilt around until bottom is coated then place skillet back into oven under broiler and cook for 4 -8 minutes or until the socca starts to blister. (it kind of depends on your broiler so keep a close eye on it) Remove from oven and slip socca onto cutting board. Sprinkle with salt and pepper. Drizzle with olive oil if you like. Then all you do is cut and eat.
Left over socca can be stored in fridge and reheated in oven or toaster.
Note. IF you want a slightly thicker socca, use a 8 inch skillet. For a thiner, more cracker like socca, pour in 1/3 of the batter at a time (you will end up with 3 instead of 2)
It%u2019s a smoothie. And no, we have never really been smoothie people in this house, but what can I say, sometimes smoothies happen, especially when you have about 20 ripe bananas in the fruit bowl with no room in the freezer and no need for 7 loafs of banana bread.
So I smoothied. And I like it (a lot).
This is a smoothie of simplicity. Nothing fancy. Simplest of simple. Straight to the point. And all sorts of good.
You might think, does this simple smoothie you speak of taste very good? Yes, yes indeed it does. It is all sorts of fantastic. Basically if you like creamy, nutty, oaty, bananery things, you will like this. And it%u2019s a perfect breakfast, snack, dessert, or just wanting a little treat like thing that is not garbage food. A smoothie of all smoothies with the most basic ingredients. And takes about 15 seconds to whip up. Can%u2019t complain about that.
To the smoothie goodness!
The stuff. A ripe banana, some old fashion rolled oats, a pinch of salt, water, and a smidge of maple syrup if you want it.
Everything goes into blender.
And blended until smooth. Hence the word smoothie.
Pour it into a cup (or if you are feeling primal, drink it straight from the blender%u2026 it%u2019s totally cool)
And done.
A banana oat smoothie.
Let the good time roll!
-C
makes 1 smoothie
1 very ripe banana
1/3 cup raw old fashion oats
1 1/2 cups water
pinch of salt
a tablespoon or two of any sweetener you like (optional)
a pinch of cinnamon (optional)
Place everything into a blender and blend until smooth. Pour into a cup, sprinkle with cinnamon if you wish, and drink right away.
I have a bag of coconut flour that I need to use up so I have made coconut snack cake a few times the past couple weeks. Once with orange instead of lime. Once I added chocolate chips. This time I stepped it up made a little glaze action, toasted a little coconut for some extra coconutiness and took these here pictures and wrote down the recipe. Just. For. You.
Not that I don%u2019t know already that my snack cake creation is good, but I guess it was just super A+++. I threw this one together right before the mr and I headed down to PA to hang with my dad. As soon as he (and sister and nephews) started in on it, well the responses were more then average. My dad even snuck a piece off and hid it for later. They really, really, really were into it. Wanted me to make another right then and there. Normally I would but my dad doesn%u2019t keep coconut flour on hand and I don%u2019t make it a habit to travel with any myself. (I might have to change that.) Next time he will know to stock the coconut flour.
I didn%u2019t realize my people were such coconut people. Good thing for them that I like coconut people. As a matter of fact, I consider myself a coconut person. And coconut is not code for awesome, but I am that too. HA
Anyway enough about me. Coconut snack cake is what you want to know about. It is soft and dense. Moist, not overly sweet. Lots of lime and coconut flavor and is just perfect for snack time. Eat it with a fork on a plate with coffee or tea or grab an piece and eat it walking down the street while thinking about green leaves and warmer weather. Or wherever and whenever. If you make it then it%u2019s up to you when and where you eat it. That only seems fair.
Now to the snack cake of your coconut lime dreams.
The stuff. Gonna need all purpose flour, coconut flour, salt, baking soda, baking powder, a couple flax eggs, some warmed coconut oil, plant milk, brown sugar, vanilla extra, apple sider vinegar, a couple lime, some powdered sugar, and some lightly toasted shredded coconut.
Grab a big bowl. Add in the brown sugar, flax eggs, warmed coconut oil, apple cider vinegar, and vanilla. Mix it all up until evenly incorporated.
Dump in the flours, baking soda and powder, and salt. Zest in lime, squeeze in lime juice and start to mix. Add in the milk as you are mixing.
Cake batter mixed and done. Now to bake it.
Dump the cake batter into a well greased baking pan and level it off with a spoon or spatula.
Now it%u2019s oven time to bake into a great and well cake.
A cake out of the oven, great and well. Golden brown and smells of all the goodness that a coconut cake could possible smell.
While cake is cooling, which it should be now, make the glaze. Powdered sugar, lime zest, and lime juice. Mix until it%u2019s glazy.
Pour the glaze all over cooled cake.
Don%u2019t forget the shredded coconut. Get it on before the glaze starts to set.
And then it%u2019s just the matter of cutting cake%u2026%u2026.
You know once you cut it, that means snack time right? Coconut lime snack cake for all of your coconut time, lime time, hungry snack time needs.
Keep it good.
-C
Makes a 9×9 cake
1 1/2 cups all purpose flour
1/2 cup coconut flour
3/4 packed cup brown sugar
1 teaspoon salt
1 teaspoon baking soda
1 teaspoon baking powder
1/2 cup coconut oil (warmed to liquid)
1 1/4 cup plant milk (I used almond)
2 flax eggs (2 tablespoons ground flax seeds with 1/2 cup warm water)
1 teaspoon vanilla
1 tablespoon apple cider vinegar
A lime
For the glaze
3/4 cup powdered sugar
a lime
1/4 cup or so toasted shredded coconut to sprinkle on top (optional)
Preheat oven to 350
In a large bowl, mix together the bbrown sugar, flax eggs, warmed coconut oil, vanilla, and apple cider vinegar until completely incorporated. Next dump in the flour, coconut flour, salt, baking soda and baking powder. Zest the lime into bowl. Start mixing, adding in the juice of the lime and the plant milk. Mix it all together until completely incorporated.
Dump mixture into a well greases 9×9 baking pan and level off with a spoon or spatula. Place into oven and bake for 30-35 minutes or until golden brown and a tester stuck into the middle of cake comes out clean.
Once baked, remove from oven, let cool in pan for a few minutes then carefully remove cake from pan and let cool on a wire rack.
While cake is cooling, make the glaze. Just zest other lime into powered sugar then add the juice (or as much juice as you needed) of the lime until a pourable glaze forms. If your lime is not particularly juicy enough and the glaze is still really thin, just add a splash of water to thin out as needed.
And when cake is completely cooled, pour glaze all over cake and cover with toasted coconut flakes.
Now cut. And eat.
Store left over cake in a air tight container for 3-4 days. Individual pieces freeze well for all your future snacking needs.
Nothing here but a mere craving, the fact that I had a fresh head of cauliflower, and I really wanted tahini. TA DA. I made exactly what I wanted and it was so so sooooo good. Maple Cumin is one of those super A+++ taste pairings and anything roasted cover in tahini is basically going to be a win so I had no fear when making this dish that it was going to be anything but fanatic.
And of course I was right. It was so freaking good, like now I am going to make it again and again because I don%u2019t want make cauliflower any other way ever or at least until I get sick of it or of roasted vegetables. But that probably won%u2019t happen for a while.
So if you like cauliflower and tahini and amazingness, here, make this.
To the cauliflower
The stuff. A head of cauliflower, tahini, maple syrup, cumin powder, red wine vinegar, salt and pepper, and olive oil.
Break or cu the head of cauliflower up into florets and toss with a little oil, the maple and cumin, and a little salt and pepper.
Scatter on a baking sheet and stuff it into a hot oven.
Meanwhile mix tahini with vinegar, salt and pepper, and enough warm water to thin out.
Roasted all nice and crisp and delightful.
And now you gather up all that cauliflower and cover with all the tahini you want. Grab a bowl, or just eat off baking sheet, and get to it.
And there is no shame in eating a whole head of cauliflower because hey, its cauliflower.
-C
Makes a meal for one or a side for a few
a head of cauliflower
3 teaspoons cumin
2 tablespoons maple syrup
olive oil
3 tablespoons tahini
2 tablespoons red wine vinegar
2-3 tablespoons warm water
salt and pepper
Preheat oven to 450
Break or cut the cauliflower into medium sized florets. Place in a bowl and drizzle with a teaspoon or so olive oil and toss around. Drizzle in maple, add in the cumin, and a pinch of salt and pepper. Toss until coated then dump the cauliflower onto a baking sheet. Place in hot oven for 25-30 minutes or until roasted to your liking.
While that%u2019s roasting, mix up the tahini, vinegar, and a pinch of salt and pepper. Add in warm water until the mixture is a drizzlable consistency.
Once cauliflower is out of oven, cover with tahini.
Now eat.
There will be no left overs so don%u2019t worry about it.
Any time is a good time for pickles, but now is a great time. There has been so much baking, heavy, rich, and time consuming foods in the past month that I think everyone could use themselves a good helping of veggies and maybe a little brightness, like a good pickled green bean. Freshy, crisp, and clean. A jar of happy green goodness. (Don%u2019t you describe jars of pickles just like that, a happy green jar of goodness?)
Around there parts, it%u2019s kind of a holiday tradition with the mr to get a jar or two of pickled beans. I don%u2019t know exactly how it started, but they are something that he has been getting every year. So this year instead of buying him a jar, I just made them. And let me tell you, it is a heck of a lot cheaper to make your own then it is to buy them, plus I think mine taste better if I do say so myself. These pickles are of the refrigerator kind so there is no processing or stress of bad seals. Nope, these pickles take all of 15 minutes to make, a day to pickle up nice and good in the fridge, and that is that. Ready to go, ready to eat. A small task, nothing fancy, nothing a small child could not handle (um.. well I would not let a small child near boiling water so nix that but a medium to large child, yeah sure.)
Pickled green beans. You know you want them so go and make them.
To the pickled beans!
The stuff. Fresh green beans, white vinegar, salt, peppercorns, garlic, dill and a dried cayenne pepper. The dill and cayenne pepper are optional and you can use any spices you want, but these are good ones to try.%u2026 Next batch I am going to do fresh turmeric and ginger, see how that comes out.
The hardest and not hard at all part. Blanch the beans. Basically just toss the beans into a boiling pot of water for 2ish minutes then scoop them out into a bowl of ice water. Easy peasy.
Jar preparation. I figured I would do two flavors, a spicy cayenne and a dill. (Cayenne for me, dill for the mr) Both jars get a chunked up glove of garlic and some slightly smashed up peppercorns. The hot pepper goes into one and the dill into the other.
Then make the brine. Just boil the vinegar with salt. Nothing fancy.
You got the jars ready and the brine made so now you just pack the two jars with the blanched beans. You might need to snip a few in order to fit, but I just eat those ends anyway so I am doing myself favor here.
Then you pour equal amounts of the brine into the jars then top off the the jars with ice water. Place a lid on those suckers and give them a good shake and into the fridge they go. 24 hours give or take and that is that.
And now you got pickled green beans. The question is weather you eat a few at a time or if one jar constitutes a vegetable serving and you eat the whole jar at once.
I say eat the whole jar. Not like it took very long to make right? So maybe you just a few extra jars.
Have a lovely weekend.
-C
maks 2 pint jars
1 pound green beans
2 cups water vinegar
1 1/2 – 2 cups cold water
2 teaspoons salt
1 teaspoon whole or slightly crushed peppercorn
2 big cloves garlic
A tablespoon dried dill and a dried cayenne pepper (optional)
Rinse green beans. Bring a large pot of water to a boil and grab a large bowl and fill with cold water and a few ice cubs. Place half the green beans in the boil water and let cook for about 2 minutes. Scoop them out and place into the bowl of ice water. Repeat for the second half of beans.
Place the vinegar and salt in a small pot (or use the pot you used to boil water) and bring to a boil. Set aside
Grab 2 pint jars making sure the are nice and clean. Peel and cut the garlic into a few pieces and place into the bottoms of the jars. Add the dill to one and cayenne to the other (or whatever spices you do or don%u2019t want to use) Give each jar some of the peppercorns then start packing the balanced beans into the jars. Try to make them all straight so you can fit in as may as you can, and if the bean is to long, just cut to fit (eat the ends) Once both jars are packed pour equal amounts of the vinegar brine to the jars. Top off each jar with cold ice water. Place a lid on the jars, give it a good shake and place jars into the fridge for 24 hours. After the wait, pop the lid and eat.
Pickled beans will last about a month in the fridge but really, if you have them for more then a week, that is just a shock.
Note about lids. I use plastic lids when dealing with anything acidic. The metal lids will work but will rust after a while and sometimes leaves metallic taste. If you only have metal lids, use a piece of wax paper in between the kid and jar.
It happens every year. SO MANY TOMATOES! This is not a complaint, just a fun fact. And so for the forseeable future, besides canning and freezing tomatoes at a rapid pace, I will also be sticking them into everything. Enter here a tomato cracker. But who wants just a tomato cracker? I( bet some would love just a tomato cracker) But a tomato basil cracker, well that is something people will want. And yes, I have a buttload of basil at he moment too.. I cook with what I got!
Tomato basil crackers. First off, I needed to make a road snack for the mr and cut up chunks of raw tomatoes would not have gone down well with him, so I figured what better way to use up some tomatoes then a cracker situation because why the hell not.%u00a0%u00a0I was a little hesitant to use fresh tomatoes and not cook them or roast the in anyway before using them in the crackers, but I glad I didn’t. The tomato flavor really shines through, pairs beautifully with the basil,%u00a0and you get to skip having to deal with cooking down the tomatoes, which makes them all the more easy to make.
So I made the crackers and gave a baggie to the mr to eat, which he did right then and there (with some sweet ass baba ganoush because yes)%u00a0then packed a big bag for the road trip.%u00a0Not only was the mr chowing down, but my sisters were gobbling them up too, even the one who is gluten free. %u00a0That is good cracker validation.%u00a0
If you have never made your own crackers and you are a cracker person, now is the time to start doing it. I don’t eat crackers personally, but the mr and every one around me really seem to be cracker people so a while back I started to make them at home, and once you make a homemade cracker, the store bought ones will just not be acceptable anymore. But they really are super easy so you really should be making them at home anyway.. No pressure though.
The stuff. Flour, olive oil, tomatoes, fresh basil, and sea salt.%u00a0
Chunks of fresh tomato go into blender and get blended up all nice and smooth. Add in basil and oil and pulse until basil turns to little specks.
Pour the blended mixture into the flour.
Mix with a spoon until you can’t mix anymore then dump onto the counter.
Keeping the counter nice and floured, knead dough for a minute until it all comes together into nice ball.
Working with half of the dough at a time, roll out one of the pieces %u00a0about 1/4-1/8 inch thick.%u00a0%u00a0(really flour counter and rolling pin)%u00a0
And cut into crackers.. Shapes are up to you, but inch to 2 inch squares are easies to cut.%u00a0
Place crackers onto backing sheet. Before oven time and after oven time.%u00a0%u00a0They shrink and puff up a little bit in the oven. That is what a cracker is suppose to do. (but if you don’t like that you can prevent it by piercing the crackers with a fork before they go into the oven)%u00a0
And that’s it. Simple, and delicious.%u00a0
Crackers are looking all pretty like I am about to have party or something. I even made baba ganoush to serve with them. Lucky mr, he got to have this cracker party all to himself. Ha (He did not eat all of these crackers at once, that would be crazy)%u00a0
-C
makes between 100 -125 crackers%u00a0
3 cups flour
2 large tomatoes %u00a0( equal to 1 1/4 cup of tomato puree )
1/3 cup fresh basil leaves%u00a0
4 tablespoons olive oil%u00a0
About 2 tablespoons sea salt%u00a0
Remove core from tomatoes and place into food processor or blender. Blend until smooth and measure out 1 1/4 cups of the puree. Any left overs rs can be used as food later on. Dump measured puree back into blender and add in the basil and oil and pulse until the basil is in little pieces but not completely blended in. %u00a0Add flour to a big bowl then pour in tomato mixture and mix until a dough forms. Dump out onto counter and knead for a minute or two until dough is uniform in texture.%u00a0
Preheat oven to 400 degrees
On a floured surface, divide dough in half as to make rolling it easier, and roll dough into a rectangle that is 1/4- 1/8 inch thick. It is important to make sure the rolling pin and counter are well floured to avoid the dough from sticking. Once rolled out, sprinkle with sea salt and lightly roll the dough once more to kind of press the salt in then cut with either pizza cutter or a cracker cutter, or a knife, into 1 1/2 inch squares. The edges are going to be wonky shaped and you can either except them as they are or re roll and recut. (Note. IF you want your crackers to late flat and not puff up while baking, stab the crackers with a fork before they go into oven to create air vents. But honestly, most people really like the puffed up cracker)%u00a0%u00a0Place cut crackers onto a baking sheet and stick into oven. Bake for 15 minutes, checking after 10, until the crackers are golden brown. %u00a0Don’t forget to roll and bake off the other half of the dough!
Once crackers look good, remove from oven and place onto cooling rack. They will get crisper as they cool.%u00a0
Eat as many as you want. Store extra crackers in a airtight container or bag.%u00a0
I sometime struggle with certain veggies, not like in a eating way (I have no snuggle eating any veggie)%u00a0but in a making something with that certain veggie kind of way,%u00a0like I don’t make anything out of them, I just eat them raw as they are. (That was terribly long winded and does it even make sense?)%u00a0I don’t find this to be a problem most of the time, but sometime I think I need to be less lazy about eating and maybe prepare a dish for a meal rather then just eating raw beans out of the garden for lunch…..I mean, I am not going to stop doing that but I am going to start being a little more creative and planning meals with a little more substance. Adding nuts is more substance right?
These beans were freaking fantastic. %u00a0Blistered and charred, and not soggy and soft. They were perfect.%u00a0(I like my veggies either raw or burnt)%u00a0I made them late morning and was going to save them for dinner but the mr, Barb, and I ate them all just on snacking on them. %u00a0Just a really good, A+%u00a0veggies situation here. Highly recommended, hot or cold. Almost beats a bean lunch in the garden. Almost.%u00a0
The stuff. Green beans, almonds, garlic, ginger, soy, and a little oil.%u00a0
Quick fast, rough chop the almonds and give them a toast in a dry skillet (you can skip this part if you have already toasted almonds)%u00a0
And here would be the time to trim the beans if you are a person that does that. I am however, not a bean trimmer. But you must wash them, so give them a good rinse , and keep them a little wet. The moisture will help them cook.%u00a0
Just washed beans go into a medium high hot skillet (add in a tablespoon of oil) and get a nice little cover to start the cooking process. %u00a0Leave them alone for a few minutes, then remove lid and toss them around. Do that ever few minutes.%u00a0
While the beans start cooking, mince the garlic and the ginger and add to the soy sauce.
Smells so good!
Beans have cooked for about 10 minutes here and are all nice and blistered and just about done so now add in the ginger garlic soy mixture and toss around. Keep cooking for a minute or two.
And now don’t forget those almonds, mix those in too. Then it’s into a bowl they go.%u00a0
Green beans so good. Can’t go wrong with these.
Have a marvelous weekend, maybe go pick some green beans!
-C
About a pound of green beans (trimmed if you want to trim them)
2-3 cloves garlic
2 tablespoons freshly grated ginger%u00a0
1/4 cup almonds
3 teaspoons soy sauce
tablespoon oil
Rough chop almonds into small pieces and place in a dry skillet (meaning no oil). Turn heat on to medium high heat to toast for about 5 minutes or until you can start to smell the almonds and they are slightly browning. (you can skip the tasting %u00a0part if your almonds are already toasted, jus chop them into small pieces)
Dump the almonds into bowl and set aside. Keep skillet on heat and add in the oil. Rinse beans off, keeping them damp,%u00a0and very carefully, dump the damp beans into the hot skillet. Place a lid on beans and let cook about 4-5 minutes. In the meantime, mince garlic and ginger and combine with the soy sauce. After a few minutes, remove the lid from beans and toss the bean around. Keep doing this for another 8-10 minutes or until the beans are cooked though and blistered in places. Once the beans are cooked,%u00a0%u00a0dump the garlic ginger soy mixture into pan. Toss around and leave in pan for another minutes then stir the toasted almonds in. Transfer the whole bit of it into a big bowl or plate.%u00a0
Eat right away or.. They taste freaking fanatic cold too.%u00a0
Whenever I think of pot pies, I think of those little frozen, boxed pot pies that you get in the freezer section of the grocery store. Those frozen disks filled with all sorts of nasty shit made many appearances in my childhood. Hungry after school?%u00a0Go home,grab pot pie from the freezer, give it a few stabs with a fork and toss it into the oven..%u00a0
Well one day I did exactly that. Came home from school, grabbed a pot pie out of the freezer,%u00a0grabbed %u00a0a sharp knife (wait a knife?) and stabbed the pie. One hole. Stabbed it again. Two holes. One more time for good measure. three holes, and. knife goes through pie and into my hand. I can remember it like it was yesterday. I was so shocked that I just stood there for a few minutes just staring at the whole situation.%u00a0Imagine that, a little girl holding a knife with a frozen pot pie stuck on it covered in blood, screaming. Ugh.
Needless to say, after that, I never touched one of those frozen pot pies again.
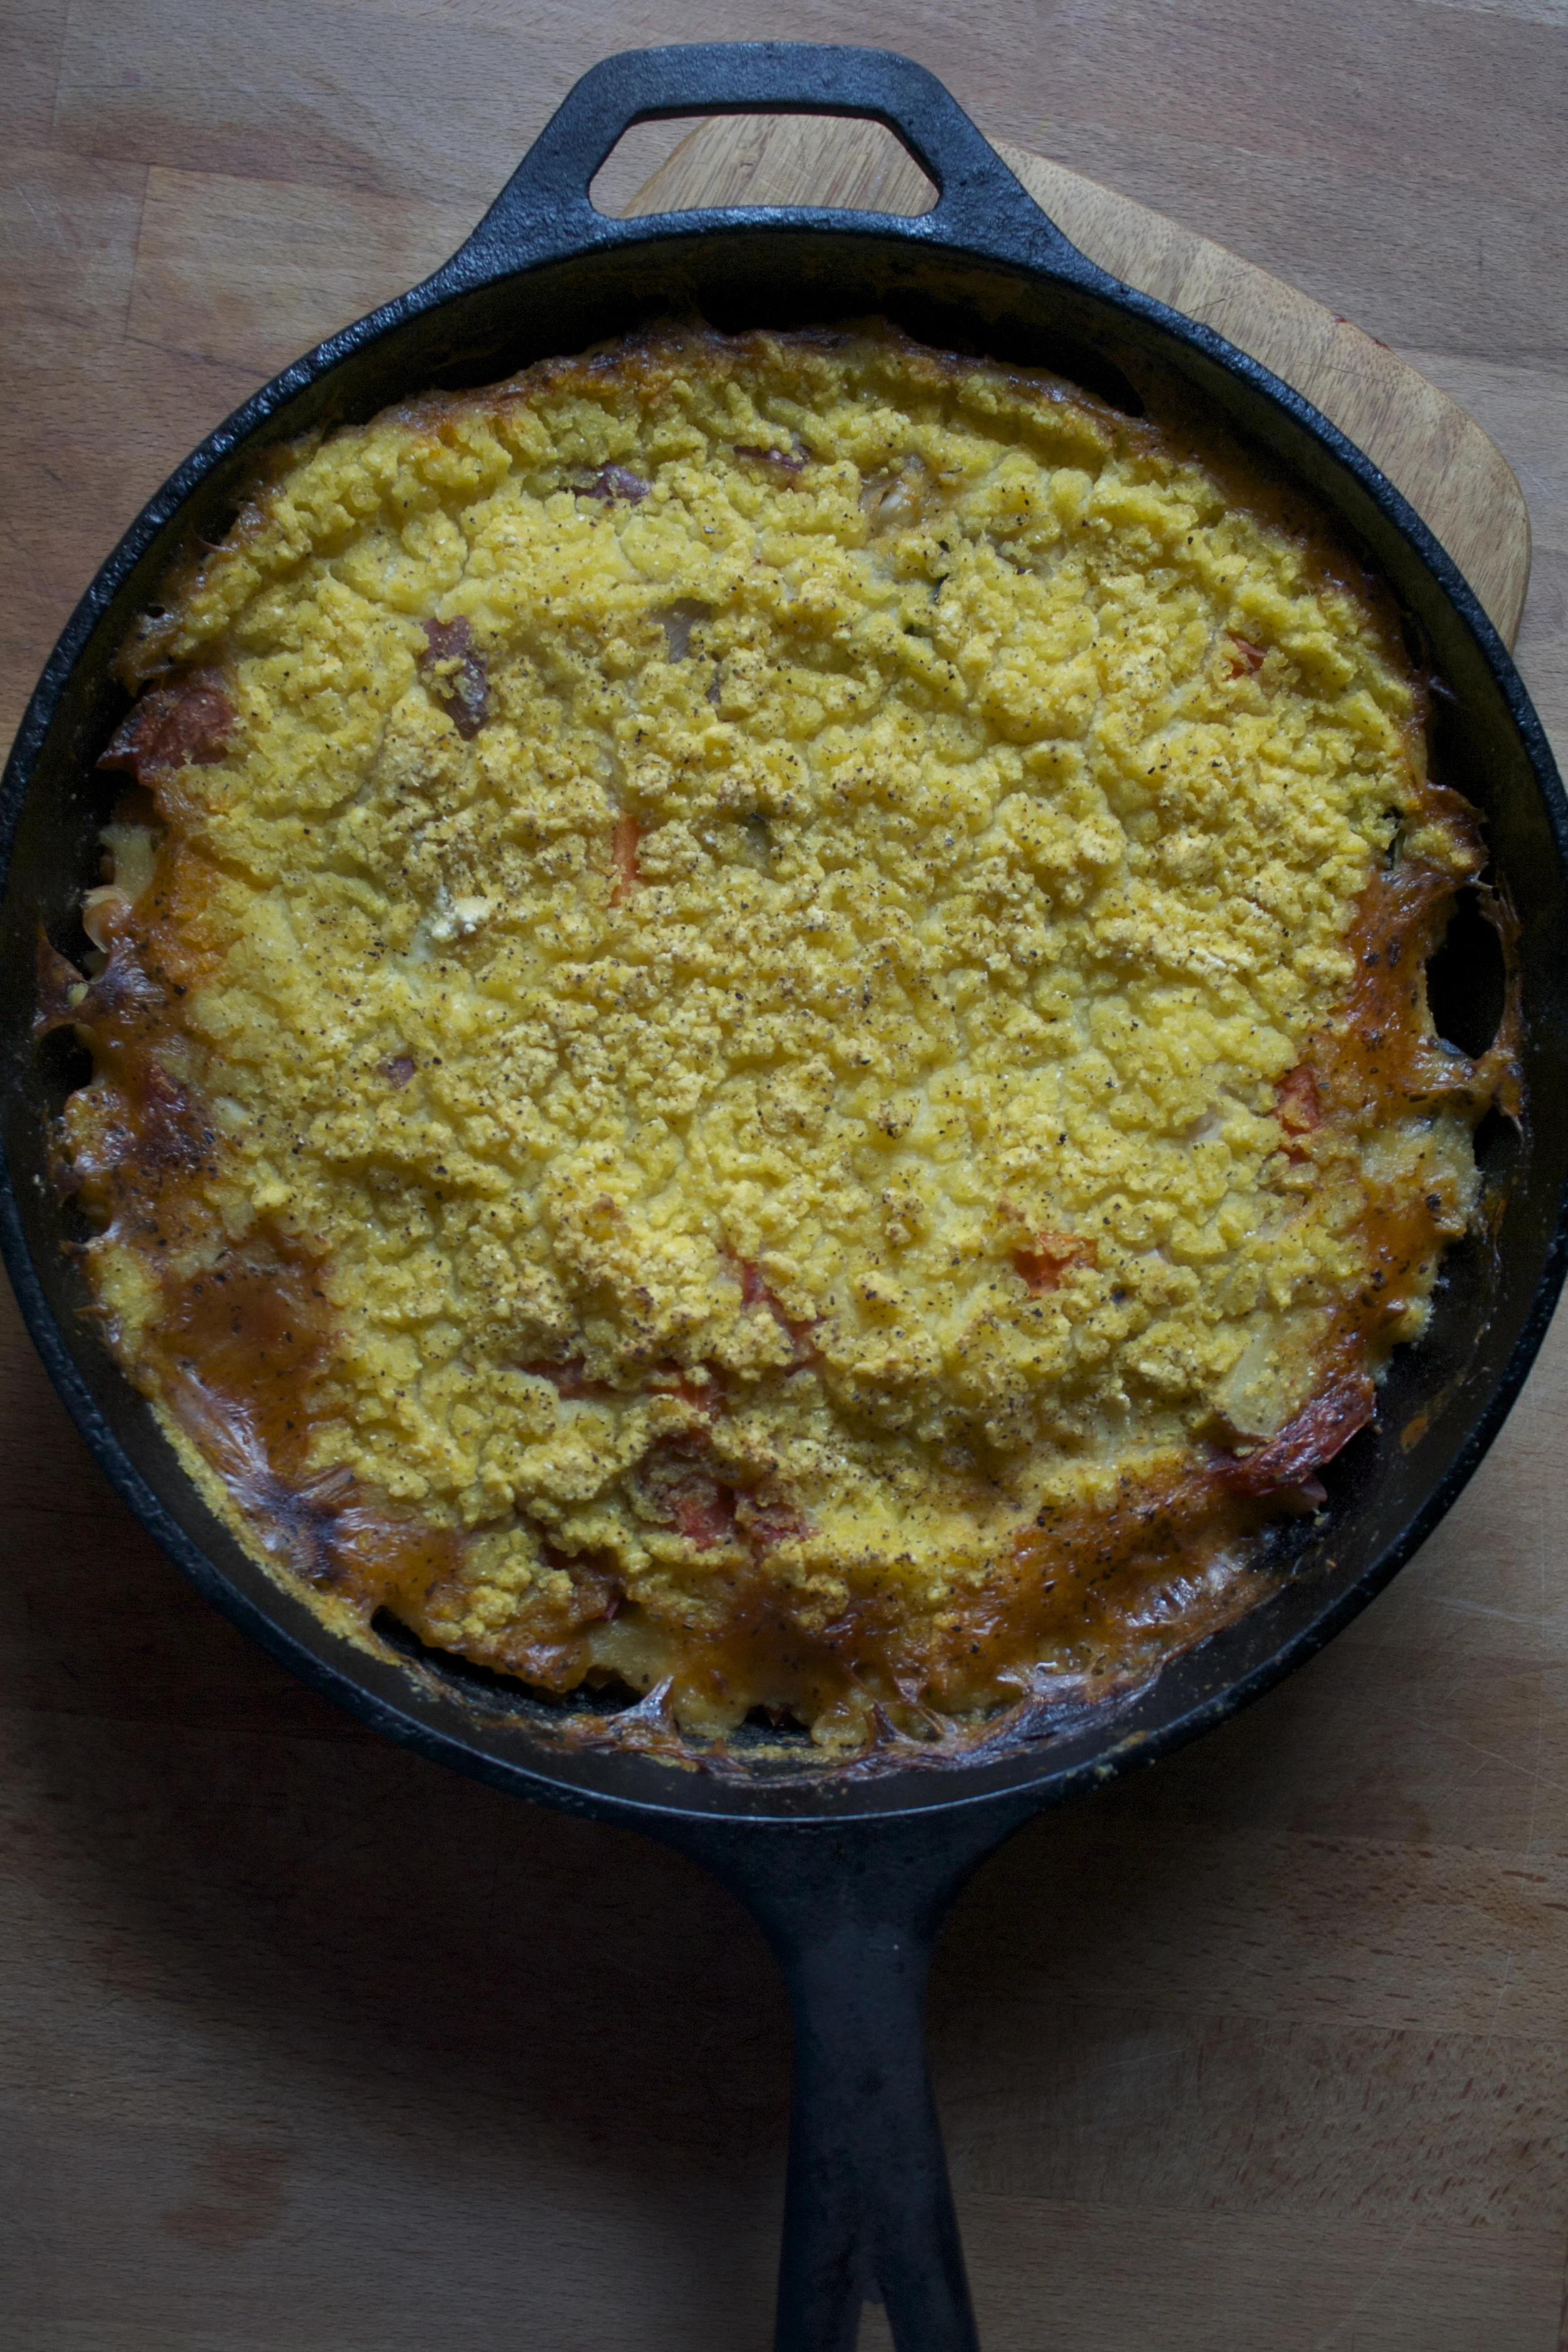
But this is not one of those nasty frozen pot pies. This is a one pot,(skillet) full of warm and hearty goodness. Seasoned tender veggies and beans covered in a creamy polenta crust that has no need for any sort of stabbing. %u00a0%u00a0And bonus.. only one pot to clean up! And it’s all cool and autumn-y out so we don’t want to die when to oven is on!!!%u00a0
Pot Pie WInner!
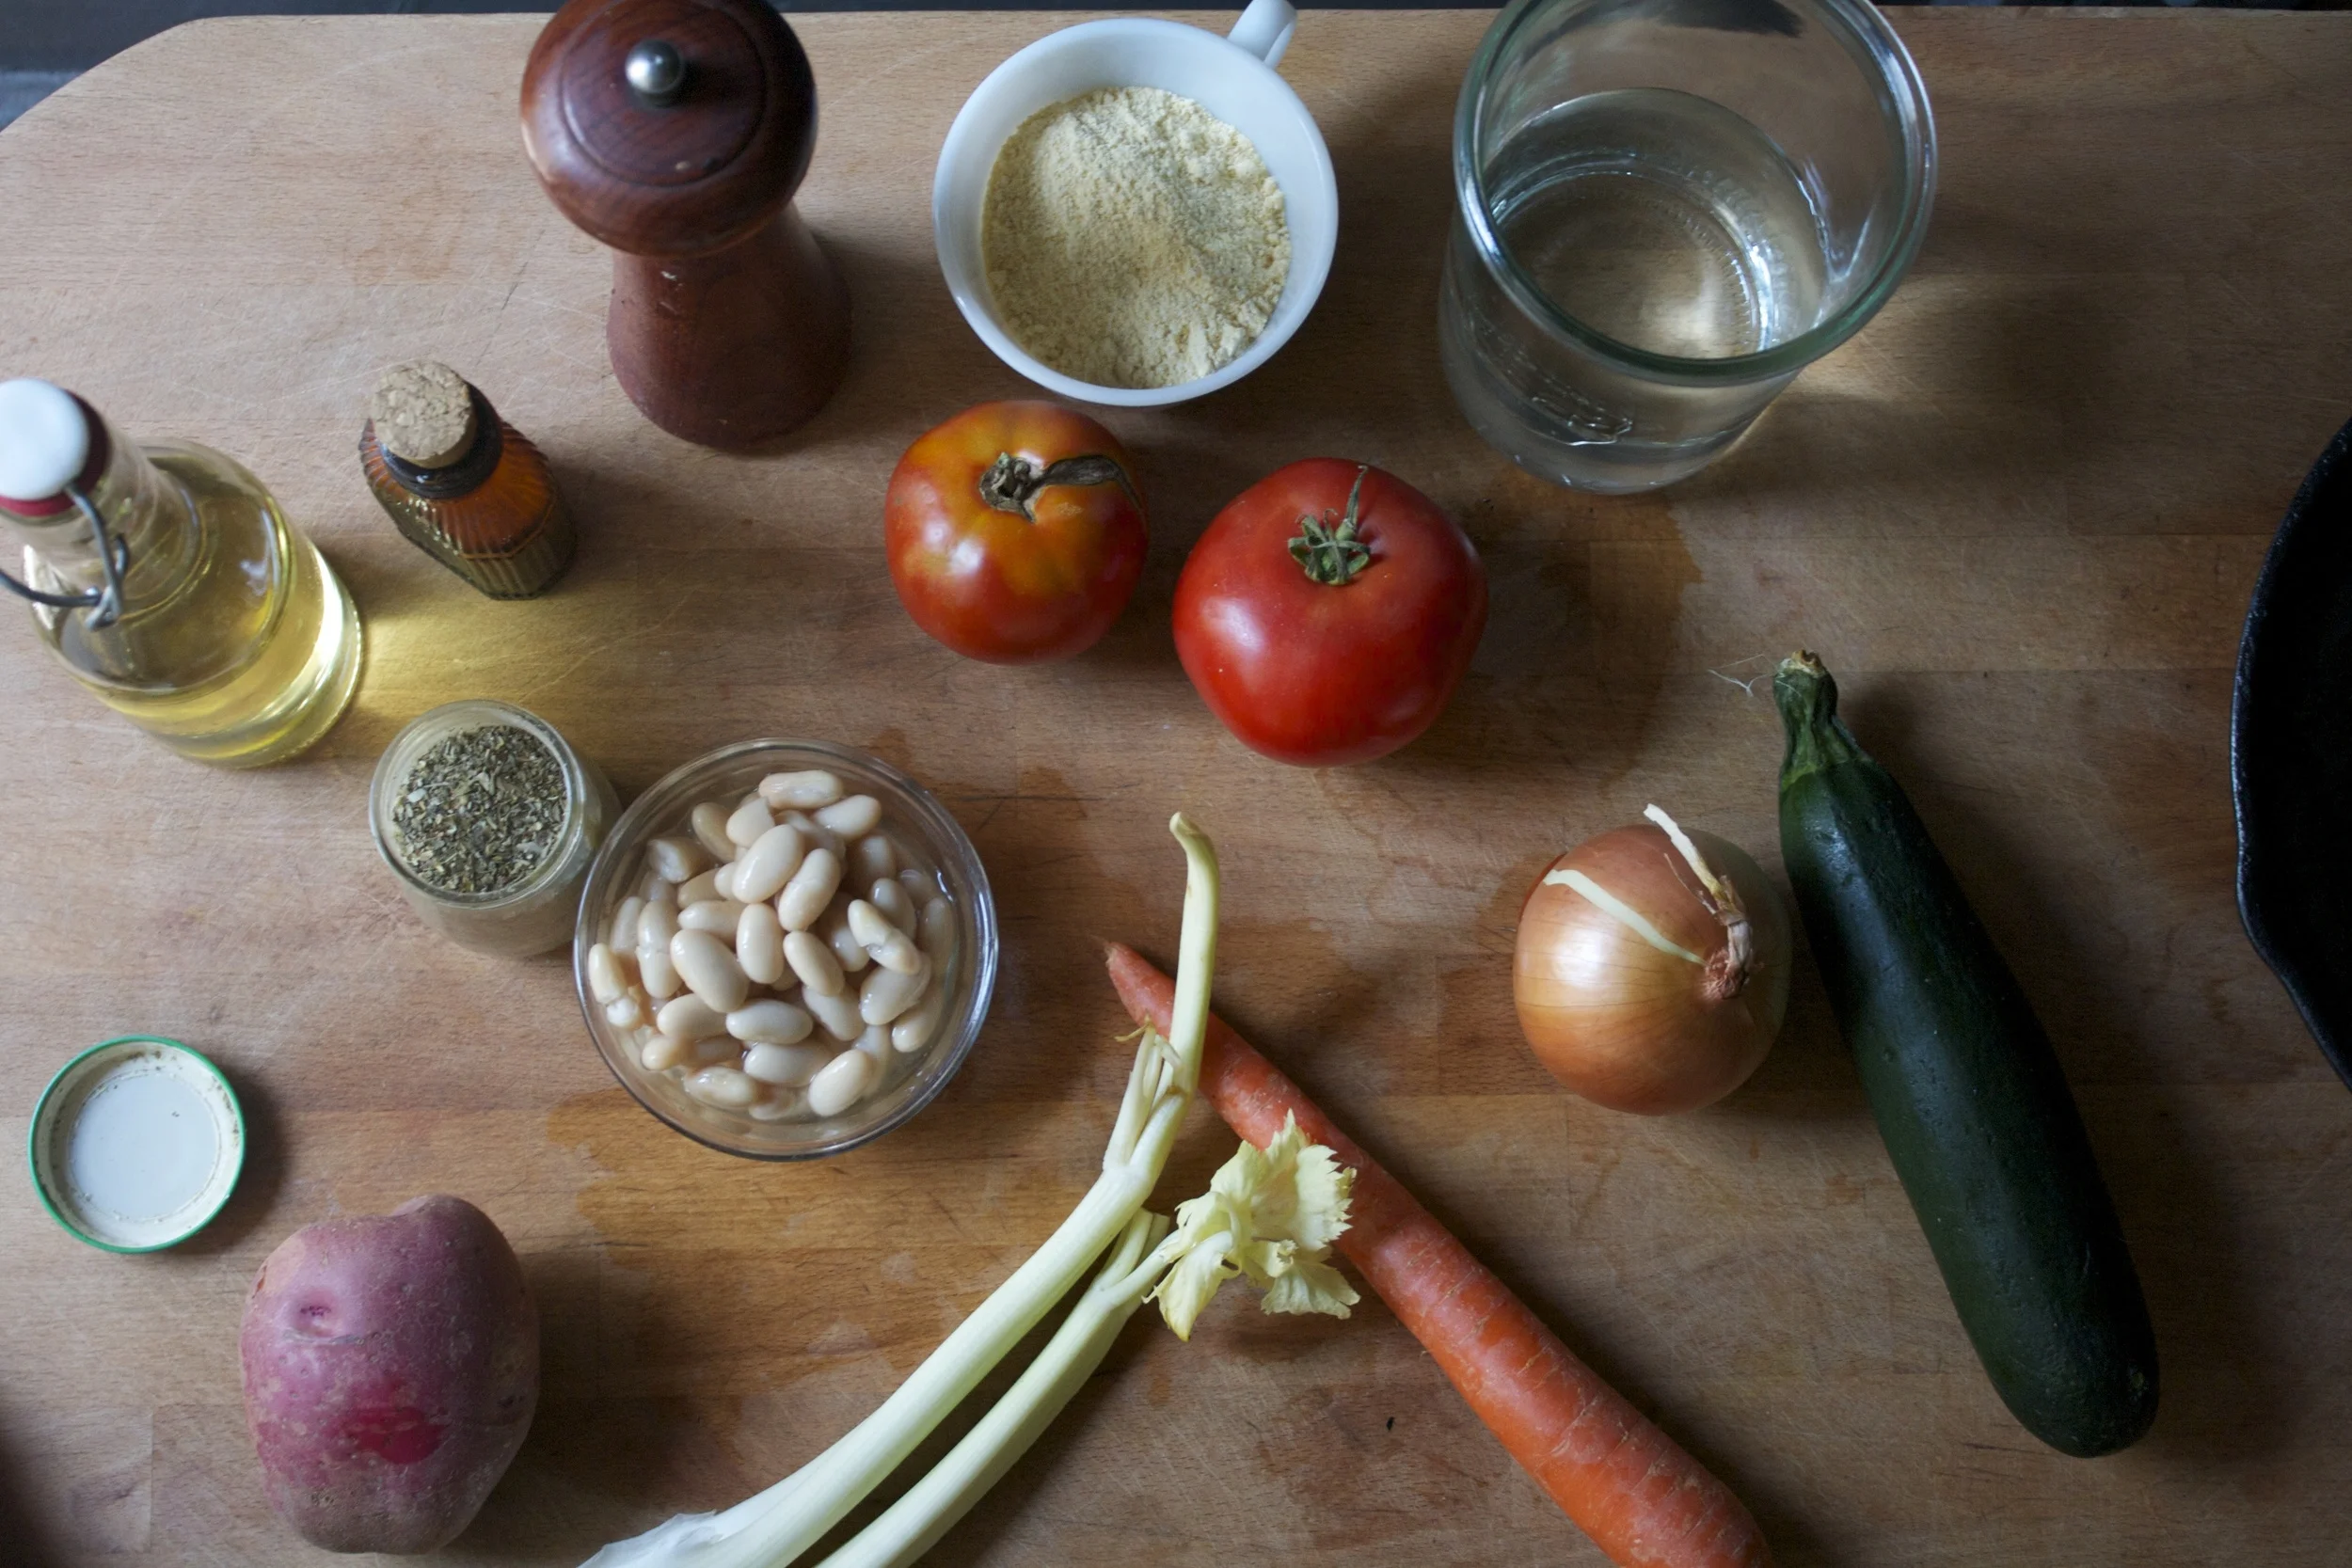
The stuff. Onion, zucchini. potato, carrot, tomato, canaille beans, corn meal, boiling water, Italian seasoning, salt and pepper, and a little olive oil. %u00a0
So If you are missing, or not wanting to use any of the above veggies, don’t. Just sub in more of another or ad something different. Same with the bean. If you had chick peas or navy beans%u2026 its’ all going to taste good.%u00a0
Chop up all the veggies, except the tomato and toss into a oiled skillet. Sprinkle with salt and pepper and the italian seasoing and stick on medium heat. We want to give the veggies a little cooking head start, but the majority of the cooking will happen in the oven. With that said, turn your oven on.%u00a0
Once the veggies have become slightly tender,%u00a0add in the beans and the tomatoes.%u00a0%u00a0Keep cooking for a little while longer, just to soften up the tomatoes.
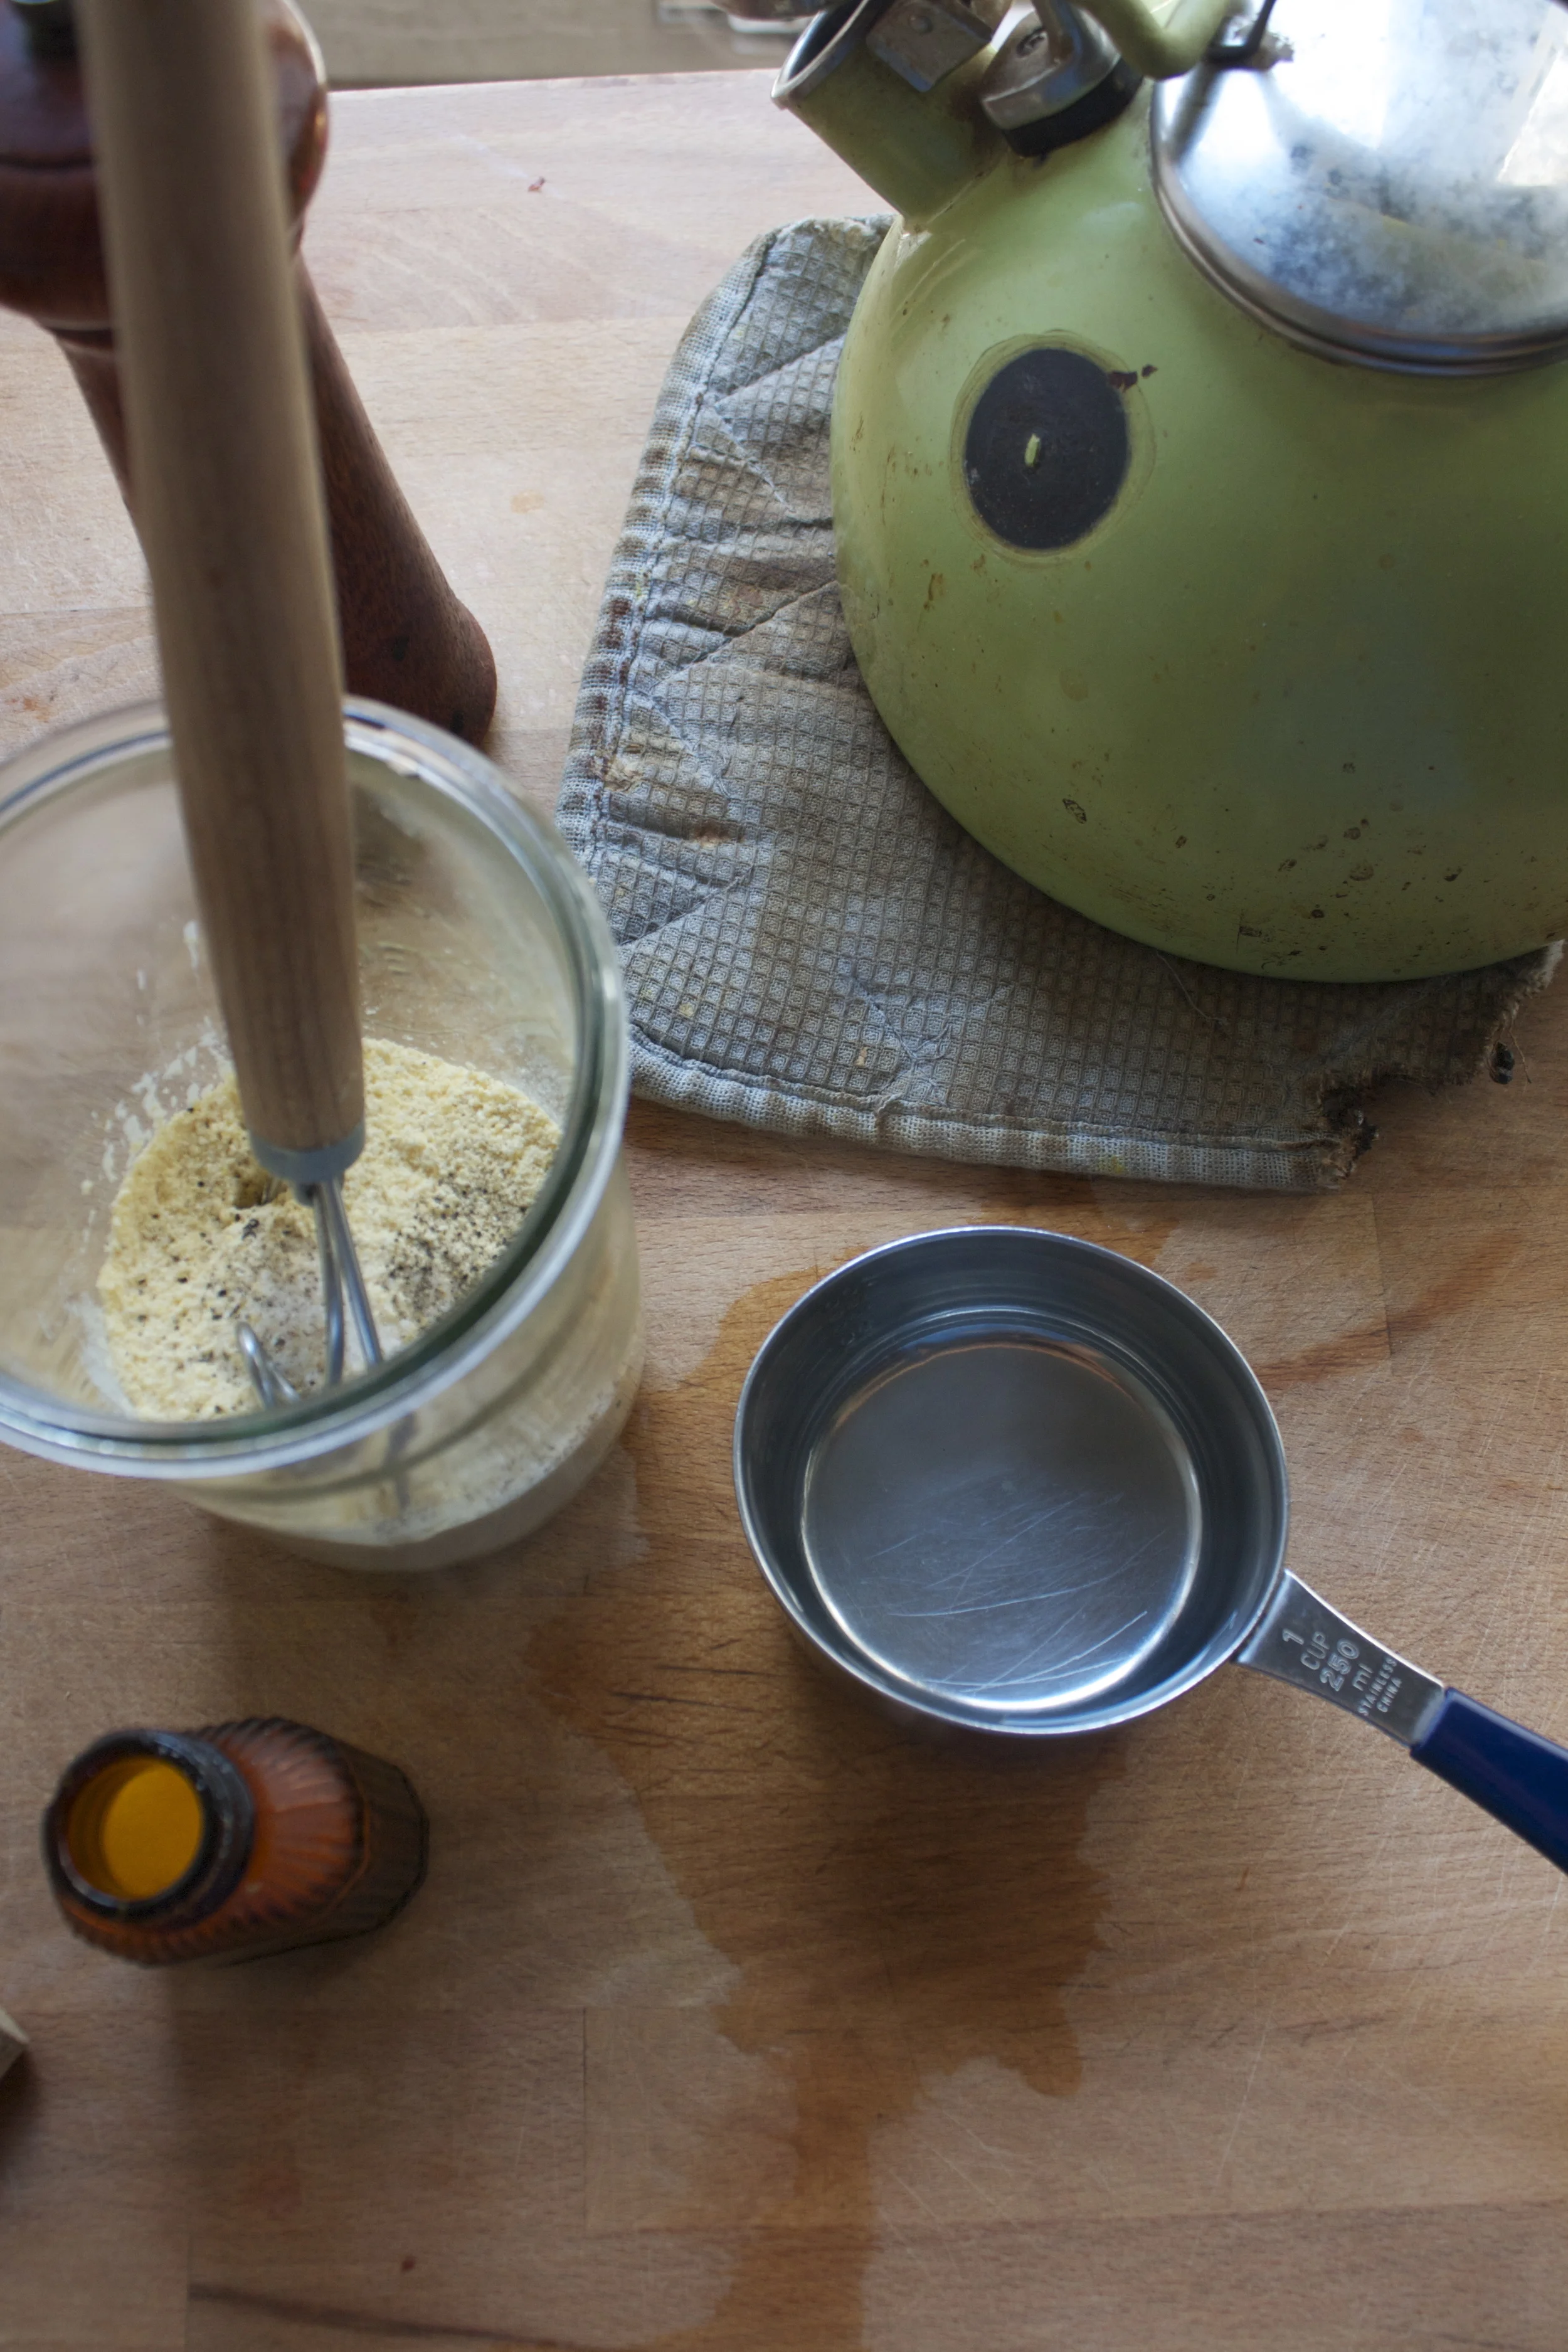
While thats going on, get the polenta ready. Add a little salt to the cornmeal and grab yourself a whisk. Slowly poor boiling water over cornmeal while constantly mixing with whisk to prevent big lumps. (it’s ok if there rare a few small lumps)
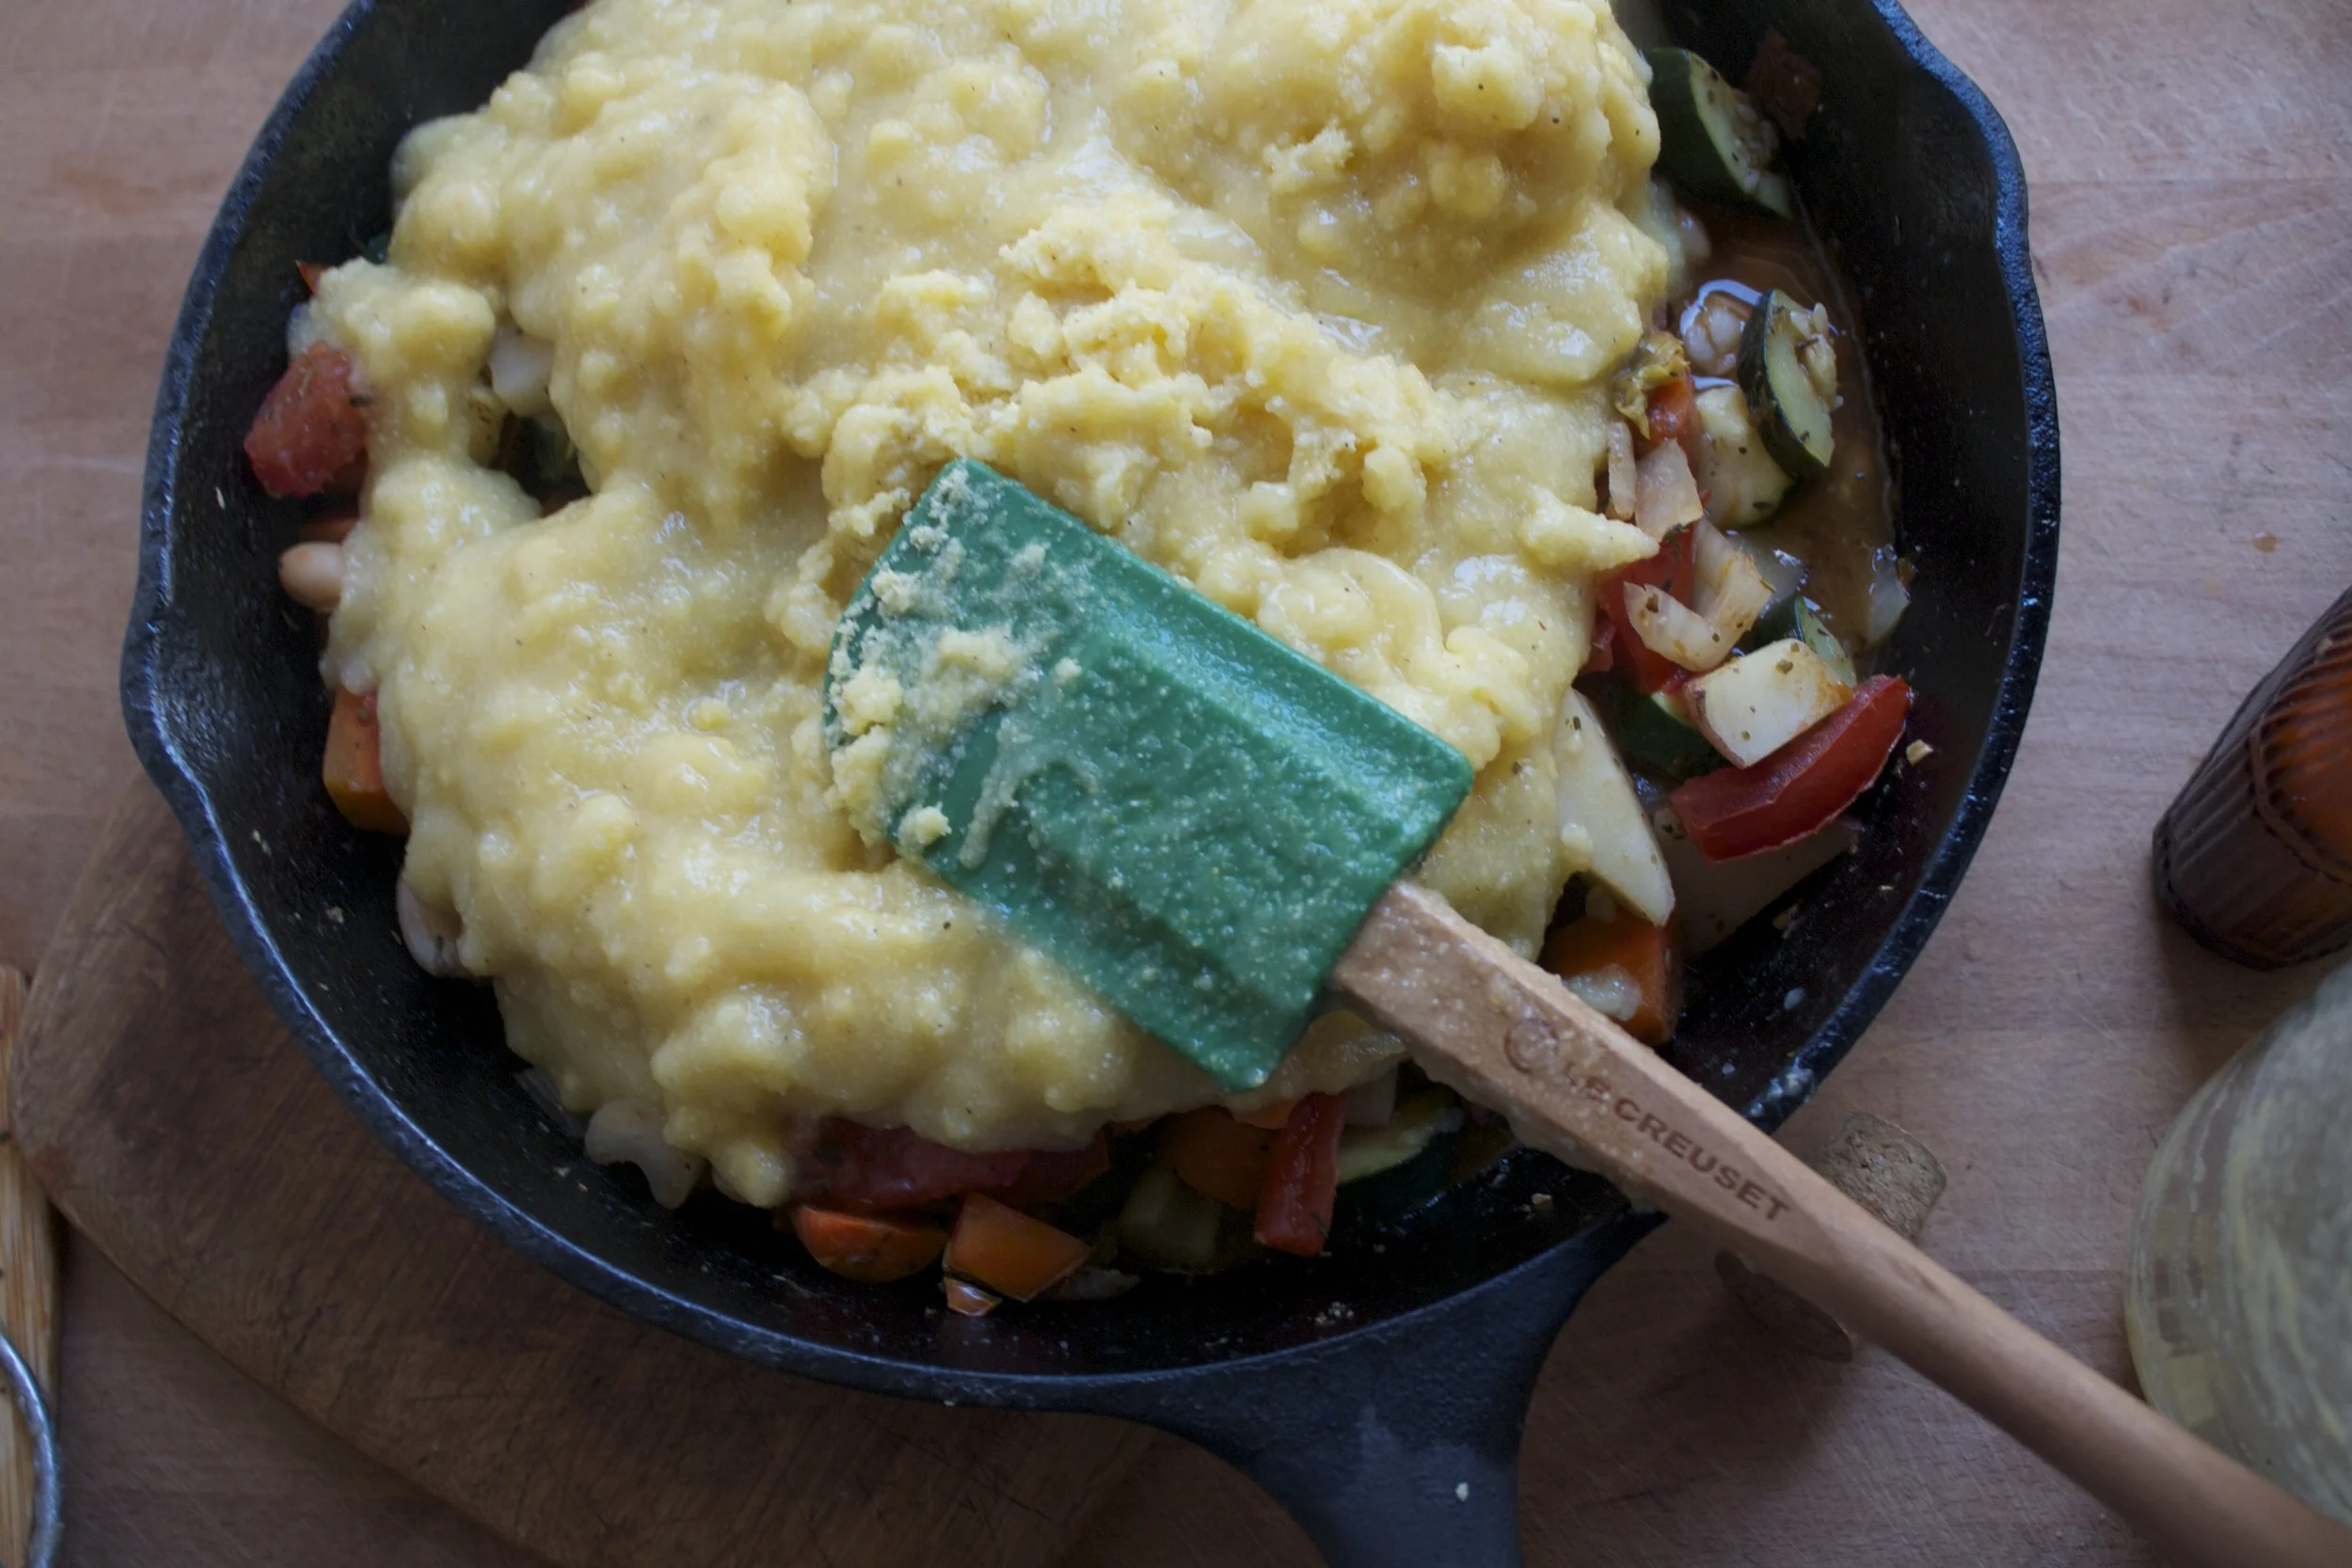
Dump the polenta onto veggies
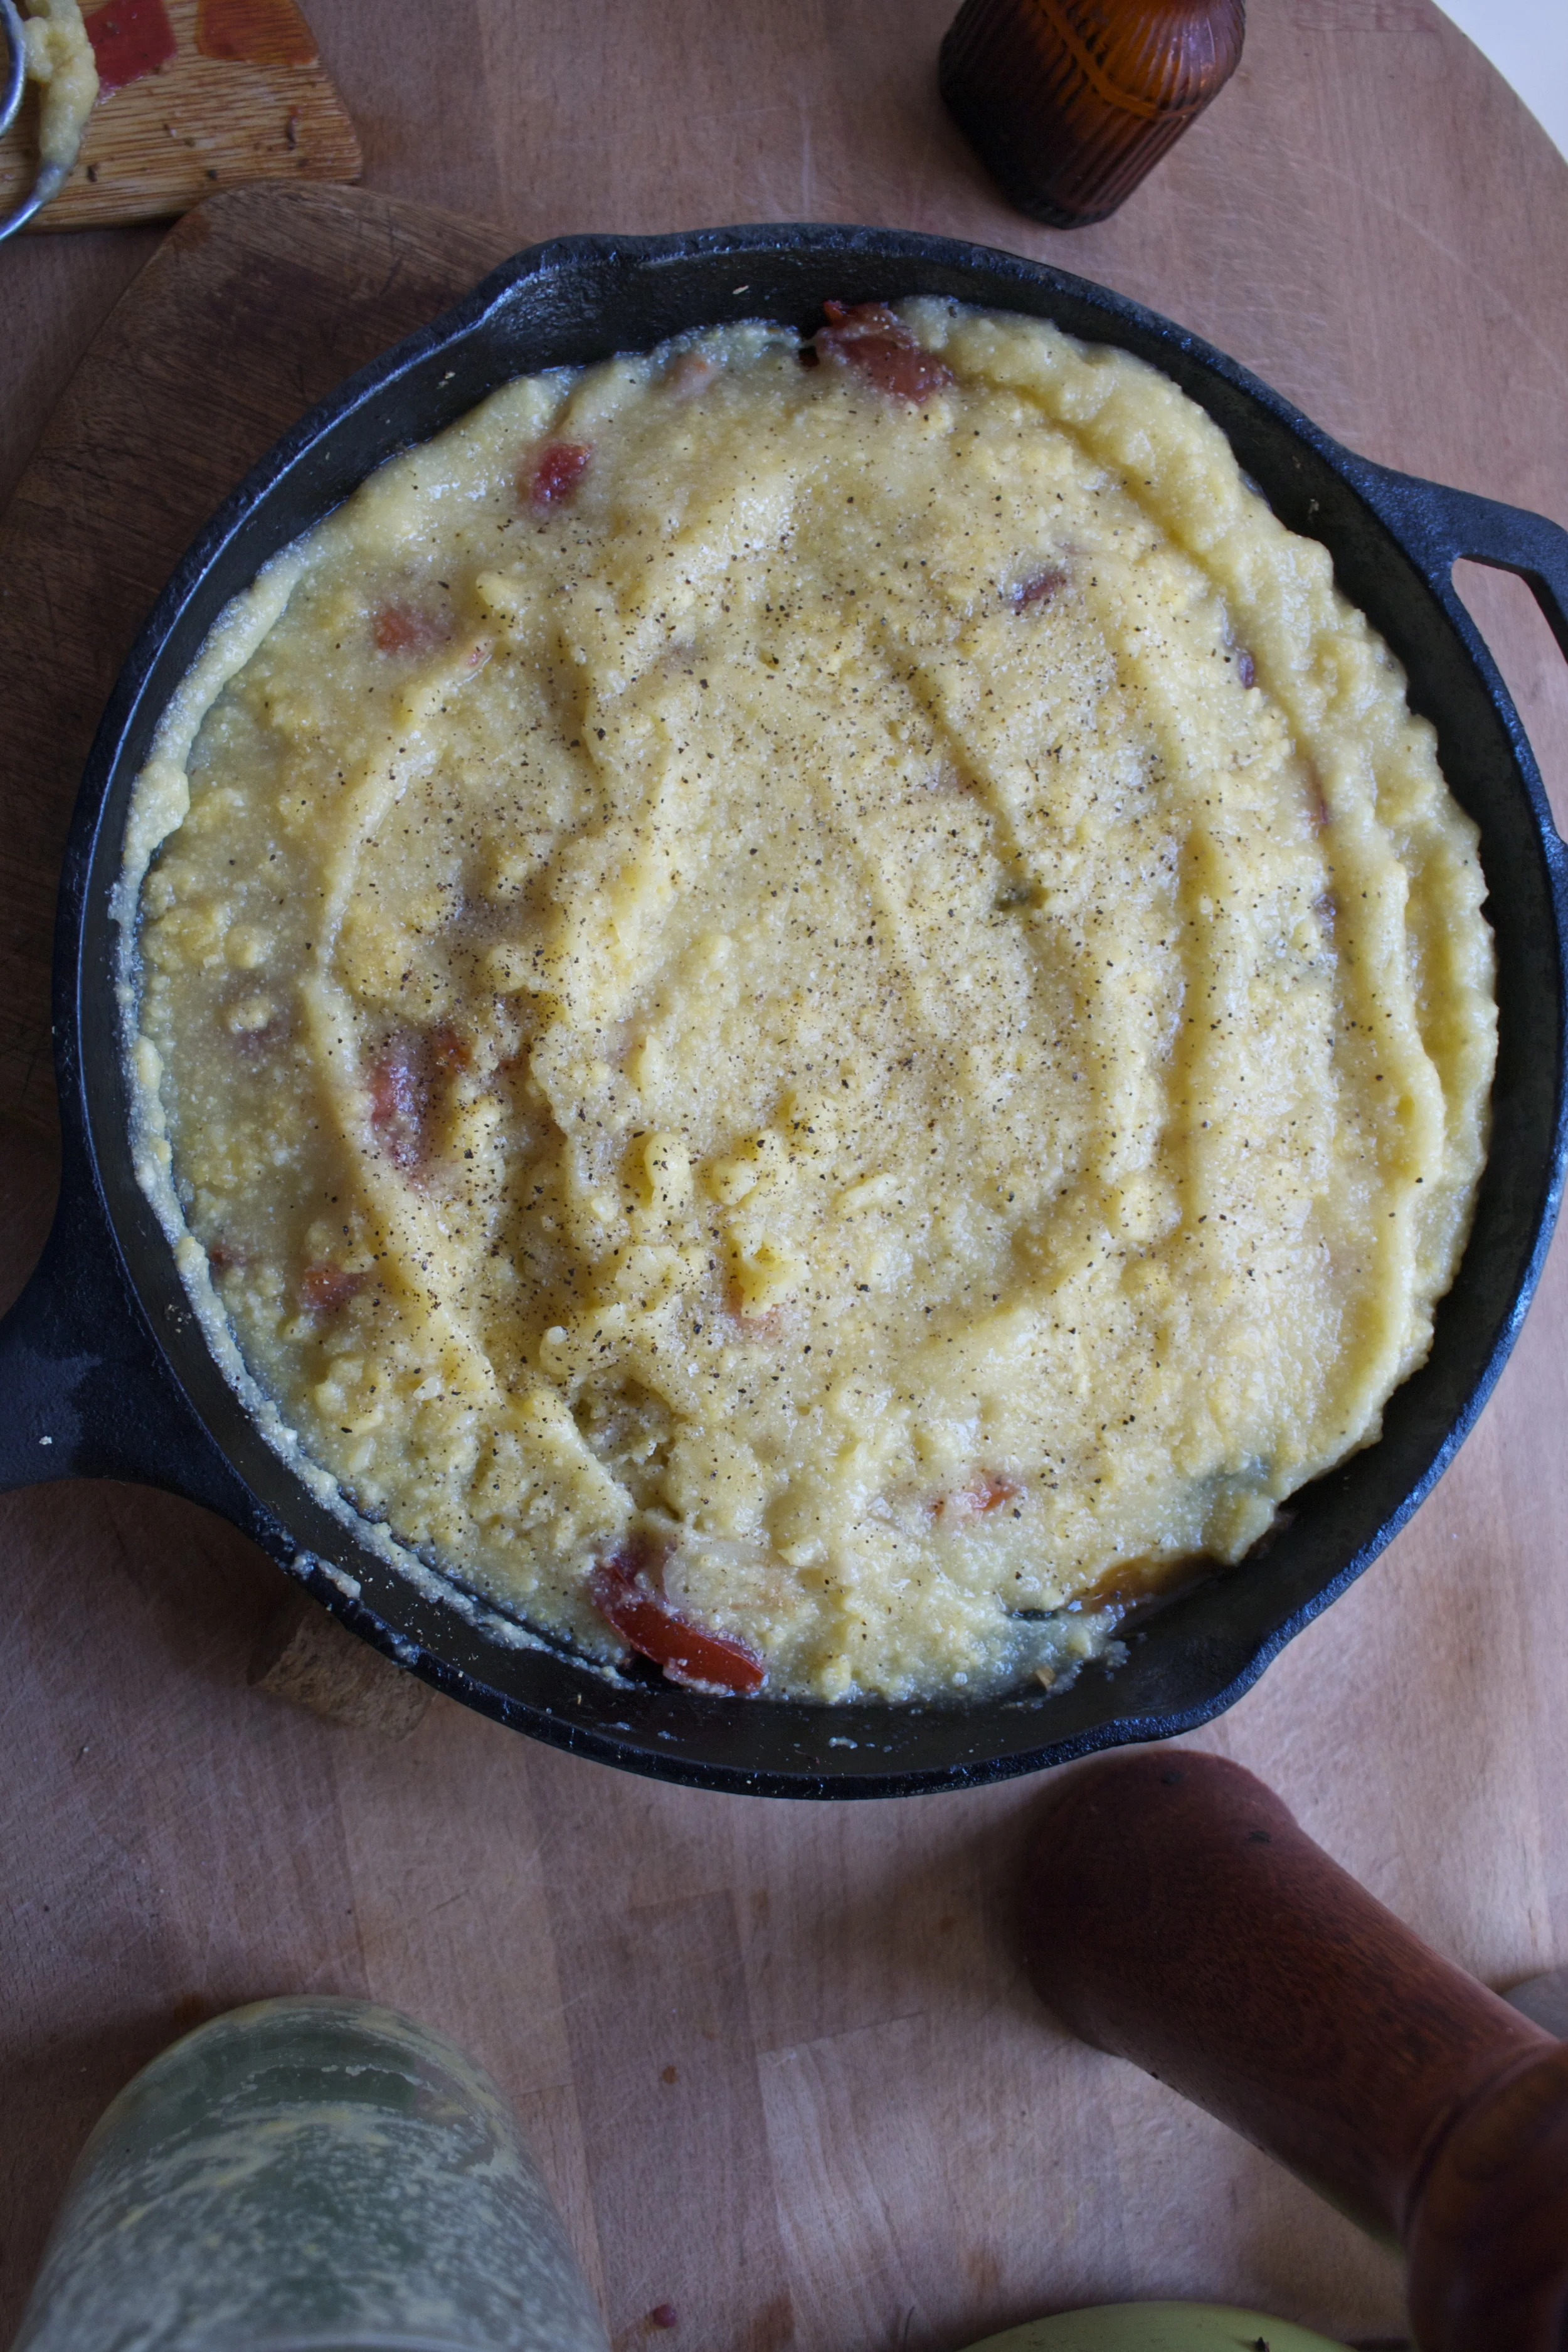
And smooth over the top. Sprinkle with lots of pepper and stick it into hot oven to bake.
Some time later(about 45 minute) the polenta is all cooked and crispy, the veggies underneath %u00a0are all %u00a0creamy and soft, and the whole thing is ready for consumption.
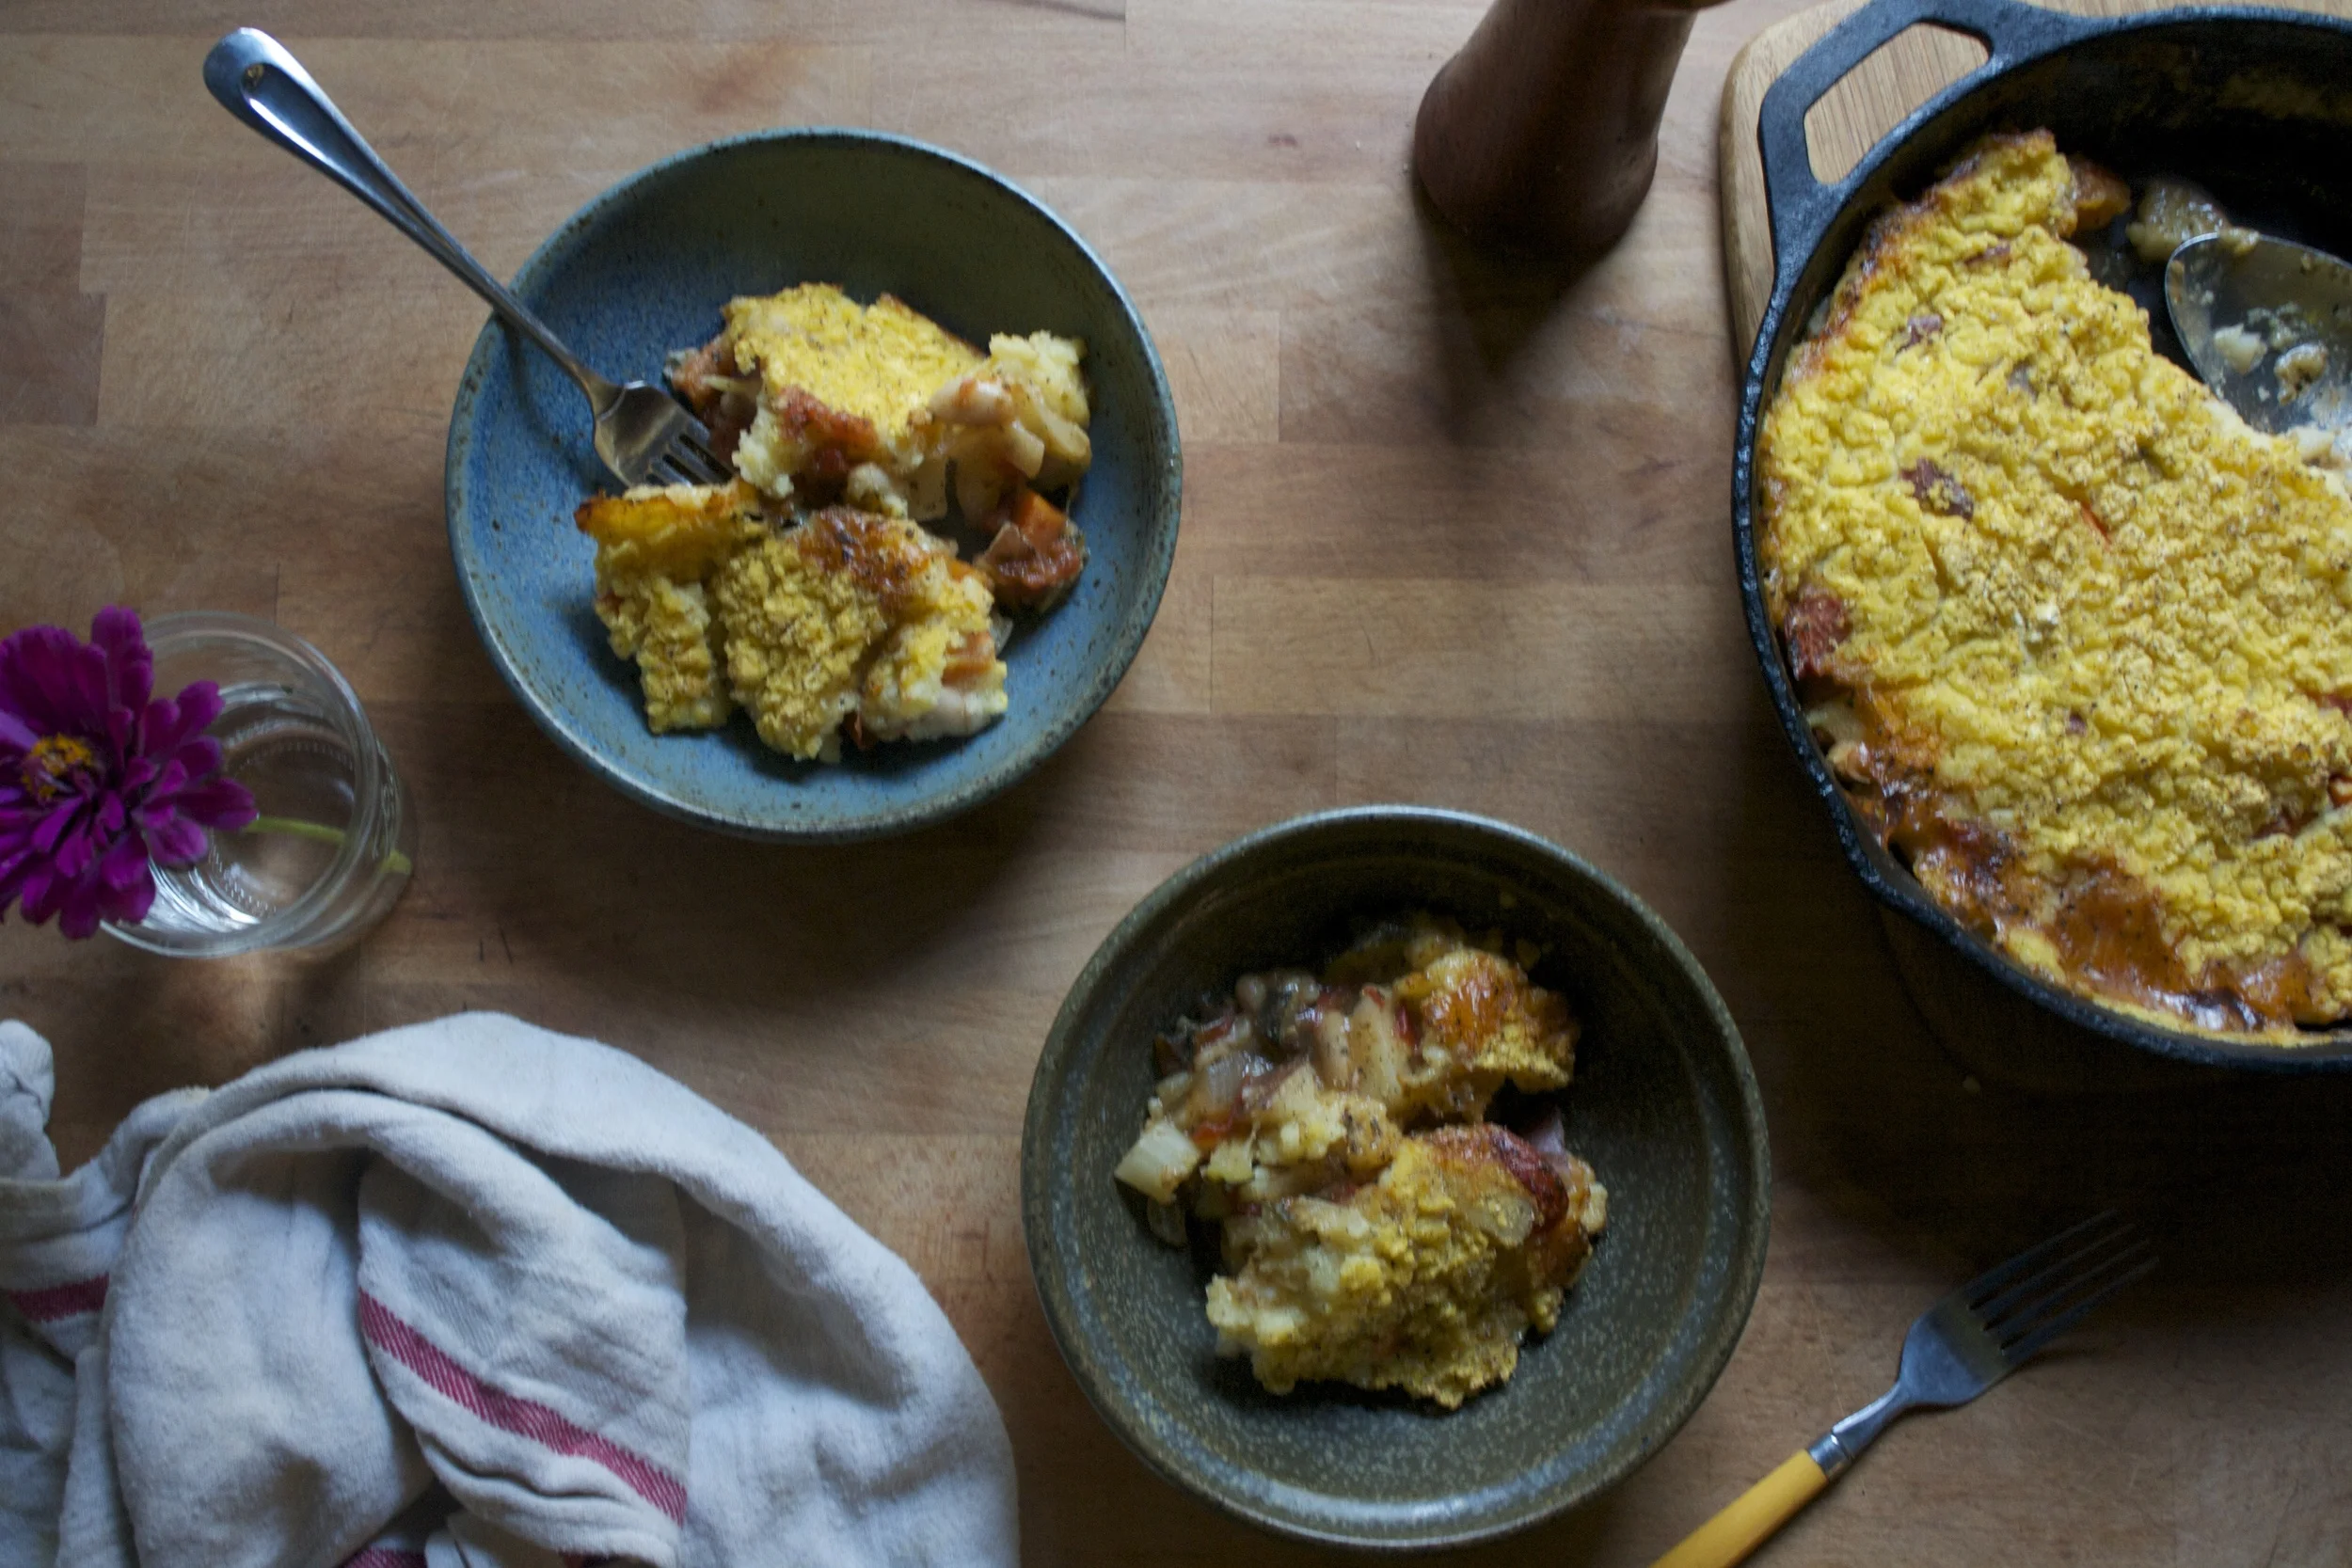
Grab you bowls, grab you forks%u2026%u00a0Big scoops right into bowl
And happy eating it is.
-C
serve 3-4
1 carrot
1 small onion
2 stalks celery
1 medium red potato
2 tomatoes
1 small zucchini
1 cup canaille beans
3 tablesoons italinan spice blend*
3/4 cup corn meal
3 cups boiling water
salt and pepper
olive oil %u00a0
*I make my own italian spice blend, which consists of basil, oregano, thyme, marjoram,,%u00a0rosemary,%u00a0and garlic powder. I think most blends are the same, minus the garlic so make your own use a pre blended mixture, just look to see there is garlic in it. If not, add a teaspoon or two of garlic powder to the veggies.
Preheat oven to 425.
Oil a large (I used a 12 inch) cast iron skillet or such oven. Chop up all the veggies, except the tomatoes, into smallish, mouth sized chunks and toss into skillet. Add in seasoning and a good few pinches of salt and pepper. Place on medium heat and cook for about 8 minutes, or until the veggies start to release there juices and are slightly tender.%u00a0%u00a0Now chop up the tomatoes and toss those into the pot along with the beans, in with the veggies. Cook for another 5 %u00a0minutes or until all the veggies are slightly tender.%u00a0
In a large jar or bowl, whisk together a pitch or two of salt and pepper to the cornmeal. While continuously whacking, pour the boiling water over the cornmeal. Pour/ spread cornmeal mixture over veggies, then smooth it out to form the crust. Season with salt and lots of pepper and place into oven. Bake for 45-50 minutes or until the polenta is cooked and has turned a nice golden brown. Remove from oven, let cool for a few minute, then serve.
Some folks might enjoy some type of cheese so if you want to,%u00a0%u00a0give it to them.
Fall is all up in here!. The air is so nice and crisp and the leaves are changing to the prettiest colors.%u00a0I gots my pumpkins, an abundance of apples and squashes (our table is forverver overflowing with some type of squash) and am wearing all of my favorite sweaters.%u00a0
I am a happy lady here!
And this happy lady just wants to sit on her butt and knit.
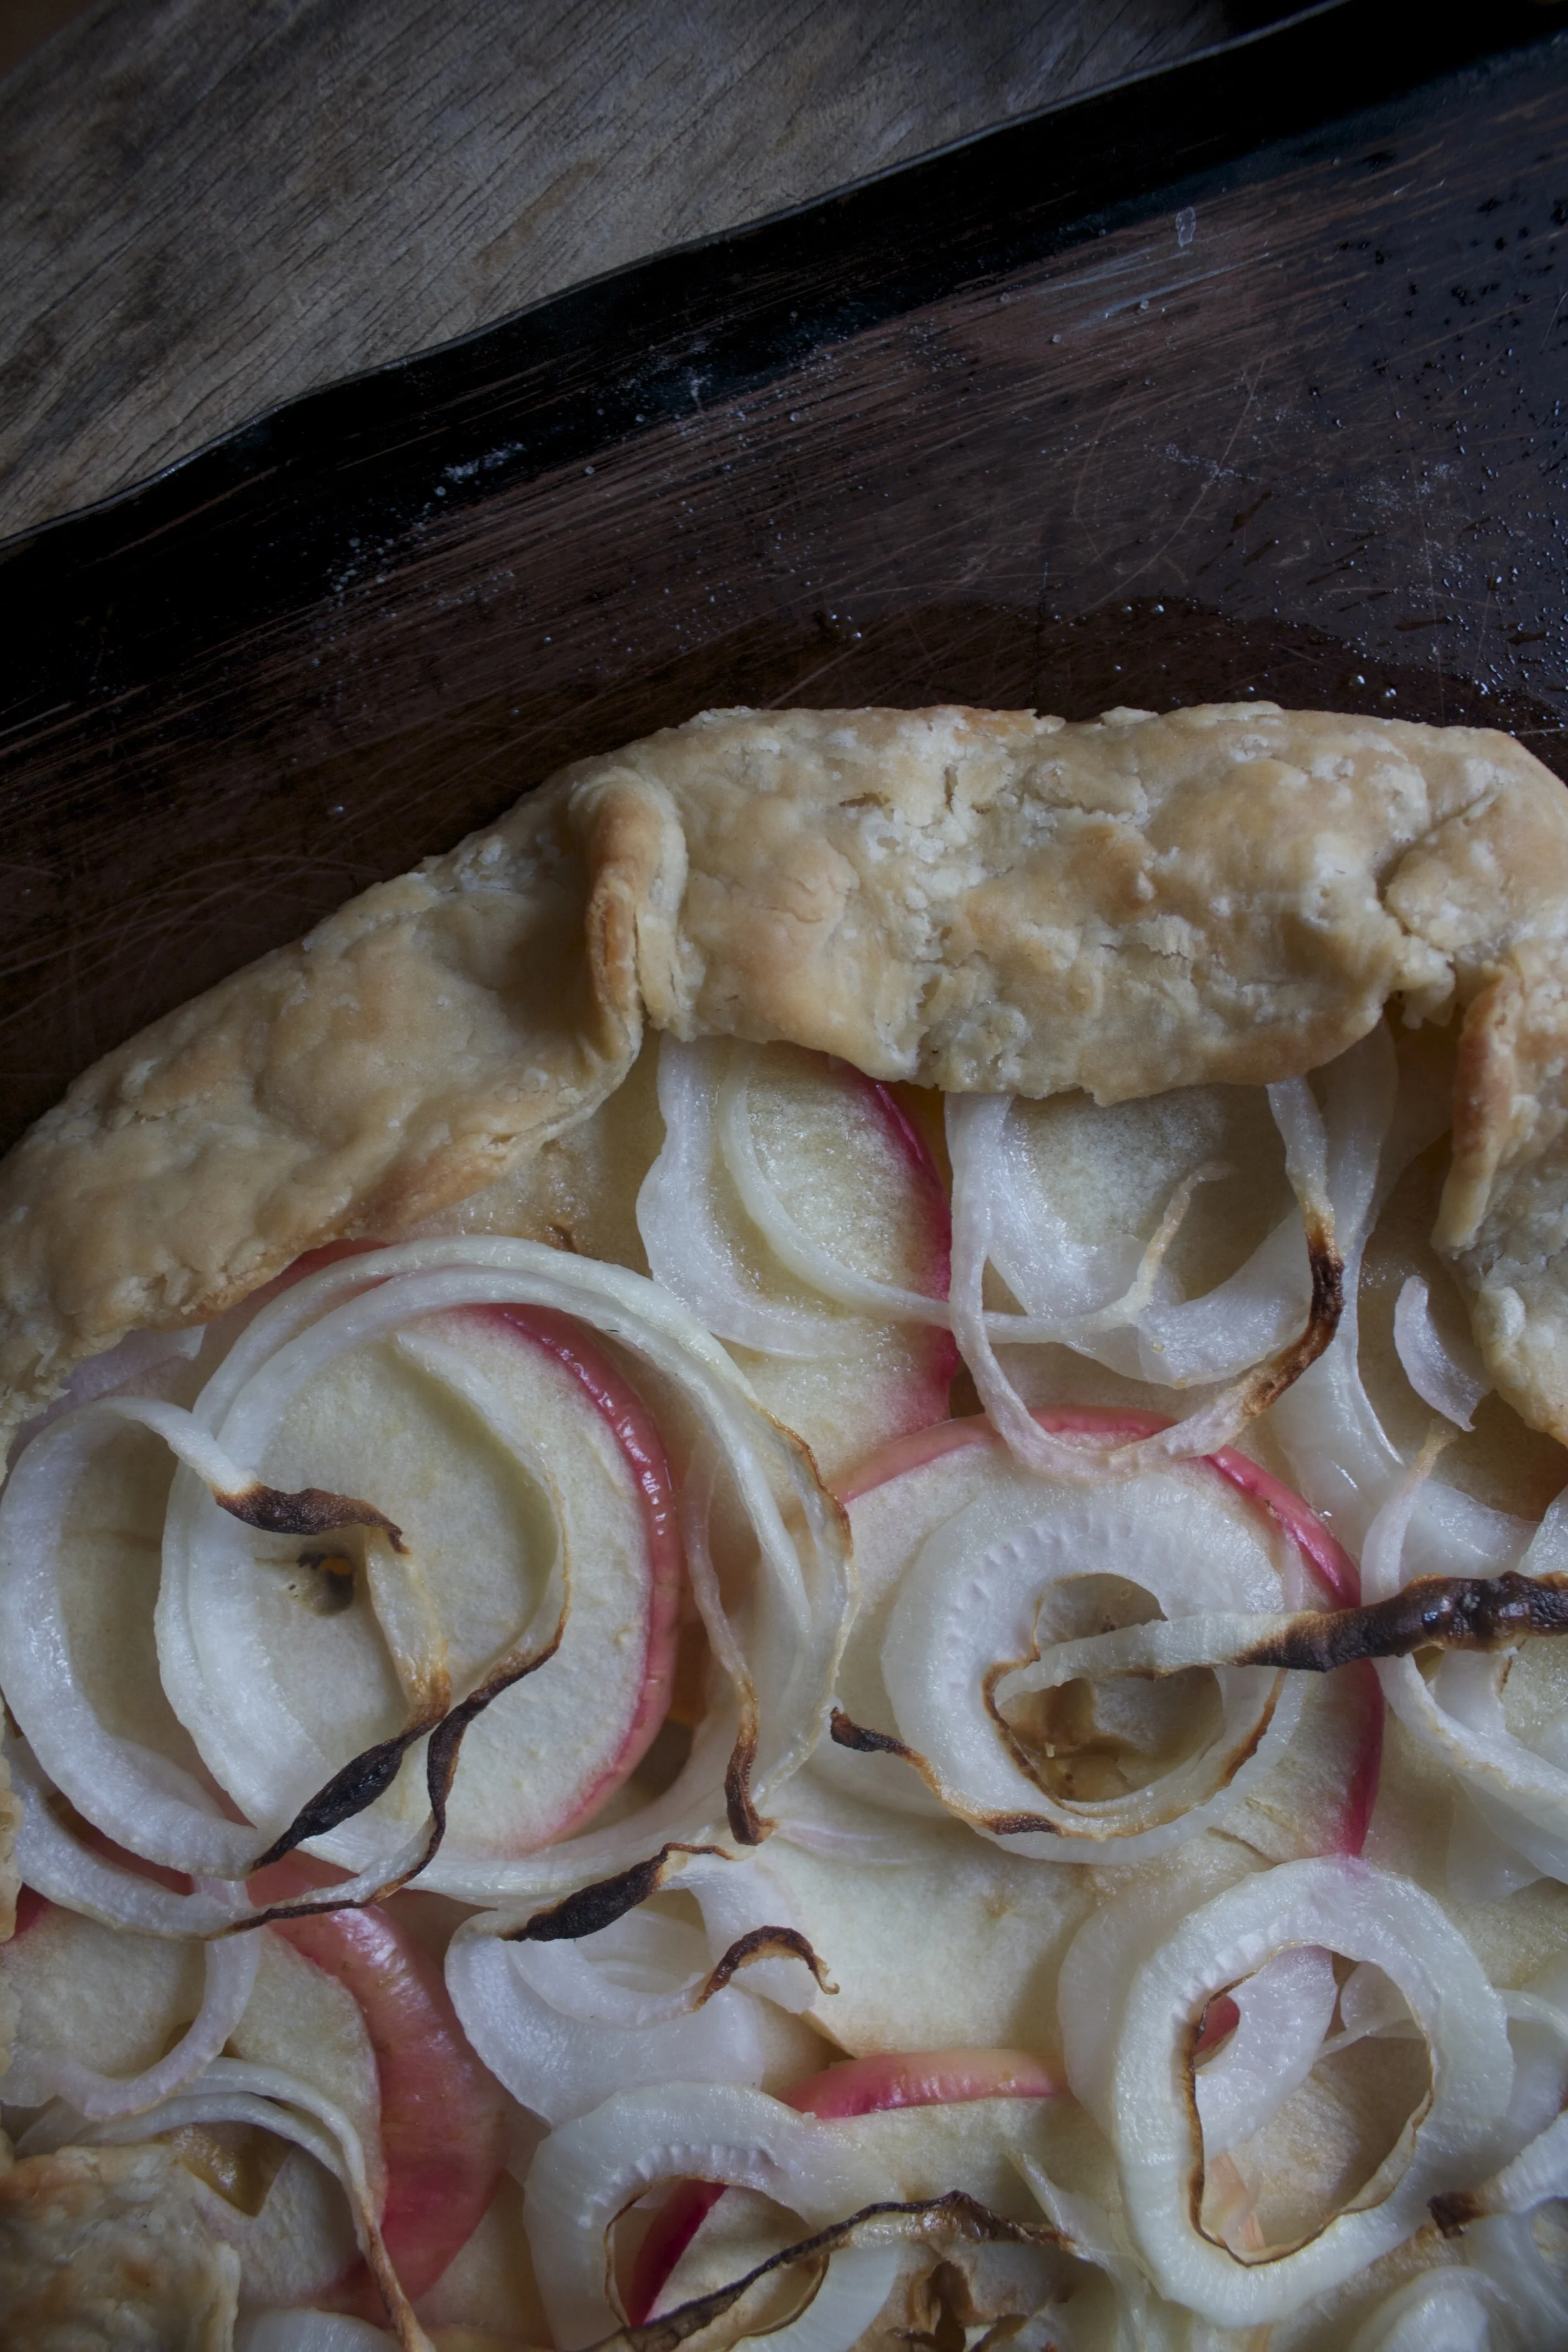
But first, dinner. And my thought are. “What to do that doesn’t include doing much of anything (especially dishes) and maybe even has the oven on for a little extra warmth?” See here, I am a thinker. I knew I %u00a0had a single pie dough in the freezer (you should always have a pie dough in the freezer), a table full of the loveliest produce. So this happened. And the mr ate it, and he was all like “Whoa”.%u00a0 And I was like,”yeah dude, I know.”
A Ssuper fall galette.. and I still had time for my knitting and my butt.%u00a0
Like Whoa!
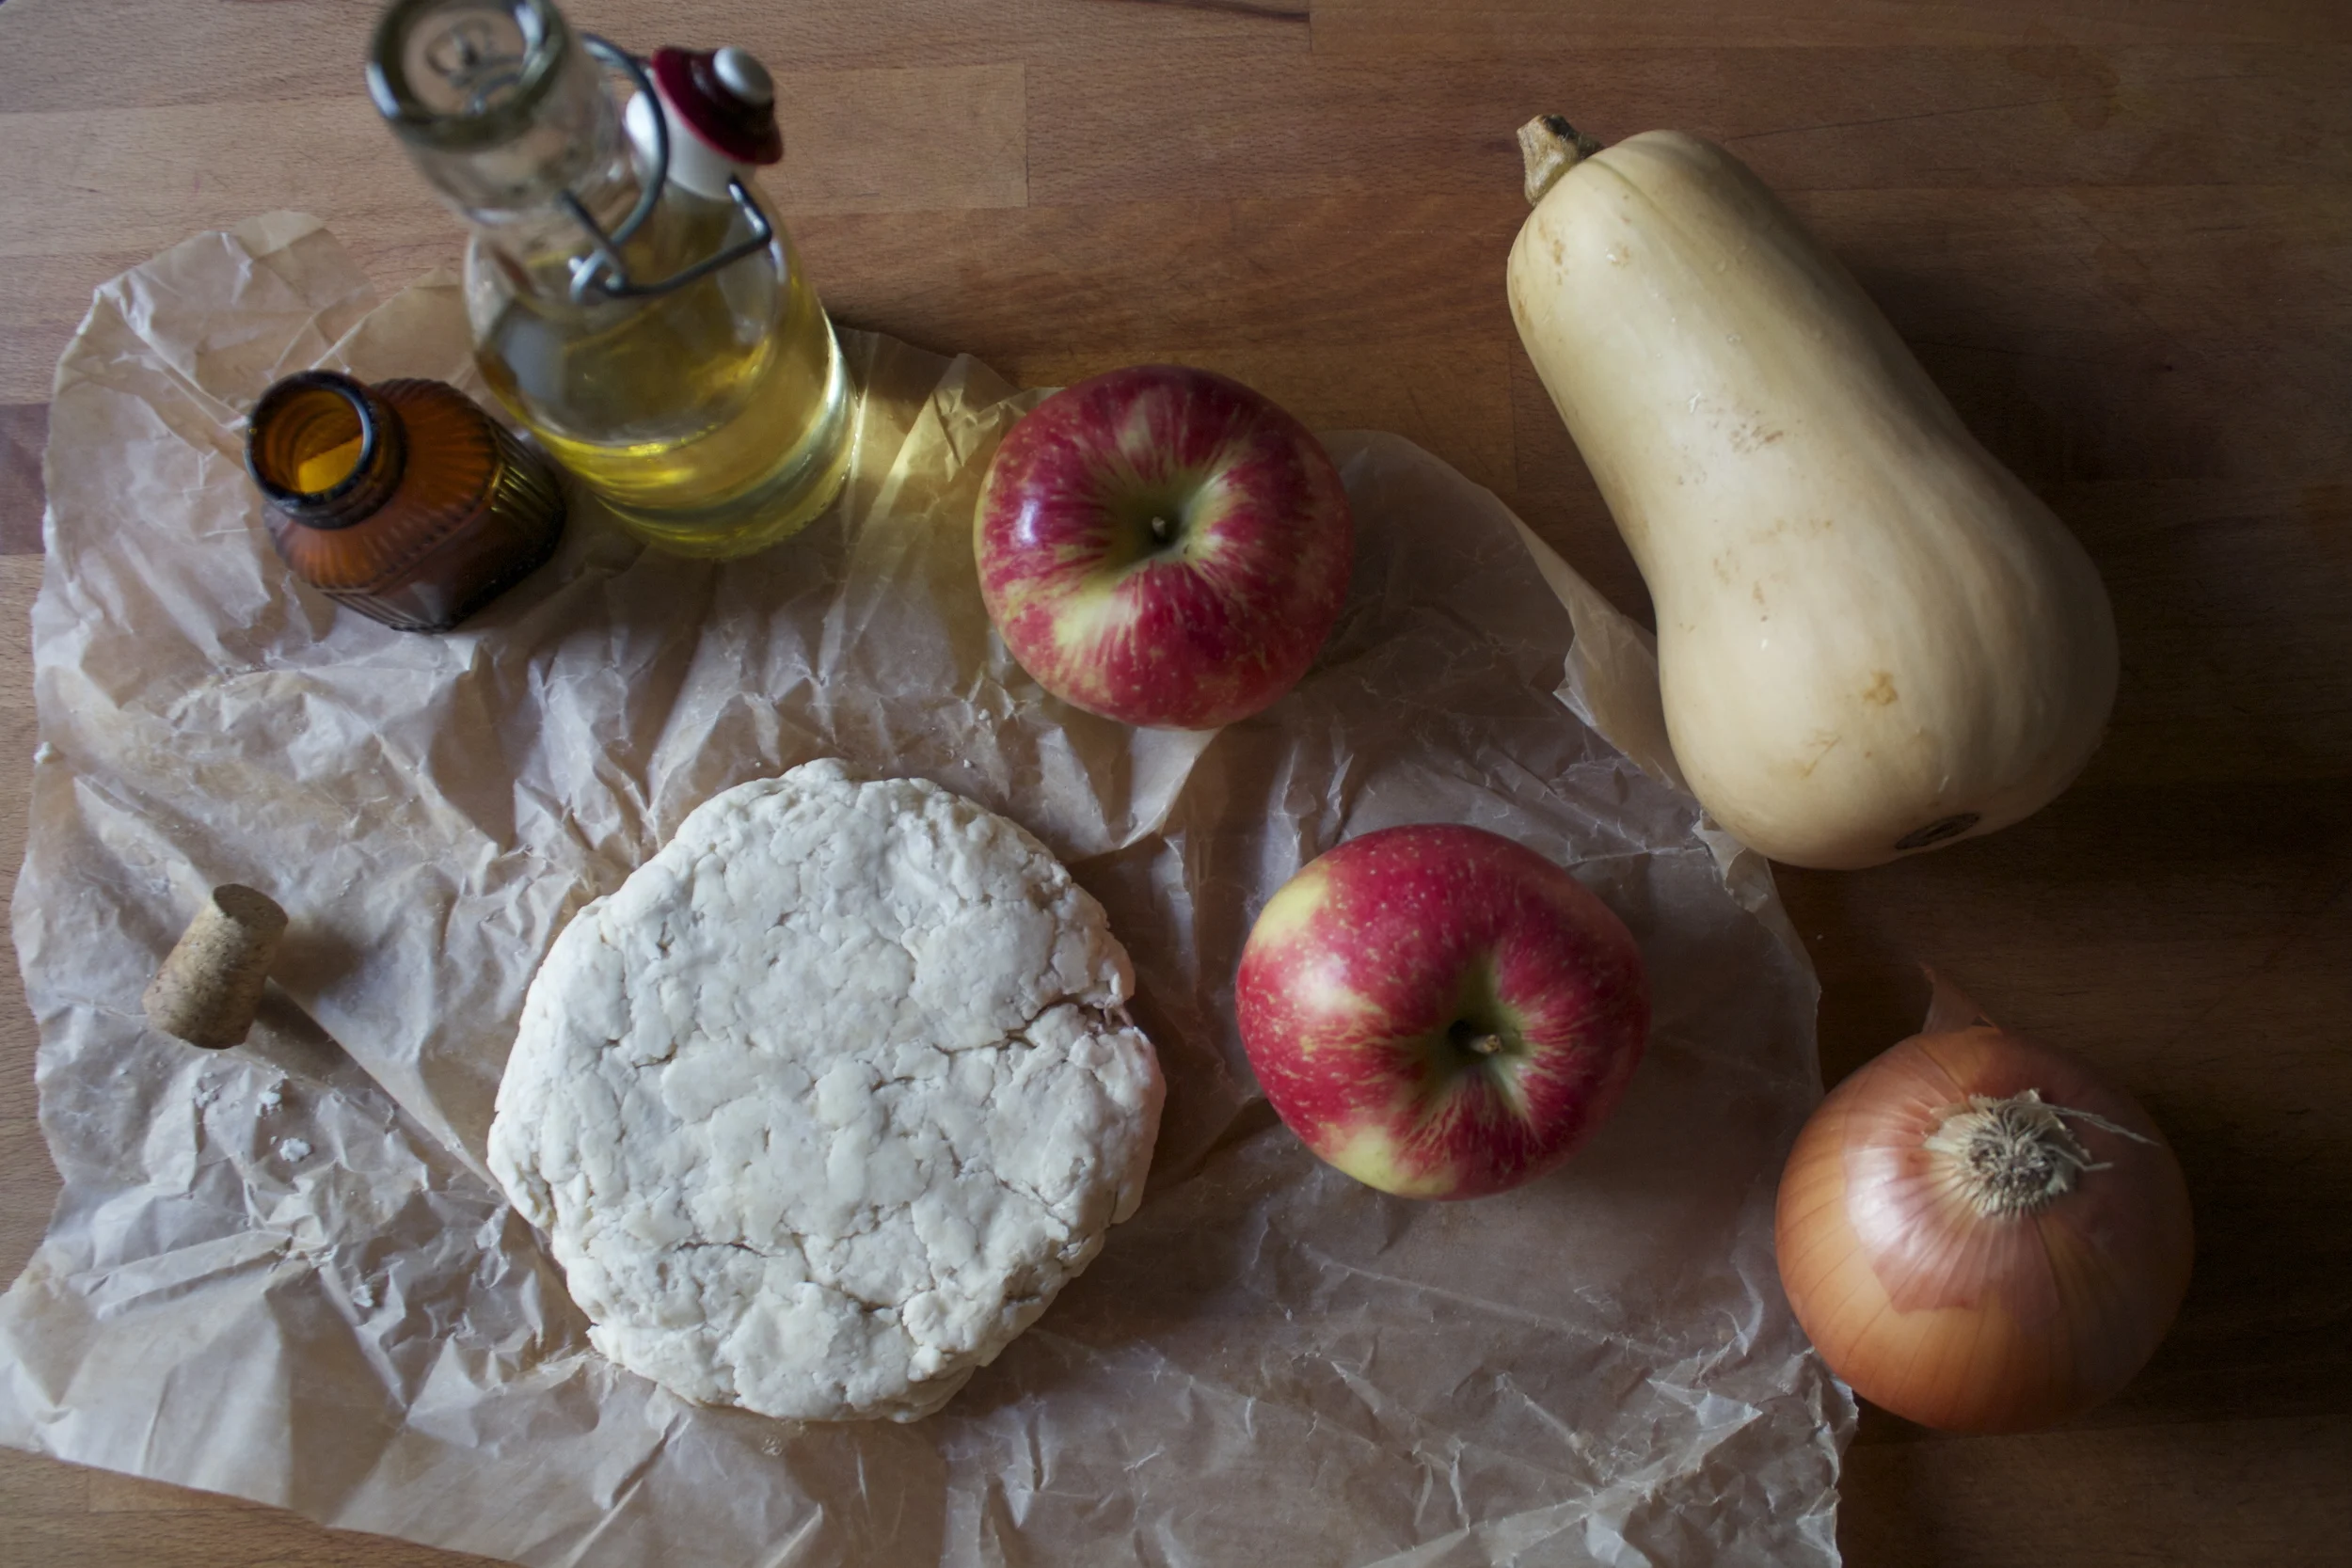
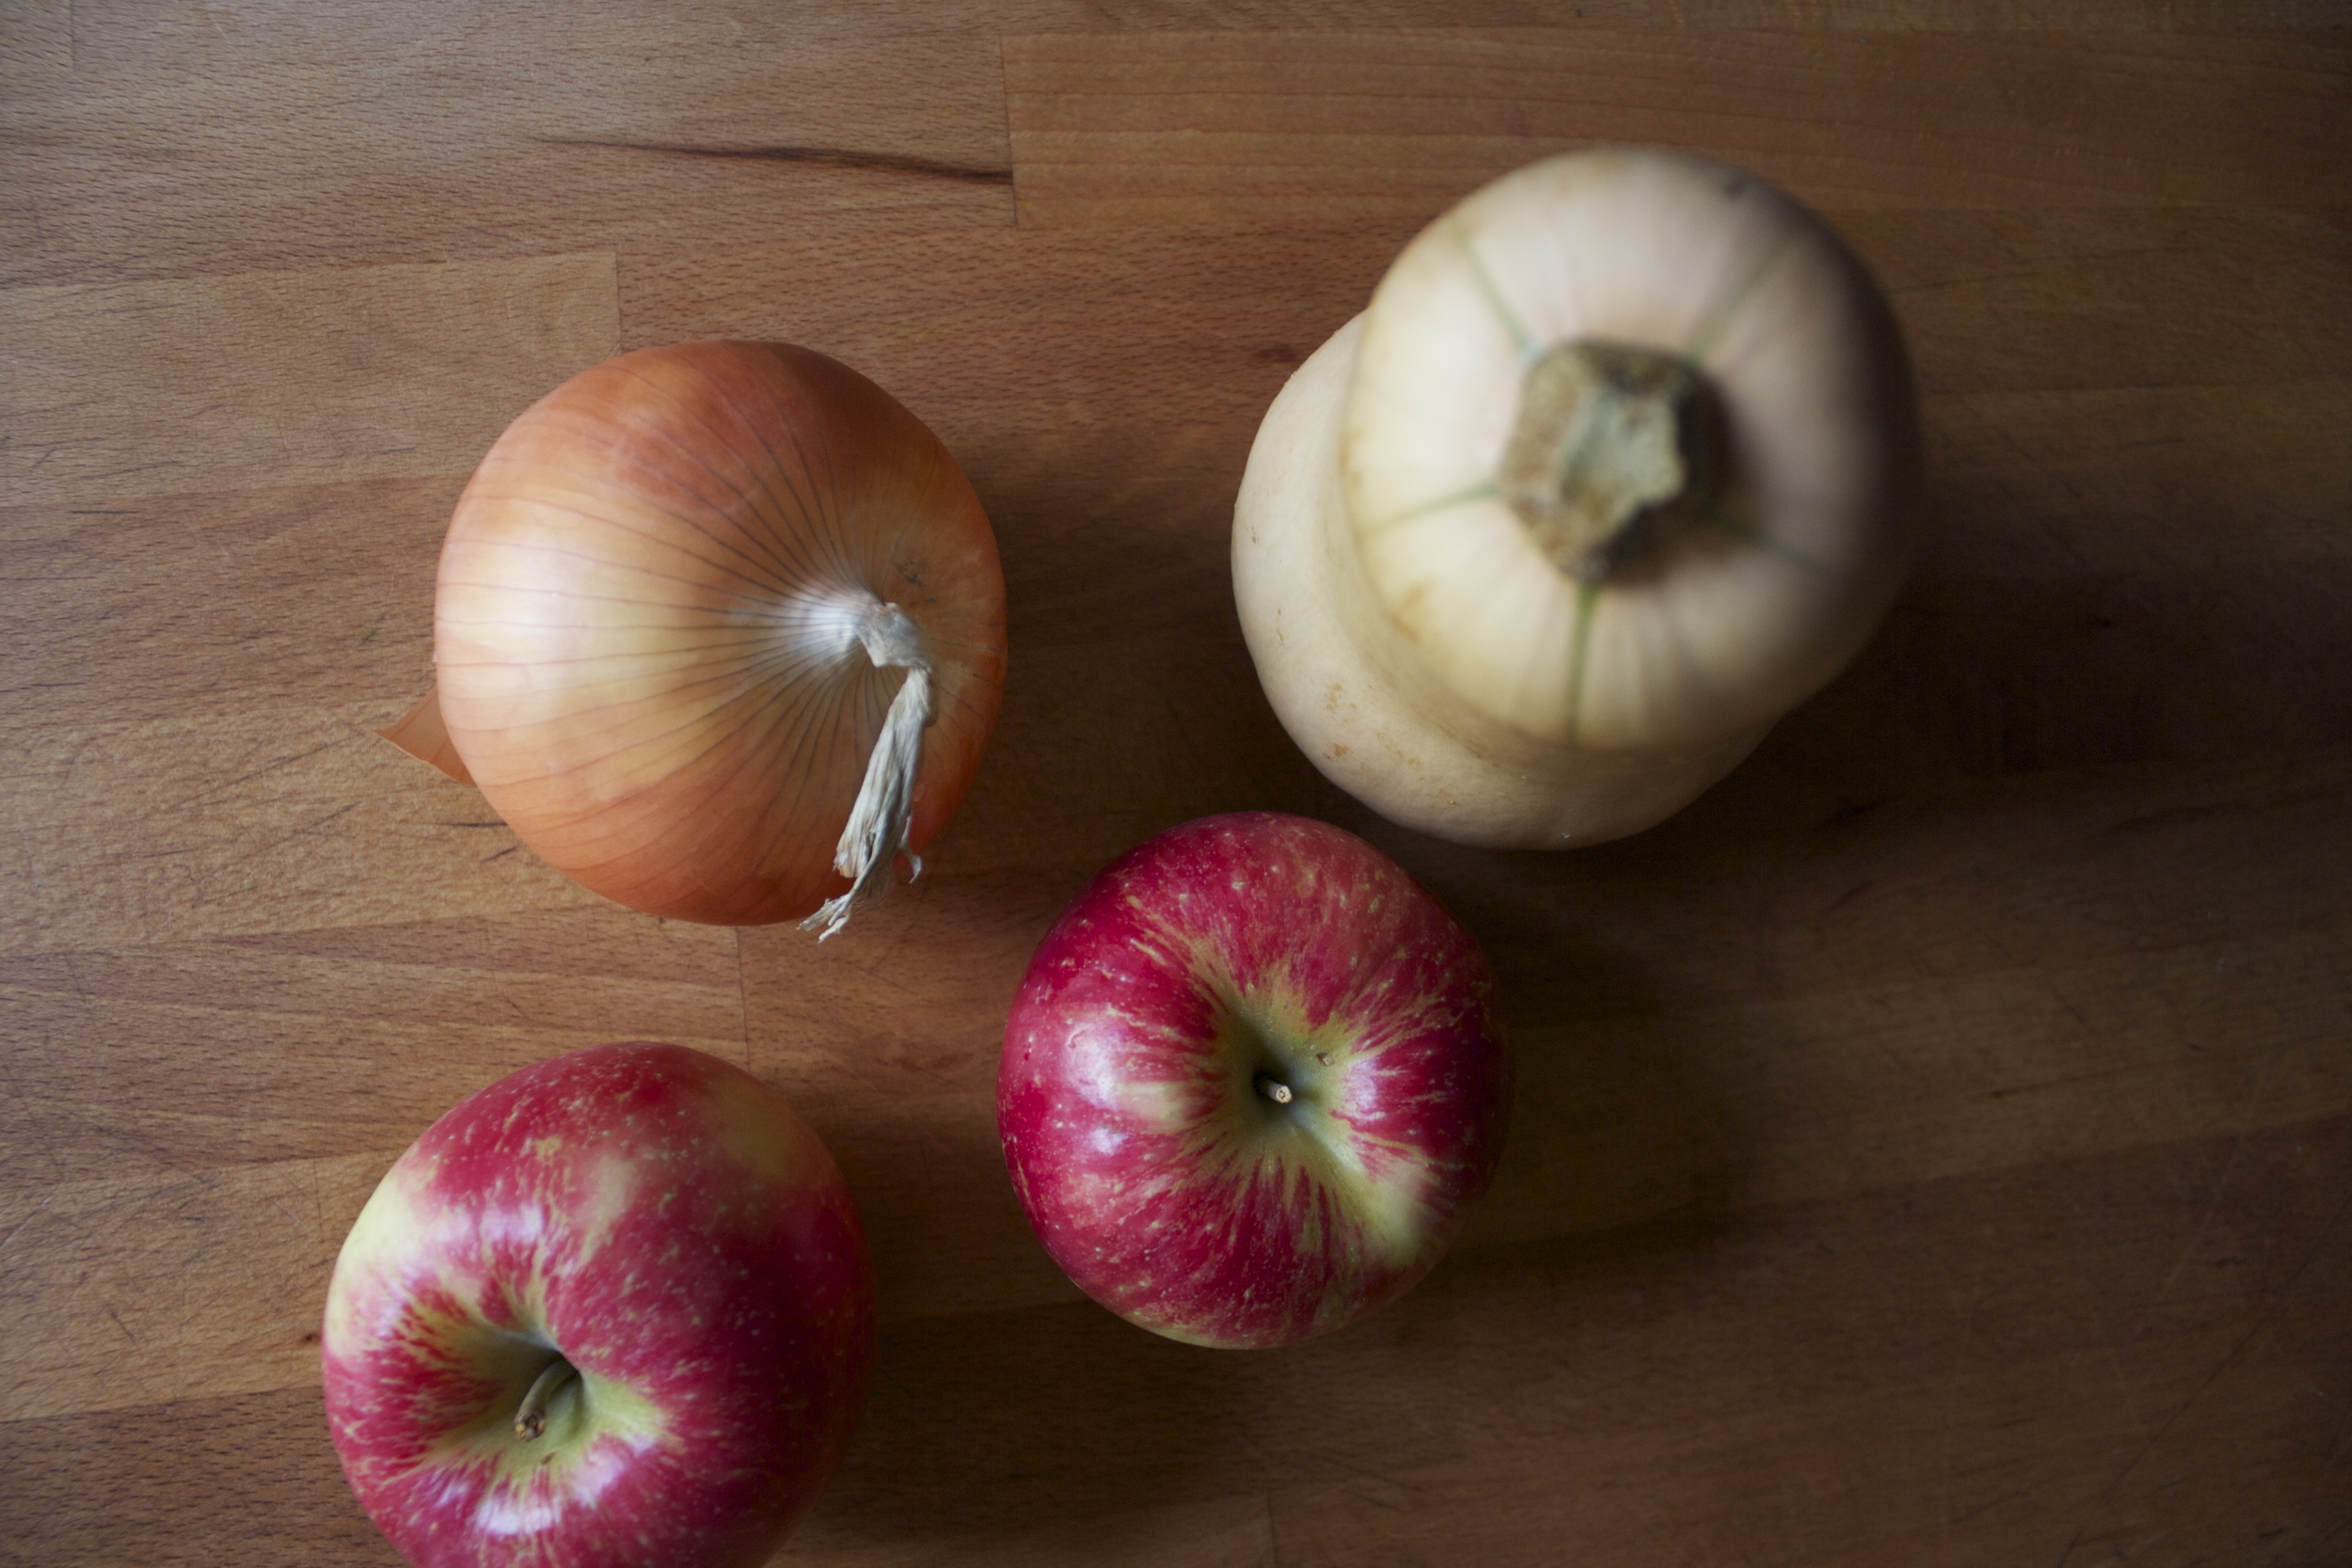
The stuff. A single crust pie dough, a butternut squash, an onion, and a honey crisp apple.(there are 2 shown, but I only needed on1)%u00a0%u00a0Also going to need a tiny bit if olive oil and a pinch of salt
Preheat oven to 375.
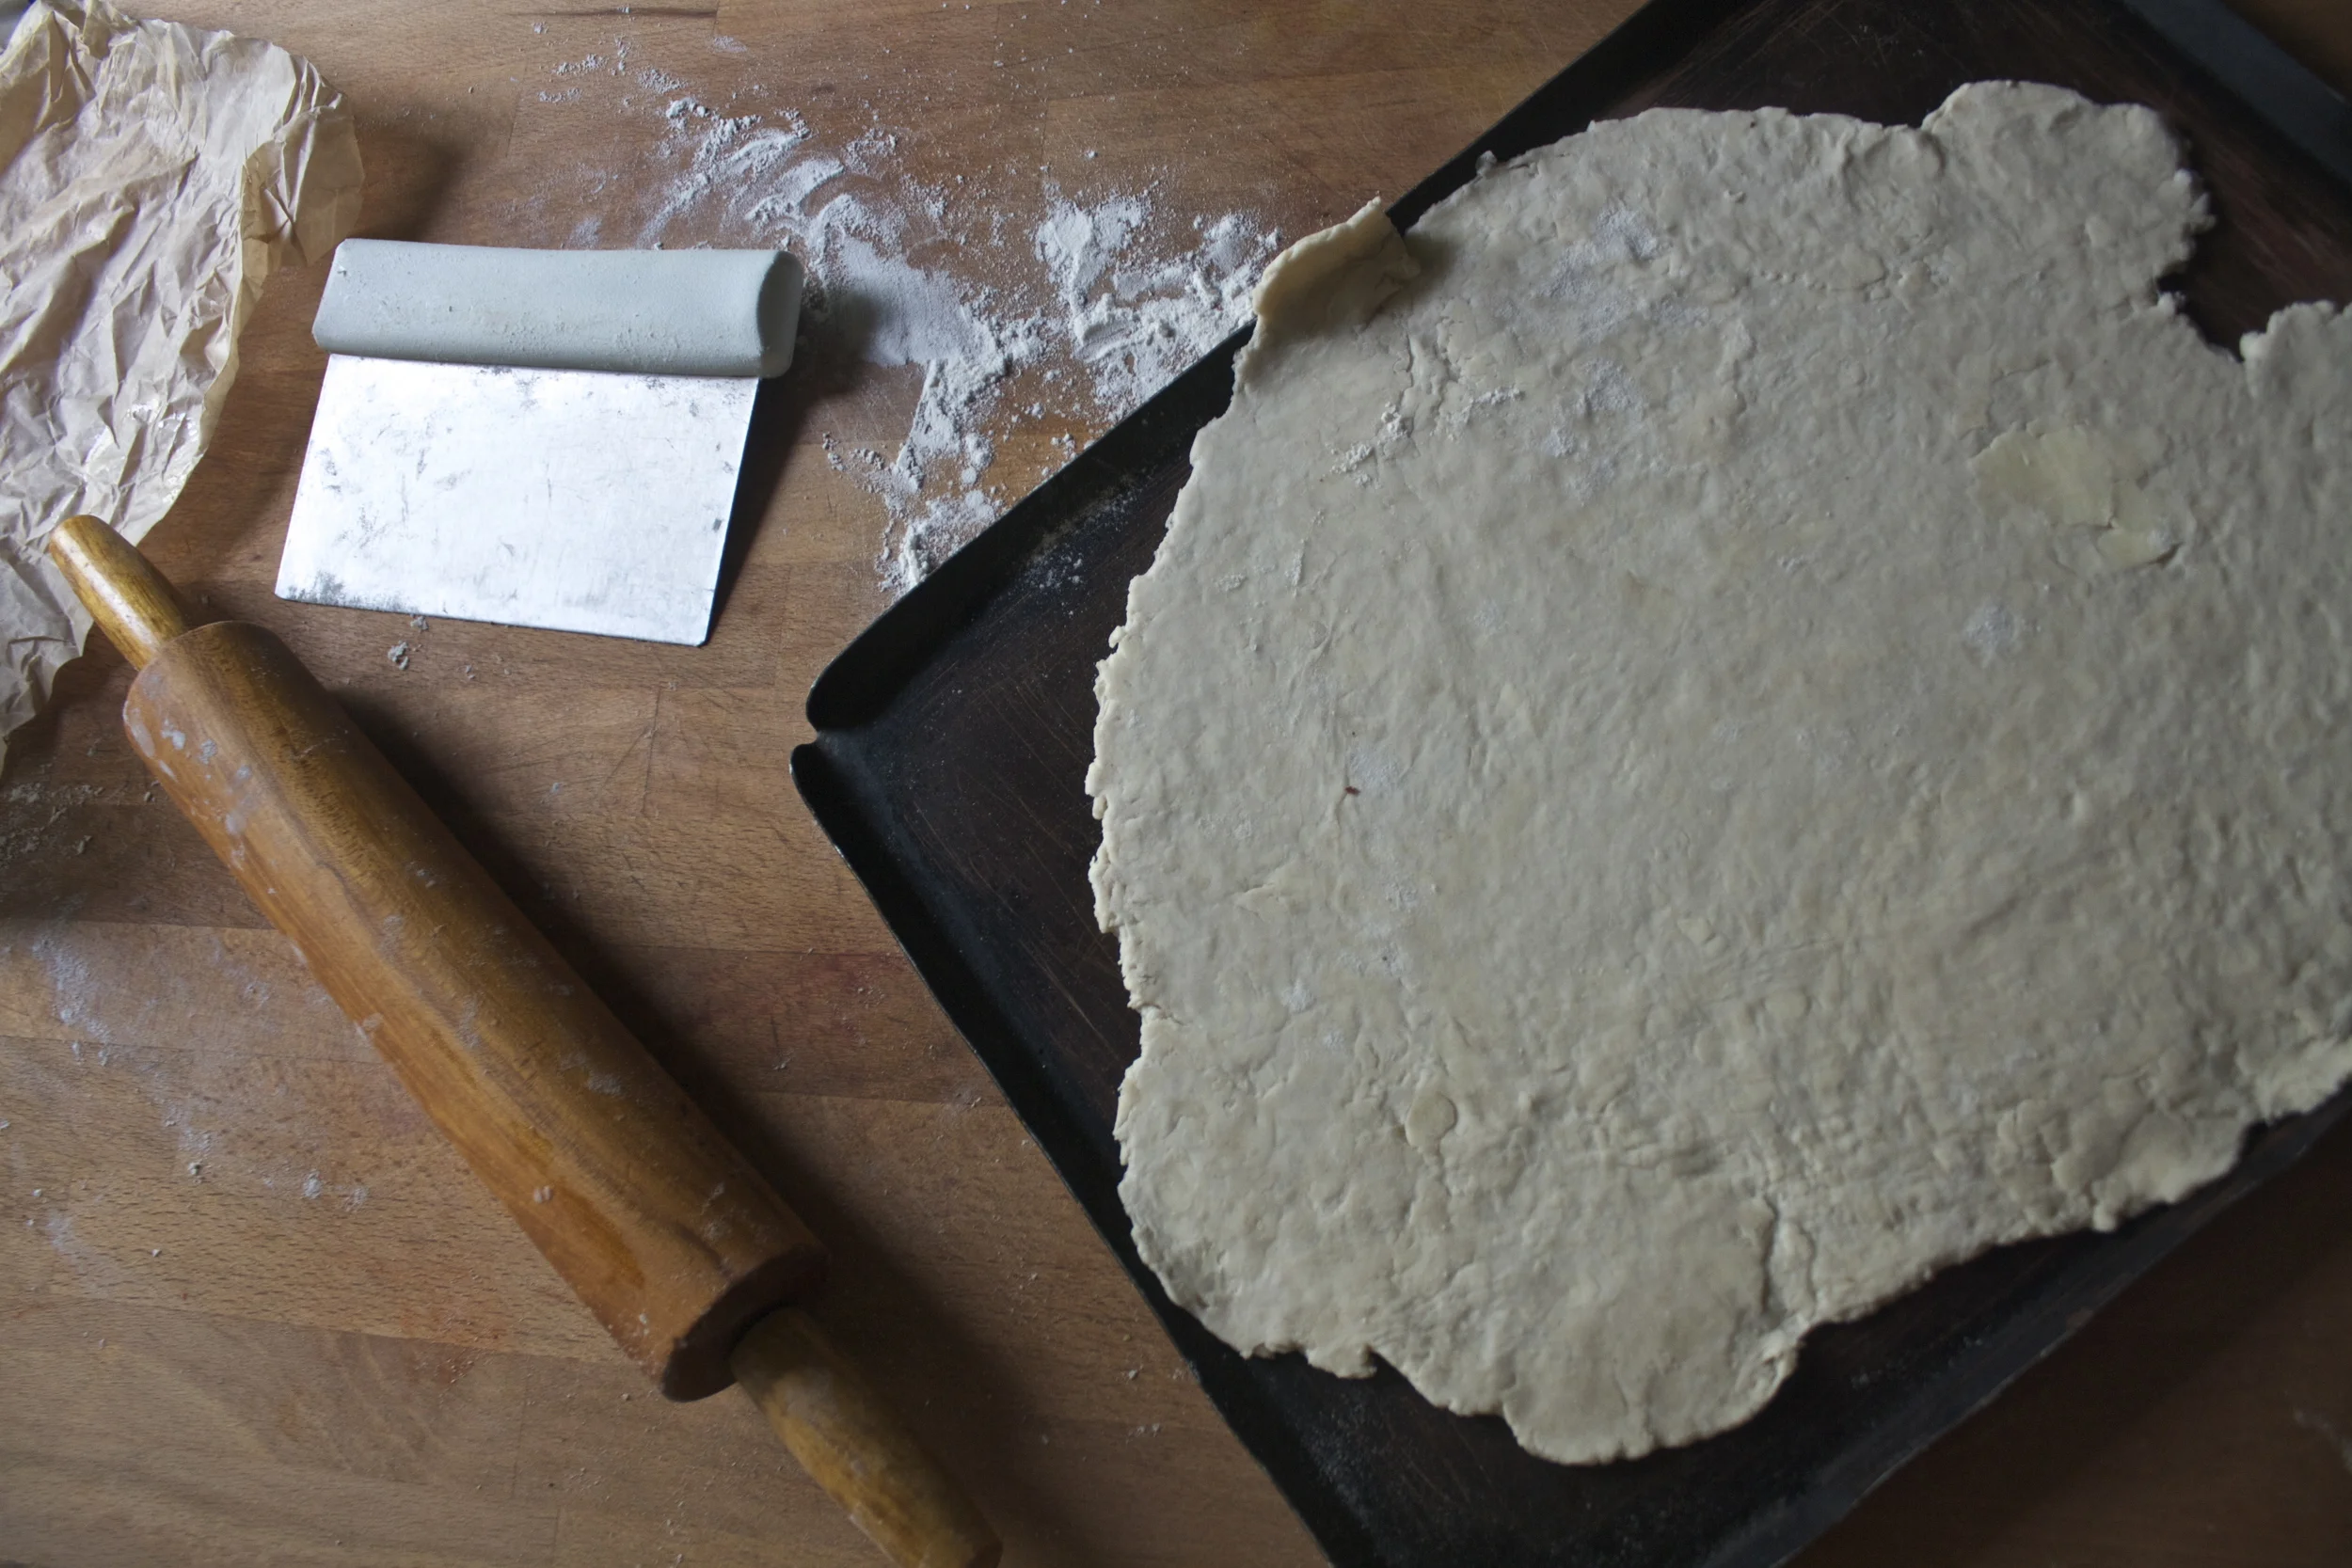
Roll your chilled dough out %u00a0on a lightly floured surface and place onto a large baking sheet. Stick it in the fridge to rest for a few minutes.
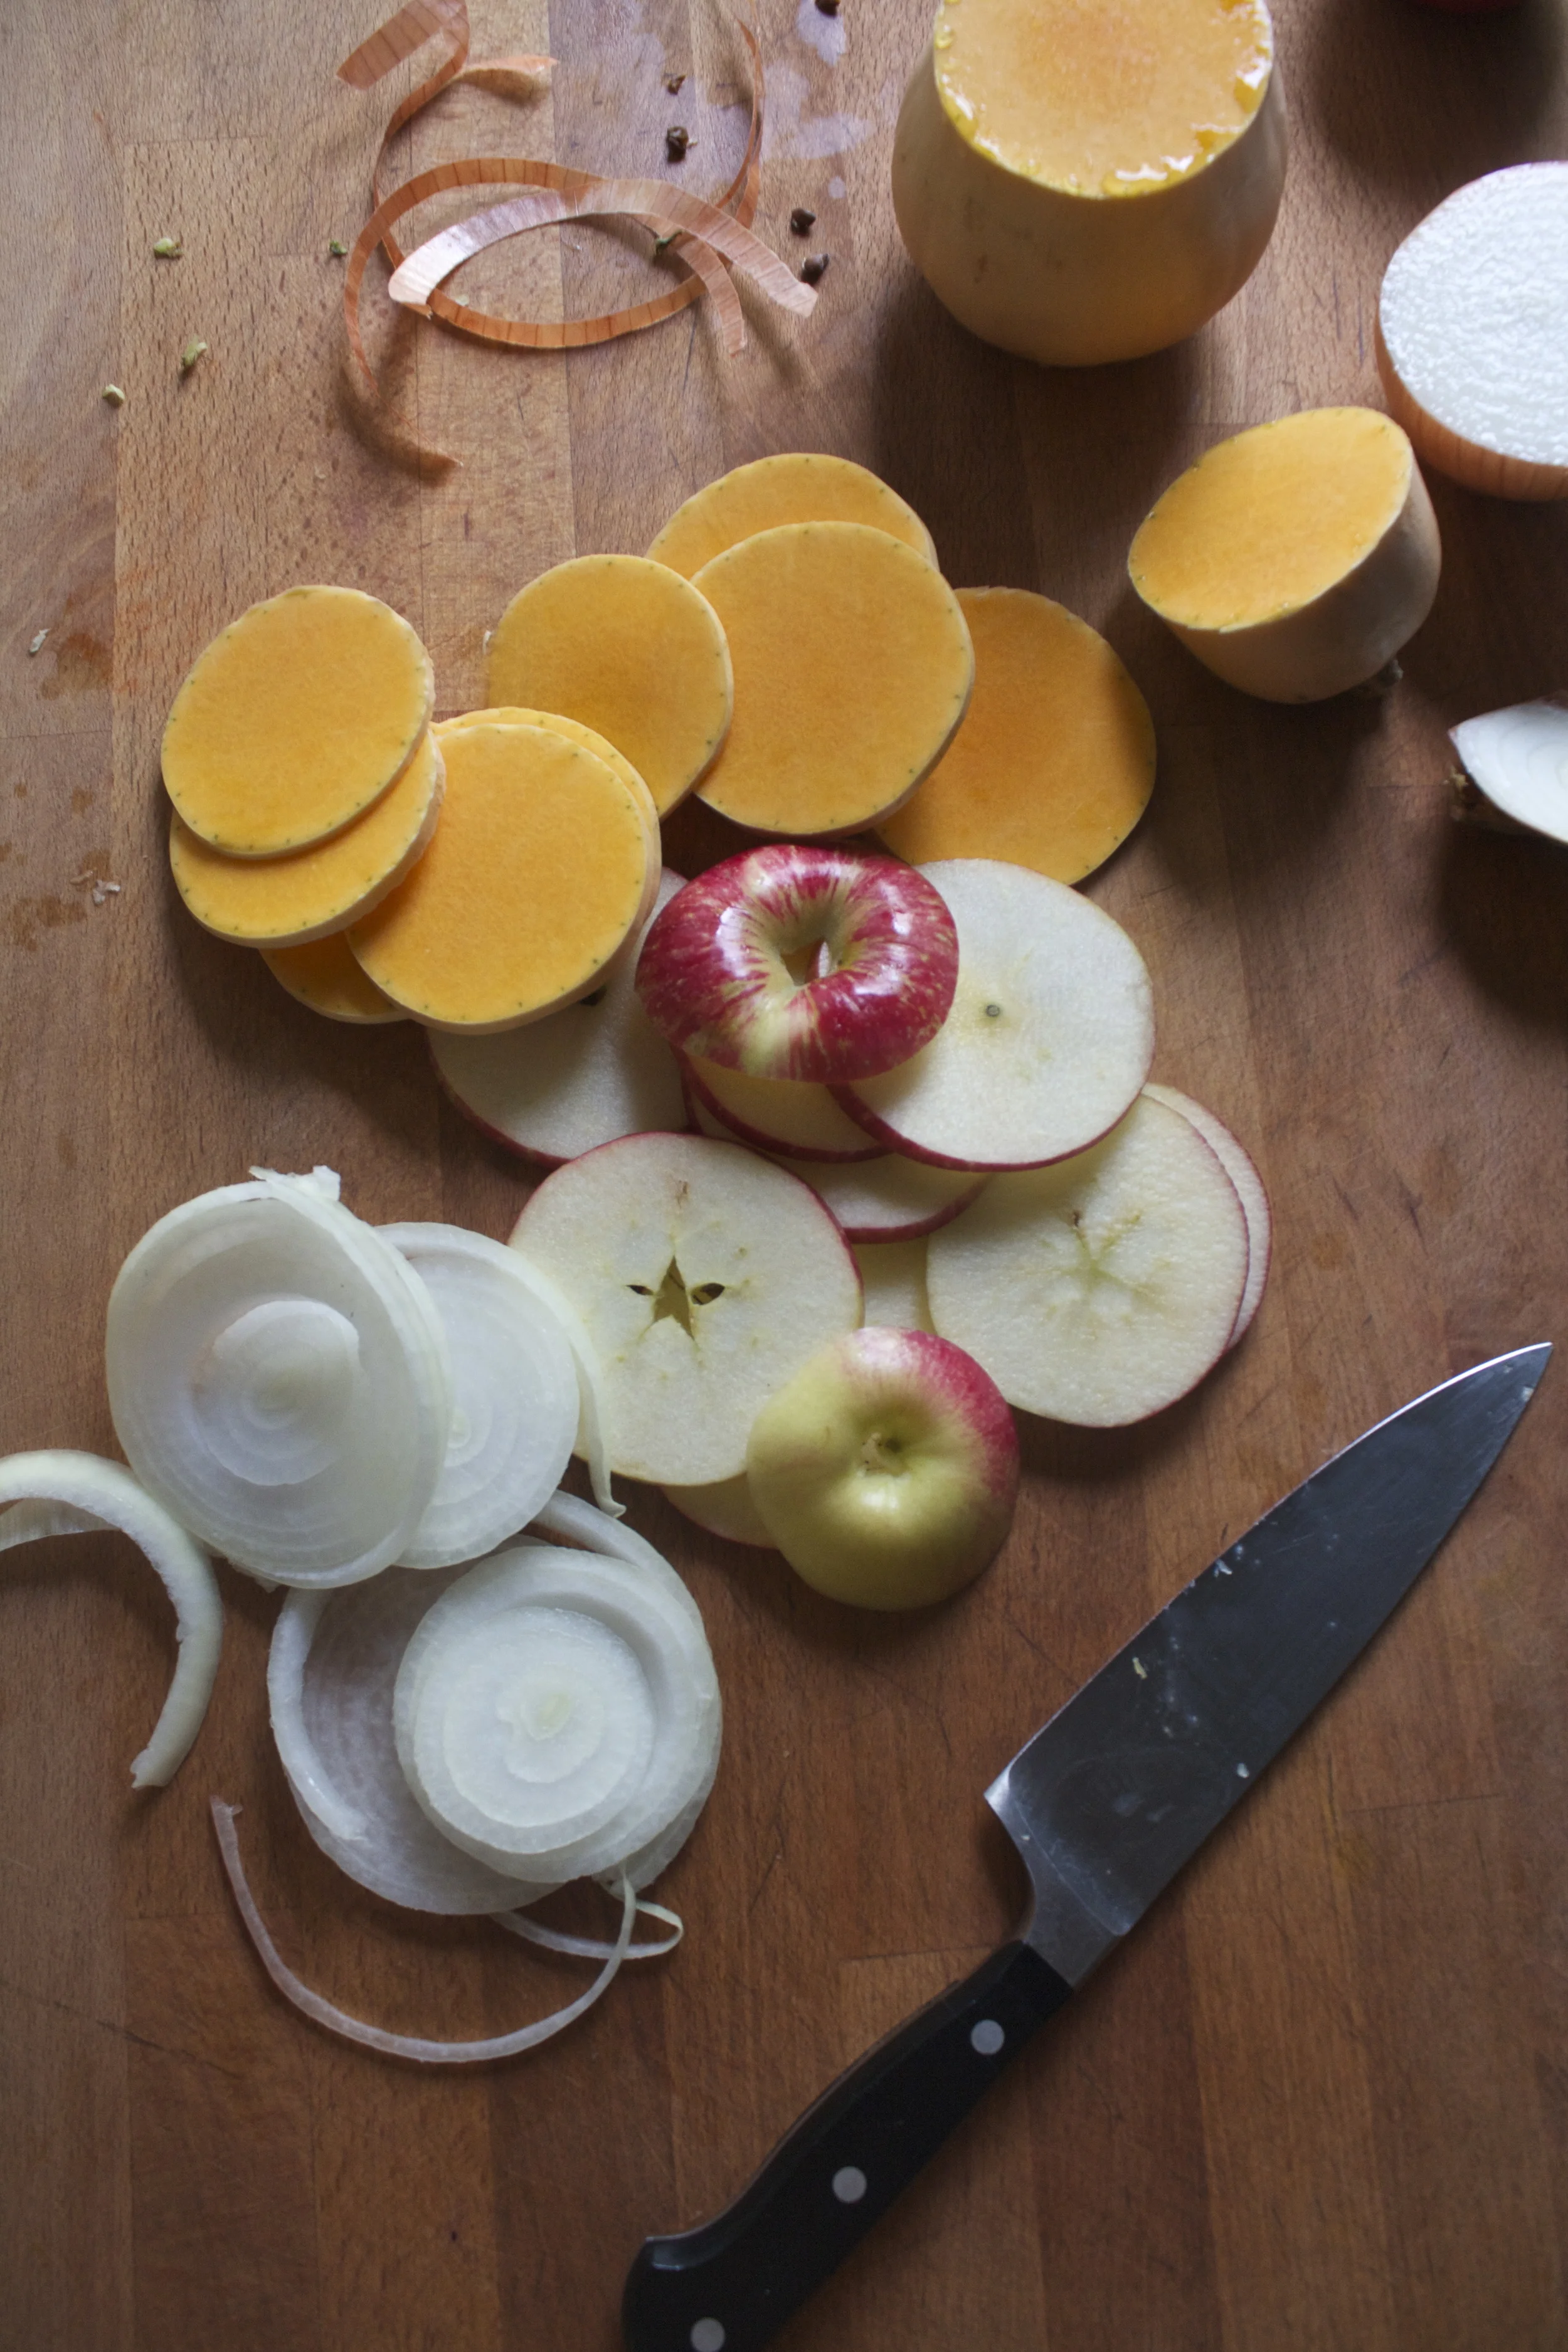
And slice them up into 1/4 inch-ish thick srounds.
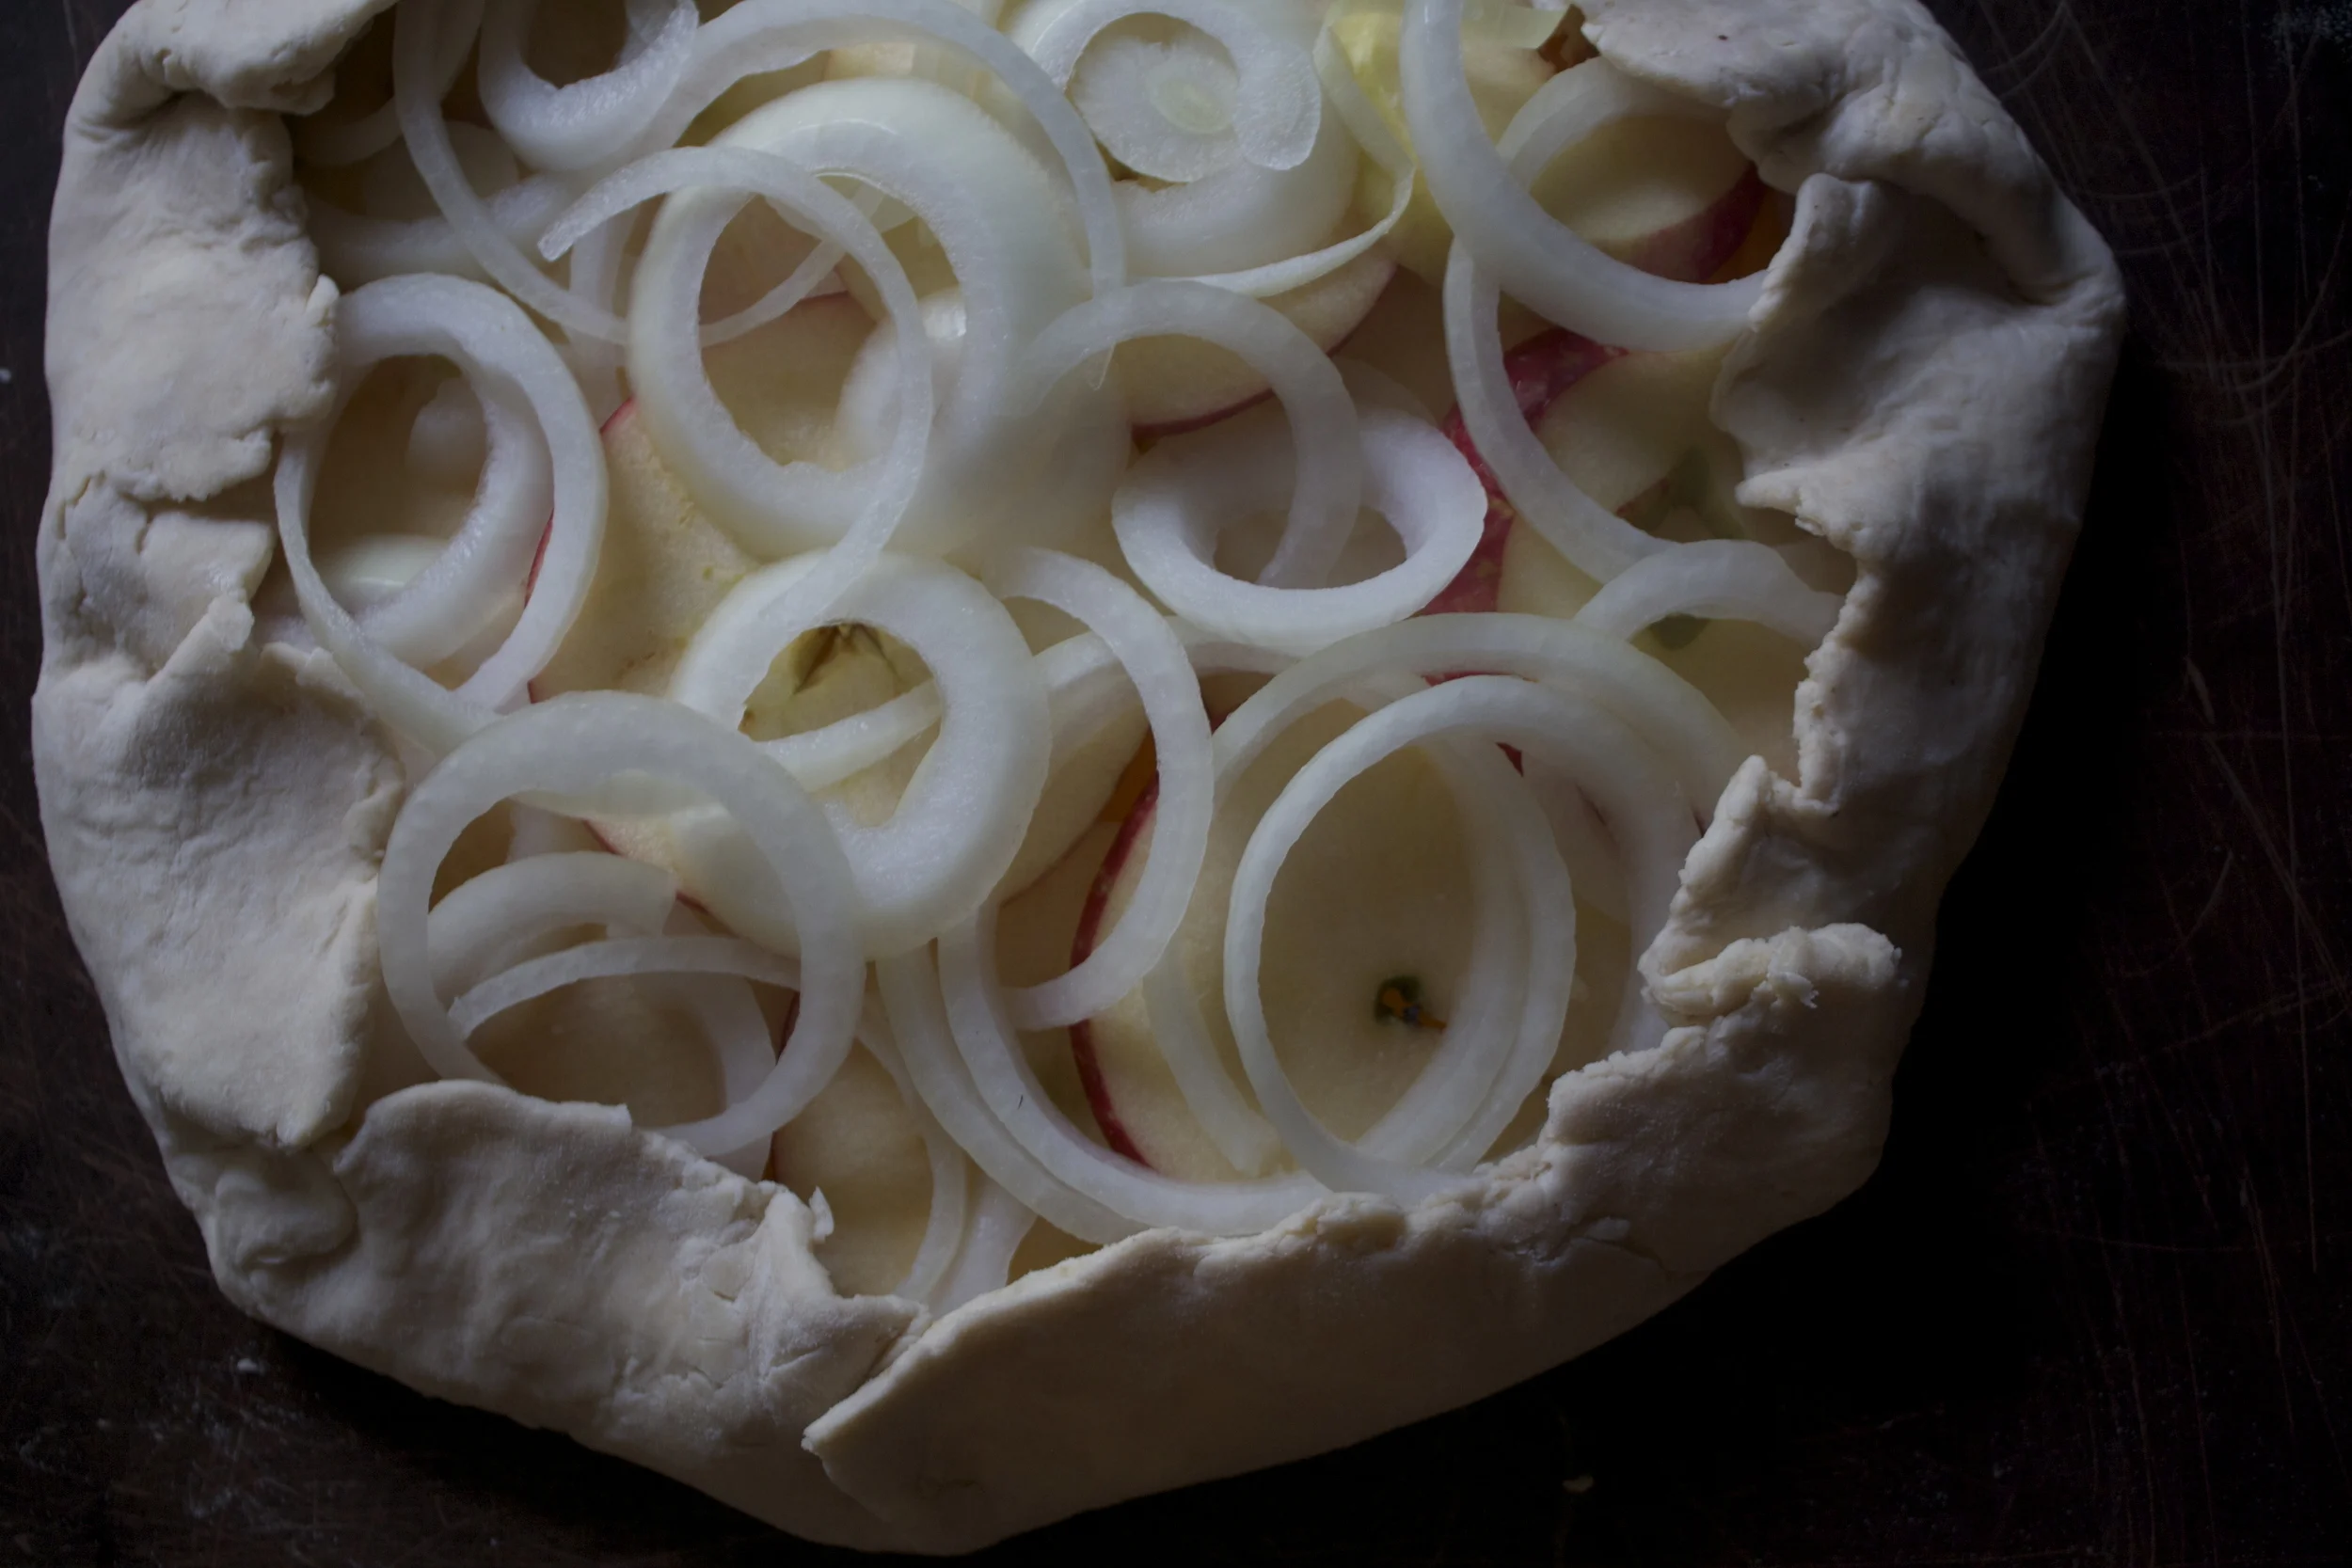
Time to compile%u2026 A layer of overlapping squash. (Make sure to leave inch-ish boarder)%u00a0%u00a0Then a layer of the apples, and lastly the onion, which I think looks so pretty as ringlets, but you could keep in rounds if you wanted.%u00a0
Fold the sides and pinching dough to keep it secure. Drizzle the top, and the crust, with a tiny bit of olive oil and sprinkle with a picnh of salt.
Now into the oven it goes!
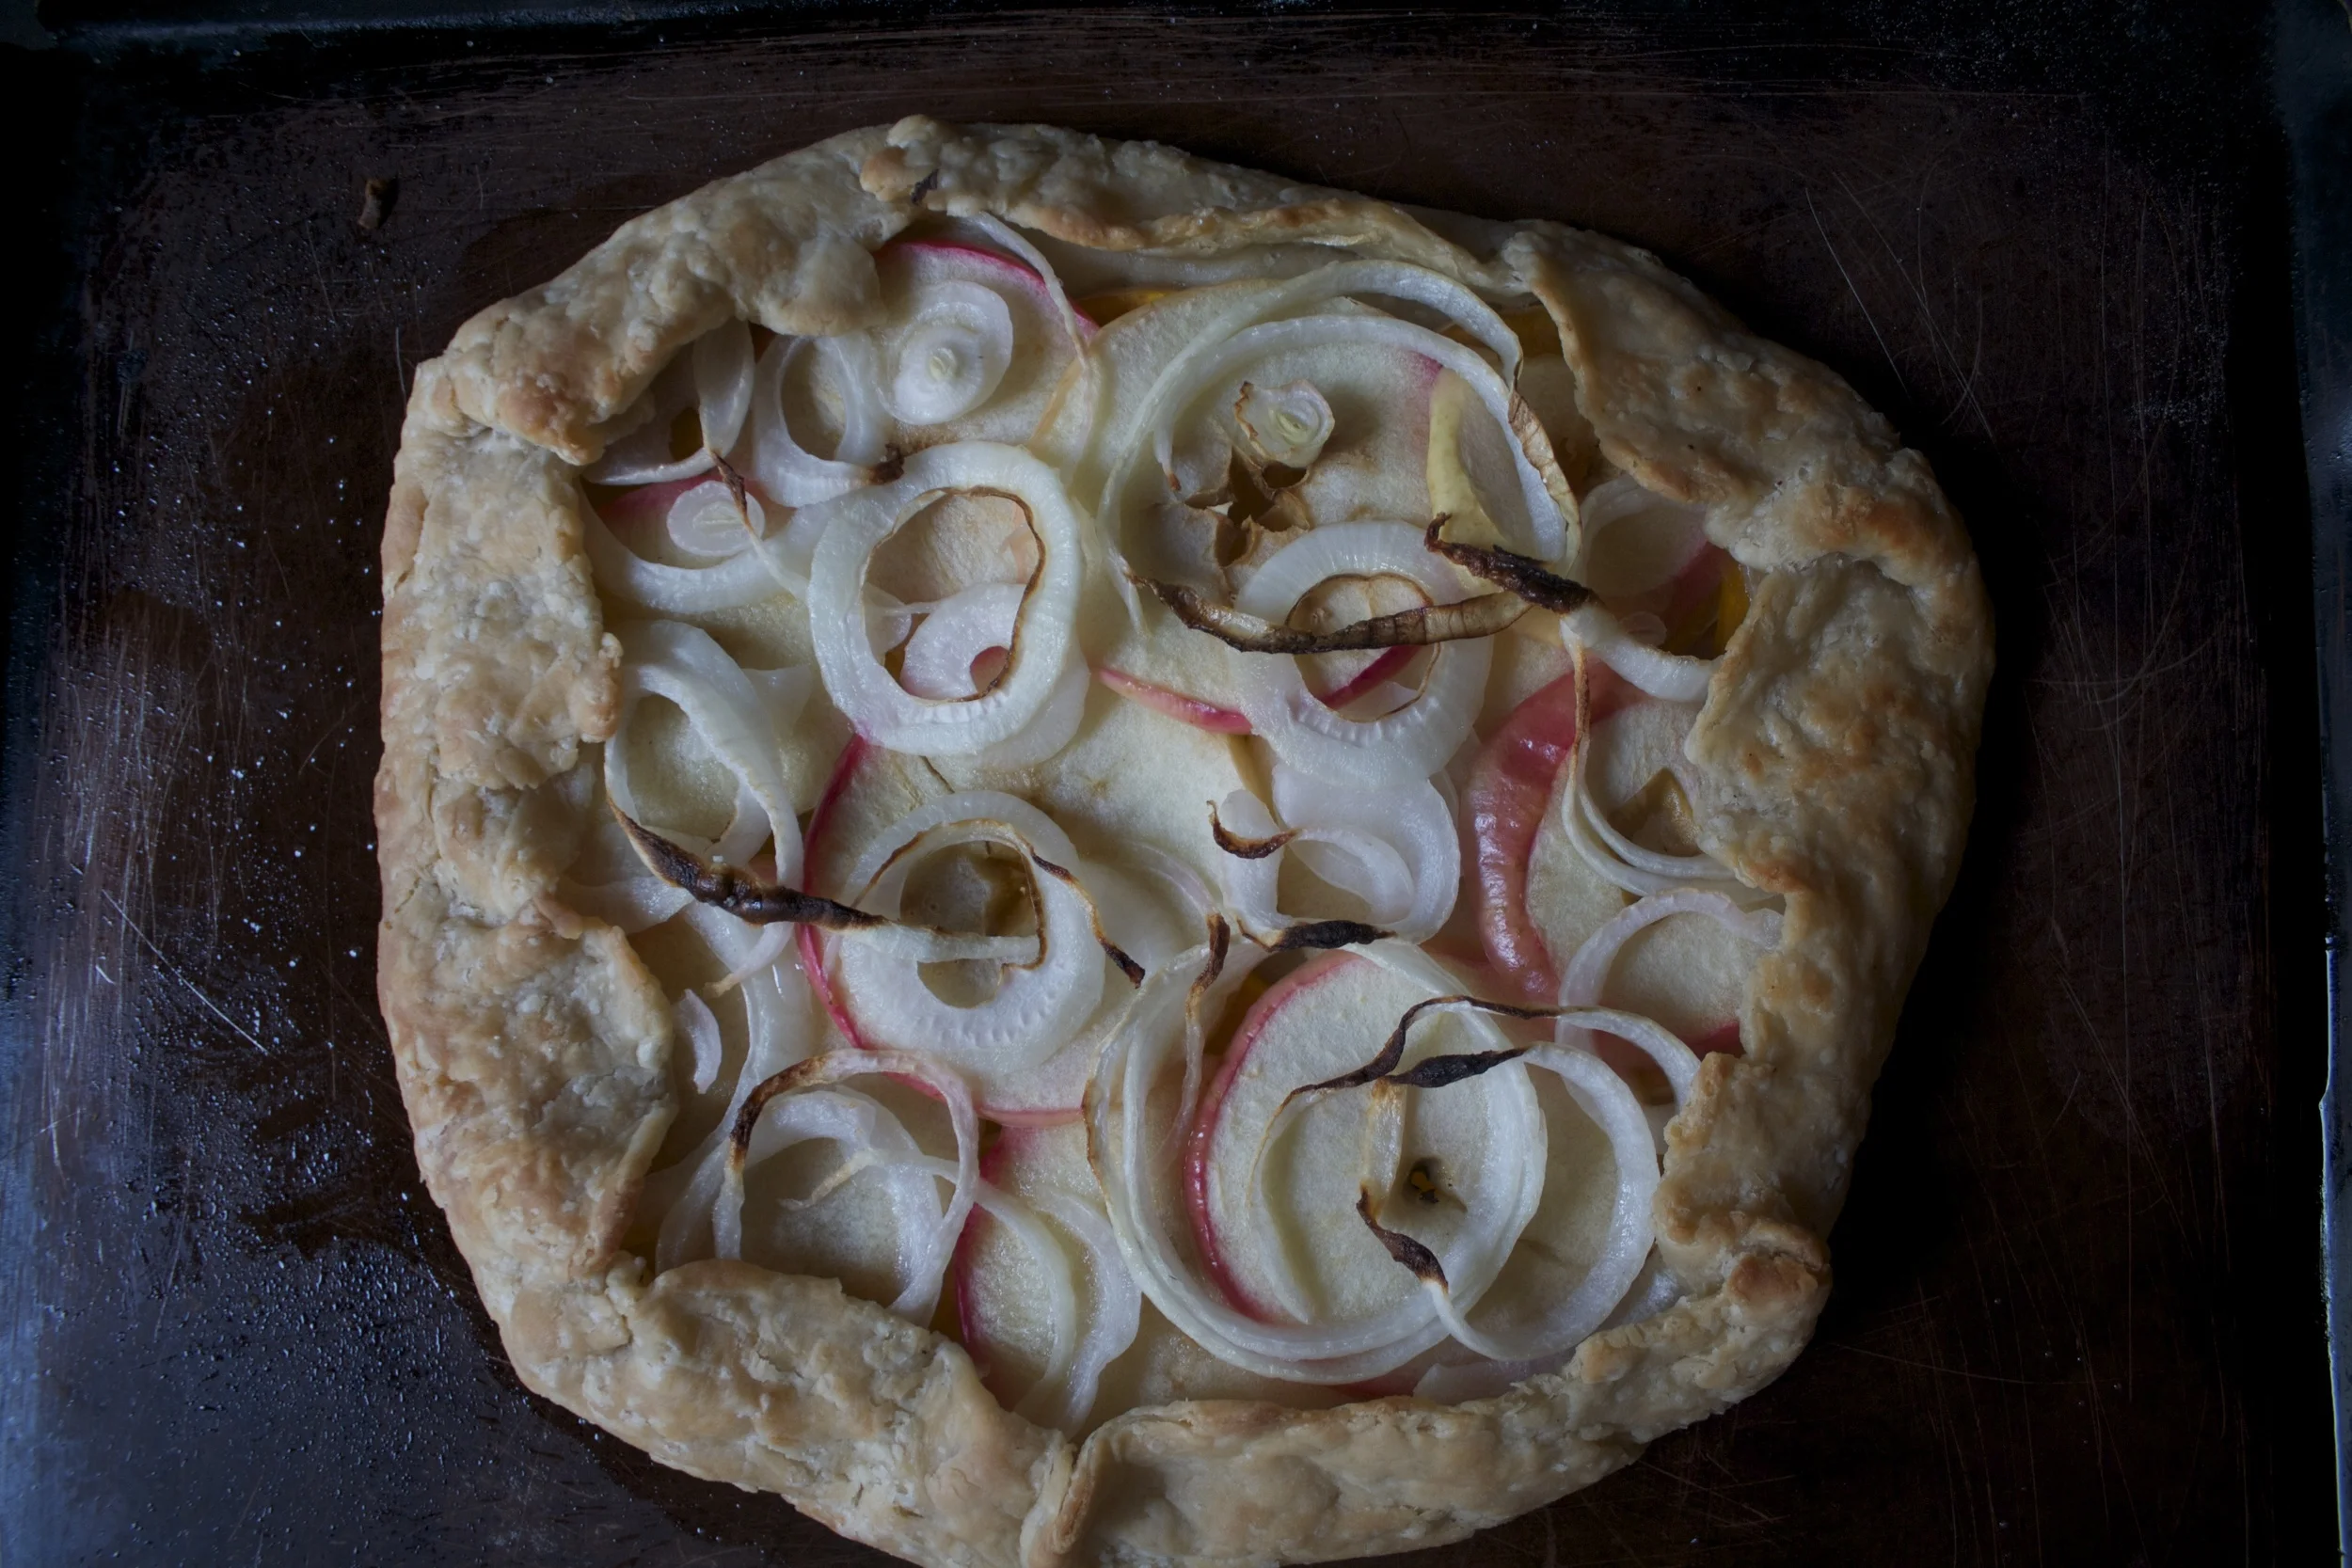
And %u00a0after about 45 minutes when the dust is perfectly golden and the stuff inside is nice and tender. Remove (turn off the oven) and let cool
And there you have it.. A ode to fall in flavors and colors..
Have a great day%u2026 Eat lots of fall food!
-C
1 single pie dough (recipe here)
1 small butternut squash
1 medium sweet onion
1 large honey crisp apple
olive oil
salt
Preheat oven to 375.
Roll out chilled pie dough %u00a0on a lightly floured surface to about a 12-14 inch round (ish) and place on a large baking sheet and stick in the fridge.
Grab the squash and cut the neck off the bottom.%u00a0Save the bottom for later (maybe soup?)%u00a0and slice up the neck into 1/4 inch thick rounds. %u00a0Now take the onion and apple and slice those into 1/4 inch thick rounds too. (the seeds and the stem will just fall our.. but if they don’t, just poke them out with a knife)
Grab the dough from fridge and start to layer. First a layer of squash, leaving around an 1.5 inch boarder. You want the pieces to overlap,but don’t double layer. Next the apples go on top of the squash, again overlapping. Finally the onion. I liked the look of the individual ringlets%u2026 but you can do thick rounds if you want.%u00a0Fold over the sides of the dough, pinching it in wherever it needs to be pinch until all the stuff is snug. Drizzle with a tiny bit of olive oil %u00a0and rub a little oil on the outside crust as well. Sprinkle with a pinch of salt and stick into oven.
Bake for about 45 minutes or until crust is a nice light golden brown and the stuff inside is tender.
Remove, let cool for a few minutes and eat your heart out.
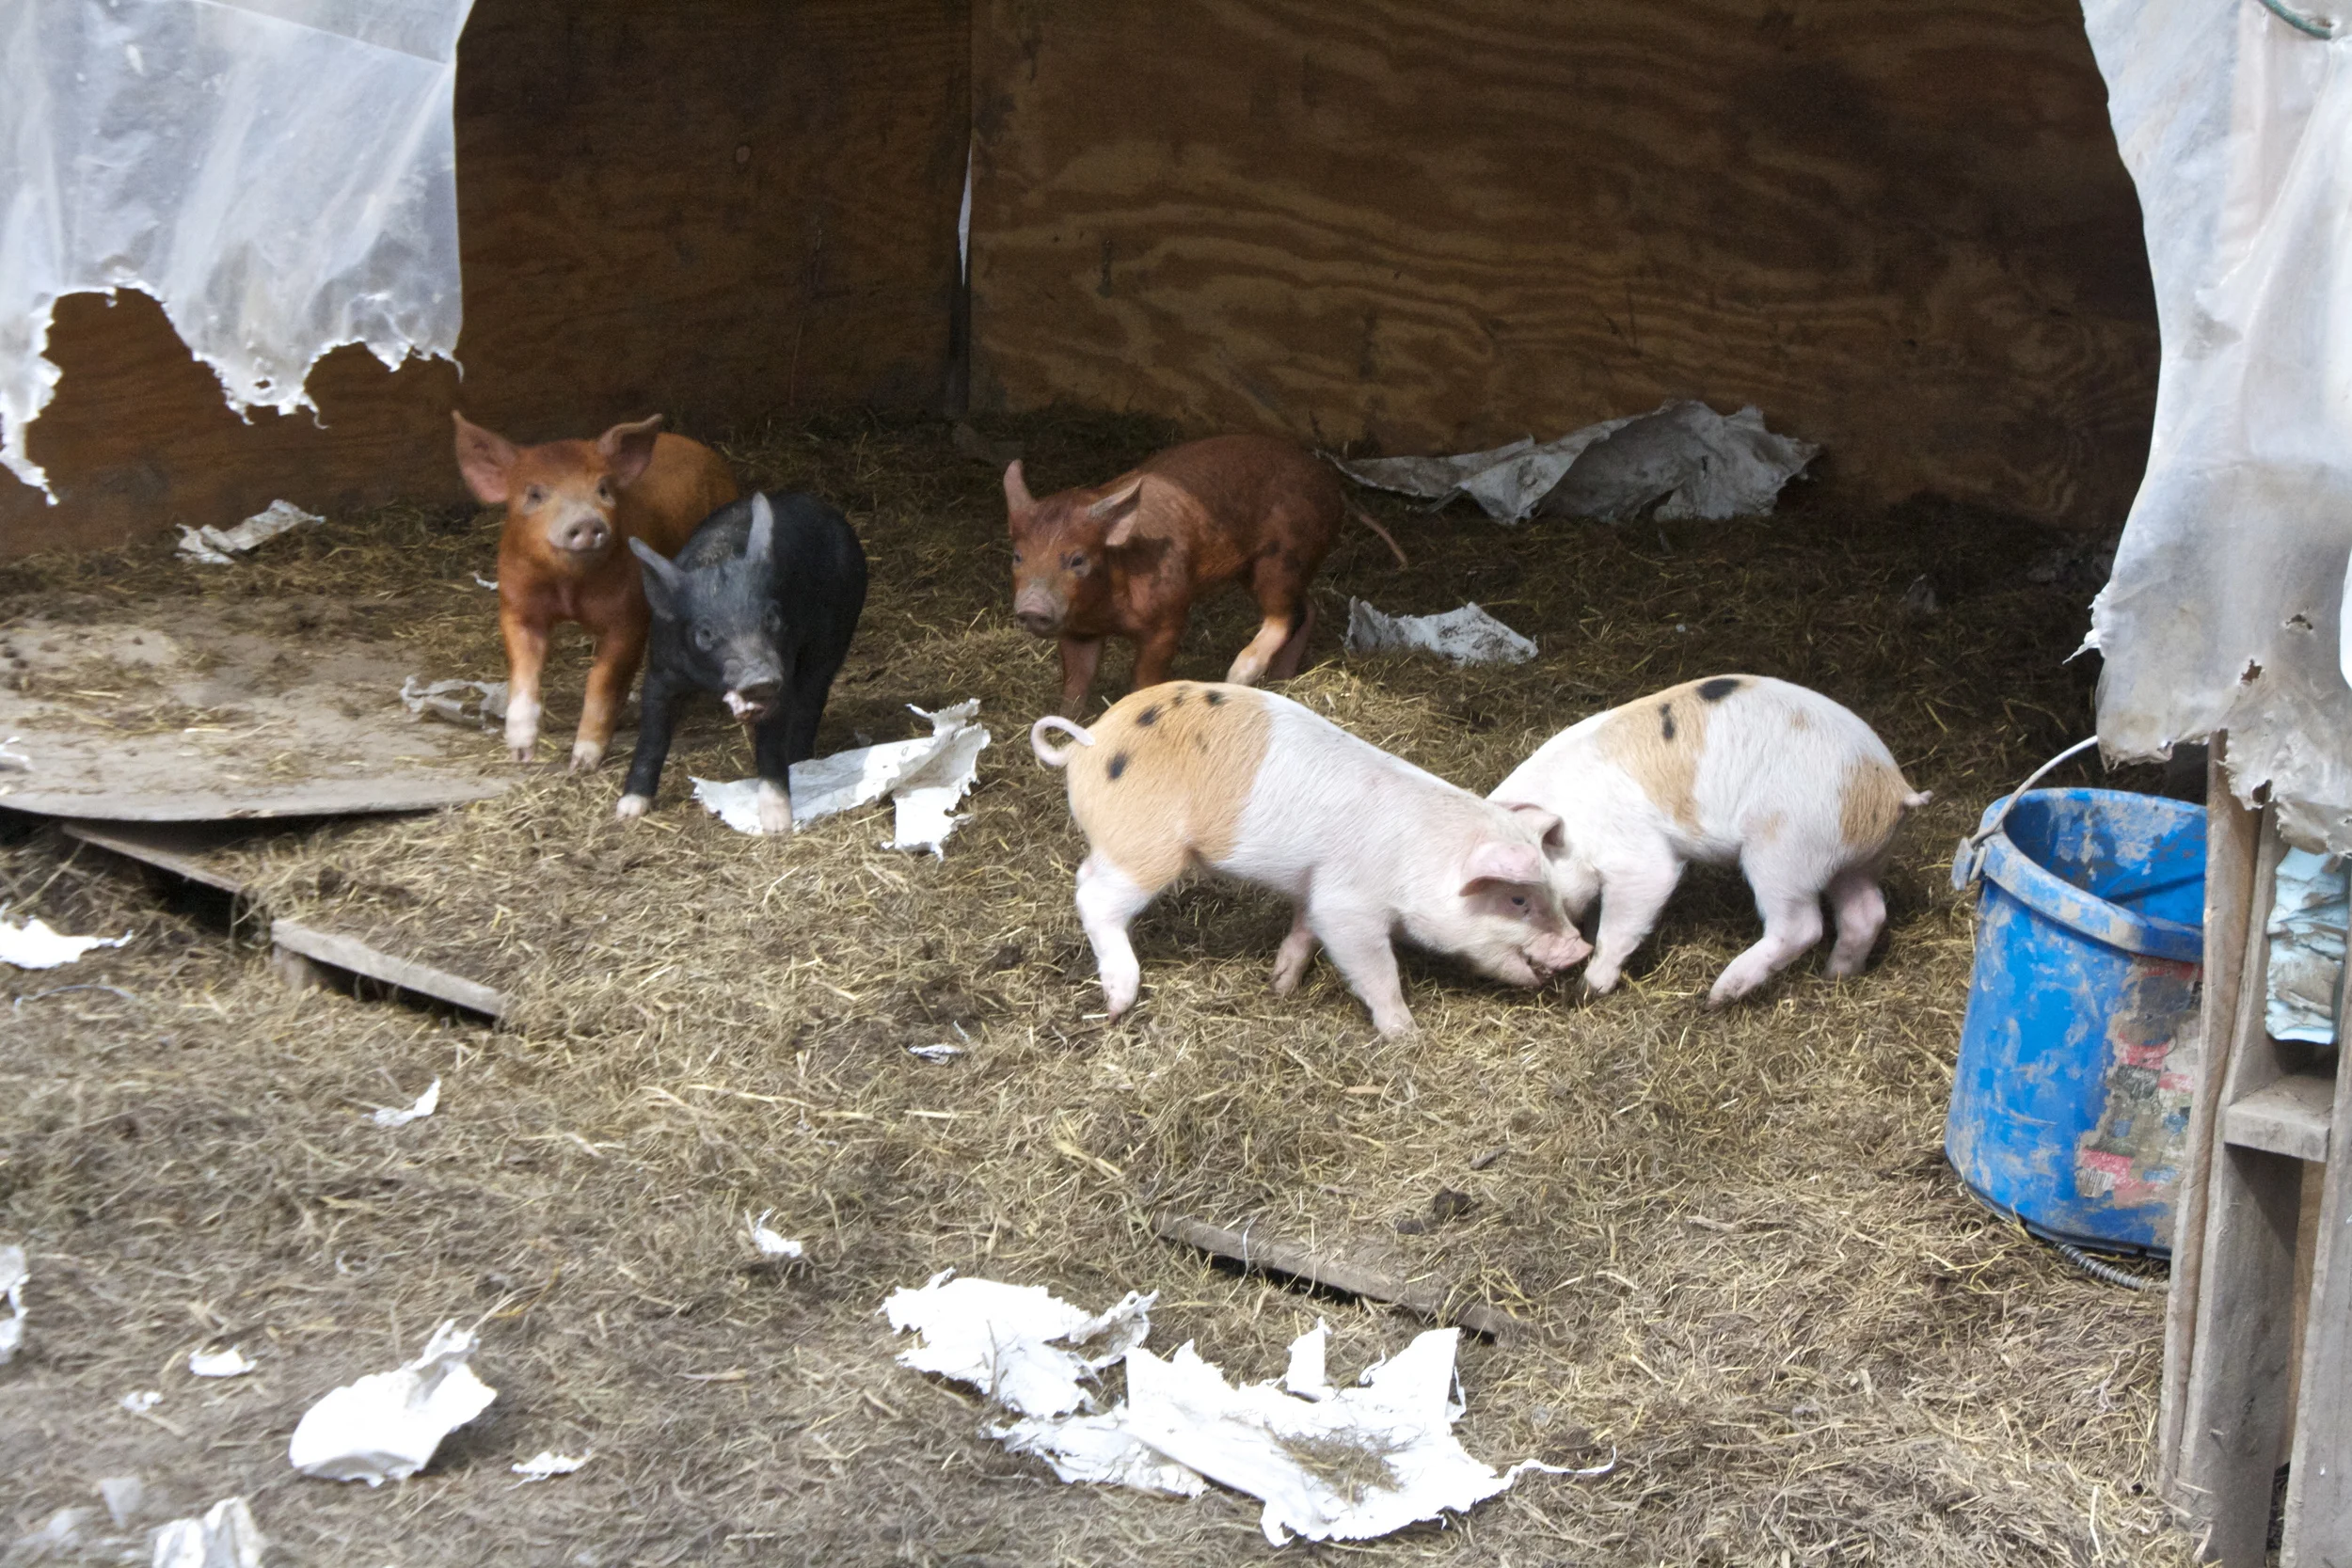
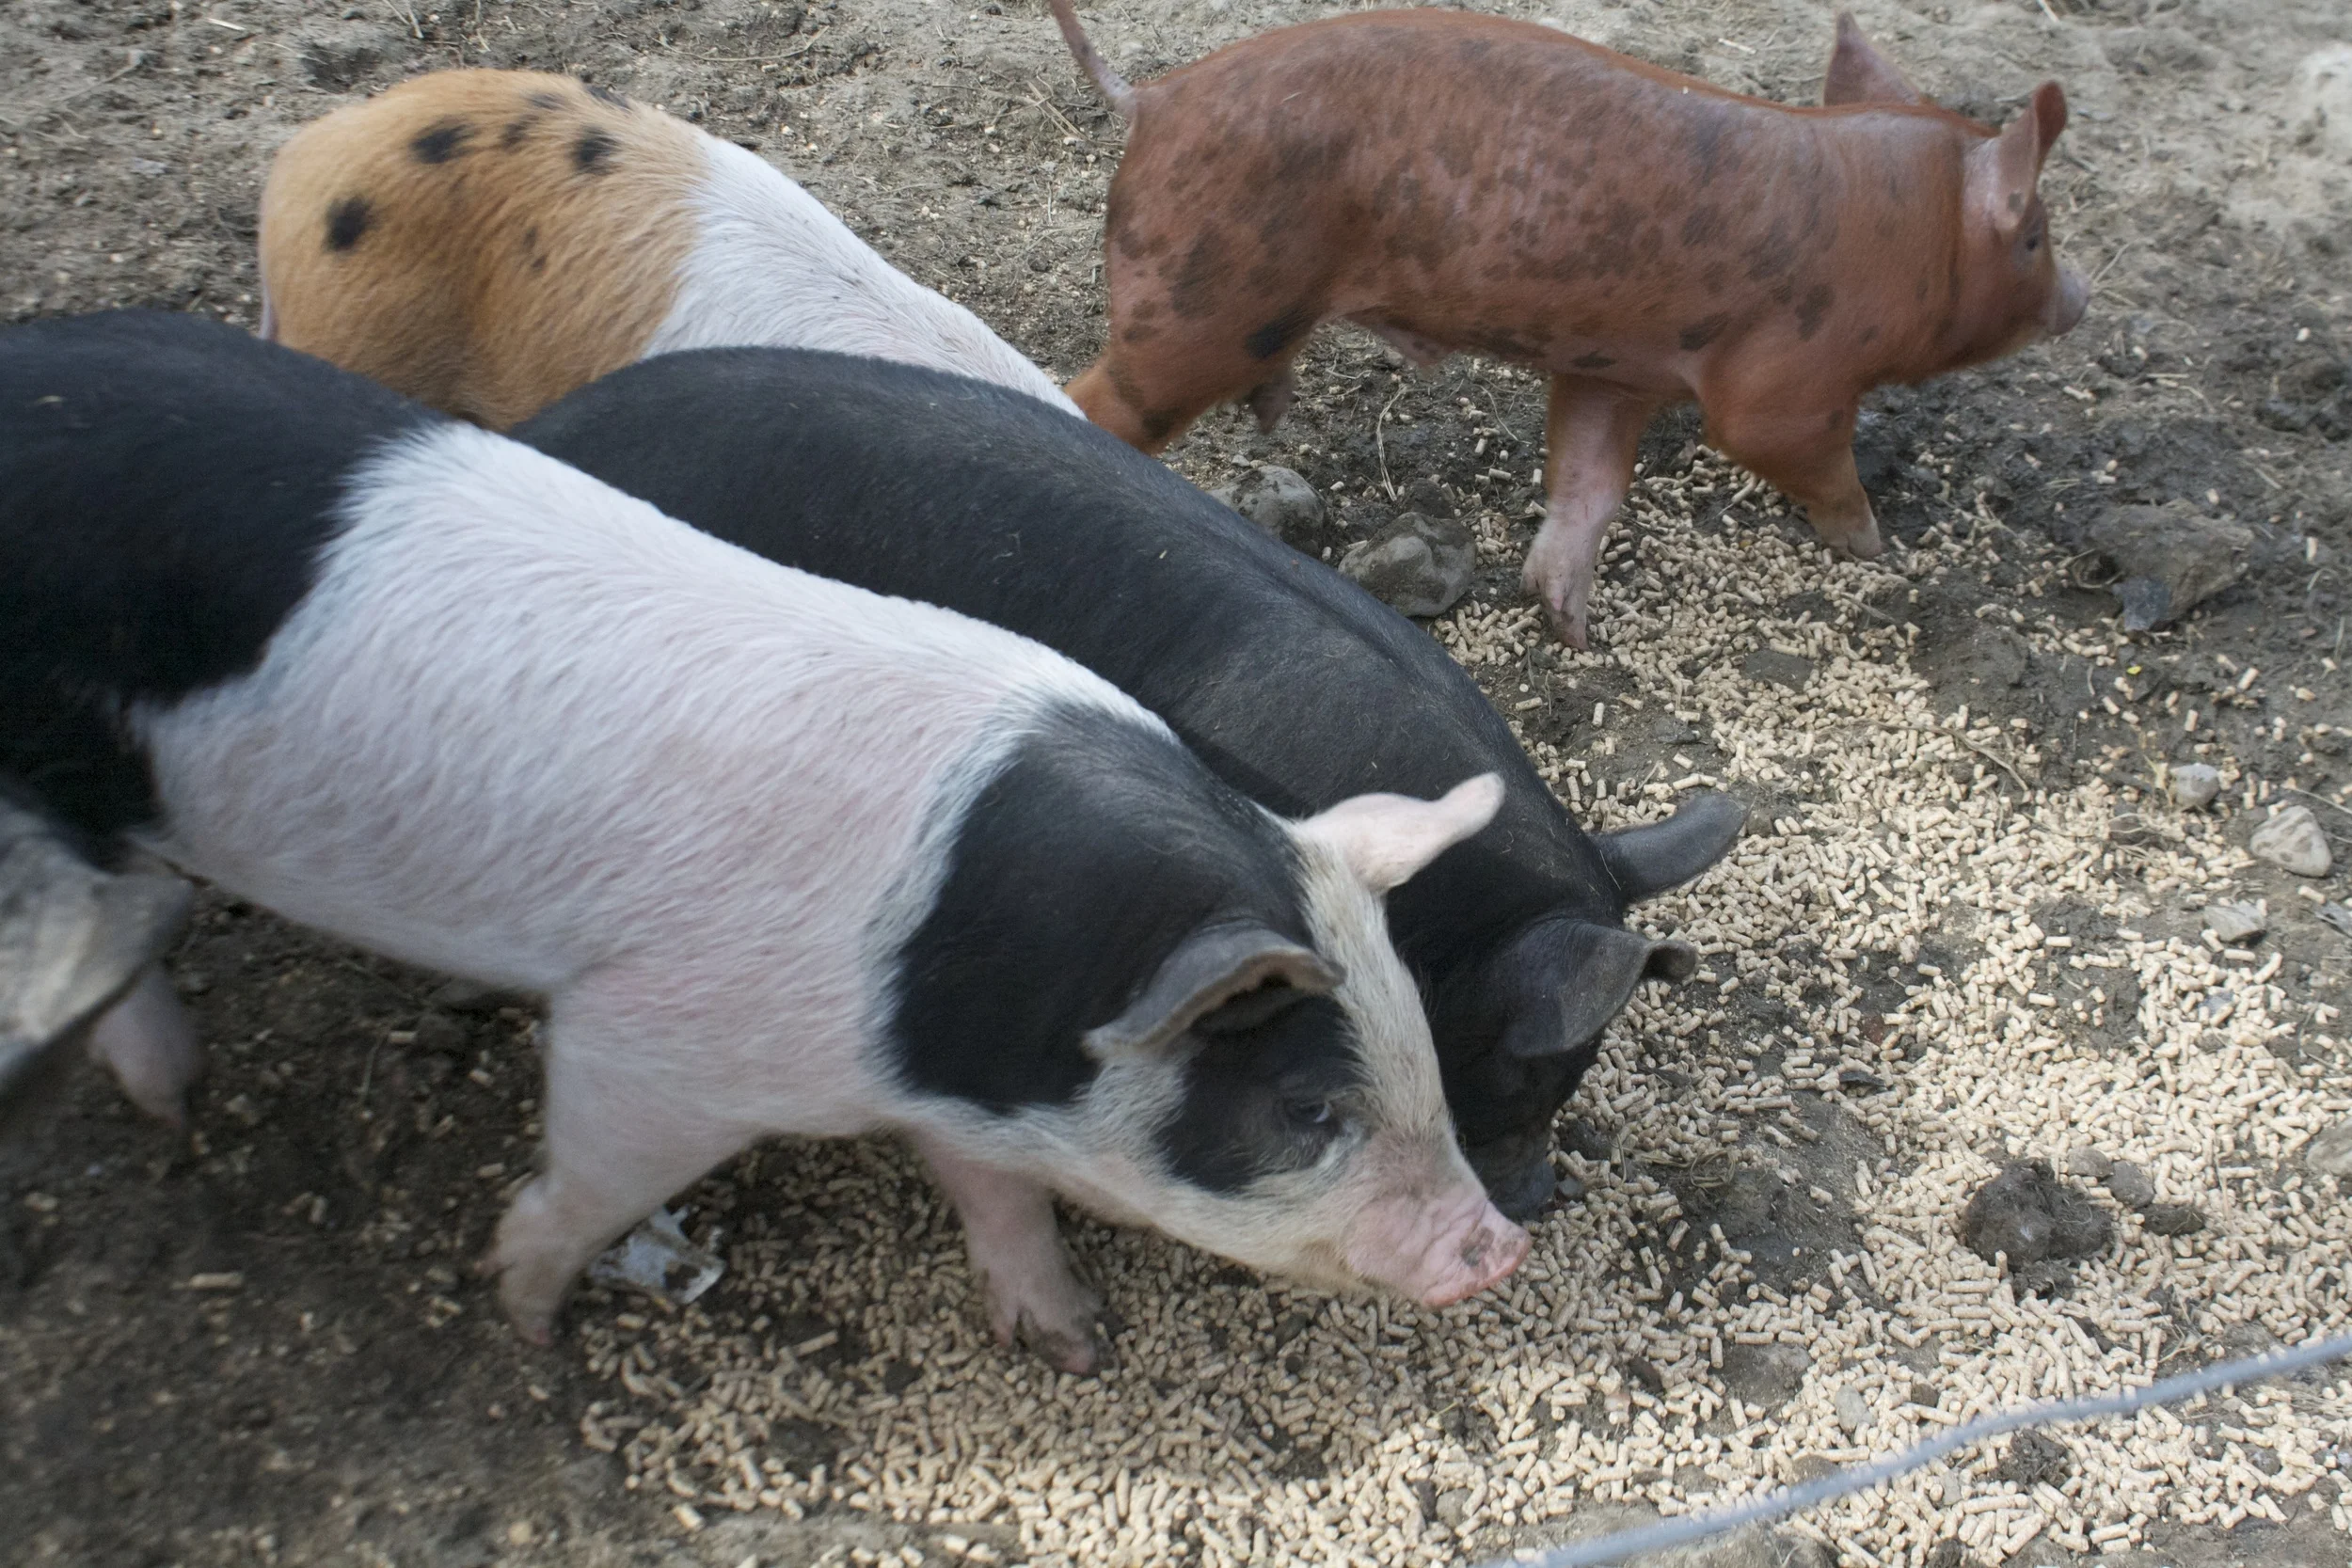
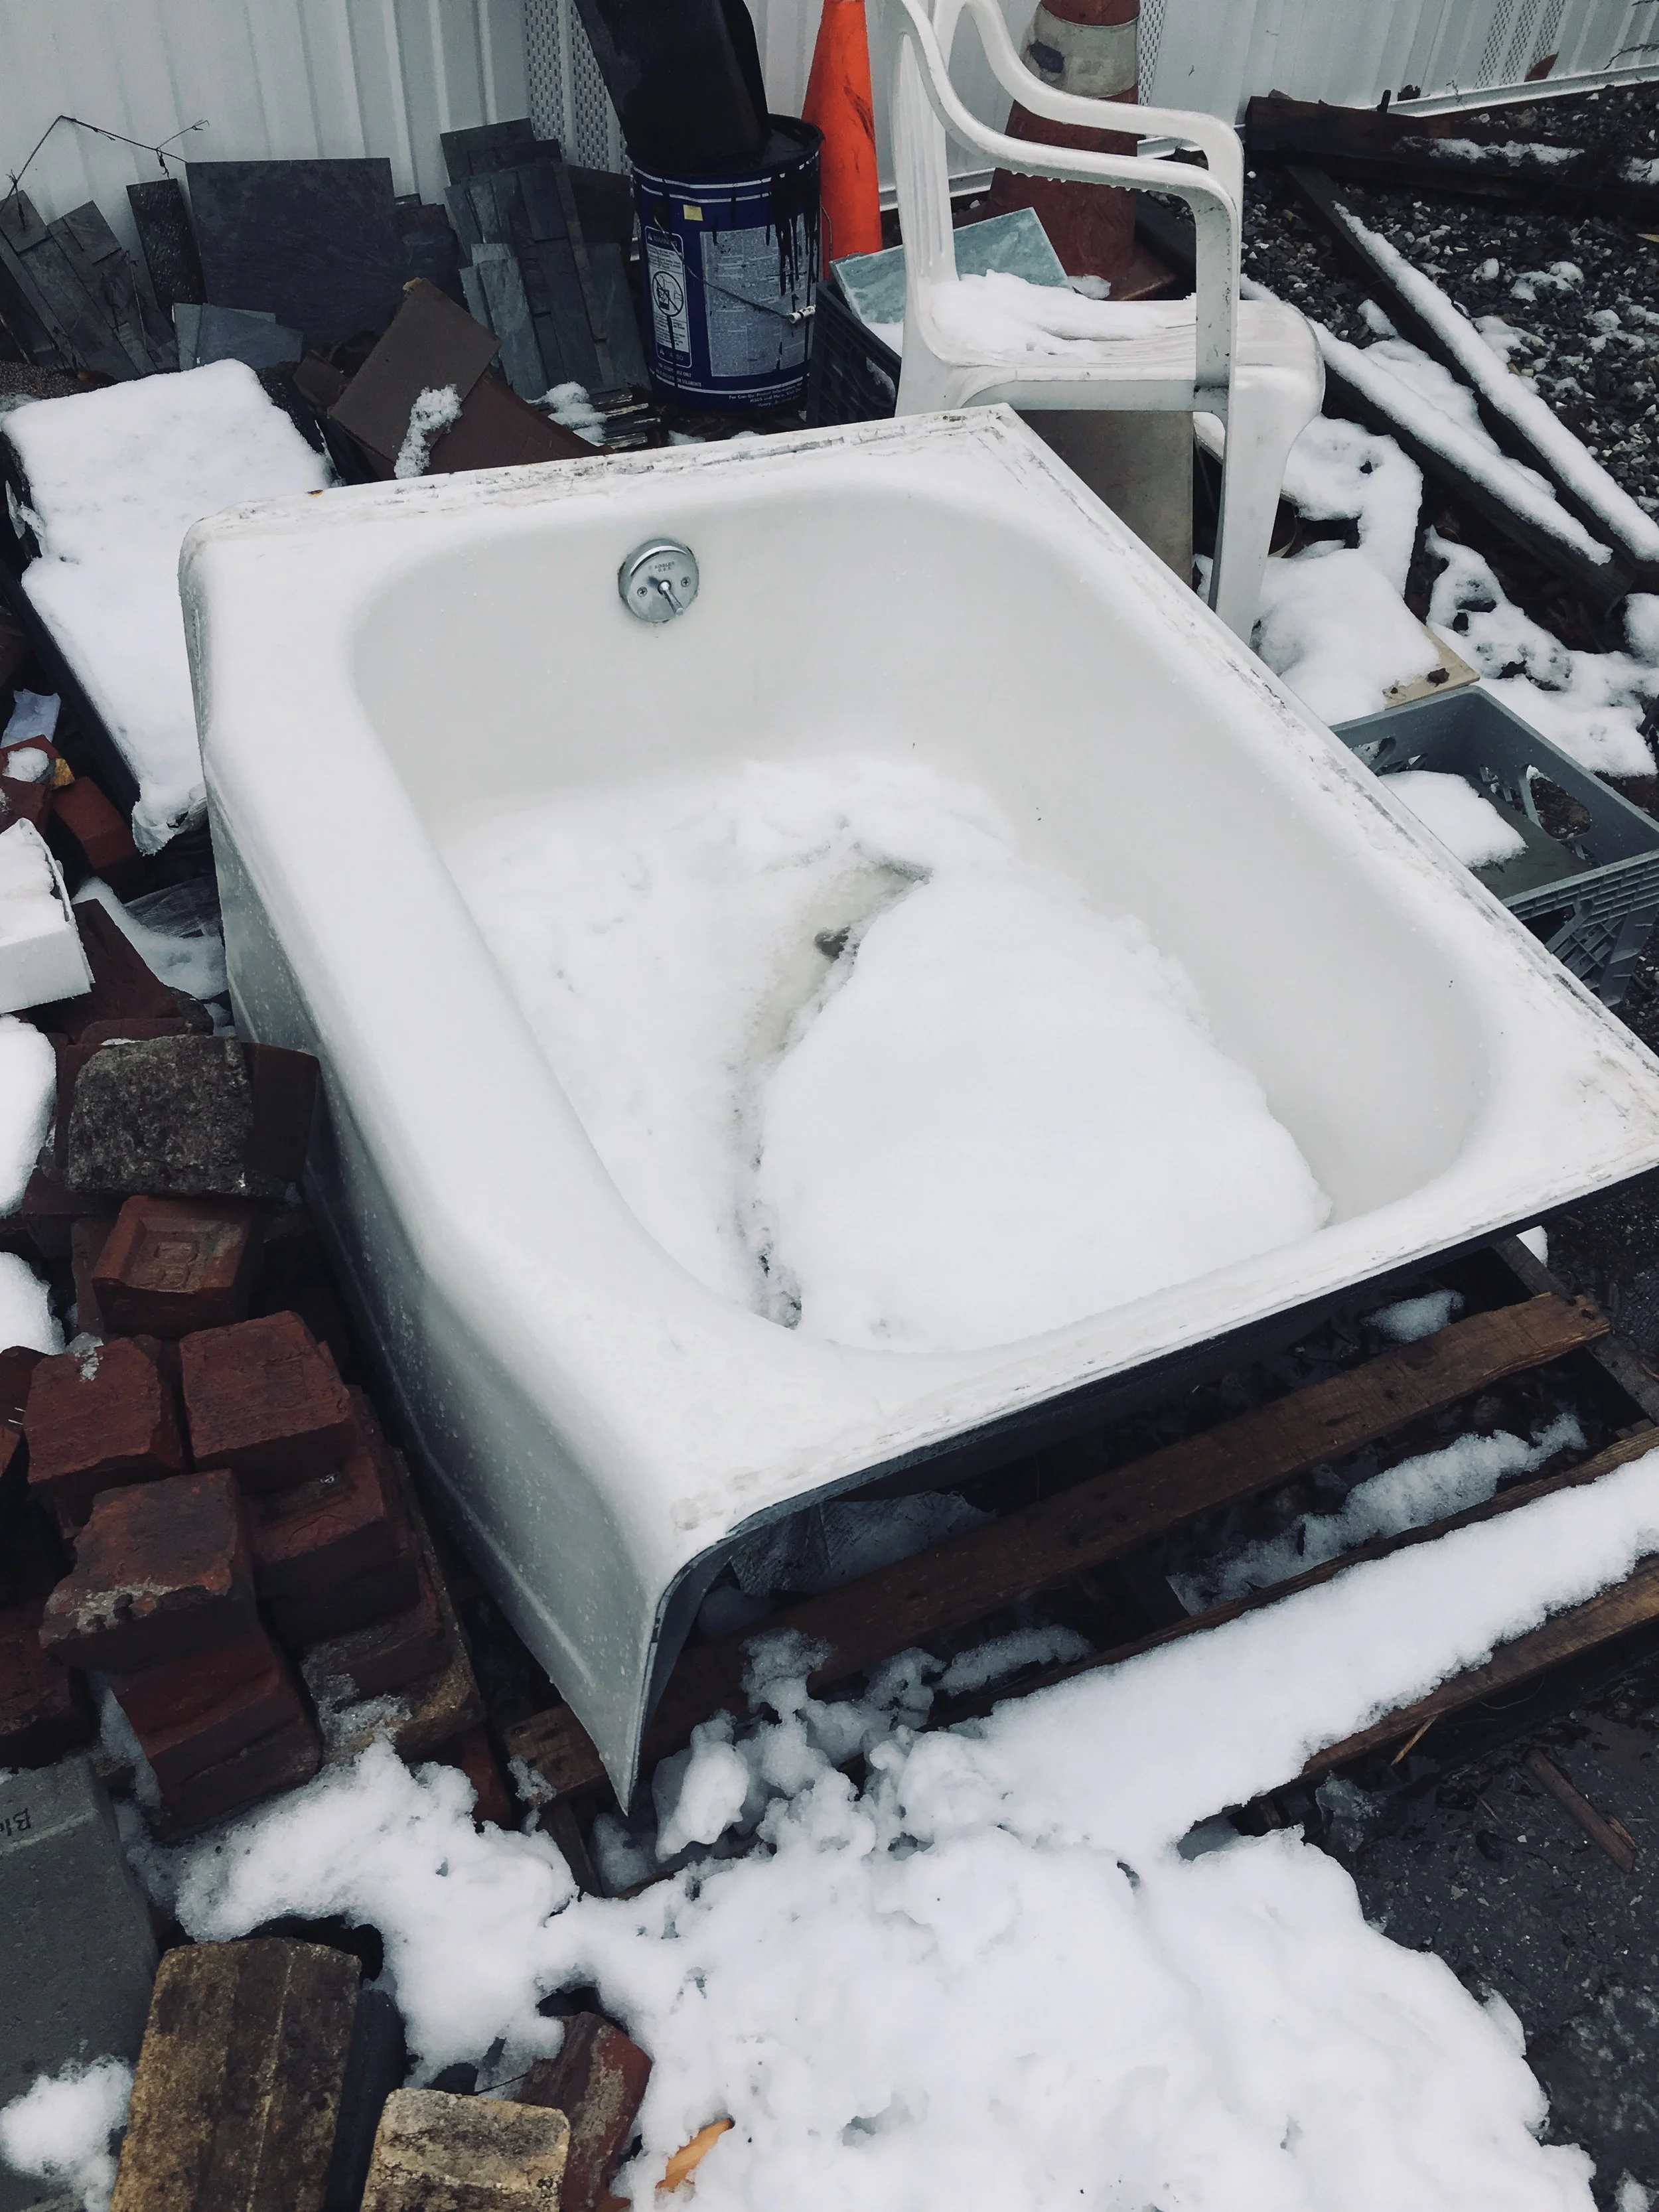
We have been doing work on the house for a while now, ripping things out, patching things up.. must mostly ripping things out. Well yesterday we made our first purchase for something that is going into the house… A vintage green pedestal sink. YES!!! I scoured the internet,looked in salvage yards, all the while not really thinking I would find anything (anything I could afforded) but lo and behold, two days ago I found one on craigslist. Crazy, and only a little drive away. So the mr and I jumped on that and yesterday we drove out to the country, stopped at the pig farm, feed the cutest 5 week old piglets stale donuts and retrieved out new green sink from the frozen mud. I am so excited. We have officiallybought our first major piece for the house.%u00a0 And it’s so pretty and green and almost tacky, (could get tacky) but is going to be perfect.%u00a0 Oh how I love me the craigslist.
Other news.%u00a0 Have you hear about the pre-peeled oranges from Whole Foods, the ones that made everyone all crazy and waere all over the news and internet? So stupid right. (Like yeah it’s kinda stupid to sell pre-peeled oranges and a waste of plastic, but is it any more dumb the to sell single serve plastic coffee pods, shrink wrapped potatoes, or plastic wrapped junk food. Just saying.) The mr and I were watching the morning news when the story came on. We started to have very normal discussion about who and why and all that when I guess I made a comment about how I have to peel his oranges. (I don’t peel his oranges, but I might have helped start a orange a few tines) And then all of a sudden this light hearted discussion about pre-peeled oranges went down hill. The pre peeled oranges made us turn on each other (our argument might not been entirely about the oranges…) Long story short. probably not going to be buying oranges for a while….Or maybe I’ll take it one step further and just stock the fridge with pre-peeled, sectioned off segments of oranges.
HAHAHAHA. I am brilliant!
So oranges, new green sink, and the temperature outside is going up up UP. Life is life and going pretty good.%u00a0 I am excited and ready and going to pull my bike out of the basement today. As soon as all the ice is melted out of the road… look out world! And clean. All I want to do it clean. Have you gotten the spring clean itch yet? My itch is like a rash. I want to get ride of EVERYTHING and power wash the inside of the house. I also want to invent something that keeps the dog nasty off of my life kinda like a bath). Yeah, maybe we will wash Washer today. That could be fun (not at all fun)
Other then that, not sure. Hoping for a long leisurely walk (pre-dog bath), a spring time salad situation involving lots of fresh baby arugula and pears and at least one small nap on the couch with window open. Not to much to ask, but we shall see.
Here, some links to take you on my internet findings.
– Slice The Price Of Fruits And Veggies, Save 200,000 Lives? I think so.
-We don’t buy dog treats, sometime I make them, but mostly he gets apples and carrots as treats. 11 Healthy Fruit & Vegetable Treats for Your Dog or Cat
–Get ready for a Mary-Kate and Ashley Olsen museum... Buying a yearly pass..hahaha!
-Some might say I have a mouth like a sailor.. and they are probably right, but I can’t help it. What Makes Swearing So Damn Satisfying, Anyway?
– This nursery is perfect. Maybe one day…..
-Completely in love with this house. And this cabin.. yes please.
–7 Types of Fruit Trees You Can Grow in Your Living Room. and I want to grow the ALL!
-I totally get this.%u00a0 No one will make you do the things you love%u2013so here%u2019s how to make yourself
-I pretty much only use cast iron for everything. so this is cool to see. How Lodge Cast Iron Skillets Are Made in Tennessee
– Yup, this would work for me. Exercise Bike Doubles As Washing Machine
-This is good news for the little ones.Peanut Mush In Infancy Cuts Allergy Risk.
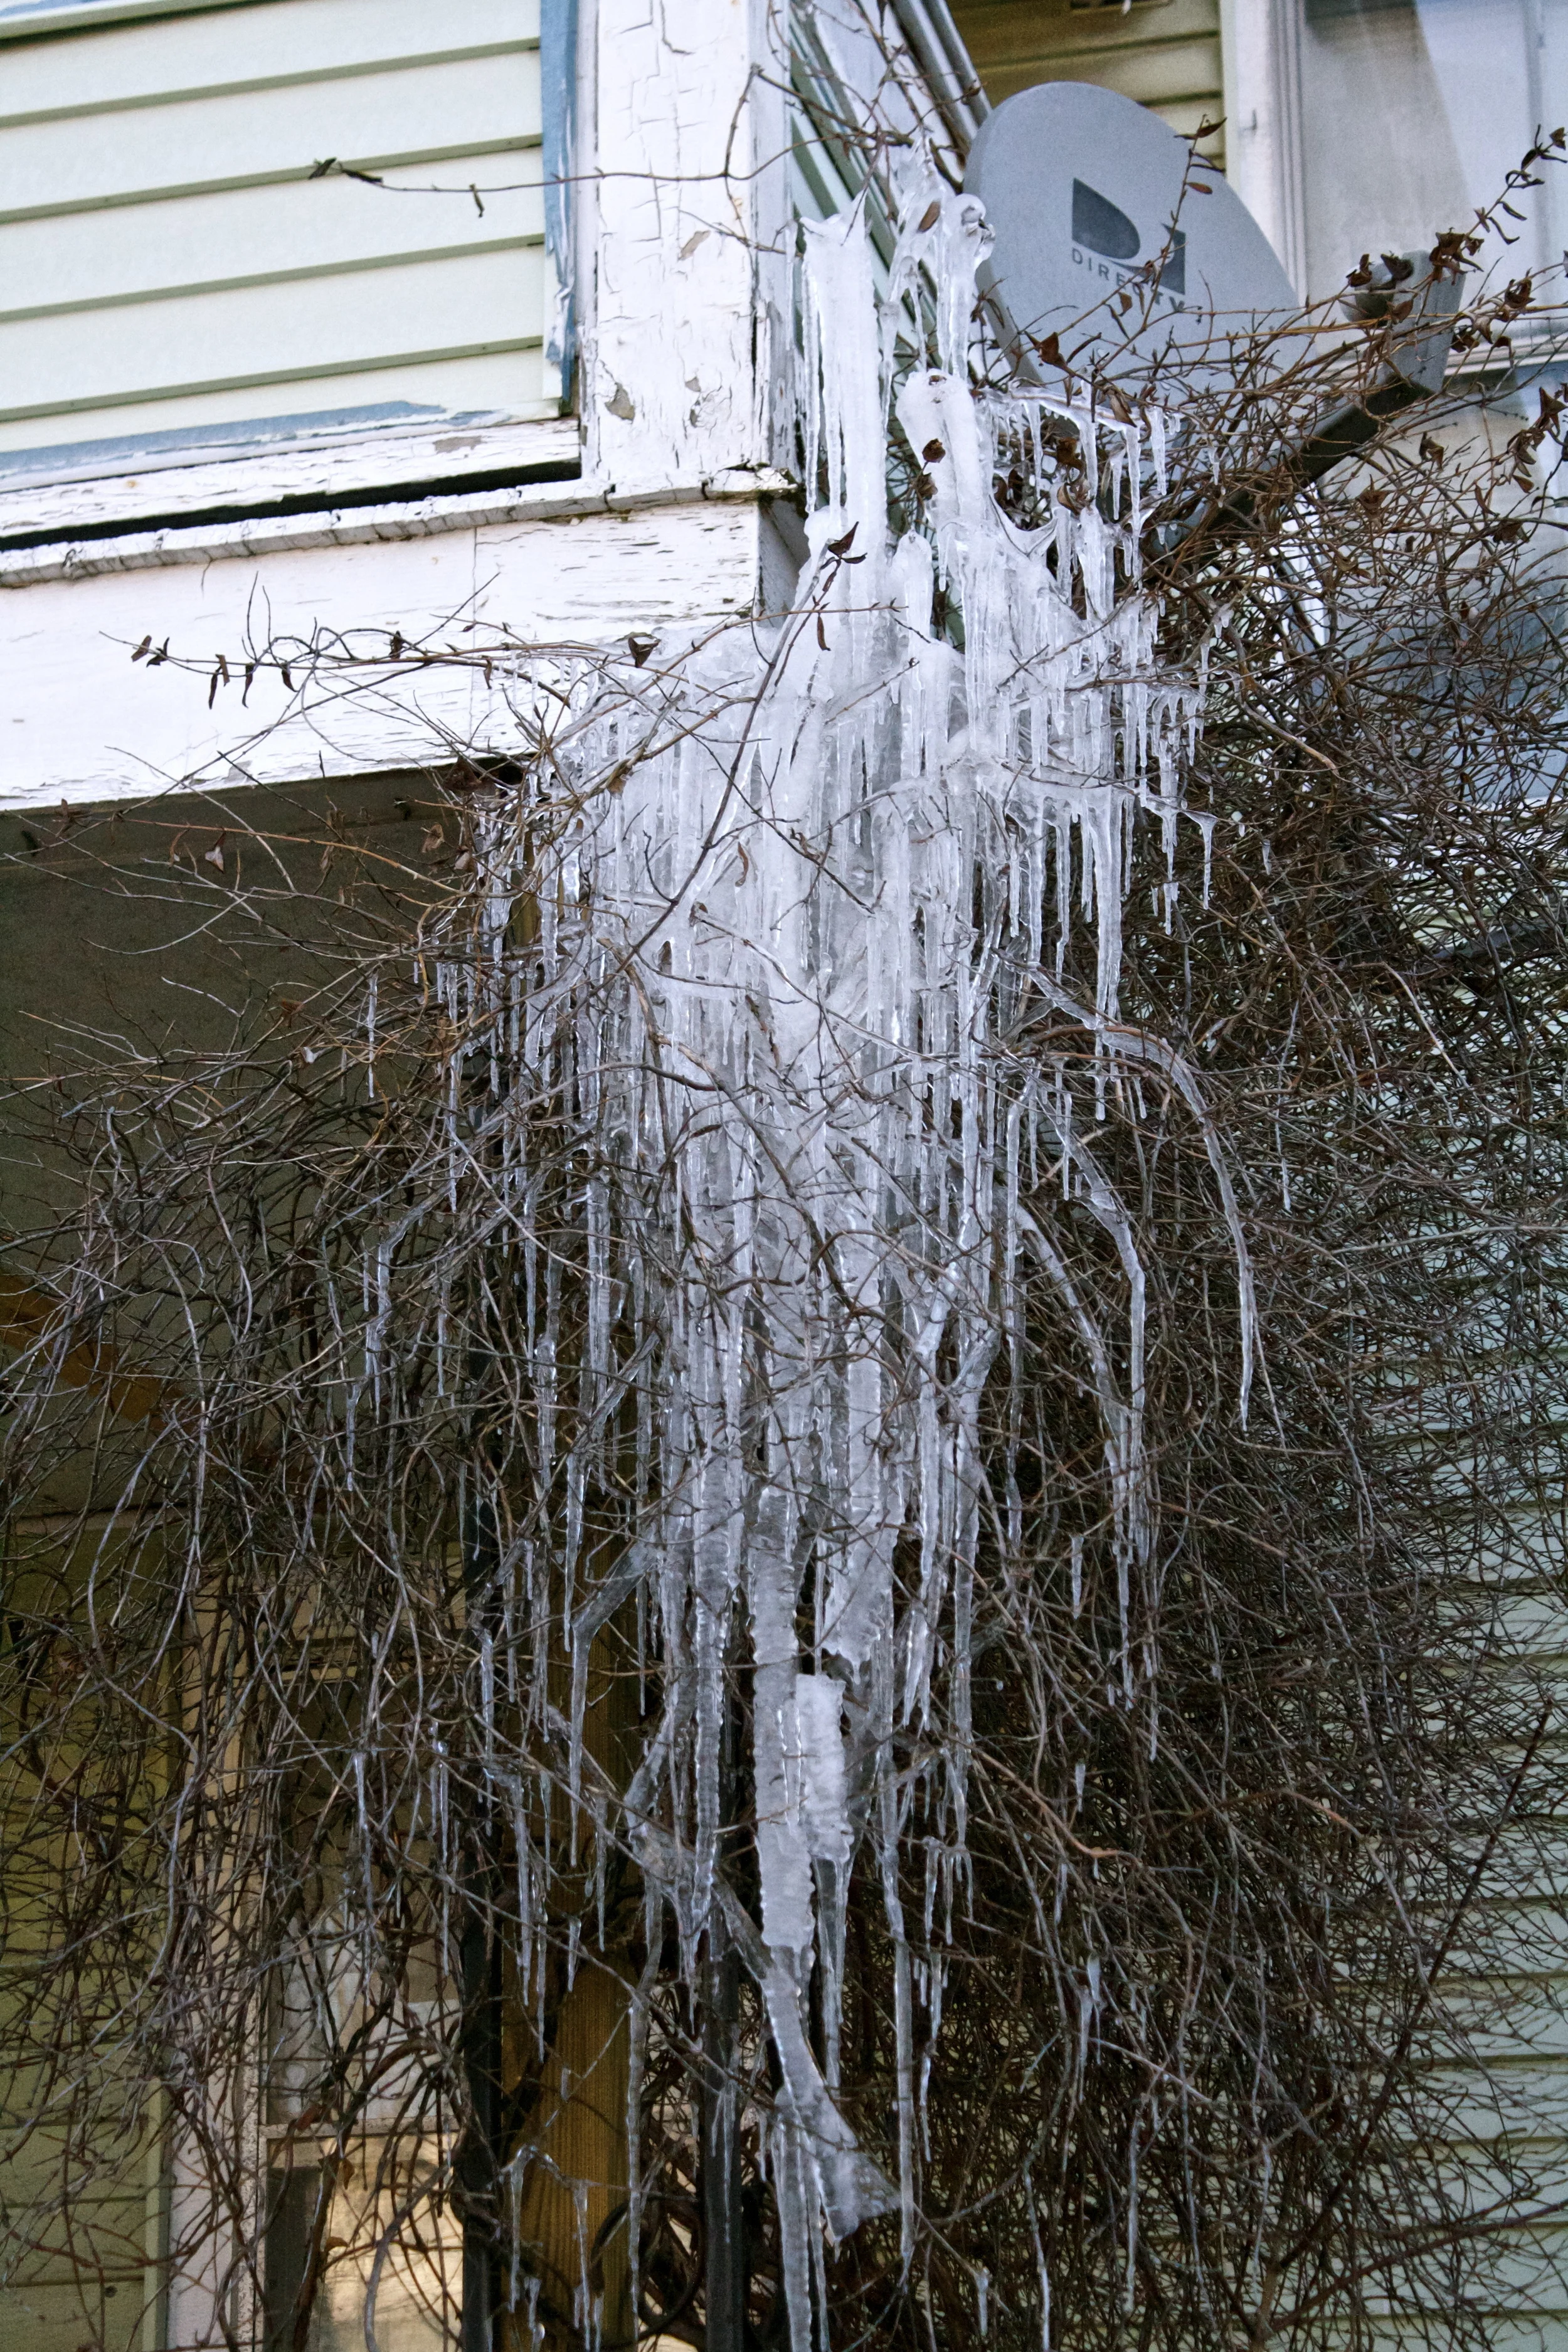
And yes, picture of baby pigs, and some other stuff.
Every year I look forward to St Patrick’s day.. And not because I am Irish, (which I am) or because I want to drink on excess (which I do not) and no,%u00a0 green eggs and ham are not something that I plan on making. No Ido not look forward to any of those things (although I actually do like to pinch the littles that wear no green and talk about pots of gold and rainbows) I love this time of year because cabbage is always on a freaking super sale everywhere you go.%u00a0 Something that is usually 80-99 cents a pound goes down to like 20 cents a pound. And for someone that eats like 10 heads of cabbage a week, this is a hug savings. SO yeah, I buy so so much (I have already bought 12 heads, but I actually plan on buying a full case before the sale is over)
No, I am not crazy, I will eat it all….. and I am going to be making so much sauerkraut. Woo hoo!
But until then. A cabbage pot roast. Yes. I remember growing up my mom would make pot roasts once in a while. A big pot full of big chunks of veggies topped with a big slab of some kind of meat. I never liked the meat, but I always loved the big chunks of the veggies at the bottom of the pot. So I figured I would make a big pot roast, replace the meat with a head of cabbage (I have so much) and add beans because protein and because they are just so good. . And when it’s all cooked and said and done, you end up with a big pot of plump and so flavorful veggies and beans and the most tender wedged of roasted braised cabbage.%u00a0 This is my kind of pot roast.
Now go quick.. the cabbage sales will be over soon.
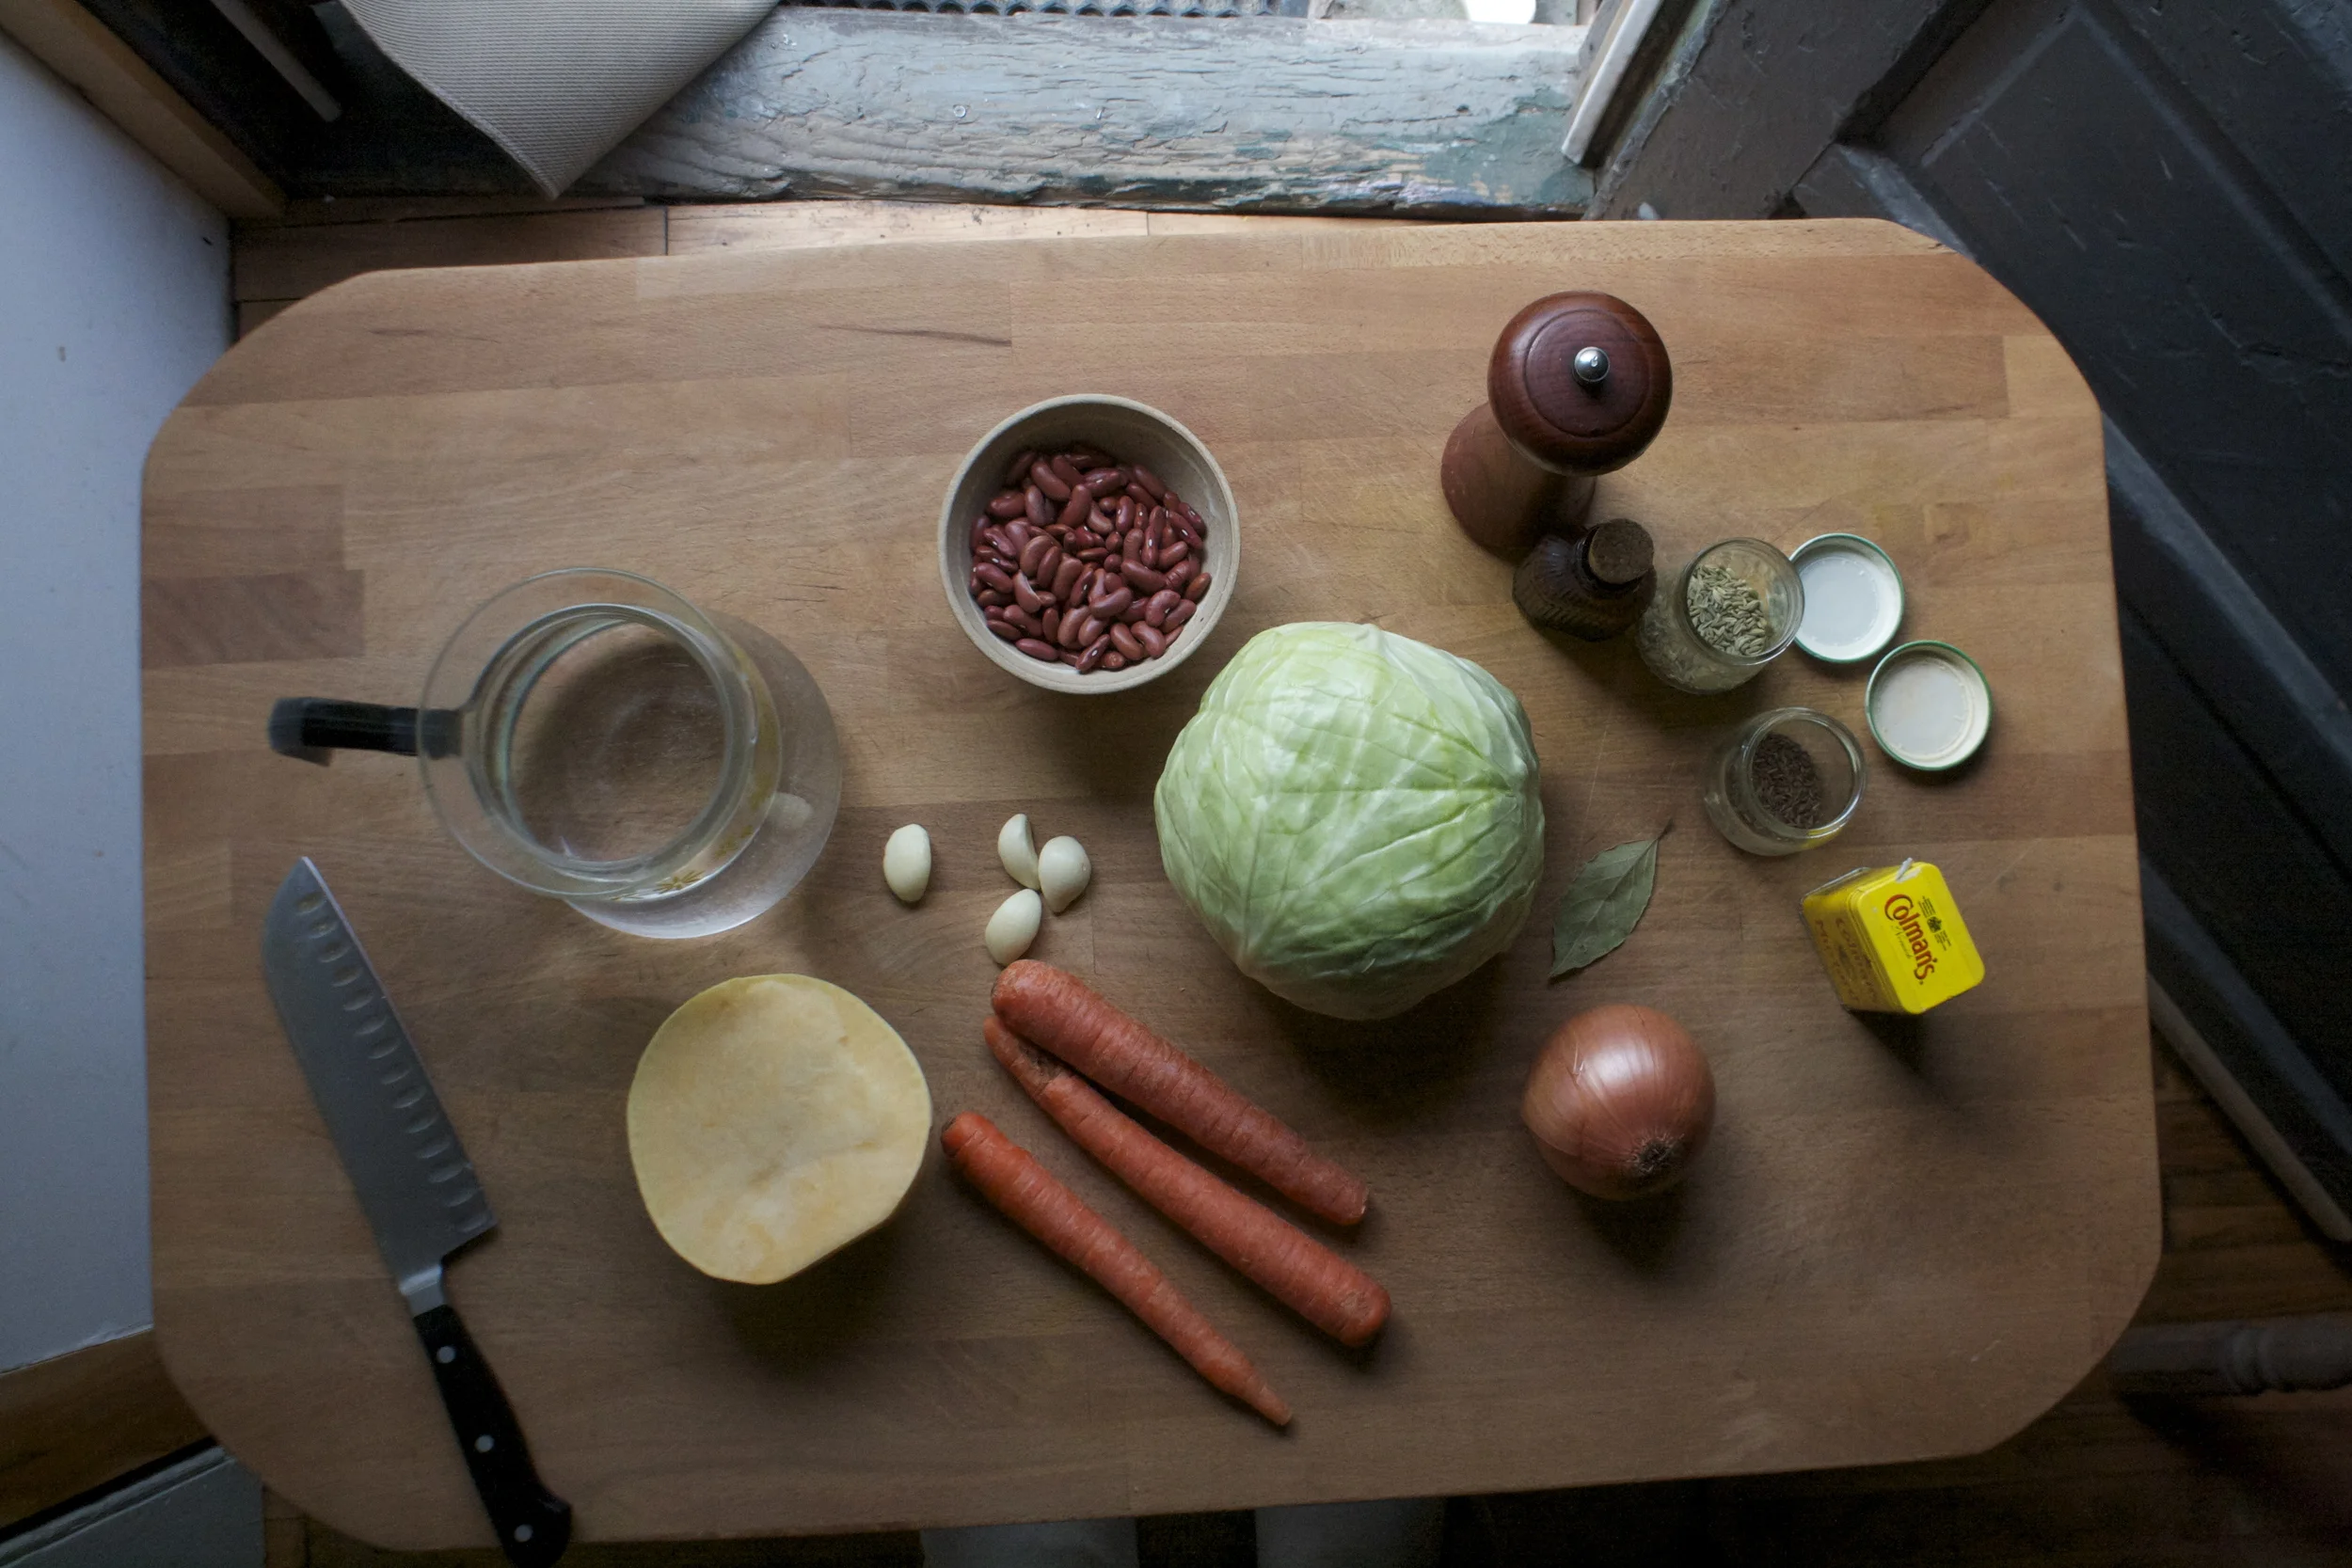
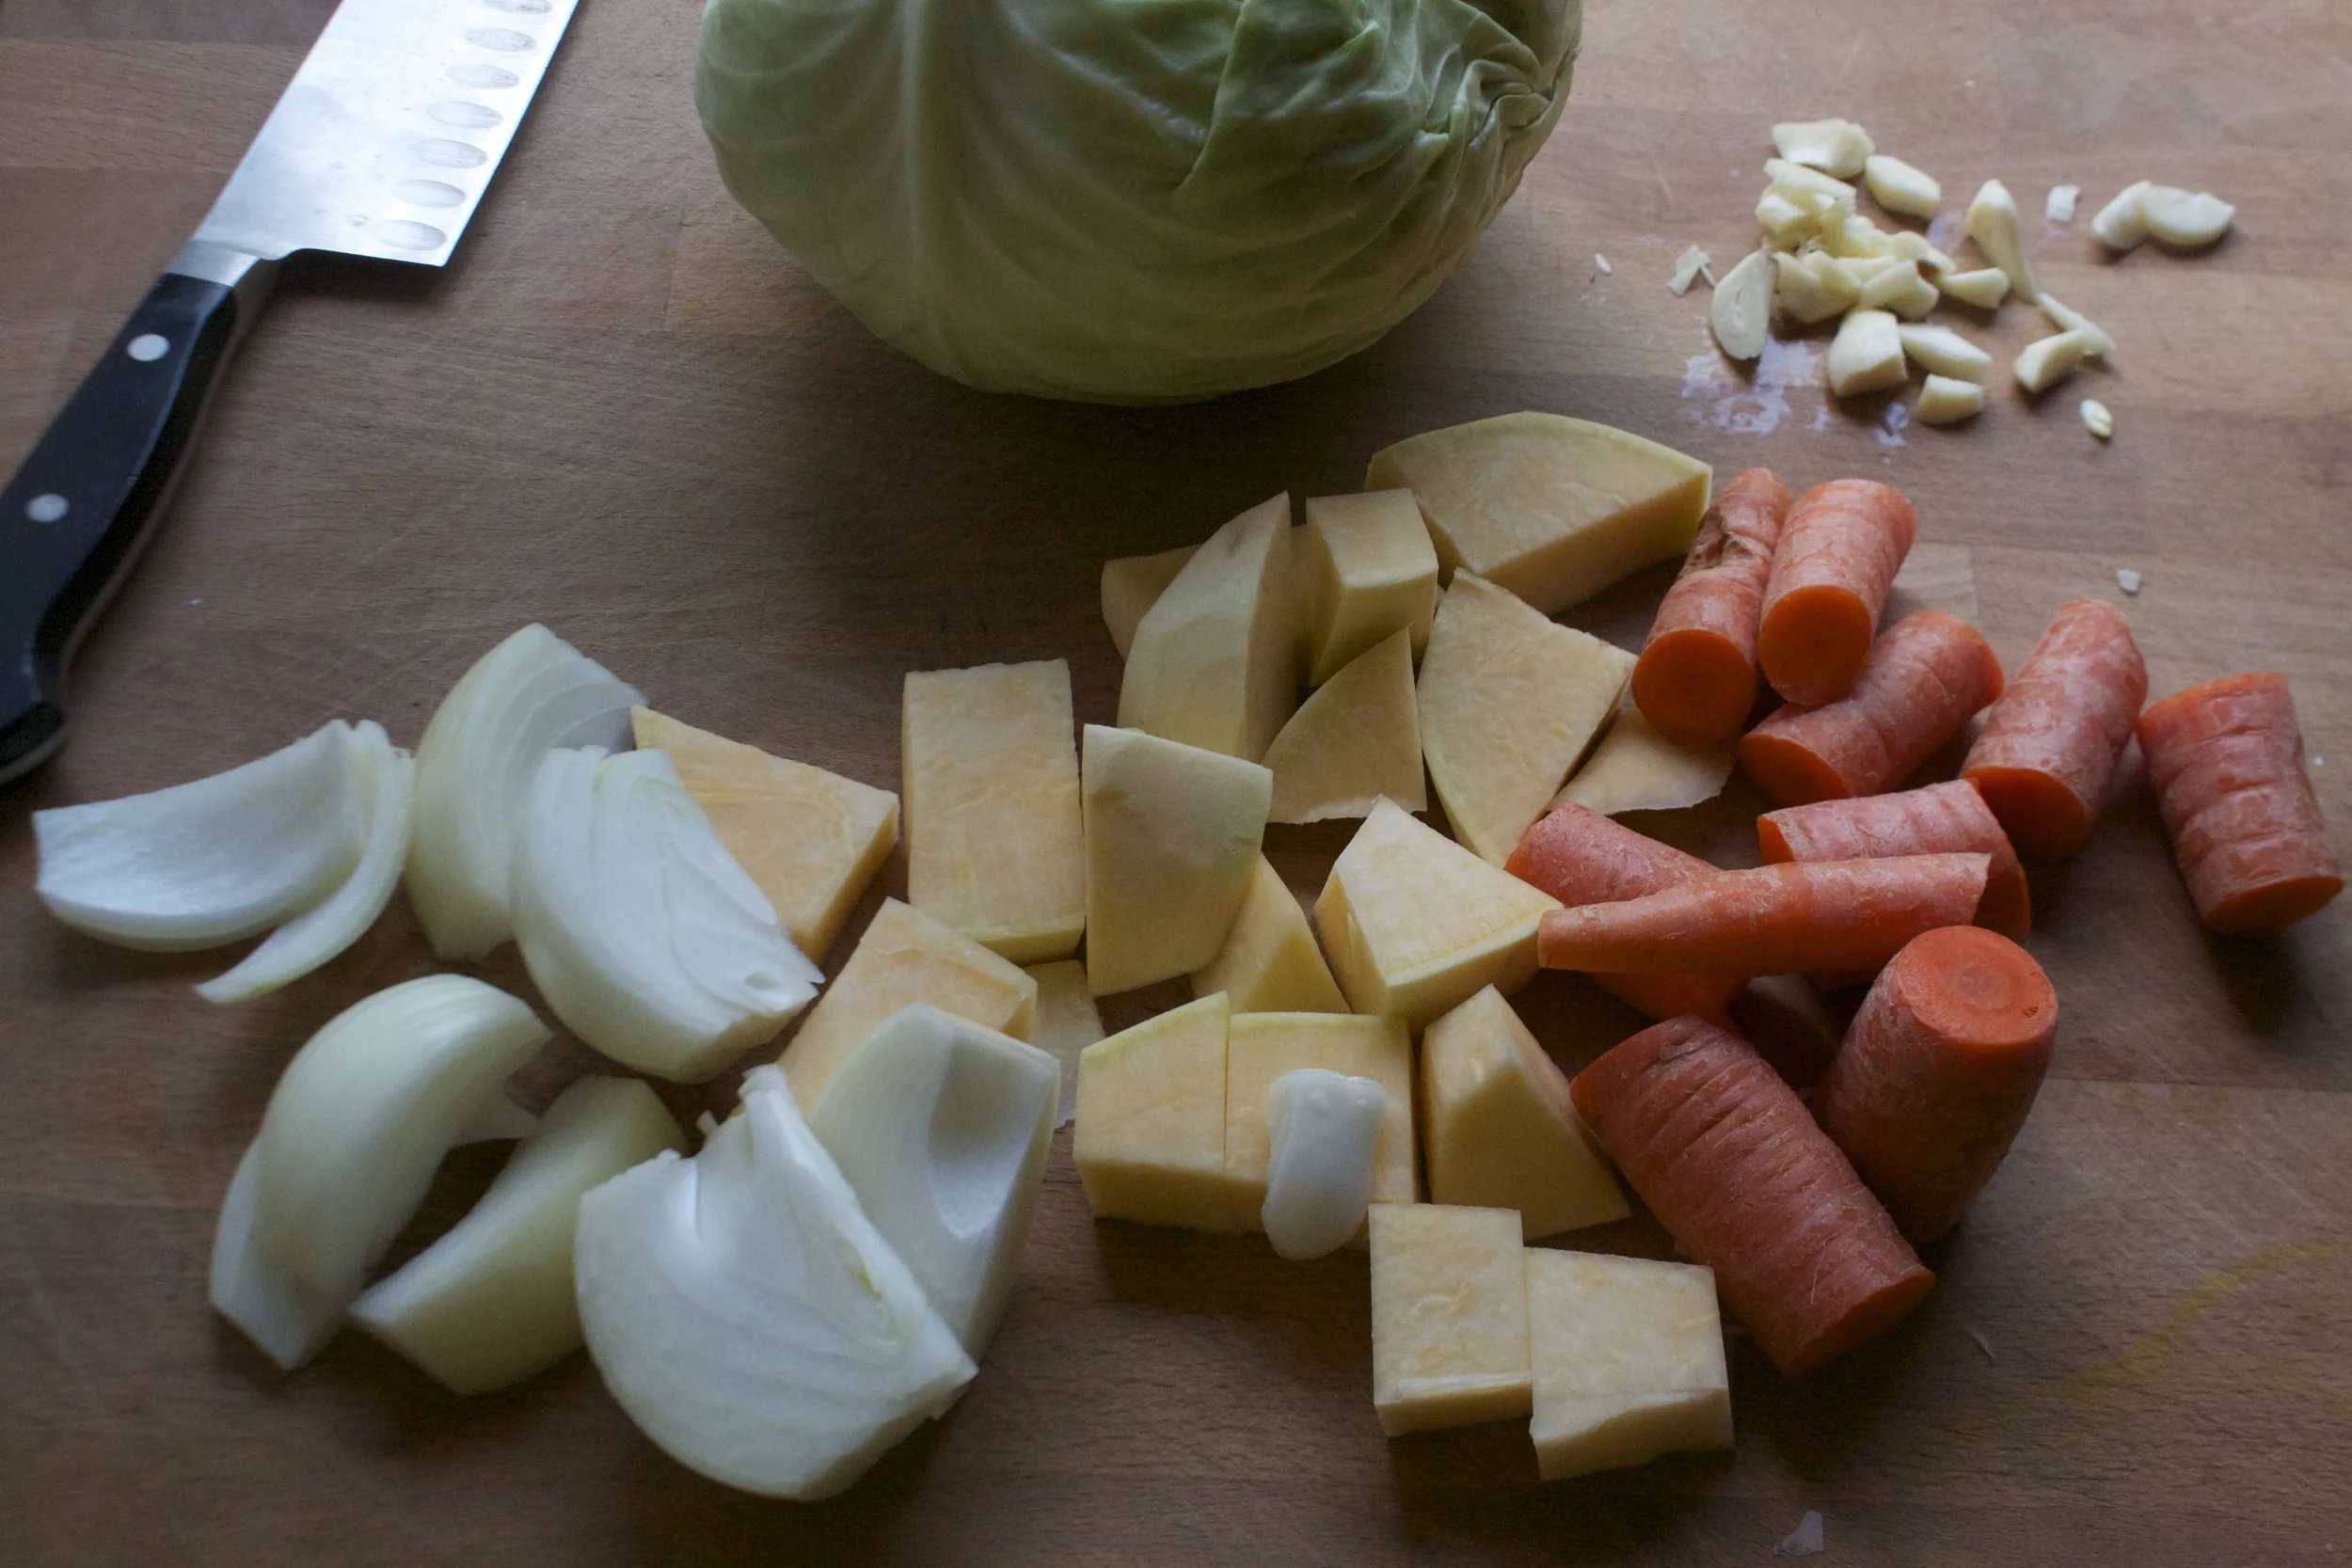
The stuff. One good sized head of cabbage, a few carrots, a big onion, and a hunk of rutabaga. Also have some dried kidney beans, caraway and fennel seeds, dried ground mustard, a bay leaf, some garlic, and salt and pepper. And water… water is needed.
Note. You can use just caraway or just fennel and you can replace or even add a potato in place of the rutabaga.
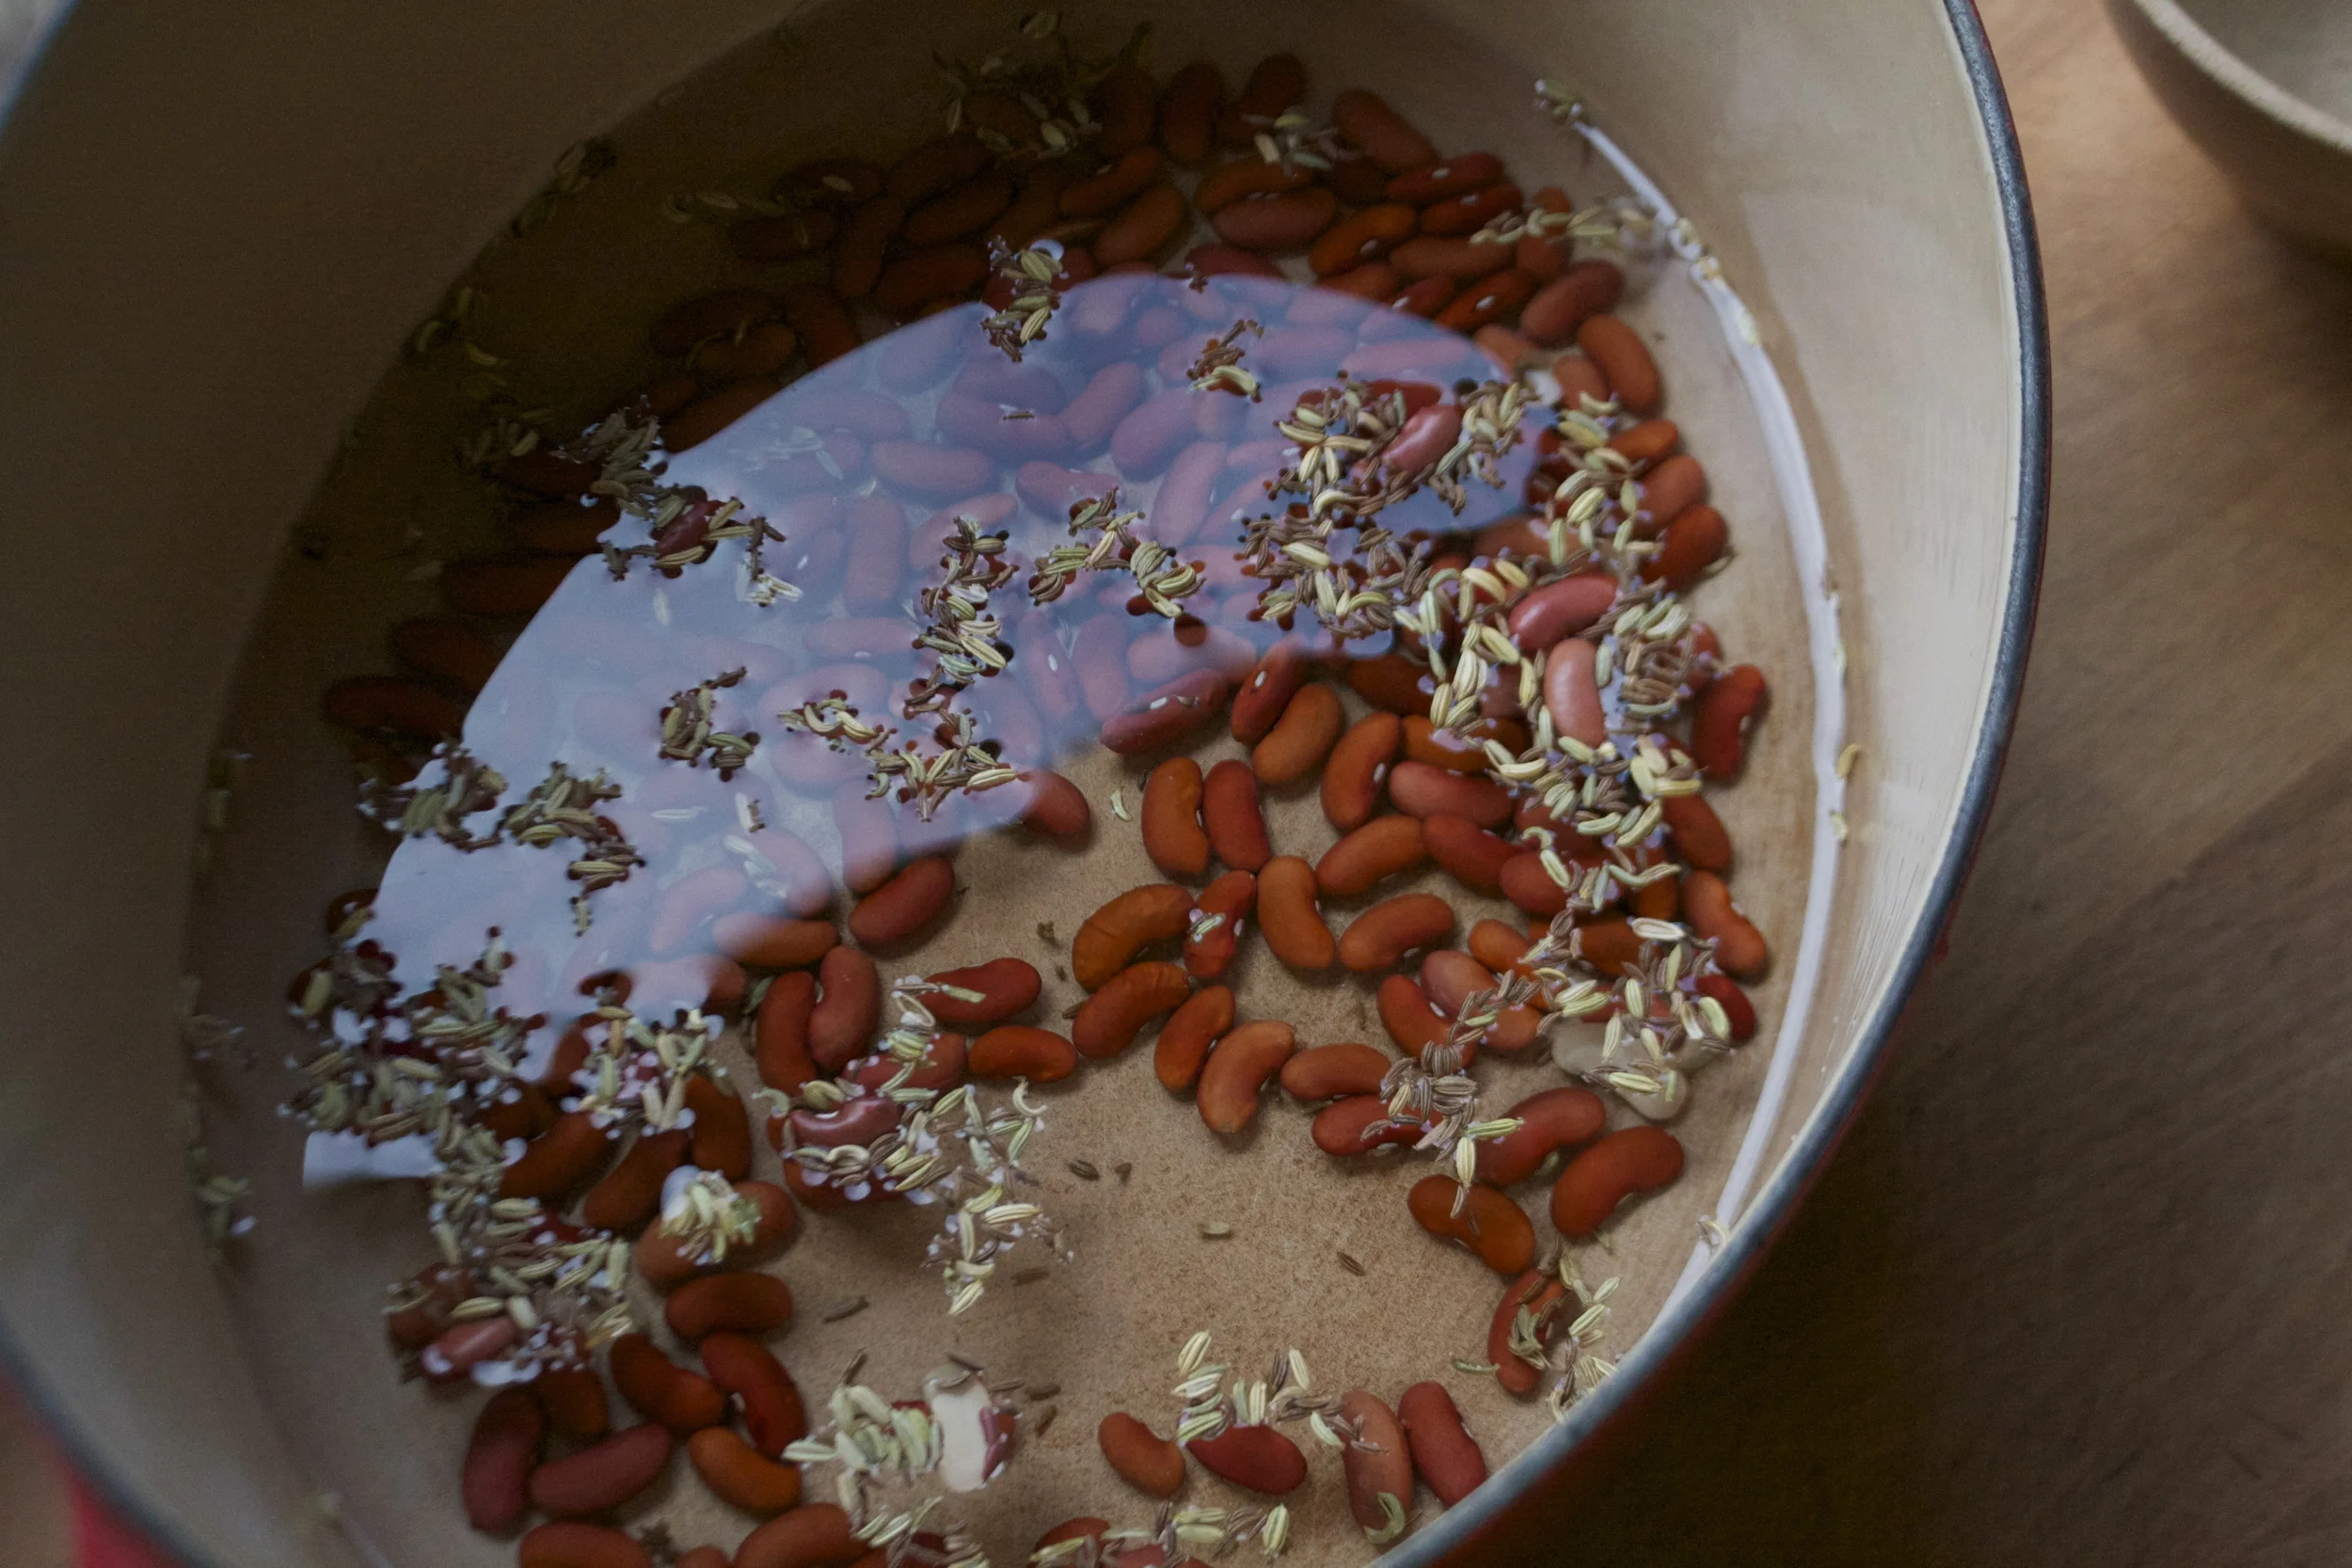
Dried beans, fennel and caraway into a pot with water. Stick the pot on the stove ans bring to a boil, then to a simmer to give the beans a quick head start before going into the oven.
While the beans are simmering, dice up the garlic and chop up the veggies into big chunks… you don’t want small chunks or they will kind of turn to mush while cooking.
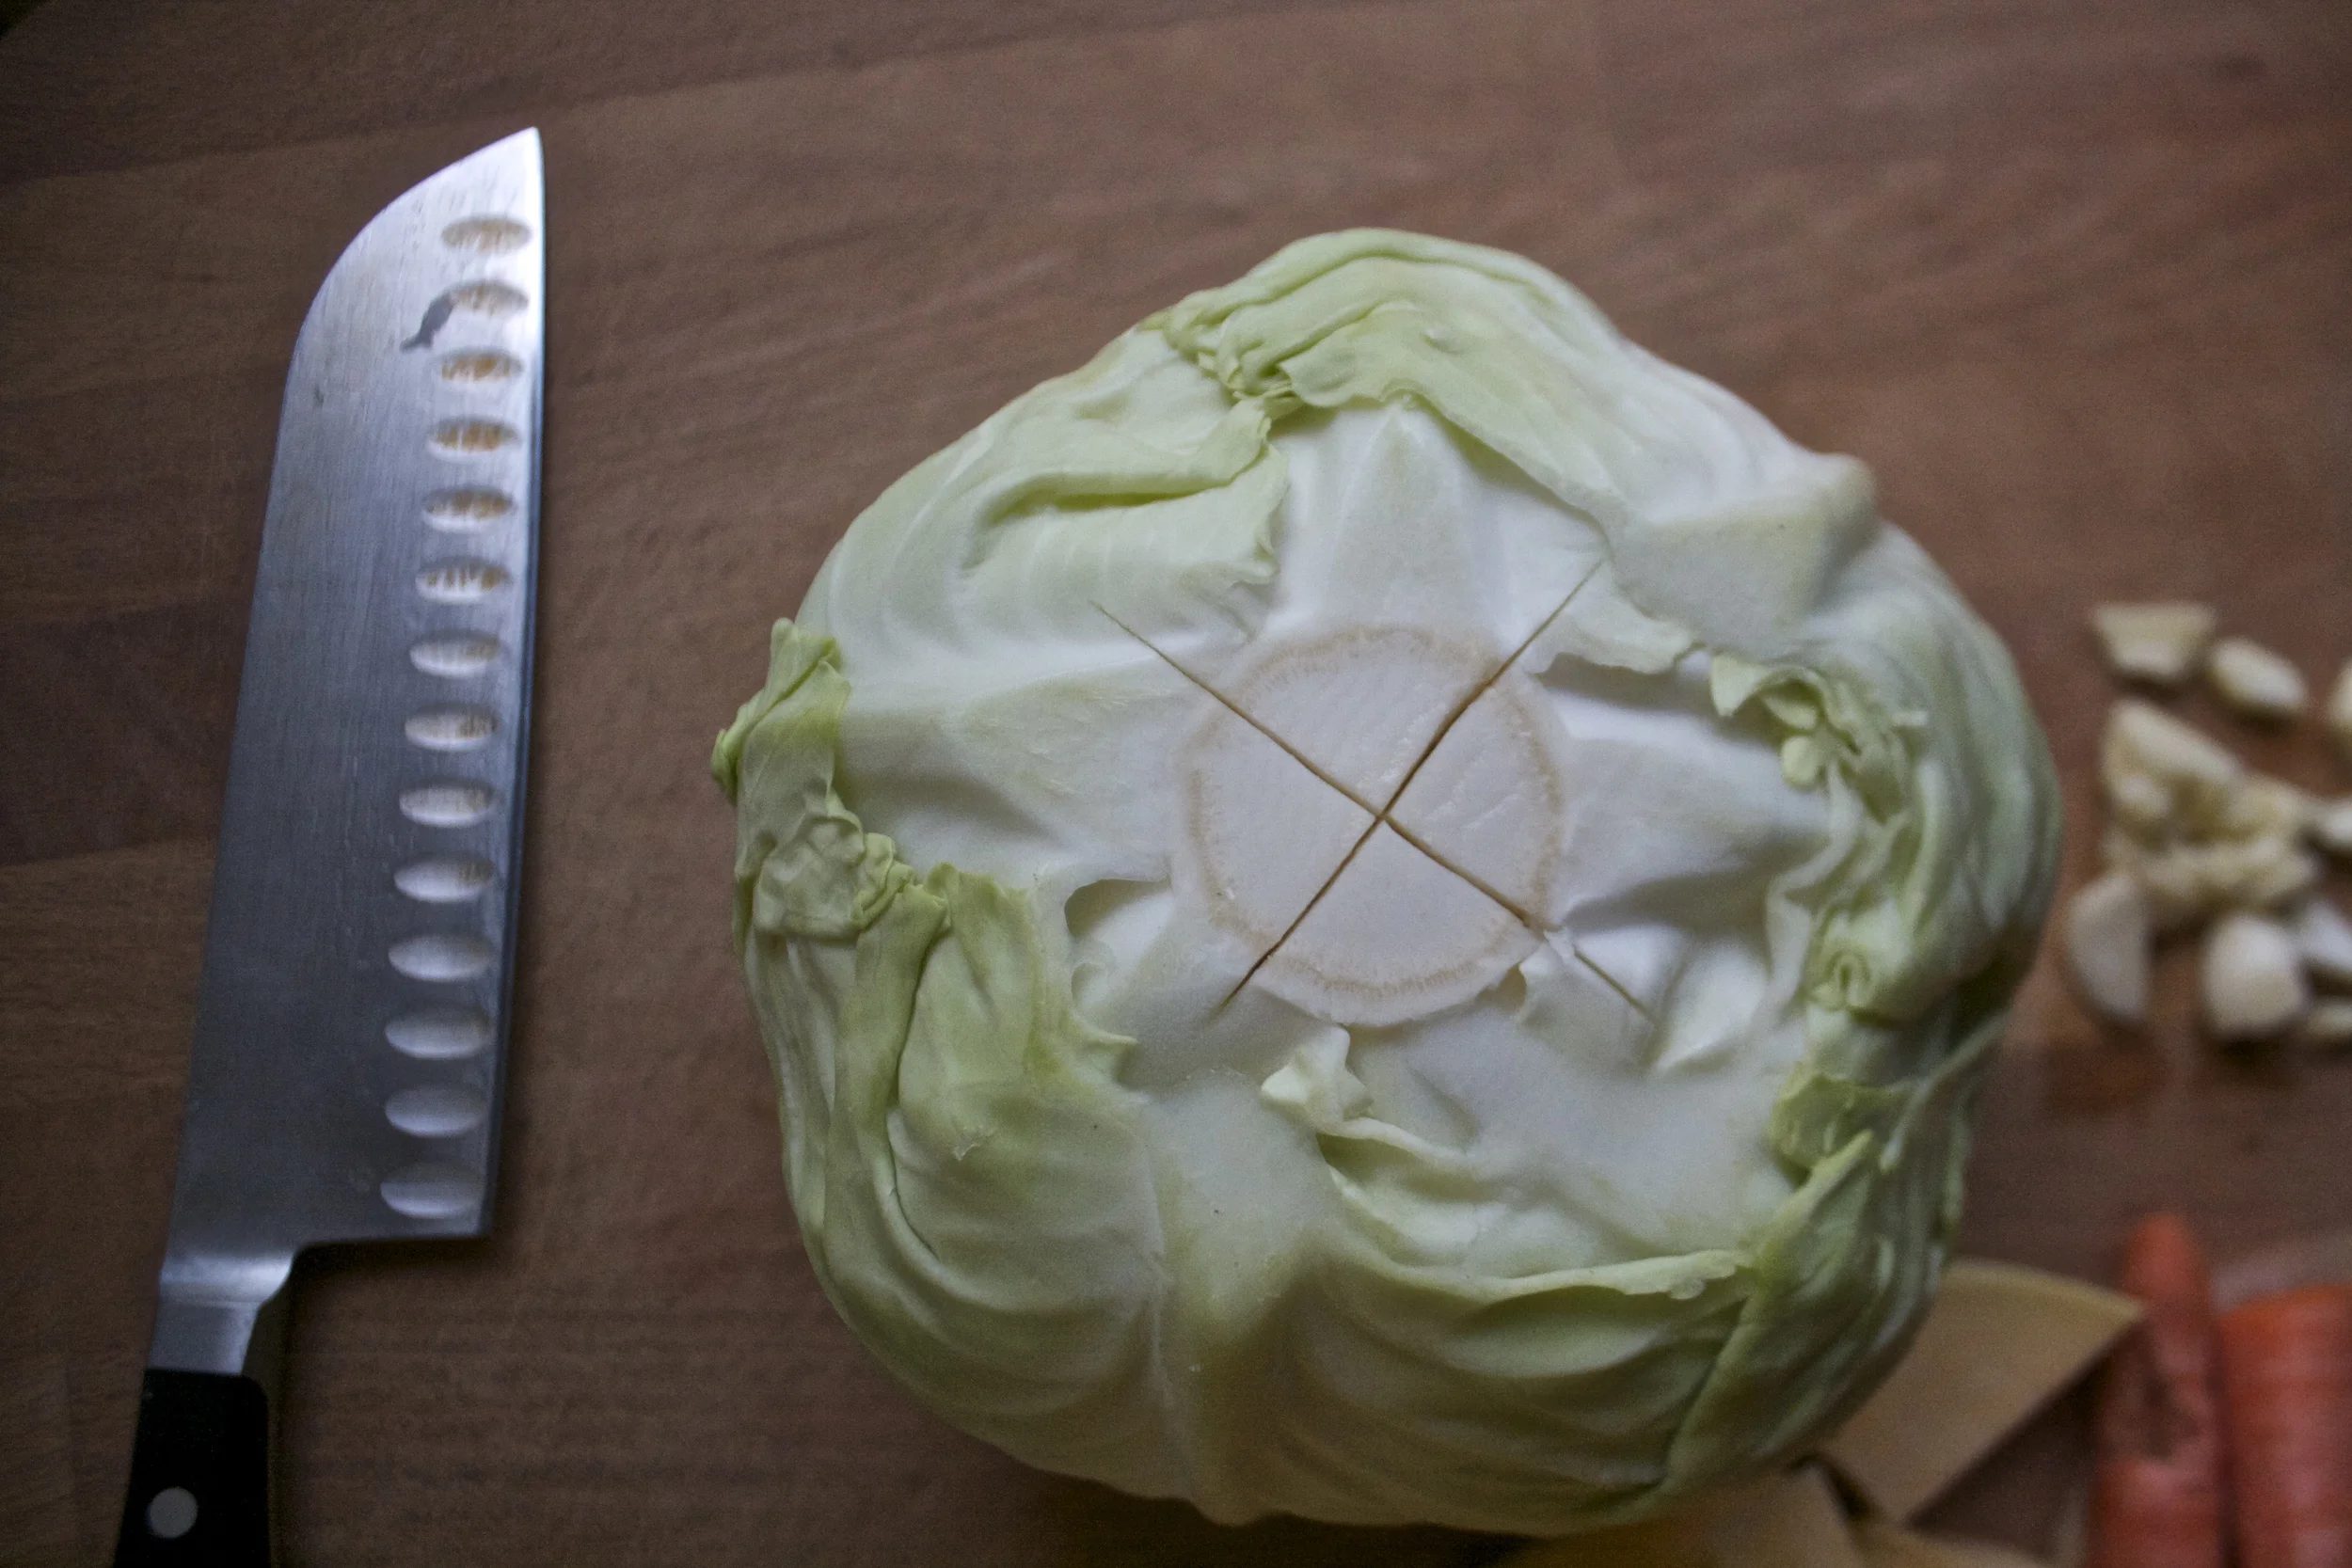
And turn over the cabbage head, take a knife, and slice a deep x into the core. DO THIS or else the inside of the cabbage will not cook through. Oh and preheat the oven to 375.
Beans looking a bit plumped..
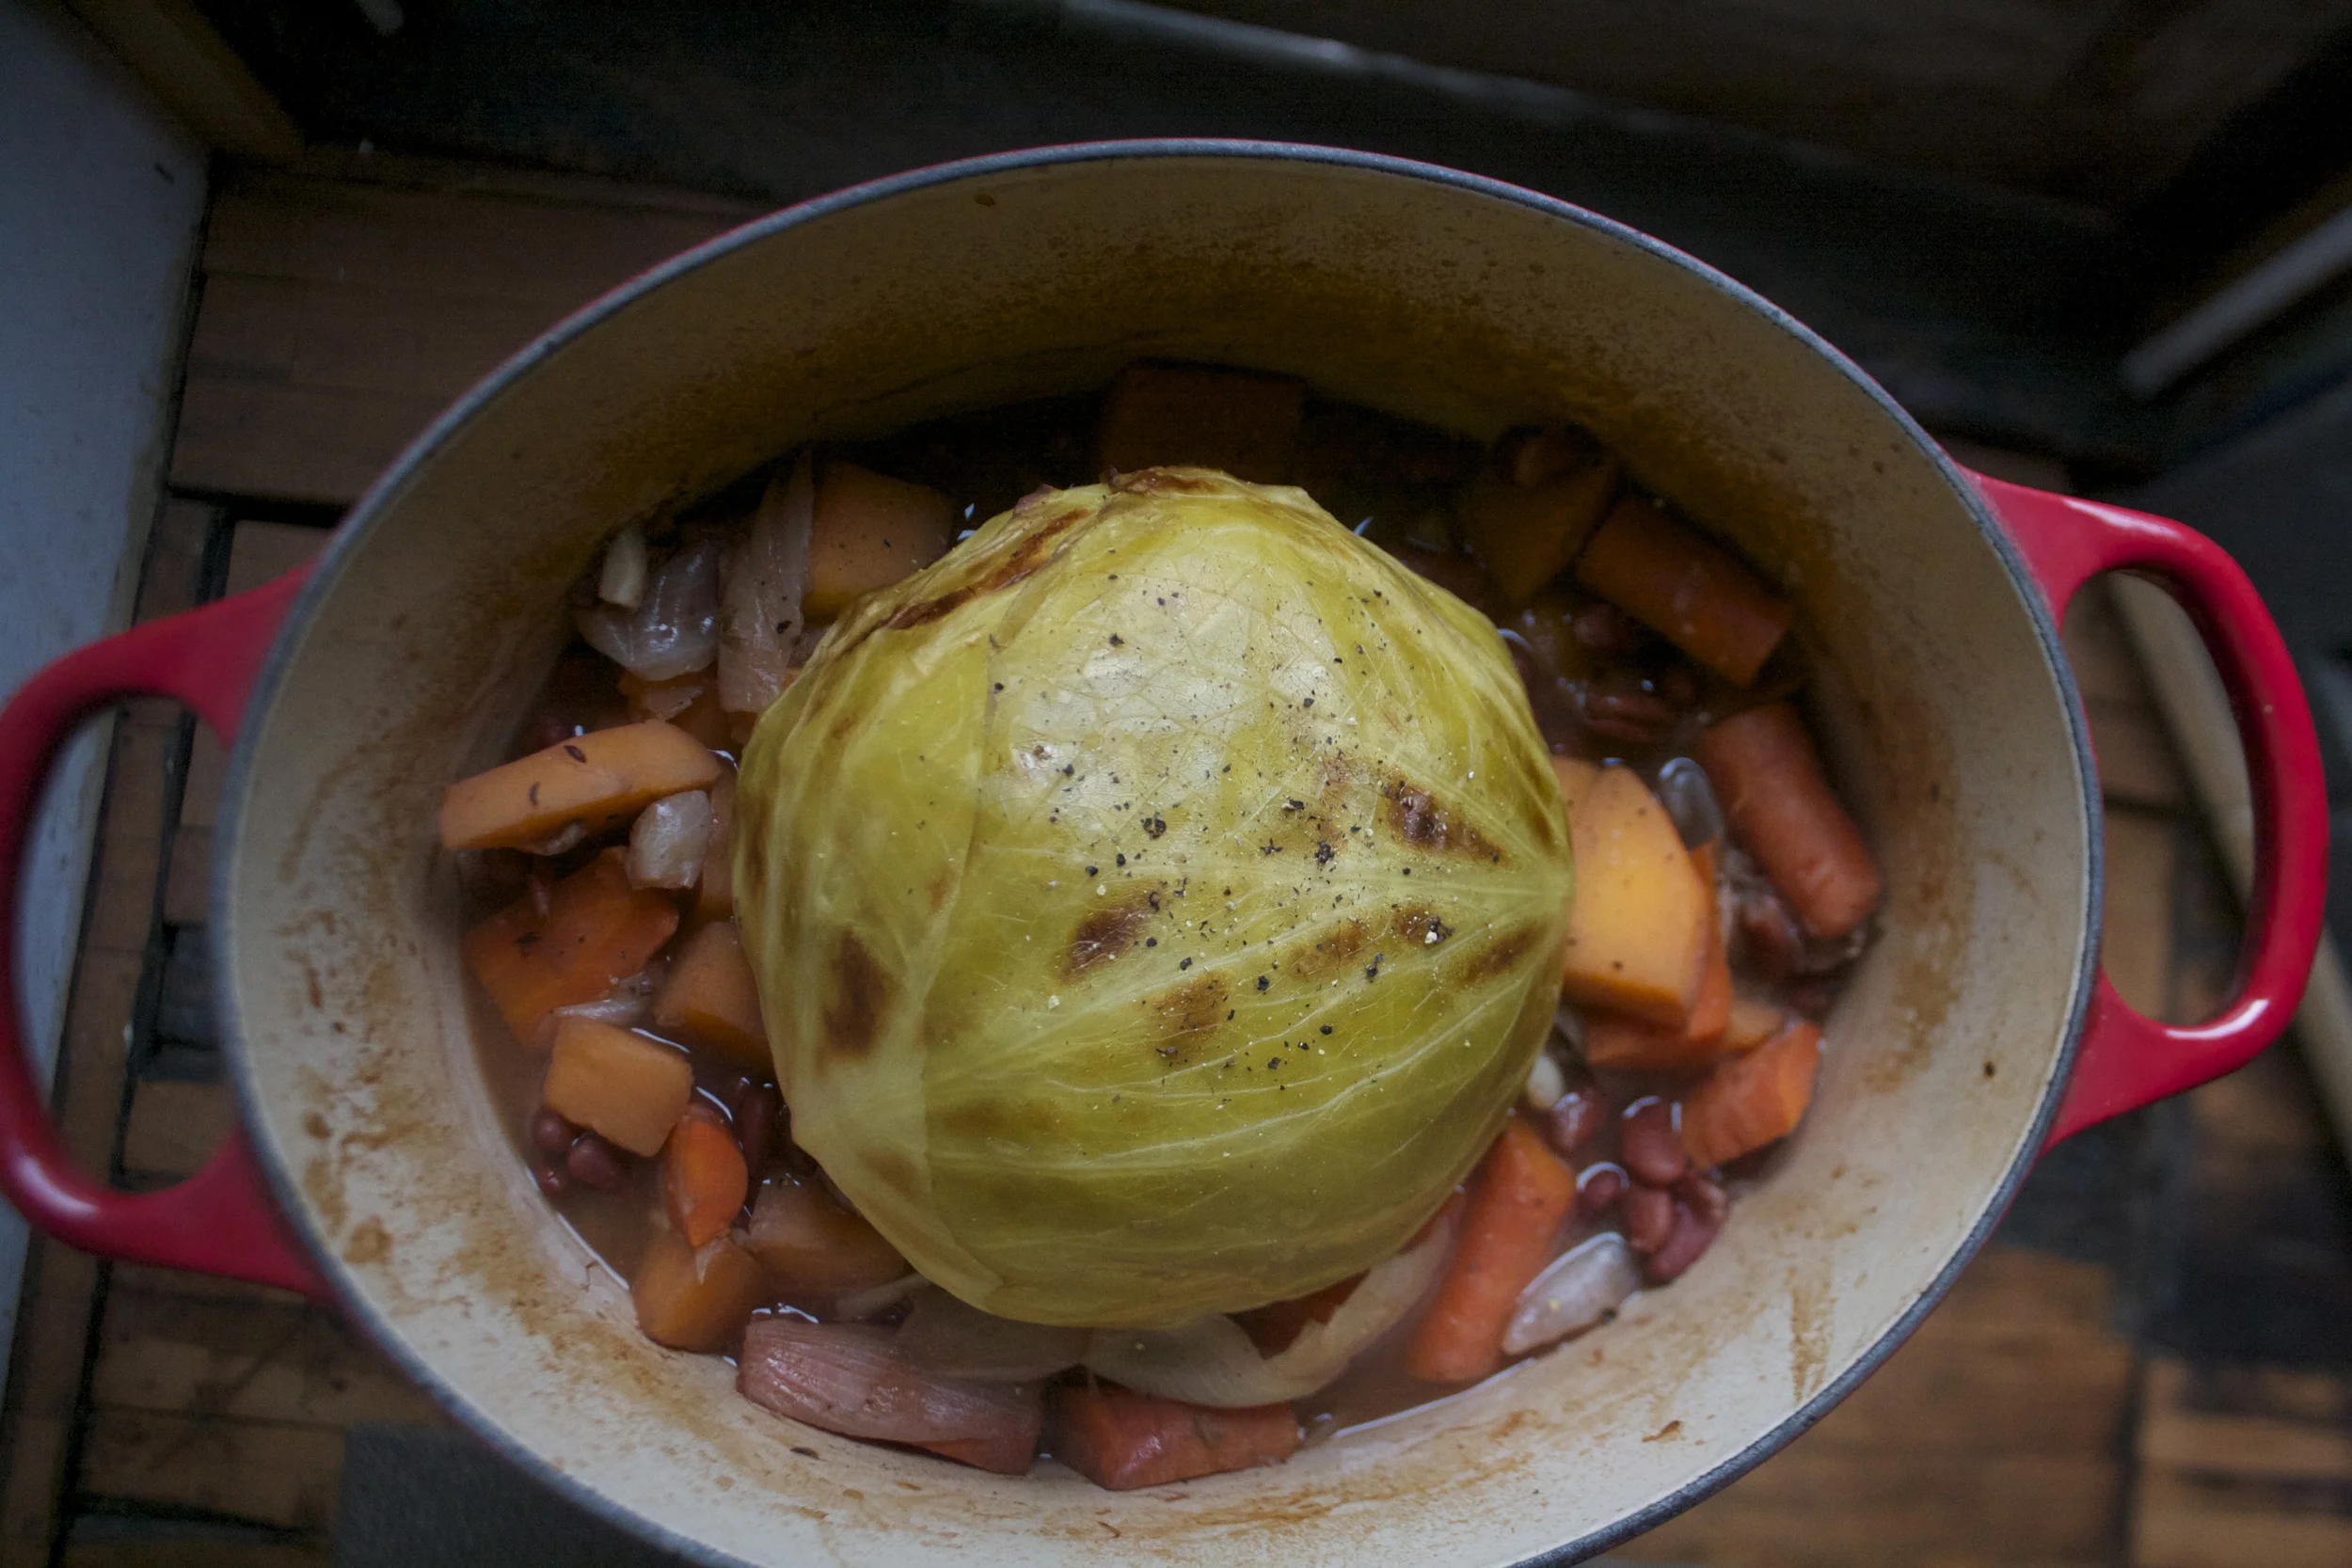
Top those beans with all the chopped veggies,(don’t stir them in., you want to keep the bean under submerged in the water) sprinkle those with the mustard, salt and pepper and place that lovely cabbage head right on top…
Place a lid on the pot and slide it into the oven to cook away. It’s going to take a bit of time (about an hour) but it’s pretty much hands off. Just take a look after about 45 minutes, check the bean doneness, add in another cup or so of water and place lid bacck on and cook for another 12-20 minutes until the beans are done. When they are, take the lid off, crank the oven to 450 and cook for another 15 or so minutes until the cabbage gets all golden brown
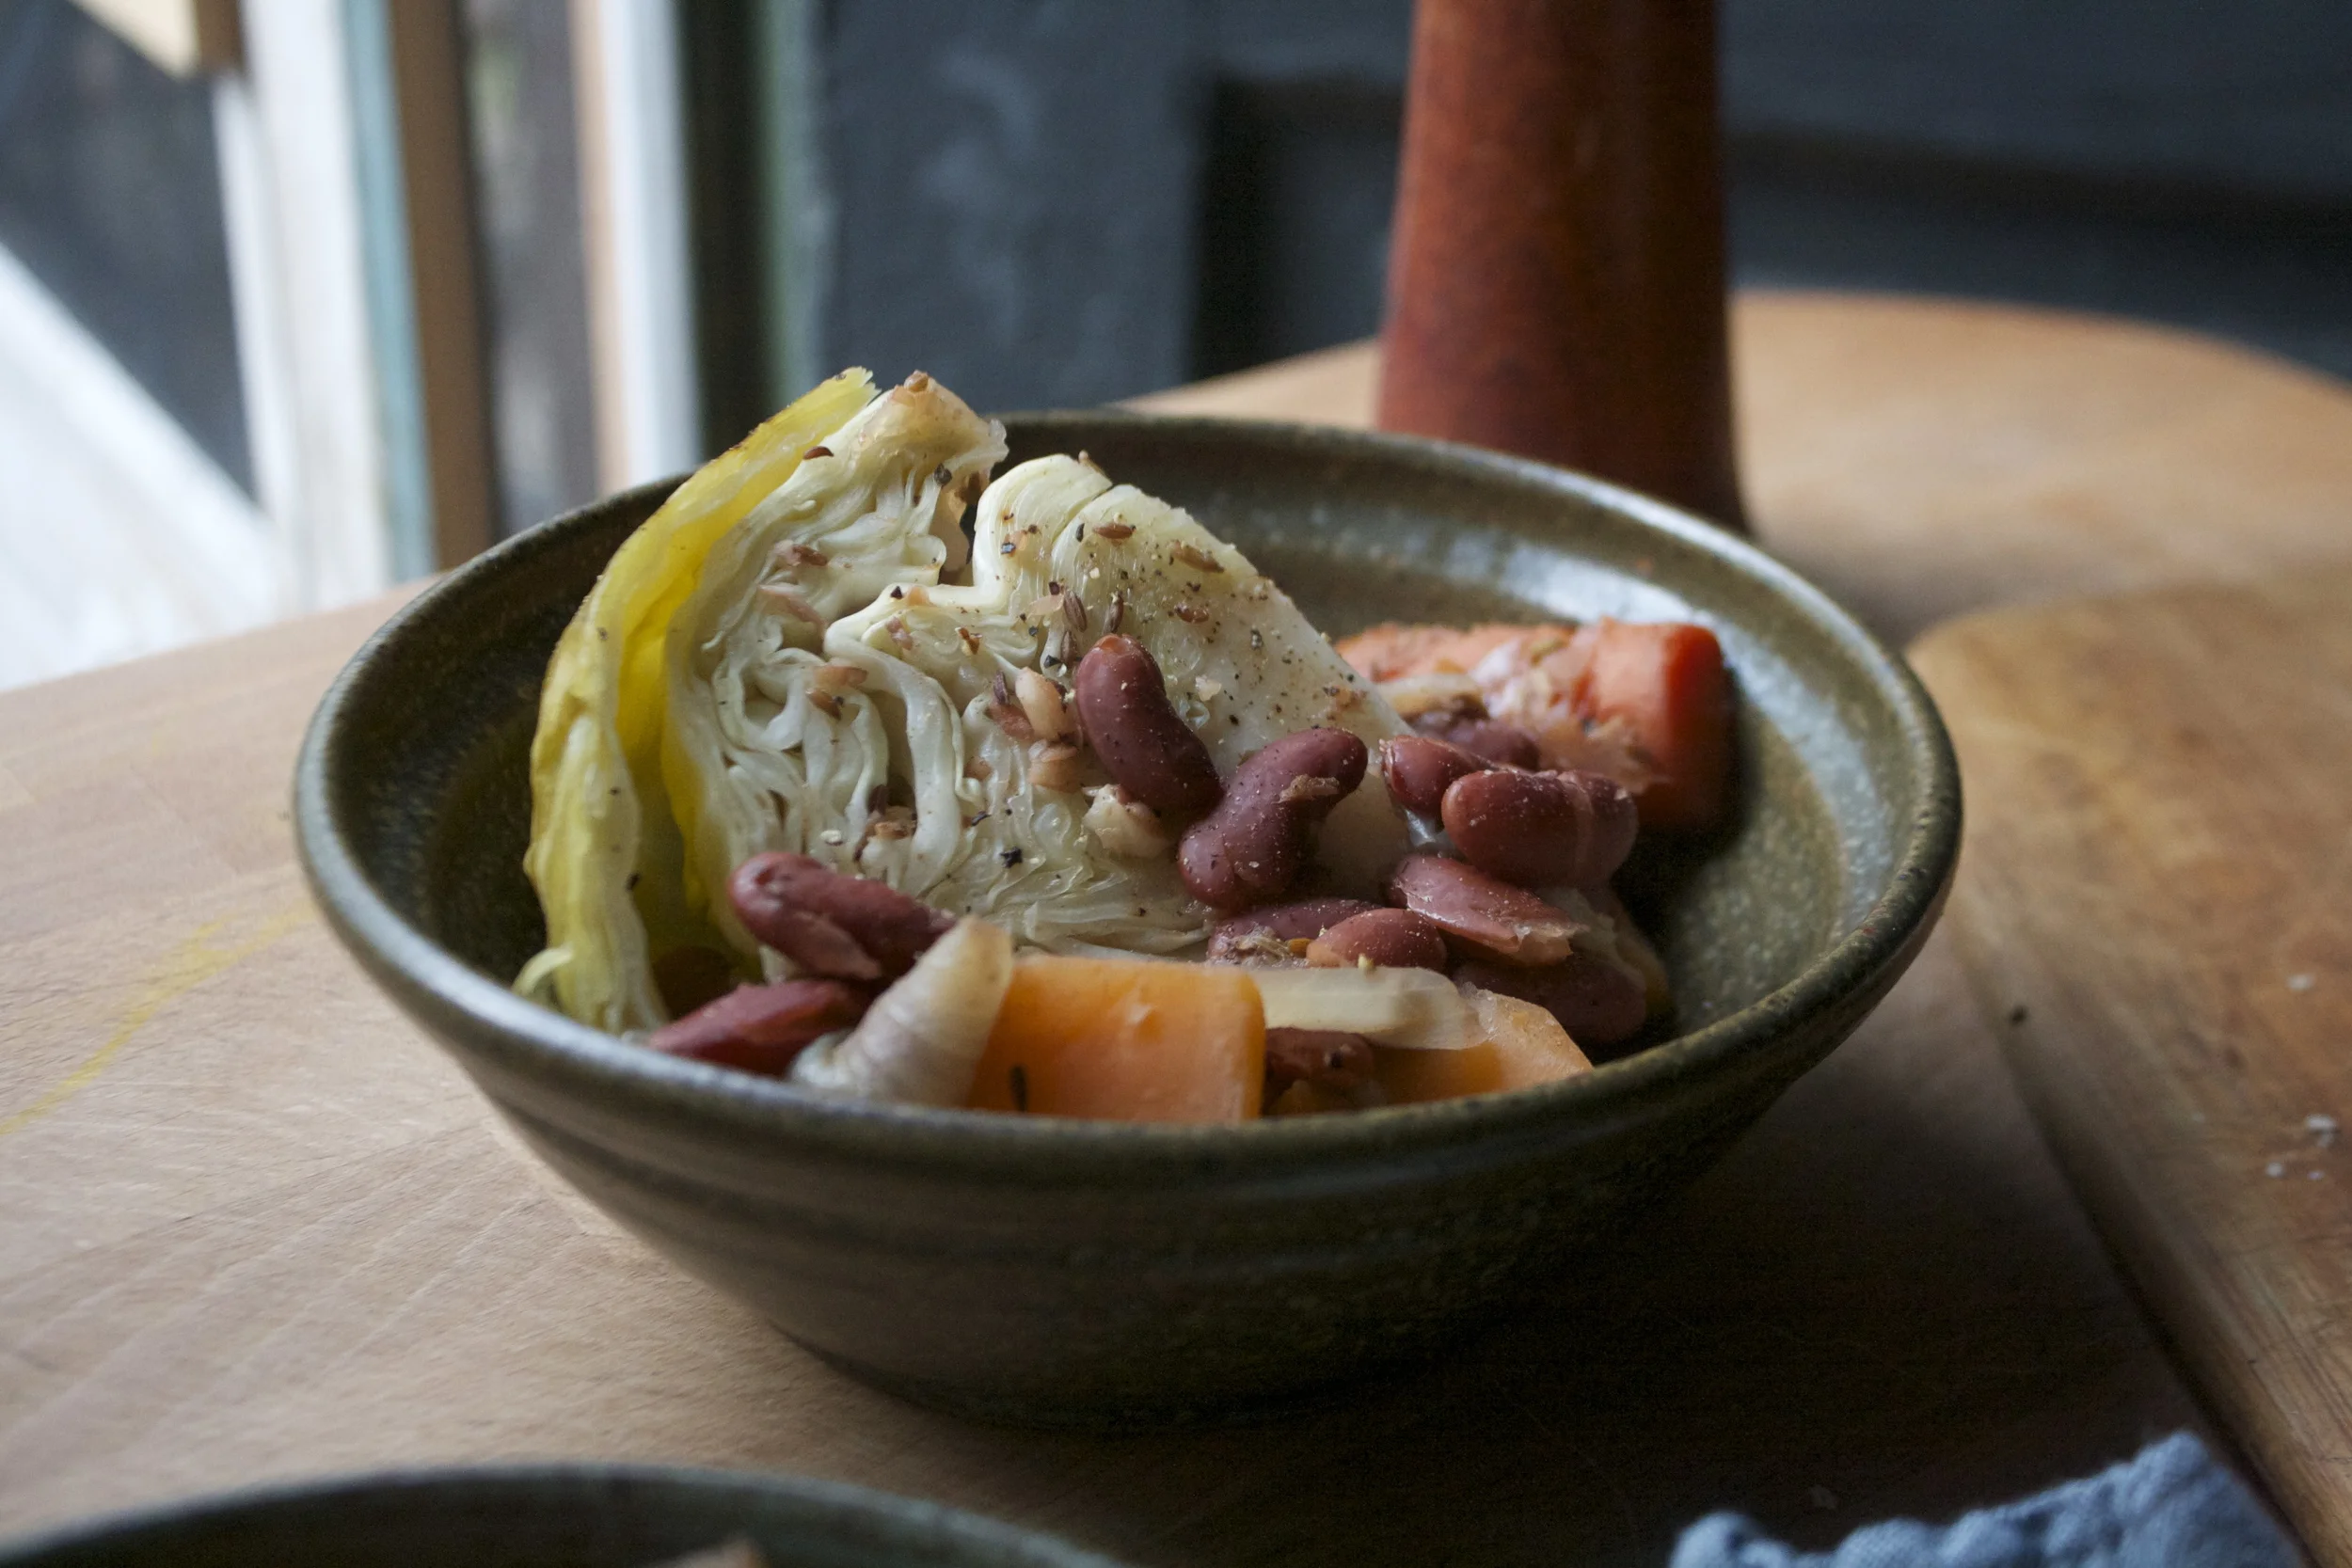
Look at that… Tender roasted veggies, plump beans. Everything about this is right.
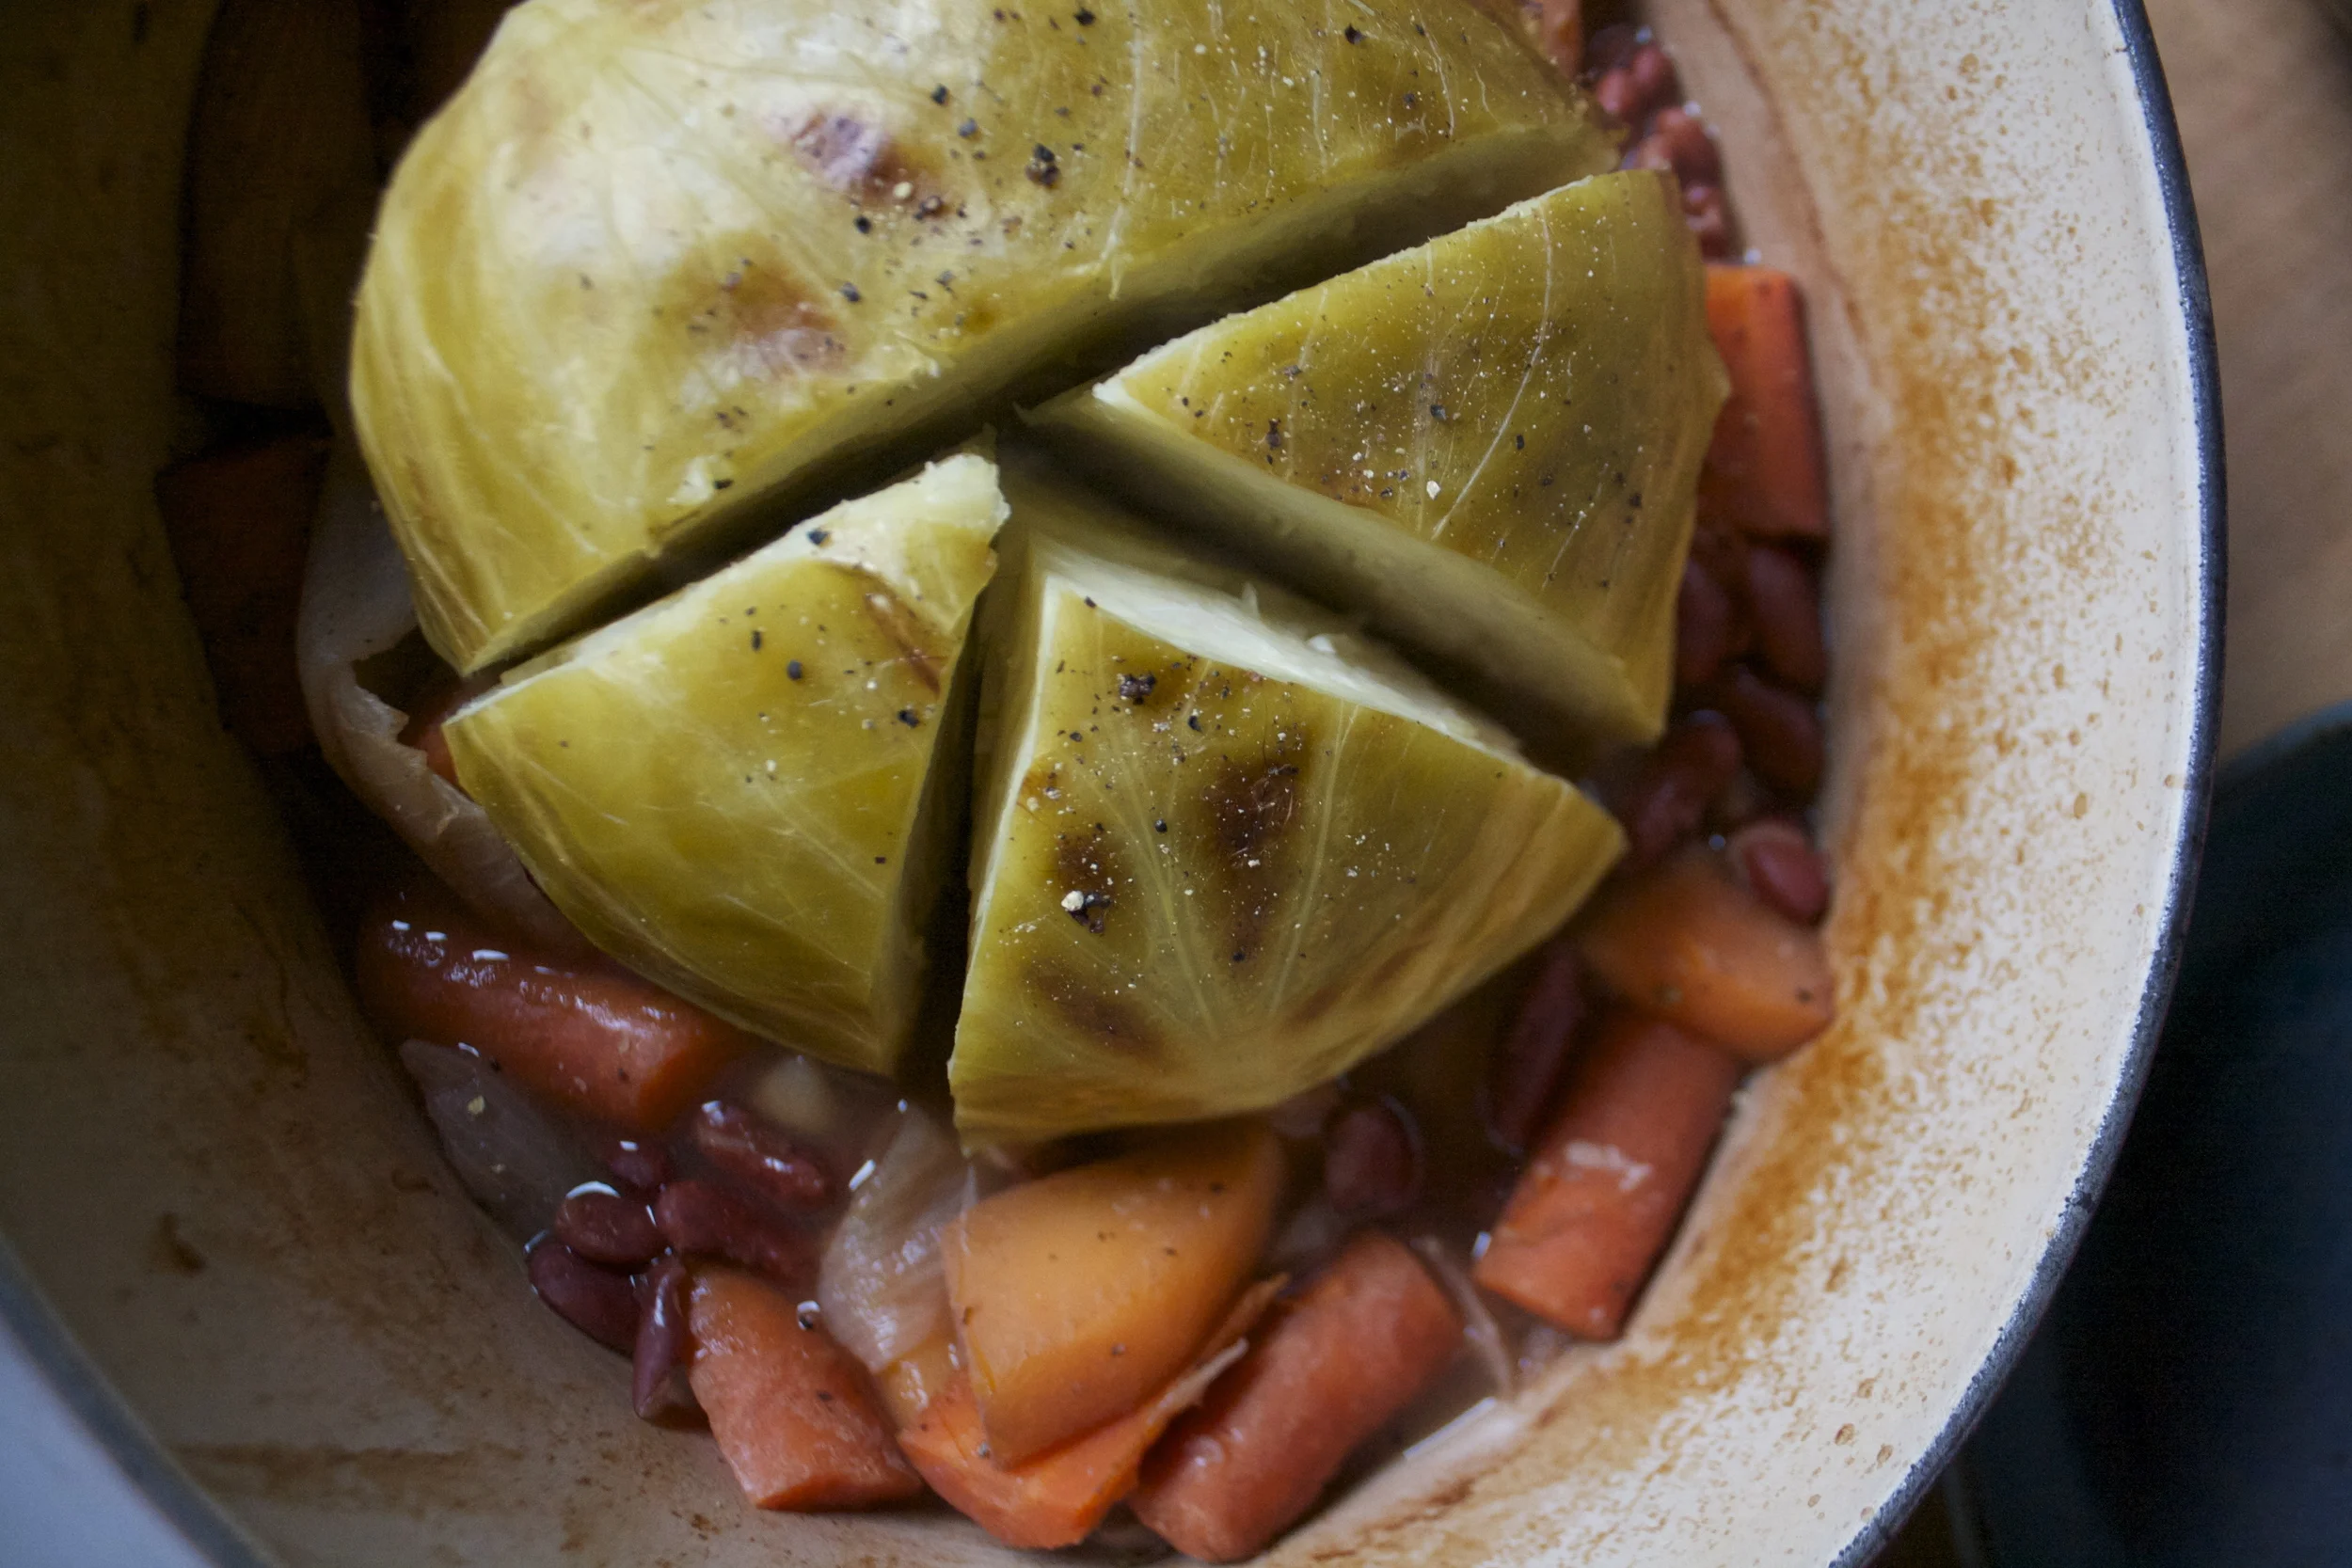
Grab a knife and cut the cabbage (its so tender) into big wedges.
A wedge into a bowl along with a big spoonful or two of the beans and veggies..
Finished with a dash of salt and pepper and (not shown here,) lots of mustard.. Oh cabbage… you are so good!
Eat away and Happy St Patrick’s Day.
-C
serves 3-4
1 cup dried kidney beans
3-4 cups water
a medium sized head of cabbage
2-3 carrots
1 large onion
%u00a0a potato or a a small rutabaga(or both)
1 heaping teaspoon caraway seeds
1 heaping teaspoon fennel seeds
1 heaping teaspoon ground mustard
a bay leaf
salt and pepper
Place the fennel, the caraway, and the bay leaf into a large dutch oven along with the dried beans and 3 cups of water. Place on the stove and being to a boil then, turn heat to low and simmer the beans for about 15 minutes.
While beans are simmering, chop up the carrot, onion and rutabaga into big chunks and dice up the garlic. Take head of cabbage and slice a deep x into the core.
Preheat oven to 375
Once the beans have simmered a bit, add in the chunks of veggies, the ground mustard and salt and pepper (Don’t stir, you want to keep the bean submerged in the water). Place the head of cabbage right on top of the veggies and sprinkle with salt and pepper.
Place a lid on the pot and stick the whole thing into the oven. After about 45 minutes, check the roast and the beans for doneness and adding in another cup of water id needed. Back into oven with the lid for another 15-20 minutes or until the beans are tender Onnce they are, remove the lid form the pot and crank the oven up to 425. Cook for another 15 minutes or so until the cabbage turns a nice golden brown.
Remove from oven, let cool for a few minutes, cut the cabbage head into wedges and serve it up with big spoonfuls of beans and veggies.
My brain is buzzing with all sorts of happy fall feelings. Warm, fuzzy feelings %u00a0about sweaters, socks, and the smell of decomposing leaves. I think that we are %u00a0pretty much entering the fall season around here and I couldn’t be happier. (about the weather)
Fall means soup. Soup all the time. And yeah, I am a soup person all year round, but soup in the fall just so right and almost taste better because: one, you are not sweating profusely while making and eating it, Two, there is so much fantastic stuff coming from the farm and garden that the ingredients are just aces. And three,%u00a0pretty leaves and cozy cuddles on the couch make soup a magic treat.
Doesn’t that sound about right?
And this soup is one of my go to favorites. Especially this time of year when I have tomatoes coming out of my ears and peppers stuck into every available crevice in the fridge. (Oh what farm people problems I have) I take all of my tomatoes, pick out the best looking ones, stick those back on the tables, and use the leftover ones, the ones that are starting to maybe go a little or are not as pretty as the others. Then I do the same with the peppers, whichever ones are starting to go or looking a little sad, I grab those and use those as well. That’s another thing about soup, you can use the veggies that might not be up to snuff for other dishes. Soup is a good way to cut back on any food waste! Soup. Tastes so good and is combating food waste with ever bowl! But yes, you can use the prettiest of your produce too cause if you don’t use the pretty up, it will eventually turn into the not so pretty and mold stuff. Anyways..
Roasted red peppers and roasted tomatoes= (in a Mavin Gay voice) %u00a0Oh yeah!
Now lets just crank on the oven and make the soup!
The stuff. Tomatoes, peppers, onion, garlic, a lemon, salt pepper and olive oil. %u00a0
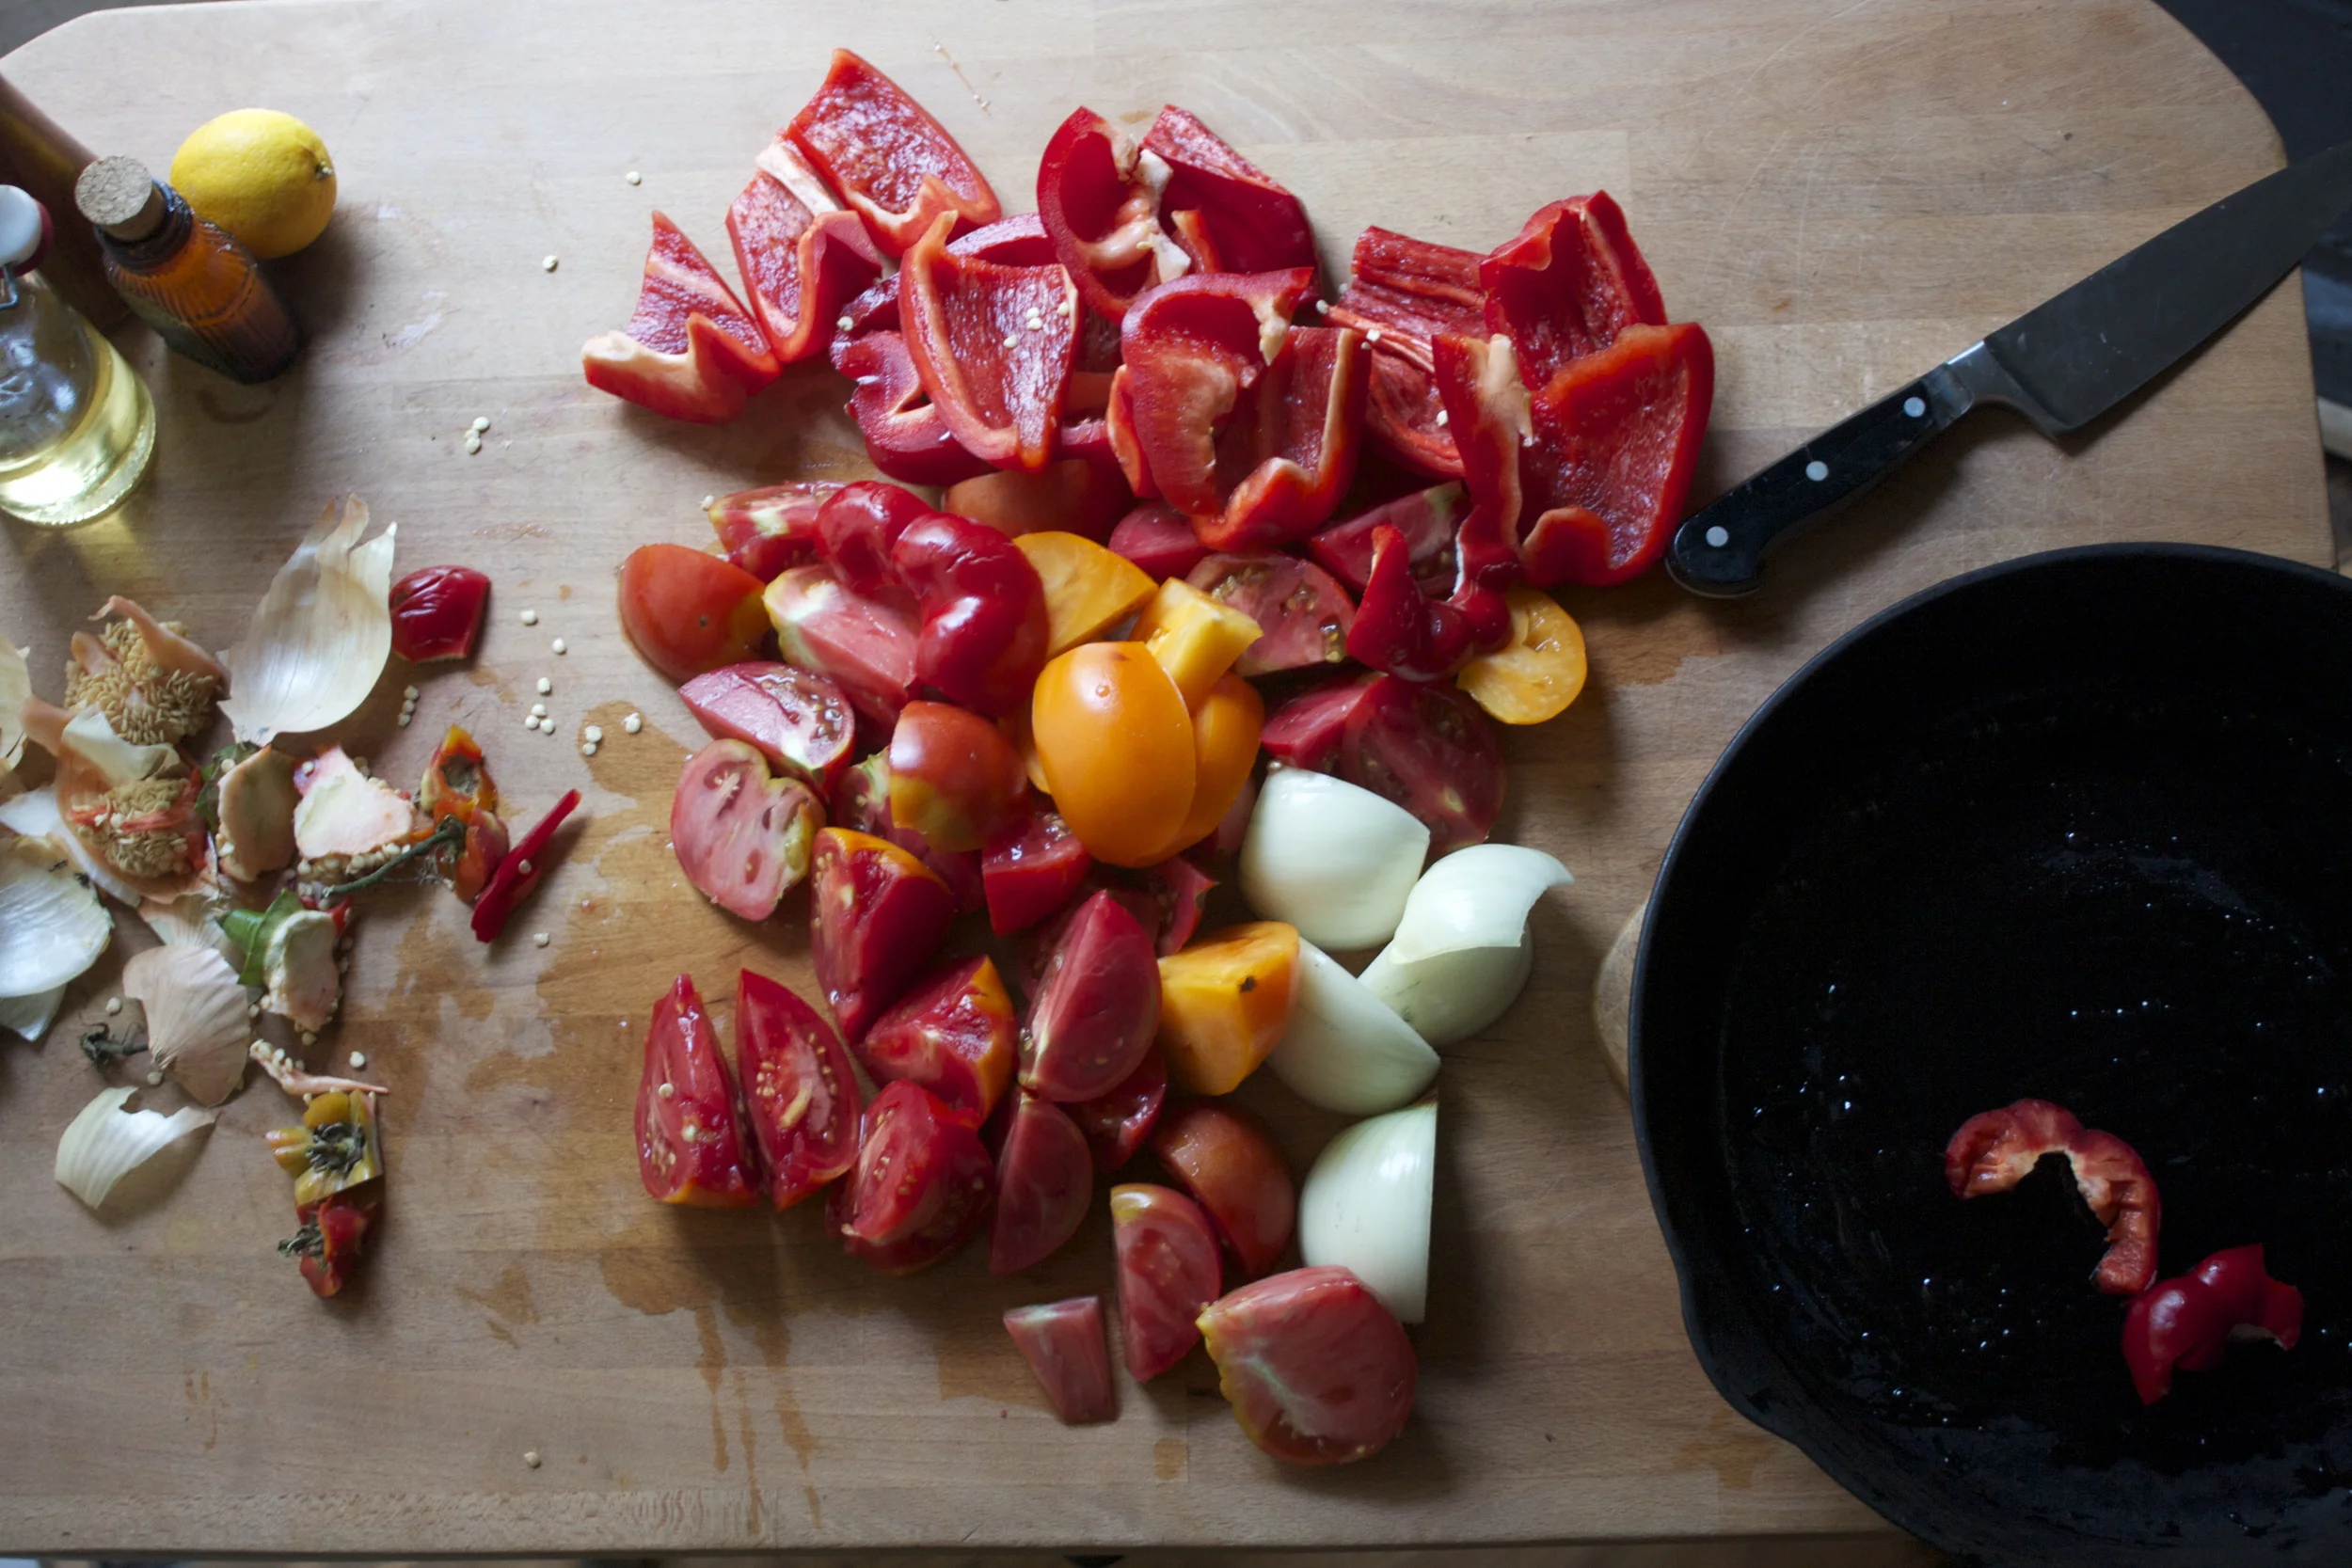
Take tomatoes, remove cores and chop into chunks. Remove stem and seeds from peppers and chop into a few chunks as well. Grab the onion and chop that up too.The garlic can go in as whole cloves.. no need for chunks.
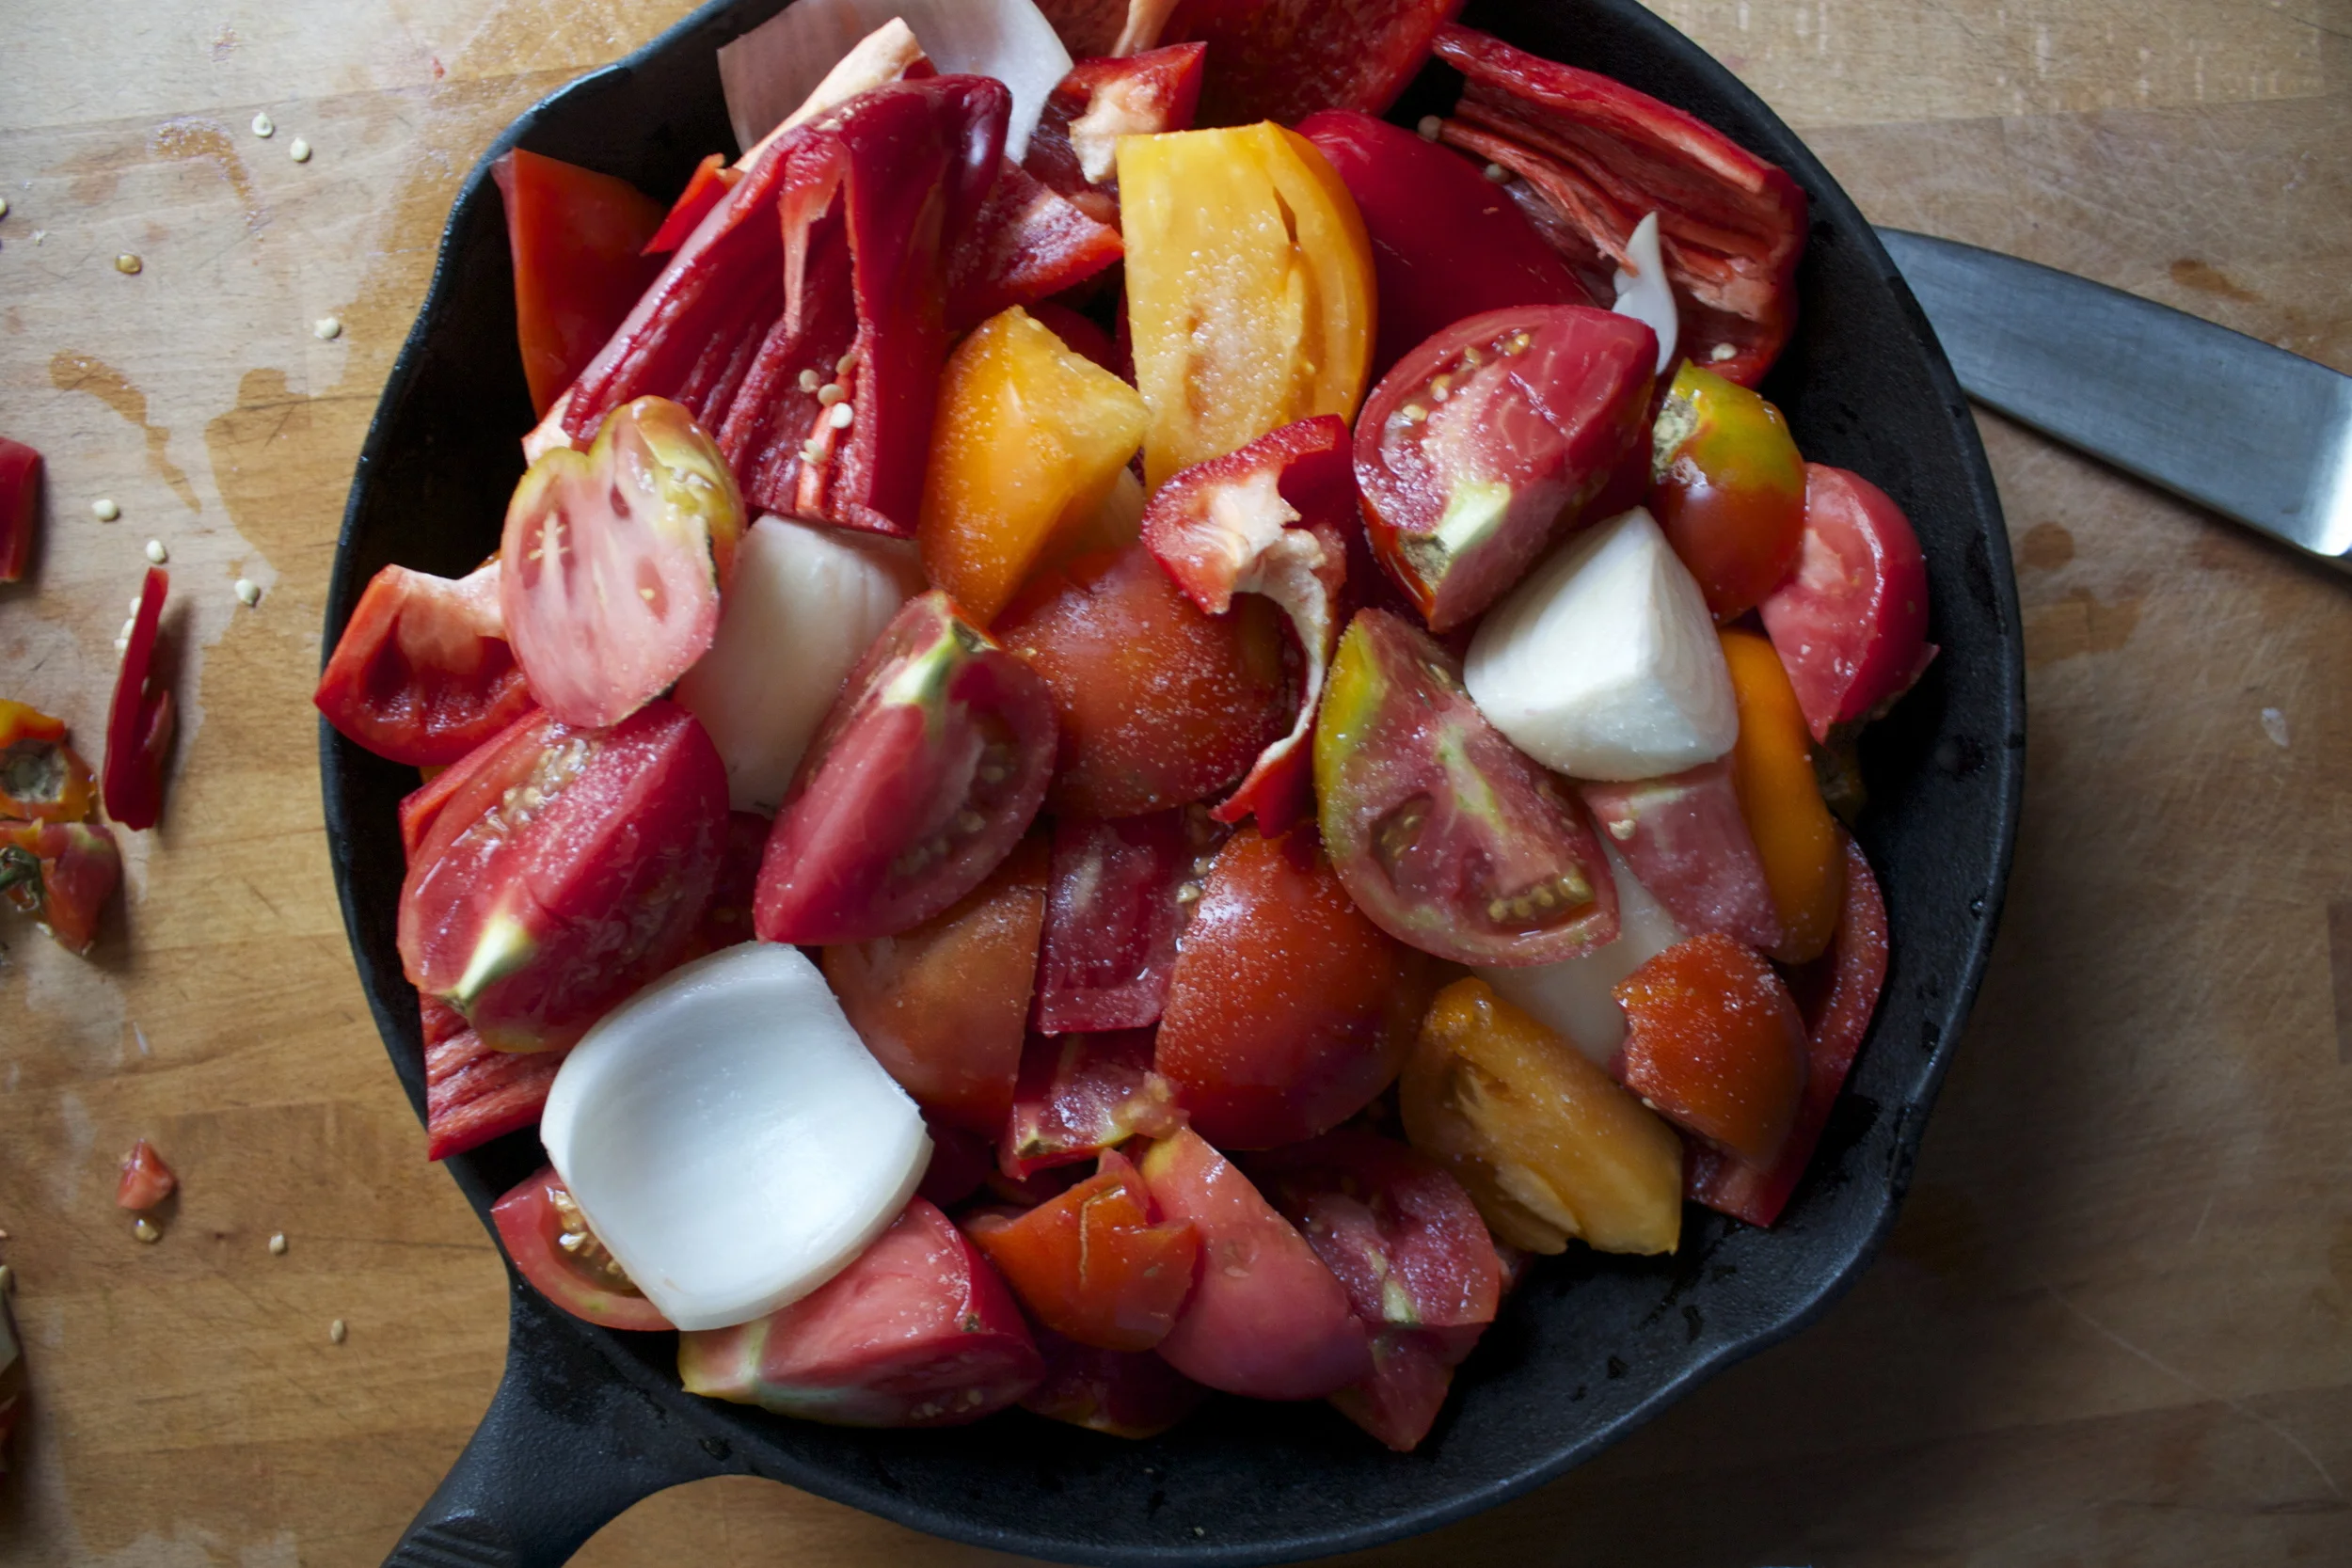
Dump it all into a well oiled skilled or dutch oven and sprinkle well with salt and pepper. Place into oven to roast away.
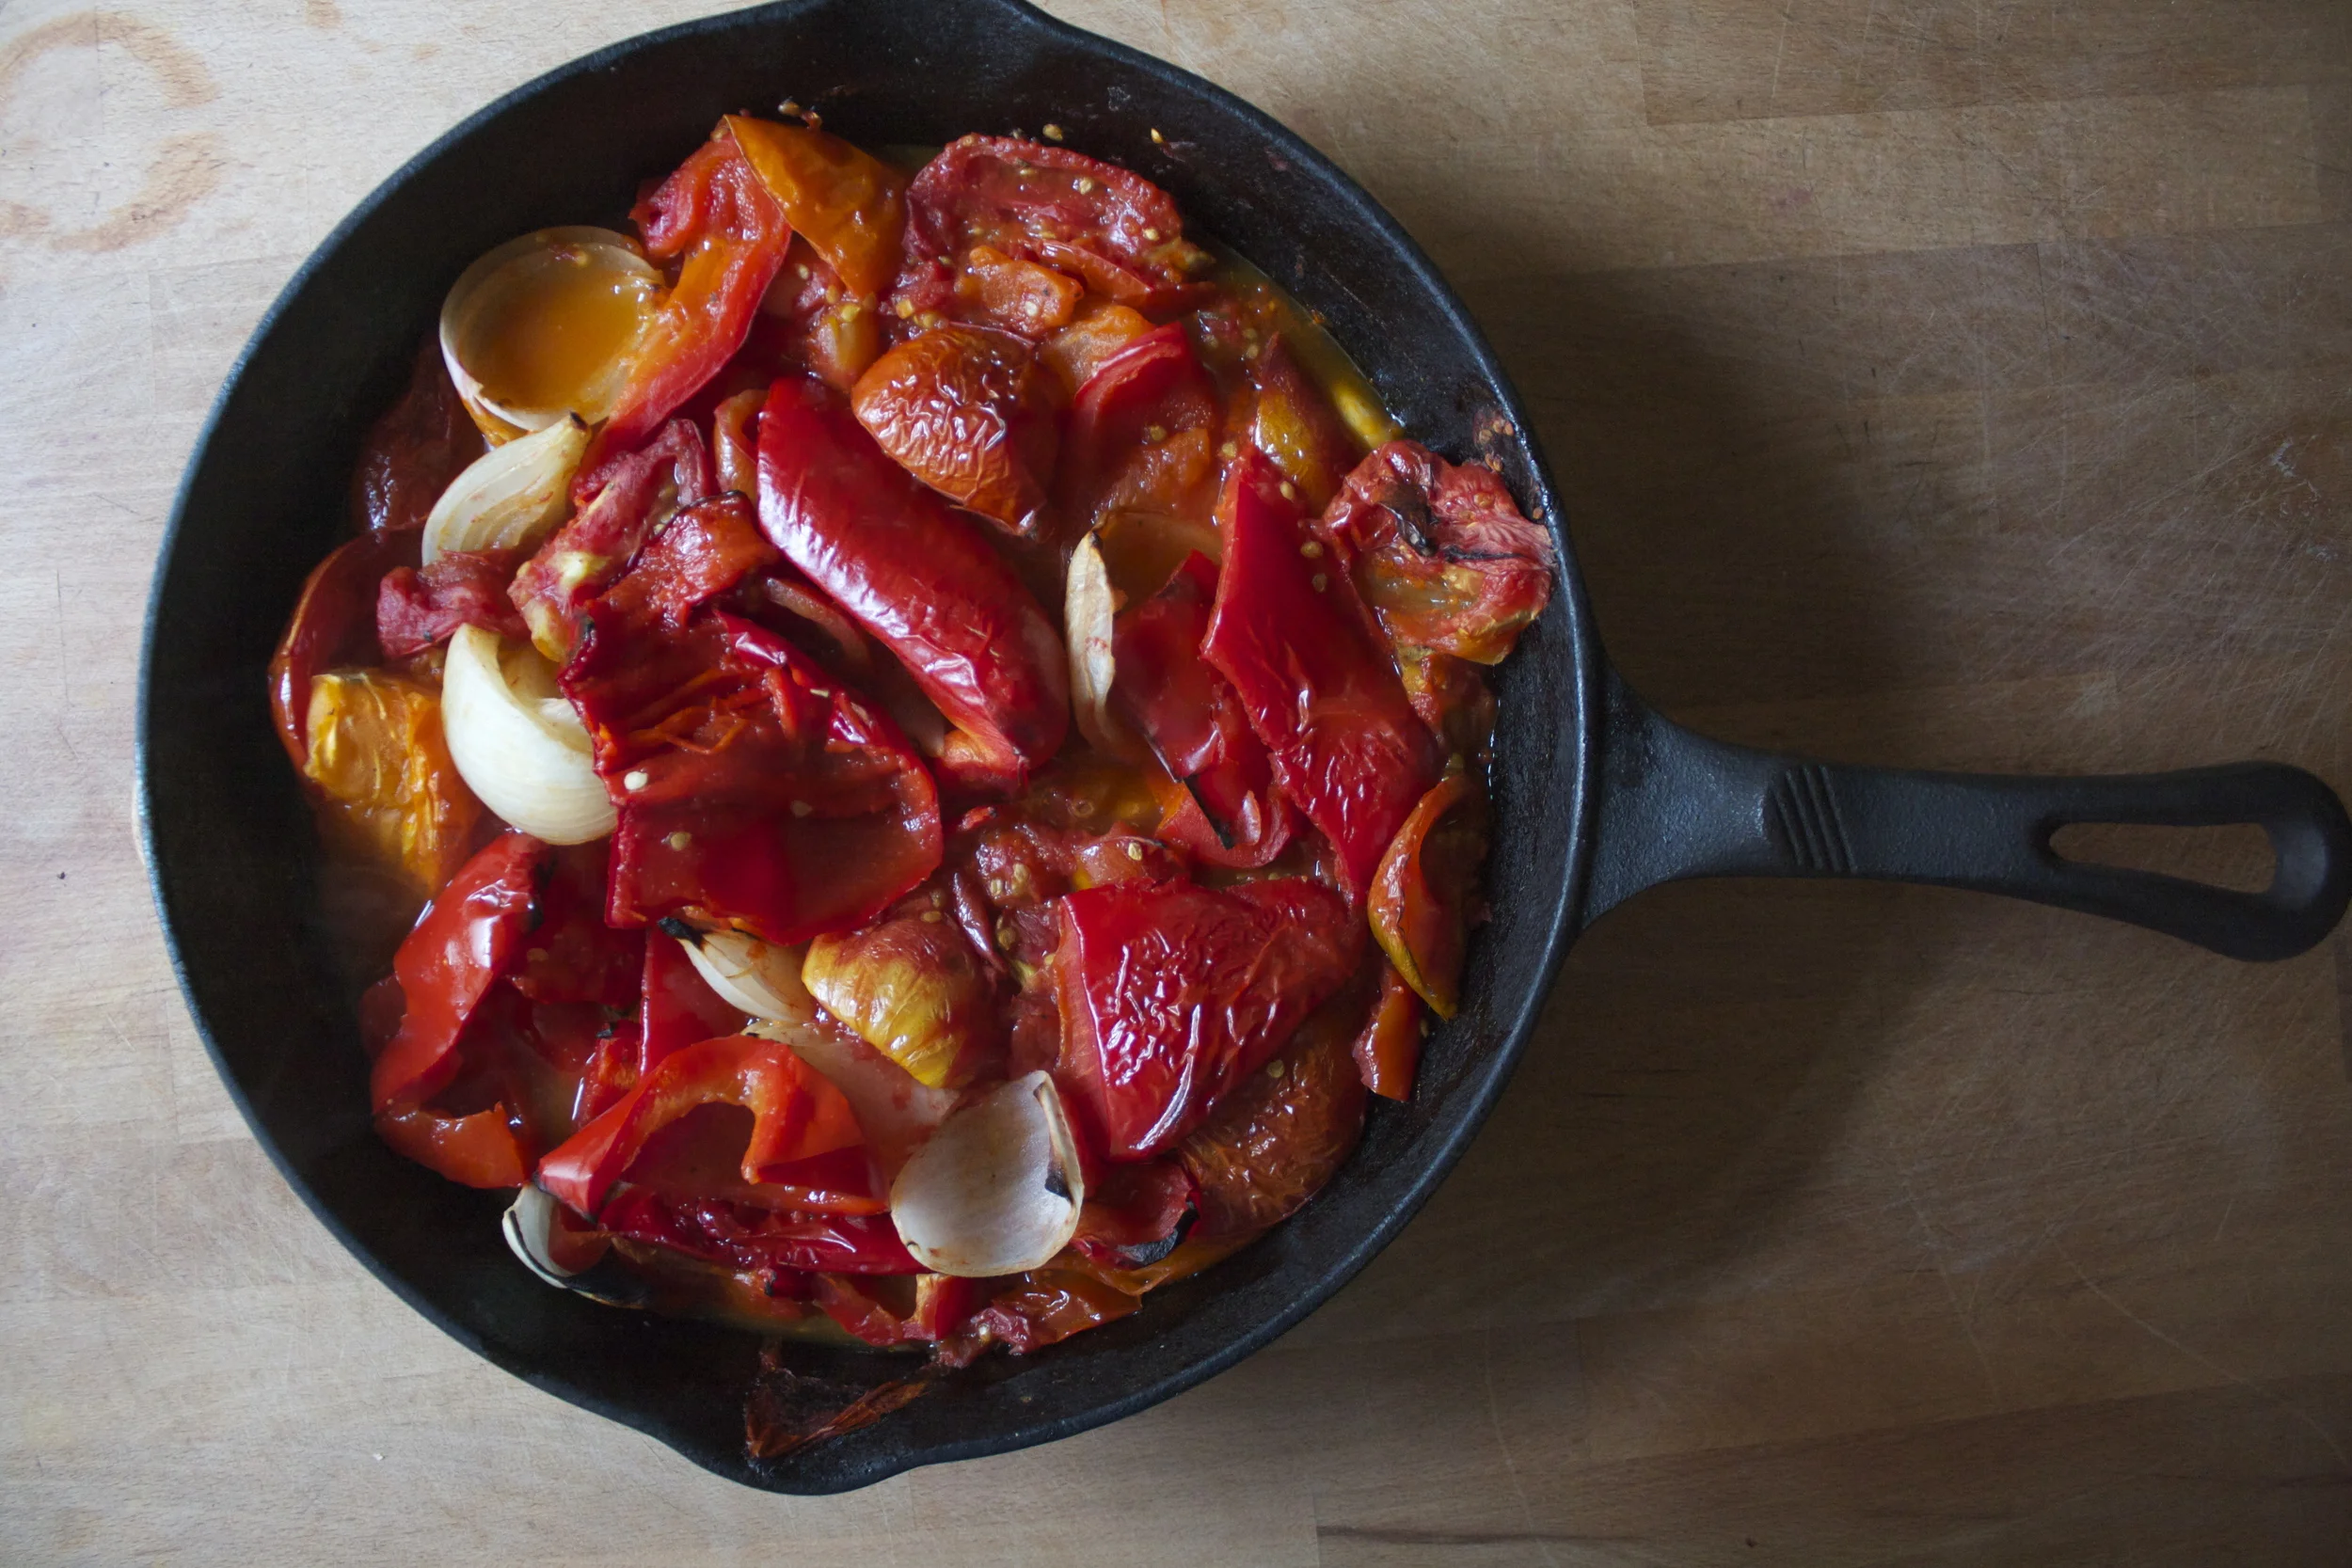
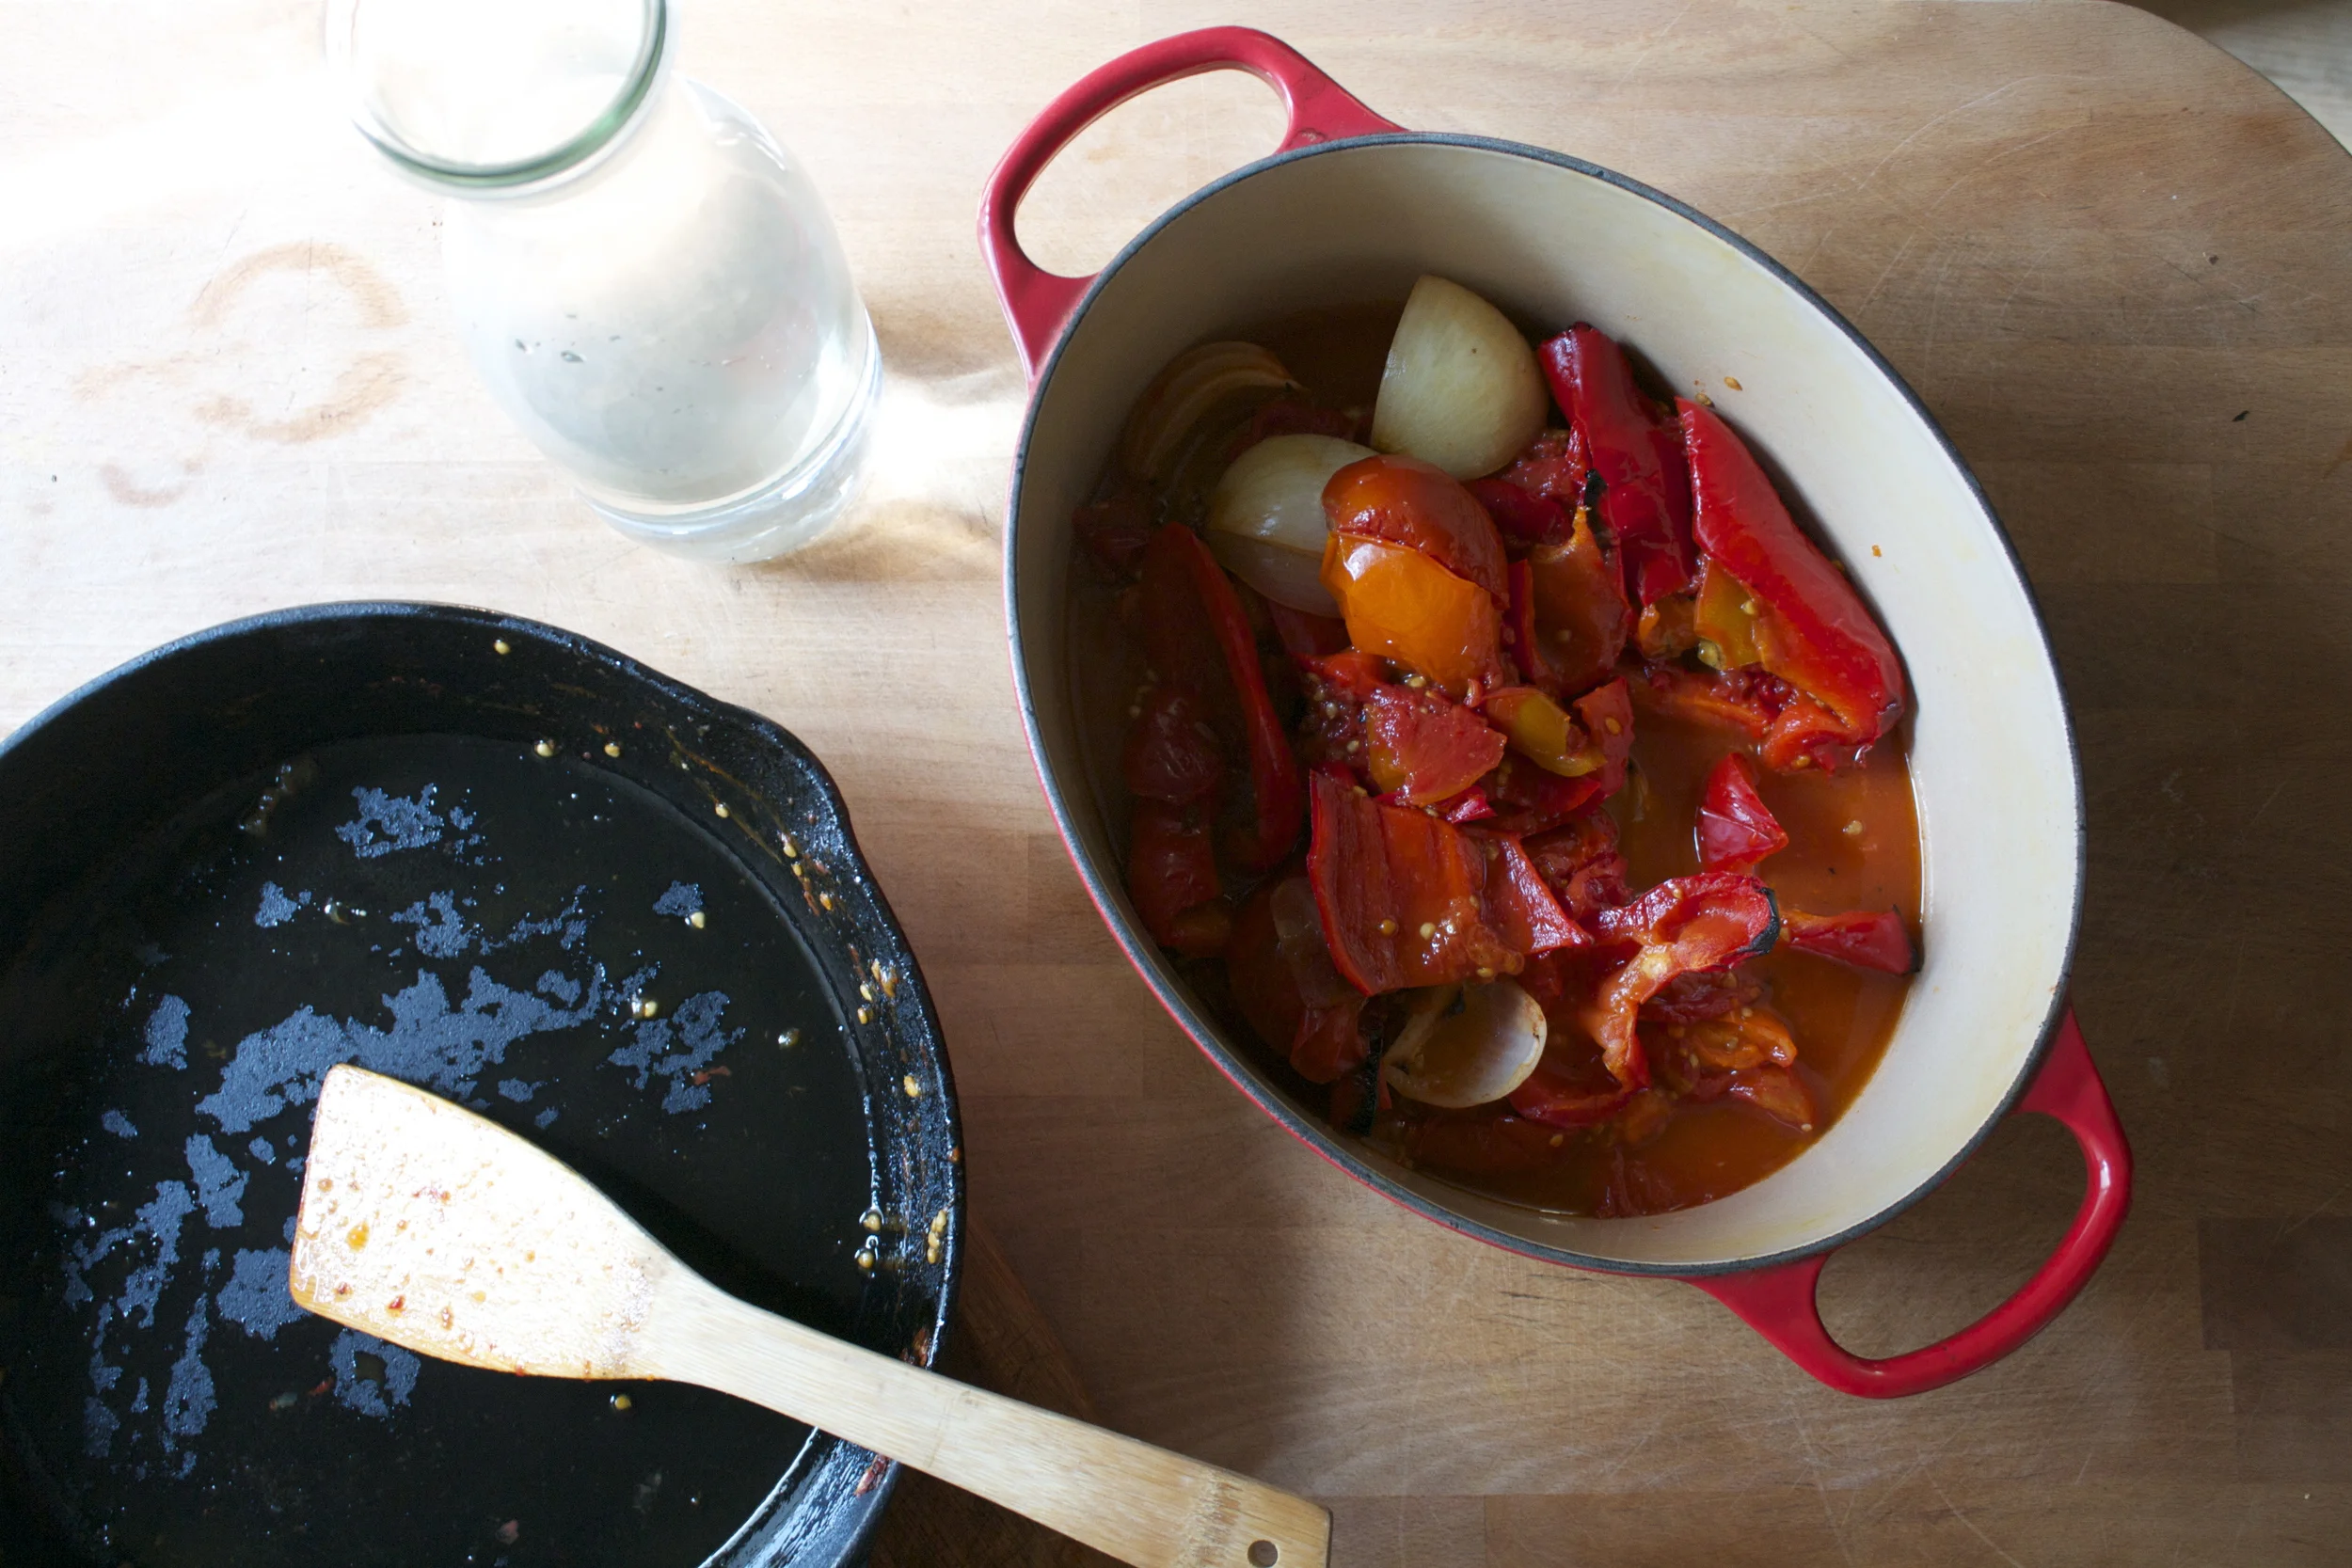
And when everything in the skillet is all roasted soft and falling apart, remove from oven.
And dump the roasted stuff into a pot and add in a few cups of water.
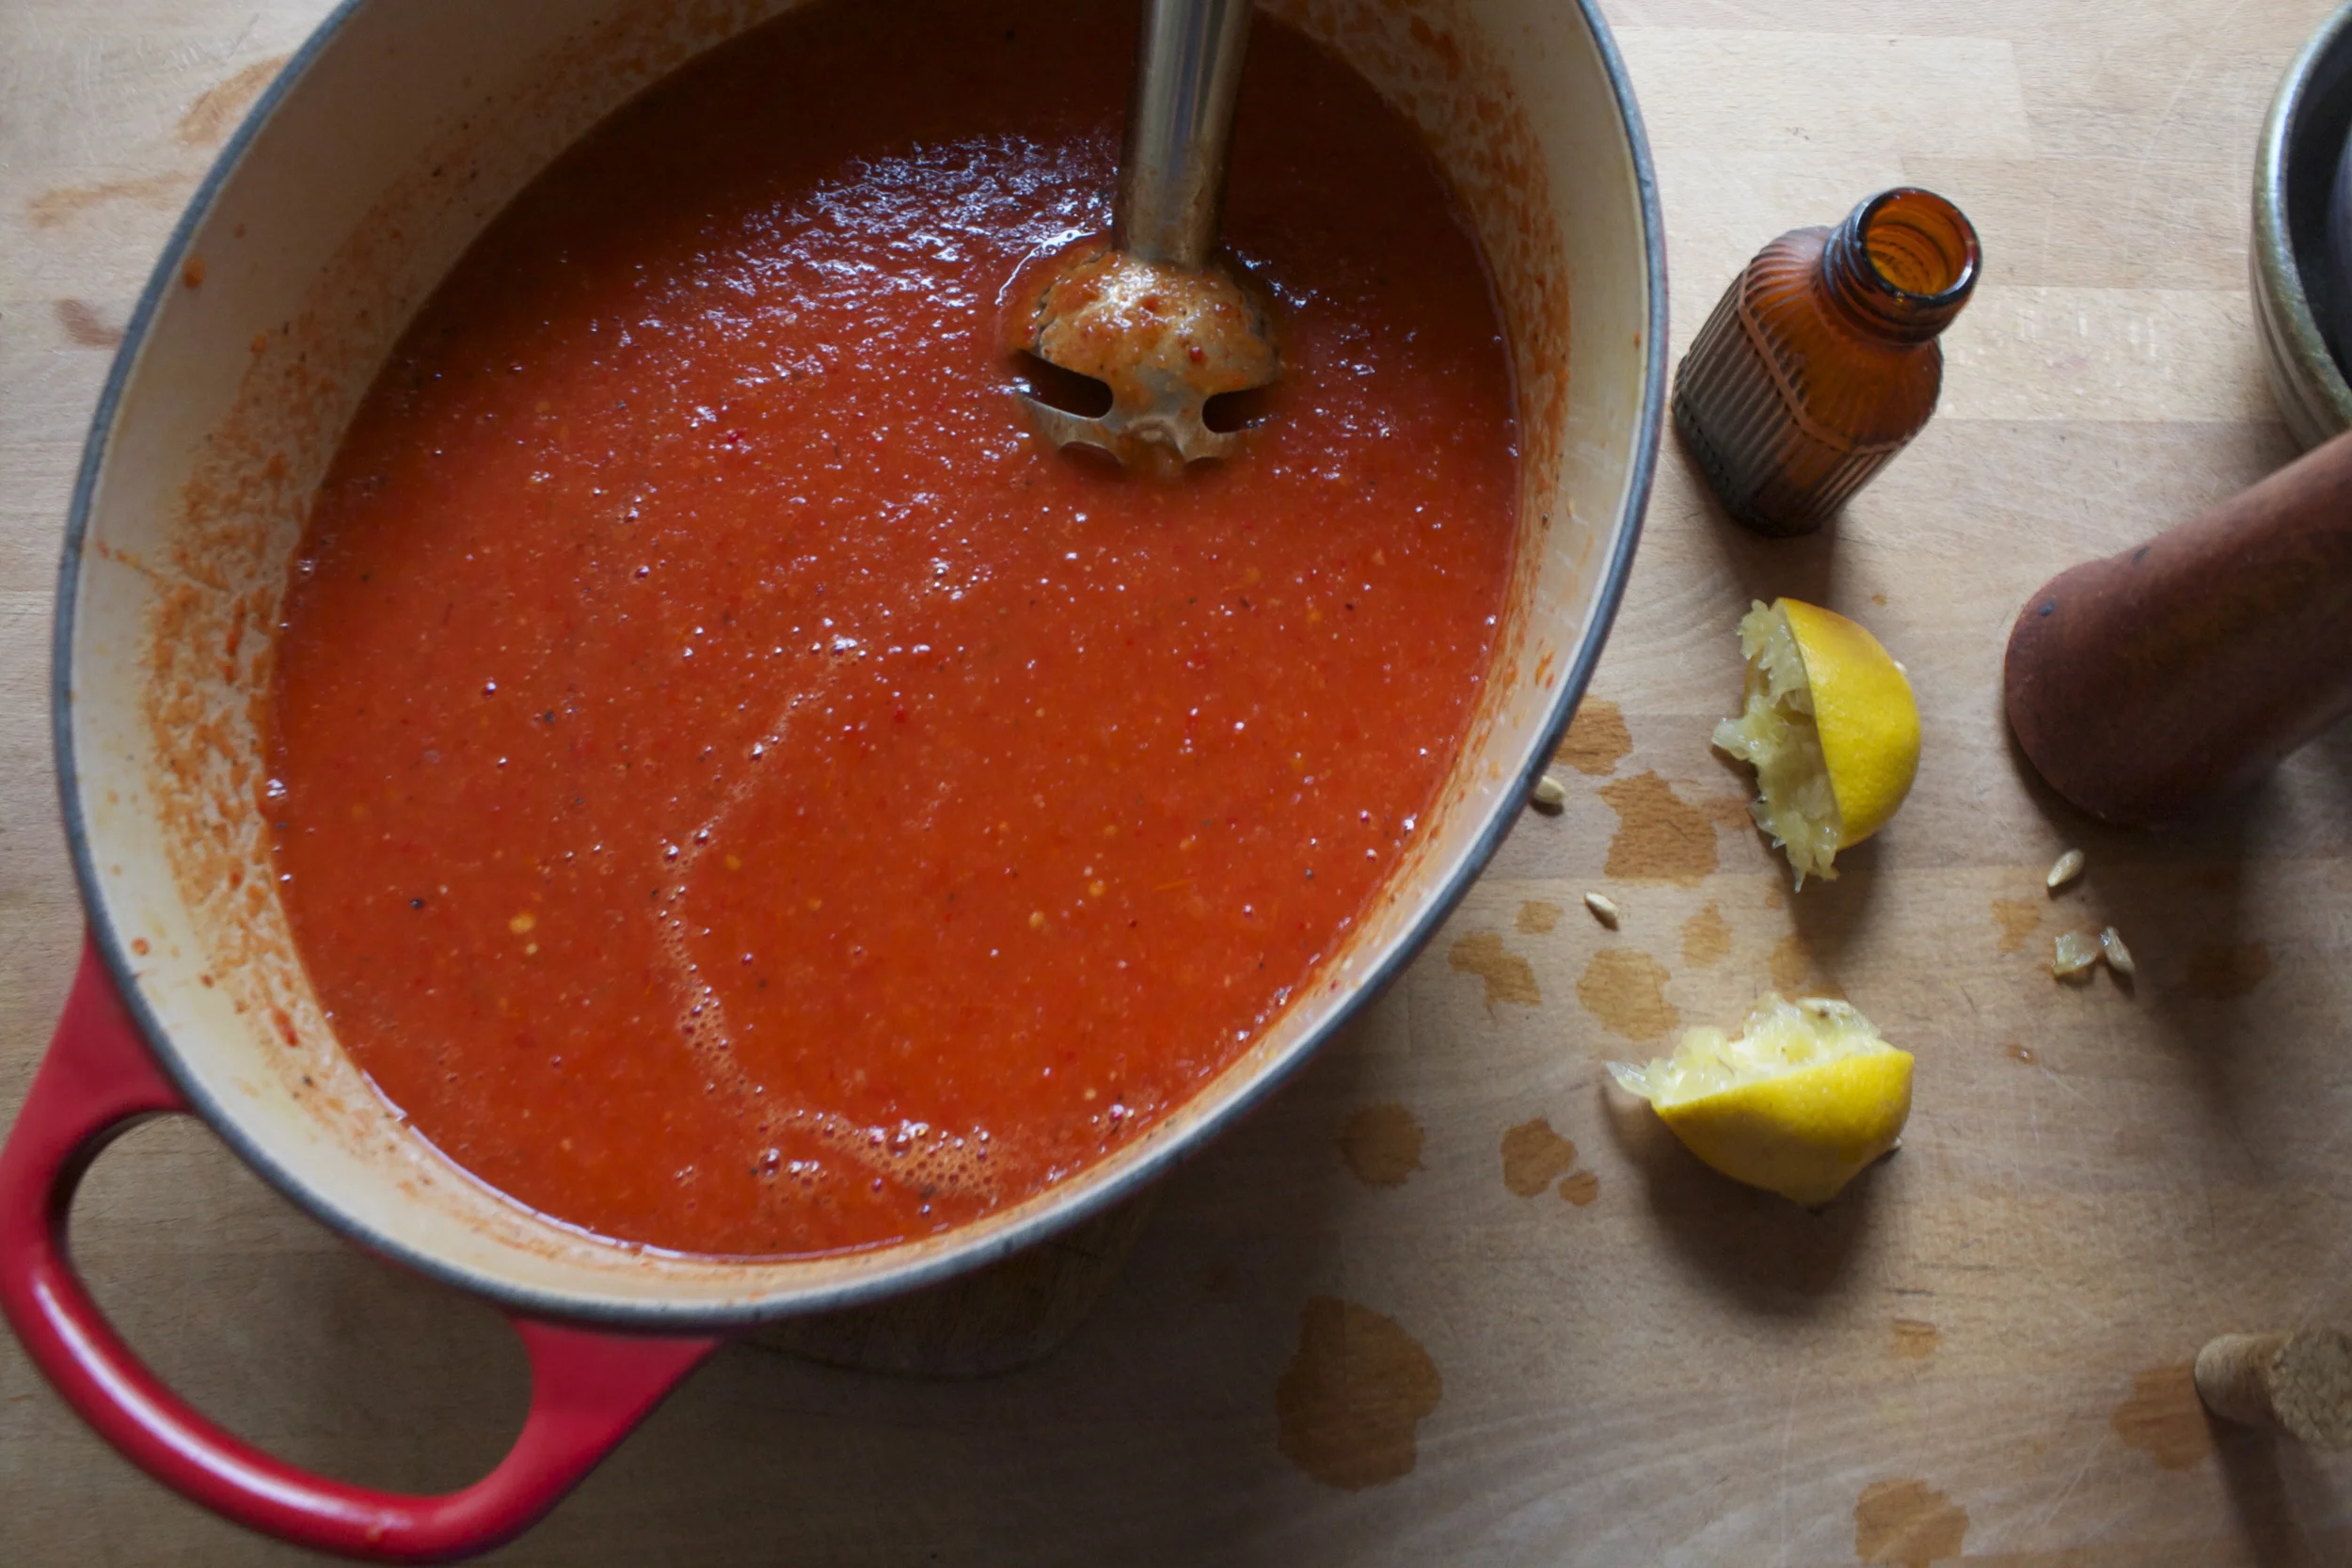
Squeeze in the juice of the lemon and using a hand blender, go to town. Belnd unit la nice creamy smooth. Now I let my soup simmer on the stover for a little longer, like 10-15 minutes, just for it to meld a little more, but really you could go for it right away, or even let it simmer for longer.
When you are ready, ladle into bowl, grab a spoon, maybe a book (soup and a book is my happy place) and eat you until your belly is happy.
Have a super awesome friday!!
-C
6-8 medium tomatoes
3-4 big red (yellow or orange work too) peppers
1 large onioon
1 head of garlic
1 lemon
salt
pepper
olive oil.
2-3 cups water
Tunn oven on to 450
Core tomatoes and core and remove seeds from peppers. Cut into big chunks along with the onion and toss into a large well oiled oven safe skillet or dutch oven. Add in the cloves of garlic and season with salt and pepper. Stick into oven to roast %u00a0for about 45 minutes or until everything is all soft and bubbly and good.
Once everything is roasted all the way, remove from oven and transfer the veggies to a pot (unless already in a pot). Add in the juice of the lemon, about 2 cups of water (more if you want it a bit thinner) %u00a0and using a hand blender, blend until smooth and creamy. If you don’t have a hand blender, use a regular one.
Place soup in pot on medium low heat and simmer for 1at least 10 minutes (if you can wait, 1/2 is good)%u00a0or until ready to eat.
Serve with lots of %u00a0cracked pepper and a spoon and maybe something crunchy.
You ever have that problem where your clothes start to smell a little on the funky side, even when you wash them, remember to swtcich to dryer right away (I forget to switch a lot, which leads to a bad smell as well), and really, fully dry them? %u00a0Maybe it’s just our washer and dryer or maybe it’s because we use the non smelly non yucky laundry soup that might actually just be made of thickened water, or maybe it’s because we are just extra dirty people. But no matter what it is, our clothes as of late have been coming out of the dryer kind of stale..
. I want my clothes to smell fresh, or else why do I bother washing them (ok, I know why, but still)
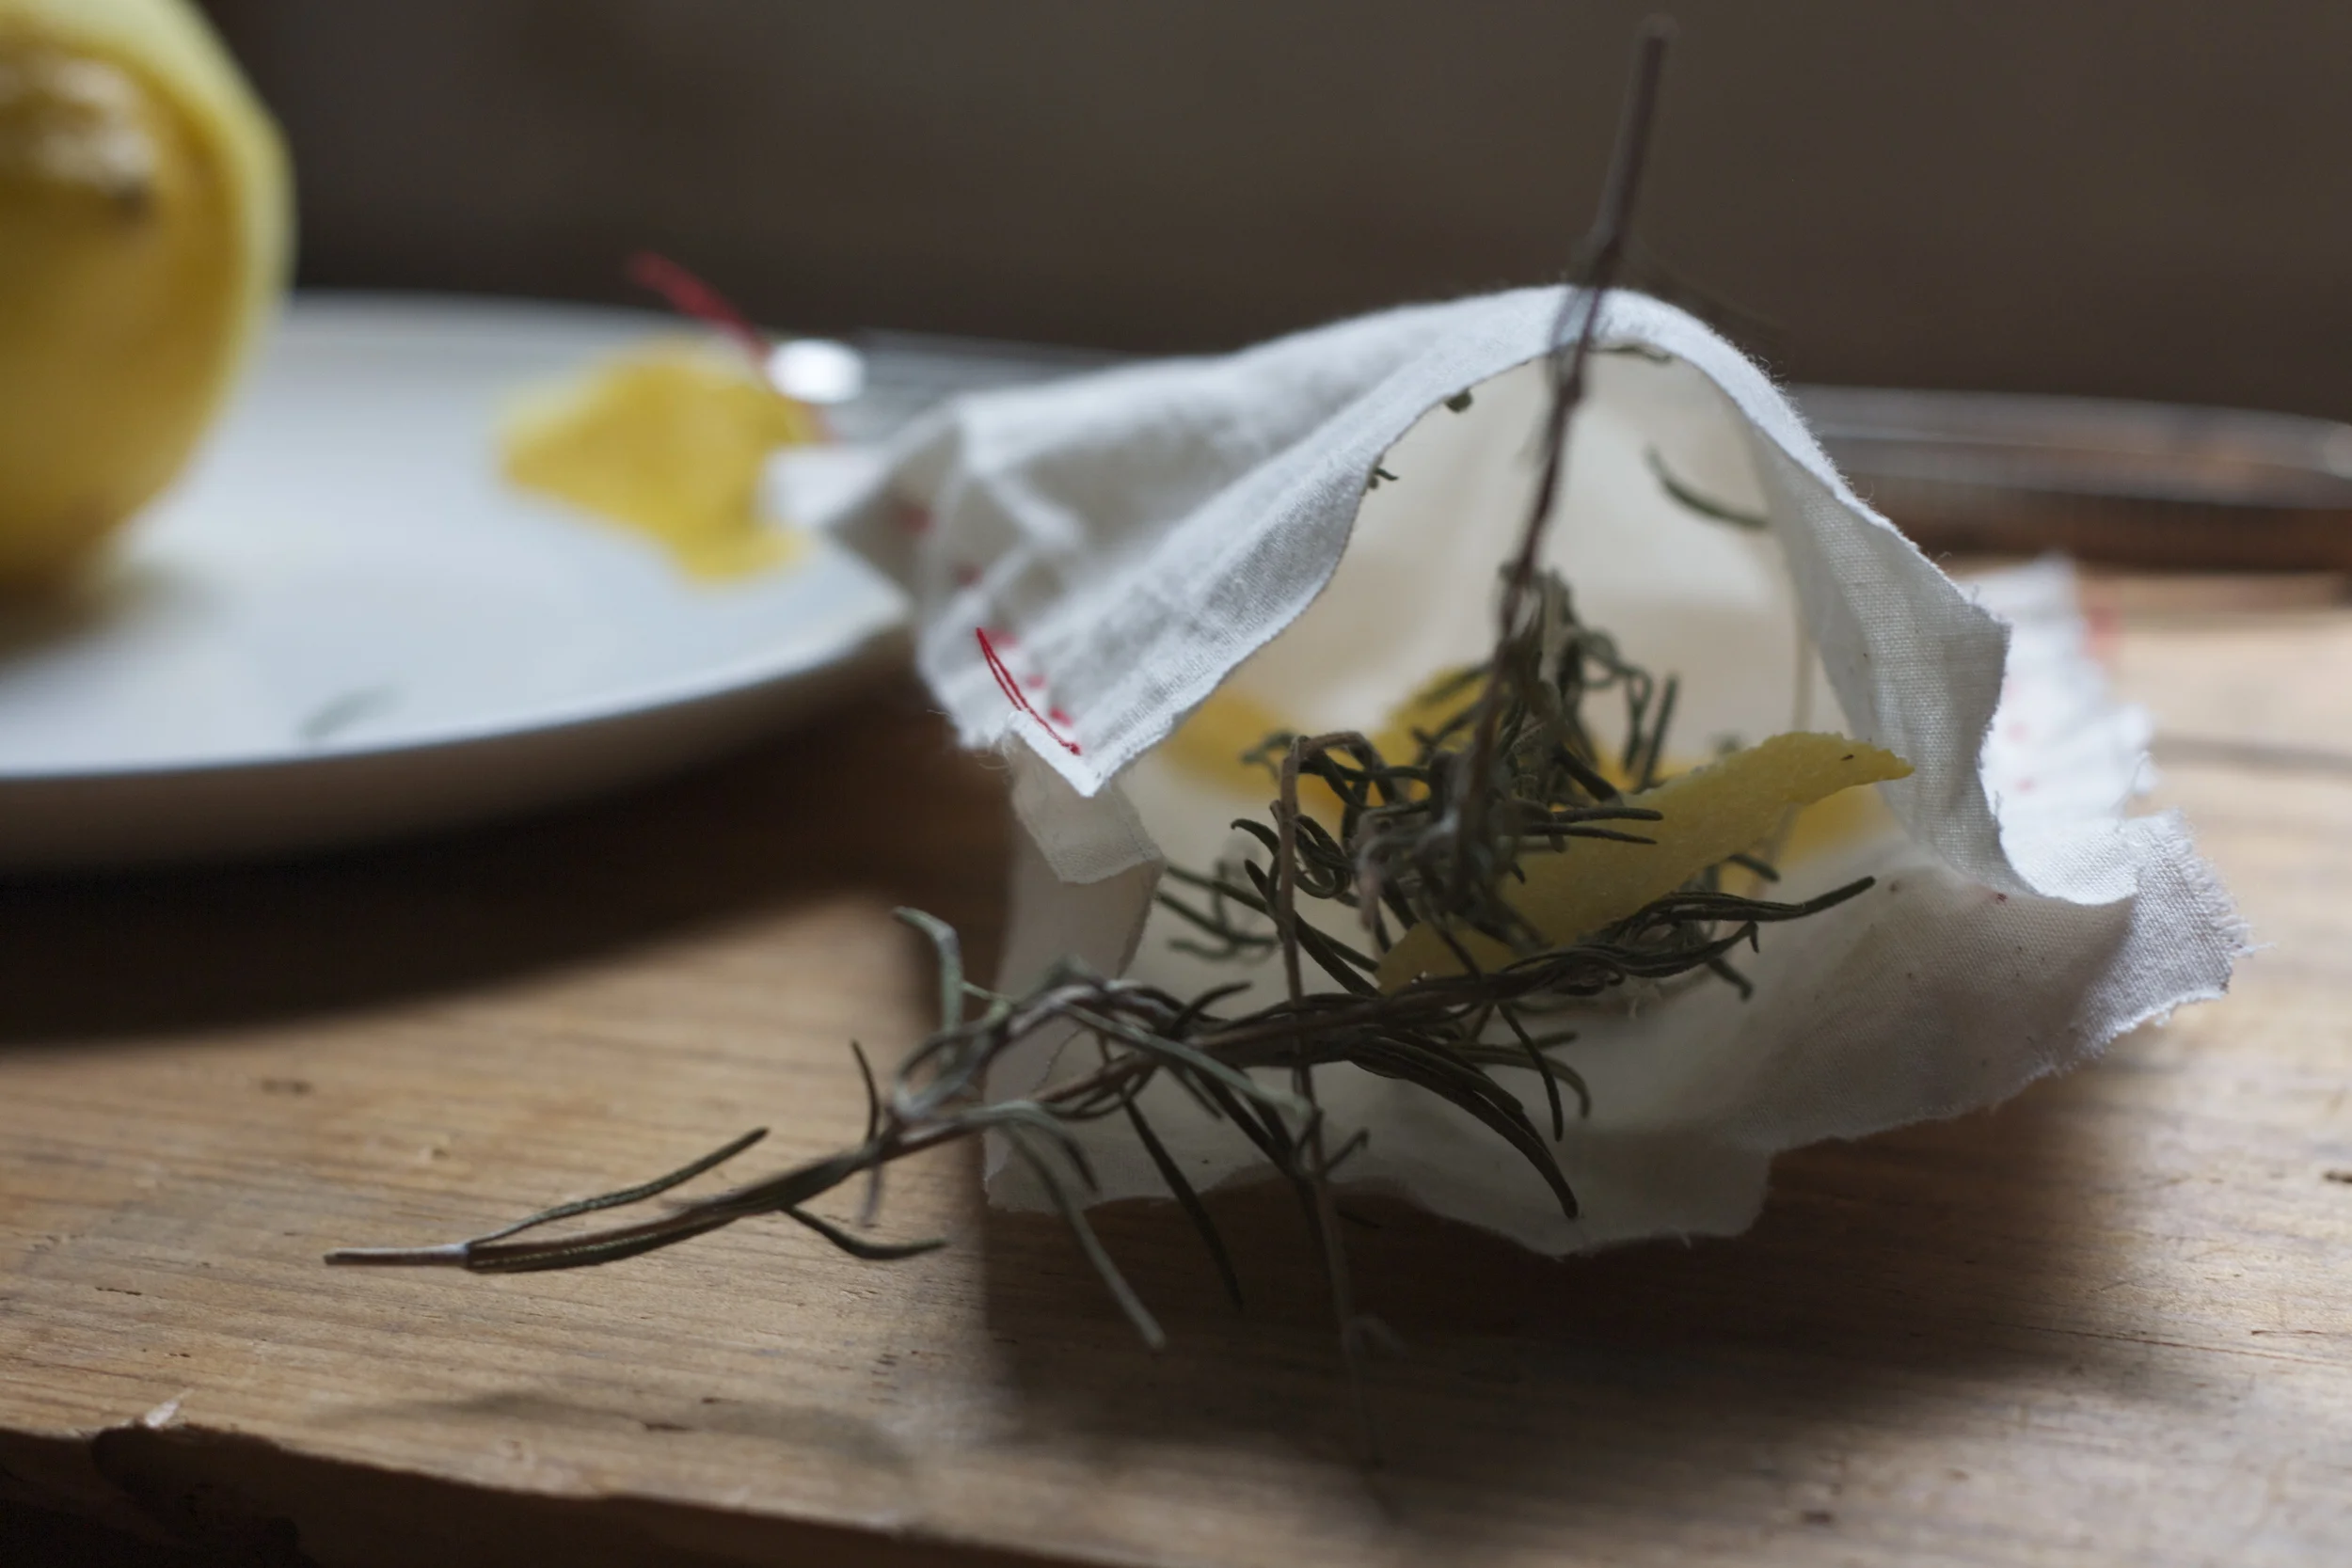
Being the %u00a0problem solver that I am, I made these little satchels of good smelling herbs.%u00a0Sure I could go and buy dryer sheets, but those just smell like chemical ass to me and I might actually prefer the smell of stale clothes. I also %u00a0have a ton of the nieces oh nice smelling rosemary growing outside my door. It just made sense. Good smelling herbs stuck into a sack and tossed %u00a0into the dryer with the clothes.
It works like a charm! Our clothes have been smelling nice and freshy fresh!%u00a0No more stale ass clothes!
Stuff you will need
A bunch of fresh or a handful of dried, good smelling herbs (rosemary, lavender, cinnamon stick. dill..whatever smells good to you)
citrus peels (totally optional)
Scrap faric
needle and thread or use your sewing machine
Directions .
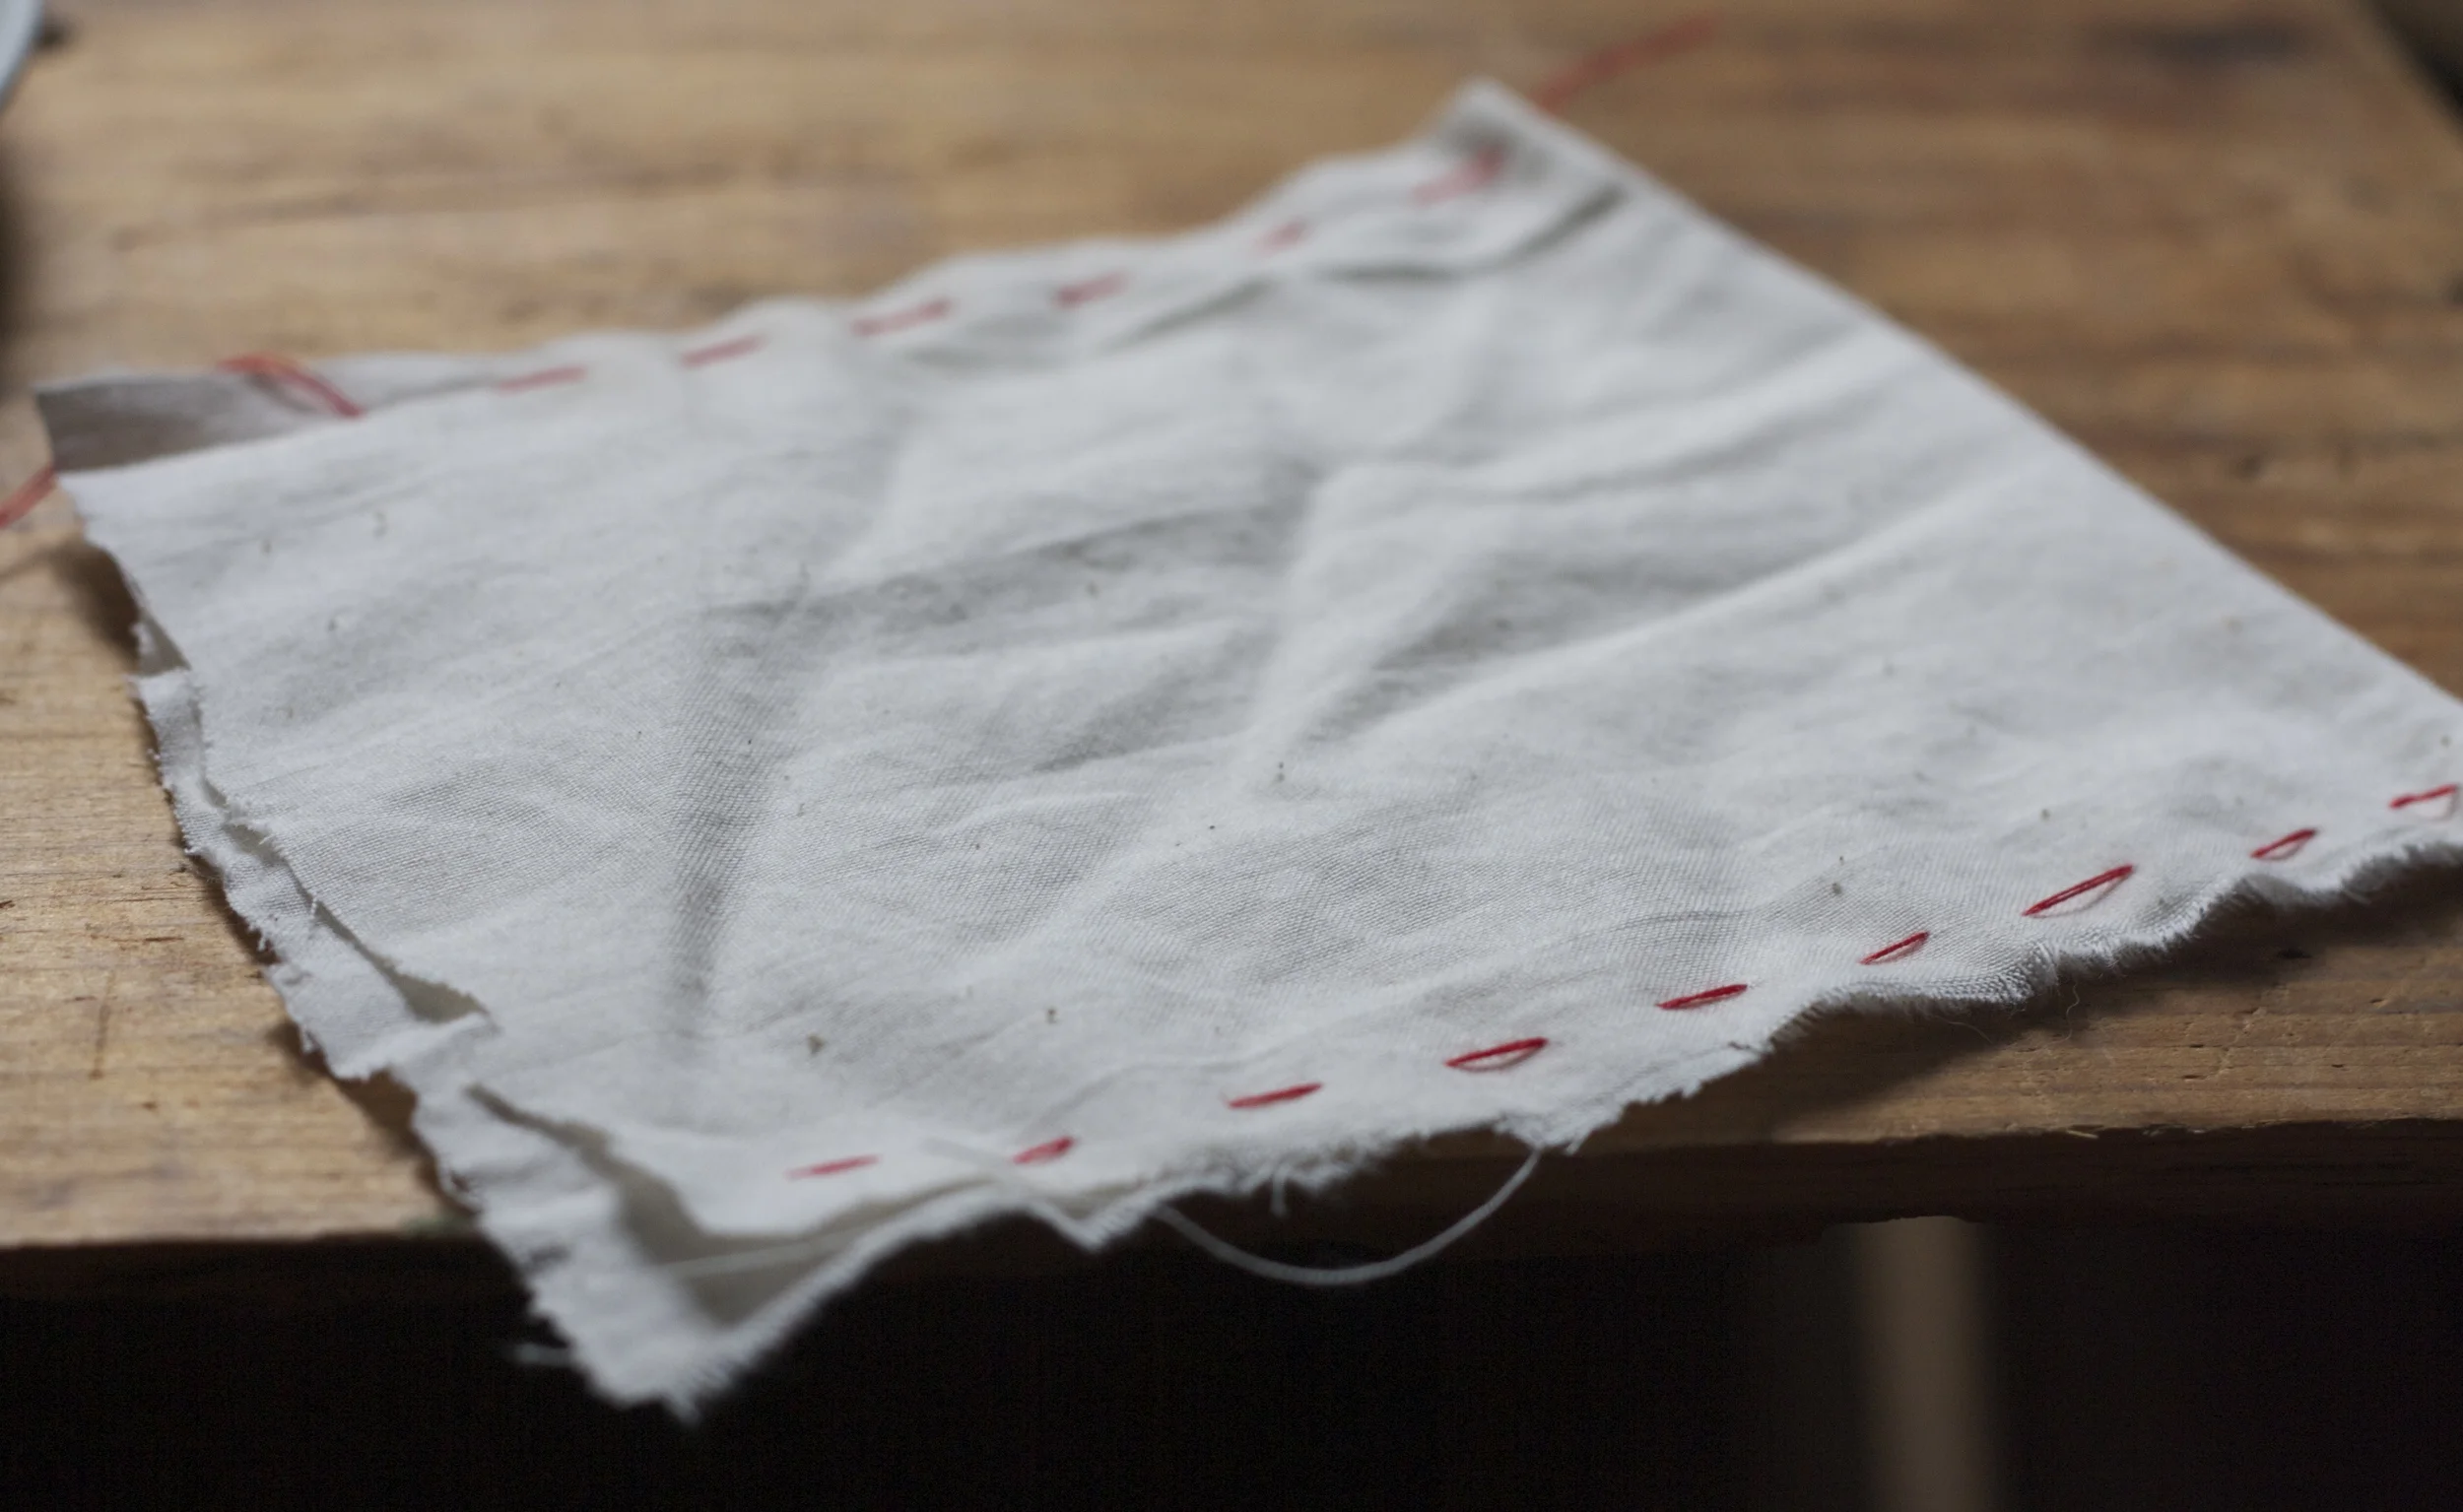
Just sew up a little sack roughly the size of your hand,, leaving one side open. Stuff with herbs and peels of your choice and sew the last side up and toss into your next dryer load%u2026%u00a0
Can be reused 4-5 times. And when it starts to lose its effectiveness, the sack can be riped open on one side and refilled with fresh herbs.
I am kind of sick right now. A chest cold thing and maybe e coli from all the romaine. Plus my arm hurts a shit ton from kind of dropping a 500 pound cast iron sink on it. Oh and I spilt boiling hot water on my leg and burn the shit out of myself, and I grabbed a falling cactus which got a hand full of prickers stuck into it. Plus I am still feeling all sorts of sad about Only. I guess you could say I am not at my finest right now. But this time nest week, I am sure I will be radiant and gleeful. HAHA. (But I sure do hope so.)
The past two weeks have been a blur. Only getting sick and then having to put him down took it all right out of me. Dealing with him being so sick and then the week after him being gone%u2026just so shitty. But there was good stuff too.. There was lots of snow that made me so so happy. Shannon had a pizza birthday party. The family did the annual pre -Thanksgiving Thanksgiving, which the mr and I only spent a short time at because we had to bring Only to the vets. There were dinners with the littles, more snow, cold weather, work stuff, broom shopping, heavy cast iron sink moving. There was stuff.
Then we did a little Thnaksgiving on actual Thanksgiving with Erin and the littles. We played board games (well, they did, I was cooking), made Christmas decorations, listened to Christmas music and danced a little. I made tofu lasagna, mac and cheese, potatoes, and bread. And of course there were veggies and fruit, but yea, starch bomb. But that is what the littles wanted. I am nothing but accommodating. Quite, low key, and everyone was happy. It was a just what I needed.
And then the day after Thanksgiving was Erins birthday so the littles came over again and we made her a cake and they slept over and we watched more Christmas movies and ate pancakes for breakfast all the while I was feeling like garbage. So after we brought them home, I kind of curled in on myself. I can%u2019t deal with being sick.
So today the mr and I are going to keep it a low key day, probably just putz around the house, maybe hang the Christmas lights outside, read a lot, drink lots and lots of hot tea (and coffee). I don%u2019t want to get any sicker then I am so I need to kick it. That%u2019s the goal for the day Get un-sick!
Some stuff from the internet that I looked at that you can look at too.
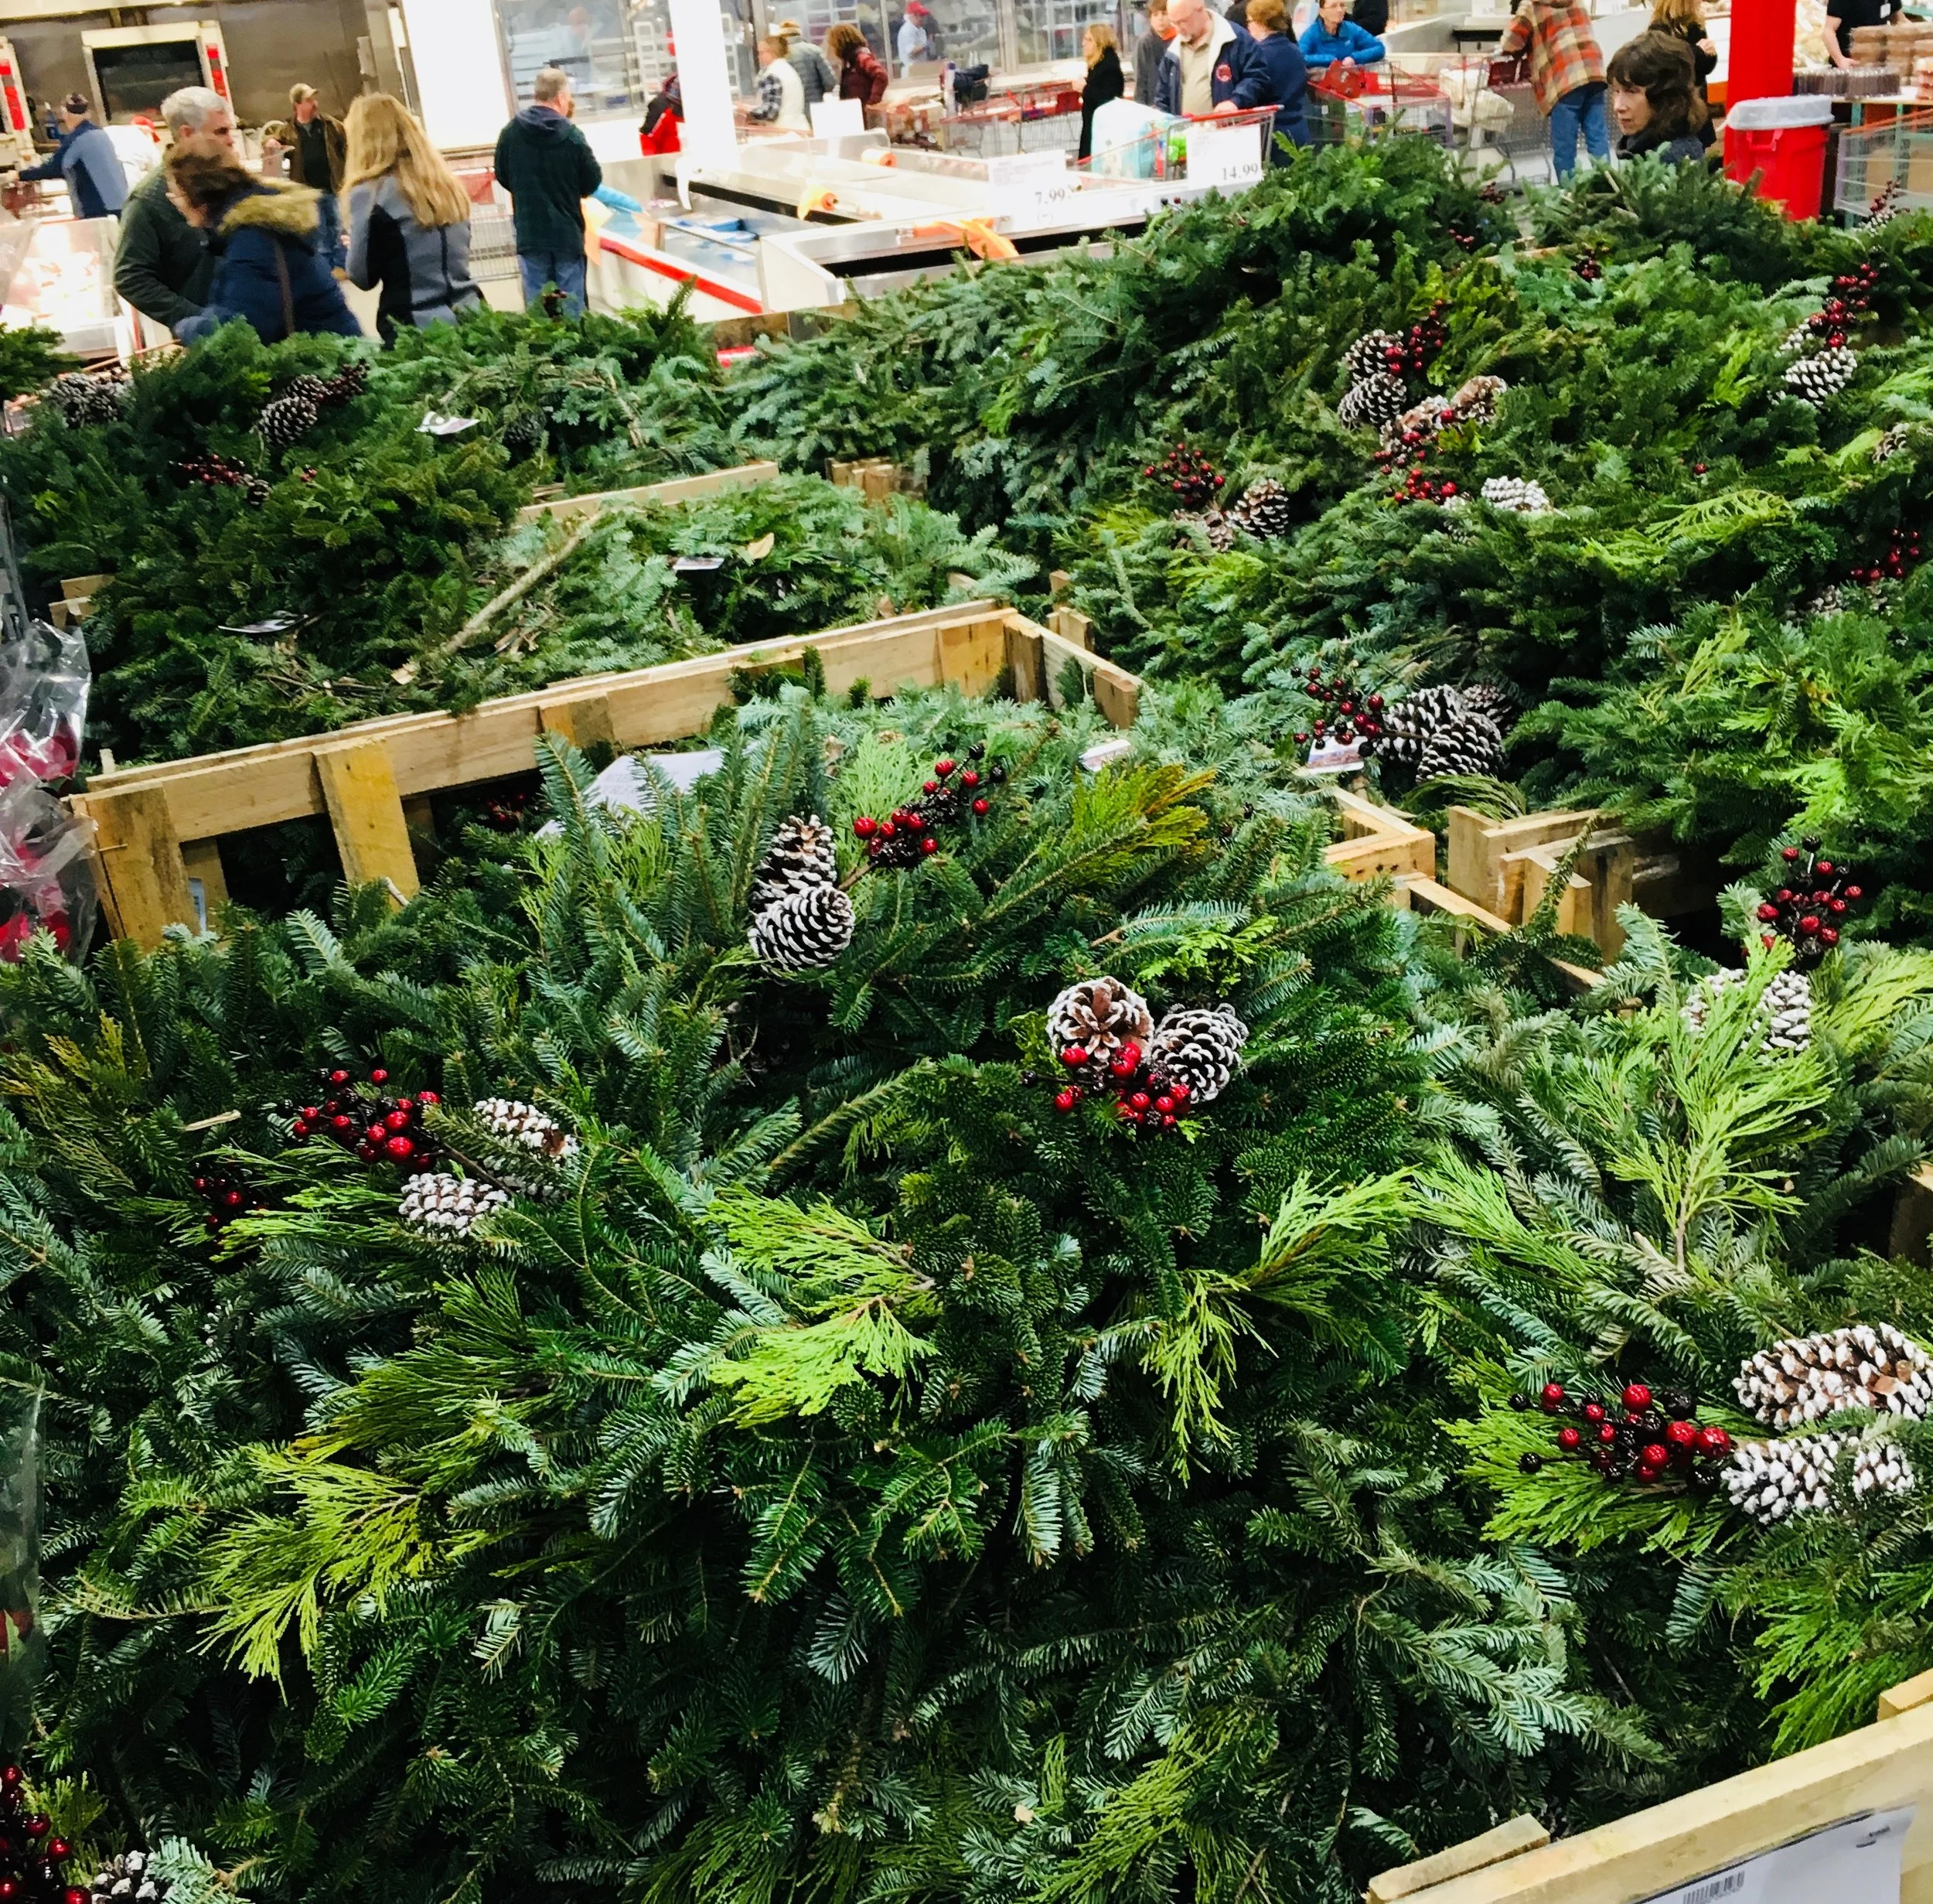
-I asked the mr if he could ever do a fake tree. He hesitated but said no. (the hesitation shocked me) I could never get a fake tree, or scratch that. I must always have the main tree be real. Having extra fake trees is ok. Hking in the woods to cut our tree down is probably one of my favorite things ever. Real all the way. Real And Fake Christmas Tree Sellers Fight For American Hearts And Minds.
–Reading Fiction Makes You a Little Nicer. With all the reading I do, should I be nicer. Ha
-We must ACT NOW! It isn%u2019t a freaking joke. Shit is already hitting the fan. Climate impacts grow, and U.S. must act, says new report
–Sweet Potatoes: It’s A Thin Line Between Love And Hate. Sweet potatoes are amazing. I can%u2019t understand how some people hate them. They just haven%u2019t had it roasted with cumin and chili powder or covered in tahini.
-Can Anyone Save PBR? The beer that conquered Brooklyn is on the brink of extinction. I know a lot of people who will be so sad if PBR goes away. (the mr for sure)
–Why Does It Seem Like Everyone Is Getting Sick from Salad? Another reason to eat as local as you can. (although more then half my food is local but I am still convinced I got E coli form the romaine%u2026 I need my own farm to grow ALL my own food!)
-Holiday crafting is the best. I am working on something like this.
–Breathing Through the Nose May Offer Unique Brain Benefits. To smell all the smells.
-I am really feeling these shoes%u2026but I will never buy them because I don%u2019t buy shoes. But someone needs to get a pair.
-Oh, The Places You’ll Go: Toilet Signs Try To Help
Pictures from the past two weeks. There are not a lot because I pretty much didn%u2019t take any pictures for a week.
I have so so so many winter squash. It’s getting kind of out of hand. The mr is even making me a couple of wall shelves specifically for the squash so we can get our table back (it is currently covered in squash and tomatoes).%u00a0I hoard them and I can’t exactly tell you why. I think there is a part of me that is afraid that sometime durning the winter I am going to ran out of squash and am going to be forced to eat, I don’t know, other food. And there also the part of me that knows that I will eat it all and why the hell not hoard them.. they are so pretty and lovely and%u2026..well because I can!%u00a0When I sit here and think about it, %u00a0there is no real logical reason for me to have so many, especially sense I will be doing a winter farm share and we get squash at each pick up all winter long.%u00a0
Hum%u2026.Things to think about..Oh well. I’ll just call it a little werido quork of mine%u2026 squash hoarder, which is much better then a trash hoarder or a “stupid shit I found on the side of the road” %u00a0hoarder (that would be the mr.. but I don’t judge).
So yeah, %u00a0I might need a squash intervention, or I can just make everyone around me happy by baking them sweet ass squash treats. I have shared and I always like to share my squash loot (see, another resin to have so many)%u00a0but I found that most of the people in my life do not have the same kind of hunger for savory cooked squash.(weirdos) But you know what they do like? Cake Everyone will eat cake.
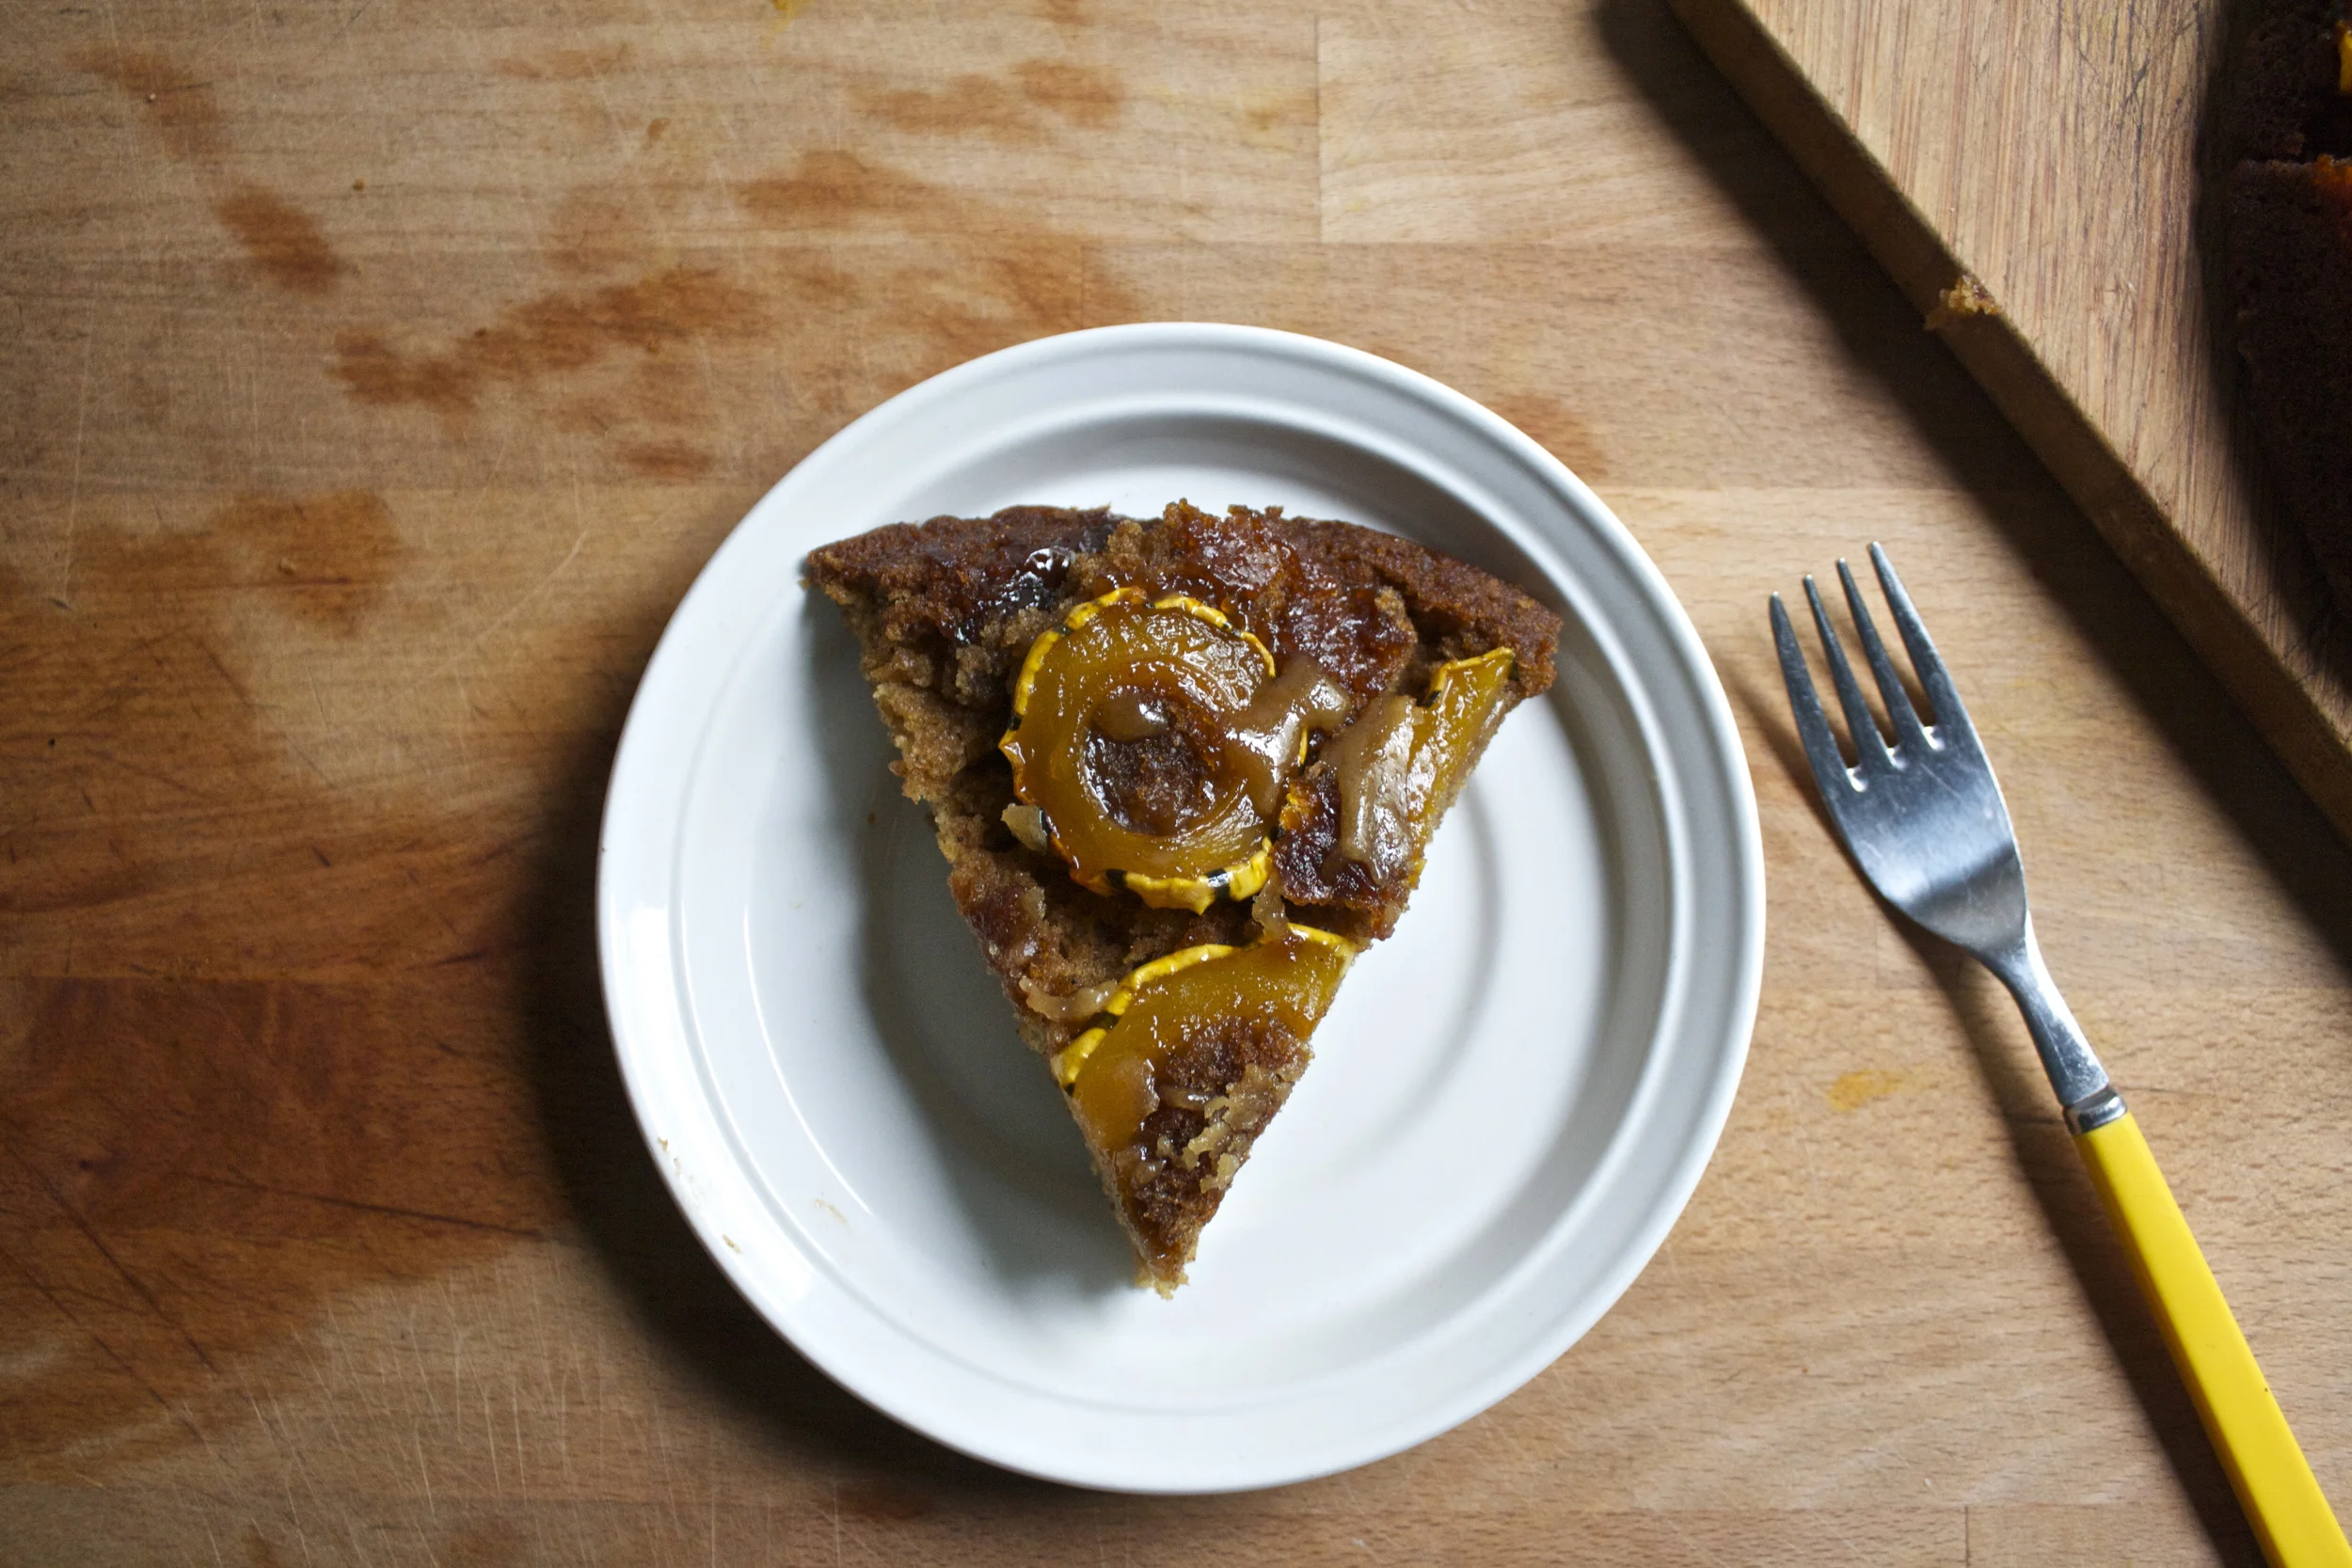
And for this cake I used delicata. It is really sweet,(I think all on its own it taste like a sweet dessert)%u00a0so tasty, and easy to cook, The perfect squash for a cake. Add in the warm fall spices and you got yourself a winner. And bonus.. if you have heard that there is a canned pumpkin shortage this year and are are worried about you pumpkin fix. Stop. You don’t need canned pumpkin. Just make your own puree and make it with all the squashes, especially delicata.%u00a0
Now go bake a cake.. I will probably make another one this weekend while I start on eating/baking with the sweet dumplings and buttercups that are piled on the fridge (seriously.. I have squash EVERYWHERE!)
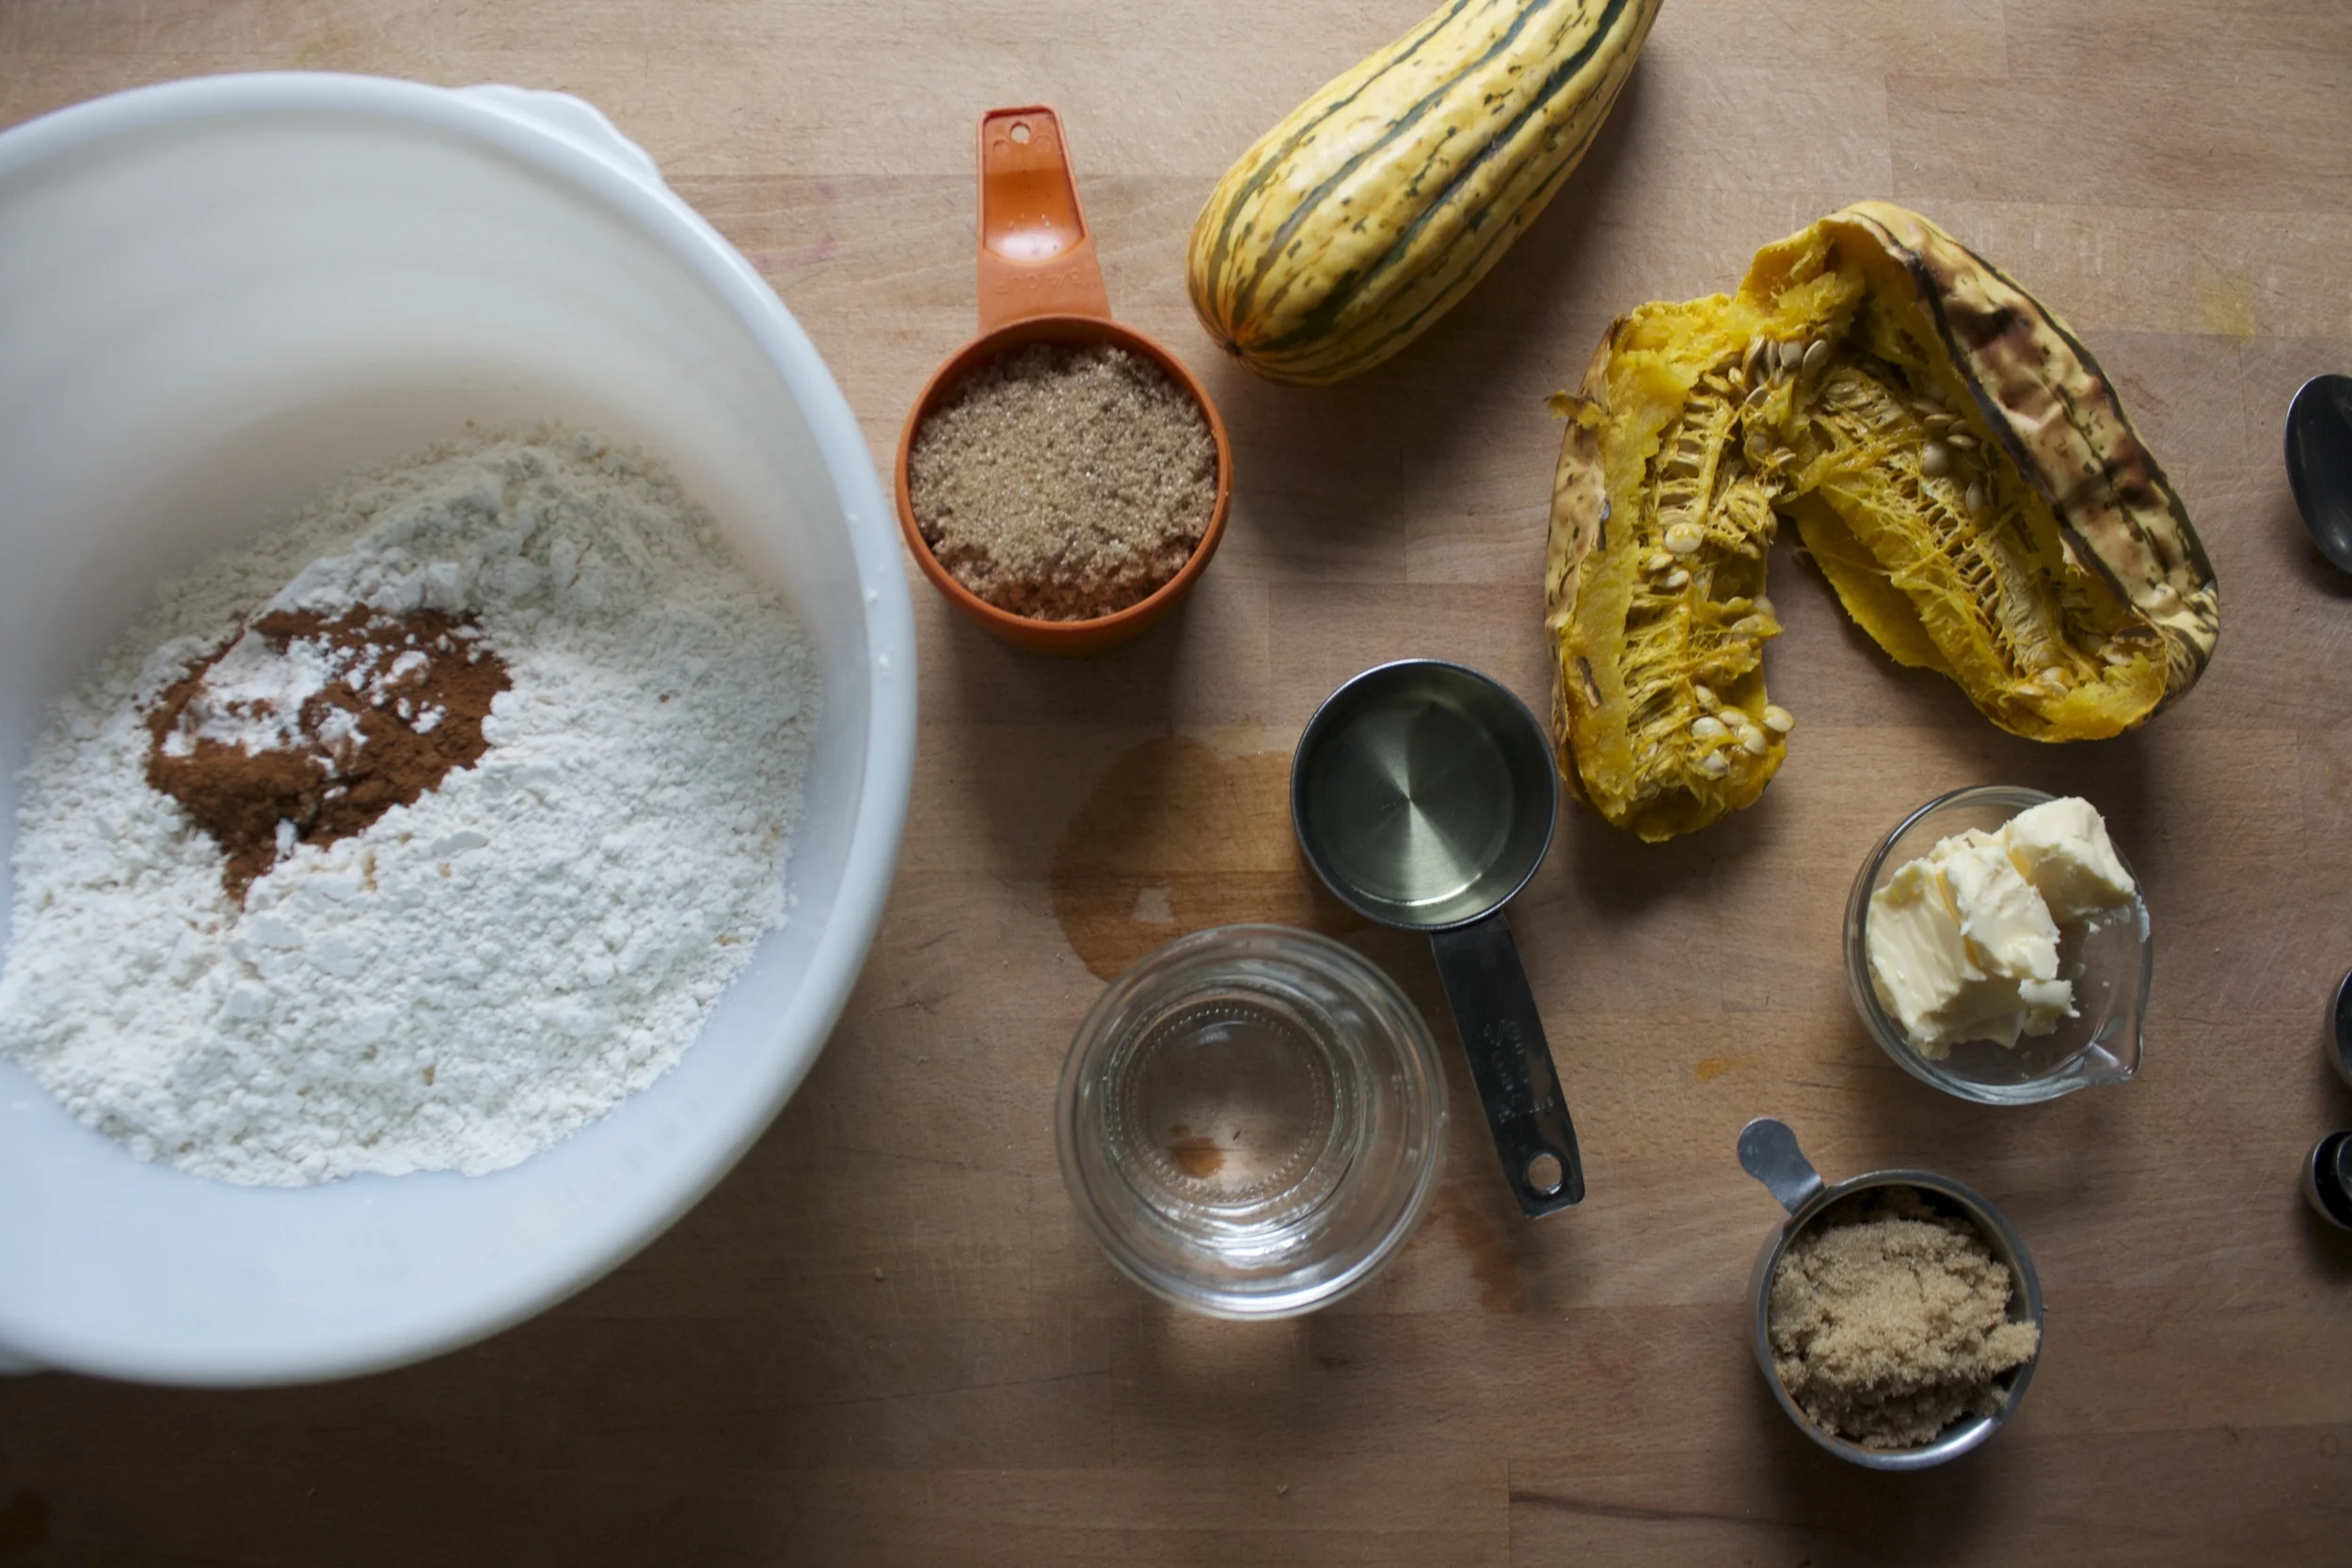
The stuff. In the big white bowl there is white whole wheat pastry flour, baking soda and powder, salt, cinnamon and nutmeg. Then we have some brown sugar, oil, water with some vinegar and a already baked delicata squash. Also going to need another uncooked squash, earth balance and a little more brown sugar for the upside down part.
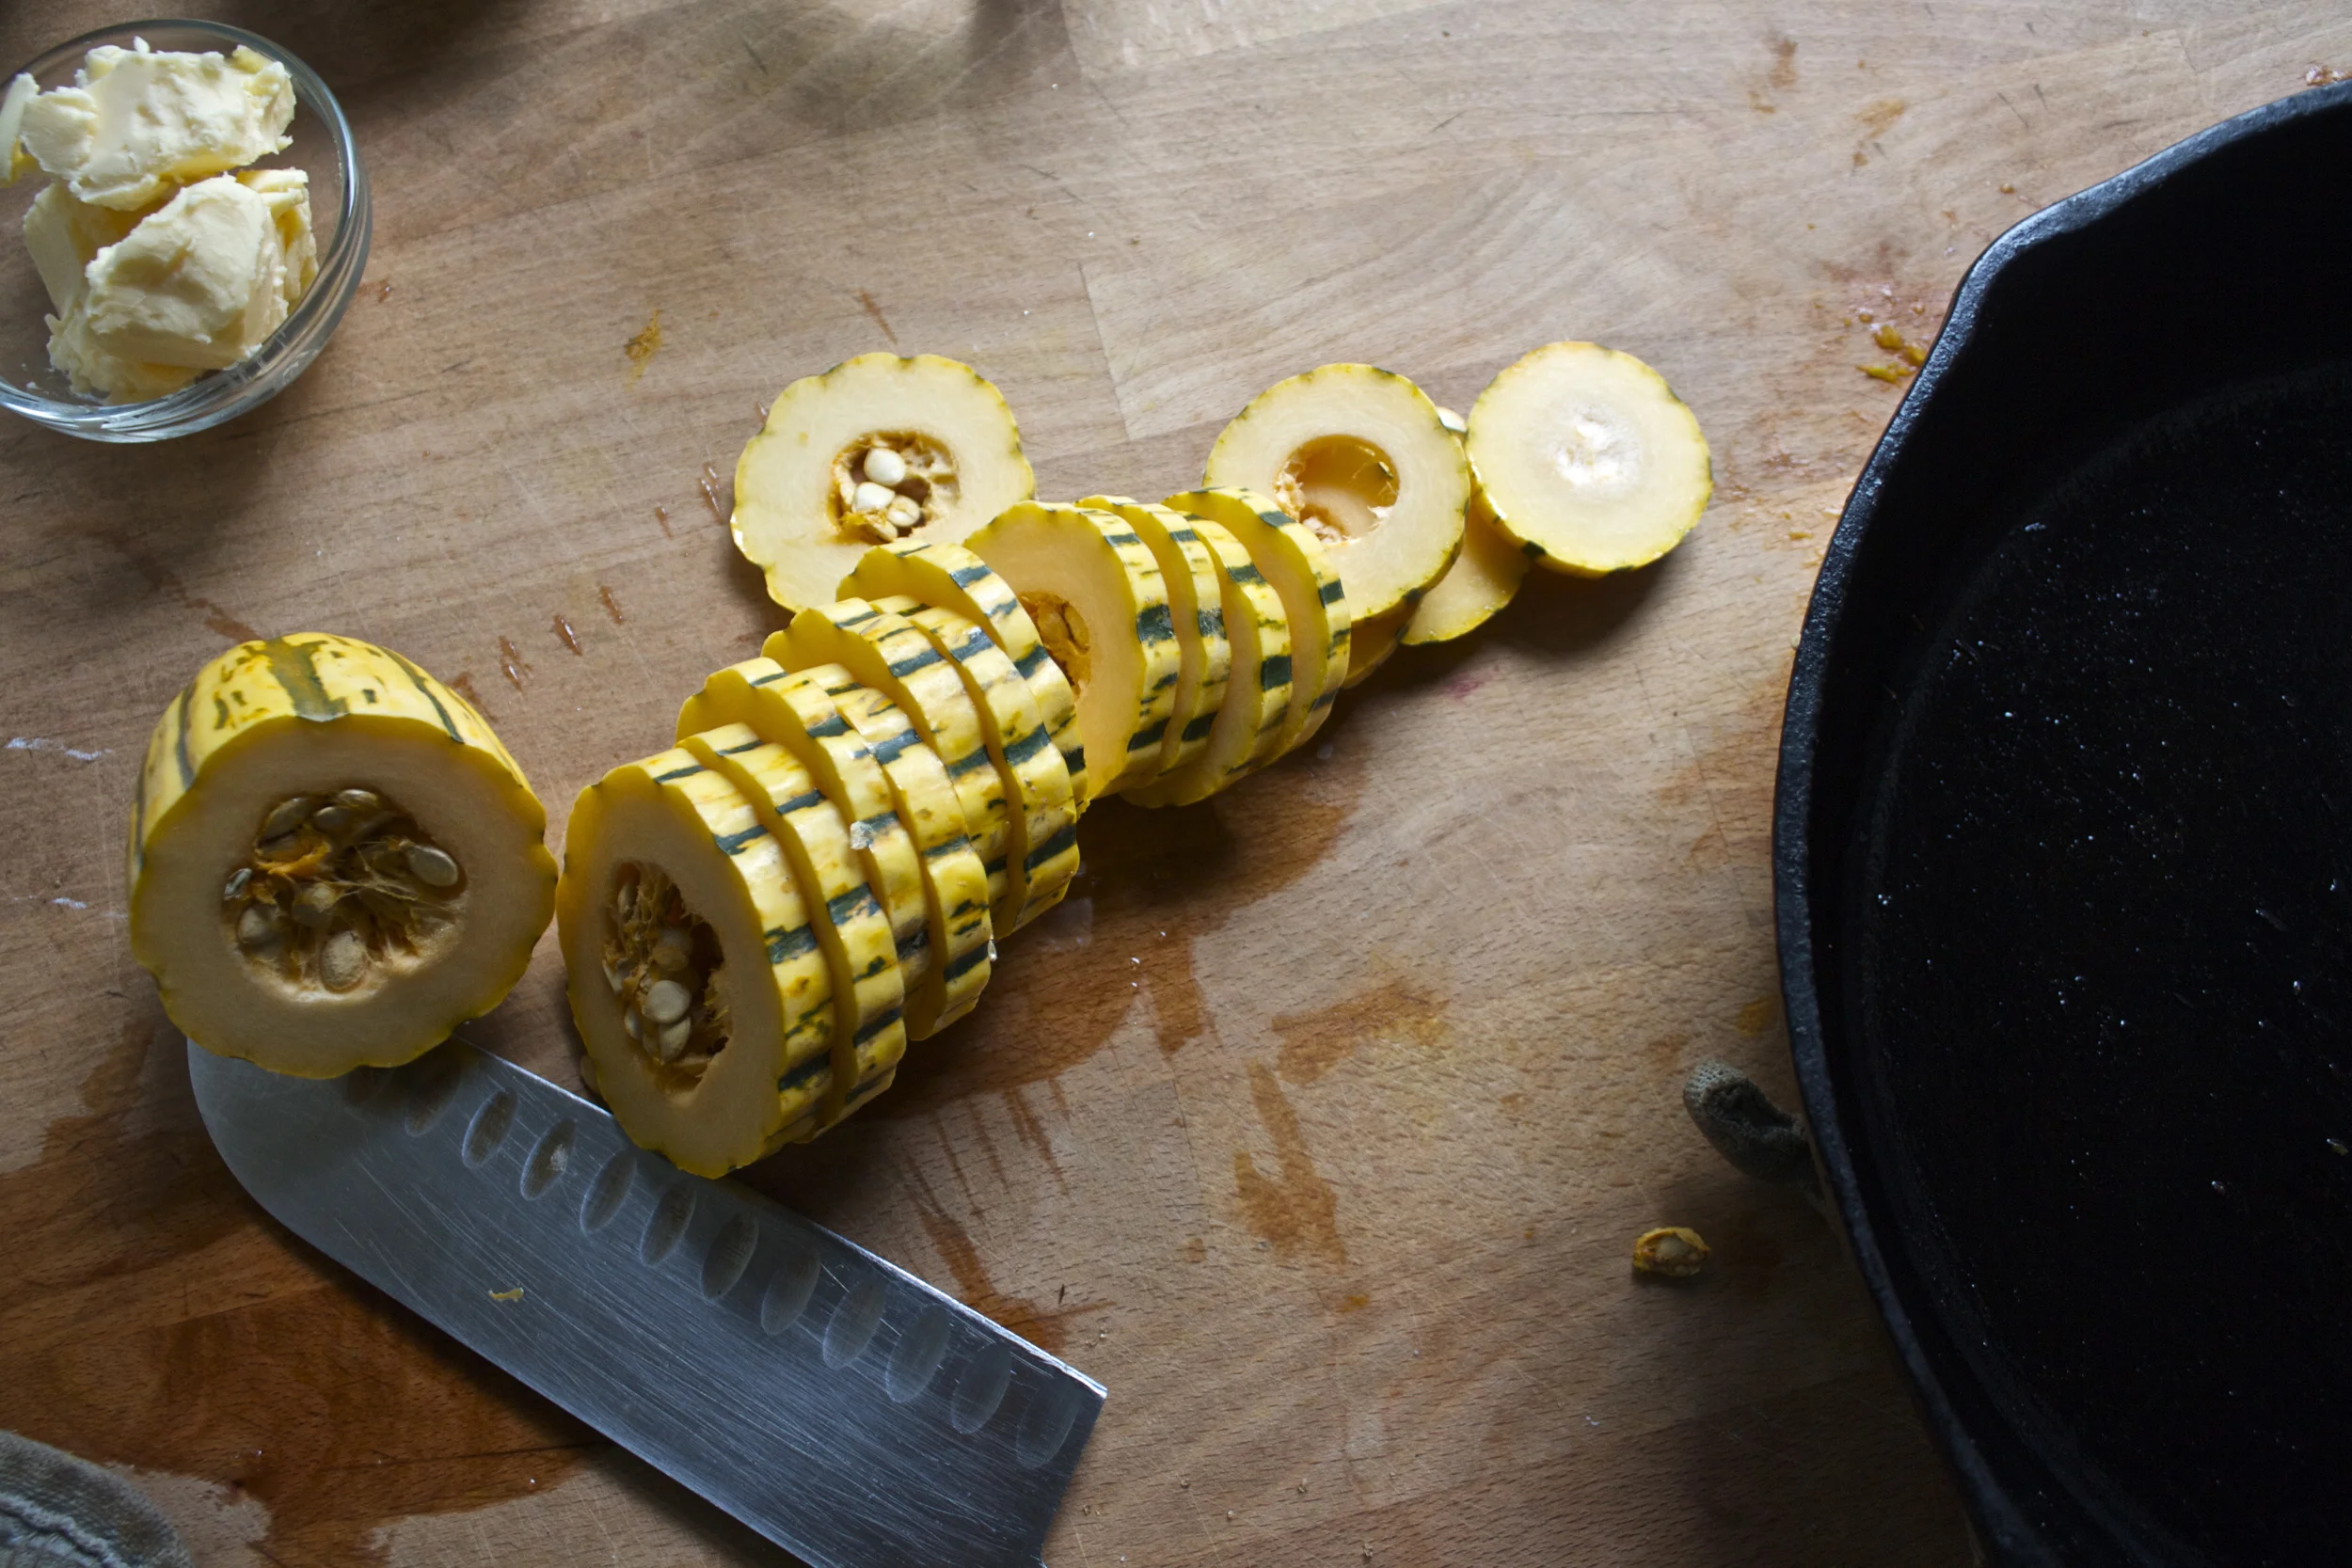
First off, grab yourself 10-12 inch skillet, preferably one that you have not just cooked garlic in.%u00a0
Slice up the uncooked delicata into 1/2 inch slices and remove the seeds (to roast later)
Stick the earth balance and the lesser amount of brown sugar into the skillet and place it on low heat, just to melt the butter and sugar down to form a sauce.
Now layer the squash rounds in the sauce. Fill in the skillet as much as you can. (%u00a0any left over can be for %u00a0cooked for lunch)
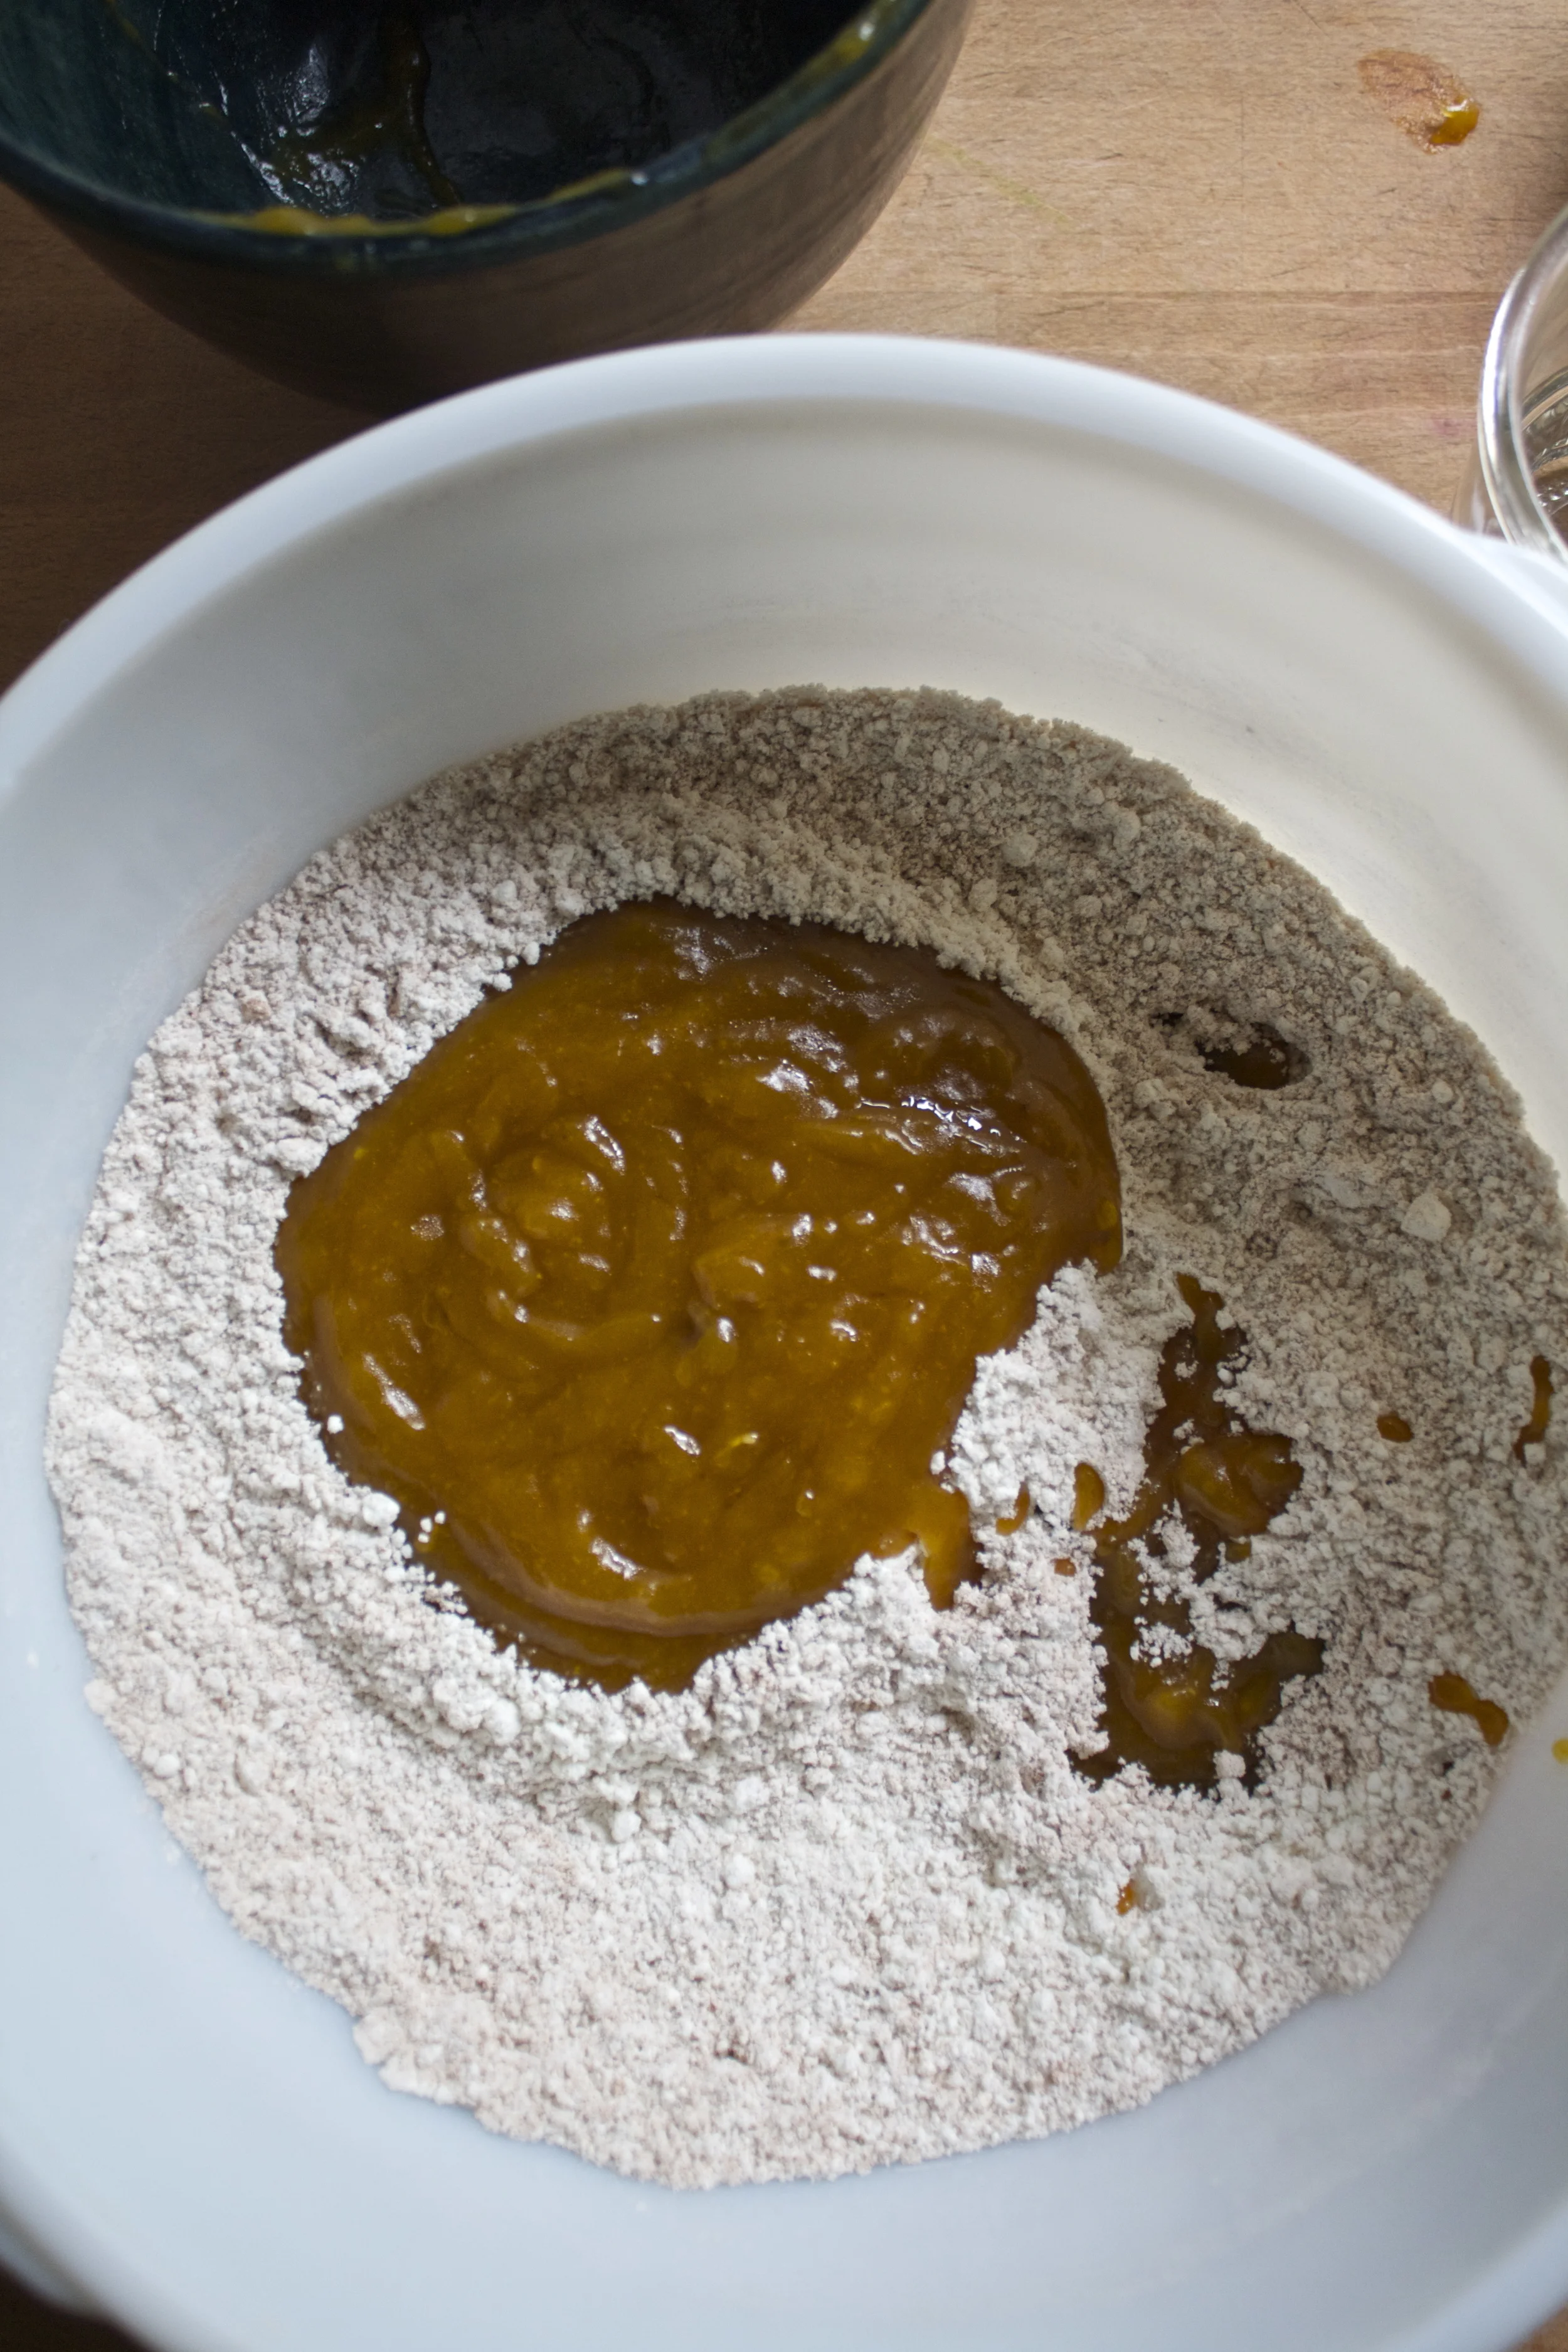
The already baked delicata squash (minus the seed and skin.. save the seeds to roast, skin you eat right away) goes into a bowl with the brown sugar and oil. Mix it all together until combined.%u00a0
Note.. My squash was still warm when I mixed it with the sugar and oil. which really helped the sugar resolve and for the mixture to be smooth. If you squash is cold,%u00a0warm it up a bit..
Whisk together all the dry and dump in the squash mixture and mix.
And slowly pour in the water/ vinegar mixture and mix until just incorporated.
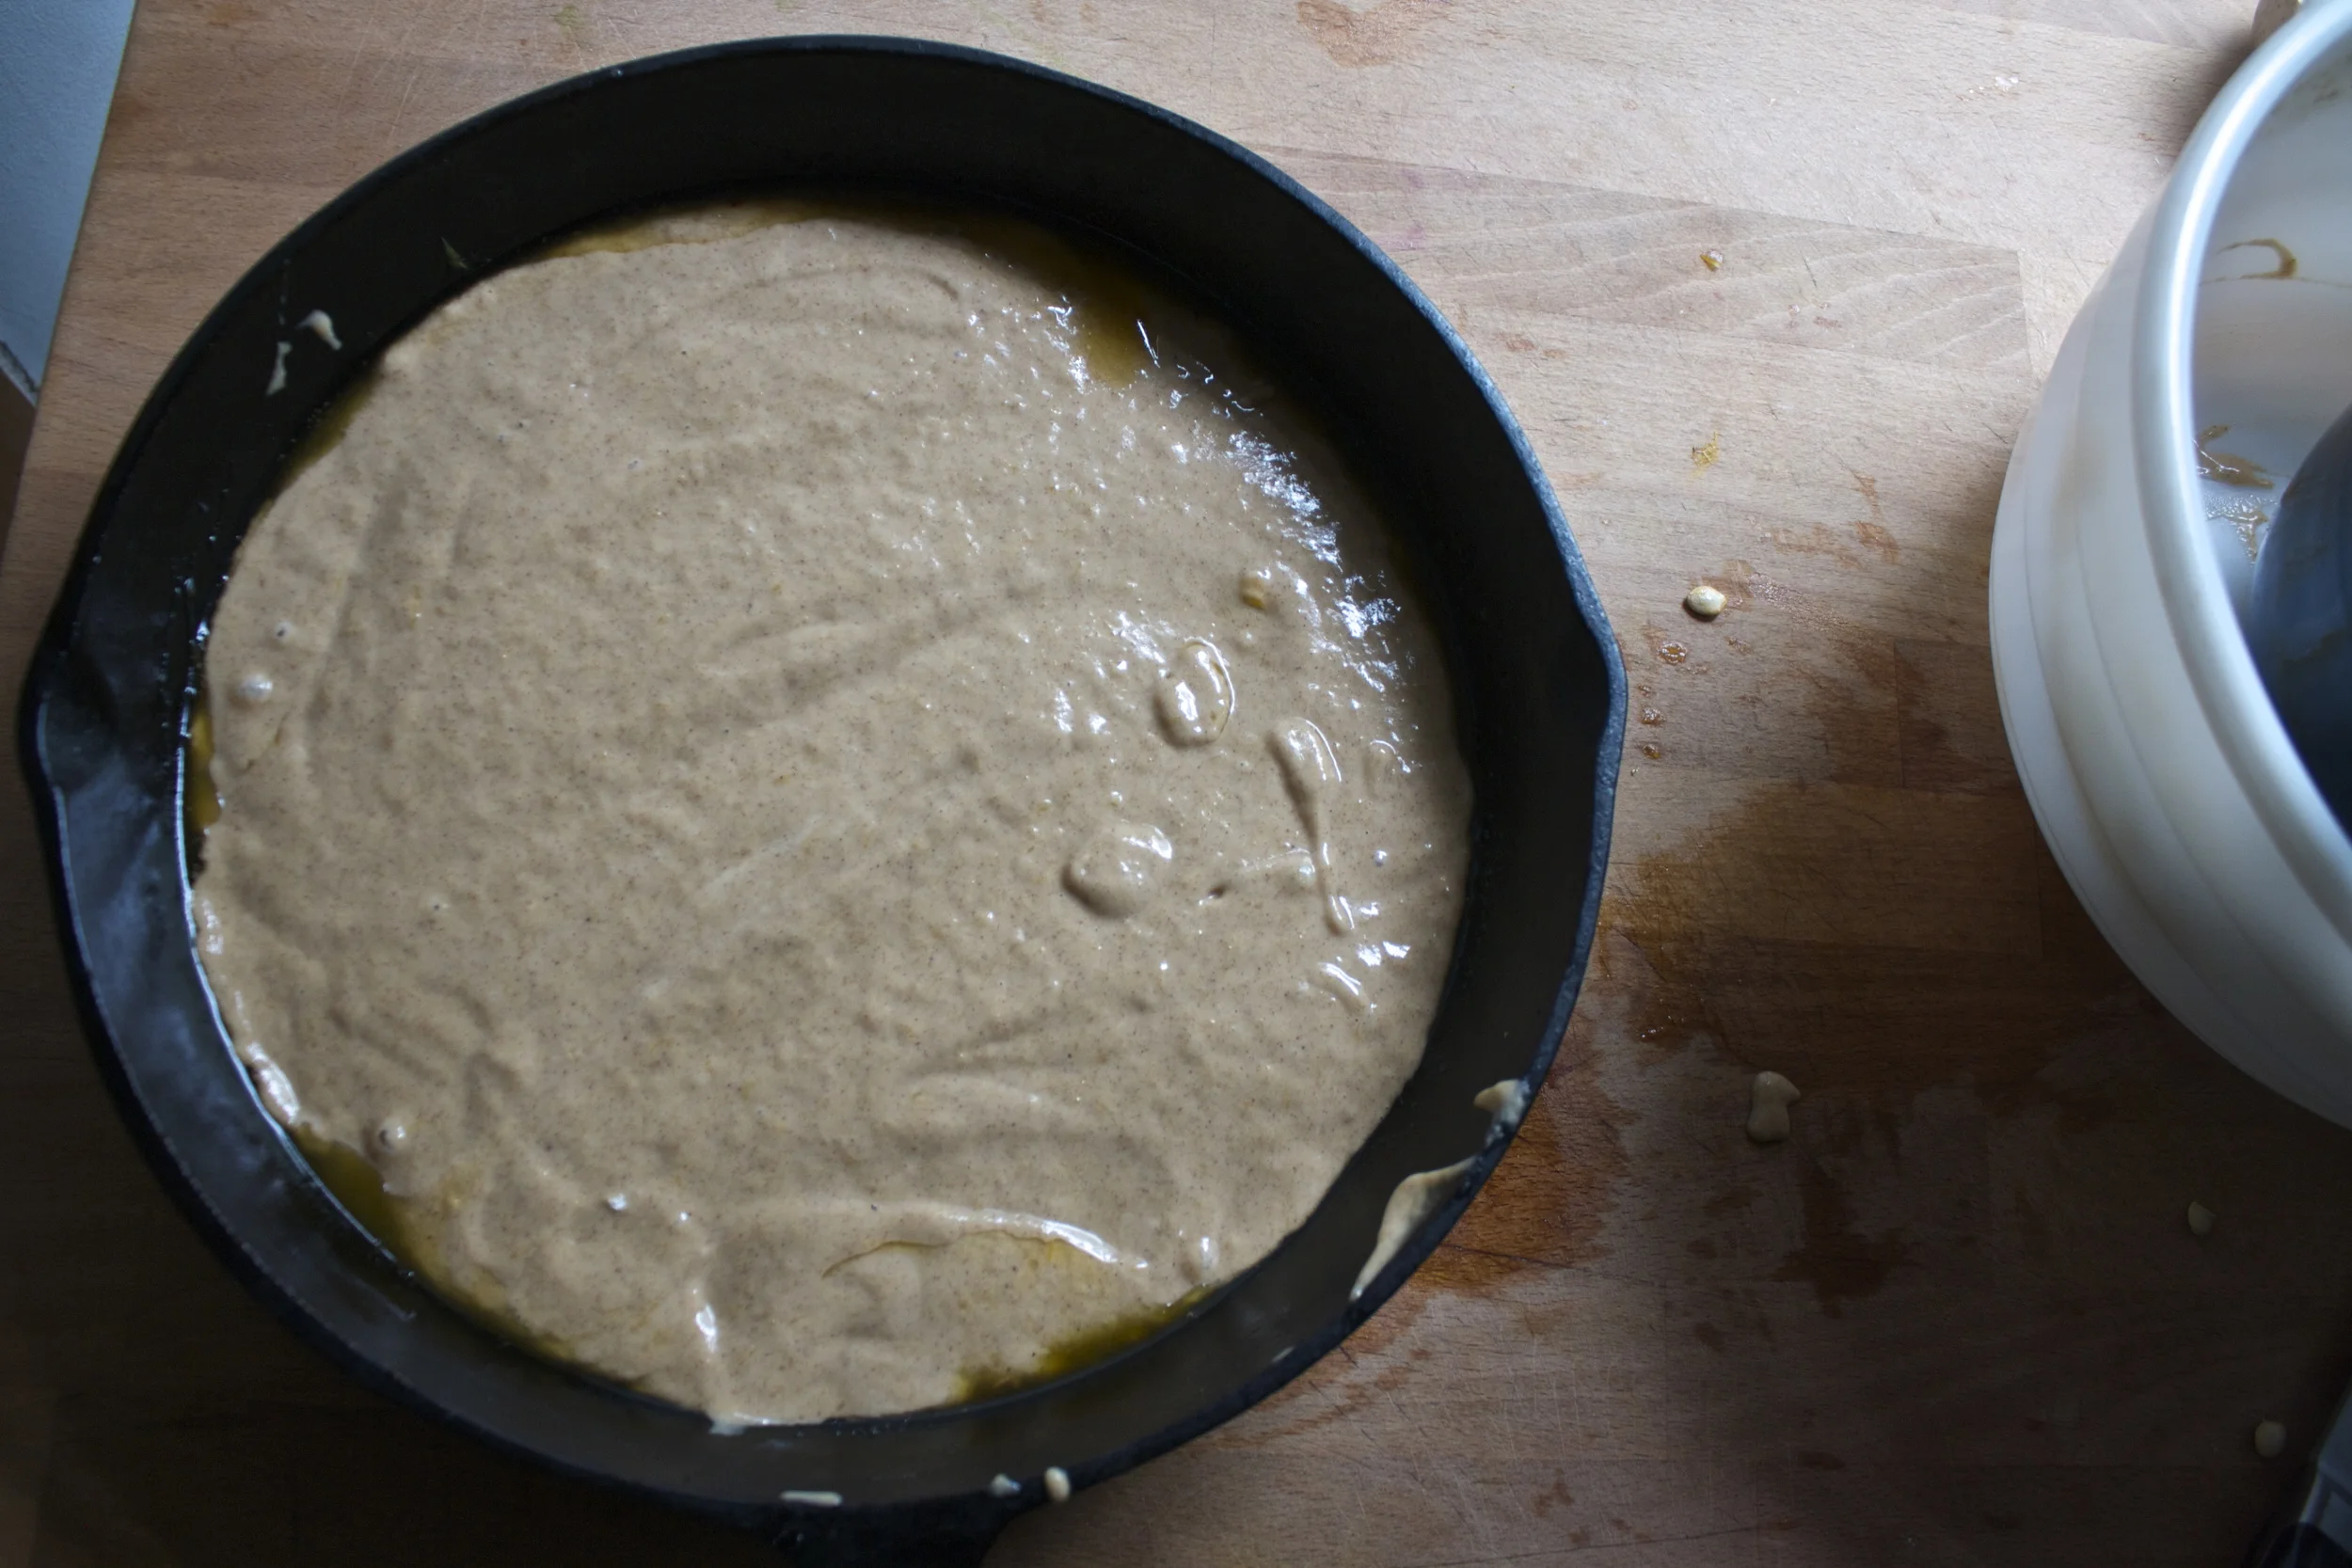
Now slowly pour batter over the delicata in the skillet.
And into the oven it goes!
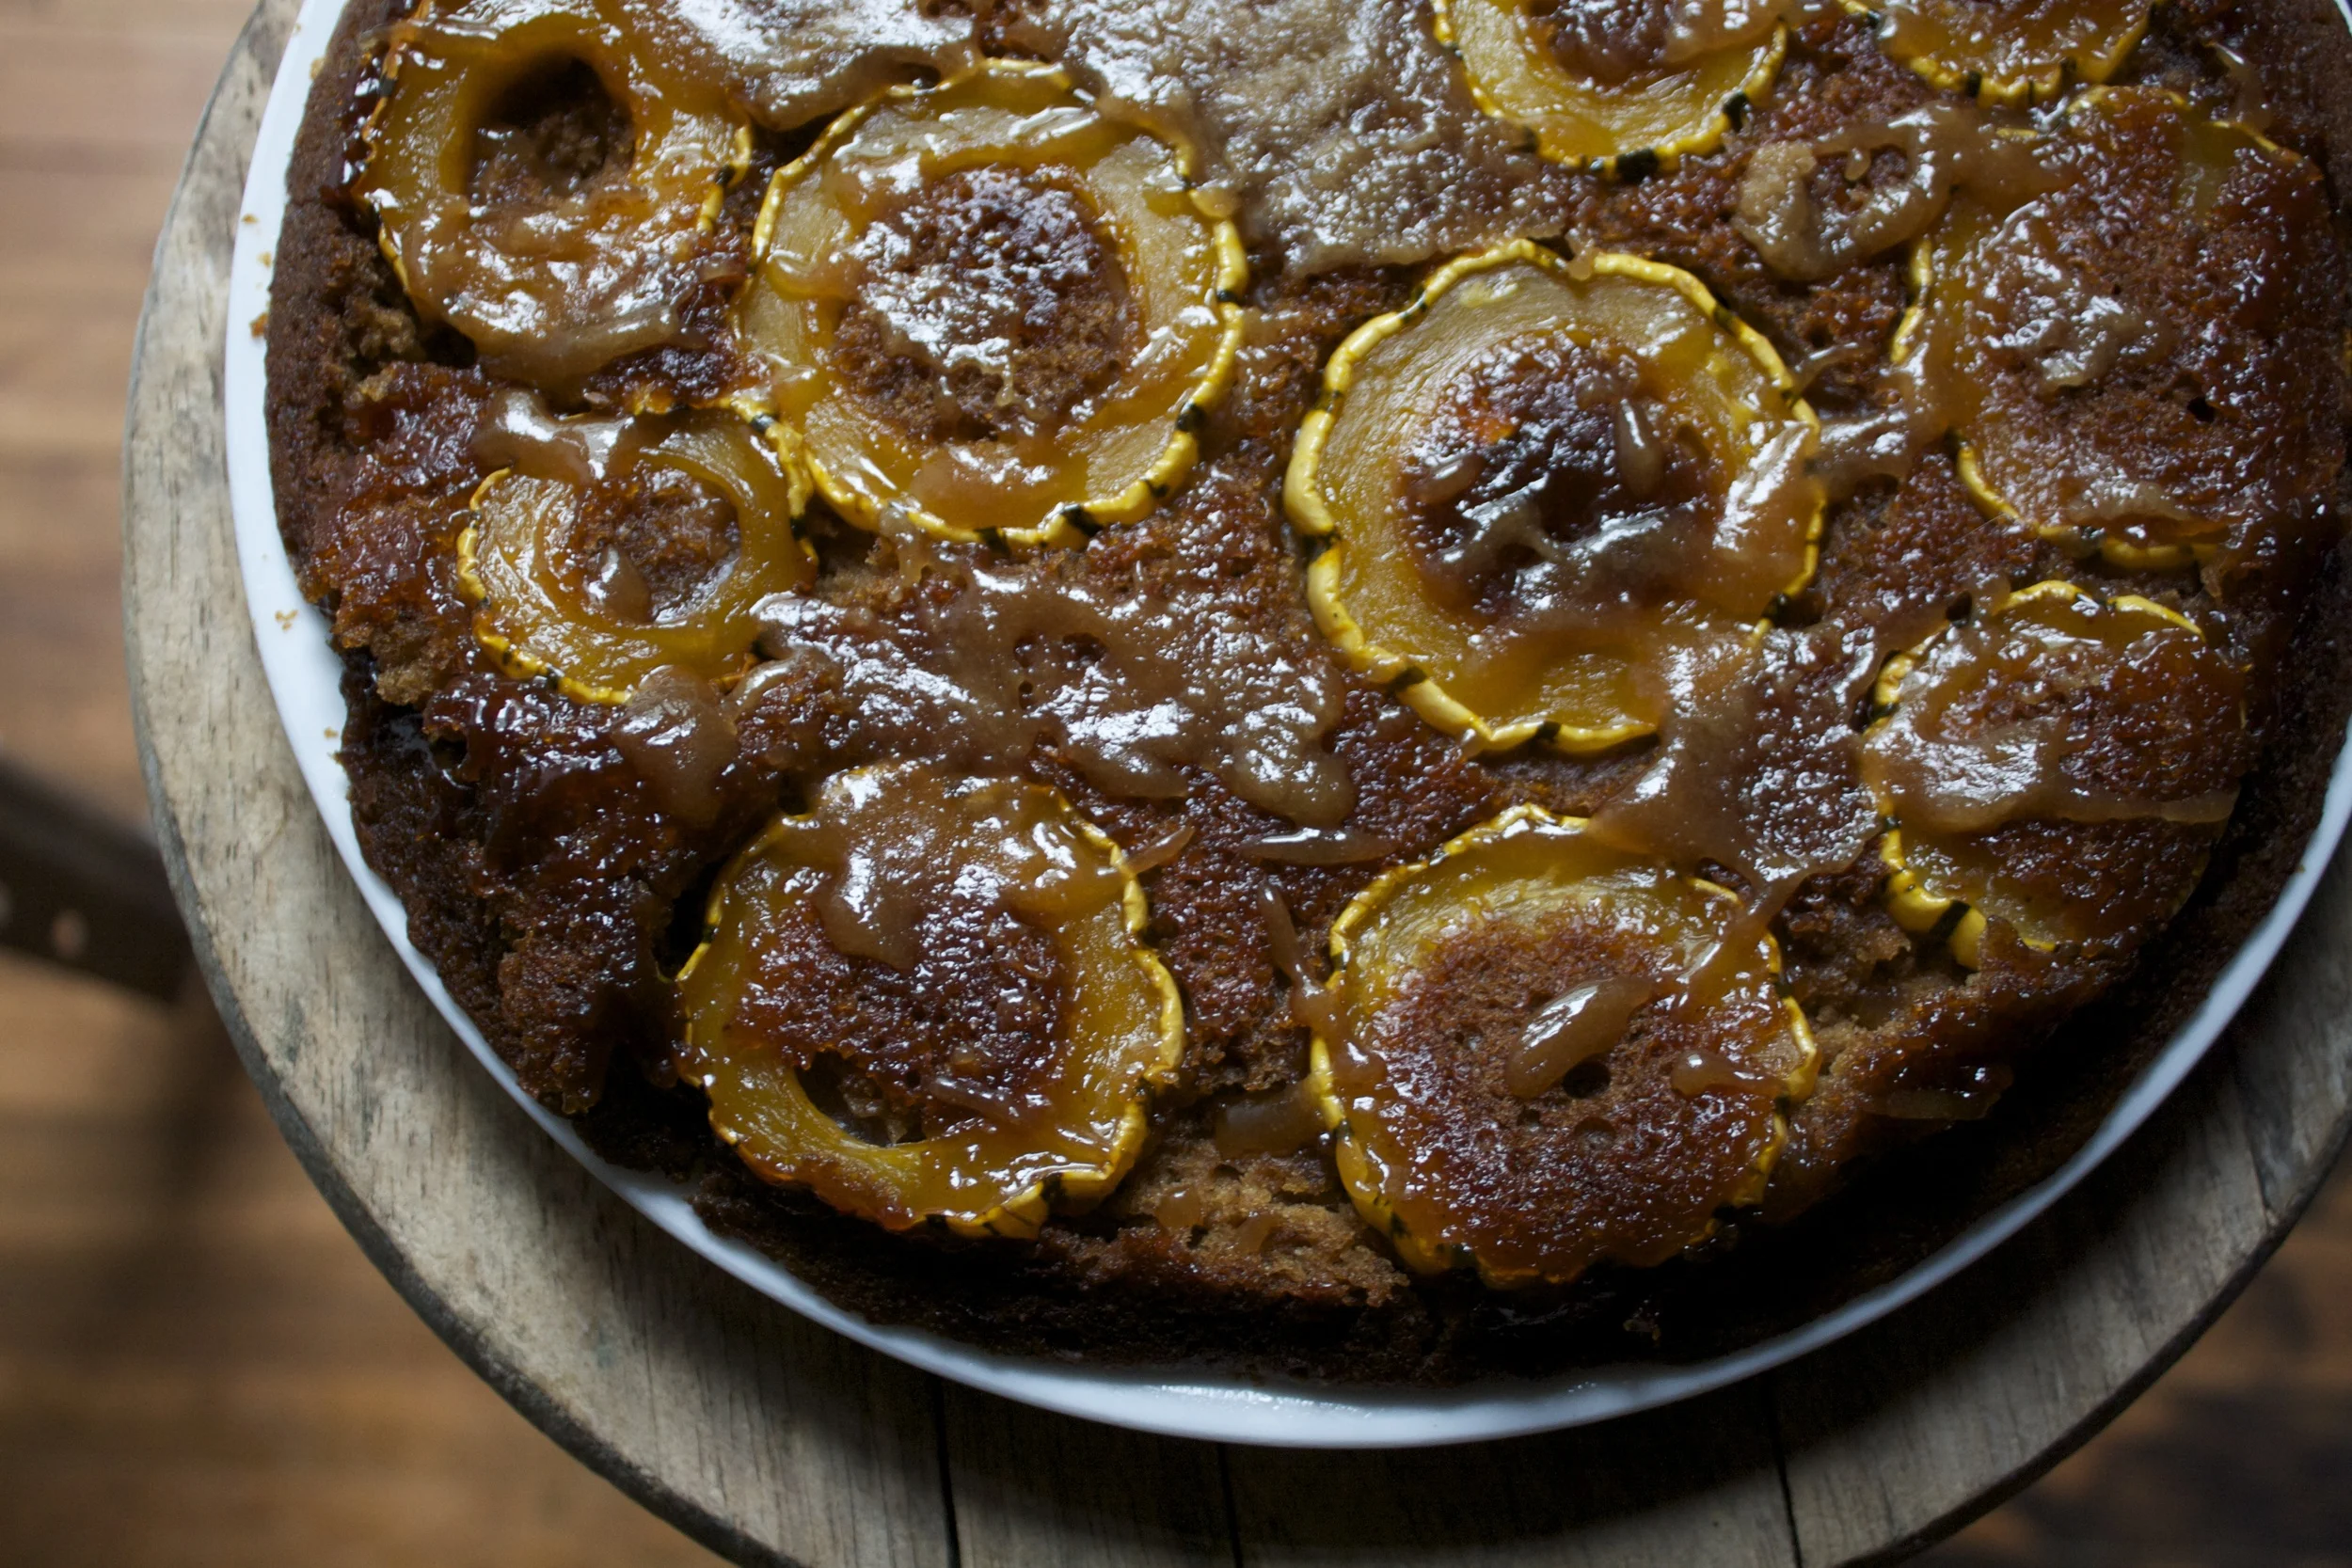
After 45-50 minutes, the cake should be browned and beautiful and a tester should come out clean when stuck in the middle. Remove the cake and place on cooling rack for about 8-10 minutes to cool. Don’t get to excited and do it to soon or else the caramelization on the bottom will still be too liquid and completely soak into cake. Giving it a few minutes will let it cool enough to set up and stick to the top%u2026.so just wait!
And for the best and scary part%u2026flip the skillet onto a plate or cutting board and be amazed. oh, but right before you do, run a spatula or knife around the edge to make sure the cake is loose.
It really should have no problem coming out of the skillet, but if any of the squash sticks (one piece of mine did) just scrap it out and place it back on the cake%u2026 no one will notice)
Now time for a slice%u2026 or maybe two!
And for reals, go get yourself lots of squash, even if it’s just to make cakes with!
Have a fantastic weekend!
-C
Makes a 12 inch skillet cake (can be made in a can pan)
For the cake
1 3/4 cup white whole wheat pastry flour (can use white pastry, wheat pastry, or all purpose)
3/4 cup brown sugar
1 cup warm delicata squash puree*
1 teaspoon baking soda
1 teaspoon baking powder
1/3 cup mild flavored oil (canola or veggie)
1 cup water%u00a0
1 tablespoon apple cider vineagr
1 teaspoon salt
2 teaspoons cinnamon
1/2 teaspoon nutmeg%u00a0
For the upside down part
1/4 cup of brown sugar
3 tablespoons earth balance]
1 small uncooked delicata squash%u00a0
*Note.. To make delicata puree, simply stick the whole squash into the oven and roast until fork tender. Remove and let cool enough to handle. Cut in half, scoop to the seeds and scoop the flesh into a bowl%u2026.thats it. Oh, save seeds to roast and eat the skin as a snack (skin is my favorite part and the seeds are almost better then pumpkin!)
Preheat oven to 350 degrees.%u00a0
Grab yourself a 10-12 inch clean cast iron skillet (maybe don’t cook garlic in it before you make this cake). Stick the earth balance and the brown sugar in it and place on low heat until the butter and sugar melt together and form a sauce. Remove pan from heat. Take the raw delicata squash and slice it into 1/2 inch rounds. Remove the seeds(save for roasting) and place the rounds into the bottom of the skillet, fitting in as many as you can, without overlapping. Set aside and make cake batter.
In a large bowl, whisk together the flour, salt, baking soda and powder and the cinnamon and nutmeg. In a separate bowl, combine the cooked warm squashwith the oil and the brown sugar. (if you squash puree is cold, warm it up. It mixes better warm)%u00a0Mix until completely combined. Dump wet into dry and whack together then slowly pour in water/ vinegar mixture and whack until everything is full incorporated.%u00a0
Pour cake batter over the stuff in the skillet and place into the oven. Bake for 45-50 minutes , until a nice golden brown and tester in middle comes out clean. Remove and place on a cooling rack or ontop of the oven to cool for 8-10 minutes. Once %u00a0cooled, take a plate, cooling rack, or cutting board that is a least a little bigger therm the skillet, place it ontop pif the killet, and flip. The cake should drop right out%u2026. if anything sticks in the skillet, trust scrap it off and stick it back on the cake.
Now the cake is ready to eat.. so grab a knife, cut a slice and do it.
It just hit me, it is December, the last month of the year. The year is almost over, again. I never get used to it, that feeling that it can%u2019t possible be the end of the year because it just started, right? But it%u2019s cool, I love December and I love me a fresh new year so we are good. Welcome December, I am going to enjoy the hell out of you.
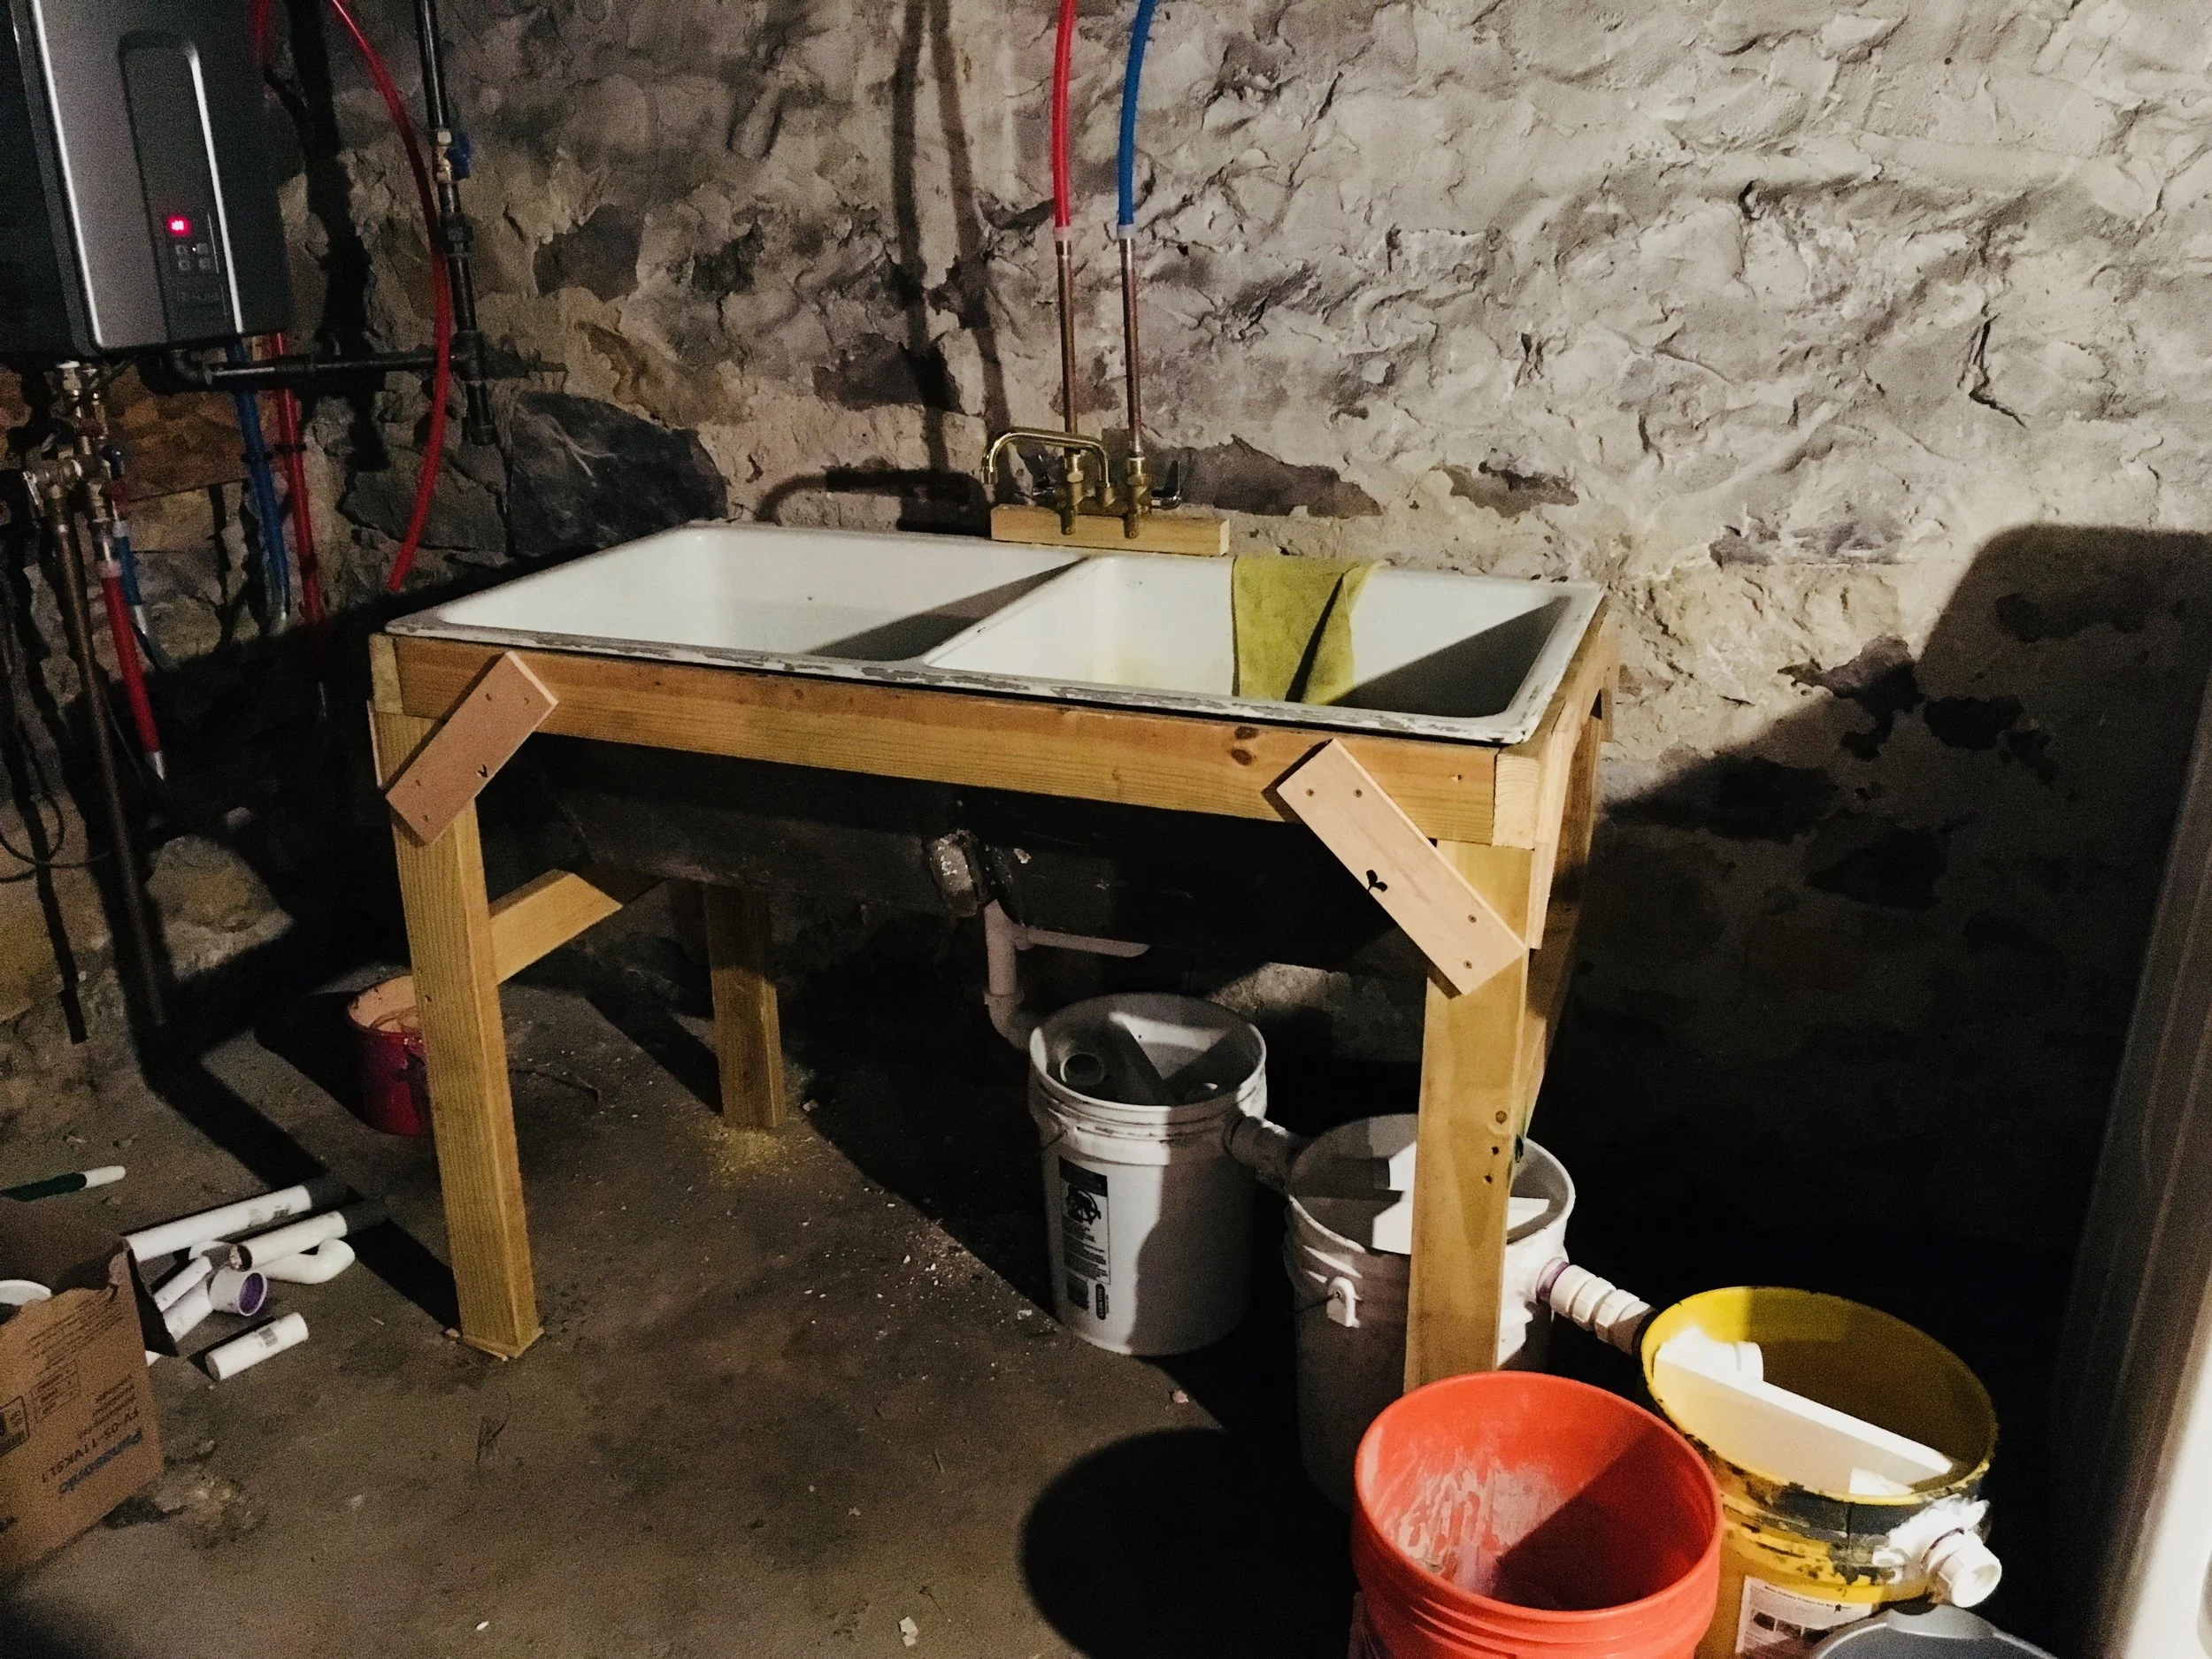
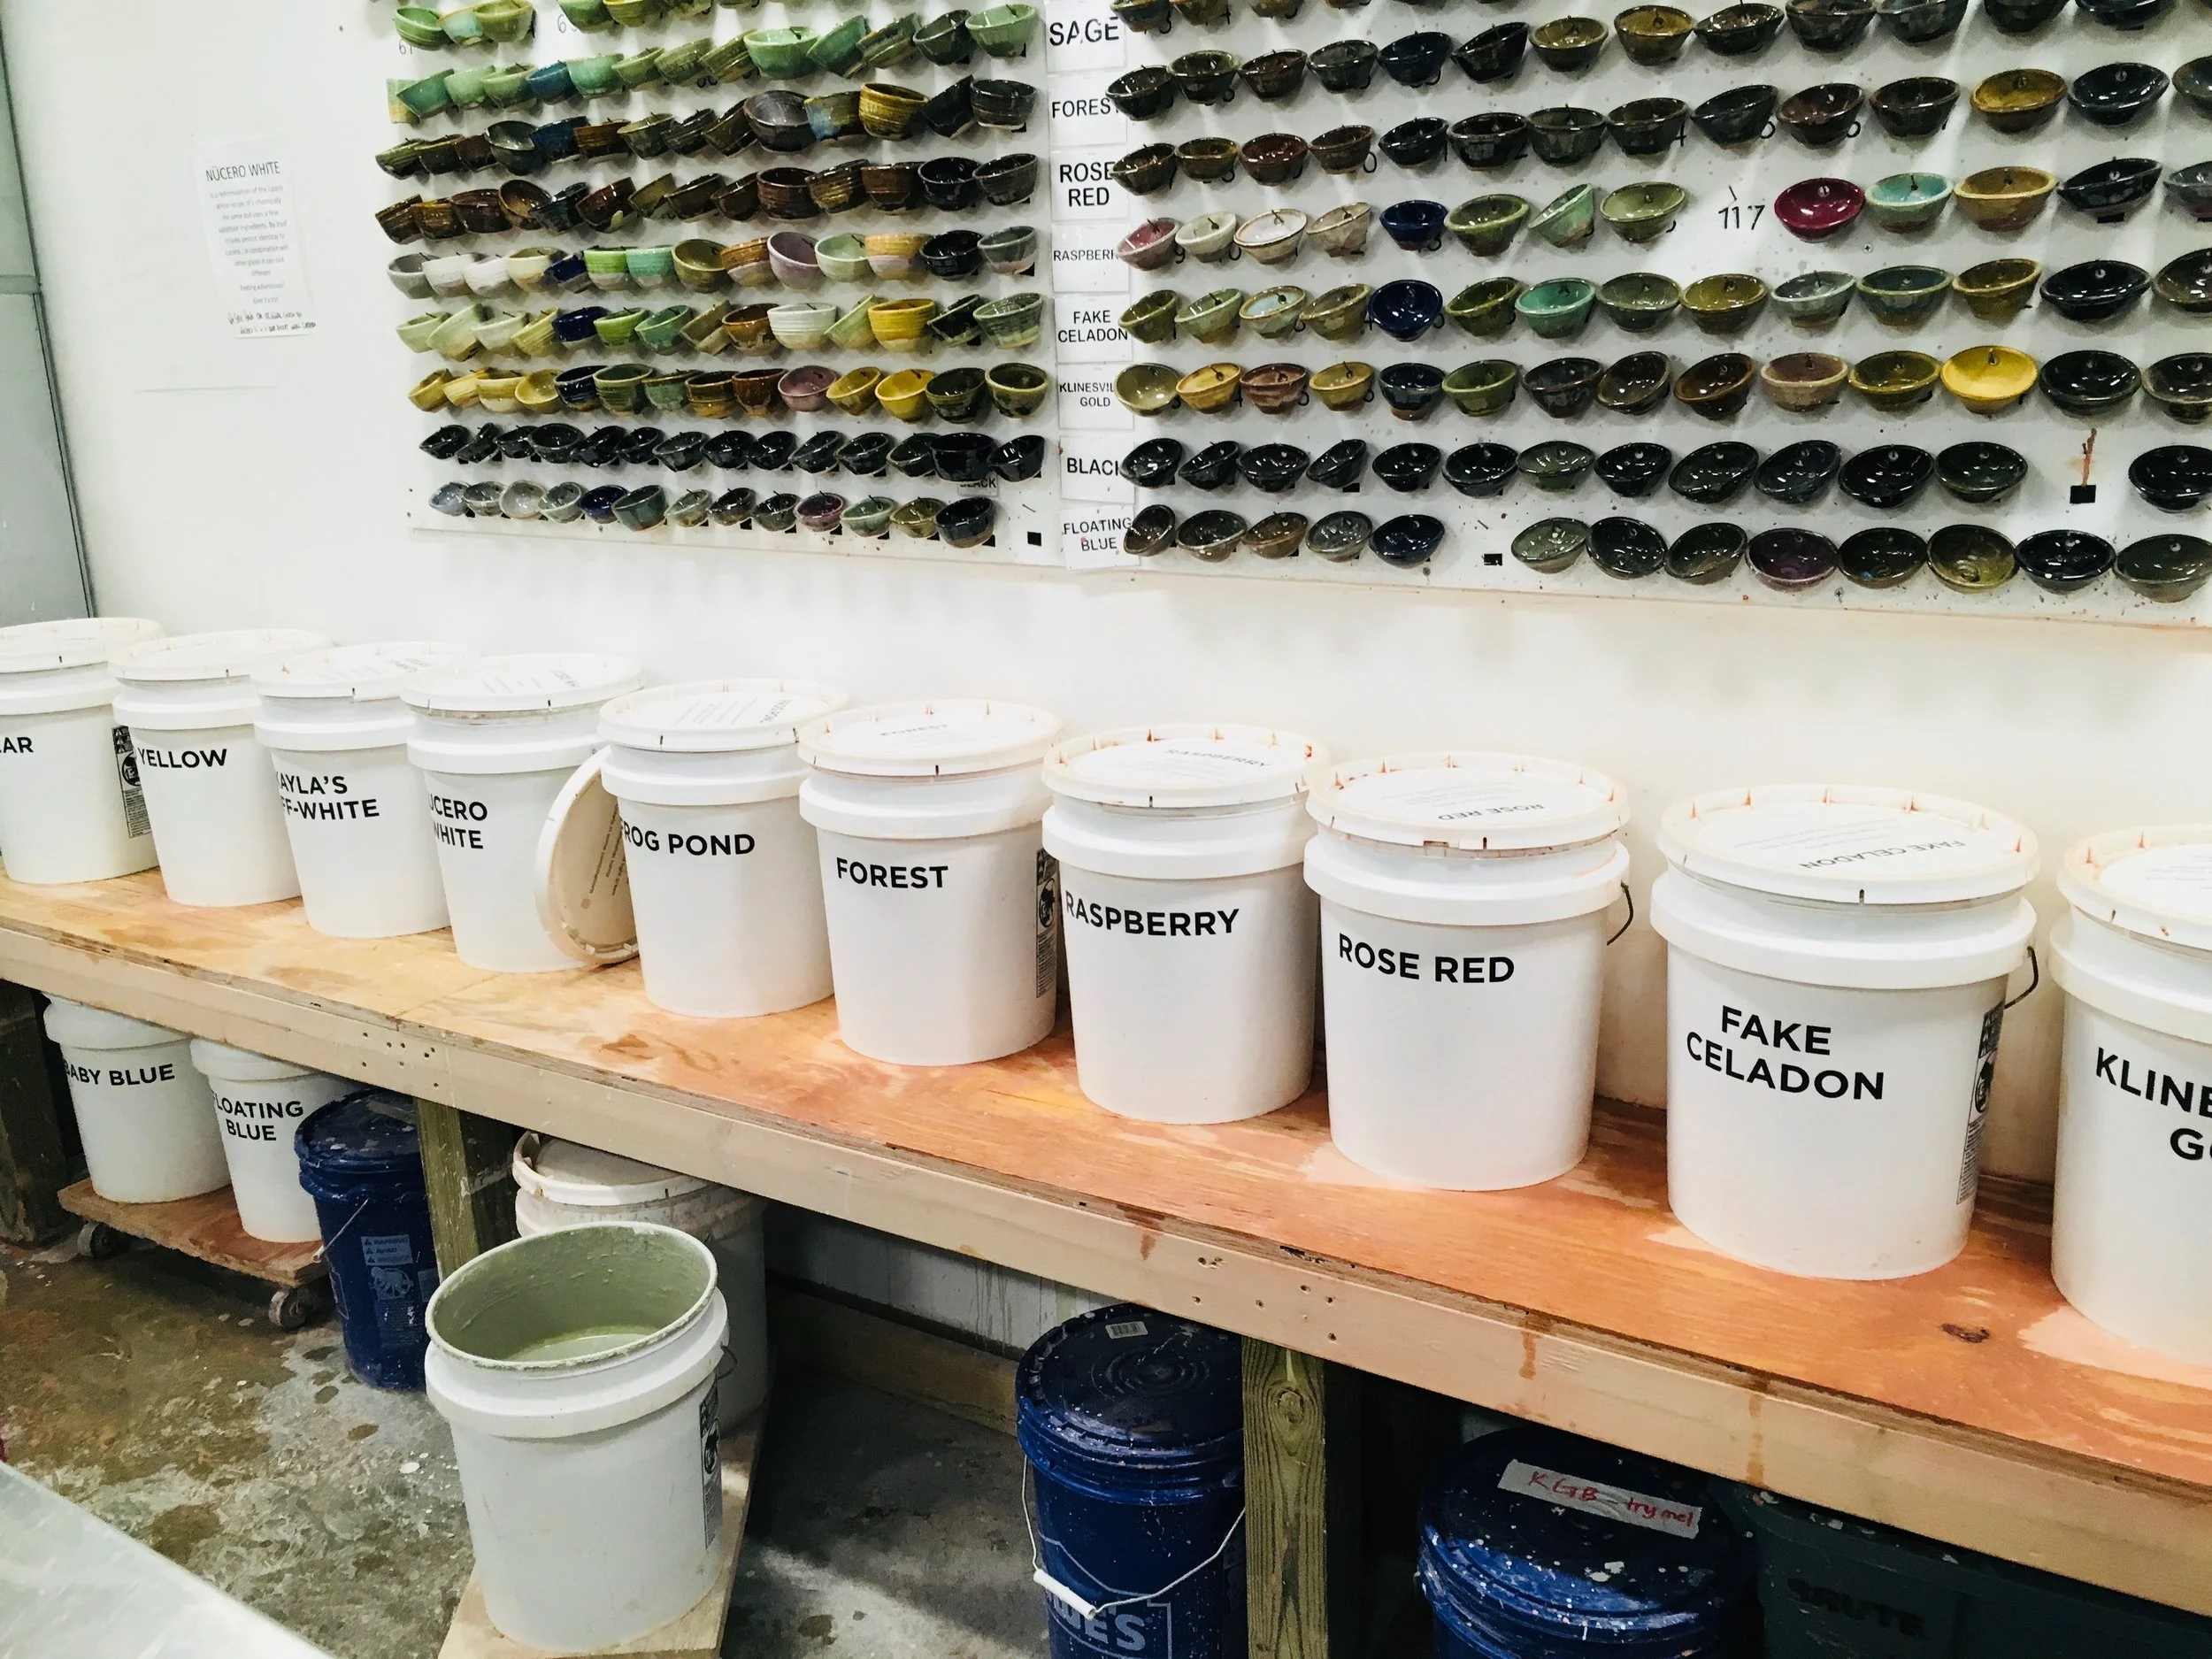
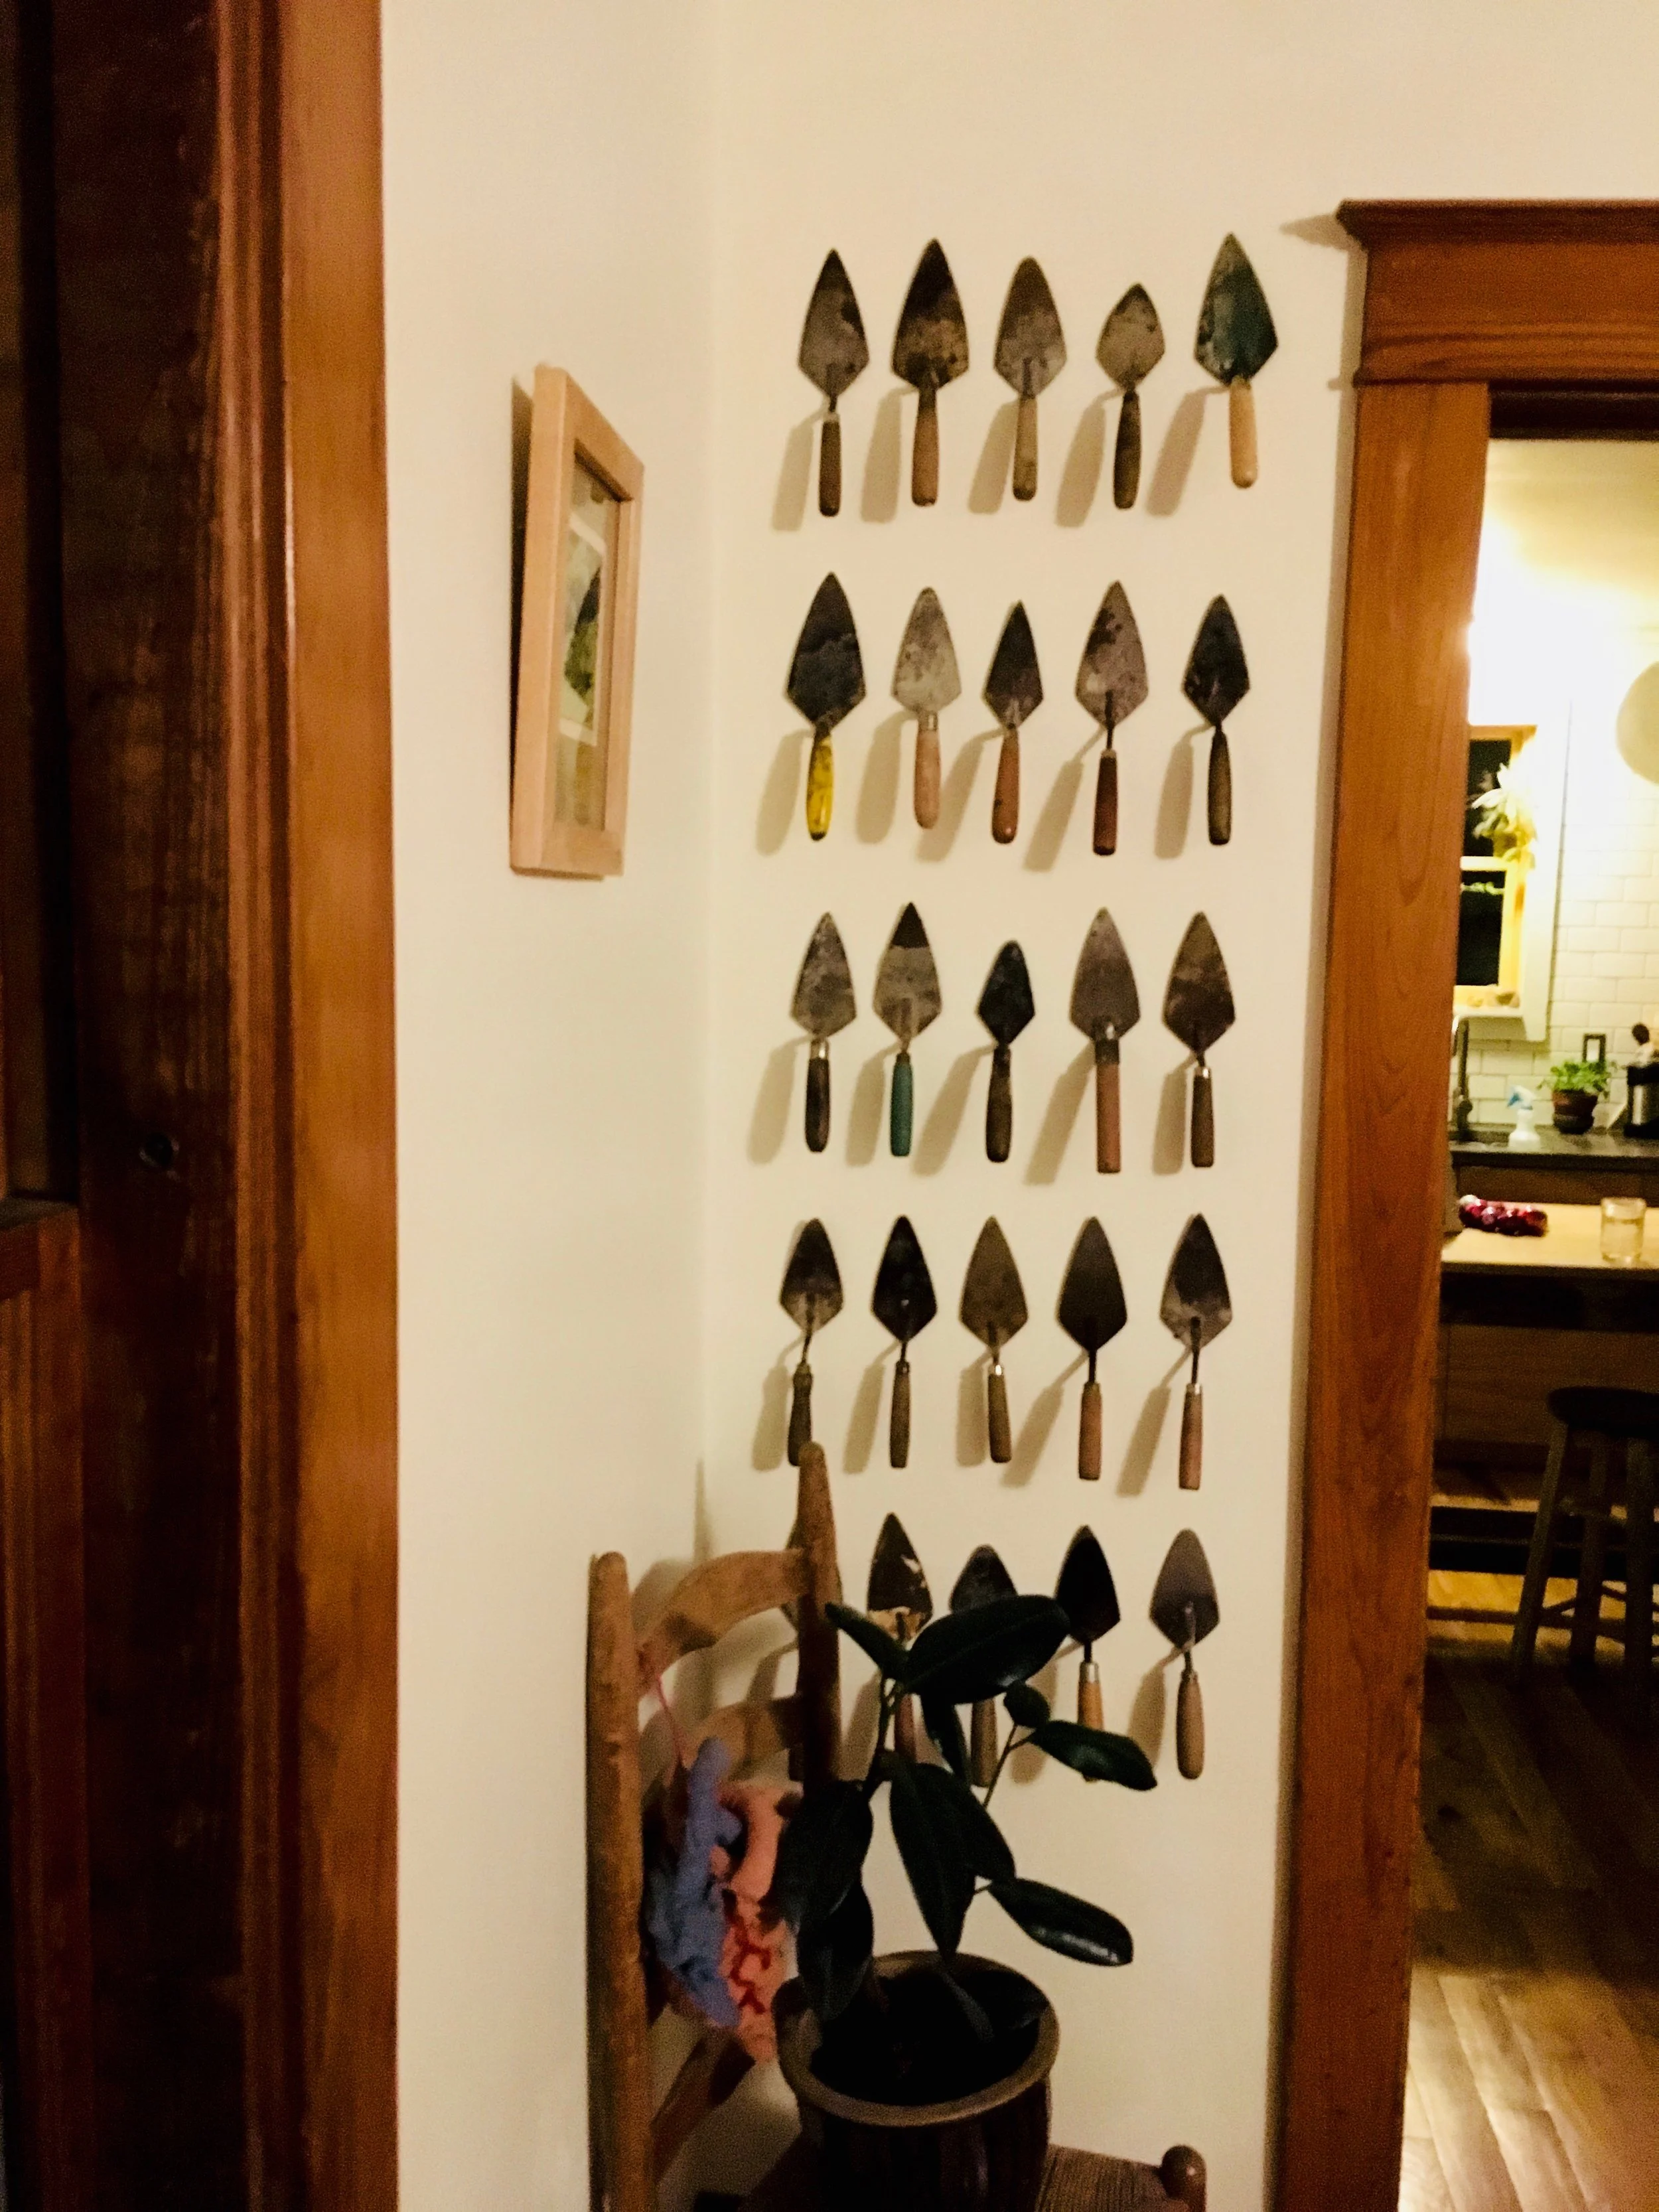
The past week has basically been one big hack fest here at my house. The mr way worse then me, but we both have been coughing up our lungs unaccompanied by feeling like garbage. Being sick had put a slight damper on everything. Bed by 8 (or 7), humidifer on full blast, tons of liquids, and just trying to take it easy. We both would go through the day, doing what we need to do, but not really having much energy to do much else. I did work a little on decorating for Christmas and making our cards, but haven%u2019t really gotten as far as I would like to with those (I wanted them done). I worked at the studio (I cleaned the shit out of the glaze buckets.. cleanest buckets ever), baked a cake, dropped a cake, baked a new cake, and cleaned out the fridge. The mr did some stuff too even though he has been feeling worse. Besides work, he finally hung his collection of old trowels on the wall (not sure I like where they are). He also spent a few days in the basement plumbing and setting up a complicated series of buckets to act as a clay trap for the new sink. That took a lot of research and finding of random pipes and such, all for me (or all so I don%u2019t clog the drain with clay) but still. He is so nice. And having a sink in the basement has been so wonderful. Water without having to drag a heavy ass bucket up and down the stairs. It%u2019s the little things, you know.
Anyway, we have been lame for the most part. No big hikes, no hanging with the littles, a quick dinner with Barb, but that was just pastas and lasted just enough time for her to eat and run away and I did stop by Megans to say hi and get some human interaction, but nothing super exciting. But we on the upswing and getting better, in fact we are getting much better which leads us to today!
Today is the day I have been waiting all year for (or really, the past week). The mr and I are going to hike the mountains and bring us home our Christmas tree!!!!! Per our tradition, we hike into the Green Mountain National Forest, find the finest tree (our taste differ greatly from most) and drag it back to the car. Spend the entire of the hour or so drive home listening to Hanson Christmas album, get giant coffees, and worry the entire way that the tree is going to fly of the top of the car. I am so excited!!!!
Some of that the internet has from the week.
–NPR%u2019s Book Concierge. Our Guide To 2018%u2019s Great Reads. Look forward to this list every year. It is so noes to be able to click on a book and have it give a little blurb. I have and will read a many of these books
-Going to pull some taffy this week (hopefully) Fun Taffy Facts: Its Origins & Why You Pull Taffy
-Geminid meteors peak, and more can’t-miss sky shows in December. Always a fan of a good meteor shower.
-I get ladybugs in the winter and always thought it curious. 5 Things to Know About Dealing with Ladybugs in the Kitchen
-Hell yeah, a vegan bodega is a fine idea. This guy knows whats what. Beyond Bodega Bites: This Man Wants More People To Eat ‘Vegan In The Hood’
-4 Words to Say to Someone Who Has to Get a Root Canal. Hahahaha.
-The older I get the less color I want in my house%u2026 This is pretty much what I want my house (and my wardrobe) to look like color wise. A NATURAL HOME IN THE NETHERLANDS.
–The Controversy Over Parents Who Eat Lunch With Their Children at School. I remember be jealous of the kids that had a lunch visit from parents. But I probably would have thought a regular lunch date a bit strange.
–But what is lunch exactly? Lunch, Explained
–Magic Rhinos. Siberian unicorns lived alongside humans, and they were so much cooler than the mythical version






















































THE LOVELY CRAZY
August 19, 2019 by maximios • Blog
We have officially kicked off our summer camping adventures. And with camping comes all the greatness of all the things, including camping food.
Recently a friend asked me what it is that we do for camp food. So I told her. Camp food is basically aways the same and consists of a big pot of spiced warm lentils or split peas (both cook really fast and have lots of protein), a shredded summer squash in the summer, or pumpkin in the colder months, maybe fresh tomatoes or a bunch of kale to chop and mix in, and a side of cut up carrots, cucumbers, green beens or whatever else I have.. Then I’ll bring a hunk of bread for the mr to eat and me, usually a small head of cabbage to squirt mustard on and crunch into. (Always have the mustard on hand.) And I bring apples to snack on too, but that usually it. (Sometime I%u2019ll back a desert for the mr. If I am feeling nice.)
She was a little taken aback. Said when she (and basically everyone in the world, which I disagreed with) goes camping it is bags of chips, cookies, meat, and everything and anything that she (they) wanted. Basically that camp food was junk food and that she though we were weirdos. But cool weirdos so you know.
So our camp food%u2026 not like many others. But honestly it is everything that I want to eat and I love it so whatever whatever. As for the mr, he is happy with the food and when he is not, he brings along something else, but that rarely happens because my lentils be so good. HA!
But she got me thinking that I should have a few more snack options beside cut up carrots and apples. So that is why I made crackers. These chickpea chili lime, freaking amazing crackers. Because crackers are a very appropriate snack food, and these crackers in particular are even greater because they are made with the goodness of chickpea flour which is packed full of protein and is well received after a day of hiking or other fun outdoor camping activities. And how can you go wrong with chili lime? Well i%u2019ll tell you, you really can%u2019t
So the plan was to make a batch, eat a few, save the rest for this camping weekend. But guess what? I have to make another batch. They didn%u2019t make it. We ate them all. (not sorry) At least I know we will be liking our new camping snack addition well and right.
So if you like crackers, camping or elsewhere, you should really gives these a go. They will not disappoint.
Now to the crackers!
The stuff. Chickpea flour, chili powder, a lime, a little baking powder, olive oil, salt and pepper, and water.
Combine the flour, zest of the lime, half the chili powder and half the salt, and the baking powder and some pepper in a bowl. Mix until completely combined then add in the oil, water and the juice of the lime.
Mix until dough forms. It might feel a little sticky, if that is the case, just mix other tablespoon of chickpea flour.
Knead dough on a well chickpea floured surface for a good minute until the dough is a even consistency then let it sit for a few minutes to rest. Once rested, cut dough into 2-3 pieces because working smaller is easier.
Roll out your first piece of dough about 1/8 inch thick. (Again, make sure to really flour your work surface and rolling pin.) Mix salt and chili powder together and sprinkle on top. Cut out your crackers (squares are nice but triangles would be nice too) then poke each cracker with a fork.
Crackers on a baking sheet before baking and after baking looking all crackery and delicious. And yeah, they shrink a bit.
And lastly, cool the crackers on a cooling rack. They will crisp up a even more. Then it%u2019s all you.
Ready to eat whenever you make the move. You can pack them away for later or place these delicious crackers in a very pretty bowl and eat them away. Or both.
A cracker win!
-C
make 75 crackers
1 1/2 cups chick pea flour plus about 1/3 more for dusting and rolling
1/2 teaspoon baking powder
1 tablespoon olive oil
1/3 cup room temp water
1 teaspoon chili powder split in half
1 lime
1 teaspoon salt split in half
1/2 teaspoon fresh crackers pepper
Preheat oven to 350.
In a bowl combine the chick pea flour, baking soda, pepper, 1/2 teaspoon chili powder, and half a 1/2 teaspoon salt. Mix until evenly incorporated. Add in oil, the juice of the lime, and and water and mix until a dough forms. Dump dough onto counter and knead until completely uniform in texture. Add more flour if the dough is really sticky. Set dough aside for a few minutes to rest.
To make the crackers, really dust the counter with chickpea flour. Cut the dough into 2-3 pieces and roll1 piece out at a time to about an1/8 inch thin. Again, really flour the surface and rolling pin or else the dough will stick Once rolled, combine the remaining chili powder and salt and sprinkle the top with it. And then cut the crackers. Take a knife of bench scrapper or pizza cattier and cut the dough into inch long strips vertically, then diagonally. Poke each cracker with a fork then gently place them onto a baking sheet. Repeat with remaining dough.
Bake crackers for 15-20 minutes or until a nice deep golden brown. Remove from oven and let cool on a wire rack.
And then eat.
Store uneaten crackers in an airtight container for about a week.
I am obsessed. For real. That might seem like a strong statement for a feeling about a food, but right now, it is truth. I spend more time then I want to admit thinking and drooling over Socca, which is, to those who do not know, the most basic chickpea flour pancake-y bread thing. Chickpea flour, water and salt. Cooked fast under the broiler in a screaming hot skillet. That is it. And it is amazing. Depending on how you make it, it can be creamy and soft or more cracker like with some crisp crunch to it. Either way, it is just so freaking good. Of course, what I am dreaming about regarding it is not just plan basic socca (which I have made 3 times in the past 3 days) but different flavored soccas (I have experimented with lot of seasoning, and they are all A+) with all sorts of different topping and using it in all sorts of different ways. But for now, I wanted to keep basic so we all know how good simplicity is. We will go from here.
There is no stopping me. There is no stopping the socca.
Now to my new favorite food, the socca.
Chickpea flour, salt and water. That is it. Mix it all up.
Batter all smooth and now in need of a rest. Half an hour or up to a day of rest is good.
Now to cook the socca. You need to use something oven safe like cast iron. The trick here is to preheat the skillet while you are preheating the oven. Crank oven to 450 with the skillet in oven and once the oven reaches temp, turn oven over to a high broil. Let the skillet get really hot for another minute or two then remove skillet from oven (carefully!!!) and give it a splash of oil. Don%u2019t preheat the skillet with oil in it or else it will start to smoke and get gross.
Now that you got a nice hot and oiled skillet, grab the rested batter and pour half of it in. Tilt skillet around to coat bottom then stick skillet back into oven under broiler and cook for 4-8minutes. ( It depends on your broilers strength and your preference for blisters)
Out from the broiler. Cooked and slightly blistered. I went easy on this one. The next one got a few more blisters.
2 soccas, one a little thicker then the other. One a little more blistered then the other. Both in my belly.
So many Soccas to come.
So. many. Soccas.
-C
makes two 10 inch soccas
1 cup chickpea flour
1 cup room temperature water
1/2 teaspoon salt
olive oil for pan
Mix chickpea flour, salt and water together into a bowl until smooth. Let mixture rest for at least half an hour or up to a day.
When ready to make the socca, preheat oven to 450 with a 10 inch oven safe skillet (I used cast iron but any oven safe dish would work) in oven.
Once oven reaches temp, turn oven over to broil and place skillet under it for a minute to really heat the skillet. Carefully, with oven mitts, remove hot skillet from oven and brush or pour a smidge of oil into the hot skillet to coat bottom. Pour in half the batter and tilt around until bottom is coated then place skillet back into oven under broiler and cook for 4 -8 minutes or until the socca starts to blister. (it kind of depends on your broiler so keep a close eye on it) Remove from oven and slip socca onto cutting board. Sprinkle with salt and pepper. Drizzle with olive oil if you like. Then all you do is cut and eat.
Left over socca can be stored in fridge and reheated in oven or toaster.
Note. IF you want a slightly thicker socca, use a 8 inch skillet. For a thiner, more cracker like socca, pour in 1/3 of the batter at a time (you will end up with 3 instead of 2)
It%u2019s a smoothie. And no, we have never really been smoothie people in this house, but what can I say, sometimes smoothies happen, especially when you have about 20 ripe bananas in the fruit bowl with no room in the freezer and no need for 7 loafs of banana bread.
So I smoothied. And I like it (a lot).
This is a smoothie of simplicity. Nothing fancy. Simplest of simple. Straight to the point. And all sorts of good.
You might think, does this simple smoothie you speak of taste very good? Yes, yes indeed it does. It is all sorts of fantastic. Basically if you like creamy, nutty, oaty, bananery things, you will like this. And it%u2019s a perfect breakfast, snack, dessert, or just wanting a little treat like thing that is not garbage food. A smoothie of all smoothies with the most basic ingredients. And takes about 15 seconds to whip up. Can%u2019t complain about that.
To the smoothie goodness!
The stuff. A ripe banana, some old fashion rolled oats, a pinch of salt, water, and a smidge of maple syrup if you want it.
Everything goes into blender.
And blended until smooth. Hence the word smoothie.
Pour it into a cup (or if you are feeling primal, drink it straight from the blender%u2026 it%u2019s totally cool)
And done.
A banana oat smoothie.
Let the good time roll!
-C
makes 1 smoothie
1 very ripe banana
1/3 cup raw old fashion oats
1 1/2 cups water
pinch of salt
a tablespoon or two of any sweetener you like (optional)
a pinch of cinnamon (optional)
Place everything into a blender and blend until smooth. Pour into a cup, sprinkle with cinnamon if you wish, and drink right away.
I have a bag of coconut flour that I need to use up so I have made coconut snack cake a few times the past couple weeks. Once with orange instead of lime. Once I added chocolate chips. This time I stepped it up made a little glaze action, toasted a little coconut for some extra coconutiness and took these here pictures and wrote down the recipe. Just. For. You.
Not that I don%u2019t know already that my snack cake creation is good, but I guess it was just super A+++. I threw this one together right before the mr and I headed down to PA to hang with my dad. As soon as he (and sister and nephews) started in on it, well the responses were more then average. My dad even snuck a piece off and hid it for later. They really, really, really were into it. Wanted me to make another right then and there. Normally I would but my dad doesn%u2019t keep coconut flour on hand and I don%u2019t make it a habit to travel with any myself. (I might have to change that.) Next time he will know to stock the coconut flour.
I didn%u2019t realize my people were such coconut people. Good thing for them that I like coconut people. As a matter of fact, I consider myself a coconut person. And coconut is not code for awesome, but I am that too. HA
Anyway enough about me. Coconut snack cake is what you want to know about. It is soft and dense. Moist, not overly sweet. Lots of lime and coconut flavor and is just perfect for snack time. Eat it with a fork on a plate with coffee or tea or grab an piece and eat it walking down the street while thinking about green leaves and warmer weather. Or wherever and whenever. If you make it then it%u2019s up to you when and where you eat it. That only seems fair.
Now to the snack cake of your coconut lime dreams.
The stuff. Gonna need all purpose flour, coconut flour, salt, baking soda, baking powder, a couple flax eggs, some warmed coconut oil, plant milk, brown sugar, vanilla extra, apple sider vinegar, a couple lime, some powdered sugar, and some lightly toasted shredded coconut.
Grab a big bowl. Add in the brown sugar, flax eggs, warmed coconut oil, apple cider vinegar, and vanilla. Mix it all up until evenly incorporated.
Dump in the flours, baking soda and powder, and salt. Zest in lime, squeeze in lime juice and start to mix. Add in the milk as you are mixing.
Cake batter mixed and done. Now to bake it.
Dump the cake batter into a well greased baking pan and level it off with a spoon or spatula.
Now it%u2019s oven time to bake into a great and well cake.
A cake out of the oven, great and well. Golden brown and smells of all the goodness that a coconut cake could possible smell.
While cake is cooling, which it should be now, make the glaze. Powdered sugar, lime zest, and lime juice. Mix until it%u2019s glazy.
Pour the glaze all over cooled cake.
Don%u2019t forget the shredded coconut. Get it on before the glaze starts to set.
And then it%u2019s just the matter of cutting cake%u2026%u2026.
You know once you cut it, that means snack time right? Coconut lime snack cake for all of your coconut time, lime time, hungry snack time needs.
Keep it good.
-C
Makes a 9×9 cake
1 1/2 cups all purpose flour
1/2 cup coconut flour
3/4 packed cup brown sugar
1 teaspoon salt
1 teaspoon baking soda
1 teaspoon baking powder
1/2 cup coconut oil (warmed to liquid)
1 1/4 cup plant milk (I used almond)
2 flax eggs (2 tablespoons ground flax seeds with 1/2 cup warm water)
1 teaspoon vanilla
1 tablespoon apple cider vinegar
A lime
For the glaze
3/4 cup powdered sugar
a lime
1/4 cup or so toasted shredded coconut to sprinkle on top (optional)
Preheat oven to 350
In a large bowl, mix together the bbrown sugar, flax eggs, warmed coconut oil, vanilla, and apple cider vinegar until completely incorporated. Next dump in the flour, coconut flour, salt, baking soda and baking powder. Zest the lime into bowl. Start mixing, adding in the juice of the lime and the plant milk. Mix it all together until completely incorporated.
Dump mixture into a well greases 9×9 baking pan and level off with a spoon or spatula. Place into oven and bake for 30-35 minutes or until golden brown and a tester stuck into the middle of cake comes out clean.
Once baked, remove from oven, let cool in pan for a few minutes then carefully remove cake from pan and let cool on a wire rack.
While cake is cooling, make the glaze. Just zest other lime into powered sugar then add the juice (or as much juice as you needed) of the lime until a pourable glaze forms. If your lime is not particularly juicy enough and the glaze is still really thin, just add a splash of water to thin out as needed.
And when cake is completely cooled, pour glaze all over cake and cover with toasted coconut flakes.
Now cut. And eat.
Store left over cake in a air tight container for 3-4 days. Individual pieces freeze well for all your future snacking needs.
Nothing here but a mere craving, the fact that I had a fresh head of cauliflower, and I really wanted tahini. TA DA. I made exactly what I wanted and it was so so sooooo good. Maple Cumin is one of those super A+++ taste pairings and anything roasted cover in tahini is basically going to be a win so I had no fear when making this dish that it was going to be anything but fanatic.
And of course I was right. It was so freaking good, like now I am going to make it again and again because I don%u2019t want make cauliflower any other way ever or at least until I get sick of it or of roasted vegetables. But that probably won%u2019t happen for a while.
So if you like cauliflower and tahini and amazingness, here, make this.
To the cauliflower
The stuff. A head of cauliflower, tahini, maple syrup, cumin powder, red wine vinegar, salt and pepper, and olive oil.
Break or cu the head of cauliflower up into florets and toss with a little oil, the maple and cumin, and a little salt and pepper.
Scatter on a baking sheet and stuff it into a hot oven.
Meanwhile mix tahini with vinegar, salt and pepper, and enough warm water to thin out.
Roasted all nice and crisp and delightful.
And now you gather up all that cauliflower and cover with all the tahini you want. Grab a bowl, or just eat off baking sheet, and get to it.
And there is no shame in eating a whole head of cauliflower because hey, its cauliflower.
-C
Makes a meal for one or a side for a few
a head of cauliflower
3 teaspoons cumin
2 tablespoons maple syrup
olive oil
3 tablespoons tahini
2 tablespoons red wine vinegar
2-3 tablespoons warm water
salt and pepper
Preheat oven to 450
Break or cut the cauliflower into medium sized florets. Place in a bowl and drizzle with a teaspoon or so olive oil and toss around. Drizzle in maple, add in the cumin, and a pinch of salt and pepper. Toss until coated then dump the cauliflower onto a baking sheet. Place in hot oven for 25-30 minutes or until roasted to your liking.
While that%u2019s roasting, mix up the tahini, vinegar, and a pinch of salt and pepper. Add in warm water until the mixture is a drizzlable consistency.
Once cauliflower is out of oven, cover with tahini.
Now eat.
There will be no left overs so don%u2019t worry about it.
Any time is a good time for pickles, but now is a great time. There has been so much baking, heavy, rich, and time consuming foods in the past month that I think everyone could use themselves a good helping of veggies and maybe a little brightness, like a good pickled green bean. Freshy, crisp, and clean. A jar of happy green goodness. (Don%u2019t you describe jars of pickles just like that, a happy green jar of goodness?)
Around there parts, it%u2019s kind of a holiday tradition with the mr to get a jar or two of pickled beans. I don%u2019t know exactly how it started, but they are something that he has been getting every year. So this year instead of buying him a jar, I just made them. And let me tell you, it is a heck of a lot cheaper to make your own then it is to buy them, plus I think mine taste better if I do say so myself. These pickles are of the refrigerator kind so there is no processing or stress of bad seals. Nope, these pickles take all of 15 minutes to make, a day to pickle up nice and good in the fridge, and that is that. Ready to go, ready to eat. A small task, nothing fancy, nothing a small child could not handle (um.. well I would not let a small child near boiling water so nix that but a medium to large child, yeah sure.)
Pickled green beans. You know you want them so go and make them.
To the pickled beans!
The stuff. Fresh green beans, white vinegar, salt, peppercorns, garlic, dill and a dried cayenne pepper. The dill and cayenne pepper are optional and you can use any spices you want, but these are good ones to try.%u2026 Next batch I am going to do fresh turmeric and ginger, see how that comes out.
The hardest and not hard at all part. Blanch the beans. Basically just toss the beans into a boiling pot of water for 2ish minutes then scoop them out into a bowl of ice water. Easy peasy.
Jar preparation. I figured I would do two flavors, a spicy cayenne and a dill. (Cayenne for me, dill for the mr) Both jars get a chunked up glove of garlic and some slightly smashed up peppercorns. The hot pepper goes into one and the dill into the other.
Then make the brine. Just boil the vinegar with salt. Nothing fancy.
You got the jars ready and the brine made so now you just pack the two jars with the blanched beans. You might need to snip a few in order to fit, but I just eat those ends anyway so I am doing myself favor here.
Then you pour equal amounts of the brine into the jars then top off the the jars with ice water. Place a lid on those suckers and give them a good shake and into the fridge they go. 24 hours give or take and that is that.
And now you got pickled green beans. The question is weather you eat a few at a time or if one jar constitutes a vegetable serving and you eat the whole jar at once.
I say eat the whole jar. Not like it took very long to make right? So maybe you just a few extra jars.
Have a lovely weekend.
-C
maks 2 pint jars
1 pound green beans
2 cups water vinegar
1 1/2 – 2 cups cold water
2 teaspoons salt
1 teaspoon whole or slightly crushed peppercorn
2 big cloves garlic
A tablespoon dried dill and a dried cayenne pepper (optional)
Rinse green beans. Bring a large pot of water to a boil and grab a large bowl and fill with cold water and a few ice cubs. Place half the green beans in the boil water and let cook for about 2 minutes. Scoop them out and place into the bowl of ice water. Repeat for the second half of beans.
Place the vinegar and salt in a small pot (or use the pot you used to boil water) and bring to a boil. Set aside
Grab 2 pint jars making sure the are nice and clean. Peel and cut the garlic into a few pieces and place into the bottoms of the jars. Add the dill to one and cayenne to the other (or whatever spices you do or don%u2019t want to use) Give each jar some of the peppercorns then start packing the balanced beans into the jars. Try to make them all straight so you can fit in as may as you can, and if the bean is to long, just cut to fit (eat the ends) Once both jars are packed pour equal amounts of the vinegar brine to the jars. Top off each jar with cold ice water. Place a lid on the jars, give it a good shake and place jars into the fridge for 24 hours. After the wait, pop the lid and eat.
Pickled beans will last about a month in the fridge but really, if you have them for more then a week, that is just a shock.
Note about lids. I use plastic lids when dealing with anything acidic. The metal lids will work but will rust after a while and sometimes leaves metallic taste. If you only have metal lids, use a piece of wax paper in between the kid and jar.
It happens every year. SO MANY TOMATOES! This is not a complaint, just a fun fact. And so for the forseeable future, besides canning and freezing tomatoes at a rapid pace, I will also be sticking them into everything. Enter here a tomato cracker. But who wants just a tomato cracker? I( bet some would love just a tomato cracker) But a tomato basil cracker, well that is something people will want. And yes, I have a buttload of basil at he moment too.. I cook with what I got!
Tomato basil crackers. First off, I needed to make a road snack for the mr and cut up chunks of raw tomatoes would not have gone down well with him, so I figured what better way to use up some tomatoes then a cracker situation because why the hell not.%u00a0%u00a0I was a little hesitant to use fresh tomatoes and not cook them or roast the in anyway before using them in the crackers, but I glad I didn’t. The tomato flavor really shines through, pairs beautifully with the basil,%u00a0and you get to skip having to deal with cooking down the tomatoes, which makes them all the more easy to make.
So I made the crackers and gave a baggie to the mr to eat, which he did right then and there (with some sweet ass baba ganoush because yes)%u00a0then packed a big bag for the road trip.%u00a0Not only was the mr chowing down, but my sisters were gobbling them up too, even the one who is gluten free. %u00a0That is good cracker validation.%u00a0
If you have never made your own crackers and you are a cracker person, now is the time to start doing it. I don’t eat crackers personally, but the mr and every one around me really seem to be cracker people so a while back I started to make them at home, and once you make a homemade cracker, the store bought ones will just not be acceptable anymore. But they really are super easy so you really should be making them at home anyway.. No pressure though.
The stuff. Flour, olive oil, tomatoes, fresh basil, and sea salt.%u00a0
Chunks of fresh tomato go into blender and get blended up all nice and smooth. Add in basil and oil and pulse until basil turns to little specks.
Pour the blended mixture into the flour.
Mix with a spoon until you can’t mix anymore then dump onto the counter.
Keeping the counter nice and floured, knead dough for a minute until it all comes together into nice ball.
Working with half of the dough at a time, roll out one of the pieces %u00a0about 1/4-1/8 inch thick.%u00a0%u00a0(really flour counter and rolling pin)%u00a0
And cut into crackers.. Shapes are up to you, but inch to 2 inch squares are easies to cut.%u00a0
Place crackers onto backing sheet. Before oven time and after oven time.%u00a0%u00a0They shrink and puff up a little bit in the oven. That is what a cracker is suppose to do. (but if you don’t like that you can prevent it by piercing the crackers with a fork before they go into the oven)%u00a0
And that’s it. Simple, and delicious.%u00a0
Crackers are looking all pretty like I am about to have party or something. I even made baba ganoush to serve with them. Lucky mr, he got to have this cracker party all to himself. Ha (He did not eat all of these crackers at once, that would be crazy)%u00a0
-C
makes between 100 -125 crackers%u00a0
Remove core from tomatoes and place into food processor or blender. Blend until smooth and measure out 1 1/4 cups of the puree. Any left overs rs can be used as food later on. Dump measured puree back into blender and add in the basil and oil and pulse until the basil is in little pieces but not completely blended in. %u00a0Add flour to a big bowl then pour in tomato mixture and mix until a dough forms. Dump out onto counter and knead for a minute or two until dough is uniform in texture.%u00a0
Preheat oven to 400 degrees
On a floured surface, divide dough in half as to make rolling it easier, and roll dough into a rectangle that is 1/4- 1/8 inch thick. It is important to make sure the rolling pin and counter are well floured to avoid the dough from sticking. Once rolled out, sprinkle with sea salt and lightly roll the dough once more to kind of press the salt in then cut with either pizza cutter or a cracker cutter, or a knife, into 1 1/2 inch squares. The edges are going to be wonky shaped and you can either except them as they are or re roll and recut. (Note. IF you want your crackers to late flat and not puff up while baking, stab the crackers with a fork before they go into oven to create air vents. But honestly, most people really like the puffed up cracker)%u00a0%u00a0Place cut crackers onto a baking sheet and stick into oven. Bake for 15 minutes, checking after 10, until the crackers are golden brown. %u00a0Don’t forget to roll and bake off the other half of the dough!
Once crackers look good, remove from oven and place onto cooling rack. They will get crisper as they cool.%u00a0
Eat as many as you want. Store extra crackers in a airtight container or bag.%u00a0
I sometime struggle with certain veggies, not like in a eating way (I have no snuggle eating any veggie)%u00a0but in a making something with that certain veggie kind of way,%u00a0like I don’t make anything out of them, I just eat them raw as they are. (That was terribly long winded and does it even make sense?)%u00a0I don’t find this to be a problem most of the time, but sometime I think I need to be less lazy about eating and maybe prepare a dish for a meal rather then just eating raw beans out of the garden for lunch…..I mean, I am not going to stop doing that but I am going to start being a little more creative and planning meals with a little more substance. Adding nuts is more substance right?
These beans were freaking fantastic. %u00a0Blistered and charred, and not soggy and soft. They were perfect.%u00a0(I like my veggies either raw or burnt)%u00a0I made them late morning and was going to save them for dinner but the mr, Barb, and I ate them all just on snacking on them. %u00a0Just a really good, A+%u00a0veggies situation here. Highly recommended, hot or cold. Almost beats a bean lunch in the garden. Almost.%u00a0
The stuff. Green beans, almonds, garlic, ginger, soy, and a little oil.%u00a0
Quick fast, rough chop the almonds and give them a toast in a dry skillet (you can skip this part if you have already toasted almonds)%u00a0
And here would be the time to trim the beans if you are a person that does that. I am however, not a bean trimmer. But you must wash them, so give them a good rinse , and keep them a little wet. The moisture will help them cook.%u00a0
Just washed beans go into a medium high hot skillet (add in a tablespoon of oil) and get a nice little cover to start the cooking process. %u00a0Leave them alone for a few minutes, then remove lid and toss them around. Do that ever few minutes.%u00a0
While the beans start cooking, mince the garlic and the ginger and add to the soy sauce.
Smells so good!
Beans have cooked for about 10 minutes here and are all nice and blistered and just about done so now add in the ginger garlic soy mixture and toss around. Keep cooking for a minute or two.
And now don’t forget those almonds, mix those in too. Then it’s into a bowl they go.%u00a0
Green beans so good. Can’t go wrong with these.
Have a marvelous weekend, maybe go pick some green beans!
-C
Rough chop almonds into small pieces and place in a dry skillet (meaning no oil). Turn heat on to medium high heat to toast for about 5 minutes or until you can start to smell the almonds and they are slightly browning. (you can skip the tasting %u00a0part if your almonds are already toasted, jus chop them into small pieces)
Dump the almonds into bowl and set aside. Keep skillet on heat and add in the oil. Rinse beans off, keeping them damp,%u00a0and very carefully, dump the damp beans into the hot skillet. Place a lid on beans and let cook about 4-5 minutes. In the meantime, mince garlic and ginger and combine with the soy sauce. After a few minutes, remove the lid from beans and toss the bean around. Keep doing this for another 8-10 minutes or until the beans are cooked though and blistered in places. Once the beans are cooked,%u00a0%u00a0dump the garlic ginger soy mixture into pan. Toss around and leave in pan for another minutes then stir the toasted almonds in. Transfer the whole bit of it into a big bowl or plate.%u00a0
Eat right away or.. They taste freaking fanatic cold too.%u00a0